Irresistible Biscuits and Gravy Hashbrown Breakfast Casserole Recipe

“`html

Biscuits and Gravy Hashbrown Breakfast Casserole: A Southern Delight

If you’re searching for a soul-satisfying, crowd-pleasing breakfast dish, look no further than the Biscuits and Gravy Hashbrown Breakfast Casserole. This recipe combines the irresistible flavors of a classic Southern breakfast, melding savory sausage, fluffy eggs, and golden cheese into a hearty casserole destined to become a kitchen favorite. Ideal for lazy weekend mornings, family gatherings, or cozy brunches with friends, this dish delivers a comforting experience with every bite.

Why You’ll Love This Recipe

This breakfast casserole is an all-in-one meal that simplifies your morning routine. Its combination of ingredients creates a balanced dish full of protein, fats, and carbohydrates. The recipe’s versatility allows for customization, making it suitable for any dietary preference. With its inviting flavors, it’s perfect for impressing guests or treating yourself to a comforting meal.

Context/Background

The Biscuits and Gravy Hashbrown Breakfast Casserole is a modern twist on a traditional Southern classic. Originating in the Southern United States, biscuits and gravy became a staple for farmhands seeking a hearty start to their day. Over time, this dish evolved, incorporating hash browns, an American breakfast favorite, creating a convenient all-in-one bake that highlights the warmth and hospitality of Southern home cooking.

Recipe Details

Serves: 6-8
Prep Time: 15 minutes
Cook Time: 35-40 minutes
Total Time: 55 minutes

Ingredients

  • 1 lb ground breakfast sausage
  • 1 onion, diced
  • 1 red pepper, diced
  • 6 eggs
  • 1 cup milk
  • 1 tsp garlic powder
  • 1 tsp dried thyme
  • Salt and pepper to taste
  • 1 package frozen shredded hash browns
  • 1 can flaky biscuits
  • 2 cups shredded cheddar cheese

Directions

  1. Preheat your oven to 375°F and grease a 9×13 baking dish.
  2. In a skillet, cook the breakfast sausage until browned and crumbled. Add the diced onion and red pepper, and sauté until softened.
  3. In a separate bowl, whisk together the eggs, milk, garlic powder, thyme, salt, and pepper.
  4. Layer the frozen hash browns in the bottom of the baking dish. Pour the egg mixture over the hash browns.
  5. Cut the flaky biscuits into quarters and place them on top of the egg mixture. Sprinkle the cooked sausage mixture on top.
  6. Top with shredded cheddar cheese.
  7. Bake for about 35-40 minutes, or until the eggs are set and the biscuits are golden brown.
  8. Serve hot and enjoy this hearty breakfast casserole!

Tips for Perfect Biscuits and Gravy Hashbrown Breakfast Casserole

  • Experiment with proteins like bacon or plant-based sausage for variety.
  • Add vegetables such as spinach or mushrooms for extra flavor and nutrients.
  • Consider different cheese varieties, such as pepper jack or gouda, for a unique taste.

Serving Suggestions

Pair this casserole with fresh fruit like orange slices or berries to balance its savoriness. A refreshing mimosa or freshly brewed coffee can complete your brunch experience.

Storage and Leftovers

This casserole can be prepared the night before and baked fresh in the morning. After cooking, store leftovers in airtight containers in the refrigerator for up to three days. For longer storage, freeze in individual portions for up to two months.

Final Thoughts

Experience the comforting essence of Southern cuisine with this Biscuits and Gravy Hashbrown Breakfast Casserole. Whether shared with loved ones or enjoyed individually, it’s a delightful addition to any breakfast table. Try this recipe today and savor the authentic flavors of home cooking!

Recipe Notes

  • Make biscuits from scratch if you prefer a homemade touch.
  • For dietary adjustments, consider using dairy-free milk or egg whites.
  • Country gravy can be added before baking or served on the side for a traditional feel.

“`

Ultimate Biscuits and Gravy Hashbrown Breakfast Casserole Recipe

“`html

Biscuits and Gravy Hashbrown Breakfast Casserole: A Crowd-Pleasing Delight

Are you craving a cozy, heartwarming breakfast that’s big on flavors and perfect for feeding a crowd? Look no further than the delectable Biscuits and Gravy Hashbrown Breakfast Casserole. Combining the savory delight of breakfast sausage, creamy gravy, and crispy hash browns with fluffy eggs and cheddar cheese, this casserole is a complete breakfast in one dish. It’s perfect for meal prep or a weekend brunch, offering the comfort and taste of a classic Southern breakfast with every bite.

Why You’ll Love This Recipe

This Biscuits and Gravy Hashbrown Breakfast Casserole is set to become a family favorite because it brings together all your breakfast staples in one convenient dish. Its layers of flavors—savory sausage, creamy gravy, and rich cheese—offer a satisfying start to the day. It’s also perfect for entertaining, as it feeds a crowd and is easy to prepare ahead of time, freeing you up to enjoy the company of your guests.

Whether it’s a special family gathering or a casual breakfast with friends, this casserole has the warmth and comfort that makes breakfast feel special. Its hearty, satisfying nature ensures that it fills bellies and pleases taste buds.

Context/Background

The roots of this delightful casserole lie in the tradition of Southern comfort food, reflecting the rich history of American breakfast classics. Originating from the need for a filling morning meal for Southern farmers and laborers, biscuits and gravy have long been a staple. Incorporating diner-style hash browns adds a nostalgic twist, and this casserole brings these elements together in a convenient modern dish.

Recipe Details

Serves: 8

Prep Time: 15 minutes

Cook Time: 35 minutes

Total Time: 50 minutes

Ingredients

  • 1 lb ground breakfast sausage
  • 1/4 cup all-purpose flour
  • 2 cups milk
  • Salt and pepper to taste
  • 1 package frozen shredded hash browns
  • 6 eggs
  • 1 cup shredded cheddar cheese
  • 1 can refrigerated biscuits

Directions

  1. Preheat the oven to 350°F and grease a 9×13 baking dish.
  2. In a large skillet, cook the sausage over medium heat until browned. Stir in flour and cook for 1 minute.
  3. Gradually whisk in milk and bring to a simmer. Cook until thickened, then season with salt and pepper.
  4. Spread the hash browns in the prepared baking dish, then pour the sausage gravy on top.
  5. In a separate bowl, whisk the eggs and pour over the gravy layer. Top with shredded cheese.
  6. Cut the biscuits into pieces and arrange on top of the casserole.
  7. Bake for 30-35 minutes until biscuits are golden and eggs are set.
  8. Slice and serve this hearty breakfast casserole!

Tips for Perfect Biscuits and Gravy Hashbrown Breakfast Casserole

  • For a vegetarian version, substitute sausage with plant-based crumbles.
  • For added spice, use spicy sausage and include jalapeños or red pepper flakes.
  • Use a mix of cheeses like Monterey Jack or Swiss for varied flavor profiles.
  • Make ahead by assembling the casserole the night before and baking fresh in the morning.

Serving Suggestions

Pair this casserole with a side of fresh fruit salad or steamed vegetables. A glass of freshly squeezed orange juice or a cup of coffee complements the savory flavors perfectly.

Storage and Leftovers

Store any leftovers in an airtight container in the refrigerator for up to three days. Reheat portions in the oven or microwave to enjoy.

Final Thoughts

This Biscuits and Gravy Hashbrown Breakfast Casserole invites you to savor the comforting warmth of a Southern kitchen. Whether for a special occasion or a simple weekend treat, it’s sure to leave your guests raving and satisfied. Gather your ingredients and get cooking—this dish is well worth making!

Recipe Notes

  • For a gluten-free version, use gluten-free flour and biscuits.
  • Double the recipe for larger gatherings, adjusting the baking dish and time as needed.
  • Experiment with different spices and herbs to customize flavor.

“`

Savory Noodles Soup with Crispy Bacon: A Comforting Recipe

**Introduction**

There’s something inherently comforting about a steaming bowl of noodle soup. It’s the kind of dish that warms you from the inside out, enveloping your senses with rich aromas and hearty flavors. Our Noodles Soup with Bacon elevates this comforting classic to new heights by incorporating the smoky, savory goodness of bacon. This recipe is not just a meal; it’s an experience that brings together the best of both worlds – the hearty satisfaction of a noodle soup and the irresistible crispiness of bacon. Whether you’re seeking solace on a chilly evening or simply craving a soulful dish, this recipe promises to deliver warmth and satisfaction with every spoonful.

**History and Background**

Noodle soup has a storied history that spans cultures and continents. Originating in China over 4,000 years ago, noodles have since become a staple in various forms worldwide. While traditional noodle soups are often associated with Asian cuisine, the concept of broth-based noodle dishes can be found in many cultures, from Vietnam’s pho to Italy’s minestrone. Bacon, on the other hand, traces its roots to early European traditions. The marriage of these two ingredients in a single dish might appear unconventional, but it showcases a delightful fusion of flavors and textures that transcend culinary boundaries. By blending the wholesome, broth-infused noodles with the smoky allure of bacon, this recipe stands as a testament to the universality and adaptability of comfort food.

**Ingredients Breakdown**

– Dried Noodles (8 oz): These form the foundation of the dish, offering a starchy contrast to the broth. Depending on preference, they can be substituted with rice noodles, whole wheat noodles, or gluten-free options.

– Chicken or Vegetable Broth (6 cups): This is the heart of the soup, infusing every ingredient with savory depth. For a richer flavor, opt for homemade broth, though store-bought versions are convenient and effective.

– Bacon (6 slices, cooked and crumbled): Adds a smoky, crispy element that pairs beautifully with the softness of the noodles. Turkey bacon or plant-based bacon can serve as alternatives for dietary considerations.

– Carrots (2, sliced): Provide a subtle sweetness and textural contrast. For extra flavor, consider roasting the carrots before adding them to the soup.

– Onion (1, diced): Infuses the soup with aromatic depth. Shallots or leeks can be used as substitutes if desired.

– Garlic (3 cloves, minced): Enhances the overall flavor profile with its pungent nuances. For garlic enthusiasts, additional cloves can be added.

– Dried Thyme (1 tsp): Offers an earthy aroma and complements the richness of the broth. Fresh thyme can be substituted if available.

– Salt and Pepper to Taste: Essential for balancing and enhancing the flavors. Adjust according to personal preference.

– Fresh Parsley, Chopped for Garnish: Adds a burst of freshness and visual appeal. Other herbs like cilantro or chives can also be used.

**Step-by-Step Instructions**

1. Prepare the Bacon: In a large pot over medium heat, lay down the slices of bacon. Cook them until they reach your desired level of crispiness. Once done, remove the bacon and set it aside, ensuring the drippings remain in the pot for added flavor.

2. Sauté Vegetables: Add the diced onion, sliced carrots, and minced garlic to the bacon drippings. Sauté this mixture for about 5-7 minutes or until the onions are translucent and the carrots start to soften.

3. Incorporate the Broth and Noodles: Pour in the chicken or vegetable broth and raise the heat to bring the pot to a boil. Add the dried noodles and dried thyme to the boiling broth. Once the noodles are added, reduce the heat to a simmer, covering the pot and allowing the soup to simmer until the noodles are thoroughly cooked.

4. Season the Soup: Taste the broth and adjust with salt and pepper to suit your flavor preferences.

5. Serve and Garnish: Ladle the hot soup into bowls, ensuring a generous serving of noodles and vegetables. Top each bowl with crumbled bacon and a sprinkle of fresh parsley for garnish.

**Tips and Variations**

– Vegetarian Option: Replace bacon with smoked tempeh or mushrooms to maintain a smoky flavor without meat.

– Add Protein: Consider adding cooked chicken or tofu for additional protein content.

– Spicy Twist: Introduce a bit of heat by adding chili flakes or a splash of hot sauce.

– Creamy Version: Stir in a dollop of cream cheese for a richer, creamier texture.

**Nutritional Information and Serving Suggestions**

While the actual nutritional content can vary based on specific ingredient brands, an average serving of this noodle soup is likely to include around 300-400 calories, balanced with proteins and a moderate level of carbohydrates and fats from the bacon. For a well-rounded meal, consider serving this noodle soup with a side of crusty bread or a simple salad. Pair it with a light white wine or iced tea for a delightful contrast to the warmth of the soup.

**FAQs**

1. Can I make the noodle soup ahead of time?
Yes, you can prepare the soup a day in advance. Store it in an airtight container in the refrigerator. Before serving, reheat gently on the stove, adding a splash of broth if needed to thin the soup.

2. What type of noodles is best for this soup?
While traditional egg noodles work well, you can choose any noodle type based on your preference, such as udon, soba, or even spaghetti.

3. Can the bacon be cooked in advance?
Absolutely. Cook the bacon ahead of time and store it in the refrigerator. Crisp it up again on a skillet before serving.

4. Is this recipe gluten-free?
The soup can be made gluten-free by selecting gluten-free noodles and ensuring the broth does not contain any gluten-based additives.

5. How can I thicken the soup?
To thicken the soup, you could make a slurry with cornstarch and water or add more noodles, which will absorb some of the broth.

**Conclusion**

Embark on a culinary adventure and savor the heartwarming combination of Noodles Soup with Bacon. This recipe is not just an opportunity to enjoy a comforting bowl of soup but also a chance to experiment with flavors and textures. We invite you to try this recipe in your kitchen and share the joy it brings with friends and family. Whether you follow the recipe to the letter or adapt it with your personal touches, this noodle soup offers a delightful promise of satisfaction and warmth. Don’t forget to share your experience and any creative twists you added to make this dish your own.

Irresistibly Moist Vanilla Banana Walnut Cake for Perfect Homemade Baking

“`html

Luscious Vanilla Banana Walnut Cake: A Decadent Delight for Any Occasion

Indulge your taste buds with this Luscious Vanilla Banana Walnut Cake, a delectable dessert that combines the sweetness of ripe bananas, the warm essence of vanilla, and the crunchy texture of walnuts. This delightful cake is perfect for any occasion and sure to be a hit with your family and friends.

Why You’ll Love This Recipe

This Luscious Vanilla Banana Walnut Cake is a treat like no other. With its moist and tender crumb, each bite offers a harmonious blend of flavors. The natural sweetness of bananas complements the rich notes of vanilla, while the walnuts add a satisfying crunch. Whether you’re celebrating a special occasion or simply craving a comforting dessert, this cake hits the spot.

What sets this cake apart is its versatility. It’s just as fitting for a sophisticated dinner party as it is for a cozy family gathering. Plus, it’s a great way to use up those overripe bananas sitting on your countertop!

Not only is this cake delicious, but it’s also simple to make. With everyday ingredients and straightforward steps, you’ll have a stunning cake ready in no time.

Context/Background

The origin of banana cake can be traced back to early American banana bread recipes, designed to make use of overripe bananas. As the recipes evolved, additions like vanilla and walnuts were incorporated to enhance the flavor profile, resulting in a cake that’s as irresistible as it is nostalgic.

Banana cakes rose in popularity during the 1930s as bananas became more widely available, and home bakers began experimenting with different variations. The inclusion of walnuts in this recipe adds a delightful texture and an element of depth, complementing the sweetness of the bananas.

Recipe Details

Serves: 8

Prep Time: 15 minutes

Cook Time: 45 minutes

Total Time: 1 hour

Ingredients

  • 1 ½ cups all-purpose flour
  • 1 teaspoon baking soda
  • ¼ teaspoon salt
  • ½ cup unsalted butter, softened
  • 1 cup granulated sugar
  • 2 large eggs
  • 1 teaspoon vanilla extract
  • 3 ripe bananas, mashed
  • ½ cup chopped walnuts

Directions

  1. Preheat your oven to 350°F (175°C) and grease a 9-inch round cake pan.
  2. In a medium bowl, sift together the flour, baking soda, and salt.
  3. In a large bowl, cream the butter and sugar until light and fluffy. Beat in eggs, one at a time, then stir in vanilla.
  4. Mix in mashed bananas until well combined. Gradually add the dry ingredients to the banana mixture, stirring until just combined.
  5. Fold in walnuts and pour the batter into the prepared cake pan.
  6. Bake for 45 minutes or until a toothpick inserted into the center comes out clean.
  7. Allow the cake to cool in the pan for 10 minutes, then turn out onto a wire rack to cool completely before serving.

Tips for Perfect Luscious Vanilla Banana Walnut Cake

  • Use ripe bananas for the best flavor and natural sweetness.
  • Do not overmix the batter to keep the cake tender and moist.
  • If you prefer a crunchier texture, toast the walnuts before folding them into the batter.
  • For an extra flavor boost, add a pinch of cinnamon to the batter.

Serving Suggestions

This cake pairs beautifully with a scoop of vanilla ice cream or a dollop of whipped cream. For a sophisticated touch, serve it with a drizzle of warm caramel sauce or a sprinkle of powdered sugar.

Storage and Leftovers

Store leftovers in an airtight container at room temperature for up to 3 days or refrigerate for up to a week. This cake also freezes well; wrap it tightly in plastic wrap and foil for up to 2 months.

Final Thoughts

Whether you’re a seasoned baker or just starting out, this Luscious Vanilla Banana Walnut Cake is a must-try recipe. It’s the perfect way to enjoy the classic combination of banana, vanilla, and walnut and is sure to become a favorite in your baking repertoire.

Recipe Notes

  • Substitute pecans for walnuts if desired.
  • Add chocolate chips for an extra sweet treat.
  • If you prefer, use whole wheat flour for a healthier twist.

“`

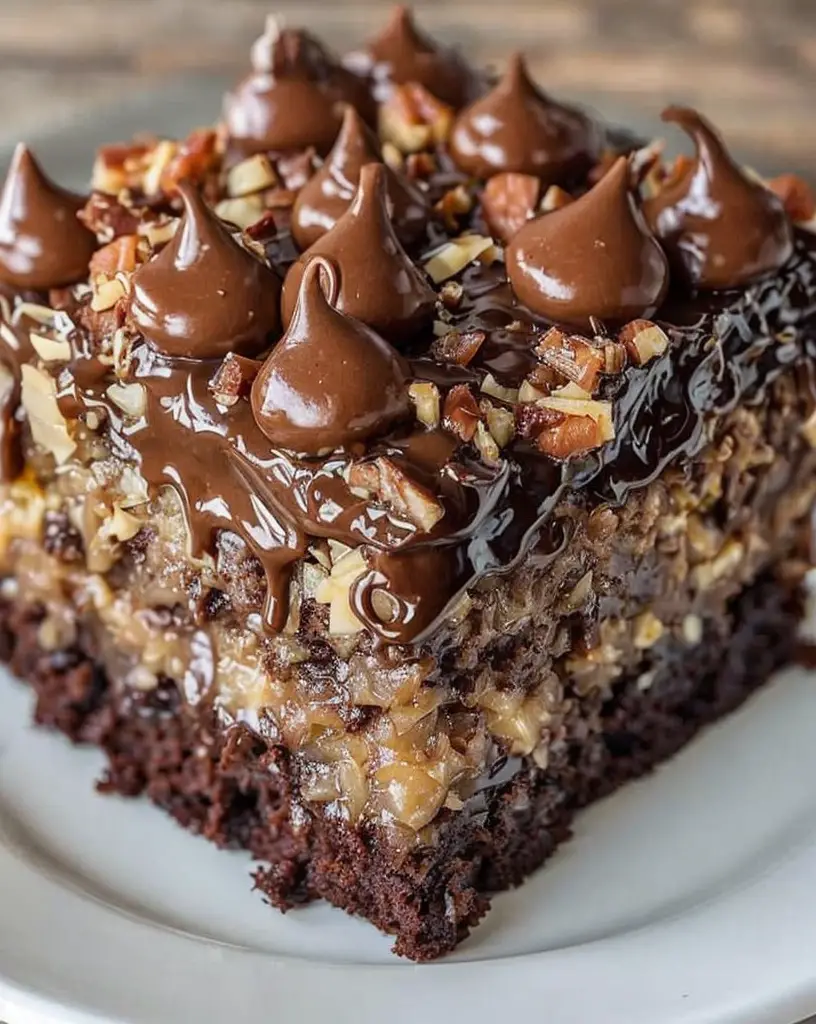
Irresistible German Chocolate Poke Cake Recipe for Sweet Tooth Lovers

“`html

German Chocolate Poke Cake: A Decadent Dessert Experience

Indulge in the irresistible flavors of this German Chocolate Poke Cake, a treat that promises to leave your taste buds dancing with joy. Featuring a moist chocolate cake infused with an indulgent coconut-pecan filling, this cake brings the classic German chocolate cake to a whole new level with every bite.

Why You’ll Love This Recipe

This German Chocolate Poke Cake is a dessert lover’s dream, delivering a rich and luscious flavor profile that perfectly balances sweetness and texture. Its preparation makes it perfect for all skill levels, allowing you to wow at family gatherings, potlucks, or festive occasions. The gooey filling seeps into every bite, making it deliciously moist and flavorful.

The recipe is a wonderful twist on the traditional, offering a fun and accessible way to enjoy a beloved classic. The divine combination of chocolate, coconut, and pecans is sure to satisfy any craving, while the easy preparation process ensures it will become your go-to dessert for impressing guests effortlessly.

Context/Background

The German Chocolate Poke Cake is a modern take on the classic German chocolate cake, which actually hails not from Germany but from Texas in the United States. Created in the mid-19th century, the original recipe was named after an English-American named Samuel German, who developed a type of dark baking chocolate for the Baker’s Chocolate Company.

The poke cake variation involves “poking” holes into a baked cake and allowing a deliciously rich filling to seep throughout its layers. This innovative technique ensures maximum flavor penetration, making each slice a mouth-watering delight.

Recipe Details

Serves: 12
Prep Time: 20 minutes
Cook Time: 30 minutes
Total Time: 50 minutes

Ingredients

  • 1 box of chocolate cake mix
  • 1 cup shredded coconut
  • 1 cup chopped pecans
  • 1 can (14 ounces) sweetened condensed milk
  • 1 jar (12 ounces) caramel sauce
  • 1 tub (8 ounces) whipped topping, thawed
  • 1 cup German chocolate, finely grated

Directions

  1. Prepare the chocolate cake according to the package instructions. Once baked, allow it to cool slightly.
  2. Using the handle of a wooden spoon, poke holes across the surface of the cake at 1-inch intervals.
  3. In a bowl, combine the sweetened condensed milk and caramel sauce. Pour this mixture evenly over the cake, focusing on the holes.
  4. Sprinkle the shredded coconut and chopped pecans evenly across the top of the cake.
  5. Spread the thawed whipped topping over the coconut and pecans, creating a smooth, even layer.
  6. Finish with a generous sprinkle of grated German chocolate. Chill the cake for at least 2 hours before serving.

Tips for Perfect German Chocolate Poke Cake

  • Ensure the cake is warm when you pour the filling to help it absorb better.
  • Wait for the whipped topping to thaw completely for a smooth application.
  • Customize the sweetness by adjusting the amount of caramel sauce used.
  • For added decadence, toast the coconut and pecans beforehand.

Serving Suggestions

German Chocolate Poke Cake is perfect on its own but can also be paired with a scoop of vanilla ice cream. Serve it chilled directly from the fridge for a refreshing dessert on hot days.

Storage and Leftovers

Store the cake covered in the refrigerator for up to 3 days. If you need to store it longer, cut it into portions and freeze individual slices wrapped in plastic wrap and aluminum foil for up to a month.

Final Thoughts

This German Chocolate Poke Cake is more than just a dessert; it’s an experience that encapsulates sweet indulgence and happiness. Whether served at a dinner party or enjoyed as a personal treat, it’s a recipe you’ll want to revisit time and time again.

Recipe Notes

  • Substitute pecans with walnuts for a different nutty flavor.
  • Add a few drops of vanilla extract to the filling for an extra layer of flavor.
  • For a quicker version, use pre-shredded caramel coconut flakes available in grocery stores.

“`

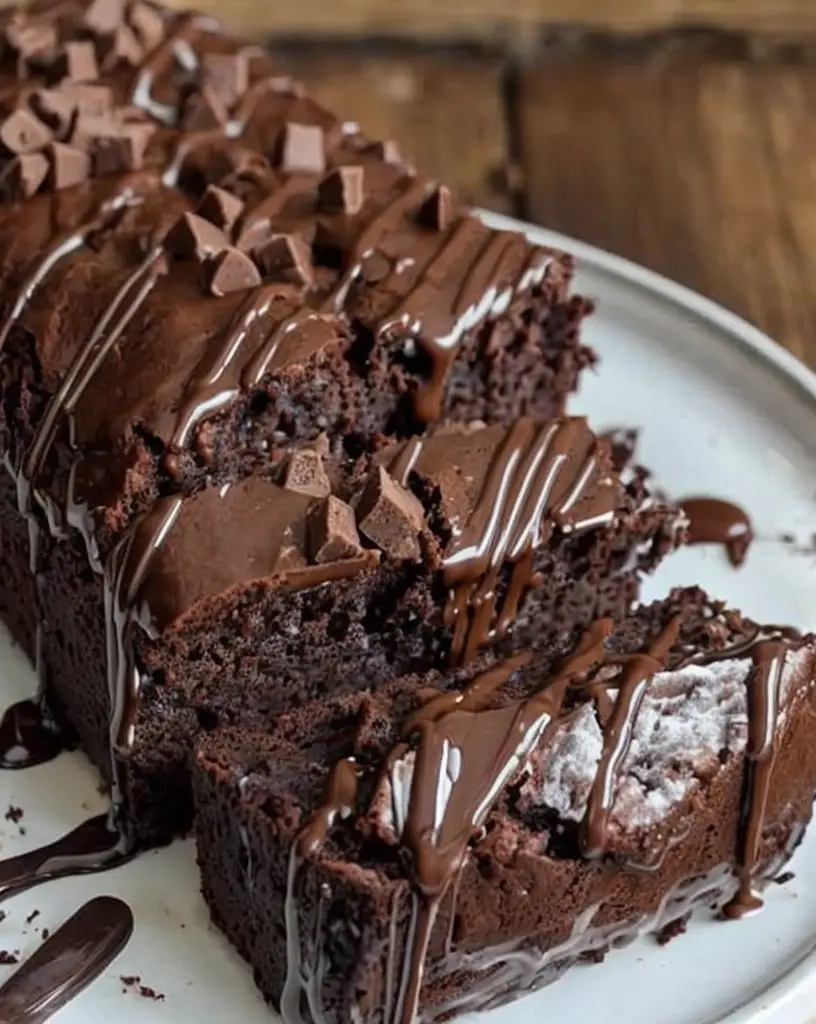
Decadent Hot Fudge Brownie Bread: The Ultimate Chocolate Delight

“`html

Hot Fudge Brownie Bread Recipe: Ultimate Chocolate Treat

Indulge in the fudgy depths of chocolaty heaven with this Hot Fudge Brownie Bread Recipe. This ultimate chocolate treat is perfect for satisfying your sweet tooth, combining the moistness of a brownie with the comforting charm of bread. A must-have delight for chocolate lovers, it’s easy to make and even easier to devour!

Why You’ll Love This Recipe

This Hot Fudge Brownie Bread is a dream come true for any chocolate aficionado. Its rich, decadent flavor makes it the perfect dessert for a special occasion or when you simply crave something sweet and indulgent. The blend of warm chocolate and firm, cake-like bread creates a unique texture that will leave you reaching for another slice. Plus, it’s simple to prepare, allowing you more time to savor its luscious flavors.

Perfect for cozy gatherings or as a delightful homemade gift, this brownie bread is versatile and universally beloved. The recipe requires minimal effort, meaning you can whip this up any evening you are in need of a chocolate fix. It’s also a great base for experimenting with different mix-ins, such as nuts or chocolate chips, making it a customizable treat for every palate.

Context/Background

The Hot Fudge Brownie Bread brings together elements from both brownies and sweet breads, creating a delightful hybrid destined to captivate your taste buds. Brownies have been a staple American dessert since the late 19th century, evolving over time to include countless variations. This recipe takes the classic brownie a step further by incorporating a bread-like structure, resulting in a deliciously moist and tender loaf.

By utilizing traditional bread-making techniques combined with rich brownie ingredients, this recipe offers a unique twist on two beloved classics. The result is a comforting, chocolate-filled delicacy that’s ideal for enhancing any dessert spread.

Recipe Details

Serves: 8-10

Prep Time: 15 minutes

Cook Time: 45 minutes

Total Time: 1 hour

Ingredients

  • 1 cup all-purpose flour
  • 1/2 cup unsweetened cocoa powder
  • 1 cup sugar
  • 1/2 teaspoon baking powder
  • 1/4 teaspoon salt
  • 1/2 cup unsalted butter, melted
  • 2 large eggs
  • 1 teaspoon vanilla extract
  • 1/4 cup hot water
  • 1/2 cup hot fudge sauce

Directions

  1. Preheat your oven to 350°F (175°C) and grease a 9×5-inch loaf pan.
  2. In a large bowl, whisk together flour, cocoa powder, sugar, baking powder, and salt.
  3. In another bowl, combine melted butter, eggs, vanilla extract, and hot water. Mix well.
  4. Gradually add wet ingredients to the dry ingredients, stirring until just combined.
  5. Fold in the hot fudge sauce, ensuring a marbled effect in the batter.
  6. Pour the mixture into the prepared loaf pan, smoothing the top.
  7. Bake for 45 minutes or until a toothpick inserted in the center comes out clean.
  8. Let cool in the pan for about 10 minutes before transferring to a wire rack to cool completely.

Tips for Perfect Hot Fudge Brownie Bread

  • Ensure your hot fudge is slightly heated for easier integration into the batter.
  • Do not overmix the batter to maintain a light and airy texture.
  • Allow the bread to cool completely before slicing to avoid crumbling.
  • Experiment with mix-ins like chopped nuts or chocolate chips for added texture.

Serving Suggestions

Serve warm slices of Hot Fudge Brownie Bread with a scoop of vanilla ice cream or a dollop of whipped cream for a truly decadent dessert. For a special touch, drizzle additional hot fudge over the top.

Storage and Leftovers

Store leftover brownie bread in an airtight container at room temperature for up to three days. For longer storage, freeze slices wrapped individually in plastic wrap, and then placed in a resealable freezer bag for up to two months. Thaw at room temperature before serving.

Final Thoughts

This Hot Fudge Brownie Bread recipe is a deliciously rewarding way to satisfy your chocolate cravings. Its simple preparation and irresistible flavors make it a necessary addition to your baking repertoire. Whether you’re sharing it with loved ones or enjoying a slice solo, it guarantees a pleasurable experience with each bite.

Recipe Notes

  • Substitute chocolate syrup if hot fudge is unavailable, but adjust sweetness accordingly.
  • For a gluten-free version, use a 1:1 gluten-free flour blend.
  • Add a pinch of espresso powder to enhance the chocolate flavor.

“`

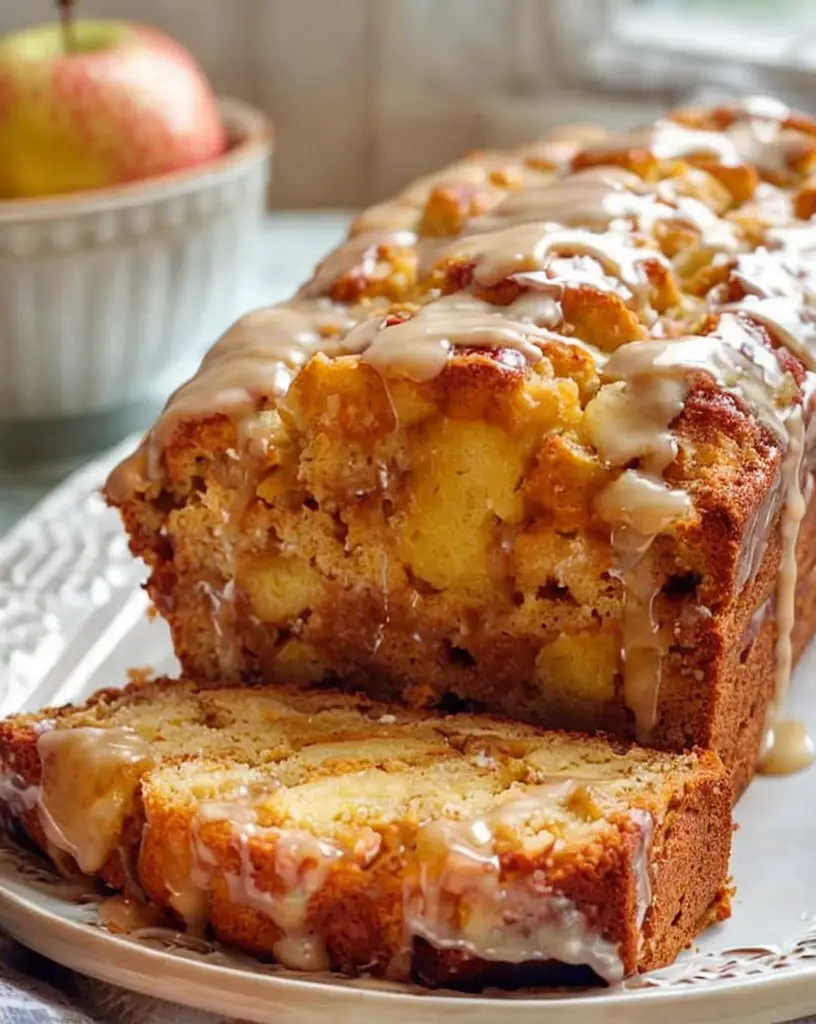
Irresistibly Delicious Luscious Country Apple Fritter Bread Recipe

“`html

Luscious Country Apple Fritter Bread: A Rural Delight You Can’t Resist

Welcome to the enchanting world of Luscious Country Apple Fritter Bread, a scrumptious treat that captures the essence of autumn in every bite. Bursting with the sweet and tangy flavors of fresh apples and hints of cinnamon, this bread is the perfect companion for cozy mornings or afternoons with a steaming cup of coffee.

Why You’ll Love This Recipe

This Luscious Country Apple Fritter Bread is a delightful fusion of classic apple fritters and moist bread, offering a texture that’s both soft and chewy. The caramelized apple chunks and the gentle spice from cinnamon will make your taste buds sing. It’s an ideal dessert for family gatherings, holiday baking, or simply transforming any day into a celebration.

Whether you’re an experienced baker or a beginner, this recipe’s simplicity and rich flavors will ensure it’s a favorite in your home. Its delightful aroma will fill your kitchen with the warmth and comforts of country living, reminding you of simpler times.

Context/Background

Our Luscious Country Apple Fritter Bread pays homage to the beloved apple fritter, a staple in many country kitchens around the world. This recipe takes inspiration from traditional baking methods passed down through generations, known for their straightforward techniques and reliance on wholesome ingredients. Embraced during autumn harvests, apple fritters are celebrated for their adaptability and comforting flavors.

Techniques like gentle folding and precise baking are crucial in achieving the tender crumb and mouthwatering crust that define this regional favorite.

Recipe Details

Serves: 8-10

Prep Time: 20 minutes

Cook Time: 50 minutes

Total Time: 1 hour 10 minutes

Ingredients

  • 2 cups all-purpose flour
  • 1/3 cup granulated sugar
  • 1/4 cup packed brown sugar
  • 1 tablespoon baking powder
  • 1 teaspoon ground cinnamon
  • 1/2 teaspoon salt
  • 1/2 cup milk
  • 1/4 cup unsalted butter, melted
  • 2 teaspoons vanilla extract
  • 1 large egg
  • 2 cups diced apples (Granny Smith or Honeycrisp)

Directions

  1. Preheat your oven to 350°F (175°C) and grease a 9×5-inch loaf pan.
  2. In a large bowl, whisk together flour, granulated sugar, brown sugar, baking powder, cinnamon, and salt.
  3. In a separate bowl, mix milk, melted butter, vanilla extract, and egg.
  4. Gently fold the wet ingredients into the dry ingredients until just combined.
  5. Fold in the diced apples.
  6. Pour the batter into the prepared loaf pan and smooth the top.
  7. Bake for about 50 minutes, or until a toothpick inserted in the center comes out clean.
  8. Let cool in the pan for about 10 minutes before transferring to a wire rack to cool completely.

Tips for Perfect Luscious Country Apple Fritter Bread

  • For a crunchy top, sprinkle a little sugar before baking.
  • Ensure apples are evenly diced for uniform baking.
  • Do not overmix the batter to prevent a dense texture.
  • Use fresh, tart apples for the best flavor.

Serving Suggestions

Serve this delicious bread slightly warm with a dollop of butter or cream cheese. It pairs wonderfully with a hot cup of tea or coffee, making it an ideal breakfast or dessert option.

Storage and Leftovers

Store your apple fritter bread in an airtight container at room temperature for up to 3 days. For longer storage, wrap in plastic wrap and refrigerate for up to a week. It freezes well too; just thaw it out at room temperature before serving.

Final Thoughts

If you’re searching for a delightful recipe that effortlessly marries warm spices and fresh apples, the Luscious Country Apple Fritter Bread is a must-try. Its comforting taste and aroma promise a delightful culinary experience that leaves you longing for more.

Recipe Notes

  • Feel free to add a handful of chopped nuts for added texture.
  • For a sugary glaze, mix powdered sugar with a drizzle of milk and pour over cooled bread.
  • You can substitute whole wheat flour for a portion of the all-purpose flour for a healthier version.

“`

Indulgent Cheesecake Stuffed Baked Apples: A Perfect Fall Dessert

“`html

Cheesecake Stuffed Baked Apples: A Delicious Dessert Delight

Creamy, sweet, and irresistibly delicious, Cheesecake Stuffed Baked Apples are the perfect dessert to impress your guests. This delightful treat combines the tartness of baked apples with the creamy goodness of cheesecake, creating a dish that is both comforting and indulgent. Whether you’re a cheesecake lover or simply looking for a unique dessert to try, this recipe is sure to satisfy your cravings.

Why You’ll Love This Recipe

These Cheesecake Stuffed Baked Apples are a delightful fusion of flavors and textures. The warm, tender apples create a perfect vessel for the rich, creamy cheesecake filling. This treat not only looks stunning but tastes incredible, making it an ideal choice for special occasions or cozy family gatherings.

Besides their irresistible taste, these baked apples offer a healthier alternative to traditional cheesecake by incorporating fresh fruit into the mix. It’s a dessert that feels indulgent without being overly heavy, providing the perfect balance of sweetness and creaminess.

Context/Background

The concept of stuffed baked apples hails from traditional American and European recipes, where various fillings are used to elevate the humble baked apple. Marrying this technique with the popular New York-style cheesecake brings a modern twist to a classic dessert. It’s a brilliant way to enjoy the flavors of cheesecake with a touch of nostalgia.

Recipe Details

Serves: 4

Prep Time: 15 minutes

Cook Time: 30 minutes

Total Time: 45 minutes

Ingredients

  • 4 large apples (such as Honeycrisp or Fuji)
  • 8 oz cream cheese, softened
  • 1/4 cup granulated sugar
  • 1 tsp vanilla extract
  • 1/2 tsp ground cinnamon
  • 1/4 cup crushed graham crackers
  • 2 tbsp melted butter
  • A pinch of salt

Directions

  1. Preheat your oven to 350°F (175°C).
  2. Core the apples, making sure to leave the bottom intact to hold the filling.
  3. In a bowl, mix cream cheese, sugar, vanilla extract, and a pinch of salt until smooth.
  4. Fill each apple with the cheesecake mixture.
  5. In a separate bowl, mix crushed graham crackers, cinnamon, and melted butter until combined.
  6. Sprinkle the graham cracker topping over the filled apples.
  7. Place the apples in a baking dish and bake for 30 minutes or until the apples are tender.

Tips for Perfect Cheesecake Stuffed Baked Apples

  • Select firm, large apples to hold the filling better.
  • Ensure the cream cheese is softened for a smooth filling.
  • Monitor the baking time to prevent the apples from becoming too mushy.
  • Experiment with different apple varieties for flavor variations.

Serving Suggestions

Serve the Cheesecake Stuffed Baked Apples warm, garnished with a drizzle of caramel sauce or a sprinkle of cinnamon. Pair with vanilla ice cream for an extra decadent touch.

Storage and Leftovers

Store any leftover baked apples in an airtight container in the refrigerator for up to 3 days. Reheat gently in the oven or microwave before serving.

Final Thoughts

Cheesecake Stuffed Baked Apples offer a delightful twist on traditional desserts, blending familiar flavors with a touch of innovation. This recipe is a must-try for cheesecake enthusiasts and apple lovers alike. Give it a try and enjoy a dessert that’s as pleasing to the eye as it is to the palate.

Recipe Notes

  • For a nutty twist, add chopped nuts to the graham cracker topping.
  • Substitute brown sugar for granulated sugar for a deeper flavor.
  • Consider using flavored cream cheese for a unique twist.

“`

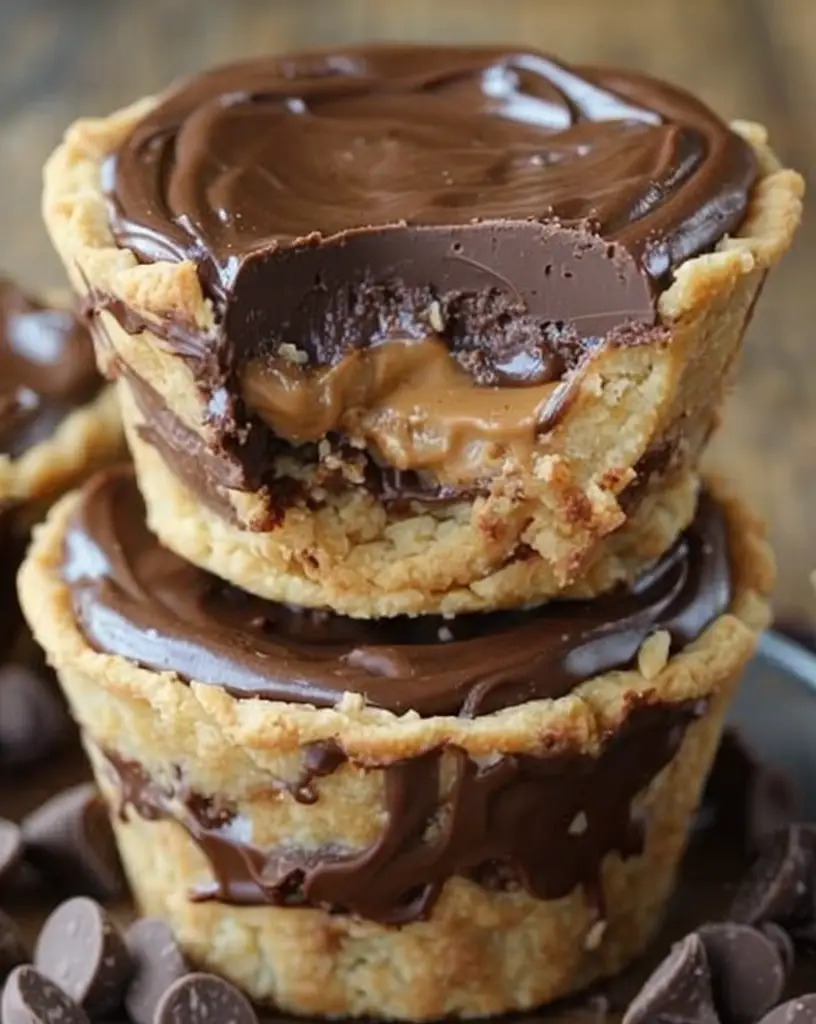
Indulge in Irresistible Mini Chocolate Peanut Butter Pies Recipe

“`html

Irresistible Mini Chocolate Peanut Butter Pies: A Delightful Bite-Sized Treat

Indulge in the decadent world of these irresistible mini chocolate peanut butter pies, a dessert that brings together the beloved combination of chocolate and peanut butter in a bite-sized, blissful experience. Perfect for satisfying sweet cravings, these delightful pies are rich in flavor and easy to make, making them a must-try recipe for dessert lovers.

Why You’ll Love This Recipe

These mini chocolate peanut butter pies are an absolute crowd-pleaser, offering a harmonious blend of silky chocolate and creamy peanut butter encased in a buttery graham cracker crust. Perfect for parties, gatherings, or simply enjoying at home, their bite-sized nature makes them both fun and convenient to eat. Moreover, these pies can be made ahead of time, allowing hosts to focus on enjoying the company of their guests.

The recipe caters to various taste preferences with its adaptable nature, ensuring that whether you’re a chocolate enthusiast, peanut butter lover, or both, you will find these mini pies truly irresistible. Plus, the recipe is simple enough for novice bakers while still producing results that impress even the most discerning palates.

Context/Background

The divine pairing of chocolate and peanut butter has been a beloved combination for decades, celebrated in everything from candy bars to decadent desserts. These mini chocolate peanut butter pies draw inspiration from classic American baking traditions, where the fusion of these two ingredients creates a perfect harmony of sweet and salty flavors. The mini format adds a modern twist, enhancing their visual appeal and ease of serving.

Recipe Details

Serves: 12

Prep Time: 20 minutes

Cook Time: 15 minutes

Total Time: 35 minutes

Ingredients

  • 1 cup graham cracker crumbs
  • 1/4 cup melted butter
  • 2 tablespoons granulated sugar
  • 1 cup smooth peanut butter
  • 1/2 cup powdered sugar
  • 1 teaspoon vanilla extract
  • 1 cup heavy cream
  • 1 cup dark chocolate chips
  • 1 tablespoon vegetable oil

Directions

  1. Preheat your oven to 350°F (175°C). In a bowl, combine graham cracker crumbs, melted butter, and granulated sugar. Mix well until crumbly.
  2. Press the crumb mixture into mini pie molds or a muffin tin, creating a firm base. Bake for 10 minutes, then remove and cool.
  3. In another bowl, blend peanut butter, powdered sugar, and vanilla extract until smooth and creamy.
  4. Divide the peanut butter mixture evenly into each cooled pie crust.
  5. In a saucepan, heat heavy cream until it just begins to simmer. Remove from heat and pour over chocolate chips. Add vegetable oil and stir until the chocolate melts completely.
  6. Pour the chocolate over the peanut butter layer and let the pies cool at room temperature, then refrigerate until set.

Tips for Perfect Mini Chocolate Peanut Butter Pies

  • Ensure the graham cracker base is tightly packed to prevent crumbling.
  • Use high-quality chocolate for a richer taste.
  • Allow the pies to cool completely before serving for the best texture.
  • Experiment with adding a pinch of sea salt on top for an added flavor dimension.

Serving Suggestions

Serve these mini chocolate peanut butter pies chilled, as they make a refreshing contrast to the rich flavors. They pair beautifully with a scoop of vanilla ice cream or a dollop of whipped cream.

Storage and Leftovers

Store any leftovers in an airtight container in the refrigerator for up to five days. For longer storage, these pies can also be frozen for up to two months – just thaw in the refrigerator before serving.

Final Thoughts

Embrace the blissful indulgence of these irresistible mini chocolate peanut butter pies, a treat that’s not only easy to make but also offers a perfect balance of flavors. Whether you’re hosting a party or simply looking for a delightful dessert, these pies are sure to be a hit and leave everyone wanting more.

Recipe Notes

  • For a firmer pie, consider using more butter in the graham cracker crust.
  • Swap the dark chocolate with milk chocolate if you prefer a sweeter taste.
  • Add chopped roasted peanuts for an extra crunch in the filling.

“`

Indulge in Decadent Sparkling Pumpkin Spice Chocolate Truffles Today

“`html

Sparkling Pumpkin Spice Chocolate Truffles: A Festive Delight

Indulge your senses and bring some sparkle into your holiday season with these Sparkling Pumpkin Spice Chocolate Truffles. This delightful treat combines the warm and cozy flavors of pumpkin spice with the rich decadence of chocolate, offering a perfect festive treat that’s both indulgent and comforting.

Why You’ll Love This Recipe

These Sparkling Pumpkin Spice Chocolate Truffles are not only a feast for the taste buds but also a treat for the eyes. The shimmering coating adds a touch of elegance, making them ideal for holiday gatherings, dinner parties, or as a thoughtful homemade gift. Plus, the fusion of pumpkin spice and chocolate creates a harmonious flavor profile that’s hard to resist.

The truffles are incredibly easy to make and require just a few ingredients. This makes them a great choice for last-minute dessert preparations or for when you want to impress guests with minimal effort. Additionally, they are rich and satisfying, ensuring a little goes a long way.

Context/Background

The concept of truffles finds its roots in European confectionary, traditionally made with chocolate and cream to form rich, bite-sized delicacies. The addition of pumpkin spice is a nod to the autumn season, capturing the essence of cozy fall days in a single bite. The sparkle is an innovative twist, adding festivity and a modern touch to a classic treat.

Technique-wise, these truffles highlight the art of balancing flavors and textures. Mixing warm spices with rich chocolate, then finishing with a sparkling coating, creates a multi-sensory experience that’s both delightful and memorable.

Recipe Details

Serves: 24

Prep Time: 20 minutes

Cook Time: 10 minutes

Total Time: 30 minutes

Ingredients

  • 1 cup heavy cream
  • 8 oz dark chocolate, chopped
  • 2 tbsp pumpkin spice mix
  • 1 tsp vanilla extract
  • 1/4 tsp salt
  • Edible glitter or sparkling sugar, for coating

Directions

  1. Heat the heavy cream in a small saucepan over low heat until just beginning to simmer.
  2. Remove from heat, and add the chopped dark chocolate. Let sit for 2 minutes, then whisk until smooth.
  3. Stir in the pumpkin spice mix, vanilla extract, and salt until fully incorporated.
  4. Transfer the mixture to a bowl and refrigerate for at least an hour until firm but scoopable.
  5. Using a small scoop or spoon, form balls from the mixture and roll them between your palms to smooth.
  6. Roll each truffle in edible glitter or sparkling sugar to coat evenly.
  7. Store in the refrigerator until ready to serve.

Tips for Perfect Sparkling Pumpkin Spice Chocolate Truffles

  • Use high-quality chocolate for the best flavor and texture.
  • Ensure the cream is hot enough to melt the chocolate completely for a smooth ganache.
  • Refrigerate the mixture until it is firm enough to handle but not too hard.
  • For a different sparkle effect, try mixing different colors of edible glitter.

Serving Suggestions

Serve these truffles on a decorative platter as a dessert centerpiece, or include them in a holiday cookie tray. They also pair beautifully with a glass of red wine or hot cocoa.

Storage and Leftovers

Store the truffles in an airtight container in the refrigerator for up to two weeks. They can be frozen, though the sparkling coating may lose its luster over time. To freeze, place truffles on a parchment-lined tray and freeze until solid before transferring to a freezer-safe bag or container.

Final Thoughts

Whether you’re celebrating a special occasion or simply treating yourself, these Sparkling Pumpkin Spice Chocolate Truffles are sure to impress with their elegant appearance and scrumptious taste. Easy to make and delightfully indulgent, they are a must-try for any chocolate lover.

Recipe Notes

  • If you prefer a softer truffle center, reduce the chilling time slightly.
  • Feel free to customize the spice mix to your preference by altering the pumpkin spice ratios or adding a dash of nutmeg or cardamom.
  • For a dairy-free version, use coconut cream and dairy-free chocolate in place of cream and chocolate.

“`