Irresistibly Tender Slow Cooker Mongolian Beef Recipe for Busy Days

Slow Cooker Mongolian Beef: An Effortless Savory Delight

⚖️
Difficulty
Easy

⏲️
Prep Time
15 mins

🕒
Cook Time
240 mins

⏱️
Total Time
255 mins

🍽️
Servings
6

Slow Cooker Mongolian Beef is a tender, savory delight that captures the essence of East Asian cuisine using the convenience of a slow cooker. This dish combines the rich flavors of a soy sauce-based marinade with the sweetness of brown sugar, paired perfectly with spices and aromatics like garlic and ginger. As the beef simmers slowly, it absorbs these wonderful flavors, resulting in a melt-in-the-mouth experience that’s both delicious and satisfying without fuss.

This Mongolian Beef recipe truly exemplifies comfort food at its best. The ease of preparation makes it an excellent choice for busy weeknights or any occasion when you want a gourmet meal without the effort. The slow-cooked beef becomes incredibly tender, and the sauce thickens into a glaze that clings beautifully to each piece, ensuring every bite is as flavorful as the last. With minimal prep and cleanup, you can enjoy more time with family or entertain guests effortlessly while your slow cooker does the work.

Putting this dish together is straightforward and requires surprisingly few ingredients, making it both budget-friendly and accessible. Experience the fusion of classic flavors with modern simplicity, and let this recipe add a touch of culinary delight to your dining table.

Quick Recipe Highlights

  • Flavor Profile: Slow Cooker Mongolian Beef offers a sweet and savory fusion with deep soy sauce notes combined with subtle ginger and garlic aromas.
  • Texture: The beef becomes melt-in-your-mouth tender due to the low and slow cooking process, while the sauce thickens to coat each bite satisfyingly.
  • Aroma: Emit gentle fragrances of soy and sesame with a hint of ginger spice as it simmers away.
  • Visual Appeal: Featuring a glossy, caramelized finish that glistens on every piece of beef, serving it up with bright green onions makes a visually stunning dish.
  • Skill Level Needed: An easy recipe that requires basic prep of ingredients and the patience to allow them to cook slowly for maximum flavor extraction.
  • Special Equipment: A reliable slow cooker is the singular tool necessary to achieve this dish’s perfect texture.

Recipe Overview

  • Difficulty Level: This meal is categorized as easy due to its straightforward preparation and reliance on the slow cooker to perform most of the culinary work.
  • Category: A hearty main course perfect for casual family dinners or meal prep for the week.
  • Cuisine: Rooted in Asian culinary traditions but adapted for Western slow-cooking techniques, achieving an international favorite.
  • Cost: Reasonably priced as it utilizes affordable beef cuts and pantry staples to create a rich, gourmet meal feel without overspending.
  • Season: Year-round appeal but especially comforting during the fall and winter months when warm, aromatic meals are most revered.
  • Occasion: Ideal for intimate family meals, potlucks, or when you have guests over and want to offer tasty and comforting fare.

Why You’ll Love This Recipe


Slow Cooker Mongolian Beef offers an incomparable taste and texture with its soft, flavorful beef enhanced by the magical mix of soy, ginger, and garlic. Each morsel is bathed in a sweet-savory glaze that captures the perfect balance of Asian-inspired flavors, making every bite satisfying and fulfilling.

The next benefit is convenience. With minimal prep time and only a few core ingredients—like beef, brown sugar, and soy sauce—your slow cooker takes charge. This process grants you more time to relax while the kitchen fills with delightful aromas that herald the feast to come.

From a nutritional standpoint, this recipe uses high-quality proteins and allows effortless integration of additional vegetables for added nutrients. This flexibility can cater to dietary needs without sacrificing the taste experience.

Socially, this dish is a stunner at gatherings with its luscious presentation that garners compliments. It’s a true conversational piece when you reveal how little intervention was required to create such engaging flavors, making Slow Cooker Mongolian Beef a go-to for entertaining.

Finally, its cost-effectiveness coupled with accessibility ensures that you can enjoy this gourmet recipe without breaking the bank. Simplicity and flavor come together, making a restaurant-quality meal achievable in any home kitchen.

The Recipe

Slow Cooker Mongolian Beef

Serves: 6

Prep Time: 15 mins

Cook Time: 240 mins

Total Time: 255 mins

Kitchen Equipment Needed

  • Sharp knife
  • Cutting board
  • Mixing bowl
  • Slow cooker

Ingredients

  • 2 lbs flank steak, sliced thinly
  • 1 cup soy sauce
  • 3/4 cup brown sugar
  • 1 tablespoon garlic, minced
  • 1 tablespoon fresh ginger, minced
  • 1/4 cup cornstarch
  • 3 tablespoons vegetable oil
  • 1/2 cup sliced green onions, for garnish

Directions

  1. In a bowl, combine soy sauce, brown sugar, garlic, and ginger, stirring until the sugar fully dissolves.
  2. Coat sliced flank steak with cornstarch and place it inside the slow cooker.
  3. Pour the soy sauce mixture over the steak, ensuring thorough coating.
  4. Cover and cook on low for 4 hours or until beef is tender.
  5. Before serving, heat vegetable oil in a pan and lightly sauté green onions.
  6. Garnish the cooked beef with sautéed green onions before serving warm.

Recipe Notes

  • Substitute flank steak with skirt steak if unavailable.
  • For a richer sauce, reduce liquid by simmering it in a saucepan before adding green onions.

Master the Art of Perfectly Seared Scallops in Creamy Curry Sauce

Perfectly Seared Scallops in Creamy Curry Sauce: A Flavorful Delight

⚖️
Difficulty
Intermediate

⏲️
Prep Time
15 mins

🕒
Cook Time
20 mins

⏱️
Total Time
35 mins

🍽️
Servings
4

Imagine tender, buttery scallops perfectly seared to golden-brown perfection, sitting atop a bed of lush creamy curry sauce. This dish enchants with an intoxicating mix of savory and subtle sweet notes, balancing the rich texture of the creamy sauce with the delicate sea flavor of the scallops. An absolute show-stopper for any special occasion, these Perfectly Seared Scallops in Creamy Curry Sauce promise to tantalize every taste bud.

Crafting this delightful dish requires some finesse with timing and heat, ensuring a delightful crunch on the scallops while maintaining their sumptuous, juicy interior. The creamy curry sauce complements this, providing a symphony of aromatic spices that elevate this seafood delicacy into the realm of fine dining. Whether you’re cooking for loved ones or treating yourself, this recipe brings both elegance and warmth to the table.

The beauty of these seared scallops lies not only in their delectable flavor but in their simplicity. Surprisingly easy to prepare, these scallops are an ideal recipe for home chefs ready to venture into the world of gourmet dishes. Prepare to impress with bold flavors and a sophisticated presentation that perfectly captures the spirit of a luxurious dining experience.

Quick Recipe Highlights

  • Flavor Profile: A delightful blend of savory, sweet, and mild spices gives these scallops a unique and refreshing taste.
  • Texture: Expect a perfect mix of crispy sear and tender interior with the scallops enriched by the creamy smoothness of the sauce.
  • Aroma: Experience a fragrant allure from the curry-infused sauce, enhanced by the subtle sea essence of the scallops.
  • Visual Appeal: Golden scallops rest on a bed of sauce with vibrant colors, making the dish as beautiful as it is delicious.
  • Skill Level Needed: Suitable for those with moderate culinary skills, focusing on precise timing and heat control.
  • Special Equipment: A good quality non-stick pan and spatula are essential for achieving the perfect sear on your scallops.

Recipe Overview

  • Difficulty Level: The recipe requires an intermediate skill level due to the precise searing technique and the nuanced balance in the spicy curry sauce.
  • Category: These scallops fit beautifully as a sophisticated main course or an extravagant appetizer.
  • Cuisine: This dish reflects a fusion of Western seafood traditions with an exotic Indian flair, blending different culinary worlds.
  • Cost: Ingredients may be on the pricier side, owing to the scallops and spices, yet they promise a restaurant-quality outcome.
  • Season: Best prepared during spring and summer when fresh scallops are more readily available, enhancing the dish’s flavor.
  • Occasion: Perfect for romantic dinners, celebrations, or anytime you wish to impress guests with a gourmet meal.

Why You’ll Love This Recipe

The taste and texture of these Perfectly Seared Scallops in Creamy Curry Sauce will delight anyone who craves a twist on traditional seafood dishes. The subtle heat from the curry is well balanced by the sauce’s creaminess, providing a robust, rounded delight. Unlike ordinary scallop recipes, this one promises a symphony of flavor in every bite.

Preparing this recipe offers a satisfying culinary adventure. The steps are clear and concise, enabling you to create a dish of impressive quality. Moreover, this recipe suits various occasions, whether a date night or a holiday feast. Its complexity in flavors makes it stand out on any table, ensuring enjoyment for both cooks and diners.

Additionally, the nutritional advantages align with dietary preferences focused on lean proteins and healthy fats. Scallops are protein-rich, low in calories, and when paired with a carefully curated sauce, maintain a healthful balance without excessive guilt. It’s decadence without extravagance.

Your social gatherings will benefit as this recipe is a conversation starter, encouraging discussions about flavor profiles and cooking techniques. It’s a perfect dish to open up bonds over shared gourmet interests, elevating both the meal and the company.

Finally, the affordability of such an exquisite dish is remarkable. With thoughtful ingredient choices and preparation, you can enjoy a restaurant-style meal at home, potentially saving costs while delighting in an effortlessly elegant dining experience.

Historical Background and Cultural Significance

The concept of serving scallops dates back centuries, with this seafood revered since ancient times in coastal communities worldwide. Traditionally seized fresh from the ocean, scallops have been prized for their delicate flavor and rich meat, making them a valuable and luxurious ingredient.

Culturally, scallops hold significance in many culinary traditions ranging from French to Asian cuisines. Their inherent versatility allows them to be adapted into numerous dishes, each encompassing regional flavors and techniques. Scallops in a curry sauce is somewhat of a modern invention, integrating Asian spice palettes into Western cuisine trends.

Over the years, the recipe has evolved, with chefs continuously experimenting with different spice blends and preparation techniques to perfect the balance of flavors and textures. This version plays on robust spices commonly found in Indian curry, merged with the preparation methods of classic French cuisine.

Regional variations of this dish exist, with coastal regions adding their signature local flavors to enhance this exquisite seafood. These adaptations often follow the availability of spices and other fresh ingredients, creating a rich tapestry of flavor profiles all celebrating the humble scallop.

Ingredient Deep Dive

The star of this recipe, scallops are globally renowned for their succulence and mild sweetness. Historically, scallops have been a favorite among coastal communities, cherished for their rich taste and versatile nature. Nutritionally, they are high in protein yet low in calories and fat, offering a nutritious option for seafood lovers.

When selecting scallops, freshness is crucial. Opt for scallops that have a fresh, mild scent and a firm, slightly moist texture. If fresh scallops are unavailable, dry-packed frozen scallops are an acceptable alternative. Store them in the coldest part of your refrigerator and use them promptly to enjoy their full flavor.

Curry powder, the key component of this sauce, traces its roots back to Indian cuisine. Traditionally used for its aromatic and rich characteristics, curry powder typically includes turmeric, cumin, coriander, and other spices. It’s rich in antioxidants and has numerous health benefits.

To ensure high-quality flavor, choose a fresh, aromatic curry powder. Store it in a cool, dry place to maintain its potency. While different blends offer varying heat and flavor profiles, start with mild alternatives if experimentation is your goal. You can easily adjust the heat with complementary spices like cayenne or pepper.

Common Mistakes to Avoid

  • Overcooking Scallops: Avoid a rubbery texture by watching the time and heat carefully, aiming for a perfect sear.
  • Inadequate Seasoning: Ensure a proper balance of flavors by tasting and adjusting seasoning levels throughout.
  • Choosing the Wrong Pan: Use a hot, quality pan to achieve an even crust without burning or uneven cooking.
  • Improper Sauce Thickening: Monitor sauce thickness carefully; a thin sauce will not cling well to the scallops.
  • Buying Wet-Packed Scallops: Opt for dry-packed to avoid excessive moisture and improve searing.
  • Failing to Dry Scallops: Pat scallops dry before cooking to ensure a crisp, brown crust.
  • Using Low Heat: High heat is necessary for a quick, even sear—do not crowd the pan with too many scallops.
  • Neglecting Freshness: The dish’s quality is deeply dependent on the freshness of both scallops and spices.
  • Heavy-handed Spice Usage: Balance curry flavors with the cream to avoid overwhelming the dish’s delicacy.
  • Skipping Rest Time: Allowing scallops to rest briefly after cooking will maintain juiciness and flavor.

Essential Techniques

Searing scallops perfectly is paramount. Achieving a golden-brown crust requires high heat and patience. Ensure the pan is adequately heated and avoid moving scallops prematurely. Look for a rich color before flipping to guarantee a crispy, flavorful exterior.

Curry sauce must be well-balanced, creamy, and aromatic. Stir consistently to avoid scorching and ensure ingredients meld seamlessly. Look for a slightly thickened sauce that clings to the back of a spoon. Visual cues like a rich, golden hue and intoxicating aroma will indicate the sauce is ready.

Pro Tips for Perfect Scallops in Creamy Curry Sauce

Allow scallops to reach room temperature before cooking. This ensures even cooking and superior searing. Use a non-stick or stainless-steel pan for the best sear, paying attention to heat levels and scallop spacing.

Clarifying your butter allows for a higher smoking point, enhancing the searing process without burning. To amplify the scallop’s natural flavor, finish with a squeeze of fresh lemon juice before serving.

When choosing curry powders, starting with mild and medium flavors lets you control the heat as you adjust to taste preferences more confidently. The sauce should remain creamy without losing any of its aromatic intensity or spice richness.

Variations and Adaptations

Regional variations might see the addition of local spices or heat levels. For instance, Thai influences might introduce lemongrass or kaffir lime leaves for an exotic touch. Adjust the heat of your curry to suit seasonal climates, favoring milder versions in warm weather.

Dietary modifications include substituting heavy cream with coconut milk for a non-dairy version. Introduce flavor variations by switching traditional curry powders with specific blends like Madras or Masala, each offering distinct, exciting profiles.

Modern serving suggestions might see scallops resting on a bed of zucchini noodles or spinach for a fresh, light alternative. These ideas highlight the dish’s versatility, accommodating both presentation and flavor.

Serving and Presentation Guide

For an inviting presentation, consider using white or light-colored plates to make the colors of the dish pop. Garnish with cilantro or microgreens for an aromatic and vibrant touch. Balance servings with accompaniments like jasmine rice or crusty bread, which enhances the dish’s versatility and enjoyment portfolio.

Consider temperature and timing. Scallops should be served immediately to maintain their delicate warmth and texture. Carefully portion the scallops, adjusting according to your crowd size for an exquisite balance of flavors, color, and texture.

Wine and Beverage Pairing

For wine pairings, a crisp white wine like Chardonnay enhances the dish’s creamy attributes, while maintaining enough brightness to cut through the richness. If avoiding alcohol, consider a sparkling water or lightly brewed iced tea with a squeeze of citrus.

A light herbal tea would complement the curry without overpowering it, while an oolong or jasmine tea enhances the aromatic complexity. Serve beverages at a chilled temperature to offer a refreshing counterbalance to the meal’s warm richness.

Storage and Shelf Life

Store any leftover scallops and sauce separately in airtight containers. Refrigerate promptly and use within 2 days for optimal freshness. If freezing, scallops can maintain quality for up to 2 months, but ensure a thorough and gentle reheat, avoiding overcooking.

Signs of spoilage include an off-odor or significant texture change—consume only when confident in freshness. Reheated scallops should be gently warmed to prevent overcooking, and stored sauce gently reheated to maintain a creamy consistency.

Make Ahead Strategies

The curry sauce can be made ahead of time and stored in the fridge, allowing for flavors to meld overnight. Scallops, however, are best seared fresh to retain their texture. Prepare all ingredients ahead of time and store them appropriately, facilitating stress-free assembly.

For an organized approach, prep your cooking station by gathering needed equipment and ingredients beforehand. This preparation aids in efficiency and quality, maintaining the highest standards for your meal.

Scaling Instructions

For intimate or expanded gatherings, adjust ingredient quantities keeping all proportions consistent. Doubling the recipe might necessitate cooking in batches, ensuring each scallop receives adequate pan space for the best sear.

Equipment, like additional pans or larger cooktops, might be necessary for larger adjustments. Consider how storage and reheating practices change, ensuring quality remains uncompromised with increased volume.

Nutritional Deep Dive

This recipe offers a balanced macro profile with protein-rich scallops and a flavorful sauce low in refined sugars. Micronutrients, including selenium and vitamin B12, add nutritional value, supporting overall health.

Those focusing on portion control can enjoy this meal’s hearty composition without excess calories, aided by its satiating qualities. Understanding each nutrient’s contribution encourages mindful, healthful dining.

Dietary Adaptations

For gluten-free adaptations, ensure curry powders and all accompaniments, such as rice or breads, meet dietary requirements. Dairy-free versions benefit from coconut cream, while vegan editions can substitute scallops with tofu or mushrooms, maintaining the dish’s essence.

Low-carb and keto diets can adapt by using full-fat creams or cheeses in the sauce, eliminating sugars entirely. Paleo adherents might consider a ghee or coconut oil base, ensuring complete compliance.

Troubleshooting Guide

Texture issues might arise from incorrect searing temperatures—fix this by ensuring a very hot pan and minimal scallop movement. Flavor balancing requires tasting frequently and adjusting spices incrementally, ensuring neither overpowers the other.

Temperature concerns should be addressed by investing in a reliable cooking thermometer to maintain accuracy. Equipment challenges might involve necessary updates or substitutions with available tools.

Recipe Success Stories

Community feedback consistently praises the dish’s rich, balanced palate and inviting warmth. Enthusiasts have shared successful adaptations with regional spices, extending its reach across varied palate preferences.

Engagement is widespread on social platforms, with shared adaptations and striking presentations. Feedback often highlights the recipe’s blend of complexity and simplicity, appreciating its restaurant-quality appeal from home kitchens.

Frequently Asked Questions

1. Can I use frozen scallops for this recipe? Yes, thaw them properly before use. Look for dry-packed versions to avoid excess moisture.

2. How do I know when the scallops are cooked perfectly? Look for a golden crust and opaque center. Avoid overcooking to maintain tenderness.

3. Can I substitute the cream for a dairy-free alternative? Absolutely, coconut milk makes an excellent alternative to accommodate dairy-free needs.

4. What should I pair this dish with? Pair with light white wines or herbal teas, complementing the dish’s delicate, spiced aromas.

5. How do I store leftovers? Store scallops and sauce separately in the refrigerator, consuming within two days for best results.

6. Are there any other spices I can add to this dish? Customize your curry sauce with additional spices like lemongrass or kaffir lime for a varied profile.

7. Can I prepare parts of this dish ahead of time? Yes, prepare the curry sauce ahead, refrigerating it to meld flavors; scallops should be fresh.

8. How do I avoid making my scallops rubbery? Control cooking time, ensuring a very hot pan and limiting scallop movements during searing.

9. Is this dish suitable for special diets? With modifications, it can suit gluten-free, dairy-free, keto, and paleo diets.

10. What is the best way to reheat scallops? Gently reheat in a warm pan or oven, avoiding microwaves to preserve texture.

Additional Resources

Explore related recipes like our Garlic Butter Shrimp or Lemon-Infused Baked Cod, each sharing complementary flavors and techniques. Our comprehensive guide on seafood selection offers insights for various preferences, enhancing your understanding and enjoyment.

Discover equipment recommendations for achieving perfect sears with non-stick and stainless pans, ensuring professional outcomes from home kitchens. Align your seasonal cooking pursuits with our collection of fresh, vibrant options, each capturing culinary specificity yearlong.

Join the Conversation

Engage in our community through social media by sharing your own recipe adaptations. Provide honest reviews and suggestions, or pick up new culinary tips. We encourage open conversation and recipe variation, each step enhancing our shared dining experience.

Contribute to vibrant forums, sharing your culinary triumphs and photography. Whether finding inspiration or providing guidance, each interaction strengthens our shared passion for flavorful, elegant cooking.

The Recipe

Perfectly Seared Scallops in Creamy Curry Sauce

Serves: 4

Prep Time: 15 mins

Cook Time: 20 mins

Total Time: 35 mins

Kitchen Equipment Needed

  • Non-stick or stainless-steel skillet
  • Spatula
  • Mixing bowls
  • Whisk
  • Knife
  • Cutting board

Ingredients

  • 12 large sea scallops
  • 2 tablespoons olive oil
  • 1 tablespoon unsalted butter
  • Salt and pepper to taste
  • 1 cup heavy cream
  • 1 tablespoon curry powder
  • 1 teaspoon minced garlic
  • 2 teaspoons lemon juice
  • Chopped cilantro for garnish

Directions

  1. Pat scallops dry with a paper towel and season with salt and pepper.
  2. Heat olive oil in a skillet over medium-high heat. Add butter and allow it to melt.
  3. Sear scallops for 2-3 minutes on each side until golden brown. Remove from skillet and set aside.
  4. Reduce heat to medium. Add garlic to the skillet and sauté until fragrant.
  5. Stir in curry powder, mixing well with the garlic.
  6. Gradually whisk in heavy cream, letting the sauce simmer and thicken.
  7. Add lemon juice, tasting and adjusting seasoning as needed.
  8. Return scallops to the skillet, gently stirring to coat them in the sauce.
  9. Garnish with cilantro before serving warm.

Recipe Notes

  • For a milder sauce, reduce the curry powder or use a fresh blend tailored to your heat preference.
  • Substitute olive oil with ghee or clarified butter for an enhanced flavor profile.
  • For a dairy-free option, use coconut cream instead of heavy cream.

Irresistible Cheesy Beefy Rolls Perfect for Easy Weeknight Dinners

Cheesy Beefy Rolls: A Savory Delight You Can’t Resist

⚖️
Difficulty
Easy

⏲️
Prep Time
15 mins

🕒
Cook Time
30 mins

⏱️
Total Time
45 mins

🍽️
Servings
4

Imagine biting into a warm, freshly baked roll filled to the brim with tender beef and gooey cheese—our Cheesy Beefy Rolls promise a burst of flavor in every bite. If you crave something comforting and immensely satisfying, these are the perfect fit. With a delicious combination of seasoned beef and cheese snugly wrapped in a soft dough, this recipe not only captivates your taste buds but also offers a delightful texture that simply melts in your mouth. Ideal for a cozy dinner or a festive snack, these rolls are a joy to make and even better to share.

Quick Recipe Highlights

  • Flavor Profile: The Cheesy Beefy Rolls are a medley of savory beef richness complemented by the creamy, salty essence of cheese, delivering mouthfuls of balanced umami tastes.
  • Texture: Expect a delightful contrast between the soft, pillowy dough and the hearty, slightly chewy filling, making each bite an experience of its own.
  • Aroma: These rolls release a tantalizing mix of freshly baked bread and sizzling beef aroma, punctuated by the luscious smell of melted cheese.
  • Visual Appeal: Served fresh out of the oven, they boast a golden-brown exterior, with slight cheese bubbling, making for an enticing presentation.
  • Skill Level Needed: This easy recipe is suitable for all experience levels, involving simple steps that beginners can follow without hassle.
  • Special Equipment: A rolling pin and a baking sheet are the primary tools needed, making this recipe accessible to anyone with a basic kitchen setup.

Recipe Overview

  • Difficulty Level: The Cheesy Beefy Rolls are categorized as easy because they require minimal preparation and cooking techniques—primarily browning beef and assembling dough.
  • Category: These rolls serve wonderfully as appetizers, snacks, or main courses for a simple, hearty meal option.
  • Cuisine: The dish takes inspiration from American comfort food traditions with a universal appeal, making it adaptable in various culinary contexts.
  • Cost: Using simple ingredients like ground beef, cheese, and flour, these rolls are budget-friendly while also delivering great taste.
  • Season: Perfect for all seasons, they can particularly enhance fall and winter menus when warm, hearty dishes are most comforting.
  • Occasion: Suitable for casual family meals, game nights, or festive gatherings where convenient finger foods are appreciated.

Why You’ll Love This Recipe

Cheesy Beefy Rolls are a taste sensation that combine beef’s robust flavor with cheese’s creamy indulgence. The dish is perfect for those who appreciate a hearty, flavorful meal with minimal fuss. The roll’s texture is a harmony of soft dough with a rich filling, ensuring a delightful eating experience from start to finish.

Convenience is a key benefit of this recipe. With just a few accessible ingredients and straightforward preparation, you’ll have delicious rolls ready in under an hour. Plus, these rolls can be made ahead of time for easy entertaining or meal planning.

Nutritionally, this recipe offers protein and calcium from the beef and cheese, supporting balanced meals that satisfy without sacrificing taste. The calories can be adjusted by choosing leaner cuts or low-fat cheese options.

Social events are made better with Cheesy Beefy Rolls, providing a versatile dish perfect for sharing. These rolls are a hit at parties and family gatherings, offering an irresistible appetizer everyone will enjoy.

Cost-effectiveness is another advantage, using budget-friendly ingredients without compromising on flavor or satisfaction, making this dish both delicious and economical.

Historical Background and Cultural Significance

The origin of recipes like Cheesy Beefy Rolls can be traced back to the comfort food movements in American culinary history. These dishes evolved to cater to families seeking simple yet hearty home-cooked meals that are both delicious and affordable.

Cheesy Beefy Rolls have become emblematic of the fusion between traditional bread-making practices and modern convenience foods, especially valued in busy households across Western countries. The fusion of beef and cheese within a bread roll is seen in different culinary traditions globally, from European stuffed breads to Asian buns.

Over time, these rolls have become a staple in diverse regions, with variations tailored to local staple ingredients and traditional cooking methods. Each variation tells a story of its cultural backdrop, making the dish a culinary tapestry of tastes and traditions.

The adaptive nature of this recipe is what has allowed it to sustain popularity, with variations ranging from the type of meat, choice of cheese, and seasoning profiles reflective of regional preferences or dietary needs.

Ingredient Deep Dive

Ground beef is a primary ingredient, heralded for its versatile, rich flavor and substantial protein content. History shows beef was a luxurious staple in times past, becoming more commonplace with industrial advancements in farming practices. Selecting beef with a balanced fat ratio ensures a juicy filling, stored well when wrapped tightly and refrigerated. Substitutions like turkey or plant-based crumbles can cater to specific preferences.

Cheese adds indulgence, crucial for its creamy melt that balances beef’s taste. Historically loved in culinary arts for its variation across regions, cheese contributes not only taste but essential nutrients like calcium and vitamin D. Select cheese that melts well, such as cheddar or mozzarella, stored best when sealed in a cool environment. Dairy-free substitutes are increasingly popular among those with dietary restrictions.

Common Mistakes to Avoid

  • Not browning the beef properly: It is crucial to cook ground beef until it is evenly browned to enhance flavor. Otherwise, you might end up with under-flavored rolls.
  • Using wet dough: Ensure your dough is of good consistency to prevent rolls from becoming soggy or falling apart. Knead until you achieve elasticity.
  • Overfilling the rolls: Adding too much filling can lead to leaks and uneven cooking. Stick to recommended measurements for the best outcome.
  • Skipping the rolling pin: A rolling pin helps ensure your dough is evenly flat, crucial for consistent baking and filling distribution.
  • Not sealing edges properly: Sealed edges prevent filling from spilling and ensure the rolls hold their shape during baking.
  • Skipping resting steps: Let the dough sit to help yeast activate fully, crucial for the dough’s texture and rise.
  • Inaccurate oven temperature: Ensure your oven is preheated to achieve perfectly cooked rolls that are golden brown.
  • Cheese choice mistake: Use cheese that melts well to avoid greasy outcomes or uneven texture.

Essential Techniques

Mastering the technique of browning beef is critical; it involves cooking the ground beef over medium-high heat until fully browned, ensuring that the meat develops a rich, umami flavor. Understanding this process helps prevent texture issues and achieves a deep flavor profile. Observing color and noting a firm texture help confirm the beef is ready.

Kneading dough successfully brings about the desired elasticity and pliability crucial for these rolls. Mastering it involves using your palms efficiently, folding the dough over itself, and continuing this motion until smooth. Not kneading properly might lead to tough roll texture.

Pro Tips for Perfect Cheesy Beefy Rolls

Start with room temperature ingredients to ensure even cooking and the best results. Cold butter or dough can significantly impact the texture and cooking time of the rolls.

Incorporate flavorful herb seasoning in your beef to add an extra layer of complex taste that elevates the whole dish without overcomplicating the method.

For a glossy finish, brush a bit of melted butter on top of rolls right before baking—this will give them an appealing golden hue and added moisture.

Consider partially baking the rolls, then pausing to reheat just before serving for fresh, warm servings that taste as though newly baked.

Adjust the cheese type based on flavor preference but ensure it’s a cheese that melts well to bind ingredients and avoid drying out.

Increase or decrease filling according to personal preference while being mindful not to overfill and compromise the roll’s integrity.

Variations and Adaptations

Regional variations might include swapping beef for lamb or chicken, each bringing unique flavors that suit culturally specific dining preferences. Alternatively, cuisines might use herbs and spices native to their regions for a distinct taste.

Seasonal ingredients also influence adaptations—summer versions could incorporate bell peppers, while winter might call for spiced beef filling, adjusting the warmth and taste profile.

Dietary modifications include using gluten-free dough or plant-based cheese, offering satisfying alternatives without compromising the essential flavors of Cheesy Beefy Rolls.

Introduce flavor variations by trying different cheeses. Spicy jalapeño cheese, for example, can add heat that contrasts deliciously with the beef.

Modify texture by brushing the dough with olive oil for crunchier rolls, ensuring rolls hold their shape and exhibit delightful structure balance.

Presentation alternatives include serving the rolls with a dipping sauce of your choice, enhancing their appeal and providing versatile options for guests.

Serving and Presentation Guide

Achieve elegant plating by serving on a wooden platter, offering a warm, rustic feel that complements the dish’s comforting nature. Consider garnishing with fresh parsley or a sprinkle of Parmesan for added allure.

Traditional accompaniments like a crisp side salad or tangy tomato soup can enhance the enjoyment of the rolls, bringing contrast in texture and taste.

For modern gatherings, present rolls in mini form as elegant hors d’oeuvres, offering smaller portions that are ideal for mingling guests.

Mind the temperature—serve these rolls warm to preserve the ideal cheese melt and flavor balance. Cold rolls may overshadow the experience by altering texture.

Portion control tips include slicing each roll in half for lighter servings, perfect for gatherings where varied appetizers are offered.

Wine and Beverage Pairing

Pairing your Cheesy Beefy Rolls with a full-bodied red wine like a Cabernet Sauvignon can accentuate the beef’s rich notes and cheese’s creaminess, creating harmonious layers of flavor.

Non-alcoholic alternatives such as a citrusy lemonade provide a refreshing balance to the rolls’ savory qualities, cleansing the palate between bites.

If your meal extends to brunch, consider pairing with a rich, aromatic coffee. The robust flavors enhance the rolls without overpowering them.

Keep drinks at optimal temperatures: wines slightly cool, non-alcoholics chilled to refresh, and coffee warm enough to evoke comforting aromas.

Serve with standard glasses for easy handling or gourmet cups for an elevated dining experience, heightening the visual and experiential aspects of the meal.

Storage and Shelf Life

Store Cheesy Beefy Rolls in airtight containers to maintain their freshness and prevent ambient moisture from affecting texture. Refrigeration prolongs shelf life but may require reheating for optimal taste.

Containers should be of a durable material that can transition from fridge to microwave, ensuring convenience for short-notice meals or snacks.

Be mindful of spoilage signs, such as an off-smell or mushy texture, indicating potential degradation—consume within three days when refrigerated.

For reheating, use an oven to bring back the rolls’ crisp exterior, achieving fresh-like qualities.

To freeze, tightly wrap individual rolls in plastic wrap, then place in a freezer bag to prevent freezer burn, keeping for up to one month.

Make Ahead Strategies

Prepare your filling a day in advance, allowing flavors to meld overnight. Store it in a sealed container in the fridge, saving time on the day of assembly.

Create dough in advance, refrigerate after kneading, and allow to come to room temperature before rolling—a crucial step for relaxed preparation timelines.

Quality can be retained when stored between preparations by wrapping rolls with cling film before final baking; an efficient method for managing dishes simultaneously.

Assemble rolls ahead and refrigerate; bake right before serving for warm, inviting appetizers perfect for entertaining.

Reheat gently at low oven temperatures to maintain texture integrity without overcooking, ensuring leftovers retain freshness.

Fresh herbs or toppings can be added just before serving, bringing new pops of flavor to already prepared items, offering flexibility and impressive outcomes.

Scaling Instructions

Halving the recipe for smaller gatherings involves adjusting ingredient ratios accordingly and a potentially shorter cooking time, utilizing personal judgment about readiness.

To double or triple, increase ingredient quantities while monitoring dough consistency, adding slight adjustments where necessary to maintain dough properties.

Use appropriately sized equipment to accommodate larger batches without overcrowding, ensuring consistent cooking.

Larger recipes might require staggered cooking, careful time monitoring to prevent over- or undercooking, with a focus on equilibrating textures.

Consider storage space and container availability ahead—increased quantities demand proper allocation to maintain dish quality.

Nutritional Deep Dive

This recipe serves a well-rounded macronutrient profile, rich in proteins crucial for muscle health and metabolism, with fats from cheese contributing to energy needs.

Micronutrient highlights include zinc and iron from beef, vital for immune function, alongside calcium and vitamin D from cheese.

Health benefits encompass sustained energy release, muscle maintenance, and also mood enhancement from delightful taste experiences.

Dietary considerations allow for ingredient swapping to lower fat content or increase fiber, tailoring rolls according to nutritional goals like weight management.

Establish portion sizes aligned with dietary needs—adjust individual serving sizes for balanced meals that contribute positively to daily intake, encouraging moderation.

Dietary Adaptations

Gluten-free adaptation involves swapping traditional flour for a suitable gluten-free alternative, ensuring texture without dietary compromise.

Dairy-free ideas work when plant-based cheese is used, delivering familiar comforts alongside health-conscious adjustments, albeit with some flavor modifications.

Vegan options require meat substitutes like lentils or tofu, maintaining essential nutritional balance while honoring plant-based ethics.

Low-carb adjustments emphasize lean protein and vegetables as filler, discounting carb-heavy dough; adjustable for more conscious eating without sacrificing enjoyment.

Keto-friendly versions maximize toppings like cheese but limit flour type, keeping within engineered dietary macros—offering creativity even in restricted choices.

Low-FODMAP alternatives are possible with precise ingredient selection, focusing on easily digestible items that balance satisfaction with dietary limits.

Troubleshooting Guide

Texture issues often arise from improperly kneaded dough; achieve smoothness via repeated folding to ensure an airy, consistent bake.

Flavor balance may tip when spices are overused—taste-test throughout preparation to maintain harmony between cheese, beef, and herbs.

Temperature problems can detract from the baking process; ensure oven calibration or preheating accuracy to promise the right bake dynamics.

Equipment challenges include dough sticking; ensure proper flouring of surfaces and tools for seamless handling, even in novice hands.

Ingredient substitutions should respect equal parts and function; swapping plant-based cheeses works best in equal measure to maintain cohesion.

Timing concerns manifest in under- or overcooking; invest in timers and consistent practice to be attentive towards developing properly cooked dishes.

Recipe Success Stories

Our community has shared enthusiastic feedback, with many praising the rich, savory balance and quick preparation, becoming a weeknight favorite.

Variations involving spicy peppers or innovative cheeses have found immense appreciation, showcasing the recipe’s adaptability and charm.

Reader suggestions frequently highlight taste combinations, emphasizing the dish’s simple base as adaptive to personal preference, sparking creative impulse.

Photography tips from others suggest capturing rolls’ golden texture against shadowy backgrounds, allowing their appeal to shine through effortlessly.

Community sharing encourages aspiring cooks to maintain this recipe as part of their base repertoire—proof that mastering Cheesy Beefy Rolls is indeed rewarding.

Frequently Asked Questions

Can I prepare these rolls in advance? Yes, the rolls can be prepared and stored in the refrigerator for up to two days before baking, helping you manage your time efficiently.

What is the best way to reheat the rolls? To reheat, use an oven set at a low temperature to crisp the exterior without overcooking. Microwave reheating might render them soggy.

Can I freeze Cheesy Beefy Rolls? Yes, individually wrap each roll before placing it in freezer bags, ensuring airtight storage to keep them fresh for up to a month.

Can I use a different type of cheese? Certainly! Different cheeses can provide unique flavors. Mozzarella offers a mild taste, while pepper jack adds a spicy kick.

How can I make the rolls thicker? Roll the dough to your desired thickness, remembering that the thicker the dough, the longer the bake time necessary for even cooking.

What kind of dipping sauce pairs well? A tangy marinara or savory cheese sauce complements these rolls, enhancing their savory profile with contrasting flavors.

Is gluten-free flour suitable for this recipe? Absolutely! Gluten-free flour substitutes effectively when also using xanthan gum for structure and elasticity in the dough.

How can I ensure even browning? Rotate the baking tray halfway through the baking process; this ensures that all rolls are exposed to consistent heat.

What meat alternatives work well? Ground turkey or plant-based meat crumbles mimic beef texture and flavor while suiting dietary preferences or restrictions.

Are there vegan alternatives for cheese? Plant-based cheeses crafted from cashews or soy provide a vegan swap, though flavors and melting properties might vary slightly.

Additional Resources

Explore related recipes like herbed savory rolls or cheesy stuffed breads that offer a different texture or flavor profile, complementing similar craving needs with a twist.

Technique guides on dough handling or cheese melting inspire confidence in executing each recipe component skillfully, allowing today’s learnings to transcend across other dishes.

Ingredient insights inform selection choices for kitchen staples, educating readers on making informed decisions for nutritional and taste factors.

Incorporating varied seasonal roll fillings offers a dynamic approach throughout the year, continuously aligning the recipe’s comfort with seasonal freshness.

Equipment recommendations center on versatile kitchen tools that streamline processes across multiple recipes, ensuring home-cooking remains a satisfying pursuit.

Join the Conversation

Engage with fellow readers on social media platforms where Cheesy Beefy Roll creations are shared daily, stimulating a tide of culinary interactions.

Discovery of photography tips that keep food presentations appealing further enthuses, sharing visual stories that heighten recipe experiences.

Encouragement to review recipes nurtures a vibrant community ethos amid varying cooking successes, reminding all of the interconnected joy cooking delivers.

Recipes become jumping points for conversation, sparking exchanges over flavor tweaks or adaptations for particular events, enforcing its community-rooted popularity.

Irresistible Chicken Fried Steak Recipe with Creamy Country Gravy

Chicken Fried Steak with Country Gravy: A Southern Comfort Classic

⚖️
Difficulty
Moderate

⏲️
Prep Time
25 mins

🕒
Cook Time
30 mins

⏱️
Total Time
55 mins

🍽️
Servings
4

Indulge in the crisp, comforting delight of Chicken Fried Steak with Country Gravy, a staple in Southern cuisine that promises to bring a taste of home-cooked warmth to your table. This classic dish features tenderized beef steak, dredged in a flavorful seasoning mix and fried to golden perfection. Bathed in smooth, savory country gravy, each bite offers a delightful blend of crispy textures and rich flavors. Perfect for a hearty meal, this Southern delicacy continues to charm with its tantalizing aroma and comforting taste.

Quick Recipe Highlights

  • Flavor Profile: A harmonious blend of savory richness and peppery spice.
  • Texture: Crispy coating with a tender, juicy interior.
  • Aroma: A nostalgic mix of fried goodness and creamy, buttery warmth.
  • Visual Appeal: Golden-brown crust with creamy white gravy draped gracefully over.
  • Skill Level Needed: Moderate, requiring attention to breading and frying techniques.
  • Special Equipment: A heavy-bottomed skillet for even frying.

Recipe Overview

  • Difficulty Level: Moderately challenging due to the sequential process of frying and gravy preparation.
  • Category: Main Course, capturing the essence of comfort food.
  • Cuisine: Deeply entrenched in Southern culinary tradition, renowned for its indulgence and simplicity.
  • Cost: Economical, utilizing affordable cuts of beef and readily available pantry staples.
  • Season: Perfect year-round, providing warmth in winter and nostalgia in summer.
  • Occasion: Ideal for family gatherings, comforting Sunday meals, or a casual dinner.

Why You’ll Love This Recipe


Chicken Fried Steak with Country Gravy captivates with its irresistible combination of taste and texture. The steak offers a satisfying crunch that gives way to soft, juicy meat, accentuated by a creamy gravy that sings with rich flavors. Convenience is another appealing aspect; while preparation requires some effort, the steps are straightforward, making it feasible for home cooks. From a nutritional standpoint, this dish provides protein and can be balanced with sides like steamed vegetables.

For social occasions, this meal shines as a centerpiece at family dinners, encouraging conversation and comfort around the table. Economically, the recipe is budget-friendly, making use of simple ingredients that don’t break the bank. These factors, combined with the timeless appeal of a Southern classic, ensure that Chicken Fried Steak with Country Gravy remains a cherished meal for generations.

Historical Background and Cultural Significance


Chicken Fried Steak with Country Gravy originated in the Southern United States, with roots tracing back to German and Austrian immigrants who brought recipes for wiener schnitzel. The dish gained popularity during the early 20th century, particularly in Texas, where it became a symbol of Southern hospitality and comfort food excellence. Its evolution reflects the region’s agricultural heritage, emphasizing staple ingredients like beef and dairy.

Culturally, chicken fried steak is celebrated for its ability to bring people together over hearty, satisfying fare. Its variations, such as serving styles and regional gravy recipes, showcase the diversity of Southern cooking practices. Over time, it has influenced other American dishes, contributing to the rich tapestry of the nation’s culinary landscape.

Ingredient Deep Dive


Beef Steak is the heart of this dish, echoing the cattle-raising traditions of the American South. Rich in protein and iron, it’s essential to choose a tenderized cut like cube steak. Selection focuses on a good balance of marbling for flavor without excessive fat. Store chilled, using air-tight packaging to maintain freshness and avoid contamination. Should you need an alternative, consider using pork cutlets or even chicken for a lighter texture.

The Bread Coating, combining flour, seasoning, and sometimes cracker crumbs, is crucial for achieving the desired crispy exterior. It flourishes with its role in flavoring the meat and ensuring that the breading adheres correctly during frying. Store flour in a cool, dry place, and if gluten is an issue, opt for gluten-free mixes or cornmeal. Season generously for a full-bodied taste that complements the savory steak.

Common Mistakes to Avoid

  • Improper Meat Tenderizing: Failing to sufficiently tenderize the beef can lead to tough texture.
  • Overcrowding the Pan: Crowding results in uneven cooking and soggy breading.
  • Incorrect Oil Temperature: Not maintaining hot enough oil can cause greasy food.
  • Poorly Seasoned Breading: Insufficient seasoning results in blandness.
  • Skipping Resting Time: Not letting the finished steak rest leads to loss of moisture.
  • Over-thickening Gravy: Adding too much flour to the gravy makes it overly thick and pasty.
  • Insufficient Dredging: Skipping a second dredging reduces the crispy coating.
  • Inadequate Gravy Stirring: Lazy stirring can result in lumps.

Essential Techniques


Proper Bread Dredging ensures a crispy outer layer. Coat each steak first in flour, then egg wash, followed by a final flour dip, pressing down slightly to ensure adherence. Mastering breading is about keeping one hand dry and one wet to maintain cleanliness and efficiency.

Achieving Perfect Gravy is paramount; start by making a roux with equal parts flour and fat before slowly whisking in milk. Watch for the desired thickness, introducing milk gradually and stirring continuously to avoid lumps. The finishing touch is a seasoning balance of salt, pepper, and optional herbs for enhanced flavor.

Pro Tips for Perfect Chicken Fried Steak


To maximize flavor, season both the flour and egg mixture with salt and pepper. Let breaded steak sit for a few minutes before frying to lock in the coating. Use a heavy skillet to maintain consistent frying temperature. Always check oil heat using a thermometer for precision. Make gravy directly in the skillet used for frying to capture residual flavors, and set a wire rack over a baking sheet to drain excess oil for a non-greasy result.

Variations and Adaptations


Southern regions bring their flair to Chicken Fried Steak by varying the spices used in the coating, such as cayenne for heat in Texas. Seasonal twists can involve using buttermilk for a tangy batter or experimenting with different gravies like white or brown, based on personal preference or regional influences.

For dietary needs, a gluten-free version can be crafted using gluten-free flour and breadcrumbs, while a dairy-free alternative swaps traditional milk for plant-based options. Play with different flavor enhancements, such as smoked paprika or garlic powder, to offer unique taste experiences. For a lighter version, consider baking the steak rather than frying, adjusting cooking times accordingly.

Serving and Presentation Guide


Serve Chicken Fried Steak with traditional sides like mashed potatoes and green beans for an authentic Southern experience. The dish shines when presented on large platters, allowing the steak to be the focal point. Garnish with fresh chopped parsley for a pop of color, and consider offering gravy in a separate dish, inviting guests to pour as desired. Ensure it is served hot for optimal flavor and texture appeal.

Wine and Beverage Pairing


Pair this indulgent dish with a light-bodied red wine such as Pinot Noir, whose fruity notes complement the savory flavors. Non-alcoholic options like sweet iced tea or lemonade add a refreshing contrast. If preferred, a cup of strong coffee provides a perfect ending to this rich meal. Presentation counts, so always serve wines slightly chilled, with iced drinks poured over large cubes to maintain chill without dilution.

Storage and Shelf Life


Store any leftover Chicken Fried Steak in an airtight container to maintain its flavor. Refrigerate for up to three days to ensure safety, allowing the gravy to remain separate until reheating to preserve texture. Reheat steak in an oven set to 350°F until warmed through, maintaining its crispness. Avoid freezing as the breading can become unappetizingly soggy upon thawing.

Make Ahead Strategies


Prepare this dish by breading the steak a few hours in advance, allowing time for the coating to adhere properly. Store breaded steak covered in the refrigerator, separating layers with parchment paper to avoid sticking. This helps streamline mealtime preparation, ensuring a quicker cook time and reducing stress. Prepare gravy just prior to serving to maintain its smooth, creamy consistency.

Scaling Instructions


Adjust this recipe for larger crowds by doubling ingredients, ensuring each steak has ample space for frying without crowding the pan. Larger groups may benefit from a dual-batch cook strategy, supporting adequate heat retention. For smaller portions, consider halving the recipe while maintaining careful seasoning balance. When scaling, keep prepared parts fresh and warm, heating additional batches consistently between servings to maintain quality.

Nutritional Deep Dive


Chicken Fried Steak provides a robust mix of proteins and minerals, key in energy provision and muscle repair. Its higher fat content necessitates moderation, making it ideal as an occasional treat. Balanced with other nutritious components such as vegetables, it offers a hearty yet nourishing meal. Adjustments using leaner cuts of meat or reduced-fat dairy in the gravy produce a slightly lighter dish without compromising on taste.

Dietary Adaptations


Create a gluten-free option using certified gluten-free flour and breadcrumbs, maintaining crispy texture. For a dairy-free choice, opt for plant-based milk in both soaking and gravy, ensuring full-bodied flavor remains intact. To accommodate low-carb or keto diets, replace traditional flour with almond flour and seek heavy cream-based gravies. Vegans might enjoy a similar preparation using seitan or tofu, promising a cruelty-free indulgence.

Troubleshooting Guide


Address texture issues by ensuring adequate meat tenderizing; tougher cuts need extra care. Balance flavors by seasoning breading and gravy effectively, while cracked breading indicates insufficient adherence – remedy by pressing flour mix thoroughly into meat. Temperature matters, influencing frying success, so verify oil heat beforehand. Equipment challenges are solvable using heavy skillets to retain heat and an instant-read thermometer for accurate oil checks.

Recipe Success Stories


Our readers shared delightful experiences recreating this Chicken Fried Steak, with feedback highlighting its authentic Southern flavor and welcoming aroma. Many enjoyed experimenting with seasoning blends, leading to unique takes on a classic favorite. Photos submitted by our community capture the vibrant, appealing nature of their efforts, celebrating homemade comfort food’s power to evoke memorable dining moments.

Frequently Asked Questions

Q: Can I use another type of meat?
A: Yes, pork or chicken cutlets serve as excellent substitutes, offering different but complementary textures and flavors.

Q: How can I keep the breading from falling off?
A: Ensure the meat is dry before breading, and allow it to rest post-breading to firm up before frying.

Q: Is butter suitable for frying?
A: While butter adds flavor, it can burn easily, so a neutral oil with high smoke point, like canola, is preferred.

Q: Can this be cooked in an air fryer?
A: Yes, an air fryer provides a healthier, less oily alternative; adjust times as needed for consistent doneness.

Q: How do I vary the gravy flavor?
A: Incorporate herbs like thyme or smoked paprika for depth, or simmer with onions for sweetness.

Q: What’s the best way to reheat leftovers?
A: Use an oven or air fryer for the steak to return crispness, and gently warm the gravy on the stovetop.

Additional Resources


Explore related Southern cuisine with recipes like Buttermilk Biscuits or Collard Greens, providing complementary sides that further enhance the meal experience. For technique mastering, consider breading tutorials or frying workshops available online. Books detailing Southern culinary history provide insightful context, enriching your appreciation for this beloved dish.

Join the Conversation


Share your Chicken Fried Steak creations on social media, tagging us for a chance to be featured! Contributors often exchange variations and adaptations, offering fresh takes on a time-honored favorite. Engage with fellow cooks through comments or forums to exchange tips and stories, building community through love of cooking and shared culinary journeys.

The Recipe

Chicken Fried Steak with Country Gravy

Serves: 4

Prep Time: 25 mins

Cook Time: 30 mins

Total Time: 55 mins

Kitchen Equipment Needed

  • Heavy-bottomed skillet
  • Meat tenderizer
  • Tongs
  • Whisk
  • Wire rack

Ingredients

  • 4 beef cube steaks
  • 2 cups all-purpose flour
  • 2 teaspoons salt
  • 1 teaspoon black pepper
  • 1 teaspoon paprika
  • 2 large eggs
  • 1 cup whole milk
  • Vegetable oil for frying
  • 1/4 cup butter
  • 1/4 cup all-purpose flour (for gravy)
  • 2 cups whole milk (for gravy)
  • Salt and pepper to taste (for gravy)

Directions

  1. Pound steaks to 1/4 inch thickness with a meat tenderizer.
  2. Whisk together flour, salt, pepper, and paprika in a shallow dish.
  3. In another dish, beat eggs with 1 cup of milk.
  4. Dip each steak in flour mixture, then egg mixture, and back into flour, pressing to adhere.
  5. Heat oil in a skillet over medium-high heat. Fry steaks until golden brown, about 3-4 minutes per side.
  6. Remove steaks, draining on a wire rack.
  7. In the same skillet, melt butter. Whisk in 1/4 cup flour, stirring for 1-2 minutes.
  8. Gradually add 2 cups milk, whisking continuously until thickened. Season gravy with salt and pepper.
  9. Serve steaks with a generous pour of country gravy on top.

Recipe Notes

  • Feel free to adjust spices in the coating to your taste preference.
  • Gravy can be flavored with fresh herbs like thyme or parsley for added aroma and taste.

Irresistible Herb-Crusted Beef Tenderloin: A Gourmet Dinner Delight

Herb-Crusted Beef Tenderloin: A Gourmet Delight for Every Occasion

⚖️
Difficulty
Intermediate

⏲️
Prep Time
20 mins

🕒
Cook Time
30 mins

⏱️
Total Time
50 mins

🍽️
Servings
6

Indulge in the succulent flavors of an Herb-Crusted Beef Tenderloin, a truly magnificent dish that will leave your guests in awe. With its tender texture, intoxicating aroma, and herbaceous crust, this beef tenderloin recipe is designed to deliver a memorable culinary experience. The main keyword, Herb-Crusted Beef Tenderloin, is at the heart of this dish, offering a fine balance between elegance and robust flavors. Perfect for a special occasion or a delightful dinner party, every bite is infused with the earthy goodness of fresh herbs and the savory satisfaction of a perfectly cooked beef tenderloin.

Quick Recipe Highlights

  • Flavor Profile: Experience a rich, savory taste with an earthy herb crust balanced by the succulent, juicy beef.
  • Texture: Delight in a tender and juicy interior wrapped in a perfectly crisp herb crust.
  • Aroma: The fresh fragrance of rosemary, thyme, and garlic infuses the air with an irresistibly mouthwatering aroma.
  • Visual Appeal: This dish boasts a beautiful crust, with vibrant greens from fresh herbs adding a pop of color to the succulent beef.
  • Skill Level Needed: While intermediate skills are required, the recipe is straightforward with detailed steps.
  • Special Equipment: A roasting pan with a rack and a meat thermometer ensure perfectly cooked beef.

Recipe Overview

  • Difficulty Level: An intermediate task, the herb crust requires focusing on balance and even coating.
  • Category: This entree shines as a centerpiece for dinners that demand a touch of culinary magnificence.
  • Cuisine: Rooted in European culinary traditions, it’s influenced by French and Italian techniques.
  • Cost: This is a slightly higher-end recipe due to beef tenderloin’s premium cut, but worth the splurge.
  • Season: Ideal for winter or holiday gatherings when rich, warm meals are most appreciated.
  • Occasion: Perfect for festive celebrations, intimate dinners, or gourmet gatherings.

Why You’ll Love This Recipe


The Herb-Crusted Beef Tenderloin stands out with its exquisite flavors and textures. The crust provides a vibrant, aromatic crunch that complements the tender, juicy meat, offering an unforgettable taste experience. Convenience is key, as the preparation is straightforward despite its gourmet outcome. Nutritionally, beef tenderloin is a high-protein dish with essential nutrients like iron and vitamin B12. This recipe also shines socially, offering a stunning presentation sure to impress guests. While the initial cost may be notable, the luxury and satisfaction this dish brings to the table make it a cost-effective delight for special occasions, especially when considering the high-end restaurant experience it delivers at home.

Historical Background and Cultural Significance


Beef tenderloin boasts a storied history rooted in European culinary traditions, known for its tenderness and flavor. Historically, the dish has been a prized element of fine dining, revered in French cuisine as part of refined meals. Over time, it has remained a gourmet staple, with herb-crusted variations adding a sophisticated touch. The cultural significance lies in its association with celebration and culinary mastery, making it a popular choice for festive occasions across the globe. Regional variations have emerged, with each enhancing the beef’s natural flavor with a unique herb blend, reflecting local tastes and traditions.

Ingredient Deep Dive


Start with premium beef tenderloin, a cut revered for its tenderness and mild flavor. Historically, it has been a centerpiece in many classic dishes across European tables, signifying sophistication. Nutritionally, it is a rich source of protein, with essential vitamins and minerals. When choosing beef, look for marbling to ensure taste. Store in the coldest part of your refrigerator, and consume within 3-5 days for optimal freshness. If necessary, it can be substituted with other tender cuts like filet mignon. Complementing the beef is a blend of fresh herbs, such as rosemary and thyme, which enhance flavor and aroma. These herbs carry traditional uses in Mediterranean cuisine and are known for their antioxidant properties. Opt for fresh over dried for a robust flavor, and store them in a refrigerator wrapped in a damp paper towel. Dry herbs as a substitution result in more concentrated flavors, so adjust accordingly.

Common Mistakes to Avoid

  • Not allowing beef to come to room temperature before cooking, which can result in uneven cooking.
  • Skipping meat rest time post-cooking causes juices to escape, leading to dryness.
  • Over-coating with herbs may overpower the beef’s natural flavor.
  • Under-seasoning the beef leads to a bland taste; balance is crucial.
  • Cooking at too high a temperature risks burning the crust.
  • Using low-quality herbs diminishes the flavor profile significantly.
  • Not using a meat thermometer can lead to overcooked or undercooked beef.
  • Cutting the beef immediately after cooking causes the juices to run out.

Essential Techniques


A key technique is achieving the perfect herb crust. The balance of herbs is essential, with even coating ensuring a flavorful bite. To master this, pack the herbs firmly onto the beef after applying a thin layer of mustard or oil, which acts as a binder. Avoid common pitfalls by not oversoaking the herbs in oil, ensuring instead that they are barely moistened for optimal adhesion. Visual cues for success include even herb coverage and a vibrant green color without burning.

Pro Tips for Perfect Herb-Crusted Beef Tenderloin


Surround the beef with a layer of plastic wrap when applying the herb crust to maintain hygiene and evenness. Invest in a high-quality meat thermometer to monitor internal temperature accurately. To boost flavor, marinate the beef in olive oil and minced garlic overnight. Preheat your oven fully before inserting the beef to ensure a perfect sear. Control salt levels by initially under-seasoning, then adjusting after tasting the cooked beef. After cooking, let your beef rest on a warm platter under loose foil to distribute the juices. Finally, use a mixture of different herbs for a multi-dimensional flavor profile, balancing strong and mild herbs.

Variations and Adaptations


Explore regional variations like incorporating Provençal herbs for a French twist or using basil and oregano for an Italian influence. Seasonal adaptations include adding lemon zest in summer for freshness. For dietary modifications, substitute with a plant-based beef alternative, adjusting cook time accordingly. Expand flavor horizons by experimenting with different spices within the crust, like cumin for warmth or smoked paprika for depth. Enhance texture with a nut crust made from finely chopped almonds or walnuts for added crunch. Presentation can be elevated by serving on a bed of fresh greens or garnishing with edible flowers.

Serving and Presentation Guide


Highlight this dish’s presentation by slicing in front of your guests for a dramatic effect, showcasing the juicy interior against the crusty exterior. Use garnishes such as fresh sprigs of herbs or pink peppercorns for color contrast. Traditional accompaniments include roasted vegetables or a creamy potato side. Modernize with a dressed arugula salad or a light balsamic glaze. Serve immediately from the oven slice by slice for perfect warmth, and manage portions considering the richness of the dish, allowing for plenty of accompaniments to balance the meal.

Wine and Beverage Pairing


Pair Herb-Crusted Beef Tenderloin with a bold red wine, such as a full-bodied Cabernet Sauvignon, to complement the rich beef flavors. For non-alcoholic options, a robust black tea or sparkling grape juice offers a similar depth. If coffee is preferred, a rich espresso further enhances the dish’s aroma. Ensure wines are served at controlled room temperature, and consider serving chilled non-alcoholic alternatives for a refreshing contrast. For best results, discuss varietals with a knowledgeable wine merchant to match personal preferences with the beef’s savory notes.

Storage and Shelf Life


After cooking, store the beef tenderloin in an airtight container in the refrigerator, where it will remain fresh for up to three days. Maintain a consistent refrigerator temperature to ensure safe storage. Use glass or BPA-free plastic containers to prevent flavor absorption. Be mindful of spoilage signs, such as off-smells or discoloration, and discard if any signs are present. Reheat gently in a low oven to retain moisture without overcooking. For longer storage, wrap tightly in foil or freezer paper before placing in a freezer-safe bag; frozen, it remains good for up to three months.

Make Ahead Strategies


To get ahead, prepare the herb crust and apply it to the beef tenderloin up to one day in advance, storing it covered in the refrigerator. This allows for easy assembly day-of, retaining moisture and flavor. Time management, such as initiating accompaniment prep during beef cooking, can further streamline your process. Assess any quality impact by conducting a small taste test beforehand if possible, which allows for flavor tweaks. Reheat slowly in an oven to preserve texture, and add fresh herbs or a squeeze of lemon before serving for a freshly prepared feel.

Scaling Instructions


When halving the recipe, reduce the size of the beef tenderloin while maintaining the same herb coating proportions to ensure rich flavor. Double or triple portions for larger gatherings by purchasing multiple beef tenderloins instead of increasing size, preserving cook time integrity. Adjust your roasting pan size and use multiple thermometers to monitor internal temperatures consistently. Timing modifications, such as staggered timers, ensure even cooking across all cuts. Consider storage and reheating logistics to maintain perfect presentation and texture when preparing large quantities.

Nutritional Deep Dive


Herb-Crusted Beef Tenderloin offers a powerhouse of nutrition, boasting a balance of macros with high protein levels crucial for muscle maintenance. Packed with micronutrients, beef tenderloin is a source of iron, zinc, and vitamin B12, supporting overall health. Dietary considerations point to its low-carbohydrate nature, suitable for protein-rich diets. Portion control is critical given its rich flavor and caloric density. Leveraging these nutrients, this dish fits a balanced diet when served with ample vegetables. Weight-conscious diners may enjoy smaller portions while savoring the profound flavors this beef tenderloin provides.

Dietary Adaptations


For gluten-free needs, ensure sauces and condiments used in seasoning contain no wheat derivatives. A dairy-free adjustment replaces any butter in the recipe with olive oil, maintaining health benefits while respecting dietary needs. Vegan adaptations are achievable with plant-based beef alternatives and a mix of flavor-forward herbs and spices to enrich taste. For low-carb and keto preferences, eliminate any traditionally served starches and focus on leafy green side dishes. Paleo adjustments involve using coconut oil instead of traditional fats, enhancing the natural herb flavors.

Troubleshooting Guide


If your beef lacks the desired tenderness, ensure proper internal temperatures are reached without overcooking. For balancing overpowering herb mixtures, strip back the intensity by reducing strong herbs like rosemary. Combat uneven cooking by resting the beef after searing, reducing internal temperature variance. When equipment is challenging, such as thermometers becoming inaccurate, test for doneness by slicing slightly to check the interior color. Substitute missing ingredients by creatively altering the herb crust with available alternatives like dried powders. Timing concerns can be addressed by practicing patience, particularly with the critical resting period after roasting to lock in juices.

Recipe Success Stories


Content inspiration from community feedback has shown that variations, such as integrating walnuts into the crust, have been praised for achieving delightful added crunch. Reader suggestions, like pairing it with a robust chimichurri sauce, have elevated the dish’s complexity. Community members have taken pride in adaptive stories shared online, using local herbs for unique twists while ensuring the foundational aspects remain consistent. Photography tips from those who have successfully captured this dish highlight using natural light to accentuate the rich tones of the meat against the bright, green crust.

Frequently Asked Questions

Can I prepare the beef tenderloin ahead of time?

Yes, the beef can be pre-crusted and stored in the refrigerator up to a day before cooking. Assemble just before roasting for maximum freshness.

How do I ensure an even herb crust?

Use a thin layer of mustard or olive oil as a base to adhere herbs perfectly, pressing them gently but firmly into place for even coverage.

What side dishes complement this tenderloin?

Roasted root vegetables or a fresh mixed salad with a tangy vinaigrette pair beautifully, providing balance to the rich flavors of the beef.

How can I prevent the beef from drying out?

Allow the beef to rest under loose foil after cooking. This step is critical for redistributing juices and preserving moisture.

Can I use dried herbs instead of fresh?

While fresh herbs are preferred for their robust flavor, dried herbs can be used in smaller quantities, recognizing their stronger concentration.

What temperature should the beef reach for doneness?

For medium-rare, aim for an internal temperature of 135°F before resting. Resting raises temperature slightly, achieving perfect doneness.

Is this recipe suitable for a large gathering?

Absolutely, multiply the recipe for larger portions and monitor each piece with separate thermometers for accurate cooking across all tenderloins.

Can leftovers be reheated successfully?

Leftovers can be gently reheated in a low-temperature oven to maintain tenderness without overcooking, ideally to just warm through.

What type of mustard is best for this recipe?

Dijon mustard adds a refined flavor profile without overpowering the herbs and beef, serving as an excellent base in the herb crust.

How to add more flavor to the beef?

For additional depth, consider marinating the beef overnight in olive oil, garlic, and a hint of lemon juice before applying the herb crust.

Additional Resources


Explore related recipes, such as a classic beef Wellington or herbed lamb roast, all fit for similar elegant dining occasions. Technique guides on perfecting searing and roasting ensure your beef tenderloin shines in presentation and taste. Dive into ingredient information such as herb selection to deepen culinary knowledge for home cooking refinements. Equipment recommendations, particularly for quality thermometers and roasting pans, complete the culinary toolkit needed for success. Finally, seasonal variations offer insights into adapting this tenderloin recipe to fit different dietary and flavor preferences throughout the year.

Join the Conversation


We encourage readers to share their Herb-Crusted Beef Tenderloin experiences on social media, connecting with a community of culinary enthusiasts. Use photography tips to capture your dish in natural light and tag #HerbCrustedTenderloin for a chance to be featured. Rate the recipe and share reviews to help others achieve the perfect tenderloin. Engage in discussions around recipe variations and learn from others’ adaptations. We look forward to your contributions to our culinary journey!

The Recipe

Herb-Crusted Beef Tenderloin

Serves: 6

Prep Time: 20 mins

Cook Time: 30 mins

Total Time: 50 mins

Kitchen Equipment Needed

  • Roasting pan with rack
  • Meat thermometer
  • Mixing bowl
  • Sharp knife
  • Baking sheet

Ingredients

  • 3-pound beef tenderloin, trimmed
  • 2 tablespoons olive oil
  • 1/4 cup Dijon mustard
  • 2 teaspoons kosher salt
  • 1 teaspoon black pepper
  • 2 cloves garlic, minced
  • 1/4 cup fresh rosemary, finely chopped
  • 1/4 cup fresh thyme, finely chopped
  • 1/4 cup fresh parsley, finely chopped

Directions

  1. Preheat your oven to 425°F (220°C).
  2. Pat the beef tenderloin with paper towels until dry. Rub with olive oil and season with salt and pepper.
  3. Mix herbs and minced garlic in a bowl. Spread the Dijon mustard over the beef, coating evenly. Press the herb mixture over the mustard, adhering it to the beef.
  4. Place the beef on a roasting rack in a roasting pan.
  5. Roast in the preheated oven for 30 minutes or until the internal temperature reaches 135°F for medium-rare.
  6. Remove from the oven and let rest under foil for 10-15 minutes before slicing.
  7. Slice and serve warm, garnished with additional fresh herbs if desired.

Recipe Notes

  • Substitute different herbs like basil or tarragon for a flavor twist.
  • For well-done beef, roast to an internal temperature of 150°F.
  • Pair with a red wine reduction sauce for an elevated dining experience.

Irresistible Crispy Parmesan Artichoke Hearts Recipe for Perfect Appetizers

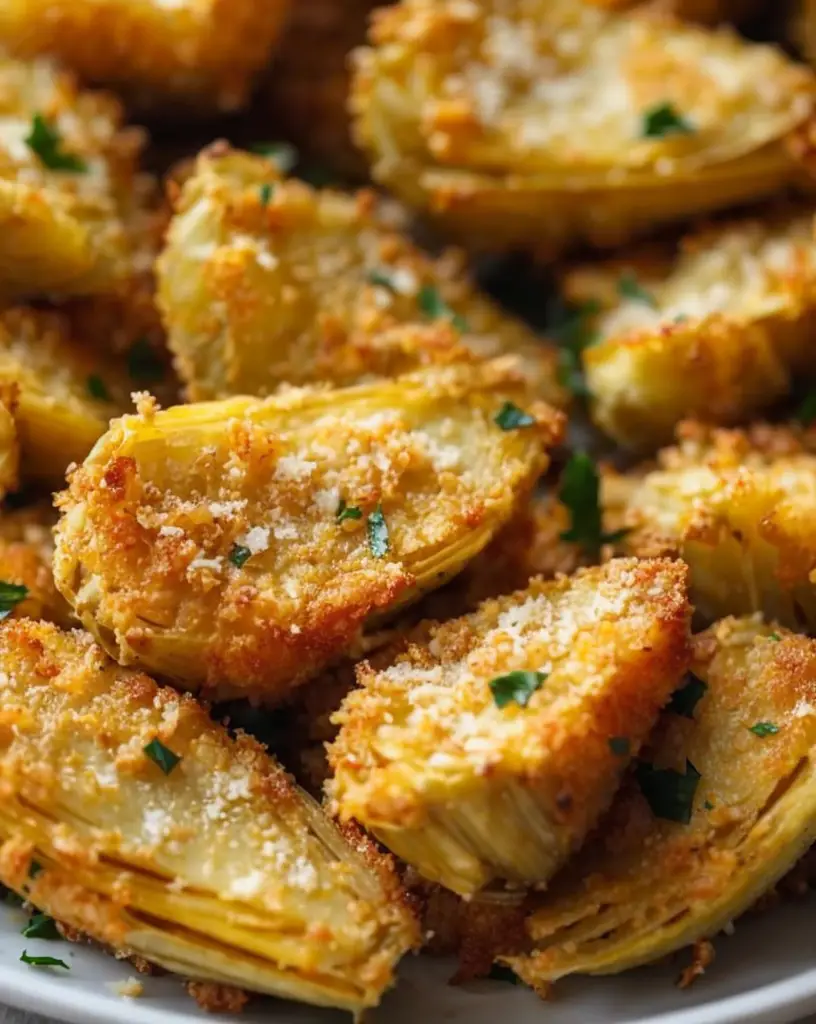
Crispy Parmesan Artichoke Hearts: The Ultimate Appetizer Delight

⚖️
Difficulty
Easy

⏲️
Prep Time
15 mins

🕒
Cook Time
20 mins

⏱️
Total Time
35 mins

🍽️
Servings
4

Crispy Parmesan Artichoke Hearts make a stellar appetizer that excites your palate with each bite. These savory mouthfuls are perfect for gatherings, offering a perfected mixture of textures and flavors. The golden-brown crust, crafted from the delicate blend of Parmesan and bread crumbs, encases the tender richness of artichoke hearts, creating an irresistible treat. Whether you’re hosting a dinner party or preparing a snack for yourself, these artichoke hearts promise an enjoyable culinary adventure.

Quick Recipe Highlights

  • Flavor Profile: Celebrates the tangy artichoke with a savory Parmesan base.
  • Texture: Crispy exterior with a soft, tender center ensures a delightful contrast.
  • Aroma: Aromatic notes of Parmesan cheese enhance the herbal hints from artichokes.
  • Visual Appeal: Golden crust with a vibrant green interior captures the eye.
  • Skill Level Needed: Perfect for beginners, needing basic kitchen skills.
  • Special Equipment: A baking sheet and oven are essentials for perfect results.

Recipe Overview

  • Difficulty Level: This recipe is straightforward, requiring minimal culinary expertise. Most steps are intuitive, and the artichokes are easy to handle.
  • Category: Ideal as an appetizer or a side dish, these crispy gems are versatile in any meal scenario.
  • Cuisine: This dish showcases Artisan Mediterranean influences, encompassing a rustic yet sophisticated palate typical of Italian traditions.
  • Cost: Affordable, using accessible ingredients like canned artichokes and Parmesan to create a budget-friendly gourmet snack.
  • Season: Perfect year-round appetizer, with heightened enjoyment during spring and summer when artichoke season is at its peak.
  • Occasion: Suitable for both casual gatherings and upscale dinners, impressing guests with its flavor profile.

Why You’ll Love This Recipe


Diving into these Crispy Parmesan Artichoke Hearts, the first thing that captivates is the harmonious blend of flavors and textures. The sharpness of Parmesan melds effortlessly with the subtle bitterness of artichoke, creating a taste that is both comforting and sophisticated. These artichoke hearts are perfect for those who appreciate culinary simplicity with gourmet outcomes.

When it comes to convenience, this recipe shines as an exceptionally manageable dish to prepare. With a few easy steps, this recipe suits anyone who prefers quick preparation without sacrificing taste. Its simplicity doesn’t complicate your kitchen routine; instead, it complements it by offering a delightful go-to recipe.

Nutritionally, artichokes are a powerhouse, providing a wealth of fiber, vitamins C and K, folate, and antioxidants. Coupled with the protein boost from Parmesan cheese, this dish is both a treat and a boost to your dietary routine. Balancing indulgence with health benefits makes it an invaluable addition to your cooking repertoire.

Socially, these crispy artichoke hearts are perfect for gatherings, fostering an atmosphere of sharing and enjoyment. Their bite-sized form makes them easy to serve and enjoy in social settings, sparking conversation through flavor. Whether hosting brunch or an evening soirée, these bites adapt to any social event.

Cost-effectiveness and accessibility also play significant roles in the recipe’s appeal. The ingredients are not only affordable but widely available, enabling anyone to craft this dish without hassle. Even when on a tight budget, this recipe provides a luxurious experience that doesn’t stress your wallet.

Historical Background and Cultural Significance


The artichoke has a rich history rooted in the Mediterranean, where it originated and has been cultivated for centuries. Initially revered by the Romans and Greeks, artichokes were valued for their aphrodisiac properties and medicinal uses. This culinary gem made its way to Europe, becoming a staple in French and Italian kitchens.

Culturally, artichokes symbolize abundance and love in Mediterranean communities. Their blooming flower represents prosperity, which made them a popular offering at festivals. Over time, artichokes have become embedded in the cultural fabric of Mediterranean diets, celebrated for their vibrant flavor and adaptability.

The evolution of artichoke recipes speaks to the versatility of this vegetable. From raw preparations in Italian salads to roasted forms in Provencal cuisine, artichokes have been adapted to various culinary expressions. Each preparation maintains an homage to its origins while exploring creative culinary pathways.

Regionally, artichoke hearts take on unique flavors and preparations. In Spain, they might be paired with Jamon Serrano. In Sicily, stuffed with regional cheeses and herbs. Such variations showcase its adaptability, celebrating local culinary traditions while honoring artichokes’ deep-rooted history.

Ingredient Deep Dive


The artichoke heart is the star ingredient, revered for its deep history and culinary flexibility. Its tender profile is complemented by its subtle earthy flavor, making it a versatile ingredient. In Mediterranean cuisines, artichokes have been front-runners due to their ability to deliver bursts of freshness to dishes, celebrated for their rich heritage.

From a nutritional standpoint, artichokes present a range of benefits. They are high in fiber, aiding digestion, and contain notable antioxidants that contribute to overall health. Artichokes also offer a good dose of vitamin C, contributing to a robust immune system. This balance makes them a health-conscious ingredient, without compromising on taste.

When selecting artichokes, look for a vibrant green with tightly packed leaves ensuring freshness. If purchasing canned variety, choose those that are stored in brine for a robust flavor profile. Store fresh artichokes in a cool, dry place or refrigerate for tinned varieties to maintain their quality.

For substitutions, artichoke bottoms offer a thicker, heartier texture for those preferring a denser bite. Alternatively, hearts of palm can mimic their texture while providing a unique take on flavor, offering an innovative twist on the traditional preparation.

Parmesan cheese enriches the dish with its unmistakable umami punch. The aged notes of Parmesan create a rich, nutty backdrop ideal for pairing with artichokes. For those seeking alternatives, Pecorino Romano provides a similar sharpness while Grana Padano delivers a slightly milder experience.

Common Mistakes to Avoid

  • Not drying artichokes thoroughly before coating. Excess moisture can hinder the breadcrumb’s adherence, leading to a less crispy finish.
  • Skipping the use of egg wash, which acts as a binding agent, ensuring breadcrumbs and Parmesan stick to the artichokes effectively.
  • Overcrowding the baking sheet. This prevents even browning, resulting in soggy rather than crispy artichokes.
  • Using stale breadcrumbs. Fresh breadcrumbs provide a richer texture, ensuring optimal crispiness.
  • Under-seasoning. Artichokes crave a sprinkle of salt to enhance their natural flavor; be generous yet measured with your seasoning.
  • Ignoring preheating the oven. A hot oven is essential for achieving that crispy, golden crust.
  • Cooking without flipping. To ensure even browning, turn artichokes halfway through the bake.
  • Neglecting fresh Parmesan. Pre-grated varieties don’t melt as well, affecting texture and flavor.
  • Not letting artichokes cool slightly before serving. They’re best enjoyed when cooled a little as the flavors meld better together.

Essential Techniques


Mastering the coating process is key to ensuring your Crispy Parmesan Artichoke Hearts turn out perfect. The egg wash facilitates the adherence of breadcrumbs and cheese. Ensuring each artichoke heart is thoroughly coated results in an even crust, necessary for that satisfying crunch. Practicing precision during this phase can overcome any coating challenges.

The baking process itself is pivotal to achieving the desired texture. High, even heat crisps up the breadcrumbs while cooking the artichokes through. Monitoring the baking process carefully allows you to adjust if artichokes aren’t crisping evenly. Once mastered, this skill ensures every batch is consistently golden and mouth-watering.

Pro Tips for Perfect Crispy Parmesan Artichoke Hearts


Start by allowing canned artichokes to drip dry in a colander for a few minutes to remove excess moisture. Pat them down with paper towels thoroughly, giving the coating the best shot at adhering well.

Use a mixture of olive oil and melted butter to grease the baking sheet. This adds an extra layer of flavor infusion while promoting an even bake for the artichokes.

Incorporate finely chopped fresh herbs like parsley or thyme directly into the breadcrumb mixture for a hint of earthiness that accentuates the artichokes’ flavor profile.

For added crunch, toast the breadcrumbs lightly in a pan before adding them to the coating mix. This guarantees they stay crispy after baking.

Remember to flip the artichokes halfway through the baking time. This technique ensures both sides achieve a beautiful, even golden-brown color.

Experiment with different cheeses like Asiago or Romano to tinker with the flavor intensity, providing a unique twist on the traditional Parmesan crust.

Variations and Adaptations


Depending on your taste preferences, regional variations of this recipe can bring new life to traditional artichoke hearts. Mediterranean-style uses sun-dried tomato bits mixed with the breadcrumbs to add a tangy depth.

Adapting this dish seasonally involves pairing artichokes with seasonal herbs, such as rosemary in winter months or basil in the summer. These herbs respectively complement and contrast the earthy tones of the artichokes.

For a dietary change, gluten-free breadcrumbs can be seamlessly substituted, while the dish retains its textural integrity. Vegan adaptations utilize nutritional yeast instead of Parmesan, delivering umami richness without the dairy.

If you’re after flavor exploration, try adding chili flakes to kick-start the palate. This modification enlivens each bite with warmth, perfectly balancing the richness of the Parmesan.

For a texture play, dip each artichoke heart into a finely ground nut powder, such as almonds, alongside the breadcrumbs. This provides a nutty crunch that complements the creamy artichoke interior.

Presentation can be enhanced using microgreens as a garnish. Their peppery flavor and vibrant color serve as a stunning visual contrast to the golden artichoke hearts.

Serving and Presentation Guide


When it comes to plating these artichoke hearts, less is more. Arrange them on a broad plate, giving each piece space to breathe and showcasing their golden finish. This minimalist approach allows the artichokes’ crispness to remain the focal point.

For an added layer of presentation, consider garnishing with freshly grated lemon zest. The brightness and color invigorate the visual appeal, making the artichokes irresistible on sight.

Traditional accompaniments such as aioli or a simple marinara sauce can complement the artichoke hearts beautifully. Offer these dips in small bowls beside your serving plate for easy access and an enhanced experience.

Modern serving suggestions may include pairing with a zingy citrus salad, creating a refreshing counterbalance to the richness of the baked artichokes. This lively complement underscores the versatility of artichoke hearts.

Temperature matters; artichoke hearts are best served slightly warm. Allow them to cool for 5 minutes post-baking to let flavors meld, achieving a delectable balance of toasted exterior and succulent interior.

Consider portioning a few hearts per serving, as their richness means a little goes a long way. This control allows for enjoyment without overwhelming, ensuring they remain a delicate appetizer rather than a heavy starter.

Wine and Beverage Pairing


The moderate bitterness and nutty profile of these artichoke hearts pair wonderfully with a crisp white wine such as Sauvignon Blanc. Its acidity cuts through the richness, cleansing the palate and complementing the flavor intensity.

Non-alcoholic alternatives such as sparkling water infused with lemon or cucumber provide a refreshing backdrop that doesn’t overshadow the artichoke hearts’ complexity. These beverages keep your palate engaged without overpowering the subtle notes.

Coffee or tea is generally not a tradition pairing, but if you’re inclined, a light Pu-erh tea may serve as an exotic sip option that doesn’t detract. Its understated earthiness marries well with the artichokes.

Temperature considerations, especially in beverages, play a role in enhancing the enjoyment. Ensure that wines are adequately chilled, while non-alcoholic drinks maintain a refreshing coolness, sustaining the appetite for the next delightful bite.

Serve wine in clear glassware to emphasize clarity, matching the sophisticated elegance the dish delivers. Similarly, non-alcoholic choices in tumbler glasses provide aesthetic cohesion to your presentation.

Storage and Shelf Life


Crispy Parmesan Artichoke Hearts are best enjoyed fresh but can be kept for short-term storage if needed. Place leftovers in an airtight container to maintain as much crispness as possible.

Refrigerate your artichoke hearts if storing for up to three days. Proper containment is essential to prevent the dish from absorbing surrounding odors in the fridge.

When reheating, employ a low-temperature oven to gently warm the hearts without compromising the crispy exterior. Avoid microwaving, as it can lead to soggy results.

Check for signs of spoilage before consumption such as off smells or slime formation. Such signs indicate they should not be eaten.

Freezing isn’t recommended due to textural changes resulting in a less desirable consistency upon thawing.

Repurpose any leftovers by chopping and incorporating into salads or pasta dishes; their savory profile enriches these dishes without needing a full re-bake.

Make Ahead Strategies


Venturing into make-ahead preparations for this recipe enriches the experience of stress-free hosting. Consider coating your artichokes in advance, refrigerating them until baking time. This practice lets you focus on other elements of your meal.

Store coated artichokes between layers of parchment paper. This arrangement preserves the integrity of the coating and prevents clumping or weakening.

Assess the quality impact and ensure to employ a reheating method that retains texture. Always test bake a few pieces to determine the optimal timing and temperature settings.

If assembling in advance, remember to refresh flavors with a squeeze of fresh lemon juice post-bake. This step revitalizes stored components, infusing brightness back into the artichoke hearts.

Keep fresh elements like herbs or garnishes stored separately until serving. This ensures they maintain their vibrancy and texture without wilting or over blending with stored components.

Scaling Instructions


For smaller gatherings, halving the recipe allows for a more manageable yield without excessive leftovers. Adjust seasoning quantities accordingly to maintain flavor balance amidst reduced volume.

Doubling or tripling the recipe requires careful monitoring of brewing times to ensure all artichokes retain their desired crispy texture. Larger batches may necessitate additional baking sheets and staggered baking rounds.

Consider adapting cooking equipment for larger batches, using commercial-sized ovens or convection settings for efficiency and even heat distribution.

Increased ingredient volume translates to adjustments in prep times. When scaling, allow for additional slicing, drying, and coating time, ensuring consistent quality across greater yields.

Factoring storage needs becomes critical when scaling up. Evaluate whether storage capacity can accommodate renewed quantities, ensuring freshness is never compromised.

Nutritional Deep Dive


These Crispy Parmesan Artichoke Hearts boast a remarkable macro blend, balancing carbohydrates from breadcrumbs and protein from cheese. This profile supports energy needs while maintaining finish and taste.

Micronutrient contributions from artichokes include significant levels of magnesium, iron, and folate, vital to various bodily functions, including immune support and heart health. Incorporating this dish means indulging in health benefits along with enjoyment.

From a health standpoint, this recipe provides a harmonized approach to eating well without guilt. With a moderate portion size, it fits well within dietary goals without excess.

Pay attention to portion control as the richness benefits from sensible servings. This balance ensures satisfaction without overindulgence, aligning with nutritional wisdom.

Maintaining the fiber intake from artichokes supported with cheese-induced vitamins offers a well-rounded dietary inclusion. Consider this dish an easy inclusion for boosting daily nutrient profiles.

Dietary Adaptations


Transforming these artichoke hearts into gluten-free delights is simple. Substitute traditional breadcrumbs with a gluten-free alternative, adjusting flavors to taste, while still achieving a desired crispness.

For a dairy-free version, swap Parmesan with a nutritional yeast mix that maintains umami richness without dairy content, delivering compassionate comfort aligned with plant-based values.

A vegan adaptation requires swapping both cheese and egg wash. Use aquafaba as a binding substitute and nutritional yeast to replicate flavor, creating a fully plant-based variation.

Low-carb adherences may consider reducing breadcrumbs and focusing on a more cheese-inclusive coating for a satisfying crust, ensuring the recipe aligns with carbohydrate-focused dietary plans.

Should you follow the keto or paleo approach, almond flour can replace breadcrumbs. The nutty flavor complements artichokes while adhering to dietary principles. Adjust seasoning to tailor your savory palate.

In pursuing a Low-FODMAP solution, consider removing ingredients that destabilize the balance. Monitor individual ingredient impacts, borrowing supportive alternatives that retain quality diet adherence without sacrificing taste.

Troubleshooting Guide


Dealing with texture issues begins with monitoring coating adherence. Ensure artichokes are patted dry and coated thoroughly. This consistency before baking solves most texture pitfalls.

To achieve balanced flavor, focus on proper seasoning application. Taste before finalizing serving, modifying additives to suit desired profiles.

If encountering temperature problems, particularly uneven baking, adjust rack placement and rotate pans to resolve these challenges, ensuring thoroughness.

Equipment surprises are resolved through planning. Preheat your ovens, double-check baking sheets, and ensure your oven thermometer provides accurate temperatures.

Ay ingredient shortages, think about substitutions that maintain balance without losing the essence of the original recipe. Mindful swaps retain integrity without disruption.

Timing concerns emerge when aligning all steps. Monitor preparation sequences and arrange processes sequentially for smooth execution, minimizing stress over timing deviations.

Recipe Success Stories


Our community feedback reveals delightful creative adaptations. One user described adding truffle oil, offering a luxurious depth of flavor to the crispy artichokes, while another incorporated a spicy twist using cayenne.

Variation successes also highlight potential for exploration. A reader mentioned replacing Parmesan with Manchego, inspiring engaging culinary innovation across borders demonstrated in their photos.

Adaptation stories paint a vivid picture of possibility, illustrating the endless opportunity for customization while grounded in the original recipe, turning it into unique personal expressions.

Reader suggestions encompassed garnishing with a squeeze of lime, opening up refreshing avenues to infuse brightness into the flavor profile, an inspiring tip captured beautifully.

For a photography tip, natural lighting brings out the vibrancy in colors and textures, best showcasing both ingredients’ quality and cooking skills. Enthusiasts find beauty in abundance already present in the recipe.

Frequently Asked Questions

Can I use fresh artichokes instead of canned ones?

Yes, fresh artichokes can be used. However, they require additional preparation steps like steaming or boiling before coating. The canned version offers convenience but using fresh provides a distinct flavor for those inclined.

What alternatives exist for Parmesan cheese?

Pecorino Romano and Asiago can be used instead of Parmesan. For a dairy-free choice, nutritional yeast offers a savory alternative that maintains umami depth typical of Parmesan.

How can I keep the exterior crispy?

Use a high heat setting and ensure even spacing on the baking tray. A thin yet complete coating layer also helps achieve the desirable crispness, turning halfway through baking locks in texture.

Do artichokes require pre-cooking?

When using canned artichokes, pre-cooking isn’t necessary, as they are pre-cooked. If you’re using fresh ones, steaming or boiling until tender is necessary before proceeding with the recipe.

Can I store leftovers, and how should I reheat them?

Yes, leftovers can be stored in an airtight container in the fridge. Reheat in a low-temp oven to keep them crispy rather than microwaving, ensuring texture is preserved in every bite.

Is it possible to fry instead of bake?

Yes, frying ensures crispiness but results in a different mouthfeel and may alter the calorie count significantly. Baking offers a healthier option, reducing fat content without sacrificing flavor.

How do I prevent breadcrumbs from becoming soggy?

Dry the artichokes thoroughly before coating. Avoiding overcoating and ensuring proper bake time maintains breadcrumb crispness. Use pre-toasting techniques for breadcrumbs to secure better results.

What dipping sauces pair well with artichoke hearts?

Aioli or marinara sauce complements the savory notes. Lemon-thyme yogurt dip pairs well, offering zesty contrast, or explore green chutney to introduce a burst of herbal flavors while serving.

Can frozen artichokes be used?

Frozen artichokes can be employed, but ensure they are completely thawed and patted dry to avert excessive moisture, which affects crispness. Adjust baking time as needed for flavor depth.

How can I add a spicy twist?

Incorporate chili flakes into the breadcrumb-Parmesan mixture for a subtle heat. Alternatively, a spicy dipping sauce can provide a burst of spice without altering the artichokes themselves.

Additional Resources


For more related recipes, explore our additional compilation of Mediterranean appetizers. You’ll find an array of artichoke recipes that further illuminate the breadth of this versatile vegetable.

Technique guides brim with clarity, offering insights into essential kitchen strategies. Here, practice the art of breadcrumbing, as our step-by-step processes yield efficiency and excellence.

Ingredient information articles amplify knowledge, delving into the nutritional virtues of the humble artichoke while celebrating cheese varieties that dazzle in such pairings.

Equipment recommendations provide clarity on essential kitchen gadgets, noting which tools elevate the cooking experience with ease.

Seasonal variations inspire bouts of culinary creativity. Discover how artichoke embraces seasonal produce, influencing preparations while celebrating fresh availability.

Join the Conversation


Our community flourishes through shared culinary experiences. Connect with us on social media, tagging posts and sharing photos. Engage through commentary; we love celebrating recipe achievements.

Photography tips from our experts inspire creativity in capturing the beauty of artichoke creations. Focus on natural light to bring colors and textures to life, engaging viewers with authentic vibrancy.

Recipe reviews and adaptations drive discussion, supporting passionate culinary explorations. Your feedback excites our community, while inspiring continued recipe-tasting journeys.

Perfect Comfort Food: Classic Slow Cooker Pot Roast Recipe

Classic Slow Cooker Pot Roast: A Hearty Family Favorite

⚖️
Difficulty
Easy

⏲️
Prep Time
20 mins

🕒
Cook Time
480 mins

⏱️
Total Time
500 mins

🍽️
Servings
6

As the aroma of a Classic Slow Cooker Pot Roast fills your kitchen, you know you’re about to enjoy something extraordinary. This traditional dish, with its rich flavors and tender meat, makes a perfect meal for any family gathering or cozy dinner night. The convenience of a slow cooker allows you to set it, forget it, and still end up with a meal that tastes like it took hours of attention. With every bite, enjoy a mixture of soft, succulent beef matched with the robust flavors of carefully selected herbs and vegetables.

Quick Recipe Highlights

  • Flavor Profile: Rich and savory with a depth of flavor from herbs and tender beef.
  • Texture: Tender, melt-in-your-mouth beef with soft, flavorful vegetables.
  • Aroma: Inviting scents of roasted meats with a hint of earthy herbs.
  • Visual Appeal: A vibrant mix of wholesome veggies and well-cooked beef.
  • Skill Level Needed: Suitable for beginner cooks with simple techniques.
  • Special Equipment: Requires a slow cooker for best results.

Recipe Overview

  • Difficulty Level: This is categorized as easy due to the straightforward assembly and cooking method using a slow cooker.
  • Category: Primarily considered a dinner entree, perfect for weeknight meals or special occasions.
  • Cuisine: A staple in American cuisine, influenced by traditional English and European pot roasts.
  • Cost: Budget-friendly as it uses a cut of meat that is typically inexpensive but cooked to perfection.
  • Season: Ideal for fall and winter when warm, hearty meals are most comforting.
  • Occasion: Perfect for family dinners, potlucks, and Sunday roasts with friends.

Why You’ll Love This Recipe


The Classic Slow Cooker Pot Roast delivers unparalleled taste, with beef simmered to tender perfection, harmoniously blending with aromatic herbs and hearty vegetables. It’s not only about the savory flavors but also the convenience. Simply prepare your ingredients, place them in the slow cooker, and walk away. This set-it-and-forget-it approach makes it perfect for busy days.

Nutritionally, this pot roast is packed with protein and fiber, making it a balanced meal that satisfies both taste and health considerations.

The recipe’s versatility makes it a popular choice for social gatherings, easily feeding a crowd with minimal effort. Moreover, its cost-effectiveness is unmatched, using budget-friendly ingredients to create a dish that feels luxurious.

Historical Background and Cultural Significance


The pot roast has a storied history, tracing back to European roots where similar slow-cooked dishes have been crafted for centuries. In America, the Classic Slow Cooker Pot Roast became a staple, particularly during times when efficiency and resourcefulness were crucial.

Culturally, sharing a pot roast carries a sense of warmth and hospitality, often being a centerpiece for family gatherings. Over time, each region has developed its variations, adding unique elements that best represent local tastes.

Ingredient Deep Dive


The main ingredient, beef chuck roast, is prized for its flavor and tenderness when slow-cooked. Historically, this cut was favored for its ability to transform through long cooking into a succulent, juicy dish.

Nutritionally, beef is an excellent source of protein, iron, and essential vitamins. When selecting, look for a well-marbled cut, indicating flavorful fat distribution. Store refrigerated, tightly wrapped to maintain freshness and prevent odor absorption.

Common Mistakes to Avoid

  • Not searing the beef: Searing enhances flavor by creating a rich, browned crust.
  • Using too much liquid: The slow cooker does not evaporate liquid as much, so adjust accordingly.
  • Skipping seasoning: Proper seasoning is essential to draw out the flavors of both meat and vegetables.
  • Neglecting the resting step: Allowing the pot roast to rest before serving ensures juicier meat.
  • Overcrowding the slow cooker: This can lead to uneven cooking.

Essential Techniques


Searing the beef before slow cooking is crucial for flavor. This technique creates a caramelized surface on the meat, adding depth to the overall dish. Mastering this requires high heat and patience to avoid moving the beef too quickly.

Pro Tips for Perfect Classic Slow Cooker Pot Roast


Enhance flavors by using root vegetables such as carrots and parsnips. They add natural sweetness, complementing the savory roast. Adding fresh herbs toward the end of cooking amplifies the aroma without overwhelming the taste. Balance seasoning with a splash of red wine for acidity and depth.

Variations and Adaptations


Adapt your Classic Slow Cooker Pot Roast by incorporating regional spices or sauces to reflect unique traditions. Seasonal vegetables can replace the classics, offering variety and fresh flavors during different times of the year.

Serving and Presentation Guide


For an elegant presentation, serve your pot roast sliced over a bed of creamy mashed potatoes. Garnish with freshly chopped parsley for a touch of color and freshness. Traditional accompaniments include crusty bread or a lightly dressed green salad for a balanced meal.

Wine and Beverage Pairing


Complement your pot roast with a robust red wine like Cabernet Sauvignon, a perfect match for the rich flavors. Non-alcoholic alternatives include a tart cranberry juice cocktail, which provides a refreshing contrast.

Storage and Shelf Life


Store leftovers in an airtight container in the refrigerator for up to four days. For longer preservation, freeze portions individually, allowing for convenient reheating. Before serving again, ensure thorough reheating for safety and quality assurance.

Make Ahead Strategies


Prepare ingredients the night before to streamline cooking. Assemble everything in the slow cooker insert and refrigerate overnight, then start cooking in the morning. This plan ensures maximum flavor infusion and tenderness while freeing up your day.

Scaling Instructions


To adjust servings, consider equipment size and cooking times. Halve the recipe for smaller gatherings or double for larger events, ensuring your slow cooker can accommodate the volume. Remember that cooking times remain largely consistent; monitor for doneness.

Nutritional Deep Dive


Classic Slow Cooker Pot Roast offers a balanced macro composition, providing strong protein content and essential nutrients like iron and vitamin B-12. The use of vegetables complements with fiber, helping maintain dietary needs within a single serving.

Dietary Adaptations


For gluten-free, ensure all seasonings and broths contain no gluten derivatives. Dairy-free options entail judicious use of oils instead of butter. For a low-carb version, increase the proportion of vegetables and reduce or eliminate starchy sides.

Troubleshooting Guide


If texture issues arise, make sure you’re using the correct cut of meat—chuck roast is essential. For flavor imbalances, check seasoning levels early in the cooking process. If cooking times aren’t aligning, verify the slow cooker temperature settings.

Recipe Success Stories


Our community has shared numerous enjoyable variations, from adding mushrooms for umami depth to incorporating bourbon in the cooking liquid for a smoky twist. These adaptations show the endless possibilities of enhancing the classic recipe.

Frequently Asked Questions

What cut of meat is best for pot roast? Chuck roast is recommended for its marbling and tender outcome when slow-cooked.

Can I make this dish ahead of time? Yes, prepare ingredients the night before for effortless assembly in the morning.

How do I know when the pot roast is done? The roast is ready when it easily shreds with a fork.

Why is my roast tough? Ensure it’s cooked long enough at the right temperature; slow cooking breaks down tough fibers.

Can I cook this on high? Lower settings are recommended for tenderness; however, cooking on high can work in a pinch but may affect texture.

Additional Resources


Explore our related recipes for sides that complement the Classic Pot Roast, such as creamy mashed potatoes or honey-glazed carrots. Check equipment guides for selecting the best slow cooker based on your household needs.

Join the Conversation


We encourage our readers to share their Classic Slow Cooker Pot Roast creations online. Tag us in your photos, review the recipe, or participate in discussions about variations you’ve tried at home.

The Recipe

Classic Slow Cooker Pot Roast

Serves: 6

Prep Time: 20 mins

Cook Time: 480 mins

Total Time: 500 mins

Kitchen Equipment Needed

  • Slow cooker
  • Large skillet
  • Tongs
  • Cutting board
  • Knife

Ingredients

  • 3 lbs beef chuck roast
  • 4 carrots, chopped
  • 3 potatoes, cubed
  • 2 onions, quartered
  • 2 cups beef broth
  • 2 tablespoons olive oil
  • 1 tablespoon salt
  • 1 teaspoon black pepper
  • 3 cloves garlic, minced
  • 3 sprigs fresh thyme
  • 2 bay leaves

Directions

  1. Heat olive oil in a large skillet. Sear the beef on all sides until browned.
  2. Place seared roast into the slow cooker. Add chopped vegetables around the roast.
  3. Pour beef broth over the beef and vegetables. Add garlic, thyme, and bay leaves.
  4. Season with salt and black pepper.
  5. Cover and cook on low for 8 hours, or until beef is tender and shreds easily.
  6. Remove thyme and bay leaves before serving.

Recipe Notes

  • For added depth of flavor, consider deglazing the skillet with red wine and adding it to the slow cooker.
  • Substitute root vegetables based on seasonality for variety.

Hearty Slow Cooker Tomato Tortellini Soup with Ground Beef Recipe

Slow Cooker Tomato Tortellini Soup with Ground Beef: Comfort in a Bowl

⚖️
Difficulty
Easy

⏲️
Prep Time
15 mins

🕒
Cook Time
240 mins

⏱️
Total Time
255 mins

🍽️
Servings
6

Imagine coming home after a long day and being greeted by the rich aroma of Slow Cooker Tomato Tortellini Soup. This comforting meal combines the hearty taste of ground beef with the subtle sweetness of tomatoes, creating an irresistible symphony of flavors. The addition of cheese-filled tortellini adds a delightful creamy texture, making each bite a perfect balance of savory and smooth.

If there’s one word to describe Slow Cooker Tomato Tortellini Soup with Ground Beef, it’s “satisfying.” This dish not only fills the kitchen with a cozy, inviting aroma but also ensures that every bowl delivers a burst of flavor and warmth. The convenience of using a slow cooker allows the flavors to meld together, making preparation a breeze without compromising on taste.

For those who appreciate a blend of textures, the tender ground beef offers a fantastic counterpoint to the soft, chewy tortellini, creating a delightful mouthfeel. Whether it’s a chilly evening or a casual family gathering, this soup is sure to impress with its heartiness and depth of flavor.

Quick Recipe Highlights

  • Flavor Profile: The savory beef paired with tangy tomatoes and cheesy tortellini creates a robust flavor profile.
  • Texture: Tender beef with soft tortellini provides a satisfying mouthfeel.
  • Aroma: Rich aromas of tomato and herbs fill the kitchen as the soup simmers.
  • Visual Appeal: A vibrant red broth with specks of green herbs and golden tortellini makes this dish visually inviting.
  • Skill Level Needed: Simple enough for beginners with just basic browning and slow-cooking skills required.
  • Special Equipment: A slow cooker is necessary to achieve the right consistency and blend of flavors.

Recipe Overview

  • Difficulty Level: The recipe is straightforward, involving minimal chopping and browning, perfect for novice cooks.
  • Category: A comforting main dish that’s perfect for cold nights and casual dinner parties.
  • Cuisine: Inspired by Italian-American cuisine, merging classic flavors in a comforting soup.
  • Cost: Budget-friendly ingredients make it an economical choice without sacrificing taste.
  • Season: Best enjoyed in fall and winter when warm, hearty soups are most appreciated.
  • Occasion: Ideal for family dinners, potlucks, or any time you want a no-fuss meal that satisfies.

Why You’ll Love This Recipe


The Slow Cooker Tomato Tortellini Soup with Ground Beef captivates with its hearty yet creamy taste, offering a delightful balance between robust and smooth flavors. The chewy texture of tortellini combined with richly seasoned beef creates a heavenly taste experience that’s hard to resist. Each spoonful is a comforting reminder of home-cooked meals at their finest.

Embrace the convenience of this recipe which allows you to set it and forget it. As the soup simmers, flavors meld beautifully, transforming a handful of everyday ingredients into a restaurant-worthy dish. Serve this to guests, and you’re bound to earn praises for providing such a flavorful feast with minimal effort.

Nutritionally, this soup is a great source of protein from the beef and cheese, while the tomatoes contribute essential vitamins like C and A. The balance of carbohydrates, fats, and proteins makes it a wholesome meal option.

Beyond its taste and nutritional benefits, this dish is a crowd-pleaser, perfect for social gatherings or quiet family nights alike. Its comforting essence brings people together over shared meals, sparking joy and conversation around the dining table.

In terms of cost, all ingredients are commonly found in most pantries or easily accessible at local supermarkets. The simple list ensures that you’re not breaking the bank, while still delivering a decadent bowl of goodness for everyone to enjoy.

Historical Background and Cultural Significance


Inspired by classic Italian tomato and pasta soups, Slow Cooker Tomato Tortellini Soup with Ground Beef is a modern twist on traditional flavors that take root in Italy’s rich culinary history. Tortellini, renowned for its delectable cheese filling, originates from Italy’s Emilia-Romagna region, where pasta making is an art form passed down through generations.

Soup has been a staple dish across many cultures for centuries, reflecting the adaptability of ingredients that represent the heart of traditional cooking methods. This particular recipe embodies a blend of Italian culinary artistry with the seamless integration of modern appliances like slow cookers, which infuse convenience into traditional cooking techniques.

As culinary tastes continue to evolve, this dish exemplifies the innovation within comfort food, adapting well-loved ingredients into a format that suits today’s fast-paced lifestyle. Regional variations may introduce different meats or vegetable broths, but the underlying principle remains fidelity to robust flavors and nourishing outcomes.

Variations of this soup are celebrated in different parts of the world, each adding unique touches that reflect local ingredients and preferences. By adjusting herbs or swapping in local cheeses, regional interpretations showcase the dish’s adaptability and global appeal.

Ingredient Deep Dive


The use of tomatoes in this soup deserves particular attention, given their integral role in achieving the dish’s vibrant base. Tomatoes, originally from South America, have become a cornerstone ingredient in many cuisines due to their versatility and nutritional benefits. They are packed with vitamin C, potassium, and antioxidants such as lycopene, known for their heart-health benefits.

Selecting the best tomatoes involves choosing those with rich color and firm flesh, indicating ripeness and quality. Storage in a cool, dry place helps maintain their flavor and freshness. Canned varieties provide a convenient alternative with prolonged shelf life while maintaining similar nutritional content. If fresh tomatoes are unavailable, canned crushed tomatoes work perfectly, offering consistency in texture.

Ground beef is another vital component, providing a rich and savory flavor. Lean ground beef is preferable for those looking to reduce fat content, while maintaining protein and iron intake. Opt for fresh, bright red beef with a consistent texture and minimal fat marbling. For storage, keep beef refrigerated and use within a day or two of purchase, or freeze for extended preservation.

Ground beef provides substantial protein and essential minerals, including iron and zinc, making it an energizing addition to any meal. If looking for a leaner option or different flavor palette, ground turkey or chicken can be perfect substitutes, compatible with the soup’s robust nature.

Common Mistakes to Avoid

  • Overbrowning the ground beef before adding it to the slow cooker can result in a dry texture; aim for a light golden brown sear.
  • Adding frozen tortellini directly to the slow cooker may increase cooking time; it’s best to defrost them before use.
  • Skipping the initial browning step for the beef can compromise the depth of flavor in the final dish.
  • Not seasoning the soup adequately could lead to blandness; ensure spices and salt are balanced to taste.
  • Leaving the soup cooking for too long might dissolve the tortellini, resulting in them becoming mushy, impacting texture.
  • Using low-quality canned tomatoes can affect the overall taste; opt for high-quality brands for the best flavor.
  • Ignoring the cheese in the tortellini assuming it’s an optional addition; it’s essential for the creamy texture.
  • Failing to taste and adjust seasoning before serving may lead to an imbalanced flavor profile.
  • Forgetting to monitor the water level could result in a drier soup than desired – add broth if needed to maintain consistency.
  • Not considering dietary preferences or adjustments could make the dish unsuitable for some guests; consider providing alternatives.

Essential Techniques


Browning ground beef is crucial, as it enhances the meat’s flavor through the Maillard reaction, producing deliciously rich and complex flavors. Mastering this technique involves heating the pan before adding beef and cooking it quickly in small batches to ensure it doesn’t steam.

Understanding the function of a slow cooker is key to perfecting this soup, allowing low and slow cooking that tenderizes meats and melds ingredients’ flavors. A common pitfall is lifting the lid too often, which releases heat and can extend cooking time. Let the slow cooker do its job for best results.

Taste as you go to maintain flavor balance, since this soup relies on a mix of fresh and canned ingredients that vary in saltiness and acidity. Adjusting seasonings as needed based on preference ensures the final dish is flavorful and satisfying.

Visual cues of perfectly cooked tortellini include a soft, slightly puffed appearance and a tender bite. Overcooked tortellini may become too mushy, losing their chewiness and diminishing the desired texture.

Pro Tips for Perfect Slow Cooker Tomato Tortellini Soup


Consider adding a splash of white wine when sautéing the beef for an extra layer of flavor, enhancing acidity and depth in the soup.

Fresh herbs like basil or parsley added towards the end of cooking impart a vibrant freshness to the soup that dried herbs can’t quite replicate.

For a creamier soup, stir in a few spoonfuls of ricotta or a splash of cream cheese just before serving to enrich the broth’s texture.

Experimenting with different tortellini fillings like spinach or mushroom can layer in additional flavors and complement the core ingredients.

Balancing a teaspoon of sugar with the tomatoes’ acidity can smoothen out sharpness, resulting in a more rounded flavor profile.

Garnish with freshly grated Parmesan cheese and a drizzle of olive oil for enhanced richness and a visually appealing finish.

Variations and Adaptations


Regional variations can include using local sausages or specialty meats in place of ground beef, delivering unique flavor infusions via local herbs or spices.

A seasonal adaptation might involve adding seasonal vegetables like squash or zucchini in autumn months or even fresh corn kernels in the summer for sweetness.

Dietary modifications such as using gluten-free pasta or opting for dairy-free cheese alternatives can make this recipe inclusive for different dietary needs, without sacrificing taste.

Explore bold flavor variations by incorporating roasted red peppers or smoked paprika for added spice and warmth, complementing the beef nicely.

Texture modifications might come from adding crunchy croutons as a garnish or stirring in some beans for extra substance, shifting the texture’s focus.

Presentation alternatives can involve serving this soup in a bread bowl, adding an element of novelty and enhancing its rustic, comforting appeal.

Serving and Presentation Guide


Effective plating techniques include using wide, shallow bowls to showcase the soup’s vibrant color and toppings like herbs or cheese, adding visual interest.

Garnish ideas could involve fresh herbs, a dollop of pesto, or a sprinkle of cracked black pepper, providing both a flavor boost and aesthetic appeal.

Traditional accompaniments such as warm crusty bread or classic garlic breadsticks are ideal sides, providing a textural foil to the soup’s softness.

Modern serving suggestions might include offering the soup in small cups for an appetizer or pairing with a light salad for a balanced meal set.

Temperature considerations involve ensuring the soup is served piping hot to maintain the intensity of flavors and the comfort factor that comes with warm soups.

Portion control tips ensure everyone gets their fill, suggesting about 1 to 1.5 cups per serving, depending on whether it’s a starter or main course.

Wine and Beverage Pairing


Pair this soup with a medium-bodied red wine like Chianti or a young Cabernet Sauvignon, which complements the tomato-based broth and beef richness.

For non-alcoholic alternatives, consider a sparkling mineral water with a slice of lemon that refreshes the palate between bites.

Should you prefer coffee or tea, a mild black tea can offer a smooth accompaniment, while a light roast coffee works surprisingly well with the tortellini’s cheesy notes.

Temperature considerations for wine emphasize serving reds slightly chilled or at room temperature, and non-alcoholic beverages can be delightfully cool with subtle carbonation.

Serving suggestions promote offering beverages in appropriate glassware to enhance the dining experience, whether a classic wine glass or a chilled tumbler.

Storage and Shelf Life


Proper storage methods to maintain freshness involve storing the soup in an airtight container, preserving its flavor and texture longer.

Maintain an ideal temperature by refrigerating promptly after cooling, best consumed within 3-4 days to ensure optimal taste and quality.

Consider using glass or BPA-free plastic containers for storing leftovers to avoid flavor absorption or chemical leaching.

Signs of spoilage like off-odors or discoloration are clear indicators the soup is past its prime; if in doubt, discard to maintain food safety.

When reheating, gently bring to a simmer on the stovetop or use a microwave in increments, ensuring even heating without overcooking the tortellini.

Freezing guidelines encourage portioning the soup before freezing, allowing quicker thawing and portion control; consume within 1-3 months for best quality.

Make Ahead Strategies


Plan a prep timeline by browning the beef and chopping vegetables a day ahead, storing them in separate containers for quick assembly.

Between steps, store prepped ingredients in the refrigerator to maintain freshness and eliminate any moisture build-up, ready for slow cooking.

Assess quality impact by noting that flavors meld better overnight, resulting in more balanced and deeper taste upon reheating.

Assembly tips for this make-ahead wonder suggest layering ingredients directly into the slow cooker, minimizing cleanup and prep time.

Reheating guidelines prioritize gentle warming to preserve the tortellini’s structure and maintain the beef’s tenderness.

Enhance freshness with additions like fresh herbs or a squeeze of lemon juice during reheating to revive and elevate flavors.

Scaling Instructions


Halving the recipe for fewer servings involves simply dividing ingredients, maintaining balance in ratios and ensuring appropriate slow cooker size.

Doubling or tripling implies more efficient ingredient use without compromising ratios but requires a larger cooker or multiple appliances.

Equipment adjustments may involve larger or additional slow cookers for scaled recipes, maintaining uniform heat distribution for successful outcomes.

Timing modifications, especially at larger scales, might mean extending cooking times by 1-2 hours, checking for doneness and flavor integration.

Store any larger quantities adequately, dividing portions into freezer-safe containers for later use, preventing waste and extending meal availability.

Nutritional Deep Dive


This soup offers an advantageous macro breakdown with balanced portions of protein (from beef), carbohydrates (tortellini), and fats (cheese), supporting sustained energy release.

Micronutrient analysis reveals benefits like vitamins C and A from tomatoes, along with iron and zinc from beef, covering essential dietary needs.

Recognize health benefits beyond basic nutrition, such as lycopene for heart health from tomatoes and complete amino acids from beef.

Consider dietary constraints, advising that with appropriate modification, this dish can accommodate most, including gluten-free and dairy-sensitive eaters.

Portion analysis demonstrates that a balanced serving provides concentrated macro and micronutrient intake, aiding overall dietary goals.

Weight management tips for conscious eaters include moderating pasta portions or employing low-carb substitutes for tortellini to align with dietary plans.

Dietary Adaptations


For a gluten-free version, use gluten-free tortellini or replace it entirely with rice pasta, maintaining core soup characteristics.

Dairy-free adaptations may necessitate substituting regular tortellini for those with dairy-free cheese, or testing pasta alternatives like chickpea flour types.

A vegan-friendly take could involve removing beef and tortellini, introducing chickpeas and spiralized vegetables like zucchini for texture and nutrition.

Low-carb adjustments replace tortellini with spiralized vegetable noodles, maintaining similar texture elements matched with beef protein sources.

Keto adaptations also thrive with similarly reduced-carbohydrate pasta options, supplemented by additional healthy fats such as avocado garnish to complement protein.

Paleo variations might substitute beef with another lean protein source and replace tortellini with suitable vegetables or greens for a unique spin on tradition.

Low-FODMAP recipes can reduce onion and garlic while retaining slow-cooked flavors, introducing alternatives like garlic-infused oil to uphold taste profiles.

Consider other diet-specific tweaks according to need, ensuring wide accessibility based on taste and nutritional adherence.

Troubleshooting Guide


Texture issues often arise from overcooking; avoid mushy pasta by cooking tortellini closer to serving time for optimal texture.

Flavor balance sometimes requires sharper hits of acid; adding lemon juice or red wine vinegar late offers a reliable fix for weak flavors.

Temperature problems linked to unexpected slow cooker variances mean monitoring allows reclaiming regularity and ensuring safe cooking.

Equipment challenges vary but are solvable with alternative setups; even a sturdy stovetop-compatible casserole doubles as functional cookware.

Ingredient substitutions can advance successful outcomes, such as using common ingredient swaps that maintain both flavor and dietary adherence.

Timing concerns, particularly with diffused heat distribution, mean strategic stirring helps recalibrate consistency for steady heat management.

Recipe Success Stories


The Slow Cooker Tomato Tortellini Soup with Ground Beef has garnered praise within our community, with many highlighting its comforting, rich flavors.

Creative variations inspire readers to share their unique ingredient swaps or adaptations that accommodate personal preferences or dietary needs.

Many adapt this versatile recipe; ideas include adding roasted vegetables or swapping in unique pasta shapes for dietary or visual variety.

Community feedback consistently underscores simplicity’s appeal, valuable even to beginners mastering new kitchen skills.

Photography encouragement comes alongside shared stories, illustrating unique soup finishes that echo rich flavors through compelling visual stories.

Reader suggestions frequently build exciting new content, encouraging continuous improvements or experiments in taste, flavor and texture pursuits.

Frequently Asked Questions

Can I freeze leftover soup? Yes, this soup freezes well. Use freezer-safe containers and reheat slowly for best flavor retention.

What spices pair best aside from listed ingredients? Enhancements like red pepper flakes or fresh basil provide depth and complexity.

Is it possible to make this soup vegetarian? Omitting beef and including hearty mushrooms or plant proteins like beans adds nourishment.

Can I use canned tomatoes instead of fresh? Absolutely, canned options reliably match depth of fresh tomatoes and maintain consistent flavor.

What’s the easiest method to thicken the soup? Incorporating a roux or mashed beans can deliver an appreciated thickness without altering taste.

Are there specific tortellini alternatives? Yes, you can substitute tortellini with ravioli or similar stuffed pasta variations.

How can I reduce salt content naturally? Use low-sodium broth and fresh tomatoes, seasoning with herbs and lemon for enhanced taste.

Will the soup taste watery with substitutions? Enhancing flavor with stock or vegetable reductions offsets any perceived watering down from subs.

How is different cookware suited for broths? Conventional pots ensure circulation within broths and proper slow cooker care means consistent cook.

What garnishes add uniqueness? A sprinkle of pine nuts or drizzle of white truffle oil offers unique garnishes lending tantalizing aromatic touches.

Additional Resources


Explore related recipes that further develop your kitchen repertoire, pairing this soup with homemade focaccia or bruschetta.

Access technique guides for honing kitchen skills related to soup crafting, offering insights into balancing flavors and layering ingredients.

Discover essential ingredient information ensuring quality selections and storage recommendations advancing culinary expertise.

Benefit from equipment recommendations providing quality assurance across varied kitchen tools facilitating exceptional home cooking.

Embrace seasonal variations that cater to produce availability influencing distinctive taste variations across seasons.

Join the Conversation


Join our engaging social media community, sharing your soup presentation photos and receiving friendly critique and tips.

Submit personal reviews on this recipe, discussing taste, preparation, and modifications executed catering to household tastes.

Participate in photography tips discussions, mastering visual storytelling to accompany your culinary creations.

Encourage active community engagement, celebrating variations, adaptations, and resulting successes with like-minded enthusiasts.

Discuss inspiring recipe interpretations, showcasing imaginative spins unique to each person and sparking creativity in home kitchens.

The Recipe

Slow Cooker Tomato Tortellini Soup with Ground Beef

Serves: 6

Prep Time: 15 mins

Cook Time: 240 mins

Total Time: 255 mins

Kitchen Equipment Needed

  • Slow cooker
  • Large skillet
  • Wooden spoon
  • Chef’s knife
  • Cutting board

Ingredients

  • 1 lb ground beef
  • 1 yellow onion, chopped
  • 2 cloves garlic, minced
  • 1 can (28 oz) crushed tomatoes
  • 4 cups beef broth
  • 1 tsp Italian seasoning
  • Salt and pepper to taste
  • 2 cups cheese tortellini
  • Fresh basil, for garnish
  • Parmesan cheese, for topping

Directions

  1. In a large skillet, brown the ground beef over medium heat, breaking it apart with a wooden spoon.
  2. Add the chopped onions and garlic, and cook until the onion is translucent.
  3. Transfer the beef mixture to the slow cooker.
  4. Pour in the crushed tomatoes and beef broth. Stir in the Italian seasoning, salt, and pepper.
  5. Set the slow cooker to low and cook for 4 hours.
  6. Add the tortellini to the slow cooker and cook for an additional 30 minutes on low.
  7. Serve hot with fresh basil and Parmesan cheese sprinkled on top.

Recipe Notes

  • Feel free to substitute beef with ground turkey for a lighter version.
  • For additional flavor, add a splash of red wine while cooking the beef.
  • Store leftovers in the refrigerator for up to 4 days or freeze for up to 3 months.

Irresistible Dill Pickle Chex Mix Recipe for Snack Lovers

Dill Pickle Chex Mix Recipe: A Tangy Snack Delight

⚖️
Difficulty
Easy

⏲️
Prep Time
10 mins

🕒
Cook Time
30 mins

⏱️
Total Time
40 mins

🍽️
Servings
8-10

Imagine diving into a bowl of Dill Pickle Chex Mix, where each bite promises a burst of tangy delight. Perfect for pickle enthusiasts, this snack combines the best of crispy Chex cereal and the unmistakable zest of dill pickles. Whether you’re planning a family game night or a casual picnic, this recipe serves as an ideal treat with its savory, crave-worthy flavor.

With minimal prep and cook time, the Dill Pickle Chex Mix is designed for both experienced cooks and budding chefs. Its combination of cereals and unique seasoning offers a twist on traditional snack mixes, ensuring you’ll impress friends and family with this flavorful creation. Add to that the joy of homemade snack mixes, prepared with love, and you’ve got a winner.

This mix offers an explosion of flavors and textures that will transport your taste buds straight to pickle yesteryear while keeping your snacking experience modern and convenient. The versatility of this recipe makes it a must-try for all occasions, whether lounging at home or hosting a friendly gathering.

Quick Recipe Highlights

  • Flavor Profile: A delightful combination of salty, tangy, and slightly spicy flavors, making every crunch satisfying.
  • Texture: Super crunchy with varied textures from different cereals and nuts, offering a playful mouthfeel.
  • Aroma: Inviting dill aroma with undertones of spices, making each bite alluring before it even hits the tongue.
  • Visual Appeal: Golden brown mix flecked with green dill bits, beautifully varied with unique shapes of included cereal.
  • Skill Level Needed: Simple and accessible steps ensure even a novice can achieve a delicious result on the first try.
  • Special Equipment: Basic baking and mixing tools, such as a large bowl and baking sheet, are needed.

Recipe Overview

  • Difficulty Level: This recipe is rated as easy, as the steps involve mixing ingredients and baking, with little technical skill required.
  • Category: Snack mixes, appetizers, and crowd-pleasers, perfect for parties or casual munching.
  • Cuisine: Inspired by American culinary traditions with a modern twist on popular snack themes.
  • Cost: An affordable mix using common pantry items, making it a cost-effective option for group events.
  • Season: This versatile mix is great year-round but particularly shines during summer for picnics and barbecues.
  • Occasion: Ideal for informal gatherings, family movie nights, or as a unique potluck contribution.

Why You’ll Love This Recipe


The Dill Pickle Chex Mix is a standout due to its irresistible taste and textural variety. The crispy cereals combined with the tangy, dill-infused seasoning create a harmony that dances on the palate. Perfectly baked, these flavors enhance the crunch, making every bite a flavor-packed adventure.

For those who cherish convenience, this recipe involves a straightforward preparation process. With its simple steps and short bake time, it’s a hassle-free snack perfect for any occasion. The mix can be stored for days without losing its delightful crunch, making it a prep-and-forget option for continuous enjoyment.

Nutrition-wise, the inclusion of nuts provides a source of healthy fats and protein, balancing out the indulgent nature of snack mixes. This tangy treat not only satisfies cravings but also offers a nutritional edge without compromising on taste.

Beyond its culinary prowess, the Dill Pickle Chex Mix invites social sharing. Friends and family will flock to this novel snack, its unique flavor profile sparking conversations and delight. Whether it’s for a party or a picnic, this mix is a guaranteed crowd-pleaser.

Affordability and accessibility further contribute to the mix’s appeal. Ingredients are widely available, ensuring that even those with the most modest grocery budgets can partake in this tangy delight.

Historical Background and Cultural Significance


Snack mixes find their roots in early American culinary history, evolving from simple cereal bowls to complex flavor profiles like our Dill Pickle Chex Mix. This recipe pays homage to the tradition of twisty, savory snacks crafted for sharing during social gatherings.

Culturally, Chex Mix variations hold a special place in American holiday traditions, symbolizing comfort and nostalgia for gatherings that bring people together. The dill pickle twist modernizes this legacy, linking present snacking habits with a cherished past.

Over the years, Dill Pickle flavor has gained recognition, particularly in North America, where its tangy burst has been integrated into various culinary applications, elevating traditional recipes with a zesty flair.

Regions across the United States popularized various takes on snack mixes. Each geography added a distinct, localized flavoring, slowly paving the way for contemporary takes like the Dill Pickle Chex Mix, now an emerging classic.

Ingredient Deep Dive


Chex cereal forms the base of this mix, a beloved ingredient in American cuisine that originated in the mid-20th century. Its versatile, light-crunch profile lends itself beautifully to seasoning adaptations, making it a favorite among innovative snack recipes.

Dill, the herb behind the signature flavor, has a rich culinary history, deeply rooted in Middle Eastern and European traditions. Known for its fresh, grassy taste, dill not only enhances this recipe but also brings a host of nutritional benefits, including antioxidants and anti-inflammatory properties.

Common components such as nuts add to the versatility of the mix, providing a satisfying crunch and enhancing satiety. When selecting nuts, ensuring freshness is key to maintaining the best flavor profile. Opt for raw or lightly roasted varieties to allow the dill seasoning to shine.

Storage-wise, preparing the mix ahead of time will highlight the prolonged flavor retention in an airtight container, ensuring freshness for days. In case some ingredients aren’t available, reasonable substitutions like swapping peanuts for almonds are feasible.

Common Mistakes to Avoid

  • Overbaking: Watch the baking time closely to prevent a burnt aftertaste; slightly golden is the desired finish.
  • Uneven Coating: Mix the seasoning well to ensure each piece is evenly coated for a consistent taste throughout.
  • Skimping on Seasoning: The dill flavor should be vibrant, so don’t hesitate to use the recommended quantities for the full tangy experience.
  • Using Stale Ingredients: Freshness is key, particularly for cereal and nuts; check your pantry before starting the recipe.
  • Inappropriate Storage: Use airtight containers post-baking to maintain crunchiness and flavor retention.
  • Ignoring Mixing Tools: Employ wide mixing bowls for even coating of all elements with seasoning.
  • Heat Mismanagement: Consistent oven temperature is crucial to achieving balanced cooking without over-drying.
  • Skipping Resting Time: Allow a short cooling period for flavors to settle, enhancing the overall taste profile.
  • Overcomplicating: Stick to the recipe for an optimal balance of flavors and textures initially.
  • Ingredient Swaps: While substitutions are possible, ensure compatibility with dill and the seasoning mix to maintain harmony.

Essential Techniques


Mastering mix seasoning requires evenly distributing your seasoning blend over every bite-size piece. Consistently tossing the cereal after adding the flavor mix will ensure a uniform coating, enhancing the taste experience.

Baking requires precision, beginning with preheating the oven to the recommended temperature. This foundational step ensures the mix crisp evenly, granting the desired golden brown hue.

Crucial to achieving a balanced crunch is monitoring both temperature and time. A golden sheen is your cue, signaling an ideal combination of having baked long enough to develop flavor without the risk of burning.

Post-bake cooling on a wire rack or open-air container is an advanced technique, providing consistent texture while preventing the mix from steaming and losing its crispness.

Pro Tips for Perfect Dill Pickle Chex Mix

Quality pickles are the unsung heroes of this dish. Opt for full-flavor, brined pickles known for their consistent tang when choosing your seasoning ingredients.

For an even better flavor infusion, consider allowing your seasoning to sit and meld its flavors for a few minutes before adding to the Chex. This melding will elevate the tangy notes throughout the mix.

Incorporating a hint of cayenne pepper can bring a subtle heat, contrasting the sweetness of Chex cereal harmoniously.

Proper returning of mixture while baking will ensure complete flavor immersion on every piece of cereal.

Choose your nuts wisely. Roasting nuts lightly before adding them into the mix allows their natural oils to accentuate the dill-coated flavor profile, lending a richer taste.

Experiment with garlic powder or onion powder sparingly for an added layer of depth.

Variations and Adaptations

Regionally, add herbs like thyme or basil native to your location for a nuanced layer of local flavors. Such adaptations can reflect regional garden availability.

As the seasons change, consider adapting with seasonally available seeds like sunflower or pumpkin seeds for added crunch and taste just right for harvest time.

For dietary needs, gluten-free Chex cereal and suitable nut alternatives provide an accessible option without sacrificing the treasured dill flavor.

Adventurous palates might enjoy adding extra spice-infused ingredients to manifest a bold tasting experience.

If you prefer a lighter option, opt for a reduced-oil approach by moderating butter quantities, refreshing the dill mix with water for solvent-free binding.

For alternative presentations, create personal snack-size bags or a sophisticated party bowl with garnished dill sprigs for an eye-catching display.

Serving and Presentation Guide

Plating your Dill Pickle Chex Mix can be as simple or elegant as you choose. Consider using clear glass bowls to showcase the mix’s colors, accentuated with fresh dill sprigs for visual freshness.

Garnishing with sprinkle of fresh herbs such as dill will highlight its core flavor and appeal visually, enhancing your table presentation.

Traditionally, Chex Mix has been served in large bowls for communal gatherings, encouraging sharing and social enjoyment, perfect for family-style events.

For a modern twist, offer individual servings in decorative paper cups, complementing picnics or parties while offering ease of access.

Consideration of the mix’s temperature is key in presentation. Serve it freshly cooled to maintain crunch and maximize flavor profile impact as guests dig in.

Maintain consistent portion sizes with this intuitive snack using small scoops or ladles so that each serving perfectly encapsulates the mix’s flavorscape.

Wine and Beverage Pairing

Dill Pickle Chex Mix, with its vibrant, tangy notes, pairs beautifully with crisp, light white wines, such as a Sauvignon Blanc or a Pinot Grigio, enhancing its sharp flavors.

For non-alcoholic alternatives, consider serving with fizzy lemon lime soda, which complements the dill pickle tones with its refreshing notes.

Incorporating a cold brew herbal tea, like a mint blend, can offer a smooth, balanced backdrop to the dill-forward bite.

Temperature matters in beverage pairings; aim to chill wines and non-alcoholic drinks slightly cooler than standard serving temperatures to offset the snack’s savory character.

For best results, serve beverages in elegant stemware to elevate the presentation and invite your guests into the tasting experience more fully.

Storage and Shelf Life

To maintain optimal crunchiness and freshness, store your Dill Pickle Chex Mix in an airtight container at room temperature, where it will last up to one week.

Temperature stability is key. Avoid placing the container in humid or excessively warm areas, as this can impact the texture and flavor negatively.

Consider a glass or stainless steel container for long-term storage, minimizing any potential plastic taste leeching into the mix.

Signs that the mix may be losing its pinnacle quality involve a damp or stale texture, indicating the need for a fresh batch.

To revive slightly stale mix, a quick five-minute bake at a low setting can restore the crispiness without much effort.

Freezing the mix is not generally recommended, as it may alter the texture, but it can be done in tightly sealed bags for up to a month.

Make Ahead Strategies


Preparing Dill Pickle Chex Mix in advance is straightforward. Begin by measuring and mixing the dry ingredients up to a day before.

Between steps, store pre-measured ingredients in airtight containers to maintain freshness before fully assembling the mix.

Pre-baking the mix may slightly impact the freshness, but with proper storage, it will retain its crunch and flavor for a short period.

Assembled, unbaked mix can be stored and then baked just before serving to maintain that fresh-bake appeal and aroma.

Upon reheating, ensure an even spread on your baking surface to maintain uniform flavor and texture distribution.

After reheating, refreshing the mix with a sprinkle of fresh dill or seasoning before serving can reinforce its vibrant taste.

Scaling Instructions


For smaller gatherings, halving the Dill Pickle Chex Mix recipe is straightforward by simply dividing ingredient amounts while maintaining the same equipment.

Doubling or tripling the recipe for large events may require additional baking sheets and mixing bowls to keep preparation times consistent.

Account for equipment adjustments, such as larger ovens or enhanced storage containers, when scaling up significantly to avoid uneven baking.

Timing modifications in baking may be necessary, observing for signs of golden brown uniformity as a cue rather than setting specific time increments.

When preparing larger quantities, ensure portions are mixed thoroughly to avoid inconsistent seasoning distribution throughout the batch.

Packaging in appropriate containers for scaled-up quantities ensures the mix remains fresh and enjoyable over extended periods.

Nutritional Deep Dive


The Dill Pickle Chex Mix provides a balanced nutritional profile, with carbohydrates from the cereal and protein from added nuts.

Micronutrient benefits, such as vitamin A from dill and essential minerals from nuts, contribute to an overall healthy snacking option.

The mix allows a controlled portion of energy from healthy fats in nuts while keeping other less nutritious snack options at bay.

When broken down, each portion presents a satisfying snack that can deter overindulgence by focusing on quality over quantity.

In dietary considerations, opt for wholegrain cereal variants for increased fiber content, enhancing digestive benefits.

For active individuals, this mix offers substantial snack satisfaction without derailing weight management goals due to its modest, nutrient-rich ingredients.

Dietary Adaptations


For gluten-free adjustments, select verified gluten-free Chex cereal varieties and ensure all seasoning ingredients are celiac-safe.

To achieve a dairy-free mix, substitute butter with a high-quality vegan butter alternative that maintains the mix’s rich flavor.

For vegan adaptation, confirm all ingredients, especially Worcestershire sauce, are vegan-certified or use known vegan alternatives.

Low-carb versions require substituting cereal with low-carb crunch options, available in specialty health food stores, while retaining the core dill pickle seasoning.

In a keto-friendly adaptation, focus on high-fat nuts and seeds, reducing cereal portions significantly in favor of dietary fat intake.

Paleo versions can focus on grain-free alternatives, using vegetables such as kale chips or coconut crisps with dill-enhanced nuts.

For low-FODMAP needs, modify ingredient selections in line with IBS-friendly guidelines, such as reducing garlic powder and using appropriate cereal options.

Troubleshooting Guide


If the mix turns soggy, consider reheating to evaporate any absorbed moisture, ensuring an open-air cool down to maintain crispness.

Dill overload can be rectified by mixing in additional base ingredients, balancing the flavor intensity to desired preference.

Temperature issues, such as uneven baking, may be solved with consistent check-ins and gently rotating baking trays for even drying.

Encounters with lacking crunch are often resolved through extended baking at a slightly decreased heat to balance cooking without burning.

Substitute confusion may require reevaluating ingredient compatibility, particularly with seasoning bases to retain the authentic flavor profile.

Timing concerns such as an overextended bake can be mitigated with preliminary recipe walkthroughs, establishing baking cues and signs.

Recipe Success Stories


Recently, home cooks have expressed delight in the Dill Pickle Chex Mix, celebrating its innovative flavor that refreshes traditional snack expectations.

Reader stories frequently share successful adaptations, discovering unique flavors by adding various seeds or choosing different nut varieties for added personalization.

Adaptations in photography showcase the mix’s versatility, where seasoned culinary influencers present their distinctive interpretations visibly, enhancing the visual appeal across diverse platforms.

Shared community engagements reveal consistent praise about the mix’s compete nutritional balance as a veteran snack favorite with new-age health consciousness.

Photography tips frequently accompany reader stories, noting the importance of natural light and ingredient dispersal for social media-ready captures.

Frequently Asked Questions

What variations can I try with this recipe?

Try adding different herbs or spices, light spice elements such as cayenne pepper, or include festive ingredients for seasonal twists.

How long does the Dill Pickle Chex Mix stay fresh?

When stored properly in an airtight container, your Chex Mix will remain fresh for up to a week.

Can I make this recipe gluten-free?

Certainly, use gluten-free Chex cereals and double-check all seasonings to accommodate a gluten-free diet seamlessly.

Is this recipe suitable for vegan diets?

Yes, with careful selection of vegan-friendly ingredients or using suitable substitutes, the snack can accommodate a vegan lifestyle.

Will this recipe store well if made in advance?

The mix’s shelf stability supports advance preparation for serving at your convenience and remains delicious and crisp for days.

What can I use instead of dill?

Consider using herbs like parsley or chives for a similar fresh taste that complements the mix’s textures.

How do I fix an overly tangy mix?

Incorporate additional Chex cereal for balance, gently baking again to refresh flavor harmony if necessary.

Why is my mix soggy?

Ensure proper air distribution during cooling processes to prevent moisture retention, reheating with a brief return to the oven for remediation.

What’s the best way to introduce the dill flavor?

Consistently toss the seasoning mix prior to adding it to the Chex, ensuring even dill distribution before baking.

How can I enhance the visual appeal of my Chex Mix?

Add colorful dried fruits or seeds, such as cranberries or pumpkin seeds, along with the mix for visual variation without altering flavor core elements.

Additional Resources


Enhance the recipe with aligned dishes such as dill-centric dips or savory spreads, extending your snack table variety.

Delve into other snack creation guides to advance your culinary expertise, applying professional techniques to perfect consistency and seasoning blends.

Ingredient insights, focusing on Chex variations or herbs like dill, will expand your flavor palette for future creative applications.

Keep up-to-date with innovative seasonings and kitchen gadgetry that continually enhance snacking experiences to modern, desirable levels.

Embrace seasonal shifts in ingredient availability, leveraging local freshness in respective applications for peak taste enhancement.

Join the Conversation


Harness the community’s collective creativity by sharing your own adaptations of the Dill Pickle Chex Mix on social media platforms.

Contribute feedback and reviews; each perspective enhances our collective culinary appreciation of this wonderfully tangy, engaging snack.

Join discussions on innovative camera techniques that highlight food aesthetics, rendering your homemade snack creations worthy of showcase.

Join forums dedicated to recipe exchanges, where enthusiasts and seasoned cooks alike can share their takes and inspire new interpretations.

Seize opportunities to connect with other food lovers globally, discovering variations beyond traditional borders for an ever-evolving flavorful journey.

The Recipe

Dill Pickle Chex Mix

Serves: 8-10

Prep Time: 10 mins

Cook Time: 30 mins

Total Time: 40 mins

Kitchen Equipment Needed

  • Large mixing bowl
  • Baking sheet
  • Measuring spoons
  • Oven
  • Air-tight container for storage

Ingredients

  • 4 cups of Chex cereal (Rice or Corn)
  • 2 cups of pretzel sticks
  • 1 cup of peanuts or mixed nuts
  • 1/4 cup of butter, melted
  • 2 tablespoons of dill pickle juice
  • 1 tablespoon of dried dill weed
  • 1 teaspoon of garlic powder
  • 1 teaspoon of onion powder
  • Salt and pepper to taste

Directions

  1. Preheat your oven to 300°F (150°C) to prepare for a gentle, even bake.
  2. In a large mixing bowl, combine Chex cereal, pretzel sticks, and nuts.
  3. In another small bowl, mix melted butter, dill pickle juice, dried dill, garlic powder, onion powder, salt, and pepper until well-blended.
  4. Pour the seasoning mixture over the cereal mix, thoroughly coating all pieces by tossing gently.
  5. Spread the mixture evenly onto a baking sheet.
  6. Bake in the preheated oven for 30 minutes, stirring every 10 minutes to ensure even cooking.
  7. Remove from the oven and allow to cool before serving or storing in an airtight container.

Recipe Notes

  • For a spicier version, add 1/4 teaspoon of cayenne pepper to the seasoning mix.
  • For best results, ensure nuts are fresh to maintain optimal flavor and texture.
  • The recipe is flexible; feel free to add or remove ingredients based on personal preference or dietary needs.

Delicious Homemade Hamburger Steaks with Savory Onion Gravy Recipe

Hamburger Steaks with Onion Gravy: A Comfort Classic

⚖️
Difficulty
Easy

⏲️
Prep Time
15 mins

🕒
Cook Time
30 mins

⏱️
Total Time
45 mins

🍽️
Servings
4

Indulge in the savory goodness of Hamburger Steaks with Onion Gravy, the ultimate comfort food for any night of the week. This dish brings together perfectly seasoned beef patties simmered in a luscious, rich onion gravy. The tender hamburger steaks are cooked just right, providing a delightful texture that pairs beautifully with the velvety smooth sauce. You’ll love the classic flavors and warmth that this meal brings to your dinner table.

Quick Recipe Highlights

  • Flavor Profile: Juicy beef patties are smothered in a robust onion gravy, delivering a savory and slightly sweet taste.
  • Texture: The hamburger steaks are juicy and tender, while the gravy adds a silky mouthfeel.
  • Aroma: The dish fills your kitchen with enticing notes of sautéed onions and thyme.
  • Visual Appeal: Golden-brown steaks draped in a glossy, amber-hued gravy make a visually comforting presentation.
  • Skill Level Needed: Basic cooking skills required; anyone can master this comforting dish.
  • Special Equipment: A cast-iron skillet is recommended for even cooking and flavor enhancement.

Recipe Overview

  • Difficulty Level: Easy; it involves straightforward cooking techniques perfect for beginners.
  • Category: Main course; perfect for dinner with family or friends.
  • Cuisine: Rooted in American comfort food traditions, with influences of classic French techniques for the gravy.
  • Cost: Budget-friendly; utilizes common, affordable ingredients such as ground beef and onions.
  • Season: Ideal for fall and winter, providing warmth and heartiness during cooler months.
  • Occasion: Suitable for weeknight dinners or as a homely dish to impress guests.

Why You’ll Love This Recipe

The taste of Hamburger Steaks with Onion Gravy is a flavor explosion, combining the umami of beef with the sweet, caramelized flavor of onions. The contrasting textures of tender steaks and smooth gravy make every bite a pleasure. This recipe is convenient and quick, taking less than an hour from start to finish, making it perfect for busy weeknights. Nutritionally, it’s a good source of protein and iron, essential for a balanced diet. This dish is wonderfully versatile in terms of serving, making it a great choice for family meals and entertaining.

Hamburger Steaks with Onion Gravy is a cost-effective recipe that relies on simple, inexpensive ingredients, making it accessible for those on a budget. Its ease of preparation means you’ll spend more time enjoying with loved ones rather than stuck in the kitchen. Served alongside creamy mashed potatoes or a crusty slice of bread to sop up the gravy, it provides a comforting and rustic dining experience that guests will remember.

Historical Background and Cultural Significance

This recipe traces its roots back to the early 20th century, when American diners sought hearty meals that were both affordable and delicious. The hamburger steak is said to have emigrated from Germany in the form of frikadeller and evolved into its current form in the States. As for the onion gravy, it borrows French culinary techniques, indicating a fascinating blend of traditions. Over the years, this dish has become a staple in American households, symbolizing hearty, uncomplicated home cooking.

The cultural importance of this dish is profound in the U.S., being a nostalgic reminder of family meals and comfort. It’s a prime example of traditional cooking that embodies simplicity while delivering satisfying flavors. Various regional adaptations have introduced elements like mushrooms or garlic to enrich the gravy, demonstrating its versatile appeal.

Ingredient Deep Dive

Ground beef is the star of the hamburger steaks, providing richness and depth thanks to its inherent fat content. Historically, beef has been a staple protein in American diets, valued for its versatility. When selecting ground beef, opt for a medium fat content for juiciness. Store it refrigerated and consume within a couple of days, or freeze for longer storage. For substitutes, ground turkey offers a lower-fat alternative.

Onions are indispensable in this recipe, offering their sweet, caramelized notes to the gravy. Known for their widespread use across cuisines, onions add a subtle depth to dishes. Choose firm, dry bulbs for the best quality and store them in a cool, dry place. If unavailable, shallots can serve as a flavorful substitute.

Common Mistakes to Avoid

  • Avoid using lean ground beef, as it can result in dry steaks. Choose a fat content of at least 15%.
  • Don’t rush the onion caramelization process; allow onions to cook slowly for optimal flavor.
  • Ensure your skillet is hot before adding the steaks to achieve a good sear and lock in juices.
  • Overcrowding the pan with steaks can lead to steaming rather than searing.
  • Do not overmix the meat mixture; doing so can make the steaks tough.
  • Avoid skipping the resting period for cooked steaks, as it redistributes juices evenly.
  • Under-salting can be corrected, but over-salting cannot; taste as you season.
  • Using stale or low-quality beef results in a lackluster flavor experience.

Essential Techniques

Mastering the art of onion caramelization is crucial. Properly caramelized onions should be deeply browned and sweet, forming the foundation of flavor for the gravy. Cook them slowly over low heat to draw out natural sugars and develop the best aroma. Avoid a high flame, which could burn or over-crisp the onions rapidly.

Searing the steaks is another vital technique. A seared exterior enhances flavor and texture. To achieve this, heat your skillet until very hot before adding the steaks, test with a sprinkle of water to hear it sizzle. Common pitfalls include flipping the steaks too early—let a crust form first—and overcrowding.

Pro Tips for Perfect Hamburger Steaks with Onion Gravy

For ultra-tender steaks, consider adding a tablespoon of breadcrumbs to the beef mixture. Allowing the uncooked patties to chill for 30 minutes firms them up, maintaining shape while cooking. Utilize a generous herb selection in both the meat and gravy for added depth.

Use beef broth instead of water in the gravy for enhanced flavor. A splash of Worcestershire sauce can add a complex umami note to the gravy. Make sure to rest the steaks for a few minutes post-cooking for even juicier results.

Variations and Adaptations

Explore regional variations by adding sautéed mushrooms to the onion gravy, providing earthy tones typical of Midwest American cuisine. For a seasonal twist, incorporate grated carrots or parsnips into the gravy during colder months. A gluten-free adaptation can be made by using rice flour for thickening the gravy instead of all-purpose flour.

Experiment with different herbs in the meat mixture such as dill or tarragon to alter flavor profiles. Texture modifications can be achieved by adding a touch of cream to the gravy for a silkier finish. Present the dish over polenta or rice for a modern, beautiful serving approach.

Serving and Presentation Guide

Consider serving Hamburger Steaks with Onion Gravy on a rustic wooden board to enhance its homely appeal. Garnish with fresh chopped parsley or thyme for a pop of color and inviting aroma. Traditionally accompanied by mashed potatoes, some choose steamed green beans or buttered carrots as modern side options.

Maintain ideal serving temperatures to preserve the dish’s flavors—lukewarm is not ideal. Balance portion control by serving a single steak per person, supplemented by plentiful sides for a comforting balance.

Wine and Beverage Pairing

Rich red wines like Cabernet Sauvignon can complement the hearty flavors of the steak and gravy. For non-alcoholic options, a chilled glass of sparkling apple cider pairs well, offering a crisp contrast. Tea enthusiasts may enjoy a bold black tea which accents the dish’s savory elements.

Temperature is key; serve beverage pairings slightly cooled, so they complement rather than overpower the meal flavor profile.

Storage and Shelf Life

Store leftover Hamburger Steaks with Onion Gravy in an airtight container in the refrigerator, maintaining quality for up to three days. Always ensure the dish is fully cooled before sealing to prevent moisture buildup. Signs of spoilage include an off smell or grey hue to the gravy.

For reheating, gently warm on the stove over medium-low heat, adding a splash of water or broth to rejuvenate the gravy’s consistency. If freezing, wrap airtight and consume within three months for best results, thawing overnight before reheating.

Make Ahead Strategies

Prepare hamburger patties a day ahead to save time, storing refrigerated until ready. Assemble components of the gravy without the liquid, and cook when convenient. Once cooked, the entire dish reheats well without compromising quality. If reassembly is necessary, reserve fresh herbs for final addition to retain their aromatic punch.

Reheating is most successful using stovetop methods to prevent over-zapping of beef in the microwave. A sprinkle of chopped fresh thyme or parsley can freshen the reheated dish.

Scaling Instructions

For halved recipes, reduce ingredient measures accordingly; do not reduce cooking times, as this ensures proper texture development. Doubling the recipe requires ample skillet space, or cook in batches to maintain quality. Adjust seasoning progressively to suit larger yields.

Properly storing extra portions necessitates high-quality storage containers to maintain freshness. Consider utilizing a vacuum sealer for ideal preservation. When scaling, remain mindful of equipment capacities and preparation space limitations.

Nutritional Deep Dive

Hamburger Steaks with Onion Gravy offer a significant protein boost, with reasonable fat content for sustaining energy levels. The onions contribute key vitamins like vitamin C and antioxidants. For health-conscious diners, moderate portion sizes and supplementary steamed vegetables can uplift the dish’s nutritional profile.

A beneficial macro breakdown shows adequate carbs, derived mainly from the gravy and potential carbohydrate accompaniments. Weight management is supported by mindful consumption, considering portion sizes in relation to daily caloric needs.

Dietary Adaptations

For a gluten-free version, gluten-free breadcrumbs and rice flour are viable substitutions. Dairy-free adaptations exclude any butter used in the gravy; substitute plant-based alternatives. Vegans can replicate savory flavors with plant-based ground meats and non-dairy gravy enhancers.

Low-carb seekers should pair the steak with sides like cauliflower mash instead of traditional potatoes. Each adaptation ensures the essence of the dish remains intact, respecting various dietary preferences and health needs.

Troubleshooting Guide

For texture issues, if steaks turn out dry, assure you are not overcooking and check for sufficient fat content in the beef. If flavor lacks depth, assess the seasoning, particularly of the gravy; sometimes a pinch more salt or Worcestershire sauce can balance flavors effectively.

Equipment like pans should be non-stick or well-seasoned cast iron to prevent sticking, and ensure even heating. Timing disputes often arise if multitasking; set timers or practice mise en place to streamline your cooking process. Ingredient substitutions, handled adeptly, should align with preferences while respecting traditional flavors.

Recipe Success Stories

A community favorite, readers frequently rave about the recipe’s ease and flavorful results. Variations submitted include chicken-based versions and pepper-infused gravies, maintaining the dish’s versatility. Reader tips often highlight using fresh-cut herbs from backyard gardens, adding a personal touch to each preparation.

Photography enthusiasts capture the dish on vintage-style dinnerware, enhancing its nostalgic appeal. Engaging social media shares frequently feature different plating techniques, encouraging vibrant community engagement around this classic recipe.

Frequently Asked Questions

Q: Can I make the hamburger steaks ahead of time?
Absolutely, you can prepare the beef patties in advance and refrigerate them for up to a day. This helps the flavors meld and simplifies preparation on the cooking day.

Q: Are there vegetarian alternatives to this recipe?
Yes, you can substitute the beef patties with vegetarian-friendly options like portobello mushrooms or store-bought plant-based patties. Adjust seasonings in the onion gravy to align with these alternatives.

Q: How do I thicken the onion gravy if it’s too runny?
For a thicker consistency, mix a small amount of cornstarch or flour with cold water to create a slurry, then gradually whisk it into the simmering gravy.

Q: What can I pair with the steaks apart from mashed potatoes?
Popular alternatives include sautéed greens, such as spinach or kale, a crisp salad for contrast, or a warm grain side like quinoa or rice pilaf.

Q: Can I cook these on a grill instead of a skillet?
While traditionally cooked in a skillet for the perfect crust and flavor integration with gravy, grilling is possible. Ensure the patties are firm enough to hold together without crumbling.

Q: What herbs pair best with this dish?
Thyme and rosemary work excellently with beef, enhancing the savory profile, while parsley is perfect for garnishing, adding freshness and color to the plate.

Q: Is there a low-sodium version available?
To lower sodium, opt for low-sodium beef broth and reduce added salt. Limiting Worcestershire and soy sauce usage can also preserve flavor while minimizing sodium intake.

Q: Can I substitute caramelized onions with onion powder?
While onion powder lacks the depth and sweetness of caramelized onions, you can use it sparingly to flavor the patty mixture but not for the gravy itself.

Q: How do I prevent the patties from falling apart?
Ensure the ground beef mix has cohesion. Adding breadcrumbs and chilling the patties before cooking greatly aids in maintaining their structural integrity.

Q: How can I make this dish spicy?
For added heat, incorporate chopped chili peppers or a pinch of cayenne into the beef mix. Spicing up the gravy with a splash of hot sauce is also an option.

Additional Resources

Explore related recipes such as Salisbury Steak or Beef stroganoff for similar flavor profiles with unique twists. Discover detailed guides on cooking techniques like pan-searing and caramelization for perfect execution every time. Ingredient insights on quality beef selection and onion varietals can further enhance cooking proficiency.

Equipment suggestions include high-quality cast-iron skillets for unmatched heat retention and distribution. Seasonal variations align this dish with culinary updates, enhancing year-round enjoyment.

Join the Conversation

Engage with us on social media by sharing your Hamburger Steaks with Onion Gravy photos and tips. Discover photography ideas that highlight the dish’s comforting nature. Submit your recipe reviews and connect with fellow readers who’ve tried exciting variations. We encourage community interaction, fostering a space for sharing techniques and serving suggestions.

The Recipe

Hamburger Steaks with Onion Gravy

Serves: 4

Prep Time: 15 mins

Cook Time: 30 mins

Total Time: 45 mins

Kitchen Equipment Needed

  • Cast-iron skillet
  • Mixing bowls
  • Wooden spoon
  • Tongs

Ingredients

  • 1 lb ground beef (80% lean)
  • 1 onion, thinly sliced
  • 3 tablespoons all-purpose flour
  • 1 cup beef broth
  • 1 tablespoon Worcestershire sauce
  • Salt and pepper, to taste
  • 2 tablespoons olive oil
  • Fresh thyme, for garnish

Directions

  1. In a bowl, mix ground beef with salt, pepper, and a tablespoon of Worcestershire sauce. Form into 4 patties.
  2. Heat olive oil in a cast-iron skillet over medium heat. Add the patties and cook until browned, about 4 minutes per side. Remove from skillet and set aside.
  3. Add sliced onions to the same skillet, cooking until caramelized.
  4. Stir in flour, cooking for an additional minute to form a paste.
  5. Slowly add beef broth, stirring to make a smooth, thick gravy. Season with salt and pepper.
  6. Return the patties to the skillet, spooning gravy over the top. Simmer for 10 minutes. Garnish with fresh thyme before serving.

Recipe Notes

  • Ensure patties reach an internal temperature of 160°F for safety.
  • Consider adding a splash of cream to the gravy for an extra-rich finish.
  • Leftover gravy makes an excellent addition to mashed potatoes or rice.