End your day with a delicious, comforting, and satisfying dinner! Whether you’re looking for quick and easy weeknight meals, cozy comfort food, or elegant dishes for special occasions, we have the perfect recipes for you.
From hearty casseroles and one-pan wonders to savory pastas, juicy meats, and flavorful vegetarian options, our collection is designed to make dinnertime effortless and enjoyable.
Busy schedule? No problem! Try our slow cooker meals, sheet pan dinners, and 30-minute recipes to save time without sacrificing flavor. Whatever your craving, these recipes will bring warmth and joy to your table every night. 🍽️✨
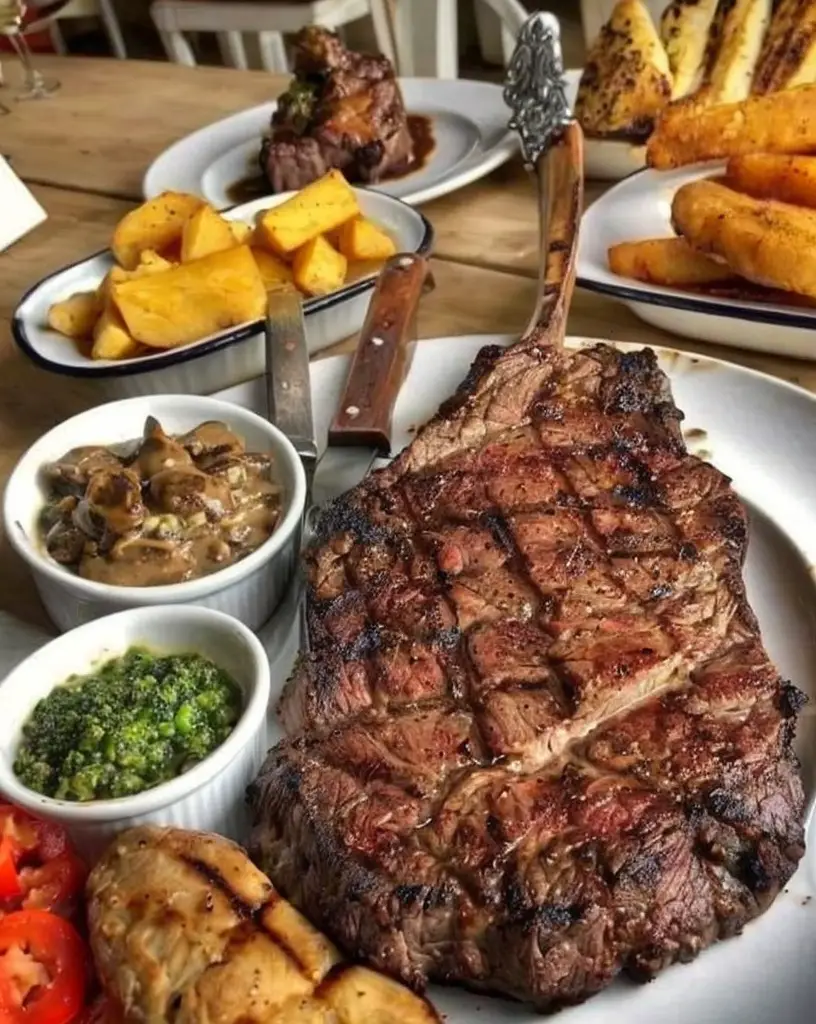
Savor the Perfect Ribeye Steak with These Expert Grilling Tips
Perfect Ribeye Steak: A Delight for the Senses
⚖️
Difficulty
Medium
⏲️
Prep Time
10 mins
🕒
Cook Time
15 mins
⏱️
Total Time
25 mins
🍽️
Servings
2
Indulge in the exquisite taste of a perfectly cooked ribeye steak, where each bite unveils a symphony of flavors in your mouth. The ribeye, renowned for its marbling and tenderness, offers a juicy, flavorful experience perfect for any steak lover. Savory and rich, this steak delivers a sensory journey that’s as enjoyable to look at as it is to taste. With minimal ingredients and an emphasis on technique, you’ll be able to craft a restaurant-quality dish in the comfort of your own home.
The magic of ribeye steak lies in its marbling, which ensures a tender and juicy bite every time. Whether seared to perfection on a skillet or grilled over an open flame, the ribeye’s decadent taste and buttery texture make it a standout choice for any special occasion. Enhance its natural flavors with a simple seasoning of salt, pepper, and a hint of garlic or butter, and let the meat speak for itself with its robust and hearty profile.
Transform any evening into a culinary celebration as the heady aroma of a cooking ribeye fills the kitchen. This dish not only tantalizes the taste buds but also captivates with its sizzling soundtrack and mouthwatering scent, promising a memorable dining experience.
Quick Recipe Highlights
Flavor Profile: Rich and umami-filled, with buttery and savory notes that captivate the palate with each bite.
Texture: Expertly tender, with a beautiful balance between the juicy meat and a delightfully crispy sear.
Aroma: Invigorating blend of beefy goodness with a touch of smoky char and subtle hints of garlic and butter.
Visual Appeal: Gorgeous caramelized crust with bursts of marbling that promise deliciousness in every slice.
Skill Level Needed: Intermediate, ideal for those familiar with basic cooking techniques seeking to refine searing skills.
Special Equipment: A cast-iron skillet or grill enhances flavor with its even heat distribution and superior searing capabilities.
Recipe Overview
Difficulty Level: Moderate due to the focus on perfect timing and heat control to achieve the desired sear and doneness.
Category: Main course; ideally suited for dinner.
Cuisine: Rooted in American tradition, showcasing hearty, rustic flavors with an emphasis on quality beef.
Cost: Moderate, primarily due to the quality of the beef cut, balanced by simple, accessible additional ingredients.
Season: Best in cooler months when comfort foods reign supreme, although equally delightful year-round for steak enthusiasts.
Occasion: Perfect for special gatherings, romantic dinners, or a luxurious treat for yourself.
Why You’ll Love This Recipe
The ribeye steak’s taste is unparalleled due to its marbled fat, which melts during cooking, imparting a juicy, beefy flavor. The contrast between the seared crust and tender interior enhances the eating experience. Conveniently, this recipe requires minimal effort but yields maximum satisfaction. Seasoning is straightforward, complementing the meat without overshadowing its natural flavor.
With its high protein content and moderate fat levels, this steak offers nutritional benefits while keeping you satiated. The relatively quick cooking time makes it an excellent choice for an impressive, hassle-free meal when entertaining. Its luxurious taste paired with a simple salad or mashed potatoes creates a full meal without complexity.
Ribeye offers both cost-effectiveness and accessibility: while the cut is premium, the straightforward recipe doesn’t demand extravagant ingredients. Easy to find in most grocery stores, ribeye strikes a balance between indulgence and approachability, making it a staple in both casual and formal menus.
Historical Background and Cultural Significance
Ribeye steak, a prime cut from the beef rib section, is celebrated for its marbling and flavor. Originating from the traditional butchery practices, ribeye has become synonymous with luxury and indulgence in American cuisine. Over the years, its preparation has evolved from simple grilling to various culinary techniques ensuring tenderness.
This cut holds cultural importance as a centerpiece in many family get-togethers, backyard barbecues, and upscale dinners. Each region has its take, with some opting for dry rubs while others love a classic marinade. The ribeye is integral to regional cuisines across the globe, with each culture adding its unique footprint to this classic dish.
Ingredient Deep Dive
The ribeye steak, prized for its marbled composition, ensures both flavor and tenderness. This cut is often associated with celebrations and indulgence due to its robust taste. Nutritionally, it is a powerhouse of protein and essential nutrients. When selecting ribeye, look for rich marbling and a bright, fresh color to ensure quality.
Store your ribeye in the coldest part of your refrigerator or freeze for longer shelf life. If substitutions are needed, similar fatty cuts like sirloin can suffice. However, nothing truly replaces the juicy, tender experience of a genuine ribeye steak.
Common Mistakes to Avoid
Avoid over-seasoning the steak. Let the meat’s natural flavors shine.
Don’t skip resting the steak post-cooking; this step redistributes juices.
Ensure the skillet or grill is hot to achieve a proper sear and crust.
Use a meat thermometer for accurate doneness rather than guessing.
Allow your steak to reach room temperature before cooking to ensure even cooking.
Essential Techniques
Mastering the art of searing is crucial for ribeye. A hot skillet ensures a perfect crust and locks in juices, creating a rich, savory exterior. Understanding internal temperatures with a digital thermometer allows precise doneness, ensuring the meat is neither undercooked nor overdone.
Letting the steak rest before cutting allows muscle fibers to relax and juices to redistribute, creating a more succulent bite. Focus on these techniques for a consistently perfect ribeye experience.
Pro Tips for Perfect Ribeye Steak
– Allow your steak to reach room temperature before cooking for uniform results.
– Use clarified butter for high-heat cooking without burning.
– Avoid flipping the steak multiple times; one good sear on each side is ideal.
– Allow the juices to redistribute by letting the steak rest before slicing.
– Enhance flavor by finishing the steak with garlic butter or herb-infused oil.
Variations and Adaptations
Regional variations emerge from different seasoning approaches. In Texas, a smoky, spicy rub may be preferred, whereas in France, a wine-based sauce might accompany ribeye. Seasonal adaptations include using fresh herbs in summer or hearty root vegetables in winter. For dietary needs, leaner cuts can replace ribeye, but with slight flavor compromise.
Serving and Presentation Guide
Plating is key to enhancing ribeye’s appeal. Slice the steak diagonally while ensuring even portions. Add a pat of herb butter on top for an elegant touch, alongside vibrant vegetables or a simple salad. Traditional accompaniments include baked potatoes, but modern trends suggest pairing with grilled asparagus or sautéed mushrooms.
Wine and Beverage Pairing
A robust red wine, such as a Cabernet Sauvignon, complements ribeye’s richness. For non-alcoholic options, consider a sparkling water infused with lemon or ginger. During cooler months, a hot tea with subtle spice notes could elevate the dish’s comfort factor.
Storage and Shelf Life
Store cooked ribeye in an airtight container in the fridge for up to 3 days. Reheat gently to avoid overcooking, using low oven heat or a covered skillet. For extended storage, freeze the steak for up to three months, ensuring it’s tightly wrapped to prevent freezer burn.
Make Ahead Strategies
Marinate the steak a day ahead to enhance flavor. Let it reach room temperature before cooking for best results. Store delicate side ingredients separately to maintain their integrity, adding them fresh when assembling the final dish.
Scaling Instructions
Adjust the ribeye portions depending on your guest count. Halve the recipe for intimate settings, or increase it for larger groups by using a grill or larger skillet. Time adjustments might be necessary when cooking multiple steaks concurrently to ensure even cooking.
Nutritional Deep Dive
Ribeye steak boasts a high protein content, along with essential vitamins such as B12 and iron. The fat provides flavor and satiety, important for balanced meals. To maintain a healthy diet, consider pairing the steak with fiber-rich sides to aid digestion and provide a balanced macro breakdown.
Dietary Adaptations
For a gluten-free meal, ensure all seasonings and sides meet dietary requirements. Lean cuts like sirloin can replace ribeye for lower-fat, cholesterol-friendly options. Vegetarian versions could involve using portobello mushrooms as a steak alternative, offering a similar experience with different flavor profiles.
Troubleshooting Guide
For texture issues like toughness, adjust resting time or slice thinner. For flavor imbalance, ensure even seasoning distribution. Temperature problems may arise with equipment calibration; always preheat thoroughly for best results, and calibrate thermometers regularly.
Recipe Success Stories
Many home cooks cherish the ribeye steak for its simplicity and ability to impress. Readers often share variations including marinated versions or adaptations with unique spice mixes. Photography tips suggest natural lighting and featuring cross-section shots to display its succulent center.
Frequently Asked Questions
What is the best way to season ribeye steak?
Simple seasoning with salt and pepper is usually sufficient. To enhance flavor, one may add garlic powder or fresh herbs like rosemary or thyme after cooking.
How do you know when a ribeye steak is done?
Using a meat thermometer is most accurate; for medium-rare, aim for an internal temperature of 135°F (57°C), letting it rest to reach 145°F (63°C). Visual checks can also work, but calibration is key.
Additional Resources
Explore related recipes like pan-seared filet mignon or grilled New York strip steak for additional culinary inspiration. Access technique guides on perfect searing methods and internal temperature tips. Utilize equipment recommendations for professional results, enhancing your kitchen endeavors.
Join the Conversation
Join our foodie community to discuss ribeye variations, share your culinary triumphs, and discover what others are creating in their kitchens. Follow us on social media for the latest recipes, photography tips, and steak inspiration. Engage with fellow enthusiasts to expand your cooking horizons and share your ribeye success stories.
The Recipe
Perfect Ribeye Steak
Serves: 2
Prep Time: 10 mins
Cook Time: 15 mins
Total Time: 25 mins
Kitchen Equipment Needed
Cast-iron skillet or grill
Meat thermometer
Kitchen tongs
Cutting board
Chef’s knife
Ingredients
2 ribeye steaks, about 1-inch thick
Salt and pepper to taste
1 tablespoon olive oil
2 cloves garlic, minced
2 tablespoons butter
Fresh rosemary or thyme (optional)
Directions
Remove the ribeye steaks from the refrigerator and allow them to come to room temperature.
Preheat a cast-iron skillet over high heat and add olive oil.
Season the steaks generously with salt and pepper on both sides.
Place the steaks in the hot skillet and sear for 3-4 minutes per side, achieving a golden-brown crust.
Add butter and minced garlic to the pan, basting the steaks as they finish cooking.
For desired doneness, use a meat thermometer to check the internal temperature.
Remove the steaks and let them rest on a cutting board for 5-10 minutes.
Slice and serve with fresh herbs, if using.
Recipe Notes
For extra flavor, marinate the steaks beforehand with herbs and olive oil.
Adjust seasonings to your preference, including spicy rubs or smoky seasonings.
Zesty Spicy Mango Steak and Shrimp Alfredo Recipe Delight
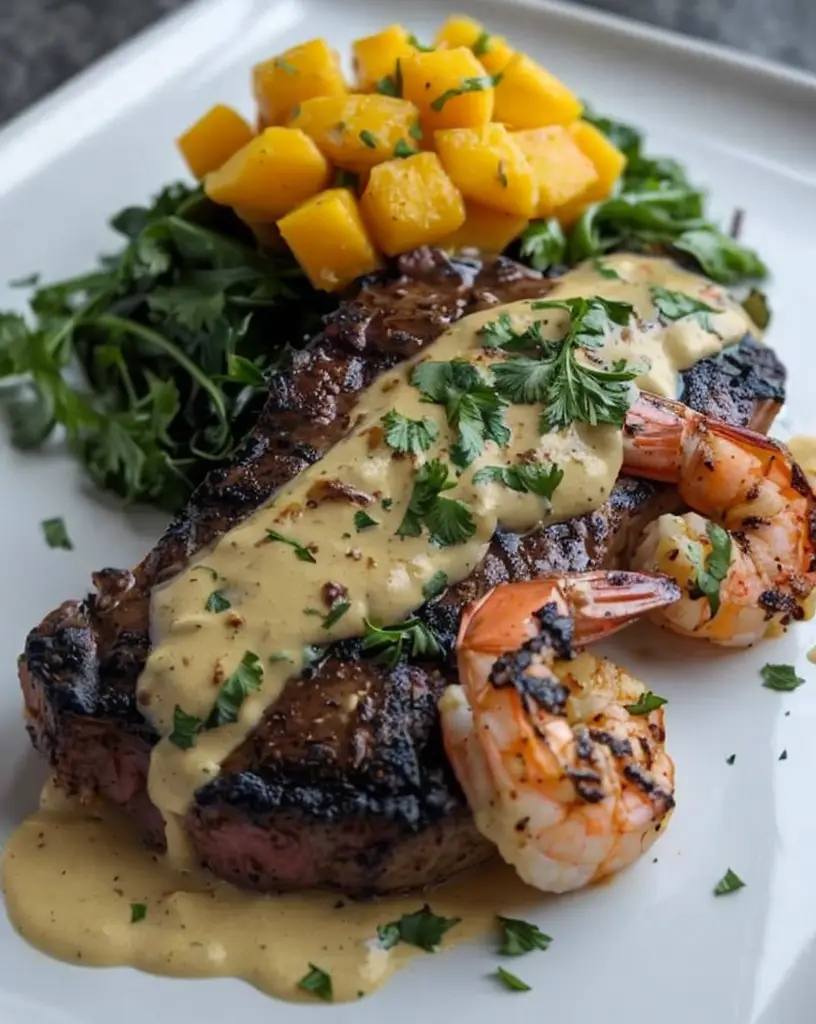
Spicy Mango Steak and Shrimp Alfredo: A Fusion of Rich Flavors
⚖️
Difficulty
Medium
⏲️
Prep Time
25 mins
🕒
Cook Time
30 mins
⏱️
Total Time
55 mins
🍽️
Servings
4
Indulge in the vibrant taste of Spicy Mango Steak and Shrimp Alfredo, a perfect blend of savory and sweet with a hint of heat. This dish marries perfectly tender steak, succulent shrimp, and a creamy Alfredo sauce infused with the tropical sweetness of mango. The result is a culinary experience that tantalizes your taste buds with its rich flavors and unique fusion of influences. Perfect for those who love the creamy smoothness of Pasta Alfredo but crave a little extra flair.
Each element of this Spicy Mango Steak and Shrimp Alfredo is carefully balanced for maximum pleasure. As the steak sizzles and the shrimp turns pink, the aroma is simply irresistible. The creaminess of the Alfredo sauce, combined with the unexpected zing from the mango and spices, ensures a dish that is both comforting and exciting. Ideal for special occasions or just a delightful family dinner.
If you’re looking to impress with a dish that stands out for its flavor and creativity, this Spicy Mango Steak and Shrimp Alfredo checks all the boxes. Rich in taste, contrasting textures, and vibrant colors make this dish a feast for the senses. Easy enough for a midweek meal yet impressive enough for a dinner party, it encapsulates the joy of cooking with bold ingredients that tell a story of culinary innovation.
Quick Recipe Highlights
Flavor Profile: This dish skillfully blends the sweetness of mango with spicy undertones, enveloped in a creamy and rich Alfredo sauce.
Texture: The perfect combination of silky pasta, juicy steak, and tender shrimp creates a diverse yet harmonious mouthfeel.
Aroma: Experience the tantalizing fragrance of grilled steak and shrimp, mixed with garlicky Alfredo and tropical mango.
Visual Appeal: A vibrant ensemble of golden shrimp, pink steak, and creamy pasta highlighted by specks of fresh herbs.
Skill Level Needed: Suitable for home cooks with moderate experience, the recipe involves stovetop and pan-searing techniques.
Special Equipment: A cast-iron skillet or grill pan and a large pasta pot ensure an even cooked, flavorful dish.
Recipe Overview
Difficulty Level: While this recipe includes multiple steps, its simplicity lies in its straightforward techniques and richly rewarding flavors.
Category: This dish falls under hearty main courses, perfect for family meals or elegant dinner parties.
Cuisine: An inventive fusion drawing inspiration from Italian and Caribbean flavors, creating a unique culinary experience.
Cost: Moderate cost given quality steak and shrimp, though well worth the investment for the entire dining experience.
Season: Best enjoyed during summer months when mangoes are in season, providing the freshest and most vibrant flavor.
Occasion: Ideal for special dinners, celebrating occasions, or whenever you need a gourmet treat to elevate your meal.
Why You’ll Love This Recipe
The taste and texture of the Spicy Mango Steak and Shrimp Alfredo offer a delightful twist on the traditional Alfredo experience. The interplay of creamy sauce with juicy meat and the unexpected spice provides an exciting zing that keeps each bite compelling. It’s a fresh approach to a comforting classic that doesn’t shy from bold tastes and exciting textures.
Convenience is another key appeal of this recipe. While impressive on the plate, it doesn’t demand extensive time commitments or complex techniques. With a few key steps, you can create an amazing dish that will leave everyone asking for seconds. It’s a meal that brings restaurant-style elegance to your home kitchen easily.
When it comes to nutrition, this dish offers a balanced source of proteins and essential vitamins. Herbs and spices not only boost the flavor but enrich the meal’s health profile. Incorporating mango adds not only a delicious sweetness but also a powerful dose of antioxidants and dietary fiber.
As a centerpiece for entertaining, Spicy Mango Steak and Shrimp Alfredo shine thanks to its visual and flavorful impact. It’s an ideal choice for creating joyous, shared dining experiences that foster conversation and delight. Sharing this meal together is a celebration of the art of good cooking and enjoyable food.
Economically, this meal offers an affordable luxury. Although it uses premium ingredients like steak and shrimp, the cost per serving is manageable. Utilize peak-season mangoes and make your own Alfredo sauce to further reduce expenses while maximizing freshness, which means more delicious experiences for fewer dollars.
Historical Background and Cultural Significance
The story of Alfredo sauce dates back to early 20th-century Italy, where it was devised as a simple but luxurious dish—a buttery Parmesan fusion that quickly became a favorite. Introduced to the American palate through restaurateurs, the dish found fertile ground as a popularized variant, welcoming new influences lovingly adapted to suit regional tastes.
Culturally, Alfredo sauce represents a bridge between the traditional richness of Italian cuisine and its modern adaptations. The addition of shrimp and steak adds surf-and-turf elegance, while mango infusion harkens to Caribbean culinary tradition distinguished by its playful use of fruits and spices, resulting in a thoughtful culinary journey.
Over time, adaptations of Alfredo sauce have emerged globally, each making use of local ingredients and tastes. The inclusion of mango and spices in this recipe is a celebration of cultural fusion, offering a testament to the recipe’s capability of adapting and delighting across culinary boundaries.
Regional variations are prevalent across the globe—the base of butter, Parmesan, and cream adapting into countless evolutions. From white wine infusions to the addition of varied spices, the story of Alfredo is one of joyful creativity, celebrated by food enthusiasts who dare to blend the classic with the contemporary.
Ingredient Deep Dive
Mango brings an essential element to this Alfredo variant, both in flavor and cultural resonance. Used globally as a symbol of tropical flavor, mango pairs beautifully with seafood and spice, offering a fibrous texture and sweet contrast to spicy elements, while complementing creamy sauces with its refreshing note.
In nutritional terms, mangos are packed with vitamins A and C, providing an antioxidant boost and dietary fiber. Select ripe yet firm mangoes for optimum texture and sweetness. Store them at room temperature until ripened, then refrigerate for longevity. In a pinch, substitute fresh mango with ripe peaches or nectarines.
Shrimp serves as the surf in this dish, its tender juiciness offering a counterbalance to the rich sauce. Light yet filling, shrimp is a versatile ingredient with a global culinary history. It symbolizes tradition in many coastal cuisines—its adaptability allowing it to shine in spicy and creamy contexts alike.
Nutritionally, shrimp is low in calories and rich in protein, adding a lean element to the dish. When selecting shrimp, look for firm, moist shells and avoid any fishy odors. Store them refrigerated and use promptly. If needed, prawns offer a dependable substitute—though with a slightly sweeter and firmer bite.
Common Mistakes to Avoid
Overcooking the steak or shrimp is a common mishap. Timing is key to retain tenderness, so always adhere to recipe guidance for optimal results.
Under-seasoning the pasta dish can make the flavor profile less comprehensive. Be sure to taste and adjust with salt, pepper, and spices as needed.
Incorporating mango that is too ripe can result in excess sweetness or mushy texture. Select ones that are slightly firm to achieve the best balance.
Using pre-grated Parmesan brings less savory impact and may cause clumping in the sauce. Opt for fresh grating for the best texture and flavor.
Attempting to prepare all ingredients at once may lead to chaos in the kitchen. Set up a structured mise en place to keep the process smooth.
Overcrowding the pan when cooking steak or shrimp impedes caramelization. Cook in batches to ensure proper browning and flavor development.
Forgetting to rest the steak after cooking results in loss of juices and flavor in the final dish. Allow it to sit before slicing for juicy tenderness.
Ignoring the need to gradually add cheese can lead to a broken sauce. Introduce cheese slowly while stirring to maintain the smooth emulsification.
Alterations to the sauce base without due consideration may result in an imbalanced flavor. Stick to proportions for cream, cheese, and spices.
Neglecting the aromatic elements, such as garlic and herbs, loses the nuanced layers of aroma that contribute vitally to the dish’s appeal.
Essential Techniques
Cooking steak properly is fundamental for this dish. Achieving a perfect sear involves using high heat and minimal handling, allowing a crust to form while keeping the interior juicy. Rest the steak post-cooking to redistribute juices, ensuring rich flavor with every bite.
For shrimp, timing and observation are your best friends. Pink tint and opaque flesh indicate doneness; overcooked shrimp becomes tough—a common pitfall. Combine the shrimp with spices during cooking to allow flavor absorption, enhancing the overall profile.
Creating the Alfredo sauce calls for careful temperature moderation. Constant stirring over gentle heat prevents the sauce from separating, while gradually adding cheese maintains a smooth, silky consistency. Attention to visual cues avoids common pitfalls like clumping or breaking.
Pro Tips for Perfect Spicy Mango Steak and Shrimp Alfredo
For an enhanced experience, marinate the steak in mango puree and spices—this adds another layer of flavor infusion and tenderization. Even a short marinade time can make a notable difference in taste.
Achieve textural variety by using a pasta shape that holds sauce well. Fettuccine or linguine works beautifully, but penne may yield delightful pockets of flavor with each bite. Toss in the still-hot pasta for better absorption and flavor integration.
To heighten mango notes, finish with a fresh mango garnish before serving, offering a fresh bite against the creamy backdrop. A sprinkle of chili flakes further accentuates the spiciness for those who enjoy extra heat.
Create vegetable pairings that complement the dish. Lightly steamed broccoli or a fresh arugula salad invites a satisfying contrast, while a squeeze of lemon heightens bright notes and balances richness.
Adding a dash of white wine to the Alfredo sauce elevates complexity and depth. Its acidity complements the creamy texture, emphasizing subtle cheese nuances and enrobing the pasta luxuriously.
When plating, use contrasting colors to enhance visual allure—think fresh cilantro leaves or a sprinkling of paprika for artistic detail. This simple final tweak transforms the dish into a true feast for the eyes.
Variations and Adaptations
Regional variations can include incorporating local spices or herbs that align with the regional palate. Asian influences could introduce soy sauce or ginger notes for an astonishingly different yet delicious outcome.
For seasonal adaptations, consider using fresh stone fruits like peaches when mangoes are out of season, preserving the sweet undertone amidst pasta’s richness. Peaches retain sweetness while offering a unique textural twist.
Dietary modifications welcome vegetables as protein substitutes. Grilled tofu or portobello mushrooms offer substantial alternatives for vegetarians or those looking to reduce meat intake without compromising satisfaction.
Consider flavor variations by introducing smoked paprika or cayenne pepper for layers of smoky intensity. Conversely, tone down the spiciness with hints of nutmeg or lemon zest for a fresh spin.
Texture modifications can be achieved by incorporating crushed nuts such as almonds or cashews, offering a crunchy contrast to creamy pasta and smooth mango. A garnish of crispy shallots lifts each bite with delightful subtlety.
Presentation alternatives range from serving the Alfredo over a bed of wild rice or cauliflower rice for a grain-free version that highlights unique cross-textural experiences, maintaining vibrancy and intrigue.
Serving and Presentation Guide
For plating, twirl pasta into a neat nest and top with delicately arranged steak slices and shrimp. The elegance of the presentation heightens the anticipation—an artful setup amplifies dining pleasure.
Garnishing with sliced fresh mango and chopped herbs creates a colorful backdrop, hinting at the flavor profile awaiting the diner. The finishing flourish brings together a dish that tastes and looks expertly coordinated.
Traditional accompaniments include warm crusty bread to scoop up the luscious Alfredo sauce and balance the mango’s sweetness. Alternatively, serve alongside a simple leafy salad dressed with vinegar for balance.
For a modern serving suggestion, consider utilizing mango salsa as a topper, introducing familiar flavors under an unexpected guise, maintaining tradition while embracing creativity.
Temperature considerations ensure optimal enjoyment; serve piping hot or warm to fully experience the creamy texture and nuanced taste. Avoid reheating in the microwave to preserve textural integrity.
Portion control tips include serving pasta on smaller plates, which naturally encourages adequate portion awareness without missing indulgence. The dish’s richness means satisfaction often triumphs over volume consumption.
Wine and Beverage Pairing
For wine pairings, a chilled Chardonnay offers a complementary creaminess and a touch of fruitiness, harmonizing beautifully with the sweetness and spice of the dish. A light red such as Pinot Noir can also delight, offering subtle earthiness.
Non-alcoholic alternatives introduce tart citrus juices like grapefruit or an infused mocktail incorporating lime and sugar, echoing the dish’s vibrant notes without overshadowing its complexity.
When considering coffee or tea pairings, a light herbal tea provides a refreshing finish—a mint or ginger brew neutralizes the palate, promoting a complete and satisfying taste experience without overstimulation.
Temperature considerations recommend serving wine chilled to subtly tame the heat and offer a soothing contrast to the dish’s warmth. Refresh beverages throughout the meal for continual palette cleansing.
For serving suggestions, stemware or elegant tumblers heighten the sophistication of the meal, creating an atmospheric balance encouraging lingering conversation and delighted appreciation among diners.
Storage and Shelf Life
Proper storage of leftovers requires airtight containers, preserving freshness and preventing odor absorption. Quick refrigeration after cooling maintains flavors and textures, prolonging the recipe’s shelf life considerably.
Adhere to temperature requirements—a steady, cold environment is essential, typically below 40°F. Consume fully within 2–3 days to enjoy the vibrant ingredients at their best. Freezing isn’t ideal due to potential texture changes.
Container recommendations include glass or high-quality BPA-free plastic options that maintain a suitable environment for the Alfredo elements. Ensure tight seals avoid encouraging spoilage or drying out.
Signs of spoilage include off odors, separation of sauce components, or shriveling of mango and shrimp textures. Refrain from consuming if any such signs persist.
Reheating instructions prioritize gentle, gradual warming. Preferred methods include stovetop over low-medium heat with occasional stirring, or baking until heated through—generally avoiding microwaves to preserve original texture.
Freezing guidelines recommend freezing only the sauce components minus pasta for longer shelf life and reduced textural impacts. Thaw gently and prepare pasta fresh, integrating once fully warmed.
Make Ahead Strategies
Plan an effective prep timeline by slicing steak and preparing shrimp, as well as keeping the Alfredo sauce ready a day before use. The captured flavors improve overnight, enriching the pasta further.
Storage between steps should prioritize chilling each prepared element separately, ensuring continued freshness before final assembly. This approach maximizes time use without loss of quality or flavor.
Assess the potential impact of quality throughout steps; gradual advancement may even enhance the dish’s harmonious flavors, particularly in marination or sauce integration.
Assembly tips encourage adding pasta to sauce moments before serving to ensure proper absorption, with mango segments added upon serving for textural integrity and burst of freshness.
Reheating guidelines offer tips for gently reheating the steak and sauce elements separately to maintain moisture and performance, avoiding mushy results or hardened textures.
Fresh element additions before serving can reinvigorate flavors, incorporating fresh herbs, spices, or garnishes like lemon zest that freshen the final presentation and overall experience vivaciously.
Scaling Instructions
When halving the recipe, adjust ingredients proportionally, paying particular attention to spices that can overpower due to reduced volume. Check seasoning throughout preparation for balance.
Doubling or tripling is straightforward; however, ensure proper equipment such as larger pans or pots maintain heat distribution and control. Adjustments in cooking time may be necessary to accommodate increased volumes.
Equipment adjustments include using a larger skillet or additional burners, preserving the efficiency of sequential cooking strategy. Avoid overcrowding and maintain gentle handling of ingredients.
Timing modifications should account for larger batches often requiring extended or adjusted cooking durations—favoring gradual sauce building and attentive ingredient integration.
Storage considerations for larger batches advocate portioning that aligns with manageable, single-use volumes. This approach allows for easier, more even reheating and more effective preservation of flavors and texture.
Nutritional Deep Dive
A thorough macro breakdown reveals a balanced dish offering strong sources of protein from steak and shrimp, healthy fats from the Alfredo sauce, and a starchy component from the pasta sustaining energy levels.
Micronutrient analysis reveals key vitamins from mango, rich in vitamin A and C, and the leafy herbs used in the dish. Mangos and shrimp provide potassium, rounding out essential nutrients.
The dish’s health benefits lie in its rich protein content, paired with a moderate carb source and essential fats. Its construction offers a well-rounded nutritional profile for a satisfying meal.
Dietary considerations suggest ensuring moderate portions due to creamy sauce richness, lending itself to enhanced enjoyment while maintaining calorie awareness. Complementary sides balance meal components.
Portion analysis aligns with calculated moderation aspects, suggesting one-quarter of the total made dish per serving for a balanced plate approach, enhancing nutritional harmony without overindulgence.
Weight management tips advocate savoring each bite for total satisfaction while appreciating portion control to encourage balanced intake and promote healthier dining habits as part of a broader meal plan perspective.
Dietary Adaptations
Gluten-free options use corn or rice-based pasta, achieving similar textural results without gluten exposure while maintaining the integrity of sauce and inclusions.
The dish adapts to a dairy-free diet using vegan-friendly cream alternatives and dairy-free Parmesan substitutes. These complement the textures without sacrificing indulgent appeal.
Vegan considerations invite vegetable protein like tofu or tempeh to substitute meat components, retaining the primary flavor characteristics while aligning with plant-based preferences.
Low-carb alternatives could involve swapping pasta for zucchini noodles or spiralized vegetables, lowering carb intake and providing a great complement to the naturally sweet and savory elements offered.
Keto considerations emphasize high-fat content using cream or butter while staying mindful of serving sizes and carb elements, achieving compliance with guidelines harmoniously.
Paleo adaptations incorporate lean protein with additional vegetable companions, allowing enjoyment within outlined dietary structures, while nut-based creams replace traditional sauce elements.
Low-FODMAP variations reduce garlic or onion content, with infused oils or other herbs and spices as effective replacements enhancing flavor without dietary distress.
For other specific diets, adjust particular elements while maintaining the foundational components and flavors—innovate with mindful substitutions aligning with preferences or requirements.
Troubleshooting Guide
Texture issues such as overly thick sauce suggest adding additional liquid such as reserved pasta water or a dash of cream to improve fluidity and provide a smooth creaminess.
Flavor balance problems could result from incorrect seasoning levels—emphasize gradual incorporation of spices, adjusting for taste throughout preparation to ensure a balanced profile.
Temperature problems arise when incorrectly heating components, affecting textures or causing scorching. Favor consistent heat levels and thorough monitoring to safeguard quality throughout.
Equipment challenges from inappropriate tools influence cooking times or outcomes. Ensure suitable selections supporting task expectations, facilitating a controlled preparation environment.
Ingredients substitutions require careful consideration, ensuring that changes harmonize rather than conflict with the dish’s intended balance and complexity of flavor.
Timing concerns could impact texture and doneness. Plan efficiently to complement the cooperative nature of cooking steps, ensuring aligned cooking times and peak doneness consistency.
Recipe Success Stories
Community feedback heralds the Spicy Mango Steak and Shrimp Alfredo as a triumph of taste—users celebrate its simplicity and impactful flavor, generating interest and acclaim from peers.
Variation successes highlight wholesome inclusions like fresh vegetables and alternative pastas, contributing to a customized experience while preserving the core delight of the dish.
Adaptation stories detailing various dietary integration reveal the dish’s versatility, opening avenues for diverse consumption experiences—a tale of adaptability catering to individual preferences seamlessly.
Reader suggestions inspire creativity, prompting unique takes infusing personal twists into the classic preparation, creating interesting dialogues within the community fostering mutual appreciation.
Photography tips enrich engagement, promoting a sharing environment that highlights artistic angles, elegant lighting, and presentation invitations that capture the delightful essence of the dish.
Frequently Asked Questions
Can I make this dish ahead of time?
Yes, you can prepare the sauce and marinate the steak a day ahead. Store each component in separate airtight containers to maintain freshness and flavor.
What type of pasta should I use?
Fettuccine or linguine works best as they hold the sauce well. However, penne or rigatoni can also be used for added texture and sauce retention.
How do I store leftovers?
Store leftovers in an airtight container in the refrigerator. Consume within 2–3 days to ensure maximum freshness. Avoid freezing for best texture results.
Can I adjust the spiciness?
Absolutely. Simply reduce or increase the quantity of chili flakes or other spices to align with your taste preference, creating the heat level you enjoy most.
What’s an alternative to fresh mango?
Ripe peaches or nectarines offer a similar sweet profile that complements the dish’s flavors effectively, providing a great standby in mango’s absence.
Can this be made dairy-free?
Yes, use plant-based cream and cheese alternatives for a dairy-free version that maintains the creamy Alfredo texture and delightful taste.
How do I prevent the sauce from breaking?
Gradually add grated cheese while continuously stirring over low heat to achieve a smooth sauce. Excessive heat can cause separation, so slow and steady adjustments are key.
What wine pairs well with this dish?
A chilled Chardonnay complements the creamy texture well, while a light, bright red such as a Pinot Noir offers subtle, elegant earthiness.
Can I omit the steak?
Omit the steak and double the shrimp quantity for an equally delicious variation. Alternatively, incorporate a vegetarian protein like portobello mushrooms.
Is there a specific type of mango to use?
Alphonso or Ataulfo mangoes are preferable for their sweetness and creamy texture, but any ripe mango that isn’t too ripe will work just as well.
How can I make this low-carb?
Substitute traditional pasta with zoodles or spiralized squash, without compromising flavor for a reduced carb intake while enjoying the essentials.
What is the best way to reheat the pasta?
Reheat gently over a stovetop on low, stirring regularly or in an oven to avoid overheating that can affect the texture adversely with unwanted changes.
Additional Resources
Explore related recipes to deepen your culinary repertoire with options that showcase creative pasta dishes or mango-infused delights. Each provides unique pairing opportunities for more satisfying meal plans.
Technique guides enrich your cooking skills, covering vital methods like searing, sauce consistency, and innovative pairings that pave the way for successful culinary endeavors.
Ingredient information broadens knowledge on the utilized delicacies, highlighting nutritional breakdowns, benefits, and culinary uses that ignite passion for creative discovery with repeatedly joyful results.
Equipment recommendations enhance your kitchen environment with selections that support the ideal execution of classics while offering tools for inventive spins on beloved favorites.
Seasonal variations feature expert input and insight on how to best approach evolving tastes throughout the year, encouraging menu adaptations that stimulate year-round enthusiasm for food.
Join the Conversation
Share your own experiences preparing Spicy Mango Steak and Shrimp Alfredo, engaging with a community that’s passionate about culinary discovery. Every shared recipe reveals new perspectives and kitchen stories.
Capture your creations through photography, detailing the journey with tips from lighting techniques to plating design, creating a visual narrative that speaks to aesthetics and taste equally.
Review your preparation process, noting favorite flavor highlights or methodology preferences. Each review fosters mutual understanding and offers inspiration to fellow enthusiasts echoing similar passions.
Respond to reader suggestions by contributing creative twists or alternative ingredient insights, encouraging exploration and ingenuity that extends far beyond single interpretations of the dish.
Engage through social media, extending sharing opportunities across platforms to deepen culinary connections, excite audiences, and bond over a genuine appreciation for the diverse world of food preparation and enjoyment.
The Recipe
Spicy Mango Steak and Shrimp Alfredo
Serves: 4
Prep Time: 25 mins
Cook Time: 30 mins
Total Time: 55 mins
Kitchen Equipment Needed
Cast-iron skillet or grill pan
Large pasta pot
Sharp knife
Cutting board
Tongs
Medium saucepan
Ingredients
1 lb sirloin steak, seasoned with salt and pepper
12 oz shrimp, peeled and deveined
8 oz fettuccine
1 ripe mango, diced
1 cup heavy cream
1/2 cup Parmesan cheese, grated
2 cloves garlic, minced
1 tsp red pepper flakes
Salt and pepper to taste
2 tbsp olive oil
Fresh cilantro, chopped for garnish
Directions
Bring a large pot of salted water to boil and cook fettuccine according to package instructions. Drain and set aside.
Heat olive oil in a cast-iron skillet over medium-high heat. Sear the seasoned steak for 4–5 minutes on each side until desired doneness. Let rest before slicing.
In the same skillet, add shrimp and cook until pink and opaque. Remove from heat.
In a medium saucepan, heat cream over low heat. Stir in grated Parmesan and minced garlic, whisking until cheese melts and sauce is smooth.
Combine fettuccine and sauce, stirring to coat pasta evenly with Alfredo sauce. Add diced mango, cooked shrimp, and sliced steak.
Top with red pepper flakes and chopped cilantro. Serve immediately, enjoying the fusion of spicy, sweet, and creamy flavors.
Recipe Notes
Substitute mango with peach if desired.
Adjust chili levels for a milder version.
Use gluten-free pasta for a gluten-free dish.
Ultimate Crispy Two-Cheese Potato Gratin Recipe for Cheese Lovers
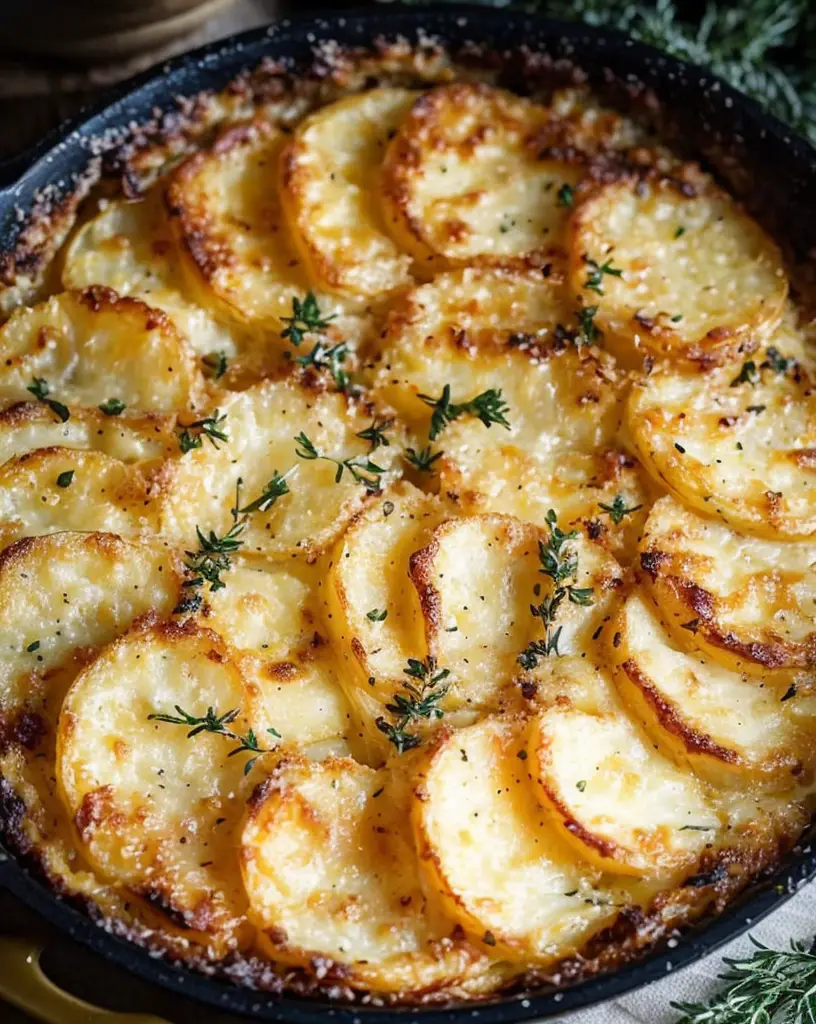
Crispy Two-Cheese Potato Gratin: A Perfect Cheesy Delight
⚖️
Difficulty
Easy
⏲️
Prep Time
20 mins
🕒
Cook Time
45 mins
⏱️
Total Time
65 mins
🍽️
Servings
6
When it comes to comfort food, nothing beats a warm, cheesy dish straight from the oven. This Crispy Two-Cheese Potato Gratin is a delightful masterpiece that brings together creamy and crispy elements in one sumptuous bite. Imagine the rich aroma of cheddar and Gruyère cheese bubbling to perfection, enveloping thinly sliced potatoes. The golden crust on top adds that extra layer of indulgence, making it a must-try dish for any gathering.
If you’re looking to impress your guests or simply craving something decadent, this potato gratin is your answer. The combination of two types of cheese creates a nuanced flavor profile, offering both sharpness and creaminess. The silky texture of the potatoes perfectly complements the crispy cheese topping, while the subtle infusion of garlic and herbs delivers a savory kick. This dish not only captivates the palate but also delights the senses with its enticing aroma and beautifully layered appearance.
Quick Recipe Highlights
Flavor Profile: A harmonious blend of sharp cheddar and nutty Gruyère enhances the natural earthiness of potatoes, while subtle garlic notes add depth.
Texture: Creamy and tender potato layers contrasted with a crispy, golden cheese crust offer a delightful mouthfeel.
Aroma: Rich, cheesy aromas wafting from the oven, combined with hints of garlic and herbs, create an inviting and mouthwatering experience.
Visual Appeal: Vibrant layers of golden cheese atop perfectly sliced potatoes bring an elegant touch to any table setting.
Skill Level Needed: Simple slicing and layering techniques make this recipe accessible to cooks at all skill levels.
Special Equipment: A mandoline slicer ensures uniform potato slices, while a baking dish provides even cooking.
Recipe Overview
Difficulty Level: This recipe is straightforward, relying on simple techniques like slicing and layering. Beginners will find it as approachable as it is satisfying.
Category: Perfect as a side dish, this potato gratin complements any main course with its creamy richness.
Cuisine: Rooted in French culinary tradition, this dish incorporates classic gratin techniques with a comforting twist.
Cost: Affordable with staple ingredients, making it budget-friendly without compromising on taste or elegance.
Season: Best enjoyed year-round but especially inviting during cool autumn and winter months when hearty dishes are in demand.
Occasion: Ideal for festive gatherings, holiday dinners, or any special occasion needing a crowd-pleasing side.
Why You’ll Love This Recipe
One of the most compelling aspects of this Crispy Two-Cheese Potato Gratin is its irresistible combination of flavors and textures. The melding of sharp cheddar and creamy Gruyère against the backdrop of tender potatoes creates a taste that is both comforting and sophisticated. Each bite offers a melty, cheesy sensation, highlighting the dish’s savory and nutty qualities. Furthermore, the satisfaction of breaking through the crunchy topping enhances the overall eating experience, leaving every cheese lover enchanted.
Convenience is another key factor in why this recipe shines. With minimal prep and straightforward cooking steps, it allows both novice and seasoned cooks to achieve a gourmet result without stress. The use of a mandoline slicer makes slicing potatoes quick and consistent, ensuring even cooking. Additionally, the gratin can be assembled in advance, making it an excellent choice for busy hosts or weeknight dinners when time is limited but quality and taste are a priority.
Nutritionally, potatoes provide an excellent source of vitamins and minerals, notably vitamin C and potassium. Cheese adds not only divine flavor but also offers protein and calcium, making this dish a delicious way to include some essential nutrients in your meal. While indulgent, the balanced ingredients ensure you can enjoy each serving knowing there’s nutritional value tucked into every cheesy layer.
For social situations, this potato gratin proves to be a unifying dish that pleases a variety of palates. Whether it’s a holiday feast or a casual family gathering, its robust flavors and enticing presentation invite compliments and second helpings. It serves as a reliable side that pairs well with most proteins—from roast chicken to hearty steaks—making it versatile for any dining scenario.
Cost-effectiveness is also noteworthy. By leveraging everyday ingredients like potatoes and cheddar cheese, this recipe offers sophistication without breaking the bank. Even the addition of Gruyère for its distinctive nuance doesn’t significantly impact the budget, making it an accessible luxury. The ingredients are easily found in most grocery stores, providing an uncomplicated yet gourmet dish available to everyone.
Historical Background and Cultural Significance
The origins of the potato gratin trace back to French culinary traditions, where “gratin” means crust or skin, commonly achieved through baking dishes with breadcrumbs, cheese, or both. This method has been celebrated in France for centuries and was initially utilized to transform humble ingredients into rich, sustaining meals, marking it as both an economical and delightful cooking technique.
In France, regional variations of gratin abound. Often associated with the Dauphiné region, gratin dauphinois is closely related to this dish but traditionally does not include cheese, relying more on cream and garlic for its luscious sauce. The addition of cheese to the gratin unites these French traditions with the beloved culinary practice of using cheese to enhance and elevate simple ingredients, leading to a richer version embraced by cheese lovers.
Over time, this dish has transcended borders, with each culture adding its individual twist. In the United States and beyond, the incorporation of various cheeses and additional ingredients such as bacon or onions have become popular adaptations. Despite these changes, the core of gratin—thinly sliced potatoes baked with cream or milk—remains a testament to its classical roots.
Today, the potato gratin stands as a versatile dish that continues to evolve, influenced by local customs and palates. Its enduring appeal is a testament to its balance of simplicity and indulgence, offering a dish that remains both familiar and dynamic, shaped by history yet infinitely adaptable to modern tastes and preferences.
Ingredient Deep Dive
**Potatoes:**
As the foundation of this gratin, potatoes bring a wealth of cultural and culinary significance. Historically a staple in many diets worldwide, potatoes are praised for their versatility and availability. Rich in vitamins C and B6, potassium, and fiber, they are both nutritious and filling, providing the bulk of this delectable dish. When selecting, look for firm, smooth potatoes free from sprouting or green spots to ensure good quality and taste. Store them in a cool, dry place away from sunlight to prolong their freshness and flavor. If necessary, substitute with sweet potatoes for a different yet delicious twist.
**Cheddar Cheese:**
Cheddar’s sharp and tangy profile makes it a natural fit for gratins, contributing both richness and depth. Originating in England and celebrated globally, cheddar is a remarkably versatile cheese. With considerable calcium and protein, it provides both flavor and nutritional benefits. Freshly grated cheese yields the best melt, creating that signature gooey layer. Choose a mature variety for more intense flavor, and store it in the refrigerator, tightly wrapped, to maintain freshness. For an alternative, try aged gouda for an equally satisfying result.
Common Mistakes to Avoid
Overlapping potato slices can lead to uneven cooking. Ensure slices are thin and evenly distributed.
Skipping pre-grating can result in clumpy cheese layers. Grate fresh for smoother integration.
Not using enough seasoning can make the dish bland. Taste and adjust salt and herbs to preference.
Piling too much cheese can overwhelm the dish. Balance cheese to potatoes for optimal texture.
Baking at too low a temperature may lead to undercooked potatoes. Follow the suggested temperature for best results.
Setting oven racks improperly can affect browning. Position racks in the center for even heat distribution.
Insufficient greasing of baking dish can cause sticking. Coat with butter or cooking spray beforehand.
Overbaking can cause dried edges. Check for doneness around suggested cooking time to prevent this.
Cutting immediately after baking can cause it to fall apart. Let it rest to firm up before serving.
Skipping testing for doneness can leave potatoes undercooked. Insert a fork to ensure they are tender.
Essential Techniques
**Slicing Potatoes:**
Slicing potatoes thinly is pivotal to achieving the gratin’s tender layers and requires careful technique. A mandoline slicer is invaluable here, providing uniform slices that cook evenly. Ensure safety by using a hand guard to protect fingers, and aim for consistent thickness for perfect stacking. This precision not only aids cooking but also enhances the dish’s visual appeal.
**Layering:**
Layering is both an art and essential to distributing flavors evenly throughout the gratin. To master this, alternate layers of potatoes evenly with cheese and seasoning. This creates balance and allows flavors to meld seamlessly. Avoid overly thick layers to facilitate even cooking, and consider seasoning lightly with each layer to build depth without overpowering.
Pro Tips for Perfect Crispy Two-Cheese Potato Gratin
1. **Use Waxy Potatoes**: For the best texture, opt for waxy potatoes like Yukon Gold. They hold their shape better in the oven, ensuring a firm, sliceable dish.
2. **Cheese Combination**: Don’t shy away from experimenting with cheese combinations. Adding a bit of Parmesan to the cheese mix can intensify flavor and enhance browning.
3. **Infusion Technique**: Infuse cream with herbs like rosemary or thyme before layering to enrich the flavor subtly without overwhelming the dish.
4. **Uniform Slices**: Aim for potato slices no thicker than 1/8 inch. Uniformity ensures even cooking and a harmonious blend of textures.
5. **Prevent Browning with Foil**: Cover the gratin with foil initially during baking to prevent over-browning. Remove in the last 15 minutes to achieve that golden, crispy top.
6. **Rest before Serving**: Allowing the gratin to rest for a few minutes before serving lets it set, aiding in neat portions and enhancing its rich flavors.
Variations and Adaptations
**Regional Variations:**
In different regions, potato gratin is customized using local ingredients. In Italy, additional herbs like parsley or oregano might be included, while Swiss variations often incorporate Emmental cheese, adding a sweeter, more nutty layer.
**Seasonal Adaptations:**
Adapting this gratin to the season can heighten its appeal. In spring, try incorporating fresh garlic or ramps for a verdant twist. Winter offers the opportunity to enrich with root vegetables like parsnips or carrots for a hearty and colorful take.
**Dietary Modifications:**
For a vegan option, swap out dairy cheese with a nut-based cheese and use almond or soy milk. Gluten-free breadcrumbs can ensure crispness without gluten.
**Flavor Variations:**
Complement or replace Gruyère with blue cheese or brie for an intense flavor profile. Adding caramelized onions or leeks can introduce a sweet, earthy balance.
**Texture Modifications:**
For a fluffier texture, incorporate a beaten egg into the milk mixture before baking. This adds an airy element that lightens the dish’s classic heaviness.
**Presentation Alternatives:**
Individual gratin servings, baked in ramekins, can offer an elegant, personal dining experience. This is particularly appealing for dinner parties or intimate gatherings.
Serving and Presentation Guide
Plating techniques for a stellar presentation begin with using a sharp knife to cut even squares of gratin, ensuring clean edges. For added sophistication, garnish with freshly chopped chives or parsley to brighten the dish visually and flavor-wise.
Traditional accompaniments include a side of roasted vegetables or a fresh, crisp salad, both of which balance the richness of the gratin with light, refreshing notes. For modern flair, consider serving with a vinegary slaw or pickled radishes to add a complementary tang.
Temperature considerations are crucial for maintaining the gratin’s appeal. Serve warm to ensure the cheeses are melted and gooey, which intensifies the dish’s comfort factor. When it comes to portion control, consider the richness; a small serving often suffices, allowing the gratin to shine without overwhelming other dish components at the meal.
Wine and Beverage Pairing
Pairing wine with this gratin can elevate the dining experience. A medium-bodied white wine such as Chardonnay complements the creamy cheese while cutting through the richness, highlighting the dish’s complexity. For red wine enthusiasts, a light Pinot Noir offers an ideal balance, with its fruity notes highlighting the potato’s earthiness.
If you prefer non-alcoholic options, consider a robust oolong tea. Its rich brew mirrors the gratin’s depth, adding layers to the meal without overpowering the flavors. Or choose a refreshing sparkling water with a lemon slice to cleanse and refresh the palate between bites.
For those who enjoy coffee or tea with their meal, a smooth black coffee or lightly infused herbal tea, such as chamomile or sage, pairs well, enhancing the gratin’s natural herbal notes without introducing bitterness.
Seasonal beverages also have their charm. In colder months, a savory hot cider can complement perfectly, while light lemon or basil-infused water can be ideal in warmer seasons, providing refreshment alongside the gratin.
Storage and Shelf Life
For optimal storage, allow the gratin to cool to room temperature before transferring to an airtight container. This prevents condensation, which can make the dish soggy. Refrigerate for up to three days; the flavors often meld and deepen over this period, enhancing each subsequent serving.
When reheating, do so gently in an oven preheated to 350°F (175°C) for 15-20 minutes, which revives the crisp top and heats through without drying out the potatoes. A microwave works for convenience, though it may soften the crisp layers.
If freezing, do so before baking. Assemble the dish, cover it tightly with foil, and store it in a freezer-safe container for up to one month. Thaw overnight in the refrigerator before baking as instructed. Signs of spoilage include an off smell, discoloration, or excessive liquid in the dish.
Make Ahead Strategies
Planning to assemble the gratin ahead? Perfect! Prepare the dish up to the baking step, cover, and store in the refrigerator for up to 24 hours. This allows you to enjoy your time with guests while the gratin bakes to perfection just before serving.
Between preparation and baking, ensure potatoes are fully submerged in the cream mixture to avoid oxidation and discoloration. If necessary, overlay with parchment directly on the potatoes before covering to maintain color and texture.
To retain peak freshness, reheat without compromising quality by using an oven rather than a microwave. This ensures the top retains its hallmark crispiness, and infusing freshly grated cheese on top before reheating can refresh its look and taste alike.
Scaling Instructions
To easily halve the recipe, reduce all ingredients proportionally; this includes minimizing the baking dish size to avoid a thin, overcooked layer. Great for intimate dinners or smaller households, and keeps proportions consistent.
Doubling or tripling the recipe requires paying close attention to oven space and cooking times. Large batches may need longer cooking to achieve consistent results, particularly for the golden crust. Utilize multiple smaller dishes if necessary to maintain oven circulation.
Equipment adjustments often correlate with scaling: ensure you have sufficiently large mixing bowls and baking dishes, and a food processor can assist with larger quantities of cheese. Consider storage carefully when increasing recipe size, ensuring sufficient refrigerator or freezer space.
Nutritional Deep Dive
With a macro breakdown rooted in its main ingredients, each serving provides considerable carbohydrates primarily from potatoes, supplemented by protein and fats from the cheese. Potassium and vitamin C are notable micronutrients from the potatoes, while calcium and vitamin D are prominent in the cheese, beneficial for overall health.
Health benefits extend to its comforting and satisfying nature, curbing cravings with nutrient-dense qualities rather than empty calories. For those focused on weight management, portion control is advisable given its caloric density afforded by the cheeses.
In terms of dietary considerations, monitor portions if on specialized diets like low-fat or keto, as this dish leans heavily on dairy fats. Balancing with a portion of lean protein or high-fiber vegetables can create a more well-rounded meal.
Dietary Adaptations
**Gluten-free:**
Naturally gluten-free without breadcrumbs, this gratin is suitable for celiac-friendly dining. Use gluten-free flour for thickening cream if needed.
**Dairy-free:**
For a dairy-free variant, replace milk and cheese with almond milk or oat milk and use a vegan cheese blend that melts well, such as those made from cashews.
**Vegan:**
In addition to dairy substitutes, use nutritional yeast for umami flavor and additional cheeselike complexity. Coconut cream can substitute heavy cream to maintain creaminess.
**Low-carb:**
Creating a low-carb version involves replacing potatoes with thinly sliced zucchini or cauliflower for a similar texture with a fraction of the carbs.
**Keto:**
A keto adaptation keeps carbs in check while increasing fats. Replace potatoes with cauliflower or turnip, ensuring high-fat dairy cheese consistency.
**Paleo:**
Ensure compliance by substituting regular cheese with Paleo-friendly nut-based cheeses, and swap potatoes with sweet potatoes or squash for a delightful alternative.
**Low-FODMAP:**
Reduce ingredients such as onions and garlic powder which are high in FODMAPs, replacing them with garlic-infused oil to maintain flavors without digestive discomfort.
Troubleshooting Guide
**Texture Issues:**
If the gratin is too dry, check oven temperature and duration. Slow, even cooking prevents moisture loss. Adding more cheese on top can restore moistness without altering internal layers.
**Flavor Balance:**
For blandness, ensure each layer is seasoned. Tasting cheese before use helps to anticipate necessary salt adjustments, maintaining the desired punchy flavor.
**Temperature Problems:**
An under-set center often results from opening the oven mid-bake. Keep the door closed, utilizing internal thermometers or visual checks when nearing completion.
**Equipment Challenges:**
Utilizing proper equipment ensures more reliable results. If lacking a mandoline, carefully slice by hand to mimic uniformity. An oven thermometer can assist in verifying heat.
**Ingredient Substitutions:**
Adjust ratios if substitutions change moisture levels. For example, flavorful additions like ham necessitate additional cream to maintain balance without dryness.
**Timing Concerns:**
Sticking strictly to timeframe works best for small batches. Larger portions might need longer cooking times, particularly in crowded ovens—adjust and test as necessary.
Recipe Success Stories
**Community Feedback:**
Readers report great success with Gruyère and Parmesan blends, elevating the dish’s nuance while maintaining its beloved cheesiness and ensuring crowd-pleasing results.
**Variation Successes:**
Creative takes encompassing seasonal vegetables such as asparagus prove to be delightful incorporations, offering a symphony of textures that both balance and enhance flavors.
**Adaptation Stories:**
Those adapting for dietary needs discover plant-based approaches, like coconut milk and nutritional yeast, provide a satisfying pale yellow hue and flavor akin to the original.
**Reader Suggestions:**
Enhancements such as truffle oil drizzled subtly on top capture the senses, adding earthy undertones that complement its core components beautifully.
**Photography Tips:**
Success stories often feature golden crisps evocative of snow, a visual feast that works particularly well under natural light, capturing each tempting detail.
Frequently Asked Questions
Can I prepare the potato gratin in advance? Absolutely! Assemble the gratin, cover and refrigerate for up to 24 hours before cooking. This can help meld flavors and save time on cooking day.
What type of potatoes are best for gratin? Yukon Gold potatoes are a great choice due to their waxy nature, which helps them hold their shape during baking, offering a smooth, butter-like texture.
How do I make the gratin crispier? Make sure to use a higher oven temperature during the last few minutes or broil briefly, keeping a close watch to avoid burning.
What cheese substitutes can I use? Feel free to use other melty cheeses like mozzarella or Emmental for a different flavor profile and texture experience.
How long will leftover gratin keep? Stored properly in the fridge, gratin can last 3-4 days. Reheat in the oven to restore the top’s crispness.
Can I freeze the gratin? Freezing is possible pre-bake. Wrap tightly and freeze, then thaw before baking as usual, ensuring even cooking.
Are there low-calorie cheese options? Opt for low-fat cheese varieties or mix with aspects like nutritional yeast to match flavors while controlling calories.
How do I prevent the dish from being greasy? Balance cheese with potatoes and cream to avoid excess greasiness. Using high-quality, firm cheese helps manage oils expelled during baking.
What if I don’t have a mandoline? Careful hand slicing is an option if a mandoline slicer is unavailable, or use a kitchen knife but aim for uniformity in thickness.
How do I adjust for uneven oven temperatures? Frequently rotate the dish halfway through cooking, or employ oven thermometers for precise internal temperature tracking.
Additional Resources
For those eager to expand their culinary prowess, explore related recipes such as scalloped potatoes or au gratin variations featuring different vegetables for inspired results. Technique guides on mastering mandoline skills or cheese integration provide further insight into achieving perfection.
Ingredient information access, particularly concerning which potato variants work best under different circumstances, is invaluable. Equipment recommendations ensure your kitchen stays ready to tackle any potato gratin challenge with finesse.
Seasonal variations offer creative pathways through timely ingredient focuses; earthy mushrooms or fresh spring greens alter the gratin landscape exquisitely.
Join the Conversation
We’ll love to hear your thoughts on this Crispy Two-Cheese Potato Gratin recipe! Share your own adaptations and photos with us across social media platforms and exchange culinary tips and tricks with fellow gratin enthusiasts in our community. We host regular feature posts spotlighting reader-submitted variations, showcasing the talents and creativity within our cooking community.
Savor the Perfect Ribeye Steak with Caramelized Onions and French Fries
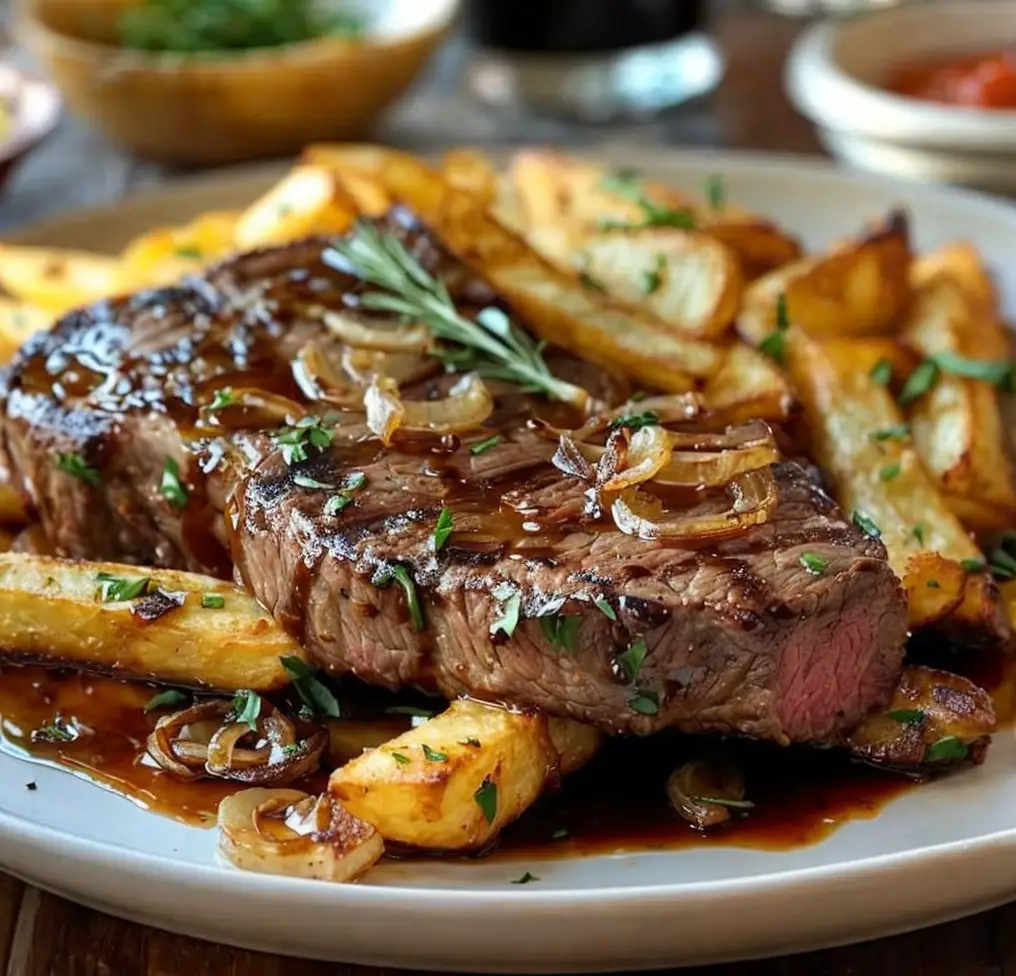
Ribeye Steak with Caramelized Onions and French Fries: A Gourmet Delight
⚖️
Difficulty
Medium
⏲️
Prep Time
20 mins
🕒
Cook Time
30 mins
⏱️
Total Time
50 mins
🍽️
Servings
2
Prepare to indulge in the mouthwatering flavors of our Ribeye Steak with Caramelized Onions and French Fries. This classic recipe merges the rich, savory goodness of a perfectly seared ribeye steak, topped with sweet and luscious caramelized onions, and served alongside crispy, golden French fries. Perfect for a cozy dinner or a special occasion, this dish promises an unforgettable taste experience.
The hearty ribeye steak, known for its marbled texture and robust flavor, is complemented by the delicate sweetness of caramelized onions, creating a harmony of taste profiles. The sides of traditional French fries add a delightful crunch, providing a satisfying contrast in every bite. Whether you’re a steak enthusiast or a culinary explorer, this combination will tickle your taste buds.
Quick Recipe Highlights
Flavor Profile: A rich and robust combination of savory steak and sweet, soft onions.
Texture: Juicy and tender ribeye with a caramelized coating and crispy fries.
Aroma: Enticing beefy aroma with sweet, deep notes from the onions.
Visual Appeal: A visually striking meal with beautifully seared steak, golden onions, and crispy fries.
Skill Level Needed: Requires basic searing skills and knowledge of onion caramelization.
Special Equipment: A heavy skillet or grill pan is essential for the perfect sear.
Recipe Overview
Difficulty Level: Intermediate – Involves timing precision and temperature management for a perfectly cooked steak and caramelization of onions.
Category: Elegant main course ideal for dinner.
Cuisine: Rooted in classic American steakhouse traditions with a touch of French culinary influence from the onion preparation.
Cost: Moderately priced, with ribeye being a premium cut balanced by inexpensive onions and potatoes.
Season: Best enjoyed in cooler weather for its hearty warmth, though it’s delicious year-round.
Occasion: Perfect for dinner dates, family gatherings, or special celebrations.
Why You’ll Love This Recipe
Savor the indulgence of tender ribeye steak exquisitely paired with sweet caramelized onions, offering an irresistible combination that keeps you coming back for more. The steak’s rich, beefy flavor creates a delectable contrast to the mellow sweetness of the onions, while the fries complement the dish with just the right amount of crispy satisfaction.
Time-saving and straightforward, this ribeye steak recipe allows you to create a restaurant-quality meal in the comfort of your home without requiring hours of preparation. The caramelized onions can be made ahead, saving you precious time on busy evenings or festive occasions when you’re hosting.
Not only is this meal a feast for your senses, but it also provides an ample protein boost, aiding in muscle repair and growth. You’ll gain essential nutrients such as iron and vitamin B12 from the steak, beneficial for overall health.
Impress your guests with a dish that’s both elegant and satisfying. Perfect for social gatherings, this ribeye steak and caramelized onions delight brings a touch of sophistication to any occasion. Share this recipe with fellow cooking enthusiasts and watch as it becomes a new dinner party favorite.
With simple, accessible ingredients, this dish is both cost-effective and easy to source, ensuring that you never have to travel far for a gourmet experience. Adjust the recipe to suit any budget by choosing different cuts of beef or experimenting with alternative onion varieties.
Historical Background and Cultural Significance
Ribeye steak has long been a prized cut, known for its rich marbling and exceptional flavor. Its roots trace back to ancient beef consumption, evolving over centuries into a centerpiece of modern steakhouse dining.
The accompanying caramelized onions lend a nod to traditional French cuisine, where the technique of slowly cooking onions to release their natural sugars is a celebrated culinary art. This fusion of American and French elements creates a dish that’s both comforting and sophisticated.
Over time, the preparation of ribeye steak has evolved, incorporating innovative seasoning and cooking methods. This particular recipe embracing caramelized onions showcases a harmonious balance of flavor, a testament to culinary evolution.
In various regions, this dish enjoys unique spins and adaptations, from different seasoning blends to alternative side accompaniments. Its enduring popularity speaks to its universal appeal and adaptability in diverse cultural settings.
Ingredient Deep Dive
The ribeye steak, renowned for its superb marbling, holds significant cultural value as a symbol of luxury and indulgence. Its history spans across global cuisines, often featured in grand feasts and celebrations. Selecting a well-marbled ribeye is essential for achieving that tender, juicy bite everyone craves.
Nutritionally, ribeye offers a rich source of protein, vital for muscle health, and impressive amounts of essential vitamins and minerals like iron and zinc. Store your ribeye steak in a refrigerator and bring it to room temperature before cooking to ensure even grilling.
Caramelized onions, esteemed in French cuisine, provide sweetness and depth, transforming a humble ingredient into a gourmet delight. They hold nutritional benefits with low calorie counts, delivering fiber and vitamin C for health benefits.
After purchase, store onions in a cool, dry place to prolong their shelf life. Consider white or yellow onions for a sweeter caramelization, or substitute red onions for a milder flavor profile.
Common Mistakes to Avoid
Overcooking the steak can result in a tough texture; always follow recommended timing and temperature.
Rushing the caramelization process leads to underdeveloped flavors. Patience is key to achieving the desired sweetness.
Not letting the steak rest after cooking causes juice loss; always rest the steak for optimal juiciness.
Skipping the meat thermometer can result in incorrect doneness, so use one to ensure accuracy.
Using a non-preheated pan affects searing quality; ensure the pan is hot before adding the steak.
Failing to season both sides of the steak leads to an imbalance in flavor distribution.
Caramelizing onions on high heat can burn them; use medium-low heat instead for even cooking.
Crowding the pan with onions can result in steaming rather than caramelizing.
Using too much oil can make the onions greasy instead of evenly coated and golden.
Neglecting to slice onions uniformly results in uneven cooking; strive for consistent slices.
Essential Techniques
Achieving the perfect caramelized onion is an art. Start by slicing onions uniformly to ensure consistent cooking. Add them to a preheated pan and let them cook slowly over low to medium heat. The secret is allowing the natural sugars to emerge without high heat, creating a rich, golden-brown hue.
In searing a ribeye, it’s vital to preheat your skillet to ensure the steak achieves a delectable crust. Avoid moving the steak too much during searing; this ensures even caramelization while retaining the ribeye’s juicy interior. A perfect sear creates both flavor and texture contrasts.
Pro Tips for Perfect Ribeye Steak with Caramelized Onions and French Fries
Use a cast-iron skillet for impeccable heat retention and excellent searing results on your steak. Rest the steak after cooking to allow juices to redistribute, enhancing tenderness.
Before slicing onions, consider chilling them slightly in the fridge to reduce tear-inducing vapors. Slice uniformly for consistent caramelization which amplifies their sweet, complex flavor.
Cook your French fries either in an air fryer for a healthier alternative or double-fry them in batches for extra crispiness. Season with salt immediately after cooking for optimal flavor absorption.
Dry your ribeye steak with paper towels before seasoning to promote a crisp, offering an irresistible outer crust.
Experiment with adding a splash of balsamic vinegar during the last stages of onion caramelization for a tangy twist that elevates sweetness.
Use fresh herbs like rosemary or thyme on the steak for additional aroma, infusing it with a delightful, herbaceous undertone.
Variations and Adaptations
In exploring regional variations, consider using locally available meat cuts like sirloin or tenderloin for economic adaptability. Seasonal root vegetables like parsnips or sweet potatoes serve as alternative side options, delivering a delightful twist to the traditional French fry accompaniment.
For those observing dietary restrictions, explore substitutions such as air-fried zucchini wedges or a cauliflower mash, providing low-carb, gluten-free alternatives that align with keto or paleo diets.
Ensure culinary diversity by introducing bold spice rubs or marinades that correspond with cultural inclinations—smoky chipotle for a twist of Tex-Mex flair or a mix of sesame and soy for an Asian inspiration.
Elevate the dish’s texture by adding a crispy, herbed breadcrumb topping to the caramelized onions, offering both visual appeal and sensory diversity.
Presentation possibilities abound, whether opting for rustic, shareable planks of steak strips or artfully plated individual servings, garnished with fresh parsley for a pop of color.
Serving and Presentation Guide
Thoughtful plating can transform your ribeye steak into a culinary masterpiece. Consider a minimalist approach with sliced steak fanned over a smattering of caramelized onions, flanked by elegantly stacked French fries. Sprinkle chopped fresh herbs for a burst of color and aroma.
Elevate your garnishing strategy by experimenting with different sauces, such as a creamy garlic aioli or chimichurri, drizzling artfully for aesthetic appeal and flavor enhancement.
A buffet-style presentation on a large wooden board, with slices of ribeye beautifully fanned and encompassed by bowls of onions and crispy fries, encourages convivial sharing.
Taking temperature into account, serve this dish promptly to maintain the desired warmth, maintaining the steak’s ideal medium-rare experience that brings out its full flavor.
Guide each serving with the perfect amount of French fries, advocating for a balanced portion that complements without dominating the plate, ensuring each bite seamlessly melds together.
Wine and Beverage Pairing
When pairing wine with your ribeye steak, look no further than a bold, structured red wine, such as a Cabernet Sauvignon or Malbec, which complements the beef’s richness while mirroring the deep, mellow notes of the caramelized onions.
For those seeking non-alcoholic options, consider a rich, tannic iced tea or a pomegranate spritzer, providing contrasting acidity that invigorates the palate with each bite.
Should coffee or tea be part of your dining ambiance, a robust dark roast or a smoked tea infusion creates a seamless aromatic experience that echoes the dish’s depth.
Ensure your beverage selection is served at optimal temperatures—wine tastes best slightly below room temperature, while iced options refresh when chilled.
Play with presentation by serving drinks in elegant glassware. The transparency allows for visual interaction with the vibrant dish and enhances the meal experience.
Storage and Shelf Life
For optimal freshness and safety, store leftover ribeye steak and caramelized onions in airtight containers. Keep these containers in the refrigerator, where they will remain good for up to three days.
Freezing the steak uncooked is an option if vacuum-sealed, allowing it to maintain its quality for up to six months. Always ensure to thaw it gradually in the fridge before cooking.
Pay attention to any signs of spoilage, such as off-odors or discolorations, and discard any component that seems suspect to ensure food safety.
When reheating, opt to gently warm the steak in an oven at low heat covered loosely with foil, protecting it from drying and toughening.
In tackling French fries, recapture their crispiness by a brief reheat in an air fryer or oven, avoiding microwaving, which might render them soggy.
Make Ahead Strategies
Maximize efficiency by caramelizing onions a day ahead, storing them in a refrigerator-ready container, and simply reheating to serve.
Construct a prep-friendly timeline where meat can be seasoned ahead and refrigerated, allowing flavors to fully infuse before searing to amplify its taste.
By preparing the fries in advance, you can focus on other meal components. Parboil potatoes ahead and refrigerate, finishing them off in the fryer or oven just before serving.
Assessing quality impact, know that certain elements such as fries may diminish in crispiness if pre-cooked completely, so aim for partial preparations for the best results.
Anticipate presentation enhancements by freshly adding garnishing herbs, sauces, or crispy onion toppings—elements that benefit from last-minute attention to retain freshness.
Scaling Instructions
Adapting this recipe to varying crowd sizes is straightforward. When halving, maintain balance in proportions, ensuring flavor intensity remains consistent by carefully scaling down spices and condiments.
Doubling or tripling for larger gatherings requires equipping a larger skillet or grill surface to accommodate added portions without overcrowding, preserving ideal searing quality.
Keep in mind timing modifications, as larger quantities necessitate adjustments both for cooking and resting phases to secure the same tender, juicy result.
Store surplus steak correctly, optimizing potential use for subsequent meals as added elements in sandwiches, salads, or sides, ensuring no portion goes to waste.
Nutritional Deep Dive
With a macronutrient-rich profile, ribeye steak offers substantial protein aiding muscle development and repair. Its generous heme iron boosts energy through improved oxygen transport in cells.
Explore micronutrients such as zinc for immunity strength and vitamin B12 critical for nervous system health, ensuring each serving supports a balanced diet.
A well-rounded portion strategy can accommodate weight management goals by pairing the meal with leafy greens, balancing caloric intake while still indulging in its flavors.
Dietary fiber present in onions facilitates digestion, complementing the ribeye’s nutrient density, and creating a harmonious nutritional experience.
Awareness of these elements ensures the dish not only satisfies the palate but also contributes valuable dietary benefits to health-conscious dining practices.
Dietary Adaptations
For a gluten-free adaptation, ensure all seasonings used are certified gluten-free, typically being free from contaminants present in some spice blends.
Achieve a dairy-free experience by avoiding cream-based side sauces, which you might pair instinctively, favoring oil-based or vegetable reductions instead for those averse or intolerant to dairy.
Vegan diners may opt for plant-based substitutes such as portobello mushrooms, which replicate the ribeye’s savory nature, accompanied by vegetable-based sides maintaining the essence while diverging from animal products.
Catering to low-carb needs involves replacing traditional fries with baked or air-fried vegetable sticks such as zucchini or asparagus, aligning with keto or paleo preferences.
Adapt to the low-FODMAP diet by replacing onions with green onions, still imparting flavor while minimizing digestive concerns, illustrating customizable accessibility for all diets.
Troubleshooting Guide
Don’t let texture issues ruin your steak; always rest your ribeye, allowing fibers to reabsorb juices. Through this, you maintain desired tenderness, crucial for enjoying the dish to its fullest.
For balanced flavor, consider using a meat thermometer. If you find disparities, optimizing internal temperature to an exact reading ensures that the steak isn’t over or underdone.
Achieve seamless temperature control by choosing the right pan; heavier alternatives retain heat better, ensuring even cooking—essential when avoiding center misfires.
If your kitchen lacks necessary equipment, look for inventive solutions using available tools. For instance, a heavy pot lid can serve as a steak press in some cases, assisting equally effective searing.
When ingredient substitutions seem necessary, remain vigilant to how such adjustments impact flavor profiles or textures, seeking guidance on best alignments if uncertainty arises.
Maintain precision through recipe timing, factoring minute variances in oven or stove efficiency; methodically checking progress averts over or under-cooking, which can be common.
Recipe Success Stories
Feedback from our community continuously validates this recipe’s acclaim, celebrating its convenience and mouthwatering outcome. Suggested variations frequently include an addition of roasted garlic or honey-glazed elements, imbuing dishes with extra layers of taste.
Reader suggestions offer inspiration, occasionally resulting in successful family adaptations like adding bold chimichurri or blue cheese crumbles enriching depths of flavor.
Photography enthusiasts love highlighting the dish’s presentation, sharing tips to capture ribeye’s marbling, vibrant onion hues, and contrasting golden fries under natural light for optimal appeal.
Community engagement is crucial as shared interpretations circulate, fostering a collective atmosphere where individuals experiment and contribute firsthand adaptations of the recipe.
Readied with reader photos, the dish effortlessly showcases appetite-inducing imagery in solidifying its reputation, encouraging continued savoring across various culinary circles.
Frequently Asked Questions
How can I ensure my steak is perfectly cooked without a meat thermometer?
Without a meat thermometer, evaluate the doneness by using the touch method; gently press the steak center and compare the resistance to different parts of your palm, indicative of cooked stages – soft equating to rare, firmer reflecting well-done.
Are there alternative meats for ribeye in this recipe?
Substituting ribeye with sirloin or tenderloin offers leaner or less costly alternatives, both possessing unique attributes while preserving core flavor essence despite minor texture changes.
What type of oil should I use for caramelizing onions?
Opt for mild-flavored oils like canola or vegetable oil, ensuring onions caramelize without overwhelming with taste deviations, enhancing the natural sweet progression of pan-searing.
Can I use pre-packaged onion caramelization kits?
While feasible, preparing fresh onions often reveals deeper flavors and greater texture contrast, typically more satisfying whether from local produce or sourcing adaptable varieties.
How long can caramelized onions last in the fridge?
Properly stored in airtight containers, caramelized onions maintain their flavor and quality for up to five days, ensuring readiness for use in upcoming meals.
What are suggestions for non-alcoholic pairings?
Consider iced chamomile tea for an herbaceous complement or a pomegranate spritzer, providing depth through tart contrast accompanied by natural effervescence.
Can I grill the steak instead of pan-frying?
Grilling is an approved alternative, offering smoky notes; following optimal temperature guidelines ensures characteristic ribeye marks and flavor perfection.
What are some garnishing ideas for presentation enhancement?
Use fresh herbs like rosemary or thyme and finishing with a touch of sea salt or freshly cracked pepper complements visual refinement while amplifying finished dish aroma.
Are there lower-cost substitutions for French fries?
Consider oven-baked sweet potato wedges, delivering a similar crunch with enhanced sweetness, offering both cost efficiency and comparable tastiness.
How do I prevent steak from sticking to the pan?
Preheat the skillet properly, lubricating with a thin layer of oil prevents sticking; additionally allowing the steak to sear undisturbed secures the foundational crust’s integrity.
Additional Resources
Explore related recipes that shape your culinary presence by drawing inspiration from classic steakhouse menu creations or rich, homey comfort dishes with a personal touch.
Glimpse into our technique guides, offering insight into mastering perfection in steak searing or the artistry of onion caramelization, critical for any culinary journey.
Investigate essential ingredient information to make informed shopping decisions, ensuring your choices foster the freshest possible dish quality each preparation.
Dive into equipment recommendations, echoing the need for the right gear to enhance every cooking venture, maximizing safety and effectiveness.
Challenge seasonal variations as a means of exploration, embracing how classic dishes can seamlessly adapt to ever-changing palate demands driven by diversity.
Join the Conversation
Engage with a global community of culinary enthusiasts who celebrate tweaking and tasting, creating lively dialogue furthering connection through shared meal experiences.
Leverage social media platforms to showcase creations, exchanging tips with like-minded individuals excited to explore novel presentations and diverse personal spins.
Every recipe review submitted helps foster a platform thriving on honesty and growth, yielding spaces rich in diverse voices amplifying delicious progress.
Involved photography aficionados contribute high-value imagery, refining skills and perfecting compositions highlighting the signature beauty of each crafted dish—a sight to behold.
Embrace collaborative learning spaces where community-driven recipe variations showcase achievable results, invigorating creativity inspiring further experimentation among participants.
The Recipe
Ribeye Steak with Caramelized Onions and French Fries
Serves: 2
Prep Time: 20 mins
Cook Time: 30 mins
Total Time: 50 mins
Kitchen Equipment Needed
Cast-iron skillet or grill pan
Sharp knife
Cutting board
Non-stick pan for onions
Baking sheet or fryer
Ingredients
2 ribeye steaks, about 1 inch thick
2 large onions, thinly sliced
2 tablespoons olive oil, divided
Salt and pepper, to taste
4 large potatoes for fries, thinly sliced
Vegetable oil for frying
Fresh herbs for garnish (optional)
Directions
Heat 1 tablespoon of olive oil in a non-stick pan over medium heat. Add onions and cook, stirring occasionally, for about 20–25 minutes until they are golden and caramelized. Remove from heat and set aside.
Preheat oven to 400°F (200°C) for fries. Spread potato slices onto a baking sheet, drizzle with remaining olive oil, and season with salt. Bake for 25-30 minutes until golden and crisp, turning them halfway through cooking.
Meanwhile, heat a cast-iron skillet or grill pan over high heat for steak preparation. Season steaks generously with salt and pepper.
Place steaks in the pan, cook for 3-4 minutes on each side for medium-rare, longer if preferred. Remove and let rest for 5 minutes to redistribute juices.
Plate the steak, topping with caramelized onions and serve with freshly baked fries. Garnish as desired.
Recipe Notes
You can substitute regular potatoes with sweet potatoes if desired.
Caramelized onions can be made ahead and reheated gently before serving.
Adjust searing time based on steak thickness and preferred doneness.
Irresistible Pot Roast Served Over Creamy Mashed Potatoes Recipe
Pot Roast over Mashed Potatoes: A Comforting Classic
⚖️
Difficulty
Medium
⏲️
Prep Time
20 mins
🕒
Cook Time
3 hours
⏱️
Total Time
3 hours 20 mins
🍽️
Servings
6
Experience the ultimate comfort food with our Pot Roast over Mashed Potatoes recipe. This classic dish marries tender, slow-cooked beef with creamy, buttery mashed potatoes for a hearty meal that warms the soul. Ideal for family dinners or special occasions, this recipe delivers on taste and satisfaction. With every bite, enjoy the layers of flavor imparted by a vibrant mix of herbs and robust red wine, finished with a luxurious, velvety texture perfect for soaking up every drop.
Quick Recipe Highlights
Flavor Profile: Rich and savory with deep, umami notes from pot roast and a buttery finish from mashed potatoes.
Texture: The beef is melt-in-your-mouth tender with silky smooth mashed potatoes for a comforting feel.
Aroma: Inviting scents of rosemary, thyme, and garlic fill the kitchen as the roast simmers to perfection.
Visual Appeal: A beautifully browned roast adorned with vibrant vegetables against fluffy, white mashed potatoes.
Skill Level Needed: Suitable for intermediate cooks who are comfortable with long cooking times and attentive seasoning.
Special Equipment: A heavy-duty Dutch oven or slow cooker is essential for ensuring even, heat-controlled cooking.
Recipe Overview
Difficulty Level: This dish requires an intermediate skill level due to the long cooking time and the need for layering flavors.
Category: A dinner staple, this meal falls under cozy, home-cooked classics renowned for their heartiness.
Cuisine: Rooted in American culinary tradition with European influences, especially from French braising techniques.
Cost: Utilizing affordable cuts of beef, this recipe is cost-effective, with most ingredients being pantry staples.
Season: Best enjoyed during fall and winter for its warmth and robust flavors that complement chilly weather.
Occasion: Perfect for family gatherings, holiday celebrations, or any night you crave a wholesome, comforting dinner.
Why You’ll Love This Recipe
This Pot Roast over Mashed Potatoes recipe offers a taste experience like no other. The beef absorbs all the goodness from its seasoning, offering a prevailing depth of flavor in every tender morsel. Accompanying the meat, mashed potatoes add a delightful creaminess that balances perfectly.
Convenience comes in its minimal active preparation time, allowing you to set it on simmer while moving on with your day. The recipe is easily adaptable, letting you incorporate seasonal vegetables or preferred spices to suit personal taste.
For those keen on nutrition, this dish provides a balanced intake of protein, carbohydrates, and essential minerals, making it a nutritious choice for family meals. When entertaining, its aroma sets the mood, and plating it skillfully attracts eyes and compliments from guests.
Economical and accessible, this recipe saves costs without compromising quality, utilizing basic ingredients that result in a meal reminiscent of high-end dining.
Historical Background and Cultural Significance
Pot roasts have deep roots in culinary traditions worldwide. While many cultures have their versions, it is beloved in America for its homey, rustic appeal. The dish traces back to classic French braising techniques, emphasizing slow cooking to extract maximum flavor and tenderness.
Served in family homes for generations, it symbolizes warmth, hospitality, and sumptuous indulgence. Across regions, variations emerge—belgians enjoy carbonnade with beer, while Italians opt for brasato al Barolo. Its evolution involves incorporating available herbs, vegetables, and nearby cuts of meat.
Ingredient Deep Dive
Beef chuck roast stands at this recipe’s core, cherished for its marbling and flavor. Historically, chuck was prized as an economical cut capable of extreme tenderness once the collagen melted after a slow braise. Nutritionally, beef offers protein, iron, and B vitamins beneficial for body functions.
Selecting the freshest beef ensures a succulent result. Look for marbling throughout and a deep red color. Ensure it is stored in the refrigerator within two days of purchase or freeze for longer storage. Substitutions like brisket or shoulder can offer similar outcomes, adapting the cooking time appropriately.
Common Mistakes to Avoid
Insufficient browning: Failing to sear the roast properly results in less flavorful meat.
Rushing: Trying to cut down on slow cooking results in tough, chewy beef.
Using lean cuts: Avoid lean beef, as they do not break down like marbled cuts.
Insufficient seasoning: Not layering seasoning while cooking leads to bland results.
Premature slicing: Letting the roast rest post-cooking locks in juices and tenderness.
Using low-fat dairy: Full-fat dairy is crucial for creamy mashed potatoes.
Overmixing potatoes: Too much handling leads to gummy, rather than fluffy, mashed potatoes.
Ignoring deglazing: Skipping deglaze removes complexity in flavor from the sauce.
Essential Techniques
Browning is essential, creating a rich crust that injects deeper flavor into the pot roast. Achieve success by thoroughly drying the meat and using high heat with oil until a dark, even crust forms on all sides.
Pro Tips for Perfect Pot Roast
Liberally season each layer—first the beef, then the vegetables, and finally the sauce—to develop a harmonious profile.
For a deeper flavor, substitute part of the broth with red wine to enhance the beef essence. Experiment with herbs; rosemary and thyme add warmth if the palate seeks more aromatics.
Variations and Adaptations
Try a Cajun-style pot roast: use Creole spices in seasoning and bell peppers within vegetables. For a low-carb version, swap mashed potatoes with cauliflower mash to retain comfort with lesser carbohydrates.
Serving and Presentation Guide
Present this dish piping hot, on broad plates, with mashed potatoes forming a base mound. Lay slices of pot roast across, draping with sauce and garnishing with fresh parsley for vibrancy and aroma.
Wine and Beverage Pairing
Pair this cuisine with a full-bodied red wine such as Cabernet Sauvignon to complement the roast’s robust flavors, or opt for non-alcoholic, herbal teas with mint or chamomile for comforting balance.
Storage and Shelf Life
Refrigerate leftovers in airtight containers to preserve freshness up to four days. When freezing, separate beef and potatoes to prevent texture deterioration. Defrost in fridge and gently warm to maintain quality.
Make Ahead Strategies
Prepare elements separately: cook the pot roast a day ahead and refrigerate. On serving day, reheat gently while whipping up fresh, perfectly creamy mashed potatoes.
Scaling Instructions
To half the recipe, reduce ingredients proportionally, taking care with seasoning. Doubling calls for a larger pot and possible extended cooking jams for fullness; storage containers must suffice for portion increases.
Nutritional Deep Dive
This dish boasts a well-rounded macronutrient profile, offering significant protein from beef and carbohydrates from potatoes. Nutritionally dense, it supports muscle growth and energy levels within balanced portions.
Dietary Adaptations
Create a gluten-free version by ensuring all broth and seasoning choices lack gluten. For dairy-free, substitute olive oil and almond milk in potatoes, achieving similar creaminess without dairy elements.
Troubleshooting Guide
If mashed potatoes turn out gummy, next time use less stiff potatoes such as Yukon Gold. When finding roast too dry, increase liquid and cover tightly to retain moisture during cooking.
Recipe Success Stories
Readers from Chicago to Sydney share joys of adapting flavors, savoring results in family gatherings, and contrasting cultural festivals each adding unique spins—a testament to this recipe’s global appeal.
Frequently Asked Questions
How do I know when the beef is tender? Test by inserting a fork; perfect doneness results in the beef easily pulling apart.
Can I use different potatoes? Yes, Yukon Golds yield creaminess. Reds offer a slightly firm texture; avoid waxy for fluffy results.
Should I trim the roast fat? Leave moderate fat for flavor, trimming only excess to avoid overt greasiness.
Freezing considerations? Separate elements for best texture upon reheating, avoiding potatoes’ starch change when frozen collectively.
Additional Resources
Discover similar heartwarming recipes and guidelines in mastering slow-cooked meals through our catalog. Explore traditional roasting techniques further for gaining deeper culinary insights.
Join the Conversation
Connect with our vibrant community of enthusiastic cooks by sharing your culinary journey on social media. Join groups for discussions or tips and tricks to tweak our Pot Roast over Mashed Potatoes recipe to personalize each experience.
The Recipe
Pot Roast over Mashed Potatoes
Serves: 6
Prep Time: 20 mins
Cook Time: 3 hours
Total Time: 3 hours 20 mins
Kitchen Equipment Needed
Dutch Oven or Slow Cooker
Skillet for browning
Potato Masher
Mixer (optional)
Ingredients
3 lbs beef chuck roast
4 cups beef broth
1 cup red wine
6 large potatoes, peeled and diced
2 cups carrots, chopped
1 cup onions, chopped
2 tbsp olive oil
4 cloves garlic, minced
1 tsp thyme
1 tsp rosemary
Salt and pepper to taste
1/2 cup milk
1/4 cup butter
Directions
Preheat oven to 275°F (135°C).
Season the beef generously with salt and pepper. In a heated skillet, brown beef on all sides in olive oil.
In a Dutch oven, add beef broth, red wine, garlic, thyme, and rosemary. Place browned beef in broth mixture.
Add carrots and onions around the beef. Cover and cook for 3 hours or until beef is tender.
Boil potatoes in salted water until soft. Drain and mash with butter and milk until creamy. Season with salt and pepper.
Slice beef and serve atop mashed potatoes, ladling pan juices and vegetables over top.
Recipe Notes
For a gluten-free option, ensure the broth and wine used are certified gluten-free.
Add a splash of cream to mashed potatoes for extra richness.
Vegetables can be customized based on preference—consider adding parsnips or turnips for added flavors.
Delightful Christmas Italian Cheese Loaf Recipe for Festive Feasts
Christmas Italian Cheese Loaf: A Festive Delight for Your Holiday Table
⚖️
Difficulty
Moderate
⏲️
Prep Time
30 mins
🕒
Cook Time
45 mins
⏱️
Total Time
75 mins
🍽️
Servings
8
Imagine a holiday table with the alluring aroma of freshly baked bread wafting through the air. This Christmas Italian Cheese Loaf is the perfect addition, combining the rich flavors of Italian cheeses with a crusty exterior and a soft, savory center. The holiday season is all about gathering, and what better way to bring people together than with a warm, cheesy loaf that’s sure to be the centerpiece of any festive meal. As you slice into this bread, you uncover layers of taste and texture that make every bite a new experience.
The combination of sharp Parmesan, creamy mozzarella, and tangy provolone creates a flavor explosion that pairs beautifully with the bread’s chewiness. This loaf isn’t just a treat for the taste buds; it’s a feast for the senses. The glorious golden hue and the crunch of the crust are enough to draw everyone to the table. Whether served as a starter or alongside your main Christmas courses, this Italian cheese loaf will become a cherished tradition.
Quick Recipe Highlights
Flavor Profile: This loaf offers a delightful blend of savory, tangy, and creamy flavors thanks to the trio of Italian cheeses.
Texture: Enjoy the satisfying crunch of the crust combined with a soft, cheesy interior that melts in your mouth.
Aroma: Expect a mouthwatering aroma of freshly baked bread melded with heavenly hints of cheese.
Visual Appeal: The golden-brown crust, with cheese bubbling around the edges, is visually irresistible.
Skill Level Needed: Ideal for intermediate bakers, this recipe involves dough handling and cheese layering techniques.
Special Equipment: A dough hook attachment for your mixer and a baking sheet are recommended for optimal results.
Recipe Overview
Difficulty Level: This recipe sits at a moderate level due to the techniques involved in making and handling the dough.
Category: This Italian cheese loaf makes an excellent appetizer or side dish.
Cuisine: Rooted in Italian culinary tradition, celebrated for its cheese variety and fresh bread baking.
Cost: The cost mainly involves the trio of cheeses, making it a relatively mid-range baked good.
Season: Best during the winter holidays when comforting, warm bakes are most appreciated.
Occasion: Perfect for festive celebrations like Christmas, family gatherings, or casual dinner parties.
Why You’ll Love This Recipe
The Christmas Italian Cheese Loaf is an indulgent treat that impresses with both taste and texture. Each bite delivers a robust flavor profile with the harmonious blend of Parmesan, mozzarella, and provolone cheeses. The crust creates a delightful contrast to the soft, savory interior, ensuring a memorable tasting experience.
In terms of preparation convenience, this cheese loaf is relatively straightforward to make. The dough can be prepared in advance, which leaves plenty of time to enjoy guests’ company. Once in the oven, the enticing aroma fills the kitchen, setting the scene for a cozy, heartwarming gathering.
Nutritionally, the loaf provides protein from the cheese and carbohydrates from the bread, offering a satisfying snack or side dish. While it leans toward indulgence, the loaf contains ingredients familiar to most, making it a balanced festive choice without being overly rich.
From a social perspective, the cheese loaf becomes a conversation starter due to its impressive appearance and delightful sensory qualities. Perfect for sharing, it complements any holiday spread and entices guests to savor the communal joy of festive dining.
Regarding cost-effectiveness and accessibility, ingredients are generally available year-round in most supermarkets. Cheese enthusiasts will appreciate the gourmet quality without breaking the bank, as each component is chosen to enhance and marry together to present a luxurious loaf.
Historical Background and Cultural Significance
The tradition of baking bread with cheese is an ancient one, with roots tracing back to Italy—home to some of the world’s most beloved cheeses. Italian cheese loaves have long been celebrated during holidays and gatherings, symbolizing warmth and abundance.
Over the years, the cheese loaf has evolved, incorporating various cheeses and herbs to reflect regional tastes and preferences. In Italy, recipes are often passed down through generations, with each family adding their unique touch, creating a legacy of flavor and tradition.
The addition of cheese to bread symbolizes prosperity, making this loaf particularly significant during festive times. Its preparation and consumption during the holiday season is linked to sharing nature, bringing families together to celebrate and give thanks.
While variations exist, the core essence of this dish remains unchanged, preserving its cultural significance and reinforcing its status as a beloved festive treat. Today, the Italian cheese loaf has crossed borders, becoming a staple in international Christmas celebrations.
Ingredient Deep Dive
Parmesan, known as the “King of Cheeses,” has a rich historical significance, originating from the Emilia-Romagna region. Its sharp and nutty flavor enhances our loaf, adding depth. Packed with protein and calcium, Parmesan is a nutritional powerhouse. When selecting Parmesan, look for clear labeling of “Parmigiano-Reggiano.” Store it wrapped in wax paper and refrigerated to maintain freshness. If necessary, aged Grana Padano can substitute for a similar taste.
Mozzarella is Italy’s gift to the world, hailing from southern regions like Campania. Its creamy texture adds lusciousness to the loaf. Mozzarella offers healthy fats and vitamins, contributing to the loaf’s nutritional value. Fresh mozzarella balls in brine provide the best texture. Store mozzarella in its brine, refrigerated, for maximum shelf life. Burrata is a worthwhile alternative, offering creaminess with a more indulgent texture.
Common Mistakes to Avoid
Skipping dough proofing: Ensure proper rising time for a fluffy texture.
Overcrowding cheese: Too much cheese can impede even baking.
Overbaking: Keep an eye on the loaf to prevent an overly dry interior.
Using cold ingredients: Room-temperature cheese helps the loaf bake evenly.
Improper measuring: Accurate flour and cheese measurements are crucial.
Ignoring crust formation: A hot oven ensures a crispy, golden crust.
Uneven cheese distribution: Spread cheese evenly for uniform flavor.
Skipping egg wash: Adds shine and color to crust.
Forgetting to preheat the oven: Essential to achieve the desired texture.
Essential Techniques
Kneading is crucial for gluten development, affecting the loaf’s structure and chewiness. Master this by kneading until the dough is smooth and elastic. Over-kneading can lead to tough bread, so aim for a balance. Visual cues such as a springy texture indicate success.
Cheese layering determines even flavor distribution throughout the loaf. Spread cheese evenly, allowing for a consistent taste in each slice. Avoid clumping, which might create heavy, localized pockets of cheese, affecting the loaf’s texture.
Pro Tips for Perfect Christmas Italian Cheese Loaf
Use high-quality Italian cheeses to ensure authenticity and flavor depth. This simple choice makes a significant difference.
Allow the dough to rest adequately, promoting the best elasticity and crumb structure.
Experiment with herbs like rosemary or thyme, adding aromatic dimensions and visual appeal to the loaf.
For an extra burst of flavor, include a layer of semi-dried tomatoes with the cheese before rolling the dough.
Make sure your oven is fully preheated to create the ideal crusty exterior.
Brush with melted butter after baking for a shiny finish that enhances the loaf’s visual appeal.
Variations and Adaptations
There are countless regional variations for this Italian cheese loaf. In southern Italy, for example, spicy Calabrian peperoncino might be added for an extra kick, while northern regions might incorporate mushrooms for added earthiness.
In terms of seasonal adaptations, consider using lighter cheeses and herbs during spring to create a refreshing take on this recipe, or add spiced nuts and dried fruits for a winter twist.
For dietary modifications, a gluten-free flour blend can replace the wheat flour to accommodate gluten intolerances. For a vegan version, use plant-based cheese alternatives that melt well.
Spice up the loaf with a touch of chili flakes or incorporate roasted garlic for more flavor depth.
Adjust the texture by altering the bake time; a slightly reduced bake time results in a softer interior, while a longer bake intensifies the crust’s crunch.
Consider a more artisanal presentation by scoring the top of the loaf before baking, creating a rustic, bakery-style appearance.
Serving and Presentation Guide
Consider a warm presentation, serving the loaf straight from the oven to highlight its aroma. Slice thickly, each piece showcasing its golden crust and oozing cheese.
For garnishing, sprinkle fresh parsley or oregano over the sliced loaf, adding a pop of color and freshness.
Traditionally served with antipasto platters, consider pairing with olives and cured meats for a classic Italian accompaniment.
For modern serving suggestions, pair the loaf with a fresh arugula salad dressed with balsamic vinegar and olive oil.
Temperature considerations are key; enjoy the loaf warm when the cheese’s texture is at its peak, but rest assured, it remains delightful at room temperature.
For portion control, serve as an appetizer or on a sharing platter, allowing guests to take as little or as much as they like.
Wine and Beverage Pairing
Pair this Italian cheese loaf with a bold Chianti or a smooth Barbera wine to complement the cheese’s robust flavors perfectly. Their acidity balances the cheesy richness.
For non-alcoholic alternatives, consider serving a chilled pomegranate mocktail that refreshes the palate.
If you’re a fan of coffee, a robust espresso could pair intriguingly, especially for those enjoying the loaf as part of a brunch setting.
Temperature plays a role, so keep white wines slightly chilled and reds at room temperature to enhance the loaf’s rich flavors.
Serve beverages in wide-bottom glasses, allowing guests to enjoy the aroma as they sip alongside their meal.
Storage and Shelf Life
Store the cooled cheese loaf wrapped in foil or in an airtight container at room temperature for up to three days.
Ideally, freeze individual slices, separated by parchment paper, to extend shelf life and enable easy reheating.
Look for signs of spoilage, such as mold or off smells, when storing beyond recommended timelines.
Reheat slices in the oven at a low temperature to restore the crust’s crispness and cheese’s gooeyness.
For freezing, allow the loaf to cool completely before wrapping tightly to prevent freezer burn and moisture loss.
Make Ahead Strategies
Prepare the dough a day in advance, letting it proof in the fridge overnight for enhanced flavor development and time savings.
Assemble the loaf a few hours ahead, covering with plastic wrap and refrigerating until ready to bake, ensuring a fresh-out-of-the-oven experience for guests.
Assess quality ahead to gauge the flavors and dough handling on the day of baking, ensuring the best loaf possible.
When reheating, consider baking the loaf covered in foil to preserve moisture, removing the foil near the end for a crispy crust.
Enhance freshness with add-ons, such as a sprinkle of fresh herbs or grated Parmesan before serving.
Scaling Instructions
For halving the recipe, adjust the ingredient quantities proportionally, ensuring the loaf maintains its balanced flavors.
If doubling or tripling, bear in mind that certain ingredients, such as yeast, might not scale linearly. Experiment gradually with adjustments.
Equipment considerations include larger bowls for mixing and extra baking sheets if needed, ensuring even baking for multiple loaves.
Adjust baking time slightly if the loaf density changes, keeping an eye on visual cues of doneness.
With scaled recipes, storage becomes vital. Plan for extra space or multiple containers to maintain freshness.
Nutritional Deep Dive
This cheese loaf offers a satisfying macronutrient profile with protein levels driven by the cheese variety. Each slice serves a balanced meal component or robust snack.
Micronutrients, including calcium and vitamin D, are delivered by the cheese layers, contributing to bone health.
While indulgent, the loaf fits well into a balanced diet when enjoyed in moderation, offering richer flavors without excesses when shared with family.
Portion carefully to prevent overindulgence, savoring smaller slices to maintain mindful eating practices at holiday tables.
If concerned about weight management, consider pairing with lighter dishes during the meal, optimizing enjoyment and balance.
Dietary Adaptations
For a gluten-free version, substitute traditional flour with a trusted gluten-free blend that offers the elasticity required for dough development.
Dairy-free adaptations call for plant-based cheese substitutes, carefully selected for melting properties and flavor compatibility with traditional cheeses.
Adapting for vegan palates involves incorporating reputed vegan cheese brands, olive oil in place of butter, and a flaxseed meal egg substitute for binding.
Low-carb enthusiasts might explore a version using almond flour and mozzarella dough, aligning with popular “fathead dough” recipes.
Keto followers can similarly employ high-fat cheese options and alternative flour varieties, ensuring the loaf meets dietary restrictions while retaining flavor.
Paleo adaptations can focus on nut-based flours and coconut-derived cheeses, keeping the loaf accessible to diverse dietary needs.
For low-FODMAP considerations, ensure cheese varieties low in lactose, such as aged cheddar, are integral to your chosen cheeses.
For other specific diets, consider ingredient swaps that align with individual preferences and tolerances, maintaining the essence of the cheese loaf experience.
Troubleshooting Guide
For texture issues, assess kneading duration and dough hydration levels, ensuring dough is neither too dry nor too sticky.
To correct flavor imbalances, consider adjusting the cheese types or quantities in future iterations, aiming for harmonious contrasts.
If temperature problems arise such as an uneven bake, check oven calibration and consider flipping the loaf midway through baking for evenness.
When encountering equipment challenges, be adaptable; if lacking specific tools like a dough hook, hand kneading is a fine alternative.
For ingredient substitutions, explore flavor-compatible alternatives that provide similar textures and baking results.
Timing concerns often revolve around proofing; adjust rising time based on ambient temperature conditions, aiming for a doubled dough volume.
Recipe Success Stories
Across the globe, home bakers have embraced the Christmas Italian Cheese Loaf, adapting it to various regional flavors and ingredient availability.
Community feedback highlights the loaf’s versatility, with readers sharing stories of added ingredients like spinach to enhance nutritional value.
Variations have seen households mix goat cheese with herbs for a Mediterranean twist, with successes shared online through culinary forums.
Readers have recommended and photodocumented their use of smoked mozzarella for an aromatic alternate, receiving widespread acclaim.
Photography tips include showcasing cheese pulls in images, a mesmerizing feat that entices viewers to recreate the recipe at home.
Frequently Asked Questions
What should I do if my loaf doesn’t rise properly? Allow more proofing time in a warm environment, and ensure your yeast is fresh.
Can I use pre-shredded cheese? Yes, but fresh cheese often melts better and provides richer flavors.
How do I avoid a dense loaf? Pay attention to dough hydration levels and ensure sufficient kneading for gluten development.
What’s the best way to reheat leftovers? Reheat slices in a preheated oven at low heat to restore texture and warmth.
Can I freeze the loaf? Absolutely. Cut into slices, wrap securely, and freeze, maximizing freshness.
Is there a way to make this ahead? Prepare the dough and encapsulate the loaf in advance, baking fresh before serving.
Are there alternatives for vegetarians? The recipe is already vegetarian, but for vegans, use plant-based cheeses.
How can I achieve a more golden crust? Consider brushing the loaf with egg wash before baking to enhance crust color.
How do I know when the loaf is done? A hollow sound when tapped indicates full baking, along with a golden crust.
Can I use different cheeses? Absolutely. Mix and match cheeses to create your own flavor profile while retaining similar textures.
What ingredients can enhance the loaf’s taste? Consider semi-dried tomatoes, roasted garlic, herbs, or even a dash of pesto!
How do I prevent burnt cheese edges? Ensure the oven rack is well positioned, and monitor cheese exposure during baking.
Additional Resources
Explore related recipes such as rosemary focaccia or classic pizza for more Italian baking inspiration and complementary meals.
Delve into technique guides covering dough preparation and cheese handling, enhancing skills for baking mastery in other recipes.
Investigate ingredient information to understand cheese varieties’ nuances and their culinary applications, empowering confident cooking.
Consider equipment recommendations including better ovens or mixers, elevating the baking experience with valuable kitchen investments.
Seasonal variations in our blog cover adapting flavors and ingredients year-round, unlocking versatility and accessibility with each change of season.
Join the Conversation
Share your Christmas Italian Cheese Loaf experiences and photos on social media, tagging us at #FestiveCheeseLoaf.
Gift others your photography insights, documenting the loaf’s process from dough to baked masterpiece in a captivating narrative.
Leave reviews and recipe variations for community building, inspiring others with your unique take and hearing feedback in return.
Engage in culinary discussions, sharing adaptation stories and learning about others’ traditions that enrich their holiday cooking.
Experiment with presentation styles, challenging yourself to find fresh ways to serve and garnish this beloved Italian loaf, impressing at every gathering.
The Recipe
Christmas Italian Cheese Loaf
Serves: 8
Prep Time: 30 mins
Cook Time: 45 mins
Total Time: 75 mins
Kitchen Equipment Needed
Mixing Bowl
Measuring Cups and Spoons
Baking Sheet
Brush for Egg Wash
Spatula
Oven
Ingredients
3 cups all-purpose flour
1 package active dry yeast
1 teaspoon sugar
1 cup warm water
1 teaspoon salt
2 tablespoons olive oil
1 cup shredded mozzarella cheese
1/2 cup grated Parmesan cheese
1/2 cup sliced provolone cheese
1 egg yolk
1 tablespoon water
Directions
In a mixing bowl, dissolve yeast and sugar in warm water; let stand until bubbly, about 10 minutes.
Add flour, salt, and olive oil to the yeast mixture. Mix until well combined and dough begins to pull away from the sides of the bowl.
Knead the dough on a floured surface until smooth and elastic, about 10 minutes. Place the dough in a lightly oiled bowl, cover, and let rise in a warm area until doubled in size, about 1 hour.
Preheat the oven to 375°F (190°C). Punch dough down and turn onto a floured surface. Roll out into a large rectangle.
Layer mozzarella, Parmesan, and provolone over the dough, leaving a small border around the edges. Roll the dough tightly into a loaf shape.
Place on greased baking sheet, seam side down. Beat egg yolk with water and brush over the loaf.
Bake in preheated oven for 40-45 minutes, or until golden brown and cheese is bubbling.
Let cool slightly before slicing and serving.
Recipe Notes
Feel free to add herbs like rosemary or thyme for added flavor.
This loaf pairs perfectly with tomato-based dipping sauces.
Store leftovers in an airtight container and reheat before serving for the best texture.
Irresistible Bacon Mushroom Swiss Cheese Meatloaf Recipe for Dinner
Bacon Mushroom Swiss Cheese Meatloaf: A Comforting Delight
⚖️
Difficulty
Medium
⏲️
Prep Time
20 mins
🕒
Cook Time
60 mins
⏱️
Total Time
80 mins
🍽️
Servings
8
Crafted with love, our Bacon Mushroom Swiss Cheese Meatloaf brings together the rich flavors of smoky bacon, earthy mushrooms, and creamy Swiss cheese. This meatloaf is a family favorite, balancing savory and cheesy elements with a delicate texture that melts in your mouth. The aroma of sizzling bacon combined with the satisfying bite of perfectly cooked meatloaf creates a comforting meal that warms both the heart and the soul, making it a go-to dish for any occasion.
The uniqueness of this Bacon Mushroom Swiss Cheese Meatloaf lies in its blend of ingredients that transform a classic meatloaf into a gourmet experience. As the dish bakes, the natural juices bind the flavors of the bacon and mushrooms, creating a sumptuous dinner centerpiece that pleases both the eyes and the palate. With its golden-brown crust and gooey cheese filling, this meatloaf promises satisfaction with every slice.
Packed with nutrients and flavor, our meatloaf is perfect for a family gathering or a special treat on a quiet weekend night. It offers an irresistible combination of textures—from the tender meat and creamy cheese to the crispness of bacon, each bite is a medley of delight. Easy to prepare and deeply soul-satisfying, this meatloaf earns its place as a staple in your recipe collection.
Quick Recipe Highlights
Flavor Profile: This meatloaf delivers a harmonious mix of smoked bacon, umami mushrooms, and creamy Swiss cheese, ensuring a memorable savory experience.
Texture: Featuring a tender interior with chunks of bacon and mushrooms, it offers both a soft bite and a satisfying chew.
Aroma: Enjoy the tantalizing smell of crispy bacon and earthy mushrooms as it wafts through your kitchen.
Visual Appeal: The golden crust and melted cheese offer a visual delight, complemented by the rustic charm of mushrooms and bacon bits.
Skill Level Needed: Moderate culinary skills are required, involving frying, mixing, and baking techniques.
Special Equipment: A loaf pan and a sauté pan are essential for achieving the perfect texture and flavor development.
Recipe Overview
Difficulty Level: This recipe is perfect for intermediate cooks who are comfortable with frying ingredients and managing baking times.
Category: Ideal as a comforting main dish, this meatloaf fits perfectly into dinner or lunch menus.
Cuisine: Inspired by classic American comfort food, with hints of European cheese and meat-style enhancements.
Cost: Approximate cost ranges from $15 to $20, depending on the quality and source of ingredients like bacon and Swiss cheese.
Season: Enjoy this dish year-round, with its hearty flavors being especially delightful during the cooler months.
Occasion: Perfect for family meals, casual gatherings, or potlucks where comforting classics are cherished.
Why You’ll Love This Recipe
Bacon Mushroom Swiss Cheese Meatloaf is a testament to texture and taste, offering layers upon layers of rich, umami flavors. Each portion delivers a burst of smoky bacon intertwined with tender mushrooms and the comforting creaminess of Swiss cheese, inviting everyone back for seconds.
This recipe’s convenience makes it a standout. With straightforward preparation steps and minimal equipment, it’s easy to bring this dish together on a laid-back evening. The succinct cooking process and common ingredients allow you to plan and prepare this comfort food without hassle, giving you more time to savor the experience.
While inherently rich, this meatloaf has nutritional perks when prepared with lean beef. Mushrooms contribute valuable vitamins and minerals, while Swiss cheese adds calcium, making it a relatively balanced meal choice. Tailor it to suit your diet by adjusting the ingredients and exploring leaner alternatives to fit nutritional needs.
Not only is this meatloaf perfect for family dinners, but it’s also a welcome centerpiece for entertaining guests. It pairs beautifully with a variety of sides, like mashed potatoes or seasonal greens. Once shared, it’s a recipe likely to spark conversations and create lasting memories, enhancing any social occasion with its comforting essence.
In terms of cost, Bacon Mushroom Swiss Cheese Meatloaf proves to be economical, offering a hearty meal from reasonably priced ingredients that serve multiple people. Many components also often exist as pantry or fridge staples, ensuring frequent, budget-friendly meal options through simple adjustments or bulk purchases when items go on sale.
Historical Background and Cultural Significance
The history of meatloaf can be traced back to ancient Roman times, where meat patties were blended with bread and wine. Over centuries, this staple food evolved into a popular dish in European and American cuisines, appreciated for its flexibility and affordability, particularly during tough economic times.
In American culture, meatloaf gained popularity during the Great Depression. Its adaptability allowed home cooks to stretch family meals with inexpensive fillers like breadcrumbs, while offering nutritious sustenance. Regional variations began to emerge, with ingredients adjusted to local tastes and available products.
The integration of bacon, mushrooms, and Swiss cheese is a modern twist that elevates the traditional meatloaf. This blend takes advantage of the smokiness of cured meats and the creaminess inherent in Swiss cheese, reflecting contemporary tastes that crave rich comfort food combined with gourmet elements.
Today, meatloaf remains a quintessential American dish, celebrated for its homeliness and culinary versatility. From coast to coast, it is prepared with distinct regional spins, reflecting both cultural heritage and modern influences that continue to shape its ingredients and flavor profile.
Ingredient Deep Dive
Bacon, beyond its smoky flavor, holds a deep cultural significance in American cuisine. It’s often associated with the comforting scent of breakfast or as a companion in hearty meals. Nutritionally, bacon provides protein and essential fats but requires moderated use due to its high salt and fat content.
Mushrooms, rich in B vitamins and antioxidants, have been cultivated globally as both food and medicine. When selecting mushrooms, opt for fresh, firm textures and an earthy smell. They easily spoil, so store in the fridge inside a breathable bag and consume quickly.
Swiss cheese, known for its nutty and mild flavor, traces cultural roots to Swiss cultures, enjoying widespread use in dishes worldwide. Packed with calcium, it benefits bone health, making it a valuable protein source that also adds delicious creaminess to recipes.
Common Mistakes to Avoid
Over-mixing the meat can lead to a dense texture. Mix just until combined for the best results.
Skipping the sauté step with mushrooms and onions can result in underdeveloped flavors.
Forgetting to let the meatloaf rest post-baking may cause it to crumble when sliced.
Not seasoning adequately may make the meatloaf bland. Ensure a balanced seasoning with salt and pepper.
Using overly lean meat can lead to dryness. Aim for a balance with some fat content for moisture.
Not incorporating a binder like eggs can cause the meatloaf to fall apart.
Cooking at too high a temperature may result in a burnt exterior and undercooked center.
Failing to cover the meatloaf during cooking can lead to excessive drying.
Using a non-ventilating pan may trap steam, affecting texture.
Underestimating cooking time can lead to a raw interior. Use a thermometer to ensure doneness.
Essential Techniques
Proper sautéing of bacon and mushrooms is essential for intensified flavors. Cook these ingredients until they release their moisture and begin to caramelize, a process that heightens both smokiness and umami, anchoring the meatloaf’s taste profile.
Gently combining the meat mixture is vital to maintain tenderness. Overworking compresses the proteins, creating a dense final product. Use your hands to achieve a light blend, ensuring all ingredients are incorporated without compacting the mixture too tightly.
Ensuring that the meatloaf is shaped evenly and compactly helps it hold its form while baking. Uneven distribution can lead to uneven cooking, resulting in areas of the loaf being over- or undercooked, therefore shaping is critical to success.
Pro Tips for Perfect Bacon Mushroom Swiss Cheese Meatloaf
For a juicier meatloaf, consider adding a touch of milk or broth to the mixture. This extra moisture is absorbed during cooking, resulting in a more succulent finish.
Always rest your meatloaf after baking. This ensures the juices redistribute throughout the loaf, preventing it from falling apart when slicing, while also enriching flavor integration.
Add grated cheese to the mixture for even more cheesy richness throughout. It melds seamlessly during baking, bringing the Swiss flavor into every bite.
Prepare a glaze with ketchup or barbecue sauce for the top of the meatloaf to infuse additional flavor depth and create an attractive, glossy finish post-bake.
Consider using a loaf pan liner to facilitate seamless removal and cleaning, while creating a smoother shape and easier serving experience.
To impart even more flavor, experiment with adding finely chopped herbs such as parsley or thyme, providing a fresh and aromatic contrast to the smoky, savory base notes.
Variations and Adaptations
Embrace regional variations by incorporating other cheeses like cheddar or gruyere for altered flavor profiles. Each cheese brings unique characteristics from sharpness to nuttiness, impacting the overall taste.
Seasonal adaptations abound with this meatloaf. Incorporate seasonal vegetables like bell peppers or carrots for bursts of color and flavor, making different adaptations suitable for any time of year.
For dietary modifications, substitutes like turkey or chicken can be used instead of beef for a lighter option. While changes like these can affect texture and taste, the core methodology remains applicable.
Consider swapping bread crumbs for alternatives like almond flour or oats to create gluten-free adaptations. These changes can alter both binding and texture, requiring slight adjustments to ingredient proportions.
If a more refined presentation is desired, use individual ramekins for portion-controlled meatloaves. They provide elegant plating and personalized servings, suitable for upscale dinners without losing homey appeal.
Serving and Presentation Guide
When plating, elevate the meatloaf by slicing it cleanly and presenting it over a base of mashed potatoes or polenta, adding height and visual interest to the dish.
Creative garnishing using fresh herbs or microgreens provides a pop of color and freshness, which enriches both flavor and presentation, making it more inviting on the plate.
Accompany with side dishes such as roasted vegetables or a crisp salad for complementary taste and texture contrasts, balancing the hearty meatloaf with lighter, fresher elements.
Modern serving suggestions might include pairing smaller portions with sliders or atop savory waffles, reinventing classic pairings with innovative twists that bring forth new culinary experiences.
Temperature is key; ensure your meatloaf is served warm, as the cheese remains melty, enhancing both texture and taste. Carefully reheated portions retain most of their original integrity and appeal.
Control portion sizes with calculated slices, considering the richness of the ingredients. Each person might enjoy one moderate portion to fully appreciate the depth of flavor without overindulgence.
Wine and Beverage Pairing
Pair this meatloaf with a robust red wine such as Cabernet Sauvignon or Merlot. Their bold flavors complement the savory bacon and umami, creating a harmonious dining experience.
For non-alcoholic alternatives, try a full-bodied iced tea or sparkling water with a touch of citrus. Their refreshing qualities provide a palate cleanse between bites, enhancing enjoyment of the meal.
Coffee or tea pairings may include a rich black coffee or a bold English breakfast tea. Both offer earthiness and an aromatic complement that enriches the meal experience.
Providing beverages at the right temperature is crucial, with wines decanted to breathe and teas served hot or cold, each releasing aromas and flavors that elevate the culinary experience.
Serve wine in appropriate glassware to enhance aromatics, using larger goblets to capture the essence, while keeping non-alcoholic options in similar fashioned glassware so as not to differentiate the experience.
Storage and Shelf Life
Store leftover meatloaf in an airtight container in the refrigerator, where it should remain fresh for up to 3-4 days. Ensure slices are separated by parchment to prevent sticking and enhance preservation.
Temperature is key; refrigerator temperatures should be maintained below 40°F. For extended shelf life, consider freezing portions in vacuum-sealed bags for up to three months.
Signs of spoilage include off-odors, discoloration, or slimy textures; any such changes warrant discarding. Regularly check stored portions to ensure optimal quality maintenance.
To reheat, use a moderate oven temperature of about 350°F, allowing thorough warming without drying out. Cover with foil to keep moisture within and restore the original flavor profile.
When freezing, consider slicing prior to storage for easy portioning. Defrost refrigerated portions overnight before reheating to maintain texture and moisture balance.
Make Ahead Strategies
Prepare components such as bacon and mushroom mixtures ahead of time. This allows the flavors to develop and saves time during final assembly, providing convenience on the cooking day.
Once assembled, uncooked meatloaf can be stored in the fridge for a day, or frozen for later use, allowing flexibility in meal planning. Adapt carefully timed steps to ensure fresh quality upon reheating.
Assess quality impact when storing in advance—over-stored components may lose freshness. Adjust seasoning slightly after prolonged storage to counteract any flavor loss during inactive periods.
When assembling, consider leaving out more volatile ingredients like cheese until ready to bake, optimizing both flavor and texture in the final cooked dish.
Reheat leftovers gently, using a low oven setting. Incorporate fresh elements like herbs or garnishes just before serving to reinvigorate flavors and maintain exciting visual presentation.
Scaling Instructions
To scale down, halve the recipe for a smaller batch. Adjust baking times slightly, starting checks earlier to accommodate thinner layers.
When scaling up, doubling ingredients is straightforward, but consideration of pan size and oven space is crucial. Allow sufficient air circulation around larger pans to ensure even cooking.
For larger batches, prep multiple loaf pans and rotate positions in the oven to ensure even heat distribution. Observe carefully to prevent uneven browning at edges versus center portions.
Up-scaled portions require adjusted timing, typically adding 10-15 minutes to ensure center doneness. Use a meat thermometer to verify internal temperature, aiming for 160°F for a perfectly cooked loaf.
Storage considerations include dividing larger portions into multiple containers to maintain freshness post-cooking. Label thoroughly for clear identification when freezing for future use.
Nutritional Deep Dive
A single serving offers an appealing balance of macronutrients: rich in protein from beef and cheese, providing energy and satiation.
Micronutrients include vitamin D, zinc, and iron from mushrooms, contributing to bone and immune health, essential considerations within varied diets and meal planning.
Dietary considerations guide preparations for optimal health benefits, with potential modifications to suit sodium, fat, or carbohydrate-specific needs according to personal dietary goals.
Portion analysis helps manage balanced consumption, particularly if paired with nutrient-dense sides like greens—an approach focusing on full meal rounds rather than isolated component assessment.
Weight management tips suggest portion control and mindful ingredient choices, keeping in view potential calorie impact from richer meats and cheeses, often mitigated by balance with leaner options.
Dietary Adaptations
For gluten-free adaptations, replace breadcrumbs with crushed gluten-free oats, binding the meat without altering core flavors or textures significantly.
Dairy-free considerations include omitting cheese or substituting treated cheese alternatives that melt well, preserving creamy texture while accommodating intolerance needs.
Vegan alternatives could involve plant-based substitutes like lentils or legumes, binding agents like flaxseed, and omitting meat entirely, crafting a comparable yet cruelty-free dish.
Low-carb versions benefit from pork rinds or cheese crisps in place of breadcrumbs, ideal for ketogenic lifestyles seeking minimal carbohydrate impact without sacrificing depth of flavor.
Paleo-friendly alternatives rely on almond flour and omitting processed meats like bacon, aligning with whole-food eating patterns in line with ancestral dietary principles.
Low-FODMAP adaption ensures onion and mushroom minimization or substitution, enhancing digestive comfort without significant reduction in beloved flavors.
Troubleshooting Guide
Texture issues often arise from incorrect meat handling. Overprocessing can create toughness; consider lighter mixing or using higher-fat content meat for naturally juicier results.
Flavor balance may suffer if insufficiently seasoned. Adjusts should include salt to enhance umami, and pepper for bite, always tasting and refining before final assembly.
Temperature problems often reflect improper baking conditions. Ensuring preheating and steady oven operation is essential—use an oven thermometer for calibration accuracy.
Equipment challenges regarding pan sizes affect how evenly meatloaf cooks. Adapt surfaces and adjust positioning for optimal heat distribution across loaf.
Ingredient substitutions require careful consideration. Interruptions may affect results—consult equivalency charts and adjust proportions for consistency with recipe integrity.
Timing concerns should prioritize incremental checking; cooking at a lower temperature for longer may ensure even doneness, preventing raw interiors and burnt exteriors.
Recipe Success Stories
Our readers have celebrated the versatility of this meatloaf. With countless variations, it has inspired culinary creativity, introducing elements from cheddar accents to spicy jalapeno infusions.
Adaptation stories highlight lactose-free versions with nutritional yeast, ensuring flavorful success without compromising creamy textures, a notable approach for those managing intolerance.
Reader-suggested substitutions include ground turkey and diced apple for an unexpected sweet spin, offering delightful new dimensions to our established recipe.
Photo tips recommend capturing the dish fresh and vibrant, focusing on depth, with close-up angles that showcase the inviting textures—an ideal practice leading to visually stunning results.
Engagement with the community is key; shared iterations and experiences on social media platforms have resulted in creative, supportive exchanges among enthusiasts and experts.
Frequently Asked Questions
Can I freeze the meatloaf before cooking?
Yes, the prepared meatloaf can be frozen before baking. Wrap tightly in plastic wrap and foil to maintain freshness, and thaw in the refrigerator before cooking.
What’s the best way to reheat leftover meatloaf?
The best method is to reheat slices gently in a low oven at 350°F, covered in foil to retain moisture, or microwaved under a damp paper towel to prevent drying.
How do I prevent my meatloaf from falling apart?
Ensure proper binding by using adequate eggs and breadcrumbs. Avoid over-mixing and let the loaf rest after baking to allow it to firm up before slicing.
Can I use turkey instead of beef?
Yes, ground turkey can be substituted for beef. It creates a lighter, leaner version but might require additional seasonings to compensate for the subtle difference in taste.
Why is my meatloaf dry?
Dry meatloaf results from overly lean meat or overcooking. Opt for a higher fat content for moistness, and monitor cook time carefully to avoid overbaking.
Is Swiss cheese necessary?
While Swiss cheese adds unique flavor, it can be replaced with other melting cheeses, such as cheddar or mozzarella, to suit personal preferences or dietary restrictions.
How do I keep the top of my meatloaf from drying out?
Applying a glaze like ketchup or barbecue sauce on top before baking prevents drying, providing moisture and additional flavor to enhance the overall appeal.
What’s the ideal internal temperature for meatloaf?
The ideal internal temperature is around 160°F, ensuring the meat is cooked safely without losing tenderness, layered by precise timing consideration.
Can I add vegetables to the meatloaf?
Yes, finely diced vegetables can be added to enhance flavor and nutrition, ensuring they’re sautéed or blanched first to prevent excess moisture from affecting the texture.
How do I know when my meatloaf is done?
A thermometer confirming 160°F internally guarantees doneness. Additionally, a firm surface and juices running clear at slice testing indicate readiness for serving.
Additional Resources
Explore related recipes such as our Classic Meatloaf or Lean Turkey Meatloaf, offering further insights into variations and complementary customization suggestions.
Technique guides include detailed step-by-step tutorials on proper sautéing and optimal baking practices, ensuring flavorful perfection with ease.
Ingredient information delves deeper into cheese options, offering pairings and flavor profiles to suit a range of culinary preferences and dietary requirements.
Equipment recommendations outline key tools like loaf pans and thermometers, promoting successful recipes through informed, practical kitchen investments.
Seasonal variations highlight shifts and adaptations suitable throughout the year, ensuring year-round enjoyment with elements reflecting available produce and trends.
Join the Conversation
Your thoughts are invaluable! Share your meatloaf experiences on social media, employing photography tips to showcase the recipe’s enticing warmth visually.
Engage in recipe reviews, offering insights and personal tweaks that may inspire fellow cooks, nurturing a community of shared culinary passion and collaboration.
Discover creative variations and adaptations, sharing personal successes and regional twists that expand horizons and enrich our collective food experience.
The discussion on engaging platforms like forums or comment sections encourages lively exchange, supporting knowledge growth and innovation in accessible, enjoyable ways.
Your participation enlivens the culinary conversation, making each creation a meaningful shared endeavor. Join us in celebrating the comforting joy of homemade meatloaf today.
The Recipe
Bacon Mushroom Swiss Cheese Meatloaf
Serves: 8
Prep Time: 20 mins
Cook Time: 60 mins
Total Time: 80 mins
Kitchen Equipment Needed
Loaf pan
Sauté pan
Mixing bowl
Spatula
Meat thermometer
Ingredients
1 lb ground beef
1/2 lb bacon, chopped
1 cup mushrooms, finely chopped
1 cup Swiss cheese, grated
1/2 cup breadcrumbs
2 eggs
1 tsp salt
1/2 tsp black pepper
1 small onion, diced
2 cloves garlic, minced
1 tbsp Worcestershire sauce
Directions
Preheat your oven to 350°F (175°C).
In a sauté pan over medium heat, cook the bacon until crisp. Remove and set aside.
In the same pan, add mushrooms and onions; sauté until soft. Add garlic and cook for another minute.
In a large mixing bowl, combine beef, sautéed vegetables, bacon, breadcrumbs, cheese, eggs, salt, pepper, and Worcestershire sauce. Mix gently until combined.
Transfer the mixture into a loaf pan, pressing lightly to shape evenly.
Bake for 60 minutes, or until the internal temperature reaches 160°F (70°C).
Allow the meatloaf to rest for 10 minutes before slicing and serving.
Recipe Notes
Adjust seasoning to taste preferences.
Substitute other cheeses if Swiss is unavailable.
For a spicier version, add diced jalapeños.
Irresistible Bacon Mushroom Swiss Cheese Meatloaf Recipe for Dinner
Bacon Mushroom Swiss Cheese Meatloaf: A Savory Delight for Your Taste Buds
⚖️
Difficulty
Intermediate
⏲️
Prep Time
20 mins
🕒
Cook Time
1 hr
⏱️
Total Time
1 hr 20 mins
🍽️
Servings
6
Imagine a mouthwatering blend of rich flavors, where savory bacon, earthy mushrooms, and creamy Swiss cheese meet in a perfect culinary marriage. Our Bacon Mushroom Swiss Cheese Meatloaf is the ultimate comfort food that elevates traditional meatloaf with gourmet touches. This recipe not only satisfies your cravings but pleases the crowd, offering a cozy and delightful dining experience. Get ready to savor every bite of this hearty and flavorful meatloaf, perfect for family dinners or special occasions.
The Bacon Mushroom Swiss Cheese Meatloaf is a versatile dish that incorporates a medley of flavors and textures, making it an instant favorite at any dinner table. The crispy bacon adds a smoky essence, while the sautéed mushrooms bring a depth of earthiness that complements the creamy, melted Swiss cheese. With each slice, you are greeted by a harmonious balance of taste that is both comforting and indulgent.
Quick Recipe Highlights
Flavor Profile: A delightful blend of smoky bacon, earthy mushrooms, and creamy Swiss cheese for a sophisticated taste experience.
Texture: Juicy and tender meatloaf with a crispy bacon exterior and a melty cheese core.
Aroma: Inviting notes of smoked bacon and sautéed mushrooms fill the kitchen with warmth.
Visual Appeal: Golden-brown crust with pockets of melted Swiss cheese and speckled mushrooms.
Skill Level Needed: Intermediate skills are sufficient to manage sautéing, mixing, and baking perfectly.
Special Equipment: A loaf pan and mixing bowls are essential for creating the perfect blend.
Recipe Overview
Difficulty Level: This recipe is classified as intermediate due to the balance required in seasoning and baking to perfection.
Category: Perfect as a main course for dinner, but also suitable for meal prep.
Cuisine: Rooted in American comfort food with a touch of gourmet flair.
Cost: Affordable ingredients make it a budget-friendly yet elegant meal option.
Season: Ideal for fall and winter, but versatile enough for year-round enjoyment.
Occasion: Perfect for family gatherings, holiday dinners, or casual weekend meals.
Why You’ll Love This Recipe
Our Bacon Mushroom Swiss Cheese Meatloaf is a taste sensation like no other, combining the richness of mushrooms and bacon with the creamy delight of Swiss cheese. Its hearty texture is comforting, providing a satisfying bite full of indulgent flavors. Whether you’re looking for an effortless weeknight dinner or an impressive dish for guests, this meatloaf is sure to become a staple in your recipe collection.
Preparation is streamlined and hassle-free, allowing you more time to enjoy with loved ones rather than spending hours in the kitchen. This recipe offers a perfect make-ahead solution—the flavors only deepen with time, making leftovers highly desirable. With straightforward steps and accessible ingredients, convenience is truly at the heart of this meal.
From a nutritional perspective, our Bacon Mushroom Swiss Cheese Meatloaf provides a balanced portion of protein, fats, and vital nutrients. Mushrooms contribute antioxidants and beneficial minerals, while the cheese offers calcium for bone health. The combination ensures you and your family enjoy a wholesome, delicious meal without forfeiting health benefits.
Socially, this dish is a showstopper; it’s near impossible to resist its aromatic allure and visual appeal. It’s perfect for sharing and gathering, enabling easy serving and enjoyment around the table. The exquisite taste and texture make it a crowd-pleaser, capturing attention and sparking conversation.
Finally, this meatloaf is budget-friendly, crafted using ingredients that are cost-effective without compromising quality. Enjoy a gourmet dining experience at home, proving that elegance and sophistication can be achieved within any budget. The affordability means you can replicate this dish regularly, ensuring it remains a beloved choice.
Historical Background and Cultural Significance
The meatloaf has longstanding roots in culinary history, particularly within American cuisine, where it emerged as a staple during the Great Depression. By utilizing readily available ingredients, meatloaf offered a hearty and nutritious meal, providing sustenance in challenging times. Over the decades, variations of traditional recipes have appeared, with Bacon Mushroom Swiss Cheese Meatloaf representing a modern twist.
Culturally, the meatloaf symbolizes comfort food across numerous societies, delivering warmth and hospitality. It bridges generational gaps, bringing families together over the dinner table. This version encapsulates the essence of its past while embracing contemporary flair by introducing unique taste combinations.
Evolving into an all-season favorite, the Bacon Mushroom Swiss Cheese Meatloaf epitomizes innovation in classic American cuisine. Adjustments in ingredients and techniques showcase the adaptability and creative potential within traditional recipes. While keeping the core elements intact, this meatloaf adapts the essence to modern preferences.
Regional variations have emerged as traditional meatloaf transcended borders and customs. Each adaptation captures local culinary influences, with regional spices, cheeses, and ingredients cropping up in similar dishes internationally. The Bacon Mushroom Swiss Cheese Meatloaf stirs curiosity and exploration, celebrating individual cultural infusion and culinary exploration.
Ingredient Deep Dive
Bacon, a staple in many cuisines, plays an instrumental role in providing smoky flavor and rich texture. Originating from preserved pork belly, bacon has historical significance, often linked to northern European cuisines. Its distinctive taste is prized worldwide, enhancing numerous dishes with its unique aroma and crispy texture.
When selecting bacon, ensure that it is evenly sliced with a good proportion of fat to meat for optimal crispiness. Store bacon in a breathable wrapper in the refrigerator for fresh use. If substitutions are necessary, turkey bacon offers a leaner alternative with less fat content.
Mushrooms, particularly the cremini variety featured in this meatloaf, are lauded for their delicate earthy flavor and nutritional benefits. Historically referred to as the “food of the gods,” mushrooms were prized by many ancient civilizations. This wonder fungus is renowned for its vitamins, minerals, and antioxidants.
Choose firm, uniform mushrooms free of blemishes. They remain freshest in a paper bag stored in the refrigerator. If needed, portobello mushrooms can serve as a substitute, offering a similar flavor and texture, enhancing the meatloaf’s earthy appeal.
Common Mistakes to Avoid
Overpacking the meatloaf mixture leads to a dense consistency. Gently mix and handle to maintain moisture.
Not sautéing the mushrooms enough may result in excess moisture affecting the meatloaf structure. Ensure mushrooms are cooked thoroughly.
Incorrect cheese proportion can cause an overpowering flavor or lack of richness. Measure cheese precisely for balance.
Skipping the resting period leads to a difficult-to-slice loaf as juices redistribute. Rest for the recommended time.
Using lean meat may cause dryness. Opt for a balanced fat-to-lean ratio for juicy results.
Failing to pre-cook bacon removes its signature crispiness. Pre-bake or lightly fry before integrating.
Uneven baking results from temperature fluctuations. Maintain consistent oven heat throughout cooking.
Ignoring seasoning results in bland flavors. Carefully season at every layer for depth and complexity.
Essential Techniques
Sautéing the mushrooms is critical for drawing out moisture, ensuring the meatloaf retains its structure during baking. Sauté over medium heat until the mushrooms release their juices and begin browning, capturing a concentrated flavor that enhances the overall dish.
Resting the meatloaf post-bake is essential. Allow the loaf to cool for at least 10 minutes, which helps with proper slicing and moisture retention. Comprehend indications such as clear juices and firm crust to confirm doneness before cutting.
Pro Tips for Perfect Bacon Mushroom Swiss Cheese Meatloaf
Incorporate finely chopped onions and garlic into the minced beef portion for aromatic depth from the start. Choose aged Swiss cheese for a robust flavor profile complementing the mushrooms and bacon. Resting the meatloaf is non-negotiable for tender, juicy results. A scatter of fresh herbs, such as parsley or thyme, offers vibrant color and fresh flavor. Layer extra bacon slices on top for added crispiness and visual appeal.
To keep the loaf shape intact, use parchment paper during shaping and baking. Test bake with small portions to adjust seasoning and ratios confidently before committing to the whole recipe.
Variations and Adaptations
Incorporating regional flavors can customize the meatloaf, such as adding chorizo for a Spanish-inspired twist or Gorgonzola cheese for an extra bold taste. In warmer seasons, fresh herbs like rosemary or basil can elevate the flavor profile, providing a bright balance to the richness.
Dietary needs are easily addressed by substituting beef with ground turkey while ensuring adequate moisture retention. Vegetarians may omit the bacon, incorporating matches like spinach or bell peppers to maintain flavor and substance.
Serving and Presentation Guide
For a modern, refined presentation, slice the meatloaf uniformly, displaying the contrast of bacon, mushrooms, and cheese layers. Garnish with a sprinkle of finely chopped parsley and freshly ground black pepper. Accompany with colorful seasonal vegetables for a balanced, picturesque plate.
Traditional accompaniments such as mashed potatoes or roasted root vegetables bring a harmonious pairing. Presenting the sliced meatloaf on a warm platter enhances aroma and taste upon serving.
Wine and Beverage Pairing
A full-bodied Merlot or Pinot Noir complements the heartiness of the meatloaf, while the earthy undertnotes highlight the mushrooms. Non-alcoholic alternatives such as a well-spiced chai or earthy green tea maintain culinary harmony.
Consider serving at room temperature for the optimal aroma, allowing the essences to meld and present a rounded taste profile.
Storage and Shelf Life
To store leftovers, wrap the meatloaf securely in aluminum foil or place it in an airtight container. Refrigerate promptly, ensuring it remains edible for up to four days. For longer storage, freeze individual slices to maintain flexibility for future meals.
When reheating, retain moisture by covering with foil in the oven to avoid drying. Ensure the internal temperature reaches a safe 165°F (74°C) before serving. Frozen slices can be gently thawed overnight in the refrigerator.
Make Ahead Strategies
For advance preparation, assemble the meatloaf and cover it tightly with foil or cling wrap. Store in the fridge for up to 24 hours before baking. If preferred, bake ahead and reserve in the refrigerator or freeze cooked portions for later consumption.
Reheat slowly to ensure even, thorough warming, adding fresh garnishes before serving.
Scaling Instructions
Efficiently scale the recipe by doubling ingredients for larger gatherings, ensuring a larger loaf pan if needed. Timing adjustments are necessary—extend baking and resting periods to accommodate increased volume, ensuring even cooking.
When halving, use a suitable loaf pan size to maintain cooking rhythm. Carefully adapt seasoning to avoid imbalances in the final taste.
Nutritional Deep Dive
Packed with protein, this meatloaf offers substantial energy, contributing to overall muscle and cell health. Swiss cheese boosts calcium and phosphorus intake, vital for bone strength. Mushrooms, rich in vitamin D and antioxidants, provide significant health benefits, bolstering immune function.
Approach serving sizes mindfully, balancing macro and micronutrient intake with side dishes to create a wholesome and nourishing meal.
Dietary Adaptations
To create a gluten-free meatloaf, employ gluten-free breadcrumbs in place of standard varieties, ensuring no cross-contamination. Substitute dairy-free cheese for Swiss to address lactose concerns, without sacrificing flavor depth.
For a vegan adaptation, replace meat substances with lentils and mushrooms, incorporating nutritional yeast as a cheese substitute for umami richness.
Troubleshooting Guide
Addressing texture issues entails ensuring precise breadcrumb proportions; excessive amounts result in dense loafs, while too few lead to instability. Balance is key. If flavor lacks depth, rectify by seasoning each ingredient during assembly, ensuring even distribution and potency.
Temperature fluctuations within the oven may affect consistency; consider investing in an oven thermometer for accurate readings. Equipment challenges may arise without a loaf pan; utilize foil to mold shapes if necessary. Ingredient substitutions should be carefully measured to reflect original flavor intent, maintaining consistency.
Recipe Success Stories
Reader testimonials emphasize the universal appeal, praising the vibrant flavors and ease of preparation. Variations, such as incorporating local cheeses or spices, amplify personalization, supported by an active community eager to explore culinary creativity.
A social media gallery of stunning meatloaf presentations showcases diverse inspirations, sparking a thriving exchange of tips, substitutions, and personal adaptations among enthusiastic cooks.
Frequently Asked Questions
Can I make the meatloaf without mushrooms?
Yes, omit mushrooms and increase the bacon or a similar ingredient to maintain texture and volume.
What can I use instead of Swiss cheese?
Provolone or Gouda are suitable substitutes, each offering a distinct taste palette requiring slight adjustments in cooking time.
Is it possible to use a slow cooker instead of an oven?
Yes, but ensure the loaf remains intact by lining the slow cooker and adapting cooking time to thoroughly cook through.
Can the meatloaf be made ahead of time?
Absolutely! Prepare a day prior and refrigerate or bake fully and store, then reheat before serving.
How can I achieve a crispy top on the meatloaf?
Bake uncovered for the final ten minutes, and consider briefly broiling to achieve a desirable crust.
Will turkey bacon work instead of regular bacon?
Yes, but note changes in texture and flavor intensity, as turkey bacon is typically less fatty and more subtle in taste.
How long should leftovers be stored?
Refrigerate in an airtight container for up to four days or freeze for extended storage potential.
Can I add vegetables to the meatloaf?
Incorporate finely chopped, water-rich vegetables such as bell peppers or spinach for added texture and nutrition.
What’s the best way to reheat leftovers?
Reheat in a foil-covered oven dish until hot throughout, ensuring moisture retention and even distribution.
How do I stop the loaf from falling apart?
Ensure even mixing and binding with ample breadcrumbs or oats, and rest post-baking for optimal results.
Can I use a different type of ground meat?
Yes, blends of beef, pork, turkey, or chicken are viable, ensuring moisture balance when cooking.
Why does my meatloaf lose shape?
This occurs due to overmixing and handling; delicately combine components to promote structural integrity.
Additional Resources
Explore related recipes for more meatloaf variations that embrace diverse inspirations, pairing guides for complementary side dishes designed to elevate your meal, and methodical breakdowns of essential cooking techniques fundamental to mastering classic American cuisine.
Dive into ingredient guides detailing sourcing and selection tips for optimal freshness. Delve into seasonal variations to adapt classic dishes to suit personal thriving culinary creativity across different cuisines.
Join the Conversation
Engage with our online community, share images of your culinary creations, and contribute feedback through social media, ensuring inspiration fuels your culinary journey. Exchange ideas and experiences with fellow enthusiasts, fostering creativity and adaptability.
Encourage connections through photography and vivid documentation, showcasing variations and adaptations among diverse culinary backgrounds. Provide insights and mentorship, fostering a passionate and thriving community eager to embrace creativity and connection.
The Recipe
Bacon Mushroom Swiss Cheese Meatloaf
Serves: 6
Prep Time: 20 mins
Cook Time: 1 hr
Total Time: 1 hr 20 mins
Kitchen Equipment Needed
Mixing bowls
Loaf pan
Frying pan
Oven
Knife and chopping board
Ingredients
1 pound ground beef
6 slices bacon, cooked and chopped
1 cup cremini mushrooms, chopped
1 cup Swiss cheese, shredded
1/2 cup breadcrumbs
1 egg
1/2 cup onion, finely chopped
2 cloves garlic, minced
1 tablespoon Worcestershire sauce
Salt and pepper to taste
Directions
Preheat your oven to 350°F (175°C).
Sauté the mushrooms in a frying pan over medium heat until tender and moisture has evaporated. Remove and let cool.
In a mixing bowl, combine ground beef, cooked bacon, sautéed mushrooms, and shredded cheese.
Add breadcrumbs, egg, onion, garlic, Worcestershire sauce, and seasoning. Mix gently but thoroughly.
Shape the mixture into a loaf and place it in a lightly greased baking loaf pan.
Bake for 60 minutes or until a meat thermometer reads an internal temperature of 160°F (71°C).
Let the meatloaf rest for 10-15 minutes before slicing to serve.
Recipe Notes
For a gluten-free version, substitute breadcrumbs with gluten-free options.
Incorporate a pinch of herbs like thyme or rosemary for aromatic nuances.
Delicious Cornbread Casserole Recipe: A Perfect Comfort Food Delight
Delicious Cornbread Casserole Recipe: A Southern Staple
⚖️
Difficulty
Easy
⏲️
Prep Time
15 mins
🕒
Cook Time
45 mins
⏱️
Total Time
60 mins
🍽️
Servings
8
Whatever the occasion, this cornbread casserole recipe is the perfect comfort food that will leave everyone asking for seconds. This traditional Southern dish combines the delightful sweetness of corn with the savory richness of butter and cheese, creating a lip-smacking harmony of flavors. Whether served as a side dish during family gatherings or as the star at your potluck party, this casserole brings a cozy and nostalgic touch to any meal.
The cornbread casserole ticks all the right boxes when it comes to texture and taste. Its golden-brown crust gives way to a moist and tender interior packed with juicy kernels of corn. The balanced combination of sweet and savory notes makes it a versatile dish that pairs beautifully with a variety of main courses. So, gather your ingredients and discover the magic of homemade cornbread casserole—a real crowd-pleaser!
Quick Recipe Highlights
Flavor Profile: This dish offers a delightful blend of sweet corn and savory cheese melded perfectly with a hint of buttery richness.
Texture: Expect a moist and soft interior contrasted with a slightly crispy, golden crust.
Aroma: The enticing aroma of freshly baked cornbread mingling with melted cheese will fill your kitchen with warmth.
Visual Appeal: Its golden exterior tantalizes the eyes, while the colorful flecks of corn kernels provide a pleasing visual contrast.
Skill Level Needed: Suitable for beginners due to the straightforward mixing and baking steps.
Special Equipment: Requires a baking dish for perfect results.
Recipe Overview
Difficulty Level: This recipe falls in the easy category, as it involves simple steps and readily available ingredients. Ideal for novice cooks and those short on time, its success hinges on proper mixing and oven management.
Category: A versatile side dish that complements both casual and formal meals, ideal for lunch and dinner settings.
Cuisine: Rooted in Southern cuisine, this dish showcases the region’s love for corn-based recipes and comfort food dining.
Cost: With economical ingredients like cornmeal and cheese, the overall cost remains reasonable, perfect for budget-friendly meal planning.
Season: Best enjoyed in cooler months, its comforting warmth is also ideal during festive seasons.
Occasion: A staple for Thanksgiving and potlucks, yet simple enough for everyday family meals.
Why You’ll Love This Recipe
This cornbread casserole offers a sensory delight with its rich flavor profile and luscious texture, making every bite a pleasure. Its marriage of sweet corn and savory elements is perfect for those seeking a comforting dish that satisfies all taste buds.
Beyond its incredible taste, this casserole is remarkably convenient to prepare. With no elaborate steps or techniques, even kitchen novices will find success. Its ingredients are likely staples in your pantry, streamlining the process further.
A feast for the eyes as well as the stomach, the casserole incorporates nutrient-rich corn, offering vitamins and fiber while maintaining a balance of flavors that won’t overwhelm your nutritional goals.
The dish’s social versatility is unmatched—whether you’re hosting a dinner party or enjoying a family dinner on a busy weeknight, it fits effortlessly into any menu plan, enhancing the meal’s overall enjoyment.
The cost-effectiveness of cornbread casserole ensures it is accessible for everyone. Using staple ingredients and requiring minimal special tools, it’s a practical choice for home cooks looking to create a satisfying meal without breaking the bank.
Historical Background and Cultural Significance
Cornbread, a staple of Southern American cuisine, has roots that trace back to Indigenous peoples who utilized maize as a fundamental part of their diet. The fusion of corn in bread form became popularized by the settlers who adapted local culinary techniques into their recipes.
Over the years, cornbread evolved into a beloved side dish across America, gaining prominence in Southern households where it was often paired with rich stews and meats. This cultural exchange laid the groundwork for modern cornbread casserole recipes that harness the key ingredients of that era.
Cornbread casserole, as we know it today, serves as a testament to years of culinary evolution, incorporating modern ingredients like cheese and sour cream for added richness and flavor complexity. This evolution highlights the adaptability and enduring appeal of the dish.
Regional variations exist, showcasing the flexibility of cornbread casserole to embrace local flavors and preferences. From incorporating jalapeños in the Southwest to sweet renditions with honey and maple syrup in the North, cornbread casserole reflects a wide culinary tapestry.
Ingredient Deep Dive
Cornmeal, a fundamental ingredient, bears historical significance as a staple grain among Native American tribes. Its fine texture and subtle sweetness form the foundation of various baked goods, notably cornbread. Nutritionally, cornmeal offers dietary fiber, vitamins, and essential minerals, contributing to daily nutrient intake.
In terms of selection, opt for yellow cornmeal when seeking that classic cornbread hue. Store cornmeal in an airtight container in a cool, dry place to prevent moisture and bugs. If needed, polenta can be substituted, although its coarser texture may alter the final product’s consistency.
Cheese, particularly cheddar, lends savory depth and richness to the casserole. Originating from English cheese-making traditions, cheddar is now globally cherished for its robust flavor profile. Besides its flavor appeal, cheese adds calcium and protein, beneficial for bone health.
Select mature cheddar for a more pronounced taste, ensuring freshness by storing it in airtight wrapping within the fridge. Should you desire a different flavor profile, consider substituting with gouda or mozzarella, which melt well and bring their unique flavors to the dish.
Common Mistakes to Avoid
Over-mixing the batter: This can lead to tough, dense cornbread. Mix just until combined to preserve lightness.
Baking at the wrong temperature: Ensuring your oven is preheated accurately is key to achieving the correct texture.
Using outdated cornmeal: Rancid cornmeal can alter flavor, so always check expiration dates before use.
Neglecting to grease the baking dish: This step prevents sticking and maintains the casserole’s aesthetic appeal.
Ignoring ingredient temperatures: Ensure dairy products are room temperature for easier blending and results.
Substituting ingredients haphazardly: Each component contributes to the final taste and texture—adjust with caution.
Skipping rest time: Allow the casserole to cool slightly post-baking for easier slicing and serving.
Underseasoning: Season effectively, especially when using cheese, to enhance the overall flavor profile.
Essential Techniques
Mastering the art of creating a tender cornbread mixture is crucial for success. Combine dry and wet ingredients separately before gently folding them together. This prevents overworking the batter, ensuring the baked result is light and fluffy.
When baking, place the dish in the center rack for even cooking. This position allows consistent heat distribution, crucial for achieving both a golden-brown crust and moist interior. Keep a watchful eye towards the end of the baking time to prevent overbaking.
Thoroughly greasing your baking dish is a simple yet essential step. It facilitates easy removal of servings and maintains the casserole’s structural integrity. Use butter or a non-stick spray generously along the sides and base of the dish.
Employing the right cheese melting technique can elevate the dish. Shred cheese finely to encourage even distribution throughout the casserole, maximizing its creamy flavor. Avoid pre-shredded variations with anti-caking agents that hinder melting.
Pro Tips for Perfect Cornbread Casserole
Add a touch of sweetness by incorporating a tablespoon of honey or maple syrup. This enhances the sweet corn flavor without overpowering the savory elements, creating a well-rounded taste.
For a spicier kick, dice a jalapeño or add a pinch of cayenne to the batter. This culinary twist complements the casserole’s flavors while adding a southwestern flair.
Achieve fluffier results by ensuring all ingredients are at room temperature before mixing. This promotes a more even batter consistency and aids in cooking evenly throughout.
Add crunch by sprinkling a layer of crushed crackers or breadcrumbs on top before baking. This creates a delightful textural contrast to the soft interior of the casserole.
For an even cheese distribution, mix some cheese into the batter rather than layering it all on top. This ensures every bite is packed with creamy flavor, not just the top crust.
Enhance flavor depth by using an oven-to-table baking dish. The retained heat keeps the casserole warmer longer, allowing flavors to meld more harmoniously over time.
Variations and Adaptations
Incorporate regional flair by adding a handful of diced bell peppers and onions for a Creole-inspired twist. This lends vibrant color and additional sweetness to the dish.
With seasonal produce in mind, substitute fresh corn kernels during summer months for canned or frozen options in winter. This offers a taste of summer’s bounty while maintaining casserole consistency.
For dietary modifications, replace regular cheese with a dairy-free alternative to accommodate lactose-intolerant guests. Choose a flavor-rich vegan cheese to maintain the savory essence without compromising on dietary needs.
Infuse Mexican influences by adding a layer of refried beans and salsa for a layered casserole bursting with flavors. The added layers introduce a spicy and tangy edge to the traditional dish.
For texture transformation, blend half of the corn into the batter for a smoother consistency. This creates a uniform cornbread texture while retaining corn’s inherent sweetness.
Enhance presentation by baking the casserole in individual ramekins. Personal portions elevate the dining experience and embody modern presentation standards.
Serving and Presentation Guide
Carefully slice the casserole into squares, ensuring each piece maintains its integrity. Use a spatula for easier transfer from dish to plate, avoiding breaks in the delicate structure.
Top with freshly chopped parsley or cilantro for a burst of color. These herbs introduce both visual beauty and a fresh contrast to the casserole’s warm, rich flavors.
Traditional accompaniments include barbecued meats or smoky grilled vegetables, balancing the cornbread’s sweetness with robust savory elements.
Consider a modern twist by serving alongside a crisp green salad with a tangy vinaigrette dressing. This offers a refreshing counterpart to the dish’s rich texture and buttery flavor.
Ensure serving at a mildly warm temperature. Allow a cooling period post-bake to settle flavors and firmness, then reheat briefly if served later to restore warmth without drying out.
Employ portion control by cutting evenly distributed squares for a clean, professional look. This aids in planning section distribution and enhances visual appeal on the serving platter.
Wine and Beverage Pairing
Pair with a crisp Chardonnay or a light Pinot Grigio to complement the cornbread’s buttery notes. These wines’ acidity balances the casserole’s richness while highlighting its sweet corn elements.
For non-alcoholic options, serve with a refreshing iced herbal tea. Its subtle flavors wash over the palate, creating a clean contrast to the casserole’s hearty nature.
In cooler months, a spiced apple cider offers a cozy complement, aligning with the casserole’s autumn aromas. Serve warm to enhance the interplay of temperatures.
Coffee, particularly a well-rounded medium roast, can heighten the dining experience when pairing breakfast or brunch iterations of this casserole.
Ensure beverages are served at appropriate temperatures to enhance flavors. Chilled white wines emphasize freshness, while warm drinks echo the casserole’s comfort.
Offer beverages in clear glass or ceramic to elevate the presentation. Visual clarity can enhance the overall appeal when perfectly paired with the colorful casserole serving.
Storage and Shelf Life
After cooling, store leftovers in an airtight container to prevent dryness. This method preserves freshness for up to three days when refrigerated. Reheat in a preheated oven or microwave to restore warmth, adding a splash of milk if needed to maintain moisture.
Freezing is possible for portions, although flavor and texture may alter upon thawing. Use freezer-safe containers, ensuring maximum air exclusion to prevent ice crystal formation.
When handling leftovers, inspect for signs of spoilage such as discoloration or sour odor. Err on the side of caution by discarding if quality doubts arise.
Defrost frozen portions overnight in the fridge beforehand to ensure even reheating. Oven warming is preferred for a more consistent result.
Reserve fresh elements for post-storage addition. Address a deflated topping by adding cheese or herb sprinkles post-reheating to refresh the dish’s look and taste.
Make Ahead Strategies
Prepare the batter up to a day in advance, storing it covered in the fridge. This saves time and allows flavors to meld, enhancing the baked result.
If assembling the casserole ahead, combine ingredients and store them unbaked. Cover securely to prevent fridge aromas from imparting off-flavors.
Consider baking in stages, splitting efforts into mixing and baking phases. This minimizes day-of prep and optimizes oven availability for concurrent dishes.
Evaluate quality impacts when making in advance. Longer baking duration can age flavors positively but adhere to set guidelines to prevent overcooking.
Incorporate fresh elements such as parsley or freshening cheese topping just before serving to invigorate day-old dishes.
Advance reheating guidelines offer a better finish. Use foil to cover the casserole during warming, preventing moisture loss while ensuring deep, thorough heating.
Scaling Instructions
To halve the cornbread casserole recipe, simply reduce each ingredient by fifty percent. Use a smaller baking dish to accommodate reduced quantities, ensuring even cooking.
For larger gatherings, double or triple the recipe. Adjust baking dishes accordingly to retain thickness proportion—consider multiple dishes for increased quantity.
Equipment may require scaling adjustments—ensure all items used can accommodate increased load or smaller batch for equalized heating dynamics.
Adjust cooking time based on thermal mass—larger batches may need extended periods, while smaller portions often bake quicker. Monitor closely during cooking.
Account for increased ingredient amounts in storage and preparation areas when scaling, checking for space and feasible operation within intended kitchen setup.
Reflect on serving needs by adjusting portion sizes to maintain consistently served sections across varied guest numbers, employing plates or chafing dishes as needed.
Nutritional Deep Dive
Each serving of cornbread casserole offers an excellent source of carbohydrates, providing sustenance and energy throughout the day. With addition of cheese, the recipe has a notable calcium and protein supply, essential for bone health and cellular functions.
Micronutrient analysis reveals generous portions of vitamin A and E from cornmeal, contributing positively to visual health and overall well-being. The dish remains sufficiently balanced within portion size to avoid excess caloric intake.
Health benefits are rooted in its whole grain content, offering a rich supply of beneficial fiber crucial for digestive health. As with any recipe, exercise portion awareness to prevent overturning dietary goals.
Consider dietary restrictions with component analysis—such as the importance of cheese varieties concerning lactose intolerance or specific nutritional targets.
Mindful portion control allied with balanced meal planning accommodates a range of dietary preferences, aligning taste with nutritional prudence.
Dietary Adaptations
For gluten-free considerations, use gluten-free cornmeal and double-check all processed ingredients for cross-contamination. Ensuring the integrity of each component can address sensitivities effectively.
To create a dairy-free version, substitute regular cheese with lactose-free or plant-based alternatives. Maintain texture and flavor richness by selecting a cheese substitute that melts properly.
Plant-based eaters can enjoy a vegan rendition by using soy milk and flaxseed as an egg replacement. Opt for vegan cheese options to retain the casserole’s savory appeal.
To adapt to keto preferences, reduce cornmeal use and incorporate almond flour for a low-carb variation. This maintains a familiar texture while minimizing carbohydrates.
Paleo fans should explore a grain-alternate recipe utilizing almond or coconut flour while integrating coconut milk to enhance flavor depth.
Consider low-FODMAP dinner arrangements by closely reviewing cheese choices, opting for lactose-free styles. Portion control remains instrumental to allergic sensitivities.
Troubleshooting Guide
For texture issues, avoid additional flour in the batter. Instead, introduce moisture elements like milk or egg whites cautiously to enhance fluffiness instead of density.
To balance flavors, ensure harmony by adjusting seasoning gradually. Taste between ingredient additions to achieve a consistent, wonderful taste profile.
Keep an eye on temperature throughout baking to combat challenges, utilizing an oven thermometer to promote accuracy without surprises.
Stay attentive to ingredient substitution tactics, limiting replacement to one item at a time to gauge impact. Embrace adjustments mindfully to maintain quality.
Timing concerns are alleviated through regular oven checking—use visual cues such as crust coloration or fragmented separations for insight on completion.
When equipment poses challenges, customize dish arrangements or pursue cookware substitutions mindful of size and heat conductivity.
Recipe Success Stories
Every household has its iteration of a classic cornbread casserole success, with stories of gatherings and heartfelt sharing of beloved recipes through generations passed.
Adaptation tales emerge frequently—one reader credits the addition of bacon for elevating flavor, while another introduces chive toppings for a fresh twist.
Community feedback often lauds the dish’s versatility—images show enthusiastic reader variations, speaking to the casserole’s integrative flexibility across cuisines globally.
Photography enthusiasts play with serving angles and lighting arrangements to capture the casserole’s appetizing visual impact, eliciting sensory intrigue.
Reader suggestions from across varied regions provide ingenious enhancement strategies, continually evolving a traditional dish into exciting experiences uniquely representative of regional preferences.
Frequently Asked Questions
Can I use pre-cooked corn instead of canned corn?
Yes, pre-cooked corn works well as a substitute for canned variants. Simply drain thoroughly and incorporate naturally into your batter for desired moisture retention.
Is it possible to prepare the whole dish the night before?
Preparation of the uncooked casserole a day in advance is permissible. Store securely in the fridge, excluding any time-sensitive toppings to retain freshness when baking.
What type of cornmeal should I use for a lighter texture?
Fine-ground cornmeal facilitates smoother batter consistency and results in a lighter casserole texture post-baking. Opt for fresh cornmeal to promote uniformity.
How does baking dish material affect outcomes?
Material impacts heat distribution—a ceramic dish retains heat evenly, promoting thorough baking while metal variants sharpen crust effects. Consider usage based on your preferences.
Should liquids be adjusted in high-altitude baking?
At higher altitudes, slight liquid additions and reduced leavening aid in maintaining baking stability. Experiment gradually to tailor textures to altitude requirements.
Why add eggs at room temperature?
Room-temperature eggs aid in seamless ingredient incorporation, avoiding graininess. This improves batter elasticity and culminates in uniform baking flavors and textures.
Can I freeze before or after cooking?
Freezing after cooking is recommended due to the components’ transformative qualities. Ensure portions are well-contained to minimize freezer burn or textural degradation.
What if cheese forms greasy patches?
Occasional cheese grease requires balancing—distribute mixed cheese evenly to mitigate pooling and moderate overall fat content for equilibrium refinement.
How can I add sweetness without affecting structure?
Strategic use of subtle sweeteners like honey or agave gracefully conduces the natural corn flavor without structural compromise. Monitor optional sugar ratios accordingly.
Can lactose-free cheese perform identically?
Diverse lactose-free types are now commercially available, boasting credible melting properties. Selecting the right variant ensures flawless textural complementarity to standard cheese.
Is non-dairy milk a good substitution?
Non-dairy alternatives are advantageous—select full-fat, potentially creamier types like coconut or macadamia, which emulate dairy richness within moist, flexible textures.
Are any vegan eggs suitable?
Facilities now include flaxseed ‘eggs’ or aquafaba across modern vegan adaptations. Each provides binding aptitude while leaving intact conventional preparation forms and techniques.
Additional Resources
Discover related recipes such as spicy jalapeño cornbread cupcakes or a traditional Southern cornbread stuffing recipe to complement and expand your dish repertoire effectively.
Surround cherished times with technique guides on even greasing strategies and folding methods critical for mastering signature cornbread casserole precision.
Enhance ingredient familiarity by referencing nutrient-specific guides, where detailed discussion over cornmeal selection or cheese types aligns with personal aims or allergy conditions.
Explore quality cookware options—understand vital bakeware’s role influencing outcomes, guiding budget with insights spanning from residential mileage to professional-grade needs.
Opt for seasonal casseroles or time-specific servings—unearthed insight into optimal seasons promotes climatic harmony through aligned sides and interconnected plans.
Join the Conversation
Engage with fellow culinary explorers through social media platforms, sharing creative photos and personalizing each casserole shaping in an embrace of communal enthusiasm.
Develop photography skills inspired by readers, capturing contrasts and angles highlighting the casserole’s distinctive design. Lighting insights clear visual winners enhance aesthetic quality.
Participate in recipe reviews and feedback facilitations—your distinct tastes and experiential foundations enhance core recipe outlook, merging collectivism across flavor timelines.
Deepen community bonds by discussing variation desires or offering educational tips. Unite through seasonal exchanges, upholding a collaborative spirit reflective of hidden secrets.
Try new interpretations or adapt established ones—experimentation with visual stimuli not only hones skill but nurtures a collaborative constituency of food-sharing excitement.
The Recipe
Cornbread Casserole
Serves: 8
Prep Time: 15 mins
Cook Time: 45 mins
Total Time: 60 mins
Kitchen Equipment Needed
Baking dish
Mixing bowls
Whisk
Spatula
Grater
Ingredients
1 cup cornmeal
1 cup all-purpose flour
2/3 cup sugar
1 tablespoon baking powder
1/2 teaspoon salt
2 large eggs
1 cup milk
1/2 cup melted butter
1 cup canned corn, drained
1 cup cheddar cheese, shredded
Directions
Preheat oven to 375°F (190°C). Lightly grease the baking dish.
In a large mixing bowl, whisk together cornmeal, flour, sugar, baking powder, and salt.
In another bowl, beat eggs and mix in milk and melted butter.
Combine wet and dry ingredients, mixing gently until just combined. Do not over-mix.
Stir in canned corn and half of the shredded cheese.
Pour batter into the prepared baking dish, spreading evenly.
Sprinkle the remaining cheese over the top.
Bake for 45 minutes, or until a toothpick inserted into the center comes out clean.
Allow to cool slightly before serving.
Recipe Notes
Substitute canned corn with fresh kernels for a fresher taste.
Add a pinch of cayenne pepper for a spicy variation.
Store leftovers in the refrigerator for up to three days.
Deliciously Healthy: Crispy Salmon Bowls with Bang Bang Sauce
Crispy Salmon Bowls: A Flavorful Delight with Bang Bang Sauce
⚖️
Difficulty
Medium
⏲️
Prep Time
15 mins
🕒
Cook Time
20 mins
⏱️
Total Time
35 mins
🍽️
Servings
4
Experience the perfect combination of crispy salmon paired with a zesty Bang Bang sauce in our Crispy Salmon Bowls. These bowls are a fantastic blend of flavors and textures, providing a satisfying meal that’s both nutritious and indulgent. The salmon’s crispy skin, juicy interior, and the spicy-sweet bang bang sauce create a compelling taste that will leave your taste buds longing for more. Whether you’re serving family or impressing guests, this dish is sure to be a hit.
Quick Recipe Highlights
Flavor Profile: The blend of spicy, tangy, and slightly sweet Bang Bang sauce elevates the rich flavor of the salmon.
Texture: Enjoy crunchy yet tender salmon with a creamy sauce over a bed of soft rice and crisp vegetables.
Aroma: The salmon releases appetizing aromas that are complemented by the tangy scent of the sauce.
Visual Appeal: Vibrant orange salmon paired with green vegetables and a creamy sauce makes for a stunning presentation.
Skill Level Needed: Some culinary skills are required to achieve perfect salmon crispiness, but it’s simple enough for home cooks.
Special Equipment: A sharp knife for slicing the salmon, a non-stick skillet for cooking, and a whisk for the sauce.
Recipe Overview
Difficulty Level: This medium-level recipe requires some attention to detail when cooking the salmon to achieve a perfect sear without overcooking.
Category: Ideal as a main course for lunch or dinner.
Cuisine: Drawing inspiration from Asian flavors, this dish is a fusion of traditional and modern culinary styles.
Cost: Using fresh salmon can be slightly luxurious but is balanced by affordable ingredients like rice and vegetables.
Season: Best enjoyed in spring and summer when fresh ingredients are in abundance, but can be made year-round.
Occasion: Perfect for family dinners, casual entertaining, or a stress-free weeknight meal.
Why You’ll Love This Recipe
The taste and texture appeal to anyone who enjoys a well-cooked piece of fish. The salmon’s crispy edges and the creamy, spicy-sweet Bang Bang sauce marry wonderfully to create a dish that’s satisfying and full of flavor. Convenience is another strong point. With a prep time of only 15 minutes and a total cooking time of 35 minutes, these crispy salmon bowls are perfect for a quick yet rewarding culinary endeavor. Nutritionally, the dish is well-balanced, offering a great source of protein from the salmon and essential vitamins and minerals from fresh veggies. Socially, these bowls are impressive, showing off your cooking skills without requiring extensive culinary expertise. The cost-effectiveness makes it a viable option for many budgets, especially if ingredients are sourced seasonally.
Historical Background and Cultural Significance
The use of Bang Bang sauce, a creation with origins in Asian cuisine known for its sweet and spicy kick, pairs beautifully with salmon, providing a contemporary twist to traditional flavors. Its cultural significance is rooted in the modern adaptation of Asian sauces in Western cooking. This recipe showcases the evolution of mixing culinary traditions to develop new and exciting dishes. Regional variations of this dish can be found, often featuring different ways to prepare the salmon or altering the accompanying sauce to reflect local tastes.
Ingredient Deep Dive
Salmon is the star ingredient, known for its rich, buttery flavor and high omega-3 fatty acid content. Selecting fresh, wild-caught salmon yields the best flavor and texture. Proper storage is key—keep it refrigerated and use it within one to two days of purchase. The Bang Bang sauce, made with mayo, sriracha, and a hint of honey, provides both cultural significance as it bridges Asian and Western cuisines and nutritional benefits by incorporating healthy fats.
Common Mistakes to Avoid
Overcooking the salmon: Keep a close eye on the salmon for perfect doneness.
Being heavy-handed with the sauce: Balance is key, start with a small amount and add more to taste.
Using canned salmon: Opt for fresh salmon for the best texture and flavor.
Skipping the crisping process: The crispy skin adds a necessary texture contrast.
Neglecting seasoning: A little salt and pepper on the salmon can make a big difference.
Preparing ingredients in advance: Cut veggies just before assembling to maintain freshness.
Incorrect sauce consistency: Ensure the sauce is smooth and well combined.
Not patting the salmon dry: This step is crucial for achieving perfectly crispy skin.
Using low-quality oil: Use high-smoke-point oils like avocado or coconut for salmon frying.
Overloading the skillet: Cook in batches if necessary to ensure even cooking.
Essential Techniques
Master the technique of achieving crispy salmon skin by patting the skin thoroughly dry before cooking, using a hot skillet, and avoiding overcrowding to ensure even crisping. A common pitfall is impatiently flipping the fish too early, which can tear the skin—wait for visual cues, like the edges pulling away from the pan, indicating it’s time to flip. The relevance of mixing the Bang Bang sauce thoroughly cannot be overstated; this ensures homogenous flavors and a creamy texture.
Pro Tips for Perfect Crispy Salmon Bowls
For perfect crispy skin, start with a hot pan and place the salmon skin-side down first. Use a fish spatula to gently press down on the salmon to ensure the skin makes full contact with the pan, resulting in optimal crispness. Another tip is to let the salmon rest for a few minutes after cooking; this helps the juices redistribute, enhancing tenderness. When preparing the Bang Bang sauce, feel free to adjust the heat level of the sriracha to suit your personal taste. Always taste the sauce before serving to ensure the flavors are balanced. Using a non-stick skillet can be beneficial, especially if you’re nervous about the fish sticking. Lastly, serve over a bed of rice or quinoa for a nutritious and filling meal, adding fresh herbs like cilantro for an aromatic finish.
Variations and Adaptations
Regional variations might incorporate locally available fish or adjust the spiciness of the sauce to suit regional heat preferences. For seasonal adaptations, try swapping out the vegetables based on what’s fresh, like adding asparagus in the spring or zucchini in the summer. Dietary modifications are easily made by using a gluten-free soy sauce and omitting sugar from the sauce for a sugar-free option. To change the flavor profile, try using a teriyaki glaze instead of Bang Bang sauce for a Japanese twist. If you prefer a different texture, consider panko-breading the salmon before frying. Finally, to enhance presentation, use a ring mold when forming the rice base in the bowl for a polished, restaurant-quality look.
Serving and Presentation Guide
To elevate your Crispy Salmon Bowls, focus on layering the ingredients for a harmonious presentation. Start with a base layer of rice or quinoa, followed by neatly arranged vegetables like thinly sliced cucumbers, carrots, or avocado. Place the salmon filet on top, slightly off-center, to create a dynamic look. A sprinkle of sesame seeds and fresh herbs adds an elegant touch. When garnishing, consider using microgreens or finely chopped chives. For traditional accompaniments, serve with a side of pickled ginger or a wedge of lime for added zest. Ensure the dish is served hot, as this enhances both the flavors and overall dining experience.
Wine and Beverage Pairing
Pair this dish with a crisp, chilled white wine like a Sauvignon Blanc or a Viognier, as these wines will complement the rich flavors of the salmon and the spicy elements of the Bang Bang sauce. Non-alcoholic alternatives could include a ginger lemonade, which echoes the dish’s spicy notes while providing refreshing contrast. If you prefer tea or coffee, consider a lightly brewed green tea to cleanse the palate. When choosing beverages, remember to serve them well-chilled to contrast with the warm elements of the dish.
Storage and Shelf Life
Store any leftover salmon in an airtight container in the refrigerator, and consume it within two days to ensure freshness. If storing the Bang Bang sauce separately, it will last up to a week when kept in a sealed jar. Be mindful of signs of spoilage, such as a sour smell or slimy texture on the salmon. It’s best to reheat the salmon gently, either in a pan or a low oven, to maintain its original texture without drying it out. Although not recommended due to texture changes, if necessary, freeze the cooked salmon for up to two months.
Make Ahead Strategies
To streamline your meal preparation, marinate the salmon and prepare the Bang Bang sauce up to two days in advance, storing them in the fridge until needed. This not only enhances the flavors but saves valuable time. Consider chopping the vegetables the morning of serving so they remain fresh and crisp. When assembling the dish, start with reheating the rice to ensure that all components are served warm. Add fresh elements, like herbs or greens, just before serving to preserve their vibrant color and flavor.
Scaling Instructions
Halving the recipe is straightforward; simply adjust the quantity of each ingredient proportionally. For doubling or tripling, ensure you have the necessary cooking space and tools to maintain quality. Consider cooking in batches to ensure even cooking and crispiness when scaling up. Adjust timing, especially when cooking additional salmon fillets, to prevent overcrowding. Keep in mind that the Bang Bang sauce proportions can be easily multiplied without affecting cooking dynamics, allowing you to easily scale the flavor profile.
Nutritional Deep Dive
This dish is rich in protein and healthy fats, thanks to the salmon, which supports heart health and satiety. It also provides a well-rounded macro breakdown, with balanced carbohydrate content from rice and abundant micronutrients from fresh veggies. Each serving is rich in vitamin D and B, which are essential for maintaining healthy body functions, as well as potassium and antioxidants. If monitoring caloric intake, adjusting portion sizes and using whole grain alternatives can tailor the dish to fit specific dietary needs.
Dietary Adaptations
Make this recipe gluten-free by ensuring all ingredients, including condiments like soy sauce, are certified gluten-free. For a dairy-free option, the recipe already uses mayonnaise, which is generally dairy-free, but verify your brand’s ingredients to confirm. To adapt for a ketogenic diet, swap rice for cauliflower rice to reduce carbs while maintaining volume and texture. For a vegan alternative, substitute tofu for salmon and proceed with cooking as outlined—ensure to use a plant-based mayo for the Bang Bang sauce.
Troubleshooting Guide
If finding the sauce too sweet, add a splash of rice vinegar to amp up the acidity. To address overly crispy salmon, lower the cooking temperature slightly to allow more even heat distribution. For common temperature problems, always bring the salmon to room temperature before cooking to ensure even cooking throughout. If encountering equipment challenges, non-stick pans are essential for preventing sticking and achieving perfect skin crispiness. Ingredient substitutions such as different fish types should account for varying cooking times to maintain quality.
Recipe Success Stories
Many readers have shared their success stories, noting how easy it was to impress guests with these flavorful bowls. Variations incorporating seasonal vegetables have been particularly popular, showcasing the adaptability of this dish. Community feedback highlights how fantastic the Bang Bang sauce is, with many doubling it to enjoy extra on the side. Reader suggestions include using lime zest before serving for an extra citrus punch, proving that these Cripsy Salmon Bowls offer a canvas for personal culinary creativity.
Frequently Asked Questions
Can I use frozen salmon?
Yes, but ensure it is fully thawed before cooking for optimal crispiness and even cooking.
What can I substitute for sriracha?
Feel free to use another favorite hot sauce, or adjust the spice level by mixing chili paste with honey.
How can I make them ahead of time?
Prepare each component separately, then assemble just prior to serving to maintain freshness and texture.
What is the best substitute for mayonnaise?
Greek yogurt can be an effective substitute, though it will alter the traditional Bang Bang sauce flavor.
How do I prevent the salmon from sticking to the pan?
Ensure your pan is properly preheated and lightly coated with oil before adding the salmon.
Can this be made in an air fryer?
Yes, an air fryer can be used for the salmon, offering a quick and less messy alternative while still achieving crispiness.
What sides pair well with this dish?
A crisp cucumber salad, steamed green beans, or roasted sweet potatoes complement the meal nicely.
Is this dish suitable for meal prepping?
Absolutely, particularly if stored properly to maintain the individual components effectively.
How long does the sauce last in the fridge?
The sauce can be kept refrigerated for up to one week in a tightly sealed container.
Can I grill the salmon instead?
Grilling is a fantastic alternative for adding a smoky flavor, but mind the cooking time to avoid overcooking.
Additional Resources
Dive deeper into Asian-inspired recipes, like spicy tuna rolls, to explore how different varieties of seafood pair with similar flavor profiles. Check out our technique guide on achieving the perfect sear on fish, which provides step-by-step insights for various cooking methods. Learn about the nutritional benefits of incorporating omega-rich fish into your diet through our comprehensive ingredient information posts. For equipment, discover our recommendations on the best non-stick pans for consistently impressive results, and explore seasonal variations in our dedicated section to keep your cooking exciting year-round.
Join the Conversation
Share your Crispy Salmon Bowl creations on social media using #CrispySalmonBowls, where you can interact with a community of fellow food enthusiasts. Engage with others by sharing photography tips to best capture the vibrant colors of your dishes. Leave a review or suggest your variation in the comments section; your feedback can help shape future recipes. Explore the vast array of recipe variations shared by our community, and feel welcome to contribute your own twist on this delightful dish. Join the conversation and enrich your culinary repertoire today.
The Recipe
Crispy Salmon Bowls with Bang Bang Sauce
Serves: 4
Prep Time: 15 mins
Cook Time: 20 mins
Total Time: 35 mins
Kitchen Equipment Needed
Non-stick skillet
Sharp knife
Mixing bowl
Whisk
Spatula
Ingredients
4 salmon fillets
2 tablespoons olive oil
Salt and pepper to taste
1 cup mayonnaise
2 tablespoons sriracha
1 tablespoon honey
2 cups cooked white rice
1 cucumber, thinly sliced
1 avocado, sliced
2 tablespoons sesame seeds
Fresh cilantro for garnish
Directions
Pat dry salmon fillets with paper towels and season with salt and pepper.
Heat olive oil in a non-stick skillet over medium-high heat. Add salmon skin-side down.
Cook for 5-7 minutes until skin is crispy, then flip and cook for another 3-4 minutes.
In a bowl, whisk together mayonnaise, sriracha, and honey to create bang bang sauce.
Divide cooked rice into bowls, top with crispy salmon, cucumber, avocado, and drizzle with sauce.
Sprinkle sesame seeds and garnish with cilantro before serving.
Recipe Notes
You can use cauliflower rice for a low-carb version.
Adjust sriracha level based on your heat preference.
Finish with a squeeze of lime for an extra zesty kick.
Hi I'm Emy
I’m passionate about sharing a diverse collection of sweet and savory recipes that I’ve meticulously tested and perfected in my own kitchen.