Easy Air Fryer Green Beans – Crispy & Ready in Minutes

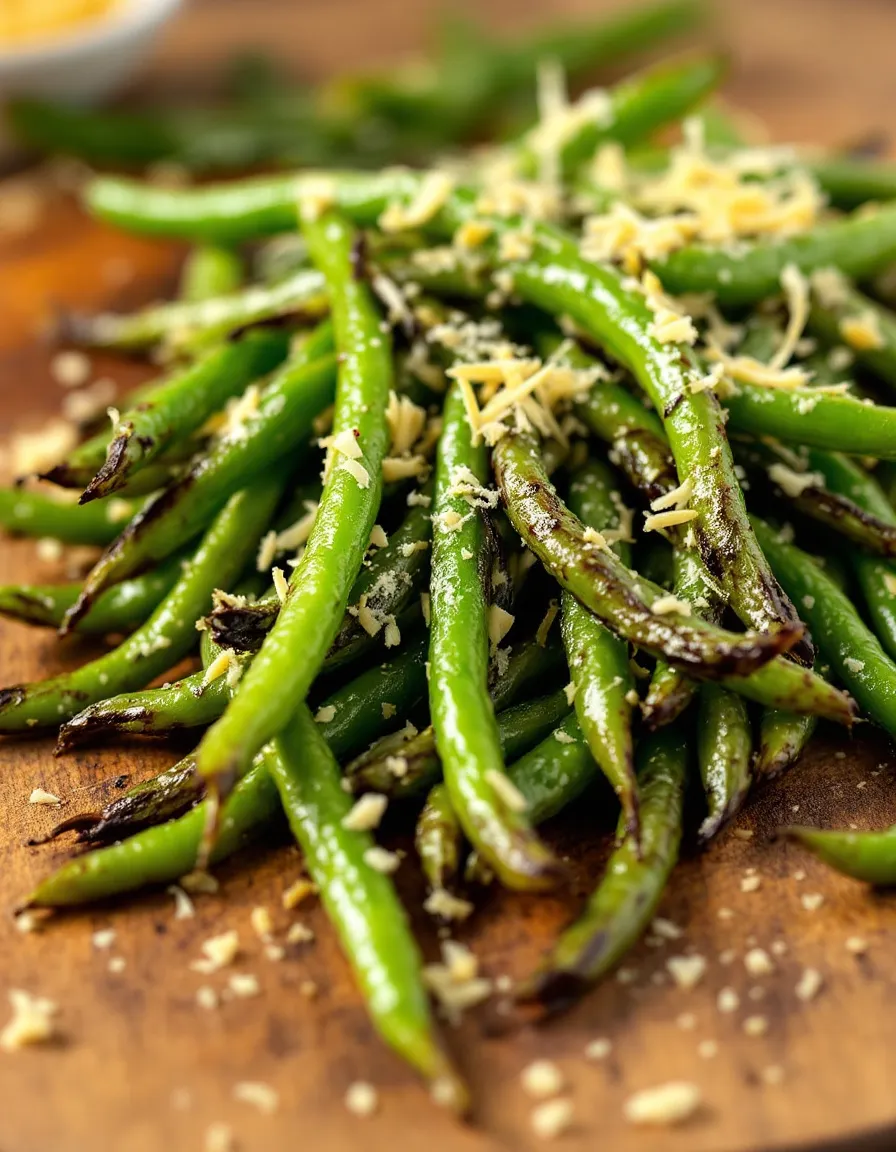
Delicious Air Fryer Green Beans: A Healthy Crunch for Every Meal

⚖️
Difficulty
Easy

⏲️
Prep Time
10 mins

🕒
Cook Time
12 mins

⏱️
Total Time
22 mins

🍽️
Servings
4 servings

When it comes to quick side dishes that pack a flavorful punch, Air Fryer Green Beans stand out as a vibrant and healthy choice. Tossed in olive oil, sprinkled with garlic powder, and seasoned with salt and pepper, these green beans emerge from the air fryer perfectly crisp yet tender. With every bite, you can enjoy a delightful crunch that complements any meal, from grilled meats to vegetarian entrees. Easy to prepare and bursting with freshness, this recipe transforms an everyday vegetable into a gourmet experience that your family will love.

As a versatile side, air fryer green beans allow you to customize flavors according to your preferences. Imagine pairing them with zesty lemon juice, spicy red pepper flakes, or even toasted almonds for a nutty twist. The air fryer not only ensures that the beans stay crisp but also reduces the cooking time compared to traditional roasting methods, making it the ultimate go-to meal solution when you’re short on time yet craving something nutritious and tasty.

Quick Recipe Highlights

  • Flavor Profile: Savory with a hint of garlic and a touch of salt.
  • Texture: Crisp-tender with a satisfying crunch.
  • Aroma: Inviting aroma of garlic and roasted vegetables.
  • Visual Appeal: Vibrant green color that adds freshness to any plate.
  • Skill Level Needed: Perfect for beginners; no special skills required.
  • Special Equipment: Requires an air fryer for optimal cooking.

Recipe Overview

  • Difficulty Level: This recipe is easy, making it a perfect option for novice cooks. The straightforward steps involve minimal preparation, ensuring success with every attempt.
  • Category: This dish falls under quick side dishes, suitable for family dinners or potlucks.
  • Cuisine: Rooted in American culinary traditions, this recipe reflects a growing trend of healthy cooking techniques using air fryers.
  • Cost: Economical to prepare, using simple ingredients that can be found in any grocery store.
  • Season: Ideal for enjoying green beans year-round, especially in spring and summer when they are at their freshest.
  • Occasion: Great for weeknight dinners, BBQs, or holiday gatherings. They pair well with a range of main courses.

Why You’ll Love This Recipe

Air fryer green beans deliver an exciting taste and texture combination that elevates the customary vegetable side dish. The balance of flavors, thanks to the seasoning, produces a rich, savory profile that is just irresistible. Moreover, the crispy texture combined with a tender bite creates an appealing mouthfeel that complements various dishes. From family meals to dinner parties, these green beans invite everyone to savor delightful conversations while enjoying their crispiness with each forkful.

The convenience of preparation provides another compelling reason to love this recipe. With a brief prep time and quick cooking in the air fryer, you can have a healthy, delicious side ready in no time. This makes it exceptionally suitable for busy weeknights or last-minute guests. The air fryer simplifies the cooking process, allowing anyone to whip up gourmet-quality dishes without the need for extensive culinary skills.

Nutritionally, air fryer green beans shine as well. Green beans are low in calories and packed with essential vitamins and minerals, including Vitamin C, Vitamin K, and fiber. Preparing them in the air fryer retains their nutrients while adding minimal fat, making them an excellent addition to any health-conscious diet. It’s a delicious way to incorporate vegetables without compromising on taste.

Socially, air fryer green beans make for excellent conversation starters at gatherings. Their bright color and delightful crunch invite guests to enjoy this healthy alternative while engaging in insightful discussions about nutritious eating. The dish not only serves as a delicious side but also endorses a lifestyle that values health and wellness, making it perfect for shared meals.

Last but not least, the cost-effectiveness of air fryer green beans adds to their appeal. Using affordable ingredients, this recipe allows for large portions suitable for feeding families or entertaining larger groups without breaking the bank. The ability to source fresh green beans easily means that anyone can access and enjoy this simple yet tasty dish at home.

Historical Background and Cultural Significance

The history of green beans dates back to ancient Mesoamerican cultures, where they were cultivated for food. Over the centuries, green beans have become a staple in many households across the globe. In the United States, they’re often linked to home cooking traditions, further popularized by their involvement in various seasonal festivities, particularly Thanksgiving, where they are often featured in classic casseroles. The introduction of air frying technology has redefined how we prepare these beloved beans, highlighting their versatility while keeping cooking simple and healthy.

Culturally, green beans hold a place of importance in American cuisine. Their incorporation into everyday meals represents a shift towards healthier dining options, focusing on fresh produce and modern cooking techniques. This object signifies not just sustenance but also connects communities that gather around tables to share meals, stories, and traditions, showcasing their value in bringing people together.

As cooking methods evolved over time, the air fryer emerged as a revolutionary tool, allowing home cooks to recreate the comfort of frying with less oil. This technique has given rise to creative adaptations of classic recipes and opened an opportunity to showcase green beans in a new light. The air fryer promotes the idea of healthier eating, inviting a broader demographic to enjoy vegetables while simplifying preparations.

Regional variations of green beans can be found worldwide, tailored to local flavors and ingredients. For instance, in Southern cuisine, green beans might be cooked with bacon or ham, infusing rich flavors that contrast sharply with the simplicity offered by air frying. These adaptations reflect how culinary practices are influenced by geography and cultural preferences, proving that even a humble vegetable can take on many forms.

Ingredient Deep Dive

Green Beans

Green beans, also known as string beans, have a rich history and are one of the commonly consumed vegetables in many households. Their versatility in different cuisines makes them a staple ingredient. Besides being delicious, they are low in calories and high in fiber, which supports a healthy digestive system. Selecting fresh green beans involves looking for vibrant color and firmness as signs of freshness.

When it comes to storage, you should keep green beans in the refrigerator, ideally in a produce bag to maintain their crispness. They can last about a week when stored properly. If you want to substitute them, consider snap peas or asparagus for a similar crunch and flavor profile.

Olive Oil

Olive oil is a heart-healthy fat packed with antioxidants. It has cultural significance, especially in Mediterranean cuisine, where it is used generously for cooking and dressing. Olive oil helps bring out the flavors of the vegetables and provides a slight richness without overwhelming other ingredients. When selecting olive oil, look for extra virgin varieties for the best quality and flavor.

Storage of olive oil requires keeping it in a cool, dark place to maintain its integrity. If you need substitutions, avocado oil or grapeseed oil works well in similar applications, offering a similar taste without compromising on health benefits.

Garlic Powder

Garlic powder is revered for its flavor-enhancing properties and health benefits, especially in supporting heart health and possessing anti-inflammatory properties. It’s frequently used in kitchens worldwide to elevate the taste of dishes, including our air fryer green beans. When buying garlic powder, ensure you select high-quality brands for a better flavor.

Garlic powder can be stored in a dark, cool place and has a long shelf life. If you need to replace it in a recipe, consider using fresh minced garlic, adjusting the quantity according to personal preference.

Salt and Pepper

Salt enhances flavors, while pepper adds complexity; both are essential in cooking. Their roles are critical in the air fryer green beans recipe, promoting taste and balancing flavors. Sea salt or kosher salt is recommended for seasoning, as they provide a purity of flavor without additives. On the other hand, fresh ground black pepper is advised for the best flavor intensity.

It is essential to store salt in a cool, dry area. You’re welcome to replace table salt with sea salt if needed, as long as measurements are adjusted slightly due to differing grain sizes.

Common Mistakes to Avoid

  • Overcrowding the Air Fryer: This can cause uneven cooking, leading to some beans being undercooked while others are overdone. Ensure the beans are arranged in a single layer for the best results.
  • Not Preheating the Air Fryer: Skipping this step can affect cooking times and lead to undercooked beans. Preheat the air fryer for consistent temperatures.
  • Using Wilting or Old Green Beans: Always check freshness; limp beans won’t yield the same crisp texture.
  • Failing to Toss Halfway through Cooking: This promotes even cooking. Skip this step, and you might find some beans crisping while others are soggy.
  • Insufficient Seasoning: Season before cooking, but don’t be shy! Green beans benefit from generous seasoning, so add more garlic powder, salt, or pepper as required for flavor.
  • Ignoring Cooking Times: Each air fryer model may differ. Always check for doneness and adjust cooking times for your specific unit.
  • Using Low-Quality Oil: High-quality olive oil enhances flavor and health benefits. Opt for quality over quantity.
  • Not Cleaning the Air Fryer: Residues from previous cooking can affect the taste of your beans. Clean out any debris or prior oils for optimal flavor delivery in your dish.

Essential Techniques

Air Frying: The cornerstone technique for this recipe. Air frying circulates hot air to achieve a crispy texture while using minimal oil. Mastering this method can lead to healthier versions of traditionally fried foods. Avoid overcrowding the basket to ensure optimal air circulation for even cooking.

Seasoning: Proper seasoning ensures that the flavors of your green beans shine. Always season your vegetable base before cooking, allowing the flavors to meld. Pay attention to salt; a little goes a long way. Taste and adjust as necessary for the best outcome.

Pro Tips for Perfect Air Fryer Green Beans

1. Choose fresh, vibrant green beans for maximum flavor and crunch. Look for beans that snap easily and have a bright color.

2. Consider marinating your beans briefly in olive oil and sprinkle with spices for a unique twist. Marinade can introduce extra flavor depths.

3. Experiment with additional seasonings! A dash of red pepper flakes can spice things up, or a sprinkle of parmesan cheese can provide a savory coating.

4. For variations, try adding sliced almonds or sesame seeds just after air frying for added crunch and nutrition.

5. Check the beans frequently towards the end of cooking time. Every air fryer can differ, so adjust according to your appliance.

6. Allow the beans to cool slightly before serving; this helps retain their texture while enhancing flavor.

7. Pair the air fryer green beans with a dipping sauce like ranch or balsamic glaze for added complexity and taste.

8. Lastly, if you want a caramelized flavor, put the beans in the basket for a few minutes longer but watch closely to avoid burning.

Variations and Adaptations

Regional Variations: Different cultures have unique takes on green beans. For example, French-style green beans can be enhanced with shallots and herbs for a different flavor profile.

Seasonal Adaptations: In fall, you can mix in roasted pumpkin or squash for a seasonal touch that adds sweetness and richness to your dish.

Dietary Modifications: For a vegan variant, skip any cheese toppings and load up on veggies while ensuring low-sodium seasonings are used.

Flavor Variations: Develop a Mediterranean feel by integrating feta cheese, sun-dried tomatoes, or kalamata olives, delivering a burst of flavor that transports you through the Mediterranean.

Texture Modifications: Add toasted breadcrumbs after frying for extra crunch and a gourmet finish.

Presentation Alternatives: Serve in a stylish dish with a drizzle of balsamic reduction. The combination of colors and flavors can turn your dish into a centerpiece.

Serving and Presentation Guide

For plating, arrange the air-fried green beans parallel on a serving dish to highlight their vibrant color. Add a sprinkle of fresh herbs such as parsley or thyme for a touch of brightness and flavor. Consider serving with complementary dips like garlic aioli or a squeeze of fresh lemon to elevate the dining experience.

Garnishes not only make the dish visually appealing but can enhance the taste. Lemon wedges or zest can add a refreshing kick that pairs well with the beans. Utilize decorative serving bowls that contrast with the green, such as white or black, to create an eye-catching presentation.

For modern serving suggestions, group air fryer green beans alongside hearty entrees like grilled chicken, or use them as a vibrant addition to a salad. For temperature considerations, serve warm to maintain the optimal texture, as they can become less appealing if left to cool.

Portion control is key; aim for a fist-sized serving of green beans per person to keep servings manageable yet satisfying, allowing guests to enjoy them without overwhelming their plates.

Wine and Beverage Pairing

When it comes to wine pairings, a crisp, dry white wine like Sauvignon Blanc or Pinot Grigio complements the fresh flavors of air-fried green beans beautifully. These wines highlight the vibrant nature of the dish while keeping the palate refreshed.

For non-alcoholic alternatives, consider sparkling water with a splash of lemon or a light herbal iced tea. These drinks provide a refreshing contrast to the savory elements of the green beans. The slight acidity or sweetness of the beverage can enhance your overall dining experience.

If you enjoy coffee, a light roast with citrus notes can work surprisingly well as a unique pairing with your meal. Ensure the coffee is served at the right temperature to avoid overpowering the vegetable dish.

Storage and Shelf Life

Store any leftover air fryer green beans in an airtight container in the refrigerator. They are best consumed within 2 to 3 days for optimal flavor and texture. When storing, separate layers using parchment paper to prevent sogginess.

The best temperature for storage is around 34°F to 40°F to maintain freshness. Always ensure the beans are completely cool before sealing them in a container to prevent moisture buildup. As for reheating, place gradually in the air fryer for about 5 minutes to regain that delightful crispiness.

If you wish to freeze them, consider blanching green beans beforehand. Once cooled, place in a freezer-safe bag and remove air before sealing. They can last up to 6 months, although they are best suited for immediate consumption.

Make Ahead Strategies

For those looking to save time, consider prepping green beans the day before by washing and trimming them. Store in a sealed container with a damp paper towel to keep them crisp. You can season them ahead of time too; just wait to add oil until you’re ready to cook.

After pre-preparation, you can place them in the air fryer from the fridge without needing a longer cooking time. Assess the quality impact; pre-seasoned beans may lose some fresh flavor but will still be delightful once cooked.

If making the dish during a gathering, organize ingredients into labeled bags for quick assembly. This ensures your cooking timeline is seamless, focusing on the assembly rather than individual ingredient prep.

Scaling Instructions

To halve this recipe, simply scale down the ingredients accordingly while keeping the air frying time the same for consistent results. For larger gatherings, you can double or triple the recipe, just be cautious of the air fryer size to avoid overcrowding.

Adjusting the equipment might be necessary; if preparing a large batch, consider air frying in shifts while keeping the first batch warm in the oven at low temperature. Remember, timing may vary, so regularly check on your beans to maintain crispness.

For storing, larger quantities may require more significant containers or multiple bags. Consider portioning leftovers in single-serving sizes for more accessible reheating and enjoyment later on.

Nutritional Deep Dive

Air fryer green beans are a healthy addition to your diet, offering minimal calories with impressive micronutrients. They are particularly rich in fiber, helping promote digestive health while aiding in weight management. A typical serving provides around 30 calories, making it a guilt-free side dish choice.

At a macro level, the dish is low in fat due to the minimal use of olive oil while retaining delightful flavor. In terms of micronutrient analysis, green beans are high in vitamins A and C, essential for skin health and immune support.

In focusing on health benefits, regular consumption of green beans can support heart health due to their potassium content, which aids in regulating blood pressure. They’re suitable for various dietary needs, especially for those looking to maintain healthy weight levels or blood sugar control.

Dietary Adaptations

For a gluten-free option, this recipe naturally fits the bill! Ensure seasonings do not contain gluten, and you can safely enjoy them without worry.

If you prefer a dairy-free dish, skip any cheese toppings and keep it simple with minimal oil and seasonings. This maintains the dish’s healthful nature.

For vegans, air fryer green beans serve as a fantastic side or main component in a meal. Pairing with a protein source like tofu can provide a well-rounded dish.

If you’re following a low-carb or keto diet, these green beans are an excellent vegetable option that enhances your meals without exceeding carbohydrate limits.

Paleo adherents will love this dish, as it features whole, nutrient-dense ingredients aligned with the diet’s principles. Add in hearty nuts to boost healthy fats if desired.

Those on a low-FODMAP diet can indulge in this recipe by monitoring any added ingredients but typically can enjoy them outright.

Troubleshooting Guide

If you encounter texture issues with your green beans, such as them being too soft, consider lowering cooking time next time to preserve their natural crunch. If beans seem overcooked, try adjusting the temperature slightly lower for more control over texture.

If flavor balance seems off, take note of seasonings used in future batches. A little extra salt or acidity from lemon juice can help elevate the profile dramatically.

Temperature problems can arise if the air fryer is not preheated. Be consistent in preheating to the desired temperature before adding the beans to address any undercooking or overcooking concerns.

When facing equipment challenges, familiarize yourself with your air fryer’s settings and ensure you have the right size for your recipe. Every appliance behaves differently.

For ingredient substitutions, use what you have on hand but strive for similar flavor profiles. Fresh garlic, for instance, can replace garlic powder, and while there may be nuances in taste, they won’t detract from the dish.

Recipe Success Stories

Our community love for air fryer green beans continues to grow, with many readers sharing they’ve discovered a new favorite side dish! Recipes that explore different seasonings create excitement, and adaptation stories reflect the variety made possible with simple tweaks.

Readers have reported successful variations, from adding different nuts to experimenting with spice blends, attributing their perfect air fryer green beans to these small modifications.

Photography tips shared by our audience suggest capturing the vibrant green of the beans against a contrasting background to showcase their appetizing appeal. Engaging composition attracts attention and encourages sharing on social media platforms, helping to inspire new culinary enthusiasts.

Frequently Asked Questions

Can I make this recipe with frozen green beans? Yes, you can use frozen green beans, but adjust the cooking time slightly longer as they are initially cold.

How do I know when the green beans are done cooking? They should be bright green and tender with a slight crunch; check them after 10 minutes for doneness.

What dipping sauces pair well with air fryer green beans? Options like garlic aioli, ranch dressing, or even a tangy vinaigrette complement the beans wonderfully.

Is this recipe suitable for meal prep? Absolutely! Store cooked green beans separately and reheat as needed for quick meal integration.

Can I add other vegetables? Yes, adding quick-cooking vegetables such as bell peppers or zucchini can create a colorful medley.

What’s the best way to reheat air fryer green beans? Use the air fryer at a lower temperature for a few minutes to restore crispness without overcooking.

What other seasonings work well? Additional seasonings like cumin, smoked paprika, or Italian herbs can provide a new flavor dimension.

Can I make this recipe ahead of time? You can prepare and season green beans before cooking, and air fry them just before serving.

How do I store leftover green beans? Keep them in an airtight container in the fridge for up to 3 days.

Can I make air fryer green beans without oil? Yes, you can reduce or eliminate oil, but this may affect the crispiness slightly.

Additional Resources

For more inspiration, check our related recipes that feature green vegetables, roasted sides, or quick air fryer meals. Discover techniques around other cooking appliances to maximize your kitchen skills. Dive deeper into ingredient information, showcasing how fresh produce can elevate daily meals, and explore equipment recommendations to find recommendations for the best air fryers available.

Join the Conversation

Engage with us on social media! Share your air fryer green bean creations by tagging us and using our specific hashtags. We want to hear about your variations and personal touches to this beloved recipe. Providing reviews helps others discover great recipes while contributing to a supportive cooking community. Let’s encourage each other to explore culinary creativity and discover new ways to enjoy healthy meals.

The Recipe

Air Fryer Green Beans

Serves: 4 servings

Prep Time: 10 mins

Cook Time: 12 mins

Total Time: 22 mins

Kitchen Equipment Needed

  • Air fryer
  • Mixing bowl
  • Kitchen tongs

Ingredients

  • 1 pound fresh green beans, trimmed
  • 2 tablespoons olive oil
  • 1 teaspoon garlic powder
  • Salt and pepper to taste

Directions

  1. Preheat the air fryer to 400°F (200°C).
  2. In a mixing bowl, toss the green beans with olive oil, garlic powder, salt, and pepper until evenly coated.
  3. Arrange the green beans in a single layer in the air fryer basket.
  4. Cook for 10-12 minutes, shaking the basket halfway through, until crisp-tender.
  5. Remove from the air fryer and serve immediately.

Recipe Notes

  • For added flavor, consider mixing in different herbs or spices as mentioned.
  • If you prefer crisper beans, cook them a few minutes longer, checking frequently to avoid burning.
  • Can substitute olive oil with avocado oil for an alternate flavor.

Easy Angel Chicken Rice – Creamy & Comforting Dinner

Angel Chicken Rice: A Heavenly Treat for Your Taste Buds

⚖️
Difficulty
Easy

⏲️
Prep Time
15 mins

🕒
Cook Time
40 mins

⏱️
Total Time
55 mins

🍽️
Servings
4

Angel Chicken Rice is a delightful concoction that perfectly combines tender chicken, creamy sauces, and fluffy rice to deliver a dish that feels both comforting and indulgent. This recipe is an invitation to savor the heavenly flavors that come together in a mere 55 minutes. The creamy texture of the angel sauce envelops each bite of chicken, while the seasoned rice serves as a perfect base to soak up all the delicious juices. With its buttery flavor and richness, this dish promises to elevate any dining experience.

Imagine gathering around the table with family and friends, as the aroma of angel chicken wafts through the air, tempting everyone to dig in. This recipe not only nourishes the body but also warms the heart with its delightful flavors. The visual presentation, with succulent chicken pieces resting atop a bed of rice, makes for an enticing meal that you’ll find hard to resist. Whether it’s a weeknight dinner or a special occasion, Angel Chicken Rice is sure to impress.

Quick Recipe Highlights

  • Flavor Profile: The dish features a wonderful balance of savory, rich, and creamy flavors that harmonize beautifully with the simplicity of rice.
  • Texture: Enjoy the tender chicken contrasted with fluffy rice, providing a satisfying mouthfeel that is both hearty and comforting.
  • Aroma: A blend of buttery and savory notes permeates the air, inviting everyone to experience this culinary delight the moment it’s served.
  • Visual Appeal: The golden-brown chicken on a bed of white rice offers a stunning contrast, making the dish as lovely to look at as it is to eat.
  • Skill Level Needed: This recipe is simple enough for novice cooks yet impressive enough for seasoned chefs to appreciate its delicious output.
  • Special Equipment: You will need a large skillet or sauté pan, measuring utensils, and a serving dish.

Recipe Overview

  • Difficulty Level: This recipe is classified as easy because it involves straightforward cooking techniques that lead to outstanding flavor without the need for advanced skills.
  • Category: Angel Chicken Rice is perfect for dinner, appealing to families and guests alike, providing a heartwarming experience.
  • Cuisine: It draws inspiration from American comfort food, blending rich, creamy textures with classic Southern flavors.
  • Cost: An approximate cost per serving is budget-friendly, making it an excellent choice for both everyday meals and special occasions.
  • Season: This dish can be enjoyed year-round, but it holds a special place during the fall and winter months when comfort foods are most desired.
  • Occasion: Perfect for family gatherings, cozy dinners, or even simple weeknight meals, this recipe never disappoints.

Why You’ll Love This Recipe

Angel Chicken Rice is not just another recipe; it’s a gastronomic delight that ticks all the boxes for taste and texture. The combination of savory chicken enveloped in a creamy sauce, with the ever-so-soft rice makes every bite a heavenly experience. This dish harmonizes rich flavors without being overwhelming, making it appealing to everyone at the table. You can expect a flavor explosion that balances buttery goodness with the lightness of rice.

Convenience is yet another reason to adore this recipe. With just a few ingredients and minimal prep time, you can whip up a hearty meal that tastes like it’s been crafted in a fine restaurant. It is a one-pan wonder, simplifying both cooking and cleanup, making it easier to enjoy a leisurely meal without spending hours in the kitchen.

Nutritionally speaking, chicken is an excellent source of lean protein, while the addition of rice provides complex carbohydrates for sustained energy. When prepared with fresh ingredients, this dish also contains vital nutrients that support a healthy lifestyle. It’s a delightful treat without the guilt, allowing you to savor rich flavors while keeping health concerns in check.

Beyond its incredible taste, Angel Chicken Rice serves as a fantastic social dish. It’s ideal for family gatherings, celebrations, or casual dinners with friends, offering a sense of community as everyone shares a delicious meal together. The ease of preparation allows you to engage with your guests instead of being tied to the stove.

Lastly, the cost-effectiveness of this recipe is remarkable. With the ability to prepare generous servings without breaking the bank, Angel Chicken Rice stands out as an affordable option for satisfying meals that can feed a crowd, maximizing both flavor and value in one perfect dish.

Historical Background and Cultural Significance

The origins of Angel Chicken Rice can be traced to the comfort food revolution that rose to prominence in American kitchens, where families sought satisfying meals that were also budget-friendly. While specifics about “angel chicken” are less documented, it is strongly connected to the nostalgic flavors of Southern cooking intertwined with modern convenience.

Culturally, this dish resonates with many home cooks as it embodies the essence of togetherness and home-cooked comfort. It often appears in potlucks and gatherings, where its presence evokes cherished memories and sense of belonging. Although it may typically be labeled a modern recipe, it harkens back to a time when food was a centerpiece for family interaction.

Over the years, the recipe has evolved through personal adaptations, inviting different spices and herbs that enhance its traditional base, allowing each family to make it their own. As culinary influences from various regions mingle, angel chicken has transitioned beyond being a simple dish to embodying creative cooking.

In terms of regional variations, communities have adopted and adapted the recipe based on locally available ingredients. Whether it’s the incorporation of seasonal vegetables or different varieties of rice, the flexibility of this recipe allows each cook to add their unique touch to the beloved classic.

Ingredient Deep Dive

Chicken serves as the star ingredient in Angel Chicken Rice, providing not only essential protein but also acting as a blank canvas for flavors. The use of chicken thighs or breasts can depend on personal preferences, but both options offer juiciness and tenderness. When selecting chicken, it is best to look for organic or free-range options that promise a richer flavor profile. Store any leftovers in the refrigerator, ensuring they are sealed well to maintain freshness.

The creamy sauce often includes ingredients like cream of mushroom soup and ranch seasoning, which contribute to the dish’s characteristic richness. Cream of mushroom soup has its roots in American cooking, providing a quick route to adding flavor and creaminess without making a sauce from scratch. When selecting canned soup, look for low-sodium versions to control the saltiness.

Rice is the base that ties the dish together, and choosing the right variety can elevate your meal. Long-grain white rice is commonly used, but you can experiment with brown rice for added nutrition. Properly rinsing the rice before cooking removes excess starch, helping to achieve that desirable fluffiness in the final dish.

Butter enhances the flavor and helps create the silky sauce that everyone loves. Using unsalted butter allows you to control the seasoning better, creating a customized flavor experience. Store it in a cool, dry place, and be careful not to expose it to light for extended periods to maintain its quality.

Lastly, additional herbs like parsley can be sprinkled over the dish for a pop of color and freshness, offering a vibrant contrast to the creamy elements below. Fresh herbs are key to brightening any dish, and they can be easily substituted with dried herbs if fresh ones are unavailable.

Common Mistakes to Avoid

  • Using frozen chicken: Always opt for fresh chicken to ensure better flavor and texture in your dish. Frozen chicken can lead to uneven cooking.
  • Skipping the marination: Allowing chicken to marinate adds depth to the flavor. A quick soak in seasoning can enhance the final result dramatically.
  • Overcooking the rice: Following the recommended cooking times is essential. Overcooked rice becomes mushy and loses its inviting texture.
  • Neglecting to measure ingredients: Precision in measuring ingredients ensures flavor consistency. Avoid the guesswork for the best results.
  • Rushing the cooking process: Take your time to sear the chicken properly and let flavors develop. Rushing can lead to bland outcomes.
  • Not balancing seasoning: Taste as you go; this allows for necessary adjustments to avoid overpowering flavors.
  • Using low-quality canned soup: Lower quality options can result in off-flavors. Investing in better products elevates the dish significantly.
  • Skipping garnishes: A sprinkle of herbs not only adds color but also brightens the flavors. Don’t overlook the presentation aspect.
  • Cooking in a crowded pan: Too many ingredients can lower the cooking temperature, preventing even cooking.
  • Not letting the dish rest: Allowing the dish to rest before serving helps flavors meld together for a better overall taste experience.

Essential Techniques

Searing chicken properly is crucial for building flavor. By getting a good browning on the chicken, you create a depth of flavor that enhances the entire dish. To master this technique, ensure your pan is adequately preheated and avoid overcrowding, which can trap moisture and hinder browning. Look for a golden crust before flipping.

Preparing a creamy sauce requires balancing heat and flavor. Begin by mixing your base ingredients thoroughly without overheating, which can cause cream to curdle. To master this, maintain a stable medium heat, stirring frequently to monitor consistency and flavors. The desired outcome is a silky texture without graininess.

Cooking rice effectively ensures proper texture. Rinse the rice before cooking to remove excess starch, which helps it cook evenly. Use the right water-to-rice ratio for your chosen variety; a common mistake is using the same ratio for all rice types. Look for slightly tender grains that still hold their shape when done.

Incorporating fresh herbs enhances flavors significantly. Knowing when and how to add herbs is vital for maximizing their potential. Fresh leafy herbs should be added at the end of cooking for optimal flavor, while sturdier ones like thyme benefit from longer cooking times. Taste along the way to achieve balance.

Serving and storing leftovers properly contributes to a successful meal. Use airtight containers to keep the dish fresh and avoid temperature fluctuations, which can impact quality. Store in the fridge for a maximum of three days, and always reheat gently to maintain texture and flavor.

Pro Tips for Perfect Angel Chicken Rice

1. For an even more decadent dish, experiment with adding cream cheese to the sauce, creating an ultra-rich base.
2. Try marinating the chicken overnight in the ranch seasoning mix for an extra punch of flavor.
3. If you prefer extra crunch, consider adding fried onions on top just before serving for a delightful textural contrast.
4. Enhance the nutritional value by incorporating spinach or other greens during the cooking process; they wilt nicely into the sauce.
5. Serve with crusty bread or a fresh salad for a complete meal that offers balance alongside the richness of the chicken and sauce.
6. Remember to adjust the cooking time if using larger pieces of chicken for uniform doneness in your final dish.
7. If you like spice, don’t hesitate to add a pinch of red pepper flakes to the sauce for an unexpected kick.
8. For a more vibrant dish, add in sautéed bell peppers or carrots along with the chicken to brighten up the plate visually and nutritionally.

Variations and Adaptations

Angel Chicken Rice can be effortlessly adapted to an array of regional variations. For instance, consider incorporating regional spices such as Cajun or Creole flavors for a Southern twist that adds depth. You can also explore cooking styles by preparing it as a casserole, layering the chicken and rice, then baking for a comforting, baked version of this classic dish.

Seasonal adaptations can elevate your meal by including fresh ingredients that reflect the seasons. In summer, try adding fresh corn or zucchini for a bright, summery vibe. During fall, a hint of pumpkin or squash in the sauce can create a warm, cozy feel perfect for cooler months.

For those with dietary restrictions, Angel Chicken Rice can easily be modified. A low-carb version can be achieved by substituting rice with cauliflower rice, which absorbs flavors and provides a light alternative. Gluten-free enthusiasts can ensure all packaged ingredients, such as sauces, are certified gluten-free, maintaining the integrity of the dish.

Flavor variations can be explored by changing the type of sauce used. Experiment with a cheesy mushroom sauce or a tangy barbecue alternative to excite the palette and work with everyone’s preferred taste profiles. You can also ramp up the herbs and spices to customize the flavor and create new favorites each time.

Texture modifications can also be made by adding nuts or seeds for crunch or sautéed mushrooms for a touch of earthiness. Presentation alternatives, such as serving in individual bowls or going family-style in a large dish, can create a unique dining experience.

Serving and Presentation Guide

Plating techniques play a critical role in how your Angel Chicken Rice is perceived. Start by using a shallow bowl to create height with rice, then nestle the chicken pieces atop, allowing the sauce to cascade down the sides. This showcases the dish beautifully and makes it more appealing.

Garnishing with freshly chopped parsley or scallions can add vibrant color and a burst of flavor. Consider including lemon wedges on the side; their acidity can cut through the richness of the dish and rejuvenate the taste.

Traditional accompaniments like cornbread or biscuits help balance the flavors while modern options such as light salads can provide a refreshing contrast. Serving while still warm enhances the overall experience, as dishes served hot maintain better flavor and texture.

Temperature considerations are vital when serving. If you’ve prepared the dish ahead, gently reheat to avoid drying out the chicken. Portion control tips suggest serving reasonable amounts to ensure guests can appreciate the dish without feeling overwhelmed, allowing for a satisfying dining experience.

Wine and Beverage Pairing

When it comes to wine pairing, Angel Chicken Rice calls for a crisp white wine that complements the richness of the dish. A Chardonnay, with its buttery undertones, will beautifully echo the creamy sauce while balancing the overall flavor experience.

If you prefer non-alcoholic options, consider sparkling water with a slice of lemon, which offers refreshing acidity to cleanse the palate. Herbal teas can also serve as a delightful accompaniment, particularly chamomile, which can promote a calming dining atmosphere.

For a cozy pairing, serve with a good quality coffee or herbal tea that enhances the warming elements of the dish. Temperature considerations play into enjoying the meal; ensure that drinks served alongside the dish are well-chilled or appropriately warm.

Storage and Shelf Life

Proper storage of Angel Chicken Rice ensures it retains its flavor and texture for later enjoyment. Store leftovers in airtight containers, placing them in the refrigerator where they’ll last for up to three days. Ensure that the dish has cooled to room temperature before sealing to avoid condensation that may dilute flavors.

In terms of reheating, opt for the stovetop over the microwave when possible; this preserves the texture better. Gently heat over low to medium heat, stirring occasionally until warmed through.

For those looking to keep their meal longer, Angel Chicken Rice can be frozen. Divide into portions, then seal in freezer-safe containers. Make sure to label your containers with the date for easy tracking. Properly frozen, it can last for up to three months.

Signs of spoilage include off-odors, changes in texture, or discoloration. If any of these are present, it’s best to discard any questionable food to ensure safety.

Make Ahead Strategies

Planning ahead can simplify the cooking process of your Angel Chicken Rice. Begin by marinating the chicken the night before, enhancing the flavor and resulting in a juicier dish upon cooking.

Store prepped ingredients separately in the fridge until ready to cook. This allows you to efficiently assemble your meal without sacrificing quality.

Assemble the chicken and sauce earlier in the day, but keep the rice uncooked until you are ready to serve. Cooking rice fresh preserves its light, fluffy texture rather than allowing it to become dense and gummy.

When reheating parts of the dish, consider leaving out fresh garnishes and adding them just before serving for an eye-catching finish. This preserves flavor and texture for a delightful presentation.

Adding fresh elements like herbs or sliced lime right before serving brightens up the dish, enhancing not just taste but also visual appeal.

Scaling Instructions

Scaling recipes can allow you to adjust for gatherings or intimate dinners. To halve the Angel Chicken Rice recipe, simply divide the number of ingredients by two; keep an eye on cook times, shortening them slightly if necessary since smaller batches may cook faster.

If you plan to double or triple the recipe, ensure your pan size accommodates the increased volume. You may also need to adjust the cooking times accordingly, especially as larger amounts may require additional time to heat through completely.

Consider using larger pots or Baking dishes when scaling up to avoid overcrowding, which can lead to uneven cooking.

Timing modifications include starting with the chicken first and searing it in batches if necessary to achieve that desirable golden color.

Be mindful of your storage containers if the dish is scaled; larger batches will require appropriately-sized containers to ensure freshness and quality during storage.

Nutritional Deep Dive

The macro breakdown of Angel Chicken Rice includes a healthy balance of proteins, carbohydrates, and fats. Chicken contributes lean protein essential for muscle repair and overall body maintenance. Depending on the type of rice used, carbohydrates will vary; white rice offers quick energy while brown rice provides additional fiber.

Micronutrient analysis highlights vitamins and minerals found in chicken, while enriched rice provides B vitamins. Any added vegetables not only boost nutrition but also contribute micronutrients that aid in overall health.

Health benefits include high protein content for muscle support and complex carbs for sustained energy, making this dish perfect for active lifestyles. This recipe can cater to dietary needs by adjusting serving sizes and incorporating more veggies for nutrient density.

Portion analysis is important for maintaining a balanced diet; a serving of Angel Chicken Rice typically provides enough nutrients without overindulging. Be mindful of portion size, especially when serving high-calorie dishes.

Weight management tips involve monitoring serving sizes and considering substitutions like cauliflower rice for a lower-carb option, allowing enjoyment without compromising dietary goals.

Dietary Adaptations

For gluten-free diets, ensure all ingredients are gluten-free, particularly the soup and any seasonings utilized. Using certified gluten-free products allows those with sensitivities to enjoy this dish without worry.

Dairy-free adaptations can replace creamy ingredients with coconut milk or cashew cream, recreating that luscious texture without compromising flavor.

For vegan versions, use tofu or chickpeas in place of chicken, preparing them with seasoning to replicate the original recipe’s flavor profile. Utilize vegetable broth for added depth in the sauce.

Low-carb options can feature spiralized vegetables in place of rice or substituting rice with cauliflower rice while ensuring sufficient flavor and creaminess.

Keto adaptations focus on eliminating high-carb ingredients, using cauliflower rice and heavy cream for a richer texture. This approach keeps the dish low in carbs while maintaining indulgent qualities.

Paleo diets can adapt by using coconut milk instead of dairy products while sticking to natural, unprocessed chicken for protein.

Low-FODMAP diets can avoid ingredients high in fermentable fibers; check specific brands of packaged products to ensure they meet these guidelines.

Troubleshooting Guide

Texture issues can arise if chicken is overcooked, leading to dryness. Ensure proper monitoring of cooking times, and always check internal temperatures for optimal juiciness. Conversely, undercooked chicken poses safety risks and should be adequately cooked to an internal temperature of 165°F.

Flavor balance can be affected by improperly measured ingredients; always taste as you go and adjust seasoning to reach the ideal profile, especially when using potent seasonings or sauces.

Temperature problems may occur if dishes are reheated too quickly or at high temperatures, leading to uneven warming. Opt for lower heat and longer durations to avoid drying out food.

Equipment challenges arise when not using the appropriate tools, which may lead to inconsistent cooking. Invest in quality kitchenware that can sustain high heat for better results.

Ingredient substitutions can lead to unexpected outcomes, especially with crucial components like broth or sauces. Familiarize yourself with flavor profiles to maintain overall dish integrity.

Timing concerns can occur when meals are prepared too far in advance, leading to loss of quality. To prevent this, store components separately and only combine just before serving.

Recipe Success Stories

Community feedback often highlights the warm and filling nature of Angel Chicken Rice, with many users sharing their little tweaks that personalize the dish further. Multiple readers have expressed joy at the simplicity of preparation, especially during busy weekdays.

Variation successes come from personal adaptations—some enjoy the added crunch from slivered almonds while others include vegetables to enhance nutrient content, both pointing to the recipe’s flexibility.

Adaptation stories have emerged, especially among families with dietary restrictions, who’ve successfully transformed the classic dish into gluten-free and dairy-free options without sacrificing flavor quality.

Reader suggestions frequently provide insights into presentation techniques or side dishes that perfectly complement Angel Chicken Rice, enhancing overall meal experience and enjoyment.

Photography tips encourage showcasing the dish’s creamy texture and garnishing elements to capture the essence of what makes it inviting, drawing in fellow cooks to try their hand at recreating this delicious meal.

Frequently Asked Questions

Can I prepare Angel Chicken Rice ahead of time?

Yes, this dish can be partially prepped ahead of time. Marinate the chicken overnight and store ingredients separately, then assemble and cook when ready to serve for the best results.

What can I substitute for rice?

For a low-carb alternative, cauliflower rice works well. You can also try quinoa or even zucchini noodles for a fresh twist.

Is it possible to freeze leftovers?

Absolutely! Leftover Angel Chicken Rice can be stored in airtight containers and frozen for up to three months. Just make sure to reheat thoroughly before serving.

How do I prevent the chicken from drying out?

To prevent dryness, monitor the cooking time closely and remove the chicken just as it reaches an internal temperature of 165°F. Allow it to rest before slicing to retain juices.

Can I add vegetables to this recipe?

Yes, feel free to add vegetables such as bell peppers, spinach, or peas to incorporate more nutrition and color. Simply sauté them prior to adding the chicken for thorough flavor integration.

What’s the best way to reheat leftovers?

The stovetop is the best method for reheating leftovers. Use low heat and stir occasionally to restore the dish’s texture and prevent burning.

Can I use a different type of meat?

Of course! This recipe can be adapted to use pork or turkey, adjusting cooking times as needed for each type of meat to ensure complete cooking.

How can I make this dish lower in calories?

To reduce calories, use less butter in the sauce, opt for low-fat cream of mushroom soup, and substitute cauliflowers or zucchini for rice to lower carbs while maintaining flavor.

Is it safe to eat chicken if it looks slightly pink?

As long as the internal temperature is 165°F, it is safe to consume chicken, even if it appears slightly pink. Always use a meat thermometer to ensure proper cooking.

What’s a good side dish for Angel Chicken Rice?

A light salad, steamed vegetables, or crusty bread complements the richness of Angel Chicken Rice beautifully, balancing flavors and textures for a complete meal.

Additional Resources

For those seeking related recipes, check out our collection of comforting one-pan meals and casseroles that echo the ease and heartiness of Angel Chicken Rice. Technique guides help to sharpen skills in searing, sautéing, and essential cooking methods for a wide range of dishes.

Ingredient information can provide insights into choosing quality products, focusing on seasonality, and exploring local options to enhance your culinary journey.

Equipment recommendations ensure that you have the right tools at your disposal for more efficient cooking, making meal preparation an enjoyable experience.

Don’t forget to explore seasonal variations, which can inspire new dishes and flavors in your cooking year-round.

Join the Conversation

We invite you to share your Angel Chicken Rice creations on social media! Tag us with your photos and let us know your personal adaptations or favorite tips. Community engagement is key, so leave your thoughts and reviews to help others discover the joy of this recipe.

If you have made variations or have tried new serving suggestions, we encourage you to share these experiences for everyone to benefit and learn from. Your photography tips and presentation ideas can inspire others to elevate their own cooking and serve up their version of this delicious dish.

The Recipe

Angel Chicken Rice

Serves: 4

Prep Time: 15 mins

Cook Time: 40 mins

Total Time: 55 mins

Kitchen Equipment Needed

  • Large skillet or sauté pan
  • Measuring cups and spoons
  • Wooden spoon or spatula
  • Airtight container for leftovers
  • Meat thermometer

Ingredients

  • 4 boneless, skinless chicken breasts
  • 1 cup of creamy ranch dressing
  • 2 cans of cream of mushroom soup
  • 1 cup of long-grain white rice
  • 2 cups of chicken broth
  • 1 cup of shredded cheese (optional)
  • 1 tablespoon of butter
  • Salt and pepper to taste
  • Fresh parsley for garnish

Directions

  1. Preheat the oven to 350°F (175°C).
  2. In a large skillet, melt the butter over medium heat. Season the chicken with salt and pepper, then sear for about 5 minutes on each side until golden brown.
  3. In a bowl, mix together the ranch dressing, cream of mushroom soup, and chicken broth. Pour the mixture over the seared chicken in the skillet.
  4. Add the rice to the skillet, ensuring it’s submerged in the sauce. Cover and simmer for about 30 minutes or until the rice absorbs the liquid.
  5. If using, sprinkle cheese over the top and place skillet in the oven for 10 minutes until bubbly and the cheese is melted.
  6. Serve hot, garnished with fresh parsley.

Recipe Notes

  • You can substitute chicken with turkey or pork for different flavors.
  • Fresh vegetables like spinach or carrots can be added for added nutrition
  • To make it dairy-free, use coconut milk and omit cheese.
  • This dish is ideal for meal prep; leftovers can be refrigerated for up to three days.

Authentic Chettinad Prawns Fry – Spicy South Indian Shrimp

Delicious Chettinad Prawns Fry: A Spicy Seafood Delight

⚖️
Difficulty
Medium

⏲️
Prep Time
20 mins

🕒
Cook Time
15 mins

⏱️
Total Time
35 mins

🍽️
Servings
4 servings

Chettinad Prawns Fry is a quintessential dish hailing from the South Indian state of Tamil Nadu, renowned for its vibrant and bold flavors. This delightful seafood dish combines succulent prawns with an array of aromatic spices, resulting in a crunchy, flavorful, and satisfying meal that excites the palate. The fiery spices coated on the prawns are a true testament to the rich culinary heritage of the Chettinad region. As you take your first bite, you’ll be enveloped in the delicious flavors, with each prawn providing an irresistibly crispy exterior that gives way to tender, juicy meat.

What sets Chettinad Prawns Fry apart is its alluring balance of heat and aromatic spices, achieved through ingredients like dried red chilies, coriander, and fennel seeds. These not only enhance the taste but also provide a colorful presentation that makes the dish a feast for the eyes. Pair this dish with steamed rice or fluffy dosa, and you’ve got yourself a complete meal that is not only delicious but also satisfying. With this recipe, you’ll be able to recreate a cherished South Indian classic in your own kitchen!

Quick Recipe Highlights

  • Flavor Profile: Chettinad Prawns Fry has a spicy, tangy flavor from freshly ground spices combined with the natural sweetness of prawns.
  • Texture: The prawns are nicely crisp on the outside, while remaining tender and juicy inside, creating a perfect contrast.
  • Aroma: The cooking process releases a mouth-watering aroma, filled with earthy notes from spices like cumin and coriander.
  • Visual Appeal: Garnished with fresh cilantro, the dish displays vibrant colors, making it eye-catching on any dining table.
  • Skill Level Needed: This dish is approachable for home cooks, making it suitable for those with intermediate kitchen skills.
  • Special Equipment: Standard kitchen tools like a frying pan and mortar and pestle or spice grinder are needed.

Recipe Overview

  • Difficulty Level: The medium difficulty is due to the spice preparation and frying process. However, the steps are straightforward and accessible for home cooks.
  • Category: This dish is perfect for lunch or dinner and makes a great appetizer for special occasions or family gatherings.
  • Cuisine: Originating from Chettinad, this dish embodies a rich culinary tradition known for its intricate use of spices and bold flavors.
  • Cost: The ingredients are easily obtainable and affordable, making this dish economical for regular cooking.
  • Season: Enjoy Chettinad Prawns Fry year-round, particularly in the summer when fresh prawns are abundant.
  • Occasion: Ideal for festive occasions, dinner parties, or when you want to impress your family with a home-cooked meal.

Why You’ll Love This Recipe

Chettinad Prawns Fry is a tantalizing explosion of flavors that will dance on your palate with every bite. The vibrant spices not only enhance the prawns’ natural taste but also create a mouthwatering sensation that invites everyone to the table. The combination of heat from the spices and the sweetness of the prawns makes this dish utterly delectable. Whether enjoyed with rice, roti, or as a standalone dish, it’s hard to resist the charms of this classic recipe.

Beyond its incredible flavor, this recipe offers the added benefit of being incredibly quick and simple to prepare. In less than an hour, you can whip up an impressive dish that seems like it took much longer to make. It’s perfect for busy weeknights or spontaneous gatherings when you want delicious food with minimal fuss. You’ll be surprised at how easy it is to bring authentic South Indian cuisine to your home kitchen.

Health-wise, prawns are a fantastic source of lean protein, low in calories and rich in essential nutrients. This dish offers a wholesome option for those looking to maintain a balanced diet while still enjoying their culinary escapades. Combined with spices that have various health benefits, such as boosting metabolism and having anti-inflammatory properties, you can savor every bite knowing you are making a healthy choice.

Chettinad Prawns Fry also shines when it comes to entertaining. The dish’s stunning presentation and inviting aroma make it a showstopper at gatherings. Hosting guests? Serve them this dish to showcase the vibrant flavors of South Indian cuisine, which is sure to spark delightful conversations and compliments.

Lastly, the dish is relatively cost-effective. Many of the ingredients are pantry staples or can be found within your local markets at reasonable prices. Rather than opting for takeout, prepare this dish at home and enjoy the satisfaction of cooking a flavorful seafood dish that even your wallet will appreciate.

Historical Background and Cultural Significance

Chettinad cuisine has deep historical roots, tracing back to the Chettiar merchants who thrived during the age of trade and spices in South India. This cooking style makes extensive use of spices, herbs, and traditional techniques passed down through generations. The origin of Chettinad Prawns Fry is tied closely to the seafood-rich coastal region, where prawns are abundant and hold significant cultural importance.

The cuisine reflects the agricultural practices and the bounty of local markets, incorporating fresh ingredients that promote vibrant culinary experiences. Beyond just food, it signifies the hospitality and warmth of Tamil culture, where meals are often shared among family and friends, creating lasting memories and bonds. The tradition of sharing meals is essential to the Chettinad way of life, making this dish part of everyday celebrations.

As the recipe has evolved, various iterations have surfaced, influenced by different cultures through trade and migration. Modern adaptations may include the use of new cooking methods or ingredient modifications, but the core flavors remain intact, preserving the essence of Chettinad cuisine.

Chettinad Prawns Fry is a beloved dish not only among locals but has gained appreciation globally as well. Its richness has found a place in Indian restaurants outside of India, drawing food lovers to experience the bold flavors that represent the region’s culinary art.

Ingredient Deep Dive

Prawns

Prawns are a staple in many coastal cuisines around the world. Historically, they have been cherished for their delicate flavor and versatility, often being the centerpiece of various dishes. Rich in protein, low in calories, and packed with vitamins and minerals, prawns boast numerous health benefits, including heart-healthy omega-3 fatty acids. When selecting prawns, fresh ones with a firm texture and a mild scent are ideal. Store them in the coldest part of your refrigerator and consume within a day or two for the best quality. If you need to substitute, consider scallops or firm fish fillets for a similar texture.

Coriander Seeds

Coriander seeds have a rich history, being used for millennia in various cultures for culinary and medicinal purposes. They offer a warm, citrusy flavor that complements seafood dishes beautifully. In terms of nutrition, they aid digestion and are an excellent source of antioxidants. When buying, look for whole seeds for maximum freshness. Store in a cool, dark place, and they can last a year if kept dry. If unavailable, ground coriander can be used, though the flavor may slightly differ.

Dried Red Chilies

Dried red chilies are integral to many Indian dishes, bringing heat and flavor that distinguishes dishes like Chettinad Prawns Fry. They have a vibrant color and are often chosen based on their spiciness. Nutritionally, they are rich in vitamins A and C, and they may have metabolism-boosting properties. When selecting, choose chilies that are bright and free of blemishes. Store them in an airtight container, away from sunlight. For a milder flavor, use bell peppers for color and texture instead.

Cumin Seeds

Cumin seeds are a beloved spice worldwide, recognized for their earthy and warm flavor. They have been used since ancient times for both culinary and medicinal purposes. Cumin seeds are excellent for digestion and may help in controlling blood sugar levels. When selecting, aim for whole seeds, as they retain flavor longer. Store in a cool, dry place, and they can last for several months. In case of a shortage, fennel seeds can serve as a flavorful substitute.

Common Mistakes to Avoid

  • Skipping the marination step: Allowing the prawns to marinate ensures they absorb the spices, enhancing flavor.
  • Overcooking the prawns: This can lead to a tough texture; cook just until they turn opaque.
  • Using old spices: Fresh spices offer better flavor; ensure yours are not expired.
  • Not preheating the oil: This can prevent the prawns from getting a crisp exterior.
  • Overcrowding the pan: Fry in batches to maintain heat and crispiness.
  • Ignoring seasoning levels: Adjust spice levels according to taste for balance.
  • Not monitoring heat: Too high can burn the spices; too low won’t allow for proper frying.
  • Using frozen prawns without thawing: Make sure they’re fully thawed for even cooking.

Essential Techniques

Frying prawns is a key technique that requires attention to heat levels and timing. It’s essential to start with a hot pan to ensure the prawns get a beautiful golden-brown coating. Monitor the prawns closely to achieve that perfect crunch. A common pitfall is cooking them too long, which can make them rubbery—look for a change in color as a cue for doneness.

Marination is another crucial step, as it intensifies flavor. Combine your spices, ensuring every prawn is coated evenly. Let them sit for at least 20 minutes to soak up the flavors. The common mistake here is rushing this step; allowing sufficient time will yield better results.

Using a mortar and pestle to grind spices brings out their full flavor. Be careful not to grind them too fine; a coarse texture can add complexity to your dish. If using a spice grinder, pulse carefully while keeping the spice’s essence intact.

Pro Tips for Perfect Chettinad Prawns Fry

1. Use fresh ingredients for the best flavor and aroma.
2. Experiment with different types of dried chilies to adjust heat levels.
3. Consider adding a pinch of sugar to balance the spices.
4. Use a cast-iron skillet for better heat retention and even frying.
5. Always taste the marinade and adjust to personal preference before applying to the prawns.
6. Rest the prawns for a couple of minutes after frying for an even better texture.
7. Serve immediately after cooking for optimum crunchiness; reheating can make them soggy.
8. Garnish with fresh cilantro and lemon wedges for added color and flavor.

Variations and Adaptations

Chettinad cuisine is adaptable, and this dish can certainly be modified to cater to different tastes and dietary preferences. For those who prefer a milder flavor, consider using fewer dried chilies or opting for bell pepper-based marinades. Likewise, seafood lovers can substitute prawns with fish or squid for a delightful twist on the classic dish.

For vegetarian adaptations, use cauliflower or paneer marinated in the same spices to recreate the indulgent flavors of Chettinad Prawns Fry. During festive seasons, you might find variations incorporating nuts or dried fruits to complement the spices, adding an interesting visual and taste experience.

If you wish to enhance the texture, try shallow frying instead of deep frying to achieve a lighter feel, while still maintaining that crispy outer shell. Additionally, seasonal ingredients like spring onions or zesty lime can be introduced based on availability.

Serving and Presentation Guide

Plating plays a crucial role in presenting Chettinad Prawns Fry. To create an enticing plate, arrange the prawns artfully around a mound of fluffy basmati rice or alongside crispy dosas. Garnishing with fresh cilantro or a sprinkle of sesame seeds adds color and elevates the visual appeal.

For added flavor, consider placing a few lemon wedges on the side, allowing guests to squeeze fresh juice over the dish just before eating. Incorporating contrasting colors, such as vibrant salads or chutneys, enhances presentation and complements the spicy profile.

Additionally, consider using personalized serving dishes like small clay pots for a traditional feel. Maintaining a balance between rustic charm and modern aesthetics will create an engaging dining experience for you and your guests.

Wine and Beverage Pairing

When pairing beverages with Chettinad Prawns Fry, consider options that complement the bold spices rather than compete with them. A crisp white wine, such as Sauvignon Blanc or a lightly oaked Chardonnay, works beautifully, balancing the heat while enhancing seafood flavors.

For those preferring non-alcoholic options, a refreshing mint lemonade serves to cut through the spices while providing a refreshing lift. Alternatively, pair with a light, aromatic Riesling to complement the dish’s zest.

If you’d like to enjoy a traditional beverage, serve alongside South Indian filter coffee, known for its rich taste, or a spiced chai that mirrors Indian spices, enhancing the culinary experience.

Storage and Shelf Life

Storing Chettinad Prawns Fry correctly is essential for maintaining its flavor and texture. The dish can be kept in an airtight container in the refrigerator for up to two days. If you plan to store leftovers, allow the dish to cool to room temperature before sealing.

For longer preservation, consider freezing them. Place the prawns in a freezer-safe bag, pressing out excess air to prevent freezer burn. Prawns can be frozen for up to three months; however, be cautious as refreezing can affect quality.

Upon reheating, gently warm the prawns in a skillet over medium heat. Avoid using a microwave as it can make them rubbery. If they seem a bit dry, add a splash of water or oil to revive some moisture without losing the crispy texture.

Make Ahead Strategies

For those wishing to prepare Chettinad Prawns Fry in advance, marinating the prawns a few hours ahead is advisable. This not only allows the spices to infuse effectively but also saves time on the day of cooking. Store them in the refrigerator in an airtight container to preserve freshness.

Prepare the spice mix separately and store it for up to a week. When ready to cook, simply combine with the marinated prawns. Having your ingredients prepped allows for quick assembly and ensures that your cooking remains efficient, even on busy days.

If frying ahead of time, it’s best to store the prawns uncovered in the refrigerator to maintain crispiness. Reheat them in a preheated oven to regain their crunch without overcooking the interior.

Scaling Instructions

When scaling Chettinad Prawns Fry for larger gatherings, the ingredient ratios can easily be doubled or tripled without any modifications. Ensure you maintain proper cooking times and skillet sizes to allow even cooking.

If you need fewer servings, simply halve the ingredients, but be mindful of adjusting spices to maintain the flavor profile. Cooking in smaller batches can lead to better control of heat and flavor.

For larger quantities, consider preparing in batches instead of all at once; this helps retain quality and taste. Larger quantities may require longer cooking times, so check for even doneness and adjust as needed.

Nutritional Deep Dive

When analyzing the nutritional content of Chettinad Prawns Fry, each serving offers a healthy dose of protein vital for muscle recovery and overall health. Prawns are known for being low in calories while still offering high nutritional value, making them a great choice for various diets.

The spices used in the dish not only enhance flavors but also provide unique health benefits. For example, turmeric has anti-inflammatory properties, while cumin aids digestion. This dish can be an enticing option for those aiming to include spice-rich environments into their meals without compromising health.

In moderation, this dish can fit into a balanced diet, providing essential macronutrients without excessive carbohydrates or unhealthy fats. The combination of seafood and spices offers a nutritious boost without overloading on calories, making it a guilt-free delight.

Dietary Adaptations

For those following gluten-free diets, Chettinad Prawns Fry is inherently suitable as it contains no gluten-containing ingredients. Simple modifications will allow the dish to fit various dietary needs.

For dairy-free adaptations, the recipe remains compliant, as it does not traditionally use milk or dairy products. Vegan versions can be achieved by substituting prawns with tofu or jackfruit, marinating them in the same way to capture the flavors.

Low-carb enthusiasts can enjoy this dish without hesitation, as it focuses primarily on protein-rich ingredients. Those on a keto diet may find it fits perfectly, replacing any rice or traditional sides with low-carb options like cauliflower rice or zucchini noodles.

Troubleshooting Guide

If you encounter texture issues with your prawns, ensure you’re not overcooking them, as this can lead to a rubbery result. Check your heat levels to maintain crispy exteriors without burning the spices.

Flavor balance can sometimes skew toward extreme spice or salt. To mitigate this, consider adding a small amount of sweetening agents like sugar or honey to even out flavors. Adjusting the spice level during marination allows for customization.

If your oil isn’t reaching the right temperature, this can affect frying; use a thermometer to verify. If the prawns soak up too much oil, they may not achieve that necessary crisp—try frying in smaller batches to control temperature better.

Ingredient substitutions may yield different results. For instance, if you notice flavors lacking, revisit the freshness of your spices or consider experimenting with new ones to achieve desired flavor profiles.

Timing concerns can be tricky with larger batches, so always err on the safe side by checking for doneness earlier than required, adjusting cook times as necessary based on size and quantity.

Recipe Success Stories

Readers often share positive experiences after trying Chettinad Prawns Fry. Many have highlighted the combination of spices as a standout feature, appreciating how accessible the recipe is to recreate at home. The vibrant colors and aromas make it a favorite for both family dinners and special occasions alike.

Variations have also sparked creativity among cooks, with individuals adapting the dish for dietary needs while maintaining its authenticity. These adaptation stories not only reflect the versatility of Chettinad cuisine but also showcase the joy of cooking in a communal environment.

Guest photographers in community forums frequently post their renditions of the dish, providing inspiring visuals that encourage others to take the plunge. Feedback and tips exchanged within the community demonstrate a supportive atmosphere among culinary enthusiasts seeking to perfect their skills.

If you’ve customized the recipe in your kitchen, don’t hesitate to share your story. Each success story serves as encouragement for others to explore new flavors and techniques, fostering a communal love for cooking.

Frequently Asked Questions

What type of prawns is best for this recipe?

Fresh, large-sized prawns are generally recommended for optimal flavor and texture. Look for prawns that are firm and have a mild smell, avoiding any with a fishy odor.

Can I make Chettinad Prawns Fry in advance?

While it’s best served fresh, you can marinate the prawns ahead of time. Store them in the refrigerator, ideally frying them just before serving to retain crunchiness.

How do I adjust spice levels?

To adjust the spice levels, modify the quantity of dried chilies based on your tolerance. You can also add sweetness with sugar to balance excessive heat.

Is Chettinad cuisine always spicy?

While Chettinad cuisine is known for its bold flavors and spices, the level of heat can vary. You can personalize recipes to your needs by controlling spice levels during preparation.

Can this recipe be made without frying?

You can grill or bake the prawns instead, though the texture will differ from frying. Adjust cooking times accordingly to ensure they are cooked through.

How can I store leftovers?

Store any leftovers in an airtight container in the fridge for up to two days. You can also freeze them to extend shelf life, with proper reheating later.

What sides pair well with Chettinad Prawns Fry?

This dish works splendidly with steamed basmati rice, roti, or dosa, allowing you to mop up the delicious flavors and juices. Enjoy a light salad or raita on the side for freshness.

Can I use frozen prawns?

Yes, you can use frozen prawns but ensure to completely thaw them before marinating and cooking. This will help in even cooking and avoid excess moisture.

How do I know when the prawns are cooked?

Prawns are cooked when they turn opaque and curled slightly. Overcooking can result in a rubbery texture, so watch them closely.

What are some alternatives to prawns?

If you cannot find prawns, consider using other seafood like scallops or firm fish, but adjust cooking times as needed for each ingredient.

Additional Resources

For those interested in further exploring the flavors of Chettinad cuisine, consider trying recipes featuring traditional dishes like Chettinad Chicken or Vegetable Biryani. Techniques such as spice grinding and authentic dosa preparation can deepen your culinary skills. Seek local markets for fresh ingredients, particularly spices that can elevate your cooking.

Honing your skills with ingredient information about spice origins can enhance your appreciation for flavors and aromas. Investing in quality kitchen equipment will also streamline your cooking processes. Don’t hesitate to discover seasonal variations of ingredients that can inspire creativity in your cooking.

Join the Conversation

We’d love to hear about your experiences with Chettinad Prawns Fry! Share your thoughts, modifications, or photos on social media and tag us to engage with a community of cooking enthusiasts. Your feedback and suggestions can spark new ideas and help others refine their cooking techniques.

Discuss your favorite pairings or what inspired you to create this dish. By connecting with fellow readers, you contribute to a thriving community that appreciates the rich flavors and cultural significance of cuisine. We encourage you to experiment, share your own variations, and inspire others to explore the world of culinary possibilities.

The Recipe

Chettinad Prawns Fry

Serves: 4 servings

Prep Time: 20 mins

Cook Time: 15 mins

Total Time: 35 mins

Kitchen Equipment Needed

  • Frying pan or skillet
  • Mortar and pestle or spice grinder
  • Measuring spoons
  • Cutting board and knife

Ingredients

  • 500g fresh prawns, cleaned and deveined
  • 2 tablespoons coriander seeds
  • 1 tablespoon cumin seeds
  • 4-5 dried red chilies
  • 2 tablespoons ginger-garlic paste
  • 2 tablespoons lemon juice
  • Salt to taste
  • 2-3 tablespoons vegetable oil for frying
  • Fresh cilantro for garnish

Directions

  1. First, grind coriander seeds, cumin seeds, and dried red chilies to a coarse powder using a mortar and pestle or spice grinder.
  2. In a bowl, combine the ground spices, ginger-garlic paste, lemon juice, and salt to create a marinade.
  3. Add the prawns to the marinade and mix well. Allow marinating for at least 20 minutes.
  4. Heat the oil in a frying pan over medium heat. Once hot, carefully add the marinated prawns in batches, avoiding overcrowding.
  5. Fry the prawns for 3-4 minutes on each side until they turn golden brown and opaque.
  6. Remove the prawns and drain on paper towels to absorb excess oil.
  7. Garnish with fresh cilantro before serving and enjoy with rice or dosa.

Recipe Notes

  • For a milder version, adjust the number of dried red chilies used.
  • Fresh seafood is recommended for the best taste; avoid frozen if possible.
  • Serve with a side of lemon wedges for guests to add brightness to their servings.

Best Steamed Momos Recipe – Soft, Juicy & Flavorful

Steamed Momos: A Delightful Taste of Tradition

⚖️
Difficulty
Medium

⏲️
Prep Time
30 mins

🕒
Cook Time
20 mins

⏱️
Total Time
50 mins

🍽️
Servings
4

Steamed momos, traditional dumplings originating from the Himalayan region, are beloved around the world for their delightful flavors and cultural significance. These bite-sized pockets are filled with a variety of ingredients, predominantly vegetables or minced meat, enveloped in a soft, chewy dough. The steaming process enhances the filling’s taste while keeping the outer layer tender, creating a delicious combination that is hard to resist.

Perfect as an appetizer, snack, or even a main course, steamed momos deliver a unique experience with every bite. The versatility in preparation allows for an endless array of flavors, from spicy and savory to subtle and herbal, appealing to many palates. Whether enjoyed at a bustling street vendor or crafted at home, these dumplings bring an authentic taste of culture and community right to your plate.

Quick Recipe Highlights

  • Flavor Profile: Steamed momos have a rich combination of savory and spicy flavors from the filling, complemented by the softness of the dough.
  • Texture: The dumpling’s exterior is soft and chewy, while the filling can be juicy and flavorful, providing a satisfying contrast.
  • Aroma: Aromatic herbs and spices, such as garlic, ginger, and cilantro, create a mouthwatering scent that entices your senses.
  • Visual Appeal: Momos’ plump, rounded shapes are visually enticing, often served with vibrant dipping sauces that enhance their presentation.
  • Skill Level Needed: While basic cooking technique is required, making momos can be mastered with practice, making them accessible even for beginners.
  • Special Equipment: A steaming basket or pot is essential for cooking momos, ensuring they remain moist and fluffy.

Recipe Overview

  • Difficulty Level: Medium, as it requires technique in making the dough and shaping the dumplings, which can be simplified with practice.
  • Category: Ideal for appetizers or snacks, and can also serve as a main course option for lunch or dinner.
  • Cuisine: Hailing from Tibetan and Nepalese cuisines, momos are influenced by various regional flavors and preferences.
  • Cost: The ingredients are generally affordable, making momos a cost-effective choice for meals that impress.
  • Season: Accessible year-round, but particularly enjoyed during winter months for their warmth and comfort.
  • Occasion: Perfect for gatherings, festivals, or family meal nights, momos invite sharing and community.

Why You’ll Love This Recipe

Steamed momos offer a perfect blend of taste and texture that is truly captivating. The tender, chewy outer layer contrasts beautifully with the flavorful fillings, making every bite a delightful exploration of flavors. Whether you prefer a vegetarian filling bursting with fresh veggies or a hearty meat version, the options are endless, allowing customization to cater to any preference.

The convenience and simplicity of making steamed momos at home are unbeatable. With a few basic ingredients and tools, you can create these delicious dumplings that evoke a sense of belonging and warmth, suitable for any occasion. Preparing momos can also be a fun family activity, where everyone can join in and share laughter while creating their own tasty dumplings.

From a nutritional standpoint, momos can be a healthy option depending on the filling used. Rich in vegetables, proteins, and aromatic herbs, they provide various essential nutrients while remaining low in calories. You can opt for lean meat or create entirely plant-based fillings, ensuring a balanced meal packed with flavors.

Socially, steamed momos have a unique value as they encourage sharing and bonding. Serving a platter of momos at your next gathering will surely ignite conversations and create memorable experiences. Their delightful presentation and inviting nature make them a perfect addition to any table, enhancing the overall enjoyment of your meal.

In terms of cost-effectiveness, steamed momos prove to be an affordable choice that doesn’t compromise on flavor or satisfaction. With basic pantry staples and a few fresh ingredients, you can whip up a batch of these delightful dumplings, keeping both your taste buds and wallet happy.

Historical Background and Cultural Significance

The origin of momos can be traced back to Tibet, where they were traditionally prepared by the nomadic tribes in the Himalayan region. These dumplings were not only a source of nourishment during long journeys but also a delicious way to utilize leftover ingredients. Over time, momos spread to neighboring countries, including Nepal and India, becoming an integral part of various cuisines.

Culturally, momos hold significant importance in the Himalayan community, often served during festivals, weddings, and family gatherings. The process of making and sharing momos embodies the spirit of togetherness, symbolizing hospitality and warmth. They are enjoyed by people of all ages, bringing communities closer, and are often the highlight of social events.

The evolution of the recipe has seen the introduction of numerous fillings, ranging from traditional minced meat and herbs to innovative vegetarian and vegan options. Each region has its version, such as the spicy chicken momos prevalent in North India or the sweet dessert momos found in Tibet.

Regional variations have also emerged, with each locale incorporating local ingredients and flavors into their momos, leading to a rich tapestry of tastes and experiences. This adaptability illustrates how food can evolve while still paying homage to its roots, showcasing the versatility and appeal of steamed momos.

Ingredient Deep Dive

– **Dough Flour:** Flour is the foundation of the dough, providing the structure for momos. Look for all-purpose flour for optimal texture. Choose high-quality flour for better flavor and elasticity. Store it in a cool, dry place to maintain its freshness.

– **Vegetables (Cabbage, Carrots, etc.):** Vegetables are essential for flavorful fillings. They not only provide taste but also add nutrients and texture to the dish. Fresh vegetables are key; opt for seasonal produce for the best flavors. Store them in the refrigerator to maintain their crispness.

– **Herbs and Spices (Ginger, Garlic, Cilantro):** These ingredients add depth and richness to the filling. Fresh herbs provide a burst of flavor; dried spices can enhance the overall taste profile. Store herbs in the refrigerator and spices in a cool, dark place to maintain potency.

– **Protein (Minced Meat or Tofu):** For non-vegetarian momos, using lean meat like chicken or pork will create tasty fillings. For vegetarian options, firm tofu or paneer work well. Choose high-quality protein sources for optimal flavor and nutrition. Store them according to their requirements – refrigerated or frozen.

Common Mistakes to Avoid

  • Not kneading the dough enough, which results in tough momos. Knead until smooth and elastic.
  • Using too much flour to roll out the dough can make it dry and undesirable. Lightly flour your surface to prevent sticking.
  • Filling the momos too much can lead to bursting during cooking. Use a moderate amount for the best results.
  • Not sealing the dumplings properly can cause them to open during steaming. Make sure the edges are pressed firmly together.
  • Overcrowding the steamer can lead to uneven cooking. Space momos apart to allow steam circulation.
  • Skipping the resting period for the dough can result in tough momos. Let the dough sit before rolling for better texture.
  • Failing to preheat the steamer can increase cooking time. Always preheat before placing momos in it.
  • Using cold fillings straight from the fridge may affect cooking time. Allow them to come to room temperature before use.

Essential Techniques

– **Kneading the Dough:** This technique is crucial for developing gluten, resulting in a chewy yet soft texture. Master the art of kneading by using your palms to push and fold the dough until it’s smooth. Avoid overworking to prevent it from becoming too tough. Visual cues include a smooth surface and slight elasticity.

– **Folding and Shaping:** The manner in which you fold and shape momos determines their appearance and sealing effectiveness. Practice various pleating styles, ensuring all edges are sealed, which prevents steaming during cooking. A well-made momo should have a plump, round appearance with neatly folded edges.

– **Steaming:** Properly steaming momos is vital to ensure they cook thoroughly while retaining moisture. Use a bamboo steamer or a metal one, ensuring there’s enough space for steam circulation. Visual indicators of doneness include a translucent wrapper and a soft texture. Check to avoid overcooking, which can dry them out.

Pro Tips for Perfect Steamed Momos

– Experiment with the filling options to find your favorite combination of flavors and textures.
– Allow the dough to rest adequately for a softer and stretchier result.
– Always ensure your steamer is adequately prepared with enough water to last the entire cooking time.
– Cover the momos with a damp cloth while you work to prevent them from drying out.
– If using meat, ensure it is finely minced to ensure even cooking and better flavor distribution.
– Pair momos with spicy dipping sauces to enhance the flavor experience.
– Use a silicone mat or parchment paper in the steamer to prevent sticking.
– Practice makes perfect; don’t hesitate to try different folding techniques for aesthetics.

Variations and Adaptations

– **Regional Variations:** Momos can be found in diverse forms across regions, with variations in filling and spicing reflecting local tastes. For example, Tibetan momos often use yak meat, while Nepali versions may include more robust spices.

– **Seasonal Adaptations:** Use seasonal vegetables for your filling to embrace the bounty of nature. For instance, spinach and feta can make an excellent summer filling, while winter vegetables like squash pair beautifully in the colder months.

– **Dietary Modifications:** Steamed momos are incredibly adaptable, allowing for gluten-free dough made from rice flour or a vegan filling made with lentils, making them suitable for various diets.

– **Flavor Variations:** Experiment with different spices and herbs in your fillings. Adding smoked paprika or cumin can lend a unique twist to traditional recipes.

– **Texture Modifications:** For a crunchier texture, consider pan-frying your steamed momos for a couple of minutes post-steaming, creating a delightful contrast between the soft outer layer and crispy base.

– **Presentation Alternatives:** Serve momos on skewers or as part of a platter alongside various dips and sauces to create an impressive visual presentation for gatherings.

Serving and Presentation Guide

Plating techniques can elevate the dining experience significantly. Arrange steamed momos in a circular pattern on a vibrant plate to create a visually appealing display. Garnish with fresh herbs, such as cilantro or parsley, to add color and freshness.

Garnishing can further enhance your momos’ visual appeal. Serve with colorful dipping sauces like green chili sauce or red chutney, placing them in small bowls around the momos for a rustic yet elegant touch. The contrast of colors provides an enticing view.

Traditional accompaniments like pickled vegetables or a simple salad can add further layers of flavor and texture to the dish. Modern serving suggestions might include adding a side of crispy potato fries for a fusion twist.

When serving, consider the temperature of momos; they are best enjoyed warm. Keep them covered with a cloth until ready to serve to maintain moisture. Pay attention to portion control; aim for 4-6 momos per person as an appetizer, adjusting based on the meal context.

Wine and Beverage Pairing

Complementing your steamed momos with the right beverage can enhance the meal. For wine enthusiasts, light white wines like Sauvignon Blanc or a crisp Pinot Grigio pair well, balancing the spices without overpowering the dish.

If you’re looking for non-alcoholic alternatives, sparkling water with a splash of lemon offers a refreshing accompaniment that cleanses the palate between bites.

For those who enjoy a warm drink, pairing momos with a soothing cup of ginger tea or a robust chai can create a delightful contrast, enhancing the overall flavor experience. Serve all beverages chilled or warm, depending on the season and occasion.

Storage and Shelf Life

Storing your momos properly can extend their shelf life significantly. Cooked momos can be kept in an airtight container in the fridge for up to 3 days. For longer storage, consider freezing them; they can last up to 2 months in the freezer.

When freezing, ensure to separate each momo with parchment paper to prevent them from sticking together. To keep them fresh, use freezer-safe containers or zip-lock bags.

Signs of spoilage may include changes in texture or an off-smell; if you notice either, it’s best to toss them. To reheat, steam them lightly until heated through, avoiding the microwave to maintain texture.

Freezing guidelines recommend partially cooking momos before freezing, allowing for an easier cooking process once you decide to enjoy them later.

Make Ahead Strategies

Preparing momos in advance can save time during busy meal times. You can prepare the filling a day ahead and store it in the fridge, ensuring it’s flavorful and ready to use.

Another option is to assemble the momos the day before and keep them covered in the refrigerator, allowing you to steam them fresh the next day with minimal hassle.

Quality may be impacted if they sit too long, especially if the dough can dry out. To mitigate this, keep the assembled momos moist with a damp cloth until you’re ready to steam them.

Assembly tips include making sure the filling is not overly wet, which can affect the dough’s integrity. Also, it’s crucial to keep working quickly to prevent the dough from drying as you form the momos.

Scaling Instructions

Scaling the recipe can be easily done when you wish to prepare a larger batch of steamed momos. Halving the recipe requires simply dividing each ingredient by two, while doubling or tripling requires careful consideration of both proportion and mixing time.

Equipment adjustments may be necessary for larger batches, such as using multiple steamers or a larger pot. Ensure your steamer capacity can accommodate the increased volume, spacing the momos to allow for proper steaming.

Timing modifications should be made based on the quantity cooked at once; larger batches may require slightly longer cooking times to ensure thorough cooking throughout.

When storing, consider using multiple containers rather than one large one, as this helps maintain quality and makes reheating more manageable.

Nutritional Deep Dive

Understanding the nutritional values of steamed momos provides insight into their health benefits. A standard serving of steamed momos can provide a balanced mix of carbohydrates, proteins, and essential vitamins depending on the filling used.

Macro breakdown reveals that momos primarily consist of carbohydrates from flour and can be enriched with protein via meat or legumes. Always consider the balance of macronutrients to ensure a healthy meal option.

Micronutrient analysis shows that the filling ingredients provide essential vitamins and minerals. Vegetables contribute fiber and Vitamin C, while proteins offer B vitamins, contributing to overall health.

Health benefits of momos stem from their nutrient-dense fillings and relatively low-calorie count, making them a satisfying choice for portion control and weight management.

Portion analysis is key; enjoying momos as a snack or light meal allows you to savor flavors while keeping your energy levels stable throughout the day.

Dietary Adaptations

– **Gluten-free:** Use gluten-free flour such as rice or almond flour to make a suitable dough for those with gluten allergies.
– **Dairy-free:** Opt for completely plant-based fillings like vegetables or beans, avoiding any dairy-based sauces.
– **Vegan:** A plant-based filling with vegetables, tofu, or tempeh works perfectly for a vegan version.
– **Low-carb:** Consider substituting traditional dough with cauliflower or zucchini-based alternatives for a low-carb option.
– **Keto:** Use fathead dough or almond flour in place of traditional flour, keeping fillings keto-friendly with proteins and low-carb veggies.
– **Paleo:** Create paleo-friendly momos by using almond or coconut flour for the dough and fillings like ground meats and veggies.
– **Low-FODMAP:** Stick to lower FODMAP ingredients, avoiding high-FODMAP vegetables while focusing on safe herb and spice selections.

Troubleshooting Guide

– **Texture Issues:** If the momos are too chewy, it may be due to over-kneading the dough. Knead just enough to develop elasticity without overworking.
– **Flavor Balance:** If the filling lacks flavor, season generously with salt, pepper, and aromatic herbs before assembling.
– **Temperature Problems:** If momos are cooked unevenly, check the steaming temperature and ensure steam circulates properly.
– **Equipment Challenges:** If using a makeshift steamer, watch for water boiling over or steaming inconsistently; adjust heat and ensure a tight fit.
– **Ingredient Substitutions:** If substituting ingredients, be aware that moisture levels may change, potentially affecting dough consistency.
– **Timing Concerns:** If the filling is undercooked, keep an eye on steaming time and adjust accordingly based on the filling type used.

Recipe Success Stories

Many community members have shared their successful experiences with steamed momos, detailing how they personalized the fillings or adapted the recipe to fit their dietary needs.

Variation successes highlight the creativity of fans who experimented with flavors—one reader created a spicy vegan filling that became a family favorite!

Adaptation stories often feature readers who tackled their first momo-making experience, many indicating an increase in confidence alongside improved techniques with each batch.

Readers suggest photography tips aimed at capturing the delightful steam and aesthetics of momos, emphasizing the visual appeal of their finished dishes.

Sharing these success stories fosters a sense of community among those trying their hand at this beloved recipe, encouraging others to get involved and explore their culinary skills.

Frequently Asked Questions

What are the common fillings for momos?

Common fillings include minced meat like chicken, pork, and buffalo, or vegetables mixed with herbs and spices. Some innovative versions may also include cheese or tofu for additional flavor.

Can I make momos without a steamer?

While a steamer is the traditional method, you can improvise by using a pot with a lid and a heat-safe plate or rack above simmering water to steam the momos.

How do I prevent momos from sticking together?

To prevent sticking, make sure to lightly grease your steamer basket or layer parchment paper between momos during the steaming process.

Can I freeze cooked momos?

Yes, cooked momos can be frozen for up to two months. Ensure they are fully cooled before placing them in an airtight container for best results.

What can I serve with momos?

Momos can be served with a variety of dipping sauces, such as chili garlic sauce, soy sauce, or yogurt-based sauces. Pickled vegetables also make a great accompaniment.

How long does it take to cook momos?

Typically, momos take about 15 to 20 minutes to fully steam, depending on the size of the dumplings and the specific filling used.

Are momos healthy?

Steamed momos can be a healthy option, particularly when filled with fresh vegetables and lean proteins. Their low-calorie count makes them a good choice for light meals or snacks.

Can I make momos ahead of time?

Yes, you can prepare the filling and assemble momos ahead of time. Store them in the refrigerator for a day before steaming them fresh when needed.

What is the best way to reheat momos?

The best way to reheat momos is to steam them again briefly until heated through, maintaining their texture and moisture.

How do I know when momos are done?

Momos are done when the outer layer appears semi-translucent and the dough feels soft yet firm to the touch, indicating they are cooked through.

Additional Resources

If you’re looking for more delicious recipes, check out our collection of traditional dumpling recipes, including various Asian and Eastern European options.

Explore our technique guides for mastering dough-making and steaming to elevate your culinary skills.

Our ingredient information section provides deeper insights into specific vegetables and meats used in momos, ensuring you’re well-informed on purchasing.

For those interested in special equipment, read about the best steamers available for home use, as well as ways to create an efficient kitchen setup.

Seasonal variations of this recipe can help you incorporate seasonal produce, showcasing the beauty of ingredients throughout the year.

Join the Conversation

We invite you to share your experiences with making steamed momos! Engage on social media platforms by tagging your delicious creations, sharing tips, and showcasing your variations.

Photography tips can help you capture the beauty of your momos—play with lighting and background to emphasize their enticing features.

Join the growing community of food lovers and share your recipe reviews, encouraging others to step into this exciting culinary journey of crafting steamed momos.

Feel free to suggest your own twists and adaptations, enriching our collection of flavorful dumplings together.

The Recipe

Steamed Momos

Serves: 4

Prep Time: 30 mins

Cook Time: 20 mins

Total Time: 50 mins

Kitchen Equipment Needed

  • Bamboo or metal steamer
  • Mixing bowl
  • Rolling pin
  • Cutter or knife

Ingredients

  • 2 cups all-purpose flour
  • 1 cup water (adjust as needed)
  • 1 cup finely chopped cabbage
  • 1 carrot, grated
  • 1/2 cup minced chicken or tofu
  • 2 tablespoons ginger-garlic paste
  • 2 tablespoons chopped cilantro
  • Salt and pepper to taste

Directions

  1. In a large mixing bowl, combine flour and water, kneading until smooth. Cover and let rest.
  2. In another bowl, mix the filling ingredients (cabbage, carrot, meat/tofu, spices) until combined.
  3. Divide the dough into small balls and roll each into a thin circle.
  4. Place a small amount of filling in the center of each circle, fold, and seal the edges carefully.
  5. Prepare your steamer by boiling water, then place the momos inside, ensuring they do not touch.
  6. Cover and steam for 15-20 minutes until cooked through and the dough appears translucent.
  7. Serve hot with your favorite dipping sauce!

Recipe Notes

  • Adjust the filling ingredients based on your preference (vegetarian options work well).
  • Allow the dough to rest for at least 20 minutes for better elasticity.
  • For easier shaping, keep a small bowl of water nearby to moisten the edges of the dough before sealing.

Best Creamy Garlic Mushroom Stuffed Shells Recipe

Creamy Garlic Mushroom Stuffed Shells: A Delicious Delight for Mushroom Lovers

⚖️
Difficulty
Medium

⏲️
Prep Time
30 mins

🕒
Cook Time
40 mins

⏱️
Total Time
70 mins

🍽️
Servings
4 servings

Indulge yourself in a burst of flavors with Creamy Garlic Mushroom Stuffed Shells. This delightful pasta dish is the perfect combination of creamy, savory, and hearty, making it a fantastic choice for weeknight dinners or special occasions. Picture this: tender jumbo pasta shells filled with a decadent mixture of sautéed garlic, earthy mushrooms, and creamy ricotta cheese, all nestled in a luscious béchamel sauce that is both comforting and satisfying. Prepare to embark on a culinary journey that will transport your taste buds to a cozy Italian trattoria.

The beauty of this recipe lies not only in its delicious flavor but also in its ability to satisfy a variety of cravings. Whether you are a devoted mushroom lover looking for a robust dish or simply seeking a new comforting pasta option, these stuffed shells are tailored for you. As you take the first bite, you’ll experience the harmony of textures—the creamy filling coupled with the tender pasta and the velvety sauce creating a symphony of flavor in every mouthful.

Quick Recipe Highlights

  • Flavor Profile: Expect an irresistible combination of earthy mushrooms and creamy ricotta cheese with hints of garlic and herbaceous notes.
  • Texture: The contrast of the firm pasta shells and the soft, creamy filling provides a delightful mouthfeel that’s both satisfying and indulgent.
  • Aroma: This dish boasts a rich, savory aroma with aromatic garlic and sautéed mushrooms that fills your kitchen as it cooks.
  • Visual Appeal: The vibrant colors from the béchamel sauce and garnished with fresh parsley make this dish as eye-catching as it is delicious.
  • Skill Level Needed: While the recipe has a few steps, it’s approachable for home cooks with some experience using fresh ingredients.
  • Special Equipment: All you need is a pot for boiling pasta, a skillet for sautéing, and a baking dish for assembling the shells.

Recipe Overview

  • Difficulty Level: While medium in difficulty, the recipe involves straightforward steps that can be mastered by any passionate chef.
  • Category: This delightful dish falls under the pasta category, ideal for lunch or dinner pairings.
  • Cuisine: Inspired by Italian culinary traditions, these stuffed shells come with a rich history of flavors that celebrate fresh produce and comforting ingredients.
  • Cost: Ingredients are affordable, making it a budget-friendly dish that doesn’t compromise on flavor.
  • Season: Perfect for all seasons, this recipe shines particularly during the colder months as a warming comfort food.
  • Occasion: Great for family dinners, potlucks, or even a romantic dinner at home.

Why You’ll Love This Recipe

Imagine gathering around the table with loved ones, sharing a dish that envelops you with warmth and flavor. The creamy garlic mushroom stuffed shells not only deliver on taste but also provide a comforting and nostalgic experience that evokes the warmth of home cooking. Each bite captures the essence of savory mushrooms blended seamlessly with the creamy filling, creating a dish that feels indulgent without being overly rich.

The convenient preparation makes this recipe a go-to for busy weeknights. With a little bit of early prep, you can assemble the stuffed shells and pop them in the oven while you attend to other tasks. The enticing aroma of bubbling béchamel sauce and roasted garlic in the kitchen is certain to draw family members in, curtailing any late-night snack cravings.

In terms of nutrition, this dish is loaded with essential nutrients. Mushrooms provide vital antioxidants and improve your meal’s nutritional quotient, while ricotta adds protein and creaminess. Paired with a side salad, this dish can easily contribute to a balanced meal, presenting a wonderful blend of flavors along with health benefits.

When hosting guests, nothing brings people together quite like a delectable platter of stuffed shells. The communal style of serving encourages sharing and conversation, transforming your dinner into a memorable gathering. Perfect for family gatherings or dinner parties, this dish is sure to impress with its gourmet appeal.

Finally, the cost-effectiveness of this recipe is unbeatable. With a simple ingredient list and easy preparation, you can create a gourmet meal that feels extravagant while maintaining a budget-friendly framework. With this recipe, you can whip up an impressive dinner that looks and tastes like it came from a fine restaurant.

Historical Background and Cultural Significance

The roots of stuffed pasta can be traced back to ancient culinary practices in Italy, where pasta was commonly filled with various ingredients. Stuffed shells, specifically, gained popularity in the early 20th century as Italian immigrants brought their rich culinary traditions to the United States. Over the decades, this dish has become a beloved staple in American-Italian cuisine.

Culturally, mushroom-based dishes hold significant importance across various regions, celebrated for their unique flavors and health benefits. Italian cuisine, deeply connected to the land, showcases mushrooms as essential ingredients, providing earthy flavors that enhance pasta dishes. The combination of mushrooms with dairy products like ricotta and béchamel highlights the country’s emphasis on using fresh, local ingredients.

As pasta evolved in America, stuffed shells emerged as a clever way to incorporate fillings that resonated with regional preferences. Families began customizing their fillings with ingredients such as garlic, spinach, and ricotta, leading to a dish that celebrates versatility. As a result, mushroom stuffed shells have become a cherished meal, often passed down through generations, making it a beloved family tradition.

Today, variations of stuffed shells exist worldwide, demonstrating the adaptability and resilience of this classic dish. From vegetarian adaptations to meat-filled varieties, the stuffed shell continues to evolve while maintaining its roots in Italian heritage. They represent a comforting meal that transcends culinary boundaries, inviting home chefs to explore their creativity while honoring tradition.

Ingredient Deep Dive

Mushrooms

Mushrooms have held a significant role in culinary traditions around the world, celebrated not only for their unique flavor and texture but also their health benefits. They are low in calories and high in essential nutrients, making them an excellent addition to any diet. The earthy flavor of mushrooms adds depth and richness to dishes, often enhancing the taste of accompanying ingredients.

When selecting mushrooms for this recipe, look for fresh specimens that are firm and unblemished. Store them in a paper bag in the refrigerator to maintain their freshness. If you need to substitute, consider options like shiitake or portobello mushrooms, which can offer a similar texture and flavor profile.

Ricotta Cheese

Ricotta cheese, a staple in Italian cuisine, is known for its creamy texture and mild flavor. This cheese is made from whey, a byproduct of cheese production, showcasing the resourcefulness of Italian cooking. Ricotta is an excellent source of protein and calcium, contributing to overall dietary nutrition and providing a delightful creaminess to recipes.

When purchasing ricotta, opt for fresh cheese free from additives and preservatives to achieve the best flavor and texture. Store it in the refrigerator and consume within a week for optimal freshness. Additionally, cottage cheese can serve as a suitable alternative in a pinch, although it may create a different consistency in your dish.

Common Mistakes to Avoid

  • Using dry or stale pasta shells: Always check the expiration date on your pasta. Fresh, quality pasta will hold the filling better.
  • Overcooking the pasta: Avoid mushy shells by cooking the pasta al dente since they will absorb more moisture during baking.
  • Not seasoning properly: Ensure each component is well seasoned, from the filling to the béchamel sauce, for a balanced flavor.
  • Skipping the sauce: A layer of béchamel sauce not only adds flavor but prevents the pasta from drying out in the oven.
  • Insufficient filling: Pack the filling generously but avoid overstuffing, which can lead to bursting shells during baking.
  • Forgetting to preheat the oven: Ensure your oven is preheated before baking to achieve a perfect golden-brown top.
  • Neglecting to let it rest: Allow the dish to cool slightly before serving, which helps set the filling and enhances the overall flavor.
  • Not garnishing: Fresh herbs or grated cheese can elevate the presentation and flavor of your dish significantly.

Essential Techniques

Cooking pasta al dente is crucial for this recipe. The importance lies in achieving the right texture, preventing the pasta from becoming overly soft and mushy. To master this, follow package instructions carefully, tasting the pasta a minute or two before the suggested cooking time. Look for firm yet tender shells that can hold their shape when filled.

Sautéing mushrooms properly is another essential technique. Begin by ensuring the pan is hot before adding the mushrooms, allowing them to sear and brown instead of steaming. This enhances their flavor and adds a savory depth to the filling. Watch for their juices to evaporate, as this will concentrate their earthy taste.

Pro Tips for Perfect Creamy Garlic Mushroom Stuffed Shells

1. Choose fresh mushrooms for the best flavor and texture. Varieties like cremini or shiitake will add a rich, earthy taste to your filling.
2. For a flavor boost, consider adding sautéed onions or shallots to the mushroom filling.
3. Incorporate herbs like fresh parsley or basil for bright notes that complement the creamy filling.
4. If you want to enhance the sauce, a splash of white wine or lemon juice can add depth to the béchamel.
5. For a crispy topping, mix breadcrumbs with grated Parmigiano-Reggiano cheese and sprinkle over the final layer before baking.
6. If you’re short on time, prepare the filling ahead of time and assemble closer to mealtime.
7. Serve your stuffed shells with a simple green salad dressed with lemon vinaigrette for a delightful contrast in flavors.
8. Allow your dish to cool for about 10 minutes after baking; this helps the flavors meld and makes serving easier.

Variations and Adaptations

Feel free to explore regional variations of stuffed shells! For a hearty Italian twist, add Italian sausage or ground beef to your filling mix. Seasonal adaptations can also be made by incorporating fresh spinach or zucchini into your filling during summer months, while adding butternut squash puree for a touch of sweetness in fall.

Dietary modifications cater to everyone—vegan versions can use cashew cream instead of ricotta and omit cheese in the béchamel. Alternatively, low-carb enthusiasts can replace pasta shells with zucchini noodles for a lighter option. Flavor variations can be achieved by adding different types of cheese, such as feta or goat cheese, to lend a tangy taste to the filling.

For a twist on presentation, consider arranging the stuffed shells in individual ramekins or mini cast-iron skillets, which provide a rustic and charming dining experience. Top with fresh herbs and serve with a side of crusty bread to complete the meal.

Serving and Presentation Guide

For an inviting presentation, arrange the stuffed shells in a large baking dish, generously covering them with béchamel sauce and a sprinkle of cheese to create an appealing golden crust. When plating, consider layering shells on a bed of fresh arugula or mixed greens to add color and a slight bitterness that contrasts the rich filling.

Garnish your dish with freshly chopped herbs, such as parsley or basil, for a pop of color and flavor. Pair it with crusty Italian bread for an artisan touch, inviting diners to soak up the delicious sauce. Always serve warm and pair with a side salad for an elegant touch, ensuring proper portion control by limiting servings to 2-3 shells per person.

Wine and Beverage Pairing

When it comes to wine pairings, consider a crisp Sauvignon Blanc or a Pinot Grigio to complement the creamy flavors of the dish without overwhelming it. For red wine lovers, a medium-bodied Chianti balances the earthy notes of the mushrooms beautifully.

Non-alcoholic alternatives like sparkling water with fresh lemon or cucumber can refresh your palate between bites while maintaining the elegance of your meal. Additionally, a robust herbal tea serves as a delightful digestif, enhancing the overall experience of enjoying this rich pasta dish.

Storage and Shelf Life

For optimal freshness, store any leftovers in an airtight container in the refrigerator, where they can last for up to three days. To reheat, gently warm in the oven at 350°F until heated through to preserve texture.

For longer storage, consider freezing the stuffed shells before baking. Arrange them in a single layer in a freezer-safe container, allowing for up to three months of shelf life. When ready to enjoy, simply bake from frozen, adding a few extra minutes to the cooking time.

Signs of spoilage include an off-smell or visible mold on the pasta or sauce. When reheating, ensure the dish reaches an internal temperature of 165°F for food safety.

Make Ahead Strategies

To save time, consider preparing the filling ahead of time; it can be stored in the fridge for up to a day allowing the flavors to meld. The pasta shells can also be cooked and stored separately, ready for assembly when you’re prepared to serve.

Assembling the stuffed shells can be done up to 24 hours in advance. Cover the dish tightly with foil and pop it in the fridge until you’re ready to bake. This way, you can simply preheat the oven and enjoy a freshly baked dish in minimal time.

For the best quality, avoid adding the béchamel sauce until just before baking to maintain texture. If desired, sprinkle fresh herbs or cheese on top when ready to serve for an added burst of flavor.

Scaling Instructions

If you wish to halve this recipe, simply use half of the ingredients and adjust the baking time accordingly. For larger gatherings, doubling or tripling the recipe will not require significant adjustments, but you may need to use multiple baking dishes.

Ensure your oven can accommodate larger pans, as baking times may vary. Keep an eye on the shells as they bake, and use visual cues such as golden-brown cheese on top to ensure they don’t overcook.

For storage considerations, invest in larger containers to house the extra portion. Label and date your containers to track freshness easily.

Nutritional Deep Dive

A serving of creamy garlic mushroom stuffed shells provides a well-rounded blend of macronutrients. Each shell is filled with protein-rich ricotta, healthy fats from the béchamel sauce, and complex carbohydrates from the pasta, balancing your meal.

In terms of micronutrient analysis, this dish is packed with calcium from the cheese, B vitamins from the mushrooms, and essential vitamins from added produce like parsley. Incorporating a side salad will further amplify your intake of vitamins, fiber, and antioxidants.

Additionally, consider portion analysis when indulging in this dish. A serving of 2-3 shells not only satisfies hunger but provides a symphony of flavors without excessive calories, aiding weight management goals while still enjoying a gourmet experience.

Dietary Adaptations

For those following a gluten-free diet, consider using gluten-free pasta shells which are widely available in grocery stores. Whole-wheat or veggie-based pasta options are great for those looking to increase fiber in their diet without compromising flavor.

Vegans can substitute the ricotta with blended cashews or tofu seasoned with nutritional yeast and herbs. The béchamel sauce can be easily achieved using silken tofu or plant-based milk alternatives that provide creamy consistency without the dairy.

Keto and low-carb dieters can replace traditional pasta shells with zucchini or eggplant slices, providing a nutritious and flavorful alternative that keeps the dish low in carbs. Other modifications like low-FODMAP options can simply use lactose-free cheese or omit onions and garlic to suit dietary restrictions.

Troubleshooting Guide

If the pasta shells turn out too watery, make sure to drain any excess moisture from the mushroom filling. This can be crucial in preventing a soggy result. Additionally, proper seasoning at each cooking stage also enhances the final outcome.

In case of bland flavor, experiment with ensuring that all ingredients are seasoned properly from the filling to the béchamel sauce. Adding a squeeze of fresh lemon juice can brighten up the dish remarkably.

If the sauce appears too thick, add a splash of milk or cream to loosen the consistency while stirring over gentle heat. For a burnt top, cover the dish with foil during the last stretch of baking to prevent over-crisping.

Timing can also be a factor; ensure enough baking time to heat through the center of the stuffed shells, adjusting according to your oven. Lastly, when making substitutions, keep in mind that different ingredients may require different cooking times or handling, so being adaptable is key.

Recipe Success Stories

Our community has joyfully embraced the creamy garlic mushroom stuffed shells recipe, praising it for its delightful taste and ease of preparation. Many families have shared their success stories, emphasizing how this dish has become a beloved family favorite, often requested during gatherings and special occasions.

Readers have enjoyed experimenting with variations, incorporating seasonal ingredients like spinach during spring or butternut squash in fall, showcasing the adaptability of this dish. The feedback highlights how simple changes can elevate the flavors uniquely.

Those who have posted photos on social media have attracted followers keen to recreate the dish, appreciating both its satisfying comfort food aspect and the sophisticated presentation it offers. Families cherish the time shared in the kitchen preparing the recipe together, creating a sense of community and connection.

The tips and suggestions exchanged among readers have enhanced the recipe, further creating a sense of belonging. It’s evident that Creamy Garlic Mushroom Stuffed Shells are more than just a recipe—they represent nourishment and togetherness.

Frequently Asked Questions

Can I prepare the dish in advance?

Yes! You can prepare the filling and cook the pasta shells ahead of time, store them separately, and assemble right before baking.

How do I freeze the stuffed shells?

Assemble the shells without baking them, cover with plastic wrap, and place in a freezer-safe container. They can be frozen for up to 3 months.

What can I use as a gluten-free alternative?

Look for gluten-free pasta shells available in most grocery stores. Many alternatives are made with rice or quinoa.

How long do leftovers last?

Store leftovers in an airtight container in the refrigerator for up to three days.

Can I substitute different fillings?

Absolutely! Feel free to use different vegetables or proteins in your filling, such as spinach, chicken, or ricotta alternatives.

Is there a dairy-free version?

Yes! You can replace ricotta with blended cashews or tofu and use plant-based milk for béchamel sauce.

Can I add more vegetables?

Certainly! Caramelized onions, sautéed spinach, or roasted peppers can add delicious flavor and texture to the filling.

What’s the best way to reheat the stuffed shells?

Reheat in an oven at 350°F until heated through or microwave until warm, ensuring they are covered to maintain moisture.

What type of cheese works best?

Traditionally, ricotta cheese works best, but you can also experiment with cottage cheese or soft goat cheese for different flavors.

Can I use a different pasta shape?

Yes! While jumbo shells are preferred, other pasta shapes like cannelloni or large shells can also work well for this recipe.

Additional Resources

Explore related recipes that complement the creamy garlic mushroom stuffed shells beautifully. For those interested in perfecting pasta-making skills, a technique guide on creating fresh pasta from scratch is available. Ingredient information on the nutritional benefits of mushrooms and ricotta will further enrich your understanding of this dish.

If you’re seeking fun seasonal variations, consider experimenting with summer vegetables or holiday spices to create a festive touch. Equip yourself with knowledge on essential kitchen tools that enhance cooking experiences, ensuring that you are fully prepared for this and future dishes.

Join the Conversation

We love hearing from our community! Share your Creamy Garlic Mushroom Stuffed Shells experiences on social media and post photos for a chance to be featured. Join us in discussions about unique variations and enhancements made to the recipe. Your feedback influences how we share further cooking tips and ideas.

Discuss your thoughts on flavor combinations, presentation styles, or even photography tips for capturing those mouthwatering shots of your meal. Engage with others as we explore the beauty of home cooking together and inspire each other with culinary creativity.

The Recipe

Creamy Garlic Mushroom Stuffed Shells

Serves: 4 servings

Prep Time: 30 mins

Cook Time: 40 mins

Total Time: 70 mins

Kitchen Equipment Needed

  • Large pot for boiling pasta
  • Skillet for sautéing
  • Baking dish for assembly
  • Measuring cups and spoons
  • Mixing bowls
  • Spatula or wooden spoon for mixing

Ingredients

  • 12 jumbo pasta shells
  • 2 cups mushrooms, finely chopped
  • 1 cup ricotta cheese
  • ½ cup grated Parmesan cheese
  • 2 cloves garlic, minced
  • 2 tablespoons olive oil
  • 1 cup béchamel sauce
  • Salt and pepper, to taste
  • Fresh parsley, for garnish

Directions

  1. Preheat the oven to 375°F (190°C).
  2. Cook the pasta shells according to package instructions until al dente. Drain and set aside.
  3. In a skillet, heat olive oil over medium heat. Add garlic and sauté until fragrant. Then add chopped mushrooms and cook until softened, about 5-7 minutes.
  4. In a mixing bowl, combine cooked mushrooms, ricotta cheese, and half of the grated Parmesan. Season with salt and pepper to taste.
  5. Stuff each pasta shell generously with the mushroom mixture and place them in a baking dish.
  6. Pour béchamel sauce over the stuffed shells and sprinkle the remaining Parmesan on top.
  7. Bake in the preheated oven for 25-30 minutes, or until bubbly and golden brown on top.
  8. Garnish with fresh parsley before serving.

Recipe Notes

  • Feel free to add sautéed spinach to the filling for additional flavor and nutrition.
  • For a spicier kick, add red pepper flakes to the mushroom filling.
  • Leftovers can be stored in an airtight container in the fridge for up to three days.

Best In-N-Out Copycat Animal Style Fries at Home

In-N-Out Copycat Animal Style Fries: The Ultimate Comfort Food

⚖️
Difficulty
Easy

⏲️
Prep Time
15 mins

🕒
Cook Time
30 mins

⏱️
Total Time
45 mins

🍽️
Servings
4

The craving for late-night comfort food often leads to a search for something rich and satisfying. Enter In-N-Out Copycat Animal Style Fries—a tantalizing indulgence that has taken comfort food to a whole new level. Picture this: perfectly crisp French fries crowned with a melty blanket of cheese, a drizzle of perfectly blended special sauce, and finished with bold flavors of fresh onions. This complete flavor experience is what makes Animal Style Fries an unforgettable delight.

These fries are not just about the taste; they’re a feast for the senses. The combination of crunch from the fries, the creaminess of the cheese, and the unique flavors of the special sauce invites you to dive in. Whether you’re preparing them for a cozy night in or a gathering with friends, these Animal Style Fries will impress and satisfy every foodie’s craving.

Quick Recipe Highlights

  • Flavor Profile: Enjoy the savory notes of cheese paired judiciously with a tangy sauce that elevates the ordinary fry experience.
  • Texture: The crispy exterior of the fries contrasts beautifully with the gooey melted cheese and rich sauce, creating a perfect mouthfeel.
  • Aroma: The scent of frying potatoes mixed with the sharpness of fresh onions and the warmth of melted cheese will have you salivating.
  • Visual Appeal: The golden fries topped with creamy cheese and sauce create a visually stunning plate that’s hard to resist.
  • Skill Level Needed: This recipe is beginner-friendly, making it easy for anyone to create these delightful fries at home.
  • Special Equipment: A deep fryer or heavy-bottomed pot is recommended for frying to achieve the ideal crispy fries.

Recipe Overview

  • Difficulty Level: This easy recipe involves simple frying and assembling, making it accessible for all cooking enthusiasts.
  • Category: These Animal Style Fries belong to the snack category, perfect for appetizers or side dishes.
  • Cuisine: Inspired by California fast-food joints, this dish encapsulates the essence of American comfort food with a twist.
  • Cost: The approximate cost for making Animal Style Fries is low, with common ingredients like potatoes, cheese, and condiments.
  • Season: Fries are a year-round favorite, but they are especially popular during summer barbecues and gatherings.
  • Occasion: Ideal for casual hangouts, game days, or any occasion that calls for delicious finger food.

Why You’ll Love This Recipe

You’ll find that the taste and texture of In-N-Out Copycat Animal Style Fries make them an irresistible option for any meal or snack time. The combination of the crispy fries, melted cheese, and savory special sauce creates a sensational palette of flavors that will have everyone coming back for more. These fries easily stand out with their bold flavors and delightful crunch, setting them apart from your ordinary side.

In addition to being incredibly tasty, the convenience of this recipe cannot be overstated. With easy-to-follow steps, even novice cooks can whip up a batch in under an hour. The simplicity of preparing these fries means you can spend less time in the kitchen and more time enjoying your guests’ company or indulging in a cozy night on the couch with a movie.

When it comes to nutritional benefits, you can customize the ingredients in this recipe to better align with your dietary preferences without sacrificing flavor. Using fresh-cut potatoes and quality cheese allows you to enjoy indulgent fries that can fit into a balanced diet.

Sharing food brings people together, and these Animal Style Fries are a perfect crowd-pleaser for social gatherings. They’re great for parties, where everyone can dip in and enjoy at their own pace. Imagine friends huddling around a bowl of piping-hot fries, each bite becoming a reason for laughter and conversation.

Finally, the cost-effectiveness of this recipe means you can treat yourself and your loved ones to these delicious fries without breaking the bank. With just a few affordable ingredients, you can create a dish that rivals restaurant quality at home, making it approachable for everyone.

Historical Background and Cultural Significance

The origin of Animal Style Fries can be traced back to the beloved In-N-Out Burger, founded in California in 1948. With its secret menu, In-N-Out has created a unique cult following, and Animal Style is one of its most famous offerings. This secret preparation style adds to the allure of these fries, making them a must-try for fast-food enthusiasts.

Culturally, In-N-Out represents a significant aspect of Californian cuisine, embodying the spirit of fresh, simple, and satisfying food. The fast-food joint has tapped into the American desire for convenience while still preserving a focus on quality, making it a staple for locals and tourists alike.

Over time, the recipe for Animal Style Fries has evolved beyond just a menu item. It has inspired a plethora of copycat recipes that aim to recreate this homemade version. The general accessibility of common ingredients while maintaining food quality has sparked widespread interest among food bloggers and home cooks.

Regionally, variations of the recipe have emerged outside of California, demonstrating its adaptability and popularity. People across the country have embraced the idea of dressing up their fries, resulting in unique takes that reflect local culinary traditions.

Ingredient Deep Dive

Potatoes: The backbone of any good fry, potatoes hold significant cultural importance in many cuisines. They are versatile and nutrient-rich, providing carbohydrates for energy along with vitamin C and potassium. When selecting potatoes, look for firm, blemish-free specimens that are suitable for frying, like Russets. Store potatoes in a cool, dark place, ensuring they remain fresh for longer. For substitutions, sweet potatoes can provide a healthier and naturally sweet alternative.

Cheese: American cheese is often used in traditional Animal Style Fries, offering a creamy and melty texture that pairs perfectly with the fries. It’s essential to choose a good-quality cheese made from real ingredients to ensure optimal flavor. Generally classified as processed, American cheese can melt beautifully, enhancing the overall dish. If you desire to change the flavor profile, options such as cheddar or pepper jack can introduce new dimensions.

Special Sauce: The special sauce is what elevates this dish to culinary bliss. Often a mix of ketchup, mayonnaise, and relish, this sauce provides both tanginess and creaminess that complements the fries beautifully. Making your own sauce allows you to cater to your taste preferences, using fresh ingredients. Be sure to store any leftover sauce in an airtight container in the refrigerator. Experiment with the ratio of ingredients to discover your perfect balance of flavor.

Onions: Fresh diced onions lend a bite and freshness that contrast with the richness of the cheese and fries. Onions are also packed with antioxidants and vitamins, making them a healthy addition to the dish. When selecting onions, look for firm bulbs with dry skins. For those sensitive to strong flavors, consider soaking the chopped onions in cold water for a milder taste.

Common Mistakes to Avoid

  • Overcrowding the Fryer: Adding too many fries at once can lower the oil temperature, leading to soggy fries. Fry in batches to ensure they cook evenly.
  • Using the Wrong Oil: Not all oils are suitable for frying. Use oils with high smoke points, like canola or peanut oil, for better results.
  • Not Soaking Potatoes: Skipping the soaking step can result in fries that aren’t as crispy. Soaking removes excess starch, which helps them crisp up beautifully.
  • Not Preheating the Oil: Failing to heat the oil properly can lead to greasy fries. Aim for an oil temperature of about 350°F (175°C).
  • Using Freshly Cut Potatoes: While fresh potatoes are ideal, using frozen fries can save time and still yield delicious results.
  • Not Seasoning: Remember to season immediately after frying. Salt sticks best to wet surfaces; that means seasoning while they’re hot and fresh out of the fryer.
  • Skipping the Cheese Melting: Allowing the cheese to melt separately can lead to less cohesive bites. Add it right after frying for a gooey texture.
  • Not Tasting the Sauce: The balance of your sauce is crucial. Always taste and adjust the flavors according to your preference.
  • Forgetting Timing: Frying for too long can quickly turn crisp fries into bitter and burnt ones. Keep a close eye on them!
  • Improper Storage: Storing leftover animal style fries in an airtight container without separating components may lead to sogginess. Store components separately for freshness.

Essential Techniques

Frying: Proper frying is key to achieving crispy fries. Heat oil in a deep fryer or heavy-bottomed pot until it reaches the ideal temperature. Fry in small batches while ensuring the temperature stays consistent, which allows fries to turn golden brown without absorbing excess oil. Monitoring during the frying process is crucial; look for a consistent bubbling action to know the oil is hot enough.

Seasoning: The art of seasoning is equally important. Season fries immediately after frying when they’ve released heat, as the salt will adhere better. Use sea salt for an added texture or explore flavored salts for unique twists. Remember, a little goes a long way, and balancing flavors can make a significant difference in the overall dish’s appeal.

Pro Tips for Perfect In-N-Out Copycat Animal Style Fries

1. For extra crisp, double fry the potatoes: fry once at a lower temperature to cook through, and then again at a higher temperature to achieve that perfect color and crunch.
2. Choose the right type of potato: Russets are ideal for fries due to their high starch content, resulting in a fluffy interior and crispy exterior.
3. Experiment with the special sauce: Customize your sauce by adding spices or herbs to make your fries unique and even more flavorful.
4. Fresh-cut vs. frozen: Freshly cut potatoes can enhance the taste, but quality frozen fries can save prep time while still achieving delicious results.
5. Perfect portioning: Cut fries into even sizes to ensure they cook uniformly, leading to consistent texture and flavor in every bite.
6. Allow time for cooling: Let the fries rest a minute after frying to allow excess oil to drip off, ensuring every bite is crispy and not greasy.
7. Use a thermometer: Invest in a frying thermometer to monitor the oil’s temperature accurately, giving you perfectly cooked fries every time.
8. Serve immediately: For the best experience, serve your Animal Style Fries hot from the fryer, maintaining their texture and flavor at their peak.

Variations and Adaptations

For a regional twist, consider adding local flavors or spices that represent your area. Incorporate chili powder or jalapeños for a spicy kick, embracing the fusion of flavors. Seasonal adaptations can also make the dish more appealing; adding roasted vegetables during the harvest season or drizzling with a pesto in summer can enhance the dish’s freshness.

Dietary modifications can also be made to cater to different preferences. For a low-carb option, try using zucchini or eggplant slices instead of traditional fries. If you want a healthier alternative, opt for baking or air-frying the fries with minimal oil for a lighter version.

Texture modifications can elevate the dish; consider adding crispy bacon bits or crunchy fried onions on top for extra flavor and crunch. And for a feast that rivals the original, you can introduce different types of cheeses, such as blue cheese crumbles or pepper jack for a spicier element, providing variations that excite the palate.

Lastly, presentation alternatives such as serving fries in mini paper baskets or lined with parchment paper can bring a fun, diner-style atmosphere into your home dining experience while also making for excellent photo opportunities.

Serving and Presentation Guide

Presenting your In-N-Out Copycat Animal Style Fries beautifully can enhance the whole dining experience. A simple yet elegant way to serve fries is in a deep dish or bowl, with a sprinkle of fresh herbs or green onions for an enticing color contrast. Keeping them hot is important, so serve them on warm plates to maintain that irresistible crisp.

For garnishing ideas, use freshly chopped parsley or a drizzle of your special sauce on the side for dipping. Including a few burger sliders on the plate can create a fun meal combo and exciting dining experience for your guests.

Traditional accompaniments may include a side of ranch or garlic mayo that complements the bold flavors without overshadowing them. For a modern twist, consider pairing with unique dips like spicy sriracha or guacamole, which add extra dimension to each bite.

Temperature plays a significant role in how fries are enjoyed. Aim to serve fries as soon as they’re out of the fryer to ensure they maintain their rich flavor and ideal texture. Additionally, portion control can enhance guests’ experience; consider serving smaller portions with multiple sauces to encourage sharing and tasting among friends.

Wine and Beverage Pairing

Pairing beverages with your Animal Style Fries can elevate your meal experience. For wine lovers, consider a chilled Chardonnay or a light-bodied Pinot Noir that balances the creamy textures of the cheese with their crisp notes. The acidity in these wines will cut through the richness, refreshing the palate.

For non-alcoholic options, a sparkling lemonade or ginger ale pairs wonderfully, adding a refreshing contrast to the heavier fries. These beverages cleanse the palate and enhance the overall dining experience.

If considering coffee or tea, a cup of light-roast coffee works wonders. The coffee’s smooth tones complement the savory flavors of the fries without overpowering them. Alternatively, for tea fans, an iced mint tea can provide a refreshing counterpoint, especially during warmer months.

Temperature matters when serving drinks alongside hot fries; ensure that beverages are served at the right temperature, enhancing the entire taste experience without cooling down the fries too quickly.

Storage and Shelf Life

For those wondering how to store your In-N-Out Copycat Animal Style Fries, it’s vital to keep them crispy. Store leftover fries in an airtight container, but note they will lose their crispness over time. If you have assembled the dish, it’s best to separate the cheese and sauce and store them separately for better preservation.

Refrigerating fries in a single layer will help maintain their texture longer than stacking them effortlessly. When it comes to reheating, using an oven or air fryer is ideal; both methods restore the fries’ crunch while warming through.

For freezing, fries can be stored before being fried, ideally blanched and cooled, but avoid freezing them once they’ve been cooked with cheese and sauce, as this can lead to unacceptable texture changes. When reheating previously frozen fries, allow them to thaw in the refrigerator before cooking again for the best results.

Signs of spoilage include an off smell or changes in color and texture; always err on the side of caution when considering eating stored food items.

Make Ahead Strategies

Planning ahead for your In-N-Out Copycat Animal Style Fries can save time during busy evenings. Consider prepping all your ingredients in advance; wash and cut the potatoes, chop fresh onions, and prepare your special sauce up to a day before. Storing these ingredients separately will preserve freshness and flavors until you’re ready to fry.

Cooling and storing fries in the refrigerator for later frying can also work, but make sure to pat them dry completely before storing to avoid moisture build-up, which could lead to sogginess.

Quality is key when planning ahead: Cooked fries can be kept warm for a short period in a low-temperature oven, but this is best done shortly before serving to maintain crunchiness. Assemble the fries only right before serving, allowing for all components to remain fresh and flavorful.

Adding fresh elements, such as herbs or greens, just before presenting them ensures optimal flavor and looks appetizing. This allows you to reheat the fries while prepping your toppings for a great presentation.

Scaling Instructions

Scaling the In-N-Out Copycat Animal Style Fries recipe can cater to larger gatherings or intimate dinners. Halving the recipe is straightforward; simply divide the ingredients and maintain the same cooking techniques. Ensure that the frying time is adjusted slightly, as you may need to fry in batches for the best texture.

For doubling or tripling, consider the size of your frying pot or fryer—overcrowding can lead to uneven cooking. Timing may need to be altered slightly depending on the quantity; keeping an eye on the color of the fries is essential, as fresher batches may cook faster.

If scaling the recipe, make sure to have sufficient oil, cheese, and sauce available. Larger quantities of sauce may lead to inconsistencies in flavor; always taste as you go to meet the desired flavor profile.

For storage considerations, remember to keep leftovers sealed and separated per previously discussed methods, so nothing loses its freshness or appeal.

Nutritional Deep Dive

Analyzing the nutritional content of your In-N-Out Copycat Animal Style Fries allows for informed choices. The macro breakdown will typically depend on factors like frying method—and whether the fries are served with or without cheese. A standard serving might consist of approximately 350 calories, with carbohydrates being the main component due to the potatoes.

Micronutrient analysis shows that these fries can provide essential nutrients, especially if using fresh ingredients—potatoes are a good source of potassium and vitamin C, while cheese adds calcium and protein.

From a health perspective, it may be beneficial to balance indulgent items with fresher, whole ingredients. Consider including fresh toppings, such as herbs or vegetables, as this can enhance the dish and bolster its nutritional profile.

Monitoring portion sizes is crucial for weight management. Stick to recommended serving sizes, especially since fries can be calorie-dense. Emphasizing enjoyment and moderation will make these fries a delightful treat rather than an everyday meal.

Finally, suggesting balanced meals can help incorporate these fries responsibly into your diet. Pair them with lean proteins and plenty of veggies for an overall healthier menu.

Dietary Adaptations

For those following specific diets, In-N-Out Copycat Animal Style Fries can be modified to meet various needs. A gluten-free option can easily be accomplished by ensuring all ingredients—including sauces—contain no gluten-based additives.

Dairy-free adaptations are straightforward; consider vegan cheese and mayonnaise to replicate the creamy texture without dairy. Similarly, a vegan option might include plant-based fries paired with a vegan special sauce, which can offer flavor without animal products.

Low-carb and keto-friendly variations can swap out traditional potatoes for alternatives like zucchini or cauliflower, delivering a unique texture and flavor suitable for those avoiding carbs.

For paleo diets, traditional fries should be avoided, but baked sweet potato or butternut squash fries can provide the same taste minimally altered for a health-conscious twist.

Each specific diet requires creativity and willingness to experiment with flavors and textures, ensuring that you still enjoy delicious fries while adhering to your dietary guidelines.

Troubleshooting Guide

If you encounter texture issues with your fries—whether they’re soggy or not crispy—monitor your oil temperature closely while frying, as insufficient heat often leads to unappetizing results. A digital thermometer can be a fantastic investment for maintaining this consistency.

If the flavors seem off or unbalanced, retrying the special sauce mix can salvage your dish. Adjust levels of salt or sauce components incrementally until you achieve your desired taste.

Temperature problems can arise too; serving too quickly or letting fries sit can affect texture. Keep fries warm in the oven at a low setting while you prepare dips and toppings for maintenance.

Equipment challenges may include deep fryer issues; ensure it’s functioning correctly before use. Also, do not attempt to use cookware not suited for frying—heavier pots work best for even temperature distribution.

For ingredient substitutions, be cautious and test your new options beforehand, ensuring they will hold up in frying without altering the overall dish character.

Timing concerns are also essential; ensure that everyone has plated fries ready when serving to keep everything fresh and inviting without guests waiting unnecessarily.

Recipe Success Stories

Many readers have delighted in recreating In-N-Out Copycat Animal Style Fries at home, embracing not only the flavors but the fun of preparing this beloved comfort food. Feedback from users suggests that experimenting with variations of the sauce or the addition of toppings has led to numerous successful adaptations.

Community excitement has blossomed around sharing personal twists on the recipe—some have incorporated unique ingredients like truffle oil or different spices for a regional flair, making it a delightful experience for home cooks looking to put their spin on this classic dish.

Visual storytelling on social media platforms has allowed many food enthusiasts to showcase their finished product, generating inspiration for others to jump into the kitchen and create their own versions.

Photography tips shared among readers suggest that engaging visuals can positively impact a recipe’s reception. Capturing the golden, cheesy fries right can make all the difference in sharing that infectious excitement for In-N-Out Copycat Animal Style Fries.

Each story emphasizes the joy of cooking and connecting through food, making this recipe not only a favorite but a shared experience.

Frequently Asked Questions

Can I use frozen fries for this recipe? Yes, you can use frozen fries to save time. Just follow the package instructions for frying or baking and proceed to assemble them with cheese and sauce as outlined in the recipe.

How do I keep my fries crispy after frying? To keep fries crispy, avoid covering them after frying; instead, place them on a wire rack to drain excess oil and allow air circulation. Serve immediately for the best texture.

What should I do if my fries are too greasy? If your fries turn out greasy, it may be due to frying at too low a temperature. Ensure your oil is hot enough and refrain from overloading the fryer, which can lead to greasy results.

Can I use a different type of cheese? Absolutely! Feel free to experiment with other types of cheese, like cheddar or pepper jack. Just remember that the melting properties may differ, which can impact the final texture.

Are there any vegan options for this recipe? Yes! For a vegan version, simply replace the cheese with vegan cheese alternatives and make a plant-based special sauce using dairy-free ingredients.

Can I meal prep these fries ahead of time? You can prep ingredients like cut potatoes and prepared sauce in advance. However, it’s best to fry them just before serving for maximum freshness and crunch.

What type of potatoes are best for frying? For the best fries, use russet potatoes. They have a high starch content, leading to crispy results with fluffy interiors.

How can I make my special sauce taste even better? Try adjusting the elements of your special sauce. Add more relish for sweetness or hot sauce for spice, and mix to find your perfect balance.

What if I don’t have a deep fryer? You can still make these fries using a heavy-bottomed pot for frying. Ensure it’s deep enough to contain the oil and have a thermometer to monitor the temperature.

Can I bake the fries instead of frying them? Yes, you can bake the fries for a healthier alternative. Toss them in oil and bake until crispy, but expect a slightly different texture compared to fried.

Additional Resources

If you enjoyed making In-N-Out Copycat Animal Style Fries, you might want to explore related recipes like gourmet burgers or topped nachos that offer similarly indulgent experiences. Additionally, diving into ingredient information for potatoes and cheeses can further enhance your cooking vocabulary and skill.

Consider checking out equipment recommendations for the best frying tools or looking into special tools that make food prep more accessible. Technique guides can also provide insight into making your frying and sauce-making processes easier and more effective.

Embarking on seasonal variations allows you to incorporate fresh and available ingredients into your dishes, making your cooking experiences even more enjoyable.

Join the Conversation

Engage with the growing community of food lovers by sharing your experiences and insights on making In-N-Out Copycat Animal Style Fries. Utilize social media platforms to document your journey—post photos, share tips, and build connections with fellow food enthusiasts.

Encourage others to try your variations and share their success stories, creating a community atmosphere where everyone feels welcome and inspired.

Leave reviews or comments to foster discussions around dish experiences, cooking tips, or personal preferences. Celebrate each effort, knowing that every attempt at replicating this hearty dish contributes to the overall culinary adventure.

Celebrate the fun of cooking and connecting through food, offering encouragement while exploring the endless possibilities this delicious recipe has to offer.

The Recipe

In-N-Out Copycat Animal Style Fries

Serves: 4

Prep Time: 15 mins

Cook Time: 30 mins

Total Time: 45 mins

Kitchen Equipment Needed

  • Heavy-bottomed pot or deep fryer
  • Thermometer
  • Slotted spoon
  • Wire rack (optional)
  • Knife and cutting board

Ingredients

  • 4 large russet potatoes
  • 8 oz American cheese
  • 1 cup mayonnaise
  • 1/4 cup ketchup
  • 3 tbsp sweet pickle relish
  • 1/4 cup diced fresh onions
  • Salt to taste
  • Oil for frying

Directions

  1. Wash and peel the potatoes, then cut them into fry shapes.
  2. Soak the cut potatoes in cold water for 30 minutes to remove excess starch.
  3. Heat oil in a deep fryer or pot to 350°F (175°C).
  4. Drain and dry the potatoes thoroughly, then fry in batches until golden brown and crispy.
  5. While frying, mix mayonnaise, ketchup, and relish in a bowl to create the special sauce.
  6. Once fries are done, remove them from the oil and immediately top with sliced cheese for melting.
  7. Assemble by placing fries on a plate, drizzling with special sauce, and topping with diced onions.
  8. Serve immediately and enjoy!

Recipe Notes

  • Feel free to adjust the special sauce recipe based on your preference for sweetness or tanginess.
  • If you want to add a kick, consider incorporating hot sauce into the special sauce mix.
  • Store leftover fries and sauce separately to maintain freshness for later enjoyment.

Easy Crab & Corn Chowder – Creamy and Flavorful Recipe

Delicious Crab & Corn Chowder: A Creamy Coastal Delight

⚖️
Difficulty
Moderate

⏲️
Prep Time
15 mins

🕒
Cook Time
30 mins

⏱️
Total Time
45 mins

🍽️
Servings
6

Crab & Corn Chowder is a delightful embodiment of coastal comfort food, bringing together the sweet burst of fresh corn and the delicate briny flavor of succulent crab meat. This savory chowder is truly a hug in a bowl, offering a creamy texture that soothes the soul as it tantalizes the taste buds. The combination of aromatic onions, garlic, and a hint of thyme infuses each spoonful with warmth, making it perfect for chilly evenings.

Additionally, the visual allure of this chowder cannot be overlooked. The contrasting yellow corn and the bright pink of the crab create a colorful presentation that appeals to the eyes as much as the palate. Adding fresh herbs as a garnish lends a touch of sophistication, transforming this simple dish into a centerpiece for any gathering. Whether served on a casual weeknight or at a festive occasion, this chowder promises to impress.

Quick Recipe Highlights

  • Flavor Profile: The rich, creamy base is enhanced by the natural sweetness of corn and the umami of crab, creating a symphony of flavors that delight the senses.
  • Texture: This chowder offers a velvety smoothness from the cream balanced by tender bites of corn and succulent crab, adding a gratifying mouthfeel.
  • Aroma: Expect a delightful mix of savory onion, fresh thyme, and sweet corn aromas wafting through your kitchen as it cooks.
  • Visual Appeal: The bright yellow of the corn intermingling with the pink crab and green herbs makes a visually stunning dish that tempts the appetite.
  • Skill Level Needed: While this recipe requires basic cooking skills such as chopping and sautéing, it is straightforward enough for any home cook to master.
  • Special Equipment: You will need a large saucepan or Dutch oven for simmering and a ladle for serving, making this an accessible recipe for most kitchens.

Recipe Overview

  • Difficulty Level: The moderate difficulty of this recipe is attributed to the timing and various ingredients, but the popularity of chowder warrants a little extra effort.
  • Category: This chowder can be categorized as both a main course and a comforting soup, suitable for lunch or dinner.
  • Cuisine: Originating from coastal regions, this chowder is a testament to the culinary traditions that celebrate seafood and locally sourced ingredients.
  • Cost: The cost to prepare this dish is reasonable, making it an ideal choice for a casual family meal or entertaining guests without breaking the bank.
  • Season: While delicious any time of year, it’s especially comforting on cold winter nights or during seaside summer gatherings.
  • Occasion: Perfect for holiday feasts, family gatherings, or cozy dinners, this chowder brings warmth to any table.

Why You’ll Love This Recipe

This Crab & Corn Chowder presents a lovely taste and texture appeal that creates an inviting dish for all. The creamy soup wraps around tender crab pieces and crisp, sweet corn kernels, a wonderful harmony of flavors that is both satisfying and indulgent. Every spoonful is a treat, exuding a sense of warmth and contentment that makes it feel like a home-cooked hug.

The convenience of preparation is another reason this chowder stands out. With just a handful of ingredients, it can come together in under an hour. The simplicity of the preparation allows you to enjoy the cooking process without feeling overwhelmed. Additionally, it serves as a great way to use up leftover crab, making it an economical choice that minimizes waste.

Nutritionally, this chowder offers benefits from both crab and corn, which provide essential vitamins and minerals. Crab is high in protein and low in calories, making it a smart choice for health-conscious individuals. Meanwhile, corn adds loads of dietary fiber and antioxidants, promoting gut health and a balanced diet.

Serving this chowder can elevate social and entertaining occasions. Whether you’re hosting a casual get-together or a more formal dinner, presenting a steaming pot of chowder will surely impress your guests. It encourages conversation and connection, inviting everyone to gather around the table for a delightful culinary experience.

Lastly, its cost-effectiveness ensures that you can serve this dish often without overspending. The ingredients are typically affordable, easily found at your local grocery store, making this recipe a staple you can rely on for satisfying meals at home.

Historical Background and Cultural Significance

Crab & Corn Chowder honors its roots from New England tie-ins, where chowders are an integral part of local cuisine. The dish is believed to have evolved from simple fisherman’s stew, made from what was readily available in coastal towns. Traditionally, chowders combine fresh catch and local produce, celebrating the abundance of maritime resources.

The cultural significance of this chowder reflects a communal aspect, often shared among families and friends during special gatherings. Many coastal communities have their variations, showcasing regional seafood and seasonal vegetables, each adding a unique twist and flavor profile to the chowder tradition.

Over the years, the recipe has adapted to modern culinary trends, accommodating different palates by incorporating elements like smoked paprika or spicy peppers. This evolution demonstrates how chowder remains relevant across generations, blending culinary history with contemporary tastes.

Regional variations abound, with crab chowder being particularly beloved in areas like Maryland and the Pacific Northwest, where Dungeness crab is a local delicacy. Each iteration of chowder speaks to the locale’s availability and preference, making it a dish rich in cultural nuances.

Ingredient Deep Dive

Crab is the star ingredient in this chowder, renowned for its flaky texture and rich flavor. Historically, crab has been a staple in coastal diets, valued for its nutrient density and excellent protein source. It contains Omega-3 fatty acids, which are beneficial for heart health. When selecting crab for your chowder, opt for fresh, sustainably sourced crab to ensure the best flavor. For storage, keep it refrigerated and use it within a couple of days for optimal taste, but frozen crab can also work if needed.

Corn, another crucial component, carries with it a sweet and earthy flavor that enhances the overall profile of the chowder. This ingredient is harvested in the summer and has been integral to various cultures. Native Americans cultivated corn for centuries, offering its nutritional benefits. When selecting corn, fresh, in-season corn on the cob will provide the sweetest taste. For storage, keep it in the fridge, and consider freezing any leftovers for future chowder adventures.

Cream adds a luxurious texture and richness to the chowder. While often seen as a decadent ingredient, it is also an excellent source of calcium. To achieve the right consistency in your chowder, ensure you incorporate it gradually, allowing flavors to meld. Store any leftovers in an airtight container in the fridge and reheat gently to avoid separation.

Common Mistakes to Avoid

  • Using frozen crab meat instead of fresh can result in a less flavorful chowder. Always opt for fresh if possible.
  • Adding cream too early can cause it to curdle. Introduce it towards the end of the cooking process for a smooth consistency.
  • Not sautéing the onions appropriately can lead to a bitter taste. Ensure they become translucent and fragrant for optimal flavor.
  • Overcooking the corn can result in a mushy texture. Add it in the last few minutes of cooking to maintain crunch.
  • Skipping the broth base can leave your chowder bland. Use high-quality seafood or vegetable broth for depth of flavor.
  • Neglecting to season properly may lead to a lack of flavor. Taste and adjust seasonings throughout the cooking process.
  • Using too little liquid can dry out the chowder, while too much can make it watery; find a balance based on your preference.
  • Serving it too hot can cause the delicate flavor to dissipate. Let the chowder cool slightly before serving to enhance the tasting experience.
  • Not using a mix of crab types can limit flavor complexity. Combining different types offers depth to your chowder.
  • Failing to add a finishing touch like fresh herbs or lemon juice can make it listless; these final accents elevate the dish significantly.

Essential Techniques

Sautéing vegetables properly is vital for building a flavor base. Start with a hot pan and add your oil before introducing onions, ensuring they cook evenly. Watch for signs of browning; you want them soft and sweet, but not burnt. The transformation of their flavor during this step is essential for a delicious chowder.

Incorporating cream smoothly is another essential technique. Gradually add cream to your broth while stirring to prevent it from curdling. Visual cues include a creamy, consistent texture without lumps. Taking care during this step ensures your chowder will have that luxurious mouthfeel that characterizes a great crab chowder.

Pro Tips for Perfect Crab & Corn Chowder

Choose high-quality crab for the best flavor; the fresher, the better, as it greatly impacts the dish.
Use homemade stock if possible; it enhances flavor compared to store-bought options.
Integrate fresh herbs, such as thyme or dill, at the end of cooking for a burst of freshness.
Balance sweetness with acidity; a squeeze of lemon or lime can elevate the taste significantly.
If you’re looking for extra richness, consider adding a splash of sherry or white wine to the broth.
Ensure your cookware is heated adequately before sautéing vegetables to achieve the optimal texture.
Craft your chowder with love; flavors develop better when made with care and attention.
Allow the chowder to rest for a few minutes before serving; this brings flavors together beautifully.

Variations and Adaptations

Regional variations of this chowder can include different types of seafood, such as shrimp or scallops, that add distinct flavors and textures. For instance, a New England-style chowder may often feature potatoes, giving it a heartier consistency, while a Southern take might include andouille sausage for a spicy kick.

Seasonal adaptations can make this chowder even more vibrant. Incorporating seasonal vegetables like bell peppers or squash in place of corn allows for a fresh twist that excites the palate during various times of the year.

For those on dietary modifications, this chowder can be easily adapted to be gluten-free by using cornstarch instead of flour for thickening. To create a lighter version, you could use alternatives such as coconut milk or almond milk instead of heavy cream for a dairy-free option.

Flavor variations can also be exciting; try adding a pinch of cayenne pepper for heat or smoked paprika for a hint of smokiness that pairs beautifully with the crab and corn.

Texture modifications can be introduced by pureeing a portion of the chowder for a thicker base. This creates a comforting, creamy foundation while leaving chunkier ingredients intact for a delightful bite.

Presentation alternatives might include serving the chowder in hollowed-out bread bowls or garnishing with crispy bacon bits or chives for added flair.

Serving and Presentation Guide

Plating techniques for chowder can enhance its appeal. Serve in shallow bowls to showcase the vibrant colors of crab and corn. Consider adding a swirl of cream or a dollop of sour cream on top, offering visual texture.

For garnishing ideas, fresh herbs like parsley or chives not only enhance flavor but also provide a pop of color. A sprinkle of smoked paprika or freshly cracked pepper can add a sophisticated touch while also intensifying flavor.

Traditional accompaniments often include crusty bread or crackers, which provide a delightful crunch that complements the creamy texture of the chowder. Modern suggestions might involve pairing it with a refreshing salad to balance the richness.

Temperature considerations are crucial; serve chowder hot but not boiling, ensuring the flavors meld perfectly without losing their essence. This allows guests to truly enjoy their first spoonful instead of it being overwhelming.

Lastly, for portion control, use ladles for serving to maintain even portions. Consider offering smaller cups for a tasting menu or appetizer setting, allowing guests to enjoy multiple flavors during their meal.

Wine and Beverage Pairing

When it comes to wine pairings, a chilled Sauvignon Blanc tends to complement Crab & Corn Chowder perfectly. The crisp acidity of this wine balances the creaminess of the chowder while enhancing the natural sweetness of the crab.

If you’re looking for non-alcoholic alternatives, consider a sparkling water with a slice of lemon or a refreshing iced tea. The lightness of these beverages help cleanse the palate between bites, enhancing the overall dining experience.

For coffee lovers, a light roast coffee could be an interesting pairing, offering a contrast that prevents flavor fatigue during the meal. Warm drinks like herbal tea also go well, especially when flavored with citrus to complement the chowder.

Temperature considerations are essential when dealing with pairings; ensure that both the chowder and beverages are at ideal serving temperatures for the best enjoyment. This attention to detail can take your meal to the next level.

Storage and Shelf Life

Proper storage methods for your chowder are essential. Store leftovers in an airtight container in the refrigerator and consume within 3-4 days to ensure freshness. The chowder can also be frozen for up to 2 months; however, note that the texture may slightly change upon reheating.

When it comes to container recommendations, glass containers work well because they are non-reactive and allow you to see what’s inside. For freezing, make sure to leave some space at the top of the container as the liquid expands when frozen.

Signs of spoilage include an off smell or a change in flavor and texture. If you notice any separation or curdling, it’s best to err on the side of caution and discard the chowder.

For reheating instructions, gently warm it on the stove over low heat; avoid boiling to maintain a smooth consistency. If the chowder appears too thick upon reheating, add a splash of broth or cream to restore the desired texture.

Freezing guidelines suggest portioning out the chowder before freezing to make reheating more convenient. This allows you to take out just what you need without having to defrost the entire batch.

Make Ahead Strategies

Planning your chowder can lessen stress, particularly for gatherings. A good prep timeline starts with chopping your vegetables and storing them overnight in the fridge, ready for quick assembly the next day.

Storing between steps may come in handy; you can prepare the base broth and allow it to cool before refrigerating. When you’re ready to finish the chowder, simply heat it up and add in your crab and cream.

Assessing the impact on quality is crucial; flavors often develop and deepen when ingredients mingle overnight. The chowder might even taste better the next day, providing an easy, delicious option for busy weeknights.

When it comes to assembly tips, don’t hesitate to prepare your chowder base earlier and finish it right before serving. This way, you can avoid any last-minute rushing while still ensuring everything is warm and fresh.

Lastly, consider fresh element additions; incorporate herbs or a squeeze of lemon right before serving. These last touches breathe new life into the dish, allowing it to shine even more brightly on the plate.

Scaling Instructions

Scaling down the recipe is straightforward; simply halve the ingredient quantities while keeping the same cooking methods. Adjust the broth proportion if you’re using a base to ensure flavor consistency.

Doubling or tripling the recipe is also feasible, especially for large gatherings. Make sure your cooking pot is large enough to handle the increased volume. You may need to extend the cooking time slightly to allow for even heating.

For equipment adjustments, ensure you have enough space for all ingredients while preparing. Using multiple pots may be necessary if scaling up significantly.

Timing modifications may also come into play when you scale the recipe. Monitor the chowder closely as it cooks; larger batches may require more time to heat through and meld flavors fully.

Lastly, storage considerations include maintaining proper proportions for leftovers. Store in individual containers for easy reheating, keeping in mind that the texture may vary slightly depending on batch size maintained during cooking.

Nutritional Deep Dive

A macro breakdown of this chowder shows that it offers a good balance of proteins, fats, and carbohydrates, largely due to the crab and dairy content. The crab provides significant protein, aiding muscle repair and growth, while cream contributes fats for energy.

Micronutrient analysis highlights the vitamins found in fresh corn and crab. Corn is a significant source of vitamin B6 and thiamine, which support metabolic function, while crab is rich in zinc and selenium, essential for boosting the immune system.

Health benefits extend beyond mere nutrition; the inclusion of fresh herbs adds antioxidants to the chowder as well. Together, they create a dish that can be both comforting and nourishing.

Dietary considerations vary based on how the chowder is prepared. By modifying ingredients—such as substituting dairy with alternatives—this chowder can fit into different dietary lifestyles while still tasting delightful.

For portion analysis, being mindful of serving sizes can aid in weight management. Create smaller servings if you’re looking to extend the dish without overindulging, ensuring that it can be a satisfying but controlled addition to your meal plan.

Dietary Adaptations

For those requiring gluten-free options, simply ensure that all ingredients, including broth, are certified gluten-free. This way, you avoid contamination while enjoying this delicious chowder.

To adjust for dairy-free diets, you can swap in coconut milk or almond milk instead of cream, with the addition of some nutritional yeast for creaminess. This delivers a delightful texture without compromising flavor.

If you’re pursuing vegan options, consider substituting crab with hearts of palm or artichokes, which have a similar texture. Use a vegan cream option to maintain richness without animal products.

For low-carb variations, reduce the amount of corn and consider adding more seafood or leafy greens to bulk up the dish without increasing carb levels.

Adapting for keto or paleo lifestyles may involve swapping standard ingredients with alternatives like cauliflower rice for thickening or matching seasonings that align with low-carb or whole-foods principles.

Adapting per specific diets can encourage everyone to enjoy this chowder without missing out. Each variation brings its own unique touch, ensuring that the essence of the dish remains while catering to diverse needs.

Troubleshooting Guide

Texture issues often arise when using frozen crab; to remedy this, ensure you thaw it fully and drain excess liquid before adding. This helps maintain the integrity of the chowder’s texture, making it creamy without excess water.

Finding flavor balance can be tricky; if the chowder tastes bland, consider incorporating more herbs or adjusting salt levels. A squeeze of lemon can also elevate flavors, adding brightness without being overpowering.

Temperature problems may occur simply from cooking too high; maintain lower heat to prevent boiling and ensure gentle cooking. It allows the flavors to meld properly while preventing curdling of the cream.

Equipment challenges, such as lacking proper pots, can require creative solutions; you can rely on mixing bowls for preparation and smaller pots to ensure even cooking.

Ingredient substitutions can lead to unexpected outcomes; ensure that you understand each ingredient’s properties before swapping. Fresh ingredients generally yield better flavors, especially in chowder.

Timing concerns can affect the overall outcome; when in doubt, invest additional time in simmering to improve flavor development, allowing each element to shine through.

Recipe Success Stories

Readers have shared their joy over this Crab & Corn Chowder, often discussing how it has become a family favorite. Many have noted how their children who are typically finicky eaters happily devour it, a clear testament to its appealing flavors.

Variation successes have been shared, with testaments to using different types of crab resulting in delightful nuances in flavor. Some readers have adopted local seafood for their versions, celebrating their regional catch while deliciously adapting the recipe.

Adaptation stories showcase how individuals have transformed this chowder to suit dietary restrictions, with readers reporting success in creating dairy-free and gluten-free versions without sacrificing taste or texture.

Photography tips have emerged, with many enthusiasts explaining how the vibrant colors of the chowder make for stunning visuals. Creative garnishing ideas using fresh herbs or spices have helped elevate readers’ food photography.

Engaging with the community has only strengthened interest in this recipe; it has become a rallying point for friends and families to come together, trying variations and sharing their updates frequently.

Frequently Asked Questions

Can I use frozen crab in this chowder?

Yes, you can use frozen crab. Just make sure to thaw and drain it before adding it to your chowder to maintain the proper texture and flavor.

How long can I store leftover crab chowder?

Leftover crab chowder can be stored in an airtight container in the fridge for 3-4 days. You can also freeze it for up to 2 months, though the texture might change slightly upon reheating.

What can I substitute for heavy cream?

If you’re looking for a lighter option, you can use half-and-half, coconut milk, or even almond milk. Each alternative may slightly alter the flavor, so choose according to your tastes.

Is corn chowder gluten-free?

This chowder can easily be made gluten-free. Just ensure that the broth you use is certified gluten-free, and it’s good to go!

Can I add other seafood to this chowder?

Definitely! The base of this chowder is versatile, so you can incoporate shrimp, scallops, or any seafood of your choice to enhance the flavor and texture.

What’s the best way to reheat crab chowder?

Reheat on low heat on the stove, stirring frequently to prevent curdling. If it’s too thick, add a splash of broth or cream to restore the desired consistency.

Can I make crab & corn chowder in advance?

Absolutely! You can prepare and store the base of the chowder a day ahead. Just add the crab and cream right before serving for the best flavor and texture.

What pairs well with crab chowder?

Crab chowder pairs wonderfully with crusty bread, fresh salads, or even light appetizers such as shrimp cocktails or bruschetta for a balanced meal.

How do I enhance the flavor of the chowder?

Add fresh herbs, a splash of citrus, or a hint of spice during cooking. These elements can elevate the overall flavor profile and brightness.

Is this recipe kid-friendly?

Yes, the creamy texture and sweet corn make it appealing for kids. Adjust the seasoning to make it milder if necessary, and they’ll love it!

Additional Resources

For those looking to expand their culinary skills, check out related recipes such as New England Clam Chowder or Lobster Bisque, both sharing similar techniques and rich flavors. Consider consulting technique guides on how to properly sauté vegetables or make the perfect stock, enhancing your overall cooking repertoire. Seek ingredient information for alternative seafood options that can be substituted into this chowder.

For equipment recommendations, look for high-quality pots that retain heat well; this is crucial for achieving the right consistency. Lastly, keep an eye on seasonal variations to take advantage of fresh ingredients for your chowder, ensuring it is always delightful no matter the time of year.

Join the Conversation

We love hearing from our readers and encourage you to share your culinary journey. Whether you post your chowder photos on social media or leave reviews, your feedback enriches our community.

Feel free to share any tips or variations you’ve discovered in making this recipe. Engaging in conversation fosters creativity and inspiration among fellow cooking enthusiasts, as we learn from each other’s experiences and enhance our recipes together.

Don’t hesitate to ask questions or share your stories while making Crab & Corn Chowder. Your insights could inspire someone else to try their hand at this delicious recipe!

The Recipe

Crab & Corn Chowder

Serves: 6

Prep Time: 15 mins

Cook Time: 30 mins

Total Time: 45 mins

Kitchen Equipment Needed

  • Large saucepan or Dutch oven
  • Ladle
  • Cutting board
  • Knife
  • Measuring cups and spoons

Ingredients

  • 1 tablespoon olive oil
  • 1 medium onion, diced
  • 2 cloves garlic, minced
  • 2 cups corn (fresh or frozen)
  • 2 cups crab meat, flaked
  • 4 cups seafood broth
  • 1 cup heavy cream
  • 1 teaspoon fresh thyme
  • Salt and pepper to taste
  • Fresh parsley for garnish

Directions

  1. Heat olive oil in a large saucepan over medium heat. Add diced onion and sauté until translucent.
  2. Add minced garlic and corn; sauté for an additional 2-3 minutes.
  3. Pour in seafood broth and bring to a boil. Reduce heat and simmer for 15 minutes.
  4. Stir in crab meat, thyme, and heavy cream. Simmer for an additional 10 minutes.
  5. Season with salt and pepper to taste.
  6. Serve hot, garnished with fresh parsley.

Recipe Notes

  • For a thicker chowder, puree a portion with an immersion blender before adding back the crab.
  • Feel free to substitute crab with shrimp or lobster for different flavors.
  • For a lighter version, use half-and-half instead of heavy cream.

Easy Pineapple Chicken and Rice – A Sweet and Savory Meal

Pineapple Chicken and Rice: A Tropical Delight for Dinner

⚖️
Difficulty
Medium

⏲️
Prep Time
15 mins

🕒
Cook Time
30 mins

⏱️
Total Time
45 mins

🍽️
Servings
4

Pineapple Chicken and Rice brings the vibrant flavors of the tropics right to your dinner table. This delightful dish marries succulent chicken with juicy pineapples, all perfectly cooked on a bed of seasoned rice that soaks up all the sweet and savory juices. With its colorful presentation and irresistible aroma, you’ll find it hard to resist digging in as soon as it’s plated. Whether you’re hosting a dinner party or enjoying a relaxing weeknight meal, Pineapple Chicken and Rice will impress everyone at the table.

The combination of fresh pineapple and tender chicken thighs creates a harmony of flavors that’s both sweet and savory, making each bite a delightful experience. As the chicken simmers with soy sauce, garlic, and ginger, the rich fragrance fills your kitchen, evoking memories of sunny isles and beachside lunches. This dish not only satisfies your taste buds but also provides a beautiful, hearty meal that looks as good as it tastes.

Quick Recipe Highlights

  • Flavor Profile: The Pineapple Chicken offers a perfect balance of sweetness from the tender pineapple and a savory depth from the seasoned chicken, enhanced with soy sauce and spices.
  • Texture: Enjoy a delightful combination of textures with crispy vegetables, succulent chicken, and fluffy rice all in one dish.
  • Aroma: The aromatic notes of garlic and ginger mingle with the sweet aroma of pineapple to create an enticing fragrance that fills your kitchen.
  • Visual Appeal: Bright pieces of yellow pineapple paired with golden-brown chicken and vibrant vegetables make this dish a treat for the eyes.
  • Skill Level Needed: This is a medium-difficulty recipe, ideal for home cooks looking to expand their skills with techniques like sautéing and simmering.
  • Special Equipment: You will need a large skillet or wok to cook all the ingredients evenly.

Recipe Overview

  • Difficulty Level: This is a medium-difficulty recipe that requires basic cooking skills but allows for creativity in seasoning and presentation.
  • Category: Pineapple Chicken and Rice is perfect for a main course, suitable for family dinners or casual gatherings.
  • Cuisine: Drawing inspiration from Asian cuisine, particularly Hawaiian and Chinese flavors, this dish encapsulates the essence of tropical cooking.
  • Cost: The ingredients for this dish are generally affordable, making it a budget-friendly option for weeknight meals.
  • Season: This dish shines in the summer, utilizing fresh pineapple, but can be enjoyed all year round by using canned pineapple.
  • Occasion: Ideal for family dinners or summer barbecues, this dish can easily be made in large batches for entertaining guests.

Why You’ll Love This Recipe

Pineapple Chicken and Rice offers a mouthwatering taste and texture experience. The sweet and savory flavor combination provides endless satisfaction, perfect for anyone craving a hearty meal. The pineapple adds moisture, preventing the chicken from drying out while infusing it with sweetness. Each grain of rice absorbs the tangy sauce, making every bite delectable.

In terms of convenience, the recipe comes together quickly, allowing you to enjoy an impressive dish without spending hours in the kitchen. With a prep time of only 15 minutes, you can have dinner ready in under an hour. This makes it perfect for busy weeknights or unexpected guests, ensuring you always have a delicious meal at your fingertips.

Nutritionally, this dish is packed with protein from the chicken and vitamins from the vegetables. Adding pineapple brings in healthy antioxidants and natural sweetness, making it a balanced meal without the need for excessive sugars or fats.

This dish is also a showstopper for entertaining, boasting not only delightful flavors but also vibrant colors and aromas that will entice your friends and family. When garnished with scallions or sesame seeds, it transforms from simple to stunning.

Lastly, the cost-effectiveness of Pineapple Chicken and Rice is hard to beat. With ingredients that are typically inexpensive and accessible, you can whip up a fantastic meal that will impress your guests without breaking the bank.

Historical Background and Cultural Significance

The origins of Pineapple Chicken can be traced back to Asian cuisine, particularly in regions where pineapples are abundantly grown such as Hawaii and Southeast Asia. The interplay of sweet and savory flavors is a hallmark of many Asian culinary traditions, marrying various influences to create something truly unique.

In Hawaiian culture, the use of pineapple is not just limited to enjoyment but extends to hospitality, often featuring in traditional dishes. Its sweet juiciness is a symbol of nourishment and welcome, making it a central ingredient in many festive and casual meals alike.

Over the years, Pineapple Chicken has evolved from simple home cooking to a popular fare in restaurants, showcasing diverse regional variations. From sweet teriyaki flavors to more spicy versions, this dish reflects the creativity in modern adaptations while honoring its roots.

Regional variations, especially in American-style dishes, have brought about a mix of ingredients and techniques, providing a unique take on the classic. For example, the addition of bell peppers or cashews is common in fusion interpretations, notable for their crunch and enhanced flavor profiles.

Ingredient Deep Dive

Chicken
Chicken serves as the protein foundation for this dish, providing both nutritional benefits and a satisfying texture. It is a versatile meat that adapts well to various flavors, making it ideal for marinating and cooking with pineapple.

When selecting chicken, look for cuts that are dark, such as thighs, as they offer more flavor and moisture than white meat. Fresh, high-quality chicken will yield the best results in terms of taste and texture.

For storage, keep raw chicken refrigerated and use it within 1-2 days or freeze it for longer shelf life. When substituting, turkey or firm tofu can work as excellent alternatives for a different protein source.

Pineapple
The sweet and tangy pineapple brings joy and a tropical flair to the dish. Not only does it provide a refreshing flavor boost, but it is also rich in vitamin C and manganese, offering numerous health benefits.

When choosing a pineapple, pick one that smells sweet at the base and has a slight give when pressed. Store it at room temperature if uncut; once sliced, keep it in an airtight container in the refrigerator to maintain freshness.

In baking or cooking, canned pineapple can easily substitute fresh pineapple. Just ensure to drain the liquid for balanced flavors.

Common Mistakes to Avoid

  • Overcooking the chicken can lead to dry meat. Ensure to check for doneness and adjust cooking time as needed.
  • Using too much pineapple juice can overpower the dish. Balance the sweetness by using measuring cups accurately.
  • Not marinating the chicken long enough. A longer marination allows flavors to seep in, enhancing the taste.
  • Neglecting to taste and adjust seasonings during cooking. Check for flavor balance and enhance as needed.
  • Cooking rice too quickly can cause a sticky texture. Use patience and let the rice absorb all the liquid.
  • Forgetting to chop vegetables evenly can result in uneven cooking. Focus on uniform sizes to ensure even doneness.
  • Using low-quality soy sauce can lack flavor depth. Opt for natural brands for better results.
  • Skipping the garnish can detract from presentation. Fresh herbs add flavors and visual appeal.

Essential Techniques

One key technique in this recipe is marinating the chicken. Marinating is crucial because it allows the chicken to absorb the flavors from the pineapple and soy sauce, resulting in a juicy and flavorful outcome. To master this technique, let the chicken sit in the marinade for at least 30 minutes or overnight for better flavor penetration.

Another essential technique involves sautéing vegetables. This method is not just about cooking but adds a caramelized flavor and enhances the dish’s overall texture. Make sure to sauté on medium heat, stirring frequently to prevent burning. Look for tender and slightly browned edges to indicate success.

Pro Tips for Perfect Pineapple Chicken and Rice

1. Use fresh pineapple for a more vibrant flavor; however, canned pineapple can serve in a pinch.
2. Marinate the chicken overnight if possible to intensify the flavor.
3. For a spicy kick, add red pepper flakes or chili sauce to the marinade.
4. Use day-old rice for better texture, as it helps prevent stickiness.
5. Season the vegetables with salt before adding to the mix to boost their flavor.
6. Let the cooked dish sit for a few minutes before serving; it helps the flavors meld together.
7. Experiment with add-ins like peas or carrots for added nutrition and color.
8. Garnish with toasted sesame seeds and chopped green onions for the finishing touch.

Variations and Adaptations

Regional variations of this dish are plentiful. For instance, consider the addition of cashews or bell peppers for extra crunch. Some may prefer using teriyaki sauce in place of soy sauce for a sweeter flavor profile.

Seasonal adaptations can also enhance this dish. Using seasonal vegetables, such as zucchini in summer or butternut squash in fall, can bring a unique twist.

For dietary modifications, swapping chicken for plant-based options like chickpeas or tofu caters to vegan diets without sacrificing flavor.

Flavor variations can be achieved by adding different herbs and spices. Experimenting with basil, cilantro, or even curry powder can customize the dish to your liking.

In terms of texture modifications, consider using quinoa or cauliflower rice instead of traditional rice for health-conscious alternatives.

Lastly, presentation alternatives such as serving in bowls versus plates can make a difference in visual appeal, allowing for a more comforting dining experience.

Serving and Presentation Guide

For an appealing presentation of Pineapple Chicken and Rice, consider layering the rice first, creating a fluffy base for the chicken and vegetables. Nestle pieces of chicken atop the rice, allowing those vibrant pineapple chunks to peek through, ensuring texture and color contrast.

Garnishing with fresh cilantro or green onions adds a burst of color and flavor. Sprinkling sesame seeds can create a beautiful visual touch.

Traditional accompaniments like a side salad or steamed broccoli provide balance and complement the flavors nicely.

In serving, it’s best to present the dish warm, allowing its aromas to entice your guests. Encourage serving with lime wedges for an added zing, heightening the pineapple’s sweetness and the dish’s overall flavor.

Wine and Beverage Pairing

When it comes to wine pairings, a chilled Riesling pairs wonderfully with Pineapple Chicken and Rice. The sweetness of the wine complements the dish’s tropical flavors while balancing any spiciness.

For a non-alcoholic alternative, consider serving iced tea with a hint of lemon or mint. This refreshes the palate and enhances the dish’s tropical notes.

If coffee or tea pairing is applicable for your meal setting, opt for iced herbal tea or a light citrus-flavored tea to match the vibrant flavors of the dish.

Pay attention to serving temperatures; chilled beverages will contrast beautifully with the warm flavors of the meal and provide a complete culinary experience.

Storage and Shelf Life

Store any leftover Pineapple Chicken and Rice in an airtight container in the refrigerator, where it can last for 3-4 days. Ensure it’s cooled before sealing to maximize freshness.

For storage, avoid leaving it at room temperature for extended periods as this may lead to spoilage. Signs of spoilage include an off smell or discoloration.

To reheat, use the microwave or stovetop but add a splash of water or broth to prevent dryness. For longer shelf life, consider freezing portions. When frozen properly, the dish can last up to 3 months.

When reheating frozen portions, allow to thaw in the refrigerator overnight for best texture and flavor upon serving.

Make Ahead Strategies

To streamline preparation, you can chop vegetables and marinate the chicken a day in advance. Store them separately in the refrigerator for freshness.

Assembly of the dish can also be prepped ahead. Cook the rice and allow it to cool; mix all your ingredients upon ready to serve. This goes a long way in preserving their structural integrity and flavor.

Consider reheating the dish gently to avoid mushiness, adding fresh elements like green onions just before serving to maintain their crispness.

By planning ahead, you can enjoy Pineapple Chicken and Rice as a quick weeknight dinner while still indulging in its fresh flavors.

Scaling Instructions

If you wish to halve the recipe, simply adjust each ingredient proportionately and remember that cooking times may slightly decrease.

Doubling or tripling the recipe for a gathering is entirely feasible. Ensure to use a larger pot or skillet to accommodate the increased volume and adjust simmering times to ensure even cooking.

Consider pre-heating your equipment before starting, as larger batches may take additional time to reach the desired cooking temperature.

For effective storage, separate the portions into containers that suit your needs. This ensures that everyone at your gathering can enjoy the dish without any waste.

Nutritional Deep Dive

A standard serving of Pineapple Chicken and Rice offers a well-rounded macro breakdown featuring around 30 grams of protein primarily from the chicken, a balanced amount of carbohydrates from the rice, and a modest fat content.

Micronutrient analysis reveals a rich supply of vitamin C from the pineapple, providing antioxidant benefits along with contributing to immune support—a great addition to a healthy diet.

Health benefits include high protein content, which aids in muscle building, combined with the fiber from the vegetables that promotes digestive health.

For those managing their weight, this dish can be tailored to portion control, allowing for a satisfying meal without excessive caloric intake.

Dietary considerations can be made by monitoring the types of rice used or adjusting serving sizes to fit individual health goals.

Dietary Adaptations

For gluten-free adaptations, simply use tamari or coconut aminos in place of soy sauce, keeping the flavors intact while making this dish suitable for those with gluten sensitivities.

If you’re looking for a dairy-free option, rest assured, this recipe is naturally dairy-free, maintaining its creaminess through the use of fresh ingredients.

Vegan adaptations can be achieved by replacing chicken with tofu or tempeh, marinating them for a similar texture and flavor exchange.

For a low-carb variation, substitute rice with cauliflower rice, offering a lighter alternative while still allowing you to enjoy the beloved dish.

Keto enthusiasts will appreciate the versatility of using chicken thighs and low-carb vegetables to keep the dish low on carbs while rich in flavor.

Paleo followers can enjoy Pineapple Chicken by ensuring all ingredients align with the dietary restrictions, focusing on natural and whole foods.

Troubleshooting Guide

If your chicken ends up tough, it may have been overcooked or marinated too long. Pay attention to the cooking time and perform a taste test for doneness.

Should the rice turn mushy, it’s often due to excessive liquid or overcooking. Use just enough broth for the rice to absorb and follow package instructions for timing.

If flavors seem off-balance, consider adjusting with a bit more soy sauce or fresh lime juice to enhance the overall taste.

Equipment challenges can arise if your non-stick cookware isn’t working correctly; make sure to preheat and utilize oils as necessary to avoid sticking.

In terms of ingredient substitutions, if you find your pineapple lacking in sweetness, consider adding a touch of honey or brown sugar to invigorate the dish.

Timing concerns often happen when multitasking. Focus on the chicken and rice separately first to avoid overlap that may hinder cooking efficiency.

Recipe Success Stories

Community feedback on Pineapple Chicken and Rice often highlights its deliciousness and ease. Many families report this dish becoming a weekly favorite due to its simplicity and wonderful taste.

Variations created by readers add to its legacy. From incorporating different vegetables to experimenting with sauces, the dish continues to evolve based on personal tastes and preferences.

Adaptation stories from home cooks prove its versatility, with many opting for healthier choices or special occasions, encouraging creativity in cooking.

Photography tips often emphasize the importance of natural lighting for capturing the vibrant hues of the dish. A well-styled plate garnished with fresh herbs creates a mouthwatering visual.

Frequently Asked Questions

Can I use frozen chicken for this recipe?
Yes, but it’s best to thaw it before marinating to ensure even flavor and texture throughout the meat.

What type of rice works best for this dish?
Long-grain white rice or jasmine rice are excellent choices, providing a light texture that complements the flavors.

Can I prepare this dish in advance?
Yes, you can pre-marinate the chicken and prepare the rice ahead of time, just assemble and cook right before serving.

What vegetables can I add?
Feel free to include bell peppers, snap peas, or carrots for extra color, nutrition, and crunch.

How can I store leftovers?
Place any leftovers in an airtight container and refrigerate for up to 4 days or freeze for longer preservation.

Can I substitute the chicken with a vegetarian option?
Absolutely! Tofu or chickpeas are great substitutes that can be marinated similarly.

Is this dish spicy?
It’s generally not spicy, but you can add chili flakes if you prefer a kick.

What should I serve with it?
A simple salad or steamed vegetable pairs nicely, balancing out the flavors and textures.

Can I make this dish gluten-free?
Yes, simply use tamari or coconut aminos in place of soy sauce to maintain the flavor without gluten.

How long does it take to cook?
The meal requires about 45 minutes in total from prep to serving, making it a quick and delicious option.

What wine pairs well with Pineapple Chicken and Rice?
A chilled Riesling or a light white wine works beautifully, enhancing the tropical flavors.

How can I enhance the flavor of the dish?
Consider adding fresh herbs or a splash of lime juice just before serving to elevate the taste.

Additional Resources

If you enjoyed Pineapple Chicken and Rice, explore other tropical-inspired recipes, such as Mango Salsa or Coconut Shrimp.

For technique guides, check out our tips on perfecting marinades or rice cooking methods, ensuring culinary success every time.

Learn more about ingredient pairings, including other fruits that complement chicken beautifully in savory dishes.

Equipment recommendations for cooking, such as non-stick cookware or quality knives, can also elevate your experience in the kitchen.

For seasonal variations, consider attempting this dish with different fruits like peaches or mangoes for a unique twist in flavor.

Join the Conversation

Share your Pineapple Chicken and Rice creations on social media with us! Connect with our community by tagging us in your photos and using our hashtags.

Photography tips can help showcase your culinary triumphs—focus on natural light and simple plating for the best results.

We’d love to hear your recipe reviews and any suggestions you might have for variations to this vibrant dish.

Engage with our community by asking questions or sharing tips; your feedback helps us bring more delicious recipes to life!

The Recipe

Pineapple Chicken and Rice

Serves: 4

Prep Time: 15 mins

Cook Time: 30 mins

Total Time: 45 mins

Kitchen Equipment Needed

  • Large skillet or wok
  • Cutting board
  • Knife
  • Measuring cups and spoons
  • Spatula or wooden spoon

Ingredients

  • 1 pound chicken thighs, boneless and skinless
  • 1 cup fresh pineapple, cubed
  • 2 cups cooked rice
  • 1/4 cup soy sauce
  • 2 tablespoons vegetable oil
  • 2 cloves garlic, minced
  • 1 teaspoon ginger, grated
  • 1 bell pepper, chopped
  • Green onions, for garnish
  • Salt and pepper to taste

Directions

  1. Marinate chicken with soy sauce, garlic, and ginger for at least 30 minutes.
  2. Heat vegetable oil in a large skillet over medium heat.
  3. Add marinated chicken and cook until browned and cooked through (about 6-8 minutes).
  4. Add bell pepper and pineapple, cooking for another 5 minutes until soft.
  5. Stir in cooked rice and heat until warm, about 3-4 minutes. Toss to combine.
  6. Season with salt and pepper, garnish with green onions, and serve immediately.

Recipe Notes

  • Feel free to experiment with adding other vegetables like snap peas or carrots.
  • Adjust the marinade time according to preference; longer marination enhances flavor.
  • If using day-old rice, it helps in achieving a non-sticky texture.
  • Leftovers can be stored in an airtight container in the fridge for up to 4 days.

Easy Cheesy Garlic Chicken Wraps – Perfect for Lunch

Cheesy Garlic Chicken Wraps: A Flavorful Delight for Any Meal

⚖️
Difficulty
Easy

⏲️
Prep Time
15 mins

🕒
Cook Time
20 mins

⏱️
Total Time
35 mins

🍽️
Servings
4

Indulge in the irresistible flavors of Cheesy Garlic Chicken Wraps, a recipe that will quickly become a household favorite. These wraps are a perfect blend of tender chicken, robust garlic, and gooey cheese, all wrapped in a soft tortilla. They are not only flavorful but also incredibly easy to make, making them an excellent option for a weeknight dinner or a quick lunch. Picture biting into a warm wrap filled with succulent chicken, and as you chew, the rich taste of cheese and garlic envelops your taste buds. This sensory experience makes Cheesy Garlic Chicken Wraps a delightful treat.

What sets this recipe apart is its versatility. Whether you are looking for a satisfying meal for a busy family or a simple dish to impress guests, these wraps come through effortlessly. Each bite is packed with flavor, and you can customize the ingredients to suit your preferences or dietary needs. The combination of textures—from the crunchy vegetables to the soft tortilla and creamy cheese—ensures that every bite is a delightful experience. With the perfect balance of savory and cheesy elements, Cheesy Garlic Chicken Wraps will please everyone at the table.

Quick Recipe Highlights

  • Flavor Profile: The wraps deliver a delicious combination of garlic and melted cheese, complemented by tender chicken and fresh vegetables, creating a delightful medley of taste.
  • Texture: Experience a satisfying crunch from crisp veggies, a chew from the tortilla, and a creamy mouthfeel from the melted cheese in each bite.
  • Aroma: As these wraps cook, the rich, buttery aroma of garlic fills your kitchen, tantalizing your senses and making your mouth water.
  • Visual Appeal: The colorful fillings of fresh veggies and golden-brown chicken create a feast for the eyes, making these wraps as appealing as they are delicious.
  • Skill Level Needed: This recipe is beginner-friendly, requiring basic cooking techniques and minimal preparation skills.
  • Special Equipment: You will need a frying pan or skillet, spatula, and a cutting board to prepare these savory wraps.

Recipe Overview

  • Difficulty Level: Easy, this recipe is perfect for cooks of any skill level, requiring just a few simple steps and minimal ingredients.
  • Category: Ideal for lunch, dinner, or as a snack, these wraps fit well into various meal categories and occasions.
  • Cuisine: Rooted in modern American cuisine, these wraps draw inspiration from Tex-Mex flavors, making them universally loved.
  • Cost: The ingredients are budget-friendly, making this recipe an economical choice without compromising on taste.
  • Season: Perfect year-round, these wraps can be enjoyed even in colder months, bringing warmth and satisfaction.
  • Occasion: Great for casual gatherings, game days, or potlucks, these wraps are sure to be a crowd-pleaser.

Why You’ll Love This Recipe

Cheesy Garlic Chicken Wraps are an explosion of taste and texture that keeps you coming back for more. The rich, cheesy filling marries beautifully with tender, garlic-infused chicken, creating a wrap that feels decadent yet comforting. Each bite bursts with flavor, and the combination of fillings allows for endless personalization, accommodating various taste preferences effortlessly.

Convenience is another major reason to love these wraps. With minimal preparation, you can whip up a delicious meal in just 35 minutes. This makes them perfect for busy weeknight dinners or when you want to feed a crowd without spending hours in the kitchen. The straightforward steps ensure that even novice cooks can create a marvelous dish with ease.

Nutritionally, these wraps can be tailored to suit health-conscious diets. You can opt for whole wheat tortillas for added fiber, incorporate a variety of fresh vegetables, or customize your protein choice. This flexibility makes Cheesy Garlic Chicken Wraps a nutritious option without sacrificing flavor.

When it comes to entertaining, these wraps shine. They’re easy to serve and make for a fun build-your-own style meal, which adds an interactive element to dinner parties or family gatherings. The ability to customize ingredients means that guests can create their own perfect combination, promoting a sense of involvement in their meal.

Lastly, Cheesy Garlic Chicken Wraps are budget-friendly, ensuring that everyone can enjoy delicious flavors without breaking the bank. The simplicity of the ingredients, combined with the quick cooking time, makes this an accessible recipe for anyone looking to create tasty meals at home.

Historical Background and Cultural Significance

Cheesy Garlic Chicken Wraps have a modern American culinary origin, blending the hearty flavors of traditional American cooking with the vibrant, bold elements typically found in Tex-Mex cuisine. Wraps themselves have become increasingly popular in American dining, influenced by the convenience that comes with a portable meal. Their versatility allows for a multitude of fillings, making them adaptable depending on regional preferences.

The rise of quick and easy meals aligns with today’s busy lifestyles, making wraps a beloved choice for family dinners and social gatherings. They have transcended their origins, becoming a staple in various cultures thanks to their customizable nature, allowing for endless creativity in the kitchen.

Throughout the years, wraps have evolved from simple combinations of deli meats and cheeses into intricate culinary creations that incorporate global flavors and ingredients. This evolution reflects a growing trend in cuisine toward healthy, fresh elements that keep the palate excited.

Regional variations of wraps can be found throughout the world, with each culture adding its unique touch. For instance, Mediterranean wraps may feature hummus and olives, while Asian-inspired versions often include fresh herbs and spices. These adaptations add to the dish’s popularity, allowing it to resonate with a broad audience.

Ingredient Deep Dive

The star of Cheesy Garlic Chicken Wraps is undoubtedly the chicken. Chicken has a rich cultural significance, being a staple protein in numerous cuisines across the globe. Its versatility allows it to absorb various flavors easily, and nutritionally, it provides essential proteins and nutrients that are crucial for a balanced diet. When selecting chicken, look for organic or free-range options to ensure the highest quality. Proper storage involves keeping it in the refrigerator for no more than two days or freezing for longer shelf life. If you’re looking for alternatives, turkey or plant-based proteins can be excellent substitutions.

Next is garlic, known for its robust flavor and health benefits. Historically, garlic has been valued for its medicinal properties and is a key ingredient in many dishes worldwide. Garlic is rich in vitamins and antioxidants, helping to boost the immune system and reduce inflammation. When selecting garlic, choose firm bulbs without any signs of sprouting or mold. Store garlic in a cool, dry place to maintain freshness. For a gentler flavor, roasted garlic can be used, or you can substitute with shallots for a different flavor profile.

The cheese adds a creamy depth to the wraps. Cheese has been a beloved ingredient across cultures for centuries, providing both flavor and texture. Cheddar is commonly used for its strong flavor, but you can explore a variety of cheeses to suit your taste—think mozzarella for a milder option or pepper jack for a kick. Choose fresh, high-quality cheese stored properly in the refrigerator for the best texture and flavor. Alternatively, if you’re seeking a dairy-free option, cashew cheese or nutritional yeast can be great alternatives.

Common Mistakes to Avoid

  • Under-seasoning the chicken: Be generous with spices and flavors to enhance the overall taste of the wraps. Seasoning should not be an afterthought.
  • Overcooking the chicken: To achieve tender chicken, monitor cooking time closely; overcooking can lead to dryness.
  • Using too much filling: Stuffing wraps may lead to spills, while too little makes them less satisfying. Aim for a balanced amount.
  • Not toasting the wraps: Toasting enhances flavor and prevents them from being soggy, providing a better texture.
  • Ignoring the resting time: Allowing the chicken to rest after cooking leads to juicier meat, as it gives the juices time to redistribute.
  • Using cold ingredients: Room temperature ingredients help in achieving better melting and flavor integration in the wraps.
  • Choosing the wrong tortilla: Different tortillas impart varying flavors and textures. Whole wheat or flavored options can enhance the dish.
  • Skipping the veggies: Not including fresh vegetables can make the wraps less nutritious and crispy. Always strive for a balance.

Essential Techniques

Cooking chicken properly is vital for any chicken wrap recipe. Start by opting for uniform pieces to ensure even cooking. To master this technique, use a meat thermometer to check the internal temperature, which should reach 165°F for safety. Avoid moving the chicken around too much during cooking to develop a nice sear, which enhances flavor.

Wrapping the ingredients correctly is also crucial. To master the technique of folding a wrap, lay down your filling strategically, ensuring that there is enough space at the edges for a neat closure. Start by folding in the sides and then rolling from the bottom up. This ensures that the contents stay sealed inside during cooking and eating.

Pro Tips for Perfect Cheesy Garlic Chicken Wraps

Consider marinating the chicken for an hour before cooking. This adds extra flavor and moisture, resulting in tastier wraps. Use a mix of spices, such as paprika, oregano, and black pepper, to elevate the flavor profile even further.

Experiment with different types of cheese to find your preferred flavor. Cheese choices like pepper jack can add a bit of heat, while mozzarella keeps it classic and mild.

Add crunch through fresh vegetables like lettuce, bell peppers, or cucumbers to contrast the melt-in-your-mouth chicken and cheese. Don’t shy away from adding herbs for freshness, such as cilantro or parsley.

To streamline your cooking process, prepare all your ingredients before starting. Having everything prepped allows you to move efficiently through the cooking steps without interruption.

To enhance the wrap’s flavor, consider mixing some sautéed onions or mushrooms with the chicken. This can add extra layers of taste that’s close to gourmet without much extra effort.

For a spicy kick, incorporate jalapeño slices or hot sauce directly into your wraps. This adds excitement and caters to those who enjoy a little heat in their meals.

Finally, don’t forget about the optional sides. Serve your wraps with homemade salsa or a tangy dipping sauce to boost flavor even more, creating a pleasurable dipping experience.

Variations and Adaptations

For regional variations, consider incorporating local ingredients such as adding guacamole for a southwestern twist or roasted vegetables for a Mediterranean flair. Each adaptation can reflect your taste preferences or seasonal offerings.

You can also modify these wraps according to the season. In the summer, include fresh tomatoes and cucumber for a light version, whereas in winter, adding hearty root vegetables can create a warm, fulfilling dish.

Dietary modifications are easy with this recipe. For a gluten-free version, simply switch to corn or gluten-free tortillas. A vegan adaptation could involve using grilled tempeh or a chickpea filling to replace chicken, offering a plant-based protein alternative.

For flavor variations, try experimenting with different spreads, such as pesto or hummus, on the tortilla before adding the fillings. This subtle change can create entirely new flavor profiles.

Texture modifications can be introduced by adding roasted nuts or seeds into the fillings for extra crunch, giving an enjoyable contrast to softer ingredients.

Presentation alternatives, like serving in a neat stack or cutting the wraps into pinwheels, can add an appealing visual element and intrigue when serving guests.

Serving and Presentation Guide

Plating the wraps can be creatively done. Consider stacking them on a large platter, garnished with fresh herbs or colorful vegetable slices for a vibrant display.

Garnishing can enhance both visual appeal and flavor. Consider adding sliced avocado, drizzling lime juice over the wraps, or even sprinkling some chili flakes for an additional flavor punch.

When serving, pair the wraps with traditional accompaniments like salsa or guacamole for a complete meal experience. For modern alternatives, consider serving them with an herb-infused yogurt dip or smoky BBQ sauce.

Temperature considerations are crucial as well. The wraps should always be served warm but avoid overheating, as that might result in sogginess. A gentle reheat can maintain their ideal texture.

For portion control, cut the wraps into halves or quarters. This approach not only looks appealing but also makes it easier for guests to sample multiple flavors if they wish.

Wine and Beverage Pairing

When it comes to wine pairings, a crisp Sauvignon Blanc complements the richness of the cheddar beautifully. The freshness of this white wine balances the heaviness from the cheese and chicken, creating a harmonious drinking experience.

For a non-alcoholic alternative, consider serving lemonade or sparkling water with a splash of fruit juice. The refreshing bubbles will provide a nice contrast to the savory flavors of the wraps.

Coffee can serve as a delightful after-meal drink, particularly a light roast or cold brew, which can cleanse the palate. If you prefer tea, a mint tea can promote digestion and refresh your senses.

Temperature considerations include serving these beverages chilled or at room temperature, ensuring they enhance your dining experience without overpowering the delicious wraps.

You could also create a fun mocktail using fresh fruits and flavored syrups. This adds a unique touch and can engage guests in a creative beverage experience.

Storage and Shelf Life

For storing leftover Cheesy Garlic Chicken Wraps, wrap them tightly in foil or plastic wrap and place them in the refrigerator. Proper storage will maintain their freshness for up to three days.

If you’re looking for longer storage options, consider freezing the assembled, unwrapped wraps. Place them in a suitable container or a freezer bag, which can keep them fresh for up to three months.

Ensure that any refrigerated wraps show no signs of spoilage before consuming. If they have an unusual smell or texture, it’s best to discard them.

When reheating, preheat your oven to 350°F, place the wraps on a baking sheet, and heat for about 10-15 minutes. This method ensures they’re warmed thoroughly without making them soggy.

If you freeze the wraps, reheat them directly from frozen, adjusting the time to about 15-20 minutes. Cook them until heated through and the cheese begins to melt slightly.

Make Ahead Strategies

To make Cheesy Garlic Chicken Wraps ahead of time, you can prep the chicken and vegetables a day before cooking. Store them separately in the refrigerator until you’re ready to assemble.

Consider making the wraps in batches. After assembling, you can either refrigerate or freeze them to save for later use. This makes for incredibly quick meals on busy days.

Quality can be impacted by making ahead, so avoid assembling the wraps until just before serving, especially if using fresh vegetables. This keeps them crisp and refreshing.

When it comes to reheating, be mindful not to overdo it. Gently warm the assembled wraps to preserve their texture, keeping the tortilla soft and pliable.

Finally, adding fresh elements right before serving can revitalize make-ahead wraps. A sprinkle of fresh herbs or a crisp salad on the side can enhance their quality greatly.

Scaling Instructions

To halve the recipe, simply adjust the ingredient quantities accordingly. This method works seamlessly, ensuring the ratio of flavors remains balanced while reducing the total yield.

If you intend to double or triple the wraps, ensure to use larger cooking equipment or divided batches to maintain even cooking throughout.

Timing modifications may be necessary when scaling up the recipe. Larger quantities might require additional cooking time; use visual cues like browning and internal temperatures to determine readiness.

For larger gatherings, prepare all components ahead of time, storing them separately until you’re ready to assemble. This allows for a fresh, restaurant-style experience.

Consider how you’ll store your scaled yield. The same recommendations apply for freezing and reheating, ensuring each batch maintains its flavor and quality.

Nutritional Deep Dive

When analyzing the macro breakdown of Cheesy Garlic Chicken Wraps, you will find a well-rounded blend of proteins, carbs, and fats. Each wrap typically contains sufficient protein from the chicken, essential for muscle repair and energy.

Micronutrient analysis reveals a wealth of vitamins and minerals, especially if you incorporate a variety of vegetables. Ingredients like bell peppers and leafy greens contribute vitamins A, C, and K, enhancing the overall nutritional profile.

Health benefits of this dish extend beyond just the ingredients; the ability to customize allows for tailored nutrition. For example, you can easily adapt the wrap to fit your dietary needs while still enjoying a delicious meal.

Portion analysis is vital for those tracking calorie intake. Understanding the serving size can help maintain moderation, contributing to weight management goals without sacrificing enjoyment.

For a healthier version, consider swapping ingredients such as using Greek yogurt instead of sour cream or opting for whole-grain wraps. These adjustments can reduce calories and augment nutritional value without losing flavor.

Dietary Adaptations

To make the Cheesy Garlic Chicken Wraps gluten-free, simply select gluten-free tortillas and ensure all fillings are certified gluten-free. This makes the recipe accessible for those with gluten sensitivities.

For a dairy-free option, replace regular cheese with plant-based cheese alternatives or nutritional yeast for a non-dairy cheesy taste. This adaptation allows those on dairy-free diets to enjoy the flavor and texture they’re after.

If you’re following a vegan diet, substitute the chicken with grilled tofu, tempeh, or a hearty bean mixture. These adjustments can create a satisfying meal packed with nutrients while staying true to vegan principles.

For low-carb and keto versions, opt for lettuce wraps instead of tortillas. This minimizes carbs while providing a crunchy alternative, retaining the wraps’ essence.

Paleo dieters can enjoy this recipe by utilizing clean protein such as chicken or turkey and avoiding any processed ingredients like cheese or flour-based tortillas.

Low-FODMAP modifications can include selecting compliant vegetables and cheeses, thus allowing those with digestive sensitivities to indulge in the rich flavors without any discomfort.

Troubleshooting Guide

For texture issues, if your wrap comes out soggy, ensure you’re not overstuffing or using wet ingredients. Using drier veggies or lightly grilling them can prevent excess moisture.

Flavor balance becomes crucial when combining spices; if too bland, do not hesitate to add more salt or acid like lemon juice to brighten the dish. Layering flavors throughout the cooking process can also solve this issue.

Temperature problems can arise if the chicken is unevenly cooked. Always check for a proper internal temperature using a meat thermometer for safety and optimal taste.

If you encounter challenges with equipment, ensure your pans are preheated before cooking, which promotes better searing and flavor retention of the chicken.

If substitutions were made and the dish seems off, take note of taste adjustments needed and consider rebalancing with additional spices or flavors to compensate.

Timing concerns, particularly around freezing and reheating, can also affect the dish. Ensuring proper time adjustments while reheating can help reach the ideal every time.

Recipe Success Stories

Our community has shared numerous feedback highlighting the versatility of Cheesy Garlic Chicken Wraps. Many have reported great success when substituting different proteins, showcasing the recipe’s adaptability to personal preferences.

Readers have fondly shared their own adaptations, such as incorporating unique spices based on regional preferences which inspired new flavor combinations that others loved to try.

Photography tips from our community have encouraged capturing the vibrant colors and textures of the wraps. This has motivated more home cooks to share their culinary successes online, fostering a cooking community.

Feedback on ease of preparation has been overwhelmingly positive, with many expressing gratitude for a quick recipe that delivers impressive flavors without stressing the kitchen.

Adaptation stories often revolve around dietary restrictions, with readers thrilled to find ways to make the wraps suitable for gluten-free and vegan diets without sacrificing taste or satisfaction.

Frequently Asked Questions

Can I prepare Cheesy Garlic Chicken Wraps ahead of time?

Yes, you can prepare the chicken and other fillings in advance. Assemble just before serving for the freshest wrap experience.

What kind of tortillas should I use?

You can use traditional flour or corn tortillas. For a healthier option, consider whole wheat or gluten-free tortillas depending on your dietary needs.

Can I freeze these wraps?

Absolutely! Assemble and freeze the wraps before cooking. Label them and freeze for up to three months, reheating directly from frozen.

What sides pair well with these wraps?

Fresh salsa, guacamole, or a side of salad are excellent companions to enhance the overall meal experience.

How can I make these wraps spicier?

Incorporate spices like cayenne, or add jalapeño slices to the chicken filling for an extra kick of heat.

What’s a good vegetarian substitute for chicken?

Grilled mushrooms, tempeh, or chickpeas make fantastic vegetarian alternatives that keep the flavor and texture intact.

Can I use other types of cheese?

Definitely! Feel free to experiment with different cheeses like mozzarella, pepper jack, or even a vegan cheese alternative.

How do I prevent the chicken from drying out?

Make sure to marinate the chicken before cooking, and avoid overcooking by monitoring its internal temperature closely.

What if I don’t have fresh garlic?

You can substitute with garlic powder or garlic salt; use about 1/8 teaspoon of garlic powder for each clove of fresh garlic.

Are there any good substitutes for tortillas?

Sure! Lettuce wraps or even rice paper can be good alternatives, especially for a low-carb option.

Additional Resources

If you’re inspired by Cheesy Garlic Chicken Wraps, you might also enjoy similar recipes like BBQ Chicken Wraps or Mediterranean Veggie Wraps. Each offers a delicious filling while keeping the wrap concept intact.

Techniques like marinated grilling, sautéing veggies, or even mastering homemade sauces can further enhance your culinary repertoire. Consider looking for guides on these techniques to improve your skills.

For ingredient information, get familiar with selecting fresh vegetables and herbs that can elevate your wrap game even more, utilizing seasonal produce when possible.

Equipment recommendations include non-stick frying pans, which can make cooking the chicken easier and lead to fewer sticking issues and more flavorful outcomes.

Finally, don’t forget seasonal variations! Adjust your ingredients based on what’s fresh and in-season, such as adding corn in the summer or root veggies in the fall for an enticing twist on the wraps.

Join the Conversation

We love hearing how you adapt recipes! Share your modifications and experiences with Cheesy Garlic Chicken Wraps on social media and engage with others in the culinary community.

Photography tips are highly encouraged; capturing your culinary creations can inspire others to try the recipe and share their own creations.

Leave a review and ratings on the recipe to help others make informed decisions and enhance the community experience with positive feedback and suggestions.

Engage with fellow cooks by sharing your unique variations. This collaboration allows for a flourishing community of cooking enthusiasts to unite over a delicious dish.

Participate in discussions or comment sections to share your tips, success stories, or ask questions about the wraps and get answers from experienced cooks.

The Recipe

Cheesy Garlic Chicken Wraps

Serves: 4

Prep Time: 15 mins

Cook Time: 20 mins

Total Time: 35 mins

Kitchen Equipment Needed

  • Frying pan or skillet
  • Spatula
  • Cutting board

Ingredients

  • 2 cups cooked chicken, shredded
  • 1 tablespoon minced garlic
  • 1 cup shredded cheese (cheddar or your choice)
  • 4 large tortillas
  • 1 cup mixed vegetables (bell peppers, onions, etc.)
  • Salt and pepper to taste
  • Olive oil for cooking

Directions

  1. In a skillet, heat olive oil over medium heat. Add minced garlic and sauté until fragrant.
  2. Add in the shredded chicken and mixed vegetables, cooking until warmed through. Season with salt and pepper.
  3. Sprinkle cheese over the mixture and allow it to melt slightly.
  4. Warm tortillas in another pan for about 30 seconds on each side.
  5. Layer the chicken mixture evenly onto each tortilla and wrap tightly.
  6. Serve warm with your choice of salsa or dip.

Recipe Notes

  • You can customize the fillings with your favorite ingredients or use leftovers.
  • For a spicier kick, add sliced jalapeños to the filling.
  • These wraps can be prepared ahead of time and frozen for easy meals later.

Easy Melt in Your Mouth Chicken Recipe (Super Tender)

Melt in Your Mouth Chicken Recipe: The Ultimate Comfort Dish

⚖️
Difficulty
Easy

⏲️
Prep Time
15 mins

🕒
Cook Time
30 mins

⏱️
Total Time
45 mins

🍽️
Servings
4

Melt in Your Mouth Chicken is a delightful dish that promises to impress with its rich flavors and tender texture. This recipe is designed for home cooks looking to create a meal that combines simplicity with heartwarming comfort. Imagine succulent pieces of chicken breast marinated in a blend of spices and brought to life with a creamy sauce, each bite melting effortlessly in your mouth. The dish is an invitation to gather around the table, bringing family and friends together in appreciation of home-cooked goodness.

This recipe is not only about the rich taste; it’s about the ease of preparation that fits perfectly into a busy lifestyle. With a prep time of just 15 minutes and a cook time of 30 minutes, it provides a satisfying meal option for weeknights or casual get-togethers. Moreover, the combination of herbs and spices elevates the dish, imparting a depth of flavor that will have everyone asking for seconds.

Quick Recipe Highlights

  • Flavor Profile: The dish balances savory herbs and spices with a hint of creaminess from the sauce, creating a beautifully harmonious flavor.
  • Texture: The chicken remains tender and juicy, while the sauce offers a velvety, luscious mouthfeel.
  • Aroma: A warm and inviting aroma fills the kitchen, with notes of garlic, herbs, and the sautéed chicken enticing everyone.
  • Visual Appeal: Golden-brown chicken smothers in a creamy sauce, garnished with parsley, promises an enticing presentation.
  • Skill Level Needed: This easy recipe requires basic cooking techniques making it accessible for beginners and satisfying for seasoned cooks alike.
  • Special Equipment: A large skillet and a sharp knife are the only essential tools required for this dish.

Recipe Overview

  • Difficulty Level: This Melt in Your Mouth Chicken recipe is categorized as easy, making it suitable for cooks of all skill levels. It employs straightforward methods that yield delicious results without complex techniques.
  • Category: This dish is a fantastic option for dinner and is perfect for serving guests or enjoying during family meal times.
  • Cuisine: While primarily reflecting American comfort food, this recipe incorporates elements from various culinary traditions, bringing a warm, homey vibe to the dining table.
  • Cost: The ingredients for this dish are typically affordable, making it a budget-friendly option that doesn’t compromise on flavor.
  • Season: This recipe is perfect for any season, providing warmth during colder months and comfort year-round.
  • Occasion: It’s great for family dinners, casual gatherings, or any occasion when you want to share a thoughtful meal.

Why You’ll Love This Recipe

This Melt in Your Mouth Chicken recipe offers an unbeatable taste and texture that will leave you craving more. The chicken is incredibly tender, enhanced by a delicious creamy sauce that binds the flavors together beautifully. Each bite feels luxurious as the softness of the meat marries with the rich sauce, making it a memorable meal for you and your loved ones.

The convenience of this recipe stands out. With minimal prep and cooking time, you can whip up this meal on a busy weeknight or when entertaining guests unexpectedly. Simply gather your ingredients, follow the steps, and enjoy a home-cooked feast that will impress everyone around the table without stress.

From a nutritional standpoint, chicken is a great source of lean protein, packed with essential nutrients. When paired with healthy sides like vegetables or whole grains, this dish can definitely fit into a balanced diet. The sauce can also be adjusted to meet dietary preferences, allowing for a meal that suits personal health goals.

Socially, this recipe is perfect for gatherings where everyone can dish up their plates family-style. Melt in Your Mouth Chicken is a conversation starter, inviting compliments and encouraging sharing. It’s a beautiful way to showcase comfort food in a modern yet nostalgic manner.

Finally, cost-effectiveness makes this recipe a winner. With easily accessible ingredients and a straightforward cooking method, you can create a meal that feels special without breaking the bank. Plus, leftovers (if there are any!) reheat beautifully, extending the value of your cooking efforts.

Historical Background and Cultural Significance

The origins of Melt in Your Mouth Chicken can be traced back to savvy home cooks looking to create simple yet satisfying meals for their families. The concept of combining chicken with creamy sauces has been a staple in American kitchens for generations, known for providing comfort and nourishment during busy days.

Culturally, this dish signifies the importance of home-cooked meals as traditional family gatherings often feature hearty recipes that represent love and time spent with one another. Melt in Your Mouth Chicken embodies this sentiment, reminding us of the joy found in sharing meals with those we cherish.

Over the years, the recipe has evolved, with various adaptations emerging to fit contemporary tastes and diet preferences. Today, people are incorporating healthier ingredients or bold flavors, while still maintaining that signature melt-in-mouth quality.

Regional variations of this dish often pop up depending on local culinary traditions. For instance, some areas may introduce different spices or garnishes that reflect local flavors, creating a unique twist while preserving the essence of the classic recipe.

Ingredient Deep Dive

Chicken Breast: The main ingredient in Melt in Your Mouth Chicken, chicken breast is a popular choice due to its lean nature and versatility. Historically, this cut became a staple in many households because of its ability to soak up flavors beautifully while ensuring a health-conscious meal. Nutritionally, chicken breast is rich in protein while being low in calories, making it an ideal choice for many diets. When selecting chicken, look for fresh and pink pieces without blemishes, and store them in the refrigerator for short-term use or freeze for later.

Cream: The use of cream in this dish contributes its velvety texture and rich flavor, elevating the overall experience. It adds a touch of indulgence, transforming everyday chicken into a restaurant-quality dish. Cream is high in fats, offering essential vitamins and nutrients, but can be substituted with low-fat options or non-dairy alternatives for a lighter dish. For optimal texture, it’s best to incorporate cream gradually to avoid curdling in the sauce.

Common Mistakes to Avoid

  • Not seasoning the chicken adequately: To achieve maximum flavor, it’s essential to properly season the chicken before cooking, ensuring it absorbs all the flavors from the marinade and sauce.
  • Cooking chicken at too high a temperature: High heat can result in dry, overcooked chicken. Instead, moderate heat allows the chicken to cook evenly while retaining moisture.
  • Failing to let the chicken rest: Allowing the chicken to rest after cooking ensures that the juices redistribute for a more tender bite when sliced.
  • Using low-quality ingredients: The flavor of this dish heavily relies on the quality of the cream and spices; always opt for fresh ingredients to enhance the taste.
  • Not monitoring the cooking time: Overcooking the chicken can lead to a rubbery texture. Use a meat thermometer to ensure perfect doneness.
  • Skipping the marinating step: Marinating chicken adds depth to the flavor. Don’t rush this stage and allow the chicken to soak in herbs and spices.
  • Not adjusting seasoning to taste: Every chicken breast can differ; always taste the sauce and adjust the seasoning as necessary to achieve the desired flavor.
  • Neglecting presentation: A beautiful presentation enhances the dining experience. A sprinkle of fresh herbs can greatly improve the dish’s visual appeal.

Essential Techniques

Marinating: Marinating the chicken prior to cooking is crucial for breaking down proteins while infusing it with flavors. To master this technique, allow the chicken to soak in the marinades for at least 30 minutes, or longer for deeper flavor. Common pitfalls include not using enough liquid or marinating for too short a time. Visual cues of a successful marinade include visible absorption and a pleasing aroma while cooking.

Searing: Searing the chicken at the beginning of the cooking process enhances flavor development through caramelization. To execute this technique effectively, preheat the skillet until hot before adding the chicken. It should produce a sizzling sound when placed in the pan. Avoid overcrowding the pan, as this can lead to steaming instead of searing, and look for a golden-brown crust to signal successful searing.

Pro Tips for Perfect Melt in Your Mouth Chicken

– Always use fresh chicken for optimum flavor and tenderness; frozen chicken can lead to uneven cooking results.
– Enhance the richness of the cream sauce by adding a splash of chicken broth for added depth.
– Experiment with different herbs like thyme or rosemary to elevate the flavor profile.
– For a spicy kick, add red chili flakes or a dash of hot sauce directly to the marinade.
– To save time, prepare the chicken the night before to marinate overnight for maximum flavor absorption.
– When reheating, do so gently on low heat to maintain the texture of the chicken.
– Pair with seasonal vegetables for a complete meal while adding nutrition and balance.
– Keep the presentation clean and elegant with fresh herb garnishing before serving.

Variations and Adaptations

This recipe offers endless possibilities for delicious variations. You can create a lemon-garlic version by incorporating lemon zest and juice into the marinade. Alternatively, try a Mediterranean twist by adding olives, sun-dried tomatoes, and feta cheese for a refreshing flavor shift. Seasonal adaptations can also come into play; consider adding fresh asparagus in the spring or roasted root vegetables in the fall to complement the chicken beautifully.

Dietary modifications can be made by swapping heavy cream with coconut milk for a dairy-free alternative, or using almond milk for a lighter option. For flavor variations, experiment with different spices like Cajun seasoning for a zesty kick or curry powder for an exotic twist. Texture modifications, such as adding a crunch with breadcrumbs on top before baking, can enhance the appeal of the dish. Enjoy exploring these creative directions while maintaining the essence of this beloved Melt in Your Mouth Chicken recipe.

Serving and Presentation Guide

Plating Melt in Your Mouth Chicken can enhance the overall dining experience significantly. A white plate will provide a beautiful contrast for the creamy sauce, creating an eye-catching display. Consider garnishing each plate with fresh parsley or a sprig of thyme to add color and freshness.

Accompaniments such as garlic mashed potatoes or steamed vegetables can complement the dish wonderfully while balancing its richness. To serve, portion the chicken generously and drizzle the cream sauce artfully over the top, ensuring each bite is not just tasty but also visually appealing.

Temperature considerations are crucial as well; serve the dish hot, ensuring its appealing aroma wafts through the room. For portion control, aim for 4-5 ounces of chicken per serving; this helps maintain balance, especially when served with sides.

Wine and Beverage Pairing

To elevate your dining experience, choosing the right wine pairing can make all the difference. A light, crisp Chardonnay works wonderfully with Melt in Your Mouth Chicken due to its fruity notes and buttery finish, complementing the creamy sauce beautifully.

For a non-alcoholic alternative, consider serving sparkling water with a citrus twist, which adds freshness and cuts through the richness of the dish. Additionally, a light herbal tea such as chamomile can offer a soothing contrast to the flavors. Always serve beverages chilled, particularly white wines, to maintain their flavor profile, and consider earthenware glasses for a rustic touch when serving.

Storage and Shelf Life

To ensure longevity, store any leftovers of Melt in Your Mouth Chicken in an airtight container in the refrigerator. Properly stored, the dish can last up to 3-4 days while retaining its flavor and texture. When reheating, use a microwave or stovetop over low heat, adding a splash of chicken broth or cream to whip back the sauce’s richness.

For longer-term storage, consider freezing the dish in portions; it can last up to 2-3 months frozen. Always use freezer-safe containers and label them with dates for easy identification. Be mindful, however, that the texture may slightly change upon reheating. Signs of spoilage include off odors, significant texture changes, and discoloration.

Make Ahead Strategies

To optimize your cooking process, prepping Melt in Your Mouth Chicken ahead of time proves beneficial. Marinate the chicken the night before to allow the flavors to penetrate deeply with optimal absorption.

For an efficient cooking timeline, consider chopping onions and garlic beforehand, storing them in the refrigerator until you’re ready to use them. Additionally, you can blend the sauce components the day before, ensuring you only need to combine and heat the next day.

If freezing, assemble the dish without cooking it and store it in the freezer. When ready to enjoy, thaw in the refrigerator overnight before cooking, ensuring a quick meal that’s still packed with flavor. Fresh herbs can be added right before serving for that extra touch.

Scaling Instructions

Scaling this Melt in Your Mouth Chicken recipe is an effortless task. For times when you need to halve the recipe, simply divide all ingredient measurements by two while ensuring the cooking method remains unchanged.

On the other hand, doubling or tripling the recipe requires minimal adjustment, but ensure that your cooking equipment can accommodate the increased quantity. A larger skillet may be necessary, and cooking times may vary slightly, so monitor the chicken’s doneness closely.

In terms of storage, consider your equipment’s capacity; larger batches may require more storage containers. Always check the chicken’s internal temperature with a meat thermometer to guarantee safety regardless of the scaled size.

Nutritional Deep Dive

In understanding the nutritional aspects, Melt in Your Mouth Chicken provides a well-balanced meal option. A standard serving typically contains around 300-400 calories, with a significant protein content of approximately 30 grams. The combination of chicken breast and cream creates a rich meal that also contains beneficial fats and essential nutrients.

Micronutrient analysis reveals that this dish can be a great source of B vitamins, necessary for energy production, and important minerals like selenium, which may promote cellular function. Keep in mind that portion control is essential, especially for those monitoring caloric intake; balancing this meal with vegetables can enhance fiber content, aiding digestion.

Furthermore, keeping track of individual ingredient types can help you meet dietary considerations and weight management tips. For instance, opting for lower-fat cream substitutes can significantly reduce overall calorie content while still providing that delicious taste.

Dietary Adaptations

For those following specific dietary guidelines, this Melt in Your Mouth Chicken recipe can be adapted to fit various preferences.

– Gluten-free: Simply ensure that any broth or sauces used are labeled gluten-free.
– Dairy-free: Substitute heavy cream with coconut cream or cashew cream for a luscious, dairy-free version.
– Vegan: Replace chicken with tofu or tempeh, ensuring to marinate similar to chicken before cooking.
– Low-carb/Keto: Use almond flour to thicken the sauce instead of traditional flour, and serve with cauliflower rice rather than potatoes.
– Paleo: Stick with approved ingredients like coconut cream, fresh herbs, and avoid processed items.
– Low-FODMAP: Replace onions and garlic with the green parts of scallions and use garlic infused oils instead.

Troubleshooting Guide

If you encounter texture issues, ensure the chicken is thoroughly cooked through; overcooked chicken can become rubbery. For flavor balance, add a splash of acid like lemon juice or a dash of vinegar to brighten the dish if it’s too rich.

For temperature problems, use a meat thermometer to ensure an internal temperature of 165°F; camping for heat zones can lead to uneven cooking results. If you’re dealing with equipment challenges such as a sticky pan, remember to preheat adequately and use enough oil to prevent sticking.

When exploring ingredient substitutions, understand how flavors may vary based on what you choose. Lastly, timing concerns are easily mitigated with a prepared mise en place; having everything ready in advance will help the cooking process run smoothly.

Recipe Success Stories

This Melt in Your Mouth Chicken recipe has delighted countless readers and home cooks alike. Many people have shared their successes in adding personal touches and variations, such as experimenting with different marinades and sides, proving how adaptable this recipe can be.

Community feedback highlights the ease of preparation and the enjoyment families experienced during dinners, especially with kids appealing to the tasty creamy sauce. Readers report that even picky eaters are drawn to this fulfilling dish, making it a family favorite.

Photography tips suggest showcasing the sauce’s creamy texture in your images by using a contrasting background or a close-up shot of the drizzling sauce. Capture those moments when the chicken is served, helping to emphasize the communal aspect of sharing a meal.

Frequently Asked Questions

Can I use frozen chicken for this recipe?
Yes, you can use frozen chicken, but it’s best to thaw it completely before marinating and cooking.

How can I make the sauce thicker?
To thicken the sauce, incorporate a cornstarch slurry or cook it down for a little longer to reduce its volume.

What sides pair well with this chicken?
Options like garlic mashed potatoes, steamed vegetables, or a fresh salad complement the dish beautifully.

Can I prepare this dish in advance?
Absolutely! You can marinate the chicken and make the sauce ahead of time; just assemble and cook when ready to serve.

Is this recipe suitable for meal prep?
Yes, it stores well in the refrigerator and reheats beautifully, making it perfect for meal prep.

Can I use different cuts of chicken?
Yes, thighs or drumsticks can also be used, simply adjust cooking time as necessary for different cuts.

How long can leftovers be stored?
Leftovers can be stored in the refrigerator for 3-4 days in an airtight container.

Is there a low-carb option for this dish?
You can create a low-carb version by serving it over cauliflower rice instead of traditional grains.

What herbs work well with this recipe?
Fresh herbs such as thyme, parsley, and basil complement the chicken beautifully; feel free to experiment.

Can I make a spicy version of this dish?
Yes! Add red pepper flakes or a spicy sauce into the marinade for added heat.

Additional Resources

Explore more delectable recipes and cooking techniques related to Melt in Your Mouth Chicken. For instance, consider browsing simple side dishes that pair well with this chicken for a complete meal experience.

Technique guides on marinating or searing chicken can enhance your cooking toolkit, while ingredient information specific to dairy substitutes will aid those with dietary restrictions. Equipment recommendations, such as high-quality skillets or meat thermometers, can help optimize your kitchen experience.

Lastly, seasonal variations allow you to recreate this dish all year round, adjusting the ingredients as needed to complement the changing seasons.

Join the Conversation

We invite you to share your experiences and photographs of your own Melt in Your Mouth Chicken creations. Use social media to connect with fellow food enthusiasts and exchange tips on making this dish your own; we are eager to see your unique interpretations!

Leave a review or comment on variations you’ve loved; the community thrives on shared feedback and inspiration. Engage in recipe discussions and don’t hesitate to ask questions if you’re unsure about any techniques outlined in the recipe. Your journey in the kitchen is a collective adventure—we’re excited to be part of it with you!

The Recipe

Melt in Your Mouth Chicken

Serves: 4

Prep Time: 15 mins

Cook Time: 30 mins

Total Time: 45 mins

Kitchen Equipment Needed

  • Large skillet
  • Meat thermometer
  • Cutting board
  • Knife
  • Mixing bowl

Ingredients

  • 4 boneless, skinless chicken breasts
  • 1 cup heavy cream
  • 2 tablespoons olive oil
  • 2 cloves garlic, minced
  • 1 teaspoon paprika
  • 1 teaspoon dried thyme
  • Salt and pepper to taste
  • Fresh parsley for garnish

Directions

  1. In a mixing bowl, combine olive oil, minced garlic, paprika, thyme, salt, and pepper. Add chicken breasts and marinate for at least 30 minutes.
  2. Heat the large skillet over medium heat and add marinated chicken breasts. Cook for about 5-7 minutes on each side until golden brown.
  3. Reduce heat to low and add heavy cream to the skillet. Allow it to simmer and thicken, stirring occasionally, for about 15 minutes.
  4. Check chicken with a meat thermometer to ensure it reads 165°F for doneness.
  5. Remove from heat and allow the chicken to rest for a few minutes before slicing.
  6. Garnish with fresh parsley and serve warm.

Recipe Notes

  • For extra flavor, consider adding a splash of lemon juice to the cream sauce.
  • This dish pairs well with roasted vegetables or a fresh salad.
  • Feel free to experiment with different herbs and spices to tailor the dish to your taste.