Mouthwatering Longhorn Steakhouse Parmesan Chicken Recipe You Can Make at Home

Longhorn Steakhouse Parmesan Crusted Chicken: A Savory Delight

⚖️
Difficulty
Medium

⏲️
Prep Time
20 mins

🕒
Cook Time
25 mins

⏱️
Total Time
45 mins

🍽️
Servings
4

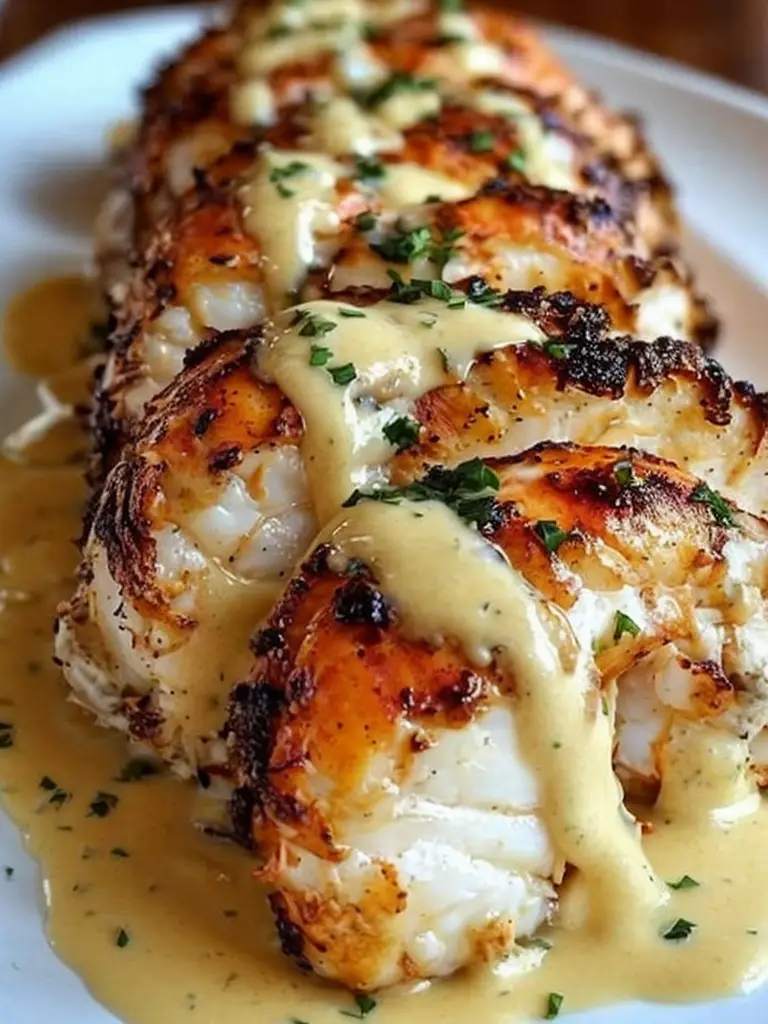
This Longhorn Steakhouse Parmesan Crusted Chicken recipe is a taste explosion of crunchy parmesan crust and moist, tender chicken. Infused with garlic and herbs, every bite is packed with bold flavors that are irresistibly delicious. Perfect for family dinners or entertaining, this dish will have everyone asking for seconds. The combination of savory and creamy cheese topping offers a rich taste that brings comfort and indulgence to your plate.

Quick Recipe Highlights

  • Flavor Profile: The recipe boasts a harmonious blend of garlic, parmesan, and herb flavors, creating a tantalizing symphony on your palate. The cheddar cheese sauce adds a creamy depth.
  • Texture: Expect a satisfying crunch from the parmesan crust, balanced by the tender juiciness of the chicken breast.
  • Aroma: Freshly grated parmesan and fragrant herbs fill your kitchen with a mouthwatering aroma that beckons everyone to the table.
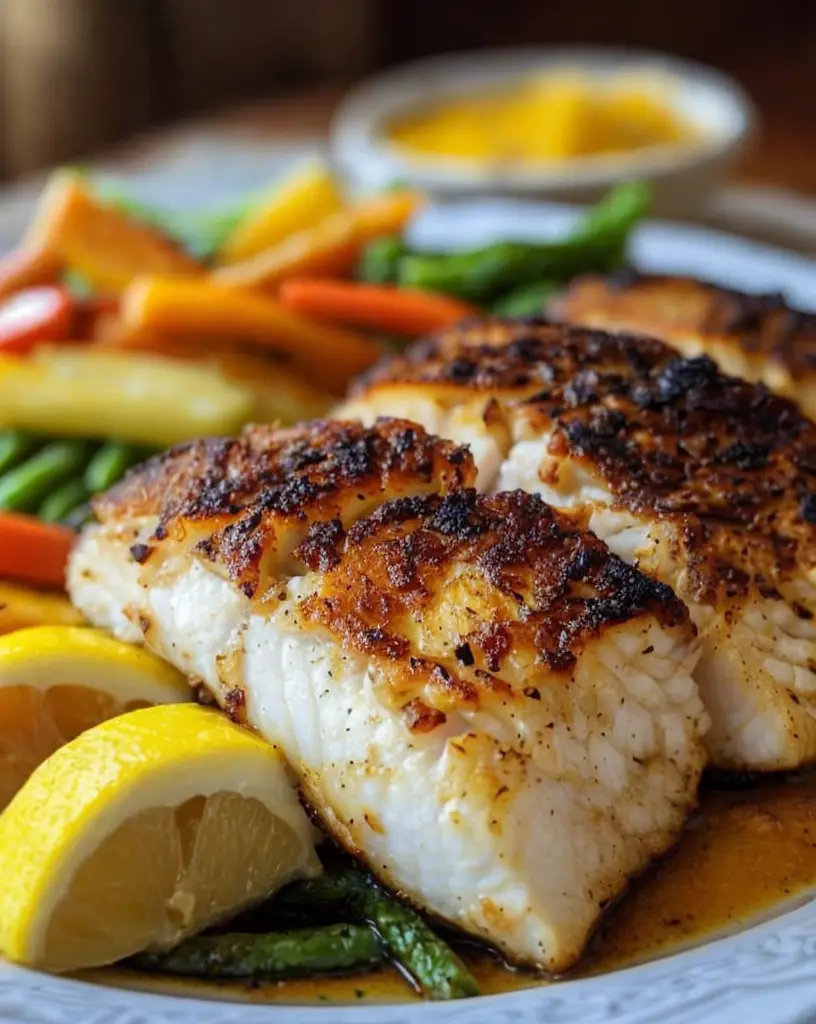
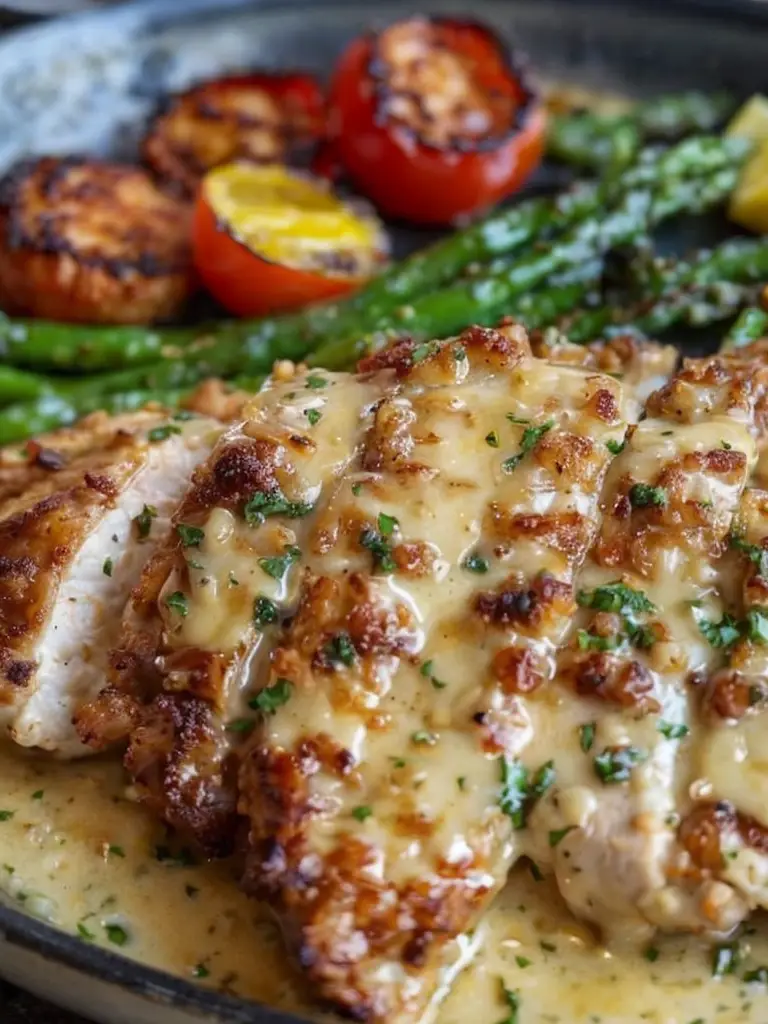
  • Visual Appeal: Golden-browned crust and vibrant herbs create a visually appealing dish perfect for presentation.
  • Skill Level Needed: Ideal for home cooks with intermediate skills, this recipe involves making a crust and a cheese topping.
  • Special Equipment: A baking dish or an oven-safe skillet is essential for toasting the parmesan crust perfectly.

Recipe Overview

  • Difficulty Level: While not overly complex, requires precise timing and care to perfect both the chicken and the parmesan crust.
  • Category: A versatile main course dish fit for weekday dinners or elegant parties.
  • Cuisine: A fusion of Italian and American influences, offering rich flavors synonymous with both traditions.
  • Cost: Moderate-cost ingredients mostly available at any supermarket, with special cheeses being the key staples.
  • Season: Best enjoyed year-round, presenting a hearty dish ideal for cozy winter nights or festive summer gatherings.
  • Occasion: Perfect for family dinners or special celebrations, this dish offers a touch of sophistication to any meal.

Why You’ll Love This Recipe

The Longhorn Steakhouse Parmesan Crusted Chicken provides a taste and texture experience unlike any other. The crispy parmesan crust contrasts beautifully with the tender, juicy chicken, offering a crunchy exterior enveloping a flavorful interior. With just a few staple ingredients and simple preparation steps, this recipe comes together quickly, making it a convenient choice for weeknight dinners without skimping on flavor. It also brings nutritional benefits by using lean protein and keeping rich toppings proportionate for a balanced meal.

Entertaining takes on a delightful ease with this dish as its presentation and simplicity make a professional impression without the hassle. Despite the gourmet feel, this recipe is budget-friendly, using ingredients largely available in your pantry. Its adaptability to various dietary preferences makes it an inclusive choice, ensuring everyone around your table can enjoy its magic.

Historical Background and Cultural Significance

The origins of the Parmesan Crusted Chicken can be traced back to Italian culinary traditions, where parma’s revered cheese and herbs were often used to elevate poultry dishes. Over time, American cuisine adopted and morphed this concept into a beloved recipe treasured for its balance of flavor and ease of preparation. This dish has evolved to capture the richness of both cultures, seamlessly blending Italian artistry with American culinary convenience.

Within regions across Italy and America, variations of the crust and sauce add a unique flair, demonstrating local preferences and adaptations. The recipe has significantly impacted dining trends by showcasing how humble ingredients can be used innovatively for extraordinary results. Today, this savory delight is welcomed warmly in homes and upscale restaurants alike, savored not only for its taste but also its story of tradition and fusion.

Ingredient Deep Dive

Chicken breasts form the base, providing lean protein that easily absorbs marinade flavors, ensuring each bite is juicy and flavorful. Choose fresh, organic cuts when possible for superior taste and quality. Store chicken in the coldest part of your fridge and cook it within two days of purchase to preserve freshness.

Parmesan cheese is a paramount element, chosen for its bold, nutty flavor that crisps beautifully atop the chicken. When selecting parmesan, opt for blocks rather than pre-grated versions to maximize flavor. Grate only as needed, and store unused portions tightly wrapped in the cheese drawer of your refrigerator.

Common Mistakes to Avoid

  • Not marinating the chicken long enough reduces flavor absorption; ensure at least 30 minutes for optimal results.
  • Skipping the step of patting the chicken dry prior to coating leads to a soggy crust.
  • Using low-quality parmesan affects both the flavor and texture, diminishing the crust’s potential crispness.
  • Avoid overcrowding the baking dish to ensure even heat distribution and prevent steaming rather than crisping the crust.
  • Cooking on too high a temperature can result in a burnt crust before the chicken is cooked through.
  • Failing to preheat the oven adequately will inhibit attaining a crunchy parmesan topping.
  • Overcooking the chicken leads to a dry interior; instead, time precisely or use a meat thermometer.
  • Replacing fresh herbs with dried ones preemptively without adjusting the quantity impacts the recipe’s subtle flavor balance.

Essential Techniques

Marinating the chicken ensures profound seasoning and juiciness. Be consistent with marination times to ensure consistent results.

Mastering the orid of the parmesan crust entails patience and adherence to correct temperatures. Maintain an even layer for uniform crunch.

Perfecting the cheese sauce requires a gentle simmer, ensuring even melting to enhance the chicken without overpowering it.

Proper doneness for chicken involves visually checking and possibly using a meat thermometer; alertness to subtle cues is crucial for achieving the succulent texture intended.

Pro Tips for Perfect Longhorn Parmesan Crusted Chicken

Rub the chicken with a garlic clove before marinating for an extra flavor boost.

Allow the chicken to come to room temperature before cooking; this aids in even cooking.

For maximum crust crunchiness, finish under the broiler for the last few minutes.

Pair with a simple side salad dressed in a lemon vinaigrette to cut through the richness.

Grate your parmesan at room temperature for easier handling and enhanced flavor.

Experiment with herbs like thyme or rosemary in the crust for varied aromatic profiles.

Variations and Adaptations

Regionally, ingredients like sun-dried tomatoes or a sprinkle of oregano can add distinct flair. For a seasonal touch, incorporate asparagus or cherry tomatoes into the pan.

Adapt for low-carb diets by swapping breadcrumbs for almond flour in the crust. Flavor expansions can utilize chili flakes for heat or lemon zest for a citrus kick.

For texture variation, consider a panko breadcrumb mix for the crust, providing additional crunch that complements the parmesan.

Transform presentation by slicing the chicken and arranging it attractively over a bed of greens, accentuating both the beauty and freshness of the dish.

Serving and Presentation Guide

Artful plating involves slicing the chicken diagonally and slightly overlapping the pieces for a professional presentation. Garnish with fresh parsley or basil for color contrast.

Traditionally, accompany with mashed potatoes or pasta al dente, staying true to the dish’s Italian essence. For a modern spin, serve with grilled vegetables.

Serve warm for optimal texture and aromatic notes, dividing portions equitably for a balanced meal that satisfies without overwhelming.

Wine and Beverage Pairing

A lightly oaked Chardonnay accentuates the chicken’s richness and glass atop the cheese’s nutty undertones. For those preferring non-alcoholic options, a sparkling apple cider adds a refreshing zing.

Coffee complements are limited due to the savory nature of the dish, but a post-meal espresso can cleanse the palate.

Serving chilled or room temperature enhances the dish’s depth, allowing nuanced flavors to emerge.

Storage and Shelf Life

To store leftovers, cover securely in an airtight container and refrigerate for up to three days. Freezing is not recommended due to the crust’s potential sogginess upon reheating.

Always use foil to tent when reheating, reserving moisture without jeopardizing crunch. A brief reheat in the oven restores both taste and texture capably.

Make Ahead Strategies

Prepare the chicken marinade early and keep it covered in the fridge, allowing flavors to intensify for up to 24 hours.

Assemble crust ingredients, storing separately for freshness, assembling prior to baking. Reheating remains unadvised; however, prepped ingredients permit swift day-of assembly with ease.

Scaling Instructions

To halve, reduce ingredient quantities evenly, ensuring measurement precision. For larger gatherings, double or triple accordingly, factoring in oven capacity and heat distribution for consistent cooking results.

Maintain ratios while scaling to sustain the balance of flavors, and be mindful of storing excess portions appropriately.

Nutritional Deep Dive

Chicken is a low-fat protein powerhouse supporting muscle growth, paired here with beneficial monounsaturated fats from olive oil used in the crust.

Vitamin-rich parmesan contributes calcium, crucial for bone health, while fresh herbs present antioxidants.

Monitoring portion sizes allows this indulgent dish to fit seamlessly within a balanced diet, offering both decadence and dietary support.

Dietary Adaptations

For gluten-free versions, swapping breadcrumbs for a gluten-free alternative is crucial. Adjustments for vegan adaptations are complex but possible with plant-based proteins and vegan cheese.

Including avocado oil instead of butter reduces saturated fats for heart-healthy iterations.

A keto-friendly approach might replace traditional carbs on plate sides with leafy green salads or sautéed vegetables.

Troubleshooting Guide

Supple chicken lacking the crust’s crisp texture indicates improper oven settings; ensure the right heat levels and time under the broiler.

Unwanted dryness stems from overcooking; maintain strict timing to optimize juiciness.

Recalibrate ingredient proportions if you encounter sauce imbalance; adjustments are key when wet toppings overpower delicate flavors.

If kitchen tools prove insufficient for task completion, consider adapting via more proactive monitoring or incremental cooking strategies.

Recipe Success Stories

Feedback praises its elegance and ease, effortlessly able to be tailored to taste. Community highlights have celebrated holiday meals elevated by this recipe’s presence. Adaptive versions witness-customization ripe for sharing creatively divergent yet fundamentally harmonious recols.

Readers have encountered; ranging from beautifully seasoned earlier-in-the-day dishes to sumptuous results bearing surprisingly modest preparation time.

Frequently Asked Questions

1. Can I use frozen chicken?

Yes, but ensure it’s fully thawed before starting the recipe for even cooking.

2. What’s an alternative to parmesan?

Asiago or Romano cheeses provide a similar nutty flavor profile.

3. Can I add more cheese sauce?

Certainly, adjust to preference while monitoring to prevent excessive moisture.

4. How do I keep the chicken moist?

Properly timing cooking and resting it for a few minutes before serving aides juiciness retention.

5. What’s a go-to side?

Garlic green beans or a fresh Caesar salad flawlessly complement the dish.

6. Can I grill instead of baking?

Yes, though textures will differ slightly; maintain core steps for consistency.

7. Is marinating critical?

For optimum flavor, yes. Skipping reduces taste impact – ideally allow partial marinades at a minimum.

8. What wine pairs best?

Chardonnay’s depth complements the cheese, working symbiotically to enhance flavor layers.

9. Any microwave reheating tips?

Microwave on low, focusing on gradual heat for the best results.

10. Can additional herbs be added?

Certainly, basil, thyme, or rosemary introduce complementary aromatic notes.

11. Is crust customizable?

Absolutely, Experiment with various parmesan-to-panko ratios to favor desired textures.

12. Any garnish suggestions?

Freshly chopped parsley or cherry tomatoes enhance visual allure.

Additional Resources

Browse our comprehensive guides on cheese varieties for further cheese insights, and explore seasonal recipes to pair ideally alongside this dish. For complementary techniques and equipment, uncover steely sharp skills from our culinary tool recommendations.

Join the Conversation

Share your creation on social media using #ParmesanDelight. Elevate photography via natural lighting and crisp elements for supreme capture. Feedback drives discussions, where sharing your experiences, suggestions, and successes propels collective culinary evolution. Enthusiastically delve into exchanges, connecting with passionate enthusiasts shaping ongoing tradition.

The Recipe

Longhorn Steakhouse Parmesan Crusted Chicken

Serves: 4

Prep Time: 20 mins

Cook Time: 25 mins

Total Time: 45 mins

Kitchen Equipment Needed

  • Baking dish or oven-safe skillet
  • Mixing bowls
  • Meat thermometer
  • Whisk
  • Zester (optional)

Ingredients

  • 4 boneless, skinless chicken breasts
  • 1 cup grated Parmesan cheese
  • 1 cup panko breadcrumbs
  • 1/2 cup grated cheddar cheese
  • 1/4 cup melted butter
  • 2 tablespoons olive oil
  • 2 cloves garlic, minced
  • 1 teaspoon Italian seasoning
  • Salt and pepper to taste

Directions

  1. Preheat your oven to 350°F (175°C).
  2. In a mixing bowl, combine 1/2 cup Parmesan and panko breadcrumbs, seasoning with Italian herbs, salt, and pepper.
  3. Pat the chicken dry, then rub with minced garlic and a little olive oil for flavor.
  4. Place the chicken in a baking dish. Top with parmesan and breadcrumb mixture, pressing slightly to adhere.
  5. Drizzle with melted butter and bake for 20 minutes.
  6. Sprinkle cheddar on top, then broil for 5 minutes until the crust is golden and cheese melted.
  7. Use a meat thermometer to ensure chicken reaches 165°F internally. Allow resting before serving.

Recipe Notes

  • For an added kick, mix in some chili flakes with the Parmesan topping.
  • Balance flavors with a side of lightly dressed greens.
  • This dish pairs beautifully with light-bodied white wines.

Discover the Secret to Tremendous Easy Blackened Cod Recipe

Tremendous Easy Blackened Cod: A Flavorful Delight for Any Occasion

⚖️
Difficulty
Easy

⏲️
Prep Time
10 mins

🕒
Cook Time
15 mins

⏱️
Total Time
25 mins

🍽️
Servings
4

Dive into the incredible world of flavors with our Tremendous Easy Blackened Cod recipe. This dish combines the savory taste of fresh cod with a vibrant mix of spices, creating an irresistible culinary experience. Perfect for busy weeknights, this blackened cod recipe delivers a restaurant-quality meal in just 25 minutes. The spicy and slightly smoky exterior contrasts beautifully with the tender, flaky interior, providing a satisfying texture with every bite. Whether you’re a seasoned cook or just starting out, this easy recipe promises success and satisfaction.

Quick Recipe Highlights

  • Flavor Profile: Experience a harmonious blend of paprika, garlic, and cayenne pepper giving this blackened cod a rich, warm taste with a hint of heat.
  • Texture: Enjoy the perfectly seared crust that locks in the moisture, resulting in a tender and flaky cod filet.
  • Aroma: The enticing scent of smoked paprika and garlic sets the mood for a delightful meal as soon as it hits the pan.
  • Visual Appeal: This dish impresses with its golden-brown crust contrasted against the pure white of the cod, garnished with fresh herbs.
  • Skill Level Needed: An achievable recipe for all levels, requiring basic cooking skills to master the art of perfectly searing cod fillets.
  • Special Equipment: A well-seasoned cast iron skillet is essential for achieving the classic blackened finish.

Recipe Overview

  • Difficulty Level: This recipe is considered easy, making use of simple ingredients and cooking techniques that require minimal skill yet deliver maximum flavor.
  • Category: Tremendous Easy Blackened Cod is perfect for main courses, serving as a delightful centerpiece to everyday meals or formal dinners.
  • Cuisine: Rooted in Southern culinary traditions, this dish draws inspiration from Cajun and Creole influences, characterized by bold flavors and comforting aromas.
  • Cost: A budget-friendly recipe, utilizing affordable, fresh cod and spices readily available in most pantries.
  • Season: Ideal year-round, with fresh cod being accessible in various seasons, making it a versatile choice for any time of year.
  • Occasion: Suitable for casual family dinners, impressive enough for entertaining, and a delightful option for special gatherings.

Why You’ll Love This Recipe


The Tremendous Easy Blackened Cod stands out for its exceptional taste and texture, combining a flavorful crust with a tender interior. This quick and convenient recipe fits seamlessly into a busy lifestyle, taking a mere 25 minutes to prepare and cook. Nutritionally speaking, cod is an excellent source of lean protein and omega-3 fatty acids, making this dish both delicious and healthful. Socially, it’s a perfect choice for serving at dinner parties, allowing you to impress guests without spending hours in the kitchen. Finally, the ingredients are accessible and cost-effective, ensuring affordability without sacrificing quality.

Historical Background and Cultural Significance


Blackened fish recipes have their origins in Cajun and Creole cuisines, traditionally enjoyed in the southern United States. The blackening technique, popularized by Chef Paul Prudhomme, involves coating the fish in a spice blend and cooking it at high heat, creating a signature charred look. This preparation method reflects the region’s flavorful cooking style while celebrating the plentiful fish of the Gulf of Mexico. Over time, the dish has evolved, incorporating variations and adaptations, yet it remains a cultural staple marked by its bold, distinct flavors.

Ingredient Deep Dive


Cod is the star ingredient of this recipe. Known for its economic importance in various cultures, cod has been a dietary staple for centuries, praised for its mild flavor and versatility. Nutritionally, it boasts high levels of protein and low fat, contributing to heart and muscle health. To select the best cod, look for firm, white flesh with a fresh sea scent. For storage, wrap it in wax paper or place it in an airtight container in the refrigerator. If necessary, substitute with haddock or tilapia to maintain the recipe’s integrity.

Common Mistakes to Avoid

  • Not drying the cod: Ensure the cod fillets are thoroughly patted dry to achieve a proper sear.
  • Overcrowding the pan: Cook the fillets in batches if needed, avoiding overcrowding to ensure even cooking.
  • Using a non-stick pan: Opt for a cast iron skillet to achieve the classic blackened effect.
  • Ignoring spice balance: Adjust the spice rub to your heat preference while maintaining the core blend to avoid overpowering flavors.
  • Overcooking the fish: Pay attention to timing, cooking only until the fish is opaque and flakes easily.
  • Skipping resting time: Allow the cooked fish to rest for a minute to seal in juices before serving.
  • Choosing poor-quality fish: Freshness is vital; select the best-quality cod for optimal flavor and texture.
  • Poor spice distribution: Ensure an even coating of the spice blend on each fillet for consistent flavor.

Essential Techniques


The art of blackening is key to this recipe, involving the creation of a flavorful crust on the cod. This technique is crucial for imparting the signature smoky flavor associated with blackened dishes. Begin by heating your cast iron skillet to a medium-high temperature, ensuring it’s sufficiently hot before adding the fish. The heat will efficiently sear the spices onto the cod, creating that delectable crust. Avoid turning too frequently; flip the fillet only once to prevent disrupting the crust.

Pro Tips for Perfect Tremendous Easy Blackened Cod


Start with room-temperature fish for more even cooking. For a richer flavor profile, toast whole spices before grinding them to make your spice mix. If available, use clarified butter instead of oil for a more authentic, richer taste. Always let the fish rest for a minute or two off the heat to allow flavors to meld before serving. Serve with a squeeze of fresh lemon to brighten the flavors, and garnish with parsley or cilantro for added freshness.

Variations and Adaptations


For regional variations, try using different spice blends, such as traditional Jamaican jerk. Seasonal adaptations can include serving the cod with a fresh summer salad or a warm winter root vegetable medley. For dietary modifications, adjust the spices for a low-sodium version, or use almond flour instead of regular for paleo diets. To enhance flavor, experiment with different herbs or add citrus zest to the spice rub. Modify texture by marinating the fish briefly in a yogurt-based marinade before applying the spice rub, adding moistness and flavor depth.

Serving and Presentation Guide


When plating Tremendous Easy Blackened Cod, consider using a white or brightly colored dish to highlight the fish’s golden crust. Complement with simple sides like steamed vegetables or a fresh salad to allow the fish to shine. Garnish with chopped fresh herbs, such as cilantro or parsley, and serve with lemon wedges for added brightness. For more modern presentations, stack the fish over a bed of roasted vegetables or drizzle with a homemade herb sauce. Temperature-wise, ensure the fish is served warm for the best taste experience.

Wine and Beverage Pairing


Pair this blackened cod with a crisp, cold white wine, such as a Sauvignon Blanc or a Chardonnay, to complement its spicy profile. Non-alcoholic alternatives include an iced herbal tea or sparkling water with a twist of lime. If you prefer a hot beverage, consider serving a light green tea that won’t overpower the dish’s flavors. Ensure wines and other drinks are chilled appropriately to enhance their refreshing qualities and provide a well-rounded dining experience.

Storage and Shelf Life


Store any leftover blackened cod in an airtight container in the refrigerator for up to two days. Always allow the fish to cool completely before refrigerating to avoid condensation, which can affect texture. Signs of spoilage include off odors or a slimy texture, indicating the fish should not be consumed. For reheating, gently warm the fish in a skillet over low heat to prevent overcooking. While freezing is an option, be aware that it might slightly alter the texture; if you choose to freeze, wrap the fish tightly in plastic wrap followed by foil.

Make Ahead Strategies


To streamline preparation, consider mixing the spice blend in advance and storing it in an airtight container. Cod can be pre-cut into fillets, dried, and seasoned a day ahead, then refrigerated until cooking time. Be mindful that early seasoning might intensify flavors, so adjust as needed. When ready to cook, swiftly proceed to the searing step for fresh flavors. Fresh lemon juice or cut herbs can be added just before serving to enhance freshness.

Scaling Instructions


Scaling this recipe to suit your needs is straightforward. To halve the recipe, adjust the ingredient measurements accordingly and use a smaller skillet. Doubling or tripling the recipe requires more spice mixture and possibly cooking the fish in batches to avoid crowding the pan. Equipment adjustments include using larger pans or cooking in multiple pans for greater quantities. Cooking times remain roughly the same, but monitor the fish to prevent overcooking when scaling up.

Nutritional Deep Dive


The Tremendous Easy Blackened Cod is high in protein and low in carbohydrates, making it ideal for protein-rich diets. Cod is a great source of omega-3 fatty acids, which are essential for heart health. Additionally, cod provides vitamins like B-12 and phosphorus, supporting energy production and bone health. This dish aligns with dietary goals like weight management due to its lean profile, and the spices offer antioxidant benefits, enhancing the meal’s health advantages.

Dietary Adaptations


For those needing gluten-free options, ensure that your spice blend components and garnishes are certified gluten-free. To make it dairy-free, opt for vegetable oils instead of butter for cooking. The recipe can be transformed to suit a vegan lifestyle by substituting tofu or portobello mushrooms for the cod, maintaining the same delicious spice profile. For low-carb and keto diets, pair with a low-carb side like cauliflower rice. Paleo dieters can enjoy it as-is with natural ingredients.

Troubleshooting Guide


If your cod is too dry, it may have been overcooked; aim for an opaque interior that flakes easily. Adjust your spices to better balance flavor if the dish feels overwhelming, adding lime or lemon juice to cut through the heat. To avoid the cod sticking to the skillet, ensure the pan is preheated with enough oil. Equipment challenges, like uneven heating, can be addressed with a quality cast iron skillet. Timing concerns often relate to fish thickness; start checking doneness early, adjusting time based on size.

Recipe Success Stories


Many readers rave about the consistent success and rich flavors of our Tremendous Easy Blackened Cod. Adaptations like varying the heat level in the spice mix have led to personalized versions enjoyed by families across the globe. Photography tips from the community suggest capturing the dish’s beautiful char under natural light to highlight its contrast in tones. Shared on social media platforms, this recipe has sparked creativity, with users incorporating unusual sides for a complete meal.

Frequently Asked Questions

Q: Can I use frozen cod for this recipe?

A: Yes, but make sure to thoroughly defrost and dry the fillets before seasoning to ensure even cooking and proper crust formation.

Q: What oil is best for blackening?

A: Oils with high smoke points, such as grapeseed or avocado oil, are ideal for blackening as they withstand high heat without burning.

Q: Is the spice mix very hot?

A: The spice blend has a moderate level of heat; feel free to adjust cayenne pepper to match your personal preference.

Q: How can I make the dish less spicy?

A: Reduce the amount of cayenne pepper in the spice mixture, or omit it entirely for a milder flavor profile.

Q: Can I use a non-stick pan instead of cast-iron?

A: While possible, a non-stick pan may not achieve the same depth of sear or crust as a cast-iron skillet, which is ideal for blackening.

Q: Do I need a special tool to flip the fish?

A: A wide spatula works best for carefully flipping the fish without breaking it.

Q: Can I use other types of fish?

A: Yes, haddock and tilapia are great alternatives that pair well with the spice mix.

Q: How do I know when the fish is done?

A: The cod is done when it turns opaque and flakes easily with a fork. The internal temperature should reach 145°F (63°C).

Q: What side dishes pair well with blackened cod?

A: Consider light and fresh sides like mixed greens, coleslaw, or a citrus-infused couscous salad for a balanced meal.

Q: How can I tell if the cod is fresh?

A: Fresh cod should have a mild sea scent, firm flesh, and bright, translucent skin. Avoid any fish that smells overly fishy or has discolored spots.

Additional Resources


For more spice mix inspiration, check out our Cajun and Creole spice guides. Curious about mastering the cast iron skillet? Dive into our detailed tutorial on cast iron cooking and maintenance. Explore our related recipes like Blackened Chicken, for diverse flavors and techniques using the blackening method. Seasonal variations showcase how to adapt this blackened cod for any time of year, inspired by global cuisines.

Join the Conversation


Engage with us on social media to share your Tremendous Easy Blackened Cod creations. Use the hashtag #BlackenedCodCreations for a chance to be featured. Share your personalized twists or ask questions in our vibrant online community. Explore our photography guide for capturing beautiful shots of your dish. Leave a review to let us know how you incorporated this recipe into your weekly menu or special gatherings. We’re excited to see your recipe photographs and hear your adaptation success stories.

The Recipe

Tremendous Easy Blackened Cod

Serves: 4

Prep Time: 10 mins

Cook Time: 15 mins

Total Time: 25 mins

Kitchen Equipment Needed

  • Cast iron skillet
  • Wide spatula
  • Mixing bowl
  • Measuring spoons

Ingredients

  • 4 cod fillets (6 oz each)
  • 2 tablespoons olive oil
  • 2 tablespoons paprika
  • 1 tablespoon garlic powder
  • 1 teaspoon onion powder
  • 1 teaspoon cayenne pepper
  • 1 teaspoon dried thyme
  • 1 teaspoon dried oregano
  • Salt and black pepper to taste
  • Fresh lemon wedges, for serving

Directions

  1. Pat cod fillets dry with paper towels to ensure a good sear and season lightly with salt and black pepper.
  2. In a small bowl, mix paprika, garlic powder, onion powder, cayenne pepper, thyme, and oregano to form the spice rub.
  3. Coat each fillet generously with the spice rub on all sides, pressing gently so it adheres well.
  4. Heat olive oil in a cast iron skillet over medium-high heat until shimmering.
  5. Add the coated cod fillets to the skillet, cooking for about 3-4 minutes on each side until blackened and cooked through.
  6. Remove from the pan and let rest for a minute. Serve immediately with fresh lemon wedges and your choice of sides.

Recipe Notes

  • Adjust the cayenne pepper for more or less heat according to taste.
  • For extra flavor, add a pat of butter to the skillet just before finishing cooking.
  • Try serving with fresh, chopped cilantro or parsley for a burst of color and flavor.

Savor Rich Crockpot French Onion Short Rib Soup Recipe

Crockpot French Onion Short Rib Soup: The Ultimate Comfort Dish

⚖️
Difficulty
Medium

⏲️
Prep Time
20 mins

🕒
Cook Time
420 mins

⏱️
Total Time
440 mins

🍽️
Servings
6

Transform your dining experience with our Crockpot French Onion Short Rib Soup, a delectable fusion of savory short ribs and rich, caramelized onions. This recipe is slow-cooked to perfection, creating a deep and luxurious taste that’s both comforting and elegant. Imagine the warmth of French onion soup combined with tender beef that melts in your mouth. It’s a symphony of flavors that will have your family and friends coming back for more.

Our Crockpot French Onion Short Rib Soup is not just a dinner; it’s an experience. The slow-cooked process enhances the natural sweetness of the onions and allows the beef to absorb all the savory nuances of the broth. The result is a hearty soup with a depth of flavor unmatched by quick fixes. Perfect for chilly evenings or when you need some culinary comfort, this dish is as soothing as it is satisfying.

The magic of our Crockpot French Onion Short Rib Soup lies in its ingredients and the time they spend fusing together in a slow cooker. As the soup simmers, it fills your home with a delightful aroma that promises the rich taste to come. With every bite, you’ll savor the harmonious blend of caramelized onions, tender beef, and subtle herbs, creating a dish that’s as fulfilling to make as it is to eat.

Quick Recipe Highlights

  • Flavor Profile: The soup boasts a rich, savory base with sweet undertones from the caramelized onions and a beefy depth from the short ribs.
  • Texture: Tender short rib meat falls apart in the mouth, complemented by soft, golden onions swimming in the velvety broth.
  • Aroma: Inviting aromas of sweet onions and savory beef waft through the air, making it impossible to resist.
  • Visual Appeal: A stunning dish of deep browns and golden hues, topped with a sprinkle of fresh herbs adding a touch of vibrancy.
  • Skill Level Needed: Moderate cooking skills required to properly caramelize onions and manage slow-cooking techniques.
  • Special Equipment: A dependable crockpot is essential to gently cook the ingredients to perfection over several hours.

Recipe Overview

  • Difficulty Level: The recipe demands patience more than expertise, with proper sautéing and layering techniques necessary for optimal results.
  • Category: This dish is perfect as both a hearty main course and a warming soup, ideal for lunch or dinner.
  • Cuisine: Deeply rooted in the classic tradition of French cooking, influenced by heartland comfort foods.
  • Cost: Economical, with the key expenses being high-quality beef and fresh produce, making it affordable for family meals.
  • Season: Best enjoyed in fall or winter when warm, comforting dishes are most appreciated.
  • Occasion: Ideal for family gatherings, cozy dinners, and special occasions where you want to impress without fuss.

Why You’ll Love This Recipe

Indulge in the delightful taste and texture of our Crockpot French Onion Short Rib Soup. The slow-cooked process ensures tender beef and perfectly caramelized onions, creating a mouthwatering flavor that’s simply irresistible. This soup is the ultimate comfort food, ideal for those chilly nights when you crave something rich and warming.

Convenience is key with this recipe. Let your crockpot do the hard work as the soup simmers away, allowing you to go about your day. By the time you’re ready for dinner, a comforting homemade meal awaits with minimal ongoing supervision required during cooking.

Beyond taste, this soup also offers nutritional benefits. Short ribs provide a good source of protein, while onions add fiber and essential vitamins. It’s a balanced dish that can contribute positively to your well-being while also indulging your taste buds.

There’s always something magical about serving up something special to those you love. This soup is a great conversation starter and entertaining piece, with its aromatic, inviting scent filling the room and setting the mood for good times and shared moments.

Cost-effectiveness and accessibility are highlights of this recipe. Using basic ingredients that can be easily found year-round, you can treat yourself and your loved ones to a restaurant-worthy meal without breaking the bank. Perfect for budget-conscious cooks seeking great-tasting dishes.

Historical Background and Cultural Significance

The origins of French onion soup date back centuries, initially as a humble peasant dish made with onions—a staple in many kitchens—and stale bread. The evolution of this classic into gourmet status is a testament to the transformative power of simple ingredients and cooking techniques.

French onion soup holds a cherished place not only in French cuisine but globally, celebrated for its rich, harmonious flavors. Its development over the years has seen variations that adapt to regional tastes while staying true to its roots—balancing savory broth with the sweetness of caramelized onions.

Over the years, ingredients have evolved along with cooking preferences and availability, leading to numerous versions and adaptations of the soup. From broths that boggle the senses to cheeses that adorn its crust, each iteration celebrates local nuances while honoring the dish’s heritage.

Regional variations abound, with distinct iterations featuring diverse cheeses, bread toppings, and even additional proteins or spices. Each variation brings something unique, yet all share a common love for this heartwarming dish that transcends borders and centuries.

Ingredient Deep Dive

Short ribs serve as the star component, imparting a rich flavor and hearty texture. Traditionally, beef short ribs are favored for their marbling and flavor profile, making them an ideal choice for slow-cooking applications. In terms of selection, look for ribs with a good balance of meat and fat.

Onions, particularly sweet yellow ones, are crucial in achieving the deep flavor that defines this dish. Caramelization brings out the onions’ natural sugars, providing a sweet balance to the robust beef broth. Fresh, firm onions are best for optimal flavor and texture.

Caramelizing onions is a process that requires patience. The key is to cut them uniformly, use a moderate heat setting, and stir consistently to prevent burning. The resulting golden-brown onions provide the foundational sweetness and depth for which the soup is renowned.

Beef broth serves as the base, enhancing the earthy notes of the soup. Quality matters here, so selecting a broth with no added sodium allows you to control the saltiness of the final dish. Alternatively, homemade broth tends to impart an unmatched depth of flavor.

Herbs such as thyme and bay leaves bring aromatic undertones and layers of subtle complexity to the dish. Their inclusion elevates the soup beyond mere comfort food to a gourmet dining experience, with herbs providing a fresh counterpoint to the richness of the broth.

Common Mistakes to Avoid

  • Rushing the caramelization process can lead to burnt onions instead of sweet, golden perfection. Patience is key to achieving the desired flavor.
  • Overcrowding your crockpot can result in uneven cooking. Ensure there’s ample room for the ingredients to mingle and cook uniformly.
  • Choosing the wrong cut of beef can alter the texture and flavor. Prioritize short ribs with a good balance of fat for the best result.
  • Underseasoning in the beginning can lead to a bland soup, so taste and adjust seasoning with each layer.
  • Not allowing the soup to simmer long enough might hinder flavor development, so be patient for full taste potential.
  • Skipping the searing process robs the ribs of a deep, caramelized outer layer, impacting the overall depth of the soup’s flavor.
  • Settling for low-quality broth compromises the base flavor. Always seek high-quality or homemade broth for the richest experience.
  • Overlooking excess fat removal will make the soup oily. Skim regularly for a balanced dish.
  • Forgetting to deglaze the pan after searing means lost flavors. Always use a splash of vinegar or wine to capture and incorporate those flavors into the broth.
  • Disregarding the importance of finishing garnishes limits visual appeal. Fresh herbs or a well-chosen cheese can elevate the final presentation.

Essential Techniques

The art of caramelizing onions is crucial for this recipe. It involves slow-cooking onions on low heat, allowing them to brown and release their sugars while developing a deep, rich flavor—key to the soup’s signature taste.

Searing the short ribs is another fundamental technique, providing the meat with an initial browning that locks in juices and imparts a pronounced, savory flavor. This step enriches the broth, maximizing the dish’s taste.

Layered seasoning ensures each component infuses the soup with flavor. Start with the beef and continue seasoning every layer of ingredients added to the crockpot. This incremental approach builds depth without overwhelming the senses.

Time plays a crucial role in the transformation of both ingredients and flavors in this dish. Allow ample time for the crockpot to work its magic, gently melding each element together for a robust, cohesive flavor profile.

The finishing touch comes in the form of garnishes. Whether cheese, herbs or simply some toasted bread, the choice of topping adds texture, flavor, and visual appeal to the final presentation, inviting you to indulge.

Pro Tips for Perfect Crockpot French Onion Short Rib Soup

Invest in high-quality beef short ribs for the best results, as they form the foundation of this dish, imparting rich flavor and meaty texture. Pat them dry before searing for a perfect crust.

Don’t rush the caramelization process of the onions. Stir frequently and be patient, as this will lay the flavor foundation for your entire dish. The better the caramelization, the richer and more developed the taste will be.

Deglaze the pan after searing the short ribs to capture all the flavorful fond left behind. This simple step enhances the overall taste and prevents those precious flavors from being wasted.

Use homemade beef broth if possible. Its depth of flavor is unparalleled and can make a world of difference in a slow-cooked dish. If using store-bought, choose a low-sodium option to control seasoning levels.

Add bay leaves and thyme to the crockpot for an aromatic infusion that’s subtle yet impactful. These herbs complement the rich flavors, bringing hints of freshness and refinement to the robust soup.

For a richer flavor, consider adding a splash of red wine into the crockpot. The acidity helps balance the flavors and adds another layer of complexity to this already delectable dish.

Maintain a consistent check on the pot’s liquid levels, especially if left unattended for long periods. Add more broth or water as needed to prevent drying out and ensure that everything cooks evenly.

Before serving, remove excess fat that may have surfaced during the slow cooking process with a spoon for a cleaner, more balanced flavor in each bite.

Variations and Adaptations

Regional variations can introduce local cheeses or breads for the topping, offering new flavor profiles while honoring the soul of the dish. Different cultural influences can bring exciting twists to this classic comfort food.

Seasonal adaptations might include the addition of root vegetables like carrots or parsnips during winter months, enriching the soup with a heartier flavor and complementing the short ribs beautifully.

Dietary modifications are also possible, such as substituting the short ribs with tofu for a vegetarian version. Adjust the seasoning to enhance the tofu’s flavor and ensure a satisfying, meat-free meal.

Experiment with flavor variations by incorporating different herbs or spices. A touch of rosemary or a hint of garlic can add an interesting dimension to the traditional flavors.

Texture modifications can be achieved with the addition of legumes or grains like barley, adding a wholesome and fulfilling element that makes the dish even more robust.

For a modern presentation, serve the soup in bowls with crusty, artisan bread on the side, allowing guests to dip and savor the deep flavors in a contemporary, engaging manner.

Serving and Presentation Guide

Plating techniques can elevate the visual appeal of the soup. Use rustic bowls for a farmhouse touch or simple white porcelain for a more refined presentation that highlights the colors of the dish.

Garnishing ideas include freshly chopped parsley, crumbled toast, or shredded gourmet cheese, each adding a fresh pop of color and extra layer of flavor.

Traditional accompaniments like a chunk of baguette or a simple salad create a lovely balance with the hearty soup, adding contrast and completing the meal.

Modern serving suggestions could involve smaller portions served as an appetizer, ideally followed by a lighter main course for balance.

Consider serving the soup with a generous scoop of mashed potatoes for a truly hearty meal that warms the heart and satisfies the appetite.

Portion control tips help maximize enjoyment, suggesting serving sizes to accommodate a range of diners without overwhelming the palate or stomach.

Wine and Beverage Pairing

Robust red wines such as a Cabernet Sauvignon or Merlot complement the richness of the soup, with their bold flavors harmonizing beautifully with the short ribs and caramelized onions.

For those seeking non-alcoholic options, rich apple cider or a ginger-infused herbal tea can be delightful, pairing well with the complex flavors and providing a refreshing contrast.

Temperatures are key—red wines should be slightly cooler than room temperature, allowing their flavors to marry perfectly with the warmth of the soup.

Serving suggestions include decanting the wines ahead of time to enhance their aromas and taste, ensuring that each sip is as enjoyable as each bite of the soup.

Strong, dark coffee or rich black teas pair well post-dinner, providing a satisfying end to the meal and complementing its hearty notes.

Storage and Shelf Life

To preserve the freshness of leftovers, allow the soup to cool before storing it in airtight containers. Ensure it’s kept in the refrigerator if consumed within a few days.

Temperature requirements are crucial; ideally stored at below 40°F (4°C) to prevent the growth of bacteria and maintain the quality of the dish.

Select containers that are BPA-free and have a good seal to avoid contamination and to preserve flavors, extending the shelf life.

Identify spoilage by any sour smells or changes in color, which may indicate the soup has surpassed its viable shelf life and should not be consumed.

If reheating, do so gently over low heat to maintain the integrity of the ingredients and flavors, ensuring the soup’s deliciousness remains intact.

Freezing guidelines suggest portioning the soup and sealing in freezer-safe bags or containers for up to three months. Thaw slowly in the refrigerator overnight before reheating.

Make Ahead Strategies

Create a prep timeline that fits your schedule by chopping onions or other vegetables the night before making the process more seamless and efficient when it’s time to cook.

Store steps separately where possible to preserve freshness, like keeping the chopped onions refrigerated in a covered container until ready for use.

Quality might slightly be impacted when not executed fresh; however, the slow cooking method helps to meld flavors and maintain delicious results, even if prepped hours earlier.

Assembly tips include having its ingredients ready for the crockpot ahead of time to streamline the cooking process and ensure a more straightforward experience.

When reheating, opt for stovetop over microwave whenever possible to evenly distribute heat, bringing out the best flavors of the soup at each serving.

Introduce fresh garnishes just before serving to restore vibrancy and introduce crisp textures and flavors that might have mellowed during cooking.

Scaling Instructions

If halving the recipe, simply divide each ingredient by two, maintaining cook times for consistency as cutting the ingredient amount won’t necessarily reduce the time needed for flavors to fully develop.

For doubling or tripling, ensure the crockpot is large enough to accommodate the increased volume. Overcrowding could affect the cooking process and compromise results.

Some equipment adjustments may be necessary, like using extra-large pots or multiple slow cookers to handle extra servings without risking mishaps or overflow.

Timing modifications should be cautious. Larger quantities naturally need more time to come to temperature. Monitor closely, especially near the end of the cook time.

Consider additional cooling and storage requirements to safely prepare and store larger batches without food safety concerns.

Nutritional Deep Dive

The soup’s macro breakdown consists mainly of proteins from short ribs, followed by fats from rendered meat and, finally, carbohydrates from onions and any potential bread offerings.

Micronutrient analysis highlights key benefits from consuming onions regularly, which can include heart health and dietary fiber—all contributing positively to overall wellness.

Health benefits of this soup are bolstered by its strong nutritional profile, proving that hearty, comforting meals can be both delicious and nutritious.

Dietary considerations should account for content from beef, optional cheese, and bread. If any food allergies or restrictions exist, alternate ingredients can be thoughtfully included.

Portion control remains important, even with something as flavorful as this soulful soup. Aim to balance it with fresh produce or other side elements for a comprehensive dietary offering.

For weight management tips, consider leaner beef options or controlled portions to strike a balance between indulgence and health, making this tempting soup part of a successful dietary routine.

Dietary Adaptations

To make this Crockpot French Onion Short Rib Soup gluten-free, opt for gluten-free bread alternatives if including toast or thickening with flour to ensure the recipe meets specific dietary guidelines.

For a dairy-free version, skip topping the soup with cheese, substituting with a sprinkle of nutritional yeast for a similar savory touch without impacting underscoresheet restrictions.

For a vegan adaptation, exchange short ribs for protein-rich tofu or tempeh, adjusting seasonings to make up for the diminished umami tones provided by earthy beef.

A low-carb version can reduce onions and opt for alternate thickening agents or using low-glycemic vegetables to support subscribed limitations.

A keto-friendly adaptation will carefully measure carbs and fats, selecting ingredients like ghee instead of butter and more meat to compensate for lost calories otherwise.

To meet the paleo criteria, ensure all ingredients align, avoiding grains and selecting grass-fed meat for holistic compatibility.

Low-FODMAP modifications potentially involve considering onion substitutes or serving alternatives more aligned with this digestive-conscious diet may offer relief for some discomforts too.

Additional specific dietary alterations can include accommodating allergies—always ensure replacements match nutrient needs to avoid any detriments.

Troubleshooting Guide

In the event of texture issues like overly soft ingredients, adjust cooking time and test periodically to prevent vegetables and meat from becoming too mushy.

Balance flavors by tasting broth in stages, as over-seasoning is correctable by diluting with water, while under-seasoning may only require additional herbs or condiment accents.

If temperature discrepancies arise, verify crockpot settings and use an external thermometer regularly—not only for cravings but balance safety, too, during meal use.

Equipment challenges might crop up, demanding immediate solutions such as manual stirring or readjustments to the heat/counter timers as needed for process peace.

Ingredient substitutions could lead to unplanned changes or issues when replacements aren’t 1:1—get creative or course-correct with new proportions or spices to boost and balance further.

Timely concerns often lead to panic, making preparation key to ensuring seamless meal readiness. Balance leisure and process all once underway for efficiency over stress.

Recipe Success Stories

Our community has shared numerous success stories risen from the love of perfecting this dish, with some tweaking flavors or playing with new ingredients to bring uniqueness to the table.

From introducing unexpected twists—like fragrant rosemary or wine substitutions—many have embraced adaptability without sacrificing the essence of the traditional recipe.

Community feedback has shared glowing accounts of happy gatherings and memories formed over bowls of this hearty soup, adding warmth to occasions and homes alike.

Adapting recipes furthermore proves paramount, especially within constraints. Culinary experimentation has led to cherished stories, reaching new audiences every time.

Conversations around the soup often circle photography, with beautifully captured dishes now adorning social media feeds’ inspiring other food lovers to capture and celebrate their culinary masterpieces.

Frequently Asked Questions

Q: Can I use a different cut of beef?
A: Yes, cuts like chuck roast or beef shank may be used as alternatives. They provide similar results but may require slight adjustments in cooking time and seasoning.

Q: Is it necessary to caramelize the onions?
A: Caramelizing onions is crucial as it deepens the flavor and balances the savory beef broth. Skipping this step may result in a less flavorful dish.

Q: Can I make this soup in advance?
A: Absolutely! This soup benefits from resting as flavors continue to meld. Reheat gently to rediscover its rich nature when ready to serve.

Q: Can I freeze leftovers?
A: Yes, freezing is a great way to preserve this soup. Portion and store it in freezer-safe containers for up to three months, reheating gently when needed.

Q: Are there low-sodium alternatives for the broth?
A: Opt for low-sodium or homemade broths for better control over salt levels. When commercial options are preferable, make sure to dilute if flavors prove overpowering.

Q: What can I substitute for the beef broth?
A: Try vegetable or mushroom broth as suitable alternatives. They offer rich, umami profiles perfect for enhancing the soup, keeping any vegetarians in mind.

Q: Can I add vegetables to the recipe?
A: Certainly! Root vegetables like carrots or parsnips add texture and sweetness, enriching the soup without overshadowing its key flavors.

Q: What cheeses work best for topping?
A: Gruyère or Swiss are classical choices, melding beautifully when toasted. However, experiment with flavors to find harmonious adaptions suitable for your palate.

Q: How long can leftovers be stored?
A: Left in proper refrigeration, it’s possible to safely keep leftovers for about 3 to 4 days. Plan accordingly to savor every bit of this delectable soup.

Q: Can wine be incorporated into the recipe?
A: Yes! A splash of dry red wine elevates flavors, adding complexity and depth. Ensure it’s thoroughly blended to prevent overpowering the delicate soup balance.

Additional Resources

Dive deeper into related recipes that extend the soup’s influence by exploring other timeless classics, ensuring culinary experiences remain diverse and engaging.

Technique guides offer insights into perfecting foundational skills that enhance each dish, making replicating great meals easier and consistently memorable.

Ingredient information is valuable and fosters understanding of flavor profiles and compatibility, helping you become adept at creating stand-out flavor variations.

Equipment recommendations list essential kitchen tools that elevate cooking mastery and support experimentation, allowing culinary creativity to bloom safely and effectively.

Seasonal variations impart knowledge on how to adapt recipes year-round, encouraging continued enthusiasm for dishes while accommodating fresh, in-season produce.

Join the Conversation

Engage on social media by sharing your experience with this recipe, whether how joyous aromas have captivated senses or how adept garnishes transformed appearance and intrigue.

Photography tips guide readers through presenting dishes gorgeously, drawing inspiration from seasoned photographers to document and showcase delectable artistry through images.

In-depth recipe reviews provide additional perspectives in written or spoken form, granting insight into firsthand experiences, ideas for personalization, and sincere enjoyment shared.

Community engagement is encouraged by submitting variation suggestions and adaptation stories, allowing for dynamic recipes that hold collective input and ingenuity as inherent assets.

Endless exploration fosters inspiration, broadening horizons for new culinary pursuits that hold a cherished connection through engagement, exploration, and vibrant collaboration throughout.

The Recipe

Crockpot French Onion Short Rib Soup

Serves: 6

Prep Time: 20 mins

Cook Time: 420 mins

Total Time: 440 mins

Kitchen Equipment Needed

  • Crockpot or slow cooker
  • Large skillet
  • Knife
  • Cutting board
  • Tongs
  • Wooden spoon
  • Measuring spoons

Ingredients

  • 2 pounds beef short ribs
  • 4 large yellow onions, thinly sliced
  • 4 cups beef broth
  • 2 tablespoons olive oil
  • 2 teaspoons salt
  • 1 teaspoon black pepper
  • 3 cloves garlic, minced
  • 2 bay leaves
  • 1 teaspoon thyme
  • Optional: 1/2 cup red wine
  • Optional: Fresh parsley for garnish
  • Optional: Gruyère cheese for topping
  • Optional: Bread for serving

Directions

  1. Season the short ribs with salt and pepper, then sear in a large skillet over medium-high heat until browned on all sides. Transfer to the crockpot.
  2. In the same skillet, add olive oil and onions. Sauté over medium heat until onions caramelize and turn golden brown.
  3. Add minced garlic to the onions and cook for an additional minute.
  4. Deglaze the skillet with red wine, if using, scraping up any browned bits from the pan for extra flavor.
  5. Transfer the caramelized onions into the crockpot with the short ribs. Add beef broth, bay leaves, and thyme.
  6. Cover and cook on low for 6-8 hours, until the beef is tender and shreds easily.
  7. Before serving, remove bay leaves and skim any excess fat from the surface.
  8. Optionally, garnish with fresh parsley and serve with crusty bread and Gruyère cheese for a delectable finish.

Recipe Notes

  • For a richer sauce, increase the amount of beef broth or add a spoon of beef bouillon paste.
  • Adjust seasoning to taste, considering additional herbs or spices to suit personal preference.
  • For extra crunch, top servings with croutons directly before enjoying.
  • Feel free to substitute your preferred cheese if Gruyère is unavailable or undesirable.

Irresistible Easy Cheesy Thumbprint Appetizers for Your Next Party

Easy Cheesy Thumbprint Appetizers: Perfect Party Bites

⚖️
Difficulty
Easy

⏲️
Prep Time
15 mins

🕒
Cook Time
25 mins

⏱️
Total Time
40 mins

🍽️
Servings
12

Indulge your guests with flavorful and enticing Easy Cheesy Thumbprint Appetizers that combine creamy cheese with a delightful crunch. Perfect for festive gatherings, this recipe brings warmth and joy to every bite. Taste the melted cheese infused with aromatic herbs and spices, creating a symphony of flavors that dance on your palate. These appetizers are not only delicious but also visually stunning, making them a perfect centerpiece for any party table.

The Easy Cheesy Thumbprint Appetizers recipe is a delightful experience, offering a rich combination of crispy exterior and gooey, savory filling. The buttery texture complements the hint of spice, ensuring each bite is more satisfying than the last. With a captivating aroma that fills the room, these appetizers will surely attract both hungry eyes and eager noses.

Quick Recipe Highlights

  • Flavor Profile: A harmonious blend of tangy cheese and savory herbs, topped with a hint of spice to elevate the overall taste.
  • Texture: The contrasting textures of a crisp outer layer and a creamy center create a delightful mouthfeel.
  • Aroma: The combination of melted cheese and fresh herbs produces an irresistible, savory fragrance.
  • Visual Appeal: These golden bites are not only delicious but also eye-catching, perfect for enhancing the look of your food spread.
  • Skill Level Needed: Designed for cooks who appreciate easy yet satisfying recipes, requiring basic kitchen skills.
  • Special Equipment: All you need is a baking sheet and a mixing bowl to bring these cheesy wonders to life.

Recipe Overview

  • Difficulty Level: This recipe is perfect for beginners, as the steps are straightforward and the ingredients are easy to handle.
  • Category: Ideal as an appetizer or snack, these bites fit well into any casual or festive occasion.
  • Cuisine: Although rooted in Western cuisine, the cheese and herb combination allows room for creative, global adaptations.
  • Cost: With accessible ingredients, this dish is budget-friendly, yet tastes gourmet.
  • Season: Best enjoyed year-round, but they truly shine during holiday gatherings due to their comforting attributes.
  • Occasion: Suitable for parties, game nights, or whenever you crave an easy-to-prepare treat.

Why You’ll Love This Recipe
Experience a world of flavor and texture with the Easy Cheesy Thumbprint Appetizers. They are savory, with a crumbly base and creamy cheese filling that soothes and satisfies. The balance of flavors makes this appetizer ideal for those who appreciate depth in taste without an overpowering intensity. Their small, manageable size ensures they’re perfect for munching while mingling.

Convenience is at the heart of this recipe. With minimal preparation and quick cooking time, it’s a lifesaver for anyone looking to impress without spending hours in the kitchen. Plus, most of the ingredients are pantry staples, making this recipe a go-to for spontaneous gatherings or unexpected guests.

These appetizers aren’t just easy to make; they’re also nutritionally rich, thanks to ingredients like cheese providing calcium and other nutrients. This is a snack that can fit into many dietary preferences when handled thoughtfully.

When it comes to social events, Easy Cheesy Thumbprint Appetizers provide both a conversation starter and a satisfying treat. People love to gather around food that’s prepared with love, and these appetizers are sure to enhance the mood of any gathering, making them memorable.

Cost-effectiveness is a notable advantage. Despite their gourmet taste, the appetizers require simple, inexpensive ingredients, allowing you to maintain a party budget without sacrificing quality. They’re proof that great taste doesn’t have to come with a hefty price tag.

Historical Background and Cultural Significance
The concept of thumbprint cookies finds its roots in Swedish traditions, initially known as “Hulkor” or “thumbprints.” This concept evolved over time, with sweet versions becoming popular globally. The savory adaptation of the thumbprint idea taps into this rich history, combining culinary techniques from different cultures.

In many Western culinary traditions, cheese has always been a central ingredient. The Easy Cheesy Thumbprint Appetizers capitalize on this, reflecting the universal love for cheese while blending it with contemporary flavors and techniques. This evolution showcases the influence of global tastes on traditional recipes.

As appetizers claim their rightful place at the heart of gatherings, these thumbprint bites have found their niche. They represent the fusion of convenience and exquisite taste that modern cuisine demands. The recipe’s evolution continues as more people customize it with local flavors, highlighting its adaptability.

Regional variations abound, with different herbs and spices being used for diverse culinary interpretations. This recipe encourages culinary creativity, inviting cooks to contribute to its growing history by incorporating local ingredients and flavors.

Ingredient Deep Dive
Cheese is the central ingredient in this recipe. It not only enhances flavor but also provides a creamy texture that contrasts beautifully with crispy, baked dough. Cheese’s cultural significance spans continents, with its presence in meals symbolizing prosperity and comfort. Nutritionally, it’s packed with calcium, vitamins, and protein, making it a beneficial addition to any dish.

Selecting the right cheese can make or break this recipe. Opt for a semi-hard cheese that melts well but retains some form and texture. Storage is crucial – keep cheese wrapped in parchment or wax paper and refrigerate to maintain its freshness. For an extra twist, try blending cheeses or even substituting with special alternatives for dietary needs or preferences.

Herbs are equally important in providing aroma and enhancing flavor. Fresh herbs tend to deliver superior taste, but dried herbs can be used when fresh is unavailable. The choice of herbs reflects personal taste and culinary tradition, with parsley and chives being popular options for their bright, peppery notes.

When storing herbs, a wet paper towel in a sealed bag within the fridge helps maintain their freshness. In terms of substitutions, dried can substitute fresh, but remember to adjust quantities accordingly as dried herbs are more potent.

Common Mistakes to Avoid

  • Avoid using too much cheese, as it can cause the appetizers to lose shape and become too oily during baking.
  • Don’t overbake, as these appetizers can quickly turn from perfectly golden to burnt due to the cheese’s fat content.
  • Refrain from using pre-grated cheese, which often contains additives that can affect melting.
  • Ensure even spacing on the baking sheet to allow for proper air circulation and even baking.
  • Resist the temptation to overcrowd the thumbprint with too much filling, which can cause it to spill over.
  • Use baking paper or a silicone mat to prevent sticking and ensure easy removal from the baking sheet.
  • Monitor the oven temperature, ensuring it is consistent, as fluctuations can affect how evenly these appetizers bake.
  • Avoid under-seasoning; cheese benefits from a balanced hint of salt to accentuate its flavors.

Essential Techniques
Creating the perfect indentation for the thumbprint is crucial to the appetizer’s success. This step requires gently pressing into the dough’s center to form a well that will securely hold the cheese mixture. Proper indenting ensures that the filling stays in place throughout baking, enhancing both appearance and taste.

Mastering the baking time is essential. Pay close attention to visual cues like color change from pale to light golden to avoid overbaking. Timing is everything, as the cheese should melt but not burn, maintaining its creamy consistency. Practice patience, and avoid opening the oven door unnecessarily, as this can disrupt the baking process.

Pro Tips for Perfect Easy Cheesy Thumbprint Appetizers
Rotate the baking sheet halfway through for even baking and consistent color development. Experiment with cheese blends for unique flavor profiles, combining aged cheese with softer types for depth. Use a piping bag for precise filling to avoid overloading each thumbprint.

Chill the dough slightly before creating indentations to enhance handling and prevent sticking. Add a sprinkle of freshly cracked pepper or additional herbs atop the cheese filling before baking for added flavor. Consider using parchment paper to ensure easy handling and perfect release after baking.

Variations and Adaptations
Regional variations might involve incorporating specific spices or herbs native to your area. These appetizers are adaptable to different seasons, with spring versions featuring light herbs and autumn variants including warm spices. For dietary needs, consider gluten-free or keto-friendly doughs, opening more doors for those with specific preferences.

Flavor variations abound with this recipe due to the allowance for different cheeses, herb mixtures, and spices. Each different combination can lead you down a deliciously new path. Additionally, texture changes, such as incorporating different types of nuts for added crunch, are a creative option. Presentation, too, can vary—think creatively about shapes, colors, and plating techniques that catch the eye.

Serving and Presentation Guide
For plating, consider a contrasting background like a dark slate plate to make the golden thumbprints pop. Garnishing options include a light sprinkle of chopped herbs or a small slice of sweet pepper for a dash of color. While traditional accompaniments may suggest wine, consider pairing these appetizers with a refreshing herbal iced tea for a modern take.

Temperature matters; serve these appetizers slightly warm to allow the cheese to retain its delicious, melty consistency. Be mindful of portion control, suggesting four to six pieces per guest to ensure no one is left wanting and that everyone has a chance to savor them.

Wine and Beverage Pairing
Pair these appetizers with a crisp, chilled Chardonnay or a bold, fruity red wine for a delightful taste balance. For non-alcoholic alternatives, a sparkling cucumber mocktail provides a refreshing contrast to the rich, cheesy bites, complementing the flavors without overpowering them.

For wine pairings, serve them well-chilled or at room temperature, depending on the variety, to enhance both the sip and bite experience. Consider offering a choice between red and white to accommodate diverse tastes and preferences.

Storage and Shelf Life
Store leftovers in an airtight container in the refrigerator to maintain their crispness. To reheat, use an oven or toaster oven set to a low temperature to preserve the cheese’s texture while avoiding sogginess. Signs of spoilage include off odors or changes in cheese color and texture.

These appetizers can also be frozen, allowing for storage in advance or saving leftovers for later. Place them in a single layer on a baking sheet before transferring to a storage container to prevent sticking. Thaw in the refrigerator before reheating for optimal texture and taste.

Make Ahead Strategies
Prepare the dough and the filling separately, allowing for easy assembly when needed. Storing these components in the refrigerator can retain freshness and make the final assembly step quicker. Once filled, pop them into the oven for freshly baked flavor without the rush of last-minute preparation.

Consider assembling the thumbprints just before guests arrive, baking them off when needed for ultimate freshness. The flavors are more intense when the appetizers are served fresh and hot. Keep chilled fillings refrigerated right up until baking time to ensure a safe and tasty appetizer.

Scaling Instructions
For a smaller gathering, halve the recipe. Pay attention to ingredient measurements and baking times to avoid under- or over-baking. Doubling or tripling is perfect for larger parties—ensure you have sufficient kitchen space and baking sheets to accommodate batches without crowding the oven.

Adjust oven times slightly when handling much larger batches, as ovens can require more time to reach the optimal bake when filled. Remember to rotate trays for even baking throughout the party, ensuring a steady stream of perfectly baked appetizers for your guests.

Nutritional Deep Dive
Cheese contributes significantly to the macro breakdown, adding proteins and fats, with options to reduce fat by choosing lighter cheeses. Vitamins like calcium and Vitamin A are present, counterbalanced by the carbs from the dough. For health benefits, remember the importance of cheese’s protein and the herbs’ antioxidants.

Consider portion sizes to manage dietary intake and manage any restrictions accordingly. While the dish can fit into moderate calorie budgets, adjustments can be considered for particular dietary needs by opting for low-fat cheeses or alternative dough bases.

Dietary Adaptations
For gluten-free alterations, substitute the dough with your favorite gluten-free alternative, ensuring no sacrifice in texture. Dairy-free options involve using plant-based cheeses, finding a balance that still offers a creamy center. The vegan avenue includes both the aforementioned dough and cheese adjustments, alongside egg substitutes if needed.

Low-carb enthusiasts can adjust traditional dough recipes with almond flour or equivalent low-carb options to retain similarly satisfying bites. Paleo and keto presents the opportunity to utilize natural, whole-food-based cheeses and nut flours while keeping the essence of the dish intact.

Troubleshooting Guide
For a dry texture, ensure you’re using high-quality cheese and maintain moisture balance with the dough. Over-creaming cheese or herbs can dilute the flavor; don’t overpower the thumbprints with excessive seasoning. Proper temperature management is crucial—use an oven thermometer for accuracy.

If ingredients substitute but flavor or consistency is compromised, balance flavors with a dash of lemon or vinegar to maintain brightness. Timing concerns—like misaligned bake durations, can be countered by arranging smaller batches. Test a few ahead of others for refinement.

Recipe Success Stories
Feedback has highlighted how this recipe thrives, championing reader adjustments to cheese types, from spicy Pepper Jack to smoky Gouda. The growing community loves sharing photos on social platforms, showcasing their unique variations. Recent suggestions involved introducing ingredients like sundried tomatoes for an elevated twist.

Photography tips from the community recommend capturing the gooey cheese pull for maximum tantalization. Engaging interaction and reader successes continue to evolve the recipe’s impact far beyond its original creation.

Frequently Asked Questions

Can I make these appetizers ahead of time?

Yes, you can prepare both the dough and the filling in advance. Store them in the fridge separately and assemble just before baking for optimal freshness.

What types of cheese work best?

Choose semi-hard cheeses like cheddar or gouda for melting qualities, or experiment with different flavors to match your personal taste.

Are there vegetarian versions?

The dish is naturally vegetarian. All cheeses can be replaced with vegetarian alternatives that mimic the melting qualities of the original to fit dietary needs.

What if I don’t have fresh herbs?

Dried herbs work well, just use about one-third the quantity to avoid overpowering the flavors due to their concentrated nature.

Is there a way to add more crunch?

Consider adding crispy bacon bits or small nuts within the filling for a crunchy texture that complements the creamy cheese.

How can I prevent soggy bottoms?

Ensure your baking sheet isn’t overcrowded, allowing heat to circulate properly for a uniformly crispy bake on all sides.

What’s the secret to perfect consistency?

Maintaining a proper balance of dough to cheese is key; ensure fillings don’t overflow by pressing a precise thumbprint well.

What do I pair these with at parties?

Pair them with a selection of wines, a vibrant salad, or light soup to complement their rich flavors without clashing.

Can I freeze these appetizers?

Yes, freeze them in a single layer before transferring to a storage container, then defrost completely before reheating to maintain texture.

Do different cheeses affect bake time?

Some cheeses melt faster, so monitor the first batch closely, making time adjustments based on your ingredient choice.

Additional Resources
Explore other cheese appetizers such as Gouda and Green Onion Puffs or Mozzarella Stuffed Red Peppers. Uncover a realm of other thumbprint variations, from sweet noblesse to savory renditions like Olive and Sundried Tomato prints. Technique guides can assist with understanding the perfect indentation, and equipment tips offer the best bake-ware selections for optimizing the recipe’s success.

Join the Conversation
Share your personal takes, substitutions, and successes on social media with #CheesyThumbprintAppetizers. Engage with other readers’ innovations, from successful variations that form unique spins to tips on improvising with local ingredients. Support the continual growth of this recipe with feedback and creative twists, contributing to a communal cookbook of beloved party creations. Join in the social media fun, and snap your perfect appetizer photos for all to enjoy!

The Recipe

Easy Cheesy Thumbprint Appetizers

Serves: 12

Prep Time: 15 mins

Cook Time: 25 mins

Total Time: 40 mins

Kitchen Equipment Needed

  • Baking sheet
  • Mixing bowl
  • Measuring cups
  • Silicone mat or baking paper

Ingredients

  • 1 cup all-purpose flour
  • ½ cup unsalted butter, softened
  • 1 cup shredded cheddar cheese
  • 1 tablespoon fresh parsley, chopped
  • ½ teaspoon salt
  • ¼ teaspoon paprika
  • 1 egg yolk

Directions

  1. Preheat the oven to 350°F (175°C). Line a baking sheet with silicone mat or baking paper.
  2. In a mixing bowl, cream together butter and egg yolk until smooth. Gradually add flour, paprika, and salt, mixing until a dough forms.
  3. Fold in the cheddar cheese and parsley until evenly distributed.
  4. Scoop tablespoon-sized amounts of dough onto the prepared baking sheet, spacing them evenly apart.
  5. Use your thumb or a spoon to press an indentation into each piece of dough.
  6. Bake for 20-25 minutes or until golden brown. Allow to cool slightly on the baking sheet.

Recipe Notes

  • You can experiment with different herbs or spices to personalize your flavor profile.
  • Serve warm for optimal taste and texture.
  • Store leftovers in an airtight container in the refrigerator.

Indulge in Luxurious Creamy Garlic Butter Lobster Tails Recipe

Creamy Garlic Butter Lobster Tails: A Luxurious Delight

⚖️
Difficulty
Medium

⏲️
Prep Time
15 mins

🕒
Cook Time
20 mins

⏱️
Total Time
35 mins

🍽️
Servings
2

Indulge in the decadent flavors of Creamy Garlic Butter Lobster Tails, an exquisite dish that brings the luxury of a high-end seafood restaurant to your table. This recipe transforms tender lobster tails with a luscious blend of garlic, butter, and cream, capturing the essence of a luxurious coastal cuisine. Perfect for special occasions or an indulgent weeknight treat, these lobster tails promise to delight your taste buds with every buttery, savory bite.

With a perfect balance of creamy richness and subtle garlic notes, this dish is not only flavorful but also visually stunning, making it an ideal centerpiece for gourmet dinners. Embrace the warm aroma of melting butter and sautéed garlic as it fills your kitchen, inviting anticipation for what’s to come. This dish combines classic flavors in a way that feels both familiar and exciting, providing a culinary experience that is both comforting and luxurious.

Quick Recipe Highlights

  • Flavor Profile: Savory and rich, with buttery and garlicky notes harmonizing with the delicate sweetness of lobster.
  • Texture: Tender lobster meat with a creamy sauce, offering a melt-in-your-mouth experience.
  • Aroma: A fragrant blend of garlic and butter, creating an irresistible scent.
  • Visual Appeal: Vibrant lobster tails nestled in a creamy sauce, garnished with fresh herbs.
  • Skill Level Needed: Moderate, requiring basic sautéing and baking techniques.
  • Special Equipment: A heavy skillet and an oven-safe dish are essential.

Recipe Overview

  • Difficulty Level: Medium; the recipe involves careful timing and temperature control to achieve the perfect creamy sauce consistency without overcooking the lobster.
  • Category: Ideal for dinner or a special main course that promises to impress.
  • Cuisine: Inspired by classic French techniques enriched with modern flavors.
  • Cost: On the higher end due to the main ingredient, but considered affordable luxury for two.
  • Season: Best enjoyed in late spring and summer when lobsters are at their peak.
  • Occasion: Perfect for romantic dinners, celebrations, or festive gatherings.

Why You’ll Love This Recipe

The Creamy Garlic Butter Lobster Tails recipe is cherished for its outstanding taste and texture, making it a favorite for those who want to enjoy a restaurant-quality meal at home. The tender lobster, enveloped in a rich, buttery sauce, offers a delightful contrast in each bite. Despite its gourmet nature, the recipe is relatively easy to follow, requiring only a few simple steps to achieve perfection. Nutritionally, the dish provides a high-quality source of protein and healthy fats, offering a satiating meal option without being overly heavy.

Socially, this dish elevates any dining occasion, perfect for creating memorable experiences with loved ones. It doubles as an impressive entrée for dinner parties, garnering praise for both its taste and visual appeal. Economically, while lobster may initially seem like a splurge, this homemade recipe remains more cost-effective than ordering it at a restaurant, allowing you to indulge without breaking the bank.

Historical Background and Cultural Significance

Lobster has long been associated with the coastal regions where it is abundant, originally a staple for local fishermen before gaining popularity among the elite. The transition of lobster from a humble shellfish to a gourmet delicacy is a testament to its versatile nature and rich flavor profile. Over time, lobster dishes have evolved, embracing new culinary techniques and ingredients that highlight its luxurious taste.

Today, lobster tails are celebrated in various culinary traditions, from French-style preparations to New England classics, each offering unique takes on this iconic seafood. The Creamy Garlic Butter Lobster Tails recipe draws inspiration from these cultural influences, blending traditional and modern flavors to create a dish that pays homage to its rich heritage while appealing to contemporary palates.

Ingredient Deep Dive

Lobster Tails: Considered a luxurious seafood choice, lobster tails offer a firm, succulent texture and a sweet, mild flavor that pairs well with rich ingredients. When selecting lobster tails, opt for those that are frozen or fresh with a vibrant color. Store them in the refrigerator until ready to use, or freeze for longer shelf-life. If lobster is not available, large prawns or crayfish may be substituted.

Garlic: This ingredient brings an essential aromatic and slightly pungent flavor to the dish. Fresh garlic is recommended, as it provides a more robust taste compared to pre-minced or powdered forms. To store, keep garlic in a cool, dry place to maintain freshness for longer periods. For those who prefer a milder garlic flavor, shallots can be used as an alternative.

Common Mistakes to Avoid

  • Overcooking Lobster: This results in a tough, rubbery texture. Monitor the lobster closely and adhere to recommended cooking times.
  • Using Low-Quality Butter: Choose high-quality butter for the best taste and smooth texture.
  • Under-seasoning: Ensure the dish is properly seasoned throughout to enhance the flavors.
  • Not Patting Lobster Dry: Moisture on the lobster can dilute the sauce, so ensure the lobster is well-dried before cooking.
  • Rushing the Sauce: Allow time for garlic to gently sauté in butter to avoid a bitter taste.
  • Skipping the Broil: A brief broil adds a golden finish to the dish and should not be overlooked.
  • Ignoring Temperature: Ensure consistent heat while sautéing and baking to avoid burning the ingredients.
  • Improperly Minced Garlic: Garlic should be evenly minced to prevent burning and ensure even flavor distribution.
  • Neglecting Rest Time: Allow the dish to rest post-cooking for flavors to meld.
  • Wrong Pan Size: Ensure the pan fits all ingredients comfortably to allow proper cooking.

Essential Techniques

Perfecting the sauce: The key to mastering this dish lies in creating a rich, creamy sauce without separation. Start by gently melting butter and sautéing garlic until fragrant, then gradually incorporate cream, stirring continuously to maintain the emulsion. Keep an eye on the heat to ensure the sauce remains smooth and luscious.

Broiling for finish: Broiling the lobster tails briefly enhances their color and texture, providing a visually appealing finish. Watch closely to prevent burning, and remove just as the tops turn golden brown. This technique adds depth to the overall presentation and flavor.

Pro Tips for Perfect Creamy Garlic Butter Lobster Tails

– Always start with dry lobster tails to ensure they cook evenly and the sauce adheres properly.
– Use freshly minced garlic for maximum flavor intensity and aroma.
– Allow enough time for the garlic to lightly brown for depth of flavor without becoming bitter.
– Stir the sauce gently and continuously to prevent it from curdling or separating.
– Season the dish in layers, starting with a well-seasoned white wine reduction.
– Garnish with fresh herbs like parsley or chives for added color and aroma.

Variations and Adaptations

Explore regional adaptations by incorporating local spices and herbs. For a Mediterranean twist, add sun-dried tomatoes and basil. If you’re seeking a seasonal flair, experiment with citrus zest during summer months to brighten the dish. Dietary needs can be accommodated by using lactose-free cream or coconut cream for a dairy-free option, while maintaining the essence of the recipe.

Serving and Presentation Guide

For a polished presentation, serve the lobster tails on warmed plates, surrounded by the creamy garlic butter sauce. Garnish with fresh herbs or microgreens for a touch of color and elegance. Consider plating with a side of roasted vegetables or a light salad to complement the rich flavors. Serve immediately for the best taste and visual appeal.

Wine and Beverage Pairing

Pair these Creamy Garlic Butter Lobster Tails with a chilled glass of Chardonnay or Sauvignon Blanc, which will complement the buttery richness with crisp acidity. If you prefer non-alcoholic options, a zesty lemonade or lime spritz provides a refreshing balance. Ensure all beverages are served cold to enhance the dining experience.

Storage and Shelf Life

Store leftovers in an airtight container in the refrigerator for up to two days. Reheat gently over a low flame to prevent overcooking the lobster or separating the sauce. Freezing is not recommended, as the texture of the lobster and sauce may be compromised. Check for any changes in aroma or appearance before consuming.

Make Ahead Strategies

Prepare the elements separately ahead of time for streamlined cooking. You can sauté the garlic butter mixture and store it refrigerated until ready to use. Pre-cut the lobster tails, ensuring timely cooking when guests arrive. This approach maintains the quality while reducing on-the-spot preparation.

Scaling Instructions

The recipe is easily halved for an intimate setting or doubled for a larger gathering. Adjust cooking times slightly when increasing the quantity to ensure even heat distribution. Ensure you have a suitably sized pan to accommodate the extra servings, and maintain consistent quality by adjusting seasonings proportionally.

Nutritional Deep Dive

Lobsters are a high-protein, low-calorie seafood option rich in essential nutrients like omega-3 fatty acids, which support heart health. Paired with the moderate use of cream and butter, the dish offers a balanced yet indulgent meal. It supports muscle repair and offers a savory satisfaction without extreme calorie burden.

Dietary Adaptations

To adapt the recipe for gluten-free diets, ensure all ingredients, including butter and cream, are certified gluten-free. For a dairy-free version, substitute coconut cream and a plant-based butter alternative, keeping the luxurious texture intact without compromising on taste.

Troubleshooting Guide

If you find the sauce separating, it may be due to high heat; lower the temperature and whisk gently to recombine. Bland flavors can be adjusted with a pinch of salt or a splash of lemon juice upon serving. Should the lobster tails appear undercooked, finish under the broiler for a few additional minutes.

Recipe Success Stories

Readers have shared their successes with variations incorporating truffle oil for added decadence or utilizing the dish as a lavish surf-and-turf companion. Many praise it as a go-to for impressing dinner guests, lauding its ease of execution and restaurant-quality finish.

Frequently Asked Questions

Can I use frozen lobster tails? Yes, ensure they are fully thawed before cooking to achieve even texture and flavor.

What can I serve with the lobster? Steamed asparagus, buttered corn or a light salad make excellent sides.

Is there a substitute for cream? Coconut cream or a nut-based cream can substitute for a dairy-free version.

How do I know when the lobster is done? Lobster should be opaque and firm to the touch, you can test with a fork.

Can I prepare this dish in advance? Parts can be made ahead, but it’s best assembled when ready to serve.

Does the recipe freeze well? Freezing is not recommended due to changes in texture upon reheating.

What wine pairs best? A crisp white like Chardonnay complements the rich sauce nicely.

Can I omit the garlic? Garlic can be reduced or substituted with shallots for a milder flavor.

Will it work with other seafood? Yes, shrimp or crab can be alternatives, adjusted for cook time.

How important is broiling? Broiling adds color and texture, enhancing the final presentation.

Additional Resources

Enhance your culinary skills with related recipes that use similar techniques, such as Creamy Shrimp Pasta or Garlic Butter Scallops. Explore detailed guides on sauce-making and learn how to select and prepare seafood efficiently. Elevate your dining with expert wine pairing tips available in our companion articles.

Join the Conversation

Share your experience with this recipe on social media using #GarlicButterLobster, and don’t forget to tag us for a chance to be featured. We encourage you to leave comments and reviews, share variations or adaptations that worked for you, and inspire fellow readers with your culinary creations.

The Recipe

Creamy Garlic Butter Lobster Tails

Serves: 2

Prep Time: 15 mins

Cook Time: 20 mins

Total Time: 35 mins

Kitchen Equipment Needed

  • Heavy skillet
  • Oven-safe dish
  • Garlic press (optional)
  • Broiler

Ingredients

  • 2 lobster tails
  • 4 tablespoons unsalted butter
  • 3 garlic cloves, minced
  • 1/2 cup heavy cream
  • Salt and pepper to taste
  • Chopped fresh parsley, for garnish

Directions

  1. Preheat your oven to broil on high.
  2. In a heavy skillet, melt the butter over medium heat. Add the minced garlic and sauté until fragrant, about 1 minute.
  3. Stir in the heavy cream, and bring the mixture to a simmer. Season with salt and pepper to taste.
  4. Place the lobster tails in an oven-safe dish and pour the creamy garlic butter sauce over them.
  5. Broil for about 10-12 minutes, or until the lobster meat is opaque and cooked through.
  6. Garnish with fresh parsley and serve hot.

Recipe Notes

  • For a richer flavor, add a splash of white wine to the sauce.
  • This recipe can be doubled for larger gatherings.
  • Serve with crusty bread to soak up the delicious sauce.

Cozy Italian Pastina Soup Recipe for a Perfect Comfort Meal

Italian Pastina Soup: The Ultimate Comfort Food

⚖️
Difficulty
Easy

⏲️
Prep Time
10 mins

🕒
Cook Time
20 mins

⏱️
Total Time
30 mins

🍽️
Servings
4

Italian Pastina Soup is the culinary embodiment of comfort. Whenever the cold weather rolls in or you’re under the weather, this soup acts like a warm, nurturing embrace. With tender pastina pasta nestled in a light, savory broth, it’s a dish that invites second helpings and warms the soul just as much as the body. A traditional Italian comfort staple, this soup melds simple ingredients in perfect harmony, producing complex flavors that dance in your mouth.

Quick Recipe Highlights

  • Flavor Profile: The soup presents a subtle yet delightful combination of seasoned broth with a gentle hint of cheese.
  • Texture: The pastina absorbs the flavors beautifully, giving each spoonful a unique, melt-in-the-mouth experience.
  • Aroma: The inviting scent of aromatic broth mingles with just a touch of nutty parmesan.
  • Visual Appeal: The adorable star-shaped pasta makes this dish irresistible both to the eyes and the palate.
  • Skill Level Needed: Perfect for beginners, this recipe requires minimal techniques and guarantees success.
  • Special Equipment: A basic soup pot and a ladle are all you need to bring this recipe to life.

Recipe Overview

  • Difficulty Level: This recipe is considered easy, making it accessible for even the most inexperienced home cook. It involves simple steps of boiling and seasoning that anyone can master.
  • Category: Italian Pastina Soup fits seamlessly into categories like comfort food, easy dinners, and traditional soups.
  • Cuisine: Rooted in Italian traditions, this dish highlights the beauty of simplicity typical of Italian home cooking.
  • Cost: This soup is incredibly affordable, with key ingredients being economical and easily accessible.
  • Season: Best enjoyed during cooler months, though its comforting notes are perfect for any dreary day.
  • Occasion: It’s a wonderful choice for casual family meals or as a light dish during gatherings.

Why You’ll Love This Recipe


Taste and texture go hand in hand in this Italian Pastina Soup. The broth offers a savory base, bridging delicate flavors through tender pastina pasta. The texture is velvety, comforting without being overwhelmingly rich.

Convenience becomes evident as you prepare this dish; from pantry to table, the timeline is pleasingly brief. The ingredients demand minimal prep, ensuring a quick transition from raw to ready.

Nutritionally, this soup offers balanced nourishment. The pasta delivers energy, while the broth hydrates and satisfies without unnecessary calories, making it a health-conscious choice.

Beyond taste, its social value is notable. It serves as a heartwarming anchor at dinner parties, gently nurturing conversation and camaraderie around the dinner table.

Lastly, its cost-effectiveness stands out. A few quality ingredients transform into something extraordinary without straining your budget, proving delicious meals need not be expensive.

Historical Background and Cultural Significance


Originating from Italian cuisine, pastina dishes have long been a staple in Italian homes, served as a core comfort food. In Italy, it is often one of the first solid foods introduced to children.

The cultural importance lies in its simplicity and tradition, symbolizing nourishment and family loving care. Grandmothers have passed down these recipes through generations, embedding family stories into each bowl.

Over time, the recipe has evolved. While originally perhaps more minimal, today’s versions incorporate richer broths and various personal touches, reflecting changing tastes while maintaining its essence.

Regional variations exist, from adding tiny meatballs in some parts to enhancing flavors with fresh herbs elsewhere, showcasing Italy’s diverse culinary heritage.

Ingredient Deep Dive


Pastina, a tiny pasta shape like stars, holds cultural importance within Italian families, often a child’s introduction to solid foods. It’s nutritious, offering a good balance of carbohydrates essential for energy.

Broth forms the soup’s base, preferably homemade, showcasing classic Italian flavors. It’s nutrient-rich and provides deeper flavors after simmering, improving both the taste and nutrition of your soup.

Parmesan cheese adds umami and richness. Select freshly grated parmesan for the best results. Storage involves keeping it in the fridge, tightly wrapped. For substitutions, consider Asiago for a similar nutty flavor.

Egg whisked into the broth delivers extra protein and creates a lovely silky finish. Freshness is key, so always choose quality eggs and store them in a cool place. To replace, silken tofu offers a similar texture in vegan adaptations.

Common Mistakes to Avoid

  • Overcooking the pastina can lead to mushy soup. Monitor your pasta carefully to keep the texture just right.
  • Skipping the broth seasoning makes the soup bland. Always taste and adjust your broth with salt and herbs.
  • Adding cheese too early results in a grainy soup. Parmesan should be added just before serving.
  • Boiling after adding egg can cause curdling. Ensure the heat is low when incorporating eggs.
  • Using low-quality parmesan sacrifices flavor. Always opt for the best cheese you can find.
  • Neglecting to remove pasta foam could dull flavors. Skim any foam that forms while cooking.
  • Forgetting to taste as you cook may cause imbalanced flavors. Stir and taste frequently.
  • Miscalculating water-to-pasta ratio can yield a dry soup. Stick to the recommended measurements for best results.

Essential Techniques


Boiling the pastina is crucial since this simple action defines the soup’s texture. Master it by waiting till your water is at a rolling boil and giving constant stirs.

Whisking the egg into the broth enriches the soup. Practice a soft continuous whisking motion to achieve a silky, smooth result, avoiding direct heat after adding it into the mix.

Cheese incorporation into warm, not boiling, soup ensures a smooth texture throughout. Learning to sprinkle and fold gently prevents any clumping and enhances the umami profile beautifully.

Parmesan should be integrated right before serving, ensuring its fragrant and nutty flavor is prominent. Let the soup cool slightly to allow flavors to settle well, then garnish before plating.

Pro Tips for Perfect Italian Pastina Soup


Use fresh, high-quality parmesan cheese for a richer, more authentic flavor profile. It’s worth the investment to elevate your soup.

Adding a pinch of nutmeg can enhance the aromatic qualities of the broth subtly, giving it a gourmet touch.

If desired, a few drops of fresh lemon juice can brighten the soup delicately, balancing the richness of the cheese and broth.

For a creamier consistency, consider substituting a portion of the broth with cream or milk just before serving.

If using store-bought broth, select a low-sodium version and adjust the salinity yourself. This prevents overly salty outcomes and gives more control over your dish’s flavor.

When reheating leftovers, do so gently to avoid overcooking the pasta, especially over direct heat. A quick microwave zap, or steaming is ideal.

Variations and Adaptations


Join the conversation by participating in our vibrant community. Share your Italian Pastina Soup photos on social media, engage with others by sharing your unique twists, and contribute to developing new recipe versions. Blog comments are encouraged as a space for sharing feedback and additional ideas. Let’s build a community of food lovers united by this comforting dish!

Elevate Your Dining Experience with The Ultimate Surf and Turf Dinner

The Ultimate Surf and Turf Dinner: A Perfect Culinary Delight

⚖️
Difficulty
Medium

⏲️
Prep Time
30 mins

🕒
Cook Time
40 mins

⏱️
Total Time
70 mins

🍽️
Servings
4

Indulge in a heavenly feast with The Ultimate Surf and Turf Dinner, where land meets sea in a culinary symphony that promises to satiate your taste buds. Perfect for special occasions or an exquisite weekend treat, this dish combines the richness of tender steak with the delicate flavor of lobster. It’s a dazzling dance of textures and tastes that makes every bite a memorable experience. From the crackling sear of the beef to the buttery tenderness of the lobster, this Surf and Turf recipe is all about the joy of eating.

Quick Recipe Highlights

  • Flavor Profile: The contrast between the hearty, savory steak and the sweet, succulent lobster creates a balanced and luxurious flavor.
  • Texture: Enjoy the firm, juicy texture of perfectly cooked steak alongside the tender flakes of fresh lobster meat.
  • Aroma: The fragrant blend of garlic, butter, and steak drippings creates an intoxicating aroma that prepares your senses for the deliciousness to come.
  • Visual Appeal: A spectacular plate with glistening lobster tails and perfectly seared steak garnished with fresh herbs.
  • Skill Level Needed: Moderate cooking skills are required due to the searing and grilling techniques involved, ensuring both the steak and lobster are cooked to perfection.
  • Special Equipment: You’ll need a skillet or grill pan for the steak and an oven-safe dish for the lobster tails.

Recipe Overview

  • Difficulty Level: This meal is rated medium due to the need for precise timing and temperatures to achieve perfect results.
  • Category: Main Course, featuring both seafood and red meat.
  • Cuisine: A blend of American and New England culinary traditions, showcasing a luxurious dining experience.
  • Cost: While a splurge-worthy dish, sourcing good quality steak and lobster can be done at a reasonable price at local markets.
  • Season: Best enjoyed in the summer and fall when lobsters are abundant, though it can be made year-round.
  • Occasion: Ideal for anniversaries, romantic dinners, or celebratory meals with friends and family.

Why You’ll Love This Recipe


The Ultimate Surf and Turf Dinner offers a phenomenal blend of taste and texture. The juicy steak provides a robust flavor, while the lobster tail adds a sweet, marine taste. Together they balance each other perfectly, creating a taste experience that is both indulgent and satisfying.

This dish’s convenience lies in its straightforward preparation, making it attainable even for those new to cooking such opulent meals. The detailed cooking instructions will guide you to culinary success with ease.

For those conscious about their nutrition, this meal provides a great balance of proteins, essential fatty acids from the lobster, and iron from the steak, making it not just scrumptious but nutritious.

Socially, presenting such a dish can elevate any dining experience, making your gathering or date night truly special. It’s a guaranteed showstopper that will impress even the most discerning foodie.

Despite its luxurious feel, this meal doesn’t break the bank. Surf and Turf can be quite affordable when planned with carefully sourced ingredients, making high-end dining experiences achievable at home.

Historical Background and Cultural Significance


The concept of combining seafood with steak has been a staple in American cuisine since the mid-20th century. Originating in fine dining establishments, it was designed to offer diners the best of both worlds.

Culturally, Surf and Turf showcases the abundant bounty of both land and sea, reflecting the prosperity of the regions it hails from. It has become a symbol of culinary elegance and gourmet sophistication.

While classic in nature, the Surf and Turf dish has evolved over time, with variations in techniques and components to suit different palates and dietary requirements.

Regional variations exist, such as the use of different shellfish or cuts of beef, allowing each version to reflect local tastes and ingredient availability, adding to its widespread popularity.

Ingredient Deep Dive


Steak is deeply embedded in culinary traditions worldwide. It is synonymous with luxury for many, providing robust iron content and protein, vital for energy and muscle development.

When selecting steak, seek cuts like ribeye or filet mignon, rich in marbling and tenderness for optimal flavor. Store properly wrapped in the refrigerator, and ensure it’s brought to room temperature before cooking. Substitute with other cuts like sirloin if necessary.

Lobster offers an unmatched sweetness and delicate texture. Rich in omega-3 fatty acids and essential minerals, it supports heart health and boosts the immune system.

Select whole live lobsters or fresh tails, ensuring they are firm and vibrant in color. Store lobsters in a cool environment and cook shortly after purchasing. For alternatives, shrimp or crab can substitute lobster.

Common Mistakes to Avoid

  • Overcooking steak ruins its tenderness. Monitor internal temperatures closely.
  • Undercooked lobster can be tough and chewy. Ensure it’s opaque and white in color.
  • Not resting the steak after cooking can cause juices to run, resulting in dry meat.
  • Using too much seasoning can overpower the inherent flavors of the steak and lobster.
  • Failing to preheat your pan properly will not allow the steak to sear correctly.
  • Overcrowding the pan with steak reduces the searing effect, leading to steaming instead.
  • Disregarding the quality of butter and aromatics affects the overall richness of the dish.
  • Timing is key. Ensure both components are timed to be ready concurrently for optimal serving.

Essential Techniques


Searing your steak correctly ensures that you lock in juices while creating a delicious crust. It’s crucial to use a hot pan and resist turning too frequently. Visual cues include a golden-brown crust and easy release from the pan when turned.

Grilling lobster tails may seem daunting, but melting butter over a low flame helps avoid drying out. Shell-side down cooking allows for even heat distribution. Moreover, it becomes cedar-like when cooked to perfection with buttery juices within.

Pro Tips for Perfect The Ultimate Surf and Turf Dinner


Incorporating fresh herbs like rosemary or thyme into your butter baste adds layers of aromatic richness to the steak.

Brushed garlic lemon butter over the lobster tail before grilling can elevate flavors while keeping the meat juicy.

Let your steak rest for at least five minutes after cooking. This resting period allows the fibers to reabsorb internal juices, improving tenderness.

Use a thermometer to accurately gauge internal temperatures for both steak and lobster, ensuring precision and preventing overcooking.

A light drizzle of fresh lemon juice over your lobster just before serving can brighten the dish and balance flavors.

Choose a complimentary side, such as roasted vegetables or mashed potatoes, to accentuate the steak and lobster while providing color contrast.

Variations and Adaptations


Regional variations often swap lobster for local shellfish varieties like prawns in the southern states, maintaining the dish’s luxurious feel while staying local.

For a seasonal twist, consider autumn accompaniments like pumpkin puree or a spiced cranberry glaze to contrast the main components with seasonal flavors.

Dietary modifications can include substituting butter with ghee for lactose-free or using a grilled portobello mushroom cap instead of steak for a veggie alternative.

To change the flavor, try marinating the steak in a balsamic glaze, introducing a sweet-tart complement to the robust beef.

If a firmer texture is desired, switch grilling for roasting with your choice of aromatic herbs and spices, developing deeper flavors.

Presentation can be modernized by serving sliced steak with artfully placed lobster on a wooden board, incorporating a rustic visual element.

Serving and Presentation Guide


When plating your Surf and Turf dinner, allow the shine of the lobster shell to stand out by placing it prominently beside the steak, enhancing the visual impact.

A sprig of fresh herbs or a lemon wedge brings out vibrant colors, creating an edible garnish while adding flavor contrast and brightness.

Traditional accompaniments such as drawn butter or a creamy hollandaise sauce can be served on the side to enhance tactile richness.

If modern presentation is desired, consider artisanal slate or wooden boards for serving, emphasizing a natural aesthetic.

Maintain temperature by serving immediately, ensuring the steak is at the right warmth and the lobster remains succulent.

For best portion control, slice the steak and serve it in pre-cut portions, which aids in even distribution and gives a neat presentation.

Wine and Beverage Pairing


Wine aficionados will appreciate full-bodied red wine like Cabernet Sauvignon or Merlot, complementing the richness of the steak, balancing flavors harmoniously.

For non-alcoholic alternatives, try spiced apple cider or a cranberry spritzer, offering a fruity counterbalance to the umami elements of the dish.

A strong black coffee or green tea pairs well post-dinner, cleansing the palate and offering contrasting warmth to the abundant flavors of the meal.

Temperature matters; serve white wines well-chilled for lobster and red wines slightly below room temperature.

Pour the wine just before serving to allow for proper oxygenation, helping to enhance aromatic notes and bouquet.

Storage and Shelf Life


Store leftovers in airtight containers in the refrigerator to maintain freshness and prevent aromas from mixing with other food items.

The steak and lobster dish should typically be consumed within 48 hours of preparation to ensure optimal texture and flavor.

Use glass or ceramic containers to minimize leaching odors and flavors, preserving integrity of the dish until reheating.

Signs of spoilage in cooked lobster include a fishy odor or discoloration of the meat, while steak may develop a slimy texture.

To reheat, place in an oven set at low temperature covered to retain moisture, ensuring the meat remains tender without overcooking.

If freezing leftovers, wrap portions individually in plastic wrap and aluminum foil to prevent freezer burn and keep at peak quality for up to three months.

Make Ahead Strategies


Prepare components like compound butter or seasoning mixtures well in advance, storing them in the refrigerator until ready to use.

Keep proteins stored separately post-prep and right before cooking, allowing space for easy organization and minimizing preparation stress.

Assess flavor quality if left too long between preparation stages. Marinades and rubs applied too early may alter textures through over-tenderization.

Tips for assembly include organizing all ingredients beforehand, simplifying the cooking environment for seamless progression through each step.

Reheat gently with indirect heat. Quick reheats can cause uneven temperatures and moisture loss, particularly in lobster and steak.

Fresh herbs should be added just before serving, preserving aromatic freshness and enhancing presentation vibrancy.

Scaling Instructions


When halving the recipe, adjust seasonings proportionately, remembering that critical reactions like Maillard do not scale linearly.

Doubling or tripling requires attention to equipment capacity; ensure pans and grills can accommodate without overcrowding, as this inhibits browning.

Cooking time modifications necessitate attention to frying pan or grill heats; larger quantities retain heat longer and may slow down cooking processes.

Consider container size flexibility and batch processing for storage considerations, ensuring portions fit available space without compromising freshness.

When scaling, watch for seasoning intensity. Larger meats need not be overly saturated, as surface area and volume differ in seasoning absorption.

Nutritional Deep Dive


The macro breakdown of this Surf and Turf dinner showcases balanced proteins, with steak and lobster offering essential amino acids necessary for tissue repair and muscle growth.

Mineral-dense lobster tail provides calcium, necessary for bone health, while the steak offers iron and B vitamins, supporting metabolic function.

Dietary considerations should include portion sizes to benefit from nutrient profiles without overindulgence. Consuming in moderation maintains balance with diverse food intake.

Each portion averages approximately 500-600 calories, allowing for nutrient-dense meals alongside sensible dietary plans, fitting into numerous diets without excessive calorie intake.

Weight management tips include pairing with vegetables high in fiber, providing satiety without excessive calorie contribution.

Troubleshooting Guide


If the texture of your steak is tough or chewy, consider adjusting cooking times or resting it longer post-cooking to redistribute juices effectively.

For flavor balance, ensure your seasoning complements the natural taste of meat and seafood; avoid overpowering with one-dimensional seasoning.

Temperature problems can be resolved by using a thermometer for precise internal readings at regular intervals during cooking.

Equipment challenges like inadequate pan size can be mitigated by batch processing or upscale tools ensuring even heat distribution.

Ingredient substitutions may require flavor matching. If you use prawns instead of lobster, account for the inherent sweetness variance.

Timing concerns are resolved by preparing ingredients in advance, keeping cooking progression smooth and eliminating unexpected delays.

Recipe Success Stories


An enthusiastic home chef shared their success with a surf-and-turf variation, adding their signature lemon herb butter twist, earning rave reviews from family and friends.

One reader swapped steak for a vegetarian mushroom-walnut patty and praised the balance of earthiness against the sweet richness of lobster.

Adaptations garnered positive feedback, incorporating Cajun seasoning for a southern flare; this adaptation created a bold and spicy flavor loved by readers.

Numerous suggestions came through from the community about elevating presentation; incorporating edible flowers and microgreens offers an elegant touch for special appearances.

An amateur photographer shared stunning captures of their plated version, recommending natural lighting and rustic tableware for Instagram-ready images.

Frequently Asked Questions

Q: Can I make the dish without a grill?
A: Yes. Instead of grilling, sear the steak in a hot skillet and bake the lobster in a preheated oven to achieve similar tastes and textures.

Q: What is the best way to ensure my steak is juicy?
A: Allowing the steak to rest after cooking is crucial, as it helps the fibers reabsorb juices, maintaining its succulence.

Q: Can I use frozen lobster tails?
A: Absolutely. Thaw them properly in the refrigerator overnight to maintain texture, then proceed as you would with fresh.

Q: How do I know when the lobster is done?
A: Cooked lobster meat is white and opaque, with a firm texture. An internal temperature of 140°F (60°C) confirms perfect doneness.

Q: Are there alternatives to cooking with butter?
A: Ghee or olive oil are suitable alternatives for those avoiding butter while still preserving flavor and richness.

Q: What side dishes complement this meal?
A: Consider roasted vegetables or a refreshing green salad with a tangy vinaigrette. They add a color and textural contrast without crowding flavors.

Q: What if my steak is too salty?
A: Serve with an unsalted side dish to counteract the seasoning or lightly drizzle with lemon to balance flavors.

Q: How can I store leftovers effectively?
A: Use airtight containers and refrigerate promptly. Consume within 48 hours for optimal flavor and safety.

Q: Is there a vegetarian version of Surf and Turf?
A: Yes, substituting steak for grilled portobello mushrooms or a robust veggie patty can provide an equally satisfying experience.

Q: Can I prepare some components ahead of time?
A: Certainly. Marinating the steak and prepping the lobster will streamline the cooking process on serving day.

Additional Resources


Explore our related recipes: Sizzling Shrimp Skewers, Grilled Mushroom Caps, and Herb-Butter Mashed Potatoes to enhance your meal with harmonious sides.

For mastering steak cooking techniques, review our in-depth grilling and searing guides, offering tips for achieving steakhouse-quality results at home.

Discover essential equipment that enhances your cooking experience. Our curated selection highlights tools that amplify flavors.

Dive into ingredient guides emphasizing sustainable sourcing. Understand the impacts of locally sourced meat and seafood.

Stay attuned to seasonal adaptations, reflecting the best each time of year has to offer in flavors, textures, and availability.

Join the Conversation


Share your creations on social media, tagging us for potential features and culinary camaraderie. Your visual stories showcase your unique twists on a classic dish.

Photography tips are available for improving your food captures. Experiment with natural light and plating techniques to make your surf and turf visually appealing.

Leave a recipe review on our site to connect with fellow food lovers, sharing insights and contributing to enhancements in culinary communities.

Community engagement thrives on feedback. Suggest variations, adaptations, and ingredients to enrich our diverse recipe repository.

Venture beyond recipe confines by adding your regional touches to ingredients and seasonings, creating a personalized dining experience that resonates.

The Recipe

The Ultimate Surf and Turf Dinner

Serves: 4

Prep Time: 30 mins

Cook Time: 40 mins

Total Time: 70 mins

Kitchen Equipment Needed

  • Skillet or Grill Pan
  • Oven-safe Dish
  • Thermometer
  • Cooking Tongs
  • Baking Sheet
  • Brush for Butter Basting

Ingredients

  • 4 ribeye steaks (approximately 8 oz each)
  • 4 lobster tails
  • 1/2 cup unsalted butter, melted
  • 2 tablespoons olive oil
  • 3 cloves garlic, minced
  • Salt and pepper to taste
  • Fresh lemon wedges for serving
  • Fresh herbs for garnishing (optional)

Directions

  1. Preheat your skillet over medium-high heat.
  2. Season the steaks generously with salt and pepper. Add olive oil to the skillet.
  3. Sear steaks for 4-5 minutes per side, or until desired doneness is reached. Use a meat thermometer to ensure accuracy.
  4. Let the steaks rest on a cutting board covered with foil to retain warmth.
  5. Preheat oven to 400°F (200°C). Arrange lobster tails in an oven-safe dish.
  6. Mix butter with minced garlic and brush over lobster tails. Season with salt and pepper.
  7. Bake lobster tails in the preheated oven for 10-12 minutes or until cooked through and opaque.
  8. Arrange steaks and lobster on a platter, garnishing with fresh herbs and lemon wedges before serving.

Recipe Notes

  • For a garlic butter steak, add cloves of crushed garlic to the steak pan for the final minute of cooking.
  • Adapt sides based on your preferences. Consider garlic mashed potatoes or a simple asparagus salad.
  • If using frozen lobster tails, ensure they are fully thawed in the fridge for at least 8 hours before cooking.

Delicious Mini Zucchini and Beef Burgers for a Healthy Twist

Mini Zucchini and Beef Burgers: A Delicious and Nutritious Delight

⚖️
Difficulty
Easy

⏲️
Prep Time
15 mins

🕒
Cook Time
20 mins

⏱️
Total Time
35 mins

🍽️
Servings
4

Indulge in the delightful flavors of our Mini Zucchini and Beef Burgers, a delicious and nutritious twist on the classic burger that promises to tantalize your taste buds. Packed with the goodness of fresh zucchini and lean beef, these mini burgers are perfect for a quick and satisfying meal. The combination of zucchini and beef creates a juicy and flavorful patty that will leave you craving for more.

Whether you’re hosting a BBQ or looking for a weeknight dinner solution, these Mini Zucchini and Beef Burgers are sure to be a hit. The subtle flavors of zucchini blend perfectly with the richness of beef, making for a harmonious taste sensation. Not only are these burgers delicious, but they also offer a great way to incorporate more vegetables into your diet without compromising on taste.

Quick Recipe Highlights

  • Flavor Profile: These burgers offer a savory profile, with the subtle sweetness of zucchini complementing the rich, umami flavors of beef, enhanced with a touch of garlic and spices.
  • Texture: Enjoy a juicy and tender patty with a crisp exterior, thanks to the perfect blend of beef and finely grated zucchini.
  • Aroma: The inviting aroma of grilled beef and fresh zucchini fills the air, with hints of garlic in every bite.
  • Visual Appeal: The vibrant green flecks of zucchini throughout the burger add a pop of color, making it visually appealing on the plate.
  • Skill Level Needed: This recipe is ideal for cooks of all skill levels. Minimal technique is required beyond mixing and shaping patties, making it accessible for beginners.
  • Special Equipment: You’ll need a griddle or non-stick skillet for the best results, along with a box grater for the zucchini.

Recipe Overview

  • Difficulty Level: This recipe is rated as easy, primarily involving basic mixing and grilling techniques that are straightforward and simple for any home cook.
  • Category: This versatile dish is perfect for both casual weeknight dinners and enjoyable weekend BBQs.
  • Cuisine: Drawing inspiration from American and Mediterranean cuisines, these burgers have an international flair thanks to the use of zucchini.
  • Cost: With budget-friendly ingredients like ground beef and zucchini, this recipe is wallet-friendly without compromising on quality.
  • Season: While zucchini is a summer vegetable, these burgers can be enjoyed year-round, making them perfect for any season.
  • Occasion: Ideal for family gatherings, friendly get-togethers, or just a comforting meal at home.

Why You’ll Love This Recipe

The distinct blend of beef and zucchini delivers a succulent and delightful burger experience. The juicy tenderness and slightly crispy edges make every bite a joy, while the natural flavors harmonize beautifully, ensuring a tasty and satisfying meal.

One of the greatest advantages of these Mini Zucchini and Beef Burgers is their ease of preparation. With only a few simple steps and readily available ingredients, you can whip up a delicious meal in no time, perfect for busy evenings.

Aside from being delicious, these burgers are nutritious and lower in fat compared to traditional beef burgers. Zucchini adds valuable vitamins and minerals, boosting the nutrition profile without any compromise on flavor.

These mini burgers are perfect for entertaining, providing a quick and easy dish that will please a crowd. Their appealing size makes them perfect for sliders or appetizers, offering a touch of variety to your menu.

With affordable ingredients, this recipe is a cost-effective way to enjoy a gourmet meal at home. Zucchini and beef are staple ingredients that won’t break the bank, and the simplicity of the recipe means you’re getting great value and enjoyment without a hefty price tag.

Historical Background and Cultural Significance

The origin of mini burgers can be traced back to the American culinary tradition, where smaller portions of classic dishes became popular in the late 20th century. These Mini Zucchini and Beef Burgers are a modern twist, infusing a traditional dish with a healthy edge.

In many cultures, combining vegetables with meat has been a way to stretch ingredients and add flavor. The addition of zucchini in this recipe is inspired by Mediterranean cooking, where vegetables are often used innovatively in meat dishes.

Over time, the recipe has evolved, with home cooks and chefs adding their unique touches to make these mini burgers even more versatile and flavorful. This adaptability has allowed the dish to remain relevant and loved globally.

Today, regional variations of these mini burgers exist, from incorporating different spices to altering the protein used. This cultural exchange and adaptation demonstrate the universal appeal and flexibility of the recipe.

Ingredient Deep Dive

Zucchini, a staple in many households, offers a mild taste and high moisture content, making it an ideal ingredient for various dishes. Originating in Central America, zucchini is praised in many cuisines for its versatility and nutritional value.

Rich in vitamins A, C, and K, zucchini supports overall health while being low in calories and carbs. It’s a fantastic option for those looking to boost their vegetable intake while enjoying a tasty meal.

To select the best zucchini, look for firm, medium-sized specimens with smooth, bright skin. Store them in the refrigerator and aim to use them within a week for optimum freshness.

If zucchini isn’t available, feel free to substitute with grated carrot or squash. Each offers a unique flavor and texture, allowing you flexibility when creating your burgers.

Ground beef brings umami richness, perfectly balancing the delicate taste of zucchini. Opt for lean ground beef to create a healthier burger without losing flavor and juiciness.

When selecting ground beef, choose options with a moderate fat content (around 15-20%) to ensure a juicy burger. Store beef in the coldest part of your refrigerator and use it within a couple of days for the best quality.

For vegetarians, you can substitute the ground beef with lentils or black beans for a similar texture and protein content while maintaining the robust flavors through seasonings.

Common Mistakes to Avoid

  • Avoid over-mixing the burger mixture to prevent a tough texture. Gently combine ingredients just until mixed.
  • Take care not to overcook the burgers, as they should remain juicy. Aim for medium doneness for the best flavor.
  • Make sure to season both the beef and zucchini adequately to enhance the natural flavors.
  • Grate the zucchini finely to ensure it incorporates seamlessly into the beef mixture.
  • Don’t skip squeezing excess moisture from the zucchini, or the burgers may be too wet and fall apart.
  • Rest the burgers after cooking to allow juices to redistribute, ensuring a juicy bite.
  • Use a griddle or non-stick pan to prevent sticking and ensure even cooking.
  • Ensure your grill or pan is hot before placing the patties on it to achieve a nice sear.

Essential Techniques

Grating zucchini is an essential technique for this recipe, ensuring the vegetable integrates well with the meat. Use a fine grater to achieve soft strands that meld with the beef for harmonious flavors.

Proper patty formation is crucial for even cooking and prevents falling apart. Use your hands to lightly shape the patties, ensuring they’re not too thick, for quick and uniform grilling.

Master the art of grilling by preheating your grill or pan. This ensures a consistent temperature, delivering an even cook and a delicious, caramelized crust on the burgers.

Pay attention to visual cues such as browning and patty firmness to determine doneness. This avoids overcooking, ensuring the burgers remain juicy and flavorful.

Pro Tips for Perfect Mini Zucchini and Beef Burgers

For added moisture and flavor, consider mixing some finely diced onions into the patty mixture. This enhances the overall taste and results in a juicier burger.

Resting the patties before cooking allows flavors to meld together, rendering a richer taste that will impress your taste buds.

Experiment with different cheese toppings for variety. A slice of cheddar or gouda melt makes for an indulgent topping, complementing the flavors beautifully.

Try incorporating various herbs and spices into your mixture, such as basil or oregano, to add depth and character to your burgers.

Cooking these mini burgers on a charcoal grill adds a smoky flavor that elevates the overall taste, making them perfect for outdoor gatherings.

Consider using slider buns or mini brioche for a gourmet touch. These smaller buns fit the patties perfectly and provide an upscale twist on a classic dish.

Variations and Adaptations

Across the Mediterranean, variations of mini sliders often include spices like cumin and coriander, adding a bold flavor profile. Try incorporating these spices for a regional twist.

In spring and summer, add fresh herbs like mint and parsley for a refreshing take on these burgers. Seasonal freshness can elevate the dish, making it perfect for warm weather.

For a gluten-free version, use gluten-free breadcrumbs or omit them altogether, ensuring a delicious burger for all dietary needs.

Experiment with flavor by topping the burgers with pickled onions or drizzling with a garlic aioli, adding layers of taste that make every bite an adventure.

For a delightful crunch, add some chopped walnuts or pecans for a texture contrast that complements the juicy patty.

Present these mini burgers as part of an elegant platter with microgreens and edible flowers, offering a modern and visually appealing approach.

Serving and Presentation Guide

Stack your mini burgers on wooden skewers for a fun presentation and to keep them secure, especially if serving at a party or gathering.

Garnish with bright greens like arugula for a pop of color and a slight peppery taste, enhancing both the look and flavor profile of your dish.

Include classic accompaniments such as a light coleslaw or potato salad to complement the flavors of the burgers without overwhelming them.

Consider serving mini burger sliders on a wooden board for a rustic aesthetic, making the presentation as inviting as the food itself.

Serve at a slightly warmer temperature than room temperature for optimal taste, but avoid serving too hot, which could mask the intricate flavors.

Control portions by considering two mini burgers per person, ensuring that both the presentation and the meal are balanced and satisfying.

Wine and Beverage Pairing

Pair these mini burgers with a light red wine such as a Pinot Noir, which beautifully complements the beef while not overpowering the delicate zucchini flavor.

For non-alcoholic options, a spritzer made with cucumber and mint offers a refreshing palate cleanser which matches the dish’s fresh components.

For those who enjoy tea, a mild green tea can provide an earthy complement to the savory elements, maintaining the meal’s overall balance.

Serve all beverages slightly chilled to enhance their refreshing properties, particularly if you pair these with the summer-leaning qualities of the dish.

Consider a variety of drink options when hosting, allowing guests to choose a pairing that best suits their palate and enhances their dining experience.

Storage and Shelf Life

Store leftover patties in an airtight container in the fridge for up to three days. This helps maintain freshness and quality while enjoying leftover delights.

Ensure the burgers are fully cooled before refrigerating to reduce condensation from breaking down texture and flavor.

Consider storing pre-cooked patties with parchment paper between each one to avoid sticking, maintaining their shape and integrity.

Signs of spoilage include an off smell or change in texture. Always prioritize freshness and quality, especially when storing leftovers.

Reheat leftover burgers on a stovetop or in a conventional oven for the best flavor and texture. Avoid microwaving, which can over-chew the texture.

If you plan to freeze patties, pre-portion them and wrap in plastic wrap, then in foil, to ensure they remain delicious for up to three months.

Make Ahead Strategies

Prepare the beef and zucchini mixture a day in advance and store it in the refrigerator. This allows flavors to develop, improving the overall taste once cooked.

Divide storage between steps by forming and cooking the patties ahead of time. This ensures maximum convenience without losing freshness at serving time.

Assess the quality impact of refrigerating versus freezing, opting for refrigeration when possible for the best texture and flavor.

When reheating, consider adding freshly cut herbs or a slice of cheese to add vibrancy and enhance freshness for every meal.

Incorporate fresh elements like new toppings or garnishes during assembly, ensuring each burger feels thoughtfully made even if prepped in advance.

Scaling Instructions

Halve the recipe by reducing all ingredients proportionally, maintaining balance and taste while catering to a smaller crowd.

For larger gatherings, double or triple ingredients for this flexible recipe, noting adjusted cooking times for larger batches to ensure even cooking.

Modify equipment choices for scaled recipes, perhaps opting for larger grills or multiple pans to accommodate increased patty volumes.

Timing will need slight adjustment when scaling the recipe, allowing thorough cooking while ensuring each burger remains juicy and succulent.

Ensure storage considerations for larger batches to maintain quality over quantity, using airtight containers and thoughtful preparation and storage techniques.

Nutritional Deep Dive

With a balance of protein and vegetables, these burgers are an excellent choice for a nutritious meal, combining essential macronutrients and fiber.

Loaded with vitamins from zucchini and protein from beef, this recipe offers a balanced, nutrient-rich meal perfect for all lifestyles.

With careful ingredients like lean beef and added vegetables, this dish supports dietary needs while maintaining flavor and appeal.

Understanding portion sizes is crucial for weight management, with one serving balancing protein, carbs, and fats appropriately.

Capitalize on the flavor-packed nature of the dish as a delicious way to meet nutritional goals without sacrificing satisfaction and enjoyment.

Dietary Adaptations

Adjust the recipe for gluten-free diets by using gluten-free breadcrumbs, ensuring inclusivity without altering flavor or texture.

For a dairy-free adaptation, simply use a dairy-free cheese alternative or omit cheese toppings to accommodate dietary preferences.

Transform this recipe into a vegan option by swapping beef for a plant-based protein such as lentils or chickpeas, still achieving a satisfying bite.

To cater to low-carb diets, omit the buns and serve the patties on large lettuce leaves, maintaining the burger experience without excess carbs.

Adapting this recipe for a keto lifestyle is simple with the omission of buns, focusing on patty quality and additional healthy fats for a delicious main course.

Troubleshooting Guide

If your burger texture is off, ensure grated zucchini is well-squeezed to remove excess liquid, crucial for maintaining patty integrity.

For issues with flavor balance, adjust seasoning slightly by incrementally adding salt and pepper while mixing the patty for a refined taste.

If temperature consistency is problematic, use a meat thermometer to ensure the interior of the burger reaches the appropriate temperature.

Address equipment challenges with carefully chosen pans and tools, emphasizing non-stick or grill options to ensure even cooking and an easy process.

Ingredient substitutions can lead to varied results; ensure compatible replacements, such as appropriate vegetable protein for beef.

Use controlled timing for consistent results, ensuring burgers rest after cooking, locking in moisture and achieving optimal taste and texture.

Recipe Success Stories

Our community has raved about these Mini Zucchini and Beef Burgers, constantly sharing how they became a staple in their home cook repertoire.

Read about creative twists on the recipe, with variations like herb-infused patties and global adaptation attempts enhancing the enjoyment for all.

Adaptation stories reveal how simple substitutions, like vegan adaptations, allow more people to enjoy the burger’s exquisite flavors.

Discover compelling reader suggestions showcasing unique tips and strategies for elevating the dish further, enjoying every bite anew.

Explore photography tips from talented individuals highlighting how they visually capture the dish’s color and enticing appeal through their lenses.

Frequently Asked Questions

Can I make these burgers in advance?

Yes, you can prepare the patties ahead of time, cooking them later. Store in an airtight container in the refrigerator to maintain freshness.

What can I use instead of zucchini?

You can substitute zucchini with grated carrots or even finely chopped spinach for a different but equally delicious experience.

Can I freeze these burgers?

Absolutely! Freeze uncooked or cooked patties by wrapping them in plastic wrap, then foil, for freshness that lasts up to three months.

How do I prevent the burgers from falling apart?

Ensure extra moisture is squeezed from the zucchini, ensuring a firm mix. Also, form compact patties to maintain shape during cooking.

What spices complement this recipe?

Experiment with garlic powder, smoked paprika, or a sprinkle of red pepper flakes to add depth and an extra burst of flavor.

Can I use turkey instead of beef?

Yes, ground turkey can provide a lean and flavorful alternative, maintaining the deliciousness while offering a slightly lighter bite.

What is the best way to cook these burgers?

While grilling offers a smoky flavor, a non-stick skillet or griddle provides consistent heat distribution for perfectly cooked burgers.

Any advice for a vegan version?

Use lentils or chickpeas instead of beef, adding spices to heighten flavor, ensuring a delightful, plant-based adaptation for everyone to enjoy.

Are these burgers healthy?

With lean beef and nutrient-rich zucchini, these burgers support balanced nutrient intake, making them a delicious and healthy option.

How can I enhance the flavor further?

Try adding toppings like pickles, aioli, or a slice of your favorite cheese to introduce new dimensions and elevate the taste profile.

Additional Resources

Explore related recipes such as traditional beef stew or zucchini fritters, complementing the Mini Zucchini and Beef Burgers for a diverse meal plan.

Learn technique guides through helpful tutorials, showcasing useful kitchen tips like grating, mixing, and grilling for confident cooking results.

Find more ingredient information about zucchini and beef, uncovering the full potential of these versatile components in various recipes.

Equipment recommendations highlight essential tools for the best cooking experience, ensuring optimal results every time you prepare the recipe.

Seasonal variations teach how to adapt recipes for all-year enjoyment while enjoying the freshest produce available each season.

Join the Conversation

Share your experiences by posting your Mini Zucchini and Beef Burgers on social media, engaging with a community that celebrates culinary creativity.

Join the discussion on photography, exchanging tips and ideas for capturing the dish’s various angles and making the images pop with life.

Leave a recipe review to share feedback and suggestions, strengthening the recipe’s credibility and enhancing development through shared stories.

Participate and engage with a network of fellow food enthusiasts, joining conversations that explore variations, ideas, and everyday culinary successes.

Enter our world of mini burger variations, unveiling adaptations and alternatives that take you on a flavorful global journey within your kitchen.

The Recipe

Mini Zucchini and Beef Burgers

Serves: 4

Prep Time: 15 mins

Cook Time: 20 mins

Total Time: 35 mins

Kitchen Equipment Needed

  • Griddle or non-stick skillet
  • Box grater
  • Mixing bowl
  • Spatula

Ingredients

  • 1 pound lean ground beef
  • 1 medium zucchini, finely grated
  • 2 garlic cloves, minced
  • 1/2 teaspoon salt
  • 1/4 teaspoon black pepper
  • 1 tablespoon olive oil
  • Slider buns or mini brioche, to serve

Directions

  1. In a large mixing bowl, combine ground beef, grated zucchini, minced garlic, salt, and pepper. Mix until just combined.
  2. Form small patties from the mixture, approximately the size of the slider buns.
  3. Heat olive oil in a griddle or non-stick skillet over medium-high heat.
  4. Cook patties for 3-4 minutes on each side, or until browned and cooked through.
  5. Serve on slider buns or mini brioche with your choice of toppings.

Recipe Notes

  • For added flavor, consider topping with cheese slices or fresh herbs.
  • If the mixture is too moist, adjust with breadcrumbs to improve consistency.
  • Experiment with spices to add variety and additional depth to the patties.

Delicious Gluten-Free Creamy Chicken Pesto Pasta for Easy Dinner

Creamy Chicken Pesto Pasta: Easy Gluten-Free Dinner Recipe

⚖️
Difficulty
Easy

⏲️
Prep Time
15 mins

🕒
Cook Time
20 mins

⏱️
Total Time
35 mins

🍽️
Servings
4

Discover the creamy delight of our Chicken Pesto Pasta – a gluten-free easy dinner recipe perfect for any night of the week. Succulent chicken mingles with the aromatic basil flavor of pesto, delivering a taste sensation that is both refreshing and comforting. This dish combines simplicity and elegance, ensuring that even the busiest home cooks can enjoy a restaurant-quality meal at home.

This creamy chicken pesto pasta recipe boasts a perfect balance of creamy and savory elements, making it irresistible to pasta lovers everywhere. Its delightful texture coupled with the vibrant green of the homemade pesto sauce offers a visually stunning plate that appeals to both the eyes and the palate. As you delve into each forkful, the melding flavors of fresh garlic, Parmesan, and nuts will surely transport your senses to a comforting place.

This recipe is incredibly versatile and can adapt to suit any occasion—from a quick midweek dinner to a sophisticated weekend feast. It’s also a crowd-pleaser, making it a great dish to share with family and friends. With each ingredient contributing to its nutritional benefits, this pasta dish is not only delicious but also nourishing.

Quick Recipe Highlights

  • Flavor Profile: The creamy chicken pesto pasta has a rich, earthy flavor from the basil pesto, complemented by the succulent taste of seared chicken and tangy Parmesan.
  • Texture: This dish offers a luscious creamy texture, enriched with tender chicken pieces and perfectly cooked gluten-free pasta that provide a satisfying bite.
  • Aroma: The aroma of fresh basil and garlic fills the kitchen, mingling with the warm scent of toasted pine nuts and Parmesan cheese.
  • Visual Appeal: A vibrant green pesto envelops the pasta, paired beautifully with the white and golden hues of cooked chicken for a stunning presentation.
  • Skill Level Needed: Ideal for all cooking enthusiasts, from beginners to seasoned chefs, requiring basic cooking techniques and minimal preparation time.
  • Special Equipment: Only basic kitchen tools such as a large skillet and a pot are needed, with no special equipment required.

Recipe Overview

  • Difficulty Level: This recipe is categorized as easy due to its straightforward steps, with most cooking processes being simple, such as sautéing and simmering.
  • Category: Perfect as a main course, it serves as an ideal choice for family dinners, romantic dates, or any special occasion where a comforting dish is desired.
  • Cuisine: Rooted in Italian culinary traditions, this pasta dish celebrates the authentic Italian love for pasta, cheese, and herbs.
  • Cost: Crafted from commonly available ingredients, this dish is budget-friendly, ensuring a satisfying meal without breaking the bank.
  • Season: While pesto is often associated with summer, thanks to its fresh basil, this dish can be enjoyed all year round, offering a nostalgic taste of summer even in the colder months.
  • Occasion: Suitable for casual dinners or upscale gatherings, its adaptability makes it a valuable addition to any festive spread or comfort meal.

Why You’ll Love This Recipe


The creamy chicken pesto pasta shines through its robust flavors and creamy textures, creating a delightful culinary experience for your taste buds. The fresh pesto base offers a vibrant contrast to the soft, tender chicken, making each bite a flavorful journey. The versatility and straightforwardness of this dish allow for hassle-free preparation, making it perfect for those seeking an effortless, yet delicious dinner option.

Moreover, this gluten-free recipe ensures inclusivity, making it accessible to those with gluten sensitivities. The nutritional advantages of using lean chicken breast and a homemade pesto packed with fresh basil provide a healthful edge, ensuring you indulge guilt-free. This dish is not only nutritional but also acts as a fantastic social hub, bringing together family and friends to enjoy a delightful home-cooked meal.

Economically, it offers a cost-effective solution for those desiring a gourmet-style dinner without expensive ingredients or multiple trips to specialty stores. Its simplicity translates into reduced cooking stress, letting you focus on enjoying the meal and cherishing moments with loved ones. The creamy chicken pesto pasta is popular not just for its taste but its versatility and ability to fit any dining situation.

Historical Background and Cultural Significance


Pesto, originating from Genoa in the Liguria region of northern Italy, has long been revered for its aromatic basil base tempered by its rich, nutty elements. Traditionally crafted with a mortar and pestle, pesto’s name derives from “pestare,” meaning “to pound,” emphasizing its historical method of preparation. Over time, it evolved to incorporate ingredients native to the region, such as Ligurian olive oil and Grana Padano.

As Italian cuisine spread around the globe, so did its introductory dishes, like the vibrant pesto. Various regions adopted and modified the original pesto recipe, adding unique elements to complement their local culinary landscapes. Chicken pesto pasta, for example, is a modern take that emerged in response to the demand for hearty yet manageable meals, a testament to the recipe’s adaptability to new contexts.

This dish’s evolution encapsulates the hybridization of refined Italian flavors with globally popular ingredients, showcasing its significance in both historical and contemporary culinary narratives. Although many regional versions exist, the essential character and flavorful ingenuity of the original pesto sauce remain universally appreciated. It’s a transparent reflection of Italy’s knack for turning simple ingredients into bold and elegant culinary experiences.

Moreover, the inclusion of chicken in this pasta recipe is a nod to contemporary preferences for balanced meals, combining protein and carbohydrates harmoniously. Today, it’s a beloved staple for those seeking an entrée that combines traditional flavor profiles with modern convenience and diet considerations.

Ingredient Deep Dive


Basil, the star of any traditional pesto, holds significant cultural importance in Italian cuisine. Historically linked to sacred rituals and symbolizing love, basil leaves impart a sweet yet peppery flavor and vibrant color to any dish. Nutritionally, it is rich in antioxidants and vitamin K, essential for bone health and anti-inflammatory properties. While selecting basil, look for bright green leaves free from blemishes to ensure optimal freshness and flavor.

Pine nuts, although often subtle, contribute to pesto’s distinct taste with their creamy, buttery undertones. Rich in healthy fats and crucial vitamins, they add richness to the sauce while supporting heart health. When purchasing pine nuts, opt for ones with a firm texture and milky aroma, storing them in the refrigerator to preserve freshness and prevent rancidity. If a substitute is needed, walnuts offer a reasonable stand-in, providing a similar texture.

Common Mistakes to Avoid

  • Using store-bought pesto often lacks the fresh flavor found in homemade versions and can alter the dish’s taste. Opt for making a simple homemade pesto to enhance the dish.
  • Overcooking the chicken results in dryness and a less enjoyable texture. Aim for a golden-brown sear and juicy interior by using a meat thermometer to ensure proper cooking.
  • Not properly salting the pasta water can lead to bland pasta. Ensure the water is salty like the sea to enhance the flavor of the dish overall.
  • Mixing pasta and sauce while the pasta is still wet can result in diluted flavors. Drain pasta well before combining with the sauce.
  • Ignoring portion control may lead to ingredient imbalance. Stick to the recommended servings for a balanced flavor profile.
  • Leaving pesto exposed can lead to oxidation. Keep it covered or immediately toss with pasta to preserve its vibrant color.
  • Adding chicken at the wrong time can cause it to become too tough. Ensure proper timing for tenderness.
  • Using low-quality parmesan compromises flavor. Invest in good quality cheese to uphold the dish’s authenticity.

Essential Techniques


Creating a Creamy Pesto Sauce is paramount for this dish’s success. Blending pesto with cream requires a balance—too much can overpower while too little fails to achieve the desired creaminess. Whisk in the cream slowly to create a smooth blend and avoid a split sauce. This technique ensures a perfect marriage of cream and basil that envelops every piece of pasta.

Searing chicken is essential to lock in moisture and create a succulent texture. Start with a hot pan and avoid crowding to achieve a golden crust. Cooking thoroughly without burning is key; once seared, let it rest before slicing to distribute juices evenly. Mastering this ensures flavorful bites in every mouthful of pasta.

Pro Tips for Perfect Creamy Chicken Pesto Pasta


– Toast pine nuts before blending into pesto for added depth and better management of delicate flavors.
– Add a splash of pasta cooking water to the sauce for perfect consistency, using the starch to bind sauce and pasta together seamlessly.
– Utilize a high-quality olive oil for pesto to enhance its flavor, reflecting true Italian authenticity.
– Incorporate fresh lemon zest into the pesto for brightness that elevates the overall dish.
– Always taste your sauce before serving, adjusting seasoning as necessary to ensure flavor harmony.
– Store leftovers correctly by sealing in an airtight container, ensuring you enjoy freshness even the next day.

Variations and Adaptations


Regional variations abound, with Southern Italian processes introducing sun-dried tomatoes for a different taste profile, imparting sweetness and rich flavor. Adapting this dish for seasonal changes can involve using seasonal greens like kale instead of basil in colder months, offering a unique twist with earthy notes. Dietary modifications are straightforward, substituting dairy-free parmesan and cream alternatives for a lactose-intolerant-friendly dish. Flavor variations could involve adding roasted cherry tomatoes for a burst of sweetness or substituting grilled shrimp for an upscale seafood version. Presentation alternatives include serving this dish with a sprinkle of edible flowers for an elegant touch or tossing in a vibrant salad for added freshness.

Serving and Presentation Guide


Plating this dish requires attention to color and texture. Use a spacious plate to allow the vibrant pesto sauce to shine. Garnish with freshly grated parmesan and toasted pine nuts for added texture and visual appeal. Traditional accompaniments would involve a rustic Italian bread that complements creamy pasta. Modern serving suggestions might incorporate pairing with a crisp salad featuring balsamic dressing for balance. Serve pasta at optimal warmth, ensuring flavors meld together; consider smaller servings for an intimate, gourmet experience.

Wine and Beverage Pairing


Pair this pasta with a Chardonnay for its complementary buttery notes that match the creamy sauce, enhancing the chicken’s flavor. For non-alcoholic alternatives, opt for a sparkling lemon-infused water to refresh the palate. If coffee is desired after the meal, a smooth, medium roast can provide a pleasant conclusion. Serving suggestions include chilled whites or a lightly carbonated water, keeping temperatures cooler to contrast with the warm, creamy pasta.

Storage and Shelf Life


Store leftover creamy chicken pesto pasta in an airtight container, ensuring it’s kept in the refrigerator to maintain freshness for up to 3 days. Avoid exposing to air to prevent oxidation and flavor loss. Reheat gently on the stovetop, adding a bit of cream to rejuvenate the sauce’s texture, or microwave with a cover to prevent moisture loss. The pasta can be frozen, but expect some texture changes; ensure to thoroughly thaw before reheating.

Make Ahead Strategies


This dish can be prepped in parts; consider making the pesto up to two days in advance, storing it in the fridge in airtight conditions. Cook the chicken a day before, chilling it to minimize prep time on busy cooking days. Assembled pasta should be cooked just before serving to maintain creamy idealness. Reheat the sauce by thinning with additional cream if it thickens too much in storage. Add fresh elements like basil just before serving.

Scaling Instructions


To halve the recipe, simply adjust ingredient quantities proportionally, ensuring consistent flavor. Doubling or tripling may necessitate using larger cooking equipment, such as wider pans to accommodate increased volume, ensuring even heat distribution. Modifications in timing should reflect these changes, factoring in longer cooking times for increased portions. Larger batches can be divided post-cooking into separate containers, maintaining fresh servings for each meal set aside.

Nutritional Deep Dive


This pasta offers a balanced macro profile, combining carbohydrates from pasta, lean protein from chicken and healthy fats introduced by olive oil and nuts. Micronutrient benefits include the basil’s vitamin A and K contribution and garlic’s antioxidant properties. With proper portion control, this dish supports weight management goals without sacrificing taste. Serving size awareness is crucial; complement with a light salad to complete a well-rounded meal.

Dietary Adaptations


For gluten-free variations, ensure the pasta used is certified gluten-free, maintaining the overall dish integrity. Dairy-free adjustments involve substituting almond milk or vegan cream products, with nutritional yeast in place of parmesan for flavor preservation. Low-carb enthusiasts might swap the pasta for zucchini noodles, cutting carbohydrate load significantly while preserving pesto’s flavor impact.

Troubleshooting Guide


Address texture issues by ensuring sauce consistency through the addition of pasta water to stabilize creamy textures. Correct flavor imbalances by adjusting seasoning with salt, lemon juice or pepper to suit taste preferences. For temperature problems, opt for gentle reheating methods to reinstate optimal warmth without drying out. Equipment challenges may arise – verify pan sizes and burner heats to ensure uniform cooking in kitchen environments. Ingredient substitutions should maintain balance; use suggested replacements to keep flavor profiles intact.

Recipe Success Stories


Recipes incorporating personalized twists have gathered a loyal following, and reader adaptations include adding roasted red peppers or asparagus for a pop of color and additional nutrients. Community feedback applauds the simplicity yet richness of the dish, perfect for entertaining without fuss. Photography tips suggest natural lighting to enhance the pesto’s vibrant colors, with garnish highlights adding depth and allure to each image.

Frequently Asked Questions

Can I use other nuts instead of pine nuts in the pesto? Yes, many find success with walnuts or almonds, providing a similar texture with unique flavor undertones.

How can I make this dish spicy? Add red pepper flakes to the sauce or incorporate diced jalapeños for a fiery kick that complements creamy flavors.

Is it possible to prepare this dish vegan? Absolutely, substitute chicken with grilled portobello mushrooms and use vegan cream and cheese for the sauce.

What’s the best way to reheat without losing creaminess? Reheat over low heat and add a splash of cream to maintain the sauce’s signature creaminess.

Can I make pesto without a food processor? Yes, use a mortar and pestle to manually blend ingredients, achieving a more authentic, rustic texture.

What’s an ideal side dish to pair with this pasta? A crisp, green salad with light vinaigrette complements the pasta’s richness, offering a refreshing balance.

How do I ensure the chicken stays juicy? Sear at high heat, then reduce and cook through without cutting immediately to retain internal juices.

How long can I store homemade pesto? Fresh pesto lasts in the fridge for about a week, or freeze for longer storage and use within three months.

Can I use dried basil instead of fresh? Fresh basil is recommended for optimal flavor, but dried basil can be used in a pinch, though the flavor will be less vibrant.

Is frying the pine nuts necessary? Toasting amplifies their flavor, but this step can be skipped if you prefer a milder nut presence in your pesto.

Additional Resources


For a deeper dive into pesto’s versatility, explore recipes tailored for summer salads and sandwiches, utilizing its fresh flavors across diverse culinary applications. Technique guides on achieving the perfect pasta consistency can enhance your confidence in boiling methods. Discover ingredient information establishing the health benefits of core components like basil and olive oil. Seasonal variations include transitioning this dish for festive occasions with holiday-specific substitutions. For equipment recommendations, explore options that facilitate easier pasta preparation and sauce making.

Join the Conversation


Engage with our community and share your personal takes on this creamy chicken pesto pasta recipe. Social media platforms serve as a fantastic space to connect, offering tips and insights into unique twists and flavorful add-ons. We encourage photography showcases, inviting you to post your creations that capture the vibrant allure of this dish. Share reviews and adaptations you’ve found successful, contributing to an ever-growing collection of culinary achievements. Our community thrives on such interactions, each story adding a layer of shared culinary enthusiasm.

The Recipe

Creamy Chicken Pesto Pasta

Serves: 4

Prep Time: 15 mins

Cook Time: 20 mins

Total Time: 35 mins

Kitchen Equipment Needed

  • Large pot
  • Large skillet
  • Blender or food processor
  • Wooden spoon
  • Cutting board
  • Knife

Ingredients

  • 1 lb gluten-free pasta
  • 1 lb chicken breast, sliced
  • 2 cups fresh basil leaves
  • 1/3 cup pine nuts, toasted
  • 2 cloves garlic
  • 1/2 cup grated Parmesan cheese
  • 1/2 cup olive oil
  • 1/2 cup heavy cream
  • Salt and pepper to taste
  • 1 tbsp olive oil for cooking

Directions

  1. Begin by cooking the gluten-free pasta according to package instructions. Drain and set aside.
  2. In a skillet, heat 1 tbsp of olive oil over medium heat. Add the chicken slices, seasoning with salt and pepper, and cook until golden brown and cooked through. Remove from heat and set aside.
  3. For the pesto, combine basil, toasted pine nuts, garlic, Parmesan cheese, and 1/2 cup olive oil in a blender or food processor. Blend until smooth.
  4. In the same skillet used for the chicken, add the pesto and heavy cream, heating gently. Do not boil.
  5. Combine the cooked pasta with the creamy pesto sauce, adding chicken slices. Toss well to coat evenly.
  6. Serve warm, garnished with additional Parmesan and pine nuts if desired.

Recipe Notes

  • To make this dish dairy-free, substitute heavy cream with coconut cream and use nutritional yeast instead of Parmesan.
  • Add a splash of lemon juice to the pesto for a zesty twist.
  • For added flavor, consider grilling the chicken for a smoky edge.

Irresistible Philly Steak Cheese Fries Recipe for Ultimate Comfort Food

Philly Steak Cheese Fries: A Decadent Delight

⚖️
Difficulty
Easy

⏲️
Prep Time
15 mins

🕒
Cook Time
25 mins

⏱️
Total Time
40 mins

🍽️
Servings
4

Philly Steak Cheese Fries combine the rich, savory taste of the classic cheesesteak with the satisfying crunch of golden fries. This indulgent dish is perfect for a hearty meal or as a crowd-pleasing appetizer. The flavorful combination of tender beef, melted cheese, and crispy fries creates a delightful harmony of textures and tastes that will leave you craving more. Whether you’re a fan of traditional Philadelphia cuisine or you’re looking for a new way to enjoy steak and cheese, these fries are sure to become a favorite.

Enjoy the enticing aroma of caramelized onions and sizzling beef as they fill your kitchen. The visual appeal of this dish is undeniable, with its vibrant layers of golden fries, creamy cheese sauce, and tender steak slices topped with fresh herbs. The skill level is quite approachable, making it an ideal recipe for both beginner and intermediate cooks who are looking to expand their culinary repertoire.

Quick Recipe Highlights

  • Flavor Profile: Savor the succulent taste of juicy beef paired with the creamy richness of melted cheese, all atop crispy, golden fries.
  • Texture: Experience the perfect balance of velvety cheese sauce with the crunchy exterior of well-cooked fries and tender steak slices.
  • Aroma: Delight in the mouthwatering fragrance of sautéed onions and grilled beef, a true olfactory treat.
  • Visual Appeal: A feast for the eyes, this dish boasts layers of vibrant ingredients and vibrant colors, topped with herbs for added flair.
  • Skill Level Needed: Easy enough for beginners while challenging enough for novice chefs to improve their cooking skills.
  • Special Equipment: A skillet, baking sheet, and a cheese grater are the essentials for crafting this delectable fry dish.

Recipe Overview

  • Difficulty Level: The dish is straightforward, with most of the effort focused on prepping the ingredients and managing cooking times to achieve the perfect texture.
  • Category: This dish can be served as a main course or as a shareable appetizer, making it highly versatile for any meal plan.
  • Cuisine: Rooted in American traditions, particularly the influence of Philadelphia’s classic cheesesteak, this recipe brings a modern twist to a beloved classic.
  • Cost: Depending on the quality of ingredients, you can expect this dish to remain budget-friendly, with steak being the most expensive component.
  • Season: Perfect all year round, but especially delightful during the colder months when hearty meals are appreciated.
  • Occasion: Ideal for game days, casual gatherings, or even as an indulgent dinner option.

Why You’ll Love This Recipe

The taste and texture of Philly Steak Cheese Fries will undoubtedly win you over from the first bite. The tender beef pairs beautifully with the creamy cheese sauce, while the crisp fries add a glorious crunch that completes each mouthful. The savory satisfaction of this dish satisfies those deep cravings for comfort food but with an elevated flair.

Convenience is king with this recipe. The preparation is broken into simple steps that ensure you’ll have no trouble achieving perfection every time. Its easy-to-follow method makes it accessible for weeknights yet impressive enough for entertaining guests at home.

Nutritionally, this dish provides a balanced amount of proteins and carbohydrates, especially when prepared with high-quality steak and fresh potatoes. You can further enhance its nutritional profile by incorporating whole-grain or sweet potato fries.

In a social setting, this dish never fails to impress. Its visually stunning presentation makes it a great talking point and helps elevate any dining experience. It’s an ideal choice for serving family-style at parties or as an indulgent appetizer, sure to leave your guests raving.

Cost-effectiveness and accessibility make this recipe stand out. With standard ingredients that can be found easily in most supermarkets, you won’t break the bank creating this dish. By selecting seasonal or on-sale produce and cheese, you can extend your budget even further while crafting a memorable meal.

Historical Background and Cultural Significance


Philly Cheesesteak’s storied origins lie in Philadelphia, Pennsylvania, where the combination of thinly-sliced beef and cheese nestled in a split roll became an emblematic dish. Incorporating these iconic flavors into Fries seems like a natural progression reflecting fondness for this American classic.

Culturally, cheesesteaks carry significant weight as a representation of both Philadelphia’s culinary identity and America’s diversity in food. The addition of fries is a nod to both countries’ love for comfort food, bringing together staple components in one indulgent dish.

The evolution of the dish into Philly Steak Cheese Fries taps into society’s penchant for fusion cuisine, reflecting how traditional meals can inspire new creations. It showcases innovation while maintaining a deep respect for the classics by taking familiar flavors and giving them fresh appeal.

Regional variations might include additions such as peppers or mushrooms, common accompaniments to cheesesteak. Each version adds its own flair while staying true to the spirit of melding cheese and beef.

Ingredient Deep Dive


The key ingredient—beef—is central both culturally and nutritionally to Philly Steak Cheese Fries. High-quality ribeye or sirloin provides authentic flavor and tenderness. Look for marbling in the beef as a sign of flavor intensity. Keep the steak refrigerated until use to maintain its structure, and slice just before cooking for optimum freshness.

Potatoes, whether they’re classic russets or sweet potatoes, provide the foundation for this dish. Selecting starchy potatoes helps achieve the desired crispiness when deep-fried or oven-baked. To store them, keep in a cool, dark place to avoid sprouting. Experimenting with sweet potatoes can create a new twist by offering a touch of natural sweetness.

Cheese contributes another layer of delectable flavor—the go-to options being provolone or melted cheddar, both bringing contrasting creamy juiciness when melted over other ingredients. Opt for freshly grated cheese to improve melting quality. If provolone is unavailable, mozzarella serves as an excellent alternative for delicate reserves and pulls.

Caramelized onions enhance both taste and depth with their inherent sweetness. Choose onions that feel firm without any soft spots, store them in a ventilated area away from potatoes to prolong shelf life, and transform them by slow-cooking—even slightly burnt edges can intensify flavor.

Common Mistakes to Avoid

  • Avoid using pre-shredded cheese as it generally contains anti-caking agents that can affect smooth melting.
  • Improper frying or baking technique leads to limp fries; ensure even heat distribution and avoid overcrowding the pan.
  • Overcooking the steak results in toughness; aim for medium-rare for tender beef.
  • Skipping the caramelization step for onions can reduce flavor depth and sweetness.
  • Using under-seasoned components can result in a bland dish; balance seasoning throughout the layers.
  • Rushing the cooking process can lessen both flavor and visual appeal.
  • Choosing low-fat cheese alternatives might weaken flavor consistency and texture.
  • Neglecting to rest cooked steak causes loss of juices when slicing.
  • Omit temperature check on baking temp for fries to maintain crispness.

Essential Techniques


Caramelizing onions is essential for releasing their sugars, leading to a sweet, rich taste. Slowly cook sliced onions with a little olive oil over medium-low heat until they turn a deep golden brown. Avoid turning the heat up too high to prevent burning.

Perfectly frying potatoes ensures both crisp exterior and fluffy interior. To achieve this, choose starchy potatoes like russet, soak in cold water to reduce excess starch, and ensure they are completely dry before cooking. Fry in small batches for even browning, or alternatively, bake at high temps for healthier crisp fries.

Pro Tips for Perfect Philly Steak Cheese Fries

For extra flavor, marinate steak in Worcestershire sauce, garlic, and pepper before cooking. This step will tenderize the beef while infusing it with flavor complexity.

Fry or bake potato strips twice for maximum crispiness, blanching first and then applying a finishing fry or bake at a higher temperature.

Using a cast-iron skillet for cooking steak helps achieve a nice sear due to even distribution of heat—creating a classic finish to your beef.

Preserve cheese sauce smoothness by consistently stirring as it melts to prevent curdling, utilizing low heat and constant motion.

Top fries with fresh herbs and grated parmesan for additional layers of flavor complexity and presentation enhancement.

Slicing steak against the grain ensures tenderness and makes each piece absorb flavors more efficiently while enjoying enhanced eating experience.

Variations and Adaptations


For regional variations, consider adding bell peppers or mushrooms to bring extra depth to your Philly Steak Cheese Fries. They not only add color and flavor but also contribute to nutritional benefits.

Seasonal adaptations might incorporate modified toppings like adding roasted squash in fall for a cozy twist on this classic.

To adapt for dietary preferences, switch to lactose-free cheese to make it dairy-friendly while keeping the creamy texture. If you prefer to reduce carbs and calories, use baked sweet potato fries as a base.

Want to test flavor profiles? Amplify the savoriness by utilizing aged cheeses or spicy alternatives like jalapeño cheddar for adventurous tastebuds.

Alter textures by swapping classic fries with waffle or curly fries, offering varied crispiness and fun visual elements!

For creative serving ideas, present this dish in individual skillets or ramekins with personalized layers and customization from guests’ toppings.

Serving and Presentation Guide


For an impressive presentation, serve on a large platter or in a cast iron skillet with small sprigs of rosemary for color contrast.

Garnish with chopped parsley, a sprinkle of paprika, or a dash of sesame seeds as edible decor.

Serve with complementary dipping sauces like aioli or tangy yogurt to elevate the taste and encourage interactive dining.

Consider serving with cold beers or carbonated drinks that refresh between bites, cooling palates while creating harmony.

Maintain essential temperature contrasts with warm beef and cheese atop chilled plates, and balance portion sizes to complement other menu components.

Wine and Beverage Pairing


Pair Philly Steak Cheese Fries with a robust red wine like Cabernet Sauvignon, which matches the depth of steak flavors and accents cheese undertones, offering an elegant touch.

For non-alcoholic options, consider iced tea or sparkling waters with citrus enhancements, balancing rich dish elements.

In cooler months, hot apple cider adds a comforting element alongside this heartwarming meal.

Beverage options like pale lagers or amber ales present smooth notes that harmonize effortlessly with grilled beef tones.

Enjoy these pairing options while keeping drinks appropriately chilled or warmed, elevating your overall dining experience.

Storage and Shelf Life


Store leftovers in airtight containers placed in the fridge, ensuring separation between fries to prevent sogginess.

Maintain proper food safety by consuming within 2-3 days, checking for signs like soggy fries or unappealing aromas indicating spoilage.

Reheat leftovers in an oven or air fryer to restore crispness on fries and ensure full reheating without losing texture quality.

Follow freezing guidelines by wrapping cooked steak separately from fries to extend shelf life beyond immediate consumption, preventing unwanted moisture absorption.

Make Ahead Strategies


Prep steak and ingredient components up to 24 hours ahead, storing components separately in airtight containers to maintain freshness.

Optimize cooking times by staging cleanup between batches, allowing time to begin fresh component assembly while previous elements rest or cool.

Reheat steak gently for meals made ahead, prioritizing preservation of its juices while ensuring it stays flavorful.

Infuse fries or onion components with extra spices before reheating to refresh flavors and enhance taste.

For styling and presentation consistency, aim for assembling right before serving, which should maintain crispness and balanced texture.

Scaling Instructions


To halve servings, adjust ingredient measurements proportionately while maintaining seasoning levels, ensuring the original flavor balance remains intact.

Doubling involves readiness for larger equipment like sheet pans to accommodate increased volume, adjusting oven time and placements accordingly to guarantee thorough cooking for fries.

Monitor frying or baking temperatures closely if scaling substantially—more potato volume means fluctuating temperature while ensuring even outcomes.

Store surplus servings in large, separated containers to prevent improper textures combining, reheating separately for balanced execution later.

Nutritional Deep Dive


The primary macronutrients—proteins, carbs, and fats—are well-represented within Philly Steak Cheese Fries through its hearty marble steak, cheese, and potato accompaniments, providing an excellent fuel source post-workout or midday meal.

Micronutrients like iron and B vitamins from beef support cellular function and energy regulation ensuring this dish has substantial nutritional value despite its indulgent feel.

Balance remaining dietary intakes before and after consumption given the slightly higher fat content, maintaining a well-rounded nutritional profile.

Perfect for sharing, portion control principles allow for harmonious consumption within planned balance without strenuous constraints.

Dietary Adaptations


Choose gluten-free fries and a gluten-free cheese sauce for a celiac-friendly version without compromising flavors.

Use alternative cheeses like almond or soy-based alternatives for a plant-based experience while consulting sources on substitute substitutions for melting behavior.

Going low-carb might involve baked zucchini fries for an equally delicious crunch that aligns with dietary expectations.

Should keto principles guide your selections, exclude potatoes and increase meat content proportionally, paired with additions like mushrooms for nutritional fiber.

Paleo adaptations can lead to grain-free fry alternatives alongside grass-fed steak choices maintaining ethical adherence to holistic nutrition practices.

Troubleshooting Guide


If fries turn soggy, ensure you maintain rigorous drying techniques and avoid overcrowding when baking to achieve best results.

For overly salty results, counterbalance this with a squeeze of lemon juice or low-sodium stocks to enhance other dish elements.

Temperature concerns might arise if cheese behaves unpredictably; consistent stirring serves as a solution for smooth sauce textures.

If dry steak becomes problematic, explore marination beforehand and add fats like butter or oils during cooking to enhance tenderness.

Consult reliable sources about effective culinary changes that make substitution transitions seamless for abstract needs, using varying options for maximum flavor preservation despite modifications.

Recipe Success Stories

Community feedback echoes high praise for Philly Steak Cheese Fries, showcasing reader success stories adapting toppings and cheeses to match personal tastes while maintaining core attributes.

Images often feature delightful perfection through vibrant online communities sharing adaptations alongside recipe tweaks inspiring experiments.

Photographers regularly note flair shown in garnishment presentation celebrating individual creativity alongside distinctive serving styles.

Reader suggestions for additions like jalapeño slices or avocados have been incorporated successfully, adding fresh layers of flavor contrasts.

Joining Philly Steak Cheese Fries online community groups brings opportunities for collaborative attempts advancing delicious culinary experiences.

Frequently Asked Questions

Q: Can I use frozen fries?

A: Absolutely! Frozen fries streamline cooking times without overriding flavors—opt for brands with high-quality textures and taste benefits providing consistent results.

Q: How do I prevent cheese clumping?

A: Grate cheese finely; use a low, consistent heat to control smooth melting, and preserve delicate flavors and even distributions avoiding anti-caking additives found in pre-shredded options.

Q: Do I need to use a specific type of potato?

A: Starchier potatoes like russets develop perfect structuring ideal for both frying and baking purposes, assuring ultimate characteristic balance—though sweet potatoes also serve.

Q: Can I replace steak with chicken?

A: Absolutely! Thinly sliced chicken breast works well within Philly Steak Cheese Fries, adjusting seasonings slightly for variance and ensuring even cooking on all aspects.

Q: What’s the best way to store leftovers?

A: Store individual components separately in sealed containers to maintain texture and quality, adhering closely to food safety recommendations for secure consumption later.

Q: If my sauce looks too thin, how do I thicken it?

A: Introduce cornstarch slurry slowly while stirring, gauging results without overpowering dominant cheese flavor balances, making minimal adjustments gradually.

Q: What’s a simple way to reduce the dish’s sodium content?

A: Opt for low-sodium versions of cheese or beef, paired alongside rock salt fries and using strategic seasoning moderation for desired reduction.

Q: How can I make it spicier?

A: Increase heat flavorings through additions like cayenne pepper and smoked paprika while embedding chili-laced cheeses—create layers accentuating key dish dimensions efficiently.

Q: Do I have to caramelize the onions?

A: While it’s not mandatory, caramelized onions greatly impact flavor complexity—achieving beneficial depth and substance enhances the dish exponentially, inviting reprising through encouraged participation.

Q: Can leftovers be reheated without losing quality?

A: To maintain balance and structure, separate ingredients when storing and reheat in methods restoring authentic crispy attributes from prior servings, preserving integrity.

Additional Resources

For those delving deeper into making Philly Steak Cheese Fries a staple, staying updated on quality ingredient sourcing guides enhances procurement choices considerably.

Explore further recipes featuring out-of-the-ordinary iterations within this delightful dish tweaking nuance variations that follow culinary passion alongside traditional aspects.

Eager to improve technique comprehension? Check online video resources focusing on fundamental cooking methods incorporating supportive references achieving core objectives.

Join the Conversation

Connect with enthusiasts online through sharing Philly Steak Cheese Fries content, engaging social media exchanges bringing amazing ideas to life and saluting creativity globally fashioned from habitual tendencies.

Additionally, reviewing alternative post iterations leads broader discussions inspiring reinterpretations through expanding familiar reaches and opening possibility portals alongside signature encouragement iterations, energizing rich experiences.

Artistic photography tips include lighting and color decoding—capturing dishes beautifully boasts elements that truly spark joy celebrating moments, inviting gourmet endeavors inspiring shared enjoyment immersion!

From formal recipe reviews to online snapshots showcasing differing elements added into recipes such as Philly Steak Cheese Fries adaptations, rich exchanges embracing multi-dimensional role experiments positively thrive.

Explore Philadelphia’s vibrancy within international influences from travelogues inspired by authentic cheesesteak recollections transcending consequential horizons.