Irresistible Garlic Bread Sloppy Joes Recipe for Easy Dinners

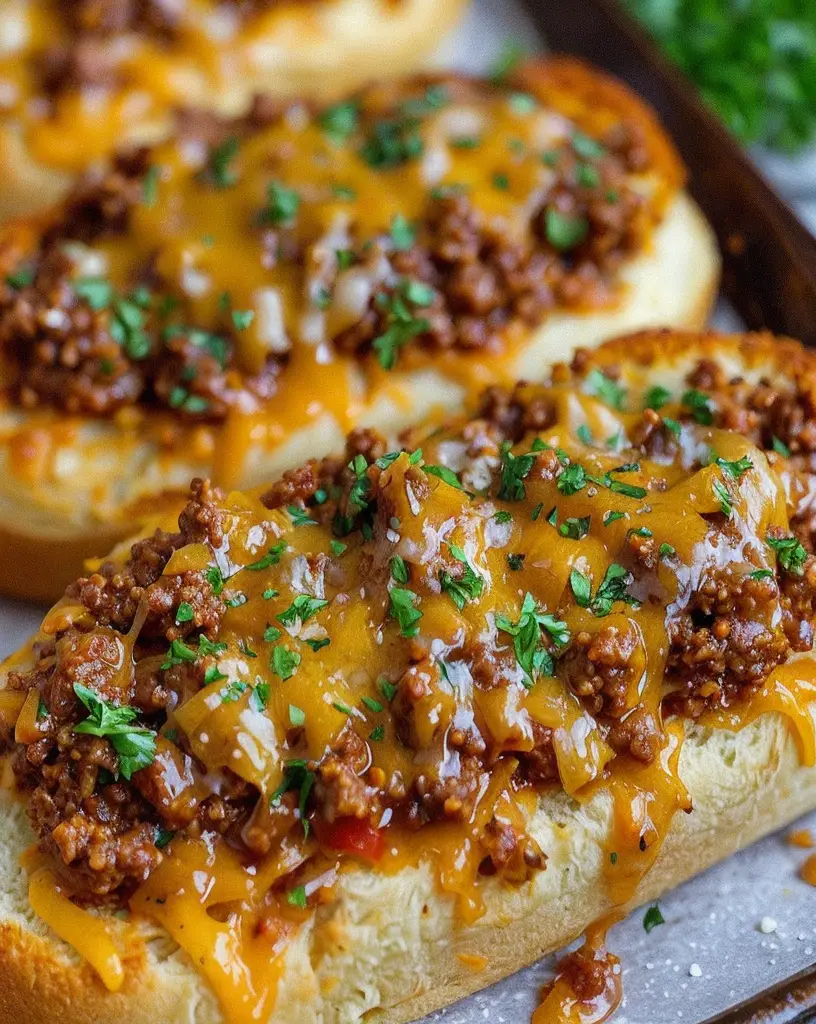
Garlic Bread Sloppy Joes: A Flavorful Twist on a Classic Favorite

⚖️
Difficulty
Easy

⏲️
Prep Time
10 mins

🕒
Cook Time
20 mins

⏱️
Total Time
30 mins

🍽️
Servings
4

Garlic Bread Sloppy Joes brings together two comfort food favorites into a single delightful dish that will tantalize your taste buds. Imagine the savory flavors of traditional sloppy joes melded with the rich, buttery notes of garlic bread. This easy recipe is perfect for busy weeknights or a cozy weekend meal, promising to deliver a fulfilling and flavorful experience with each bite.

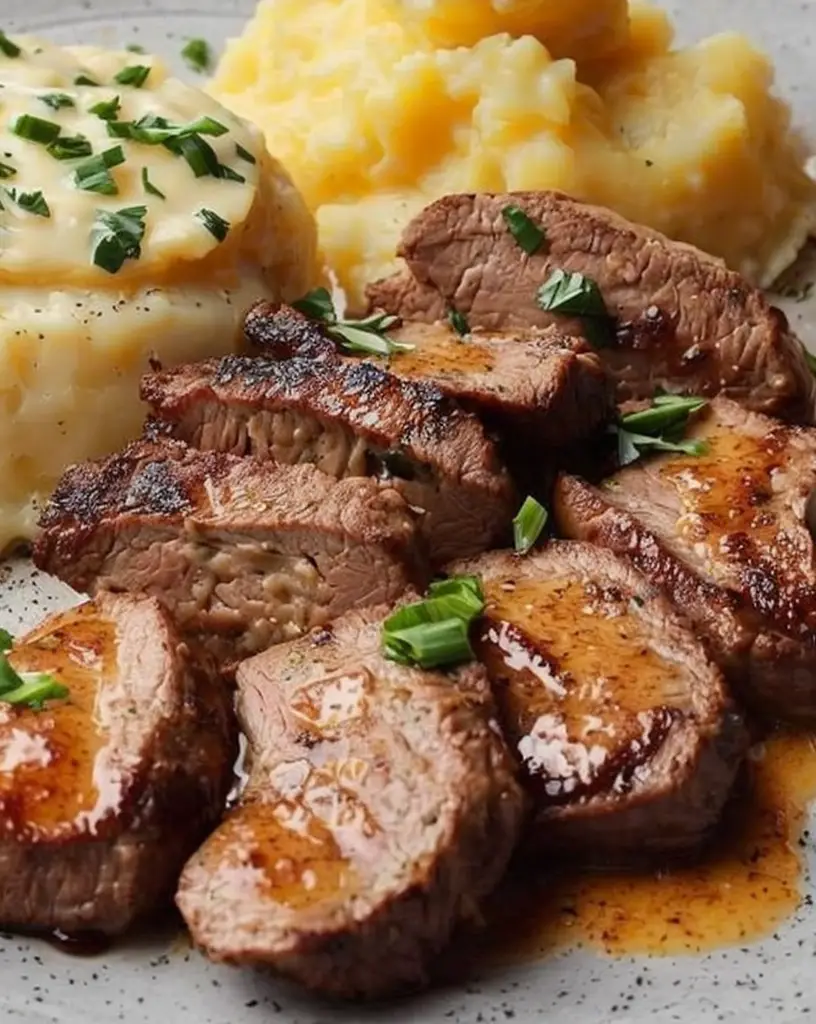
These Garlic Bread Sloppy Joes are more than just a meal; they are a delightful experience that combines textures, aromas, and tastes to create something truly special. Picture the perfect crispiness of garlic-infused bread cradling a hearty and savory beef mixture topped with melted cheese—every ingredient plays its part in creating a beautiful harmony that defines comfort and indulgence.

Quick Recipe Highlights

  • Flavor Profile: Expect a perfect balance of savory ground beef, infused with the aromatic punch of garlic, and a hint of sweetness from ketchup.
  • Texture: Enjoy a delightful contrast between the crispy toasted garlic bread and the juicy, tender beef filling, crowned with melted cheese.
  • Aroma: Savor the enticing scent of freshly toasted garlic bread mingling with the rich aroma of seasoned beef.
  • Visual Appeal: Presenting vibrant red from the beef mix, golden-brown garlic bread, and gooey cheese, creating an inviting and mouthwatering display.
  • Skill Level Needed: Beginner-friendly, requiring basic cooking techniques and common kitchen tools.
  • Special Equipment: A large skillet or frying pan will effectively accommodate all ingredients.

Recipe Overview

  • Difficulty Level: Chosen as easy due to the straightforward preparation steps, requiring minimal cooking skills, perfect for novice cooks or quick meals.
  • Category: This recipe fits the category of quick, filling, and heartwarming meals, suitable for lunch, dinner, or weekend gatherings.
  • Cuisine: Rooted in American comfort food, this dish showcases culinary influences of traditional homemade recipes with a modern twist.
  • Cost: An economical option, affordable ingredients make this dish both budget-friendly and accessible for most households.
  • Season: Best enjoyed year-round, providing warmth and comfort during colder seasons yet delightfully satisfying anytime.
  • Occasion: Ideal for weeknight dinners, casual parties, or family gatherings, delivering flavor without complexity.

Why You’ll Love This Recipe


This Garlic Bread Sloppy Joes recipe offers taste and texture appeal that merges two beloved comfort foods into one extraordinary dish. The juicy beef mixture, combined with fragrant garlic bread and melted cheese, creates a burst of flavors in every bite. Whether you’re craving something hearty or need a quick, fulfilling meal, this recipe checks all the boxes.

Convenience is a highlight, as this dish requires minimal preparation time and effort, making it perfect for busy days or last-minute meal plans. With just a few common ingredients, you can create a delightful and satisfying dinner that requires just 30 minutes from start to finish.

Nutritionally, this dish offers a good balance of protein from beef, carbohydrates from bread, and fat from cheese, making it a complete and satisfying meal. While it exudes indulgence, you can tweak ingredients to better fit dietary needs or preferences, offering flexibility and healthful advantages.

Socially, this dish is a true crowd-pleaser, perfect for sharing with friends and family. Its comforting nature makes it a fantastic option for game nights, casual get-togethers, and family dinners, creating joy and conversation around the table.

Cost-effectiveness is another plus. The use of affordable, easily accessible ingredients ensures that this recipe can fit within a budget, offering a delicious and satisfying meal without breaking the bank.

Historical Background and Cultural Significance


The origin of sloppy joes traces back to the early 20th century in America, believed to have emerged as an adaptation of a loose meat sandwich. Simple yet filling, it quickly gained popularity, becoming a staple in diners and home kitchens alike. Over the years, the dish evolved, with countless variations emerging in different regions.

Culturally, the sloppy joe represents the epitome of comfort food, evoking nostalgia for many. It has been adapted and modified to suit various tastes and preferences, from the traditional beef filling to vegetarian and vegan versions, illustrating its versatility.

The recipe’s evolution showcases how a basic concept can flourish into countless adaptations, each adding a new layer of flavor and style. Regional variations highlight local ingredients and flavors, ensuring that the dish remains fresh and exciting wherever it is served.

In different regions, ingredients and flavors vary, contributing to the dish’s adaptability. Whether it’s adding spices for heat, incorporating vegetables for texture, or tweaking the sauce for sweetness, each version reflects local tastes and preferences, offering a unique spin on a classic.

Ingredient Deep Dive


Ground beef serves as the protein heart of this dish, offering both taste and nutrition. Its cultural significance in American cuisine cannot be overstated, often associated with traditional dishes such as burgers and meatloaf. Nutritionally, beef provides a rich source of protein, iron, and essential nutrients, supporting muscle growth and energy.

When selecting ground beef, consider the fat content. A lean blend (85% lean) is preferred for balancing flavor and health benefits. Freshness is key, so check for a bright red color and firm texture. Store wrapped in airtight containers in the fridge for 1-2 days or freeze for up to 3 months.

Garlic contributes a significant aromatic note to this recipe. Known for its strong cultural significance and usage across various cuisines, garlic adds depth and warmth. Its nutritional benefits include anti-inflammatory and immune-boosting properties. Choose fresh, plump bulbs for maximum flavor, storing them in a cool, dry place away from direct sunlight.

Sloppy joes often include bread, with garlic bread elevating them to new heights. Choose a hearty loaf that can withstand the filling’s moisture. Storage tips for garlic bread involve cooling it to room temperature before refrigerating in a sealed bag for 2-3 days. For longer storage, wrap and freeze, reheating in an oven before serving.

Consider substitutions to adapt to dietary needs. Turkey or chicken offer lower-fat alternatives to beef, while mushrooms or lentils provide a vegetarian option. For bread, gluten-free variations are available, offering flexibility without sacrificing the dish’s integrity.

Common Mistakes to Avoid

  • Overcooking the beef can lead to a dry filling. Cook just until browned and no longer pink to retain juiciness.
  • Using stale or overly thick bread could result in a soggy sandwich. Opt for fresh, well-textured garlic bread to maintain crispiness.
  • Not balancing flavors can lead to a one-dimensional dish. Ensure a harmonious balance between savory, sweet, and tangy elements.
  • Overloading the sandwich can make it difficult to eat. Ensure a generous but manageable filling.
  • Skipping fresh garlic for powder reduces aromatic depth. Fresh garlic provides a robust and authentic garlicky punch.
  • Forgetting to pre-toast the bread may result in a lackluster texture. Light toasting enhances crunch and flavor.
  • Neglecting to season the beef mixture can make the dish bland. Salt and pepper, along with herbs, enhance flavors.
  • Using the wrong cheese can overpower the dish. Choose a mild, melty cheese to complement the flavors.
  • Overcooking the garlic can cause bitterness. Sauté until golden, not brown, for optimal flavor.

Essential Techniques

Creating the perfect Garlic Bread Sloppy Joes involves mastering a few essential techniques. The initial technique is browning the beef. This process not only cooks the meat but also develops a rich, savory flavor due to the Maillard reaction. To master this, ensure your pan is hot before adding the beef and avoid crowding to prevent steaming.

Perfectly toasting the garlic bread is another key technique. The goal is to achieve a crisp exterior with a soft interior. This is accomplished by brushing the bread lightly with garlic-infused butter and baking until golden brown, providing a savory and crunchy base for the sloppy joe mixture.

Combining flavors effectively is crucial for this recipe’s success. Ensuring that each ingredient is proportioned correctly and seasoned allows the unique characteristics of each to shine while harmonizing into a comforting, cohesive dish. Tasting as you go helps maintain balance and adjust to personal preferences.

Pro Tips for Perfect Garlic Bread Sloppy Joes

For exceptionally flavorful beef, add a splash of Worcestershire sauce during browning. It enhances umami, pairing perfectly with the garlic bread’s savory profile.

Include finely chopped onions in the beef mixture to add moisture and depth of flavor. Cook until translucent for a subtle sweetness that complements the beef and garlic.

For added richness, incorporate a tablespoon of tomato paste into the beef mixture. It provides a concentrated tomato flavor, enhancing the overall taste.

Enhance garlic flavor by using roasted garlic in the butter mix for the bread. Roasting reduces bitterness and intensifies sweetness, offering a delicious twist.

Keep melted cheese in mind. Cheddar offers sharpness, Monterey Jack adds creaminess, and Swiss provides nuttiness. Blend to your preference for a custom cheese experience.

Switch up your greens. Adding fresh spinach or arugula to the filling introduces a fresh note, balancing the hearty, meaty tones, and incorporating additional nutrients.

Variations and Adaptations

Regional variations of Garlic Bread Sloppy Joes abound, allowing customization to personal taste and cultural influences. In the Southwest, adding chili powder and jalapeños infuses the dish with characteristic heat, while Midwest versions may incorporate sweet corn for added texture and sweetness.

Taking advantage of seasonal ingredients allows for refreshing adaptations. Summer might introduce fresh basil or pesto for a Mediterranean flair, while autumn could inspire incorporating mushrooms and sage for earthiness.

To accommodate dietary needs, consider designing a low-carb version by placing the beef mixture in hollowed-out bell peppers. Keto followers may use almond flour bread, while gluten-free options exist to suit various restrictions.

Flavor variations can take this dish from familiar to exotic with a few simple tweaks. Try infusing the beef with curry powder and coconut milk for an Indian-inspired twist, or add teriyaki sauce and sliced green onions for an Asian influence.

Adjusting for texture may include using a food processor to finely mince vegetables, creating a smoother filling. More crunch can be introduced through toppings like crispy onions or shredded cabbage.

Presentation can also vary, from the traditional open-faced sandwich style to bite-sized, appetizer-friendly sliders, allowing flexible serving options for different occasions.

Serving and Presentation Guide

For an eye-catching presentation, consider plating open-faced Garlic Bread Sloppy Joes using rustic wooden boards or colorful ceramic plates. The contrast between the golden bread and the vibrant beef topping is visually enticing.

Garnishing with freshly chopped parsley or basil provides a pop of color and freshness, enhancing both aesthetics and flavor. A light sprinkle of paprika adds a touch of smokiness and visual warmth, perfect for enhancing the rustic appeal.

Traditionally paired with a refreshing side salad or crispy fries, this dish is versatile enough for modern accompaniment as well. Think roasted vegetables or quinoa salad for a refreshing change, bringing additional nutrients to your meal.

When serving, temperature matters; aim to deliver the dish hot, just out of the oven, ensuring the cheese is at its gooey best and the beef filling remains juicy.

Consider portion control techniques like slicing the bread into manageable sections, suitable for individual servings, making it ideal for gatherings and buffet-style dining.

Wine and Beverage Pairing

Pairing wine with Garlic Bread Sloppy Joes can elevate the dining experience. Opt for a medium-bodied red like Merlot or Zinfandel, their fruity and subtle spice notes complement the savory beef filling.

For non-alcoholic alternatives, consider a glass of iced tea or sparkling water infused with lemon or mint. Their refreshing nature contrasts with the rich garlic and beef flavors without overpowering them.

Coffee may not be a common pairing, but a strong espresso can serve as a bold finish to this hearty meal, cleansing the palate and complementing the savory notes.

The serving temperature of beverages should be balanced; chilled for wines and non-alcoholic beverages contrasts with the hot dish, enhancing the overall sensory experience.

Serving suggestions include using stemless glasses for a casual setting, matching the laid-back vibe of the meal, and making the experience comfortable and approachable for all guests.

Storage and Shelf Life

Storing leftovers properly ensures the quality and safety of your Garlic Bread Sloppy Joes. Refrigerate the beef mixture in an airtight container for up to 3 days, ensuring freshness.

For the best method, separate the components: Keep the beef mixture and bread separate to avoid sogginess. The bread should be wrapped in foil or stored in a bread box.

Temperature considerations suggest refrigerating promptly to prevent bacterial growth, maintaining a temperature below 40°F (4°C).

Signs of spoilage include off odors, change in texture, or visible mold, indicating the leftovers should not be consumed if present.

Reheat leftovers in a skillet for best texture, adding a splash of liquid to retain moisture. Alternatively, use the microwave for convenience, but be cautious of overcooking the beef.

Freezing the beef filling is a viable option, allowing storage for up to 3 months. Thaw overnight in the refrigerator before reheating, ensuring food safety and quality.

Make Ahead Strategies

Prepare components ahead of time for a stress-free cooking experience. The beef mixture can be cooked in advance and refrigerated, staying good for 2-3 days.

Storage between steps is crucial. Keep beef in airtight containers and store bread in a bread box or similar to maintain freshness.

Quality impact assessment shows minimal change; flavors meld beautifully over time, enhancing taste without compromising texture.

Assembly tips include ensuring bread is toasted just before serving, guaranteeing crispiness and not absorbing too much moisture.

Reheating guidelines emphasize using a skillet for the filling to maintain moisture and texture. Cheese can be added during reheating for freshness.

Fresh element additions, such as fresh herbs or a squeeze of lemon, brighten flavors, adding a pop of freshness when ready to serve.

Scaling Instructions

When halving the recipe, reduce each ingredient accordingly, ensuring a consistent balance of flavors. Use smaller equipment, if possible, to avoid altering the cooking process.

Doubling or tripling requires scaling ingredients proportionally, ensuring appropriate seasoning adjustments as flavors concentrate with larger volumes.

Equipment adjustments might include using larger frying pans or multiple skillets to accommodate increased quantities, maintaining consistent cooking times and textures.

Timing modifications may be necessary for browning or simmering processes, so keep an eye on cooking cues to prevent over or undercooking.

Storage considerations increase with scaling; ensure sufficient containers and refrigerator space to accommodate additional portions securely.

Nutritional Deep Dive

Breaking down the macronutrient profile, Garlic Bread Sloppy Joes deliver a balanced mix of protein, carbohydrates, and fats, providing energy and sustenance.

The micronutrient analysis highlights essential vitamins and minerals such as iron, vitamin B12 from beef, and the immunity-boosting properties of garlic.

Health benefits include muscle maintenance from protein, energy from carbohydrates, and beneficial fats, with garlic contributing to anti-inflammatory and cardiovascular health.

Dietary considerations might involve portion control for calorie-sensitive individuals, ensuring a balanced intake according to dietary needs.

Portion analysis aids in understanding caloric distribution per serving, assisting with meal planning for weight management and healthy living.

Weight management tips include pairing the dish with a salad or steamed vegetables, providing fiber, reducing calorie density, and promoting satiety.

Dietary Adaptations

For gluten-free variations, use gluten-free bread alternative while ensuring all ingredients, like sauces, are certified gluten-free to avoid cross-contamination.

Create a dairy-free version by substituting cheese with a dairy-free alternative or nutritional yeast, offering a cheesy flavor without the lactose.

A vegan adaptation involves replacing beef with lentils or black beans and ensuring all components, such as bread and sauces, align with vegan principles.

For low-carb enthusiasts, consider using almond flour bread or lettuce wraps, maintaining the filling’s essence while significantly reducing carbohydrate intake.

Those following a keto diet may appreciate using low-carb bread alternatives and incorporating high-fat ingredients like avocado or full-fat cheeses.

Paleo adaptations include eliminating grains and refined sugars, using sweet potatoes or cauliflower as a base instead of bread and ensuring natural ingredient use.

Troubleshooting Guide

Address texture issues by ensuring proper cooking time for each component. Tough beef might be due to overcooking; use gentle, moderate heat to maintain tenderness.

Flavor balance can be restored by adjusting seasonings. If too salty, add sweeteners or acidity. Conversely, a bland dish can benefit from more spices or aromatics.

Temperature problems arise from inadequate reheating. Ensure components are even in temperature to maintain flavor and texture integrity.

Equipment challenges involve ensuring the skillet size matches the ingredient volume, preventing overflow or inadequate caramelization during cooking.

Ingredient substitutions may require taste testing; alternative proteins or vegan cheeses can alter flavors, so season adaptively for best results.

Timing concerns, especially for multitasking, can be mitigated by pre-prepping ingredients, ensuring a smooth recipe flow and timely completion.

Recipe Success Stories

Community feedback consistently highlights the recipe’s adaptability and crowd-pleasing nature. Readers love sharing their flavor variations, achieving unique dishes with ease.

Variation successes include incorporating locally sourced ingredients and switching up herbs or spices, yielding delightful twists that often become newfound favorites.

Adaptation stories showcase readers altering components to fit dietary needs, proving the recipe’s flexibility while maintaining its delicious core.

Reader suggestions offer valuable insights; small tips from adding heat with cayenne to enhancing flavors with fresh herbs contribute to the communal cooking experience.

Photography tips guide aspiring food bloggers in capturing the dish’s beauty. Highlight cheese pulls, garnish vibrancy, and texture for eye-catching visuals.

Frequently Asked Questions

What type of beef should I use?
Choose ground beef with around 15% fat content for flavor and juiciness, but adjust based on preference for leanness.

Can I use pre-made garlic bread?
Yes, pre-made garlic bread is a time-saving option, but ensure it’s freshly toasted for optimal texture and flavor.

How can I add more vegetables?
Incorporating finely chopped vegetables like bell peppers or carrots into the beef mix can add nutrition and texture.

What’s the best way to store leftovers?
Store components separately in airtight containers in the fridge for up to 3 days and reassemble before serving.

Are there vegan alternatives?
Use plant-based ground meat and vegan cheese substitutes for a delicious vegan adaptation of the recipe.

How do I prevent soggy bread?
Ensure the bread is toasted well, serve immediately, and avoid excess filling to maintain crispness.

Can I freeze the assembled sandwiches?
It’s best to freeze the components separately; thaw and combine upon reheating for freshness.

What sides pair well with this dish?
A fresh green salad, roasted vegetables, or corn on the cob complement and balance the meal nicely.

How can I add spice?
Incorporate sliced jalapeños or a dash of chili powder to the beef mixture for an added kick.

Is there a substitute for Worcestershire sauce?
Soy sauce with a splash of vinegar offers a similar savory depth if Worcestershire sauce is unavailable.

What’s the best cheese to use?
Cheddar, Monterey Jack, or a cheese blend provide gooey goodness, enhancing the dish’s savory profile.

How do I keep cheese from sticking to the pan?
Use a non-stick skillet or lightly coat the surface with non-stick spray to prevent sticking.

Additional Resources

Explore related recipes such as Classic Sloppy Joes or transform leftover garlic bread into amazing croutons, each providing new ways to enjoy similar flavors.

Technique guides can enhance kitchen skills, offering insights on perfecting frying techniques or understanding flavor profiles to better tackle any dish.

For those interested in ingredient information, delve into articles exploring beef varieties, the health benefits of garlic, and selecting the best cheeses.

Equipment recommendations guide you to finding the perfect skillet or bread knife, ensuring seamless preparation and presentation.

Seasonal variations highlight the recipe’s adaptability to new ingredients, encouraging exploration of local markets and fresh produce.

Join the Conversation

Engage with us on social media by sharing your Garlic Bread Sloppy Joes creations. Tag us with your photos and experiences using the recipe hashtag, fostering community interaction and shared culinary joy.

Photography tips offer guidance on capturing your culinary masterpiece. Focus on lighting, composition, and detail to highlight the food’s texture and colors.

Recipe reviews help fellow home cooks learn from shared experiences; offer your thoughts, tweaks, and tips in the comments section below the post.

Join our community through cooking forums and recipe swaps, sharing successes, adaptations, and inspirational ideas with fellow culinary enthusiasts.

Experiment with recipe variations and innovation, whether it’s international influences or dietary adjustments, and share your newfound favorites with fellow readers.

The Recipe

Garlic Bread Sloppy Joes

Serves: 4

Prep Time: 10 mins

Cook Time: 20 mins

Total Time: 30 mins

Kitchen Equipment Needed

  • Large skillet
  • Oven-safe tray
  • Spatula
  • Garlic press (optional)

Ingredients

  • 1 lb ground beef
  • 4 slices of garlic bread
  • 1 cup shredded cheese (cheddar or Monterey Jack)
  • 1 small onion, finely chopped
  • 2 cloves garlic, minced
  • 1 cup ketchup
  • 1 tbsp Worcestershire sauce
  • Salt and pepper to taste
  • Basil or parsley for garnish

Directions

  1. Preheat oven to 350°F (175°C). Arrange garlic bread on a baking tray.
  2. In a large skillet over medium heat, cook the onions and garlic until translucent.
  3. Add ground beef, breaking apart with a spatula, and cook until browned. Drain excess fat.
  4. Stir in ketchup, Worcestershire sauce, salt, and pepper; cook for an additional 5 minutes.
  5. Toast the garlic bread in the oven until crispy, approximately 5-7 minutes.
  6. Spoon the beef mixture over the toasted garlic bread, top with cheese, and bake until cheese is melted.
  7. Garnish with chopped basil or parsley before serving.

Recipe Notes

  • Substitute turkey for a leaner meat option.
  • To add more flavor, incorporate herbs like oregano or thyme into the beef mixture.
  • For a spicier version, add chili flakes or hot sauce to the beef.

Delicious Chicken with Spinach and Mushrooms in Creamy Parmesan Sauce Recipe

Chicken with Spinach and Mushrooms in Creamy Parmesan Sauce: A Delightful Dinner Delight

⚖️
Difficulty
Intermediate

⏲️
Prep Time
10 mins

🕒
Cook Time
25 mins

⏱️
Total Time
35 mins

🍽️
Servings
4

Imagine a dinner that ignites your senses and comforts your soul. Our Chicken with Spinach and Mushrooms in Creamy Parmesan Sauce does exactly that. The tender pieces of chicken are enveloped in a rich, velvety sauce made with freshly grated Parmesan, paired perfectly with earthy mushrooms and freshly wilted spinach. This dish not only appeals to your taste buds with its symphony of flavors but also presents a visually stunning meal that is as pleasing to the eye as it is to the palate.

In this family favorite recipe, the textures intertwine as the creamy sauce cloaks the succulent chicken while the spinach offers a slight crunch, complementing the umami-rich mushrooms. The aroma wafts through your kitchen, with tantalizing notes of garlic and sautéed mushrooms that promise a delightful culinary experience. This recipe is ideal for a weekend dinner treat or an elegant yet simple meal on a busy weeknight, bringing gourmet dining into your home.

Quick Recipe Highlights

  • Flavor Profile: Enjoy a harmonious blend of savory chicken, rich Parmesan, and complementary spinach and mushrooms.
  • Texture: Experience tender chicken in a silky, creamy sauce contrasting with a slight crunch of fresh spinach.
  • Aroma: Delight in the inviting scent of garlic and sautéed mushrooms combined with creamy Parmesan.
  • Visual Appeal: Present a stunning plate featuring vibrant green spinach against a golden, creamy backdrop.
  • Skill Level Needed: Suitable for intermediate cooks who are comfortable with sauce preparation.
  • Special Equipment: You’ll need a non-stick skillet, sharp knife, cutting board, and a whisk for the sauce.

Recipe Overview

  • Difficulty Level: This dish requires some finesse with cooking chicken to perfection and creating a smooth, lump-free sauce.
  • Category: Perfect for dinner, both as a family meal or a sophisticated dinner party offering.
  • Cuisine: This recipe takes inspiration from Italian cuisine with its use of Parmesan and a rich cream sauce.
  • Cost: Reasonably priced, with the main expenses being fresh chicken breasts and good-quality Parmesan cheese.
  • Season: Best enjoyed in colder months when hearty, comforting dishes are most appealing.
  • Occasion: Ideal for intimate gatherings or special family dinners.

Why You’ll Love This Recipe


Indulge in the sumptuous taste of creamy Parmesan sauce lovingly embracing tender chicken, with the freshness of spinach and earthiness of mushrooms playing supporting roles. Every bite is a testament to balance and culinary expertise, merging the simplicity of ingredients with complexity of flavors.

Prepare to be amazed by the ease of creating such a dish. With a total time of just 35 minutes from preparation to table, this meal provides gourmet dining without demanding hours in the kitchen, proving perfect for the modern, busy cook.

Not only delicious but also nutritious, this meal offers lean protein from chicken and a host of vitamins from spinach, making it an excellent choice for health-conscious diners who refuse to compromise on flavor.

Entertain your guests with a dish that carries both elegance and warmth. This recipe fills the room with an inviting aroma that speaks of hospitality and culinary joy, ready to be shared and savored.

Enjoy both affordability and accessibility; most ingredients are common pantry staples or easily found at your local grocery store. The cost-effective nature of this dish makes it suitable for cooks who desire taste to meet value.

Historical Background and Cultural Significance


Chicken and spinach have been a part of culinary traditions for centuries, finding their way into savory pies, stews, and gratins across cultures. The integration of these elements into a creamy Parmesan sauce reflects an Italian influence, where dairy, cheese, and fresh ingredients combine harmoniously.

Throughout history, Parmesan cheese has been revered not only for its flavor but also for its ability to enrich dishes, showcasing how regional flavors like Parmigiano-Reggiano shape global cuisines. This fusion pays homage to Italian culinary arts while adapting them for global tastes.

The evolution of this recipe mirrors changes in dietary preferences and ingredient availability, shifting towards simpler, home-friendly versions that maintain the essence of traditional recipes. It’s a testament to the adaptability and enduring nature of ingredients like spinach and mushrooms.

While traditionally enjoyed at family dinner tables, modern adaptations emphasize ease of cooking without sacrificing depth of flavor. Embracing regional variations, this dish can be found in myriad forms worldwide, celebrating the shared love for creamy, savory meals.

Ingredient Deep Dive


Chicken, the star of many culinary cultures, is prized for its lean protein and versatility. Historically significant from curries to roasts, it’s cherished across cuisines for its adaptability in absorbing flavors from a multitude of spices, herbs, and sauces.

Spinach, hailed for its nutritional profile, was first cultivated in ancient Persia and has since travelled to tables worldwide. Its rich iron and vitamin content make it a staple in health-focused diets, enhancing dishes with both color and nutrients.

Mushrooms add an umami depth, revered in both Asian and European kitchens. Rich in antioxidants and immune-boosting benefits, they should be firm to the touch and free from moisture for optimal freshness when selecting from markets.

Parmesan cheese brings a pronounced savory richness. Known for its long maturation, this cheese should be stored in airtight conditions to preserve its intense flavor, serving as a key ingredient for thickening and enriching sauces.

Cream, the cornerstone of decadent sauces, boasts luxurious mouthfeel. Opt for heavy cream for a thicker sauce, and ensure freshness by selecting cream with a firm, rich consistency to avoid separation during cooking.

Substitute options abound in this dish; cauliflower or zucchini can replace mushrooms for varied textures, while lactose-free cream provides a dairy-free twist. Consider kale as a robust alternative to spinach, enhancing both nutritional value and flavor diversity.

Common Mistakes to Avoid

  • Overcooking the chicken can result in dry, tough meat. Ensure to sear just until golden before removing from heat to allow finishing in sauce.
  • Failing to deglaze the pan after mushrooms can lead to burning and uneven sauce consistency. Use chicken broth or wine to release flavorful brown bits.
  • Adding spinach too early can overcook it, leading to a loss of vibrant color and nutrient value. Introduce spinach last to retain its freshness.
  • Using pre-grated Parmesan can result in a less creamy sauce. Freshly grated cheese melts more smoothly, creating a silkier texture.
  • Neglecting seasoning adjustments once combined may underwhelmingly balance flavors. Taste and adapt salt and pepper levels towards the end.
  • Rushing through sauce reduction can prevent proper thickening. Allow time for cream to simmer gently and thicken naturally for a cohesive sauce.
  • Selecting the wrong cream may cause sauce separation. Use heavy cream to ensure it blends well with Parmesan without curdling.
  • Unsuitable pan size can hinder even cooking. Choose a pan wide enough to accommodate chicken pieces without overcrowding for efficient heat distribution.

Essential Techniques


Mastering the pan-searing of chicken ensures it retains juicy tenderness while acquiring a delicious golden crust. Use a hot pan and avoid turning too soon to achieve perfect Maillard reaction.

Perfecting a creamy sauce involves steady whisking while adding cheese to prevent clumping. Opt for gradual incorporation of Parmesan into gently simmering cream, aiming for a smooth consistency.

Deglazing is crucial for lifting flavorful fond from the pan. Introduce broth or wine after cooking mushrooms, scraping the bottom to integrate rich, caramelized notes into the sauce.

Timing is key with fresh additions like spinach. Incorporate greens at the last moment to briefly wilt while maintaining vibrant color, achieving optimal freshness.

Gauge sauce thickness by coating the back of a spoon, ensuring it leaves a clear line when running a finger through. This “nape” test confirms a perfectly thickened, luscious sauce.

Troubleshoot sauce separation by adjusting heat gently and incorporating a splash of cooking water to achieve the desired emulsification in cases of over-thickening.

Pro Tips for Perfect Chicken with Spinach and Mushrooms in Creamy Parmesan Sauce


Utilize a heavy-bottom skillet for effective heat distribution, improving caramelization without scorching your ingredients.

Enhance mushroom flavor by allowing them to brown undisturbed initially, releasing natural sugars and umami-driven richness.

Boost Parmesan flavor intensity with a small pinch of nutmeg, echoing traditional Italian seasoning practices for creamy dishes.

Experiment with fresh herbs such as parsley or basil for brightness in finish, offering both added flavor and visual appeal.

Keep chicken warm in a low oven post-searing, preserving its heat and moisture while preparing the sauce.

For an elegant presentation, serve chicken over a bed of risotto or garlic mashed potatoes, ensuring each element contributes to the overall flavor harmony.

Variations and Adaptations


For regional twists, introduce sun-dried tomatoes and olives as Mediterranean additions, amplifying the dish’s savory complexity and texture.

Seasonally, substitute mushrooms with other hearty vegetables like winter squash or bell peppers, adapting to what’s freshest and most flavorful.

Adjust for dairy-free diets with non-dairy cream and nutritional yeast instead of Parmesan, catering to lactose sensitivities while maintaining creamy texture.

Create flavor variations by incorporating truffle oil for an elevated, luxury edition, or chili flakes for a hint of heat that enlivens the traditional creamy profile.

Alter textures with walnuts or pine nuts for a crunchy element, adding both richness and depth to the dish’s ensemble of ingredients.

Consider using elegant serving alternatives like individual mini casserole dishes for a refined, personalized presentation at your dinner table.

Serving and Presentation Guide


Utilize classic plating principles with chicken as the focal point, artfully draped with sauce, contrasted by the vibrant spinach for a professional finish.

Garnish with freshly grated Parmesan and a sprinkle of cracked black pepper, accentuating flavors and offering a hint of color contrast.

Accompany traditionally with fresh ciabatta or focaccia, allowing diners to soak up the scrumptious sauce, maximizing the dish’s enjoyment.

Modernize with a refreshing arugula or radicchio salad on the side, providing a crisp, peppery counterpoint to the rich main course.

Ensure optimal serving temperature by plating just before dining, allowing the cream sauce’s warmth to accentuate its flavors and textures.

Adopt portion control by slicing larger chicken pieces into medallions, enabling ease of serving and enhanced presentation of even-sized portions.

Wine and Beverage Pairing


Complement with a full-bodied Chardonnay or a light Pinot Grigio to balance the rich sauce and enhance the dish’s subtle earthy notes.

Offer a non-alcoholic pairing with sparkling water infused with lemon and rosemary, refreshing and cutting through the creaminess superbly.

For alternatives, consider a gentle green tea, which introduces a delicate infusion pairing while offering aromatic balance to the creamy components.

Maintain proper serving temperatures: serve white wines chilled to heighten freshness and complex bouquet of flavors, elevating the dining experience.

Suggest glassware that complements each beverage’s characteristics, enhancing both aroma and presentation through suitable wine or tumbler glasses.

Storage and Shelf Life


Store leftovers in an airtight container in the refrigerator for up to 3 days to preserve freshness and prevent contamination.

Maintain the sauce’s integrity by reheating gently over low heat, adding a splash of milk or cream to restore its smooth texture.

Opt for sturdy, freezer-safe containers if planning to freeze portions for later use, ensuring an airtight seal to avoid freezer burn.

Identify spoilage through changes in color, unpleasant odor, or separation in the sauce, signaling possible bacterial growth over time.

Implement proper freezing techniques by cooling the dish before storing, preventing excess condensation and maintaining flavor cohesion.

Strategize optimal consumption by thawing frozen portions evenly in the refrigerator to prepare them for gentle reheating when ready to eat.

Make Ahead Strategies


Prepare the chicken in advance by marinating and precooking for refrigerated storage, simplifying day-of assembly and maintaining flavor depth.

Craft the sauce separately, storing it in a sealed container to prevent skin formation. Reheat gently, incorporating spinach fresh during final assembly.

Assess quality impacts of early preparation by maintaining strict temperature controls; this ensures flavors remain robust and the sauce smooth post-assembly.

Enhance assembly tips by organizing ingredients for each stage in advance, streamlining integration and ensuring minimal kitchen disruptions.

Refine reheating guidelines to preserve creaminess, employing low heat and gradual warming techniques to retain sauce consistency and flavor profile.

Introduce fresh elements like parsley or lemon zest just before serving, amplifying both visual appeal and refreshing notes against the sauce’s richness.

Scaling Instructions


Halve the recipe by adjusting ingredient amounts accordingly, ensuring cooking times remain consistent through precise proportion reduction.

Double or triple using larger cookware to accommodate increased volume, ensuring proper heat distribution maintains cooking efficiency and uniformity.

Consider equipment adjustments for larger batches, such as utilizing a wider saucepan or batch-cooking chicken for even searing and result consistency.

Adapt timing by adding a few extra minutes to each cooking stage when scaling up, allowing for thorough cooking and flavor integration across larger amounts.

Store extra portions appropriately, adhering to refrigeration and freezing guidelines to maximize freshness and prevent any quality degradation.

Nutritional Deep Dive


Analyze macronutrients with a focus on protein from chicken and healthy fats from cream, supporting muscle growth and satiety for balanced meals.

Highlight micronutrient contributions from spinach, offering Vitamin K, iron, and essential minerals that support overall health and well-being.

Emphasize health benefits from fresh mushroom content, such as antioxidants and immune-boosting properties, bolstering resilience against illness.

Detail dietary considerations for lactose intolerance or gluten-free dining, suggesting potential ingredient swaps to accommodate varying nutritional needs.

Portion insights guide balanced servings, aligning dish satisfaction with hunger levels and maintaining nutritional balance within dietary guidelines.

Connect weight management efforts through controlled ingredient choices and serving suggestions that maximize fullness while preventing overindulgence.

Dietary Adaptations


Modify for gluten-free diets using rice flour instead of wheat-based thickeners, maintaining sauce texture and flavor without compromising dietary restrictions.

Adapt to dairy-free preferences through almond or coconut cream substitutes, paired with nutritional yeast for a similar cheesy note without dairy.

Create vegan versions by replacing chicken with tofu or tempeh and eliminating animal-based products, focusing on plant-driven flavors and textures.

Switch to a low-carb format by serving over cauliflower rice, preserving creamy goodness while accommodating carbohydrate-conscious meal planning.

Experiment with a keto twist using high-fat dairy options like butter or coconut cream, aligning the dish with popular ketogenic dietary frameworks.

Embrace paleo adaptability by utilizing organic, whole-food ingredients, pairing high-quality proteins with natural, nutrient-dense produce choices.

Address low-FODMAP diets with advisements on suitable ingredients, focusing on ease of digestion and minimizing potential gastrointestinal disturbance.

Troubleshooting Guide


Prevent texture concerns by assessing chicken doneness with a meat thermometer, achieving a juicy center with a safe internal temperature.

Balance flavor components through cautious salt and pepper adjustments post-sauce creation, ensuring a harmonious and enticing flavor profile.

Overcome temperature difficulties by adhering to gradual heating methods for both preparation and reheating — avoiding abrupt heat that coagulates sauce elements.

Address equipment usage issues by checking cookware presence and quality, verifying sharp knives for ingredient preparation to prevent cutting obstacles.

Navigate ingredient substitutions through strategic selection: lighter creams blending well, and suitable green alternatives for spinach offering similar outcomes.

Time management solutions involve structuring preparation phases, leading to efficient use of resources and prevention of disengagement during cooking.

Recipe Success Stories


Take inspiration from our community of home chefs who’ve embraced personal twists on this classic, infusing their personality or local spices into the mix.

Benefit from learnings of global variations successfully adapted by fans, showcasing the dynamic versatility of foundational flavors and ingredients.

Engage with reader insight, utilising feedback about recipe results and adjustments posited by fellow culinary enthusiasts gathered through passionate exchanges.

Inspired by social media showcases, witness different plating styles and garnishes creatively displayed, creating visual allure and dynamic hospitality captured through photography.

Draw empowerment from community storytelling, sharing mutual love for creating flavorful, warming meals that connect families and commemorate gatherings.

Frequently Asked Questions

Can I use frozen spinach?

Yes, you can use frozen spinach as a convenient alternative. Ensure to thaw and drain excess moisture before adding to the sauce, maintaining thickness and flavor.

What’s the best way to reheat this dish?

Reheat over low heat on the stovetop, stirring occasionally. Add a splash of cream or milk to restore sauce consistency if it thickened during refrigeration.

Can I add other vegetables?

Absolutely, experiment with vegetables like bell peppers or zucchini for added flavors and texture. Add them based on cooking times to ensure they are cooked evenly.

How do I prevent the sauce from separating?

Ensure the sauce maintains a gentle simmer. Gradually incorporate cheese with continuous stirring, avoiding high temperatures to maintain smoothness.

Can I make this with chicken thighs?

Chicken thighs are a great alternative, offering more juicy flavor. Adjust cooking times slightly longer for darker meat to ensure it cooks through perfectly.

Is this recipe suitable for meal prep?

Yes, prepare in advance and store components separately to combine when needed. The sauce can be made ahead, and chicken pre-seared for simplified reheating and assemblage.

What can I serve with this dish?

This dish complements well with side servings of parmesan risotto, roasted vegetables, or garlic bread. Fresh salads with lemon dressing refresh the palate effectively.

Does the dish freeze well?

While chicken and sauce can be frozen, do so separately to maintain creaminess. Thaw thoroughly before reheating to preserve flavor and consistency.

Can I use other cheeses?

Parmesan is preferred, but feel free to experiment with Asiago or Pecorino for unique flavor enhancements. Each brings distinct tasting notes to the cream base.

How do I know when the chicken is cooked?

Use a meat thermometer to check the internal temperature reaches 165°F (74°C). Alternatively, slice open the thickest part to ensure clear juices and no pinkness.

How should leftovers be stored?

Store in airtight containers, keeping chicken and sauce separate to maintain texture. Consume within 3 days for best results, ensuring freshness and flavor retention.

Additional Resources


Explore related recipes like Chicken Alfredo or classic Coq au Vin for varied culinary adventures rooted in similar ingredient combinations and techniques.

Access technique guides detailing methods like pan-searing and sauce reduction to elevate your kitchen skills and apply them to a variety of dishes confidently.

Discover ingredient information focusing on essential components like cheese aging processes and mushroom varieties, enriching your understanding of culinary options.

Refer to equipment recommendations for cookware that enhances cooking results, such as non-stick pans, ensuring consistent success across various recipes.

Adapt meals seasonally by examining ingredient availability and freshness, maximizing both flavor and nutritional benefits through aligned cooking practices.

Join the Conversation


Engage with our vibrant culinary community via social media platforms. Share your success stories, ask questions, and offer insights for personalized variation ideas.

Refine your photography skills through basic tips for capturing this dish’s elegance on camera, turning meals into beautiful visual narratives.

Contribute your reviews and experiences to our growing recipe discussions, offering feedback and ideas for enhancement that inspire fellow cooks.

Invite friends and family to join you in trying out this recipe, fostering connections over shared meals and creating lasting culinary memories.

Incorporate reader variations into your repertoire, experimenting with established suggestions while remaining open to further innovations and creativity.

The Recipe

Chicken with Spinach and Mushrooms in Creamy Parmesan Sauce

Serves: 4

Prep Time: 10 mins

Cook Time: 25 mins

Total Time: 35 mins

Kitchen Equipment Needed

  • Non-stick skillet
  • Sharp knife
  • Cutting board
  • Whisk

Ingredients

  • 4 boneless, skinless chicken breasts
  • 1 tablespoon olive oil
  • 2 cups fresh spinach
  • 8 ounces mushrooms, sliced
  • 1 cup heavy cream
  • 1 cup freshly grated Parmesan cheese
  • 2 cloves garlic, minced
  • Salt and pepper to taste

Directions

  1. In a non-stick skillet, heat olive oil over medium heat. Season chicken breasts with salt and pepper. Cook chicken until golden brown on both sides, about 6-7 minutes per side. Remove and set aside.
  2. In the same skillet, add mushrooms and garlic, sautéing until mushrooms are the golden and garlic is fragrant.
  3. Reduce heat to low, stir in heavy cream and Parmesan cheese, whisking until blended smoothly.
  4. Return chicken to the skillet, spoon sauce over the top. Simmer until chicken is fully cooked through and sauce thickens, about 8-10 minutes.
  5. Incorporate spinach and cook until just wilted. Adjust seasoning as needed with salt and pepper.
  6. Serve hot, garnished with additional Parmesan and fresh herbs if desired.

Recipe Notes

  • For added depth, deglaze the pan with white wine before adding cream.
  • Substitute spinach with kale for a heartier texture.

Delicious Garlic Butter Steak Bites with Cheesy Smashed Potatoes Recipe

Garlic Butter Steak Bites and Cheesy Smashed Potatoes: A Delicious Combination

⚖️
Difficulty
Medium

⏲️
Prep Time
15 mins

🕒
Cook Time
25 mins

⏱️
Total Time
40 mins

🍽️
Servings
4

In this savory and satisfying dish, garlic butter steak bites are combined with creamy and indulgent cheesy smashed potatoes, delivering a meal that’s perfect for dinner or special occasions. This combination not only entices the palate but also captures the heart with its comforting flavors. The succulent steak, juicy and seared to perfection, pairs wonderfully with the rich cheesy potatoes, making it an instant family favorite.

Quick Recipe Highlights

  • Flavor Profile: The steak bursts with garlic buttery goodness, balanced by the creamy, cheesy potatoes that provide both richness and a touch of savory depth.
  • Texture: Enjoy tender, juicy steak bites juxtaposed with the creamy, velvety texture of the potatoes, each bite promising a different sensory experience.
  • Aroma: The inviting smell of melted garlic butter combined with roasted steak and earthy, cheesy potatoes fills the air, creating an irresistible atmosphere.
  • Visual Appeal: This dish features a spectrum of colors, from the golden crust on juicy steak to the creamy, golden hue of cheese-studded potatoes.
  • Skill Level Needed: Intermediate culinary skills are ideal as you need to master the sear and the perfect potato smash.
  • Special Equipment: A cast-iron skillet for the steak and a potato masher for the potatoes ensure optimal results.

Recipe Overview

  • Difficulty Level: The recipe sits at an intermediate level due to the precise cooking of the steak and achieving the texture of the cheesy potatoes. Mastering the steak sear elevates the flavors, while patience with the potatoes brings out their full richness.
  • Category: This dish is suited for dinner, family gatherings, or any occasion requiring a hearty and comforting meal.
  • Cuisine: Rooted in Western culinary traditions, this dish combines classic American diner flavors with a touch of French sophistication, thanks to the garlic butter.
  • Cost: Budget-friendly, the primary expense is the steak, but potatoes and cheese are cost-effective ingredients that make this meal both luxurious and accessible.
  • Season: While delicious year-round, it shines in the colder months, providing warmth and comfort on chilly days.
  • Occasion: Ideal for both casual family dinners and more formal gatherings, thanks to its robust yet refined combination of flavors.

Why You’ll Love This Recipe


The delectable combination of garlic butter steak bites and cheesy smashed potatoes appeals both in taste and texture. The juicy steak, perfectly seared, delivers mouthfuls of flavor complemented by the creamy and cheesy richness of the potatoes. Convenience is key in this recipe, with easy-to-follow steps that guarantee consistent results, making it an excellent choice for a weeknight dinner or weekend feast.

Nutritionally, this dish brings a well-rounded meal to the table. Steak offers a high-protein option, while potatoes provide carbs and essential vitamins. The moderate use of cheese adds flavor without overwhelming the dish with unnecessary calories, striking a beneficial balance between deliciousness and health.

Socially, its combination allows for a delightful shared experience, pairs wonderfully with a good wine or beer, and serves as a conversation starter, with its inviting aromas drawing people together. And regarding cost-effectiveness, the meal utilizes accessible, shelf-stable ingredients, ensuring it doesn’t break the budget while delivering a restaurant-quality experience at home.

Historical Background and Cultural Significance


The pairing of steak and potatoes has deep roots in Western cuisine, epitomizing comfort food for generations. This dynamic duo has been elevated from its humble origins through various influences, most notably the introduction of garlic butter, a staple ingredient in French cuisine that adds depth and sophistication. Over time, this dish has evolved, adapting to local tastes and seasonal ingredients.

Culturally, steak and potatoes represent the quintessential American meal, symbolizing abundance and hospitality. Its adaptation with garlic butter embodies an intersection of cultures, merging traditional American simplicity with French culinary flair. Today, this dish echoes the fusion found in modern gastronomy, where classic recipes are reinvented for contemporary palates.

Globally, variations of this dish exist, each region adapting it to their resources and flavor profiles. From spiced versions in South America to herb-laden variations in the Mediterranean, it demonstrates the universal appeal of steak and potatoes.

Ingredient Deep Dive


The main ingredient, steak, historically revered as a luxury item, provides the protein that gives this dish its robustness. It’s essential to select a tender cut such as ribeye or sirloin, which cooks beautifully in a high-heat skillet to render the meat flavorful and succulent. Proper storage involves refrigeration and using the steak within a few days to maintain its quality. Sealed packaging with minimal exposure to air extends its shelf life.

Potatoes, a staple across cuisines, contribute to this recipe’s comforting texture while providing a good source of carbohydrates and vital nutrients such as vitamin C and potassium. Select firm, unblemished potatoes that are best stored in a cool, dark place to avoid sprouting. The right choice of cheese, particularly sharp cheddar or a rich gouda, imparts the necessary flavor depth without overpowering the delicate balance with the steak.

Common Mistakes to Avoid

  • Overcooking the steak is a common mistake; aim for medium-rare to maintain juiciness and flavor.
  • Underseasoning the steak can result in a bland dish; be generous with salt and pepper.
  • Cooking steak on a cold skillet leads to uneven searing; ensure the skillet is fully pre-heated.
  • Over-mashing the potatoes can make them gummy; gently smash for a perfect texture.
  • Failing to drain the potatoes thoroughly may result in watery gravy.
  • Using too much butter overwhelms rather than enhances; balance flavors mindfully.
  • Forgetting to rest the steak after cooking can cause loss of juices; give it a few minutes to relax.
  • Neglecting to adjust oven temperature for altitude or oven type can affect cooking times.

Essential Techniques


Achieving the perfect steak sear is crucial in this recipe. Using high heat and a well-seasoned cast-iron skillet, create a crust by avoiding unnecessary movement of the steak during cooking. This allows for the Maillard reaction to occur, producing that flavorful golden brown exterior. Mastering this involves vigilance, listening for the sizzle, and using visual cues like edge browning.

Smashed potatoes require a delicate hand. After boiling until tender, allow them to steam dry briefly to remove excess moisture, before gently smashing to maintain texture. Uniformity in mashing ensures even cheese distribution without creating a paste.

Pro Tips for Perfect Garlic Butter Steak Bites and Cheesy Smashed Potatoes

Use a garlic press for a finer consistency, allowing the garlic to meld seamlessly with the butter, enhancing the steak’s flavor profile. Pat the steak dry before seasoning to improve the crust during cooking and maintain moisture within. Taste the cheesy potatoes before serving, adjusting for saltiness and cheesiness to your preference. Incorporate herbs like rosemary or thyme to add an aromatic dimension that elevates the dish. Allow the butter to brown slightly for a deeper nutty flavor that enriches the meat. Consider resting the potatoes before adding cheese to let flavors meld completely, resulting in a more cohesive taste.

Variations and Adaptations


Regional adaptations include utilizing locally available cuts of meat, while seasonal changes can involve incorporating vegetables such as green beans or asparagus during the spring. Dietary restrictions can be accommodated by choosing lactose-free cheese or a dairy-free butter alternative. For vegan variations, substitute steak with tofu or mushrooms and leverage nutritional yeast for that cheesy flavor without dairy. Enhance flavor by experimenting with various herb and spice combinations like paprika or curry for a global twist.

Serving and Presentation Guide


For an enticing presentation, spoon cheesy potatoes onto a large platter and arrange steak bites around them, garnishing with fresh herbs like parsley or chives. Experiment with height and movement, sculpting potatoes into appealing mounds, and use a drizzle of infused oil or balsamic glaze for visual and flavor contrast. Portion control is best achieved with individual plates presented family-style, encouraging shared enjoyment and engagement.

Wine and Beverage Pairing


Pair this dish with a full-bodied red wine such as a Cabernet Sauvignon or a Merlot, which complements the richness of the steak and the creaminess of the potatoes. Non-alcoholic options include a sparkling water infused with lemon or a robust kombucha for an acidic balance. Consider serving with a fresh-brewed herbal iced tea to cleanse the palate, ensuring all flavors shine.

Storage and Shelf Life

Store leftovers in airtight containers in the refrigerator, consuming within two days for best quality. Potatoes may be separated if reheating, to avoid overcooking steak bites during reheating. Use microwave-safe containers or gently reheat in an oven set to 350°F to retain the integrity of both steak and potatoes. Freezing is viable for the potatoes, but steak is best consumed fresh due to texture changes post-freezing.

Make Ahead Strategies


If preparing ahead, partially prepare the potatoes, boiling and cooling them before smashing later to save time. The steak can be marinated for added flavor, and garlic butter can be prepared in advance, infusing overnight for a richer taste. Avoid complete assembly until serving, preserving optimal freshness and avoiding any soggy textures.

Scaling Instructions


To scale the recipe, consider each serving and proportionally increase the ingredient quantities, adjusting cooking times where necessary, especially when using larger cuts or batches. Stagger the searing of steak to ensure consistent cooking and maintain tenderness across servings. Plan storage accordingly when preparing larger volumes, ensuring adequate refrigeration or cooling for hot dishes before sealing.

Nutritional Deep Dive


This dish provides a substantial macronutrient profile, rich in proteins from the steak and fats from both the steak and potatoes. The inclusion of garlic not only boosts flavor but contributes health benefits with its antioxidant properties. Balancing this dish within a broader meal plan involves considering portion sizes to keep caloric intake in check.

Dietary Adaptations


For a gluten-free version, ensure spices and pre-prepared products are certified gluten-free. Craft a dairy-free dish using plant-based butter alternatives and cheese, maintaining the flavors and textures needed for a satisfying meal. Adapt recipes to vegan needs by using boguer substitutes for meat, and leverage nutritional yeast to achieve cheese flavor layers.

Troubleshooting Guide


If encountering toughness in steak, ensure it is not overcooked; consider sous vide techniques for a more controlled outcome. To balance overpowering garlic, reduce quantities or switch to milder varieties. Equipment limitations like nonstick pans should be addressed with alternative cooking methods that sustain heat well. Timing adjustments across varied altitudes can also ensure consistent results.

Recipe Success Stories


Many readers praise the ease of following the recipe and achieving restaurant-level flavor at home. Some variations include incorporating spicy peppers or caramelized onions for added flavor dimensions. Photography tips often suggest focusing on the color contrast between the steak and potatoes for impactful food styling.

Frequently Asked Questions

Do I need a cast-iron skillet?
A traditional skillet can work, but cast-iron offers superior heat retention and creates a perfect sear.

How can I prevent garlic from burning?
Add garlic to the butter during the last minute of cooking to avoid burning and maintain flavor integrity.

What’s the best way to smash potatoes?
Use a masher or the back of a spoon for gentle pressure to maintain some texture.

Can I make this recipe dairy-free?
Yes, substitute butter and cheese with plant-based versions without sacrificing flavor.

How do you know when the steak bites are done?
Look for caramelization on edges and an internal temperature of 130°F for medium-rare.

Are there appropriate non-alcoholic pairings?
Sparkling water or iced tea complements well without overpowering the flavors.

Additional Resources


For further exploration, try recipes that complement garlic and potatoes, such as garlic-roasted vegetables or cheesy garlic bread. Explore equipment guides that highlight essential kitchen tools like effective steak knife sets or non-stick cookware. Engage with seasonal recipe adaptations that prepare this dish in line with available regional ingredients.

Join the Conversation


Join our community on social media where you can share your creations with the hashtag #SteakPotatoDelight. Connect with fellow readers, discuss recipe modifications, or share your presentation photos. Your feedback enriches the shared culinary experience, sparking ideas for new meal variations.

The Recipe

Garlic Butter Steak Bites and Cheesy Smashed Potatoes

Serves: 4

Prep Time: 15 mins

Cook Time: 25 mins

Total Time: 40 mins

Kitchen Equipment Needed

  • Cast-iron skillet
  • Potato masher
  • Medium saucepan
  • Garlic press
  • Meat thermometer

Ingredients

  • 1 pound steak, cut into small cubes
  • 4 tablespoons unsalted butter
  • 4 cloves garlic, minced
  • 2 pounds small potatoes
  • 1 cup shredded cheddar cheese
  • Salt and pepper to taste
  • Fresh parsley for garnish

Directions

  1. Boil the potatoes in salted water until tender, about 15 minutes. Drain and slightly smash them.
  2. In a cast-iron skillet, melt 2 tablespoons of butter over medium-high heat. Add steak cubes, season with salt and pepper, and sear until golden brown.
  3. Add garlic to the pan and cook briefly until fragrant. Remove the steak and set aside.
  4. In the same skillet, melt remaining butter, add potatoes, and sprinkle with cheese. Cover until cheese melts.
  5. Plate the cheesy potatoes, serving steak bites on top. Garnish with parsley and serve immediately.

Recipe Notes

  • For variation, add cooked bacon bits to the potatoes.
  • Shrimp can replace steak for a lighter option.
  • Feel free to season with your choice of spices, like paprika or rosemary.

Indulge in Deliciously Hearty Steak-Loaded Baked Potatoes Tonight

Steak-Loaded Baked Potatoes: A Delicious Twist on a Classic Dish

⚖️
Difficulty
Easy

⏲️
Prep Time
15 mins

🕒
Cook Time
1 hour

⏱️
Total Time
1 hour 15 mins

🍽️
Servings
4

Imagine sinking your teeth into a perfectly baked potato, delightfully crisp on the outside and soft on the inside, brimming with a succulent, juicy steak topping. These Steak-Loaded Baked Potatoes are a match made in culinary heaven, bringing together the hearty comfort of a classic baked potato with the gourmet touch of tender steak bites. This combination is sure to tantalize your taste buds with its robust flavors, making it a perfect dinner option for any occasion.

Are you tired of the usual potato toppings? Give your baked potatoes a makeover by loading them with pan-seared steak laced with butter, garlic, and herbs. The savory blend creates a delightful symphony of tastes, offering an incredible gastronomic experience whether you’re dining alone or with family and friends. The aromatic notes of rosemary and thyme waft through the kitchen, inviting everyone to gather around and indulge in this mouthwatering creation.

Quick Recipe Highlights

  • Flavor Profile: The rich, umami flavors of the steak complement the creamy potato flesh, amplified by the aromatic herbs and melted butter.
  • Texture: Crispy potato skins provide the perfect contrast to the tender, melt-in-the-mouth steak bites, resulting in a delightful medley of textures.
  • Aroma: Infused with garlic, rosemary, and thyme, the aroma is savory and earthy, instantly creating a warm and inviting atmosphere.
  • Visual Appeal: The rustic golden-brown crust of the baked potato, topped with luscious steak pieces, offers a visually striking presentation.
  • Skill Level Needed: With straightforward steps, this recipe is accessible for cooks of all skill levels, requiring basic chopping and searing techniques.
  • Special Equipment: Ensure you have a reliable oven and a good-quality skillet to perfect this recipe.

Recipe Overview

  • Difficulty Level: Designed with simplicity in mind, this recipe is labeled as easy, perfect for home cooks seeking a gourmet yet uncomplicated dish.
  • Category: These Steak-Loaded Baked Potatoes belong to both comfort food and gourmet dinner categories, bridging the gap magnificently.
  • Cuisine: Inspired by American cuisine with a gourmet twist, this dish incorporates elements typically associated with steakhouse dining.
  • Cost: Steak can be a pricier ingredient, but overall, this recipe is cost-effective, especially if you catch a good deal on potatoes and beef cuts.
  • Season: While enjoyable year-round, late fall and winter seasons enhance the cozy and hearty nature of this meal.
  • Occasion: Ideal for family dinners, casual gatherings, or a romantic night, its versatility makes it suitable for both everyday meals and special occasions.

Why You’ll Love This Recipe


The taste and texture appeal of Steak-Loaded Baked Potatoes is irresistibly mouthwatering. The combination of crispy, buttery baked potatoes loaded with succulent steak pieces is a divine pairing that hits all the right notes. Every forkful offers a burst of savory goodness where flavors and textures meld seamlessly, ensuring that every mouthful is a memorable experience.

From a convenience perspective, this recipe is a winner. With minimal preparation and straightforward cooking steps, you can easily whip up this gourmet delight on a weeknight. Plus, the components—potatoes and steak—are widely available year-round, making it a reliable option at any time.

Steak-Loaded Baked Potatoes also deliver a nutritional punch. High in protein and fiber, this dish provides energy to fuel an active lifestyle while keeping you fuller for longer. The addition of herbs and spices enhances not only the flavor but also the antioxidant profile, contributing to a healthy, balanced meal.

Perfect for social and entertaining value, this dish is sure to impress guests with its appealing presentation and robust flavors. Whether hosting a small gathering or an intimate dinner, these baked potatoes create a culinary centerpiece that encourages communal enjoyment.

Finally, considering the cost-effectiveness and accessibility, this recipe makes the most of affordable and commonly stocked ingredients. Investing in good-quality potatoes and a cut of steak that suits your budget can yield a meal that exemplifies luxury dining without breaking the bank.

Historical Background and Cultural Significance


The origin story of the loaded baked potato can be traced back to the advent of the modern steakhouse. It evolved from the simple act of providing a hearty starch alongside steak to help diners feel fully satisfied and content. Over time, the dish gained popularity, and people began to experiment with various toppings to enhance the steakhouse experience.

Steak-Loaded Baked Potatoes hold cultural importance particularly in the United States, where they are often associated with rustic, hearty meals served in family restaurants. They represent the joy of indulging in comfort food that marries quality ingredients with love and attention to delicious details.

As this recipe evolved, it spread beyond steakhouses and became a family favorite across the nation. The loaded concept transformed the baked potato into a standalone dish, allowing for endless creativity with accompaniments.

Regional variations abound, with different states adding their local flavors to the dish. In the South, you might find spicy jalapeños and cheddar, while the East Coast might favor a seafood spin with lobster. However, the luxurious steak version remains a timeless classic, loved across all borders.

Ingredient Deep Dive


Potatoes, the primary ingredient, have a rich cultural significance and history, originating in the Andes region. Not only are they a staple in many global diets, but they also offer exceptional nutritional benefits. Packed with essential vitamins and minerals, their high fiber content supports digestive health. When selecting, look for firm, blemish-free potatoes. Store them in a cool, dark place to extend their shelf life. For a delightful variation, sweet potatoes can be a nutritious substitute, offering natural sweetness.

Steak is the highlight here, offering a muscle-building punch of protein. Its juicy texture forms the heart of the dish. Historically a luxury in many cultures, steak brings an element of indulgence. Opt for cuts like ribeye or sirloin for balanced marbling and flavor. Proper storage in a refrigerator before use, wrapped in butcher paper, enhances freshness. Should beef be unavailable, chicken provides a leaner alternative without compromising on taste.

Common Mistakes to Avoid

  • Overcooking the potatoes can result in a dry texture instead of the desired fluffy interior. Bake until just tender to ensure optimum creaminess.
  • Failing to season the steak sufficiently is a common pitfall. Remember, salt and pepper are integral to maximizing flavor depth.
  • Neglecting to preheat the oven may cause uneven cooking, leaving parts of the potato underdone. Always ensure your oven reaches the full temperature before baking.
  • Slow-cooking the steak can lead to tough meat. Sear at a high temperature for optimal caramelization and tenderness.
  • Using cold steak straight from the fridge can hinder even cooking. Allow meat to reach room temperature before searing for the best results.
  • Skipping the butter may save calories, but it also detracts from both flavor and moisture. Consider it essential to achieving that melt-in-your-mouth effect.
  • Overcrowding the skillet can steam rather than sear the steak cubes. Give each piece ample room to achieve a crispy, golden crust.
  • Not letting the steak rest after cooking misses a vital step in keeping juices locked in, resulting in a dryer texture.

Essential Techniques


Baking the perfect potato relies on achieving a robust outer skin while ensuring the inner flesh remains fluffy. This requires a high oven temperature and ample time—pricking them with a fork beforehand allows steam to release, preventing explosions and ensuring thorough cooking. Look for a crispy skin as a visual cue of readiness.

Searing steak to achieve that coveted crust requires high heat on a well-preheated skillet. The Maillard reaction responsible for this browning enhances flavor through caramelization. Avoid frequent flipping and refrain from moving steak pieces during this process.

Rotating the baking sheet halfway through cooking potatoes ensures even baking, a critical step given variations in temperamental oven hotspots. This simple action prevents half your batch from turning out undercooked or unevenly browned.

Pro Tips for Perfect Steak-Loaded Baked Potatoes


For a flavor boost, add a dash of worcestershire sauce to the steak during cooking. It amplifies umami flavors and complements the meat’s rich profile. Let the potatoes cool slightly before cutting them open to avoid scorching your fingers. This pause also allows the starches to set, making for cleaner handling.

Reserve some fresh herbs until the end of the cooking process. Adding chives, parsley, or cilantro at the last moment can provide a refreshing contrast to the dish’s heavier flavor components. If pressed for time, pre-cooking your potatoes in the microwave before finishing them in the oven can shorten the waiting period significantly without compromising on texture.

Include a small dollop of sour cream atop the finished dish. Its creamy tang enhances and balances out the rich flavors found within the dish. Use an oven thermometer for accuracy, ensuring your baked potatoes achieve precise doneness.

Variations and Adaptations


Regional variations offer delightful twists, such as incorporating local ingredients like hatch green chilies for a Southwestern touch, or adding a hint of spicy sausage for Cajun-infused warmth. Consider seasonal adjustments such as integrating spring asparagus into the filling or switching to squash during fall.

Dietary modifications are straightforward—substitute steak with portobello mushrooms or jackfruit for a vegan approach without losing that satisfying, meaty texture. Customize flavor with different cheese varieties like blue cheese crumbles for tang or smoked gouda for depth.

Transform texture by mashing the potato’s insides and refilling the skins, achieving a twice-baked consistency. Presentation-wise, serve in a cast-iron skillet for a rustic flair or newly trend with crisply curated platters for family-style events.

Serving and Presentation Guide


Plating can elevate the entire dining experience. Consider slicing the potatoes open on a diagonal for an elegant presentation. Garnish with microgreens or edible flowers to add color and sophistication to your serving.

Garnishing ideas extend beyond typical herbs by featuring fried leeks or crispy shallots for added crunch and aroma. Traditional accompaniments, such as side salads or grilled vegetables, balance the meal, while more contemporary offerings like roasted cauliflower provide a modern touch.

Serve piping hot for deep enjoyment; however, cooling slightly before presentation can allow flavors to meld. Ensure portions are generous but manageable to maintain comfort and elegance at the dining table.

Wine and Beverage Pairing


For wine lovers, pair these Steak-Loaded Baked Potatoes with a bold Syrah or full-bodied Cabernet Sauvignon. The depth of a red wine accentuates the steak’s richness while balancing the potato’s creamy texture.

Non-alcoholic alternatives like apple cider or a robust iced tea offer complementary acidity and flavors without overwhelming the palate. If considering coffee pairings, a dark roast blends well as an after-dinner treat.

Temperature plays a quintessential role in beverage enjoyment—opt for slightly chilled reds or room-temperature whites to adequately complement the flavors in the dish. Serve your choice of beverage in appropriate glassware to round out the dining experience.

Storage and Shelf Life


Storage of leftovers should be in an airtight container to prevent moisture loss, which could affect texture and flavor. Ideally, consume within two to three days for optimal taste.

Keep refrigerated at consistent temperatures, avoiding the mixing of hot and cold air that could prompt spoilage. Utilize shallow containers to expedite cooling and help maintain freshness.

Be aware of signs of spoilage, such as off-odors or discoloration. In the case of reheating, consider doing so in the oven to revive crispness compared to microwave methods, which can render results soggy.

Make Ahead Strategies


Plan ahead by baking potatoes the night before and reheating them while prepping the other components. This can save considerable time, especially for hosting purposes.

Store steak and potato separately to maintain textural integrity. Potatoes can become gummy if stored with other moist ingredients. Quality impacts remain minimal with planned prep, allowing steps to be efficiently executed.

Add fresh elements like chopped scallions or cheese only at serving to retain vibrancy. Reheating the entire assembly in a hot oven for a brief time ensures uniform warmth without overcooking the individual parts.

Scaling Instructions


Halving the recipe is easy by reducing both ingredients and cooking time accordingly, ideal for smaller gatherings. Conversely, for larger parties, simply double your quantities and extend baking times slightly to accommodate volumes.

Consider using larger baking sheets or multiple ovens to maintain efficiency when scaling. Timing modifications might be necessary, typically increasing for larger batches and decreasing for halved portions to avoid overcooking.

Adapt storage considerations for larger quantities, opting for stackable containers to save space. Calculate serving amounts based on guests to ensure adequate portions are prepared.

Nutritional Deep Dive


These Steak-Loaded Baked Potatoes boast an excellent macro balance, offering protein from the steak complemented by carbohydrates and fiber from the potatoes. They are ideal for muscle recovery while providing satiety.

Micronutrient analysis highlights the rich vitamin C and B6 content of potatoes, alongside thyme and garlic’s antioxidant contributions. Health benefits include boosting immunity and supporting heart health through potassium and iron-rich cuts of beef.

Dietary considerations are prominent here; portion awareness aids in managing dietary intake effectively. Balance smaller portions with a nutrient-dense side salad for an overall well-rounded meal.

Dietary Adaptations


For gluten-free variations, ensure all purchased ingredients, especially spices, are certified gluten-free. This simple adaptation opens doors to wider consumption without sacrificing flavor.

Dairy-free needs are met by using plant-based butter or olive oil in lieu of traditional dairy. Vegan adaptations are effectively achieved through mushroom steak substitutes and plant-based cheese toppings.

Low-carb enthusiasts can enjoy this dish by replacing traditional potatoes with cauliflower alternatives without missing out on the satisfying experience. Creativity shines, allowing for adaptation to suit specific dietary preferences without loss of intent.

Troubleshooting Guide


When facing texture issues with potato skins, ensure thorough drying before baking; moisture may lead to flabbiness. If flavor balance feels off, adjust seasoning with herbs, sticking to taste and preference as your guide.

Temperature discrepancies, often due to unreliable ovens, can be resolved by utilizing an oven thermometer to ensure accuracy. If lacking proper equipment like a skillet, use a sturdy, high-walled pan to sear steak effectively.

Ingredient substitutions must be carefully considered to maintain integrity. Swap with an equivalent feature—for volume or flavor—to minimize impact. Timing concerns are addressed by mindful assembly, ensuring readiness aligns with cooking progress.

Recipe Success Stories


Community feedback has hailed this recipe as a staple for family dinners and entertaining due to its impressive flavors and eye-catching presentation. Many have shared personal successes with variations suited to local tastes and dietary needs.

Readers have discovered that experimenting with cheese types and additional spices yields unique tweaks that enhance the experience without straying from the original vision. Photography enthusiasts find the dish’s aesthetics make for captivating captures, showcasing the vibrant colors and textures.

Recipe adaptation stories abound, with individuals incorporating locally sourced ingredients or expanding the potato filling to incorporate additional vegetables. This flexibility allows a personal touch while retaining core elements.

Frequently Asked Questions

Can I use a different type of potato for this recipe?

Yes, you can substitute the classic russet potato with sweet potatoes or red/yellow potatoes. Keep in mind that texture and flavor will vary slightly with each type.

What is the best steak cut for this dish?

Ribeye and sirloin are popular choices due to their marbling and tenderness. However, flank and skirt steak can be suitable for a leaner option.

How can I make this dish vegan?

Replace the steak with portobello mushrooms for a meaty texture and substitute dairy items for plant-based options. Ensure all seasonings and toppings align with a vegan diet.

How long can leftovers be stored?

If stored in an airtight container in the fridge, leftovers can last up to three days, provided they are reheated thoroughly in an oven to ensure quality and safety.

Is this a kid-friendly dish?

While this recipe is rich and flavorful, it can be adapted for picky eaters by adjusting the level of spices and opting for milder steak cuts. Cheese and minimal herbs tend to appeal to children.

What drinks pair best with this meal?

A bold red wine like Cabernet Sauvignon enhances the beef flavors, while a chilled non-alcoholic cider offers a refreshing contrast.

Can I make this dish ahead of time?

Bake and prep potatoes and steak in advance, storing separately. Reheat and assemble just before serving to retain texture and freshness.

How can I ensure my steak is tender?

Properly sear over high heat and allow the steak to rest before slicing to maintain juiciness. Marinating overnight can also enhance tenderness.

Why are my potatoes taking longer to bake?

If using larger potatoes, they may require extra baking time. Consider raising oven temperature slightly or precooking in a microwave before oven completion.

Can I freeze this recipe for later use?

Baked potatoes can freeze well if wrapped individually, reheatable in the oven, though steaks should be freshly cooked to preserve flavor and texture.

Additional Resources


Diving into related recipes like other loaded potato variations can offer fresh ideas and inspirations. Technique guides for optimizing steak cooking render invaluable insights for perfecting your skills.

Explore ingredient information, especially for potatoes and steaks, to elevate your knowledge of their varieties and cooking properties. Equipment recommendations can ensure you’re always prepared with the right tools for the job, enhancing convenience and outcomes simultaneously.

Join the Conversation


We invite you to share your culinary attempts and successes on social media, inspiring others to try Steak-Loaded Baked Potatoes. Tag us and join a community of food enthusiasts sharing personal spins and interpretations.

Engage by leaving reviews and feedback, offering insights that help others perfect their craft. Capture your creations with photography tips from our community, where natural lighting and appealing angles can make your dish a visual masterpiece.

The Recipe

Steak-Loaded Baked Potatoes

Serves: 4

Prep Time: 15 mins

Cook Time: 1 hour

Total Time: 1 hour 15 mins

Kitchen Equipment Needed

  • Oven
  • Skillet
  • Knife
  • Cutting Board
  • Measuring Spoons

Ingredients

  • 4 large russet potatoes
  • 1 pound of steak (ribeye or sirloin)
  • 2 tablespoons olive oil
  • 1 teaspoon salt
  • 1 teaspoon black pepper
  • 4 tablespoons butter
  • 2 cloves garlic, minced
  • 1 teaspoon fresh thyme, chopped
  • 1 teaspoon fresh rosemary, chopped

Directions

  1. Preheat oven to 425°F (220°C).
  2. Scrub potatoes and pierce them with a fork several times. Bake directly on the oven rack for about 1 hour, until tender.
  3. Meanwhile, heat olive oil in a skillet over medium-high heat. Season steak cubes with salt and pepper.
  4. Sear steak cubes in the skillet, turning occasionally until browned and cooked to desired doneness. Remove from skillet.
  5. In the same skillet, melt butter and add garlic, thyme, and rosemary. Cook for 1 minute.
  6. Once potatoes are done, let them cool slightly and then slice each open lengthwise. Fluff insides with a fork.
  7. Top potatoes with steak pieces and drizzle with herbed butter from the skillet.

Recipe Notes

  • For a spicy kick, add a sprinkle of red pepper flakes to the steak during cooking.
  • Top with shredded cheese or sour cream for added richness.

Spice Up Dinner with Flavorful Cajun Salmon and Shrimp Recipe

Cajun Salmon and Shrimp: A Delightful Seafood Combination

⚖️
Difficulty
Medium

⏲️
Prep Time
15 mins

🕒
Cook Time
20 mins

⏱️
Total Time
35 mins

🍽️
Servings
4

Immerse yourself in the rich flavors of Cajun cuisine with this incredible Cajun Salmon and Shrimp recipe. Combining the bold spices of Cajun seasoning with succulent shrimp and tender salmon, this dish promises a memorable dining experience. The harmonious blend of flavors is enhanced when paired with rice or fresh greens, making it perfect for impressing guests or treating yourself to a weeknight indulgence. Its vibrant seasoning melds beautifully with the sweetness of the seafood, creating a must-try recipe for any seafood enthusiast.

Quick Recipe Highlights

  • Flavor Profile: The Cajun-inspired spices provide a lively, spicy kick and complement the natural umami of the salmon and shrimp.
  • Texture: The flaky salmon contrasts with the firm, juicy shrimp for a delightful mouthfeel.
  • Aroma: Bold, smoky, and spicy aromas create an unforgettable appetizing scent.
  • Visual Appeal: The rich, dark glaze of the Cajun seasoning adds depth to the pink and white tones of the seafood.
  • Skill Level Needed: Intermediate cooking skills with basic knowledge of pan-searing techniques.
  • Special Equipment: A heavy-bottomed skillet or grill pan is essential for perfect searing.

Recipe Overview

  • Difficulty Level: This dish is ideal for cooks with some experience in seafood, as it requires careful timing to ensure both salmon and shrimp are perfectly cooked.
  • Category: Main course, particularly suited for dinner due to its hearty and satisfying nature.
  • Cuisine: Rooted in American Southern culinary traditions with strong Cajun influences.
  • Cost: Relatively moderate, primarily determined by the quality and source of your seafood ingredients.
  • Season: Best enjoyed in spring and summer when fresh seafood is plentiful and outdoor grilling is convenient.
  • Occasion: Suitable for both casual family dinners and special occasions due to its impressive flavors and presentation.

Why You’ll Love This Recipe


The contrast in taste and texture offered by the Cajun Salmon and Shrimp is nothing short of delightful. The dish pairs the firm texture of salmon with tender shrimp, all enveloped in a spicy Cajun mix that tantalizes the taste buds. Preparation is seamless, with straightforward steps yielding a restaurant-quality meal, all within thirty-five minutes. Nutritional benefits abound, as both salmon and shrimp are high in protein and omega-3 fatty acids, supporting heart health. This dish’s versatility makes it perfect for intimate dinners or when entertaining guests; the impressive flavors make it a conversation starter. Economically, it offers a fantastic way to savor luxury seafood tastes without breaking the bank, with ingredients accessible at most supermarkets.

Historical Background and Cultural Significance


Cajun cuisine draws from French, African, and Spanish influences, originating from the Acadians who settled in Louisiana. Over time, this dynamic culinary tradition has developed its distinctive character, marked by simple ingredients and bold spices. Cajun Salmon and Shrimp highlight traditional techniques like blackening and pan-searing, essential in creating the intense, smoky flavor profile associated with Cajun dishes. These methods have evolved as cooks adapted the recipes to reflect personal preferences and regional ingredients, leading to numerous delightful variations.

Ingredient Deep Dive


Salmon takes center stage, revered for its rich, buttery texture and nutrient density, offering vitamin D, B vitamins, and essential fatty acids. Consider wild-caught varieties for a more robust flavor profile. To maintain its freshness, store salmon in the coldest part of your refrigerator and prepare it within a day or two of purchase. If substitutions are necessary, steelhead trout makes an excellent alternative. Meanwhile, shrimp bring a sweetness to the dish, balancing the heat of the Cajun spices. Look for wild-caught or sustainably farmed options, ensuring they are deveined and peeled for convenience. Shrimp freeze well when sealed properly, providing a readily available protein option.

Common Mistakes to Avoid

  • Overcooking: Precisely timed cooking ensures the salmon and shrimp remain succulent.
  • Uneven seasoning: Coat ingredients thoroughly for consistent flavors throughout.
  • Improper pan temperature: Use medium-high heat to achieve a proper sear without burning.
  • Neglecting to dry seafood: Patting dry is crucial to get that crispy texture.
  • Using old or low-quality spices: Fresh spices are key to authentic Cajun flavor.
  • Improper oil selection: Use a high-smoke-point oil like grapeseed for searing.
  • Skipping resting time: Allow seafood to rest briefly to let juices redistribute.
  • Neglecting proper storage: Storing improperly can lead to quick spoilage.

Essential Techniques


Master the art of seasoning; it’s crucial to coat your seafood evenly with spices, as this is where the flavor is established. Perfect your pan-searing technique by ensuring your pan is hot enough to create a delightful crust without overcooking. Keep an eye on the visual cues—golden brown crust and opaque flesh indicate doneness. For the best results, allow seafood to rest briefly before serving to lock in moisture and flavors.

Pro Tips for Perfect Cajun Salmon and Shrimp


Opt for fresh Cajun spice blends to capture authentic flavors. Consider marinating the salmon and shrimp briefly to deepen their taste. For an added twist, finish the dish with a squeeze of lemon to brighten the flavors. Customize the heat level to your preference by adjusting the cayenne pepper. Achieve restaurant-quality presentation by garnishing with fresh herbs like parsley or cilantro. Lastly, serve with side dishes or sauces that complement the spice and richness, such as coleslaw or a creamy aioli.

Variations and Adaptations


Embrace regional variations by incorporating local spices and herbs, such as adding thyme for a Mediterranean flair or cilantro for a Latin twist. To adapt this dish for seasons, switch sides like replacing winter root vegetables with a summery avocado and mango salsa. For a dietary spin, prepare the dish with a low-sodium Cajun mix and serve with cauliflower rice for a keto-friendly option. Plant-based eaters can substitute tofu for the seafood while using smoked paprika to evoke that smoky essence. For a unique texture, add a crunchy element with toasted nuts or seeds for contrast. Presentations can be elevated with artistic plating or creative vegetable garnishes, making it a feast for the eyes.

Serving and Presentation Guide


Use large white plates to make the colors of the Cajun Salmon and Shrimp pop, and arrange the seafood artfully with height for dimension. Garnish the dish with fresh parsley or microgreens for color contrast and freshness. Pair with traditional sides like steamed vegetables or buttery cornbread. For a modern twist, use a mirror glaze sauce artistically drizzled across the plate. Serve the dish at a warm temperature to maintain the seafood’s succulent quality. Portion with care to balance seafood and sides for a satisfying dining experience.

Wine and Beverage Pairing


A crisp, chilled Sauvignon Blanc pairs beautifully with this Cajun dish, cutting through the spices while complementing the seafood’s natural flavors. For non-alcoholic options, try an infused citrus water or a ginger lemonade that echoes the dish’s brightness. Coffee enthusiasts can appreciate an after-dinner cup of mild, aromatic coffee like a Sulawesi, which pairs well with savory notes. Serve beverages in appropriate glassware, such as wine in a chilled goblet or drinks in fun tumblers, enhancing the experience through thoughtful presentation.

Storage and Shelf Life


Leftovers should be swiftly chilled within two hours of serving and stored in an airtight container in the refrigerator, where they can last up to 2-3 days. Always monitor the dish for spoilage signs, such as off-odors or textures. When reheating, do so gently to prevent overcooking; using a microwave-safe plate or gentle warming on the stovetop can maintain tenderness. For long-term storage, freeze seafood separately before cooking, ensuring a taste revive when desired.

Make Ahead Strategies


Prepare the Cajun seasoning blend in advance, storing it in an airtight container for up to three months, readying it for quick use. Seafood can be cleaned and prepped a day ahead, saving time on the cooking day. Assemble sides or sauces ahead to focus on optimal seafood cooking during mealtime. Reheat components gently to preserve quality, adding fresh herbs or citrus zest right before serving to revive flavors.

Scaling Instructions


For a smaller serving, reduce ingredients proportionately, adjusting cooking times slightly for faster results. Doubling or tripling requires a larger skillet to maintain even cooking; work in batches if needed to avoid crowding the pan. Scale seasoning blends appropriately to distribute flavors evenly across larger seafood quantities. More guests? Serve buffet-style, simplifying the process; portion extras into containers ready for refrigeration.

Nutritional Deep Dive


Cajun Salmon and Shrimp are nutrient-dense, providing high-quality proteins essential for muscle repair and maintenance. Salmon’s omega-3 fatty acids are beneficial for cardiovascular health, while shrimp offer essential vitamins like B12 and selenium, supporting overall well-being. Monitor portion sizes to align nutritional intake with dietary goals, benefiting from nutrient-rich sides to balance the meal. Prudent ingredient choices, like controlling added salt in seasoning, contribute to a heart-healthy profile.

Dietary Adaptations


For a gluten-free version, ensure that all seasonings used are certified gluten-free. Dairy-free diners need only check their choice of side dishes and sauces for potential dairy content. For vegans, opting for seasoned, seafood-flavored plant proteins like tempeh can replicate textures. Experiment with low-carb alternatives like serving the dish over a bed of leafy greens or zucchini noodles, aligning with keto goals. Adjustments should maintain flavor integrity while catering to unique dietary needs.

Troubleshooting Guide


To counter texture issues like toughness, reduce cooking times and ensure seafood begins at room temperature. Balancing flavors may involve adjusting spice levels; consider adding acidity through lemon juice to cut the heat. Overcoming temperature challenges is simplified by managing pan heat levels, ensuring even cooking. Ingredient substitutions need careful consideration; consider flavor profiles and consistency when swapping spices or seafood. Time all elements to finish together without compromising the quality of any.

Recipe Success Stories


Culinary enthusiasts have lauded this recipe for its vibrant flavors and versatility in adapting to personal tastes. A favorite feedback note highlights adding fresh basil and tomatoes for a Cajun-Italian twist, elevating the experience. Adapting for festive occasions, one home cook incorporated a garlic butter sauce, delighting guests. Photographers have captured its visual appeal beautifully for social media showcases, earning praises and new followers alike.

Frequently Asked Questions

Q: Can Cajun Salmon and Shrimp be cooked on the grill?
A: Absolutely! Grilling imparts a smoky flavor; ensure the grill is pre-heated and use a grill basket or foil to prevent sticking.

Q: What can be used instead of salmon?
A: Trout or cod make excellent substitutes if you prefer different flavors or have dietary restrictions.

Q: How spicy is this dish?
A: The base recipe offers a moderate spice level. Adjust cayenne pepper quantities up or down to match your heat preference.

Q: How should leftovers be stored?
A: Store cooked seafood in the fridge in a sealed container, and consume within 2-3 days for the best quality.

Q: Can Cajun Salmon and Shrimp be made in advance?
A: The dish is best fresh, but prepping ingredients and creating spice mixes in advance can save time on the cooking day.

Q: How is fresh Cajun seasoning made?
A: Combine paprika, garlic powder, onion powder, cayenne, thyme, and oregano for a quick, homemade blend.

Q: What side dishes pair well with this recipe?
A: Consider rice pilaf, quinoa salad, or simply sautéed greens to complement the spicy Cajun flavors.

Q: Can I use frozen shrimp?
A: Yes, simply thaw them completely and drain any excess water before cooking to ensure they absorb seasoning well.

Q: Is this recipe suitable for kids?
A: Reduce spices to adapt the recipe for a milder flavor, keeping in mind the savory appeal of the salmon and shrimp.

Q: Can I incorporate additional vegetables?
A: Vegetables like bell peppers or zucchini can be a colorful addition, sautéed briefly to maintain a firm bite.

Additional Resources


Explore related recipes like Blackened Fish Tacos or Seamless Shrimp Jambalaya for further culinary adventures in Cajun cuisine. Consult guides on perfecting seafood searing or crafting homemade spice mixes for additional mastery. Engage with ingredient sourcing tips for sustainable seafood choices, access blog posts about equipment perfect for Cajun cooking, and browse seasonal adaptations to freshen presentations.

Join the Conversation


We invite you to share your culinary journey with Cajun Salmon and Shrimp through our social media platforms; post your photos and use the hashtag #CajunSeafoodLove. Share your recipe success stories in the comments, ask questions, or provide feedback to join our vibrant community of food enthusiasts. Discover a wealth of tips, connect with like-minded cooks, and delve into endless opportunities to customize and perfect this dish.

The Recipe

Cajun Salmon and Shrimp

Serves: 4

Prep Time: 15 mins

Cook Time: 20 mins

Total Time: 35 mins

Kitchen Equipment Needed

  • Heavy-bottomed skillet
  • Spatula
  • Mixing bowls
  • Measuring spoon set
  • Tongs

Ingredients

  • 4 salmon fillets
  • 8 large shrimp, peeled and deveined
  • 2 tablespoons Cajun seasoning
  • 1 tablespoon olive oil
  • 1 lemon, juiced
  • Salt to taste
  • Fresh parsley for garnish

Directions

  1. Pat the salmon fillets and shrimp dry with paper towels.
  2. Rub a tablespoon of Cajun seasoning evenly across each salmon fillet and shrimp.
  3. Heat olive oil in a heavy-bottomed skillet over medium-high heat.
  4. Place salmon and shrimp in the hot skillet, cooking salmon skin side down.
  5. Cook salmon for about 5-7 minutes on each side until cooked through, and shrimp for 2-3 minutes per side.
  6. Squeeze fresh lemon juice over seafood before serving and garnish with parsley.
  7. Serve immediately with preferred sides.

Recipe Notes

  • Adjust spices for personal heat preference by reducing or increasing Cajun seasoning.
  • Substitute smoked paprika for a milder spice level without missing out on flavor.

Irresistible Cowboy Butter Lobster Tails Perfect for Gourmet Grilling

Cowboy Butter Lobster Tails: A Flavorful Delight

⚖️
Difficulty
Moderate

⏲️
Prep Time
20 mins

🕒
Cook Time
15 mins

⏱️
Total Time
35 mins

🍽️
Servings
4

Dive into a culinary journey with Cowboy Butter Lobster Tails. This exquisite dish captures the essence of rich butter, aromatic herbs, and the sweet succulence of lobster meat. When combined, these elements create a gourmet experience that’s sure to impress any seafood lover. Perfect for special occasions, this dish highlights the marriage of bold flavors with a touch of elegance. Imagine the aroma of sizzling butter enveloping the tender lobster flesh, creating an unforgettable sensory experience.

Quick Recipe Highlights

Flavor Profile: The Cowboy Butter imparts a savory richness, complemented by a hint of citrus and fragrant herbs, elevating the sweet taste of lobster. The combination of butter and herbs like thyme and garlic creates a complex palate.

Texture: The tenderness of lobster tail contrasts beautifully with the smooth, velvety butter sauce. Each bite offers a luxurious mouthfeel, promising an indulgent dining experience.

Aroma: As the lobster tails cook, the air fills with the enticing aroma of melted butter and fresh herbs, inviting diners to the table. Garlic and citrus enhance this sensory appeal.

Visual Appeal: With vibrant red lobster shells and a luscious butter glaze, this dish is as pleasing to the eyes as it is to the palate. Garnishes of fresh herbs add a pop of color, ensuring a stunning plate presentation.

Skill Level Needed: While preparing lobster may seem daunting, with step-by-step guidance, even novice cooks can achieve success. The mastery lies in the butter sauce, a key element that ties the dish together.

Special Equipment: A sharp chef’s knife is essential for splitting the lobster tails, while a basting brush helps apply the butter evenly. A broiler or grill is useful to achieve the perfect cook on the lobster.

Recipe Overview

Difficulty Level: This recipe is classified as moderate because it involves shelling lobsters and perfecting the butter sauce texture. With practice, the steps become intuitive, proving rewarding for home chefs.

Category: Cowboy Butter Lobster Tails comfortably fits into dinner or lunch categories, especially for those looking to add a touch of sophistication to a meal.

Cuisine: Drawing inspiration from American seafood traditions, this dish incorporates flavors typical of Southern-style cowboy butter, which boasts a blend of spices and herbs.

Cost: As lobster is a premium ingredient, the dish leans toward the higher end in terms of cost. However, it stands as a luxurious treat worth every penny for seafood enthusiasts.

Season: Although excellent year-round, this dish shines during summer when fresh lobster is at its peak. Outdoor grilling adds a delightful char that complements the buttery sauce.

Occasion: Ideal for festive gatherings, romantic dinners, or upscale entertaining, Cowboy Butter Lobster Tails promise to leave a lasting impression on your guests.

Why You’ll Love This Recipe

The taste and texture of Cowboy Butter Lobster Tails are a gourmet revelation. The combination of succulent lobster with rich, savory butter enchants the palate, providing a luxurious dining experience that transcends the norm. Each mouthful reveals layers of flavor complexity that make this dish irresistibly delicious.

Convenience is a key feature of this recipe. With clear instructions and minimal prep work, you can effortlessly create a restaurant-quality meal in your own kitchen. The quick cook time means you’ll spend less time preparing and more time savoring the delightful flavors.

From a nutritional standpoint, lobster is a great source of lean protein and essential vitamins. Combined with the health benefits of garlic and herbs, this dish supports a balanced diet while still delivering indulgent flavors.

Socially, serving Cowboy Butter Lobster Tails at your next gathering elevates the occasion, offering your guests something unforgettable. This impressive dish not only pleases the palate but also sparks conversations around the dining table.

Despite its luxurious feel, this recipe is cost-effective compared to dining out. Enjoy a gourmet meal in the comfort of your home, using fresh ingredients that ensure quality and flavor at a fraction of restaurant prices.

Historical Background and Cultural Significance

Tracing the origins of Cowboy Butter Lobster Tails takes us to the heart of American culinary tradition. Cowboy butter, hailing from rustic Western kitchens, embodies robust, hearty flavors with a touch of spice, typically used for grilling meats. Its pairing with lobster is a perfect fusion of rustic charm and coastal elegance.

In the cultural landscape, lobster has long been associated with luxury. However, in the early United States, it was considered a food for the poor. Over time, lobster’s status soared, becoming synonymous with fine dining, a testament to its exquisite taste and texture.

The Cowboy Butter Lobster Tails recipe demonstrates evolution by bringing together regional elements in a harmonious blend. Traditionally, lobster prepared simply was favored, but integrating the boldness of cowboy butter marks a modern twist appreciated by adventurous palates.

Distinct regional variations of cowboy butter exist, featuring different herb blends and spice levels. Each adaptation tells a story of local influences, yet they all share a common goal: to enhance the main ingredient with the rich, buttery sauce.

Ingredient Deep Dive

Lobster Tails: As a culinary icon, lobster boasts a fascinating history. Once regarded as a humble food in colonial America, it is now celebrated for its tender and flavorful meat, a staple in gourmet seafood cuisine. Nutritionally, lobster offers valuable protein without excessive calories or fat, making it a delicious choice for health-conscious individuals.

Selecting lobster tails involves looking for firm shells and vibrant color; fresh tails should have a pleasing marine scent. When storing, keep them cold to preserve freshness, which is paramount for an authentic seafood experience. In cases when lobster is unavailable, large prawns or scallops offer a viable substitute, ensuring the dish remains indulgent.

Butter: Butter is more than a cooking fat; it is a vehicle for flavor infusion. With roots tracing back millennia, butter has been cherished worldwide for its creamy texture and unmatched taste. Opt for high-quality unsalted butter as the best base for creating flavorful sauces like cowboy butter.

Proper storage in a refrigerator ensures butter maintains its freshness and flavor, crucial for any recipe relying on its rich characteristics. For those avoiding dairy, plant-based butter offers a commendable alternative, adding a similar richness while accommodating dietary preferences.

Common Mistakes to Avoid

– Overcooking the lobster tail leads to tough, rubbery meat. It is crucial to monitor cooking times closely and pull tails from heat the moment they turn opaque.
– Skipping the buttery basting reduces the depth of flavor. Consistently apply cowboy butter during cooking to keep the tails moist and flavorful.
– Incorrectly slicing the lobster can cause an uneven cook. Ensure clean cuts using a sharp knife to split the shell for even heat distribution.
– Using salted butter may result in an overly salty dish. Start with unsalted butter, adding seasoning to taste to control salt levels.
– Ignoring presentation diminishes the visual impact. Arrange the lobster tails with garnished herbs for a professional touch that matches the dish’s taste.
– Cooking with frozen lobster tails without full defrosting can lead to uneven cooking. Properly thaw tails in advance for the best results.
– Underseasoning the cowboy butter fails to capture its essence. Adequate seasoning with herbs and spices is essential to achieve a robust flavor.
– Neglecting to rest the lobster post-cooking can lead to dryness. Allow a brief rest, enabling juices to settle and preserve moistness.

Essential Techniques

Mastering the art of butter basting elevates this recipe. Basting involves continuously brushing the tails with rich cowboy butter, ensuring each part of the lobster is imbued with luscious flavor. This technique helps maintain moisture, particularly when grilling or broiling at high temperatures.

Proper shelling and splitting of lobster tails ensure an even cook. Using a sharp knife, along with measured force, allows for a clean slice down the tail, exposing the meat while retaining the shell’s integrity. Visual cues for success include the exposed pink flesh and even distribution of cowboy butter.

Pro Tips for Perfect Cowboy Butter Lobster Tails

For a smoky twist, cook the lobster tails on a charcoal grill. The subtle smokiness adds a new layer of complexity, enhancing the dish’s bold flavors.
Experiment with different herbs and spices in your cowboy butter to discover unique flavor profiles. Variations with cilantro or paprika can offer delightful results.
Ensure your cowboy butter is prepared in advance, allowing the flavors to meld. This pre-preparation step ensures consistency and depth in taste.
Pair with fresh, zesty lemon wedges to brighten the flavors. This can counterbalance the richness of the butter and elevate the seafood notes.
Consider using clarified butter for a cleaner butter option that reduces milk solids and offers a clearer, more luxurious sauce.
For a touch of sweetness, add a subtle drizzle of honey into the cowboy butter. It layers in sweetness that complements the robust spices beautifully.

Variations and Adaptations

Regional adaptations might include integrating local spices within the cowboy butter. For example, adding chipotle peppers gives a Southwestern edge, while ginger can infuse an Asian twist.
Incorporate seasonal ingredients like spring asparagus or summer corn to embellish your plate, providing fresh contrast to the rich lobster.
Dietary modifications are achievable by substituting butter with coconut oil for a dairy-free version without compromising on richness.
Adjust the heat level to your liking by adding or omitting hot spices like cayenne pepper in your cowboy butter, allowing the flavor profile to match personal preference.
Texture can be manipulated by including toasted breadcrumbs atop the lobster for a crunchy counterpoint to the soft meat.
Explore presentation alternatives by serving the lobster atop a bed of mixed greens or alongside colorful vegetable medleys for an appealing visual aesthetic.

Serving and Presentation Guide

Proper plating elevates the dining experience. Consider arranging the lobster on a large platter, drizzled generously with remaining cowboy butter, and adorned with fresh herbs for color and aroma contrast.
Garnish with sprigs of parsley or cilantro for added freshness and visual appeal. This detail communicates attentiveness to presentation and flavor balance.
Traditional accompaniments such as boiled potatoes or steamed asparagus work seamlessly with the lobster’s rich flavors, aiding in a complete meal offering.
Modern serving suggestions include pairing with a light, fruity salad, providing a refreshing acidity to counterbalance the opulent butter.
Temperature is crucial; serve the lobster immediately after preparation to maintain the perfect texture and warmth, enhancing the overall palatability.
Portion control is key—offer a single lobster tail per serving to allow the indulgent flavors to shine without overwhelming the palate.

Wine and Beverage Pairing

A crisp white wine, such as a Chardonnay or Sauvignon Blanc, pairs superbly with Cowboy Butter Lobster Tails, enhancing the buttery notes while providing refreshing acidity.
For non-alcoholic alternatives, consider a chilled sparkling lemonade or citrus-infused iced tea, which complements the dish’s flavors while offering palate refreshment.
If you prefer coffee or tea offerings post-meal, a light herbal tea, such as chamomile or lemon balm, harmonizes well with the meal’s richness, aiding digestion.
Take note of temperature considerations: wine or beverages should be served chilled to match the dish’s lightness, improving the overall dining experience.
Serving suggestions involve using elegant glassware for beverages to heighten the sense of occasion and attention to detail.

Storage and Shelf Life

For optimal storage, keep leftover lobster tails tightly sealed in an airtight container within the fridge, extending freshness up to two days.
Adhere to temperature requirements, storing cooked lobster at 40°F or below to inhibit bacterial growth and maintain safety.
Utilize recommended glass or stainless steel containers to preserve the lobster’s flavor integrity, being mindful of odors from other foods.
Signs of spoilage, such as off-putting smells or slimy textures, should be checked before consumption; the pristine taste is essential.
For reheating, gently warm in a preheated oven at low temperatures to retain moisture without over-cooking, preserving the lobster’s delicate texture.
Freezing is discouraged for prepared lobster due to texture degradation; fresh preparation is best for maintaining quality.

Make Ahead Strategies

Begin your prep timeline by preparing cowboy butter a day ahead, allowing flavors to meld and simplifying on-the-day tasks without compromising the finished product.
Store completed butter in the fridge, ensuring it is at room temperature before applying to lobster for optimal coverage.
Quality impact when making ahead is minimal if the timing guidelines are followed, allowing for a balanced and efficient cooking process.
Assembly tips include pre-cutting the lobster tails and setting out tools to streamline efforts during cooking.
Reheat cowboy butter gently before use, avoiding separation. Small amounts added while heating help maintain texture.
Adding fresh elements like lemon slices right before serving infuses the dish with a vibrant citrus pop.

Scaling Instructions

When halving the recipe, maintain ingredient ratios to ensure the balance of flavors remains intact. Adjust seasoning levels to personal taste.
Doubling the recipe requires scaling up equipment like grilling racks or broiler trays, facilitating consistent cooking times despite increased volume.
Modify timing considerations to accommodate larger quantities, such as staggering cooks or adjusting heat sources for even cooking.
Constrain storage considerations to accommodate added portions by expanding using larger or multiple containers.
For parties, consider providing extra garnish and presentation enhancements, preserving visual appeal across increased servings.

Nutritional Deep Dive

Cowboy Butter Lobster Tails offer a balanced macro profile, with lean protein from lobster and rich fats from butter contributing to satiety and flavor finesse.
The dish benefits from micronutrients such as vitamin B12 and selenium, essential for maintaining energy and supporting immune function.
Due to its protein content, lobster provides a healthful alternative to heavier meats, satisfying dietary needs while offering premium taste experiences.
Dietary considerations should include awareness of butter’s calorie count, incorporating moderation into your meal plans for balanced consumption.
Portion analysis can shed light on personalized serving sizes, guiding weight management practices alongside thorough satisfaction of culinary cravings.

Dietary Adaptations

For gluten-free adaptations, ensure all spices and herbs used in cowboy butter are certified gluten-free, maintaining safety for those with sensitivities.
Explore dairy-free conversions by preparing the butter with alternatives like vegan spreads, achieving a similar richness without compromising dietary needs.
Lobster naturally fits within a low-carb or keto

Delicious Creamy Alfredo Mac and Cheese Recipe for Family Meals

Creamy Alfredo Mac and Cheese Recipe 🍝 Perfect for Family Meals ❤️

⚖️
Difficulty
Easy

⏲️
Prep Time
15 mins

🕒
Cook Time
25 mins

⏱️
Total Time
40 mins

🍽️
Servings
6

Who can resist a comforting, cheesy dish like Creamy Alfredo Mac and Cheese? This delightful recipe combines the classic taste of mac and cheese with a creamy Alfredo twist, making it perfect for family meals. The rich and savory sauce envelops every piece of tender macaroni, promising a mouth-watering experience that even the pickiest eaters will love. The blend of Parmesan and mozzarella cheese enhances the depth of flavors, making this mac and cheese recipe unforgettable.

Whether you’re hosting a dinner party or looking for a quick weekday meal, our Creamy Alfredo Mac and Cheese is a flexible delight that suits any occasion. Imagine the smiles on your family members’ faces as they dive into this cheesy, warm dish. The aroma that fills your kitchen will have everyone eagerly waiting at the table. It’s not just a meal; it’s a heartwarming culinary experience that brings loved ones together.

Strong ingredients like fresh garlic and a hint of nutmeg infuse this dish with sophisticated flavors that set it apart. While it carries a touch of gourmet flair, the preparation is easy enough for chefs of all skill levels. With this recipe, you’ll quickly become everyone’s favorite cook, as it offers the perfect balance of creamy texture and cheesy goodness that will linger in everyone’s memory.

Quick Recipe Highlights

  • Flavor Profile: A rich, cheesy blend with a balance of garlic’s sharpness and a hint of nutmeg.
  • Texture: A creamy sauce coating tender macaroni gives this dish a luxurious mouthfeel.
  • Aroma: The heavenly scent of melted cheese and fresh garlic will fill your kitchen.
  • Visual Appeal: Golden layers of melted mozzarella make an enticing and inviting dish.
  • Skill Level Needed: Suitable for any skill level, requiring simple stirring and baking techniques.
  • Special Equipment: An oven-safe dish and a medium saucepan are all you need.

Recipe Overview

  • Difficulty Level: This recipe is categorized as easy, perfect for beginners and busy home cooks. The steps involve basic cooking skills, requiring only simple mixing and baking.
  • Category: Comfort food; it falls perfectly under the category of pasta dishes suitable for dinner or a hearty lunch.
  • Cuisine: This dish takes inspiration from Italian-American culinary traditions, combining classic American mac and cheese with Italian Alfredo sauce influences.
  • Cost: Moderate; while cheese can be a bit pricey, the other ingredients are affordable, balancing overall costs.
  • Season: Ideal for colder winter months when hearty, warm meals are most appreciated.
  • Occasion: Great for family gatherings, casual dinners, or even as a holiday side dish.

Why You’ll Love This Creamy Alfredo Mac and Cheese Recipe

The creaminess of the Alfredo sauce takes your standard mac and cheese to new heights. The combination of Parmesan and mozzarella provides a cheesy richness that pairs perfectly with pasta. This recipe offers a delightful texture, blending smooth sauce with tender macaroni. Every bite melts in your mouth, offering cheesy goodness that’s impossible to beat.

Convenience is key, and this recipe delivers. It requires minimal hands-on time, allowing you to prepare other elements of a meal or simply relax while it bakes. The simple preparation makes it feasible for weeknights when time is of the essence. With easy-to-find ingredients, you’ll love the straightforward shopping list that doesn’t send you on a wild goose chase.

Nutritionally, this dish offers a good source of calcium and protein, thanks to the generous amounts of cheese. You can enhance its nutritional profile by adding vegetables like broccoli or peas. Even on its own, it serves as a comforting, satisfying meal that fills you up with wholesomeness.

One of the best parts of this recipe is its social and entertaining value. Shared with friends or family, this dish becomes the star of any gathering. Its universally loved flavors ensure it disappears quickly from the buffet table—prepare to see empty plates and happy smiles all around.

Cost-effectiveness makes this recipe a favorite for feeding a crowd. Basic, affordable ingredients like pasta, milk, and cheese come together to create a rich and impressive dish without stretching your budget too thin. It’s both pocket-friendly and luxurious—a rare combination that’s hard to resist.

Historical Background and Cultural Significance

Mac and cheese has a long-standing history with European roots, evolving over centuries from pasta and cheese casseroles that first appeared in medieval cookbooks. When paired with Alfredo—a creamy, buttery sauce thought to have originated in Rome in the early 20th century—this mac and cheese adaptation brings together iconic flavors from two culinary traditions.

The adaptation of Alfredo sauce into popular culture garnered attention through Italian restaurateur Alfredo di Lelio’s dish called “Fettuccine Alfredo,” which became famous among Hollywood elite and tourists. Over time, American tastes embraced and modified the concept, leading to modern recipes such as this mac and cheese iteration.

Culturally, mac and cheese represents comfort and nostalgia, akin to a warm embrace through food. Its evolution and adaptability have made it a beloved staple in homes across North America, and its pairing with Alfredo showcases how hybrid recipes can create new culinary experiences.

Regional variations abound, with adaptations featuring local cheeses or supplementary ingredients. From Southern barbecue infusions to spicy jalapeño and bacon versions, mac and cheese demonstrates incredible versatility and personalization, becoming a true canvas for expression.

Ingredient Deep Dive

**Parmesan Cheese**:
Parmesan adds an unmistakable umami element, deepening the mac and cheese’s flavor. Originating from Italy, this hard cheese is aged to develop its signature rich taste, and is key to traditional Alfredo sauce. Rich in calcium and phosphorus, Parmesan supports bone health and offers a strong flavor that allows for using smaller amounts effectively.

To select Parmesan, look for a firm texture with straw-colored tones. Store the cheese in the fridge, wrapped in parchment and sealed tight to maintain freshness and aroma. In a pinch, substitutes like Grana Padano or Pecorino Romano can provide similar depth.

**Mozzarella Cheese**:
Mozzarella is known for its melty texture and mild flavor, perfect for creating indulgent mac and cheese. While originally from Italy’s Campania region, modern mozzarella can be found worldwide, varying in water content and flavor. It’s higher in moisture compared to Parmesan, creating the gooey stretch people crave.

Select mozzarella based on your desired texture—from fresh to low-moisture varieties, which extend shelf life. Store it in a refrigerator, making sure to consume it quickly to limit moisture loss. Use Monterey Jack if you need a similar substitute, though you may lose some elasticity.

Common Mistakes to Avoid

  • Using pre-shredded cheese: This can contain anti-caking agents that affect melting. Grate your own for a smoother sauce.
  • Overcooking the pasta: Al dente texture is essential, as pasta continues to cook while baking.
  • Skipping the béchamel sauce: It acts as a base, binding the cheese and preventing graininess.
  • Ignoring seasoning: Balance with salt, pepper, and nutmeg to highlight flavors.
  • Forgetting to stir constantly: Avoid cheese clumping and ensure an even sauce texture by regular stirring.
  • Using wrong noodle shapes: Stick to shapes that capture sauce well, like macaroni or shells.
  • Neglecting to add a crispy topping like breadcrumbs: It adds texture contrast that enhances the mac and cheese.
  • Baking at too high a temperature: This risks drying out the mac and cheese—low and slow ensures creaminess.
  • Substituting milk with water: Always use full-fat dairy for creaminess, as water dilutes flavor and texture.
  • Not letting it rest: Allow the dish to sit for a few minutes post-bake for an optimal set texture.

Essential Techniques

**Building a Proper Béchamel**:
This technique is crucial as it forms the foundation of the cheese sauce. Achieve a silky texture by gradually adding milk to your butter-flour roux, ensuring smooth integration. Be wary of lumps by whisking continuously, and watch for a thick consistency that signals mixture readiness. Homemade béchamel lends a rich base that prevents the separated cheese texture.

**Proper Pasta Cooking**:
Undercooking pasta slightly is paramount since it continues softening as it bakes. This guarantees the macaroni absorbs just enough sauce without turning mushy. Pay attention to pasta when boiling; tasting is the best way to determine correct doneness.

**Creating a Crispy Topping**:
Achieving a delightful contrast of texture involves adding breadcrumbs or panko to the top of your mac and cheese. Toss them with melted butter before sprinkling over the dish, and then bake until golden. This transforms the dish’s final aesthetics while offering a satisfying crunch.

Pro Tips for Perfect Creamy Alfredo Mac and Cheese

Always use freshly grated cheese to avoid cellulose and other additives that hinder melting, resulting in a perfectly smooth sauce texture.

Do not omit the nutmeg—it might sound insignificant, but a pinch heightens and rounds out your dish’s flavor profile.

Bake the dish covered for the initial 20 minutes to trap moisture, removing the foil for the last 5 to 10 minutes to brown the top beautifully.

Infuse your roux with garlic and onion powder to add depth without overpowering the primary cheese flavors, subtly enriching the sauce.

Consider enhancing umami by adding a splash of soy sauce or miso to the béchamel during preparation for an intriguing layer of flavor sophistication.

For a slightly tangy twist, mix in a spoonful of cream cheese; it adds a dense richness that complements the Alfredo profile beautifully.

Reserve pasta water when draining—it’s a versatile starchy liquid that can adjust the sauce’s consistency subtly if required post-bake.

Edit the recipe’s mac-and-cheese perception by serving in ramekins or individual skillets for personalized portions that bring a touch of restaurant elegance to home dining.

Variations and Adaptations

Regional variations could include smoky bacon or crispy pancetta crumbles to deliver a savory depth characteristic of Southern barbecue influences. Adding a spicy kick with jalapeños or red pepper creates a version favored by those drawn to heat.

To adapt this dish for different seasons, incorporate vegetables like roasted butternut squash in autumn or fresh peas in spring, letting the recipe versatility shine through every quarter. Seasonal ingredients freshen the dish and introduce local produce flavors that captivate.

Dietary modifications are possible: substitute traditional dairy with plant-based milk and nutritional yeast for a vegan take, or gluten-free pasta guarantees everyone enjoys it.

For a flavor journey, use blue cheese for a tangy iteration, or truffle oil drizzle for indulgence worthy of gourmet acclaim. Swap cheddar for a smoky Gouda or even spicy pepper jack for heat-seeking aficionados.

If aiming for texture modifications, replace regular macaroni with shell pasta or cavatappi, known for catching sauce—a perfect solution for those desiring maximum gooeyness in every bite.

Presentation alternatives vary from single-serve oven dishes dotted with herbs to large family-style casserole platters. Imagine scattering crispy shallots or parsley over the mac for that Instagram-worthy touch.

Serving and Presentation Guide

Adopt simple yet effective plating techniques by ladling portions into gently warmed bowls before topping neatly with breadcrumbs or fresh herbs, providing an inviting warmth and eye-appeal.

Garnishing with freshly chopped chives changes the dish’s aromatic and visual landscapes, inviting diners with its bright green color contrast against golden cheese.

Traditionally, this creaminess pairs well with a side serving of simple salad dressed with lemon vinaigrette; it cuts the rich flavor and aligns with fresh, crisp complementarity.

Modern serving suggestions include individual ramekins or cast-iron skillets for personal elegance, transforming a communal dish into an intimate dining experience with presents modern flair.

Ensure portions are served hot to retain sauce melody and pasta warmth, delivering that cherished gooey softness alongside partner accompaniments that share the same dining temperature.

Portion control tips involve using scoop comparisons or measuring cups, maintaining consistency for calculated nutrition information per serving, and avoiding overindulgence pitfalls.

Wine and Beverage Pairing

A full-bodied Chardonnay or a glass of crisp Sauvignon Blanc lightly offsets the creamy richness, with wine’s acidity balancing every cheesy bite perfectly.

For non-alcoholic alternatives, serve chilled sparkling water with lemon or a citrus spritzed soda, providing a refreshing palate cleanse.

If pairing with coffee, opt for a medium roast; its mellow, nutty notes complement creaminess without overshadowing subtler sauce flavors.

Cool serving temperatures enhance cream sauce dishes, offering a stark contrast between warm pasta and refreshing drinks.

Suggest serving suggestions include using tall wine glasses to showcase color spectrum distinctions, enhancing experiential wine connections.

Storage and Shelf Life

Store leftovers in an airtight container placed in the fridge, maintaining freshness for up to three days post-preparation, labeling accordingly for swift identification.

Maintain optimal quality through refrigeration, typically at a steady 40°F (4°C) to safeguard against spoilage. Poise any longer preservation by transitioning to freeze-friendly solutions.

Sign of spoilage includes off smells or an uncertain surface film—notice any changes; these indicate unsuitable consumption.

Reheating instructions necessitate low-temperature oven warming for even cheese melt-in, while microwave reheating should embrace short, gentle bursts, allowing interval stirring for cream consistency retention.

Freezing guidelines suggest cool down before foil-wrap or bag usage, marking storage dates; encourage consumption within two months to savor flavor integrity intact.

Make Ahead Strategies

Offering a make-ahead timeline simplifies event management, encouraging the pasta to pre-cook before assembling, skipping the freeze until day-of preparation.

Store elements separately to avoid sogginess or premature combining of liquid components with pasta, retaining dish integrity for optimal presentation.

Assess the quality impact of making certain aspects like béchamel upfront, understanding potential sauce thickening alterations from starchy pasta water residue interaction.

Privacy for last-minute assembling involves pre-grated cheese and chopped ingredients readiness for successful execution under pressure, achieving seamless dining delivery.

Reheating guidelines stress timely, gentle heat diffusion to maintain original flavors, integrating culminating final touches like breadcrumbs post-warm-up for crisp texture enjoyment.

Add zestful, fresh elements like sprinkled herbs or arranged microgreens on the day, energizing the visuals and refreshing pre-prepared main dish coursing.

Scaling Instructions

Scaling the recipe accommodates various numbers by precisely doubling or tripling ingredient measurements while adjusting key elements like spices to taste.

Keep equipment sizing in perspective—larger casserole dishes or additional baking sheets might be required when expanding meal yields.

Modify cooking times accordingly, remaining vigilant of individual oven variances while ensuring an even cook-through, guaranteeing neither undercooked nor dry results.

Focus on storage shifts when considering larger portions—ensure appropriately large airtight containers or freezing solutions are accessible for post-meal conservation.

Embrace container guarantees for space management, particularly when halving does not capably support leftovers due to volume reductions.

\n
Ensure utensil adjustments for increased quantities, mindful of replacing whisks with significantly larger spatulas to support seamless béchamel sauce mastery.

Nutritional Deep Dive

The macro content in this dish primarily offers a higher carbohydrate and fat profile, due to the pasta and cheese compositions blending to deliver energy-dense nourishment.

Micronutrients like calcium, phosphorus, and vitamin A are present abundantly, positively supporting health through substantial amounts of cheese and milk.

Health benefits arise from the excellent bone-strengthening elements, attributed to ingredients delivering critical nutrition while enjoying a comforting meal.

Dietary considerations involve portion understanding; maintaining a balance between mac and cheese consumption and fresh vegetable pairings achieves optimal nutrient equilibrium.

Portion analyses further explore grain and dairy intake proportions, reflecting realistic caloric count for meal management during any health-conscious eating schedule.

For effective weight management, consider reaching for a single ladle scoop as serving guide, potentially opting for side salad alignment should dietary space require calorie shift arrangements.

Dietary Adaptations

For a gluten-free version, substitute pasta with non-gluten varieties such as rice flour or corn-based options, retaining sauce loyalty despite ingredient diversifications.

Dairy-free adaptations may involve utilizing plant-based milk like almond alongside nutrition yeast or vegan cheese alternatives, balancing authenticity with dietary restrictiveness.

Vegan needs likewise navigate creatively through dairy-free substitutions coupled with flavor-enhancing elements like nutritional yeast for cheese-like richness, omitting animal-derived additions relatively efficiently.

Low-carb considerations encompass zucchini noodles or cauliflower base to sustain mac and cheese identity while acknowledging carb constraints for keto-focused eaters.

Paleo enthusiasts transform servings with nut-based cheeses and grain-free pasta, engaging culinary creativity within recipe framework adaptable to historical tradition deviations.

Low-FODMAP customization embraces accommodating digestive sensitivities, subbing dairy with lactose-free variants, achieving similar sensations via equal-matched proportions.

Exploring further diet inclusionary avenues, experiment with ingredient swaps or reductions resonant with personalized taste yet appropriately addressed for recognized accumulative or limiting factors.

Troubleshooting Guide

For any texture issues, confirm sauce emergence balanced by thorough béchamel attention, acknowledging possible uneven pasta compatibility factors.

To resolve flavor balance dilemmas, consider seasoning alterations and cheese variety swap-outs, understanding potential operational tool impacts on desired culinary heights.

Should temperature problems occur, monitor regulatory conditions through thermometer checks, gauging suitability warmth capture meets internal distribution.

Address equipment challenges by evaluating size compensations relevant to adjusted quantities or altered integration layout changes for preparation finesse.

Ingredient swap errors merit examination; focus on complement previews, achieving congruent flavor-sector improvements amid desired substitution elements, facilitating enhanced continuities creation.

Address timing concerns with pre-planned oven engagement, embracing attention prioritization while considering existing vaunted estimates—always affording cushion margins for constraint mitigations.

Equipment tool missteps bolster heedings where feasible, understanding reshaping execution involves varying compatibility principles through diverse culinary pathways, maintaining steadfast attentiveness to uninterrupted completion achievement.

Recipe Success Stories

This recipe inspired countless families to revisit cherished mac and cheese experiences, their updates infusing personal elements that demonstrate lasting adaptation potential within home memories.

Community engagement stories stirred creativity, returning innovative transformations where endless customization created welcomed newness blossoming from original inclusivity comforts long celebrated.

Reader recipe variation successes extend concerted encouragement, igniting creative opportunities revealing endless inspiration resonances, resulting in a unified culinary community revelatory for all who partake.

Shared adaptation recommendations emerged championing conversions like seasonal swaps or dietary limitations that illuminate cherished cross-sphere connectivity.

Impromptu tips illustrated photography improvement investments for bloggers sharing irresistible dishes beyond narrative or print, capturing gastronomic imagination wreathing irresistible moments worth celebrating.

Frequently Asked Questions

Q: Can I pre-make the béchamel sauce for this dish?
A: Yes, you can make the béchamel sauce one or two days in advance. Store it in the refrigerator in an airtight container and reheat gently on the stove while stirring frequently to maintain its smooth consistency.

Q: How can I prevent my cheese from becoming grainy?
A: Avoid overheating the cheese by adding it slowly to the warm béchamel and stirring constantly. Using high-quality, freshly grated cheese rather than pre-packaged shreds will assist in achieving a smoother melt.

Q: What makes this mac and cheese “Alfredo”?
A: The addition of béchamel sauce along with Parmesan cheese creates an Alfredo-style sauce, lending the iconic creamy texture and rich cheese flavor associated with Alfredo dishes due to its similar ingredient profile.

Q: Is it possible to adapt this recipe for a slow cooker?
A: Yes, this recipe can be adapted for a slow cooker by precooking the pasta and béchamel before combining and transferring to slow cook. Adjust times and procedures specific to your appliance for consistent texture maintenance.

Q: What can I serve alongside Creamy Alfredo Mac and Cheese?
A: Consider a simple greens salad or steamed vegetables to accompany the richness of this dish. A light lemon vinaigrette complements the cheesiness wonderfully, delivering a contrast between creamy and refreshing palettes.

Q: Can I use other cheese varieties beyond mozzarella and Parmesan?
A: Certainly! Experiment with cheeses such as Gruyère, Asiago, or Fontina for alternate flavors. Ensure you choose cheese types that melt well and match your desired flavor profiles as you adapt the recipe considering technology limits.

Q: How long can I freeze leftovers for, and is it recommended?
A: Leftovers can be frozen for up to two months, but it’s recommended to serve them fresh to preserve optimal taste and texture. For best results, allow the baked mac and cheese to cool completely, then portion into freezer-safe containers with lids.

Q: What happens if the dish comes out too dry?
A: A dry dish usually indicates either overbaked pasta or insufficient sauce ratio. Correct by adjusting baking lengths or increasing béchamel proportions. Consider adding a bit of reserved pasta water to revive any separation but utilize sparingly.

Q: What is the best pasta shape to use?
A: Traditional elbow macaroni works wonderfully, although other cost-effective shapes like shell pasta or cavatappi also capture sauce excellently. Feel free to choose a shape based on preference while maintaining sauce engagement capacity.

Q: How do I prevent pasta from clumping?
A: Ensure pasta is cooked per package directions, considering constant stirring during hot water immersion. While cooling, adding a bit of olive oil keeps pasta from sticking before transitioning into your casserole composition matrix.

Q: Why is nutmeg important in this recipe?
A: Nutmeg adds a subtle spiced note that quietly supports the cheese profile without overpowering it, rounding the flavors and adding a gourmet touch that complements creamy components nicely.

Additional Resources

Seek similar recipes that explore alternate cheese combinations for macaroni and cheese enthusiasts, offering enriching options applicable to preferences favoring broader cheesery selections.

Discover further béchamel sauce creation guides for technical advice refinement in classic culinary know-how expansion, supporting adeptness versatility pursuits.

Ingredient explorations include profiles on cheese aging processes, dairy peculiarities, or cultivar distinctions for comprehensive knowledge building across everyday cooking aspects.

Delve into recommended equipment nuggets detailing non-stick casserole dish preferences or oven practices contributing towards everyday cooking brilliance.

Seasonal insight variations highlight ingredient rotation suitability within oven recipes, explaining best selections amid fresh component availability period determinations.

Join the Conversation

Engagement centerpiece activity around social media encompasses harness insights into post-served photography signifying blissfully shared visual components.

Launched feedback section offers direct recipe review opportunities where additional contributions welcome variety recognition mutually beneficial exchange orchestration.

Ingredient substitution tips provide field-tested options that readers could employ or adapt for personalizations captivating versatility or addressing dietary limitations directly.

Building communities around this Creamy Alfredo Mac and Cheese reflects the inbound dialogue echo celebrated flavor legacies fostered through unified, shared experiences.

Involve yourself by sharing successful endeavors through communication platforms, communicating innovative transformations balancing legacy iconography with newfound flavor interpretations.

The Recipe

Creamy Alfredo Mac and Cheese Recipe

Serves: 6

Prep Time: 15 mins

Cook Time: 25 mins

Total Time: 40 mins

Kitchen Equipment Needed

  • Medium saucepan
  • Oven-safe casserole dish
  • Whisk
  • Pasta pot
  • Cheese grater

Ingredients

  • 2 cups elbow macaroni
  • 2 tablespoons butter
  • 2 tablespoons flour
  • 2 cups milk
  • 1 cup grated Parmesan cheese
  • 1 cup shredded mozzarella cheese
  • 1/4 teaspoon ground nutmeg
  • Salt and pepper to taste
  • 1/2 cup breadcrumbs (optional)
  • 2 cloves garlic, minced

Directions

  1. Preheat your oven to 350°F (175°C).
  2. Cook macaroni according to package instructions until al dente. Drain and set aside.
  3. In a medium saucepan, melt butter over medium heat. Add garlic and sauté until fragrant.
  4. Stir in flour to form a roux and cook for 1 minute.
  5. Gradually whisk in milk, ensuring a smooth mixture, and cook until it thickens.
  6. Remove from heat, then stir in Parmesan and mozzarella cheese until melted and blended smoothly. Add nutmeg, salt, and pepper to taste.
  7. Combine the macaroni with the cheese sauce, mixing well to coat evenly.
  8. Pour mixture into a buttered casserole dish, then top with breadcrumbs if desired.
  9. Bake for 20-25 minutes or until bubbling and golden on top. Let sit for a few minutes before serving.

Recipe Notes

  • Feel free to add cooked bacon or peas for extra flavor and nutritional boost.
  • Swap gluten-free pasta for a gluten-free version.
  • Store leftovers in the refrigerator up to three days or freeze for up to two months.

Irresistibly Delicious Juicy Ribeye Steak Sandwich Recipe

Tremendous Juicy Ribeye Steak Sandwich: Mouthwatering Delight

⚖️
Difficulty
Medium

⏲️
Prep Time
15 mins

🕒
Cook Time
20 mins

⏱️
Total Time
35 mins

🍽️
Servings
4

Indulge in the delightful experience of a Tremendous Juicy Ribeye Steak Sandwich. This succulent creation transforms a classic ribeye into a flavor-packed sandwich that pleases both the eyes and the palate. With tender and juicy steak as the star, it permeates your senses with delectable aromas and a taste that promises to leave you craving more. Imagine biting into the rich, buttery ribeye enveloped in fresh, crusty bread with just the right crunch, offering a perfect contrast to the mouthwatering tenderness of the steak.

Ideal for steak lovers looking to enjoy a restaurant-quality meal at home, this ribeye steak sandwich provides the perfect balance of savory flavors and vibrant textures. The juicy steak combines with onions and peppers, bringing subtle sweetness and peppery warmth that elevates the whole experience. The softness of the cheese paired alongside melts perfectly atop the ribeye, ensuring every bite is a symphony of gourmet flavors and textures.

Quick Recipe Highlights

  • Flavor Profile: Juicy ribeye offers a rich, beefy essence complemented by sweet caramelized onions and spicy peppers.
  • Texture: Experience the juxtaposition of tender steak with crispy bread for a delightful mouthfeel.
  • Aroma: Savory and smoky notes from the ribeye are balanced beautifully with sweet onions and hints of melted cheese.
  • Visual Appeal: Vibrant colors from vegetables against golden bread make for an Instagram-worthy presentation.
  • Skill Level Needed: Intermediate skills needed for grilling steak to perfection and assembling the sandwich neatly.
  • Special Equipment: Grill or griddle pan for optimal cooking results and a sharp knife for precise slicing.

Recipe Overview

  • Difficulty Level: A medium difficulty level reflecting the need for attention to detail while grilling and assembling to capture all the sandwich’s flavors.
  • Category: Main course or brunch special, making it perfect for hearty meals that impress.
  • Cuisine: Rooted in American cuisine with influences from traditional steakhouse and barbecue cooking styles.
  • Cost: Moderate, with the ribeye as the primary investment, balanced by the affordability of other ingredients.
  • Season: Best enjoyed year-round but shines in spring and summer for outdoor grilling festivities.
  • Occasion: Perfect for family gatherings, cookouts, or casual dinner parties looking for a touch of elegance.

Why You’ll Love This Recipe


The Tremendous Juicy Ribeye Steak Sandwich is not just a feast for your appetite but also a true sensory delight. The rich flavor of the ribeye steak takes center stage, complemented by the gentle sweetness of caramelized onions. Every bite delivers an umami-packed punch with the subtle zest of peppers adding a slight hint of warmth. The satisfying crunch of the fresh bread pairs perfectly with the melted, creamy cheese, creating a texture that is both hearty and fulfilling.

This recipe offers convenience without sacrificing taste, making it a go-to option for weekend lunches or quick dinners. With straightforward preparation steps that cater to those intermediate in cooking skills, you can easily create a gourmet meal in your kitchen. The flexibility in ingredient choices also allows for a personalized touch, accommodating various dietary needs or preferences with ease.

Nutritionally, the sandwich is a balanced meal with protein from the ribeye and cheese, while the peppers and onions contribute fiber and essential vitamins. This makes it an ideal choice for a meal that keeps you energized and satisfied. It’s a powerhouse of nutrients presented in a delightfully delicious format.

Social events and entertaining are made better with this standout sandwich as it caters to the steak lovers and gourmet enthusiasts alike. Whether you’re hosting a casual dinner party or looking for a dish to share at a potluck, this ribeye steak sandwich offers an impressive presentation and flavor that makes it a crowd favorite.

Last but not least, the recipe is cost-effective. While ribeye is an investment, making your sandwiches at home significantly reduces dining costs. Additionally, by purchasing seasonal vegetables locally, you further enhance its accessibility and affordability without compromising on quality or taste.

Historical Background and Cultural Significance


The ribeye steak sandwich captures the heart of American culinary traditions, where beef often takes a central role at the table. Its origin can be traced back to the early 20th century when sandwiches became a popular format for combining various flavors with convenient handling. This particular version draws inspiration from traditional steakhouse cuisines while modernizing it for home cooking ease.

Culturally, the ribeye steak sandwich represents the fusion of comfort and sophistication. It reflects the ways Americans have embraced the simple sandwich structure to create high-end culinary experiences. As both casual and cosmopolitan, this dish reveals how versatile beef can be when approached with creativity and care.

Over the years, the ribeye steak sandwich has evolved, influenced by regional preferences and available local produce. In the west, you might find it with hints of Mexican spices, while the east coast might prefer it with sharper cheeses. This adaptability showcases the sandwich’s ability to transcend its origins while maintaining core flavor principles.

Regional variations highlight its popularity across the United States. Slow smoke cooking methods popular in southern regions impart smoky depth, while northern areas might lean towards employing bolder seasoning techniques. Each version echoes its birthplace, showcasing how diverse influences shape gastronomical perspectives across America.

Ingredient Deep Dive


Ribeye steak is the star of this sandwich, prized for its marbled richness and tender texture. Renowned for its melt-in-the-mouth quality, ribeye pays homage to the luxury of beef. Historically, ribeye has held a special place in culinary traditions, often regarded as one of the most flavorful cuts, favored by chefs and home cooks alike.

Nutritionally, ribeye offers a high protein count, essential amino acids, and healthy fats, making it an excellent choice for a well-rounded meal. When selecting ribeye, focus on marbling and freshness, opting for organic or grass-fed options for the maximum nutritional benefits and ethical considerations. Keep ribeye chilled until ready to use and consume ideally within two days of purchasing.

The selection of peppers and onions provides both a vibrant pop of color and a nutritional boost. High in vitamin C and fiber, bell peppers add sweetness that complements the savory meat. Onions, aside from their aromatic properties, are known for containing antioxidants that support heart health.

Peppers and onions should be crisp and flawless upon selection; storing them in a cool, dark place prolongs freshness. Slice thinly for even cooking and optimal sandwich distribution. If unavailable, ingredients can substitute with green onions or mild chili peppers to adjust spice levels as per preference.

Common Mistakes to Avoid

  • Overcooking the ribeye: Ensure your grill is preheated and the steak is brought to room temperature beforehand for even cooking.
  • Skipping resting time: Always let the steak rest before slicing, allowing juices to redistribute for a juicy bite.
  • Inconsistent slicing thickness: Slice ribeye into equal pieces for a balanced sandwich. Uniformity ensures even cooking and presentation.
  • Using stale bread: Ensure bread is fresh to maintain the right texture. A stale slice can detract from an otherwise sumptuous bite.
  • Cheese overpowering the steak: Use cheese sparingly so as not to mask the ribeye’s rich flavors.
  • Not aligning flavors: Properly season vegetables to harmonize with the steak, avoiding imbalanced flavor profiles.
  • Using old produce: Select fresh onions and peppers, as these offer peak flavor and nutritional benefits.
  • Forgoing sauce balance: Incorporate sauces sparingly to enhance rather than overshadow the sandwich’s natural flavors.
  • Cutting against the grain: Slice ribeye against the grain for maximum tenderness.
  • Under-melting cheese: Cheese should be well-melted to integrate seamlessly with the steak without being overly liquid.

Essential Techniques


Mastering the grill for ribeye requires understanding heat levels. High heat sears the outside while maintaining medium-rare inside, making temperature regulation crucial. Practice using a thermometer to achieve the perfect doneness; each ribeye thickness may slightly alter this timing.

Respect the resting phase to maintain juicy results. Resting allows flavors to set and juices to redistribute, ensuring every bite is succulent. Cover the steak with foil and allow it to rest for at least five minutes before slicing.

Onion caramelization is a technique ensuring sweetness. Cook onions slowly over medium heat, stirring often to avoid burning but drawing the natural sugars out for a deliciously sweet profile. This process is key to the depth of flavor within the sandwich.

Proper sandwich assembly ensures structural integrity. Layer intentionally, spreading sauces sparingly, and evenly distribute vegetables and steak pieces to provide an even burst of flavor with each bite. Start by smearing a thin layer of condiment onto the bread for maintaining moisture.

Always slice ribeye against the grain. This technique reduces muscle fibers’ length, making it easier to chew and further elevating its tenderness. Follow visual cues in the ribeye texture to guide your cuts for optimal results.

Pro Tips for Perfect Ribeye Steak Sandwich


For the juiciest results, try a reverse sear method, starting the ribeye at a lower temperature to cook through, then finish with a hot sear for the perfect crust. This method balances tenderness with flavor development.

Utilize compound butters for enhanced flavor. Infuse butter with garlic, herbs, and spices; apply over steak post-cooking for an aromatic overlay and added richness.

Don’t shy from grilling vegetables. Caramelizing peppers on the grill enhances their natural sweetness and imparts a mildly smoky taste that complements the ribeye’s deep flavors.

Look beyond classic sauces for additional touches. Options like balsamic glaze or mustard can elevate the sandwich with tangy notes, proving harmonious with the steak’s inherent richness.

Maximize presentation with mindful slicing. Cut sandwiches diagonally to showcase the filling layers, using fresh herbs as garnish for added visual appeal and aromatic depth.

Consider resting your steak at room temperature before grilling. Allowing it to reach room temperature promotes even cooking throughout the steak. This ensures the center warms without the outside overcooking.

Opt for freshly baked artisanal bread to amplify texture. A crispy crust juxtaposes beautifully with the tender steak, contributing to the sandwich’s multi-dimensional enjoyment. A well-toasted bun enhances the sandwich’s structural appeal and taste.

Variations and Adaptations


For a bold regional twist, consider implementing southwestern flavors by adding roasted chili peppers and a dash of chipotle sauce for a smoky, spicy variation that highlights the ribeye’s robust character.

Seasonal adaptations may include swapping out peppers for mushrooms in autumn for an earthy layer that aligns well with ribeye’s substantial depth, bringing a forest-like aroma and taste to the sandwich.

Those with dietary restrictions might explore replacing traditional bread with gluten-free alternatives or embracing the richness of a lettuce wrap for a low-carb choice, maintaining the steak as the prominent feature.

Flavor exploration is endless, from adding a hint of bourbon-infused barbecue sauce for heightened smokiness to utilizing truffle oil to impart an elevated umami punch, aligning with the steak’s intrinsic luxurious nature.

For texture modification, incorporate additional crispy elements. Thin fried onion rings provide extra contrast and an enjoyable crunch without overpowering the ribeye’s tender profile.

Presentation can be innovatively adapted. Think open-faced or piled-high gourmet styles, maximizing visual appeal and allowing guests to customize toppings for a personalized experience.

Serving and Presentation Guide


Carefully arrange the sliced ribeye atop a bed of arugula or spinach, enhancing color and lending a fresh, peppery bite contrasting the steak’s richness. The vivid greens add color and another flavor layer to the presentation.

Garnish with fresh herbs like parsley or a sprinkle of microgreens to convey sophistication and underline the sandwich’s gourmet elements. Their subtle aromas enrich the overall flavor profile.

Traditional accompaniments might include a side of golden fries or a refreshing salad. Each offers textural variety—one crispy, the other light and hydrating.

Modern serving suggestions extend to crafting mini versions for hors d’oeuvres at parties, making them even more accessible and bite-sized without losing character.

Serve slightly warm at room temperature, aiming to keep it from direct refrigerated cold, which dulls flavor. But avoid hot temperatures that could congeal cheese and dry the steak further.

For portion control, consider half sandwiches for lighter meals or pair with sides to maintain steadier meal balances, ensuring satisfaction without excess.

Wine and Beverage Pairing


When harmonizing with the delicious flavors of a ribeye steak sandwich, opt for a full-bodied red wine like Cabernet Sauvignon whose robust tannins can support the rich, fatty texture and elevate the meatiness.

Non-alcoholic alternatives can draw on the tartness and effervescence of a nicely chilled sparkling water with citrus wedges. Its refreshing quality cleanses the palate, brightening each bite anew.

For those who enjoy coffee or tea pairings, select a bold black tea or a rich dark roast coffee. Hinting at similar roasted notes, these beverages complement the steak’s depth beautifully.

Ensure wines are served at the recommended temperature to appreciate complete flavor profiles. Reds should be slightly cooler than room temperature to balance out tannins and acidity effectively.

Serving suggestions encourage a mix of glassware. Consider traditional red wine glasses or playful tumblers for non-wine options to maintain theme consistency yet infuse it with modern flair.

Storage and Shelf Life


To preserve the freshness of your ribeye steak sandwich, store it in an airtight container within the refrigerator, aiming to maintain the best condition by consuming within three to four days.

For optimum quality, keep refrigerated at temperatures below 40°F (4°C) to prevent bacterial growth while ensuring nothing else infuses unwanted flavors into your stored sandwich.

Consider separating elements if meal prepping ahead—keep steak and bread apart until assembling, preventing moisture from impacting bread texture over time.

Signs of spoilage will include off-putting smells, visible mold, or alterations in texture. Trust your senses; discard at any suggestion of these cues to maintain food safety.

Reheating instructions involve lightly warming the steak in a skillet over medium heat, aiming to revive while preserving its tenderness without further cooking it through entirely.

While freezing ribeye might normally be inconvenient, should the need arise, wrap steak separately with parchment paper, sealing it tightly to avoid freezer burn before utilizing it within three months.

Make Ahead Strategies


Start your prep the day before by marinating the ribeye overnight, heightening flavor as it permeates deep into the meat fibers. Schedule onion caramelization a day ahead too, letting flavors develop fully.

Consider storage between steps, ensuring all prep work elements—pre-cut vegetables, prepared sauces—are neatly contained using proper storage solutions, keeping refrigerated until usage.

Evaluate quality impact carefully. Freshly assembled sandwiches deliver optimal experiences concerning texture and taste. Pre-assembled sandwiches may compromise the bread’s crispness somewhat over prolonged fridges.

Assembly tips incorporate just-in-time strategies. Final assembly should happen prior to meal serving, preventing sogginess while maintaining a pleasurable eating experience.

Reheating guidelines demand caution. Only warm components to temperate so that they reach ideal serving warmth rather than fully reheating or cooking again, ensuring texture fidelity.

Add fresh elements post-reheating for enhanced vibrance, as these tend to fade after cold storage. Counterbalance refrigeration effects with the bright warmth of fresh garnishes or condiments.

Scaling Instructions


Scaling this sandwich recipe either down or up deserves attention to detail concerning texture and nutritional balance. When halving, precision is key, adjusting not just ingredient amounts but also retaining proportions.

Doubling or tripling calls for proportional increases in marinade rubs and sauces, ensuring each steak receives adequate coverage to maintain full flavor. Adjust cooking times accordingly when handling larger batches.

Equipment adjustments may include using larger grill surfaces or additional pots for simultaneous vegetable preparations. This balances timely execution with ingredient quality consistency across all scales.

Consider timing modifications for thicker or larger quantities; slightly revamping grilling schedules might be necessary to reach unity in doneness and temperature control across those extra inputs.

Storage considerations ought to extend matching containers to planned scale; opt for larger airtight solutions to prevent compromise on food safety and quality despite increased production.

Nutritional Deep Dive


Breaking it down, the ribeye steak sandwich offers a balanced macronutrient profile composed of a significant protein source complete with healthy fats integrating with essential amino acids, supporting muscle function.

Micronutrients contribute as well; vitamin-rich peppers add antioxidants alongside vitamins C and A. Onions bring potassium and B6, completing the sandwich’s overall nutrient framework.

Health benefits include protein sustainment for muscle growth and repair, paired with fiber from vegetables, facilitating digestive support while improving satiety for fewer cravings later.

By closely monitoring portion sizes, this dish can align with weight management goals, delivering nutrient-dense energy without overshooting calorie budgets.

Dietary considerations give focus to balance without excessive saturated fats beyond ribeye; utilizing whole grain buns amp up fiber intake substantively. Vegetarian alternatives through plant-based protein options explore new dietary frontiers.

Control complete meal impact by concentrating on generous greens pairings or lower-carb choices aligned with portion analysis efforts personally or client-centered.

Dietary Adaptations


For gluten-free requirements, explore bread substitute options ranging from gluten-free bakery choices to lettuce wraps, offering a crispy, low-calorie alternative to traditional buns while maintaining the essence of the sandwich.

When considering vegan or dairy-free adjustments, delve into plant-based cheeses, and consider tofu as a ribeye alternative, bringing a satisfying heartiness without compromising taste when marinated thoroughly.

Low-carb is attainable by whittling carbs through reduction or complete removal of bread, redesigning the meal into a hearty salad with steak topping, or utilizing cauliflower wraps as base adjustments.

Keto adherence is supported by retaining ribeye as the central piece while opting out of bread and incorporating high-fat cheeses or avocados to meet macro targets.

Paleo aligns effortlessly due to the steak’s prime position; ensure compatible fats, and vegetables comply with specific diet requirements—all naturals here need alignment only to sauce choices.

Low-FODMAP can align this recipe by modifying onion choices and utilizing alternatives like garlic-infused oils, achieving similar profiles through flavor integration while adhering to digestive sensitivities.

Explore further adaptations through ingredient substituting based on dietary restrictions; experiment with mushroom steaks or tempeh slices where versatility meets nuanced tastes efficiently.

Troubleshooting Guide


If texture issues arise, check your cooking timing and doneness. Measure accurately and carefully monitor meat resting periods post-cooking to ensure natural juices are retained.

Flavor imbalance can often be a result of uneven seasoning; reassess your seasoning distribution, considering how each component interacts harmoniously for a perfectly balanced bite.

Temperature problems might include the steak overheating or under-resting. Allow for sufficient time pre- and post-grill, confirming internal temperatures reflect optimal medium-rare preferences.

Overcoming equipment challenges begins with understanding your grill. Preheat it to maximum capacity to ensure even cooking. Alternatively, a cast iron skillet yields similar searing results for indoor preparation.

Ingredient substitutions can sometimes lead to unexpected outliers within the flavor profile. A consistent set of base ingredients helps maintain reputable, enjoyable results across attempts.

Timing concerns should also acknowledge pre-existing meal components; pre-preparing certain elements like sauces or vegetables alleviates last-minute pressures while preserving peak freshness.

Recipe Success Stories


Within our community, countless experiences echo consistent themes of admiration for the ribeye steak sandwich’s simplicity paired with culinary satisfaction. Reviews hail its ease of preparation married to explosive flavor.

Many have embraced regional variations, adding spices or specific representative components, sharing photos adorning social media feeds displaying personal twists on a classic favorite that resonates locally or personally.

Adaptation stories reveal a host of successes where diet-conscious approaches thrive; readers report recreations ranging from low-carb alternatives to inventive plant-based options cleverly impressing meat-free followers.

Engagement fosters an enthusiastic community; those who’ve shared culinary tips or presentation techniques often inspire new creative directions others eagerly follow or implement, contributing to vibrant cross-pollination.

Photography tips center around capturing sandwich layers’ salient qualities, shining light complementing steaks’ caramel crisscrosses while contrasting fresh rainbow vegetables with a pinch of balanced aesthetic.

Frequently Asked Questions

1. Can I use a different cut of steak for this sandwich?
Absolutely, though each cut will impart unique qualities; experiment with sirloin or strip steak for varying flavor profiles and textures.

2. How can I recreate this sandwich on a budget?
Consider identified savings by purchasing steak on sale or bulk, selecting seasonal vegetables at farmers’ markets, maximizing overall cost efficiency without sacrificing quality.

3. What cheese works best in this sandwich?
Opt for a mild cheese like provolone, ensuring it melds perfectly into the steak while adding gentle creaminess without overshadowing its robust profile.

4. Can I prep the sandwich components in advance?
Yes, marinate ribs and saute vegetables in advance; fully assemble sandwiches closer to serving for optimal texture and taste, avoiding bread becoming soggy.

5. How do I make it spicier?
Incorporate spicy peppers or a touch of hot sauce, adjusting to preference levels for additional heat within your culinary repertoire.

6. What are substitutive veggies I could consider?
Mushrooms or zucchini present earthy options paired with spinach; these veggies consistently complement the ribeye’s boldness, suited for digestion as well.

7. Is it required to grill or can it be baked?
While grilling offers authentic flavor results, a well-maintained skillet or broiler provides alternatives, replicating desired crispy exterior through radiant heat.

8. What’s the best bread type to use?
Crispy baguettes, ciabatta, or sourdough create excellent textural bases, yielding structures that retain fillings while offering nuanced flavor profiles.

9. What would improve flavor depth?
Experiment with compound butter or flavored oils as finishing touches that imbue complexity beyond standard preparations in gourmet directions.

10. Can this be a suitable meal during pregnancy?
Yes, with careful handling ensuring moderate consumption includes properly cooked steak conforming with balanced dietary preferences and doctor recommendations.

Additional Resources


Refer to related recipes for warm-weather grilling delights like kebabs or salad skewers, each celebrating summer’s bounty alongside similar grilled techniques.

Technique guides devoted to mastering the grill offer further expertise-building avenues, crucial for maximizing meat cooking methods delivering unparalleled taste experiences.

Ingredient information expands horizon awareness; explore farm-to-table guides, emphasizing seasonality’s value upon flavor elevation with sustainable sourcing practices.

Kitchen equipment recommendations ensure all necessary tools are accounted for; suggestions include sharpening grinders or grill maintenance tips assisting adventurous culinary enthusiasts.

Seasonal variations capitalize on regional produce – encouraging taste explorations that echo the environment, merging traditional methods with inspired turns; correlating kitchen creativity close to nature perpetuates development.

Join the Conversation


Share your ribeye steak sandwich photos and variations on social media using #RibeyeSandwichDelight to join our thriving community, celebrating culinary creativity bound by mutual inspiration.

Photography tips enhance captured experiences; focus on light reflections off golden bread crusts contrasting the sandwich’s inviting insides, effectively creating memorable visual impact.

Encourage recipe reviews detailing personal experiences reiterate each unique exploration into flavor landscapes – amplifying involved creation amongst peers motivating further skill refinement.

Community engagement fosters shared affection towards these culinary dalliances – feedback boosts collective knowledge while sparking newfound direction possibilities through entirely new contexts.

Reinvention of traditional elements inspires evolved recipes; expand participation with contests for new variants or easy challenges crossing conventional boundaries exemplifying novelty passionately.

The Recipe

Tremendous Juicy Ribeye Steak Sandwich

Serves: 4

Prep Time: 15 mins

Cook Time: 20 mins

Total Time: 35 mins

Kitchen Equipment Needed

  • Grill or Griddle Pan
  • Sharp Knife
  • Cutting Board
  • Spatula
  • Foil
  • Basting Brush

Ingredients

  • 1 lb ribeye steak
  • 4 slices provolone cheese
  • 4 ciabatta rolls, sliced
  • 1 large onion, thinly sliced
  • 2 bell peppers, sliced
  • 2 tbsp olive oil
  • Salt and pepper to taste
  • Favorite steak seasoning blend

Directions

  1. Preheat your grill or griddle to high heat. Rub the ribeye steak with olive oil and seasoning blend, allowing it to come to room temperature.
  2. Grill the ribeye for about 4-5 minutes on each side, or until desired doneness. Remove and let rest for at least 5 minutes, then slice thinly against the grain.
  3. Meanwhile, in a pan, sauté onions and bell peppers over medium heat until tender and caramelized. Season with salt and pepper to taste.
  4. Open ciabatta rolls and place slices of cheese on each half. Toast on the grill until cheese is melting.
  5. Layer with slices of ribeye and topped with onions and peppers. Close sandwiches and serve immediately.

Recipe Notes

  • For extra flavor, apply a light brush of garlic butter over rolls before toasting.
  • Adapt seasonings to accommodate regional or personal preferences.
  • Consider adding a layer of fresh arugula or spinach for added texture.

Delicious Cheesy Baked Mostaccioli for a Quick Family Dinner

Cheesy Baked Mostaccioli Recipe: A Deliciously Simple Family Dinner

⚖️
Difficulty
Easy

⏲️
Prep Time
15 mins

🕒
Cook Time
40 mins

⏱️
Total Time
55 mins

🍽️
Servings
6

Welcome to our Cheesy Baked Mostaccioli Recipe—a perfect choice for an easy family dinner that guarantees smiles with every bite. This classic Italian dish incorporates perfectly cooked pasta, enveloped in a rich and savory tomato sauce, layered generously with melted cheese. It offers the kind of home-cooked comfort that everyone craves, especially on a chilly evening. The marriage of flavors between the tangy marinara and the creamy, gooey cheese creates a symphony in every mouthful.

The melted cheese not only adds a scrumptious texture that strings with every forkful, but it also beautifully complements the hearty and zesty sauce. This Cheesy Baked Mostaccioli recipe is not just about the delightful taste; it’s about creating warm and memorable moments with your loved ones, gathering around your family table to share a meal made from the heart.

Comfort food is always a hit, and this baked masterpiece is a testament to the incredible flavor depth that can be achieved with simple ingredients. The mostaccioli, true to its tradition, beautifully soaks up the sauce while maintaining its tender bite, making it a dish that’s as delicious to the senses as it is to the soul.

Quick Recipe Highlights

  • Flavor Profile: Experience a burst of umami with every bite, mingled with tangy tomato sauce and creamy melted cheese that rounds up the flavors perfectly.
  • Texture: Smooth bites of tender pasta topped with bubbling, golden-brown cheese create a satisfying contrast that makes each mouthful delightful.
  • Aroma: As the dish bakes, your kitchen will be filled with an enticing aroma of garlic, herbs, and roasted cheese that whets the appetite.
  • Visual Appeal: A feast for the eyes, this dish is beautifully golden with flecks of aromatic herbs, inviting you to dig in immediately.
  • Skill Level Needed: Easy enough for beginners, requiring basic cooking skills like sautéing and baking.
  • Special Equipment: A trusty baking dish and a stove will get you started on this culinary journey.

Recipe Overview

  • Difficulty Level: Perfect for beginners, this recipe makes culinary exploration enjoyable without overwhelming complexities.
  • Category: This dish fits firmly into the comfort food category, with its hearty and warming elements that cater to everyone’s craving for wholesome meals.
  • Cuisine: Rooted in Italian culinary tradition, this baked mostaccioli embraces the simplicity and rich flavors characteristic of the region’s beloved pasta dishes.
  • Cost: Economical, using pantry staples like pasta and tomato sauce, with cheese as the primary investment for a truly satisfying meal.
  • Season: While it shines in cooler months, its comforting nature makes it a year-round favorite for family dinners.
  • Occasion: Ideal for casual dinners, potlucks, or whenever you need a dish that brings people together with ease.

Why You’ll Love This Recipe

The Cheesy Baked Mostaccioli Recipe offers unparalleled taste and texture appeal. The fusion of creamy cheese and herb-infused tomato sauce envelops the pasta, creating a dish rich in flavor. Each bite reveals layers of textures from the soft pasta and granular, melted cheese, delivering comfort in every forkful. The textures and tastes come together to evoke feelings of warmth and satisfaction, making this recipe a stellar example of home-cooked delight.

Convenience is at the heart of this recipe. With a simple preparation process and common ingredients, it allows for effortless assembly. The recipe is designed with busy families in mind, making it a go-to choice for weeknight dinners that require minimal fuss in the kitchen, allowing you more time with loved ones.

From a nutritional standpoint, this recipe provides a balanced mix of carbohydrates, protein, and fat, offering energy, sustenance, and pleasure. It strikes just the right chord, making it a fulfilling meal that’s good for both body and soul. Additionally, it’s adaptable for various dietary needs, making it an inclusive meal for diverse family preferences.

Socially, this mostaccioli becomes a focal point at gatherings, encouraging conversations and laughter over shared plates of deliciousness. Its family-style serving adds to the dining experience, fostering communal dining that strengthens bonds and creates lasting memories. Its simplicity encourages creativity, allowing for personal touches and adaptations.

Affordability and accessibility are key benefits, as it uses budget-friendly ingredients, readily available at any grocery store. Its accessibility doesn’t compromise on taste, making it a perfect dish for those seeking deliciousness without breaking the bank. This recipe perfectly exemplifies that wonderful meals don’t always require expensive ingredients.

Historical Background and Cultural Significance

The origin of mostaccioli lies deeply rooted in Italy, where pasta is not just a dish but a staple of life and culture. Derived from ‘mostax’ meaning ‘mustache,’ the gently ribbed tubes resemble a small mustache themselves. Over the years, Italians have crafted an astonishing variety of pasta dishes, with baked variations seen as a prime way to bring out rich, savory flavors through layered ingredients.

Culturally, pasta dishes such as the Cheesy Baked Mostaccioli play a significant role in Italian cuisine, often representing family, tradition, and joy. It’s a dish that’s traditionally served during celebrations and large family gatherings, symbolizing unity and shared happiness. In Italy, this meal is a cherished part of weekly family dining, embodying a tradition that carries stories through generations.

Throughout its evolution, baked pasta has shown remarkable adaptability. Initially, simple pasta types served with basic tomato sauces, the evolution introduced cheeses and herbs, adding depth and enhancing the array of flavors present in today’s version. Innovations in cheese production and tomato cultivation have enriched its flavors further, cementing its place on dinner tables worldwide.

Regionally, variations in Italy see mostaccioli served with different complementary flavors and techniques. While Southern regions favor spicy tomatoes and robust cheeses, Northern recipes might incorporate softer cheese blends and a luxurious touch of cream, demonstrating the versatility and rich cultural influence behind the Cheesy Baked Mostaccioli.

Ingredient Deep Dive

– **Mostaccioli Pasta:** A tubular pasta, mostaccioli’s role is central, given its ability to soak up flavors while maintaining texture. Culturally significant in Italy’s pasta production history, it’s appreciated for its versatility and adaptability. Rich in carbohydrates, it provides the energy essential for everyday tasks. To select the best, seek brands renowned for using durum wheat, ensuring a chewy texture after cooking. Dry pasta should be stored in airtight containers at room temperature, while cooked varieties require refrigeration. In place of mostaccioli, penne or rigatoni can be substituted seamlessly.

– **Cheese:** Cheese is the heart of this dish, offering both creamy textures and enhanced flavors. Traditionally, mozzarella pairs best due to its melting properties, cultural significance, and affordability. Nutritionally, cheese contributes essential proteins and calcium, beneficial for bone health. Store cheese in wrapped parchment within a sealed container to retain moisture and aroma, preventing the adverse effects of molds. Both provolone and fontina serve as excellent substitutes, providing unique flavor twists while maintaining creamy consistencies.

– **Tomato Sauce:** Tomatoes, integral to Italian gastronomy, provide the foundational flavor. Opt for sauces with minimal preservatives to retain an authentic taste. These sauces are rich in lycopene, contributing to cardiovascular health, and their tangy notes elevate the cheese’s creamy hints. Unopened, canned sauce lasts up to a year, while homemade versions should be consumed within a week when refrigerated. In place of tomato-based sauces, consider cream or pesto alternatives to introduce variation.

Common Mistakes to Avoid

  • Undercooking the Pasta: Ensure pasta is slightly undercooked during boiling; it will continue cooking in the oven, soaking up more flavors as it bakes.
  • Skipping Cheese Shreds: Grate your own cheese to avoid additives found in pre-packaged variants, which can affect the recipe’s creaminess.
  • Neglecting Sauce Layering: Evenly layer sauce and pasta to ensure each bite is perfectly flavored and helps prevent dryness or clumpiness.
  • Overcrowding: Avoid overfilling your baking dish to ensure even cooking and prevent spillovers inside your oven.
  • Forgetting to Preheat: Preheating your oven is crucial for achieving a crispy, golden cheese top—a hallmark of baked dishes.
  • Using Low-Quality Pasta: Opt for quality brands to ensure firmness is retained after baking, preventing a mushy dish.
  • Inefficient Nesting: Properly nesting pasta within cheese layers guarantees consistent flavor and texture across dishes.
  • Discarding Broil Time: A quick broil enhances the cheesy topping, giving it that desirable crispy edge without burning.

Essential Techniques

– **Perfect Pasta Boiling:** Boiling pasta to an ideal chewy texture enhances the dish overall. Ensure water is at a rolling boil and liberally salted before adding pasta, cooking until just shy of ‘al dente.’ Pay attention to watery sauce, as pasta needs to soak up moisture while baking without becoming mushy.

– **Cheese Layering:** Master precise cheese layering for balanced flavor distribution. Begin with a modest amount of sauce directly over mostaccioli, topped with shredded cheese. This crucial step ensures full coverage, avoiding burnt or undercooked sections.

– **Baking to Perfection:** Proper baking contributes to flavor conversion and texture. Cover the dish initially to trap moisture before uncovering to brown cheese. Maintain mid-temperature settings, pivoting to broil to crisp the final layer, thus adding visual and textural depth.

Pro Tips for Perfect Cheesy Baked Mostaccioli

– Use a high-quality grated Parmesan cheese for added depth and a sharper flavor contrast without overpowering the dish.
– Incorporate fresh herbs, such as basil or parsley, to bring a fresh, aromatic dimension at both baking and garnish stages.
– Try a combination of mozzarella and sharp cheddar for a unique blend, offering both a gooey texture and satisfying sharpness.
– Prepare the sauce in advance, allowing flavors to meld, which enhances the dish’s overall intensity.
– Let the dish rest for five minutes post-baking to allow flavors to settle and make slicing easier.
– Experiment with adding cooked sausage or ground beef for meat lovers, elevating the dish’s protein content and heartiness.

Variations and Adaptations

Regional variations abound, with Southern versions incorporating spicy sausages or red pepper flakes for heat. Alternatively, Northern styles might be cream-based, featuring softer cheese blends. For seasonal adaptations, include squash or root vegetables in fall, ensuring heartiness, while spring might see peas or asparagus woven into the mix, adding freshness.

For dietary modifications, opt for gluten-free pasta variants, allowing those with sensitivities to enjoy the same culinary experience. Vegetarian adaptations easily replace meatful iterations, filling them with mushrooms or spinach, offering nutrient-dense alternatives without flavor compromise. Flavor varieties come from altering the sauce base; a basil pesto or creamy Alfredo provides a refreshing twist to the tomato anchors.

Texture modifications include baking with panko breadcrumbs sprinkled atop; their crunch contrasts delightfully with creamy cheese, adding layers of interest. Presentation exertions like serving individual ramekins provide an upscale, personalized dining experience, engaging visuals through unique serving pieces.

Serving and Presentation Guide

Consider portioning pasta into personal-sized cocottes for modern twists in presentation, guaranteeing each serve is both attractive and practical. Garnishing with fresh basil leaves or a light dusting of Parmesan adds a pop of color and flavor that’s visually appealing and fragrant. Traditional accompaniments include garlic bread or a crisp green salad, creating complementary contrasts to the warm, rich pasta.

Serving temperature matters; aim for the dish being hot out of the oven yet not scalding. Allowing brief rest periods enables flavors to settle, textures to firm, essential for neat and enjoyable portions. Control portion sizes by adhering to the mantra of quality over quantity, ensuring each served amount fits comfortably on dining plates, reflecting balance and sophistication.

Wine and Beverage Pairing

For wine aficionados, a pairing choice of medium-bodied Chianti, with its bright acidity and rustic tones, harmonizes beautifully with the creamy, tomato-rich mostaccioli. Alternatively, Burgundy wines offer subtle tannins and berry notes, complementing the zesty flavors within the dish. For non-alcoholic alternatives, sparkling water with a squeeze of lemon lifts the richness and refreshes the palate between bites.

If coffee is desired, reach for a light or medium roast for a post-meal pairing that resonates well, maintaining flavor integrity without overpowering subtle dish nuances. Hot beverages like tea should lean towards floral or citrus-infused varieties—Earl Grey or green melange balance with savory tones, suggesting complimentary warmth without conflicting acidity.

Storage and Shelf Life

Make use of airtight containers to prolong freshness in both refrigerated and frozen states, ensuring your baked they remain enjoyable beyond immediate consumption. Mostaccioli maintains quality for up to 3 days in the fridge, although freezing extends its lifecycle to three months—ideal for busy schedules. Be mindful of storing at consistent temperatures to avoid textural degradation.

Spoilage indicators include soured cream aroma or brittle cheese, cautioning against further consumption. For reheating, opt for oven use over microwaving for even heat distribution and to restore the dish’s original texture. Freezing considerations should include portion pastes, facilitating portion-friendly tunes out of storage, preventing waste or remainders.

Make Ahead Strategies

Prepare sauces a day in advance, letting them marry overnight for flavor integration. At assembly, chilled versions should be acclimated to room temperature, ensuring even cook time and texture when baking. Components should be layered, followed by refrigeration or freezing without the cheese, which should be saved for just before baking.

To reheat, consider lower, gentler oven temperatures to maintain moisture and tenderness through warming periods, resulting in crisp yet soft pasta servings. Adding fresh herbs post-reheating retains rustic freshness in taste and appearance. Maintaining component integrity improves both flavor and presentation when revisiting stored or pre-prepared dishes.

Scaling Instructions

For a smaller gathering, feel free to halve all measurements, adjusting your baking pieces both smaller in size and reduced in time, ensuring even heat coverage without burning. Doubling or tripling recipes lets the mostaccioli feed larger audiences, maintaining uniform techniques, but merely increasing your dish size accordingly with portions larger scales while keeping within regular ranges.

Recalculate time from prep to presentation to guarantee even familiarity retention and adjustment storage in multiples requires sorting with larger fridge and freezer spaces, already in advance required. Adapting equipment uses to scale changes should encompass baking sheets and dishes, limiting convoluted cook times and unreliable outcomes.

Nutritional Deep Dive

Delving into Cheesy Baked Mostaccioli reveals solid balance in macros—providing complex carbohydrates essential for energy, proteins facilitating muscle repair by the cheese component, and fats beneficial for brain function. Vitamins like A, C, and E emerge in the tomato used, promoting broader health benefits including immunity boosts and moderating digestive processes.

Portion control keeps calorie counts favorable, aiding weight management and dietary compliance. Consuming alongside fresh greens introduces fiber, increasing satiety while supporting nutrient diversity within meals. This culinary vision balances gourmet taste and responsible nutrition, showcasing diversity through culinary craftsmanship and thoughtfulness.

Dietary Adaptations

Embrace dietary needs with easy gluten-free pasta swaps, maintaining original dish integrity without triggering sensitivities. Dairy alternatives curated through plant-based cheeses ensure vegan inclusivity while protecting culinary depth and umami combinations. Low-carb or keto enthusiasts can modify with zoodles instead of traditional pasta, preserving enjoyment across dietary landscapes.

For paleo, substitute legumes in place of mostaccioli or explore tomato and walnut mixtures substituting typical sauces. Low-FODMAP requires onion and garlic replacements using infused oils or compatible alternative herbs. Others like egg-free variations exist, inviting discovery and exploration through ingredient choices that match lifestyle requirements without dish disparity.

Troubleshooting Guide

Texture issues arise from overcooked pasta or imbalanced wet-to-dry ratios; avoid by adhering to precise measures and cooking times. If flavors lack, consider seasoning escalation with herbs or spices during sauce prep. Inconsistent temperatures create uneven cook results; continuously monitor through dish center checks.

Prevent equipment challenges by maintaining tools readily accessible and properly functioning pre-initiation. Ingredient substitutions require scrutiny; wheat bran taste difference necessitates taste correction through complementary flavors. Timing concerns suggest setting paced efforts, tracking intervals to assure content cooking and cohesive entirety.

Recipe Success Stories

Turn to community feedback, sharing delightful variations and individualized dishes. Noteworthy reader suggestions include delightful spinach and ricotta versions, which introduce elements of surprise and texture refinement. Engaging in photography tips uplifts the visual component of culinary blogging, bringing light and experience for shared insights.

Explore adaptation stories detailed in commentaries across platforms where interaction bolsters both expectation and performance. Successes echo through innovation and community involvement, creating vibrant food experiences told through universal culinary language and community-driven enthusiasm towards legacy dishes remembered fondly for their reach.

Frequently Asked Questions

Q: Can I use a different kind of pasta?

A: Absolutely! While mostaccioli is traditionally used, penne, rigatoni, or even ziti work well. They retain a similar structure that ensures sauce captivation and preparation consistency.

Q: How do I make this gluten-free?

A: Substitute conventional pasta with certified gluten-free alternatives that maintain structure and adaptability without issuing flavor alterations, perfect for dietary sensitivities.

Q: What cheese substitutes work best?

A: While mozzarella or similar melts are optimal, vegan cheeses work well in preservation efforts ensuring consistent taste profiles while meeting dietary exclusions.

Q: How can I add meat?

A: Integrating cooked ground beef or sausage incrementally amidst sauce layers within preparation escalates proteins, pairing robust textures and rich flavors perfectly.

Q: Is this recipe freezer-friendly?

A: Yes, it freezes exceptionally well. Directions include air-tight serialized segmenting to contain freshness, lasting up to three months when correctly regulated.

Q: Can I use fresh tomatoes for sauce?

A: Fresh tomato variations require skinning and blending for consistency to maintain delicate herb balances, enriching natural tomato sweetness without undercooking them.

Q: Are there vegetarian options?

A: Certainly! Emphasizing rich vegetables like mushrooms or bell peppers expands layers and nutrition while respecting vegetarian inclinations simultaneously.

Q: How do I enhance the flavor?

A: Consider incorporating minced garlic, oregano sprigs, or basil leaves, respecting flavor principles towards enhancement and sustained culinary excellence.

Q: What happens if my pasta is overcooked?

A: Baking hardens subsequent steps, and less al dente outcomes enact firmer results when using tomato concentrates or textural binding ingredients balancing efforts.

Q: What size baking dish should I use?

A: Standard 9×13-inch dishes are suitably contained, ensuring efficient layered thickness and containment without overspill or compromised crust quality.

Q: Can I prep this dish in advance?

A: Absolutely! Follow make-ahead insights, allowing supervision without complexity. Storing safely before committal maintains consistency with reduction in aggregate preparation speeds.

Additional Resources

Explore additional recipes encompassing varied tomato bases or infused cheeses, creating diverse dinner options mirroring culinary depth. Delve into technique guides emphasizing boiling, broiling, and cooling improvements for proficiency. Ingredient glossaries explain historical and nutritional merits, empowering informed culinary manipulations.

Equipment recommendations enrich dining experiences, with emphasis on preservation, production, and apposite elements for thriving execution. Seasonal variations reflect shifts in produce and palate preferences, prompting adaptive transitions by season, this maintaining culinary reactivity throughout potential shifts, fortifying versatility.

Join the Conversation

Share your Cheesy Baked Mostaccioli creations on social media platforms, using the hashtag #CheesyMostaccioliMagic to connect with fellow enthusiasts. Engage in digital conversations about unique modifications and photography insights, developing dynamic ways to present dishes effectively. Your recipe reviews are invaluable, fostering growth and appreciation for pasta with diverse interpretations within culinary communities.

The community strengthens through sharing transformable suggestions and tangible stories, ensuring every Cheesy Baked Mostaccioli iteration is memorable, expanding familial ties and widening culinary expressions. Dive headlong into conversations, enabling you to create compelling narratives behind each delicious bite served, enhancing global kitchen and dining narratives.

The Recipe

Cheesy Baked Mostaccioli

Serves: 6

Prep Time: 15 mins

Cook Time: 40 mins

Total Time: 55 mins

Kitchen Equipment Needed

  • Large pot
  • Colander
  • Baking dish (9×13 inch)
  • Grater
  • Wooden spoon

Ingredients

  • 500g mostaccioli pasta
  • 2 cups marinara sauce
  • 1 1/2 cups shredded mozzarella cheese
  • 1/2 cup grated Parmesan cheese
  • 1 tablespoon olive oil
  • 1 teaspoon dried oregano
  • Salt and pepper to taste
  • Fresh basil leaves for garnish (optional)

Directions

  1. Preheat your oven to 375°F (190°C).
  2. Cook the mostaccioli in heavily salted boiling water until slightly undercooked, as it will continue cooking in the oven.
  3. Drain and transfer the pasta back into the pot. Stir in the olive oil to prevent sticking.
  4. Add the marinara sauce and mix until the pasta is thoroughly coated. Season with salt, pepper, and oregano.
  5. Transfer the pasta mixture to a 9×13 inch baking dish. Spread evenly.
  6. Top with mozzarella and Parmesan cheese, covering the pasta completely.
  7. Bake in the oven for 30 minutes or until the cheese is golden and bubbly.
  8. If desired, broil the top for 1-2 minutes to crisp the cheese further.
  9. Let the dish cool for 5 minutes. Garnish with fresh basil if using, and serve hot.

Recipe Notes

  • For a meatier option, consider adding browned ground beef or sausage.
  • Leftovers keep well in the refrigerator for up to 3 days.
  • Freeze in single portions for easy future meals.

Irresistible Bacon Mac ‘n’ Cheese Burger Wrap Recipe Unveiled

Bacon Mac ‘n’ Cheese Burger Wrap: A Savory Delight Unveiled

⚖️
Difficulty
Medium

⏲️
Prep Time
30 mins

🕒
Cook Time
20 mins

⏱️
Total Time
50 mins

🍽️
Servings
4

A Bacon Mac ‘n’ Cheese Burger Wrap is the ultimate indulgence, combining the creamy comfort of mac ‘n’ cheese, the irresistible allure of bacon, and the hearty satisfaction of a burger. This wrap is a feast for your senses, delivering rich flavors and a variety of textures in every bite. Whether you are a die-hard cheese lover or a meat enthusiast, this dish promises to tantalize your taste buds and provide a satisfying meal experience.

With crispy bacon complementing gooey mac ‘n’ cheese, and a juicy beef patty all wrapped in a soft tortilla, this creation is bound to become a favorite in your household. It’s perfect for casual dining, weekend cookouts, or as a creative option for your next gathering. Not only does it tick all the boxes for comfort food lovers, but it also stands out for its unique presentation and fusion of flavors.

Quick Recipe Highlights

  • Flavor Profile: Decadent and savory with a perfect blend of cheesy goodness and smoky bacon undertones.
  • Texture: Creamy mac ‘n’ cheese with a crunchy bacon wrap around a juicy burger.
  • Aroma: Mouth-watering scent from sizzling bacon and melted cheese.
  • Visual Appeal: Golden-brown wrap filled with vibrant, creamy cheese and meat.
  • Skill Level Needed: Intermediate cooking skills required for multi-step preparation.
  • Special Equipment: A frying pan or grill pan for cooking the bacon and burger.

Recipe Overview

  • Difficulty Level: This recipe requires some intermediate cooking skills, particularly in handling multiple components like cooking pasta, bacon, and burger patties simultaneously.
  • Category: Ideal for lunch or dinner; could also work as a hearty brunch option.
  • Cuisine: A modern fusion drawing from American classic dishes like burgers and mac ‘n’ cheese.
  • Cost: Relatively affordable, with bacon, cheese, and beef being the main expenses.
  • Season: Best suited for any season due to its comforting ingredients.
  • Occasion: Perfect for casual dining, movie nights, and parties.

Why You’ll Love This Recipe

The Bacon Mac ‘n’ Cheese Burger Wrap offers an unforgettable taste and texture experience. The gooey, creamy consistency of the mac ‘n’ cheese contrasted with crispy bacon and the tenderness of the beef patty creates a harmonious blend of flavors. Each bite promises a burst of hearty satisfaction, perfect for indulging in a bit of comfort food.

The recipe’s convenience lies in its adaptability to various lifestyles and preferences. The preparation can be streamlined to suit your timing needs, and each component can be prepared ahead of time, allowing you to enjoy the dish without any last-minute rush. The simple ingredient list also contributes to its ease of preparation, making it accessible to both beginners and seasoned cooks.

Nutritionally, this dish provides a good balance of proteins and carbohydrates, offering energy and sustenance. The presence of lean beef, cheese, and tortillas ensures you’ll receive a decent amount of these macronutrients, which play a significant role in meal satisfaction and maintaining energy levels.

Socially, this wrap can be the star of any gathering, encouraging guests to savor the distinct combination of flavors in a fun, interactive eating experience. The straightforward portions make it easy for everyone to help themselves, fostering a communal dining atmosphere around a dish that pleases diverse palates.

Overall, the cost-effectiveness of the Bacon Mac ‘n’ Cheese Burger Wrap makes it an attractive choice. It’s a budget-friendly way to enjoy several culinary delights in one dish, with ingredients that are readily available and often found on grocery store specials.

Historical Background and Cultural Significance

While the Bacon Mac ‘n’ Cheese Burger Wrap is a modern culinary creation, the elements it combines hold deep-rooted historical significance. Mac ‘n’ cheese traces back to early comfort foods, cherished across cultures for its warmth and simplicity. Bacon, a globally beloved pork product, brings a smoky flavor used historically to enhance dishes.

Burgers are American classics, ubiquitous at diners and family BBQs. Their origin, credited to German immigrants, revolutionized quick meals worldwide. This wrap evolves the classic burger, revitalizing its relevance in today’s food culture while showcasing a blend of tradition and innovation.

As the culinary landscape evolves, recipes like this wrap emerge, representing experimentation and fusion of established food comforts. Adaptations of traditional dishes like these frequently offer new cultural relevance, acknowledging diverse palates and ingredients readily available in contemporary markets.

Regional variations include different protein types or sauces, suggesting ways in which local flavors influence the dish while maintaining the base elements of cheese, bacon, and burger. This reflects the culinary evolution driven by availability, technology, and taste preferences.

Ingredient Deep Dive

Bacon, beloved for its rich, smoky flavor, holds significant cultural value as a breakfast staple and flavor enhancer. Historically, bacon originated from preserving pork belly, a technique passed from ancient to modern cuisines. Nutritionally, bacon provides protein and fat, although moderation is key due to its sodium content.

Selection tips point to choosing bacon with a balance of meat and fat for optimal flavor. To store, refrigerate raw bacon until the expiration date, or freeze for longer conservation. If substituting, consider turkey bacon or plant-based alternatives for varied nutrition profiles.

Mac ‘n’ cheese requires a creamy blend of cheeses, which dates back to early European cooking techniques of blending pasta with sauces. Nutritionally, cheese offers calcium and protein, though high in calories. Select cheese based on melting quality, such as cheddar or a cheese blend for depth of flavor.

Store cheese wrapped in wax paper for longevity. Substitution can involve non-dairy cheese for those preferring lactose-free options, which preserve creaminess without dairy content.

Common Mistakes to Avoid

  • Overcooking pasta leads to mushy texture; aim for al dente for optimal mac ‘n’ cheese.
  • Skipping cheese sauce preparation results in uneven cheese melting.
  • Using excessively lean meat leads to a dry burger; maintain some fat content for juiciness.
  • Overcooking bacon can lead to burnt flavor; monitor closely for desired crispness.
  • Under-seasoning can result in bland taste; ensure adequate salt and pepper use.
  • Overstuffing the wrap may cause it to tear or fail to close.
  • Ignoring resting time for burgers can lead to dry texture when juices aren’t redistributed.
  • Rushing preparation leads to disjointed flavors; follow each step for cohesive taste.

Essential Techniques

Achieving perfect mac ‘n’ cheese begins with creating a smooth cheese sauce. It’s crucial to melt cheese over low heat, stirring constantly to avoid clumps. This guarantees a creamy consistency that evenly envelops the pasta, crucial for cohesive cheesy flavor in every bite.

Cooking bacon just right is another vital technique. Crisping without burning requires medium heat and consistent flipping, locking in smoke flavor while maintaining the characteristic crunch that contrasts the softer elements of the wrap.

For burgers, the right sear is essential. Heat the pan before adding patties, cooking each side without disturbing for a perfect crust. This caramelization seals in juices, adding a robust, textural component beneath the creamy and crispy layers.

Pro Tips for Perfect Bacon Mac ‘n’ Cheese Burger Wrap

For a juicy burger, let patties sit at room temperature for 10 minutes before cooking, and avoid pressing them with a spatula during cooking. This allows even cooking and prevents moisture loss, ensuring a succulent burger.

Enhance cheese sauce by adding a dash of mustard or garlic powder for a subtle kick. This extra flavor depth balances the creaminess and adds unexpected intrigue to each bite, complementing the bacon’s smokiness.

To prevent wrap splitting, warm tortillas slightly before filling. This adds pliability, making them less prone to tearing under the weight of the filling, especially when overstuffed.

Incorporate vegetables like caramelized onions or grilled peppers for added moisture and flavor. They complement the existing components, adding nutrients and depth without overpowering the primary ingredients.

Opt for freshly grated cheese over pre-shredded varieties to ensure quick and even melting. Pre-packaged options often contain additives that can impede smooth sauce formation, crucial for the wrap’s lush interior.

Toast the wrap briefly after assembling to merge flavors and add a slight crunch to the exterior. This finishing touch enhances the sensory experience, tying together the smoky, creamy, and savory notes.

Variations and Adaptations

Explore regional variations by integrating local cheeses into the mac ‘n’ cheese mix, adding distinct flavor profiles reflective of regional palates. European, Asian, or Mediterranean cheeses each provide unique flavor complexities while maintaining the dish’s foundational elements.

For seasonal adaptability, rotate vegetables like zucchini in the summer or squash in the fall for fresh, relevant additions. These vegetables introduce a crop-specific freshness that enhances the overall aromatic experience.

Consider dietary modifications such as gluten-free tortillas, dairy-free cheeses, or plant-based burger patties for inclusive adaptations that cater to various dietary preferences without sacrificing flavor.

Experiment with flavor variations by incorporating barbecue sauce or spicy sriracha into the wrap for a customized taste experience. This experimentation allows the wrap’s versatility to shine, catering to spicier or sweeter palates.

Texture modifications can involve changing burger patty types, such as using ground chicken or turkey for lighter options. This adds interest and opens the possibilities for meeting different dietary requirements.

For presentation, opt for a deconstructed version with components layered on a platter. This offers an elegant take, still satisfying the core dish elements while making an impression for formal dining situations.

Serving and Presentation Guide

Master plating techniques by slicing the wrap at an angle and displaying wrapped halves with the filling exposed. This shows off the cheese and bacon layers for added visual appeal, piquing interest at first glance.

Garnishing ideas include fresh herbs like parsley or chives for a pop of color against the golden-brown wrap, enhancing the dish’s aesthetic. These additions bring out the freshness while adding subtle aromatic contrast.

Traditional accompaniments such as coleslaw or a vinegar-based salad pair well with the rich flavors, providing a refreshing palate cleanser that complements the wrap’s indulgence.

For modern serving suggestions, accompany the wrap with crispy sweet potato fries or a tangy dipping sauce. This complete meal route emphasizes the wrap’s adaptability across casual or trendy dining scenes.

Temperature considerations encourage serving hot or warm to maintain cheese consistency and burger juiciness, ensuring guests experience the dish’s intended textures and flavors as designed.

Guide portion control by offering half-wrap servings in a buffet or as finger foods during parties, allowing guests to sample without filling up entirely on the wrap alone.

Wine and Beverage Pairing

Pair with robust red wines like Zinfandel or Malbec, enhancing the bacon’s smokiness and beef’s richness with their deep flavor profiles. These wines elevate the umami content, creating a harmonious taste experience.

Consider non-alcoholic alternatives such as sparkling water with citrus or a sharp ginger beer. These drinks cleanse the palate between bites, refreshing the flavor profile and preparing the palate for the next indulgence.

Coffee or tea pairings may seem unconventional, but a smoky black tea or espresso’s bitterness contrasts well, providing a unique depth that complements the wrap’s savory qualities.

For beverages, serve chilled to balance the warm, hearty nature of the wrap, enhancing the refreshing contrast that prolongs the eating experience and encourages pacing during meals.

Suggestions for future pairings include exploring local craft beers with malt-forward profiles that reflect regional brewing trends. They provide a complex yet complementary carbonation to the wrap’s creamy and crispy elements.

Storage and Shelf Life

Store components separately to preserve individual qualities; wrap tortillas, mac ‘n’ cheese, and patties in airtight containers. This separation helps each maintain texture integrity until ready for assembly and consumption.

Optimal storage temperature for the cooked components is in the fridge at 40°F or below. This temperature prevents spoilage and extends freshness for up to 2-3 days, ensuring quality upon reheating.

Utilize containers with sealing lids to prevent moisture loss, which may result in texture degradation like soggy tortillas or hardening of mac ‘n’ cheese. Tight seals are crucial for maintaining desired qualities.

Spoilage signs include off-odors, discolored mac ‘n’ cheese, or slimy bacon, indicating it’s time to discard. Always assess visually and olfactorily to determine freshness before consuming leftovers.

Reheating instructions involve using the oven for even warming, which helps revive intended textures. Wrapping tortillas in foil prevents drying out during the reheating process, preserving quality.

For freezing, consider individual components only, ensuring future reassembly steps don’t compromise any single ingredient’s characteristics.

Make Ahead Strategies

Strategically plan the prep timeline by cooking mac ‘n’ cheese a day prior, stored in the fridge until needed. This allows for quick wrap assembly on cooking day, minimizing day-of prep.

Store components in air-tight containers, convenient for when you need them. This allows you to focus on cooking tasks as they come, without worrying about overlap or degradation.

Assess the quality impact of assembling the wrap prior, which can lead to a slightly different texture. Instead, assemble when ready to serve for optimal freshness and warmth.

Whether prepped or made-to-order, assembly tips include keeping kinks in the wrap process minimal. This guarantees that each bite is as satisfying as the next, with a consistent flavor profile running through the wrap.

Reheating instructions involve moderate oven temperatures; avoid microwaving for better crunch-integrity. An oven provides a more gradual and even heat, resulting in preferable outcomes.

Adding fresh elements right before serving, such as diced tomatoes or freshly shredded lettuce, provides succulence that ties flavors together, making each wrap feel freshly made.

Scaling Instructions

Halving the recipe is straightforward by reducing ingredients proportionately—this method preserves the wrap’s intended taste balance without wasting unnecessary portions. It’s optimal for more intimate gatherings or meals for two.

Doubling or tripling requires larger cooking equipment, such as a wider skillet for bacon and multiple pots for faster cooking times and sync. Tools like these enhance efficiency and ensure quality.

Adjust timing by staggering the start of each component to accommodate larger volumes, preventing overcrowding in cooking implements which leads to uneven cook times or quality issues.

Consider storage when scaling; larger batches will require space. Implement strategies like stackable containers in deep freezers or adjust shelving arrangements to fit more efficiently.

Manage portions by pre-measuring wrap fillings for consistent taste. This ensures uniformity throughout servings, avoiding any imbalanced flavored outcomes, especially during large festivities.

Nutritional Deep Dive

A comprehensive macro breakdown reveals high protein content from beef and cheese, offering substantial energy from fats and carbohydrates in pasta and tortillas. This balance supports sustained nourishment throughout the day.

Micronutrient analysis highlights calcium from cheese and iron from beef, critical for bone health and oxygen transport. The mac ‘n’ cheese provides a surprising nutritional boost, often overlooked in comfort food.

Health benefits include satiety from protein-rich elements, preventing overeating. This complements a balanced diet by supplying essential macros without excess caloric inflation if moderated.

Portion analysis recommends half-wrap servings to reduce calorie intake, preserving the indulgence within balanced eating guidelines. Controlled enjoyment aids weight management while satisfying cravings.

Dietary considerations accommodate various restraints, with ingredient substitutions applicable for individual dietary preferences, ensuring each wrap maintains nutritional integrity.

Weight management tips advocate mindful eating practices like savoring each bite and hydrating before meals to enhance enjoyment without excess calorific indulgence.

Dietary Adaptations

For gluten-free adaptations, select tortillas made from alternative flours such as corn or rice. This maintains the wrap’s structure while catering to gluten sensitivities.

To create a dairy-free version, opt for cheese substitutes crafted from cashews or soy, maintaining a creamy texture and smoky flavor for a lactose-free indulgence that mirrors the original experience.

Vegan options involve plant-based patties and bacon substitutes, offering a compassionate twist without forsaking the wrap’s hearty and comforting essence, accommodating ethical eating choices.

Low-carb versions omit the tortilla, crafting the wrap into a bowl format, emphasizing nutrient density while minimizing carbohydrates for those adhering to keto or paleo diets.

For paleo adherents, focus on fresh, natural ingredients like lettuce wraps. This lightens the dish without losing flavor—a testament to adaptability within constrained dietary frameworks.

Low-FODMAP strategies adjust ingredient selections to tame digestive issues, incorporating lactose-free cheese and tortilla alterations designed to prevent irritability while inspiring delight.

Troubleshooting Guide

For texture issues like soggy wraps, ensure draining all mac ‘n’ cheese moisture prior to filling tortillas. This technique maintains dryness necessary for wrap stability and enjoyment.

Cure imbalance by adjusting seasoning increments throughout prep stages, maintaining consistent taste profiles across components, which is essential for flavor harmony in complex dishes.

Address temperature problems by pre-heating cooking surfaces, offering steady heat absorption to each element, preventing raw centers or burned exteriors in meats and wraps.

Equipment challenges resolve through adapting to available tools, like substituting grill pans for broiler sheets, enabling similar results with conventional kitchen implements.

Ingredient substitutions smooth over any component availability issues, preserving intended flavors through carefully chosen alternatives, such as turkey bacon for pork or cheddar for gouda.

Timing concerns mitigate with dedicated organization, arranging prep stages by cook times and simultaneous tasks, fostering seamless flow and superior dish quality above all.

Recipe Success Stories

Community feedback highlights inventive adaptations with flavorful twists that remained true to the original concept. Readers loved the freedom to personalize, and shared creative interpretations like including regional cheeses.

Successes in variation included introducing spice elements like jalapeños, proving that customization is where flavor magic lives for those willing to explore and adapt.

Adaptation stories showcased dairy-free alternatives gaining traction among plant-based lifestyle adherents. These shared stories broadening the dish’s reach emphasize its versatility and widespread appeal.

Reader suggestions involved adding vegetable components for nutritional enhancement without overpowering existing flavors, offering valuable insights into ingredient potential.

Photography tips amassed welcomed guidance, from user-submitted photos that captured vivid, irresistible portrayals of the dish in its numerous innovative presentations and variations.

Frequently Asked Questions

Can I use turkey bacon instead of pork bacon?

Yes, turkey bacon is an excellent alternative for those seeking lower fat content. It offers a similar smoky, savory flavor profile, though the texture might be slightly less crunchy.

How do I prevent the tortilla from tearing when wrapping?

Warm the tortillas briefly to enhance flexibility before filling. This pliability prevents tearing and allows easy wrapping, accommodating ample filling without damage.

Is it possible to make this dish vegetarian?

Certainly! Use plant-based patties and cheese substitutes to maintain the essence while catering to a vegetarian diet. This modification supports dietary preferences without sacrificing flavor.

What is the best cheese for mac ‘n’ cheese?

Cheddar is a classic choice, offering melting quality and flavor richness. A blend of cheeses like mozzarella, parmesan, or gouda accentuates the mac ‘n’ cheese complexity.

Can I make the mac ‘n’ cheese ahead of time?

Yes, preparing mac ‘n’ cheese ahead curtails day-of workload. Store refrigerated in airtight containers, ensuring freshness while freeing up time for final wrap assembly.

Will a grain-free tortilla work for this wrap?

Certainly, grain-free options like almond or coconut flour tortillas accommodate dietary needs while forming a suitable vessel for the wrap’s filling.

How do I achieve perfect burger doneness?

For desired doneness, monitor internal temperatures with a meat thermometer. Medium is 160°F, resting afterward redistributes juices, securing optimal outcomes.

Can I prepare the burger patties in advance?

Yes, shaping patties before cooking allows for easy, quick meal assembly. Store chilled until needed, preserving form and quality.

Should I let the burger rest before wrapping?

Definitely! Resting patties for a few minutes post-cooking ensures juices reabsorb, resulting in a moist, flavorful burger within your wrap.

How to store leftovers effectively?

Deconstruct components for separate storage solutions, maintaining texture integrity and flavor freshness for future reheating aligned with desired outcomes.

Is it possible to freeze the prepared wrap?

Freezing affects the wrap’s texture negatively, particularly dairy elements. Instead, freeze only individual components to retain desired qualities.

What if I want a spicier version?

Enhance heat by adding chopped jalapeños or a dollop of hot sauce into the mac ‘n’ cheese or alongside filling, allowing personal spiciness control.

Additional Resources

Explore related recipes offering twists on the classic mac ‘n’ cheese or burger concepts, expanding culinary horizons with varied ingredient combinations that inspire creativity.

Technique guides on perfecting essential cooking methods employed in this dish enhance skills through detailed, step-by-step walkthroughs promising mastery and meal success.

Gain insight into ingredient information, delving deeper into nutritional advantages and selection guides for cheese varieties and beef qualities that mirror this recipe’s components.

Equipment recommendations support optimal kitchen tool choices fitted for this recipe, fostering confidence and ease when creating each delectable portion of the wrap.

Seasonal variations prompt experimenting with components, reflecting current produce availability, enriching both nutritive value and sensory engagement with nature’s freshest gifts.

Join the Conversation

Engage in social media sharing by posting your unique wrap versions or adaptations, joining a global community reveling in shared culinary endeavors that spur excitement.

Photography tips for capturing the wrap’s vibrant allure include using natural light and garnishing with minimal but vivid additions, which highlight the wrap’s rich colors and textures.

Leave recipe reviews on your experience, sharing process satisfaction and personal tastes catered to, offering aid to peers exploring wrap possibilities while divulging suggested improvements.

Community engagement invites discussion on culinary twists, suggestions of new sidelines or techniques enhancing wrap composition and allowing continuous innovation exploration.

Share recipe variations online, joining forums or groups dedicated to gastronomic curiosity and adaptation success, broadening exposure to enthusiastic eaters worldwide who treasure creativity.

The Recipe

Bacon Mac ‘n’ Cheese Burger Wrap

Serves: 4

Prep Time: 30 mins

Cook Time: 20 mins

Total Time: 50 mins

Kitchen Equipment Needed

  • Frying pan or grill pan
  • Large pot
  • Mixing bowls
  • Cutting board
  • Knife
  • Spatula

Ingredients

  • 8 slices bacon
  • 1 lb ground beef
  • 1 1/2 cups macaroni pasta
  • 1 cup shredded cheddar cheese
  • 1/2 cup milk
  • 1 tbsp butter
  • Salt and pepper, to taste
  • 4 large tortillas

Directions

  1. Cook the macaroni pasta in a large pot according to the package instructions; drain and set aside.
  2. In a mixing bowl, combine ground beef with salt and pepper; form into four patties.
  3. Cook bacon in a frying pan until crispy; remove and drain on paper towels.
  4. In the same pan, cook burger patties to desired doneness; remove and set aside.
  5. Melt butter in a pot; add milk and cheese, stirring until a smooth, creamy sauce forms.
  6. Incorporate cooked macaroni into the cheese sauce, stirring to coat evenly.
  7. Assemble each wrap by layering mac ‘n’ cheese, burger patty, and bacon on a tortilla.
  8. Fold and wrap neatly; toast briefly in the pan for added texture.

Recipe Notes

  • Substitute cheddar with your favorite cheese blend for varied flavor.
  • For a spicier kick, add hot sauce to the mac ‘n’ cheese.