Delicious Chicken Lo Mein Recipe for a Perfect Dinner Night

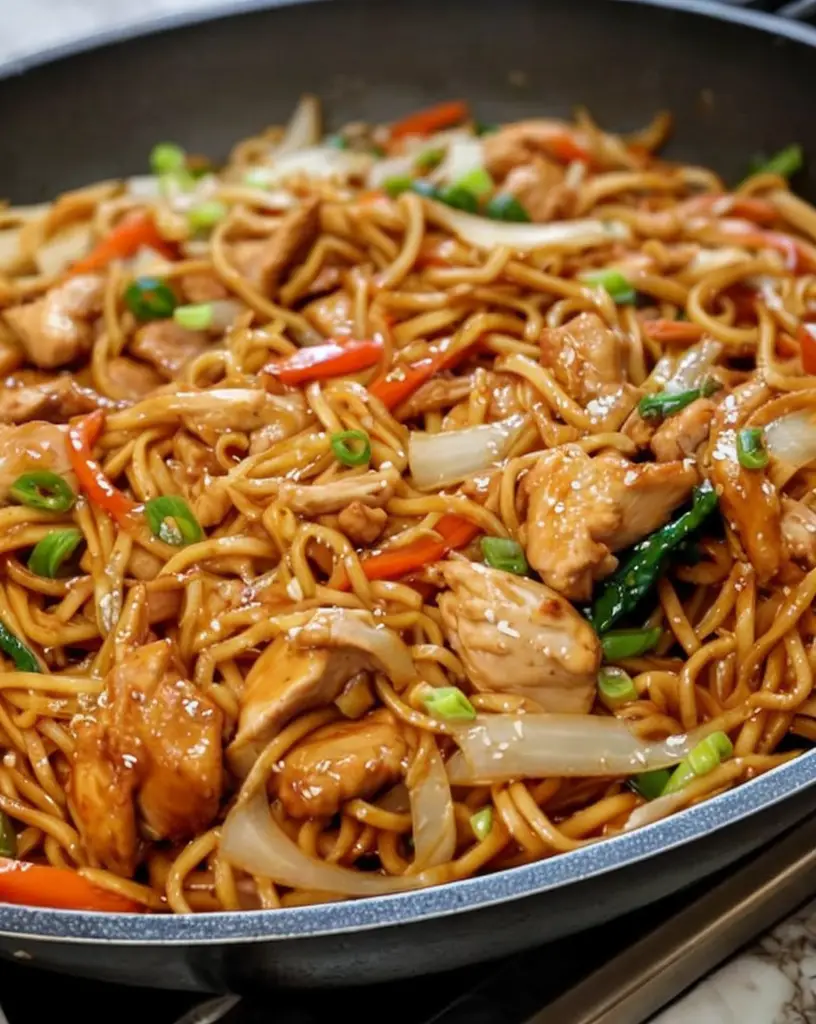
Delicious Chicken Lo Mein: A Taste of Comfort

⚖️
Difficulty
Easy

⏲️
Prep Time
15 mins

🕒
Cook Time
15 mins

⏱️
Total Time
30 mins

🍽️
Servings
4

Discover the joy of homemade Chicken Lo Mein, a classic dish that combines tender chicken, vibrant vegetables, and perfectly cooked noodles all tossed in a rich, savory sauce. This meal epitomizes comfort and is a staple in many households for good reason. The combination of flavors and textures creates a satisfying balance that keeps you coming back for more. Perfectly suited for any weekday dinner, this dish not only fills your belly but also warms your heart.

Creating Chicken Lo Mein at home is an incredibly rewarding experience. The aroma of garlic, ginger, and sautéed vegetables fills the kitchen, awakening your senses and drawing everyone to the table. Each bite reveals the delightful interplay of the chewy noodles, tender vegetables, and juicy pieces of chicken, all brilliantly coated in a delicious stir-fry sauce. Whether it’s a family dinner or a special gathering, this Chicken Lo Mein will always impress.

Quick Recipe Highlights

  • Flavor Profile: Chicken Lo Mein boasts a savory blend of soy sauce, sesame oil, and ginger that creates a mouthwatering taste.
  • Texture: The dish features a wonderful combination of tender chicken, crisp vegetables, and soft yet slightly chewy noodles that dance on your palate.
  • Aroma: Expect a rich, comforting aroma dominated by garlic and ginger, blending beautifully with the essence of sautéed vegetables.
  • Visual Appeal: The vibrant colors of bell peppers, carrots, and green onions against the golden noodles make this dish as beautiful as it is delicious.
  • Skill Level Needed: This dish is suitable for cooks of all skill levels, making it perfect for both novice and experienced home chefs.
  • Special Equipment: All you need is a large skillet or wok for optimal cooking and flavor infusion.

Recipe Overview

  • Difficulty Level: This Chicken Lo Mein recipe is categorized as easy, making it accessible for anyone looking to whip up a delicious meal quickly.
  • Category: This dish is perfect for main courses and Asian cuisine nights, ideal for family dinners and casual gatherings.
  • Cuisine: Chicken Lo Mein hails from Chinese culinary traditions, known for their vibrant stir-fried dishes that emphasize fresh ingredients and bold flavors.
  • Cost: The average cost of ingredients is budget-friendly, making this recipe an economical choice for feeding a family.
  • Season: This comforting dish is fantastic all year round, but it shines particularly in colder months when hearty meals are desired.
  • Occasion: Whether it’s a weeknight dinner or a potluck, this Chicken Lo Mein meets the occasion beautifully.

Why You’ll Love This Recipe

The delightful taste and texture of Chicken Lo Mein make it an irresistible option for dinner. With a rich combination of savory flavors and a satisfying blend of vegetables and proteins, each bite transports you to a cozy Chinese restaurant. This dish is a perfect way to enjoy authentic tastes right at home without sacrificing quality or flavor.

Convenience is key in today’s fast-paced world, and this Chicken Lo Mein recipe fits perfectly into that lifestyle. Quick to prepare and cook, you can have a delicious meal ready in just 30 minutes. Plus, it’s a great opportunity to use up leftover vegetables you have on hand, creating a customized dish that suits your preferences while minimizing waste.

Nutritionally, this recipe offers a balanced meal featuring lean protein from chicken, vitamins from colorful vegetables, and carbohydrates from the noodles. It provides a wholesome option that supports a healthy diet without compromising on taste. You’re feeding your body and satisfying your taste buds at the same time.

Gathering around food brings people together, and Chicken Lo Mein is perfect for social occasions. The vibrant colors and enticing aroma of this dish are sure to impress guests, making it an excellent option for entertaining. Serve with crispy spring rolls or fortune cookies to elevate the dining experience.

Lastly, the cost-effectiveness of this dish cannot be overstated. With affordable ingredients and easy preparation, you can feed a family of four without breaking the bank. It’s an excellent go-to recipe that proves deliciousness doesn’t need to come with a hefty price tag.

Historical Background and Cultural Significance

The origins of Chicken Lo Mein can be traced back to China, where noodles have been a staple for centuries. The name “Lo Mein” translates to “stirred noodles,” reflecting the cooking method used to prepare this vibrant dish. The dish gained popularity in Western cuisine as Chinese immigrants introduced it, adapting to local tastes while maintaining essential flavors.

Culturally, Chicken Lo Mein signifies comfort food in many Chinese households, similar to how macaroni and cheese is viewed in Western cultures. It embodies the essence of family meals, often served during gatherings and festivals, representing unity and togetherness. The dish has transcended its origins, becoming a beloved choice for people around the globe who enjoy Asian cuisine.

Over the years, the recipe has evolved with different regions of China adding their unique twists. These variations might include different types of proteins such as shrimp or beef, as well as a diverse array of vegetables. This flexibility has allowed Chicken Lo Mein to adapt to local tastes, making it a versatile and enduring dish.

Regional variations also showcase the diverse culinary traditions within China. For instance, Hong Kong-style Chicken Lo Mein may include richer sauces and different noodles, highlighting the locality’s flair. Similarly, Americanized versions frequently feature added ingredients like broccoli, making it more appealing to wider audiences.

Ingredient Deep Dive

Chicken: Chicken is the star ingredient of this dish. It holds cultural significance as a symbol of prosperity and festivity in Chinese culture. When selecting chicken for your Lo Mein, look for fresh, boneless options. Nutritionally, chicken is a lean source of protein that supports muscle growth and overall health. Store raw chicken in the refrigerator and use it within a couple of days or freeze it for extended use. As a substitution, tofu or tempeh can be used for a plant-based alternative.

Noodles: Lo Mein noodles are typically made from wheat flour and egg, giving them a delightful texture. Noodles have a rich history in Asian cuisine, symbolizing longevity. When choosing noodles, opt for fresh varieties if available; they provide the best texture when cooked. Nutritionally, noodles provide carbohydrates for energy. Store them in a cool, dry place, and they can last for months. For gluten-free options, consider using rice noodles or zucchini noodles as a substitute.

Vegetables: Fresh vegetables like bell peppers, carrots, and bok choy add color, texture, and essential nutrients to Chicken Lo Mein. Vegetables symbolize abundance in Chinese culture and are integral to a balanced meal. For the best flavor and nutrition, choose vibrant, fresh produce. Store vegetables in the refrigerator for longevity while ensuring they are used within a week to maintain freshness. If you’re missing some vegetables, feel free to customize the mix; broccoli or snap peas can be fantastic additions.

Soy Sauce: Soy sauce is the backbone of flavor in this dish, contributing saltiness and umami. Its history stretches back thousands of years in Asian cuisine, where it was developed as a means of preserving food. When selecting soy sauce, opt for low-sodium varieties to reduce salt intake without sacrificing flavor. Nutritionally, soy sauce contains antioxidants and flavor-enhancing amino acids. Store it in a cool, dark place; it lasts quite a long time due to its high salt content. Tamari is a suitable gluten-free alternative that can be used in its place.

Common Mistakes to Avoid

  • Overcooking the Noodles: This is a common mistake that leads to mushy noodles. Always check the packaging for the recommended cooking time and do not exceed it.
  • Using Stale Ingredients: Using old vegetables or expired sauce can ruin the dish. Always check the freshness of produce and expiration dates before cooking.
  • Skipping the Marination: Failing to marinate the chicken can lead to bland flavor. A simple marinade can enhance the dish significantly.
  • Not Preparing Ahead: Ensure all ingredients are prepped before cooking, as stir-frying goes quickly, and you won’t have time to chop later.
  • Too Much Sauce: Adding too much soy sauce can result in an overly salty dish. Start with a small amount and adjust to taste.
  • Underestimating Heat: Cooking on low heat will not give the desired stir-fry effect. Ensure your pan is hot enough before adding ingredients.
  • Crowding the Pan: Cooking too much at once can cause steaming rather than frying. Cook in batches for the best texture.
  • Skipping the Oil: Not using enough oil can lead to sticking. A little oil goes a long way in achieving the perfect stir-fry.
  • Neglecting to Taste: Always taste your food before serving. Adjustments made during cooking can save a bland dish.
  • Piling Too High: When plating, avoid stacking food too high as it may not look appealing. Presentation matters!

Essential Techniques

Stir-Frying: This technique is vital for this recipe, as it creates a quick, high-heat environment that helps to seal in flavors and textures. To master stir-frying, ensure your pan is hot enough before adding any ingredients. A common pitfall is overcrowding the pan, which can cause steaming rather than frying. Visual cues for success include seeing slight browning on your ingredients.

Marination: Marinating chicken prior to cooking enhances flavor and tenderness. To do this, combine soy sauce, garlic, and ginger and let it sit for at least 20 minutes. The key is allowing enough time for the flavors to penetrate the chicken adequately. A common mistake is marinating for too long, which can lead to an overly salty result.

Chopping Vegetables: Properly chopping vegetables ensures even cooking and a pleasing presentation. Always aim for uniformity in size, as this creates a consistent cooking time. A common issue arises when using dull knives—it’s safer and more efficient to use a sharp blade. Look for vibrant colors and a crisp texture as indicators of fresh vegetables.

Prepping Ahead: Preparing all your ingredients before you begin cooking is crucial in stir-frying. This allows for a fluid cooking process without interruptions. Keep your ingredients organized and in bowls to ensure you can move quickly. Forgetting to prep can lead to overcooked ingredients or delays in service.

Pro Tips for Perfect Chicken Lo Mein

One key tip for perfect Chicken Lo Mein is to use a mix of fresh vegetables to enhance both flavor and nutrition. Bell peppers, bok choy, and snap peas can create a colorful and nutritious blend.

Ensure you allow the noodles to cook just until al dente, as they will continue to cook when tossed with the hot chicken and vegetables. This prevents overcooking and maintains a pleasant texture.

Experiment with marinades for added flavor depth; sesame oil, garlic, and ginger can elevate your chicken’s taste profile significantly.

Add a splash of rice wine or sherry to the cooking process to introduce a new layer of depth in flavor.

For a spicier kick, consider adding chili flakes or fresh sliced chilies during cooking, adjusting to your heat preference.

Opt for high-quality soy sauce, as it dramatically affects the dish’s overall taste. Opt for low-sodium varieties if you’re watching your salt intake.

Finish with freshly chopped green onions or sesame seeds before serving for an aromatic and visually appealing touch.

Using cornstarch to coat your chicken before cooking will help it achieve that wonderful crispy texture.

Variations and Adaptations

Chicken Lo Mein is wonderfully adaptable, allowing you to switch up proteins including shrimp, beef, or tofu for a vegetarian version.

Seasonal adaptations can introduce ingredients like asparagus in spring or pumpkin in the fall, ensuring you make the most of what’s fresh.

For dietary modifications, consider using gluten-free noodles and a gluten-free soy sauce alternative for those with dietary restrictions.

Flavor variations could include adding oyster sauce or hoisin sauce to deepen the dish’s savory notes and offer a different taste experience.

Experimenting with texture modifications can elevate the dish; adding crushed peanuts on top can add crunch, while cabbage can contribute a great mouthfeel.

In terms of presentation alternatives, serving in individual bowls topped with fresh herbs or placing them on a colorful platter can make the dish stand out during gatherings.

Serving and Presentation Guide

When plating Chicken Lo Mein, consider using a large, shallow bowl to showcase the vibrant colors of the dish.

Garnishing with fresh cilantro or sliced green onions just before serving can add a splash of color and brightness to the dish.

Traditional accompaniments include spring rolls or dumplings, making for a complete and satisfying meal.

Modern serving suggestions might involve generating a family-style presentation, allowing guests to serve themselves, which encourages community.

Temperature considerations are essential, as this dish is best enjoyed fresh and hot from the skillet.

Portion control tips include offering smaller servings initially, allowing for guests who may want seconds to not overindulge at first.

Wine and Beverage Pairing

For wine pairings, consider a lightly chilled Riesling or Pinot Noir, both of which complement the flavors of Chicken Lo Mein beautifully without overpowering them.

If you’re looking for non-alcoholic alternatives, iced tea with lemon or ginger ale can provide a refreshing contrast to the savory dish.

Coffee or tea pairings are less common with Asian cuisine, but a green tea can enhance the meal, acting as a soothing digestif afterward.

When serving beverages, ensure they are well-chilled to enhance the dining experience, especially with summer gatherings.

Consider serving wines in larger glasses to allow for the aromas to fully develop, enhancing the overall tasting experience.

Storage and Shelf Life

To store Chicken Lo Mein, place it in an airtight container in the refrigerator to keep it fresh, where it can last for 3-4 days.

For best longevity, consume the dish within a day or two for optimal flavor and texture, particularly with the noodles.

Signs of spoilage may include off-smells or discoloration, which indicates it’s time to discard the dish.

When reheating, do so gently on the stove or in the microwave, ensuring it reaches the proper temperature of 165°F to kill any harmful bacteria.

If planning to freeze, separate the ingredients as noodles can become mushy upon thawing; ideally, store the chicken and sauce separately from the noodles.

Make Ahead Strategies

To prep Chicken Lo Mein ahead of time, chop vegetables and marinate chicken the night before. Store them separately in the fridge to ensure freshness.

Setting a prep timeline ensures everything is ready when you need it, making the cooking process swift. Aim for all ingredients to be prepped an hour before cooking.

Store components in clear containers or bags to easily see what’s inside and avoid losing ingredients between steps.

Quality is not compromised when ingredients are prepped ahead, as long as they are stored correctly and consumed within a reasonable timeframe.

Assembling the dish is fast once components are prepped. Just stir-fry in quick succession for a seamless cooking experience.

Consider slicing any fresh herbs or garnishes last minute to add freshness as you serve, enhancing the final appearance of your dish.

Scaling Instructions

When halving the Chicken Lo Mein recipe, maintain the ratio of the ingredients to ensure the balance of flavor remains the same while adjusting cooking times slightly.

Doubling or tripling the recipe is straightforward, but make sure to use a larger pan or wok to maintain proper cooking temperatures.

Equipment adjustments may be necessary when scaling; ensure you have enough storage containers or cooking vessels.

Timing modifications become essential as larger amounts can require slightly longer cooking times and additional attention when stirring.

Be mindful of storage considerations; larger quantities will require more space in your refrigerator or freezer.

Nutritional Deep Dive

A macro breakdown of Chicken Lo Mein reveals a healthy balance of carbohydrates, protein, and fats that make it a satisfying meal choice.

Micronutrient analysis shows the inclusion of vitamins A and C from vegetables, while chicken provides essential B vitamins necessary for energy production.

Health benefits include increased protein intake promoting muscle health and vitality, alongside nutrient-dense vegetables contributing to overall dietary needs.

Dietary considerations should reflect personal health goals; for instance, adjust ingredient choices for lower sodium or added fiber content.

Portion analysis emphasizes that moderation is vital; enjoying this dish paired with fresh greens can round out meals nicely.

Weight management tips suggest serving smaller portions to enjoy its deliciousness without overindulging, particularly with rich dishes like this.

Dietary Adaptations

For gluten-free adaptations, use rice noodles and a gluten-free soy sauce alternative to enjoy Chicken Lo Mein without gluten.

Dairy-free modifications are inherently easy as this recipe contains no dairy; simply stick to the core ingredients for a delightful meal.

Vegan alternatives can involve substituting chicken with tofu or tempeh while enhancing with more vegetables for protein and flavor.

Low-carb adaptations could entail using zucchini noodles in place of traditional noodles, making it suitable for keto diets.

Paleo enthusiasts can enjoy this dish with the same adapted noodles and a focus on fresh ingredients that adhere to paleo guidelines.

Low-FODMAP options are available by avoiding garlic and onion and selecting specific vegetables that suit dietary requirements.

Troubleshooting Guide

If you encounter texture issues with the noodles, ensure they are cooked al dente initially to prevent them from becoming too soft during stir-frying.

For flavor balance, taste as you cook, adjusting soy sauce and seasoning to avoid over-salting or under-seasoning your dish.

Temperature problems can occur if your stove isn’t hot enough; preheat your pan adequately to ensure a good sear on your ingredients.

If you face equipment challenges, such as limited kitchen tools, consider cooking in smaller batches which allows for optimal cooking conditions.

With ingredient substitutions, understanding the flavors and textures of alternatives is key to maintaining the integrity of the dish.

Timing concerns can be managed by having all ingredients prepped beforehand, allowing for a seamless cooking process when everything is ready to go.

Recipe Success Stories

Community feedback often highlights the wonderful combinations of texture and flavor that Chicken Lo Mein offers, with readers sharing their unique adaptations.

Success stories frequently mention the quick preparation timing as a game-changer for busy families seeking fast yet delicious meals.

Adaptive variations shared by readers, like changing protein sources or adding seasonal vegetables, show the flexibility of this recipe.

Photography tips from enthusiasts suggest highlighting vibrant colors and fresh ingredients to make your Chicken Lo Mein look as good as it tastes.

Readers often suggest serving Chicken Lo Mein family-style to engage diners, fostering a communal dining experience that enhances enjoyment.

Frequently Asked Questions

Q: Can I use frozen vegetables in Chicken Lo Mein?
A: Yes, frozen vegetables can be used for convenience, but fresh vegetables provide a better texture and flavor. Look for blends that include bell peppers, peas, and carrots for the best results.

Q: What noodles are best for Chicken Lo Mein?
A: Traditional egg noodles work best, but for gluten-free versions, rice noodles are an excellent alternative. Choose the noodle type based on your dietary needs and preferences.

Q: Can I make Chicken Lo Mein ahead of time?
A: While it’s best enjoyed fresh, you can prep ingredients ahead and store them separately. Cooked Chicken Lo Mein can last in the fridge for 3-4 days.

Q: Is Chicken Lo Mein healthy?
A: Chicken Lo Mein can be healthy, especially when loaded with vegetables and using lean chicken. Adjusting sauce amounts and using whole grain noodles can further enhance its nutritional profile.

Q: What protein can I substitute for chicken?
A: You can easily substitute chicken with shrimp, beef, tofu, or any combination of these proteins to suit your taste preferences or dietary restrictions.

Q: How spicy is Chicken Lo Mein?
A: The spiciness of Chicken Lo Mein can be adjusted to individual tastes. You can add chili oil or fresh chilies for heat, or keep it mild by omitting spicy ingredients.

Q: How can I make it vegetarian?
A: To make Chicken Lo Mein vegetarian, simply omit the chicken and replace it with tofu or tempeh while increasing the vegetable quantity for more flavor.

Q: Can I freeze Chicken Lo Mein?
A: Yes, you can freeze Chicken Lo Mein, but noodles might become mushy when thawed. It’s best to freeze the sauce and protein separately for optimal texture.

Q: What’s a good side dish to serve with Chicken Lo Mein?
A: Spring rolls, dumplings, or a simple side salad work beautifully alongside Chicken Lo Mein, providing a fresh contrast to the meal.

Q: What’s the best way to reheat Chicken Lo Mein?
A: The best way to reheat Chicken Lo Mein is on the stove over low heat, adding a little water or broth to revive moisture, or in the microwave with a damp paper towel.

Additional Resources

Explore related recipes like Beef Chow Mein and Vegetable Stir-Fry for more exciting culinary options.

Technique guides on stir-frying and marinating will bolster your confidence in the kitchen as you explore Asian-inspired cooking.

Ingredient information can deepen your understanding of Asian noodles, sauces, and key spices that elevate your culinary endeavors.

Consider investing in quality kitchen equipment such as a wok or a good knife set to enhance your cooking experience significantly.

Lastly, check out seasonal variations by incorporating fresh, local produce into your Cooking for a unique twist on traditional dishes.

Join the Conversation

Share your Chicken Lo Mein creations on social media for a chance to be featured, fostering a community of culinary enthusiasts striving for deliciousness.

Consider joining forums or cooking classes to engage with fellow food lovers and expand your skills through shared knowledge and experiences.

Share your photography tips with others to help improve their food styling and presentation techniques, enhancing the visual appeal of their dishes.

Invite readers to leave reviews of the recipe and share personal twists or variations they experiment with in their own cooking adventures.

Lastly, encourage community engagement through feedback on your blog or social media platforms, fostering a collaborative environment where culinary dreams thrive.

The Recipe

Chicken Lo Mein

Serves: 4

Prep Time: 15 mins

Cook Time: 15 mins

Total Time: 30 mins

Kitchen Equipment Needed

  • Wok or large skillet
  • Cutting board
  • Sharp knife
  • Measuring cups and spoons
  • Mixing bowl

Ingredients

  • 8 oz egg noodles
  • 1 lb chicken breast, sliced
  • 2 cups mixed vegetables (bell peppers, carrots, bok choy)
  • 3 tablespoons soy sauce
  • 1 tablespoon sesame oil
  • 2 cloves garlic, minced
  • 1 teaspoon ginger, minced
  • Salt and pepper to taste

Directions

  1. Cook the egg noodles according to package instructions, then drain and set aside.
  2. In a bowl, marinate the sliced chicken with soy sauce, garlic, and ginger for 15 minutes.
  3. Heat sesame oil in a wok over medium-high heat. Add marinated chicken and stir-fry until cooked through.
  4. Add the mixed vegetables and stir-fry for an additional 3-4 minutes until tender.
  5. Toss in the cooked noodles, adding more soy sauce if needed, and stir well to combine all ingredients.
  6. Season with salt and pepper to taste, then serve hot, garnished with green onions.

Recipe Notes

  • Feel free to substitute chicken with tofu or shrimp.
  • Add any leftover vegetables you have for variety.
  • Store leftovers in an airtight container in the fridge for up to 3-4 days.

Ginger Sesame Chicken Coleslaw Salad: A Flavorful Delight

Ginger Sesame Chicken Coleslaw Salad: A Flavorful Fusion Delight

⚖️
Difficulty
Easy

⏲️
Prep Time
15 mins

🕒
Cook Time
10 mins

⏱️
Total Time
25 mins

🍽️
Servings
4 Servings

Ginger Sesame Chicken Coleslaw Salad is not just a dish—it’s a colorful, vibrant assembly of fresh ingredients that is as appealing to the palate as it is to the eye. The combination of tender chicken coated in a zesty ginger and sesame dressing mingled with crunchy cabbage, carrots, and scallions creates a harmonious blend of flavors and textures. Each bite offers a refreshing crunch paired with the savory notes of chicken, elevating the traditional coleslaw to a whole new level. Perfect for warm weather dining or as a side dish year-round, this salad is sure to impress at any gathering.

The secret to this dish’s irresistible allure lies in its dynamic flavor profile. The ginger adds a warm, peppery kick while the sesame presents a nutty undertone, creating a delightful contrast with the crispiness of the fresh vegetables. This is not your average salad; it bursts with flavor from the very first bite. Whether served at a potluck, picnic, or weeknight dinner, it is a crowd-pleaser that delivers both on taste and nutrition.

Quick Recipe Highlights

  • Flavor Profile: The warm, spicy flavor of ginger complements the nutty sesame dressing, bringing depth to each component in this salad.
  • Texture: The crisp cabbage and carrots contrast beautifully with the tender chicken, offering a satisfying crunch with every forkful.
  • Aroma: The fragrant ginger and toasted sesame oil create an enticing aroma that lingers, inviting everyone to the table.
  • Visual Appeal: Bright green cabbage, vivid orange carrots, and golden-brown chicken make this salad visually stunning on any plate.
  • Skill Level Needed: This recipe is easy and beginner-friendly, making it perfect for cooks of all experience levels.
  • Special Equipment: No special tools are required—just a sharp knife, cutting board, and mixing bowl!

Recipe Overview

  • Difficulty Level: This Ginger Sesame Chicken Coleslaw Salad is classified as easy, requiring minimal cooking skills and a straightforward method.
  • Category: Ideal for salads, this recipe serves as both a main dish or a side, fitting seamlessly into any meal plan.
  • Cuisine: Drawing inspiration from Asian cuisine, this salad showcases the delightful use of ginger and sesame, creating a dish that celebrates those flavors.
  • Cost: The cost is relatively low, especially considering the fresh vegetables and staple pantry items used, making it budget-friendly.
  • Season: This salad shines in the warmer months, showcasing seasonal produce, but can be enjoyed year-round for a crunchy treat.
  • Occasion: Whether at a family barbecue, a potluck, or just a quick weeknight meal, this dish is versatile enough for any occasion.

Why You’ll Love This Recipe

Taste and texture appeal play significant roles in making the Ginger Sesame Chicken Coleslaw Salad a must-try. The vibrant harmony of flavors—spicy ginger mixing with savory sesame and the freshness of crisp vegetables—offers a satisfying experience for your taste buds. The chicken adds protein without overshadowing the freshness of the coleslaw components, making every bite feel wholesome and balanced.

Convenience and preparation are standout benefits of this recipe. With just 15 minutes of prep time and only 10 additional cooking minutes, this salad is perfect for busy weeknights or last-minute events. It allows for a healthy meal without spending hours in the kitchen, making it an excellent choice for those who prioritize quick yet flavorful dining.

Nutritionally, this salad is a winner. Loaded with fresh vegetables, lean protein, and beneficial flavors from ginger and sesame, it delivers important vitamins and minerals while also satisfying cravings. This makes it an excellent choice for anyone looking to maintain a healthy lifestyle while enjoying food that tastes great.

Social and entertaining value is another compelling reason to whip up this dish. Its visual appeal and delicious taste make it a conversation starter at any gathering. Friends and family will love the fresh take on classic coleslaw, and its unique flavor profile is likely to spark recipe requests and discussions.

Cost-effectiveness and accessibility enhance its appeal. Most ingredients are pantry staples or available at any grocery store, making this dish easy to source. The balance of flavors also means you get gourmet taste without a gourmet price tag, allowing everyone the chance to enjoy a high-quality dish without breaking the bank.

Historical Background and Cultural Significance

The origins of ginger in cooking date back thousands of years, primarily rooted in Asian cultures, where it has been celebrated not only for its flavor but also its medicinal properties. In this Ginger Sesame Chicken Coleslaw Salad, ginger merges with sesame, a staple in many Asian cuisines, to create a dressing that enhances the taste of the dish and connects various culinary traditions.

Culturally, the use of coleslaw in various forms has been prevalent in different parts of the world, particularly in Western cuisine. This salad takes a classic recipe and transforms it by incorporating Asian flavors, thus showcasing the fusion of food cultures and their evolution over time.

As global influences on cooking continue to expand, dishes like this one symbolize the blending of culinary traditions. Modern recipes are increasingly incorporating diverse ingredients, allowing home cooks to explore and enjoy flavors from around the world.

Regional variations abound, showcasing local ingredients and preferences. For example, incorporating different vegetables or proteins can result in unique spins on this salad, further enriching its culinary significance and allowing for personalized family favorites.

Ingredient Deep Dive

Ginger:
Originating in Southeast Asia, ginger has gained global popularity, recognized for its distinctive spicy flavor and medicinal benefits. It is rich in antioxidants and has anti-inflammatory properties, making it beneficial for digestion and overall health. When selecting ginger, look for firm roots with smooth skin and avoid any with signs of mold or shriveling. Store ginger in a cool, dry place or in the refrigerator for longevity. Substitutions include galangal or powdered ginger, though fresh is always best.

Sesame Oil:
Sesame oil, a staple in Asian cooking, is made from pressed sesame seeds, praised for its rich aroma and flavor. It contains healthy fats and antioxidants, promoting heart health and skin vitality. Choose toasted sesame oil for its robust flavor, and it’s best kept in a dark, cold place to maintain freshness. If unavailable, grapeseed oil or olive oil can be used as alternatives, though they will alter the flavor profile slightly.

Chicken:
Chicken is a versatile protein option that forms the heart of this salad. It is low in fat while being a great source of essential proteins and nutrients, making it a favored choice in numerous diets. Opt for chicken breasts for a tender result, and ensure you handle raw chicken properly to avoid cross-contamination. Store cooked chicken in the refrigerator for 3-4 days or in the freezer for longer preservation. Substitutions like tofu or grilled shrimp can cater to different dietary preferences.

Cabbage:
Cabbage has a rich history, being a staple in various global cuisines. It’s low in calories yet high in vitamins K and C, offering beneficial health properties. When selecting cabbage, look for firm heads and vibrant leaves, avoiding any with soft spots. Store it in the refrigerator for maximum freshness, and consider using Napa or Savoy cabbage as alternatives for a different texture and flavor in this salad.

Common Mistakes to Avoid

  • Overcooking the chicken: Cooking chicken too long can lead to dry, tough meat. Use a cooking thermometer to ensure it reaches 165°F for optimal juiciness.
  • Using too much dressing: Balance is key; too much dressing can overpower other flavors. Start with a small amount, taste, and adjust as necessary.
  • Chopping vegetables unevenly: Uniform sizes ensure even crunch and flavor distribution. Take the time to chop cabbage and carrots into similar-sized pieces.
  • Not seasoning enough: While ginger and sesame oil are flavorful, a pinch of salt can enhance the overall taste profile.
  • Ignoring ingredient quality: Fresh, high-quality ingredients significantly improve the dish’s taste. Opt for fresh produce and quality oils.
  • Making a dressing too early: Preparing the dressing too far ahead can cause it to separate; mix it just before serving for the best results.
  • Neglecting to taste as you go: Adjusting flavors while cooking is essential. Make minor tweaks based on your palate for a personalized dish.
  • Not letting the salad sit: Allowing the salad to rest helps flavors meld together. A brief resting time before serving can enhance taste.

Essential Techniques

Chopping vegetables is crucial for this recipe. Properly slicing the cabbage and carrots ensures a uniform texture that enhances the dish’s overall enjoyment. To master this technique, use a sharp knife and practice stable cutting methods to prevent injury. Look for even sizes to guarantee the best mouthfeel and flavor experience.

Mixing the dressing is another pivotal step. It is important to thoroughly combine ginger, sesame oil, and other ingredients to create a cohesive flavor. Whisking helps infuse the flavors properly; aim for a balanced mix without any separation of oils or solids. A well-mixed dressing coats the salad evenly, elevating every bite.

Pro Tips for Perfect Ginger Sesame Chicken Coleslaw Salad

One of the best tips is to use fresh, seasonal ingredients. The freshness of the vegetables will enhance the texture and flavor complexity—plan your salad around what’s in season for the best results.

Make the dressing ahead and store it in an airtight container. This allows the flavors to develop further and can save time on days when you’re busy.

When preparing chicken, consider marinating it in the ginger and sesame dressing beforehand. This adds extra flavor to the meat, balancing it nicely with the salad.

To amp up the crunch factor, consider adding nuts like sliced almonds or crunchy peanuts. They offer a delightful contrast to the tender chicken and crisp vegetables, enriching each bite.

Don’t shy away from heat; adding a touch of red pepper flakes or sriracha to your dressing can introduce an exciting kick that complements the ginger beautifully.

For an artful presentation, layer the salad ingredients rather than tossing everything together. This allows for vibrant colors to shine through, making it visually appealing.

Ensure to use kitchen shears for cutting green onions directly into your salad. This traditional technique keeps your prep quick while adding fresh flavor without damaging the onions.

Lastly, don’t forget to taste before serving. A final check for seasoning can make a significant difference, ensuring that the balance of flavors is just right.

Variations and Adaptations

For regional variations, consider adding traditional elements from local cuisines, such as jalapeños for a southwestern twist or cilantro for a fresh, herby flavor.

Seasonal adaptations can include swapping vegetables based on what’s fresh at the market. Spring peas or radishes can provide exciting textures and flavors that change with the seasons.

Dietary modifications are also easy to incorporate. For a vegetarian option, replace chicken with tofu or chickpeas, and for a gluten-free option, use tamari instead of soy sauce in the dressing.

Flavor variations might involve different nut oils or the addition of fruit like mango or apples for sweetness, which complement the ginger’s spice and add a delightful contrast.

Texture modifications can be achieved by incorporating different types of shredded vegetables, like beetroot or daikon, which can provide unique flavors and colors.

Lastly, consider presentation alternatives. Serving the salad in small jars or bowls can make for a stunning display at events, allowing guests to enjoy their individual portions.

Serving and Presentation Guide

When plating Ginger Sesame Chicken Coleslaw Salad, variety is key. Use a large, shallow platter to showcase the colorful ingredients, allowing guests to see the vibrant colors mingling together.

For garnishing, a sprinkle of sesame seeds or freshly chopped cilantro adds a finishing touch that complements the dish’s flavors. Pile the salad high for a visually appealing effect, showcasing the fresh ingredients’ brightness.

For traditional accompaniments, serve with rice or crusty bread to create a well-rounded meal, or offer as a light lunch on its own.

Modern serving suggestions might include individual salad cups, a trendy way to serve salads that enhances both the visual appeal and functionality, especially for gatherings.

Temperature considerations are also vital. Serve the salad chilled or at room temperature for the freshest taste and best texture.

Finally, keep portion control in mind when serving. Aim for balanced portions that allow guests to experience all the flavors while avoiding excess.

Wine and Beverage Pairing

For wine pairings, consider a light, crisp white like Sauvignon Blanc or a dry Riesling. These wines enhance the salad’s vibrant flavors without overpowering them, ensuring a harmonious dining experience.

Non-alcoholic alternatives include sparkling water with a splash of lime or ginger-infused iced tea, both of which complement the ginger and freshness of the salad beautifully.

If coffee or tea are preferred options, consider serving a light green tea, which can cleanse the palate and match the dish’s lively character.

Temperature considerations are essential—for sparkling water or iced tea, serving them chilled enhances their refreshing nature, making them ideal accompaniments.

Serving suggestions could include pairing the salad with light appetizers, allowing for the flavors to mingle and create a harmonious buffet-style meal for any occasion.

Storage and Shelf Life

For optimal storage methods, place any leftover Ginger Sesame Chicken Coleslaw Salad in an airtight container, ensuring that it remains fresh. The ideal temperature for storage is the refrigerator, where it will last up to three days.

Container recommendations include glass or BPA-free plastic containers which are perfect for keeping the salad crisp without risk of contamination.

Signs of spoilage include wilted vegetables, an off odor, or excessive moisture collecting on the lid—discard if any of these signs are present.

Reheating guidelines suggest using the microwave for the chicken but avoid warming the coleslaw, as it is best consumed cold for the texture and flavor benefits.

Freezing is not recommended for this salad because the vegetables do not freeze well, losing their fresh taste and texture once thawed.

Make Ahead Strategies

To prepare ahead, chop all vegetables and store them separately in airtight containers within the fridge for up to two days. This approach allows you to assemble the salad quickly before serving.

For the dressing, make it in advance and refrigerate. Homemade dressing can last a week, giving you a flavor-packed base ready to use when cooking.

Quality impact assessment is important; while vegetables can withstand a few days prepped, avoid cutting them too early to prevent wilting—tackle them the day before for the freshest taste.

Assembly tips can facilitate an easier mealtime; consider creating a “salad bar” setup with separate containers for the components so everyone can customize their own bowls.

Reheating guidelines for the chicken can include warming it gently in a frying pan to keep it juicy without drying it out, while keeping the salad fresh.

Finally, adding fresh herbs or avocado just before serving can elevate flavors and provide that freshly prepared feel, enhancing the overall salad experience.

Scaling Instructions

When halving the recipe, adjust the ingredients accordingly, ensuring you maintain the flavor balance. This aspect is particularly important for sauces, which should be evenly proportioned.

Doubling or tripling the ingredients is manageable, but larger portions may require additional mixing bowl space for proper blending.

Equipment adjustments include using bigger bowls or utensils for larger quantities, ensuring everything mixes thoroughly without spillage.

Timing modifications should be considered; while prep time stays consistent, cooking in larger batches may take slightly longer, so monitor chicken temperature closely.

Storage considerations become essential when accommodating larger quantities—ensure your storage containers are adequate for the increased volume to avoid spoilage.

Nutritional Deep Dive

The macro breakdown of this salad reveals a balance of proteins from chicken, healthy fats from sesame oil, and fiber from the vegetables, making it a well-rounded meal. Each serving is designed to provide essential macros to fuel your day.

Micronutrient analysis highlights the salad’s vitamins from fresh vegetables, particularly Vitamin C and K, delivering key benefits to your immune function and bone health.

Health benefits of ginger and sesame also include improved digestion and inflammation reduction, making this dish not only delicious but also conducive to a healthy lifestyle.

Dietary considerations let you enjoy this dish within various eating plans, making it adaptable for those monitoring caloric intake or specific macronutrient goals.

Portion analysis is recommended to ensure balanced servings are enjoyed, catering to both light eaters and those needing more sustenance, providing versatility for different appetites.

Weight management tips include opting for lean protein and increasing vegetable intake to help with feelings of fullness while enjoying a flavorful dish that satisfies.

Dietary Adaptations

For gluten-free adaptations, simply replace soy sauce with gluten-free tamari or coconut aminos, allowing those with dietary restrictions to savor the flavors without concern.

For a dairy-free version, ensure no dairy products are used in the chicken preparation or dressing, keeping it aligned with lactose-free dietary needs.

Consider a vegan adaptation by substituting chicken with plant-based proteins like tofu or tempeh, ensuring you use vegan sauces and dressings.

A low-carb approach can be achieved by avoiding sugar in the dressing and incorporating additional fiber-rich vegetables, enhancing the salad’s nutritional profile.

Keto dieters might find this salad appealing with its high protein and low carb content, perfect for satisfying cravings without compromising dietary goals.

Paleo enthusiasts can enjoy the unprocessed components of this salad, allowing for a healthy, whole food option that aligns with their eating principles.

Low-FODMAP adaptations may require careful ingredient selection, particularly in the dressing; omit high-FODMAP ingredients to ensure suitability for affected individuals.

Troubleshooting Guide

For texture issues, ensure the chicken is not overcooked; if it is tough or dry, try brining next time to retain moisture.

Flavor balance can be adjusted by balancing salt and acidity levels—if the salad tastes flat, a splash of vinegar or citrus can bring flavors back to life.

Temperature problems arise if the chicken is too hot when mixed; ensure it cools slightly before adding to keep the salad crisp instead of wilting.

Equipment challenges can occur if your kitchen tools are insufficient—investing in a good knife will make chopping more efficient, maintaining consistent vegetable sizes.

Ingredient substitutions may result in unexpected flavors; stick close to suggested swaps for the most harmonious results.

Timing concerns may create challenges when everything should be served fresh—prepare components ahead but mix just before serving to maintain quality.

Recipe Success Stories

Community feedback highlights how adaptable this dish is, with many users customizing ingredients based on personal preferences or what they have on hand. It’s great to see families swapping in their favorites and creating new traditions.

Variation successes include converting this salad into a wrap; readers have reported delicious results using the salad fillings to embody flavor-packed wraps for lunch.

Adaptation stories also showcase how this recipe works well as meal prep; many find it holds up wonderfully throughout the week, making it a staple in their kitchens.

Reader suggestions have emphasized the benefits of adding fruits like apples or mandarin oranges to the salad, improving both sweet and savory elements significantly.

Photography tips are shared amongst readers, showcasing how vibrant colors of this dish can be best captured with natural light, enhancing its visual appeal for social media.

Frequently Asked Questions

Can I make this salad ahead of time? Yes, you can prepare the veggies and dressing in advance, but it’s best to mix them just before serving to maintain freshness and texture.

What can I substitute for the chicken? Tofu, tempeh, or chickpeas work well as alternative proteins, making this dish vegetarian or vegan-friendly.

How long does this salad last in the fridge? It’s best consumed within three days for optimal freshness.

Can I use different vegetables? Absolutely! Feel free to adapt the recipe to include your favorite crunchy veggies like peppers or radishes.

Is this dish gluten-free? It can be made gluten-free by using gluten-free tamari instead of regular soy sauce.

What’s the best way to store leftovers? Store any remaining salad in an airtight container in the fridge for up to three days, but keep the dressing separate if possible.

Can I freeze the salad? Freezing is not recommended, as the vegetables will lose their crispness once thawed.

How spicy is the dish? The spice level mainly depends on the amount of ginger used; feel free to adjust according to your preference.

What kind of sesame oil should I use? Toasted sesame oil is ideal for added flavor, but regular sesame oil can also work.

Can I add other proteins? Certainly! Grilled shrimp, seared beef, or even hard-boiled eggs can make great additions to this salad.

How do I make the dressing my own? Customize the dressing by adding ingredients like honey, mustard, or citrus for varied flavor profiles.

Is there a low-carb version of this salad? Yes, avoiding sugar and utilizing low-carb vegetables can easily create a low-carb version of the salad.

Additional Resources

For further exploration, check out related recipes that emphasize fresh vegetables and light dressings for additional meal ideas. Classic summer salads and Asian-inspired dishes can complement the Ginger Sesame Chicken Coleslaw Salad, broadening your culinary repertoire.

Technique guides focusing on knife skills, mixing sauces, and preparing proteins can enhance your overall cooking talents, making meal preparation easier and more enjoyable.

Ingredient information about sesame and ginger can deepen your understanding of their nutritional benefits and culinary uses, allowing you to incorporate them more creatively in your meals.

Equipment recommendations might include high-quality knives, mixing bowls, and storage containers to elevate your cooking experience, ensuring you are well-prepared for any recipe.

Lastly, seasonal variations can guide you to adapt the dish based on what’s available at farmers’ markets or grocery stores, embracing whatever is fresh and delicious.

Join the Conversation

Engagement on social media provides a platform where both photography enthusiasts and home cooks can share their creations. Consider using dedicated hashtags to connect with others who enjoy similar recipes.

Photography tips encourage experimentation with natural lighting, staging, and unique angles that highlight the vibrant colors in dishes like this salad. Sharing these photos not only boosts engagement but also inspires others to try the recipe.

Recipe reviews are valuable for both community building and helping others decide whether to try a dish. Sharing personal experiences, adaptations, or celebrations around the recipe can amplify its presence and encourage usage.

Community engagement around popular dishes enhances the overall experience, allowing you to foster a network of fellow cooking enthusiasts who share their successes and suggestions.

Encouraging recipe variations among readers sparks creativity and showcases how the Ginger Sesame Chicken Coleslaw Salad can act as a base for exploration and culinary adventure.

The Recipe

Ginger Sesame Chicken Coleslaw Salad

Serves: 4 Servings

Prep Time: 15 mins

Cook Time: 10 mins

Total Time: 25 mins

Kitchen Equipment Needed

  • Cutting board
  • Sharp knife
  • Mixing bowl
  • Whisk or fork
  • Measuring cups and spoons

Ingredients

  • 2 cups shredded cabbage
  • 1 cup shredded carrots
  • 2 cups cooked chicken, diced
  • 1/4 cup chopped scallions
  • 1/4 cup sesame oil
  • 1 tablespoon minced fresh ginger
  • 2 tablespoons soy sauce
  • 1 tablespoon rice vinegar
  • 1 tablespoon honey (optional)
  • Sesame seeds for garnish

Directions

  1. In a large mixing bowl, combine cabbage, carrots, chicken, and scallions.
  2. In a small bowl, whisk together sesame oil, fresh ginger, soy sauce, rice vinegar, and honey until well combined.
  3. Pour the dressing over the salad mixture and toss gently to combine.
  4. Let the salad sit for about 10 minutes to allow flavors to meld.
  5. Garnish with sesame seeds before serving.

Recipe Notes

  • Feel free to customize your salad with additional toppings such as nuts or seeds.
  • This dish can be made ahead of time; just remember to add the dressing right before serving.
  • Substitute any of the veggies based on your preference or seasonal availability.

Deliciously Creamy Cheesy Pasta with Ground Beef Recipe

Creamy Cheesy Pasta with Ground Beef: A Comforting Delight

⚖️
Difficulty
Easy

⏲️
Prep Time
10 mins

🕒
Cook Time
20 mins

⏱️
Total Time
30 mins

🍽️
Servings
4 servings

The Creamy Cheesy Pasta with Ground Beef is a luscious dish that pleases both the palate and the heart. Picture a plate bursting with perfectly cooked pasta enveloped in a rich, creamy cheese sauce blended with seasoned ground beef. This recipe embodies comfort, making it a fantastic choice for busy weeknights or family gatherings. The melding of flavors—from the savory beef to the melted cheese—creates a dish that’s enticing and hearty.

Imagine the aroma wafting through your kitchen, a blend of fresh garlic, melting cheese, and sizzling beef. It’s a fragrance that promises a meal of indulgence and warmth. The beautiful golden color of the creamy sauce, when drizzled over the pasta, adds a visual feast to the plate, making it irresistible. Each forkful delivers a creamy texture that coats every piece of pasta, inviting seconds before the first plate is even finished.

Quick Recipe Highlights

  • Flavor Profile: The rich cheese melds beautifully with the savory taste of seasoned ground beef, creating a harmonious blend that excites the taste buds.
  • Texture: Each bite offers a creamy mouthfeel with a hint of chewiness from the pasta and a slight crunch from any added fresh herbs or toppings.
  • Aroma: The combination of sautéed garlic and onion with the warm scent of melted cheese fills your kitchen with an inviting fragrance.
  • Visual Appeal: The dish boasts a golden cheesy sauce that beautifully contrasts with the hearty beef, creating an appetizing look that’s sure to impress.
  • Skill Level Needed: This recipe is perfect for beginners and experienced cooks alike, with simple steps that yield impressive results.
  • Special Equipment: A large pot for cooking pasta and a skillet for sautéing the beef and preparing the creamy sauce are essential.

Recipe Overview

  • Difficulty Level: Creamy Cheesy Pasta with Ground Beef is an easy recipe, making it perfect for those new to cooking. The steps are straightforward, and the process is forgiving for beginners.
  • Category: This dish falls into the comfort food category, embodying warmth and satisfaction, perfect for family dinners or casual gatherings.
  • Cuisine: This recipe draws inspiration from Italian-American cuisine, famously known for its cheesy pasta dishes that combine hearty ingredients.
  • Cost: The ingredients are affordable and easy to find, making this a budget-friendly meal for families or small gatherings.
  • Season: While delightful any time of year, this dish shines in the cooler months when comfort food is most sought after.
  • Occasion: Ideal for a cozy family dinner, potluck gatherings, or even a weekday treat after a long day.

Why You’ll Love This Recipe

The creamy, cheesy texture combined with the savory flavor of ground beef offers an irresistible taste experience. Each bite melts in your mouth, making it a delightful meal that comforts and satisfies. The familiarity of pasta topped with a rich, cheesy sauce brings a nostalgic feeling that many love.

Another reason to adore this recipe is its convenience. The ingredient list is straightforward, the preparation is quick, and the cooking time is short. This allows busy individuals and families to whip up a delicious meal without spending all evening in the kitchen.

Nutritionally, this dish provides a good balance of proteins and carbohydrates, making it a filling option for any meal. You can add vegetables like spinach, peas, or bell peppers to sneak in some extra nutrients without sacrificing flavor.

Socially, it’s a fantastic dish for entertaining. Its wide appeal means it’s likely to please a crowd, making it a go-to for potlucks and gatherings. The comfort of creamy pasta paired with hearty ground beef creates a warm, inviting atmosphere at any table.

Lastly, the cost-effectiveness of this recipe cannot be ignored. Most ingredients are pantry staples, meaning you won’t have to spend a lot to create a hearty, delicious meal that feels indulgent without breaking the bank.

Historical Background and Cultural Significance

The origins of creamy pasta dishes can be traced back to Italy, where pasta is a dietary staple. Italian immigrants brought their pasta-making skills to America, adapting traditional recipes with locally available ingredients. This fusion gave rise to comfort food favorites, including our Creamy Cheesy Pasta with Ground Beef.

Culturally, pasta serves as a universal symbol of gathering and family. In Italy, meals are often celebrations centered around sharing food with loved ones. This recipe evokes similar sentiments, making it perfect for family dinners and communal occasions.

Over the years, the recipe has evolved, incorporating various ingredients and flavors based on regional preferences. While some prefer the classic version, many have adopted personal touches that enhance the dish’s uniqueness.

Regional variations have emerged, showcasing different types of cheese and meat. While ground beef is a favorite, some regions prefer sausage or even turkey, allowing for creativity in the kitchen and making this dish adaptable to personal tastes.

Ingredient Deep Dive

– **Pasta**: A staple in many cuisines, pasta has a rich history dating back thousands of years. Different types can alter the dish’s character, with shapes like penne or rotini providing distinct textures. For storage, keep pasta in a cool, dry place, and consider whole grain options for added fiber.

– **Ground Beef**: This versatile protein offers a savory flavor that beautifully complements the creamy sauce. Choose lean ground beef for a healthier option, and remember to store it in the refrigerator and use it within a couple of days, or freeze it for longer storage. Substitutions like turkey or plant-based ground meat can cater to various dietary preferences.

Common Mistakes to Avoid

  • Overcooking the pasta can lead to a mushy texture; always cook it al dente for the best results.
  • Not seasoning the ground beef adequately can result in bland meat, so don’t skimp on the salt and pepper.
  • Rushing the sauce preparation will prevent the flavors from fully melding, so take your time.
  • Using low-quality cheese can affect the creaminess of the dish; opt for freshly grated cheese for the best melt.
  • Overcrowding the skillet can lead to uneven cooking; cook in batches if necessary.
  • Skipping the pasta water when mixing can prevent the sauce from adhering well to the pasta, so reserve some before draining.
  • Not tasting the dish before serving can lead to unbalanced flavors; adjust seasoning as needed.
  • Forgetting to mix in any additional veggies reduces the nutritional value without enhancing the meal.

Essential Techniques

To perfect your creamy sauce, start with a roux made from butter and flour. This thickening agent is crucial for achieving the desired creaminess. Always whisk continuously to avoid lumps and ensure a smooth sauce. Cooking it gently is key to preventing burning and developing off-flavors.

Additionally, when browning ground beef, ensure it’s cooked evenly. Use a good-quality skillet over medium heat and break the meat into small pieces for consistent cooking. This also helps to develop depth of flavor through caramelization, enhancing the overall taste of the dish.

Pro Tips for Perfect Creamy Cheesy Pasta with Ground Beef

– Use freshly grated cheese instead of pre-packaged to enhance creaminess and flavor.
– Reserve some pasta water to adjust the sauce’s consistency when combining.
– Experiment with different cheeses for unique flavors; try blending mozzarella with cheddar for a delicious twist.
– Incorporate sautéed vegetables to add color and nutrition without altering the core recipe.
– For extra depth, consider adding a splash of white wine to the skillet after browning the beef.
– Don’t skip the garlic and onion; they are essential for building flavor in the dish.
– Allow the assembled dish to sit for a minute before serving to let the flavors meld.
– Garnish with fresh herbs like parsley or basil for a bright finish.

Variations and Adaptations

For those looking to customize, consider integrating seasonal ingredients such as fresh spinach or cherry tomatoes. These additions not only enhance flavor but also boost the nutritional profile. For a lighter option, swap ground beef for ground turkey or chicken, providing a deliciously lean substitute.

Additionally, vegetarians might appreciate a version featuring sautéed mushrooms and lentils for heartiness without meat. For a spicy kick, adding crushed red pepper or jalapeños to the sauce can elevate the dish, appealing to those who enjoy heat.

Texture modifications can also accommodate personal preferences; try adding crushed crackers to the top before baking for an added crunch. Lastly, experiment with presentation by serving the pasta in individual dishes garnished with fresh herbs or a sprinkle of grated cheese for an elegant touch.

Serving and Presentation Guide

Plating this dish beautifully adds to its appeal. Use shallow bowls to showcase the creamy sauce with pasta. Garnish with a combination of fresh herbs and a sprinkle of cheese to enhance visual appeal. To elevate your serving style, consider offering a side of garlic bread or a fresh salad to accompany the dish.

Temperature is key; serve immediately when the pasta is hot and creamy. Portion control is also important; serve in moderate portions to allow guests to enjoy seconds without overwhelming their plates. This makes for a refined dining experience when entertaining.

Wine and Beverage Pairing

Pairing this creamy pasta dish with the right beverage can enhance the dining experience. A crisp white wine, such as a Sauvignon Blanc, complements the creamy richness of the dish beautifully. Alternatively, a light-bodied red like Pinot Noir balances the flavors without overpowering the meal.

For those opting for non-alcoholic options, consider serving sparkling water with a slice of lemon for a refreshing contrast. A chilled herbal tea could also work well, especially in warmer months. Ensure all beverages are served at the appropriate temperatures to complement the dish effectively.

Storage and Shelf Life

To store leftovers, cool the dish completely before transferring it to an airtight container. This keeps flavors fresh while extending the shelf life. Refrigerated, it should last up to three days. For longer storage, consider freezing portions in freezer-safe containers for up to three months.

When reheating, a microwave works well for single portions, while using the stovetop preserves texture for larger quantities. Always check for signs of spoilage, such as an off smell or noticeable texture changes, before consuming.

Make Ahead Strategies

To streamline cooking, prep the ingredients beforehand. Chop vegetables, grate cheese, and brown the ground beef a day in advance. Storing them separately allows for quick assembly on the day of serving.

You can also prepare the sauce in advance. Simply reheat it on the stovetop and stir in the cooked pasta right before serving for a freshly made taste. Reheating at a low temperature helps maintain the dish’s creaminess, avoiding separation.

Scaling Instructions

When scaling this recipe, consider adjustments based on the number of servings desired. For halving the ingredients, simply divide each by two, ensuring you also check the seasoning levels as you adjust.

To double or triple the recipe, maintain proportions, but take care with cooking times. For such larger quantities, you may need to prepare in batches or utilize larger pots and pans. Furthermore, if storing, follow the same refrigeration or freezing guidelines as for the original recipe.

Nutritional Deep Dive

This creamy pasta dish is balanced in macronutrients, offering a good source of protein from the ground beef and carbohydrates from the pasta. Each serving provides essential energy and satisfaction, making it a perfect meal choice for any occasion.

Micronutrient analysis shows that adding vegetables can significantly enhance vitamins and minerals. Consider this when planning or preparing the dish. It’s also important to analyze portion sizes and calories to manage dietary needs effectively.

Dietary Adaptations

For a gluten-free version, swap traditional pasta for gluten-free varieties made from rice or lentils. This maintains the dish’s integrity without sacrificing taste. For a lighter option, consider using zucchini noodles or spaghetti squash.

Dairy-free individuals can experiment with cashew cream or almond milk for the sauce, achieving a similar creaminess without traditional dairy. Those on a keto diet might enjoy substituting the pasta with shirataki noodles to reduce carbohydrates while enjoying the dish’s flavors.

Troubleshooting Guide

If the sauce is too thick, gradually stir in reserved pasta water to achieve the desired consistency. If under-seasoned, taste and adjust with more salt, pepper, or herbs. For overly salty flavors, adding a splash of cream or additional cheese can help balance the taste.

In the event of pasta clumping together, ensure it is cooked in plenty of salted water and stirred frequently. If the sauce separates, reheat gently while stirring to bring it back together. Always taste and adjust along the cooking process to prevent common cooking pitfalls.

Recipe Success Stories

The Creamy Cheesy Pasta with Ground Beef has garnered praise from families who appreciate its comforting flavors. Many share how their children eagerly finish their plates, making it a go-to weeknight meal that satisfies everyone.

Readers often highlight how easy it is to customize the recipe, with some successfully incorporating seasonal vegetables or experimenting with different spices to create their unique variations. These adaptations often lead to delightful discoveries that enhance the recipe’s appeal.

Food photography tips have also emerged, with many readers excitedly posting their beautifully plated dishes. Vibrant garnishes and careful plating techniques enhance the dish’s visual appeal, inviting others to try it for themselves.

Frequently Asked Questions

Can I use a different type of meat?

Yes, ground turkey, chicken, or even vegetarian options like lentils can be used as substitutes. Each will bring its unique flavor and texture to the dish.

How do I store leftovers?

Allow the dish to cool completely before placing it in an airtight container. It will last in the fridge for up to three days or can be frozen for up to three months.

Can I make this dish ahead of time?

Absolutely! Prepare the sauce and cook the pasta ahead of time, then store them separately in the fridge. Combine them just before serving to retain freshness.

What type of cheese works best?

Sharp cheddar and mozzarella are popular choices for this dish. Feel free to mix different cheeses for a more complex flavor profile.

How can I make it spicy?

Adding crushed red pepper flakes or diced jalapeños to the sauce can infuse it with heat. Adjust according to your preference for spice.

Is this recipe suitable for meal prep?

Yes, it’s a great option for meal prep! Prepare larger batches, and portion them out for quick lunches or dinners throughout the week.

What sides pair well with this pasta?

A simple side salad, garlic bread, or steamed vegetables complement the creamy pasta nicely and offer balance to the meal.

Can I freeze this dish?

Yes, you can freeze it. Just ensure it cools completely and is stored in freezer-safe containers. Thaw in the refrigerator before reheating.

How do I reheat leftovers?

You can reheat it in the microwave or on the stovetop over low heat. If it’s too thick, add a splash of milk or reserved pasta water.

What if the sauce is too thick?

If you find the sauce too thick, gradually mix in reserved pasta water or a bit of cream to achieve the desired consistency.

Are there any good vegetarian alternatives?

Yes, replace meat with a mix of sautéed vegetables and plant-based proteins like mushrooms or lentils to create a hearty vegetarian version.

Additional Resources

If you enjoyed this Creamy Cheesy Pasta with Ground Beef, you may also appreciate related recipes. Try our Spinach and Ricotta Stuffed Shells for another cheesy delight. Explore our technique guides on making homemade pasta or perfecting macaroni and cheese.

For ingredient-specific information, check out our deep dives on cheeses or cooking meats. Looking for seasonal variations? Consider fresh summer vegetables mixed into your pasta for a delightful twist.

Join the Conversation

I invite you to share your experiences with this Creamy Cheesy Pasta recipe! Post your unique spins on the dish on social media, tagging us for a chance to be featured.

Photography enthusiasts can share tips on capturing the perfect plated dish to inspire others. Your reviews and comments create a community of food lovers who can learn from each other’s successes and challenges with this recipe!

The Recipe

Creamy Cheesy Pasta with Ground Beef

Serves: 4 servings

Prep Time: 10 mins

Cook Time: 20 mins

Total Time: 30 mins

Kitchen Equipment Needed

  • Large pot
  • Skillet
  • Wooden spoon
  • Colander
  • Measuring cups and spoons

Ingredients

  • 8 oz pasta (such as penne or rotini)
  • 1 lb ground beef
  • 2 cups shredded cheese (cheddar or mozzarella)
  • 1 cup heavy cream
  • 1/2 cup chopped onion
  • 2 cloves garlic, minced
  • Salt and pepper to taste
  • Fresh herbs for garnish (optional)

Directions

  1. Boil salted water in a large pot and cook pasta according to package instructions until al dente. Drain and set aside.
  2. In a skillet, brown the ground beef over medium heat. Add onion and garlic, cooking until softened.
  3. Reduce heat, then stir in heavy cream and cheese until melted and combined. Season with salt and pepper.
  4. Fold in the cooked pasta, ensuring all pasta is well coated in the sauce. Adjust seasonings as needed.
  5. Serve hot, garnished with fresh herbs if desired.

Recipe Notes

  • Experiment with different cheeses for varied flavors.
  • Add vegetables like spinach or bell peppers for added nutrition.
  • Substitute ground beef with ground turkey or a plant-based alternative for dietary preferences.

Irresistible No-Peek Chicken Casserole: A Family Favorite Recipe

No-Peek Chicken Casserole: A Comforting Family Favorite

⚖️
Difficulty
Easy

⏲️
Prep Time
15 mins

🕒
Cook Time
45 mins

⏱️
Total Time
1 hour

🍽️
Servings
6

The No-Peek Chicken Casserole is a delightful dish packed with flavor and comfort. This recipe is perfect for busy weeknights when you’re searching for a meal that requires minimal effort but yields maximum satisfaction. With tender chicken, savory vegetables, and a creamy sauce, each bite invites you into a world of comforting home-cooked bliss. This casserole not only satisfies your appetite but also speaks to the heart, making it an ideal centerpiece for family gatherings or cozy dinners.

Imagining the aroma wafting through your kitchen as the casserole bakes is enough to make anyone’s mouth water. The combination of tender chicken mixed with hearty vegetables creates a welcoming dish that’s both colorful and inviting. In just one hour, you can prepare a wholesome meal that not only tastes delicious but also impresses your loved ones. Trust us; this is a recipe you’ll want to make again and again.

Quick Recipe Highlights

  • Flavor Profile: Savory and creamy, with hints of onion and garlic that enhance the overall taste.
  • Texture: A delightful combination of tender chicken, crunchy vegetables, and a smooth sauce creates a satisfying mouthfeel.
  • Aroma: The fragrance of baking chicken mixed with aromatic spices fills your kitchen with warmth.
  • Visual Appeal: Golden-brown topping with colorful vegetables makes for a visually appealing dish.
  • Skill Level Needed: This dish is beginner-friendly, ideal for anyone looking to expand their cooking repertoire.
  • Special Equipment: A large casserole dish is all you need to create this comforting meal.

Recipe Overview

  • Difficulty Level: The No-Peek Chicken Casserole is an easy-to-make recipe that requires basic cooking skills and minimal hands-on time.
  • Category: This casserole belongs to the comfort food category, ideal for family meals and gatherings.
  • Cuisine: This dish embodies classic American cuisine, often found in home kitchens across the country.
  • Cost: The ingredients are wallet-friendly, making this recipe accessible for any budget.
  • Season: Great for year-round enjoyment but shines particularly during cold months when comfort food is most appreciated.
  • Occasion: Perfect for family dinners, potlucks, and cozy gatherings.

Why You’ll Love This Recipe

You will adore the blend of flavors in the No-Peek Chicken Casserole! The combination of spices and creamy sauce creates a mouthwatering dish that keeps everyone coming back for seconds. It’s the kind of recipe that warms your heart and fills your stomach, making it a winning choice for family dining.

The convenience of this recipe is undeniable. Simply toss the ingredients together, place them in the oven, and let it do its work while you focus on other tasks. This makes it an excellent choice for busy days when you don’t want to spend hours in the kitchen.

From a nutritional standpoint, this casserole includes protein-rich chicken and a variety of vegetables, offering a balanced meal for your family. The dish can easily be adapted with additional veggies or whole grains, keeping it healthy and satisfying.

The social aspect of this recipe is also significant. Cooking and sharing meals like the No-Peek Chicken Casserole creates memorable experiences for family and friends. It fosters connections and encourages conversation around the dinner table.

Finally, you’ll love how budget-friendly this casserole is. It incorporates simple ingredients that won’t break the bank, making it an excellent option for families seeking delicious and economical meal choices.

Historical Background and Cultural Significance

The No-Peek Chicken Casserole has roots in traditional American home cooking, where casseroles were a staple for their simplicity and ability to feed many. Originating in the early 20th century, casseroles became popular as families searched for convenient cooking methods that maximized flavor and minimized effort.

This dish reflects a significant cultural aspect of American cuisine, where self-sufficiency and the essence of family gatherings are prioritized. Recipes like the No-Peek Chicken Casserole are passed down from generation to generation, embedding them into family traditions and celebrations.

Over the decades, this casserole has evolved, adapting to suit modern tastes and dietary needs. As people began to prioritize health, many variations emerged, focusing on using fresh ingredients and reducing fat levels without sacrificing flavor.

Regional variations of the casserole exist, highlighting the different culinary influences throughout the United States. Some may include cheese or unique spices, illustrating how this comforting dish has been embraced across diverse communities, making it a beloved staple everywhere.

Ingredient Deep Dive

Chicken is the primary protein in this casserole, known for its versatility and wide-ranging culinary application. As a staple protein in many diets, chicken contains essential nutrients like B vitamins and selenium. When selecting chicken, look for fresh, high-quality cuts, and if you can, choose organic or free-range options for optimal flavor. Store it in the refrigerator for no more than 2 days, and consider freezing it if not used within that time frame.

Canned cream soups contribute to the creamy texture of the casserole. Initially popularized as a quick meal solution in American kitchens, these soups provide rich flavors and save time. While convenient, they often contain preservatives, so consider making homemade cream sauces for a healthful alternative. When choosing canned options, look for low-sodium varieties and check for better-quality brands. These soups can last on the shelf for quite some time, and once opened, store in the refrigerator.

Vegetables add crucial nutrients to the dish, enhancing both flavor and texture. For this casserole, you may use common choices like carrots, celery, and peas. Each brings unique vitamins and fiber, making the dish more nutritious. When selecting vegetables, opt for fresh, colorful options to ensure maximum flavor. Properly stored, most vegetables can last up to a week in the refrigerator. If you want to adjust this recipe, consider substituting seasonal vegetables for freshness.

Common Mistakes to Avoid

  • Skipping the browning step: Not browning the chicken before adding it to the casserole can result in less flavor. Always sear your chicken for a richer taste.
  • Overcooking: Cooking the casserole for too long can dry out the chicken. Keep an eye on the time and check for tenderness.
  • Using frozen vegetables: While convenient, frozen veggies release excess moisture, making the casserole watery. Fresh vegetables perform better in this dish.
  • Not seasoning properly: Casseroles tend to need a bit more seasoning than you might expect. Be generous with your herbs and spices.
  • Incorrect layering: Proper layering of ingredients ensures even cooking and flavor distribution. Always follow the recipe guidelines for best results.
  • Skipping the resting time: Allowing your casserole to rest after baking helps flavors meld together and improves texture.
  • Ignoring storage tips: If you have leftovers, store them properly to maintain the casserole’s freshness and prevent spoilage.
  • Not adjusting for dietary preferences: Be mindful of modifications needed for specific diets before serving guests.

Essential Techniques

Browning is essential in cooking chicken, as it develops flavor and enhances the overall richness of the dish. To master this technique, ensure your pan is hot before adding oil and chicken. Look for golden brown edges before removing it from the heat, which indicates a deep flavor development.

Layering is another crucial technique that impacts the final outcome. Proper layering prevents soggy bottoms by allowing moisture to escape while ensuring that everything cooks evenly. Start with the more watertight ingredients at the bottom, such as cream soups, followed by veggies and finally the chicken.

Pro Tips for Perfect No-Peek Chicken Casserole

1. Use high-quality chicken for the best flavor and texture. Organic or free-range options are often more flavorful.
2. Feel free to mix in your favorite seasonal vegetables for freshness and variation.
3. Preheat your oven adequately to ensure even cooking throughout the casserole.
4. Consider using brown rice or quinoa instead of white rice for an added health kick.
5. Let the casserole rest for at least 10 minutes before serving to allow flavors to meld.
6. Garnish with fresh herbs for a pop of color and added freshness upon serving.
7. For a creamier texture, consider adding cream cheese or sour cream before mixing in the other ingredients.
8. Don’t be afraid to experiment with different spices or cheeses to create unique variations of this classic dish.

Variations and Adaptations

Regional variations of the No-Peek Chicken Casserole can include different types of cheeses or spices, creating unique flavors. For instance, try using pepper jack cheese for an added kick if you enjoy spicy dishes.

Seasonal adaptations allow you to utilize fresh produce that is abundant at various times of the year. Consider incorporating spring vegetables like asparagus or summer zucchini for a seasonal twist.

Dietary modifications are also easy; swap out traditional dairy products for plant-based alternatives to create a vegan version of this casserole. Other modifications include using gluten-free rice or flour for those with dietary restrictions.

Serving and Presentation Guide

When serving your No-Peek Chicken Casserole, consider thoughtful plating techniques. Use a large serving spoon to gently scoop portions while preserving the casserole’s shape. Garnishing with fresh herbs or a sprinkle of paprika enhances visual appeal and adds freshness.

Traditional accompaniments like a side salad or crusty bread are excellent options for a complete meal. On the modern side, consider presenting the casserole in individual ramekins for a more upscale look.

Always serve the casserole warm, ensuring that you check for proper temperature. For portion control, aim for balanced servings to keep everyone’s appetite in check while still enjoying the dish.

Wine and Beverage Pairing

When it comes to wine pairings, a crisp Chardonnay complements the creamy texture of the casserole beautifully. Its acidity balances the richness, elevating the meal. Alternatively, a light-bodied Pinot Noir provides a nice contrast without overwhelming the dish.

For non-alcoholic alternatives, consider sparkling water with a slice of lemon or a refreshing herbal iced tea. These beverages provide a light palate cleanser that elevates the dining experience.

If you enjoy coffee, opt for a subtly flavored brew, such as hazelnut or vanilla, which can enhance the comfort food vibe beautifully.

Storage and Shelf Life

After preparing your No-Peek Chicken Casserole, it’s essential to store any leftovers properly. Allow the casserole to cool before transferring it into airtight containers. Refrigerate for up to 3-4 days or freeze for up to 2-3 months.

For freezing, use heavy-duty freezer bags or containers designed for freezer use. Label and date your containers for easy identification later.

Check for signs of spoilage, such as off odors or visible mold, before reheating. When reheating, ensure the casserole reaches a minimum internal temperature of 165°F for safe consumption.

Make Ahead Strategies

To save time, consider prepping your No-Peek Chicken Casserole the night before. Chop your vegetables, and mix together your chicken, soups, and seasonings, storing them separately until you’re ready to assemble.

You can also assemble the entire casserole ahead of time and refrigerate it for up to 24 hours before baking. Adjust the cooking time accordingly, as it may need a few more minutes in the oven if it’s cold from refrigeration.

When reheating from frozen, allow the casserole to thaw in the fridge overnight before baking to ensure even cooking.

Scaling Instructions

To scale this recipe, simply adjust the ingredient quantities based on your portion needs. Halve or double the amounts for a smaller or larger group, keeping the ratios consistent for best results.

When doubling the recipe, use a larger dish to accommodate the increased volume while ensuring proper cooking times and temperatures are maintained.

Keep in mind that baking times may vary based on the size of your casserole, so always ensure the chicken is cooked through to 165°F.

Nutritional Deep Dive

This casserole is a balanced meal, featuring protein from chicken, carbohydrates from rice, and a host of vitamins and minerals from various vegetables. Each serving typically contains around 350-450 calories, making it a satisfying choice without being overly indulgent.

The casserole’s nutritional profile can be enhanced by adding a variety of vegetables, increasing fiber content and promoting satiety. Additionally, substituting with brown rice can increase the whole grain content, promoting better health outcomes.

For weight management, this dish can be portion-controlled by serving smaller sizes alongside a salad or vegetables, enhancing its health benefits while still being hearty.

Dietary Adaptations

To make the No-Peek Chicken Casserole gluten-free, swap traditional rice for quinoa or a gluten-free grain. Additionally, ensure that any canned soups you use are gluten-free labeled.

For a dairy-free alternative, choose plant-based cream products and skip the cheese. Many nut cheese alternatives provide a similar creaminess and flavor without dairy.

Vegetarian guests can enjoy a similar experience by substituting chicken with hearty vegetables or legumes, providing adequate protein and delightful texture without meat.

Troubleshooting Guide

If you encounter texture issues, such as a dry casserole, consider adding moisture by mixing in additional broth or cream before serving.

For flavor balance, taste before serving and adjust seasoning as needed, adding salt, pepper, or additional herbs to enhance the overall profile.

Temperature issues can often be remedied by ensuring the casserole is baked in an adequately preheated oven, checking the internal temperature with a meat thermometer for accuracy.

Ingredient substitutions may affect overall flavor; always strive to use similar flavor profiles to ensure the casserole remains delicious.

Timing concerns can arise if your ingredients are not cut evenly; ensure consistent sizes to promote uniform cooking.

Recipe Success Stories

Many community members have embraced the No-Peek Chicken Casserole, sharing their stories of successful modifications and family gatherings. Some readers have found joy in adding spice variations, creating their unique twist on the traditional recipe.

Adaptation stories are also common, where busy parents have successfully prepared this dish in advance, freeing up time during hectic weekday evenings.

Photography tips have included suggestions on capturing that golden top and colorful vegetable medley to showcase the dish’s appeal beautifully.

Frequently Asked Questions

Q: Can I use brown rice instead of white rice?
A: Yes! Brown rice is a nutritious substitute, but it may require a longer cooking time. Adjust the liquid slightly to accommodate for the increased absorbency of brown rice.

Q: What can I substitute for cream soup?
A: You can use homemade cream sauces made from butter, flour, and milk or even sour cream for a richer flavor.

Q: How can I make this dish spicier?
A: Incorporating jalapeños or using pepper jack cheese instead of regular cheese can add a wonderful kick to the casserole.

Q: Can I freeze leftover casseroles?
A: Absolutely! Store the casserole in airtight containers or heavy-duty freezer bags to preserve freshness when freezing for later use.

Q: How long can I keep leftovers?
A: Leftovers can be stored in the refrigerator for up to 3-4 days. If frozen, they can last for up to 3 months.

Q: Is it possible to make this casserole vegan?
A: Yes! Substitute chicken with tofu or chickpeas, and use a plant-based cream soup alternative for a delicious vegan option.

Q: How do I ensure my chicken stays moist?
A: Browning the chicken before adding it to the casserole and using a covered dish during baking can help retain moisture.

Q: Can I add cheese to this recipe?
A: Yes! Adding cheese can enhance the creaminess. Try grated cheddar or mozzarella for a delightful melty topping.

Q: What type of vegetables can I use?
A: Feel free to use a mix of your favorites, including bell peppers, corn, or even spinach, depending on your preference and what’s in season.

Q: How can I adjust the recipe for smaller servings?
A: To make smaller portions, simply halve the ingredient amounts while keeping cooking times similar.

Additional Resources

If you’re interested in exploring more comfort food recipes, check out our collection of casseroles that satisfy your cravings. For those new to cooking casseroles, we also offer technique guides focused on mastering the art of baking and preparation.

Interested in ingredient-specific information? Our detailed ingredient articles provide insights into freshness, nutritional benefits, and selection tips. No matter the occasion, we’ll help you find seasonal variations to keep your meals exciting.

Join the Conversation

We love hearing from our community! Share your No-Peek Chicken Casserole photos on social media and let us know what variations you’ve tried. Recipe reviews and suggestions for improvements are always welcome, as we encourage a collaborative cooking experience.

Your contributions help others spark joy in their cooking adventures, and together we can create a vibrant space for sharing flavors and experiences.

The Recipe

No-Peek Chicken Casserole

Serves: 6

Prep Time: 15 mins

Cook Time: 45 mins

Total Time: 1 hour

Kitchen Equipment Needed

  • Casserole dish
  • Large mixing bowl
  • Measuring cups and spoons
  • Wooden spoon or spatula

Ingredients

  • 1.5 pounds of chicken breast, diced
  • 1 cup of long-grain rice
  • 1 can of cream of chicken soup
  • 1 can of cream of mushroom soup
  • 1 cup of chicken broth
  • 1 cup of frozen mixed vegetables
  • 1 teaspoon of garlic powder
  • Salt and pepper to taste

Directions

  1. Preheat your oven to 350°F (175°C).
  2. In a large mixing bowl, combine the diced chicken, rice, cream soups, chicken broth, frozen vegetables, garlic powder, salt, and pepper. Mix well.
  3. Spread the mixture evenly in a greased casserole dish.
  4. Cover the dish tightly with aluminum foil.
  5. Bake for 45 minutes or until the chicken is cooked through and the rice is tender.
  6. Remove from the oven, let rest for about 10 minutes before serving.

Recipe Notes

  • Feel free to substitute the chicken with turkey or tofu for a different protein source.
  • Variations can include any of your favorite vegetables for a personal touch.
  • Cheese can be added on top during the last 10 minutes of baking for a cheesy finish.

Easy Crock Pot Cheddar Chili Mac Recipe for Comfort Food Lovers

Crock Pot Cheddar Chili Mac: A Hearty Comfort Food Delight

⚖️
Difficulty
Easy

⏲️
Prep Time
15 mins

🕒
Cook Time
4 hours

⏱️
Total Time
4 hours 15 mins

🍽️
Servings
6

Crock Pot Cheddar Chili Mac is not just a meal; it’s an experience that wraps you in warmth and satisfaction. Imagine tender pasta enveloped in a rich, cheesy sauce with the bold flavors of chili, creating a dish that brings joy to every bite. This comforting recipe is perfect for busy families or anyone who enjoys a hearty bowl of goodness without spending hours in the kitchen.

As the delicious aroma of spices and melted cheese fills your kitchen, you’ll find it hard to resist the anticipation of diving into this delightful dish. The combination of creamy cheddar and zesty chili creates a symphony of flavors that evoke childhood memories and warm gatherings around the dinner table. Let’s prepare to indulge in a meal that is not only easy to make but is sure to become a new favorite in your household.

Quick Recipe Highlights

  • Flavor Profile: This dish balances the creaminess of cheddar cheese with the rich, spicy flavors of chili, resulting in a satisfying and comforting experience.
  • Texture: The tender pasta combined with the creamy sauce offers a delightful mouthfeel, while the chili adds a hearty and chunky texture.
  • Aroma: A tantalizing blend of spices, garlic, and melted cheese will fill your kitchen, inviting everyone to the table.
  • Visual Appeal: The warm golden pasta, speckled with red bits of chili and topped with green cilantro, makes for an inviting and colorful presentation.
  • Skill Level Needed: Perfect for beginner cooks, this recipe requires minimal techniques, making it accessible for all.
  • Special Equipment: You will need a reliable crock pot, measuring cups, and spoons for this recipe.

Recipe Overview

  • Difficulty Level: The Crock Pot Cheddar Chili Mac is classified as easy, making it a great choice for novice cooks or busy individuals. With only a few simple steps, you can create a satisfying meal without stress.
  • Category: This dish fits beautifully into the comfort food category, ideal for family dinners or potlucks.
  • Cuisine: While it draws on elements of American cuisine, particularly the classic mac and cheese and chili combination, it can be adapted with various spices and toppings.
  • Cost: This recipe is budget-friendly, with common ingredients that won’t break the bank, making it perfect for everyday meals.
  • Season: Crock Pot Cheddar Chili Mac is a fantastic fall or winter dish, perfect for cold evenings when you crave warmth and comfort.
  • Occasion: Whether it’s a casual family night, game day, or a cozy gathering, this recipe suits various occasions with its hearty and crowd-pleasing nature.

Why You’ll Love This Recipe

Crock Pot Cheddar Chili Mac delights with its mix of delectable taste and appealing texture. The creamy cheddar cheese melds perfectly with the spicy chili, creating a unique flavor combination that satisfies every craving. The pasta’s tenderness rounds out the dish, making it a comfort food bonanza that will have you going back for seconds.

The convenience of this recipe is unmatched; simply throw all the ingredients in the crock pot and let it do the work. This one-pot dish means less cleanup and more quality time with family and friends. You can prepare it in the morning and come home to a delicious hot meal without any fuss.

Nutritiously, this dish provides a balanced mix of protein from beans, carbs from pasta, and calcium from cheese. It offers a satisfying meal that can fuel your day while indulging in delightful flavors, promoting comfort and nourishment.

Crock Pot Cheddar Chili Mac is perfect for social gatherings, where everyone can gather around a warm bowl of goodness. It’s ideal for game days, family dinners, or potlucks, encouraging social interaction while sharing a meal that brings people closer together.

In addition to its taste and comfort, this recipe is exceptionally cost-effective. With budget-friendly ingredients and leftovers that can be enjoyed for days, it’s a smart choice that makes the most of your grocery list while providing unbeatable flavor.

Historical Background and Cultural Significance

The origins of chili mac can be traced back to classic American comfort foods. It blends elements of the familiar mac and cheese with zesty chili, capturing the essence of hearty home-cooked meals. This dish has evolved through various regional interpretations, often reflecting local ingredients and preferences.

Chili itself has roots in Tex-Mex cuisine, bringing a rich history of flavors and techniques that reflect the blending of cultures. The inclusion of pasta into traditional chili dishes emerged as a simple way to expand servings and enhance nourishment, creating a beloved and hearty meal.

Over time, recipes for chili mac have transformed, allowing for creativity and personal touches. Families have added their unique flair, using different types of pasta and varying spice levels, ensuring that each bowl is both nostalgic and modern.

Regional variations can include everything from Detroit-style to Cincinnati chili, showing just how versatile and loved this dish has become across the United States. Every family has their version, uniting generations around a common love for this comforting meal.

Ingredient Deep Dive

When considering the ingredients for Crock Pot Cheddar Chili Mac, pasta serves as the foundation. Its history as a staple food dates back centuries, and it carries significant cultural relevancy across various cuisines. Nutritionally, pasta is a great source of carbohydrates, essential for energy, and comes in many varieties, allowing for gluten-free or whole grain options.

Choosing the right pasta is crucial for this dish. Opting for smaller shapes, like elbow macaroni or shells, ensures they catch the sauce perfectly. Store pasta in a cool, dry place to maintain freshness, and consider using alternatives that suit dietary restrictions, such as chickpea or lentil pasta.

Cheddar cheese is another star ingredient, with its rich flavor and meltability. Its history traces back to the English countryside, evolving into the beloved cheese known worldwide today. Cheddar is known for being high in calcium and protein, and it adds creamy richness to the dish. Selecting aged cheddar provides deeper flavor, while young cheddar offers a milder taste. Store it in the fridge, wrapped tightly to maintain freshness.

The chili in this dish often consists of ground beef, beans, and spices. This hearty trio provides protein, fiber, and essential nutrients. Each component carries historical meaning—from the ancestral preparation methods of beans to the cultural significance of spices in flavoring meats. Choosing lean cuts of meat reduces fat content, while beans provide a plant-based protein alternative.

Common Mistakes to Avoid

  • Overcooking the pasta: Ensure that the pasta is only added during the last hour of cooking to prevent mushiness.
  • Using pre-shredded cheese: Pre-shredded cheeses often contain anti-caking agents, affecting meltability. Shred your cheese fresh for the best results.
  • Not seasoning properly: Taste and adjust seasoning throughout the cooking process to ensure balanced flavor.
  • Using too much liquid: Stick to the recipe measurements for liquids to avoid a soupy texture.
  • Neglecting to brown the meat: Browning the ground beef first adds depth of flavor to the dish and enhances its richness.
  • Skipping the aromatics: Onions, garlic, and spices are key to building flavor. Don’t skip sautéing these ingredients before adding them to the pot.
  • Cooking on high: If using a crock pot, opt for low and slow to allow flavors to meld beautifully.
  • Not letting it rest: Allow the dish to sit for a few mins after cooking. This helps thicken the sauce and improves texture.

Essential Techniques

To master the art of cooking in a crock pot, starting with browning your meat is vital. This technique enhances the flavor dramatically, as it caramelizes the meat’s surface. Sautéing adds a depth of color and richness to the finished dish, so don’t skip this step. Keep an eye on it, and aim for a nice golden-brown hue for optimum results.

Another essential technique is building flavor through layering ingredients. Start by adding aromatics like onions and garlic at the bottom of the crock pot, ensuring they release their flavors as they cook. Follow with beans and meat, and finally, pour in the liquids last. This technique creates a harmonious flavor in every bite, making it an integral part of your cooking process.

Finally, mastering correct timing is key when cooking. Crock pots are all about low and slow; different settings can produce significantly different results. Familiarize yourself with your device, checking the dish periodically so you can learn how it cooks. A well-cooked meal should be tender, with flavors that sing, so keep time and temperature in check for success.

Pro Tips for Perfect Crock Pot Cheddar Chili Mac

1. Layer flavors: Start by sautéing spices and aromatics to enhance their flavor before adding them to the crock pot.
2. Use high-quality cheese: Freshly grated cheese melts better and has superior flavor compared to pre-shredded cheese options.
3. Experiment with spices: Enhance your chili mac with additional spices like cumin or smoked paprika for added warmth and depth.
4. Add veggies: Incorporate bell peppers or corn for an extra layer of nutrition and flavor.
5. Adjust consistency: If the mac is too thick upon finishing, a splash of milk or broth can loosen it to your preferred texture.
6. Top with fresh herbs: A sprinkle of cilantro or green onions before serving brightens the dish and adds a fresh zing.
7. Cook low and slow: For best results, cook on low for a few hours to achieve perfect flavor and texture.
8. Let it sit: Allowing the dish to sit for 10 minutes after cooking helps the flavors meld and the sauce to thicken.

Variations and Adaptations

1. **Regional variations**: Experiment with Tex-Mex flavors by adding jalapeños or pepper jack cheese to enhance the dish’s heat and spice.
2. **Seasonal adaptations**: In fall, add diced pumpkin or butternut squash for a seasonal twist while maintaining creaminess and depth.
3. **Dietary modifications**: For a lower-carb option, substitute regular pasta with spiralized zucchini or cauliflower rice.
4. **Flavor variations**: Mix in barbecue sauce for a smoky flavor or taco seasoning for a Mexican-inspired take.
5. **Texture modifications**: Top the finished dish with crushed tortilla chips for crunch or some crispy bacon bits for added flavor.
6. **Presentation alternatives**: Serve in individual ramekins for a fun and personal touch, allowing guests to customize their toppings.

Serving and Presentation Guide

For beautiful plating, use shallow bowls that elevate the dish’s colors and textures. A simple swirl pattern can showcase the creamy sauce and pasta beautifully. Garnish generously with fresh cilantro or scallions, providing a splash of color and an inviting aroma that enhances the dish’s appeal.

Traditional accompaniments such as crusty bread or a fresh green salad can elevate the experience and provide a refreshing contrast to the richness of the mac. Consider serving with a side of tortilla chips for added crunch, which complements the soft and creamy pasta, creating a delightful contrast.

Temperature is critical; serve the dish piping hot to bask in its gooey cheese and flavors. Portions can be easily controlled by using smaller bowl sizes, allowing guests to enjoy as a starter or generous main course.

Wine and Beverage Pairing

When pairing wine with Crock Pot Cheddar Chili Mac, opt for a medium-bodied red like Merlot or Zinfandel. These wines offer enough fruitiness to balance out the spicy chili while complementing the richness of the cheese. For a white wine option, try a chilled Sauvignon Blanc, which can cut through the creaminess and enhance the overall flavor.

Non-alcoholic beverages also have great options; a refreshing iced tea with lemon or a bubbly sparkling water enhances the meal without overpowering the dish’s robust flavors. Should you prefer coffee, a robust dark roast can provide a nice contrast to the richness of the mac and cheese.

Temperature is essential; serve white wines chilled and allow reds to breathe at room temperature before savoring. This practice enhances the flavors and aromas, providing a delightful accompaniment to your meal.

Storage and Shelf Life

For proper storage, place any leftover Crock Pot Cheddar Chili Mac in an airtight container, ensuring it’s completely cooled before sealing. Store in the refrigerator for up to 3-4 days. Reheating the dish requires gentle heating in either the microwave or on the stovetop; adding a splash of milk can help revive the creaminess.

If you want to extend its life, freezing is an option; this dish can be frozen for up to 3 months. Ensure it is well-sealed in freezer-safe containers to prevent freezer burn. When ready to enjoy, thaw in the refrigerator overnight before reheating.

Signs of spoilage include off smells or unusual texture changes in the cheese or meat. Always trust your instincts; when in doubt, it’s better to discard any questionable food than to risk food safety.

Make Ahead Strategies

For those busy evenings, preparing components ahead of time can be a lifesaver. Chop onions, garlic, and any vegetables you plan to include in advance, storing them in the fridge for quick access on cooking day. You can also brown the meat a day before and refrigerate it for easy incorporation the next day.

Assembling the dish the night before is an excellent strategy. Simply layer all ingredients into the crock pot liner, cover, and refrigerate until ready to cook. On cooking day, set it to low and forget it until dinner time.

The impact on quality is minimal with this approach; the flavors often deepen when ingredients sit together in advance, resulting in a tastier final dish. Garnishing and any fresh ingredient additions, like herbs or avocado, should be reserved until serving for freshness.

Scaling Instructions

When scaling the Crock Pot Cheddar Chili Mac recipe, consider adjusting beans and meat proportions to ensure flavor remains balanced. Halving the recipe can be easily done by reducing ingredient amounts proportionally and ensuring you have a smaller crock pot to accommodate.

For larger gatherings, doubling or tripling the recipe is an excellent way to feed a crowd. Just be mindful that larger quantities may require additional time to cook thoroughly, so check for doneness and adjust cooking time wisely.

Equipment adjustments may also be necessary; ensure your crock pot is large enough to fit additional ingredients comfortably. If you have a smaller slow cooker, consider cooking batches instead.

Timing modifications will depend on the scale; larger volumes will take longer to heat through, while smaller amounts may cook faster, so keep an eye on the dish during the cooking time and adjust as needed.

Nutritional Deep Dive

In Crock Pot Cheddar Chili Mac, you’ll find a delightful balance of macros. Each serving contains protein from beef and beans, carbohydrates from pasta, and healthy fats from cheese. This balance makes it an excellent choice for sustaining energy levels throughout the day.

Micronutrient analysis reveals that this dish provides essential vitamins and minerals, including calcium from cheese, iron from meat, and dietary fiber from beans. Each of these nutrients contributes to a well-rounded meal that supports overall health.

Health benefits include the dish’s ability to provide comfort while still being nutritious. The combination of protein and carbohydrates offers a satisfying and satiating meal, ideal for families seeking warmth and satisfaction.

For portions, be mindful of serving sizes to manage caloric intake effectively. The richness from cheese and pasta can add up, so consider serving with a side salad for an additional fiber boost and a lighter meal presentation.

Dietary Adaptations

For those needing gluten-free options, substitute traditional pasta with gluten-free varieties made from rice or corn. Be sure to verify that all sauces and canned goods meet gluten-free standards for safety.

Individuals seeking dairy-free alternatives can use plant-based cheeses made from nuts or soy. Coconut milk can serve as a creamy base in place of regular dairy to maintain richness without compromising flavor.

Vegan adaptations are also easy—simply omit the meat and replace it with a hearty lentil or jackfruit mixture, which provides texture and protein. The remaining ingredients can typically remain the same to ensure flavor continuity.

Low-carb dieters can swap traditional pasta for spiralized veggies or edible “zoodles,” removing the starches while still enjoying the delightful flavors of chili mac.

For those following the keto diet, use cauliflower instead of regular pasta and ensure all your ingredients are low in carbs yet high in flavor, maintaining texture without overindulging in carbohydrates.

Troubleshooting Guide

If you encounter texture issues with your Crock Pot Cheddar Chili Mac, often the cause is overcooking. If pasta turns mushy, consider adding it towards the end of the cooking time. If undercooked, check the cooking time and give it a little longer until tender.

Flavor balance can easily shift; if too spicy, a dollop of sour cream or a splash of creaminess can help counteract. Adding extra cheese can also enhance flavor without overwhelming the palate.

Temperature problems may arise if using an older crock pot. Ensure you monitor the temperature settings, and if you notice uneven cooking, consider switching recipes to a stovetop option for better control.

If facing equipment challenges, such as a malfunctioning crock pot, it’s advisable to have a backup plan. An instant pot or stovetop can often replicate the crock pot experience, providing flexibility.

Ingredient substitutions can lead to unwanted changes; always test new brands or types to ascertain their effect on flavor and texture. Adjusting seasoning gradually when replacing offers greater control.

Timing concerns can lead to stress; always aim to start earlier to provide a buffer for unexpected delays or changes to the cooking process, ensuring you can still achieve your desired outcome.

Recipe Success Stories

Community feedback reinforces the widespread appeal of this Crock Pot Cheddar Chili Mac. Families have shared their experiences of children savoring every bite, an exciting evolution from traditional mac and cheese to a more robust meal that everyone enjoys.

Variation successes include numerous adaptations, with readers highlighting how they’ve personalized the recipe with specific family favorite ingredients. Adding their unique spins has made the dish a cherished family tradition.

Photo submissions from readers participating in a community hash-tag campaign have showcased the dish’s vibrant colors and inviting presentation. These visuals often spark further creativity in others looking to recreate the dish.

Suggestions from the community often highlight the ease of preparation along with its comforting flavors. Users express how this dish has become a go-to for busy weeknights due to its simplicity and satisfying nature.

Frequently Asked Questions

1. Can I cook this recipe on high instead of low?

Yes, you can cook this recipe on high, but be cautious as it may require shorter cook times. Check for doneness after about 2 hours.
2. How can I thicken the sauce?

If the sauce turns out too thin, you can thicken it by mixing a tablespoon of cornstarch with water and adding it to the pot, cooking for an additional 30 minutes.
3. Is it possible to freeze this dish?

Yes! This dish freezes well. Store it in airtight containers for up to three months and reheat as needed.
4. Can I use whole wheat pasta?

Absolutely! Whole wheat pasta can be substituted for regular pasta if desired, providing added nutritional benefits.
5. What if I don’t have chili powder?

If you don’t have chili powder, you can substitute it with a mix of paprika, cumin, and cayenne for a similar flavor profile.
6. How do I know when it’s done cooking?

The dish is done cooking when the pasta is tender and the cheese has melted through, typically about 4 hours on low.
7. Can I make this vegetarian?

Yes, by omitting the meat and using additional beans or lentils, you have a delicious vegetarian version.
8. What kind of toppings can I add?

Toppings like sour cream, chopped green onions, or shredded cheese enhance the flavor profile significantly.
9. How can I reduce the spice level?

To reduce spiciness, use less chili powder and incorporate dairy products like sour cream, which can neutralize heat.
10. What if my sauce is too salty?

If the sauce turns out too salty, add a bit of sugar or a splash of vinegar to help balance the flavor.
11. Can I make a larger batch?

Yes! Just ensure your crock pot is large enough for all ingredients and adjust cooking time accordingly.

Additional Resources

Explore related recipes and guides that complement this dish beautifully. Consider trying side dishes like cornbread or a fresh garden salad to provide balance to this hearty meal. Use technique guides to refine your skills in slow cooking, as well as ingredient information to understand how to choose the best components for your recipes.

For equipment recommendations, ensure you have a reliable crock pot and utensils that can help you create other delightful slow-cooked meals. Explore seasonal variations to keep the recipe fresh and exciting throughout the year.

Join the Conversation

We invite you to share your experiences cooking this recipe! Join our community by posting photos on social media, and share how you’ve made this dish uniquely yours. Provide feedback through comments or reviews, and engage with others who are eager to try their hand at this comforting meal. Your variations could inspire others in their cooking journey, so let’s keep the conversation going.

The Recipe

Crock Pot Cheddar Chili Mac

Serves: 6

Prep Time: 15 mins

Cook Time: 4 hours

Total Time: 4 hours 15 mins

Kitchen Equipment Needed

  • Crock pot
  • Measuring cups and spoons
  • Large skillet
  • Wooden spoon or spatula
  • Airtight storage containers

Ingredients

  • 1 pound ground beef
  • 1 medium onion, chopped
  • 2 cloves garlic, minced
  • 1 can (15 oz) kidney beans, drained and rinsed
  • 1 can (28 oz) diced tomatoes
  • 2 cups beef broth
  • 1 tablespoon chili powder
  • 1 teaspoon cumin
  • 8 ounces elbow macaroni
  • 2 cups shredded cheddar cheese
  • Salt and pepper to taste

Directions

  1. In a large skillet, brown the ground beef over medium heat until fully cooked. Drain excess fat.
  2. Add chopped onion and garlic to the beef. Sauté until the onion is translucent.
  3. Transfer the beef mixture to the crock pot and add the kidney beans, diced tomatoes, beef broth, chili powder, and cumin. Stir to combine.
  4. Cover and cook on low for 4 hours.
  5. During the last 30 minutes of cooking, add in the elbow macaroni and stir until well mixed.
  6. Once the macaroni is cooked through, stir in the shredded cheddar cheese until melted and creamy.
  7. Season with salt and pepper, and let it sit for 10 minutes before serving.

Recipe Notes

  • Feel free to substitute ground turkey or chicken for a leaner option.
  • For extra flavor, add your favorite hot sauce when serving.
  • Enjoy leftovers for lunch or freeze for up to 3 months.

Irresistibly Tender Braised Oxtails Recipe for Ultimate Comfort Food

Braised Oxtails Recipe: A Comforting Culinary Delight

⚖️
Difficulty
Moderate

⏲️
Prep Time
30 mins

🕒
Cook Time
3 hours

⏱️
Total Time
3 hours 30 mins

🍽️
Servings
4

Braised oxtails are a perfect blend of rich, savory flavors that evoke a sense of comfort and warmth. Cooking oxtails low and slow allows the meat to become incredibly tender, while absorbing the delightful flavors of the accompanying broth and spices. This dish, often enjoyed during family gatherings, brings people together with its inviting aroma and satisfying taste. It pairs beautifully with a side of creamy mashed potatoes or crusty bread, making any meal feel special.

Whether you’re preparing a cozy dinner for loved ones or impressing guests at a dinner party, this braised oxtails recipe will surely be a crowd-pleaser. The lush, deep flavors and melt-in-your-mouth meat create a dish that is not only a meal but a heartfelt experience. With its enticing aroma and captivating taste, it captures the essence of home-cooked comfort food.

Quick Recipe Highlights

  • Flavor Profile: The rich umami of the oxtails, complemented by aromatic herbs and spices, creates a deeply satisfying flavor.
  • Texture: Expect tender, fall-off-the-bone meat enveloped in a silky sauce.
  • Aroma: A hearty blend of garlic, onion, and herbs fills the kitchen, promising a meal that is hard to resist.
  • Visual Appeal: The deep brown sauce glistens over tender oxtails, presenting a tempting dish on your table.
  • Skill Level Needed: Ideal for home cooks with moderate skills; the main challenge lies in time management.
  • Special Equipment: A heavy-bottomed pot or Dutch oven is essential for achieving the perfect braise.

Recipe Overview

  • Difficulty Level: Braising oxtails requires some patience and attention, but the process is straightforward, making it manageable for home cooks.
  • Category: This dish is perfect for a hearty dinner, particularly during colder months.
  • Cuisine: Traditionally, braised oxtails can be found in various culinary cultures around the world, bringing unique spice profiles and cooking methods.
  • Cost: Oxtails can be on the pricier side compared to other cuts, but the richness and flavor make it worth the investment.
  • Season: This dish shines during fall and winter, providing a warm and cozy meal option for gatherings and family dinners.
  • Occasion: Perfect for holiday feasts, special family dinners, or any occasion calling for comforting, hearty food.

Why You’ll Love This Recipe

Braised oxtails deliver a unique taste experience that melds savory flavors with comfort-driven heartiness. The long cooking process allows the fat to render out, leaving you with tender meat enveloped in a delicious sauce that makes every bite a joy. Pairing with sides such as creamy polenta or crusty bread helps capture the sauce, ensuring no flavor goes to waste.

Convenience in preparation is another reason to love this recipe. Once the initial sautéing is complete, the dish can simmer while you attend to other tasks or simply relax. This hands-off cooking method makes it perfect for dinner parties or family meals, allowing you to focus on enjoying time with loved ones rather than spending hours in the kitchen.

Nutritional advantages are also present in this dish, as oxtails are rich in collagen and healthy fats that can be beneficial for joint health. When coupled with vegetables like carrots and celery, you elevate the dish’s nutritional profile, making it a hearty option for nutritious family meals.

Socially, braised oxtails have a way of drawing people together. The inviting aroma and the eventual celebration around the dining table foster a sense of community and shared experience that enhances any gathering.

Last but not least, the cost-effectiveness of this dish makes it appealing. While oxtails may seem pricey, they can feed a crowd, providing a gourmet meal experience at a fraction of what you would pay at a restaurant. The depth of flavor you get from braising is unparalleled and leaves a lasting impression without breaking the bank.

Historical Background and Cultural Significance

The origins of braised oxtails are rooted in cultures around the world, where slow-cooking techniques have traditionally been employed to extract maximum flavor from tough cuts of meat. Historically, oxtails were considered a byproduct of butchering cattle and were often used in hearty stews and soups, making them a staple during harder times.

Culturally, the dish embodies community and family values. Across different cultures, such as Caribbean, Italian, and French, braised oxtail has evolved and adapted, showcasing the unique flavors and cooking methods of each region. Whether served alongside rice and beans or pasta, it’s a dish that unites cultures through shared cooking traditions and flavors.

Over the years, braised oxtail recipes have evolved, incorporating a variety of spices and cooking techniques that highlight regional preferences. This evolution has allowed for creative adaptations while maintaining the core essence of the dish.

Regional variations of braised oxtails exist across the globe, with each culture bringing its nuances to this comfort food staple. From savory Caribbean stews with spices like allspice to classic French oxtail soup, this dish continues to delight taste buds and provide a taste of home wherever it’s served.

Ingredient Deep Dive

Oxtails are the star of this recipe and carry with them not only a rich flavor but also cultural significance and history. As a cut mostly derived from the tail of cattle, they are known for their hearty, gelatinous texture which, once cooked, becomes incredibly tender. Oxtails are an excellent source of collagen, which is beneficial for skin and joint health. When selecting oxtails, look for pieces that have ample marbling and meat to ensure a flavorful dish. To store, keep them refrigerated for up to 3-4 days or freeze them for longer storage.

Onions, used in the braise, play a crucial role in providing sweetness and depth to the dish. Onions are rich in vitamins and antioxidants, which contribute to a healthier immune system. When storing, place them in a cool, dark place, and they can last several weeks. If you’re out of onions, shallots can be an excellent substitute that offers a milder flavor profile.

Garlic adds a pungent burst of flavor that enhances the overall dish. Known for its health benefits, garlic has been associated with improved heart health and immune function. When choosing garlic, look for firm cloves with no signs of sprouting. Store garlic in a cool and dry environment, and if needed, you can substitute fresh garlic with granulated garlic.

Carrots not only contribute sweetness and color but also added nutrition. They are a great source of beta-carotene and fiber. When selecting carrots, choose firm ones with a vibrant color. Store them in the refrigerator wrapped in a damp cloth to retain freshness. If unavailable, parsnips can be used as an alternative.

Celery adds a crunchy texture and enhances the flavor base. Known for its low-calorie content, celery is often ingested for its hydration and health benefits. Choose bright, crisp stalks, and store them in the fridge to prolong freshness. For a substitution, fennel can provide a unique flavor twist.

Common Mistakes to Avoid

  • Skipping the browning step: This is crucial for developing deep, rich flavors in your oxtails.
  • Cooking on too high heat: A gentle simmer ensures even cooking and maximum tenderness.
  • Not using enough liquid: The oxtails need sufficient liquid to braise properly; otherwise, they may dry out.
  • Over-seasoning: The natural flavors of the oxtails are enhanced by the slow cooking; adjust seasoning towards the end.
  • Rushing the cooking time: Patience is key; allow the oxtails to cook long enough to achieve the desired tenderness.
  • Not letting the dish rest: Allowing the dish to rest helps meld the flavors together and improves taste.
  • Using low-quality oxtails: Choose well-marbled, fresh cuts for the best results.
  • Ignoring the importance of proper storage: Store leftovers correctly to preserve flavor and texture.
  • Forgetting to skim the fat: Skimming excess fat after cooking helps create a cleaner sauce.
  • Neglecting to taste throughout: Tasting at various stages allows you to adjust the flavors better.

Essential Techniques

Browning the oxtails is a key technique in this braising process. It not only enhances the flavor but also contributes to the dish’s color. To master this, ensure your pot is appropriately heated before adding the oxtails, turning them to achieve an even browning on all sides. Avoid overcrowding the pan to ensure proper caramelization.

The braising process itself is vital for ensuring that the oxtails are tender and flavorful. Use a good mix of aromatic vegetables and herbs in the braising liquid to create a rich base. Pay attention to the simmering; the liquid should barely bubble, which indicates that the dish is properly cooking without becoming tough.

Monitoring the cooking time is important for achieving perfect tenderness. It’s best to test the meat with a fork; it should easily fall off the bone when done. If it isn’t tender enough, continue simmering and checking regularly.

Finally, deglazing the pot after browning the meat captures all the flavorful bits stuck to the bottom. Pour in your braising liquid and scrape the bottom with a wooden spoon, making sure not to leave any flavor behind.

Pro Tips for Perfect Braised Oxtails

1. **Choose your oxtails wisely:** Look for well-marbled pieces, as the fat will render down and keep the meat moist during cooking.

2. **Sear thoroughly:** Ensure each piece is browned nicely to develop a deeper flavor and rich color.

3. **Use homemade broth:** For an even better flavor, use homemade beef broth instead of store-bought.

4. **Add herbs and spices:** Experiment with herbs like thyme or bay leaves to elevate the flavor profile.

5. **Let it rest:** After cooking, let your dish sit for a bit to allow the flavors to develop further.

6. **Skim the fat:** Before serving, skim off any excess fat from the surface to achieve a cleaner taste.

7. **Adjust seasoning:** Taste the sauce before serving to check if any additional seasoning is required.

8. **Pair wisely:** Serve with sides that soak up the sauce, such as creamy polenta or mashed potatoes.

Variations and Adaptations

Regional variations of braised oxtails can transform the dish entirely. For instance, in Caribbean cuisine, spices like allspice and a touch of sugar might be added to create a sweet and spicy profile. Italian variations might call for tomatoes and herbs like rosemary, creating a different flavor journey.

Seasonal adaptations can also be made, incorporating root vegetables such as parsnips or sweet potatoes during the fall and winter. These ingredients complement the robust flavors and add an earthy sweetness to the dish.

For dietary modifications, consider swapping oxtails with other meats such as beef shank or short ribs if you’re looking for a leaner option. Additionally, you can use plant-based substitutes for a vegetarian version, using hearty vegetables like mushrooms to achieve a similar texture.

Texture modifications might include adding a touch of cornstarch slurry at the end of cooking to thicken the sauce if a richer, more decadent sauce is desired.

Presentation alternatives can elevate the dish further; serve over a bed of sautéed greens or in a rustic bowl with fresh bread on the side for a comforting and inviting display.

Serving and Presentation Guide

Plating braised oxtails can be an opportunity to impress your guests. Start by spooning a generous portion of the oxtails onto a shallow bowl, ensuring you include ample sauce. Use a large spoon to create a well, allowing the sauce to envelop the meat.

Garnish with fresh herbs, like chopped parsley or thyme, to add a burst of color and freshness. This not only enhances visual appeal but also brightens the dish before serving.

Consider traditional accompaniments, such as creamy polenta or soft mashed potatoes, which work well at soaking up the rich sauce. You can also introduce a modern twist by adding roasted vegetables to your plate for added flavor and nutrition.

Temperature is key—serve the dish piping hot to fully enjoy the flavors. Portion control is essential; a serving of two oxtail pieces along with sauce per person is generally recommended, ensuring everyone indulges without overdoing it.

Wine and Beverage Pairing

When it comes to pairing wines with braised oxtails, look for rich, full-bodied reds like Cabernet Sauvignon or Syrah. These wines enhance the hearty nature of the dish while their tannins cut through the richness of the meat.

For non-alcoholic alternatives, consider a robust sparkling grape juice, which can mimic the complexity of wine without the alcohol content. If you enjoy herbal teas, a dark, herbal brew with hints of spices like chai can complement the deep flavors of the oxtails wonderfully.

Serve red wines slightly below room temperature, around 65°F, to bring out their best flavors, while non-alcoholic options can be served chilled for a refreshing contrast to the meal.

Storage and Shelf Life

Proper storage of braised oxtails is crucial for preserving flavor and extending shelf life. Allow the dish to cool before transferring it to airtight containers. Braised oxtails can be stored in the refrigerator for 3-4 days. For extended shelf life, they can be frozen for up to 3 months.

To ensure safety, always check for signs of spoilage such as off colors or unpleasant odors before consuming leftovers. When reheating, use a low heat setting on the stove or microwave, adding extra broth if necessary to maintain moisture.

If freezing, ensure you use freezer-safe containers, leaving some space for the liquid to expand. Thaw in the refrigerator overnight before reheating to retain the best texture and flavor.

Make Ahead Strategies

Preparing braised oxtails in advance can be a real-time saver for busy cooks. To do so, you can complete the braising process a day or two ahead of your planned meal. Once cooked, allow the dish to cool, then refrigerate.

On the day of service, gently reheat on the stove, adding a splash of stock or water to achieve your desired sauce consistency. This method not only saves time but often enhances the flavor, as the ingredients have more time to meld together.

You can also prep individual ingredients like vegetables and seasonings in advance, storing them in the refrigerator until you’re ready to cook. This strategy not only streamlines the cooking process but ensures fresh flavors.

Additionally, consider making the sauce in bulk if you enjoy the dish frequently. Store it separately, and simply braise fresh oxtails when needed for a quick and fulfilling meal.

Scaling Instructions

Scaling this braised oxtails recipe up or down can be done easily. If halving the recipe, adjust the quantities accordingly but maintain the same cooking temperature and time frame, keeping an eye on tenderness.

When doubling or tripling the recipe, make sure your pot is large enough to accommodate the increased volume. You may need to extend the cooking time slightly to ensure all oxtails are equally tender.

Adjust your seasoning as well; scale back initially and taste throughout cooking, as the increased quantities can amplify flavors. Remember that cooking in larger batches may require more potential fat skimmed off before serving.

Store leftovers in airtight containers and refrigerate, ensuring the flavors remain intact in subsequent servings.

Nutritional Deep Dive

Braised oxtails are a source of rich nutrition, primarily providing protein and healthy fats. A serving can deliver approximately 25 grams of protein, essential for muscle repair and overall bodily function.

In terms of micronutrients, oxtails contain important vitamins and minerals, including Vitamin B12, which supports nerve function, and zinc, which is crucial for immune health. The collagen in oxtails contributes not only to joint integrity but also to skin health.

For those focused on dietary considerations, make mindful selections based on portion size. While rich in nutrients, braised oxtails are also calorie-dense, so balancing with lighter sides can enhance overall meal planning.

Weight management can be addressed by portion control and pairing with high-fiber vegetables, which contributes to a feeling of fullness while limiting caloric intake.

Dietary Adaptations

For gluten-free adaptations, ensure that any broths used are certified gluten-free, as many commercially available options may contain gluten.

Dairy-free versions can be easily achieved by skipping any dairy-based sides, instead opting for vegetable-based options like mashed potatoes or cauliflower purée.

If you’re looking for a plant-based version, consider using mushrooms or chunks of hearty vegetables, such as eggplant or squash, and loading up on spices and herbs to maintain flavor.

Low-carb and keto adaptations can involve serving the dish over steamed vegetables or a cauliflower mash rather than traditional carbs, while still benefiting from the rich meaty flavors.

For paleo diets, retain the natural ingredients and eliminate any processed options, focusing on whole-food sides, and adhering to clean ingredients throughout the recipe.

Troubleshooting Guide

Texture issues can arise if oxtails are not cooked long enough; further braising can remedy this by allowing more time for the collagen to break down.

Flavor balance may be off if the dish becomes too salty; adding a splash more water or unsalted stock during the cooking process can help even out the saline concentration in the sauce.

Temperature problems can occur if the pot is not adequately heated; always start with a well-heated pot to ensure proper browning.

Equipment challenges may arise when a standard pot does not suffice; having a heavy-bottomed Dutch oven can solve uneven cooking issues.

If substitutions were made, ensure that the replacements provide similar cooking times; for example, tougher cuts will generally require longer cooking than leaner meats.

Timing concerns can lead to overcooked oxtails if not monitored; always check tenderness periodically towards the end of the listed cooking time to avoid this.

Recipe Success Stories

Community feedback has been overwhelmingly positive, with many sharing their own variations of the braised oxtails recipe, incorporating family spices or local grocery finds. Several readers have experimented with different cooking techniques, finding joy in the trial and error process that ultimately leads to delicious outcomes.

Successes often unfold during family gatherings, where the dish becomes the star of the meal. Feedback shared on social media typically highlights the tender texture and bold flavors that have won over many family tastes.

Many have documented their own adaptation stories, sharing how they’ve made the dish their own by infusing regional flavors or seasonal ingredients, leading to new favorites.

Photography tips have also surfaced from the community, showcasing the rich colors and textures of braised oxtails, inspiring many home cooks to recreate their own versions and share the journey with others.

Frequently Asked Questions

1. Can I use frozen oxtails? Yes, you can certainly use frozen oxtails. Just ensure that they are completely thawed before beginning the cooking process to allow for even cooking.

2. How do I know when the oxtails are done? Oxtails are done when the meat is tender and easily falls off the bone. This typically takes about 3-4 hours of braising.

3. Can I make this dish in a slow cooker? Absolutely! You can adapt this recipe for a slow cooker, cooking on low for 6-8 hours until tender.

4. What can I serve with braised oxtails? Serve with mashed potatoes, polenta, or rice to soak up the delicious sauce. Roasted vegetables also pair beautifully.

5. How do I store leftovers? Store leftovers in airtight containers in the refrigerator for 3-4 days or freeze for up to 3 months.

6. Can I use a different cut of meat? Yes, you can use other cuts like beef shanks or short ribs, but cooking times may vary.

7. What is the best way to reheat braised oxtails? Reheat gently on the stove with a splash of broth to maintain moisture, or in the microwave on low power.

8. How do I make the sauce thicker? To thicken the sauce, you can add a cornstarch slurry towards the end of cooking or simmer it uncovered to reduce.

9. Can I omit the vegetables? While you can omit them, the vegetables contribute significant flavor and depth, so it’s recommended to keep at least some.

10. How can I make this dish spicier? Add crushed red pepper flakes or a dash of hot sauce during the braising process to enhance the heat level.

Additional Resources

If you’re looking for related recipes, consider exploring other braised dishes like coq au vin or beef bourguignon. Each recipe features slow-cooked tenderness and complex flavors. Technique guides for braising can provide deeper insights into mastering this method.

For ingredient information, delve into the nutritional benefits of underground vegetables and spices used in braising recipes. Equipment recommendations can guide you toward the best pots for braising, ensuring superior results.

Seasonal variations should inspire you to adapt dishes based on what’s available in your local markets, keeping your meals fresh and exciting.

Join the Conversation

Share your experiences with braised oxtails on social media, showcasing your culinary creations through beautiful photography. Engage with a community of home cooks by sharing tips, variations, and reviews to foster a lively exchange of ideas and inspiration.

Try asking for suggestions on unique adaptations or alternatives that have worked for others, creating an open dialogue around this comforting dish. Celebrate the joy of cooking braised oxtails together, while discovering new flavors and techniques.

The Recipe

Braised Oxtail

Serves: 4

Prep Time: 30 mins

Cook Time: 3 hours

Total Time: 3 hours 30 mins

Kitchen Equipment Needed

  • Large Dutch oven or heavy-bottomed pot
  • Wooden spoon
  • Measuring cups and spoons
  • Sharp knife
  • Cutting board

Ingredients

  • 3-4 lbs oxtails
  • 2 tablespoons olive oil
  • 1 large onion, chopped
  • 3-4 garlic cloves, minced
  • 2 carrots, chopped
  • 2 stalks celery, chopped
  • 4 cups beef broth
  • 1 cup red wine
  • 2-3 sprigs fresh thyme
  • 2-3 bay leaves
  • Salt and pepper to taste

Directions

  1. Preheat your oven to 300°F (150°C).
  2. Heat the olive oil in a large Dutch oven over medium-high heat. Season the oxtails with salt and pepper, then sear them on all sides until browned. Remove the oxtails and set aside.
  3. Add the onions, garlic, carrots, and celery to the pot, sautéing until softened.
  4. Pour in the red wine, scraping up any brown bits from the bottom of the pot.
  5. Add the beef broth, thyme, bay leaves, and the reserved oxtails back into the pot; bring to a gentle simmer.
  6. Cover and transfer the pot to the preheated oven. Braise for about 3 hours or until the meat is tender.
  7. Remove the pot from the oven, discard the bay leaves, and adjust seasoning as needed.
  8. Serve the oxtails with sauce over a bed of creamy potatoes or polenta.

Recipe Notes

  • Feel free to add other vegetables like potatoes or mushrooms for more texture.
  • For a spicier profile, consider adding crushed red pepper flakes during the cooking process.
  • Leftovers can be stored in the refrigerator for up to 4 days or frozen for longer storage.

Delicious Beef and Pepper Rice Bowl Recipe for Quick Meals

Beef and Pepper Rice Bowl: A Wholesome Delight for Any Meal

⚖️
Difficulty
Easy

⏲️
Prep Time
15 mins

🕒
Cook Time
20 mins

⏱️
Total Time
35 mins

🍽️
Servings
4

The Beef and Pepper Rice Bowl is a delightful dish that brings together tender cuts of beef, vibrant bell peppers, and fluffy rice, all infused with a harmony of flavors. This recipe is perfect for busy weeknights, as it offers a quick yet satisfying meal that everyone in the family will enjoy. Whether you’re looking for a hearty dinner or an appealing lunch option, this rice bowl delivers a comforting experience that tantalizes the taste buds.

Imagine biting into succulent strips of beef that are beautifully sautéed, complemented by the crunch of fresh, colorful peppers. The aromatic blend of spices enhances the natural flavors, making every mouthful a celebration of taste and texture. This dish not only satisfies hunger but also brings a touch of culinary artistry that can elevate any dining occasion.

Quick Recipe Highlights

  • Flavor Profile: The Beef and Pepper Rice Bowl is aromatic, savory, and slightly sweet, offering a balanced fusion of tastes that keeps you coming back for more.
  • Texture: A mouthwatering combination of tender beef, crunchy bell peppers, and fluffy rice creates a delightful contrast that makes this dish hard to resist.
  • Aroma: The dish showcases a wonderful medley of spices from garlic, onion, and pepper, which waft through the kitchen, inviting everyone to the table.
  • Visual Appeal: The bright colors of red, yellow, and green peppers against the golden rice make this bowl not only delicious but visually stimulating.
  • Skill Level Needed: This recipe is simple enough for beginners while still offering a flavorful outcome for skilled cooks, making it a versatile choice for any kitchen.
  • Special Equipment: A heavy skillet or wok is ideal for this recipe, allowing for even heating and excellent browning.

Recipe Overview

  • Difficulty Level: The Beef and Pepper Rice Bowl falls under the easy category, making it accessible for novice cooks while still delicious enough for seasoned chefs to appreciate.
  • Category: This dish is ideal for lunch or dinner, merging comfort food with a healthy advantage.
  • Cuisine: The Beef and Pepper Rice Bowl is inspired by Asian cuisine, drawing on flavors and cooking techniques from various traditions.
  • Cost: The ingredients are budget-friendly, providing a wholesome meal without breaking the bank. Expect a cost of around $10 to $15 for the entire dish.
  • Season: This rice bowl can be enjoyed year-round, as bell peppers are typically available across all seasons, ensuring freshness.
  • Occasion: Perfect for family dinners, meal prep, or casual gatherings with friends, this dish fits whenever you need a scrumptious meal.

Why You’ll Love This Recipe

The Beef and Pepper Rice Bowl is a feast for the senses, where the pairing of rich beef and crisp peppers harmonizes perfectly. Each bite is an explosion of flavors that will please your palate and satisfy your cravings. This recipe not only nourishes but also excites with its vibrant colors and appetizing aroma, making it a visual treat as well.

Convenience is another quality that makes this dish a favorite. The quick preparation and cooking time mean you can whip this up even on the busiest nights. In just thirty-five minutes, you will have a wholesome meal ready to grace your dining table, making it an unbeatable option for those long workdays.

The nutritional aspects of this recipe are equally appealing. Packed with protein from the beef and essential vitamins from the peppers, it’s a well-rounded dish that supports a healthy diet. The addition of rice provides a good source of carbohydrates to fuel your day, creating a balanced meal without compromising on flavor.

Social gatherings become more enjoyable with the Beef and Pepper Rice Bowl. Its striking presentation and delightful taste make it an ideal dish for entertaining guests. Create a buffet-style serving, allowing everyone to customize their bowls, which fosters conversation and a sharing atmosphere.

Lastly, this recipe is cost-effective, using ingredients that are not only affordable but also widely available. You can easily adapt the recipe based on what you have at home, ensuring that your dining experience remains accessible and enjoyable without overspending.

Historical Background and Cultural Significance

The origins of the Beef and Pepper Rice Bowl can be traced back to various Asian culinary traditions where stir-fried dishes reign supreme. It symbolizes how simple ingredients can come together to create a meal that is hearty and fulfilling, showcasing the art of cooking with minimal waste and maximum flavor. In many Asian cultures, rice serves as a staple food, bridging meals and forming an essential part of social gatherings.

Culturally, dishes like this one represent the concept of “comfort food” that provides not just sustenance but emotional warmth and family connections. In many households, the act of preparing a meal together serves to strengthen family bonds and foster relationships.

Over the years, the Beef and Pepper Rice Bowl has evolved, influenced by various chefs and home cooks embracing local ingredients. From traditional recipes sprinkled with fresh herbs to modern adaptations including spicy sauces, each version tells a unique story that reflects its cultural roots.

Regional variations abound, with each country adding its favorite spices or cooking techniques. In Thailand, for instance, the dish may incorporate basil and lime, while in China, a heavier reliance on soy sauce and ginger may come into play. Each adaptation enhances the dish in its distinctive ways, making it a versatile favorite across the globe.

Ingredient Deep Dive

Beef is the star of this dish, providing not just flavor but also essential nutrients such as protein, iron, and vitamin B12. Choosing cuts like flank or skirt steak ensures tenderness and flavor depth. When shopping, look for bright red meat with a fine grain, indicating freshness and quality. Properly storing beef in the refrigerator or freezer can extend its shelf life. If you’re looking for alternatives, consider chicken or tofu for a lighter option.

Bell peppers add a pop of color and nutrition to the dish, rich in vitamins A and C. These vegetables also bring a touch of sweetness and crunch to the meal. When selecting peppers, opt for firm ones with vibrant skin and avoid those with wrinkles or soft spots. They can be stored in the fridge and used within a week. Feel free to mix and match different colored peppers to enhance both flavor and presentation.

Rice, a classic accompaniment to various cuisines, serves not only as a filling base but also complements the bold flavors of the beef and peppers. Opt for long-grain rice for a fluffier texture or medium-grain for a creamier result. It’s vital to rinse rice before cooking to remove excess starches, ensuring that your final dish is light and fluffy. Store uncooked rice in a cool, dry place, and it can last for years. If you’re seeking a low-carb option, cauliflower rice works splendidly as a substitute.

Common Mistakes to Avoid

  • Overcooking the beef can result in a chewy texture. Aim for medium-rare to keep the meat tender and juicy; sear on high heat for just a few minutes.
  • Using dull knives may lead to uneven cuts of meat and vegetables. Invest in a sharp knife for even slices, which promotes uniform cooking.
  • Not seasoning adequately can lead to bland flavors. Taste as you cook and adjust seasoning gradually for the most impactful flavor profile.
  • Failing to let the rice rest after cooking can result in sticky clumps. Allow it to steam for a few minutes post-cooking for even fluffiness.
  • Skipping the marinating step for the beef can lead to a lack of flavor. Even a short marination can greatly enhance the taste of your dish.
  • Overcrowding the pan when cooking the ingredients can cause steaming rather than sautéing. Cook in batches to achieve that perfect sear.
  • Neglecting to chop the vegetables uniformly will affect the cooking time, leading to unevenly cooked peppers.
  • Not preparing all ingredients beforehand can lead to a chaotic cooking experience. Pre-measure and chop ingredients for a smoother process.
  • Using old rice can result in a less desirable texture and flavor. Always check the expiry date to ensure freshness.
  • Failing to adjust cooking time for varying stovetops can lead to undercooked or burnt results. Always keep an eye on the dish while it cooks.

Essential Techniques

Mastering the art of sautéing is crucial for creating the perfect Beef and Pepper Rice Bowl. This technique allows for beautiful browning and the development of complex flavors. For optimal results, use a large, heavy skillet to maintain even heat, cook a small amount of meat at a time to prevent overcrowding, and allow each side to sear before flipping to achieve that desirable crust.

Additionally, properly cooking rice is a skill that can make or break your dish. Rinse the rice until the water runs clear to remove excess starch, ensuring it cooks fluffy rather than clumpy. Use a ratio of 1 part rice to 2 parts liquid, bring it to a boil, then cover and simmer. Allow it to rest off the heat once cooked, which allows for steam to finish the cooking process without risking sogginess.

Pro Tips for Perfect Beef and Pepper Rice Bowl

Start with high-quality beef for the best flavor and texture. A well-marbled cut like ribeye will provide richness, but you can use leaner cuts like flank for a healthier option. Marinate the beef with soy sauce, ginger, and garlic to infuse it with flavor before cooking.

Cut the vegetables in uniform sizes to ensure even cooking. This way, the peppers maintain a pleasant crunch while the beef cooks. Additionally, consider adding other vegetables like broccoli or snap peas for added nutrition and color.

Use a splash of sesame oil towards the end of cooking for a nutty flavor that complements the dish beautifully. For extra depth, finish with a drizzle of soy sauce or a sprinkle of sesame seeds, elevating the presentation and taste.

When serving, prep a few garnishes like chopped green onions or cilantro to sprinkle on top. This not only boosts the visual appeal but adds freshness to each bite.

Invest time in perfecting your rice cooking method; fluffy rice will elevate your bowl experience. Steaming the rice after cooking allows it to settle and become light, providing a great base for the beef and peppers.

Finally, taste your dish as you go. Adjusting the seasoning during cooking helps to achieve a well-balanced flavor profile, making sure every component shines in the final presentation.

Variations and Adaptations

You can experiment with regional varieties to give your Beef and Pepper Rice Bowl a unique twist. Consider adding a Thai flair with ingredients like fish sauce and basil or a Korean spin with gochujang and green onions for a spicy kick.

Seasonal adaptations are also exciting; substitute bell peppers with zucchini in summer or sweet potatoes in fall for a delightful difference in taste and texture. Flavor variations might include using teriyaki sauce for a sweeter glaze or adding chili paste for heat.

If you’re looking for dietary modifications, the recipe easily adapts to be gluten-free by using tamari instead of soy sauce, or it can be made dairy-free without needing any adjustments. Vegan options are also simple, as substituting tofu or jackfruit for beef maintains the essence of the dish while catering to plant-based diets.

Presentation alternatives can enhance your meal. Serving the bowl in a halved pineapple or coconut adds a fun, tropical flair, appealing especially during festive gatherings or summer parties.

Serving and Presentation Guide

Plating your Beef and Pepper Rice Bowl beautifully can enhance the dining experience. Start by placing a generous mound of fluffy rice in the center of the bowl, then add a vibrant mix of sautéed beef and peppers on top. For an appealing contrast, consider adding a colorful garnish like chopped green onions or sesame seeds to accentuate the dish.

Garnishing isn’t just for looks; it adds layers of flavor. Incorporating fresh herbs like cilantro, a squeeze of lime, or a drizzle of chili oil can create a beautifully balanced dish. Offering lime wedges on the side invites guests to customize their flavor profile.

Temperature matters in presentation as well. Serve the bowl hot to maintain the vibrant colors and fresh flavors of the ingredients. If preparing in advance, reheat gently on the stovetop to prevent drying out.

Portion control is key, especially if serving a large group. Consider using smaller bowls to control serving sizes, allowing guests to take a variety of dishes or ensuring leftovers for later enjoyment.

Lastly, consider presenting the meal family-style for a more communal dining experience, placing the rice, beef mixture, and garnishes on a shared table. This encourages interaction and enjoyment of the cooking process.

Wine and Beverage Pairing

When considering wine pairings for your Beef and Pepper Rice Bowl, a medium-bodied red wine like Pinot Noir complements the richness of the beef beautifully without overwhelming the flavors. For white wine lovers, a chilled Riesling provides a pleasant sweetness that balances the savory elements of the dish.

Non-alcoholic beverages can also be a great accompaniment. A refreshing iced tea with a hint of lemon or a ginger ale adds a vibrant zest that meshes well with the spicy notes of the dish. Feel free to showcase creative mocktails for a more festive touch, perhaps a cucumber mint cooler for refreshment.

If you enjoy coffee or tea, a light roasted coffee brewed with minimal acidity enhances the meal without overpowering it, while a mild green or white tea offers a soothing complement.

Temperature is essential in wine pairings; serve red wines slightly below room temperature and white or sparkling wines chilled to maximize the flavor experience, creating a perfect synergy with your meal.

Storage and Shelf Life

To maximize the storage life of your Beef and Pepper Rice Bowl, it’s essential to properly store leftovers. Allow the dish to cool completely before transferring it to an airtight container to prevent condensation, which could lead to spoilage. In the refrigerator, it can last for up to three days.

For longer storage, consider freezing the individual components. The beef and pepper mixture can be stored in freezer bags for up to three months, while the rice can retain quality for about one month. To reheat, thaw in the fridge overnight before microwaving or warming in a skillet over low heat until heated through.

Checking for signs of spoilage is crucial. Look for any off smells, discoloration, or change in texture before consuming. Always reheat thoroughly to ensure food safety.

For best practices, when reheating, add a splash of water to the rice to reintroduce moisture and prevent it from becoming dry. Aim for an internal temperature of 165°F when reheating any dish for safety.

Make Ahead Strategies

If you want to prepare your Beef and Pepper Rice Bowl ahead of time, consider batching the components. The beef can be marinated and refrigerated the night before, allowing deeper flavor penetration. Pre-chop the vegetables to save time on cooking day, storing them in airtight containers to keep them fresh.

Cooking the rice in advance is also efficient; simply allow it to cool and refrigerate. When you’re ready to serve, you can quickly reheat it in the microwave or on the stovetop while preparing the beef.

Evaluating the quality impact, make sure not to reheat too many times, as each time can lead to loss of texture or moisture. Aim to assemble all components right before serving for the freshest experience.

For assembly tips, consider layering the dish in meal prep containers, placing rice at the bottom, followed by the beef and peppers on top. This not only looks appealing but makes for easy grab-and-go meals.

Add fresh elements just before serving, such as herbs or lime juice, to elevate flavors that may have diminished during storage, ensuring that every bite remains vibrant and tantalizing.

Scaling Instructions

When needing to adjust the Beef and Pepper Rice Bowl recipe, halving the ingredient amounts is straightforward and perfect for smaller households. Simply cut all quantities in half and proceed with the same cooking instructions for a smaller yield.

For doubling or tripling the recipe, keep in mind your cooking equipment. You may need larger pots or pans and possibly more than one skillet to ensure even cooking without overcrowding.

Adjust cooking times accordingly; additional amounts might require a few extra minutes, particularly for the beef, ensuring it cooks thoroughly and remains tender. Test for doneness, as cooking times may vary based on the scale and size of your ingredients.

Consider storage options carefully when scaling up. Use multiple containers if preparing in bulk, or consider freezing the extra portions separately for easy meals later on.

Lastly, always taste and adjust seasonings when scaling up, as flavors can intensify with larger quantities or change due to ingredient variations.

Nutritional Deep Dive

Analyzing the nutritional profile of the Beef and Pepper Rice Bowl indicates a hearty balance of macronutrients. One serving delivers approximately 30g of protein primarily from beef, providing significant dietary benefits for muscle repair and overall health.

Micronutrient analysis reveals an abundance of vitamins and minerals, with bell peppers contributing substantial amounts of vitamin C and potassium, while the beef adds iron and vitamin B12, which are essential for blood health and energy production.

Health benefits include heartiness and satiety, keeping energy levels stable throughout the day. While enjoying this dish, portion sizes can be adapted to meet individual dietary needs, ensuring that it fits into a balanced meal plan.

For those watching their weight, consider dividing the bowl into smaller servings or using leaner cuts of beef to reduce overall calories. This dish keeps its integrity while allowing flexibility in ingredient choices to cater to various dietary considerations.

Regular consumption of nutrient-dense meals like this recipe can support weight management and overall wellness, making it a smart choice for those looking for delicious yet nutritious meal options.

Dietary Adaptations

Creating a gluten-free version of the Beef and Pepper Rice Bowl is simple. Just replace soy sauce with gluten-free alternatives like tamari or coconut aminos while maintaining all other ingredients the same. The dish will still be flavorful and enjoyable without gluten.

For a dairy-free adaptation, no modifications are necessary as this recipe contains no dairy products. Replace beef with plant-based options like tofu or seitan for a vegan alternative, making sure to incorporate adequate seasonings to achieve robust flavors.

If following a low-carb or keto diet, substitute rice with cauliflower rice or shredded vegetables. This retains the textures and allows you to enjoy the flavors while minimizing carbohydrates, keeping the dish in line with your dietary goals.

These adaptations accommodate various dietary needs, ensuring that everyone can savor the Beef and Pepper Rice Bowl. The flavors remain delightful, allowing your meals to accommodate diverse lifestyle choices effortlessly.

Troubleshooting Guide

If you encounter texture issues, such as tough beef, it often results from overcooking or choosing a less tender cut. Always select the right cut and avoid cooking at too high a temperature for extended periods to keep it tender.

Flavor balance can be tricky; if your dish tastes too salty, adding a splash of vinegar or a pinch of sugar can help to counteract the saltiness. Adjust seasonings gradually to find the right balance between savory and sweet.

Temperature problems can arise if your beef isn’t cooked all the way through or if the rice remains undercooked. Always check meat temperatures with a thermometer, and ensure you allow enough simmering time for the rice.

Equipment challenges, such as sticking rice or uneven cooking, can often be remedied by using non-stick pans or ensuring your flame is set to medium. Always monitor cooking carefully and adjust the heat as necessary to avoid burning.

Ingredient substitutions can lead to unexpected outcomes. Be sure to primarily focus on flavor profiles; for example, switching beef for a leaner option may change cooking times and require additional seasonings.

Timing concerns often occur with meal prep. To avoid eating late, have all ingredients prepped before starting. Use timers and prepare each element sequentially to maximize speed and efficiency in the kitchen.

Recipe Success Stories

Community feedback on the Beef and Pepper Rice Bowl has been overwhelmingly positive. Many home cooks have reported that this dish has become a weeknight staple in their households, thanks to its balance of flavor, ease of preparation, and variety of ingredients.

The versatility of the recipe allows for personal adaptations, with readers sharing their success with different vegetable combinations, which adds unique twists while retaining the essence of the original dish. These variations have sparked a creative cooking community, inspiring people to showcase their unique recipes.

Adaptation stories frequently highlight how families have incorporated seasonal vegetables or regional spices, effortlessly creating their renditions. These adjustments maintain the core of the dish while providing extra flair, showcasing how simple recipes can evolve with creativity.

Additionally, photography tips from the community have encouraged many to share their beautiful bowls on social media, promoting engagement and conversation around meal presentations. This has fostered a culture of sharing and learning from one another’s experiences in the kitchen.

The Beef and Pepper Rice Bowl is not just a meal; it’s a conversation starter and a canvas for community creativity, encouraging everyone to explore flavors and make it their own.

Frequently Asked Questions

1. Can I use different types of meat for this dish?

Absolutely! You can use chicken, pork, or even tofu for a vegetarian option. Just remember to adjust cooking times according to the meat’s thickness and type.

2. How can I store the leftover rice bowl?

Allow the dish to cool completely before transferring it to an airtight container. It can be kept in the refrigerator for up to three days or frozen for up to three months.

3. What is the best way to reheat the rice bowl?

The best way to reheat is on the stove with a splash of water to ensure moisture while warming, or use a microwave covered with a damp paper towel.

4. Can I make this dish in advance?

Yes! You can marinate the beef and chop the vegetables ahead of time. Just cook everything fresh right before serving for maximum flavor.

5. Are bell peppers the only vegetables I can use?

Not at all! Feel free to swap out bell peppers for other vegetables like snap peas, broccoli, or even carrots, depending on your preference.

6. How spicy is this dish?

The spice level depends on how much heat you add. You can adjust by including more garlic, adding chili paste, or incorporating hotter peppers to cater to your taste.

7. Can I serve this dish cold?

Yes, the Beef and Pepper Rice Bowl can be enjoyed cold as a salad. Just be sure to refrigerate it properly before serving.

8. What kind of rice is best for this recipe?

Long grain rice such as jasmine or basmati is ideal due to its fluffy texture, but medium grain rice can work as well. It ultimately comes down to personal preference.

9. How can I make this dish gluten-free?

Swap out standard soy sauce with gluten-free alternatives like tamari or coconut aminos, and ensure other sauces are also gluten-free.

10. Is this recipe suitable for meal prepping?

Yes! This dish is perfect for meal prep. Simply divide portions and store them in airtight containers to grab for lunch or dinner during the week.

Additional Resources

Looking to expand your culinary horizons? Check out related recipes like Spicy Chicken Stir-Fry or Vegetable Fried Rice for more delightful flavors. For technique guides, explore our sections on mastering stir-frying and cooking rice to ensure each dish turns out perfectly.

If you’re curious about ingredient information, our guide on bell peppers and beef will inspire you to learn more about what you’re eating. As for kitchen equipment recommendations, we discuss the best kinds of woks and pans to use for a variety of cooking techniques.

Lastly, consider seasonal variations of this dish, incorporating new flavors by adjusting ingredients based on local produce or seasonal offerings to keep your cooking fresh and exciting.

Join the Conversation

We’d love to hear your thoughts on the Beef and Pepper Rice Bowl! Share your photography tips to showcase your creations; tag us in your social media posts to connect with our culinary community. Your recipe reviews and variations play a key role in inspiring others to craft their versions of this delightful dish.

Participating in our community discussions not only enriches your cooking experience but also helps others discover new flavors and techniques. Join us in celebrating the joy of food through sharing, learning, and enjoying every aspect of cooking together.

The Recipe

Beef and Pepper Rice Bowl

Serves: 4

Prep Time: 15 mins

Cook Time: 20 mins

Total Time: 35 mins

Kitchen Equipment Needed

  • Heavy skillet or wok
  • Cutting board
  • Chef’s knife
  • Measuring cups and spoons
  • Spatula

Ingredients

  • 1 lb beef, cut into strips
  • 2 bell peppers, sliced (any colors)
  • 1 onion, sliced
  • 2 cups cooked rice
  • 3 tbsp soy sauce
  • 2 cloves garlic, minced
  • 1 tbsp oil for frying
  • Salt and pepper to taste

Directions

  1. Heat the oil in a heavy skillet over medium-high heat.
  2. Add the beef and cook until browned, about 4-5 minutes.
  3. Add garlic and onions, sautéing for an additional 2 minutes until fragrant.
  4. Incorporate the bell peppers and cook for 3-4 minutes until tender yet crisp.
  5. Pour in the soy sauce, stirring to coat all ingredients evenly; season with salt and pepper to taste.
  6. Serve the beef and pepper mixture over a bed of warm rice.

Recipe Notes

  • Feel free to substitute any vegetables or protein based on your preferences.
  • Adjust the amount of soy sauce to control the flavor intensity.
  • This dish can be served as leftovers, perfect for meal prep!

Delicious Greek Lemon Chicken and Potatoes Recipe for Dinner

Greek Lemon Chicken and Potatoes: A Flavorful Mediterranean Delight

⚖️
Difficulty
Easy

⏲️
Prep Time
15 mins

🕒
Cook Time
45 mins

⏱️
Total Time
60 mins

🍽️
Servings
4 servings

Welcome to the vibrant world of Mediterranean cuisine with our Greek Lemon Chicken and Potatoes recipe. This dish combines succulent chicken marinated in zesty lemon juice and flavored with aromatic herbs, all lovingly roasted alongside golden, crispy potatoes. With every bite, you’ll experience the fresh and lively flavors of Greece, making this dish not just a meal, but an experience that transports you to sun-drenched shores and bustling tavernas. Ideal for family gatherings or a cozy dinner at home, this recipe embodies warmth, simplicity, and the joy of good food shared with loved ones.

The bold aromas of garlic and oregano mingle beautifully, while the tangy lemon brightens the rich flavors of the chicken and potatoes, creating a harmony that is truly satisfying. Imagine serving this colorful platter at your next dinner party, delighting your guests not only with a delicious dish but also with its beautiful presentation. It’s time to gather your ingredients and embark on this culinary adventure!

Quick Recipe Highlights

  • Flavor Profile: This Greek Lemon Chicken and Potatoes dish boasts a blend of citrusy brightness from fresh lemons, earthiness from potatoes, and a hint of savory herbs.
  • Texture: Enjoy tender, juicy chicken contrasted with crispy glazed potatoes that provide a delightful crunch, ensuring a satisfying mouthfeel with every bite.
  • Aroma: The aroma of roasted garlic combined with fresh lemon and herbs will fill your kitchen, invoking warm, homely feelings.
  • Visual Appeal: This dish is as visually inviting as it is delicious, with golden-brown chicken and vibrant, roasted potatoes accentuating your dinner table.
  • Skill Level Needed: This recipe is beginner-friendly, making it simple for new cooks but offering enough depth of flavor to please experienced chefs.
  • Special Equipment: All you need is a baking dish or sheet, a knife for prep, and basic kitchen utensils.

Recipe Overview

  • Difficulty Level: With straightforward steps and minimal techniques required, this recipe is labeled as easy, perfect for anyone looking to impress with minimal fuss.
  • Category: This dish fits wonderfully as a main course for family dinners, and it’s also a great option for meal prep, adding variety to your weekly menu.
  • Cuisine: Rooted in Greek culinary traditions, this recipe highlights the importance of fresh ingredients, simple flavors, and communal dining experiences.
  • Cost: The ingredients used are affordable and easy to source, making this dish a budget-friendly option without sacrificing quality or flavor.
  • Season: Enjoy this recipe year-round, but it shines particularly in the warmer months when fresh herbs are abundant and outdoor dining is a pleasure.
  • Occasion: Perfect for any gathering, from casual weeknights to festive celebrations, this dish tells a story of love and enjoyment around the dinner table.

Why You’ll Love This Recipe

This Greek Lemon Chicken and Potatoes will quickly become a favorite for many reasons. Its taste and texture offer a delightful balance of savory chicken with a hint of citrus freshness that brightens the palate. The tender meat paired with crispy potatoes creates an enjoyable contrast that elevates the entire meal experience.

Not only is this recipe delicious, but it also offers convenience in preparation. With simple steps and a hands-off cooking process, it allows you to engage with family or relax while the oven does the work. This dish is fuss-free yet presents beautifully, making it ideal for entertaining guests.

Health-wise, this dish packs an array of nutrients, thanks to the wholesome ingredients. Chicken is a great source of protein, while the potatoes provide carbohydrates and fiber. With fresh herbs and lemon, you also gain additional vitamins and antioxidant benefits, providing both flavor and nutrition in every bite.

Furthermore, this recipe is perfect for social gatherings. The warm, inviting aroma and colorful presentation create an appealing atmosphere, encouraging everyone to come together and share their love for food. This dish encourages conversation, laughter, and connection, enhancing any dining occasion.

Finally, its accessibility and cost-effectiveness set it apart from other complex recipes. The straightforward preparation and common ingredients make it a go-to option for both special occasions and everyday meals. Impressing your family or guests has never been easier!

Historical Background and Cultural Significance

Greek cuisine is known for its emphasis on fresh, high-quality ingredients, and this dish exemplifies that ethos perfectly. Originating in the Mediterranean region, Greek food celebrates the use of local produce, meats, and herbs, deriving its unique flavors from traditional cooking methods and local customs. Lemon chicken has been a staple in Greek households for generations, reflecting the agricultural abundance found in the region.

The significance of sharing meals in Greece cannot be overstated. Food is central to social gatherings and family life, where dishes like Greek Lemon Chicken and Potatoes invite people to gather around the table. This recipe encapsulates the essence of Greek hospitality, known as “philoxenia,” which translates to love of strangers, showcasing the welcoming nature of Greek culture.

Over time, the recipe has evolved, with numerous variations emerging in different regions of Greece, incorporating local ingredients and family traditions. This adaptability ensures that the dish remains a comforting and familiar option for many while allowing for personal touches to be added by each cook.

Regional variations can be seen with the use of different herbs or additional vegetables, reflecting personal and family preferences. This flexibility makes Greek Lemon Chicken and Potatoes not just a recipe, but a canvas for creativity, personalization, and culinary exploration.

Ingredient Deep Dive

– Chicken: Historically, chicken has been a preferred protein in Greek cuisine, valued for its versatility and availability. Rich in protein, chicken is beneficial for muscle health and overall nutrition. Choosing organic or free-range options tends to enhance flavor and quality. For storage, keep raw chicken refrigerated and use within 2 days for optimal freshness.

– Potatoes: A staple food in Greece, potatoes are embraced for their adaptability in recipes. They provide necessary carbohydrates and fiber, making them a filling addition. Look for firm potatoes without blemishes. Store in a cool, dry place. If you’re out of potatoes, consider substituting with sweet potatoes for a unique twist.

– Olives: A quintessential component of Greek cooking, olives add rich, briny notes that enhance many dishes. They are loaded with healthy fats, particularly oleic acid, which supports heart health. Choose high-quality olives and store them in brine for longevity. If unavailable, consider using sundried tomatoes as a substitute.

– Fresh Herbs: Oregano, thyme, and parsley bring freshness and complexity to the dish. Excellent sources of antioxidants, these herbs contribute both flavor and nutritional benefits. Purchase fresh herbs when possible for maximum flavor, and store them in a damp paper towel in the fridge. Dried alternatives can be used, but adjust quantities as needed.

– Lemons: The bright acidity of lemons not only flavors the dish but also enhances the overall aesthetic appeal. Lemons are packed with vitamin C and can aid digestion. Opt for organic lemons when possible. Store them at room temperature if used frequently or in the fridge for longer shelf life.

Common Mistakes to Avoid

  • Over-marinating the chicken can lead to a soggy texture; limit marinading time to 30-60 minutes.
  • Using unseasoned potatoes might result in blandness; seasoning them well ensures a flavorful bite.
  • Not letting the chicken rest after cooking can result in loss of juiciness, so allow it to sit for a few minutes.
  • Skipping olive oil can lead to dry chicken; a generous drizzle keeps everything moist and flavorful.
  • Ignoring cooking times can lead to undercooked or overcooked chicken; use a meat thermometer for accuracy.
  • Overcrowding the baking dish can prevent even cooking; use two dishes if needed to ensure proper heat circulation.
  • Choosing low-quality ingredients can diminish the overall flavor; invest in fresh, high-quality components.
  • Not adjusting seasonings after cooking can lead to unbalanced flavors; taste before serving and adjust accordingly.
  • Failing to preheat the oven can affect cooking times; always ensure the oven is properly heated before starting.
  • Not using enough lemons can lead to a dull taste; zest and juice generously for the best results.

Essential Techniques

Marinating chicken is crucial for flavor and tenderness. Use citrus, oil, and herbs to boost flavor profiles. Avoid long marinades as they can negatively affect the chicken’s texture; 30-60 minutes is ideal. Look for a silky texture before cooking, indicating the marinade has properly absorbed.

Roasting techniques elevate the dish’s flavor. Start with high heat to achieve a crispy exterior, followed by lower heat to cook through without drying out. Keep an eye on the color—golden-brown is the goal. Use a meat thermometer to check for doneness, targeting 165°F (75°C) in the thickest part of the chicken.

Pro Tips for Perfect Greek Lemon Chicken and Potatoes

– Opt for bone-in chicken pieces for extra flavor and juiciness compared to boneless cuts.
– Use a combination of yellow and red potatoes for color variety and different textures.
– Don’t skip the fresh herbs; they greatly enhance the flavor profile and aesthetic appeal.
– For a crispy finish, consider broiling the chicken for a few minutes before serving.
– Adding lemon slices on top of the chicken while baking enhances both flavor and appearance.
– Experiment with additional spices, like smoked paprika, for a unique flavor twist.
– Serve with extra lemon wedges on the side for guests to customize their plates.
– Pair this dish with a crisp Greek salad to add freshness and balance to the meal.

Variations and Adaptations

Regional variations of this dish may include the addition of Kalamata olives or capers for a tangy burst of flavor representative of Greek cuisine. In the summer, you can add seasonal vegetables like zucchini or bell peppers alongside the chicken and potatoes, enhancing the dish’s freshness.

For vegan adaptations, substitute chicken with marinated tofu or tempeh, ensuring to allow marination time to absorb the flavors. The potatoes can then be roasted with additional vegetables to create a hearty, flavorful meal.

Consider seasonal adaptations by incorporating herbs like rosemary in winter for a heartier flavor profile, whereas, in spring, fresh dill could brighten the dish beautifully. Feel free to play with spices to reflect your own taste preferences!

Serving and Presentation Guide

For an appealing presentation, serve the chicken and potatoes on a large platter, garnished with freshly chopped herbs. Consider adding lemon wedges around the circumference for a bright touch.

Use rustic serving dishes to enhance the Mediterranean vibe, and consider pairing the dish with a colorful salad, such as a traditional Greek salad, featuring feta cheese and olives to add additional textures and flavors.

Temperature is key for serving; ensure your dish is hot, but let it rest for a few minutes before carving for improved juiciness. For portion control, consider serving individual plates family-style, allowing guests to serve themselves.

Wine and Beverage Pairing

White wines such as Sauvignon Blanc or a crisp Greek Assyrtiko complement the citrusy notes of the dish beautifully, providing a refreshing contrast. Rose wine also works marvelously, enhancing the summer-inspired flavors while keeping the palate clean.

If you’re looking for non-alcoholic options, consider serving sparkling water flavored with lemon and mint to echo the dish’s freshness. Herbal infusions such as ginger tea can also serve well, balancing the richness of the meal with their brightness.

When serving coffee or tea, opt for lighter varieties that don’t overpower; a refreshing mint tea works particularly well, enhancing the Mediterranean experience.

Storage and Shelf Life

To store leftover Greek Lemon Chicken and Potatoes, place them in an airtight container and keep them in the refrigerator for up to three days. When reheating, make sure to do so in the oven or microwave until thoroughly heated through.

For longer storage, you can freeze the dish for up to three months. Make sure to use a freezer-safe container and label it with the date.

When reheating frozen portions, allow them to thaw overnight in the refrigerator or use the microwave for quick defrosting. Always reheat to a safe internal temperature of at least 165°F (75°C) to ensure food safety.

Make Ahead Strategies

You can marinate the chicken the night before, allowing the flavors to develop much deeper. Simply place the marinated chicken in a covered container in the fridge, then cook it when ready.

For potatoes, you can prep them by washing, peeling, and cutting them in advance, storing them in water to prevent browning. Just drain and season them when you’re ready to cook.

If you’re hosting, consider preparing a side salad ahead of time; it complements the main dish beautifully while saving you time on the day of the event.

Scaling Instructions

If you’re looking to halve the recipe, maintain the same flavor balance—just adjust cooking times as necessary. When doubling or tripling, ensure your baking dish is large enough to accommodate all components without overcrowding.

For times, you may need to increase overall cooking time slightly, checking for doneness with a meat thermometer. Be cautious not to overcook chicken, adjusting oven temperature or using multiple pans when necessary.

When scaling, keep storage considerations in mind; larger portions may require larger containers for proper refrigeration or freezing.

Nutritional Deep Dive

This Greek Lemon Chicken and Potatoes dish offers a solid macro breakdown, featuring lean protein from the chicken, complex carbohydrates from the potatoes, and healthy fats from olive oil. Portion control ensures balanced servings of every nutrient.

In terms of micronutrients, the dish is rich in vitamins C and B6, essential for immune function and energy metabolism, thanks to the lemon and chicken. Fresh herbs contribute antioxidants, promoting overall health.

This recipe supports weight management due to its high protein and fiber content, both of which provide satiety, helping to manage hunger levels effectively.

Dietary Adaptations

For gluten-free adaptations, this recipe is naturally gluten-free as all key ingredients do not contain gluten. Just be cautious of any cross-contamination with packaged ingredients.

If vegan, replace chicken with hearty vegetables or plant proteins. For a dairy-free option, simply omit cheese garnishes or creamy sides.

For low-carb diets, focus on using fewer potatoes or substitute them with cauliflower to create a lower-carb version while maintaining overall flavor.

For paleo diets, ensure to use fresh, whole foods and avoid processed ingredients, sticking to the natural ingredients in this recipe.

Troubleshooting Guide

If the chicken turns out dry, it may have been overcooked. Always use a meat thermometer to achieve the perfect temperature without exceedance.

Should the potatoes come out mushy, they were likely overcooked; ensure to check them frequently during the roasting process.

If flavors are unbalanced, take notes on portion sizes and adjust herbs and spices as per your preference in future attempts to suit your taste better.

Similar issues with texture could arise from improperly preheating your oven; ensuring it’s at the correct temperature before cooking can greatly impact final results.

Recipe Success Stories

Many home cooks have shared their successes, praising the dish for its relatable flavors and ease of preparation. Variations with seasonal vegetables have been particularly well-received, allowing everyone to personalize their experience.

Others have noted how it becomes a staple for family dinners, with readers often expressing their delight at how quickly it comes together. It’s created wonderful moments around the dinner table, connecting loved ones over shared deliciousness.

Photography tips offered by many community members, featuring vibrant colored plates and garnish suggestions, have showcased the beauty of this dish, making it a showstopper event after event.

Frequently Asked Questions

How long can I store leftovers?

You can safely store leftovers in the refrigerator for up to three days, or freeze them for up to three months.

Can I use different types of potatoes?

Yes, feel free to use any potatoes you prefer—golden, red, or even sweet potatoes can work beautifully in this recipe.

What herbs can I substitute?

If you don’t have oregano, try thyme or rosemary, which also capture some of the Mediterranean flavor profile.

Can I make this dish in advance?

Marinating the chicken overnight is a great make-ahead strategy, and you can prep the potatoes in advance as well.

Is this recipe suitable for meal prep?

Yes, portioned servings are perfect for meal prep! Simply reheat as needed during the week for quick, delicious meals.

What should I serve with this dish?

A Greek salad, tzatziki sauce, or crusty bread pair excellently with Greek Lemon Chicken and Potatoes.

Can I use skinless chicken?

Skinless chicken is workable but may lack some of the richness that the skin contributes. Adjust cooking time accordingly.

How spicy is this recipe?

This dish is mild; however, you can add red pepper flakes for a spicy kick if you prefer!

Can I use fresh tomatoes?

Absolutely! Fresh tomatoes can be a lovely addition, adding an extra layer of flavor.

Do I have to use lemon?

Lemon is a key component, but other citrus fruits like orange can be used for a sweeter flavor profile.

Additional Resources

Explore related recipes to expand your Mediterranean cooking repertoire, including flavorful Greek salads, tzatziki sauces, and other delightful main courses that share similar vibrant profiles. Consider technique guides for marinating and roasting chicken to further enhance your culinary skills.

For ingredient information, learning about the local flora of Greek cuisine can help in selecting the freshest herbs. Equipment recommendations can help ensure you have everything you need for optimal results, from sturdy roasting pans to quality kitchen knives.

Stay inspired with seasonal variations; think about combining this recipe with vegetables that are in season to add freshness and variety to your meals.

Join the Conversation

Engage with our community by sharing your unique experiences with this Greek Lemon Chicken and Potatoes recipe. Share your cooking tips, adaptations, and feedback through social media, enhancing our shared love for delicious food.

Photography enthusiasts can explore ways to capture the dazzling colors and textures of the dish, offering guidance and inspiration to others looking to showcase their culinary endeavors.

Don’t forget to leave a review and suggest any variations you’ve made to this beloved recipe—we love hearing from our community members and learning about your journey in the kitchen!

The Recipe

Greek Lemon Chicken and Potatoes

Serves: 4 servings

Prep Time: 15 mins

Cook Time: 45 mins

Total Time: 60 mins

Kitchen Equipment Needed

  • Baking Dish
  • Knife
  • Cutting Board
  • Cooking Spoon
  • Meat Thermometer

Ingredients

  • 4 chicken thighs, bone-in
  • 2 pounds potatoes, cut into wedges
  • 1/4 cup olive oil
  • Juice and zest of 2 lemons
  • 4 cloves garlic, minced
  • 2 teaspoons dried oregano
  • Salt and pepper to taste
  • Fresh parsley for garnish

Directions

  1. Preheat your oven to 400°F (200°C). In a large bowl, combine olive oil, lemon juice, lemon zest, garlic, oregano, salt, and pepper.
  2. Add chicken thighs to the bowl, ensuring they are well coated in the marinade. Let marinate for at least 30 minutes.
  3. Place potatoes in a separate bowl and drizzle with olive oil, salt, pepper, and any leftover marinade.
  4. Arrange the chicken in a baking dish, placing the potatoes around them.
  5. Bake for 45 minutes or until chicken is cooked through and reaches an internal temperature of 165°F (75°C) and the potatoes are golden brown.
  6. Let rest for a few minutes before serving. Garnish with fresh parsley.

Recipe Notes

  • For added depth, you can include sliced onions or other vegetables in the roasting pan.
  • Feel free to adjust marination time based on your schedule; up to overnight is wonderful.
  • Leftovers can be stored in an airtight container and refrigerated for up to three days.

Delicious Garlic Parmesan Crusted Chicken for Easy Weeknight Dinners

Garlic Parmesan Crusted Chicken: A Flavorful Delight

⚖️
Difficulty
Easy

⏲️
Prep Time
15 mins

🕒
Cook Time
30 mins

⏱️
Total Time
45 mins

🍽️
Servings
4 servings

Garlic Parmesan Crusted Chicken is a mouthwatering dish that is sure to impress family and friends with its rich flavors and satisfying crunch. In this simple yet exquisite recipe, chicken breasts are coated with a flavorful mixture of garlic, parmesan cheese, and breadcrumbs, creating a delectable crust that locks in the juicy tenderness of the chicken. As you take a bite, you’ll experience the harmonious blend of savory garlic and the nutty richness of parmesan, making it a true delight for your taste buds.

This dish is perfect for busy weeknights or special occasions, as it comes together quickly and easily, without sacrificing taste. The crispy crust paired with moist, tender chicken makes it a comforting choice for all ages. Whether served with a side of roasted vegetables or a fresh salad, Garlic Parmesan Crusted Chicken delivers a balance of flavors and textures that will make your dinner memorable.

Quick Recipe Highlights

  • Flavor Profile: The combination of garlic, parmesan cheese, and herbs provides an irresistible savory flavor with a touch of nuttiness.
  • Texture: The crispy outer layer contrasts beautifully with the juicy interior of the chicken, offering a satisfying bite.
  • Aroma: As the chicken cooks, the warm aroma of roasted garlic fills the kitchen, enticing everyone to the dining table.
  • Visual Appeal: The golden-brown crust on the chicken creates an appetizing contrast against its tender white meat, making it visually appealing.
  • Skill Level Needed: This recipe is approachable for cooks of all skill levels, making it an ideal choice for beginner chefs.
  • Special Equipment: Basic kitchen tools such as a baking sheet and mixing bowl are all you need for this easy recipe.

Recipe Overview

  • Difficulty Level: This Garlic Parmesan Crusted Chicken is categorized as easy, making it accessible even for novice cooks who are still learning their way around the kitchen.
  • Category: This dish is perfect for a main course, served alongside your favorite sides like pasta, rice, or vegetables.
  • Cuisine: While it embodies Italian influences through its use of parmesan and garlic, this recipe is adaptable and loved by many cultures worldwide.
  • Cost: The ingredients for Garlic Parmesan Crusted Chicken are relatively inexpensive, making it a cost-effective meal option.
  • Season: Ideal for any season, this dish’s warm flavors particularly shine during the colder months.
  • Occasion: Perfect for a family dinner, potluck, or gathering, this dish can easily be scaled for larger groups.

Why You’ll Love This Recipe

The taste and texture of Garlic Parmesan Crusted Chicken are truly captivating. The first bite reveals a wonderful crunch, followed by the juicy tenderness of the chicken. The robust flavor profile, enhanced by the garlic and cheese, creates a mouthwatering experience that keeps you coming back for more. Each serving encapsulates comfort food at its finest, sure to leave everyone satisfied.

In terms of convenience, this recipe is straightforward and quick, making it an excellent option for busy weeknights. With just 15 minutes of prep time and a total cooking time of 30 minutes, you can easily whip up a delicious homemade meal without the stress of complex techniques. The simplicity of the recipe allows for easy incorporation into your meal planning.

Nutritionally speaking, chicken is a great source of lean protein, aiding in muscle growth and repair while providing essential vitamins and minerals. Coupled with the healthy fats from the olive oil and the nutritional benefits of garlic, this dish not only tastes great but also supports a balanced diet.

Socially, this dish is an ideal choice for entertaining. The delightful aroma that wafts through the kitchen is bound to create a warm atmosphere, making your guests feel right at home. Garlic Parmesan Crusted Chicken is also versatile; it pairs well with many sides, making it easy to craft a complete meal that caters to various preferences.

Lastly, the cost-effectiveness of this recipe makes it an attractive choice for households on a budget. The ingredients are typically found in every pantry, and creating this flavorful dish at home is more economical than dining out. Plus, the satisfaction of serving a homemade dish is priceless.

Historical Background and Cultural Significance

The origins of garlic and chicken dishes can be traced back thousands of years, with garlic being revered in many ancient cultures for its health benefits. Garlic has long been used not only for its flavor but also for its medicinal properties. As for chicken, it has been a staple protein in various culinary traditions around the globe, cherished for its versatility and richness.

Garlic Parmesan Crusted Chicken, specifically, reflects the Italian culinary tradition, where using high-quality ingredients is paramount. The combination of garlic and parmesan is quintessentially Italian, representing comfort and indulgence. This dish allows home cooks to recreate the essence of Italian dining experiences in their own kitchens.

Over the years, this recipe has evolved, with variations adapting to different tastes and preferences. From the classic preparation to modern takes involving breadcrumbs and herb mixtures, each adaptation tells a story of culinary evolution, showcasing how traditional recipes can be enhanced while still retaining their essence.

Regional variations abound as well, with differences in seasoning and additional ingredients reflecting local tastes. For instance, some versions may incorporate herbs like basil or parsley, while others may suggest using different types of cheese, providing home cooks the flexibility to personalize the dish.

Ingredient Deep Dive

  • Chicken Breasts: This primary ingredient is favored for its lean protein content and versatility. Nutritionally, chicken breast is high in protein, low in fat, and a good source of B vitamins. Look for fresh, antibiotic-free chicken for the best quality, and store it properly in the refrigerator to maintain freshness. Substituting with turkey breast can be an option for a different flavor profile.
  • Parmesan Cheese: Known for its sharp, nutty flavor, parmesan cheese enhances many dishes, including this one. With its rich calcium content, it’s a great addition to a balanced diet. When choosing parmesan, opt for block cheese for a fresher taste, and keep it refrigerated. If you need a dairy-free option, consider nutritional yeast for a similar cheesy flavor.
  • Garlic: This aromatic bulb not only adds incredible flavor but also serves as a health powerhouse, known for its antioxidant properties. Fresh garlic should be selected for its potent flavor and nutritional benefits. Store garlic in a cool, dark place to avoid sprouting. For a milder flavor, roasted garlic can be used as a substitute.
  • Breadcrumbs: Essential for that crispy crust, breadcrumbs can be made from fresh or dry bread. They add texture and act as a binder for the ingredients. Whole-grain breadcrumbs can be a healthier option, and they should be stored in an airtight container. If gluten-free, use crushed gluten-free crackers or panko.

Common Mistakes to Avoid

  • Overcooking the chicken: To avoid dry chicken, ensure it is cooked to the proper internal temperature of 165°F (74°C).
  • Using stale breadcrumbs: Fresh breadcrumbs yield a better texture; always check the expiration date before using.
  • Not seasoning adequately: Make sure to season each component generously for optimal flavor.
  • Skipping the rest step: Letting the chicken rest for a few minutes after cooking ensures juiciness.
  • Using cold chicken: Allow chicken to sit at room temperature for 20-30 minutes before cooking for even cooking.
  • Choosing low-quality cheese: High-quality cheese makes a significant difference in flavor; opt for freshly grated parmesan.
  • Not preheating the oven: Always preheat your oven to ensure even cooking and proper crust development.
  • Neglecting to monitor the cooking time: Keep an eye on the chicken to prevent overcooking and maintain tenderness.
  • Using too much oil: Too much oil can make the crust soggy; a light drizzle is sufficient.
  • Not testing for doneness: Always use a meat thermometer to check for proper cooking temperature, rather than relying on cooking time alone.

Essential Techniques

  • Coating Techniques: Properly coating your chicken with breadcrumbs is essential for that crispy texture. Dredge in flour, dip in egg, and then coat in breadcrumbs for even coverage. Use your hands to press the breadcrumbs firmly onto the chicken for a better crust.
  • Cooking Method: Baking is a healthier alternative to frying while still yielding a crispy exterior. Ensure your baking sheet is lined or lightly greased to prevent sticking, and consider using a wire rack for better air circulation around the chicken.
  • Ingredient Preparation: Mincing garlic finely ensures an even distribution of flavor. When preparing your chicken, trim excess fat and pound the breasts to an even thickness for consistent cooking.
  • Meat Thermometer: Using a meat thermometer will guarantee that your chicken is cooked perfectly. Insert the thermometer at the thickest part of the meat without touching bone, aiming for an internal temperature of 165°F (74°C).

Pro Tips for Perfect Garlic Parmesan Crusted Chicken

  • Always season the chicken with salt and pepper before applying the crust for an extra flavor boost.
  • Mix in some Italian herbs with the breadcrumbs for added dimension, such as oregano or thyme.
  • For extra crispiness, broil the chicken for the last few minutes of cooking, keeping an eye on it to prevent burning.
  • Use freshly grated cheese rather than pre-shredded, as the latter often contains anti-caking agents that can affect melting.
  • Let the chicken rest after cooking; this keeps it juicy and allows flavors to meld.
  • For a lighter version, consider using almond flour or crushed nuts instead of breadcrumbs for a gluten-free option.
  • If you’re short on time, marinate the chicken in olive oil and garlic overnight for deeper flavor.
  • Melt some additional butter and brush it on the chicken before serving for a gorgeous finish and added richness.

Variations and Adaptations

If you’re looking to switch things up, consider trying different cheese varieties such as mozzarella or pecorino for a unique flavor profile. Adding herbs like rosemary or thyme can elevate the dish and add seasonal elements. For those who prefer a spicier kick, incorporating some red pepper flakes into the breadcrumb mixture will give your Garlic Parmesan Crusted Chicken an exciting twist.

For a seasonal adaptation, you can pair the chicken with fresh vegetables or a light salad in the summer. In fall or winter, serving it with creamy mashed potatoes or butternut squash adds comforting warmth. If you are following a specific diet, the recipe can easily be modified to be gluten-free using almond flour or gluten-free breadcrumbs, ensuring that everyone at your table can enjoy it without worry.

In terms of presentation, you can serve the chicken on a bed of sautéed vegetables or atop a fresh arugula salad for a touch of elegance. Drizzling balsamic reduction over the top gives a fancy finish and enhances the flavor profile.

Serving and Presentation Guide

Plating Garlic Parmesan Crusted Chicken can elevate your meal presentation significantly. Start with a simple white plate to let the dish shine. Place the chicken slightly off-center to allow room for sides, creating a visually interesting plate. Garnishing with fresh parsley or a sprinkle of extra parmesan adds a pop of color.

Consider serving with classic sides like roasted potatoes or steamed asparagus for a well-rounded meal. A small bowl of marinara sauce on the side can provide a flavorful dipping option. When serving, be mindful of portion sizes; a single chicken breast per person is typically sufficient, especially when accompanied by hearty sides.

Temperature is crucial for serving; allow the chicken to rest for a few minutes after cooking for optimal juiciness. Ensure that any sides are cooked and served hot to create a cohesive meal experience.

Wine and Beverage Pairing

When it comes to pairing beverages with Garlic Parmesan Crusted Chicken, opt for a crisp white wine like Sauvignon Blanc or a light-bodied red such as Pinot Noir. These wines complement the savory flavors of the chicken without overpowering it. If you prefer non-alcoholic alternatives, a sparkling water with lemon or a light iced tea works well, offering a refreshing counterpoint to the richness of the dish.

For a unique touch, consider pairing the meal with a light beer or cider, which echoes the dish’s comforting flavors and offers a nice balance. Always serve your beverages chilled, enhancing the overall dining experience.

Storage and Shelf Life

To store Garlic Parmesan Crusted Chicken, allow it to cool completely before placing it in an airtight container. Proper storage ensures freshness for up to three days in the refrigerator. For longer preservation, consider freezing the cooked chicken; properly wrapped in plastic wrap and aluminum foil, it can last for up to three months in the freezer.

When checking for spoilage, look for changes in color or smell before reheating. Reheating in an oven or air fryer is recommended to maintain crispiness; avoid microwaving as it may lead to sogginess. Always ensure that the chicken is heated to an internal temperature of 165°F (74°C) before consuming.

Make Ahead Strategies

You can prepare Garlic Parmesan Crusted Chicken in advance, making it perfect for meal prepping. The chicken can be coated with the breadcrumb mixture and refrigerated for up to 24 hours before cooking. This allows the flavors to deepen and makes for a quick dinner option.

To streamline your cooking process, you can also pre-chop your garlic and mix the breadcrumb coating in advance. Just store these ingredients separately in the refrigerator until you’re ready to cook.

If you’re looking to add fresh elements, consider preparing a salad or side dish the day of serving, ensuring that everything is fresh and delicious. This approach not only saves time but allows for a flavorful, stress-free meal.

Scaling Instructions

Scaling the Garlic Parmesan Crusted Chicken recipe can be done with ease. To halve the recipe, simply reduce each ingredient by half accordingly. For a larger gathering, doubling or tripling the ingredients will only require additional baking sheets and a slight extension in cooking time, ensuring everything is cooked evenly.

When adjusting quantities, remember to monitor the internal temperature of the chicken, as larger pieces may require more time to reach the desired doneness. If using a different size of baking sheets or pans, be aware that this could affect cooking time; smaller batches might cook faster, while larger ones may need more time.

Storing leftovers or excess portions should be done in batches, making it easier to reheat as needed while maintaining freshness.

Nutritional Deep Dive

Each serving of Garlic Parmesan Crusted Chicken offers a well-balanced profile of macronutrients, primarily lean protein from chicken, along with healthy fats from cheese and olive oil. The protein content aids in muscle recovery and satiation, beneficial for active individuals.

Analyzing the micronutrients, this dish provides essential vitamins such as B6 and niacin from the chicken, important for energy metabolism. Garlic lends additional health benefits, including antioxidants that help combat free radicals. This nutrient-rich profile makes the dish suitable for overall health and wellness.

When assessing portion sizes, control over serving sizes can help maintain a balanced diet and aid in weight management. Accompanying this dish with vegetables increases fiber intake, promoting a healthy digestive system alongside the benefits of lean protein.

Dietary Adaptations

For those following dietary restrictions, Garlic Parmesan Crusted Chicken can easily be modified. For gluten-free variations, replacing breadcrumbs with crushed rice crackers or gluten-free breadcrumbs ensures that those with sensitivities can enjoy this delicious dish.

Dairy-free options can be achieved using nutritional yeast as a substitute for parmesan, offering a similar depth of flavor without the dairy content. For a low-carb or keto adaptation, skipping the breadcrumbs altogether and seasoning the chicken with herbs can maintain flavor while aligning with dietary goals.

Vegan adaptations can involve substituting chicken with firm tofu or tempeh, ensuring to adjust cooking times accordingly for optimal results. Each substitution allows for a nutritious and satisfying meal while accommodating various dietary needs.

Troubleshooting Guide

In the event that your chicken comes out dry, ensure to monitor the cooking time and use a meat thermometer next time to gauge doneness accurately. If the crust is soggy instead of crispy, check that you’re using fresh breadcrumbs and ensure to bake at the recommended temperature for optimal results.

For flavor balance, if the dish tends to be overly salty, try reducing the salt in the breadcrumb mixture. If using highly seasoned ingredients, remember to adjust accordingly. If your chicken is falling apart during cooking, often a sign of overcooking or using chicken that’s been previously frozen, be cautious during the thawing phase and cook at the appropriate temperature.

Cooking equipment variations may also result in uneven cooking; ensure to use the right size of the baking sheet and rotate the chicken halfway through cooking for consistent results.

Recipe Success Stories

Many readers have shared their success stories with Garlic Parmesan Crusted Chicken, highlighting its ease and flavor. Home cooks have adapted the recipe to feature local spices, creating unique flavor profiles that resonate with local cuisines.

The versatility of the dish allows cooks to experiment, leading to variations that excite their families and friends. From adding a dash of hot sauce to incorporating locally sourced cheeses, the possibilities for adaptation are endless. Community members have even expressed how this recipe has become a staple in their weekly meal rotations due to its straightforward preparation.

With the supportive feedback shared in online groups, photography and plating tips have emerged, helping others present their creations beautifully. As cooks share their photos, they inspire others to attempt the dish as well, creating a community around a shared love for delectable food.

Frequently Asked Questions

Can I use thighs instead of breasts?

Yes, thighs can be used for a more flavorful result. They may require slightly longer cooking time, so always ensure they are cooked to the safe temperature of 165°F (74°C).

Can I make this dish ahead of time?

Absolutely! You can coat the chicken with the breadcrumb mixture and refrigerate it for up to 24 hours before baking. Just bake it when you’re ready to serve.

What can I serve on the side?

This dish pairs well with a variety of sides like roasted vegetables, garlic mashed potatoes, or a light salad for a balanced meal.

How do I ensure the crust stays crispy?

To maintain a crispy crust, avoid overcrowding the baking sheet and ensure proper air circulation during cooking. An air fryer can also yield excellent results.

Can I use frozen chicken?

While you can use frozen chicken, it’s best to thaw it first for even cooking. Exercise caution, ensuring it is cooked to the appropriate temperature.

Is this dish kid-friendly?

Yes! The flavors are mild yet appealing, making Garlic Parmesan Crusted Chicken a fantastic option for kids who may be picky eaters.

Can I add vegetables to this recipe?

Incorporating vegetables like zucchini or bell peppers alongside the chicken in the oven can create a wholesome, one-pan meal.

What if I don’t have parmesan cheese?

You can substitute with another hard cheese such as pecorino romano or even nutritional yeast for a dairy-free option with a similar flavor.

How should I store leftovers?

Store leftovers in an airtight container in the refrigerator for up to three days. You can reheat them in the oven for best results.

Can I change the herbs used?

Definitely! Feel free to experiment with different herbs such as thyme, oregano, or basil for a personalized touch.

Additional Resources

To further enhance your culinary skills, check out additional recipes featuring chicken, such as Lemon Herb Grilled Chicken or Chicken Piccata. These dishes also incorporate similar preparation techniques and delicious flavors.

Consider exploring technique guides that delve into proper breading, pan-frying, and baking styles to gain confidence with various cooking methods. Ingredient information on garlic and spices can deepen your understanding of flavor profiles and how to balance them in your cooking.

If you’re looking for equipment recommendations, investing in quality baking sheets and measuring tools can significantly improve your overall cooking experience, ensuring accurate results time after time.

Join the Conversation

We encourage you to share your experiences with Garlic Parmesan Crusted Chicken! Whether you’ve made your own twists, embraced different dietary adaptations, or simply enjoyed the dish, your feedback is invaluable. Connect with us on social media platforms to share photos, tips, and ideas for serving this delicious recipe.

Get involved in the community by commenting your variations or hosting recipe review sessions, where you can exchange insights and improve your own cooking endeavors. Join the conversation and let’s celebrate our love for culinary creativity together!

The Recipe

Garlic Parmesan Crusted Chicken

Serves: 4 servings

Prep Time: 15 mins

Cook Time: 30 mins

Total Time: 45 mins

Kitchen Equipment Needed

  • Oven
  • Baking sheet
  • Mixing bowl
  • Measuring cups and spoons
  • Meat thermometer

Ingredients

  • 4 boneless, skinless chicken breasts
  • 1 cup grated Parmesan cheese
  • 1 cup breadcrumbs
  • 3 cloves garlic, minced
  • 2 tablespoons fresh parsley, chopped
  • 1 teaspoon salt
  • ½ teaspoon black pepper
  • ½ teaspoon paprika
  • ¼ cup olive oil

Directions

  1. Preheat your oven to 375°F (190°C).
  2. In a mixing bowl, combine breadcrumbs, grated Parmesan, garlic, parsley, salt, pepper, and paprika.
  3. Brush chicken breasts with olive oil to ensure the breadcrumb coating sticks.
  4. Dredge each chicken breast in the breadcrumb mixture, pressing down to ensure an even coating.
  5. Place the coated chicken breasts on a lightly greased baking sheet.
  6. Bake in the preheated oven for 25-30 minutes or until the internal temperature reaches 165°F (74°C).
  7. After removing from the oven, let the chicken rest for a few minutes before serving.

Recipe Notes

  • You can substitute chicken breasts with thighs for a juicier result.
  • Feel free to experiment with different herbs and spices in the coating.
  • This dish can be easily doubled for larger gatherings.

Ultimate Dill Pickle Cheese Ball Recipe for Irresistible Snacking

Dill Pickle Cheese Ball Recipe: A Fun and Flavorful Snack!

⚖️
Difficulty
Easy

⏲️
Prep Time
15 mins

🕒
Cook Time
0 mins

⏱️
Total Time
15 mins

🍽️
Servings
8 servings

Are you ready to elevate your next gathering with a deliciously quirky twist? The Dill Pickle Cheese Ball is a fun and flavorful snack that combines creamy cheesiness with the tangy crunch of dill pickles! A perfect appetizer for parties, game days, or even just a cozy night at home, this cheese ball captivates everyone with each bite, marrying the classic flavors of a cheese spread with the invigorating zest of pickles. You’ll love the balance of textures, from the smoothness of the cream cheese to the crispness of the dill pickles, making each mouthful a delightful experience.

Creating this Dill Pickle Cheese Ball is not only simple—taking just 15 minutes—but it also allows you to customize it with your preferred cheese and herbs. Imagine presenting this eye-catching cheese ball on a tray surrounded by crisp crackers or fresh veggies, making it the star of your snack table. With its attractive presentation and crowd-pleasing taste, this dish is sure to impress your family and friends!

Quick Recipe Highlights

  • Flavor Profile: The Dill Pickle Cheese Ball delivers a delightful blend of creamy cheeseiness balanced by the tangy crunch of dill pickles, with hints of garlic and onion for added depth.
  • Texture: This dip boasts a creamy, smooth texture enveloped in a crunchy exterior from the finely chopped nuts and herbs, making it incredibly satisfying to eat.
  • Aroma: The aromatic blend from fresh dill and garlic creates an enticing scent that draws everyone in as soon as it’s served.
  • Visual Appeal: The vibrant green pickle bits contrast beautifully with the pale cheese mixture, making the cheese ball look as appetizing as it tastes.
  • Skill Level Needed: This recipe is perfect for beginners and requires no specialized culinary skills beyond basic mixing and shaping.
  • Special Equipment: No special tools are required, just a mixing bowl and a spatula or wooden spoon to combine the ingredients!

Recipe Overview

  • Difficulty Level: The Dill Pickle Cheese Ball is considered easy to prepare, making it suitable for novice cooks or those in a rush. With just a few simple steps, anyone can whip it up and serve.
  • Category: This dish falls under appetizers or party snacks, ideal for social gatherings, holiday parties, or even casual get-togethers.
  • Cuisine: Drawing inspiration from classic American flavors, this recipe intermingles elements loved in many regional styles, showcasing the important role pickles play in American side dishes.
  • Cost: The estimated costs of ingredients are budget-friendly, primarily consisting of common items like cream cheese and dill pickles, making this a cost-effective option for party planning.
  • Season: The Dill Pickle Cheese Ball is a year-round favorite, but it shines particularly during the summer months when gatherings and outdoor events are abundant.
  • Occasion: Perfect for game days, picnics, potlucks, and holiday celebrations, this cheese ball is versatile enough to fit various occasions with ease.

Why You’ll Love This Recipe

The combination of taste and texture in the Dill Pickle Cheese Ball is nothing short of phenomenal. The creamy cheese base intertwines perfectly with the tangy pickles, producing flavors that are both comforting and refreshing. Each ingredient brings something unique, ensuring every bite is a delightful surprise. The crunchiness from the nuts adds an unexpected yet welcomed textural contrast that keeps you coming back for more.

Additionally, its convenience cannot be overstated. With a preparation time of just 15 minutes, you can easily whip up this engaging appetizer without the fuss of lengthy cooking procedures. Simply mix, shape, and serve! This makes it an excellent choice for unexpected guests or last-minute gatherings, ensuring you always have a crowd-pleasing snack on hand.

Nutritionally, the Dill Pickle Cheese Ball has some advantages. While it is indulgent with cheese and nuts, you can also incorporate lighter ingredients or serve it with nutritious dippers like veggies to boost the health factor. The pickles themselves contain beneficial probiotics and can aid digestion, making this appetizer not only delicious but a bit wholesome too.

When it comes to entertaining, the Dill Pickle Cheese Ball is sure to shine. It garners attention on a loveably platter and beckons guests to socialize around it, creating a fun and interactive dining experience. With serving options galore, such as crackers, pretzels, or fresh vegetables, you can customize how everyone enjoys it, amplifying the social aspect of food.

Lastly, its cost-effectiveness makes it an attractive option when feeding a crowd. The ingredients are inexpensive, and you can tailor the recipe portions according to your needs. This enables you to serve a large group without breaking the bank while still impressing them with fantastic flavors!

Historical Background and Cultural Significance

The origins of the cheese ball date back to the early 19th century in America, when cream cheese gained popularity. It was often used in savory dishes, and cheese balls evolved as a delightful party snack, showcasing a variety of flavors and ingredients. The love for pickles combined with cheese grew, leading to the creation of the Dill Pickle Cheese Ball, which embodies the spirit of entertaining and communal dining.

Historically, pickles have played a significant role in American cuisine, representing the country’s affinity for bold flavors and preservation methods. Dill pickles, with their sharp flavor, became symbolic of summer picnics and festive gatherings, contributing to the cheese ball’s lasting popularity. This dish reflects not only a harmony of textures and flavors but also the cultural importance of shared experiences and flavors in American food history.

As recipes have evolved, the Dill Pickle Cheese Ball has adapted through regional variations and personal preferences. While the core ingredients remain constant, creative twists from different locales feature different spices, cheese types, or toppings, which enrich this cheese ball’s narrative. Each variation tells a new story while connecting back to the original flavor inspirations.

Today, the Dill Pickle Cheese Ball stands as both a nostalgic and innovative dish. It’s embraced at casual family gatherings and upscale soirées alike, continually reminding us of the joy that simple, delicious food can bring. This beloved snack shines in diverse settings while holding a special place in the hearts—and stomachs—of those who partake.

Ingredient Deep Dive

Dill Pickles: Dill pickles are a classic condiment that has their roots in numerous culinary traditions worldwide. Their contributions to flavor can elevate many dishes, providing a sharp tang that cuts through richness. They’re low in calories yet high in flavor, making them an ideal addition to appetizers. When selecting dill pickles, opt for crisp, firm varieties without any blemishes for the best crunch. Store unopened jars in a cool, dark place, while opened jars should be kept in the refrigerator for maximum freshness. If you’re in a pinch, you can substitute with other pickle varieties, but ensure the flavor remains robust and tangy to achieve the desired taste.

Cream Cheese: Cream cheese is a staple in many American kitchens, originating in the 19th century when dairy processing techniques improved. Its creamy texture and mild flavor make it a versatile base for dips, spreads, and desserts. Nutritionally, cream cheese provides a good source of calcium, though it should be enjoyed in moderation due to its fat content. Look for fresh varieties at your local grocery store, avoiding ones that appear dull or discolored. Cream cheese can be stored in the refrigerator for several weeks; if you have leftovers, it’s excellent for use in cooking and baking. For a lighter option, consider alternatives like Greek yogurt or cottage cheese, which can still offer that creamy aspect while providing increased protein.

Common Mistakes to Avoid

  • Not letting the cream cheese soften at room temperature before mixing. This will make it difficult to incorporate ingredients evenly.
  • Overmixing the ingredients which can cause the cheese ball to become too soft and lose its shape.
  • Forgetting to taste and adjust seasoning before shaping the cheese ball. Flavors can vary between brands of pickles and cheese.
  • Using pickles that are too wet. Make sure to drain them well to avoid soggy cheese ball texture.
  • Skipping the chilling step before serving can result in a cheese ball that’s too soft to handle easily.
  • Choosing low-quality nuts for coating, which can lead to off-flavors. Fresh, quality nuts enhance the overall taste.
  • Not covering the cheese ball tightly when refrigerating. This can lead to dryness or absorption of other scents from the fridge.
  • Not adjusting for texture. If the mixture feels too dense, add a bit of yogurt or sour cream to improve spreadability.
  • Ignoring presentation; while taste is important, a cheese ball should look as good as it tastes to entice guests!

Essential Techniques

Mixing: Mixing is essential when preparing the cheese ball. The key is to blend the ingredients until they’re well integrated without overworking. Overmixing can make the texture too soft, losing that perfect consistency. Aim for a smooth blend while retaining some chunky pickles for texture. Trust your senses—visually, you should see even distribution, and when tasting, the flavors should bloom harmoniously.

Chilling: Chilling the cheese ball is crucial. This allows the flavors to meld while firming up the mixture, making it easier to handle and serve. Refrigerate for at least an hour before serving. To ensure successful chilling, wrap it tightly in plastic wrap and place it on a flat surface. If you want, you can even freeze it in advance for longer-term storage, simply defrost in the refrigerator before serving!

Pro Tips for Perfect Dill Pickle Cheese Ball

1. For extra flavor, consider adding a splash of pickle juice to the mixture—it can amplify the dill taste.

2. Mix in finely chopped herbs such as chives or parsley for added depth and color.

3. Experiment with different types of nuts for coating; walnuts and pecans offer unique flavors compared to traditional almonds.

4. If you prefer a stronger flavor, blend in some shredded cheddar or similar cheese with your cream cheese.

5. Garnish your cheese ball with additional pickles or fresh herbs for added appeal and a burst of freshness.

6. Serve with a variety of dippers—consider pretzel sticks, sliced baguette, or fresh veggies to cater to different tastes.

7. Create a themed platter by pairing the cheese ball with complementary dishes like charcuterie or olives.

8. Don’t hesitate to adapt the flavors based on your guests’ preferences! You might discover a new favorite combination.

Variations and Adaptations

Regional variations of the Dill Pickle Cheese Ball often include substituting different pickles, such as bread and butter or hot pickles, to create a sweet or spicy twist. Seasonal adaptations might involve incorporating fresh herbs during spring or adding roasted red peppers in the fall for a colorful presentation.

If dietary modifications are needed, vegan cream cheese works beautifully in place of regular cream cheese, resulting in a dairy-free option that still retains the essential flavors. Low-carb dieters can slap it on cucumber slices instead of crackers for a guilt-free treat!

For flavor variations, consider adding a dollop of horseradish or mustard to introduce a zesty kick. If you crave a cheesier profile, blending in smoked gouda or pepper jack will create an exciting fusion of flavors that your palate will love.

Texture modifications can be achieved as well; for instance, use cream cheese that has a higher fat content for a richer consistency. If you’d prefer a lighter texture, mix in some whipped cream cheese instead. Presentation can also change dramatically with the use of colorful garnishes or a creative serving platter!

Serving and Presentation Guide

When plating, consider using a beautiful serving platter to enhance visual appeal; round shapes work particularly well to enhance the cheese ball’s form. You can sprinkle chopped herbs or crushed nuts around the cheese ball for added color and contrast. Garnishing with dill sprigs and extra pickles can enhance the overall look, making it even more appetizing.

Pair the cheese ball with various accompaniments like crostini, crackers, or a veggie tray to provide plenty of choices for guests. Think about temperature considerations as well; serving the cheese ball slightly cooler allows flavors to concentrate, while allowing it to sit for a few minutes out of the fridge can make it easier to spread.

For portion control tips, consider providing small scoops or candy scoops alongside the cheese ball, allowing guests to serve themselves without needing to cut into it directly.

Wine and Beverage Pairing

When pairing wine with the Dill Pickle Cheese Ball, white wines like Sauvignon Blanc or a light Pinot Grigio complement the dish beautifully. Their acidity balances the richness of the cheese, enhancing the overall tasting experience. If you prefer non-alcoholic alternatives, sparkling water infused with citrus or a refreshing iced tea can provide a delightful match.

For coffee or tea lovers, consider a light herbal tea with mint undertones—this will add a refreshing dimension as well as clean the palate between bites. Ensure you serve all beverages chilled, as the refreshing temperature enhances the experience while enjoying this engaging appetizer.

Storage and Shelf Life

Proper storage methods are key to preserving the Dill Pickle Cheese Ball. Store it in an airtight container in the refrigerator if you have leftovers; it should remain fresh for up to one week. For optimal flavor and texture, consume within the first few days for best results. When checking for spoilage, look for off odors or a change in texture, which can indicate that it’s time to discard.

Reheating instructions are generally unnecessary, as the cheeseball is typically served cold, but if you prefer a warm version, place it in a 350°F oven for about 10-15 minutes until softened. Additionally, if you’re hoping to keep it longer, cheese balls can be frozen wrapped tightly in plastic wrap and then stored in a freezer bag—just be sure to consume it within 3 months for the best quality.

Make Ahead Strategies

If you’re planning a gathering, the Dill Pickle Cheese Ball shines as a make-ahead option. Prepare the mixture the day before your event, shape it into a ball, and wrap it tightly in plastic wrap. This allows the flavors to develop overnight. When you’re ready to serve, simply remove it from the fridge, coat with nuts, and present!

Quality can be affected if left out for too long, so if you prepare ahead, aim to have it chilled until serving time. Consider leaving out some garnishes until the last moment to ensure freshness; this also boosts visual appeal! For easy assembly, you can pre-chop your dippers and store them in sealed bags, ready for your next gathering.

Scaling Instructions

When scaling the Dill Pickle Cheese Ball recipe, consider the number of people you’re serving. For smaller gatherings, you can easily halve the recipe; simply adjust the ingredient quantities accordingly. Ensure you select a smaller bowl for mixing.

If doubling or tripling the recipe, doubling the mixing bowl size is key for ease of handling, and make sure to increase chilling time if necessary. Cooking times remain unchanged, as you’re preparing a cheese ball rather than cooking a dish. Storage considerations remain the same regardless of size, so be mindful of airtight containers for maintaining freshness.

Nutritional Deep Dive

When exploring the macros in the Dill Pickle Cheese Ball, it generally consists of a good balance of fats from the cream cheese and nuts, combined with carbohydrates from the pickles. A typical serving can yield around 200 calories; however, this can vary based on the portion size and ingredient types used.

The cheese ball contains several micronutrients as well. Cream cheese provides calcium and vitamin A, while dill pickles contribute antioxidants, vitamins A and K, and fiber. Portion control is key for weight management, so keep servings modest for enjoyable snacking without overspending caloric limits.

Dietary Adaptations

For a gluten-free option, simply ensure that all your accompaniments are certified gluten-free, as the cheese ball itself is naturally gluten-free. If you’re looking for dairy-free adaptations, plant-based cream cheese is widely available and can effectively replace regular cream cheese while keeping the flavors intact.

Vegans can enjoy this dish by using vegan cream cheese and ensuring all garnishes and accompaniments align with a vegan diet. For those pursuing a low-carb lifestyle, serve with sliced cucumbers or bell pepper strips instead of crackers to keep carbs at bay.

Keto followers can benefit from using full-fat cream cheese and enjoy this cheese ball as part of their high-fat diet while still delighting in incredible flavors. Paleo enthusiasts can opt for nut coatings and gluten-free dippers to create a version that aligns with their dietary needs, ensuring everyone can enjoy this delightful snack!

Troubleshooting Guide

If you encounter texture issues with your cheese ball, such as overly soft or runny mixtures, confirm you didn’t add too much pickle juice. If this happens, slowly incorporate additional cream cheese to balance it out.

For flavor balance problems, consider adding a pinch of salt or extra herbs to heighten the overall taste. If using a less intense cheese, a bit of garlic powder can help elevate the flavors. If your cheese ball is served too cold and hard, letting it sit at room temperature for about 15-20 minutes will restore spreadability.

If you face equipment challenges like a malfunctioning mixer, remember that almost everything can be mixed by hand! Having a sturdy spatula or wooden spoon at hand can make for smooth mixing. Should timing concerns arise, adjust chilling times based on size—larger rounds may need more time to firm.

Recipe Success Stories

Community feedback showcases broad enjoyment and creativity surrounding the Dill Pickle Cheese Ball. Many bakers and home cooks have shared their variation success stories, adapting ingredients based on local preferences or seasonal availability. The cheese ball’s versatility allows for unique spins, and readers frequently provide delightful photographs of their creations.

Accompanying suggestions often highlight additional flavors, with many recommending unique spices or herbs to infuse the cheese ball with personality and flair. Photography tips include utilizing natural light to enhance the dish’s brightness and refreshing appeal, creating mouthwatering images that garner attention.

Frequently Asked Questions

Can I make the cheese ball ahead of time?

Absolutely! The Dill Pickle Cheese Ball is a fantastic make-ahead recipe. You can prepare it up to two days in advance, allowing the flavors to meld beautifully. Just be sure to chill it in the fridge until you’re ready to serve.

What can I serve with the cheese ball?

You can enjoy the cheese ball with a variety of dippers, including crackers, pretzels, vegetable sticks, or sliced baguettes. These will provide that perfect crunch and enhance the flavors of the cheese ball.

How long will leftovers last?

If stored in an airtight container in the fridge, the cheese ball can last about a week. Ensure it’s wrapped tightly to maintain freshness, and consume it within that timeframe.

Can I freeze the cheese ball?

Yes, the cheese ball can be frozen! Wrap it tightly in plastic wrap, then place it inside a freezer-safe bag. When ready to enjoy, defrost it in the fridge overnight before serving.

Can I use different types of cheese?

Definitely! While cream cheese is essential for the base, feel free to incorporate other cheeses such as cheddar, gouda, or even pepper jack for added flavor variations.

Is this recipe spicy?

This Dill Pickle Cheese Ball is not inherently spicy; however, you can add spices like cayenne or hot sauce if you’d like to introduce some heat to the mixture!

What’s the best way to shape the cheese ball?

Once your mixture is ready, use your hands to form it into a ball shape. For less mess, you can also use a piece of plastic wrap to help shape it neatly.

Can I mix in other ingredients?

Absolutely! Feel free to get creative by mixing in ingredients like chopped bacon, olives, or herbs, customizing the cheese ball to your taste.

What is the best way to serve it?

Present the cheese ball on a beautiful platter surrounded by your choice of dippers. You could even garnish it with herbs or additional pickle slices for a polished look!

Are there any vegan alternatives?

Yes! You can easily make a vegan version of this cheese ball by using non-dairy cream cheese and ensuring all other ingredients are plant-based, such as nuts that are certified vegan.

Additional Resources

For those seeking related recipes, try exploring variations on classic cheese dips, which sometimes integrate different flavor profiles or seasonal ingredients. Additionally, look into technique guides for preparing cheese-based dishes for parties, ensuring you garner plenty of excitement!

Ingredient information can help you understand the nutritional benefits of the dish as well; learning about cream cheese and pickles enhances your cooking experience while also providing lots of fun facts to share! Finally, consider checking out equipment recommendations to optimize your cooking and presentation skills while experimenting with themed platters!

Join the Conversation

We encourage you to share your experiences with the Dill Pickle Cheese Ball by posting photos on social media or leaving comments below. Insights from your own kitchen adaptations or any twist you added can inspire fellow food lovers!

Photography tips for capturing your cheese ball can enhance your engagement; natural light and vibrant garnishes showcase its appetizing nature. If you’ve discovered new flavors or variations, be sure to share those suggestions, too. Engaging with the community helps to create a collective appreciation for culinary creativity and celebrates this fun dish’s versatility!

The Recipe

Dill Pickle Cheese Ball

Serves: 8 servings

Prep Time: 15 mins

Cook Time: 0 mins

Total Time: 15 mins

Kitchen Equipment Needed

  • Mixing bowl
  • Spatula or wooden spoon
  • Serving platter
  • Plastic wrap (optional)

Ingredients

  • 16 oz cream cheese, softened
  • 1 cup dill pickles, finely chopped
  • 1/2 cup shredded cheese (optional for additional flavor)
  • 1/4 cup green onions, chopped
  • 1/2 cup chopped nuts (walnuts, almonds, etc. for coating)
  • 1 tsp garlic powder
  • 1 tsp onion powder
  • Salt and pepper to taste
  • Fresh dill or parsley for garnish (optional)

Directions

  1. Start by mixing softened cream cheese in a mixing bowl until smooth.
  2. Fold in the finely chopped dill pickles, green onions, shredded cheese (if using), garlic powder, onion powder, and a pinch of salt and pepper.
  3. Once well-combined, shape the mixture into a ball using your hands. If it sticks, wet your hands slightly with water.
  4. Roll the cheese ball in chopped nuts until fully coated.
  5. Wrap the cheese ball in plastic wrap and refrigerate for at least one hour to firm up.
  6. Before serving, remove from the fridge and garnish with fresh dill or parsley, if desired.
  7. Serve with a platter of your favorite dippers like crackers, veggie sticks, and pretzels!

Recipe Notes

  • Feel free to substitute dill pickles with bread and butter pickles or spicy varieties for a different flavor.
  • You can adjust the garlic and onion powder according to your taste preferences.
  • This cheese ball can be made up to two days in advance; it stores well in the fridge.