Crispy Oven-Baked Chicken Tenders – Crunchy, Juicy & Easy

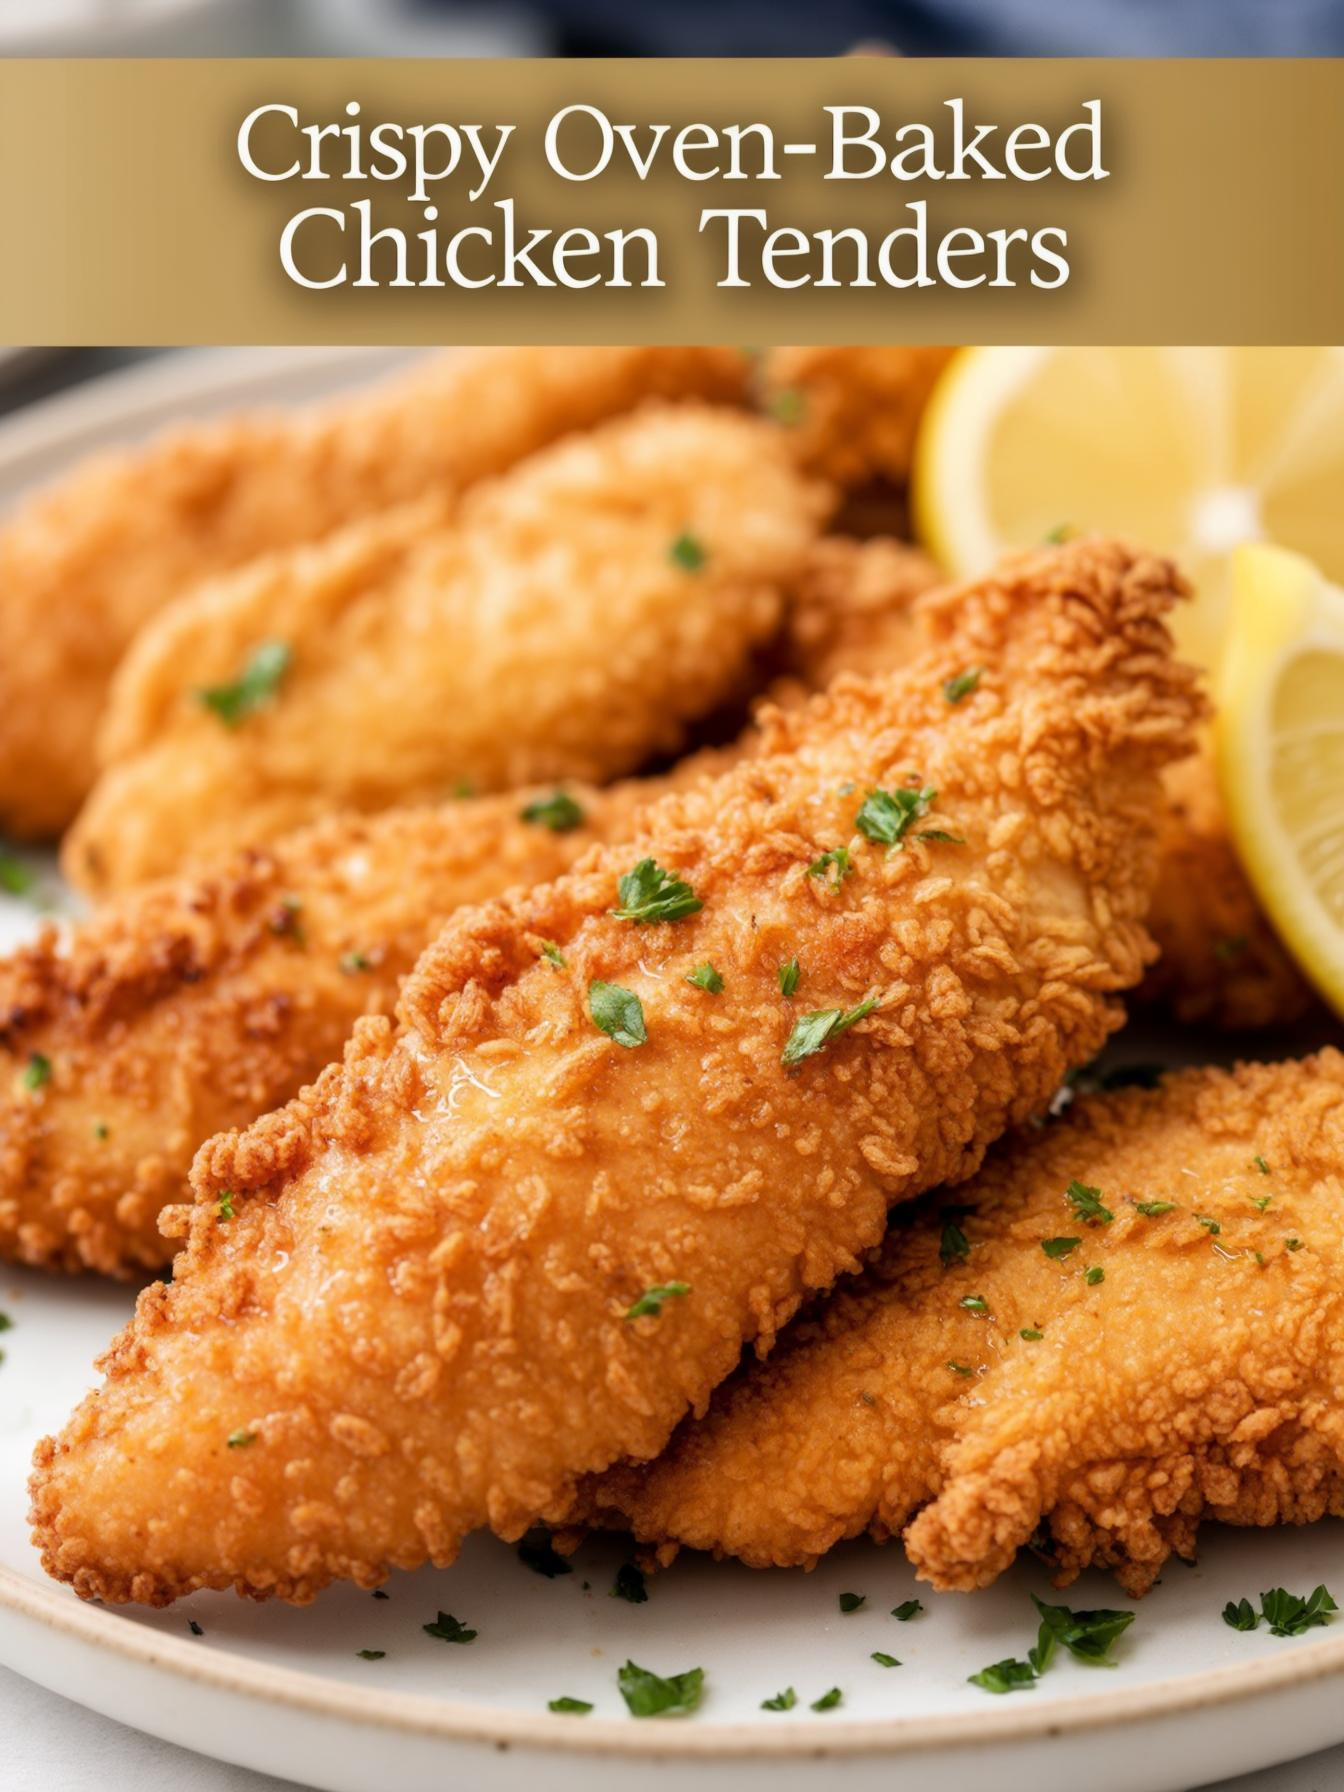
Craving crispy, golden-brown chicken tenders without deep frying? These Crispy Oven-Baked Chicken Tenders are the perfect solution! They’re juicy on the inside, crunchy on the outside, and baked to perfection—no greasy mess!

Coated in a flavor-packed breadcrumb mixture, these tenders are great for kids and adults alike. Serve them with your favorite dipping sauces for a quick weeknight meal, game-day snack, or party appetizer!


Why You’ll Love This Recipe

Crispy & Crunchy Without Frying – Thanks to panko breadcrumbs & oven baking!
Juicy & Flavorful – Tender chicken with a well-seasoned coating.
Healthier Than Fried – Less oil, same crispy texture!
Great for Meal Prep – Make ahead and reheat easily.


Ingredients You’ll Need

For the Chicken:

  • 1 ½ lbs chicken tenders (or boneless chicken breasts cut into strips)

  • ½ teaspoon salt

  • ½ teaspoon black pepper

  • ½ teaspoon garlic powder

  • ½ teaspoon smoked paprika

  • ½ teaspoon onion powder

For the Breading:

  • 1 cup panko breadcrumbs (extra crispy!)

  • ½ cup grated Parmesan cheese (for extra flavor)

  • 1 teaspoon Italian seasoning

  • ½ teaspoon paprika

For the Egg Wash:

  • 2 eggs

  • 2 tablespoons milk

For Baking:

  • Cooking spray or olive oil


How to Make Crispy Oven-Baked Chicken Tenders

Step 1: Preheat & Prep

  • Preheat oven to 425°F (220°C).

  • Line a baking sheet with parchment paper and place a wire rack on top (for extra crispiness!).

Step 2: Season the Chicken

  • Pat chicken tenders dry and season with salt, pepper, garlic powder, paprika, and onion powder.

Step 3: Set Up the Breading Station

  1. In one bowl, whisk together eggs and milk.

  2. In another bowl, mix panko breadcrumbs, Parmesan cheese, Italian seasoning, and paprika.

Step 4: Coat the Chicken

  1. Dip each chicken tender into the egg mixture, letting excess drip off.

  2. Press into the breadcrumb mixture, coating evenly.

  3. Place on the prepared baking sheet with a wire rack.

Step 5: Bake Until Crispy!

  • Lightly spray chicken tenders with cooking spray (this helps crisp them up!).

  • Bake for 18-20 minutes, flipping halfway, until golden and crispy.

  • Check for an internal temperature of 165°F (75°C).

Step 6: Serve & Enjoy!

  • Let cool for 5 minutes, then serve with your favorite dipping sauces.


Tips for the Best Crispy Chicken Tenders

Use panko breadcrumbs – They make the tenders extra crispy.
Bake on a wire rack – This allows heat to circulate, crisping up both sides.
Don’t skip the Parmesan – It adds amazing flavor to the breading!
Want extra crunch? – Double-coat by dipping in egg and breadcrumbs twice.


Dipping Sauce Ideas

Classic Choices:

  • Ranch dressing 🥗

  • Honey mustard 🍯

  • BBQ sauce 🍖

Unique Twists:

  • Spicy sriracha mayo 🌶

  • Garlic aioli 🧄

  • Sweet chili sauce 🌟


Variations & Add-Ins

Make It Spicy 🔥

  • Add ½ teaspoon cayenne pepper to the breadcrumb mixture.

  • Drizzle with hot honey before serving.

Make It Gluten-Free 🌾

  • Use gluten-free panko or crushed cornflakes.

Air Fryer Option ✈️

  • Preheat air fryer to 400°F.

  • Cook for 10-12 minutes, flipping halfway, until crispy.


How to Store & Reheat

Storing Leftovers

  • Keep in an airtight container in the fridge for up to 3 days.

Reheating

  • Oven: Bake at 375°F for 10 minutes.

  • Air Fryer: Heat at 350°F for 5 minutes.

  • Microwave: Not recommended (they lose crispiness).

Freezing

  • Freeze uncooked breaded tenders for up to 2 months.

  • Bake directly from frozen at 425°F for 22-25 minutes.


FAQs About Crispy Oven-Baked Chicken Tenders

Q: Can I use chicken breasts instead of tenders?
A: Yes! Slice boneless, skinless chicken breasts into ½-inch thick strips.

Q: What can I use instead of eggs?
A: Try buttermilk, Greek yogurt, or a flaxseed egg as a binder.

Q: Can I make these ahead of time?
A: Yes! Bread the chicken and refrigerate for up to 24 hours before baking.

Q: What sides go well with chicken tenders?
A: French fries, coleslaw, roasted veggies, or mac & cheese are great choices!


Final Thoughts

These Crispy Oven-Baked Chicken Tenders are golden, crunchy, and packed with flavor—perfect for a quick dinner, snack, or meal prep. They’re healthier than fried, but just as crispy and delicious!

Try them out and let me know how you like them! What’s your favorite dipping sauce?

Print
clock clock iconcutlery cutlery iconflag flag iconfolder folder iconinstagram instagram iconpinterest pinterest iconfacebook facebook iconprint print iconsquares squares iconheart heart iconheart solid heart solid icon

Crispy Oven-Baked Chicken Tenders – Crunchy, Juicy & Easy


  • Author: Emy

Description

These Crispy Oven-Baked Chicken Tenders are the perfect healthy alternative to fried tenders without sacrificing flavor or crunch! Coated in a seasoned breadcrumb mixture and baked until golden brown, these tenders are juicy on the inside and crispy on the outside—just like you love them!


Ingredients

Scale

For the Chicken Tenders:

  • 1 1/2 lbs boneless, skinless chicken tenders

  • 1 cup all-purpose flour

  • 2 large eggs

  • 1 tbsp water

  • 1 1/2 cups panko breadcrumbs

  • 1/2 cup grated Parmesan cheese

  • 1 tsp garlic powder

  • 1 tsp onion powder

  • 1/2 tsp paprika

  • 1/4 tsp salt

  • 1/4 tsp black pepper

  • 2 tbsp olive oil (for drizzling)

For Dipping (Optional):

  • Honey mustard, ketchup, or ranch dressing


Instructions

1. Preheat the Oven & Prepare the Baking Sheet:

  1. Preheat your oven to 400°F (200°C).

  2. Line a large baking sheet with parchment paper or lightly grease with cooking spray.

2. Set Up the Dipping Stations:

  1. In one shallow bowl, add flour.

  2. In another shallow bowl, whisk together the eggs and water.

  3. In a third shallow bowl, combine the panko breadcrumbs, Parmesan cheese, garlic powder, onion powder, paprika, salt, and pepper.

3. Coat the Chicken Tenders:

  1. Dip each chicken tender into the flour, ensuring it’s fully coated.

  2. Next, dip it into the egg mixture, allowing any excess egg to drip off.

  3. Finally, coat the chicken with the breadcrumb mixture, pressing down slightly to ensure an even, generous coating.

4. Bake the Chicken Tenders:

  1. Arrange the coated chicken tenders on the prepared baking sheet in a single layer.

  2. Drizzle the chicken with olive oil to help it crisp up while baking.

  3. Bake for 15-20 minutes, flipping halfway through, until the chicken is golden brown and crispy and reaches an internal temperature of 165°F (74°C).

5. Serve & Enjoy:

  1. Remove the chicken tenders from the oven and let them cool slightly before serving.

  2. Serve with your favorite dipping sauces like honey mustard, ketchup, or ranch dressing.

Notes

These Crispy Oven-Baked Chicken Tenders are perfect for a quick, family-friendly dinner. They’re healthier than the fried version but just as crispy and delicious! Serve them with your favorite sides and enjoy!

#ChickenTenders #OvenBaked #HealthyEating #CrispyChicken #EasyDinner

Let’s chat in the comments! 🍗✨

Classic Meatloaf with a Twist – Juicy, Flavorful & Unique!

If you love traditional meatloaf, but want to elevate it with a delicious twist, this Classic Meatloaf with a Twist is just what you need! This version keeps the juicy, tender texture and savory beefy flavor but adds bold seasonings, cheese, and a secret ingredient for extra moisture.

This easy, family-friendly meal is perfect for weeknight dinners, and the leftovers make amazing sandwiches the next day!


Why You’ll Love This Recipe

Juicy & Flavorful – Never dry or bland!
Secret Ingredient for Extra Moisture – A game-changer!
Unique Twist on a Classic – A fun upgrade to the traditional recipe.
Perfect for Leftovers – Great for sandwiches the next day.


Ingredients You’ll Need

For the Meatloaf:

  • 1 ½ lbs ground beef (or a mix of beef & pork for extra flavor)

  • 1 cup panko breadcrumbs (or crushed Ritz crackers for a buttery twist)

  • ½ cup whole milk

  • 1 small onion (grated or finely chopped)

  • 2 cloves garlic (minced)

  • 2 tablespoons Worcestershire sauce

  • 1 tablespoon Dijon mustard

  • 1 teaspoon salt

  • ½ teaspoon black pepper

  • ½ teaspoon smoked paprika

  • ½ teaspoon Italian seasoning

  • 1 egg (lightly beaten)

  • ½ cup shredded cheddar or mozzarella cheese (the secret twist for melty goodness!)

For the Glaze:

  • ½ cup ketchup

  • 2 tablespoons brown sugar

  • 1 tablespoon apple cider vinegar

  • 1 teaspoon hot sauce (optional, for a little kick)


How to Make Classic Meatloaf with a Twist

Step 1: Preheat & Prep

  • Preheat oven to 375°F (190°C).

  • Line a baking sheet with parchment paper or lightly grease a loaf pan.

Step 2: Mix the Meatloaf Ingredients

  1. In a bowl, combine panko breadcrumbs and milk. Let sit for 5 minutes to absorb moisture.

  2. In a large mixing bowl, combine ground beef, soaked breadcrumbs, onion, garlic, Worcestershire sauce, mustard, salt, pepper, smoked paprika, Italian seasoning, egg, and shredded cheese.

  3. Gently mix with your hands until just combined (don’t overmix, or the meatloaf will be tough).

Step 3: Shape the Meatloaf

  • Shape into a loaf on a baking sheet or press into a loaf pan.

  • Press lightly—don’t compact it too much, or it will be dense.

Step 4: Make the Glaze & Bake

  1. In a small bowl, whisk together ketchup, brown sugar, apple cider vinegar, and hot sauce.

  2. Spread half of the glaze over the top of the meatloaf.

  3. Bake for 40 minutes, then spread the remaining glaze on top.

  4. Bake for another 15-20 minutes, until the internal temperature reaches 160°F (71°C).

Step 5: Rest, Slice & Serve

  • Let meatloaf rest for 5-10 minutes before slicing.

  • Serve with mashed potatoes, roasted veggies, or buttered green beans!


Tips for the Best Meatloaf

Soak the breadcrumbs – This keeps the meatloaf juicy and tender.
Use a mix of meatsBeef + pork adds extra flavor.
Let it rest before slicing – This prevents it from falling apart.
Want a smoky kick? – Add ½ teaspoon chipotle powder to the mix.


Variations & Add-Ins

Make It Spicy 🔥

  • Add ½ teaspoon cayenne pepper to the meat.

  • Mix hot sauce into the glaze for extra heat.

Make It Healthier 🥦

  • Use ground turkey instead of beef.

  • Swap breadcrumbs for oatmeal.

Stuffed Meatloaf Twist 🧀

  • Add a layer of cheese in the center before shaping into a loaf!

BBQ Bacon Version 🥓

  • Wrap the meatloaf in bacon strips and use BBQ sauce instead of ketchup.


How to Store & Reheat

Storing Leftovers

  • Store in an airtight container in the fridge for up to 4 days.

Reheating

  • Oven: Bake at 350°F for 10 minutes.

  • Microwave: Heat in 30-second intervals until warm.

Freezing

  • Freeze uncooked meatloaf wrapped in plastic wrap for up to 3 months.

  • Thaw overnight in the fridge, then bake as directed.


FAQs About Classic Meatloaf with a Twist

Q: What’s the best meat blend for meatloaf?
A: 80/20 ground beef or a mix of beef and pork gives the best flavor.

Q: Can I make this without breadcrumbs?
A: Yes! Use crushed crackers, oats, or almond flour instead.

Q: How do I keep meatloaf from falling apart?
A: Don’t skip the egg and breadcrumbs—they act as binders!

Q: What’s the best side dish for meatloaf?
A: Mashed potatoes, roasted Brussels sprouts, or buttered corn are all great choices!


Final Thoughts

This Classic Meatloaf with a Twist is juicy, flavorful, and packed with cheesy goodness—a fun upgrade to traditional meatloaf that will become a new family favorite!

Try it out and let me know how you like it! What’s your favorite twist on meatloaf?

Print
clock clock iconcutlery cutlery iconflag flag iconfolder folder iconinstagram instagram iconpinterest pinterest iconfacebook facebook iconprint print iconsquares squares iconheart heart iconheart solid heart solid icon

Classic Meatloaf with a Twist – Juicy, Flavorful & Unique!


  • Author: Emy

Description

This Classic Meatloaf with a Twist takes the traditional meatloaf to the next level! With the addition of savory herbs, a hint of spice, and a flavorful glaze, this meatloaf is juicy, tender, and packed with flavor. Perfect for dinner and sure to impress your family and guests!


Ingredients

Scale

For the Meatloaf:

  • 1 lb ground beef (or a mixture of beef and pork)

  • 1/2 cup breadcrumbs (preferably Italian-style)

  • 1/4 cup milk

  • 1/4 cup grated Parmesan cheese

  • 1 medium onion, finely chopped

  • 1 clove garlic, minced

  • 1 large egg

  • 1/2 tsp dried thyme

  • 1/2 tsp dried oregano

  • 1/4 tsp smoked paprika (optional, for extra flavor)

  • Salt and pepper, to taste

  • 1/4 cup fresh parsley, chopped (optional for garnish)

For the Glaze:

  • 1/4 cup ketchup

  • 2 tbsp brown sugar

  • 1 tbsp Dijon mustard

  • 1 tbsp Worcestershire sauce

  • 1/2 tsp hot sauce (optional, for a little kick)


Instructions

1. Preheat Oven & Prepare the Meatloaf Pan:

  1. Preheat your oven to 375°F (190°C).

  2. Lightly grease a 9×5-inch loaf pan or line with parchment paper for easy removal.

2. Make the Meatloaf Mixture:

  1. In a large mixing bowl, combine the ground beef, breadcrumbs, milk, Parmesan cheese, chopped onion, minced garlic, egg, dried thyme, dried oregano, smoked paprika, salt, and pepper.

  2. Mix everything together until fully combined. Avoid over-mixing to keep the meatloaf tender.

3. Shape and Bake the Meatloaf:

  1. Transfer the meat mixture into the prepared loaf pan and press it down gently to form a uniform loaf.

  2. Bake in the preheated oven for 45 minutes.

4. Prepare the Glaze:

  1. While the meatloaf is baking, in a small bowl, whisk together ketchup, brown sugar, Dijon mustard, Worcestershire sauce, and hot sauce (if using).

  2. Set aside.

5. Glaze the Meatloaf:

  1. After 45 minutes of baking, remove the meatloaf from the oven.

  2. Brush the glaze generously over the top of the meatloaf.

  3. Return the meatloaf to the oven and bake for an additional 10-15 minutes, until the glaze is bubbly and caramelized.

6. Serve & Enjoy:

  1. Let the meatloaf rest for about 10 minutes before slicing to allow the juices to settle.

  2. Slice, garnish with fresh parsley, and serve with mashed potatoes, vegetables, or your favorite side dishes!

Notes

This Classic Meatloaf with a Twist is perfect for a hearty family meal. With the added glaze and seasoning twist, it’s a comforting dish that everyone will love!

#MeatloafWithATwist #ComfortFood #DinnerRecipes #FamilyMeals #HomemadeCooking

Let’s chat in the comments! 🍽✨

Creamy Spinach and Artichoke Dip – The Ultimate Party Favorite

If you’re looking for the best creamy, cheesy, and flavorful appetizer, this Creamy Spinach and Artichoke Dip is a must-try! Packed with melty cheese, tender spinach, and tangy artichokes, this dip is rich, delicious, and ridiculously easy to make.

It’s perfect for game days, parties, or a cozy night in, and pairs perfectly with chips, crackers, or toasted bread. Make it ahead, bake it, and watch it disappear!


Why You’ll Love This Recipe

Ultra Creamy & Cheesy – The perfect blend of gooey cheeses.
Super Easy – Just mix, bake, and serve!
Make-Ahead Friendly – Prep in advance for stress-free hosting.
Bakes or Cooks in a Slow Cooker – Choose your method!


Ingredients You’ll Need

For the Dip:

  • 1 (10 oz) package frozen spinach (thawed & squeezed dry)

  • 1 (14 oz) can artichoke hearts (drained & chopped)

  • 8 oz cream cheese (softened)

  • ½ cup sour cream

  • ½ cup mayonnaise

  • 1 teaspoon garlic powder

  • ½ teaspoon onion powder

  • ½ teaspoon salt

  • ¼ teaspoon black pepper

  • ¼ teaspoon red pepper flakes (optional for a little heat)

For the Cheese Blend:

  • 1 cup shredded mozzarella cheese

  • ½ cup grated Parmesan cheese

  • ½ cup shredded cheddar cheese

For Garnish & Serving:

  • Extra Parmesan & mozzarella for topping

  • Fresh parsley (chopped, optional)

  • Tortilla chips, crackers, or toasted baguette slices


How to Make Creamy Spinach and Artichoke Dip

Step 1: Preheat & Prep

  • Preheat oven to 375°F (190°C).

  • Grease a 9-inch baking dish with butter or cooking spray.

Step 2: Mix the Dip

  1. In a large bowl, combine cream cheese, sour cream, and mayonnaise until smooth.

  2. Stir in garlic powder, onion powder, salt, pepper, and red pepper flakes.

  3. Add chopped artichokes, spinach, and shredded cheeses, mixing well.

Step 3: Bake Until Golden & Bubbly

  1. Transfer mixture to the prepared baking dish.

  2. Sprinkle with extra Parmesan & mozzarella on top.

  3. Bake for 25-30 minutes, until hot and bubbly with a golden-brown top.

Step 4: Serve & Enjoy!

  • Garnish with fresh parsley, then serve warm with chips, crackers, or bread.


Alternative Cooking Methods

Slow Cooker Method

  1. Mix all ingredients as directed.

  2. Transfer to a slow cooker and cook on LOW for 2-3 hours.

  3. Stir occasionally and serve warm.

Stovetop Method

  1. Mix all ingredients in a large saucepan over medium heat.

  2. Stir until cheese is melted and the dip is creamy.

  3. Serve immediately.


Tips for the Best Spinach & Artichoke Dip

Squeeze excess water from the spinach – This prevents a watery dip.
Use freshly grated cheese – Pre-shredded cheese doesn’t melt as well.
Want extra creaminess? – Add ¼ cup heavy cream or cream cheese.
Make it extra cheesy – Stir in ½ cup more mozzarella before baking.


Variations & Add-Ins

Make It Spicy 🌶

  • Add 1 teaspoon hot sauce or extra red pepper flakes.

Make It Healthier 🌱

  • Use Greek yogurt instead of sour cream & mayo.

  • Try low-fat cream cheese for a lighter version.

Add Protein 🍗

  • Stir in cooked bacon, shredded chicken, or crumbled sausage.

Make It Dairy-Free 🥥

  • Use vegan cream cheese & dairy-free mozzarella.


How to Store & Reheat

Storing Leftovers

  • Keep in an airtight container in the fridge for up to 3 days.

Reheating

  • Oven: Reheat at 350°F for 15 minutes.

  • Microwave: Heat in 30-second intervals, stirring in between.

Freezing

  • Freeze before baking for up to 2 months.

  • Thaw overnight, then bake as directed.


FAQs About Spinach & Artichoke Dip

Q: Can I use fresh spinach instead of frozen?
A: Yes! Sauté 4 cups fresh spinach in a little olive oil until wilted, then chop and use as directed.

Q: What can I serve with this dip?
A: Tortilla chips, toasted baguette slices, pita chips, crackers, or fresh veggies.

Q: Can I make this ahead of time?
A: Yes! Assemble and refrigerate up to 24 hours ahead, then bake when ready.

Q: How do I make it extra thick & creamy?
A: Use extra cream cheese and less sour cream/mayo for a richer texture.


Final Thoughts

This Creamy Spinach and Artichoke Dip is the ultimate crowd-pleasing appetizer—cheesy, creamy, and packed with flavor! Whether you’re making it for game day, holidays, or just a snack, it’s easy, delicious, and guaranteed to be a hit.

Try it out and let me know how you like it! What’s your favorite party dip?

Print
clock clock iconcutlery cutlery iconflag flag iconfolder folder iconinstagram instagram iconpinterest pinterest iconfacebook facebook iconprint print iconsquares squares iconheart heart iconheart solid heart solid icon

Creamy Spinach and Artichoke Dip – The Ultimate Party Favorite


  • Author: Emy

Description

This Creamy Spinach and Artichoke Dip is the ultimate party appetizer! Rich, creamy, and packed with flavor, it combines fresh spinach, tender artichokes, and plenty of cheese for a dip that’s sure to be a hit at any gathering. Serve it with warm bread or chips for the perfect dip!


Ingredients

Scale

For the Dip:

  • 1 (10 oz) package frozen spinach, thawed and drained

  • 1 can (14 oz) artichoke hearts, drained and chopped

  • 8 oz cream cheese, softened

  • 1/2 cup sour cream

  • 1/2 cup mayonnaise

  • 1 1/2 cups shredded mozzarella cheese

  • 1/2 cup grated Parmesan cheese

  • 2 cloves garlic, minced

  • 1/4 tsp salt

  • 1/4 tsp black pepper

  • 1/4 tsp red pepper flakes (optional for heat)

For Serving:

  • Toasted baguette slices, tortilla chips, or fresh veggies (carrots, celery, etc.)


Instructions

1. Preheat the Oven:

  1. Preheat your oven to 375°F (190°C).

2. Prepare the Spinach and Artichokes:

  1. Squeeze any excess moisture out of the thawed spinach using a clean kitchen towel or paper towels.

  2. Drain and chop the artichoke hearts into bite-sized pieces.

3. Make the Dip:

  1. In a medium bowl, combine the cream cheese, sour cream, and mayonnaise. Stir until smooth and creamy.

  2. Add the shredded mozzarella, Parmesan cheese, garlic, salt, pepper, and red pepper flakes (if using). Stir well.

  3. Fold in the spinach and artichokes until evenly combined.

4. Bake the Dip:

  1. Transfer the mixture to a greased 9×9-inch baking dish (or similar size).

  2. Spread it evenly and bake for 20-25 minutes, or until the dip is hot, bubbly, and slightly golden on top.

5. Serve & Enjoy:

  1. Let the dip cool for a few minutes before serving.

  2. Serve with toasted baguette slices, tortilla chips, or fresh veggies for dipping.

Notes

This Creamy Spinach and Artichoke Dip is the perfect comfort food, whether you’re entertaining guests or enjoying a cozy night in. It’s easy to make, full of flavor, and always a crowd-pleaser!

#SpinachArtichokeDip #PartyAppetizers #ComfortFood #CheeseLovers #EasyDips

Let’s chat in the comments! 🧀✨

Sweet and Tangy Lemon Chicken – Quick, Flavorful & Better Than Takeout

If you love crispy, juicy chicken coated in a sticky, sweet, and tangy lemon sauce, this Sweet and Tangy Lemon Chicken is the perfect dish! It’s a quick and easy recipe, packed with fresh citrus flavor, and perfect for serving over rice, noodles, or veggies.

This dish tastes just like takeout but BETTER, with healthier ingredients and a perfect balance of sweet, savory, and zesty lemon in every bite!


Why You’ll Love This Recipe

Crispy, Juicy & Coated in the Best Lemon Sauce 🍋
Quick & Easy – Ready in 30 Minutes!
Better Than Takeout – Fresh, Flavorful & No Artificial Ingredients
Pairs Perfectly with Rice, Noodles, or Stir-Fried Veggies


Ingredients You’ll Need

For the Chicken:

  • 1 ½ lbs boneless, skinless chicken breasts (cut into bite-sized pieces)

  • ½ cup cornstarch (for a crispy coating)

  • 1 teaspoon salt

  • ½ teaspoon black pepper

  • ½ teaspoon garlic powder

  • 2 tablespoons vegetable oil (for frying)

For the Sweet & Tangy Lemon Sauce:

  • ½ cup fresh lemon juice (about 2-3 lemons)

  • ¼ cup honey (or brown sugar for a deeper sweetness)

  • ¼ cup soy sauce (low sodium recommended)

  • 2 cloves garlic (minced)

  • 1 teaspoon ginger (grated)

  • 1 teaspoon rice vinegar (for tang)

  • 1 teaspoon cornstarch + 2 tablespoons water (to thicken)

  • 1 tablespoon butter (optional, for a silky sauce)

For Garnish:

  • Lemon slices or zest

  • Chopped green onions

  • Toasted sesame seeds


How to Make Sweet and Tangy Lemon Chicken

Step 1: Coat & Cook the Chicken

  1. In a bowl, toss chicken pieces with cornstarch, salt, black pepper, and garlic powder until evenly coated.

  2. Heat 2 tablespoons vegetable oil in a large skillet over medium-high heat.

  3. Add chicken and cook for 4-5 minutes per side, until golden brown and crispy.

  4. Remove from skillet and set aside.

Step 2: Make the Sweet & Tangy Lemon Sauce

  1. In a bowl, whisk together lemon juice, honey, soy sauce, garlic, ginger, and rice vinegar.

  2. In a separate small bowl, mix 1 teaspoon cornstarch with 2 tablespoons water to create a slurry.

  3. Pour the lemon sauce into the skillet over medium heat, bringing it to a simmer.

  4. Stir in the cornstarch slurry and cook for 1-2 minutes, until the sauce thickens.

  5. Add butter (optional) for an extra rich and glossy finish.

Step 3: Toss & Serve!

  1. Return the crispy chicken to the skillet and toss to coat with the sauce.

  2. Serve hot over steamed rice, noodles, or stir-fried vegetables.

  3. Garnish with green onions, sesame seeds, and lemon slices.


Tips for the Best Lemon Chicken

Use fresh lemon juice – Bottled lemon juice won’t have the same bright flavor.
For extra crispy chicken – Double-coat in cornstarch and shallow fry instead of pan-searing.
Want more tang? – Add a little extra rice vinegar or zest for an extra citrusy punch.
Want a lighter version? – Skip the cornstarch coating and sauté the chicken without frying.


Variations & Add-Ins

Make It Spicy 🔥

  • Add ½ teaspoon red pepper flakes to the sauce.

  • Drizzle with sriracha or chili oil before serving.

Make It Extra Crispy 🍗

  • Coat the chicken in egg + cornstarch mixture for a crunchier texture.

  • Air-fry the chicken at 400°F for 12-15 minutes, flipping halfway.

Swap the Protein 🥩

  • Use shrimp, tofu, or thinly sliced beef instead of chicken.

Make It Low-Carb/Keto 🥦

  • Swap honey for sugar-free sweetener.

  • Serve over cauliflower rice or zucchini noodles instead of rice.


How to Store & Reheat

Storing Leftovers

  • Store in an airtight container in the fridge for up to 3 days.

Reheating

  • Stovetop: Warm over medium heat, adding a splash of water if needed.

  • Microwave: Heat in 30-second intervals, stirring between each.

Freezing

  • Freeze the chicken and sauce separately for up to 2 months.

  • Thaw overnight in the fridge before reheating.


FAQs About Sweet and Tangy Lemon Chicken

Q: Can I use bottled lemon juice?
A: Fresh lemon juice is best, but bottled can work in a pinch—just adjust the sweetness.

Q: Can I make this ahead of time?
A: Yes! Store the sauce separately and toss with the chicken when ready to eat.

Q: What can I serve with lemon chicken?
A: Steamed rice, stir-fried veggies, or sesame noodles are perfect pairings.

Q: How do I keep the chicken crispy?
A: Serve immediately after tossing in the sauce, or coat the chicken right before eating.


Final Thoughts

This Sweet and Tangy Lemon Chicken is crispy, juicy, and packed with citrusy goodness—a better-than-takeout meal that’s perfect for any night of the week! Serve it with rice, noodles, or veggies for a complete and delicious meal.

Try it out and let me know how you like it! What’s your favorite way to enjoy lemon chicken?

Print
clock clock iconcutlery cutlery iconflag flag iconfolder folder iconinstagram instagram iconpinterest pinterest iconfacebook facebook iconprint print iconsquares squares iconheart heart iconheart solid heart solid icon

Sweet and Tangy Lemon Chicken – Quick, Flavorful & Better Than Takeout


  • Author: Emy

Description

This Sweet and Tangy Lemon Chicken is the perfect balance of citrusy sweetness and savory goodness. With a simple yet flavorful marinade and a crispy golden crust, this dish is sure to be a new favorite in your dinner rotation!


Ingredients

Scale

For the Chicken:

  • 4 boneless, skinless chicken breasts

  • 1 tbsp olive oil

  • Salt and pepper, to taste

For the Lemon Sauce:

  • 1/4 cup fresh lemon juice (about 2 lemons)

  • 2 tbsp honey

  • 2 tbsp soy sauce (low-sodium)

  • 2 cloves garlic, minced

  • 1 tbsp Dijon mustard

  • 1 tbsp olive oil

  • 1/4 tsp red pepper flakes (optional, for a touch of heat)

  • 1 tbsp cornstarch (optional, for thickening)

  • 2 tbsp water (if using cornstarch)

For Garnish (optional):

  • Fresh parsley, chopped

  • Lemon wedges


Instructions

1. Prepare the Chicken:

  1. Season the chicken breasts with salt and pepper on both sides.

  2. Heat olive oil in a large skillet over medium-high heat.

  3. Cook the chicken for 6-7 minutes per side, or until golden brown and cooked through (internal temperature of 165°F/75°C). Remove the chicken from the skillet and set aside.

2. Make the Lemon Sauce:

  1. In the same skillet, add lemon juice, honey, soy sauce, garlic, Dijon mustard, and red pepper flakes (if using).

  2. Stir to combine and bring the sauce to a simmer over medium heat.

  3. If you’d like a thicker sauce, mix 1 tbsp cornstarch with 2 tbsp water to make a slurry, then stir it into the sauce. Let it cook for another 2-3 minutes, or until the sauce thickens.

3. Coat the Chicken:

  1. Return the cooked chicken to the skillet, and spoon the lemon sauce over the chicken to coat evenly. Let the chicken simmer in the sauce for 2-3 minutes, allowing the flavors to meld together.

4. Serve & Enjoy:

  1. Transfer the chicken to serving plates and pour the remaining sauce over the top.

  2. Garnish with fresh parsley and lemon wedges for a pop of color and added flavor.

Notes

This Sweet and Tangy Lemon Chicken is a simple yet delicious dish that brings bright, fresh flavors to your table. Pair it with rice, vegetables, or a simple salad for a complete meal!

#LemonChicken #SweetAndTangy #EasyDinner #ChickenRecipes #ComfortFood

Let’s chat in the comments! 🍋✨

Slow Cooker Chicken Tortilla Soup – Easy, Flavorful & Comforting

If you love bold, zesty flavors and a warm, comforting bowl of soup, this Slow Cooker Chicken Tortilla Soup is perfect! It’s hearty, slightly spicy, and packed with tender shredded chicken, black beans, corn, and a rich tomato broth.

Best of all? The slow cooker does all the work—just toss in the ingredients, set it, and come back to a delicious meal. Top it with crispy tortilla strips, avocado, cheese, and fresh lime for the ultimate finishing touch!


Why You’ll Love This Recipe

Dump & Go – Just add everything to the slow cooker and forget about it!
Hearty & Flavorful – Packed with protein, veggies, and bold spices.
Perfect for Meal Prep – Tastes even better the next day!
Customizable – Adjust the spice level, toppings, and add-ins to make it your own.


Ingredients You’ll Need

For the Soup:

  • 1 ½ lbs boneless, skinless chicken breasts or thighs

  • 1 (15 oz) can black beans (drained & rinsed)

  • 1 (15 oz) can corn (drained)

  • 1 (14.5 oz) can diced tomatoes (with juices)

  • 1 (10 oz) can Rotel (diced tomatoes with green chilies)

  • 1 small onion (chopped)

  • 3 cloves garlic (minced)

  • 4 cups chicken broth

  • 1 teaspoon salt

  • ½ teaspoon black pepper

  • 1 teaspoon chili powder

  • 1 teaspoon cumin

  • ½ teaspoon smoked paprika

  • ½ teaspoon oregano

  • 1 tablespoon lime juice (fresh squeezed)

For Toppings:

  • Crispy tortilla strips

  • Shredded cheese (cheddar or Mexican blend)

  • Avocado (sliced or diced)

  • Fresh cilantro (chopped)

  • Sour cream or Greek yogurt

  • Extra lime wedges


How to Make Slow Cooker Chicken Tortilla Soup

Step 1: Load Up the Slow Cooker

  1. Place chicken breasts (or thighs) in the bottom of the slow cooker.

  2. Add black beans, corn, diced tomatoes, Rotel, onion, garlic, and spices.

  3. Pour in chicken broth, stirring everything together.

Step 2: Slow Cook It

  • Cover and cook on:

    • LOW for 6-8 hours (best for juicy chicken).

    • HIGH for 3-4 hours (if short on time).

Step 3: Shred the Chicken

  1. Remove the cooked chicken from the slow cooker and shred it with two forks.

  2. Stir the shredded chicken back into the soup.

  3. Add fresh lime juice and mix well.

Step 4: Serve & Add Toppings!

  • Ladle the soup into bowls and top with crispy tortilla strips, avocado, cheese, and fresh cilantro.

  • Serve with extra lime wedges for added freshness.


Tips for the Best Chicken Tortilla Soup

Use boneless chicken thighs – They stay juicier and more flavorful than chicken breasts.
For extra richness – Stir in ½ cup heavy cream or a scoop of sour cream before serving.
Want more heat? – Add extra chili powder, diced jalapeños, or hot sauce.
Make homemade tortilla strips – Slice corn tortillas, bake or fry until crispy!


Variations & Add-Ins

Make It Creamy 🥑

  • Stir in ½ cup heavy cream or cream cheese at the end.

Make It Spicy 🌶

  • Add chopped jalapeños or a dash of hot sauce.

Swap the Protein 🍗

  • Use shredded rotisserie chicken for an even faster version.

  • Try ground turkey, shredded beef, or shrimp instead.

Make It Vegetarian 🌱

  • Skip the chicken and add extra beans, zucchini, or bell peppers.


How to Store & Reheat

Storing Leftovers

  • Keep in an airtight container in the fridge for up to 4 days.

Reheating

  • Stovetop: Warm over medium heat until heated through.

  • Microwave: Heat in 30-second intervals, stirring between each.

Freezing

  • Freeze in portions for up to 3 months.

  • Thaw overnight in the fridge and reheat before serving.


FAQs About Slow Cooker Chicken Tortilla Soup

Q: Can I use rotisserie chicken instead?
A: Yes! Add shredded rotisserie chicken in the last 30 minutes of cooking.

Q: Can I make this in an Instant Pot?
A: Yes! Pressure cook on HIGH for 10 minutes, then do a quick release.

Q: What’s the best way to make crispy tortilla strips?
A: Cut corn tortillas into strips, spray with oil, and bake at 375°F for 10-12 minutes until crispy.

Q: Can I add rice or quinoa?
A: Yes! Add ½ cup rice or quinoa during the last 30 minutes of cooking.

Q: What sides go well with this soup?
A: Serve with cornbread, a side salad, or cheesy quesadillas.


Final Thoughts

This Slow Cooker Chicken Tortilla Soup is bold, hearty, and full of zesty Tex-Mex flavors! It’s a set-it-and-forget-it meal that’s perfect for busy nights, meal prep, or cozy family dinners.

Try it out and let me know how you like it! What’s your favorite way to top tortilla soup?

Print
clock clock iconcutlery cutlery iconflag flag iconfolder folder iconinstagram instagram iconpinterest pinterest iconfacebook facebook iconprint print iconsquares squares iconheart heart iconheart solid heart solid icon

Slow Cooker Chicken Tortilla Soup – Easy, Flavorful & Comforting


  • Author: Emy

Description

This Slow Cooker Chicken Tortilla Soup is the perfect comfort food, full of tender chicken, spicy tomatoes, and hearty beans—all simmered together in a flavorful broth. Top with crispy tortilla strips and a sprinkle of cheese for a cozy meal that’s sure to please everyone!


Ingredients

Scale

For the Soup:

  • 1 lb boneless, skinless chicken breasts or thighs

  • 1 can (14.5 oz) diced tomatoes with green chilies

  • 1 can (15 oz) black beans, drained and rinsed

  • 1 can (15 oz) corn, drained

  • 1 small onion, diced

  • 2 cloves garlic, minced

  • 1 tsp ground cumin

  • 1 tsp chili powder

  • 1/2 tsp smoked paprika (optional for extra flavor)

  • 1/2 tsp salt

  • 1/2 tsp black pepper

  • 4 cups low-sodium chicken broth

  • 1 tbsp lime juice (optional for extra tang)

For the Toppings:

  • 1 cup crushed tortilla chips or homemade tortilla strips

  • 1/2 cup shredded cheddar or Mexican blend cheese

  • 1/4 cup fresh cilantro, chopped

  • Sour cream (optional)

  • Lime wedges (optional)


Instructions

1. Prepare the Soup Base:

  1. Place the chicken breasts (or thighs), diced tomatoes with green chilies, black beans, corn, diced onion, and minced garlic into your slow cooker.

  2. Add the cumin, chili powder, smoked paprika (if using), salt, and pepper.

  3. Pour in the chicken broth and stir to combine.

2. Cook the Soup:

  1. Cover the slow cooker and set it on low for 6-7 hours or high for 3-4 hours, until the chicken is fully cooked and tender.

  2. Once the chicken is cooked, shred it using two forks and stir it back into the soup.

3. Add Lime Juice:

  1. Stir in the lime juice for an extra burst of freshness and tang (optional but recommended!).

4. Serve & Enjoy:

  1. Ladle the soup into bowls and top with tortilla chips, shredded cheese, fresh cilantro, a dollop of sour cream, and a squeeze of lime if desired.

  2. Serve hot and enjoy the comforting, spicy goodness of this easy Slow Cooker Chicken Tortilla Soup!

Notes

This Slow Cooker Chicken Tortilla Soup is a great option for busy nights, packed with flavor and perfect for cozying up with family. Enjoy!

#ChickenTortillaSoup #SlowCookerMeals #ComfortFood #EasySoup #MexicanFlavors

Let’s chat in the comments! 🍲✨

Savory Sausage and Kale Soup – Hearty, Comforting & Easy

If you’re craving a warm, hearty, and flavorful soup, this Savory Sausage and Kale Soup is the perfect choice! Packed with juicy sausage, tender potatoes, fresh kale, and a rich, savory broth, this soup is both comforting and nutritious.

It’s easy to make in just 30 minutes and is perfect for meal prep, cold nights, or whenever you need a cozy, satisfying bowl of goodness.


Why You’ll Love This Recipe

One-Pot Wonder – Easy cleanup and minimal effort!
Rich & Hearty – A filling meal packed with protein and veggies.
Ready in 30 Minutes – Quick, easy, and perfect for busy nights.
Keto & Gluten-Free Friendly – Just swap the potatoes for a low-carb option!


Ingredients You’ll Need

For the Soup Base:

  • 1 lb Italian sausage (mild or spicy)

  • 1 tablespoon olive oil

  • 1 small onion (chopped)

  • 3 cloves garlic (minced)

  • 3 medium potatoes (Yukon Gold or russet, diced)

  • 6 cups chicken broth (or vegetable broth)

  • ½ teaspoon salt

  • ½ teaspoon black pepper

  • ½ teaspoon red pepper flakes (optional, for spice)

  • 1 teaspoon Italian seasoning

For the Creamy Finish:

  • 1 bunch kale (stems removed, chopped)

  • 1 cup heavy cream (or half-and-half)

  • ½ cup grated Parmesan cheese

  • 1 tablespoon lemon juice (optional, for brightness)

For Garnish:

  • Extra Parmesan cheese

  • Crusty bread (for serving, optional)


How to Make Savory Sausage and Kale Soup

Step 1: Brown the Sausage

  1. Heat olive oil in a large pot over medium-high heat.

  2. Add Italian sausage, breaking it up with a spoon, and cook until browned (about 5-6 minutes).

  3. Transfer the sausage to a plate and set aside.

Step 2: Sauté the Aromatics

  1. In the same pot, add onions and garlic, cooking for 2 minutes until softened and fragrant.

  2. Stir in potatoes, salt, black pepper, red pepper flakes, and Italian seasoning.

Step 3: Simmer the Soup

  1. Pour in chicken broth, scraping up any browned bits from the bottom of the pot.

  2. Bring to a gentle boil, then reduce heat to medium-low and simmer for 15 minutes, until potatoes are tender.

Step 4: Add the Kale & Cream

  1. Stir in chopped kale, letting it wilt for 3-4 minutes.

  2. Pour in heavy cream and return the sausage to the pot.

  3. Stir in Parmesan cheese and lemon juice, simmering for 2 more minutes.

Step 5: Serve & Enjoy!

  • Ladle into bowls and top with extra Parmesan cheese.

  • Serve with crusty bread or garlic toast for the perfect meal!


Tips for the Best Sausage and Kale Soup

Use spicy sausage – It adds a deep, bold flavor to the broth.
Don’t overcook the kale – Add it at the end to keep it vibrant and fresh.
Want extra creaminess? – Stir in 2 tablespoons of cream cheese.
More flavor? – Add a splash of white wine while sautéing the onions.


Variations & Add-Ins

Make It Low-Carb 🥦

  • Swap potatoes for cauliflower florets or turnips.

Add More Veggies 🥕

  • Try adding carrots, celery, mushrooms, or bell peppers.

Make It Dairy-Free 🌱

  • Use coconut milk instead of heavy cream.

  • Skip the Parmesan or use a dairy-free alternative.

Swap the Protein 🍗

  • Use turkey sausage, ground chicken, or smoked sausage instead of Italian sausage.


How to Store & Reheat

Storing Leftovers

  • Keep in an airtight container in the fridge for up to 4 days.

Reheating

  • Stovetop: Warm over medium heat, adding a splash of broth if needed.

  • Microwave: Heat in 30-second intervals, stirring between each.

Freezing

  • Freeze without the cream for up to 3 months.

  • Thaw overnight in the fridge, then stir in cream when reheating.


FAQs About Savory Sausage and Kale Soup

Q: Can I use spinach instead of kale?
A: Yes! Add spinach in the last minute of cooking—it wilts much faster than kale.

Q: What’s the best sausage to use?
A: Mild or spicy Italian sausage is best, but you can also use smoked sausage for a different flavor.

Q: Can I make this in a slow cooker?
A: Yes! Brown the sausage first, then add everything except the cream and kale to the slow cooker. Cook on LOW for 6-7 hours, then stir in the kale and cream before serving.

Q: What’s the best side dish for this soup?
A: Crusty bread, garlic bread, or a simple green salad pairs perfectly!


Final Thoughts

This Savory Sausage and Kale Soup is a comforting, hearty, and easy-to-make meal that’s perfect for any time of year. Whether you’re making it for a quick dinner, meal prep, or a cozy weekend meal, it’s always a hit!

Try it out and let me know how you like it! What’s your favorite soup recipe?

Print
clock clock iconcutlery cutlery iconflag flag iconfolder folder iconinstagram instagram iconpinterest pinterest iconfacebook facebook iconprint print iconsquares squares iconheart heart iconheart solid heart solid icon

Savory Sausage and Kale Soup – Hearty, Comforting & Easy


  • Author: Emy

Description

This Savory Sausage and Kale Soup is the ultimate comfort food! Hearty sausage, tender kale, and creamy potatoes come together in a rich broth for a flavorful and satisfying soup that’s perfect for cozy nights.


Ingredients

Scale

For the Soup:

  • 1 lb Italian sausage (bulk or casing removed)

  • 1 medium onion, diced

  • 3 cloves garlic, minced

  • 4 medium potatoes, peeled and diced

  • 4 cups low-sodium chicken broth

  • 2 cups water

  • 3 cups chopped kale, stems removed

  • 1 cup heavy cream (or milk for a lighter version)

  • 1/2 tsp crushed red pepper flakes (optional for a bit of heat)

  • Salt and pepper, to taste

  • 1/2 tsp dried thyme (optional)

  • 1/2 cup grated Parmesan cheese (optional for topping)


Instructions

1. Cook the Sausage:

  1. In a large pot or Dutch oven, crumble the Italian sausage and cook over medium heat until browned and fully cooked, about 6-8 minutes.

  2. Use a slotted spoon to remove the sausage from the pot and set it aside. Leave a little bit of the drippings in the pot for added flavor.

2. Sauté the Vegetables:

  1. In the same pot, add the diced onion and cook for 3-4 minutes until softened.

  2. Add the minced garlic and crushed red pepper flakes (if using), and cook for another 30 seconds until fragrant.

3. Add the Broth and Potatoes:

  1. Add the diced potatoes, chicken broth, and water to the pot. Stir to combine.

  2. Bring the soup to a boil, then reduce the heat to medium-low and simmer for about 10-15 minutes, or until the potatoes are tender.

4. Add the Sausage and Kale:

  1. Return the cooked sausage to the pot. Stir in the chopped kale and cook for 5-7 minutes, until the kale is wilted and tender.

5. Stir in the Cream and Season:

  1. Pour in the heavy cream and stir to combine.

  2. Season with salt, pepper, and dried thyme. Let the soup simmer for an additional 5 minutes to allow the flavors to meld together.

6. Serve & Enjoy:

  1. Ladle the soup into bowls and top with grated Parmesan cheese if desired.

  2. Serve warm with a side of crusty bread for dipping.

Notes

This Savory Sausage and Kale Soup is the perfect combination of savory sausage, creamy potatoes, and nutrient-packed kale. It’s a comforting, satisfying meal that will warm you up from the inside out!

#SausageAndKaleSoup #ComfortFood #HeartySoup #HealthyMeals #WinterSoup

Let’s chat in the comments! 🍲✨

Comforting Beef and Potato Casserole – A Hearty Family Favorite!

If you’re looking for a warm, satisfying, and easy dinner, this Beef and Potato Casserole is the ultimate comfort food! Layers of seasoned ground beef, tender potatoes, and a creamy, cheesy sauce come together in a baked dish that’s hearty, flavorful, and perfect for busy nights.

This recipe is budget-friendly, made with simple pantry ingredients, and can be easily customized with extra veggies or different cheeses. Serve it with a side salad or garlic bread for a complete meal!


Why You’ll Love This Recipe

Easy to Make – Just layer, bake, and enjoy!
Hearty & Filling – The perfect comfort food.
Budget-Friendly – Uses simple, affordable ingredients.
Great for Meal Prep – Leftovers taste even better the next day!


Ingredients You’ll Need

For the Beef Layer:

  • 1 lb ground beef (or ground turkey)
  • 1 small onion (chopped)
  • 2 cloves garlic (minced)
  • 1 teaspoon salt
  • ½ teaspoon black pepper
  • ½ teaspoon smoked paprika
  • ½ teaspoon Worcestershire sauce (optional, for extra flavor)

For the Potato Layer:

  • 3 large russet potatoes (thinly sliced)
  • 1 teaspoon salt
  • ½ teaspoon black pepper
  • ½ teaspoon garlic powder
  • ½ teaspoon dried thyme (or Italian seasoning)

For the Creamy Sauce:

  • 1 can (10.5 oz) cream of mushroom or cream of cheddar soup
  • ½ cup milk
  • ½ cup sour cream
  • 1 cup shredded cheddar cheese
  • ½ teaspoon garlic powder

For the Topping:

  • 1 cup shredded cheese (cheddar, mozzarella, or Colby Jack)
  • 2 tablespoons chopped fresh parsley (for garnish)

How to Make Comforting Beef and Potato Casserole

Step 1: Preheat & Prep

  • Preheat oven to 375°F (190°C).
  • Grease a 9×13-inch baking dish with butter or cooking spray.

Step 2: Cook the Beef

  1. Heat a large skillet over medium heat.
  2. Add ground beef and onion, cooking until browned (about 5-6 minutes).
  3. Stir in garlic, salt, pepper, paprika, and Worcestershire sauce.
  4. Drain any excess grease and set aside.

Step 3: Make the Creamy Sauce

  1. In a bowl, whisk together cream of mushroom soup, milk, sour cream, shredded cheese, and garlic powder.
  2. Stir until smooth and creamy.

Step 4: Assemble the Casserole

  1. Spread half of the sliced potatoes in an even layer in the baking dish.
  2. Season with salt, pepper, garlic powder, and thyme.
  3. Add half of the ground beef mixture over the potatoes.
  4. Pour half of the creamy sauce over the beef.
  5. Repeat the layers with the remaining potatoes, beef, and sauce.

Step 5: Bake

  • Cover with foil and bake for 45 minutes.
  • Remove foil, sprinkle with shredded cheese, and bake uncovered for 15 more minutes, until cheese is golden and bubbly.

Step 6: Serve & Enjoy!

  • Let the casserole rest for 5-10 minutes before serving.
  • Garnish with fresh parsley and serve hot!

Tips for the Best Beef and Potato Casserole

Slice Potatoes Thin – Use a mandoline slicer for even cooking.
Brown the Beef Well – This adds extra flavor to the dish.
Don’t Skip the Resting Time – Letting it sit helps the layers hold together.
Want Extra Creaminess? – Add ½ cup heavy cream to the sauce.


Variations & Add-Ins

Make It Healthier 🥦

  • Use ground turkey instead of beef.
  • Swap russet potatoes for sweet potatoes.
  • Add extra veggies like spinach, mushrooms, or zucchini.

Spicy Version 🌶

  • Add ½ teaspoon cayenne pepper to the beef.
  • Use pepper jack cheese instead of cheddar.

Make It Extra Cheesy 🧀

  • Add an extra ½ cup cheese inside the layers.
  • Use a mix of cheddar, mozzarella, and Parmesan for depth.

How to Store & Reheat

Storing Leftovers

  • Keep in an airtight container in the fridge for up to 4 days.

Reheating

  • Oven: Cover with foil and bake at 350°F for 15 minutes.
  • Microwave: Heat in 30-second intervals, stirring between each.

Freezing

  • Freeze the assembled but unbaked casserole for up to 2 months.
  • Thaw overnight in the fridge and bake as directed.

FAQs About Beef and Potato Casserole

Q: Can I use hash browns instead of fresh potatoes?
A: Yes! Use 4 cups frozen hash browns instead of sliced potatoes. No need to pre-cook them.

Q: What’s the best cheese for this casserole?
A: Cheddar, Colby Jack, mozzarella, or Monterey Jack all work great!

Q: Can I make this ahead of time?
A: Yes! Assemble up to 24 hours in advance, then bake when ready.

Q: What sides go well with this dish?
A: Garlic bread, steamed veggies, or a fresh salad pair perfectly.

Q: How do I prevent the casserole from being watery?
A: Drain excess grease from the beef and avoid using watery potatoes like red potatoes.


Final Thoughts

This Comforting Beef and Potato Casserole is rich, creamy, and loaded with cheesy goodness—a guaranteed family favorite that’s perfect for busy weeknights, potlucks, or meal prep.

Try it out and let me know how you like it! What’s your favorite casserole? Let’s chat in the comments! 🥔🧀✨

Print
clock clock iconcutlery cutlery iconflag flag iconfolder folder iconinstagram instagram iconpinterest pinterest iconfacebook facebook iconprint print iconsquares squares iconheart heart iconheart solid heart solid icon

Comforting Beef and Potato Casserole


  • Author: Emy

Description

This Comforting Beef and Potato Casserole is a hearty, satisfying meal that brings together seasoned beef, creamy potatoes, and melted cheese in one easy, comforting dish. It’s perfect for a family dinner and sure to leave everyone asking for seconds!


Ingredients

Scale

For the Casserole:

  • 1 lb ground beef

  • 4 medium potatoes, peeled and thinly sliced

  • 1 medium onion, diced

  • 2 cloves garlic, minced

  • 1 can (10.5 oz) cream of mushroom soup

  • 1/2 cup sour cream

  • 1 cup shredded cheddar cheese (plus more for topping)

  • 1/4 cup milk

  • Salt and pepper, to taste

  • 1 tsp dried thyme (optional)

  • 1 tsp paprika (optional for a bit of heat)

For the Topping:

  • 1/4 cup grated Parmesan cheese

  • 1/4 cup chopped fresh parsley (optional for garnish)


Instructions

1. Preheat Oven & Prepare Baking Dish:

  1. Preheat your oven to 375°F (190°C).

  2. Lightly grease a 9×13-inch baking dish with cooking spray or olive oil.

2. Cook the Beef:

  1. In a large skillet, brown the ground beef over medium-high heat, breaking it apart as it cooks.

  2. Add the diced onion and minced garlic and cook until softened, about 3-4 minutes.

  3. Drain any excess fat from the beef, then stir in the cream of mushroom soup, sour cream, milk, paprika, thyme, salt, and pepper.

  4. Mix well and cook for another 2-3 minutes to combine the flavors.

3. Assemble the Casserole:

  1. Layer the sliced potatoes evenly in the bottom of the prepared baking dish.

  2. Spread the beef mixture over the potatoes, smoothing it into an even layer.

  3. Top with cheddar cheese, ensuring it covers the entire casserole.

4. Bake:

  1. Cover the casserole with foil and bake for 40 minutes.

  2. After 40 minutes, remove the foil and continue baking for an additional 15 minutes, or until the cheese is golden and bubbly, and the potatoes are tender when pierced with a fork.

5. Serve & Enjoy:


  1. Once out of the oven, sprinkle the casserole with Parmesan cheese and garnish with fresh parsley if desired.

  2. Let it rest for a few minutes before serving.

Notes

This Comforting Beef and Potato Casserole is the perfect combination of rich flavors and satisfying textures—easy to make and perfect for any weeknight meal!


#BeefAndPotatoes #ComfortFood #CasseroleRecipes #EasyDinner #HeartyMeals

30-Minute Chicken Alfredo Pasta – Creamy, Cheesy & Easy!

If you love rich, creamy, and cheesy pasta, this 30-Minute Chicken Alfredo Pasta is the perfect weeknight dinner! Juicy pan-seared chicken tossed with tender pasta in a homemade Alfredo sauce—it’s a simple yet indulgent meal that comes together in just half an hour.

Forget store-bought Alfredo sauce—this homemade version is ultra-creamy, packed with garlic and Parmesan, and SO much better than anything from a jar!


Why You’ll Love This Recipe

Ready in 30 Minutes – Perfect for busy nights!
Super Creamy & Cheesy – Rich, velvety sauce with tons of flavor.
Easy to Customize – Add veggies, switch up the pasta, or use shrimp instead of chicken!
Better Than Takeout – Homemade Alfredo sauce beats store-bought every time.


Ingredients You’ll Need

For the Chicken:

  • 2 large boneless, skinless chicken breasts (or 3-4 small)
  • 1 teaspoon salt
  • ½ teaspoon black pepper
  • ½ teaspoon garlic powder
  • ½ teaspoon Italian seasoning
  • 1 tablespoon olive oil

For the Alfredo Sauce:

  • 2 tablespoons butter
  • 3 cloves garlic (minced)
  • 1 ½ cups heavy cream (or half-and-half for a lighter version)
  • 1 cup grated Parmesan cheese
  • ½ teaspoon salt
  • ¼ teaspoon black pepper
  • ¼ teaspoon red pepper flakes (optional, for a little heat)

For the Pasta:

  • 12 oz fettuccine, penne, or linguine
  • 1 tablespoon salt (for boiling pasta water)
  • ¼ cup pasta water (reserved)

For Garnish:

  • Fresh parsley or basil (chopped)
  • Extra Parmesan cheese

How to Make Chicken Alfredo Pasta in 30 Minutes

Step 1: Cook the Pasta

  1. Bring a large pot of salted water to a boil.
  2. Cook pasta according to package instructions until al dente.
  3. Reserve ¼ cup pasta water, then drain and set aside.

Step 2: Season & Sear the Chicken

  1. Pat the chicken dry and season both sides with salt, pepper, garlic powder, and Italian seasoning.
  2. Heat olive oil in a large skillet over medium-high heat.
  3. Cook the chicken for 4-5 minutes per side, until golden brown and cooked through (165°F internal temp).
  4. Remove from heat, let rest for 5 minutes, then slice into strips.

Step 3: Make the Alfredo Sauce

  1. In the same pan, melt butter over medium heat.
  2. Add garlic and sauté for 30 seconds until fragrant.
  3. Pour in heavy cream, stirring constantly.
  4. Add Parmesan cheese, salt, pepper, and red pepper flakes.
  5. Simmer for 2-3 minutes, stirring until smooth and creamy.

Step 4: Toss Everything Together

  1. Add the cooked pasta to the sauce and toss to coat.
  2. Stir in ¼ cup reserved pasta water to loosen the sauce if needed.
  3. Add the sliced chicken on top.

Step 5: Serve & Enjoy!

  • Garnish with fresh parsley and extra Parmesan.
  • Serve immediately and enjoy your restaurant-quality Alfredo pasta!

Tips for the Best Chicken Alfredo Pasta

Use fresh Parmesan – Pre-grated cheese won’t melt as smoothly.
Don’t overcook the chicken – Use a thermometer to check for 165°F internal temp.
Reserve pasta water – It helps make the sauce extra silky.
Want extra creaminess? – Add 2 oz cream cheese to the sauce.


Variations & Add-Ins

Make It Healthier 🥦

  • Use whole wheat pasta or zucchini noodles.
  • Swap heavy cream for half-and-half or milk.
  • Add spinach, mushrooms, or steamed broccoli for extra veggies.

Swap the Protein 🍗🍤

  • Try shrimp, salmon, or rotisserie chicken instead of chicken breasts.

Make It Spicy 🌶

  • Add 1 teaspoon Cajun seasoning or extra red pepper flakes.

How to Store & Reheat

Storing Leftovers

  • Keep in an airtight container in the fridge for up to 3 days.

Reheating

  • Stovetop: Warm on low heat, adding a splash of milk or cream.
  • Microwave: Heat in 30-second intervals, stirring between each.

Freezing

  • Alfredo sauce doesn’t freeze well, but you can freeze cooked chicken and pasta separately for up to 2 months.

FAQs About Chicken Alfredo Pasta

Q: Can I use milk instead of heavy cream?
A: Yes! Use whole milk + 1 tablespoon butter for a lighter version.

Q: What’s the best pasta for Alfredo sauce?
A: Fettuccine, penne, or linguine work best because they hold the creamy sauce well.

Q: Can I make this ahead of time?
A: Yes! Cook everything and store separately, then reheat and combine before serving.

Q: What side dishes go well with Alfredo pasta?
A: Garlic bread, Caesar salad, or roasted veggies are great choices!


Final Thoughts

This 30-Minute Chicken Alfredo Pasta is creamy, cheesy, and absolutely delicious—plus, it’s SO easy to make at home! Whether you’re making a quick weeknight meal or hosting a special dinner, this better-than-restaurant Alfredo pasta is sure to impress.

Try it out and let me know how you like it! What’s your favorite way to enjoy Alfredo pasta? Let’s chat in the comments! 🍝✨

Print
clock clock iconcutlery cutlery iconflag flag iconfolder folder iconinstagram instagram iconpinterest pinterest iconfacebook facebook iconprint print iconsquares squares iconheart heart iconheart solid heart solid icon

30-Minute Chicken Alfredo Pasta


  • Author: Emy

Description

This 30-Minute Chicken Alfredo Pasta is a quick and easy dinner that’s rich, creamy, and incredibly satisfying. Tender chicken combined with a velvety Alfredo sauce and pasta – all ready in just 30 minutes! Perfect for busy weeknights when you need something delicious fast.


Ingredients

Scale

For the Chicken & Pasta:

  • 2 boneless, skinless chicken breasts, cut into strips or cubes

  • 8 oz fettuccine or pasta of your choice

  • 1 tbsp olive oil

  • Salt and pepper, to taste

  • 1/2 tsp garlic powder

For the Alfredo Sauce:

  • 1 cup heavy cream

  • 1/2 cup chicken broth

  • 3/4 cup grated Parmesan cheese

  • 2 tbsp unsalted butter

  • 2 cloves garlic, minced

  • 1/4 tsp nutmeg (optional)

  • Salt and pepper, to taste

  • 1/4 cup chopped fresh parsley (optional for garnish)


Instructions

1. Cook the Pasta:

  1. Bring a large pot of salted water to a boil.

  2. Cook the fettuccine pasta according to package instructions (about 8-10 minutes) until al dente. Drain, reserving a small cup of pasta water for later if needed. Set aside.

2. Cook the Chicken:

  1. While the pasta is cooking, heat olive oil in a large skillet over medium-high heat.

  2. Season the chicken strips with salt, pepper, and garlic powder.

  3. Add the chicken to the skillet and cook for 5-7 minutes, turning occasionally, until golden brown and cooked through (internal temperature should reach 165°F/75°C). Remove the chicken from the skillet and set aside.

3. Make the Alfredo Sauce:

  1. In the same skillet, melt butter over medium heat.

  2. Add the minced garlic and cook for 30 seconds until fragrant.

  3. Pour in the heavy cream and chicken broth, stirring to combine.

  4. Bring the mixture to a gentle simmer, then reduce heat and cook for 2-3 minutes until it thickens slightly.

  5. Stir in the Parmesan cheese and cook until the sauce is smooth and creamy. Add a pinch of nutmeg (optional) and season with salt and pepper to taste.

4. Combine the Chicken, Pasta, & Sauce:

  1. Add the cooked pasta to the skillet with the Alfredo sauce and toss to coat the pasta evenly.

  2. Stir in the cooked chicken and mix everything together, adding some of the reserved pasta water if the sauce needs to be thinned out.

5. Serve & Enjoy:


  1. Plate the creamy Chicken Alfredo Pasta and garnish with fresh parsley for added flavor and color.

  2. Serve hot and enjoy the creamy, cheesy goodness!

Notes

This 30-Minute Chicken Alfredo Pasta is a creamy, rich dish that’s ready in no time. Perfect for satisfying your cravings without spending hours in the kitchen!

#ChickenAlfredo #QuickDinner #CreamyPasta #ComfortFood #30MinuteMeals

Garlic Parmesan Chicken Bites – Crispy, Juicy & Irresistible!

If you love crispy, flavorful chicken with a garlicky, cheesy twist, these Garlic Parmesan Chicken Bites are for you! They’re golden brown, juicy, and coated in buttery garlic Parmesan goodness—perfect as a snack, appetizer, or main dish.

These chicken bites are easy to make in under 30 minutes and can be cooked in a skillet, air fryer, or oven. Serve them with your favorite dipping sauce, over pasta, or in a salad for a delicious meal!


Why You’ll Love This Recipe

Crispy & Juicy – Perfectly golden on the outside, tender on the inside.
Quick & Easy – Ready in under 30 minutes!
Garlic Butter + Parmesan = Flavor Bomb – The ultimate combo.
Versatile – Great for snacking, meal prep, or pairing with pasta!


Ingredients You’ll Need

For the Chicken:

  • 1 ½ lbs boneless, skinless chicken breasts (cut into bite-sized pieces)
  • ½ teaspoon salt
  • ½ teaspoon black pepper
  • ½ teaspoon garlic powder
  • ½ teaspoon paprika
  • 2 tablespoons olive oil

For the Garlic Parmesan Coating:

  • 3 tablespoons butter (melted)
  • 3 cloves garlic (minced)
  • ½ cup grated Parmesan cheese
  • 1 teaspoon Italian seasoning
  • ½ teaspoon red pepper flakes (optional, for a little heat)
  • 2 tablespoons fresh parsley (chopped, for garnish)

How to Make Garlic Parmesan Chicken Bites

Step 1: Season the Chicken

  1. In a bowl, toss the chicken pieces with salt, pepper, garlic powder, and paprika until well coated.

Step 2: Cook the Chicken

Skillet Method (Quick & Crispy!)

  1. Heat olive oil in a large skillet over medium-high heat.
  2. Add the chicken and cook for 3-4 minutes per side, until golden brown and cooked through (165°F internal temp).
  3. Remove from heat and set aside.

Air Fryer Method (Extra Crispy!)

  1. Preheat air fryer to 400°F (200°C).
  2. Spray the air fryer basket with cooking spray and add the chicken in a single layer.
  3. Air fry for 8-10 minutes, shaking the basket halfway through.

Oven Method (Great for a Crowd!)

  1. Preheat oven to 400°F (200°C).
  2. Line a baking sheet with parchment paper and spread the chicken in a single layer.
  3. Bake for 15-18 minutes, flipping halfway through, until golden and cooked through.

Step 3: Make the Garlic Parmesan Coating

  1. In a bowl, mix melted butter, minced garlic, Parmesan cheese, Italian seasoning, and red pepper flakes.
  2. Toss the cooked chicken bites in the garlic Parmesan mixture, coating them evenly.

Step 4: Serve & Enjoy!

  • Garnish with fresh parsley and extra grated Parmesan.
  • Serve with ranch, marinara, or garlic aioli for dipping!

Tips for the Best Garlic Parmesan Chicken Bites

Use fresh Parmesan – It melts better and gives the best flavor.
Don’t overcrowd the pan – This ensures even browning.
Want extra crispy bites? – Toss the chicken in panko breadcrumbs before cooking.
Add more garlic! – If you’re a garlic lover, sauté extra minced garlic in the butter.


Variations & Add-Ins

Make It Spicy 🔥

  • Add ½ teaspoon cayenne pepper to the seasoning mix.
  • Drizzle with hot honey or buffalo sauce before serving.

Make It Healthier 🌱

  • Use Greek yogurt instead of butter for a lighter coating.
  • Air-fry or bake instead of pan-frying.

Turn It Into a Meal 🍽

  • Serve over buttery pasta or mashed potatoes.
  • Toss into a Caesar salad or grain bowl.
  • Stuff into a wrap with lettuce and ranch.

How to Store & Reheat

Storing Leftovers

  • Keep in an airtight container in the fridge for up to 3 days.

Reheating

  • Oven: Bake at 375°F for 10 minutes.
  • Air Fryer: Heat at 350°F for 3-4 minutes.
  • Microwave: Heat in 30-second intervals, but they may lose crispiness.

Freezing

  • Freeze the cooked chicken (without sauce) for up to 2 months.
  • Reheat in the oven or air fryer before tossing in the garlic Parmesan butter.

FAQs About Garlic Parmesan Chicken Bites

Q: Can I use chicken thighs instead of chicken breasts?
A: Absolutely! Chicken thighs are juicier and add even more flavor.

Q: What’s the best dipping sauce for these chicken bites?
A: Ranch, honey mustard, marinara, or garlic aioli pair perfectly!

Q: How do I make these extra crispy?
A: Toss the chicken in panko breadcrumbs before cooking for a crunchier texture.

Q: Can I meal prep these chicken bites?
A: Yes! Cook them ahead and store in the fridge—just reheat before serving.

Q: Can I add breadcrumbs to the coating?
A: Yes! Tossing the chicken in panko + Parmesan before cooking gives extra crunch.


Final Thoughts

These Garlic Parmesan Chicken Bites are crispy, juicy, and packed with bold, cheesy garlic flavor. They’re perfect for snacking, meal prepping, or serving as a quick dinner—plus, they’re ready in under 30 minutes!

Try them out and let me know how you like them! What’s your favorite way to serve chicken bites? Let’s chat in the comments! 🍗🧄🧀

Print
clock clock iconcutlery cutlery iconflag flag iconfolder folder iconinstagram instagram iconpinterest pinterest iconfacebook facebook iconprint print iconsquares squares iconheart heart iconheart solid heart solid icon

Garlic Parmesan Chicken Bites


  • Author: Emy

Description

These Garlic Parmesan Chicken Bites are crispy, tender, and bursting with savory flavors! Perfect as a snack, appetizer, or main dish, these bites are coated in a flavorful garlic butter sauce and topped with melty Parmesan cheese.


Ingredients

Scale

For the Chicken Bites:

  • 1 1/2 lbs boneless, skinless chicken breasts, cut into bite-sized cubes

  • 1/2 cup all-purpose flour

  • 1/2 tsp garlic powder

  • 1/2 tsp onion powder

  • 1/4 tsp paprika

  • Salt and pepper, to taste

  • 1/2 cup grated Parmesan cheese

  • 2 tbsp olive oil (for cooking)

For the Garlic Parmesan Sauce:

  • 4 tbsp unsalted butter

  • 4 cloves garlic, minced

  • 1/4 cup grated Parmesan cheese

  • 2 tbsp chopped fresh parsley (optional)

  • 1 tbsp lemon juice (optional, for a little zing)


Instructions

1. Prepare the Chicken Bites:

  1. In a shallow bowl, mix the flour, garlic powder, onion powder, paprika, salt, and pepper.

  2. Coat the chicken cubes in the flour mixture, pressing gently to ensure an even coating.

2. Cook the Chicken Bites:

  1. Heat olive oil in a large skillet over medium-high heat.

  2. Once hot, add the coated chicken bites in a single layer (do this in batches if necessary).

  3. Cook for 5-7 minutes, turning occasionally, until the chicken is golden brown and cooked through (internal temperature of 165°F/75°C). Remove from the skillet and set aside.

3. Make the Garlic Parmesan Sauce:

  1. In the same skillet, add butter and melt over medium heat.

  2. Add the minced garlic and cook for 1-2 minutes, until fragrant and golden.

  3. Stir in the grated Parmesan cheese and cook for another 1-2 minutes. If you’d like a touch of acidity, add lemon juice.

  4. Return the cooked chicken bites to the skillet, tossing them in the garlic Parmesan sauce until evenly coated.

4. Serve & Enjoy:


  1. Sprinkle with fresh parsley for a burst of color and fresh flavor.

  2. Serve immediately, either as a snack, appetizer, or over a bed of rice or pasta for a complete meal!

Notes

These Garlic Parmesan Chicken Bites are full of flavor, crispy on the outside, and tender on the inside. Perfect for any occasion and sure to be a hit with everyone!


#ChickenBites #GarlicParmesan #AppetizerIdeas #ComfortFood #EasyDinner

Sweet and Spicy BBQ Ribs – Tender, Sticky & Packed with Flavor!

If you love fall-off-the-bone tender ribs coated in a sticky, sweet, and spicy BBQ sauce, this Sweet and Spicy BBQ Ribs recipe is for you! Whether you make them in the oven, slow cooker, or on the grill, these ribs are juicy, flavorful, and finger-licking good.

The combination of brown sugar, honey, smoky spices, and a little heat creates the perfect balance of sweet and spicy. Serve them with cornbread, coleslaw, or baked beans for the ultimate BBQ feast!


Why You’ll Love This Recipe

Perfect Balance of Sweet & Heat – A delicious mix of smoky, tangy, and spicy flavors.
Super Tender & Juicy – Slow cooking makes them fall-apart good.
Great for Any Cooking Method – Oven, grill, or slow cooker options included!
Easy to Make Ahead – Prep them in advance for a stress-free meal.


Ingredients You’ll Need

For the Ribs:

  • 2 racks baby back ribs (or spare ribs)
  • 1 tablespoon olive oil

For the Dry Rub:

  • ¼ cup brown sugar
  • 1 tablespoon smoked paprika
  • 1 teaspoon salt
  • 1 teaspoon black pepper
  • 1 teaspoon garlic powder
  • 1 teaspoon onion powder
  • ½ teaspoon cayenne pepper (adjust for heat level)
  • ½ teaspoon ground mustard

For the Sweet & Spicy BBQ Sauce:

  • 1 cup BBQ sauce (your favorite brand or homemade)
  • ¼ cup honey
  • 2 tablespoons brown sugar
  • 1 tablespoon apple cider vinegar
  • 1 teaspoon hot sauce (like sriracha or Tabasco)
  • 1 teaspoon Worcestershire sauce
  • ½ teaspoon red pepper flakes (optional for extra heat)

How to Make Sweet and Spicy BBQ Ribs

Step 1: Prep the Ribs

  1. Remove the membrane from the back of the ribs by loosening one end with a knife and pulling it off with a paper towel.
  2. Pat the ribs dry with paper towels and rub with olive oil.

Step 2: Apply the Dry Rub

  1. In a bowl, mix together all the dry rub ingredients.
  2. Generously coat both sides of the ribs with the rub, pressing it in.
  3. Let the ribs sit for at least 30 minutes (or overnight for deeper flavor).

Cooking Methods

Oven Method (Easy & Foolproof!)

  1. Preheat oven to 300°F (150°C).
  2. Wrap the ribs tightly in foil and place on a baking sheet.
  3. Bake for 2 ½ to 3 hours, until tender.
  4. Remove from foil, brush with BBQ sauce, and broil for 5 minutes until caramelized.

Grill Method (Smoky & Delicious!)

  1. Preheat grill to medium (275-300°F).
  2. Place ribs on indirect heat, cover, and cook for 2-3 hours, flipping occasionally.
  3. During the last 30 minutes, baste with BBQ sauce every 10 minutes.

Slow Cooker Method (Ultra Tender!)

  1. Place ribs in a slow cooker and cook on LOW for 7-8 hours or HIGH for 4-5 hours.
  2. Remove, brush with BBQ sauce, and broil for 5 minutes to caramelize.

Step 3: Make the Sweet & Spicy BBQ Sauce

  1. In a saucepan over medium heat, combine BBQ sauce, honey, brown sugar, vinegar, hot sauce, Worcestershire sauce, and red pepper flakes.
  2. Simmer for 5 minutes, stirring occasionally, until thick and glossy.
  3. Brush over the ribs before serving.

Tips for the Best BBQ Ribs

Remove the membrane – This makes the ribs extra tender.
Low & slow cooking – Cooking at low heat gives the best texture.
Broil or grill at the end – This caramelizes the sauce for extra flavor.
Let them rest – Let ribs sit for 5 minutes before cutting for juicier meat.


Variations & Add-Ins

Make It Extra Spicy 🔥

  • Add an extra teaspoon of cayenne to the rub.
  • Use ghost pepper hot sauce for an extra kick!

Make It Smoky 🌿

  • Add 1 teaspoon liquid smoke to the sauce.
  • Use hickory or mesquite wood chips if grilling.

Honey Garlic Version 🍯

  • Swap hot sauce for extra honey & minced garlic in the sauce.

How to Store & Reheat

Storing Leftovers

  • Store in an airtight container in the fridge for up to 4 days.

Reheating

  • Oven: Wrap in foil and bake at 300°F for 15 minutes.
  • Microwave: Heat in 30-second intervals, brushing with extra sauce.

Freezing

  • Freeze cooked ribs (without sauce) for up to 3 months.
  • Thaw overnight, then reheat with BBQ sauce.

FAQs About Sweet and Spicy BBQ Ribs

Q: Can I use spare ribs instead of baby back ribs?
A: Yes! Just increase the cook time by about 30-45 minutes since they’re meatier.

Q: What’s the best BBQ sauce to use?
A: A smoky, slightly sweet BBQ sauce works best—try hickory, honey, or brown sugar-based sauces.

Q: Can I cook ribs in advance?
A: Absolutely! Cook them a day ahead, then reheat with sauce for easy serving.

Q: What sides go well with BBQ ribs?
A: Coleslaw, cornbread, mac & cheese, baked beans, or grilled corn are great choices!

Q: How do I keep ribs moist?
A: Wrapping them in foil while baking or basting with sauce while grilling keeps them juicy.


Final Thoughts

These Sweet and Spicy BBQ Ribs are the perfect mix of smoky, tender, sweet, and spicy—guaranteed to be a crowd-pleaser at any BBQ or family dinner! Whether you bake, grill, or slow-cook them, they’ll turn out mouthwateringly good every time.

Give them a try and let me know how you like them! Do you prefer your ribs sweet, spicy, or smoky? Let’s chat in the comments! 🍖🔥

Print
clock clock iconcutlery cutlery iconflag flag iconfolder folder iconinstagram instagram iconpinterest pinterest iconfacebook facebook iconprint print iconsquares squares iconheart heart iconheart solid heart solid icon

Sweet and Spicy BBQ Ribs


  • Author: Emy

Description

These Sweet and Spicy BBQ Ribs are the perfect combination of smoky, sweet, and spicy flavors. Slow-cooked until tender and then glazed with a flavorful homemade BBQ sauce, these ribs are sure to be a hit at your next BBQ or family dinner


Ingredients

Scale

For the Ribs:

  • 2 racks baby back ribs (about 4 lbs)

  • 2 tbsp olive oil

  • Salt and pepper, to taste

  • 1 tbsp garlic powder

  • 1 tbsp onion powder

  • 1 tsp smoked paprika

  • 1/2 tsp cayenne pepper (adjust to your spice preference)

For the BBQ Sauce:

  • 1 cup ketchup

  • 1/4 cup honey

  • 1/4 cup apple cider vinegar

  • 1/4 cup brown sugar

  • 2 tbsp Worcestershire sauce

  • 2 tbsp soy sauce

  • 1 tbsp Dijon mustard

  • 1 tsp smoked paprika

  • 1 tsp garlic powder

  • 1/2 tsp black pepper

  • 1/4 tsp cayenne pepper (for extra heat)


Instructions

1. Prepare the Ribs:

  1. Preheat your oven to 300°F (150°C).

  2. Remove the membrane from the back of the ribs by using a paper towel to grip and pull it off. This helps the ribs become more tender.

  3. Rub the olive oil over both sides of the ribs.

  4. Season the ribs generously with salt, pepper, garlic powder, onion powder, smoked paprika, and cayenne pepper. Massage the seasoning into the ribs and let them sit for 15-20 minutes to absorb the flavors.

2. Bake the Ribs:

  1. Line a large baking sheet with aluminum foil and place a wire rack on top.

  2. Place the ribs on the rack, meat side up.

  3. Cover the ribs with foil and bake in the preheated oven for 2 1/2 to 3 hours, or until the ribs are tender and the meat starts to pull away from the bone.

3. Make the BBQ Sauce:

  1. While the ribs are baking, combine all the ingredients for the BBQ sauce in a saucepan over medium heat.

  2. Stir occasionally and let the sauce simmer for 10-15 minutes, allowing it to thicken and the flavors to meld together.

  3. Taste and adjust seasoning, adding more honey for sweetness or cayenne for spice, depending on your preference.

4. Finish the Ribs:

  1. Once the ribs are done baking, remove them from the oven and brush a generous amount of the BBQ sauce over the ribs.

  2. Preheat a grill or grill pan to medium-high heat.

  3. Transfer the ribs to the grill and cook for an additional 5-7 minutes, basting with more BBQ sauce and turning occasionally to get a nice caramelized glaze.

5. Serve & Enjoy:


  1. Remove the ribs from the grill and let them rest for a few minutes.

  2. Slice between the bones to separate the ribs, serve, and enjoy the perfect balance of sweet and spicy flavors!

Notes

These Sweet and Spicy BBQ Ribs are tender, flavorful, and perfect for any occasion—whether it’s a casual family meal or a summer BBQ with friends!


#BBQRibs #SweetAndSpicy #GrillingSeason #BBQSeason #ComfortFood