Easy Cheesy Pepperoni Stromboli – Perfect for Pizza Night

Cheesy Pepperoni Stromboli: A Delicious Twist on a Classic Italian Favorite

⚖️
Difficulty
Medium

⏲️
Prep Time
20 mins

🕒
Cook Time
25 mins

⏱️
Total Time
45 mins

🍽️
Servings
4

Indulge in the fantastic flavors of this Cheesy Pepperoni Stromboli, a delectable dish that blends comforting cheese and zesty pepperoni, all enveloped in a golden, crispy crust. This recipe is perfect for gatherings, game nights, or simply when you’re craving something savory. As you slice into the warm, cheesy goodness, the aroma will entice everyone, making it hard to resist. The combination of melted cheese and spicy pepperoni provides a rich and satisfying bite that will leave you wanting more.

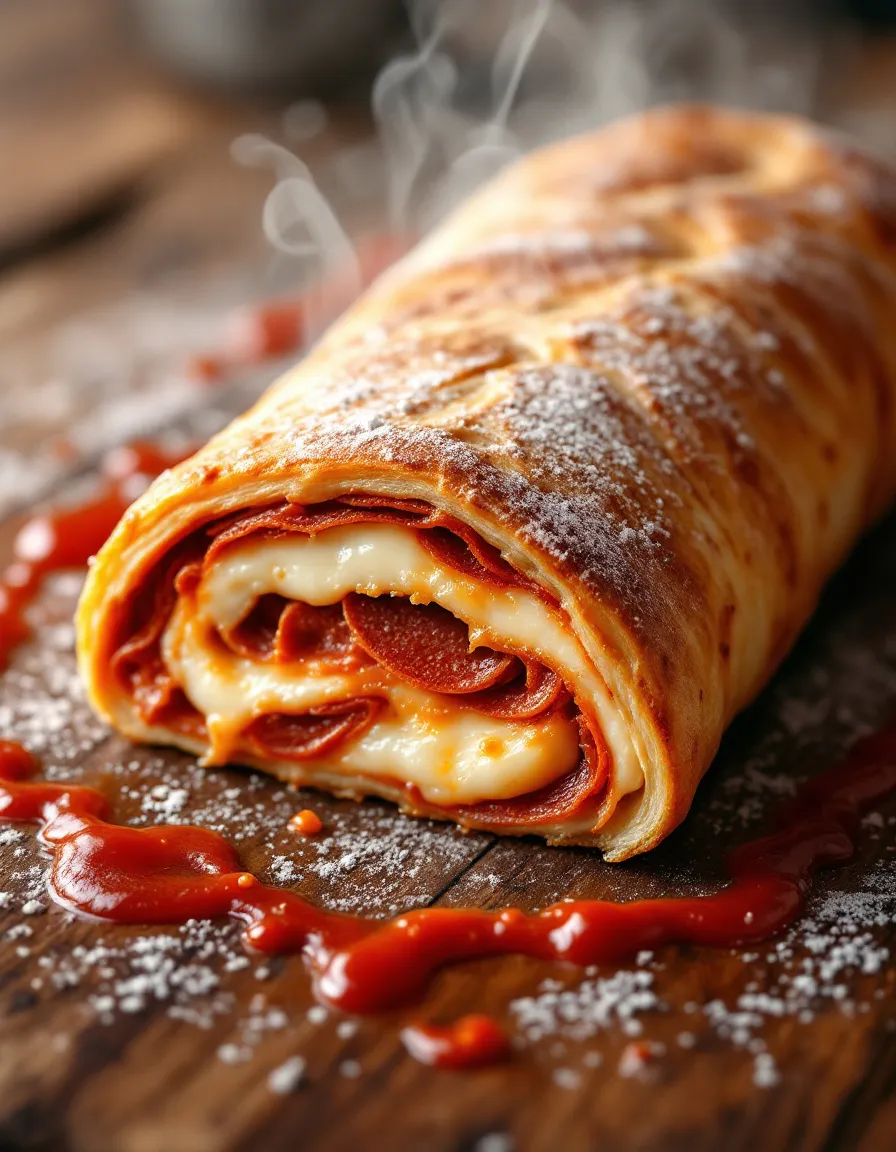
This Cheesy Pepperoni Stromboli is not just about taste; it’s also about texture! The dough bakes to a lovely crisp on the outside while remaining wonderfully soft and chewy on the inside. Each bite reveals the molten cheese and savory meat, creating a delightful mouthfeel. It’s as fun to make as it is to eat, and once you outline the steps, you’ll find it’s straightforward, making it an ideal choice for both seasoned cooks and kitchen novices alike.

Quick Recipe Highlights

  • Flavor Profile: Enjoy the rich blend of melty cheese, pepperoni’s spice, and a hint of garlic for a flavorful punch.
  • Texture: The contrast between the crispy crust and gooey center makes every bite a textural delight.
  • Aroma: A warm, inviting scent of baked bread and savory meats fills the air as it cooks.
  • Visual Appeal: The golden-brown exterior and oozy cheese make it an Instagram-worthy dish.
  • Skill Level Needed: This recipe is easy to follow, making it suitable for cooks of all abilities.
  • Special Equipment: All you need is a baking sheet and parchment paper for easy cleanup.

Recipe Overview

  • Difficulty Level: This Cheesy Pepperoni Stromboli is rated at a medium difficulty level, making it great for those who enjoy cooking but may not be experts just yet. With straightforward ingredients and steps, you’ll feel accomplished once it’s out of the oven.
  • Category: This dish fits into the category of savory snacks and finger foods, perfect for parties, movie nights, or casual family dinners.
  • Cuisine: Originating from Italian-American kitchens, Stromboli is a culinary delight that has evolved over time, becoming a staple in many households.
  • Cost: The ingredients are cost-effective, typically totaling around $10-$15, depending on local prices and sales.
  • Season: This dish can be enjoyed year-round, but it’s particularly popular during football season and for holiday parties due to its sharing nature.
  • Occasion: Perfect for casual get-togethers, tailgating, or as a delightful appetizer during any festive gathering.

Why You’ll Love This Recipe

The taste and texture appeal of this Cheesy Pepperoni Stromboli is second to none. Each bite bursts with flavor, as the rich cheese melds with the spicy pepperoni, creating a harmonious blend that is utterly addictive. You can customize it by adding your favorite toppings, ensuring that every version is unique.

Convenience is another reason this recipe shines. Preparing the Stromboli can be done in under an hour, making it a quick yet satisfying meal option. The dough can also be made ahead of time or purchased pre-made for even quicker assembly.

Nutritionally, the inclusion of protein from pepperoni and calcium from cheese can contribute to a balanced meal, especially when paired with a side salad. By choosing leaner meats and whole wheat dough, you can increase its health benefits without compromising on flavor.

This recipe offers great social value, as it’s a sharable dish that encourages everyone to gather around the table. It serves as a conversation starter and is bound to be a hit at parties and family gatherings, bringing joy and connection to your meals.

Additionally, the cost-effectiveness of this Cheesy Pepperoni Stromboli can’t be overlooked. With minimal ingredients that are typically budget-friendly, it allows you to feed a crowd without breaking the bank, making it accessible to everyone.

Historical Background and Cultural Significance

The origin of Stromboli can be traced back to Italian immigrants in the United States during the 1950s. It’s named after the volcanic island of Stromboli, invoking images of hot and spicy flavors characteristic of the region. Initially, it was a simple sandwich rolled up with various meats and cheeses, but over time, it evolved into the cheesy, baked delight we know today.

Culturally, Stromboli represents the fusion of Italian culinary traditions with American tastes. It showcases how immigrant communities adapt their traditional recipes, blending familiar flavors with local ingredients to create something new, yet reflective of their heritage.

This recipe has evolved as well, with regional variations popping up across the United States. Some feature different meats or additional vegetables, allowing families to add personal touches that resonate with their tastes and traditions.

Stromboli’s significance continues in modern culinary culture, favorably positioned as a go-to snack for sports events, parties, and family gatherings. Its ability to be customized makes it a versatile dish that bridges traditional Italian flavors and contemporary dining culture.

Ingredient Deep Dive

Dough: The bread dough is the essential base of the Stromboli, and choosing the right type is crucial for achieving optimal texture. Traditionally, a simple pizza dough is used, but you can experiment with various types, such as whole wheat or gluten-free. Nutritionally, whole wheat dough offers more fiber. When selecting, look for fresh, high-quality dough or make your own for the best results. Store it in the fridge if you’re using fresh dough or freeze it for longer preservation.

Pepperoni: This iconic Italian-American salami brings a mouthwatering spiciness and depth to your Stromboli. Packed with protein, pepperoni is a beloved ingredient, but it can also be high in sodium. When selecting, opt for high-quality pepperoni made without fillers. Store in a cool environment and consider replacing with turkey pepperoni for a lower-fat option.

Common Mistakes to Avoid

  • Overfilling the Stromboli: It’s tempting to load it up, but too much filling can lead to explosions in the oven. Stick to moderate amounts of fillings for the best outcome.
  • Not sealing properly: Ensure the edges are well-sealed to avoid leakage during baking. A simple pinch can make all the difference!
  • Baking at the wrong temperature: Follow the recommended temperature closely. Too high, and the crust may burn while the inside remains raw.
  • Using cold fillings: For a better rise and even cooking, allow ingredients like cheese and meats to reach room temperature before assembling.
  • Skipping the parchment paper: This is essential to prevent sticking. Baking directly on the pan can lead to a disaster!
  • Not allowing it to rest post-baking: Letting it rest for a few minutes helps set the filling, making slicing easier.
  • Cuts made before baking: Avoid cutting the surface before baking; this lets the steam escape and can make for a dry result.
  • Using low-quality cheese: Cheap cheese can lead to a chewy texture; opt for high-quality mozzarella for gooey goodness.
  • Ignoring the cooling time: Cutting too soon might make the filling ooze out, ruining presentation.
  • Not checking for doneness: Always use a thermometer; the internal temperature should reach 190°F for perfect results.

Essential Techniques

Rolling the Dough: Mastering the dough roll is crucial for an even Stromboli; start from one edge and gently roll outwards. Avoid uneven pressure, which can lead to tears. Aim for a thickness of about ¼ inch.

Sealing the Edges: Properly sealing the edges ensures that the filling stays inside during baking. Press firmly along the edges and consider using a fork to crimp for extra security. This is also a key visual cue to check when making Stromboli.

Pro Tips for Perfect Cheesy Pepperoni Stromboli

1. Experiment with different cheeses for varied flavors; provolone or cheddar can add a fun twist.

2. Bake on a pizza stone for a crispy crust.

3. Brush the dough with garlic butter before baking for extra flavor.

4. Opt for pesto or marinara inside for a flavor burst.

5. Serve with dipping sauces to elevate the dining experience.

6. Consider adding sautéed vegetables for an extra nutritional boost.

7. Create a themed night by pairing it with Italian wines.

8. Use leftovers creatively in other recipes to minimize waste.

Variations and Adaptations

You can easily adapt this Cheesy Pepperoni Stromboli to fit various tastes. For regional variations, try incorporating local sausage or peppers. Seasonal adaptations might include adding roasted vegetables in summer for a lighter version, while a heartier filling of meats can suit fall weather.

For dietary modifications, make it vegetarian by swapping pepperoni for sautéed mushrooms or spinach. If you’re looking for a different flavor profile, try barbecue sauce instead of traditional marinara for a barbecue chicken version.

Texture modifications can also enhance your dish; for a crunch, consider sprinkling some seasoned breadcrumbs on the filling. Furthermore, to keep it classic, stick to the traditional shape, but you could also cut it into bite-sized pieces before baking for a unique presentation.

Serving and Presentation Guide

For an impressive presentation, slice the Stromboli diagonally and arrange the pieces on a platter. Garnish with fresh herbs or a drizzle of olive oil for color. Serve alongside bowls of marinara sauce or garlic butter for dipping. Consider the temperatures carefully; Stromboli is best enjoyed warm.

To control portions, serve smaller slices for appetizers or larger pieces for a main dish. Pair it with a crisp side salad to balance the hearty flavors and offer guests a refreshing contrast.

Wine and Beverage Pairing

Pair this Cheesy Pepperoni Stromboli with a robust red wine, such as Chianti or Zinfandel, to complement the savory flavors. For non-alcoholic options, consider a sparkling grape juice or a refreshing iced tea. If a warm beverage is desired, a rich espresso could enhance the Italian experience.

Storage and Shelf Life

To store leftover Stromboli, wrap tightly in plastic wrap or aluminum foil and refrigerate for 3-4 days. For longer-lasting storage, consider freezing; wrap in multiple layers to avoid freezer burn. Signs of spoilage include an off smell or significant texture changes, so always check before consuming. When reheating, aim for a temperature of 350°F to maintain crispness while warming the interior thoroughly.

Make Ahead Strategies

If you’re preparing for an event, you can make the dough a day in advance and store it in the refrigerator. Prepare the filling ahead of time and refrigerate it separately. On the day of serving, assemble and bake directly from the fridge for a fresh taste. For best results, aim to reheat any chilled components to room temperature before final assembly, ensuring optimal flavor and texture.

Scaling Instructions

The Cheesy Pepperoni Stromboli is easily scalable; if you’re hosting a large crowd, consider doubling the recipe and preparing multiple Stromboli. For halving, use a smaller baking sheet and adjust cooking times slightly. It’s important to monitor closely to ensure even baking, particularly with varying sizes of the roll.

Nutritional Deep Dive

Analyzing the nutritional content of this Cheesy Pepperoni Stromboli reveals a good balance of macronutrients—primarily carbohydrates from the dough, protein from the toppings, and fats from the cheese. For those managing weight, consider portion sizes and balance with nutritious sides like salads or grilled vegetables to round out meals.

Dietary Adaptations

This Cheesy Pepperoni Stromboli can easily be modified to meet various dietary needs. To create a gluten-free version, use approved flour blends or gluten-free pizza dough, ensuring all fillings and sauces used are also gluten-free. For a dairy-free option, substitute traditional cheese with plant-based versions, paying attention to flavor profiles.

Troubleshooting Guide

In case of texture issues, ensure the dough is rolled evenly and baked thoroughly, as uneven thickness can lead to soggy spots. If the flavors seem off, consider adjusting the seasoning levels in the sauce or fillings to bring balance. Should timing be an issue where the Stromboli seems overcooked, check the oven’s temperature accuracy, as variances can lead to miscalculations in timing.

Recipe Success Stories

Readers have shared great success with this Cheesy Pepperoni Stromboli, noting it as a crowd-pleaser at gatherings. Many have adapted the recipe with unique ingredients, creating their own take that resonates with family traditions. Photography tips include using natural light and vibrant backgrounds to showcase the baked product’s golden color and melty cheese to attract attention on social media.

Frequently Asked Questions

Can I use other meats in this recipe? Absolutely! Feel free to swap or mix meats, such as ham or turkey, to suit your preferences while keeping the flavors exciting.

Is it possible to freeze this dish? Yes, you can freeze Stromboli both before and after baking. Wrap tightly and store in an airtight container to prevent freezer burn.

How can I make it spicier? Add jalapeños to the filling, or use spicy pepperoni for an added kick. You can also sprinkle red pepper flakes on before baking for heat.

What dipping sauces pair well? Marinara is traditional, but garlic butter, ranch dressing, or pesto offer delicious alternatives for dipping.

How do I know when it’s done baking? The Stromboli should be a golden-brown color, and internal temperatures should reach about 190°F for perfect doneness.

Can I use store-bought dough? Yes, using pre-made dough is a great time-saver! Just ensure it is high quality for the best results.

What can I add for extra flavor? Herbs like oregano, basil, or even a sprinkle of Parmesan cheese can enhance the flavor profile of your Stromboli.

How should I store leftovers? Wrap in plastic wrap or foil and keep in the fridge for up to four days, or freeze for longer storage.

Can this recipe be made vegetarian? Yes, omit the pepperoni and replace it with plenty of veggies, like bell peppers and onions, for a delightful twist.

What’s the best way to reheat Stromboli? The best method is to reheat it in the oven at 350°F for about 10-15 minutes, ensuring it stays crispy.

Additional Resources

For those interested in further exploring this cuisine, check out complementary recipes like homemade marinara, garlic knots, or Italian salads. Additionally, guides on dough making and ingredient substitutions can help elevate your culinary skills while ensuring fresh and flavorful results.

Join the Conversation

We love hearing from our cooking community! Share your experiences with this Cheesy Pepperoni Stromboli on social media, and don’t forget to tag us! Your stories and variations could inspire others. Dive into the comments below to ask questions, swap tips, or show off your beautiful creations. Let’s keep culinary creativity alive!

The Recipe

Cheesy Pepperoni Stromboli

Serves: 4

Prep Time: 20 mins

Cook Time: 25 mins

Total Time: 45 mins

Kitchen Equipment Needed

  • Baking sheet
  • Parchment paper
  • Rolling pin
  • Sharp knife

Ingredients

  • 1 pound pizza dough
  • 8 ounces mozzarella cheese, shredded
  • 6 ounces pepperoni slices
  • ½ cup marinara sauce (for dipping)
  • 1 egg, beaten (for egg wash)
  • 2 tablespoons olive oil
  • 1 teaspoon garlic powder

Directions

  1. Preheat oven to 400°F (200°C) and line the baking sheet with parchment paper.
  2. Roll out the pizza dough on a floured surface to create a rectangle, approximately ¼ inch thick.
  3. Spread the shredded mozzarella evenly across the dough, leaving a one-inch border.
  4. Layer the pepperoni slices over the cheese.
  5. Starting from one edge, carefully roll the dough away from you into a tight log, sealing the edges as you go.
  6. Tuck the ends under to seal, and transfer the Stromboli to the prepared baking sheet.
  7. Brush the top with the beaten egg, and sprinkle garlic powder over the top.
  8. Bake for 25 minutes, or until the top is golden and the cheese is bubbling.
  9. Remove from the oven, let cool for a few minutes, cut into slices, and serve with marinara sauce.

Recipe Notes

  • Feel free to substitute pepperoni with any other meat or vegetables for a personalized touch.
  • To enhance flavor, consider adding herbs and spices to the cheese filling.

Ultimate Loaded Potato & Meatloaf Casserole Recipe

Loaded Potato & Meatloaf Casserole: Comfort Food at Its Best

⚖️
Difficulty
Medium

⏲️
Prep Time
20 mins

🕒
Cook Time
60 mins

⏱️
Total Time
80 mins

🍽️
Servings
6 servings

The Loaded Potato & Meatloaf Casserole is an irresistible fusion, bringing together hearty meatloaf flavors with creamy, cheesy potatoes that simply melt in your mouth. This comforting dish is perfect for family dinners, ensuring everyone leaves the table satisfied and happy. Imagine the aroma wafting through your kitchen, as the ingredients blend together to create a cozy, inviting atmosphere.

The combination of savory meatloaf, zesty seasonings, and a baked potato topping makes for a well-rounded meal that’s not only filling but also incredibly flavorful. You’ll enjoy every bite as the texture of the meat contrasts beautifully with the fluffy potatoes and melted cheese on top. This recipe embodies the warmth of home cooking—it’s like a warm hug on a plate!

Quick Recipe Highlights

  • Flavor Profile: This dish combines the richness of beef with the creamy texture of potatoes, heightened by the addition of cheddar cheese and savory spices.
  • Texture: The meatloaf base provides a hearty bite, while the potato topping adds a velvety smoothness that enhances each mouthful.
  • Aroma: The mix of onions and seasonings make this casserole fragrant, filling your kitchen with an enticing smell that will draw everyone to the table.
  • Visual Appeal: Layered beautifully, this casserole boasts a golden, bubbly cheese crust on top, contrasting with the dark meatloaf beneath.
  • Skill Level Needed: This recipe is easy to intermediate, perfect for home cooks who want to experiment with layering flavors.
  • Special Equipment: You’ll need a baking dish and a mixing bowl, making this a straightforward dish to prepare without specialized tools.

Recipe Overview

  • Difficulty Level: This casserole is considered medium in difficulty because it involves preparing two main components (meatloaf and potatoes) but is still accessible for most cooks.
  • Category: Ideal as a main dish, it pairs perfectly with a side salad or steamed vegetables during lunch or dinner.
  • Cuisine: This recipe is rooted in American comfort food tradition, reflecting the classic potluck and family meal style.
  • Cost: The dish is budget-friendly, as it uses staple ingredients like potatoes and ground beef, making it accessible for feeding families.
  • Season: Perfect year-round, this casserole warms you up in the winter and is hearty enough for the autumn months.
  • Occasion: Excellent for family gatherings, casual dinners, or even meal prep for busy weeks.

Why You’ll Love This Recipe

The Loaded Potato & Meatloaf Casserole is the epitome of comfort food. Not only does it deliver a hearty and rich flavor experience, but it also merges the best of two beloved dishes into one easily prepared casserole. The savory meatloaf, made with high-quality ground beef and your choice of herbs, is bound to satisfy even the heartiest of appetites, while the creamy potato topping offers an indulgent finish that will have everyone coming back for seconds.

Moreover, this recipe is incredibly convenient for busy weeknights; it can easily be assembled in advance and then baked just before serving. It requires minimal prep time and keeps well, making it a perfect option for meal prepping. The combination of meat and potatoes means you can skip extra sides and still have a complete meal in one dish.

Nutritionally, this casserole provides essential proteins from the meat and carbohydrates from the potatoes, making it an energizing choice for families. It also packs in some essential vitamins and minerals, especially if you add vegetables like broccoli or green beans to the mix, enhancing its health profile.

There’s something deeply social about sharing a casserole, making this dish perfect for gatherings. It evokes camaraderie as everyone shares in the delight of this comforting meal, often sparking conversations about family traditions and favorite recipes. It’s a perfect example of how meal-sharing creates connections and joy.

Finally, the affordability of this dish cannot be overstated. Using common ingredients, it offers exceptional value while delivering a substantial meal that feeds a crowd. You can easily scale the recipe to suit larger gatherings, making it an economical meal option, compared to dining out or ordering takeout.

Historical Background and Cultural Significance

The origins of casseroles can be traced back centuries, with each culture adapting various forms of one-dish meals that combine diverse ingredients into a single pot. The Loaded Potato & Meatloaf Casserole draws inspiration from traditional American meatloaf—a dish popular since the Great Depression as a way to stretch meat and make it last longer while feeding a family.

Culturally, this casserole symbolizes the essence of American cuisine—hearty, filling, and practical. It reflects the comfort food movement that focuses on satisfying meals that remind us of home. The casserole has evolved over time, with modern recipes allowing for numerous variations to cater to changing dietary needs and taste preferences.

As families began gathering for potlucks and community events, casseroles became a staple due to their ease of preparation and transport. This Loaded Potato & Meatloaf Casserole perfectly embodies this tradition, making it an ideal dish to serve when sharing meals with others.

Regional variations of meatloaf abound, with different regions of the U.S. offering unique spins on flavor profiles and ingredient choices. For example, some might add southwestern spices for a bolder flavor, while others incorporate barbecue sauce for a sweet, smoky kick. This recipe serves as a canvas for creativity in the kitchen.

Ingredient Deep Dive

Ground Beef: Ground beef is a staple in many homes, celebrated not just for its flavor but also for its versatility. Historically, it originated as a way to use leftover cuts of meat, ground down to create new dishes. Nutritionally, it’s an excellent source of protein, iron, and B vitamins. When selecting ground beef, look for a bright red color with a firm texture. To store, keep it in the coldest part of your refrigerator or freeze for later use, ensuring optimal freshness. For substitutions, consider ground turkey or chicken for a leaner option.

Potatoes: Potatoes have been a dietary staple in many cultures for centuries. Rich in carbohydrates, vitamins, and minerals, they provide energy and nourishment. When choosing potatoes, select those that are firm and free from blemishes. Store them in a cool, dark place to prolong their shelf life. For a healthier twist, you can replace traditional potatoes with sweet potatoes or cauliflower to add different nutrients and flavors.

Common Mistakes to Avoid

  • Using too much liquid can result in a soggy casserole. Avoid adding extra broth or sauce without considering its overall moisture.
  • Overmixing the meatloaf can create a dense texture. Mix just until the ingredients are combined for a tender finish.
  • Not allowing the casserole to rest after baking can affect the texture. Letting it sit for a few minutes helps everything set properly.
  • Skipping the browning of the meatloaf can lead to a less flavorful result. Always sear the meat to develop a rich, deep flavor.
  • Using cold ingredients rather than letting them come to room temperature can alter cooking times and texture.
  • Neglecting seasoning can lead to blandness. Balance flavors with salt, pepper, and herbs throughout the cooking process.
  • Not greasing the dish properly can cause sticking, making it challenging to serve the casserole.
  • Ignoring ingredient freshness can affect both flavor and texture, so always choose the best quality ingredients for your dish.
  • Overbaking can dry out the casserole. Keep an eye on cooking times and check for doneness regularly.
  • Not layering the ingredients correctly can cause uneven cooking, so follow the directions precisely for the best results.

Essential Techniques

Layering Ingredients: Layering is crucial for ensuring even cooking and proper flavor distribution. Start by forming a solid meatloaf base before adding your potato layer. To master, think of it as building a sturdy foundation. Common pitfalls include overcrowding the dish or neglecting to spread toppings evenly. Visual cues for success are consistent height in layers and a gorgeous golden top.

Preparing Meatloaf: The technique for making meatloaf revolves around mixing ingredients without overworking the meat. To master this, gently fold in other components. Over-mixing can create a tough texture, so be cautious with your mixing. A properly prepared meatloaf should hold together but remain tender, offering delicious bites.

Pro Tips for Perfect Loaded Potato & Meatloaf Casserole

– Use freshly grated cheese for better melting and flavor compared to pre-shredded varieties, which often contain anti-caking agents.
– Try adding finely chopped vegetables like bell peppers or carrots into the meat mixture for added nutrients and texture.
– For a bit of heat, incorporate diced jalapeños or red pepper flakes into the meatloaf mix.
– Ensure the potatoes are slicing evenly for uniform cooking; thicker slices may not cook through.
– If you prefer a crunch, top the casserole with crushed crackers or potato chips during the last 10 minutes of baking.
– Allow the casserole to cool slightly before serving; this helps the layers set and makes for simpler slicing.
– For added flavor, use meatloaf seasoning blends or your favorite herbs to enhance the depth of flavor in the meat.
– Consider drizzling a sauce, like barbecue sauce or a homemade gravy, over the top before baking for an extra kick.

Variations and Adaptations

You can explore regional variations by integrating ingredients that reflect local tastes. For example, adding barbeque sauce gives a smoky South Western twist. Seasonal adaptations could incorporate fresh vegetables in spring or roasted root vegetables during fall for a more autumnal feel. Dietary modifications can be made by swapping ground beef for turkey or using gluten-free breadcrumbs in the meatloaf.

For flavor variations, adding different types of cheese like mozzarella or Swiss can completely transform the taste profile. Texture modifications can be achieved by using mashed potatoes for a smoother consistency instead of sliced potatoes. Presentation alternatives include serving individual portions in ramekins for a more upscale dining experience.

Serving and Presentation Guide

When plating your Loaded Potato & Meatloaf Casserole, consider using a deep dish to emphasize the layers. Garnishing with freshly chopped parsley adds a pop of color, while a sprinkle of paprika on top can enhance visual appeal. Traditional accompaniments include a simple green salad or bread rolls, providing a refreshing contrast.

Modern serving suggestions may incorporate side dips or sauces to elevate the dining experience. Serve it on warm plates to maintain temperature. For portion control, slice into even squares to ensure everyone receives a generous portion without excess leftovers.

Wine and Beverage Pairing

A robust red wine, such as a Cabernet Sauvignon, pairs well with the hearty flavors of the Loaded Potato & Meatloaf Casserole, enhancing the savory aspects. If you prefer white wine, consider a Chardonnay to complement the creaminess from the potatoes. For non-alcoholic alternatives, try a sparkling water with lemon for a refreshing contrast. For coffee lovers, a dark roast brewed coffee can be an interesting pairing due to its rich flavor that complements the dish.

Storage and Shelf Life

To store leftover Loaded Potato & Meatloaf Casserole, place it in an airtight container in the refrigerator, where it will keep well for up to four days. For longer storage, consider freezing it by allowing it to cool completely and then wrapping it tightly in plastic wrap followed by aluminum foil. Signs of spoilage include off-smells or visible mold, so be sure to check before reheating. Reheating can be done in the oven or microwave, but ensure it’s heated thoroughly throughout. If freezing, consume within three months for best quality.

Make Ahead Strategies

You can prepare the Loaded Potato & Meatloaf Casserole in advance by assembling it the night before and storing it in the refrigerator until ready to bake. For optimal flavor, consider letting it marinate overnight; flavors meld beautifully. During assembly, before baking, consider separating the potatoes and meat mixture. This allows for easier reheating if necessary.

When ready to enjoy, bake straight from the refrigerator but be mindful to add a few extra minutes to the cooking time. For an added touch of freshness, garnish just before serving with herbs or green onions to brighten the dish.

Scaling Instructions

For smaller gatherings, halving the recipe is simple—just cut the ingredients in half and use a smaller baking dish. To double or triple the recipe, ensure you have sufficient space in your oven and suitable baking dishes; you may need to bake in batches if your oven isn’t large enough. Timing modifications may include checking doneness sooner, as smaller or larger volumes can affect cooking times significantly.

Be mindful of storage considerations for leftovers; larger batches may need separate containers to keep the quality of the dish intact for multiple meals.

Nutritional Deep Dive

The macro breakdown of the Loaded Potato & Meatloaf Casserole primarily consists of protein from the meat, carbohydrates from the potatoes, and fats from both the cheese and ground beef. This offers a well-rounded meal. Micronutrient analysis reveals that the dish is a good source of vitamins B6, B12, and potassium.

In terms of health benefits, the protein helps in muscle repair, while the carbohydrates provide energy. It’s essential to consider dietary habits, as portion control can help with weight management. Balancing this dish with a lighter side salad can enhance overall nutritional intake.

Dietary Adaptations

For gluten-free adaptations, replace regular breadcrumbs with gluten-free options or ground oats. For dairy-free modifications, you can use vegan cheese and non-dairy milk in the potato mixture. In pursuing a vegan version, replace the beef with lentils or a meat alternative, and use mashed cauliflower instead of potatoes for a low-carb twist.

Those on a low-carb or keto diet can substitute potatoes with riced cauliflower, which maintains a similar texture while reducing carbs. Paleo eaters will benefit from using clean meats and avoiding breadcrumbs. Lastly, consider experimenting with low-FODMAP ingredients for those sensitive to certain carbohydrates.

Troubleshooting Guide

If you’re experiencing texture issues, perhaps your meatloaf is too dense; ensure you don’t overmix your ingredients. For flavor balance, if it tastes bland, enhance it with seasonings or sauces during preparation. If the casserole isn’t baking evenly, check your oven temperature with an oven thermometer to confirm accuracy.

For equipment challenges, ensure your baking dish is the appropriate size for the quantity prepared. Timing concerns can be managed by checking doneness through a thermometer; the internal temperature should reach at least 160°F.

Recipe Success Stories

Many community members have shared that the Loaded Potato & Meatloaf Casserole quickly became a family favorite due to its simplicity and flavor. Variations like adding vegetables or different spices have resulted in rave reviews. Feedback often highlights how easy it is to adapt to personal taste or dietary needs, showcasing the versatility of the dish.

Reader suggestions have included experimenting with different types of potatoes or adding more layers of cheese, adding a delightful spin to this classic recipe. For photography enthusiasts, capturing the bubbling, golden top after baking has proven to be a hit on social media, encouraging others to try their hand at this comforting dish.

Frequently Asked Questions

Q1: Can I freeze the leftovers?

Yes! This casserole freezes well. Allow it to cool completely, then wrap tightly and store in the freezer for up to three months.

Q2: Can I prepare this casserole ahead of time?

Absolutely! Assemble it a day in advance and refrigerate until you’re ready to bake. Just add extra baking time if it’s chilled.

Q3: What side dishes go well with this casserole?

A simple green salad, garlic bread, or steamed vegetables complement this dish beautifully, adding freshness to the meal.

Q4: How do I store leftovers?

Store in an airtight container in the refrigerator for up to four days. Reheat in the oven or microwave until hot throughout.

Q5: What can I substitute for ground beef?

Ground turkey, chicken, or even plant-based meat alternatives can work well for a lighter or vegetarian option.

Q6: Can I use instant mashed potatoes instead of fresh?

While fresh potatoes are recommended for the best texture, instant mashed potatoes can be used in a pinch; just follow package instructions for preparation.

Q7: Is this recipe spicy?

It’s not inherently spicy, but you can add spices like cayenne or jalapeños for some heat if desired.

Q8: Can I make this recipe in a slow cooker?

You can adapt this dish for a slow cooker! Just layer your ingredients and cook on low for 6-8 hours until done.

Q9: What should I do if my casserole is too watery?

If it’s watery, consider baking uncovered for the last 10-15 minutes to evaporate excess moisture. You can also drain some liquid before serving.

Q10: How can I make this dish vegetarian?

Substitute meat with lentils or black beans, and replace dairy with plant-based cheese for a nutritious vegetarian option.

Additional Resources

For those looking for recipes that complement the Loaded Potato & Meatloaf Casserole, consider trying roasted vegetables or homemade bread. Technique guides on perfecting mashed potatoes and meatloaf offer detailed advice for improvements. Ingredients used in this recipe are versatile—check out how to incorporate them into other meals.

If you’re seeking equipment recommendations, consider investing in a quality baking dish and good mixing tools to enhance your cooking experience. Explore seasonal variations that highlight using fresh, local produce in your dishes.

Join the Conversation

We love hearing from you! Share your creations and adaptations on social media. Don’t forget to tag us and share your photography of the Loaded Potato & Meatloaf Casserole. Engage with the community and inspire each other through recipe reviews and shared experiences.

Your input can guide others in their culinary adventures, and we encourage you to suggest variations you’ve tried. Every recipe is a journey, and sharing ours together enriches our experience in the kitchen.

The Recipe

Loaded Potato & Meatloaf Casserole

Serves: 6 servings

Prep Time: 20 mins

Cook Time: 60 mins

Total Time: 80 mins

Kitchen Equipment Needed

  • Baking dish
  • Mixing bowl
  • Knife
  • Cutting board
  • Measuring cups and spoons

Ingredients

  • 1 pound ground beef
  • 1 cup breadcrumbs
  • 1/2 cup onion, finely chopped
  • 1 cup shredded cheddar cheese
  • 4 medium potatoes, sliced
  • 1/2 cup milk
  • 1 egg
  • 1 teaspoon garlic powder
  • 1 teaspoon salt
  • 1/2 teaspoon black pepper

Directions

  1. Preheat the oven to 350°F (175°C).
  2. In a mixing bowl, combine ground beef, breadcrumbs, chopped onion, garlic powder, salt, pepper, and egg.
  3. Press the meat mixture into the bottom of a greased baking dish evenly.
  4. Layer the sliced potatoes on top of the meatloaf.
  5. Pour the milk evenly over the potatoes and sprinkle the cheddar cheese on top.
  6. Cover with aluminum foil and bake for 45 minutes.
  7. Remove the foil and bake for an additional 15 minutes or until the potatoes are tender and the cheese is bubbly and golden.
  8. Let cool slightly before serving. Enjoy!

Recipe Notes

  • For a deeper flavor, brown the ground beef before adding to the casserole.
  • Feel free to add vegetables like bell peppers or spinach to the meat mixture.
  • Experiment with different cheeses according to your taste preference.

Best Cowboy Butter Chicken Linguine – Creamy & Flavorful

Cowboy Butter Chicken Linguine: A Flavorful Twist on Italian Classics

⚖️
Difficulty
Moderate

⏲️
Prep Time
15 mins

🕒
Cook Time
30 mins

⏱️
Total Time
45 mins

🍽️
Servings
4

The Cowboy Butter Chicken Linguine recipe brings a whole new meaning to pasta night. This delightful dish is made with tender chicken sautéed in a rich, buttery sauce infused with garlic, herbs, and a hint of spice. As you twirl your fork around the creamy linguine, each bite transports you to a backyard barbecue with its smoky flavors and tantalizing aroma. The combination of fresh ingredients and robust seasoning creates a harmony that pleases the palate.

What makes this Cowboy Butter Chicken Linguine truly irresistible is its versatility. Whether you’re preparing a quick weeknight dinner or impressing guests at a dinner party, this pasta dish fits the bill. The creamy sauce perfectly coats each strand of linguine, making it a comforting meal that warms the soul. Its visual appeal, accented by colorful herbs and spices, draws you in—not to mention the savory, mouthwatering scent wafting through your kitchen as you cook.

Quick Recipe Highlights

  • Flavor Profile: The Cowboy Butter Chicken Linguine boasts a delicious blend of savory, buttery, and slightly spicy flavors that captivate your taste buds.
  • Texture: The combination of tender chicken, creamy sauce, and perfectly cooked linguine creates a delightful mouthfeel that is both satisfying and indulgent.
  • Aroma: Aromatic garlic and fresh herbs form the backbone of the dish’s scent, promising a taste experience that tantalizes your senses.
  • Visual Appeal: The vibrant colors of the dish, alongside the glistening butter sauce, make for an enticing presentation that invites everyone to dig in.
  • Skill Level Needed: This recipe calls for moderate skill, making it accessible for home cooks looking to enhance their culinary repertoire.
  • Special Equipment: You’ll need a large skillet and a pot for boiling the pasta, along with basic kitchen utensils for easy preparation.

Recipe Overview

  • Difficulty Level: With a moderate difficulty level, the Cowboy Butter Chicken Linguine is perfect for those who wish to learn subtle cooking techniques while still creating an impressive dish.
  • Category: This recipe falls under the dinner category, making it an ideal choice for nighttime meals when you’re looking for something special yet quick to prepare.
  • Cuisine: Drawing influences from American and Italian cuisine, this dish embodies a fusion of flavors that bring comfort food to a new level.
  • Cost: The overall cost for ingredients is relatively affordable, allowing you to serve a gourmet meal without breaking the bank.
  • Season: This dish shines year-round, but it particularly delights in early spring when fresh herbs are plentiful.
  • Occasion: Perfect for family gatherings, casual dinner parties, or simply as a comforting weekday meal, it suits various dining occasions.

Why You’ll Love This Recipe

The Cowboy Butter Chicken Linguine is a culinary masterpiece that tantalizes the taste buds with its rich and buttery flavor. The tender chicken pieces are bathed in a delightful garlic butter sauce that seeps into the linguine, ensuring that every strand is bursting with flavor. The balance of savory and subtle spices complements the creaminess beautifully, making each bite a moment of sheer pleasure. The dish stands out because it offers comfort while still being a sophisticated option, perfect for impressing dinner guests or treating yourself after a long day.

Convenience is a key element of this recipe, as it brings together simple ingredients that you may already have in your pantry. While preparing this dish, you’ll experience minimal mess and a straightforward cooking process that yields impressive results. The ability to whip up this delightful meal in just 45 minutes makes it a great choice for busy weeknights, allowing you to enjoy a homemade gourmet meal without the fuss. Plus, the leftovers reheat perfectly, making it a convenient option for meal prep.

Nutritionally, this dish can be balanced to fit into various dietary preferences. The chicken provides a good source of protein, while the herbs and spices add essential vitamins and antioxidants. You can manipulate the richness of the sauce to suit your dietary needs by adjusting the butter or cream used, providing a flexible meal option for different lifestyles. It’s also kid-friendly, appealing to a wide range of palates, including picky eaters.

Socially, Cowboy Butter Chicken Linguine is a dish that encourages sharing and connection. It’s perfect for gatherings where serving a communal dish creates an inviting atmosphere. The vibrant presentation of the pasta, topped with freshly chopped parsley or herbs, inspires conversation as guests marvel at the dish before diving in. The experience of enjoying this hearty meal with friends and family creates lasting memories that are associated with the flavor and ambiance of the evening.

Cost-effectiveness is a practical benefit of this recipe. The ingredients are generally affordable, which means you can serve a hearty family dinner without overspending. Furthermore, you can easily scale up the recipe for larger gatherings or remain adaptable by incorporating seasonal vegetables, allowing you to make the dish your own while keeping expenses in check.

Historical Background and Cultural Significance

The Cowboy Butter Chicken Linguine recipe is a modern interpretation that encapsulates the spirit of American and Italian culinary traditions. Its origins lie in the rich barbecue culture of the American West, where butter-based sauces are favored for their flavor-enhancing qualities. These robust flavors mingle seamlessly with the Italian love for pasta, creating a delectable fusion that speaks to the culinary adventures of today.

Culturally, the dish embodies the warmth of communal dining. Cooking with family and friends around the grill has a long-standing tradition in America, making this recipe a tribute to shared experiences at the table. The blend of garlic butter and spices in the dish connects back to historical roots, where hearty and comforting meals were essential for fueling working-class families in the past.

The evolution of this recipe reflects a trend towards rustic yet sophisticated home cooking. As people seek comfort in familiar flavors, this recipe pays homage by elevating traditional ingredients with modern techniques. It’s a nod to comfort food that retains its original essence while adapting to today’s culinary landscape.

Regional variations can vary in their use of ingredients as well. Some may incorporate smoked paprika for depth, while others may use fresh herbs from the garden. Each variation tells the story of the cook, demonstrating the beautiful adaptability of this dish and how it resonates across different homes and kitchens, enriching our collective culinary heritage.

Ingredient Deep Dive

For this dish, the main ingredients include chicken, linguine, and an assortment of fresh herbs.

Chicken is a quintessential part of countless cuisines around the world, praised for its versatility and nutritional value. Rich in protein, it serves as a fantastic base for a variety of flavors. When selecting chicken for this recipe, consider using free-range or organic options for a more robust flavor. Moreover, proper storage in the refrigerator ensures freshness, while any leftover chicken can be frozen for up to three months to avoid spoilage.

Linguine, a type of Italian pasta, has a unique flat and narrow shape, which helps it hold creamy sauces better than traditional spaghetti. Originating from the coastal regions of Italy, linguine is often paired with seafood, but it adapts beautifully to various sauces, including rich and buttery ones. When choosing linguine, look for high-quality dried pasta made from semolina flour for optimal texture. Cook it in well-salted water, and store any unused pasta in an airtight container for future meals.

Herbs are what truly elevate the Cowboy Butter Chicken Linguine. Fresh parsley, thyme, and chives bring a fragrant touch that brightens the dish. These herbs not only add flavor but also contain various vitamins and minerals, contributing to the overall health benefits of the meal. To select fresh herbs, choose those that are vibrant and fragrant. Store them in water like fresh flowers, or chop and freeze them in ice cube trays for later cooking adventures.

Common Mistakes to Avoid

  • Overcooking the pasta: One of the most common mistakes is cooking the linguine beyond the al dente stage. Make sure to taste-test it a minute before the package suggests to ensure it retains a firm bite.
  • Neglecting to season: A lack of seasoning during the cooking process can result in a bland dish. Always season each component of the meal, including the water for boiling pasta.
  • Using low-quality butter: The butter is the star of the sauce; using a lower quality product can lead to a greasy texture instead of a rich and creamy one.
  • Overcrowding the pan: When sautéing the chicken, resist the temptation to pack the skillet too tightly. This will lead to steaming rather than browning, resulting in less flavor.
  • Not letting the sauce reduce: Allowing the sauce to simmer for the correct time is crucial for developing the right consistency and flavor. Don’t rush this step!
  • Skipping the herbs: Herbs are vital for elevating flavors. Don’t skip this component; fresh herbs create depth and brightness.
  • Neglecting prep: Ensure all ingredients are prepped before cooking. This allows for smooth and efficient cooking, especially with quick recipes.
  • Ignoring the rest period: Letting the dish sit for a few minutes after cooking allows flavors to meld together and achieve a more cohesive dish.

Essential Techniques

One important technique in making Cowboy Butter Chicken Linguine is the art of sautéing chicken. This method not only cooks the chicken quickly but also allows for the development of caramelization, enhancing flavors. To master this technique, ensure that your skillet is hot and that you give each piece of chicken space to cook. Watch for a golden-brown crust to form, indicating a developed flavor.

Creating a sauce is another crucial technique for this dish. Building a sauce often requires the right balance of fat, acid, and flavor. Start with melting the butter and then adding garlic to infuse it with flavor. Incorporating broth or cream will help create a luscious sauce. Be attentive to visual cues, like bubbling and thickening, to know when it’s reached the perfect consistency.

Pro Tips for Perfect Cowboy Butter Chicken Linguine

One tip for ensuring your Cowboy Butter Chicken Linguine turns out perfect is to use high-quality ingredients—this can make all the difference in taste and texture. Fresh herbs, good quality chicken, and premium butter will elevate your dish significantly.

Consider making a double batch of the butter sauce to serve over leftover chicken or pasta throughout the week. This versatile sauce can also be drizzled over vegetables or used as a dip, expanding the deliciousness beyond just one meal.

For an added depth of flavor, consider marinating the chicken in herbs and garlic for 30 minutes before cooking. This step enhances the flavor profile and ensures that every bite is flavorful.

When it comes to plating, take a moment to arrange the pasta neatly on the plate, twirling it for a lovely presentation. This simple step can impress guests and make the meal feel more gourmet.

Don’t rush the cooking process—the depth of flavor comes from patience. Allowing the sauce to simmer adequately ensures a better end product.

Lastly, use the leftover pasta cooking water to adjust the sauce’s consistency if needed. The starchy water adds silkiness to the butter sauce, allowing it to adhere beautifully to the linguine.

Variations and Adaptations

This Cowboy Butter Chicken Linguine recipe can be easily adapted to suit various tastes and dietary preferences. For a regional twist, consider adding Cajun seasoning to the butter sauce for a zesty kick typical of Southern cooking. Alternatively, for a vegetable-packed version, toss in sautéed spinach or roasted tomatoes for added nutritional benefits and flavor balance.

Seasonal adaptations are also possible; in the summer, include fresh zucchini or corn to celebrate the bounty of summer produce. These veggies pair well with the rich buttery sauce and add a refreshing crunch.

For those with dietary restrictions, you can replace regular pasta with gluten-free options, such as zucchini noodles or chickpea pasta, ensuring that everyone can enjoy this delicious meal.

If you’re looking for flavor variations, consider incorporating crushed red pepper flakes for added heat or lemon zest for brightness. Experimenting with cheeses, such as feta or Parmesan, can also introduce a new depth of flavor.

When it comes to texture, adding crispy pancetta or roasted nuts can create an appealing contrast. Finally, use a variety of herb garnishes for enhancing presentations, such as microgreens or edible flowers.

Serving and Presentation Guide

Plating your Cowboy Butter Chicken Linguine can significantly impact its appeal. Begin with a generous serving of linguine, twirling it into a nest on the center of the plate for visual impact. Then, gently place the sautéed chicken atop the pasta, allowing some of the butter sauce to drizzle over the edges.

For garnishing, consider a sprinkle of freshly chopped parsley or chives to contrast beautifully against the creamy sauce. A dusting of freshly grated Parmesan or a squeeze of lemon juice can also elevate the dish further, adding both flavor and a touch of elegance.

Traditional accompaniments include a side salad with light vinaigrette or garlic bread, which complements the richness of the linguine. For a modern twist, serve alongside roasted seasonal vegetables for a health-conscious option.

It’s also essential to consider the serving temperature; ensure the dish is served hot straight from the stove for the best experience. For portion control, use standard serving sizes or let guests serve themselves family-style, allowing them to choose their desired amount.

Wine and Beverage Pairing

To accompany your Cowboy Butter Chicken Linguine, consider a light to medium-bodied white wine, such as a Chardonnay or Sauvignon Blanc, that complements the buttery sauce without overpowering it. These wines enhance the dish’s creamy texture and offer refreshing acidity.

For non-alcoholic options, consider serving sparkling water with a slice of lemon to cleanse the palate between bites. Herbal iced teas, such as chamomile or mint, can also serve as a nice complement without overshadowing the meal.

If considering coffee pairings, a smooth, light roast could work, providing a delightful contrast to the savory elements of the dish. Be sure not to serve your beverage too cold or too hot, as the ideal temperature enhances the overall dining experience.

Storage and Shelf Life

Proper storage of your Cowboy Butter Chicken Linguine is vital for maximizing freshness and flavor. Allow any leftovers to cool to room temperature before transferring them to an airtight container. Stored in the refrigerator, this dish will keep well for 3-4 days.

For freezing, portion out the pasta and sauce separately to prevent sogginess. When stored properly, they can last up to 3 months in the freezer. Ensure to label your containers with the date to keep track of freshness.

When reheating, heat in a skillet over low heat, adding a splash of pasta water or broth to keep the sauce creamy. If microwaving, cover the dish with a lid to trap steam, promoting even heating. Always check for signs of spoilage before consuming leftovers to ensure safety.

Make Ahead Strategies

To make the Cowboy Butter Chicken Linguine ahead of time, consider prepping certain elements in advance. Marinate the chicken and cut the vegetables the night before. Store them separately in the refrigerator to ensure freshness during the cooking process.

Cooking the pasta until just shy of al dente allows you to finish it perfectly on the day of serving. You can also prepare the butter sauce ahead, storing it in an airtight container. This way, you can simply reheat it and combine with fresh pasta that day.

Assessing the quality impact is crucial here; while the flavors can deepen with a day in the fridge, it’s essential not to prep all components too early to preserve texture. Consider adding fresh herbs just before serving for the best flavor.

When assembling, combine the linguine and sauce right before serving to avoid sogginess. Freshly sautéed chicken should also be added at the last moment for the best taste experience.

Scaling Instructions

Scaling the Cowboy Butter Chicken Linguine recipe is straightforward for larger gatherings. To halve the recipe, simply cut all ingredient quantities in half while maintaining the preparation and cooking methods.

If you plan on doubling or tripling the recipe, consider using larger cooking equipment to accommodate the increased volume. Also, keep potential timing modifications in mind; when cooking larger amounts, you may need to adjust cooking times slightly, especially for chicken, to ensure uniform doneness.

In terms of storage, larger quantities may require additional airtight containers. Always remember to label your containers while scaling to avoid confusion over batch sizes.

Nutritional Deep Dive

When considering the nutritional breakdown of Cowboy Butter Chicken Linguine, a focus on macro nutrients reveals that each serving offers a balanced combination of protein, fats, and carbohydrates. The chicken contributes high-quality protein essential for muscle repair and growth, while the butter adds rich fats necessary for energy and satiety.

Micronutrient analysis indicates that this dish offers essential vitamins and minerals, particularly from the herbs and any added vegetables. Fresh herbs can enhance immunity and aid digestion, adding health benefits alongside the pleasing flavors.

In terms of dietary considerations, this dish can be modified for various health goals, such as incorporating whole grain pasta or reducing butter to align with weight management plans. Assessing portion sizes is key here; for maintaining a healthy balance, servings can be adjusted as necessary.

For those aiming to adopt healthier eating practices, moderating the use of butter and cream while enhancing flavors with herbs can maintain the integrity of the dish without sacrificing taste.

Dietary Adaptations

The Cowboy Butter Chicken Linguine can be versatile enough to accommodate different dietary needs. For gluten-free adaptations, consider using gluten-free pasta alternatives made from lentils or chickpeas, which add protein while keeping the dish delicious.

If you’re looking for a dairy-free option, substitute the butter with a plant-based alternative, such as coconut oil or dairy-free margarine. Additionally, using cashew cream can create that rich, creamy texture without dairy.

For those following vegan diets, replace chicken with a hearty plant-based protein like chickpeas or tempeh, and use vegetable broth instead of chicken broth in the sauce. This adaptation maintains the integral flavors while making it accessible to vegans.

If you’re on a low-carb or keto diet, consider using zucchini noodles as a low-carb alternative to traditional linguine. This modification keeps the same wonderful flavor while significantly cutting down on carbohydrates.

For paleo adherents, using fresh vegetables and healthy fats such as ghee can transform this dish while still being compliant with the dietary restrictions.

Troubleshooting Guide

If you encounter texture issues with your Cowboy Butter Chicken Linguine, ensure that the pasta is cooked correctly. Overcooked pasta can turn mushy, while undercooked can be overly firm. Always conduct tasting tests during cooking for the best result.

When facing flavor balance problems, remember that seasoning is key. Adding salt and pepper at different stages of cooking can enhance overall flavor. Additionally, if the dish is too rich, a splash of lemon juice can brighten the flavors and cut through the heaviness.

Temperature problems may arise if the butter sauce separates; to fix this, add a bit of the pasta cooking water and whisk it back together over low heat. This will help emulsify the sauce and restore creaminess.

If you face equipment challenges, such as not having a large enough skillet, consider cooking the chicken in batches to avoid overcrowding, leading to steaming instead of browning.

Ingredient substitutions, particularly for herbs and spices, should be made with careful consideration of the overall balance. If you don’t have fresh herbs, dried options can be used in smaller quantities, but always adjust per taste.

Timing concerns can often be remedied with mis-en-place; preparing all your ingredients beforehand will help manage time effectively.

Recipe Success Stories

Community feedback on Cowboy Butter Chicken Linguine has been overwhelmingly positive, with many praising its rich flavor and creamy texture. Readers have shared their adaptations, such as incorporating seasonal vegetables or different types of pasta, which have led to exciting variations and success.

Variation successes are frequent, particularly among those who have attempted the dish with shrimp or vegetarian protein options. These adaptations have been well-received and demonstrate the recipe’s flexibility.

Readers often share their photography tips, emphasizing angles that showcase the deliciousness of the dish. Such tips encourage others to try their hand at capturing food photography, fostering a sense of community around recipe sharing.

Individuals often share their experiences in making this dish for gatherings or family dinners, highlighting how it became a staple in their mealtime rotation. These personal stories enrich the recipe, making it relatable and inviting for others.

Feedback often highlights the dish’s ease of preparation paired with the gourmet outcome, something cooks love to share with family and friends.

Frequently Asked Questions

Can I make Cowboy Butter Chicken Linguine ahead of time?

Yes, you can prepare certain elements ahead of time. Marinate the chicken, pre-cook the pasta, and prepare the sauce separately to save time during cooking. Combine everything just before serving.

What can I substitute for chicken in this recipe?

If you’re looking for a poultry alternative, consider using extra firm tofu, chickpeas, or even shrimp. These options will still absorb the delightful flavors of the sauce.

Is this recipe suitable for freezing?

Absolutely! You can freeze the sauce and any leftover chicken separately, allowing you to reheat them together with freshly cooked pasta at a later date.

What herbs work best in this recipe?

Fresh parsley, thyme, and basil are excellent additions that enhance the flavor profile. Feel free to experiment with others like oregano or chives for a unique twist.

Can I make this dish gluten-free?

Yes, simply substitute traditional linguine for a gluten-free pasta option made from lentils or chickpeas. Adjust the cooking time according to the packaging instructions.

What’s the best way to reheat leftovers?

The best way to reheat fried or crispy elements is in a skillet over low heat, adding a splash of pasta water to maintain moisture. You can also microwave it covered to steam the dish gently.

Can I add vegetables to this dish?

Definitely! Vegetables like spinach, bell peppers, or mushrooms can blend well with the pasta and sauce, providing nutrition and fiber to the dish.

How do I know when the chicken is perfectly cooked?

The chicken is done when it reaches an internal temperature of 165°F (75°C) or is golden brown on the outside with no pink remaining in the center.

Is it possible to reduce the calories in this dish?

Yes, you can reduce calories by using less butter or substituting it with a lighter oil, using lower-fat cream, or reducing portion sizes of the pasta while increasing vegetable content.

What wines pair well with this recipe?

A Chardonnay or Sauvignon Blanc would complement the buttery sauce beautifully, while a light-bodied red, such as Pinot Noir, can also work well.

Additional Resources

For those eager to explore more, consider checking out related recipes like Spaghetti Aglio e Olio or Garlic Butter Shrimp Pasta for more delicious pasta alternatives. Technique guides on sautéing and sauce creation can enhance your skills, while ingredient information can help you choose the best products for your meals. Also, experimenting with seasonal variations is a fun way to keep your cooking fresh and exciting.

Join the Conversation

We invite you to share your versions of Cowboy Butter Chicken Linguine on social media! Feel free to tag us in your photos and reviews. Your culinary adaptations and photography tips could inspire others to try this delightful dish. Engage with fellow food enthusiasts and exchange ideas, as we continue to celebrate the love of cooking and community through shared recipes and experiences.

The Recipe

Cowboy Butter Chicken Linguine

Serves: 4

Prep Time: 15 mins

Cook Time: 30 mins

Total Time: 45 mins

Kitchen Equipment Needed

  • Large skillet
  • Pot for boiling pasta
  • Measuring cups and spoons
  • Wooden spoon or spatula
  • Knife and cutting board

Ingredients

  • 1 lb chicken breast, cut into bite-sized pieces
  • 12 oz linguine
  • 1/2 cup butter
  • 4 cloves garlic, minced
  • 1 cup chicken broth
  • 1/2 cup heavy cream
  • 1/4 cup fresh parsley, chopped
  • Salt and pepper to taste
  • Optional: red pepper flakes for spice

Directions

  1. Begin by boiling water in a large pot; add a pinch of salt and cook the linguine according to package instructions. Drain and set aside.
  2. In a large skillet, melt the butter over medium heat. Add the minced garlic and sauté for about one minute until fragrant.
  3. Add the chicken pieces to the skillet and season with salt and pepper. Cook until chicken is browned and cooked through, about 5-7 minutes.
  4. Stir in the chicken broth, scraping any brown bits at the bottom of the skillet. Bring to a simmer.
  5. Reduce heat and add the cream, allowing the sauce to thicken slightly. Adjust seasoning as needed.
  6. Add the cooked linguine to the skillet, tossing to coat in the buttery sauce. Sprinkle with fresh parsley and red pepper flakes, if using.
  7. Serve immediately with additional parsley and Parmesan cheese if desired.

Recipe Notes

  • Feel free to substitute the chicken with shrimp or tofu for a different protein.
  • For a lighter sauce, try using half the butter and replacing some of the cream with vegetable broth.

Authentic German Potato Pancakes – Crispy and Delicious

Delicious German Potato Pancakes: A Crispy Comfort Food Delight

⚖️
Difficulty
Medium

⏲️
Prep Time
15 mins

🕒
Cook Time
20 mins

⏱️
Total Time
35 mins

🍽️
Servings
4 servings

Embrace the simplicity and heartwarming flavors of German potato pancakes, also known as Kartoffelpuffer. These delicious discs of grated potatoes come together effortlessly and become a family favorite, whether enjoyed for breakfast or as a comforting dinner side. The moment you slide one of these golden-brown pancakes onto your plate, the enticing aroma wafts through the air, promising a delightful culinary experience. Crisp on the outside yet soft on the inside, each bite is a satisfying blend of textures, making them an irresistible treat that will tantalize your taste buds.

Creating these traditional German potato pancakes brings warmth to any kitchen. With just a handful of ingredients, you can whip up a batch that will not only impress your guests but also evoke a sense of nostalgia for family gatherings. With a hint of salt and a touch of nutmeg, the flavor is enhanced when served with applesauce or sour cream, adding layers of taste that beautifully complement the potatoes’ natural creaminess. Anyone can master this recipe, making it a great addition to your cooking repertoire.

Quick Recipe Highlights

  • Flavor Profile: The pancakes have a subtly sweet flavor from the potatoes, balanced with a hint of salt and nutmeg, making them perfectly savory.
  • Texture: With a crispy exterior and a tender interior, every bite provides a satisfying crunch, followed by a soft and fluffy feel.
  • Aroma: The frying process releases a mouthwatering aroma that perfectly captures the essence of comfort food.
  • Visual Appeal: Golden-brown and perfectly round, these pancakes are not only hearty but also visually striking, enhancing any meal.
  • Skill Level Needed: This recipe is straightforward, making it suitable for both novice cooks and experienced chefs looking for a quick dish.
  • Special Equipment: A box grater or food processor for grating the potatoes and a large skillet or frying pan for frying.

Recipe Overview

  • Difficulty Level: The difficulty level boasts a user-friendly approach, making it ideal for cooks at every skill level, from beginners to more seasoned home chefs.
  • Category: German potato pancakes serve wonderfully as a breakfast item, side dish, or snack, versatile enough to be enjoyed any time of day.
  • Cuisine: Rooted in German culinary tradition, these pancakes reflect the rich heritage of comfort food known for their hearty and filling qualities.
  • Cost: Ingredients are generally budget-friendly; simple potatoes and minimum seasonings keep the cost low while maximizing flavor.
  • Season: Enjoyable year-round, particularly popular in fall and winter when hearty foods are most satisfying.
  • Occasion: Perfect for family gatherings, brunch parties, or as a satisfying side during dinners, they fit well with any festive meal.

Why You’ll Love This Recipe

The taste and texture appeal of German potato pancakes is undeniable. Their savory flavor combined with a crispy exterior and a soft centre makes them a compelling dish, whether enjoyed plain or topped with applesauce. The recipe’s convenience cannot be overlooked either; it requires minimal preparation and clean-up while allowing flavors to develop naturally through simple cooking techniques. It’s an approachable dish that embodies the warmth of home cooking.

Furthermore, the nutritional value of these pancakes is an attractive aspect. Potatoes are a great source of carbohydrates and when accompanied by toppings like applesauce or a dollop of sour cream, they can be a satisfying and balanced meal option. As social and entertaining food, German potato pancakes encourage sharing, creating memorable dining experiences among friends and family.

Cost-effectiveness is another reason to love this recipe. With just a few inexpensive ingredients, you can feed a group without breaking the bank. The accessibility of this dish, requiring only items likely found in your pantry, makes it an ideal go-to recipe in tight situations. German potato pancakes are flexible and easy to incorporate into any meal, making them both practical and enjoyable.

Historical Background and Cultural Significance

The origin of German potato pancakes traces back to the culinary traditions of Germany. Made widely popular as a staple during the harvest seasons when potatoes were plentiful, this dish has become embedded in German culture. Over the years, Kartoffelpuffer have become a symbol of comfort food, often made during family gatherings and celebrations.

Culturally, these pancakes hold significance as they reflect the rural agrarian lifestyle, offering a sense of nostalgia and connection to one’s heritage. German potato pancakes have evolved in preparation and presentation, transitioning from simple farm meals to trending dishes highlighted in gourmet cooking.

The evolution of the recipe showcases variations based on regional preferences. In different areas of Germany, ingredients and accompaniments may shift, leading to distinct versions that suit local tastes while maintaining the fundamental concept of the dish.

Regional variations further enrich this food’s legacy. For instance, in some regions, you’re likely to find cheese incorporated into the batter, or additional spices selected according to local traditions. Each variation tells a story of its own, contributing to the overall appreciation of this beloved dish.

Ingredient Deep Dive

Potatoes: Potatoes are the star of the show in German potato pancakes. They are not only versatile but they also carry a rich history spanning thousands of years. Known for their versatility and nutritional benefits, potatoes are an excellent source of vitamins, particularly vitamin C and potassium. When selecting potatoes for this recipe, opt for starchy varieties like Russet or Yukon Gold for the best texture. They should be stored in a cool, dark place and used within a few weeks for optimal freshness. In terms of substitutions, sweet potatoes can provide a unique flavor twist while still achieving a crunchy exterior.

Onion: Onions add depth and aromatic flavor to the dish, enhancing the overall taste profile. This humble ingredient is steeped in history, playing a significant role in various culinary traditions around the world. Onions offer numerous nutritional benefits, including antioxidants that may support heart health. When choosing onions, look for firm bulbs with no soft spots or bruises, and store them in a cool, dry place to prolong their shelf life. If you’re seeking alternatives, shallots offer a similar flavor but with a milder profile.

Eggs: Eggs act as binding agents in the recipe, giving structure to the pancakes. Their rich nutritional profile, including protein and essential amino acids, enhances their status as a wholesome food choice. Opt for organic or free-range eggs if possible, and store them in the refrigerator for optimum freshness. For substitution, consider using a flaxseed mixture (1 tablespoon of flaxseed meal mixed with 2.5 tablespoons of water) for a vegan alternative.

Flour: All-purpose flour is typically used to provide stability and a slight crunch. Flour’s long-standing history as a staple ingredient in various cuisines reflects its importance in global culinary practices. In addition to providing structure, it helps achieve a crispy outer layer while maintaining moisture inside. Look for fresh flour stored in a cool, dry place. Possible substitutions include gluten-free flour blends for those with gluten sensitivities.

Common Mistakes to Avoid

  • Using the Wrong Potatoes: Opt only for starchy potatoes like Russets to ensure desired texture. Waxy potatoes may yield gummy pancakes.
  • Over-Grating: When grating, avoid making the pieces too finely shredded; they need some texture for proper crispness.
  • Not Draining Excess Moisture: Make sure to squeeze out excess moisture after grating the potatoes to avoid soggy pancakes.
  • Skipping the Egg: The egg acts as a binder; omitting it can result in a crumbly pancake.
  • Incorrect Heat Settings: Frying at too low a temperature can lead to greasy pancakes, while too high may burn the outside before cooking through.
  • Overcrowding the Pan: Fry in small batches to maintain consistent heat and ensure each pancake gets sufficient crispy edges.
  • Neglecting to Season: Proper seasoning enhances flavor; don’t skip on salt and spices before cooking.
  • Letting Them Sit Too Long: Try to serve immediately after frying for optimum crispness; letting them sit can lead to them becoming limp.
  • Not Using Enough Oil: A generous amount of oil is necessary for achieving that desired golden-brown crust.
  • Skipping the Topping: Common accompaniments like applesauce or sour cream elevate the dish; don’t forget these delicious additions!

Essential Techniques

Grating the Potatoes: Grating is vital for achieving the right texture in German potato pancakes. Use a box grater or food processor, and opt for medium to large holes for the best results. Work quickly to prevent browning, and look for a consistency where the shreds remain intact but finely shredded. Common pitfalls include over-grating, leading to mushiness, or under-grating, causing the pancakes to lack a uniform texture.

Frying: This technique is crucial for creating that beautiful golden-brown exterior while maintaining a soft inside. Use a cast-iron skillet or heavy-bottom pan and heat the oil to medium-high before adding the batter. Visual cues for success include shimmering oil and the sound of sizzling when pancakes hit the pan. Avoid crowding the pan; allow ample space for the pancakes to cook evenly.

Pro Tips for Perfect German Potato Pancakes

1. Use a mix of potato types for added flavor and texture; starchy potatoes are best, but consider adding a few waxy potatoes for balance.
2. Serve the pancakes immediately after frying to enjoy their crispy texture—cooling makes them soggy.
3. Experiment with spices; adding garlic powder or paprika may elevate the flavor profile.
4. Make smaller pancakes for appetizers or bite-sized snacks; they will cook more evenly and allow for faster frying.
5. Store your grated potatoes in cold water to prevent browning while you prepare other ingredients.
6. For extra crispiness, let the batter rest in the fridge for about 30 minutes before frying.
7. Use a combination of oils for frying; olive oil and butter work well together for both flavor and cooking properties.
8. Don’t forget to keep your oil hot; if it’s too cool, the pancakes will absorb oil and become greasy.

Variations and Adaptations

When it comes to regional variations, explore recipes that incorporate various herbs such as chives or parsley for a fresh twist on classic German potato pancakes. Seasonal adaptations allow for incorporating ingredients like zucchini or carrots during the summer months. For dietary modifications, replacing eggs with a flaxseed mixture creates vegan versions, while adding adapted spices can influence the flavor.

Flavor variations are endless; consider integrating cheese like cheddar or feta into the batter for a creamy richness that complements the potatoes. Adjust the texture by using a food processor for a finer blend or simply shredding by hand for a rustic feel. Presentation alternatives might include stacking pancakes and drizzling them with fresh herbs for an elegant touch.

Serving and Presentation Guide

To create an appealing plate, stack the pancakes neatly, and consider a light dusting of fresh herbs on top for color. Garnishing with a dollop of sour cream or a spoonful of applesauce not only enhances flavor but improves presentation. Dishes should be served hot, as the crispy texture is best enjoyed fresh, while a side salad can complement the heartiness of the pancakes.

Portion control tips such as serving two to three pancakes per person ensure no one goes home hungry without overwhelming their plate. Up the visual appeal by plating pancakes on a vibrant dish or using parchment paper underneath for a rustic vibe that fits casual dining aesthetics.

Wine and Beverage Pairing

For wine pairings, consider a crisp white wine such as Riesling, which complements the flavors of German cuisine beautifully. Alternatively, a light lager or pilsner can enhance the natural flavors of the pancakes, providing a refreshing counterpoint. If you prefer non-alcoholic beverages, a sparkling elderflower drink revitalizes the palate, while hot spiced tea offers a warm, comforting touch.

Serving suggestions might include offering a selection of beverages, encouraging guests to find their perfect pairing with the pancakes. Don’t shy away from considering seasonal variations in beverages, offering warm drinks in colder months while sticking to chilled options for summer.

Storage and Shelf Life

For optimal storage, place leftover pancakes in an airtight container in the refrigerator for up to three days. They should be kept in a single layer to prevent them from sticking together, or separated by parchment paper. When trying to maintain the crispy texture, these pancakes can also be reheated in a skillet with a dash of oil rather than the microwave.

Signs of spoilage include off-smells or discoloration. If maintaining quality for longer, freezing is a great option; wrap pancakes individually in plastic wrap followed by aluminum foil, and store in the freezer for up to three months. Reheating frozen pancakes directly from the freezer in a hot skillet preserves their crispness while making for quick meal solutions.

Make Ahead Strategies

If making these pancakes ahead of time, prepare the batter and store it in the fridge for up to 24 hours. This allows the flavors to meld, and simply fry them when needed. For quality impact, wait to fry until shortly before serving to ensure the crispy texture remains intact.

Another way to prep ahead is to cook the pancakes in advance, let them cool, and store for later reheating. This makes them perfect for busy days or events where quick service is preferred. Consider adding fresh elements like a dollop of sour cream or fresh herbs just before serving to enhance the final dish’s flavor.

Scaling Instructions

To halve the recipe, simply cut all ingredients in half, adjusting quantities as necessary for eggs and seasonings. For doubling or tripling, ensure your cooking surface can accommodate the increased batter and adjust cooking time accordingly—cooked batches can be kept warm in a low oven.

Equipment adjustments might include using multiple frying pans or batch cooking to ensure efficiency. Timing modifications will vary based on your setup; keep a close eye on the pancakes’ color to confirm doneness. For storage considerations, remain mindful that increased quantities may take longer to cool before refrigeration.

Nutritional Deep Dive

The macro breakdown of German potato pancakes reveals a balanced supply of carbohydrates, crucial for energy, especially when complemented by protein from eggs. The micronutrient analysis shows notable potassium content from potatoes, important for heart health.

In terms of health benefits, these pancakes offer a filling option without excessive calories. Dietary considerations include the opportunity for lighter versions with less oil or gluten-free adjustments, making them accessible for various dietary preferences.

Portion analysis emphasizes moderation; 2-3 pancakes make a satisfying meal without excess. For weight management tips, pairing these pancakes with lean proteins and vegetables can create a balanced plate that supports healthy eating habits.

Dietary Adaptations

For gluten-free adaptations, substitute all-purpose flour with a gluten-free blend, ensuring a similar texture. Dairy-free versions can easily replace sour cream with coconut yogurt or omit it entirely, offering a lighter option.

Vegan enthusiasts can substitute eggs with a flaxseed mix or chia seed gel, which provides binding without animal products. Low-carb options include using shredded vegetables instead of all potatoes, resulting in a lighter pancake.

Keto modifications might imply altering traditional flour with almond flour, leading to a different but uniquely delicious pancake. Low-FODMAP dieters should restrict onion usage, finding alternatives like green onion tops for flavor without the digestive distress.

Troubleshooting Guide

For texture issues, if your pancakes are too moist, ensure all excess moisture is drained from the grated potatoes and flour is properly mixed in as a binder. Flavor balance can be addressed by adjusting seasonings, adding salt or spices incrementally during preparation.

Temperature problems can arise, resulting in uneven cooking; maintain a consistent heat and monitor oil temperature to avoid sogginess. Equipment challenges, if your skillet isn’t non-stick, consider using more oil or switching to a different pan for better heat conduction.

Ingredient substitutions may require adjustments in other components; watch for moisture changes that could lead to sticky batter. Timing concerns about cook time can be managed by ensuring that pancakes are adequately spaced during frying to facilitate even cooking.

Recipe Success Stories

Community feedback often highlights how quick and delicious these German potato pancakes can be. Many have found great success in adjusting the recipe for personal taste, incorporating various herb additions or spice blends that reflect their preferences.

Variation successes also contribute to the richness of this recipe; readers may have added unexpected ingredients like cheese or chives, resulting in delightful surprises. Adaptation stories reveal how this recipe is loved by families, passed down through generations, creating cherished memories tied to the aroma of frying potatoes in the kitchen.

Photography tips revolve around capturing the golden colors and heartwarming steam emanating from freshly fried pancakes. These images create a visual appeal that draws readers in and encourages them to try making this beloved dish at home.

Frequently Asked Questions

Can I freeze German potato pancakes?

Yes! To freeze, wrap them individually in plastic wrap, followed by aluminum foil, and place them in a freezer-safe bag. They can last up to three months and be reheated in a skillet or oven to maintain crispness.

What type of potatoes are best for this recipe?

Starchy potatoes such as Russet or Yukon Golds are ideal because they provide the best texture. Avoid waxy potatoes as they do not achieve the desired crispiness in the finished pancakes.

Can I make these pancakes ahead of time?

Certainly! Prepare the batter and store it in the fridge for up to 24 hours. You can also cook the pancakes in advance, let them cool, and then reheat right before serving for an easy meal solution.

What toppings go well with German potato pancakes?

Popular toppings include sour cream, applesauce, or even a sprinkle of fresh herbs. Experimenting with variations like cheese or sautéed mushrooms can also enhance the flavor profile.

Can I make these pancakes gluten-free?

Yes! You can easily substitute all-purpose flour with a gluten-free flour blend. Make sure to adjust the quantity based on the flour type you use, as some absorb more moisture than others.

How do I keep the pancakes crispy when stored?

To keep them crispy, store cooked pancakes in a single layer on a cooling rack instead of stacking them. Reheat them in a skillet to retain the crispiness; avoid using the microwave, as it makes them soggy.

Why are my pancakes falling apart?

This could be due to a lack of binding agents. Ensure to use eggs or substitute with flaxseed meal if making a vegan version. Also, make sure to drain excess moisture from the grated potatoes.

Can these pancakes be baked instead of fried?

While traditional recipes call for frying, you can bake them at a high temperature (around 425°F) on a greased baking sheet, flipping once until golden. This method is a healthier alternative but may not achieve the same crispiness.

How do I improve flavor?

Enhance flavor by thoroughly seasoning the batter with salt and spices like pepper or paprika. Experiment with fresh herbs or even garlic powder to add depth.

What should I do if my batter is too liquidy?

If your batter seems too runny, add a touch more flour to help absorb excess moisture. Additionally, ensure that you pressed out moisture from the grated potatoes adequately before mixing.

Can I add vegetables to the batter?

Absolutely! Finely shredded vegetables like zucchini, carrots, or even spinach can add flavor and nutrition, making these pancakes even more delightful and vibrant.

Additional Resources

Seek out related recipes that emphasize potato as a main ingredient, such as latkes or hash browns. Technique guides addressing grating and frying will elevate your cooking skills further, ensuring crisp perfection each time.

Look for ingredient information that dives deeper into the types of potatoes ideal for frying, and equipment recommendations for high-quality pans that ensure even heat distribution. Seasonal variations highlight fresh, locally-sourced ingredients that can complement or enhance the original recipe.

Join the Conversation

I encourage you to share your personal experiences with this recipe on social media! Snap a picture of your beautifully plated German potato pancakes, and don’t forget to share any unique variations or tips you’ve discovered. Engaging with this community allows for recipe exchange and fosters creativity in the kitchen. Leave reviews and feedback, as your insights may inspire others to delve into this delicious comfort food!

The Recipe

German Potato Pancakes

Serves: 4 servings

Prep Time: 15 mins

Cook Time: 20 mins

Total Time: 35 mins

Kitchen Equipment Needed

  • Box grater or food processor
  • Large skillet or frying pan
  • Mixing bowl
  • Measuring cups and spoons
  • Spatula

Ingredients

  • 4 medium starchy potatoes, grated
  • 1 small onion, grated
  • 1 large egg
  • 1/4 cup all-purpose flour
  • 1 tsp salt
  • 1/4 tsp black pepper
  • 1/4 tsp nutmeg
  • Vegetable oil for frying

Directions

  1. Grate the potatoes and onion using a box grater or food processor and place them in a mixing bowl.
  2. Press down to remove excess moisture and combine with the egg, flour, salt, pepper, and nutmeg in the bowl.
  3. Heat a generous amount of vegetable oil in a large skillet over medium-high heat.
  4. When hot, drop spoonfuls of the potato mixture into the skillet, flattening them slightly into pancake shapes.
  5. Fry until golden brown, about 3-5 minutes per side. Transfer to a paper towel-lined plate to drain excess oil.
  6. Repeat with the remaining mixture, adding more oil as necessary to maintain cooking temperature.
  7. Serve hot with your choice of toppings such as sour cream or applesauce.

Recipe Notes

  • For extra crispiness, let the batter rest for 30 minutes in the fridge.
  • Leftover pancakes can be stored in an airtight container in the refrigerator for up to three days.
  • The mixture can be refrigerated for up to 24 hours before cooking.
  • Feel free to experiment with different toppings and flavors!

Easy Meat & Potato Casserole – Comfort Food Classic

Hearty Meat & Potato Casserole: A Comfort Food Delight

⚖️
Difficulty
Easy

⏲️
Prep Time
15 mins

🕒
Cook Time
45 mins

⏱️
Total Time
60 mins

🍽️
Servings
6

There’s nothing quite like a hearty Meat & Potato Casserole to warm your home and your heart. This classic dish brings together tender meat, creamy potatoes, and a medley of savory flavors, making it perfect for family dinners or cozy gatherings. Every bite is bursting with comfort, showcasing a delightful blend of textures that will leave everyone craving more. Whether you’re looking for a filling weeknight meal or a dish to impress guests, this casserole is sure to hit the spot.

The layers of golden potatoes, succulent meat, and a rich, flavorful sauce create an indulgent experience, while the aroma wafting from your oven will have everyone eagerly awaiting mealtime. It’s this captivating combination of flavors and aromas that elevates the Meat & Potato Casserole from simple comfort food to a beloved favorite. As you prepare this dish, you’ll find that it’s not just about the meal; it’s about the joy of sharing great food with loved ones.

Quick Recipe Highlights

  • Flavor Profile: This casserole features a robust combination of savory meat, creamy potatoes, and seasoned gravy, creating a rich, satisfying flavor.
  • Texture: The creaminess of the potatoes perfectly complements the tender meat, while a golden crust adds a delightful crunch.
  • Aroma: Expect a mouthwatering aroma filled with hearty meat juices, fragrant herbs, and the comforting scent of baked potatoes.
  • Visual Appeal: The dish’s golden hue, accented by the colorful savory filling, makes it visually inviting and appetizing.
  • Skill Level Needed: An easy recipe, suitable for novice cooks. Simple steps make this dish accessible to anyone.
  • Special Equipment: All you need is a baking dish and basic kitchen utensils, ensuring you don’t need specialized tools.

Recipe Overview

  • Difficulty Level: This Meat & Potato Casserole is classified as easy, making it perfect for beginner cooks and busy parents alike.
  • Category: This dish fits perfectly in the dinner category and makes a fantastic choice for family meals.
  • Cuisine: This casserole is a comforting staple in many homes, drawing inspiration from hearty traditional cuisine which emphasizes simple, satisfying flavors.
  • Cost: Budget-friendly, this recipe uses affordable ingredients readily available in your local grocery store, making it economical.
  • Season: Ideal for any season, it particularly shines during autumn and winter when a warm, comforting meal is most appreciated.
  • Occasion: Perfect for family dinners, potlucks, or gatherings, this casserole will surely impress your guests.

Why You’ll Love This Recipe

The taste and texture of this Meat & Potato Casserole are what truly set it apart. Each bite showcases tender meat that has absorbed the rich, savory flavors of the sauce, while the creamy potatoes provide a delightful contrast. The mouthwatering combination of these elements creates a satisfying dish that tantalizes your taste buds.

Convenience is another standout feature of this recipe. It’s ideal for busy weeknights as it can be prepared in under 30 minutes and then baked while you unwind. The one-dish nature of this casserole means less mess and fewer dishes to wash, making cleanup a breeze, which is a relief after a long day.

Nutritionally, this Meat & Potato Casserole is an excellent source of protein from the meat and essential nutrients from the potatoes. Packed with hearty ingredients, it provides energy to keep you and your family fueled throughout the day. Plus, with the inclusion of wholesome vegetables, it also offers dietary fiber, contributing to digestive health.

This casserole is not just about filling stomachs; it’s about bringing people together. Perfect for social gatherings, this dish invites conversations and laughter around the dinner table, making it a wonderful centerpiece for any occasion. Sharing a warm, homemade meal serves as an excellent way to connect with family and friends.

Lastly, the cost-effectiveness of this recipe makes it an appealing choice for budget-conscious cooks. Using simple, affordable ingredients, this casserole allows you to feed a crowd without breaking the bank. It’s the ultimate crowd-pleaser that delivers both value and taste.

Historical Background and Cultural Significance

The Meat & Potato Casserole has its roots in traditional comfort foods, which have been popular for generations. Originating from times of scarcity, families crafted these hearty dishes to maximize ingredients for nourishment, often including affordable staples like meat and potatoes. This practical approach not only created comforting meals but also promoted the use of local produce and meats, solidifying its place in numerous culinary traditions.

Cultural importance is evident in how this dish is embraced across various regions, each adding unique layers of flavor and ingredients reflective of local customs. In many households, a casserole represents warmth and belonging, often associated with family gatherings and communal meals, reinforcing the sense of togetherness and sharing.

Over the years, the evolution of the Meat & Potato Casserole has led to numerous adaptations, including different protein choices like chicken or lamb, and various sauces ranging from traditional gravy to modern twists like cheesy sauces or creamy soups. These variations showcase the dish’s adaptability and its ability to cater to different tastes and preferences.

Regional variations have also emerged, such as the inclusion of ingredients like cheese in the Midwest or the addition of garlic and herbs in Mediterranean versions. With each adaptation, the casserole maintains its essence while reflecting the unique palettes and cultural influences of its origin, showcasing just how far this comforting dish has come.

Ingredient Deep Dive

Meat: The type of meat used in this casserole can vary, with ground beef being the most popular choice. Historically, meat has always played a vital role in diets around the world, serving as a primary source of protein. Ground beef is particularly favored for its flavor and ease of preparation. When selecting meat, look for fresh, higher-quality cuts when possible, and store it properly to prevent spoilage.

Ground beef provides essential nutrients, including proteins, iron, and vitamins. If you’re looking for a healthier alternative or dietary considerations, lean cuts or ground turkey can be great substitutes. Ensure to follow proper cooking techniques to achieve the best texture and flavor, including browning the meat before adding it to the casserole for maximum flavor development.

Potatoes: Potatoes are a key ingredient in the Meat & Potato Casserole, contributing not only to its flavor but also to its overall texture. Known for their versatility, potatoes have been a staple in diets globally, prized for their carbohydrate content and satisfying bulk. When selecting potatoes, choose firm, smooth-skinned options, and store them in a cool, dark place to maintain freshness.

Nutritionally, potatoes are rich in vitamin C, potassium, and dietary fiber, making them beneficial in a balanced diet. If you’re looking to lighten the dish, sweet potatoes can offer a nutritious alternative while adding a unique sweetness and deeper flavor. Remember to peel and slice the potatoes evenly for uniform cooking within the casserole.

Common Mistakes to Avoid

  • Not browning the meat properly: This step is vital as it enhances the flavor of the casserole.
  • Using watery potatoes: Ensure your potatoes are dry before layering, as excess moisture can make the casserole soggy.
  • Overcooking the casserole: Monitor cooking time to allow the flavors to meld without over-drying the dish.
  • Skipping the seasoning: A pinch of salt and spices can elevate the overall taste; don’t skip this step!
  • Layering ingredients unevenly: Aim for uniform layers to ensure even cooking and consistent flavor in every bite.
  • Covering the casserole with foil too early: Arguably, a golden crust should develop before you cover it to prevent burning.
  • Insufficient cooling time before serving: Allow it to sit to let the flavors settle and the dish firm up for easier serving.
  • Not checking doneness: Use a thermometer to ensure meat has reached safe temperatures, preventing undercooked meat.
  • Inappropriate oven temperature: Ensure you’re baking at the correct temperature to achieve the desired consistency.
  • Neglecting to preheat the oven: Always preheat your oven to ensure even cooking from start to finish.

Essential Techniques

Browning Meat: Browning meat is crucial for flavor. To master this technique, ensure your skillet is adequately preheated and let the meat sear without moving it too much. Look for a rich, brown crust as an indicator that the meat is properly caramelized and ready for the casserole.

Layering Ingredients: Layering is vital in achieving the right texture and flavor. Familiarize yourself with a balanced approach, starting with meat, then potatoes, and layering flavors progressively. Watch out for ensuring even distribution to prevent some bites being overly potato-heavy while others lack meat.

Pro Tips for Perfect Meat & Potato Casserole

1. Use starchy potatoes, like Russets, for the best texture as they absorb flavors well and won’t turn mushy.
2. Consider adding in some vegetables, like peas or carrots, to enhance the nutritional profile and add color to the dish.
3. Try using a combination of spices to change up the flavor profile—experimenting can lead to delicious discoveries!
4. Allow the casserole to rest for at least 10 minutes after baking; this helps the flavors to meld together.
5. If you’re short on time, consider using pre-cut or frozen potatoes to speed up preparation.
6. Don’t forget to cover the casserole with cheese towards the end of baking for a bubbly, cheesy topping.
7. Prepare a larger batch and freeze portions for busy weeknights, ensuring a delicious meal is just a reheat away.
8. Garnish with fresh herbs, like parsley or chives, for a bright finishing touch that adds a pop of flavor.

Variations and Adaptations

For regional variations, try swapping the meat for Italian sausage or lamb to infuse distinct flavors that represent local cuisines. In the fall, add seasonal ingredients like butternut squash or roasted carrots to highlight autumnal tastes while bringing in seasonal nutrition.

Seasonal adaptations can include incorporating fresh vegetables from your garden or farmer’s market, allowing for a customizable approach shifting with the seasons. Dietary modifications can help cater to special dietary requirements; swap out traditional ingredients like dairy for plant-based options to accommodate specific needs.

Flavor variations invite you to explore different sauces, perhaps using cream of mushroom soup or creating a homemade garlic gravy. Additionally, texture modifications such as adding a crispy topping of breadcrumbs or crushed potato chips can create an exciting crunch contrasting the softness of the casserole. Finally, presentation alternatives, like serving in individual ramekins, can elevate the aesthetic for special occasions.

Serving and Presentation Guide

Plating techniques matter; serve the casserole in a rustic-style serving dish for a homely feel or use elegant platters for more formal gatherings. Garnishing ideas, such as a sprinkle of freshly chopped herbs or a drizzle of cream, can elevate the presentation and enhance visual appeal.

Traditional accompaniments, like a simple green salad or homemade bread, work perfectly alongside a Meat & Potato Casserole. Meanwhile, modern serving suggestions might include pairing it with lightly dressed vegetables for a balanced meal. Temperature considerations are essential; best served warm, with the flavors at their peak for everyone to enjoy.

Portion control tips include using a sturdy spatula to ensure even servings, allowing everyone to enjoy a fair share of the delicious casserole without waste, ensuring no one leaves the table hungry.

Wine and Beverage Pairing

When it comes to wine pairings, a robust red wine like Cabernet Sauvignon beautifully complements the savory flavors of the Meat & Potato Casserole, enhancing the overall dining experience. For white wine lovers, a crisp Chardonnay also works well, adding brightness to the dish.

For non-alcoholic alternatives, a sparkling berry soda can provide a refreshing contrast, while a classic iced tea with lemon adds a soothing touch. If you’re considering coffee or tea pairings, a rich espresso or a bold black tea serves as an excellent post-dinner drink to cleanse the palate. Keep serving temperatures in mind; a warm beverage balances with the warm casserole for cozy enjoyment.

Storage and Shelf Life

Store any leftover Meat & Potato Casserole in airtight containers in the refrigerator for up to 4 days. To maintain quality, keep the temperature consistently below 40°F. For longer storage, consider freezing portions in suitable containers that prevent freezer burn, where it can last for up to 2-3 months.

Signs of spoilage include any off-smell, changes in color, or noticeable separation of ingredients. For reheating, use the oven or microwave; there’s no need to add extra moisture, as the casserole tends to retain its moisture well. Avoid reheating multiple times to ensure food safety and quality. For freezing, cool the casserole completely before sealing, as this prevents steam build-up, which can impact texture.

Make Ahead Strategies

Preparing the Meat & Potato Casserole in advance is possible by prepping all ingredients ahead of time, then assembling the dish just before baking. Depending on your preferences, you can store everything in the fridge for up to 24 hours before cooking or freeze it unbaked, allowing you to enjoy it when you’re ready.

Consider a timeline to streamline your cooking process; start by washing and cutting vegetables, then browning the meat, and finally layering the casserole. The quality impact shouldn’t differ significantly if properly stored, as flavors often meld together beautifully and deepen over time.

When ready to bake, allow the casserole to come to room temperature for even cooking, avoiding a drastic temperature change. You may choose to add freshly cooked elements, like herbs or cheese, just before baking to brighten flavors. Reheating remains easy; follow previous guidelines for ensuring it warms through evenly.

Scaling Instructions

Scaling the Meat & Potato Casserole is simple; if halving the recipe, use a smaller baking dish to maintain even cooking. Doubling or tripling necessitates larger containers and may affect cooking time, so it’s essential to monitor doneness carefully.

Equipment adjustments should consider alternatives for baking dishes; use glass or ceramic for even heat distribution. When scaling, timing modifications may include reducing the cook time slightly when working with fewer layers, or extending it if more layers are created.

Always keep storage considerations in mind—if freezing, ensure containers are appropriately sized and labeled to avoid confusion later on. It’s helpful to adjust ingredients to balance taste when scaling; for instance, with more meat, consider increasing seasoning correspondingly.

Nutritional Deep Dive

When dissecting the nutrition of this dish, expect a macro breakdown rich in proteins from the meat, carbohydrates from potatoes, and fats largely derived from added dairy or oils. Each serving typically offers a hearty balance, suitable for a fulfilling meal.

Micronutrient analysis brings out the benefits of ingredients like iron and vitamin C, contributing to daily nutritional needs. The health benefits include essential minerals and vitamins that support immune function and energy levels, making it a well-rounded choice.

Dietary considerations come into play with this recipe, appealing to many eating preferences while allowing adjustments for customization. Regarding portion analysis, it’s easy to enjoy this meal without overindulgence when served appropriately.

Weight management tips may involve mindful eating practices—pairing this casserole with veggies for added fiber can help manage satiety levels while enjoying the rich flavors it offers.

Dietary Adaptations

To make the Meat & Potato Casserole gluten-free, opt for certified gluten-free flour for thickening the sauce, and double-check that all ingredients are free from gluten-based fillers or additives. For those who require a dairy-free version, substitute regular milk and cheese with plant-based alternatives like almond milk and nutritional yeast for a cheesy flavor.

For vegan adaptations, consider using lentils or chickpeas in place of meat, along with plant-based cream and nutritional yeast to keep the creaminess intact. Low-carb followers can switch out traditional potatoes for cauliflower to create a lighter version that fits their dietary preferences.

Keto enthusiasts can also benefit from cauliflower as a rice alternative and by opting for higher-fat cheese varieties. Following a Paleo diet? Focus on quality cuts of meat, fresh vegetables, and exclude the dairy for wholesome ingredients. Low-FODMAP eaters can adapt using safe vegetables for improved digestive health. Each modification provides an opportunity to savor the casserole while adhering to dietary restrictions.

Troubleshooting Guide

If your casserole has texture issues, such as being too watery, consider draining excess liquid if any is present during cooking, allowing for more concentration of flavors. For flavor balance problems, tasting during preparation is crucial. Don’t hesitate to adjust seasoning as needed; a pinch of salt or a squeeze of lemon can brighten flavors.

Temperature problems may arise if the casserole is either too dry or mushy; maintaining the correct oven temperature and monitoring cooking times can prevent these outcomes. Equipment challenges can be addressed by using alternatives; if a baking dish isn’t available, a sturdy pan can work effectively.

Ingredient substitutions require special attention to ratios; some items may absorb moisture differently or require changes in cooking times. If timing concerns arise, prepare ingredients ahead and store separately, then combine them for swift assembly on cooking day.

Recipe Success Stories

Community feedback highlights the nostalgic feeling many have experienced when revisiting this cherished recipe. Readers often share personal touches or variations that have turned the Meat & Potato Casserole into a proud family heirloom, showcasing the incredible adaptability of this comfort food.

Many have enjoyed experimenting with diverse ingredients, turning successes into memories worth sharing. Others recount their gratitude for a satisfying family meal solution amid busy schedules, emphasizing how much they appreciate the flavors and quality time this dish provides.

Adaptation stories have highlighted how this casserole has become a go-to for potlucks, where contributors share their favorite tweaks and ingredients, demonstrating its flexibility across kitchens. For those focused on photography tips, capturing the creamy texture against the golden crust gives the dish an inviting appearance that pleases viewers before even tasting it.

Frequently Asked Questions

Can I make Meat & Potato Casserole ahead of time? Yes, this dish can be assembled in advance, covered, and stored in the refrigerator or freezer until ready to bake. Just ensure to allow it to come to room temperature before baking for even cooking.

What substitutions can I make for the meat? Ground turkey or chicken can be excellent alternatives if you’re looking for a leaner option. You can also opt for lentils or plant-based meat for a vegetarian version.

How should I store leftovers? Store in an airtight container in the refrigerator for up to four days, or freeze for longer storage. Ensure to reheat thoroughly before consuming.

Can I add vegetables to the casserole? Absolutely! Adding vegetables can elevate flavor and nutrition. Consider peas, corn, or green beans added to the layers for extra texture and taste.

What temperature should I bake the casserole? Bake at 375°F for the best results. This allows the casserole to develop a golden crust while ensuring all ingredients cook evenly.

Is this dish suitable for freezing? Yes, it freezes well! Just ensure you cool it completely before transferring to freezer-safe containers.

How can I make the dish spicier? Add some red pepper flakes, hot sauce, or diced jalapeños to the meat mixture for a spicy kick that will satisfy those who enjoy heat.

Can I use instant potatoes? While fresh potatoes yield the best texture, instant potatoes can be used in a pinch; just be aware that the texture may vary.

What is the best way to reheat the casserole? The best way is to reheat gradually in the oven at 350°F for about 20-30 minutes or until heated through. You can also use the microwave, but be mindful of uneven heating.

Can I make this casserole in a slow cooker? Yes, you can adapt this recipe for a slow cooker. Layer your ingredients, set it on low for 6-7 hours, and enjoy a set-it-and-forget-it meal!

Additional Resources

If you’re intrigued by this recipe, don’t miss out on related recipes such as Shepherd’s Pie and Chicken and Rice Casserole, which also carry the comforting essence of homecooked meals. Additionally, technique guides on layering and seasoning can help elevate your cooking skills for an array of future dishes.

Ingredient information on potatoes and meat cuts can further improve your selections for not just this recipe, but many others, ensuring you create meals rich in flavor. Equipment recommendations focus on the importance of durable baking dishes that withstand high temperatures while promoting even cooking.

Lastly, explore seasonal variations of this casserole, incorporating fresh produce from local markets or your garden to keep your meals vibrant and delicious throughout the year.

Join the Conversation

Engage with our community through social media sharing! Photographs of your Meat & Potato Casserole create a beautiful display of your culinary success; consider tagging us for a chance to be featured. Recipe reviews are always welcome, along with your variations. Participate in community engagement by discussing your favorite memories associated with this dish.

Feedback not only motivates others but connects individuals through shared experiences of comfort food, reminding us all that food has the incredible power to unite us in joy and satisfaction.

The Recipe

Meat & Potato Casserole

Serves: 6

Prep Time: 15 mins

Cook Time: 45 mins

Total Time: 60 mins

Kitchen Equipment Needed

  • Baking dish (9×13 inches)
  • Large skillet
  • Cutting board
  • Knife
  • Measuring cups and spoons
  • Spatula

Ingredients

  • 1 lb ground beef
  • 4 medium potatoes, peeled and sliced
  • 1 onion, chopped
  • 2 cups beef broth
  • 1 cup cream of mushroom soup
  • 1 tsp garlic powder
  • 1 tsp salt
  • 1/2 tsp black pepper
  • 1 cup shredded cheddar cheese (optional, for topping)

Directions

  1. Preheat your oven to 375°F (190°C).
  2. In a large skillet over medium heat, cook the ground beef until fully browned. Drain excess fat.
  3. Add onions and cook until soft, approximately 5 minutes.
  4. In a large baking dish, layer half of the sliced potatoes at the bottom.
  5. Spread half of the meat mixture over the potatoes, followed by half of the broth and half of the soup.
  6. Repeat layers with the remaining ingredients, finishing with a layer of potatoes on top.
  7. Cover with foil and bake for 30 minutes. Remove foil, sprinkle with cheese if desired, and bake for an additional 15 minutes until bubbly and golden brown.
  8. Let the casserole rest for 10 minutes before serving.

Recipe Notes

  • For extra flavor, consider adding your favorite herbs to the meat mixture while browning.
  • Leftovers can be stored in an airtight container in the fridge for up to 4 days.
  • This casserole can be frozen unbaked or after baking for future meals.
  • Feel free to experiment with different types of cheese or add vegetables between the meat and potatoes for more variety.

Easy Garlic Butter Steak Fried Rice – Flavor-Packed & Fast

Garlic Butter Steak Fried Rice: A Flavorful Delight for Any Occasion

⚖️
Difficulty
Easy

⏲️
Prep Time
15 mins

🕒
Cook Time
20 mins

⏱️
Total Time
35 mins

🍽️
Servings
4

Garlic Butter Steak Fried Rice is not just a dish; it’s an experience filled with savory goodness. Imagine biting into perfectly cooked steak, sautéed with a hint of garlic and nestled beautifully in a bed of fluffy fried rice. This dish is easy to make, making it perfect for weeknight dinners or a cozy gathering with friends. The combination of flavors from the garlic butter and the tender steak will tantalize your taste buds, and the satisfying texture of the fried rice will leave you wanting more.

The richness of garlic butter plays a starring role, imparting depth to each grain of rice. Combined with the mouthwatering aromas wafting from the pan, because the moment you begin cooking, your kitchen will transform into a flavor-filled paradise. It’s a colorful, hearty meal that not only pleases the palate but also nourishes the soul, making it a family favorite and a go-to recipe for all occasions.

Quick Recipe Highlights

  • Flavor Profile: Expect a delightful blend of savory garlic butter, succulent steak, and perfectly seasoned rice.
  • Texture: The dish features the tenderness of steak combined with the fluffy texture of fried rice, creating a satisfying mouthfeel.
  • Aroma: The aromatic notes of garlic and sizzling steak will fill your kitchen, enticing everyone to the table.
  • Visual Appeal: Vibrant colors from the vegetables and the glossy sheen of garlic butter make this dish a feast for the eyes.
  • Skill Level Needed: Ideal for beginners, this recipe requires basic cooking skills and minimal specialized equipment.
  • Special Equipment: A sturdy skillet or wok is essential for achieving that perfect stir-fried texture and flavor.

Recipe Overview

  • Difficulty Level: This Garlic Butter Steak Fried Rice is classified as easy, making it accessible for novice cooks who are looking to expand their culinary skills.
  • Category: A versatile dish that can stand alone as a main course or accompany various sides, it fits beautifully into any meal plan.
  • Cuisine: Infused with Asian influences, this dish celebrates vibrant, bold flavors while being rooted in comforting homemade cuisine.
  • Cost: This recipe offers great value, utilizing affordable ingredients that are commonly found in local markets.
  • Season: Enjoy this dish year-round, although it’s particularly delightful during cooler months when you crave warmth and comfort.
  • Occasion: Great for casual weeknight dinners, family get-togethers, or as a delicious centerpiece to an Asian-inspired feast.

Why You’ll Love This Recipe

This Garlic Butter Steak Fried Rice is a symphony of taste and texture that everyone will adore. The savory notes of garlic butter beautifully complement tender steak pieces, ensuring every bite bursts with flavor. The fried rice itself is fluffy, absorbing all the rich, buttery essence while remaining light and pleasurable. This combination creates a satisfying experience, perfect for any meal, whether you’re feeding a family or impressing guests.

Convenience is a hallmark of this dish, as it can be prepared in under 40 minutes. You can easily use leftovers or pre-cooked rice, minimizing time spent in the kitchen without compromising quality. This makes it an excellent choice for busy weeknights or last-minute meal plans. Plus, the steps are straightforward, making it perfect for novice cooks or anyone looking to whip up something delicious without stress.

Nutritionally, this dish can provide a wide array of vitamins and minerals, especially with the addition of vegetables like peas and carrots. Steaks are also a great protein source, ensuring you and your loved ones stay nourished and satisfied. It’s a balanced meal that can serve as an indulgence without the guilt when prepared thoughtfully.

Socially, preparing Garlic Butter Steak Fried Rice encourages warmth and camaraderie around the dining table. Its vibrant presentation and rich flavors lead to engaging conversations and shared experiences, making it ideal for gatherings. There’s something delightful about serving a dish that not only nourishes but also brings people together.

Lastly, this recipe is cost-effective, featuring ingredients you might already have on hand. It demonstrates how a handful of staple pantry items can transform into a gourmet meal, making it accessible to everyone, regardless of budget. With its affordability without sacrificing taste and presentation, it checks all the boxes for a home-cooked favorite.

Historical Background and Cultural Significance

Garlic Butter Steak Fried Rice may appear modern, yet its roots dive deep into comforting Asian cuisine that has been enjoyed for generations. Fried rice itself has a vast history, originating from China, where it was crafted as a way to utilize leftover rice. Over time, it transformed into a well-loved dish globally, adapted to suit local flavors and preferences.

Cultural significance is evident; rice is a staple in many countries, especially in Asia, serving as a foundation for countless meals. This dish showcases how common ingredients like garlic, steak, and rice can unite food lovers, transcending boundaries. The infusion of garlic butter speaks to the evolving culinary landscape, demonstrating how traditional recipes adapt to contemporary palates while maintaining their essence.

The evolution of the recipe reflects changes in cooking methods and flavor fusions, particularly with Western influences introducing butter into Asian cooking. As rice became a universal comfort food, preparing it with the richness of garlic butter represents not just a meal, but a warm embrace of diverse cultural influences.

Today, variations abound, showcasing regional ingredients and adaptations that reflect local tastes. From stir-fries to rich casseroles, the spirit of fried rice thrives globally, making it a beloved choice for many while retaining its authentic heritage.

Ingredient Deep Dive

  • Steak: Widely enjoyed across cultures, steak is often celebrated for its rich flavor and protein density. Choosing cuts like sirloin or ribeye can influence the final dish, while considering marbling and texture. Opt for grass-fed options for additional health benefits, and always store in a cool space wrapped tightly to prevent spoilage. Additionally, this dish offers numerous substitution options for those who prefer chicken or vegetarian proteins.
  • Garlic: A cornerstone in many cuisines, garlic is cherished for its pungent flavor and health impact. Its history spans back thousands of years, revered not only for taste but also for medicinal properties. Fresh garlic, which is the best choice for this dish, should be stored in a cool, dry place away from moisture. If unavailable, garlic powder can serve as a substitute, although the flavor intensity may differ.
  • Rice: The daily staple of countless diets, rice is foundational in Asian cuisine. Long-grain rice varieties, like jasmine or basmati, create light and fluffy textures ideal for frying. Always rinse your rice to remove excess starch before cooking. For busy families, using leftover rice can be a great time-saver, but it’s crucial to ensure the rice is dry enough to fry without clumping. Consider using cauliflower rice for a low-carb option.
  • Vegetables: Various vegetables like peas, carrots, and bell peppers enhance both the flavor and nutrition of fried rice. Each offers specific vitamins and antioxidants beneficial for health. When selecting vegetables, opt for fresh and brightly colored options for the best flavor. Storing vegetables correctly in the fridge can extend their shelf life, and don’t hesitate to get creative with seasonal variations based on availability.

Common Mistakes to Avoid

  • Using wet rice: Wet or sticky rice will clump together during frying. Always ensure your rice is cooled and ideally cooked a day prior to prevent this issue.
  • Overcrowding the pan: Cooking too much at once can lead to steaming rather than frying, losing that crispy texture. Fry in batches for the best outcome.
  • Not seasoning enough: Fried rice needs flavor at every level. Ensure to taste and tweak seasoning as you cook, rather than just before serving.
  • Under-cooking the steak: Overcooked steak loses tenderness; consider cooking it separately for precise control. Slicing it against the grain also helps maintain its juiciness.
  • Skipping the aromatics: Don’t overlook the essentials like onions and garlic at the start. These layers will build the foundation of flavor for the fried rice.
  • Not letting ingredients cool: Adding hot ingredients into cold rice can create mushiness. Allow components to cool before combining.
  • Not adjusting cooking times: Different ingredients cook at different rates. Add quicker-cooking vegetables like peas late in the frying process to retain texture.
  • Neglecting final garnishes: An unadorned dish can feel flat. Always consider adding fresh herbs or a squeeze of lime for brightness.
  • Ignoring storage safety: If you have leftovers, ensure to cool them rapidly and store them properly in the fridge to prevent spoilage.
  • Forgetting tasting: Always taste as you go to ensure flavors are balanced. Adjust seasoning as needed instead of guessing at the end.

Essential Techniques

– **Cooking Rice:** The foundation of fried rice lies in the quality of the rice itself. Rinse the rice under cold water to remove excess starch, ensuring it fries well without becoming sticky. Mastering the water-to-rice ratio is crucial for achieving that light, fluffy texture. Watch closely to avoid overcooking it.

– **Stir-Frying:** Proper stir-frying technique involves high heat and constant movement in the pan to create that perfectly caramelized texture. Use a wok or a wide pan for best results, ensuring your ingredients have ample space. It’s all about timing and rhythm – have your ingredients ready to toss in as the cooking progresses.

– **Building Flavor:** Start by sautéing aromatics like garlic and onion at medium heat until fragrant before adding proteins and vegetables. This technique enhances the depth of flavor, ensuring every bite packs a punch. Ample oil in the pan is necessary too, as it prevents sticking and promotes even cooking.

– **Mixing Ingredients:** Add ingredients in stages, starting with proteins, then mixing in denser veggies, followed by quicker-cooking ones. This layered approach leads to a perfect distribution of flavors while ensuring everything achieves the right doneness.

– **Finishing Touches:** Always taste and adjust seasonings just before serving, adding fresh herbs to brighten flavors. Final garnishing of scallions or sesame seeds elevates the dish’s appearance and taste.

Pro Tips for Perfect Garlic Butter Steak Fried Rice

– Always use day-old rice for the best texture. Freshly cooked rice can be too soft and sticky, making it difficult to achieve that ideal fried rice consistency.

– Cut your steak into uniform pieces to ensure even cooking. A bias cut against the grain yields tenderness and a more appealing presentation.

– Incorporate a mix of colors in your vegetables for visual appeal and added nutrients. Vibrant options like red bell peppers and green peas bring life to the dish.

– Use a high smoke point oil like canola or vegetable oil for frying to prevent burning and achieve high heat.

– Customize the flavor with sauces like soy sauce or oyster sauce, but remember to add them gradually to avoid overwhelming the dish.

– Always taste the dish before serving and adjust soy sauce levels or seasonings to ensure it meets your desired flavor profile.

– Consider adding a splash of sesame oil at the end for a nutty finish and rich aroma that complements the garlic butter beautifully.

– Serve immediately to ensure that everyone enjoys the fried rice at its best, fresh out of the pan with steam still rising.

Variations and Adaptations

– **Regional Variations:** Explore different regional influences by incorporating unique spices and ingredients. Think Thai basil for a Southeast Asian twist or black beans for a Latin flair.

– **Seasonal Adaptations:** Use seasonal vegetables such as zucchini in the summer or root vegetables like carrots in the winter to adapt this dish to whatever is fresh and available.

– **Dietary Modifications:** For a vegetarian version, replace the steak with tofu and ensure to use vegetable broth instead of beef.

– **Flavor Variations:** Try adding a hint of chili or sriracha for a spicier kick or a splash of lime juice for brightness.

– **Texture Modifications:** If seeking a crunch, top your fried rice with crispy fried onions or toasted nuts to add layers of texture.

– **Presentation Alternatives:** Serve in bowls and garnish with fresh herbs and lime wedges. Using colorful plates can also elevate the visual appeal of the dish.

Serving and Presentation Guide

When it comes to serving Garlic Butter Steak Fried Rice, presentation can enhance the dining experience. Use large, colorful bowls to serve the fried rice, creating a beautiful center for your table. To add visual intrigue, consider twirling the fried rice into mounds for height, sprinkling chopped scallions or sesame seeds on top as a vibrant finishing touch.

For garnishing, fresh cilantro or parsley can complement the flavors and add a pop of color. Small lime wedges beside the plate not only make for an attractive presentation but also allow guests to add acidity to their personal taste.

Consider pairing the dish with side items like a light salad or fried spring rolls for variety. Temperature considerations are crucial—serve the rice hot, just off the stove, to maintain its texture and flavor, ensuring that you recreate that restaurant-quality experience.

Portion control is vital; recommend servings that coincide with accompanying dishes, helping guests enjoy their meal without overwhelming their plates. Having a colorful spread promotes an inviting dining atmosphere.

Wine and Beverage Pairing

When it comes to pairing beverages with Garlic Butter Steak Fried Rice, a light-bodied red wine like Pinot Noir works beautifully. Its fruitiness can balance the richness of garlic butter and complement the flavors of beef. For a white wine option, try a Sauvignon Blanc, which offers refreshing acidity and herbal notes that enhance the meal.

For those seeking non-alcoholic alternatives, serve iced lemon tea or a ginger ale for a refreshing counterpoint to the savory dish. Additionally, a light sparkling water infused with cucumber or mint brings a refreshing element that pairs well with the richness of the fried rice.

Consider serving hot or iced green tea as an elegant accompaniment that not only complements the flavors but also aids in digestion, enhancing the entire dining experience.

Storage and Shelf Life

To enjoy your Garlic Butter Steak Fried Rice later, proper storage is essential. Allow the dish to cool down to room temperature before transferring it into an airtight container. Refrigerate for up to three days to maintain freshness, noting that the quality may diminish over time.

To maximize shelf life, strive to freeze any leftover fried rice in compatible containers. Properly frozen, it can last up to three months. Be sure to label containers with the date for easy organization. When reheating, do so thoroughly in a skillet or microwave, adding a splash of water or broth to prevent drying out.

Warning signs of spoilage include changes in color, unpleasant odor, or notable textural changes. Confirm freshness before consumption, and discard if any of these issues are observed.

Make Ahead Strategies

Creating this flavorful Garlic Butter Steak Fried Rice can be streamlined through preparation. Start by prepping the vegetables and cutting the steak into pieces a day ahead of time. Store each in airtight containers in your refrigerator to ensure the ingredients stay fresh.

Day-old rice is ideal, so cook the rice in advance and let it cool overnight to maximize its frying potential. This preparation tip is essential to achieving that light and fluffy texture necessary for perfect fried rice.

Consider cooking the steak a few hours ahead, allowing it to rest and marinate in seasonings before combining it with the fried rice. This enhances flavor while improving the juiciness of the meat.

When you’re ready to finish and serve the dish, simply combine all prepped elements in the skillet. This approach saves time and effort, allowing you to focus on enjoying the meal rather than stressing over preparation.

Scaling Instructions

Scaling your Garlic Butter Steak Fried Rice recipe is easy, whether you’re doubling for a larger gathering or halving for a quiet night in. When halving, adjust the ingredient ratios proportionately; however, it’s essential to keep an eye on overall cooking times, particularly when reducing quantities.

If you decide to make double portions, ensure your cooking vessels offer adequate space. Overcrowding may lead to uneven cooking and lose crispiness. A larger wok or two pans may be necessary to maintain efficiency and quality.

Always remember that cooking times might slightly decrease when halving the recipe, and increase for larger portions, particularly for sautéing proteins and stir-frying rice. Tasting along the way can guide you easily through these adjustments.

Store any leftovers properly, following the same guidelines, ensuring that regardless of the batch size, your delicious Garlic Butter Steak Fried Rice remains fresh and tasty.

Nutritional Deep Dive

In assessing the nutritional makeup of Garlic Butter Steak Fried Rice, it’s vital to break down its macronutrient content, which includes proteins, fats, and carbohydrates. Typically, one serving contains a substantial source of protein from the steak, with a balance of carbohydrates from the rice, complemented by fiber-rich vegetables.

This dish also holds a wealth of micronutrients, including iron from the steak, which is excellent for muscle function and energy production. A variety of vegetables adds vitamins A and C, essential for skin health and immune support.

For those mindful of dietary considerations, this recipe can veer toward high-calorie count, especially if the garlic butter is abundant. Portioning and ingredient alterations, like using lean cuts of meat and limiting oil, can help manage caloric intake effectively without sacrificing flavor.

Portion analysis is crucial; mindful serving sizes allow for enjoyment without overindulgence. Balancing your meal with additional fresh greens or a side salad can also aid in overall satiety while enhancing nutritional value.

Dietary Adaptations

Adapting Garlic Butter Steak Fried Rice to accommodate different dietary needs is entirely feasible. For those seeking gluten-free options, ensure to opt for tamari instead of soy sauce, as it’s gluten-free while offering similar flavor nuances.

Vegetarian adaptations can be achieved by swapping out steak for tofu, seitan, or even a medley of mushrooms, which adds depth and umami richness to the dish. Utilizing vegetable broth for flavor enhancements can elevate a vegetarian version remarkably.

For a low-carb variant, consider substituting traditional rice with cauliflower rice, which offers a similar texture and absorbs flavors beautifully. This modification will lower calorie content while still offering a satisfying dish.

Keto enthusiasts can also gain from this recipe by using zoodles (zucchini noodles) as a base, keeping fats intact while reducing carbohydrates.

Incorporating specific dietary modifications like dairy-free or paleo adaptations will further enhance inclusivity, fostering an enjoyable dining experience for everyone at the table.

Troubleshooting Guide

If you encounter texture issues with your fried rice, it’s often due to excess moisture in the rice or overcooking. Ensure your rice is adequately dried and cooled to avoid clumping. Alternatively, consider reheating to evaporate unnecessary moisture if the issue arises post-cooking.

Flavor balance can sometimes feel off, often due to insufficient seasoning or a lack of acidity. Always taste as you go, adjusting soy sauce or adding a splash of vinegar or citrus to brighten and enhance overall flavor profiles.

Temperature problems can be remedied by ensuring that your pan is preheated adequately before adding ingredients, promoting proper sautéing rather than steaming, which can occur if the heat is too low.

For equipment challenges, consider switching to a wok if your skillet seems too small, allowing for better heat conduction and surface area for even cooking.

Ingredient substitutions may require adjustments in cooking times or methods—be mindful of how different proteins or veggies impact cooking duration.

Timing concerns can be managed by prepping ingredients beforehand to streamline the cooking process, allowing you to focus on achieving that perfect fried rice finish without feeling rushed.

Recipe Success Stories

Community feedback surrounding Garlic Butter Steak Fried Rice highlights its versatility and satisfaction. Many home cooks have shared their adaptations online, emphasizing the ease of incorporating leftovers into this beloved dish, showcasing its waste-reducing potential.

Readers often suggest unique variations like adding kimchi or pickled vegetables, which not only enhance taste but also provide additional textures, making it popular among families seeking new flavors.

Photographers have shared picturesque snapshots of their finished dishes, provoking interest and initiating discussions about personal touches they added, further enriching the recipe’s journey through social media.

Adaptation stories often feature skill levels of those tackling this reliable dish, proving how accessible and rewarding it is for even novice cooks.

The ongoing dialogue around this recipe continues to flourish, presenting Garlic Butter Steak Fried Rice as not only a meal but an engaging culinary adventure for the community.

Frequently Asked Questions

Can I use frozen vegetables?

Yes, frozen vegetables are a convenient option. Just ensure to thaw and drain them thoroughly before adding to the fried rice to prevent excess moisture, ensuring your dish remains fluffy and not mushy.

What type of steak is best for this recipe?

Consider using cuts like sirloin or ribeye for their flavor and tenderness. Each offers a unique texture, and opting for grass-fed selections can enhance both taste and nutritional value.

Is it possible to make this dish vegan?

Absolutely! Substitute the steak with tofu or tempeh, and replace the garlic butter with a vegan alternative or olive oil to achieve a similar flavor and richness.

How do I store leftovers properly?

Cool the fried rice to room temperature before transferring it to an airtight container. It can be stored in the fridge for up to three days or frozen for longer-term storage.

Can I use brown rice instead of white rice?

While you can use brown rice, keep in mind that it may alter the cooking time and texture. Brown rice requires more liquid and a longer cooking duration but offers added nutritional benefits.

What sides pair well with this dish?

Consider pairing Garlic Butter Steak Fried Rice with a light salad, steamed vegetables, or crispy fried spring rolls for a fulfilling meal that balances the richness of the fried rice.

How do I achieve the best texture for fried rice?

Using day-old rice is crucial, as fresh, warm rice tends to cling together. The cooling process creates firm grains that fry evenly without becoming mushy.

Can I make this in a rice cooker?

While a rice cooker isn’t typically used for fried rice, you can prepare the rice in it beforehand. Just remember to cool it down before using it in the fried rice recipe.

Is this dish spicy?

The standard recipe isn’t spicy, but you can easily make it so by adding chili flakes, hot sauce, or fresh chopped chilies while cooking for an extra kick.

How can I enhance the flavors even more?

Incorporating soy sauce, oyster sauce, or a splash of sesame oil at the end can significantly deepen the flavor profile, ensuring a savory experience in every bite.

Additional Resources

If you enjoyed this Garlic Butter Steak Fried Rice, explore similar recipes that highlight the flavors of Asian cuisine, such as classic stir-fries or steamed dumplings. There are also plenty of technique guides available, focusing on mastering rice cooking and stir-frying.

Additionally, make sure to check out ingredient information about selecting fresh produce or meats for your dishes.

Recommendations for essential kitchen equipment can help in making preparation smoother, and seasonal inspiration will keep your meals innovative and exciting throughout the year.

Join the Conversation

We’d love for you to share your Garlic Butter Steak Fried Rice experiences! Engage with us on social media, post your cooking photos, or let us know about your personal variations.

Feedback and suggestions from our readers are invaluable, as they foster community collaboration. Let’s share tips, support each other in our culinary adventures, and create remarkable meals together. Cooking is not just about food; it’s about joy, connection, and shared experiences in the kitchen.

The Recipe

Garlic Butter Steak Fried Rice

Serves: 4

Prep Time: 15 mins

Cook Time: 20 mins

Total Time: 35 mins

Kitchen Equipment Needed

  • Large skillet or wok
  • Cutting board
  • Sharp knife
  • Airtight container for storage

Ingredients

  • 2 cups day-old rice
  • 1 lb steak, sliced
  • 4 cloves garlic, minced
  • 2 tablespoons garlic butter
  • 1 cup mixed vegetables (peas, carrots, bell peppers)
  • 3 tablespoons soy sauce
  • Salt and pepper, to taste
  • Chopped scallions, for garnish

Directions

  1. Heat a large skillet or wok over medium-high heat and melt the garlic butter.
  2. Add the sliced steak, cooking until browned and cooked to your desired doneness. Remove from the skillet and set aside.
  3. Add the mixed vegetables and garlic to the skillet, sautéing for 2-3 minutes until fragrant.
  4. Stir in the day-old rice, breaking up any clumps, and mix thoroughly to combine with the vegetables.
  5. Add soy sauce and reintroduce the cooked steak to the skillet; mix until everything is heated through.
  6. Taste and adjust seasoning, adding salt and pepper as needed. Remove from heat and garnish with chopped scallions.

Recipe Notes

  • Feel free to customize the vegetables based on your preferences or seasonal availability.
  • For a spicy version, add chili flakes or your favorite hot sauce during the cooking process.
  • Using leftover steak or even chicken works well, maintaining the same cooking principles.

Easy Street Corn Chicken Rice Bowl – Full of Flavor

Delicious Street Corn Chicken Rice Bowl: A Flavor Packed Delight

⚖️
Difficulty
Easy

⏲️
Prep Time
15 mins

🕒
Cook Time
20 mins

⏱️
Total Time
35 mins

🍽️
Servings
4

This Street Corn Chicken Rice Bowl is a delightful combination of vibrant flavors and textures that elevates a simple meal into an extraordinary culinary experience. The dish brings together succulent chicken, sweet corn, and rich spices, all nestled on a bed of fluffy rice. The play of contrasting flavors, from the sweet and juicy corn to the savory, seasoned chicken, creates a taste sensation that is sure to please everyone at the table.

Imagine the aroma wafting through your kitchen as you prepare this street-inspired bowl. The tantalizing smell of grilled corn mingling with fresh herbs and spices creates an inviting atmosphere that beckons your family and friends to the dinner table. Perfect for gatherings or a cozy night in, this recipe embraces the spirit of street food while being perfectly suited for home cooking.

Quick Recipe Highlights

  • Flavor Profile: A mix of sweetness from the corn, smokiness from grilled chicken, and tanginess from lime creates a mouthwatering explosion of taste.
  • Texture: The crunch of fresh vegetables and creamy toppings offers a delightful contrast to the tender chicken and fluffy rice.
  • Aroma: The enticing scent of freshly cooked corn and spices fills the air, making it irresistible.
  • Visual Appeal: The dish bursts with colors from bright yellow corn, vibrant green herbs, and golden chicken pieces, making it a feast for the eyes.
  • Skill Level Needed: This recipe is simple enough for beginners, but it also allows culinary enthusiasts to explore complex flavors.
  • Special Equipment: Basic kitchen tools such as a grill pan or skillet and serving bowls are all you need.

Recipe Overview

  • Difficulty Level: This easy recipe can be tackled by anyone, regardless of skill level. It involves straightforward steps and common ingredients found in most kitchens, making it perfect for a weeknight meal.
  • Category: As a main course dish, this rice bowl is ideal for lunch or dinner and fits perfectly into any casual or family-style meal setting.
  • Cuisine: Drawing inspiration from Mexican street corn, this bowl reflects the vibrant flavors and culinary traditions of classic street food while remaining accessible for home cooks.
  • Cost: The ingredients are budget-friendly, typically averaging around $15 for a family-sized serving, allowing you to enjoy a gourmet experience without breaking the bank.
  • Season: This dish shines in the summer months when corn is in season, but it can be enjoyed year-round by using frozen corn.
  • Occasion: Whether it’s a family dinner, backyard BBQ, or casual get-together, the Street Corn Chicken Rice Bowl fits beautifully into any occasion.

Why You’ll Love This Recipe

Taste and texture take center stage in this Street Corn Chicken Rice Bowl. Each bite delivers a burst of flavor with the sweetness of the corn complemented by the savory, grilled chicken. The addition of fresh lime juice brightens the overall experience, making it feel lively and vibrant. The contrasting textures—the creaminess of the toppings and the crunch of the fresh ingredients—keep each mouthful exciting, ensuring that you savor every bite.

Moreover, this recipe is incredibly convenient for busy weeknights. With a quick prep time and the use of simple ingredients, you can whip up a nourishing meal in no time. You can even prepare the components ahead of time—gril the chicken, cook the rice, and roast the corn—so that when dinner time rolls around, all you need to do is assemble the bowl and enjoy. This makes it a perfect choice for families juggling multiple schedules.

Beyond convenience, this dish also offers substantial nutritional benefits. Packed with protein from the chicken, fiber from the corn, and carbohydrates from the rice, it serves as a balanced meal. The inclusion of fresh vegetables not only adds nutrition but also enhances the visual appeal and flavor profile, making this bowl a wholesome choice for health-conscious individuals.

Eating together fosters bonds, and this Street Corn Chicken Rice Bowl is perfect for sharing with family friends. It encourages communal dining with a colorful presentation that invites everyone to dig in. The opportunity for personalized toppings—such as avocado, cilantro, or extra lime—adds a fun interactive element, allowing guests to customize their bowls.

Finally, this recipe is cost-effective. Made with affordable ingredients found at your local grocery store, it doesn’t require expensive or hard-to-find items. This means you can create an impressive dish without stretching your budget, making it an accessible option for anyone looking to enjoy a homemade meal.

Historical Background and Cultural Significance

The origins of street corn, known as “Elote” in Mexico, are rooted in indigenous Mesoamerican traditions where corn has been a staple food for thousands of years. Street vendors have long offered this beloved snack, preparing it over open flames and serving it with a variety of toppings such as mayonnaise, cheese, and spices. The Street Corn Chicken Rice Bowl brings a modern twist to a classic, showcasing the continued evolution of culinary practices.

In Mexico, corn is more than just a food; it holds deep cultural significance as a symbol of sustenance and celebration. Traditional gatherings often feature corn-based dishes, reinforcing community bonds and cultural identity. By incorporating these ingredients into a rice bowl, we pay homage to this history while introducing it to a new audience.

Over time, the preparation and presentation of street corn have evolved to include grilled versions that highlight the smoky flavor, much like how barbecue foods are celebrated in various cultures. This evolution reflects the adaptability of recipes, as they transform alongside changing culinary trends and preferences.

Regionally, variations of street corn exist throughout Latin America, each with its unique spin on flavors and textures. By fusing street corn with chicken and rice in a bowl format, the recipe captures the essence of these diverse culinary influences while appealing to contemporary dining practices.

Ingredient Deep Dive

Chicken

Chicken serves as the protein powerhouse in this dish. It has a rich history as a favored ingredient across numerous cuisines due to its versatility and ability to absorb flavors. Nutritionally, chicken is a great source of lean protein, essential for muscle maintenance and growth. When selecting chicken for this recipe, look for quality cuts, preferably organic or free-range for better taste and texture. To maximize freshness, store chicken in an airtight container in the fridge and use it within a few days.

Sweet Corn

The usage of corn in this recipe not only adds sweetness and crunch but also connects to traditional Mexican street food. Corn is a rich source of carbohydrates, providing energy, along with essential vitamins like B6 and B9. When selecting corn, opt for fresh cobs if available, looking for tightly packed kernels with bright green husks. Store in the refrigerator for optimal freshness, and consider freezing any leftover kernels for future use.

Rice

Rice forms the comforting base of the bowl, often serving as a staple in various global cuisines, contributing both texture and flavor. Brown rice is often chosen for its nutritional benefits, offering higher fiber content and keeping you fuller longer. When choosing rice, consider its type; jasmine or basmati works well for this dish. Store uncooked rice in a cool, dry place to retain freshness and use within a few months.

Lime

Lime juice brightens up the flavors in the dish, offering a refreshing zing that balances the richness of other ingredients. Citrus enhances nutrition by providing a boost of vitamin C and essential minerals. Look for limes that feel heavy for their size and have a vibrant green color. Fresh limes can be stored at room temperature, while cut limes should be refrigerated.

Common Mistakes to Avoid

  • Overcooking the chicken: Ensure to check the doneness frequently; overcooking can lead to dry chicken that lacks flavor.
  • Using old corn: Always check for freshness, as stale corn loses its sweetness and crunch.
  • Neglecting seasoning: A pinch of salt and pepper goes a long way in enhancing overall flavors; don’t skip this step!
  • Underestimating prep work: Gather all your ingredients before starting to ensure a smooth cooking process.
  • Skipping the marinade: Allowing the chicken to marinate for a short while can significantly improve its flavor; don’t rush this step.
  • Improper rice cooking: Follow the recommended water-to-rice ratios to avoid clumpy or burnt rice.
  • Not allowing rice to rest: Letting cooked rice sit covered for a few minutes before serving helps improve its texture.
  • Forgetting garnish: Fresh herbs, avocado, or crumbled cheese improve taste and presentation; always consider garnishing your bowl before serving.

Essential Techniques

Grilling Chicken

Grilling is essential for the smoky flavor this recipe brings. It creates a beautiful char while locking in moisture. Achieve perfect grilling by preheating your grill and ensuring the chicken is at room temperature before cooking. Avoid the common pitfall of flipping too often; let it sear properly for optimal grill marks.

Cooking Rice

Getting rice right is crucial for the dish’s success. Rinse the rice before cooking to remove excess starch, preventing stickiness. A common mistake is not measuring water correctly; usually, a 1:2 ratio works well for most types of rice. Check for doneness through visual cues; the rice should appear fluffy and each grain separate.

Roasting Corn

Roasting corn intensifies its sweetness and enhances the flavor profile. Ensure you preheat your oven or grill and rotate the corn for an evenly cooked result. Watch for visual cues—when the kernels begin to char, it’s a good indicator they are ready.

Pro Tips for Perfect Street Corn Chicken Rice Bowl

– Marinate the chicken for at least 30 minutes or up to overnight for enhanced flavor.
– Use a mix of fresh herbs in addition to cilantro to elevate the dish’s freshness.
– Don’t skip the lime; its acidity brings balance to the richness of the chicken and creamy toppings.
– Consider using short-grain brown rice for a chewier texture that will absorb the flavors beautifully.
– When roasting corn, sprinkle spices such as chili powder or paprika for an extra kick.
– Customize your toppings with sautéed bell peppers or jalapeños for added color and heat.
– Use the leftover chicken in salads or tacos for versatile meal options throughout the week.
– Adjust spices according to personal preference, adding more heat or smokiness as desired.

Variations and Adaptations

Explore different regional variations of this dish by incorporating different proteins such as shrimp or tofu for a vegetarian-friendly version. Seasonal adaptations might include adding roasted bell peppers or zucchini for summer freshness or butternut squash in the fall. Dietary modifications are easy to implement—gluten-free options can be enjoyed by using gluten-free sauces. Flavor variations can be achieved by experimenting with different spices or sauces, such as BBQ sauce or chipotle for an extra smoky taste.

Texture modifications can also elevate the dish. For instance, try using quinoa instead of rice for a nutty flavor and added protein. Presentation alternatives might include serving components separately for a fun build-your-own bowl experience, allowing guests to customize their meal according to their preferences.

Serving and Presentation Guide

Serving this dish can be made elegant with simple plating techniques. Start with a layer of rice, topping it with beautifully arranged chicken and roasted corn. Garnish generously with fresh cilantro, a wedge of lime, and maybe a sprinkle of cheese for a pop of color. For an extra touch, consider using bowls with vibrant colors that enhance the dish’s visual appeal.

Traditional accompaniments like tortilla chips or a side salad can complement the meal perfectly. Modern presentations might involve layering ingredients in clear glass bowls to showcase the colorful layers, making it visually enticing. Always consider serving this dish warm, as the flavors meld beautifully when the ingredients are heated.

Wine and Beverage Pairing

Pair this dish beautifully with a crisp white wine like Sauvignon Blanc or a light-bodied red such as Pinot Noir, which complements the dish’s vibrant flavors. Non-alcoholic alternatives could include sparkling water with lime or a refreshing iced tea with hints of citrus.

For coffee lovers, a medium roast brewed coffee can serve as a nice contrast after meal completion. Always serve wines chilled, allowing the refreshing qualities to balance the richness of the chicken. Remember to pour generously, creating an inviting atmosphere for your dinner guests.

Storage and Shelf Life

To store leftover Street Corn Chicken Rice Bowl, allow it to cool completely before placing it in airtight containers. Proper refrigeration will keep the meal safe for up to three to four days. Be mindful of separating the chicken and rice from toppings and sauces to maintain texture and flavor integrity.

When reheating, aim for a temperature of 165°F to ensure food safety. A microwave is convenient, but using the stove can better preserve texture. For longer storage, consider freezing the chicken and rice components—up to three months for best quality. Thaw in the refrigerator before reheating to ensure even cooking.

Make Ahead Strategies

Planning ahead can save time during busy weeknights. Prepare the rice and grill the chicken the day before, storing them in airtight containers in the fridge. You can also roast the corn ahead of time, allowing the flavors to develop more complexity.

Assemble the bowls just before serving to maintain freshness. Consider having various toppings prepped and ready, letting everyone customize their bowls when dinner time arrives. Fast reheat options for the chicken and rice will create a seamless dining experience without compromising flavor.

Scaling Instructions

When scaling this recipe, halving the ingredients works smoothly—simply adjust cooking times to prevent overcooking. For doubling or tripling, using larger pans will help ensure even cooking and prevent overcrowding.

Cooking times may vary slightly with larger batches, so monitor visual cues like browning and doneness. Leftover cooked rice can be stored in the fridge and reheated separately with a splash of water to restore moisture.

Nutritional Deep Dive

This Street Corn Chicken Rice Bowl offers a balanced macro breakdown, featuring approximately 30g of protein per serving, which is essential for muscle growth and repair. With a healthy selection of carbohydrates, including rice and corn, the dish proves sustaining and energizing.

Vitamins found in the ingredients—such as B vitamins from chicken, vitamin C from lime, and antioxidants from fresh herbs—contribute to overall health. Pay attention to dietary considerations, ensuring portions are suitable for your individual needs—implementing techniques to manage weight while enjoying delicious food.

Dietary Adaptations

For gluten-free options, make certain all sauces and ingredients meet dietary requirements. Dairy-free modifications can be achieved through using avocado or coconut yogurt instead of cheese or sour cream.

Vegetarians can substitute chicken with grilled tofu or beans, ensuring sufficient protein content. Low-carb options would entail using cauliflower rice instead of traditional rice, creating a lower-calorie alternative while still enjoying the flavors.

Troubleshooting Guide

If the chicken turns out dry, ensure you’re not overcooking it by using a meat thermometer. If flavors seem off, a pinch of salt or acidity from lime can often enhance taste.

If the rice is gummy, adding a small amount of olive oil or butter while fluffing could help. Ensure your skillet is hot enough before searing chicken; an underheated pan may lead to sticking instead of a proper sear.

Cooking corn can sometimes leave it tough if not monitored; check frequently for texture and adjust time as needed.

Recipe Success Stories

This recipe has brought joy to many home cooks, featuring rave reviews and stories shared on social media. From busy parents utilizing the bowl as a quick weeknight dinner to friends making it for enjoyable gatherings, it’s proven popular due to its flexibility and ease of preparation.

Readers have successfully added their twists to the recipe, like experimenting with different proteins and seasonal vegetables, showcasing its adaptability. Many have also shared photos of their creations, emphasizing the dish’s visual appeal, creating a sense of community and inspiration.

Frequently Asked Questions

Can I use frozen corn for this recipe?

Yes, frozen corn is a great alternative to fresh corn and works perfectly in this dish. Simply ensure it is thawed and drained before adding it to your bowl.

How do I know when the chicken is fully cooked?

The best way to check is by using a meat thermometer; chicken should reach an internal temperature of 165°F (75°C). Alternatively, you can cut into the thickest part to ensure juices run clear.

What toppings are best for this rice bowl?

Fresh cilantro, lime wedges, avocado, and crumbled cheese are popular toppings. You can also try pickled jalapeños for some heat or a drizzle of your favorite hot sauce.

Can I make this dish vegetarian?

Absolutely! Substitute the chicken with grilled tofu, chickpeas, or beans to create a delicious vegetarian version while keeping the flavor profile intact.

How do I store leftovers?

Store any leftovers in airtight containers and refrigerate for up to four days. Be sure to keep sauces and toppings separate to maintain freshness.

Can I prepare this recipe in advance?

Yes! You can prepare components like the rice and chicken a day ahead. Assemble the bowls just before serving to keep ingredients fresh.

What rice is best used for this dish?

Both jasmine and basmati rice offer wonderful flavor and texture for this bowl. For a healthier option, consider brown rice for added fiber.

Can I use different vegetables?

Absolutely! Feel free to include seasonal vegetables of your choice, like bell peppers, zucchini, or even spinach for added nutrition.

Is this dish spicy?

The level of spiciness depends on the toppings and spices you choose. You can easily adjust the heat by adding extra chili powder or jalapeños.

How do I make this dish gluten-free?

Ensure all sauces and condiments used are gluten-free, and you can enjoy this dish without concern.

Additional Resources

If you enjoyed this recipe, explore similar ones on our blog, including other rice bowl recipes or vibrant street food-inspired dishes. Check out our technique guides for perfect rice cooking or tips on grilling chicken to enhance your culinary skills. Additionally, delve into ingredient information sections for a deep dive into the nutrition and history of your favorite foods, ensuring you bring knowledge along with delicious meals to your table.

Join the Conversation

Share your experiences with this recipe on social media platforms, and connect with fellow food enthusiasts who appreciate the art of cooking. Consider photography tips to improve your food styling and presentation; your beautiful bowls could inspire others to recreate this dish! We encourage recipe reviews and feedback on adaptations you’ve enjoyed, contributing to a vibrant community focused on home cooking and sharing delicious experiences.

The Recipe

Street Corn Chicken Rice Bowl

Serves: 4

Prep Time: 15 mins

Cook Time: 20 mins

Total Time: 35 mins

Kitchen Equipment Needed

  • Grill pan or skillet
  • Rice cooker or pot
  • Cutting board
  • Chef’s knife
  • Measuring cups and spoons

Ingredients

  • 1 lb chicken breast, diced
  • 2 cups corn kernels (fresh or frozen)
  • 2 cups cooked rice (white or brown)
  • 1 tablespoon olive oil
  • 1 lime, juiced
  • 1/4 cup fresh cilantro, chopped
  • Salt and pepper to taste
  • Optional toppings: avocado, cheese, jalapeños

Directions

  1. In a bowl, combine diced chicken, olive oil, lime juice, salt, and pepper. Let marinate for at least 15 minutes.
  2. Grill the marinated chicken on medium heat until fully cooked, approximately 5-7 minutes.
  3. In a separate pan, roast the corn until slightly charred.
  4. Prepare the rice according to package instructions or in a rice cooker.
  5. To serve, layer rice at the bottom of each bowl, top with grilled chicken and roasted corn, garnishing with cilantro and lime.
  6. Add optional toppings as desired and enjoy!

Recipe Notes

  • Feel free to adjust spice levels by including chili powder or fresh jalapeños in the chicken marinade.
  • This recipe is versatile; consider adding black beans for extra fiber and protein.
  • Vegetarian options are available by substituting chicken with grilled tofu or chickpeas.

Easy Cabbage Soup with Hamburger – Hearty and Delicious

Cabbage Soup with Hamburger: A Hearty Delight for Every Season

⚖️
Difficulty
Easy

⏲️
Prep Time
15 mins

🕒
Cook Time
25 mins

⏱️
Total Time
40 mins

🍽️
Servings
4 servings

Cabbage soup with hamburger is a comforting dish that warms the soul and delights the palate. This hearty soup combines the freshness of cabbage with the savory flavor of ground beef, creating a perfect harmony of taste. With each spoonful, you’ll experience the nourishing essence of vegetables complemented by the richness of meat, making it a fantastic choice for a family meal or cozy dinner. Whether served on a cold winter night or as a refreshing dish in the summer, this versatile recipe promises to satisfy and rejuvenate.

The beauty of cabbage soup with hamburger lies not just in its flavor but also in its nutritional value. Rich in fiber, vitamins, and minerals, this dish supports a healthy lifestyle while being simple to prepare. Imagine the fragrance of sautéed onions mingling with the earthy aroma of ground beef, surrounded by the fresh scent of garden vegetables. As you stir this colorful soup, the vibrant greens of cabbage, the reds of tomatoes, and the yellows of corn create an eye-catching medley that is sure to entice even the pickiest eaters.

Quick Recipe Highlights

  • Flavor Profile: This cabbage soup with hamburger features a well-balanced flavor that combines savory and slightly sweet notes from the cabbage and hearty beef.
  • Texture: Each bowl boasts a mix of tender cabbage and juicy beef, giving a satisfying mouthfeel that is both hearty and comforting.
  • Aroma: A delightful blend of sautéed onions, aromatic spices, and the freshness of herbs fills the kitchen, making it impossible not to be excited about this dish.
  • Visual Appeal: The contrasting colors of green cabbage, brown beef, and vibrant vegetables create an inviting presentation that encourages second servings.
  • Skill Level Needed: This recipe is easy to follow, making it ideal for novice cooks who want to create a delicious homemade meal.
  • Special Equipment: You’ll need a large pot or Dutch oven for cooking, along with basic chopping tools for preparing the ingredients.

Recipe Overview

  • Difficulty Level: Cabbage soup with hamburger is categorized as an easy recipe. The straightforward steps make it accessible for all cooking levels.
  • Category: This dish fits perfectly in the category of comfort food, providing warmth and satisfaction with every bowl.
  • Cuisine: Drawing inspiration from traditional family recipes, this soup reflects cultural influences that highlight resourcefulness in cooking.
  • Cost: This recipe is budget-friendly, utilizing inexpensive ingredients that are readily available at your local grocery store.
  • Season: Ideal for any season, this soup is especially comforting during the chilly fall and winter months.
  • Occasion: Whether it’s a weeknight family dinner or a gathering with friends, this soup is perfect for any occasion.

Why You’ll Love This Recipe

Cabbage soup with hamburger is not only flavorful but also offers an exceptional taste and texture experience. The combination of crunchy cabbage and tender beef creates a satisfying contrast that makes each bite enjoyable. This dish is easily customizable, allowing you to adapt the flavors to your preference, whether you want a spicy kick or a milder taste.

Convenience is a major benefit of this recipe. With a prep time of just 15 minutes and a cook time of 25 minutes, you can have a delicious meal ready in just 40 minutes. This makes it a fantastic choice for busy weeknights when you want to eat well without spending hours in the kitchen. The one-pot nature of this soup means fewer dishes and an uncomplicated clean-up process.

From a nutritional standpoint, this soup is packed with health benefits. Cabbage is known for its high fiber content, and when combined with lean ground beef, it provides a well-rounded meal that’s hearty and satisfying. Eating this soup regularly can support digestion and help maintain a healthy weight, making it an excellent addition to a balanced diet.

Moreover, cabbage soup with hamburger is an outstanding dish for evenings when entertaining family or friends. Not only does it come together effortlessly, but the aroma filling your kitchen will create an inviting atmosphere as everyone gathers around the table. Sharing such a wholesome, homemade meal fosters connection and conversation, making it a memorable experience for all.

Lastly, this recipe stands out in terms of cost-effectiveness. Many of the ingredients are pantry staples, ensuring that you can whip up this dish without breaking the bank. The availability of ingredients adds to the recipe’s accessibility, allowing everyone to enjoy a bowl of comfort without a hefty price tag.

Historical Background and Cultural Significance

Cabbage soup has its roots in various culinary traditions, with many cultures featuring their own versions of this nourishing dish. The combination of cabbage and meat in soups reflects a long-standing practice of using available local ingredients to create hearty meals that can feed families efficiently. Historically, cabbage has been a staple crop due to its ability to grow in diverse climates, making it a common element in many traditional recipes worldwide.

The cultural importance of cabbage soup can be seen across Eastern Europe, where generations have cherished it as a means of sustenance and warmth. Families would often gather around a steaming pot of soup as a symbol of togetherness, creating lasting memories and bonding over shared meals. This tradition continues today, highlighting the comforting power of food in bringing people together.

Over the years, cabbage soup has evolved from its simple beginnings to accommodate various dietary preferences and flavor profiles. Many people now customize the base recipe by adding additional vegetables, spices, or different types of meat, making it a versatile dish that adapts to personal tastes. As a result, cabbage soup became a canvas for culinary creativity while still preserving its essential characteristics.

Regional variations of cabbage soup further illustrate its cultural significance. For instance, German “Sauerkraut soup” showcases fermented cabbage, while “Caldo Verde” from Portugal incorporates greens adding an extra layer of flavor. These adaptations reflect local ingredients and preferences, proving that cabbage soup is a universal dish that transcends borders.

Ingredient Deep Dive

Cabbage has played a central role in many cuisines, recognized not only for its nutritional benefits but also for its cultural significance. This leafy green vegetable is low in calories and packed with vitamins C and K, making it an essential ingredient in many diets. When selecting cabbage, look for heads that are firm with shiny, crisp leaves, as these indicate freshness. Proper storage involves keeping it wrapped in the refrigerator, where it can last for several weeks.

Ground beef, on the other hand, is an excellent source of protein and iron, essential for maintaining muscle mass and overall health. When choosing ground beef, opt for lean cuts to reduce fat content while ensuring flavor. Store uncooked ground beef in the refrigerator for short-term use, or freeze it for longer storage. If you prefer an alternative, ground turkey or chicken can serve as a healthier substitute, maintaining the recipe’s essence.

Tomatoes are another vital ingredient in this recipe and are renowned for their versatility. Packed with antioxidants like lycopene, they offer a myriad of health benefits. When selecting tomatoes for your soup, go for plump and firm varieties. Canned diced tomatoes can also be a convenient option, ensuring consistent flavor throughout the year. Be sure to store fresh tomatoes at room temperature to preserve their flavor, while canned varieties should remain in a cool, dry place.

Onions provide a flavor foundation for this soup, adding both sweetness and depth. Yellow onions are typically used, but you can experiment with red or shallots for different flavor profiles. Proper storage involves keeping them in a cool, dark location. They can last for weeks when stored correctly.

Lastly, herbs and spices play a crucial role in enhancing the overall flavor of cabbage soup. Fresh herbs like parsley or thyme can brighten the soup, while dried spices like black pepper or paprika can add warmth. Proper storage of herbs is essential to keep them fresh, with refrigeration typically extending their shelf life. Dried spices should be stored away from light and heat to retain their potency.

Common Mistakes to Avoid

  • Overcooking the cabbage: Cooking cabbage for too long can result in a mushy texture. Aim to keep it tender but still slightly crunchy.
  • Not seasoning properly: Forgetting to season can lead to a bland soup. Ensure to taste and adjust the seasoning throughout the cooking process.
  • Using old ingredients: Fresh vegetables significantly enhance the soup’s flavor. Always check your produce for freshness before cooking.
  • Skipping the sautéing step: Sautéing the onions and meat first adds depth to the soup. Skipping this step may leave your soup lacking in rich flavor.
  • Using too much liquid: Adding too much broth or water can dilute flavors. Stick to the recommended measurements to maintain a hearty consistency.
  • Not simmering long enough: Allowing the soup to simmer helps the flavors to meld together. Rushing this step can result in an underdeveloped taste.
  • Ignoring ingredient prep: Properly chopping vegetables ensures even cooking. Aim for uniform pieces for consistent texture and flavor.
  • Neglecting storage guidelines: Improperly stored leftovers can spoil quickly. Store uneaten soup in airtight containers for optimal freshness.
  • Forgetting to layer flavors: Adding spices at the beginning creates a base flavor. Consider adjusting and adding fresh herbs towards the end for added aroma.
  • Using the wrong pot: A heavy-bottom pot distributes heat evenly. Using inadequate cookware can lead to uneven cooking.

Essential Techniques

Sautéing is a crucial technique for building flavor in cabbage soup with hamburger. This method involves cooking ingredients in a small amount of fat, allowing the natural sugars to caramelize. Master this technique by heating your pot before adding the oil and allowing the ingredients to brown before adding liquids. Aim for a golden hue but be careful not to burn them.

Simmering allows flavors to meld and develop over time. For successful simmering, bring your soup to a boil before reducing to a gentle simmer. This will enable flavors to concentrate while keeping the vegetables tender. Look for small bubbles forming at the surface but avoid a rolling boil, which can break down the cabbage too much.

Chopping vegetables uniformly helps ensure even cooking. When chopping, use a sharp knife for clean cuts, and aim for similar-sized pieces for consistency. This attention to detail enhances both the presentation and mouthfeel of your soup.

Deglazing the pot is another key technique that captures the flavorful bits left from sautéing. After browning your meat and vegetables, pour a small amount of broth into the pot while scraping with a wooden spoon. This not only adds depth to your soup’s flavor but also ensures that you’re utilizing every bit of goodness.

Pro Tips for Perfect Cabbage Soup with Hamburger

Enhance the flavor of your cabbage soup by adding a splash of vinegar or lemon juice before serving to brighten the dish. This acidity perfectly balances the richness of the beef.

For added nutritional value, consider incorporating additional vegetables like carrots or bell peppers. These can be sautéed along with onions for a nutrient boost.

Experiment with herbs; adding fresh herbs such as dill or cilantro can provide a refreshing twist to the classic recipe. These can be stirred in at the end of cooking to preserve their vibrant flavor.

If you’re short on time, using pre-packaged coleslaw mix can save on prep time and ensure a quick assembly without sacrificing flavor.

For a richer experience, allow the soup to sit for a few hours or overnight before serving. This resting time allows the flavors to deepen and meld together, resulting in an even tastier dish.

Consider garnishing with grated cheese or a dollop of sour cream for an extra creamy finish and added richness.

To customize your soup, try different protein sources like ground turkey or sausage, which can provide new flavor profiles while keeping the recipe balanced.

Finally, ensure your soup is served hot directly from the pot for an optimal tasting experience and satisfaction.

Variations and Adaptations

Regional variations of cabbage soup exist that highlight local ingredient flavors. For example, adding smoked sausage or kielbasa can provide a deeper, more savory profile typical of Eastern European cuisines. Alternatively, you could incorporate lentils or beans for a vegetarian twist that maintains the heartiness of the soup.

Seasonal adaptations can enhance the soup. In winter, you might add root vegetables like potatoes or turnips for added warmth. In the summer, fresh zucchini or corn can give a bright, fresh flavor that complements the lighter fare typical of the season.

For those with specific dietary needs, consider low-carb adaptations by omitting potatoes and adding more non-starchy vegetables like spinach or kale. For a gluten-free option, simply ensure your broth is gluten-free and avoid any hidden wheat ingredients in other components.

Flavor variations can include adding spices like cumin or smoked paprika, which can enhance the dish’s profile while keeping its original character. For added heat, a dash of cayenne or crushed red pepper flakes can bring a spicy kick, appealing to those who enjoy bold flavors.

Texture modifications can be achieved by blending portions of the soup for a creamy base, while leaving the remaining ingredients chunky for variety. This approach adds an exciting twist and can make for a more comforting feel.

Finally, presentation alternatives could include serving the soup in bread bowls or topping with crispy croutons for added crunch, creating a visual and textural contrast that enhances the dining experience.

Serving and Presentation Guide

When serving cabbage soup, presentation can elevate the dining experience significantly. It’s advisable to employ simple plating techniques, using wide, shallow bowls to showcase the vibrant colors of the soup.

Garnishing ideas can include a sprinkle of fresh herbs like parsley or chives to add a pop of color. Additionally, a dollop of sour cream or a sprinkle of cheese can create a visually appealing and delicious garnish.

Traditional accompaniments for this soup often include crusty bread or a side salad, which can enhance the overall meal experience. A simple green salad with a light vinaigrette can provide a refreshing contrast to the richness of the soup.

Modern serving suggestions might include decorative bowls that match your table setting while keeping a homely feel. Serve the soup piping hot, ensuring it’s warmed properly before plating to enhance flavors and satisfaction.

Temperature considerations are vital, but also think about the environment of your dining setup. Consider serving family-style with the pot in the center of the table, allowing guests to serve themselves. This creates an inviting atmosphere and invites conversation.

Finally, portion control tips involve serving reasonable amounts that allow guests to enjoy the meal without feeling overwhelmed. Start with a smaller serving, allowing for seconds if desired, which also aids in food waste management.

Wine and Beverage Pairing

To elevate your dining experience, consider wine pairings that complement the cabbage soup’s flavors. A light-bodied red wine such as Pinot Noir has enough acidity to balance the richness of the beef while enhancing the overall enjoyment of the dish.

For white wine enthusiasts, a Chardonnay or Sauvignon Blanc could provide a refreshing contrast, cutting through the earthy flavors of the soup with bright acidity and fruity notes.

Non-alcoholic alternatives might include sparkling water with citrus or herbal iced teas, which can cleanse the palate and enhance the overall meal experience.

When considering coffee or tea pairings, opt for herbal teas that provide a gentle flavor, such as chamomile or mint, which won’t overpower the dish but can offer a soothing finish.

Temperature considerations for your chosen beverages are essential. Serve red wine slightly below room temperature, while white wine should be chilled appropriately to complement the warmth of the soup.

Lastly, presenting beverages in stylish glassware can elevate your dining table, creating an overall sensory experience that delights your guests.

Storage and Shelf Life

Proper storage of cabbage soup ensures freshness and flavor over time. Store any leftovers in airtight containers in the refrigerator, where they can last for up to 4 days.

For long-term preservation, consider freezing portions of the soup. Ensure it’s cooled to room temperature before transferring it to freezer-safe containers, allowing for up to 3 months of shelf life. When reheating, ensure it’s heated thoroughly on the stove or in the microwave.

Observe signs of spoilage, which generally include unpleasant odors, discoloration, or off-tasting flavors. If any of these indicators are present, it’s best to discard the soup.

When reheating, ensure it bubbles gently on the stove, as this eliminates any bacteria and restores the soup to its enjoyable state. Stir occasionally to heat evenly and prevent sticking.

Freezing guidelines recommend pouring soup into smaller freezer bags, ensuring you remove as much air as possible. This not only saves space but also helps avoid freezer burn, preserving the soup’s taste and integrity.

Make Ahead Strategies

Making this cabbage soup ahead of time can enhance its flavors significantly. Consider making the soup one day in advance, as letting it sit in the refrigerator allows the flavors to meld beautifully.

Storage between steps can involve prepping ingredients like chopping vegetables and storing them in the fridge until you’re ready to cook. This not only saves time but also retains freshness.

Quality impact assessment is crucial; while the initial flavor may be bright, allowing a few hours or overnight will deepen and develop the soup’s character. If freezing, consider holding off on adding fresh herbs until reheating to maintain their vibrancy.

When assembling the soup, start with sautéing the beef and vegetables before adding the liquids. Allowing the components to simmer fully will yield a delicious, well-rounded dish later.

When reheating, fresh elements like a sprinkle of herbs or cheese can brighten up the flavors that may dull in storage, ensuring a delightful meal experience.

Scaling Instructions

When scaling this recipe, consider halving or doubling the ingredients depending on your meal needs. If halving, adjust cooking times slightly as smaller quantities will generally cook faster.

Doubling or tripling the recipe is also possible; however, you may need to use a larger pot to accommodate the extra ingredients. Keep an eye on heat distribution, ensuring the soup simmers evenly throughout.

Timing modifications should include monitoring as larger pots of soup may require a bit more time to reach a simmering state but ultimately will cook in similar durations once fully combined.

When storing a larger batch, consider using multiple containers to allow for easier reheating. This can also help portion out servings more effectively for future meals.

Lastly, if you’re preparing a big batch for a gathering or event, doubling the recipe requires diligent seasoning adjustments. Remember to taste throughout the cooking process for balance, as larger quantities can dilute flavors overall.

Nutritional Deep Dive

A macro breakdown of cabbage soup with hamburger shows it to be a well-balanced meal, rich in protein thanks to the ground beef while being low in carbohydrates due to the fiber-rich vegetables. This balance promotes satiety and energy, making it a great choice for a nutritious meal.

On the micronutrient level, cabbage is particularly high in vitamin K and vitamin C, supporting immune function and promoting healthy skin. The ground beef brings in essential iron and B vitamins, which play significant roles in energy metabolism.

Health benefits are abundant with this dish, offering a hearty dose of fiber from the cabbage and vegetables, which can aid digestion and promote gut health. The incorporation of beef provides important minerals like zinc and selenium, enhancing overall health.

Dietary considerations for this dish are also favorable; it’s customizable for varying dietary needs. By substituting lean proteins or omitting meat altogether, it can cater to vegetarian diets while still being a fulfilling meal.

When looking at portion analysis, serving sizes can be adjusted based on individual needs. One serving typically offers enough nutritional value without overpowering calorie counts, making it an excellent option for weight management.

Dietary Adaptations

For those needing gluten-free options, ensure that any added broth is certified gluten-free. This can keep the essence of the soup while adhering to dietary restrictions.

If you’re seeking a dairy-free version, avoid any creamy garnishes or cheese, focusing instead on the natural flavors of the soup. Fresh herbs can help enhance the palate without dairy.

Vegetarian adaptations may involve replacing the meat with beans, lentils, or even tofu, providing a protein boost while maintaining the soup’s hearty quality.

Low-carb variations could entail substituting starchy vegetables with lower-carb options like zucchini or mushrooms, allowing the dish to remain filling without the extra carbs.

Keto-friendly adaptations focus on excluding high-carb ingredients like potatoes while maintaining the cabbage and beef base to keep carbs at a minimum.

For those following a paleo diet, simply ensure that all ingredients are natural and unprocessed, relying on fresh produce and quality meats to conform to the guidelines.

Finally, low-FODMAP adaptations can involve omitting garlic and certain beans, ensuring that the recipe is suitable for those with sensitivities while still delivering a rich flavor.

Troubleshooting Guide

If texture issues arise, such as mushy cabbage, it may indicate overcooking. Aim to simmer just until tenderness is reached while keeping some crunch. This balances the overall texture of the dish.

Flavor balance can be adjusted by tasting throughout the cooking process. If your soup ever feels too bland, adding a touch of seasoning or acidity can brighten the dish considerably.

Temperature problems often occur if the soup does not reach a hot enough simmer. Ensure that your stovetop settings are correct to allow for proper heating and cooking without boiling.

Equipment challenges may arise if your pot is too small. In such cases, transferring to a larger pot ensures that all ingredients can cook evenly without crowding.

When considering ingredient substitutions, adjustments must take account of the properties of each substitute. For example, using chicken broth instead of beef broth alters the soup’s overall taste profile.

Timing concerns might come into play when cooking large batches. When doubling or tripling the recipe, note that additional time in cooking may be needed to reach the desired simmer point.

Recipe Success Stories

Feedback from the community often highlights the satisfaction that comes from preparing cabbage soup with hamburger. Readers rave about how easy and versatile the dish is, praising its ability to adapt to personal tastes and available ingredients. Many have shared stories of how their families eagerly devoured the dish, making it a new favorite at dinnertime.

Successes may also come from those who varied ingredients, substituting different meats or adding seasonal vegetables. These personal touches have allowed variations of the traditional recipe to flourish, encouraging readers to find their unique spin.

Photography tips from the community often emphasize the importance of plating and garnishing. A simple sprinkle of fresh herbs or a drizzle of olive oil can transform the dish’s appearance, making it look as good as it tastes.

Readers have expressed joy at the simplicity of making this soup, especially on busy weeknights. The one-pot approach has been particularly appreciated, allowing for minimal cleanup while still delivering a hearty meal.

Many have shared their adaptation journeys, exploring dietary restrictions or preferences while finding delicious alternatives that do not diminish the soup’s essence. These adaptations showcase the recipe’s flexibility, ensuring that everyone can enjoy a bowl of comforting goodness.

Frequently Asked Questions

1. How long can I store leftover cabbage soup?

Leftover cabbage soup can be stored in an airtight container in the refrigerator for up to 4 days. Make sure it is cooled before refrigerating to maintain its freshness.

2. Can I freeze cabbage soup?

Yes, cabbage soup freezes well! Store cooled soup in freezer-safe containers, where it can last for up to 3 months. Just remember to leave some space for expansion.

3. What can I add to make the soup spicier?

To add spice, consider adding crushed red pepper flakes, cayenne pepper, or fresh chili peppers. Incorporating these during cooking allows the flavors to meld beautifully.

4. Can I use other meats in the recipe?

Absolutely! Ground turkey or chicken can serve as lighter alternatives, while sausage can add a distinct flavor profile. Feel free to experiment with what you have on hand!

5. Is this soup low-carb or keto-friendly?

To make the soup low-carb or keto-friendly, exclude starchy vegetables like potatoes, and focus on leafy greens and non-starchy vegetables for a hearty meal.

6. What herbs work well with cabbage soup?

Fresh herbs like thyme, parsley, or dill can elevate the flavor profile of your soup. Add these towards the end of cooking to preserve their aromatic qualities.

7. How can I enhance the flavor of the broth?

To enhance broth flavor, consider deglazing the pot after sautéing meat and vegetables with a splash of wine or broth, scraping up any flavorful bits from the bottom.

8. Can I make this soup ahead of time?

Yes, making cabbage soup ahead of time is encouraged! The flavors develop beautifully when left overnight, making it even more delicious the next day.

9. What’s a good side dish to serve with cabbage soup?

Crusty bread, a simple salad, or hot cornbread make fantastic side dishes to complement the rich flavors of cabbage soup.

10. How can I thicken my cabbage soup?

For a thicker soup, consider adding pureed beans or lentils, or you can blend a portion of the soup and mix it back in. This method maintains the soup’s texture while enhancing heartiness.

Additional Resources

If you enjoyed this recipe, you may want to explore other related recipes such as hearty potato soup or chicken vegetable stew. Each recipe incorporates similar cooking techniques that can enhance your culinary repertoire.

Technique guides on sautéing, simmering, or making homemade broth can further improve your skills in creating wholesome soups. Mastering these techniques will allow you to experiment confidently with various ingredients.

For ingredient information, consider learning more about the health benefits of cabbage and supporting vegetables. Knowing how to select and store each ingredient ensures great quality in every dish.

Equipment recommendations could include investing in a good-quality Dutch oven or large pot. These tools are perfect for creating large batches, ensuring even cooking and heat retention.

Finally, seasonal variations can draw attention to different ingredients available at various times of the year. Utilize fresh, local produce when making your soup for a vibrant and flavorful experience.

Join the Conversation

We invite readers to share their experiences with cabbage soup with hamburger! Consider posting your delicious variations on social media and tagging our account to connect with fellow cooks.

Share your food photography success stories for this recipe; the vibrant colors and rich textures can inspire others to bring this dish into their homes.

Don’t hesitate to leave reviews or feedback on your cooking experience, as this not only helps fellow readers but also makes our recipe collection better.

Engaging with our community through suggested recipe modifications or flavor tips can lead to exciting discoveries. Let’s enjoy this culinary journey together while keeping the essence of classic comfort food alive.

As we continue to explore new ways to enjoy cabbage soup, your contributions can make a significant impact, encouraging creativity and excitement in the kitchen.

The Recipe

Cabbage Soup with Hamburger

Serves: 4 servings

Prep Time: 15 mins

Cook Time: 25 mins

Total Time: 40 mins

Kitchen Equipment Needed

  • Large pot or Dutch oven
  • Knife and cutting board
  • Wooden spoon

Ingredients

  • 1 pound ground beef
  • 1/2 head of medium green cabbage, chopped
  • 1 medium onion, diced
  • 2 medium carrots, diced
  • 2 stalks celery, diced
  • 2 cups beef broth
  • 1 can diced tomatoes (14.5 oz)
  • 1 teaspoon garlic powder
  • Salt and pepper to taste
  • Fresh herbs for garnish (optional)

Directions

  1. In a large pot over medium heat, brown the ground beef until no longer pink. Drain excess fat.
  2. Add diced onions, carrots, and celery; sauté until softened, about 5 minutes.
  3. Stir in chopped cabbage and cook for another 5 minutes, stirring occasionally.
  4. Add beef broth, diced tomatoes, garlic powder, salt, and pepper. Bring to a boil.
  5. Reduce heat and let simmer for 25 minutes or until vegetables are tender.
  6. Adjust seasoning as needed, and serve hot. Garnish with fresh herbs if desired.

Recipe Notes

  • Feel free to customize by adding your favorite vegetables.
  • For a spicier version, add crushed red pepper flakes during cooking.
  • This soup freezes well; simply reheat and enjoy later!

Easy Crockpot Chicken & Stuffing – Comfort Food Favorite

Crockpot Chicken & Stuffing: A Comforting Weeknight Meal

⚖️
Difficulty
Easy

⏲️
Prep Time
15 mins

🕒
Cook Time
6 hours

⏱️
Total Time
6 hours 15 mins

🍽️
Servings
4-6

If you’re looking for a hearty and satisfying dish that combines the comforting flavors of chicken and stuffing, look no further than this Crockpot Chicken & Stuffing recipe. This delightful meal cooks slowly in your crockpot, allowing the flavors to meld beautifully, resulting in tender chicken and fluffy stuffing infused with aromatic herbs and spices. Perfect for busy weeknights or a cozy family dinner, it’s sure to become a staple in your household.

This recipe not only guarantees a luscious meal that warms the heart but also delivers a hassle-free cooking experience. Simply combine all ingredients in your crockpot, set it to cook, and let the magic happen while you tackle other tasks — it’s truly a set-and-forget meal that invites you home with its mouth-watering aroma. Your family will appreciate the savory tenderness of the chicken, complemented by the richly flavored stuffing that soaks up all the delicious juices.

Quick Recipe Highlights

  • Flavor Profile: Savory chicken paired with herb-infused stuffing creates a comforting dish that’s perfect for fall.
  • Texture: The chicken becomes wonderfully tender while the stuffing remains fluffy and moist.
  • Aroma: This dish fills your kitchen with a warm, inviting scent as it slowly cooks throughout the day.
  • Visual Appeal: Golden brown chicken pieces sit atop a bed of beautifully cooked stuffing, making for an eye-catching meal.
  • Skill Level Needed: This recipe is beginner-friendly and requires minimal culinary skills.
  • Special Equipment: A reliable crockpot is essential for this effortless cooking process.

Recipe Overview

  • Difficulty Level: Easy, making it ideal for both novice cooks and busy parents.
  • Category: A perfect main dish for dinner or Sunday family meals.
  • Cuisine: Rooted in American comfort food traditions, it’s reminiscent of home-cooked family gatherings.
  • Cost: Budget-friendly with common ingredients, this dish is economical while still delicious.
  • Season: Perfect in the fall and winter, it warms the soul on chilly days.
  • Occasion: Ideal for weeknight dinners, potlucks, or any occasion where comfort food is welcomed.

Why You’ll Love This Recipe

The appeal of this Crockpot Chicken & Stuffing lies in its fantastic taste and texture. The chicken becomes incredibly tender after hours in the crockpot, absorbing the flavors from the stuffing and seasonings. Each bite is comforting, reminiscent of family dinners around the table. The stuffing boasts a satisfying texture, flavorful and fluffy, making it the perfect complement to the juicy chicken.

Convenience is another significant advantage of this recipe. With just a bit of prep work required upfront, you can easily combine ingredients in the crockpot and allow it to cook while you carry out your day’s activities. This ease makes it suitable for any busy individual or family looking to enjoy a homemade meal without sacrificing time or flavor.

Nutritionally, this dish offers a balanced combination of protein from the chicken and carbohydrates from the stuffing. You can enjoy a hearty meal packed with flavor and nourishment in a single pot. Moreover, it provides a sense of satisfaction as you indulge in a wholesome dinner without the overwhelming fuss of extensive cooking.

Socially, this recipe lends itself well to gatherings and family dinners. The comforting nature of this meal encourages sharing and bonding over a communal dish, making it a great choice for celebrations or casual weeknight dinners with loved ones. The aroma will draw your family into the kitchen, inviting shared moments around the table.

Cost-effectiveness is another bonus; with straightforward ingredients, you can create a filling and delicious meal without breaking the bank. The darling of pantry staples, this dish is designed for accessibility, ensuring that everyone can whip up a satisfying meal, regardless of their pantry inventory.

Historical Background and Cultural Significance

Crockpot cooking has evolved significantly since its introduction in American households in the 1970s, becoming a beloved method for convenient meal preparation. The origins of using various meats with stuffing date back much further, typically tied to family gatherings and celebrations. The method of slow cooking draws from traditions such as potlucks and family reunions, where one-pot meals became practical for feeding large groups.

In terms of cultural importance, dishes like Chicken & Stuffing symbolize togetherness, comfort, and tradition within American households. It’s not merely a meal; it reflects a legacy of cooking that honors the importance of family and community.

As recipes are passed down through generations, they have evolved to meet contemporary tastes and preferences. The addition of a slow cooker allows busy families to enjoy the heartiness of chicken and stuffing in a modern context, expanding the recipe’s reach while maintaining its comforting essence.

Regional variations have also emerged, with different regions adding their unique spices and ingredients to reflect local flavors. This regional flair enables home cooks to personalize the dish, giving it a sense of place and family heritage.

Ingredient Deep Dive

Chicken, the star ingredient of this dish, has deep roots in many cultures around the world. Known for its versatility, chicken is a lean source of protein that lends itself to a wide array of cooking methods and flavors. For this dish, it’s best to select bone-in, skin-on chicken for depth of flavor and tenderness during cooking. Remember to check for freshness, ensuring a vibrant color and firm texture. Store any leftovers in the fridge for up to three days, and consider freezing if you want to extend its shelf life.

Stuffing, often made from bread, complements chicken perfectly. It has origins that differ in various cultures, with each region developing unique recipes based on available ingredients. When selecting stuffing mix, aim for high-quality options with minimal additives. Store in a cool, dry place, and feel free to customize with herbs or additional proteins for an enhanced flavor profile.

Common Mistakes to Avoid

  • Overcooking the chicken: While slow cooking allows for tender chicken, leaving it for too long can result in dry meat. Aim for the recommended time.
  • Using the wrong cut of chicken: Choose bone-in, skin-on pieces for the best flavor; boneless, skinless cuts may dry out quickly.
  • Insufficient seasoning: Don’t skip the seasonings; they enhance the overall flavor of the dish. Adjust to taste before cooking.
  • Not layering ingredients properly: Begin with the stuffing mix at the bottom, followed by the chicken to ensure even cooking and flavor distribution.
  • Ignoring the liquid component: Ensure there is enough broth to keep the stuffing moist; insufficient liquid can result in dry stuffing.
  • Rushing the prep time: Allowing the chicken to marinate with the seasoning briefly enhances flavor depth.
  • Skipping the browning step: If time allows, quickly searing the chicken before slow cooking enhances the flavor.
  • Unattended cooking: Avoid opening the lid while cooking, as this can significantly extend cooking time and result in unevenly cooked food.

Essential Techniques

Browning the chicken is crucial for enhancing flavor. Searing the skin before adding it to the slow cooker caramelizes the proteins and creates a rich depth that infuses the entire dish. To master this technique, heat oil in a skillet, add the chicken, and allow it to brown without moving it too frequently. Watch for a golden-brown color as your visual cue for success.

Layering is essential in crockpot cooking; it influences how flavors meld together as the dish cooks. Start by placing denser ingredients like stuffing at the bottom and arrange chicken on top. This placement prevents bottom ingredients from becoming soggy and encourages a succulent result that enhances mouthfeel.

Pro Tips for Perfect Crockpot Chicken & Stuffing

1. Use high-quality chicken broth for maximum flavor infusion throughout the cooking process.
2. Add vegetables like carrots and celery to the stuffing for additional flavor and nutrition.
3. For extra gourmet flair, sprinkle fresh herbs like thyme or rosemary on top before serving.
4. Adjust seasoning according to personal preferences, ensuring a balanced flavor profile.
5. If using frozen chicken, extend the cooking time but make sure it reaches an internal temperature of 165°F before serving.
6. Consider adding a splash of white wine to the liquid for an enhanced depth of flavor.
7. Let the dish rest for about 15 minutes before serving to allow the stuffing to firm up.
8. Serve with a side of green vegetables to create a well-rounded meal.

Variations and Adaptations

Regional variations of chicken and stuffing exist across the United States, often influenced by local ingredients and culinary customs. For instance, Southern styles may incorporate cornbread into the stuffing, while New England variations often utilize sage-flavored bread. Seasonal adaptations might feature vegetables related to that harvest; fall recipes can include butternut squash or cranberries for added seasonal flavor. Dietary modifications can involve gluten-free stuffing mixes or the use of quinoa or rice, transforming the dish into a delicious gluten-free alternative.

Flavor variations can include the addition of cheese within the stuffing for creaminess or spice blends for a kick. Texture modifications may incorporate nuts or dried fruits for an interesting crunch and additional flavor complexity. Presentation alternatives might involve plating the chicken on a bed of stuffing or serving in individual bowls for a rustic touch.

Serving and Presentation Guide

For an appealing presentation, plate the sliced chicken atop a fluffy mound of stuffing. Drizzle with excess cooking juices or a gravy for a delicious glossy finish. Garnish with freshly chopped parsley or thyme to add a pop of color. Traditional accompaniments like sweet potatoes or a side salad offer textural differences and counterpoints to the dish’s richness. Modern serving suggestions include placing the entire crockpot on the table, allowing guests to serve themselves family-style. Be mindful of portion control to ensure a satisfying meal without excessive leftovers, particularly since the flavors deepen on subsequent days.

Wine and Beverage Pairing

For wine pairings, consider a light to medium-bodied white wine such as Chardonnay or Sauvignon Blanc, which complements the rich flavors of chicken and stuffing. If you prefer reds, light varietals such as Pinot Noir can work well without overpowering the dish. For non-alcoholic options, a sparkling water with a splash of lemon offers a refreshing counterpoint, while herbal teas like chamomile can also provide a soothing accompaniment. Always consider the serving temperature — whites should be chilled, while reds might be best slightly warmer.

Storage and Shelf Life

To store leftover Crockpot Chicken & Stuffing, allow it to cool down before transferring it to airtight containers. Refrigerate within two hours of cooking to ensure food safety; it can last for about three days in the fridge. If freezing, use freezer-safe containers or zip-top bags, ensuring to remove as much air as possible before sealing—this can extend the shelf life up to four months. Look for signs of spoilage such as off smells, discoloration, or excessive moisture before consuming. When reheating, aim for an internal temperature of 165°F, whether in the oven, microwave, or stove.

Make Ahead Strategies

To make this recipe in advance, you can prep the chicken and stuffing mix early in the day or the night before. Combine all ingredients within the crockpot, cover, and refrigerate for up to 24 hours before cooking. Make sure to bring it to room temperature before starting the cooking process to ensure even cooking. Alternatively, you can also prepare the stuffing separately ahead of time and then mix it together with cooked chicken just prior to serving, retaining freshness and preventing sogginess.

Scaling Instructions

If you find yourself needing to adjust serving sizes, halving the recipe is straightforward; simply use half of each ingredient and maintain the same cooking time as chicken will cook uniformly. For doubling or tripling the recipe, ensure your crockpot can accommodate the increased volume; a larger crockpot might be necessary. Timing modifications might be minimal, but keep an eye on the chicken’s internal temperature for safety. Ensure to store any larger portions properly to prevent waste.

Nutritional Deep Dive

From a nutritional standpoint, this Crockpot Chicken & Stuffing recipe provides a hearty serving of macro and micronutrients. The chicken offers a high-quality source of protein essential for muscle repair and overall health. Depending on the brand of stuffing used, it can also provide dietary fiber, aiding digestion, and balance blood sugar levels. As portion sizes can vary, consider measuring servings for those watching caloric intake. Nutritional considerations like low sodium or low-fat options can be incorporated by selecting specific broth and stuffing brands.

Dietary Adaptations

For a gluten-free version, choose a gluten-free stuffing mix and use gluten-free broth while ensuring other ingredients are also compliant. To modify for a dairy-free option, substitute regular broth with vegetable broth and forgo any dairy-based toppings. A vegan adaptation could involve replacing the chicken with textured vegetable protein or mushrooms, while still using a suitable vegan stuffing mix. For those on a low-carb or keto diet, a cauliflower-based stuffing can be used as an excellent substitute.

Troubleshooting Guide

If you find your chicken is too dry, consider adjusting the cooking time or adding a bit more broth to keep it moist. For flavor balance issues, you might need to reassess your seasoning before or during the cooking process. If texture is off or the stuffing is too soggy, reducing liquid in future preparations or opting for less bread can solve this issue. In case of heating problems, ensure your crockpot is functioning correctly and adjust temperatures accordingly. Should ingredients need to be swapped due to availability or dietary restrictions, always consider functional exchanges to maintain that comforting balance.

Recipe Success Stories

Readers consistently rave about the ease and comfort this recipe brings. Community feedback highlights its appeal for family gatherings, where everyone enjoys personal adaptations reflecting their unique tastes! One reader shared how adding butternut squash transformed the dish’s flavor profile in their seasonal rendition. Photographs of the finished product often flood our social channels, showcasing how beautifully this dish can be presented on any table, making it a community favorite.

Frequently Asked Questions

Q1: Can I use frozen chicken for this recipe?

A1: Yes, you can use frozen chicken, but ensure it cooks thoroughly to reach a safe temperature of 165°F. Just keep in mind, you might need to extend the cooking time slightly.

Q2: What type of stuffing do you recommend?

A2: Any stuffing mix works well, but try to select one with herbs and spices for added flavor. Homemade stuffing can also elevate the dish significantly.

Q3: Can I prepare this dish without a crockpot?

A3: Yes, you can make this recipe in a Dutch oven or a regular oven; just adjust cooking times to ensure the chicken cooks through thoroughly.

Q4: How do I know when the chicken is done?

A4: The best way to confirm doneness is by using a meat thermometer—ensure it reads 165°F at the thickest part of the chicken.

Q5: Can leftovers be frozen?

A5: Yes, leftovers can be frozen for up to four months. However, the quality of the stuffing may degrade slightly after thawing.

Q6: What sides pair well with this dish?

A6: Pair this dish with green beans, a fresh salad, or buttery mashed potatoes for a complete meal.

Q7: How can I make this dish spicier?

A7: Consider adding diced jalapeños, red pepper flakes, or a splash of hot sauce to the stuffing before cooking for added heat.

Q8: Is it possible to make this dish dairy-free?

A8: Absolutely! Use a dairy-free broth and skip any dairy toppings to make this recipe suitable for a dairy-free diet.

Q9: Can I make this ahead of time and store it?

A9: Yes, you can assemble the ingredients in advance and store them in the refrigerator overnight before cooking the next day.

Q10: How long can I keep leftovers in the fridge?

A10: Leftovers can be stored in an airtight container and kept for about three days in the refrigerator.

Additional Resources

Explore related recipes such as Slow Cooker Beef Stroganoff or Creamy Garlic Parmesan Pasta, showcasing similar methods for family-friendly meals. Consider diving into ingredient guides that highlight the nutritional benefits of chicken and various stuffing mixes. Furthermore, check out recommendations for crockpot models based on your cooking needs, ensuring you enjoy the best of slow cooking!

Join the Conversation

We love hearing how you enjoyed this Crockpot Chicken & Stuffing recipe! Share your experiences, variations, and photographs on social media and engage with our culinary community. Your feedback is valuable; let us know your cooking tips or advice, contributing to a shared repository of knowledge for home cooks everywhere, inspiring others to try out delightful recipes as you did!

The Recipe

Crockpot Chicken & Stuffing

Serves: 4-6

Prep Time: 15 mins

Cook Time: 6 hours

Total Time: 6 hours 15 mins

Kitchen Equipment Needed

  • Crockpot
  • Large skillet (optional for browning)
  • Meat thermometer

Ingredients

  • 4-6 pieces of bone-in, skin-on chicken (thighs or breasts)
  • 1 package of stuffing mix (your choice)
  • 1 ½ cups chicken broth
  • 1 cup diced vegetables (carrots, celery, onions)
  • 2 tablespoons butter, melted
  • 1 teaspoon garlic powder
  • Salt and pepper to taste
  • Fresh herbs for garnish (optional)

Directions

  1. Begin by seasoning the chicken with salt, pepper, and garlic powder.
  2. In a large bowl, mix the stuffing with the melted butter, diced vegetables, and half of the chicken broth.
  3. Place the stuffing mixture at the bottom of the crockpot, spreading it out evenly.
  4. Arrange the seasoned chicken on top of the stuffing.
  5. Pour the remaining chicken broth over the chicken and stuffing, ensuring everything is moist but not submerged.
  6. Cover the crockpot and cook on low for 6 hours or until the chicken is tender and reaches an internal temperature of 165°F.
  7. After cooking, let sit for 15 minutes before serving. Garnish with fresh herbs if desired.

Recipe Notes

  • This recipe can be customized by adding your favorite herbs or vegetables to the stuffing mix.
  • Feel free to substitute chicken with turkey for a Thanksgiving-inspired version!
  • For a creamy variation, add a can of cream of mushroom or chicken soup to the stuffing mixture.

Delicious Smothered Chicken and Rice Recipe for Comfort Food Lovers

Smothered Chicken and Rice: Comfort Food Delight

⚖️
Difficulty
Easy

⏲️
Prep Time
15 mins

🕒
Cook Time
40 mins

⏱️
Total Time
55 mins

🍽️
Servings
4

Indulge in the heartwarming flavors of Smothered Chicken and Rice, a dish that envelops tender chicken in a cozy sauce, served on a bed of fluffy rice. This comforting meal is perfect for a family dinner or a gathering with friends, showcasing the kind of home-cooked goodness that brings everyone together. The combination of juicy chicken, rich gravy, and perfectly cooked rice creates a delightful harmony that will warm your soul.

As you lift the lid off your pot, the enticing aroma of savory spices fills the air, promising a satisfying dining experience. Each bite is a celebration of flavors, where the chicken is enhanced by a velvety sauce, making it a staple recipe for those chilly nights or simply when you crave something comforting. Whether you are an experienced cook or a beginner stepping into the culinary world, this Smothered Chicken and Rice recipe is straightforward and rewarding.

Quick Recipe Highlights

  • Flavor Profile: Savory, rich, and satisfying with subtle hints of herbs and spices.
  • Texture: Tender chicken enveloped in a creamy sauce over fluffy, cooked rice.
  • Aroma: Inviting with a blend of spices and the warmth of home cooking.
  • Visual Appeal: A beautifully plated dish with a creamy sauce and vibrant colors.
  • Skill Level Needed: Suitable for all skill levels; easy-to-follow instructions.
  • Special Equipment: A large pot or Dutch oven for cooking the chicken and sauce.

Recipe Overview

  • Difficulty Level: Easy, making it accessible for beginner cooks and a straightforward meal for those more experienced.
  • Category: Main Dish, perfect for family meals or casual entertaining.
  • Cuisine: Southern American influence, celebrating comforting flavors and home-style cooking.
  • Cost: Affordable ingredients that fit within most budgets without sacrificing flavor.
  • Season: Ideal for any season, especially comforting during fall and winter.
  • Occasion: Perfect for weeknight dinner, family gatherings, or meal prepping for busy weeks.

Why You’ll Love This Recipe

Smothered Chicken and Rice is a feast for both the palate and the senses. The impeccable balance of flavors from the seasoned chicken melded with the rich sauce complements the rice beautifully, creating a dish that feels gourmet without being complicated. Each mouthful is tender and juicy, providing a delightful contrast to the creamy, hearty sauce that lingers in your mouth.

This recipe is incredibly convenient, allowing you to whip up a wholesome meal in just under an hour. The prep work is minimal, letting you spend more time at the table with loved ones rather than in the kitchen. Moreover, the one-pot method of cooking simplifies the cleanup process, making it a practical choice for busy nights or unexpected guests.

Nutritionally, this dish provides a balanced meal with protein from the chicken, along with carbohydrates from the rice. You can also elevate it with additional vegetables or spices, catering to your family’s preferences or dietary needs. It’s hearty enough to satisfy the hungriest of diners while still being health-conscious.

As a recipe that embodies the spirit of gathering, Smothered Chicken and Rice is often the centerpiece of family dinners and social occasions. It encourages sharing stories and laughter around the table, creating memories that last long after the last bite of food has been savored. Whether you are serving your family, hosting a dinner party, or bringing food to a friend in need, this dish is guaranteed to be a crowd-pleaser.

Moreover, this recipe is budget-friendly, making it a go-to for those looking to enjoy a great meal without overspending. The ingredients are simple yet wholesome, ensuring that you get a deliciously satisfying dish that won’t break the bank. You can save even more by utilizing leftovers and transforming them into new meals, enhancing the value of this comforting main course.

Historical Background and Cultural Significance

The origins of Smothered Chicken and Rice can be traced back to Southern cooking traditions, where hearty meals became a staple for families. This dish is often imbued with memories of home, crafted with care and love by generations. The style of smothering reflects a method of cooking designed to retain moisture and flavor, allowing the chicken to absorb the rich seasonings that make this dish unforgettable.

Culturally, Smothered Chicken holds an important place in celebrations and comfort food collections. It symbolizes warmth and hospitality, often served during family gatherings and celebrations, honoring the roots of Southern hospitality. The dish is not just a meal; it’s a representation of love and nurturing, often associated with family traditions passed down through experience.

Over the years, this dish has evolved, with regional variations reflecting local flavors and ingredients. Different cooking methods have influenced how Smothered Chicken is prepared, embracing new techniques while retaining the core essence of the dish. Each variation tells a story of cultural influences and personal twists, demonstrating the versatility and timelessness of this recipe.

Across the United States, Smothered Chicken can differ in how it’s seasoned or paired with sides. Some regions opt for a spicier version complemented with hot sauce, while others might choose to add local vegetables to enrich the dish. These variations showcase the beauty of culinary creativity, where a traditional recipe can adapt to individual tastes and preferences.

Ingredient Deep Dive

Chicken is the star of this dish, providing a rich source of protein and essential nutrients. This ingredient has a long-standing history in Southern cuisine as a go-to for family meals. When selecting chicken, look for cuts that are boneless and skinless for easy cooking and a tender result. Freshness is key; opt for organic or free-range if you can for added flavor and ethical considerations. Store unused chicken in the refrigerator for up to two days, or freeze for longer preservation. If you need substitutes, consider turkey or tofu for a different protein experience.

Rice complements the chicken perfectly, serving as a comforting base. Historically, rice has been a dietary staple across many cultures, rich in carbohydrates and energy. When choosing rice, opt for long-grain varieties for fluffiness or medium-grain for creaminess. Properly store rice in a cool, dry place to maintain its quality, and keep cooked rice in an airtight container in the refrigerator for safety. If you’re exploring substitutions, quinoa or cauliflower rice can be great options for different textures and flavors.

Common Mistakes to Avoid

  • Overcooking the chicken: This will result in dry meat. Use a meat thermometer to ensure it’s properly cooked to 165°F.
  • Undercooking the rice: Ensure your rice is fully cooked before serving. Follow package instructions accurately.
  • Using too much liquid: This can lead to a soupy texture rather than a creamy sauce. Measure carefully.
  • Not letting it simmer long enough: Allow the flavors to meld; a good simmer is key for a rich sauce.
  • Skipping seasoning: Don’t overlook the importance of seasoning at every stage of cooking for depth of flavor.
  • Wrong heat settings: Cooking on too high heat can burn the bottom while leaving the top undercooked.
  • Not resting the chicken: Let the chicken sit after cooking to enhance moisture retention.
  • Ignoring personal preferences: Adjust spice levels to fit your tastes. Experimenting is part of the cooking journey.

Essential Techniques

When cooking Smothered Chicken and Rice, mastering the technique of browning the chicken is crucial. This step is important because it develops deep flavors through the Maillard reaction. Proper browning requires a hot pan and a touch of oil to prevent sticking. Avoid overcrowding the pan as this can lower the temperature and result in steaming rather than browning.

Another essential technique is simmering the sauce. Simmering allows flavors to fully develop and marry, creating a rich, robust sauce. To master this, maintain low to medium heat, and adjust the temperature as needed. Look for small bubbles; a strong boil can break down ingredients improperly, leading to a gritty texture.

Pro Tips for Perfect Smothered Chicken and Rice

First, always sear your chicken before adding liquids for maximum flavor. This is your foundation for a rich sauce and adds color.

Use homemade chicken broth instead of water for cooking the rice; it enhances the overall flavor profile significantly.

Experiment with different herbs and spices; adding a bay leaf or thyme can uplift the aroma and complexity.

Allow the dish to sit after cooking; this resting period lets the flavors deepen and the sauce thicken.

Consider garnishing with fresh herbs like parsley or green onions for a burst of freshness and color.

Use leftovers wisely — transform them into burritos or soups for another meal option.

Don’t rush the simmering process; patience is key to creating a depth of flavor that is truly comforting.

Lastly, adjust the consistency of the sauce by adding more broth or thickening it with a cornstarch slurry, according to your preference.

Variations and Adaptations

Smothered Chicken and Rice can be adapted in numerous ways to fit regional flavors. For instance, in the Southwest, consider adding black beans and corn for a Tex-Mex flair, while in the East, incorporating soy sauce and ginger can create an Asian-inspired dish.

Seasonal adaptations are also easy; using sautéed spring vegetables like asparagus or peas can brighten up the dish in warmer months.

For dietary modifications, low-carb enthusiasts can swap traditional rice with cauliflower rice while keeping the flavor profile intact.

Adding a splash of lemon juice or vinegar can enhance the dish with a zesty undertone, making it a refreshing twist on a classic favorite.

To further play around with flavor, try marinating your chicken in different sauces or spices before cooking. This addition can offer exciting new taste experiences each time you prepare the meal.

Finally, for a crispy finish, broil the dish briefly before serving to give a slight crunch to the chicken coating, offering a delightful contrast to the creamy rice.

Serving and Presentation Guide

When plating Smothered Chicken and Rice, use a large, shallow bowl to showcase the dish beautifully. Create a nest of rice at the bottom, placing the chicken atop and then generously spooning the sauce over. For garnishing, sprinkle fresh chopped parsley to add a fresh color contrast and a hint of flavor.

Traditional accompaniments for this dish may include a side of cornbread or a fresh garden salad, which balances the richness of the chicken and sauce. You may also pair it with seasonal vegetables for a complete meal.

If serving guests, consider using individual bowls to create an intimate dining experience, enhancing presentation while making it easy for everyone to enjoy their portions. Remember to serve this dish hot, ensuring the best flavor and texture.

Portion control is essential; aim for a sensible serving of rice and chicken, allowing room for sides without overwhelming the plate.

Lastly, temperature is key — ensure all components are warm when served to maintain the best sensory experience.

Wine and Beverage Pairing

When selecting a wine to pair with Smothered Chicken and Rice, opt for a full-bodied white wine such as Chardonnay. Its creamy texture complements the richness of the sauce while enhancing the flavors of the chicken.

If you prefer red, a light-bodied Pinot Noir can provide a nice contrast without overpowering the dish’s flavors. Both options can help elevate your dining experience.

For non-alcoholic versions, consider a refreshing iced tea with a hint of lemon, or a fruity sparkling water to cleanse the palate and brighten the meal.

Always serve your wines at the appropriate temperature; whites should be chilled, while reds can be served slightly below room temperature for an optimal experience.

Storage and Shelf Life

Storing Smothered Chicken and Rice correctly helps maintain its delicate flavors. Refrigerate leftovers in an airtight container for up to three days. If you plan to keep it longer, consider freezing in portioned containers that make reheating easier.

When freezing, ensure that it’s cooled down before placing it in freezer-friendly containers to prevent ice crystals. For best texture, aim to consume frozen meals within three months.

Signs of spoilage include undesirable odor or changes in texture. When reheating, do so gradually in the oven or microwave, ensuring that it reaches a safe temperature of 165°F for consumption.

Make Ahead Strategies

To save time, consider prepping your ingredients the day before. Chop vegetables, measure out spices, and marinate the chicken, storing it all in the refrigerator overnight. This approach allows flavors to deepen while reducing cooking time the next day.

You can also cook the rice in advance and store it separately, as reheating it tends to yield better results than cooking it twice.

Additionally, you can assemble the entire dish up to a few hours before serving, allowing it to sit tightly covered in the refrigerator. Just add a few extra minutes for reheating to ensure everything is hot and unified.

When planning your meal, consider that flavors often develop even more beautifully after the dish has had time to rest, making this a perfect candidate for a make-ahead option.

Scaling Instructions

To halve the Smothered Chicken and Rice recipe, simply reduce all ingredients proportionally, ensuring the cooking time remains roughly the same as chicken needs to be cooked thoroughly regardless of the amount.

Doubling or tripling the recipe requires a larger pot or split cooking to maintain even cooking temperatures. Adjust timing slightly to account for the increased mass, as more chicken may take a tad longer to cook through.

When scaling up, ensure even seasoning and taste throughout by mixing thoroughly and possibly sampling before serving.

With larger quantities, storage considerations come into play. Use appropriately sized containers to allow even cooling in the fridge or freezer, and label portions for easy identification when ready to eat later.

Nutritional Deep Dive

A serving of Smothered Chicken and Rice typically provides a balanced macro breakdown of protein, carbohydrates, and healthy fats. The chicken delivers lean protein necessary for muscle repair and growth, making it a staple for any meal plan.

From a micronutrient perspective, each serving contains essential vitamins and minerals, particularly depending on any added vegetables or chosen seasonings. Pay attention to the sodium content from broths or sauces to ensure it fits within your dietary goals.

This meal also offers health benefits through a balanced plate, promoting satiety and energy levels for active lifestyles. Adjust portion sizes to better align with specific dietary needs and meal plans, ensuring that you enjoy the dish without excessive calorie intake.

For those focused on weight management, consider substituting with lower-carb alternatives or utilizing portion control to maintain a healthy balance.

Dietary Adaptations

For gluten-free adaptations, ensure all sauces and seasonings used are free from gluten. Substitute regular rice with quinoa, offering a different flavor profile while keeping it gluten-free.

Dairy-free individuals can swap out any dairy in the recipes with non-dairy alternatives like coconut cream or almond milk, preserving the creaminess while accommodating dietary restrictions.

Vegan versions of Smothered Chicken can be achieved by replacing chicken with tofu or tempeh and utilizing vegetable broth in place of chicken broth for a similar depth of flavor.

For those following low-carb diets, consider using riced cauliflower instead of traditional rice. It provides the same visual appeal while lowering your carb intake significantly.

Those on a keto or paleo diet can also enjoy this dish by making simple modifications, using primal-approved ingredients while ensuring flavor is not compromised.

Troubleshooting Guide

If you find that your chicken is tough, it may be due to overcooking. Ensure accurate timing and perhaps invest in a meat thermometer for consistent results.

For flavor balance issues, adjust seasoning gradually; adding salt, pepper, or acidity like lemon juice can help enhance or cut through the richness of the dish.

In case of temperature problems during cooking, check your heat settings and consider investing in a quality stove thermometer to achieve the correct cooking temperatures.

If ingredient substitutions lead to unexpected results, keep track of what changes you made for future reference and adjustments. Remember, experimenting in the kitchen is part of the fun!

Recipe Success Stories

Many readers have shared their success stories of Smothered Chicken and Rice, noting how the simple recipe has become a favorite in their households. One family mentioned that they have tested various spice combinations and found a winning blend that fits their taste perfectly.

Another reader shared how they transformed this recipe into a dish for a potluck, receiving numerous compliments! They suggested that it reheated wonderfully and that their guests enjoyed the smooth sauce paired with the chicken.

Home cooks frequently adapt it to their families’ preferences, tuning the spice levels, or even introducing new veggies they have on hand, showcasing the versatility of this dish.

Photography tips have emerged from community members who love sharing their experiences, noting that plating and garnishing significantly enhance the dish’s appeal. Their recommendations encourage everyone to get creative when presenting their successful creations.

Frequently Asked Questions

1. Can I use frozen chicken for this recipe?

Yes, you can use frozen chicken; however, ensure you thaw it completely before cooking to guarantee even cooking. This may add some extra time to your prep, so plan accordingly!

2. How can I make this dish spicier?

To amp up the heat, consider incorporating cayenne pepper, hot sauce, or diced jalapeños into the sauce while it simmers.

3. Can I use brown rice instead of white?

Absolutely! Brown rice is a great alternative, though cooking times may vary. Be sure to adjust the liquid and simmer duration as needed.

4. What can I serve with Smothered Chicken and Rice?

This dish pairs wonderfully with cornbread, steamed vegetables, or a fresh, crispy salad to complement the richness of the meal.

5. How do I know when the chicken is cooked?

The chicken should reach an internal temperature of 165°F. Using a meat thermometer is the best way to ensure food safety.

6. What should I do with leftovers?

Store leftover Smothered Chicken and Rice in an airtight container in the refrigerator and enjoy it within three days or freeze it for longer storage.

7. Can I make this dish without rice?

Yes, you can serve the chicken and sauce over mashed potatoes, noodles, or even steamed vegetables to create a delicious alternative.

8. Is this recipe suitable for meal prep?

Absolutely! It stores well and can be easily reheated, making it a fantastic option for nutritious meal prep for busy weeks ahead.

9. Can I add vegetables to the dish?

Definitely! Diced carrots, peas, or bell peppers can easily be added to enhance the nutritional value and flavor. Just make sure to adjust cooking times as necessary.

10. How can I make this recipe healthier?

To make it healthier, consider using skinless chicken, reducing the amount of oil, and incorporating more vegetables into the dish.

Additional Resources

For more delightful recipes, check out similar comfort food options like Chicken and Dumplings or Beef Stroganoff. Explore our technique guides for mastering cooking methods such as sautéing and simmering, ensuring that you create fantastic meals efficiently. Ingredient information is also available for ensuring quality choices when shopping handy. Don’t forget to check out our equipment recommendations, which can make cooking even more enjoyable. Additionally, explore seasonal variations to keep the menu fresh and exciting!

Join the Conversation

We invite you to share your experiences, tips, and adaptations of Smothered Chicken and Rice on our social media platforms! Connecting with fellow foodies allows for exchange of photography tips, recipe reviews, and the discovery of new variations that continue to enhance this classic dish. Join our community and celebrate the love of home cooking!

The Recipe

Smothered Chicken and Rice

Serves: 4

Prep Time: 15 mins

Cook Time: 40 mins

Total Time: 55 mins

Kitchen Equipment Needed

  • Large pot or Dutch oven
  • Wooden spoon or spatula
  • Meat thermometer
  • Measuring cups and spoons
  • Cutting board and knife

Ingredients

  • 4 boneless, skinless chicken breasts
  • 1 cup long-grain white rice
  • 2 cups chicken broth
  • 1 medium onion, diced
  • 2 cloves garlic, minced
  • 2 tablespoons olive oil
  • Salt and pepper to taste
  • 1 teaspoon paprika
  • 1 teaspoon dried thyme
  • 1 cup heavy cream (or coconut milk for dairy-free)

Directions

  1. In a large pot, heat olive oil over medium heat. Season chicken breasts with salt, pepper, and paprika. Sear chicken until golden brown on both sides, about 5 minutes per side. Remove from pot and set aside.
  2. In the same pot, add diced onion and garlic. Sauté until translucent, about 3-4 minutes.
  3. Add rice, chicken broth, thyme, and heavy cream to the pot. Stir to combine.
  4. Return the seared chicken to the pot, cover, and bring to a simmer. Reduce heat to low and cook until chicken is fully cooked and rice is tender, about 25-30 minutes.
  5. Remove from heat and let it sit for 5 minutes before serving. Fluff the rice with a fork and serve hot.

Recipe Notes

  • Feel free to add your favorite vegetables to the dish for enhanced flavor and nutrition.
  • Store leftovers in the refrigerator for up to three days.
  • This dish can be frozen; ensure it’s cooled before storing in airtight containers.