Easy Hot and Sour Soup Recipe (Ready in 30 Minutes)

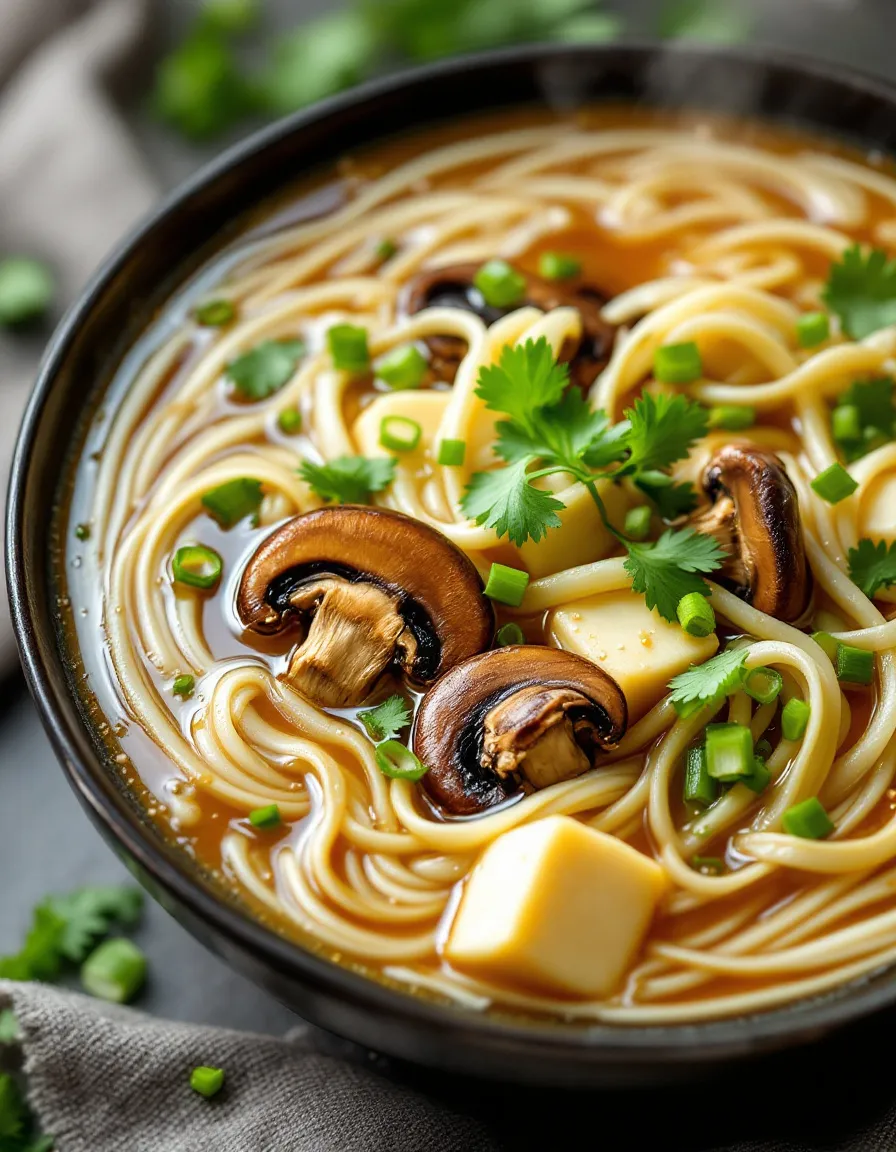
Hot and Sour Soup: A Flavorful Asian Delight

⚖️
Difficulty
Medium

⏲️
Prep Time
15 mins

🕒
Cook Time
20 mins

⏱️
Total Time
35 mins

🍽️
Servings
4

Hot and Sour Soup is a popular dish known for its unique blend of flavors and comforting warmth. This delicious soup captures the essence of traditional Asian cooking, combining the heat of white pepper with the tanginess of vinegar. Each spoonful bursts with richness while offering a delightful contrast of textures, thanks to the silky mushrooms and crunchy bamboo shoots. Perfect for chilly evenings, this soup is both nourishing and satisfying, making it an essential addition to any meal.

As you prepare Hot and Sour Soup, the aroma of garlic, ginger, and soy sauce fills the kitchen, inviting everyone to gather around the table. The balance of heat and sourness is not just a flavor but an experience that evokes comfort and nostalgia. This soup doesn’t just fill your stomach; it warms your soul.

Quick Recipe Highlights

  • Flavor Profile: This soup marries heat and acidity with earthy notes from mushrooms, resulting in a complex yet harmonious taste.
  • Texture: The soup offers a delightful blend of silky broth, soft tofu, and the crunch of bamboo shoots, creating a satisfying mouthfeel.
  • Aroma: The fragrant combination of garlic, ginger, and soy sauce enhances the soup’s warm and inviting aroma.
  • Visual Appeal: The vibrant colors from scallions and red pepper flakes make this soup visually stunning.
  • Skill Level Needed: While the recipe is accessible, it requires attention to timing to achieve the perfect flavor balance.
  • Special Equipment: A sharp knife and a good-quality pot are essential to prepare this delightful dish efficiently.

Recipe Overview

  • Difficulty Level: Medium—The recipe involves multiple cooking techniques, which could be a great learning opportunity for novice cooks.
  • Category: Perfect as an appetizer or a light meal, it suits casual dinner parties or quick family dinners.
  • Cuisine: Hot and Sour Soup originates from Chinese culinary traditions, reflecting the country’s rich history of balance in flavors.
  • Cost: This recipe is budget-friendly, utilizing easily sourced ingredients that won’t break the bank.
  • Season: Enjoy this soup year-round; however, it’s particularly comforting during cold months.
  • Occasion: This dish is perfect for family gatherings, lunch dates, or as a starter for festive celebrations.

Why You’ll Love This Recipe

Hot and Sour Soup ticks all the boxes when it comes to taste and texture. The spicy, tangy broth is invigorating, awakening the senses and making each bite feel indulgent. The tender tofu and crunchy vegetables provide contrast, making it a deliciously comforting dish. Whether you’re feeling under the weather or just need something cozy, this soup is sure to please.

The convenience of preparing Hot and Sour Soup is another reason to love it. With a prep time of just 15 minutes, you can easily whip it up on busy weeknights, making it an accessible option for anyone struggling to find time for home-cooked meals. Plus, the ingredients are often pantry staples, so you can prepare this dish with little notice.

Nutritionally, this soup offers a balance of flavors and ingredients. The mushrooms contribute fiber and can benefit heart health, while bamboo shoots are low in calories yet high in nutrients. Tofu provides a plant-based source of protein and is suitable for different dietary preferences, making it a wholesome option for various eaters.

Hot and Sour Soup also holds social and entertaining value. Ideal for sharing, it easily serves multiple guests, allowing everyone to dig into a communal bowl. Preparing this dish can become a ritual in your household, creating memorable moments of laughter and togetherness.

Finally, consider the cost-effectiveness of this recipe. With inexpensive ingredients that can be bought in bulk, you’ll find that making Hot and Sour Soup can feed a crowd without stretching your budget too much. It’s a delicious way to keep both your appetites and wallets happy.

Historical Background and Cultural Significance

The origins of Hot and Sour Soup can be traced back to China’s Sichuan province, known for its bold flavors and prolific pepper usage. Traditionally, this dish was eaten for health benefits, believed to balance the body’s energies through the warmth of peppers and the sourness of vinegar. Its early forms were simple, relying on local ingredients, which have evolved into the flavorful concoction we enjoy today.

Culturally, Hot and Sour Soup holds a special place in Chinese cuisine. It symbolizes warmth and comfort, often served during family gatherings and festive occasions. It showcases the culinary philosophy of yin and yang, where the spicy and sour elements balance each other perfectly, embodying harmony within the meal.

The evolution of Hot and Sour Soup is fascinating, as it has seen numerous adaptations over the years. Each region in China has its own spin on the recipe, incorporating local ingredients and flavors. For example, in Northern China, the soup may lean towards a thicker consistency with more starch, while Southern variations are lighter and brisker.

Regional variations add depth to the significance of this dish, reflecting the culinary diversity within China. As it gains popularity globally, many chefs and home cooks outside of China have embraced its unique flavors, creating adaptations that suit local tastes while maintaining core elements of the original recipe.

Ingredient Deep Dive

– **Tofu**: A staple in Asian cuisine, tofu is praised for its high protein content and versatility. It serves as a canvas for flavors, readily absorbing the soup’s spices. When choosing tofu, look for firm blocks with a smooth texture, and store unused portions in water in the fridge. Tofu can be substituted with chicken or additional vegetables for a non-vegetarian twist.

– **Mushrooms**: Often used for their umami flavor, mushrooms not only elevate the taste but also enhance nutritional value. Whether using shiitake or button mushrooms, fresh ones with a firm texture are preferable. Store them in a paper bag in the fridge for longevity. Dried mushrooms can be rehydrated and used for a more intense flavor.

– **Bamboo Shoots**: This unique vegetable adds crunch and slight sweetness to the soup. Choose fresh bamboo shoots if available, as canned varieties may have added preservatives. Proper storage involves keeping them submerged in water if opened and refrigerated. They can be substituted with shredded carrots or sliced water chestnuts.

– **Soy Sauce and Vinegar**: These ingredients are essential in creating the soup’s defining flavor profile. Opt for high-quality soy sauce for the best taste. While any vinegar can work, Chinese black vinegar offers the most authentic flavor. Both soy sauce and vinegar need to be stored in a cool, dark place to maintain freshness.

– **Spices**: White pepper and garlic are critical for aromatics. They not only enhance the flavor but also contribute potential health benefits. When purchasing spices, opt for whole forms and grind them as needed for maximum freshness. Keep spices in airtight containers away from heat and light.

Common Mistakes to Avoid

  • Overcooking the tofu can lead to a spongy texture; add it towards the end of the cooking process.
  • Using too much vinegar can overpower the soup; start with less and adjust to taste.
  • Neglecting to balance flavors will result in a flat dish; taste and adjust seasoning throughout cooking.
  • Adding all ingredients at once can affect cooking times; layer them according to required cooking times.
  • Using old spices can dull the soup’s flavor; always check the freshness of your spices before use.
  • Not simmering the broth long enough won’t develop deep flavors; allow it to simmer for the recommended time.
  • Skipping the garnishing step can make the dish less visually appealing; add chopped scallions for freshness.
  • Storing leftovers improperly can lead to spoilage; use airtight containers in the fridge.
  • Rushing the prep work can diminish the overall flavor; take your time to chop and measure ingredients accurately.
  • Failing to use high-quality ingredients can impact the final dish; source fresh and authentic items when possible.

Essential Techniques

– **Proper Broth Preparation**: A well-made broth is the backbone of Hot and Sour Soup. Start by combining water, soy sauce, and spices in a pot. Simmer gently, allowing flavors to meld. Visual cue: Look for a slight cloudiness indicating flavor has developed.

– **Perfecting Tofu Texture**: Tofu should be added just before serving to prevent overcooking. For a firmer texture, press tofu to remove excess moisture. Visual cue: Properly cooked tofu should appear slightly golden and not soggy.

– **Balancing Flavors**: Taste is subjective—balance heat and sourness according to your preference. Adjust by adding vinegar for more tang or pepper for spice. Visual cue: A harmonious soup should have a well-rounded flavor without one element overpowering another.

Pro Tips for Perfect Hot and Sour Soup

– Use fresh ingredients for the best flavor—opt for seasonal vegetables when possible.
– Adjust the spice level according to personal preference; add chili oil for an extra kick.
– Prepare the soup in larger batches and freeze for quick weeknight meals.
– Experiment with different mushrooms to discover unique flavor profiles—try enoki or oyster mushrooms.
– Make sure to serve the soup hot to experience its full aromatic potential.
– Garnish generously with scallions and a sprinkle of white pepper for a fresh finish.

Variations and Adaptations

Regional variations of Hot and Sour Soup can introduce exciting twists. In some areas, seafood is added for a richer flavor, incorporating shrimp or crab. Seasonally, adding fresh vegetables like snow peas can enhance the texture and color of your soup. If dietary restrictions arise, consider substituting regular soy sauce with a gluten-free brand. Additionally, spice blends can be altered, using sriracha or chili garlic sauce for a different heat profile. If you prefer a creamier texture, blending some of the soup before serving can provide a comforting mouthfeel. Finally, exploring various garnishes such as cilantro or even fried shallots can elevate the experience.

Serving and Presentation Guide

To present Hot and Sour Soup appealingly, consider using bowls that showcase the vibrant colors of the dish. Serve family-style, allowing guests to help themselves or as individual portions topped with fresh herbs. Garnishing with scallions and a drizzle of sesame oil can enhance both flavor and visual interest. For an authentic experience, pair the soup with traditional Asian accompaniments like steamed dumplings or spring rolls. Temperature is essential; ensure the soup is piping hot upon serving for maximum enjoyment. Set a portion control approach by offering smaller bowls, allowing guests to enjoy multiple flavors throughout the meal.

Wine and Beverage Pairing

When pairing beverages with Hot and Sour Soup, a light white wine such as Sauvignon Blanc complements its flavors beautifully, providing a refreshing contrast. For non-alcoholic options, try a chilled jasmine tea; its floral notes enhance the aromatic aspects of the soup. A simple soda or sparkling water can also cleanse the palate between bites. If coffee or tea is preferred, a green tea with delicate flavors serves as an ideal choice. Regardless of the pairing, ensure drinks are served chilled or at room temperature to balance the warmth of the soup effectively.

Storage and Shelf Life

To maximize the shelf life of Hot and Sour Soup, store any leftovers in airtight containers in the refrigerator. This can keep the soup fresh for up to three days. When reheating, do so on the stove for an even temperature throughout; avoid microwaving as it can change the texture. If you need to store the soup for longer, consider freezing it in portion-sized containers for up to three months. Keep an eye out for signs of spoilage, such as off odors or changes in texture, which may indicate it’s time to discard the soup. Label your containers with dates for easy tracking.

Make Ahead Strategies

To ensure an easy night of meal preparation, utilizing make-ahead strategies can be a game changer. You can chop the vegetables and tofu the day before, keeping them stored in the fridge. Broth can also be pre-made and refrigerated, saving time on cooking day. When you’re ready to assemble, all that’s needed is to bring the broth to a simmer and add your prepared ingredients. If you plan to freeze portions, consider leaving out the tofu beforehand, as its texture can change once frozen. Reheat gently and add fresh ingredients directly before serving for the best quality.

Scaling Instructions

Scaling Hot and Sour Soup is easy: to halve the recipe, simply divide all ingredients by two, ensuring spices remain balanced. For larger gatherings, doubling or tripling the recipe can be done; however, you may need to adjust cooking times accordingly. When preparing larger quantities, opt for a bigger pot to accommodate all ingredients without overcrowding. Be mindful of storing in batches, as soup expands when frozen. Always taste during cooking, as the flavor concentration may vary when increasing quantities—adjust as necessary, ensuring a consistently delicious product.

Nutritional Deep Dive

Hot and Sour Soup provides a balanced macro breakdown, contributing healthy proteins from tofu while remaining low in calories. The inclusion of vegetables enhances micronutrient content, adding fiber, vitamins, and minerals. The freshness of ingredients aids digestion and boosts overall health, making it a wise addition to any meal. Ideal for weight management, the soup’s high fiber and protein content can help with satiety, ensuring you feel full without going overboard. Be cautious about sodium levels; use low-sodium soy sauce to create a healthier dish without compromising flavor.

Dietary Adaptations

Hot and Sour Soup can easily accommodate various dietary preferences. For gluten-free individuals, opt for gluten-free soy sauce as a substitute. A dairy-free version is naturally achievable since the core recipe is without dairy ingredients. Vegans can enjoy this dish by ensuring that all components, including sauces, are plant-based. Low-carb and keto diets benefit from increasing low-carb vegetables while reducing starches. Paleo enthusiasts can swap tofu for chicken or shrimp, and opting for a brothy base meets dietary requirements. Low-FODMAP variations can be adjusted by excluding garlic and using suitable vegetable substitutes.

Troubleshooting Guide

Texture issues often arise from overcooked tofu or vegetables, compromising the quality of the soup. Adjust cooking times carefully, adding softer ingredients last. If the flavor feels off, consider rebalancing with additional vinegar for sourness or pepper for heat. Temperature problems can be easily solved—simmer the soup until hot, ensuring no cold spots. Equipment challenges may arise from inadequate pots; a sturdy pot that distributes heat evenly is crucial. For common ingredient substitutions, consult versatile alternatives like vegetable broth for a lighter taste or miso for depth. Timing concerns should be closely monitored, as egg should not be added until the last moment.

Recipe Success Stories

Community engagement around Hot and Sour Soup has resulted in many success stories. Home cooks have shared their delightful improvisations, including unique ingredient substitutions that transformed the dish. Shared photographs have showcased personal touches, like vibrant garnishes and varying representations in family meals. Suggestions from readers have enriched base recipes, leading to an evolving conversation about flavor exploration. Through these interactions, the soup becomes not just a meal but a shared experience that brings people together, encouraging the sharing of culture and recipes in a modern context.

Frequently Asked Questions

Can I make Hot and Sour Soup vegetarian?

Absolutely! Hot and Sour Soup can be entirely vegetarian or vegan by using vegetable broth and omitting any meat. Tofu acts as a great protein source, making it fulfilling.

How spicy is Hot and Sour Soup?

The spice level can be adjusted to your preference. Traditional recipes use white pepper for heat, but you can add more or less depending on your taste. Start with less and gradually add for desired heat.

How do I store leftovers?

Store any leftovers in airtight containers in the fridge for up to three days. For longer storage, consider freezing portions for future meals. Always reheat gently on the stove for the best quality.

Is it possible to make Hot and Sour Soup ahead of time?

Yes, you can prepare the broth and chop the vegetables in advance. Store them separately in the fridge, and combine before serving for maximum freshness.

What are some good sides to serve with Hot and Sour Soup?

This soup pairs well with steamed dumplings, spring rolls, or a simple rice dish, making for a complete meal experience.

Can I use frozen vegetables?

While fresh vegetables are preferred for texture, frozen vegetables can work in a pinch. Add them towards the end of cooking to avoid overcooking.

Can I adjust the sourness?

Yes, the sourness can be tailored to the individual’s taste. Add rice vinegar gradually while tasting until you achieve your preferred tartness.

What type of mushrooms work best?

Shiitake mushrooms add substantial flavor, but you can mix in other types, such as button or oyster mushrooms, for a varied texture and taste.

How do I thicken Hot and Sour Soup?

To thicken the soup, mix a small amount of cornstarch with cold water and stir it into the boiling soup until it reaches the desired consistency.

Can I make Hot and Sour Soup gluten-free?

Yes, simply replace regular soy sauce with gluten-free soy sauce or tamari, and ensure other ingredients do not contain gluten.

Additional Resources

For those interested in expanding their culinary repertoire, consider exploring related recipes featuring traditional Asian fare. Techniques for perfecting homemade dumplings or stir-fries can enhance your overall cooking skills. Ingredient information can deepen your understanding of flavor profiles in Asian cuisine, while kitchen equipment recommendations can streamline your processes. Seasonal variations to consider include light summer options, steering towards fresh produce while still honoring the classic soup essence.

Join the Conversation

We invite you to share your experiences with Hot and Sour Soup on social media! Tag your photos with unique variations and garnishes, and engage with the community by sharing tips and insights. Your experiences will provide valuable perspective and inspire others to try this delightful recipe. Together, we can create a vibrant cooking community that celebrates culture, creativity, and the joy of food.

The Recipe

Hot and Sour Soup

Serves: 4

Prep Time: 15 mins

Cook Time: 20 mins

Total Time: 35 mins

Kitchen Equipment Needed

  • Sharp knife
  • Cutting board
  • Large pot
  • Measuring cups and spoons
  • Wooden spoon for stirring

Ingredients

  • 1 cup mushrooms, sliced
  • 1 cup bamboo shoots, sliced
  • 1 block firm tofu, cubed
  • 4 cups vegetable or chicken broth
  • 2 tablespoons soy sauce
  • 3 tablespoons rice vinegar
  • 1 teaspoon white pepper
  • 2 cloves garlic, minced
  • 1 teaspoon cornstarch mixed with 2 tablespoons water (for thickening)
  • 2 scallions, chopped (for garnish)

Directions

  1. In a large pot, combine the broth, mushrooms, bamboo shoots, and garlic over medium heat. Bring to a gentle boil.
  2. Add the soy sauce, vinegar, and white pepper. Taste and adjust seasoning as necessary.
  3. Stir in the cubed tofu and allow to simmer for another 5 minutes.
  4. To thicken the soup, slowly stir in the cornstarch mixture until the desired consistency is achieved.
  5. Remove from heat and garnish with chopped scallions before serving.

Recipe Notes

  • Feel free to add more vegetables like bell peppers or carrots for extra nutrition.
  • Adjust spice levels kick by adding more white pepper or a pinch of chili flakes.
  • Vegetarian and gluten-free options can be easily made with the right substitutions.

Ultimate Spicy Chicken Sandwich with Creamy Sauce

Spicy Chicken Sandwich: A Flavor Explosion Between Two Buns

⚖️
Difficulty
Easy

⏲️
Prep Time
15 mins

🕒
Cook Time
10 mins

⏱️
Total Time
25 mins

🍽️
Servings
4

Are you ready to experience a spicy chicken sandwich that will tantalize your taste buds and add excitement to your lunch or dinner? This delightful recipe merges crispy fried chicken with a zesty sauce that offers the perfect blend of heat and flavor. The texture of the chicken combined with the crunch from fresh toppings makes every bite a savory delight. Whether you’re hosting a casual gathering or just craving a delicious meal, this spicy chicken sandwich will not disappoint.

As you take your first bite, you’ll be greeted with the mouthwatering aroma of spices and herbs. The succulent chicken is enveloped in a crispy golden coating, delivering an irresistible crunch. With every bite, enjoy the vivid flavors crafted from a blend of spices, sauces, and crunchy vegetables that elevate this sandwich beyond the ordinary. With its stunning presentation and colorful fillings, this spicy chicken sandwich is not only satisfying but also visually appealing.

Quick Recipe Highlights

  • Flavor Profile: The sandwich boasts a bold spiciness complemented by savory notes from the marinade and the rich creaminess of the sauce.
  • Texture: Expect a delectable crunch from the fried chicken, paired with the crispness of fresh vegetables.
  • Aroma: The fragrant scent of spices fills the air, inviting everyone to the table.
  • Visual Appeal: Vibrant colors from various toppings create a stunning visual experience.
  • Skill Level Needed: This recipe requires basic cooking skills, making it perfect for beginners and experienced cooks alike.
  • Special Equipment: A frying pan or deep fryer is essential for achieving perfectly crispy chicken.

Recipe Overview

  • Difficulty Level: This spicy chicken sandwich recipe is easy to follow with approachable techniques suitable for all cooks.
  • Category: It falls under the sandwich meal category, perfect for lunch or a quick dinner.
  • Cuisine: This dish showcases influences from Southern fried chicken traditions, blended with popular fast-food flavors.
  • Cost: The affordability of ingredients makes it a cost-effective meal option.
  • Season: This sandwich is ideal for year-round enjoyment, with a slight preference for warmer months when cravings for outdoor dining arise.
  • Occasion: Perfect for casual get-togethers, game days, or a cozy weeknight meal.

Why You’ll Love This Recipe

The taste and texture of this spicy chicken sandwich are sure to leave an impression. The bold flavors meld together perfectly, offering a delightful burst of spice that is balanced by the smoothness of the sauce. The crispy coating on the chicken adds a satisfying crunch, making each bite a delightful experience. This sandwich is not just about taste; it’s about how the flavors come together to create a comforting meal.

Convenience plays a significant role in loving this recipe. With quick prep and cook times, you can whip up this spicy chicken sandwich in under 30 minutes, making it a go-to option for busy weeknights or spontaneous gatherings. This simplicity allows anyone to enjoy homemade goodness without stressing over complex cooking methods.

From a nutritional perspective, this sandwich offers several advantages. The chicken provides a hearty source of protein, while the fresh toppings contribute vitamins and minerals essential for a balanced diet. Adjusting the sauce and breading can help tailor the sandwich’s health profile to meet dietary needs.

Sociable meals often bring people together, and this spicy chicken sandwich is no exception. Sharing plates creates a festive atmosphere, making it perfect for gatherings with friends and family. The ease of having a casual sandwich encourages fun conversations and joyful connections around the dining table.

Cost-effectiveness is another reason to love this spicy chicken sandwich. Ingredients are readily available and budget-friendly, allowing you to serve a flavorful meal without breaking the bank. Whether feeding a family or entertaining guests, this recipe proves that delicious doesn’t have to mean expensive.

Historical Background and Cultural Significance

The origins of the spicy chicken sandwich can be traced back to regional southern cuisine, where fried chicken gained popularity as a beloved staple. Over the years, various interpretations have emerged, influencing the modern fast-food versions we know today. This sandwich has evolved to incorporate different flavors and cooking methods, resonating with diverse cultural backgrounds.

In Southern heritage, fried chicken symbolizes comfort and abundance, often served at gatherings or festive occasions. The spicy chicken sandwich’s rise in popularity illustrates its cultural significance, bridging culinary traditions with modern preferences for zesty flavors in fast food.

The evolution of the spicy chicken sandwich has welcomed innovations. From homemade variations featuring specialized spice blends to restaurant offerings with their unique twist, this dish continues to adapt while maintaining its foundational roots. The transformation of this recipe highlights people’s aspiration to merge traditional recipes with contemporary tastes.

Regional variations of the spicy chicken sandwich reflect local spices and ingredients. For instance, some recipes introduce regional sauces that enhance the flavor profile, while others add specific toppings reflecting their culinary landscape. This diversity contributes to the overall popularity and versatility of the spicy chicken sandwich across the United States.

Ingredient Deep Dive

Chicken: Chicken is the star ingredient in this recipe. Its versatility allows for various preparations, making it a global favorite. Rich in protein, it supports muscle development and provides essential amino acids. Choose well-sourced chicken breasts or thighs for optimal flavor.

When selecting chicken, look for fresh cuts with no visible blemishes or discoloration. Store in the coldest part of your refrigerator and consume within a few days to ensure freshness. If necessary, chicken can be frozen but should be thawed safely before cooking.

Breading: The breading forms the crunchy outside of the spicy chicken. Commonly made from flour, seasonings, and sometimes breadcrumbs, the breading is essential for texture. This layer is not only delicious but acts as a barrier to retain moisture within the chicken.

To achieve the perfect breading, ensure your chicken is dry before applying and consider double dipping for a thicker coat. Keep breadcrumbs stored in an airtight container to prolong freshness and prevent staleness.

Spices and Seasonings: The blend of spices provides the sandwich’s distinctive kick. Common choices include paprika, cayenne pepper, garlic powder, and black pepper. Each element contributes to the overall flavor profile and ability to create a memorable meal.

When selecting spices, consider freshness for maximum flavor. Store them in a cool, dark place and check expiry dates regularly to ensure potency. If you’re short on certain spices, don’t hesitate to explore other options or create your unique mix.

Common Mistakes to Avoid

  • Inadequate seasoning: Not seasoning the chicken properly can lead to blandness; ensure to be generous with spices.
  • Soggy breading: Not letting the chicken rest before frying can make the breading soggy; always allow it to adhere.
  • Using cold oil: Starting with cold oil can result in greasy chicken; heat the oil thoroughly before frying.
  • Overcrowding the pan: Frying too many pieces can lower the oil temperature, preventing crispiness; cook in batches instead.
  • Under or overcooking: Failing to check chicken doneness can lead to dry or unsafe chicken; always use a meat thermometer.
  • Ignoring resting time: Skipping the resting period post-cooking can compromise flavor; allow the chicken to rest for juiciness.
  • Not using fresh ingredients: Outdated or stale ingredients can negatively affect taste; always prioritize freshness.
  • Inappropriate storage: Improper storage of leftovers can lead to spoilage; ensure to refrigerate promptly and store in airtight containers.

Essential Techniques

Frying: Frying is key to achieving a perfect spicy chicken sandwich. Mastering this technique involves controlling oil temperature and timing for even cooking. To excel, maintain consistent heat and avoid overcrowding the pan for optimal results.

Marinating: Marinating chicken enhances flavor and tenderness. It’s important to allow the chicken enough time to absorb the marinade, leading to a mouthwatering end product. Common pitfalls include inadequate marinating time and using a diluted marinade.

Pro Tips for Perfect Spicy Chicken Sandwich

1. Consider using buttermilk or yogurt for marinating the chicken to ensure it’s moist and flavorful.

2. Experiment with different spice blends to customize the heat level and flavor profile that suits your preference.

3. For less mess, try baking the chicken instead of frying it for a healthier option without losing flavor.

4. Ensure your frying oil is clean and of the appropriate type for frying, like vegetable or canola oil.

5. Let the fried chicken rest on paper towels after frying to soak up excess oil, ensuring a perfect crunch.

6. Use fresh produce for toppings like lettuce and tomatoes to enhance texture and flavor.

7. Toast the sandwich buns lightly to create a barrier against moisture and add a delightful crunch.

8. Assemble the sandwich just before serving to maintain the crispness of the chicken.

Variations and Adaptations

Regional variations can add unique twists to the spicy chicken sandwich. For example, some areas may incorporate local spices like Cajun seasonings or a vinegar-based sauce for additional kick.

Seasonal adaptations can also heighten the sandwich’s appeal—consider adding grilled vegetables in summer or earthy greens in the cooler months to amplify freshness and nutrition.

For those with dietary restrictions, modifications can be made. Substitute with gluten-free bread or use a vegan chicken alternative for a delicious plant-based version.

You can also experiment with flavor variations, such as incorporating different cheeses or pickles to amp up the flavor complexity.

Texture modifications such as using a soft brioche bun versus a crusty roll can change the entire experience of the sandwich, allowing you to customize it per your mood.

Lastly, presentation alternatives can include cutting the sandwich in half and serving it on a slate board with sides of dipping sauces.

Serving and Presentation Guide

When plating your spicy chicken sandwich, consider stacking ingredients for height and visual interest. Drizzling sauces or sprinkling herbs can further enhance the dish’s appearance, drawing attention to vibrant colors.

Garnishing ideas may include a sprig of parsley or a slice of pickle on the side, offering an appealing contrast to the spicy elements. Traditional accompaniments like potato chips or coleslaw add classic comfort to the meal.

Modern serving suggestions could involve including a small ramekin of sauce for dipping. Always ensure the sandwich is served warm for the best flavor and taste experience.

Temperature considerations are important; ensure the fried chicken is hot yet safe to eat when serving to maintain a balance between flavor and safety.

Portion control tips involve considering the sandwich’s size when serving; cut into halves for smaller appetites or serve alongside lighter sides for a complete meal.

Wine and Beverage Pairing

Pairing wine with a spicy chicken sandwich offers an opportunity to balance flavors. A chilled Sauvignon Blanc can refresh the palate while complementing the heat of the spices effectively.

For non-alcoholic alternatives, iced tea with a twist of lemon or sparkling water with lime can provide a refreshing balance to the rich flavors of the sandwich.

Consider coffee or tea pairings as well—brewed chai can resonate with the spices, while a smooth cold brew can contrast beautifully with the sandwich’s rich coating.

Temperature considerations for beverages can enhance the overall experience—always serve iced beverages cold for a refreshing counterpoint to the warm sandwich.

Serving suggestions may include offering a variety of drink options to satisfy varied preferences at your table, enhancing the meal experience.

Storage and Shelf Life

When storing leftover spicy chicken sandwiches, wrap them tightly in aluminum foil or place them in an airtight container. Refrigeration is key, allowing them to last for 3-4 days safely.

Maintain appropriate temperature requirements during storage, ideally keeping the refrigerator at 40°F (4°C) or below to preserve freshness and prevent spoilage.

Consider using glass or BPA-free plastic containers for optimal storage, ensuring no residual odors will transfer to your chicken.

Signs of spoilage can include unusual smells or mold—always perform a visual and olfactory check before consuming leftovers.

Reheating instructions suggest using an oven or air fryer to maintain crispiness; microwaving may result in a soggy texture, so use caution.

When freezing leftovers, allow the dish to cool completely before wrapping to avoid freezer burn, and consume frozen leftovers within 2-3 months for best quality.

Make Ahead Strategies

Creating a prep timeline can dramatically increase efficiency—consider marinating chicken the night before to deepen the flavor.

Proper storage between steps is crucial; keep breading separate from the chicken until right before cooking to retain crispness.

Assessing the quality impact of pre-preparation can lead to a better-tasting dish when coordinated correctly. Balance is key—ensure seasoning is adequate when preparing ingredients ahead of time.

Assembling before guests arrive allows you to enjoy the social aspect without being trapped in the kitchen during the gathering.

Fresh element additions like crisp lettuce or ripe tomatoes can be prepared just before serving to ensure freshness and color in the sandwich.

Scaling Instructions

To halve the recipe, simply reduce all ingredient amounts by half while following the same preparation steps for success.

Doubling or tripling the recipe involves considering larger pots or trays for frying, and be mindful of adjusting cooking times accordingly to ensure even cooking.

Equipment adjustments may be necessary for larger quantities; a heavy-duty frying pan could be preferred to manage heat and frying efficiently.

Timing modifications can greatly impact results; ensure each batch of chicken is fried properly to retain quality, even when increasing the total amount of chicken.

Storage considerations become essential; consider how large quantities fit into your refrigerator or freezer carefully.

Nutritional Deep Dive

The macro breakdown of the spicy chicken sandwich typically highlights significant protein content from the chicken, essential for muscle repair and energy. Balancing this with carbohydrates, particularly from the bread, aids in sustaining energy levels.

The micronutrient analysis reveals that the assortment of vegetables adds essential vitamins and minerals, further enhancing the nutritional profile of the meal.

Health benefits of this recipe can be numerous, particularly when prepared with skinless chicken and whole-grain bread, lowering saturated fat and increasing fiber.

Dietary considerations should prompt one to recognize individual requirements; balancing spice levels and sauce ingredients can cater to various dietary preferences.

Portion analysis allows for awareness of nutritional intake, ensuring favorites can align with personal health goals.

For weight management tips, consider smaller portion sizes or pairing with lighter sides for a satisfying yet mindful meal experience.

Dietary Adaptations

For those following a gluten-free diet, substitute traditional bread with gluten-free buns or lettuce wraps, ensuring the rest of the ingredients meet the same standard.

Dairy-free adaptations can include using non-dairy milk for marinating chicken, as well as plant-based sauces to maintain flavor and richness.

Vegan modifications can involve substituting chicken with crispy tofu or tempeh seasoned with similar spices to capture the essence of the sandwich.

Low-carb versions could use cloud bread or lettuce leaves instead of traditional bread, allowing for a keto-friendly option without sacrificing flavor.

Keto dieters can keep their meals low in carbs while maintaining flavors by focusing on low-carb sauces and substitutions for typical bread components.

Paleo enthusiasts will appreciate using almond flour for breading and focusing on all-natural, unprocessed sauces, remaining aligned with dietary preferences.

Low-FODMAP adaptations can involve choosing certified low-FODMAP ingredients, ensuring meal enjoyment without digestive concerns for sensitive individuals.

Troubleshooting Guide

Texture issues may arise if the chicken is not marinated long enough; ensure you allow time for flavors to penetrate the meat adequately.

Flavor balance can be tricky; if too spicy, consider adding a cool sauce or serving with a mild side to cut through the heat effectively.

Temperature problems could stem from incorrectly heated oil; use a thermometer to confirm readiness before frying.

Equipment challenges may occur if using inadequate cookware; choosing the right frying setup can greatly affect the outcome.

Ingredient substitutions should be approached carefully; ensure that replacements maintain a similar flavor profile to avoid noticeable differences.

Timing concerns can arise when preparing multiple items; prioritize chicken preparation to allow for proper cooking without overcooking other components.

Recipe Success Stories

The community is abuzz with feedback from those who’ve tried this spicy chicken sandwich, often highlighting its satisfying heat and flavor. Many have expressed their delight at the recipe’s simplicity and flavor impact.

Variation successes often come from creative interpretations of the recipe, with readers sharing their personalized spice blends, offering new twists on the classic sandwich.

Adaptation stories reflect the versatility of the recipe, with families creating their own versions to cater to dietary needs while maintaining deliciousness.

Readers often suggest practical tips, from ways to enhance the cooking process to garnishing ideas that make the sandwich visually stunning as well as delicious.

Frequently Asked Questions

Can I bake the chicken instead of frying it? Yes, you can bake the chicken for a healthier option. Preheat your oven to 400°F (200°C), place the breaded chicken on a lined baking sheet, and bake for 20-25 minutes, flipping halfway through.

What type of bread works best? A soft brioche or hamburger bun works well for a spicy chicken sandwich, providing a pleasant contrast to the crunchy chicken while being sturdy enough to hold all the toppings.

How can I reduce the spice level? To lower the heat, you can use a milder hot sauce in the marinade or incorporate sweet toppings like pickles or slaw to balance the flavors.

Can I make the chicken ahead of time? Yes, you can marinate the chicken a day in advance and coat it with breading when you’re ready to cook.

What sauces pair well with the sandwich? Creamy sauces like ranch or blue cheese dressing can complement the heat nicely, contrasting with the spicy flavors.

How do I know when the chicken is cooked? Ensure the internal temperature reaches 165°F (75°C) for safety; use a meat thermometer for accuracy.

How can I make the sandwich gluten-free? Substitute regular bread with gluten-free buns or lettuce wraps, and ensure all sauces and seasonings are gluten-free.

Can I freeze leftover sandwiches? Yes, wrap them tightly in foil or store them in airtight containers. They can be frozen for up to three months.

What toppings can I add? Common toppings include lettuce, tomato, onions, and pickles. Feel free to get creative with cheese or avocado!

Is this sandwich suitable for meal prep? Absolutely! Prepare the chicken ahead of time and store it separately from the bread and toppings until ready to assemble.

Additional Resources

Explore related recipes such as crispy fish sandwiches or vegetarian burgers for more delicious options. Technique guides highlighting frying, grilling, or marinating can enhance your cooking skills.

Ingredient information about key components like spices and bread options can provide further insights into recipe modifications and enhancements.

For equipment recommendations, investing in a good quality frying pan can significantly improve your cooking outcomes and efficiency.

Seasonal variations are an excellent way to keep your meals fresh and exciting throughout the year, using seasonal produce to complement the sandwich.

Join the Conversation

We encourage you to share your experiences and variations on this spicy chicken sandwich recipe on social media. Snap photos of your creations and tag us!

Photography tips can enhance your food pictures, capturing the vibrant colors and textures that make this sandwich irresistible. Engage with our community by leaving reviews and suggestions for future recipe adaptations.

Take part in discussions about favorite ingredients and tweaks to the basic recipe, helping create a wealth of knowledge for fellow cooking enthusiasts.

The Recipe

Spicy Chicken Sandwich

Serves: 4

Prep Time: 15 mins

Cook Time: 10 mins

Total Time: 25 mins

Kitchen Equipment Needed

  • Frying pan or deep fryer
  • Cooking thermometer
  • Mixing bowls
  • Whisk
  • Paper towels

Ingredients

  • 4 boneless chicken breasts
  • 1 cup buttermilk
  • 1 cup all-purpose flour
  • 2 teaspoons paprika
  • 1 teaspoon cayenne pepper
  • Salt and pepper to taste
  • 4 hamburger buns
  • Mayonnaise or your choice of sauce
  • Lettuce, tomato, and pickles for toppings

Directions

  1. Start by marinating the chicken in buttermilk for at least 30 minutes, or overnight for best results.
  2. In a separate bowl, combine flour, paprika, cayenne, salt, and pepper.
  3. Heat oil in a frying pan over medium-high heat until it reaches 350°F (175°C).
  4. Remove chicken from buttermilk, allowing excess to drain, and dredge in the flour mixture thoroughly.
  5. Carefully place into the hot oil and cook for about 5-7 minutes on each side until golden brown and cooked through.
  6. Once cooked, place on paper towels to drain excess oil and season lightly.
  7. Toast the buns lightly and spread with mayonnaise or your choice of sauce.
  8. Assemble the sandwich by placing fried chicken on the bun and adding lettuce, tomato, and pickles.
  9. Serve immediately and enjoy!

Recipe Notes

  • Feel free to adjust the spice level by adding more or less cayenne pepper.
  • For a healthier option, consider baking the chicken instead of frying it.
  • This recipe can be easily doubled for larger gatherings.

Best Creamy Au Gratin Potatoes – Rich, Cheesy, and Easy

Creamy Au Gratin Potatoes: The Ultimate Comfort Food

⚖️
Difficulty
Easy

⏲️
Prep Time
20 mins

🕒
Cook Time
45 mins

⏱️
Total Time
65 mins

🍽️
Servings
6

Creamy Au Gratin Potatoes is a dish that embodies comfort and indulgence, making it the perfect addition to any dinner table. Layered with thinly sliced potatoes and a velvety cheese sauce, each bite is a rich experience that melts in your mouth. This classic recipe is not only a crowd-pleaser but also a delightful side that pairs wonderfully with meats and vegetables, elevating your meal to gourmet status.

The aroma of bubbling cheese and the golden crust that forms during baking is an invitation no one can resist. This recipe is ideal for family gatherings, holidays, or simply a cozy night in when you desire something warm and hearty. The blend of creamy textures, delicious flavors, and the ease of preparation makes this dish a staple in many homes.

Quick Recipe Highlights

  • Flavor Profile: A luscious blend of creamy cheese, buttery potatoes, and a hint of garlic creates an irresistible flavor combination.
  • Texture: The potatoes offer a satisfying density, complemented by a silky cheese sauce and a crispy topping for contrast.
  • Aroma: The sweet scent of cheese mingles with the earthy fragrance of baked potatoes, creating a tantalizing aroma as it cooks.
  • Visual Appeal: Golden melted cheese bubbling over beautifully layered potatoes presents an inviting dish that’s as pleasing to the eyes as it is to the palate.
  • Skill Level Needed: This recipe is straightforward, requiring basic culinary skills, making it accessible to beginners and seasoned cooks alike.
  • Special Equipment: A sharp knife for slicing potatoes evenly, a baking dish, and a whisk for the sauce are essential for this preparation.

Recipe Overview

  • Difficulty Level: This recipe is categorized as easy, making it perfect for novice cooks or those looking for a hassle-free dish to prepare for family or guests.
  • Category: Creamy Au Gratin Potatoes fit seamlessly into the side dish category, complimenting any main dish from roast chicken to grilled steak.
  • Cuisine: This dish draws inspiration from traditional French cuisine but has become a beloved comfort food in many cultures, cherished for its rich flavors.
  • Cost: With its simple ingredients like potatoes, cheese, and cream, this recipe is both economical and satisfying, allowing you to feed a crowd without breaking the bank.
  • Season: Creamy Au Gratin Potatoes is especially popular in the fall and winter months, when hearty, warm meals are in high demand.
  • Occasion: Ideal for holiday gatherings, family dinners, or potlucks, this dish is sure to impress your guests and keep everyone coming back for seconds.

Why You’ll Love This Recipe

The taste and texture of Creamy Au Gratin Potatoes is undeniably appealing. The combination of smooth, creamy cheese and tender, buttery potatoes creates a dish that is irresistible. Enhanced with spices and herbs, it delivers a comforting warmth that brings familiarity and joy to every meal.

In terms of convenience, this recipe is straightforward and simple to follow, making it easy to incorporate into your weekly meal prep while still being impressive enough for special occasions. The use of few ingredients allows you to prepare this dish quickly without sacrificing flavor, making it a win-win in kitchen efficiency.

Nutritionally, potatoes provide an array of health benefits, including fiber which supports digestive health. Though indulgent, this dish can be part of a balanced meal when paired with lean proteins and vegetables.

Socially, Creamy Au Gratin Potatoes acts as the perfect centerpiece for gatherings, fostering connection and conversation as everyone gathers around the table to share a meal. It invites guests to indulge and relax, making your dinner party memorable.

Cost-effectiveness adds to its allure; with simple, inexpensive ingredients, you can create a lavish-feeling dish that satisfies large groups. This accessibility means you can make it multiple times without putting a strain on your budget.

Historical Background and Cultural Significance

Creamy Au Gratin Potatoes have their roots in French cuisine, where “au gratin” refers to a cooking method involving a browned crust. Originating in the 18th century, the technique was developed to enhance dishes with a crispy cheese topping, becoming a staple in French culinary tradition.

This dish holds a special place during festive gatherings, emphasizing the importance of comfort food in various cultures. As French cuisine spread across the world, variations emerged, influencing regional takes on this classic recipe, making it universally loved.

Over the years, the recipe has evolved, incorporating diverse cheeses and ingredients, such as bacon and herbs, to cater to changing tastes and cultural influences. This adaptability speaks to its enduring legacy as a beloved comfort food.

Today, Creamy Au Gratin Potatoes continue to be a staple in many homes. Its comforting nature and ability to bring family and friends together remain pivotal, embodying the essence of home-cooked meals.

Ingredient Deep Dive

Potatoes are the foundation of this dish, providing a comforting base. As a versatile ingredient, they are rich in carbohydrates and essential vitamins, particularly vitamin C and B6. When selecting potatoes, look for firm ones free of blemishes, and store them in a cool, dark place to maintain freshness. Alternatives like sweet potatoes or even cauliflower can offer interesting variations.

Cheese is another star of this recipe, adding richness and flavor to the creamy sauce. Varieties such as Gruyère, cheddar, or Monterey Jack are popular choices. Each type of cheese brings unique flavor notes, and when selecting cheese, choose high-quality options for the best results. Proper storage in a sealed container or wrapping helps preserve its flavor and texture.

Cream is a crucial element in achieving that creamy sauce. Heavy cream or half and half is typically used, delivering a luxurious mouthfeel. The cream should be stored in the refrigerator and can typically last about a week past its expiration date, provided it shows no signs of spoilage.

Common Mistakes to Avoid

  • Overcooking the potatoes can result in mushy layers, so slice them evenly to ensure they cook uniformly and maintain structure.
  • Not seasoning adequately throughout the layers can lead to a bland dish; taste as you go to enhance flavor.
  • If the cheese is added too early, it may burn before the potatoes are fully cooked; add it nearer to the end of the baking process instead.
  • Using low-quality cheese can result in undesirable textures; opt for fresh, high-quality cheeses for the best melt and flavor.
  • Skipping the resting time after baking can cause the dish to fall apart; allow it to sit so the layers bind together.
  • Not preheating the oven sufficiently can lead to uneven cooking; make sure it reaches the desired temperature prior to baking.
  • Using too much liquid can result in a soupy dish; adhere to the suggested quantities for optimal creaminess.
  • Failing to cover the dish partway through cooking can lead to an overly browned top; tent it with foil to achieve even browning.
  • Neglecting to slice potatoes uniformly can lead to inconsistent cooking; ensure even thickness for best results.
  • Using a baking dish that’s too small can cause overflowing; choose an appropriately sized dish to accommodate layers.

Essential Techniques

The first essential technique for preparing Creamy Au Gratin Potatoes is thinly slicing the potatoes. This step is crucial because uniform thickness ensures even cooking. Use a sharp knife or mandoline for consistent cuts, ideally about 1/8 inch thick. A good visual cue is when they have a translucent appearance, indicating they will cook properly.

Another technique is making a roux for the cheese sauce. This involves cooking flour and butter together until bubbly before adding cream. It’s important to whisk continuously to prevent lumps. A properly cooked roux should appear light golden and smell nutty, signaling it’s ready for the next ingredients to be added.

Pro Tips for Perfect Creamy Au Gratin Potatoes

1. Pre-soaking potatoes in cold water for 30 minutes before slicing can help reduce starch and prevent a gummy texture.
2. For an extra cheesy flavor, consider mixing a blend of cheeses such as Gruyère, cheddar, and Parmesan.
3. Enhance the flavor by adding herbs like thyme or rosemary into the sauce for a fragrant note that complements the creamy potatoes.
4. Bake covered for the first half of the cooking time to allow the potatoes to steam and cook through before browning them.
5. To save time, you can prepare the layers and cheese sauce in advance, then assemble and bake when ready to serve.
6. Sprinkle breadcrumbs or panko on top before baking for a delightful crunch that contrasts the creamy layers beneath.
7. For added richness, try incorporating cooked bacon or ham into the layers for a smoky flavor that elevates the dish.
8. Let the dish rest for at least 10 minutes after pulling from the oven, allowing the flavors to meld beautifully.

Variations and Adaptations

For regional variations, consider adding local flavors such as sautéed mushrooms or caramelized onions to elevate the dish. These ingredients provide unique tastes while maintaining the beloved creamy texture.

Seasonal adaptations can incorporate butternut squash or sweet potatoes, bringing seasonal flavors to the forefront. This not only changes the dish’s taste profile but also introduces a pop of color.

For dietary modifications, explore vegan or dairy-free alternatives using cashew cream and nutritional yeast while ensuring the dish remains rich and creamy. Similarly, low-carb versions can replace traditional potatoes with cauliflower for a lighter take.

Flavor variations can also include spices like smoked paprika or cayenne pepper to add warmth and depth to the creamy sauce. Adjust these levels to taste according to your preference.

In terms of texture modifications, try adding cooked lentils or quinoa for an unexpected sticking element that also boosts the nutritional profile, turning this side dish into a wholesome meal.

Serving and Presentation Guide

When it comes to plating, consider using a shallow, wide dish to showcase the layers and vibrant color of the cheesy potatoes. Gently spoon out portions to maintain its layered structure, ensuring that each serving boasts creamy topping and golden crust.

Garnishing with chopped fresh herbs can add a touch of freshness and color, enhancing the visual appeal while imparting additional flavor. Consider pairing with a simple green salad to balance out the richness of the dish.

Traditional accompaniments include roasted meats or grilled vegetables, which are perfect partners to the creamy potatoes. For modern settings, pair them with a zesty salsa or chimichurri sauce to provide a fresh contrast.

Temperature considerations are key; while this dish is best served hot, leftovers can be enjoyable cold or reheated. Aim for a creamy consistency without drying out during reheating.

Finally, pour control tips are crucial in ensuring everyone enjoys their fill; consider serving in individual ramekins for controlled portions and easy serving.

Wine and Beverage Pairing

For wine pairings, opt for a medium-bodied Chardonnay that complements the richness of the creamy cheese without overpowering it. Alternatively, a light Pinot Noir can complement the potatoes well with its subtle earthiness.

For non-alcoholic alternatives, serve sparkling apple cider for a delightful balance of flavors that resonates with the creamy, cheesy profile of the dish.

If coffee or tea is more to your liking, consider a rich, dark coffee that can cut through the creaminess, or a chamomile tea for a soothing, herbal pairing.

Temperature considerations for serving the wine should align with general guidelines, serving whites chilled and reds at room temperature to enhance their flavors.

When serving, stylish yet simple glassware can elevate your dinner experience, making even casual dining feel like a special occasion.

Storage and Shelf Life

For storage, place leftover Creamy Au Gratin Potatoes in an airtight container in the refrigerator. They can last up to 3-5 days when stored properly, ensuring you can enjoy them again.

Temperature requirements are key; always allow the dish to cool completely before refrigerating to maintain quality and prevent spoilage.

Container recommendations include glass or BPA-free plastic to preserve taste and texture while minimizing moisture loss.

Signs of spoilage include an off smell, discoloration, or an overly watery appearance—discard immediately if these signs are present.

For reheating, place the dish back in a preheated oven at a low temperature (around 325°F) until warmed through to ensure the creamy texture remains.

Freezing guidelines suggest stopping the cooking process slightly before fully done if you intend to freeze, as this will maintain the best texture upon reheating later.

Make Ahead Strategies

A smart prep timeline allows you to enjoy this dish without stress; consider slicing the potatoes and preparing the cheese sauce a day in advance. Store them separately in the refrigerator to maintain freshness.

Storage between steps can be effectively managed by keeping both elements airtight. Potatoes should be soaked in cold water to prevent browning, while the cheese sauce can be covered to avoid skin formation.

Quality impact assessment is essential; making ahead allows flavors to meld, producing a more robust final dish. However, be cautious about freezing potatoes, as they can alter texture upon reheating.

Assembly tips involve layering the potatoes and sauce just before baking to retain the best moisture and texture. This ensures you experience the full richness of flavors.

Reheating guidelines dictate that if you make it ahead and freeze, defrost before you bake, ensuring an even cooking process. Then, top with fresh cheese just before baking for optimal melting.

Fresh element additions can be made right before serving, adding fresh herbs or breadcrumbs for texture. This last-minute touch can brighten the dish and make it seem newly prepared.

Scaling Instructions

Halving the recipe is straightforward; simply divide all ingredients by two while maintaining the same cooking principles for optimal results.

If doubling or tripling, be mindful of the baking dish size. Use larger pans and ensure your oven can accommodate the increased load for even cooking.

Equipment adjustments may be necessary when scaling; ensure you have enough mixing bowls, utensils, and space to handle larger quantities of ingredients.

Timing modifications may also be warranted, as doubling the recipe may require additional baking time. Check for doneness by testing with a fork until soft and bubbly.

Consider storage considerations for any leftovers; ensure you have ample containers ready to store whatever you won’t consume immediately, in a vacuum-sealed form if possible.

Nutritional Deep Dive

A macro breakdown of Creamy Au Gratin Potatoes reveals a balance of carbohydrates from potatoes, fats from cheese and cream, and some protein content. Portion sizes play a crucial role in dietary management, as serving sizes affect overall calorie intake.

Micronutrient analysis illustrates a dish rich in vitamin C, potassium, and calcium from dairy products and potatoes, contributing positively to health when consumed mindfully.

Health benefits include the provision of energy from carbohydrates, while dietary fiber aids digestion. Additionally, the cheese offers protein, essential for muscle repair and maintenance.

Dietary considerations arise when planning meals; understanding the caloric density allows for better meal prep and portion management, particularly for those monitoring intake for weight management or specific health goals.

Weight management tips for enjoyment include satisfying cravings with smaller portions and incorporating this side into balanced meals involving lean protein and vegetables to create a harmonious plate.

Dietary Adaptations

Gluten-free options for this dish involve ensuring all ingredients are certified gluten-free, particularly in the case of flour used in the cheese sauce base. Cornstarch can be an excellent thickening alternative as well.

For dairy-free adaptations, use cashew or almond milk blended with nutritional yeast to create a creamy sauce, ensuring all cheese substitutes are adequately flavorful.

Vegan alternatives apply the same principles; use plant-based cheeses and buttermilk substitutes to maintain rich flavors while adhering to dietary preferences.

Low-carb versions can swap traditional potatoes for cauliflower, providing a similar texture with fewer carbohydrates while still being satisfying.

Keto followers can use cheese-based sauces thickened with cream cheese rather than flour to further reduce carbs, while still delivering that creamy consistency.

Paleo diets can incorporate sweet potatoes and coconut milk for a twist on flavors while eliminating dairy and grains entirely, keeping the spirit of the dish intact.

Low-FODMAP versions require attention to ingredients; onions and garlic may be replaced with garlic-infused oil, ensuring flavor without triggering sensitivities.

Troubleshooting Guide

Texture issues often stem from inconsistently sliced potatoes; ensure uniformity and monitor cooking time closely to achieve the desired creaminess without mushiness.

Flavor balance challenges can be rectified by adjusting seasonings; if bland, consider adding more salt or a splash of vinegar to enhance overall depth.

Temperature problems may arise if the oven isn’t fully preheated; correct this by checking the actual temperature settings before baking, allowing time to stabilize.

Equipment challenges might include insufficient space; if using multiple trays, rotate them halfway through to ensure even cooking across batches.

Ingredient substitutions can lead to unexpected results; strive for high-quality ingredients and pay attention to the ratios when altering key components.

Timing concerns should be monitored closely; err on the side of caution and check for doneness earlier than the suggested baking time to prevent overcooking.

Recipe Success Stories

Community feedback on this recipe emphasizes the incredible flavors and ease of preparation. Many readers have shared their personal adaptations, noting how specific spices have elevated their experiences.

Variation successes highlight creative twists brought by friends and family, showcasing how the core recipe can inspire chefs to experiment, such as including vegetables in the layering process.

Adaptation stories feature cooks who have used seasonal ingredients to switch up traditional flavors while still maintaining the essence of the recipe itself.

Reader suggestions often pointed out helpful tips that made the process smoother; circling back for additional thoughts helps build a community of support around this dish.

Photography tips shared by the community have inspired posts displaying their best plating ideas, bringing the visual element of showcasing this creamy delight to the forefront.

Frequently Asked Questions

Can I make Creamy Au Gratin Potatoes in advance?

Yes, you can prepare the layers and cheese sauce a day in advance. Simply store them separately in the refrigerator and assemble just before baking to ensure freshness.

What type of potatoes work best for this recipe?

Yukon Gold or Russet potatoes are ideal, as they hold their shape well and have a characteristic creamy texture, which enhances the dish’s final result.

Can I freeze Creamy Au Gratin Potatoes?

Yes, but for the best results, it’s recommended to freeze them before fully baking. This allows for better texture when reheated later.

How can I make this dish healthier?

Consider using low-fat cheese and cream options, or substitute potatoes with cauliflower to lower carbohydrate content while still retaining delicious flavors.

What cheeses work best for the topping?

Combining cheeses like Gruyère, cheddar, and Parmesan can create a rich flavors and perfect melt, enhancing the overall enjoyment of the dish.

How do I prevent my cheese from burning?

To avoid this, add your cheese mixture during the last 15 minutes of cooking, or cover the dish with foil until the final phase to retain moisture.

How can I enhance the flavor of my Au Gratin Potatoes?

Incorporate garlic, herbs, or even caramelized onions to the cheese sauce for a burst of flavor that complements the creamy potatoes beautifully.

Can I use non-dairy substitutes?

Absolutely! Use cashew cream or almond milk along with nutritional yeast to create a dairy-free alternative that maintains the creamy texture.

How do I thicken my cheese sauce?

If your cheese sauce is too thin, add a touch more flour into the roux or let the sauce simmer longer until it reaches the desired thickness.

Is this dish suitable for vegetarians?

Yes, Creamy Au Gratin Potatoes are inherently vegetarian, making them an excellent side dish for various meal types.

What’s the best way to reheat leftovers?

Reheat leftovers in a preheated oven at 325°F until warmed through. Cover with foil to retain moisture and prevent drying out.

Additional Resources

Expand your culinary horizons with other related recipes such as cheesy cauliflower gratin or creamy scalloped potatoes, both offering similar indulgent textures and flavors.

Technique guides exploring the art of making the perfect cheese sauce or mastering potato preparation techniques can enhance your skill set and cooking confidence.

Ingredient information is invaluable; delve into the rich world of potatoes and cheeses, learning about various types and their best uses for ultimate kitchen success.

Equipment recommendations can help newcomers navigate essential kitchen gear for cooking this dish effectively, including thoughtful selection on baking dishes and food processors.

Seasonal variations can inspire further creativity; celebrate the harvest with local vegetables or herbs that adapt beautifully to this classic recipe while adding unique flavors.

Join the Conversation

Share your experiences with Creamy Au Gratin Potatoes on social media by posting your version of the dish. Engage your followers with photos and stories that highlight your favorite twists.

Photography tips from others have proven beneficial, encouraging not just home chefs but also budding food bloggers to explore their culinary artistry.

Recipe reviews allow a collaborative space for feedback and enhancement ideas while spotlighting community efforts to innovate the recipe.

Engaging the community is vital, so consider participating in discussions to share variations, tips, and even highlights of your cooking adventures with this beloved dish, further enriching the experience.

The Recipe

Creamy Au Gratin Potatoes

Serves: 6

Prep Time: 20 mins

Cook Time: 45 mins

Total Time: 65 mins

Kitchen Equipment Needed

  • Sharp knife or mandoline
  • Baking dish (9×13) preferably
  • Medium saucepan
  • Whisk
  • Measuring cups and spoons
  • Wooden spoon or spatula

Ingredients

  • 4 large russet potatoes, thinly sliced
  • 2 cups shredded cheese (Gruyère or cheddar)
  • 2 cups heavy cream
  • 1/4 cup all-purpose flour
  • 2 tablespoons butter
  • 2 cloves garlic, minced
  • Salt and pepper to taste
  • Fresh parsley for garnish (optional)

Directions

  1. Preheat the oven to 375°F (190°C).
  2. In a medium saucepan, melt butter over medium heat. Add garlic and sauté until fragrant.
  3. Stir in the flour to make a roux, cooking for 1-2 minutes until golden.
  4. Gradually whisk in the cream, stirring continuously until thickened. Season with salt and pepper.
  5. Layer half the sliced potatoes in a greased baking dish, followed by half of the cheese. Pour half of the sauce over the layers.
  6. Repeat the layers with the remaining potatoes, cheese, and sauce.
  7. Cover the dish with foil and bake for 30 minutes. Remove foil and bake for an additional 15-20 minutes, until golden brown on top.
  8. Let rest for 10 minutes before serving, garnished with parsley if desired.

Recipe Notes

  • Feel free to experiment with different cheese blends for unique flavor profiles.
  • Add in vegetables like spinach or mushrooms for more nutrition.
  • For extra crunch, top with breadcrumbs before the final baking stage.

Classic Jambalaya Recipe – Perfect for Weeknight Dinners

Delicious Jambalaya: A Flavorful Journey Through Louisiana

⚖️
Difficulty
Medium

⏲️
Prep Time
15 mins

🕒
Cook Time
45 mins

⏱️
Total Time
1 hour

🍽️
Servings
4-6

Jambalaya is a beloved dish that comes with a flavorful history rooted in Louisiana’s Creole and Cajun cuisines. The harmonious blend of spices, vegetables, and protein creates a one-pot meal that is not only deceptively simple to prepare but also rich in cultural significance. This dish transports you to a vibrant place filled with the sounds of jazz and the aromas of spices wafting through the air.

The beautiful medley of colors from the bell peppers, onions, and tomatoes, combined with the rich, warm tones of sausage and shrimp, makes Jambalaya a feast for the eyes as well as the palate. Each bite resonates with layers of smoky, savory flavors, heightened by a kick of fresh herbs and spices. Whether you’re cooking for a family gathering or a cozy dinner, Jambalaya is sure to bring joy and satisfaction to everyone at the table.

Quick Recipe Highlights

  • Flavor Profile: This Jambalaya offers an incredible sweet and spicy balance, with the fresh tomato cutting through the richness of the sausage and shrimp, while Cajun spices like paprika and cayenne give it a delightful kick.
  • Texture: The rice absorbs all the rich flavors while remaining tender yet slightly al dente. The meats provide hearty textures that complement the vibrant vegetables.
  • Aroma: Get ready to be surrounded by the enticing aromas of sautéed onions, bell peppers, and garlic, combined with the warmth of spices that linger as the dish cooks.
  • Visual Appeal: This dish is a visual delight with its colorful ingredients, from the bright green bell peppers to the vibrant red tomatoes, making it as attractive as it is delicious.
  • Skill Level Needed: This recipe is perfect for home cooks with some experience and an appreciation for layered flavors and spices. The most complex techniques—like sautéing and simmering—are quite manageable.
  • Special Equipment: You’ll need a large, heavy-bottomed pot for even cooking and to ensure that the rice cooks perfectly without burning.

Recipe Overview

  • Difficulty Level: Jambalaya can be categorized as a medium difficulty recipe due to the layering of flavors and the timing of ingredient additions. Familiarity with the ingredients and techniques can make the process smooth and enjoyable.
  • Category: This dish often serves as a main course, perfect for gatherings, potluck events, or a comforting Sunday dinner.
  • Cuisine: Jambalaya is a distinguished dish from New Orleans, reflecting the diverse influences of French, Spanish, and West African culinary traditions, showcasing the fusion of flavors found in Southern cooking.
  • Cost: Preparing Jambalaya is budget-friendly, typically costing around $20-$25 to serve six people, depending on the selected proteins and market prices.
  • Season: This dish shines year-round but is particularly cherished during cooler months, allowing the comforting components to warm you up.
  • Occasion: It’s great for festive occasions, family gatherings, or just a lovely weeknight meal, bringing a taste of New Orleans to your home.

Why You’ll Love This Recipe

Jambalaya captivates with its intricate tapestry of flavors that dance on your tongue. The smoky sausage rivals the sweetness of the shrimp, while the rice soaks up every bit of the seasoned broth, creating a symphony of taste in each bite. The depth of flavor is unmatched—each mouthful is a journey through rich history and culture, providing an unforgettable dining experience.

Convenience is key, and Jambalaya embodies that perfectly. With just one pot, you can create a hearty meal that requires minimal cleanup. The ability to customize the protein content means you can adapt the dish to whatever ingredients you have on hand, making it flexible and practical for busy weeknights or last-minute gatherings.

Nutritionally, Jambalaya is balanced, offering protein from the shrimp and sausage, vitamins from the bell peppers and onions, and carbohydrates from the rice. This makes it not only filling but also a great way to get a wholesome meal in one dish, perfect for those looking to dine healthily without sacrificing satisfaction.

The recipe also shines in social settings, effortlessly feeding a crowd and stimulating conversation as guests marvel at the vibrant colors and aromas. Jambalaya encourages sharing, making it ideal for gatherings among friends and family, where a large pot serves as a centerpiece for communal dining.

Budget-friendly, Jambalaya proves accessible to all. With its ability to stretch ingredients and serve larger portions without sacrificing quality, it enables everyone to experience the taste of Louisiana without breaking the bank.

Historical Background and Cultural Significance

Originating in the early 18th century, Jambalaya finds its roots in both Spanish and French culinary traditions. This dish illustrates how diverse influences can amalgamate into a singular, delightful experience. It is believed that Jambalaya evolved from Spanish paella, adapting the core concepts to local ingredients, which reflects Southern ingenuity and resourcefulness in the kitchen.

Culturally, Jambalaya has become a symbol of Louisiana cuisine, representing the melting pot of cultures that make up the state. It is often featured during celebrations like Mardi Gras and various food festivals, showcasing the importance of community and sharing in culinary traditions. Capturing the spirit of festivity, Jambalaya invites everyone to partake in its rich history.

As the recipe developed, regional variations emerged, like the Creole Jambalaya (which includes tomatoes) versus the Cajun version (which typically does not). Each version tells a story of local preferences, ingredients, and the unique methods passed down through generations.

Today, Jambalaya continues to evolve, embracing modern flavors and cooking methods while remaining anchored in its cultural significance. It stands as a classic that can adapt and delight in various forms, ensuring that its legacy persists as a tangible connection to the past.

Ingredient Deep Dive

– **Rice**: The cornerstone of Jambalaya, rice not only provides sustenance but also absorbs the rich flavors of the dish. Historically a staple in various cuisines, rice offers an excellent source of carbohydrates, supplying energy for a busy lifestyle. When selecting rice, opt for long-grain varieties like Basmati or Jasmine, as they hold their shape better during cooking. To store, keep rice in a cool, dry place in an airtight container.

– **Sausage**: Traditionally and often made from pork, sausage imparts a distinct smokiness and richness to the dish. Full of flavor, it brings depth and contributes protein, making the dish more satisfying. Look for high-quality smoked sausage for the best results. Store sausage in the refrigerator for up to a week or freeze it for longer periods.

– **Shrimp**: A quintessential Louisiana ingredient, shrimp add a delicate sweetness and unique texture to Jambalaya. They are an excellent source of protein, low in calories, and high in essential nutrients like selenium and vitamin B12. Select fresh, wild-caught shrimp when possible for the best flavor. Store thawed shrimp in the refrigerator and use them within a day or two, or keep them frozen for longer freshness.

– **Bell Peppers**: These vibrant vegetables contribute both color and crunch to the dish. Rich in vitamins A and C, bell peppers enhance the nutritional profile while providing a crisp texture. When choosing bell peppers, look for those with shiny, taut skin without blemishes. Store them in the refrigerator’s crisper drawer for optimal freshness.

– **Onions**: Onions add a savory foundation that is hard to replicate. They are high in antioxidants and contain anti-inflammatory properties. Opt for yellow or sweet onions for sweetness. Store onions in a cool, dark place to maintain their crispness.

Common Mistakes to Avoid

  • Overcooking the rice: It’s easy to make rice mushy if you don’t watch the cooking time. Keep an eye on the liquid levels and taste to ensure perfect doneness.
  • Adding too much liquid: Jambalaya should be moist but not soupy. Measure your broth carefully to achieve the right consistency.
  • Neglecting seasoning: Don’t forget to taste and adjust the seasoning as needed, as flavors develop during cooking. Adding salt towards the end can enhance the dish significantly.
  • Skipping the brown bits: Allow the bottom of the pot to develop fond, as it adds rich flavor to your dish. Stir occasionally but don’t stir too frequently.
  • Using cold ingredients: Adding cold ingredients to a hot pot can lower the cooking temperature noticeably. Allow ingredients like meat and seafood to reach room temperature before adding them to the pot.
  • Choosing low-quality ingredients: The success of Jambalaya heavily relies on quality ingredients—choose fresh, high-quality proteins and vegetables for the best outcome.
  • Cooking on high heat: Taking your time to cook on medium heat allows flavors to develop. High heat can cause uneven cooking.
  • Omitting the resting phase: After cooking, allow the Jambalaya to rest before serving. This helps flavors meld together and the rice to firm up.
  • Peeking too often: Check the dish less frequently to maintain a steady temperature, preventing heat from escaping and affecting cooking time.
  • Not using a heavy-bottomed pot: A good cooking pot distributes heat evenly and prevents burning, so invest in a suitable pot for perfect Jambalaya.

Essential Techniques

– **Sautéing**: This technique is critical for building flavors in dishes like Jambalaya. It involves cooking ingredients in a small amount of fat over medium-high heat until they soften and caramelize. To master it, ensure your pan is hot before adding ingredients, and don’t overcrowd the pan to achieve an even color. Visual cues include a translucent appearance for onions and vibrant colors for peppers.

– **Simmering**: Essential for proper rice cooking, simmering refers to cooking ingredients slowly just below boiling point. This technique helps integrate the flavors while allowing the rice to absorb the cooking liquid evenly. To master simmering, keep an eye on the bubbles—look for gentle bubbling rather than vigorous boiling. Common pitfalls include leaving the pot uncovered, which can cause excess evaporation and uneven cooking.

– **Layering Flavors**: Jambalaya thrives on the careful layering of flavors through your cooking process. Begin with the holy trinity (onions, peppers, celery) and let them soften and develop before adding spices, proteins, and rice. This technique gives depth and complexity to the dish. To achieve this, allow each ingredient to cook through before moving on to the next to ensure the complete union of flavors.

Pro Tips for Perfect Jambalaya

– Use home-made stock or broth for maximum flavor. The quality of the liquid will significantly influence the final taste of your Jambalaya.
– Avoid pre-cooked or frozen shrimp if possible; using fresh shrimp enhances texture and flavor.
– Experiment with different proteins, such as chicken or crawfish, to create variations based on your preference and availability.
– Keep an eye on your spice level; adjust cayenne or hot sauce to customize heat according to your audience.
– Ensure the rice is rinsed before cooking to remove excess starch; this results in fluffier rice that won’t clump together.
– Allow the Jambalaya to sit covered for about 10 minutes after cooking to allow flavors to meld and the rice to firm up.
– If you’re meal prepping, store each component separately to ensure the best quality upon reheating.
– Use fresh herbs like parsley or green onions for a bright garnish to enhance visual appeal and freshness.

Variations and Adaptations

– **Regional variations**: Try Shrimp and Andouille Jambalaya, which incorporates the flavors of smoked sausage, or a vegetarian version using mushrooms and zucchini for a hearty take without the meat.
– **Seasonal adaptations**: During summer months, consider adding seasonal produce like corn or fresh tomatoes to enhance the flavor and freshness of the dish.
– **Dietary modifications**: For a gluten-free option, ensure all your ingredients (especially broth) are certified gluten-free, and you can utilize cauliflower rice for a low-carb ethic.
– **Flavor variations**: Experiment with spices by adding a bay leaf or using different types of smoked sausage for distinct, smoky flavors.
– **Texture modifications**: For extra crunch, finish the dish off with a sprinkle of toasted nuts or crispy onions for a delightful contrast.
– **Presentation alternatives**: Serve Jambalaya in hollowed-out bell peppers or cocottes for an eye-catching touch that elevates the dining experience.

Serving and Presentation Guide

Plating technique can elevate a simple dish to the next level. For Jambalaya, a mound of rice in the center of the plate allows the colorful ingredients to spill over, creating visual interest. Incorporate garnishing ideas such as slices of fresh lime or sprigs of parsley to enhance the presentation.

Pair Jambalaya with traditional accompaniments like crusty French bread for dipping, or opt for a modern twist by serving it with a fresh green salad on the side. Keep in mind the serving temperature; Jambalaya is best enjoyed warm but not piping hot, allowing flavors to be fully appreciated.

For portion control, aim to serve each guest a generous cup of Jambalaya, which is usually sufficient to satisfy appetites without overwhelming the dining experience. This promotes a shared, convivial atmosphere essential to enjoying this communal dish.

Wine and Beverage Pairing

When it comes to wine pairings, opt for a crisp Sauvignon Blanc or a light-bodied red, such as Pinot Noir, which complements the flavors of Jambalaya without overpowering them. These wines enhance the spice profile and rich ingredients beautifully.

For non-alcoholic alternatives, consider serving iced tea with lemon, which can cut through the richness of the dish and provide a refreshing contrast. If the meal requires something warm, a well-brewed chai can elegantly complement the array of spices present in the Jambalaya.

Pay attention to serving temperatures; ensure that wines are chilled appropriately and non-alcoholic beverages are served fresh. Providing a variety of options caters to all tastes and preferences.

Storage and Shelf Life

Storing Jambalaya properly is crucial to preserving its delightful flavors. Keep it refrigerated in an airtight container for up to four days after cooking. The dish heats well, maintaining flavor and texture upon reheating.

Ensure that your storage method keeps the rice from drying out; adding a dash of broth during reheating can help revive moisture. Jambalaya can also be frozen for up to three months. For best results, break it down into portions for easier thawing.

Signs of spoilage can include unpleasant odors and changes in texture or color. Always check before consuming leftovers, and refreeze only if they haven’t been stored for more than a few days.

Make Ahead Strategies

Planning ahead for Jambalaya can save time on busy nights. Prep vegetables and proteins a day in advance, ensuring they are properly stored to maintain freshness. Measure out your spices so they are ready to use when you begin cooking.

You can cook your Jambalaya a day ahead of time; the flavors will deepen overnight in the refrigerator. When ready to serve, gently reheat it on the stovetop, adding splash of broth to keep it moist.

Consider serving fresh elements, like parsley or lemon wedges, just before serving to enhance flavors without compromising freshness during storage.

Scaling Instructions

If you want to halve the recipe, simply divide all ingredient quantities by two but be mindful that cooking times may not change proportionately; keep a close eye on doneness.

For doubling or tripling the recipe, ensure your pot is large enough to accommodate the additional ingredients. Adjust cooking times slightly, allowing for a bit longer simmer to ensure thorough cooking.

Factor in equipment adjustments as larger quantities may require batch cooking, and remember that storing larger portions might require extra containers or a larger refrigerator space.

Nutritional Deep Dive

When evaluating the nutritional components of Jambalaya, it’s important to look at macronutrients. Each serving generally provides a balanced array of carbohydrates, proteins, and fats, contributing to a well-rounded meal.

Delve into micronutrient analysis as well; ingredients like bell peppers and onions offer valuable vitamins and minerals that benefit overall health. For instance, vitamin C from the bell peppers supports immune function.

Health benefits arise from the dish’s protein content, vital for muscle repair and growth, while careful ingredient management can align Jambalaya with dietary goals, promoting portion control for weight management.

Dietary Adaptations

For gluten-free diets, use certified gluten-free stock and ensure all spices are gluten-free as well. Simple adjustments like these can make this dish accessible to everyone at the table.

For a dairy-free option, it’s already suitable since no dairy ingredients are present. Replace any sausage with dairy-free varieties to maintain the hearty texture without the added lactose.

Vegan adaptations can utilize plant-based proteins like tofu or tempeh while enhancing flavors with additional spices and herbs, ensuring everyone enjoys this comforting classic regardless of dietary preferences.

Troubleshooting Guide

If you encounter texture issues, like mushy rice, it often indicates too much liquid or overcooking. Ensure you’re measuring broth accurately and use long-grain rice that holds its shape.

In regards to flavor balance, if Jambalaya is too bland, consider adding salt or spices incrementally. Taste during the cooking process to better gauge flavor level before serving.

Temperature problems can arise from uneven cooking; maintaining even heat and stirring occasionally ensures every ingredient cooks thoroughly without burning.

Recipe Success Stories

Community feedback on Jambalaya often highlights the love for its vibrant flavor and ease of preparation. Many readers have shared their successful adaptations, like adding seasonal vegetables or swapping proteins based on preferences.

Variation successes abound, with enthusiasts experimenting with seafood stocks versus chicken bases for a different spin, showcasing the versatility that Jambalaya offers.

Photographic submissions show the array of colorful presentations, encouraging the sharing of tips and experiences while encouraging others to recreate this classic that so beautifully embraces tradition.

Frequently Asked Questions

Can I make Jambalaya ahead of time?
Yes, Jambalaya can be prepared a day in advance, allowing the flavors to deepen. Store it in the refrigerator and reheat it on the stovetop for the best taste.

What is the best rice to use for Jambalaya?
Long-grain white rice is ideal for Jambalaya as it absorbs flavors well while remaining separate, providing the right texture for the dish.

Can I substitute shrimp with another protein?
Absolutely! Chicken, sausage, or even vegetables can be used as alternatives, allowing for personal preferences and dietary needs to be accommodated.

Is Jambalaya spicy?
The spice level can vary based on the amount of cayenne and hot sausage used. You can adjust the heat according to your taste preference.

How do I store leftovers?
After cooking, allow Jambalaya to cool before transferring it to an airtight container. Store it in the refrigerator for up to four days or freeze for longer preservation.

Can I freeze Jambalaya?
Yes, Jambalaya freezes well. Portion it into containers and freeze for up to three months. Reheat thoroughly before consuming.

What should I serve with Jambalaya?
Jambalaya pairs wonderfully with crusty bread, a light salad, or a side of coleslaw, balancing the rich flavors of the dish.

Is Jambalaya gluten-free?
Yes, Jambalaya can be made gluten-free by ensuring all ingredients, including sausage and broth, are gluten-free. Check labels before purchasing.

What kind of broth should I use?
Using chicken broth is traditional, but vegetable or seafood broth can enhance flavors based on the proteins used.

Can I make Jambalaya in a slow cooker?
While traditional preparation is on the stovetop, adaptations can be made for slow cookers. Just adjust cooking times accordingly for best results.

Additional Resources

Explore related recipes for sides that complement Jambalaya, like cornbread or collard greens, enriching your overall meal. Technique guides on rice cooking can also prove useful in ensuring perfect rice every time.

Delve into ingredient-specific resources for perfecting your Jambalaya, offering insights into spice blends and tips for choosing the best sausages. Recommendations on kitchen equipment can streamline your process, emphasizing quality pots and pans for optimal results.

Don’t forget seasonal variations to inspire creativity in your cooking, encouraging fresh additions based on market availability.

Join the Conversation

Engage with our community by sharing your Jambalaya creations on social media, using our designated hashtags for a chance to be featured. Photography tips can help display your culinary masterpieces and inspire others to recreate your dish.

We welcome recipe reviews and feedback, as personal experiences enrich our collective journey in the kitchen. Feel free to share your variations and adaptations to inspire fellow home cooks.

The Recipe

Jambalaya

Serves: 4-6

Prep Time: 15 mins

Cook Time: 45 mins

Total Time: 1 hour

Kitchen Equipment Needed

  • Large heavy-bottomed pot
  • Wooden spoon
  • Measuring cups and spoons
  • Chopping knife
  • Cutting board

Ingredients

  • 1 pound smoked sausage, sliced
  • 1 pound shrimp, peeled and deveined
  • 1 cup long-grain rice
  • 1 large onion, diced
  • 1 bell pepper, diced
  • 2 stalks celery, diced
  • 2 cloves garlic, minced
  • 4 cups chicken broth
  • 1 can (14.5 oz) diced tomatoes
  • 2 teaspoons Cajun seasoning
  • 1 teaspoon paprika
  • 1 teaspoon cayenne pepper (optional)
  • Salt and pepper to taste
  • Fresh parsley for garnish

Directions

  1. In a large pot, heat a tablespoon of oil over medium heat. Add sausage slices and cook until browned.
  2. Add the onions, bell peppers, and celery to the pot. Sauté until the vegetables are tender.
  3. Stir in garlic and cook for an additional minute, being careful not to let it burn.
  4. Add the rice, tomatoes, Cajun seasoning, paprika, and broth. Stir to combine all ingredients well.
  5. Bring to a boil, then reduce heat to low. Cover and simmer for about 20 minutes, or until rice is tender.
  6. Fold in the shrimp and cook for another 5-7 minutes until they turn pink and opaque.
  7. Season with salt and pepper to taste. Let stand for a few minutes before serving.

Recipe Notes

  • For added depth, substitute chicken broth with seafood broth.
  • Feel free to customize proteins: chicken or crawfish can also be excellent choices.
  • Adjust spices to your liking; more cayenne can enhance heat levels!
  • Leftovers can be stored in an airtight container in the refrigerator for a few days, or frozen for longer storage.

Easy Bacon Fried Rice – Quick and Flavorful Weeknight Meal

Bacon Fried Rice: A Flavorful and Quick Weeknight Meal

⚖️
Difficulty
Easy

⏲️
Prep Time
10 mins

🕒
Cook Time
15 mins

⏱️
Total Time
25 mins

🍽️
Servings
4

Discover the delightful combination of savory bacon and fluffy rice in this quick and satisfying bacon fried rice recipe. This dish not only brings a burst of flavor to your dinner table but also transforms leftover rice into a delectable meal. The crispy bacon intermingles beautifully with tender vegetables, creating an irresistible dish that gives a comforting nod to Asian cuisine. Each bite promises mouthwatering satisfaction that keeps you coming back for more.

Bacon fried rice is an ideal weeknight meal, as it takes only a short time to prepare and cook. Whether you are a busy professional or a parent juggling multiple activities, this recipe offers ease without compromising taste. Its simple ingredients are likely to be already in your pantry, making it a go-to option for last-minute dinners. Additionally, the fragrant sizzle of bacon in the pan fills your kitchen with an aroma that will make everyone eager to gather around the table.

Quick Recipe Highlights

  • Flavor Profile: The rich, smoky flavor of bacon perfectly complements the subtle notes of soy sauce and garlic.
  • Texture: Featuring crispy bacon and fluffy rice, this dish offers an enjoyable contrast between crunchy and soft textures.
  • Aroma: The mouthwatering aroma of frying bacon, mingled with sautéed onions and garlic, is simply irresistible.
  • Visual Appeal: Vibrant vegetables and golden bacon create a colorful plate that is as appealing as it is delicious.
  • Skill Level Needed: With straightforward and quick techniques, this recipe is perfect for beginners and experienced cooks alike.
  • Special Equipment: A large skillet or wok is essential for cooking the ingredients evenly and achieving a great texture.

Recipe Overview

  • Difficulty Level: This recipe is categorized as easy, making it accessible for all skill levels, ensuring a delightful cooking experience without overwhelming complexity.
  • Category: Bacon fried rice is a perfect main dish, showcasing the beauty of comfort food that satisfies cravings and nourishes the body.
  • Cuisine: This dish is inspired by Asian culinary traditions, particularly Chinese cuisine, where fried rice is a staple that transforms leftover ingredients into something magical.
  • Cost: The cost of this dish is quite economical, allowing for a flavorful meal at a low expense while feeding the whole family.
  • Season: Enjoy this dish any time of the year, but it particularly shines in cooler months when warm, hearty meals are most comforting.
  • Occasion: Bacon fried rice is perfect for casual family dinners, quick lunches, or even potluck gatherings, offering a crowd-pleasing option for any event.

Why You’ll Love This Recipe

This bacon fried rice surpasses expectations with its incredible taste and inviting texture. The crispness of bacon combined with perfectly cooked rice creates an excellent mouthfeel. The flavor starts with the salty, smoky essence of the bacon, balanced by the sweetness of sautéed vegetables. It’s the kind of meal that brings comfort and satisfaction, ideal for both busy weeknights and relaxed weekends with family.

Furthermore, the convenience of this recipe cannot be overstated. With minimal preparation, you can complete this dish in about 25 minutes. Leftover rice is an integral component, allowing you to reduce food waste while enjoying a delicious meal. The straightforward assembly ensures that even novice cooks can navigate the process confidently, providing an interactive experience that can include family members or friends.

Nutrition-wise, this dish packs a punch. The combination of bacon, vegetables, and rice provides a range of essential nutrients and flavors, making it not only comforting but also satisfying. Repeat customers often speak about how bacon fried rice has given them numerous nutritional benefits in a single dish, from fiber-rich vegetables to protein-packed bacon.

In terms of social and entertaining value, bacon fried rice steals the show. It’s an all-in-one meal that easily accommodates friends and family, transforming gatherings into delightful feasts. With its rich flavors and colorful presentation, it’s a dish that inspires conversation and brings people together, allowing everyone to savor each flavorful bite happily.

Lastly, the accessibility of this recipe makes it a winner. You can prepare it with simple, everyday ingredients, making it budget-friendly for anyone. Furthermore, many variations exist for adding your favorite vegetables or proteins, allowing for individual tastes to shine while enjoying a comforting standby.

Historical Background and Cultural Significance

The origins of fried rice can be traced back to the 5th century in China, where it was a practical means of using leftover rice. This time-honored technique has evolved over the centuries, becoming a staple in many Asian cuisines, including Japanese and Thai, before making its way around the world.

Culturally, fried rice represents resourcefulness, turning what would typically be waste into a delicious and economical meal. This reflects many culinary philosophies that emphasize using every part of an ingredient. As it traveled across different cultures, variations emerged, incorporating local ingredients and flavors, blending traditions while preserving the essence of simplicity.

The evolution of the recipe has led to countless adaptations, showcasing regional tastes and preferences. From the traditional Chinese Yangzhou fried rice to variations featuring seafood in Thailand, the dish illustrates the versatility inherent in this culinary tradition, allowing cooks to express creativity based on availability.

In various cultures, fried rice has grown to symbolize celebration and hospitality, frequently featured in banquets and family gatherings. Its ability to encourage sharing makes it more than just a meal; it transforms the dining experience into a communal occasion filled with laughter and conversation.

Ingredient Deep Dive

Bacon: Bacon is a beloved ingredient around the globe, cherished for its rich flavor and crispy texture when cooked. The cultural significance of bacon is profound, particularly in Western cuisine, where it often represents indulgence and comfort. Nutritionally, bacon is high in protein and B vitamins but should be consumed in moderation due to its sodium and fat content. When selecting bacon, look for quality cuts with visible layers of meat and fat for the best flavor. Proper storage in the refrigerator can extend its shelf life, and freezing can preserve it for future use. For a variation, turkey bacon or crispy pancetta can serve as substitutes.

Rice: Rice is one of the world’s most important staple foods, nourishing millions across various cultures. It holds significant cultural value and is often featured in celebrations and ceremonies. Rich in complex carbohydrates, rice provides energy and is a gluten-free food option for many diets. When purchasing rice, look for well-packaged varieties and consider choosing basmati or jasmine for their fragrant qualities. Store rice in a cool, dry place to maintain freshness, and it can last for months. For substitutions, cauliflower rice can be an excellent low-carb alternative in recipes.

Vegetables (Carrots & Peas): Carrots and peas are common vegetables in fried rice, packed with vitamins and minerals. Carrots symbolize health and vitality and their sweet flavor complements the savory ingredients. Peas are a good source of plant protein and fiber, making them a nutritious addition to meals. To select, choose vibrant, fresh options and avoid dull-looking vegetables. Store fresh vegetables in the fridge to keep them crisp, and consider using frozen options for convenience. Variations include bell peppers, corn, or broccoli, adding variety and color to the dish.

Common Mistakes to Avoid

  • Using freshly cooked rice: Freshly cooked rice can become mushy when frying. Use day-old rice, allowing it to cool and firm up for better texture.
  • Overcrowding the pan: Cooking too many ingredients at once prevents even frying. Use a large skillet or wok to help maintain optimal heat.
  • Not adjusting seasoning: Many ingredients taste different based on individual preferences. Taste and adjust soy sauce and spices throughout the cooking process to achieve desired flavor.
  • Skipping aromatics: Aromatics like garlic or onion enhance the dish’s essence. Avoid omitting them for a more flavorful experience.
  • Cooking on low heat: High heat is essential for achieving ideal frying and caramelization. Don’t hesitate to use sufficient heat to enhance flavors.
  • Choosing low-quality bacon: Bacon’s flavor is central to this dish. Opt for high-quality cuts instead of lower, cheaper alternatives for better taste.
  • Not measuring ingredients: Accurate measurements can make a difference. Use measuring cups and spoons for consistent results.
  • Neglecting to prep ingredients: Prepping all ingredients beforehand streamlines cooking. Cutting vegetables and having everything ready helps the process flow smoothly.
  • Using cold ingredients: Cold vegetables can cool down the pan significantly. Let them reach room temperature first to maintain heat.
  • Ignoring portion control: While it’s tempting to overload your plate, portion control ensures a balanced meal that won’t lead to waste and overeating.

Essential Techniques

Proper Frying: Perfect frying is crucial for achieving crispiness without burning. Mastering this technique involves using adequate oil and ensuring the pan is hot before adding ingredients. A common pitfall is not allowing enough time for the pan to heat properly, leading to uneven cooking. A visual cue for success is when ingredients sizzle upon contact, indicating they are cooking correctly.

Chopping Vegetables: Chopping vegetables properly ensures even cooking. It’s essential to create uniform sizes to promote even heat distribution. The common mistake is forgetfulness about size variations can lead to some vegetables being soft while others remain raw. Using a sharp knife and practicing your knife skills can improve this technique over time.

Pro Tips for Perfect Bacon Fried Rice

Use leftover rice: The best texture comes from day-old, refrigerated rice. Freshly made rice tends to clump together and becomes mushy.

Season gradually: Start with less soy sauce and add more as needed to achieve the desired flavor without overwhelming the dish.

Incorporate vegetables smartly: Adding vegetables at different times ensures they maintain their texture. Softer vegetables should be added after the bacon has rendered its fat.

Be creative: Feel free to incorporate different proteins such as shrimp, chicken, or tofu for varieties of taste and nutrition.

Garnish wisely: Green onions, sesame seeds, or chopped cilantro can enhance the dish’s visual appeal and add fresh flavor.

Prepare your equipment: Ensure your skillet or wok is clean and dry to promote better frying and prevent the food from sticking.

Serve hot: Fried rice is best enjoyed fresh and hot off the stove. Try to serve immediately after cooking to experience the best flavor and texture.

Variations and Adaptations

Vegetable Fried Rice: For a vegetarian twist, simply omit the bacon and increase the vegetable content. Introduce bell peppers, mushrooms, or zucchini to enhance flavor and color.

Spicy Fried Rice: For those who enjoy extra heat, consider adding diced jalapeños or a dash of chili oil. This addition can elevate the flavor profile significantly.

Vegan Fried Rice: Substitute bacon with tempeh or mushrooms for a chewy and umami-rich flavor. Each option provides a different texture and taste while maintaining the dish’s heartiness.

Seafood Fried Rice: Incorporate shrimp or crab meat for a delightful seafood twist. Sauté the seafood until just cooked before combining with the other ingredients.

Curry Fried Rice: Add curry paste or powder for deliciously fragrant fried rice. This can complement chicken or mixed vegetables beautifully.

Low-Carb Fried Rice: For keto-friendly options, swap out rice for cauliflower rice, which provides ample volume and absorbs flavors without the carbs.

Serving and Presentation Guide

Plating techniques for bacon fried rice can enhance the dish’s appeal. Use a bowl or shallow plate to showcase the colorful ingredients. A ring mold can create an impressive presentation by forming the rice into a neat shape, making it stand out during meals.

For garnishing, fresh herbs like cilantro or parsley can add a pop of color. A sprinkle of sesame seeds can give the finished dish a delightful crunch. Traditional accompaniments, such as soy sauce or sriracha on the side, can allow guests to adjust flavors to their liking.

Consider modern serving suggestions such as wrapping fried rice in lettuce leaves for a fun, low-carb bite. Temperature is crucial; serve while hot to enjoy the rice’s optimal texture and flavor.

Lastly, controlling portion sizes ensures meals remain balanced. Consider offering small bowls of bacon fried rice at gatherings, making it easier for guests to indulge without overeating.

Wine and Beverage Pairing

When enjoying bacon fried rice, pairing it with wine can enhance the overall dining experience. A crisp, chilled Sauvignon Blanc excellently balances the richness of the bacon. Alternatively, a light-bodied Pinot Noir can also complement the dish’s savory notes without overshadowing it.

For non-alcoholic alternatives, consider iced green tea or unsweetened iced herbal teas that provide refreshing palate cleansers. These drinks not only hydrate but also add a subtle hint of flavor that complements the meal.

If you enjoy coffee or tea, a lightly brewed green tea or a smooth cold brew could harmonize well with the dish, especially when served at an appropriate temperature to avoid overpowering the flavors.

Storage and Shelf Life

Proper storage of bacon fried rice maximizes its shelf life. Leftovers should be cooled promptly and stored in an airtight container in the refrigerator, where they can last up to 3-4 days. For long-term storage, freezing is an option; ideal for extending the dish’s life up to 3 months without losing flavor.

The temperature for storage should remain consistent. Keeping leftovers in a uniform area in the refrigerator or freezer helps prevent spoilage. Signs of spoilage include a sour odor or visible discoloration, indicating it’s time to discard the dish.

For reheating, ensure even heating throughout. A microwave works well for single servings; alternatively, leftovers can be reheated in a skillet over medium heat to revive texture while preventing them from becoming mushy.

Make Ahead Strategies

Preparing bacon fried rice ahead of time is possible with simple strategies. Begin by cooking and cooling the rice the day before, making it easier to manage during the final cooking. Prep vegetables and proteins and store them in the refrigerator so that the meal can be assembled quickly.

When ready to cook, follow the steps as usual or assemble everything but the final cooking. Storing between steps maintains ingredient freshness and flavor. Evaluate the quality of your ingredients prior to cooking to ensure the best results.

Consider adding fresh elements, such as herbs or a squeeze of lime, just before serving to uplift the dish’s flavor profile. It’s the final touches that can make all the difference in maintaining flavor integrity.

Scaling Instructions

Scaling bacon fried rice is straightforward, allowing you to adjust the servings easily. Halving the recipe involves reducing ingredients proportionately, ensuring balance in flavor and consistency. When doubling or tripling, ensure your cooking vessel is large enough to accommodate the additional volume without overcrowding.

Adjustment to cooking times may be necessary. Larger quantities may require slight increases in cooking time to ensure even cooking. This is especially true for vegetables, which may need extra time to soften properly.

When considering storage, a larger batch can last longer if stored correctly. Complete the recipe as usual and experiment with scaling ingredients while maintaining the core flavor of the dish.

Nutritional Deep Dive

Analyzing the macro breakdown reveals that bacon fried rice is rich in carbohydrates, primarily from rice, providing energy for daily activities. Protein content is boosted by bacon and any additional protein you incorporate, contributing to satiety.

In terms of micronutrients, the dish is a source of vital vitamins and minerals, such as Vitamin A from carrots and B vitamins from bacon. Understanding the nutritional benefits enables informed dietary choices, balancing indulgence with health.

Health considerations become crucial for those monitoring salt or fat intake. Adjusting bacon or soy sauce quantities can tailor the dish to better suited dietary preferences, maintaining enjoyment while being mindful of health choices.

Portion analysis is also essential; one serving can be easily integrated into a varied meal, supporting balanced diets. For those managing weight, remaining aware of portions helps maintain control while still delighting in flavorful cuisine.

Dietary Adaptations

Bacon fried rice can adapt to various dietary needs while retaining its essential flavors. For gluten-free diets, using tamari instead of traditional soy sauce creates a suitable alternative. Many of the dish’s key components lend themselves well to gluten-free cooking without sacrificing taste.

The vegan adaptation can replace bacon with plant-based proteins, such as tempeh or mushrooms, maintaining texture and flavor balance while meeting dietary restrictions. Several culinary industries are recognizing the rising demand for tofu and tempeh, so these options are widely available.

Low-carb enthusiasts can modify this dish by replacing rice with cauliflower rice, which mimics traditional fried rice’s texture while significantly reducing carbohydrates. This variation continues to evolve based on culinary trends.

For those following a ketogenic or paleo diet, focusing on healthy fat sources and fresh vegetables can maintain the dish’s heartiness while conforming to dietary guidelines. The adaptability of bacon fried rice ensures that everyone can enjoy this classic dish, no matter their dietary choices.

Troubleshooting Guide

Texture issues can arise if the rice is too sticky from being freshly cooked. Always use day-old rice for the best results, and avoid overcrowding the pan. If the rice becomes mushy, reduce heat to allow excess moisture to evaporate.

Flavor balance is essential. For an overly salty dish, consider balancing the flavors with a pinch of sugar or adding more rice to absorb excess seasoning. Should the flavors come across as too bland, enhance with additional soy sauce or aromatics.

Temperature problems during cooking can often be avoided. Ensure the pan is preheated sufficiently before adding ingredients. If cooking at too low of heat, raise it to achieve the desired frying effect.

Equipment challenges can often lead to uneven cooking. Assess your stovetop’s heat distribution, adjusting accordingly. If using a skillet, opt for those with flat bases to prevent ingredients from clumping together.

Ingredient substitutions should be made thoughtfully. If using other proteins or vegetables, understand their cooking times and textures compared to the original recipe to avoid impacting the final outcome.

Timing concerns often come into play with busy schedules. Remember to prepare ingredients in advance when making bacon fried rice, allowing for seamless cooking without unnecessary delay.

Recipe Success Stories

Community feedback on this bacon fried rice recipe has been overwhelmingly positive. Many home cooks have shared their variations and successes, highlighting the dish’s versatility and appeal across diverse tastes. Those adapting the recipe have reported excellent results, whether substituting vegetables or proteins.

Variations of flavor have led to interesting discoveries that enhance the classic version. Readers experimenting with different spices or using international sauces have created their unique spins, keeping the dish fresh and relevant.

This recipe offers a platform for creativity. Feedback showcases innovative ideas, like adding different proteins, which brings culinary diversity to traditional meals, emphasizing the ability to adapt.

Engagement through photography tips and recipe reviews enriches the cooking community’s experience. Home chefs share their vibrant photos and delightful stories, which inspires others to try their hand at this beloved dish, encouraging interaction and collaboration.

Frequently Asked Questions

Can I use fresh rice for bacon fried rice? Using fresh rice isn’t ideal as it tends to be sticky and moist. Always aim for day-old rice, which is firmer and more suitable for frying.

How can I make this recipe gluten-free? To make this bacon fried rice gluten-free, simply replace regular soy sauce with tamari, which offers the same savory flavor without gluten.

Is it possible to prepare this dish vegetarian? Yes! You can replace the bacon with sautéed mushrooms or tempeh to maintain a satisfying texture while keeping it vegetarian.

Can I add other proteins to the fried rice? Absolutely! Feel free to add shrimp, chicken, or even tofu to mix up the protein sources in the dish, catering to various taste preferences.

What vegetables can I include? Besides carrots and peas, consider adding bell peppers, corn, or broccoli for added nutrition, flavor, and color.

What can I do with leftovers? Store leftovers in an airtight container in the refrigerator for up to four days. Reheat in the microwave or skillet for best results.

How do I know when the bacon is cooked? Cook the bacon until it is crispy and golden brown. Ensure to render the fat well for optimal flavor in the fried rice.

Can I make bacon fried rice in advance? Yes! You can prep all ingredients ahead of time and store them separately. Just combine when ready to fry for quick meal assembly.

Should I sauté onions before others? Yes, starting with onions allows for better flavor development, enhancing the overall dish before adding other ingredients.

How can I make it spicier? To add spice, consider including diced jalapeños or a splash of Sriracha sauce while cooking for an extra kick of heat.

Additional Resources

You can explore related recipes on the blog to enhance your culinary experience. Techniques such as perfecting stir-frying or mastering rice cooking are also covered, providing comprehensive guides for incorporating complementary flavors into your cooking repertoire.

Additionally, dive deeper into ingredient information about various rice types, showcasing the differences in taste and texture. Familiarizing yourself with equipment recommendations, particularly for cooking Asian cuisine, can further improve your kitchen’s efficiency.

Finally, consider seasonal variations based on available produce. This allows you to continually adapt and refresh your bacon fried rice with exciting, new ingredients that celebrate the seasonal bounty.

Join the Conversation

We invite you to engage fully with our community! Share your own adaptations of bacon fried rice on social media platforms, encouraging others to try your take on this classic dish. Photographic tips can help enhance the visual appeal of your cooking, inspiring creativity among fellow cooks.

We love hearing from our readers! Leave your feedback and thoughts on this recipe, offering your insights or suggestions to make it even better. Share how this dish has become a part of your family traditions or gatherings, as community engagement fosters connection through shared culinary experiences.

Don’t forget to showcase your ideas and variations; the exciting possibilities are endless! Let’s keep this conversation going as we explore the endless joy of shared meals!

The Recipe

Bacon Fried Rice

Serves: 4

Prep Time: 10 mins

Cook Time: 15 mins

Total Time: 25 mins

Kitchen Equipment Needed

  • Large skillet or wok
  • Wooden spoon or spatula
  • Measuring cups and spoons
  • Cutting board and knife

Ingredients

  • 4 cups day-old rice
  • 6 strips of bacon, diced
  • 1 cup peas and carrots (fresh or frozen)
  • 3 green onions, chopped
  • 2 tablespoons soy sauce
  • 1 tablespoon vegetable oil
  • 2 cloves garlic, minced
  • 1 teaspoon sesame oil (optional)
  • Salt and pepper to taste

Directions

  1. In a large skillet or wok, cook the diced bacon over medium-high heat until crispy. Remove bacon and set aside, leaving the drippings in the skillet.
  2. Add vegetable oil to the skillet, followed by chopped green onions and minced garlic. Sauté for 1-2 minutes until fragrant.
  3. Add the peas and carrots, cooking for an additional 2-3 minutes until heated through.
  4. Stir in the rice, breaking up any clumps and mixing thoroughly with other ingredients.
  5. Pour soy sauce over the rice and mix well to ensure even distribution. Add sesame oil if desired.
  6. Return the crispy bacon to the skillet, mixing everything together until heated through. Season with salt and pepper to taste, and serve immediately.

Recipe Notes

  • For a vegetarian version, replace bacon with mushrooms or tofu.
  • Add more vegetables based on your preference.
  • Leftover bacon or beef can also be incorporated for added flavor.
  • Consider adding a fried egg on top for an extra rich and flavorful garnish.

Classic French-Style Duck Confit with Crispy Skin

French-Style Duck Confit with Crispy Skin: A Culinary Delight

⚖️
Difficulty
Medium

⏲️
Prep Time
30 mins

🕒
Cook Time
2 hours

⏱️
Total Time
2 hours 30 mins

🍽️
Servings
4 servings

Duck confit is one of the finest delicacies that embodies the essence of French cuisine. With its rich history and sumptuous flavors, this indulgent dish features tender, slow-cooked duck legs that are transformed into a gastronomic masterpiece. The mouthwatering aroma of garlic, thyme, and duck fat fills your kitchen, creating an inviting ambiance that entices anyone who steps through the door. Each succulent bite melts in your mouth, revealing an explosion of flavors that evoke the charm of rustic French bistros.

The magic of duck confit lies in its meticulous preparation. By slowly rendering the duck in its own fat, it’s not only preserved but becomes incredibly tender, while the skin crisps up beautifully when finished. The result is a delightful contrast of textures; each forkful delivers luxurious meat accompanied by an irresistible crispy layer. Perfectly paired with some fresh greens or roasted vegetables, this dish is not just a meal; it’s an experience that transports you straight to the heart of France.

Quick Recipe Highlights

  • Flavor Profile: Bold and savory, with rich, meaty notes heightened by aromatic herbs.
  • Texture: The duck meat is tender and juicy, while the skin is perfectly crispy and golden brown.
  • Aroma: A tantalizing mix of duck fat, garlic, and thyme, creating an irresistible scent that fills the air.
  • Visual Appeal: Vibrant colors with golden, crispy skin contrasting with the deep, rich tones of the meat.
  • Skill Level Needed: While a bit time-consuming, the steps are straightforward, making it accessible for passionate cooks.
  • Special Equipment: A heavy-duty pot or Dutch oven is ideal for slow-cooking in duck fat.

Recipe Overview

  • Difficulty Level: Medium. Although it requires some patience, the steps are manageable for dedicated home cooks.
  • Category: Main Course. This dish excels as the star of any dinner party or special occasion.
  • Cuisine: French. Duck confit is deeply rooted in French culinary tradition, often seen as a symbol of rustic French cooking.
  • Cost: Ingredients might vary, but the overall dish can be made affordably, especially considering the servings.
  • Season: Ideal for fall and winter, as the rich flavors pair beautifully with cooler weather.
  • Occasion: Perfect for celebratory dinners, festive gatherings, or whenever you want to impress guests with your cooking skills.

Why You’ll Love This Recipe

The flavor and texture of French-style duck confit make it irresistible. The rich, savory notes of duck meld effortlessly with the garlicky, herbal essence, providing a depth of flavor that is nothing short of sublime. When paired with the crispiness of the skin, every bite presents a delightful contrast that keeps you coming back for more. It’s a dish that delights your taste buds and satisfies your heart.

Moreover, the convenience and preparation benefits of this recipe allow you to enjoy a delicious meal without spending all day in the kitchen. While the cooking time is lengthy, much of it involves simply letting the duck confit simmer to perfection. This means you can engage in your daily routines or entertain guests while a beautifully aromatic dish does its magic in the background.

Nutritionally, duck confit offers a unique blend of proteins and fats that can be a part of a balanced diet. The duck provides essential amino acids, while herbs like thyme and garlic contribute antioxidants, promoting overall health. When enjoyed in moderation, this dish becomes not just a treat but a thoughtful addition to your meal planning.

Serving duck confit is an experience in itself, making it perfect for social gatherings. Its elaborate presentation and rich flavors spark conversation and allow you to showcase your culinary skills. Sharing this dish with friends and family brings a sense of occasion to mealtime, creating cherished memories around the table.

Finally, the cost-effectiveness and accessibility of this recipe make it an attractive option. While high-end dining may present duck confit as an extravagant choice, preparing it at home allows you to recreate this culinary delight for a fraction of the price. Plus, sourcing duck legs and simple herbs makes it easy to gather the necessary ingredients, making gourmet dining available to everyone.

Historical Background and Cultural Significance

The origins of duck confit date back to the rural kitchens of France, where preservation techniques were essential for survival. Historically, duck confit was a method of saving meat before refrigeration was widespread. It allowed the flavorful duck to be preserved for months, making it a staple in the diets of those who lived in southern France.

As time progressed, duck confit evolved from a practical preservation method into a beloved dish served in establishments that specialize in French cuisine. Its preparation showcases the traditional techniques and respect for ingredients characteristic of French culinary culture, embodying the country’s connection to its agricultural roots and gastronomic heritage.

Today, duck confit is celebrated not just for its taste but also for its cultural significance. It’s become synonymous with French countrysides and rustic cooking, often featured in various culinary festivals and events dedicated to honoring traditional French cuisine.

Regional variations of duck confit exist, each with its unique twist. From the spices used to flavor the duck to the accompaniments served alongside, these adaptations highlight the local flavors and cooking styles, demonstrating the dish’s versatility while underscoring its rustic charm.

Ingredient Deep Dive

Duck legs are the star of this dish, and they have a rich history in French cuisine. Traditionally, duck was a farmyard staple, prized for its flavorful meat and valuable fat. The fat plays a crucial role in the confit process, enabling slow cooking that results in tender, succulent meat. Nutritionally, duck is high in protein and contains beneficial fats that support a healthy diet. When selecting duck legs, look for those with even fat distribution for optimal results, and store them in the refrigerator for up to two days or freeze for longer preservation.

Next, duck fat ensures the best possible outcome for your confit. Renowned for its ability to enhance flavor while providing a luxury texture, duck fat is richer than olive oil and lends a unique taste to the dish. Duck fat can be purchased or rendered at home from the duck, making it both accessible and practical. When stored correctly, it can last for months in the refrigerator, offering a straightforward substitute for other cooking fats in various recipes.

Garlic and thyme add aromatic depth and complexity which elevate the dish. Garlic, celebrated for its many health benefits, complements the rich duck flavor and adds brightness. When selecting garlic, opt for firm bulbs with tight skin. Store fresh garlic in a cool, dry place, and for the thyme, fresh is often preferred, but dried can be used in a pinch, providing a similar, though slightly different, flavor profile.

Common Mistakes to Avoid

  • Rushing the cooking process: Duck confit requires slow cooking to reach its full potential. Don’t skimp on time for optimal tenderness.
  • Using insufficient fat: A common mistake is failing to submerge the duck completely in fat, which is essential for proper cooking.
  • Neglecting seasoning: While the duck is flavorful, seasoning it generously will enhance the overall taste and should not be overlooked.
  • Not browning the skin: The crispy texture is vital, so be sure to brown the skin properly before serving for the best results.
  • Skipping the resting time: Allow the duck to rest after cooking; this aids in moisture retention and improves texture.
  • Forget to strain the fat: Straining your duck fat after cooking is crucial to keep it clean for future use.
  • Ignoring the temperature: Cooking at excessively high temperatures can result in tough meat and burnt skin.
  • Overcooking the dish: Be mindful of timing, as overcooked duck can dry out and lose its appeal.
  • Choosing inferior ingredients: Quality ingredients lead to better outcomes; always choose fresh, high-quality duck and herbs.

Essential Techniques

One indispensable technique in preparing duck confit is the process of curing. This method not only enhances flavor but also helps preserve the meat. To master this, apply a generous amount of salt mixed with your chosen spices onto the duck legs, and let them sit overnight. This step also draws moisture out, contributing to a firmer texture. Keep an eye on your curing time; curing for too long can lead to overly salty meat.

Another crucial technique is rendering the fat properly. Gently heating the duck fat in a pot before adding the duck prevents unnecessary splattering and helps attain a uniform cooking temperature. Make sure to monitor the heat, as higher temperatures can compromise the texture and flavor of your duck confit, leading to undesirable results. Look for visual cues such as gentle bubbling, indicating that the cooking process is happening correctly.

Pro Tips for Perfect French-Style Duck Confit

1. Always use high-quality duck fat for the best flavor. If you can find rendered duck fat at a gourmet store, it can make a significant difference in taste.
2. For added flavor, consider infusing the duck fat with herbs or spices before cooking the meat.
3. If time allows, marinate the duck overnight to enhance the overall flavor profile substantially.
4. Ensure your cooking pot is large enough to avoid overcrowding the duck pieces, which can lead to uneven cooking.
5. For extra crispy skin, finish the duck under a broiler for a few minutes after it’s been taken from the fat.
6. Use leftover duck fat for roasting vegetables or frying potatoes for a deliciously rich flavor.
7. To make the dish lighter, serve with a bright salad to balance the richness of the duck.
8. Don’t hesitate to experiment with additional spices that resonate with your palate; this recipe is versatile and allows for personalization.

Variations and Adaptations

Regional variations of duck confit often include regionally-Sourced herbs and vegetables. For example, adding local spices or incorporating seasonal vegetables, like wild mushrooms, enhances the dish’s rustic charm and allows for culinary creativity.

Seasonal adaptations can also influence how duck confit is served. In spring, layering a fresh pea purée under the duck adds vibrant color and a seasonal touch. In autumn, pairing it with roasted root vegetables makes for a heartier meal perfect for cooler weather.

Dietary modifications may be limited due to the rich nature of the dish; however, alternative fats like goose fat could potentially lend a different but acceptable flavor profile. Additionally, using duck breast instead of legs could create a lower-fat version of the dish with rich duck flavor.

Flavor variations might include experimenting with different herb combinations or adding citrus zest for a refreshing twist. Similarly, adjusting the cooking time can yield a different texture, depending on personal preferences.

For a unique presentation, consider serving your duck confit over homemade gnocchi or pasta, allowing for a more elevated dining experience that transforms the dish into a sophisticated feast.

Serving and Presentation Guide

When serving French-style duck confit, focus on presentation to impress your guests. Plating the duck atop a bed of creamy polenta or wild rice can create a stunning base, while adding a splash of seasonal vegetables enhances the color palette.

Garnishing with fresh herbs, such as thyme or parsley, not only brightens the dish visually but also complements its rich flavors. Consider serving your duck confit with a small side of sautéed greens or a light salad dressed with vinaigrette to balance the meal.

For texture contrast, serve with crispy roasted potatoes or a classic gratin. Ensure the temperature is right; the duck should be served warm to retain its juicy qualities. Opt for portion control, allowing each guest to enjoy a generous yet approachable serving of the dish.

Be mindful of presentation techniques, such as arranging the ingredients in a way that highlights the crispy skin while showcasing the tender meat. Use quality plates to elevate the dining experience, making the dish feel even more special.

Wine and Beverage Pairing

Duck confit pairs beautifully with bold red wines, such as a Pinot Noir or a Malbec. The richness of the duck complements the fruity notes of these wines, providing a harmonious balance of flavors on the palate. A French Bordeaux would also be an excellent choice, enhancing the classic culinary experience.

For those preferring non-alcoholic options, consider pairing with tart cherry juice or a sparkling water flavored with fresh herbs or citrus for a refreshing accompaniment. If coffee or tea is more to your taste, opt for a robust brew to match the deep flavors of the duck, ensuring it doesn’t overshadow the dish’s complexities.

Temperature is vital; serve your chosen wine slightly cooler than room temperature to bring out its best characteristics when pairing with the richness of the confit.

Storage and Shelf Life

Proper storage of your duck confit is essential for maintaining freshness and flavor. After cooking, let the duck cool down slightly and submerge it in the rendered duck fat before the fat solidifies completely. This method preserves the meat for an extended period and enhances its depth of flavor over time.

Refrigerate the confit submerged in fat in an airtight container. It can last for several weeks in the refrigerator, making it a convenient dish to have on hand for quick meals. Signs of spoilage may include off smells or discoloration, so always inspect before using.

For those looking to extend shelf life further, freezing is an excellent option. When properly frozen, duck confit can last for months. When ready to serve, thaw in the fridge overnight to maintain its texture and flavor, then reheat gently to ensure the skin remains crispy.

Make Ahead Strategies

To optimize your time, consider preparing draft duck confit 1-2 days ahead of your planned meal. The longer it rests in the fridge, submerged in its fat, the more the flavors meld together, resulting in an even tastier dish.

You can also store cooked duck confit in the fridge and reheat it just before serving, making it a perfect choice for dinner parties or special occasions. This minimizes stress in the kitchen as your meal time approaches, allowing you to focus on entertaining.

When reheating, use gentle heat to preserve the meat’s moisture while ensuring the skin’s crispiness. Oftentimes, adding a touch of fresh herbs or citrus before serving can elevate the dish and maintain its freshness.

Lastly, consider pausing between steps if you plan to add side dishes. This preparation timeline allows for an organized cooking experience and encourages a relaxed social atmosphere for your dinner.

Scaling Instructions

When scaling your duck confit recipe, whether halving or doubling, always remember to adjust your cooking time accordingly to ensure the meat cooks evenly. For larger batches, opt for a larger oven-safe pot or Dutch oven, allowing ample space for fat and duck to cook properly without crowding.

If doubling, be mindful of the amount of duck fat needed. It’s essential to have adequate fat covering the meat to replicate the original flavors. Be prepared to adjust your seasoning as well; the increased quantity may require a subtle tweak to maintain flavor balance.

To effectively modify timing, keep an eye on the texture of the meat, which will signal when it’s reached the desired tenderness. Cooking ensures delicious duck confit regardless of the portion size as long as these adjustments are made.

Finally, when scaling for larger crowds, ensure you have ample containers for storage, especially if preparing in advance. Properly label your servings for easy access and efficient reheating.

Nutritional Deep Dive

Understanding the nutritional composition of duck confit can aid in making informed dietary choices. On average, a serving of duck confit provides approximately 300 calories, showcasing a healthy balance of protein and fats. The macros primarily consist of rich, satisfying fats that are predominantly unsaturated, promoting overall health when enjoyed in moderation.

Micronutrient analysis reveals that duck is a good source of vitamin B6 and niacin, essential for energy metabolism. Moreover, the use of garlic and herbs adds antioxidant capabilities, bolstering your immune system and overall wellbeing.

Incorporating duck confit as part of a balanced diet can provide essential nutrients while delivering on taste. It’s wise to practice portion control as high-calorie content can add up quickly, ensuring it fits into varied diet regimens without compromising health goals.

When it comes to weight management, enjoying duck confit alongside fresh vegetables or whole grains balances the overall meal, providing necessary fiber and nutrients while maintaining satisfaction.

Dietary Adaptations

Adapting duck confit for various dietary needs does require some creativity. For those following a gluten-free diet, rest assured, this dish is naturally gluten-free, allowing you to enjoy its beauty without concern.

Dairy-free adaptations also apply as duck confit traditionally doesn’t include dairy. If you’re looking to create a vegan alternative, consider using jackfruit marinated in spices and baked, providing a similar texture.

Low-carb and keto enthusiasts may find joy in the high fat content and protein ratio present in duck confit, making it a fitting choice on restrictive diets. However, be cautious with portion sizes to remain within daily carb limits.

If following a paleo plan, duck confit aligns closely with principles due to its whole food ingredients, encouraging the use of duck fatty pieces while avoiding processed oils.

For low-FODMAP diets, plain duck confit is generally acceptable, although you should be cautious with the seasonings. Avoid high-FODMAP inclusions like onions or certain beans to keep the meal safe for sensitive digestive systems.

Troubleshooting Guide

If you encounter texture issues with duck confit, consider checking your cooking time. Under-cooked duck may still be chewy, while overcooked versions can dry out. Aim for tender meat by ensuring an even cooking temperature throughout.

Flavor balance can sometimes sway too salty due to prolonged curing or not enough fat. Balancing your dish with milder side dishes or a touch of sweetness can help neutralize these flavors.

If you face temperature problems, adjust the cooking method. Use lower heat if cooking more significant amounts of duck to ensure a well-cooked result without burning the exterior.

Equipment challenges, like using the wrong pot, may lead to inconsistent cooking. Opt for a heavy-bottomed pot or Dutch oven that can maintain steady heat for better results.

Ingredient substitutions can alter flavor, so always taste as you go. If you’re lacking a primary ingredient, such as herbs, consider experimenting with others that provide similar flavor profiles.

Timing concerns can be mitigated through multi-tasking in the kitchen; if sides are falling behind, keep them warm in the oven or under a clean towel.

Recipe Success Stories

Our community has embraced this French-style duck confit recipe, sharing feedback about their culinary experiences. Many have successfully adapted the recipe to incorporate regional spices, generating new flavors while honoring tradition.

Several home cooks have noted their success in preparing the dish for large gatherings, inquiring further about how to scale up effectively without sacrificing taste or quality. The detailed instructions provided here have enabled them to confidently cook for families and friends alike.

Variations such as using different herbs for curing have led to exciting taste combinations, while others have noted that pairing the dish with unique accompaniments added a personal touch worth celebrating.

Photography tips shared among readers have led to stunning plated images, emphasizing the dish’s visual appeal for social sharing, sparking interest in trying the recipe among friends and family.

Finally, our readers continue to express gratitude, finding joy in a recipe that evokes memories of family meals shared around the table, ensuring that the tradition of duck confit remains vibrant for future generations.

Frequently Asked Questions

What is duck confit?
Duck confit is a traditional French dish made from duck legs that are slow-cooked in their own fat until very tender. The cooking process allows the fat to preserve the meat, giving it a rich flavor and irresistible texture.

How long can I store duck confit?
Duck confit can be stored in the refrigerator submerged in its fat for several weeks. If frozen, it can last for months and should be thawed in the refrigerator before reheating.

Can I use chicken instead of duck?
While the recipe is specifically for duck, using chicken can provide a similar flavor profile, though the texture will differ due to the fat content in duck. Cook it accordingly to achieve tender results.

What do I serve with duck confit?
Duck confit pairs well with roasted vegetables, creamy polenta, or a fresh salad. It’s also lovely when served alongside mashed potatoes or crispy potatoes for contrast in textures.

Is duck confit healthy?
Duck confit can be part of a healthy diet when consumed in moderation. It offers good protein and healthy fats, but portion control is crucial due to its caloric density.

Can I make duck confit ahead of time?
Absolutely! Duck confit is an excellent dish to prepare in advance. Its flavors deepen with time, and it can be stored in the fat until you are ready to enjoy it.

What is the best way to reheat duck confit?
The best way to reheat duck confit is to place it in a hot oven or under a broiler until heated through and the skin becomes crispy. Avoid microwaving to prevent sogginess.

Do I need special equipment to make duck confit?
While no specialized equipment is necessary, a Dutch oven or heavy-bottomed pot is ideal for even cooking. A ladle or tongs will also assist in handling the duck safely.

Can I use non-duck fat?
While duck fat is preferred for its unique flavor profile, you can use other fats like goose fat, lard, or even olive oil as a substitute if necessary. Bear in mind that flavor may vary.

Is duck confit gluten-free?
Yes, duck confit is naturally gluten-free, making it a great option for those with gluten sensitivities or Celiac disease.

Additional Resources

For those intrigued by duck confit, there are many related recipes worth exploring, such as duck breast seared to perfection or duck terrine, which showcases similar ingredients in a different format. Technique guides on confit preparation and using rendered fats can enhance your understanding while cooking.

Ingredient guides can further provide superior methods for selecting and storing high-quality duck and substitutes. Consider recommendations for kitchen equipment from first-rate brands that could elevate your cooking endeavors, particularly when making French cuisine. Finally, seasonal variations in duck confit, focusing on ingredient availability and pairings, can inspire creativity and elevate your culinary repertoire all year round.

Join the Conversation

We invite you to join our community and share your culinary experiences, photos, and reviews related to the French-style duck confit recipe. Engage with fellow food enthusiasts on social media, and show off your unique variations or adaptations on this classic dish.

Your feedback and suggestions can help others in their cooking journeys; recipes thrive in vibrant communities that exchange ideas and cherish shared experiences.

Whether you’re creating a simple family dinner or hosting a special occasion, your insights will inspire chefs at all levels. Join us in celebrating the beauty and art of cooking, and let’s keep the spirit of French culinary traditions alive together.

The Recipe

French-Style Duck Confit

Serves: 4 servings

Prep Time: 30 mins

Cook Time: 2 hours

Total Time: 2 hours 30 mins

Kitchen Equipment Needed

  • Heavy-bottomed pot or Dutch oven
  • Sharp knife for trimming fat
  • Mixing bowl for the seasoning
  • Storage containers for fat and duck
  • Ladle for submerging duck

Ingredients

  • 4 duck legs, bone-in and skin-on
  • 2 cups duck fat (or enough to completely submerge the duck)
  • 4 cloves garlic, crushed
  • Fresh thyme sprigs
  • 1 tablespoon salt
  • Freshly cracked black pepper, to taste

Directions

  1. Start by seasoning the duck legs with salt and black pepper, then place them, along with garlic and thyme, in the refrigerator for 24 hours to cure.
  2. Preheat your oven to 225°F (107°C). Remove the duck from the fridge and rinse off the salt and herbs gently under cold water. Pat dry with paper towels.
  3. In a heavy-bottomed pot, melt the duck fat over medium-low heat; then, add the duck legs, making sure they are fully submerged.
  4. Cover the pot and transfer it to the preheated oven. Cook slowly for about 2 hours or until the duck is tender and the meat pulls easily from the bone.
  5. Once cooked, carefully remove the duck from the fat and let it cool slightly. For crispy skin, place the duck legs on a baking sheet and broil for a few minutes until golden and crispy.
  6. Serve hot with your choice of sides and enjoy!

Recipe Notes

  • For enhanced flavor, consider infusing the duck fat with herbs while it melts.
  • Leftover duck fat can be strained and used for future cooking applications.
  • Duck confit holds up well in storage; feel free to make it in advance.
  • Don’t be afraid to experiment with additional herbs and spices for unique flavor profiles.

Classic French Onion Soup with Rich Caramelized Onions

Classic French Onion Soup: A Comforting Tradition

⚖️
Difficulty
Medium

⏲️
Prep Time
15 mins

🕒
Cook Time
1 hour

⏱️
Total Time
1 hour 15 mins

🍽️
Servings
4

French onion soup is a timeless classic that warms the soul with its rich flavors and comforting texture. This exquisite dish combines caramelized onions, a savory broth, and melted cheese for an indulgent experience that is sure to please any palate. As the onions gently caramelize, their natural sweetness emerges, creating a backdrop for a deeply satisfying soup that serves as the epitome of comfort food. Whether served as an appetizer or a main meal, classic French onion soup has carved its place in culinary tradition, celebrated for its balanced harmony of flavors and heartwarming essence.

The secret lies in the slow cooking of the onions and the skillful infusion of flavors. Each spoonful presents a delightful combination of warm, savory broth, tender caramelized onions, and a satisfying layer of melted cheese on top, all served in a rustic bowl. The delightful aroma wafting from the kitchen while the onions cook is its own unique experience, evoking memories of cozy gatherings and elegant dinner parties. This French classic not only is a treat for your taste buds but also soothes the heart, bringing people together around the dinner table.

Quick Recipe Highlights

  • Flavor Profile: Sweet and savory with a robust beef broth base, complemented by earthy undertones from fresh thyme and a hint of white wine, this soup delights with each spoonful.
  • Texture: The soup features silky broth with a satisfying chew from the onions, rounded out by the gooey, melted cheese on top.
  • Aroma: Aromatic notes of caramelized onions paired with the richness of broth create an irresistible scent that draws everyone to the table.
  • Visual Appeal: A beautifully golden layer of melted cheese floating on top of the soup, garnished with herbs, provides an inviting and rustic presentation.
  • Skill Level Needed: This recipe requires medium-level culinary skills, primarily focusing on technique and timing, perfect for aspiring cooks.
  • Special Equipment: Essential tools include a heavy-bottomed pot, a ladle, and oven-safe bowls for broiling the cheese.

Recipe Overview

  • Difficulty Level: While not overly complicated, classic French onion soup requires patience to slowly caramelize onions, making it ideal for home cooks looking to refine their technique.
  • Category: This dish is traditionally served as a soup course in a formal multi-course meal but also makes a great standalone meal, especially during colder months.
  • Cuisine: Originating from France, it showcases the country’s rich culinary heritage, emphasizing the importance of quality ingredients and foundational cooking techniques.
  • Cost: With affordable ingredients like onions, broth, and cheese, this recipe is budget-friendly while offering gourmet flair.
  • Season: Best enjoyed in fall and winter, it provides warmth and comfort, making it a popular choice for cozy dinners and gatherings.
  • Occasion: Perfect for casual family dinners or more formal occasions, French onion soup impresses guests with its warmth and depth of flavor.

Why You’ll Love This Recipe

French onion soup tantalizes the palate and pleases the senses with its rich taste and smooth texture. The slow-cooked caramelized onions provide sweetness that balances the deep, savory flavor of the broth, creating a deliciously comforting experience. Topped with a generous layer of melted cheese, each bowl is a feast for the eyes as well as the stomach. Moreover, the warmth of this soup envelops you in a hug with every bite, making it an ideal choice on a chilly day.

The convenience factor is another compelling reason to love this recipe. While it requires a little bit of time to chop and cook the onions, the process is largely hands-off, allowing you to relax while delicious aromas fill your kitchen. Once the ingredients are simmering, you can attend to other tasks or simply enjoy the comforting scents wafting through your home, making it an excellent option for meal preparation on busy days.

Beyond its taste, French onion soup is surprisingly nutritious, offering valuable nutrients from the onions, which provide vitamin C, antioxidants, and fiber. These health benefits make it a wholesome option for dinner or lunch. By using quality beef broth, you also gain essential minerals and proteins, further enhancing the soup’s nutritional value.

Socially and entertaining-wise, classic French onion soup is a great conversation starter. The shared experience of savoring this rich and aromatic dish fosters connections among friends and family, whether at a dinner party, a festive holiday gathering, or a cozy meal at home. Everyone can bond over the joys of comfort food, bringing warmth and camaraderie to the dining table.

Lastly, the cost-effectiveness of this recipe cannot be overlooked. With relatively inexpensive ingredients, classic French onion soup allows you to create a gourmet experience at home without breaking the bank. It proves that satisfying, delicious meals don’t have to come with a hefty price tag, making it a staple for those who appreciate great food done simply.

Historical Background and Cultural Significance

Classic French onion soup has its roots deeply embedded in French culinary history. It is believed to date back to ancient Roman times when the simple ingredients of onions, water, and herbs were combined for sustenance. The evolution of this dish into the rich, comforting soup we know today emerged in Paris in the 18th century. French onion soup was initially a food for common folk, cherished for its simplicity and the availability of its ingredients.

Culturally, French onion soup holds a significant place in French cuisine, embodying the spirit of using humble ingredients to create a dish that is both satisfying and flavorful. Today, it symbolizes the essence of French gastronomy, where tradition meets technique. In restaurants worldwide, it remains a popular menu item, often associated with comfort and nostalgia.

This beloved soup has seen numerous transformations over the years, including the addition of cheese, often Gruyère or Emmental, which has become a defining characteristic of the dish. The incorporation of bread as a topping was developed to enhance the texture and presentation, further elevating this traditional culinary staple. Various regions in France boast their adaptations, reflecting local flavors and preferences.

Interestingly, French onion soup is known to have inspired variations across different cultures, with similar recipes appearing in Italian and Spanish cuisines. These adaptations highlight the interconnectedness of food traditions and the universal appeal of this comforting soup, encouraging home cooks around the globe to explore and recreate classic flavors in their kitchens.

Ingredient Deep Dive

Onions

Onions serve as the heart of classic French onion soup, providing a sweet depth of flavor when caramelized correctly. They have been a staple in kitchens around the world for centuries, symbolizing nourishment and health. Rich in vitamins and antioxidants, onions contribute to various health benefits, including anti-inflammatory properties and improved heart health. When selecting onions, look for firm ones with shiny, dry skin, avoiding any soft spots or blemishes. Store them in a cool, dark place to extend their shelf life.

For substitutions, consider using shallots for a milder flavor or a mix of yellow and red onions for added sweetness and color variation in the soup.

Beef Broth

A quality beef broth enhances the flavor profile of French onion soup, bringing a rich umami taste that makes the result deliciously comforting. Broth has been a key component in many culinary traditions, often utilized for its nutritional benefits, providing essential minerals and proteins. Homemade broth is ideal for this recipe, but store-bought options work well, too. Choose selections low in sodium to control the saltiness of your soup.

For those looking for alternatives, vegetable broth can also serve as a base, though it might yield a different flavor profile. For storing, keep broth in the refrigerator for 3-4 days or freeze it for longer-term use.

Cheese

The melted cheese on top of French onion soup is iconic, creating a gooey finish that perfectly complements the savory broth and caramelized onions. Traditionally, Gruyère cheese is used, known for its melting qualities and nutty flavor. Cheese has been an integral part of culinary traditions across cultures for its flavor potential and nutritional benefits, providing protein and calcium.

When preparing your soup, look for high-quality cheese that melts smoothly, avoiding pre-shredded options as they often contain anti-caking agents that hinder melting. For those seeking substitutes, consider Emmental or Comté cheese for similar meltability and taste. Store cheese wrapped in parchment paper in the fridge to keep it fresh.

Common Mistakes to Avoid

  • Not caramelizing the onions long enough: Short cooking time yields raw-tasting onions, while the best flavor comes from slowly caramelizing them until they are deep golden brown.
  • Using low-quality broth: A delicious soup starts with a flavorful broth, so opt for high-quality homemade or well-selected store-bought to enhance the overall taste.
  • Overcrowding the pot: When cooking onions, give them enough space to caramelize properly without steaming, which can lead to soggy onions.
  • Avoiding the wine: Skipping the addition of wine can result in a less balanced flavor profile; it adds brightness and acidity that enhance the overall dish.
  • Skipping the oven step: Broiling the soup with cheese is crucial for achieving that bubbly, browned top, so don’t omit this final step.
  • Rushing the process: French onion soup is meant to be a slow-cooked dish; rushing through can compromise the depth of flavors and the overall texture.
  • Using incorrect bread: Choose a crusty bread that can hold up under the broth and cheese; soggy bread leads to an unappetizing final dish.
  • Neglecting seasoning: Be sure to taste and adjust salt and pepper as needed throughout cooking to build flavor at every stage.
  • Not using a heavy-bottomed pot: Stick to heavy pots that distribute heat evenly to avoid burning the onions and create a consistent cook.
  • Forgetting to garnish: Adding fresh herbs or additional toppings just before serving can elevate the presentation and enhance the flavor experience.

Essential Techniques

Caramelization of Onions: This is one of the most crucial techniques for French onion soup, as it develops the sweet, rich flavor essential to the dish. To master this, slice the onions evenly and start cooking them over medium-low heat, stirring frequently to avoid burning. Watch for a deep, golden color, which indicates they are ready. A common pitfall is to cook on too high a heat, which can burn the onions; the key is patience and low heat.

Building Flavor: The technique of layering flavors involves starting with good quality broth and adding aromatics such as bay leaves or thyme. This is a foundational skill that enhances the final dish. To master this, taste as you cook, adjusting seasoning and ensuring the balance of flavors is harmonious. Avoid the pitfall of under-seasoning; a well-seasoned broth is vital.

Broiling for a Cheese Crust: To achieve that beautiful melted cheese topping, pouring the soup into oven-safe bowls and topping with cheese is vital. Broiling creates a bubbly, golden crust that adds texture and visual appeal. Keep a close watch in the oven to prevent burning; 2-3 minutes is often all it needs and can vary depending on the heat of your broiler.

Pro Tips for Perfect Classic French Onion Soup

1. Choose sweet onions like Vidalia for a naturally sweeter soup, making the dish taste more refined and delicious.
2. Introduce a splash of sherry or balsamic vinegar for an added layer of acidity that cuts through the richness of the cheese.
3. Make sure to use day-old bread that is slightly stale; this helps it hold its texture in the soup without getting mushy.
4. Consider adding a splash of brandy during the cooking process for a depth of flavor and richness that elevates the dish.
5. While Gruyère is traditional, mixing two types of cheese can add complexity; consider combining it with a sharp cheddar or mozzarella for varied flavors.
6. Use fresh thyme sprigs during cooking and remove them before serving; their aromatic quality complements the other flavors beautifully.
7. If making ahead, store the soup and cheese separately to maintain texture and flavor until you are ready to serve.
8. For a more luxurious touch, finish the soup with a drizzle of truffle oil before serving for an exceptional flavor experience.

Variations and Adaptations

French onion soup can be adapted to suit different tastes and dietary preferences. For a regional twist, incorporate local cheeses or herbs to reflect seasonal availability. In colder months, various root vegetables such as carrots or parsnips can be added for extra sweetness and nutrition, giving depth to the flavor profile.

Seasonal adaptations can include adding squash in fall or fresh herbs like basil in summer for a fresh take. For those with dietary modifications, a vegan version can be created by using vegetable broth and omitting cheese, resulting in a lighter alternative that still holds its oniony goodness.

Flavor variations can also be explored, such as adding a hint of smoked paprika for warmth or adjusting the herbs based on personal preference. Texture modifications can be made by blending some of the soup for creaminess while leaving parts chunky for added interest. Lastly, play with presentation by serving in different bowl styles, perhaps garnishing with a sprinkle of fresh parsley or chives for color.

Serving and Presentation Guide

Presenting classic French onion soup elegantly can enhance the overall dining experience. Start by ladling the soup into oven-safe bowls, ensuring you have portions that reflect your guests’ preferences. For a polished look, consider using rustic ceramic bowls or clear glass to showcase the beautiful layers.

Garnishing is crucial; use fresh herbs like thyme or parsley sprinkled on top for color and vibrancy. To serve, ensure the cheese is melted and bubbly before bringing the bowls to the table. Offering sourdough or baguette slices on the side allows guests to customize their soup experience.

Temperature is essential; serve the soup hot, as this encourages the cheese to melt beautifully. Offer portion control by providing smaller bowl sizes, enabling guests to try more dishes during a multi-course meal. Lastly, determine whether to broil the cheese prior to serving, giving it a perfect finish that melds flavor with aesthetics.

Wine and Beverage Pairing

To complement classic French onion soup, consider serving it with a medium-bodied red wine, such as a Pinot Noir or a Merlot, which enhances the rich flavors of the soup. The fruitiness of these wines balances the savory notes of the beef broth and highlights the sweetness of the caramelized onions. Alternatively, a dry white wine, such as a Sauvignon Blanc, can also offer a refreshing contrast.

For non-alcoholic options, consider sparkling water with a lemon twist or a herbal iced tea, both of which hydrate and refresh the palate. If you prefer coffee or tea pairings, choose a robust cup of French roast coffee or a smooth Earl Grey tea to further elevate the dining experience and echo the warmth of the dish.

Temperature is vital in wine serving; ensure red wines are slightly chilled while whites should be served cold, allowing them to showcase their best flavor profile alongside the soup.

Storage and Shelf Life

To store classic French onion soup, allow it to cool to room temperature before transferring it to airtight containers. Properly stored in the refrigerator, it will last for 3-4 days while maintaining its quality. Keep in mind that the bread may become soggy if stored together, so it’s best to keep it separate.

For longer storage, French onion soup can be frozen for up to 3 months. When reheating, do so gently on the stovetop, adding a bit of water or broth if it appears too thick. If freezing, avoid adding cheese until you reheat, ensuring a fresher taste and texture upon serving.

Signs of spoilage include off smells or mold, so be sure to discard any soup that appears questionable. Always reheat until piping hot before serving and adjust seasoning as needed, as flavors can mellow during storage.

Make Ahead Strategies

Prepping classic French onion soup ahead of time is a great way to save time during busy weeknights. Start by caramelizing the onions and preparing the broth a day earlier; both components can be stored separately in the fridge. When ready to serve, reheat them together before adding bread and cheese.

To optimize your make-ahead strategy, consider measuring out all your ingredients the day before to streamline the cooking process. The flavors of the soup will deepen overnight, offering an even tastier experience upon reheating.

Incorporate fresh elements, such as herbs or garnishes, right before serving, ensuring you maintain the dish’s vibrancy and flavor. This strategy allows the soup to shine while providing convenience for the cook.

Scaling Instructions

Scaling classic French onion soup for gatherings is simple. To halve the recipe, adjust the amounts of onions, broth, and cheese accordingly while keeping proportions consistent. For doubling or tripling, a large heavy-bottomed pot is needed to accommodate the extended cooking times without burning the onions.

Remember that timing may change based on the quantity; larger batches may require slight adjustments in cooking durations, especially when caramelizing onions.

When storing larger quantities, consider using multiple containers to avoid compromising the soup’s quality. Keep in mind that flavor enhancements may require additional seasonings when scaling up, so taste and adjust as needed before serving.

Nutritional Deep Dive

Classic French onion soup provides a balanced mix of macronutrients. The soup typically offers carbohydrates from onions and bread, along with protein from the cheese and broth. Each serving exudes hearty flavor while delivering a comforting and satisfying meal.

In terms of micronutrients, onions are rich in vitamin C, B vitamins, and minerals like potassium. Combined with the nutrients from the beef broth, the dish can promote overall health.

For dietary considerations, it’s crucial to analyze the soup’s calorie content, particularly if using higher-fat cheeses; adjusting to lower-fat options can fit many dietary needs. Monitoring portion sizes can also aid those looking to manage weight without missing out on comfort food.

Dietary Adaptations

Classic French onion soup can be easily adapted for various dietary preferences. For gluten-free eaters, use gluten-free bread and ensure the broth is also gluten-free to maintain flavor while accommodating dietary restrictions.

For a dairy-free or vegan version, substitute the beef broth with vegetable broth and skip the cheese, or use nut-based cheese options that melt well and provide a similar experience.

For low-carb or keto diets, consider omitting the bread and incorporating roasted vegetables or additional herbs for flavor. These adaptations allow everyone to savor the heartiness of classic French onion soup regardless of dietary needs.

Troubleshooting Guide

If your French onion soup has a gritty texture, ensure that the onions were properly caramelized and weren’t rushed through cooking; a longer cook time enhances the natural sugars.

For an overly salty broth, counterbalance this by adding cooked, peeled potatoes to absorb the excess salt, then discarding them afterwards.

If the cheese does not melt smoothly, ensure you’re using the right type of cheese and pre-shred it to avoid clumping.

For flavors that are too intense, dilute the soup with a bit of water or extra broth, letting it simmer gently to bring back balance without losing depth.

Finally, if your soup has a flat taste, consider re-seasoning with fresh herbs or a splash of acid like lemon or vinegar, which can elevate the flavors and balance out sweetness.

Recipe Success Stories

Readers often rave about how classic French onion soup has become a beloved staple in their homes. Many share stories of how mastering the caramelization technique transformed their view on soups and cooking in general.

Adaptations have flourished, with some readers experimenting with local ingredients to create unique spins on the traditional recipe while maintaining its core essence. Tips from readers about photography also help others capture the beauty of this visually appealing dish.

People cherish making this dish during family gatherings and creating memories around the dining table, celebrating both taste and connection. The satisfaction of creating a restaurant-quality soup at home continues to inspire aspiring home cooks everywhere.

Frequently Asked Questions

Can I prepare French onion soup in advance?

Absolutely! You can prepare the caramelized onions and broth ahead of time. Just combine them and store them separately in the fridge. Reheat when you’re ready to serve, adding cheese only just before broiling.

What type of bread is best for French onion soup?

A crusty bread like a baguette or sourdough works best. It maintains its structure in the soup without becoming mushy, providing an ideal base for the melted cheese.

Can I make this soup gluten-free?

Yes, you can adapt classic French onion soup by using gluten-free bread and ensuring that the broth is gluten-free. Enjoy the flavors without compromising your dietary needs.

Is there a vegetarian option for French onion soup?

Indeed! Substitute beef broth with vegetable broth and omit the cheese or use a dairy-free cheese alternative to create a vegetarian or vegan-friendly version of the soup.

How do I store leftover French onion soup?

Store leftover soup in airtight containers in the refrigerator for up to 3-4 days. For longer storage, freeze the soup, ensuring to keep bread and cheese separate until serving.

How can I enhance the flavor of my soup?

Consider adding a splash of sherry or balsamic vinegar to deepen the flavor. Fresh herbs like thyme or rosemary can also provide added aroma and depth.

What’s the best cheese to use?

Gruyère cheese is the traditional choice for French onion soup due to its great melting quality and flavor, but you may also mix it with provolone or mozzarella for additional creaminess.

Can I use sweet onions instead of yellow onions?

Absolutely! Sweet onions, like Vidalia or Walla Walla, work wonderfully, adding a more pronounced sweetness to your soup, enhancing the overall dish.

What wine pairs well with French onion soup?

A smooth red wine like Pinot Noir or Merlot pairs beautifully with the richness of the soup, complementing the sweet and savory layers delightfully.

Is it necessary to broil the cheese?

Yes, broiling creates that delicious melted cheese crust that’s iconic to French onion soup, adding both flavor and texture. Don’t skip this step!

Additional Resources

For those interested in perfecting their skills, consider exploring related recipes such as creamy potato leek soup or classic butternut squash soup, both utilizing similar techniques. Additionally, check out technique guides on caramelization, broth preparation, and pastry-making if you wish to dive deeper into French cuisine. Find ingredient information on sourcing high-quality cheeses and broths to ensure the best flavors for your cooking adventures.

Join the Conversation

We invite you to share your thoughts and photos of your classic French onion soup creations on social media. Connect with other cooking enthusiasts and exchange tips, reviews, and experiences surrounding this classic recipe. Don’t hesitate to share variations or adaptations you’ve made; we love seeing how classic dishes inspire creativity in the kitchen!

The Recipe

Classic French Onion Soup

Serves: 4

Prep Time: 15 mins

Cook Time: 1 hour

Total Time: 1 hour 15 mins

Kitchen Equipment Needed

  • Heavy-bottomed pot or Dutch oven
  • Oven-safe bowls
  • Ladle
  • Wooden spoon

Ingredients

  • 4 large onions, thinly sliced
  • 4 tablespoons unsalted butter
  • 2 tablespoons olive oil
  • 4 cups beef broth
  • 1 cup dry white wine
  • 1 teaspoon fresh thyme or ½ teaspoon dried thyme
  • Salt and pepper to taste
  • 4 slices of crusty bread
  • 1.5 cups Gruyère cheese, shredded

Directions

  1. In a heavy-bottomed pot, melt the butter and olive oil over medium heat. Add sliced onions and cook, stirring frequently, for about 30-40 minutes until they caramelize and turn a deep golden brown.
  2. Add white wine, scraping any bits from the bottom of the pot, and cook until reduced by half.
  3. Pour in the beef broth and add thyme, salt, and pepper. Bring to a simmer and cook for another 15 minutes.
  4. Preheat the broiler. Ladle soup into oven-safe bowls, top with toasted bread, and sprinkle generously with cheese, about ⅓ cup per bowl.
  5. Place bowls under the broiler for 2-3 minutes or until cheese is melted and bubbly. Serve hot.

Recipe Notes

  • For a richer flavor, use homemade beef broth.
  • Feel free to substitute with your favorite cheeses to create a unique flavor profile.
  • If making ahead, store cheese and bread separately from the soup.

Easy African Chicken Curry – Rich, Spiced, and Flavorful

African Chicken Curry: A Flavorful Journey to the Heart of Africa

⚖️
Difficulty
Moderate

⏲️
Prep Time
20 mins

🕒
Cook Time
40 mins

⏱️
Total Time
60 mins

🍽️
Servings
4

Welcome to the world of African Chicken Curry, a dish that encapsulates the vibrant flavors and rich culinary traditions of Africa. This hearty curry brings together juicy chicken pieces, aromatic spices, and a medley of vegetables to create a meal that is as comforting as it is flavorful. With each bite, you’ll experience a delightful balance of heat, sweetness, and earthiness, making it a perfect dish for family gatherings or a cozy night in.

The secret to this African Chicken Curry lies in its homemade spice blend, reminiscent of earthy African landscapes. Imagine the warmth of turmeric, the kick of cayenne, and the soothing scent of cilantro filling your kitchen. This dish does more than just satisfy hunger; it warms the soul, inviting you to savor each moment spent with loved ones over a shared meal.

Quick Recipe Highlights

  • Flavor Profile: Bright notes of ginger and garlic combined with the heat of chili create a delightful balance.
  • Texture: The chicken is tender and succulent, while the vegetables add a satisfying crunch.
  • Aroma: A captivating blend of spices fills the air, awakening the senses with every simmer.
  • Visual Appeal: The vibrant golden hues of the curry, complemented by colorful vegetables, make for an eye-catching presentation.
  • Skill Level Needed: This moderate-level recipe requires some basic cooking skills but is manageable for home cooks.
  • Special Equipment: A large skillet or Dutch oven is essential for achieving the perfect simmer.

Recipe Overview

  • Difficulty Level: The recipe is moderate, with straightforward steps for preparation and cooking.
  • Category: This dish is perfect for lunch or dinner and can serve as a standout centerpiece for potlucks.
  • Cuisine: Influenced by various African regions, this dish showcases the continent’s rich culinary diversity.
  • Cost: Ingredients are generally affordable, making it a cost-effective choice for families.
  • Season: Cozy up with this dish during the cooler months when a warming curry is most welcome.
  • Occasion: Ideal for family dinners, gatherings, or themed nights showcasing African cuisine.

Why You’ll Love This Recipe

The African Chicken Curry promises a delightful taste experience, showcasing a blend of savory spices and fresh ingredients that create a unique flavor profile. The tender chicken absorbs the rich sauce, while herbs like cilantro enhance the overall freshness of each serving. It’s truly a dish that entices your palate and keeps you coming back for more.

Not only is this recipe delicious, but the convenience of preparation makes it appealing to busy cooks. With a prep time of just 20 minutes, you can quickly chop your ingredients and have dinner simmering on the stovetop in no time. The simplicity of the steps allows even novice cooks to impress family and friends effortlessly.

Packed with nutrients, this Scottish-inspired curry combines protein-rich chicken with nourishing vegetables. Bell peppers, carrots, and stirring in leafy greens create a wholesome meal that’s both satisfying and healthy. Enjoy knowing that you’re serving your loved ones a dish that fulfills both their taste buds and nutritional needs.

The communal aspect of sharing African Chicken Curry brings people together at the dinner table, fostering connections and lively conversations. The vibrant flavors and inviting aromas encourage everyone to dig in and explore cultural exchanges through food. This dish serves as a wonderful way to bond over a shared culinary experience.

Lastly, the affordability of ingredients means that this dish is easily accessible, allowing everyone to enjoy a taste of Africa without breaking the bank. With just a few pantry staples and fresh produce, you can whip up this meal any day of the week, ensuring delightful flavors are never far away.

Historical Background and Cultural Significance

African Chicken Curry has its origins in various regions across Africa, reflecting the continent’s diverse culinary traditions. The use of spices like curry reflects historical trade routes that introduced new flavors and cooking techniques to local cuisines. Over generations, communities adapted these influences, creating distinct styles of chicken curries recognizable in many countries.

The cultural importance of chicken curries in African society extends beyond mere sustenance. They are often integral to family gatherings, celebrations, and communal feasts, bridging gaps between generations. Recipes are passed down, carrying family stories and traditions into the present day, contributing to communal identity.

As globalization influences food cultures, African Chicken Curry has evolved, incorporating new ingredients and techniques drawn from both local and international sources. Contemporary variations often include fusion elements, showcasing the dish’s flexibility and ability to adapt while honoring its roots.

Regional variations abound, with each country adding its signature flair. From the spicy and rich stews in West Africa to milder versions in East Africa, these differences highlight the broad spectrum of flavors while providing a glimpse into regional preferences and availability of local ingredients.

Ingredient Deep Dive

Chicken

Chicken is a staple protein across Africa, revered for its versatility and flavor. Rich in protein, it provides essential nutrients that support a healthy diet. Choosing organic or pasture-raised chicken enhances flavor and nutritional content. When storing, keep it refrigerated and consume within a few days, or freeze for longer-lasting freshness. Popular substitutions for chicken include turkey or firm tofu for a vegetarian option.

Spices

The spices used in African Chicken Curry, such as cumin, turmeric, and coriander, have historical significance, often used for their medicinal properties. They not only contribute unique flavors but also bring nutritional benefits, including anti-inflammatory properties. Selecting fresh, whole spices and grinding them just before use enhances flavor intensity. Store spices in a cool, dark place and replace them regularly to maintain potency.

Vegetables

Vegetables like bell peppers and carrots add vital nutrients and textures to the curry. Bell peppers are high in vitamins A and C, while carrots provide fiber and beta-carotene. For the best taste, use fresh, vibrant vegetables. Store them in the fridge and consume them within a week to maintain freshness. Alternatives include zucchini or sweet potatoes, providing unique flavors and textures to the dish.

Common Mistakes to Avoid

  • Skipping the Marination: Marinating chicken enhances flavor and tenderness, so don’t skip this step!
  • Overcrowding the Pan: Cooking too many ingredients at once can lead to uneven cooking. Cook in batches if necessary.
  • Underestimating Spice Quantities: Each spice plays a vital role in flavor balance; adjust according to personal taste but don’t skimp!
  • Not Tasting While Cooking: Regularly taste your curry to adjust seasonings, ensuring the perfect flavor profile.
  • Cooking on High Heat: Cooking too quickly can lead to burnt spices and unevenly cooked chicken; slow and steady wins the race.
  • Skipping Fresh Herbs: Fresh herbs are essential for balancing flavors — always add them towards the end of cooking.
  • Ignoring Texture: Be mindful of veggie doneness; overcooked vegetables lose their texture and nutrients.
  • Not Letting the Curry Simmer: Allowing the curry to simmer is crucial for melding flavors together; don’t rush this step.
  • Using Stale Spices: Invest in fresh spices for the best flavor. Stale spices decrease the aromatic quality of your dish.
  • Serving Immediately: Allowing the curry to rest enhances flavor. Letting it sit for a while before serving can be beneficial.

Essential Techniques

Marination

Marinating chicken is crucial for enhancing flavor penetration. Use yogurt or acidic marinades, as they help tenderize the meat. Aim for at least 30 minutes of marination; longer if possible. To master marinating, ensure even coverage and utilize ziplock bags for best results. Watch out for over-marination, which can lead to mushy textures.

Browning the Chicken

Searing chicken creates depth of flavor through the Maillard reaction. Achieve a golden-brown crust by avoiding overcrowding and maintaining high heat. Master this step by ensuring the pan is adequately heated before adding chicken. Visual cues for success include a charred edge and a pleasant aroma.

Pro Tips for Perfect African Chicken Curry

1. Use high-quality spices for the best flavor and freshness. Consider importing spices from specialty stores to enhance the taste.
2. Prepare your ingredients ahead of time—chop vegetables and measure spices before starting to streamline your cooking process.
3. For extra richness, finish the curry with a splash of coconut milk or cream for a velvety texture that balances spices beautifully.
4. Adjust the heat according to your preference: add whole chilies for heat or use milder spices for a gentler dish.
5. Add roasted nuts or seeds as a garnish to introduce a crunchy texture and elevate presentation.
6. Enhance flavors by incorporating fresh lime juice or zest just before serving; it will brighten the dish remarkably.
7. Experiment with different meat cuts for varied textures; thighs and drumsticks often yield more flavor than breast meat.
8. Allow leftovers to sit overnight for a richer taste, as flavors develop and deepen in intensity.

Variations and Adaptations

Regional variations of African Chicken Curry include using different proteins such as lamb or goat, which add distinct flavor profiles. Seasonal adaptations involve using whichever vegetables are fresh and readily available — consider adding seasonal squash in the fall or leafy greens in spring.

Dietary modifications can easily be made, such as substituting chicken with chickpeas for a vegetarian option, or omitting spices that trigger dietary sensitivities. For a more robust flavor, introduce dried fruits like raisins or apricots for sweetness that contrasts beautifully with the curry.

Texture modifications include adding cooked lentils for added protein and hearty feel, or serving over fluffy rice for a satisfying base. Presentation alternatives might involve charming bowl display in vibrant serving ware, garnished with layers of fresh cilantro and a sprinkle of nuts.

Serving and Presentation Guide

Plating techniques for the African Chicken Curry should maintain its rustic appeal. Serve in a large shallow bowl with a rich sauce pooling around the chicken and vegetables. Garnish with freshly chopped cilantro or parsley for a pop of color.

Garnishing ideas include providing a drizzle of coconut cream or yogurt in a zigzag, enhancing visual appeal while adding creaminess. Traditional accompaniments can include fluffy rice or warm flatbread which help soak up the delectable sauce.

Modern serving suggestions involve incorporating side salads or roasted vegetables for a balanced meal. Serving temperature should be hot but ensure to allow the dish to rest for a few minutes to reach optimal enjoyment temperature.

Portion control tips suggest serving in moderate sizes; the curry is flavorful and rich, encouraging savoring rather than rushed consumption.

Wine and Beverage Pairing

When it comes to wine pairings, opt for a robust red like Syrah or a spicy Zinfandel that can complement the curry’s depth. For white wine enthusiasts, an off-dry Riesling can counterbalance the heat beautifully.

Non-alcoholic alternatives such as hibiscus tea or ginger lemonade bring brightness and acidity that pairs nicely with the dish’s flavors. If desired, a smooth chai could harmonize with the spices found in chicken curry.

Temperature considerations are vital: all beverages should be served at their recommended temperatures — reds slightly cool, whites chilled, and teas warm or iced as per preference.

Storage and Shelf Life

Proper storage methods allow you to enjoy African Chicken Curry for several days. Store it in an airtight container in the fridge for up to 4 days or freeze for up to 3 months.

Temperature requirements for storage are crucial, keeping the curry under 40°F in the refrigerator for food safety. Use glass containers for chilling as they allow for even cooling and can withstand freezing without cracking.

Signs of spoilage include sour smells, separation of liquids, or visual mold. When reheating, do so thoroughly to at least 165°F, stirring occasionally to ensure even heating. For freezing, separate portions into smaller containers to facilitate quicker thawing and improved quality.

Make Ahead Strategies

Planning meals ahead can simplify weeknight dinners, and African Chicken Curry is perfect for this. Prep the chicken and marinate it a day in advance for better flavor infusion.

Regarding storage between steps, keep prepared vegetables in the fridge, ideally within ziplock bags to maintain freshness. Quality impact is minimal with this dish as flavors only mature from sitting.

Assembly tips include cooking a large batch and reheating only what you need for dinner. During reassembly, consider fresh elements like herbs or vegetables to enhance flavor and nutrition.

Reheating guidelines suggest using a stovetop for best results but microwave heating is acceptable. Fresh elements like lime juice and herbs can be added post-reheat to revitalize flavors.

Scaling Instructions

Halving the recipe is ideal for smaller gatherings or few servings. Adjustments to seasonings should be made equally to ensure the curry retains its flavor integrity.

When doubling or tripling the recipe, ensure larger equipment is available for cooking. Timing modifications may be necessary, allowing for extra simmering time to meld flavors.

For storage considerations, use multiple containers to avoid overcrowding. Freeze extra servings when scaling up to maintain ingredient freshness and flavor integrity for future meals.

Nutritional Deep Dive

Analyzing the macro components of African Chicken Curry reveals it as a protein-rich meal, primarily due to the chicken’s high protein content. Carbohydrates come from vegetables and any accompaniments paired with the curry, making for a balanced meal.

Micronutrient analysis provides a bounty of vitamins and minerals, particularly from the vegetables and spices which offer anti-inflammatory benefits. This dish supports immune function and overall health when integrated thoughtfully into a balanced diet.

Health benefits of this dish include hearty nutrition without sacrificing flavor, contributing to a feeling of fullness and satisfaction. Portion analysis is essential when managing weight, as the rich flavors can lead to smaller serving sizes filled with substance.

Weight management tips involve serving with portion control, incorporating ample vegetables, and making smarter ingredient choices like leaner cuts of meat or increasing vegetable content for meals.

Dietary Adaptations

For those needing gluten-free options, simply ensure no gluten-containing ingredients are used — this recipe naturally fits into a gluten-free lifestyle.

Dairy-free adaptations can easily be made by omitting creams or using coconut milk instead, preserving moisture without sacrificing taste. Vegans can substitute chicken for chickpeas or lentils; both provide robust protein sources while keeping the dish’s heartiness intact.

Low-carb and keto adaptations may involve opting for cauliflower rice instead of traditional rice, ensuring the meal remains filling while lowering carbohydrate intake. Additionally, paleo diets can benefit from incorporating healthy fats like coconut oil while avoiding processed ingredients.

Low-FODMAP variations may replace typical high-FODMAP ingredients (like onions) with acceptable substitutes while retaining flavor balance. Assessing these modifications accommodates diverse dietary needs while preserving core flavors.

Troubleshooting Guide

Texture issues can manifest as too thick or too watery. If your curry is thick, adding a splash of broth or water will help; if too thin, let it simmer uncovered to reduce excess liquid.

Flavor imbalance might occur; a pinch of sugar can help if the curry is too spicy or tart. Conversely, add more spices to elevate lacking flavors. Pay attention to heat management during cooking to ensure thorough flavor development.

Temperature problems can arise if the dish does not reach the recommended internal temperature while heating. Use a food thermometer to guarantee safety.

Ingredient substitutions can alter results; ensure replacements deliver similar flavor elements, and adjust amounts accordingly. For example, substituting chicken stock for water adds depth but may require a reduction in added salt.

Timing concerns may lead to overcooked chicken. Utilize a timer and monitor closely to ensure chicken is cooked through without losing its tenderness.

Recipe Success Stories

Community feedback consistently praises the flavor and comfort this dish brings. Many culinary enthusiasts have shared their experiences of nourishing families and friends with this African Chicken Curry, celebrating its rich taste and satisfying warmth.

Variation successes are commonly reported; readers love experimenting with different vegetables such as zucchini or eggplant, showcasing how adaptable this recipe is to seasonal ingredients.

Adaptation stories have forged new traditions; for instance, families have integrated the recipe into their cultures, adding personal twists by including local spices or regional vegetables.

Reader suggestions have encouraged creative presentations, such as using banana leaves or rustic earthenware dishes to serve the curry, enhancing its attractive appearance while honoring its origins.

Photography tips suggest capturing the final dish without too many distractions; simple backgrounds emphasize the vibrant colors of the curry itself, with garnishes accentuating freshness and flavor.

Frequently Asked Questions

1. Can I use boneless chicken for this curry?

Yes, boneless chicken can be used for quicker cooking; however, bone-in chicken provides richer flavor due to the marrow and skin.

2. Is this curry spicy?

The spice level can be adjusted according to personal preference. Start with less chili and gradually add more to suit your taste.

3. Can I make African Chicken Curry ahead of time?

Absolutely! This curry tastes even better the next day as flavors meld; simply store it in the fridge and reheat before serving.

4. What should I serve with this curry?

Serve with steamed rice, quinoa, or traditional flatbread for a well-rounded meal that absorbs the curry’s flavors.

5. Can I freeze leftovers?

Yes, freeze leftovers in an airtight container. When ready to consume, thaw in the fridge overnight before reheating.

6. What are good side dishes to pair?

Pair it with a simple cucumber salad or roasted vegetables to balance the dish’s richness and enhance flavors.

7. How long does African Chicken Curry last in the fridge?

Stored in an airtight container, it lasts for about 4 days in the fridge without compromising quality.

8. Can I adapt this recipe to be vegetarian?

Yes, substitute chicken with chickpeas or lentils, maintaining similar spices for delightful flavor in a vegetarian curry.

9. What type of chicken is best for curry?

Thighs and drumsticks are preferred as they provide moisture and flavor during cooking compared to chicken breasts.

10. How do I make this dish less greasy?

Skim off excess fat after cooking or use skinless chicken, allowing the curry to retain flavor while reducing greasiness.

Additional Resources

Explore related recipes to expand your culinary repertoire, such as Jollof Rice or Moroccan Tagine, enhancing your understanding of African flavors.

Technique guides can provide insights into best practices for curry-making, including spice blending and marination, for even better results.

Ingredient information is vital to understand the unique properties of spices and produce, enriching your cooking experience.

Equipment recommendations highlight essential tools such as a heavy-bottomed pot that provides even heating and prevents scorching.

Finally, seasonal variations encourage you to adjust ingredients and flavors according to local harvests, ensuring the dish remains fresh and relevant throughout the year.

Join the Conversation

Engage with fellow culinary enthusiasts by sharing your very own African Chicken Curry experiences on social media, using hashtags and joining cooking groups.

Photography tips can enhance your food photography, allowing you to capture the beauty of your dish authentically and attractively.

Leave thoughtful reviews to encourage and inspire other cooks. Community engagement fosters a space for exchanging ideas, tips, and variations for further enriching the culinary experience.

Offering recipe variations not only makes others feel included but can also generate discussions around innovation and creativity in the kitchen.

The Recipe

African Chicken Curry

Serves: 4

Prep Time: 20 mins

Cook Time: 40 mins

Total Time: 60 mins

Kitchen Equipment Needed

  • Large skillet or Dutch oven
  • Cutting board
  • Chef’s knife
  • Measuring cups and spoons
  • Wooden spoon or spatula

Ingredients

  • 4 chicken thighs, bone-in, skin-on
  • 2 tablespoons vegetable oil
  • 1 cup onion, diced
  • 2 cloves garlic, minced
  • 1 tablespoon ginger, grated
  • 1 bell pepper, sliced
  • 1 carrot, sliced
  • 2 cups chicken broth
  • 2 teaspoons curry powder
  • 1 teaspoon cumin
  • 1 teaspoon turmeric
  • ½ teaspoon cayenne pepper (optional)
  • Salt and pepper to taste
  • Fresh cilantro for garnish

Directions

  1. Heat the oil in a large skillet or Dutch oven over medium heat.
  2. Add the onions and cook until translucent, about 5 minutes.
  3. Stir in garlic and ginger, cooking for another minute until fragrant.
  4. Add the chicken thighs, searing on both sides until golden brown.
  5. Mix in the spices: curry powder, cumin, turmeric, and cayenne, stirring for an additional minute.
  6. Add the broth, bell pepper, and carrot; bring to a gentle simmer.
  7. Cover and cook on low heat for 30 minutes or until chicken is tender.
  8. Remove the lid, increase heat slightly, and simmer for an additional 5-10 minutes to thicken the sauce.
  9. Season with salt and pepper to taste and garnish with fresh cilantro before serving.
  10. Serve over rice or with flatbread for a complete meal.

Recipe Notes

  • For creaminess, add coconut milk towards the end of cooking.
  • Feel free to substitute vegetables based on seasonal availability or personal preference.
  • Adjust spice levels by adding more or less cayenne for desired heat.

Easy Sausage Cream Cheese Crescents – Perfect for Any Occasion

Sausage Cream Cheese Crescents: The Perfect Appetizer for Any Occasion

⚖️
Difficulty
Easy

⏲️
Prep Time
15 mins

🕒
Cook Time
20 mins

⏱️
Total Time
35 mins

🍽️
Servings
16 crescents

The Sausage Cream Cheese Crescents are not just a dish; they’re an experience. Imagine biting into crispy, golden crescent rolls stuffed with a creamy, savory mixture of sausage and cream cheese. These delightful bites are perfect for parties or casual family get-togethers, effortlessly transitioning from appetizer to snack. The rich flavors blend beautifully, making each bite memorable.

This recipe strikes a perfect balance between ease and taste. The initial step involves cooking the sausage until it’s golden brown and crispy, infusing the air with an irresistible aroma that will whet anyone’s appetite. As the crescents bake in the oven, the buttery scent wafts through the home, inviting everyone to gather around and enjoy a delicious offering that is both comforting and indulgent.

Quick Recipe Highlights

  • Flavor Profile: The rich umami of sausage mixes seamlessly with the creamy texture of the cream cheese, accented by herbs and spices.
  • Texture: The outside is flaky and crispy, while the inside offers a warm, creamy filling that melts in your mouth.
  • Aroma: The aroma of baked pastry combined with savory sausage fills the room, creating an inviting atmosphere that draws people to the kitchen.
  • Visual Appeal: Golden brown crescents topped with a sprinkle of herbs create a visually stunning appetizer that is hard to resist.
  • Skill Level Needed: This recipe is beginner-friendly, requiring basic cooking and baking skills, perfect for aspiring chefs.
  • Special Equipment: You only need basic kitchen tools, such as a baking sheet and parchment paper, making it accessible for any home cook.

Recipe Overview

  • Difficulty Level: Easy. This recipe is straightforward, making it perfect for novice cooks or those short on time.
  • Category: Appetizer. Ideal for parties, game days, or family gatherings, these crescents are a hit at any event.
  • Cuisine: This dish combines classic American comfort food with a twist that reflects a Southern heritage in favor of hearty snacks.
  • Cost: An economical recipe that highlights budget-friendly ingredients without compromising on taste.
  • Season: Perfect year-round, these crescents are particularly appealing during holiday seasons and celebratory occasions.
  • Occasion: They make an excellent addition to movie nights, cocktail parties, or holiday gatherings, bringing everyone together.

Why You’ll Love This Recipe

The taste and texture appeal of Sausage Cream Cheese Crescents create a delightful culinary experience. The combination of the flaky crescent roll with the warm, creamy filling creates a satisfying mouthfeel that is hard to resist. Each bite is bursting with flavors, from the savory sausage to the rich cream cheese, making it a favorite for gatherings and personal indulgence alike.

Convenience and preparation benefits play a significant role in making this dish a household favorite. With minimal prep time and simple steps, even the busiest cooks can whip these crescents together in no time. Plus, they can be made ahead of time and baked just before serving, allowing for stress-free entertaining.

From a nutritional standpoint, this recipe incorporates protein from the sausage and the cream cheese offers some calcium, making it a relatively balanced option while indulging. While certainly not a health food, it provides comfort in moderation and can be a part of a balanced lifestyle.

Social and entertaining value is inherent in these crescents. They’re perfect for sharing, and their appeal tends to spark conversations and connections, making them ideal for gatherings. Guests will find themselves returning for more, enhancing the overall festive vibe.

Lastly, cost-effectiveness is a crucial aspect of this recipe. With readily available ingredients, affordability meets deliciousness. You can prepare a large batch without breaking the bank, ensuring everyone leaves satisfied.

Historical Background and Cultural Significance

The origin story of Sausage Cream Cheese Crescents can be traced back to classic American comfort foods, where savory fillings wrapped in flaky pastry have been popular for generations. While the crescent roll’s roots lie in France, the combination of sausage and cream cheese reflects a unique American twist influenced by Southern cooking traditions.

Culturally, these appetizers represent the spirit of gatherings and celebrations. In many households, dishes that involve shared finger foods are staples at parties and on festive occasions. They foster a sense of togetherness, encouraging friends and family to mingle over warm, delicious bites.

Over the years, the recipe for these crescents has evolved, incorporating various meats and flavor profiles, showcasing regional tastes and seasonal ingredients. From spicy sausage to more exotic meats, each variation has contributed to its popularity.

Regional variations abound, with many cooks adding their unique spin on the filling. In the Midwest, you might find variations incorporating cheese blends or different herbs, while Southern kitchens may lean towards spicier sausage. Each twist emphasizes local tastes and preferences.

Ingredient Deep Dive

The stars of this recipe include sausage and cream cheese.

Sausage, a beloved staple in many kitchens, has a rich history dating back centuries. Often associated with hearty breakfasts, its versatility allows it to shine in various dishes, from sandwiches to casseroles. Nutritionally, sausage offers a protein boost, but it’s essential to choose options with lower fat content to maintain balance. When selecting sausage, look for quality brands or local sources for the freshest options. Store it in the refrigerator when raw and cooked sausage can be frozen for later use.

Cream cheese, on the other hand, adds a smooth richness that complements the savory elements in this dish. Originating in the United States in the 19th century, cream cheese has become a common ingredient in many recipes. It is a good source of calcium, although it can be high in fat, so moderation is key. When purchasing cream cheese, opt for brands that offer natural ingredients and check for freshness dates. Store in the refrigerator and use within a few weeks for the best quality.

Common Mistakes to Avoid

  • Overfilling the crescents can cause them to burst during baking; stick to recommended amounts for best results.
  • Not preheating the oven can lead to uneven cooking; give your oven time to reach the proper temperature.
  • Using cold ingredients directly from the fridge can affect the cream cheese’s creaminess; allow it to soften at room temperature first.
  • Skimping on seasoning can make the filling bland; don’t forget to add herbs and spices for flavor enhancement.
  • Ignoring the quality of crescent rolls can lead to disappointing results; choose a trusted brand for the best texture.
  • Baking too long can dry out the crescents; watch closely to achieve that perfect golden-brown finish.
  • Asking guests to wait too long can lead to a less enjoyable experience; serve hot from the oven for maximum flavor.
  • Not allowing the cooked crescents to cool slightly can make them difficult to eat; let them sit for a few minutes before serving.

Essential Techniques

Mastering the art of rolling crescents is key to achieving the right shape and texture. Start by gently stretching the dough to create a comfortable surface for filling. Once filled, rolling the dough away from you helps create that signature crescent shape. Visualization is essential; your crescents should resemble a crescent moon while staying snug around the filling.

The technique of browning the sausage is also vital. Searing the sausage until browned creates a complex flavor profile that enhances the overall dish. Pay attention to how the meat looks; a golden-brown crust indicates it’s ready to incorporate into the filling. Cook it over medium heat to ensure it cooks thoroughly without burning.

Pro Tips for Perfect Sausage Cream Cheese Crescents

1. Use a combination of different sausages for a more complex flavor, such as a mix of sweet and spicy varieties.
2. Experiment with adding diced vegetables like bell peppers or onions for extra texture and flavor.
3. Brush the tops with egg wash before baking for a beautiful golden finish.
4. Allow the filling to cool before assembling to prevent melting the crescent rolls.
5. Serve with dipping sauces like mustard or ranch for an additional flavor layer.
6. For a lighter version, use low-fat cream cheese and turkey sausage.
7. Store leftovers in an airtight container to maintain freshness.
8. If freezing, flash freeze the assembled crescents first before transferring them to a freezer bag for easy reheating later.

Variations and Adaptations

Sausage Cream Cheese Crescents can easily be adapted to suit different tastes and occasions. For a regional variation, try using chorizo for a Spanish twist, or swap in Italian sausage for a richer, herbed flavor. Seasonal adaptations are also fun; consider incorporating pumpkin spice cream cheese during fall gatherings.

Dietary modifications can include utilizing vegetarian sausage options or plant-based cream cheese, making this dish appealing to those with dietary restrictions. Flavor variations can be achieved by adding jalapeños for heat or sun-dried tomatoes for a Mediterranean touch, providing an exciting twist to the classic recipe.

Presentation alternatives can elevate this dish even further. Instead of traditional crescent shapes, use mini phyllo cups for a sophisticated touch, perfect for cocktail parties.

Serving and Presentation Guide

When plating Sausage Cream Cheese Crescents, consider arranging them on a decorative platter with fresh herbs scattered around for an appealing touch. Garnishing with a light drizzle of balsamic glaze can add a gourmet flair. For the perfect bite-sized presentation, consider cutting each crescent into smaller pieces.

Modern serving suggestions might include pre-portioned servings in mini cups, allowing guests to grab and enjoy easily. Always serve hot, ensuring that the flaky, buttery texture is at its best. A side of dipping sauces completes the presentation and enhances the flavors of each bite.

Wine and Beverage Pairing

For wine pairings, consider a light, crisp Sauvignon Blanc or a fruity Riesling that can balance the savory notes of the dish. Alternatively, a mellow Chardonnay could work beautifully, offering a hint of oak that complements the creaminess of the filling.

For non-alcoholic alternatives, sparkling water with a twist of lemon provides a refreshing contrast to the rich flavors of the crescents. If coffee is your preference, a smooth blend offers a delightful end to a gathering, while the warmth can cut through the richness of the dish.

Storage and Shelf Life

To store Sausage Cream Cheese Crescents, place them in an airtight container to prevent them from becoming soggy. They will last in the refrigerator for up to three days. If you want to extend their shelf life, consider freezing them after baking.

When freezing, wrap them individually in plastic wrap and then place them in a freezer-safe bag. They can be reheated from frozen, but ensure they reach an internal temperature of 165°F when reheating to ensure food safety.

Signs of spoilage include an off smell or noticeable discoloration. Always make sure to reheat them thoroughly before serving again to retain their delightful texture and flavor.

Make Ahead Strategies

If you’re planning a gathering, Sausage Cream Cheese Crescents can be prepared ahead of time. Complete the filling process and store the unbaked crescents in the refrigerator for up to 24 hours. This allows the flavors to meld and can save you lots of time on the day of your event.

For longer-term storage, you can freeze the assembled crescents before they are baked. Once ready to serve, bake directly from the freezer, adding a few extra minutes to the cooking time. If you’d like to add fresh elements, consider garnishing right before serving for that fresh touch.

Scaling Instructions

Scaling the Sausage Cream Cheese Crescent recipe to serve more guests is simple. If halving the recipe, be sure to adjust cooking times accordingly, checking for doneness as you go. Doubling or tripling is also straightforward, but ensure your baking sheet can accommodate the amount prepared, possibly requiring you to bake them in batches.

When adjusting the recipe, consider using larger baking sheets to maximize space. Time modifications could mean you need to experiment slightly—if baking more at once, they may need a bit longer to cook evenly, or check the crescents earlier to avoid overcooking.

Nutritional Deep Dive

Analyzing the macros of Sausage Cream Cheese Crescents reveals a well-balanced offering, typically consisting of substantial protein from the sausage, fat from the cream cheese, and carbohydrates from the crescent dough. Adjusting sausage choice can significantly impact the calorie count and fat content, allowing flexibility based on dietary goals.

Micronutrient content varies between ingredients, with cream cheese providing calcium and sausage offering iron, making these bites relatively rich in essential nutrients. Consider portion control for balanced consumption during gatherings.

If portioned effectively, these crescents can fit within various dietary approaches. The key is enjoying them as part of a balanced diet, focusing on moderation while relishing their rich flavors.

Dietary Adaptations

Catering to diverse diets is achievable with Sausage Cream Cheese Crescents. For those requiring gluten-free options, using gluten-free crescent rolls ensures inclusivity while still retaining the delightful texture and charm of the original recipe.

Vegans can enjoy these delightful bites by opting for plant-based sausage and dairy-free cream cheese substitutes. Additionally, low-carb and keto diets can be accommodated using alternative flours, such as almond flour, to create low-carb crescent wraps.

Considerations for lactose intolerant individuals can include utilizing lactose-free cream cheese. Always make sure to check labels and adjust ingredients to meet your dietary needs while ensuring the final product remains delicious.

Troubleshooting Guide

When dealing with texture issues, the dough might come out too tough if overworked. To ensure it stays flaky, handle it gently and minimally while preparing.

If flavor balance seems off, it may stem from insufficient seasoning. Tasting your filling before baking can help you adjust spices as needed to achieve the desired rich, savory flavor.

Temperature problems can arise if the oven is too hot, leading to burnt tops and raw interiors. Always keep an eye on cooking progress and adjust temperatures as necessary; a lower temperature may yield more even cooking.

Equipment challenges sometimes occur; if your crescent rolls don’t rise as expected, check the expiration date on your baking powder and ensure the oven is properly preheated.

Ingredient substitutions can complicate texture — for example, substituting fresh herbs for dried can significantly alter taste. Stick to the recommended variations for best results, and if trying substitutions, proceed cautiously.

Timing concerns may cause overbaking; make sure you’re setting a timer and checking for visual cues like golden browning to achieve the perfect result.

Recipe Success Stories

Community feedback surrounding Sausage Cream Cheese Crescents reflects their popularity and crowd-pleasing nature. Many have taken this basic recipe and adapted it, sharing variations that include different spices or additional ingredients, with great success.

Readers’ variations often highlight how easy it is to customize this dish. Whether incorporating seasonal ingredients or swapping out proteins, contributors have shared stories of experimenting with personal twists, enhancing their culinary adventures.

This recipe has proven to bring friends and family together, often during celebrations. Testimonials showcase how these delightful bites have become favorites at gatherings, imposing a sense of comfort and familiarity while introducing flavors that excite.

Photography tips suggest showcasing the crescents in mouthwatering close-ups, emphasizing their flaky texture and inviting colors. Reader suggestions also include pairing with colorful dips to enhance presentation, further engaging guests.

Frequently Asked Questions

Can I make Sausage Cream Cheese Crescents ahead of time?

Absolutely! You can prepare and assemble them in advance, either refrigerating them unbaked or even freezing them. Just bake them fresh before serving for the best flavor and texture.

What type of sausage works best for this recipe?

Any ground sausage works well — pork, turkey, or even plant-based versions can be delicious. Adjustments can be made based on spice level and personal preference.

Can I use low-fat cream cheese?

Yes! Low-fat cream cheese will work in this recipe, providing a lighter option while still maintaining the creamy texture and flavor.

How do I know when the crescents are done baking?

Look for a golden brown color on top. You can also gently press one; it should feel firm and cooked, with the filling hot throughout.

What’s the best way to reheat leftovers?

The best way to reheat leftovers is in the oven at 350°F for about 10 minutes until warmed through. This keeps them crispy rather than soggy.

Can I freeze the baked crescents?

Yes, baked crescents can be frozen. Store them in an airtight container, and they’ll last for up to three months. Just reheat directly from frozen when needed.

Are there vegetarian options for this recipe?

Definitely! You can substitute the sausage with plant-based sausage, and the dish will still maintain its deliciousness without the meat.

What’s the ideal dipping sauce for these crescents?

Dipping sauces like ranch, barbecue sauce, or a spicy mustard complement the flavors beautifully and enhance the overall experience.

Can I use a different type of dough?

While crescent rolls work best, you can experiment with puff pastry or phyllo dough for a different texture and flavor profile.

What should I serve with Sausage Cream Cheese Crescents?

These crescents are perfect on their own, but you can serve them alongside salads, vegetable platters, or other appetizers to create a well-rounded meal.

Additional Resources

For those looking to explore further, consider checking out related recipes such as stuffed mushrooms or cheesy spinach dip that create the perfect appetizer spread. You can find detailed technique guides on working with crescent dough to ensure perfect results every time.

Investigating ingredient information further can help you appreciate the nuances of sausage types and cream cheese, enhancing your cooking experience. Equipment recommendations, particularly for baking sheets and mixing tools, can also prove valuable as you perfect your culinary skills.

Seasonal variations in ingredients can inspire new recipe attempts. Experimenting with seasonal herbs or different types of cheeses can keep the flavor fresh and exciting.

Join the Conversation

Sharing your culinary creations on social media can spark connections and culinary tips within the community. Photography tips focused on well-lit settings and close-ups can make your dishes pop online, attracting attention.

Recipe reviews and feedback encourage community engagement, inviting others to share their experiences or adaptations. Suggestions for variations keep the dialogue going, allowing everyone to inspire one another and expand their cooking endeavors.

Enjoying food is not just about taste, but about the memories created around it. Engage with others by exchanging stories of how this dish has made your gatherings more special and inviting.

The Recipe

Sausage Cream Cheese Crescents

Serves: 16 crescents

Prep Time: 15 mins

Cook Time: 20 mins

Total Time: 35 mins

Kitchen Equipment Needed

  • Baking sheet
  • Parchment paper
  • Mixing bowl
  • Wooden spoon or spatula
  • Measuring cups and spoons

Ingredients

  • 1 pound of ground sausage
  • 8 ounces of cream cheese, softened
  • 2 cans of crescent roll dough
  • 1 teaspoon of garlic powder
  • 1 teaspoon of onion powder
  • 1 tablespoon of chopped fresh herbs (like chives or parsley)
  • Salt and pepper to taste

Directions

  1. Preheat your oven to 375°F (190°C) and line a baking sheet with parchment paper.
  2. In a skillet over medium heat, cook the ground sausage until nicely browned. Drain excess fat.
  3. In a mixing bowl, combine the cooked sausage and softened cream cheese. Mix until well blended.
  4. Add in garlic powder, onion powder, herbs, salt, and pepper. Mix well.
  5. Unroll the crescent dough and separate it into triangles. Place a tablespoon of the sausage mixture at the wide end of each triangle.
  6. Roll the dough over the filling, starting from the wide end and tucking the ends to secure the filling.
  7. Arrange the crescents on the prepared baking sheet, ensuring they’re spaced out.
  8. Bake for 12-15 minutes or until golden brown. Serve warm.

Recipe Notes

  • Feel free to experiment with different herbs or spices in the filling.
  • For extra flavor, consider adding shredded cheese to the filling mixture.
  • Can be made ahead and frozen before baking; just increase baking time if baking from frozen.

Easy Crock Pot Crack Potato Soup – Creamy & Cheesy Comfort

Crock Pot Crack Potato Soup: Comfort in Every Bowl

⚖️
Difficulty
Easy

⏲️
Prep Time
15 mins

🕒
Cook Time
6 hours

⏱️
Total Time
6 hours 15 mins

🍽️
Servings
6 servings

Crock Pot Crack Potato Soup is the ultimate comfort food, a warm and creamy dish that wraps you in a delicious embrace after a long day. The richness of the potatoes combined with savory bacon, sharp cheddar cheese, and a hint of garlic creates a flavor explosion that dances on your palate. This soup not only fills your belly but also warms your soul, making it the perfect dish for any season. Whether it’s a chilly winter night or a casual family gathering, this soup is bound to be a hit!

Imagine coming home to a house filled with the mouthwatering aroma of crack potato soup simmering away in your crock pot. With just a few simple ingredients, you can prepare this delightful dish and let your slow cooker work its magic while you go about your day. The beauty of this recipe lies in its simplicity and convenience, allowing you to enjoy a homemade meal with minimal effort.

Quick Recipe Highlights

  • Flavor Profile: Rich, creamy, and indulgent with hints of garlic and onion, balanced by salty bacon and cheese.
  • Texture: Smooth and velvety, complemented by chunks of tender potatoes that add satisfying heartiness.
  • Aroma: Inviting notes of savory bacon and melted cheese wafting through the air, inviting everyone to gather around the table.
  • Visual Appeal: A creamy soup topped with crispy bacon bits and vibrant green chives for a pop of color.
  • Skill Level Needed: Perfect for beginners; requires no complex techniques or skills.
  • Special Equipment: Just a crock pot, a few measuring tools, and a cutting board will do!

Recipe Overview

  • Difficulty Level: This recipe is straightforward, making it an ideal choice for novice cooks. You simply chop the ingredients, throw them into the slow cooker, and let time do the rest!
  • Category: Perfect as a hearty main dish or a filling side, this soup fits right into lunch or dinner menus.
  • Cuisine: While it has elements of classic American comfort food, this soup draws influences from various culinary traditions that emphasize warmth and satisfaction.
  • Cost: This affordable recipe uses budget-friendly staples like potatoes, cheese, and bacon, making it a great choice for families.
  • Season: Enjoy it year-round, but especially during the fall and winter months when you crave something warm and comforting.
  • Occasion: Ideal for family dinners, game day gatherings, or cozy nights in, this soup is sure to please a crowd!

Why You’ll Love This Recipe

From the very first spoonful, you’ll adore the blend of creamy textures and savory flavors that define this Crock Pot Crack Potato Soup. The richness of the melted cheese melds with the softness of the potatoes, creating a sumptuous taste that is both indulgent and satisfying. Each bite delivers a balanced combination of creamy and chunky textures, making every mouthful a delightful experience.

The convenience of this recipe cannot be overstated. Just toss your ingredients into the crock pot in the morning, and by dinner time, you’ll have a warm, hearty meal waiting for you. This slow-cooking method allows the flavors to meld beautifully, giving you a luxurious soup with minimal active cooking time. Busy parents and professionals will find comfort in the ease of preparation without sacrificing taste.

On top of providing comfort and convenience, this soup also packs nutritional benefits. With a base of potatoes, which are rich in potassium and vitamins, and added ingredients like cheese that provide calcium and protein, this dish doesn’t just fill you up; it nourishes you, too. Pair it with a salad or some crusty bread for a well-rounded meal that leaves everyone satisfied.

Gathering around a steaming pot of this delightful soup fosters a sense of community and warmth. It’s an excellent dish for entertaining, as it brings people together over delicious food. Sharing a bowl with friends or family creates memories that last a lifetime, whether it’s a casual weeknight dinner or a festive celebration.

Finally, the cost-effectiveness of this recipe makes it even more appealing. Most ingredients are inexpensive and widely available, allowing you to serve this delicious soup without breaking the bank. Its straightforward nature also means you can customize it according to your budget or dietary preferences, making it versatile for any household.

Historical Background and Cultural Significance

The origins of potato soup can be traced back to the early days when potatoes became a staple food in many cultures. Initially considered a peasant dish, potatoes were inexpensive and filling, making them accessible to people from various socioeconomic backgrounds. Over time, culinary evolution turned simple potato soups into more elaborate recipes like the crack potato version we know today, enriched with cream and bacon.

This soup reflects the heart of American comfort food culture, which values hearty, satisfying meals that bring warmth and happiness. The combination of ingredients not only showcases the resourcefulness of home cooks but also highlights the importance of communal meals—centering around a pot of soup enhances fellowship and togetherness.

As time went on, variations of potato soup spread across the United States, each region adding its unique twist. From the East Coast to the West, families adapted this base recipe to include their favorite flavors, creating a multitude of interpretations that celebrate local ingredients and tastes.

Today, Crock Pot Crack Potato Soup holds a special place in the hearts of many home cooks. Its versatility allows for numerous adaptations, making it a mainstay for family dinners, casual get-togethers, and holiday feasts, embodying the spirit of warmth, nourishment, and togetherness that characterize comfort food.

Ingredient Deep Dive

Potatoes: Potatoes are one of the world’s most versatile and widely consumed vegetables, valued for their nutritional benefits and culinary flexibility. Packed with vitamins C and B6, potassium, and fiber, they are not only filling but also beneficial for maintaining a healthy diet. When selecting potatoes for this soup, look for varieties that are waxy and have smooth skins, such as Yukon Gold or red potatoes. Properly storing your potatoes in a cool, dark place can help them last longer and maintain their flavor.

Bacon: A beloved ingredient in many kitchens, bacon adds rich, smoky flavors to dishes that many of us crave. Apart from its satisfying taste, bacon offers a source of protein, although it’s wise to consume it in moderation due to its fat content. When choosing bacon, opt for high-quality brands that prioritize animal welfare and sustainability. To make your bacon last, refrigerate it and store it in an airtight container after opening, or freeze it for longer-term storage.

Common Mistakes to Avoid

  • Overcooking the potatoes can lead to a mushy soup. It’s essential to monitor cooking times closely.
  • Not chopping the potatoes evenly can result in uneven cooking. Aim for similar-sized pieces for balance.
  • Adding too much liquid can dilute flavors. Stick to recommended measurements to maintain the richness.
  • Skipping the sautéing of onions and garlic may result in a lack of depth in flavor. Always sauté before adding to the crock pot.
  • Not tasting the soup before serving can lead to unbalanced seasoning. Adjust salt and pepper according to preference.
  • Using pre-cooked bacon without adding enough fat can lead to a dry soup. Consider frying fresh bacon for best results.
  • Not allowing the soup to thicken before serving can result in a watery texture. Let it cook long enough to meld the flavors.
  • Avoid using low-quality cheese, as this can compromise the soup’s creaminess. A good sharp cheddar is key.
  • Rushing the garnishing can overlook the visual appeal and freshness. Take time to add final touches for presentation.
  • Skipping the recommended garnishes can make the soup feel incomplete. Fresh toppings enhance flavor and visual appeal.

Essential Techniques

Sautéing: This technique is crucial for developing deep flavors in your soup. Cooking the onions and garlic until they are fragrant and lightly caramelized enhances the overall taste of the dish. To master sautéing, use medium heat and a good-quality pan to ensure even cooking. Watch for the golden-brown color, which signifies perfect sautéing without burning.

Slow Cooking: Understanding the essence of slow cooking is vital for achieving the best results in your Crock Pot Crack Potato Soup. The slow cooker allows flavors to meld beautifully while keeping the ingredients tender and juicy. Be sure to follow cooking time guidelines and keep the lid closed to retain moisture and heat. Visual cues include bubbling and steam escaping, indicating a well-cooked meal.

Pro Tips for Perfect Crock Pot Crack Potato Soup

1. Chop your potatoes uniformly to ensure even cooking. Irregular sizes may lead to overcooked or undercooked pieces.

2. For a creamier consistency, use an immersion blender to puree part of the soup once it’s cooked.

3. Experiment with different types of cheese for added flavor nuances—try pepper jack for a spicy kick!

4. Make it a meal with protein by adding shredded chicken or sausage for a heartier version.

5. Adjust the creaminess by varying the amount of broth or adding more ingredients to suit your preferences.

6. Finish your bowl with a dollop of sour cream or yogurt for extra creaminess and tang.

7. Use fresh herbs like chives or parsley as a garnish for added freshness and color.

8. Cook on the low setting for maximum flavor infusion; this allows the ingredients enough time to marry together perfectly.

Variations and Adaptations

Consider adapting this classic soup with a few regional twists. In the South, you could add corn for a sweet, crunchy element, whereas in the Northeast, perhaps a dash of Old Bay seasoning could elevate the flavors. Seasonal adaptations can also play a role; add in roasted vegetables during autumn for a heartier dish or fresh herbs in the spring to lighten it up.

For dietary modifications, gluten-free options are easily achievable by ensuring all ingredients are certified gluten-free. Vegans can substitute bacon with smoked paprika for a smoky flavor and omit dairy altogether, using coconut milk or cashew cream for richness.

Serving and Presentation Guide

For serving, a rustic bowl adds charm to your dish and emphasizes its comforting qualities. Top your soup generously with crispy bacon bits and a sprinkle of fresh chives for an inviting presentation. Accompany your soup with warm, crusty bread for dipping. Consider serving a vibrant green salad on the side to contrast with the creamy soup and to add freshness.

Wine and Beverage Pairing

For an excellent wine pairing, consider a crisp white wine like a Sauvignon Blanc, which balances the richness of the soup beautifully. If you prefer something non-alcoholic, a sparkling water with a hint of lemon can cleanse the palate between bites. Alternatively, enjoy a cup of hot herbal tea, perhaps chamomile or peppermint, which enhances the comforting experience.

Storage and Shelf Life

To store your soup, place it in an airtight container in the refrigerator, where it can last up to 3-4 days. For longer storage, consider freezing the soup in portioned containers. When reheating, do so on low heat and stir occasionally to maintain the creamy texture. Always check for signs of spoilage, such as off smells or changes in texture, before consuming.

Make Ahead Strategies

If you want to prepare ahead of time, chop your vegetables the night before and store them in the refrigerator. You could also fully assemble the soup in the crock pot, then refrigerate overnight and set it to cook in the morning. This not only saves time but also enhances the flavors overnight, making for an even more delicious soup.

Scaling Instructions

If you’re looking to adjust the serving size, simply halve or double the quantities of your ingredients. For larger gatherings, tripling or quadrupling the recipe is easy, just ensure your slow cooker has enough capacity. Baking sheets can be used to prepare additional toppings such as bacon or cheese crisp to accompany the soup, enhancing the overall meal experience.

Nutritional Deep Dive

This soup offers a macro breakdown rich in carbohydrates from the potatoes, with protein and fat content coming primarily from the bacon and cheese. Potatoes provide essential vitamins and minerals, including potassium, which supports heart health. While enjoying this comforting meal, keep portion sizes in mind to aid in weight management while savoring each delicious bite.

Dietary Adaptations

For gluten-free diners, this recipe can easily be made without any gluten-containing ingredients, ensuring everyone can enjoy it. Vegans can opt for plant-based alternatives like coconut milk and use alternatives for bacon flavors without compromising on taste.

Troubleshooting Guide

If the soup turns out too watery, consider mashing some potatoes to thicken the consistency. If the flavor seems bland, a pinch of salt or herbs can elevate the taste significantly. In case it becomes too thick upon cooling, simply add some warm broth or water to achieve the desired consistency while reheating.

Recipe Success Stories

Many readers have successfully customized this Crock Pot Crack Potato Soup, sharing their adaptations such as adding different vegetables or spices. Feedback highlights the crowd-pleasing nature of the recipe, perfect for family gatherings or casual dinner parties. Whether opting for a vegetarian twist or enhancing it with unique herbs, stories of satisfaction abound!

Frequently Asked Questions

Can I use frozen potatoes in this recipe?

Yes, frozen potatoes work well, but they may have a softer texture once cooked. Ensure they are precooked before adding to the slow cooker to retain the best consistency in your soup.

How can I make this soup spicier?

To add heat, consider incorporating diced jalapeños or a few dashes of hot sauce during cooking. For additional flavor without heat, smoked paprika is an excellent choice to consider.

Can I use turkey bacon instead of regular bacon?

Absolutely! Turkey bacon is a great substitute for those looking for a leaner option. However, it may not yield as much fat, so you might want to add a little olive oil for richer flavor.

Is it possible to add vegetables to this recipe?

Definitely! Carrots, celery, or even spinach can be great additions. Just chop them into small pieces and toss them in with the other ingredients for added nutrients!

Can I make this soup on the stovetop instead?

Yes! You can cook it on the stovetop by following the same steps, simmering everything together in a pot for about 30-45 minutes until the potatoes are tender.

How do I know when the soup is done?

The soup is done when the potatoes are tender and easily mashable with a fork. Taste and adjust seasonings before serving for optimal flavor!

Can I blend the entire soup for a smoother texture?

Certainly! If you prefer a creamier soup, use an immersion blender to puree the soup until it reaches your desired consistency. Blend some or all of it depending on your preference.

What are some good toppings for this soup?

Popular toppings include crispy bacon bits, shredded cheese, sour cream, and fresh chives or green onions to enhance flavor and presentation.

How long does this soup last in the fridge?

When stored in an airtight container, Crock Pot Crack Potato Soup will last about 3-4 days in the refrigerator. It’s best enjoyed fresh but will keep well for a few days!

Can I freeze this soup?

Yes! This soup freezes well for up to 2-3 months. Just cool completely before transferring to freezer-safe containers, leaving space for expansion.

Additional Resources

For those interested in exploring more recipes, check out our collection of hearty soups and stews that warm the soul. You can also find technique guides for culinary basics and ingredient information to enhance your cooking skills. Don’t forget to explore seasonal variations that highlight the freshest produce available!

Join the Conversation

We love hearing about your experiences with this recipe! Share your versions on social media, tag us in your photos, and leave reviews to help others discover the deliciousness of Crock Pot Crack Potato Soup. Join our community and let’s create a delicious dialogue around comfort food together!

The Recipe

Crock Pot Crack Potato Soup

Serves: 6 servings

Prep Time: 15 mins

Cook Time: 6 hours

Total Time: 6 hours 15 mins

Kitchen Equipment Needed

  • Crock pot or slow cooker
  • Cutting board
  • Knife
  • Measuring cups and spoons
  • Immersion blender (optional)

Ingredients

  • 4 large Russet potatoes, peeled and diced
  • 1 cup diced onions
  • 3 cloves garlic, minced
  • 4 cups chicken or vegetable broth
  • 1 cup heavy cream
  • 1 ½ cups sharp cheddar cheese, shredded
  • 6 slices of bacon, cooked and crumbled
  • Salt and pepper to taste
  • Chopped chives for garnish

Directions

  1. In a skillet over medium heat, sauté the diced onions and minced garlic until fragrant and translucent.
  2. Transfer the sautéed onions and garlic to the crock pot. Add the diced potatoes and broth.
  3. Cook on low for 6 hours or until the potatoes are tender.
  4. Once the potatoes are cooked, add the heavy cream and shredded cheese. Stir until melted and well combined.
  5. Season with salt and pepper to taste, then garnish with crumbled bacon and chives before serving.

Recipe Notes

  • For a vegan version, substitute cream with coconut milk and omit the bacon.
  • Feel free to add additional seasonings like smoked paprika or herbs to enhance the flavor.
  • Leftovers can be refrigerated for up to 4 days or frozen for up to 3 months。