Best Blackberry Margarita Smash – Refreshing & Easy Drink

Refreshing Blackberry Margarita Smash: A Perfect Summer Cocktail

⚖️
Difficulty
Easy

⏲️
Prep Time
10 mins

🕒
Cook Time
0 mins

⏱️
Total Time
10 mins

🍽️
Servings
2

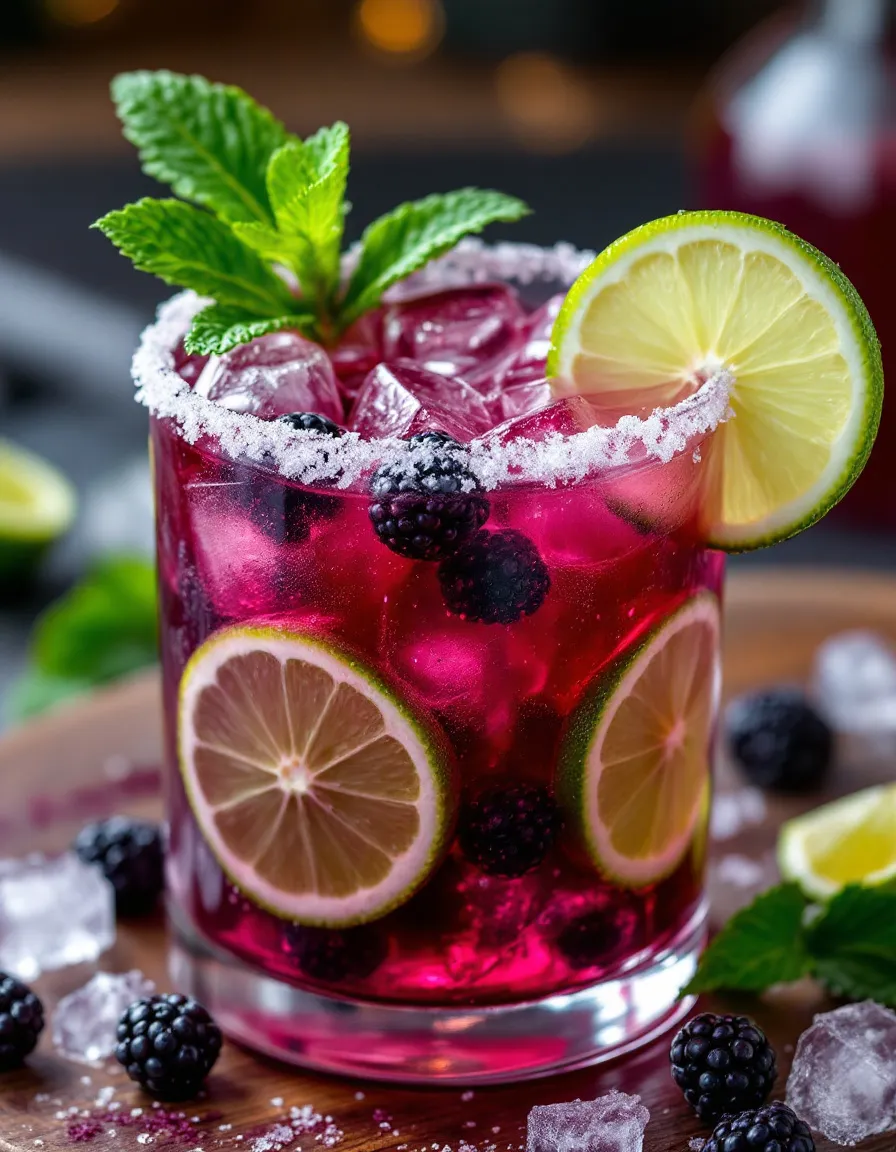
Blackberry Margarita Smash is a delightful twist on the classic margarita, blending the sweet and tart flavors of fresh blackberries with the zesty kick of lime and the smoothness of tequila. This refreshing cocktail is perfect for summer gatherings, pool parties, or simply unwinding after a long day. Imagine sipping this gorgeous, vibrant concoction while lounging in the sun, the fruity aroma mingling with a hint of salt in the air. The balance between the rich berry flavor and the bright citrus will leave you craving more!

The beauty of the Blackberry Margarita Smash lies in its simplicity. With only a few ingredients, this cocktail can be whipped up in no time, making it an easy addition to any occasion. Featuring muddled blackberries for a burst of flavor and natural sweetness, this drink not only looks stunning but also caters to the senses. The vivid purple hue enhances its appeal, ensuring it stands out on any table setting. Once you try this delicious drink, you’ll find it hard to go back to ordinary margaritas!

Quick Recipe Highlights

  • Flavor Profile: The cocktail combines the sweetness of fresh blackberries with the tartness of lime juice and the warming notes of tequila, creating a perfectly balanced drink.
  • Texture: The drink is smooth and refreshing with a slight texture from the muddled blackberries, giving it a wonderful mouthfeel.
  • Aroma: Inviting notes of ripe blackberries meld with zesty lime, creating an aromatic experience that awakens the senses.
  • Visual Appeal: The deep purple color of the cocktail is visually striking, enhanced by fresh blackberry garnish for an eye-catching presentation.
  • Skill Level Needed: This cocktail is easy to prepare, perfect for beginners and seasoned mixologists alike.
  • Special Equipment: A muddler or a spoon is required to crush the blackberries, alongside a cocktail shaker for mixing the ingredients.

Recipe Overview

  • Difficulty Level: This Blackberry Margarita Smash is classified as easy, making it accessible for anyone looking to impress guests without complicated techniques.
  • Category: This cocktail fits perfectly in the beverage category and is ideal for summer parties or casual get-togethers.
  • Cuisine: Inspired by traditional Mexican margaritas, this recipe blends a classic cocktail approach with fresh, seasonal ingredients.
  • Cost: The approximate cost of this cocktail is budget-friendly, making use of affordable staples like blackberries, lime, and tequila.
  • Season: Best enjoyed in the summer when blackberries are in peak season, this cocktail captures the essence of warm weather refreshment.
  • Occasion: Perfect for summer barbecues, birthdays, or simply relaxing on the patio, this drink brings an element of fun to any gathering.

Why You’ll Love This Recipe

Blackberry Margarita Smash is a cocktail that tantalizes your taste buds with its sweet and tangy flavors. The combination of fresh blackberries and refreshing lime provides a burst of taste that feels delightful on a summer evening. The smooth tequila complements the berry’s natural sweetness, creating a drink experience that is both vibrant and refreshing. This cocktail not only quenches thirst but also invites a social atmosphere, making it a perfect companion for gatherings with friends or family.

In addition to great taste, the convenience of making this cocktail cannot be overstated. With just a few simple steps—muddling the blackberries, mixing with lime and tequila, and straining over ice—you can have a delicious drink ready in minutes. It’s the perfect choice for those unexpected visitors or last-minute get-togethers when you want to serve something exceptional without the hassle of challenging recipes. This quick preparation creates less stress, allowing you more time to enjoy your company.

Nutritionally, while cocktails are often seen as indulgent, the use of fresh blackberries adds a healthy twist to the drink. Rich in antioxidants, vitamins, and minerals, blackberries not only enhance the flavor but also contribute beneficial nutrients. When enjoyed in moderation, Blackberry Margarita Smash makes it easy to indulge without severe guilt.

This cocktail also has strong social and entertaining value. With its vibrant color and delectable flavors, it becomes an instant crowd-pleaser. Guests are sure to be impressed, and it opens the floor to lively conversation about flavors and mixology. Sharing a well-crafted cocktail enhances the overall gathering experience, making you the star of the event.

Lastly, the cost-effectiveness of this refreshing cocktail makes it a staple in your summer drink repertoire. Fresh blackberries and common cocktail ingredients won’t break the bank, allowing you to host enjoyable gatherings without excessive expenditure. This accessibility means you can whip it up anytime the moment calls for a celebration, big or small.

Historical Background and Cultural Significance

The roots of the margarita can be traced back to the late 1930s, where stories of its creation differ, yet they often center around the melding of tequila with lime and some form of sweetener. In Mexico, the margarita has been celebrated as a beloved cocktail due largely to its refreshing nature, especially in unbearably hot weather. Its evolution into various styles is owed to the adventurous spirit of cocktail culture, allowing fruits like blackberries to find their way into increasingly popular variations, like the Blackberry Margarita Smash.

Culturally, margaritas hold significance in Mexican traditions, often accompanying festive occasions like Cinco de Mayo and various holidays. As cocktails gained popularity worldwide, they adapted local ingredients, leading to unique regional variations. The inclusion of blackberries represents how traditional recipes can evolve, bridging local flavors with classic ones to create something entirely unique and exciting.

Over the years, the margarita has gone from a simple blend of tequila and lime to a sophisticated canvas for creativity, with modern versions whispering the artistry of mixologists. The Blackberry Margarita Smash embodies this innovation, as it showcases the increasingly popular trend of utilizing fresh, seasonal fruits in crafting cocktails that please both the eye and the palate.

Regional variations are also fascinating. In different parts of Mexico and the U.S., there are countless adaptations of the margarita. Some people prefer to infuse it with spicy chilies for a kick, while others lean towards sweetness. The incorporation of blackberries offers a delightful reprieve, promising a fresher take while still holding onto the cocktail’s heritage.

Ingredient Deep Dive

Blackberries
Blackberries have a beautiful cultural significance and history, originating from North America and parts of Europe. They have been used in culinary traditions for centuries, revered for their flavor and health benefits. Packed with antioxidants, they contribute to overall health and are known for supporting heart health and boosting the immune system. When selecting blackberries, look for plump, shiny, and deeply colored fruits while avoiding any that appear dull or mushy. For storage, keep them in the refrigerator in a shallow container, and consume them within a few days for freshness. If you’re in a bind, raspberry or blueberry can serve as great substitutes.

Lime Juice
Lime juice has cultural importance in many cuisines, especially in Mexican dishes. It’s an essential ingredient in margaritas, enhancing the overall flavor profile with its acidity and brightness. Nutritionally, lime juice is high in Vitamin C and has various health benefits, such as aiding digestion and boosting the immune system. When selecting limes, choose ones that feel heavy for their size and have a slightly glossy skin. For storage, keep limes at room temperature or refrigerate for prolonged freshness. If fresh limes aren’t available, bottled lime juice can substitute, though consider using a bit less due to its concentrated flavor.

Tequila
Tequila has a rich history rooted in Mexico, where the production of this spirit dates back to pre-Hispanic times. Traditionally made from the blue agave plant, tequila is infused with cultural relevance as a national spirit. Nutritionally, it is low in sugar and carbohydrates, making it a popular choice among those watching caloric intake. When purchasing tequila, opt for 100% agave for the best quality. Ideally, store it in a cool, dark place, and avoid repeated temperature changes to preserve its flavor. If you’re looking to experiment, mezcal can provide a distinctly smoky flavor while mixing well with the other ingredients.

Common Mistakes to Avoid

  • Using Overripe Blackberries: Overripe blackberries can lead to overly sweet drinks and may affect the overall flavor balance. Always select ripe but firm fruit for the best results.
  • Neglecting Fresh Ingredients: Fresh lime juice is vital; using bottled juice can significantly alter the taste, resulting in a less vibrant cocktail.
  • Incorrect Ingredient Ratios: Ensuring the right proportions of tequila, lime, and blackberry is key for balance. Too much lime can overpower the drink, while too little tequila can make it watery.
  • Over-Muddling: Muddling blackberries too vigorously can turn them into mush, losing the freshness of the fruit. Lightly press them to release juices without overbreaking them.
  • Choosing the Wrong Tequila: Not all tequila is created equally. Avoid mixto tequila; opt for 100% agave tequila for a smoother taste.
  • Not Straining Properly: Skipping the straining step can result in a gritty texture. Ensure you strain the mixture to remove any seeds or pulp for a smooth finish.
  • Serving at the Wrong Temperature: This cocktail is best served chilled. Use ice and ensure that the ingredients are cold before mixing.
  • Inadequate Garnishing: Simple garnishes, like lime wedges or additional blackberries, can elevate the drink’s appearance; don’t skip this step for a polished presentation.
  • Forgetting to Taste: Tasting during preparation ensures that the drink meets your personal flavor preference; don’t hesitate to adjust sweetness or acidity.
  • Ignoring Seasonal Variability: The cocktail’s flavor can vary significantly depending on the ripeness of the blackberries. Adjust your sugar levels based on the sweetness of your fruit.

Essential Techniques

Muddling
Muddling is the process of gently crushing ingredients to release their essential oils and juices. It’s essential for infusing flavors, particularly in cocktails like the Blackberry Margarita Smash. To master muddling, apply light pressure with a muddler or the back of a spoon, rotating it slightly rather than smashing the ingredients. Avoid over-muddling, which can create bitterness and an undesirable texture. A successful muddling should leave the ingredient intact while letting out enough essence into the cocktail.

Mixing
Mixing ensures that the ingredients are evenly distributed and well combined. In the case of this cocktail, you’ll use a cocktail shaker to blend the muddled blackberries with lime juice and tequila. This technique is important for achieving a harmonious flavor profile and desired chill. To master mixing, fill the shaker with ice before adding your ingredients. Shake vigorously for about 15-20 seconds. The visual cue for success is when the shaker becomes frosty on the outside, indicating that the contents are chilled.

Pro Tips for Perfect Blackberry Margarita Smash

Start with fresh, ripe blackberries to ensure the best flavor profile. The natural sweetness will enhance the cocktail’s overall taste and balance with the tartness of lime.
Control the sweetness by tasting as you mix; adjust with more lime juice or simple syrup based on personal preference and the natural balance of the blackberries.
Chill your glass before serving. Placing your glass in the freezer for a few minutes ensures your drink stays cold longer.
To enhance the visual appeal, consider rimming your glasses with salt by rubbing a lime wedge around the rim before dipping it into salt. This adds an extra flavor dimension.
Experiment with textures by incorporating a splash of soda water or tonic for a fizzy variation. This elevates the cocktail while making it sparkle.
Always use a fine mesh strainer when pouring to remove any pulp or seeds for a smoother drink.
If you’re making a larger batch for a party, prepare the blackberry mix in advance, then add tequila and ice just before serving to maintain freshness.
Lastly, choose quality tequila as the taste of the liquor itself can make or break the cocktail’s flavor profile.

Variations and Adaptations

Consider adding different fruits to your Blackberry Margarita Smash for a twist. Seasonal fruits like raspberries or strawberries can offer delightful variations while maintaining that fruity flavor.
For a spicier version, infuse your tequila with jalapeños beforehand to add a kick to the cocktail. The contrast of heat with the sweetness of the blackberries yields a deliciously complex drink.
Veganizing this cocktail is easy—simply ensure any sweetener added is plant-based. Agave syrup can be a fantastic option instead of honey.
If you’re watching your carbohydrate intake, consider using a low-calorie sweetener or eliminating sugar altogether by using sweeter blackberries.
You can also create a frozen version by blending the ingredients with ice, giving you a slushy texture that’s perfect for hot summer days.
For a unique presentation, try serving it in a mason jar or over ice in a stemless glass, garnished with fresh mint for a pop of color.

Serving and Presentation Guide

For an impressive presentation, consider serving Blackberry Margarita Smash in stylish cocktail glasses; a classic margarita glass is always a hit.
Garnish with fresh blackberries or a lime wheel placed elegantly on the edge of the glass. Fresh mint sprigs can also provide a vibrant contrast in color.
Utilizing fun straws or decorative cocktail picks to enhance the visual experience can engage guests and add a festive element to your gathering.
Temperature is crucial in serving this cocktail; pouring it over ice will keep it refreshing, while a chilled glass enhances the overall drinking experience.
Consider portion control by creating smaller servings for tasting at events, allowing guests to savor multiple cocktails while keeping overall consumption moderate.

Wine and Beverage Pairing

When pairing wine with a Blackberry Margarita Smash, consider a light, fruity rosé that complements the flavors of the blackberry without overwhelming it.
For non-alcoholic alternatives, sparkling water or homemade lemonade can provide refreshing palate cleansers that enhance the summer vibe.
If you enjoy coffee with your cocktails, a chilled coffee beverage featuring vanilla notes can create a delightful contrast to the sweetness of the blackberries.
Temperature is key; serve your wine chilled, much like your cocktail, to maintain that refreshing quality throughout the experience.

Storage and Shelf Life

To maintain its freshness, the Blackberry Margarita Smash is best enjoyed immediately. If prepared in advance, store any leftover mixture in the refrigerator, ensuring it’s sealed tightly.
The ideal temperature for the drink lies around 40°F (4°C), so keep it cool before serving and avoid exposing it to heat for extended periods.
Use an airtight container for storage to prevent oxidation. The signs of spoilage include off-smells or changes in flavor profile, largely due to the blackberries fermenting.
If reheating instructions apply—like for leftovers—you may wish to serve the drink over fresh ice instead of reheating, preserving its refreshing qualities.
For any excess prepared cocktails that you cannot consume, consider freezing the mixture in ice cube trays. These can be blended again into slushies at a later date.

Make Ahead Strategies

A prep timeline for this cocktail can enhance your party experience. Muddle blackberries and mix them with lime juice in advance, storing the mixture in the refrigerator.
Timing is crucial; ensure that you only add the tequila and ice right before serving to maintain the fresh flavor.
Quality is impacted by ingredient exposure to air; ensure the blackberry mixture is sealed tightly to prolong its longevity and stay flavorful.
When it comes to assembly, have all garnishes and glassware prepared beforehand for an efficient serving process, allowing you more time with your guests.
For fresh element additions, consider garnishing just before serving the cocktail to ensure the mint stays vibrant and other decorations appear lively.

Scaling Instructions

For a smaller gathering, halving the Blackberry Margarita Smash recipe is straightforward; simply adjust all ingredient amounts accordingly.
If you are planning a larger gathering, doubling or tripling the ingredients is easy, but be sure to maintain the balance of flavors to avoid overpowering the drink.
When scaling, consider the size of your mixing equipment—adding too much to a small shaker may prevent proper mixing and chilling.
Timing adjustments may also be necessary for large batches; allow yourself ample time for mixing and serving to ensure all guests are promptly served.
For storage considerations, remember that the mixture can have a shelf life, but preparing fresh for each serving usually yields the best flavor and experience.

Nutritional Deep Dive

A macro breakdown of this cocktail indicates a relatively low-calorie option, primarily from blackberries. The sugars present in the syrup can be adjusted to cater to dietary preferences.
Micronutrient analysis shows that blackberries are rich in Vitamin C and fiber, contributing to health benefits while enjoying a delicious cocktail.
The health benefits of consuming blackberries are extensive, as they have anti-inflammatory properties and promote heart health, making this drink a guilt-free choice.
When considering dietary modifications, the drink can be tailored to be lower in sugars by adjusting syrup quantities and utilizing fresh fruit effectively.
Proper portion analysis can keep indulgence moderate. Typically, one serving of this cocktail aligns with responsible drinking standards.

Dietary Adaptations

For a gluten-free version of the Blackberry Margarita Smash, all components used are naturally gluten-free, making it inclusive for gluten-sensitive individuals.
To create a dairy-free cocktail, ensure no cream-based ingredients are introduced; keep the recipe as is for a refreshing vegan option.
Low-carb adaptations may involve reducing or replacing the sugar content with alternatives like stevia or erythritol, allowing for a more keto-friendly cocktail.
Paleo-friendly options are similar, with a focus on using natural sweeteners or wholly eliminating sugar from the recipe.
For those adhering to other specific diets, such as Low-FODMAP, assess portion sizes, as certain fruits can be high in FODMAP content in larger servings.

Troubleshooting Guide

If you encounter texture issues with your Blackberry Margarita Smash, check the muddling technique. Ensure you’re not overly crushing the blackberries to avoid bitterness.
Flavor balance can be tricky; if it veers too sweet, add more lime juice gradually to restore balance. Using less syrup can also help offset sweetness.
Temperature problems arise when ingredients are too warm before mixing; ensure everything is properly chilled, especially the cocktail glass.
For any equipment challenges, using a sturdy muddler is essential for effectively extracting flavors while avoiding tool mishaps.
If you’re navigating ingredient substitutions or timing concerns, be flexible with adjustments. You’ll want to keep the fundamental essence of the cocktail, whether through varying fruit selections or tweaking sugar levels.

Recipe Success Stories

Many readers have shared positive feedback on the simplicity and refreshing quality of the Blackberry Margarita Smash, celebrating how easy it is to impress guests.
Success stories include readers adapting the recipe with personal twists, such as adding jalapeños and experimenting with various fruit pairings, showcasing the drink’s versatility.
Community engagement around this cocktail often features photography tips, as its vibrant colors create visually appealing social media posts.
Readers often recommend this cocktail for summer parties, with many noting it quickly becomes a favorite among guests and friends.

Frequently Asked Questions

1. Can I make this cocktail in advance?
Yes, you can prepare the blackberry and lime mixture ahead of time and store it in the refrigerator. Just mix in the tequila and ice when you’re ready to serve.

2. What type of tequila should I use?
It’s best to use 100% agave tequila for the best flavor. Look for reputable brands that specify this on the label.

3. How can I make this cocktail less sweet?
To reduce sweetness, you can cut back on the sugar or syrup and increase the lime juice for a more acidic taste. Tasting as you mix will help you find the right balance.

4. Can I use frozen blackberries?
Absolutely! Frozen blackberries can be used, though be sure to thaw them first and drain any excess liquid to avoid diluting your cocktail.

5. Is there a non-alcoholic version of this cocktail?
Yes, you can create a mocktail version by replacing tequila with soda water or a non-alcoholic spirit, mixing it with the blackberry and lime juice mixture.

6. What garnishes work best?
Fresh blackberries, lime wheels, or mint sprigs work wonderfully as garnishes, adding visual appeal and freshness to each drink.

7. How do I adjust the ingredients for a larger crowd?
For larger gatherings, simply multiply all the ingredients by the number of servings you need and mix accordingly. Providing self-serve options works well for ease.

8. What are some good food pairings with this cocktail?
This cocktail pairs well with light appetizers like guacamole, grilled shrimp, or fish tacos, all echoing the bright, fresh flavors of the margarita.

9. Can I substitute the tequila with another spirit?
While tequila is traditional, you can explore alternatives such as mezcal or even vodka if you’re looking for a different flavor profile.

10. How do I prevent the drink from being too pulpy?
Using a fine mesh strainer during pouring can help eliminate any solid blackberry pieces, resulting in a smoother cocktail experience.

Additional Resources

To explore more cocktails, check out our related recipes such as the classic Margarita and refreshing Fruit Punch.
Technique guides on muddling and mixing can provide additional skills and tips for expertly crafting cocktails.
Dive deeper into ingredient information, exploring the benefits of fresh fruits and premium spirits for a greater understanding of your cocktails.
Recommendations for essential bar equipment can help you elevate your mixology game, ensuring you have what you need to create amazing drinks.
Explore seasonal variations by using fruits that peak throughout the year to create a winter version of the Blackberry Margarita Smash!

Join the Conversation

We’d love to hear your thoughts on the Blackberry Margarita Smash! Share your adaptations and successes on social media with us.
Don’t forget to capture stunning photos of your cocktails; beautiful imagery helps inspire others to try new recipes!
Leave reviews and comments to connect with our community, sharing your experiences and tips for perfecting this refreshing drink.
Engage with fellow readers by exchanging recipe variations; together, we can explore exciting twists on this delightful summer cocktail.

The Recipe

Blackberry Margarita Smash

Serves: 2

Prep Time: 10 mins

Cook Time: 0 mins

Total Time: 10 mins

Kitchen Equipment Needed

  • Muddler
  • Cocktail shaker
  • Strainer
  • Glassware (cocktail glasses)

Ingredients

  • 1 cup fresh blackberries
  • 2 oz. tequila
  • 1 oz. fresh lime juice
  • 1 oz. simple syrup (or to taste)
  • Ice for serving
  • Salt for rimming (optional)
  • Fresh blackberries and lime wedges for garnish

Directions

  1. Muddle blackberries in the bottom of a cocktail shaker until they are smashed and juicy.
  2. Add tequila, fresh lime juice, and simple syrup to the shaker.
  3. Fill the shaker with ice and shake vigorously for about 15-20 seconds.
  4. Strain the mixture into a glass filled with ice.
  5. Garnish with additional blackberries and a lime wedge. Serve immediately and enjoy!

Recipe Notes

  • For a less sweet drink, adjust simple syrup to your taste.
  • For added depth, consider infusing your tequila with herbs or spices ahead of time.
  • This cocktail can easily be scaled up for larger gatherings; just maintain the same ratios when adjusting quantities.

Easy Mexican White Cheese Dip – Creamy & Delicious

Mouthwatering Mexican White Cheese Dip: A Creamy Delight

⚖️
Difficulty
Easy

⏲️
Prep Time
10 mins

🕒
Cook Time
15 mins

⏱️
Total Time
25 mins

🍽️
Servings
4-6 servings

If you’re looking for the perfect appetizer or snack to elevate your next gathering, look no further than this delightful Mexican White Cheese Dip. This creamy concoction, infused with the enticing flavors of authentic Mexican cheese, is guaranteed to please cheese lovers and spice enthusiasts alike. The dip strikes the perfect balance of richness and zest, making it a crowd-pleaser at any party or family get-together.

With its velvety texture and mouthwatering flavor, this Mexican White Cheese Dip adds a touch of excitement to your party platter. Whether served with crunchy tortilla chips, fresh veggies, or drizzled over tacos, each bite brings a satisfying creaminess infused with a hint of spice that leaves you craving more. Moreover, this easy recipe can be whipped up in less than half an hour, making it an accessible choice for both rookie cooks and seasoned chefs.

Quick Recipe Highlights

  • Flavor Profile: A delicious blend of creamy cheese with a touch of spice, creating a both rich and savory experience.
  • Texture: Creamy and smooth, with just the right consistency for dipping and scooping.
  • Aroma: Inviting scent of melted cheese paired with savory spices, perfect for whetting your appetite.
  • Visual Appeal: The dip’s rich yellow and white hues topped with green herbs creates an inviting presentation.
  • Skill Level Needed: This recipe is beginner-friendly, requiring minimal cooking techniques to master.
  • Special Equipment: A microwave or a stove, and a mixing bowl or saucepan are all you need to prepare this dip.

Recipe Overview

  • Difficulty Level: This Mexican White Cheese Dip is easy to make, perfect for novice and experienced cooks alike, ensuring that everyone can impress their guests.
  • Category: Ideal as an appetizer or party snack, it fits perfectly into any casual meal or celebration.
  • Cuisine: This dip is deeply rooted in Mexican culinary traditions, showcasing the love for cheese and vibrant flavors found in many Mexican dishes.
  • Cost: The ingredients are relatively inexpensive, making it a budget-friendly choice for gatherings and celebrations.
  • Season: Enjoy this dip year-round; its comforting flavors are perfect for both summer barbecues and winter gatherings alike.
  • Occasion: Perfect for parties, game nights, or family gatherings, this dip is suitable for any occasion where friends come together to enjoy good food.

Why You’ll Love This Recipe

This Mexican White Cheese Dip is not just about satisfying your cheese cravings; it’s about bringing joy and comfort to your table. The taste is a perfect blend of creamy and spicy, elevating every bite into a delightful experience. Each serving delivers a luscious texture that wraps your taste buds in indulgence while the hint of jalapeño adds just the right amount of kick, allowing you to enjoy the full spectrum of flavors in every scoop.

Another reason to love this dip is its convenience. With straightforward preparation steps, you can have this delicious dip ready in just 25 minutes. It requires minimal cooking skills, making it an ideal choice for beginners. And if you’re an advanced cook, you will appreciate how easily this dip can be customized to suit your taste preferences.

Nutritionally, this dip offers comfort without compromising health. Made from cheese, it provides calcium and protein, contributing to bone health and muscle maintenance. Pair it with fresh vegetables for a nutritious snack, or serve it alongside heartier fare like tacos for a satisfying meal.

This dip is also a fantastic social dish, perfect for sharing with friends and family. It encourages conversation and laughter as everyone gathers around the snack table, dipping their chips and enjoying the flavors of Mexico together. It’s a dish that fosters connection and creates joyful memories.

Last but not least, it’s a cost-effective choice for any budget. With ingredients that are easily available at any grocery store, you can whip up a generous batch of dip that can easily feed a crowd without breaking the bank.

Historical Background and Cultural Significance

Mexican White Cheese Dip has its roots in the rich culinary traditions of Mexico, where cheese holds a prominent place in countless dishes. The combination of melted cheese and spices symbolizes the comfort and warmth of Mexican hospitality, often served during gatherings and celebrations. Its simplistic nature makes it accessible, embodying the essence of home-cooked meals.

The cultural importance of cheese dips became particularly pronounced in the United States, where they were popularized in Mexican-American cuisine. This led to the rise of various cheese dip recipes, with each offering its unique twist and flavor, showcasing the versatility of cheese as an ingredient.

Over the years, the recipe for this dip has evolved, moving from traditional kitchens to trendy restaurants. Today, interpretations abound, featuring additional ingredients like various cheeses, seasonings, and toppings. This evolution speaks to the adaptability of the dip, allowing it to blend seamlessly into different culinary settings.

Regional variations of cheese dips can also be found across the United States, with some opting for spicier blends or incorporating local favorites. This diversity in preparation exemplifies the creativity and flair present in contemporary Mexican-American cuisine.

Ingredient Deep Dive

– **Cheese**: Central to this dip, cheese contributes to its creamy texture and flavor. Historically, Mexican cheese like Oaxaca or Chihuahua is favored, but modern variations often utilize cream cheese or cheddar for greater accessibility. Nutritionally, cheese provides protein and calcium, helping support bone health. Choose high-quality cheese for the best flavor. Store it in an airtight container to maintain freshness, and consider alternatives like vegan cheese for dietary restrictions.

– **Jalapeños**: These peppers add a kick and depth to the dip. Jalapeños not only bring flavor but also have health benefits, including antioxidants. When selecting jalapeños, look for firm, smooth skins and vibrant colors. Store them in a cool, dry place, and consider substitutions like banana peppers for a milder experience or habaneros for increased heat.

Common Mistakes to Avoid

  • Using pre-shredded cheese can lead to a grainy texture due to added preservatives. Always opt for freshly shredded cheese for the best melting experience.
  • Overheating the cheese can cause it to separate, compromising the smooth texture. Heat gently and stir consistently.
  • Not tasting the dip as you go can result in imbalanced flavors. Season gradually, tasting as you adjust the spices.
  • Adding too much liquid can thin the dip excessively. Start with small amounts and add more only as needed.
  • Skipping the jarring process of blending ingredients can lead to uneven distribution. Make sure to mix thoroughly for a cohesive flavor.
  • Using unripe jalapeños can lead to an unpleasant taste. Always choose fresh, bright peppers for optimal flavor.
  • Neglecting to let the dip rest after cooking can affect flavor. Allowing it to sit lets the flavors meld beautifully.
  • Forgetting about presentation can diminish the dip’s appeal. Always garnish with fresh herbs or toppings for visual allure.

Essential Techniques

To achieve the perfect creamy consistency in your Mexican White Cheese Dip, proper melting techniques are crucial. Begin by selecting cheese with good melting properties, such as cheddar or Monterey Jack. Cut it into small pieces to ensure even melting. Heat slowly over low heat while continuously stirring to prevent burning. This ensures the cheese melts evenly without separating.

Another essential technique is balancing flavors through proper seasoning. Start by adding spices gradually, tasting as you go. This helps to avoid overpowering the dip with heat or saltiness. Additionally, consider adding acid, such as lime juice, for brightness, which enhances the overall flavor profile.

Pro Tips for Perfect Mexican White Cheese Dip

1. Always use high-quality cheese for the best flavor and texture.
2. Pre-shredded cheese often contains additives that inhibit smooth melting; fresh cheese is superior.
3. Enhance the flavor with a splash of lime juice or zest for extra brightness.
4. For a fiery kick, experiment with different types of peppers in the mix.
5. Keep the heat low while melting to prevent the cheese from becoming gritty or separating.
6. Serve immediately after preparing warm, as the dip thickens when cooled.
7. Use a slow cooker to maintain warmth for parties or gatherings.
8. Explore garnishing with fresh cilantro or diced tomatoes for color and freshness.

Variations and Adaptations

Explore the many ways you can adapt Mexican White Cheese Dip to suit your taste preferences or dietary needs. For a spicier kick, consider adding diced serrano peppers or incorporating some chipotle for a smoky flavor. For a deeper richness, try mixing different cheeses such as pepper jack or gouda to create unique flavor profiles.

If you prefer a lighter dip, a yogurt base can replace cheese for a healthier twist without sacrificing taste. For vegan alternatives, use cashew cream or vegan cheese to cater to dietary preferences while maintaining the creamy texture essential for dipping.

Seasonal variations can introduce exciting new ingredients. In the summer, fresh corn can be added for sweetness, while in the fall, roasted squash can enhance the dip’s heartiness.

Presentation alternatives include serving the dip in a hollowed-out pepper or pineapple to make your appetizer table pop with color and creativity.

Serving and Presentation Guide

When it comes to serving your Mexican White Cheese Dip, presentation can elevate the experience. Use a colorful bowl or a traditional Mexican dish to serve the dip, ensuring it draws attention at gatherings. Garnish generously with freshly chopped cilantro, diced tomatoes, or jalapeños to add visual contrast and freshness.

Accompany your dip with an array of dippers to please all tastes. Tortilla chips are traditional, but consider adding crunchy vegetables like bell peppers, cucumbers, or carrot sticks for a healthy twist. Serving the dip hot is crucial, as the flavors are best enjoyed when warm and gooey.

Also, consider portion control — serving smaller bowls or cups can help guests regulate their intake, making it easier for them to try various dips if provided.

Wine and Beverage Pairing

When it comes to pairing beverages with Mexican White Cheese Dip, consider refreshing options. A light, crisp white wine such as Sauvignon Blanc or a dry Riesling beautifully complements the creamy cheese. Their acidity balances the richness, enhancing the overall dining experience.

For a non-alcoholic choice, consider agave-based drinks like horchata or flavored iced teas that echo the flavors of Mexico. These beverages provide a refreshing counterpoint to the spiciness of the dip.

If coffee is more your style, a light roast with fruity notes pairs nicely, offering a gentle balance against the richness of the cheese. Serve it slightly chilled to keep the flavors from becoming muted.

Storage and Shelf Life

To store your Mexican White Cheese Dip, let it cool completely before transferring it to an airtight container. Refrigerate promptly and be mindful of consuming it within 3-5 days for optimal freshness. If you notice any off smells or discoloration, it’s best to discard it.

For reheating, use the microwave in short bursts or a stovetop over low heat, stirring frequently. Avoid bringing it to a boil, as this can alter the texture. If the dip thickens after cooling, a little added milk or cream can restore creaminess.

For longer storage, consider freezing the dip. Place it in a freezer-safe container, allowing some space for expansion. When ready to use, thaw in the refrigerator before reheating, ensuring quality and texture are both retained.

Make Ahead Strategies

To make your gathering stress-free, consider preparing components of the Mexican White Cheese Dip in advance. The cheese can be shredded and prepped the day before, while the jalapeños can be chopped and stored in the refrigerator.

You can also prepare the dip a day in advance, store it in the fridge, and gently reheat it when ready to serve. Just remember that the flavors meld beautifully with a little resting time, enhancing the overall taste.

For entertaining, consider setting up a dipping bar with various accompaniments beforehand. Always have some fresh herbs or garnishes ready to elevate the presentation right before serving.

Scaling Instructions

If you’re looking to scale your Mexican White Cheese Dip, adjusting ingredient quantities is straightforward. Halve the recipe to make a smaller batch, ideal for intimate gatherings, or double it for large parties without complex measuring.

When doubling, ensure you have larger equipment, such as a bigger saucepan or mixing bowl, to accommodate the greater volume. Cooking times may need slight adjustments; monitor the dip closely while cooking.

Also, consider the storage needs when scaling—larger quantities require appropriate containers and more fridge or freezer space for storing leftovers.

Nutritional Deep Dive

This Mexican White Cheese Dip can be a nutritious addition to your snacks when enjoyed in moderation. It provides essential macronutrients like protein and fat, crucial for energy and muscle maintenance. The dip can also bring key micronutrients like calcium from the cheese, supporting bone health.

For those mindful of their diet, it’s important to consider portion sizes. While the dip is tasty, it is high in calories, particularly when served with chips. Balancing it with fresh vegetables can add nutritional benefits while keeping the overall caloric intake in check.

When examining dietary considerations, remember cheese can be high in sodium, so individuals managing their intake should adjust the seasoning used in the dip. Always assess your individual dietary needs to enjoy this recipe healthily.

Dietary Adaptations

Those seeking gluten-free options can confidently enjoy Mexican White Cheese Dip, as the ingredients naturally exclude gluten. Use gluten-free corn chips for scooping, ensuring a delightful experience for those with gluten sensitivities.

For dairy-free diets, vegan cream cheese or a blend of nuts can create a similar creamy base without sacrificing the flavor. Plant-based cheeses available in the market can also make great substitutes.

Low-carb dieters can skip the chips and use sliced vegetables or pork rinds as dippers. Alternatively, a keto-friendly version can be made by incorporating cream cheese and cheddar for a richer flavor.

Adapting the dip to suit paleo diets involves omitting dairy; nut-based cheeses work well. Lastly, low-FODMAP diets may need careful adjustments, but dairy-free options can effectively meet these needs too.

Troubleshooting Guide

If your dip is too thick, try adding a splash of milk or cream to loosen it up. Mixing thoroughly can help restore a smooth consistency.

For flavor imbalance, introducing acidity, like lime juice, can brighten the dip. Alternatively, balancing spices or even adding a pinch of sugar can enhance the overall taste profile.

If the cheese separates while melting, reduce the heat and keep stirring continuously to help incorporate the cheese back into the mixture. If all else fails, whisking in a little cornstarch mixed with water can help bring it together again.

Should you face ingredient substitutions issues, staying within the same flavor profile is key. For example, if you lack cheddar, try gouda or Monterey Jack.

In case of uneven heating or melting, consider warming ingredients slowly. This cautious method prevents graininess and helps create that desired smooth texture.

Recipe Success Stories

Our community continues to share their success stories with this Mexican White Cheese Dip. From family gatherings to casual get-togethers, the dip has become a staple on several tables. Readers have reported experimenting with different cheeses and spice levels, to rave reviews from their guests.

Additionally, many have shared photography tips, showcasing the dip’s vibrant colors and textures to encourage others to give it a try. Those who have adapted the recipe to meet dietary restrictions have also inspired fellow cooks, proving that with creativity, this dip can suit anyone’s preferences.

Whether tried at parties or made for cozy movie nights at home, the feedback has been overwhelmingly positive as this dip consistently garners compliments and requests for the recipe.

Frequently Asked Questions

Can I make this dip ahead of time?

Yes! You can prepare the dip a day in advance and store it in the refrigerator. Just reheat gently before serving. The flavors will meld beautifully, enhancing the taste.

What’s the best way to reheat the dip?

The best method for reheating Mexican White Cheese Dip is to warm it slowly over low heat on the stovetop, stirring regularly to maintain a smooth consistency.

Can this recipe be made gluten-free?

Absolutely! All the ingredients in the dip are gluten-free. Pair it with gluten-free chips or fresh vegetables for dipping.

How can I make this dip spicier?

You can increase the spiciness by adding jalapeños, chipotle peppers, or even a dash of hot sauce. Adjust the heat to your liking!

What cheese is best for this recipe?

Cheddar, Monterey Jack, or a blend of authentic Mexican cheeses like Oaxaca work wonderfully for a deliciously creamy dip.

Can I freeze the dip?

Yes, you can freeze the dip. Just store it in an airtight container, allowing for some expansion. Thaw overnight in the refrigerator before reheating.

How do I adjust the consistency of the dip?

If your dip is too thick, try adding a splash of milk or heavy cream while reheating. Whisk it in to achieve the desired creaminess.

Is this recipe suitable for vegetarians?

Yes, this Mexican White Cheese Dip is vegetarian-friendly! It’s made with cheese and vegetables and contains no meat products.

What can I serve with this dip?

This dip pairs beautifully with tortilla chips, fresh-cut vegetables, or even served over tacos or nachos for an exciting twist.

Can I customize the flavors?

Definitely! You can add various spices, different kinds of cheese, or even mix in sautéed vegetables to change up the flavor profile.

Additional Resources

Looking for more delicious recipes? Explore our collection of Mexican appetizers that will complement your cheese dip perfectly. Additionally, check out our guides on essential kitchen techniques for mastering dips and sauces. If you’re interested in learning about the history of Mexican cuisine, dive into our articles dedicated to traditional cooking methods and ingredients used in authentic dishes.

Be inspired by seasonal variations, discussing unique ingredients that burst with flavor, elevating your culinary journey with every bite.

Join the Conversation

We’d love to hear from you! Join the conversation by sharing your experiences, tips, or variations of this Mexican White Cheese Dip on our social media platforms. Share photos of your creations, exchange recipe reviews, or propose exciting twists to this classic dip. Your input enriches our community, making each recipe session a collaborative culinary adventure.

The Recipe

Mexican White Cheese Dip

Serves: 4-6 servings

Prep Time: 10 mins

Cook Time: 15 mins

Total Time: 25 mins

Kitchen Equipment Needed

  • Mixing bowl
  • Stovetop or microwave
  • Wooden spoon or spatula
  • Airtight container for storage

Ingredients

  • 2 cups shredded cheese (cheddar or Monterey Jack)
  • 1 cup milk
  • 1-2 jalapeños, diced
  • 1/2 teaspoon garlic powder
  • 1/4 teaspoon salt (adjust to taste)
  • 1 tablespoon fresh cilantro, chopped (for garnish)

Directions

  1. In a saucepan over medium-low heat, combine the shredded cheese and milk, stirring frequently until melted and smooth.
  2. Add in the diced jalapeños, garlic powder, and salt, mixing well to incorporate.
  3. Continue to cook for an additional 3-5 minutes until heated through.
  4. Transfer to a serving bowl and garnish with fresh cilantro before serving warm with chips or vegetables.

Recipe Notes

  • For a creamier texture, add a splash more milk while melting the cheese.
  • Feel free to adjust the level of spice according to your preference by adding more or fewer jalapeños.
  • This dip pairs well with an array of dippers, including corn chips, vegetable sticks, or even tacos.

Best Honey Garlic Butter Roasted Carrots Recipe

Honey Garlic Butter Roasted Carrots: A Sweet and Savory Delight

⚖️
Difficulty
Easy

⏲️
Prep Time
10 mins

🕒
Cook Time
30 mins

⏱️
Total Time
40 mins

🍽️
Servings
4

Roasted carrots are a timeless side dish, embodying sweetness combined with earthy flavors, enhanced beautifully with honey, garlic, and butter. This Honey Garlic Butter Roasted Carrots recipe highlights the natural sweetness of carrots while adding a delicious glaze that makes each bite melt in your mouth. The contrast between the tender and slightly caramelized exterior of the carrots, paired with the aromatic garlic and the warm richness of butter, creates a sensory experience that is comforting and delightful.

Imagine the vibrant orange carrots, glistening under a golden sheen as they roast in the oven. As they cook, your kitchen fills with the intoxicating aroma of garlic, mingling with the sweetness of honey. This dish is perfect for weeknight dinners and elegant enough for holiday gatherings, making it a versatile addition to your cooking repertoire. Whether you’re serving it as a side to a hearty steak or alongside a light fish dish, these roasted carrots will captivate your guests and leave them wanting more.

Quick Recipe Highlights

  • Flavor Profile: The combination of honey, garlic, and butter imbues the carrots with a rich, sweet-savory flavor that excites the palate.
  • Texture: The exterior caramelizes into a tender yet slightly crispy shell, while the inside remains soft and juicy.
  • Aroma: Notes of roasted garlic and warm honey make for an inviting and fragrant dish that fills the room.
  • Visual Appeal: The bright orange color of the carrots, enhanced with a glossy glaze, creates an eye-catching presentation.
  • Skill Level Needed: This easy recipe requires minimal cooking skills, making it perfect for both novice and experienced cooks.
  • Special Equipment: A baking sheet and a mixing bowl are all you need for this simple yet delicious recipe.

Recipe Overview

  • Difficulty Level: This Honey Garlic Butter Roasted Carrots recipe is classified as easy, making it accessible for all cooking levels. The steps are straightforward, ensuring success for novice cooks while still satisfying experienced chefs.
  • Category: This dish fits perfectly as a side dish, ideal for any main course from roasts to grilled meats.
  • Cuisine: Rooted in traditional home cooking, this recipe reflects elements of classic American cuisine with a touch of gourmet flair.
  • Cost: The ingredients are affordable and easily sourced, keeping the overall cost to a minimum while delivering maximum flavor.
  • Season: Carrots are available year-round, but they shine brightest in the colder months, when their natural sugars sweeten with frost.
  • Occasion: These roasted carrots make a great addition to family meals, holiday feasts, and dinner parties, enhancing any dining experience.

Why You’ll Love This Recipe

There are several reasons to adore these Honey Garlic Butter Roasted Carrots. To begin, the blend of flavors creates a harmonious balance that caters to both sweet and savory palates. The honey adds an unexpected sweetness that pairs beautifully with the robust garlic, making each bite a delightful surprise. The carrots themselves become sweeter as they roast, resulting in vibrant flavors that will keep you coming back for more.

This recipe also offers convenience and ease of preparation. With just a few simple steps and minimal cleanup, you can whip up this dish quickly, making it ideal for busy weeknights. Simply toss the carrots in the honey-garlic mixture and let the oven do the work, allowing you to focus on other elements of your meal.

Nutritionally, roasted carrots are a great addition to your diet. They are rich in beta-carotene, vitamins A and C, and provide a good source of fiber. Enjoying this delicious side dish can contribute to your overall health while satisfying your taste buds. Plus, the appeal of vibrant vegetables can entice more people to eat their greens, especially children who might shy away from them in other preparations.

Socially, serving Honey Garlic Butter Roasted Carrots can elevate your meal, encouraging conversation and appreciation from your guests. The sweetness and unique flavor can be a talking point during gatherings, making it a memorable dish among friends and family.

Lastly, this recipe is cost-effective and accessible. As a farm-to-table style dish, you can easily source the ingredients at your local grocery store or farmers’ market without breaking the bank. Incorporating seasonal produce not only supports local farmers but guarantees fresh flavors.

Historical Background and Cultural Significance

The carrot has a rich history, originating thousands of years ago in Persia and gradually spreading through Europe and Asia. Initially used as a medicinal plant, carrots evolved into a popular vegetable, finding their place in numerous cuisines worldwide. The introduction of honey and garlic in various cultures highlights the global appreciation for sweet and savory combinations.

In various cultures, carrots symbolize good luck and prosperity. In some parts of Europe, they are often served during celebrations and feasts. Their brilliant orange color is associated with warmth and joy, further enhancing their cultural significance. The bringing together of honey and garlic with carrots in a roasted dish reflects a culinary evolution, showcasing how traditional flavors can come together to create something truly delightful.

Throughout history, homespun meals have incorporated whatever fresh produce was available, making this recipe represent both comfort and versatility. Many culinary traditions adapt simplicity in cooking to elevate the natural flavors of vegetables.

The dish has likely evolved alongside the growing trend of healthy eating and farm-to-table initiatives. As chefs seek to put a modern twist on traditional recipes, Honey Garlic Butter Roasted Carrots have emerged as a favorite among home cooks and culinary enthusiasts alike.

Ingredient Deep Dive

Carrots: Carrots are not only versatile but also packed with nutrients. They are known for their high beta-carotene content, which the body converts to vitamin A, promoting good vision and skin health. Historically, carrots were cultivated for their medicinal properties before they became a staple food. When selecting carrots, opt for firm, brightly colored ones without cracks or soft spots. Store them in the refrigerator to maintain freshness, and they can last for weeks. For substitutions, consider parsnips or sweet potatoes as they provide a similar sweetness and texture.

Honey: Honey has been used for centuries not just as a sweetener but also for its health benefits. It’s known to possess anti-inflammatory and antioxidant properties. When selecting honey, look for raw or organic varieties for the best flavor and nutritional profile. Store honey in a cool, dry place, and it can last indefinitely. For substitutions, agave syrup or maple syrup can offer similar sweetness, although they may alter the flavor profile slightly.

Garlic: Garlic is a beloved ingredient across cultures, known for its robust flavor and health benefits. Rich in vitamins B6 and C, along with manganese, garlic can boost the immune system and contribute to heart health. When selecting garlic, choose bulbs that are firm and free from blemishes. Store it in a cool, dark place to prolong shelf life. For substitutions, garlic powder or shallots can work in a pinch, though they won’t entirely replicate the same flavor.

Common Mistakes to Avoid

  • Using old or soft carrots: Always choose firm, fresh carrots for the best flavor and texture. Older carrots lose their sweetness and become woody.
  • Not preheating the oven: Ensure your oven is preheated before roasting to achieve the right level of caramelization.
  • Crowding the pan: When roasting vegetables, give them enough space to allow for even cooking; overcrowding can lead to steaming instead of roasting.
  • Ignoring cooking times: Keep an eye on the roasting time; overcooked carrots can become mushy and lose their vibrant color.
  • Skimping on the garlic: Garlic is crucial for the dish’s flavor; don’t be afraid to add an extra clove or two for a more robust taste.
  • Not adjusting the cooking temperature: Different ovens have varying heat levels; make adjustments to prevent burning or undercooking.
  • Overlooking seasoning: Don’t forget to season the carrots adequately; a pinch of salt can enhance their natural sweetness.
  • Missing out on garnishes: Consider topping off the dish with fresh herbs or a sprinkle of sesame seeds for added flavor and texture.
  • Skipping tasting: Always taste before serving; adjust seasonings as necessary to cater to your family’s taste preferences.
  • Not letting them rest: Allowing the carrots to sit for a few minutes post-roasting lets flavors meld and enhances the overall taste.

Essential Techniques

When it comes to roasting, understanding the importance of temperature is key. High heat (around 400°F) allows for caramelization, enhancing flavors. To master this technique, preheat your oven adequately and keep watch during cooking. A visual cue for success is golden-brown edges on the carrots.

Another technique to consider is proper seasoning. A well-seasoned dish distinguishes a great recipe from a mediocre one. Adequate seasoning, especially when combined with the sweetness of honey, creates a flavor profile that is unparalleled. Always taste and adjust seasoning gradually to achieve the desired outcome.

Ensure you cut the carrots evenly for uniform cooking. This guarantees that all pieces roast at the same rate, avoiding some undercooked while others are overdone. Utilize a sharp knife for precise cuts, observing the visual cue of uniform thickness between pieces.

Pro Tips for Perfect Honey Garlic Butter Roasted Carrots

1. For the best caramelization, cut the carrots into uniform pieces—either rounds or sticks; consistency guarantees even roasting.
2. Experiment with different types of honey for varying flavor profiles. Each honey variety, from clover to wildflower, can give a unique twist.
3. Don’t skimp on the butter; using good quality butter will enhance the flavor significantly and create a more indulgent glaze.
4. For added crunch, consider sprinkling toasted nuts, like pecans or walnuts, over the finished dish.
5. Adding a splash of lemon juice or vinegar just before serving can brighten the flavors and balance the sweetness.
6. Herbs like thyme or rosemary can be mixed in before roasting for an aromatic touch that complements the garlic beautifully.
7. If you enjoy spice, consider a pinch of cayenne pepper or chili flakes in the seasoning mix for a kick.
8. For an even glaze, toss the carrots halfway through roasting to ensure all sides are evenly coated and cooked.

Variations and Adaptations

Exploring regional variations can introduce new dimensions to this classic dish. For instance, Moroccan-inspired roasted carrots might include spices like cumin and coriander, bringing warmth and depth of flavor. Seasonal adaptations can include vegetables like parsnips or sweet potatoes during autumn, adding wholesome elements that reflect harvest time.

Dietary modifications can be achieved by making it dairy-free using olive oil instead of butter, while still retaining flavorful depth from the honey and garlic. For those desiring a bit more flair, consider adding a sprinkle of feta cheese or goat cheese post-roasting for a tangy finish.

Flavor variations can arise from using different sweeteners; try using maple syrup for an earthy sweetness or brown sugar for a deeper caramelization effect. Texture modifications can involve lightly mashing the carrots after roasting for a creamy side dish. Lastly, presentation can be taken to the next level with imaginative plating or by serving them on a bed of sautéed greens.

Serving and Presentation Guide

Serving Honey Garlic Butter Roasted Carrots is a delightful experience. For plating, use a contrasting dish to showcase the vibrant orange of the carrots. Arrange them in a fan or a circular pattern for an elegant touch. Garnishing with fresh herbs like parsley or chives not only enhances the visual appeal but also adds a fresh aroma.

Modern serving suggestions include pairing the carrots with a yogurt sauce or tahini dressing on the side for added flavor depth. Traditional accompaniments like roasted meats or stews complement the dish beautifully, making it an ideal pairing for holiday feasts or family dinners.

Temperature considerations are vital; serve the carrots warm for the best taste. However, they can also be enjoyed cold as part of a salad. For portion control, consider serving in small bowls alongside shared platters to encourage communal eating.

Wine and Beverage Pairing

Pairing wine with Honey Garlic Butter Roasted Carrots can elevate your dining experience. A crisp Chardonnay or Sauvignon Blanc complements the sweetness, with their bright acidity cutting through the richness of the dish. For red wine lovers, a light Pinot Noir works well, offering fruitiness that harmonizes with the carrots’ caramel notes.

Non-alcoholic alternatives, such as sparkling water with a slice of lemon, provide a refreshing contrast without overshadowing the dish. If you prefer coffee or tea, opt for an herbal tea with floral notes that echoes the sweetness of honey.

Temperature plays a role; serve white wines chilled and reds slightly above room temperature. Garnish your beverages with herb sprigs for a lovely finishing touch.

Storage and Shelf Life

Proper storage is key to prolonging the life of your Honey Garlic Butter Roasted Carrots. Allow them to cool before placing them in an airtight container. Store in the refrigerator, where they can last for about 3–5 days. For longer shelf life, consider freezing; however, note that texture may change upon reheating.

When checking for spoilage, look out for any off smells or discolored spots. To reheat, simply toss them in a skillet over medium heat until warmed through. Alternatively, they can be microwaved, but be cautious not to overheat them to retain their texture.

For freezing, arrange the carrots on a lined baking sheet in a single layer, freeze until solid, then transfer to freezer bags. This method avoids clumping and allows for easy portioning later.

Make Ahead Strategies

Planning ahead can make your mealtime comfortable and stress-free. Consider peeling and cutting the carrots a day in advance, storing them in water in the refrigerator to maintain freshness. The honey-garlic mixture can also be pre-made and stored in a jar.

Assembly is straightforward; you can combine the carrots with the glaze right before baking to preserve their vibrant color and texture. This dish is best served fresh, but it can be prepared a few hours ahead; simply roast it shortly before serving.

When reheating, you can add a fresh element, such as a squeeze of lemon juice, to revitalize the dish and lift flavors that may have dulled over time.

Scaling Instructions

For those looking to scale the recipe, halving or doubling it is a breeze. Adjust the baking sheet size accordingly; a larger batch may require a second baking sheet to avoid overcrowding.

When doubling or tripling, keep an eye on cooking times to ensure even doneness. A larger quantity may need a bit more time in the oven, so begin checking for doneness several minutes earlier than expected.

Storage considerations are minimal, as leftovers can still be stored in the same manner as the initial batch. For optimal flavors, consume within the first few days, but they can be frozen if needed.

Nutritional Deep Dive

Nutritionally, this Honey Garlic Butter Roasted Carrots dish is a powerhouse. Each serving is rich in essential vitamins, particularly A and C, promoting overall health and wellness. The high fiber content also aids in digestion, making it a wholesome component of any meal.

Analyzing the macro breakdown, this dish provides a nice balance of carbohydrates from the carrots, while the honey contributes to natural sugars. The butter, while caloric, enriches the dish and offers healthy fats.

For those watching their diets or managing weight, portion management is key. This dish can be enjoyed guilt-free with a mindful approach to serving sizes, encouraging balance in overall dietary habits.

Dietary Adaptations

Everyone can enjoy this delightful recipe with a few dietary adaptations. For gluten-free diets, all components are naturally gluten-free, allowing for broad accessibility. A dairy-free version easily substitutes the butter with olive oil or a plant-based margarine, ensuring vegan compliance.

Those following a low-carb or keto diet can enjoy this dish by moderating the honey amount or replacing it with a low-carb sweetener like erythritol. For paleo followers, simply adjust the sweetener to a natural option that aligns with paleo principles.

Low-FODMAP individuals can limit garlic or use garlic-infused oil instead, providing flavor without the triggering ingredients. Each modification maintains the core essence of the dish while catering to specific dietary needs.

Troubleshooting Guide

Should you encounter any issues with your Honey Garlic Butter Roasted Carrots, here are some solutions. For texture problems, if the carrots turn out mushy, ensure that you’re not overcooking them. Consistent cut sizes and checking for doneness regularly can help maintain ideal texture.

Flavor balance is crucial; if the dish turns out too sweet, consider adding a splash of vinegar or lemon juice to cut through the sweetness, providing a tangy counterpoint.

If you face temperature problems, verify your oven’s actual heat level with an oven thermometer. Adjust cooking times based on your oven’s inconsistencies.

In case of ingredient substitutions, be cautious with flavor intensity—garlic powder is less potent than fresh garlic, so adjust accordingly. Lastly, timing concerns can be addressed by preparing components ahead of time, ensuring a smooth cooking experience.

Recipe Success Stories

Feedback from our community has been overwhelmingly positive. Readers share their own spin on the recipe, including adding spices or garnishing with fresh herbs, elevating this classic dish. Adaptation success stories highlight the versatility behind the recipe, with many experimenting with sweeteners.

Photography tips from readers emphasize capturing the dish’s vibrant colors. Natural light with a clean backdrop showcases the glossy, caramelized appearance, making it perfect for social media sharing. These shared modifications and tips foster a sense of community engagement, with everyone enjoying different variations.

Frequently Asked Questions

Can I use frozen carrots for this recipe?

While fresh carrots yield the best texture and flavor, you can use frozen carrots. Thaw them prior to roasting, but be aware that they might release more moisture and not achieve the same level of caramelization.

What is the best type of honey to use?

Raw or local honey is often preferred due to its depth of flavor and nutritional value. However, any quality honey will suffice for this recipe. Flavored varieties can also add an interesting twist.

Can I add other vegetables to this recipe?

Absolutely! Vegetables like sweet potatoes, parsnips, or brussels sprouts can complement the carrots well. Adjust cooking times based on the density of the vegetables added.

How do I prevent the carrots from burning?

Ensure your oven temperature is consistent and check on the carrots halfway through cooking. Tossing them can help avoid burning by ensuring even roasting.

Are there alternatives to butter for a dairy-free option?

Yes, olive oil or plant-based butter can be good substitutes that will maintain the dish’s flavor profile while making it dairy-free.

What can I serve with Honey Garlic Butter Roasted Carrots?

This dish pairs beautifully with grilled meats, roasted poultry, or vegetarian grain bowls. Its versatility makes it a perfect side for various main courses.

Can I make this recipe ahead of time?

Yes, you can prepare the carrots ahead by cutting them and marinating them in the honey-garlic mixture. Just roast them fresh before serving for the best flavor and texture.

How do I store leftovers?

Store any leftovers in an airtight container in the refrigerator for 3-5 days. Reheat gently in a skillet or microwave before serving.

What’s the best way to reheat roasted carrots?

The best way to reheat is in a skillet over medium heat, allowing the carrots to regain their crispness. Microwaving is an option, but be careful not to overdo it.

Can I use this recipe for meal prep?

Yes, these roasted carrots make an excellent meal prep component. They store well and can easily enhance various meals throughout the week.

Additional Resources

For further culinary exploration, consider trying related recipes that involve roasting vegetables, such as Maple Glazed Brussels Sprouts or Garlic Mashed Sweet Potatoes. Technique guides on vegetable roasting will enhance your skills, while equipment recommendations for roasting pans can optimize your cooking experience.

Seasonal variations can also be delightful, so try incorporating root vegetables in winter or zucchini and bell peppers during summer for a fresh take on roasted vegetables.

Exploring ingredient information will help you appreciate how different vegetables impact flavor and nutrition, further enriching your cooking journey.

Join the Conversation

We encourage you to share your experience with this Honey Garlic Butter Roasted Carrots recipe on social media! Use our designated hashtags to showcase your delicious creations and connect with other cooking enthusiasts. Engage with our community by leaving feedback or sharing your variations.

Don’t be shy about asking for photography tips or seeking advice for a twist on preparation. Your voice helps us improve and celebrate the joy of cooking together!

The Recipe

Honey Garlic Butter Roasted Carrots

Serves: 4

Prep Time: 10 mins

Cook Time: 30 mins

Total Time: 40 mins

Kitchen Equipment Needed

  • Baking sheet
  • Mixing bowl
  • Knife
  • Cutting board

Ingredients

  • 1 pound of carrots, peeled and sliced
  • 3 tablespoons of unsalted butter, melted
  • 2 tablespoons of honey
  • 2 cloves of garlic, minced
  • Salt and pepper, to taste
  • Fresh parsley, chopped (for garnish)

Directions

  1. Preheat the oven to 400°F (200°C).
  2. In a large mixing bowl, combine the melted butter, honey, minced garlic, salt, and pepper.
  3. Add the sliced carrots to the bowl and toss until well-coated with the mixture.
  4. Spread the carrots evenly on a baking sheet.
  5. Roast in the preheated oven for 25-30 minutes, flipping halfway through, until golden and tender.
  6. Remove from the oven and let cool slightly before garnishing with fresh parsley.
  7. Serve warm and enjoy!

Recipe Notes

  • For additional flavor, feel free to add spices such as thyme or rosemary before roasting.
  • This recipe can easily be doubled or halved based on your serving needs.
  • Try swapping fresh garlic for garlic powder if desired, adjusting the amount to taste.

Easy Garlic Butter Shrimp Pasta – Ready in 20 Minutes

Garlic Butter Shrimp Pasta: A Quick and Delicious Dinner Idea

⚖️
Difficulty
Easy

⏲️
Prep Time
10 mins

🕒
Cook Time
15 mins

⏱️
Total Time
25 mins

🍽️
Servings
4 servings

Garlic Butter Shrimp Pasta is a delightful meal that bursts with flavor. The combination of succulent shrimp, al dente pasta, and a rich garlic butter sauce makes it a favorite among both seafood lovers and pasta enthusiasts. The dish comes together quickly, making it an ideal choice for busy weeknights or when you want to impress guests without spending hours in the kitchen. Imagine enjoying a plate of perfectly cooked pasta, tossed with juicy shrimp coated in a luscious garlic-infused butter sauce, garnished with fresh parsley and a squeeze of lemon. It’s comfort food at its best!

In this recipe, the shrimp are sautéed to perfection, accompanied by garlic that infuses the butter with a fragrant aroma. The addition of freshly grated Parmesan adds a creamy texture and elevates the savory experience. Not only does this dish satisfy your palate, but it also offers a vibrant visual feast with golden shrimp contrasting against the rich, buttery sauce. Get ready to whip up a bowl of happiness with your loved ones around the dinner table.

Quick Recipe Highlights

  • Flavor Profile: This dish boasts a blend of rich, buttery flavors with hints of garlic, allowing the natural sweetness of the shrimp to shine through.
  • Texture: Enjoy the tender bite of perfectly cooked pasta combined with the succulent texture of the shrimp, all enveloped in a creamy sauce.
  • Aroma: The enchanting aroma of garlic and herbs will fill your kitchen, enticing your family and friends long before the meal is served.
  • Visual Appeal: With its golden hue and fresh green parsley garnish, this dish is as beautiful as it is delicious.
  • Skill Level Needed: The easy preparation makes this a great dish for beginner cooks and a quick meal for experienced ones.
  • Special Equipment: You’ll need a large skillet and a pot for boiling pasta, along with basic kitchen utensils.

Recipe Overview

  • Difficulty Level: This easy recipe is perfect for home cooks of all skill levels, requiring minimal steps and ingredients while still delivering a gourmet experience.
  • Category: Garlic Butter Shrimp Pasta fits perfectly into the categories of dinner and seafood, making it versatile for various meal occasions.
  • Cuisine: This dish draws inspiration from Mediterranean cuisine, known for its use of fresh ingredients, seafood, and healthy fats.
  • Cost: Inexpensive and widely available ingredients make this recipe budget-friendly, with costs averaging around $15 for four servings.
  • Season: Best enjoyed in spring and summer when shrimp are at their peak and paired with fresh, seasonal vegetables.
  • Occasion: Ideal for casual family dinners, date nights, or entertaining guests, this dish is sophisticated yet simple to prepare.

Why You’ll Love This Recipe

The taste and texture appeal of Garlic Butter Shrimp Pasta are simply unmatched. The combination of tender shrimp and silky pasta in a creamy garlic sauce creates a mouthwatering experience. The shrimp absorb the buttery and garlicky notes, making every bite a satisfying explosion of flavor. It’s comfort food that brings warmth and joy to your dining table.

Convenience is another compelling reason to love this recipe. With just a few core ingredients and a cooking time of under 30 minutes, this dish can easily become a weeknight staple. Whether you’re coming home from a busy day at work or planning a quick meal for unexpected guests, Garlic Butter Shrimp Pasta adapts beautifully to your schedule.

Healthy eating is achievable with this delicious dish. Shrimp are a fantastic source of protein and low in calories, while the dish can be loaded with fresh vegetables like spinach or cherry tomatoes, enhancing its nutritional profile. It strikes a perfect balance between indulgent flavors and health-conscious choices.

Social and entertaining value is high with this recipe. It’s perfect for gatherings where you want to impress your guests without spending all day in the kitchen. This recipe invites shared conversations and laughter, making it a fantastic centerpiece for celebrations or casual get-togethers.

Lastly, the cost-effectiveness of this dish cannot be overlooked. With readily available ingredients, often under $15 for a family meal, it provides not only flavor but also fantastic value. Your wallet will appreciate this easy, yet refined recipe that doesn’t break the bank.

Historical Background and Cultural Significance

Garlic Butter Shrimp Pasta’s origins are closely tied to Mediterranean culinary traditions, where pasta dishes featuring seafood have been staples for centuries. The rich flavors of garlic and butter have their roots in the traditional Mediterranean diet, blending simplicity and flavor in ways that highlight the freshness of local ingredients.

This dish plays an important role in coastal cultures, where the catch of the day is often combined with pasta and simple sauces. The recipe not only reflects the emphasis on using fresh seafood but also showcases the abundance and beauty of the ocean’s harvest.

Over time, the recipe has evolved, adopting new twists and variations according to regional preferences. Influences from Italian cuisine have popularized the use of garlic and butter, merging it with shrimp for a delectable and hearty meal that captivates taste buds globally.

Regional variations of this dish can be found across many cultures that appreciate the harmony of seafood and pasta, demonstrating how this simple combination transcends boundaries to celebrate local ingredients and cooking styles.

Ingredient Deep Dive

Shrimp are the star of this dish, providing a delightful, sweet flavor with a unique texture that enhances the meal’s overall experience. With a rich history in various cuisines worldwide, shrimp have gained popularity due to their versatility in recipes. When selecting shrimp, look for fresh or frozen shrimp that are firm to the touch, with a slightly salty scent. For storage, keep them refrigerated in an airtight container and consume them within a day or two, or freeze for longer preservation.

Garlic is another essential component that brings aromatic depth to Garlic Butter Shrimp Pasta. With roots in ancient civilizations, garlic has long been treasured not only for its flavor but for its nutritional benefits, including antimicrobial properties. Choose fresh garlic bulbs that are firm and have dry skin. For storage, keep them in a cool and dry place. Avoid exposing them to moisture, which can lead to spoilage, and feel free to substitute with garlic powder in a pinch.

Pasta adds heartiness to the dish, seamlessly marrying with the flavors of the shrimp and garlic butter. Its history dates back thousands of years, showcasing the culinary prowess of Roman and Italian cultures. When choosing pasta, opt for high-quality options made from durum wheat for the best texture. For storage, keep uncooked pasta in a cool, dry place, and remember that cooking times vary depending on the type of pasta used.

Common Mistakes to Avoid

  • Overcooking the shrimp: Shrimp cook quickly and become tough if overdone. Aim for just 2-3 minutes per side.
  • Using too much garlic: While garlic is essential, adding excessive amounts can overpower the dish. Stick to the recommended amount for balance.
  • Not salting the pasta water: Salting the boiling water enhances the pasta’s flavor significantly, so don’t skip this step.
  • Choosing the wrong pasta: Ensure you select a pasta shape that holds the sauce well, such as fettuccine or linguine.
  • Cooking pasta too early: Combine the shrimp and pasta together just before serving to ensure optimum freshness and heat.
  • Neglecting to taste: Always taste your sauce before serving to ensure the flavors are balanced and the seasoning is correct;
  • Skipping the lemon juice: A splash of lemon juice brightens the dish, so don’t omit it.
  • Not letting the butter melt evenly: Allow the butter to melt on low heat so that the garlic infuses without burning.
  • Forgetting to garnish: A sprinkle of fresh parsley adds color and freshness, enhancing presentation.
  • Cooking pasta in different pots: Cook your pasta in the same pot you plan to mix it with the sauce for ease and efficiency.

Essential Techniques

Sautéing shrimp is an integral technique that ensures they are perfectly cooked while retaining their flavor and texture. The key is to preheat the skillet and cook the shrimp for just a few minutes on each side until they turn pink and opaque. Watch for visual cues: when the shrimp curl into a C shape, they’re likely done.

For achieving a rich garlic butter sauce, it’s crucial to control the heat carefully. Cooking garlic on high heat can lead to bitterness, so aim for medium heat to allow the garlic to become fragrant and soft without burning. Emulating the aroma and color of the garlic creates a delicious base for the dish.

Cooking pasta al dente is essential for maintaining texture and preventing it from becoming mushy once mixed with the sauce. Taste the pasta a minute or two before the package directions indicate to ensure it is tender yet holds its shape.

Pro Tips for Perfect Garlic Butter Shrimp Pasta

1. Use frozen shrimp for convenience—just remember to thaw them in the fridge overnight before cooking.
2. Experiment with different types of pasta to discover your favorite combination with shrimp.
3. Incorporate seasonal vegetables like spinach, asparagus, or bell peppers for added nutrition and color.
4. When sautéing the garlic, add a pinch of red pepper flakes for a touch of heat.
5. Reserve some pasta cooking water to adjust the sauce consistency if needed.
6. Try grilled or roasted shrimp for a smoky flavor twist.
7. Enhance the richness by adding a splash of white wine just after the garlic starts to soften.
8. Make sure to finish the dish with a drizzle of high-quality olive oil for extra flavor.

Variations and Adaptations

Regional variations of Garlic Butter Shrimp Pasta often blend local ingredients and spices. For instance, adding saffron in Mediterranean regions enhances the flavor profile significantly, while Southern U.S. recipes might introduce Creole seasoning for a spicy kick.

Seasonal adaptations may incorporate fresh herbs like basil in the summer or hearty greens such as kale in the winter months, showcasing seasonal produce.

For dietary modifications, try gluten-free pasta to suit gluten-sensitive diners or use plant-based shrimp as a vegan alternative.

Play with flavor variations, such as substituting the butter with olive oil or adding pesto for a different twist. Adjusting texture can be achieved by mixing in a handful of toasted pine nuts, imparting a delightful crunch.

Presentation alternatives can include plating the pasta in bowls and sprinkling edible flowers or fresh herbs on top for a visually captivating dish perfect for special occasions.

Serving and Presentation Guide

To create an inviting presentation, use large, shallow bowls or plates that showcase the beautiful colors of the dish.

Garnish with freshly chopped parsley and perhaps a sprinkle of grated Parmesan cheese for visual appeal. For added sophistication, serve with a wedge of lemon on the side, allowing guests to customize their flavor experience.

Traditional accompaniments include crusty garlic bread or a simple green salad, which complements the richness of the dish beautifully.

Modern serving suggestions could involve a drizzle of balsamic reduction over the plate for added color and flavor contrast.

Serve the pasta warm, ensuring everything is heated through before plating, and consider portion control for a balanced dining experience.

Wine and Beverage Pairing

A crisp white wine pairs exceptionally well with Garlic Butter Shrimp Pasta. Opt for a Sauvignon Blanc or a light Pinot Grigio, as their acidity complements the buttery sauce beautifully.

For non-alcoholic alternatives, consider serving sparkling water infused with lemon or cucumber; this refreshing choice enhances the meal without overwhelming flavors.

If desired, coffee lovers could explore pairing this dish with a light roast coffee after the meal for a delightful finish.

Serve beverages chilled to balance the richness of the pasta, adding an extra element of refreshment to the dining experience.

Storage and Shelf Life

Proper storage is crucial for extending the shelf life of Garlic Butter Shrimp Pasta. Store leftover pasta in an airtight container in the refrigerator for up to 3 days.

When preparing for long-term storage, consider freezing portions in freezer-safe bags or containers. This method can preserve flavor, though it’s best consumed within 1-2 months for optimal taste.

Always check for signs of spoilage before consuming, such as off smells or discoloration. Reheat gently on the stovetop or microwave to avoid overcooking the shrimp further, ensuring even heating throughout.

For freezing, separate the shrimp from the pasta if possible, as pasta tends to become mushy once thawed.

Make Ahead Strategies

To streamline preparation, consider prepping all ingredients ahead of time—chop garlic, measure pasta, and clean shrimp, keeping everything organized in the fridge.

Cook the pasta al dente just before serving to ensure freshness. If you’d like, you can sauté the shrimp in advance, allowing you to combine everything just before mealtime.

When it comes to assembling, quickly toss the pre-cooked shrimp into the pan before adding pasta and sauce, ensuring a seamless transition from prep to plate.

For reheating, warm slowly on the stove with a dash of butter to preserve flavor and texture, adding fresh herbs just before serving to brighten up the dish.

Scaling Instructions

When halving the recipe, adjust ingredient proportions accurately to maintain balance. Use the same cooking techniques and timing to produce a similar dining experience.

If doubling or tripling the recipe for a larger gathering, ensure that your cookware can accommodate the increased volume, as well as adjust the cooking time slightly to allow everything to heat through thoroughly.

Consider cooking in batches if necessary to manage maximum flavor and texture, especially with shrimp, which will require careful attention to prevent overcooking.

Keep storage considerations in mind, as extra servings may require larger containers or additional freezer bags for portion control.

Nutritional Deep Dive

Garlic Butter Shrimp Pasta presents an excellent macro breakdown, offering high-quality protein from shrimp and carbohydrates from pasta.

The dish can provide essential vitamins and minerals, especially if you add fresh vegetables. Shrimp contain beneficial nutrients such as omega-3 fatty acids, supporting heart health and brain function.

In terms of portion analysis, a standard serving provides a balanced meal option but can also be modified to suit individual dietary needs by adjusting the portion sizes or ingredient ratios.

Those watching their weight can enjoy it in moderation by pairing it with a light salad or vegetable side, ensuring a fulfilling yet low-calorie meal experience.

Dietary Adaptations

This recipe can easily become gluten-free by substituting regular pasta with gluten-free varieties made from rice or quinoa.

For a dairy-free option, replace butter with olive oil or a dairy-free alternative that fits your dietary needs while maintaining a familiar flavor.

Vegan variations can include plant-based shrimp products or mushrooms, harmoniously blending with the flavors of garlic and sauce used in this dish.

For low-carb diets, consider using spiralized vegetables like zucchini to replace pasta, keeping the integrity of the dish without added carbohydrates.

Keto-friendly adaptations may also be beneficial, utilizing creamy cauliflower sauce instead of butter and traditional pasta, thus enhancing flavors while maintaining a focus on low-carb ingredients.

Troubleshooting Guide

Texture issues can arise from overcooked shrimp or pasta; make sure to keep a close watch while cooking, adhering to proper timing to ensure tender results.

Flavor balance may need adjustment if the dish seems too salty; try adding a squeeze of lemon juice to brighten flavors.

Temperature problems can often be resolved by reheating gently if leftovers are served cold.

If you encounter equipment challenges, ensure your skillet is preheated adequately before adding ingredients, preventing unwanted sticking.

Ingredient substitutions should consider the impact on flavor—sudden switches may lead to unexpected taste outcomes.

Ensure you’re managing timing effectively. Preparing ingredients in advance can prevent drastic last-minute adjustments that cause mistakes.

Recipe Success Stories

Community feedback regarding Garlic Butter Shrimp Pasta is overwhelmingly positive, with many home cooks praising its simplicity and deliciousness.

Readers have successfully adapted this dish to their tastes, incorporating variations such as different pasta types or sauces and sharing insights on their personal recipes.

Innovation thrives as adaptations emerge, with some readers experimenting with added spices or vegetables, resulting in unique culinary creations that resonate well with family preferences.

Photography tips suggest ensuring good lighting during meals, capturing vibrant colors and appealing plates that enhance the visual experience while showcasing the beauty of the dish on social media.

Encouraging sharing and engagement, this recipe fosters cooking creativity and showcases the culinary community from all backgrounds.

Frequently Asked Questions

Can I use frozen shrimp for this recipe?

Yes, frozen shrimp can be used for Garlic Butter Shrimp Pasta. Just be sure to thaw them in the refrigerator overnight before use for best results.

How long can leftovers be stored?

Leftovers can be stored in the refrigerator for up to three days in an airtight container. It is best to consume them within this time frame for optimal taste and freshness.

Can I use other types of pasta?

Absolutely! While spaghetti, linguine, or fettuccine are traditional choices, feel free to experiment with other pastas like penne or gluten-free options as desired.

What can I substitute for garlic?

If garlic isn’t available, garlic powder can be used as a substitute in a pinch. Fresh shallots can also provide a similar aromatic quality.

Is this dish suitable for meal prep?

This dish works well for meal prep, especially if you store the components separately and combine them just before serving to maintain freshness.

What should I serve with Garlic Butter Shrimp Pasta?

A simple green salad, crusty garlic bread, or steamed vegetables pairs beautifully with this dish, enhancing your meal experience without overwhelming the flavors of the pasta.

Can I make this recipe ahead of time?

While it’s best enjoyed fresh, you can prepare the shrimp and pasta in advance and reheat them together. Add the sauce just before serving to keep everything flavorful.

What if I don’t have shrimp?

If shrimp isn’t available, consider using other seafood options such as scallops or even chicken as a substitute, adjusting cooking times accordingly.

Can I add vegetables to this dish?

Absolutely! Feel free to incorporate seasonal vegetables like spinach, asparagus, or bell peppers to add nutrition and color to your Garlic Butter Shrimp Pasta.

How can I make this dish spicier?

For a spicier kick, consider adding red pepper flakes during the sautéing process or serving with a hot sauce on the side.

Additional Resources

For additional inspiration, explore related recipes such as Lemon Herb Grilled Shrimp or Creamy Spinach Pasta.

Check out technique guides for sautéing shrimp and cooking pasta perfectly al dente to sharpen your culinary skills.

Ingredient information about shrimp and pasta types can enhance your understanding and help in selecting the best options for your cooking.

Lastly, consider investing in reliable kitchen equipment such as non-stick skillets or quality pots to ensure perfect results with every recipe.

Join the Conversation

We invite you to share your Garlic Butter Shrimp Pasta experiences on social media! Tag us with your photos and variations to inspire fellow home cooks.

Photography tips can enhance your online sharing experience, while recipe reviews provide insights that contribute to our cooking community.

Engage with us by exchanging ideas, discussions about adaptations, and suggestions that enrich everyone’s culinary repertoire.

Your feedback helps us develop more delicious recipes and encourages recipe trials that celebrate the diverse world of cooking.

The Recipe

Garlic Butter Shrimp Pasta

Serves: 4

Prep Time: 10 mins

Cook Time: 15 mins

Total Time: 25 mins

Kitchen Equipment Needed

  • Large skillet
  • Pot for boiling pasta
  • Slotted spoon
  • Cutting board and knife
  • Airtight container for storage

Ingredients

  • 8 oz pasta (spaghetti, linguine, or your choice)
  • 1 lb large shrimp, peeled and deveined
  • 4 tbsp butter
  • 4 cloves garlic, minced
  • 1 lemon, juiced and zested
  • 1/4 cup fresh parsley, chopped
  • Salt and pepper, to taste
  • Parmesan cheese, for serving (optional)

Directions

  1. Cook the pasta according to package instructions until al dente. Drain and reserve 1/2 cup pasta water.
  2. In a large skillet, melt butter over medium heat. Add minced garlic and sauté for 1-2 minutes until fragrant.
  3. Add shrimp to the skillet, seasoning with salt and pepper. Cook until pink and opaque, about 2-3 minutes per side.
  4. Mix in the drained pasta, lemon juice, lemon zest, and reserved pasta water; toss to combine.
  5. Remove from heat and stir in fresh parsley. Adjust seasoning if needed.
  6. Serve immediately with Parmesan cheese, if desired.

Recipe Notes

  • Fresh herbs can be substituted for parsley based on your preference.
  • For added flavor, consider using seafood stock instead of water for cooking pasta.
  • Experiment with other types of pasta and seafood to discover new favorites.
  • You can add vegetables like spinach or cherry tomatoes for extra nutrition.

Easy Slow Cooker Mexican Street Corn Soup Recipe

Slow Cooker Mexican Street Corn Soup: A Creamy Delight

⚖️
Difficulty
Easy

⏲️
Prep Time
15 mins

🕒
Cook Time
6-8 hours

⏱️
Total Time
6-8 hours 15 mins

🍽️
Servings
6 servings

Indulge in a bowl of warm and comforting Slow Cooker Mexican Street Corn Soup, a perfect fusion of flavors that dances on your taste buds. This delightful soup captures the essence of traditional Mexican street corn, known as “elote,” and transforms it into a creamy, hearty soup. The medley of sweet corn, spices, and toppings creates a deliciously satisfying experience that evokes the vibrant spirit of Mexican street food right in your kitchen.

Perfect for busy weekdays or a cozy gathering, this slow cooker soup not only brews beautifully but also fills your home with alluring aromas that invite everyone to the table. The rich texture, combined with the bright flavors of lime and cilantro, ensures each spoonful is both comforting and refreshing. Dive into creamy goodness that is as easy to prepare as it is essential for your fall and winter dining.

Quick Recipe Highlights

  • Flavor Profile: Creamy, sweet, and spicy with a hint of smokiness.
  • Texture: Smooth base with a delightful crunch from toppings like tortilla chips.
  • Aroma: Inviting notes of roasted corn, cilantro, and zesty lime.
  • Visual Appeal: Bright yellow color accented with fresh herbs and toppings.
  • Skill Level Needed: Perfect for beginner cooks, requiring minimal cooking techniques.
  • Special Equipment: A slow cooker or crockpot for effortless cooking.

Recipe Overview

  • Difficulty Level: This recipe is designed for all skill levels, making it an ideal choice for novice cooks. The simplicity of combining ingredients and letting the slow cooker work its magic ensures success with minimal effort.
  • Category: This soup fits perfectly as a main dish or side, ideal for lunch or dinner and makes excellent leftovers.
  • Cuisine: Rooted in Mexican cuisine, this dish pays homage to the beloved elote, celebrating the vibrant flavors and culinary traditions of Mexico.
  • Cost: Budget-friendly, as it prioritizes inexpensive ingredients like corn and broth, making it accessible to all.
  • Season: Enjoy year-round, especially during colder months when you crave something warm and satisfying.
  • Occasion: A hit at family dinners, potlucks, or any gathering that calls for delicious comfort food.

Why You’ll Love This Recipe

Imagine the delightful taste of sweet corn mingled with subtle spices and creamy broth, creating a comforting bowl of soup that warms your soul. The Slow Cooker Mexican Street Corn Soup offers a unique twist on traditional flavors, making it not only a hearty meal but also a satisfying treat for your taste buds. Its rich texture and vibrant taste truly elevate comfort food to a new level.

In addition to its captivating flavor, this recipe is all about convenience and ease. Simply toss the ingredients into your slow cooker in the morning, and by dinner time, your meal will be ready. This hands-off approach allows busy individuals and families to enjoy a nutritious, home-cooked meal without spending hours in the kitchen.

Nutritionally, corn is packed with fiber and essential vitamins, making this soup not just tasty but nourishing as well. Adding toppings like avocado, cheese, or fresh cilantro further enhances both the flavor and nutritional profile, providing additional healthy fats and vitamins.

Gathering with family and friends over a big pot of this flavorful soup creates an inviting atmosphere, perfect for sharing stories and laughter. Its appeal transcends casual meals, making it a fantastic choice for entertaining or casual get-togethers.

Considering cost-effectiveness, the simple ingredients used in the preparation keep this warm and inviting dish within budget, clearing any worries of an empty wallet. You can easily find the required components at local grocery stores without breaking the bank.

Historical Background and Cultural Significance

The origins of this dish can be traced back to the streets of Mexico, where elote is lovingly prepared and sold by vendors. This traditional street food often features grilled corn on the cob slathered with mayonnaise, cheese, and an array of flavorful spices, all combining for a unique explosion of taste. Over the years, adaptations of this beloved staple have led to delicious creations like our Slow Cooker Mexican Street Corn Soup.

Culturally, elote is more than just food; it represents a time-honored tradition and connection to home and heritage. The ingredients reflect the regional availability of produce, craft, and creativity inherent in Mexican cuisine. This soup serves as a celebration of these traditions and invites everyone to partake in the flavors of Mexico.

The evolution of the recipe from street corn to soup highlights the versatility of corn, showcasing its ability to shine in varied formats without losing its core essence. With each adaptation, we continue to nourish our bodies while simultaneously honoring the roots of these dishes.

Throughout Mexico, regional variations of elote abound, with different spices, creams, and toppings that differ by location. This recipe serves as a gateway to exploring these flavors, allowing culinary enthusiasts to customize their soup according to personal preferences, making every bowl of Slow Cooker Mexican Street Corn Soup a unique experience.

Ingredient Deep Dive

Corn, the star ingredient of our soup, has a rich background in Mexican culture, dating back thousands of years as a staple crop. It’s packed with nutritional benefits such as fiber, antioxidants, and essential vitamins. When shopping for corn, opt for fresh, sweet corn in season or frozen corn if fresh is not available. Store it in a cool place and use it within a few days for optimal freshness. For substitutions, consider using canned corn as an easier alternative.

Another essential ingredient is chicken broth that serves as the foundational liquid of the soup. Broth adds depth and flavor while providing hydration. When selecting chicken broth, look for low-sodium options to control the salt content. Homemade broth is an excellent choice if time allows, offering richer flavor and nutritional benefits. For vegetarians, use vegetable broth as a solid substitute.

Common Mistakes to Avoid

  • Not seasoning adequately: Failing to season throughout the cooking process might result in a bland soup. Taste and adjust seasoning as needed.
  • Using old corn: Always check for freshness. Older corn may lack sweetness and flavor.
  • Cooking too long: Overcooking can lead to mushy texture. Follow the recommended cooking time for best results.
  • Neglecting garnish: The right toppings elevate the soup’s flavor and appearance. Don’t skip out on garnishing.
  • Skipping blending: For a creamier soup consistency, blend part of the mixture for a smoother texture while still retaining some corn bits.
  • Inefficient layering of ingredients: Place denser items at the bottom to ensure even cooking.
  • Not allowing enough time to cool before freezing: Cooling the soup is crucial before freezing to prevent ice crystals and freezer burn.
  • Ignoring storage guidelines: Proper storage will keep the soup fresh for longer. Sealing in air-tight containers is essential.

Essential Techniques

One of the fundamental techniques for creating a delicious soup is mastering the sautéing of aromatics. This step is important as it releases flavors that enhance your broth. To master this, heat oil in the pan before adding onions, garlic, or spices. Avoid cooking on high heat, which can burn the ingredients. A good visual cue is a translucent onion, indicating readiness to add other components.

Another key technique is blending the soup. If you prefer a smoother consistency, using an immersion blender directly in the slow cooker can help achieve that. Fill the blending jar only halfway to avoid splattering or overflows, and start blending at a lower speed to control the consistency effectively.

Pro Tips for Perfect Slow Cooker Mexican Street Corn Soup

1. Use fresh corn when possible to achieve the best sweetness and flavor.

2. For added depth, consider roasting the corn before adding it to the soup.

3. Experiment with different toppings, including lime zest, queso fresco, or jalapeños.

4. For a smoky flavor, add some smoked paprika or chipotle powder during the cooking process.

5. Add a splash of cream or milk at the end for additional richness.

6. If using frozen corn, thaw it briefly before adding to avoid becoming too mushy.

7. Allow the soup to sit for 10-15 minutes before serving to let flavors meld together.

8. Monitor the cooking times closely based on your slow cooker’s settings, as they can vary significantly.

Variations and Adaptations

This recipe can be adapted to highlight regional variations. For instance, make a vegetarian version by using vegetable broth and adding black beans or chickpeas for protein. Seasonal adaptations can include enticing additions like diced peppers in summer or roasted garlic in winter.

For those with dietary restrictions, modifications can be made such as swapping dairy products for nut-based alternatives or leaving out gluten-based components altogether. These adjustments ensure everyone can enjoy this comforting soup.

From a flavor perspective, experiment with various spices that can be added during cooking. Consider adding turmeric for an earthy tone or cayenne for heat. You could also change the soup’s texture by pureeing all ingredients instead of just some for a more velvety finish.

When it comes to presentation, consider serving it in colorful bowls and garnishing generously with vibrant toppings. A drizzle of crema or a sprinkle of fresh cilantro can elevate the visual appeal significantly.

Serving and Presentation Guide

To enhance the dining experience, focus on plating techniques that showcase your soup’s vibrant color. A shallow bowl allows for creative garnishing while maintaining the soup’s creamy essence. Use a dollop of sour cream or Greek yogurt in the center and surround it with fresh cilantro and crumbled cheese.

Garnishing ideas include crunchy tortilla strips, avocado slices, or a squeeze of lime. These toppings bring an added dimension of texture and flavor, making each bite enjoyable.

Traditional accompaniments can include warm corn tortillas or a side of Mexican rice, adding more delight to your meal. If serving individual portions, consider using rustic-style bowls for that inviting touch, and remember that temperature plays a critical role—ensuring your soup is steaming hot when served enhances overall enjoyment.

Finally, keep portion control in mind; a standard serving should be about 1 ½ cups. This allows room for enjoying bread or tortillas on the side.

Wine and Beverage Pairing

For a delightful pairing, consider a crisp Sauvignon Blanc that complements the freshness of the soup while balancing its richness. The wine’s acidity beautifully enhances the flavors of lime and cilantro. Alternatively, a light-bodied beer, such as a Mexican lager, pairs well for a refreshing option with hints of flavor that marry perfectly with the spices.

Non-alcoholic alternatives can include a refreshing agua fresca made with lime and mint, providing a lovely balance to the soup’s heat. If you prefer something warm, a cup of herbal tea can also be a comforting choice, steeped with hints of chamomile or peppermint.

Storage and Shelf Life

Store any leftovers in an airtight container in the refrigerator, where the soup will keep well for approximately 3-4 days. Ensure that the soup has cooled completely before sealing it to prevent condensation from affecting the texture.

For longer storage, consider freezing the soup in portion-sized containers. Cool and package properly to avoid freezer burn, making it last up to 3 months. When reheating, be cautious not to let the soup boil. Instead, gently warm it on the stove over low heat, stirring occasionally to maintain a smooth texture.

Make Ahead Strategies

For those who enjoy planning, preparing certain ingredients ahead of time makes the cooking process streamlined. Chop vegetables a day prior and refrigerate to save time on busy mornings. Similarly, you can pre-measure spices and store them in airtight containers to minimize effort.

If you plan to freeze the soup, consider preparing a larger batch and dividing it into meal-sized portions. Label each container with the date to ensure freshness and easy access later. Remember to leave space in each container as soup expands when frozen, maintaining quality.

Incorporating fresh elements, like cilantro and lime, before serving enhances the soup’s flavors. Adding these just before eating maximizes freshness and ensures a vibrant taste.

Scaling Instructions

Adjusting the serving size of your soup is straightforward. To halve the recipe, simply divide all ingredients by two, making it ideal for smaller households. Doubling or tripling is just as easy and works perfectly for gatherings—just ensure your slow cooker has the capacity to accommodate larger volumes.

When scaling up, keep an eye on cooking times as larger quantities may extend the cooking process. Test for doneness by tasting. Additionally, if you’re using multiple slow cookers, rotate between them for even cooking and consistency.

Nutritional Deep Dive

This soup not only tantalizes the taste buds but also provides a balanced macro breakdown of carbohydrates from the corn, healthy fats if you decide to garnish with avocado, and protein if incorporating healthful toppings. Incorporating diverse ingredients ensures a well-rounded dish full of fiber and vitamins.

Examining micronutrients reveals the presence of vitamin A, C, and essential B vitamins, boosting your daily nutrient intake. Those who enjoy this flavorful bowl can benefit from a nutritious meal without feeling heavy. Additionally, portion control plays a fundamental role, helping with weight management while savoring its delightful taste.

Dietary Adaptations

This recipe can easily be modified for dietary needs. For gluten-free adaptations, ensure to use corn tortillas if you plan on serving with them, and avoid any gluten-containing ingredients. A dairy-free version can remove cheese and substituting with cashew cream creates a rich texture without the dairy.

For those following vegan diets, simply replace chicken broth with vegetable broth, and keep all toppings plant-based, utilizing fresh veggies and herbs generously to ensure flavor depth. Low-carb and keto adaptations can focus on omitting corn or replacing it with cauliflower as a hearty substitute while retaining a creamy texture.

Other specific diets like paleo or low-FODMAP can be achieved by swapping ingredients to suit needs while still maintaining taste integrity. With slight adjustments, this Slow Cooker Mexican Street Corn Soup can cater to diverse dietary preferences without sacrificing flavor.

Troubleshooting Guide

Texture issues can arise if the corn is overcooked; always check for doneness before the end of the cooking time for best results. To remedy bland flavor, add salt gradually as needed, particularly towards the end of cooking to prevent over-salting.

If there are problems with temperature control while cooking, check if your slow cooker settings are functioning correctly; slow cookers can differ in efficiency. Should ingredient substitutions lead to unexpected results, keep a careful note of flavor profiles while adjusting, ensuring proper balance when altering spices and aromatics.

Recipe Success Stories

Community feedback highlights the beauty of this comforting soup, with readers adapting it to their tastes by swapping ingredients and sharing variations that have become household favorites. One reader transformed it into a spiced version with additional jalapeños, bringing a whole new level of heat.

Variations arise from personal creativity, with some adding different garnishes such as roasted peppers or crispy bacon for an elevated flavor profile, showcasing how adaptable this recipe truly is. Photography tips from our community help ensure that every bowl looks just as good as it tastes, inspiring others to try making the dish.

Frequently Asked Questions

Q1: Can I make this soup in advance?

A: Yes! This soup can be made ahead of time. Store it in the fridge for up to 4 days or freeze it for longer storage.

Q2: Can I substitute canned corn?

A: Absolutely! Canned corn is a great equivalent and will save you some prep time. Rinse and drain before adding to the soup.

Q3: How do I thicken the soup if it’s too thin?

A: You can use a cornstarch slurry or blend a portion of the soup for added thickness. Both methods will help achieve that creamy texture you’re looking for.

Q4: What can I use as additional toppings?

A: Consider toppings like fresh avocado, shredded cheese, crispy tortilla strips, sour cream, and fresh herbs. Mix and match to find your favorite combination!

Q5: Is this soup spicy?

A: The spice level can be adjusted according to your preference. Adding jalapeños or chili powder can elevate the heat, while omitting them keeps it mild.

Q6: Can I make a vegetarian version?

A: Yes! Utilize vegetable broth and ensure all toppings are plant-based for a delightful vegetarian soup.

Q7: How long does it take to cook in a slow cooker?

A: It typically takes 6-8 hours on low heat. Adjust times based on your slow cooker’s performance for optimal results.

Q8: Can I freeze leftovers?

A: Yes, you can freeze leftovers. Make sure to cool the soup completely before placing it in airtight containers; it will keep for about 3 months.

Q9: How do I reheat the soup?

A: Reheat the soup over low heat on the stove or in the microwave, gently stirring until warmed through. Avoid boiling it.

Q10: What’s the best way to store leftovers?

A: Store leftovers in airtight containers in the refrigerator for 3-4 days or freeze for longer storage.

Q11: Can I add meat to this soup?

A: Yes! Adding shredded chicken or turkey can make the soup heartier. Stir it in towards the end of cooking to warm through.

Q12: What are good side dishes to serve with this soup?

A: This soup pairs excellently with warm corn tortillas, salad, or a side of grilled vegetables.

Additional Resources

For more delicious recipes, check out our other comforting soups like Butternut Squash Soup or Classic Tomato Basil. For learning culinary techniques, explore guides on knife skills or cooking with spices to elevate your kitchen prowess. Interested in ingredient specifics? We offer in-depth articles on corn and its versatility in cooking. Don’t forget to browse equipment recommendations to find the best slow cookers and kitchen tools to make meal prepping a breeze.

Join the Conversation

We’d love to see your creations! Share your photos on social media using our hashtag to connect with fellow cooking enthusiasts. Leave a review of your experience with this recipe and offer suggestions for those seeking to try their hand at making this delightful Slow Cooker Mexican Street Corn Soup. Join our community discussions to exchange recipe variations, cooking tips, and experiences that keep our love for food vibrant.

The Recipe

Slow Cooker Mexican Street Corn Soup

Serves: 6 servings

Prep Time: 15 mins

Cook Time: 6-8 hours

Total Time: 6-8 hours 15 mins

Kitchen Equipment Needed

  • Slow cooker
  • Chopping board
  • Sharp knife
  • Measuring cups and spoons
  • Blender or immersion blender
  • Large spoon for stirring

Ingredients

  • 4 cups sweet corn (fresh or frozen)
  • 1 medium onion, chopped
  • 2 cloves garlic, minced
  • 4 cups chicken broth (or vegetable broth)
  • 1 cup heavy cream
  • 1 tsp cumin
  • 1 tsp chili powder
  • Salt and pepper, to taste
  • Juice of 1 lime
  • Fresh cilantro, for garnish
  • Additional toppings: avocado, cheese, tortilla chips, sour cream, jalapeños

Directions

  1. In your slow cooker, combine the corn, onion, garlic, broth, cumin, chili powder, salt, and pepper.
  2. Cover and cook on low for 6-8 hours or high for 3-4 hours.
  3. Once cooked, stir in the heavy cream and lime juice.
  4. If a creamier texture is desired, use an immersion blender to blend part of the soup, then mix.
  5. Serve hot, garnished with cilantro and any additional toppings you prefer.

Recipe Notes

  • Feel free to customize spices to your liking.
  • For a vegan option, replace heavy cream with coconut cream.
  • Leftovers can be stored in an airtight container for up to 4 days.
  • To freeze, cool the soup completely and store in portioned containers.

Easy Creamy Shrimp Enchiladas with Cheesy Sauce

Creamy Shrimp Enchiladas: A Delicious and Decadent Delight

⚖️
Difficulty
Medium

⏲️
Prep Time
20 mins

🕒
Cook Time
30 mins

⏱️
Total Time
50 mins

🍽️
Servings
4 servings

Creamy shrimp enchiladas are a delightful twist on the traditional Mexican dish, combining succulent shrimp with a luscious cream sauce enveloped in soft tortillas. The dish is incredibly satisfying, perfect for a family weeknight dinner or a festive gathering. The creamy texture of the sauce paired with the tender shrimp creates a symphony of flavors that dances on the palate, making it a crowd-pleaser. Each bite offers a delightful balance of richness and zest, heightened by the use of fresh ingredients.

The beauty of creamy shrimp enchiladas lies not only in their taste but also in their versatility. You can customize the filling with various vegetables or alter the level of spice to suit your personal preferences. Whether you opt for a milder cream sauce or a spicy enchilada variant, these enchiladas promise a comforting and hearty meal. Perfectly paired with a fresh salad or some chipotle black beans, they are sure to impress both family and friends alike.

Quick Recipe Highlights

  • Flavor Profile: Creamy, savory, with a hint of spice from the enchilada sauce, bringing vibrant flavors to life.
  • Texture: Silky smooth sauce enveloping tender shrimp and soft tortillas creates a delightful eating experience.
  • Aroma: Rich and inviting aroma with hints of garlic, spices, and fresh cilantro fills the kitchen.
  • Visual Appeal: Beautifully plated with a garnish of fresh cilantro and a drizzle of sour cream adds visual interest.
  • Skill Level Needed: The medium skill level is suitable for home cooks familiar with making sauces and rolling tortillas.
  • Special Equipment: A baking dish and a sauté pan are essential for this recipe, along with measuring cups.

Recipe Overview

  • Difficulty Level: The process requires basic cooking techniques, such as sautéing and baking, making it manageable for most home cooks.
  • Category: This recipe fits well within the categories of main dishes, comfort food, and Mexican cuisine.
  • Cuisine: Influenced by traditional Mexican flavors, this dish draws upon the rich culinary history of enchiladas while incorporating creamy elements.
  • Cost: The cost is reasonable, primarily driven by the shrimp and dairy ingredients, making it accessible for home cooks on a budget.
  • Season: Ideal for any season, but especially enjoyed during the cooler months when comfort food is craved.
  • Occasion: Perfect for casual family meals, potlucks, or festive gatherings with friends and loved ones.

Why You’ll Love This Recipe

The rich and creamy flavor of these shrimp enchiladas is bound to win over your taste buds. The combination of shrimp’s natural sweetness and the cream sauce creates a depth of taste that is satisfying and hearty. Each bite reveals layers of flavors, from the spiciness of the sauce to the freshness of the cilantro, making every forkful a celebration of texture and flavor.

In addition, the preparation of creamy shrimp enchiladas is straightforward, allowing you to create a delicious meal without spending hours in the kitchen. Perfectly suited for weeknights, you can prepare the filling ahead of time and assemble them quickly when ready to bake. This convenience is perfect for busy families wanting to enjoy a home-cooked meal without sacrificing time or flavor.

Nutritionally, these enchiladas offer a good source of protein from the shrimp and can be packed with various vegetables like bell peppers or zucchini if desired. The richness of the cream sauce can be balanced with lighter ingredients, making this dish a delicious yet not overly heavy option.

These enchiladas also create an inviting atmosphere when serving guests. Their tempting aroma and beautiful presentation are sure to spark conversation and excitement at the table. The communal aspect of sharing enchiladas fosters a sense of togetherness, making every meal a cherished memory.

Finally, creamy shrimp enchiladas are cost-effective. While shrimp may be a splurge, the overall recipe remains budget-friendly with household staples. This balance makes it a wonderful choice for those looking to create something special without breaking the bank.

Historical Background and Cultural Significance

Enchiladas have a long and rich history rooted in Mexican cuisine that dates back hundreds of years. Originally served as a method to preserve meats, tortillas filled with various ingredients became a staple of the diet for many. The combination of corn tortillas filled with meats, vegetables, and sauces showcases the ingenuity of Mexican cooking and the use of available resources.

Creamy shrimp enchiladas symbolize the evolution of traditional recipes through cultural exchanges. Over time, regional variations emerged, and the use of creamy sauces began to represent a fusion of flavors, often inspired by international ingredients and cooking techniques. This modern interpretation respects the foundational elements of enchiladas while adding depth through the use of cream and shellfish.

The dish also holds significance in social gatherings. It’s common to find enchiladas served during celebrations and family gatherings in Mexico, where food acts as a unifying force. Sharing these enchiladas represents hospitality and warmth, an important aspect of Mexican culture that values family and community.

Over the years, chefs and home cooks alike have adapted enchiladas to fit modern tastes and dietary preferences. The versatile nature of the dish allows for endless experimentation, ensuring it remains relevant in contemporary kitchens worldwide. The creamy shrimp version stands as a testament to creativity within culinary traditions, offering a delicious take on a historical favorite.

Ingredient Deep Dive

Shrimp is the star ingredient in creamy shrimp enchiladas, celebrated not only for its delectable taste but also for its fantastic nutritional profile. Rich in protein and low in calories, shrimp provides essential nutrients while contributing to heart health due to its omega-3 fatty acid content. When selecting shrimp, choose fresh, sustainably sourced varieties for the best quality. To maintain freshness, store shrimp in the coldest part of the refrigerator and consume within a couple of days, or freeze if not used immediately. Substitutions can include other seafood or even chicken, depending on personal preferences.

Cream is another critical ingredient that gives these enchiladas their decadent texture. Heavy cream enriches the sauce, making it luxuriously smooth. However, for those looking for lighter options, substitutions like half-and-half or coconut cream can provide similar results. When using dairy products, ensure they are fresh, and store them properly to avoid spoilage. Cream adds a wonderful mouthfeel to the dish, complementing the shrimp beautifully.

Tortillas are the backbone of enchiladas, and while traditional corn tortillas are commonly used, flour tortillas can also be chosen for a softer, richer texture. Tortillas should be fresh and pliable to allow for easier rolling. When making the sauce, select high-quality enchilada sauce, whether homemade or store-bought, as this will greatly impact the overall flavor of the dish.

Common Mistakes to Avoid

  • Using frozen shrimp without proper thawing: Always thaw shrimp in the refrigerator or under cold running water to maintain texture and flavor.
  • Overcooking shrimp: Cook shrimp just until opaque to prevent toughness; they cook quickly, so watch carefully!
  • Not warming tortillas first: Warming tortillas makes them more pliable and easier to roll without tearing.
  • Skipping the seasoning: Adding seasoning to the shrimp and cream sauce enhances flavor; don’t overlook this crucial step.
  • Incorrect sauce thickness: Ensure the sauce has the right consistency; if too thick, add a splash of broth or cream.
  • Not letting the enchiladas rest before serving: Allowing the enchiladas to rest helps flavors meld and makes cutting easier.
  • Ignoring garnishes: Fresh herbs and a squeeze of lime elevate the dish; don’t skip the final touches!
  • Rushing the baking process: Allow enough time in the oven for the flavors to blend and the enchiladas to heat through properly.
  • Using stale tortillas: Always ensure your tortillas are fresh to avoid an unpleasant texture in the finished dish.
  • Neglecting to test flavors throughout the process: Taste your sauce and adjust seasonings as you go—it’s key to delicious enchiladas!

Essential Techniques

One essential technique for making creamy shrimp enchiladas is properly sautéing the shrimp. This step is pivotal as it enhances the shrimp’s natural sweetness while cooking them quickly to achieve a perfect texture. To master this, ensure the skillet is hot before adding the shrimp, and avoid overcrowding the pan to promote even cooking. Visual cues for success include a bright pink color and an opaque appearance to indicate that they are cooked correctly.

Another important technique is the preparation of the cream sauce. Creating a well-balanced sauce involves combining the cream with the enchilada sauce for depth of flavor. To master this, continuously stir the mixture over low heat, watching for thickening that indicates it’s ready to be added to the enchiladas. Avoid high heat, as this can lead to separating or curdling, compromising the smooth texture that defines the dish.

Pro Tips for Perfect Creamy Shrimp Enchiladas

– Always choose high-quality shrimp for superior flavor and sustainability; check for freshness and visible quality.
– When rolling tortillas, ensure they are warm and flexible, adding a bit of olive oil for added flavor and moisture.
– For a bit of kick, add diced jalapeños or green chilies to the shrimp or sauce for an extra layer of flavor.
– Experiment with garnishes such as fresh salsa, sliced avocados, or crumbled queso fresco for added texture and taste.
– Make a double batch and freeze a portion to enjoy these enchiladas on a busy weeknight later; they freeze well.
– For an even creamier sauce, whisk in some cream cheese before blending with the enchilada sauce for more flavor.
– Allow your enchiladas to sit for a few minutes after baking; this helps them firm up for cleaner slices and better presentation.
– Variation with different types of seafood or vegetables can keep this recipe fresh and exciting every time you make it.

Variations and Adaptations

For those looking to explore regional variations, consider adding green chiles or mole sauce for a twist on flavor. Seasonal adaptations, such as using fresh summer corn or zucchini, can add a delightful crunch. For dietary modifications, consider swapping the shrimp for grilled chicken or a vegetable medley for a vegetarian version, ensuring everyone at the table can enjoy this dish.

Play with flavor variations by introducing spices such as cumin or smoked paprika in the creamy sauce for a flavor boost. Texture modifications through the addition of crispy tortilla strips or crunchy toppings like crushed tortilla chips can enhance your dish. Presentation can be altered by layering the enchiladas for a more elegant serving style or by serving them on a bed of sautéed greens.

Serving and Presentation Guide

When it comes to plating your creamy shrimp enchiladas, start with a generous spoonful of sauce on the plate, followed by two enchiladas placed at an angle for an inviting presentation. Garnishing with freshly chopped cilantro and a dollop of sour cream adds an appealing contrast and invites the palate to explore.

For traditional accompaniments, serve alongside refried beans or Mexican rice for a complete meal. Modern serving suggestions include pairing with a crisp garden salad dressed with lime vinaigrette, enhancing the dish’s freshness and appeal. Consider temperature: serving this dish warm creates a welcoming atmosphere, as the creamy sauce tends to solidify when chilled.

Portion control can be managed through thoughtful cutting; instead of serving whole, consider slicing each enchilada into half or thirds for sharing, allowing guests to sample a variety of flavors.

Wine and Beverage Pairing

When pairing wine with creamy shrimp enchiladas, consider a crisp Chardonnay that complements the rich flavors without overshadowing them. The acidity provides a refreshing balance to the creaminess. A Sauvignon Blanc is also an excellent option, offering acidity and herbal notes that harmonize with the dish.

For non-alcoholic alternatives, a refreshing agua fresca made with lime or a fruity mocktail can enhance the dining experience. Cold sparkling water with a slice of lime can cleanse the palate between bites. If you prefer coffee or tea, a light herbal tea or a refreshing iced tea can work well without competing with the dish’s flavors.

Be mindful of serving temperatures; chilled wines and cold beverages might bring a refreshing contrast to warm enchiladas.

Storage and Shelf Life

Proper storage of creamy shrimp enchiladas is essential for maintaining freshness and flavor. Store any leftovers in an airtight container in the refrigerator for up to 3 days. If you plan on enjoying them later, consider freezing them before baking. They can be frozen for up to 2 months.

When reheating, do so gently in the oven or microwave, ensuring that the enchiladas reach a safe internal temperature of 165°F. If using the oven, cover them with foil to retain moisture. In terms of containers, glass or BPA-free plastic containers with tight-fitting lids work best for retaining flavors.

Signs of spoilage include any off smells or changes in texture; pay attention to any separation in the sauce upon reheating.

Make Ahead Strategies

For a stress-free cooking experience, consider making creamy shrimp enchiladas ahead of time. Prepare the shrimp filling and sauce a day in advance, storing them separately in the refrigerator until you’re ready to assemble.

Once prepared, you can assemble the enchiladas without baking them right away, allowing you to bake them fresh when needed. This strategy not only saves time but also enhances the flavors as they meld together in the fridge.

When it comes to reheating, ensure that you give time for the dish to come to room temperature before placing it in the oven. This reduces the risk of uneven heating and helps maintain the creamy texture of the sauce. Additionally, adding a sprinkle of cheese or a few fresh herbs before heating can refresh the flavors.

Scaling Instructions

Scaling creamy shrimp enchiladas is a breeze. For halving the recipe, simply divide all ingredient measurements by two while maintaining cooking times. Adjust the pan size accordingly to accommodate the reduced quantity for even cooking.

To double or triple the recipe for larger gatherings, consider using a larger baking dish. Timing might need adjustments; keep an eye on the enchiladas as they bake since larger quantities may require slightly longer cooking time.

When scaling, pay close attention to the shrimp, as they should be cooked in batches if necessary to prevent steaming. Ensure that any extra components, like cream sauce or cheese, are sufficiently increased to maintain the flavor and consistency of the dish.

Nutritional Deep Dive

The nutritional profile of creamy shrimp enchiladas makes them a satisfying choice. A typical serving contains about 400–500 calories, primarily from the shrimp and cream sauce. The dish is high in protein due to the shrimp, making it an excellent option for those looking to maintain a healthy diet.

Micronutrient-wise, shrimp provides significant amounts of selenium, vitamin B12, and iodine, playing critical roles in metabolism and overall health. The creamy sauce can be modified to reduce diary or calories for those monitoring their intake, simply by using lighter alternatives.

Overall, these enchiladas can fit well into a balanced diet. Portion control is key; enjoying them as a part of a meal with plenty of vegetables can help you stay within recommended calorie intakes while not sacrificing satisfaction.

Dietary Adaptations

For those needing gluten-free options, use corn tortillas instead of flour. Ensure that your enchilada sauce is gluten-free as well, as some store-bought versions may contain gluten as a thickening agent.

If you’re looking for a dairy-free option, substitute the cream with coconut cream or hemp milk to retain a creamy texture without the dairy. Shrimp can be kept, but for a vegetarian twist, replace it with black beans or sautéed mushrooms.

For those on low-carb or keto diets, using zucchini or spinach to create “noodles” could replace tortillas, offering a similar eating experience while cutting down on carbs. Adjust the sauce accordingly to maintain flavor without added sugars.

Troubleshooting Guide

Texture issues with the cream sauce can sometimes arise, resulting in a curdled consistency. This may be due to high heat; always cook the sauce on low to medium heat and whisk continuously to ensure a smooth result.

If your enchiladas lack flavor, revisit your seasoning. Enhancing the dish with additional salt, spices, or fresh herbs can make a world of difference, so taste as you go to adjust to your preference.

Temperature problems can occur if the dish is unevenly heated, especially when storing leftovers. Cover with foil while reheating to maintain consistent temperature and moisture throughout.

For ingredient substitutions, ensure that ratios remain similar; sometimes, using too much of a substitute can drastically affect texture and flavor, making it essential to follow recipes closely or consult measurements.

Recipe Success Stories

Community feedback surrounding creamy shrimp enchiladas has been overwhelmingly positive, with many cooks sharing that it has become a staple in their homes. Adaptations of the recipe have inspired creativity, leading to variations like spicy chipotle shrimp or adding seasonal vegetables.

Readers often rave about its versatility while offering suggestions for quick weeknight meals. Suggestions such as using precooked shrimp or shortcut sauces point to a greater trend of convenience without sacrificing quality.

Recipe success stories are accompanied by mouth-watering photography, showcasing the appeal of creamy shrimp enchiladas. Enthusiasts have taken to social media to share their plates, highlighting personal touches and additional ingredients that elevate the dish even more.

Personal anecdotes shared by readers often portray the nostalgia this dish evokes, associating it with family gatherings and celebrations, reinforcing its cherished place in many kitchens.

Frequently Asked Questions

Q: Can I use frozen shrimp?

A: Yes, frozen shrimp can be used, but ensure they are thawed correctly to maintain flavor and texture before cooking. It’s best to thaw shrimp in the refrigerator overnight or under cool running water just before using.

Q: Can I freeze leftover enchiladas?

A: Absolutely! Uneaten enchiladas can be frozen before baking for up to 2 months. Just ensure they are in an airtight container to maintain quality. Bake them from frozen, adding a few more minutes to the baking time.

Q: What if I don’t have enchilada sauce?

A: If you lack enchilada sauce, you can use salsa verde or a homemade tomato sauce as alternatives. You can mix spices like cumin, chili powder, and garlic powder to create a similar flavor profile.

Q: How do I make it spicier?

A: To adjust the spice level, consider adding diced jalapeños to the shrimp mixture or a few dashes of hot sauce to the cream sauce for extra heat. This allows you to customize according to your heat tolerance.

Q: Is it possible to make this dish ahead of time?

A: Yes, you can prepare the shrimp filling and sauce a day ahead, storing them separately in the refrigerator. When ready, assemble and bake for fresh enchiladas without the fuss.

Q: Can I use another protein?

A: Certainly, chicken or tofu can be excellent substitutes for shrimp. Just be sure to cook them through fully before assembling the enchiladas for safety and taste.

Q: What sides go well with enchiladas?

A: Traditional sides include refried beans, Mexican rice, or a simple garden salad. These healthy options complement the richness of the enchiladas, creating a well-rounded meal.

Q: Can I make these enchiladas vegetarian?

A: Yes, simply omit the shrimp and replace it with cooked beans, mushrooms, or roasted vegetables. Enhance the creamy sauce with herbs or spices to bring out flavor.

Q: Is it okay to use low-fat cream?

A: While you can use low-fat cream or alternatives like half-and-half, keep in mind that the texture may vary slightly, resulting in a less creamy sauce. It’s still a delightful option!

Q: How should I store leftovers?

A: Leftovers should be stored in an airtight container in the refrigerator for up to three days. To maintain freshness, consume them as soon as possible.

Additional Resources

For those eager to continue their culinary adventure, consider exploring other related recipes like chicken enchiladas or black bean tacos. Understanding different techniques such as perfecting homemade enchilada sauce can enhance your expertise in Mexican cuisine.

Additional ingredient information on versatile essentials like tortillas and various cheeses can open up new horizons for experimentation. Equipment recommendations, such as investing in quality non-stick baking dishes, can ensure successful outcomes every time.

Lastly, seasonal variations can encourage creativity, such as using fresh produce for summer enchiladas or adding hearty beans when temperatures drop, creating a delightful seasonal menu.

Join the Conversation

I invite you to share your experiences with creamy shrimp enchiladas on social media! Post your culinary creations and embellishments, along with any tips or substitutions that elevated your dish. Use engaging photography to inspire others and spark creativity in their kitchens.

Join the community of fellow food lovers, where shared recipes and modifications feed our collective culinary creativity. Your feedback and suggestions could inspire someone else to try the recipe or even add their personal spin to it. Let’s celebrate our love for food and cooking together!

The Recipe

Creamy Shrimp Enchiladas

Serves: 4 servings

Prep Time: 20 mins

Cook Time: 30 mins

Total Time: 50 mins

Kitchen Equipment Needed

  • Baking dish
  • Sauté pan
  • Measuring cups
  • Mixing bowl
  • Whisk

Ingredients

  • 1 pound shrimp, peeled and deveined
  • 1 cup heavy cream
  • 1 cup enchilada sauce
  • 8 corn or flour tortillas
  • 1 onion, chopped
  • 2 cloves garlic, minced
  • 1 tablespoon olive oil
  • 1 cup shredded cheese (Mexican blend or cheddar)
  • Fresh cilantro for garnish
  • Salt and pepper to taste

Directions

  1. Preheat the oven to 375°F (190°C).
  2. In a sauté pan, heat olive oil over medium heat. Add chopped onion and minced garlic; sauté until soft.
  3. Add shrimp to the pan, cooking until pink and opaque, about 3-5 minutes. Season with salt and pepper, then set aside.
  4. In a mixing bowl, combine the heavy cream and enchilada sauce; set aside.
  5. Warm tortillas in a skillet or microwave to make them pliable. Place a few shrimp in each tortilla, roll tightly, and place seam-side down in a baking dish.
  6. Pour the cream sauce over the enchiladas, covering them completely. Sprinkle shredded cheese on top.
  7. Bake for 20-25 minutes, until bubbly and golden on top. Remove from the oven and let rest for a few minutes before serving.
  8. Garnish with fresh cilantro and serve hot.

Recipe Notes

  • Feel free to substitute shrimp with chicken or your choice of vegetables.
  • This recipe can be easily doubled for larger gatherings.
  • Add chopped jalapeños for an extra kick in flavor.

Easy Steak Fajitas with Peppers and Onions

Steak Fajitas: Flavorful Mexican Delight

⚖️
Difficulty
Medium

⏲️
Prep Time
15 mins

🕒
Cook Time
15 mins

⏱️
Total Time
30 mins

🍽️
Servings
4

Steak fajitas are more than just a meal; they offer a vibrant experience, blending sizzling beef, crisp vegetables, and aromatic spices into perfect harmony. Traditionally stemming from Tex-Mex cuisine, these fajitas have an irresistible appeal that instantly transports taste buds to sunny regions of Mexico. As the steak cooks, it develops a char-grilled flavor, while the peppers and onions add a delightful sweetness. When wrapped in a soft tortilla, each bite bursts with flavor, creating a satisfying crunch mixed with tender juicy meat.

The beauty of steak fajitas lies not only in their flavor but also in their versatility and ease of preparation. Whether you’re hosting a casual get-together or enjoying a cozy family dinner, this recipe provides a moment to gather and savor the delicious taste of freshly prepared food. With colorful presentations and a combination of textures, steak fajitas make it easy to impress your guests while ensuring everyone enjoys a thrilling culinary journey.

Quick Recipe Highlights

  • Flavor Profile: Steak fajitas offer a fantastic blend of savory beef, sweet bell peppers, and sharp lime, encapsulated in a hint of smokiness from the grill.
  • Texture: Each bite combines the tenderness of the steak with a slight char, balanced by the crispiness of fresh vegetables.
  • Aroma: The dish’s fragrance is a delightful mix of caramelized onions, roasted peppers, and zesty spices that entice and invigorate your senses.
  • Visual Appeal: With vibrant colors of red, yellow, and green bell peppers alongside juicy steak drizzled with lime, this dish is a feast for the eyes.
  • Skill Level Needed: While the dish sounds fancy, it requires just medium cooking skills—perfect for both novice and experienced cooks.
  • Special Equipment: A cast-iron skillet or grill pan enhances the flavor by delivering an authentic char to the steak and vegetables.

Recipe Overview

  • Difficulty Level: This recipe is characterized as medium complexity, requiring basic chopping and cooking skills, making it approachable for home cooks.
  • Category: Steak fajitas serve as a hearty main course, perfect for both casual meals and festive gatherings.
  • Cuisine: Originating from Tex-Mex cuisine, this recipe showcases a blend of Mexican culinary traditions with American cooking styles.
  • Cost: Preparing steak fajitas is fairly economical, particularly when using seasonal vegetables and budget-friendly cuts of beef.
  • Season: Steak fajitas are delightful year-round, especially in warmer months when fresh produce is at its peak.
  • Occasion: Ideal for Taco Tuesdays, backyard barbecues, or family gatherings, steak fajitas are a versatile dish for any occasion.

Why You’ll Love This Recipe

Steak fajitas are truly a taste sensation, bringing together the rich, savory flavor of grilled steak with the inviting sweetness of caramelized onions and bell peppers. The marinade used infuses the meat with spices and acidity, enhancing the overall flavor profile, while the sizzling presentation at the table adds an element of excitement. Each bite provides a unique experience, perfect for satisfying your cravings for something bold and delicious.

Not only are steak fajitas mouthwatering, but they are also incredibly convenient to prepare. The recipe can be made in around 30 minutes, allowing you to focus on enjoying your meal rather than spending hours in the kitchen. With straightforward steps and minimal clean-up, it makes weeknight dinners or impromptu gatherings delightful and easy.

Nutritionally, steak fajitas offer a balanced meal rich in protein, vitamins, and minerals from the peppers and onions. Fresh ingredients not only elevate the flavor but also contribute to a healthier eating experience, making it an excellent option for mindful eating without compromising on taste.

These wonderful fajitas also have social and entertaining value—they are the perfect dish for sharing! When dining with friends or family, the communal aspect of building your own fajita fosters interaction and creates a lively atmosphere.

Finally, the cost-effectiveness of steak fajitas cannot be overlooked. With a few simple ingredients that pack a punch, this dish remains budget-friendly while offering a gourmet dining experience. It’s accessible for most home cooks, even those watching their expenses.

Historical Background and Cultural Significance

Steak fajitas have a rich history that dates back to the ranching days of Texas in the early 1930s. Originally, the term “fajita” referred to the cut of meat used—skirt steak. Ranch hands preparing food would utilize the less expensive cuts of beef, cooking them over open fires, leading to the creation of this delectable dish.

The cultural significance of steak fajitas cannot be overstated, as this recipe embodies the fusion of Mexican and Texan culinary traditions. The vibrant flavors reflect the use of locally sourced ingredients, highlighting the importance of both cattle ranching and agriculture in the region. Over the decades, fajitas have evolved from being a humble ranch worker meal into a beloved staple across the United States and beyond.

As the popularity of fajitas surged, variations emerged, introducing diverse ingredients and flavors. Today, you’ll find everything from shrimp to vegetarian options on the fajita menu, showcasing the flexibility of the dish while retaining its authentic roots.

Regions across the Southwest have their own interpretations of fajitas—whether it’s the spices used in marinades, the types of peppers incorporated, or the style of serving. This adaptability speaks to the deep cultural influence and love for this iconic dish.

Ingredient Deep Dive

Skirt Steak: Skirt steak is the traditional choice for fajitas due to its rich flavor and tender texture. It’s known for being economical and easy to cook. When selecting skirt steak, look for marbling for added juiciness. Store it in the refrigerator for short periods or freeze it for longer shelf life. Alternatives such as flank steak can be used but may require different cooking methods to ensure tenderness.

Bell Peppers: Bell peppers are vibrant additions to steak fajitas that contribute color and sweetness. These peppers are rich in vitamins A and C, promoting overall health. Choose fresh, firm peppers free from blemishes. Store them in a cool place and wash before use. If you’re out of bell peppers, consider using zucchini or mushrooms as substitutes for a different flavor profile.

Common Mistakes to Avoid

  • Overcooking the steak can result in a tough texture; always opt for quick cooking on high heat.
  • Cutting the steak against the grain is crucial for tenderness; failing to do so will create chewy pieces.
  • Not marinating long enough can lead to underwhelming flavor; allow at least 30 minutes or up to overnight for best results.
  • Using dull knives can pose risks when chopping ingredients; always use sharp knives for safety and efficiency.
  • Ignoring the high heat needed for cooking can prevent proper charring; a hot skillet or grill is essential.
  • Using dry tortillas can result in a sad texture; warm them up to make them pliable and enjoyable.
  • Not balancing flavors with lime juice can lead to a one-dimensional taste; acidity enhances the overall flavor.
  • Wrongly timing the addition of vegetables; cook them just until tender-crisp to avoid mushiness.

Essential Techniques

To achieve perfect steak fajitas, mastering the art of marinating is vital. Marinating tenderizes the meat while infusing it with flavor. Aim for a balance of acidity (like lime juice) and oil to create an effective marinade. Common pitfalls include using too much acid, which can “cook” the meat and impact texture negatively. For best results, marinate for several hours or overnight.

Grilling or searing is the next critical technique. Use a cast-iron skillet or grill pan and preheat until smoking hot to ensure a strong sear. This step is essential for developing the characteristic fajita flavor. You should monitor cooking times carefully; cooking too long can lead to dryness. A good visual cue is when the meat releases easily from the pan.

Pro Tips for Perfect Steak Fajitas

1. Choose high-quality, grass-fed beef for the best flavor and texture. The quality of meat can dramatically enhance your dish.
2. Use an instant-read thermometer to check for doneness. Aim for 130°F for medium-rare to keep the steak juicy.
3. Allow the steak to rest before slicing. Resting helps retain juices that would otherwise escape when cutting.
4. Incorporate a variety of color with different types of bell peppers—this not only adds flavor but makes your plating visually appealing.
5. Warm tortillas on the stovetop or grill for enhanced flavor and pliability before assembling your fajitas.
6. Experiment with additional toppings like fresh cilantro, sour cream, or guacamole, to elevate the flavor experience.
7. Perfect your lime juice squeeze by rolling the fruit on the counter beforehand; this will yield more juice.
8. Consider prepping the ingredients in advance; this practice saves time and allows you to enjoy the cooking process more.

Variations and Adaptations

Steak fajitas can easily adapt to incorporate various regional flavors. For example, adding Spicy Chipotle can provide a smoky kick while maintaining the core flavors. During autumn, swap the bell peppers for seasonal squash variants for a unique twist.

Dietary modifications can also be applied by substituting the steak with portobello mushrooms for a plant-based alternative without losing the essence. Additionally, for low-carb diets, serve the fajitas in lettuce wraps rather than tortillas.

Adjust flavor profiles by experimenting with marinades—consider orange juice for a sweeter touch, or add jalapeños for heat. Lastly, presentation alternatives like serving on a sizzling hot platter can add flair to your meal.

Serving and Presentation Guide

Present steak fajitas on vibrant platters, creating an appealing display of colors. Garnish with fresh herbs such as cilantro for a pop of color. Serve with separate bowls that house toppings, allowing diners to customize their fajitas.

Temperature is crucial; serve the steak directly from the heat to maintain warmth, and consider placing tortillas in a cloth to keep moist. For portion control, consider allowing diners to assemble their fajitas to suit their preferences, fostering engagement.

Wine and Beverage Pairing

For wine pairing, a bold red like Cabernet Sauvignon complements the robust flavor of steak, while a Blanca or Sauvignon Blanc enhances the freshness in the peppers. If opting for mocktails, a sparkling agua fresca can provide refreshing relief against the spices.

Temperature plays a role; ensure red wine is slightly chilled to enhance its flavors. Another great option is an ice-cold beer that pairs wonderfully with the spice and savory flavors of steak fajitas, especially if enjoyed outdoors.

Storage and Shelf Life

To store leftover steak fajitas, place them in airtight containers and refrigerate for up to three days. Ensure they are allowed to cool down before storing to avoid condensation. Proper heating is essential; reheat in a skillet to preserve the texture.

Signs of spoilage include a foul smell or discoloration in the meat. When re-warming, ensure the internal temperature reaches 165°F to safely consume. For longer storage, steak fajitas can be frozen for up to two months, preserving their deliciousness through proper sealing.

Make Ahead Strategies

To streamline meal prep, consider marinating the steak the night before. Chop vegetables ahead of time and store them in the refrigerator to enhance the ease when cooking.

When reheating, consider adding fresh ingredient elements like avocado or cheese to enhance flavor post-cooking. Strategically packaging ingredients separately can maintain the quality of each component during storage, preserving taste and texture.

Scaling Instructions

For halving the recipe, simply reduce the quantity of ingredients and keep an eye on cooking time to avoid overcooking. Doubling or tripling the recipe may require larger equipment, such as a larger skillet or grill to accommodate additional volume, and adjust timing accordingly to ensure even cooking.

When scaling, adjust ingredient ratios proportionally to maintain flavor balance. Storage considerations for larger batches may warrant appropriate containment for preventing spillage and preserving freshness.

Nutritional Deep Dive

Steak fajitas boast a commendable macronutrient breakdown. The protein from steak benefits muscle health, while vegetables add essential vitamins and minerals to the diet. This balance promotes an energized lifestyle while providing satisfaction in each meal.

On the micronutrient front, bell peppers serve as an excellent source of vitamin C, crucial for immune health, while onions contain antioxidants that promote heart health. With their vibrant ingredients, steak fajitas provide a diverse array of nutrients, making them a wholesome option.

In terms of portion analysis, the protein content ensures fullness while the fiber from peppers supports digestion. With moderate calorie content, steak fajitas can be enjoyed even in weight management plans without sacrificing delicious flavors.

Dietary Adaptations

For those following a gluten-free lifestyle, opting for corn tortillas instead of wheat ones ensures everyone can enjoy this dish. Dairy-free versions can exclude cheese and cream, maintaining the integrity of the flavors without compromising taste.

Vegans can utilize marinated tofu or seitan as substitutes for steak, allowing for enjoyable meat-free servings. Low-carb adaptations can involve serving steak fajitas with lettuce wraps instead of traditional tortillas, offering a fresh, crunchy alternative.

Those interested in a paleo diet can enjoy steak fajitas with a focus on whole ingredients and skipping grains altogether. Each adaptation retains the essence of flavorful, colorful ingredients while catering to dietary preferences.

Troubleshooting Guide

For common texture issues, such as tough steak, ensure you’re using quality cuts and not overcooking. In cases of over-marinating, meat can become mushy, so adhere to recommended times closely.

Flavor balance problems can often be corrected with extra lime juice or spices to synergize all the elements. Should temperature problems arise while grilling, adjust the heat accordingly and avoid crowding the grill.

For equipment challenges, ensure your cookware is suitable for high heat, as some pans have limitations. Ingredient substitutions should respect flavors; for example, if substituting beef with chicken, alter the cooking time accordingly for optimal results.

Recipe Success Stories

Community feedback regarding steak fajitas is abundant, with countless users praising the ease of preparation and flavor impact. Many share their personal twists, such as adding unique spice blends or utilizing different proteins, enriching the overall experience.

Readers often express satisfaction with the appeal of fajitas as a shared dining experience, highlighting the importance of customization with toppings. In photography, vibrant plated presentations inspired users to showcase their culinary creations, leading to an engaged and supportive cooking community.

Frequently Asked Questions

Can I use different cuts of meat for fajitas? Absolutely! While skirt steak is traditional, flank steak, chicken, and even shrimp can make fantastic fajitas. Just adjust cooking times as needed.

How do I store leftovers? Store leftover fajitas in an airtight container in the refrigerator for up to three days. For longer preservation, consider freezing them in suitable freezer bags.

What toppings are recommended for steak fajitas? Fresh toppings like salsa, avocado, sour cream, and cilantro are fantastic additions to enhance flavor and texture.

Can vegetarian or vegan options be made? Yes! Swap steak for marinated tofu, tempeh, or seitan, and adjust spices to suit your taste preferences.

Is it necessary to marinate the steak before cooking? While it adds flavor and tenderness, you can skip marinating if you’re short on time. Cooking the steak quickly can still provide great flavor.

What’s the best way to warm tortillas? Warm tortillas in a dry skillet for about 30 seconds on each side or wrap them in foil and place in a warm oven.

What’s the secret to juicy fajitas? High heat cooking is key; searing quickly allows for a crust to form while keeping the juices inside.

Can I make the marinade in advance? Yes! The marinade can be prepared ahead of time and stored in the refrigerator, making meal prep even easier.

Are there gluten-free options for fajitas? Yes! Use corn tortillas instead of wheat to keep the meal gluten-free.

Can I make this dish ahead of time? You can prep ingredients in advance, marinate the meat, and store vegetables to cook fresh closer to mealtime.

Additional Resources

For those looking to expand their culinary adventures, explore related recipes such as chicken fajitas or shrimp tacos. Enhancing your cooking skills can be achieved through various technique guides readily available, covering everything from marinating to grilling.

Equipment recommendations include investing in high-quality pans which serve multi-purposes, like cast iron skillets, perfect for sizzling steaks and vegetables. Exploring seasonal variations with each month’s freshest produce can elevate your steak fajitas and keep your dining experience exciting.

Join the Conversation

Share your steak fajita creations on social media and connect with fellow culinary enthusiasts! Participate in conversations about variations you’ve tried and your photography tips for capturing the perfect dish. Engaging in our community can lead to valuable interactions and delicious new ideas for future meals.

The Recipe

Steak Fajitas

Serves: 4

Prep Time: 15 mins

Cook Time: 15 mins

Total Time: 30 mins

Kitchen Equipment Needed

  • Cast-iron skillet or grill pan
  • Chef’s knife
  • Cutting board
  • Measuring cups and spoons
  • Citrus juicer

Ingredients

  • 1 lb skirt steak
  • 2 bell peppers (red, yellow, or green)
  • 1 medium onion
  • 3 tablespoons olive oil
  • 2 tablespoons lime juice
  • 1 tablespoon chili powder
  • 1 teaspoon garlic powder
  • Salt and pepper to taste
  • 8 flour or corn tortillas

Directions

  1. In a bowl, combine olive oil, lime juice, chili powder, garlic powder, salt, and pepper to create the marinade.
  2. Slice the skirt steak into thin strips and marinate in the mixture for at least 30 minutes.
  3. While the steak marinates, slice the bell peppers and onion into thin strips.
  4. Heat a cast-iron skillet over high heat until smoking hot, then add the marinated steak in a single layer.
  5. Cook for 3-4 minutes on each side until well-seared and cooked to your liking.
  6. Remove steak and let it rest for a few minutes. In the same skillet, add sliced vegetables and sauté until tender, about 3-5 minutes.
  7. Warm tortillas in a separate pan or directly over the flame for about 10-20 seconds.
  8. Assemble fajitas with steak and vegetables, adding preferred toppings.

Recipe Notes

  • Try adding jalapeños for extra spice.
  • Feel free to watch cooking times for preferred doneness levels.
  • Make them ahead by prepping ingredients a day prior.
  • Experiment with different vegetables such as zucchini or asparagus.

Easy Salmon Rice Bowls with Soy-Ginger Sauce

Delicious Salmon Rice Bowls: A Perfect Meal for Any Occasion

⚖️
Difficulty
Easy

⏲️
Prep Time
15 mins

🕒
Cook Time
20 mins

⏱️
Total Time
35 mins

🍽️
Servings
4

Indulge in the savory goodness of Salmon Rice Bowls that promise to satisfy your taste buds while being surprisingly easy to make. Packed with rich flavors, vibrant colors, and nutritious ingredients, this dish will become a staple in your kitchen. Perfect for busy weeknights or a casual gathering with friends and family, salmon rice bowls are as versatile as they are delicious.

Picture this: flaky, perfectly cooked salmon atop a fluffy bed of rice, punctuated by crisp veggies and drizzled with a zesty sauce. The combination of textures is delightful, with tender fish contrasting with crunchy vegetables, delivering a satisfying crunch in every bite. Each bowl is not only a feast for the eyes, gearing up your appetite, but also a health-conscious option that provides essential nutrients and healthy fats.

Quick Recipe Highlights

  • Flavor Profile: A perfect balance of savory salmon, fresh vegetables, and a tangy sauce that awakens your palate.
  • Texture: Enjoy the delicate flakiness of salmon alongside the chewy rice and crisp vegetables, creating a delightful eating experience.
  • Aroma: The dish is infused with the enticing aroma of grilled salmon complemented by fresh herbs and zesty sauces.
  • Visual Appeal: Vibrant colors from the salmon, bright greens of the veggies, and the white rice create an eye-catching presentation.
  • Skill Level Needed: This recipe requires basic cooking skills, making it accessible for beginners and enjoyable for seasoned cooks alike.
  • Special Equipment: You will need a pan for grilling salmon and a pot for cooking rice.

Recipe Overview

  • Difficulty Level: This recipe is rated easy, making it perfect for novice cooks who are ready to impress without feeling overwhelmed.
  • Category: Salmon Rice Bowls can be enjoyed as a lunch or dinner, fitting perfectly into meal prep routines for the week ahead.
  • Cuisine: This dish blends elements from Asian, American, and healthy eating cultures, showcasing the versatility of salmon.
  • Cost: This recipe is budget-friendly, with salmon being a high-quality protein that is often available at reasonable prices when in season.
  • Season: Perfect for any season, you can use fresh vegetables available locally that complement this dish throughout the year.
  • Occasion: Make salmon rice bowls for casual family dinners, meal prep for the week, or impress guests at a laid-back gathering.

Why You’ll Love This Recipe

First and foremost, the taste and texture of Salmon Rice Bowls are simply irresistible. The rich, fatty flavor of the salmon pairs beautifully with the tender rice and crunchy vegetables. You will find yourself savoring each bite as the flavors meld, offering a dining experience that’s hard to forget. The combination of ingredients brings a wonderful umami element to the forefront, making every spoonful a delightful journey.

This recipe is ideal for those who need convenience in their cooking routine. With prep time only taking about 15 minutes, you’ll find this dish can be whipped up quickly after a long day. The resting time while cooking rice allows you to multitask and prepare your salmon, making it a perfect choice for those busy nights when time is short but good food is a priority.

Nutritionally, Salmon Rice Bowls offer a plethora of benefits. Salmon is rich in omega-3 fatty acids, which are known for their heart-healthy properties. Coupled with nutrient-packed vegetables and fiber-rich rice, this dish ensures you’re getting essential vitamins and minerals to promote overall wellness.

Socially, this recipe shines as an entertaining option. Not only is it a crowd-pleaser, but its vibrant presentation makes it a hit at any dinner table. Customize your bowls according to dietary preferences and allow guests to build their own, creating an interactive and enjoyable dining experience.

Furthermore, this recipe is cost-effective. With only a few key ingredients, it doesn’t break the bank while still providing a gourmet feel. Salmon can often be found on sale or can be substituted with other protein sources like chicken or tofu, making it adaptable and accessible.

Historical Background and Cultural Significance

The origin of salmon rice bowls dates back to various Asian culinary traditions, where rice is a staple food. Salmon, particularly in Japanese cuisine, has been celebrated for centuries not only for its flavor but also for its nutritional benefits. As globalization increased, the fusion of various cultural elements brought forth the modern interpretation of this dish.

Culturally, salmon rice bowls hold an important place in Japanese cuisine, often associated with comfort food and family gatherings. The act of sharing food has deep-seated cultural beliefs around togetherness and celebration, making this dish a perfect centerpiece for gatherings.

Over time, the recipe has evolved from its traditional roots to embrace local ingredients and preferences. Today, you can find variations that cater to dietary needs and flavors from different regions, showcasing the adaptability of this beloved dish.

Regional variations abound worldwide, influenced by local ingredients and culinary practices. For instance, in the United States, you might find these bowls topped with a variety of sauces and sides, reflecting the diversity of American cooking techniques while still respecting the original concept.

Ingredient Deep Dive

Salmon is not just a delicious addition to your meals but also steeped in cultural significance, especially in regions where fishing is part of the local heritage. Rich in omega-3 fatty acids, it is known to be extremely beneficial for heart health and brain function. When selecting salmon, look for bright pink flesh and a fresh scent. Store it in the coldest part of your refrigerator and aim to consume it within a day or two for optimal freshness. If you can’t find salmon, trout or skinless chicken thighs can make great substitutes.

Rice, the backbone of any rice bowl, is versatile and fills you up without weighing you down. Using whole grain rice can add an extra layer of nutrients. Storage of uncooked rice depends on the type, with some varieties lasting longer than others. For best results, store in a cool, dry place. When cooking rice, ensure the grains are well-rinsed to remove excess starch, which can lead to a gummy texture.

Common Mistakes to Avoid

  • Overcooking the salmon can lead to a dry texture; aim for an internal temperature of 145°F for optimal juiciness.
  • Using old or stale spices can dull the flavors; always check your spice cabinet for freshness.
  • Not letting rice rest after cooking can lead to mushy grains; allow it to cool down before fluffing it.
  • Skipping the rinse for rice can lead to a sticky outcome; rinse thoroughly under cold water before cooking.
  • Using too much sauce can overwhelm the delicate flavors of the salmon; start with a small amount and add more as desired.
  • Failing to season ingredients properly can lead to blandness; seasoning is key, especially for the vegetables.
  • Overcrowding the pan while cooking salmon can lead to steaming rather than searing; ensure there’s enough space for even cooking.
  • Not preparing for assembly can lead to a messy kitchen; organize ingredients before beginning to streamline the process.
  • Serving at the wrong temperature can affect the taste; salmon is best enjoyed warm with a little room temperature on the sides.

Essential Techniques

Grilling salmon is an art that enhances flavor while keeping the texture moist. Ensure your grill is preheated for even cooking and use oil to prevent sticking. Watching for visual cues, like the salmon turning opaque, can tell you it’s done without cutting into it. Mastering this technique leads to perfectly charred, flavorful pieces that complete your rice bowl.

Cooking rice may seem straightforward, but mastering the water-to-rice ratio is crucial. Usually, a 2:1 ratio works well, but this can vary depending on the rice type. The key is to simmer on low heat after bringing it to a boil and keeping the lid on to trap steam. Common pitfalls include lifting the lid too frequently or stirring the rice—both can disrupt the cooking process.

Pro Tips for Perfect Salmon Rice Bowls

First, make sure to marinate your salmon for at least 30 minutes to enhance flavors. Simple marinades of soy sauce, honey, and garlic work wonders.

Don’t be afraid to experiment with your vegetables; mix colorful options like bell peppers and carrots for texture and visual appeal.

Incorporate fresh herbs as a garnish to brighten up the dish; cilantro and green onions are particularly excellent choices.

Serve with a side of soy sauce, sesame oil, or spicy mayo for added flavor options that guests can customize to their liking.

Prepare rice in a rice cooker to ensure perfect consistency every time; following the manufacturer’s guidelines will lead to consistently fluffy rice.

For added crunch, top with toasted sesame seeds or crushed nuts, enhancing both texture and flavor.

If you’re making this for meal prep, keep dressing and rice separate until serving to maintain freshness.

Lastly, consider using a large bowl for assembly that allows everyone to make their own customized bowl, enhancing the communal aspect of the meal.

Variations and Adaptations

Regional variations of salmon rice bowls can lead to exciting new flavors; for instance, try using local fish or toppings that reflect your area’s culinary heritage. Seasonal adaptations might include avocados in summer and roasted squashes in fall, keeping the dish fresh and relevant year-round.

Dietary modifications are easy; swap salmon for tofu or chicken for vegetarian or lean protein-friendly options.

Flavor variations can be achieved with different marinades; experiment with teriyaki or miso to give your dish a flavorful twist.

Texture modifications can involve serving alongside crispy seaweed or panko for added crunch, taking each mouthful to the next level.

PRESENTATION can also vary; serve in beautiful bowls with layered ingredients for Instagram-worthy appeal or place all components separately on a platter for a buffet-style meal.

Serving and Presentation Guide

Plating salmon rice bowls can greatly enhance the dining experience. Start with a mound of rice as a base, then artfully arrange the salmon, vegetables, and garnishes in sections.

Garnishing with fresh herbs like cilantro or parsley adds color and flavor. You can also consider drizzling with sauces for an artistic twist, which gives a visually striking effect.

Accompany the dish with traditional sides like pickled vegetables or kimchi for additional flavor profiles that compliment the salmon.

Modern serving suggestions could involve pairing your bowls with innovative drinks, like flavored iced teas, which can refresh and balance the meal.

Wine and Beverage Pairing

For wine pairings, a light, crisp white like Sauvignon Blanc or a dry Riesling works well with the fish’s richness. Additionally, a light-bodied rosé can complement the entire dish beautifully.

If you prefer non-alcoholic beverages, consider sparkling water infused with citrus, which can enhance the flavors of the salmon and vegetables.

When it comes to coffee or tea pairings, a mild green tea or a mint-infused herbal tea can cleanse the palate and provide a refreshing contrast to the meal.

Storage and Shelf Life

For proper storage, keep leftover salmon rice bowls in airtight containers in the refrigerator, where they can last up to 2-3 days. If you need to store them for longer, consider freezing the components separately.

When reheating, use the microwave or oven with a splash of water to prevent drying. Salmon can dry out quickly, so aim for low heat to maintain tenderness.

Signs of spoilage include a sour odor, a slimy texture, or discoloration; discard immediately if you encounter these changes.

Make Ahead Strategies

To maximize your cooking efficiency, prep ingredients ahead of time. Cut vegetables and marinate salmon up to 12 hours beforehand, allowing the flavors to deepen.

Store components separately to retain freshness and flavor, combining them right before serving to maintain the ideal temperatures and textures.

Quality may diminish when meals are prepared too far in advance, so keep prep times close to your serving time as much as possible.

When reheating, add fresh elements like herbs or citrus just before serving to revitalize the flavors and enhance freshness.

Scaling Instructions

If you need to halve the recipe, adjust the quantities of each ingredient proportionately, keeping the overall cooking times the same, as they can remain unchanged.

For larger gatherings, doubling or tripling the ingredients is easy; just be mindful of your cooking equipment’s limits. A larger pan or grilling surface may be necessary.

Timing modifications can be crucial; while cooking multiple portions, they may require additional attention to ensure even cooking throughout all items.

Remember to adjust storage considerations; larger quantities should be stored in appropriately sized containers to ensure they are airtight.

Nutritional Deep Dive

Each serving of Salmon Rice Bowls delivers significant amounts of protein, essential for muscle repair, and certainly supports healthy growth.

The omega-3 fatty acids present in salmon contribute to improved cognitive function and overall heart health, making this dish a smart choice.

With fiber from the vegetables and rice, these bowls aid in digestion and keep you feeling full longer. You’re ensuring a balanced meal that supports nutritional needs.

When analyzing portion sizes, it is easy to manage intake; adjusting the ingredients allows flexibility according to dietary requirements without compromising taste.

Dietary Adaptations

For gluten-free variations, use tamari instead of soy sauce and ensure all ingredients are certified gluten-free.

If you want to make it dairy-free, avoid creamy dressings and stick to marinades made from vegetables or oils for added flavor.

For vegan adaptations, substitute the salmon with grilled tofu or tempeh, seasoned similarly to capture that umami taste.

Low-carb enthusiasts can swap rice with cauliflower rice for a lighter, yet satisfying alternative.

Exploring keto adaptations may involve relying on healthy fats from avocado or coconut, maintaining keto compliance, while still delivering flavor.

Troubleshooting Guide

If you encounter texture issues, often this can originate from overcooking the rice or salmon. Check cooking times closely to ensure optimal results.

Flavor balance often comes down to seasoning; tasting throughout the cooking process ensures you avoid blandness and make adjustments as needed.

Temperature problems can arise; using a thermometer can help ensure your salmon is cooked perfectly every time, without the guesswork.

Equipment challenges are common; familiarize yourself with your kitchen tools’ quirks to minimize mistakes and improve cooking consistency.

Ingredient substitutions can lead to unintended results; always verify complementary flavors and cooking times when altering components.

Recipe Success Stories

Community feedback on Salmon Rice Bowls has been overwhelmingly positive, with many praising its flavor and ease of preparation. It’s not uncommon to hear from home cooks who’ve tailored and modified the recipe to meet family tastes, creating unique variations.

Many readers have shared their successful experiences switching up the protein, leading to new interpretations of the dish while retaining its core appeal.

Photography tips have included suggestions for plating style, showing off vibrant colors and layers that resonate well on social media platforms and engage with a wider audience.

Frequently Asked Questions

What type of salmon is best for this recipe? The best salmon for rice bowls is typically wild-caught king salmon due to its rich flavor and firm texture, but sockeye or coho can work just as well. Feel free to choose sustainable farmed salmon if wild is not available.

Can I use frozen salmon for this recipe? Yes, you can! Just ensure to completely thaw it in the refrigerator before cooking to avoid unevenly cooked pieces.

What can I substitute for rice? Cauliflower rice is a fantastic low-carb alternative, and quinoa can also be used for its nutty flavor and higher protein content.

Can the salmon be grilled instead of pan-seared? Absolutely! Grilling adds a nice smokiness and can enhance the flavors of the salmon considerably.

How can I make my rice fluffy? Rinse your rice thoroughly before cooking to remove excess starch, and let it rest covered after cooking for a few minutes to steam.

Is this dish suitable for meal prepping? Yes! Prepare all the components in advance and store them separately to maintain freshness, then assemble when ready to eat.

What vegetables should I use? Feel free to mix and match; bell peppers, carrots, and snap peas work wonderfully alongside the salmon.

How long does leftover salmon rice bowl last in the fridge? The dish can last 2-3 days in the refrigerator when stored in airtight containers. However, it’s best consumed sooner for freshness.

Can I add other sauces to the bowls? Yes! Consider sauces like teriyaki, sesame dressing, or even a spicy mayo to revive flavor and zest.

What are the best toppings for salmon rice bowls? Avocado slices, toasted sesame seeds, and chopped scallions all make excellent toppings that add texture and flavor complexity.

Additional Resources

Discover more delicious seafood recipes with a focus on healthy eating, such as grilled shrimp tacos or spicy tuna rolls, that can complement your salmon adventures.

Explore a variety of technique guides to master essential cooking skills, including perfecting knife skills for efficient ingredient prep.

Learn about ingredient information that highlights the benefits and uses for fresh produce that enhance any rice bowl, inviting creativity into your meals.

Check out equipment recommendations that simplify cooking and improve your culinary experience; consider tools that maximize functionality and efficiency.

Seek out seasonal variations to keep your dishes fresh and harmonious with the ingredients available; think asparagus in spring or hearty root vegetables in the fall.

Join the Conversation

We love hearing how you make our Salmon Rice Bowls your own! Share your photos on social media using our hashtag, and don’t forget to tag us!

Photography tips abound in our community; follow hashtags to find inspiration, or connect for feedback on your food photography skills.

Submit your recipe reviews to help fellow cooks find their way to success with this dish. Your insights can be invaluable to those looking to try it out for the first time!

Engage with our community by sharing your own variations of this recipe, as we are always eager to discover new flavors and combinations guests enjoy.

The Recipe

Salmon Rice Bowls

Serves: 4

Prep Time: 15 mins

Cook Time: 20 mins

Total Time: 35 mins

Kitchen Equipment Needed

  • Grill or frying pan
  • Pot for cooking rice
  • Measuring cups and spoons
  • Knife and cutting board
  • Mixing bowl for marinade

Ingredients

  • 1 lb salmon fillet
  • 2 cups jasmine or brown rice
  • 1 cup mixed vegetables (bell peppers, carrots, snap peas)
  • ¼ cup soy sauce
  • 2 tbsp honey
  • 2 cloves garlic, minced
  • 2 tbsp olive oil
  • Salt and pepper to taste
  • Sesame seeds for garnish
  • Chopped green onions for garnish

Directions

  1. Start by marinating the salmon. In a mixing bowl, combine soy sauce, honey, olive oil, garlic, salt, and pepper. Add salmon, ensure it’s well coated, and marinate for at least 30 minutes.
  2. Cook the rice according to package instructions; set aside.
  3. Heat your grill or frying pan over medium-high heat. Cook the salmon for 4-5 minutes on each side, or until cooked to your liking.
  4. Meanwhile, sauté mixed vegetables in the same pan until tender, about 3-4 minutes.
  5. To assemble, place a scoop of rice in each bowl, top with salmon and sautéed vegetables.
  6. Garnish with sesame seeds and chopped green onions before serving.

Recipe Notes

  • For a spicier twist, consider adding sriracha to the marinade or a drizzle on top.
  • This recipe is easily adaptable to include different proteins or vegetables based on season or preference.
  • Store leftovers in airtight containers in the fridge for up to three days.

Easy Tortellini Carbonara with Crispy Bacon

Tortellini Carbonara: A Creamy Twist on a Classic Dish

⚖️
Difficulty
Easy

⏲️
Prep Time
10 mins

🕒
Cook Time
15 mins

⏱️
Total Time
25 mins

🍽️
Servings
4

Welcome to a delightful culinary experience with this Tortellini Carbonara! This dish masterfully combines the robust flavors of Italy with the creamy comfort of a classic carbonara sauce, providing a delicious meal that is both satisfying and indulgent. The tender tortellini, often filled with cheese or meats, blends seamlessly with the rich, creamy sauce made from eggs and cheese. A touch of crispy pancetta adds a fantastic salty crunch, while fresh herbs elevate the flavors and aesthetics.

Whether you are hosting a family dinner or looking for a quick weeknight meal, this Tortellini Carbonara will impress your taste buds. The beauty of this recipe lies not only in its wonderful taste but also in its simplicity; it can be ready in under 30 minutes, making it perfect for any occasion. Just imagine twirling those mouthwatering noodles around your fork, delighting in every creamy, savory bite, and savoring the aromas wafting through your kitchen. Now let’s get cooking!

Quick Recipe Highlights

  • Flavor Profile: A delightful combination of savory ham, creamy sauce, and cheesy tortellini.
  • Texture: Silky creaminess from the sauce, complemented by the firmness of fresh tortellini and crispy pancetta.
  • Aroma: An enticing blend of rich cheese and crispy pancetta will fill your kitchen.
  • Visual Appeal: Beautiful layers of creamy sauce coating the tortellini, garnished with fresh herbs for a pop of color.
  • Skill Level Needed: Perfect for beginners and seasoned chefs alike due to its straightforward method.
  • Special Equipment: A pot for boiling pasta, a skillet for cooking the pancetta, and a mixing bowl for the sauce.

Recipe Overview

  • Difficulty Level: This Tortellini Carbonara is rated as easy, making it an excellent choice for novice cooks. The steps are simple and can be mastered with minimal experience in the kitchen.
  • Category: This dish falls under the categories of pasta, comfort food, and Italian cuisine, perfect for any pasta lover.
  • Cuisine: Inspired by traditional Italian cooking, Carbonara typically features eggs, cheese, pancetta, and black pepper— staples in Roman culinary heritage.
  • Cost: This recipe offers a budget-friendly way to enjoy fine dining at home, as most ingredients are affordable and commonly found in grocery stores.
  • Season: Great for all seasons, as the creamy richness caters to cold winter nights or a cozy dinner in spring.
  • Occasion: Ideal for casual family meals, romantic dinners, or even a festive gathering with friends.

Why You’ll Love This Recipe

Diving into the first bite of Tortellini Carbonara is like embarking on a delicious journey of taste and texture. The silky sauce envelopes the tender tortellini, creating a comforting embrace with every forkful. The salty notes from the pancetta harmonize beautifully with the rich cheese, delivering a flavor explosion that will have your taste buds dancing. The allure of comfort food is undeniable, and this dish perfectly encapsulates that—it’s heartwarming and utterly satisfying.

Not only is Tortellini Carbonara delicious, but its preparation is delightfully convenient. In just under 30 minutes, this meal can go from the stovetop to your dining table, making it a perfect option for busy weeknights or spontaneous dinner guests. Few dishes can compete with the balance of speedy preparation and exquisite flavor, making this recipe a must-have in your culinary arsenal.

Furthermore, this recipe packs a nutritious punch! Tortellini, especially those made with whole grains, can present a host of vitamins and minerals. The addition of eggs contributes protein, while the herbs can provide beneficial antioxidants. It is a well-rounded meal that doesn’t sacrifice health for taste.

When it comes to social gatherings, Tortellini Carbonara shines brightly as a crowd-pleaser. Its rich, creamy nature makes it an exceptional dish for entertaining. As guests gather around the table and savor every bite, the atmosphere becomes lively and warm, cementing memories that revolve around delicious food. Sharing this delightful dish is bound to spark conversations and joy.

Finally, cost-effectiveness plays a vital role in this recipe’s appeal. With a few economical ingredients, you can serve a sumptuous meal that feels like fine dining without the hefty price tag. It allows you to enjoy gourmet flavors without breaking the bank, making it accessible and inviting for everyone to try.

Historical Background and Cultural Significance

The origins of Carbonara are cloaked in mystery, but it’s widely believed to come from the Apennine region of Italy. The namesake sauce is thought to have been created by coal miners (“carbonari”), who needed hearty meals that would sustain them throughout long days of labor. This historical connection is essential, as it emphasizes the dish’s roots in nourishing and fulfilling food.

Culturally, Carbonara represents a pivotal part of Italian culinary traditions, showcasing simplicity and the art of using quality ingredients. The dish is a staple in Roman cuisine, often prepared in Italian households, celebrating not just the flavors but also the essence of togetherness and family gatherings around the table. Its presence at various cultural events and family dinners emphasizes the historical impact of Carbonara on everyday life in Italy.

Throughout the years, Tortellini Carbonara has evolved from its traditional roots. The addition of tortellini, although not originally part of the classic recipe, has given it a modern twist that embraces innovation while respecting its past. This evolution highlights the adaptability of Italian cuisine, allowing it to blend tradition with contemporary trends effortlessly.

Regional variations of Carbonara emphasize its cultural significance. While traditional recipes stick to specific ingredients, variations appear throughout Italy, including those using different types of pasta or various meats. Each adaptation reflects the ingredients and tastes of specific regions, adding a layer of diversity to its cultural representation.

Ingredient Deep Dive

Tortellini: A defining feature, tortellini are small, ring-shaped pasta traditionally stuffed with various fillings, including cheese, meat, or vegetables. Originating from the Emilia-Romagna region, they bring texture and heartiness to the dish. When selecting tortellini, look for fresh or frozen varieties that are high in quality. To store, keep them refrigerated for fresh options or in the freezer for long-term preservation. Substitutions may include other pasta shapes, but the unique eating experience will differ.

Pancetta: This Italian cured meat provides a savory depth to Tortellini Carbonara. With roots in central and northern Italy, pancetta is recognized for its rich flavor and fatty texture. It is packed with some protein and beneficial fats but should be consumed in moderation. While selecting pancetta, inquire about its quality and authenticity, and keep it stored in the refrigerator, labeled with a consume-by date. If unavailable, substitutes such as bacon or prosciutto can mimic its flavors while offering a different twist.

Eggs: A quintessential ingredient for the creamy sauce, eggs are what create the luscious consistency of Carbonara. Whole eggs, rich in protein and nutrients, are fundamental in Italian cuisine. Opt for fresh, high-quality eggs whenever possible. They should be stored properly in the refrigerator, where they can maintain freshness for weeks. For variations or dietary adaptations, egg substitutes may include silken tofu or a vegan cream alternative.

Parmesan Cheese: This hard cheese is essential for enhancing the flavor of the dish. With its sharp, nutty notes, Parmesan is emblematic of Italian cooking. It provides a wealth of calcium and protein and pairs well with many dishes. Choosing block cheese over pre-grated varieties not only enhances freshness but also allows you to control the texture in your sauce. Store Parmesan in its original packaging in the fridge and shred just before use for maximum flavor.

Common Mistakes to Avoid

  • Overcooking the tortellini: Leaving tortellini in boiling water too long can lead to a mushy texture. Always follow package instructions for optimal cooking times.
  • Cooking the pancetta too long: If pancetta is overcooked, it can become hard and chewy. Cook just until crispy to maintain the desired texture.
  • Using cold eggs: Cold eggs can result in a lumpy sauce. Beat them at room temperature before mixing with hot pasta to ensure a smooth consistency.
  • Not reserving pasta water: Failing to save some of the pasta cooking water can prevent you from achieving the right sauce consistency. This starchy water is essential for adjusting the sauce’s thickness.
  • Skipping fresh herbs: Fresh herbs elevate the dish; neglecting them can result in a flat flavor. Always add a sprinkle of parsley or basil before serving.
  • Ignoring seasoning: Failing to taste and adjust for salt and pepper can lead to a bland dish. Season as you go to build balance.
  • Using pre-grated cheese: Pre-grated cheese often contains anti-caking agents that affect texture. Opt for freshly grated cheese for the best flavor.
  • Not mixing quickly: When incorporating eggs into the hot pasta, be sure to mix swiftly to avoid scrambling. Work quickly for a creamy sauce.
  • Insufficient cooking liquids: Adding enough liquid when cooking the sauce is crucial for a balanced dish. Dry sauces can lead to an undesirable result.
  • Overcrowding the pan: Trying to cook too many ingredients at once can prevent even cooking. Cook pancetta in batches if necessary.

Essential Techniques

Boiling Pasta: Boiling pasta to al dente is key for the perfect bite. To master this, ensure your water is boiling before adding any pasta. Stir occasionally to prevent sticking. Look for the pasta to be firm but cooked through—this indicates it’s ready.

Making a Creamy Sauce: The art of creating a creamy sauce lies in the balance of ingredients. Ensure the pasta is hot enough to cook the eggs without scrambling. Mix vigorously and add pasta water incrementally to achieve a silky texture. The sauce should cling beautifully to the pasta.

Sautéing Pancetta: To cook pancetta perfectly, heat your skillet over medium heat. Add the meat and allow it to cook undisturbed until crispy. Look for a deep golden brown color, indicating it’s ready without becoming burnt.

Garnishing: Enhancing your dish visually and flavor-wise with garnishes is important. When placing fresh herbs or cheese, use a light hand and be creative. Opt for a touch of color and freshness to make your dish present beautifully.

Pro Tips for Perfect Tortellini Carbonara

1. For the best sauce, consider using a mixture of egg yolks and whole eggs instead of solely whole eggs. This yields a richer flavor.

2. Serve the dish immediately after mixing; Tortellini Carbonara is best enjoyed fresh to maintain its creamy consistency.

3. When cooking tortellini, utilize a large pot for sufficient space to prevent sticking.

4. Pair with a light salad to balance the richness of the pasta while enhancing the dining experience.

5. Experiment with flavors by including garlic or different cheeses for added layers in your dish.

6. Adjust the sauce thickness by adding more pasta water as needed; this keeps the dish creamy rather than dry.

7. For a spicy kick, sprinkle red pepper flakes before serving to elevate the flavor profile.

8. Top with additional freshly grated cheese for a delightful finishing touch!

Variations and Adaptations

For those looking to explore regional variations, consider swapping traditional tortellini for ravioli or gnocchi—each will impart its character and charm. Additionally, adjust the recipe to match seasonal ingredients, like using pumpkin-filled tortellini in the fall for a warm, comforting dish.

As dietary needs vary, there are several adaptations available. For gluten-free options, use gluten-free tortellini or a different pasta altogether. A keto-friendly version can substitute tortellini with spiralized zucchini or cauliflower rice.

To elevate flavors, consider including ingredients like sun-dried tomatoes, sautéed spinach, or even a touch of truffle oil. These revisions not only add unique taste but also customize the dish to your palate.

Let your creativity shine through presentation alternatives; serve in a rustic dish or garnish with edible flowers for a visually captivating experience. The possibilities are endless in presenting this classic recipe with a modern twist!

Serving and Presentation Guide

When it comes to plating your Tortellini Carbonara, consider using shallow bowls to showcase the pasta elegantly. Layer the tortellini in the center, allowing the creamy sauce to flow gracefully around it. For garnishing, a sprinkle of fresh parsley and a light dusting of Parmesan adds a fresh touch.

To elevate your serving, consider traditional accompaniments like a crisp arugula salad with a lemon vinaigrette or warm crusty bread for a delightful contrast. Modern serving suggestions include pairing it with white wine, which can further enhance the flavor experience.

Temperature considerations are essential. Serve the dish hot right after preparation while ensuring the sauce remains silky smooth. If you’re portioning leftovers, keep individual servings warm in a low oven until ready to enjoy.

Wine and Beverage Pairing

For wine pairings, look for a light-bodied white wine such as Pinot Grigio or Sauvignon Blanc. These wines complement the creamy richness of the Carbonara without overpowering it, creating a harmonious dining experience.

If non-alcoholic beverages are preferred, consider sparkling water with lemon or a lightly brewed iced tea. These refreshing options provide balance to the creamy flavors of the dish.

For unique pairing, consider a lightly roasted coffee or herbal tea post-meal, as it aids in digesting rich foods and provides a pleasant conclusion to your dining experience.

Storage and Shelf Life

To ensure the best quality, store any leftover Tortellini Carbonara in airtight containers in the refrigerator. Consume within 3-4 days for optimal freshness.

For longer storage, this dish can be frozen. Ensure it’s tightly sealed to avoid freezer burn and label with a date for easy tracking. When reheating, maintain the creamy consistency by adding a splash of milk or reserved pasta water.

Signs of spoilage include changes in color or an off-putting smell, both indicators that the meal should be discarded. Reheat gently on the stovetop or microwave, taking care not to overheat the sauce, which can lead to separation.

Make Ahead Strategies

To save time, consider preparing the sauce in advance. Mix your egg and cheese mixture, and store it separately while cooking the tortellini before serving. When ready to serve, combine while the tortellini is hot for an easy finish.

Storage between steps ensures quality; if you’re making a meal for later, keep components separate to maintain their distinct textures and flavors. Assess quality impact, as some elements may change when prepped in advance.

Adding fresh elements just before serving, like herbs or cheese, retains vibrancy and brings the meal together seamlessly after reheating. This approach enhances that fresh-made feel, making your Tortellini Carbonara an excellent option for meal prep.

Scaling Instructions

To halve the recipe, simply divide all ingredients and adjust proportions where necessary. This method ensures a balanced flavor profile while maintaining all the enriching textures.

For doubling or tripling, consider the size of your cooking vessels. Utilize larger pots and pans or batch-cook in stages for best results. Always check for even cooking, especially as quantities increase.

Tuning timing modifications may also be necessary; larger batches may require slightly longer cooking times. Adjust as needed, keeping a close eye on the pasta for desired doneness.

Storage considerations remain critical as well; ensure that you have ample space in containers to store your delicious Tortellini Carbonara safely.

Nutritional Deep Dive

On the macro front, Tortellini Carbonara usually contains carbohydrates from the pasta, protein from eggs and pancetta, and fats primarily from cheese and pancetta. Each element has a crucial role in contributing to a well-rounded meal.

Micronutrient analysis will reveal various vitamins and minerals offered by ingredients like cheese, eggs, and herbs. For example, cheese often provides calcium, while herbs may contribute beneficial antioxidants, making this dish not just delicious but nutritious.

Health benefits include the protein from eggs which supports muscle repair and growth, alongside carbohydrates from pasta providing energy. Keep in mind portioning is essential for balance, as it directly relates to overall nutrient intake.

Weight management tips suggest enjoying this dish in moderation or balancing it with other nutrient-dense foods to maintain a healthy lifestyle while enjoying rich flavors.

Dietary Adaptations

For those who are gluten-free, gluten-free tortellini can be used in place of traditional pasta without sacrificing flavor. This alternative allows all food lovers to dive into the deliciousness of Carbonara without worries.

Dairy-free adaptations can utilize cashew cream instead of cheese and nutritional yeast to mimic cheesy notes without the use of dairy, creating a creamy and flavorful experience suitable for various dietary preferences.

For vegan options, consider replacing eggs with tofu or chickpea flour to achieve a similar creamy texture. This approach keeps your meal plant-based while remaining satisfying and full of flavor.

Low-carb dieters can opt for zoodles (zucchini noodles) or cauliflower gnocchi instead of tortellini. These alternatives cut carbs while maintaining a delightful eating experience.

Troubleshooting Guide

For texture issues, if your tortellini are coming out mushy, practice cooking them al dente following package instructions closely. This will ensure desirable firmness.

If flavor balance is lacking, start with adequate seasoning early in the cooking process. Always taste and adjust before serving to ensure it matches your expectations.

In terms of temperature, if the sauce is clumping or becoming too thick, add additional reserved pasta water gradually until reaching the desired consistency. Avoid reheating over high heat to prevent further issues.

When facing equipment challenges, such as not having a skillet, consider using any stovetop-safe pan. Creativity in using available tools can lead to delicious results.

Recipe Success Stories

Many community members have shared their joy in preparing Tortellini Carbonara, highlighting its simplicity and richness. Variations, like adding vegetables, have led enthusiastic feedback.

Adaptation stories showcase readers questing for the best filling—those opting for spinach or mushroom-stuffed tortellini have found success, appreciating the enhanced flavor profiles.

Photography tips reveal that capturing the creamy texture is key. Well-lit images highlighting the vibrant colors of the dish are ideal for social media sharing.

Frequently Asked Questions

What can I use instead of pancetta? You can substitute pancetta with bacon or even turkey bacon if looking for a leaner option as both will provide a similar salty flavor rooted in the dish.

Can I make this dish vegetarian? Absolutely! Swap pancetta for mushrooms or artichokes, and ensure your tortellini is free of meat for a delicious vegetarian meal.

How can I make the sauce more creamy? To enhance creaminess, add an extra yolk or a touch of heavy cream, balancing the richness with some pasta water during mixing.

Is Tortellini Carbonara suitable for meal prep? Yes! Just store components separately to keep the textures intact and mix them when ready to serve.

Can I add vegetables to the dish? Definitely! Peas or spinach can be a wonderful addition for added nutrients and flavors.

How long can leftovers last in the fridge? Leftover Tortellini Carbonara can be stored in an airtight container for up to four days in the refrigerator.

What are some side dishes that pair well? Fresh salads, garlic bread, or roasted vegetables complement Tortellini Carbonara perfectly, enhancing the meal experience.

Can I freeze leftovers? Yes, this dish freezes well when stored in airtight containers. Just be sure to reheat gently to prevent the sauce from breaking.

What is the best type of cheese to use? Parmesan cheese is traditional for depth of flavor; however, Pecorino Romano can also be used for a stronger taste element.

Can Tortellini Carbonara be made without eggs? While eggs provide creamy texture, you can experiment with plant-based cream alternatives for similar results.

Additional Resources

For enthusiasts eager to dive deeper, explore our related recipes such as Classic Carbonara, Spinach Ricotta Tortellini, or even fresh homemade pasta. Each recipe complements the journey toward mastering Italian cuisine.

For those aiming to improve culinary skills, technique guides on sautéing vegetables, preparing homemade pasta, or cheese selection can enhance your cooking repertoire. Each of these resources nurtures your growth in the kitchen.

Understanding ingredient interactions can cultivate better results in your cooking. Deep dives into foundational ingredients like cheese or pasta types can elevate your culinary prowess significantly.

Equipment recommendations for preparing this dish often highlight essential tools such as high-quality skillets, pasta pots, and mixing bowls, leading to optimal cooking efficiency. Each kitchen should be equipped for success.

Lastly, embrace seasonal variations; try using seasonal vegetables or herbs to add freshness and vibrant flavors to your Tortellini Carbonara. Adjusting ingredients based on availability can unleash creativity and innovation.

Join the Conversation

Engaging with the culinary community expands the joy of cooking. Share your Tortellini Carbonara creations on social media platforms, inviting others to discover the love you put into your meals. Your authentic photography and experiences can inspire fellow cooks!

Recipe reviews allow for constructive feedback—accept suggestions and share your unique adaptations that might further develop this dish. Community collaboration enriches the dining experience.

Encourage storytelling by posting variations or favorite moments with this recipe, fostering connection over shared love for food. Your efforts can spark conversations, virtual dinner parties, and a sense of belonging.

The Recipe

Tortellini Carbonara

Serves: 4

Prep Time: 10 mins

Cook Time: 15 mins

Total Time: 25 mins

Kitchen Equipment Needed

  • Large pot for boiling pasta
  • Skillet for cooking pancetta
  • Mixing bowl for sauce
  • Whisk and tongs or slotted spoon

Ingredients

  • 1 lb fresh tortellini
  • 4 oz pancetta, diced
  • 2 large eggs
  • 1 cup grated Parmesan cheese
  • Salt and black pepper to taste
  • Fresh parsley for garnish

Directions

  1. Bring a large pot of salted water to a boil. Cook the tortellini according to package instructions until al dente. Reserve 1 cup of pasta water and drain the rest.
  2. While pasta cooks, heat a skillet over medium heat. Add the diced pancetta and cook until crispy. Remove from heat and set aside.
  3. In a mixing bowl, whisk together the eggs, grated Parmesan, and freshly cracked black pepper until combined.
  4. Add the hot tortellini to the skillet with pancetta and toss to combine. Remove from heat.
  5. Quickly pour the egg mixture over the tortellini, using tongs to mix continuously. Gradually add reserved pasta water as needed to achieve a creamy consistency.
  6. Season with additional salt and black pepper to taste. Serve immediately, garnished with fresh parsley and extra Parmesan cheese if desired.

Recipe Notes

  • For extra creaminess, you can use a mix of egg yolks and whole eggs.
  • Swap pancetta for bacon or mushrooms for different flavor profiles.
  • Leftovers can be stored in an airtight container for up to 4 days.
  • This dish is best enjoyed fresh but can be frozen for later use.

Authentic Dublin Coddle – A Classic Irish Comfort Dish

Traditional Dublin Coddle: A Hearty Irish Comfort Dish

⚖️
Difficulty
Easy

⏲️
Prep Time
20 mins

🕒
Cook Time
1 hour

⏱️
Total Time
1 hour 20 mins

🍽️
Servings
4

Welcome to the world of Traditional Dublin Coddle, a dish that embodies the spirit and flavors of Irish cuisine. This hearty stew combines layers of flavor from sausages, bacon, and vegetables, creating a comforting meal perfect for chilly evenings. As you delve into this recipe, prepare to savor the rustic flavors that have warmed the hearts of many across generations. Dublin Coddle is not just food; it’s a culinary hug that speaks to the soul, offering rich aromas and mouthwatering textures that invite you to indulge.

In this blog post, we will explore the rich history and cultural significance of Dublin Coddle, its comforting and nourishing qualities, and why it deserves a spot on your dinner table. The combination of savory ingredients aligns perfectly with the essence of Irish cooking – simple yet satisfying. So, grab your apron and step into the world of Dublin Coddle, where tradition meets taste in a dish that will impress your family and friends.

Quick Recipe Highlights

  • Flavor Profile: The dish presents a delightful balance of savory and slightly smoky flavors from the bacon and sausages, enriched by the sweetness of onions and the heartiness of potatoes.
  • Texture: Enjoy the tenderness of slowly cooked potatoes and the satisfaction of biting into juicy sausages, complemented by the softness of the onions.
  • Aroma: Experience the enticing aromas of garlic, herbs, and spices wafting through the kitchen, promising warmth and comfort.
  • Visual Appeal: Served in a rustic bowl, Dublin Coddle showcases a golden hue with vibrant potatoes and caramelized onions that are visually inviting.
  • Skill Level Needed: Ideal for beginner to intermediate cooks, this recipe focuses more on timing rather than intricate techniques.
  • Special Equipment: A large pot or Dutch oven is essential for simmering the ingredients to perfection.

Recipe Overview

  • Difficulty Level: Preparing Traditional Dublin Coddle is beginner-friendly. The steps involve simple chopping and layering, making it an approachable recipe for cooks of all skill levels.
  • Category: This dish serves as a comforting main course, perfect for family dinners or gatherings.
  • Cuisine: Dublin Coddle is steeped in Irish culinary tradition, celebrating the use of readily available ingredients and providing a homestyle dining experience.
  • Cost: The recipe is budget-friendly, making use of economical cuts of meat and staple vegetables, averaging around $15 for a meal serving 4.
  • Season: Particularly enjoyed during colder months, this dish warms and nourishes, making it a staple in winter celebrations.
  • Occasion: Perfect for celebratory meals, cozy family dinners, or St. Patrick’s Day festivities, showcasing the heartiness of Irish cooking.

Why You’ll Love This Recipe

The taste and texture of Traditional Dublin Coddle are simply irresistible. The richness of the sausages paired with the succulent chunks of bacon creates a filling, savory dish that delights the taste buds. Each bite reveals perfectly cooked potatoes and soft onions, juxtaposing the crunchiness of fresh bread typically served alongside. Irresistibly comforting, the dish embodies what it means to enjoy a hearty meal.

Convenience is another reason to adore this recipe. With an easy prep time of just 20 minutes, you can assemble this dish within no time. The cooking process allows the ingredients to slow-cook, developing layers of flavor, while you enjoy an evening of relaxation. It’s perfect for busy weekdays or any time you desire a wholesome meal without complicated steps.

The nutritional advantages of Traditional Dublin Coddle cannot be overlooked. Packed with protein from the meat and vitamins from the vegetables, this dish offers a satisfying balance for well-rounded nutrition. It provides a hearty meal that satiates hunger, perfect for energizing after a long day.

Socially, Dublin Coddle serves as a fantastic dish to bring people together. Its family-style serving encourages sharing and makes it ideal for gatherings, fostering warmth and camaraderie. This is the kind of dish worth accommodating a table full of loved ones, leaving everyone happy and satisfied.

Cost-effectiveness makes Traditional Dublin Coddle even more appealing. Its accessible ingredients ensure that you can feed a crowd without breaking the bank. Every element in this stew is designed to be enjoyable, satisfying, and easy on the wallet, meaning you can indulge without guilt.

Historical Background and Cultural Significance

The origin of Traditional Dublin Coddle dates back to the 1700s, synonymous with the working-class families of Dublin. As an economical dish, it allowed people to make use of leftovers and available ingredients, capturing the essence of resourcefulness in Irish cooking traditions. The story behind the dish reflects a time when simplicity in the kitchen was key to feeding a family, and every ingredient told a story of its own.

Culturally, Dublin Coddle holds a special place in Irish hearts. Oftentimes, it is synonymous with gatherings, caring family meals, and is believed to be a dish prepared for those arriving home late from the pub. Its association with folk traditions gives it a nostalgic value among those who grew up savoring it at home, linking generations through its flavors.

Over the years, Dublin Coddle has evolved to adapt to the changing tastes of the times, yet it maintains its core essence. The addition of ingredients, like different types of sausages or vegetables, has paved the way for variations while still preserving the heartiness that people have come to love. It’s a reminder of how food can reflect the culture and memories of the people it serves.

Regional variations also exist, with each area in Ireland perhaps adding their own twist, whether it be the addition of different meats, spices, or even alternative vegetables. Each interpretation reflects local tastes while paying tribute to the classic foundation of Dublin Coddle.

Ingredient Deep Dive

One of the main ingredients of Dublin Coddle is the sausage, which carries a rich history in Irish cuisine. Sausages have been a staple protein source and are integral in many traditional dishes. Nutritionally, they provide essential proteins, fats, and iron. When selecting sausages, look for high-quality options with fewer additives. You can store uncooked sausages in the refrigerator for up to two days or freeze them for longer shelf-life. If necessary, substitute with chicken or turkey sausages to reduce the fat content without losing flavor.

Another essential ingredient is bacon, cherished for its smoky depth and savory character. Bacon has roots in various cultures, and its presence adds a delightful richness to the dish. Packed with protein and fats, it enhances the overall flavor significantly. When buying bacon, choose thick-cut for a meatier bite. Store it in the fridge up to a week or freeze for extended duration. Consider alternatives like pancetta or even plant-based bacon for a twist.

Potatoes, often hailed as the backbone of Irish cuisine, add substance to the dish. They are rich in carbohydrates, making them energy-sustaining for daily needs. Opt for waxy potatoes for this recipe, as they maintain their shape perfectly during cooking. Store them in a cool, dark place and avoid refrigerating them. For variations, sweet potatoes can introduce a different flavor profile while adhering to the same cooking method.

Finally, onions add sweetness and depth of flavor. Historically, they are used in many culinary traditions for their ability to form a base in a multitude of dishes. Rich in vitamins and fiber, choosing fresh onions ensures maximum flavor. Store them in a dry, cool location away from potatoes to prevent sprouting. Leeks or shallots can be wonderful substitutions if preferred.

Common Mistakes to Avoid

  • Using low-quality sausages can compromise flavor; always choose high-quality meats for best results.
  • Overcooking the potatoes will turn them mushy; they should be tender but intact. Check for doneness periodically.
  • Neglecting to brown the meats before simmering leaves out essential deep flavors; this step is crucial for taste.
  • Skipping the resting phase after cooking results in a less developed flavor; allow the dish to sit before serving.
  • Layering ingredients incorrectly can lead to uneven cooking; always layer your meats and vegetables properly.
  • Forgetting to season adequately throughout the cooking process can result in a bland dish; taste as you go.
  • Using too much liquid can dilute flavors; aim for just enough to cover the ingredients without drowning them.
  • Storing leftover Coddle improperly can lead to spoilage; ensure it cools completely before refrigerating to maintain freshness.
  • Not adjusting to personal preferences can lead to disappointment; feel free to modify ingredients to suit your taste!
  • Rushing the simmering stage can prevent flavors from fully developing; let the dish simmer gently for best taste.

Essential Techniques

One essential technique is browning the meat, which is crucial for developing flavors. This process creates a caramelized crust on sausages and bacon, enhancing their savory notes. To master this, use a hot pot and avoid overcrowding, which can cause steaming instead. Look for a golden-brown color as a sign of success.

Layering is vital for ensuring even cooking. Start with a base of meats followed by onions and potatoes on top, which helps distribute heat properly and allows the ingredients to meld beautifully. Visual cues, such as bubbling on the edges, indicate that you are on the right track.

Pro Tips for Perfect Traditional Dublin Coddle

Use a combination of different sausage types for a multi-dimensional flavor. Mixing pork with herb-infused or spiced options can elevate the dish immensely.

Consider adding a splash of stout beer or cider to the cooking liquid to introduce a beautiful depth and richness to the broth.

If time allows, let the Coddle rest for a bit after cooking; it often tastes better the following day as the flavors continue to meld.

Experiment with fresh herbs like thyme or bay leaves during cooking to enhance aromatic elements and deepen the flavor profile.

Keep the lid on while simmering to maintain moisture; you want a rich broth without excess evaporation.

Serve Dublin Coddle alongside crusty bread for a perfect contrast, ideal for soaking up the savory broth.

Variations and Adaptations

Regional variations of Dublin Coddle might include using local sausages distinct to the area, such as black pudding, which adds unique flavors and textures.

Incorporate seasonal adaptations by adding root vegetables, such as carrots or parsnips, during autumn to reflect the harvest while enhancing nutrition and flavor.

For dietary modifications, try substituting traditional meats with plant-based alternatives to create a vegan version, maintaining the comforting essence of the dish.

Flavor variations can include introducing spices such as paprika or smoked alternatives to lend an extra kick, appealing to those who enjoy bolder tastes.

Texture modifications could involve mashing some potatoes to enrich the broth, offering a creamy consistency that contrasts perfectly with chucks of meat.

For presentation alternatives, serve the Coddle in individual pots or bowls, garnished with fresh parsley for color and a burst of flavor.

Serving and Presentation Guide

For plating, use rustic bowls that reflect the hearty nature of Dublin Coddle; a simple assembly showcases the chewy sausages and vibrant vegetables attractively.

Garnishing with freshly chopped parsley or chives adds a splash of color while introducing a fresh herbaceous note that elevates the dish.

Traditional accompaniments rice or crusty bread are essential; they soak up the comforting layers of liquid, ensuring everyone enjoys every last bite.

In modern settings, consider serving with a creamy mustard sauce on the side as a twist on traditional serving styles.

Temperature considerations are important; ensure the Coddle is served hot, allowing the deep flavors to shine, reminiscent of meals shared on cozy Irish evenings.

Portion control tips suggest serving large bowls for family-style dinners or smaller servings for gatherings, allowing guests to savor their plates.

Wine and Beverage Pairing

For wine pairings, opt for robust reds like a Cabernet Sauvignon, which matches the heartiness without overpowering its flavors.

Non-alcoholic alternatives include rich herbal teas or homemade sodas that provide refreshing contrast to the hearty stew.

Traditional pairings could involve providing a cold Irish stout, enhancing the cultural experience while harmonizing with the dish’s flavors.

For coffee aficionados, a strong Irish coffee with cream complements the savory aspects beautifully, making it a luxurious accompaniment.

Storage and Shelf Life

Proper storage methods for leftover Dublin Coddle involve cooling completely before transferring it to an airtight container, ensuring it lasts up to three days in the fridge.

Temperature requirements dictate not refrigerating while warm, as it can create unwanted condensation that leads to spoilage.

Recommended containers include glass jars or BPA-free plastic containers for effective storage without leaching flavors.

Signs of spoilage include off-putting smells or changes in texture; always err on caution when reheating and storing due meals safety.

Reheating instructions suggest using a stovetop for gentle warming, ensuring even heat distribution without boiling away the flavors.

Guidelines for freezing indicate that Dublin Coddle can be frozen for up to three months; ensure it’s placed in freezer-safe containers for maximum longevity.

Make Ahead Strategies

For a make-ahead timeline, complete the preparation stage and store uncooked components in the refrigerator for up to a day before cooking.

Storing between steps is advisable; slice vegetables ahead of time and keep them in sealed bags to maintain freshness.

Assessing quality impact, ingredients like potatoes may change textures slightly, so it’s advised to avoid cutting too far in advance to retain firm quality.

Assembly tips recommend layering all ingredients in the pot and refrigerating overnight, impacting flavor positively as the ingredients marry.

Refer to reheating guidelines, gently warming before serving to reactivate the vibrant flavors without overwhelming the broth.

Add fresh elements like herbs just before serving to maintain their potency and introduce bright flavors to complement the dish.

Scaling Instructions

To halve the recipe, divide all ingredients evenly without compromising balance, ensuring to adjust cooking times slightly to maintain optimal textures.

Doubling or tripling the recipe is straightforward; extend simmering time but maintain the layering technique for best flavor development.

Equipment adjustments may involve using a larger pot, ensuring enough space for ingredients to cook evenly without overcrowding.

Timing modifications mainly address the simmering process; larger quantities may require more time to achieve similar tenderness in meat and vegetables.

Store any additional servings immediately to retain freshness, taking care to cool before sealing according to storage guidelines.

Nutritional Deep Dive

Analyzing the macro breakdown reveals a noteworthy protein source from the meats alongside carbohydrates from potatoes, making Dublin Coddle a well-rounded option.

A micronutrient analysis highlights vitamins and minerals from both meat and vegetables, offering valuable nutrients in a comforting package.

Health benefits extend to supporting energy levels, with hearty meals providing lasting stamina, crucial for active lifestyles.

Dietary considerations warrant attention to personal preferences; balancing portions with sausages versus vegetables can cater to different health goals.

Portion analysis suggests comfortable servings that satisfy hunger without excessive caloric intake; a bowl should provide adequate sustenance while being mindful of overall consumption.

Weight management tips can include serving with a side salad to increase vegetable intake without drastically affecting caloric balance.

Dietary Adaptations

Create a gluten-free version of Dublin Coddle by using gluten-free sausages and ensuring all seasonings are gluten-free, preserving the traditional essence of the dish without unwanted discomfort.

To make it dairy-free, simply ensure no butter is used; the dish naturally remains dairy-free enhancing its accessibility.

For a vegan alternative, swap out the meats for plant-based sausage and add mushrooms for umami depth, maintaining the heartiness of this beloved classic.

Low-carb adaptations can include omitting potatoes completely in favor of cauliflower or turnips, mimicking the texture while reducing overall carb intake.

For those following a keto diet, substituting the potatoes with zucchini noodles allows for a satisfying low-carb version that stays true to comfort food.

Paleo adherents can enjoy Dublin Coddle by sticking to natural ingredients, avoiding processed meats while maintaining the rustic essence.

Low-FODMAP interpretations replace onions with chives or green onion tops and substitute garlic with garlic-infused oil, ensuring it remains gentle on sensitive digestions.

For other specific diets, consider adjusting ingredients to suit individual preferences while maintaining the iconic flavors of Coddle.

Troubleshooting Guide

If you encounter texture issues, such as mushy potatoes, consider reducing cooking time or checking for doneness earlier to prevent overcooking.

Addressing flavor balance might involve adjusting seasoning amounts; always taste as you go and don’t hesitate to add more herbs or spices if feeling bland.

Temperature problems can often be linked to inadequate simmering; maintaining consistent heat allows all ingredients to cook thoroughly and develop rich flavors.

Equipment challenges, like using a thin pot, can lead to uneven cooking; always utilize heavy-duty cookware for best results when preparing stews.

Ingredient substitutions can lead to different flavor outcomes; ensure you choose replacements that complement rather than overshadow the core flavors of the dish.

Timing concerns require attention; if unsure, always start testing early, using a fork to assess tenderness and adjust accordingly based on texture.

Recipe Success Stories

Community feedback often highlights how Dublin Coddle brings families together, sparking heartfelt conversations and shared experiences that resonate well beyond mealtimes.

Variation successes showcase how readers have taken the base recipe and added unique twists, enriching flavors, and creating their own family traditions.

Adaptation stories reveal how different cultural touches can enhance the dish, showcasing its versatility and adaptability across global kitchens.

Reader suggestions frequently point to the joy of comfort food as a bridge between generations, passing down recipes filled with care and tradition.

Photographic tips emerge from community interactions, inspiring others to share their creations while celebrating their own take on this classic dish.

Frequently Asked Questions

Q: Can I make Dublin Coddle in a slow cooker?
A: Absolutely! You can adapt this recipe for a slow cooker. Simply brown the meats on a stovetop and then transfer all ingredients into the slow cooker. Cook on low for about 6-8 hours for tender results.

Q: Is Dublin Coddle suitable for meal prep?
A: Yes! Dublin Coddle makes great leftovers, which can be stored in the fridge for up to three days and frozen for up to three months.

Q: Can I use chicken instead of pork sausages?
A: Yes! You can substitute chicken or turkey sausages if you’re looking to reduce fat, though the flavor profile may change slightly.

Q: What’s the best way to serve Dublin Coddle?
A: Traditional serving involves ladling the Coddle into bowls with a side of crusty bread; this allows you to enjoy the rich broth alongside the hearty ingredients.

Q: How can I make this dish spicier?
A: Consider adding red pepper flakes during cooking or serving with a spicy mustard to provide a kick that contrasts the dish’s rich flavors.

Q: What if I don’t have time to marinate the meat?
A: While marinating enhances flavors, it’s not necessary; you can make it without, and the cooking process will still render plenty of flavors.

Q: Can this recipe be adapted for a low-carb diet?
A: Yes! Substitute potatoes with cauliflower, and the recipe will still maintain its core flavors while adhering to low-carb guidelines.

Q: How do I adjust the recipe for a larger group?
A: Simply scale up all ingredients while ensuring your cooking pot has sufficient size to maintain even cooking as larger volumes require more time.

Q: Can I use leftover meats in this recipe?
A: Definitely! Using leftover meats can add even more flavor to your Dublin Coddle while preventing waste.

Q: How do I know when the dish is done?
A: Dublin Coddle is done when the sausages are cooked through and the potatoes are tender but not falling apart.

Additional Resources

For related recipes, check out our collections on traditional Irish stews and comfort food classics that complement the concept of hearty and homey meals.

Explore technique guides that introduce basic skillet cooking and braising methods that further enrich your culinary skills in preparing comforting dishes.

Ingredient information allows you further insights into selecting and sourcing fresh produce and meats that create the ultimate Dublin Coddle.

Equipment recommendations will help you discover the best pots and tools to use for traditional cooking, ensuring you have the right gear for every meal.

Look for seasonal variations in our blog posts that use seasonal vegetables and meats to add a touch of novelty to your meals throughout the year.

Join the Conversation

We invite you to share your experiences and variations of Dublin Coddle on social media, connecting with other cooking enthusiasts and recipe lovers.

Utilize our photography tips to capture your wholesome meals, showcasing the beauty and heartiness of each dish you create.

Engage with the community through recipe reviews, helping others discover the warmth and satisfaction that comes from preparing Traditional Dublin Coddle.

Encourage recipe variations; inspire others with new twists on this classic Irish dish that can help create unique family traditions.

The Recipe

Traditional Dublin Coddle

Serves: 4

Prep Time: 20 mins

Cook Time: 1 hour

Total Time: 1 hour 20 mins

Kitchen Equipment Needed

  • Large pot or Dutch oven
  • Chopping board
  • Kitchen knife
  • Measuring cups and spoons
  • Wooden spoon

Ingredients

  • 4 pork sausages
  • 4 slices of bacon
  • 4 medium potatoes, peeled and sliced
  • 2 large onions, sliced
  • 2 cloves of garlic, minced
  • 1 teaspoon dried thyme
  • Salt and pepper to taste
  • 4 cups chicken or vegetable broth
  • Fresh parsley for garnish

Directions

  1. In a large pot, cook the bacon over medium heat until crisp. Remove and set aside.
  2. In the same pot, brown the sausages on all sides, then remove and set aside.
  3. Layer the potatoes and onions at the bottom of the pot, and sprinkle garlic and thyme on top.
  4. Add the bacon and sausages back into the pot, seasoning with salt and pepper.
  5. Pour the broth over the ingredients until just covered. Bring to a gentle simmer.
  6. Cover the pot and allow to simmer for about 1 hour or until vegetables are tender and sausages are cooked through.
  7. Serve hot, garnished with fresh parsley.

Recipe Notes

  • Feel free to use different types of sausages for varied flavors.
  • Ok for vegetarian options; look for plant-based sausages.
  • Best enjoyed with crusty bread on the side.
  • Leftovers store well and actually taste better the next day!