Easy Lasagna Soup with Rich Tomato & Cheese Flavor

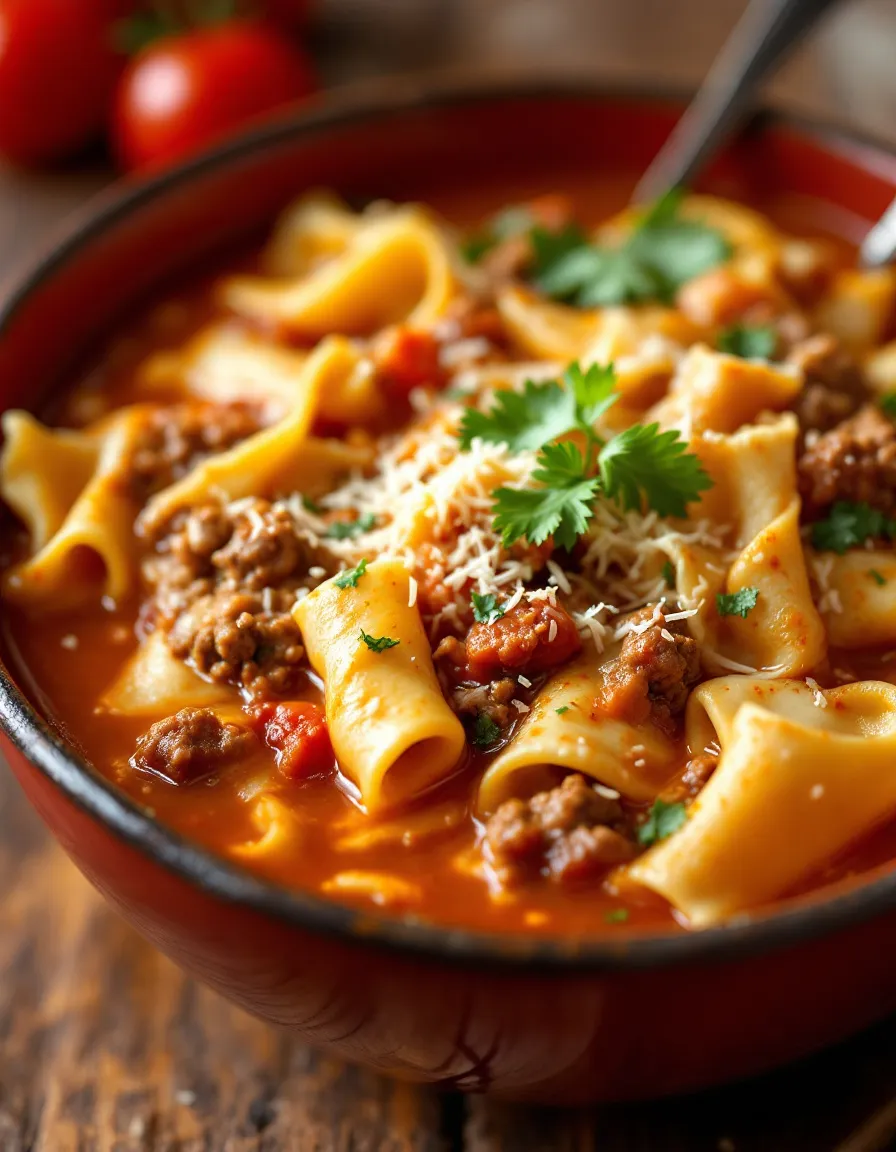
Lasagna Soup: A Comforting Twist on a Classic

⚖️
Difficulty
Easy

⏲️
Prep Time
15 mins

🕒
Cook Time
30 mins

⏱️
Total Time
45 mins

🍽️
Servings
6 servings

Lasagna Soup is a heartwarming dish that combines the rich flavors of classic lasagna in a cozy, soup format. It’s a dish that’s perfect for chilly evenings, offering a delightful medley of savory basil-tinged tomatoes, creamy ricotta, and delectable pasta. Imagine a steaming bowl of this comforting soup, where every spoonful captures the essence of traditional lasagna but with added warmth and comfort. Whether you’re cooking for yourself or for friends and family, this soup will surely satisfy everyone’s cravings.

The beauty of Lasagna Soup lies not only in its taste but also in its texture. The pasta provides a delightful chewiness that melds beautifully with the creamy goodness of the ricotta and mozzarella. As you stir in fresh herbs towards the end of cooking, the aroma wafts through your kitchen, creating a warm, inviting atmosphere. This dish promises not just to fill your stomach, but also to create lasting memories around the dinner table.

Quick Recipe Highlights

  • Flavor Profile: The blend of rich tomato base, fresh basil, and cheesy goodness creates a flavorful explosion in every bite.
  • Texture: The combination of soft noodles, creamy cheese, and tender ground meat provides a comforting mouthfeel.
  • Aroma: As it cooks, the fragrant aromas of garlic, onion, and spices fill the air, enticing everyone nearby.
  • Visual Appeal: The vibrant colors of the tomatoes, herbs, and cheese make this soup visually stunning.
  • Skill Level Needed: This recipe is easy enough for beginners yet rewarding enough for any home cook.
  • Special Equipment: A large pot or Dutch oven will work best for cooking and serving this delicious soup.

Recipe Overview

  • Difficulty Level: The Lasagna Soup is classified as easy, making it suitable for cooks of all skill levels. The simple steps ensure quick preparation, allowing you to enjoy a hearty meal without complex techniques.
  • Category: This dish fits beautifully into the comfort food category, ideal for cozy gatherings or family dinners.
  • Cuisine: Lasagna Soup draws inspiration from Italian cuisine, showcasing the traditional flavors associated with classic lasagna dishes.
  • Cost: The ingredients for this recipe are generally affordable, making it a budget-friendly option for hearty meals.
  • Season: Lasagna Soup is particularly comforting in fall and winter, providing warmth and satisfaction during colder months.
  • Occasion: This dish is perfect for family dinners, potlucks, or even casual gatherings with friends.

Why You’ll Love This Recipe

Lasagna Soup offers an incredible balance of flavors that will excite your taste buds. The rich tomato broth is layered with spices and a hint of sweetness, while the creamy ricotta and melted mozzarella make each bite irresistibly indulgent. This recipe transforms a beloved Italian dish into a warm bowl of comfort, perfect for any occasion. You’ll not only enjoy the taste but also the delightful texture, keeping you satisfied and craving seconds.

Convenience is key with Lasagna Soup. With all the layers of traditional lasagna combined into one pot, it reduces prep time and cleanup, making it an excellent choice for busy weeknights. Simply sauté the vegetables and cook the meat; then, add in the liquids and let it simmer. In under an hour, you can serve a delicious homemade meal that feels special without spending hours in the kitchen.

From a nutritional standpoint, this Lasagna Soup packs a punch with essential vitamins and minerals from the vegetables, protein from the ground meat, and calcium from the cheese. It’s a balanced dish that can comfortably fit into various dietary preferences, ensuring that you and your loved ones enjoy a meal that is not only hearty but also wholesome.

Social gatherings shine brighter with Lasagna Soup. Picture sharing this dish with friends or family: everyone around the table enjoying the same comforting meal. It provides a great opportunity for conversation, laughter, and the sharing of warm memories, solidifying its status as a crowd-pleaser.

Cost-effectiveness is also a highlight of this recipe. The ingredients are simple and affordable, and leftovers taste even better the next day, making it a practical choice for meal planning or feeding a larger crowd without breaking the bank.

Historical Background and Cultural Significance

The origins of lasagna date back to Ancient Greece, where they had layers of pasta mixed with meat and sauces. Over time, it evolved into the lasagna we cherish today, particularly in Italy. This dish has a deep cultural significance, as it represents comfort, family gatherings, and warmth.

Lasagna Soup takes a beloved classic and reimagines it for modern dining, allowing people to enjoy the same flavors in a more accessible format. This adaptation is particularly great for families with young children or those looking for quick meal solutions.

As culinary traditions evolve, recipes endure various transformations. Lasagna Soup reflects how busy lifestyles have brought about new interpretations of time-honored dishes, merging convenience with tradition.

Regionally, variations of lasagna abound, from Northern Italy’s creamy bechamel layers to Southern Italy’s chunky meats and red sauces. Lasagna Soup draws on these influences, creating a versatile dish that can vary dramatically based on regional flavors and available ingredients.

Ingredient Deep Dive

Ground Beef
Ground beef is a staple in many households and serves as the primary protein in Lasagna Soup. Rich in iron and protein, it offers nutritional benefits alongside its flavor. Always select fresh beef with an even color for the best taste. Store it in the refrigerator for short-term use or freeze for longer-lasting freshness. If you prefer, ground turkey, sausage, or plant-based proteins can be used as substitutes.

Tomato Sauce
Tomato sauce forms the backbone of this recipe, contributing both flavor and texture. It is rich in vitamins A and C, making it a healthy choice. Opt for low-sodium varieties if you’re watching your salt intake. When stored properly, tomato sauce can last in the pantry for months; however, once opened, it’s best kept refrigerated. You can substitute with marinara sauce or homemade crushed tomatoes for a personalized touch.

Ricotta Cheese
Ricotta cheese adds creaminess and richness to this soup, enhancing its comfort food quality. It’s an excellent source of calcium and protein; however, those who are lactose intolerant may need alternatives like ricotta made from almond milk. When selecting ricotta, look for fresh options that boast a smooth texture. Store it sealed in the fridge and consume within a week for optimal freshness.

Basil
Fresh basil adds vibrant flavor and aroma to the soup, elevating the overall taste profile. This herb is also packed with antioxidants and can be easily grown at home. When selecting basil, look for bright green leaves without blemishes. Store it in the refrigerator wrapped in a damp paper towel for a few days or keep it in water as you would fresh flowers to prolong its life. You can also use dried basil as an alternative, though fresh is preferred for its enhanced flavor.

Common Mistakes to Avoid

  • Not browning the meat properly: This step is crucial for developing flavors. Ensure the meat is fully browned before adding other ingredients.
  • Using too much or too little pasta: Be mindful of the amount of pasta added, as it can significantly affect the soup’s consistency. Too much pasta may absorb all the liquid, leaving you with a thick dish instead of a soup.
  • Under-seasoning: Taste and adjust seasonings throughout the cooking process to ensure a balanced dish. Remember, fresh herbs can enhance flavors immensely.
  • Ignoring the simmering time: Allow the soup to simmer adequately to meld the flavors together. Rushing this step can result in a less enjoyable dish.
  • Overcooking the pasta: Add the pasta during the last 10 minutes of cooking to avoid a mushy texture. It should be al dente when served.
  • Skipping the cheese layer: Don’t forget the fun of adding a cheesy layer of ricotta or mozzarella on top when serving to capture that lasagna essence.
  • Not using fresh ingredients: Fresh produce and herbs significantly elevate the flavor profile. Whenever possible, opt for fresh over dried.
  • Failing to taste test: Regularly tasting the soup allows for adjustments in seasoning and ensures you get the flavor just right before serving.

Essential Techniques

Sautéing Vegetables
Sautéing is a foundational technique that gently cooks ingredients, releasing their flavors and sweetness. Always ensure your pan is hot before adding the oil and vegetables, as this will prevent sticking. Stir occasionally, and watch for visual cues like a lightly golden color on your onions and garlic to indicate readiness.

Simmering
Simmering allows flavors to meld beautifully. Keep your pot at a gentle simmer (look for small bubbles, not vigorous boiling) to prevent ingredients from breaking apart. This technique is essential for infusing the broth with rich flavors. Monitor the soup closely and adjust the heat as necessary.

Pro Tips for Perfect Lasagna Soup

Start by browning your meat well to deepen the flavors, and don’t rush this process—it’s well worth the caramelization. Use a mix of cheeses for a more complex flavor; combining mozzarella, ricotta, and Parmesan creates a delightful depth. Consider adding a splash of balsamic vinegar before serving for an unexpected tang.

When adding pasta, use a pasta you love; bowtie or shells work great for capturing the broth. Keep the soup on a low simmer once assembled to prevent it from overcooking. Serve it immediately after cooking for the freshest taste, or let it sit for a bit to allow flavors to deepen.

Customize your soup with seasonal vegetables that you have on hand—spinach, mushrooms, or zucchini are delicious additions. Finally, always taste and adjust seasonings; every batch may require a different balance of spices.

Variations and Adaptations

For regional variations, consider adding Italian sausage instead of ground beef to introduce a spicier flavor profile. Seasonal adaptations could include butternut squash or pumpkin in the autumn for a sweeter touch. For dietary modifications, swap traditional pasta for gluten-free or spiralized veggies like zucchini to cater to various dietary needs.

Flavor variations could involve experimenting with different herbs; thyme, oregano, or even a dash of red pepper flakes for some heat could elevate your soup. Aside from texture modifications, try using gnocchi instead of pasta for a delightful twist. Presentation alternatives may include serving the soup in individual bread bowls for a fun, hearty experience.

Serving and Presentation Guide

To plate your Lasagna Soup like a pro, start by ladling the soup into rustic bowls or deep plates. Top with a generous dollop of ricotta cheese, and a sprinkle of fresh basil for a pop of color. Drizzling with olive oil or balsamic vinegar can enhance the presentation and flavor.

Consider serving the soup alongside garlic bread or a fresh green salad for a complete meal. When presenting, keep the focus on the soup’s rich colors; a few slices of melted mozzarella topping can create a delicious visual appeal. Serve the soup hot, ensuring a cozy dining experience.

Portion control is crucial for balanced servings. A mug or a small bowl can typically hold one serving, allowing for a generous yet manageable portion without overwhelming guests.

Wine and Beverage Pairing

For wine pairings, consider a rich red like Chianti or a lighter option such as Pinot Noir. These wines complement the tomato and cheese elements beautifully. If you’re looking for non-alcoholic alternatives, sparkling water with a twist of lemon can cleanse the palate nicely.

If you’re a coffee drinker, a rich espresso can enhance the flavors of the soup post-meal. For the best experience, serve the wine slightly chilled; this brings out the flavors without overpowering the dish.

Tea options like herbal chamomile can provide a soothing finish, while iced tea offers a refreshing complement during warmer months.

Storage and Shelf Life

Lasagna Soup can be stored in airtight containers in the refrigerator for up to five days. To reheat, simply warm it in a pot over medium heat, adding a splash of water or broth to regain desired consistency. For longer storage, Lasagna Soup freezes beautifully in freezer-safe containers for up to three months.

Signs of spoilage include an off smell or discoloration. Ensure leftovers are cooled completely before storing to extend freshness. For reheating, consider doing so in the microwave; always cover it to avoid splatters.

Make Ahead Strategies

To prepare ahead, you can chop vegetables and precook the meat on a different day, storing them separately until ready to make the soup. This strategy speeds up the cooking process significantly.

You can also assemble the soup without the pasta and refrigerate or freeze it. Just cook the pasta fresh when you’re ready to serve to maintain the ideal texture. Adding fresh herbs just before serving ensures vibrant flavors, elevating your dish.

Scaling Instructions

If you wish to halve the recipe, simply scale down the ingredients accordingly, maintaining the same cooking times. For doubling or tripling, using a large pot is essential. Monitor cooking times, as larger quantities may require additional simmering to reach the desired flavor infusion.

Adjustments may be necessary for specific ingredients—pasta can absorb broth more quickly in larger batches, so consider cooking it separately and adding it just before serving. Finally, if you’re preparing a large batch, ensure proper cooling before portioning and storing leftovers to avoid spoilage.

Nutritional Deep Dive

Lasagna Soup is not just delicious; it also provides a good balance of nutrients. Each serving typically offers a hearty portion of protein, essential for muscle building, along with complex carbohydrates from the pasta for sustained energy.

From a micronutrient perspective, you’ll find a wealth of vitamins and minerals, particularly vitamin C from the tomatoes and calcium from the cheeses. This dish can fit seamlessly into both balanced meals and those focused on weight management, ensuring you feel satisfied without overindulging.

For portion analysis, maintain mindful serving sizes to get the best nutritional benefits while enjoying the comforting flavors of each bowl.

Dietary Adaptations

Catering to gluten-free diets is achievable by substituting regular pasta with gluten-free pasta or zucchini noodles. For those who are lactose intolerant or vegan, look for dairy-free cheese alternatives that melt well or consider cashew cream to replicate creaminess.

Low-carb enthusiasts can enjoy a keto version by replacing the pasta with cauliflower rice. Similarly, the Paleo diet can be accommodated by omitting grains and using meat and vegetables only.

For those who follow the low-FODMAP diet, use specific ingredients that comply, ensuring a delicious yet gentle option for sensitive stomachs, thereby allowing everyone to enjoy this comforting dish.

Troubleshooting Guide

If your Lasagna Soup is too watery, consider cooking it longer to allow some of the liquid to evaporate, or add a bit more pasta to absorb excess broth. For flavor balance issues, add a pinch of salt or a splash of vinegar to brighten the taste.

If the soup becomes too thick, stir in some broth or water until the desired consistency is achieved. For equipment challenges, ensuring your pot is large enough during cooking will prevent spills or splattering.

Timing concerns can be resolved by prepping ingredients in advance, allowing for a smoother cooking process. Remember, every kitchen is different, so adjusting times and temperatures may require a little trial and error.

Recipe Success Stories

Readers have shared glowing feedback about their experiences with this Lasagna Soup, often recalling delightful family gatherings where it stole the show. Users have presented interesting variations, like the inclusion of seasonal vegetables or spice additions that have made the dish even more enjoyable.

Many have suggested combining this recipe with homemade garlic bread, resulting in an unforgettable dining experience. Photographers among our community recommend capturing the vibrant colors of the soup and topping with fresh basil to showcase this comforting dish.

Continued adaptations reported by users further highlight its versatility; many have found success in using different types of pasta, showcasing how the soup can remain exciting and new with each iteration.

Frequently Asked Questions

Can I make Lasagna Soup in advance? Yes, you can prepare the soup ahead of time, but it’s best to cook the pasta separately if you plan to store leftovers, as it can become mushy if left in the soup. Store any extras in airtight containers in the refrigerator.

What type of pasta works best for Lasagna Soup? Any pasta shape works well, but shorter or smaller pasta like shells, bowties, or elbows tend to hold up better in soup. Adjust cooking times based on the package instructions.

Can Lasagna Soup be frozen? Absolutely! Lasagna Soup freezes nicely. Just allow it to cool completely, then transfer it to freezer-safe containers. For best quality, consume within three months.

How do I reheat leftover soup? Reheat the soup on the stovetop over medium heat, adding a bit of water or broth to adjust the consistency if needed. You can also microwave it, stirring occasionally to ensure even heating.

Can I use different types of meat? Yes! You can use ground turkey, chicken, Italian sausage, or even plant-based proteins as substitutes in Lasagna Soup to suit your preferences.

Is this soup gluten-free? To make this soup gluten-free, simply replace the pasta with gluten-free pasta options or spiralized vegetables like zucchini.

Can I make this dish vegetarian? Of course! You can omit the meat and add more veggies to enhance the flavors. Consider using mushrooms or lentils for a hearty, protein-rich base.

What is the best way to serve Lasagna Soup? Serve it hot in deep bowls topped with ricotta cheese and fresh basil. Accompany it with crusty garlic bread for a satisfying meal.

How can I customize the flavor? Feel free to experiment with additional spices, such as red pepper flakes for heat or herbs like thyme and oregano for a more diverse flavor profile.

What can I substitute for ricotta cheese? If you’re looking for a substitute for ricotta, consider using cottage cheese, cream cheese, or vegan alternatives made from nuts. Each brings a different texture and flavor while maintaining creaminess.

Additional Resources

For those interested in creating more comforting dishes, check out related recipes like classic lasagna, baked ziti, or even a hearty spaghetti pie. Also, consider reviewing technique guides on pasta cooking and pasta-making from scratch for a deeper understanding of these culinary staples.

Explore ingredient information on tomatoes, cheeses, and herbs to enhance your knowledge about fresh components that can elevate your cooking even further. Don’t forget equipment recommendations to ensure you have the ideal tools for preparing pasta dishes at home.

For those interested in seasonal variations, look out for recipes that utilize fresh, seasonal vegetables, emphasizing the importance of cooking with what’s in season for the best flavors.

Join the Conversation

We encourage you to share your own experiences with Lasagna Soup on social media using the hashtag #LasagnaSoupGlory. Share your modifications, favorite pairings, and even doubtless your delectable photos. Engaging with our community elevates the recipe, inspiring others to try variations of this comforting dish.

We love to hear feedback or suggestions based on your cooking endeavors. Your reviews help the recipe grow and thrive, becoming even more accessible to those seeking to create a homemade culinary masterpiece.

Lastly, if you create a delicious variation of the recipe, let us know! Each adaptation contributes to expanding the scope of Lasagna Soup, creating a rich tapestry of flavors and experiences that everyone can enjoy.

The Recipe

Lasagna Soup

Serves: 6 servings

Prep Time: 15 mins

Cook Time: 30 mins

Total Time: 45 mins

Kitchen Equipment Needed

  • Large pot or Dutch oven
  • Wooden spoon or spatula
  • Measuring cups and spoons
  • Knife and cutting board

Ingredients

  • 1 lb ground beef
  • 1 onion, chopped
  • 3 cloves garlic, minced
  • 1 can (28 oz) crushed tomatoes
  • 4 cups beef or vegetable broth
  • 2 cups uncooked pasta (e.g., rotini or fusilli)
  • 1 cup ricotta cheese
  • 1 cup shredded mozzarella cheese
  • 1 tsp dried basil
  • Salt and pepper to taste
  • Fresh basil for garnish (optional)

Directions

  1. In a large pot, brown the ground beef over medium heat. Drain excess fat.
  2. Add the onion and garlic, sautéing until softened.
  3. Stir in the crushed tomatoes, broth, and dried basil; season with salt and pepper.
  4. Bring the mixture to a boil, then reduce heat and let it simmer for 20 minutes.
  5. Add the uncooked pasta and cook until al dente, about 10 minutes.
  6. Serve hot, topped with ricotta and mozzarella cheese, and garnish with fresh basil.

Recipe Notes

  • You can substitute ground beef with sausage or turkey for different flavors.
  • Feel free to add vegetables like spinach or zucchini for added nutrition.
  • For a creamy texture, you can mix the ricotta cheese with some reserved pasta cooking water before serving.

Easy African Chicken Curry – Flavorful & Comforting Recipe

African Chicken Curry: A Flavorful Journey in Every Bite

⚖️
Difficulty
Medium

⏲️
Prep Time
15 mins

🕒
Cook Time
30 mins

⏱️
Total Time
45 mins

🍽️
Servings
4 servings

Discover the vibrant, rich flavors of African Chicken Curry, a dish that not only delights the palate but also embodies the essence of African culinary traditions. The blend of spices, aromatic herbs, and tender chicken creates a symphony of taste that transports you to the heart of Africa with every bite. This dish is perfect for family gatherings or cozy dinners, where the warmth of spices and the allure of exotic flavors build a comforting atmosphere.

The beauty of African Chicken Curry lies in its diversity; with each region offering unique variations, this recipe captures the essence while allowing room for personalization. The spicy kick from the pepper, the nuttiness of peanuts, and the sweetness from coconut milk create a balanced dish that’s both satisfying and unforgettable. Whether it’s served over fluffy rice, with warm naan, or alongside fresh salads, this curry is sure to impress everyone around your dinner table.

Quick Recipe Highlights

  • Flavor Profile: This dish boasts a delightful combination of spicy, sweet, and earthy flavors, making it irresistible to curry lovers.
  • Texture: The tender chicken melds beautifully with the creamy sauce, while the vegetables add a satisfying crunch.
  • Aroma: A fragrant blend of spices, including curry powder and turmeric, envelops the kitchen with inviting notes.
  • Visual Appeal: The vibrant colors of the yellow curry contrasted with fresh herbs create an eye-catching presentation.
  • Skill Level Needed: With easy-to-follow instructions, even beginner cooks can successfully make this delicious dish.
  • Special Equipment: A large skillet or Dutch oven will work best for achieving the perfect curry consistency.

Recipe Overview

  • Difficulty Level: The recipe is categorized as medium difficulty due to the variety of ingredients and steps involved, yet it’s approachable for those familiar with basic cooking techniques.
  • Category: This recipe makes for a perfect main dish, ideally suited for dinner or festive occasions.
  • Cuisine: African Chicken Curry draws from rich African culinary traditions, utilizing spices and ingredients that highlight the diverse flavors across the continent.
  • Cost: Typically, the ingredients are affordable, with chicken, vegetables, and spices readily available in most markets.
  • Season: While this dish can be enjoyed year-round, it is particularly comforting during colder months.
  • Occasion: Perfect for family dinners, potlucks, or celebrations, this curry is designed to gather loved ones around the table.

Why You’ll Love This Recipe

The unique taste and texture of African Chicken Curry is sure to win over anyone who tries it. The harmonization of spices paired with the creaminess of coconut milk creates a dish that’s comforting yet exhilarating. Each bite is packed with flavor, making it a true culinary delight.

Convenience is another major benefit of this recipe. With relatively simple preparation and cooking, you can serve up a plateful of delicious curry without spending the whole day in the kitchen. Plus, it holds well for leftovers, saving time on future meals.

From a nutritional perspective, this dish is a powerhouse. Packed with protein from chicken and essential vitamins from vegetables, each serving offers a balanced meal that supports a healthy lifestyle. Furthermore, using natural ingredients ensures that you’re serving up goodness without unnecessary additives.

African Chicken Curry is also an excellent dish for social gatherings. The enticing aroma wafting through your home will draw people to the kitchen, making it perfect for serving communal style. It encourages sharing and enjoying togetherness, allowing everyone to savor the amazing flavors.

Lastly, the cost-effectiveness of this recipe cannot be overlooked. Utilizing budget-friendly ingredients while offering a gourmet experience is precisely what makes this curry such a gem. You can create a feast without breaking the bank.

Historical Background and Cultural Significance

Originating from various regions in Africa, chicken curry showcases the melding of different culinary styles. Incorporating spices such as ginger, garlic, and cumin is a nod to ancient trading routes that spread flavors across the continent. Each area has its local twist, often integrating indigenous ingredients, which further diversifies the dish’s identity.

Culturally, curry holds great importance in many African families as a recipe passed down through generations. It serves as a connection to heritage, and for many, cooking curry is an act of love. Gathering around a pot of curry illustrates the significance of sharing meals as a community.

Over time, the recipe has evolved, inspired by various cultures that have influenced African cuisine. From Indian to Arabian spices, the integration of these elements has brought about a rich culinary tapestry. It’s fascinating to see how a basic concept can transform into endless variations.

Regional variations abound, with each country adding its own flair. For instance, South African curries often feature chutneys for sweetness, while East African versions might include coconut milk. This adaptability ensures that African Chicken Curry continues to be celebrated globally.

Ingredient Deep Dive

Chicken is the star of this recipe, favored for its versatility and ability to absorb flavors beautifully. Traditionally, it represents a source of protein in many African diets. Nutritionally, chicken is low in fat and high in necessary nutrients, making it a staple in households.

Spices play a crucial role in this dish, particularly curry powder, which brings warmth and flavor. Historically, spices have been valued for both their taste and medicinal properties. When selecting spices, fresh ones will deliver the most vibrant flavors. Store them in a cool, dark place to maintain their potency.

Coconut milk adds creaminess and sweetness, essential for balancing the curry’s heat. This ingredient has its roots in tropical regions, often linked to traditional cooking methods. When choosing coconut milk, opt for canned varieties with no additives for maximum flavor. It can be stored in the pantry until opened, after which it’s best refrigerated.

Peanuts, sometimes used for garnish, offer a crunchy texture and deepen the flavor profile. They are high in healthy fats and protein, making them a great addition. Purchase unsalted peanuts for the best flavor, and remember to check for allergies if serving to guests.

Common Mistakes to Avoid

  • Overcooking chicken: Ensure that you remove the chicken once it’s fully cooked to avoid dryness. Aim for an internal temperature of 165°F for perfect juiciness.
  • Using stale spices: Fresh spices are key to vibrant flavors. Regularly check expiration dates and replace older spices for best results.
  • Skipping the aromatic base: The combination of onions, garlic, and ginger provides the fundamental flavors for curry. Neglecting this step can lead to a bland dish.
  • Not simmering long enough: Allow the sauce to simmer to develop flavors thoroughly. A rushed cook doesn’t allow the spices to meld properly.
  • Adding too much salt: Taste your dish before adjusting seasoning. It’s easy to oversalt, especially if you’re using salted ingredients like broth.
  • Skipping the garnish: Fresh herbs and garnishes not only add color but enhance the overall taste. Don’t overlook this final touch!
  • Using low-quality coconut milk: The richness of genuine coconut milk will elevate your dish. Always opt for high-quality brands.
  • Neglecting texture: Balance is essential in curry. Consider adding vegetables for a contrasting crunch that compliments the tender chicken.

Essential Techniques

One crucial technique in making African Chicken Curry is building the flavor base by sautéing aromatics. Starting with onions, garlic, and ginger in oil allows essential oils to release. This foundation adds depth to the final dish and creates an inviting aroma. Watch for the onions to become translucent before adding spices.

Simmering is another vital technique. After adding the coconut milk and chicken, let the curry gently simmer. This method allows flavors to meld and develop. Look for bubbling around the edges and a gentle reduction in liquid for cues that your curry is perfect.

Pro Tips for Perfect African Chicken Curry

To achieve the perfect balance of flavors, adjust the spice levels gradually. Start with a smaller amount, and taste as you go. If the essence is too strong, add coconut milk for sweetness and creaminess.

Use fresh ingredients whenever possible, especially herbs. They enliven the dish and provide brightness that store-bought alternatives can lack. Fresh cilantro, for instance, makes a world of difference.

For added complexity, explore different nut butters, such as almond or cashew, to blend with coconut milk, enhancing the dish’s richness while maintaining its authenticity.

Marinating the chicken in spices and yogurt for a few hours will infuse it with flavor and tenderize it beautifully. This technique yields a juicier result in the finished curry.

Experiment with vegetable additions. Bell peppers, spinach, or carrots not only boost nutritional value but also introduce new textures and colors to the dish.

Serve with traditional sides like rice or flatbreads, ensuring guests can soak up the decadent sauce. Presentation matters; use vibrant plates to highlight the dish’s colors.

Don’t hesitate to customize with your favorite ingredients, knowing that many African Chicken Curry variations exist. Add beans for protein or switch up the vegetables based on seasonal availability.

Variations and Adaptations

You can explore the rich tapestry of regional variations with African Chicken Curry. For instance, in West Africa, you might find a peanut butter version adding a nutty richness. In East Africa, the use of coconut milk creates a tropical aroma and creamy consistency that is hard to resist.

Seasonal adaptations can make this dish even more enjoyable. In summer, add fresh zucchini and summer squash for a lighter touch, while in winter, root vegetables like sweet potatoes can add heartiness.

For dietary modifications, consider replacing chicken with chickpeas or lentils for a vegetarian option. This adaptation ensures that those on plant-based diets don’t miss out on the delectable flavors.

If you want a different flavor profile, experiment with spices. A hint of cinnamon can bring warmth, or a touch of lime zest can brighten the overall taste. Don’t shy away from adjusting the heat level; add more chili for spice lovers or omit entirely for a milder take.

Texture modifications can enhance the dish; consider using shredded chicken instead of chunks for a different mouthfeel. Alternatively, experiment with cooking times to create a thicker or brothier curry based on personal preference.

Presentation can also vary—serve in rustic bowls topped with toasted coconut flakes or chopped nuts for added visual appeal. Garnishing with fresh herbs is essential for enhancing both flavor and presentation.

Serving and Presentation Guide

For plate presentation, layer fluffy rice or a flavorful grain like quinoa as the base. Serve the curry on top, allowing vibrant colors to shine through. Adorn with fresh cilantro and a drizzle of coconut cream for an enticing look.

Garnishing ideas include scattering toasted peanuts or sliced green onions for a burst of color and texture. Traditional accompaniments can range from homemade naan to simple crusty bread, allowing people to savor every last bit of the sauce.

Modern serving suggestions might involve offering portions in individual bowls to fuel a more intimate dining experience. This method also encourages guests to enjoy their servings at their own pace.

Regarding temperature, serve the curry warm but avoid overheating, which could degrade the coconut milk’s rich flavor. A final note on portion control: consider serving smaller portions and allowing guests to come back for seconds, enhancing the communal experience.

Wine and Beverage Pairing

For perfect wine pairings, consider a chilled white wine like Sauvignon Blanc. Its acidity complements curry’s richness while balancing the spice notes. For a red option, a light-bodied Pinot Noir can add an interesting contrast without overshadowing the curry’s flavors.

Non-alcoholic alternatives include spiced chai or a refreshing ginger-infused lemonade. These beverages echo the spices found in the dish, making them suitable companions for your meal.

If coffee or tea is your preference, try a mild black tea infused with spices for a complementary pairing. Serve it hot alongside your meal to enhance the dining experience.

Serving beverages at the appropriate temperature is essential. White wines should be chilled, while red wines can be slightly cooler than room temperature to help ease their extraction of flavor alongside the spiced dish.

Storage and Shelf Life

Proper storage methods are vital for maintaining the integrity of African Chicken Curry. After it cools, store the curry in an airtight container in the refrigerator. Typically, it remains fresh for up to four days when stored correctly.

Ensure that the temperature requirements are adhered to; never leave cooked curry out at room temperature for longer than two hours. With proper refrigeration, you should heat leftovers thoroughly to an internal temperature of 165°F before serving.

Opt for glass or BPA-free plastic containers for effective storage. Glass containers are particularly useful as they won’t stain with curry’s vivid colors and are microwave safe.

Signs of spoilage include off smells or unexpected changes in texture. If the curry appears grainy or has a sour smell, it’s best to err on the side of caution and discard it.

When considering freezing, the curry should be cooled completely first and then packed carefully to avoid freezer burn. It can typically last for up to three months in the freezer, and reheating should take place on the stovetop for a more even warm-up.

Make Ahead Strategies

Prep timeline is crucial for making this recipe seamlessly. Consider marinating the chicken the night before for the best flavor infusion. This strategy scales your prep time wonderfully and allows the spices to permeate the meat deeply.

Storage between steps is feasible as well; pre-chop your vegetables and store them in the fridge to hasten the cooking process. That way, you can pull them out and toss them in as needed, cutting down on time during your actual cooking routine.

Quality impact assessment is essential—flavors continue to develop and meld as the ingredients sit together. You can benefit from making this dish a day in advance, allowing it to intensify overnight in the fridge.

Assembly tips involve preparing components like rice or sides ahead of time so that when it comes time to serve, you can focus on the final touches of assembly rather than cooking everything simultaneously. This strategy keeps stress levels down in the kitchen.

When it comes to reheating, a gentle method on the stovetop with a splash of water will give you the best results. This approach helps retain the creaminess of the sauce and avoids burning.

Consider adding fresh herbs right before serving for a final touch; this adds brightness and elevates the dish’s presentation significantly.

Scaling Instructions

If you need to halve the recipe, everything should simply be reduced proportionally. Keep in mind the cooking times may decrease slightly, especially for the simmering steps, so taste and adjust accordingly.

Doubling or tripling the recipe can be just as easy; larger pots or several skillets may be necessary to accommodate increased quantities. Adjust timings slightly for larger batches as they may cook more slowly.

When adjusting equipment, ensure that you have enough pots and pans to manage the increased ingredients. Ensure not to overcrowd your cooking vessels to maintain even cooking.

Timing modifications are straightforward; keep an eye on the aroma—when the onions are translucent and everything smells wonderfully fragrant, it’s likely time to add your chicken.

Consider storage requirements; larger quantities equate to a need for larger containers. It’s also essential to cool food safely before refrigeration to maintain its quality.

Nutritional Deep Dive

A macro breakdown reveals that African Chicken Curry is rich in proteins from chicken, healthy fats from coconut milk, and carbohydrates, especially if served with rice. This balance makes for an excellent energy source, ensuring satiation.

In terms of micronutrient analysis, the dish is packed with vitamins A and C from vegetables, alongside essential minerals like zinc and iron from chicken. Each serving provides a nutritious boost essential for healthy bodily functions.

Health benefits extend beyond simple nutrition; the spices used can offer anti-inflammatory properties and contribute to heart health. The inclusion of herbs and spices adds various phytochemicals that enhance overall wellness.

Dietary considerations are essential, especially for those monitoring specific nutritional intakes. This dish can be adapted to suit various diets, ensuring everyone can enjoy a flavorful meal without compromising their health needs.

For better weight management, keep portions in check and couple the curry with fiber-rich grains or greens. This approach helps to increase fullness while providing necessary nutrients to fuel an active lifestyle.

Dietary Adaptations

For gluten-free modifications, ensure that all ingredients, including condiments and spices, are certified gluten-free. This curry can be safely enjoyed without the worry of cross-contamination.

Dairy-free adaptations are seamless; coconut milk naturally replaces dairy while offering a creamy mouthfeel. This aspect makes the recipe suitable for those with lactose intolerance or dairy allergies.

Vegans can replace chicken with chickpeas or tofu, allowing them to soak up the delicious sauce while providing a protein hit. Adjust seasoning accordingly to suit the change in texture and flavor.

Low-carb versions can substitute rice with cauliflower rice, providing a lighter complement to the curry without sacrificing taste or enjoyment.

For keto enthusiasts, replacing regular coconut milk with a lower-carb alternative keeps carbohydrate content minimal while retaining flavor.

Paleo dieters will find this dish appealing since it’s primarily whole, natural ingredients. Ensure that all added spices and sauces are compliant with the diet.

A Low-FODMAP version can be achieved by using lactose-free coconut milk and carefully selecting low-FODMAP vegetables. This adaptation is beneficial for those with digestive restrictions.

Troubleshooting Guide

If you encounter texture issues, such as the sauce being too thin, consider simmering longer to reduce the liquid. Alternatively, add an additional spoonful of peanut butter to thicken the mix.

For flavor balance, if the dish is too spicy, incorporate more coconut milk to cut through the heat. If it’s too bland, enhance with salt, pepper, or extra spices to elevate the flavors.

Temperature problems arise in various forms; if your rice is cold, reheat it separately and serve it warm alongside your curry. Keep the sauce warm in a low-temperature oven while plating.

Equipment challenges may occur if using inadequate cookware. Ensure your pot is large enough to hold all ingredients without overcrowding them. This method promotes even cooking and prevents burning.

Ingredient substitutions may impact flavor, so always taste as you go to adjust spices if needed. Changing chicken for tofu might require different cooking times and approaches.

Timing concerns, such as undercooked chicken, should be addressed by checking the internal temperature regularly and allowing additional cooking time.

Recipe Success Stories

Community feedback highlights the ease and richness of this dish, with many finding it a family favorite. Readers often report adapting the recipe to fit their own culinary styles, introducing new vegetables or spices to personalize their experience.

Variation successes often emerge from experimentation. Many adapt African Chicken Curry into vegetarian versions, finding that lentils and chickpeas provide a hearty backbone while still marrying well with the spicy sauce.

Adaptation stories showcase individuals turning this dish into meal prep options, cooking in bulk for easy lunches throughout the week. The flavors develop beautifully over time, making it ideal for storing.

Reader suggestions often lead to the discovery of added spices or techniques that enhance taste, revealing a growing community engaged with the recipe through shared experiences and adaptations.

Photography tips often include using natural lighting to highlight the dish’s vibrant colors. Presenting in rustic dishware can also enhance the visual appeal, making it more inviting.

Frequently Asked Questions

Q1: Can I use frozen chicken for this recipe?

Yes, you can use frozen chicken. However, ensure it is fully thawed before cooking to achieve even texture and flavor. For the best results, plan ahead and thaw in the refrigerator overnight.

Q2: How do I make this dish spicier?

To add more heat, incorporate fresh chopped chilies or increase the amount of chili powder used in the recipe. Alternatively, consider using a hotter curry powder blend to elevate the spice level.

Q3: Can I meal prep this dish?

African Chicken Curry is an excellent option for meal prepping! You can store it in the refrigerator for up to four days or freeze it for up to three months. Reheat thoroughly before serving.

Q4: Is this recipe good for kids?

Yes! This curry can be mild and flavorful, making it appealing to children. Adjust the spice level to suit their taste, and serve with rice to balance flavors.

Q5: What if I don’t have curry powder?

If you don’t have curry powder, you can create your own blend using turmeric, cumin, coriander, and a pinch of cinnamon. This mixture will provide a similar flavor profile.

Q6: Can I add more vegetables?

Absolutely! Feel free to load up your African Chicken Curry with any vegetables you like, such as bell peppers, spinach, or peas, for added nutrition and texture.

Q7: What can I serve with this curry?

Serve it with fluffy rice, quinoa, or warm flatbreads. Fresh salads with citrus dressing also balance the richness of the curry beautifully.

Q8: Can I make this dish vegan?

Yes! Substitute the chicken with chickpeas or tofu, and use coconut milk as the base. Adjust the flavors as needed to maintain its deliciousness.

Q9: How do I store leftovers?

Cool the curry completely before transferring it to an airtight container. It can be refrigerated for up to four days or frozen for three months. Reheat thoroughly before enjoying.

Q10: How long does this dish last?

When stored correctly, African Chicken Curry can last in the fridge for up to four days and in the freezer for three months without losing flavor.

Additional Resources

Explore related recipes that increase your knowledge of African cuisine, such as Spicy Lentil Stew or Vegetable Tagine, to delight your taste buds. Each brings unique flavors without straying from traditional roots.

Consider technique guides to help improve your cooking skills; mastering spice blending or vegetable preparation can elevate your overall culinary prowess.

Ingredient information is also crucial. Understanding the health benefits of spices common in African cuisine can enrich your cooking experience and guide you through selections.

For equipment recommendations, investing in a high-quality skillet or Dutch oven can enhance your cooking performance, ensuring your dish is cooked evenly without burning.

Lastly, keep an eye out for seasonal variations that bring fresh ingredients to your table, optimizing flavors with the freshest produce available.

Join the Conversation

We love hearing your feedback and stories! Share your experiences with African Chicken Curry on our social media channels. Your insights and adaptations can inspire others to try this flavorful dish.

Capture and showcase your dishes with beautiful photography; don’t forget to use natural lighting for a stunning effect. Engaging with the community through recipe reviews allows everyone to benefit from shared culinary adventures.

We encourage you to explore variations and encourage creativity in the kitchen while creating this dish. Every spoonful has the potential to be a new experience, so don’t hesitate to make it your own.

The Recipe

African Chicken Curry

Serves: 4 servings

Prep Time: 15 mins

Cook Time: 30 mins

Total Time: 45 mins

Kitchen Equipment Needed

  • Large skillet or Dutch oven
  • Cutting board
  • Chef’s knife
  • Measuring cups and spoons
  • Wooden spoon

Ingredients

  • 2 tbsp vegetable oil
  • 1 lb chicken thighs, boneless and skinless, cut into pieces
  • 1 onion, chopped
  • 2 cloves garlic, minced
  • 1 inch ginger, grated
  • 2 tbsp curry powder
  • 1 can (15 oz) coconut milk
  • 1 cup chicken broth
  • 1 cup diced tomatoes (fresh or canned)
  • 1/2 cup peanut butter
  • Salt and pepper to taste
  • Fresh cilantro for garnish

Directions

  1. Heat vegetable oil in a large skillet over medium heat. Add onions, garlic, and ginger, sauté until fragrant.
  2. Add chicken pieces and brown them on all sides, cooking for about 5-7 minutes.
  3. Stir in curry powder and cook for another minute, ensuring the chicken is well coated.
  4. Pour in coconut milk, broth, and diced tomatoes. Bring the mixture to a simmer.
  5. Reduce heat and let it simmer for 20 minutes until chicken is cooked through and tender.
  6. Stir in peanut butter, season with salt and pepper, and mix well.
  7. Serve warm, garnished with fresh cilantro.

Recipe Notes

  • You can substitute chicken with chickpeas or tofu for a vegetarian version.
  • Feel free to adjust the spice level to your liking; add more curry powder for extra heat.
  • This curry tastes even better the next day, so consider making it ahead.

Easy Pineapple Chicken and Rice – A Flavorful One-Pan Meal

Pineapple Chicken and Rice: A Tropical Delight for Every Meal

⚖️
Difficulty
Easy

⏲️
Prep Time
15 mins

🕒
Cook Time
30 mins

⏱️
Total Time
45 mins

🍽️
Servings
4

Pineapple Chicken and Rice is not just a meal; it’s an experience that embodies vibrant flavors and tantalizing textures. This refreshing dish combines tender chicken pieces sautéed to perfection with juicy, sweet pineapple chunks, making each bite a delightful journey to a tropical paradise. The fragrant jasmine rice serves as the perfect canvas, absorbing the rich, savory flavors of the dish, making it a satisfying meal that is both nutritious and appetizing. With its beautiful presentation and comforting essence, Pineapple Chicken and Rice is a perfect choice for family dinners or gatherings.

Imagine the aroma wafting through your kitchen as the sweetness of pineapple mingles with the savory scent of chicken and spices, awakening your senses. The colorful medley of vibrant green bell peppers and golden pineapple creates an eye-catching presentation, bringing joy to mealtime and enticing everyone to the table. Whether you’re having a cozy dinner or entertaining guests, this dish is sure to impress with its delightful combination of flavors, textures, and visual appeal.

Quick Recipe Highlights

  • Flavor Profile: This dish harmonizes sweet and savory notes, with pineapple adding a refreshing touch to the succulent chicken.
  • Texture: The juicy chicken and tender pineapple contrast beautifully with the fluffy rice, creating a satisfying mouthfeel.
  • Aroma: The combination of spices, chicken, and pineapple fills the air with an enticing tropical aroma that invites everyone to enjoy a delicious meal.
  • Visual Appeal: With its colorful medley of ingredients, this dish is not only delicious but also a feast for the eyes, making it perfect for any occasion.
  • Skill Level Needed: This recipe is beginner-friendly, making it accessible for cooks of all experience levels.
  • Special Equipment: All you need is a skillet, a cutting board, and a rice cooker or pot to get started on this delightful meal.

Recipe Overview

  • Difficulty Level: Easy, perfect for novice cooks looking to enhance their culinary skills while impressing friends and family.
  • Category: This dish fits perfectly into both the dinner and comfort food categories.
  • Cuisine: Drawing inspiration from Asian cuisine, it melds sweet and savory flavors that are iconic in tropical cooking.
  • Cost: Ingredients are affordable, and the dish can be made for under $15, making it budget-friendly.
  • Season: This recipe shines year-round but is especially refreshing during the hot summer months when pineapple is in season.
  • Occasion: Great for family dinners, casual lunches, or even festive gatherings with friends.

Why You’ll Love This Recipe

This Pineapple Chicken and Rice recipe is not only a visual treat but also a flavor-packed delight that you’ll fall in love with. The combination of sweet, juicy pineapple and tender chicken creates a dish that pleases every palate. The rice absorbs the flavors beautifully, ensuring that every bite is bursting with taste. Not only is it satisfying, but the added benefit of healthy ingredients makes it a guilt-free choice that you can serve with pride.

Convenience is another reason to love this recipe. With a preparation time of just 15 minutes and a cook time of 30 minutes, you can whip up a hearty meal quicker than you think. It’s perfect for busy weeknights or spontaneous gatherings. The ingredients are common staples found in most kitchens, which means you can easily put this dish together without a special trip to the grocery store.

Nutritionally, Pineapple Chicken and Rice packs quite the punch. The chicken is a lean source of protein, while pineapple adds a burst of vitamins and minerals, including vitamin C and manganese. Coupled with the fiber-rich rice and vegetables, this dish offers a balance of macronutrients, making it both filling and beneficial for health-conscious individuals.

When it comes to social gatherings and entertaining, this dish serves as a perfect conversation starter. It’s visually appealing and bursting with flavor, making it an instant hit among guests. Serving Pineapple Chicken and Rice at your next gathering will show off your culinary skills while providing your friends and family with something new and exciting to try.

Lastly, cost-effectiveness is a significant factor that can’t be overlooked. This dish is not only delicious but also inexpensive, as it allows you to create a beautiful meal without breaking the bank. With simple ingredients and straightforward steps, you can serve a nutritious and delightful meal that leaves everyone satisfied.

Historical Background and Cultural Significance

The origin of Pineapple Chicken can be traced back to the fusion of various culinary traditions, particularly those influenced by tropical regions. Pineapples, native to South America, were introduced to the culinary world in Asia, where they became a popular ingredient in savory dishes. This dish symbolizes culinary blending, showcasing how imported ingredients can elevate local flavors.

In many Southeast Asian cultures, combining sweet and savory ingredients is a common practice. Paring pineapple with chicken not only emphasizes this culinary trend but also reflects a broader cultural appreciation for balance in flavors. The incorporation of rice serves not only as a staple but also as a medium that harmonizes the various taste profiles.

Over the years, the recipe has evolved, with countless variations emerging across different regions and households. While the core elements remain the same, chefs around the globe have adapted the dish to reflect their regional flavors and ingredients, showcasing its versatility.

Regional variations further enhance this dish’s appeal. In some parts of Asia, the recipe might be altered to include additional spices or local vegetables, expanding its flavor profile and catering to regional tastes. It stands as a testament to how individual cooks interpret traditional recipes, adding their unique touches while preserving the essence of the original dish.

Ingredient Deep Dive

Chicken
Chicken is a key protein source in numerous cultures around the world, adored for its versatility and ability to absorb flavors. Nutritional benefits of chicken include high protein content, essential vitamins, and minerals. When selecting chicken for this dish, look for fresh, high-quality cuts that are free of any discoloration. Proper storage in airtight containers can keep chicken fresh, while it can also be effectively frozen for longer shelf life. If needed, tofu or tempeh can serve as excellent plant-based substitutes.

Pineapple
Pineapple not only adds a tropical flair to dishes but also carries cultural significance as a symbol of hospitality in many regions. This nutrient-dense fruit is rich in vitamins C and B6 and provides a delightful sweetness that balances savory ingredients. Selecting a ripe pineapple involves checking for golden color and a fragrant smell. Keep uncut pineapples at room temperature, while cut pieces should be stored in airtight containers in the refrigerator. If unavailable, canned pineapple or other fruits can work as suitable substitutes.

Common Mistakes to Avoid

  • Overcooking the chicken can lead to dryness; ensure it reaches an internal temperature of 165°F (75°C).
  • Using under-ripe pineapple results in a less sweet and flavorful dish; always choose ripe, sweet pineapple for the best results.
  • Failing to let the rice rest after cooking may affect the texture; allow it to steam for a few minutes before serving.
  • Skipping marination can diminish flavor; allow chicken to marinate for at least 30 mins for enhanced taste.
  • Not balancing the flavors can result in an uninteresting dish; taste and adjust seasoning throughout the cooking process.
  • Using too much liquid can make the rice mushy; stick to recommended measurements for a fluffy result.
  • Cutting ingredients unevenly can cook them inconsistently; practice cutting chicken and vegetables into uniform sizes.
  • Forgetting to allow the dish to cool before storing can introduce bacteria; let it cool at room temperature before refrigerating.
  • Using leftover rice can sometimes affect flavor; freshly made rice is preferred for the best dish quality.
  • Ignoring presentation may lessen the appeal; take a moment to plate beautifully before serving.

Essential Techniques

Marination
Marinating the chicken is essential for infusing it with flavor, creating a juicy and tender texture. To master this technique, ensure the chicken is coated evenly with the marinade and allowed to rest in the refrigerator for at least 30 minutes. Pay attention to the acidity in your marinade; over-marinating can lead to a mushy texture.

Sautéing
Sautéing the chicken and vegetables at high heat quickly brings out their natural flavors while retaining essential nutrients. To master this technique, ensure the pan is hot before adding ingredients, and avoid overcrowding to prevent steaming. Watch for visual cues, such as browning on the chicken, to indicate it’s done perfectly without overcooking.

Pro Tips for Perfect Pineapple Chicken and Rice

1. Always use fresh spices to elevate flavor; stale spices can significantly impact taste.
2. Adjust sweetness by balancing pineapple with a touch of soy sauce or lime juice for a flavor lift.
3. Cook rice separately for perfect texture; adding it directly to the pan can lead to gummy rice.
4. Garnish with fresh herbs like cilantro or green onions for added flavor and color.
5. Consider adding bell peppers or peas for extra nutrition and a pop of color.
6. Rest the cooked chicken before slicing; this retains juices for a more tender bite.
7. Serve with lime wedges to add a fresh finish that enhances the tropical flavors.
8. Experiment with different rices, such as brown or jasmine, for varied texture and flavor profiles.

Variations and Adaptations

This recipe lends itself well to regional variations, such as adding teriyaki sauce for a richer flavor or incorporating tropical fruits like mango for a different sweetness profile. Seasonal adaptations can include using fresh vegetables based on what’s available, such as snap peas in the spring or carrots in the winter. For dietary modifications, replace chicken with tofu or tempeh for a vegetarian option, or adjust the seasoning to align with your unique preferences. Texture modifications may involve incorporating cashews for added crunch or topping with crunchy fried onions for an extra layer of flavor.

Serving and Presentation Guide

When plating Pineapple Chicken and Rice, begin with a mound of rice on the plate, then gently layer the chicken and pineapple mixture atop it. Drizzle some of the sauce around the plate for a beautiful, artistic touch. Garnish with fresh herbs, and consider adding a lime wedge on the side for added visual appeal. To enhance flavors, serve warm and ensure portions are balanced for an enjoyable dining experience.

Wine and Beverage Pairing

For a delightful pairing, consider serving Riesling or Sauvignon Blanc, both of which complement the sweetness of Pineapple Chicken beautifully. Alternatively, a light, fruity non-alcoholic spritzer can mirror the tropical notes of the dish. If coffee is preferred following the meal, a light roast will round out the flavors nicely without overshadowing the sweetness.

Storage and Shelf Life

To store Pineapple Chicken and Rice, cool it to room temperature before placing it in an airtight container. It can last in the refrigerator for up to three days. Ensure to reheat thoroughly before consuming; the ideal method is in a microwave or on the stovetop with a touch of water to prevent dryness. Freezing is possible for up to three months, but it’s best to freeze the chicken and rice separately to maintain texture.

Make Ahead Strategies

For busy days, prepare the marinade a day in advance, and let the chicken sit overnight for maximum flavor. You can also cook the rice ahead and store it in the refrigerator, allowing you to whip up this dish at a moment’s notice. When ready, simply sauté the chicken and add the previously cooked rice along with the pineapple mixture for a quick assembly. Adding fresh herbs right before serving keeps them vibrant and enhances freshness.

Scaling Instructions

Easily halve or double the recipe by adjusting ingredient quantities while maintaining the same preparation steps. Be mindful of the cooking time, as larger batches may require a bit more time to cook evenly. Ensure you have sufficient cookware if scaling up significantly and consider cooking in batches to prevent overcrowding the pan, which can affect cooking quality.

Nutritional Deep Dive

Pineapple Chicken and Rice provides a nutritious balance of macronutrients, including protein from chicken, fiber from rice, and vitamins from pineapple. Each serving contains a healthy amount of carbohydrates, making it an excellent source of energy. The combination also offers numerous micronutrients such as Vitamin C, Iron, and Potassium, contributing to overall health and wellness. Mindful of portion control, it’s beneficial for those managing weight when served in appropriate servings.

Dietary Adaptations

For a gluten-free option, substitute soy sauce with tamari. Dairy-sensitive individuals can enjoy this dish as it naturally does not include dairy products. Additionally, vegans can easily replace chicken with tofu and use vegetable broth for the rice. Low-carb and keto dieters might opt for cauliflower rice instead of traditional rice, retaining the balance of flavors without high carbohydrate content.

Troubleshooting Guide

In the case of texture issues with the chicken, ensure it’s not overcooked and allows it to rest after cooking. For flavor balance, simply adjust seasoning with salt or sugar as needed. If the rice turns out too sticky, opt for rinsing the rice before cooking to remove excess starch. Should equipment challenges arise, always check the functionality of your stove and cookware to ensure optimal cooking performance.

Recipe Success Stories

Readers have shared numerous feedback highlighting the dish’s simplicity and delightful taste. Many have embraced variations, using seasonal fruits or vegetables, receiving rave reviews from family gatherings. Photography tips for capturing the dish beautifully focus on natural lighting and vibrant plating, ensuring the meal looks as good as it tastes.

Frequently Asked Questions

Can I use frozen chicken for this recipe?
Yes, frozen chicken can be used; just ensure it’s fully thawed before marinating and cooking to ensure even cooking.

What other fruits can I add to this dish?
Besides pineapple, consider adding mango, bell peppers, or even diced apples for a unique twist.

Is this dish suitable for meal prep?
Absolutely! It stores well in the refrigerator and can be reheated, making it perfect for meal prep throughout the week.

Can I make this dish in a slow cooker?
Yes, simply add marinated chicken, pineapple, and rice to the slow cooker with appropriate liquids, and cook on low for 4-6 hours.

How spicy is this dish?
This recipe is not inherently spicy, but you can add chili flakes or hot sauce to taste if you prefer some heat.

Does this dish freeze well?
Yes, Pineapple Chicken and Rice can be frozen for up to three months, stored in an airtight container.

What can I serve with this dish?
Consider pairing it with a simple green salad or steamed vegetables to complement the meal.

How do I prevent the chicken from drying out?
Ensure the chicken is marinated and monitor cooking closely; it should be cooked to an internal temperature of 165°F.

Can I skip marinating the chicken?
While you can skip it, marinating enhances flavor significantly, so it’s highly recommended.

What’s the best way to reheat leftovers?
The microwave is quick for reheating, but using a skillet on medium heat with a splash of water can help maintain texture.

Additional Resources

For those looking to expand their culinary skills, explore related recipes such as Sweet and Sour Chicken or Thai Coconut Curry. Additionally, consider technique guides focusing on sautéing or stir-frying to enhance your abilities. Information on ingredient substitutions can also provide intrigue and ensure the perfect fit for your preferences.

Join the Conversation

We invite you to share your Pineapple Chicken and Rice experience on social media. Snap a picture of your creation, and consider tagging us for a chance to be featured in our community highlights. We love hearing your variations, feedback, and tips to improve this delightful dish for everyone to enjoy.

The Recipe

Pineapple Chicken and Rice

Serves: 4

Prep Time: 15 mins

Cook Time: 30 mins

Total Time: 45 mins

Kitchen Equipment Needed

  • Skillet
  • Cutting Board
  • Rice Cooker or Pot

Ingredients

  • 1 pound of chicken breast, cubed
  • 1 cup fresh pineapple, diced
  • 1 cup jasmine rice
  • 1 green bell pepper, sliced
  • 3 tablespoons soy sauce
  • 2 tablespoons vegetable oil
  • 1 tablespoon ginger, minced
  • 2 cloves garlic, minced
  • Salt and pepper to taste

Directions

  1. In a bowl, combine the cubed chicken with soy sauce, ginger, garlic, salt, and pepper. Let it marinate for at least 30 minutes.
  2. While the chicken is marinating, cook the rice according to package instructions.
  3. In a large skillet, heat vegetable oil over medium-high heat. Add the marinated chicken, cooking until browned and fully cooked, about 7-10 minutes.
  4. Stir in the diced pineapple and sliced bell pepper, cooking for an additional 5-7 minutes until heated through.
  5. Once rice is cooked, fluff it with a fork and serve topped with the pineapple chicken mixture.

Recipe Notes

  • For added spice, consider adding crushed red pepper flakes during the cooking process.
  • This dish works well with brown rice or even cauliflower rice for a low-carb option.
  • You can substitute chicken with tofu or shrimp as a different protein source.

Easy Garlic Mushrooms Cauliflower Skillet – Ready in 20 Min

Garlic Mushrooms Cauliflower Skillet: A Flavorful Vegetarian Delight

⚖️
Difficulty
Easy

⏲️
Prep Time
10 mins

🕒
Cook Time
15 mins

⏱️
Total Time
25 mins

🍽️
Servings
4

Savor the vibrant flavors of our Garlic Mushrooms Cauliflower Skillet, a dish that transforms ordinary vegetables into an extraordinary experience. This easy-to-make recipe combines earthy mushrooms with nutrient-packed cauliflower, all enriched with the bold taste of garlic and aromatic herbs. Whether you’re looking for a quick weeknight meal or a vibrant side dish for your next gathering, this skillet meal delivers on both flavor and nutrition.

Imagine your kitchen filled with the inviting aroma of sautéing garlic, coaxing the natural sweetness from mushrooms and cauliflower as they caramelize beautifully in the pan. The vegetables take on a delightful golden hue, while the garlic creates a depth of flavor that enhances the dish and tickles your taste buds. Perfectly seasoned and served over a bed of quinoa or a salad, this Garlic Mushrooms Cauliflower Skillet is not just a feast for the palate but also a visually appealing dish that will impress your family and friends.

Quick Recipe Highlights

  • Flavor Profile: A delightful blend of savory garlic and earthy mushrooms, complemented by the subtle nuttiness of cauliflower, creating a harmonious and satisfying taste.
  • Texture: The key to this recipe’s success is its varied textures—crisp-tender cauliflower combined with the meaty texture of mushrooms ensures every bite is exciting.
  • Aroma: The beautiful scent of sautéed garlic mingles with the hearty scent of roasted mushrooms, filling your kitchen with mouthwatering aromas.
  • Visual Appeal: With its rich browns and creamy whites, garnished with fresh herbs, this dish is as eye-catching as it is delicious.
  • Skill Level Needed: This easy recipe is perfect for beginner cooks; it requires minimal cooking techniques and yields satisfying results.
  • Special Equipment: All you need is a single skillet or frying pan, making clean-up a breeze.

Recipe Overview

  • Difficulty Level: This dish is rated easy due to its straightforward steps and short cooking time, making it approachable even for novice cooks.
  • Category: This skillet meal fits perfectly into the vegetarian category, ideal for lunch or dinner.
  • Cuisine: Inspired by classic Mediterranean flavors, this recipe reflects a healthy lifestyle and celebrates plant-based eating.
  • Cost: The grocery list is inexpensive, with a total cost of around $10, making it accessible to all budgets.
  • Season: This dish is perfect for any season, but spring is particularly wonderful as fresh vegetables are in abundance.
  • Occasion: Ideal for casual dinners, family meals, or even gatherings, this dish is versatile enough for any occasion.

Why You’ll Love This Recipe

Discover the incredible taste and texture that makes our Garlic Mushrooms Cauliflower Skillet a favorite among home cooks. The umami-rich mushrooms paired with garlic bring forth a flavor profile that’s simple yet sophisticated, ensuring that every bite is satisfying and packed with delightful sensations. The tender cauliflower not only enhances the taste but also contributes to the attractive plate presentation.

This recipe provides fantastic convenience—perfect for busy weeknights when you want a wholesome meal without hours of preparation. In just 25 minutes, you can have a colorful, healthy dinner on the table. Plus, it requires minimal ingredients and easy preparation, allowing you to focus on enjoying your meal instead of laboring in the kitchen.

Nutritionally, this dish shines with its high fiber content and a myriad of vitamins that promote good health. Cauliflower is known for its anti-inflammatory properties, while mushrooms deliver rich antioxidants, making this recipe a smart choice for anyone dedicated to healthful eating.

Socially and entertaining-wise, this Garlic Mushrooms Cauliflower Skillet allows you to impress your guests without the fuss. Whip it up for a quick family dinner or serve it as a delicious side dish at a potluck—everyone will be asking you for the recipe! Its appealing flavors and beautiful presentation are sure to spark conversations around the dinner table.

Lastly, the cost-effectiveness of this skillet recipe is unmatched. With just a handful of affordable ingredients, you can cater to multiple servings, making it an economical choice that doesn’t sacrifice quality or flavor. Enjoy this delightful meal while staying within your budget.

Historical Background and Cultural Significance

The origins of garlic-infused dishes can be traced back to ancient cultures, where garlic was revered not only for its distinct flavor but also for its medicinal properties. Cultures across Europe and Asia have embraced garlic in their cooking, often highlighting it as a key ingredient in rustic, wholesome meals.

The use of mushrooms in cuisine dates back centuries, reflecting regional diversity in how they are prepared and enjoyed. Throughout Europe, mushrooms have held a special place in traditional dishes, often celebrated for their versatility and rich, savory flavors.

Over time, the combination of garlic and mushrooms has evolved to suit modern diets, gaining popularity among vegetarians and health-conscious individuals looking to embrace plant-based meals. Today, dishes like our Garlic Mushrooms Cauliflower Skillet celebrate these ingredients with a contemporary twist, making them more accessible and appealing.

Regional variations of this dish may incorporate local vegetables or herbs, such as bell peppers in Mediterranean cuisine or spices that reflect Indian flavors. The adaptability of this recipe means it welcomes experimentation, allowing home cooks to personalize the dish to their taste.

Ingredient Deep Dive

Mushrooms: Mushrooms have held cultural significance across various cuisines, with varieties like shiitake and portobello being celebrated for their unique flavors and textures. Nutritionally, they provide a wealth of vitamins and minerals, including B vitamins and selenium. When selecting mushrooms, look for firm, plump specimens with a fresh scent. Store them in a paper bag in the refrigerator and consume them within a week for optimal taste. For substitutions, you may use button or cremini mushrooms.

Cauliflower: Cauliflower has made its mark on the culinary world, often touted for its versatility and health benefits. As a cruciferous vegetable, it’s rich in vitamins C and K, and offers numerous antioxidants. When choosing cauliflower, opt for heads with firm, white florets and green leaves. To store, keep it in a sealed container in the fridge for about a week. For a different flavor, substitute with broccoli or even zucchini.

Common Mistakes to Avoid

  • Overcrowding the skillet: This leads to steaming rather than sautéing. Cook in batches if necessary for even browning.
  • Using old garlic: Fresh garlic is crucial for the best flavor. Avoid sprouted or shriveled cloves.
  • Not seasoning properly: Season throughout the cooking process to enhance flavors. Remember to taste as you go.
  • Cooking at too high a temperature: This can cause the garlic to burn quickly. Aim for medium heat for gradual cooking.
  • Forgetting to clean mushrooms: Gently wipe them with a damp cloth instead of rinsing under water, which can make them soggy.
  • Using the wrong type of mushrooms: Different mushrooms have varying textures and flavors; choose those that complement the dish.
  • Overcooking cauliflower: It should be tender but still crisp. Aim to sauté just until a fork easily goes through.
  • Neglecting fresh herbs: Fresh herbs elevate the dish’s flavor; add them at the end for a burst of freshness.
  • Inadequate chopping: Cutting mushrooms and cauliflower into uniform sizes ensures even cooking.
  • Skipping flavor layers: Ensure to add spices and herbs at various stages for a well-rounded taste.

Essential Techniques

Sautéing: This technique is crucial for developing rich flavors in a dish. Start with a hot, oiled skillet, add your ingredients, and avoid overcrowding to enable even cooking. Look for visual cues, like browning edges, indicating both progress and taste enhancement.

Deglazing: After sautéing, add a splash of broth or wine to the pan to release the flavorful bits stuck to the bottom. This elevates the taste of the dish, incorporating all those delicious flavors into the final result.

Chopping: Properly chopping vegetables not only enhances texture but ensures even cooking. Invest time to refine your knife skills, focusing on uniform cuts for consistent results.

Pro Tips for Perfect Garlic Mushrooms Cauliflower Skillet

Start with a hot skillet for the best sauté. A preheated pan allows vegetables to sear perfectly without becoming soggy.
Don’t rush the garlic. Add it after the mushrooms have started to brown to avoid burning and bitterness.
For a burst of acidity, squeeze fresh lemon juice over the finished dish. It brightens the flavors and enhances the overall experience.
Experiment with spices. A pinch of red pepper flakes or smoked paprika can add a delightful kick to your skillet.
Incorporate greens for added nutrition. Spinach or kale can be tossed in during the last few minutes of cooking for a pop of color and flavor.
Garnish with fresh herbs like parsley or cilantro for added freshness and visual appeal.
Pair with a high-quality olive oil for drizzling just before serving. It adds richness and depth to the overall flavor.
Double the recipe for meal prepping, as flavors deepen and improve when reheated.

Variations and Adaptations

Regional flavors can be introduced by incorporating herbs and spices specific to various culinary traditions. For Italian flair, add basil and oregano, while cumin and coriander lend a Middle Eastern touch.

Seasonal adaptations can enhance the dish; in winter, add roasted carrots or brussels sprouts, while spring brings in fresh peas and asparagus for a vibrant contrast.

Dietary modifications, such as making it vegan, are effortless since the recipe is plant-based. For those following low-carb diets, replace quinoa with spiralized zucchini or cauliflower rice.

Flavor variations can be explored by using different types of mushrooms, such as shiitake for an umami boost or oyster mushrooms for a delicate taste.

Changing textures is also possible by tossing in nuts or seeds for added crunch or serving over creamy polenta for a rich base.

Presentation alternatives might include serving the dish in a cast-iron skillet for a rustic feel or layered in a glass trifle dish for an elegant look.

Serving and Presentation Guide

Plating can be as simple as mounding the sautéed mixture in the center of the dish or using a ring mold for a tidy presentation.

Garnishing options include fresh herbs scattered on top or a drizzle of balsamic reduction for a touch of sweetness and color.

Consider traditional accompaniments like crusty bread for soaking up the flavor, while modern servings could include a side salad to elevate the meal’s health quotient.

Serve hot but be mindful of portion control—ideal servings can vary based on personal preferences and dietary needs. Have extra plates ready for family-style dining, encouraging shared meals.

Serving temperature plays a key role; aim for a warm dish that contrasts nicely with cool sides, like a fresh garden salad.

Wine and Beverage Pairing

A crisp white wine, such as Sauvignon Blanc or Pinot Grigio, pairs perfectly with the savory elements of garlic mushrooms and cauliflower. The acidity in these wines complements the dish’s richness.

For non-alcoholic options, a sparkling water with fresh lemon or a light herbal tea can provide a refreshing contrast to the hearty flavors.

If coffee is a welcome beverage, a light roast can offer an interesting palate contrast, enhancing the meal without overpowering the flavors.

Serve your beverages chilled to provide a refreshing balance to the warm dish.

Storage and Shelf Life

Storing Garlic Mushrooms Cauliflower Skillet is simple: keep leftovers in an airtight container in the refrigerator, where they will last for 3-4 days.

For long-term storage, consider portioning out servings in freezer-safe containers; the dish can be frozen for up to 3 months. Reheat in the microwave or on the stovetop to restore its delightful flavor.

Look for signs of spoilage, such as discoloration or unusual odors. If the dish shows any signs of deterioration, it’s best to discard it.

Reheating should be done gently; using medium heat helps it maintain its texture without becoming mushy.

Freezing guidelines recommend not freezing vegetables that have already been cooked; it works best with sautéed mixtures that can be reheated quickly and easily.

Make Ahead Strategies

Prepare components of the Garlic Mushrooms Cauliflower Skillet a day ahead by chopping vegetables and storing them in the fridge for up to 24 hours.

Consider sautéing mushrooms in advance; they can be stored for a quick addition when it’s time to finish the dish.

Quality may be impacted if vegetables are pre-cooked too far ahead, as freshness is key to maintaining flavor and texture.

Assembly can be done in under 15 minutes, allowing for a quick meal on busy nights without sacrificing quality.

When reheating, be sure to incorporate fresh elements like herbs or a squeeze of lemon juice to refresh the flavors and textures.

Scaling Instructions

To halve the Garlic Mushrooms Cauliflower Skillet recipe, simply divide all ingredients in half, adjusting cooking time accordingly to ensure even cooking.

Doubling or tripling the recipe requires a larger skillet or cookware; consider splitting batches if your skillet isn’t large enough to avoid overcrowding.

Keep in mind that cooking times may slightly change; monitor doneness and adjust as needed for larger quantities.

Storage considerations become essential with larger batches; ensure you have sufficient airtight containers to keep multiple servings fresh.

Adjust seasoning with larger quantities; always taste as you go, since scaling recipes can sometimes lead to less flavorful results if not monitored closely.

Nutritional Deep Dive

A macro breakdown of this dish reveals its rich fiber content from both mushrooms and cauliflower, supporting digestive health.

Micronutrient analysis shows a significant source of vitamins C, K, and B6, along with essential minerals like potassium and magnesium.

Known health benefits include anti-inflammatory properties from garlic and the antioxidants present in mushrooms, making it a great choice for a balanced diet.

Dietary considerations include low-calorie content while providing a hearty serving size, contributing to weight management goals without sacrificing satisfaction.

For portion analysis, enjoying this dish as part of a balanced meal helps maintain energy levels throughout the day, making it an ideal option for lunch or dinner.

Dietary Adaptations

For gluten-free adaptations, this recipe is already suitable as it contains no gluten-heavy ingredients. Serve over quinoa or gluten-free grains for a full meal.

Dairy-free versions are equally simple. Omit any dairy-based toppings like cheese and emphasize fresh herbs for added flavor.

Vegan adaptations require no changes to the basic recipe, as all ingredients are plant-based, making it an ideal choice for vegan diets.

Low-carb dieters may substitute cauliflower for a more concentrated serving, while the base ingredients keep it within their dietary preferences.

Keto enthusiasts can enjoy this dish, especially when paired with healthy fats like avocado or coconut oil to enhance the overall meal profile.

Paleo diets will benefit from the nutrient-rich mushrooms and cauliflower, aligning perfectly with the fruit and vegetable focus of this lifestyle.

Low-FODMAP variations can omit garlic and substitute garlic oil or infused oils for enhanced flavor without digestive distress.

Troubleshooting Guide

Texture issues, such as mushiness, often arise from overcooking vegetables. Ensure to sauté only until tender-crisp for the best mouthfeel.

Flavor balance can be adjusted by adding a pinch of salt or acidity if the dish tastes flat; lemon or vinegar can enhance overall flavor.

Temperature problems, like a cool serving, may occur if the dish isn’t reheated properly. Use medium heat to bring it back to serving temperature.

Equipment challenges are easily managed; ensure your skillet is non-stick or well-oiled to prevent sticking during cooking.

Ingredient substitutions should be approached with care; always consider complementary flavors and textures when altering the recipe.

Timing concerns, such as over-stepping cooking times, can lead to burnt garlic or soggy vegetables. Keep a close eye and adjust accordingly based on your equipment.

Recipe Success Stories

Community feedback has been overwhelmingly positive, with readers praising the ease and taste of the Garlic Mushrooms Cauliflower Skillet.

Variation successes often include creative adaptations; some readers swap different vegetables, sharing their own twist on the original recipe.

Adaptation stories highlight how this dish is versatile, allowing people to embrace local ingredients or personal taste preferences.

Photography tips shared by our community members showcase beautiful plating ideas, inspiring others to present their creations as visually appealing meals.

Recipe reviews consistently emphasize the excitement of making the dish for shared family meals, turning it into a beloved tradition.

Frequently Asked Questions

Can I substitute different vegetables? Absolutely! Feel free to experiment with seasonal vegetables or your favorites. Broccoli, asparagus, or bell peppers work well in this skillet dish.

How do I store leftovers? Store leftovers in an airtight container in the refrigerator for up to four days. Reheat in the microwave or on the stovetop for best results.

Can I make this dish ahead of time? Yes, you can prep the ingredients in advance and sauté them when ready to serve for maximum freshness.

Is this dish suitable for meal prep? Definitely! This recipe can be easily multiplied, stored in portions, and reheated throughout the week.

What can I serve with Garlic Mushrooms Cauliflower Skillet? This dish pairs well with quinoa, rice, or a fresh salad for a complete meal.

Do I need any special tools for this recipe? No special tools are required; a basic skillet or frying pan will suffice.

How spicy is this dish? This recipe is mild, but you can add red pepper flakes or your preferred spices to give it more heat.

Can I use frozen vegetables? Fresh vegetables yield the best texture and flavor, but frozen can work in a pinch; just be sure to thaw them beforehand.

Is this recipe gluten-free? Yes, all ingredients used in this Garlic Mushrooms Cauliflower Skillet are naturally gluten-free, making it a safe choice for those with gluten sensitivities.

Can I add protein to this dish? Certainly! Adding grilled chicken, tofu, or chickpeas can enhance the dish’s nutritional value and make it even more filling.

Additional Resources

If you enjoyed this Garlic Mushrooms Cauliflower Skillet, consider trying other related recipes such as sautéed greens or hearty grain salads to complement your meals.

Explore technique guides for sautéing vegetables to refine your cooking skills and delve deeper into flavor enhancement strategies.

Discover ingredient information to understand the health benefits of mushrooms, cauliflower, and other vegetables you love to use.

Consider investing in kitchen tools like non-stick skillets or nice chopping knives for more efficient cooking experiences.

Seasonal variations can inspire you to create recipes that align with what’s fresh and available, keeping your meals exciting and varied.

Join the Conversation

Don’t forget to share your experiences recreating the Garlic Mushrooms Cauliflower Skillet! Share photos on social media, join our cooking community, and inspire others with your cooking adventures.

Photography tips can help you capture the beauty of your dishes, showcasing the vibrant colors and textures of your culinary creations.

We love hearing recipe reviews, so feel free to leave comments or suggestions on how you customized the dish for your tastes.

Engage with fellow home cooks and discuss your new takes on the recipe; your creativity might inspire someone else’s masterpiece.

Explore variations and share your adventures in adapting recipes to your unique preferences. Your contributions are invaluable to our cooking community!

The Recipe

Garlic Mushrooms Cauliflower Skillet

Serves: 4

Prep Time: 10 mins

Cook Time: 15 mins

Total Time: 25 mins

Kitchen Equipment Needed

  • Skillet or frying pan
  • Knife and cutting board
  • Spoon for stirring
  • Measuring cups and spoons

Ingredients

  • 1 medium head of cauliflower, chopped
  • 8 oz mushrooms, sliced
  • 4 cloves garlic, minced
  • 2 tbsp olive oil
  • Salt and pepper to taste
  • Fresh parsley for garnish (optional)

Directions

  1. Heat olive oil in a skillet over medium heat.
  2. Add chopped cauliflower and sauté for 5 minutes, stirring occasionally.
  3. Incorporate sliced mushrooms and continue cooking for another 5 minutes until mushrooms soften.
  4. Add minced garlic and stir well; cook for an additional 2-3 minutes until fragrant.
  5. Season with salt and pepper to taste.
  6. Remove from heat and garnish with fresh parsley, if desired, then serve warm.

Recipe Notes

  • Feel free to add a splash of vegetable broth for added flavor.
  • Swap in your favorite vegetables to customize this dish.
  • Leftovers can be stored in the fridge for up to 4 days.

Easy One-Pot Garlic Parmesan Pasta with Spinach & Mushrooms

One-Pot Garlic Parmesan Pasta with Spinach and Mushrooms: An Easy, Flavor-Packed Delight

⚖️
Difficulty
Easy

⏲️
Prep Time
10 mins

🕒
Cook Time
20 mins

⏱️
Total Time
30 mins

🍽️
Servings
4

Indulge in the creamy goodness of our One-Pot Garlic Parmesan Pasta with Spinach and Mushrooms. This recipe is ideal for busy weeknights or a satisfying comfort meal. With every twirl of pasta, you’ll experience the rich flavors of garlic and Parmesan, perfectly balanced by the earthiness of mushrooms and the vibrant pop of spinach. It’s simple, delicious, and requires minimal cleanup, making it perfect for both seasoned cooks and beginners!

This one-pot dish not only saves time on cooking and cleaning but also brings a comforting aroma that fills your kitchen. Imagine the fragrant garlic mingling with the Parmesan, creating a dish that’s as pleasing to the senses as it is to the palate. The addition of spinach and mushrooms not only enhances the flavor but also adds an extra layer of nutrition, transforming a simple pasta dish into a well-rounded meal.

Quick Recipe Highlights

  • Flavor Profile: Savory, creamy, and slightly salty from the Parmesan, with fresh hints from garlic and a touch of earthiness from the mushrooms.
  • Texture: Creamy comfort from the sauce, tender pasta, and delightful bites of mushrooms and wilted spinach that add a pleasing mouthfeel.
  • Aroma: A heavenly blend of roasted garlic and nutty Parmesan fills the air, inviting you to dig in!
  • Visual Appeal: The dish presents beautifully with a contrasting color palette of vibrant green spinach, earthy mushrooms, and creamy pasta.
  • Skill Level Needed: Designed for home cooks of all skill levels, this dish is straightforward and forgiving.
  • Special Equipment: All you need is a large pot to make this dish, making it easy to prepare and clean up.

Recipe Overview

  • Difficulty Level: The recipe is easy enough for novice cooks but still presents enough techniques to be satisfying for more advanced chefs.
  • Category: This dish falls under the main course category, perfect for lunch or dinner.
  • Cuisine: Rooted in Italian cuisine, this pasta dish draws from traditional flavors and techniques while being accessible for all.
  • Cost: The ingredients are budget-friendly, with an approximate cost of $10-$15 for a family-sized meal.
  • Season: This pasta is especially comforting in the fall and winter months, perfect for a cozy evening in.
  • Occasion: Serve this dish at family dinners, gatherings, or casual date nights for a delicious yet effortless meal.

Why You’ll Love This Recipe

The taste and texture of One-Pot Garlic Parmesan Pasta with Spinach and Mushrooms are truly delightful. The combination of creamy sauce, perfectly cooked pasta, and fresh vegetables creates a comforting and satisfying dish. Each bite is infused with garlicky goodness, enhanced by the salty richness of Parmesan cheese, resulting in a flavor explosion that keeps you coming back for more.

Convenience plays a key role in why this recipe is so appealing. With everything cooked in a single pot, you save time on both preparation and cleanup. The minimal number of steps allows even the busiest home cooks to whip up something delicious without sacrificing quality or taste. It’s a dish that caters to modern culinary needs, balancing effort and flavor wonderfully.

Health-wise, this recipe offers nutritional benefits you can feel good about serving your family. Spinach adds essential vitamins and minerals, while mushrooms provide antioxidants and help elevate the dish’s savory flavors. This makes each serving not just delicious but also nourishing—perfect for anyone looking to enjoy a bit of indulgence without skimping on health.

This pasta dish is also an excellent option for social gatherings. It’s a crowd-pleaser that caters to various dietary preferences, and serving it in a family-style is inviting and encourages sharing stories and laughter around the dinner table. It adapts well to being transformed into leftovers too, ensuring that the good times can continue on another day.

Moreover, you won’t break the bank with this easy, vibrant meal. The affordability of the ingredients makes it an accessible option for everyone, from families to students. This pasta dish proves that delicious meals don’t have to be extravagant or costly, aligning with the growing interest in budget-friendly cooking.

Historical Background and Cultural Significance

Pasta has a long and storied history, tracing back to ancient civilizations in the Mediterranean. The combination of pasta with garlic and cheese can be found in many Italian dishes, emphasizing the traditional use of local, simple ingredients that come together to create something monumental. This specific variation emerged from the need for a quick, hearty meal that reflects Italian cooking styles.

The cultural importance of dishes like One-Pot Garlic Parmesan Pasta lies in their ability to bring people together. Food has always been a central component in Italian culture, serving as a means of bonding among family and friends. This dish exemplifies communal eating, highlighting how essential meals are to a shared cultural experience.

Over the years, this type of simple pasta dish has evolved to incorporate different ingredients, techniques, and preferences, showcasing its flexibility. Today, chefs and home cooks alike continue to adapt recipes based on available ingredients, regional preferences, and dietary considerations, further embedding this dish into culinary culture.

Regional variations also play a critical role. For instance, you might find different types of cheese, or variations in the greens used, depending on the local availability or cultural identities within Italy. This reflects the resourcefulness and creativity of Italian cuisine, celebrating diversity in flavor while remaining true to its roots.

Ingredient Deep Dive

Pasta: Pasta is the staple of Italian cuisine and a key player in this dish. Its history dates back centuries, deeply entwined within cultural traditions around the world. Nutritionally, pasta provides carbohydrates that are essential for energy. When choosing pasta, opt for whole grain or legumes for a healthier option. Store it in a cool, dark place to maximize freshness, and consider substituting with gluten-free options if desired.

Spinach: Spinach is not only a flavorful addition but also a powerhouse of nutrients. Rich in vitamins A, C, and K, it plays an integral role in various diets. When selecting spinach, look for vibrant, crisp leaves free of wilting. To store, keep it in a breathable container in the fridge and consume it within a few days for maximum freshness. A good substitute can be kale or Swiss chard.

Mushrooms: Mushrooms add an earthy flavor that complements pasta beautifully. Tracing back centuries, their cultural significance spans many cuisines. Nutritionally, they deliver vitamins D and B, enhancing the dish’s health profile. Opt for fresh, firm mushrooms when shopping; avoid those that appear slimy. Store them in a paper bag, and they should be consumed relatively quickly to maintain freshness. Substitution options include zucchini or eggplant for a different take on texture.

Garlic: Garlic is known for its health benefits, including anti-inflammatory properties. Its strong, aromatic flavor is foundational in many dishes. When selecting, choose firm cloves that are not sprouting. Store garlic in a cool, dry place. If you’re looking for a substitute, shallots or garlic powder can be used, though they provide a different flavor profile.

Parmesan Cheese: This cheese is a staple in Italian cooking, revered for its umami flavor. Made from cow’s milk, it’s enjoyed for its grating qualities. When purchasing, go for freshly grated over prepackaged for better flavor. Store it in the refrigerator, and use it within a month for optimal taste. You can replace it with nutritional yeast for a dairy-free alternative.

Common Mistakes to Avoid

  • Overcooking the pasta: Ensure you follow the cooking time, as overcooking can lead to mushy pasta that lacks texture.
  • Not seasoning adequately: Since this dish relies on the flavors of various ingredients, ensure to season the pasta water and the dish itself to maximize flavor.
  • Using low-quality ingredients: Fresh, high-quality ingredients make a significant difference in the taste and should be prioritized whenever possible.
  • Skipping the garlic: Garlic is a crucial flavor component; omitting it diminishes the flavor profile substantially.
  • Neglecting to reserve pasta water: This starchy water can help bind your sauce, improving consistency, so don’t forget to reserve some before draining.
  • Not using fresh herbs: Fresh herbs elevate the dish; using dried varieties can lead to a less vibrant flavor.
  • Rushing the sautéing process: Allow enough time for the garlic and mushrooms to caramelize; this enhances the flavors significantly.
  • Using grated cheese too early: Adding Parmesan too early can change its texture; instead, sprinkle it in at the end for the best results.
  • Forgetting to taste: Always try your dish while cooking to make adjustments and ensure the flavors meld perfectly.
  • Using cold ingredients: Ingredients such as cheese and cream should not be straight from the fridge; let them come to room temperature to blend better.

Essential Techniques

One-Pot Cooking: The essence of one-pot cooking is about maximizing flavor while minimizing cleanup. To master this, layer your ingredients based on cooking time—add the longer-cooking items first and the quicker ones later. This technique not only simplifies the process but also ensures that flavors meld together beautifully. A common pitfall is overcrowding the pot; ensure there’s enough room for steam to circulate.

Proper Garlic Sautéing: Sautéing garlic at the right temperature is crucial; too high and it will burn, while too low might result in a lack of flavor. Mastering this involves starting with a cold pan before slowly adding oil and garlic as the pan heats. Look for the garlic to lightly brown, which indicates optimal flavor extraction. Monitoring closely is essential to avoid a burnt taste!

Cheese Melting: Adding cheese requires a gentle approach to avoid clumping. To successfully achieve a creamy texture, sprinkle the cheese gradually while stirring continuously. Trust your senses—your cheese is ready when it has melted and integrated smoothly. Common pitfalls include adding it all at once, leading to clumps instead of a desirable creamy sauce.

Reserving Pasta Water: This essential technique is often overlooked. The starchy water not only adds flavor but also helps emulsify sauce, creating a cohesive dish. To ensure success, take a cup of the pasta cooking water before draining, and use it as needed. Don’t let it sit too long after cooking to keep its optimal texture and flavor!

Pro Tips for Perfect One-Pot Garlic Parmesan Pasta with Spinach and Mushrooms

1. Always taste your dish as you go along to balance flavors accurately. A pinch of salt or a squeeze of lemon juice can elevate the overall dish.

2. For added creaminess, consider finishing the dish with a splash of heavy cream or milk for a richer sauce. This enhances both texture and flavor.

3. Experiment with different cheese varieties for a unique flavor twist. Gouda or Pecorino Romano can add new dimensions to your dish.

4. Don’t rush your sautéing process; allowing the mushrooms to brown properly adds depth and enhances the umami characteristic of the dish.

5. For even more freshness, consider tossing in a squeeze of lemon juice or fresh herbs such as basil or parsley before serving.

6. Make it a complete meal by including proteins like grilled chicken or shrimp, enhancing the nutritional value while satisfying your hunger.

Variations and Adaptations

For regional variations, consider adding traditional Italian ingredients such as sun-dried tomatoes or artichokes to introduce different textures and flavors. Seasonal adaptations can include substituting spinach for asparagus in spring or butternut squash in the fall, each providing complementary tastes.

Dietary modifications such as using gluten-free pasta or vegan cheese can cater to various dietary restrictions while maintaining the essence of the dish. Flavor variations can be achieved by adding chili flakes for a spicy kick or experimenting with different herbs for a unique flavor profile.

Texture modifications can embrace the addition of toasted pine nuts or crushed walnuts for added crunch, while presentation alternatives might include a sprinkle of microgreens on top before serving for a fresh, restaurant-style finish.

Serving and Presentation Guide

For a beautiful plating, use a pair of tongs to neatly twirl pasta into a perfect nest shape in the center of the plate. This creates an appealing height and draws the eye to the dish. Garnish with freshly grated Parmesan, drizzle with extra virgin olive oil, or finish with cracked black pepper to elevate the presentation and flavor.

Traditional accompaniments such as garlic bread or a fresh side salad pair beautifully with this pasta dish, enhancing the meal experience. Modern serving suggestions include using shallow bowls for a casual feel or wide plates for a more refined touch. Also, consider serving at an optimal temperature; this dish is best enjoyed warm, allowing the flavors to shine!

Portion control is essential for a balanced meal—typically, a serving of pasta should be about one cup, but consider individual preferences and dietary needs when serving.

Wine and Beverage Pairing

A crisp white wine such as Pinot Grigio or a light red like Chianti beautifully complements the flavors of the garlic and Parmesan. The acidity in these wines cuts through the creaminess, enhancing the dish overall. For non-alcoholic alternatives, a sparkling water with a slice of lemon offers a refreshing contrast.

If you enjoy coffee, a light brew can pair surprisingly well by offering roasted notes that complement the savory aspects of the dish. Consider serving beverages chilled to maximize refreshment—an important detail when enjoying a comforting, creamy dish like this One-Pot Garlic Parmesan Pasta.

Storage and Shelf Life

Store leftovers in an airtight container in the refrigerator for up to three days. It’s essential to allow the dish to cool before sealing, to prevent condensation buildup, which can lead to sogginess. For longer storage, consider freezing individual servings, which can last for up to three months.

To identify signs of spoilage, look for off odors, discoloration, or mold. When reheating, do so gently in the microwave or on the stovetop; adding a splash of water or broth can help revive the sauce’s consistency. Follow these guidelines for a satisfying second-round meal and enjoy every last bite!

Make Ahead Strategies

To save time, consider prepping ingredients like chopping vegetables and measuring spices the day before. Store everything in the fridge to keep them fresh. Alternatively, you can prepare the entire dish and store it in the refrigerator before serving, allowing the flavors to marinate overnight for an even better taste.

Quality impacts can vary based on how you store it; always ensure your containers are airtight to maintain optimal freshness. When reheating leftovers, think about adding fresh elements like herbs or a squeeze of citrus to revive the dish and keep it vibrant. This approach not only maximizes flavor but also presents the dish in its best light!

Scaling Instructions

For halving the recipe, simply reduce each ingredient by half, which works seamlessly for this dish without affecting flavor balance. When doubling or tripling, keep in mind that you may need a larger pot and should adjust cooking timings slightly as quantity increases.

Adjustments in equipment will be critical; using a wider pot will allow for even cooking. Ensure your cooking water ratio remains constant, and don’t overcrowd the pot during cooking. Monitor the texture closely, as timing may be slightly different based on amounts—keep taste testing along the way!

Nutritional Deep Dive

This One-Pot Garlic Parmesan Pasta is balanced with carbohydrates, proteins, and healthy fats. With approximately 400 calories per serving, it offers substantial energy, perfect for a busy day. The macro breakdown includes intricate variations in protein, fat, and fiber, giving it a well-rounded nutritional profile.

Micronutrient analysis reveals significant amounts of vitamins A and K from spinach, while mushrooms contribute important minerals such as selenium. This dish packs a nutritional punch while also pleasing the palate—making it a practical meal for anyone conscious of their dietary choices. Ultimately, each serving is balanced, ensuring you can indulge without guilt!

Dietary Adaptations

To modify this recipe for gluten-free diets, simply swap out the pasta for a gluten-free alternative. There are many options available, from rice pasta to chickpea pasta, which will still provide a satisfying texture.

For those seeking dairy-free versions, consider substituting the parmesan with nutritional yeast or vegan cheese options that melt well. Maintaining the flavor profile while accommodating dietary needs ensures everyone can enjoy this comforting dish!

Vegan adaptations can be achieved by omitting the cheese and incorporating plant-based cream or cashew cream to achieve a creamy texture. Low-carb variants can feature zucchini noodles as a base, but keep in mind that cooking times may vary.

Troubleshooting Guide

If caught with texture issues, such as too dry or too watery, adjust by adding reserved pasta water incrementally to achieve the desired creaminess. Similarly, if flavor balance seems off, consider adding a touch of salt or acid like lemon juice, which can elevate the entire dish.

In the event of unexpected temperature problems, revisit cooking methods—low and slow tends to meld flavors best without compromising individual ingredient freshness. If dealing with equipment challenges, such as a broken stove, preparing this dish using an electric kettle for boiling pasta can retain the essence of the recipe!

Recipe Success Stories

Community feedback has been overwhelmingly positive for this dish, with many noting its ease and flavor. Variations have flourished, from added proteins like chicken to adaptations for vegan diets, demonstrating its versatility. Home cooks share joyful experiences about serving this pasta at family gatherings, with many considering it a go-to comfort meal.

Readers have also provided stunning photography tips, suggesting natural light and vibrant garnishes to elevate social media captures. Success stories and shared memories continue to build a warm community around this beloved recipe, further spreading its appeal!

Frequently Asked Questions

Can I use other types of pasta for this recipe?

Absolutely! This recipe is versatile and can accommodate various pasta types like penne, fusilli, or gluten-free options. Just keep an eye on cooking times, as they may vary based on the pasta shape.

How do I store leftovers?

Store leftovers in an airtight container in the refrigerator for up to three days. Alternatively, you can freeze individual portions, which can last for about three months.

Can I make this pasta dairy-free?

Yes, you can easily make this dish dairy-free by substituting traditional parmesan with nutritional yeast or dairy-free cheese. You can also replace heavy cream with coconut cream for added richness without dairy.

What herbs can I add for more flavor?

Fresh herbs like basil, parsley, or thyme work wonderfully in this dish. Consider adding them towards the end of cooking to maintain their vibrant flavor and color.

Is this a good make-ahead meal?

Yes! You can prepare this dish in advance, and it’s actually beneficial to let the flavors meld together. Just be sure to store it properly and reheat gently to maintain texture.

Can I add protein to this dish?

Yes, grilled chicken, shrimp, or even sautéed tofu are excellent additions that can turn this pasta into a heartier meal while complementing its flavor profile.

What if my sauce is too thin?

If the sauce is too thin, simmer it on low heat to reduce it further while stirring. You can also add a little more cheese or reserved pasta water to help thicken it.

How can I make this recipe more spicy?

Add red pepper flakes during cooking for a flavorful kick or toss in some diced jalapeños to incorporate fresh heat.

Can this dish be served cold?

While typically served warm, this pasta can be enjoyed cold as a pasta salad! Just refrigerate after cooking and serve with a drizzle of olive oil and fresh ingredients.

Do I have to use mushrooms?

No, you can substitute mushrooms with other vegetables such as zucchini, bell peppers, or broccoli. Just remember to adjust cooking times accordingly based on the vegetable choice!

Additional Resources

Explore related recipes like creamy Alfredo pasta, garlic butter shrimp linguine, or a classic caprese salad to accompany your One-Pot Garlic Parmesan Pasta. For technique guides, consider looking into how to sauté vegetables perfectly or tips for cooking pasta al dente.

Ingredient information can deepen your understanding of the nutritional value and culinary uses of components, while equipment recommendations for essential kitchen tools can enhance efficiency in meal prep. Seasonal variations can introduce exciting flavors year-round, keeping your meals fresh and enticing.

Join the Conversation

Share your One-Pot Garlic Parmesan Pasta experiences on social media. Post your photos, modifications, and feedback, and connect with fellow home cooks! Engaging in recipe reviews and sharing your culinary journey allows us to build a valued community around shared tastes and interests.

The Recipe

One-Pot Garlic Parmesan Pasta with Spinach and Mushrooms

Serves: 4

Prep Time: 10 mins

Cook Time: 20 mins

Total Time: 30 mins

Kitchen Equipment Needed

  • Large pot
  • Wooden spoon
  • Measuring cups and spoons
  • Cutting board
  • Chef’s knife

Ingredients

  • 12 ounces pasta (spaghetti or penne)
  • 2 tablespoons olive oil
  • 4 cloves garlic, minced
  • 8 ounces mushrooms, sliced
  • 4 cups spinach, fresh
  • 1 cup Parmesan cheese, grated
  • 3 cups vegetable or chicken broth
  • Salt and black pepper, to taste
  • Red pepper flakes, optional

Directions

  1. In a large pot, heat olive oil over medium heat. Add the garlic and sauté until fragrant, approximately 1 minute.
  2. Add the sliced mushrooms and cook until they are golden, about 5-7 minutes.
  3. Pour in the vegetable or chicken broth and bring to a simmer.
  4. Add the pasta and cook according to package instructions, stirring occasionally.
  5. Once the pasta is cooked, reduce the heat and stir in the fresh spinach, followed by the grated Parmesan cheese. Mix until creamy.
  6. Season with salt, pepper, and red pepper flakes, if desired. Serve hot and enjoy!

Recipe Notes

  • For a richer flavor, try adding a splash of heavy cream when mixing in the cheese.
  • Feel free to substitute your favorite vegetables for the mushrooms and spinach.
  • This dish can be made ahead and reheated, but it’s best fresh for optimal taste.
  • To store, cool completely and refrigerate in an airtight container for up to 3 days, or freeze for up to 3 months.

Easy Honey Sriracha Salmon Bowls with Rice and Veggies

Honey Sriracha Salmon Bowls: A Flavorful Asian Inspired Delight

⚖️
Difficulty
Easy

⏲️
Prep Time
10 mins

🕒
Cook Time
15 mins

⏱️
Total Time
25 mins

🍽️
Servings
4

If you’re looking for a dish that combines the rich flavors of honey and the spicy kick of sriracha, then these Honey Sriracha Salmon Bowls are a perfect choice. Each bowl features perfectly cooked salmon, glazed with a sweet and spicy sriracha honey sauce that is guaranteed to tantalize your taste buds. The freshness from the veggies, alongside the wholesome texture of rice, creates a balance that is not only healthy but satisfying.

This recipe is not just about nourishment; it’s a culinary experience. Imagine digging into a bowl filled with vibrant vegetables, fluffy rice, and succulent salmon all brought together by a glossy, inviting sauce that glistens under the light. The playful combination of flavors and textures in each bite makes this dish a delightful treat, whether you’re indulging after a long day or preparing for a gathering with friends and family.

Quick Recipe Highlights

  • Flavor Profile: The honey sriracha glaze adds a sweet, spicy, and savory element that complements rich salmon perfectly.
  • Texture: Enjoy a variety of textures including tender salmon, crunchy fresh veggies, and fluffy rice that create a mouth-watering experience.
  • Aroma: The fragrance of honey, garlic, and chili fills your kitchen, making it an inviting space.
  • Visual Appeal: A vibrant dish that showcases a colorful array of ingredients, making it both appetizing and Instagram-worthy.
  • Skill Level Needed: This recipe is beginner-friendly, requiring basic cooking techniques that anyone can master.
  • Special Equipment: All you need is a skillet and a couple of bowls for assembly, making it a hassle-free cooking experience.

Recipe Overview

  • Difficulty Level: This easy recipe is approachable for cooks of all levels. It involves simple techniques and quick prep, making it suitable for weeknight dinners or special occasions.
  • Category: Perfect for a main dish or meal prep, these bowls can serve as a healthy lunch or dinner option.
  • Cuisine: Drawing inspiration from Asian flavors, this dish celebrates the harmony of sweet and spicy in traditional culinary methods.
  • Cost: The ingredients are budget-friendly, with salmon being the most costly item, making it accessible for any kitchen.
  • Season: Enjoy these delicious salmon bowls year-round, but they shine particularly in summer when fresh vegetables are abundant.
  • Occasion: Ideal for family dinners, meal preps, or casual gatherings, this recipe is versatile enough for any occasion.

Why You’ll Love This Recipe

The flavor and texture of Honey Sriracha Salmon Bowls deliver an unparalleled delight in every bite. The marriage of honey’s sweetness and sriracha’s heat creates a well-rounded taste that is both comforting and invigorating. The salmon is seared to perfection, offering a crispy exterior while maintaining flaky tenderness inside, making it satisfying even for the most discerning palate.

Convenience is another reason to fall in love with this recipe. With a prep time of just 10 minutes and a total cooking time of 15 minutes, you can whip up a delicious meal without spending hours in the kitchen. This makes it an ideal choice for busy weeknights or when entertaining guests.

Beyond its delectable taste, this dish boasts impressive nutritional benefits. Salmon is packed with omega-3 fatty acids, which are essential for heart health and promoting a balanced diet. Coupled with a colorful array of vegetables, this bowl ensures you get a variety of vitamins and minerals.

Sharing this delicious bowl with friends and family elevates any gathering. The arrangement of colorful ingredients encourages conversation and makes dining more enjoyable. It’s perfect not only for dinners but also for potlucks or picnics, allowing others to experience your culinary creation.

Finally, this recipe is cost-effective. With reasonably-priced ingredients—especially when buying salmon in bulk or on sale—it’s possible to enjoy gourmet flavors without breaking the bank. This accessibility makes it a staple in any home cook’s repertoire.

Historical Background and Cultural Significance

The origins of honey and sriracha go back centuries, each with its own rich history. Honey has been revered in many cultures for its sweetness and health benefits, often used in medicinal practices and ancient cuisines. On the other hand, sriracha, originally from Southeast Asia, particularly Thailand, has gained international fame for its unique blend of sweetness and heat, enhancing countless dishes globally.

Culturally, the combination of these two ingredients represents a fusion of flavors that speaks to the evolving nature of cuisine. Like many other global dishes influenced by travel and trade, honey sriracha salmon bowls encapsulate a modern interpretation of classic tastes that marry different culinary techniques and traditions.

Over time, the recipes that utilize these ingredients have evolved. Sriracha, for instance, was initially crafted for dipping but has transformed into a versatile sauce that enhances marinades, dressings, and condiments. The integration of honey into savory dishes is a trend that has seen considerable growth, ushering in a new wave of sweet-savory flavor combinations.

Regionally, this recipe reflects the flexibility of home cooking, where ingredients are adapted based on local availability. The recipe encourages experimentation, allowing cooks to incorporate seasonal produce and artisan ingredients, making it an evolving favorite on dinner tables.

Ingredient Deep Dive

Salmon, as a core ingredient, has long been associated with the seafood-rich diets of coastal regions. Known for its distinctive flavor and omega-3 fatty acids, salmon is not just delicious but incredibly beneficial to health, promoting heart health and cognitive function. When selecting salmon, look for vibrant color and firm texture, avoiding any that appears dull or has an off smell. Proper storage involves keeping it refrigerated for up to two days or frozen for longer-term preservation.

Honey, the natural sweetener used in this recipe, has a historical significance stretching back to ancient civilizations, valued not only for its taste but also for its medicinal properties. It provides a unique sweetness that balances the heat of sriracha beautifully. To ensure quality, choose raw, unprocessed honey, which can usually be identified by its cloudy appearance. It’s best stored in a cool, dry place to prevent crystallization. As a substitute, agave nectar can also work, though it may alter the final flavor profile slightly.

Sriracha sauce adds depth to this recipe, having gained popularity for its ability to enhance a variety of dishes with its spicy kick and garlicky undertones. Originating from Thailand, it’s now a staple in many households worldwide. Opt for a brand that prioritizes authentic flavor, and remember to store it in a cool place to maintain freshness. If sriracha is unavailable, substitute with a blend of garlic paste and hot sauce.

Common Mistakes to Avoid

  • Overcooking Salmon: Salmon should be cooked to just the point of flakiness. Overcooking can result in dry and unappetizing fish.
  • Ignoring Marination Time: Allowing the salmon to marinate enhances flavor. Skipping this step may leave the fish bland.
  • Choosing Low-Quality Ingredients: The quality of salmon and honey directly affects the dish’s flavor. Always opt for the best quality available.
  • Using Too Much Sriracha: While it’s meant to add heat, too much sriracha can overwhelm the dish. Start with a smaller amount and adjust to your heat preference.
  • Not Pairing with Proper Sides: Balance the meal with complementary sides like vegetables or grains to maximize its health benefits.
  • Skipping the Prep: Prep all ingredients before starting to cook. This avoids unnecessary delays and ensures everything is ready for assembly.
  • Overcrowding the Pan: When cooking, make sure not to overcrowd the skillet, as it can affect cooking time and texture.
  • Not Tasting Before Serving: Always taste the sauce before serving to ensure the flavors are well-balanced.

Essential Techniques

One crucial technique when preparing the Honey Sriracha Salmon Bowls is mastering the perfect sear on the salmon. This step is important because it creates a golden, crispy exterior while locking in moisture. Start by patting the salmon dry to remove excess moisture and ensure it sears properly. Using a hot pan and a small amount of oil will help achieve that desirable crust without sticking.

Another essential technique is properly balancing the sauce. Mixing honey and sriracha requires careful attention to balance sweetness with heat. Begin by combining small amounts, then taste testing is crucial. This will help you achieve a personalized flavor profile rather than one that is overly sweet or too spicy. A visual cue for success is a glossy sauce that coats the back of a spoon, indicating it’s well-mixed and ready to use.

Pro Tips for Perfect Honey Sriracha Salmon Bowls

To elevate your Honey Sriracha Salmon Bowls, consider marinating the salmon for at least 30 minutes to absorb all the flavors. This makes the dish more flavorful and aromatic.

Utilize a combination of grains for a base—such as brown rice and quinoa—to add texture and nutrition. Experimenting with different grains can also alter the overall feel of the dish significantly.

Garnish the finished bowls with sesame seeds or chopped green onions for an added crunch and a pop of color. These toppings not only enhance the visual appeal but also contribute to the dish’s flavor complexity.

For additional vegetables, consider adding roasted sweet potatoes or steamed broccoli. They can improve the flavor profile and add a comforting warmth to the bowl.

If you’re preparing these for a crowd, keep the components separate until serving to maintain freshness and presentation integrity. This is particularly helpful when making multiple servings.

Adjust the sriracha levels according to personal preference. If you know your guests are sensitive to spice, offer the sauce on the side for self-service.

Lastly, double the recipe for meal prep—these bowls store beautifully in the fridge and can be reheated for quick lunches throughout the week, making it both a delicious and practical choice.

Variations and Adaptations

If you’re feeling adventurous, there are numerous ways to adapt the Honey Sriracha Salmon BowlRecipe. For regional variations, try replacing salmon with other fish like tilapia or even tofu for a vegetarian option. This not only lets you enjoy the flavors in different forms but caters to diverse dietary preferences.

Seasonal adaptations can also breathe new life into the dish. In the summer, substitute sautéed zucchini or grilled corn for your vegetables, creating a fresher, garden-inspired bowl. In the winter, roasted root vegetables can be added for a heartier flavor.

Dietary modifications include ensuring the bowl is gluten-free by using tamari instead of soy sauce in the marinade. For those looking to reduce carbs, use cauliflower rice instead of traditional grains for a lighter version of this dish.

Flavor variations can be achieved by adding ginger to your marinade or incorporating different hot sauces for topping. These small tweaks can lead to exciting new versions of the original dish.

Texture modifications could involve using crunchy toppings like crushed nuts or seeds, which offer a delightful contrast to the tender salmon.

For presentation alternatives, layer ingredients in a glass jar for a visually stunning look that also makes for an easy lunch option on the go.

Serving and Presentation Guide

When it comes to plating your Honey Sriracha Salmon Bowls, consider the arrangement of your ingredients. Start with a scoop of rice or grain as a base, then carefully layer your protein and vegetables. Aim for a mix of colors to create a visually appealing presentation.

Garnishing with fresh herbs like cilantro or parsley can add an aromatic touch, while sesame seeds provide a wonderful crunch and enhance the overall look of the dish. For a creative spin, serve in a hollowed-out avocado for added nutrients and an impressive presentation.

Accompany the bowls with traditional sides, such as pickled vegetables or kimchi, to offer a taste of the culinary heritage behind this dish. If you’d like to elevate your experience, consider serving alongside a light Asian-inspired salad.

For temperature considerations, it’s crucial that the salmon is served hot while the vegetables are just slightly warm or at room temperature for crunch. This contrast makes every bite enjoyable.

For portion control, consider the balance between salmon, carbohydrates, and vegetables to ensure each bowl is not only satisfying but also healthy. Aim for one serving of protein, a healthy portion of grains, and an abundant mix of vegetables for the perfect balance.

Wine and Beverage Pairing

When it comes to wine pairing with your Honey Sriracha Salmon Bowls, a chilled Sauvignon Blanc is an excellent choice. Its vibrant acidity and citrus notes complement the sweet and spicy flavors of the dish beautifully, enhancing the overall tasting experience.

For those seeking non-alcoholic alternatives, a light, sparkling water infused with lemon or cucumber can refresh the palate without competing with the dish’s flavors.

Tea enthusiasts might enjoy pairing the meal with a cold brewed green tea, which adds a calming balance to the dish, while maintaining that elegant Asian cultural touch.

When considering temperature, ensure beverages are served chilled—this enhances the overall experience against the warm elements of your meal. Serving suggestions like incorporating herbs into cocktails could also elevate the gathering vibes.

Storage and Shelf Life

To maximize the shelf life of your Honey Sriracha Salmon Bowls, store any leftovers in airtight containers in the refrigerator. Properly stored, they will last for up to three days without compromising flavor or safety.

When storing, separate the salmon from the rice and vegetables to prevent sogginess. Before reheating, ensure the salmon has been safely thawed and brought to an internally safe temperature for optimal taste and texture.

Signs of spoilage include an off smell, discoloration, or a slimy texture. It’s best to discard any leftovers that exhibit these signs to maintain your health.

For freezing, ensure the ingredients are cooled and sealed tightly in freezer-safe containers. These can remain frozen for several months, making meal prep a breeze.

When ready to eat, simply thaw overnight in the fridge before reheating in the microwave or oven, ensuring everything is heated through evenly.

Make Ahead Strategies

Planning ahead for your Honey Sriracha Salmon Bowls makes meal prep efficient and stress-free. Prepare the marinade in advance and store it in the refrigerator, allowing the salmon to absorb all the flavors before cooking.

Additionally, washing and chopping vegetables can be done one or two days ahead of time. Keep the prepared ingredients in separate, sealed containers to maintain their freshness.

For assembling the bowls, you may separate the rice and sauce components, combining them just before serving. This method keeps everything fresh and vibrant till the last moment.

Reheating the bowls can be done swiftly in the microwave, so keep the components together for quick assembly when hunger strikes. When ready to serve, add fresh ingredients such as herbs or sliced avocado for a vibrant touch.

Finally, consider batch cooking the rice or grains ahead of time and storing them in the fridge. This allows you to put together your bowls quickly without lengthy cooking processes.

Scaling Instructions

If you need to adjust the recipe size for a larger group, scaling the ingredients is straightforward. For halving the recipe, simply reduce each ingredient proportionally, ensuring that the ratios remain intact for consistent flavor and texture.

Doubling or tripling the recipe is also an option, especially if you’re preparing for gatherings. Be mindful of pot sizes and cooking times, as larger quantities may require increased cooking time.

Adjust your cooking equipment accordingly; for instance, if making rice, use a larger pot or a rice cooker for optimal results in a shorter time frame.

Timing modifications become essential when scaling up—monitor the cooking process closely to avoid overcooking, especially with proteins like salmon.

Lastly, when storing large batches, use multiple airtight containers to allow for easy access and portion controls for future meals.

Nutritional Deep Dive

In terms of macros, Honey Sriracha Salmon Bowls provide a balanced meal with a healthy serving of protein, fats, and carbohydrates. The salmon offers high-quality protein and essential omega-3 fatty acids, crucial for heart and brain health.

Micronutrient analysis reveals a treasure trove of vitamins and minerals thanks to the diverse ingredients. For example, vegetables contribute necessary antioxidants, while whole grains offer fiber, aiding in digestion and promoting satiety.

Health benefits extend beyond immediate nutrition; the combination of fish and the antioxidant-rich vegetables contribute to a well-rounded lifestyle, lowering risks associated with chronic diseases.

Additionally, this dish is ideal for portion management, as the structured bowl ensures you get a balanced meal. This level of dietary control promotes mindful eating, encouraging greater awareness of hunger and satisfaction signals.

If weight management is a concern, this recipe is optimal. The high protein content aids in muscle preservation during weight loss, and the healthy fats from salmon promote a greater feeling of fullness, aiding in portion control.

Dietary Adaptations

Making Honey Sriracha Salmon Bowls accommodating for various dietary needs is easy. For gluten-free versions, be sure to select gluten-free soy sauce or tamari for the marinade to enjoy the same great flavors.

A dairy-free adaptation comes naturally to the recipe, as no dairy products are used—ensuring those with lactose intolerance can indulge without concern.

For vegan options, replace the salmon with grilled tofu marinated in the same honey-sriracha mix. The high vegetarian protein source pairs well with vegetables, maintaining robust flavor.

Low-carb enthusiasts may replace the traditional rice base with cauliflower rice, allowing for a similar texture without heavy carbohydrates.

Those following a keto or paleo diet would benefit from the high protein and healthy fats contained within this dish; simply adjust your marinade to suit your taste preferences and ingredient lists.

Troubleshooting Guide

If you encounter texture issues with your salmon, ensure that your cooking temperature is adequately high, allowing it to sear rather than steam. If it’s tough, it may have been overcooked; aim for an internal temperature around 125°F for optimum flakiness.

Flavor balance can be tricky; if your dish is too spicy, balance it out with additional honey or a side of creamy avocado. On the other hand, if it’s too sweet, add a splash of vinegar or lime juice for acidity.

For temperature problems, always check your cooking time and adjust to ensure that the salmon is heated through without becoming dry or rubbery. Another common challenge is keeping the sauce thick enough; adding cornstarch mixed with water may help thicken the glaze.

Equipment challenges can arise if you lack specific kitchen tools; improvising with a non-stick pan or investing in a good quality skillet can improve cooking conditions immensely.

If you’re facing ingredient substitutions, always consider texture and flavor; for instance, if you’re out of salmon, consider a firmer fish like mahi-mahi that can hold up under similar cooking time parameters.

Timing concerns often stem from not accounting for prep work—ensure vegetables are prepped before cooking to speed up the process and allow for a more leisurely cooking experience overall.

Recipe Success Stories

As community feedback pours in, many home cooks are sharing how their Honey Sriracha Salmon Bowls have turned into family favorites. Various adaptations, such as ingredient swaps or cooking styles, have encouraged creativity and led to delighted taste testers around the table.

Virtual cooking classes have also found this dish a popular choice. Participants often share how the vibrant colors of the bowl impress guests, while the incredible flavor invites second helpings.

Some readers have shared incredible variation stories, such as using leftover grilled vegetables for a quick reheating meal the following day, proving these bowls are perfect for maximizing ingredients and minimizing waste.

Through photography, readers have captured their versions of this dish, sharing it on social platforms. Visuals have sparked conversations and ideas, contributing to the evolving success of this beloved recipe.

Finally, enthusiastic readers often include their own personal recipes, offering tricks and tips they’ve discovered while customizing this dish, enhancing the overall variety available for future cooks.

Frequently Asked Questions

Can I use frozen salmon for this recipe?

Yes, frozen salmon can work well. Just ensure it’s thawed completely and patted dry before marinating to ensure the best texture and flavor.

What if I don’t have sriracha?

If you don’t have sriracha, you can substitute it with another hot sauce that you prefer. You can also mix in some chili powder or diced chili peppers for a spicy kick.

Can I prepare the honey sriracha sauce in advance?

Absolutely! You can prepare the sauce up to a week in advance and store it in the refrigerator. Just give it a good shake before using it.

Is this dish suitable for meal prep?

This recipe is perfect for meal prep! You can make several servings, store them in airtight containers, and enjoy them throughout the week.

How long does leftover salmon last in the fridge?

Leftover salmon can last in the refrigerator for up to three days. Ensure it’s stored in an airtight container to maintain freshness.

Can I use a different protein?

Yes! Feel free to substitute salmon with chicken, tofu, or shrimp—just adjust the cooking times as necessary to ensure your protein is properly cooked.

What’s the best way to reheat these bowls?

The best way to reheat the bowls is in the microwave or on the stovetop over low heat. Ensure all components are heated evenly, but avoid overheating to prevent drying out.

Are there vegan options available for this recipe?

Yes! Simply replace the salmon with marinated tofu or tempeh, and ensure other ingredients such as rice and veggies align with your vegan diet.

What sides pair well with this dish?

Excellent sides would include pickled vegetables, a simple Asian-style salad, or even sesame green beans that complement the flavors of the salmon bowls.

How do I know when salmon is cooked properly?

The best way to tell if salmon is cooked is to look for an opaque color and the salmon flaking easily with a fork. Cooking to an internal temperature of about 145°F is also recommended.

Additional Resources

If you’re interested in more recipes, try pairing Honey Sriracha Salmon Bowls with other Asian-inspired dishes, like teriyaki chicken or stir-fried vegetables.

For newbies in the kitchen looking to refine their skills, consider technique guides on fish cooking methods or mastering stir-frying to get the most out of these flavors.

Ingredient information on types of honey or varieties of sake can also enhance your culinary experience when making this dish.

If you’re interested in investing in kitchen equipment, high-quality pans or grills can make a significant difference in cooking fish successfully.

Lastly, seasonal variations ensure you enjoy this dish throughout the year, adapting fresh vegetables and flavors based on what’s in season.

Join the Conversation

We invite you to share your experiences with Honey Sriracha Salmon Bowls on social media! Post your creations and tag us to show off your personalized versions of this delicious dish.

Photography tips like capturing the dish in natural light or highlighting the vibrant colors of your ingredients can help make your posts pop.

Don’t hesitate to leave a review about your experience, sharing any modifications or personal twists that made the recipe uniquely yours. Your insights can help inspire fellow cooks and contribute to an engaging community!

Get involved in the discussion by subbing to our page for recipe updates and sharing your photos or suggestions with us! Together, let’s embrace good food and create memorable dining experiences, one bowl at a time.

The Recipe

Honey Sriracha Salmon Bowls

Serves: 4

Prep Time: 10 mins

Cook Time: 15 mins

Total Time: 25 mins

Kitchen Equipment Needed

  • Skillet
  • Measuring spoons
  • Spatula
  • Mixing Bowl
  • Airtight containers for storage

Ingredients

  • 4 salmon fillets
  • 1/3 cup honey
  • 1/4 cup sriracha sauce
  • 2 cups cooked rice (white or brown)
  • 1 cup mixed vegetables (bell peppers, carrots, broccoli)
  • 2 tablespoons soy sauce
  • 1 tablespoon sesame oil

Directions

  1. In a mixing bowl, combine honey, sriracha, soy sauce, and sesame oil. Mix well to create the marinade.
  2. Place the salmon fillets in the marinade, ensuring they are fully coated. Allow to marinate for at least 10 minutes.
  3. Heat a skillet over medium-high heat, and add the marinated salmon. Cook for about 5-6 minutes on each side, or until cooked through.
  4. In the same skillet, add mixed vegetables and sauté for about 3-4 minutes until tender-crisp.
  5. To serve, place rice at the bottom of each bowl, followed by salmon and sautéed vegetables. Drizzle with additional honey sriracha sauce if desired.

Recipe Notes

  • For a vegan-friendly option, replace salmon with tofu.
  • Experiment with different grains such as quinoa or farro for added texture.
  • Make the sauce spicy or mild based on personal preferences.
  • Store leftovers in airtight containers for up to three days.

Best Sweet Potato Casserole with Crunchy Pecan Topping

Best Sweet Potato Casserole: A Comfort Food Delight

⚖️
Difficulty
Easy

⏲️
Prep Time
20 mins

🕒
Cook Time
30 mins

⏱️
Total Time
50 mins

🍽️
Servings
8

Sweet potato casserole is a beloved dish that brings warmth and joy to any gathering. The creamy texture of mashed sweet potatoes, infused with buttery goodness and enriched with a hint of sweetness, creates a symphony of flavors that is both comforting and satisfying. With a crunchy pecan topping that adds a delightful contrast, this sweet potato casserole is perfect for holiday dinners or family gatherings. Each bite not only excites your taste buds but also evokes fond memories of home-cooked meals.

This recipe highlights the natural sweetness of the sweet potatoes while balancing it with savory and nutty notes. With its golden hue and enticing aroma, this sweet potato casserole is a feast for the eyes as well. Whether served as a side dish or a main attraction on the table, it’s bound to be a showstopper and garners raves from friends and family alike.

Quick Recipe Highlights

  • Flavor Profile: The casserole offers a harmonious blend of sweet and savory, complemented by the nutty crunch of toasted pecans.
  • Texture: Expect a creamy base paired with a crunchy topping, delivering a satisfying mouthfeel in every bite.
  • Aroma: The inviting scent of warm sweet potatoes mingled with hints of cinnamon and buttery pecans fills your kitchen.
  • Visual Appeal: The vibrant orange of the sweet potatoes topped with golden-brown pecans creates a visually stunning presentation.
  • Skill Level Needed: This recipe takes minimal cooking skills, making it accessible for beginner cooks.
  • Special Equipment: You’ll need a mixing bowl, a baking dish, and an oven to bring this delightful dish together.

Recipe Overview

  • Difficulty Level: The sweet potato casserole is categorized as easy, with straightforward steps that simplify the cooking process.
  • Category: This dish fits well in holiday and comfort food categories, making it a versatile addition to various meals.
  • Cuisine: Often associated with American cuisine, sweet potato casserole has roots in Southern cooking traditions, where sweet potatoes are a staple ingredient.
  • Cost: With affordable ingredients, this casserole can be made for under $20, making it budget-friendly for large gatherings.
  • Season: Autumn is the ideal season for this dish, coinciding with harvest time for sweet potatoes and holiday celebrations.
  • Occasion: Perfect for Thanksgiving dinners, potluck gatherings, or family reunions, this casserole is sure to impress.

Why You’ll Love This Recipe

Sweet potato casserole is a delightful blend of flavors and textures that will keep you coming back for more. The combination of creamy sweet potatoes and crunchy pecans creates a perfect harmony—sweetness from the potatoes balances with the nuttiness of the pecans, making each forkful a joyous experience. This dish not only captivates your taste buds but also provides an abundance of nutrients, thanks to the sweet potatoes, which are rich in vitamins A and C.

Convenience is another reason why this casserole shines. With a quick preparation time and simple steps to follow, you’ll have more time to spend with loved ones. Sweet potatoes are also versatile; you can transform leftovers into a delicious breakfast by mixing them into a smoothie or using them in pancakes.

Health-wise, sweet potatoes contribute to a well-balanced diet, loaded with fiber and antioxidants. They can aid in digestion, support heart health, and even play a role in managing blood sugar levels. This makes sweet potato casserole not just a treat, but a beneficial dish for your wellbeing.

Socially, this sweet potato casserole is ideal for gatherings. Its inviting aroma and eye-catching appearance can spark conversations and create lasting memories. Sharing delicious food often strengthens bonds between family and friends, making this casserole a perfect centerpiece.

Lastly, cost-effectiveness cannot be overlooked. The ingredients are readily available and typically inexpensive, allowing you to whip up this casserole without breaking the bank. It’s easier than ever to create a show-stopping dish that sates both hunger and budget.

Historical Background and Cultural Significance

The sweet potato casserole boasts a rich history intertwined with Southern American cooking. Traditionally made with yams, early iterations of this dish were often savory, incorporating spices and herbs. However, the introduction of sweet potatoes into the recipe transformed it into the sweet dessert we cherish today. The shift reflects the regional availability of ingredients and the evolution of American cuisine over time.

In Southern culture, sweet potatoes are celebrated not only for their flavor but also for their historical significance as a staple food. They embody resilience and resourcefulness, often serving as a primary source of nutrition. This dish has become a Thanksgiving favorite, representing gratitude and togetherness during family gatherings.

Over the years, the recipe for sweet potato casserole has evolved, integrating various flavors and toppings. From marshmallows to pecans, each household adds its unique touch, reflecting personal and familial traditions. This adaptability has led to numerous regional variations that highlight the local ingredients and culinary preferences.

Today, sweet potato casserole is a beloved dish across the United States. It transcends cultural barriers, uniting people in their love for hearty, comforting food. Its presence at holiday tables signifies not only nourishment but also a lasting tradition that connects generations.

Ingredient Deep Dive

Sweet potatoes are the star of this casserole, cherished for their vibrant color and nutritious benefits. This root vegetable is historically significant, originally cultivated by indigenous peoples and eventually becoming a staple in Southern cuisine. Nutritionally, sweet potatoes are a powerhouse, packed with beta-carotene, vitamins A and C, and fiber. When selecting sweet potatoes, look for firm, smooth-skinned varieties free of blemishes. Proper storage involves keeping them in a cool, dark place to maintain freshness.

The pecans in this dish offer a delightful crunch that contrasts beautifully with the creaminess of the sweet potatoes. Native to North America, pecans have been consumed for centuries and are known for their heart-healthy fats, providing omega-3 and omega-6 fatty acids. Choose fresh pecans that are plump and fragrant, and store them in an airtight container to protect against rancidity. If a pecan shortage occurs or dietary restrictions are in place, walnuts or almonds can serve as excellent substitutes due to their similar textures and flavors.

Cinnamon adds a warm, comforting aroma and flavor, tying the dish together beautifully. As a spice used globally, cinnamon has a long history, dating back to ancient times. It’s known for its anti-inflammatory properties and ability to aid digestion. Opt for Ceylon cinnamon for a more delicately sweet profile or stick with cassia for a bolder flavor. When storing, keep your spices in a cool, dark place to maintain their potency, and consider trying fresh ground varieties for more intense flavor.

Common Mistakes to Avoid

  • Not peeling sweet potatoes thoroughly: Leaving skins can affect texture and overall taste.
  • Over-mixing the sweet potato mixture: This can lead to a gummy consistency. Mix just until combined.
  • Skipping the taste test: Always taste and adjust sweetness or seasoning before baking.
  • Not using enough fat: Using insufficient butter or oil can result in a dry casserole. Be generous for a creamy finish.
  • Baking at the wrong temperature: Ensure your oven is properly preheated to achieve the right texture and flavor.
  • Forgetting to cover: If baking too long, cover the casserole with foil to prevent over-browning.
  • Using stale nuts: Ensure your pecans are fresh to enhance flavor; old nuts may taste rancid.
  • Not allowing width for topping: Spread toppings evenly for balanced texture; avoid clumps that won’t toast properly.
  • Ignoring the resting period: Let the casserole sit after baking to set and enhance flavors.
  • Neglecting to grease the baking dish: This can lead to sticking and make serving difficult. Always grease or use baking spray.

Essential Techniques

When preparing sweet potato casserole, mastering the technique of boiling sweet potatoes is paramount. Boil whole sweet potatoes with their skins on; this helps preserve moisture and maintain flavor. Cut them carefully into larger pieces to ensure even cooking, and avoid overcooking, which leads to mushy potatoes. You’ll know they’re ready when a fork easily pierces through the flesh.

Another essential technique is correctly mashing the sweet potatoes. Use a potato masher or a food processor to achieve a smooth consistency. It’s crucial to do this while the sweet potatoes are still warm to help break down fibers easily. Be cautious of over-mixing, which can lead to a gluey texture rather than a fluffy finish. The right consistency will result in a creamy, luscious base for your casserole.

Pro Tips for Perfect Best Sweet Potato Casserole

1. Choose sweet potatoes of uniform size for even cooking. It ensures each piece cooks through simultaneously, avoiding discrepancies in texture or doneness.
2. For added depth of flavor, consider roasting sweet potatoes instead of boiling. The roasting process caramelizes natural sugars, yielding a sweeter, more complex flavor profile.
3. Experiment with spices; add a pinch of nutmeg or ginger for unique flavor notes that complement the sweetness of the potatoes.
4. Toast your pecans before adding them to the topping. Toasting enhances their flavor and adds an extra layer of richness to the finished dish.
5. Use brown sugar or maple syrup for a deeper sweetness that pairs beautifully with sweet potatoes. Adjust the amount according to your taste preference.
6. To achieve a crispy topping, broil the casserole during the last few minutes of baking. Watch it closely to prevent burning.
7. Let your casserole cool slightly after baking for easier slicing and serving. It allows the dish to set and slice more neatly.
8. If making ahead, assemble the casserole without baking, cover it tightly, and refrigerate. When ready to serve, simply bake straight from the fridge, adding a few extra minutes to cook time.

Variations and Adaptations

For a regional twist, try adding Southern-style flair by incorporating cooked bacon or smoked sausage into your casserole. This makes for a savory bite that contrasts beautifully with the sweetness of the potatoes. Seasonal adaptations can include pumpkin or butternut squash, expanding the flavor palate while retaining the comforting essence.

If dietary modifications are required, consider making it vegan by substituting butter with coconut oil and using almond milk instead of dairy. For a healthy spin, use cauliflower instead of sweet potatoes for a lower-carb version that retains a creamy texture.

For added flavor variations, stir in chopped apples or cranberries for a sweet-tart element. These ingredients provide an unexpected burst of flavor and add visual appeal, making each serving pop with color. When preparing for a gathering, try presenting the casserole in individual dishes to enhance the dining experience.

Serving and Presentation Guide

When serving sweet potato casserole, consider garnishing with freshly chopped herbs, like parsley or chives, for a vibrant contrast against the orange hue of the dish. Place the casserole in the center of the table, allowing guests to help themselves, or serve individual portions for an elegant touch.

For modern serving suggestions, try using small ramekins for a personal-sized dessert experience. This allows guests to enjoy their serving warm from the oven. Temperature-wise, sweet potato casserole is best enjoyed warm but can also be served at room temperature, making it versatile for buffets and potlucks.

Consider pairing the casserole with traditional accompaniments such as roasted turkey, green beans, or cornbread. This combination can create a balanced meal that showcases the casserole as a highlight around the dinner table.

Wine and Beverage Pairing

When considering wine pairings for sweet potato casserole, a light, fruity white wine such as Riesling complements the dish nicely. The wine’s acidity balances the sweetness of the casserole, creating a harmonious dining experience. For red wine lovers, a Pinot Noir offers a softer approach, enhancing the flavor profile without overpowering it.

If you prefer non-alcoholic options, consider serving sparkling cider or a refreshing ginger ale. Both beverages provide a crisp contrast to the rich flavors of the casserole. For a cozy touch, a spiced apple cider could work beautifully, bringing warmth and festive aromas to your meal.

For evening gatherings, a warm tea or coffee can be delightful post-dinner choices, allowing guests to continue indulging in seasonal warmth while enjoying the sweet flavors of the casserole.

Storage and Shelf Life

To store leftover sweet potato casserole, allow it to cool completely before transferring it to an airtight container. Refrigerate promptly, and it should be consumed within 3-4 days for optimal freshness. If you wish to keep it longer, consider freezing the casserole. After cooling, wrap tightly in plastic wrap and then in aluminum foil.

When reheating, it’s best to thaw the frozen casserole in the refrigerator overnight for best results. Reheat in the oven until warmed through, ensuring it retains its creamy texture. If you notice any signs of spoilage, such as off smells or unusual colors, it’s advisable to discard the casserole to ensure food safety.

Make Ahead Strategies

Making sweet potato casserole ahead of time can save you stress on the big day. Prepare the casserole up to the point of baking, cover tightly, and refrigerate. This allows the flavors to meld beautifully, enhancing the dish’s overall taste.

If you’re planning to freeze, prepare the casserole, let it cool, and then freeze it unbaked. To ensure quality remains high, consume the casserole within 2-3 months. When it’s time to enjoy, simply thaw overnight in the refrigerator, then bake as instructed.

Consider adding fresh elements closer to serving time, such as freshly chopped pecans or a sprinkle of marshmallows. This allows for a crunchy texture and beautiful visual presentation right before serving.

Scaling Instructions

Scaling sweet potato casserole can be done easily for larger gatherings. To halve or double the recipe, adjust the quantities proportionately for all ingredients while keeping baking time generally the same. For significant changes, like tripling, consider using a larger baking dish to accommodate the volume without overcrowding.

Equipment adjustments may be necessary, such as using multiple dishes for larger batches or baking them in shifts if you have limited oven space. Pay attention to timing, ensuring you allow enough time for the casserole to cook through fully without scorching the top.

If you decide to make larger portions, keep in mind that the casserole may require a slightly longer baking time. Use a food thermometer to check for doneness; sweet potatoes should be tender and creamy when fully cooked.

Nutritional Deep Dive

The macro breakdown of this casserole showcases its appealing nutritional profile. Sweet potatoes provide a healthy serving of carbohydrates, primarily natural sugars, while offering significant dietary fiber to support good digestion. Additionally, the fats from the pecans contribute to overall energy requirements and support heart health.

Micronutrient analysis reveals that sweet potatoes are especially high in beta-carotene, an antioxidant that benefits eye health and boosts the immune system. The addition of cinnamon not only enhances flavor but also comes with its own health benefits, including blood sugar regulation.

This dish can fit seamlessly into various dietary considerations. Consuming sweet potato casserole provides a nice balance of carbohydrates and healthy fats, making it suitable for those looking for wholesome side options. If you monitor portion sizes, enjoying this casserole can effortlessly fit into a weight management strategy.

Dietary Adaptations

For those adhering to gluten-free diets, this sweet potato casserole is naturally gluten-free, making it a perfect choice. Ensure all ingredients, particularly any sweeteners or toppings, are certified gluten-free to avoid cross-contamination.

Dairy-free adaptions can include substituting butter with margarine or coconut oil and using almond or coconut milk instead of traditional dairy. This maintains the same creamy texture while accommodating dairy sensitivities.

If you’re following a vegan diet, replacing eggs with flax eggs or applesauce can yield similar binding results. For individuals focused on low-carb or keto diets, consider experimenting with cauliflower in place of sweet potatoes for a lower-carb alternative. You can also minimize sweetness by using sugar substitutes.

Troubleshooting Guide

If you encounter issues with texture, ensure sweet potatoes are thoroughly mashed and not over-mixed, which can lead to a gummy end product. If your casserole is too watery, consider reducing the moisture by cooking down sweet potatoes slightly before mashing them.

For flavor balance, if the casserole turns out too sweet, add a pinch of salt or a dash of vinegar to temper the sweetness. If it lacks sweetness, gradually add sweetener until the desired flavor is achieved.

Temperature problems during baking often stem from uneven oven heat. Use an oven thermometer to check accuracy. If the top is browning too quickly, cover it with foil until the end of the baking time to prevent burning.

When tackling ingredient substitutions, ensure replacements are complementary. If you’ve run out of sweet potatoes, consider mixing with butternut squash; however, keep in mind adjustments in texture and flavor may be required.

Recipe Success Stories

Community feedback on this sweet potato casserole is overwhelmingly positive, with many sharing their unique twists and adaptations. Readers have suggested incorporating nuts from local farmers for fresh, seasonal flavors, or emphasizing local herbs for an aromatic enhancement. Many families report this dish becoming a cherished family tradition during holidays.

Variation successes often highlight personal stories, with some readers adapting the recipe for various dietary needs while still preserving its heartwarming qualities. Photography tips from the community regularly emphasize capturing the vibrant colors of sweet potatoes, suggesting a natural light setup for the best results.

In sharing personal experiences, readers often discuss substituting sweet potatoes with other roots or integrating international flavors that resonate with their cultural heritage—demonstrating the versatility of this beloved dish.

Frequently Asked Questions

Q1: Can I use canned sweet potatoes instead of fresh?
A1: Yes, canned sweet potatoes can be a convenient substitute. However, be sure to drain and rinse them well to remove excess syrup, and adjust the sugar in the recipe accordingly to avoid an overly sweet casserole.

Q2: How can I make the casserole ahead of time?
A2: You can prepare the casserole up to the point of baking, cover it tightly, and refrigerate for up to 24 hours. On baking day, allow it to come to room temperature before popping it in the oven.

Q3: Is sweet potato casserole best served warm or cold?
A3: Sweet potato casserole is best served warm. It enhances the creamy texture and sweet flavors, creating a comforting dish that is perfect for gatherings.

Q4: Can I freeze leftovers?
A4: Yes, sweet potato casserole can be frozen. Allow it to cool, then transfer to an airtight container. It can last in the freezer for up to 2-3 months. Thaw it in the refrigerator before reheating.

Q5: What can I use as a topping if I don’t like pecans?
A5: If you prefer to skip pecans, you can use other nuts like walnuts or almonds, or opt for a crumb topping made with oats for a different texture.

Q6: How do I know when it’s done baking?
A6: The casserole is done when the topping is golden brown and the center is heated through. You can insert a knife into the center—if it comes out warm, it’s ready!

Q7: Can I add marshmallows to the topping?
A7: Absolutely! Adding marshmallows on top creates a sweet, chewy contrast to the creamy sweet potatoes. Add them during the last 10 minutes of baking for a delightful finish.

Q8: Is sweet potato casserole a healthy dish?
A8: Sweet potato casserole can be a healthy dish, especially when made with less sugar and healthier toppings. Sweet potatoes are rich in vitamins and fiber, making them a nutritious choice.

Q9: What spices can I add for more flavor?
A9: Besides cinnamon, consider incorporating nutmeg, cloves, or ginger to enhance the flavor profile and add warmth to the dish.

Q10: How can I make it gluten-free?
A10: This recipe is naturally gluten-free since sweet potatoes do not contain gluten. Just ensure that all other ingredients, including any toppings, are gluten-free.

Additional Resources

If you enjoyed making this sweet potato casserole, consider exploring related recipes such as butternut squash gratin or mashed pumpkin. These dishes highlight seasonal ingredients and incorporate similar cooking techniques.

For technique guides, check out resources on how to properly boil or roast vegetables. Diving into ingredient information on sweet potatoes will also enhance your understanding and appreciation of such a versatile staple.

Finally, don’t hesitate to invest in quality kitchen equipment, such as an immersion blender or a high-quality baking dish that can withstand the rigors of many hearty meals. Seasonally, keep an eye out for local farmers’ markets to find the freshest ingredients.

Join the Conversation

We invite you to share your thoughts on this sweet potato casserole recipe! Whether you’ve made it with a twist or included a personal touch, connect with us by sharing your recipes and photography.

Use social media hashtags like #SweetPotatoCasseroleLoved and #CookingWithLove to engage with our community. Recipe reviews help us improve, and we value your feedback.

We also encourage you to share variations you’ve tried or unique adaptations you’ve made for dietary needs. Your insights might inspire others and create an even richer tapestry of shared recipes and experiences!

The Recipe

Best Sweet Potato Casserole

Serves: 8

Prep Time: 20 mins

Cook Time: 30 mins

Total Time: 50 mins

Kitchen Equipment Needed

  • Mixing bowl
  • Baking dish (9×13 inches)
  • Masher or food processor
  • Oven
  • Measuring cups and spoons
  • Knife and chopping board

Ingredients

  • 4 large sweet potatoes
  • 1/2 cup butter, melted
  • 1/2 cup milk (or dairy-free alternative)
  • 1 cup brown sugar (adjust to taste)
  • 1 teaspoon vanilla extract
  • 1 teaspoon cinnamon
  • 1/2 teaspoon nutmeg (optional)
  • 1 cup chopped pecans
  • 1 cup mini marshmallows (optional)

Directions

  1. Preheat the oven to 350°F (175°C).
  2. Peel and chop sweet potatoes into large chunks, then boil in a large pot until tender, about 15-20 minutes.
  3. Drain the sweet potatoes and let them cool slightly before mashing them in a mixing bowl.
  4. Add melted butter, milk, brown sugar, vanilla extract, cinnamon, and nutmeg to the mashed sweet potatoes. Mix until well combined.
  5. Spread the sweet potato mixture evenly into a greased 9×13 baking dish.
  6. In a separate bowl, mix chopped pecans with a tablespoon of butter and sprinkle over the sweet potato mixture. If using, add mini marshmallows on top.
  7. Bake in the preheated oven for 30 minutes, or until the topping is golden brown.
  8. Let cool for a few minutes before serving.

Recipe Notes

  • Feel free to substitute maple syrup for brown sugar for a different flavor profile.
  • Leftovers can be reheated in the microwave or oven for quick servings.
  • Add additional spices (ginger or cloves) to personalize flavors.

Best Homemade Bakery French Bread – Soft and Crusty

Homemade Bakery French Bread: The Ultimate Comfort Loaf

⚖️
Difficulty
Medium

⏲️
Prep Time
30 mins

🕒
Cook Time
25 mins

⏱️
Total Time
55 mins

🍽️
Servings
1 loaf

French bread holds a cherished place in culinary traditions worldwide, celebrated for its crispy crust, airy crumb, and neutral yet rich flavor that makes it versatile for any occasion. This Homemade Bakery French Bread recipe invites you into the warm atmosphere of a bakery, offering a delightful hands-on experience as you knead and shape the dough. Imagine the comforting aroma wafting through your kitchen, reminiscent of quaint French bakeries, as you await the mouthwatering golden-brown loaf that emerges from your oven.

With the perfect balance of ingredients and a little patience, you’ll create a crusty loaf that boasts a soft interior, delightful for morning toast or as an elegant accompaniment to dinner. The beauty of this recipe lies not just in the taste, but in the experience of making it. The process of watching your dough rise and transform is incredibly rewarding and brings a sense of accomplishment, making this Homemade Bakery French Bread a go-to choice for both novice and experienced bakers alike.

Quick Recipe Highlights

  • Flavor Profile: This bread features a subtle sweetness, the nutty essence of wheat, and a hint of yeast that gracefully enhances various toppings.
  • Texture: With its crispy exterior and a fluffy, airy crumb, this bread strikes the perfect balance between crust and softness.
  • Aroma: Expect an enticing blend of warm bread notes, complemented by hints of toasted wheat and fresh yeast as it bakes.
  • Visual Appeal: A golden-brown crust with a rustic feel and slight sheen makes this French bread a standout centerpiece at any meal.
  • Skill Level Needed: This recipe is moderate; it requires basic baking techniques like kneading and proofing.
  • Special Equipment: A large mixing bowl, baking sheet, and preferably, a kitchen scale for accurate measurements.

Recipe Overview

  • Difficulty Level: While creating bread can seem daunting, this recipe is straightforward and perfect for those willing to dedicate time; it allows you to learn fundamental baking skills.
  • Category: Enjoy this bread as part of breakfast, lunch, or dinner; it pairs perfectly with soups, cheeses, and spreads.
  • Cuisine: This recipe draws inspiration from traditional French baking, capturing the essence of artisanal bread-making techniques passed down through generations.
  • Cost: Ingredients are affordable and often staples in the pantry, making this a cost-effective culinary endeavor.
  • Season: While delicious year-round, this bread is especially comforting during colder months when a freshly baked loaf brings warmth to the home.
  • Occasion: Serve this Homemade Bakery French Bread at family gatherings, dinner parties, or simply as a delightful treat on a leisurely weekend.

Why You’ll Love This Recipe

Making your own Homemade Bakery French Bread is not just about satisfying a craving; it’s a sensory journey from start to finish. The combination of the crusty outer layer and the soft, pillowy interior creates a satisfying mouthfeel that complements both sweet and savory toppings. Whether you enjoy it with butter and jam for breakfast or as a vehicle for dipping into hearty soups, the bread adapts beautifully to your preferences.

Additionally, baking this bread at home provides a wonderful opportunity to bond with family. Kids, in particular, enjoy participating in simple tasks like kneading the dough or shaping the loaf, creating lasting memories in the kitchen. As the enticing aroma fills your home during the baking process, it sets the mood for a comforting meal shared with loved ones.

From a nutritional perspective, homemade bread is often healthier than store-bought options. You have complete control over the ingredients, allowing you to avoid preservatives and artificial additives. Plus, the flavor and texture of fresh bread are unmatched, giving you a wholesome and enjoyable eating experience.

Cost-effectiveness is another reason to embrace this recipe. With basic pantry staples, you can produce a delicious homemade loaf that rivals anything from a bakery. Making bread at home reduces the expense of pre-packaged options while promoting sustainable cooking practices by reducing waste.

Lastly, having fresh bread on hand enhances your entertaining game. Slice it up for a rustic cheese platter, or use it to create gourmet sandwiches. This Homemade Bakery French Bread is both a crowd-pleaser and an easy way to elevate your dining experience.

Historical Background and Cultural Significance

The origins of French bread trace back to ancient civilizations who baked rustic loaves made from flour and water. Over centuries, this evolved into the beloved baguette, marked by its distinct shape and crust. In France, bread takes on a vital role in daily life, as it symbolizes nourishment and comfort.

French bread’s cultural significance cannot be understated; each region boasts its unique variations reflecting local ingredients and traditions. For instance, the sourdough variations in the south provide a tangy twist, while northern regions lean towards denser loaves. The daily ritual of purchasing fresh bread from local boulangeries connects communities and cultivates a sense of belonging.

As baking techniques advanced, the introduction of yeast transformed bread-making, allowing for the light, airy loaves we know today. This evolution not only changed the texture but also expanded the flavor profiles available, allowing bakers to experiment and create unique offerings.

Today, artisanal bread-making is experiencing a renaissance, with many bakers returning to traditional methods, emphasizing quality ingredients and patience in the process. This Homemade Bakery French Bread reflects that rich history while allowing each home baker to bring their personal touch to a time-honored recipe.

Ingredient Deep Dive

Flour: Flour is the backbone of any bread, with all-purpose or bread flour being ideal for achieving the right protein level for gluten development. Different types of flour can enhance the flavor and texture; for example, whole wheat flour offers a heartier taste. Always choose high-quality flour for the best results.

Yeast: Yeast is crucial for fermentation and unleashing delightful flavors in the bread. Active dry yeast is commonly used for its convenience; however, instant yeast can be substituted. When using yeast, always check expiration dates to ensure optimal performance, as old yeast won’t rise effectively.

Salt: Salt plays a significant role in enhancing the flavors of your bread while regulating yeast activity for controlled fermentation. Use sea salt or kosher salt for the best taste, avoiding iodized salt for baking since it may result in an off-flavor.

Water: Water activates the yeast and creates the desirable crumb structure through hydration. Using filtered water can eliminate any chlorine or impurities that could interfere with yeast performance. Aim for lukewarm water, as it encourages yeast activity without harming it.

Sugar: A small amount of sugar can stimulate yeast activity and improve browning during baking. While granulated sugar is most common, variants like honey or maple syrup can add sweetness and depth to the flavor profile of your bread.

Common Mistakes to Avoid

  • Not measuring ingredients accurately: Accurate measurements are crucial for achieving the right texture and rise in your bread. Use a kitchen scale for best results, especially for flour.
  • Using hot water: Water that’s too hot can kill yeast, preventing your dough from rising. Always use lukewarm water for optimal yeast activation.
  • Skipping proofing: Proofing is essential for developing flavor and texture. Allow the dough to rise adequately; rushing this step can lead to dense bread.
  • Overworking the dough: Kneading develops gluten, but overworking can lead to tough bread. Knead only until the dough is smooth and elastic.
  • Not preheating the oven: Skipping this can result in uneven baking and insufficient crust formation. Always preheat the oven to ensure proper cooking.
  • Cutting into the bread too soon: Letting your bread cool completely before slicing is vital for maintaining its structure and preventing gummy interiors.
  • Using old yeast: Yeast loses potency over time. Always check expiration dates and store yeast properly for maximum efficiency.
  • Failing to create steam: Introducing steam during baking enhances crust development. Use a baking stone or a pan of water placed in the oven for best results.
  • Neglecting flavor additions: Experimenting with herbs, spices, or seeds can elevate your bread. Don’t hesitate to customize this recipe with your favorite ingredients.
  • Ignoring dough texture: The dough should be slightly tacky but not overly sticky. Adjust flour or water as necessary during the mixing process for the right consistency.

Essential Techniques

Kneading: Kneading is crucial for developing gluten, which gives bread its structure and chewy texture. Begin by pressing and folding the dough on a clean surface, incorporating air to strengthen it. Avoid over-kneading; the dough should be smooth and elastic, ready for its first rise. A visual cue for success is a windowpane test, where the dough stretches without tearing.

Proofing: This technique allows the yeast to ferment, creating gas that makes the dough rise. After kneading, let the dough rest in a warm environment until it doubles in size, usually about 1-2 hours. Monitor the dough carefully; if it’s over-proofed, the bread could collapse during baking. A good sign of readiness is the dough holding its shape when gently pressed.

Pro Tips for Perfect Homemade Bakery French Bread

1. Use a kitchen scale for precise ingredient measurements, ensuring consistent results in every loaf.
2. Experiment with different flour blends, like bread flour and whole wheat, to develop unique flavors and textures.
3. Allow your dough ample time to rise; patience yields better flavor and structure.
4. Consider using a Dutch oven for baking, as it creates a steamy environment that enhances crust quality.
5. Use a sharp blade or lame to score the dough before baking, allowing for controlled expansion and an artistic touch.
6. Try adding herbs or spices to the dough for an added layer of flavor; rosemary and garlic work wonderfully together.
7. Invest in a bread thermometer to check for doneness; bread is typically done when it reaches an internal temperature of about 190°F.
8. If your bread is browning too quickly in the oven, tent it loosely with aluminum foil to prevent burning while it finishes baking.

Variations and Adaptations

For a taste of different regions, consider creating sourdough or using essential oils like rosemary and lavender for infused varieties. Seasonal adaptations could include mixtures of dried fruits for a delightful autumn loaf or incorporating pumpkin seeds for a festive twist during the fall.

Dietary modifications are simple; you can use gluten-free flour blends for those with sensitivities, although results may vary. For a low-carb version, almond flour or coconut flour substitutes can yield intriguing results, though adjustments are necessary to maintain the correct moisture levels.

If a firmer crust is desired, try brushing the dough with olive oil or butter pre-baking for a delectable sheen. Alternatively, experiment with various toppings; sesame or poppy seeds can be sprinkled on before baking for added crunch and flavor.

Serving and Presentation Guide

For an elegant presentation, slice your bread on a diagonal for longer slices, showcasing the airy crumb structure. Serve warm, perhaps alongside a small dish of olive oil or herb-infused butter for dipping. Consider garnishing the table with fresh herbs for a sophisticated touch.

Pair your Homemade Bakery French Bread with spreads like hummus or a robust cheese platter for easy, flavorful appetizers. Additionally, placing the loaf in a rustic basket lined with a cloth napkin adds charm to your serving style.

Temperature is key; serving this bread slightly warm enhances the sensory experience. For optimal flavor, pair it with crusty soups or salads, allowing the bread to absorb delicious broth.

For portion control, offer individual slices or small rounds at gatherings for easy sharing. This approach not only showcases your beautiful bread but also encourages guests to savor each bite while mingling.

Wine and Beverage Pairing

When it comes to pairing wine with your Homemade Bakery French Bread, consider a light white such as Sauvignon Blanc, which complements the subtle flavors without overpowering them. If you prefer red wine, a Pinot Noir offers a refreshing balance with its bright acidity.

For non-alcoholic options, sparkling water infused with citrus or fresh herbs enhances the meal experience while cleansing the palate between bites. When serving the bread for a hearty meal, consider pairing it with a robust beer like a pale ale or a traditional ale that echoes the bread’s yeasty notes.

Coffee aficionados may enjoy a light roast brewed using the pour-over method, allowing the nuanced flavors of the bread to shine through. Ultimately, choose beverages that speak to your personal preferences and elevate the experience.

Storage and Shelf Life

Store your Homemade Bakery French Bread in a cool, dry place, wrapped in a clean kitchen towel to maintain its crustiness. For extended storage, place it in a paper bag to avoid unnecessary moisture that could lead to sogginess.

Whole loaves can last for about 3-4 days at room temperature. If you notice a change in texture, it may be time to freeze or toast the bread. When freezing, wrap the bread tightly in plastic wrap and aluminum foil to prevent freezer burn, preserving its taste for up to a month.

To reheat, preheat your oven to 350°F and wrap the bread in foil for about 10-15 minutes. If toasting, aim for a light golden color, enhancing the crunchy exterior without drying it out.

Signs of spoilage include visible mold or an off smell; in such cases, it’s best to discard the bread to ensure your health and safety.

Make Ahead Strategies

Consider preparing the dough the night before and allowing it to rise in the refrigerator. This method enhances flavor as the yeast continues to develop slowly, resulting in a more complex taste profile. Before shaping, allow the dough to come to room temperature for ease of handling.

You can also shape your loaves and freeze them before the final proofing step. When ready to bake, remove the dough from the freezer, let it thaw, and proceed with the second rise; this makes for an effortless last-minute addition to any meal.

Organizing a timeline is helpful; consider setting aside specific days or times for mixing, kneading, and shaping to streamline your homemade baking experience effectively.

Lastly, allow for new additions; incorporating freshly chopped herbs or cheese just before the final rise adds fun twists to the flavor profile of your Homemade Bakery French Bread.

Scaling Instructions

Adjusting your recipe to serve larger or smaller groups is simple. Halving the recipe requires basic conversions of flour and water, easily managed with a kitchen scale. Always maintain the same ratio of ingredients for successful results.

For doubling or tripling, keep an eye on your mixing bowl size and ensure you have ample oven space, as larger loaves may need more time to cook through. Moreover, adjust baking times as necessary; larger loaves might require additional time in the oven.

Consider using multiple baking sheets or pans when cooking larger batches. Monitor internal temperatures to ensure that all loaves come out perfectly baked regardless of size.

Lastly, while scaling, maintain great taste and texture by choosing the same high-quality ingredients for consistent results in each loaf.

Nutritional Deep Dive

Analyzing the macro contents of your Homemade Bakery French Bread reveals contributions from carbohydrates, proteins, and minimal fats, making it a great energy source. Typically, a slice contains around 70-100 calories, depending on thickness and additives.

In terms of micronutrients, vital components include B vitamins essential for energy absorption, along with minerals like iron and magnesium present in whole grain flour. These nutrients contribute to healthy bodily functions, benefiting active lifestyles.

For added health benefits, consider ingredient substitutions, such as whole wheat for white flour, enhancing fiber content and fulfilling daily intake requirements more effectively.

Monitoring portion size is crucial. While homemade bread is undoubtedly delicious, practicing moderation will help manage calorie consumption, ensuring it complements your meals rather than overwhelming them.

Implement weight management tips by enjoying bread as one component of a balanced plate alongside proteins and vegetables, fostering a wholesome approach to your diet.

Dietary Adaptations

Creating gluten-free versions of your Homemade Bakery French Bread involves using prepared gluten-free flour blends that typically contain a mix of starches and natural thickeners. While flavor and texture may differ, many find these adaptations equally enjoyable with a few experiments.

For dairy-free options, replacing any milk or butter with non-dairy alternatives like almond or coconut milk works seamlessly while adding a delightful twist to the flavor profile.

If you wish to create vegan bread, simply omit any eggs or dairy and replace with plant-based options or additives that promote rise and binding in the dough.

Low-carb and keto adaptations can be achieved using almond flour or coconut flour, resulting in moist yet dense loaves. Be aware that adjustments in liquid levels may be necessary to keep the texture balanced.

Lastly, a paleo approach incorporates natural ingredients aligned with a primal diet. Utilizing almond flour and avoiding grains while enriching flavor with seeds and herbs often results in satisfying loaves.

Troubleshooting Guide

If your Homemade Bakery French Bread exhibits dense texture, ensure adequate kneading and proofing; proper gluten development and fermentation are critical for successful rises.

Balancing flavors may present challenges; taste adjustments can be made during mixing by adding a dash of salt or sugar to achieve your desired profile. Be cautious of overly salty ingredients; moderate additions can create harmony in taste.

Temperature problems during baking may result in uneven browning; adjusting oven racks or rotating pans can help. If loaves get too dark before fully baked, tent with foil to allow even cooking without risking an overbaked crust.

Ingredient substitutions can sometimes lead to unexpected results; always keep an eye on texture changes and be prepared to add or reduce moisture accordingly.

For those struggling with rising issues, ensure yeast is fresh and properly activated. If dough is sluggish, warm temperatures and more time may be required for optimal fermentation.

Recipe Success Stories

Readers have shared numerous successful adaptations of the Homemade Bakery French Bread, praising its versatility in various diets. One reader experimented with incorporating cheese into the dough, creating a savory twist that became an instant hit at family gatherings.

Others have reported satisfaction with their gluten-free versions, where they found impressive results through trial and error, noting the importance of selecting quality gluten-free flour blends.

Community engagement around this recipe highlights shared excitement as families collaborate in the kitchen, turning baking sessions into cherished traditions filled with laughter and learning.

Individuals appreciate the straightforward nature of the recipe, often emphasizing how rewarding it is to create bread from scratch, igniting their passion for baking and inspiring friends and family to join in the fun.

Additionally, photography tips shared among readers encourage capturing the beauty of each loaf, inspiring social media sharing and bringing the community together around a shared love for baking.

Frequently Asked Questions

Can I use all-purpose flour instead of bread flour?

Yes, all-purpose flour can be substituted for bread flour. However, bread flour has a higher protein content, which contributes to a chewier texture. Expect a slight difference in the finished loaf when using all-purpose flour.

What should I do if my dough doesn’t rise?

If your dough fails to rise, check that your yeast is fresh and active. You can test it by mixing it with warm water and a bit of sugar; if it bubbles within a few minutes, it’s good to go. Be sure to provide a warm environment for proofing, as cool temperatures can hinder rising.

How do I store leftover bread?

To store leftover bread, wrap it in a clean kitchen towel to maintain crustiness, or place it in a paper bag. Store at room temperature for up to 4 days; for longer storage, freeze tightly in plastic wrap and foil.

What’s the best way to reheat French bread?

To reheat French bread, wrap it in foil and place it in a preheated oven at 350°F for about 10-15 minutes. This method restores crispness while warming the interior without drying it out.

Can I freeze the dough before baking?

Yes, you can freeze the shaped dough before the final proof. Wrap it tightly and when ready to use, let it thaw in the refrigerator overnight, then allow it to rise to double its size before baking.

How can I achieve a crustier bread?

For crustier bread, create steam in the oven by placing a pan of hot water on the bottom while baking or using a Dutch oven to help maintain moisture during cooking.

Can I add herbs or spices to the dough?

Definitely! Adding herbs like rosemary or thyme to the dough can enhance flavor and create delightful variations. Fresh or dried additions can be incorporated during mixing.

What’s the difference between a baguette and French bread?

Baguettes are a type of French bread characterized by their long, thin shape and crispy crust. While they share ingredients, the shaping and baking process yield different textures and appearances.

Is there a way to tell if my bread is done baking?

To check if your bread is done, tap the bottom of the loaf; it should sound hollow. Alternatively, use an instant-read thermometer; aim for an internal temperature of about 190°F for fully baked bread.

Can this recipe be made without sugar?

Yes, sugar can be omitted if desired, but it helps activate the yeast and improve browning. If avoiding sugar for dietary reasons, consider using a sugar substitute that doesn’t hinder yeast activity.

How long will the bread keep in the freezer?

Your Homemade Bakery French Bread can last in the freezer for up to a month when properly wrapped. To maintain its quality, ensure it’s well-sealed from air exposure.

Additional Resources

Delve deeper into the world of baking with related recipes, such as artisan breads or unique flatbreads that challenge your skills. Explore technique guides that emphasize kneading and fermentation for those wishing to expand their baking repertoire.

Learn more about ingredients used in bread recipes, focusing on flour types and their impacts on flavor and texture. Consider investing in quality equipment, such as mixing bowls and dough scrapers, to enhance your baking experience.

Watch for seasonal variations and how different grains can add intrigue to traditional recipes, allowing you to celebrate different flavors throughout the year.

Join the Conversation

We invite you to share your baking adventures and experiences with Homemade Bakery French Bread on social media! Tag us in your photos and stories, as we love seeing your unique creations and interpretations.

Share the recipe with friends and family to inspire them to create their own bread, fostering a community of home bakers. Encourage recipe reviews and feedback, creating a space for sharing tips and tricks.

Was your bread a success? Consider sharing variations you tried to inspire others in their baking journey. Let’s come together as a community that celebrates homemade bread and the joy it brings to our tables!

The Recipe

Homemade Bakery French Bread

Serves: 1 loaf

Prep Time: 30 mins

Cook Time: 25 mins

Total Time: 55 mins

Kitchen Equipment Needed

  • Mixing bowl
  • Baking sheet
  • Clean kitchen towel
  • Kitchen scale (optional)
  • Dough scraper (optional)
  • Bread knife or lame

Ingredients

  • 3 cups bread flour
  • 1 cup lukewarm water
  • 2 teaspoons active dry yeast
  • 1 teaspoon sugar
  • 1 teaspoon salt
  • 2 tablespoons olive oil (optional)

Directions

  1. In a mixing bowl, combine yeast, sugar, and warm water. Allow to sit for 10 minutes until bubbly.
  2. In a separate bowl, whisk together flour and salt. Gradually add the yeast mixture to the flour, mixing until a dough forms.
  3. Knead the dough on a floured surface for about 10 minutes until smooth and elastic.
  4. Place the dough in a lightly oiled bowl, cover with a towel, and let rise in a warm place until doubled in size, about 1-2 hours.
  5. Preheat your oven to 425°F (220°C).
  6. Punch down the risen dough and shape it into a loaf. Place it on a lined baking sheet.
  7. Cover the loaf and let it rise for an additional 30 minutes.
  8. Using a sharp knife or lame, score the top of the loaf with a few diagonal slashes.
  9. Bake in the preheated oven for 20-25 minutes, until the bread is golden brown and sounds hollow when tapped on the bottom.
  10. Allow it to cool on a wire rack before slicing.

Recipe Notes

  • Feel free to add herbs or seeds to the dough for additional flavor.
  • This recipe can be adjusted for different types of flour but may require testing to achieve the desired results.
  • For a softer crust, brush the loaf with melted butter after baking.

Easy Broccoli Bites Recipe – Crispy and Kid-Friendly Snack

Easy Broccoli Bites Recipe: A Deliciously Simple Snack Idea

⚖️
Difficulty
Easy

⏲️
Prep Time
10 mins

🕒
Cook Time
20 mins

⏱️
Total Time
30 mins

🍽️
Servings
4 servings

If you’re looking for a quick and easy snack that packs a nutritious punch, look no further! This Easy Broccoli Bites Recipe is your perfect solution. Bursting with vibrant green color, these broccoli bites make for a delightful snack or side dish. The crunch from the broccoli combined with the savory flavors from the cheese and spices creates a mouthwatering experience that will leave you craving more.

Not only are Easy Broccoli Bites incredibly simple to prepare, but they are also a fantastic way to sneak in those greens! This recipe uses fresh broccoli mixed with cheese, breadcrumbs, and spices, all baked to perfection. The flavor is irresistible, making it an excellent option for kids and adults alike. Whether served as an appetizer at parties or a nutritious snack, these bites are bound to impress!

Quick Recipe Highlights

  • Flavor Profile: These broccoli bites are cheesy, savory, and slightly nutty, with a touch of spices that elevate the taste.
  • Texture: Each bite offers a satisfying crunch outside, with a tender and moist inside, making them simply irresistible.
  • Aroma: The delightful aroma of baked cheese and fresh broccoli fills your kitchen, making it hard to wait until they are done.
  • Visual Appeal: The bright green color of the broccoli contrasts beautifully with the golden-brown crust, creating an eye-catching presentation.
  • Skill Level Needed: This recipe is beginner-friendly, requiring minimal cooking skills and basic kitchen equipment.
  • Special Equipment: All you need is a mixing bowl, baking sheet, and an oven to whip up this delightful snack.

Recipe Overview

  • Difficulty Level: This Easy Broccoli Bites Recipe is perfect for novice cooks, as it involves simple mixing and baking steps.
  • Category: This recipe falls under snacks and appetizers, making it versatile for various occasions.
  • Cuisine: Influenced by American cuisine, this dish embraces fresh vegetables, highlighting the importance of healthy eating.
  • Cost: Economical to make, the ingredients used are budget-friendly, making it easy to whip up without breaking the bank.
  • Season: Broccoli is a year-round vegetable, but enjoying these bites in the cooler months can be particularly satisfying.
  • Occasion: Perfect for parties, game nights, or just a cozy evening snack, these bites can fit any gathering’s theme.

Why You’ll Love This Recipe

Broccoli Bites offer an incredible taste and texture that will delight your palate. The combination of crunchy, cheesy exterior with the soft, flavorful broccoli inside is simply mouthwatering. They are perfect for satisfying cravings without feeling heavy, making them an ideal snack anytime.

The convenience of preparing Easy Broccoli Bites makes them a favorite in many households. In just about 30 minutes, you can have a delicious snack ready to go. Ideal for meal prep, these bites can be stored and enjoyed later, making them a savvy choice for busy individuals.

From a nutritional perspective, these bites are a powerhouse of health benefits. Broccoli is known for its high vitamin C and fiber content, while the addition of cheese adds a good source of calcium. The balance of vegetables and wholesome ingredients makes these bites a guilt-free snack option.

Socially, serving Easy Broccoli Bites at gatherings can elevate your hosting game. They are not only a favorite among kids but also appeal to adults looking for something healthier to munch on while mingling. Their bite-sized nature makes them perfect for sharing.

Cost-effectiveness is another reason to love this recipe. With few ingredients required, you can make a large batch for a fraction of the price compared to store-bought snacks. These homemade bites are not only healthier but also easier on your wallet.

Historical Background and Cultural Significance

The origins of Broccoli Bites can be traced back to the trend of incorporating vegetables into popular snacks, prioritizing health in modern diets. The popularity of broccoli as a superfood has made it a staple in the kitchen, encouraging innovative recipes to showcase its versatility.

In American culture, the rise of health consciousness has led to a greater appreciation for vegetable-rich snacks. Broccoli, specifically, has been recognized for its nutritional value, making recipes like Broccoli Bites an appealing option for wellness-focused individuals.

This recipe has evolved over time, adapting to include various flavors and ingredient modifications to suit preferences. Each family or chef may have a unique twist on the recipe, incorporating local spices or alternative ingredients.

Regional variations exist as different cultures integrate their culinary practices, leading to exciting adaptations that enhance the basic recipe. Chefs may include herbs, spices, or even different cheeses to add their personal touch and regional flavor.

Ingredient Deep Dive

Broccoli is the star of this dish, praised for its nutritional significance and health benefits. It is a cruciferous vegetable rich in vitamins and minerals, and its high fiber content aids in digestion. When selecting broccoli, look for fresh, firm florets with a vibrant green color. Proper storage in the fridge can extend its shelf life, and blanching is a great way to prepare it for recipes.

Cheese adds a delightful creaminess that complements the crispiness of the broccoli. Various cheeses can be used, with cheddar being a popular choice. When selecting cheese, opt for fresh, high-quality options for the best flavor. Always store cheese in a cool environment to maximize freshness, and consider swapping cheeses to experiment with new flavors.

Breadcrumbs provide the essential crunch and binding properties in this recipe. Using fresh breadcrumbs can elevate the dish, while panko offers a light, flaky texture that enhances the overall experience. Storing breadcrumbs in an airtight container can help retain their texture and prevent staleness.

Eggs serve as a binder for the ingredients, providing moisture and helping the bites hold their shape. When choosing eggs, look for free-range or organic options for better flavor and quality. Proper storage in a cool area away from strong odors is crucial for preserving their freshness.

Common Mistakes to Avoid

  • Overcooking the broccoli: This can lead to mushy bites instead of maintaining their crunch. Aim to blanch the broccoli just until tender.
  • Not seasoning adequately: A pinch of salt and pepper are essential to elevate the flavors. Don’t skip out on tasteful seasonings.
  • Using stale breadcrumbs: Fresh breadcrumbs or panko make a significant difference in texture and flavor. Always ensure they are fresh.
  • Packing the mixture too tightly: This can lead to dense bites. Gently mix ingredients to maintain fluffiness.
  • Baking at the wrong temperature: Always preheat your oven for even cooking. An uncontrolled temperature may alter the desired crispness.
  • Not allowing bites to cool before serving: Letting them rest helps maintain the texture and flavor, ensuring a better tasting experience.
  • Skipping the parchment paper: This can lead to sticking and difficulty in removing the bites. Parchment paper ensures easy peeling.
  • Not adjusting for preferences: Feel free to modify spices or add more cheese; not every palate is the same!

Essential Techniques

To master the art of making Easy Broccoli Bites, blanching broccoli is an essential technique. This method softens the broccoli while retaining its bright color and nutrients. Ensure the broccoli is boiled just until tender, then immediately place it in an ice bath to halt the cooking process. This step guarantees that your bites are cooked just right, without becoming mushy.

Mixing the ingredients correctly is vital. When combining broccoli with cheese and breadcrumbs, aim to maintain a light touch. Over-mixing can crush the broccoli and result in a dense mixture. It’s also important to visually assess the mixture; it should have a cohesive yet slightly chunky texture to ensure perfect bites.

Utilizing the right baking method can also impact the outcome. Baking the bites at a high temperature promotes browning and a crunchy exterior. Keep an eye on them as they cook to achieve that golden-brown perfection, which is key to a satisfying bite.

Pro Tips for Perfect Easy Broccoli Bites

1. **Select Fresh Broccoli**: Look for bright green florets without any yellowing or wilting for the best flavor.
2. **Experiment with Cheese**: Try different cheeses like mozzarella or pepper jack for a flavor twist.
3. **Add Flourishes**: Toss in herbs like oregano or thyme for an aromatic uplift.
4. **Control Bake Time**: Keep a close watch on your bites and remove them as soon as they turn golden to avoid overcooking.
5. **Serve with Dipping Sauce**: Pair your bites with a tangy dipping sauce like ranch or tzatziki for added flavor.
6. **Batch Cooking**: Prepare larger quantities and freeze for quick snack options.
7. **Keep Mixture Moist**: If your mixture seems dry, add a few drops of water or extra egg to achieve the right consistency.
8. **Adjust Spice Levels**: Customize the amount of spice you incorporate based on your heat tolerance.

Variations and Adaptations

This Easy Broccoli Bites Recipe lends itself well to various regional adaptations. In Italy, you might consider adding some grated Parmesan and oregano for an herbal kick. For a spicy variation, incorporate minced jalapeños or chili flakes to heat things up.

Seasonal adaptations can also make this dish exciting. In spring, adding fresh herbs like basil or parsley can brighten the flavor profile, while fall can introduce warming spices like nutmeg or cinnamon.

In terms of dietary modifications, consider making these bites gluten-free by using almond flour or gluten-free breadcrumbs. For a vegan option, substitute cheese with nutritional yeast or a dairy-free cheese alternative.

Flavor variations can be explored by introducing other vegetables such as grated carrots or zucchini, enriching the nutritional value. Finally, if you want to enhance the texture, try frying instead of baking for a crispier exterior or adding nuts for extra crunch.

Serving and Presentation Guide

When plating Easy Broccoli Bites, consider using a beautiful serving platter to showcase their vibrant colors. Create a visually appealing arrangement by placing the bites in a circular fashion and interspersing with carrot sticks or celery for a colorful contrast.

Garnishing with fresh herbs or a drizzle of balsamic reduction elevates the presentation and adds a touch of sophistication. Accompanying the bites with a selection of dipping sauces can turn your dish into a delightful snack bar, catering to a variety of tastes.

Temperature considerations are important, as these bites are best served warm, allowing the cheese to be gooey and the exterior crispy. If you’re serving at a gathering, consider using a warming plate to keep them at the perfect temperature.

Portion control is crucial to ensure everyone gets to enjoy these tasty snacks. Consider serving them in small paper cups to assist with easy grabbing, especially during parties or gatherings.

Wine and Beverage Pairing

Pairing drinks with Easy Broccoli Bites can enhance your tasting experience. A crisp Sauvignon Blanc complements the earthy flavors of broccoli beautifully, while a light red wine like Pinot Noir can also work quite well. The acidity of the wine balances the richness of the cheese, creating a harmonious flavor profile.

For non-alcoholic alternatives, consider serving sparkling water with a splash of lemon for a refreshing drink that cleanses the palate. Alternatively, a light iced tea infused with citrus can be a delightful match, enhancing your guests’ enjoyment.

If you prefer warm beverages, a cup of herbal tea, specifically mint tea, can energize your palette, creating a contrast to the savory bites. Serve cooled beverages alongside your dish for the perfect complement.

Storage and Shelf Life

When it comes to storing your Easy Broccoli Bites, ensure they are completely cooled before placing them in an airtight container. Proper storage in the fridge can last for up to three days. Keep them away from strong-smelling ingredients to maintain their flavor.

For longer storage, consider freezing them. Wrap each bite in plastic wrap individually before placing them in a freezer bag. They can last up to two months in the freezer and can be re-baked from frozen for a quick snack.

Signs of spoilage include an off odor or slimy texture; be cautious and discard any bites that look questionable. Reheating can be done in the oven or an air fryer to restore their crunch—avoid using a microwave, as it can make them soggy.

Make Ahead Strategies

If you want to prep Easy Broccoli Bites ahead of time, consider mixing the ingredients the night before. Store the mixture in a container in the refrigerator, allowing the flavors to meld. The next day, simply portion and bake them for a quick snack.

You can also form the bites and freeze them before cooking. Lay them in a single layer on a baking sheet until frozen, then transfer to an airtight container. This allows for quick cooking on demand without compromising on flavor.

Assess the quality impact of making them ahead by testing the mixture with a small batch first. This helps in determining how well the flavors integrate and if any adjustments are necessary.

For reheating, you can add fresh ingredients like a sprinkle of cheese or herbs just before baking to enhance freshness and flavor.

Scaling Instructions

Scaling this Easy Broccoli Bites Recipe is straightforward. To halve the recipe, simply divide all ingredients accordingly, ensuring you maintain proper blending ratios for consistent flavor and texture.

If doubling or tripling, consider your baking sheet size to accommodate the increased volume. You might also need to adjust the cooking time slightly; simply keep an eye on the bites to ensure they reach the desired golden color.

Equipment adjustments, such as utilizing multiple trays, can help manage larger batches without overcrowding. Remember to leave space for air circulation to ensure they cook evenly.

When storing, be mindful of portion sizes so that you can maximize the freshness and flavor retention of these snacks post-cooking.

Nutritional Deep Dive

Understanding the nutritional composition of Easy Broccoli Bites provides insights into their health benefits. Each serving contains a mix of macronutrients, largely comprising carbohydrates from breadcrumbs, and protein from both cheese and eggs. This balanced approach creates lasting energy.

Micronutrient analysis reveals that broccoli is rich in vitamins A, C, and K, which play essential roles in immune function and overall health. Cooking also enhances some nutrients’ bioavailability, making this dish a nutritious choice.

Health benefits are apparent, as broccoli is high in fiber, which aids digestion and promotes a feeling of fullness. This dish is without added sugars, making it a suitable choice for those mindful of their sugar intake.

Considering portion size is important, particularly when minding weight management. Each bite is nutrient-dense, making moderation key. Balancing this savory snack with a variety of other healthful foods can promote a well-rounded diet.

Dietary Adaptations

For those following a gluten-free diet, adapting the Easy Broccoli Bites is simple by using gluten-free breadcrumbs. This substitution allows those with sensitivities to enjoy this delicious snack without any negative effects.

Dairy-free options are prevalent by replacing traditional cheese with dairy-free cheese, such as those made from almonds or cashew nuts. Nutritional yeast can also provide a cheesy flavor without the dairy.

For a vegan rendition, substitute eggs with flax eggs or aquafaba, which can help bind the mixture. The recipe still retains its flavor profile while accommodating vegan dietary restrictions.

Low-carb and keto adaptations are made easily by replacing breadcrumbs with almond flour or crushed pork rinds. This maintains texture while drastically reducing carbohydrate content.

Paleo dieters can utilize almond flour or coconut flour, as these are accepted in this lifestyle. Adjusting seasonings can also promote flavor without compromising dietary restrictions.

Troubleshooting Guide

If you experience texture issues with your Easy Broccoli Bites, it could be due to over-blanching the broccoli. Simply cook for a shorter period next time and ensure there’s a quick transfer to ice water.

Flavor balance can be tricky; if your bites taste bland, consider increasing the seasonings or adding a pinch of garlic powder or red pepper flakes to enhance flavor.

Temperature problems may arise if the bites are cooked at too low a temperature. Always preheat your oven and ensure you’re baking at the recommended heat for optimal crispiness.

If you’re encountering equipment challenges, like uneven baking, consider rotating your baking sheets for even cooking. This ensures consistent results across batches.

For ingredient substitutions, be cautious! When swapping components, particularly those that contribute to structure, test a small portion first to assess the impact on the final product.

Timing concerns can be resolved by keeping a close watch toward the end of the bake time. If uncertain, use a toothpick to check for doneness in the centers of the bites.

Recipe Success Stories

The feedback from our community regarding Easy Broccoli Bites has been overwhelmingly positive. Many have shared their variations, such as topping with hot sauce or adding different veggies, leading to delicious discoveries.

Readers have adapted this recipe to elevate their gatherings, providing delightful bites that impress even the pickiest eaters. This variation hasn’t just broadened our traditional bites but transformed social meals into extraordinary experiences.

Photography tips for sharing this vibrant dish highlight the importance of natural lighting and contrasting colors in presentation. Capture the golden-brown bites against a colorful platter to entice taste buds visually.

Many have reported success with maintaining the freshness of ingredients, uplifting the flavor without sacrificing quality. With such encouragement, these bites have become a popular choice for snacks at home or potlucks.

Frequently Asked Questions

1. Can I freeze Easy Broccoli Bites?
Yes, you can freeze these bites before or after baking! Wrap them in plastic wrap and store them in an airtight container for up to two months. Bake from frozen, adding a few extra minutes to the cooking time.

2. What can I serve with these bites?
These bites pair excellently with various dips such as ranch, tzatziki, or marinara sauce. Their versatile flavor also complements vegetable platters.

3. How can I make these bites spicier?
To add spice, incorporate minced jalapeños or red pepper flakes into the mixture. Adjust according to your preferred heat level.

4. Can I use frozen broccoli for this recipe?
Yes, you can! Just ensure to thaw and drain excess moisture before mixing with the other ingredients to maintain the right texture.

5. Are there any vegan options available?
Absolutely! Replace cheese with nutritional yeast, and use flax eggs or aquafaba as a binder to keep them vegan-friendly without sacrificing flavor.

6. How do I know when these bites are done?
The bites should be golden brown and crispy on the outside. You can also test the internal temperature with a food thermometer, aiming for 165°F (74°C).

7. Can I use different vegetables?
Yes! Feel free to add other veggies like grated carrots or zucchini for a different flavor and added nutrition. Just adjust the moisture levels accordingly.

8. How can I make these bites more nutritious?
Enhance the nutrition by adding flaxseeds, chia seeds, or nuts for extra fiber and omega-3 fatty acids.

9. What if the mixture is too dry?
If the mixture appears dry, add a little water or an extra egg to achieve the right consistency before baking.

10. Can I make these bites ahead of time?
Yes! Prepare the mixture and store it in the refrigerator overnight. You can also freeze formed bites for a quick bake later.

Additional Resources

For those interested in exploring more veggie-based snacks, consider checking out our other recipes, including Sweet Potato Fritters or Cauliflower Tots, both offering delicious and healthy alternatives.

If you’re looking to refine your cooking techniques, our technique guides cover methods like blanching, proper baking, and ingredient preparation tips to ensure your cooking skills accelerate seamlessly.

Additionally, check out our ingredient information articles for deeper dives into nutritious vegetables like broccoli, exploring their health benefits, selection, and best storage techniques.

For equipment recommendations, consider investing in quality baking sheets and mixing bowls that enhance your cooking experience, ensuring consistency with every batch.

Lastly, seasonal variations can become an exciting avenue of exploration, allowing you to adapt this recipe to suit the freshest produce available throughout the year.

Join the Conversation

We’d love to hear your experiences with Easy Broccoli Bites! Share your thoughts on social media by tagging us or leaving a comment. Suggestions and adaptations from our community can inspire new creative twists on this simple recipe.

For those interested in photographing your creations, consider using tongs to carefully place bites on a plain background for clean shots. Remember to engage with our online community, sharing both successes and tasty experiments.

Feel free to leave a review of this recipe, as your feedback can help others embark on their culinary journey. Engage with fellow food enthusiasts to contribute to an ever-growing landscape of fun, tasty meal ideas!

The Recipe

Easy Broccoli Bites

Serves: 4 servings

Prep Time: 10 mins

Cook Time: 20 mins

Total Time: 30 mins

Kitchen Equipment Needed

  • Baking sheet
  • Mixing bowl
  • Ice bath for blanching
  • Measuring cups and spoons
  • Mixing spatula

Ingredients

  • 2 cups broccoli florets (fresh or thawed from frozen)
  • 1 cup shredded cheese (cheddar or your choice)
  • 1/2 cup breadcrumbs
  • 1 egg
  • 1/2 teaspoon garlic powder
  • Salt and pepper to taste

Directions

  1. Preheat your oven to 400°F (200°C). Line a baking sheet with parchment paper.
  2. Bring a pot of salted water to a boil. Blanch the broccoli for 2-3 minutes, then cool in an ice bath.
  3. In a mixing bowl, combine the cooled broccoli, cheese, breadcrumbs, egg, garlic powder, salt, and pepper. Mix well.
  4. Form small balls or patties with the mixture and place them on the prepared baking sheet.
  5. Bake for 20 minutes until golden brown and crispy.
  6. Allow to cool slightly before serving with your favorite dipping sauce.

Recipe Notes

  • Feel free to substitute ingredients based on your preferences or dietary needs.
  • Store leftovers in an airtight container in the fridge for up to 3 days.
  • These bites can be frozen before baking; just add a few extra minutes of baking time if cooking from frozen.

Easy No-Peek Chicken Casserole – Comfort Food Favorite

No-Peek Chicken Casserole: A Comforting Family Favorite

⚖️
Difficulty
Easy

⏲️
Prep Time
15 mins

🕒
Cook Time
1 hour

⏱️
Total Time
1 hour 15 mins

🍽️
Servings
4

The No-Peek Chicken Casserole is more than just a meal; it’s the very essence of home-cooked comfort food. This delicious, hearty casserole brings together tender chicken, rich flavors, and a creamy sauce enveloped in a buttery layer of crunchy topping. Imagine the aroma wafting through your home, filling it with warmth and inviting everyone to gather around the dinner table, eager to dig into a dish that guarantees satisfaction. Whether it’s a busy weeknight or a cozy weekend dinner, this casserole stands strong as a family favorite that appeals to both kids and adults alike.

What makes this recipe truly special is its effortless preparation method. You just mix the ingredients, pour them into a casserole dish, and let the oven do its magic, meaning you can spend more time enjoying your family and less time cooking. The magical no-peek method allows the flavors to meld beautifully while creating a bubbly, golden crust on top that is simply irresistible. Get ready to experience melt-in-your-mouth bites that burst with flavor—perfect for any family gathering or casual weeknight meal.

Quick Recipe Highlights

  • Flavor Profile: This casserole combines savory chicken with creamy mushroom soup and a pop of herbal goodness, delivering a taste that’s rich yet comforting.
  • Texture: Expect a delightful mix of tender chicken, creamy sauce, and a crunchy topping that adds an enjoyable contrast in every bite.
  • Aroma: Your kitchen will be filled with the warm scents of chicken and herbs, tantalizing anyone nearby.
  • Visual Appeal: This casserole boasts a beautifully golden top with a creamy, inviting interior that will make your mouth water at first sight.
  • Skill Level Needed: Simple enough for beginner cooks, but even seasoned chefs will appreciate its flavors and ease of preparation.
  • Special Equipment: You will need a large baking dish and basic kitchen tools, making this recipe accessible to any home cook.

Recipe Overview

  • Difficulty Level: This No-Peek Chicken Casserole is straightforward and easy to follow, making it perfect for newcomers to the culinary world.
  • Category: It fits well into the casserole category, known for its hearty and comforting qualities, ideal for family dinners.
  • Cuisine: Drawing inspiration from traditional American comfort food, it incorporates familiar ingredients that resonate with domestic palates.
  • Cost: This recipe is budget-friendly, providing a wholesome meal without breaking the bank, easily feeding a family of four.
  • Season: While delightful year-round, it’s particularly cozy during colder months, making it a go-to dish for fall and winter.
  • Occasion: Perfect for casual gatherings, busy weeknights, or even potluck parties, this casserole fits nearly any occasion.

Why You’ll Love This Recipe

This No-Peek Chicken Casserole is loved for its layered flavors and comforting texture that brings an instant smile to anyone’s face. The rich, savory taste from the chicken combined with the creamy base creates a taste sensation that satisfies even the heartiest appetites. Each bite is a balance of flavors—from herbaceous notes to a hint of garlic—that together create a harmonious dish you’ll crave again and again.

Preparation is convenient, allowing you to mix ingredients quickly and pop it into the oven without any fuss. This means you can easily whip it up even on your busiest days without sacrificing quality. Plus, it’s an excellent opportunity to involve kids in the kitchen, as they can help mix and prepare ingredients, making cooking a family affair.

Nutritionally, this casserole incorporates protein-rich chicken that’s loaded with essential nutrients while keeping comfort food intact. You also have options to sneak in some vegetables, such as peas or carrots, for an extra boost of vitamins without compromising taste. It’s a dish that proves health and flavor can co-exist harmoniously.

Socially, it’s a fantastic centerpiece for gathering around the dinner table, sparking conversations and laughter while sharing a delightful meal. The casserole’s inviting aroma and appearance tend to draw friends and family together, making mealtime more than just eating—it’s about connection.

Financially, it offers amazing cost-effectiveness by using simple, pantry staples and versatile ingredients. You can create a satisfying meal that stretches your budget and delights your family, ensuring delicious leftovers for lunch or another dinner.

Historical Background and Cultural Significance

The origins of casseroles in American cuisine date back to the early 19th century, a time when meals needed to be hearty and fulfilling. As the American population began to grow, these one-dish meals became popular for their ability to feed families with diverse appetite sizes, making the No-Peek Chicken Casserole a beloved classic. It embodies the spirit of home cooking, where nourishment and comfort take precedence.

Culturally, the casserole represents the gathering of family and friends around mealtime. Its simplicity and versatility allow families to enjoy individually tailored variations that reflect personal tastes, showcasing the recipe’s adaptability throughout generations. As families move and grow, the tradition of casserole cooking remains a way to preserve family connections.

Over the decades, the No-Peek Chicken Casserole has evolved, with variations in ingredients depending on regional preferences. For example, adding local vegetables or using different types of cheese allows this dish to be a blank canvas for culinary creativity. This adaptability keeps the casserole relevant, evolving smoothly through changing tastes and culinary trends.

In the age of convenience cooking, casseroles have retained their significance by providing easy meal solutions for busy lifestyles. The No-Peek Chicken Casserole is a perfect example of how traditional dishes have merged with modern convenience, ensuring it remains a staple recipe in countless households today.

Ingredient Deep Dive

Chicken

Chicken is not only a staple protein rich in nutrients but also holds cultural significance in various cuisines worldwide. It provides essential proteins and amino acids necessary for growth and repair. When selecting chicken, opt for high-quality sources—organic or free-range options can enhance flavor. Moreover, store chicken properly in refrigerated conditions and consume it before its expiration date to ensure safety. In recipes like casseroles, boneless chicken breasts or thighs work well, but alternatives include turkey or even plant-based options for a meatless twist.

Mushroom Soup

Mushroom soup has roots in traditional cooking, valued for its rich flavor and creamy texture. Besides being delicious, it’s a convenient ingredient packed with umami, providing depth to dishes. When choosing mushroom soup, look for low-sodium versions to control your intake of salt, and ensure freshness by checking expiration dates. You’ll want to use it soon after opening. Alternative options include homemade mushroom sauce to elevate your dish and offer a unique spin on flavor.

Common Mistakes to Avoid

  • Not preheating the oven: Skipping this step might lead to uneven cooking and texture issues. Always allow the oven to reach the desired temperature.
  • Overcooking the chicken: Overcooked chicken can result in dryness. Ensure you follow the suggested cooking times closely and check with a thermometer.
  • Ignoring ingredient proportions: Accurate measurements are crucial in casseroles. Adjusting them haphazardly might throw off the final texture and taste.
  • Using cold ingredients: Letting your ingredients sit out at room temperature for a bit helps them cook evenly, leading to better flavor integration.
  • Not covering the dish: Covering your casserole with foil initially traps moisture and enhances steaming; uncover it only towards the end for browning.
  • Skipping the resting period: Allow the casserole to rest for about 10 minutes after baking. This helps flavors meld and makes serving easier.
  • Overloading with toppings: While crispy toppings are delightful, too much can overpower the dish or lead to a burnt texture. Use toppings sparingly and evenly.
  • Failing to season: Don’t overlook the importance of seasoning your ingredients properly; a little salt and pepper enhance the overall flavor immensely.
  • Ignoring texture variations: Mixing ingredients can lead to a mushy casserole. Pay attention to the combination of textures, balancing crispy and creamy elements.
  • Neglecting personal touches: While specific steps are important, don’t forget to make the recipe your own with herbs, spices, and additional ingredients.

Essential Techniques

Mixing Ingredients

Proper mixing ensures even distribution of flavors throughout your casserole. Mix the chicken, soup, and spices until well combined, avoiding overmixing to preserve texture. A common pitfall here is being too aggressive, which can break down the chicken and make it mushy. Look for a nice, even blend without obvious clumps.

Layering Flavors

Building layers of flavor is crucial for creating a well-rounded dish. This can involve sautéing vegetables before adding them, and ensuring that herbs and seasonings are evenly spread. Many make the mistake of forgetting this step, resulting in a one-note flavor. Aim for visible layers in your casserole—this visual cue often translates to better flavor development.

Pro Tips for Perfect No-Peek Chicken Casserole

– Use high-quality chicken to enhance flavor; organic options can elevate taste significantly.
– Mix in seasonal vegetables like carrots or bell peppers to boost nutrition.
– Experiment with different soup bases for unique flavor combinations, such as cream of celery or cheddar cheese soup.
– Consider marinating the chicken beforehand for added flavor depth.
– Use fresh herbs whenever possible; they will brighten the dish and provide a fresh contrast to the creamy elements.
– For a bit of heat, add a sprinkle of red pepper flakes or chopped jalapeños.
– If you want a cheesy twist, mix in your favorite cheese before baking for a deliciously gooey result.
– Always taste your mixture before putting it in the oven to adjust seasoning as needed.

Variations and Adaptations

– Regional variations can include adding southern-style corn or creamed corn for a sweeter touch, fitting for comfort Southern meals.
– Seasonal adaptations might involve adding butternut squash during fall or peas and carrots in spring to keep the dish fresh.
– Dietary modifications can include substituting chicken for chickpeas for a vegetarian-friendly option while keeping all other elements intact.
– Flavor variations are easy; consider adding mustard or hot sauce to the cream base for a tangy kick.
– Texture modifications can include utilizing panko bread crumbs for a crunchier topping compared to regular breadcrumbs.
– Presentation alternatives could involve baking individual servings in ramekins for a modern twist and appealing plating presentation.

Serving and Presentation Guide

To plate your No-Peek Chicken Casserole attractively, serve generous portions on pre-warmed plates. Garnish with fresh herbs, such as parsley or thyme, to add a pop of color and freshness opposite the rich casserole. Serve alongside a simple green salad or crusty bread for a complete meal experience. When arranging, ensure even portions for family-style serving, promoting an inviting atmosphere. It’s best served warm; consider placing it back briefly in the oven to retain heat before serving.

Wine and Beverage Pairing

For the No-Peek Chicken Casserole, a white wine such as Chardonnay complements its creamy texture beautifully. Alternatively, a light red such as Pinot Noir can create an intriguing pairing without overpowering the dish. If you prefer non-alcoholic options, a sparkling water with a splash of lemon or lime balances richness effectively. Consider pairing with herbal teas post-meal to help digestion while providing a cozy end to your meal.

Storage and Shelf Life

Store your No-Peek Chicken Casserole in an airtight container in the refrigerator, where it will remain fresh for 3-4 days. Make sure it cools to room temperature before transferring to avoid condensation. For freezing, wrap tightly in plastic wrap and foil to prevent freezer burn, lasting up to 3 months. When reheating, do so in the oven covered with foil to keep it moist, heating until warmed through to preserve texture and flavor integrity.

Make Ahead Strategies

To make your cooking process smoother, consider prepping the casserole ingredients a day in advance. Store them separately in the refrigerator and combine just before baking to maintain freshness. If assembling beforehand, cover the dish tightly and let it sit in the fridge overnight; baking time might increase slightly, so monitor the cooking carefully. Fresh herbs and crunchy toppings are best added just prior to serving to maintain texture and vibrancy.

Scaling Instructions

To halve the recipe, use a smaller baking dish, adjusting cooking times accordingly to avoid overcooking. If doubling or tripling, consider using a larger baking dish, but ensure even layering for optimal cooking. Communicate any unique cupcake variations based on the number of servings needed, and take note of the total time required; often, larger casseroles will require additional cooking time.

Nutritional Deep Dive

In analyzing macro-nutrient content, this casserole typically provides a wonderful balance of protein from chicken, carbs from the soup base, and fat from the creamy components. However, it’s essential to check ingredient labels for sodium levels, which can accumulate in processed ingredients. Regarding micronutrients, the inclusion of vegetables can provide critical vitamins such as Vitamin A and potassium. This recipe promotes practical portion control, offering enough to satisfy while keeping caloric intake manageable.

Dietary Adaptations

Creating a gluten-free version of the casserole can be achieved by substituting traditional breadcrumbs with gluten-free alternatives or using gluten-free flour mixes. Dairy-free adaptations can utilize coconut cream instead of mushroom soup, while maintaining texture. Vegan versions might involve omitting chicken entirely, utilizing chickpeas to provide protein while adapting the creamy base with plant-based alternatives. For low-carb or keto variations, replace traditional creamy components with cauliflower-based sauces, minimizing carbohydrate intake without sacrificing satisfaction.

Troubleshooting Guide

For texture issues, if the casserole turns out too watery, consider letting it sit uncovered for a few minutes to release excess moisture. If you notice an imbalance in flavor, a pinch of salt or a dash of acid (like lemon juice) can enhance flavors dramatically. To resolve temperature problems, ensure an accurate oven thermometer and preheating practices. Common equipment challenges may arise from not having a tight-fitting lid; explore options for layering generously with foil if necessary. If ingredient substitutions were made, be prepared to adjust timing based on the chosen items’ cooking attributes.

Recipe Success Stories

The No-Peek Chicken Casserole has sparked joy for numerous families, with many sharing how their kids devour every bite. Readers have experimented with variations, such as adding spices or vegetables, leading to new family favorites. Adaptation stories have highlighted the ease of incorporating leftover ingredients, reinforcing the recipe’s versatility. Photography tips have portrayed dazzling creations, encouraging others to share their culinary masterpieces and experiences around this comforting casserole.

Frequently Asked Questions

Can I use leftover chicken for this casserole?
Yes! Leftover cooked chicken is a great way to save time; simply shred or cube it before mixing with other ingredients.

How do I store leftovers?
Store any remaining casserole in an airtight container in the fridge for up to four days. Make sure it cools first to maintain quality.

What can I substitute for mushroom soup?
You can substitute cream of chicken soup, cream of celery soup, or even homemade white sauce for a healthier version without processed ingredients.

How can I make this recipe spicier?
Feel free to add a pinch of cayenne pepper or sliced jalapeños into the mixture to give it an extra kick.

Can I prepare this casserole ahead of time?
Absolutely! You can assemble it the night before and bake it just before serving for maximum freshness.

Is this casserole freezer-friendly?
Yes, it freezes beautifully. Just ensure proper wrapping and consume within three months for the best quality.

What vegetables can I add?
Consider adding peas, carrots, or corn for extra nutrition and flavor, ensuring they’re chopped small for even cooking.

Can I use different cheeses on top?
Yes! Feel free to experiment with different cheese varieties like cheddar, mozzarella, or even pepper jack for unique flavors.

How long does it take to bake?
Typically, it takes about an hour to bake. However, if you’ve stored it in the fridge, it might need an additional 10-15 minutes.

Can I make this recipe gluten-free?
Yes! Substitute all-purpose flour and breadcrumbs with gluten-free alternatives to make this casserole accessible for gluten-sensitive individuals.

Additional Resources

Explore related casserole recipes that emphasize comforting layers of flavors, enriching your repertoire for those cold nights. Consider browsing technique guides to master perfect potato toppings or creating homemade soups for even richer base flavors. Gain insight into ingredient selection, ensuring freshness and quality in every meal. Don’t forget about kitchen equipment recommendations that streamline your cooking process, making tasks like chopping or mixing easier for delightful outcomes.

Join the Conversation

We encourage you to share your experiences with the No-Peek Chicken Casserole! Post your favorite variations or take stunning images of your creations on social media using the hashtag #NoPeekCasserole. Engage with our community by sharing tips or asking for advice. We love hearing about how this recipe fits into your family traditions and mealtime memories—let’s keep the conversation going around this delicious dish!

The Recipe

No-Peek Chicken Casserole

Serves: 4

Prep Time: 15 mins

Cook Time: 1 hour

Total Time: 1 hour 15 mins

Kitchen Equipment Needed

  • Large baking dish
  • Mixing bowl
  • Measuring cups and spoons
  • Wooden spoon or spatula

Ingredients

  • 4 boneless, skinless chicken breasts
  • 1 can cream of mushroom soup
  • 1 cup milk
  • 1 cup shredded cheese (optional)
  • 1 cup breadcrumbs
  • 1 tablespoon dried thyme
  • Salt and pepper to taste

Directions

  1. Preheat your oven to 350°F (175°C).
  2. In a mixing bowl, combine the cream of mushroom soup, milk, thyme, salt, and pepper.
  3. Layer the chicken breasts in the baking dish and pour the soup mixture over them.
  4. Sprinkle breadcrumbs evenly on top. If using, add shredded cheese over the breadcrumbs.
  5. Cover the baking dish with foil and bake for 45 minutes. Remove the foil and bake for an additional 15 minutes or until the top is golden brown.
  6. Let it rest for 10 minutes before serving.

Recipe Notes

  • Feel free to add vegetables like peas or carrots for a nutritional boost!
  • If you prefer, substitute the mushroom soup with a lower-sodium option.
  • Consider marinating the chicken for at least an hour before cooking for enhanced flavor.