Delicious Baklava Cream Sandwich Cookies for a Sweet Treat

Baklava Cream Sandwich Cookies: A Delightful Fusion of Tradition and Taste

⚖️
Difficulty
Moderate

⏲️
Prep Time
30 mins

🕒
Cook Time
20 mins

⏱️
Total Time
50 mins

🍽️
Servings
24 cookies

Baklava Cream Sandwich Cookies are a heavenly blend of rich flavors, inspired by traditional baklava. These delightful treats combine the sweet, nutty essence of walnuts, the aromatic spices of cinnamon, and a luscious honey cream filling, all nestled between perfectly baked cookies. Ideal for any gathering, these cookies bring the irresistible taste of Mediterranean desserts to your table, creating a memorable experience for everyone who indulges. Whether you’re playing host to a dinner party or simply looking to treat yourself, these cookies are sure to become a beloved favorite.

The layered flavors unfold beautifully with each bite, offering a delightful crunch from the nuts and a smooth creaminess that balances the sweetness perfectly. The delicate process and attention to detail required to create these sandwich cookies not only enhance their taste but also make them a cherished project worth every moment spent in the kitchen. With their unique texture and vibrant flavors, these cookies stand out as a show-stopping dessert.

Quick Recipe Highlights

  • Flavor Profile: The Baklava Cream Sandwich Cookies offer an exquisite mix of honey sweetness, nutty richness, and warm spices, creating a flavor explosion that pays homage to classic baklava.
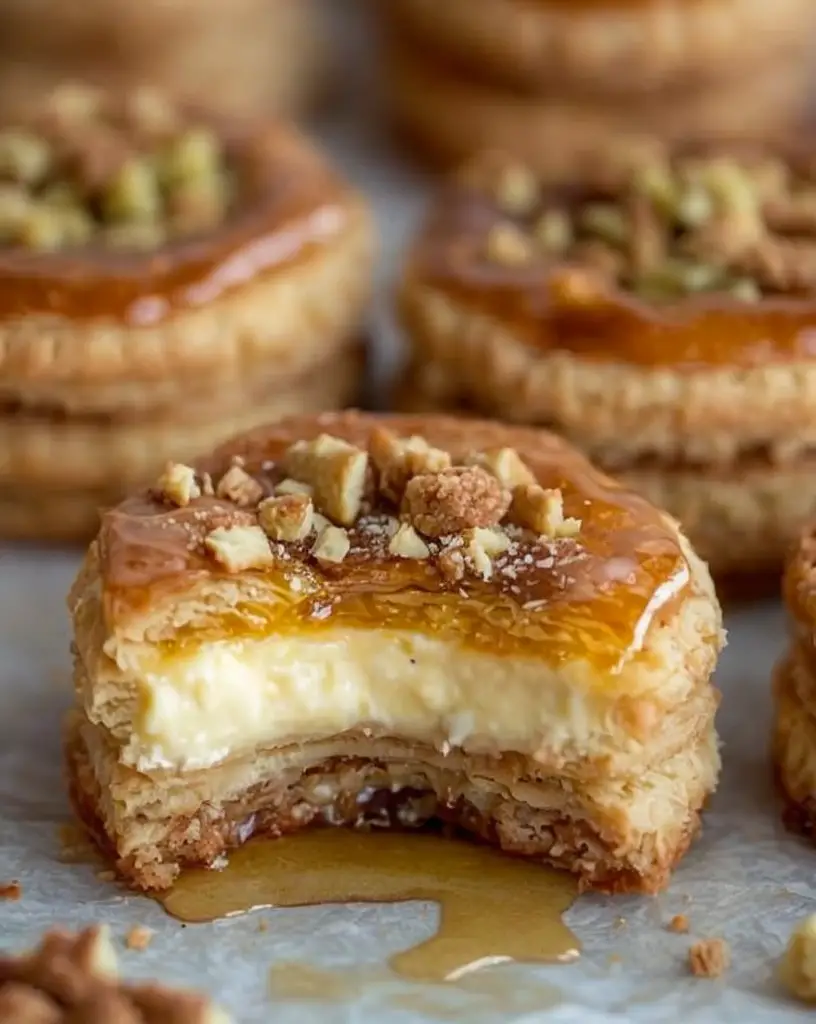
  • Texture: Each cookie boasts a crisp exterior enveloping a soft, fluffy cream filling, while the crunchy walnut pieces add an exciting contrast that keeps you coming back for more.
  • Aroma: The mouthwatering aroma of cinnamon and toasted nuts fills the air, inviting everyone to dive into these delectable desserts.
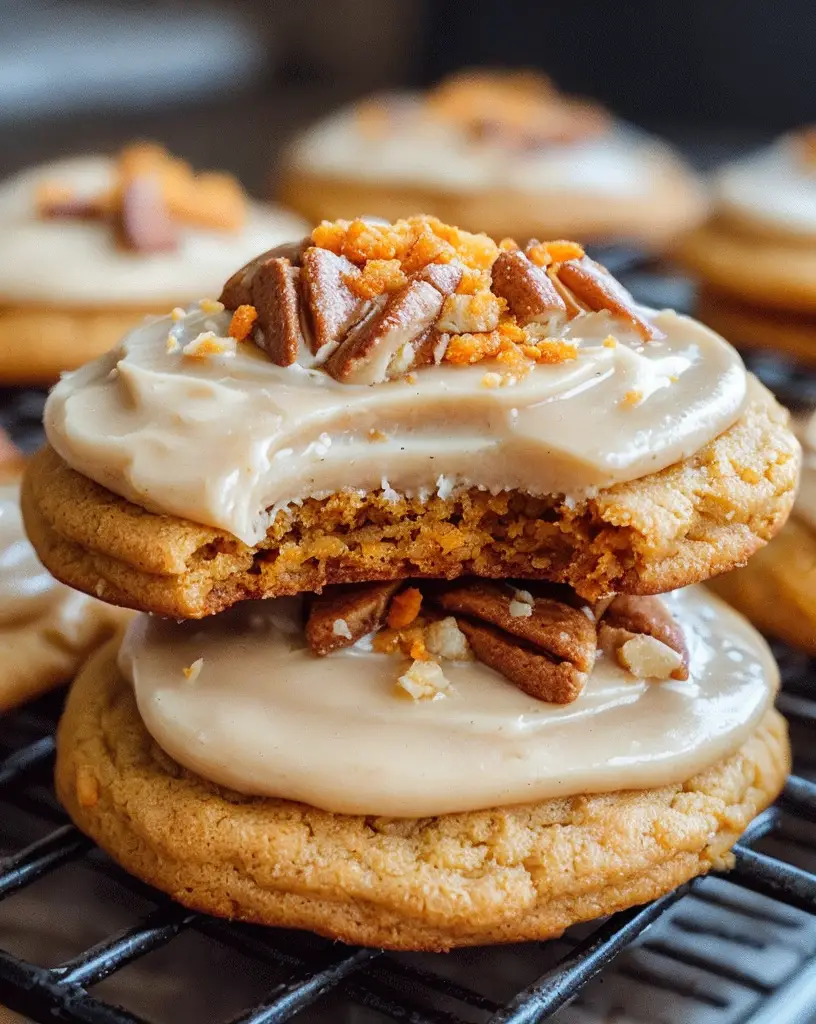
  • Visual Appeal: Golden brown cookies with creamy filling and a sprinkle of chopped nuts make for an eye-catching presentation that invites indulgence.
  • Skill Level Needed: Although slightly advanced, this recipe is manageable for home bakers familiar with cookie and cream preparation techniques.
  • Special Equipment: A stand mixer or hand mixer will be essential for achieving the perfect creamy filling, as well as parchment paper for seamless baking.

Recipe Overview

  • Difficulty Level: The moderate difficulty level of these Baklava Cream Sandwich Cookies demands a bit of patience and precision, especially when crafting the cream filling and ensuring the cookies bake evenly.
  • Category: These cookies belong in the dessert category, making them a perfect treat for any occasion, be it casual or festive.
  • Cuisine: Drawing on Middle Eastern influences, the recipe evokes a sense of tradition and heritage with every bite, showcasing the rich flavors characteristic of baklava.
  • Cost: While the ingredients for these cookies average around $15-$20, the unique flavors and impressive outcome make it well worth the investment.
  • Season: These cookies shine in the fall and winter months, making them great for holiday celebrations and gatherings.
  • Occasion: Perfect for holiday parties, family gatherings, or casual afternoons paired with tea, these cookies are sure to impress.

Why You’ll Love This Recipe

Baklava Cream Sandwich Cookies appeal to a wide array of tastes and preferences, making them an everyday treat or an extraordinary dessert for special occasions. Their rich sweetness and buttery flavor create a heavenly experience that transports you to Mediterranean markets bursting with vibrant aromas. Known for their layered and intricate flavors, they don’t just taste delicious; they bring a joyful experience with each bite.

Convenience plays a pivotal role in this recipe’s allure. Though they require a bit of time and effort, the outcome is immensely rewarding. The satisfaction of creating a baked good that garners rave reviews from friends and family is unmatched. Whether you’re a seasoned baker or a novice looking to impress, these cookies present a fun challenge and delicious results.

Nutritionally, Baklava Cream Sandwich Cookies offer an interesting balance between indulgence and satisfaction. The use of walnuts not only provides a delightful crunch but also adds healthy fats and protein. Coupling traditional dessert flavors with a thoughtful approach to wellness highlights how baked goods can be both pleasurable and beneficial.

Sharing these cookies elevates any social gathering. Their unique flavor and presentation make them an exceptional conversation starter, fostering connections while providing a memorable treat. These delightful cookies are meant to be shared, making them a perfect addition to your culinary repertoire for family and friends.

Cost-effectiveness is yet another reason to love this recipe. With affordable ingredients, you can whip up dozens of cookies that deliver greatness without breaking the bank. When compared to store-bought alternatives, the homemade version shines bright, allowing you to customize flavors and presentation to suit any occasion.

Historical Background and Cultural Significance

The origins of baklava date back to the Byzantine Empire, where it was crafted as a luxurious dessert. The historical significance of baklava transcends borders, with each region offering its spin on the traditional recipe. These cookies draw from that rich heritage, adapting the core elements of the original dessert into a modern, fun format.

Culturally, baklava is often featured in celebrations, festivals, and special occasions, embodying hospitality and community spirit. Its presence has persisted throughout centuries, reflecting the significance of sharing food as a bonding experience. Through these cookies, we can appreciate and honor that cultural value.

As the recipe evolves, baklava has inspired countless adaptations, from variations using different nuts to creative presentations. This evolution highlights the versatility of traditional recipes while showcasing the influence of cultural exchanges across culinary practices. The transformation of baklava into these cookies serves as a testament to how history informs contemporary cooking.

Different regions have their variations of baklava, often reflecting local tastes and ingredients. These cookies encapsulate that diversity while maintaining the essence of what makes baklava beloved worldwide. In this adaptation, we celebrate the flavors passed down through generations while embracing the joy of modern baking techniques.

Ingredient Deep Dive

Walnuts:
Walnuts are a prominent feature in baklava, bringing a distinctive crunch and flavor. Historically, walnuts have been used across cultures for their nutritional benefits, including heart health support and antioxidant properties. When selecting walnuts for your cookies, look for fresh, unblemished nuts that emit a nutty aroma. Store them in a cool, dark place to maintain freshness, and consider freezing any excess for long-term storage.

Honey:
Honey not only sweetens the filling but also binds it together, offering a unique flavor profile that freshens as it cooks. In many cultures, honey symbolizes prosperity and wellness and has been lauded for its antibacterial properties. When choosing honey, opt for raw or local varieties for the best flavor. Store it in a cool, dry place. If you need substitutions, agave syrup can work, but it will alter the flavor slightly.

Cinnamon:
Cinnamon adds warmth and comfort to the cookies, playing a key role in the flavor profile. This spice has long been cherished for its health benefits, including anti-inflammatory properties and potential blood sugar regulation. For optimal flavor, choose whole cinnamon sticks over powdered form and grind them fresh if possible. Store your spices in a cool, dark place to retain their potency, and experiment with other spices like nutmeg for variations.

Butter:
Butter provides richness and enhances the texture of both the cookies and filling. It’s essential for creating that melt-in-your-mouth experience. High-quality butter offers better flavor and performance for baking. Pay attention to its freshness—use unsalted butter to control the sweetness of your cookies. Store butter in the fridge, and consider freezing for longer preservation. As needed, substitutes like coconut oil can provide a different flavor experience.

Common Mistakes to Avoid

  • Overmixing the dough: Mixing too much can lead to tough cookies instead of the desired tenderness.
  • Not chilling the dough: Chilling the dough helps maintain the cookie shape during baking, preventing them from spreading too much.
  • Skipping the measuring: Accurate ingredient measurements are crucial for consistency in flavor and texture in baking.
  • Using old nuts: Stale nuts can ruin the flavor profile. Always opt for fresh ingredients.
  • Undercooking: Ensuring the cookies are baked to golden perfection is important to achieve the right texture—always trust your instincts.
  • Overfilling: Filling the cookies with too much cream can lead to overflow during baking. Always keep it balanced.
  • Ignoring temperature: Accurate oven temperatures matter; an oven thermometer can help ensure correctness.
  • Not letting them rest: Allowing cookies to cool before enjoying enhances their flavor development, making them even more delightful.

Essential Techniques

Preparing the Cream Filling:
Creating the ideal cream filling is essential to replicating the classic baklava taste. Mix thoroughly until the texture is fluffy and smooth, taking care not to overbeat. Visual cues to look for include a light, airy texture and even consistency. A common pitfall is not letting the cream chill, which can affect spreading and texture.

Baking the Cookies:
Achieving uniform cookies requires properly measuring dough portions and using a silicone mat for even baking. Preheat your oven and avoid opening it during baking to maintain temperature. The cookies should be lightly golden when done, indicating they’re ready to be removed. Consistency is key to obtaining a balanced taste throughout the batch.

Pro Tips for Perfect Baklava Cream Sandwich Cookies

1. Toast your walnuts lightly before using them to enhance their flavor and bring out their natural oils.
2. Experiment with different nuts like pistachios for a unique twist on the traditional baklava flavors.
3. Allow the cookies to cool completely for optimal assembly; this prevents melting and improves texture.
4. Use a piping bag for precision when adding your cream filling for a professional look.
5. Play with spices like cardamom or allspice for a unique flavor that still blends well with the traditional baklava experience.
6. Consider adding a touch of vanilla extract to your cream filling to elevate the flavor profile.
7. Always chill the assembled cookies before serving; this helps firm up the cream and improve the layering.
8. For extra sweetness, drizzle some honey over the assembled cookies just before serving.

Variations and Adaptations

For those looking to explore regional variations, consider using local nuts like hazelnuts or pecans to adapt the flavors. Seasonal adaptations include infusing spices such as pumpkin spice for fall or adding citrus zest during warmer months for a refreshing twist. Dietary modifications can be made with gluten-free flour blends to cater to those with dietary restrictions.

Flavor variations can also be exciting; adding orange blossom or rosewater to the cream filling can provide a delightful floral note. Texture modifications, such as incorporating flaky pastry layers around the edges, can create an intriguing contrast. Presentation alternatives include dusting with powdered sugar or a drizzle of caramel sauce to elevate the visual appeal.

Serving and Presentation Guide

For plating, arrange the cookies on a decorative platter, perhaps adorned with nuts for added visual interest. A sprinkle of powdered sugar or a drizzle of honey enhances their appearance while inviting guests to indulge. Traditional accompaniments include mint tea or Turkish coffee, enhancing the experience of enjoying these cultural delights.

Modern serving suggestions can include pairing the cookies with ice cream or serving them with a scoop of yogurt for a refreshing contrast. Ensure cookies are served at room temperature to reveal flavors fully. Portion control is crucial; consider serving two cookies per person alongside a beverage for a well-balanced dessert experience.

Wine and Beverage Pairing

When it comes to wine pairings, opt for sweet dessert wines like Moscato or a dry Riesling that complement the honey and nut flavors beautifully. Non-alcoholic alternatives, such as mint-infused lemonade, can provide a refreshing contrast to the sweet cookies. Additionally, a well-brewed cup of strong coffee or spiced chai can enhance the cookie experience, highlighting their rich flavors.

Temperature considerations are important; serve beverages chilled or at room temperature for the best experience. For coffee and tea, serving slightly warm allows for an inviting presentation that enhances the overall flavor of the cookies.

Storage and Shelf Life

To ensure the freshness of your Baklava Cream Sandwich Cookies, store them in an airtight container at room temperature for up to a week. For longer storage, consider refrigerating the cookies, keeping moisture at bay. The ideal temperature for optimal freshness typically ranges between 65-70°F.

Use parchment paper or wax paper to separate layers in the container, preventing sticking and maintaining texture. Signs of spoilage may include an off smell or changes in texture, such as excessive softness or dryness. Should you need to reheat, allow them to sit at room temperature before serving to regain their delightful texture. For freezing, wrap individually in plastic wrap and store in a freezer-safe bag for up to three months.

Make Ahead Strategies

To make the Baklava Cream Sandwich Cookies ahead of time, begin with baking the cookies a day in advance and allowing them to cool completely before storing. The cream filling can be prepared a few days earlier, keeping it chilled until assembly. When you’re ready to serve, assemble the cookies and chill them for an hour before presenting them for optimal flavor development.

Quality impact is crucial; keeping components separate until baking enhances freshness. For assembly, add the cream filling shortly before serving to prevent soggy cookies. Include fresh elements such as mint leaves or zest for a rejuvenating touch just before serving.

Scaling Instructions

When scaling the recipe, halving it is straightforward; simply adjust the ingredients accordingly, maintaining the same cooking times. Doubling or tripling the recipe requires increased attention to mixing times and may necessitate using a larger mixing bowl to handle the increased volume effectively.

Always check oven space to ensure that cookie sheets fit comfortably, allowing proper airflow for even baking. Timing modifications may be subtle; generally, cookies will bake at the same intervals, but larger batches may require an additional few minutes. For storage, make sure to utilize multiple containers to prevent moisture exposure in larger quantities.

Nutritional Deep Dive

Each Baklava Cream Sandwich Cookie typically contains a mix of macros, with a focus on carbohydrates from flour and sugars, fats from butter and nuts, and proteins from walnuts. A careful balance ensures flavor while keeping nutritional value in mind.

Micronutrient analysis reveals nutrients such as magnesium from walnuts, which is beneficial for health. The overall health benefits can include improved heart health and lowered cholesterol, especially when nuts are incorporated into your diet. Dietary considerations can include mindful consumption, especially for those managing sugar intake or calorie counting.

Portion analysis plays a crucial role in enjoying these cookies as treats, allowing you to savor the delightful combination of flavors while maintaining moderation. Weight management tips, such as serving smaller portions alongside a healthy beverage, can help balance indulgence with dietary goals.

Dietary Adaptations

Baklava Cream Sandwich Cookies can be made gluten-free by substituting traditional flour with almond flour or a mix of gluten-free flours. For dairy-free options, using coconut cream instead of butter helps maintain the creamy consistency while catering to those with lactose intolerances.

For a vegan alternative, replace the honey with maple syrup and use plant-based butter or coconut oil for the cream filling, ensuring the taste remains delightful. Low-carb versions can be achieved using almond flour, erythritol for sweetness, and ensuring the filling adheres to the same principles.

Additionally, explore keto-friendly adaptations by carefully selecting low-carb sweeteners while maintaining the richness of the original flavors. Paleo dieters may opt for natural sweeteners and whole food ingredients, aligning with their health principles while enjoying these cookies.

Troubleshooting Guide

For texture issues, if cookies come out cakey instead of chewy, it could indicate overmixing the dough. Ensure you mix just until incorporated for a better outcome. If cookies spread too much, chill the dough for a bit before baking or check your oven temperature for accuracy.

Flavor balance can be tricky; if cookies taste too sweet, consider reducing the sugar in the filling next time. If there’s a lack of flavor, adding more nuts or spices can elevate the taste. For temperature problems that yield burnt edges, make sure to evenly spread cookies on your baking sheet and keep an eye on them while baking.

Equipment challenges may arise: if using a hand mixer, ensure not to overbeat the cream filling to avoid it becoming too runny. Timing concerns can include under-baking; when in doubt, check the cookies a minute or two before the recipe states to ensure they hold their structure.

Recipe Success Stories

Readers often share success stories about how they adapted the Baklava Cream Sandwich Cookies to suit family tastes, incorporating additional spices or using different nuts. Feedback showcases the versatility of the recipe, as families blend in cultural traditions and preferences.

Variations of the recipe became crowd favorites at holiday gatherings, where kids enjoyed the process of assembling the cookies and adding fun toppings. Suggestions for easier techniques or adaptations have led to a growing community of bakers sharing their experiences with the recipe.

Photography tips have also emerged from the community, with tips on capturing the best angles and using natural lighting to showcase the beautiful layered cookies. These contributions illustrate how a beloved recipe can bring people together and encourage creativity in the kitchen.

Frequently Asked Questions

Q: Can I freeze the cookies?
A: Yes! These cookies freeze exceptionally well. Just wrap them individually in plastic wrap and store in an airtight container for up to three months. When ready to enjoy, simply thaw at room temperature.

Q: What can I substitute for honey if needed?
A: Maple syrup is a great substitute for honey, but keep in mind that it will give a different flavor profile. Agave syrup is another alternative that works well.

Q: How can I make these cookies dairy-free?
A: To make this recipe dairy-free, you can substitute vegan butter and use coconut cream or a dairy-free whipped cream for the filling.

Q: Are the cookies very sweet?
A: Yes, they have a sweetness due to the honey and sugar. You can adjust the sugar levels to your liking or use a sugar substitute.

Q: How do I ensure the cookies are chewy?
A: Ensure you do not overmix the dough and bake just until the edges are golden. Letting them cool completely before handling will also help retain chewiness.

Q: Can I add other flavors to the filling?
A: Absolutely! Vanilla extract and orange zest are delightful additions to the cream filling for extra flavor. Feel free to get creative with your additions.

Q: Will almond flour work for this recipe?
A: While almond flour can work for a gluten-free version, it may alter the texture slightly. It’s best to use a specific gluten-free flour blend for best results.

Q: How can I make my cookies softer?
A: You can increase the butter content slightly or make sure to under-bake just a tiny bit to keep the cookies soft.

Q: What is the best way to store these cookies?
A: Store them in an airtight container at room temperature for up to a week. To keep them fresh longer, you can refrigerate them.

Q: Can I use different nuts?
A: Definitely! Feel free to experiment with pistachios, pecans, or even hazelnuts if you prefer, creating a unique twist on the traditional flavors.

Additional Resources

For those eager to explore more delightful baking recipes, consider checking out similar cookies like Nutella-stuffed cookies or classic snickerdoodles. Resources on baking techniques can further enhance your skills and confidence in the kitchen. Ingredient information is also crucial for making informed choices about sourcing and substitutions.

If kitchen equipment recommendations are needed, inserting tools like silicone mats or stand mixers can refine your baking process. Also, seasonal variations like cookie recipes tailored for specific holidays can provide fresh inspiration year-round.

Join the Conversation

We invite you to share your thoughts on Baklava Cream Sandwich Cookies! Share your experiences and photos on social media with our hashtag, and connect with fellow bakers. Recipe reviews help foster a sense of community, encouraging others to try these delectable treats.

Engaging with your cooking journey can provide invaluable insights, so don’t hesitate to share your adaptations or any tips you’ve developed along the way. Inspiring each other with creativity not only enriches our cooking experiences but also brings us together in the love of baking.

The Recipe

Baklava Cream Sandwich Cookies

Serves: 24 cookies

Prep Time: 30 mins

Cook Time: 20 mins

Total Time: 50 mins

Kitchen Equipment Needed

  • Stand mixer or hand mixer
  • Baking sheets
  • Parchment paper
  • Sifting spoon
  • Piping bag (optional)

Ingredients

  • 2 cups all-purpose flour
  • 1 cup unsalted butter, softened
  • 1 cup powdered sugar
  • 1/2 teaspoon salt
  • 1 teaspoon vanilla extract
  • 3/4 cup walnuts, finely chopped
  • 1/4 teaspoon cinnamon
  • 3/4 cup honey
  • 1 cup heavy cream

Directions

  1. Preheat your oven to 350°F (175°C) and line baking sheets with parchment paper.
  2. In a large bowl, cream together the butter and powdered sugar until light and fluffy.
  3. Add the flour, salt, and vanilla extract, and mix until a dough forms.
  4. Stir in chopped walnuts and cinnamon until well combined.
  5. Bake for 15-20 minutes, or until the edges are lightly golden.
  6. While cooling, whip heavy cream until soft peaks form, then gently fold in honey.
  7. Once cookies are cool, spread a dollop of honey cream filling between two cookies to create sandwiches.
  8. Chill the assembled cookies for at least 30 minutes before serving.

Recipe Notes

  • For a stronger nut flavor, feel free to use other nuts like pistachios or almonds.
  • Make sure to store cookies in an airtight container to maintain freshness.
  • Adjust the sweetness of the cream filling to your taste preference.

No Bake Mini Lemon Raspberry Cheesecakes: Quick and Delicious Treats!

No Bake Mini Lemon Raspberry Cheesecakes – Easy & Delicious!

⚖️
Difficulty
Easy

⏲️
Prep Time
20 mins

🕒
Cook Time
0 mins

⏱️
Total Time
20 mins

🍽️
Servings
12 mini cheesecakes

If you’re looking for a refreshing dessert that’s easy to make and requires no baking, then these No Bake Mini Lemon Raspberry Cheesecakes are perfect for you! The bright, tangy flavors of lemon combined with the sweetness of fresh raspberries create an irresistible combination that’s sure to impress your guests. These delightful mini cheesecakes are not only beautiful to look at but also bursting with flavor, making them an ideal treat for any occasion, from summer barbecues to elegant dinner parties.

The creamy texture of the cheesecake fills your mouth, while the crumbly crust adds a satisfying crunch. The vibrant colors of the lemon and raspberry topping create a visually stunning dessert that looks as good as it tastes. Prepare to delight in layers of indulgence as you take the first bite of these mini delights. Trust us, once you taste these cheesecakes, they’ll become a regular on your dessert table!

Quick Recipe Highlights

  • Flavor Profile: The zesty lemon flavor shines through, perfectly complemented by the sweetness of ripe raspberries.
  • Texture: Creamy and smooth cheesecake with a crunchy graham cracker crust creates a delightful contrast.
  • Aroma: Refreshing citrus notes mixed with sweet berry fragrance fill your kitchen as they chill.
  • Visual Appeal: Vibrant yellow and deep red colors create an eye-catching presentation that will draw everyone in.
  • Skill Level Needed: This recipe is simple enough for beginners, requiring no advanced culinary skills.
  • Special Equipment: A muffin tin or mini springform pans are recommended for perfect presentation.

Recipe Overview

  • Difficulty Level: These mini cheesecakes are very easy to make, with no baking required. A basic knowledge of mixing ingredients is sufficient.
  • Category: Perfect as a dessert for brunch, parties, or a sweet treat any day of the week.
  • Cuisine: Inspired by classic American desserts, these cheesecakes add a fresh twist with the inclusion of fruity flavors.
  • Cost: The total cost is affordable, with the main ingredients being common pantry staples.
  • Season: Ideal for spring and summer when lemons and berries are in season, providing the best flavor.
  • Occasion: They’re perfect for celebrations, family gatherings, or simply as a delightful snack.

Why You’ll Love This Recipe

The combination of the creamy cheesecake and zesty citrus flavor creates a dessert that feels luxurious yet is unbelievably easy to make. The tartness of the lemon paired with the sweetness of the raspberry provokes a flavor explosion with every bite. Furthermore, their presentation makes them excellent for entertaining, as they look beautiful and are served in individual portions, leading to no mess at the dining table.

Not only are these mini cheesecakes a joy to eat, but they also offer convenience in preparation. With just a little time spent mixing and layering, you can prepare these treats ahead of time and keep them in the fridge for later. This makes them a stress-free option for hosting guests, giving you more time to engage with your company rather than being stuck in the kitchen.

Nutritionally, these cheesecakes can provide a nice balance when made with lower-fat cream cheese and yogurt. The use of fresh fruits like raspberries not only enhances the flavor but also adds essential vitamins and antioxidants, making them a somewhat guilt-free indulgence. Their balanced profile appeals to a wide range of guests, catering to different tastes while still leaving everyone satisfied.

These cheesecakes are perfect for social gatherings or a relaxed family dinner. Their mini size makes them easy to serve and eat without needing forks or plates, encouraging guests to grab and go. They can also become a talking point, as people love sharing their love for creative, beautiful desserts that are equally delicious.

Lastly, the cost-effectiveness of this recipe cannot be overstated. With simple and readily available ingredients, you can create a show-stopping dessert without breaking the bank. This is particularly desirable for those cooking on a budget but wanting to impress family and friends with delightful homemade treats.

Historical Background and Cultural Significance

Cheesecake has a long history that dates back to ancient Greece, where it was considered a form of energy food for athletes. The tradition evolved over time, with various cultures putting their own spin on the classic dessert, leading to the American-style cheesecake prominent today, often incorporating a no-bake method for convenience.

The modern no-bake cheesecake emerged in the mid-20th century, becoming popular for its ease of preparation. This method allows for a diverse range of flavor combinations, making it a versatile dessert option. Incorporating fruits like lemon and berries adds seasonal freshness to the cake, celebrating the natural bounty of each season.

Throughout the years, no-bake cheesecakes have become a beloved treat, particularly at gatherings and celebrations, symbolizing sharing and enjoyment among family and friends—an essential part of many cultural festivities. The addition of flavors like lemon and raspberry speaks to a cultural appreciation for bright, fresh ingredients that appeal to the senses.

In recent years, the popularity of mini desserts has surged, allowing for personalized servings that cater to individual preferences while making it easier for hosts to manage portion sizes. Mini cheesecakes have become a staple at parties, highlighting both tradition and modern culinary trends.

Ingredient Deep Dive

Lemon: The bright citrus flavor of lemon adds a refreshing element to desserts. Lemons are rich in vitamin C and antioxidants, making them a nutritious ingredient to incorporate. When selecting lemons, look for firm fruits with shiny, unblemished skin, and store them at room temperature to maintain freshness.

For any recipe substitution, fresh lemon juice is ideal, though bottled juice can work in a pinch. Store lemons in the refrigerator for up to two weeks to keep them from drying out.

Raspberries: Fresh raspberries add natural sweetness and tartness to the cheesecake. They are rich in dietary fiber and vitamins C and K, promoting overall health. When choosing raspberries, opt for plump berries with a vibrant color and avoid those that appear mushy or have dark spots. Raspberries can typically be stored in the refrigerator but should be consumed within a few days for the best flavor.

For substitutions, frozen raspberries can be a practical alternative for cooking and baking, providing similar flavors while being more cost-effective and longer-lasting. Ensure that they are defrosted without additional water to avoid sogginess in your dish.

Common Mistakes to Avoid

  • Not letting the cream cheese soften: Make sure to take cream cheese out of the refrigerator in advance for easier mixing, which ensures a smooth texture.
  • Skipping the chilling step: Allow your mini cheesecakes to chill after layering to achieve the ideal texture and ease of serving.
  • Overmixing the filling: Overmixing can incorporate too much air, leading to cracks in the surface once set.
  • Using expired ingredients: Always check the expiration dates on your dairy products to avoid unwanted flavors and textures.
  • Not preparing the crust adequately: Press the graham cracker crust firmly to form a stable base, ensuring it holds shape once filled.
  • Ignoring ingredient temperature: Use room temperature ingredients for a seamless texture when mixing the filling.
  • Using too much lemon zest: Opt for balanced zesting, as too much can overpower the other flavors.
  • Not adjusting the sugar to taste: Always taste the filling before pouring it in, and adjust sweetness based on your preference.

Essential Techniques

Mixing Cream Cheese: It’s crucial to beat the cream cheese until it’s smooth and free of lumps. This step ensures a creamy texture that combines well with other ingredients. To master this, start mixing at a low speed to avoid splattering, then gradually increase the speed. A common pitfall is adding other ingredients too early, which can make achieving a smooth mix difficult.

Preparing the Crust: A well-formed crust should be evenly pressed into the muffin tin or pan to hold the cheesecake filling. Use the back of a spoon or a small measuring cup to press down firmly without gaps. Pay attention to the pie crust-to-filling ratio to ensure balance. Watch for visual cues like the edges pulling away from the pan, indicating that the crust will hold its shape properly.

Pro Tips for Perfect No Bake Mini Lemon Raspberry Cheesecakes

1. Use fresh ingredients for the best flavor and texture, especially with fruits like lemons and raspberries.

2. Consider adding a pinch of salt to the filling for enhanced flavor contrast.

3. For a fancier look, pipe whipped cream on top and garnish with extra berries before serving.

4. Chill the cheesecakes longer if you prefer a firmer texture; overnight is ideal!

5. Experiment with flavored extracts, like vanilla or almond, for a different twist on the classic recipe.

6. Consider adding a layer of lemon curd on top for an extra tangy punch.

7. Always taste the filling before final assembly to make any necessary adjustments.

8. Have fun with the presentation by using colorful cupcake liners for each cheesecake.

Variations and Adaptations

You can easily modify this recipe by incorporating seasonal fruits like strawberries or blueberries for a different flavor profile. Alternatively, swap lemon for lime for a refreshing twist. For a chocolate variation, add cocoa powder to the filling and drizzle melted chocolate over the top for an indulgent treat.

For dietary modifications, consider using dairy-free cream cheese for vegan adaptations. Additionally, almond flour or nut-based crusts can replace graham crackers for gluten-free diets. Each variation can create a uniquely satisfying cheesecake experience!

Serving and Presentation Guide

For an elegant presentation, serve your mini cheesecakes on a colorful platter. Consider garnishing with mint leaves or extra lemon zest for added flair. Each cheesecake can be topped with fresh raspberries or a dollop of whipped cream for improved visual appeal. When plating, be mindful of portion sizes, ensuring they are bite-sized for ease of consumption.

Wine and Beverage Pairing

A light and crisp Sauvignon Blanc would pair wonderfully with these mini cheesecakes, complementing the citrus flavors perfectly. For non-alcoholic options, consider serving iced herbal teas or sparkling lemonade paired with the dessert for a refreshing delight while targeting the similar flavor profile.

Storage and Shelf Life

Store your mini cheesecakes in an airtight container in the refrigerator to keep them fresh. They will maintain their best quality for up to three days. If you need to keep them longer, they can also be frozen for up to two months. Ensure to thaw them in the refrigerator overnight before serving.

Make Ahead Strategies

These cheesecakes are ideal for preparation in advance. You can make the crust and filling up to a day ahead of time and assemble just before serving. This allows the flavors to meld together beautifully. Keep the layered cakes in the refrigerator until you’re ready to serve, maximizing freshness and taste!

Scaling Instructions

To double the recipe, simply adjust your ingredient measurements accordingly and ensure you have sufficient muffin pan space. Be mindful of the chilling time, which might need slight adjustments based on the total volume of the cheesecake batter produced. When scaling down the recipe, keep ingredient ratios consistent to maintain flavor balance.

Nutritional Deep Dive

Each mini lemon raspberry cheesecake offers a surprisingly balanced treat, providing a good mix of carbohydrates, fats, and proteins. The lemon brings in vitamin C while the raspberries add fiber and antioxidants, contributing positively to your daily diet plan. Be mindful of portion sizes if you are tracking nutritional intake, as mini sizes can still contribute significantly to total caloric intake.

Dietary Adaptations

For a gluten-free version, substitute the traditional graham crust with almond flour or gluten-free crumbs. To make them dairy-free, use a plant-based cream cheese substitute and coconut whipped cream. If you’re following a vegan diet, ensure the ingredients are free from animal products, like switching to coconut milk yogurt.

Troubleshooting Guide

If you encounter texture issues, try blending longer until the mixture is completely smooth. If the flavor balance is off, adding a touch more sweetness can often remedy a too-tart dessert. Pay attention to the chilling times as insufficient chilling can affect both the firmness and overall texture; make sure to allow enough time for the mini cheesecakes to set properly.

Recipe Success Stories

Many readers rave about how simple and delicious these no bake mini cheesecakes are. One community member highlighted how easy it was to adapt the recipe for a children’s birthday party, using bright colors and various toppings, while another shared their success by creating a gluten-free version for a family gathering. Every iteration shows the recipe’s versatility and ability to please any audience!

Frequently Asked Questions

Can I make these mini cheesecakes in advance? Yes! These cheesecakes store well in the refrigerator for up to three days, and they freeze nicely for up to two months.

What can I use instead of raspberries? You can easily substitute with strawberries, blueberries, or other seasonal fruits that you prefer!

How can I adjust the sweetness of the cheesecake? Adjust the amount of sugar based on your preference, tasting as you go to find the perfect balance.

Can I use a store-bought crust? Absolutely! A pre-made graham cracker crust can save time and still achieve a delicious outcome!

What can I do if the filling is too runny? If your filling is too runny, consider adding more cream cheese and chilling it longer to firm up. Alternatively, try folding in a bit of whipped cream for texture.

How do I prevent the filling from cracking? Avoid overmixing and ensure the filling is well incorporated before chilling it properly.

Can I use different types of cheese? Yes! You can experiment with mascarpone or goat cheese for unique flavor profiles, keeping in mind that this may change the texture.

Do I need to bake these cheesecakes? No! This is a no-bake recipe, making it convenient and easy for anyone!

How long do these mini cheesecakes last in the fridge? They can last for up to three days in the refrigerator stored in an airtight container.

Can I double the recipe? Yes! Just multiply the ingredients by two, and be mindful of adjusting your chilling time if you’re using a deeper dish.

Additional Resources

If you enjoyed this No Bake Mini Lemon Raspberry Cheesecake recipe, explore related recipes like classic cheesecake, lemon bars, or homemade fruit tarts. Also, check out techniques for making the perfect crust or maximizing your dessert presentation skills. Understanding ingredient substitutions can also enhance your baking repertoire and allow for on-the-fly adjustments as needed.

Join the Conversation

We’d love to hear from you! Share your creations on social media, and don’t forget to tag us for a chance to be featured. Participate by leaving a review for this recipe or share any unique adaptations that you made. Join our community of baking enthusiasts and inspire others with your ideas and feedback!

The Recipe

No Bake Mini Lemon Raspberry Cheesecakes

Serves: 12 mini cheesecakes

Prep Time: 20 mins

Cook Time: 0 mins

Total Time: 20 mins

Kitchen Equipment Needed

  • Muffin tin or mini springform pans
  • Mixing bowls
  • Electric mixer
  • Spoon or spatula
  • Measuring cups and spoons

Ingredients

  • 1 cup graham cracker crumbs
  • 1/4 cup sugar
  • 1/3 cup unsalted butter, melted
  • 2 cups cream cheese, softened
  • 1/2 cup sugar (adjust to taste)
  • 1/2 cup sour cream
  • 1/4 cup fresh lemon juice
  • 1 tablespoon lemon zest
  • 1 cup fresh raspberries (for topping)
  • Optional: whipped cream for garnish

Directions

  1. Prepare your muffin tin by lining it with paper liners or greasing it lightly to prevent sticking.
  2. In a mixing bowl, combine graham cracker crumbs, sugar, and melted butter until well mixed.
  3. Press the crumb mixture into the bottom of each muffin cup to form the crust.
  4. In another bowl, beat the softened cream cheese and sugar together until smooth and creamy.
  5. Add sour cream, lemon juice, and zest to the cream cheese mixture, beating until combined.
  6. Pour the cheesecake filling over the crust in each muffin cup, smoothing the tops.
  7. Refrigerate for at least 4 hours or overnight for best results.
  8. Before serving, top each cheesecake with fresh raspberries and a dollop of whipped cream, if desired.

Recipe Notes

  • For added flavor, feel free to incorporate other berries or fruits as toppings.
  • These can be frozen for up to two months; thaw overnight in the refrigerator before serving.

Delicious Sweet Potato Honeybun Cookies for Fall Baking Bliss

Sweet Potato Honeybun Cookies: A Delightful Treat for Any Occasion

⚖️
Difficulty
Easy

⏲️
Prep Time
15 mins

🕒
Cook Time
20 mins

⏱️
Total Time
35 mins

🍽️
Servings
24 cookies

Sweet Potato Honeybun Cookies are a delicious twist on classic cookies, combining the earthy sweetness of sweet potatoes with the warm, comforting flavor of honey. These cookies are not only soft and chewy but also packed with nutrients, making them a perfect treat for any time of the day. The unique combination of flavors creates a delightful taste experience that will keep you and your family coming back for more.

As you take a bite, the rich honey glaze perfectly complements the natural sweetness of the sweet potato, providing a comforting warmth that is reminiscent of homemade goodness. The vibrant orange color of the sweet potatoes adds visual appeal, making these cookies not only tasty but also beautiful on any dessert platter. Perfect for family gatherings, school bake sales, or cozy evenings at home, these cookies are sure to impress and delight all who try them.

Quick Recipe Highlights

  • Flavor Profile: The sweet potato brings a rich, earthy taste, while honey provides a lovely sweetness that balances beautifully.
  • Texture: Soft and chewy with a hint of crispness on the edges, these cookies create a delightful mouthfeel.
  • Aroma: The inviting blend of baked sweet potatoes and honey wafts through the kitchen, creating an irresistible aroma.
  • Visual Appeal: The vibrant color of the orange sweet potato against the golden honey glaze makes for a stunning presentation.
  • Skill Level Needed: Ideal for beginners, these cookies require minimal techniques, making them accessible to all.
  • Special Equipment: A simple mixing bowl and a baking sheet are all you need to create these delicious treats.

Recipe Overview

  • Difficulty Level: Sweet Potato Honeybun Cookies are classified as easy, making them perfect for novice bakers and experienced chefs alike.
  • Category: These cookies fall into the dessert category, serving as a delightful end to any meal or a sweet snack throughout the day.
  • Cuisine: Their warm flavors are deeply rooted in American dessert traditions, showcasing the use of sweet potatoes in comforting recipes.
  • Cost: The ingredients are readily available and budget-friendly, making this recipe economical for home cooks.
  • Season: Fall is the perfect season for sweet potato desserts, taking advantage of the harvest season for fresh produce.
  • Occasion: Whether it’s a holiday gathering, a birthday party, or just a cozy evening at home, these cookies fit any occasion.

Why You’ll Love This Recipe

The taste and texture of Sweet Potato Honeybun Cookies are truly irresistible. The natural sweetness of the sweet potatoes harmonizes with the honey, creating a cookie that is not overly sweet yet incredibly satisfying. Each cookie provides a lovely chewy texture, giving a delightful bite that leaves you wanting more. Pairing these cookies with a warm beverage enhances their comforting nature, making each bite a moment to savor.

Convenience is another reason to love this recipe. With only 15 minutes of prep time and minimal equipment required, you can whip up a batch of these cookies in no time. Once baked, they store well and can be conveniently packaged for gifts or outings, making them an excellent choice for busy schedules while delivering homemade goodness effortlessly.

Nutritionally, sweet potatoes are packed with vitamins and minerals, including vitamin A, which is crucial for your health. By adding this superfood to your cookies, you’re not only indulging your sweet tooth, but also providing your body with essential nutrients. This makes Sweet Potato Honeybun Cookies a guilt-free indulgence that you can enjoy with peace of mind.

These cookies are perfect for social gatherings and entertaining. Their unique flavors will spark conversations and compliments, while the beautiful presentation will elevate any dessert table. They are an excellent way to share joy with friends and family, creating memories that will last long after the cookies are gone.

Lastly, Sweet Potato Honeybun Cookies are cost-effective. The ingredients are typically inexpensive and often already on hand, making this a budget-friendly baking project. So, whether you are looking to impress guests, treat your family, or simply satisfy your own cravings, this recipe delivers both flavor and value.

Historical Background and Cultural Significance

Sweet potatoes have a rich history in culinary traditions across various cultures. Native to Central and South America, they have been cultivated for thousands of years and were a staple food source for indigenous peoples. As European settlers arrived in the Americas, they adopted sweet potatoes into their diets, recognizing their versatility and nutritional benefits.

In the United States, sweet potatoes are especially significant in Southern cuisine, where they are celebrated in both savory and sweet dishes. This cultural importance is magnified during Thanksgiving, where sweet potato dishes hold a revered place on dinner tables. Incorporating sweet potatoes into desserts showcases their adaptability and the creativity of home cooks who aim to infuse traditional recipes with seasonal ingredients.

The evolution of Sweet Potato Honeybun Cookies reflects the changing tastes and preferences in baking. Over the years, recipes have transformed to include various types of flours, sweeteners, and flavorings, adapting to health trends while remaining true to their roots. This adaptation highlights the evolution of cookies from simple snacks to gourmet treats that fit into today’s awareness of nutrition and flavor.

Regional variations of sweet potato desserts across the U.S. highlight the diverse culinary landscape. From sweet potato pies in the South to casseroles topped with marshmallows, each region has adapted this humble tuber into its treats, creating unique culinary expressions. Sweet Potato Honeybun Cookies serve as a bridge, combining diverse influences into a singular, delightful cookie experience.

Ingredient Deep Dive

The main ingredient in Sweet Potato Honeybun Cookies is the sweet potato itself. This nutritious root vegetable is not only delicious but also carries significant cultural history, especially in American cuisine. Sweet potatoes are rich in vitamins A and C, along with fiber and antioxidants. When selecting sweet potatoes, look for firm ones with smooth skins, avoiding any that are soft or have blemishes. For storage, they should be kept in a cool, dark place to maintain freshness, and if you’re short on sweet potatoes, pumpkin puree makes for an excellent substitution in this recipe.

Honey serves as the primary sweetener and glaze for these cookies. Renowned for its natural sweetness and distinct flavor, honey has been used as a sweetener for centuries across numerous cultures. It adds a unique depth to the cookies, enhancing their flavor profile. Choosing raw honey can maximize health benefits, as it retains its natural enzymes. When baking, always consider the temperature of honey; too high heat can alter its flavor. Honey should be stored in a sealed container at room temperature, maintaining its quality for quite some time.

Flour is the foundation of any cookie, providing structure. All-purpose flour is commonly used but can be replaced with gluten-free options like almond or coconut flour to cater to dietary restrictions. When selecting flour, ensure you keep it in an airtight container to avoid moisture absorption and maintain freshness. Always measure flour correctly; too much can lead to dry cookies. Using whole wheat flour can add a nutty flavor while increasing fiber content.

Butter provides richness and flavor to the cookies, contributing to their chewy texture. For those who prefer a dairy-free option, substitute with coconut oil or vegan butter, which still delivers rich flavor and texture. When using butter, be sure to soften it at room temperature for optimal mixing. Storing butter in the refrigerator will maintain freshness, while leftover cookies should be stored in an airtight container to prevent drying.

Lastly, spices like cinnamon and nutmeg are essential for enhancing the cookies’ warmth and aroma. These spices have long-standing cultural significance, often linked to celebratory meals and seasonal baking. When selecting spices, consider freshness to ensure maximum flavor. Store spices in a dark, cool place to maintain their potency, and for added warmth, experiment with incorporating ginger or allspice to broaden the flavor profile of your cookies.

Common Mistakes to Avoid

  • Adding Too Much Flour: Using too much flour can lead to dry cookies. Always measure accurately, spooning flour into the measuring cup and leveling it off.
  • Overmixing: Mixing the batter too much can result in tough cookies. Mix just until the ingredients are combined for a tender texture.
  • Baking at Inconsistent Temperatures: Ensure your oven is properly preheated to avoid uneven baking. An oven thermometer can help verify the correct temperature.
  • Using Cold Ingredients: Using cold butter can make mixing difficult and may affect the cookie’s texture. Let butter come to room temperature before use.
  • Not Cooling the Cookies: Allowing cookies to cool too long on the baking sheet can result in over-baking. Transfer to a wire rack shortly after removing from the oven.
  • Skipping the Chilling Process: For even distribution of flavors and better texture, chilling the dough for 30 minutes before baking can be beneficial.
  • Poor Storage: Storing cookies in an unsealed container can cause them to dry out. Use a sealable container to maintain moisture.
  • Ignoring Ingredient Quality: Using low-quality ingredients, especially honey and sweet potatoes, can affect the overall flavor. Opt for fresh, high-quality items.
  • Not Tasting the Batter: Before baking, tasting the dough can help adjust sweetness or spice levels, ensuring that the final product meets your preferences.
  • Assuming Baking Time is Universal: Every oven has its quirks; check cookies a minute or two before the suggested baking time to prevent over-baking.

Essential Techniques

One essential technique for making Sweet Potato Honeybun Cookies is properly creaming butter and sugar. This process aerates the butter, leading to a light and fluffy texture in the cookies. To master this technique, use room temperature butter and beat it with sugar until it is light in color and fluffy in texture. A common pitfall is to skip this step, resulting in dense cookies. Look for the mixture to be pale and increased in volume for success.

Another crucial technique is measuring your ingredients accurately. Cooking is a science, and precise measurements can greatly affect the outcome of your cookies. Use a kitchen scale for the most consistent results, especially for flour. A common mistake is to scoop flour directly from the bag, which can lead to using too much. For a visual cue, the flour should mound slightly but not be overflowing the measuring cup when using the spooning method.

Pro Tips for Perfect Sweet Potato Honeybun Cookies

Start with room temperature ingredients, especially butter and eggs, to ensure even mixing and better consistency.

If you want an extra burst of sweetness, drizzle a bit more honey on top of the cookies right before baking for a caramelized effect.

For added texture, consider folding in chopped nuts or chocolate chips to the batter before baking. This adds an interesting crunch to the chewy cookies.

Always let your baked cookies cool completely on a wire rack before storing them to maintain their texture and prevent them from becoming soggy.

Experiment with different spices such as cardamom or ginger-based on your personal taste preferences for a unique twist to the traditional flavor.

For a visually appealing touch, sprinkle a pinch of sea salt on top of the cookies right after they come out of the oven; this enhances flavor and adds a professional look.

If you prefer a less sweet cookie, reduce the amount of honey slightly, as the sweet potato adds natural sweetness.

Try using different types of honey, such as wildflower or clover, to explore diverse flavor notes that could enhance your cookies.

Lastly, keep in mind to check your cookies during baking time rather than relying solely on the clock; ovens can vary widely in temperature efficiency.

Variations and Adaptations

Sweet Potato Honeybun Cookies can be easily adapted for various dietary needs. For a gluten-free option, substitute all-purpose flour with almond flour or a gluten-free baking blend. This maintains the texture while accommodating those with gluten sensitivities.

Seasonally, you could incorporate pumpkin spice into the mix, turning these cookies into Pumpkin Sweet Potato Honeybuns perfect for autumn festivities. Alternatively, during the summer, consider adding chopped dried fruits like apricots or cranberries for a refreshing twist.

For those with dietary restrictions, a dairy-free version can be created by using coconut oil instead of butter while still keeping the cookies rich and delicious. Additionally, substituting maple syrup for honey creates a vegan-friendly cookie that retains the sweet flavor.

Flavor variations include adding a dash of cocoa powder to create a chocolatey version, or mixing in different extracts, such as vanilla or almond, to provide complexity. Texture modifications like adding oats can bring a hearty feel to the cookies, making them even more satisfying.

Finally, for presentation, consider cutting the cookies into fun shapes using cookie cutters or drizzling a homemade glaze over the top as a final garnish to wow your guests at any event.

Serving and Presentation Guide

When serving Sweet Potato Honeybun Cookies, consider using a simple yet attractive platter to showcase their vibrant colors. Arrange the cookies in an overlapping pattern to create visual interest and allow for easy access. For a decorative touch, you can dust them with powdered sugar or drizzle with a honey glaze right before serving.

Garnishing ideas include pairing these cookies with a scoop of vanilla ice cream or a dollop of whipped cream, creating an impressive dessert plate. Traditional accompaniments can include coffee or spice teas, which enhance the warmth of the cookies’ flavors.

Modern serving suggestions may introduce elements like pairing them with a fresh fruit compote or tangy yogurt dips, adding a refreshing contrast to the sweetness. When considering temperature, these cookies can be enjoyed warm or at room temperature. For portion control, consider presenting them as mini cookies for smaller bites—ideal for gatherings.

Wine and Beverage Pairing

When it comes to wine pairings for Sweet Potato Honeybun Cookies, a late-harvest Riesling complements the natural sweetness beautifully, with its fruity notes enhancing the flavors of honey and sweet potatoes. Alternatively, a light Pinot Noir can provide a delightful contrast with its acidity.

For non-alcoholic alternatives, try pairing with a warm spiced apple cider that echoes the fall flavors inherent in the cookies. Additionally, a chai tea offers spice and warmth, enhancing the treat’s comforting qualities.

Coffee lovers will enjoy a rich cup brewed with dark roast beans, providing a bold flavor to balance the sweetness of the cookies. For the best experience, serve beverages warm, allowing the aromatic notes to complement the nature of the cookies.

Storage and Shelf Life

Proper storage of Sweet Potato Honeybun Cookies is essential for maximum freshness. Store them in an airtight container at room temperature for up to one week. To maintain their chewy texture, consider placing a slice of bread in the container to absorb moisture.

If you want to extend their shelf life, consider freezing the cookies. Place them in a freezer-safe bag provided with a layer of parchment paper between each cookie to prevent sticking. They can be frozen for up to three months. To thaw, leave them at room temperature or warm them in the oven for a few minutes before serving.

Signs of spoilage include an off smell or a change in texture; discarded cookies ensure safe eating. For reheating, a warm oven works well to restore freshness—just 5 minutes at 350°F (175°C) should do the trick.

Make Ahead Strategies

One effective strategy for preparing Sweet Potato Honeybun Cookies ahead of time is to mix the dough and store it in the refrigerator for up to 48 hours before baking. This allows flavors to meld and can even enhance the cookie’s taste.

You can also consider portioning out the dough into balls and freezing them raw. When you’re ready to bake, simply place the frozen dough balls directly onto a baking sheet and add a couple of extra minutes to the baking time. This provides a quick, last-minute treat without sacrificing flavor.

When making them ahead of time, be mindful of leaving the cookies fresh, where adding fresh elements like a drizzle of glaze just before serving can help maintain their appeal. Consider assembling a batch for a gathering—freeze beforehand, knowing they’ll taste freshly baked when warmed for guests.

Scaling Instructions

If you wish to halve the Sweet Potato Honeybun Cookies recipe, simply divide all ingredients by two, resulting in approximately 12 cookies instead of 24. Adjust your baking time slightly, as smaller batches may bake faster.

Doubling or tripling the recipe is straightforward; however, ensure your mixing bowl can accommodate the increased volume without spilling. For larger batches, consider baking in multiple sheets at once, rotating them halfway through for even baking.

Timing modifications may also be necessary for larger batches, as baking might take slightly longer. Keep an eye on the cookies, checking for doneness based on the visual cues shared earlier.

Storage considerations should include appropriately sized containers, ensuring there’s enough space to maintain the cookies’ texture after baking.

Nutritional Deep Dive

In terms of nutritional breakdown, Sweet Potato Honeybun Cookies provide a beneficial serving of carbohydrates, primarily from the sweet potatoes and flour. They contain healthy sources of energy, with sweet potatoes contributing to the overall macro balance with fiber, keeping you satisfied.

Regarding micronutrient analysis, sweet potatoes stand out for their high vitamin A content, crucial for eye health and immune function. Additionally, honey adds antioxidants, helping reduce inflammation and promote overall well-being.

These cookies offer substantial health benefits, particularly when made with whole food ingredients. They can be part of a balanced diet when enjoyed in moderation, ensuring that you satisfy sweet cravings without overindulging in processed sugars.

From a dietary consideration, with careful substitutions, these cookies can cater to various dietary preferences or restrictions, such as gluten-free, vegan, or low-carb, ensuring that more people can enjoy this delightful treat.

Portion analysis is also vital; a standard serving size of one cookie provides enough sweetness without excessive calorie intake, making these cookies a smart choice for those looking to balance their indulgences with healthful eating.

Dietary Adaptations

Making Sweet Potato Honeybun Cookies gluten-free is simple with the use of almond flour or a gluten-free flour blend. This keeps the texture delectable while broadening accessibility for those with gluten allergies or intolerances.

For a dairy-free option, simply swap out butter for coconut oil or a plant-based butter alternative, ensuring the flavor remains rich without compromising dietary preferences. These substitutions allow for a delicious treat without dairy concerns.

For vegan adaptations, use maple syrup in place of honey, and replace eggs with flaxseed meal mixed with water; this adds moisture while providing structure. The final product will still maintain the soft chewiness characteristic of traditional cookies.

Low-carb enthusiasts can utilize almond flour and erythritol as a sweetener, transforming these cookies into a suitable treat for keto diets without sacrificing taste.

Additionally, respect the nuances of various cultures. For example, for a Paleo modification, simply remove the sweeteners and rely on natural sweet potatoes for flavor, while ensuring no processed ingredients are involved.

Troubleshooting Guide

Addressing texture issues in Sweet Potato Honeybun Cookies often stems from ingredient ratios; if they’re too dry, adding more sweet potato or a touch of coconut oil can improve moisture.

Flavor balance problems could arise if insufficient sweetness is present. Taste the batter before baking to adjust the amount of honey according to preference and the sweet potato’s inherent sweetness.

Temperature problems may occur if the oven is not preheated correctly. Always ensure your oven is the appropriate temperature before placing the cookies inside to avoid under or overbaking.

Common equipment challenges include using cookie sheets that are not non-stick. Line your baking trays with parchment paper to ensure easy release and consistent baking results.

Ingredient substitutions could lead to unexpected results; knowing your alternative ingredients and how they react in baking can prevent mishaps. For instance, swapping honey for a liquid sweetener could alter the moisture level of your dough significantly.

Timing concerns often manifest in underbaked or overbaked cookies. Check cookies for doneness a bit earlier than the suggested time, given that each oven has unique idiosyncrasies influencing bake times.

Recipe Success Stories

Community feedback has been overwhelmingly positive for these Sweet Potato Honeybun Cookies. Numerous readers have shared their success stories about playing with spices and other nuts to customize their cookies, sparking creativity in the kitchen.

Variations inspired by favorites like adding dark chocolate pieces or walnuts have received rave reviews, celebrating the versatility of these cookies and encouraging readers to share their own adaptations on social media.

Photography tips shared in community forums underscore that capturing the vibrant colors of the cookie amidst a cozy home setting enhances the appeal, inviting other bakers to give it a try.

Readers have also suggested using these cookies as a base for ice cream sandwiches, providing an innovative way to elevate this simple recipe into something extraordinary that delights on hot days.

Finally, readers have expressed how these cookies have become a staple in their households, often baking multiple batches to have on hand for both snacks and desserts, proving that adaptability fits well into various lifestyles.

Frequently Asked Questions

Can I use canned sweet potatoes instead of fresh?

Yes, canned sweet potatoes can be used, but be sure to drain them well to avoid excess moisture. Fresh sweet potatoes provide a richer flavor, but canned is a convenient alternative if you’re short on time.

How do I know when my cookies are done baking?

Your cookies are done when the edges are lightly golden but the center is still a bit soft. They will firm up as they cool on the baking sheet.

Can I make these cookies ahead of time?

Absolutely! You can prepare the dough and refrigerate it for up to 48 hours before baking. Alternatively, shape the cookies and freeze them for an even longer storage option.

What if I don’t have honey?

If you don’t have honey, maple syrup or agave nectar can serve as perfect alternatives. Both will provide a similar sweetness and flavor profile, though they may slightly alter the cookie’s texture.

How should I store my cookies?

Store your cookies in an airtight container at room temperature for up to a week. For extended freshness, consider freezing them in a sealed bag between layers of parchment paper.

Are there vegan options for this recipe?

Yes, by substituting honey with maple syrup and using coconut oil instead of butter, you can create a delicious vegan version without compromising on taste.

Can I add nuts or chocolate to the cookies?

Definitely! Chopped nuts, chocolate chips, or dried fruit can be added to the dough for additional flavor and texture. Just be sure to adjust the amounts based on your preferences.

What drinks go well with these cookies?

Sweet Potato Honeybun Cookies pair excellently with coffee, tea, or warm cider, enhancing the cozy taste experience. The flavors complement each other beautifully, making every bite a pleasure.

Are these cookies gluten-free?

If you use a gluten-free flour blend, you can easily adapt this recipe to be gluten-free without losing the wonderful flavor and feel of the cookies.

Can I use a different sweet potato variety?

While orange-fleshed sweet potatoes are most common, white or purple varieties can also be used. Just be aware that the flavor and sweetness levels may vary slightly.

How do I make my cookies chewy?

To ensure chewy cookies, measure your flour accurately and avoid overbaking. Using brown sugar in place of granulated sugar can also enhance the chewiness.

Additional Resources

For those who enjoy baking, you may find related recipes like Pumpkin Spice Cookies or Carrot Cake Cookies enticing. Both utilize seasonal flavors, much like the Sweet Potato Honeybun Cookies, and offer delightful variations for different occasions.

If you’re keen on honing your technique, be sure to explore guides on cookie texture and perfecting your mixing methods for a successful baking journey, ensuring consistent results every time.

Understanding the nutritional content of ingredients is essential; research sweet potato benefits or how different flours impact your baking to make informed choices.

Equipment recommendations, particularly for baking sheets and mixers, can greatly influence your baking experience. A non-stick baking sheet or a stand mixer may be worth considering for smooth and successful baking.

Lastly, seasonal variations are an exciting way to celebrate culinary diversity; feel free to share your personal favorite recipes using seasonal ingredients that can inspire others in their kitchens!

Join the Conversation

We invite you to share your creations and experiences with Sweet Potato Honeybun Cookies on social media. Engaging with fellow baking enthusiasts fosters a sense of community and provides a wealth of inspiration for future baking adventures.

Consider contributing photography tips to help others capture the beauty of their culinary delights. Showcasing your finished products helps celebrate individual creativity while inviting constructive feedback for improvement.

Recipe reviews serve as fantastic engagement; sharing personal twists and taste notes encourages an exchange of ideas that enriches the baking process for everyone involved.

Join the discussion around variations and adaptations, sharing insights on how you’ve modified the recipe to fit your preferences or dietary needs, what worked well, and what you might have tried differently.

Remember, your voice matters, and together we make the kitchen a place of innovation and joy. Spread the warmth of good food and connection with every bite shared.

The Recipe

Sweet Potato Honeybun Cookies

Serves: 24 cookies

Prep Time: 15 mins

Cook Time: 20 mins

Total Time: 35 mins

Kitchen Equipment Needed

  • Mixing bowl
  • Baking sheet
  • Parchment paper
  • Electric mixer
  • Measuring cups and spoons

Ingredients

  • 1 cup mashed sweet potatoes (cooked and cooled)
  • 1/2 cup honey
  • 1/4 cup butter, softened
  • 1 cup all-purpose flour
  • 1 teaspoon baking powder
  • 1/2 teaspoon cinnamon
  • 1/4 teaspoon nutmeg
  • 1/4 teaspoon salt
  • 1 teaspoon vanilla extract

Directions

  1. Preheat your oven to 350°F (175°C) and line a baking sheet with parchment paper.
  2. In a mixing bowl, cream together the softened butter and honey until light and fluffy.
  3. Add the mashed sweet potatoes and vanilla extract, mixing until combined.
  4. In a separate bowl, whisk together the flour, baking powder, cinnamon, nutmeg, and salt.
  5. Gradually add the dry ingredients to the wet mixture, stirring until just combined.
  6. Drop tablespoon-sized portions of dough onto the prepared baking sheet, spacing them about 2 inches apart.
  7. Bake for 15-20 minutes, or until the edges are lightly golden.
  8. Let the cookies cool on the baking sheet for 5 minutes before transferring to a wire rack to cool completely.

Recipe Notes

  • For added sweetness, drizzle extra honey over the cookies after baking.
  • These cookies can be stored in an airtight container for up to a week.
  • You can freeze the dough for later use; simply shape into balls and freeze before baking.

Irresistible Mini Biscoff Cheesecakes: A Perfect Dessert Delight

Delicious Mini Biscoff Cheesecakes: Bite-Sized Bliss

⚖️
Difficulty
Moderate

⏲️
Prep Time
20 mins

🕒
Cook Time
30 mins

⏱️
Total Time
50 mins

🍽️
Servings
12 servings

Indulge in the sweetness of Mini Biscoff Cheesecakes, where creamy, rich flavors collide with the warm, spiced notes of Biscoff cookies. These delightful treats are perfect for any occasion, offering a unique twist on traditional cheesecake. Each mini cheesecake is a harmonious blend of velvety cream cheese, luscious caramel, and the iconic taste of Biscoff, all nestled in a buttery cookie crust. Whether served at a party or enjoyed as an evening treat, these cheesecakes will surely captivate your taste buds.

Imagine sinking your spoon into these delightful little desserts and tasting the creamy filling that melts in your mouth. The crust provides a satisfying crunch that perfectly complements the smooth cheesecake, making every bite a delightful contrast of textures. The aroma of caramelized sugar combined with the spicy notes of cinnamon fills the air, inviting everyone to indulge. These Mini Biscoff Cheesecakes are more than just dessert; they’re a miniature experience of joy and satisfaction.

Quick Recipe Highlights

  • Flavor Profile: Mini Biscoff Cheesecakes boast a unique combination of creamy, sweet cheesecake and caramel notes with a hint of spiciness from the Biscoff cookies.
  • Texture: The cheesecakes feature a smooth and creamy filling set against a crunchy and buttery cookie crust, providing a delightful mouthfeel.
  • Aroma: They offer a heavenly aroma of caramel with subtle hints of cinnamon and brown sugar that will fill your kitchen as they bake.
  • Visual Appeal: These mini cheesecakes are visually stunning, with golden caramel swirls on top and perfectly baked crust edges, creating an irresistible presentation.
  • Skill Level Needed: This recipe is suitable for those with moderate baking skills, as it requires attention to detail and some patience during preparation and assembly.
  • Special Equipment: You will need a muffin tin and cupcake liners to create the mini cheesecakes, along with a mixing bowl and an electric mixer for the filling.

Recipe Overview

  • Difficulty Level: Although classified as moderate, this recipe is manageable for most bakers, making it a great choice for those who want to expand their baking repertoire.
  • Category: These mini cheesecakes fall into the dessert category, perfect for gatherings, celebrations, or simply satisfying your sweet tooth.
  • Cuisine: This recipe embraces a modern twist on classic American desserts, incorporating the renowned European Biscoff flavor that adds an elegant touch.
  • Cost: With an average estimated cost of around $15, these delightful treats are budget-friendly while still delivering gourmet taste.
  • Season: Enjoy these cheesecakes year-round, but they shine during festive gatherings, holidays, and special occasions.
  • Occasion: Ideal for parties, potlucks, or as a sweet finishing touch to dinners, these Mini Biscoff Cheesecakes are suitable for any event.

Why You’ll Love This Recipe

The taste and texture of Mini Biscoff Cheesecakes is enough to make anyone swoon. With a creamy texture that seems to float on your tongue, combined with the subtle crunch from the Biscoff crust, each bite is a delightful experience. The balance of sweetness and spice strikes the perfect note, appealing to those who love rich desserts without being overwhelmingly sweet.

One of the most significant advantages of this recipe is its convenience. The preparation time is relatively short, allowing you to whip up a batch quickly, yet the cheesecakes taste as if they’ve been laboriously crafted over hours. Additionally, they can be easily made ahead of time, making them a perfect choice for busy hostesses or those who simply want to prepare for an upcoming gathering in advance.

Nutritionally, these mini cheesecakes provide the joy of indulgence without the guilt. While they feature cream cheese, you can opt for reduced-fat versions or incorporate Greek yogurt for added protein, making them a more wholesome dessert option. The presence of Biscoff cookies also adds a unique element, a treat that feels special and indulgent.

Hosting friends or family? These Mini Biscoff Cheesecakes serve as an eye-catching and unique dessert that guests will rave about. They offer the chance for fun, engaging conversations and Instagrammable moments. Their individual serving portions mean everyone can enjoy their own decadent experience alongside other desserts without feeling guilty for taking seconds.

Cost-effectiveness is one of the many appealing aspects of this recipe. With a small list of ingredients and simple instructions, you can create a beautiful dessert that feels luxurious without breaking the bank. Each cheesecake serves as a small, affordable treat that tastes far more sophisticated than it costs. This sweetness is exactly what any home baker looks for when crafting special dessert creations.

Historical Background and Cultural Significance

Cheesecakes have a long and rich history dating back to ancient Greece, where the earliest known recipe can be traced to around 2000 B.C. This creamy and indulgent dessert evolved over centuries, crossing borders and adapting to various cultures. The classic American cheesecake, with its rich cream cheese filling, came into popularity in the 20th century and has since spawned numerous variations, including the beloved Mini Biscoff Cheesecakes.

The cultural significance of cheesecake goes beyond flavors; it represents celebration and community. Traditionally served at gatherings and special occasions, cheesecakes signify indulgence and hospitality. The introduction of Biscoff cookies into this classic dessert brings an international flair, reflecting an appreciation for diverse flavors and culinary traditions, particularly from Belgium, where Biscoff originated.

Over the years, the cheesecake recipe has evolved and adapted to different preferences, resulting in mini interpretations like the Mini Biscoff Cheesecakes. This adaptation allows for easy portioning and individual servings, making it a popular choice for gatherings where guests appreciate personal desserts. The original depth of flavor remains intact, achieving a perfect balance of creamy and crunchy delights.

Regional variations have emerged with each culture adding its touch, such as introducing tropical fruits, chocolate ganache, or alternative crusts. The Mini Biscoff Cheesecake highlights this adaptability, incorporating a much-loved European cookie to create a modern classic that appeals to both traditionalists and adventurous foodies alike.

Ingredient Deep Dive

Biscoff cookies are a defining ingredient of this recipe. Originating from Belgium, these caramelized biscuits feature a unique texture that’s both crunchy and crumbly. Their warming spice notes, predominantly cinnamon, enhance the flavor profile of these mini cheesecakes by adding an aromatic complexity. Nutritionally, Biscoff cookies contain fewer calories than traditional cookies, making them an excellent choice for lighter desserts. When selecting Biscoff, choose fresh packages to ensure proper texture and flavor for the crust. Store unopened packages in a cool, dry place and consider crumbling extra cookies to use as a garnish.

The second pivotal ingredient is cream cheese. This smooth and tangy dairy product serves as the cheesecake’s primary filling and symbolizes creaminess. Cream cheese brings richness to this dessert and acts as a fantastic canvas for flavor. It contains significant amounts of protein, calcium, and vitamins A and B12. Opt for full-fat or low-fat varieties based on dietary preferences. When storing cream cheese, remember to keep it well-covered in the refrigerator and used within a few weeks of opening for best flavors. Substituting with Greek yogurt can add a protein boost while shifting the flavor profile slightly, making it a healthier alternative.

Common Mistakes to Avoid

  • Overmixing the Cream Cheese: Overmixing can incorporate too much air, leading to cracks during baking. Mix until just combined for a smooth texture.
  • Not Soften Cream Cheese: Cold cream cheese doesn’t blend well, resulting in lumps. Always let it sit at room temperature before mixing.
  • Skipping the Cooling Process: Allowing cheesecakes to cool gradually prevents cracking. Rushing this step can compromise the final look and texture.
  • Overbaking the Cheesecakes: Overbaking leads to a dried-out texture. Keep a close eye on baking time and remove them when just set.
  • Using Subpar Ingredients: The flavor of this dessert hinges on high-quality ingredients. Avoid generic brands and opt for premium cream cheese and cookies.
  • Misjudging the Baking Temperature: Even a small discrepancy in temperature can affect baking results. Use an oven thermometer for accuracy.
  • Incorrectly Filling the Muffin Tin: Overfilling can cause the cheesecakes to overflow. Use a small ice cream scoop for even portions.
  • Not Chilling Before Serving: Chilling mini cheesecakes enhances their flavors and ensures the best texture. Room-temperature cheesecakes won’t be as delightful.
  • Skipping the Cupcake Liners: Without liners, cheesecakes can be difficult to remove. Always line the tin to prevent sticking.
  • Neglecting to Test Doneness: Relying purely on baking time can lead to errors. Use a toothpick to check; it should come out clean when the cheesecakes are done.

Essential Techniques

One essential technique is to ensure your ingredients are at room temperature. This step is critical as it allows for better incorporation and a smoother final product. When ingredients are too cold, they won’t blend well, leading to lumps. To master this, take the cream cheese out of the fridge an hour before you plan to start mixing.

Baking in a water bath is another technique that can greatly improve the texture of your mini cheesecakes. Placing the muffin tin in a water bath allows for gradual and even baking, reducing the chances of cracking. To achieve this, wrap the muffin tin with aluminum foil and place it inside a larger dish filled with hot water during baking.

Pro Tips for Perfect Mini Biscoff Cheesecakes

1. **Chill Before Serving:** Allow the cheesecakes to chill in the fridge for at least four hours for the best flavor and texture before serving.

2. **Garnish Creatively:** Top with whipped cream, drizzled caramel, or crushed Biscoff cookies to elevate the presentation and enhance flavors.

3. **Ensure Even Baking:** Rotate the muffin tin halfway through the baking time to ensure even baking, especially if your oven has hot spots.

4. **Use Heavy Duty Liner:** Opt for heavy-duty cupcake liners for easier removal and to prevent the cheesecake from sticking.

5. **Taste Test:** Don’t skip tasting the filling before baking. This allows you to adjust sugar levels as needed to match your preference.

6. **Avoid Direct Heat:** If possible, use an oven thermometer to check the temperature to avoid direct heat, which can lead to cracking.

7. **Preheat Thoroughly:** Preheat the oven for at least 20 minutes to reach the desired baking temperature consistently for the smoothest results.

8. **Keep Extras:** Store any leftover cheesecakes in an airtight container in the fridge to prolong their shelf life while maintaining flavor.

Variations and Adaptations

While the classic Mini Biscoff Cheesecake is heavenly on its own, regional variations can enhance its appeal. For instance, incorporating seasonal pumpkin puree during fall adds a delicious twist, transforming Creamy Biscoff Cheesecakes into a festive treat. Alternatively, during summer, adding fresh berries as a topping can provide a refreshing berry-flavored variation.

For those with dietary restrictions, gluten-free Biscoff cookies are available, allowing anyone to enjoy these treats without guilt. You can also modify the texture by experimenting with different crusts, such as chocolate graham crackers or almond flour, resulting in unique flavor profiles.

If you want to surprise your guests, consider flavor variations such as adding a hint of espresso to the cheesecake filling or swirling in some Nutella for a delightful chocolatey finish. The possibilities are endless, making this recipe versatile for different tastes.

Presentation can also be adapted; instead of using muffin tins, you could serve the cheesecake in mini mason jars for a charming rustic look. This not only changes the visual appeal but also enhances the interactive experience for guests.

Serving and Presentation Guide

The key to serving Mini Biscoff Cheesecakes lies in thoughtful presentation. Start by gently removing each cheesecake from its liner and placing it on a chilled plate. For an elegant touch, dust with powdered sugar or drizzle some caramel sauce on top before serving.

Garnishing ideas include fresh mint leaves or seasonal fruits that not only add color but also provide contrasting flavors. Traditional accompaniments can include a scoop of vanilla ice cream for a delightful temperature contrast.

Modern serving suggestions include creating mini dessert charcuterie boards where various dessert options are presented together, allowing guests to mix and match. Pay attention to temperature settings when serving; these cheesecakes are best served chilled.

Finally, don’t forget portion control; smaller servings are forward-thinking, especially for events with multiple dessert offerings. Providing small forks or spoons creates a friendly and accessible dessert experience for your guests.

Wine and Beverage Pairing

Pairing wines with Mini Biscoff Cheesecakes can elevate the dessert experience significantly. A sweet dessert wine like Riesling or a late-harvest Sauvignon Blanc complements the sweetness of the cheesecake and amplifies the caramel undertones of the Biscoff cookies.

If you prefer non-alcoholic options, consider pairing with creamy chai or spiced apple cider, as their warming spices harmonize beautifully with the cheesecake’s flavors. For coffee lovers, a rich espresso or a smooth cappuccino can create a delightful contrast to the sweet and creamy textures.

Temperature is crucial when serving desserts alongside beverages. The cheesecakes should be served chilled, while the wine may be slightly cooler than room temperature. Try to create balance; if the dessert is rich, choose a lighter drink that won’t overwhelm the palate.

Storage and Shelf Life

To ensure the best quality, store Mini Biscoff Cheesecakes in an airtight container in the refrigerator, where they will stay fresh for up to five days. Make sure they are properly chilled before sealing the container to avoid condensation that may lead to sogginess.

If you wish to keep them for longer, consider freezing them. Wrap each cheesecake individually in plastic wrap and place them in a freezer-safe container. They can be frozen for up to three months. When ready to enjoy, thaw in the refrigerator overnight rather than at room temperature to maintain texture and flavor.

Signs of spoilage include a sour smell or changes in texture. If any cheesecakes appear to have formed ice crystals or freezer burn, it’s best to discard them. If reheating is necessary, do so gently to avoid compromising the delicious creaminess.

Make Ahead Strategies

One of the best strategies for making Mini Biscoff Cheesecakes is to prepare them the day before your event. Assemble the cheesecakes and let them cool in the refrigerator overnight to allow the flavors to meld beautifully and provide a smoother texture. This method saves time and ensures they are perfectly chilled for serving.

Storage between steps is essential, especially in warmer weather. Keep the cheesecake filling chilled while you prepare the crust to prevent it from becoming too soft. For assembling, filling the crusts can be done an hour ahead, and they should be refrigerated until ready to serve.

Consider fresh element additions right before serving. Toppings like whipped cream or fresh fruit create a delightful finishing touch and maintain their freshness longer than other components when added ahead of time.

Scaling Instructions

If you want to halve the recipe, simply divide all ingredient measurements by two. This approach works well for those who wish to make fewer servings without sacrificing quality or flavor.

Doubling or tripling the recipe is also easy. Ensure you have enough muffin tins and bakers in your kitchen. Keep track of baking times as they may slightly change with increased volume of batter.

For larger gatherings, consider using larger cake pans, but remember that the bake time will vary based on the thickness of the cake. Additionally, ensure proper storage considerations; use extra fridge space for bigger batches and plan your chilling times accordingly.

Nutritional Deep Dive

Examining the macros of Mini Biscoff Cheesecakes reveals a balance of carbohydrates, proteins, and fats. Each cheesecake averages around 220 calories, making it a satisfying yet manageable indulgence. With 10g of protein per serving from the cream cheese, it offers a nutritional boost compared to other desserts.

Micronutrient analysis shows they provide calcium, vitamin A, and essential fats, supporting overall health in moderation. These cheesecakes fit well within a balanced diet, allowing for enjoyment without significant guilt.

For dietary considerations, focusing on portion control is crucial. Reducing serving sizes can help manage calorie intake while still enjoying desserts. If you’re conscious of weight management, pairing with fruit can offer additional fiber and nutrients while keeping the indulgence satisfying.

Dietary Adaptations

Making these Mini Biscoff Cheesecakes gluten-free is simple by using gluten-free Biscoff cookies or alternative cookie brands that provide similar flavors. Adjusting the crust to use almond flour also works for paleo diets.

Dairy-free versions can emerge using cashew cream blended into a smooth consistency to mimic the creaminess of cream cheese. This adaptation maintains the flavor profile while ensuring inclusivity for vegan lifestyles.

For those on low-carb diets, experimenting with sugar-free cookies can reduce carbohydrates significantly, while using low-carb sweeteners to maintain sweetness in the batter offers a satisfying solution.

The keto diet can also work with these cheesecakes by minimizing the sugar content and opting for nut-based crusts, creating delicious bites without excess carbs.

Troubleshooting Guide

Texture issues often arise when cream cheese is not softened adequately, leading to gummy or lumpy cheesecakes. Ensure cream cheese is at room temperature to avoid this. If your cheesecakes are overly dense, it may be due to overmixing; ensure you incorporate ingredients just until combined.

For flavor balance, adjust sweetness as per your preference; tasting the mixture before baking allows you to correct it. If they taste bland, a touch of vanilla extract can enhance the flavor.

Oven temperature problems may lead to uneven baking or cracks; utilize an oven thermometer for precision and adjust cooking times accordingly.

Ingredient substitutions may also affect your final results; stay loyal to the main recipe to ensure success, especially when changing crucial components like cream cheese for firmer-textured alternatives.

Recipe Success Stories

Community feedback highlights how these Mini Biscoff Cheesecakes have become a hit at family gatherings. One reader noted how their friends couldn’t stop complimenting the unique Biscoff flavor, leading to recipe requests.

Variation successes have emerged, with some having experimented with chocolate and berry additions. These adaptations have turned into family traditions, shared and cherished over time.

Readers often dive into substitution stories, sharing recommendations based on dietary restrictions. Many have found ways to replace sugar and flour seamlessly, enhancing their overall dessert experience.

Photography tips shared by successful bakers reveal how a simple high-contrast plate can enhance the visual appeal of the cheesecakes, leading to mouthwatering social media posts!

Frequently Asked Questions

Can I use different flavored cookies for the crust?

Absolutely! While Biscoff cookies offer a unique flavor, feel free to experiment with chocolate graham, vanilla wafers, or even gluten-free options for a personalized touch.

How long can I store these cheesecakes?

Mini Biscoff Cheesecakes can be stored in the refrigerator for up to five days. For longer storage, consider freezing them for about three months.

Can I make these without eggs?

Yes! You can substitute eggs with flax eggs or applesauce to keep the recipe egg-free. The texture may vary slightly, but they will still be delicious.

What’s the best way to thaw frozen cheesecakes?

The best method of thawing frozen cheesecakes is in the refrigerator overnight. This will maintain their creamy consistency without compromising flavor.

Can I make a full-sized cheesecake instead of mini ones?

Yes, you can indeed convert this recipe into a full-sized cheesecake by adjusting the baking time in a springform pan. Keep an eye on the baking process for best results.

What can I use instead of Biscoff cookies?

If Biscoff cookies are unavailable, ginger snaps or speculoos cookies could work as a good alternative, offering similar flavors and textures.

How do I ensure they won’t crack while baking?

To prevent cracking, avoid overmixing the batter and allow the cheesecakes to cool gradually. A water bath can also help maintain moisture during baking.

Can I customize the flavor of the filling?

Of course! You can add extracts, candies, or even fruit purees to the cheesecake filling for added variety and flavor enhancements.

Are these cheesecakes suitable for freezing?

Yes, just make sure to wrap individual cheesecakes properly in plastic wrap before placing them in a freezer-safe container for best results.

How can I make these dairy-free?

For a dairy-free version, substitute cream cheese with cashew cream or a commercial vegan cream cheese alternative to still enjoy creamy goodness.

Additional Resources

Explore related recipes such as Mini Chocolate Cheesecakes or Pumpkin Spice Cheesecakes for additional indulgences that will complement your dessert table. Learning about essential baking techniques can also enhance your skills; consider techniques like creating flavored ganaches or mastering quick cheesecakes without baking.

Ingredient information about Biscoff cookies will guide your shopping to ensure you find the best quality products, enhancing your baking creations. Equipment recommendations for baking can save you time and effort, ensuring you have all the necessary tools for future recipes.

If you’re looking for seasonal variations, our blog also includes tips on crafting holiday-themed desserts, integrating seasonal flavors into your baking repertoire.

Join the Conversation

We invite you to join our community on social media and share your experiences making Mini Biscoff Cheesecakes! Whether it’s showcasing your beautiful photos or sharing variations you’ve tried, we love to see how you make it your own.

Engage with us through recipe reviews and feedback to help others discover this delightful treat, or suggest your takes on the recipe. Let’s create a vibrant cooking community where we can inspire and learn from each other!

The Recipe

Mini Biscoff Cheesecakes

Serves: 12 servings

Prep Time: 20 mins

Cook Time: 30 mins

Total Time: 50 mins

Kitchen Equipment Needed

  • Muffin tin
  • Cupcake liners
  • Mixing bowl
  • Electric mixer
  • Spatula
  • Measuring cups and spoons

Ingredients

  • 24 Biscoff cookies, crushed (for crust)
  • 1/2 cup unsalted butter, melted (for crust)
  • 16 oz cream cheese, softened
  • 1/2 cup granulated sugar
  • 1/4 cup sour cream
  • 2 large eggs
  • 1 tsp vanilla extract
  • 1/3 cup Biscoff spread (for filling)
  • Additional Biscoff cookies for garnish (optional)

Directions

  1. Preheat the oven to 325°F (163°C) and line a muffin tin with cupcake liners.
  2. In a mixing bowl, combine crushed Biscoff cookies and melted butter until well combined.
  3. Press the mixture into the bottom of each cupcake liner to form the crust.
  4. In another bowl, beat the cream cheese and sugar together until smooth and creamy.
  5. Add sour cream, eggs, and vanilla extract, mixing until just combined.
  6. Fold in Biscoff spread until evenly distributed in the batter.
  7. Pour the cheesecake batter over the prepared crust in each cupcake liner, filling each halfway.
  8. Bake for 25-30 minutes or until set and slightly jiggly in the center.
  9. Remove from the oven and let cool completely before refrigerating for at least 4 hours.

Recipe Notes

  • For best results, allow the cheesecakes to chill overnight before serving.
  • Feel free to top with whipped cream and crumbled Biscoff cookies before serving for extra flavor and texture.
  • If using a full-sized cheesecake pan, baking time may need adjustment; check periodically after 40 minutes.

Irresistible Blueberry Lime Cheesecake Cupcakes You’ll Love to Bake

Irresistible Blueberry Lime Cheesecake Cupcakes Recipe 💜🧁

⚖️
Difficulty
Medium

⏲️
Prep Time
30 mins

🕒
Cook Time
20 mins

⏱️
Total Time
50 mins

🍽️
Servings
12 cupcakes

Indulge in the delightful combination of sweet blueberries and zesty lime with our Irresistible Blueberry Lime Cheesecake Cupcakes. These charming little treats are not just visually appealing; they bring an incredible burst of flavors that dance on your palate. The creamy cheesecake filling paired with the refreshing brightness of lime juice creates a beautiful harmony, making each bite a heavenly experience. Perfect for any occasion, whether it’s a sunny picnic or a cozy evening at home, these cupcakes are bound to impress and satisfy your cravings.

As you prepare to make these cheesecake cupcakes, picture the soft and fluffy texture that contrasts with the smooth, rich filling. The addition of crushed blueberries gives a lovely pop of color and flavor, while the lime adds an uplifting twist, ensuring that your taste buds are treated to an unforgettable experience. These cupcakes not only satisfy your dessert desires but also add a splash of vibrant colors to your table, making them an eye-catching centerpiece for gatherings or celebrations.

Quick Recipe Highlights

  • Flavor Profile: A perfect balance of creamy cheesecake contrasted with the tartness of fresh blueberries and zesty lime.
  • Texture: Soft, moist cupcakes with a rich and luscious cheesecake center that melts in your mouth.
  • Aroma: Delightful, fruity aromas of berries and citrus fill the kitchen as they bake.
  • Visual Appeal: Stunning blueberry swirls and a bright lime garnish create a feast for the eyes.
  • Skill Level Needed: Moderately easy, perfect for home bakers looking to impress.
  • Special Equipment: Standard muffin tin, electric mixer, and cupcake liners.

Recipe Overview

  • Difficulty Level: Medium, requiring basic baking skills and attention to detail for layering flavors.
  • Category: Dessert; a sweet treat suitable for celebrations, casual gatherings, or everyday indulgence.
  • Cuisine: Inspired by American dessert traditions, incorporating playful flavors from cheesecake and fruit desserts.
  • Cost: Generally low-cost ingredients, making it an economical choice for delicious homemade treats.
  • Season: Best enjoyed in late spring or summer when blueberries are in season and fresh limes are vibrant.
  • Occasion: Perfect for birthdays, brunches, potlucks, or simply a delightful afternoon snack.

Why You’ll Love This Recipe

These Blueberry Lime Cheesecake Cupcakes are a taste sensation, marrying the richness of cheesecake with the tartness of lime and the sweetness of ripe blueberries. The creamy filling is expertly balanced, and the acidity of lime enhances the overall flavor, making each bite a symphony of taste. The lightness of the cupcakes allows the robust flavors of the filling to shine without being overly heavy, making them a perfect seasonal dessert.

Convenience is key in this recipe; you can whip up a batch in under an hour, making them ideal for impromptu gatherings or dessert cravings. The straightforward instructions and minimal baking time allow busy bakers to navigate through this recipe with ease, ensuring a stress-free baking experience while achieving gourmet results.

Nutritionally, these cupcakes provide a delightful treat without compromising on health. Blueberries are packed with antioxidants, while Greek yogurt or cream cheese in the filling offers essential nutrients, making these cupcakes a guilt-free indulgence.

In social settings, these cupcakes are showstoppers. Their vibrant colors and individual servings make them an attractive option for sharing, and their taste profile encourages engagement—everyone will want to know your secret recipe. These cupcakes can transform a simple gathering into a memorable culinary event.

Cost-effectiveness is another reason why this recipe stands out. Most ingredients are pantry staples or easy to find, making it accessible for any home baker. Whipping up a delightful batch of Blueberry Lime Cheesecake Cupcakes won’t break the bank, providing a delicious return on your investment.

Historical Background and Cultural Significance

The origin of cheesecake can be traced back to ancient Greece, where it was served to athletes during the first Olympic Games in 776 BC. The concept of combining sweet cheese with fruits has evolved over centuries, spreading through various cultures before becoming the beloved dessert we know today. Blueberries and limes, while not traditional ingredients in classic recipes, have become popular modern adaptations that showcase local freshness.

In American culture, the cheesecake has been adapted to fit diverse tastes and occasions, leading to the popularization of mini cheesecakes, which allow for individual servings at social events. The incorporation of seasonal fruits such as blueberries elevates the appeal, making this dessert suitable for summer festivities.

The evolution of recipes to include lighter ingredients and innovative combinations highlights a shift toward health-conscious baking. This Blueberry Lime Cheesecake Cupcake represents a modern take on traditional cheesecake, appealing to both the nostalgic and the contemporary baker.

Regional variations of cheesecake exist throughout the United States, from the dense New York style to the lighter versions found in the Midwest. Integrating flavors like blueberry and lime contributes to an ever-evolving dessert landscape, showcasing the creativity and adaptability of home bakers everywhere.

Ingredient Deep Dive

Blueberries are a defining ingredient in this recipe, celebrated not only for their sweet taste but also for their impressive nutritional profile. Rich in antioxidants and essential vitamins, they are frequently called a superfood. When selecting blueberries, opt for firm, plump ones with a deep blue hue, and store them in the refrigerator, ideally in a breathable container to prolong freshness. You can also freeze blueberries for later use, making them a versatile ingredient in your pantry.

Limes, with their bright acidity, play a crucial role in balancing the sweetness of the cheesecake. The zest and juice are both essential here, providing a vibrant punch of flavor. Fresh limes are preferable, and they can be stored at room temperature or in the refrigerator to keep them juicy. If you run out of fresh limes, bottled lime juice can serve as a substitute, though fresh offers the best flavor.

Cream cheese, essential for the cheesecake filling, is rich and creamy, contributing to the luscious texture. Choosing high-quality, full-fat cream cheese will give you the best results. Store cream cheese tightly wrapped in the refrigerator, and use it within a week or two for optimal freshness. If you need a lighter version, consider using Neufchâtel cheese as a substitute, though it will yield a slightly different texture.

The flour and sugar in the cupcake batter provide the foundation for the texture and sweetness of these delightful treats. Opt for all-purpose flour for versatility, and granulated sugar for the right sweetness level. For a healthier option, you can partially substitute whole wheat flour and use alternatives like coconut sugar for a different flavor profile.

Common Mistakes to Avoid

  • Overmixing the batter: This can lead to dense cupcakes rather than light, fluffy ones. Mix just until combined.
  • Using stale ingredients: Always check the expiration dates on baking powder, baking soda, and dairy products to ensure freshness.
  • Not preheating your oven: This step is vital for even baking, so make sure your oven is ready before you place the cupcakes inside.
  • Skipping the cooling step: Allow the cupcakes to cool completely before filling them to avoid melting the cheesecake filling.
  • Incorrectly measuring ingredients: Use proper measuring cups and spoons for accuracy, especially for dry ingredients.
  • Overcrowding the pan: Ensure to leave enough space between cupcakes in the muffin tin for even baking and proper rising.
  • Choosing low-quality cream cheese: Opt for full-fat cream cheese for the best texture and flavor in the cheesecake filling.
  • Omitting the lime zest: The zest is essential for flavor depth; don’t skip this step!
  • Skipping the cupcake liners: Liners help in easy removal and presentation of cupcakes, so make sure to use them.
  • Not adjusting baking times: Ovens may vary, so check for doneness a few minutes before the recommended time to prevent overbaking.

Essential Techniques

Using the correct mixing technique for your batter is important to achieve the right texture in your Blueberry Lime Cheesecake Cupcakes. Start by creaming the butter and sugar until light and fluffy; this helps to create air pockets that will expand during baking, leading to a soft cupcake. Avoid overmixing once you add the dry ingredients; just gently fold them in until they disappear to prevent a dense texture.

Incorporating the lime juice and zest is a crucial step that enhances flavor. Zesting before juicing ensures you get the maximum amount of flavor from the lime. Use a microplane for the zest, taking care to avoid the bitter white pith. When adding the zest and juice to the batter, fold them in gently to maintain the lightness of the mixture.

Don’t overlook the importance of cooling. Allow the cupcakes to chill fully before adding the cheesecake filling. This cooling period not only sets the structure of the cupcake but also prevents any melting or leaking when you fill them with the cheesecake mixture.

Pro Tips for Perfect Irresistible Blueberry Lime Cheesecake Cupcakes

Start with room temperature ingredients for a smoother batter and more evenly mixed cheesecake filling. This will help everything blend seamlessly, reducing lumps and ensuring great texture.

When filling the cupcake liners, use a piping bag to make it easier and less messy. This ensures a consistent amount of filling in each cupcake, making them visually appealing.

For added visual impact, consider topping each cupcake with a fresh blueberry and a sprig of mint after frosting. This not only enhances presentation but also offers a refreshing contrast.

Allow the cupcakes to chill in the refrigerator for at least an hour after filling. This helps to set the cheesecake filling properly and enhances the overall flavors, making the cupcakes even more delightful.

Experiment with different citrus flavors. If you want to switch it up from lime, lemon zest and juice work beautifully with blueberries as well.

Bake a test cupcake if using a new oven. Different ovens can have variances in heating, and a test cupcake will help you gauge the right cooking time for the remaining batch.

Variations and Adaptations

Consider creating a no-bake version of these Blueberry Lime Cheesecake Cupcakes. Simply prepare the cheesecake filling and layer it in jars with crushed graham crackers and blueberries for a refreshing summertime treat.

Try other fruit combinations by swapping blueberries for raspberries or strawberries. Each fruit will impart its unique flavor profile while still complementing the tanginess of lime beautifully.

For gluten-free adaptations, substitute all-purpose flour with a gluten-free blend. Many blends will function similarly, ensuring that your cupcakes will still rise, remain tender, and taste great.

Change the texture by adjusting the cupcake base; incorporate a chocolate cupcake or vanilla sponge recipe as a base, creating a different flavor experience while keeping the cheesecake centerpiece intact.

Customizing the frosting is also an option. Try a light whipped cream topping flavored with lime zest for a lighter finish or a traditional cream cheese frosting for added richness and indulgence.

Serving and Presentation Guide

To elevate the presentation of your cupcakes, consider using a decorative serving platter to display them proudly at gatherings. Rotate the platter for even visibility, allowing each guest to admire the visual feast of colors.

Garnish each cupcake with a sprinkle of lime zest, a fresh blueberry, or a mint leaf to enhance the aesthetic appeal. These small touches create eye-catching desserts that will draw guests in.

Temperature is important for enjoyment. Serve the cupcakes chilled after refrigerating to ensure the filling is firm yet creamy, presenting the best texture when eaten.

For portion control, use a standard ice cream scoop when filling cupcake liners. This ensures each serving is uniform, making it easier to manage servings for events and gatherings.

Pair the cupcakes with a refreshing beverage such as iced tea or lemonade to complement their flavors while adding a festive touch to your serving setup.

Wine and Beverage Pairing

A light sparkling wine such as Prosecco beautifully complements the fruity flavors of Blueberry Lime Cheesecake Cupcakes. The bubbles elevate the flavors, creating a delightful pairing experience.

For a non-alcoholic option, consider serving these cupcakes with a homemade limeade. The brightness of the citrus will echo the flavors in the cupcakes while providing a refreshing drink option for all guests.

If you prefer coffee, a lightly brewed iced coffee will also pair well. The slight bitterness of coffee can balance the sweetness of the cupcakes, making for a balanced dessert experience.

Ensure your beverages are served at the correct temperatures to maximize refreshment and enjoyment during your dessert serving.

Storage and Shelf Life

To store your Blueberry Lime Cheesecake Cupcakes, keep them in an airtight container in the refrigerator. This will help maintain their freshness while keeping the cheesecake filling firm.

Consume the cupcakes within 3-5 days for optimal flavor and texture. After this time, the quality may start to decline, especially the freshness of the fruit.

If you wish to freeze the cupcakes, do so before adding the filling. Wrap them individually in plastic wrap and then place them in a freezer-safe bag. They can be frozen for up to 3 months.

When ready to enjoy your frozen cupcakes, thaw them in the refrigerator overnight. After thawing, fill them with the cheesecake mixture and enjoy fresh cupcakes again.

Signs of spoilage include an off smell or a noticeable change in texture. If you observe mold or any discoloration, discard the cupcakes immediately for safety.

Make Ahead Strategies

You can prepare your Blueberry Lime Cheesecake Cupcakes ahead of time by baking the cupcakes and storing them in an airtight container for up to two days before adding the cheesecake filling.

Alternatively, you can prepare the cheesecake filling a day in advance and store it separately in the refrigerator. This will reduce the workload on the day you plan to serve them.

When planning ahead, ensure that you have the necessary storage containers available for both cupcakes and filling. This ensures freshness and easy assembly when it’s time to serve.

To enhance quality, add fresh elements like fruit toppings just before serving to create a visually appealing dessert that’s as fresh as possible.

Scaling Instructions

Halving the recipe is straightforward; simply divide all ingredient quantities by two. Adjust the baking time slightly to ensure cupcakes remain moist and fluffy.

Doubling or tripling the recipe? Ensure to use larger pans or multiple trays and rotate them during baking. This helps achieve uniform baking across all cupcakes.

Keep equipment adjustments in mind. If you’re using a different size muffin pan, check for corresponding baking times as different sizes can affect how quickly they cook through.

Monitor timing modifications closely when scaling; the overall bake time may change slightly due to increased volume or heat distribution in the oven.

When storing larger batches, consider using larger containers or prepping in stages to ensure freshness and avoid overcrowding, which can lead to spoilage.

Nutritional Deep Dive

Each Blueberry Lime Cheesecake Cupcake offers a delightful mix of macronutrients. The balance of carbohydrates from the cupcake base and creaminess from the cheesecake filling contributes to a satisfying treat.

Micronutrient analysis shows an abundance of vitamins and antioxidants from the blueberries, which promote good health and support the immune system. Lime adds extra vitamin C, boosting health benefits further.

Including these cupcakes in a balanced diet can offer occasional indulgences without guilt. Allowing yourself a treat can link enjoyment with healthy eating habits rather than deprivation.

For weight management, enjoy serving sizes that allow you to indulge without overindulging. Consider the balance of the nutritional value within your overall daily intake to maintain a healthy lifestyle.

The versatility of ingredients can easily adjust macros further; using whole-grain flour instead of all-purpose flour adds fiber, while experimenting with sugar alternatives can lower calorie content.

Dietary Adaptations

For those seeking gluten-free options, swapping all-purpose flour with a certified gluten-free alternative ensures that everyone can enjoy these delightful treats without issue.

If you need dairy-free options, use a vegan cream cheese alternative for the filling and adjust the recipe accordingly. Coconut oil can replace butter in the cupcake batter to maintain moisture.

Vegans can enjoy these cupcakes by substituting traditional ingredients—using flax eggs instead of regular eggs, almond milk in place of dairy, and a plant-based cream cheese.

For low-carb adaptations, a sugar substitute like erythritol can replace granulated sugar, along as utilizing almond flour for a gluten-free flour alternative, keeping carbs low while still offering delicious flavors.

Keto enthusiasts can further adapt with low-carb sweeteners and focus on wholesome, low-carb ingredients to enjoy cupcakes that align with their dietary goals without feeling deprived.

Troubleshooting Guide

If your cupcakes come out dry, it may be a sign of overbaking. Keep an eye on them during the last few minutes of baking and test for doneness with a skewer.

When experiencing flavor imbalance, a pinch of salt in the batter can help enhance sweetness and balance acidity, perfecting the overall flavor profile of your cupcakes.

If you notice the cheesecake filling leaking out, ensure the cupcakes have cooled completely before adding the filling. Consider using a thicker filling next time for a sturdier consistency.

If your cheesecake did not set properly, review the chilling process. If it was rushed, allow more time in the refrigerator or adjust recipe ratios for better texture.

If the cupcake tops dome too much, try lowering the oven temperature slightly and baking for a longer time. This helps them rise gradually without becoming overly domed.

Recipe Success Stories

Community feedback has been incredibly positive, with many bakers sharing their modifications and personal touches. Readers have reported successful adaptations, including different fruit combinations and even gluten-free variations, broadening the appeal of these cupcakes.

Several bakers have shared tips on social media, showcasing their creative presentations. Some have taken it a step further, encouraging friends and family to help in the baking process, promoting a fun bonding activity.

A few have even mentioned how their children enjoyed helping make these cupcakes, using it as an opportunity to teach baking fundamentals and share family time in the kitchen, creating lasting memories.

Photographers and food bloggers have been particularly expressive about the visual impact these cupcakes have. The stunning contrast of colors translates beautifully to social media feeds, as they highlight their delicious creations.

Through the sharing of these success stories, a community of home bakers has formed, where enthusiasm for baking continues to grow, fostering connection over sweet treats.

Frequently Asked Questions

Can I use frozen blueberries instead of fresh?

Yes, frozen blueberries can be used in this recipe. Just ensure they are thawed and drained before incorporating them into the batter to prevent excess moisture.

How do I know when the cupcakes are done baking?

You can check for doneness by inserting a toothpick into the center of a cupcake; if it comes out clean or with a few moist crumbs, they are ready.

Can I make these cupcakes dairy-free?

Yes! Use plant-based cream cheese for the filling and substitute butter with coconut oil or a dairy-free alternative in the cupcake base.

How should I store leftovers?

Store any leftover cupcakes in an airtight container in the refrigerator for up to 3-5 days or freeze them for longer-term storage.

Can I make these cupcakes ahead of time?

Absolutely! You can bake the cupcakes a day in advance and store them in the refrigerator. Just fill with the cheesecake mixture shortly before serving.

What if my cheesecake filling is too runny?

If your filling is runny, consider adding a bit more cream cheese or allowing it to chill longer in the fridge to firm up before filling the cupcakes.

Can I substitute other fruits for blueberries?

Yes, you can use raspberries, strawberries, or blackberries in place of blueberries, each providing its unique flavor while blending well with lime.

Is it necessary to use cupcake liners?

While optional, cupcake liners help with easy removal and maintain a clean presentation, so it’s recommended to use them for best results.

Can I use a different citrus besides lime?

Absolutely! Lemons or even oranges can be used in place of lime for a different flavor twist while keeping the delicious fruity profile.

What’s the best way to reheat these cupcakes?

For best results, let them sit at room temperature to return to almost a normal state. If you want them warm, you can microwave for short increments (10-15 seconds).

Additional Resources

For those who love baking, exploring related recipes can expand your dessert repertoire. Consider trying other cupcake recipes, like chocolate or lemon desserts, to complement your newfound favorites.

Technique guides specific to mastering cupcakes or cheese-based desserts offer valuable insights. These resources help refine your skills, elevating your baking game further.

Learn more about various baking ingredients, like the benefits of using organic versus conventional products. Understanding what goes into your baking can enhance the quality of your final output.

Invest in quality baking equipment, as it can greatly affect the outcome of your recipes. Updated tools can improve efficiency in the kitchen and ensure success with even the most intricate recipes.

Seasonal variations can inspire fantastic adaptations of this recipe. Think of incorporating seasonal fruits or flavors, bringing a fresh twist to the classic blueberry lime flavor.

Join the Conversation

Engage with your community by sharing your baking experiences on social media. Inviting friends to replicate the Blueberry Lime Cheesecake Cupcake recipe can create a shared love for baking.

Invite others to share their photography tips or insights, creating a network of inspiration as bakers come together to celebrate their achievements and variations.

Encourage discussions around the variations you’ve tried, fostering creativity and innovation in the kitchen. Exchanging tips and tricks can empower each other to elevate the art of baking together.

Through comments and feedback, inspire others to share their favorite adaptations of this recipe, making the conversation around delectable desserts dynamic and inclusive.

Share your success stories to motivate new bakers, proving that anyone can create beautiful and delicious treats with a little practice and creativity.

The Recipe

Irresistible Blueberry Lime Cheesecake Cupcakes

Serves: 12 cupcakes

Prep Time: 30 mins

Cook Time: 20 mins

Total Time: 50 mins

Kitchen Equipment Needed

  • Muffin tin
  • Cupcake liners
  • Electric mixer
  • Measuring cups and spoons
  • Mixing bowls
  • Cooling rack
  • Piping bag

Ingredients

  • 1 cup all-purpose flour
  • 1/2 cup granulated sugar
  • 1/2 cup unsalted butter, softened
  • 2 large eggs
  • 1 tsp vanilla extract
  • 1 tsp baking powder
  • 1/2 tsp salt
  • 1 cup fresh blueberries
  • 1 cup cream cheese
  • 1/2 cup Greek yogurt or sour cream
  • 1/4 cup powdered sugar
  • Juice and zest of 1 lime

Directions

  1. Preheat your oven to 350°F (175°C) and line the muffin tin with cupcake liners.
  2. In a mixing bowl, cream together the butter and granulated sugar until light and fluffy.
  3. Add in the eggs, one at a time, mixing well after each addition. Stir in the vanilla extract.
  4. In another bowl, whisk together the flour, baking powder, and salt.
  5. Gradually add the dry mixture to the wet ingredients, mixing until just combined.
  6. Gently fold in the blueberries, being careful not to crush them.
  7. Fill each cupcake liner about 2/3 full with the batter and bake for 18-20 minutes or until a toothpick comes out clean.
  8. Allow cupcakes to cool completely on a wire rack.
  9. In another bowl, beat together cream cheese, Greek yogurt, powdered sugar, lime juice, and zest until smooth.
  10. Fill a piping bag with the cheesecake filling and gently fill the cooled cupcakes.
  11. Chill in the refrigerator for at least 1 hour before serving.

Recipe Notes

  • You can substitute lime with lemon for a different flavor.
  • For a more decadent treat, add whipped cream on top of each filled cupcake.
  • Store leftover cupcakes in the refrigerator for up to 5 days.
  • Feel free to adjust the sweetness to your preference.

Indulge in Heavenly Raspberry Cheesecake Bars for Dessert Bliss

Heavenly Raspberry Cheesecake Bars: Indulge in Creamy Delight

⚖️
Difficulty
Moderate

⏲️
Prep Time
20 mins

🕒
Cook Time
40 mins

⏱️
Total Time
1 hour

🍽️
Servings
12 bars

These Heavenly Raspberry Cheesecake Bars are the ultimate dessert offering a luscious blend of creamy cheese and tart raspberries that sets your taste buds on a joyous adventure. The buttery graham cracker crust beautifully underpins the rich cheesecake layer, while the vibrant raspberry swirl not only adds a pop of color but also a delightful tang that perfectly balances the richness of the cheesecake. Imagine indulging in these bars at a family gathering or enjoying an after-dinner treat, and you’ll quickly see why this dessert has become a beloved mainstay in kitchens everywhere.

Whether you’re hosting a party or simply craving something sweet, these cheesecake bars promise to impress. Their melt-in-your-mouth texture combined with the bright, fruity notes captures the essence of summer in every bite. Plus, they are just as appealing visually, making them a perfect addition to any dessert table. With every slice, you’re guaranteed compliments that will keep you making this recipe for years to come.

Quick Recipe Highlights

  • Flavor Profile: The cheesecake is rich and creamy, complemented by the fresh tang of raspberries, creating a delightful contrast that is hard to resist.
  • Texture: Each bar offers a smooth, creamy filling on a crunchy, buttery crust, with bursts of raspberries providing a juicy contrast.
  • Aroma: The sweet scent of baked cheesecake blends perfectly with the fruity aroma of fresh raspberries, awakening the senses.
  • Visual Appeal: The vibrant pink swirls atop the creamy white filling create an eye-catching presentation that draws everyone in.
  • Skill Level Needed: This recipe is moderately easy, perfect for those familiar with basic baking techniques and willing to try something new.
  • Special Equipment: You’ll need a rectangular baking pan, a mixing bowl, and a hand mixer or stand mixer to achieve that smooth, creamy texture.

Recipe Overview

  • Difficulty Level: While not overly complicated, these bars do require attention to detail in both mixing and baking, making it a moderate challenge.
  • Category: These bars fit perfectly as desserts, ideal for parties, gatherings, or a special treat at home.
  • Cuisine: Rooted in American desserts, these raspberry cheesecake bars showcase the classic cheesecake with a fruity twist.
  • Cost: The ingredients are relatively inexpensive, making them accessible while delivering an elegant finish.
  • Season: Enjoy these bars year-round, but they shine during warmer months when fresh raspberries are in season.
  • Occasion: Perfect for birthdays, holiday celebrations, or casual family dinners, these bars add a touch of decadent indulgence.

Why You’ll Love This Recipe

These Heavenly Raspberry Cheesecake Bars boast a flavor that perfectly balances creamy sweetness with tangy berry goodness, making for an irresistible treat. The smooth, melt-in-your-mouth texture of the cheesecake harmonizes beautifully with the crunchy graham cracker crust, delivering the ideal contrast of textures that everyone loves. Not only do they look gorgeous with their bright raspberry swirls, but they also satisfy any sweet tooth, all while inviting a sense of nostalgia reminiscent of summertime desserts.

Preparation is a breeze with this recipe. Most of the process involves mixing simple ingredients, pouring, and baking. The time it takes to prepare is well worth the delicious outcome, and once baked, the cheesecake bars can chill while you prepare for your event, freeing up your time while still ensuring fresh dessert.

Nutritionally, the main ingredients support both energy and satisfaction without overwhelming you with guilt. Raspberries are high in antioxidants, while cream cheese and eggs provide richness. Enjoying one of these bars feels indulgent, but you can also savor them knowing they are made with wholesome ingredients.

These bars can elevate any gathering, bringing friends and family together over a shared love of desserts. They make a stunning centerpiece on dessert tables and are easily cut into squares, making serving straightforward and stress-free at your next party or dinner.

Economically, preparing desserts at home is generally more cost-effective than buying them from bakeries. This recipe offers a chic dessert that looks and tastes like a high-end treat without the associated price tag, making it a win-win for both your wallet and your guests’ taste buds.

Historical Background and Cultural Significance

The origins of cheesecake can be traced back to ancient Greece, where it was served to athletes at the first Olympic Games. Over time, cheesecake evolved, with each culture contributing its unique spin, leading to today’s beloved American variety. The incorporation of fresh fruits like raspberries reflects local farming traditions and the desire to enhance existing flavors, creating a dessert that is both historical and contemporary.

Raspberry cheesecake, in particular, showcases the adaptability of this dessert to regional tastes and available ingredients. As raspberries are a popular fruit in many areas, they often find their way into cheesecake recipes. The use of seasonal produce not only honors local bounties but also emphasizes sustainability in cooking.

Through the years, cheesecake recipes have been passed down as family traditions, often filling homes with delightful memories of baking and sharing. Special occasions were celebrated with this delicious dessert, solidifying its place in culinary heritage and marking important milestones in family histories.

Modern variations keep this dessert vibrant, with many bakers experimenting with flavors, ingredients, and techniques, thereby celebrating the cultural significance and evolution of raspberry cheesecake bars in contemporary cuisine.

Ingredient Deep Dive

Raspberries: Raspberries hold a prominent place in culinary history, often symbolizing sweetness and summer abundance. These berries are not only flavorful but also packed with vitamins and minerals like Vitamin C, manganese, and dietary fiber, making them a nutritious choice. When selecting raspberries, look for bright, plump berries with a fragrant aroma and avoid any that are mushy or dull. Store them in the refrigerator and consume them quickly for the best quality; consider freezing them if you won’t be using them soon, and they can also be used in smoothies or sauces later.

Cream Cheese: The decadent cream cheese used in cheesecake recipes has a beloved spot in dessert-making history. Known for its creamy texture and tangy flavor, cream cheese pairs beautifully with sweet ingredients. It contributes to the rich taste of the cheesecake while offering a level of versatility for other recipes. Choose full-fat cream cheese for the best results in terms of creaminess and flavor. It can be stored in the refrigerator for several weeks, but be sure to use it within the guideline expiration date. Low-fat alternatives might work but could alter the texture and taste.

Common Mistakes to Avoid

  • Overmixing the cream cheese can lead to a tough texture; mix just until smooth.
  • Not allowing the cream cheese to come to room temperature can result in lumps; always soften the cheese first.
  • Baking at too high a temperature may cause cracks; aim for a steady temperature to ensure even baking.
  • Skimping on the cooling time can lead to a soggy crust; allow adequate cooling before slicing.
  • Using insufficient crust ingredients can result in a flimsy base; ensure proper measurements for a strong foundation.
  • Neglecting to line the baking pan can make removal difficult; always use parchment paper for easy lifting.
  • Skipping the chilling stage after baking can affect consistency; always refrigerate for optimal texture.
  • Cutting bars too soon can lead to crumbling; let them set thoroughly before slicing.
  • Using frozen raspberries without thawing can release too much moisture; ensure they’re drained before mixing in.
  • Assuming all ovens bake the same can lead to inconsistency; test for doneness with a toothpick to be certain.

Essential Techniques

Mixing Cream Cheese: Properly mixing cream cheese is crucial for achieving a smooth, creamy texture. Start by allowing the cream cheese to soften at room temperature to prevent lumps. Use a hand mixer or stand mixer at medium speed until the cream cheese is smooth before incorporating other ingredients. Avoid overmixing once the eggs are added to prevent excess air, which can lead to cracks during baking.

Creaming the Sugar: Creaming sugar with butter or cream cheese introduces air into the mixture, creating a light texture. Use a mixer on medium to high speed until the mixture is fluffy and pale in color. This aeration is key in achieving the perfect cheesecake bars. Pay close attention to the visual cues, like the mixture turning light and fluffy, before moving on to the next steps.

Pro Tips for Perfect Heavenly Raspberry Cheesecake Bars

1. Always let the cream cheese soften fully at room temperature before mixing to avoid a lumpy batter.

2. Use fresh raspberries for the best flavor and appearance; frozen can work, but drain them well beforehand.

3. Line your pan with parchment paper or use a non-stick spray for easy removal of the bars.

4. Allow the bars to cool fully in the pan before cutting to maintain their structure.

5. For an extra tang, add a touch of lemon juice or zest to the cheesecake mix.

6. If you want a firmer texture, consider freezing the bars for about an hour before slicing.

7. Experiment with adding a layer of chocolate ganache over the top for a decadent twist.

8. Garnish with additional raspberries or mint for a beautiful presentation that will wow your guests.

Variations and Adaptations

Consider adding different fruits to the cheesecake mix such as strawberries or blueberries for seasonal variations that celebrate the bounty of summer. During autumn, swapping the raspberries for pumpkin or pecans can transform the bars into a delightful fall treat. For dietary modifications, use coconut cream in place of cream cheese for a vegan option that’s equally creamy and satisfying. Flavors can also be adjusted by incorporating vanilla or almond extracts for richer undertones, while texture can be tweaked by mixing in chocolate chips or nuts.

Serving and Presentation Guide

When serving Heaven Raspberry Cheesecake Bars, opt for a clean, elegant presentation. Use a sharp knife to cut bars into uniform pieces, and consider placing them on a decorative platter for visual impact. Garnishing with fresh raspberries, a dusting of powdered sugar, or a drizzle of chocolate sauce enhances appeal. Serving the bars chilled or at room temperature is ideal, and pairing with a scoop of whipped cream adds a luxurious touch. For portion control, plan to cut smaller bars as they are rich and satisfying, which helps in serving guests without overwhelming them.

Wine and Beverage Pairing

To balance the richness of the cheesecake bars, consider pairing them with a glass of Moscato or a fruity Riesling, which complement the raspberry flavor beautifully. If you prefer non-alcoholic options, a refreshing sparkling water with lime or a berry-infused iced tea works wonderfully. For coffee lovers, a light roast coffee can enhance the dessert experience, while avoiding heavy blends that may overpower the delicate flavors of the bars. Serve each beverage chilled or at a slightly cool temperature to enhance the fruity notes of the cheesecake.

Storage and Shelf Life

Store any leftover Heavenly Raspberry Cheesecake Bars in an airtight container in the refrigerator for optimal freshness. They should keep well for about 5-7 days, allowing you to enjoy them throughout the week. Always check for signs of spoilage, such as off odors or changes in texture, before indulging. For longer storage, consider freezing the bars. Cut them into individual portions, wrap tightly in plastic wrap, and place them in a freezer-friendly container to safeguard against freezer burn. Thawing can be done in the refrigerator overnight for the best results.

Make Ahead Strategies

To enjoy these heavenly cheesecake bars without the rush, consider making them a day in advance. Prepare the bars as directed, allowing them to cool then refrigerate them overnight to enhance flavors and set their texture perfectly. If you prefer, you can make the crust ahead of time and simply assemble the filling when you’re ready to bake. Another option is to prepare the filling separately and store it in the fridge until you’re ready to bake, ensuring minimal last-minute hustle and maximum flavor.

Scaling Instructions

If you aim to halve this recipe, ensure to divide all ingredients accurately and adjust your baking time accordingly. Use a smaller baking dish to avoid spreading the mixture too thin, which could result in overbaking. Conversely, if doubling or tripling the recipe, choose a larger pan and keep an eye on the baking time as it will vary. Always check for doneness with a toothpick in the center, looking for a slightly firm texture. Adjust storage methods based on the increased yield to maintain freshness.

Nutritional Deep Dive

One serving of Heavenly Raspberry Cheesecake Bars provides a rich source of nutrients, including healthy fats from cream cheese and antioxidants from fresh raspberries. Each bar contains a balanced mix of macro and micronutrients, making it a delightful indulgence that allows for weight management when consumed mindfully. Pay attention to portion sizes, as the rich ingredients can lead to larger calorie intakes with excessive consumption. For an in-depth analysis, consider the overall balance of fats, sugars, and vitamins in each serving to better align with your dietary needs.

Dietary Adaptations

For those following a gluten-free lifestyle, use gluten-free graham crackers or a nut-based crust to create a delicious base without traditional flour. Dairy-free alternatives can be found in the form of vegan cream cheese, providing a similar creamy consistency without using animal products. Individuals on low-carb or keto diets may substitute creamy cheese with alternatives high in protein but low in carbs. Additionally, you can adjust sugar content with stevia or monk fruit sweetener for those pursuing sugar-free options without compromising flavor.

Troubleshooting Guide

If you encounter texture issues with your cheesecake bars, ensure all cream cheese has softened properly before starting. If they don’t set properly, it may have been due to underbaking, so always check for firmness before cooling. Flavor imbalance can be resolved by incorporating fresh lemon juice for brightness; taste as you mix to ensure the perfect flavor balance. If you notice cracks on top, they could be a result of overmixing air into the batter. Keep an eye on mixing speed to avoid this common pitfall.

Recipe Success Stories

Many bakers have shared delightful variations of the Heavenly Raspberry Cheesecake Bars, often incorporating different fruits or flavorings based on personal tastes. Community feedback showcases adaptations that have led to successful new combinations, proving the versatility of this recipe. Readers also provide helpful tips regarding presentation, suggesting unique garnishing ideas that elevate the visual appeal of the bars. For those unsure about their baking skills, sharing successes and failures leads to learning and improvements over time, fostering a sense of camaraderie in the baking community.

Frequently Asked Questions

What can I substitute if I don’t have raspberries? While raspberries are a favorite, you can replace them with fresh strawberries, blueberries, or even cherries. Each of these fruits brings a unique flavor and can change the color profile of your cheesecake bars, allowing for a fun variation while still capturing fruitiness.

Can I use low-fat cream cheese? Yes, low-fat cream cheese can be used, but it may slightly alter the texture and richness of the bars. If you want the traditional creamy taste, opt for full-fat cream cheese for the best results.

How do I prevent my cheesecake from cracking? To avoid cracks, make sure to mix your batter gently to prevent air bubbles from forming. Additionally, bake the cheesecake in a water bath to keep the temperature consistent and avoid rapid cooking.

How long will these bars keep in the fridge? These cheesecake bars can be stored in the refrigerator for about 5 to 7 days when stored in an airtight container, maintaining their deliciousness throughout the week.

Can these bars be frozen? Absolutely! They can be frozen for up to three months. Ensure they’re well-wrapped to prevent freezer burn, and thaw them in the fridge before serving for the best texture.

Why is chilling important after baking? Chilling allows the cheesecake to firm up properly and enhance flavors. By letting the bars rest, you achieve that perfect creamy consistency that is so loved in cheesecakes.

Can I add chocolate to this recipe? Of course! Adding chocolate chips to the batter or drizzling melted chocolate over the cooled bars can enhance flavor and create a delightful chocolate-berry combination.

What size baking dish should I use? This recipe works best in a 9×13 inch rectangular baking dish. Ensure that the batter is evenly distributed for even baking.

How do I know when the cheesecake is done? The cheesecake should be set around the edges but slightly jiggly center when done. It will continue to firm up as it cools.

Can I use a disposable pan for this recipe? Yes, disposable aluminum pans are great for this recipe, especially if you’re bringing these bars to a potluck or gathering.

Additional Resources

For more delicious raspberry recipes or variations of this cheesecake, check out our related recipes section, featuring desserts that utilize seasonal fruits. Additionally, explore ingredient guides to deepen your understanding of which ingredients work best for you. If you’re interested in similar techniques, our technique guides offer insights into perfecting other classic desserts. And if you’re keen to explore seasonal variations, join our community for ideas on how to adapt traditional recipes into year-round favorites.

Join the Conversation

We love hearing from our community! Share your own experiences with baking Heavenly Raspberry Cheesecake Bars on social media, using our hashtag for a chance to be featured. Don’t forget to snap a few pictures of your creations, as they provide inspiration for fellow bakers. Engage with others by sharing your recipe reviews and suggestions for variations. By participating in our community, you also have the opportunity to learn new tips and tricks that enhance your baking adventures.

The Recipe

Heavenly Raspberry Cheesecake Bars

Serves: 12 bars

Prep Time: 20 mins

Cook Time: 40 mins

Total Time: 1 hour

Kitchen Equipment Needed

  • 9×13 inch rectangular baking dish
  • Mixing bowls
  • Hand mixer or stand mixer
  • Parchment paper
  • Measuring cups and spoons

Ingredients

  • 1 ½ cups graham cracker crumbs
  • ½ cup unsalted butter, melted
  • 2 cups cream cheese, softened
  • 1 cup granulated sugar
  • 2 large eggs
  • 1 tsp vanilla extract
  • 1 cup fresh raspberries, pureed
  • ¼ cup fresh raspberries for garnish

Directions

  1. Preheat your oven to 350°F (175°C). Line a 9×13 inch baking dish with parchment paper.
  2. In a bowl, combine graham cracker crumbs and melted butter. Press the mixture into the bottom of the prepared baking dish to form an even crust.
  3. In another large bowl, beat cream cheese and sugar together until smooth and fluffy. Add eggs one at a time, mixing well after each addition. Stir in vanilla extract.
  4. Pour the cream cheese mixture over the crust in the baking dish. Swirl in the raspberry puree using a knife to create a marbled effect.
  5. Bake in the preheated oven for 40 minutes or until the center is set but still slightly jiggly.
  6. Remove from the oven and let cool to room temperature before refrigerating for at least 4 hours or overnight.
  7. Once set, cut into bars, garnish with fresh raspberries, and serve.

Recipe Notes

  • For added flavor, consider mixing a tablespoon of lemon juice into the cream cheese batter.
  • Try experimenting with other fruit purees like strawberry or blueberry for delicious variations.
  • These bars can be made ahead of time and stored in the refrigerator until ready to serve.

Indulge in Decadent Boston Cream Pie Cheesecake Delight

Decadent Boston Cream Pie Cheesecake: A Sinful Delight

⚖️
Difficulty
Medium

⏲️
Prep Time
30 mins

🕒
Cook Time
60 mins

⏱️
Total Time
90 mins

🍽️
Servings
12 slices

Indulge your senses with this **Decadent Boston Cream Pie Cheesecake**, a rich and creamy blend that combines the luscious flavors of chocolate, vanilla, and moist cake in one irresistible dessert. This cheesecake is perfect for any occasion, whether it’s a birthday party, holiday gathering, or simply a self-treat. With its beautiful layers, it will not only satisfy your cravings but also impress your guests.

As you slice into this cheesecake, the smooth, rich vanilla custard filling and velvety chocolate topping create a delightful symphony of flavors. Each bite is a blissful journey that brings back memories of the classic Boston cream pie, but in a cheesecake form. The combination of the creamy cheesecake with the light, fluffy sponge cake base offers a textural contrast that is simply divine.

Quick Recipe Highlights

  • Flavor Profile: Expect a delightful mixture of rich chocolate and smooth vanilla, enhanced by a hint of buttery cake.
  • Texture: The cheesecake is creamy and dense, topped with a silky chocolate ganache, creating a lush experience.
  • Aroma: Enjoy the rich aromas of vanilla and chocolate mingling together as the cheesecake cools.
  • Visual Appeal: The layered presentation, with a glossy chocolate glaze, makes it a feast for the eyes.
  • Skill Level Needed: This recipe requires moderate baking skills, including knowledge of cheesecake techniques.
  • Special Equipment: You will need a springform pan, a mixer, and a saucepan for preparing the ganache.

Recipe Overview

  • Difficulty Level: While this cheesecake may seem daunting, the step-by-step instructions will guide you through each layer seamlessly.
  • Category: This recipe falls into the dessert category, making it a perfect end to any meal.
  • Cuisine: Inspired by both American and French culinary traditions, this cheesecake embodies the best of both worlds.
  • Cost: The overall cost of ingredients is moderate, making it accessible for home bakers looking for a special treat.
  • Season: This dessert is versatile and can be made year-round, but particularly shines at parties and celebrations.
  • Occasion: Ideal for birthday celebrations, holiday gatherings, or as a delightful weekend dessert.

Why You’ll Love This Recipe

This **Decadent Boston Cream Pie Cheesecake** is a true delight for both the palate and the eyes. The melding of flavors will tantalize your taste buds, making it hard to resist a second slice. Its rich, creamy texture is perfectly complemented by the smooth chocolate topping, creating a heavenly combination that will leave you and your guests craving more.

Preparing this cheesecake allows for an enjoyable baking experience. With a manageable prep time coupled with easy-to-follow steps, it makes for a wonderful opportunity to bond with family or friends as you create a masterpiece together. The finished product not only tastes incredible but looks like a professional bakery creation.

In addition to the unforgettable flavor, this recipe offers some nutritional benefits worth noting. Made with quality ingredients, this cheesecake can provide an indulgent treat while still bringing joy and satisfaction without excessive guilt.

This cheesecake is perfect for social gatherings. Its elegant presentation invites conversation, making it an excellent centerpiece for parties and celebrations. Sharing this dessert will create delightful moments, as everyone shares their thoughts on its delightful taste.

Lastly, this recipe is cost-effective, as its ingredients are widely available and do not break the bank. With its impressive flavors and quality presentation, you can create an unforgettable dessert that provides immense value for your investment.

Historical Background and Cultural Significance

The Boston cream pie, despite its name, is actually a cake! Its origins trace back to the 19th century when it was first created by chefs at the Parker House Hotel in Boston. This charming dessert has become synonymous with the city itself and was even designated as the official dessert of Massachusetts.

Throughout the years, the Boston cream pie has evolved, blending tradition with modern variations. The concept of transforming this classic pie into a cheesecake emerged as bakers sought to provide new interpretations of beloved desserts, allowing fans to enjoy the flavors they adore in more versatile forms.

The cultural significance of this beloved dessert extends beyond its delightful taste; it symbolizes the innovative spirit of American cuisine. As food cultures merge and change, desserts like the Boston cream pie cheesecake showcase the adaptability of culinary traditions, perpetuating their relevance in contemporary culture.

Regional variations have also emerged. While some may stick to the traditional chocolate and vanilla combination, others have played with flavors, introducing ingredients like espresso, caramel, or fruit, each bringing a unique twist on this iconic dessert.

Ingredient Deep Dive

Cheese: Cream cheese serves as the backbone of this cheesecake, delivering a rich and creamy texture. It is a source of calcium and protein and should be at room temperature for optimal blending. Store it in the fridge and avoid purchasing when expired. If unavailable, mascarpone can be used as a delightful alternative.

Chocolate: High-quality semi-sweet or dark chocolate contributes to the luscious chocolate ganache, providing rich flavor and antioxidants. Choose a bar over chips for better melting consistency, and store it in a cool, dry place. Substitutes like cocoa powder or milk chocolate can alter the flavor but work in a pinch.

Common Mistakes to Avoid

  • Not using room-temperature ingredients: Failing to let your cream cheese and eggs come to room temperature can result in a lumpy cheesecake.
  • Overmixing the batter: Mixing too vigorously incorporates air, leading to cracks in the surface once baked. Aim for a gentle blending.
  • Skipping the water bath: A water bath helps regulate heat and moisture, preventing dryness or cracking in the cheesecake.
  • Baking at the wrong temperature: Ensure your oven is preheated and at the correct temperature to avoid uneven cooking.
  • Not allowing the cheesecake to cool properly: Cooling too quickly can cause cracks and texture issues. Allow it to cool gradually in the oven.
  • Using a cracked springform pan: Inspect the seals; any leaks can lead to a ruined cheesecake.
  • Rushing the chill process: Allow your cheesecake ample time to set in the refrigerator; patience is key for the best texture.
  • Not tasting the ganache: Always taste your chocolate ganache to ensure it meets your desired sweet-to-bitter balance.
  • Ignoring baked cheesecake signs: Look for a slightly wobbly texture in the center, indicating it’s done without overbaking.
  • Neglecting to prep the pan: Grease the pan with butter to avoid sticking, which can ruin presentation.

Essential Techniques

Water Bath Technique: This method is essential for creating a moist environment for the cheesecake. Wrap the springform pan in aluminum foil to prevent water from seeping in. Place it in a larger pan filled with hot water before baking. This technique helps cook the cheesecake more evenly, reducing the chances of cracks.

Chilling the Cheesecake: After baking, allow the cheesecake to cool in the oven with the door ajar for about an hour. This gradual cooling prevents sudden temperature changes that can crack the top. Once at room temperature, move it to the refrigerator to chill for at least four hours before slicing.

Pro Tips for Perfect Decadent Boston Cream Pie Cheesecake

– Use high-quality chocolate for the ganache to elevate the cheesecake’s flavor, ensuring a rich and decadent experience.
– Always integrate the ganache while the cheesecake is still cold, allowing it to set up nicely without running off.
– Allow ingredients like cream cheese and eggs to come to room temperature to facilitate a smoother batter consistency.
– When preparing the crust, ensure it is tightly packed and baked until it smells fragrant, which enhances the flavor.
– For extra flair, top the cheesecake with chocolate shavings or berries to enhance the presentation visually.
– Always make sure your oven is calibrated accurately; an oven thermometer can help maintain the correct baking temperature.
– Practice patience; let the cheesecake set overnight for the best flavors to meld and enhance the overall richness.
– Consider garnishing with a sprinkle of coarse sea salt to balance the sweetness of the ganache and enhance its flavor.

Variations and Adaptations

This **Decadent Boston Cream Pie Cheesecake** can be modified in several exciting ways. For a seasonal touch, incorporate pumpkin puree into the cheesecake batter during fall or add a layer of fresh berries for a refreshing summer twist.

When it comes to dietary accommodations, you can experiment with gluten-free options by replacing conventional graham crackers with gluten-free ones. This adaptation does not compromise the texture or flavor while allowing those with dietary restrictions to enjoy the dessert.

Flavor modifications can also introduce varieties such as hazelnut or espresso to the ganache. These adjustments will infuse a deeper flavor profile while enhancing the overall richness!

To present the cheesecake differently, consider serving it in individual jars for easy handling and a stylish touch. This modern serving style allows for unique garnishing options!

Serving and Presentation Guide

Plating your cheesecake beautifully is crucial for making it visually appealing. Slice evenly using a hot, dry knife for clean cuts, then transfer slices to dessert plates with a gentle hand.

Garnishing with whipped cream, chocolate curls, or fresh fruit not only adds color but also showcases the flavors within. A drizzle of chocolate or caramel sauce can contribute an extra touch of decadence.

Consider traditional accompaniments such as coffee or tea to serve alongside the cheesecake, enhancing flavor consistency. For modern presentation, serve slices alongside a scoop of vanilla ice cream for a delightful contrast in temperature and texture.

Be mindful of temperature; this cheesecake should ideally be served chilled for the best flavor experience. Offer bites that are proportionate to ensure everyone can enjoy without excess.

Wine and Beverage Pairing

For the perfect pairing, consider serving a sweet dessert wine like a late-harvest Riesling. Its fruity notes will complement the cheesecake’s sweetness. Alternatively, a bold Port wine can amplify the richness of the chocolate ganache.

Non-alcoholic alternatives include a rich hot chocolate or an iced coffee, both of which offer a harmonious balance to the dessert’s creaminess. Remember to serve these beverages at the right temperature for the best experience.

If you’re opting for a coffee or tea pairing, a robust espresso can cut through the richness of the cheesecake, enhancing its chocolate flavors. When serving, offer cream or milk options to accommodate different preferences.

Storage and Shelf Life

To ensure the cheesecake remains fresh, store it in an airtight container in the refrigerator. It can last for up to one week. For longer storage, consider freezing individual slices wrapped in plastic wrap and placed in a freezer-safe bag. These can last up to three months!

Keep an eye out for signs of spoilage, such as an off smell or unusual texture, which indicate it’s time to dispose of the cheesecake. When ready to enjoy frozen slices, let them thaw in the refrigerator for a few hours before serving.

Reheating cheesecake is generally unnecessary; however, if you wish to warm a slice slightly, use a microwave for short intervals to avoid melting the ganache.

Make Ahead Strategies

This cheesecake is an excellent candidate for making ahead of time. Prepare the cheesecake entirely up to a day in advance, allowing sufficient chilling time for the flavors to meld beautifully.

If you’re planning an event, consider baking the cheesecake earlier in the week. An excellent strategy is to freeze the unglazed cheesecake, then thaw and add the ganache just before serving. This ensures maximum freshness.

Quality impacts are minimal if you treat the cheesecake with care, and assembling it before serving allows for a crisply plated presentation. When reheating any elements for serving, ensure they complement the cheesecake’s cold nature harmoniously.

Fresh elements like whipped cream or fresh fruit toppings should always be added just before serving for a vibrant and appetizing look.

Scaling Instructions

Scaling a recipe like this is quite easy. If you wish to halve the recipe, simply divide the ingredient amounts by two and adjust the pan size accordingly. For a smaller cheesecake, consider using a 6-inch springform pan to achieve the same great taste with less volume.

Doubling or tripling the recipe will require careful consideration of your mixing equipment. You may need to mix in batches to achieve even distribution within your batter.

Timing modifications are also necessary; larger cheesecakes will require additional baking time. Test for doneness by checking if the edges are set while the center remains slightly jiggly.

When storing oversized portions, ensure they are layered appropriately in the fridge or freezer to prevent sticking or uneven thawing.

Nutritional Deep Dive

On a macro level, this cheesecake is rich in fat and carbohydrates, primarily from cream cheese and sugar, while providing a moderate protein content. Nutritionally, it’s essential to consume it in moderation, as its richness can lead to higher caloric intake.

Key micronutrients present include calcium from cream cheese, which supports bone health. Additionally, chocolate possesses antioxidants that contribute positively to one’s overall health.

When it comes to dietary considerations, it’s advisable to factor in serving sizes. Enjoying smaller portions during special occasions can satisfy both cravings while maintaining balance in your diet.

For those mindful of weight management, consider pairing this dessert with a light, fresh fruit salad or a cup of herbal tea, balancing sweetness with lighter options for a fulfilling finish.

Dietary Adaptations

For gluten-free eaters, swap traditional graham cracker crust with gluten-free alternatives like almond flour for a delightful base that doesn’t compromise flavor.

Vegans can experiment with plant-based cream cheese and aquafaba (chickpea liquid) to replace eggs, creating a dairy-free, egg-free delight that maintains creamy texture.

For lower-carb or keto variations, utilize almond or coconut flour for the crust and an appropriate sugar substitute for the filling, ensuring a delectable dessert that aligns with dietary restrictions.

Consider low-FODMAP options by using lactose-free cream cheese and ensuring your chocolate is dairy-free; this can cater to individuals with sensitive stomachs while still delivering the same satisfaction.

Troubleshooting Guide

If your cheesecake is cracking, it may be due to overmixing or a rapid temperature change during cooking. Always mix gently and allow the cheesecake to cool gradually within the oven.

Texture issues, such as a grainy consistency, often result from cold ingredients; ensure your cream cheese and eggs are at room temperature for optimal blending.

Should the flavor be off-balance, taste and adjust your sugar or chocolate levels. Sometimes a pinch of salt can enhance chocolate flavors significantly.

If your ganache is too thin, ensure you allow it to cool properly before pouring. Also, using higher cocoa content chocolate can give a thicker consistency.

Finally, if the cheesecake is too dry, it may have been baked too long. Aim for a slight jiggle in the center when removing from the oven and allow it to set in cooling conditions.

Recipe Success Stories

Readers have raved about their experiences with this **Decadent Boston Cream Pie Cheesecake**, sharing how it became the star of their celebrations. Many have experimented with unique adaptations, such as incorporating their favorite flavors, proving the versatility of the recipe.

Community feedback has highlighted the cheesecake’s rich, creamy texture and seamless blend of flavors. Several home bakers enjoyed the process, finding the results deeply rewarding, prompting them to share photos on social media platforms.

Adaptation stories reveal readers choosing to invert the traditional flavor by incorporating fruit toppings or adjusting the base for dietary preferences, enhancing its broad appeal.

Photography tips shared by readers emphasize the importance of natural lighting when capturing the cheesecake’s glossy ganache; many found it easy to showcase its beauty with minimal effort.

Frequently Asked Questions

Can I make this cheesecake ahead of time?
Yes! This cheesecake is perfect for making a day or two in advance, allowing it to chill and flavor to develop beautifully. Just ensure it is properly sealed in the fridge.

What’s the best way to store leftover cheesecake?
Leftover cheesecake should be stored in an airtight container in the refrigerator, where it can last up to a week. You can also freeze portions for longer storage.

Can I use a different type of chocolate for the ganache?
Absolutely! While semi-sweet chocolate is traditional, dark chocolate or even white chocolate can provide delightful variations in taste.

How do I prevent my cheesecake from cracking?
To help prevent cracks, bake the cheesecake in a water bath and allow it to cool slowly. Mixing the batter gently and avoiding over-mixing is also essential.

Is it possible to make this recipe gluten-free?
Yes! Simply substitute the graham cracker crust with a gluten-free crust alternative or use almond flour as a base, staying true to an excellent flavor profile.

What should I serve with the cheesecake?
Offer accompaniments such as whipped cream, fresh fruit, or a scoop of ice cream to balance and elevate the delightful flavors of the cheesecake.

Can I customize the flavors of this cheesecake?
Certainly! Modifications can include adding fruit purees, flavored extracts, or even spices into the batter for a unique twist while maintaining its essence.

Is it necessary to use a springform pan?
While a springform pan is recommended, you can use a standard cake pan, but be sure to line the bottom with parchment for easy removal.

Can I freeze the cheesecake?
Yes, individual slices can be frozen for up to three months. Wrap them tightly in plastic wrap and store them in an airtight container.

What is the ideal baking temperature for the cheesecake?
Cheesecake is best baked at 325°F (160°C) to ensure even cooking without overbaking, which contributes to cracked surfaces.

Additional Resources

Expand your cooking repertoire with similar dessert recipes like our chocolate fudge cake or strawberry shortcake. For those looking to refine their baking techniques, check out our detailed guides on mastering the art of cake baking or cheesecake troubleshooting.

Explore ingredient information to understand the best types of cream cheese for cheesecakes, and find recommendations for the finest brands of chocolate to use in your desserts.

If you want to tap into seasonal variations, discover how to incorporate festive flavors in your baking during holidays, or attend local food festivals that celebrate desserts.

Finally, explore equipment suggestions to ensure you have the best tools necessary to create stunning cheesecakes and other confections.

Join the Conversation

We invite you to share your **Decadent Boston Cream Pie Cheesecake** experiences on social media, showcasing your stunning creations for others to admire. Use our hashtag to connect with fellow cheesecake enthusiasts and exchange tips or variations on our beloved recipe.

Feel free to leave photography tips or ideas for creative presentations. We love to hear how you’ve made the recipe your own! Join our community for discussions about recipe challenges, successes, and joyful moments that come when sharing delicious desserts.

Interactive discussion not only fuels our passion for baking but helps others find inspiration in the kitchen. So, let’s celebrate our collective love for all things cheesecake!

The Recipe

Decadent Boston Cream Pie Cheesecake

Serves: 12 slices

Prep Time: 30 mins

Cook Time: 60 mins

Total Time: 90 mins

Kitchen Equipment Needed

  • Springform pan
  • Mixer
  • Whisk
  • Measuring cups and spoons
  • Aluminum foil
  • Spatula
  • Double boiler or microwave-safe bowl

Ingredients

  • For the crust:
  • 1 ½ cups graham cracker crumbs
  • ½ cup unsalted butter, melted
  • ¼ cup sugar
  • For the cheesecake filling:
  • 2 lbs cream cheese, softened
  • 1 cup sugar
  • 1 teaspoon vanilla extract
  • 4 large eggs
  • For the ganache:
  • 8 oz semi-sweet chocolate, chopped
  • ½ cup heavy cream

Directions

  1. Preheat your oven to 325°F (160°C).
  2. In a mixing bowl, combine graham cracker crumbs, melted butter, and sugar. Press mixture firmly into the bottom of a springform pan.
  3. Bake the crust for 10 minutes, then set aside to cool while preparing the filling.
  4. In a large bowl, beat cream cheese until smooth. Gradually add sugar and mix until creamy, then incorporate vanilla.
  5. Add eggs one at a time, mixing just until combined. Avoid overmixing to minimize air bubbles.
  6. Pour the filling over the cooled crust and smooth the top.
  7. Wrap the springform pan in aluminum foil and place it in a larger baking dish filled with hot water for a water bath.
  8. Bake for 60 minutes or until the edges are set and the center is slightly jiggly. Turn off the oven and let it cool with the door ajar for one hour.
  9. Remove from the water bath and refrigerate for at least four hours until completely chilled.
  10. For the ganache, heat the cream in a saucepan until just boiling, then pour over the chopped chocolate. Let sit for a few minutes then whisk until smooth.
  11. Once the cheesecake has set, pour the ganache over the top, allowing it to drizzle down the sides.
  12. Chill again for at least 30 minutes to set the ganache before slicing and serving.

Recipe Notes

  • Feel free to add a layer of fresh fruit or nuts for extra flavor.
  • For a less sweet variation, reduce the sugar in the ganache by a few tablespoons.
  • Consider chocolate curls as an added garnish to enhance presentation.

Delightful Hawaiian Pineapple Cake Recipe for Tropical Taste Lovers

Hawaiian Pineapple Cake: A Tropical Delight for Every Occasion

⚖️
Difficulty
Easy

⏲️
Prep Time
20 mins

🕒
Cook Time
30 mins

⏱️
Total Time
50 mins

🍽️
Servings
8

Welcome to the tropics with our delightful Hawaiian Pineapple Cake! This lovingly crafted dessert is not only a feast for the taste buds but also a visual delight. Combining the sweetness of ripe pineapples with a moist and tender cake, every slice transports you to a sunny Hawaiian beach, making it perfect for any occasion. Whether it’s a birthday party or a casual family gathering, this cake stands out with its vibrant flavors and inviting aroma.

Indulging in this Hawaiian Pineapple Cake is all about the layers of flavor. The irresistible blend of fresh pineapple, creamy coconut, and a hint of vanilla creates a flavor explosion that’s both refreshing and satisfying. Each bite is enhanced by the cake’s fluffy texture, resulting in a dessert that feels light yet indulgent at the same time. Topped with a luscious cream cheese frosting, this cake is sure to impress anyone who takes a piece!

Quick Recipe Highlights

  • Flavor Profile: Sweet and tangy with a hint of coconut and vanilla.
  • Texture: Moist, fluffy cake with a creamy frosting.
  • Aroma: Tropical fragrances of pineapple paired with rich vanilla.
  • Visual Appeal: A golden cake layered with rich cream cheese frosting and pineapple garnish.
  • Skill Level Needed: Perfect for beginner bakers looking to impress.
  • Special Equipment: A round cake pan and mixing bowls are all you need!

Recipe Overview

  • Difficulty Level: This Hawaiian Pineapple Cake is designed for amateur bakers and requires basic mixing and baking skills.
  • Category: A delightful dessert that works perfectly for brunch, parties, or simply as a sweet treat.
  • Cuisine: Inspired by the vibrant flavors of Hawaiian cuisine, this cake is a true representation of tropical desserts.
  • Cost: With approachable ingredients, this cake can be made without breaking the bank.
  • Season: Best enjoyed in warmer months, this cake brings tropical vibes year-round.
  • Occasion: Ideal for birthdays, beach parties, or any gathering where celebration is on the menu.

Why You’ll Love This Recipe

This Hawaiian Pineapple Cake brings delight with every bite, highlighting the perfect balance of sweet and tangy. The delightful notes of fresh pineapple mingle beautifully with a moist cake, creating a dessert that is not only tasty but also satisfying. The texture is sensational; it boasts a fluffy crumb that melts in your mouth, complemented perfectly by the creamy frosting.

In terms of convenience, this cake is simple to prepare and can be made ahead, which takes the pressure off entertaining guests. Plus, the baking time is modest, allowing you to focus on other meal preparations without stress. With easily accessible ingredients, this recipe does not require any specialized skills or tools, making it perfect for bakers of all levels.

Nutritionally, this cake incorporates fresh pineapple, which is rich in vitamins and antioxidants. It offers a lightness that can make indulgence feel a little less guilty. Plus, being a crowd-pleaser, it’s a fantastic way to introduce vegetables or fruits into the dessert spectrum.

This Hawaiian Pineapple Cake is fabulous for social gatherings, promoting conversation and connection around the dining table. It’s a dessert that not only satisfies a sweet craving but could also spark joy and laughter among friends and family as they enjoy their slice of paradise together.

Last but not least, the cost-effectiveness of this cake is notable. With minimal ingredients, you can create a dessert that looks and tastes exquisite, offering great value for any budgeting chef without compromising on taste or presentation.

Historical Background and Cultural Significance

The origins of Hawaiian Pineapple Cake trace back to the rich agricultural heritage of Hawaii, where pineapples were cultivated extensively. As the pineapple industry flourished, cakes incorporating this tropical fruit became a beloved dessert among locals and visitors alike.

Culturally, pineapple symbolizes hospitality in Hawaiian tradition. Thus, this cake serves as a delightful centerpiece during gatherings, embodying the spirit of ohana (family) and the warmth of Hawaiian hospitality.

Over the years, the recipe has evolved from vintage family favorites to modern variations, showcasing diverse baking styles and flavors while honoring its roots. Newer adaptations have introduced unique twists like coconut cream or macadamia nuts, reflecting the vibrant nature of Hawaiian cuisine.

Today, Hawaiian Pineapple Cake is not just a dessert; it represents a joyful celebration and appreciation for the culinary influences that Hawaii has imparted to the world, making every bite a nod to paradise.

Ingredient Deep Dive

Pineapple: This tropical fruit brings both flavor and moisture to the cake. Nutritionally, pineapple is rich in vitamin C and bromelain, an enzyme that aids digestion. When selecting pineapples, look for ones that are firm and slightly soft at the stem end. Store fresh pineapple in the fridge and consume within a week for the best flavor. If fresh is unavailable, canned or frozen can be substituted, ensuring it’s well-drained to maintain cake integrity.

Coconut: Coconut adds a creamy richness that transforms the texture of the cake while enriching its flavor. Nutritional benefits include healthy fats and fiber. It’s best to use unsweetened coconut flakes for balance. Store in a cool, dry place, and if you have a sweetened version, adjust sugar accordingly in the recipe.

Common Mistakes to Avoid

  • Overmixing the batter can lead to a dense cake. Mix just until the ingredients are combined.
  • Forgetting to sift the flour may result in clumps and uneven texture.
  • Not preparing the cake pan properly could lead to sticking. Grease and flour the pan adequately.
  • Using canned pineapple without proper draining can make the cake soggy; always ensure excess liquid is removed.
  • Ignoring the oven’s temperature can lead to overcooking; always preheat your oven.
  • Not testing the cake for doneness can result in an undercooked center; use a toothpick to check.
  • Neglecting to cool the cake before frosting can cause the frosting to melt and run.
  • Not allowing the cake layers to cool completely can lead to structural issues when stacking.

Essential Techniques

Mixing the Batter: Proper mixing is crucial for incorporating air into the batter for a fluffy cake. Use the creaming method to beat sugar and butter until light and fluffy, then add eggs one at a time. Be cautious not to overmix, as this can affect the crumb. A light hand at this stage leads to a tender crumb.

Frosting Application: Applying frosting can be an art! Start with a crumb coat to lock in the crumbs, then proceed to frost the top and sides. A cake scraper can help achieve smooth edges. This ensures a polished, professional finish that enhances the cake’s presentation.

Pro Tips for Perfect Hawaiian Pineapple Cake

1. Use room temperature ingredients for a smoother batter and better rise.

2. Experiment with different types of pineapples—fresh, canned, or dried—to discover your favorite flavor profile.

3. Add a splash of rum for an adult twist that pairs wonderfully with the flavors.

4. Incorporate shredded coconut into the batter for extra flavor and texture.

5. Chill your frosting slightly before spreading to achieve a thicker consistency and prevent melting.

6. Garnish with toasted coconut flakes on top for an appealing finish and added crunch.

7. Allow the cake to rest overnight for flavors to meld and deepen.

8. Consider using cream cheese with a hint of lime for a tangy twist in the frosting.

Variations and Adaptations

For those seeking unique takes on the Hawaiian Pineapple Cake, consider experimenting with different fruit additions, like mango or passionfruit, to embellish the tropical flavor.

Seasonally, you can incorporate spices like cinnamon and nutmeg in the batter for a warm autumn twist, transforming it into a delightful fall dessert.

For dietary modifications, using gluten-free flour or dairy-free cream cheese can make this cake accessible to those with dietary restrictions.

If you crave varied textures, incorporating chopped nuts or using a layer of pineapple upside-down cake as a base can add a new dimension.

Serving and Presentation Guide

For an inviting presentation, serve slices on white plates to highlight the colorful frosting and garnishes. Add fresh pineapple slices or mint leaves as garnishes to complement the tropical theme.

When plating, consider cutting the cake into triangles for a decorative presentation. Serve chilled for an energizing dessert that’s refreshing, especially during warm weather.

Temperature-wise, allowing the cake to reach room temperature before serving enhances flavors. This way, each bite is a perfect balance of sweetness and tanginess.

Wine and Beverage Pairing

A light, fruity white wine, such as Moscato, pairs perfectly with the sweetness of the Hawaiian Pineapple Cake, enhancing the overall experience.

If you prefer non-alcoholic options, a refreshing iced tea infused with lime can complement the tropical flavors, helping to cleanse the palate.

For coffee lovers, a smooth, mildly roasted coffee enhances the flavor profiles, offering a delightful contrast to the sweetness of the cake.

Storage and Shelf Life

Store the Hawaiian Pineapple Cake in an airtight container at room temperature for up to three days. If you want to keep it longer, refrigerate for up to a week, ensuring it stays moist.

For those looking to freeze the cake, wrap it tightly in plastic wrap and then in aluminum foil. It can last up to three months in the freezer. To enjoy, thaw overnight in the fridge before serving.

Make Ahead Strategies

You can bake the cake layers in advance and store them wrapped tightly. Preparing the frosting a day ahead makes assembly a breeze!

Consider chilling the layers before frosting to stabilize the cake, allowing for easier assembly without slipping or sliding.

Scaling Instructions

Scaling this recipe for larger gatherings is simple! When doubling or tripling the recipe, remember to increase baking time slightly, keeping an eye on doneness.

For smaller gatherings, halving the recipe works perfectly, but adjust pan sizes accordingly to maintain the structure and baking consistency.

Nutritional Deep Dive

This Hawaiian Pineapple Cake offers a moderate dose of carbohydrates and sugars, thanks to its pineapple content. Each slice provides essential vitamins and minerals while being relatively low in saturated fat.

For those mindful of their diet, the addition of fresh fruit provides natural sugars, increasing fullness and satisfaction with a lighter indulgence.

Dietary Adaptations

The Hawaiian Pineapple Cake can easily be made vegan by substituting eggs with flaxseed meal and using non-dairy milk for moisture.

For gluten-free needs, replace regular flour with a 1:1 gluten-free baking blend to maintain the cake’s fluffy texture.

Troubleshooting Guide

If your cake is dry, ensure you measure flour properly by scooping it directly from the bag with a spoon rather than packing it down in the measuring cup.

For overly dense cake, check your oven temperature with an oven thermometer to avoid underbaking or overbaking.

Recipe Success Stories

Frequently Asked Questions

Can I use fresh pineapple instead of canned?

Absolutely! Fresh pineapple will add a delightful and vibrant flavor to the cake. Just ensure to chop it into small pieces and drain any excess juice before adding it to the batter.

How can I make this a healthier option?

You can replace the sugar with honey or agave in moderation and use whole wheat flour for added fiber. Incorporating Greek yogurt into the frosting also increases the nutritional value without compromising on taste.

Can I freeze the cake?

Yes! Make sure to wrap it tightly in plastic wrap followed by aluminum foil to prevent freezer burn. It keeps well for about three months; just thaw it overnight in the fridge before enjoying.

What frosting pairs best with this cake?

A classic cream cheese frosting perfectly complements the flavors of the Hawaiian Pineapple Cake. However, you can also opt for whipped cream or coconut frosting for a tropical twist.

Is this cake suitable for kids?

Definitely! The sweet, fruity flavors make it appealing to children. Just be mindful of any allergies or dietary restrictions before serving.

How do I know when the cake is done?

Insert a toothpick into the center of the cake. If it comes out clean or with a few moist crumbs attached, the cake is ready. Be cautious, as overbaking can lead to dryness.

Can I substitute eggs in the recipe?

Yes, you can use unsweetened applesauce (1/4 cup per egg) or flaxseed meal mixed with water as an egg substitute, which works wonderfully in keeping the cake moist.

What should I do if my frosting is too runny?

To thicken the frosting, simply add more powdered sugar until you reach the desired consistency. Chilling the frosting can also help it firm up.

Can I add other fruits to this cake?

Certainly! Consider adding diced mango or shredded coconut for added texture and flavor. Just be sure to adjust the liquid proportions accordingly to avoid a soggy batter.

What’s the best way to store leftovers?

Store leftover cake in an airtight container in the refrigerator for up to a week. It can also be frozen for long-term storage, ensuring every slice stays fabulous for future enjoyment.

Additional Resources

For those who enjoy tropical desserts, check out recipes for coconut macaroons or passionfruit mousse to accompany your Hawaiian Pineapple Cake. Techniques in cream frosting application can be found in our frosting guides for those looking to enhance their baking arsenal.

Join the Conversation

We’d love to hear how your Hawaiian Pineapple Cake turned out! Share your photos and reviews on social media, and don’t hesitate to try variations or suggestions from our community. Your creativity inspires others in their baking journeys!

The Recipe

Hawaiian Pineapple Cake

Serves: 8

Prep Time: 20 mins

Cook Time: 30 mins

Total Time: 50 mins

Kitchen Equipment Needed

  • Mixing bowls
  • Round cake pans
  • Electric mixer
  • Spatula
  • Toothpick (for testing doneness)

Ingredients

  • 2 cups all-purpose flour
  • 1 1/2 cups sugar
  • 1 cup crushed pineapple, drained
  • 1/2 cup unsweetened coconut flakes
  • 1/2 cup softened butter
  • 3 large eggs
  • 1 teaspoon baking soda
  • 1 teaspoon vanilla extract
  • 1/2 teaspoon salt

Directions

  1. Preheat your oven to 350°F (175°C) and grease the cake pans.
  2. In a large bowl, cream together sugar and butter until light and fluffy.
  3. Add eggs one at a time, mixing well after each addition.
  4. Stir in the crushed pineapple, coconut flakes, and vanilla extract.
  5. In another bowl, mix flour, baking soda, and salt together.
  6. Gradually add the dry ingredients to the wet mixture, stirring until just combined.
  7. Divide the batter evenly between prepared cake pans and smooth the tops.
  8. Bake for 25-30 minutes, or until a toothpick inserted into the center comes out clean.
  9. Allow cakes to cool in pans for 10 minutes, then transfer to wire racks to cool completely.
  10. Prepare your favorite frosting and frost the cooled cakes before serving.

Recipe Notes

  • For a richer flavor, consider adding a teaspoon of coconut extract to the batter.
  • This cake can be made a day in advance; just store it properly to maintain moisture.
  • Feel free to decorate with fresh pineapple slices or maraschino cherries for a festive look.

Indulge in Irresistible Luxurious German Chocolate Poke Cake Recipe

Luxurious German Chocolate Poke Cake: A Decadent Sweet Delight

⚖️
Difficulty
Moderate

⏲️
Prep Time
30 mins

🕒
Cook Time
30 mins

⏱️
Total Time
3 hours

🍽️
Servings
12 servings

Immerse yourself in the rich flavors of our Luxurious German Chocolate Poke Cake, a dessert that’s sure to impress all chocolate lovers. Picture velvety chocolate cake infused with a smooth and luscious coconut and pecan frosting. Each slice is an invitation to indulge, bringing memories of festive gatherings and sweet celebrations. This cake is not just a treat; it’s an experience, combining texture, flavor, and simplicity into a showstopper dessert perfect for any occasion.

As you prepare this cake, you will find that the poke cake technique creates an irresistible, syrup-soaked texture, ensuring that every bite is moist and bursting with flavor. Topped with a generous layer of creamy frosting and chunky pecans adds earthy notes that perfectly balance the sweetness. The dessert’s elegant layers and mouthwatering aroma fill the kitchen, welcoming your guests with warmth and delight.

Quick Recipe Highlights

  • Flavor Profile: Rich chocolate cake harmonizes seamlessly with a sweet coconut and pecan frosting, creating a flavor explosion that dances on your palate.
  • Texture: The cake is delightfully moist, while the frosting adds a creamy, slightly crunchy layer that enhances each mouthful.
  • Aroma: The aroma of chocolate mingles with nutty pecans and coconut, creating an inviting scent that captivates and entices.
  • Visual Appeal: A beautiful contrast of deep chocolate and creamy frosting dotted with toasted pecans make this cake visually stunning.
  • Skill Level Needed: Ideal for home bakers with moderate skills, this recipe blends straightforward techniques with an impressive finish.
  • Special Equipment: Basic baking tools such as mixing bowls, a whisk, a measuring cup, and a standard cake pan are all you need.

Recipe Overview

  • Difficulty Level: The moderate difficulty makes this cake accessible for most bakers while still offering room to impress family and friends.
  • Category: This German Chocolate Poke Cake falls under the dessert category, perfect for satisfying sweet cravings at any time of day.
  • Cuisine: German chocolate roots celebrate the combination of rich ingredients—originally founded as a recipe by a Texan named Sam German.
  • Cost: The overall cost of the ingredients is quite reasonable, making this luxurious cake an affordable indulgence.
  • Season: Ideal for celebrations throughout the year, particularly during holidays where festive baked goods take center stage.
  • Occasion: Perfect for birthdays, potlucks, or holiday gatherings, this cake is a true crowd-pleaser.

Why You’ll Love This Recipe

This Luxurious German Chocolate Poke Cake is not just a dessert; it’s an adventure for your taste buds. The combination of rich chocolate and sweet, gooey frosting offers a delightful contrast that makes each bite delectable. The poke method allows the frosting to seep into the cake, enhancing its flavor and moistness, ensuring that your guests will be asking for seconds.

Moreover, the convenience in preparing this recipe makes it ideal for home bakers. The steps are straightforward, requiring minimal effort while producing stunning results. It offers the perfect balance between ease and elegance, making it suitable for both casual and formal occasions.

From a nutritional perspective, while this cake is an indulgent treat, it contains wholesome ingredients such as pecans and coconut, providing vital nutrients. Pecans are rich in healthy fats and antioxidants, making this dessert a bit more wholesome compared to traditional sweets.

Socially, this cake serves as a showstopper at gatherings. Sharing a slice of Luxurious German Chocolate Poke Cake fosters connection and conversation, turning every meal into a memorable experience. As you serve it alongside beverages or coffee, you create a warm and inviting atmosphere that encourages bonding.

Lastly, the cost-effectiveness of this recipe cannot be overlooked. With ingredients like flour, sugar, eggs, and chocolate—all pantry staples—this luxurious cake can be made without breaking the bank. It pairs beautifully with seasonal fruit or ice cream for an added touch of indulgence.

Historical Background and Cultural Significance

The origins of German chocolate cake date back to the 19th century, highlighted by the use of German’s chocolate, a dark-baking chocolate developed by an American named Samuel German. Despite the name, the cake has roots deep within Texas, making it a classic American dessert often enjoyed at family gatherings.

In German culture, the combination of chocolate and nuts carries a significant tradition, representing celebration and comfort. Cakes are an integral part of the culinary fabric of many cultures, often featured at special occasions. This recipe, with its poke method, has evolved over the years, becoming a standardized favorite in the dessert category across the country.

The technique of poking holes in the cake was originally intended to allow the chocolate syrup to soak into the cake, enhancing flavor and moisture. As the recipe evolved, variations began to incorporate a pecan and coconut frosting, adding a unique twist reminiscent of tropical flavors that resonate with many palates.

Regional variations exist, with some incorporating different nut types or additional flavorings such as coffee or caramel. While variations abound, the Luxurious German Chocolate Poke Cake remains a beloved staple for both casual gatherings and festive celebrations, its roots grounding it in joyful experiences shared among friends and family.

Ingredient Deep Dive

Cocoa powder, a key ingredient, is essential for achieving the cake’s rich flavor. The unique process of fermenting and drying cocoa beans lends it the iconic chocolate essence that’s deeply satisfying. Nutritionally, cocoa powder is high in antioxidants, making it a beneficial ingredient when consumed in moderation. Selecting high-quality cocoa will ensure depth of flavor, enhancing your cake significantly. Store it in a cool, dry place to maintain its freshness.

Pecans play an important role in the cake’s texture and flavor, adding distinct crunchiness and earthiness. These nuts are not only delicious but also contain healthy fats and protein, contributing nutritional value. When selecting pecans, look for fresh, plump nuts without a rancid odor. For storage, keep them in an airtight container in the refrigerator or freezer to prolong their shelf life. If desired, substitutions can include walnuts, which provide a different flavor profile yet maintain the crunch factor.

Common Mistakes to Avoid

  • Overmixing the batter can lead to a dense cake. Mix until just combined to keep it light and airy.
  • Not allowing the cake to cool before frosting will melt the frosting, creating a soggy mess. Always ensure complete cooling.
  • Using the wrong type of cocoa can alter the flavor. Stick to Dutch-processed cocoa for a deeper taste.
  • Failing to poke the holes deep enough means the frosting won’t soak in. Use a skewer or handle of a wooden spoon to achieve deep holes.
  • Neglecting to toast pecans first can diminish the nutty flavor. Toasting adds enhanced taste and aroma.
  • Not measuring ingredients accurately can lead to inconsistent results. Invest in a good set of measuring cups and spoons.
  • Using cold eggs will not incorporate well into the batter. Always use room temperature eggs for best results.
  • Not checking for doneness is a common issue. Use the toothpick method; it should come out with a few moist crumbs.

Essential Techniques

When preparing a poke cake, the technique of poking holes is crucial. It allows the frosting to seep into the cake, creating an incredibly moist and flavorful dessert. To master this technique, use a skewer or the handle of a wooden spoon to gently create holes throughout the cake once it’s baked and cooled slightly. Avoid excessive pressure, which can cause the cake to crumble.

Properly combining ingredients is equally important. Creaming butter and sugar until fluffy introduces air, which gives your cake its lift. This step should take about 3-5 minutes at medium speed. If this step is rushed, the cake may turn out flat and dense. Look for a pale-color texture before proceeding to the next step.

Pro Tips for Perfect Luxurious German Chocolate Poke Cake

– To achieve a richer flavor, consider adding a touch of brewed coffee to the cake batter. Coffee enhances the chocolate flavor without being detectable.
– Use parchment paper in your cake pan for easy removal post-baking. This will prevent the cake from sticking and crumbling upon lifting.
– Let the cake cool in the pan for about 10-15 minutes before transferring it to a wire rack. This helps prevent breakage.
– For extra moistness, brush the cake with simple syrup prior to frosting. This locks in moisture and adds sweetness.
– Top with extra toasted pecans for added crunch on the frosting layer; it elevates the presentation and flavor.
– Allow the complete cake to chill in the fridge for a bit after frosting. This allows the flavors to meld beautifully.
– Use high-quality, bittersweet chocolate for the frosting for a richer, more sophisticated palette.
– Experiment with different fillings, like salted caramel, to add another layer of flavor to the cake.

Variations and Adaptations

There are numerous regional and seasonal variations to this German chocolate cake, perfect for adapting it to different tastes and occasions. For a spring twist, consider incorporating fresh berries between the layers for a colorful and fruity surprise. Seasonal adjustments, like pumpkin spice variations in the fall, can provide a festive update as well.

For dietary modifications, experimenting with gluten-free flour can make this treat accessible for those with gluten sensitivities. Vegan adaptations can also be achieved by swapping eggs for flaxseed meal and using a dairy-free frosting option, such as coconut cream.

Flavor variations abound; for instance, adding almond extract into the frosting or the cake batter can introduce an enticing nutty note. Additionally, you can change the texture by mixing in chocolate chips or using a different nut type to diversify the crunch level. Presentation can also vary by using a different styling technique when serving; dramatic sauces or edible flowers can elevate it visually.

Serving and Presentation Guide

When it comes to serving your Luxurious German Chocolate Poke Cake, presentation matters! For an elegant plate, use a large serrated knife to cut uniform slices that hold together beautifully. Consider garnishing each slice with a dollop of whipped cream and a sprinkle of toasted coconut and pecans for added flair.

Traditional accompaniments like vanilla ice cream or a drizzle of chocolate sauce can elevate the dessert. For modern suggestions, try serving it in individual mason jars for a rustic flair, making it easy to serve and enjoyable. When it comes to temperature, serving the cake chilled allows the flavors to shine while adding a refreshing element, particularly on warmer days.

Finally, for portion control, consider serving smaller slices, as the richness of the cake means a little goes a long way. This can make it more accessible, especially for larger gatherings.

Wine and Beverage Pairing

Pairing your Luxurious German Chocolate Poke Cake with the right beverages can elevate the entire dessert experience. A full-bodied red wine like Cabernet Sauvignon complements the rich chocolate flavors, providing a harmonious balance. Alternatively, a port wine with its natural sweetness offers a decadent match.

For those seeking non-alcoholic alternatives, consider serving a robust tea, such as a spiced chai, which brings warmth and complimentary flavors. A rich and creamy coffee, like an espresso, can further enhance the cake’s chocolate notes.

Temperature considerations are essential: serve chill beverages to contrast the cake’s richness, highlighting its indulgent elements and providing a well-rounded palate experience.

Storage and Shelf Life

Proper storage of your Luxurious German Chocolate Poke Cake is crucial for maintaining its flavor and freshness. Keep it in an airtight container in the refrigerator, where it can last for up to 5 days. If you anticipate longer storage, consider freezing portions wrapped in plastic wrap and foil to maintain moisture.

Signs of spoilage include dryness or an off smell, indicating it’s time to discard the dessert. If reheating is necessary, do so in the microwave for short bursts, ensuring it doesn’t dry out. Refresh the frosting with a touch of cream for optimal texture upon serving.

For longer preservation, you can freeze the unfrosted cake layers, allowing you to assemble once needed and keep the dessert feeling fresh each time it’s served.

Make Ahead Strategies

Preparing your Luxurious German Chocolate Poke Cake in advance can save time while ensuring a delicious dessert is on hand when needed. The cake itself can be made a day or two ahead, stored in airtight containers to prevent drying.

Poke the holes just before frosting to maintain the cake’s structure, allowing it to retain moisture until served. Store the frosting separately until closer to serving to keep it fresh and fluffy.

If desired, prepare the cake layers and freeze them, then layer and frost just before serving. This preparation method brings convenience while ensuring fantastic flavors and moisture, even after a freeze.

Lastly, consider assembling last-minute garnishes or sauces that can easily complement your cake, adding a fresh element without requiring extra time the day of the gathering.

Scaling Instructions

Scaling your Luxurious German Chocolate Poke Cake recipe up or down can be straightforward. Halve the ingredients for smaller gatherings or events. Conversely, for larger crowds, doubling or tripling is possible while ensuring you have sufficient mixing capacity and appropriately sized baking pans.

Equipment adjustments may include batch-baking using multiple pans when increasing the recipe size. Timing modifications should also be factored in, as larger cakes may require additional baking time and monitoring.

Storage considerations come into play when scaling, as larger quantities will likely require more extensive refrigerating or freezing space, making strategic planning essential.

Nutritional Deep Dive

Examining the nutritional aspects of your Luxurious German Chocolate Poke Cake offers insight into its components. The macro breakdown reveals a delightful balance of carbohydrates, fats, and sugars inherent in cake recipes. For those counting macros, consider the cake’s rich cocoa and nut content for healthier fat sources.

From a micronutrient viewpoint, this cake contains beneficial vitamins and minerals found in pecans, such as Vitamin E, essential for overall health. Notably, coconut in the frosting provides fiber as well, giving a slight nutritional boost.

Portion size is key; consider smaller slices, utilizing the richness of the cake to manage weight effectively. Enjoying desserts in moderation fosters a balanced approach, allowing the indulgence of sweet treats without sacrificing dietary goals.

Dietary Adaptations

Flexibility in preparing your Luxurious German Chocolate Poke Cake allows for numerous dietary adaptations. For gluten-free variations, using almond flour or gluten-free all-purpose flour can yield delicious results.

Dairy-free options can be achieved by utilizing coconut milk or almond milk and substituting non-dairy butter for easy replacements. For a vegan alternative, flaxseed meal works well as an egg replacer alongside non-dairy cream for the frosting.

Low-carb or Keto adaptations can be accomplished with sugar substitutes, while maintaining rich flavor options. For those on lower FODMAP diets, certain nuts and lactose-free ingredients can easily be swapped.

Each modification allows everyone to indulge in the luxurious flavors without sacrificing dietary restrictions, making the cake a versatile option for diverse gatherings.

Troubleshooting Guide

Texture issues can arise if the cake is overbaked or improperly stored. To avoid dryness, monitor your baking time closely and store leftovers as noted for optimal freshness.

Flavor balance can be achieved by adjusting sweetness with optional salt components, enhancing the chocolate flavors. If your cake becomes too sweet, adding a bit of bittersweet cocoa can help balance the flavors.

Temperature problems may manifest if the cake is not allowed to fully cool before frosting, potentially leading to melted frosting. Always allow cooling time to avoid this common pitfall.

Ingredient substitutions can sometimes lead to unexpected results; it’s wise to test modifications in smaller batches before serving at large events. Lastly, maintaining consistent timing in preparing components will streamline the baking process.

Recipe Success Stories

Many bakers have shared their success stories with this Luxurious German Chocolate Poke Cake, enjoying the ease of preparation and delicious output. Enthusiastic feedback highlights the moist texture and rich flavor that have dazzled both family and friends.

Variations suggested by the community, like adding different fillings or toppings, have inspired creativity in the kitchen. Feedback also emphasizes the benefits of employing the poke technique, with many enthusiastic about how it enhances moisture retention perfectly during baking.

Photography tips suggested by readers showcase how beautifully this dessert presents; people love to share their own adaptations and plating ideas on social media, creating a delightful tapestry of inspiration around this beloved recipe.

Frequently Asked Questions

1. Can I make the cake ahead of time?
Yes, you can make the cake a day or two ahead. Store it in an airtight container to maintain moisture until you are ready to frost and serve.

2. How should I store leftovers?
Leftover cake should be stored in an airtight container in the refrigerator and can last for up to 5 days.

3. Can I freeze this cake?
Yes, you can freeze both the unfrosted cake layers and the frosted cake. Just ensure proper wrapping to prevent freezer burn.

4. Is there a substitute for pecans?
If preferred, walnuts or almonds can be used in place of pecans. The flavor profile will change slightly, but it will still be delicious.

5. What if I don’t have coconut?
If you don’t have coconut, consider using cream cheese frosting or simply topping with more pecans for a different flavor profile.

6. Can I make this recipe vegan?
Yes, you can substitute the eggs with flaxseed meal and use non-dairy milk and cream to create a vegan version of this cake.

7. How do I know when the cake is done?
You can check for doneness by inserting a toothpick; it should come out clean or with a few moist crumbs attached.

8. What can I serve this cake with?
This decadent cake pairs beautifully with vanilla ice cream, whipped cream, or a cup of coffee or tea.

9. Can I add extra flavors to the frosting?
Certainly! Adding extracts like vanilla or almond can elevate the frosting’s flavor profile.

10. What’s the best way to cut the cake?
Use a serrated knife to cut the cake, ensuring clean edges, especially around the frosting areas.

Additional Resources

For those inspired by this Luxurious German Chocolate Poke Cake, explore related recipes that highlight chocolate in delightful ways, such as decadent brownies and rich chocolate mousse.

Technique guides can help refine your baking skills, offering tips on mixing methods and ingredient substitutions that enhance your culinary prowess. Information on ingredients will assist in making informed choices, particularly when sourcing organic versus conventional products.

Equipment recommendations, from mixers to baking pans, can further assist in ensuring your baking adventures are successful. Lastly, seasonal variations encourage creativity, allowing you to adapt this recipe to suit different celebrations throughout the year.

Join the Conversation

We encourage you to share your baking journeys with us! Engage on social media by using the hashtag associated with this recipe, showcasing your beautiful cakes and any adaptations you’ve tried. Photography tips can help share the beauty of your desserts, making it easier for others to get inspired.

Recipe reviews allow others to discover the excitement around this dish, fostering community engagement alongside delicious desserts. We’d love to hear your experience and any variations you might have experimented with; your creative touches may inspire others to try something new.

The Recipe

Luxurious German Chocolate Poke Cake

Serves: 12 servings

Prep Time: 30 mins

Cook Time: 30 mins

Total Time: 3 hours

Kitchen Equipment Needed

  • Mixing bowls
  • Electric mixer or whisk
  • Cake pans
  • Measuring cups and spoons
  • Spatula
  • Cooling rack

Ingredients

  • 1 box German chocolate cake mix
  • 1 cup water
  • 1/2 cup vegetable oil
  • 3 eggs
  • 1 can (12 oz) evaporated milk
  • 1 cup coconut flakes
  • 1 cup chopped pecans
  • 1/2 cup sugar
  • 1/4 cup butter
  • 1 tsp vanilla extract

Directions

  1. Preheat the oven to 350°F (175°C) and prepare your cake pans.
  2. In a bowl, mix the cake mix, water, vegetable oil, and eggs until well combined. Pour into prepared pans.
  3. Bake for 30 minutes or until a toothpick comes out clean. Let cool for 10 minutes.
  4. Using the handle of a wooden spoon, poke holes all over the warm cake.
  5. In a saucepan, combine evaporated milk, sugar, butter, and vanilla; bring to a boil, then pour over the cake, letting it soak in.
  6. In a separate bowl, mix coconut and pecans. Spread over the cake and let cool completely.
  7. Once cooled, frost with your choice of chocolate frosting or ganache.
  8. Chill before serving for enhanced flavor.

Recipe Notes

  • For added flavor, consider using brewed coffee instead of water.
  • You may substitute pecans with walnuts if desired.
  • Store leftovers in an airtight container in the refrigerator for up to 5 days.

Delicious Heavenly Banana Cream Cheese Cupcakes You Must Try

Heavenly Banana Cream Cheese Cupcakes Recipe: A Delightful Treat for Every Occasion!

⚖️
Difficulty
Easy

⏲️
Prep Time
15 mins

🕒
Cook Time
20 mins

⏱️
Total Time
35 mins

🍽️
Servings
12 servings

Enjoy the sweet, comforting taste of homemade Heavenly Banana Cream Cheese Cupcakes Recipe, perfect for any celebration or simply as a delightful snack. These cupcakes are a sublime combination of ripe bananas and luscious cream cheese, creating a treat that’s not only delicious but also brings back fond memories of home baking. The fluffy texture, paired with a sweet, creamy frosting, makes every bite a moment to savor.

From birthday parties to family gatherings, these cupcakes bring a smile to everyone’s face. Imagine the scent of bananas warming in the oven, tickling your senses as it fills your kitchen. Each cupcake is a tiny celebration waiting to happen, the perfect balance of savory and sweet that makes them irresistible.

Quick Recipe Highlights

  • Flavor Profile: A perfect combination of sweet ripe bananas and tangy cream cheese creates a balanced flavor that everyone loves.
  • Texture: Light and fluffy cupcakes topped with rich, creamy frosting create a delightful contrast in textures.
  • Aroma: The warm, inviting aroma of baked bananas with hints of creamy vanilla make these cupcakes a must-try.
  • Visual Appeal: Beautifully frosted with a smooth, creamy texture and a sprinkle of crushed nuts add an inviting touch.
  • Skill Level Needed: Easy—perfect for beginners and experienced bakers alike.
  • Special Equipment: Standard cupcake pan and mixer for ease of preparation.

Recipe Overview

  • Difficulty Level: This recipe is classified as easy, making it ideal for beginner bakers. The steps are straightforward, allowing you to create delightful treats without overwhelming complexity.
  • Category: These cupcakes fall under the dessert category, perfect for sweet tooth satisfactions or special occasions.
  • Cuisine: The recipe draws inspiration from classic American baking traditions, where bananas frequently are incorporated into desserts.
  • Cost: This budget-friendly recipe utilizes common ingredients, making it accessible for anyone looking to whip up a delicious treat.
  • Season: Best enjoyed throughout the year, particularly during the spring and summer when bananas are forecasted to be at their sweetest.
  • Occasion: These cupcakes are excellent for birthdays, tea parties, or simply a cozy evening treat with family.

Why You’ll Love This Recipe

Heavenly Banana Cream Cheese Cupcakes Recipe offers an incredible taste experience that balances sweet and creamy flavors. The bananas provide natural sweetness while the cream cheese adds a delightful tang, making each cupcake explode with flavor. With every bite, you’re welcomed by a moist, fluffy texture that melts in your mouth, supported by a creamy frosting that mirrors the lusciousness of each delightful bite.

The convenience of this recipe is another reason to love it. With a preparation time of just 15 minutes, you can easily whip these cupcakes together and pop them in the oven. Even as a novice baker, the simple steps ensure you’ll feel confident in creating these delightful desserts. They are perfect for last-minute gatherings or whenever the craving strikes.

Nutritionally, this recipe is versatile. Bananas are a great source of potassium and fiber, making this treat a slightly healthier indulgence. Incorporating bananas not only enhances the flavor but also provides natural moisture, resulting in tender cupcakes that everyone will adore.

Socially, these cupcakes are perfect for sharing. They are the ideal treat to bring to parties, family events, or casual get-togethers, sparking conversations around flavors and fond memories. Sharing homemade goodies is a way to connect with others, showcasing love and care through culinary creations.

Cost-effectiveness makes this recipe even more appealing. Using ingredients you may already have in your pantry means you can create something special without splurging. Whether you’re baking for a special occasion or as a little surprise for yourself, this recipe is accessible and delightful.

Historical Background and Cultural Significance

The origins of banana desserts can be traced back to various culinary practices around the world. Bananas have been a staple fruit in many cultures, appreciated for their naturally sweet flavor and versatility in cooking. The banana cupcake represents a fusion of traditional American baking techniques combined with the globally available banana, making it a universally loved treat.

In American culture, bananas became famous during the 20th century, particularly after WWII when canned products became popular. The ease of using ripe bananas in baking contributed significantly to the rise of banana-based recipes, solidifying their place in American home baking kitchens. The beloved banana bread also shares this history, making banana desserts a comforting reminder of home.

Over the years, the banana cupcake has evolved from a simple sweet treat to a gourmet dessert. Today, variations abound, featuring different frostings, fillings, and even gluten-free options. The flexibility of this recipe allows bakers to adapt it to current trends while retaining the classic elements that make it beloved.

Regional variations of banana desserts also add to their cultural significance. In many tropical nations, raw bananas are used in savory dishes as well as desserts, highlighting their versatility. The heavenly banana cream cheese cupcake stands as a testament to how one ingredient can transcend culinary boundaries and unite flavors from different cultures.

Ingredient Deep Dive

  • Bananas: Bananas are tropical fruits with rich potassium content. Selecting ripe bananas improves sweetness; slightly overripe ones work best for baking. Store them at room temperature and use them within a week, or freeze for future use.
  • Cream Cheese: This creamy cheese provides a tangy flavor and smooth texture. Opt for full-fat cream cheese for best results. It’s best stored in the refrigerator and can be softened at room temperature before use.
  • Flour: All-purpose flour creates a tender cupcake base. Look for flour with protein content around 10-12%. Store in a cool, dry place to maintain freshness, and protect it from moisture.
  • Sugar: Granulated sugar sweetens the batter and enhances texture. Adjust the amount according to personal taste. Keep sugar in an airtight container to prevent clumping.
  • Baking Powder: This leavening agent is essential for fluffy cupcakes. Ensure it is fresh to avoid dense results. Store in a cool, dry place, and check the expiration date regularly.
  • Eggs: Eggs provide moisture and richness, binding all ingredients together. Use large eggs for best results, and allow them to come to room temperature before baking for even mixing.

Common Mistakes to Avoid

  • Using unripe bananas: Ensure your bananas are ripe for maximum sweetness overall. Unripe bananas may not provide the balanced flavor needed.
  • Overmixing the batter: Mixing just until combined helps keep your cupcakes light and fluffy. Overmixing activates the gluten in the flour, leading to dense cupcakes.
  • Not measuring ingredients correctly: Baking is a science, so accurate measurements are crucial. Use a kitchen scale for precise measuring.
  • Skipping the frosting: Skimping out on cream cheese frosting can lead to a less enjoyable taste. Don’t miss out on this delicious addition!
  • Using cold eggs: Cold eggs can affect the batter consistency, resulting in uneven baking. Always let eggs adjust to room temperature before using.
  • Opening the oven door too soon: Opening the oven during baking can cause the cupcakes to sink. Wait until they are close to being done before checking.
  • Overbaking: Pay attention to baking time; overbaked cupcakes can dry out. Test for doneness with a toothpick in the center.
  • Ignoring storage tips: Properly store leftover cupcakes in an airtight container to maintain moisture and freshness.

Essential Techniques

Baking is all about technique, and understanding a few key practices can elevate your Heavenly Banana Cream Cheese Cupcakes Recipe to the next level. One essential skill is the creaming method, which involves mixing the sugars and cream cheese until fluffy; this step helps to incorporate air, ensuring a light structure. Watch for a pale, fluffy mixture before adding in other ingredients to ensure success.

Another vital technique is proper folding. This careful method of integrating dry ingredients into a wet mixture is crucial to avoid overmixing. Use a spatula to gently bring together the mixtures without deflating the batter, allowing your cupcakes to rise beautifully in the oven.

Learn to test for doneness, the best way to check if your cupcakes are fully baked is by inserting a toothpick in the center. If it comes out clean or with a few crumbs, they are good to go!

Also, mastering the art of frosting is key with the cream cheese topping. Ensure cream cheese is at room temperature for smooth spreading. Use an offset spatula to create decorative swirls for visual appeal.

Lastly, understanding variance in oven temperature can significantly affect results. Invest in an oven thermometer to ensure an accurate reading, which can prevent surprises when it comes time to enjoy your baked masterpieces.

Pro Tips for Perfect Heavenly Banana Cream Cheese Cupcakes

– Use overly ripe bananas for optimal natural sweetness and moisture in your cupcakes. Aim for bananas with brown spots for rich flavor.
– Allow all ingredients to reach room temperature before mixing; this can streamline the blending process and ensure you have a consistent batter.
– Do not skimp on the frosting! Cream cheese frosting adds a delicious contrast that is the highlight of the cupcake. Consider flavors like vanilla bean for a unique twist.
– When frosting, opt for a piping bag for easy and decorative application, creating beautiful effects without added stress.
– Store any leftovers properly and enjoy them within a few days to maintain freshness. Meanwhile, feel free to freeze cupcakes for longer storage and to have on-hand treats.
– Experiment with mix-ins like chocolate chips or nuts for added flavor and texture variations in your next batch!
– Consider lightly dusting the frosted cupcakes with crushed nuts or a sprinkle of cinnamon for additional flair.
– Start with a clean kitchen, as this promotes organization and aids in a seamless baking process.

Variations and Adaptations

For those looking to explore variations, there are many delightful options to personalize your Heavenly Banana Cream Cheese Cupcakes. Consider adding a seasonal twist by incorporating pumpkin puree or spices to create a fall-inspired cupcake. Nutritional modifications can also be made by switching to gluten-free flour for those with dietary restrictions; this maintains texture while accommodating different needs.

In terms of flavor variations, adding a layer of caramel or a dollop of peanut butter in the center of each cupcake provides an unexpected delight. For a refreshing summer twist, consider using coconut milk in place of the cream cheese for a lighter version with a tropical flavor.

Incorporating seasonal fruits like strawberries or cherries atop the frosting makes for a stunning visual presentation and adds a burst of flavor. For those who need dairy-free options, use a vegan cream cheese, which provides a similar taste and texture without compromising on taste.

Lastly, consider texture adaptations by turning these cupcakes into a means for creative experimentation, such as using half the flour and substituting with oatmeal or almond flour for additional nutrients and depth.

Serving and Presentation Guide

Serving your Heavenly Banana Cream Cheese Cupcakes can be just as delightful as baking them. To enhance presentation, consider using decorative cupcake liners that match your occasion, whether it’s a festive holiday or a casual gathering. For a touch of elegance, affix a piece of fresh fruit or mint on top of each frosted cupcake just before serving.

Plating techniques can also play a role; present cupcakes on a tiered stand to create a visually stunning display that captures attention at parties and gatherings. Garnish with a sprinkle of powdered sugar or crushed nuts for a beautiful finish.

Temperature considerations are also essential; serve cupcakes slightly chilled or at room temperature, as this enhances the cream cheese frosting experience. For portion control, consider cutting the cupcakes in half for sharing, allowing guests to sample more than one flavor at your next gathering.

Finally, elevate the experience with traditional accompaniments like a scoop of vanilla ice cream or a dollop of whipped cream. These additions complement the flavors perfectly and provide guests a delightful experience they won’t forget!

Wine and Beverage Pairing

Pairing beverages with your Heavenly Banana Cream Cheese Cupcakes can enhance the flavors and overall experience. For a delightful complement, consider a sparkling wine like Prosecco, which offers a lightness that pairs beautifully with the rich frosting. Its fruity notes also echo the bananas nicely.

If you prefer non-alcoholic options, consider serving these cupcakes with a chilled glass of fresh lemonade or iced tea, providing a refreshing contrast to the sweetness. The acidity of citrus beverages can elevate the creamy frosting without overwhelming palates.

For coffee lovers, a rich cappuccino or mocha could work wonders, providing a deep, hearty balance to the sweet notes of the cupcake, ensuring each bite is accented.

Additionally, consider herbal teas infused with vanilla or fruit flavors. These can enhance the overall dining experience while offering lovely aroma profiles that change with every sip, making the treat even more enjoyable.

Storage and Shelf Life

Proper storage is crucial to maintaining the freshness of your Heavenly Banana Cream Cheese Cupcakes. Keep them in an airtight container to avoid drying out and ensure they stay moist. Stored in the refrigerator, they can last up to a week, but for optimal taste, enjoy them within 3 to 5 days.

If you want to extend their shelf life, consider freezing them. Wrap each cupcake individually in plastic wrap and place them in a freezer-safe bag. They can last for up to three months in the freezer, and when it’s time to enjoy, simply allow them to thaw in the refrigerator overnight.

Look for signs of spoilage, such as unusual smells or a changed texture; if there’s any doubt, it’s safer to discard them. If reheating is needed, warm cupcakes slightly in the microwave for 10-15 seconds to retain their moisture.

Lastly, avoiding adding frosting before freezing is best, as fresh frosting can sometimes lose its texture when thawed. Instead, frost after thawing to ensure the best flavor and appearance.

Make Ahead Strategies

When planning for an event, making your Heavenly Banana Cream Cheese Cupcakes ahead of time is a savvy strategy. Bake the cupcakes a day in advance and store them in an airtight container at room temperature, preventing any last-minute stress.

Consider preparing the frosting the night before, kept in the refrigerator until you’re ready to frost the cupcakes; this can streamline your baking process and ensure optimal flavor. Just be sure to let the frosting come to room temperature for smooth spreading.

If you’re preparing for a larger gathering, make a double batch and freeze half for later use. They can maintain their flavor and texture remarkably well, saving time for future occasions.

You can also assemble a timeline for preparation, breaking down the process into manageable steps to maximize your baking success. The day of the event, simply frost the cupcakes and add any garnishes for presentation, making sure they look as good as they taste!

Scaling Instructions

If you wish to scale your Heavenly Banana Cream Cheese Cupcakes Recipe, adjusting the quantities for larger gatherings is simple. For halving the recipe, reduce all ingredients accordingly, ensuring an equal balance of flavors to maintain quality.

Doubling or tripling the recipe is straightforward too. Make sure to account for larger mixing bowls and baking equipment; a stand mixer can be very helpful in speeding up the process for larger batches.

Timing may differ slightly, especially if you’re baking multiple trays at once. You might need to rotate cupcakes halfway through baking for even cooking. Use an oven thermometer to check temperature accurately for best results.

When scaling, also consider storage methods. Larger batches can mean more cupcakes to store, so ensure to have adequate containers to prevent spoilage and maintain quality.

Nutritional Deep Dive

A complete nutritional analysis of your Heavenly Banana Cream Cheese Cupcakes can help you appreciate their benefits further. Each cupcake typically provides carbohydrates from sugar and flour, alongside dietary fiber from bananas. Bananas are also a good source of potassium, which supports heart health.

Examining the macro breakdown reveals a balance between carbohydrates, fats from cream cheese frosting, and proteins from eggs. For those looking to manage weight, paying attention to portion sizes can be helpful since cupcakes can be quite calorie-dense when frosting is included.

The micronutrient analysis indicates that these cupcakes include essential vitamins such as vitamin C and B6 from bananas. With slight modifications like reducing sugar or using lower-fat cream cheese, nutritional enhancements can be made to make them even healthier.

Furthermore, dietary considerations can also be adjusted through thoughtful substitutions, making this recipe accessible for various dietary needs. Analyzing the health benefits helps highlight their place in a balanced diet when enjoyed in moderation.

Dietary Adaptations

Heavenly Banana Cream Cheese Cupcakes can be easily adapted for various dietary needs. For gluten-free options, substitute with a gluten-free flour blend, ensuring a similar texture without compromising flavor.

Dairy-free variations can replace cream cheese with vegan cream cheese made from nuts or soy. This retains the base flavor while catering to those who are lactose intolerant.

For those following a low-carb or keto diet, consider using almond flour and a sugar substitute like erythritol to create a low-carb version that still satisfies cravings without the extra carbs.

Vegans can enjoy these cupcakes by replacing eggs with flaxseed meal or applesauce and using plant-based cream cheese. Adapting the recipe provides inclusivity for all, ensuring everyone can indulge!

Low-FODMAP options can be achieved by avoiding added sugars or considering fructose-free bananas, catering to those with digestive sensitivities.

Troubleshooting Guide

Texture issues can arise if cupcakes come out too dense; this can typically result from overmixing or using cold ingredients. Ensure ingredients, especially eggs, are at room temperature and avoid overmixing for best results.

Flavor balance can be key. If cupcakes are too sweet, consider reducing the sugar in the frosting. On the other hand, if they are bland, add a pinch of salt or increase the vanilla extract for depth.

If there are temperature problems, make sure your oven is properly calibrated. Underbaking can lead to raw centers, while overbaking creates dry cupcakes; investing in an oven thermometer can prevent this issue.

For equipment challenges, ensure you have appropriately sized pans. Using the wrong size can affect baking time and the final result; consistency is vital!

Ingredient substitutions can sometimes lead to unexpected results. If substituting flour, be cautious of the type used, as this can significantly affect both texture and taste.

Timing concerns can also affect outcomes. It is vital to set timers for both prep and baking stages to avoid over or undercooking, leading to unfavorable results.

Recipe Success Stories

Our community of bakers continues to share stories of success with the Heavenly Banana Cream Cheese Cupcakes. Readers rave about how easy this recipe is to customize, with many opting to add chocolate chips or nuts, creating unique variations everyone can enjoy.

Notably, several families have incorporated these cupcakes into their holiday traditions, favoring their nostalgia-inducing banana flavor. Many reflect on fond memories of baking with loved ones, often passing down the recipe, showcasing its timelessness.

Photography tips have also arisen, encouraging bakers to share their creations on social media platforms. Beautiful plating and close-ups of the luscious frosting have led to a surge in engagement, with stories of community connections forged through these baking experiences.

Sharing adaptations has inspired others to try new flavors or cater to unique dietary needs—encouraging collaboration and creativity among bakers. The success stories fuel excitement, making this recipe a staple in many kitchens, ensuring it continues to evolve with each new batch baked.

Frequently Asked Questions

1. Can I use frozen bananas?

Yes, frozen bananas work perfectly for this recipe! Just make sure to thaw them and drain any excess moisture before mashing to ensure the right consistency.

2. How should I store leftover cupcakes?

Leftover cupcakes can be stored in an airtight container at room temperature for about 1-2 days. For longer freshness, refrigerate them or freeze them for later enjoyment.

3. Can I make these cupcakes dairy-free?

Absolutely! You can substitute cream cheese with plant-based varieties and replace eggs with flaxseed meal to create a delicious dairy-free version of these cupcakes.

4. How long do these cupcakes last in the fridge?

These cupcakes can last in the refrigerator for about 5-7 days. Make sure they are sealed well to keep moisture intact.

5. What can I use instead of eggs in this recipe?

Flaxseed meal mixed with water, applesauce, or silken tofu are great substitutes for eggs in this recipe, providing the binding you’ll need for the cupcakes.

6. Can I add chocolate chips to this recipe?

Yes! Feel free to fold in chocolate chips for an extra touch of sweetness and flavor. They pair wonderfully with the banana and cream cheese.

7. Is it necessary to frost the cupcakes?

While the cupcakes are delicious on their own, the cream cheese frosting adds richness that enhances flavor. However, you can skip frosting for a lighter treat.

8. How do I prevent my cupcakes from sinking?

To prevent sinking, avoid overmixing your batter, and ensure your leavening agents (like baking powder) are fresh. Also, do not open the oven too early.

9. Can I use whole wheat flour instead of all-purpose flour?

Yes, you can substitute half of the all-purpose flour with whole wheat flour for more fiber. This will give a slightly different texture but still tastes great!

10. How can I heighten the banana flavor in the cupcakes?

To intensify the banana flavor, consider using banana extract in addition to the mashed bananas or incorporate a layer of sliced ripe bananas inside the batter itself.

Additional Resources

If you’re looking for more delicious recipes, check out related posts featuring variations of cream cheese desserts or banana treats. Technique guides on frosting and baking can also support your baking journey with tips and tricks.

For ingredient information, our section on baking staples can help you understand common alternatives or organic choices. Need equipment recommendations? We provide insights on the best mixers, pans, and tools to streamline the baking process, assisting you in achieving perfect results every time.

Join the Conversation

We’d love to hear from you! Share your experiences with the Heavenly Banana Cream Cheese Cupcakes on social media. Include your special adaptations or variations and connect with fellow baking enthusiasts.

Don’t forget to share your stunning photographs of the final product, as we love seeing how you make this recipe your own. Engage with our community by providing feedback and suggestions, and let’s continue to inspire each other with creative baking ideas!

The Recipe

Heavenly Banana Cream Cheese Cupcakes

Serves: 12 servings

Prep Time: 15 mins

Cook Time: 20 mins

Total Time: 35 mins

Kitchen Equipment Needed

  • Cupcake pan
  • Mixing bowls
  • Electric mixer or whisk
  • Measuring cups and spoons
  • Offset spatula for frosting

Ingredients

  • 1 ½ cups mashed ripe bananas (about 3 medium bananas)
  • 1 cup sugar
  • ½ cup unsalted butter, softened
  • 4 oz cream cheese, softened
  • 2 large eggs
  • 1 ½ cups all-purpose flour
  • 1 tsp baking powder
  • 1 tsp vanilla extract
  • Pinch of salt

Directions

  1. Preheat the oven to 350°F (175°C) and line cupcake pan with liners.
  2. In a large bowl, cream together the butter, sugar, and cream cheese until light and fluffy.
  3. Add in the eggs, one at a time, mixing until well incorporated.
  4. Stir in mashed bananas and vanilla extract until blended.
  5. In another bowl, whisk the flour, baking powder, and salt together.
  6. Gradually mix the dry ingredients into the wet batter until just combined.
  7. Fill each cupcake liner about 2/3 full with batter.
  8. Bake for 18-20 minutes or until a toothpick inserted comes out clean.
  9. Allow cupcakes to cool before frosting with cream cheese frosting.

Recipe Notes

  • Additional flavors can be added by incorporating chocolate chips or nuts.
  • Frosting options include classic cream cheese or flavored variations like chocolate or vanilla.
  • These cupcakes can be frozen without frosting for later enjoyment. Just thaw and frost before serving.