Deliciously Juicy Peach Raspberry Cake for Every Occasion

Juicy Peach Raspberry Cake: A Summer Dessert Delight

⚖️
Difficulty
Medium

⏲️
Prep Time
20 mins

🕒
Cook Time
40 mins

⏱️
Total Time
1 hour

🍽️
Servings
8

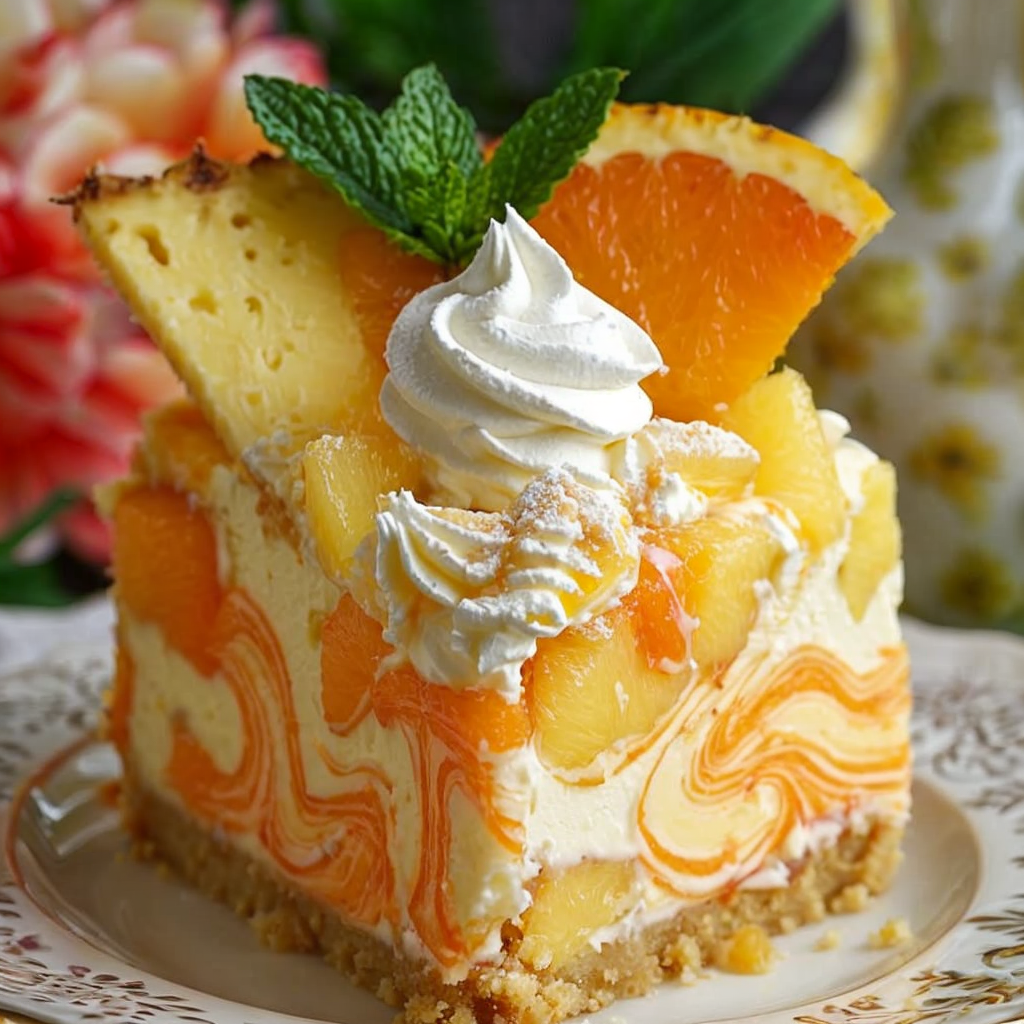
Indulge in the sweet, sun-kissed flavors of summer with our Juicy Peach Raspberry Cake. This delightful cake features layers of ripe peaches and tart raspberries enveloped in a moist, buttery cake, creating a perfect balance of flavors. Each slice is a celebration of summer’s bounty, making it a must-try for any dessert lover.

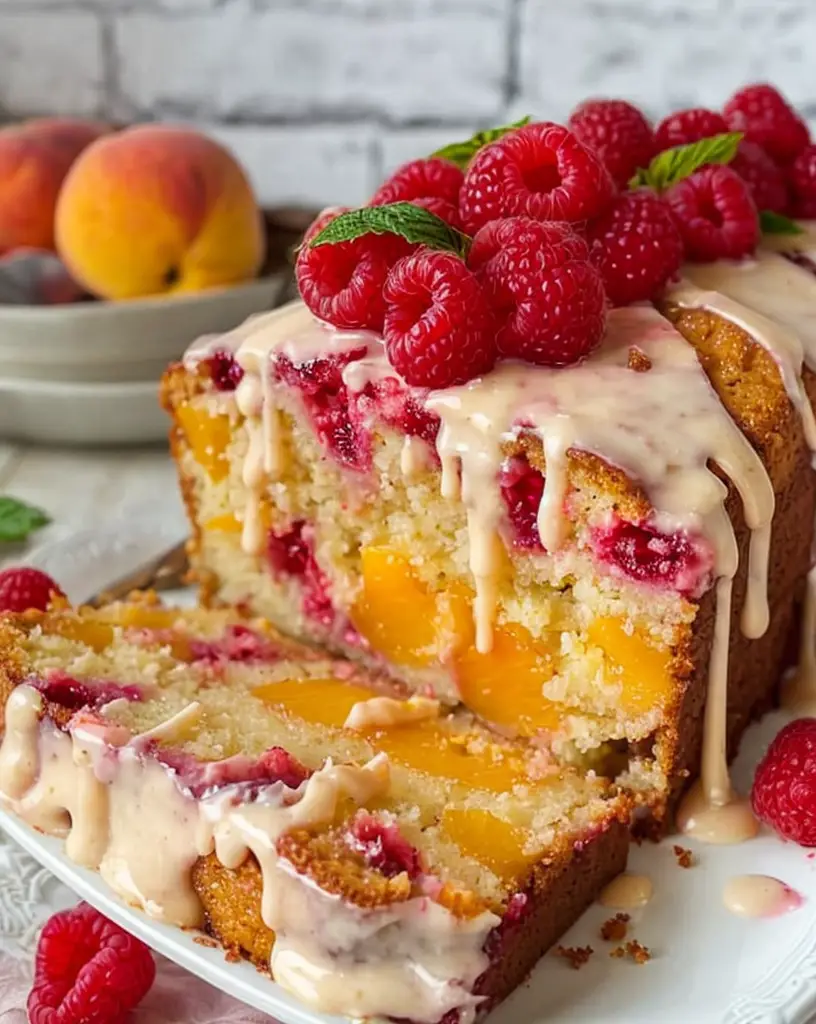
As you bite into this cake, the juicy peaches release their natural sweetness, harmoniously complemented by the tangy raspberry undertones. This cake not only delivers a burst of flavors but also offers a beautiful presentation, showcasing vibrant colors that will impress your guests at any gathering. Whether for a picnic, birthday party, or just a lazy Sunday afternoon, this cake is sure to delight and satisfy.

Quick Recipe Highlights

  • Flavor Profile: The combination of juicy peaches and tart raspberries creates a cake that is both sweet and slightly tart, making each bite refreshing.
  • Texture: This cake boasts a light and fluffy texture, with juicy pieces of fruit that add bursts of moisture throughout.
  • Aroma: The aroma of fresh peaches and raspberries baking in the oven is intoxicating, filling your kitchen with a sweet, inviting scent.
  • Visual Appeal: Topped with a vibrant raspberry glaze, this cake is both stunning and irresistible, showcasing a beautiful gradient of colors.
  • Skill Level Needed: This recipe is approachable for bakers of all levels, making it a fantastic project for both novice and experienced cooks.
  • Special Equipment: Basic baking tools are required, such as mixing bowls, a cake pan, and an electric mixer for a smooth batter.

Recipe Overview

  • Difficulty Level: This Juicy Peach Raspberry Cake is classified as medium in difficulty, as it involves mixing cake batter and preparing the fruit layer, but with careful attention, even beginners can master it.
  • Category: This dessert fits beautifully into the category of cake and can be served at any gathering or special occasion.
  • Cuisine: The recipe draws inspiration from classic American baking, blending seasonal fruits commonly found in summer recipes.
  • Cost: With accessible ingredients, this cake is cost-effective, making it an economical choice for gatherings.
  • Season: Late summer, when peaches and raspberries are at their peak, is the best time to enjoy this cake, allowing for the freshest flavors.
  • Occasion: Perfect for summer barbecues, birthday celebrations, or a sweet treat at a picnic, this cake is versatile for many occasions.

Why You’ll Love This Recipe

This Juicy Peach Raspberry Cake is not just about looking delicious; it tantalizes your taste buds with a unique combination of flavors that details the essence of summer. The sweetness of ripe peaches, balanced with the tartness of fresh raspberries, creates a harmony you won’t forget.

Preparation for this cake is straightforward, allowing you to enjoy more time with friends and family rather than spending hours in the kitchen. This cake comes together quickly, making it a perfect option for anyone looking for convenience without sacrificing flavor.

Nutritionally, peaches are a good source of vitamins A and C, while raspberries offer antioxidants beneficial for your health. This cake provides a touch of indulgence while still being a bit kinder on your dietary goals.

The social aspect of baking this cake brings people together, from the mixing of ingredients to the final presentation. It’s perfect for sharing, whether you’re hosting a gathering or simply treating loved ones to a homemade dessert.

Lastly, this Juicy Peach Raspberry Cake proves to be real value for money. Whether bought from a bakery or prepared at home, it’s a delicious way to use seasonal produce and enjoy a rewarding dessert.

Historical Background and Cultural Significance

The origins of peach desserts date back to ancient Persia, where the fruit was celebrated for its sweetness. As peaches spread to Europe and then to America, they became a staple in many households, especially in southern cuisine, where recipes often highlight seasonal harvests.

Raspberries have a storied history too, cultivated since the Roman Empire. Their tartness complements sweet foods, making them a favored choice for desserts across various cultures. The combination of peaches and raspberries is a beautiful representation of the union of fruits from different backgrounds brought together in one delightful cake.

Over time, the recipe for peach and raspberry desserts has evolved, incorporating different techniques and amendments to suit modern palates. Layer cakes became popular in the 18th century, offering bakers creative freedom in combining flavors such as these.

Various regional variations also exist around this delightful duo, from cobblers in the south to savoury jams in the Pacific Northwest, showing the versatility and love for these fruits.

Ingredient Deep Dive

Peaches, a key ingredient in this cake, are often called “the fruit of the gods” for their sweetness and nectar-like flavor. Rich in vitamins, they aid in digestion and skin health, providing a sense of indulgence with nutritional value. When selecting peaches, opt for those that are firm yet slightly soft to the touch, indicating ripeness. Store them at room temperature until ripe, then transfer them to the refrigerator.

Raspberries add a vibrant color and tangy flavor to this cake. Known for their antioxidant properties, raspberries are a healthy addition to any dessert. When choosing raspberries, look for plump, firm berries with a deep red color. These delicate fruits should be used fresh or can be frozen; ensure they are carefully washed and dried before use to prevent mold.

Common Mistakes to Avoid

  • Overmixing the batter: This can lead to a dense cake rather than a fluffy one. Mix until ingredients are just combined.
  • Using unripe fruit: Unripe peaches or raspberries may not yield the sweetness expected. Always choose ripe, flavorful fruit.
  • Not greasing the pan properly: A well-greased pan ensures the cake releases easily. Use butter or baking spray generously.
  • Ignoring room temperature ingredients: Cold ingredients can affect the mixing process. Let eggs and dairy come to room temperature before using.
  • Not preheating the oven: Always preheat your oven to the correct temperature to ensure even baking.
  • Using the wrong baking pan size: Different pan sizes can affect baking times and results. Make sure to use the size specified in the recipe.
  • Neglecting to cool the cake properly: Allowing the cake to cool too quickly can cause it to crack. Let it cool in the pan for a few minutes before transferring.
  • Not tasting the batter: Always do a quick taste of your batter for seasoning and sweetness before baking, as it can affect your final cake.
  • Skipping the glaze: The raspberry glaze not only adds flavor but also enhances the cake’s appearance. Always include it for the best presentation.
  • Forgetting to check for doneness: Always use a toothpick or cake tester in the center to ensure the cake is fully baked before removing it from the oven.

Essential Techniques

One key technique in cake making is proper creaming of the butter and sugar. This step incorporates air, yielding a light and fluffy texture. To master this, ensure your butter is at room temperature and cream it with the sugar until it appears light in color and fluffy.

Another important technique is folding in the fruit. This gently incorporates the fruit without deflating the batter, preserving the cake’s lightness. Use a spatula to fold carefully, rotating the bowl as you go; this method keeps the batter airy while distributing the fruit evenly.

Pro Tips for Perfect Juicy Peach Raspberry Cake

1. For enhanced flavor, consider marinating the fruit in a bit of sugar for 30 minutes before incorporating it into the batter.

2. Experiment with adding spices like cinnamon or nutmeg to the batter for extra depth of flavor.

3. Keep your eggs and butter at room temperature for best mixing results; they’ll combine more smoothly.

4. Ensure that you do not open the oven door frequently while baking, as this can cause the cake to sink.

5. If you prefer a layered cake, consider making two thinner layers instead of one thick one for easier assembly and serving.

6. Allow the cake to cool completely before glazing to avoid the glaze melting into the cake.

Variations and Adaptations

Regional variations of this cake may use locally available fruits, such as blackberries or strawberries, instead of raspberries. Each variant brings its unique flavor while maintaining the essence of the recipe.

Seasonal adaptations can be achieved by incorporating spices like pumpkin pie spice in the fall or citrus zest in the winter for brightness. These variations offer exciting twists on the classic cake.

For those with dietary restrictions, this cake can be easily modified. Substitute traditional flour with gluten-free alternatives for a gluten-free version, or use coconut oil instead of butter for a dairy-free adaptation.

Serving and Presentation Guide

To effectively plate your Juicy Peach Raspberry Cake, consider using a decorative serving plate. Slice the cake into even pieces and arrange them in a circular shape, placing a mint leaf or extra berries on top for a pop of color. Watercoloring effects can be achieved by drizzling additional raspberry glaze on the plate beside each slice.

Traditional accompaniments may include vanilla ice cream or a dollop of whipped cream to enhance the dessert. For modern flair, consider a scoop of sorbet or a sprinkle of edible flowers for garnish.

Wine and Beverage Pairing

When deciding on a wine pairing, a light and fruity rosé complements the flavors of the cake beautifully, enhancing the fruity notes without overwhelming the palate. Opt for a sparkling wine if you prefer a fizz, as it also accentuates the freshness of the dessert.

For non-alcoholic alternatives, consider iced tea with a hint of lemon or a refreshing homemade lemonade. These beverages help cleanse the palate and carry through the fresh fruit flavors of the cake.

Storage and Shelf Life

To store this cake, wrap it tightly in plastic wrap and place it in an airtight container. When stored this way, it can last for about 3-4 days at room temperature or up to a week in the refrigerator.

If you notice any signs of spoilage, such as mold or an off-smell, it’s best to discard the cake. When reheating, ensure you do so gently in the microwave or toaster oven to retain moisture.

Make Ahead Strategies

If you’re preparing this cake in advance, you can bake the cake layers a day or two ahead. Wrap them well and store in the refrigerator until you’re ready to glaze and serve.

Consider preparing the raspberry glaze ahead of time as well; store it in a sealed container in the fridge. Just warm it slightly before drizzling over the cake for a fresh presentation.

Scaling Instructions

If you wish to half the recipe, simply reduce all ingredients proportionally. For doubling or tripling, adjust the ingredient amounts accordingly, but watch your baking time as larger cakes may take longer to bake than indicated in the recipe.

When scaling, also ensure your baking pans can accommodate the increased quantity, as different sizes may require precise timing adjustments to achieve even baking.

Nutritional Deep Dive

This cake’s macros primarily come from the sugar content and fruit, with a moderate calorie count. When portioned correctly, it can fit into a balanced diet while satisfying your sweet tooth.

Vitamin and mineral content is enhanced through the addition of peaches and raspberries, each contributing beneficial nutrients like fiber and antioxidants which aid in overall health.

Dietary Adaptations

For gluten-free adaptations, substitute regular flour with a gluten-free blend, keeping the measurements consistent. This ensures that the cake still rises and maintains its structure.

Dairy-free alternatives can be easily made by using almond milk and coconut oil in place of regular milk and butter. This version still retains the flavor while being suitable for those with lactose intolerance.

Troubleshooting Guide

If your cake comes out too dry, it could be due to overmixing or baking for too long. Always keep an eye on your cake towards the end of the bake time to avoid this issue.

Finding your cake too sweet? Adjust the sugar content next time and consider adding a pinch of salt to balance flavors.

Recipe Success Stories

Many readers reported delightful results when they shared their take on the Juicy Peach Raspberry Cake, highlighting how incorporating fresh local ingredients really elevated the flavors. These community feedback stories have inspired even more variations and unique adaptations.

Some bakers shared creative tips such as topping the cake with fresh fruit before serving, adding an extra burst of freshness while enhancing its aesthetic appeal.

Frequently Asked Questions

Can I use frozen peaches or raspberries?
Frozen fruit can be used, though it may release more moisture into the batter; ensure to adjust the baking time accordingly to account for added liquidity.

How can I know when my cake is done?
Insert a toothpick into the center, and if it comes out clean or with a few moist crumbs, your cake is done. If the batter sticks, give it a few more minutes in the oven.

Can I substitute other fruits?
Absolutely! Try incorporating other fruits like strawberries, blueberries, or even a mix for a delicious variation while keeping the same ratios.

How should I store leftovers?
Wrap the cake in plastic wrap and store in an airtight container to keep it fresh for several days. Alternatively, slice and freeze portions for longer storage.

Is this cake suitable for dietary restrictions?
Yes! The recipe can be easily modified to accommodate gluten-free and dairy-free diets with appropriate substitutions.

How do I prevent the bottom from burning?
Line your baking pan with parchment paper and don’t open the oven door too many times while baking.

What can I serve with this cake?
This cake pairs beautifully with vanilla ice cream, whipped cream, or a flavorful sorbet to complement the peach and raspberry flavors.

How do I enhance the raspberry flavor in the glaze?
Consider adding more fresh raspberries or a splash of raspberry extract to deepen the flavor in your glaze.

Can I make this cake ahead of time?
Yes! The cake layers can be baked in advance, wrapped tightly, and stored in the fridge until you’re ready to glaze and serve.

What variations can I try?
The possibilities are endless! Try adding nuts, chocolate chips, or swapping fruits based on the season for a unique twist.

Additional Resources

To further enjoy peach and raspberry desserts, check out our collections of summer recipes, including peach cobbler and raspberry parfaits, both of which celebrate these delightful fruits.

For tips on mastering cake baking techniques, visit our guides on mixing, folding, and layering to enhance your baking skills in the kitchen.

Join the Conversation

We invite you to share your creations and tips on social media, tagging your photos with our hashtag to join our community of enthusiastic bakers. Your feedback can inspire others on their baking journeys!

The Recipe

Juicy Peach Raspberry Cake

Serves: 8

Prep Time: 20 mins

Cook Time: 40 mins

Total Time: 1 hour

Kitchen Equipment Needed

  • Mixing bowls
  • Cake pan (9-inch)
  • Electric mixer
  • Spatula
  • Measuring cups and spoons

Ingredients

  • 2 cups all-purpose flour
  • 1 ½ cups sugar
  • 1 cup unsalted butter, softened
  • 4 large eggs
  • 1 cup peach puree (fresh or canned)
  • 1 cup fresh raspberries
  • 2 tsp baking powder
  • ¼ tsp salt
  • 1 tsp vanilla extract
  • Raspberry glaze for topping

Directions

  1. Preheat your oven to 350°F (175°C) and grease your cake pan.
  2. In a mixing bowl, cream together the butter and sugar until light and fluffy.
  3. Beat in the eggs one at a time, mixing well after each addition.
  4. Add the peach puree and vanilla extract, mixing until smooth.
  5. In another bowl, whisk together the flour, baking powder, and salt.
  6. Gradually add the dry ingredients to the wet mixture, mixing until just combined.
  7. Gently fold in the raspberries, ensuring they are evenly distributed without crushing them.
  8. Pour the batter into the prepared cake pan and level the top with a spatula.
  9. Bake in the preheated oven for 35 to 40 minutes, or until a toothpick comes out clean.
  10. Allow the cake to cool in the pan for 10 minutes before transferring to a wire rack to cool completely.
  11. Once cooled, top with raspberry glaze before serving.

Recipe Notes

  • For a richer flavor, you can add a dash of almond extract along with the vanilla.
  • Be creative with the glaze; you can substitute with other berries for different flavors.

Create Your Own Pineapple Coconut Dream Cake Delight Today!

Pineapple Coconut Dream Cake: A Tropical Paradise for Your Taste Buds

⚖️
Difficulty
Medium

⏲️
Prep Time
30 mins

🕒
Cook Time
45 mins

⏱️
Total Time
1 hr 15 mins

🍽️
Servings
12 servings

The Pineapple Coconut Dream Cake is a delightful dessert that transports you straight to a tropical paradise. With its luscious layer of pineapple paired with creamy coconut, this cake is perfect for any occasion. The sweet, juicy pineapple enhances the rich flavors of coconut, while a light, fluffy cake provides the ideal base, making every bite a heavenly experience. This cake not only pleases the palate but also delights the senses with its vibrant colors reminiscent of sandy beaches and palm trees.

When you cut into the Pineapple Coconut Dream Cake, the moisture seeps out, filling the room with an irresistible aroma. The combination of the sweet, tangy pineapple and the nutty profile of the coconut creates a flavor explosion that is simply unforgettable. Whether you’re celebrating a special event or just indulging in a slice after a long day, this cake offers a taste of sunshine no matter the season.

Quick Recipe Highlights

  • Flavor Profile: The bright flavors of pineapple combined with the creamy sweetness of coconut create a refreshing and irresistible taste experience.
  • Texture: The cake has a moist and fluffy texture, while the frosting is creamy and smooth, providing a delightful contrast.
  • Aroma: Expect a tropical aroma that wafts through your kitchen, thanks to the fresh pineapple and rich coconut.
  • Visual Appeal: This cake boasts a gorgeous golden hue with a garnish of toasted coconut flakes and pineapple slices, making it a stunning centerpiece for any gathering.
  • Skill Level Needed: This recipe is accessible for bakers of all skill levels, making it a great choice for both novices and seasoned cooks.
  • Special Equipment: A round cake pan and an electric mixer are recommended for optimal results, ensuring the cake rises beautifully.

Recipe Overview

  • Difficulty Level: Although this Pineapple Coconut Dream Cake requires multiple steps, careful following of the instructions will yield a stunning cake that is well worth the effort.
  • Category: This cake is perfect as a dessert or a sweet treat for brunch, making it versatile for various meal occasions.
  • Cuisine: The recipe is influenced by tropical culinary traditions, especially drawing from Hawaiian flavors, which celebrate the use of pineapple and coconut.
  • Cost: The ingredients are generally affordable, making this recipe a budget-friendly choice for your baking adventures.
  • Season: Perfect for summer gatherings and celebrations, this cake embodies the essence of sunshine and warmth.
  • Occasion: Ideal for birthdays, baby showers, and potlucks, this cake is sure to impress your guests.

Why You’ll Love This Recipe

The Pineapple Coconut Dream Cake not only delivers a fabulous taste but also an exciting texture that can awaken your senses. The combination of fluffy cake with creamy frosting and chunks of real pineapple creates an experience that feels indulgent yet refreshing. It’s a treat that can highlight any celebration, providing a delightful tropical shortcut from the everyday dessert routine.

One of the standout benefits of this recipe is its convenience. The preparation steps are straightforward, allowing anyone to bring a touch of tropical bliss to their kitchen with minimal fuss. Gathering fresh ingredients and assembling them takes no time, and the bake time allows you to focus on other tasks or simply enjoy the pleasant baking aroma wafting through your home.

Nutritiously, the inclusion of pineapple adds a dose of vitamins, while coconut provides healthy fats. Together, they not only enhance the flavor but also contribute to a more balanced treat. This cake is an invitation to indulge without the guilt, showcasing how desserts can combine taste and nutrition beautifully.

Moreover, this cake shines when it comes to social settings. Imagine serving this creation at a gathering, where its colorful appearance and tropical aroma captivate everyone. It encourages conversations around sweet memories associated with summer, vacations, and sunny beaches, making it an excellent conversation starter.

Cost-effectiveness is another asset of this recipe. With easily sourced ingredients that often fit into a standard grocery budget, you can whip up this delightful cake without breaking the bank. Plus, the satisfaction gained from creating this treat in your own kitchen adds to its appeal, making it an accessible option for all.

Historical Background and Cultural Significance

The roots of the Pineapple Coconut Dream Cake can be traced back to the tropical islands, where pineapple and coconut thrive. Both ingredients have long been primary commodities in Hawaiian culture, symbolizing abundance and hospitality. These tropical flavors have crossed cultural boundaries, becoming popular across various cuisines globally.

Culturally, the cake represents a celebration of summer, often associated with luaus and beach parties. Its creation speaks to the joy of sharing a piece of tropical indulgence with friends and family, fostering connections amidst the spirit of fun and relaxation.

Over time, the recipe has evolved, incorporating various techniques and flavor elements based on regional adaptations. Some have introduced layers of cream cheese frosting for an added tang, while others prefer lighter whipped cream variations to enhance the cake’s airy texture.

Regional variations of this cake can include different fruits or nuts, adjusted based on what is locally available or seasonally ripe. In some coastal cities, macadamia nuts might be added for a delightful crunch, showcasing how versatile and loved this cake has become in global baking traditions.

Ingredient Deep Dive

Pineapple: Pineapple brings a proprietary sweetness and a vibrant tropical flavor to the cake. Rich in vitamin C and manganese, it promotes digestion and offers antioxidant benefits. When selecting pineapple, choose fresh, firm fruits with a sweet aroma. To store, keep intact at room temperature; once cut, refrigerate in an airtight container.

Coconut: Coconut provides a delicious nutty taste that complements the pineapple perfectly. It contains healthy fats, which can contribute to better heart health. Opt for unsweetened shredded coconut for the best flavor and texture. Store it in a cool, dark place, and using it soon after purchasing will ensure maximum freshness.

Common Mistakes to Avoid

  • Not properly measuring ingredients: Accuracy in measuring flour and sugar is vital for achieving the right texture in your cake.
  • Using warm eggs: Ensure your eggs are at room temperature for better emulsification with the wet ingredients, resulting in a fluffier cake.
  • Overmixing the batter: Overmixing can lead to a dense cake, so mix until just combined to keep it light and airy.
  • Misjudging baking time: Always check your cake a few minutes before the suggested time, as ovens can vary in temperature.
  • Not adjusting the recipe for altitude: If you live at a high altitude, adjustments in flour and liquid can help ensure proper baking results.
  • Skipping the cooling process: Allow your cake to cool completely before frosting to prevent the frosting from melting off.
  • Underestimating ingredient substitutions: Using alternatives without considering their properties can alter the final product, so make informed choices.
  • Not enough pineapple: Ensure you are using sufficient pineapple for flavor; this is crucial for the cake’s tropical identity.

Essential Techniques

Whipping Egg Whites: This technique is essential for creating a light and airy cake. Start with clean, dry beaters and whip the egg whites until soft peaks form. Avoid overwhipping, which can lead to a dry texture. The goal is to create volume and support for the cake structure.

Creaming Butter and Sugar: This foundational technique cream is crucial for incorporating air into your cake batter. Begin with room-temperature butter and sugar, mixing until the color lightens and the mixture becomes fluffy. Look for a pale, creamy texture; this indicates sufficient air has been incorporated, contributing to the cake’s rise.

Pro Tips for Perfect Pineapple Coconut Dream Cake

– Use fresh, ripe pineapple for the best sweetness and flavor; canned options can lack the brightness.
– Consider toasting shredded coconut for added depth and a delightful crunch in your finished cake.
– Always preheat your oven to ensure even baking throughout.
– Let the cake layers cool completely before layering and frosting to maintain structural integrity.
– Frosting works best when the cake is chilled, making it easier to achieve a smooth finish.
– For added tropical flair, top with maraschino cherries or slices of fresh pineapple.
– Ensure all your ingredients, especially dairy and eggs, are at the same temperature before mixing for the best emulsion.
– Enhance the flavor by adding a splash of coconut extract in the batter for more coconut goodness.

Variations and Adaptations

Regional variations often feature distinct flavor profiles; consider using passion fruit or mango puree for a tropical twist. Seasonal adaptations can involve fresh berries for summer gatherings, integrating local ingredients to make each version unique. For dietary modifications, substituting gluten-free flour can cater to gluten-sensitive guests without compromising flavor.

Flavor variations could include chocolate coconut layers or lemon zest for added brightness. Texture modifications might involve creating a layer of cream cheese frosting for contrast or integrating nuts for crunch. Presentation alternatives could involve a simple dusting of powdered sugar for a classic look, or a lavish drizzle of coconut cream for a more extravagant appearance.

Serving and Presentation Guide

When plating your Pineapple Coconut Dream Cake, consider using a cake stand for elevation and drama. Garnish with toasted coconut flakes and strategically placed pineapple slices for a stunning visual. Pair with whipped cream as a side for a fluffy contrast, and serve cool for the best flavor experience.

For modern suggestions, consider serving with a tropical fruit salad or a scoop of coconut ice cream to complement the flavors. Maintain attention to portion control by slicing into equal pieces, ensuring each serving contains a delightful mix of cake, frosting, and pineapple.

Wine and Beverage Pairing

To enhance your dining experience with Pineapple Coconut Dream Cake, consider pairing it with a light and fruity wine, such as a Riesling or Moscato, which complements the tropical flavors. For a non-alcoholic option, a sparkling lemonade or ginger beer can provide refreshing effervescence.

Coffee lovers may enjoy a well-brewed vanilla latte alongside the cake, as the richness of the coffee balances out the sweetness of the dessert. Remember, when serving, it’s beneficial to keep drinks cool to balance the warmth of the baked goods.

Storage and Shelf Life

To keep your Pineapple Coconut Dream Cake fresh, store it in an airtight container at room temperature for up to three days. If you need to keep it longer, refrigeration will extend the shelf life to about a week. Always look for signs of spoilage, such as a change in texture or odors.

For freezing, slice the cake and wrap each piece tightly in plastic wrap, followed by foil. This ensures that it remains sealed and fresh, allowing for up to three months of quality storage. To reheat, let it thaw in the fridge overnight; you can revive its moisture by wrapping it in a damp paper towel during reheating.

Make Ahead Strategies

To streamline your preparation, bake and cool the cake layers one day in advance. Wrap them in plastic wrap and store in the refrigerator to lock in moisture. Frosting can also be made ahead of time; just ensure it’s stored correctly to prevent drying out.

When you’re ready to assemble, allow the layers to come to room temperature for the best spreadability. Remember that adding fresh components such as fruit or whipped cream right before serving will enhance the overall presentation and taste.

Scaling Instructions

When halving the recipe, make sure to adjust the pan size accordingly to maintain even baking times. Doubling or tripling allows for a larger gathering—just ensure you have a sufficiently big mixing bowl and ample space in your oven.

Timing modifications may be necessary; larger cakes usually require an extended baking time, while smaller batches will cook quicker. Take care to adjust based on your oven’s heat distribution for optimal results.

Nutritional Deep Dive

The Pineapple Coconut Dream Cake yields ahead in a macro breakdown of carbohydrates, primarily from sugar and flour, and healthy fats derived from coconut. Incorporating pineapple adds valuable vitamin C and dietary fiber, while the cake remains a delightful treat when enjoyed in moderation.

A closer look at micronutrients reveals potassium and magnesium present in the pineapple, alongside beneficial nutrients from coconut’s healthy fat profile. For those watching their dietary intake, it’s important to consider portion sizes to enjoy this indulgence responsibly while still benefiting from the key nutrients.

Dietary Adaptations

Making the Pineapple Coconut Dream Cake gluten-free is achievable by swapping regular flour for gluten-free flour mixes. For a dairy-free option, use coconut milk and vegan butter in your frosting for a completely dairy-free version.

These adaptations allow more individuals to enjoy this wonderful cake while tailoring it to specific dietary needs, providing a delicious alternative without sacrificing flavor or texture. Adjusting sugar content can also appeal to low-carb and keto dieters, allowing more people to indulge in this tropical dessert.

Troubleshooting Guide

If your cake turns out too dense, assess whether you overmixed the batter or added too much flour. To fix flavors that seem off-balance, consider adjusting sweetness by adding a bit of salt or an acidic element like lemon juice to elevate the taste.

Equipment challenges can arise when using an unfamiliar oven; keep a close eye on your cake, testing frequently to avoid overbaking. Ingredient substitutions like using different fats (such as oil instead of butter) can change texture; ensure that any swaps balance out with the other elements in the recipe.

Recipe Success Stories

Community feedback about the Pineapple Coconut Dream Cake highlights its ability to create joyful memories and satisfy a wide range of taste preferences. Many readers love sharing their variation successes, using different fruit combinations or unique frostings that offer creative alternatives.

Adaptation stories often inspire others to experiment with this recipe, leading to newfound family favorites during the summer months. Recipe reviews showcase how this cake has become a staple at festive gatherings, with many sharing photography tips that highlight its beautiful layers and textures.

Frequently Asked Questions

Q: Can I make this cake gluten-free?

A: Yes, you can easily swap the flour for a gluten-free blend, ensuring the cake remains equally delightful.

Q: Can I use canned pineapple instead of fresh?

A: Canned pineapple can be used, but ensure it’s well-drained to prevent excess moisture in the cake.

Q: How do I store leftovers?

A: Store leftover cake in an airtight container at room temperature for up to three days or refrigerate for longer shelf life.

Q: Can I freeze the cake?

A: Yes, wrap individual slices tightly in plastic wrap and foil for up to three months in the freezer.

Q: What can I use instead of eggs?

A: Replace each egg with a quarter cup of unsweetened applesauce or a flaxseed meal equivalent for a vegan option.

Q: Can I add nuts to the recipe?

A: Absolutely! Chopped macadamia or walnuts can be added for texture and flavor.

Q: Why is my cake dense?

A: Density can result from overmixing the batter or using the wrong flour measurement, so ensure you mix just until combined and measure accurately.

Q: What frosting works best with this cake?

A: Cream cheese frosting pairs beautifully, while whipped cream can add a light touch to the finished cake.

Q: How long does this cake last in the fridge?

A: When properly stored, it can last up to one week in the refrigerator without losing quality.

Q: Can I bake this cake in a different pan type?

A: Yes, baking in a bundt pan or cupcakes is feasible, but baking times will vary, so monitor the cake carefully.

Additional Resources

For those eager to explore further, consider trying related recipes such as tropical fruit salads or coconut macaroons. Technique guides focusing on mixing methods and frosting techniques can be extremely useful as well.

Ingredient information specific to fruits and nuts can add to your expertise when making future desserts. Additionally, equipment recommendations for cake baking will assist beginners in creating perfect cakes every time, along with seasonal variations that inspire creativity in your baking endeavors.

Join the Conversation

We encourage you to share your baking experiences with Pineapple Coconut Dream Cake on social media. Tagging us with your photos helps build a community of dessert lovers eager to swap tips and celebrate creativity in the kitchen. Your recipe reviews can not only inspire others but also refine what makes this treat truly special.

Feel free to contribute your unique variations, along with any suggestions based on your experience. We’d love to see how this tropical delight comes to life in your home and brings joy to your table!

The Recipe

Pineapple Coconut Dream Cake

Serves: 12 servings

Prep Time: 30 mins

Cook Time: 45 mins

Total Time: 1 hr 15 mins

Kitchen Equipment Needed

  • Round cake pans (2)
  • Mixing bowl
  • Electric mixer
  • Rubber spatula
  • Cooling rack

Ingredients

  • 2 cups all-purpose flour
  • 1 ½ cups granulated sugar
  • 1 cup coconut milk
  • 1 cup crushed pineapple (drained)
  • ½ cup unsweetened shredded coconut
  • ½ cup unsalted butter, softened
  • 3 large eggs
  • 1 ½ tsp baking powder
  • 1 tsp vanilla extract
  • ½ tsp salt

Directions

  1. Preheat the oven to 350°F (175°C) and grease the cake pans.
  2. In a mixing bowl, cream butter and sugar together until light and fluffy.
  3. Add eggs one at a time, mixing well after each addition. Stir in the vanilla.
  4. In a separate bowl, whisk together the flour, baking powder, and salt.
  5. Combine the dry ingredients with the wet mixture, alternating with the coconut milk, until blended.
  6. Fold in the crushed pineapple and shredded coconut gently.
  7. Divide the batter evenly into the prepared cake pans and smooth the tops.
  8. Bake for 30-35 minutes or until a toothpick comes out clean.
  9. Let the cakes cool in pans for 10 minutes before transferring to a wire rack.
  10. Once cooled, frost with your choice of frosting and decorate as desired.

Recipe Notes

  • For extra flavor, consider adding a splash of coconut extract to the batter.
  • Ensure all ingredients are at room temperature before starting for optimal mixing.
  • This cake can be made a day in advance; wrap the layers in plastic wrap after cooling to maintain moisture.

Irresistible Mini Chocolate Peanut Butter Pies Everyone Will Love

Irresistible Mini Chocolate Peanut Butter Pies: Indulge in a Bite-Sized Delight

⚖️
Difficulty
Easy

⏲️
Prep Time
20 mins

🕒
Cook Time
10 mins

⏱️
Total Time
30 mins

🍽️
Servings
12 mini pies

Chocolate and peanut butter is a classic combination that tantalizes taste buds and brings smiles all around. These Irresistible Mini Chocolate Peanut Butter Pies are not only delightful treats but also a perfect way to indulge your sweet tooth in a manageable portion. Each bite bursts with rich chocolate flavor complemented by a creamy peanut butter filling, making these pies an absolute favorite for parties, gatherings, or just a treat for yourself.

Picture this: you’re hosting friends for a dinner party, and you want to impress them with a unique dessert. These mini pies fit the bill perfectly—with their deliciously layered flavors and stunning presentation, they’re sure to be a talking point. Plus, the sweet aroma of chocolate paired with nutty peanut butter wafting through your kitchen is an experience you wouldn’t want to miss.

Quick Recipe Highlights

  • Flavor Profile: Each mini pie is a delightful mix of sweet chocolate and creamy peanut butter, creating a flavor explosion.
  • Texture: These pies feature a crispy chocolate crust, a smooth and creamy peanut butter filling, and a silky chocolate ganache topping.
  • Aroma: The intoxicating smell of melting chocolate, combined with the nutty scent of peanut butter fills the air as you prepare the pies.
  • Visual Appeal: Their charming, petite size makes them cute and photogenic, perfect for serving on a dessert platter.
  • Skill Level Needed: This straightforward recipe is suitable for all skill levels, making it easy for anyone to recreate.
  • Special Equipment: All you need is a muffin tin, a mixing bowl, and some measuring cups.

Recipe Overview

  • Difficulty Level: With its simple steps and forgiving nature, this recipe is ideal for novices and experienced bakers alike.
  • Category: This dessert falls under the ‘Sweet Treats’ category, perfect for satisfying any sugar cravings!
  • Cuisine: These pies take inspiration from American desserts, with a rich history of combining chocolate and peanut butter.
  • Cost: This recipe is budget-friendly, requiring easily accessible ingredients that cost around $10.
  • Season: These little pies can be enjoyed year-round; however, they’re especially popular during holidays and parties.
  • Occasion: Ideal for birthday celebrations, potlucks, BBQs, or as a special after-dinner treat.

Why You’ll Love This Recipe

  • Taste and texture appeal: The combination of smooth and crunchy textures coupled with a rich flavor profile makes every bite of these mini pies an enjoyable experience.
  • Convenience and preparation benefits: Quick to whip up and requiring minimal kitchen tools, you can have these ready in no time!
  • Nutritional advantages: While indulgent, the peanut butter provides protein and healthy fats, making these pies a guilt-free treat—if enjoyed in moderation.
  • Social and entertaining value: These mini dessert pies are easily shareable and are guaranteed to impress guests at any gathering.
  • Cost-effectiveness and accessibility: With inexpensive and readily available ingredients, these mini treats will not break the bank.

Historical Background and Cultural Significance

  • Origin story: Chocolate and peanut butter first exploded onto the dessert scene through candy bars, capturing hearts and inspiring countless recipes.
  • Cultural importance: In American culture, this duo has become a beloved classic, shaping dessert menus and holiday tables.
  • Evolution of the recipe: Over the years, the combination has evolved from simple candy bars to intricate desserts, including pies and cheesecakes.
  • Regional variations: Mini chocolate peanut butter pies are enjoyed across the United States, with each region adding their unique twist.

Ingredient Deep Dive

  • Chocolate: Essential in many desserts, chocolate’s rich flavor and antioxidant properties make it a beloved ingredient. Look for high-quality chocolate to ensure the best flavor and meltability. Store chocolate in a cool, dark place, and keep it away from moisture.
  • Peanut Butter: With a history that dates back to ancient cultures, peanut butter is not only tasty but also packed with protein. Always opt for natural varieties without added sugars or oils for a healthier option. Store it in a cool part of your pantry, and consider refrigeration if the oil separates.

Common Mistakes to Avoid

  • Using low-quality chocolate can result in a less flavorful pie. Always choose good quality chocolate for the best taste.
  • Overmixing the peanut butter filling can lead to a less creamy texture. Mix just until smooth and combined.
  • Not allowing the chocolate ganache to cool properly might result in it melting the peanut butter filling. Be patient!
  • Skipping the refrigeration step can cause the pies to lose their shape; always chill them for the best results.
  • Using the wrong sized muffin tin can alter the cooking time; ensure you use a standard muffin tin for this recipe.
  • Not measuring ingredients accurately can lead to undesirable outcomes. Always double-check your measurements!
  • Using creamy peanut butter instead of chunky can change the texture. Stick to what the recipe calls for unless you prefer a crunchy version.
  • Serving the pies too warm can make them messy. Allow them to cool before serving for a better presentation.

Essential Techniques

  • Melting chocolate: Crucial for achieving that silky ganache, melt chocolate carefully using a double boiler or microwave. Stir frequently to avoid burning.
  • Mixing fillings: Combine peanut butter with cream cheese/sugar until smooth. This ensures a creamy texture that holds well in the crust.

Pro Tips for Perfect Mini Chocolate Peanut Butter Pies

  • For a more intense chocolate flavor, consider adding cocoa powder to the crust.
  • Incorporate a pinch of sea salt into the filling for a subtle flavor contrast.
  • Use a food processor for a uniform and finely crushed crust.
  • Decorate with crushed peanuts or mini chocolate chips on top for added texture and flavor.
  • Experiment with flavored peanut butter (like chocolate or honey) for a unique twist.
  • Allow the pies to set overnight in the refrigerator for enhanced flavors.
  • Sprinkle flaky sea salt on top before serving to elevate the flavor profile.
  • Use silicone muffin cups for easy removal without damaging the pies.

Variations and Adaptations

  • Regional variations: Add spices like cinnamon or nutmeg to infuse additional warmth into the taste.
  • Seasonal adaptations: Consider adding pumpkin or peppermint flavors for fall or winter holiday versions.
  • Dietary modifications: Substitute ingredients for gluten-free or vegan alternatives, such as almond flour and plant-based butter.
  • Flavor variations: Incorporate coffee or espresso powder for a mocha twist in flavor.
  • Texture modifications: Add layers of whipped cream or a drizzle of caramel for texture contrast.
  • Presentation alternatives: Use different molds or individual serving cups for an eye-catching presentation.

Serving and Presentation Guide

  • Plating techniques: Arrange mini pies on a beautiful dessert platter, spacing them evenly.
  • Garnishing ideas: Use fresh berries or additional crushed peanuts for a pop of color.
  • Traditional accompaniments: Pair with whipped cream or vanilla ice cream for a classic complement.
  • Modern serving suggestions: Serve with a scoop of gelato for a gourmet experience.
  • Temperature considerations: These pies taste best chilled, so ensure they’re properly set before serving.
  • Portion control tips: Each mini pie is perfectly sized, allowing guests to indulge without overdoing it.

Wine and Beverage Pairing

  • Wine pairings: Pair these pies with a rich port or dessert wine that will complement the chocolate flavor.
  • Non-alcoholic alternatives: Chocolate milk or iced coffee can provide refreshing options alongside the pies.
  • Coffee/tea pairings: A dark roast coffee or a cup of chai tea balances the sweetness beautifully.
  • Temperature considerations: Ensure any accompanying drinks are served alongside the pies to maintain the perfect experience.
  • Serving suggestions: Offer drinks in chilled glasses for a refreshing contrast against the creamy pies.

Storage and Shelf Life

  • Storage methods: Refrigerate in an airtight container to keep them fresh.
  • Temperature requirements: Best stored below 40°F to preserve texture and flavor.
  • Container recommendations: Use a shallow, wide container to avoid squishing the top of the pies.
  • Signs of spoilage: Check for odd aromas or textures; discard if noticed.
  • Reheating instructions: Best served cold; avoid reheating as it may ruin the texture.
  • Freezing guidelines: These pies freeze well; wrap tightly and consume within a month for best results.

Make Ahead Strategies

  • Prep timeline: Prepare the crust and filling a day in advance to save time on the day of serving.
  • Storage between steps: Chill filling until ready to assemble for the best consistency.
  • Quality impact assessment: Pies can be made ahead of time without sacrificing quality when properly stored.
  • Assembly tips: Assemble just before serving for the freshest taste.
  • Reheating guidelines: Serve chilled; if using frozen pies, thaw in the refrigerator overnight before serving.
  • Fresh element additions: Add whipped cream or fresh fruit right before serving for that just-made freshness.

Scaling Instructions

  • Halving the recipe: Simply divide all ingredients measurements by two, and adjust baking time accordingly!
  • Doubling or tripling: Increase ingredients proportionally but be mindful of the muffin tin used.
  • Equipment adjustments: Use additional pans to accommodate extra batter if doubling the recipe.
  • Timing modifications: Keep an eye on the mini pies as they may bake faster or slower when scaled.
  • Storage considerations: Ensure you have enough airtight containers if making multiple batches!

Nutritional Deep Dive

  • Macro breakdown: Each mini pie contains a balance of carbohydrates, protein, and fats; perfect for energy without excess.
  • Micronutrient analysis: Ingredients provide essential vitamins and minerals, making these treats more than just a dessert.
  • Health benefits: The peanut butter adds protein, aiding in muscle recovery and satiety.
  • Dietary considerations: Low glycemic index elements make these pies suitable for moderate consumption.
  • Portion analysis: Each mini pie is portion-controlled, helping to manage calorie intake effectively.
  • Weight management tips: Enjoy as a part of a balanced diet to satisfy cravings without overindulgence.

Dietary Adaptations

  • Gluten-free: Substitute regular flour with almond or oat flour for a gluten-free option.
  • Dairy-free: Use dairy-free cream cheese and coconut cream for the filling if avoiding dairy.
  • Vegan: Opt for plant-based ingredients, ensuring all components are suitable for vegans.
  • Low-carb: Replace traditional sugar with a low-carb sweetener for calorie-conscious individuals.
  • Keto: Utilize almond flour and a sugar-free sweetener for a keto-friendly version.
  • Paleo: Focus on natural ingredients like honey for sweetening and coconut oil for the crust.
  • Low-FODMAP: Stick to low-FODMAP ingredients while maintaining flavor integrity.
  • Other specific diets: Adjust recipes accordingly to ensure they meet the necessary dietary restrictions.

Troubleshooting Guide

  • Texture issues: If the filling is runny, consider adding more cream cheese or letting it chill longer.
  • Flavor balance: If overly sweet, a pinch of salt can enhance the overall flavor, balancing the sweetness.
  • Temperature problems: If chocolate ganache doesn’t set, allow it to cool longer at room temperature.
  • Equipment challenges: If using a non-stick muffin tin, run a buttered knife around the edges to release.
  • Ingredient substitutions: Keep in mind that swapping ingredients may affect taste and texture; use caution.
  • Timing concerns: Always check for doneness; if uncertain, a toothpick test is reliable in assessing cooked fillings.

Recipe Success Stories

  • Community feedback: Many bakers report back with enthusiastic reviews, raving about how simple and delicious these mini pies are.
  • Variation successes: Readers have found success in adding unique flavor variations, such as coconut or almond.
  • Adaptation stories: Some have tailored the recipe to fit specific dietary needs while maintaining great taste.
  • Reader suggestions: Feedback includes tips for adding spices or using different nuts for the crust.
  • Photography tips: When sharing your own, natural lighting and clean backgrounds make these pies look even more tempting!

Frequently Asked Questions

Can I make these mini pies ahead of time?

Absolutely! These mini pies can be prepared a day or two in advance. Just make sure to keep them refrigerated for the best flavor and texture.

What type of chocolate is best for this recipe?

For the best flavor, use semi-sweet or dark chocolate. High-quality chocolate gives a richer taste and a smooth consistency.

Can I freeze these mini pies?

Yes! These pies freeze well. Just make sure to store them in an airtight container, and consume them within a month for the best quality.

What’s the best way to remove the mini pies from the tin?

Allow the pies to cool completely, then gently run a butter knife around the edges before removing them from the tin. Silicone muffin cups also work wonders for easy removal!

Is there a way to make this recipe healthier?

Indeed! You can substitute traditional sugar with natural sweeteners, use dark chocolate, and opt for healthier nut butter options.

Can I use a different nut butter?

Yes, feel free to use almond butter or cashew butter for a twist on the filling. Adjust sweetness accordingly, as some nut butters can be sweeter than others.

What can I serve with these pies?

They pair wonderfully with whipped cream, fresh fruits like strawberries, or a scoop of ice cream for an extra treat!

How long do these mini pies last?

When stored properly in the fridge, they can last up to a week. Make sure to keep them in an airtight container.

Can I make them without baking?

Yes! You can create no-bake versions by using a pre-made crust and chilling the filling before serving.

Are there gluten-free options available?

Absolutely! You can use gluten-free graham crackers or nuts for the crust to make these mini pies gluten-free.

What if I’m allergic to peanuts?

If you have a peanut allergy, you can substitute with sunflower seed butter or any other nut-free alternative.

Additional Resources

  • Related recipes: Explore other chocolate desserts such as chocolate mousse or brownies for more indulgent options.
  • Technique guides: Learn about the best chocolate melting techniques to enhance your baking skills.
  • Ingredient information: Discover more about the health benefits of peanut butter and alternatives to diversify your cooking!
  • Equipment recommendations: Invest in a quality muffin tin and a versatile set of measuring cups for seamless baking.
  • Seasonal variations: Discover recipes that highlight seasonal fruits to incorporate in your mini pies for refreshing tastes!

Join the Conversation

We love to hear how your baking adventures turn out! Share your version of these Irresistible Mini Chocolate Peanut Butter Pies on social media using #MiniChocolatePeanutButterPies. Don’t forget to include your tips and tricks for customization!

Have a favorite variation? Drop a comment below, and let’s inspire others together! Your feedback and stories inspire us and others in the community.

The Recipe

Irresistible Mini Chocolate Peanut Butter Pies

Serves: 12 mini pies

Prep Time: 20 mins

Cook Time: 10 mins

Total Time: 30 mins

Kitchen Equipment Needed

  • Standard muffin tin
  • Mixing bowls
  • Measuring cups and spoons
  • Double boiler or microwave-safe bowl
  • Rubber spatula

Ingredients

  • 1 ½ cups chocolate crumbs (from crushed cookies or graham crackers)
  • ½ cup melted butter
  • 1 cup creamy peanut butter
  • 8 oz cream cheese, softened
  • ½ cup powdered sugar
  • 1 cup chocolate chips
  • ¼ cup heavy cream

Directions

  1. Preheat the oven to 350°F (175°C).
  2. In a mixing bowl, combine the chocolate crumbs and melted butter. Mix until all crumbs are coated.
  3. Press the crumb mixture into the bottom of each muffin tin cup, forming a crust. Bake for 10 minutes and let it cool.
  4. In another bowl, beat the peanut butter, softened cream cheese, and powdered sugar until smooth and creamy.
  5. Spoon the peanut butter mixture into each cooled crust, filling to the top.
  6. In a small saucepan, heat the heavy cream until just hot, then remove from heat and add chocolate chips. Stir until smooth to create the ganache.
  7. Pour the ganache over the peanut butter filling in each pie.
  8. Refrigerate for at least one hour until set before servings.

Recipe Notes

  • For a gluten-free option, choose gluten-free cookies or graham crackers.
  • Add a sprinkle of flaky sea salt on top for an extra flavor dimension.
  • Feel free to substitute the chocolate ganache with whipped cream if you prefer a lighter topping.

Delicious Applesauce Muffins Recipe for a Perfect Breakfast Treat

Mouthwatering Applesauce Muffins: The Perfect Cozy Treat

⚖️
Difficulty
Easy

⏲️
Prep Time
15 mins

🕒
Cook Time
20 mins

⏱️
Total Time
35 mins

🍽️
Servings
12 muffins

Are you looking for a delightful snack that combines the comforting flavors of apples with the warmth of fresh baked goods? Look no further than these Mouthwatering Applesauce Muffins. Bursting with natural sweetness and a hint of spice, these muffins are a perfect companion for coffee in the morning or as an after-school treat. Each bite is tender and rich, promising to envelop your senses with the sweet, fruity aroma that fills your kitchen as they bake.

What makes these muffins stand out is not just their flavor, but their versatility. Whether you enjoy them plain, topped with cinnamon sugar, or even with a drizzle of honey, you’ll find that these muffins can adapt to any palate. The health-conscious will appreciate that they’re made with applesauce, which not only provides moisture and reduces the need for additional fats, but also packs a nutritional punch. These muffins become an instant favorite for family gatherings or a cozy brunch, making your kitchen feel like home.

Quick Recipe Highlights

  • Flavor Profile: Sweet and spiced with cinnamon, these muffins feature the delicious taste of fresh apples tempered with nutty accents.
  • Texture: Soft and moist, the muffins have a light crumb that melts in your mouth, enhanced by occasional bits of apple.
  • Aroma: A warm blend of cinnamon and baked apples wafts through your home, inviting everyone to indulge.
  • Visual Appeal: Golden-brown tops sprinkled with sugar create an enticing look that draws everyone in.
  • Skill Level Needed: Anyone can make these muffins; they require minimal skills, making them perfect for beginners.
  • Special Equipment: Just need standard baking utensils, like a muffin tin and mixing bowls, to whip up this recipe.

Recipe Overview

  • Difficulty Level: These muffins are easy to prepare, making them an excellent choice for novice bakers or kids eager to help in the kitchen.
  • Category: Perfect for breakfast, snacks, or desserts, these muffins fit a variety of meal times.
  • Cuisine: Rooted in Western baking traditions, these muffins reflect a love for seasonal fruits and simple, gratifying foods.
  • Cost: With affordable ingredients like flour, sugar, and applesauce, this recipe can be made without breaking the bank.
  • Season: Ideal for fall when apples are in peak season, but delicious any time of year.
  • Occasion: Great for cozy gatherings, family breakfasts, or even as festive treats during holidays.

Why You’ll Love This Recipe

First and foremost, the taste and texture of these Mouthwatering Applesauce Muffins are irresistible. Rich in flavor with just the right hints of cinnamon and nutmeg, each muffin provides a moist, tender bite that fills the air with a delightful aroma that makes your mouth water. The addition of applesauce not only enhances sweetness but adds a pleasantly fruity background that keeps you coming back for more.

The convenience of this recipe cannot be overstated. With a quick prep time of just 15 minutes, these muffins can be in the oven and baking away while you finish your morning coffee or finish some weekend chores. The straightforward directions mean you can whip them up on a whim, making them a go-to recipe for last-minute gatherings or morning snacks.

Nutritionally, this recipe leverages applesauce as a substitute for oil or butter, significantly cutting down on unhealthy fats. Applesauce is rich in antioxidants, and when combined with whole wheat flour options, these muffins become a healthful snack or breakfast choice, allowing you to enjoy treats without the guilt.

On the social front, these muffins are perfect for sharing. Whether it’s a morning coffee with friends or an afternoon snack for kids, they bring people together. Preparing these muffins can become a family event, encouraging kids to get involved and learn valuable cooking skills, which also makes them excited to enjoy what they’ve helped create.

Last but not least, these muffins are incredibly cost-effective. With pantry staples like flour and sugar alongside simple, inexpensive ingredients such as apples and applesauce, you can create a batch of delightful muffins without a hefty price tag. Their accessibility means everyone can enjoy this comforting treat, regardless of budget.

Historical Background and Cultural Significance

The origins of muffins can be traced back to medieval times, with various interpretations across cultures. The applesauce muffin in particular showcases a distinct American twist, integrating the abundance of apples in the U.S. into traditional muffin recipes. This makes the muffin not just sweet but rich in cultural heritage and collective memories of home baking.

In many households, applesauce muffins became a staple during harvest seasons when apples were plentiful, giving families a warm, nutritious option to utilize the fruit. This recipe encapsulates the essence of comfort food, often associated with gatherings and family time—inviting nostalgia with every bite.

Over time, the muffins have evolved, with many taking on different variations reflecting regional fruits and spices. Adaptations have included adding nuts, changing sweeteners, or even incorporating savory elements, showcasing the creative freedom of home baking while maintaining the core principles of simplicity and warmth.

Today, applesauce muffins are celebrated for their versatility in flavor and texture, finding their place in cafes and home kitchens alike. They remain a symbol of nourishment, comfort, and the joyful act of sharing food with loved ones.

Ingredient Deep Dive

Applesauce serves as the star ingredient in this recipe. Traditionally, it has been used in many cuisines worldwide as a natural sweetener and binder. Nutritionally, applesauce is low in calories yet high in fiber and vitamin C, making it a heart-healthy option that adds natural moisture to baked goods without the need for oil. When selecting applesauce, opt for unsweetened varieties for better control over sweetness levels in your muffins. Proper storage involves keeping it sealed in the refrigerator, where it can last for about a week, or freezing it for longer-term use.

Next on the list is all-purpose flour. This staple ingredient is fundamental in most baking, providing structure and texture. Depending on your dietary needs, whole wheat flour can be a fantastic substitute—it offers more fiber and nutrients than its refined counterpart. When selecting flour, check for freshness to ensure the best results in your baking. Store flour in a cool, dry place, and it can last for several months if sealed correctly.

Common Mistakes to Avoid

  • Using too much applesauce: While it’s a great ingredient, using more than the recipe calls for may make the muffins overly dense.
  • Not measuring accurately: Baking is a science, and inaccurate measurements can lead to undesirable textures.
  • Overmixing the batter: This can lead to tough muffins. Mix until just combined for the best outcome.
  • Skipping the resting time: Allowing the batter to rest before baking can yield better results.
  • Not checking for doneness: Use a toothpick test to ensure muffins are baked through without being overcooked.
  • Using old, stale ingredients: Freshness matters, especially for baking powder and flour.
  • Not using liners or greasing the pan: This can cause muffins to stick, making removal difficult.
  • Cooling muffins incorrectly: Removing them from the pan too soon can cause them to crumble.

Essential Techniques

Properly creaming butter and sugar is vital to achieving a light and fluffy batter. The process aerates the mixture, leading to muffins that rise perfectly. To master this, beat the mixture on medium speed until it lightens in color and increases in volume. Visual cues include a pale color and light texture.

Correctly folding ingredients is also crucial. When combining wet and dry ingredients, gently fold rather than stir. This technique ensures that air pockets are maintained for a lighter muffin. If the batter looks slightly lumpy, that’s okay—mix until just combined to avoid overworking the gluten in the flour.

Pro Tips for Perfect Mouthwatering Applesauce Muffins

Tip 1: For enhanced flavor, consider adding spices like nutmeg or ginger to the batter—this will elevate the warmth and richness of the muffins.

Tip 2: Use a muffin scoop for uniform portions, ensuring even baking and a professional look.

Tip 3: Experiment with mix-ins like walnuts or dried cranberries to add a unique texture and flavor twist.

Tip 4: Adjust the sweetness by adding a touch of maple syrup or honey, allowing for custom sweetness levels.

Tip 5: For a crunchy topping, sprinkle a mixture of sugar and cinnamon over the muffins before baking.

Tip 6: Allow muffins to cool in the pan for a few minutes before transferring them to a cooling rack, which maintains structure and prevents them from becoming soggy.

Tip 7: Use fresh, seasonal apples if you want to incorporate chunks into the batter for added moisture and taste.

Tip 8: Consider adding a glaze made from powdered sugar and milk for an irresistible finish.

Variations and Adaptations

One regional variation of the applesauce muffin includes the addition of pumpkin puree, offering a seasonal touch with a spicy flavor profile. Alternatively, substituting part of the flour with almond flour adds a nutty flavor while also enhancing the texture for gluten-free enthusiasts.

Seasonal adaptations can significantly change these muffins; for example, incorporating grated zucchini in the summer provides moisture and a nutritional boost!

If you’re looking for dietary modifications, replacing traditional sugars with stevia or monk fruit sweeteners can cater to those who prefer low-sugar options without sacrificing the delightful taste of these muffins.

Texture modifications can be achieved by adding oats to the batter, which gives a heartier bite and boosts the nutritional content.

When it comes to presentation alternatives, consider cupcake liners in festive colors or sprinkling powdered sugar on top just before serving for an attractive finish.

Serving and Presentation Guide

When it comes to plating these muffins, simplicity is key. Place them on a decorative plate, allowing their golden-brown tops to shine. You could sprinkle a dash of cinnamon sugar on top for added flavor and visual appeal.

Garnishing ideas include serving with a dollop of whipped butter or cream cheese spread for an indulgent treat. Accompany them with fresh fruit or a small bowl of honey for a picturesque presentation.

Traditional accompaniments such as coffee or tea enhance the cozy vibe while modern serving suggestions could include a small glass of milk or yogurt for a refreshing contrast.

Temperature considerations are essential; these muffins are best served warm, straight from the oven or lightly reheated. Portion control can be managed by serving them in pairs for brunch-style gatherings.

Wine and Beverage Pairing

When pairing wine, consider a light Riesling or a crisp Chardonnay, complementing the fruity flavors of the muffins beautifully. For those who prefer non-alcoholic beverages, apple or ginger tea would also resonate nicely with the muffin’s flavors.

If coffee is your choice, a smooth cappuccino offers a balanced contrast, providing rich, warm notes that match the muffin’s sweet profile perfectly.

Temperature matters; serve wines chilled while enjoying warm muffins for a delightful tasting experience.

Storage and Shelf Life

To keep your muffins fresh, store them in an airtight container at room temperature for up to three days or in the refrigerator for longer shelf life. Ensure they are completely cooled before sealing to prevent moisture accumulation.

If you want to extend their usability, consider freezing the muffins. Wrap each muffin tightly in plastic wrap and then place them in a zip-top freezer bag. They can last in the freezer up to three months. Reheat in the oven at 350°F for a quick revival that restores their just-baked goodness.

Make Ahead Strategies

Prepping these muffins ahead of time is easy! You can mix dry ingredients the night before and store them in an airtight container. In the morning, simply add the wet ingredients and bake.

During storage between steps, keeping fresh fruit out until you’re ready to mix will ensure they don’t spoil early. Quality is impacted less when ingredients are merged right before baking.

For assembly tips, prepare the batter and let it chill in the fridge for about half an hour; this can enhance the flavor depth and texture.

Reheating these muffins is straightforward; a quick 10-15 seconds in the microwave or a few minutes in the oven can bring back their delightful warmth.

Scaling Instructions

Should you wish to halve the recipe, it’s as simple as cutting each ingredient in half while ensuring that baking time remains generally the same.

Doubling or tripling the recipe for a crowd will require adjustments to your mixing bowl size but not necessarily the baking time—just be cautious of how full the pan is to avoid overflow.

For equipment adjustments, ensure you have enough muffin tins to accommodate larger batches. Using multiple pans may require staggering baking so that they come out perfectly timed.

Storage considerations should account for the volume you produce; larger batches may need divided storage for optimal freshness.

Nutritional Deep Dive

A macro breakdown shows these muffins pack a decent protein punch if made with whole grains, while the carbohydrates come from healthy sources like apples and oats.

On the micronutrient side, expect a boost in fiber and vitamin C from the applesauce while incorporating whole grains adds B vitamins and iron—important nutrients for overall health.

Health benefits of this recipe include heart-healthy fats from any optional nuts, while also facilitating digestive health through the soluble fiber contributed by apples and oats.

Dietary considerations are easily customizable with various flour choices, allowing those on specific diets to adjust the ingredients according to their nutritional needs.

This muffin recipe can serve as an excellent snack for weight management, providing a filling option that satisfies sweet cravings without excessive calories.

Dietary Adaptations

For gluten-free adaptations, utilize almond flour or a gluten-free flour blend to maintain texture while accommodating dietary restrictions.

To create a dairy-free version, substitute any dairy components like butter or milk with plant-based alternatives without losing flavor.

Vegan adaptations can be made by replacing eggs with a flaxseed or chia seed mixture, ensuring the muffins rise properly while maintaining plant-based ingredients.

Low-carb options are possible by using almond flour combined with sugar substitutes to keep carb counts down.

Keto enthusiasts can also utilize erythritol to substitute sugar, creating a muffin that fits well within carbohydrate limits.

Paleo followers will appreciate this recipe with simple substitutions, omitting refined sugars and grains in favor of natural sweeteners and coconut-based flours.

Low-FODMAP followers should consider optional ingredients carefully, picking those compatible to maintain gut health.

Troubleshooting Guide

If you encounter texture issues where muffins are too dense, ensure proper measurement and avoid overmixing the batter. Incorporating more baking powder may help lift them as well.

In terms of flavor balance, if your muffins taste too bland, consider increasing the amount of cinnamon or adding vanilla extract; these flavors meld beautifully with apples.

Temperature problems such as muffins not baking through may be a sign of oven inconsistencies; using an oven thermometer can help ensure your baking temperature is accurate.

Equipment challenges like not having a muffin pan can easily be addressed by using cases made from parchment paper or silicone molds.

Ingredient substitutions can lead to unwanted flavors; always make one change at a time to evaluate impact before further alterations.

Timing concerns, especially during busy mornings, can be alleviated by preparing a batch of muffins to freeze ahead of time for a quick breakfast solution.

Recipe Success Stories

Community feedback often highlights how versatile these muffins can be—everyone seems to love the ability to add their own twist! From nuts to dried fruits, adaptations offer a personal touch that makes the recipe feel unique.

Variation successes are often shared, with readers posting photos of their beautifully baked muffins that spark inspiration for others to try new things.

Adaptation stories tell of families coming together to create their versions of these muffins, leading to bonding moments over the delicious aroma floating from the kitchen.

Recipe reviews consistently point to how easy and foolproof the process is, encouraging even novice bakers to step into the kitchen confidently.

Photography tips emphasize the golden color and texture; capturing the muffins in their rustic state highlights their homemade charm and invites others to indulge.

Frequently Asked Questions

Q1: Can I use fresh apples instead of applesauce?

Absolutely! You can replace applesauce with finely chopped fresh apples. Just ensure you adjust the moisture by adding a tablespoon or two of additional liquid if needed.

Q2: How do I keep my muffins moist?

To maintain moisture, avoid overbaking and make sure to store them in an airtight container. Adding ingredients like yogurt can also provide extra moisture.

Q3: Can I make these muffins ahead of time?

Yes, you can prepare the batter in advance and keep it in the fridge. However, it’s best to bake the muffins fresh; if baked ahead, they can be stored for up to three days.

Q4: What’s the best way to reheat muffins?

The best way to reheat muffins is by placing them in a preheated oven at 350°F for about 5-10 minutes or microwaving them for about 10 seconds.

Q5: Can I add nuts or chocolate chips?

Yes! Feel free to add nuts, chocolate chips, or any other mix-ins to elevate your muffins. Just make sure not to overdo it to keep the batter balanced.

Q6: How can I make these muffins vegan?

You can make these muffins vegan by substituting eggs with a flaxseed meal mix or applesauce, and using non-dairy milk instead of regular milk.

Q7: What are the signs that the muffins are done baking?

The muffins are finished when the tops are golden and a toothpick inserted into the center comes out clean or with a few moist crumbs attached.

Q8: Can I freeze the muffins?

Yes, muffins freeze wonderfully! Wrap them tightly in plastic wrap and store them in a freezer-safe bag. They can last for up to three months.

Q9: How should I store leftover muffins?

Store leftover muffins in an airtight container at room temperature for up to three days or in the refrigerator to extend their freshness.

Q10: Can I substitute other fruits in this recipe?

Certainly! You can replace applesauce with other fruit purees like pumpkin, banana, or pear for different flavor profiles while maintaining the recipe’s integrity.

Additional Resources

For those inspired by this recipe, check out related recipes on my blog that highlight autumn flavors, such as pumpkin bread or spiced pear muffins. These seasonal ideas are not only comforting but also change your palettes throughout the year. Furthermore, explore technique guides on mixing and baking cakes to refine your baking skills.

Ingredient information for apples can enhance your understanding of seasonal fruits and their various usages in baking. For those looking to invest in kitchen tools, recommended equipment lists can help elevate your baking experience, making the process more enjoyable and efficient.

Seasonal variations can always breathe new life into classic recipes. Consider fresh cranberries for a winter delight or fresh strawberries in the summer—adaptability is key to keeping your baking exciting!

Join the Conversation

I’d love to hear from you! Share your photography and adaptations of these Mouthwatering Applesauce Muffins on social media. Tag me in your posts, and don’t hesitate to leave comments about your experiences along with any variations you’ve tried. Engaging with community tips can enrich our baking journeys, allowing us to refine this delightful recipe together. Join in the conversation and inspire others to whip up these tasty creations!

The Recipe

Mouthwatering Applesauce Muffins

Serves: 12 muffins

Prep Time: 15 mins

Cook Time: 20 mins

Total Time: 35 mins

Kitchen Equipment Needed

  • Muffin tin
  • Mixing bowls
  • Measuring cups and spoons
  • Whisk or mixer
  • Spatula

Ingredients

  • 1 cup applesauce
  • 1/2 cup sugar
  • 1/3 cup vegetable oil
  • 2 large eggs
  • 1 1/2 cups all-purpose flour
  • 1 teaspoon baking soda
  • 1 teaspoon cinnamon
  • 1/2 teaspoon salt
  • 1/2 teaspoon vanilla extract
  • Optional: 1/2 cup chopped walnuts or chocolate chips

Directions

  1. Preheat the oven to 350°F (175°C) and line a muffin tin with paper liners.
  2. In a large bowl, mix together the applesauce, sugar, oil, and eggs until well combined.
  3. In a separate bowl, whisk together the flour, baking soda, cinnamon, and salt.
  4. Gradually add the dry ingredients to the wet mixture, stirring gently until just combined. Do not overmix.
  5. If desired, fold in chopped walnuts or chocolate chips.
  6. Fill each muffin cup about two-thirds full with batter.
  7. Bake for 20-25 minutes, or until a toothpick inserted in the center comes out clean.
  8. Allow muffins to cool in the pan for 5 minutes before transferring to a wire rack to cool completely.

Recipe Notes

  • Feel free to substitute applesauce with any fruit puree for varied flavor.
  • For an extra crunch, top the muffins with a sprinkle of cinnamon sugar before baking.
  • Your choice of mix-ins can personalize these muffins; consider fresh berries or other nuts.

Delicious Blackberry Raspberry Heaven Cheesecake Recipe for Dessert Lovers

Blackberry Raspberry Heaven Cheesecake: A Decadent Delight

⚖️
Difficulty
Medium

⏲️
Prep Time
25 mins

🕒
Cook Time
60 mins

⏱️
Total Time
85 mins

🍽️
Servings
8

Indulge in the sheer bliss of our Blackberry Raspberry Heaven Cheesecake, a delightful dessert that celebrates the flavors of summer berries. The luscious combination of sweet blackberries and tart raspberries layered atop a rich, creamy cheesecake will whisk you away to a fruity paradise with every bite. This cheesecake is perfect for special occasions or simply as a treat for yourself, and its captivating colors promise to impress everyone at the table.

From the first forkful, you’ll experience the exciting contrast of the creamy cheesecake base and the vibrant berry topping. As the flavors meld, the sweetness of the blackberries balances beautifully with the refreshing tartness of the raspberries, creating a harmonious flavor profile that dances on your palate. The crunch from the graham cracker crust adds texture to each bite, making this dessert a truly satisfying experience.

Quick Recipe Highlights

  • Flavor Profile: The cheesecake showcases a perfect blend of creamy, sweet, and tart flavor notes that come from the fresh berries.
  • Texture: A smooth and creamy cheesecake filling sits on a crunchy graham cracker crust, topped with a silky berry compote.
  • Aroma: The enticing aroma of baked cream cheese combined with the bright, fruity scent of fresh berries enhances the overall experience.
  • Visual Appeal: The stunning contrast of the deep purple-blackberry and bright red-raspberry topping against the creamy white cheesecake makes for an eye-catching dessert.
  • Skill Level Needed: This recipe requires intermediate baking skills, but with careful attention to detail, it is manageable for home bakers.
  • Special Equipment: A springform pan is essential for this cheesecake to allow for easy removal and presentation.

Recipe Overview

  • Difficulty Level: This medium-difficulty recipe involves making both the cheesecake and the berry topping, requiring careful assembly and baking time.
  • Category: A decadent dessert perfect for special occasions, this cheesecake is especially popular at summer gatherings and holiday celebrations.
  • Cuisine: Drawing inspiration from classic American cheesecake, this recipe features fresh berries that highlight seasonal produce and local flavors.
  • Cost: With an approximate cost of $20, this cheesecake utilizes economical ingredients to create an impressive dessert.
  • Season: Best enjoyed during the warmer months when berries are in season, this cheesecake takes advantage of their peak flavor and availability.
  • Occasion: Whether it’s a birthday party, holiday gathering, or a simple family dinner, this cheesecake is sure to be the star of the show.

Why You’ll Love This Recipe

The rich and velvety taste of the Blackberry Raspberry Heaven Cheesecake is truly irresistible. Each slice offers a perfect balance of flavors, combining creamy, sweet, and tangy notes that made it a hit among friends and family. The topping not only enhances the taste but also provides a visually stunning element that makes every serving delightful. Additionally, the contrasting textures—the creamy filling, crunchy crust, and smooth fruit topping—create an engaging eating experience.

This cheesecake is remarkably convenient to prepare, allowing you to focus on enjoying quality time with friends or family. With minimal prep effort and a straightforward baking process, you can have this impressive dessert ready for any occasion. Letting the cheesecake chill overnight ensures that every slice has a perfectly set texture, making it easy to cut and serve!

From a nutritional standpoint, using fresh berries contributes not only to the flavor but also provides essential vitamins and antioxidants. Blackberries and raspberries are known for their health benefits and low-calorie counts. Incorporating these fresh fruits into your dessert provides a guilt-free way to indulge while enjoying the perks that come with them.

Socially, a beautifully crafted cheesecake brings people together. It’s the kind of dessert that sparks conversations and laughter, creating cherished memories during celebrations. The act of sharing such a delightful treat enhances the joy of your gatherings, making each moment more special.

Cost-effective yet elegant, this cheesecake is a great choice for entertaining. It utilizes basic ingredients that you might already have on hand, allowing you to create a lavish dessert without breaking the bank. The relatively low investment results in a stunning centerpiece that is sure to impress your guests.

Historical Background and Cultural Significance

The concept of cheesecake dates back to ancient Greece, where it was served to athletes during the first Olympic Games. This rich and satisfying dessert has evolved over centuries, blending various culinary traditions into what we recognize today. The American version, characterized by its creamy texture and use of cream cheese, rose in popularity during the 19th century. Incorporating berries into cheesecakes, particularly in the summer, became a popular method to enhance the dessert’s flavor profile.

Raspberry and blackberry cultivation can be traced back to indigenous cultures, symbolizing richness and vitality. These berries were highly regarded for their nutrition and medicinal properties. They have remained popular in many culinary traditions and are often incorporated into desserts, showcasing their versatility and flavor.

This recipe reflects the evolution of traditional desserts while embracing modern tastes. The combination of berries atop cheesecake captures the essence of seasonal eating, where fresh ingredients take center stage to elevate classic recipes and make them more relatable in contemporary kitchens.

Regional variations exist, with different cultures adding their local fruits or flavors. From the New York-style cheesecake to variations that include hints of chocolate or spices, each adaptation introduces unique characteristics while honoring the original dish’s spirit, allowing for endless creativity in your baking.

Ingredient Deep Dive

Blackberries, known for their dark, sweet flesh and tart flavor, are a staple in many kitchens. Rich in fiber and vitamins C and K, they are recognized for their antioxidant properties. When selecting blackberries, look for plump, shiny berries without any signs of mold or bruising. Store them in the refrigerator to maintain freshness, and use them within a few days. If fresh blackberries are unavailable, frozen options work well in this cheesecake, providing similar taste and texture.

Raspberries, often celebrated for their vibrant color and bright flavor, are another essential ingredient in this recipe. Low in calories yet high in nutrients, they provide a delightful tang that complements the sweetness of the cheesecake. Choose raspberries that are bright, firm, and free of blemishes. They can also be stored in the refrigerator and should be enjoyed soon after purchase for optimal freshness. For a twist on this recipe, you might experiment with frozen raspberries during the off-season.

Common Mistakes to Avoid

  • Not allowing the cream cheese to soften: Ensure your cream cheese is at room temperature before mixing to avoid lumps and achieve a smooth consistency.
  • Overmixing the filling: Mix just until combined to prevent over-aeration, which can cause the cheesecake to crack during baking.
  • Skipping the water bath: Baking the cheesecake in a water bath helps maintain moisture and promotes even cooking, reducing the risk of cracking.
  • Ignoring chilling times: Allow the cheesecake to chill sufficiently before slicing, as it needs time to set properly.
  • Using too much gelatin: If your recipe calls for gelatin, measure carefully to avoid a rubbery texture that detracts from the creamy filling.
  • Not preparing the crust correctly: Be sure to press the crust firmly into the bottom of the pan to create a stable base.
  • Inadequate cooling: Letting the cheesecake cool slowly in the oven after baking can prevent cracks and help maintain its shape.
  • Using stale ingredients: Always check the freshness of your baking ingredients, particularly dairy items like cream cheese and eggs.
  • Unnecessary oven opening: Avoid opening the oven door while the cheesecake bakes, as sudden temperature changes can lead to cracks.
  • Not tasting as you go: Always sample the filling and topping to ensure the right balance of flavors before baking.

Essential Techniques

Mastering the water bath technique is crucial for achieving a creamy cheesecake without cracks. This method involves surrounding your cheesecake pan with a larger pan filled with hot water, promoting even baking and preventing the sides from overcooking. To prepare, wrap the bottom of your springform pan with aluminum foil to prevent leaks. Make sure to keep an eye on the water level during baking, replenishing it if necessary.

Mixing ingredients properly is another key technique. When preparing your cheesecake filling, beat the cream cheese until smooth and free of lumps before adding other ingredients. Incorporate eggs one at a time, mixing gently to avoid over-aeration. Overmixing can introduce air bubbles, which might expand and cause the cheesecake to crack during baking. Observing the right consistency and ensuring all ingredients are mixed thoroughly helps achieve the perfect creamy texture.

Pro Tips for Perfect Blackberry Raspberry Heaven Cheesecake

1. **Use Room Temperature Ingredients**: For smoother batter, ensure that your cream cheese, eggs, and sour cream are at room temperature before mixing.

2. **Invest in a Good Pan**: A high-quality springform pan will help create a tightly sealed environment for your cheesecake, improving baking results.

3. **Cool Gradually**: After baking, turn off the oven and leave the door ajar with the cheesecake inside to cool gradually, minimizing the risk of cracking.

4. **Top with Fresh Berries**: For added freshness, consider topping your cheesecake with more fresh berries just before serving, enhancing both flavor and presentation.

5. **Plan Ahead**: Make the cheesecake a day in advance for the best flavor and texture; chilling overnight helps the flavors meld beautifully.

6. **Use a Knife to Cut**: Dip a sharp knife in hot water and dry it off between slices for clean cuts.

7. **Experiment with Flavors**: Don’t be afraid to mix in different flavors like lemon zest or vanilla extract for an added layer of complexity.

8. **Chill the Cheesecake**: Allow the cheesecake to chill for at least 4 hours or overnight for optimal texture and flavor development.

Variations and Adaptations

Regional variations of cheesecakes can offer exciting new flavors and textures. For instance, adding a hint of citrus zest, such as lemon or lime, can enhance freshness and balance the sweetness of the berries. Seasonal adaptations, such as substituting strawberries in the summer or pumpkin in the fall, keep your cheesecake experience interesting throughout the year.

Dietary modifications can also be made for gluten-free eaters by substituting regular graham crackers with gluten-free options. Dairy alternatives, such as using vegan cream cheese and plant-based whipped toppings, can accommodate those following a vegan diet. Texture modifications include opting for a no-bake cheesecake version or using mascarpone for a lighter filling.

For a unique twist, consider presenting the cheesecake in individual jars, allowing for stunning visuals and easy serving. Layering crushed graham crackers, filling, and berry compote creates a delightful dessert parfait that’s perfect for gatherings.

Serving and Presentation Guide

To present your Blackberry Raspberry Heaven Cheesecake beautifully, start by carefully removing it from the springform pan onto a decorative serving platter. Consider enhancing the visual appeal by garnishing with softened whipped cream, fresh mint leaves, or additional berries arranged artistically around the plate. For an elegant touch, you can dust the top with powdered sugar, creating a contrast against the smooth filling.

Temperature considerations are essential; serve the cheesecake chilled for the best flavor experience. This will help maintain its creamy texture, while whipping cream should also be chilled before using for garnishing to keep it stable. For portion control, cut slices evenly and consider offering smaller portions if serving alongside other desserts; a small slice of this rich cheesecake is often all you need!

Wine and Beverage Pairing

Pairing wines with your Blackberry Raspberry Heaven Cheesecake can elevate the dessert experience. A sweet Moscato or a ripe Riesling complements the fruity flavors beautifully, enhancing each bite. If you prefer something bolder, a light-bodied red like Pinot Noir can balance the richness of the cheesecake. For non-alcoholic options, a refreshing herbal tea, such as peppermint, or homemade lemonade can provide a delightful contrast and prevent the dessert from feeling heavy.

Consider serving coffee, particularly a mild, light roast, to create a contrast with the sweet flavors of the cake. Temperature is key; serve wines slightly chilled to ensure they harmonize perfectly with the cheesecake, maximizing your enjoyment.

Storage and Shelf Life

To keep your Blackberry Raspberry Heaven Cheesecake fresh, store it in the refrigerator covered with plastic wrap or foil. It will remain delicious for about 5-7 days. If you prefer to make it ahead, freezing is an option; wrap the cheesecake tightly and store it in an airtight container. When properly frozen, it can last up to three months. To defrost, place it in the refrigerator overnight for best results.

Signs of spoilage to watch for include an off odor, discoloration, or changes in texture, such as excessive moisture on the surface. Reheating cheesecake isn’t advisable, but you can enjoy it cold or at room temperature after chilling; just allow it to sit out for about 30 minutes before serving for the best dining experience.

Make Ahead Strategies

Preparing your Blackberry Raspberry Heaven Cheesecake in advance is an excellent strategy for time management. Start with the crust and filling, refrigerating or freezing them separately before assembling. Once built, it can be stored in the refrigerator for 1-2 days or frozen for longer storage. During assembly, be sure to incorporate any perishable toppings just before serving to maintain freshness.

Quality impact assessment is crucial; allowing the cheesecake to chill overnight enhances the flavors, resulting in a richer taste. When preparing ahead, ensure proper storage to prevent any loss in quality or flavor. For best results, serve the cheesecake within a few days of making it.

Scaling Instructions

When scaling your Blackberry Raspberry Heaven Cheesecake recipe, consider adjusting ingredient quantities proportionally. Halving is straightforward, while doubling or tripling might require using larger pans or additional baking time. A larger springform pan will accommodate more batter; thus, extend the baking time and check for doneness by inserting a toothpick into the center—the cheesecake should be set but still slightly jiggle in the middle.

When modifying your recipe, be mindful of storage considerations. A larger cheesecake may require more room in the refrigerator or freezer, so plan accordingly. This recipe is versatile and can easily adapt to various serving sizes without sacrificing flavor or texture.

Nutritional Deep Dive

The nutritional benefits of Blackberry Raspberry Heaven Cheesecake go beyond its delicious taste. A typical slice provides a balance of macros, with protein from the cream cheese and carbs from the crust and berries. Each serving can contribute beneficial vitamins and minerals, especially when made with quality ingredients.

A closer look into the micronutrient analysis reveals that the addition of blackberries and raspberries packs a hefty vitamin C punch and essential antioxidants. Paying attention to portion control is vital for those mindful of calorie intake; enjoying smaller slices can satisfy your sweet tooth while keeping calorie counts in check.

Dietary Adaptations

This cheesecake recipe is incredibly adaptable to meet various dietary needs. For gluten-free eaters, ensure to substitute regular graham crackers with gluten-free varieties. Those following a dairy-free or vegan diet can use plant-based cream cheese and substitute eggs with flaxseed meal mixed with water for binding.

If you’re looking for a low-carb or Keto option, consider using almond flour for the crust and artificial sweeteners in place of sugar. These adaptations maintain the essence of the dessert while catering to specific dietary preferences, making it an inclusive treat for everyone at your gatherings.

Troubleshooting Guide

Common texture issues arise from overmixing or underbaking. Adjust your mixing technique to achieve a smooth consistency without incorporating too much air. If the cheesecake appears too soft, extend the baking time slightly, checking for doneness without overcooking.

Certain flavor balances may need tweaking, especially during the customization process. If your cheesecake is too sweet, consider thawing the berries with a touch of lemon juice for added acidity, enhancing flavor complexity. Should you face ingredient substitutions, keep a close eye on moisture levels and baking times to ensure balance.

Recipe Success Stories

Feedback from our culinary community has been overwhelmingly positive, highlighting the delicious balance of flavors and easy preparation of this cheesecake. Many users have successfully adapted the recipe to showcase unique flavors, such as incorporating lemon zest or even swapping in different berries, leading to delightful results. Your personal story could inspire other home bakers, so don’t hesitate to share your variations and tips!

Photography tips are also encouraged; capturing this visually stunning dessert allows you to showcase your baking journey. Experiment with different angles and natural lighting to highlight the cheesecake’s colors and textures; a well-composed photo can inspire others to try this delicious recipe!

Frequently Asked Questions

Q: Can I use frozen berries in the cheesecake?
A: Yes, frozen berries work well in this recipe. Just ensure they are thawed and drained of excess liquid before using them in the topping.

Q: How can I prevent my cheesecake from cracking?
A: To avoid cracks, use the water bath method, ensure your ingredients are at room temperature, and avoid overmixing. Cooling the cheesecake slowly in the oven helps as well.

Q: Can I make this cheesecake dairy-free?
A: Absolutely! Substitute cream cheese with dairy-free alternatives and use vegan ingredients for the crust.

Q: How do I know when my cheesecake is done baking?
A: The cheesecake should be set around the edges but still have a slight jiggle in the center. It will continue to firm up as it cools.

Q: What should I do if I don’t have a springform pan?
A: If you don’t have a springform pan, any sturdy round cake pan can work, but be prepared for more difficulty in removing the cheesecake.

Q: How long can I keep leftovers?
A: Leftover cheesecake can be stored in the refrigerator for 5-7 days or properly wrapped in the freezer for up to three months.

Q: How should I store the cheesecake?
A: Cover the cheesecake tightly with plastic wrap or foil, ensuring no air can reach it to maintain freshness.

Q: Can I add other flavors to the cheesecake?
A: Yes, feel free to add vanilla extract, almond extract, or citrus zest to enhance the flavor of your cheesecake.

Q: Is this cheesecake suitable for freezing?
A: Yes, this cheesecake freezes well. Wrap it tightly and store it in an airtight container for optimal quality.

Q: How can I achieve a glossy berry topping?
A: To get a shiny fruit topping, you can heat fruit preserves and brush them over the fresh berries right before serving.

Additional Resources

For those eager to explore more delicious recipes, check out other variations of cheesecake, including traditional New York-style and fruit-infused cheesecakes. Technique guides that detail making a perfect graham cracker crust or mastering a no-bake cheesecake can further enhance your baking skills. Ensure to familiarize yourself with ingredient information regarding cream cheese and the best seasonal fruits to use in your upcoming creations. Additionally, equipment recommendations will help you select the right tools to elevate your experience in the kitchen.

Join the Conversation

We love hearing about your baking experiences! Share your Blackberry Raspberry Heaven Cheesecake creations on social media, and don’t forget to use our hashtag. Join our community discussions; we encourage you to post your photographs, reviews, and any modifications you’ve tried. Engaging with fellow bakers offers tremendous inspiration, and we celebrate your enthusiasm in trying new flavors and techniques. Your journey in creating this delightful cheesecake can inspire others to continue exploring the art of baking!

The Recipe

Blackberry Raspberry Heaven Cheesecake

Serves: 8

Prep Time: 25 mins

Cook Time: 60 mins

Total Time: 85 mins

Kitchen Equipment Needed

  • Springform pan
  • Mixing bowls
  • Electric mixer
  • Measuring cups and spoons
  • Spatula
  • Aluminum foil
  • Oven-safe pan for water bath

Ingredients

  • For the Crust: 1 ½ cups graham cracker crumbs, ½ cup unsalted butter (melted), ¼ cup sugar.
  • For the Filling: 24 oz cream cheese (softened), 1 cup sugar, 4 large eggs, 1 tsp vanilla extract, 1 cup sour cream.
  • For the Topping: 1 cup blackberries, 1 cup raspberries, ¼ cup sugar, juice of 1 lemon.

Directions

  1. Preheat the oven to 325°F (160°C). Grease the springform pan and set aside.
  2. Mix the graham cracker crumbs, melted butter, and sugar until well combined, then press into the bottom of the prepared pan.
  3. In a large bowl, beat cream cheese until smooth. Gradually add sugar and mix until well incorporated.
  4. Add eggs one at a time, mixing gently after each addition. Stir in vanilla and sour cream until smooth.
  5. Pour the filling over the crust and smooth the top. Place the springform pan into a larger pan and fill it with water halfway up the sides of the cheesecake pan.
  6. Bake for 60 minutes or until edges are set and the center is slightly jiggly. Turn off the oven and leave the cheesecake inside for an hour.
  7. Remove from the oven and let it cool completely before refrigerating for at least 4 hours or overnight.
  8. For the topping, combine blackberries, raspberries, sugar, and lemon juice in a saucepan over medium heat. Cook until the berries soften and juice is released, about 10 minutes. Cool before spreading on the cheesecake.
  9. Prior to serving, top the cheesecake with the berry mixture. Enjoy your Blackberry Raspberry Heaven Cheesecake!

Recipe Notes

  • Fresh berries are preferred but frozen can be used if thawed before topping.
  • For a firmer cheesecake, consider adding a tablespoon of cornstarch to the filling mixture.
  • This cheesecake can be made 1-2 days in advance for best results.

Delightful Southern Pineapple Orange Swirl Cheesecake Recipe You’ll Love

Refreshing Southern Pineapple Orange Swirl Cheesecake: A Burst of Tropical Flavor

⚖️
Difficulty
Medium

⏲️
Prep Time
30 mins

🕒
Cook Time
60 mins

⏱️
Total Time
90 mins

🍽️
Servings
8 servings

Indulge your senses with our Refreshing Southern Pineapple Orange Swirl Cheesecake, a delightful dessert that brings the sunshine of the South directly to your table. This luscious cheesecake combines the tropical flavors of pineapple and orange to create a beautifully swirled masterpiece. Every bite reveals a smooth, creamy texture coupled with the zestiness of citrus and the sweetness of the pineapple, making it the perfect finish to any meal. Whether you’re hosting a summer barbecue or celebrating a special occasion, this cheesecake is sure to impress your guests.

Not only is our Southern Pineapple Orange Swirl Cheesecake visually stunning, but it also captures the essence of summer in every bite. The vibrant yellows and oranges evoke the warmth of sunny days, while the rich, creamy filling offers a refreshing reprieve from heat. With a buttery graham cracker crust that provides a satisfying crunch, this dessert balances flavors and textures beautifully, making it a crowd-pleaser that will have everyone coming back for seconds.

Quick Recipe Highlights

  • Flavor Profile: Bursting with citrus flavors, this cheesecake features sweet pineapple and zesty orange tones, creating a harmonious blend that’s light and refreshing.
  • Texture: The creamy filling contrasts wonderfully with the crunchy graham cracker crust, delivering a delightful mouthfeel in every bite.
  • Aroma: Aromatic notes of fresh pineapple and bright orange will fill your kitchen, inviting loved ones to indulge.
  • Visual Appeal: The stunning orange and yellow swirls against the creamy white cheesecake create an eye-catching presentation that dazzles.
  • Skill Level Needed: A medium skill level is required; while preparing a cheesecake requires precision, it’s achievable for most home bakers.
  • Special Equipment: This recipe requires a springform pan for easy release and cooling, and an electric mixer for whipping the ingredients smoothly.

Recipe Overview

  • Difficulty Level: Though it might seem daunting, making this cheesecake is straightforward. The key is to keep an eye on the baking time to ensure it sets perfectly.
  • Category: Dessert, suitable for dinner parties, potlucks, or holiday gatherings.
  • Cuisine: Infused with Southern flavors, this cheesecake reflects influences from traditional American desserts using fresh fruits.
  • Cost: This recipe is affordable, with ingredients comprising common pantry items and fresh fruits, making it a cost-effective option.
  • Season: Great for summer and spring festivities, when pineapple and orange are in season, enhancing their freshness.
  • Occasion: Ideal for birthdays, barbecues, or any celebration needing a light yet indulgent dessert.

Why You’ll Love This Recipe

This Refreshing Southern Pineapple Orange Swirl Cheesecake is not just about taste; it’s an experience, capturing the essence of summer with every mile of deliciousness. The swirl of tropical-infused cheesecake speaks to both the eyes and palate, ensuring guests are mesmerized before taking their first bite. You’ll find the crisp citrus notes dance alongside the rich creaminess, offering a refreshing finish perfect after any meal.

Preparation benefits are significant, allowing you to make it ahead of time. The cheesecake needs to chill, meaning less last-minute fuss when it’s time to serve. So, you can put your feet up while enjoying the delightful anticipation of enjoying a beautifully swirled treat.

This cheesecake is not just a dessert; it’s a healthier option packed with the goodness of natural fruit flavors. Pineapple provides vitamins and enzymes that can aid digestion, while the orange zest brings a punch of vitamin C, making it a guilt-free indulgence.

Socially, this dessert serves as a centerpiece that inspires conversation at any gathering. Present it boldly, and watch friends and family delight in its unique flavors, spurring stories and memories. It’s sure to become a staple at your events, encouraging others to share their own twists on this classic.

Cost advantages abound since this recipe leverages fruit that’s often readily available, yet it provides an upscale feel. For a minimal investment, you craft an impressive dessert that rivals those found at high-end bakeries, giving you more value for your culinary efforts.

Historical Background and Cultural Significance

The story of cheesecake dates back thousands of years, but the Southern twist on this classic dessert began to emerge as fruit became a staple ingredient across the region. Each bite of the Refreshing Southern Pineapple Orange Swirl Cheesecake honors Southern heritage by showcasing local produce in a playful and delicious manner.

Culturally, this cheesecake aligns with the South’s love for celebration and hospitality. It pays homage to gatherings often centered around shared meals, reflecting a community spirit that defines Southern living. Its roots in indulgence and seasonal fruit merging not only satisfy sweet tooth cravings but also highlight the importance of fresh, flavorful ingredients.

Over the years, cheesecakes have evolved from simple recipes into artistic forms influenced by regional flavors. The infusion of citrus from the South aligns perfectly with the tradition of using what’s available in gardens, creating an exquisite treat that reflects homegrown hospitality.

Regional variations have sprouted over time influenced by what’s available across the nation. This Southern twist showcases the essence of home cooking, where each family may add their unique touches, from different citrus fruits to the addition of local nuts or berries, reflecting individual heritage and culinary instincts.

Ingredient Deep Dive

Pineapple: A tropical fruit rich in enzymes and vitamins, pineapple has a long-standing history in Southern cooking, playing a prominent role in dishes and desserts alike. When choosing pineapple for your cheesecake, opt for fresh, ripe ones for the best flavor and juiciness. Store any leftover pineapple in an airtight container in the refrigerator to preserve its texture and flavor.

Orange: Oranges bring brightness to this cheesecake, complementing the pineapple beautifully. High in vitamin C and bursting with flavor, oranges are vital in many culinary traditions. Select firm, heavy oranges with smooth skin for maximum juiciness, and store them at room temperature to maintain their sweetness. Consider using blood oranges for a twist in color and flavor!

Cream Cheese: The heart of any cheesecake, cream cheese contributes to the rich, dense texture that defines this dessert. This ingredient is not just delicious; it’s also a source of calcium and fat, providing richness to balance the acidity of the fruit. Choose full-fat cream cheese for the smoothest texture. Always allow it to soften at room temperature before use for easy mixing.

Graham Crackers: The classic crust component, graham crackers provide a sweet crunch that pairs exceptionally well with the creamy filling. Whole-wheat options are available for added nutritional benefits. When selecting graham crackers, look for varieties with minimal added sugar and natural ingredients, and store them in a cool, dry place to maintain their crunch.

Common Mistakes to Avoid

  • Overmixing the batter: This will incorporate too much air, resulting in cracks during baking.
  • Not allowing the ingredients to reach room temperature: Cold ingredients can cause a lumpy texture in your cheesecake.
  • Skipping the cooling phase: Rapid temperature changes can cause the cheesecake to crack, so gradual cooling is vital.
  • Using low-fat cream cheese: This can lead to a less creamy texture and can affect the flavor profile significantly.
  • Not lining the pan: Failure to line the springform pan can result in a frustrating removal process, leading to a crumbled cheesecake.
  • Baking too long: Overbaking can dry out the cheesecake, ruining its creamy texture.
  • Not chilling the cheesecake long enough: Allow it to set fully in the refrigerator for the best consistency and flavor.
  • Poor quality crust: A crust that’s too dry can lead to a disjointed texture; ensure it’s moist and cohesive.
  • Neglecting to swirl: A visually stunning swirl should not be overlooked—it adds both flavor and presentation.
  • Forgetting garnishes: Toppings can elevate the cheesecake presentation; don’t skip on coconut flakes or fresh fruits!

Essential Techniques

Baking a perfect cheesecake requires mastery of several techniques. One crucial skill is beating the cream cheese until smooth, which prevents lumps in your final product. Use an electric mixer on medium speed to ensure a silky consistency, avoiding overmixing that can create air pockets leading to cracks.

Pre-baking the crust is another critical step. This allows the crust to firm up, providing a sturdy base for your rich cheesecake filling. When mixing the crust, ensure the crumbs are coated evenly with butter to prevent dryness and ensure better flavor integration.

Swirling is an art that adds style to your cheesecake. It requires patience and precision. Use a skewer or knife to lightly swirl the fruit mixture into the cream cheese batter, creating a beautiful marbled effect. Avoid stirring too vigorously to maintain distinct layers within the cake, enhancing its visual appeal.

Cooling gradually is an essential technique. After baking, turn off the oven and crack the door, allowing the cheesecake to cool slowly, which minimizes the risk of cracking. Placing a bowl of water in the oven can introduce moisture, which further ensures a successful bake.

Finally, chilling is crucial after baking. Allow your cheesecake to sit in the refrigerator for at least four hours, preferably overnight, to achieve optimal texture and flavor development. This rest period allows the cheesecake to fully set and enables the flavors to meld beautifully.

Pro Tips for Perfect Refreshing Southern Pineapple Orange Swirl Cheesecake

Use fresh ingredients for the best flavor—fresh pineapple and orange zest enhance the cheesecake’s profile significantly.
Plan ahead—the cheesecake should chill for several hours, so don’t rush this step; make it the day before serving.
Experiment with flavors—try adding grated coconut or almond extract for variation.
Ensure even mixing—scrape the sides and bottom of the bowl frequently to integrate ingredients thoroughly.
Be patient during baking—open the oven only toward the end of baking to maintain consistent temperature.
Consider using room temperature ingredients to ensure a smoother texture and easier incorporation.
Garnish just before serving to maintain the freshness of toppings like fruit slices or whipped cream.
Serve chilled, allowing flavors to shine, and enjoy the creamy texture that is luscious and light.

Variations and Adaptations

This Southern Pineapple Orange Swirl Cheesecake can be adapted to suit various regional and seasonal preferences. Consider indulging in a tropical twist by incorporating mango or passion fruit into the swirl for an exotic flair. Alternatively, during the fall, apple or pumpkin puree could serve as a seasonal twist, introducing new flavors aligned with the autumn harvest.

For dietary modifications, a gluten-free crust can easily replace traditional graham crackers; simply use ground nuts or gluten-free cookie alternatives for a delicious foundation. Additionally, for a lower-calorie option, consider substituting Greek yogurt for some of the cream cheese, adding a slight tang while reducing fat.

Texture modifications could involve reducing the baking time slightly, leading to a creamier “no-bake” cheesecake style if you prefer a more custard-like consistency. Presentation can also be varied; consider pouring the fruit topping on top after baking for an elegant finish or using a ring mold for individual servings.

Bringing in different spices, such as cinnamon or nutmeg, can transform the flavor profile while providing a unique sensory experience during the holidays.

Serving and Presentation Guide

To serve this delicious cheesecake, focus on clean, elegant plating. Consider using a sharp knife warmed in hot water for neat slices, minimizing crumbling. Present the cheesecake on a colorful serving platter to enhance its visual appeal.

For garnishing, add fresh pineapple cubes or orange slices on top for a burst of color. Whipped cream, coconut flakes, or mint leaves can provide a creative touch, elevating the presentation.

Traditional accompaniments may include a drizzle of chocolate sauce or a scoop of vanilla ice cream, which can add a decadent touch. Modern serving suggestions could involve pairing with a lighter cold brew tea or a refreshing mint-infused lemonade for balance.

Mind the temperature since a chilled cheesecake is the most enjoyable. Allow it to sit for 10-15 minutes at room temperature before serving to let the flavors bloom more fully. Portion control is advisable; serve small slices, giving everyone a chance to explore the flavors without overindulging.

Wine and Beverage Pairing

When considering beverages to pair with your Refreshing Southern Pineapple Orange Swirl Cheesecake, opt for whites that can complement the fruit flavors. A chilled Riesling or Moscato can enhance the tropical notes while providing sweetness to balance the creaminess of the cheesecake.

Non-alcoholic alternatives, such as a sparkling citrus soda, can provide a refreshing complement that resonates with the lightness of the cheesecake. Additionally, iced tea with lemon or herbal infusions like peach or mint can further enhance the overall experience.

Coffee enthusiasts might prefer a light roast, offering a smooth, nutty base that pairs well with fruity desserts.

Always consider temperature, aiming to serve the cheesecake straight from the fridge alongside chilled beverages to enhance the refreshing experience.

Storage and Shelf Life

To maximize freshness, store any leftovers of your cheesecake in an airtight container in the refrigerator. When properly stored, it can last up to one week, maintaining its delightful texture and flavor.

For longer storage, freezing is an option. Wrap individual slices in plastic wrap, followed by aluminum foil to prevent freezer burn. When ready to eat, simply thaw in the refrigerator overnight for the best texture.

Signs of spoilage include a change in odor or a watery texture on the surface; when in doubt, it’s best to discard.

Reheating isn’t necessary, as serving the cheesecake cold enhances taste, but if you wish to warm it slightly, do so in small increments in the microwave to prevent warming the entire slice.

Make Ahead Strategies

Planning ahead is crucial for a smooth baking experience with this cheesecake. You can prepare the crust a day prior, ensuring it has ample time to cool fully and firm up before adding the cheesecake filling.

Consider assembling the cheesecake in the morning if serving later that day; it needs several hours to chill. This affords flexibility, allowing you to focus on creating an inviting atmosphere for your guests instead of last-minute kitchen duties.

Assess the quality impact of chilling overnight; the flavors meld beautifully and enhance upon resting, which can elevate the overall taste experience on serving.

When reassembling for serving, have fresh fruits ready to garnish, which can keep everything looking vibrant and fresh.

Scaling Instructions

To scale this recipe, consider whether you’d like to halve or double the ingredients based on your gathering size. For smaller portions, simply halve the ingredient quantities while maintaining the same prep and baking times.

If doubling, use a larger pan such as a 10-inch springform instead of the standard 9-inch, and you may need to increase baking time by about 10-15 minutes; always check for doneness visually.

Adjust kitchen equipment by using larger mixing bowls or multi-tasking during preparation to ensure thorough mixing without creating a mess.

Storing any excess cheesecake is straightforward; simply alter the container size based on batch size to maintain freshness.

Nutritional Deep Dive

From a nutritional standpoint, this cheesecake offers a balanced structure of macronutrients. Cream cheese provides a rich source of fats necessary for energy, while the crust offers carbohydrates to sustain satiety.

With fresh fruit takes center stage, pineapple contributes dietary fiber and essential vitamins, aiding digestion and providing benefits to overall health. Orange’s vitamin C content strengthens immunity, making each bite a potential health booster.

Micronutrient analysis reveals a balance of calcium from cream cheese, while the fruits introduce a spectrum of antioxidants beneficial for long-term health.

Portion control can be favorable, as the cheesecake allows you to indulge while maintaining moderation; enjoying a small slice can provide a satisfying experience without jeopardizing caloric intake.

For weight management, consider pairing this cheesecake with healthy sides like fruit salads that can enhance fullness while keeping your overall meal balanced.

Dietary Adaptations

For a gluten-free adaptation, simply replace the graham cracker crust with crushed gluten-free cookies or even a nut-based crust, maintaining delicious results without compromising texture.

Dairy-free alternatives can use cashew cream combined with coconut cream to achieve a similar density, providing a rich taste without dairy.

Vegan variations can be created by utilizing silken tofu blended with fruit puree, creating a delicious alternative that captures the essence of this cheesecake.

Low-carb and keto enthusiasts can skip the crust altogether, focusing on the cheesecake filling, replacing sugar with a suitable low-carb sweetener for sweetness.

Paleo adaptations can consider using honey as the sweetener while maintaining fresh fruit swirls for balancing texture and flavors.

For anyone following a low-FODMAP diet, limit the serving size or choose a lactose-free cream cheese to minimize discomfort while still enjoying the delightful dessert.

Troubleshooting Guide

If you face texture issues, ensure you are blending ingredients thoroughly—lumps often come from improperly mixed cream cheese; beat until smooth.

To balance flavor, adjusting sweetness is simple—taste the batter before baking and ensure the mixture aligns with your desired flavor profile, adding more sweetener as necessary.

Temperature problems can arise from overbaking—always monitor cheesecakes closely in the oven, and utilize a water bath technique to maintain even heat distribution.

Equipment challenges can involve your mixer; make sure to have enough mixing power to incorporate ingredients adequately without fatigue.

Ingredient substitutions can result in inconsistencies; ensure that any replacements align with the overall recipe—especially regarding moisture levels with cream cheese.

Timing concerns generally involve letting the cheesecake chill properly; don’t rush; the final outcome relies heavily on setting time.

Recipe Success Stories

Community feedback plays a significant role in developing this recipe, with many praising the refreshing taste and beautiful presentation. Families have reported that their children eagerly devour every slice, highlighting the appeal to all ages.

Variations initiated by readers have emerged, with some suggesting adding different fruits based on seasonal availability, leading to unique adaptations that add personal touches.

Adaptation stories reveal that many home bakers have enjoyed turning this cheesecake into an annual family tradition for holidays, each year introducing unique garnishes and flavors.

Readers express joy over the ease of preparation, sharing tips for quick assembly, which indicates that this cheesecake has become a beloved addition to many kitchens.

Photography tips from the community have also enriched the experience, emphasizing the importance of capturing the vibrant colors that the recipe produces, enhancing social media shares.

Frequently Asked Questions

Can I use canned pineapple in this recipe? Yes, you can use canned pineapple, but ensure it is packed in juice or water rather than syrup for the best flavor.

How do I know when my cheesecake is done baking? The edges should be set with a slight jiggle in the center. It will firm up as it cools.

Can I freeze the cheesecake? Absolutely! Make sure to wrap it tightly in plastic wrap and aluminum foil to maintain freshness and avoid freezer burn.

What can I use if I don’t have cream cheese? Softened silken tofu blended until smooth can be a great alternative for a dairy-free version.

How long should I chill the cheesecake? Ideally, chill for at least 4 hours, but overnight is preferred for optimal texture and flavor.

Can I add other flavors or fruits? Yes, be creative! You can try adding strawberries, blueberries, or even a layer of key lime for a twist.

Is it necessary to use a springform pan? While a springform pan is ideal for easy removal, you can use a regular pan but will need to be more cautious when serving.

What’s the best way to store leftovers? Keep any leftover cheesecake covered in an airtight container in the refrigerator for up to one week.

Can I make mini cheesecakes with this recipe? Yes, this recipe can be adapted for mini cheesecake tarts using a muffin tin!

How can I enhance the garnish? Consider toasted coconut flakes, whipped cream, or fresh mint for beautiful garnishing options.

Additional Resources

For those inspired by the Refreshing Southern Pineapple Orange Swirl Cheesecake, other related recipes include classic New York-style cheesecakes or berry-loaded versions that provide variety.

Technique guides on cheesecake baking methods can help clarify the culinary processes, ensuring mastery of this delightful treat.

Those looking into ingredient information can explore the nutritional benefits of fruits and dairy products, improving knowledge about healthier choices in desserts.

Equipment recommendations are available to guide you in selecting the best tools for making cheesecakes, ensuring successful baking.

Explore seasonal variations in cheesecake recipes, which allow for creative uses of fresh produce throughout the year.

Join the Conversation

We encourage you to share your experiences and feedback on the Refreshing Southern Pineapple Orange Swirl Cheesecake. Share your photos on social media and tag us to showcase your baking success!

Photography tips come in handy for those wishing to capture the beauty of their baking creations. Think about natural light and simple backgrounds for stunning results.

Recipe reviews assist fellow bakers in decision-making; sharing your thoughts enhances community engagement, encouraging others to try this delicious recipe.

Consider variations, whether you’ve created unique mixes of flavors or presented the cheesecake differently; your creativity can inspire others to cook.

We appreciate all forms of community interaction, so don’t hesitate to engage with us or fellow bakers through comments and discussions, fostering a culinary dialogue that enriches everyone’s experience!

The Recipe

Refreshing Southern Pineapple Orange Swirl Cheesecake

Serves: 8 servings

Prep Time: 30 mins

Cook Time: 60 mins

Total Time: 90 mins

Kitchen Equipment Needed

  • Springform pan
  • Mixing bowl
  • Electric mixer
  • Measuring cups and spoons
  • Rubber spatula

Ingredients

  • 1 ½ cups of graham cracker crumbs
  • ½ cup of unsalted butter, melted
  • 2 (8 oz) packages of cream cheese, softened
  • 1 cup of sugar
  • 3 large eggs
  • 1 cup of crushed pineapple, drained
  • ½ cup of fresh orange juice
  • 1 tablespoon of orange zest
  • 1 teaspoon of vanilla extract

Directions

  1. Preheat your oven to 325°F (160°C).
  2. In a bowl, mix graham cracker crumbs with melted butter until well combined. Press mixture into the bottom of the springform pan to form a crust.
  3. In a large bowl, beat together cream cheese and sugar until smooth and creamy.
  4. Add the eggs one at a time, mixing thoroughly after each addition, followed by the vanilla extract, orange juice, and pineapple. Mix until well combined.
  5. Gently pour the cheesecake batter into the prepared crust. Using a spoon, add dollops of the remaining orange juice mixture and swirl gently across the top with a skewer to create a marbled effect.
  6. Bake in the preheated oven for 60 minutes or until the edges are set but the center still has a slight jiggle.
  7. Turn off the oven, crack the door, and let the cheesecake cool gradually for 1 hour inside the oven.
  8. Remove from the oven and refrigerate for at least 4 hours, or preferably overnight.

Recipe Notes

  • For best results, use room temperature ingredients to minimize lumps.
  • Any leftover cheesecake can be stored in an airtight container for up to one week.
  • Consider using other fruits for a unique twist—strawberries or blueberries work great too!

Indulge in a Decadent Dessert Inspired by Irresistible Flavors

Delicious Chocolate Lava Cake: Indulge in Warm, Gooey Goodness

⚖️
Difficulty
Intermediate

⏲️
Prep Time
15 mins

🕒
Cook Time
10 mins

⏱️
Total Time
25 mins

🍽️
Servings
4

There’s nothing quite as satisfying as breaking through a warm, chocolate shell to reveal the gooey, molten center of a rich chocolate lava cake. This decadent dessert is perfect for special occasions, romantic dinners, or simply when you’re craving something truly indulgent. With its perfect balance of sweetness and chocolate intensity, this lava cake invites you to savor every bite, creating an experience that is not only delicious but also memorable.

Imagine the feeling of a warm, fudgy cake melting in your mouth, the luxurious chocolate flowing into your palate. Each forkful combines different textures, from the firm outer layer to the soft, velvety inside. Baking these cakes might seem daunting, but fear not! This recipe is designed for both novices and experienced bakers who want to impress without investing hours in the kitchen.

Quick Recipe Highlights

  • Flavor Profile: Rich, bittersweet chocolate with hints of vanilla and a luscious melted core.
  • Texture: A crispy exterior that gives way to a silky, creamy center.
  • Aroma: The decadent smell of melting chocolate mixed with buttery goodness fills the kitchen.
  • Visual Appeal: Elegant individual cakes topped with a dusting of powdered sugar or a scoop of vanilla ice cream.
  • Skill Level Needed: Intermediate due to the precise timing required for baking.
  • Special Equipment: Ramekins, a mixing bowl, and a whisk.

Recipe Overview

  • Difficulty Level: This chocolate lava cake recipe is classified as intermediate, with a focus on precise baking time. It’s essential to monitor the baking to ensure the centers remain molten.
  • Category: This dessert fits beautifully into the category of delectable sweets, ideal for dinners or festive gatherings.
  • Cuisine: Both French and American influences are present in this dish, showcasing global appreciation for chocolate desserts.
  • Cost: Approximately $10 to $15, depending on ingredient quality, offering a lavish treat without breaking the bank.
  • Season: Ideal for warm weather and cozy winter nights, as chocolate feels indulgent year-round.
  • Occasion: Perfect for birthdays, anniversaries, and even holidays when you want to treat yourself and your loved ones.

Why You’ll Love This Recipe

This chocolate lava cake is the ultimate indulgence, combining rich flavors and an unforgettable texture. The sweet, creamy chocolate that flows from within creates an experience that is both nostalgic and luxurious. Each bite captures your essence of dessert perfection.

Not only is this dish delectable, but it’s also incredibly convenient. With a minimal prep time and straightforward baking steps, you can whip up these individual cakes with ease. Perfect for last-minute dessert plans or unexpected guests!

From a nutritional standpoint, dark chocolate offers several benefits, including antioxidants that promote heart health. When enjoyed in moderation, this decadent dessert can be part of a balanced diet.

Socially, this chocolate lava cake is a crowd-pleaser. It’s a wonderful centerpiece to share with friends and family, making dinner parties feel more intimate and connected as you all dig into warm, delightful cakes together.

Cost-effectiveness also stands out; for an impressive dessert, the ingredients required are simple. Buying quality chocolate doesn’t have to break the bank, allowing you to treat yourself without guilt!

Historical Background and Cultural Significance

Originating in the United States, the chocolate lava cake became popular in the 1980s and has since spread worldwide. Many believe its inspiration lies in the classic French chocolate fondant.

Culturally, the cake reflects the rich history of chocolate, which has roots in ancient civilizations that revered this delightful ingredient. Today, it stands as a symbol of indulgence and celebration.

Over the years, the recipe has evolved, with variations popping up in various cuisines. While chocolate remains the star, different fillings and presentations add unique spins to the classic dish.

Regional variations include spicy or alcoholic infusions, showcasing local flavors. A touch of chili powder or a splash of rum can transform this dessert into a personal signature for any baker.

Ingredient Deep Dive

Dark Chocolate: Revered for its rich flavor, dark chocolate is integral to this recipe. Not only does it provide a delightful taste, but it also contains less sugar than milk chocolate, making it a healthier option. Choose high-quality chocolate for the best results.

Selection Tips: Look for chocolate with a cocoa content of 70% or higher for a robust flavor. Store in a cool, dry place, away from strong odors to preserve its integrity.

Eggs: Essential for binding and providing structure in the dessert. They’re what gives the cake its rise and helps achieve that perfect molten center.

Nutritional benefits include protein and beneficial fats, so consider relying on free-range options for better overall quality. Store eggs in their carton to allow for proper airflow.

Common Mistakes to Avoid

  • Overbaking: This is the most common mistake. Keep an eye on the timer and check the cakes a minute or two before the suggested cook time.
  • Undermixing: Ensure all ingredients are fully combined for a consistent texture by mixing until smooth.
  • Using cold eggs: Eggs must be at room temperature to blend seamlessly into the batter. Allow them to sit out for at least 30 minutes.
  • Greasing ramekins improperly: Without proper greasing, cakes can stick, ruining their shape. Use butter to coat the insides thoroughly.
  • Skipping the resting time: Allowing the cakes to cool slightly before serving ensures stability, keeping molten centers intact.
  • Serving too hot: This dessert tastes best when slightly cooled, allowing the chocolate to better set while remaining gooey inside.
  • Ignoring the chocolate quality: Cheap chocolate will lead to a less flavorful outcome. Invest in high-quality chocolate for delicious results.
  • Using all-purpose flour in excess: Too much flour may affect the texture, leading to a dry cake. Measure accurately and sift if needed.

Essential Techniques

Melting Chocolate: It’s crucial to melt chocolate consistently to prevent burning. Use a double boiler or microwave on low power, stirring frequently until fully melted and smooth.

Baking Time: Perfecting your timing is vital for achieving that gooey center. Use a toothpick to test; it should come out slightly sticky.

Pro Tips for Perfect Chocolate Lava Cake

  • Preheat your oven and remember to adjust racks for even heat distribution.
  • Chill the ramekins if you’re baking a large batch; this slows baking to ensure centers stay soft without the outer layer becoming dry.
  • For added flavor, consider adding a splash of espresso or orange liqueur to the batter.
  • Experiment with different fillings, such as peanut butter or caramel for creative variations.
  • Dust with cocoa powder instead of flour to create a rich chocolate crust.
  • Don’t forget the scoop of vanilla ice cream to complement the lava cake perfectly.
  • Allow your cakes to cool for a few minutes for easier unmolding.
  • Introduce a dollop of whipped cream to add a creamy texture when serving.

Variations and Adaptations

Consider trying a molten caramel lava cake by substituting rich caramel for the chocolate center. For a fruity twist, introduce raspberry or cherry filling that complements the chocolate beautifully.

Seasonal adaptations can involve including spices like cinnamon or nutmeg in the batter during the colder months for added warmth. During the summer, incorporating zesty flavors can make it refreshing.

Dietary modifications are also easy; explore gluten-free or vegan options by substituting traditional ingredients with almond flour or aquafaba.

For those craving different textures, you can sprinkle nuts or chocolate chips into the batter for an added crunch. Simple surface decorations with icing or ganache can elevate your presentation.

Serving and Presentation Guide

Plating techniques play a significant role in impressing guests. Use a dessert plate, and carefully center the cake before drizzling it with chocolate sauce and a dusting of powdered sugar.

Consider garnishing with fresh berries or mint leaves for a contrasting color burst and added freshness. Traditional accompaniments like vanilla ice cream or chocolate drizzle elevate the dessert.

Temperature considerations are essential; serve the cakes warm to keep the center gooey while balancing with cold toppings.

Portion control tips often mean serving individual ramekins, allowing guests to enjoy their cake while maintaining a clean, elegant presentation.

Wine and Beverage Pairing

Rich desserts like chocolate lava cake pair beautifully with bold wines. A full-bodied Cabernet Sauvignon enhances the chocolate, while a heavier dessert wine such as Port can provide a delightful contrast.

Non-alcoholic alternatives, such as a rich hot cocoa or a creamy vanilla latte, offer comforting pairings that complement the cake’s intense flavors.

For coffee lovers, a robust espresso can perfectly balance the sweetness, further enhancing the overall experience.

Storage and Shelf Life

The best way to store chocolate lava cakes is in their ramekins, covered with plastic wrap to prevent drying. They are best consumed within 2-3 days for optimal taste.

Cold storage should occur in the refrigerator, keeping them fresh. Ensure proper reheating options exist, as microwaving briefly on low can restore warmth without affecting texture.

Freezing your unbaked lava cakes for up to a month is acceptable. Just wrap them well and allow for a longer cooking time when preparing from frozen.

Make Ahead Strategies

Prep timelines can involve making the batter a day in advance and refrigerating it, allowing the flavors to meld. Just bake right before serving!

Storing between steps includes keeping prepared ingredients in the fridge and letting them come to room temperature before baking for the best results.

Quality impacts may vary; ingredients like heavy cream can lose airiness over time. Aim to whip freshly when treating guests.

Assembly can be fairly simple; divide the mix into ramekins and chill until you’re ready to bake, maintaining convenience without sacrificing taste.

Scaling Instructions

Halving the recipe can lead to perfect results for smaller gatherings. Simply adjust amounts while maintaining proper ratios of ingredients.

When doubling or tripling, ensure ramekins fit on your baking sheet, increasing baking time slightly while monitoring closely.

Equipment adjustments may involve extending baking time or adjusting oven settings, so stay vigilant while baking larger batches.

Timing modifications include understanding that larger cakes may require longer to cook, primarily focusing on those gooey centers.

Nutritional Deep Dive

The macro breakdown reveals a balance of healthy fats from chocolate and eggs, along with carbohydrates from the flour. A single serving generally contains around 350–400 calories.

Micronutrient analysis shows vitamins from eggs and antioxidants in dark chocolate, contributing positively to overall health perceptions.

Health benefits of dark chocolate include heart-healthy properties due to flavonoids, making it a more guilt-free indulgence.

Dietary considerations should encompass calorie counting and carbohydrate management for health-conscious individuals.

Portion analysis aids in management; enjoy in moderation as part of indulgent desserts occasionally to support a balanced diet.

Dietary Adaptations

For a gluten-free version, substitute all-purpose flour with almond flour or another gluten-free blend, ensuring the cakes retain their rich texture.

Dairy-free adaptations can include coconut oil and almond milk, providing an alternative that doesn’t compromise flavor.

Vegan options allow for the use of aquafaba (whipped chickpea water) instead of eggs and adaptable vegan chocolate brands for excellent results.

Low-carb and keto diets can substitute sugar with a suitable sweetener, creating a dessert that aligns with dietary preferences.

Paleo followers may explore almond flour and raw honey, crafting a deliciously compliant dessert without sacrificing pleasure.

Low-FODMAP variations can include lactose-free ingredients to maintain gut harmony while enjoying a delicious treat.

Troubleshooting Guide

If your lava cake seems too firm, it suggests overbaking; next time, reduce the time slightly, checking a moment earlier. To fix flavor balance issues, enhance it with a touch of salt to fine-tune sweetness.

Temperature problems might arise when cakes remain cold in the center. A reliable thermometer could help check for readiness better than visual cues alone.

For equipment challenges, ensure the oven’s even heat distribution by avoiding overcrowding on baking sheets, allowing hot air to circulate better.

Ingredient substitutions can shift textures; using lower-quality chocolate impacts melting and overall flavor. Always use high-quality chocolate for the best result.

Recipe Success Stories

Community feedback highlights the ease of preparation and the enjoyment factor across the board, inspiring many bakers to make this recipe a staple at gatherings.

Variation successes often come from creative fillings, with new flavors introduced, keeping this classic dessert refreshing and exciting.

Many readers share adaptation stories, revealing personal touches and family secrets that enhance the recipe, proving its versatility.

Photography tips provided by readers emphasize capturing that delightful molten center, encouraging others to let their creativity shine through in presentation.

Frequently Asked Questions

How do I ensure my lava cake has a gooey center? Timing is crucial; make sure you keep an eye on the cakes as they near completion. A slight jiggle in the center indicates doneness.

Can I make chocolate lava cake in advance? Yes, you can prepare the batter ahead of time and refrigerate it. Bake right before serving for the best experience.

What if my chocolate lava cake comes out too dry? This usually means it was overbaked. Reduce the time by 1-2 minutes next time while checking for gooeyness near the end of baking.

Could I use milk chocolate instead of dark chocolate? While possible, the flavor will differ, leading to a sweeter cake. Dark chocolate generally works best for this recipe.

Are there gluten-free options for this recipe? Absolutely! Use a gluten-free flour blend or almond flour to achieve similar results.

What can I substitute for eggs in a vegan version? Aquafaba works very well in place of eggs, providing needed binding and moisture.

Can I add other flavors to this cake? Yes! Consider adding espresso, vanilla, or even spices like cinnamon for exciting variations.

How can I improve the presentation of my lava cake? Use a dusting of powdered sugar, fresh berries, or a scoop of ice cream to elevate your dessert visually.

What is the best way to store leftovers? Cover your ramekins tightly and store them in the refrigerator. Reheat gently before serving.

Can I use silicone molds instead of ramekins? Yes, silicone molds can work beautifully, allowing for easy release when serving.

Additional Resources

Seeking related recipes? Consider exploring brownie recipes or chocolate fondant ideas for more indulgent treats.

Technique guides can help you master baking basics, elevating your overall dessert game.

Ingredient information can add depth to your cooking knowledge, increasing the quality of your dishes as you understand each component.

Equipment recommendations cover essential baking tools, assisting in proper preparation for fantastic outcomes.

Seasonal variations can inspire your baking as you incorporate seasonal flavors like pumpkin or peppermint for festive occasions.

Join the Conversation

Sharing on social media boosts community engagement, allowing you to connect with other food enthusiasts while showcasing delicious results.

Consider photography tips shared by the community that emphasize visual appeal and inspire others to replicate your successful chocolate lava cake.

Encourage recipe reviews that provide valuable insights for improving and adapting this cake to personal tastes and preferences.

Community engagement drives creativity, allowing bakers to let their imaginations roam free and invent new personal spins on this classic recipe.

The Recipe

Chocolate Lava Cake

Serves: 4

Prep Time: 15 mins

Cook Time: 10 mins

Total Time: 25 mins

Kitchen Equipment Needed

  • Ramekins
  • Mixing bowl
  • Whisk
  • Double boiler or microwave-safe bowl
  • Baking sheet

Ingredients

  • 1/2 cup unsalted butter
  • 1 cup dark chocolate chips (70% cocoa)
  • 1 cup powdered sugar
  • 2 whole eggs
  • 2 egg yolks
  • 1 teaspoon vanilla extract
  • 1/2 cup all-purpose flour
  • Pinch of salt

Directions

  1. Preheat the oven to 425°F (220°C) and grease the ramekins with butter.
  2. In a double boiler, melt the butter and dark chocolate, stirring until smooth.
  3. Remove from heat and mix in powdered sugar until well combined.
  4. Add eggs, egg yolks, and vanilla extract; whisk until smooth and fluffy.
  5. Gently fold in flour and salt until no lumps remain.
  6. Divide mixture among ramekins, filling them halfway full.
  7. Bake for 10-12 minutes until edges are firm but the center is soft.
  8. Remove from oven, let cool for 1 minute, then invert onto plates.
  9. Serve warm, with ice cream or whipped cream if desired.

Recipe Notes

  • For a richer flavor, use high-quality dark chocolate.
  • Experiment with flavored chocolate chips for unique variations.
  • You can prepare the batter a day in advance and refrigerate until ready to bake.

Delicious Hawaiian Pineapple Carrot Cream Cake Recipe to Try

Hawaiian Pineapple Carrot Cream Cake: A Tropical Delight

⚖️
Difficulty
Intermediate

⏲️
Prep Time
30 mins

🕒
Cook Time
45 mins

⏱️
Total Time
1 hour 15 mins

🍽️
Servings
12 slices

Indulge in the flavors of the tropics with this Hawaiian Pineapple Carrot Cream Cake. This vibrant dessert combines the sweetness of fresh pineapple with the earthy notes of grated carrots, resulting in a moist and flavorful cake that is perfect for any occasion. Topped with a luscious cream cheese frosting, this cake is visually stunning, with its bright orange and yellow hues, making it an enticing centerpiece for gatherings or a delightful treat for a quiet afternoon.

The combination of pineapple and carrot creates a harmonious balance of sweetness and spice, while the cake’s fluffy texture melts in your mouth. The tropical essence of the coconut adds another layer of richness, tying together the various elements in this exquisite dessert. Whether you’re celebrating a special event or simply treating yourself, this Hawaiian Pineapple Carrot Cream Cake promises to transport you to a sunny paradise with every bite.

Quick Recipe Highlights

  • Flavor Profile: A delightful mix of tropical sweetness from pineapple complemented by warm spices from grated carrots.
  • Texture: Moist and fluffy cake with a creamy, luscious frosting that adds an appealing contrast.
  • Aroma: Inviting and fragrant, with aromatic notes of coconut and hints of tropical fruits wafting through the air.
  • Visual Appeal: A vibrant display of yellow and orange, beautifully frosted, perfect for impressing guests.
  • Skill Level Needed: Perfect for intermediate bakers seeking to expand their repertoire with a delicious tropical flavor.
  • Special Equipment: A standard baking pan and mixing bowls are all you need to create this show-stopping dessert.

Recipe Overview

  • Difficulty Level: This recipe is best suited for intermediate bakers. It requires careful measurement and timing to achieve the perfect balance of flavors and textures.
  • Category: This cake falls under the dessert category and is ideal for afternoon tea or as a festive celebration cake.
  • Cuisine: Rooted in Hawaiian culinary traditions, this cake highlights the islands’ love for tropical fruits and vibrant flavors.
  • Cost: Ingredients are reasonably priced, making it an affordable yet impressive dessert option that won’t break the bank.
  • Season: Ideal for sunny days and warm weather, but delicious year-round, especially during festive celebrations.
  • Occasion: Perfect for birthdays, luaus, and potlucks, this cake is sure to be a crowd-pleaser that evokes joyful memories.

Why You’ll Love This Recipe

The vibrant flavors of this Hawaiian Pineapple Carrot Cream Cake create a delightful taste sensation that is both refreshing and satisfying. The combination of sweet pineapple and earthy carrots adds a unique twist that sets it apart from traditional cakes. Each bite is enhanced by the creamy frosting, creating an indulgent experience for your taste buds.

In terms of convenience, this cake can be prepared ahead of time and stored in the refrigerator, allowing you to whip up a show-stopping dessert with minimal last-minute effort. Additionally, the ingredients are commonly found in most grocery stores, ensuring you won’t need to hunt for anything special.

Nutritionally, the inclusion of carrots and pineapple provides vitamins and minerals that add value to your dessert. Carrots are rich in beta-carotene, while pineapple is a good source of vitamin C. Together, they contribute to a cake that is both delectable and a bit better for you than most sweets.

Socially, this cake serves as a great centerpiece for gatherings. Whether it’s a backyard barbecue or a birthday party, it sparks conversations and creates a festive atmosphere, bringing people together to enjoy a delicious slice of paradise.

Finally, its affordability makes it an accessible treat for everyone. You don’t have to compromise on taste or presentation even when sticking to a budget, making it a fantastic choice for anyone looking to impress without overspending.

Historical Background and Cultural Significance

The origins of the Hawaiian Pineapple Carrot Cream Cake can be traced back to the rich culinary traditions of Hawaii, where tropical fruits are celebrated and often incorporated into various dishes. Pineapples have been a staple in Hawaiian cuisine since the early 1900s, when the Dole Corporation brought them to the islands. This beloved fruit has since become synonymous with the tropical paradise of Hawaii.

Culturally, this cake represents more than just a dessert—it embodies the spirit of aloha and the islands’ emphasis on sharing meals with family and friends. Celebrations in Hawaii often center around food, with festive cakes like this playing a key role in bringing people together.

The evolution of this cake reflects changing tastes and trends, as many bakers began experimenting with incorporating vegetables into desserts to add moisture and nutritional value. The popularity of carrot cake in the mainland United States paved the way for this Hawaiian twist, combining the elements of both worlds.

Regional variations have emerged, with some families adding macadamia nuts for crunch or coconut for an extra layer of tropical flavor. Each version of this cake pays homage to its Hawaiian roots while allowing personal touches that celebrate individual tastes.

Ingredient Deep Dive

Pastry flour is one of the key components of the Hawaiian Pineapple Carrot Cream Cake. This fine flour is essential for achieving the cake’s soft texture, allowing the cake to rise without becoming dense. When selecting flour, it’s important to choose unbleached options that retain more of the wheat’s natural nutrients and flavor. Stored in a cool, dry place, pastry flour can last for several months when kept in an airtight container. All-purpose flour can be substituted if necessary, but expect a slightly different texture.

Fresh carrots are indispensable in this recipe, contributing both sweetness and moisture to the cake. They are a great source of beta-carotene, vitamin K1, and potassium, along with antioxidants that promote eye health. When selecting carrots, look for firm, smooth specimens without any blemishes or soft spots. They should be stored in the refrigerator and can usually be kept for weeks. If fresh carrots aren’t available, pre-grated carrots can work in a pinch, but the freshness may vary.

Pineapple adds a signature tropical flavor and moisture to the cake. Fresh pineapple is the most flavorful option, but canned pineapple can be convenient. When choosing canned options, be sure to pick those in juice rather than syrup for a healthier choice. Proper storage involves keeping fresh pineapple in the refrigerator, while canned varieties should be stored in a cool, dry place. Unused canned pineapple can be frozen for later use if needed, making it a versatile ingredient to keep on hand.

Lastly, cream cheese is crucial for the luscious frosting that elevates this cake. It adds a tangy flavor and creamy texture. When selecting cream cheese, opt for full-fat varieties for the best results. This ingredient should be stored in the refrigerator and can be frozen, although it may change in texture. Light cream cheese can be used as a lower-fat option, though the flavor might differ slightly.

Common Mistakes to Avoid

  • Overmixing the batter can lead to a tough cake. Mix ingredients just until combined for the best rise and texture.
  • Not measuring ingredients accurately will affect the cake’s final texture; use a kitchen scale for precision.
  • Using fresh pineapple improperly can result in excess moisture; drain well if using canned pineapple.
  • Baking the cake in an ungreased pan can lead to sticking; ensure your pans are well-prepared with cooking spray or butter.
  • Not allowing the cake to cool completely before frosting can cause the frosting to melt and slide off.
  • Ignoring oven temperature can lead to uneven baking; always preheat and use an oven thermometer for accuracy.
  • Not tasting the batter for sweetness may result in a cake that lacks flavor; adjust as needed before baking.
  • Using cold ingredients instead of bringing them to room temperature can yield poor emulsification, reducing fluffiness.
  • Filing your cake layers unevenly can affect the final presentation; use a serrated knife for even slicing.
  • Not letting the cake rest can compromise flavor; allowing it to cool fully enhances the taste through fermentation.

Essential Techniques

Preparing the cake layers requires an essential mixing technique that ensures proper incorporation of ingredients without overworking the batter. Creaming the sugar and butter properly creates a light and airy cake. Begin by beating the butter until smooth, then gradually add sugar until the mixture is fluffy. This process helps to create the desired texture for the cake.

Baking at the right temperature is crucial for cake success. An oven that’s too hot can lead to a dome or cracks on the surface, while too cool results in a dense product. For consistency, use an oven thermometer to confirm accuracy and always preheat before placing your cake in the oven.

Cooling the cake layers is essential. Once removed from the oven, allow the cakes to rest in the pan for about 10 minutes. This step enables them to firm up slightly, making it easier to remove them without breaking. After that, transfer them to a wire rack to cool completely, ensuring they maintain their shape.

Frosting should be done only when the cake is completely cool to avoid melting. Using a pastry bag for frosting adds texture and detail to the final presentation. Fill the bag and frost from the center outward for even coverage.

Pro Tips for Perfect Hawaiian Pineapple Carrot Cream Cake

Start with fresh, high-quality ingredients to enhance flavors; this tip is essential for any baking endeavor. Enhance the flavor profile by experimenting with spices—cinnamon or nutmeg add depth. Always sift dry ingredients to avoid clumping, ensuring a smooth batter.

For added texture, consider incorporating chopped nuts or shredded coconut into the batter for a delightful crunch and additional tropical notes. To achieve visual appeal, decorate the cake with toasted coconut or fresh fruit slices.

Let the frosted cake sit in the refrigerator for a minimum of 30 minutes; this helps the frosting set and enhances the overall flavor meld.

If you’re making it ahead of time, wait to frost until serving for the best presentation. The cake can be stored unfrosted in the refrigerator for a few days, retaining its moisture.

Finally, be creative with your presentation. A garnished coconut sprinkle on top or edible flowers adds a beautiful touch that enhances visual appeal and invites dessert enthusiasts to dive into a slice.

Variations and Adaptations

Regional variations of the Hawaiian Pineapple Carrot Cream Cake often include coconut, which complements the tropical theme beautifully. A standard adaptation can be made by adding shredded coconut to the batter, enhancing both flavor and texture.

For seasonal adaptations, consider substituting ripe seasonal fruits. In summer, berries can replace pineapple for a fresh berry cream cake, while autumn can call for pumpkin instead of carrots for a festive, seasonal twist.

Dietary modifications are also possible; you can create a gluten-free version using almond flour or a gluten-free flour blend. For lactose intolerance, consider using a softened dairy-free cream cheese for the frosting.

Flavor variations can include zesting citrus fruits, such as lime or orange, into the batter to introduce a zesty note that brightens the cake. You can also infuse flavors with extracts, like almond or coconut extract, for an earthy undertone.

Texture modifications, such as adding chopped nuts or using different types of flour, can create distinct characteristics in the cake. Experimenting with different types of sweeteners, like honey or maple syrup, can also change the flavor profile significantly.

Serving and Presentation Guide

Plating techniques for the Hawaiian Pineapple Carrot Cream Cake can elevate its presentation tremendously. Start by placing the cake on a decorative cake stand to showcase its beauty. Cut even slices for serving, ensuring each piece maintains its shape.

Garnishing ideas include fresh fruit on top, such as pineapple slices or edible flowers, which can create a striking visual contrast against the cream cheese frosting. Traditional accompaniments like vanilla ice cream or a dollop of whipped cream can provide another layer of enjoyment.

Modern serving suggestions can involve pairing the cake with a tropical fruit compote or a drizzle of caramel sauce for an indulgent twist. Temperature considerations are essential, as serving the cake at room temperature enhances the flavors and texture.

For portion control tips, cut the cake into smaller slices, allowing guests to sample without overindulging, while still satisfying the craving for sweet treats.

Wine and Beverage Pairing

Wine pairings for this cake can include a light white wine, such as a Riesling or a Sauvignon Blanc, which complements the tropical flavors without overpowering them. The sweetness of the wine can enhance the cake’s fruity notes, making it a delightful combination.

For non-alcoholic alternatives, consider serving with a refreshing iced tea infused with lemon and mint. This beverage provides a contrasting herbal note that complements the warmth of the cake perfectly.

Coffee or tea pairings, such as a light roast coffee or chai tea, can also work well depending on individual preferences. Coffee’s robust flavor can balance the sweetness of the cake, while chai adds a spiced complement.

Temperature considerations are crucial; wines should be served slightly chilled and teas can be enjoyed iced or hot, allowing for a refreshing experience that harmonizes with the cake.

Storage and Shelf Life

Proper storage methods for the Hawaiian Pineapple Carrot Cream Cake are essential to maintain its moisture and flavor. Store the cake in an airtight container in the refrigerator, where it can last for up to 5 days. This ensures freshness and keeps flavors intact.

Temperature requirements should be adhered to; avoid leaving the cake out for extended periods, especially if it’s frosted with cream cheese, which can spoil if left unrefrigerated for too long.

Container recommendations include using cake domes or glass containers that seal tightly to avoid drying out. If you detect any signs of spoilage, such as off smells or unusual textures, it’s time to discard the cake.

Reheating instructions involve removing a slice and warming it slightly in the microwave for a few seconds. This approach brings out the flavors and softens the frosting without compromising texture.

For freezing, wrap slices tightly in plastic wrap and then in aluminum foil for up to 3 months. When ready to enjoy, simply thaw the desired amount overnight in the refrigerator before serving.

Make Ahead Strategies

Planning ahead is wise when preparing Hawaiian Pineapple Carrot Cream Cake. You can bake the cake layers up to two days in advance; just ensure they cool completely before wrapping them in plastic wrap to retain moisture.

Storage between steps is crucial; keep frosted cakes in the refrigerator, while unfrosted layers can be stored at room temperature, providing flexibility in timing.

Quality may be impacted if not allowed to rest before serving; this resting period enhances flavors through fermentation, allowing the cake to taste fresher.

Assembly tips include preparing all ingredients in advance. Pre-measure your dry and wet ingredients to streamline the process on baking day, ensuring efficiency.

Reheating guidelines can be simple; pair with an addition of fresh elements, like whipped cream or fruits, to bring a fresh touch to the cake after storage.

Scaling Instructions

Scaling recipes, such as this Hawaiian Pineapple Carrot Cream Cake, can be straightforward with some adjustments. Halving the recipe will require precise measuring, particularly concerning the egg count; use large egg whites for consistency.

Doubling or tripling the recipe may necessitate using larger baking pans or multiple pans simultaneously, ensuring even baking. Consider reducing baking times slightly if you’re using multiple pans, as they can bake faster than a single large cake.

Equipment adjustments may involve larger mixing bowls or different oven settings to accommodate increased quantities effectively.

Timing modifications can depend on your oven; larger cakes often need more time while smaller cakes generally require less. Always conduct the toothpick test regularly to check for doneness.

Storage considerations should also be taken into account; larger quantities may need special handling, particularly when it comes to refrigeration and displaying finished cakes.

Nutritional Deep Dive

A macro breakdown of this Hawaiian Pineapple Carrot Cream Cake shows a balance of carbohydrates from the flour and sugars, fats from the cream cheese, and some protein from the eggs. Each slice provides a satisfying treat without overwhelming calorie content, making it a reasonable dessert option.

Micronutrient analysis reveals vitamins provided by the carrots and pineapple, such as vitamin A, vitamin C, and potassium. These nutrients contribute to a balanced treat that offers more than mere empty calories.

Health benefits of the major ingredients include antioxidant properties from carrots and digestion aid from pineapple. These elements allow for a dessert experience that feels both indulgent and slightly beneficial.

Dietary considerations should take into account the use of whole ingredients like fresh fruits and vegetables, which elevate the nutritional profile while minimizing artificial additives commonly found in pre-packaged desserts.

Portion analysis encourages responsible indulgence; consider slicing smaller pieces to appreciate the dessert’s rich flavors without excess. This approach can aid in weight management while providing a satisfying treat.

Dietary Adaptations

For those seeking a gluten-free version of the Hawaiian Pineapple Carrot Cream Cake, opt for almond or coconut flour as substitutes, ensuring the right balance of moisture and texture.

Dairy-free options allow for the use of plant-based cream cheese and milk substitutes, making this delicious cake accessible to those with lactose intolerance.

A vegan adaptation replaces eggs with a flaxseed egg mixture for binding, maintaining moisture without sacrificing flavor. Additionally, using maple syrup instead of sugar can provide a different, less refined sweetness.

Low-carb versions are viable by substituting traditional sugar with erythritol or stevia, providing sweetness without the extra carbohydrates.

Keto enthusiasts can enjoy this treat by focusing on nut flours and maintaining a low sugar content while making smart ingredient choices.

For those on a Paleo diet, this cake can be made with primal-approved sweeteners and ingredients emphasizing natural sources.

Low-FODMAP diets can adapt the recipe by substituting lactose-free cream cheese and ensuring fruit quantities remain low.

Troubleshooting Guide

When encountering texture issues with the Hawaiian Pineapple Carrot Cream Cake, it’s essential to determine the cause. If the cake is too dense, it may be due to overmixing. Mix just until combined to preserve the airy texture.

Flavor balance is crucial; if the cake tastes bland, consider adding more spices or adjusting sugar levels, especially when it comes to the sweetness of fruits used.

Temperature problems occur when cakes are either underbaked or overbaked. Use the toothpick test to ensure proper cooking times according to your oven calibration.

Equipment challenges may arise, particularly if using older baking pans that don’t distribute heat evenly. Investing in high-quality bakeware can significantly influence performance.

When dealing with ingredient substitutions, remember to account for texture changes; different flours and sugars can yield contrasting results, necessitating adjustments to liquid ratios.

Timing concerns may result in cakes that are rushed and undeveloped. Allow ample time for baking and cooling to achieve the best flavor and consistency.

Recipe Success Stories

Community feedback on the Hawaiian Pineapple Carrot Cream Cake has been overwhelmingly positive. Many readers note its ability to please diverse palates and how it often becomes the star of gatherings.

Variation successes are frequently shared, with readers experimenting by incorporating different fruits or nuts, leading to unique twists that maintain the recipe’s integrity while allowing personal flair.

Adaptation stories, where readers share their experiences in transforming the cake to meet dietary restrictions, highlight the cake’s flexibility and wide appeal.

Photography tips often accompany these success stories, inspiring others to experiment with their own presentations, contributing to a visual feast that encourages sharing on social media platforms.

Recipe variations have led to a lively discussion among bakers, with many swapping ideas on how to enhance flavors and textures, creating a vibrant community of dessert enthusiasts.

Frequently Asked Questions

Can I use canned pineapple instead of fresh?

Yes, you can use canned pineapple. Be sure to drain it well to avoid adding extra moisture to the batter.

How do I prevent my cake from sinking in the middle?

Ensure that you don’t overmix the batter once you’ve added the flour. Also, check that your oven temperature is accurate.

Can I make this cake ahead of time?

Absolutely! Bake the cake a day in advance and store it in the refrigerator, frosting it the day you plan to serve.

Is it possible to freeze this cake?

Yes, this cake freezes well, especially when unfrosted. Wrap it tightly in plastic wrap and aluminum foil to preserve its moisture.

What’s the best way to store leftovers?

Store leftovers in an airtight container in the fridge. Properly stored, they can last up to a week.

Can I substitute other vegetables for the carrots?

Yes, you can experiment with other vegetables like zucchini, though it will change the flavor and texture of the cake.

How do I make the frosting extra fluffy?

Beat the cream cheese for several minutes until it’s smooth and airy before adding the sugar. Incorporating whipped cream can also add lightness.

Can I use a different type of flour?

Yes, you may substitute all-purpose flour, but for gluten-free versions, use a high-quality gluten-free blend.

What can I do if the frosting is too runny?

If the frosting is too runny, refrigerate it for a bit to firm up or add more powdered sugar to thicken it.

Can I add nuts to the batter?

Absolutely! Chopped walnuts or pecans can add a nice crunch and nutty flavor to your cake.

Additional Resources

For related recipes, consider exploring tropical-themed desserts like coconut cream pies or mango mousse, which share similar flavor profiles with the Hawaiian Pineapple Carrot Cream Cake.

Technique guides are available to help you master the art of baking, focusing on essential skills like creaming butter, perfecting frosting techniques, and ensuring moist cakes every time.

Ingredient information can lead to deeper dives into the nutritional benefits of carrots and tropical fruits, providing context for why these choices enhance both flavor and healthfulness.

Equipment recommendations include high-quality baking pans and mixers that ensure your baking adventures yield the best results, whether you’re a novice or experienced baker.

Lastly, seasonal variations are great for leveraging what’s fresh and in season. Adapting the cake could involve experimenting with other fruits that shine during different times of the year.

Join the Conversation

We encourage our readers to share their experiences with the Hawaiian Pineapple Carrot Cream Cake. Engage with us on social media, showcasing your beautiful creations and any personal twists you’ve added to the original recipe.

Photography tips can enhance your food presentations, inspiring others in the community to experiment with their own versions of this cake.

Recipe reviews and feedback are vital for continuous improvement, so feel free to leave your thoughts and suggestions in the comments section.

Community engagement fosters a sense of belonging among bakers and dessert lovers, creating a lively space for discussion and recipe sharing.

Lastly, recipe variations encourage creativity! Share what adaptations you’ve made, whether it’s dietary modifications or personal flavor twists, to inspire others in their culinary journey.

The Recipe

Hawaiian Pineapple Carrot Cream Cake

Serves: 12 slices

Prep Time: 30 mins

Cook Time: 45 mins

Total Time: 1 hour 15 mins

Kitchen Equipment Needed

  • Mixing bowls
  • Baking pans (round or rectangular)
  • Electric mixer
  • Spatula
  • Wire cooling rack

Ingredients

  • 2 cups all-purpose flour
  • 2 teaspoons baking powder
  • 1 teaspoon baking soda
  • 1 teaspoon ground cinnamon
  • ½ teaspoon salt
  • 1 cup unsalted butter, softened
  • 2 cups granulated sugar
  • 4 large eggs
  • 2 cups grated carrots
  • 1 cup crushed pineapple, drained
  • 1 cup shredded coconut (optional)
  • 1 teaspoon vanilla extract

Directions

  1. Preheat the oven to 350°F (175°C). Grease and flour the cake pans.
  2. In a bowl, combine flour, baking powder, baking soda, cinnamon, and salt. Set aside.
  3. In a large mixing bowl, cream the butter and sugar until light and fluffy.
  4. Add the eggs one at a time, mixing well after each addition. Stir in vanilla extract.
  5. Gradually mix in the dry ingredients until just combined.
  6. Fold in grated carrots, crushed pineapple, and coconut if using.
  7. Divide the batter evenly into prepared pans and smooth the tops.
  8. Bake for 25-30 minutes, or until a toothpick inserted into the center comes out clean.
  9. Allow cakes to cool in the pans for 10 minutes, then transfer to a wire rack to cool completely.
  10. For the frosting, beat together cream cheese and butter until smooth, then gradually add powdered sugar and a splash of vanilla. Frost cooled cake layers as desired.

Recipe Notes

  • Try adding nuts for extra texture.
  • Use fresh pineapple for the best flavor.
  • Advanced preparation can enhance the cake’s flavor.

Chamomile and Honey Sleepytime Latte Recipe for Ultimate Relaxation

Chamomile & Honey Sleepytime Latte: A Soothing Sip for Relaxation

⚖️
Difficulty
Easy

⏲️
Prep Time
5 mins

🕒
Cook Time
5 mins

⏱️
Total Time
10 mins

🍽️
Servings
2 cups

As evening falls and the day winds down, there’s nothing quite as comforting as a warm cup of Chamomile & Honey Sleepytime Latte. This delightful beverage, infused with the calming properties of chamomile and the natural sweetness of honey, beckons you to unwind and relax. Whether you’ve had a long day at work or simply need some alone time at the end of a busy day, this latte provides a soothing escape. With every sip, feel the warmth of the drink wrap around you like a cozy blanket, making it the perfect nightcap before bedtime.

The Chamomile & Honey Sleepytime Latte not only delights the palate but also fills your space with the enchanting aroma of chamomile blossoms and rich honey. Imagine a warm kitchen, the soft sounds of evening ahead, and the comforting fragrance enveloping you. This latte is more than just a drink; it’s an invitation to slow down, breathe deep, and nurture your well-being as you transition into a peaceful night.

Quick Recipe Highlights

  • Flavor Profile: This latte combines the gentle floral notes of chamomile with the rich sweetness of honey, creating a truly magical taste experience.
  • Texture: Creamy, velvety, and warm, the latte sits delicately on the tongue, making each sip an indulgent experience.
  • Aroma: The soothing scent of chamomile, paired with aromatic vanilla and a hint of honey, fills the air, enticing you to savor every drop.
  • Visual Appeal: A beautifully swirled latte topped with a sprinkle of cinnamon creates a visually stunning drink perfect for cozy evenings.
  • Skill Level Needed: Requires minimal cooking expertise, making it accessible for novice cooks looking to impress.
  • Special Equipment: All you need is a small pot and a whisk, making this an easy recipe to whip up any night of the week.

Recipe Overview

  • Difficulty Level: This Chamomile & Honey Sleepytime Latte is rated easy due to its uncomplicated steps and quick preparation time. It is perfect for anyone, from beginners to experienced chefs.
  • Category: This latte falls under beverages, specifically warm drinks designed for relaxation and comfort, often enjoyed during evening routines or special occasions.
  • Cuisine: Rooted in herbal traditions, particularly those of Western herbalism, chamomile has been used for centuries as a natural remedy for relaxation, making this latte a wonderful addition to any health-conscious culinary repertoire.
  • Cost: The ingredient costs are low, primarily featuring chamomile tea and honey, with little additional expense for the milk needed to create the latte.
  • Season: Ideal for any season, but particularly comforting during fall and winter evenings when you seek warmth and coziness.
  • Occasion: Perfect for unwinding after a long day, this latte is also great for hosting relaxed gatherings or quiet nights in.

Why You’ll Love This Recipe

This Chamomile & Honey Sleepytime Latte is a delightful blend of taste and texture that genuinely caters to your senses. The creamy consistency coupled with the floral chamomile makes every sip feel luxurious. The subtle sweetness from honey rounds out the flavors, offering a gentle reminder to slow down and enjoy life’s simple pleasures.

The convenience of this recipe cannot be overstated. Preparation is quick and requires minimal effort, allowing you to whip up a protective shield against a hectic day in mere minutes. This warm beverage promises to relieve stress and promote a restful evening without complicated steps.

Packed with nutritional advantages, chamomile is renowned for its serene properties, often used to alleviate insomnia and promote deeper sleep. Coupled with honey, which is rich in antioxidants, this latte offers a wholesome alternative to other sugary nightcaps that may disrupt your sleep cycle.

This recipe shines when it comes to social gatherings. Imagine serving this enchanting latte during a girls’ night in or family gathering. Sharing this experience fosters a warm, comforting environment, encouraging connections through shared moments of relaxation and joy.

Lastly, considering its cost-effectiveness and accessibility, this latte is a budget-friendly option that elevates your evening routine. With easy-to-find ingredients, anyone can indulge in this soothing drink without breaking the bank.

Historical Background and Cultural Significance

Chamomile has a storied past, often hailed for its calming effects since ancient times. Originating from Europe and Asia, this herb was prized by Egyptians, Greeks, and Romans alike for its medicinal properties. Over centuries, chamomile has transcended cultural boundaries, evolving into a global symbol of relaxation, thus paving the path for recipes like our Sleepytime Latte.

The cultural significance of chamomile is profound; frequently celebrated in herbal traditions, it represents peace and tranquility across various civilizations. In different cultures, chamomile has been utilized to treat ailments ranging from minor digestive issues to significant stress relief, affirming its role as a natural remedy.

As this beverage has evolved, modern adaptations have emerged, showcasing chamomile alongside honey in creative concoctions. Today, the Chamomile & Honey Sleepytime Latte honors the rich history of chamomile while offering a contemporary take that resonates with modern tastes.

Regional variations of chamomile drinks can include adding spices or other herbal elements, reflecting local preferences and the versatility of this calming flower. This adaptability speaks to its deep-rooted significance around the world, from soothing drinks enjoyed after a long day in Europe to herbal teas celebrated in Asian cultures.

Ingredient Deep Dive

Chamomile: Known for its calming effects, chamomile has been cherished for millennia. This delightful flower provides not only flavor but remarkable health benefits, such as reducing stress and aiding digestion. When selecting chamomile, look for dried flowers that exhibit a bright color and pleasant aroma. Store in a cool, dry place to retain freshness.

Honey: While sweetening our latte, honey also adds a multitude of health benefits, including antioxidants and antimicrobial properties. Its versatility is unparalleled, and it can be easily substituted with agave syrup or maple syrup if desired. To ensure quality, opt for raw or local honey, and keep it in a tightly sealed container to prevent crystallization.

Common Mistakes to Avoid

  • Using boiling water for chamomile: Overly hot water can scald the flowers, leading to a bitter flavor. Aim for a temperature just below boiling for optimal extraction.
  • Rushing the steeping time: Chamomile needs time to release its flavor; allowing it to steep for 5-10 minutes maximizes the herbal essence.
  • Using processed honey: Avoid overly processed honeys that contain additives; choose pure, raw honey for the best flavor and health benefits.
  • Skillfully foaming milk: Whether using a frother or whisk, ensure to carefully foam milk to avoid burning it, which can alter the taste.
  • Forgetting the vanilla: Vanilla enhances the soothing flavors; omitting it diminishes the latte’s complexity.
  • Using low-quality tea: Ensure to use high-quality chamomile tea or flowers to avoid a bland drink.
  • Neglecting to garnish: A sprinkle of cinnamon or a lemon twist can elevate the visual and flavor profile; it’s worth the extra step!
  • Ignoring allergies: Always check for potential allergies with chamomile or honey, particularly when serving to guests.
  • Skipping taste adjustments: Tailoring sweetness to your palate can help create a more enjoyable drink. Taste and adjust as you see fit!
  • Serving too hot: Allow the latte to cool slightly before serving, especially if it’s intended for children or sensitive drinkers.

Essential Techniques

Infusing Chamomile: Infusion is vital to bring out the flavor of chamomile. Use loose flower buds or high-quality tea bags and steep them in hot water for 5-10 minutes. Avoid extremes in temperature, which can lead to bitterness.

Milk Frothing: Frothing milk adds a velvety texture to your latte. Use a milk frother or whisk to create foam but be cautious not to heat it excessively. Look for tiny bubbles for perfect foam without burnt or scorched flavors.

Pro Tips for Perfect Chamomile & Honey Sleepytime Latte

1. Utilize fresh chamomile flowers if available; they provide a richer flavor than dried.

2. Experiment with sweeteners; maple syrup and coconut sugar can add unique flavors.

3. Warm the milk before frothing for a smoother integrate; this yields a better-textured latte.

4. Try adding spices like nutmeg or cardamom for an aromatic twist.

5. Use non-dairy milk alternatives if desired; oat milk or almond milk froth beautifully.

6. Serve with a side of biscuits or shortbread for a delightful treat.

7. Chill any leftover latte in the fridge for a refreshing iced version the next day.

8. Create a chamomile syrup for quick sweetening during long nights with friends.

Variations and Adaptations

This latte can be easily adapted to cater to various tastes and dietary needs. Consider a vanilla chamomile version by adding a splash of vanilla extract for extra flavor. Seasonal adaptations might include using pumpkin spice during fall or mint for a refreshing summer brew.

For dietary modifications, explore using almond or coconut milk for a dairy-free version. This not only makes the latte suitable for vegans but also provides unique flavor combinations that are equally delightful. Add a packet of flaxseed or chia seeds for a nutritional boost.

If you prefer a stronger chamomile essence, feel free to double the amount of chamomile used in the recipe while reducing honey to balance sweetness. Additionally, for a heartier texture, consider adding brewed chai tea into the mix.

Serving and Presentation Guide

For an aesthetically pleasing serving, consider using clear glass mugs that showcase the beautiful color of the latte. Plating techniques can be as simple as layering the frothed milk to create a swirl effect. For garnishing, a sprinkle of cinnamon or fresh chamomile flowers adds visual appeal.

Pair your latte with traditional accompaniments like homemade cookies or fruit tarts to enhance the experience. Additionally, serving it in a warm, cozy environment can amplify its comforting allure, making it a treat for both the eyes and taste buds.

Temperature is key; serve the latte warm but not too hot to ensure enjoyability for everyone. Portion control can be easily managed by serving in smaller cups, allowing guests to savor multiple sips rather than overwhelming them with one large drink.

Wine and Beverage Pairing

When it comes to pairing beverages like the Chamomile & Honey Sleepytime Latte, consider serving it with herbal wines or lightly flavored white wines, such as Sauvignon Blanc that won’t overpower the soft flavors of chamomile. For non-alcoholic alternatives, pair it with herbal teas that complement the chamomile, like lavender or peppermint.

If you’re planning a cozy night in, pairing the latte with a side of light champagne can offer an effervescent contrast, making the experience even more special. For iced variations, serve it alongside a refreshing lemonade to balance the creamy texture with citrus brightness.

Storage and Shelf Life

The Chamomile & Honey Sleepytime Latte is best enjoyed fresh; however, if you have leftovers, store them in an airtight container in the fridge for up to two days. To retain quality, ensure it’s cooled before refrigerating. When reheating, do so gently on the stovetop or in the microwave, watching out for any signs of spoilage such as an off smell or discoloration.

For optimal freshness of ingredients like chamomile and honey, store them in a dark, cool space away from moisture and direct sunlight. Honey naturally has a long shelf life, but if it crystallizes, gently heat it to restore its texture. Freezing prepared lattes isn’t advisable, but you can freeze chamomile tea bags for later use.

Make Ahead Strategies

Preparing your Chamomile & Honey Sleepytime Latte can be streamlined for busy evenings. Brew a larger batch of chamomile tea in advance, allowing you to speedily assemble the latte later. Store the brewed tea in the fridge so you can eliminate steeping time.

Consider prepping the honey syrup by combining honey with hot water in advance. This ensures it blends seamlessly into your drink without clumping. Additionally, froth your milk just before serving to maintain texture and temperature.

Quality will remain intact with these strategies, but remember to make the latte close to serving time for maximum freshness. Reheating whole batches should be avoided, as flavors can dull when reheated multiple times.

Scaling Instructions

Scaling this recipe is simple! If you’re interested in halving the recipe for a solo cup, simply adjust the quantities accordingly, focusing on maintaining the balance of flavors. For larger groups, double or even triple the ingredients, ensuring you have the necessary equipment to heat and froth larger amounts of milk.

Timing might change slightly with larger quantities; closely monitor the heating process to maintain your optimal flavors and textures. Store any additional latte in the fridge, following the storage guidelines above, to ensure freshness. Remember, the key is adjusting your proportions without sacrificing quality!

Nutritional Deep Dive

In analyzing the nutritional value of this Chamomile & Honey Sleepytime Latte, each serving holds a balance of essential macros. It offers a satisfying amount of carbohydrates primarily from honey, while the milk provides crucial proteins and fats, ensuring a well-rounded drink suitable for a soothing evening.

Micronutrient analysis indicates that chamomile is rich in antioxidants, while honey contributes vitamins like B6 and minerals such as calcium and magnesium. Together, these elements support overall health, aiding digestion and promoting relaxation, making this latte not just delicious, but beneficial too.

When considering health benefits, the calming effects of chamomile make it a popular choice for those suffering from insomnia or stress-related issues. With proper portions, this drink aligns well with many dietary considerations, but it’s still best enjoyed in moderation, especially with added sweeteners.

Dietary Adaptations

For those requiring gluten-free options, this recipe naturally fits the bill! Chamomile tea and honey are gluten-free; simply ensure that the milk alternative you choose also adheres to dietary restrictions.

Adapting this recipe for dairy-free diets can easily be done by using alternatives such as almond or oat milk, maintaining the flavor and texture. Vegans can replace honey with maple syrup or agave nectar to suit their dietary needs.

Low-carb and keto followers can modify by utilizing sugar-free sweeteners, keeping the richness of flavor while cutting down on carbs. Each dietary adaptation allows for variations while ensuring everyone can enjoy a warm mug of relaxation.

Troubleshooting Guide

If your latte turns out too bitter, re-evaluate the steeping time of your chamomile. Excessive brewing can impart unwanted flavors, so ensure it’s within the recommended time frame. If a soapy taste emerges, double-check your milk’s freshness, as old milk can affect the flavor quality.

For texture issues, if it’s too watery, reduce the amount of milk or increase the chamomile quantity. On the other hand, if it’s too thick, gently add more milk until the desired consistency is reached.

Common equipment challenges may arise when frothing milk; using chilled tools can help in creating better foam. Lastly, always taste your latte before serving and adjust sweetness as needed; this allows for a personalized drink tailored to individual preferences.

Recipe Success Stories

As community feedback has flowed in, many readers have fallen in love with this Chamomile & Honey Sleepytime Latte. The warmth that comes from sharing a soothing drink at the end of a long day has led to heartfelt success stories, enhancing connections among friends and family.

Variation successes have emerged as well, with many trying this recipe with an added hint of lavender or ginger for a spicy twist, proving just how flexible and enjoyable this latte can be.

Readers often share their adaptations, showcasing unique spellings or serving suggestions that align with personal preferences. Photos flooded on social media exhibit stunning latte art and creative presentations, encouraging a broader community engagement around evening rituals.

Frequently Asked Questions

Can I use fresh chamomile flowers?

Absolutely! Fresh chamomile flowers offer an even more robust flavor. Use about double the amount of fresh flowers compared to dried ones, and steep them as you would any herbal tea.

What if I don’t have honey?

No worries! You can substitute honey with agave syrup, maple syrup, or even stevia for a sugar-free option. Adjust quantities to taste, as sweetness levels can vary greatly.

How can I make this latte more frothy?

For a frothier latte, ensure your milk is heated properly, and use a frother or a whisk to aerate the milk vigorously until it forms a nice foam. You can use cold milk by frothing it first and then warming it gently.

Can I make this latte iced?

Yes! Prepare the latte as usual, let it cool down, and then pour it over ice. You may want to reduce the amount of milk slightly for a more concentrated flavor when serving it iced.

How long will leftovers last in the fridge?

Leftover latte can be stored in the refrigerator for about 2 days in a sealed container. However, be aware that flavors might alter slightly, so it’s best enjoyed fresh.

Can I add more spices to the latte?

Definitely! Adding spices like cinnamon, nutmeg, or even cardamom can enhance the flavor profile. Start with small amounts and adjust to your personal preference.

Is this recipe suitable for children?

Yes, this latte is a gentle option for children as it contains no caffeine. However, be mindful of the honey content, particularly for infants under one year.

What type of milk works best?

Any milk will work well, including dairy and alternatives like almond or oat milk. Choose your favorite or the one that aligns with your dietary preferences; they all froth differently but will taste great!

Can I use flavored chamomile tea bags?

Certainly! Flavored chamomile tea bags can add a unique twist to your latte, so feel free to experiment with flavors that you enjoy, such as vanilla or lavender chamomile.

Is it okay to keep the latte warm in a thermos?

Yes, a thermos can help maintain the warmth of your latte, making it a great option for enjoying it on the go or keeping it warm throughout your evening routine.

Additional Resources

For those looking to expand their beverage repertoire, explore related recipes like herbal teas or infused milks that can enhance your evening routines. Technique guides on milk frothing can help take your lattes to the next level, while ingredient information on chamomile can deepen your understanding of this calming flower.

Be sure to check out equipment recommendations for frothers or specialty mugs to elevate your experience. Seasonal variations can also inspire creativity in your drink selections, ensuring your evening rituals stay exciting throughout the year.

Join the Conversation

Engagement around this Chamomile & Honey Sleepytime Latte can flourish through social media sharing. As you enjoy your latte, snap a photo and tag your friends, inviting them to partake in the soothing experience. Photography tips can help elevate your food styling, leading to beautiful presentations that deserve to be shared.

Recipe reviews and community engagement help foster connections among fellow latte lovers. Encourage your readers to suggest their own adaptations and variations; after all, recipes evolve as they move through communities!

The Recipe

Chamomile & Honey Sleepytime Latte

Serves: 2 cups

Prep Time: 5 mins

Cook Time: 5 mins

Total Time: 10 mins

Kitchen Equipment Needed

  • Small pot
  • Whisk or frother
  • Measuring cups and spoons
  • Fine strainer (if using loose chamomile)

Ingredients

  • 2 cups of water
  • 2 tablespoons dried chamomile flowers or 2 chamomile tea bags
  • 1 cup milk (dairy or non-dairy)
  • 2 tablespoons honey (adjust to taste)
  • 1/2 teaspoon vanilla extract (optional)
  • Pinch of cinnamon for garnish

Directions

  1. Bring water to a boil in a small pot.
  2. Add chamomile flowers or tea bags to the boiling water and steep for about 5-10 minutes.
  3. While the tea is steeping, heat the milk in another small pot until warm but not boiling.
  4. If desired, froth the milk using a whisk or frother until a silky foam develops.
  5. Remove the chamomile from heat and strain (if using loose flowers) into a large mug.
  6. Stir in honey, adjusting sweetness to your liking, along with vanilla extract if using.
  7. Pour in the warm milk and gently mix.
  8. Top with a sprinkle of cinnamon and serve immediately.

Recipe Notes

  • Try adding a splash of almond or coconut milk for a different flavor profile.
  • Leftover latte can be stored in the fridge for up to two days; reheat gently prior to serving.
  • Feel free to experiment with other spices, such as nutmeg or ginger, for added depth.
  • This recipe can easily be multiplied for larger gatherings.

Delightful Southern Hummingbird Cake with Cream Cheese Frosting Recipe

Southern Hummingbird Cake with Cream Cheese Frosting: A Tropical Delight

⚖️
Difficulty
Moderate

⏲️
Prep Time
20 mins

🕒
Cook Time
30 mins

⏱️
Total Time
50 mins

🍽️
Servings
12 slices

Indulging in a slice of Southern Hummingbird Cake is like taking a bite of sunshine. This vibrant cake, infused with bananas, pineapple, and toasted pecans, is draped in a rich and creamy cream cheese frosting that beautifully complements its tropical flavors. Originating from the South, this cake isn’t just a dessert; it’s a celebration of the flavors that embody Southern hospitality and warmth. Imagine the sweet aroma of freshly baked cake wafting through your kitchen, beckoning loved ones to gather around and enjoy a slice of joy.

Whether you’re hosting a family gathering or simply treating yourself, this Southern Hummingbird Cake is versatile enough to shine in any setting. The unique combination of flavors, from the sweetness of ripe bananas to the tropical twist of crushed pineapple, creates a symphony that dances on your palate. Add in the moist texture and the delightful crunch of pecans, and you have a cake that not only looks stunning but also satisfies every sweet tooth.

Quick Recipe Highlights

  • Flavor Profile: A perfect balance of sweetness, with hints of tropical fruits and nutty pecans creating a delightful mix.
  • Texture: Moist and fluffy with a creamy frosting, this cake offers a delightful melt-in-your-mouth experience.
  • Aroma: Inviting tropical notes from bananas and pineapple complemented by the rich scent of vanilla and cream cheese.
  • Visual Appeal: Eye-catching layers topped with a fluffy frosting and adorned with pecans for a rustic look.
  • Skill Level Needed: Ideal for moderate bakers; requires basic mixing and baking techniques.
  • Special Equipment: Standard kitchen tools including mixing bowls, a whisk, and a cake pan are all you need.

Recipe Overview

  • Difficulty Level: This recipe strikes a balance between beginner-friendly and challenging, making it a great opportunity to enhance your baking skills.
  • Category: Dessert – perfect for birthdays, celebrations, or simply enjoying with a cup of coffee.
  • Cuisine: Deeply rooted in Southern culture, Hummingbird Cake represents the region’s love for bold flavors and rich traditions.
  • Cost: Ingredient costs are reasonable, especially for fresh fruits and pantry staples, making it an accessible choice.
  • Season: Best enjoyed in spring and summer, when fresh fruits are at their peak, but delicious year-round.
  • Occasion: Suitable for both casual and formal gatherings, making it a versatile choice for entertaining.

Why You’ll Love This Recipe

The Southern Hummingbird Cake is a perfect marriage of tropical flavors that sings of nostalgia and celebration. Each slice delivers a delightful combination of sweet bananas, juicy pineapple, and crunchy pecans, creating an irresistibly flavorful experience. Its moist and fluffy texture contrasts beautifully with the rich cream cheese frosting, leaving a lasting impression on every palate. This cake isn’t just food; it’s an experience that draws people together, inviting them to enjoy the sweetness of life.

In terms of preparation, this cake is manageable for both novice bakers and those looking to refine their skills. The straightforward instructions make it easy to follow along and enjoy the step-by-step process without feeling overwhelmed. Additionally, the ability to bake and frost the cake ahead of time adds convenience, ensuring that you can focus on your guests when it’s time to serve.

Another reason to adore this cake is its nutritional punch. Bananas and pineapple contribute essential vitamins and minerals, making it a slightly guilt-free treat. While it’s still a dessert, the use of fresh fruits enhances its nutritional profile. The pecans also provide healthy fats and protein, adding to the overall goodness of this delightful cake.

This Southern Hummingbird Cake shines at social gatherings, fostering warmth and connection among family and friends. Its inviting aroma and beautiful presentation create a lure that encourages sharing and celebrating togetherness. When served at parties, this cake becomes a centerpiece that sparks conversation and creates memories.

Lastly, the ingredients used in this recipe are both affordable and readily available in most grocery stores, ensuring that everyone can make this cake without breaking the bank. This accessibility allows more people to enjoy the wonders of Southern baking, solidifying the cake’s position as a beloved recipe passed down through generations.

Historical Background and Cultural Significance

The origins of the Southern Hummingbird Cake can be traced back to the southern United States, where it has been a popular dessert for many years. Its name is said to have been inspired by the Hummingbird, a bird that loves sweet nectar, metaphorically reflecting the cake’s irresistible sweetness. The cake embodies the essence of Southern hospitality, often served during gatherings to showcase the warmth and generosity of the region.

Culturally, the cake holds a special place in the hearts of many Southerners, symbolizing community and celebration. It is a common feature at weddings, birthdays, and other significant events, often eliciting nostalgia in those who grew up with it. The recipe has evolved over time, with families passing down their variations, adding personal twists to the classic cake that tell a story through every bite.

As the recipe traveled beyond its Southern roots, it gained popularity across the country, becoming a staple dessert in many households and cafes. Its transformation and adaptation have led to numerous variations, reflecting the diverse palates and techniques of bakers everywhere while still staying true to the essence of the original recipe.

You can find regional variations of the Hummingbird Cake, including adjustments such as adding coconut for a tropical twist or using different nuts, which showcases the creativity of home bakers. Each iteration offers a glimpse into the local ingredients and flavors while keeping the traditional spirit alive.

Ingredient Deep Dive

Bananas

Bananas are a key ingredient in Southern Hummingbird Cake, not only providing natural sweetness but also contributing moisture to the cake. Rich in potassium and vitamins B6 and C, bananas promote heart health and provide energy. When selecting bananas for baking, look for ones that are overripe with brown spots, as they will add more flavor to the cake. Store ripe bananas at room temperature or refrigerate them to prolong their freshness. An excellent substitute for bananas in recipes can be applesauce or even mashed avocado if you’re looking for alternatives.

Pineapple

Crushed pineapple adds a tropical flair that balances the richness of the cake. This ingredient is high in vitamin C and bromelain, an enzyme that aids in digestion. When selecting pineapple, fresh, in-season varieties will provide the best flavor, but canned crushed pineapple also works well. Ensure to drain the canned version to prevent excess moisture from affecting the cake’s texture. For a twist, consider using other tropical fruits such as mango or papaya which can provide similar moisture and sweetness.

Pecans

Pecans are a classic addition to Hummingbird Cake, adding crunch and a nutty flavor that complements the fruits. Packed with healthy fats, fiber, and antioxidants, pecans contribute to heart health and support overall well-being. When purchasing pecans, look for fresh, unbroken nuts, and store them in an airtight container to keep them from becoming rancid. You can substitute pecans with walnuts or almonds if preferred, though they will impart a different taste profile.

Cream Cheese

The cream cheese frosting is the crowning glory of this cake, lending a tangy flavor that balances the sweetness of the cake. Cream cheese provides calcium and protein, enhancing the nutritional value of the frosting. Choose block-style cream cheese for a thicker consistency that beats well into a creamy frosting. If aiming for a lower-fat version, consider using Neufchâtel cheese or Greek yogurt as healthier substitutes, although they may differ slightly in flavor and texture.

Common Mistakes to Avoid

  • Using Overripe Bananas: Ensure your bananas are overripe, but not rotten. Overripe bananas add sweetness and moisture, crucial for a successful Hummingbird Cake.
  • Incorrect Oven Temperature: Always preheat your oven properly. An oven that is too hot can cause the cake to rise unevenly, while a cool oven can leave it dense.
  • Skipping the Sifting Step: Sifting your flour helps to aerate it, preventing a dense cake. Always sift your flour before measuring for optimal results.
  • Not Draining Pineapple: Excess moisture from canned pineapple can lead to a soggy cake. Be sure to drain it well before using in the recipe.
  • Overmixing the Batter: Mix only until the ingredients are combined; overmixing can result in a tough cake texture.
  • Not Letting the Cake Cool: Allow the cake layers to cool completely before frosting. This prevents the frosting from melting and sliding off.
  • Incorrect Cream Cheese Consistency: Ensure your cream cheese is softened to room temperature for a smooth, spreadable frosting.
  • Neglecting to Taste: Always taste your batter before baking. Adjust sweetness as necessary, especially with added fruits.
  • Ignoring Storage Guidelines: Improper storage can lead to a dry cake. Make sure to store it in an airtight container.
  • Skipping the Nuts: While they can be optional for some, toasted pecans add essential flavor and texture to the cake, do not skip them unless there are allergies.

Essential Techniques

Mixing the Batter

Properly mixing the batter is crucial for achieving the desired texture of your cake. Start by creaming the sugar and butter until light and fluffy. This process introduces air into the mixture, ensuring a light cake. After incorporating the eggs, gently fold in the dry and wet ingredients until just combined to prevent overmixing. Watch for visual cues such as smooth texture and slight lumpiness—which is perfectly acceptable. Avoiding overmixing is key, as it can develop gluten and lead to a dense cake.

Cooling the Cake

Once baked, allow the cakes to cool in their pans for about 10-15 minutes before transferring them to wire racks. This cooling period allows the steam to escape, preventing sogginess while ensuring the cakes hold their shape. For a successful transfer, gently run a knife around the edges to loosen the cake before inverting it. Adequate cooling before frosting is essential; a warm cake can cause the frosting to melt, resulting in an unappealing finish.

Pro Tips for Perfect Southern Hummingbird Cake

– Use fresh, high-quality ingredients for the best flavor and texture; ripe bananas and fresh pineapple will elevate your cake.
– Toast your pecans before adding them to the batter for an extra layer of depth in flavor.
– Do not frost the cake until it is completely cool to prevent the frosting from melting and sliding off.
– Consider adding a touch of coconut for a tropical twist; it complements the other flavors beautifully.
– Use a serrated knife to level off the tops of your cake layers, ensuring a neat stacking when frosting.
– If you have leftovers, store them in the fridge to maintain moisture, though it’s best enjoyed fresh.
– For an easy serving option, slice the cake into smaller squares and present them on a platter for gatherings.
– Experiment with different cake pans, like bundt or square, to create various presentation styles.

Variations and Adaptations

When it comes to Southern Hummingbird Cake, the possibilities for variations and adaptations are endless. For a regional twist, consider adding shredded coconut alongside the banana and pineapple for a classic tropic flavor fusion. During the fall months, a seasonal adaptation might include incorporating spices like cinnamon or nutmeg to create a warm, comforting flavor profile.

If you’re seeking dietary modifications, this cake can be easily transformed into a gluten-free delight by using a gluten-free flour blend in place of all-purpose flour. For those following a dairy-free or vegan lifestyle, there are alternative recipes that use plant-based yogurts or cream cheese substitutes, enabling everyone to savor its wonderful flavors.

Flavor variations can also be explored by introducing different fruits such as mango, contributing a unique twist to the traditional recipe. Alternatively, adding a splash of rum to the frosting or the cake batter takes the flavor to new heights. For those who enjoy a crunch, consider swapping the pecans for walnuts or macadamias to switch up the texture.

Presentation alternatives can also elevate this dessert; try serving it as individual mini cakes or in a trifle dish layered with frosting and cake crumbs for an elegant touch.

Serving and Presentation Guide

Presentation is key when serving your Southern Hummingbird Cake. For an impressive display, consider using a cake stand to elevate the beauty of your creation and allow guests to admire it from all angles. Garnish with whole pecans on top of the frosting or sprinkle toasted coconut to enhance its visual appeal.

When it comes to traditional accompaniments, a scoop of vanilla ice cream or a dollop of whipped cream can complement the cake beautifully. For modern serving suggestions, pair each slice with a fruity sauce or coulis to enhance the flavor experience.

Temperature considerations are essential; serve your cake slightly chilled for a refreshing treat, especially on hot days. Regarding portion control, a standard slice can be generous, so consider cutting smaller portions for gatherings, allowing guests to enjoy multiple treats without feeling guilty.

Wine and Beverage Pairing

To elevate your dessert experience, consider pairing a slice of Southern Hummingbird Cake with a light dessert wine such as a Moscato or a sweet Riesling, both of which will complement the cake’s fruity flavors. For a non-alcoholic alternative, a refreshing mint tea or creamy chai latte makes for an excellent gardening companion, perfectly balancing the sweetness.

If you’d like a coffee pairing, a lightly brewed coffee or even a flavored espresso can beautifully contrast the richness of the cake’s cream cheese frosting. Serve these beverages at a slightly warm temperature, enhancing the overall indulgence and experience of savoring your Hummingbird Cake.

Storage and Shelf Life

To ensure the longevity of your Southern Hummingbird Cake, store it in an airtight container at room temperature for up to three days. If you’d like to keep it for a longer duration, refrigeration will help extend its shelf life, preserving it for up to a week.

When refrigerating, ensure the frosting doesn’t become damaged; consider covering it with plastic wrap. Look for signs of spoilage such as a change in texture or an off smell, as these indicate the cake may no longer be good to eat.

If you wish to freeze your cake, wrap it tightly in plastic wrap followed by aluminum foil, ensuring it’s airtight. This can preserve it for up to three months. When ready to serve, thaw in the refrigerator overnight and allow the cake to come back to room temperature before enjoying.

Make Ahead Strategies

Making your Southern Hummingbird Cake ahead of time can be a time-saver, especially for busy occasions. You can bake the cake layers up to a day in advance, allowing them to cool completely before wrapping and storing them in the refrigerator. This will keep your cake moist and fresh while you prepare for your event.

When it comes to assembling, frost the cake the day of serving to maintain maximum freshness and prevent any textural changes. Once assembled, store the cake in a cool area before serving to keep the frosting intact.

If you’re interested in adding fresh elements later, consider preparing the frosting ahead of time and refrigerating it. This makes assembly quick and convenient. Just be sure to re-whip the frosting slightly before application.

Scaling Instructions

Scaling your Southern Hummingbird Cake up or down is straightforward. If you need to halve the recipe, use smaller pans or adjust the baking time, checking for doneness earlier. Alternatively, to double or triple the recipe, use larger pans and potentially increase the baking time.

Keep in mind that larger cakes may require additional time to bake through, so be vigilant towards the end of the baking period to avoid overcooking. Additionally, when scaling up, consider the capacity of your mixer; working in batches might be necessary to meet your volume requirements.

Storage remains consistent based on whether you’re making one or multiple cakes; ensure they’re appropriately wrapped to minimize exposure to air and retain moisture.

Nutritional Deep Dive

A slice of Southern Hummingbird Cake offers a delightful balance of indulgence and nutrition. The macro breakdown of this cake includes healthy fats from pecans, carbohydrates from fruits, and a moderate amount of sugar, while the cream cheese frosting adds a touch of protein.

In terms of micronutrients, bananas provide potassium, while pineapple brings vitamin C to the table. The addition of pecans enriches the nutrient profile with healthy fats and antioxidants crucial for supporting overall wellbeing.

This cake can be enjoyed as part of a balanced diet, as the natural sweetness of the fruits reduces the need for excessive added sugars. However, mindful portion control is essential to align with dietary goals, as enjoying this delicious treat occasionally can fit seamlessly into a healthy lifestyle.

For weight management, consider smaller slices paired with fruits or nuts to create a satisfying dessert experience without overindulging.

Dietary Adaptations

Southern Hummingbird Cake can be easily tailored to suit a variety of dietary preferences. If gluten-free is a necessity, substituting regular flour with a gluten-free blend ensures that everyone can enjoy this beloved dessert without worry.

For those avoiding dairy, using vegan cream cheese and plant-based milk will allow for a delicious, dairy-free version without sacrificing flavor. Additionally, egg substitutes such as flax eggs or applesauce can seamlessly replace eggs for a vegan option.

If you’re following a low-carb diet, consider a sugar substitute in both the cake and frosting recipes, carefully selecting options that do not compromise the cake’s texture. Alternatively, using almond flour instead of regular flour can reduce the overall carb count while still providing a deliciously rich cake.

For those adhering to a paleo diet, focusing on whole, natural ingredients with substitutions for refined sugars will produce a cake that meets dietary standards while remaining delightful and indulgent.

Troubleshooting Guide

If you encounter texture issues with your Hummingbird Cake, consider checking your oven temperature; an oven that runs too hot can create dry layers while a too cool oven may lead to dense cakes. Additionally, ensure the correct measurements of ingredients to maintain the ideal moisture level.

Flavor balance can sometimes be off; if your cake is too sweet, consider reducing the sugar slightly in future batches. If it lacks sweetness, the addition of a simple syrup brushed onto the layers can enhance flavors without affecting texture.

Temperature problems, particularly with frosting melting after application, can often be remedied by ensuring your cake is completely cool before frosting. Additionally, ingredients like cream cheese should be at room temperature for the best results.

Equipment challenges, such as poor mixing or uneven baking, can often be solved by investing in quality bakeware that promotes even heating. Utilizing a kitchen scale for exact measurements can significantly improve results, making it easier to replicate the recipe.

Adapt your timings where necessary, especially when experimenting with altered recipes or larger servings; always test cakes with a toothpick to ensure thorough baking without dryness.

Recipe Success Stories

Community feedback about the Southern Hummingbird Cake often highlights its nostalgic flavors, transporting individuals back to family gatherings and celebrations. Readers frequently share their success stories of variations they’ve tried, such as adding chocolate chips or moister fruits that enhance the traditional recipe.

Throughout social media, home bakers enthusiastically document their experiences, noting how the cake quickly becomes a favorite among family members or friends at gatherings. Adaptation stories reveal the creativity of home bakers who add their unique twist, whether through ingredients or presentation.

Tips shared by readers often include frosting techniques or cake assembly strategies that transformed their cakes into stunning desserts worthy of any event. Many share heartfelt narratives about the joy and connections facilitated by sharing this cake.

Photography tips shared within the community capture these epic cakes in all their glory, with many recommending various angles or lighting setups to showcase the beauty of their creations.

Frequently Asked Questions

1. Can I freeze the Southern Hummingbird Cake?
Yes, you can freeze the cake! Wrap individual slices or the entire cake in plastic wrap and then aluminum foil. It can last for up to three months in the freezer. To serve, thaw in the refrigerator overnight before enjoying.

2. How do I substitute ingredients in the Hummingbird Cake?
You can substitute ripe bananas with applesauce for a different fruity flavor. If you need a gluten-free version, use a gluten-free flour blend instead of all-purpose flour.

3. Can I make this cake ahead of time?
Absolutely! You can bake the cake layers a day in advance and store them in the fridge. Frosting the cake on the day of serving will maintain its freshness.

4. What is the best way to store leftovers?
Store leftover cake in an airtight container at room temperature for 3-4 days or in the refrigerator for up to a week to maintain its moisture.

5. Can I make the cream cheese frosting vegan?
Yes, you can use a vegan cream cheese product alongside plant-based butter for a dairy-free frosting without sacrificing too much on flavor.

6. How do I know when the cake is done baking?
Insert a toothpick in the center of the cake; it should come out clean or with a few moist crumbs. This indicates the cake is fully baked.

7. What if my cake turns out too dry?
This could be due to overbaking. To avoid dryness in the future, start checking the cake for doneness earlier than the prescribed bake time.

8. Is there a gluten-free option for this cake?
Yes! Simply replace regular flour with a gluten-free flour blend to create a delicious version that everyone can enjoy.

9. What can I serve with Hummingbird Cake?
This delightful cake pairs well with a scoop of vanilla ice cream, whipped cream, or a light fruit sauce for an extra touch of flavor.

10. Can I use different nuts instead of pecans?
Certainly! While pecans add a unique flavor, walnuts or almonds can also work well as substitutes.

Additional Resources

If you enjoyed this Southern Hummingbird Cake, explore our related recipes for more exciting desserts, like classic Southern pecan pie or rich red velvet cake. Enhance your baking skills with our technique guides, covering everything from mastering the perfect frosting to tips for layering cakes.

For ingredient information, visit our detailed guides on choosing fresh fruits or selecting the best baking supplies for your kitchen. Additionally, keep an eye out for seasonal variations of our recipes featuring fresh summertime berries or holiday spices to keep your dessert game strong all year round.

To perfect your baking experience, check out our equipment recommendations that ensure success in your culinary endeavors.

Join the Conversation

Engaging with our community is a vital part of the experience. We encourage you to share your variations, tips, and tricks learned while making Southern Hummingbird Cake. Posting your beautiful photos on social media is a fantastic way to inspire other bakers.

We invite you to leave your feedback or review about your baking success with this cake, as it can help others explore its delights.

Your unique adaptations and story might just spark someone else’s creativity in the kitchen. Share your journey, and connect with fellow baking enthusiasts who cherish the same passion for food and community!

The Recipe

Southern Hummingbird Cake

Serves: 12 slices

Prep Time: 20 mins

Cook Time: 30 mins

Total Time: 50 mins

Kitchen Equipment Needed

  • Mixing bowls
  • Whisk and spatula
  • Cake pans
  • Cooling racks
  • Electric mixer

Ingredients

  • 3 ripe bananas, mashed
  • 1 cup crushed pineapple, drained
  • 1 cup vegetable oil
  • 2 cups sugar
  • 3 large eggs
  • 2 teaspoons vanilla extract
  • 2 cups all-purpose flour
  • 1 teaspoon baking soda
  • 1 teaspoon ground cinnamon
  • ½ teaspoon salt
  • 1 cup pecans, chopped
  • For the frosting: 8 oz cream cheese, softened, ½ cup butter, softened, 4 cups powdered sugar, 1 teaspoon vanilla extract

Directions

  1. Preheat the oven to 350°F (175°C). Grease and flour three 9-inch round cake pans.
  2. In a large bowl, combine the mashed bananas, crushed pineapple, oil, and sugar. Mix well.
  3. Add the eggs and vanilla extract to the mixture; stir until combined.
  4. In another bowl, whisk together the flour, baking soda, cinnamon, and salt.
  5. Gradually add the dry ingredients to the wet mixture while stirring gently until just combined.
  6. Fold in the chopped pecans.
  7. Divide the batter evenly among the prepared cake pans.
  8. Bake for 25-30 minutes or until a toothpick inserted in the center comes out clean.
  9. Cool the cakes in the pans for 10 minutes, then transfer to wire racks to cool completely.
  10. For the frosting, beat the cream cheese and butter together until smooth. Gradually add the powdered sugar and vanilla, mixing until fluffy.
  11. Once the cakes are completely cool, frost the top of one layer, add the next layer, and repeat, finishing with the top layer. Frost the top and sides of the cake.
  12. Garnish with additional pecans or coconut if desired. Serve and enjoy!

Recipe Notes

  • For extra fruit flavor, you can add shredded coconut.
  • Make sure all ingredients are at room temperature for better mixing.
  • Feel free to use walnuts instead of pecans if that’s your preference.