Crispy Cinnamon-Sugar Air Fryer Banana Chips Ready in Minutes

Cinnamon-Sugar Air Fryer Banana Chips: The Perfect Crispy Snack

⚖️
Difficulty
Easy

⏲️
Prep Time
5 mins

🕒
Cook Time
10 mins

⏱️
Total Time
15 mins

🍽️
Servings
2-4 servings

Who’s ready for a crispy, sweet, and healthy snack that’s ready in minutes? These Cinnamon-Sugar Air Fryer Banana Chips are not only delicious but also offer a guilt-free way to satisfy your cravings. Imagine biting into a perfectly crisp slice of banana, coated with a hint of cinnamon and sugar, providing a delightful contrast to its creamy interior. Perfect for snacking or as a topping for yogurt or oatmeal, this recipe is a must-try for banana lovers!

Creating these banana chips in the air fryer allows you to enjoy that satisfying crunch without the need for frying. The cooking process enhances the natural sweetness of the bananas and caramelizes the sugar and cinnamon, creating an irresistible blend of flavors. Whether you’re looking for a quick snack to satisfy your sweet tooth or a nutritious treat to share with friends, these banana chips will not disappoint.

Quick Recipe Highlights

  • Flavor Profile: The sweet and warm cinnamon pairs beautifully with the natural sweetness of the bananas, creating an irresistible blend that tantalizes your taste buds.
  • Texture: The exterior is irresistibly crispy, while the inside remains soft, offering a delightful contrast that makes each bite satisfying.
  • Aroma: Expect your kitchen to fill with the warm, comforting aroma of cinnamon as the banana chips cook, inviting everyone to gather around.
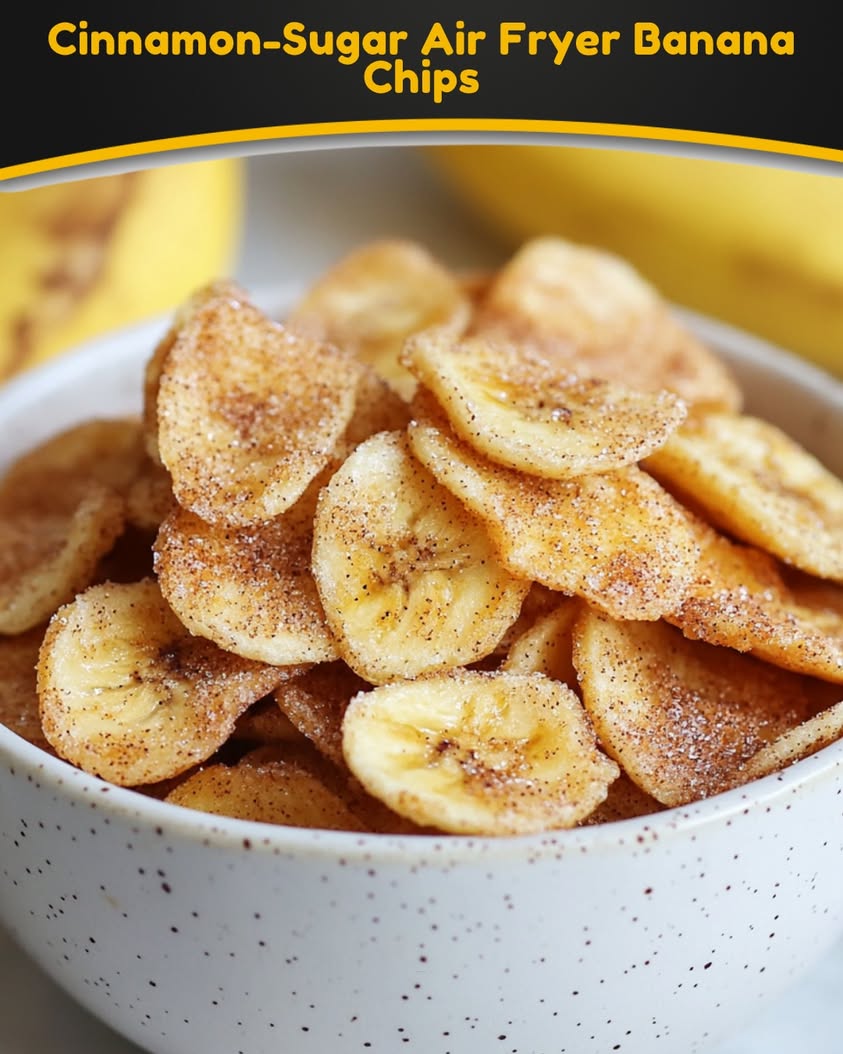
  • Visual Appeal: Golden-yellow slices with a hint of cinnamon sugar make these banana chips not only tasty but also beautiful—ideal for impressing guests.
  • Skill Level Needed: This recipe is extremely beginner-friendly, making it suitable for home cooks of all skill levels.
  • Special Equipment: You’ll need an air fryer, which makes this recipe quick and easy without the mess of traditional frying.

Recipe Overview

  • Difficulty Level: This Cinnamon-Sugar Air Fryer Banana Chip recipe is rated easy. The steps involve simple slicing and air frying, making it perfect for novice cooks.
  • Category: This recipe falls under snacks, great for afternoon munchies or party appetizers.
  • Cuisine: While the idea of frying bananas exists in various cuisines, the air fryer adaptation adds a modern twist, reflecting contemporary health trends.
  • Cost: The ingredients are inexpensive, with bananas being affordable staples in most homes, making this recipe budget-friendly.
  • Season: Bananas are available year-round, so you can enjoy these anytime. They’re particularly refreshing in warmer months.
  • Occasion: Perfect for birthday parties, movie nights, or casual weekends when you crave something sweet yet healthy.

Why You’ll Love This Recipe

If you’re a fan of all things sweet and crispy, you’re going to fall head over heels for these air fryer banana chips. Each bite combines the natural sweetness of the bananas with the delicate crunch delivered by the air fryer, resulting in an irresistible snack. Unlike store-bought snacks laden with preservatives, these chips are free from harmful additives, offering a healthier alternative that doesn’t compromise on taste.

In addition to their delightful flavor, these chips come together incredibly quickly, making them a lifesaver on busy days when you want a healthy snack without any complicated preparation. Simply slice the bananas, sprinkle with cinnamon sugar, and air fry. It’s as easy as that!

Nutritionally, these banana chips are a powerhouse of energy. Bananas provide a good source of potassium and fiber, which are essential for heart health and digestion. The cinnamon not only adds flavor but also has numerous health benefits, including anti-inflammatory properties.

They also serve as excellent snacks for social gatherings or family get-togethers, as they’re easily shareable and enjoyably fun to eat. Their sweet flavor profile will appease even the pickiest of eaters, making them a hit at any event.

Moreover, with their affordable ingredients, banana chips show you don’t need to break the bank to enjoy a delicious and healthy snack. Incorporating these into your diet is both accessible and budget-friendly.

Historical Background and Cultural Significance

The origin of banana chips can be traced back to various tropical regions where bananas are cultivated. They have been a popular snack in many cultures, particularly in countries like the Philippines, where they are often fried and enjoyed as a street food delicacy. Over time, the method of preparing banana chips has evolved, and healthier methods like air frying have gained popularity.

In many cultures, bananas symbolize happiness and prosperity, making banana chips not just a snack but also a treat associated with good luck. The crispiness of banana chips has created a niche in snack culture, providing a crunchy alternative to regular potato chips.

The evolution of banana chips reflects a broader shift towards healthier snacking options, leading to innovations such as making them in an air fryer. This method preserves the banana’s natural sweetness while offering a guilt-free crunch that appeals to health-conscious snacking.

In addition to their historical roots, banana chips have various regional adaptations, with each area adding unique flavors and spices. From sweet to savory, they continue to be a beloved treat across the globe.

Ingredient Deep Dive

Bananas: Bananas, a staple fruit, have been consumed for thousands of years, originating from Southeast Asia. They are not only delicious but also extremely nutritious, providing essential vitamins and minerals such as Vitamin C, B6, and potassium. When selecting bananas for your chips, opt for ripe but firm bananas to ensure the best flavor and texture. Store them at room temperature, away from direct sunlight. If you have overripe bananas, they can still be used, and their sweetness will enhance the flavor of the final product.

Cinnamon: This aromatic spice has a rich history and is known for its health benefits, including anti-inflammatory properties and antioxidant effects. In the culinary world, cinnamon is often used to add warmth and sweetness to dishes. When selecting cinnamon, look for Ceylon cinnamon for a more delicate flavor or Cassia cinnamon for a stronger kick. Store cinnamon sticks whole and ground cinnamon in an airtight container to preserve freshness. Ground cinnamon can also be substituted with other spices, like nutmeg or pumpkin spice, for diverse flavor profiles.

Common Mistakes to Avoid

  • Using overly ripe bananas: While they’re sweeter, these may become mushy in the air fryer, resulting in an undesirable texture.
  • Not preheating the air fryer: Failing to preheat can lead to uneven cooking and soggy chips.
  • Overcrowding the basket: This prevents proper air circulation, leading to unevenly cooked banana chips.
  • Not adjusting the temperature: Cooking at too high a temperature can cause the sugar to burn before the bananas are crispy.
  • Skipping the cinnamon-sugar mixture: This adds crucial flavor; don’t omit or under-season!
  • Using non-fresh ingredients: Make sure your spices are fresh for maximum flavor impact.
  • Not slicing bananas thin enough: Thicker slices will take longer to cook and may remain chewy rather than crispy.
  • Ignoring cook times: Every air fryer is different; monitor closely to avoid burnt chips.
  • Forgetting to shake the basket: Shaking helps ensure even cooking and prevent sticking.
  • Storing improperly: If not stored correctly, your chips may lose their crispiness quickly.

Essential Techniques

Air Frying: This cooking method uses a fan to circulate hot air, creating a crispy texture with minimal oil. To master air frying, make sure to adjust your temperature and timing according to your air fryer’s specifications. Common pitfalls include overcrowding the basket and not shaking it halfway through cooking to ensure even results. You’ll know you’ve succeeded when your chips are crisp and golden brown.

Cutting Bananas Evenly: Uniform slicing of bananas not only ensures even cooking but also provides a consistent texture in each chip. Use a sharp knife for clean cuts, and aim for slices about 1/8 inch thick. Visual cues for success include evenly colored slices and consistent thickness, which you can easily achieve with a mandoline slicer.

Pro Tips for Perfect Cinnamon-Sugar Air Fryer Banana Chips

1. For added flavor, sprinkle a pinch of sea salt along with the cinnamon-sugar mixture. The contrast between sweet and salty enhances the overall taste.
2. Experiment with different spices, such as nutmeg or cardamom, to create your unique twist on traditional banana chips.
3. For a richer flavor, use brown sugar instead of white sugar in your cinnamon-sugar mix.
4. Make sure to use fresh, ripe bananas for the best flavor and texture in your chips.
5. Allow the banana chips to cool completely before storing to help maintain their crispiness.
6. If you prefer a sweeter chip, let the sliced bananas sit with sugar for a few minutes before cooking to draw out their natural juices.
7. Serve these chips with a dip, like yogurt or chocolate, for a delightful snack that feels indulgent.
8. Keep an eye on them in the last few minutes of cooking to achieve your desired level of crispness without burning.

Variations and Adaptations

You can explore various regional variations of banana chips by incorporating local spices or flavors. For example, adding a light dusting of coconut flakes before air frying introduces a tropical flair to your chips. In seasonal adaptations, consider infusing pumpkin spice for a fall twist during the harvest season. Dietary modifications can tailor this recipe for specific needs; for example, using coconut sugar for a deeper caramel flavor or adjusting the sweetness level based on dietary restrictions.

For a texture twist, try coating the banana chips in a mixture of almond or oat flour for a different crunch. Consider presentation alternatives, like stacking them in charming jars or serving on a colorful platter with drizzles of honey or maple syrup for added appeal.

Serving and Presentation Guide

When plating your Cinnamon-Sugar Air Fryer Banana Chips, consider using small bowls or plates to create an appealing display. Layer them attractively or fan them out to show off their golden deliciousness. garnishing ideas might include sprinkling fresh cinnamon on top or pairing with fresh mint for a pop of color.

For traditional accompaniments, serve with a side of yogurt or tapenade to enhance the flavor experience. Modern serving suggestions could include pairing them with a small glass of ginger ale or iced tea. Remember to keep them at room temperature, as they lose their crispness when served warm. Practicing portion control by serving them in individual cups can help manage snacking while ensuring everyone gets their fair share.

Wine and Beverage Pairing

Pair your Cinnamon-Sugar Banana Chips with a sweet Riesling or a light sparkling wine that complements their sweetness without overpowering it. For non-alcoholic alternatives, consider pairing with a refreshing iced tea or lemonade for a bright contrast. The sweetness of the chips will also harmonize beautifully with coffee or chai, creating a lovely pairing to enjoy while snacking.

Temperature should be kept cool when serving beverages as chilled drinks effectively balance out the warmth of freshly made banana chips.

Storage and Shelf Life

For optimal storage, keep banana chips in an airtight container at room temperature. They’ll stay fresh for about 3-5 days. If you notice them becoming soft, simply pop them back into the air fryer for a few minutes to restore their crispness. Check for signs of spoilage, such as a change in color or unpleasant odors.

If you opt to freeze any leftovers, be sure to layer them between parchment paper to prevent sticking. When ready to enjoy, simply reheat them in a preheated air fryer for a few minutes until crisp.

Make Ahead Strategies

If you want to prepare ahead, slice bananas, mix your cinnamon-sugar, and store them in the fridge for up to 24 hours. On cooking day, you can quickly air fry them without any additional prep. As for storage between steps, you can store the sliced bananas in lemon juice to prevent browning.

Assessing the quality impact is crucial; prepare them fresh when possible for the best texture. If preparing in advance, consider assembling all components the day before to maintain freshness. If you want to add fresh elements like nuts or berries, do so just before serving to prevent sogginess.

Scaling Instructions

If you’re halving the recipe, simply divide the number of bananas and the cinnamon-sugar mixture accordingly. For doubling or tripling, you might need to cook in batches as the capacity of your air fryer will dictate cook times and crispness. When scaling, consider adjusting timing as cooking larger quantities may require additional time.

Always test a few extra chips if unsure of timing and remember to store any excess properly to keep them fresh for later enjoyment.

Nutritional Deep Dive

Cinnamon-Sugar Air Fryer Banana Chips are not only delicious but also wholesome. A medium banana typically contains around 105 calories, providing a rich source of dietary fiber and potassium that aids in digestion and heart health. The addition of cinnamon introduces beneficial antioxidants that may help reduce inflammation and regulate blood sugar levels.

Pay attention to portion sizes when snacking, as the energy density can add up quickly if you consume too many chips. For those watching their weight, these chips can fit into a balanced diet, especially when made at home with controlled ingredients.

Critical to weight management is the balance of snacks; enjoy these chips occasionally and pair them with proteins or healthy fats for a more filling snack routine.

Dietary Adaptations

For gluten-free adaptations, this recipe is naturally gluten-free as bananas and cinnamon do not contain gluten. For vegan options, you can opt for plant-based toppings or dips without compromising flavor. If following a low-carb, keto, or paleo diet, simply reduce the sugar in the cinnamon-sugar mix or skip it altogether for a more natural, fruit-forward taste.

Low-FODMAP diets can also adapt this recipe with careful portion control of bananas. As for other specific diets, substitutions are easy, allowing a versatile approach to accommodate various dietary needs while still enjoying these tasty snack chips.

Troubleshooting Guide

If your banana chips turn out too chewy, they may have been sliced too thick or not cooked long enough. To resolve this, slice them thinner and adjust the cooking time. If they burn, this may be due to cooking at too high a temperature; lower the heat and monitor closely in future attempts.

If there’s a flavor imbalance, consider adding a touch more cinnamon or sugar and tasting along the way. For ingredient substitutions, be cautious of how different sugars or spices may affect taste and texture.

Lastly, if you encounter equipment challenges, consult your air fryer’s manual for adjustments based on your make and model to ensure successful cooking every time.

Recipe Success Stories

Many readers have shared their success stories after trying this Cinnamon-Sugar Air Fryer Banana Chips recipe. Several family gatherings became more vibrant when families discovered the delightful nature of this crispy snack, leading to personal twists like adding a dash of cayenne for heat. Feedback on social media highlights how easy and fun it was to create together with children, enhancing family bonding.

Adaptation stories share insights into how various spices can be incorporated into the mix, showcasing personalization that meets every home cook’s flavors. Photography tips from readers suggest using white plates to make the golden hue of the banana chips pop brilliantly, capturing the attention of viewers online.

Frequently Asked Questions

1. Can I use frozen bananas for this recipe?
Using frozen bananas is not recommended as they tend to become mushy once thawed, which can affect the texture of the chips. It’s best to use fresh bananas for optimal results.

2. How do I store leftover banana chips?
After they cool down completely, store the banana chips in an airtight container at room temperature. They will last for around 3-5 days while keeping their crispy texture.

3. Can I make these banana chips without an air fryer?
Yes! You can bake them in the oven at a low temperature, but keep in mind the cooking time may vary. Spread them out on a baking sheet lined with parchment paper and flip halfway through baking.

4. Are there any healthy modifications I can make to the recipe?
Absolutely! You can reduce the amount of sugar used, experiment with stevia or monk fruit sweeteners, and even opt for coconut sugar for a healthier alternative.

5. What can I pair these banana chips with?
These chips are fantastic when paired with yogurt, smoothies, or even as a topping for pancakes or oatmeal. Feel free to get creative!

6. Is this recipe suitable for kids?
Yes! This recipe is kid-friendly as they can help with sprinkling the cinnamon-sugar mix and arranging the chips in the air fryer, making it a fun family activity.

7. How can I add more flavor to the chips?
You can infuse different flavors such as vanilla extract, cocoa powder, or other spices to enhance the flavor profile and create a unique spin on the recipe.

8. Can the recipe be doubled?
Yes! You can easily double or triple the recipe, however, make sure to not overcrowd the air fryer basket as it may affect even cooking.

9. What if my banana chips taste soggy?
This can happen if they are not sliced thin enough or if they were overcrowded in the air fryer. For the best results, slice them uniformly and ensure proper air flow.

10. Can these chips be made in advance?
Yes, you can prepare the sliced bananas and the cinnamon-sugar mixture ahead of time; just store them in the fridge until you’re ready to air fry for the best crispiness.

Additional Resources

Explore related recipes that feature bananas, such as banana bread, smoothies, or oatmeal bowls. Delve into technique guides that offer more insights into air frying or tips on how to select the best ingredients, especially fruits. For equipment recommendations, consider investing in high-quality air fryers that allow for versatile cooking and provide consistent results.

Seasonal variations can also inspire new ways to use these banana chips; for fall, consider integrating apple slices with similar cinnamon sugar for a harvest-inspired snack.

Join the Conversation

We invite you to share your experiences with making these Cinnamon-Sugar Air Fryer Banana Chips! Post your comments, variations, and success stories on social media. If you have some photography tips to sharpen the presentation of snacks, we’d love to hear them. Engage with our community, and let’s celebrate our love for healthy yet delicious snacks together!

The Recipe

Cinnamon-Sugar Air Fryer Banana Chips

Serves: 2-4 servings

Prep Time: 5 mins

Cook Time: 10 mins

Total Time: 15 mins

Kitchen Equipment Needed

  • Air fryer
  • Sharp knife or mandoline slicer
  • Mixing bowl
  • Parchment paper (optional)

Ingredients

  • 2-3 medium ripe bananas
  • 1/4 cup granulated sugar
  • 1 tsp ground cinnamon

Directions

  1. Start by preheating your air fryer to 350°F (175°C).
  2. Peel the bananas and slice them thinly, about 1/8 inch thick.
  3. In a mixing bowl, combine sugar and ground cinnamon.
  4. Gently toss the banana slices in the cinnamon-sugar mixture until well coated.
  5. Arrange banana slices in a single layer in the air fryer basket. Avoid overcrowding.
  6. Air fry for 8-10 minutes, shaking the basket halfway through for even cooking.
  7. Once they are golden brown and crispy, remove them from the air fryer and let cool.
  8. Serve and enjoy as a snack!

Recipe Notes

  • Store banana chips in an airtight container at room temperature for 3-5 days.
  • Feel free to experiment with different spices in the sugar mix for unique flavors.
  • Make it more decadent by drizzling with chocolate after air frying.

Indulge in Nestle Toll House Death by Chocolate Cake Recipe

Nestle Toll House Death by Chocolate Cake: Indulge in Decadent Layers of Chocolate Bliss

⚖️
Difficulty
Intermediate

⏲️
Prep Time
30 mins

🕒
Cook Time
40 mins

⏱️
Total Time
1 hr 10 mins

🍽️
Servings
12 servings

The Nestle Toll House Death by Chocolate Cake is a chocolate lover’s dream come true. Imagine biting into moist layers of rich chocolate cake, indulgently frosted with velvety chocolate ganache, topped with a sprinkle of chocolate chips, and finished off with a drizzle of chocolate syrup. It’s a decadent dessert that will make every celebration special, whether it’s a birthday party, holiday gathering, or simply a treat for yourself.

This cake is not just about its extraordinary taste, but also about the experience it creates. The aroma of baking chocolate fills your kitchen, enticing everyone around to anticipate a scrumptious chocolate feast. Each bite of this Death by Chocolate Cake invites you to savor the textural contrast between the airy cake layers and the creamy frosting, making it a memorable culinary experience that is sure to impress your family and friends.

Quick Recipe Highlights

  • Flavor Profile: This cake features deep cocoa notes with a hint of sweetness from the chocolate chips and syrup, creating a divine chocolate explosion.
  • Texture: The combination of sponge-like cake layers with a smooth ganache provides a delightful mouthfeel that melts in your mouth.
  • Aroma: There’s nothing quite like the rich, warm scent of chocolate wafting through your home as this cake bakes, making it hard to resist even before it’s served.
  • Visual Appeal: The multi-layered chocolate cake adorned with chocolate chips and syrup creates an alluring centerpiece for any dessert table.
  • Skill Level Needed: While the recipe requires some baking techniques, the result is well worth the effort, even for intermediate bakers.
  • Special Equipment: A stand mixer and round cake pans are essential for achieving the ideal texture and shape.

Recipe Overview

  • Difficulty Level: Intermediate bakers will find this recipe manageable, although it does require attention to detail in mixing and baking times.
  • Category: This is an indulgent dessert fit for special occasions or as a luxurious treat for any day.
  • Cuisine: This recipe combines classic American baking traditions with a modern twist of decadence, highlighting chocolate’s cultural significance.
  • Cost: With a mix of pantry staples and high-quality ingredients, the total cost is moderate, making it accessible for most home bakers.
  • Season: Chocolate cake is beloved year-round, but it’s especially popular during festive seasons when gatherings are abundant.
  • Occasion: Perfect for birthdays, anniversaries, and holiday celebrations, this cake brings a touch of elegance to any event.

Why You’ll Love This Recipe

The Nestle Toll House Death by Chocolate Cake is primarily loved for its overwhelmingly delightful taste and texture, reminiscent of countless chocolate desserts enjoyed over the years. Each mouthful promises an indulgent experience, with layers that tease and satisfy cravings for something special. The soft, moist layers play beautifully off the rich and creamy ganache, creating a luscious dessert that feels both comforting and extravagant.

In addition to its gastronomic appeal, this recipe offers the convenience of straightforward preparation steps, allowing home bakers to whip it up without extensive prior baking experience. The ingredients are generally easy to find, emphasizing both simplicity and flavor in one delicious package. As a result, it becomes a go-to cake for spontaneous baking projects or planned celebrations, ensuring that you can easily impress guests or make any occasion more memorable.

On the nutritional front, while it may not be the healthiest dessert, chocolate is known for its mood-boosting properties, thanks to the compounds it contains. Dark chocolate has even been associated with numerous health benefits, including antioxidant properties. Of course, moderation is key, allowing you to appreciate each enticing slice without compromise.

Socially, the cake opens doors to gatherings, making it an essential part of celebrations and connected moments among loved ones. Sharing a slice can elevate the experience of togetherness, laughter, and joy, making it a focal point at dinner tables everywhere. Plus, its rooted connection with nostalgia often revives memories of childhood baking adventures.

Finally, the cost-effectiveness of this Death by Chocolate Cake is a huge bonus. Most ingredients are staple items found in many kitchens and can be purchased without breaking the bank. Its impressive presentation and rich flavor make it an affordable luxury that competes with elaborate patisserie-style desserts often found in bakeries.

Historical Background and Cultural Significance

The origin of chocolate cake can be traced back to the early 19th century when chocolate began to be used in desserts after the invention of cocoa powder. Over the years, chocolate cake recipes evolved, integrating chocolate into cake batters and introducing various styles such as layered and filled cakes. The Nestle brand’s involvement in developing chocolate recipes, especially those utilizing Nestle Toll House chocolate chips, has played a significant role in making chocolate cake a staple in American households.

In terms of cultural importance, chocolate cake represents celebration and indulgence; it has become synonymous with birthdays, anniversaries, and other festivities. The act of baking and sharing a cake embodies love and appreciation, with many families passing down cherished recipes through generations. Notably, Nestle’s Toll House cookie recipe led to the popularity of using their chocolate chips for cake, bridging classic cookies and the cake world.

As recipe evolution continued, the Death by Chocolate Cake emerged as a decadent variation, amplifying the chocolate experience with multiple layers and intense flavors. This evolution highlights how traditional recipes can adapt and innovate while still retaining their roots. The modern implementations of the cake now feature various adaptations to suit dietary preferences, allowing it to remain a favorite.

Regional variations of chocolate cake can be found across different cultures, from the rich Sachertorte in Austria to the beloved flourless chocolate cakes that take the dessert to a gluten-free status. Each version offers a unique perspective on making a chocolate cake, showcasing how versatile and universally adored chocolate has become.

Ingredient Deep Dive

Cocoa Powder: Cocoa powder is the heart of chocolate cake, bringing the quintessential chocolate flavor. It’s derived from cacao beans that have been fermented, dried, roasted, and ground. The nutritional benefits of cocoa include a rich source of antioxidants and flavonoids, which may help improve heart health. When selecting cocoa powder, opt for high-quality varieties like Dutch-processed for a smoother taste. Store it in a cool, dark place in an airtight container to maintain freshness. If you’re in a bind, you can substitute cocoa powder with unsweetened chocolate by doubling the amount and reducing the fat in the recipe.

All-Purpose Flour: Flour serves as the structure of the cake, providing the necessary gluten for rising. High-quality all-purpose flour is essential for achieving a light and airy texture. Nutritionally, flour contributes carbohydrates, which provide energy. When shopping, look for flour stored in sealed bags with the latest expiration date. Store it in a dry place, and for longer shelf life, keep it in the refrigerator. If needed, substitute with cake flour for a finer crumb or gluten-free flours for dietary modifications.

Chocolate Chips: Nestle Toll House chocolate chips add a delightful burst of sweetness throughout the cake. They are a classic choice for baking, offering a creamy texture and melty goodness. Nutritionally, chocolate chips are a source of fat and sugar, emphasizing balance when indulging. Choose semi-sweet chocolate chips for the best balance of sweetness and richness. Store chocolate chips in a cool, dry location, and use them within six to twelve months for optimal quality. Dark chocolate chips can be used for a more intense chocolate experience or peppermint chips for a fun twist.

Common Mistakes to Avoid

  • Using stale ingredients – Always check the freshness of your cocoa powder, baking powder, and chocolate before starting.
  • Overmixing the batter – Mixing too long can result in a dense cake; mix until just combined.
  • Not measuring accurately – Baking is precise; use measuring cups and spoons for accuracy in your ingredients.
  • Opening the oven too soon – Avoid checking the cake for at least the first 25 minutes to prevent it from collapsing.
  • Skipping the cooling step – Let the cake cool completely before frosting to avoid melting your icing.
  • Using cold ingredients – Ensure eggs and butter are at room temperature for better integration into the batter.
  • Ignoring oven calibration – Always check that your oven temperature is accurate for optimal baking results.
  • Using the wrong pan size – Always refer to the recipe for the correct pan size to ensure even baking.
  • Frosting too soon – Wait for the cake layers to cool completely to prevent the ganache from melting.
  • Not tasting while baking – A little taste of the batter before baking can ensure that it has the right flavor balance.

Essential Techniques

Separating eggs: This technique is essential for cake aeration and achieving a light, fluffy texture. To master this, use clean, dry tools, and separate the yolks from the whites in separate bowls to prevent any contamination. A common pitfall is having yolk in whites, which makes them challenging to whip to peaks. Visual cues consist of firm peaks when whipped correctly.

Folding method: Folding is crucial for incorporating delicate ingredients without losing air. Use a rubber spatula to gently lift and turn the batter from underneath. Avoid vigorous stirring, which will deflate your mixture. The successful visual cue here is a marbled texture without visible streaks when done correctly.

Cooling the cake: Allowing your cake to cool in the pan for about 10 minutes and then on a wire rack is critical for preventing sogginess. Use a thin knife to gently separate the edges before inverting. Common pitfalls include skipping this step, leading to cake crumbling away. A properly cooled cake should feel firm when touched but bounce back slightly.

Creating a ganache: Properly preparing ganache involves heating cream to a simmer, then pouring it over chopped chocolate. Allow it to stand before stirring for silky smooth texture. Common pitfalls include overheating or stirring too quickly, leading to separation. A successful ganache should be glossy and spreadable.

Pro Tips for Perfect Nestle Toll House Death by Chocolate Cake

1. Always sift your dry ingredients to prevent clumping and ensure an even texture in your batter.
2. Use high-quality chocolate and cocoa powder for the best flavor – it truly makes a difference.
3. Try using coffee instead of water in your cake mix for added depth of flavor.
4. Ensure your oven is preheated before putting your cake in for accurate cooking times.
5. Allow your cake to rest overnight in the refrigerator before serving for enhanced flavor development.
6. Experiment with adding a hint of sea salt to your frosting for a delightful contrast to the sweet cake.
7. For simpler layering, refrigerate the cake layers before frosting for easier handling.
8. If using a different pan shape, watch the cake closely as cooking times may vary.

Variations and Adaptations

Incorporating seasonal variations can elevate your Nestle Toll House Death by Chocolate Cake all year round. For example, adding pumpkin purée and seasonal spices during fall can turn this into a festive treat. Changing flavor profiles with mint extract or orange zest can also add a refreshing twist while maintaining the chocolate essence intact.

Dietary modifications can personalize this recipe further. You can create a gluten-free cake by substituting all-purpose flour with almond or gluten-free flour blends. For a dairy-free adaptation, use nut-based milk and coconut oil instead of butter, ensuring still an indulgent dessert without compromising on flavor.

Texture modifications can further enhance the cake experience. Consider adding crushed nuts, like walnuts or pecans, within the layers for crunch, or a layer of chocolate mousse made from dark chocolate can elevate the richness. For presentation, an elegant glaze on top complements the layers beautifully, achieving a professional look at home.

Serving and Presentation Guide

When plating the Nestle Toll House Death by Chocolate Cake, aim for an aesthetically pleasing arrangement. Use a heated knife to slice through the layers easily and present them on a clean, white plate to make the chocolate colors pop. Garnish with fresh berries and mint leaves for vibrancy.

Modern serving suggestions can enhance the eating experience, such as pairing slices with a scoop of vanilla ice cream or a dollop of whipped cream, providing a pleasing contrast. Ensure that the cake is served at room temperature for an optimal experience, allowing its flavors to shine through.

Consider portion control by slicing into equal pieces, ideally around 1-2 inches wide, as this cake is rich and fulfilling. For special events, consider serving smaller slices alongside other desserts to create a beautiful dessert table that offers guests various choices.

Wine and Beverage Pairing

For the ultimate indulgence, pair your Nestle Toll House Death by Chocolate Cake with a full-bodied red wine, such as a Cabernet Sauvignon or a robust Merlot, which can complement the rich chocolate flavors beautifully. The tannins in these wines help cut through the sweetness, balancing the experience.

Non-alcoholic alternatives can include a dark and rich coffee, enhancing the cake’s chocolate notes while providing a cozy touch. For a refreshing option, a sparkling beverage can elevate the mood and cleanse the palate between bites.

Temperature considerations are vital; ensure that any accompanying ice cream or whipped cream is slightly chilled but not frozen, allowing for harmonious contrasts in your dessert experience. Serve your beverages in elegant glassware to enhance presentation.

Storage and Shelf Life

To store the Nestle Toll House Death by Chocolate Cake, keep it in an airtight container at room temperature for up to 3 days. For longer storage, place the cake in the refrigerator, where it can last up to a week without compromising taste.

When it comes to freezing, wrap well in plastic wrap and then place in a freezer-safe container. The cake can be frozen for up to 2 months. Be mindful of signs of spoilage, such as changes in color or odor, before consuming. When reheating, use the microwave in short increments to keep the cake moist.

Make Ahead Strategies

To prepare the Nestle Toll House Death by Chocolate Cake ahead of time, consider baking the layers and refrigerating them overnight. This allows the cake to set properly and enhances flavor profiles. Assembling the cake a day in advance is ideal for infusing moisture.

When planning to serve the cake, take care to store the components appropriately. Cover the cake layers with plastic wrap until you’re ready to assemble, ensuring they do not dry out. When you’re ready to serve, simply frost and garnish the cake.

Add fresh elements like berries, whipped cream, or mint right before serving to keep them vibrant and flavorful. This two-part strategy keeps the cake fresh while allowing you to focus on serving day logistics.

Scaling Instructions

When scaling the Nestle Toll House Death by Chocolate Cake recipe, consider adjusting ingredients equally for consistency in texture and flavor. For instance, if halving the recipe, ensure to use smaller pans to avoid uneven baking. Keep a close eye on baking times, as they may vary with pan size.

For doubling or tripling the recipe, ensure proper mixing capacity by using a large bowl or stand mixer. Baking in batches can streamline the process while ensuring each layer retains its quality. Adjust the baking time accordingly, as larger quantities might require additional minutes.

Always factor in storage considerations when scaling, as larger cakes will require more refrigerator or countertop space. Be mindful of the assembly time, as larger cakes may take longer to cool and frost adequately.

Nutritional Deep Dive

The Nestle Toll House Death by Chocolate Cake offers a delightful blend of indulgent flavors and textures, but it’s essential to consider its nutritional profile. Each slice contains a notable amount of calories, predominantly from sugars and fats, making it a rich dessert option.

A macro breakdown shows a balance of carbohydrates from the flour, fats from the chocolate and butter, and moderate protein content from eggs. While sugar leads the charge, cocoa powder offers some health benefits, such as antioxidants.

For those watching their micronutrient intake, the cake provides limited vitamins and minerals. However, incorporating whole ingredients like dark chocolate can enhance the nutrient density slightly. Suggested portion sizes can ensure you enjoy the dessert while maintaining balance in your diet.

For weight management, consider enjoying smaller portions and pairing the cake with fresh fruit to add fiber and balance out the dessert richness.

Dietary Adaptations

Creating a gluten-free version of the Nestle Toll House Death by Chocolate Cake can be achieved by replacing all-purpose flour with a gluten-free flour blend. Always check that your baking powder is also certified gluten-free to ensure the cake rises properly.

For those who prefer dairy-free options, substitute regular milk with almond or coconut milk and use coconut oil instead of butter, ensuring the flavor remains rich and chocolatey. Additionally, consider using dairy-free chocolate chips to maintain the guilt-free indulgence of this dessert.

Vegan adaptations can be realized by substituting eggs with flax eggs and ensuring all other ingredients are plant-based. This modification allows the cake to remain deliciously moist while catering to a wider audience.

For those on low-carb or keto diets, replacing the sugar with keto-friendly sweeteners can create a healthier version while maintaining sweetness.

Troubleshooting Guide

During the baking process, texture issues can arise if the cake turns out dry. This is often due to overbaking, so keep a close eye on the baking time, and use a toothpick to check for doneness without relying solely on time estimates.

Flavor balance is critical; if the cake tastes too sweet, consider adding a pinch of salt in future batches to enhance overall flavor. For an overpowering bitterness, ensure cocoa powder is well-balanced with sugars and fats in future recipes.

Temperature problems can occur if the cake is unevenly baked. Rotate the pan halfway through baking to even out the heat distribution in the oven. If you notice the middle is undercooked, allow the cake to bake a bit longer, keeping the temperature steady.

If you face equipment challenges, such as a mixer malfunction, hand-whisking can be a viable alternative. Use extra muscle to incorporate air into the batter, ensuring a good rise.

Ingredient substitutions can lead to unexpected results; always test a small batch first if experimenting with ingredients that differ significantly from the original recipe.

Timing concerns arise when guests arrive before the cake is ready, placing pressure to rush through the process. Consider prepping elements in advance, such as baking the cakes early and refrigerating until you’re ready to frost.

Recipe Success Stories

Community feedback on the Nestle Toll House Death by Chocolate Cake reflects its effectiveness as both a crowd-pleaser and a showstopper. Many bakers have shared their adaptations of the recipe, showcasing creative variations like adding hazelnuts or using flavored liqueurs in the ganache.

Variation successes in using unique ingredients such as peanut butter frosting have turned this classic dessert into a new experience, garnering enthusiastic responses from families and friends. Readers often suggest modifying the chocolate pairings to introduce fresh flavor profiles.

Photography tips suggest bright, natural lighting to highlight the rich textures of the cake. Capturing a slice with drizzled syrup can elevate your food photography, encouraging others to embark on their baking journey.

Engagement within the community fosters a sense of capability among home bakers, promoting confidence in trying the Death by Chocolate Cake recipe, knowing they share a journey with fellow chocolate enthusiasts.

Frequently Asked Questions

1. Can I make this cake in advance? Yes! You can bake the cake layers a day or two ahead, store them in the fridge, and frost them on the day you plan to serve it for best flavor.

2. What type of chocolate should I use? Semi-sweet chocolate is recommended for a balanced sweetness, but feel free to use dark chocolate for a more intense chocolate flavor.

3. How do I ensure my cake rises properly? Make sure your baking powder is fresh and avoid overmixing the batter, as both of these factors can inhibit proper rising.

4. Can I substitute eggs in this recipe? Yes, consider using flax eggs (1 tablespoon ground flaxseed mixed with 2.5 tablespoons water per egg) for a vegan version.

5. How should I store leftovers? Store any leftover cake in an airtight container at room temperature for up to three days or refrigerate for up to a week.

6. Why did my cake turn out dry? A dry cake often results from overbaking. Check the doneness a few minutes before the timer goes off.

7. How can I make this cake gluten-free? Substitute the all-purpose flour with a gluten-free flour blend for a perfectly enjoyable gluten-free version.

8. Is it okay to freeze this cake? Yes! Wrap your cake in plastic wrap and aluminum foil to freeze. It can last for up to two months in the freezer.

9. Can I add other flavors to this recipe? Absolutely! Consider adding coffee or liqueurs to your batter for a unique twist, or nuts for added texture.

10. What if I don’t have chocolate chips? You can chop up a chocolate bar or use cocoa nibs as a substitute; they both work well in the recipe.

Additional Resources

For those interested in expanding their baking repertoire, exploring related recipes such as a classic chocolate fudge cake or chocolate lava cake can provide fresh inspiration in the kitchen. Technique guides on cake baking and decoration can enrich your skills and confidence in creating beautiful desserts.

Ingredient information is invaluable for understanding how to choose high-quality cocoa and chocolate. Recommendations for essential baking equipment can aid in elevating your baking practices, ensuring success in every project.

Seasonal variations can also be explored, such as preparing a chocolate cake with seasonal fruits or flavors to keep your baking relevant and fun.

Join the Conversation

Engaging with your baking community online can offer immense support and idea-sharing opportunities. Consider sharing your photography of the Nestle Toll House Death by Chocolate Cake on social media, showcasing your delicious results and inviting feedback from friends and family.

Recipe reviews from the community can provide insight into adaptations that work well or new serving suggestions for old favorites. Participate actively by commenting on others’ posts, sharing tips, or asking for help.

Partake in discussion boards or forums related to baking—a place to connect over shared experiences can transform how you view cooking, making it even more enjoyable and rewarding.

The Recipe

Nestle Toll House Death by Chocolate Cake

Serves: 12 servings

Prep Time: 30 mins

Cook Time: 40 mins

Total Time: 1 hr 10 mins

Kitchen Equipment Needed

  • Stand mixer
  • Measuring cups and spoons
  • Round cake pans
  • Rubber spatula
  • Wire rack
  • Heating knife

Ingredients

  • 2 cups all-purpose flour
  • 1 ¾ cups granulated sugar
  • ¾ cup unsweetened cocoa powder
  • 1 ½ tsp baking soda
  • 1 ½ tsp baking powder
  • 1 tsp salt
  • 1 cup milk
  • ½ cup vegetable oil
  • 2 large eggs
  • 1 tsp vanilla extract
  • 1 cup boiling water
  • 1 cup Nestle Toll House chocolate chips
  • For Ganache: 1 cup heavy cream, 2 cups semi-sweet chocolate chips

Directions

  1. Preheat your oven to 350°F (175°C) and grease and flour your cake pans.
  2. In a mixing bowl, combine the flour, sugar, cocoa powder, baking soda, baking powder, and salt; mix well.
  3. Add milk, vegetable oil, eggs, and vanilla extract; beat on medium speed for two minutes.
  4. Stir in boiling water until the batter is smooth.
  5. Fold chocolate chips into the batter and pour evenly into prepared pans.
  6. Bake for 30-40 minutes, or until a toothpick inserted comes out clean.
  7. Remove from the oven and cool in the pans for 10 minutes before transferring to a wire rack.
  8. For the ganache, heat cream until simmering, pour over chocolate chips, and stir until smooth.
  9. Let the layers cool completely before frosting with ganache.
  10. Enjoy your delicious Nestle Toll House Death by Chocolate Cake!

Recipe Notes

  • For richer flavor, use dark chocolate ganache.
  • Allow the cake to set overnight for enhanced flavor.
  • Dress with fresh berries and mint for an appealing presentation.

Mouthwatering Cruffins Recipe: A Unique Pastry Delight to Try

Delicious Cruffins: A Delectable Pastry Delight

⚖️
Difficulty
Intermediate

⏲️
Prep Time
30 mins

🕒
Cook Time
25 mins

⏱️
Total Time
55 mins

🍽️
Servings
12

Welcome to the world of cruffins—where the flaky tenderness of croissants meets the delightful fluffiness of muffins! These delicious cruffins are filled with sweet delights or savory ingredients, making them the perfect accompaniment to your breakfast or afternoon tea. Whether you’re indulging in chocolate, cinnamon sugar, or fruit preserves, each bite of these delightful pastries brings a harmony of flavor and texture that will captivate your taste buds and leave you wanting more.

What sets these cruffins apart is their unique layering technique, which creates beautiful, flaky layers reminiscent of a croissant, yet shaped like a muffin. The process may seem daunting, but fear not! With a little patience and practice, this delicious recipe will be your go-to for gatherings or cozy mornings at home. Imagine these golden pastries, straight from the oven, sharing warmth and creativity among friends and family, enhancing every moment. Let’s dive into the cruffin-making adventure!

Quick Recipe Highlights

  • Flavor Profile: Each cruffin boasts a buttery, sweet or savory filling, complemented by a light, flaky exterior.
  • Texture: The contrast between the crispy top and the soft, airy inside makes every bite a pleasure.
  • Aroma: Freshly baked cruffins fill the air with enticing buttery scents combined with your chosen flavors.
  • Visual Appeal: These pastries are a feast for the eyes, showcasing layers that hint at the deliciousness within.
  • Skill Level Needed: While the folding technique requires practice, the rewards are well worth the effort.
  • Special Equipment: A muffin tin is essential for shaping your cruffins perfectly.

Recipe Overview

  • Difficulty Level: This recipe is classified as intermediate due to the dough preparation and layering techniques required.
  • Category: Perfect for breakfast or brunch, cruffins also work wonderfully as a delightful snack.
  • Cuisine: Although originating from a blend of French and American culinary traditions, cruffins can be adapted to various flavors and fillings.
  • Cost: With mostly pantry staples needed, these pastries are relatively economical to prepare at home.
  • Season: Enjoy these flaky delights year-round; they are particularly comforting during cooler months.
  • Occasion: Great for birthdays, brunches, or any time you want to impress guests with a homemade treat.

Why You’ll Love This Recipe

The delicious taste of cruffins combines the best of both muffins and croissants, creating a unique flavor experience that’s both rich and satisfying. With layers of buttery pastry melting in your mouth, combined with your choice of sweet or savory fillings, each bite offers something new, appealing to various palates. Whether filled with chocolate, fruits, or cheeses, these treats will awaken your culinary creativity and spruce up any meal.

These cruffins offer convenience without compromising on quality or taste. Despite their complex appearance, the preparation involves straightforward dough handling and filling techniques. The cruffins come together quickly, making them an excellent choice for busy mornings or last-minute gatherings. You can easily prepare the dough ahead, allowing for a quick bake whenever cravings strike.

Nutritionally, these cruffins can be made with healthier alternatives while maintaining their delicious character. Incorporating whole wheat flour or healthier sweeteners gives a nutritious twist without sacrificing flavor. This makes them a perfect indulgence, suitable for families wanting to enjoy sweet treats with more wholesome ingredients.

When hosting guests or celebrating special occasions, cruffins shine as an impressive and shareable treat. Their unique form and rich flavors create a natural conversation starter and a terrific centerpiece on any dining table. Imagine presenting your guests with a warm basket filled with these mouth-watering pastries!

Cost-effectiveness is another reason to cherish this culinary gem. With many ingredients already in store and the ability to control portion sizes, making cruffins at home can be significantly cheaper than purchasing them from cafes. This recipe encourages experimentation, allowing you to explore various flavors and fillings at minimal costs.

Historical Background and Cultural Significance

The cruffin is a modern pastry, a delightful invention that combines the well-loved characteristics of croissants and muffins. This innovative treat emerged from the creative minds of pastry chefs, particularly in the culinary melting pot of California. With its rich buttery layers and sweet or savory fillings, the cruffin has swiftly gained popularity, becoming a brunch staple among food enthusiasts.

Culturally, cruffins resonate with the growing trend toward hybrid foods that showcase culinary creativity and playful flavors. They blur the lines between traditional pastries and innovative baked goods, making them an exciting addition to any baker’s repertoire. Their rise in popularity has also paved the way for numerous adaptations, each reflecting local tastes and influences.

The evolution of the cruffin showcases the culinary innovation that characterizes modern baking. As bakers experiment with fillings and flavor combinations, the cruffin has transformed from a novelty to a sought-after pastry in cafes and homes alike. This evolution highlights how traditional techniques can be reimagined while still paying homage to classic baking methods.

Regional variations of cruffins have begun to emerge, with bakeries offering unique takes on the original recipe. From tropical-inspired fillings to spicy savory options, these adaptations celebrate local flavors and ingredients, further enriching the cruffin’s legacy and inviting even more bakers to join in the fun of cruffin-making.

Ingredient Deep Dive

The staple ingredient for cruffins is dough, typically made with high-quality flour and butter. Flour has been a central component of baking for millennia, providing structure and texture to countless recipes. For cruffins, using all-purpose or bread flour contributes to the pastry’s flakiness. For a nutritious spin, whole wheat flour can be used, adding fiber and depth to the flavor.

Butter is the star that brings richness to cruffins. Traditionally used in pastries, it enhances flavor and creates that desirable flaky texture. Look for unsalted butter for more control over the sweetness of your cruffins. For healthier alternatives, coconut oil or even plant-based butter can yield similar results while catering to dietary preferences.

Fillings for cruffins can range from chocolate chips, fruit preserves, or cream cheese, providing endless options. Chocolate has a universal appeal and adds a rich, decadent taste to your creations, while fruit preserves introduce a zingy freshness. Opt for seasonal fruit preserves for added flavor or use cream cheese for a savory touch, reminding us of the versatility of this delightful pastry.

Sugar plays a critical role in balancing flavors in dough and fillings. Granulated sugar is commonly used, but alternative sweeteners like honey or agave syrup can provide unique flavor profiles. Always choose methods based on desired sweetness and dietary needs, ensuring that the cruffins meet everyone’s tastes.

Common Mistakes to Avoid

  • Overworking the dough: This can result in tough pastries instead of the desired flaky texture. Handle the dough gently to maintain its lightness.
  • Using the wrong flour: All-purpose flour works best for this recipe; avoid using cake flour, as it may lead to a dense cruffin.
  • Skipping the chilling step: Allowing the dough to chill enhances its flakiness, essential for achieving that perfect texture.
  • Not preparing your muffin tin: Greasing the muffin tin thoroughly ensures the cruffins release easily after baking.
  • Overfilling the cruffins: Too much filling can cause the pastry to overflow, leading to messy results. Keep filling amounts moderate to avoid spills.
  • Underbaking: Ensure the cruffins are visibly golden on top; this guarantees they’ve baked through and will have the ideal texture.
  • Ignoring ingredient temperature: Using cold butter is crucial for flaky layers. Allowing ingredients to reach room temperature can alter the final product.
  • Inadequate proofing time: Allow enough time for the dough to rise; this step is vital for flavor development and optimal texture.
  • Not experimenting with flavors: Sticking to just one filling can be monotonous; don’t hesitate to explore various fillings for diversity.
  • Not following the recipe proportions: Accurate measurements ensure balanced flavors and texture. Always use a scale for precise results.

Essential Techniques

One of the most important techniques in making cruffins is rolling and folding the dough properly. This method creates the distinct layers expected in flaky pastries. Start by rolling out the dough and folding it into thirds repeatedly, allowing layers of butter to create that sought-after flakiness. Keep the butter cold to achieve optimal results during baking.

Another key technique involves filling the cruffins evenly and judiciously. Filling them to just below the brim will allow for expansion while preventing overflow. Additionally, using a spoon or piping bag for even distribution aids in consistently delicious bites. Practice makes perfect; don’t hesitate to adjust your filling method as needed.

Pro Tips for Perfect Cruffins

Use high-quality ingredients for the best flavor. Invest in fresh butter, premium flour, and organic fillings for a superior pastry experience. Quality influences both taste and texture, ensuring your cruffins shine.

Chill the dough between steps. If you notice the dough getting warm while working, return it to the refrigerator for a quick chill. Keeping the dough cold is vital to achieving those lovely layers when baked.

Experiment with different fillings. Whether you gravitate towards sweet or savory, don’t be afraid to mix things up. From chocolate and raspberry to cheese and bacon, the options are limitless!

Watch your oven closely. Every oven is different, so begin checking for doneness a few minutes earlier than the suggested time. The perfect cruffin should be golden brown and slightly puffed.

Make sure to rotate the muffin tin halfway through baking. This ensures even baking, especially if your oven has hot spots, resulting in uniformly cooked cruffins.

Consider gluten-free options. If you or your guests have gluten sensitivities, use gluten-free flour blends to create equal parts deliciousness without the gluten.

Rest your cruffins. Allow them to cool for a few minutes before removing from the pan. This resting time helps maintain their structure as they cool.

Lastly, have fun! Baking is about creativity. Make this recipe your own by adding local flavors, seasonal ingredients, or personal touches that reflect your unique taste.

Variations and Adaptations

Regional variations of cruffins often reflect local tastes. Try incorporating spices like cinnamon or nutmeg into the dough for warmth or consider fillings that highlight seasonal fruits such as cranberries during the fall.

Seasonal adaptations can make cruffins even more enticing. In summer, use fresh strawberries or peaches, while winter might call for richer fillings like toffee or chestnut cream. These options keep your recipes aligned with nature’s bounty and add excitement throughout the year.

Dietary modifications are easy with cruffins. For a vegan twist, substitute eggs with flaxseed meal and butter with plant-based alternatives. You can enjoy the delightful texture and flavor without sacrificing dietary choices.

For flavor variations, consider experimenting with herbal or spicy additions. Savory cruffins filled with cheese, fresh herbs, or even jalapeños create an exciting aspect to what is often considered a sweet pastry.

Texture modifications could involve adding nuts for a delightful crunch or using almond flour for a different texture experience. Adjustments alter the pastry’s mouthfeel while enhancing flavor complexity.

Presentation alternatives can elevate your cruffins beyond what’s expected. Try dusting powdered sugar on top or drizzling caramel or chocolate sauce to create elegant dessert pastries that delight the eye as much as the palate.

Serving and Presentation Guide

Plating your cruffins can be a fun part of serving! Arrange them on a decorative platter or tiered stand for a visually striking display. Layering them also adds height and visual interest.

To elevate the presentation, consider garnishing with edible flowers or fresh herbs, which contrast beautifully against the flaky pastry. You can also serve with a small bowl of fresh fruit or whipped cream for dipping.

Traditional accompaniments could include fluffy whipped butter or rich cream cheese spread, enhancing the cruffin experience. Provide a variety of spreads so guests can personalize their flavors according to their taste preferences.

Modern serving suggestions might involve pairing these pastries with artisanal coffee or herbal tea, which complements their flavors and makes for a cozy or sophisticated gathering.

Temperature considerations play a crucial role in serving. Warm cruffins out of the oven provide the best experience, but if prepared ahead of time, gently reheating ensures they maintain their original allure.

Portion control tips involve cutting each cruffin in half if serving as part of a larger spread, allowing guests to sample various flavors without feeling overwhelmed by a single pastry.

Wine and Beverage Pairing

When it comes to wine pairings, look for a light and slightly sweet white, such as a Riesling or a Moscato, which can beautifully complement sweet cruffins. Sparkling wines also work well, bringing a refreshing contrast to rich, buttery pastries.

If you’re serving savory cruffins, opt for a dry Sauvignon Blanc or a fruity rosé. These wines can enhance the flavors while balancing the richness of the pastry, creating a harmonious dining experience.

For non-alcoholic alternatives, consider pairing with fruity iced tea or a refreshing lemonade, elevating flavors while providing guests with a vibrant and exciting experience.

When it comes to coffee and tea pairings, consider an aromatic, medium-roast coffee for sweet variations. A herbal tea can also provide a delightful contrast without overshadowing the delicate flavors of the cruffins.

Temperature considerations are essential; serve white wines chilled, while red wines can be enjoyed slightly below room temperature. Keep coffees hot for that rich, comforting flavor that pairs excellently with pastries.

Serving suggestions might include presenting beverages in decorative cups or glasses alongside the cruffins, creating an inviting atmosphere that encourages guests to indulge and enjoy.

Storage and Shelf Life

To store cruffins, place them in an airtight container at room temperature for up to two days. For longer storage, you can refrigerate them, which enhances longevity while still maintaining their delicious flavor.

When freezing cruffins, make sure they are completely cooled and then wrap them tightly in plastic wrap or aluminum foil. Properly stored, they can last up to three months while still preserving their taste and texture during thawing.

Keep an eye out for signs of spoilage, such as unusual odors or excessive dryness. Fresher pastries are always preferable; it’s best to consume them when they are at their optimum flavor.

Reheating your cruffins can reinvigorate their flaky texture. Use a microwave for quick heating but consider a toaster oven or conventional oven for a crispier finish that mirrors their fresh-baked sensation.

For additional flexibility, feel free to freeze the pastry dough before shaping it into cruffins. This way, you can enjoy freshly baked pastries at a moment’s notice, making it easier to impress guests or satisfy cravings spontaneously.

Make Ahead Strategies

When prepping the dough, consider making it the night before, allowing adequate chilling time. Once prepared, you can store your rolled dough in the refrigerator overnight, ready to shape and bake whenever you desire.

Storage between steps can be managed effectively by keeping your filling stored separately. Prepared fillings can be stored in the fridge for a few days, allowing for quick assembly when you are ready to bake.

Quality impact assessment is crucial; dough components can vary based on how long they are stored. Always inspect your stored ingredients before assembling your cruffins to ensure the best results.

For assembly tips, organize your workspace to streamline the filling and shaping process. Having all ingredients nearby reduces preparation time and allows a smoother flow to your baking day.

Reheating guidelines suggest warming at a low temperature until warmed through, ensuring the buttery layers retain their flakiness and delightful texture once again.

Lastly, don’t forget about adding fresh elements when serving. Consider topping baked cruffins with fresh fruits or drizzles of glaze just before serving for a vibrant presentation and to captivate guests even more.

Scaling Instructions

For halving the recipe, simply divide all ingredients and adjust your baking time to ensure that the quantities cook through evenly. Scaling down makes it perfect for smaller gatherings or a personal treat.

When doubling or tripling, consider using multiple muffin tins to bake at once. Ensure that each tray has adequate spacing for air circulation, allowing for even cooking that doesn’t compromise texture.

Equipment adjustments might include varying baking sheets or muffin tins, as necessary. Check them halfway to ensure uniform baking, especially when dealing with larger batches.

Timing modifications should observe closely; larger quantities can take a bit longer to bake through, so check doneness with a toothpick to ensure proper cooking without overbaking.

Storage considerations for leftover cruffins can be handled similarly to the original recipe but keep in mind that larger batches might require multiple storage containers to maintain freshness.

Nutritional Deep Dive

The macro breakdown of cruffins primarily revolves around carbohydrates from the flour, fats from the butter, and sugars from any fillings and toppings. This rich balance makes them decadent yet satisfying when enjoyed mindfully.

In terms of micronutrient analysis, depending on the ingredients used, cruffins can offer key vitamins and minerals such as calcium from dairy and vitamin C if fruit fillings are added. Adaptations in recipes can enhance these nutrient profiles as well.

Health benefits come in various forms; for instance, incorporating whole grains or fruits can increase fiber intake. The inclusion of sweet potatoes or pumpkin in fillings can add beta carotene and lower overall sugar content.

Dietary considerations can be made, especially for customizations and healthier adaptations. By using alternative flours and sweeteners, these pastries can accommodate gluten-free or lower-sugar diets without sacrificing much flavor.

As with portion analysis, moderation is key. While cruffins are delicious, enjoying in reasonable amounts helps maintain balance within desserts in your eating plan. They can be made versatile through creativity in serving.

For those focusing on weight management, recreating cruffins with more wholesome ingredients allows enjoyment without the guilt. Opting for seasonal vegetables in savory versions can enhance both nutrients and flavor.

Dietary Adaptations

For gluten-free cruffins, utilize a high-quality gluten-free flour blend to recreate that delightful texture without the gluten. Always check ingredient labels to ensure a completely gluten-free experience.

Dairy-free options can be managed through substituting butters and creams with plant-based alternatives, making it easier to cater to a variety of dietary restrictions in your baking endeavors.

Vegan adaptations can transform this recipe stunningly. By using flaxseed meal or applesauce as binding agents, you can achieve the perfect texture while keeping everything plant-based and delicious.

Low-carb enthusiasts can swap traditional flour with almond or coconut flour, thereby creating scrumptious cruffins that fit within ketogenic diets while still being flavorful and satisfying.

Paleo-friendly versions can utilize natural sweeteners like honey or maple syrup, removing refined sugars altogether, ensuring the cruffins align with paleo dietary goals while enhancing their flavors authentically.

Low-FODMAP options can focus on specific fibers in fillings and minimizing garlic or certain fruits. These adaptations allow those with sensitivities to enjoy cruffins without discomfort, focusing on suitable ingredients.

Troubleshooting Guide

Texture issues can arise if the dough is overworked. Avoid persistent kneading to prevent dense cruffins. For the desired flakiness, allow layers to remain distinct and handle the dough delicately.

Flavor balance might be off if not adequately adjusted. Taste your fillings or batter before baking; flavor concentrates while baking, so it’s crucial to find your sweet or savory notes before they’re settled.

Temperature problems can occur in improperly preheated ovens. Always preheat your oven properly to the suggested temperature before placing your cruffins inside, ensuring that they rise evenly right from the start.

Equipment challenges can arise if you’re unfamiliar with using different types of muffin tins. Familiarize yourself with how your specific tools heat and cook; follow cooking times and adjust according to your equipment’s quirks.

Ingredient substitutions require careful planning. Each ingredient can alter the overall flavor and texture; understanding how to replace them correctly ensures success even when adapting the recipe.

Timing concerns can often be improved by following the guidance of the recipe strictly. Adjust for your own baking environment, but maintain the ingredient proportions to achieve tasty results at the right times.

Recipe Success Stories

Feedback from the community indicates that cruffins are a favorite treat amongst brunch lovers and bakers alike. Many users noted how versatile the recipe could be, catering to both sweet and savory palates seamlessly.

Variations of cruffins have become a recurring topic, with bakers sharing their personalized takes, from tropical-inspired to decadent chocolate variations. Everyone appreciates being able to put their twist on this classic treat.

Adaptation stories showcase the ability of this recipe to incorporate seasonal ingredients, which resonates with many bakers seeking to enhance flavor profiles while prioritizing local produce in their creations.

Readers have delighted in sharing their photographic success; showcasing beautiful golden cruffins has encouraged others to dive into their own cruffin-making adventures. Enthusiasts often come together to create new blends and designs.

Photography tips regarding food styling and natural lighting have enabled bakers within the community to elevate their presentation of cruffins, ultimately allowing them to become more engaging for social media sharing and gatherings.

Frequently Asked Questions

1. Can I prepare the dough in advance?

Absolutely! You can prepare and chill the dough a day in advance. Chill it properly to enhance the flakiness when baked.

2. What should I do if my cruffins are dry?

If your cruffins are dry, ensure proper storage techniques are used, and consider adjusting ingredient ratios next time for a moist outcome.

3. Can I use different types of fillings for cruffins?

Certainly! Feel free to experiment with both sweet and savory fillings, such as fruits, chocolate, or cheese to tailor the recipe to your taste.

4. How do I store leftover cruffins?

Store cruffins in an airtight container at room temperature for up to two days or refrigerate for longer freshness. Reheat before serving for the best experience.

5. What is the best way to serve cruffins?

Arrange on platters with complementary spreads, or include garnishes like fruit or herbs to elevate the presentation and enhance flavors.

6. Can I make cruffins dairy-free?

Yes, use plant-based butter and non-dairy fillings to create a deliciously dairy-free version of cruffins without sacrificing texture.

7. How long do cruffins last in the freezer?

When properly wrapped, cruffins can be stored in the freezer for up to three months. Just thaw gently before reheating to enjoy.

8. Can I make cruffins gluten-free?

Yes! Use high-quality gluten-free flour blends in place of all-purpose flour to maintain the texture while keeping them gluten-free.

9. Are cruffins suitable for kids?

CRUD-based flavored fillings often appeal to children. Opt for sweet fillings like chocolate or fruit to cater to young taste buds.

10. What type of muffin pan is best for cruffins?

A standard muffin pan works best, but silicone pans can also create easy release and shape retention for your cruffins!

Additional Resources

Explore related recipes that elevate your baking skills, such as classic croissants or muffins with unique flavors. Each recipe adds depth to your culinary repertoire and experimentation will yield delicious results.

Dive into technique guides that can help you master pastry skills, including tips for kneading, shaping, and baking to ensure your baking remains consistent and enjoyable.

Ingredient information is vital for success. Learn about the different types of flour, butters, and fillings to make informative choices that enhance your baking experience.

Consider equipment recommendations that assist in baking your cruffins, such as high-quality measuring cups and mixing bowls that make prep easier and more efficient.

Seasonal variations can enhance your cruffin recipes, allowing bakers to utilize fresh, local produce to create new, exciting flavors that elevate this classic pastry.

Join the Conversation

We’d love to hear about your cruffin experiences! Share your successes, adaptations, and stories across social media platforms. Use hashtags that connect with fellow bakers and followers of flakiness!

Photography tips are encouraged within our community. Capture the beauty of your baked goods in natural light and engage more actively with viewers interested in your creations.

Get involved with recipe reviews that help refine existing recipes, as feedback leads to improvement, promising future bakers greater joy in their culinary journey.

Feel free to share how you’ve adapted recipes and allowed them to fit personal taste. Engage with your audience through comments and questions, creating a sense of community around cruffin-making!

Explore new culinary techniques together, fostering creativity in the making, enjoying the beauty of baking, and savoring cruffins while sharing the love of food.

The Recipe

Delicious Cruffins

Serves: 12

Prep Time: 30 mins

Cook Time: 25 mins

Total Time: 55 mins

Kitchen Equipment Needed

  • Muffin tin
  • Rolling pin
  • Mixing bowls
  • Spatula or wooden spoon
  • Plastic wrap
  • Measuring cups and spoons

Ingredients

  • 2 cups all-purpose flour
  • 1/2 cup unsalted butter (melted)
  • 1/4 cup granulated sugar
  • 1/2 cup warm milk
  • 1 packet (2 1/4 tsp) of instant yeast
  • 1/2 tsp salt
  • 1 egg
  • 1/2 cup of chocolate chips (or preferred filling)

Directions

  1. In a bowl, mix warm milk and yeast, allowing it to activate for about 5 minutes.
  2. Combine melted butter, sugar, salt, and the egg in a large mixing bowl.
  3. Add activated yeast mixture and flour gradually, mixing until a dough forms.
  4. Knead the dough on a floured surface until smooth and elastic.
  5. Cover with plastic wrap and let rise for about 1 hour.
  6. Roll out dough into a rectangle, and spread melted butter, sugar, and desired fillings evenly.
  7. Fold and cut the dough into strips, rolling them into a cruffin shape in muffin tins.
  8. Let them rise again for 30 minutes, then bake at 375°F for 25 minutes or until golden.

Recipe Notes

  • Feel free to experiment with various fillings to customize your cruffins.
  • Make sure to cover the muffins to prevent drying out while they rise.
  • Store any leftovers in an airtight container to maintain freshness.

Delicious Honey Butter Cornbread Poppers: A Irresistible Treat

Honey Butter Cornbread Poppers: A Sweet and Savory Treat

⚖️
Difficulty
Easy

⏲️
Prep Time
15 mins

🕒
Cook Time
20 mins

⏱️
Total Time
35 mins

🍽️
Servings
12 Poppers

Welcome to a delicious treat that combines the rich sweetness of honey and the buttery goodness of cornbread in bite-sized poppers. Honey Butter Cornbread Poppers are perfect for any occasion, whether it’s a casual family dinner, a festive gathering, or even a potluck. These delightful morsels are not only easy to prepare, but they also promise to satisfy your taste buds with their irresistibly sweet and savory flavor profile. Each popper is a bite of warm, comforting goodness, ideal for dipping in additional honey butter for that extra touch of sweetness.

These poppers are a delightful twist on traditional cornbread. They encapsulate the essence of comfort food while being fun and approachable for all ages. Picture it: golden-brown poppers with a tender, buttery center that melts in your mouth, accompanied by a rich aroma of freshly baked cornmeal. Plus, they can easily be served as an appetizer or a side dish, which makes them an incredibly versatile recipe for your culinary repertoire.

Quick Recipe Highlights

  • Flavor Profile: These poppers boast a delightful combination of sweet honey and rich butter, creating a warm and inviting flavor that’s perfect for snacking.
  • Texture: The outside of each popper is slightly crispy, while the inside remains soft and moist, providing a delightful contrast that enhances every bite.
  • Aroma: The aroma of freshly baked cornbread mingled with honey butter fills the kitchen, inviting everyone to gather around for a taste.
  • Visual Appeal: With their golden hue and appealing round shape, these poppers are as visually enticing as they are delicious, making them a centerpiece on any table.
  • Skill Level Needed: This recipe is perfect for beginners as well as seasoned cooks, requiring minimal culinary expertise and yielding impressive results.
  • Special Equipment: You will need muffin tins and a mixing bowl, making this an accessible recipe for any home cook.

Recipe Overview

  • Difficulty Level: This recipe is easy and approachable, requiring only basic mixing and baking skills that even kids can assist with.
  • Category: Perfect as an appetizer or side dish, they also serve well as a breakfast treat.
  • Cuisine: This recipe draws inspiration from traditional Southern cuisine, highlighting the popularity of cornbread in American households.
  • Cost: Inexpensive to make with basic pantry staples, these poppers can be made for a few dollars, making them budget-friendly.
  • Season: Great year-round, but especially comforting during the fall and winter months when warm, hearty dishes are preferred.
  • Occasion: Ideal for holiday festivities, gatherings with friends, or even as a simple weeknight treat.

Why You’ll Love This Recipe

Each Honey Butter Cornbread Popper provides a welcome burst of flavor that is inherently satisfying. The rich combination of honey and butter makes each bite a taste of comfort, bringing familiar warmth and joy reminiscent of home-cooked meals. When you gather around and enjoy these poppers, the sweet aroma fills the air, reminiscent of cozy family moments and shared laughter.

The convenience of this recipe is another reason to love it. With a prep time of just 15 minutes and a cooking time of only 20 minutes, these poppers will quickly become a go-to choice for your busy schedule. You can whip them up quickly for last-minute gatherings or an easy weeknight side dish.

Nutritionally, cornbread can be a great source of whole grains and fiber, offering sustenance while keeping your energy levels stable throughout the day. Plus, the addition of honey can promote a natural sweetness without refined sugars. A perfect choice for those looking for a satisfying yet nutritious option.

Socially, these poppers are fantastic for sharing. Their bite-sized nature makes them easy to serve at parties while encouraging mingling among guests. They are a popular item that can spark conversations and smiles alike—a definite crowd-pleaser!

Lastly, they’re cost-effective. Using common pantry staples, you can produce a delightful dish without breaking the bank. Families can enjoy hearty, home-cooked snacks that are delicious and affordable.

Historical Background and Cultural Significance

The origins of cornbread date back to the Indigenous peoples of North America, who utilized corn as a staple food long before European settlers arrived. As corn became a crucial component of Southern cooking, cornbread emerged as a beloved dish, often associated with comfort and community gatherings.

In Southern culture, cornbread has deep-rooted significance, symbolizing hospitality and home. Dishes like honey butter cornbread poppers reflect an evolution of traditional recipes, combining classic ingredients with contemporary culinary twists suitable for modern palates.

Throughout the years, variations of cornbread have appeared, often influenced by regional preferences. The Honey Butter Cornbread Poppers merge the classic sweetness of honey with the savory essence of cornbread. This evolution demonstrates how traditional flavors can inspire new creations within home cooking today.

Regional variations of cornbread across the U.S. showcase diverse ingredients, from jalapeños in Texas to sweet variations enriched with fruits. This flexibility highlights the cultural significance of cornbread as a canvas for creativity in many Southern kitchens.

Ingredient Deep Dive

Cornmeal: The backbone of cornbread, cornmeal has a long history as a dietary staple in many cultures. Rich in carbohydrates and fiber, it provides energy while being low in fat. To choose quality cornmeal, look for a fine texture and a fresh aroma. Store it in a cool, dry place to maintain its freshness.

Honey: Honey has been revered for its natural sweetness and medicinal properties across various cultures. Nutritionally, it’s a natural source of energy and has antioxidant properties. When selecting honey, choose local, raw varieties for maximum flavor and health benefits. Store covered in a cool, dark place to preserve its quality.

Common Mistakes to Avoid

  • Overmixing the batter — This can lead to dense poppers instead of fluffy ones; mix until combined.
  • Not preheating the oven — Skipping this can affect the rise and texture; always ensure the oven is at the correct temperature.
  • Using stale ingredients — Fresh ingredients are key; check expiry dates on cornmeal and baking powder.
  • Ignoring the mixing order — Following the recipe’s order can impact the final texture; wet ingredients should be combined before adding dry.
  • Underbaking — Keep an eye on the baking time; underbaked poppers can turn out gummy inside. Perform the toothpick test to check doneness.
  • Neglecting to grease the muffin tin — A well-greased tin prevents sticking; consider using cooking spray or oil.
  • Not letting the batter sit — Allow the batter to sit for a few minutes, which can enhance the texture. This step is often overlooked.
  • Using too much honey — While it adds sweetness, excessive honey can make them overly sticky; adhere to the recipe’s measurements.

Essential Techniques

Mixing Batter: Proper mixing is crucial for achieving the right texture in your Honey Butter Cornbread Poppers. Overmixing can create a dense consistency, while undermixing can lead to an uneven texture. Aim to mix until just combined.

Testing for Doneness: Knowing when your poppers are finished baking is essential to ensure they are perfectly cooked. Insert a toothpick into the center; it should come out clean. If the batter sticks, continue to bake, checking at 2-3 minute intervals.

Pro Tips for Perfect Honey Butter Cornbread Poppers

1. Let your batter rest for a few minutes after mixing to achieve a better texture.

2. Experiment with different types of honey, such as clover or wildflower, to impart unique flavors.

3. Add mix-ins like corn kernels or jalapeños for an extra flavor boost.

4. Use high-quality butter for a richer taste.

5. Adjust the sweetness by reducing honey if you prefer a less sweet popper.

6. Serve poppers warm with additional honey butter on the side for dipping.

7. Ensure the muffin tin is well-greased to avoid sticking.

8. Store leftover poppers in an airtight container at room temperature for best flavor retention.

Variations and Adaptations

Regional variations can include adding ingredients like bacon or cheese for a savory twist. Consider seasonal adaptations such as pumpkin puree during fall for a festive nod. Dietary modifications can cater to gluten-free diets by using alternative flours like almond or gluten-free blends. For a lighter texture, you may substitute milk with buttermilk, enhancing both flavor and richness. Otherwise, try different toppings or sprays to present your poppers uniquely!

Serving and Presentation Guide

When serving your Honey Butter Cornbread Poppers, consider plating them on a rustic wooden board for a homey feel. Garnish with fresh herbs such as parsley or chives for a touch of color. Pair them with a small bowl of honey butter or maple syrup for dipping to elevate the experience. For optimal flavor, serve warm and in generous portions, allowing guests to enjoy a second helping.

Wine and Beverage Pairing

Pair your poppers with a chilled glass of Riesling or a light Sauvignon Blanc, allowing the sweetness of the wine to complement the honey’s flavor. For non-alcoholic alternatives, serve with apple cider or an herbal iced tea for a refreshing contrast. If you’re feeling adventurous, a spiced chai could accentuate the honey and butter’s richness beautifully.

Storage and Shelf Life

For optimal freshness, store your Honey Butter Cornbread Poppers in an airtight container at room temperature for up to three days. If extended storage is needed, consider wrapping each popper in plastic wrap and freezing them. When reheating, a quick dunk in the microwave or an oven at low heat will restore their delightful softness. Always check for visual and scent changes before consuming.

Make Ahead Strategies

You can prepare the batter ahead of time and refrigerate it for later use. Just ensure to store it in a well-sealed container. Assemble the poppers right before baking to ensure optimal freshness. Fresh elements such as herbs or additional toppings can be added just before serving to brighten the dish. Timing the baking just right ensures they will be wonderfully warm when guests arrive.

Scaling Instructions

To halve the recipe, simply divide all measurements by two and adjust serving sizes accordingly. When doubling or tripling, be mindful of the muffin tin capacity to prevent overcrowding. Adjust baking times slightly; larger batches may require a few extra minutes in the oven. For storage, ensure you have ample airtight containers to accommodate your scaled recipe.

Nutritional Deep Dive

These poppers provide a well-balanced nutritional profile, offering carbohydrates for energy and a small amount of protein. Each popper is relatively low in fat, particularly when made with moderation in mind regarding honey and butter. For those keeping an eye on macros, keep in mind portion control to enjoy this treat without guilt.

Dietary Adaptations

For gluten-free versions, substitute the cornmeal with certified gluten-free alternatives. A dairy-free adaptation can be made using coconut oil in place of butter and almond milk instead of regular milk. For vegan diets, replace honey with agave syrup or maple syrup while using dairy-free butter. These adaptations ensure that anyone can enjoy the deliciousness of Honey Butter Cornbread Poppers!

Troubleshooting Guide

If your poppers are not rising properly, ensure your baking powder is fresh and that you haven’t overmixed the batter. If they turn out too dry, consider reducing the cooking time slightly and check for doneness earlier. Overly dense poppers may result from too much mixing; aim for a gentle hand while combining ingredients.

Recipe Success Stories

Readers have shared how these Honey Butter Cornbread Poppers became a family favorite, with some opting to add spice variations for added flair. Feel free to experiment and make this recipe your own, as many have successfully adapted the sweetness according to their personal taste preferences. Sharing photos of your poppers on social media can inspire others to try their hands at this delectable recipe!

Frequently Asked Questions

Can I make these ahead of time? Absolutely! You can prepare the batter ahead of time and store it in the fridge. Just bake them fresh when you need them.

How do I keep the poppers moist? Ensuring not to overbake and allowing them to rest for a few minutes will maintain moisture. Additionally, serving with honey butter will add extra moisture.

What can I substitute for cornmeal? If you don’t have cornmeal, you may use a combination of flour and fine-ground cornmeal or a gluten-free corn flour blend.

Are these poppers gluten-free? You can make these poppers gluten-free by using certified gluten-free cornmeal or a suitable flour substitute.

Can I freeze leftover poppers? Yes! Allow them to cool completely and store them in an airtight container for up to 3 months.

What’s the best way to reheat them? You can reheat your frozen poppers in the microwave or place them in a 350°F oven for about 10-15 minutes until warmed through.

Can I add cheese to the recipe? Yes, you can fold in shredded cheese of your choice into the batter for a savory twist.

How should I serve them? These poppers are best served warm with honey butter or maple syrup for dipping.

How long do they last? Honey Butter Cornbread Poppers can be stored for up to 3 days at room temperature in an airtight container.

Are they suitable for kids? Yes, these poppers are kid-friendly and make a great addition to lunch boxes or after-school snacks!

Can I use a different sweetener? You can substitute honey with agave or maple syrup, but be aware that this may slightly alter the flavor.

Additional Resources

For those looking to branch out from Honey Butter Cornbread Poppers, consider exploring alternative cornbread recipes, such as savory versions or those that incorporate vegetables. Additionally, check out ingredient guides for honey and cornmeal for more insights on their benefits and uses. Techniques for baking can also help refine your overall skills in the kitchen.

Join the Conversation

We love hearing from our readers! Share your thoughts, adaptations, and results when making the Honey Butter Cornbread Poppers. Connect with us on social media and upload your recipe photos, tag us to showcase your baking adventures. Let’s build a community to share tips, tricks, and delicious inspiration!

The Recipe

Honey Butter Cornbread Poppers

Serves: 12 Poppers

Prep Time: 15 mins

Cook Time: 20 mins

Total Time: 35 mins

Kitchen Equipment Needed

  • Muffin tin
  • Mixing bowl
  • Measuring cups and spoons
  • Whisk or spatula

Ingredients

  • 1 cup cornmeal
  • 1 cup all-purpose flour
  • 1/4 cup sugar
  • 1 tablespoon baking powder
  • 1/2 teaspoon salt
  • 1 egg
  • 1 cup milk
  • 1/4 cup melted butter
  • 1/3 cup honey

Directions

  1. Preheat the oven to 400°F (200°C) and grease the muffin tin.
  2. In a mixing bowl, combine cornmeal, flour, sugar, baking powder, and salt.
  3. In a separate bowl, whisk together the egg, milk, melted butter, and honey.
  4. Pour the wet ingredients into the dry ingredients and mix until just combined.
  5. Scoop the batter evenly into the muffin tin, filling each cup about 2/3 full.
  6. Bake for about 15-20 minutes until golden and a toothpick comes out clean.
  7. Let cool slightly before serving with extra honey butter for dipping.

Recipe Notes

  • Feel free to add ingredients like cheese or jalapeños for added flavor.
  • To make gluten-free, substitute with gluten-free flour options.
  • Serve warm for the best experience!

Delicious Lemon Cream Cheese Dump Cake Recipe to Try Today

Lemon Cream Cheese Dump Cake: A Refreshing Delight for Any Occasion

⚖️
Difficulty
Easy

⏲️
Prep Time
15 mins

🕒
Cook Time
45 mins

⏱️
Total Time
60 mins

🍽️
Servings
12

Indulge your senses with this delightful Lemon Cream Cheese Dump Cake, perfect for any occasion, be it a sunny picnic or a cozy family gathering. The combination of zesty lemon and creamy cheese creates a unique flavor explosion that tantalizes your taste buds while providing a comforting texture. Each bite offers a burst of refreshing citrus, light sweetness, and a smooth creamy finish, making it an irresistible dessert that will have your guests coming back for seconds.

Preparing this Lemon Cream Cheese Dump Cake is not only simple but also enjoyable, making it an ideal choice for bakers of all skill levels. With minimal preparation steps and a straightforward baking process, you are just an hour away from a mouthwatering dessert. Furthermore, the visual appeal of a golden crust contrasted with the bright yellow lemon filling and creamy top is enough to make your mouth water in anticipation.

Quick Recipe Highlights

  • Flavor Profile: This cake is a delightful blend of tart lemon with creamy sweetness, creating an exquisite balance that tantalizes the palate.
  • Texture: The cake boasts a fluffy yet moist texture that perfectly complements the rich cream cheese layer, providing a delightful mouthfeel.
  • Aroma: Fresh lemon zest fills the air as the cake bakes, offering a bright and uplifting scent that’s hard to resist.
  • Visual Appeal: The bright yellow color of the lemon filling and the golden crust offers an eye-catching presentation that is sure to impress.
  • Skill Level Needed: This recipe is ideal for beginners and experienced bakers alike due to its straightforward steps and minimal technical skill required.
  • Special Equipment: You will need a mixing bowl, a baking dish, and an oven—tools that are typically found in any kitchen.

Recipe Overview

  • Difficulty Level: This Lemon Cream Cheese Dump Cake is categorized as easy, making it accessible for novice bakers. The straightforward nature of the dump cake means less time spent in the kitchen and more time enjoying your delicious dessert.
  • Category: This recipe falls under desserts, perfect for satisfying your sweet tooth after dinner or as an afternoon treat. It can also serve as a sweet addition to brunch menus.
  • Cuisine: This cake reflects a balance of American cuisine, incorporating lemon as a popular flavor in many beloved confections, inspired by the fresh and vibrant nature of citrus fruits.
  • Cost: The ingredients for this cake are budget-friendly, and the overall cost can be kept under $15, making it accessible for everyone.
  • Season: The zesty nature of this cake makes it particularly suitable for spring and summer, but lemon desserts are beloved year-round.
  • Occasion: Ideal for gatherings, celebrations, or simply satisfying a sweet craving, this cake fits perfectly for birthdays, picnics, or holiday desserts.

Why You’ll Love This Recipe

The Lemon Cream Cheese Dump Cake is a true masterpiece of taste and texture. The bright tartness of the lemon balances the richness of the cream cheese, resulting in a sweet treat that is not overwhelmingly sweet. Each bite offers a fluffy texture that melts in your mouth, leaving you refreshed and satisfied. This delicate balance creates an unforgettable dessert experience that you’ll want to share with family and friends.

Convenience is a hallmark of this recipe; this dump cake requires minimal effort and time compared to traditional layered cakes. Simply mix the ingredients and dump them into a baking dish—no complicated steps or layers to assemble! This ease of preparation makes it perfect for busy weeknights or impromptu gatherings, allowing you to whip it up in no time.

This delightful dessert also boasts some nutritional advantages. Lemon is a great source of vitamin C, an essential nutrient known to boost your immune system. Additionally, the cream cheese provides calcium, making this cake not only delicious but also somewhat beneficial when enjoyed in moderation.

Social gatherings come alive with the Lemon Cream Cheese Dump Cake! Its delightful flavor and simple serving make it a fantastic choice for picnics, birthdays, and holiday parties alike. It’s a dish that invites compliments and sparks conversations, bringing people together around a shared love for delicious food.

Lastly, this cake is incredibly cost-effective. With affordable and readily available ingredients, you can create a dessert that looks and tastes like it came from a gourmet bakery without breaking the bank. Its simplicity and economic nature make it an attractive option for any home cook looking to impress without overspending.

Historical Background and Cultural Significance

The origins of the dump cake can be traced back to the mid-20th century, a time when quick and easy recipes became popular in American homes. Utilizing the concept of ‘dumping’ ingredients into a pan, this method revolutionized home baking by providing a faster alternative to traditional cake recipes. The addition of lemon represents the American affinity for fresh and zesty flavors that emerged throughout the 20th century.

Culturally, this Lemon Cream Cheese Dump Cake is a reflection of the nostalgia associated with family gatherings and picnics in America. Many people have fond memories sharing desserts like lemon-flavored cakes at gatherings, which showcase the communal aspect of food. The cream cheese layer also nods to the popularity of cream cheese icing and fillings in American baking traditions.

As with many beloved recipes, the Lemon Cream Cheese Dump Cake has evolved over the years, with each baker adding their own twist. Some prefer to incorporate fruit compotes while others might tweak the sweetness level. This evolution reflects personal tastes and regional preferences, ensuring that the recipe remains relevant.

Regional variations are also significant, with some people adding coconut or berries to the mix. These adaptations highlight how versatile and beloved the recipe is, making it a staple in homes across the country, linking tradition with personal culinary expressions.

Ingredient Deep Dive

– **Lemon**: A staple in many culinary traditions, lemons are not only refreshingly tart but also offer a plethora of health benefits, including high levels of vitamin C. When selecting lemons, choose ones that feel heavy for their size and have a bright, shiny skin. For storage, keep them at room temperature or in the refrigerator for extended freshness. If fresh lemons aren’t available, bottled lemon juice can be used, but try to choose one without added sugars for the best flavor.

– **Cream Cheese**: Widely used in American and European desserts, cream cheese adds a rich and creamy texture. It’s an excellent source of calcium and protein. When purchasing cream cheese, look for products with minimal additives and a smooth consistency. Store it in the refrigerator and seal it tightly to prevent drying. If you need a substitute, mascarpone or soft goat cheese can work well in this recipe, though the flavor will change slightly.

Common Mistakes to Avoid

  • Not Measuring Ingredients: Accurate measurements are crucial in baking; using too much or too little can significantly alter the texture and flavor of your cake.
  • Skipping the Cream Cheese Layer: Skipping or underestimating the importance of the cream cheese layer can lead to a lack of moisture and richness in the final cake.
  • Baking at the Wrong Temperature: Ensure your oven is preheated to the correct temperature to achieve the desired texture and prevent over or under-baking.
  • Overmixing the Batter: Overmixing can lead to a dense texture; mix until just combined for best results.
  • Using Old Ingredients: Expired baking soda or powder can lead to a flat cake; always check the freshness of ingredients before use.
  • Not Tasting: Always taste your batter before baking—adjusting sweetness or acidity can make a big difference in flavor.
  • Poor Pan Choice: Using the wrong size pan can affect the baking time and texture; stick to the recommended size for the best results.
  • Cooling Too Quickly: Letting the cake cool too quickly can cause cracks; allow it to set in the pan for a while before transferring to a wire rack.
  • Not Allowing the Cake to Set: Allow the cake to cool and set before cutting to ensure it holds its shape and maintains the creamy texture.

Essential Techniques

– **Creaming**: Creaming the cream cheese with sugar before incorporating other ingredients is crucial. This technique helps to create a smooth consistency and properly integrates air into the mixture, resulting in a lighter cake. To master this, use room temperature cream cheese and beat until fluffy, usually around 3-5 minutes.

– **Layering**: Properly layering your ingredients ensures even distribution and allows flavors to meld beautifully during baking. Start with the lemon layer, followed by the cream cheese, and top with cake mix—each layer should be spread evenly to avoid clumping or uneven cooking.

Pro Tips for Perfect Lemon Cream Cheese Dump Cake

– Always use fresh lemons for the best flavor; zest and juice just before using to maintain brightness.
– Allow cream cheese to sit at room temperature for easy mixing; this will prevent lumps in the final product.
– For added texture, consider sprinkling some finely chopped nuts on top before baking.
– For a sweeter cake, lightly dust the top with powdered sugar after baking.
– Enhance the flavor by adding a splash of vanilla extract to the cream cheese mixture for a more complex flavor profile.
– Adjust baking time based on your oven; every oven varies slightly, so keep an eye on the cake as it nears completion.
– Serve warm topped with a dollop of whipped cream for a show-stopping dessert presentation.
– Keep leftovers in an airtight container to maintain moisture and flavor.

Variations and Adaptations

Regional variations of the Lemon Cream Cheese Dump Cake often involve the inclusion of additional fruits, such as blueberries or raspberries, to enhance sweetness and flavor complexity. In the summer months, substituting fresh seasonal fruits can create a vibrant and delicious alternative.

For seasonal adaptations, consider making a pumpkin spice version in the fall by swapping out lemon for pumpkin puree and adjusting spices accordingly. This provides a delightful twist on the traditional recipe while maintaining the ease of preparation.

Dietary modifications are another way to enjoy this cake; using gluten-free cake mix will make it accessible for those with gluten sensitivities. You can also modify it to be vegan by using dairy substitutes like almond cream cheese and a vegan cake mix.

Flavor variations can include different citrus fruits, such as orange or lime, giving a unique twist to the classic lemon taste. Alternatively, mixing in some lemon extract in place of zest can intensify the lemon flavor.

Texture modifications include adding a crumb topping with oats for added crunch or incorporating shredded coconut within the layers for a tropical flair. Serving it in a glass dish allows for a layered presentation that showcases the cake beautifully.

Serving and Presentation Guide

Plating is key when presenting your Lemon Cream Cheese Dump Cake. Use a sharp knife to cut even slices, and serve on a colorful plate to make the vibrant yellow of the cake stand out. For an attractive presentation, consider garnishing each slice with a sprig of mint or additional lemon zest.

Garnishing ideas include a light dusting of powdered sugar or a drizzle of lemon glaze over the top for additional sweetness. This not only enhances the visual appeal but also adds an extra layer of flavor.

Traditional accompaniments like fresh berries can add a bright contrast and additional flavor elements, while modern serving suggestions might include a scoop of vanilla ice cream on the side, enhancing the dessert experience.

Consider temperature when serving; ideally, the cake should be slightly warm or at room temperature for the best texture and taste. Allowing it to cool slightly before serving helps the creamy layer hold its shape.

Portion control is essential if serving at gatherings. Cut smaller portions that allow guests to enjoy a taste without overindulging, making it easy for everyone to try a variety of desserts.

Wine and Beverage Pairing

Pairing the Lemon Cream Cheese Dump Cake with wine can elevate your dessert experience. A light sparkling wine or prosecco complements the citrus flavors beautifully, enhancing the refreshing elements of the cake.

If you prefer non-alcoholic options, consider pairing with a ginger ale or sparkling lemonade to match the cake’s bright flavors. Cold brewed iced tea with a hint of lemon can also create a refreshing balance.

For coffee lovers, pairing with an iced coffee or a light roast can create a delicious contrast with the sweetness of the cake. Ensure that your beverages are served chilled for the best experience.

Consider the serving temperature of the cake and beverages; serving them together is crucial for an enjoyable dining experience.

Storage and Shelf Life

Proper storage is vital to maintain the freshness of Lemon Cream Cheese Dump Cake. Store leftovers in an airtight container at room temperature for up to two days, or refrigerate for up to a week to prolong freshness.

When storing the cake in the refrigerator, ensure that it is covered to prevent it from drying out or absorbing other odors from the fridge. If the cake has been frosted with additional cream cheese or whipped cream, refrigeration is necessary.

Signs of spoilage include an off-smell or visible mold, indicating that the cake should not be consumed.

For reheating, warm individual slices in the microwave for about 10-15 seconds to enjoy the cake warm and creamy again. Alternatively, reheat in the oven at a low temperature for a few minutes.

If you want to extend storage, this cake can be frozen for up to three months. Wrap tightly in plastic wrap and then foil before placing in a freezer-safe container to prevent freezer burn.

Make Ahead Strategies

Prepping your Lemon Cream Cheese Dump Cake ahead of time can save you stress on the day of your event. You can prepare the cake batter the night before and store it in the fridge until you’re ready to bake. Just give it a gentle stir before pouring it into your baking dish.

To maintain quality, keep the cream cheese layer separate until right before baking. This ensures the best flavor and texture when it comes time to serve.

Assess the quality impact of make-ahead decisions; by preparing ingredients in advance, you can streamline the cooking process without compromising flavor.

Assembly tips include measuring out all your ingredients beforehand, which simplifies the recipe execution. This also allows for quick cleanup afterward.

When reheating, consider adding fresh elements like whipped cream or fresh fruit to provide a burst of freshness that complements the richness of the cake.

Scaling Instructions

Scaling your Lemon Cream Cheese Dump Cake up or down can easily adapt to any occasion. If halving the recipe, use a smaller baking dish and ensure that the baking time is adjusted accordingly, checking for doneness earlier.

Doubling or tripling requires careful oversight of the mixing and baking processes. Be aware of the size of your oven; you may need to bake in batches to ensure even cooking.

When changing batch sizes, consider that cooking times may vary, with larger batches often requiring longer baking times. It’s wise to check the cake for doneness by inserting a toothpick into the center.

For storage considerations, larger cakes should be kept covered in the refrigerator to prevent drying out. Using smaller containers can help in portion control for large gatherings.

Nutritional Deep Dive

Understanding the nutritional content of your Lemon Cream Cheese Dump Cake can help in making informed decisions. Each slice provides a balanced mix of carbohydrates from the cake mix, fats from the cream cheese, and sugars from the lemon, offering both energy and satisfaction.

The macro breakdown includes significant carbohydrates primarily from the cake mix, moderate fats from the cream cheese, and protein, giving you a rich dessert experience.

Micronutrient analysis reveals that the cake can be a good source of calcium and vitamin C, both essential for overall health when enjoyed in moderation.

Health benefits include a refreshing lemon flavor, known for boosting mood and vitamin levels, while being a satisfying treat that curbs sweet cravings.

When considering weight management, mindful portioning is key. Enjoying a small slice can satisfy sweet cravings while maintaining overall dietary goals.

Dietary Adaptations

For those requiring dietary modifications, transforming the Lemon Cream Cheese Dump Cake to gluten-free is easily achievable by using a gluten-free cake mix. This way, everyone can enjoy the delightful flavors without health concerns.

Dairy-free options can include substitutes like almond or cashew cream cheese, allowing for rich creaminess without dairy ingredients.

Vegetarians can indulge freely, while vegans can opt for plant-based cake mixes and cream cheese alternatives to create a delicious version that fits their diet.

For low-carb or keto followers, research specific sugar substitutes and low-carb cake mixes to make a delicious yet compliant treat, ensuring that carb counts stay in check while still enjoying dessert.

Paleo individuals can swap out traditional ingredients for paleo-friendly versions, such as coconut flour instead of cake mix, achieving similar textures with more natural elements.

Troubleshooting Guide

Texture issues can arise if the cake is overmixed or too many dry ingredients are added. Ensure to mix just until combined and adjust ingredients for optimal results before baking.

Flavor balance is crucial; if the cake turns out too tart, consider adjusting the amount of sugar in the cream cheese layer next time and reducing lemon juice slightly for a more balanced sweetness.

Temperature problems can occur if the oven is not preheated correctly or if the cake is placed incorrectly within the oven. Always use an oven thermometer to ensure accurate baking temperatures.

Equipment challenges may arise if improper tools are used, stick to basic baking equipment to avoid potential issues. A good-quality pan can make all the difference in even cooking.

Ingredient substitutions need careful consideration; failing to account for texture or flavor differences may lead to disappointing results. It’s crucial to research common substitutes and their baking properties.

Timing concerns arise often; if the cake is not cooked through after the given time, keep baking and check regularly to avoid overcooking or underbaking.

Recipe Success Stories

Community feedback about the Lemon Cream Cheese Dump Cake highlights its versatility and deliciousness. Many fans rave about its refreshing flavors, making it a favorite for summer gatherings.

A variety of adaptations have been shared, from adding berries to switching up the cream cheese layer, showcasing the recipe’s flexibility. Readers find joy in experimenting with their personal touches while maintaining the essence of the original recipe.

Those who have documented their baking journeys have expressed delight in the simplicity of preparation and the impressive results, with many sharing stunning photographs of the finished cake.

Engagement on social media platforms has inspired a community of bakers to try their hands at this recipe, yielding creative variation suggestions that enhance the overall experience for everyone.

Photography tips from readers include showcasing the vibrant colors of the cake; using natural light can make every slice look irresistibly appetizing, capturing the essence of this refreshing dessert.

Frequently Asked Questions

1. Can I use a different cake mix flavor?
Yes, while the lemon cake mix provides a unique and refreshing flavor, experimenting with other flavors such as vanilla or yellow can yield equally delightful results. Just adjust lemon juice and zest accordingly for taste balance.

2. How do I know when the cake is done baking?
To check for doneness, insert a toothpick in the center of the cake. If it comes out clean or with a few moist crumbs, it’s ready. If there’s wet batter on the toothpick, give it another few minutes.

3. Can I make this recipe gluten-free?
Absolutely! Substitute the cake mix with a gluten-free version. The other ingredients remain the same, ensuring that you can enjoy this recipe without gluten-related issues.

4. What is the best way to store leftovers?
Store leftovers in an airtight container at room temperature for up to two days or in the refrigerator for up to a week. It can also be frozen for longer storage; wrap tightly in plastic before freezing.

5. Can I prepare the cake batter in advance?
Yes, you can prepare the batter a day in advance and store it in the refrigerator. Just stir the batter gently before pouring it into your baking dish to ensure even texture.

6. Is the cake still good if I let it sit overnight?
Yes, the flavors continue to meld overnight in the fridge, often improving the taste. Just make sure to cover it tightly to keep it fresh.

7. Can I add other ingredients like fruit?
Certainly! Adding fruits like blueberries or strawberries can enhance the overall flavor, adding extra moisture and natural sweetness to the cake.

8. Is it okay to replace cream cheese with another type of cheese?
You can use mascarpone or ricotta as substitutes for cream cheese, but be aware that this will slightly alter the texture and flavor.

9. How can I adjust the sweetness of the cake?
If you prefer a less sweet cake, reduce the sugar in the cream cheese layer or use a sugar substitute that fits your dietary needs.

10. What should I serve with this cake?
This cake pairs well with whipped cream, fresh fruit, or a scoop of ice cream. Additionally, complementing it with coffee or a light tea can elevate the dessert experience.

Additional Resources

For those interested in exploring more delightful recipes, consider checking out our related recipes section. Discover additional lemon-infused desserts, easy one-pan cakes, or no-bake treats that are just as simple and delicious.

Enhance your baking skills with technique guides that cover everything from mixing methods to mastering the perfect crumb. Learning these essential techniques can elevate your baking prowess to new heights.

Ingredient information is another useful resource; understand the nutritional benefits of your favorite ingredients, along with tips for selection and storage, ensuring your recipes turn out perfectly every time.

Explore our equipment recommendations to find the best tools for your baking journey. Proper kitchen equipment can significantly impact your baking outcomes and overall experience.

Seasonal variations are also available; discover the best ways to adjust your recipes based on seasonal ingredients, allowing you to keep your baking fresh and exciting throughout the year.

Join the Conversation

We invite you to share your experiences with the Lemon Cream Cheese Dump Cake! Whether you try the recipe as is or make your adjustments, your feedback and variations are valuable.

Consider sharing photographs of your finished masterpiece on social media, showcasing your creativity and love for baking. We encourage you to review the recipe and share your thoughts with our community, building a supportive network of home bakers.

Engage with others by discussing ideas and tips that can enhance the community’s baking experiences. Your suggestions can inspire fellow bakers to mix things up and try new flavors.

Lastly, take part in recipe variations by contributing your ideas and unique spins on this darling dessert, sparking new conversations and creativity in the kitchen.

The Recipe

Lemon Cream Cheese Dump Cake

Serves: 12

Prep Time: 15 mins

Cook Time: 45 mins

Total Time: 60 mins

Kitchen Equipment Needed

  • Baking dish (9×13 inches)
  • Mixing bowl
  • Whisk or electric mixer
  • Measuring cups and spoons
  • Spatula

Ingredients

  • 1 box lemon cake mix
  • 1 (8 oz) package cream cheese, softened
  • 1 cup powdered sugar
  • 1 cup water
  • 1/3 cup lemon juice
  • Zest of 1 lemon
  • 1/2 cup melted butter

Directions

  1. Preheat your oven to 350°F (175°C). Grease a 9×13 inch baking dish.
  2. In a mixing bowl, blend the softened cream cheese and powdered sugar until smooth. Set aside.
  3. In another bowl, mix the lemon cake mix, water, lemon juice, and lemon zest until just combined.
  4. Pour half of the lemon batter into the prepared baking dish. Spread the cream cheese mixture on top, then pour the remaining lemon batter over the top of the cream cheese.
  5. Drizzle the melted butter over the top of the batter.
  6. Bake for 45 minutes or until the edges are golden and a toothpick inserted in the center comes out clean.
  7. Allow to slightly cool before serving and garnish as desired.

Recipe Notes

  • Feel free to add fresh berries on top before baking for an added touch of flavor.
  • This cake is best when enjoyed freshly baked but can be stored in the refrigerator for up to a week.
  • To enhance the lemon flavor, consider adding a tablespoon of lemon extract in addition to the zest and juice.

Indulge in Delicious Cinnamon-Kissed Cheesecake Donut Cookies Today!

Cinnamon-Kissed Cheesecake Donut Cookies: The Perfect Fusion Treat

⚖️
Difficulty
Medium

⏲️
Prep Time
15 mins

🕒
Cook Time
20 mins

⏱️
Total Time
35 mins

🍽️
Servings
24 cookies

If you’re craving a sweet treat that beautifully merges the creaminess of cheesecake and the fluffy goodness of donuts, look no further than these Cinnamon-Kissed Cheesecake Donut Cookies. Picture cookies with a soft, pillowy texture wrapped in a heavenly cinnamon sugar coating and filled with a luscious cheesecake-like center. Each bite transports you to dessert paradise, making these cookies a must-try for anyone with a sweet tooth. Perfect for gatherings, snack time, or just because, these treats will undoubtedly delight your senses.

These delightful cookies offer a wonderful combination of flavors and textures that will have you coming back for more. The cookie base is lightly spiced with cinnamon, perfectly balanced by the creaminess of the cheesecake filling. Topped with a light dusting of cinnamon sugar, each cookie is as pleasing to the eye as it is to the palate, making it an elegant addition to any dessert table or an indulgent afternoon snack. Buckle up for a taste sensation that will leave you smiling!

Quick Recipe Highlights

  • Flavor Profile: Expect a delightful blend of cinnamon sweetness balanced perfectly with the rich, creamy taste of cheesecake.
  • Texture: Soft and chewy, the exterior has a slight crisp from cinnamon sugar while the inside remains luxuriously smooth.
  • Aroma: The tempting scent of cinnamon wafts through your kitchen as these cookies bake, promising a warm, inviting treat.
  • Visual Appeal: These cookies shine with a golden-brown exterior, dusted with white sugar, making them look as good as they taste.
  • Skill Level Needed: Intermediate baking skills are recommended to achieve the perfect cookie without sacrificing the creamy filling.
  • Special Equipment: A mixer, piping bag, and cookie sheet will enhance your cookie-making experience.

Recipe Overview

  • Difficulty Level: This recipe is categorized as medium difficulty due to the need for precise measurements and technique but is definitely achievable for most home bakers.
  • Category: These cookies fit beautifully into dessert categories, perfect for parties, family get-togethers, or special occasions.
  • Cuisine: This recipe draws inspiration from classic American desserts, uniquely fusing the elements of cheesecake and traditional cookies.
  • Cost: With readily available ingredients, the approximate cost for this recipe is budget-friendly, making it accessible for all.
  • Season: Ideal for any season, but especially delightful during the fall and winter months, as cinnamon evokes cozy vibes.
  • Occasion: Whether it’s a birthday, holiday celebration, or simple weekend treat, these cookies are perfect for elevating any occasion.

Why You’ll Love This Recipe

The taste and texture of these Cinnamon-Kissed Cheesecake Donut Cookies are nothing short of magical. As you bite into the soft exterior, you’ll be greeted by the rich, creamy cheesecake filling that provides a delightful contrast to the cookie’s soft chewiness. The rounded taste of cinnamon enhances the sweet flavor, creating a comforting treat that feels cozy and indulgent at the same time.

Convenience is another significant advantage of this recipe. You can easily make the dough ahead of time and refrigerate it, allowing you to bake these cookies fresh at your convenience. This flexibility means you can surprise guests or enjoy a sweet snack on a whim without fuss.

From a nutritional standpoint, you can appreciate the balance of indulgence and joy. While these cookies are certainly a treat, incorporating cream cheese provides some protein, making them a more balanced choice compared to many standard cookies. This makes them a unique option for satisfying your sweet craving without overindulging.

Socially, these cookies bring people together. Whether they are served at a gathering or shared with friends, they always elicit smiles and compliments. Baking and sharing treats like these can elevate your next gathering and create lasting memories.

Lastly, the cost-effectiveness of this recipe makes it accessible. With common pantry staples and affordable ingredients, you can whip up a batch of delicious cookies without breaking the bank. This means satisfying your sweet cravings and delighting friends and family can often fit into a budget.

Historical Background and Cultural Significance

Cinnamon desserts have a rich history, often associated with festive celebrations and family gatherings around the world. Aromatic spices have long been cherished, adding warmth and flavor to our food. The combination of sweet treats and spices was popularized in colonial America, making cinnamon a staple in many households. Cheesecake, rooted in ancient Greece, also evolved into variations across numerous cultures, each region adding its twist. This fusion of cinnamon and cheesecake beautifully reflects the culinary evolution within American cuisine.

The popularity of donuts in America can be traced back to the late 19th century, when they first appeared in cookbooks. Their rise continued through the 20th century, evolving into various kinds, often adorned with sugary coatings. Mixing donuts with another beloved dessert like cheesecake represents a continuing trend of culinary creativity in merging traditional flavors.

Over many decades, recipes have evolved by adding modern ingredients and adjusting techniques to enhance flavors, as seen in the Cinnamon-Kissed Cheesecake Donut Cookies. With new variations and adaptations sprouting regularly, these indulgent treats celebrate the joy of experimentation while honoring their roots.

Culturally, desserts like these are more than food—they are an experience. They often symbolize hospitality and celebration, making them perfect for gatherings when sharing food brings everyone together. Creating dishes that blend various cultural aspects empowers bakers to explore flavors and ingredients that resonate personally and universally.

Ingredient Deep Dive

Flour:
Flour is essential in cookie-making, providing the structure and texture. Choose all-purpose flour for versatility, and know it can be preserved in a cool, dry place for an extended shelf life. Its nutritional value includes carbohydrates and some protein, making it a base for many baked goods. For substitutions, you can use almond flour or a gluten-free blend for those with dietary restrictions.

Cream Cheese:
Cream cheese provides the signature smooth filling in these cookies. This ingredient hails from the United States, gaining popularity in the late 1800s. Packed with calcium and some vitamins, it’s a delicious addition that adds richness to various desserts. Proper storage is essential; keep it refrigerated, and for best results, use the full-fat version to enhance flavor. For a healthier option, consider low-fat cream cheese or ricotta as a substitute.

Cinnamon:
Cinnamon is a spice with centuries of history dating back to ancient China. It not only contributes flavor but also boasts antioxidant properties. When selecting cinnamon, choose ground cinnamon for convenience but prefer Saigon or Ceylon varieties for enhanced flavor. Store in a cool, dark place to maintain potency. Exploring cinnamon’s various forms, including sticks or blends, can offer intriguing results in baking to satisfy diverse palates.

Common Mistakes to Avoid

  • Overmixing the dough: This can lead to tough cookies. Mix until just combined to keep them soft and airy.
  • Incorrect cream cheese temperature: Using cold cream cheese can result in lumps. Allow it to soften before mixing.
  • Skipping chilling time: Chilling the dough is crucial to prevent spreading during baking, ensuring the cookies maintain their shape.
  • Not measuring ingredients properly: Accurate measurements are vital for the right texture and flavor balance; always use a kitchen scale when possible.
  • Baking on an ungreased tray: Avoid sticking by lightly greasing or lining the baking sheet with parchment paper.
  • Overbaking: Keep an eye on the cookies to prevent them from becoming dry; they should be lightly golden on the edges when done.
  • Inconsistent cookie size: Use a cookie scoop for uniform sizes, ensuring even cooking and presentation.
  • Ignoring cooling time: Let cookies cool properly before serving to achieve the best texture and flavor.
  • Inadequate mixing of wet ingredients: Mixing wet ingredients thoroughly ensures an even distribution of flavors, enhancing the final result.
  • Forgetting to preheat your oven: Always preheat your oven to ensure proper baking temperatures, which are essential for achieving perfect cookies.

Essential Techniques

Creaming Butter and Sugar:
This technique is crucial for incorporating air into your dough, which helps the cookies rise and become fluffy. Beat the butter and sugar together until light and fluffy. A common pitfall is not mixing long enough, which can result in dense cookies. Look for a pale color and a light texture.

Chilling the Dough:
Chilling the dough before baking prevents spreading and helps maintain texture. The cold fat will solidify and result in thicker, chewier cookies. A common mistake is to skip this step, leading to flat cookies. You’ll know it’s ready when the dough is firm to the touch.

Proper Measuring:
Using the correct measuring technique is essential for the success of any recipe. For dry ingredients, spoon them into the measuring cup and level off with a knife for accuracy. Many bakers make the mistake of scooping directly from the bag, which can lead to overly dense or dry cookies. Invest in good measuring tools to ensure success.

Pro Tips for Perfect Cinnamon-Kissed Cheesecake Donut Cookies

– Make sure butter is at room temperature for easy blending. It helps achieve the perfect creamy texture in your dough.
– Use fresh spices for the best flavors. Bolder flavors can significantly enhance your cookies and keep them delicious.
– Pipe the cheesecake filling into the center of each cookie for a neat presentation and controlled amounts.
– Experiment with different sugars for the coating. Brown sugar can add a deeper flavor compared to granulated sugar.
– Use parchment paper on your baking sheets for easy cleanup and to ensure cookies don’t stick.
– Add a pinch of nutmeg to the filling for an extra layer of flavor that beautifully complements the cinnamon.
– Keep an eye on baking times; every oven is different, and you want to avoid overbaking.
– Allowing the cookies to cool on the pan for a few minutes before transferring them can prevent breaking.

Variations and Adaptations

You can easily adapt this recipe for different flavor profiles. For a seasonal twist, consider adding pumpkin spice during the fall or a hint of peppermint during the holidays. Making the cookies with different fillings, such as chocolate ganache or fruit preserves, can also enhance their appeal, catering to varied tastes.

For those looking for healthier alternatives, you can substitute traditional sugar with a natural sweetener like honey or maple syrup. Additionally, consider using whole-wheat flour for a fiber boost, making your indulgence feel a bit more wholesome.

Seasonal adaptations could include using ripe seasonal fruits in the cheesecake filling, such as crushed strawberries in the summer or apples in the winter. This not only adds flavor but also a burst of freshness.

In terms of presentation, consider drizzling chocolate or icing on top for an extraordinary look. Glazing can provide extra sweetness and create eye-catching designs that will impress your guests.

Serving and Presentation Guide

To present your Cinnamon-Kissed Cheesecake Donut Cookies beautifully, consider arranging them on a vibrant platter for a festive touch. A sprinkle of extra cinnamon sugar before serving can enhance visual appeal.

Garnishing with fresh mint leaves or edible flowers adds elegance, complementing the cookies aesthetically. Traditional accompaniments could include a side of whipped cream or fruit coulis, offering an interactive dessert experience.

Serve warm with a scoop of ice cream or chilled alongside coffee for a delightful pairing. Don’t forget to consider portion control; offering smaller cookie sizes allows guests to enjoy multiple flavors while indulging without going overboard.

Wine and Beverage Pairing

To enhance your dessert experience, consider pairing these cookies with a sweet dessert wine such as Moscato or Riesling, which complement the rich flavors without overpowering them. If you’re serving guests who prefer non-alcoholic beverages, a warm spiced cider or a creamy chai latte can complement the cinnamon notes splendidly.

For coffee lovers, a latte or cappuccino would create a comforting match with the cookies, enhancing their flavors. Ensure the temperature of beverages is optimal for enjoyment, keeping drinks warm but not scalding hot, which allows for a more pleasant tasting experience.

Storage and Shelf Life

Once baked, allow your Cinnamon-Kissed Cheesecake Donut Cookies to cool completely before storing them. They should be kept in an airtight container at room temperature for up to five days, maintaining freshness.

For longer storage, you can freeze the cookies, ensuring to separate layers using parchment paper to prevent sticking. These cookies will retain flavor and texture when frozen for about three months. To reheat, simply thaw at room temperature and warm in the oven for a few minutes to revive that freshly baked taste.

Always check for signs of spoilage—if the cookies develop a strange odor or become overly hard, it’s best to discard them.

Make Ahead Strategies

To simplify your baking experience, consider preparing the dough ahead of time. You can chill it for up to 24 hours before baking, allowing the flavors to meld beautifully. For even more convenience, freeze shaped cookie dough balls and bake them directly from the freezer, adjusting the baking time as needed.

Additionally, you can prepare the cheesecake filling in advance and store it in a sealed container in the refrigerator. This way, when you’re ready to bake, you can simply assemble your cookies quickly.

Always assess the quality of frozen dough before baking; if it shows any signs of freezer burn, it’s advisable to discard it. Fresh prepped dough guarantees the best flavor and texture.

Scaling Instructions

If you want to halve the recipe, reduce all ingredients by half, including the baking time, which might need slight adjustments to avoid over or under-baking. To double or triple the recipe, ensure your baking sheets can accommodate the batch size, and consider using multiple pans for even baking.

Equipment adjustments may include using larger bowls for mixing and additional cookie sheets for faster production. Always keep an eye on bake times, as larger batches may require different time allocations.

When scaling, pay attention to storage considerations; larger quantities might take more time to cool completely, impacting freshness and texture.

Nutritional Deep Dive

These cookies provide a balance of carbohydrates, fats, and proteins, making them a treat worth enjoying in moderation. A single cookie typically has around 150 calories, with a breakdown comprising carbohydrates from flour and sugar, fats from butter and cream cheese, and protein primarily from the cream cheese.

Considering the micronutrients, cream cheese adds calcium and phosphorus, while cinnamon provides antioxidants and anti-inflammatory properties. Adjusting portion size can accommodate various diets; enjoy one or two as a treat while balancing your overall nutritional intake.

Weight management can benefit from enjoying these cookies as part of a diverse and balanced diet. Baking with whole ingredients allows for a wholesome approach to indulgence without excessive calories from heavy additives. Enjoy as an occasional treat, relishing their rich flavors and comforting perceptions.

Dietary Adaptations

For individuals with gluten sensitivity, substituting all-purpose flour for a gluten-free blend allows everyone to enjoy these delectable cookies without adverse effects. Explore using gluten-free 1:1 flour for best texture and taste.

Those dairy-free can substitute cream cheese with a plant-based alternative, ensuring it retains its creamy consistency. For a vegan option, use vegan butter and ensure the alternative cream cheese contains no animal products.

Low-carb diets can adapt this recipe using almond flour and a sugar alternative, ensuring that taste isn’t compromised while retaining a low glycemic index. Other specific dietary needs, such as keto and paleo modifications, can follow similar adjustments, prioritizing natural ingredients that fit within those categories.

Troubleshooting Guide

If your cookies turn out too dry, ensure you’re not overbaking them. They may require less time than anticipated, so check them a few minutes early.

In case your cookies spread too much, reevaluate your chilling time. Also, confirm that your butter was at the right temperature and that you accurately measured your flour.

For flavor issues, adjust the cinnamon balance in the dough and filling; tasting during the mixing process can help you fine-tune the sweetness.

If cream cheese lumps appear in your filling, make sure it is softened to room temperature and well-mixed before use.

When your dough appears crumbly, recheck your ingredient ratios; adding a bit more liquid can help bind it together.

If the cookies don’t puff up as expected, ensure you’re using fresh baking powder and verify ingredient freshness before starting your recipe.

Recipe Success Stories

Community feedback on these cookies has been overwhelmingly positive. Many bakers were thrilled to discover how easy it is to recreate a beloved dessert hybrid at home. One reader shared that these cookies became a favorite at her family gatherings, often requested by relatives.

Variations suggested by readers have included using pumpkin spice in place of some cinnamon during fall festivals, adding a delightful seasonal twist. Another baker substituted fruit puree in the cheesecake filling, bringing a fresh and light flavor, which was especially appreciated during warmer months.

Photographers on social media have showcased their impressive cookie builds, receiving accolades for their creative presentation and delectable-looking spreads. These success stories underline the fun and joy baked goods can bring, connecting people through the art of baking.

Frequently Asked Questions

Q1: Can I use a different type of cheese for the filling?

A1: While cream cheese provides the best texture and flavor, you can experiment with mascarpone or ricotta. Just ensure the alternative maintains a similar consistency for the best outcome.

Q2: How should I store these cookies?

A2: Store your cookies in an airtight container at room temperature to keep them fresh. For longer storage, freeze them, making sure they are well-wrapped.

Q3: Are these cookies suitable for children?

A3: Absolutely! These cookies are a hit with children, thanks to their sweet flavors and delightful textures. Just be aware of any potential allergies in the ingredients.

Q4: Can I make the dough ahead of time?

A4: Yes! You can prepare the dough and chill it in the refrigerator for up to 24 hours or freeze it for longer storage. Just make sure to thaw before baking if frozen.

Q5: What is the best way to reheat these cookies?

A5: To reheat, allow the cookies to come to room temperature, then place them in a preheated oven at 350°F (177°C) for about 5 minutes to refresh their texture.

Q6: Can I add chocolate chips to these cookies?

A6: Definitely! Adding chocolate chips can provide an additional flavor dimension. Just make sure to tweak the filling accordingly for balance.

Q7: Is there a vegan option for these cookies?

A7: Yes! You can use vegan butter and plant-based cream cheese to create a fully vegan version of these cookies without compromising flavor.

Q8: Can I reduce the sugar in this recipe?

A8: You can reduce the sugar slightly, but keep in mind that it may affect the texture and moisture. Consider natural sugar alternatives for a healthier option.

Q9: How do I prevent my cookies from sticking to the pan?

A9: Always use parchment paper or a silicone baking mat when baking to prevent sticking, and ensure your dough is chilled before placing it on the baking sheet.

Q10: Can I freeze the cookies before baking them?

A10: Yes, you can freeze the shaped dough balls. When ready to bake, bake them directly from the freezer, adding a minute or two to the baking time.

Additional Resources

If you enjoyed this recipe, check out more of our related recipes, such as classic chocolate chip cookies or rich cheesecakes for inspiration on your baking journey.

For technique guides, explore articles on mastering cookie dough, managing cream cheese fillings, and tips on the proper way to blend essential ingredients for delightful bakes.

Looking for ingredients? We recommend sourcing organic and high-quality products to enhance your baking experience. Always explore seasonal fruits for unique spins on your favorite desserts.

Recommended baking equipment, such as cookie sheets and measuring tools, can also make a difference in your baking endeavors, ensuring greater accuracy and efficiency.

Finally, consider experimenting with seasonal variations of this recipe throughout the year, using varying spices and fillings to keep your dessert game fresh and exciting!

Join the Conversation

We love to hear from you! Share your own take on the Cinnamon-Kissed Cheesecake Donut Cookies by tagging us on social media. We encourage you to upload your photos and modifications so others can be inspired by your creativity.

If you have tips for this recipe or have tried other adaptations, leave a comment to engage with our community. Your input can help fellow bakers achieve their own cookie perfection.

Sharing your experiences helps foster a thriving culinary community, encouraging each other in our baking endeavors. Start a discussion about your favorite flavors, techniques, or even how these cookies fit into your celebrations.

The Recipe

Cinnamon-Kissed Cheesecake Donut Cookies

Serves: 24 cookies

Prep Time: 15 mins

Cook Time: 20 mins

Total Time: 35 mins

Kitchen Equipment Needed

  • Mixing bowls
  • Electric mixer
  • Cookie sheets
  • Parchment paper
  • Measuring cups and spoons
  • Piping bag

Ingredients

  • 2 cups all-purpose flour
  • 1/2 tsp baking powder
  • 1/2 tsp baking soda
  • 1/4 tsp salt
  • 1/2 cup unsalted butter, softened
  • 3/4 cup granulated sugar
  • 1 large egg
  • 1 tsp vanilla extract
  • 8 oz cream cheese, softened
  • 1/2 cup powdered sugar
  • 1 tbsp cinnamon sugar (for topping)

Directions

  1. Preheat your oven to 350°F (175°C) and line cookie sheets with parchment paper.
  2. In a bowl, whisk together flour, baking powder, baking soda, and salt.
  3. In a large mixing bowl, cream together the softened butter and granulated sugar until light and fluffy.
  4. Add the egg and vanilla extract, mixing until well combined.
  5. Gradually add the flour mixture to the wet ingredients, mixing until just combined.
  6. In a separate bowl, beat together the cream cheese and powdered sugar until smooth.
  7. Using a piping bag, fill each cookie dough ball with the cheesecake filling.
  8. Roll the filled cookies in cinnamon sugar gently, then place them on the prepared sheets.
  9. Bake for 15-20 minutes, or until the edges are lightly golden.
  10. Allow them to cool slightly before transferring them to a wire rack to cool completely.

Recipe Notes

  • For a twist, add chocolate chips to the cookie dough for added richness.
  • Store in an airtight container to maintain freshness up to 5 days.
  • To freeze, wrap each cookie individually and store in a freezer-safe container.

Irresistible Kahlua Chocolate Cupcakes for Coffee Lovers

Kahlua Chocolate Cupcakes: Indulge in Richness

⚖️
Difficulty
Medium

⏲️
Prep Time
20 mins

🕒
Cook Time
25 mins

⏱️
Total Time
45 mins

🍽️
Servings
12 cupcakes

Indulging in Kahlua chocolate cupcakes is a true pleasure for any chocolate lover. These delightful treats combine the rich, decadent flavors of chocolate with the smooth, coffee-infused notes of Kahlua liqueur. Imagine sinking your teeth into a moist, fluffy cupcake topped with a velvety chocolate frosting that boasts a hint of Kahlua. The intoxicating aroma of freshly baked chocolate mingling with coffee wafts through your kitchen, coaxing you to savor each bite.

These cupcakes are perfect for various occasions, whether you’re hosting a gathering, celebrating a special event, or simply treating yourself. The unique combination of flavors makes them an instant favorite among guests and family alike. Each bite not only tantalizes the taste buds but also invokes a sense of warmth and comfort, reminiscent of cozy coffee shop mornings or indulgent dessert pedestals at gatherings.

Quick Recipe Highlights

  • Flavor Profile: The delightful combination of chocolate and coffee creates a rich and unique flavor that is both comforting and sophisticated.
  • Texture: These cupcakes are incredibly moist with a light crumb, while the frosting adds a smooth, decadent finish.
  • Aroma: The irresistible aroma of chocolate mixed with a hint of coffee is simply enchanting, making it hard to resist.
  • Visual Appeal: Topped with chocolate ganache and a sprinkle of cocoa powder, these cupcakes are as beautiful as they are delicious.
  • Skill Level Needed: With just a few steps, even novice bakers can master these cupcakes, making them accessible to everyone.
  • Special Equipment: All you need is a mixing bowl, a whisk, and a muffin tin to create these delightful treats.

Recipe Overview

  • Difficulty Level: With a medium difficulty level, this recipe will challenge new bakers just enough to sharpen their skills without overwhelming them.
  • Category: Ideal for dessert, these cupcakes fit beautifully into any meal as a sweet finish or an afternoon treat.
  • Cuisine: Inspired by American baking traditions with a twist of Mexican influence from the Kahlua, these cupcakes are a delicious fusion.
  • Cost: The ingredient costs are reasonable, making this an affordable dessert option for any gathering.
  • Season: Best enjoyed year-round, these cupcakes are particularly cozy in the fall and winter months, perfect for holiday celebrations.
  • Occasion: Ideal for birthday parties, coffee meet-ups, or casual get-togethers, these cupcakes shine in any setting.

Why You’ll Love This Recipe

The taste and texture appeal of Kahlua chocolate cupcakes is undeniable. The moist, rich chocolate cake blends seamlessly with the coffee liqueur, providing a flavorful punch that melts in your mouth. You’ll love the smooth chocolate ganache that crowns each cupcake, offering an extra layer of decadence that leaves guests wanting more.

The convenience and preparation benefits make this recipe a favorite. With minimal time spent in the kitchen, you can create an elegant dessert that impresses without a ton of effort. Perfect for those who want to whip up something sweet quickly, these cupcakes can be made ahead of time and stored for later enjoyment.

Nutritionally, while these cupcakes are indulgent, they do offer some positive attributes. Dark chocolate in the batter includes antioxidants, and the use of real ingredients also allows you to control the quality, making them a step up from processed snacks.

Socially, these cupcakes carry an element of fun and sophistication. Whether served at a gathering or enjoyed cozying up with a good book, the delightful flavors and charming presentation elevate the experience. They’re great for sharing or enjoying solo, making them a versatile treat for any occasion.

Lastly, the cost-effectiveness and accessibility of these cupcakes make them a smart choice for all baking enthusiasts. With common ingredients and straightforward instructions, creating these treats becomes a delightful and achievable endeavor without breaking the bank.

Historical Background and Cultural Significance

Kahlua, a coffee-flavored liqueur, has roots tracing back to the 1930s in Mexico. Originally produced as a way to celebrate the region’s rich coffee culture, Kahlua has become a staple in cocktail and dessert recipes, making it a natural fit for chocolate treats. The use of coffee in baking showcases a delightful convergence of flavors, bridging the gap between dessert and beverage.

In culinary traditions, chocolate and coffee have long been partners, enhancing each other’s complexity. This combination has evolved into numerous recipes across cultures, marking Kahlua chocolate cupcakes as part of a broader trend that values rich, multi-layered flavors in desserts.

The evolution of this recipe reflects changes in consumer preferences. Modern bakers often seek to elevate traditional desserts with creative twists, and incorporating Kahlua into cupcakes bridges classic comfort food with contemporary culinary trends.

Regional variations also abound. Some bakers incorporate different liqueurs or adjust the frosting to include alternative flavors, which creates a diverse range of cupcakes that cater to differing tastes and preferences across various cultures.

Ingredient Deep Dive

The star ingredient in Kahlua chocolate cupcakes, dark chocolate, has a rich history rooted in ancient Mesoamerican civilizations. Valued as a source of energy and regarded as sacred, chocolate has transformed into a beloved culinary element worldwide. Nutritionally, dark chocolate contains flavonoids, offering heart-healthy benefits and low sugar content compared to milk chocolate. When selecting chocolate for baking, choose high-quality brands with at least 70% cocoa content for the best flavor. To store dark chocolate, keep it in a cool, dry place away from direct sunlight and strong odors.

Kahlua, on the other hand, provides the coffeeshop flavor that makes these cupcakes unique. Originating from the coffee-rich region of Veracruz, Mexico, Kahlua has maintained its allure since its inception. While it adds a rich depth of flavor, it also brings with it health benefits associated with coffee, such as increased alertness and improved mood. Kahlua should be stored upright in a cool place, and it can be enjoyed in a variety of cocktails or desserts. For those who prefer non-alcoholic versions, coffee extracts or flavored syrups can serve as excellent substitutes.

Common Mistakes to Avoid

  • Overmixing the batter can create dense cupcakes; rather, mix until just combined to retain a light texture.
  • Using cold ingredients straight from the fridge can hinder proper mixing; allow your eggs and butter to come to room temperature for best results.
  • Not letting the cupcakes cool properly before frosting can cause the frosting to melt completely; cool them completely on a wire rack.
  • Using too much flour can lead to dry cupcakes; measure accurately and consider spooning flour into the measuring cup rather than scooping.
  • Baking at incorrect temperatures can lead to improper cooking; always preheat your oven and use an oven thermometer for accuracy.
  • Skipping the ganache step can result in a less luscious cupcake; don’t underestimate the deliciousness of a rich ganache topping.
  • Not tasting the batter can leave you with uncertain flavors; a small taste test can ensure you’re on the right track.
  • Ignoring baking time can lead to either undercooked or overdone cupcakes; use a toothpick test to check for doneness.
  • Rushing the cooling process can affect frosting application; patience is key for the best presentation.
  • Forgetting to line your cupcake tin can make removal a hassle; always prepare your baking pan to prevent sticking.

Essential Techniques

Understanding the folding technique is vital when working with cupcake batter. Folding gently will preserve air bubbles, ensuring a light and airy cupcake, rather than a dense one. Always start by incorporating a small amount of batter into the egg whites or whipped cream and then gently combine with the remaining ingredients using a spatula without overmixing.

Proper measuring techniques are crucial to successful baking. Use dry ingredients for weights and scoops instead of packed measuring cups, as this can cause dense and dry cupcakes. For liquid ingredients, always use clear measuring cups and check the level at eye-level for accuracy to achieve the desired texture in your cupcakes.

Pro Tips for Perfect Kahlua Chocolate Cupcakes

When preparing Kahlua chocolate cupcakes, utilize a combination of both dark and semi-sweet chocolate for added depth. This enhances flavor while balancing sweetness. For a richer taste, consider adding a splash of brewed espresso to the batter, amplifying the coffee notes.

For the perfect ganache, warm the cream until it simmers before mixing it with chopped chocolate. Allow the mixture to sit for a few moments before stirring to create a smooth texture. If desired, refrigerate it to achieve a thicker consistency for frosting.

Experimenting with different fillings like caramel or hazelnut spread can turn ordinary cupcakes into extraordinary surprises. Inject the fillings into the center of the cupcakes for added delight.

Create a glaze instead of frosting by reducing the ganache slightly and drizzling it over the cooled cupcakes for a modern twist. This makes them less heavy and more suitable for elegant gatherings.

For added visual flair, top with decorative chocolate shavings or a dash of sea salt. This contrast of sweet and salty will elevate flavors significantly.

Lastly, ensure your frosting is at room temperature before piping. Cold frosting can be too thick to spread easily, while softened frosting remains beautifully pliable for easy decoration.

Variations and Adaptations

Regional variations of Kahlua chocolate cupcakes can be delightful, incorporating local liqueurs or spices to reflect cultural influences. For instance, using an Irish cream liqueur for an Irish twist or infusing with spices like cinnamon or nutmeg can add a unique flair to the recipe.

Seasonal adaptations could include using pumpkin-spice elements during autumn or a peppermint twist around the holidays, maintaining the core chocolate flavor while catering to the seasons. These adaptations keep the recipe fresh and exciting throughout the year.

Dietary modifications, such as gluten-free flour blends or dairy substitutes, can make these treats accessible. For a vegan version, consider using applesauce for eggs and substituting with plant-based butter and dairy-free chocolate.

Creating flavor variations with fruit purees or zests can enhance the cupcakes. Consider raspberry or orange zest to provide an interesting contrast to the chocolate.

For texture modifications, add chopped nuts or chocolate chips into the batter for extra crunch, or try baking them as mini cupcakes for bite-sized enjoyment.

Inserting whipped cream or whipped topping for a playful presentation or including fun cupcake wrappers can change the visual appeal entirely for those special occasions.

Serving and Presentation Guide

For plating techniques, consider using decorative cake stands or tiered displays for an elegant presentation. Arrange cupcakes in a pattern or themed color scheme to make a beautiful spread at any event. For garnishing, consider dusting with cocoa powder or using edible flowers for a pop of color.

Traditional accompaniments might include a scoop of vanilla ice cream or a dollop of whipped cream on the side, enhancing the overall indulgence. Modern serving suggestions could involve pairing with coffee cocktails to resonate with the Kahlua flavor profile.

Temperature considerations are important; serve cupcakes at room temperature to fully appreciate the flavors. Ensure they’re not overly cold, as this can dampen the taste experience.

For portion control tips, consider creating mini versions of these cupcakes, allowing guests to enjoy just a few bites without overwhelming sweetness.

Wine and Beverage Pairing

When pairing wines with Kahlua chocolate cupcakes, a robust dessert wine like a port or a rich Cabernet Sauvignon complements the chocolate beautifully. Their sweetness balances the cupcake’s flavors while enhancing the overall experience.

For non-alcoholic options, consider pairing with rich, brewed coffee or coffee-flavored beverages to enhance the Kahlua notes. A creamy cold brew or iced mocha could serve as a delightful accompaniment, tying flavors together.

When choosing coffee or tea pairings, a dark roast coffee would heighten the chocolate experience while a sweet chai latte could add an aromatic twist to the dessert.

Temperature considerations are key; serve beverages slightly warmer than room temperature and cupcakes at their ideal texture for the best combination.

In terms of proportionality, balance richness with lighter drinks for an overall well-rounded experience that encourages enjoyment of both your cupcakes and the accompanying beverage.

Storage and Shelf Life

To store Kahlua chocolate cupcakes, keep them in an airtight container in a cool, dry place. They will last for up to three days at room temperature or can be refrigerated for up to a week, but take care to bring them back to room temperature before serving to preserve their decadent texture.

For layering and storage methods, consider using parchment paper between layers to avoid sticking, especially if frosting has been applied. Glass containers with vented lids are ideal for refrigeration.

Signs of spoilage include an off-odor, discoloration, or unexpected texture changes, signaling that it’s best to discard the cupcakes. Over time, the frosting may become grainy or lose its sheen, indicating freshness is diminishing.

Reheating cupcakes isn’t typically recommended, but for a fresh experience, you can warm them slightly in the microwave for a few seconds to restore softness. If freezing, wrap cupcakes tightly in plastic wrap and store in an airtight container for up to three months, ensuring you thaw them gradually in the refrigerator when ready to enjoy.

Make Ahead Strategies

To make ahead, prepare the cupcake batter and store it in the fridge overnight before baking. This can improve flavor and texture, giving the chocolate a little extra time to infuse its characteristics.

Baking day can be shortened by making the cupcakes earlier in the week, allowing for easier assembly or decoration closer to your event. They can also allow flavors to meld beautifully, enhancing richness.

Consider assembling but not frosting until the day of your event to maintain the frosting’s integrity. This also prevents sogginess that can occur from prolonged contact. Storage of baked cupcakes care should be taken, ensuring they’re kept in breathable containers to avoid moisture retention.

Quality impacts come from storing properly; ensure cupcakes are completely cool before covering to prevent steam build-up that leads to sogginess. Freezing can also extend their shelf life without compromising taste significantly.

Fresh elements like whipped cream or fresh fruit toppings can also be added right before serving to enhance flavor profiles, providing a contrast to the rich chocolate notes.

Scaling Instructions

If you want to halve the recipe, simply divide each ingredient measurement by two while keeping the baking time relatively the same. Monitor doneness closely, as smaller portions can bake faster than larger ones.

Doubling or tripling the recipe can be ideal for parties or gatherings, but be sure to use larger mixing bowls and possibly two muffin tins to accommodate the batter without overfilling any pans. Timing adjustments should be minimal since baking times typically won’t change with quantity.

Equipment adjustments may include using a larger oven if available or baking in separate batches. Just keep a watchful eye on the temperature for optimal results.

Storage considerations for made-ahead cupcakes become essential when scaling; ensure adequate space in your refrigerator or consider individual packaging for efficiency if serving at events.

Finally, keep track of your timing with separate batches to ensure all cupcakes come out evenly cooked and at the freshness level you expect.

Nutritional Deep Dive

The macro breakdown of Kahlua chocolate cupcakes shows considerable caloric content due to the usage of flour and sugar combined with fats both from butter and chocolate. A typical serving may range around 200-300 calories depending on portion sizes and toppings used.

Nutritionally, these cupcakes can offer health benefits linked to the antioxidants present in dark chocolate, potentially improving cardiovascular health when consumed in moderation. The coffee content from Kahlua also provides small but notable energy boosts, adding to their appeal.

Dietary considerations should be made for those monitoring sugar intake; these cupcakes may not suit strict diets, but reasonable portion control allows indulgence without significant guilt. Calculated portions are key in allowing enjoyment while maintaining better dietary management.

Vegans might be able to adapt this recipe using substitutions without losing integrity. This opens doors for those with specific health considerations or lifestyle choices to partake in these delicious treats!

Weight management tips include freezing cupcakes for individual enjoyment later; this helps prevent overeating by offering easy portion control and encourages indulgence on designated occasions.

Dietary Adaptations

Transforming Kahlua chocolate cupcakes into a gluten-free option can be done by substituting standard flour with almond or coconut flour blends, ensuring the right texture remains intact. Consider binding agents like eggs or applesauce to improve moisture if going gluten-free.

For a dairy-free adaptation, use plant-based butter and dairy-free chocolate, ensuring you verify the Kahlua variant to guarantee it fits these dietary guidelines. Utilizing almond or oat milk can also help maintain creaminess without dairy.

A vegan version can be created without eggs, substituting with flax egg mixtures or adding silken tofu for moisture and richness. Always check chocolate and Kahlua ingredients to ensure compliance with vegetarian guidelines.

Exploring low-carb options could include using alternative sweeteners and almond flour to dramatically reduce sugar content, leading to keto-friendly variations.

Paleo approaches might call for adhering strictly to whole food ingredients, avoiding processed sugars, and opting for honey or maple syrup as a sweetener to enhance flavors naturally.

Those following low-FODMAP guidelines should seek alternatives specific to their diet, replacing high-impact foods with compliant options ensuring enjoyment without discomfort.

Troubleshooting Guide

Addressing texture issues often comes down to overmixing or using the wrong flour ratio. If your cupcakes tend to be dense, reduce mixing time and ensure accurate ingredient measurements for a lighter consistency.

Flavor balance can sometimes skew towards one ingredient overpowering another. If chocolate is too overpowering, consider reducing the cocoa content slightly to allow the Kahlua and other flavors to shine through more distinctly in the batter.

Temperature problems during baking can often lead to either overly baked or underdone cupcakes. Getting to know your oven’s behavior can help; different ovens can vary in heat levels, so always rotate your pans halfway through baking to ensure evenness.

Equipment challenges, like not having cupcake liners, can hinder your baking experience; if paper liners aren’t available, consider greasing pans well with butter to help prevent sticking.

Ingredient substitutions can change flavor profiles; if experimenting, try swapping one ingredient at a time to pinpoint what works best without compromising quality.

Timing concerns are crucial; ensure not only correct baking times are gauged but also resting times before frosting. Patience can enhance both the appearance and texture of your cupcakes significantly.

Recipe Success Stories

Community feedback on Kahlua chocolate cupcakes reveals their popularity, with many bakers sharing their enjoyment of the moist texture and rich flavors. The supportive nature of the baking community fosters inspiration, encouraging others to try variations and substitutions with great success.

Variation successes abound, where bakers experiment with flavored liqueurs or fillings to personalize their cupcakes. These stories often highlight the creativity in putting a new spin on a classic recipe.

Readers have left suggestions for complementary side dishes, elevating the overall dessert experience. Many find that serving with freshly brewed coffee can recreate delightful café vibes at home, consistently receiving positive comments.

Photography tips have encouraged more enthusiastic bakers to document their baking journeys. Community members share photo ideas for showcasing these delectable treats elegantly after successful baking sessions, enhancing visual appeal in their presentations.

Adaptation stories continue to proliferate as followers of different dietary lifestyles successfully replicate these cupcakes according to their dietary needs. Their creativity shines as they inspire others to step outside of traditional recipe bounds while maintaining flavor integrity.

Frequently Asked Questions

Can I make these cupcakes gluten-free?
Yes, you can substitute regular flour with a gluten-free blend for this recipe. Ensure to maintain the right ratios and perhaps consider adding binding agents like eggs or chia seeds for moisture.

What can I use instead of Kahlua?
If you prefer not to use Kahlua, coffee extract or other flavored syrups can serve as substitutes. For non-alcoholic options, using brewed coffee can replicate a similar taste.

Can I freeze these cupcakes?
Absolutely! You can freeze Kahlua chocolate cupcakes. Wrap them individually in plastic wrap and store in an airtight container in the freezer for up to three months. Just thaw in the fridge when ready to enjoy.

How can I make the chocolate ganache thicker?
To achieve a thicker ganache, use colder cream or add a little extra chocolate to the mixture. Allow it to set for some time after mixing before applying it to cupcakes.

How do I avoid overbaking my cupcakes?
Keep a close eye on them during the last few minutes. Using a toothpick to check for doneness can alert you early; once it comes out clean or with only a few crumbs, pull them out to cool.

What are some good toppings for these cupcakes?
Options for topping include whipped cream, chocolate shavings, or even a light sprinkle of sea salt to enhance the flavors. Creativity is key!

Can I adapt this for a vegan version?
Yes, you can replace eggs with flax eggs or applesauce and use dairy-free butter and chocolate. Ensure the Kahlua variant is vegan-friendly as well.

Are there any common mistakes with this recipe?
Yes, overmixing the batter, not measuring ingredients correctly, and not allowing the cupcakes to cool properly before frosting are a few common pitfalls to watch for.

What should I do if my cupcakes come out too dense?
This often happens due to overmixing or using too much flour. To rectify this in the future, try mingling the batter gently and ensure accurate measuring of ingredients.

Is there a way to make these cupcakes more festive?
Absolutely! Consider adding festive sprinkles or seasonal flavors, such as cinnamon for holidays, to excite your presentation!

Additional Resources

For those wanting to expand their baking repertoire, explore these related recipes featuring chocolate, such as double chocolate muffins or mocha cheesecake. Alongside exploring various baking skill technique guides, you can also discover in-depth ingredient information to help you choose the best items for your cupcakes.

Consider investing in quality kitchen equipment recommended for cupcake baking, such as silicone muffin molds or high-quality mixing bowls, to improve your overall baking experience. Seasonal variations of baking tend to highlight light, fruity flavors in spring or warm spices in fall, diversifying your dessert options year-round.

Join the Conversation

We encourage readers to join the conversation by sharing experiences, experimenting with variations, and engaging in discussions about this recipe. Engaging on social media can yield new photography tips, which help visually document the baking journey, inspiring others along the way.

Consider leaving a review of your experiences or any feedback you have. Your input can guide others looking to step into the enchanting world of baking Kahlua chocolate cupcakes!

The Recipe

Kahlua Chocolate Cupcakes

Serves: 12 cupcakes

Prep Time: 20 mins

Cook Time: 25 mins

Total Time: 45 mins

Kitchen Equipment Needed

  • Mixing bowls
  • Muffin tin
  • Whisk
  • Spatula
  • Toothpick for testing doneness

Ingredients

  • 1 cup all-purpose flour
  • 1/2 cup unsweetened cocoa powder
  • 1 cup granulated sugar
  • 1/2 cup unsalted butter, softened
  • 2 large eggs
  • 1/2 cup Kahlua
  • 1/2 cup milk
  • 1 tsp vanilla extract
  • 1 tsp baking powder
  • 1/2 tsp salt

Directions

  1. Preheat your oven to 350°F (175°C) and line a muffin tin with cupcake liners.
  2. In a mixing bowl, cream together the softened butter and sugar until light and fluffy.
  3. Add in the eggs one at a time, mixing well after each addition, then stir in Kahlua, vanilla, and milk.
  4. In another bowl, whisk together the flour, cocoa, baking powder, and salt.
  5. Gradually add the dry ingredients to the wet ingredients, mixing just until incorporated.
  6. Divide the batter evenly among the cupcake liners.
  7. Bake for 20-25 minutes, or until a toothpick comes out clean. Allow to cool completely.
  8. Prepare chocolate ganache by heating cream until simmering and mixing with chocolate, then let it set before frosting the cupcakes.
  9. Frost cooled cupcakes with ganache and decorate as desired.

Recipe Notes

  • For a stronger coffee flavor, consider adding an espresso powder to the dry ingredients.
  • These cupcakes can be stored in an airtight container for up to 3 days.
  • Freezing cupcakes? Wrap tightly in plastic and store in a freezer-safe container.

Delicious Homemade Strawberry Shortcake Recipe for Summer Bliss

Delicious Strawberry Shortcake: A Summer Delight

⚖️
Difficulty
Easy

⏲️
Prep Time
20 mins

🕒
Cook Time
30 mins

⏱️
Total Time
50 mins

🍽️
Servings
8 servings

Strawberry shortcake is a classic dessert that truly embodies the spirit of summer. With vibrant strawberries that burst with sweetness, light and fluffy shortcake, and rich whipped cream, this dish is not only visually stunning but also a delight for the taste buds. The refreshing flavors and textures combine to create a dessert that’s perfect for celebrations, picnics, or a simple family dinner. Each layer of this strawberry shortcake tells a story of summer freshness and culinary craftsmanship, making it irresistible to anyone who loves a sweet treat.

Made with seasonal strawberries, this dish captures the essence of summer in every bite. The key to an outstanding strawberry shortcake lies in the quality of ingredients. Using fresh, organic strawberries enhances the flavor profile and offers a more authentic taste. When combined with a buttery, tender biscuit and topped with luscious whipped cream, it transforms into an unforgettable experience. Whether you’re serving it for a family gathering or enjoying it on a warm afternoon, this strawberry shortcake promises to bring moments of joy and satisfaction.

Quick Recipe Highlights

  • Flavor Profile: Sweet, juicy strawberries contrast perfectly with the buttery, slightly sweet biscuit base and smooth whipped cream.
  • Texture: The shortcake is light and fluffy, while the strawberries provide a juicy burst, complemented by the airy whipped cream.
  • Aroma: The inviting scent of fresh strawberries mingles with the warm, buttery aroma of freshly baked shortcake.
  • Visual Appeal: Bright red strawberries nestled atop a golden shortcake create a vibrant and inviting presentation.
  • Skill Level Needed: This recipe is accessible for beginners, as it primarily involves straightforward mixing and layering techniques.
  • Special Equipment: A mixing bowl, baking sheet, measuring cups, and a piping bag (optional) for whipped cream are all you need.

Recipe Overview

  • Difficulty Level: Strawberry shortcake is considered easy to make due to its simple ingredients and straightforward preparation methods.
  • Category: This dessert fits perfectly into a summer treat category and works as a delightful ending to any meal.
  • Cuisine: Originating from American culinary traditions, strawberry shortcake showcases the use of fresh, local ingredients.
  • Cost: The cost of making strawberry shortcake is relatively low, primarily requiring fresh strawberries and basic pantry staples.
  • Season: Best enjoyed in late spring and summer when strawberries are at their peak ripeness and sweetness.
  • Occasion: Ideal for celebrations such as birthdays, summer BBQs, and even casual family dinners.

Why You’ll Love This Recipe

Strawberry shortcake captivates with its incredible taste and texture. The delicate sweetness of fresh strawberries combined with the rich, buttery shortcake creates a harmonious balance. Each bite erupts with juicy fruitiness, making it a perfect dessert for warm days. The lightness of the whipped cream adds an airy touch, ensuring that even after a hearty meal, there’s always room for dessert.

Preparing strawberry shortcake can be both convenient and enjoyable. With minimal cooking required, this delicious dish can be on your table in under an hour. The straightforward steps allow even novice bakers to craft this delightful dessert without stress. The fun is not just in making it but also in assembling the beautiful layers, which can turn any kitchen into a bustling bakery filled with sweet aromas.

When it comes to nutritional advantages, strawberries stand out as a superfood packed with vitamins, antioxidants, and fiber. This shortcake balances indulgence with health by incorporating fresh fruit. The dessert also supports seasonal eating, encouraging the use of locally sourced strawberries, which are more nutrient-dense compared to out-of-season alternatives.

Sharing this dessert with family and friends fosters a warm atmosphere perfect for celebrating together. Strawberry shortcake serves as a nostalgic treat that often evokes fond memories of summers spent picking berries, enhancing its appeal. It brings people together, making gatherings more special and memorable.

Lastly, making strawberry shortcake is cost-effective, especially during peak strawberry season. The ingredients are mostly affordable pantry staples. This means you can whip up a delightful treat that won’t break the bank, allowing you to indulge in this crowd-pleaser again and again.

Historical Background and Cultural Significance

The origin of strawberry shortcake can be traced back to the United States in the 19th century, where it emerged as a popular dessert for the warm months. Seasonal eating was a significant part of American households, and fresh strawberries became a favorite for desserts. The simple combination of strawberries, sugar, and lightly sweetened whipped cream made this dessert easy to prepare and enjoy during summer gatherings.

Culturally, strawberry shortcake has maintained a place as a symbol of summer picnics and outdoor celebrations. This dessert is often mentioned in literature and songs, underscoring its position in American pop culture as a traditional treat for joyous occasions. Its association with communal dining makes it a symbol of connection and joyful memories shared around the table.

Over the years, strawberry shortcake has evolved from its original form. The basic shortcake recipe has various adaptations, with some favoring sponge cake, others using biscuits, and even variations that incorporate layer cakes. Each adaptation reflects regional preferences, showcasing America’s diverse culinary landscape.

In the different regions of the country, variations exist, such as using angel food cake in the South or incorporating different fruits. These adaptations highlight how this beloved dessert has influenced and been influenced by local culinary traditions, allowing strawberry shortcake to remain relevant and enjoyed nationwide.

Ingredient Deep Dive

A deep dive into strawberries reveals their rich history and cultural significance. Native to the Americas, strawberries have been enjoyed since ancient times. They serve not only as a delightful treat but also as a symbol of purity and love in many cultures. Revisiting strawberries during the summer season connects us with nature’s bounty and offers a reminder of seasonal eating benefits.

Nutritionally, strawberries are loaded with vitamin C, manganese, and various antioxidants. They promote heart health, aid in digestion, and have anti-inflammatory properties. Choosing organic strawberries when possible further enhances nutritional benefits. Look for bright red, plump strawberries without any green or white spots for the best quality, and store them in the refrigerator for optimal freshness.

The next key ingredient, flour, serves as the backbone for the shortcake. Flour has been a staple in countless cuisines worldwide for centuries. Understanding the role of flour in baking—particularly its gluten-forming properties—can elevate your baking skills. Opt for all-purpose flour for the best texture, and ensure it’s stored properly in a cool, dry place to maintain its quality.

Baking powder is essential for achieving the desired rise in your shortcake. This leavening agent has evolved over the years, with modern versions making it easier and quicker to bake. Look for fresher products to maximize leavening, as old baking powder can lead to flat cakes. For storage, keep it in a cool, dry area and replace it every six months for best results.

Whipping cream, the finishing touch of this recipe, has a rich history dating back to medieval Europe. High in calcium, it adds a luxurious texture and flavor to your shortcake. When choosing cream, look for heavy cream with a fat content of 36% or higher for the best whipping qualities. This keeps it stable when whipped and enhances the overall richness of the dish.

Common Mistakes to Avoid

  • Not using fresh strawberries: Using stale or overripe strawberries can greatly diminish the flavor of your strawberry shortcake. Always opt for fresh, seasonal berries for the best taste.
  • Overmixing the dough: Overmixing can lead to dense shortcakes. To achieve a light, fluffy texture, mix only until the ingredients are combined.
  • Skipping the chilling step: Chilling your mixing bowl and beaters before whipping cream helps achieve perfect peaks. Skipping this can lead to a runny cream.
  • Not measuring ingredients correctly: Baking is a science, so it’s crucial to use the correct measurements. Use a digital scale for accuracy whenever possible.
  • Using too much sugar: While strawberries are sweet, adding excessive sugar can overpower their natural flavors. Start with less and adjust to taste.
  • Not tasting as you go: Always taste your layers and adjust flavors accordingly. A hint more sugar or vanilla can elevate your shortcake.
  • Making it too far in advance: Strawberry shortcake is best served fresh. Preparing it too early can lead to sogginess; assemble just before serving.
  • Using a dull knife: A dull knife can squish your freshly made shortcake. Use a serrated knife for clean cuts for optimal presentation.
  • Skipping flavor additions: Don’t underestimate the power of adding a splash of vanilla or lemon zest to elevate your cream and cake.
  • Ignoring storage instructions: Improper storage can lead to sogginess. Keep components separate until ready to serve for the best texture.

Essential Techniques

Whipping cream is an essential technique in preparing strawberry shortcake. It’s crucial to achieve soft peaks for a light texture that complements the strawberries. To master this, start with a chilled bowl and heavy cream, and whisk until you see trails in the cream. Avoid overwhipping, which can lead to butter; stop when it forms soft peaks.

Baking the shortcake is another key technique that requires careful temperature monitoring. Preheating the oven ensures even baking, resulting in a light and fluffy texture. Keep an eye on the shortcake; it should be golden brown and spring back when touched. Using an oven thermometer can help prevent over- or underbaking.

Assembling the layers plays a significant role in creating the perfect strawberry shortcake. First, slice the shortcake horizontally to form layers. Spread whipped cream evenly and add strawberries on top before layering again. This method ensures every bite contains the perfect balance of cake, cream, and fruit.

Chopping strawberries effectively enhances flavor distribution throughout the dessert. Use a sharp knife to create uniform slices and toss them in sugar to create a sweet syrup. This process not only sweetens the berries but also allows their juices to release, creating a delicious sauce when layered in the cake.

Adjusting sugar levels is integral to achieving flavor balance. Depending on the sweetness of your berries, you may need to adjust the sugar used in both the strawberries and the whipped cream. Always taste and adjust gradually, ensuring the dessert is perfectly balanced and not overly sweet.

Pro Tips for Perfect Strawberry Shortcake

To achieve the perfect strawberry shortcake, always use fresh, in-season strawberries for optimal flavor and juiciness. Look for firm, bright red berries free of blemishes. Store them in the fridge to maintain freshness until you’re ready to use them.

When whipping cream, use a cold bowl and beaters to increase volume and stability. Heavy cream with a fat content of at least 36% will yield the best results. Add a teaspoon of vanilla extract to enhance the flavor.

Consider soaking the biscuit layers lightly in strawberry syrup before assembling. This will infuse additional strawberry flavor and moisture, creating a more decadent dessert.

For extra texture, add sliced almonds or crushed biscuits between the layers. This not only provides a crunch but also adds visual appeal to your strawberry shortcake.

Be creative with your assembly by layering in individual glasses for miniature desserts. This technique allows for easy presentation and serving while looking stunning at the same time.

Experiment with different flavorings in the whipped cream, such as citrus zest or flavored extracts. This simple addition can elevate the overall taste profile of the dessert.

Variations and Adaptations

Strawberry shortcake can be adapted to suit various tastes and preferences. For regional flair, try incorporating local berries when strawberries are out of season or expensive. Raspberries or blueberries can add a unique taste while maintaining the essence of the original dessert.

Seasonal adaptations allow for creative twists on traditional flavors. In fall, consider a spiced pumpkin shortcake paired with spiced whipped cream, or winter variations with roasted citrus. Each season can inspire new flavor combinations.

Dietary modifications make strawberry shortcake accessible for everyone. For gluten-free options, replace all-purpose flour with a gluten-free blend. Ensure that all other ingredients, especially baking powder, are also gluten-free for safe consumption.

Flavor variations can also transform your shortcake. Try adding a splash of balsamic vinegar to the strawberries to enhance their sweetness and create an interesting depth of flavor. Infusing the cream with mint or lavender can add an aromatic touch that’s refreshing.

Texture modifications are simple yet impactful. Consider a buttery crumble topping instead of traditional shortcake for delicious crunch, or incorporate soft mascarpone cheese in the whipped cream for added richness.

Presentation alternatives can elevate your dessert to new heights. Serve the components separately for a self-assembly experience, allowing guests to customize their shortcake with varying amounts of whipped cream and strawberries.

Serving and Presentation Guide

Plating techniques are crucial for showcasing your strawberry shortcake. Consider using a cake stand to elevate the shortcake, dusting it with powdered sugar for a polished look. Use a serrated knife for clean, perfect slices that will impress your guests.

Garnishing ideas can add elegance to the presentation. A sprig of fresh mint on top of each serving provides a pop of color and freshness. You might also drizzle some strawberry sauce around the plate for a beautiful aesthetic.

Traditional accompaniments for strawberry shortcake often include homemade vanilla ice cream or even a light berry compote. They enhance the flavor and add delicious variety to each bite, making the dessert more indulgent.

Modern serving suggestions might include individual glass jars or bowls, allowing for beautiful layers to be visible. This method also adds a fun and interactive element to the dessert experience, perfect for parties or gatherings.

Temperature considerations are important as serving cold strawberries enhances their flavor and texture. Make sure the whipped cream is well-chilled before topping the cake.

Portion control tips suggest serving manageable slices that allow guests to enjoy every component. Consider using dessert plates that provide just the right amount of space for a generous serving.

Wine and Beverage Pairing

When pairing wine with your strawberry shortcake, opt for a sparkling wine like Prosecco or Champagne. The bright acidity and fruity notes will complement the sweetness of both the strawberries and the cream, enhancing the overall experience.

For a non-alcoholic alternative, serve iced herbal tea. A delicate chamomile or mint tea can provide a refreshing contrast that harmonizes beautifully with the dessert’s flavors.

Coffee lovers might enjoy a mild brew of coffee, such as a light roast to avoid overshadowing the sweetness. Serve it hot or as an iced coffee for a cool, invigorating pairing.

Temperature considerations also apply to your beverages. The wine should be chilled, enhancing its refreshing qualities, while hot beverages should contrast the coolness of the cake and cream.

Serving suggestions can include mimosas for brunch occasions or elegant tea parties, where light flavors help to create a balanced experience when enjoying a slice of strawberry shortcake.

Storage and Shelf Life

Proper storage methods are essential to keep your strawberry shortcake fresh. Keep any leftover components (cake, strawberries, and whipped cream) separate in airtight containers in the refrigerator. The shortcake will last for about 2-3 days, while the strawberries are best consumed within one day.

Ensure that your whipped cream is stored in a well-sealed container to prevent it from absorbing any other flavors in the fridge. It can last for about 2 days in proper conditions before it starts to lose its texture.

The ideal temperature for storing the shortcake is around 40°F or lower to maintain freshness. Avoid leaving it out at room temperature for an extended period as it can lead to spoilage.

Signs of spoilage in strawberries include mushiness, discoloration, or a sour smell. If you notice these signs, it’s best to discard them to avoid any potential foodborne illnesses.

For reheating instructions, simply place your shortcake in a preheated oven at a low temperature for a few minutes to warm the cake without compromising the strawberries. Be careful not to overheat the whipped cream; it’s best added fresh right before serving.

Freezing guidelines involve storing components separately. Unassembled shortcake components can be frozen for up to a month. When ready to serve, thaw overnight in the refrigerator and assemble as desired.

Make Ahead Strategies

Planning ahead for your strawberry shortcake can make entertaining a breeze. You can prepare the shortcake itself a day in advance and store it in an airtight container at room temperature, ensuring it remains fresh for serving.

Strawberries can be sliced and mixed with sugar a few hours ahead of time, allowing them to macerate and release their juices, enhancing their flavor. Cover and refrigerate until you are ready to assemble.

Whipping cream can be prepared a few hours in advance as well. Whip it until soft peaks form and store it in the refrigerator. Just remember to give it a light re-whip if it begins to deflate before serving.

When it comes to assembly, the best practice is to layer the components just before serving. This method ensures that each element maintains its distinct texture, presentation, and flavor.

You can also create an assembly line for guests to customize their own strawberry shortcakes. This interactive approach allows everyone to tailor their dessert while cutting down on stress for the host.

For fresh element additions, consider garnishing with freshly sliced strawberries or mint just before serving. This vibrant touch will elevate the visual appeal of the dessert.

Scaling Instructions

Scaling a strawberry shortcake recipe to accommodate more servings is straightforward. To double the recipe, simply multiply each ingredient by two and use a larger baking dish to accommodate the increased batter.

Halving the recipe is equally simple, but be careful with the baking time; for smaller cakes, reduce baking by about 5-10 minutes. Always check for doneness with a toothpick; it should come out clean when the cake is ready.

Adjust equipment size if needed; you might prefer to use two smaller baking dishes rather than one large to ensure even baking. Pay attention to oven space when scaling, as larger items might take longer to cook.

It’s also essential to modify the timing for the whipped cream. The larger the batch, the longer it may take to whip properly; keep an eye on it as you whip for optimal results.

Consider ingredient storage for larger quantities. Use airtight containers for any unused strawberries, and ensure whipped cream is kept in a stable, cold environment for freshness.

When making adjustments, always taste several components to check their balance. This practice ensures consistency in flavor regardless of portion size.

Nutritional Deep Dive

To analyze the nutritional breakdown, a serving of strawberry shortcake provides a balanced mix of macronutrients. The shortcake is predominantly carbohydrate-based from flour and sugar but is complemented by healthy fiber from strawberries.

Among its micronutrients, strawberries boast high levels of vitamin C, essential for immune support and skin health. They also provide manganese, helpful in bone formation and metabolism. The whipped cream adds calcium, but it’s crucial to enjoy it in moderation due to its higher fat content.

The health benefits of strawberries, including high antioxidant properties, combat oxidative stress, promoting overall health. They can aid in digestion and may assist in reducing cholesterol levels, contributing to heart health.

Dietary considerations for such a dessert should involve portion control to maintain balanced energy intake. Given its sweetness, limiting servings can prevent excessive sugar consumption.

For those watching their weight, this dessert can be a delightful treat when savored in small portions, emphasizing the importance of enjoying sweet treats in moderation while balanced with a healthy diet.

Dietary Adaptations

For gluten-free adaptations, consider using almond flour or a gluten-free flour blend in place of traditional flour. Both options provide delightful textures and maintain the flavor profile of the original recipe.

For dairy-free versions, substitute heavy cream with coconut cream or almond milk whipped cream. Both alternatives whip well and offer unique, rich flavors that can complement the strawberries beautifully.

Vegan adaptations typically involve swapping butter for plant-based margarine and using a dairy-free whipped topping. These changes offer similar textures and flavors while catering to specific dietary needs.

Low-carb variations can be achieved by replacing sugar with a sugar substitute like erythritol or stevia, and utilizing almond flour instead of all-purpose flour, making this dessert accessible for those following a low-carb lifestyle.

The keto option also leans towards almond flour and the same sugar substitutes, allowing for indulgence without compromising dietary goals while retaining that classic shortcake texture.

Make sure to accommodate any nut allergies by avoiding almond flour. Instead, try coconut or oat flour blended with a binding agent for texture without nuts.

Troubleshooting Guide

Texture issues can arise if the shortcake is too dry; ensure correct flour measurements and avoid excess mixing. If it’s too wet, check the ratio of wet to dry ingredients.

Flavor balance can be tricky; if the shortcake is bland, consider adding vanilla extract or a pinch of salt to enhance the sweetness of the strawberries. Always taste it before serving to ensure a pleasant experience.

Temperature problems might occur if the cake is overbaked, leading to a dry result. Always check for doneness early to avoid this; a toothpick should come out clean without overbaking.

If your whipped cream isn’t stiff enough, ensure the bowl and beaters are cold before whipping. You might also need to incorporate a stabilizer like gelatin or cornstarch if there’s a problem with deflation.

Ingredient substitutions can lead to different results; when substituting flours, ensure proper ratios are followed as gluten-free options often require specific blends to mimic traditional properties.

Timing concerns come into play if components are prepared too early. Assemble the dessert just before serving to keep the strawberries and cream fresh and avoid a soggy cake.

Recipe Success Stories

Community feedback on strawberry shortcake has been overwhelmingly positive, with many bakers sharing their memories and successes. From grandmas passing down recipes to new interpretations, this dessert continues to bring joy.

Variation successes have also been celebrated, many readers have incorporated unique flavors or alternative fruits, leading to delightful outcomes. These personal touches showcase the versatility of this beloved dessert.

Adaptation stories reveal the creativity fulfilled by those with dietary restrictions. Individuals have shared how they’ve modified the recipe and retained the enjoyable experience of indulging in strawberry shortcake.

Reader suggestions continue to inspire new ideas; many have recommended harmony with bright, fruity desserts during summer events, further enhancing the communal aspect of sharing food.

Photography tips shared within the community highlight the importance of capturing the dessert’s beauty. Stunning images of strawberry shortcake adorn social media, inspiring bakers worldwide to try their hand at making this classic dish.

Frequently Asked Questions

Q1: Can I use frozen strawberries for this recipe?

A1: Yes, you can use frozen strawberries, but fresh strawberries are highly recommended for the best flavor and texture. If using frozen, thaw and drain any excess moisture before use.

Q2: How do I prevent my whipped cream from deflating?

A2: To prevent deflation, ensure you whip the cream to stiff peaks and consider adding a stabilizer such as powdered sugar or gelatin to maintain its structure for longer.

Q3: Can I make the shortcake ahead of time?

A3: Absolutely! You can prepare the shortcake a day in advance. Just store it wrapped at room temperature to maintain freshness before assembling.

Q4: What’s the best way to serve leftover strawberry shortcake?

A4: Store the cake components separately in the fridge. Assemble them fresh when you’re ready to eat for the best texture and flavor.

Q5: Can I use a different kind of fruit?

A5: Yes, you can experiment with different berries such as blueberries or raspberries, or even peaches for a twist on the classic recipe!

Q6: How do I know when my shortcake is baked properly?

A6: The shortcake is done when it’s lightly golden on top and springs back when gently pressed. A toothpick should come out clean when inserted into the center.

Q7: Is there a gluten-free option for this recipe?

A7: Certainly! You can replace all-purpose flour with a gluten-free flour blend. Make sure to account for any texture differences in your baking.

Q8: Can I make a lower sugar version of this dessert?

A8: Yes! You can reduce the amount of sugar in the cake and use a sugar substitute for the whipped cream and strawberries if desired.

Q9: How should I store leftover shortcake?

A9: Store each component—cake, strawberries, and whipped cream—in separate airtight containers in the refrigerator. This prevents moisture from making the cake soggy.

Q10: How do I enhance the flavor of my strawberries?

A10: Tossing the strawberries in a bit of sugar and letting them sit for about 30 minutes before assembling will help draw out their juices and intensify flavor.

Q11: What can I use instead of baking powder?

A11: If you find yourself out of baking powder, you can substitute it with baking soda plus cream of tartar. Use 1/4 teaspoon of baking soda plus 1/2 teaspoon of cream of tartar for every teaspoon of baking powder needed.

Q12: What is the best way to present strawberry shortcake?

A12: For stunning presentation, consider layering the components in individual glass cups for a beautiful view of the layers, or serve it on a cake stand dusted with powdered sugar for a classic look.

Additional Resources

If you enjoyed this recipe for strawberry shortcake, you might also love related recipes, such as other berry desserts or refreshing summer cakes. Consider trying a blueberry crumble or a lemon berry tart to keep your summer dessert game strong.

To enhance your baking skills, explore our technique guides on various baking methods such as whipping cream, cake baking, and fruit preparation. These resources can help take your baking to the next level.

For ingredient information, check out our detailed guides on the best types of strawberries, how to choose optimal baking supplies, and seasonal considerations to keep your pantry stocked effectively.

Equipment recommendations can help streamline your baking process. Look for quality mixing bowls, measuring cups, and baking sheets that will elevate your cooking and baking experience.

It’s also worth considering seasonal variations in your recipe palette. As summer fades into autumn, replacing strawberries with apples or pears can inspire exciting new flavors and desserts.

Join the Conversation

We’d love to hear about your experiences making strawberry shortcake! Share your photos and thoughts on social media, tagging us to connect with fellow dessert enthusiasts.

Photography tips for your strawberry shortcake can elevate how you present this beautiful dessert to impress your friends and family. Natural light and simple backgrounds work best to let the colors pop.

Your recipe reviews help us improve and inspire others to try new techniques. Share your tips on how you made the recipe uniquely yours, whether through flavor variations or personal family stories.

Engage with our community by sharing your own strawberry shortcake variations or adaptations to expand our collective culinary knowledge on this beloved dessert.

Whether it’s a family gathering or a simple weeknight treat, your connections and contributions make cooking and sharing even more meaningful. Let’s continue to celebrate the joys of homemade treats together!

The Recipe

Strawberry Shortcake

Serves: 8 servings

Prep Time: 20 mins

Cook Time: 30 mins

Total Time: 50 mins

Kitchen Equipment Needed

  • Mixing bowl
  • Baking sheet
  • Measuring cups
  • Whisk or electric mixer
  • Serated knife

Ingredients

  • 4 cups fresh strawberries, hulled and sliced
  • 1/4 cup granulated sugar
  • 2 cups all-purpose flour
  • 1/2 cup granulated sugar (for the shortcake)
  • 2 teaspoons baking powder
  • 1/2 teaspoon salt
  • 1/2 cup unsalted butter, cold and cubed
  • 1 cup heavy cream
  • 1 teaspoon vanilla extract

Directions

  1. In a bowl, mix strawberries and 1/4 cup sugar. Let them sit for 30 minutes to release juices.
  2. Preheat oven to 425°F (220°C). In a mixing bowl, combine flour, 1/2 cup sugar, baking powder, and salt.
  3. Using a pastry cutter, cut in cold butter until the mixture resembles coarse crumbs.
  4. Add heavy cream and mix until just combined. Do not overwork the dough.
  5. Turn dough onto a floured surface, knead gently, and pat into a 1-inch thick circle.
  6. Cut into rounds and place on a baking sheet. Bake for 12-15 minutes or until golden brown.
  7. In a separate bowl, whip remaining heavy cream until soft peaks form, then add vanilla.
  8. To assemble, slice shortcake in half horizontally, layer with strawberries and cream, then top with the other half.
  9. Serve immediately and enjoy your delicious strawberry shortcake!

Recipe Notes

  • For best results, use fresh strawberries in season.
  • Shortcake can be made a day in advance; store in an airtight container.
  • Try adding a splash of lemon juice to the strawberries for extra flavor.

Indulge in Fudgy Chocolate Raspberry Swirl Cookies Today!

Fudgy Raspberry Swirl Cookies: Irresistibly Chocolaty Treats!

⚖️
Difficulty
Medium

⏲️
Prep Time
15 mins

🕒
Cook Time
12 mins

⏱️
Total Time
27 mins

🍽️
Servings
24 cookies

Craving a dessert that combines rich chocolate with the vibrant tang of raspberries? Look no further than these Fudgy Raspberry Swirl Cookies! Each bite of these cookies delivers a heavenly experience of intense chocolate flavor intertwined with a sweet raspberry swirl. They’re not just any cookies; they’re a celebration of flavors that evoke warmth, happiness, and nostalgia. Imagine sinking your teeth into a fudgy center, carried along with the delightful tartness of fresh raspberries. You won’t be able to stop at just one!

What’s even better is how effortless these cookies are to whip up! With simple ingredients that you’ll likely have in your pantry and just a few steps, these treats can be ready in less than half an hour. Perfect for an afternoon snack, a gathering, or even just to satisfy that sweet tooth, these cookies are a delightful way to elevate any moment. Let’s dive into how you can make these scrumptious cookies at home!

Quick Recipe Highlights

  • Flavor Profile: Rich chocolate complemented by sweet-tart raspberry swirls creates a balance that’s both indulgent and refreshing.
  • Texture: The cookies are soft and fudgy, featuring a melted chocolate core enveloped by a slight crispness outside.
  • Aroma: These cookies emanate a heavenly chocolate scent mixed with a fruity raspberry burst, making them irresistible from the oven.
  • Visual Appeal: With their colorful raspberry swirls against the dark chocolate cookie base, they make for a stunning display on any dessert table.
  • Skill Level Needed: This recipe is easy enough for beginners to follow, yet impressive enough to delight seasoned bakers.
  • Special Equipment: You’ll need a mixing bowl, a baking sheet, and parchment paper for a hassle-free baking experience.

Recipe Overview

  • Difficulty Level: These cookies are of medium difficulty, perfect for home bakers who want to level up their cookie game without requiring advanced techniques.
  • Category: These fudgy cookies serve as a delicious dessert and can easily function as a sweet snack during tea time or gatherings.
  • Cuisine: While inspired by classic cookie traditions, the raspberry element pays homage to summer berry desserts worldwide.
  • Cost: With basic ingredients like flour, sugar, cocoa powder, and fresh raspberries, this recipe is budget-friendly and rewarding.
  • Season: Perfect for summer when raspberries are in season, yet delightful year-round, especially with frozen berries.
  • Occasion: These cookies are a fantastic choice for birthdays, picnics, or any casual gatherings where sweets are called for.

Why You’ll Love This Recipe

The taste and texture appeal of these Fudgy Raspberry Swirl Cookies is undeniable. Each bite melds soft, fudgy chocolate with a tangy raspberry ribbon that awakens the taste buds. The layers of flavor create an experience that feels indulgent yet refreshing, making them suitable for every season. They are a delightful treat that can satisfy your chocolate cravings while offering a burst of fruity flavor.

In terms of convenience, this recipe is straightforward, featuring a simple mixing and baking process. You won’t spend hours in the kitchen, and the reward is a batch of cookies that taste far more sophisticated than their preparation suggests. They are ideal for beginners or anyone who wants to whip up delicious cookies without fuss.

These cookies are not just a sweet treat; they also hold some nutritional advantages! Almond flour or whole wheat flour can be used for a healthier version, and incorporating fresh raspberries adds antioxidants. It’s a lovely way to enjoy dessert without entirely sacrificing nutrition.

Socially, Fudgy Raspberry Swirl Cookies can be a great way to bring people together. Whether you share them at a gathering, bake them for friends, or indulge with your family, they often spark conversations and create memories. The joy of baking, sharing, and tasting can elevate any occasion.

Most importantly, considering cost-effectiveness, this recipe can be an economical way to provide a delicious dessert. The ingredients are relatively inexpensive and easy to source, allowing you to create a gourmet cookie experience without breaking the bank.

Historical Background and Cultural Significance

Cookies have ancient roots, tracing back to the 7th century in Persia, where sugar was first cultivated. Over the centuries, different regions adapted recipes, integrating local flavors. The use of chocolate became popular in the Americas during the 18th century, leading to the chocolate-sharpened treats we enjoy today.

The raspberry, a favored berry in many cultures, has been featured in desserts for centuries, symbolizing summer through its sweet and tart profile. Combining chocolate and raspberries creates a timeless dessert that reflects indulgence and comfort, spanning various traditions from European patisseries to American home kitchens.

Over time, cookie recipes evolved, with bakers using local fruits and flavors to customize their treats. The marriage of chocolate and raspberry as a pairing emerged as a staple in gourmet baking, inspiring countless variations while remaining rooted in centuries-old traditions.

Regionally, variations of raspberry cookies can be found worldwide, such as Linzer cookies in Austria or French macarons filled with raspberry jam. Each region plays homage to the flavors while contributing its unique twist, cementing this combination as a beloved classic.

Ingredient Deep Dive

Flour: Flour is the backbone of cookie recipes, providing structure and texture. Nutritionally, it brings essential carbohydrates and proteins. When choosing, opt for all-purpose flour for classic results or experiment with alternatives like almond or whole wheat flour for unique flavors and health benefits. For storage, keep flour in a cool, dry place in an airtight container to maintain freshness.

Cocoa Powder: Cocoa powder offers rich chocolate flavor. Packed with antioxidants, it is celebrated for potential heart health benefits. Look for high-quality unsweetened cocoa powder for the best results. Store in a cool, dark place away from moisture. If needed, substitute with carob powder for a caffeine-free option.

Butter: Butter enriches cookies with flavor and texture. It provides essential fats and vitamins A, D, and E. For flavor depth, prefer unsalted butter, and ensure it’s at room temperature for even mixing. Store butter in the refrigerator or freezer for freshness. Substitute with coconut oil or vegan margarine for dairy-free options.

Raspberries: Fresh raspberries contribute vibrant color and flavor, bursting with vitamin C and dietary fiber. When selecting, opt for firm berries with no mushiness. Store berries in the fridge and consume promptly, or freeze them for longer shelf life. Substitute with strawberries or blueberries if needed, keeping in mind flavor adjustments.

Common Mistakes to Avoid

  • Not measuring ingredients accurately: Baking requires precision, so using a scale or proper measuring cups is essential for consistent results.
  • Overmixing the dough: Overmixing can result in tough cookies; mix just until combined for a tender texture.
  • Chilling the dough too long: If you chill your cookie dough excessively, it may become too firm to scoop easily; follow timing guidelines closely.
  • Using cold butter straight from the fridge: Cold butter inhibits proper blending, leading to inconsistently baked cookies; always soften your butter before mixing.
  • Skipping parchment paper: Not lining your baking sheet can lead to sticking and uneven baking; use parchment to ensure easy removal.
  • Not letting cookies cool properly: Immediate removal from the baking sheet can cause breakage; allow cookies to set before transferring.
  • Underbaking or overbaking: Keep an eye on your cookies and perform the “toothpick test” to ensure they are perfectly baked.
  • Baking on a crowded sheet: Overcrowding can lead to uneven baking; allow space between each cookie for optimal results.
  • Neglecting to preheat the oven: A properly preheated oven is crucial; baking in a cold oven can lead to poor texture.
  • Using expired ingredients: Check your baking supplies and avoid using expired leavening agents or fruits to ensure fresh flavors.

Essential Techniques

Mixing the Dough: Properly mixing your cookie dough is critical to achieving the right texture. Begin by creaming your butter and sugar until light and airy, ensuring to incorporate air for that soft bite. Avoid overmixing, which leads to tougher cookies. Look for a smooth consistency where no flour streaks are visible, indicating readiness for the next step.

Swirling the Raspberries: When adding raspberry puree or chunks, gently fold them into the dough to create beautiful swirls without fully incorporating. This technique preserves the fruit’s presence, giving each cookie delightful pockets of flavor. Aim for a marbled look; avoid vigorous stirring to keep the raspberry distinct.

Pro Tips for Perfect Fudgy Raspberry Swirl Cookies

Choose high-quality chocolate to enhance the fudgy richness of your cookies. A blend of dark or semi-sweet chocolate chips will elevate the overall flavor profile.
Consider adding a pinch of sea salt to balance sweetness and enhance the richness.
For a fudgier cookie, underbake slightly, allowing them to firm as they cool for that perfect chewy texture.
Experiment with various berry-infused flavors, using blueberries or strawberries for unique twists.
Let your dough chill for at least 30 minutes; this step helps control spread and enhances texture.
Incorporate nuts like walnuts or pecans for added crunch, complementing the soft and fudgy interior.
If raspberry puree is used, strain it to remove seeds for a smoother texture if desired.
Store the cookies in an airtight container for optimal freshness and enjoyment for up to a week.

Variations and Adaptations

For regional variations, consider adding spices like cinnamon or nutmeg for a warm flavor profile, reflecting seasonal changes in taste preferences. Seasonal adaptations can include using cranberries for holiday baking or pumpkin spice cookies in the fall.

Dietary modifications are easy by substituting gluten-free flour for a celiac-friendly version or opting for vegan butter and flaxseed as egg replacements for a completely plant-based treat. These adaptations allow everyone to enjoy these delightful cookies, regardless of dietary restrictions.

If you’re looking for flavor variations, experiment by incorporating citrus zest or extracts, such as orange or almond, into your cookie dough for a refreshing twist. To alter the texture, consider using mini marshmallows for gooey surprises or adding more cocoa powder for extra chocolate flavor.

For presentation alternatives, dust with powdered sugar for a snowy effect or drizzle with melted chocolate for added richness and aesthetic.

Serving and Presentation Guide

For plating, stack cookies on a serving platter or arrange them in a decorative box for gifting. Garnish with fresh raspberries or mint leaves to elevate visual appeal. Traditional accompaniments include tea or coffee, enhancing the chocolate experience.

For modern serving suggestions, consider pairing these cookies with a scoop of vanilla ice cream for a decadent dessert. Serve warm with a drizzle of fudge or caramel sauce for an indulgent treat. Take care with temperature; warm cookies are best enjoyed fresh from the oven, while cooled cookies retain their structure.

In terms of portion control, aim for even scoops when baking, ensuring balanced sizes that make for perfect sharing without excess.

Wine and Beverage Pairing

Pair these cookies with a rich red wine, such as Merlot or Cabernet Sauvignon, for an indulgent experience. The fruity notes of the wine can complement the raspberry flavors beautifully.

For non-alcoholic alternatives, a sparkling berry lemonade or hibiscus tea can mimic the fruity aspects and provide a refreshing contrast.

Warm beverages like coffee or cappuccino serve as perfect companions, as their robust flavors enhance the rich chocolate profile of the cookies. Be sure to serve them at optimal temperatures, as warm cookies pair best with these beverages.

Storage and Shelf Life

To store your cookies, place them in an airtight container at room temperature for quick access and maximum freshness. They can remain good for about a week; however, freezing is recommended for longer shelf life. Use freezer bags or containers to store your cookies, ensuring all air is removed to avoid freezer burn.

Signs of spoilage include a dry, hard texture or off-putting smells—when in doubt, it’s best to discard. For reheating, pop cookies in the microwave for a few seconds or place them in a warm oven briefly to regain that freshly baked texture.

Freezing guidelines suggest letting your cookies cool completely before wrapping them individually in plastic wrap and placing them in a freezer-safe container.

Make Ahead Strategies

Consider preparing your cookie dough in advance. After mixing, you can refrigerate it overnight, allowing flavors to meld. This step also enhances browning during baking, yielding a deeper flavor.

If you opt to bake later, scoop and freeze individual cookie portions on a baking sheet, then transfer them into a bag once frozen. This method enables you to bake fresh cookies at a moment’s notice.

Be mindful of quality impact; freshly baked cookies from refrigerated or frozen dough maintain texture and flavors, allowing flexibility in your baking schedule without sacrificing taste.

When assembling after freezing, simply bake straight from the freezer, adjusting the time by a few extra minutes for perfect results.

Scaling Instructions

To halve the recipe, simply reduce all ingredient quantities equally—this ensures consistent results. Should you wish to double or triple the recipe for larger gatherings, maintaining ingredient ratios is crucial; ensure you have ample baking sheets available.

Equipment adjustments may include larger mixing bowls or additional sheets to facilitate the increased output. Timing may vary during baking; monitor your cookies closely, as larger batches may require longer or more batches to bake fully.

When storing larger batches, be prepared to re-label and organize containers to avoid mixing flavors or types inadvertently.

Nutritional Deep Dive

For a macro breakdown, these cookies primarily deliver carbohydrates and fats, leading to energy support. It’s ideal to moderate serving sizes to align with calorie goals.

A micronutrient analysis reveals advantages from integrative elements like almond flour, offering vitamin E and healthier fat content. The addition of fresh raspberries introduces a wealth of antioxidants and vitamins, promoting health benefits through flavor.

In health benefits, the combination of chocolate and berries provides a satisfying sweet while contributing beneficial nutrients. Simply adjusting ingredients can make these cookies more nourishing while maintaining their enjoyable flavor.

Consider dietary considerations during portion analysis; servings should be kept moderate to balance enjoyment with nutritional goals. For those managing their weight, opting for smaller cookies or making without chocolate chips can help adhere to dietary plans.

Dietary Adaptations

This fudgy cookie recipe can easily transform into a gluten-free delicacy with the use of gluten-free flour blends, welcoming those with dietary restrictions while still delighting taste buds.

For a dairy-free option, substitute the butter with coconut oil or a margarine of your choice, ensuring a similar creamy texture and flavor. This variation makes the recipe accessible for lactose-averse individuals.

If seeking a vegan adaptation, replace eggs with flaxseed meal mixed with water or unsweetened applesauce to maintain moisture and binding in the recipe.

For a low-carb or keto-friendly alternative, consider almond flour and erythritol for a satisfying sweet treat that aligns with diet protocols without compromising on texture.

Paleo adaptations can be achieved with nut butters and honey instead of refined sugars, creating a cookie that is both indulgent and health-conscious.

Low-FODMAP variants can be made by using specific berries and gluten-free flours to cater to digestive sensitivities without sacrificing pleasure.

Troubleshooting Guide

Encountering texture issues often stems from overbaking or incorrect ingredient measurement. Ensure to monitor baking times and iron out precise ingredient amounts for success.

Finding flavor imbalances can be resolved by adjusting sugars or adding a pinch of salt to enhance the overall taste. Experiment with various extracts or seasoning additions for optimum flavor enhancement.

Should problems arise with temperature, verify that your oven’s temperature settings are accurate; investing in an oven thermometer can save future headaches.

If faced with equipment challenges—such as baking sheets sticking—lining with parchment paper can minimize sticking and ease cleanup.

In time management, baking small batches at once can help control for adjustments based on dough preferences and baking needs.

Ingredient substitutions can often lead to unexpected results; adhere closely to suggested ratios or experimentation if you choose to modify parts of the recipe initially.

Recipe Success Stories

Community feedback on these cookies has been overwhelmingly positive, with stunning adaptations shared online. Many bakers have reported successful variations, swapping in different fruits and flavorings while still maintaining the fudgy texture.

Readers consistently express joy in how approachable the recipe is, emphasizing its ease for novice bakers who still wish to impress family and friends. Many enjoy sharing their photos on social media, highlighting the cookies’ colorful appearance.

Variations have emerged, with numerous suggestions for using leftover raspberry sauce as a dip, allowing creativity to thrive beyond the original recipe.

Through recommendations, bakers have successfully added various nuts or extras, securing further flavors and textures that entice even the most selective eaters.

The photographic appeal of these cookies fosters an understanding of Instagrammable desserts, inspiring others to try and share for their communities.

Frequently Asked Questions

Q1: Can I use frozen raspberries instead of fresh?

Yes, you can use frozen raspberries, but be sure to thaw them first and drain any excess liquid to avoid making the dough too wet. Frozen berries also work great if you mix them in gently.

Q2: How long will these cookies last?

Stored in an airtight container at room temperature, the cookies will last about a week. If you need them to last longer, consider freezing them for up to three months.

Q3: What should I do if my dough is too sticky?

If your cookie dough seems excessively sticky, you can chill it for about 30 minutes to firm it up. Alternatively, sprinkle a bit of flour on your hands while shaping the cookies.

Q4: Can I omit the raspberry swirl?

Absolutely! You can make these cookies as plain chocolate cookies if you prefer, or substitute the raspberries with another fruit or even chocolate chips.

Q5: Is it possible to make these cookies healthier?

You can make healthier variations by using whole wheat flour, reducing sugar, and incorporating nuts or seeds. These changes help enhance the nutrition content while maintaining taste.

Q6: Can I add more chocolate to the recipe?

Definitely! Feel free to increase the amount of chocolate chips or even add cocoa powder for an extra chocolatey flavor. Just remember to balance it with the wet ingredients!

Q7: How can I ensure my cookies don’t spread too much?

Chilling your dough for at least 30 minutes before baking helps prevent excessive spreading. You can also add more flour gradually if needed.

Q8: Can I freeze the cookie dough ahead of baking?

Yes, you can scoop out the cookie dough portions and freeze them! Place the portions on a baking sheet until solid, then transfer them to a freezer bag for up to three months.

Q9: Should I use unsweetened or sweetened raspberries?

Using fresh or frozen unsweetened raspberries is recommended for this recipe, as the sugar in the dough will provide enough sweetness. Sweetened varieties may lead to overly sugary cookies.

Q10: Can I bake these cookies in advance for an event?

Yes! Baking the cookies a day or two in advance is a great way to save time. Store them in an airtight container until you’re ready to serve!

Additional Resources

Explore related recipes for more cookie inspirations or delve into technique guides that can enhance your baking skills. Ingredient information can help you make informed choices, while equipment recommendations ensure you have the right tools for success.

Seasonally, consider variations based on fruits or flavors that resonate with holidays, such as pumpkin spice cookies for fall or citrus-infused cookies for spring.

Refer to expert blogs and culinary resources to gain a broader understanding of cookie-making or for troubleshooting that can make your baking endeavors even more successful.

Join the Conversation

We encourage you to share your baking experiences and thoughts on these Fudgy Raspberry Swirl Cookies! Post photos on social media with your unique twists and variations to inspire others in our community. Your creativity can spark conversations and foster connections with fellow baking enthusiasts.

Offering constructive feedback or sharing tips can contribute greatly to our culinary community. Explore different presentation techniques or ingredient substitutions—your journey encourages others to bake bravely!

Don’t forget to leave a review or comment below showcasing your results and any modifications you made. Let’s connect through the love of baking and enjoy creating these delightful treats together!

The Recipe

Fudgy Raspberry Swirl Cookies

Serves: 24 cookies

Prep Time: 15 mins

Cook Time: 12 mins

Total Time: 27 mins

Kitchen Equipment Needed

  • Mixing bowl
  • Baking sheet
  • Parchment paper
  • Whisk or electric mixer
  • Scoop or spoon

Ingredients

  • 1 cup all-purpose flour
  • 1/2 cup unsweetened cocoa powder
  • 1/2 cup butter, softened
  • 1 cup sugar
  • 2 eggs
  • 1/2 teaspoon vanilla extract
  • 1 cup fresh raspberries (or raspberry puree)
  • 1/2 cup chocolate chips

Directions

  1. Preheat your oven to 350°F (175°C) and line a baking sheet with parchment paper.
  2. In a mixing bowl, cream the softened butter and sugar until light and fluffy.
  3. Add eggs one at a time, mixing well after each addition and incorporating vanilla extract.
  4. In a separate bowl, combine flour and cocoa powder, then gradually add to the wet ingredients, mixing until just combined.
  5. Gently fold in the raspberries and chocolate chips, ensuring an even distribution.
  6. Scoop tablespoons of dough onto the prepared baking sheet, leaving space between each cookie.
  7. Optional: Swirl extra raspberry puree on top of the dough for added flavor and presentation.
  8. Bake for 10-12 minutes or until the cookies are set around the edges. They will look soft in the center.
  9. Let cool on the baking sheet for a few minutes before transferring to wire racks to cool completely.

Recipe Notes

  • For coconut oil adaptation, simply melt and replace butter in the same quantity.
  • Consider using almond extract for a twist on flavor.
  • These cookies can be frozen after baking for up to 3 months—simply thaw to enjoy!
  • Adjust the amount of raspberries based on your preference; more can intensify the fruity flavor.

Delicious Sour Cream Blueberry Coffee Cake for Perfect Mornings

Sour Cream Blueberry Coffee Cake: A Perfect Morning Treat

⚖️
Difficulty
Easy

⏲️
Prep Time
15 mins

🕒
Cook Time
45 mins

⏱️
Total Time
60 mins

🍽️
Servings
12 servings

Indulging in a slice of Sour Cream Blueberry Coffee Cake is like savoring a warm hug on a chilly morning. The combination of sweet, juicy blueberries with the creamy tanginess of sour cream creates a delightful explosion of flavor that dances on your taste buds. This cake is tender yet dense, providing a satisfying bite that is perfect for breakfast or an afternoon snack. The lush, buttery crumb is what truly elevates this coffee cake, making it a favorite for gatherings and cozy mornings alike.

As the cake bakes, the sweet aroma fills your kitchen, inviting family and friends to the table. The subtle hint of vanilla intertwined with the blueberries makes this coffee cake irresistible. Topped with a buttery crumble, it offers a contrast in texture that will have everyone coming back for seconds. Whether enjoyed with a hot cup of coffee or a refreshing glass of milk, this delicious Sour Cream Blueberry Coffee Cake is sure to become a cherished recipe in your collection.

Quick Recipe Highlights

  • Flavor Profile: This coffee cake balances the soothing sweetness of blueberries with a hint of sour cream, creating a well-rounded flavor that is not overly sweet.
  • Texture: The cake features a soft, moist interior with a crumbly topping, making each bite a delight.
  • Aroma: The enticing aroma of baked blueberries and vanilla fills the air, creating an inviting atmosphere.
  • Visual Appeal: The vibrant blueberries nestled in a golden cake, topped with a light brown crumble, make for a visually stunning presentation.
  • Skill Level Needed: This recipe is easy to follow, perfect for beginner bakers or those looking to whip up something special without too much effort.
  • Special Equipment: A 9×13 inch baking pan and an electric mixer are recommended for the best results.

Recipe Overview

  • Difficulty Level: Easy, making it accessible for bakers of all levels. The steps are straightforward, with no complex techniques required.
  • Category: This recipe falls under breakfast and dessert, serving as a great morning treat or afternoon delight.
  • Cuisine: This cake is rooted in classic American baking traditions, often enjoyed in homes and coffee shops across the country.
  • Cost: Relatively inexpensive, with basic pantry staples and fresh blueberries, making it an affordable baking choice.
  • Season: Blueberries are in peak season during the summer, but frozen berries can be used year-round for this recipe.
  • Occasion: Perfect for brunch gatherings, holiday breakfasts, or as a simple dessert after dinner.

Why You’ll Love This Recipe

Indulging in this Sour Cream Blueberry Coffee Cake is not just a treat for your taste buds, but a warming experience that stirs nostalgia for cozy mornings. The meld of sweet blueberries with the pronounced tang of sour cream creates a wonderful contrast in flavor. Each bite is a heavenly soft texture that pairs perfectly with the crunch of the crumb topping, making it an ultimate delight.

Beyond taste, the convenience of this recipe makes it a winner. With just 15 minutes of prep time, you can pop this cake into the oven, allowing it to bake while you prepare for the day. Its ease of preparation makes it an ideal choice for busy mornings or spontaneous gatherings when friends drop by.

In terms of nutrition, the inclusion of blueberries provides not only natural sweetness but also a boost of antioxidants and vitamins. The sour cream adds moisture to the cake, keeping it tender while also contributing to a modest amount of calcium and protein. It’s the kind of indulgence you can feel good about enjoying.

Social occasions become even more meaningful with this coffee cake at the center of the table. It invites conversation and connection, whether served at brunch or as an after-dinner dessert. This recipe opens doors for shared experiences and warm memories among family and friends.

Finally, the affordability of ingredients ensures that this recipe remains accessible to everyone. With common pantry items and a handful of fresh blueberries, you can create a delicious dessert that won’t break the bank.

Historical Background and Cultural Significance

Sour cream coffee cakes have deep roots in American baking traditions, often passed down through generations. These cakes originally emerged from Eastern European culinary practices, where sour cream was a common ingredient used to enhance moisture and flavor in baked goods. As immigrants settled in America, they brought their beloved recipes, adapting them with local ingredients.

In the United States, blueberry coffee cake became popular in the late 19th and early 20th centuries, especially in regions where blueberries flourished. It is often associated with seasonal celebrations like summer picnics and family gatherings, highlighting the importance of community in enjoying homemade treats.

Over the years, the recipe has evolved. Modern incarnations often incorporate various fruits and toppings, showcasing a versatile dessert that caters to different tastes and occasions. The beloved combination of blueberries and sour cream remained a staple, celebrating traditional flavors while inviting innovation.

Regional variations can be found throughout the country, from crumbly New England versions to denser Midwest cakes. Each interpretation reflects local tastes and ingredient availability, emphasizing the cake’s enduring popularity across diverse American backgrounds.

Ingredient Deep Dive

Blueberries
Blueberries are celebrated not only for their delightful sweetness but also for their rich nutritional profile, boasting high levels of antioxidants. These tiny berries are low in calories and provide essential vitamins such as Vitamin C and K. When selecting blueberries, opt for firm, plump berries that exhibit a deep blue color. Store them in the refrigerator to maintain their freshness, and for optimal results, you can substitute with frozen blueberries, which provide similar flavors.

Sour Cream
Sour cream serves as a key ingredient in this recipe, enhancing moisture and tenderness in the cake. It’s a great source of calcium and adds a distinctive tangy flavor that balances the sweetness of the blueberries. When choosing sour cream, look for brands that use minimal additives for the best flavor. Sour cream should be stored in the refrigerator, and if you need a substitute, full-fat Greek yogurt can serve as an excellent alternative.

Common Mistakes to Avoid

  • Overmixing the batter: This can lead to a dense cake, so mix until just combined.
  • Using stale ingredients: Fresh baking powder and ingredients like sour cream ensure the cake rises and has the best flavor.
  • Skipping the parchment paper: Using parchment ensures an easy release from the pan, avoiding a stuck cake.
  • Not checking oven temperature: Ovens can vary, so using an oven thermometer can help achieve the right bake.
  • Underbaking: Ensure the cake is fully baked by inserting a toothpick that comes out clean.
  • Failing to cool: Allow the cake to cool completely before slicing for a clean presentation.
  • Ignoring ingredient temperature: Room temperature eggs and dairy lead to better texture.
  • Not measuring accurately: Use measuring cups and spoons for precise ingredient quantities.

Essential Techniques

Proper Mixing
Proper mixing techniques are key to achieving the cake’s fluffy texture. Start by creaming the butter and sugar until light and fluffy, which incorporates air. Gradually add the eggs one at a time, mixing thoroughly to avoid lumps. Stir in the dry ingredients slowly to prevent overdevelopment of gluten, ensuring a tender crumb.

Layering Ingredients
Layering blueberries evenly in the batter helps prevent them from sinking to the bottom. To do this, coat the berries in flour before folding them into the batter. This tactic allows them to distribute evenly while baking, creating a visually appealing slice and an even burst of flavor with each bite.

Pro Tips for Perfect Sour Cream Blueberry Coffee Cake

1. Use fresh blueberries for the best flavor, but frozen blueberries work well in a pinch; just don’t thaw them before baking.
2. For added flavor, consider adding a hint of lemon zest to the batter to complement the blueberries.
3. Allow the cake to cool in the pan for at least 10 minutes before transferring it to a wire rack.
4. To make a more indulgent treat, drizzle a simple glaze made from powdered sugar and milk over the cooled cake.
5. Store your cake in an airtight container to maintain its freshness for several days.
6. Experiment with adding nuts like walnuts or pecans to the crumb topping for added crunch.
7. If the topping gets too dark while baking, cover it lightly with foil for the last few minutes.
8. Serve slices warm with a dollop of whipped cream for a delicious dessert option.

Variations and Adaptations

Consider regional variations of this cake by incorporating seasonal fruits such as peaches or strawberries for a summer twist. For an autumn flavor, add spices like cinnamon or nutmeg to the batter. Dietary modifications can be made; for a gluten-free option, substitute regular flour with a gluten-free blend while keeping the same proportions.

For flavor variations, add a splash of almond extract or orange zest to the batter for a fragrant twist. To alter the texture, try making a layer of cream cheese frosting on top for an even richer finish. Exploring different toppings, like a streusel made with oats and brown sugar, can also create a delightful change.

Serving and Presentation Guide

When serving Sour Cream Blueberry Coffee Cake, consider using a cake stand to elevate your presentation. Dust the top lightly with powdered sugar for an elegant touch. Serve with a side of fresh blueberries to enhance the visual appeal and invite curiously to enjoy.

Complementing the cake with a scoop of vanilla ice cream or a dollop of whipped cream can elevate the experience and provide a delightful contrast in temperature and texture. For warm looks, slice when slightly cool, allowing everyone to share their opinions on flavor and presentation before diving in.

Wine and Beverage Pairing

Pairing wine with coffee cake can provide a delightful contrast. A light, fruity white wine, such as a Moscato or Riesling, enhances the cake’s sweetness. For those seeking non-alcoholic alternatives, consider herbal teas, like chamomile or a fruity iced tea, to complement the flavors without overpowering them.

For coffee lovers, a smooth, balanced brew or even a light cappuccino can amplify the comforting vibes of the coffee cake, perfect for a relaxed morning gathering.

Storage and Shelf Life

To properly store your Sour Cream Blueberry Coffee Cake, wrap it in plastic wrap or place it in an airtight container to maintain moisture. It can be stored at room temperature for up to 3 days or in the refrigerator for about a week. Be sure to check for any signs of spoilage, such as an off smell or texture changes.

For longer-term storage, consider freezing slices individually wrapped in plastic wrap and then placed in a freezer-safe bag. When ready to enjoy, simply thaw at room temperature or warm it in the oven for a delicious treat that feels freshly baked.

Make Ahead Strategies

For those busy mornings, consider making the batter a day ahead and storing it in the fridge. This allows the flavors to meld, enhancing overall taste. You can also prepare the crumb topping in advance, keeping it in the fridge until you’re ready to bake.

As for assembly, if you’re expecting guests, pre-slice the cake and arrange it on a platter with garnishes, making it easy for everyone to enjoy. Reheating the cake lightly before serving can restore its moist texture and warm flavors.

Scaling Instructions

If you plan to halve the recipe, simply divide each ingredient by two, but maintain the baking time, checking for doneness regularly. For larger gatherings, doubling or tripling the recipe is a breeze; just ensure you have adequate baking gear on hand, such as multiple pans.

When increasing the batch size, keep an eye on the oven, as larger quantities may require slight adjustments in baking time or temperature. Store any leftovers according to the mentioned shelf-life guidelines to enjoy later.

Nutritional Deep Dive

A slice of Sour Cream Blueberry Coffee Cake contains a balanced array of macros, including carbohydrates from the flour and sugars, healthy fats from butter, and proteins from eggs and sour cream. The blueberries provide fiber and numerous vitamins, enriching this delightful treat.

In assessing micronutrients, the inclusion of blueberries infuses the cake with antioxidants, helping counter oxidative stress. Keep portion sizes in mind, as indulging occasionally can fit into a balanced diet.

Being aware of the ingredients can aid in weight management, making substitutions to lower calorie counts without sacrificing flavor. Enjoying a slice thoughtfully can enhance your culinary experiences without guilt.

Dietary Adaptations

For those following a gluten-free diet, consider a 1:1 gluten-free flour blend for an easy swap, ensuring that everyone can enjoy this delightful treat. For dairy-free options, almond yogurt or coconut yogurt can replace sour cream, maintaining the moistness of the cake.

Vegan adaptations can also be achieved by using flax eggs in place of regular eggs, and coconut cream as a sour cream alternative. For low-carb and keto variations, almond flour can work as a substitute for a lowered carbohydrate effect, while creating a delicious flavor profile.

Troubleshooting Guide

Addressing texture issues often stems from overmixing; ensure to fold in the ingredients gently. If flavor balance feels off, consider adjusting the sugar or adding a touch of salt to engage flavor complexities fully.

Should your cake have burning edges but remains raw in the center, reduce the temperature and extend the bake time, providing even cooking throughout. Keep an eye on oven equipment, as home ovens can greatly vary in performance.

Ingredient substitutions can lead to unexpected results; if you must change an ingredient, involve similar counterparts to maintain cake integrity while keeping a delicious taste and texture.

Recipe Success Stories

Community feedback has highlighted the joy this coffee cake brings to many, with stories of family gatherings where everyone asks for the recipe. Variations, such as adding lemon zest or swapping fruit, have emerged, showcasing the adaptability and cherished place this coffee cake holds in families.

Readers have documented their baking adventures, sharing tips and personal modifications that have led to their own delightful successes. Photography of their renditions has decorated online spaces, further spreading the love for this classic treat within vibrant baking communities.

Frequently Asked Questions

Can I use frozen blueberries in this recipe?

Yes, frozen blueberries work great! Just fold them straight into the batter without thawing to prevent them from bleeding into the cake.

How do I store leftovers?

Store the leftovers in an airtight container at room temperature for up to three days or refrigerate for a week. It can also be frozen for longer preservation.

Can I make this cake in advance?

Absolutely! You can prepare the batter the night before and bake it the next morning.

What can I use instead of sour cream?

Full-fat Greek yogurt is an excellent substitute for sour cream in this recipe, providing similar moisture and tanginess.

What is the best way to reheat this cake?

To maintain softness, reheating can be done in a microwave for a few seconds or in an oven at 350°F for about 10 minutes until warmed through.

Can I add spices to the batter?

Yes! Adding a teaspoon of cinnamon or nutmeg can enhance the flavor profile and add warmth to the cake.

What’s the best way to serve this coffee cake?

This cake is delightful served warm, with a dusting of powdered sugar or a dollop of whipped cream on top!

Why did my cake turn out dense?

Dense cakes are often the result of overmixing the batter. Mix just until combined for a light texture.

Is this recipe suitable for diabetics?

It’s best to consult a healthcare expert, but you can lower sugar content and adjust portion sizes for better management.

Can I change the fruit used in this recipe?

Yes, you can easily switch blueberries for other fruits like raspberries or chopped strawberries, keeping the necessary moisture in mind.

Additional Resources

Delve deeper into the culinary world with our related recipes, which can enhance your baking repertoire. Explore technique guides that elaborate on essential baking skills crucial for perfecting your craft.

Ingredient information helps keep you informed about healthier choices for your recipes, while equipment recommendations can lead you to the best tools for baking success. Keep an eye out for seasonal variations to put fresh spins on your favorite dishes.

Join the Conversation

We’d love to hear your thoughts! Share your social media posts of your baking successes and tag us to join our community. Your photography tips can inspire others in their adventures, as can your unique variations on this beloved recipe.

Feedback helps us continually improve and engage our readers, creating a lively community centered around the love of baking and shared experiences in the kitchen.

The Recipe

Sour Cream Blueberry Coffee Cake

Serves: 12 servings

Prep Time: 15 mins

Cook Time: 45 mins

Total Time: 60 mins

Kitchen Equipment Needed

  • 9×13 inch baking pan
  • Mixing bowls
  • Electric mixer
  • Rubber spatula
  • Measuring cups and spoons

Ingredients

  • 1 cup granulated sugar
  • ½ cup unsalted butter, softened
  • 2 large eggs
  • 1 teaspoon vanilla extract
  • 1 cup sour cream
  • 2 cups all-purpose flour
  • 1 teaspoon baking powder
  • ½ teaspoon baking soda
  • ½ teaspoon salt
  • 2 cups fresh or frozen blueberries
  • ¾ cup crumb topping (made of flour, sugar, and butter)

Directions

  1. Preheat your oven to 350°F (175°C) and grease the baking pan.
  2. In a large bowl, beat together sugar and butter until light and fluffy.
  3. Add eggs, one at a time, mixing well after each addition.
  4. Stir in the sour cream and vanilla extract until combined.
  5. In a separate bowl, whisk together flour, baking powder, baking soda, and salt.
  6. Gradually add the dry ingredients to the wet mixture until just combined.
  7. Gently fold in the blueberries, taking care not to overmix.
  8. Pour the batter into the prepared baking pan and smooth the top.
  9. Sprinkle the crumb topping over the batter evenly.
  10. Bake for 40-45 minutes, or until a toothpick inserted in the center comes out clean.
  11. Allow the cake to cool in the pan for 10 minutes before transferring to a wire rack.

Recipe Notes

  • For added flavor, feel free to add lemon zest to the batter.
  • This cake can be frozen; just make sure to wrap it tightly to prevent freezer burn.
  • Experiment with different fruits based on seasonal availability.