Delicious Strawberry Buttercream Cake Recipe for Every Occasion

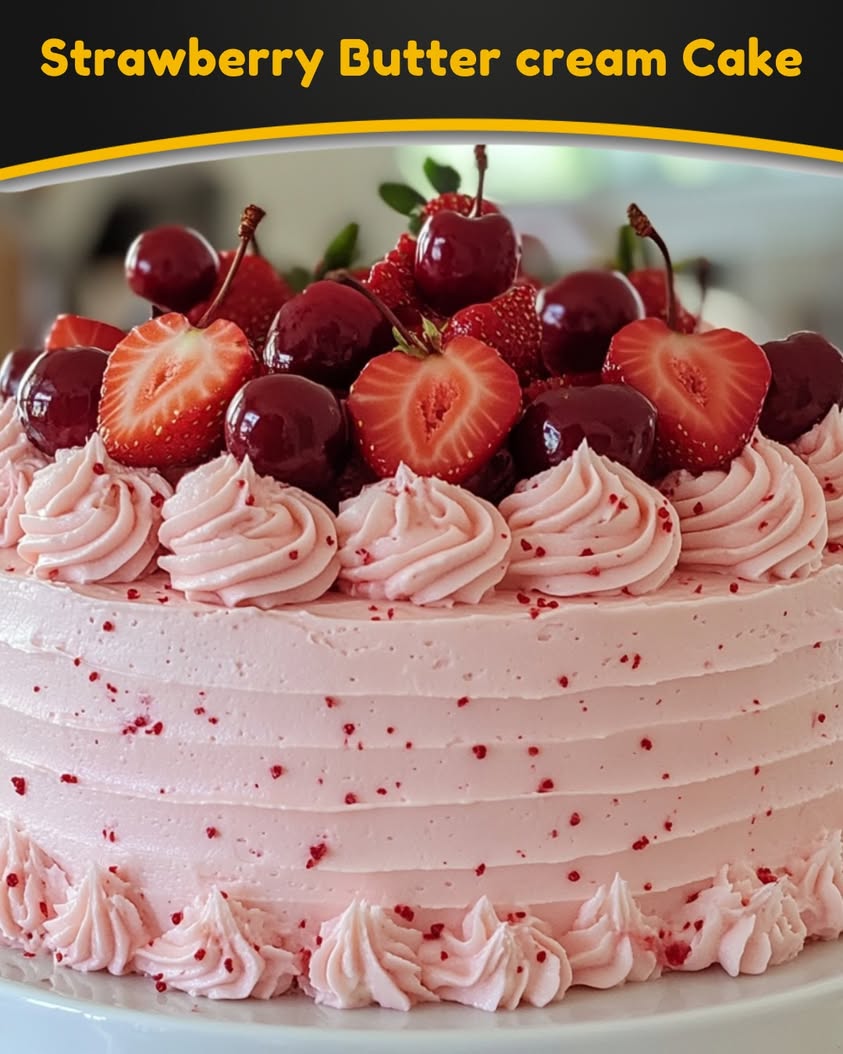
Strawberry Buttercream Cake: A Delightfully Sweet Treat

⚖️
Difficulty
Medium

⏲️
Prep Time
30 mins

🕒
Cook Time
30 mins

⏱️
Total Time
60 mins

🍽️
Servings
10

Looking for a dessert that seamlessly combines the sweetness of strawberries with the rich flavor of buttercream? Look no further than this Strawberry Buttercream Cake! This delightful cake layers fluffy vanilla sponge cake with a luscious strawberry buttercream, making it perfect for birthdays, anniversaries, or any celebration that calls for a special treat. Each bite is a heavenly experience – the creamy frosting perfectly complements the moist layers of cake, while fresh strawberries add a burst of flavor that makes this dessert unforgettable.

Let your taste buds dance with joy as you enjoy the perfect blend of textures and flavors. The lightness of the cake combined with the smooth, rich buttercream creates a delightful mouthfeel, making this Strawberry Buttercream Cake not just a dessert, but an indulgent experience. Whether you’re a seasoned baker or a novice in the kitchen, this recipe is designed to impress and satisfy anyone who takes a bite.

Quick Recipe Highlights

  • Flavor Profile: This cake features a harmonious sweetness from both the strawberries and the cake, complemented by a creamy, buttery richness from the buttercream.
  • Texture: The light sponge cake paired with fluffy buttercream creates a delightful contrast that melts in your mouth, enhancing the overall eating experience.
  • Aroma: The inviting aroma of freshly baked vanilla cake and strawberries wafts through the air, creating anticipation and excitement.
  • Visual Appeal: The vibrant pink hue of the buttercream and the fresh strawberries on top create a stunning centerpiece that grabs attention.
  • Skill Level Needed: While this cake has some complexities, it is approachable for anyone with basic baking skills.
  • Special Equipment: You’ll need a mixing bowl, electric mixer, cake pans, and pastry bags for decorating.

Recipe Overview

  • Difficulty Level: Medium – While the steps involve baking and frosting, they are manageable for any home baker willing to invest time and care.
  • Category: Dessert – This is a delicious cake suitable for a range of sweet occasions, whether served at a birthday party or as an afternoon treat.
  • Cuisine: American – This cake represents a classic American dessert, often featuring in celebrations and family gatherings.
  • Cost: Relatively low cost – With basic pantry staples and fresh strawberries, this dessert is both affordable and rewarding.
  • Season: Spring and Summer – Fresh strawberries peak during these seasons, making them ideal for this cake when they’re most flavorful.
  • Occasion: Perfect for birthdays, springtime picnics, or celebrating special moments with friends and family.

Why You’ll Love This Recipe

The Strawberry Buttercream Cake is a delightful treat that appeals to all ages. Its light, airy sponge cake pairs beautifully with the creamy buttercream, creating a perfect balance of flavors that makes each bite special. The sweetness of the strawberries is enhanced by the lush buttercream, making it irresistible.

This cake is also incredibly convenient to prepare. It doesn’t require any advanced baking techniques or specialized equipment, making it accessible to novice bakers. You can whip it up in a little over an hour and have a beautiful cake ready to impress your guests.

Additionally, strawberries provide not only sweetness but also nutritional benefits, contributing vitamins and antioxidants to your dessert. This means you can enjoy your cake guilt-free while treating yourself to a little bit of health.

The social aspect of serving this cake at gatherings is priceless. It brings people together, sparking joy and conversation. Everyone loves a slice of cake, and the strawberry flavor often evokes warm memories and happy moments.

Finally, the cost-effectiveness of this cake is a major plus. Using simple ingredients that you probably have at home, along with the affordability of strawberries during their peak season, makes this cake a delightful, budget-friendly dessert option.

Historical Background and Cultural Significance

The roots of the Strawberry Buttercream Cake can be traced back to American baking culture, where cakes have been an essential part of celebrations for generations. Cakes have been traditionally used in various ceremonies, marking milestones in life, and the Strawberry Buttercream variant stands out due to its delightful flavor profile and its use of fresh fruit.

Culturally, strawberries have held a symbolic meaning for many traditions, often representing abundance and warmth. Their bright color and sweet taste make them a favorite in dessert recipes, enhancing the celebratory feel of any event.

Over the years, recipes have evolved, incorporating different techniques and flavor combinations, but the essence of enjoying a beautifully layered cake remains. Many families have their unique takes on the Strawberry Buttercream Cake, often passed down through generations, preserving the family’s culinary legacy.

Regional variations of the Strawberry Buttercream Cake also exist. In some parts of the United States, bakers might substitute the strawberry buttercream with other fruit flavors depending on seasonal availability, making it a versatile recipe that adapts to local tastes and traditions.

Ingredient Deep Dive

1. Strawberries:
Strawberries are much loved for their sweet and tangy flavor. They are rich in vitamins, particularly vitamin C, which boosts the immune system. When selecting strawberries, look for firm, vibrant-colored berries with a fresh green cap. Store them in the fridge to prolong freshness, and use them within a few days for the best flavor. If fresh strawberries aren’t available, you can also use frozen strawberries; just ensure they are thawed and drained properly.

2. Butter:
Butter is a crucial ingredient that brings richness and flavor to the cake. It also adds moisture, creating a tender crumb. Always choose high-quality unsalted butter for baking as it allows you to control the saltiness of your recipe. Butter should be at room temperature for improved incorporation into the batter. For storage, keep butter in the fridge, and you can freeze it for up to six months. Substitutions include margarine or non-dairy butter for lactose-intolerant individuals.

3. All-Purpose Flour:
This staple ingredient is responsible for the cake’s structure. Choose a fine-milled flour for a lighter texture. Flour should be stored in an airtight container in a cool, dry place for freshness. If you require a gluten-free option, consider using almond flour or a gluten-free flour mix tailored for baking.

4. Eggs:
Eggs add richness and moisture to the cake, and they help in leavening as well. When selecting eggs, look for fresh eggs from reputable sources. They can be stored in the refrigerator and have a long shelf life. For egg substitutes, you can use flaxseed meal or commercial egg replacers for vegan options, though the texture might slightly change.

Common Mistakes to Avoid

  • Not measuring ingredients accurately can lead to a dense or dry cake. Use a digital scale or measuring cups for precision.
  • Overmixing the batter will incorporate too much air, resulting in a tough texture. Mix just until the ingredients are combined.
  • Baking at the wrong temperature can affect the rise and texture. Always preheat your oven before placing the cake inside.
  • Not allowing the cake layers to cool before frosting can result in melted buttercream and a mess.
  • Using cold ingredients can result in poor emulsification. Remember to let eggs and butter sit at room temperature.
  • Skipping the use of parchment paper may cause sticking. Line your pans for easy removal.
  • Using low-quality butter can alter the flavor. Invest in good quality for the best results.
  • Not leveling cake layers can lead to a lopsided cake. Use a serrated knife to ensure they are even.
  • Forgetting to wipe your mixing bowls clean after incorporating butter can lead to residual fat that alters the frosting texture.
  • Underestimating the importance of chilling the decorated cake can cause the buttercream to melt or smudge during transport.

Essential Techniques

1. **Creaming Butter and Sugar**: This technique is crucial for achieving a light, fluffy texture in your cake. By incorporating air into the butter, you create a structure that helps the cake rise. Master this by gradually adding sugar to room temperature butter and beating until pale and fluffy, about 3-5 minutes. A common pitfall is not creaming long enough; watch for the mixture to turn light and visibly increase in volume.

2. **Folding in Dry Ingredients**: When incorporating flour and other dry ingredients, it’s essential to fold gently to avoid deflating the batter. Use a spatula and a gentle up-and-over motion to combine without losing the volume. The aim is to maintain the air trapped during creaming, so be cautious of mixing too hard. Visual cues for success include a batter that’s just combined with some streaks of flour remaining – it will finish mixing in the oven.

3. **Whipping Egg Whites**: Whipping egg whites is key to adding volume and lightness to certain cake recipes. Ensure the bowl and beater are clean and dry, as any fat can prevent whites from whipping up properly. Beat until stiff peaks form; this means the whites stand tall rather than drooping. A common mistake is over-whipping, which can result in dry and grainy egg whites. Stop when they hold their shape perfectly.

4. **Making Buttercream**: A classic buttercream is created by beating room temperature butter until smooth and creamy before gradually adding powdered sugar. To avoid graininess, sift the sugar and add milk or cream to achieve the desired consistency. Common pitfalls include incorporating too much sugar too quickly or using cold butter, which won’t mix properly. The buttercream should be light and spreadable; if it looks too thick, add a splash of milk.

Pro Tips for Perfect Strawberry Buttercream Cake

1. Use fresh, in-season strawberries for the best flavor. They should be ripe and sweet, enhancing the overall taste of the cake.

2. Chill your frosting before applying it to the cake, as this helps to stabilize it and makes it easier to work with.

3. Level your cake layers using a serrated knife to ensure even frosting and stacking.

4. Experiment with different flavor extracts (like vanilla or almond) in your buttercream to elevate the overall flavor profile.

5. Allow the cake to sit for a few hours before serving. This lets the flavors meld beautifully while keeping it moist.

6. Decorate with extra strawberry slices and sprigs of mint for a beautiful presentation and added flavor.

7. Make sure your butter is at room temperature to achieve the best consistency for both the cake and frosting.

8. If you notice your cake doming upwards, gently press down while it cools to help maintain even layers.

Variations and Adaptations

You can add a twist to the basic Strawberry Buttercream Cake by experimenting with various flavors. For example, consider incorporating lemon zest in the batter for a refreshing citrus kick. Different berry combinations—like raspberries or blueberries—can also provide a delightful alternative to strawberries.

When it comes to seasonal adaptations, utilizing pumpkin puree in the winter can create a rich, spiced version of the cake. This makes it perfect for holiday gatherings. Dietary modifications, like using coconut cream in the buttercream, can cater to vegan needs without sacrificing flavor.

For a fun texture variation, consider adding crushed nuts, such as almonds or walnuts, to the batter for contrasting bites and added crunch. Presentation alternatives, such as making mini cakes or cupcakes, can provide a beautiful array of desserts suitable for a buffet or celebration.

Serving and Presentation Guide

When serving this Strawberry Buttercream Cake, consider adding a layer of sliced strawberries in between the cake layers for added flavor and visual appeal. A simple yet effective plating technique involves presenting each slice on a decorative plate alongside a dollop of whipped cream or a scoop of vanilla ice cream.

For garnish, consider sprinkling fresh mint leaves or edible flowers to enhance its aesthetics. If serving at an event, aim for a tiered display, showcasing the cake’s height and layered beauty. It’s also vital to consider serving temperatures; the cake is best enjoyed at room temperature, which enhances its flavor profile.

Portion control is important – cut even, manageable slices to ensure your guests enjoy the dessert without overwhelming portions. Consider providing cake forks for aesthetic appeal while enhancing the overall dessert experience.

Wine and Beverage Pairing

For the ultimate pairing experience, consider a glass of sparkling wine, such as Prosecco or Champagne. The effervescence cuts through the richness of the cake while complementing the sweetness of the strawberries beautifully.

If you’re looking for non-alcoholic alternatives, a refreshing lemonade or iced tea works well, providing a citrusy balance to the dessert. For a warm accompaniment, herbal teas like chamomile or mint can enhance the cake experience without overpowering it.

Temperature considerations are essential; serve the wine chilled and the cake at room temperature for the best flavor experience. This balance ensures a pleasant pairing that enhances both the cake and your beverage of choice.

Storage and Shelf Life

To ensure your Strawberry Buttercream Cake stays fresh, store it in an airtight container in the refrigerator. Properly stored, it can last up to three days, though it’s best enjoyed fresh. If it’s decorated with buttercream, expect a slight firming in texture as it cools.

If you wish to extend shelf life, you can freeze the cake. Wrap it tightly in plastic wrap and then in aluminum foil. This keeps the cake fresh for up to three months. To serve, allow it to thaw in the refrigerator overnight before letting it come to room temperature.

Signs of spoilage include discoloration or an off smell, signaling that it’s best to dispose of the cake. Reheating is not recommended for this dessert, as it can compromise both taste and texture.

Make Ahead Strategies

To streamline your baking process, consider preparing the cake layers and buttercream a day in advance. Bake the layers, allow them to cool, and wrap them tightly in plastic wrap. Store them in the fridge until you’re ready to frost them.

The buttercream can also be made ahead and stored in an airtight container. When it’s time to decorate, re-whip the buttercream for a few minutes to restore its fluffy texture. This allows you to assemble the cake quickly without compromising quality.

Fresh element additions, like strawberries, should be added just before serving. This ensures they maintain their freshness and visual appeal. If you’re assembling the cake in advance, consider placing parchment between the layers to prevent sticking and preserve appearance.

Scaling Instructions

When halving the Strawberry Buttercream Cake recipe, scale down the ingredients accordingly, and use smaller cake pans to ensure even baking. Baking times can slightly decrease, so monitor your cakes as they bake.

For doubling or tripling the recipe, use larger mixing bowls and pans to accommodate the additional batter. Adjust your baking times as needed; cakes may take longer to bake, so be sure to check with a toothpick for doneness.

Make sure to scale your frosting ingredients to maintain balanced ratios for the best flavor and texture. Consider the size of your equipment, as larger quantities may require multiple baking sessions, especially if using smaller pans.

Nutritional Deep Dive

In every slice of Strawberry Buttercream Cake, you’ll enjoy a delightful balance of macronutrients. The cake provides carbohydrates from the sugar and flour while fats come primarily from the butter, creating a rich, satisfying dessert.

Micronutritionally, strawberries add valuable vitamins such as vitamin C and potassium, complementing the cake’s overall nutrient profile. This fruit elevates the dessert’s health benefits compared to other sugary treats.

However, due to the sugars and fats involved, portion control is key for weight management. Enjoy a moderate slice to satisfy your sweet tooth without excessive indulgence. Offering a fruit-rich dessert like this aligns well with health-conscious choices, balancing treat with nutrition.

Dietary Adaptations

To adapt this Strawberry Buttercream Cake for gluten-free diets, consider using a gluten-free all-purpose flour blend. This allows individuals with gluten sensitivities to enjoy this delightful dessert without concern.

For dairy-free options, substitute butter with coconut oil or a plant-based butter alternative. Use non-dairy milk and dairy-free cream cheese for the buttercream to maintain rich flavors while accommodating dietary restrictions.

Vegan adaptations can easily replace eggs with flaxseed meal or chia seeds mixed in water. This results in a surprisingly similar texture and flavor, keeping the cake inclusive for all.

Low-carb and keto variations may use almond flour instead of regular flour, and sugar substitutes like erythritol or stevia can help reduce the overall carbohydrate content significantly.

Troubleshooting Guide

If you encounter texture issues like a dense cake, ensure that you’re measuring flour accurately and not overmixing the batter. A light and airy cake should be the ultimate goal.

Flavor balance problems can arise if you’re using low-quality ingredients. Always use fresh, high-quality butter and sugar to enhance the overall taste. Additionally, adding a pinch of salt can elevate sweetness.

Temperature problems often stem from an uncalibrated oven. Ensure your oven is properly preheated, and use an oven thermometer to confirm accurate baking temperatures. If the cake is browning too quickly, tent it with foil.

For equipment challenges, familiarize yourself with your mixer to understand its power. Know when it’s ready to whip and incorporate ingredients so you can achieve the right texture without mishaps.

If ingredient substitutions affect the outcome, keep a close eye on texture and taste. It’s essential to be adaptable and willing to adjust based on what you have available in your pantry.

Recipe Success Stories

Many bakers have shared their delightful experiences with the Strawberry Buttercream Cake, highlighting how well it turned out for various celebrations. This cake has proven to be a crowd-pleaser, with families serving it for birthdays, picnics, and holiday gatherings.

Readers often express their excitement when they adapt the recipe, noting how versatile it is for different fruit variations. Success stories from those who have made it gluten-free or dairy-free demonstrate the cake’s accessibility to everyone in their families.

Photography submissions show not only successful cake layers but also imaginative presentations, showcasing how creativity can elevate the standard cake recipe. Sharing these experiences strengthens the community around this beloved dessert.

Adaptation stories frequently inspire other readers, with new flavor combinations or ingredient swaps. These success stories often highlight the joy this simple recipe brings, encouraging even novice bakers to give it a try.

Frequently Asked Questions

1. Can I use frozen strawberries for the buttercream?
Yes, frozen strawberries can be used, but ensure they are fully thawed and drained to avoid excess moisture that can affect the consistency of the buttercream.

2. How should I store leftover cake?
Store leftover cake in an airtight container in the refrigerator for up to three days. It’s best served at room temperature.

3. Can I make this cake ahead of time?
Yes, the cake layers can be baked and wrapped in plastic wrap a day in advance. Prepare the buttercream the day of decorating for the best texture.

4. What can I use if I don’t have butter on hand?
You can substitute butter with coconut oil or margarine, maintaining similar ratios, though the flavor may vary slightly.

5. How do I achieve a fluffy buttercream?
Make sure your butter is room temperature before creaming, and gradually add powdered sugar. Whip for a few minutes until light and fluffy.

6. Is there a vegan alternative for this recipe?
Yes! Use plant-based butter and replace eggs with flaxseed meal mixed with water. You can also use almond or coconut milk in the batter.

7. Can I freeze the cake?
Yes! Wrap the cooled cake tightly in plastic wrap and aluminum foil, and freeze for up to three months.

8. How can I make the cake less sweet?
Try reducing the sugar in the cake and buttercream by a third or adding a pinch of salt to balance the flavors.

9. What flavor variations can I try?
You can experiment with other fruit flavors, like raspberry or lemon, by substituting berries or adding citrus zest.

10. Can I make mini versions of this cake?
Absolutely! Use smaller cake pans to create individual servings, adjusting the baking time appropriately.

Additional Resources

To further enhance your baking skills, explore related recipes that pair beautifully with your Strawberry Buttercream Cake, such as lemon curd tarts or refreshing fruit salads. Technique guides on mastering cake decoration can also serve you well as you wow your guests with your presentation skills.

Learn more about your ingredients, their origins, and uses in baking. Familiarize yourself with recommendations for cake pans and mixers that elevate the baking experience, ensuring your success each time.

Additionally, consider exploring seasonal variations that incorporate fresh produce as they become available, allowing your recipes to change with the seasons while maintaining a delicious flavor.

Join the Conversation

We invite you to share your Strawberry Buttercream Cake experiences on social media! Snap a photo of your beautiful creation and use the hashtag #StrawberryButtercreamCake. Engage with our community by sharing tips, tricks, and modifications that you’ve enjoyed.

Posting recipe reviews and feedback not only helps improve the recipe but also inspires others to try their hand at it. Let’s build a community where food lovers can suggest ideas and share their success stories, creating a network of culinary creativity focused on delicious desserts.

The Recipe

Strawberry Buttercream Cake

Serves: 10

Prep Time: 30 mins

Cook Time: 30 mins

Total Time: 60 mins

Kitchen Equipment Needed

  • Mixing bowl
  • Electric mixer
  • Cake pans
  • Pastry bags for decorating
  • Serrated knife for leveling

Ingredients

  • 2 cups all-purpose flour
  • 1 ½ cups granulated sugar
  • ½ cup unsalted butter, softened
  • 3 large eggs
  • 1 cup whole milk
  • 2 tsp baking powder
  • ½ tsp salt
  • 1 tsp vanilla extract
  • 1 cup strawberries, pureed for buttercream
  • 1 cup unsalted butter, softened for frosting
  • 4 cups powdered sugar

Directions

  1. Preheat oven to 350°F (175°C). Grease and flour two 9-inch round cake pans.
  2. In a mixing bowl, cream together the butter and granulated sugar until light and fluffy.
  3. Add the eggs one at a time, mixing well after each addition. Stir in vanilla extract.
  4. In another bowl, combine flour, baking powder, and salt. Gradually add to the butter mixture, alternating with milk until well combined.
  5. Pour the batter evenly into the prepared pans and bake for 30 minutes, or until a toothpick comes out clean.
  6. Allow cakes to cool in pans for 10 minutes before transferring to a wire rack to cool completely.
  7. While the cakes cool, prepare the buttercream by creaming the softened butter, then gradually adding the powdered sugar and the strawberry puree until smooth and fluffy.
  8. Once cooled, level the cake layers if needed, and place one layer on a serving plate. Spread a layer of strawberry buttercream over it.
  9. Top with the second layer and frost the top and sides of the cake with remaining buttercream.
  10. Decorate with fresh strawberries on top, and chill the cake before serving.

Recipe Notes

  • For added flavor, consider incorporating lemon zest into the batter.
  • Optional: Add food coloring to the buttercream for a vibrant look.
  • Store any leftover cake in an airtight container in the refrigerator.

Best Maple Bacon Waffle Burger Recipe for Breakfast Lovers

Maple Bacon Waffle Burger: A Sweet and Savory Delight

⚖️
Difficulty
Medium

⏲️
Prep Time
20 mins

🕒
Cook Time
15 mins

⏱️
Total Time
35 mins

🍽️
Servings
4

The Maple Bacon Waffle Burger is a delightful fusion that elevates your burger experience. Imagine crispy, salty bacon paired with a fluffy maple syrup-infused waffle, creating a sweet and savory combination that dances delightfully on your palate. The warmth of the maple syrup’s sweetness complements the richness of the ground beef patty, while the crispy bacon adds a satisfying crunch. This recipe is not just a meal, but a celebration of flavor and indulgence, making it perfect for brunch or dinner gatherings.

Get ready to impress your family and friends with this unique culinary creation. The process may involve a few steps, but the rewarding outcome will be worth every moment spent in the kitchen. Bite into layers of flavor and texture—soft waffle, juicy burger, crisp bacon, and a hint of maple melting into every savory bite. This dish goes beyond typical burgers and leaves you craving more!

Quick Recipe Highlights

  • Flavor Profile: This dish features a heavenly mix of sweet maple syrup, salty bacon, and savory beef, resulting in an explosion of taste that tantalizes the taste buds.
  • Texture: The contrast between the fluffy waffle, crispy bacon, and juicy burger creates a wonderful mouthfeel that is irresistibly satisfying.
  • Aroma: The aroma of sizzling bacon and fresh waffles fills the air, inviting everyone to the table to experience its mouth-watering allure.
  • Visual Appeal: Beautifully presented, the golden brown waffles and darkened, grilled patty topped with perfectly crispy bacon make this dish a feast for the eyes.
  • Skill Level Needed: This recipe requires basic cooking skills, making it accessible for novice cooks looking to create something impressive.
  • Special Equipment: A waffle maker is essential for this recipe, along with a grill or frying pan for cooking the burger.

Recipe Overview

  • Difficulty Level: The Maple Bacon Waffle Burger is classified as medium difficulty due to the coordination of multiple components, including cooking the patties and waffles simultaneously.
  • Category: Primarily served as a brunch item, this dish can easily transition into a hearty dinner option that will impress any guest.
  • Cuisine: Rooted in American comfort food traditions, this burger showcases the creativity of combining breakfast and traditional burger elements into a delightful twist.
  • Cost: The estimated cost for making this recipe is relatively budget-friendly, particularly as the main ingredients can be sourced affordably in most grocery stores.
  • Season: Ideal for any season but particularly enjoyed during late spring and summer when outdoor grilling is appealing and picnic gatherings are abundant.
  • Occasion: Perfect for weekend brunches, family gatherings, or a casual cookout with friends, making any occasion festive and delicious.

Why You’ll Love This Recipe

The Maple Bacon Waffle Burger is beloved for its robust taste and delightful textures. Combining sweet and savory gives it an edge over traditional burgers. Each bite provides satisfaction that mainstream burgers often lack. It serves as a comfort food for many, transcending regular meal boundaries.

Convenience is another reason this recipe shines. With simple ingredients and straightforward instructions, you can whip this gourmet burger up in under 40 minutes. You’ll enjoy a delicious homemade bite that is perfect for last-minute entertaining or family breakfasts.

The nutritional aspect cannot be overlooked, either. This recipe incorporates protein from the burger and bacon, providing necessary sustenance, while the waffles can be made using whole grain options for added fiber.

Socially, it appeals to a range of tastes, making it an excellent centerpiece for any gathering. Sharing this unique dish will spark conversation and delight your guests, ensuring everyone leaves satisfied and raving.

Finally, it is cost-effective. Using common ingredients that can often be found in your fridge or pantry means little fuss and maximum flavor, allowing you to serve a gourmet experience without breaking the bank.

Historical Background and Cultural Significance

Originating in the US, the concept of the burger has evolved drastically since its inception in the 19th century. The combination of waffles and burgers specifically is a delightful contemporary twist reflecting modern culinary creativity.

Within American culture, burgers represent comfort food. By merging this beloved dish with breakfast elements, such as waffles and bacon, it recognizes the role of brunch in socializing and community, bridging casual meals with more celebratory dining.

This recipe showcases how American cuisine continues to evolve, creating novel dishes that reflect current food trends focused on fusion and unique pairings.

Waffle burgers have seen a rise in popularity within food trucks and street styles, showcasing local variations that contribute to culinary exploration and the revival of classic flavors with innovative approaches.

Ingredient Deep Dive

Bacon: Bacon holds a significant place in culinary history, particularly within American and European cuisines. It’s revered for its flavor and crispy texture, used in various dishes from breakfast delights to salads. Nutritionally, it provides protein and fats, and can be stored in the refrigerator for several weeks. For those looking to make substitutions, turkey bacon is a popular alternative with lower fat content.

Burger Patty: The classic beef patty serves as the heart of this recipe. Ground beef’s history in cooking stretches back centuries, celebrating its high-protein content. When selecting, choose high-quality, lean cuts for better flavor and health benefits. Alternatives like ground turkey or plant-based patties can easily replace beef for dietary needs.

Waffle Batter: Made from simple ingredients, waffle batter is a staple for breakfast. Its cultural significance relates to the ease of preparation and versatility in sweet or savory dishes. Nutritionally, opt for whole grain flours for added fiber. Storing unused batter is easy; just keep it refrigerated and use within a few days. You can also make gluten-free versions using almond or coconut flour.

Common Mistakes to Avoid

  • Using thick bacon: Avoid using very thick bacon, as it may not crisp up properly when cooked alongside the waffles.
  • Overcooking the burger: Cooking the burger too long can lead to a dry texture, so aim for medium doneness for optimum juiciness.
  • Waffle batter too thick: A batter that’s too thick may result in dense, chewy waffles. Ensure it’s pourable for the best outcome.
  • Not preheating the waffle maker: Always preheat your waffle iron to achieve a crispy outer layer on the waffles.
  • Skipping seasoning: Failing to season your burger patties will lead to bland taste; always incorporate salt and pepper into the meat mixture.
  • Assembling too early: Wait until the waffles and burgers have cooled slightly before stacking to avoid sogginess from steam.
  • Using incorrect oil: Using an oil with a low smoking point may lead to burnt flavors; opt for canola or vegetable oil for frying.
  • Not letting the waffle iron rest: Avoid opening the waffle maker too soon; allow it to cook the waffles fully for an optimal texture.
  • Overloading with toppings: While toppings are great, too many can make the burger unwieldy and difficult to eat.
  • Lack of diversity in the seasonings: Using varied spices will enhance the overall flavor profile significantly.

Essential Techniques

To master the art of cooking bacon, start with a cold skillet; this allows it to render the fat gradually while achieving perfect crispness. Watch for a golden brown color and avoid high heat.

For the burger patties, ensure that you handle the meat minimally when forming the patties; overworking the mixture can lead to tough burgers. Cooking the patties should be done on medium-high heat, allowing for a good sear while maintaining moisture inside.

When preparing the waffle batter, it’s essential to fold it gently. This technique helps to incorporate air, resulting in fluffy waffles. A good indicator of doneness is a crisp outer layer and an effortless release from the waffle iron.

Pro Tips for Perfect Maple Bacon Waffle Burger

Ensure your waffle iron is well-greased to prevent sticking and allow for easy removal of waffles.

Cook bacon until crispy but not burnt as the flavors will enhance your burger immensely.

Consider smoking the burger patties to add an additional layer of depth to your dish.

Use fresh herbs such as thyme or parsley sprinkled on top for a touch of freshness.

Opt for maple syrup with a rich flavor to elevate the overall taste experience.

Let the burgers rest a few minutes after cooking to retain juiciness when you cut into them.

For a gourmet feel, serve with a side of arugula and pickled red onions for balance.

Variations and Adaptations

Regional variations can feature local cheeses, like pepper jack or gouda, melted over the burgers before serving. Seasonal adaptations might include adding ripe summer tomatoes or avocados for a fresh twist in the warmer months.

For dietary modifications, you may substitute with plant-based patties for a vegan option. Gluten-free waffles can be made with almond flour for those avoiding gluten.

Flavors can be adapted by mixing different syrups like blueberry or agave alongside the maple, offering complexity while keeping it sweet.

Texture variations can include using crispy fried onions as an additional topping for crunch or avocados for creaminess.

Serving this dish on a bed of greens instead of traditional buns can switch up the presentation entirely, catering to a more health-conscious crowd.

Serving and Presentation Guide

For plating, stack the burger high on the waffle and drizzle with syrup to create an enticing look. Use a toothpick to hold the burger together and add decorative herbs as garnishing.

Consider traditional accompaniments like fried eggs on top, adding visual appeal and additional flavor layers.

Temperature considerations are vital; ensure that the burger is warm, and the waffles are freshly made, providing an inviting experience.

Portion control is simple, considering keeping the burger’s size manageable for guests to enjoy without overwhelming bites.

Wine and Beverage Pairing

For wine pairings, go for a medium-bodied Chardonnay that complements the richness of the burger and sweetness of the waffles beautifully.

Non-alcoholic alternatives could include sparkling apple cider that harmonizes with the maple syrup flavors without overpowering the dish.

If coffee or tea is more your style, a light roast coffee can enhance the flavors of the sweet and savory burger in a remarkable way.

Storage and Shelf Life

Store leftover waffles and burger patties separately in airtight containers in the fridge for up to three days. Reheat in an oven or air fryer for optimal texture preservation.

Avoid keeping assembled burgers for longer periods as they will become soggy; instead, freeze cooked components separately for up to three months.

Signs of spoilage include an off smell from the burger patties or mold on the waffles; always check for freshness before consumption.

Make Ahead Strategies

You can prepare waffle batter a day in advance; simply refrigerate it until ready to use. This way, you’ll facilitate a faster cooking process during your meal preparation.

Cooked bacon and burger patties can be stored in the fridge, ready to be reheated just before assembly for a quick meal.

With assembly tips, keep waffles crisp by stacking burgers and toppings just before serving. Fresh ingredients can be added at this time for preservation of quality.

Scaling Instructions

To halve the recipe, simply divide all ingredients in half, making it manageable for smaller groups or individuals.

Doubling or tripling will require extra waffle makers or cooking in batches to maintain quality; adjust timing slightly as needed.

When scaling, always consider storage; consistent rotation and ensuring the freshest ingredients lead to better overall taste.

Nutritional Deep Dive

This recipe offers a balanced macro breakdown, featuring protein from the beef patties and bacon, carbs from the waffles, and fats from cooking oils.

Micronutrient-wise, bacon provides essential nutrients like B vitamins, while using whole-grain flour in waffles increases fiber intake.

For dietary considerations, those with dietary restrictions can adjust the ingredients to suit their preferences without losing the essence of the dish.

Dietary Adaptations

For gluten-free diners, substitute traditional breading and flour options with rice flour or gluten-free mixes suitable for waffles.

Dairy-free versions can be achieved by replacing butter with coconut oil or non-dairy butter substitutes, allowing everyone to enjoy flavor-rich waffles.

Vegan adaptations can simplify the recipe by using vegan patties made from beans or lentils, providing protein while avoiding animal products.

Troubleshooting Guide

Texture issues often stem from overcooking; ensure a reasonable cooking time for patty tenderness while keeping waffles fluffy.

For flavor balance, under-seasoned burger patties can be corrected by adding more seasoning during the formation step.

If cooking temperatures are inconsistent, investing in a good meat thermometer helps achieve the desired doneness every time.

Recipe Success Stories

Feedback from the community highlights the versatility of this recipe, with many sharing personal variations and creative adaptations for different taste preferences.

Readers often report less than typical flavor expectations, finding new favorite twists on the classic burger and waffle combination.

Photography tips suggest capturing the dish as it is assembled for an inviting, social-media-worthy presentation, showcasing that it is not only delicious but very Instagrammable!

Frequently Asked Questions

Q1: Can I use frozen waffles for this recipe?

A1: Yes, frozen waffles can work; however, homemade waffles tend to add a fresher flavor and texture that enhances the overall experience.

Q2: Can the Waffle Burger be made ahead of time?

A2: Components can be prepped ahead; store everything in the refrigerator and assemble shortly before serving to maintain freshness.

Q3: How do I prevent waffles from sticking to the waffle iron?

A3: Always ensure your waffle iron is preheated and well-greased to prevent sticking and make removal easier.

Q4: What’s the best way to reheat leftover burgers?

A4: Reheat in an oven or air fryer to retain crispness rather than using a microwave, which can create a soggy texture.

Q5: How can I add more flavors to the burger?

A5: Try adding cheese, sautéed onions, or mushrooms, or use infused oils or seasonings to elevate the overall taste.

Q6: What type of bacon works best?

A6: Thick-cut bacon is preferred for its ability to crisp up nicely without becoming overly greasy when cooked.

Q7: Is this recipe suitable for meal prepping?

A7: Yes, you can meal prep the components separately for easy assembly throughout the week, just ensure to store correctly.

Q8: Can I use different meats for the patty?

A8: Absolutely! Ground turkey, chicken, or even plant-based substitutes like lentils work nicely for variety.

Q9: What is the best way to serve these burgers?

A9: Serve immediately post-assembly drizzled with maple syrup, along with fresh greens or seasonal sides for added balance.

Q10: How can I make a healthier version of the Waffle Burger?

A10: Substitute leaner meat, use whole grain waffles, and offer toppings like avocado and greens instead of heavier sauces for a nutritious twist.

Additional Resources

To explore similar recipes, consider trying out egg and cheese sandwiches or gourmet pancake stacks for delightful breakfast experiences.

For cooking techniques, check out guides on perfecting your waffle-making skills or grilling burgers perfectly every time.

If you’re interested in ingredient information, consider researching the benefits and uses of alternative flours or meats.

Join the Conversation

Share your experiences making the Maple Bacon Waffle Burger over social media, engaging with our community for additional tips and variations.

Invite your followers to share their unique twists on the recipe or how they enjoyed the burger at gatherings, enhancing the recipe’s charm.

Take part in food photography tips to present not just this dish, but every homemade creation beautifully on your platforms to inspire others.

The Recipe

Maple Bacon Waffle Burger

Serves: 4

Prep Time: 20 mins

Cook Time: 15 mins

Total Time: 35 mins

Kitchen Equipment Needed

  • Waffle maker
  • Skillet or grill
  • Mixing bowl
  • Measuring cups and spoons
  • Spatula

Ingredients

  • 1 lb ground beef
  • 8 slices thick-cut bacon
  • 2 cups all-purpose flour
  • 2 tablespoons sugar
  • 1 tablespoon baking powder
  • 1/2 teaspoon salt
  • 2 large eggs
  • 1 3/4 cups milk
  • 1/4 cup melted butter
  • 1/2 cup maple syrup (plus more for serving)

Directions

  1. Begin by cooking the bacon in a skillet until crispy. Drain on paper towels and set aside.
  2. In a large bowl, mix together the flour, sugar, baking powder, and salt for the waffle batter.
  3. In a separate bowl, whisk together eggs, milk, melted butter, and maple syrup. Combine with the dry ingredients until just mixed; do not overmix.
  4. Heat the waffle maker, and cook waffles according to the manufacturer’s instructions.
  5. While the waffles are cooking, form the ground beef into patties and season with salt and pepper. Cook in a skillet or grill until desired doneness.
  6. Once waffles and patties are cooked, assemble your burger by placing a patty on a waffle, top with crispy bacon and additional maple syrup, another waffle on top, and serve immediately.

Recipe Notes

  • Feel free to experiment with different toppings like sliced avocados or fried eggs.
  • If you prefer a spicier flavor, add jalapeños or pepper jack cheese to the burger.
  • These burgers can also be made using alternative flours for a gluten-free option.

Indulge in Decadent Peanut Butter Cup Gooey Cookie Bars

Delicious Peanut Butter Cup Gooey Cookie Bars: A Sweet Indulgence

⚖️
Difficulty
Easy

⏲️
Prep Time
15 mins

🕒
Cook Time
25 mins

⏱️
Total Time
40 mins

🍽️
Servings
12 bars

Peanut Butter Cup Gooey Cookie Bars are the ultimate treat for any dessert lover. With a rich peanut butter flavor complemented by chocolate, these bars are decadent yet easy to make. The combination of buttery cookie dough mixed with creamy peanut butter and melted chocolate creates an indulgent experience that tantalizes the taste buds. Each bite delivers a sensation of warmth and comfort, making these cookie bars perfect for sharing with friends, family, or enjoying as a late-night snack.

The process of making these gooey cookie bars is as enjoyable as devouring them. The aroma fills your kitchen with sweet, nutty notes while the chocolate and peanut butter melt together to form a delightful filling. These bars not only satisfy your sweet cravings but also evoke nostalgia, reminiscent of childhood treats. Their visually appealing layers, with a golden brown top and gooey chocolate center, make them a standout dessert for gatherings or quiet evenings at home.

Quick Recipe Highlights

  • Flavor Profile: The rich peanut butter flavor combined with sweet chocolate creates a perfect balance of savory and sweet.
  • Texture: These bars deliver a gooey center encased in a perfectly baked cookie layer, offering a delightful contrast between the chewy cookies and creamy filling.
  • Aroma: The warm, inviting scent of melting chocolate and roasted peanuts adds to the overall indulgence of the recipe.
  • Visual Appeal: Golden-brown layers over a luscious, gooey chocolate center make for an irresistible dessert showcase.
  • Skill Level Needed: This recipe is simple, perfect for novice bakers looking to impress with minimal effort.
  • Special Equipment: All you need is a mixing bowl, a baking pan, and a reliable oven to create this mouthwatering treat.

Recipe Overview

  • Difficulty Level: This recipe is categorized as easy due to its straightforward steps and minimal ingredients, making it accessible for all skill levels.
  • Category: Dessert bars – a popular option for potlucks, parties, or simply as a satisfying treat at dinner.
  • Cuisine: Primarily influenced by American baking traditions, this recipe combines classic flavors that resonate with many dessert lovers.
  • Cost: The ingredients are affordable, typically costing around $10-15, depending on brand choices and sales.
  • Season: These cookie bars are ideal for all seasons, particularly in the fall and winter when comfort food is especially valued.
  • Occasion: Perfect for birthdays, holiday gatherings, or casual get-togethers with friends.

Why You’ll Love This Recipe

With each bite of Peanut Butter Cup Gooey Cookie Bars, expect a perfect balance of sweetness and saltiness. The richness of peanut butter combined with chocolate makes for a heavenly experience, bringing satisfaction that lingers. The texture contrast between the crunchy cookie layer and the gooey filling excites your palate.

Convenience is another highlight. This recipe allows for quick preparation and baking, providing a delightful dessert in just about 40 minutes. It calls for common ingredients found in most kitchens, eliminating the need for a special shopping trip. Families can easily make these together, enjoying the baking process and bonding over sweet treats.

Nutritionally, while indulgent, peanut butter offers protein and healthy fats, making these cookie bars slightly more substantial than average desserts. This unique twist makes you feel good sharing them as treats for kids and adults alike. Plus, these bars can satisfy your sweet tooth without being overly rich, keeping you coming back for more.

Socially, these bars serve as conversation starters when shared at gatherings. Friends will marvel at your baking skills when you present this deliciously baked dessert, inviting them to share their own fond reminiscences of peanut butter treats from their childhood. The joy of sharing something homemade adds to their allure.

Cost-effectiveness can’t be overlooked. Given their affordability and the yield of a dozen bars, you’ll find them to provide excellent value. With minimal effort and expense, you can provide satisfaction to a crowd, making them an ideal option for any casual event or family function.

Historical Background and Cultural Significance

Peanut butter has a rich history in American cuisine dating back to the late 19th century when it was first patented in the United States. Initially popularized as a health food, peanut butter soon found its place in countless desserts, including cookies and bars. The combination of chocolate and peanut butter emerged as a classic duo, favored by many dessert enthusiasts.

The cultural importance of peanut butter extends beyond its flavor; it represents comfort and nostalgia for many. In numerous households, treats made with it are a staple at holiday gatherings and kids’ birthday parties, capturing the essence of family togetherness. Every generation has its variations, from traditional peanut butter cookies to innovative bars like these.

Over the years, the recipe for Peanut Butter Cup Gooey Cookie Bars has evolved, incorporating various ingredients and methods. Today, you can find a multitude of adaptations, ranging from gluten-free to no-bake versions, appealing to different dietary preferences and lifestyles while retaining the core identity of this beloved treat.

Regional variations are also noteworthy, with some areas adding local flavors like maple syrup or using different nut butters. Each variation brings a unique twist to this classic, demonstrating the versatility and adaptability of the recipe across cultures and personal tastes.

Ingredient Deep Dive

  • Peanut Butter: A staple in many households, this ingredient is not only delicious but also provides a good source of protein and healthy fats. Opt for creamy or chunky depending on your texture preference. When selecting peanut butter, look for natural options without added sugars or hydrogenated oils for the healthiest choice. For storage, keep it in a cool, dry place, and it can be refrigerated for an extended shelf life. Alternatives like almond butter can work well too.
  • Chocolate Chips: The primary source of sweetness and richness, chocolate chips are widely loved for their convenience. Semi-sweet chips provide the perfect balance of sweetness for these bars, although you can explore dark chocolate versions for a richer taste. Be mindful of storage, as they should be kept in a cool and dry location. For those looking to cut down on sugar, using sugar-free or dark chocolate chips can be a solid substitution.
  • Flour: Essential for structure, flour acts as the backbone of the cookie dough. All-purpose flour is typically used, but whole wheat flour can add nutritional value if desired. When purchasing flour, look for brands that indicate freshness, and store in airtight containers to prevent rancidity. For gluten-free adaptations, consider almond or oat flour as great substitutes that provide unique flavors and textures.
  • Sugar: This sweetener not only adds flavor but also contributes to the overall texture of the bars. A mixture of granulated and brown sugar often enhances flavor profiles. When choosing sugar, opt for organic versions if possible, as they are less processed. Properly store sugar in an airtight container to keep it moisture-free. For healthier alternatives, look into coconut sugar or maple syrup as substitutes that add distinct flavors.

Common Mistakes to Avoid

  • Overmixing the Dough: When combining ingredients, overmixing can lead to tough bars instead of tender cookie layers. Mix just until combined for the best texture.
  • Not Measuring Ingredients Carefully: Baking requires precision, so use proper measuring techniques to ensure accurate ingredient ratios. Use a kitchen scale for the best accuracy.
  • Using Cold Ingredients: For optimal blending, ensure ingredients, especially butter and eggs, are at room temperature. This allows for smoother mixing and better texture.
  • Skipping Parchment Paper: Lining your baking pan with parchment ensures easy removal and prevents sticking, which is essential for maintaining the bar’s shape.
  • Underbaking: To achieve that gooey center, underbake slightly. Trust the cooling process, as the bars will continue to firm up outside the oven.
  • Incorrect Oven Temperature: Every oven is different; using an oven thermometer can help ensure accurate baking temperatures, leading to perfect results.
  • Storing Improperly: Failing to store leftovers correctly can lead to dry or stale bars. Always cover tightly and store in a cool place.
  • Ignoring Flavor Additions: Spice up the recipe by adding spices like cinnamon or a pinch of salt to enhance the flavors further. Don’t hesitate to customize!
  • Rushing to Cut: Allow the bars to cool completely before cutting. This step is crucial for achieving clean edges and the right consistency.

Essential Techniques

Baking requires specific techniques for success. One essential method is creaming butter and sugar, where you combine softened butter with sugar until light and fluffy. This step incorporates air, leading to a lighter texture in your bars. To master creaming, use a stand mixer or hand mixer on medium speed, avoiding overmixing for optimal results. Look for a pale color and fluffy consistency to indicate success.

Another technique is measuring dry ingredients accurately. Proper measurement is vital for achieving the desired baking chemistry. Use proper measuring cups for dry ingredients, leveling off with a knife for accuracy. Common pitfalls include scooping flour directly from the bag, which can lead to packing and excess usage; instead, spoon flour into your measuring cup for an accurate measurement.

Pro Tips for Perfect Peanut Butter Cup Gooey Cookie Bars

1. For a more intense chocolate flavor, consider swirling melted chocolate into the cookie dough before baking, creating a marbled effect.
2. Use a blend of milk chocolate and dark chocolate chips for depth and richness, adding complexity to each bite.
3. Experiment with different peanut butter: try honey-roasted or flavored varieties for added sweetness and uniqueness.
4. Allow the bars to cool in the pan for easier lifting out; using parchment paper helps tremendously.
5. Store any leftovers in an airtight container at room temperature for up to five days, maintaining freshness.
6. These bars freeze beautifully; wrap individually and store in a freezer bag for up to 3 months for a quick treat anytime.
7. Enhance presentation by drizzling melted chocolate over the top before slicing for an elegant finish.
8. Sprinkle a bit of flaky sea salt on top after baking for a delightful contrast to the sweetness.

Variations and Adaptations

Peanut Butter Cup Gooey Cookie Bars can be easily adapted to suit various tastes. For a regional twist, add crushed pretzels for a salty-sweet combination or incorporate your favorite candy bars into the chocolate filling. Seasonal adaptations could include adding pumpkin spice in the fall or peppermint extract during the winter holidays to give a festive flair.

Dietary modifications can include using natural peanut butter and organic sweeteners for a healthier option, and gluten-free flour as an alternative for a gluten-sensitive audience. Additionally, flavor variations like adding finely chopped nuts can enhance texture, while chocolate syrups or caramel can be drizzled for extra indulgence.

For those focusing on a lighter dessert, consider reducing the sugar in the recipe or using apple sauce as a substitute for some of the fat. Presentation alternatives might involve cutting the bars into fun shapes or serving them in decorative cases for parties, allowing for creativity in how you share these delightful treats.

Serving and Presentation Guide

Presenting Peanut Butter Cup Gooey Cookie Bars can elevate your dessert table. Start with a clean cutting board or cake stand; removing bars with a sharp knife after cooling ensures clean edges. Consider plating the bars in a staggered layout to capture attention or place them in cute dessert cups for individual servings.

For garnishing ideas, drizzle melted chocolate over the sliced bars and top with crushed nuts or a sprinkle of sea salt for visual impact. Traditional accompaniments like vanilla ice cream or whipped cream can enhance the experience while modern serving suggestions could include a dusting of cocoa powder for elegance.

Temperature is also crucial, as these bars taste divine when slightly warm, and the chocolate filling remains gooey. Portion control may be achieved by cutting smaller squares and serving them on shared platters, allowing guests to savor more without overindulging.

Wine and Beverage Pairing

When pairing with wine, consider a dessert wine like late harvest Riesling or a chocolate port, both of which complement the sweet richness of the bars. These drinks can enhance the chocolate and peanut butter flavors, creating a well-rounded dessert experience.

For non-alcoholic options, a cold glass of milk is always a classic choice, but you might also explore a rich hot chocolate or a creamy vanilla latte, both of which pair beautifully with the cookie bars. If serving coffee, opt for a dark roast to contrast with the sugariness of the dessert, or even an espresso that pairs wonderfully with sweet treats.

Storage and Shelf Life

Proper storage is key for keeping Peanut Butter Cup Gooey Cookie Bars fresh. Store the bars in an airtight container at room temperature for up to five days. If you’ve made a larger batch or want to save some for later, consider refrigerating them, where they’ll last for about a week.

For longer storage, these bars freeze exceptionally well. Wrap each one individually in plastic wrap or foil before placing them in an airtight container or freezer-safe bag. They can remain frozen for up to three months. When ready to enjoy, thaw at room temperature or heat them briefly in the microwave for a warm dessert experience.

Be sure to keep an eye out for signs of spoilage, such as off-putting smells or changes in texture. If you notice any dryness or hardening, they may not be as enjoyable but often can be revived with a quick microwave burst.

Make Ahead Strategies

Make-ahead strategies for Peanut Butter Cup Gooey Cookie Bars are simple and convenient. Prepare the dough a day in advance and keep it in the refrigerator, allowing flavors to meld and providing fresher-tasting bars when baked. If you prefer, assemble the bars ahead of time and store them in the fridge until you’re ready to bake.

For best results, make sure to portion the dough into the baking pan quickly to avoid any drying on the edges. When you’re ready to bake, simply follow the same instructions while keeping an eye on baking time, as chilled dough may require a minute or two longer due to its temperature.

Quality impact assessment is essential, as having the dough sit overnight enhances the final texture and flavor depth significantly. Also, when freezing the completed bars, place them in an airtight container after they’ve cooled completely to maintain moisture.

Scaling Instructions

Scaling up or down is easily managed with this recipe. To halve the recipe, simply use half the ingredients and bake in a smaller pan. Adjust cooking time accordingly, keeping a close eye on doneness.

If doubling or tripling, be mindful of your mixing bowl’s capacity and consider baking in batches or using multiple pans. When working with larger volumes, timing might need adjustment; check for doneness a few minutes earlier to avoid overbaking.

Store any extra bars by ensuring they’re fully cooled, then wrapping individually or in a single container to prevent them from sticking together. Freezing portions for later enjoyment can help with managing quantity, allowing you to enjoy a fresh treat whenever the craving strikes.

Nutritional Deep Dive

Understanding the macro breakdown of Peanut Butter Cup Gooey Cookie Bars reveals a satisfying vegetable balance between carbohydrates, fats, and proteins. Each bar typically contains a good amount of calories, mostly stemming from the peanut butter and chocolate.

Micronutrient analysis shows these bars provide essential nutrients such as potassium and magnesium from the peanut butter, along with small amounts of iron from whole wheat flour if used. These nutrients contribute to overall health, making the bars a more wholesome dessert option compared to many store-bought alternatives.

When considering health benefits, the inclusion of peanut butter delivers heart-healthy fats and protein, which can aid in satiety, helping to prevent excessive consumption. However, portion analysis remains key, with moderation advised to maintain a balanced diet.

Weight management tips include enjoying these bars as an occasional treat while pairing them with an active lifestyle to balance calorie intake. Sharing these bars can also aid in portion control, making them a perfect addition to social gatherings.

Dietary Adaptations

For gluten-free versions of Peanut Butter Cup Gooey Cookie Bars, substitute all-purpose flour with almond or coconut flour. These alternatives provide different textures while retaining flavor, making them accessible for gluten-sensitive diets.

For dairy-free options, utilize dairy-free chocolate chips and a plant-based spread instead of butter. This modification keeps the flavor profile appealing while catering to vegan preferences, ensuring everyone can partake in this delicious treat.

Low-carb eaters can explore using almond flour instead and sugar alternatives like erythritol to reduce carbohydrates without sacrificing flavor. This adaptation creates a dessert that’s lighter on the glycemic index while still being truly satisfying.

Keto and paleo versions focus on natural sweeteners and nut-based flours to maintain the dieters’ requirements. Each adaptation stays true to the essence of the bars while accommodating specific dietary restrictions and preferences.

Troubleshooting Guide

If your bars come out too dry, it’s likely due to overbaking or incorrect measurements. Keep a close eye on them during baking, and aim for a slightly underbaked center. You can also consider adding a bit of extra butter or a drizzle of syrup to enhance moisture in future batches.

Texture issues often stem from overmixing the dough; avoid this during the creaming stage. Use a gentle folding method post-adding dry ingredients to maintain a tender crumb.

Flavor imbalances can occur if you forget salt; a pinch will help to enhance all the other flavors. If you accidentally overshoot the sugar, balance it with a tiny bit of salt for a harmonious flavor.

If working with stubborn pans, ensure adequate greasing or parchment usage. The non-stick spray or butter should adequately cover the pan to avoid sticking, ensuring clean removal without damage.

For timing concerns, consider your oven’s accuracy. Investing in an oven thermometer can help ensure your baking times are consistent and reliable across various recipes, including this one.

Recipe Success Stories

Readers have shared numerous success stories about Peanut Butter Cup Gooey Cookie Bars. Many have commented on how easy and forgiving the recipe is, allowing for various modifications that led to delightful twists on the original.

Variations have proven popular, with some readers successfully incorporating different nut butters, caramel swirls, or even fruit fillings. These adaptations not only provided a personal touch but also showcased community creativity and shared love for peanut butter flavors.

Photography tips from readers highlight the importance of natural light and cleanup for better presentation. Many found that photographing the bars with a cup of coffee or a scoop of ice cream beside created a mouth-watering display, encouraging enthusiastic responses on social media.

Community engagement has also played a critical role in the success of this recipe, as readers share their personal experiences and variations, creating a lively dialogue around all things peanut butter dessert-related.

Frequently Asked Questions

Q1: Can I substitute peanut butter for almond butter?

A1: Yes, almond butter can be used as a 1:1 substitute for peanut butter in this recipe. The flavor will differ but will still produce a delicious result.

Q2: How can I make these bars less sweet?

A2: To reduce sweetness, you can use dark chocolate chips instead of semi-sweet, or cut back on the sugar by using a natural sweetener like stevia.

Q3: Can I store these bars in the fridge?

A3: Absolutely! These bars can be stored in an airtight container in the fridge for up to a week, keeping them fresh and delicious.

Q4: Are these bars suitable for freezing?

A4: Yes, they freeze well! Wrap each bar individually and store them in a freezer-safe container for up to three months for a quick treat later.

Q5: What can I use if I don’t have chocolate chips?

A5: You can chop up a chocolate bar or use cocoa powder, but the latter will need to be adjusted within the recipe to maintain texture.

Q6: Can I make these bars nut-free?

A6: To make them nut-free, replace the peanut butter with sunflower seed butter, maintaining the proportions for a similar taste and texture.

Q7: How do I know when the bars are done baking?

A7: The edges should be slightly golden, and the center will look set but not fully firm. The bars will continue to cook slightly after being removed from the oven.

Q8: Can I add other mix-ins like coconut or chopped nuts?

A8: Definitely! Feel free to add chopped nuts, chocolate chunks, or shredded coconut for additional texture and flavor throughout the bars.

Q9: What dish can I use to bake these bars?

A9: A standard 9×13 inch baking dish works best for this recipe, ensuring a proper depth for even cooking and great results.

Q10: Can I use natural peanut butter in this recipe?

A10: Yes, natural peanut butter can be used; just make sure it is well-mixed and not too runny for the best results.

Additional Resources

For those looking to explore more delightful treats, check out our collection of related recipes such as classic chocolate chip cookies, no-bake desserts, and nutritious oatmeal bars. Each provides unique flavors while maintaining ease of preparation.

Furthermore, our technique guides can offer valuable insights into baking fundamentals, including mixing methods and ingredient substitutions that can elevate your baking skills. Knowledge of ingredient types enhances your understanding of flavor profiles and textures.

Equipment recommendations are beneficial when investing in baking essentials; high-quality measuring tools, mixing bowls, and baking sheets can make a significant difference in your results.

Lastly, as seasons change, adapt your recipes accordingly to incorporate seasonal fruits or flavors, providing an ever-evolving dessert experience that keeps your baking exciting and delightful.

Join the Conversation

Engage with us on social media by sharing your pictures of your Peanut Butter Cup Gooey Cookie Bars. Join the community by using the unique recipe hashtag and leave feedback about your baking experiences and any variations you’ve tried.

Feel free to snap photos of your baking process and the final results, as we love to see how our community enjoys their creations. Recipe reviews and constructive feedback are always welcome, helping others discover tips that contribute to their success in the kitchen.

We encourage ongoing community engagement by sharing your own recipe twists and favorite serving suggestions. With each post, help inspire a new wave of bakers and dessert lovers to enjoy and experiment with this delightful cookie bar recipe.

The Recipe

Peanut Butter Cup Gooey Cookie Bars

Serves: 12 bars

Prep Time: 15 mins

Cook Time: 25 mins

Total Time: 40 mins

Kitchen Equipment Needed

  • Mixing bowl
  • Baking pan (9×13 inch)
  • Measuring cups and spoons
  • Spatula or wooden spoon
  • Parchment paper (optional)

Ingredients

  • 1 cup creamy peanut butter
  • 1/2 cup butter, softened
  • 1 cup granulated sugar
  • 1/2 cup brown sugar, packed
  • 2 large eggs
  • 1 teaspoon vanilla extract
  • 1 1/2 cups all-purpose flour
  • 1 teaspoon baking soda
  • 1/2 teaspoon salt
  • 1 cup chocolate chips
  • 1/2 cup chopped peanut butter cups (optional)

Directions

  1. Preheat the oven to 350°F (175°C). Grease the baking pan or line with parchment paper.
  2. In a mixing bowl, cream together peanut butter, softened butter, granulated sugar, and brown sugar until smooth.
  3. Add in the eggs and vanilla extract, mixing until fully incorporated.
  4. In another bowl, whisk together the flour, baking soda, and salt. Gradually add this dry mixture to the wet mixture, stirring until just combined.
  5. Fold in the chocolate chips and optional peanut butter cups.
  6. Spread the batter evenly in the prepared baking pan.
  7. Bake for 25-30 minutes, or until the edges are golden and a toothpick inserted comes out with moist crumbs.
  8. Allow to cool in the pan before cutting into bars.

Recipe Notes

  • For a richer flavor, feel free to use dark chocolate chips.
  • Store any leftovers in an airtight container at room temperature for up to five days.
  • These bars can easily be made ahead of time and stored in the freezer.
  • Customize with your favorite mix-ins like nuts or dried fruit for added variety.

Decadent Salted Caramel Chocolate Sugar Cookie Bars Recipe

Salted Caramel Chocolate Sugar Cookie Bars: Irresistibly Sweet Delight

⚖️
Difficulty
Easy

⏲️
Prep Time
20 mins

🕒
Cook Time
25 mins

⏱️
Total Time
45 mins

🍽️
Servings
16 bars

Indulge in the decadent combination of sweet salted caramel and rich chocolate with these Salted Caramel Chocolate Sugar Cookie Bars. Perfect for any occasion, these treats harmoniously blend the smooth, buttery flavor of sugar cookies with gooey salted caramel, creating a dessert that is both inviting and irresistible. The rich chocolate brings depth to each bite, ensuring a delightful experience that satisfies any sweet tooth.

These cookie bars are not only delicious but also straightforward to make, making them the perfect go-to dessert for gatherings and celebrations. The combination of textures—from the chewy chocolate base to the luscious caramel drizzle—offers a mouthwatering contrast that will keep your friends and family coming back for more. Whether you’re hosting a party or looking for a sweet treat after dinner, these Salted Caramel Chocolate Sugar Cookie Bars will shine on any dessert table.

Quick Recipe Highlights

  • Flavor Profile: Sweet chocolate, buttery sugar cookie, and rich caramel create a heavenly taste experience.
  • Texture: Soft yet chewy with a gooey caramel layer and a slight crunch from the chocolate.
  • Aroma: The warm aromas of vanilla and caramel waft through your kitchen, enticing everyone around.
  • Visual Appeal: Beautifully layered with a glossy caramel topping, perfect for Instagram photos!
  • Skill Level Needed: If you can mix ingredients and spread batter, this recipe is for you!
  • Special Equipment: A baking dish and a mixer are the only tools needed for this straightforward recipe.

Recipe Overview

  • Difficulty Level: These bars are categorized as easy due to their simple steps and minimal ingredients.
  • Category: They are perfect as a dessert or snack and are versatile enough for any meal.
  • Cuisine: Drawing influence from classic American desserts, this recipe puts a modern twist on home-baked classics.
  • Cost: With affordable ingredients, making these bars is budget-friendly for everyone.
  • Season: Enjoy these bars year-round, though they are especially delightful in the fall and winter.
  • Occasion: Great for birthdays, holiday gatherings, or just a sweet treat during the week!

Why You’ll Love This Recipe

Salted Caramel Chocolate Sugar Cookie Bars are a delightful indulgence that captivates the palate with their delightful blend of taste and texture. The sweet and salty notes play beautifully together, providing a gourmet dessert experience that feels special yet is easy to prepare at home. Each layer adds complexity—from the buttery sugar cookie base to the rich chocolate and decadent caramel topping—creating a multi-dimensional treat that doesn’t compromise on flavor.

Preparation of these bars is a breeze, allowing for more time to enjoy social gatherings rather than slaving away in the kitchen. The ingredients come together effortlessly, making them a perfect choice for both novice bakers and seasoned pros alike. The sensation of pulling them out of the oven, letting that warm caramel drizzle linger just a moment longer, will make your wait worthwhile.

These cookie bars are not only delicious but can also be made to suit various dietary needs, allowing for gluten-free or dairy-free adaptations without sacrificing flavor. Socially, they open the door to conversations and shared experiences; food tends to bring people together, and these bars will undoubtedly become a topic of enjoyment. Their affordability makes them accessible for everyone, making them a wise choice for potlucks and bake sales where you want to impress without spending a fortune.

Historical Background and Cultural Significance

The origins of cookie bars can be traced back to classic American baking traditions, which have evolved over time into the delectable treats we enjoy today. Often made for casual gatherings and family events, cookie bars like these Salted Caramel Chocolate Sugar Cookie Bars represent comfort and home-baked love. This heritage instills a sense of nostalgia that ties us to our childhood and family gatherings.

Culturally, sugar cookies have been a staple in American households, often associated with holidays and celebrations. Over the years, bakers have embraced creativity, infusing traditional recipes with innovative flavors such as caramel and chocolate, which have surged in popularity. These adjustments reflect a broader culinary curiosity and the desire for unique gastronomic experiences.

The evolution of these bars demonstrates how traditional recipes can be tailored to create contemporary delights. Each baker has the opportunity to add their flair, whether through new flavor combinations or presentation techniques, ensuring that no two batches have to be the same. Furthermore, variations based on regional flavors or seasonal ingredients allow for a deep connection to local customs and preferences.

With an explosion of flavors and regional adaptations, Salted Caramel Chocolate Sugar Cookie Bars stand as a testament to the excitement of modern baking. They embody creativity in the kitchen, uniting diverse culinary narratives into a treat enjoyed by many.

Ingredient Deep Dive

  • Flour: A key component in any cookie, flour provides structure and stability. Opt for all-purpose flour for a perfect blend of fluffiness and chewiness. Store it in a cool, dry place to maintain freshness, and consider sifting for lighter results.
  • Salted Caramel: The star of the show, providing a sweet and salty contrast that enhances the flavor profile. Caramel dates back centuries and is a beloved sweet across cultures. For convenience, pre-made caramel can be used, or try your hand at making homemade caramel sauce.
  • Chocolate Chips: Dark chocolate enhances the richness and adds depth to the bars. Choosing high-quality chocolate contributes significantly to the overall taste. Store chocolate in a cool, dark place to prevent melting and blooming.
  • Butter: Typically, unsalted butter is preferred, allowing for better control over the saltiness of the final product. Butter adds creaminess and contributes to that melt-in-the-mouth experience we crave. Always use room temperature butter for easier mixing.

Common Mistakes to Avoid

  • Measuring Ingredients Incorrectly: Failing to accurately measure ingredients—particularly flour and sugar—can drastically alter the texture and taste of your bars. Using a kitchen scale ensures precision.
  • Overmixing the Dough: Overmixing can lead to tough bars due to gluten development. Mix just until combined to maintain a tender texture.
  • Ignoring Temperature: Baking at an incorrect temperature can result in unevenly cooked bars. Always preheat your oven for consistent results.
  • Skipping the Chill Time: Allowing the dough to chill before baking helps enhance flavors and makes the bars easier to cut. Patience here pays off!
  • Not Lining the Baking Dish: Failure to line your dish with parchment paper can lead to sticking and difficulty in removing the bars. Always use parchment for easy cleanup.
  • Using Low-Quality Ingredients: Ingredient quality matters significantly in baking. Using high-quality chocolate and butter enhances the overall flavor profile.
  • Overbaking: Paying attention to baking times is crucial. Overbaking can result in dry bars; aim for a gooey center for that perfect texture.
  • Not Allowing to Cool: Cutting into the bars too soon can ruin the structure. Allow them to cool down for the best presentation.

Essential Techniques

Mixing methods are pivotal to achieving the perfect texture in your Salted Caramel Chocolate Sugar Cookie Bars. Start by creaming the butter and sugar until light and fluffy; this incorporates air into the mixture, helping the bars to rise beautifully. Ensure ingredients are at room temperature to prevent clumping.

Proper baking temperatures are essential for even cooking. An oven thermometer can help maintain the desired temperature. Rotate the bars halfway through baking to achieve uniform golden color and consistency.

Chilling dough before baking is vital for flavor development and to mitigate spreading. Wrap your prepared dough in plastic wrap and refrigerate for at least 30 minutes; this simple step will yield beautifully shaped bars.

Pro Tips for Perfect Salted Caramel Chocolate Sugar Cookie Bars

1. **Use High-Quality Chocolate:** The flavor of your bars hinges on the quality of chocolate you use; opt for chocolate chips with at least 60% cocoa content.
2. **Add Sea Salt:** A sprinkle of flaky sea salt on top of the caramel layer amplifies the flavor, providing that perfect sweet-and-salty balance.
3. **Experiment with Add-Ins:** Consider adding nuts, toffee bits, or even dried fruit for additional flavors and textures.
4. **Allow for Cooling:** Letting the bars cool completely before cutting makes them easier to slice and enhances the overall appearance.
5. **Store Properly:** Keep your cookie bars in an airtight container at room temperature to retain their soft texture during storage.
6. **Play with Presentation:** Drizzle extra caramel on top or use chocolate ganache for an elegant touch that will wow your guests.
7. **Adjust Sweetness:** If you prefer a less sweet cookie, reduce the sugar slightly while maintaining the balance of ingredients.
8. **Try Different Cookie Bases:** Mix it up by experimenting with different flavored cookie bases, such as brown sugar or oatmeal.

Variations and Adaptations

1. **Gluten-Free:** Substitute regular flour with a 1-to-1 gluten-free flour blend to create a gluten-free version without losing texture.
2. **Nutty Twist:** Incorporate finely chopped nuts such as pecans or walnuts into the mixture for added crunch and flavor.
3. **Seasonal Alterations:** Add seasonal spices, like cinnamon or nutmeg, during the fall to give an autumn twist to your bars.
4. **Vegan:** Use coconut oil instead of butter and a flax egg to create delectable vegan options without compromising flavor.
5. **Adjust the Sweetness:** For those who prefer a less sweet indulgence, consider using dark chocolate with lower sugar content or reducing the sugar in the caramel.
6. **Alternative Toppings:** Swap out the salted caramel for cookie butter or fruit compote for a unique flavor profile.

Serving and Presentation Guide

Present your Salted Caramel Chocolate Sugar Cookie Bars beautifully to impress guests. Consider serving them on a rustic wooden board for a homey feel or a sleek white platter for a more modern aesthetic. Slicing the bars into neat squares allows for easy serving and sharing. Add a drizzle of chocolate or extra caramel on top for a gourmet look, and garnish with fresh mint or edible flowers.

Temperature plays an essential role in serving these bars. They are best enjoyed slightly warm; reheat them briefly in the microwave for a melty experience. For gatherings, serve alongside a scoop of vanilla ice cream or dollop of whipped cream to elevate the indulgence factor.

Wine and Beverage Pairing

Pair your Salted Caramel Chocolate Sugar Cookie Bars with a rich dessert wine like Port or a sweet dessert wine such as a late-harvest Riesling for a perfect complement. The sweetness of these wines balances the rich flavors of caramel and chocolate, enhancing the overall tasting experience.

If you prefer non-alcoholic options, consider serving them with a creamy hot chocolate or a refreshing glass of milk. Coffee lovers can opt for a rich espresso; the bitterness of the coffee contrasts with the sweetness of the bars, making for an exquisite pairing.

Storage and Shelf Life

For optimal freshness, store your Salted Caramel Chocolate Sugar Cookie Bars in an airtight container at room temperature. They will typically last for up to one week. If you have leftovers, freezing them is a great option; simply wrap each bar individually in plastic wrap and place them in a freezer-safe bag or container.

If the bars develop a firmer texture after refrigeration, simple reheating them in the microwave for a few seconds will restore that gooey goodness. Always check for signs of spoilage, such as an off smell or discoloration, before enjoying previously stored treats.

Make Ahead Strategies

For busy bakers, these cookie bars can be made ahead of time without compromise on flavor. Prepare the dough and assemble the bars, then refrigerate them unbaked for up to three days before baking. This allows for development of flavors and convenience for busy schedules.

You can also bake the bars in advance and store them properly for later enjoyment. Just ensure to cool completely before wrapping them in foil or plastic wrap. When you’re ready to serve, simply reheat them for a fresh-out-of-the-oven experience.

Scaling Instructions

Making a large batch of Salted Caramel Chocolate Sugar Cookie Bars is easy. To double or triple the recipe, simply adjust the ingredient quantities accordingly while keeping an eye on mixing times. The baking time may need slight adjustments—adding a few extra minutes for larger batches is advisable to ensure uniform doneness.

For smaller gatherings, halving the recipe is also a breeze, but anticipate baking times to vary accordingly. Store the right amount in a variety of smaller containers for convenience or for gifting.

Nutritional Deep Dive

These Salted Caramel Chocolate Sugar Cookie Bars offer a delightful mix of indulgent flavors, but they still have moderation in mind. A typical serving contains a comforting balance of carbohydrates, fats, and sugars. The chocolate contributes antioxidants, while the butter and sugar provide a quick energy boost.

Balancing indulgence with nutrition, consider serving them alongside fruits or nuts to enhance overall nutritional value. Moderation is key; enjoying one bar can provide satisfaction while still being mindful of caloric intake.

Dietary Adaptations

For those on specific diets, adapting this recipe is straightforward. For a gluten-free version, replacing standard flour with a gluten-free blend creates an equally delightful treat. Vegan diets can accommodate with substitutions such as coconut oil and dairy-free milk, ensuring all enjoy this delicious dessert.

For a low-carb option, consider using almond flour or coconut flour while balancing the sweetness with sugar alternatives like erythritol or stevia. This allows you to enjoy the flavors without the sugar overload.

Troubleshooting Guide

If you experience texture issues, ensure the butter is at room temperature to promote smooth incorporation into the batter. If bars are too dry, avoid overbaking; they should be slightly underdone in the center for the ideal chewy texture.

Should flavor balance seem off, adjusting the sweetness with a pinch of salt may enhance the overall flavor profile. Pay attention to baking temperature and check with a toothpick; under-baked bars can always be put back in for a few moments rather than risking drying them out.

Recipe Success Stories

Readers have raved about the Salted Caramel Chocolate Sugar Cookie Bars, sharing their experiences and adaptations. Many have highlighted their love for the rich chocolate flavor combined with the gooey caramel layer, creating a perfect decadent dessert. Feedback has shown success using various chocolates, which adds uniqueness to the recipe.

Others have bridged personal touches, such as incorporating spices, nuts, or varying chocolate types, leading to creative adaptations while maintaining that beloved foundation. These success stories encourage a thriving community of bakers exploring various flavor profiles while enjoying the original concept.

Frequently Asked Questions

Can I make these cookie bars ahead of time?
Yes! You can prepare the dough and refrigerate it for a few days before baking. Alternatively, bake the bars ahead and store them for later enjoyment!

How do I store leftovers?
Store your cookie bars in an airtight container at room temperature for up to a week. For longer storage, wrap and freeze them.

Can I use different flours?
Absolutely! You can substitute all-purpose flour with gluten-free flour blends without losing the delightful texture.

What can I replace the butter with?
For a dairy-free version, coconut oil or vegan butter can be great substitutes while achieving similar results.

How can I adjust the sweetness of the recipe?
If you prefer a less sweet treat, try reducing the sugar or opting for darker chocolate, which typically has less sugar.

Can I add nuts to the recipe?
Certainly! Adding nuts like pecans or walnuts will enhance the texture and flavor of the bars.

Is it necessary to chill the dough?
Chilling the dough enhances flavors and makes it easier to work with, so it’s recommended for the best results.

Can I use homemade caramel?
Yes! Homemade caramel adds a delicious personal touch, though store-bought is equally convenient.

How do I know when the bars are done?
The bars should be set around the edges with a slight jiggle in the center. A toothpick inserted should come out with moist crumbs, not wet batter.

What’s the best way to cut the bars?
Allow the bars to cool completely before slicing for clean edges. Use a sharp knife and wipe it clean between cuts for neat slices.

Additional Resources

For those looking to expand their baking repertoire, check out our related recipes featuring variations on cookie bars, including fun takes on classic flavors and seasonal adaptations. For technique guides, we offer insights into mastering the perfect cookie and creating delightful toppings.

Understanding ingredient substitutions and their impacts on texture and flavor can expand your baking creativity, leading to personalized versions of this recipe. Whether you’re experimenting with seasonal ingredients or seeking equipment recommendations, we have resources tailored to help you become a successful home baker.

Join the Conversation

We invite you to share your thoughts on our Salted Caramel Chocolate Sugar Cookie Bars! Engage with our community by posting your plates on social media and sharing variations that you’ve explored. Your photography tips and recipe reviews will enrich our growing family of bakers!

Feel free to connect and share your own experiences in making this delightful recipe and join in on the exciting discussions, from adaptations to techniques, that can inspire newer bakers in our community.

The Recipe

Salted Caramel Chocolate Sugar Cookie Bars

Serves: 16 bars

Prep Time: 20 mins

Cook Time: 25 mins

Total Time: 45 mins

Kitchen Equipment Needed

  • Baking dish (9×13 inch)
  • Mixing bowl
  • Electric mixer
  • Spatula
  • Measuring cups and spoons

Ingredients

  • 1 cup unsalted butter, softened
  • 1 1/2 cups sugar
  • 2 large eggs
  • 1 teaspoon vanilla extract
  • 3 cups all-purpose flour
  • 1/2 teaspoon baking soda
  • 1/2 teaspoon salt
  • 1 cup chocolate chips
  • 1 cup salted caramel sauce (store-bought or homemade)

Directions

  1. Preheat the oven to 350°F (175°C) and grease or line the baking dish with parchment paper.
  2. In a mixing bowl, cream together the softened butter and sugar until light and fluffy.
  3. Add eggs one at a time, then mix in vanilla extract.
  4. In another bowl, whisk together flour, baking soda, and salt.
  5. Gradually add the flour mixture to the wet ingredients until combined. Stir in chocolate chips.
  6. Spread half of the cookie dough into the prepared baking dish evenly.
  7. Drizzle half of the salted caramel sauce over the cookie base and spread it gently.
  8. Top with the remaining cookie dough, spreading carefully to cover the caramel layer.
  9. Bake for 25 minutes, or until edges are lightly golden and a toothpick comes out clean.
  10. Let cool completely, then drizzle with additional caramel and cut into bars.

Recipe Notes

  • For an added flavor twist, incorporate a teaspoon of sea salt on top before baking.
  • Bars can be stored in an airtight container for up to one week, or frozen for longer storage.
  • Feel free to personalize with your favorite mix-ins or alterations.

Indulge in Delicious Cookie Dough Snicklers with Reese’s Ice Cream

Cookie Dough Snicklers & Reese’s Ice Cream: A Decadent Delight

⚖️
Difficulty
Medium

⏲️
Prep Time
20 mins

🕒
Cook Time
15 mins

⏱️
Total Time
35 mins

🍽️
Servings
12 servings

Indulge your sweet tooth with this extraordinary Cookie Dough Snicklers & Reese’s Ice Cream recipe. The fusion of raw cookie dough, airy ice cream, and chocolatey peanut butter makes for a truly heavenly experience. This treat serves as the perfect dessert for a summer gathering or a cozy night in, offering an infusion of rich flavors and textures that are sure to please everyone in the family. Imagine the delight on your friends’ faces when you present this creamy masterpiece.

The contrast between the soft and chewy cookie dough bites and the smooth, creamy ice cream creates a delightful sensory experience. Each bite delivers a burst of flavor and a nostalgic feeling that will remind you of carefree childhood days spent enjoying treats after school. With an impressive appearance and a taste that’s equally fantastic, Cookie Dough Snicklers & Reese’s Ice Cream will become a staple for your dessert rotations.

Quick Recipe Highlights

  • Flavor Profile: Enjoy the perfect blend of sweet and salty, as the raw cookie dough pairs beautifully with the creamy, rich flavor of Reese’s ice cream.
  • Texture: Experience the combination of soft cookie dough and smooth, velvety ice cream that create a satisfying mouthfeel.
  • Aroma: The enticing smell of freshly baked cookies mingling with sweet vanilla and rich chocolate will fill your kitchen.
  • Visual Appeal: The colorful swirls of chocolate and cookie dough nestled in a bowl of creamy ice cream make for a show-stopping presentation.
  • Skill Level Needed: This recipe is approachable for home bakers, requiring basic mixing and assembling skills.
  • Special Equipment: You’ll need a mixing bowl, baking sheet, and an ice cream maker for best results.

Recipe Overview

  • Difficulty Level: With simple steps, this recipe is medium level, achievable for novice bakers but enjoyable for everyone. The precision in measuring and mixing will elevate the final product.
  • Category: This delightful dessert falls under sweet treats, perfect for parties, barbecues, or simply a home indulgence.
  • Cuisine: With influences from both classic American desserts and ice cream parlors, this recipe is a celebration of flavors we know and love.
  • Cost: Ingredients are relatively affordable, typically amounting to about $15-$20 for a full batch without specialty items.
  • Season: Ideal for summer gatherings, the ice cream element makes it a perfect cool down dessert, but delicious year-round.
  • Occasion: From birthdays to casual get-togethers, this dessert will impress guests and add a sweet touch to any celebration.

Why You’ll Love This Recipe

With its exquisitely rich flavor and textural contrast, Cookie Dough Snicklers & Reese’s Ice Cream will quickly become a favorite. The combination of silky ice cream and delightful cookie dough pieces creates an enchanting dessert experience. Imagine a warm evening with family, gathering around to share this satisfying and tasty treat, each spoonful filled with joy.

The convenience of making your own ice cream infuses this dessert with personalized flair—adjust the sweetness and chocolate-to-peanut-butter ratio to your liking. The preparation allows you to indulge in the process, bringing creativity into the kitchen, all while keeping it simple and adaptable for various palate preferences.

Nutritionally, while this indulgence isn’t a health food, the ingredients do provide a bit of comfort and happiness in our lives. Sharing this recipe also opens up discussions about healthier alternatives, should you wish to experiment with lighter ice cream or alternative sweeteners.

Socially, bringing this decadent dish to gatherings gives you the opportunity to create lasting memories. The excitement of making and sharing the Cookie Dough Snicklers & Reese’s Ice Cream is something friends will always remember, strengthening ties and celebrating moments together.

Lastly, the cost-effectiveness of this recipe makes it an attractive option—opulent enough to wow your guests while remaining affordable for everyday enjoyment. You’ll find that making these at home can save money compared to buying similar desserts at upscale cafés.

Historical Background and Cultural Significance

The origins of cookie dough date back to the early 1900s when the first chocolate chip cookie was created by Ruth Wakefield. The playful combination of cookie dough and ice cream emerged as a popular treat in the late 20th century, showcasing American innovation in dessert crafting. Over the decades, variations have popped up, highlighting the importance of comfort desserts in American culture.

Culturally, cookie dough has become synonymous with indulgence and nostalgia, often featured in movies and media as a symbol of childhood carefree days. The act of creating desserts from scratch brings families and friends together, whether through baking or enjoying the final product, as a cherished tradition.

The evolution of this recipe reflects a blend of influences from various categories of desserts. From casual homemade recipes to upscale ice cream parlors, variations often include local ingredients making them unique and relevant. This adds to the cultural tapestry of desserts, continuously reinventing itself through creative interpretations.

Regionally, cookie dough treats can vary, with some areas showcasing local favorites like pecans or unique ice cream flavors. The embrace of cookie dough within ice cream demonstrates the versatility of desserts across the country, appealing to a wide audience regardless of age.

Ingredient Deep Dive

Cookie Dough: The central element of this recipe, cookie dough has a rich history rooted in American baking. It typically comprised butter, sugar, flour, and chocolate chips for the classic dough. Beyond its deliciousness, cookie dough brings good vibes associated with shared experiences; baking encourages togetherness. Nutritionally, it provides carbohydrates and fats; however, moderation is key. Look for high-quality ingredients for a remarkable taste experience, and store it in an airtight container in the refrigerator if not using immediately.

Reese’s Ice Cream: Featuring the iconic peanut butter cup, this creamy treat offers a delightful flavor contrast to the sweetness of cookie dough. Reese’s has its roots in the 1920s when Harry Burnett Reese created the famous treat, with recipe adaptations emerging over the years. Nutritionally, the combination of chocolate and peanut butter offers a source of protein and healthy fats, but it’s best enjoyed in moderation due to its sugar content. Opt for high-grade ice cream for the best flavor, and store it properly to maintain quality in your freezer.

Common Mistakes to Avoid

  • Using too much flour: This can lead to dry cookie dough, so measure accurately.
  • Not chilling the cookie dough: Chilling allows for better texture during baking.
  • Overmixing: Overmixing can cause tough cookies; mix until combined.
  • Using melted butter instead of softened: Melted butter alters the dough consistency.
  • Ignoring temperature: Make sure ingredients are at room temperature for uniform mixing.
  • Baking at the wrong temperature: Preheat your oven to ensure correct baking time and texture.
  • Storing improperly: Keep the cookie dough and ice cream separate for best freshness.
  • Not letting the ice cream soften: Allowing it to sit for a few minutes before serving will create a better texture.

Essential Techniques

Mixing Cookie Dough: Mixing cookie dough is critical for achieving the right texture. Creaming butter and sugar together introduces air, creating a light dough. Be cautious not to overmix, as this causes the gluten in the flour to develop, making the cookies tough. Visual cues include a light and fluffy texture before adding dry ingredients.

Chilling Dough: Chilling the cookie dough helps solidify fat and allows the flavors to meld. Typically, chilling for at least 30 minutes will yield soft, chewy cookies. Watch for firmness—when you can shape it without sticking, it’s ready for baking.

Pro Tips for Perfect Cookie Dough Snicklers & Reese’s Ice Cream

– Use high-quality chocolate chips for richer flavor; the better the ingredients, the higher the payoff.
– Don’t skimp on refrigerating the cookie dough; this is crucial for achieving the right texture.
– Incorporate different types of chocolate chips for variety; mix milk, dark, and white chocolate for a unique flavor profile.
– Ensure ice cream is slightly softened prior to serving for ease in scooping and enjoying.
– Consider a drizzle of warm chocolate sauce over the dessert before serving for an extra touch.
– Pair with a sprinkle of sea salt to enhance the sweet and salty flavors even further.
– Serve in individual bowls for effortless portion control and visual appeal.
– Experiment with additional toppings like crushed nuts or caramel sauce for personal customization.

Variations and Adaptations

For a regional twist, consider adding local flavors to the cookie dough, such as maple syrup or local nuts. Seasonal adaptations might include using pumpkin-flavored ice cream in the fall or refreshing mint ice cream in the summer. For those with dietary needs, a gluten-free flour blend can replace the all-purpose flour, creating a delicious alternative without sacrificing taste.

Flavor variations can come from infusing spices like cinnamon or adding extracts to the cookie dough, enhancing the overall depth of flavor. Texturally, you can experiment with substituting some of the chocolate chips in the recipe for crushed candies or caramel pieces for an added surprise with every bite.

For presentation, consider assembling in clear cups to showcase the layers of cookie dough and ice cream, making it not only a treat for the taste buds but also a feast for the eyes.

Serving and Presentation Guide

To plate your Cookie Dough Snicklers & Reese’s Ice Cream, use a wide, shallow bowl to allow for a generous scoop of ice cream and cookie dough to show prominently. Garnish with a sprinkle of mini chocolate chips and a drizzle of chocolate syrup for that professional touch. Traditional accompaniments could include whipped cream, while modern serving suggestions might incorporate fresh fruits, like strawberries or raspberries, to provide a refreshing contrast.

For temperature considerations, ensure your ice cream is slightly softened before serving for smoother scooping. Control portions by using a standard ice cream scoop for an even and appetizing appearance for your guests.

Wine and Beverage Pairing

Pairing this indulgent dessert with beverages can enhance the experience. A sweet dessert wine, like a late-harvest Riesling, complements the richness of the cookie dough and ice cream beautifully. Non-alcoholic alternatives, such as iced coffee or milk, can also serve as comforting accompaniments that balance out the sweetness. When considering temperature, serve your wines chilled for a refreshing contrast to the warm cookie dough flavors.

Storage and Shelf Life

To store leftover Cookie Dough Snicklers & Reese’s Ice Cream, keep it in an airtight container to prevent freezer burn. Ice cream can typically last for about 2-3 months when stored properly, but optimal texture and flavor are enjoyed within the first month. For the cookie dough, it’s best to consume it within a week when kept refrigerated, but it can also be frozen for up to 3 months. If you need to reheat any baked cookie dough, place it in a microwave for a few seconds to return some of its original softness.

Make Ahead Strategies

For a streamlined experience, prepare your cookie dough ahead of time. Refrigerate or freeze any unused dough for later use, allowing you to whip up fresh cookies without extensive preparation each time. Assemble the Cookie Dough Snicklers & Reese’s Ice Cream just before serving to maintain freshness, combining the two components right before dinning. If you decide to freeze them, assemble them in individual servings for easy grab-and-go desserts.

Scaling Instructions

Scaling the recipe can be simple; to halve it, adjust measurements accordingly, ensuring the same quality. For larger gatherings, double or triple the recipe, but keep equipment adjustments in mind—avoid overcrowding the mixing bowl. Always monitor baking times, as larger batches may require slight adjustments. When storing, ensure you have enough containers ready, so you won’t have to compromise on quality.

Nutritional Deep Dive

This indulgent treat is rich in calories and sugar, making moderation key. A macro breakdown reveals a significant source of carbohydrates and fats, primarily driven by the sugars from the cookie dough and the ice cream. Micronutrient analysis indicates some benefits from the dairy and chocolate content, although overall it is not a health-focused dish.

For those managing dietary preferences, assessing portion sizes can aid in weight management, allowing you to enjoy treats without overindulging. Analyzing its content can also lead to discussions about healthier modifications, ensuring everyone still gets to enjoy the essence of the dessert without straying too far from their nutritional goals.

Dietary Adaptations

For gluten-free versions, substitute traditional flour with almond flour or gluten-free blends, allowing those with dietary restrictions to enjoy this treat without worry. For dairy-free adaptations, opt for dairy-free ice cream and coconut oil in the cookie dough, ensuring everyone can savor the flavors. Vegan diets can similarly enjoy this dessert by using plant-based butter and flax eggs for a delicious result.

For those following low-carb or keto diets, using almond flour in place of all-purpose flour and sugar substitutes can significantly decrease carb content while still delivering a satisfying dessert. Addressing other specific dietary needs—like paleo or low-FODMAP—can be achieved through simple ingredient swaps that align with those guidelines while sacrificing very little flavor.

Troubleshooting Guide

If you’re facing texture issues, the most common problem is a grainy or dry cookie dough—ensure you’re measuring flour correctly and not overbaking the cookies. If the flavor balance is off, consider adding a pinch of salt to enhance the sweetness of the cookie dough and ice cream.

Temperature problems may result from using ice cream straight from the freezer; always let it soften briefly for smoother serving. Equipment challenges can arise during mixing; ensure your mixer is set on lower speeds to prevent splatter while combining ingredients.

When substituting ingredients, be cautious—some substitutions require adjustments in quantities to maintain the right consistency, which can impact the final product. Lastly, adjust your baking times according to batch sizes; smaller cookies may bake faster, while larger cookies may need additional time.

Recipe Success Stories

Community feedback on this Cookie Dough Snicklers & Reese’s Ice Cream is overwhelmingly positive, with readers enjoying the mix of nostalgia and treat satisfaction. Several bakers have reported improvising with different ice cream bases, leading to exciting flavor combinations that resonate well with guests.

Variational adaptations, like using cookie dough with peanut butter chunks or flavored ice creams, have also generated buzz. Readers suggest incorporating local ingredients like fruit or nuts for a unique twist, proving the flexibility of the recipe while highlighting its potential for culinary creativity.

Persistent engagement from the community further strengthens the recipe’s popularity—photography tips shared on social media encourage others to showcase how they interpret this indulgent dessert, adding to the collective joy of food creations.

Frequently Asked Questions

Can I use store-bought cookie dough?

Absolutely! Store-bought cookie dough can save time and still yield delicious results. Just ensure it’s a type that you enjoy and prefer for consistency in flavor.

How can I make this dessert gluten-free?

To adapt the recipe for gluten-free diets, use a gluten-free all-purpose flour blend in place of traditional flour. You can also try almond flour for a different texture.

What if I don’t have an ice cream maker?

No problem! You can make the ice cream without a machine by placing it in a bowl and stirring it every 30 minutes until it reaches the desired consistency; this will create a creamy texture.

How do I store leftovers?

Leftover Cookie Dough Snicklers & Reese’s Ice Cream should be stored in an airtight container. Ice cream typically lasts about 2-3 months in the freezer, while cookie dough remains best for about a week when refrigerated.

Can I substitute the Reese’s ice cream?

Yes! Feel free to experiment with different flavors of ice cream, like vanilla, cookies and cream, or any other favorite flavors—just as long it pairs well with the cookie dough.

Is there a vegan option for this recipe?

Yes, you can easily make this dessert vegan by using plant-based butter and egg substitutes in the cookie dough, along with dairy-free ice cream options.

What is the best way to serve this dessert?

Serve it in wide bowls or glasses to showcase the layers of cookie dough and ice cream. Consider garnishing with chocolate sauce or whipped cream for added decadence.

How can I make a smaller batch?

To make a smaller batch, simply halve the ingredient amounts. Keep in mind the baking times may slightly vary, so monitor closely while baking.

Are there any alternatives to chocolate chips?

Definitely! Consider using crushed nuts, butterscotch chips, or even dried fruits for a twist to the classic flavor profile.

What seasonal variations can I try?

In the fall, try adding pumpkin spice ice cream for a seasonal twist; during summer, refreshing flavors like lemon or berry that complement the cookie dough can be delightful.

Additional Resources

For those who enjoyed this recipe, consider exploring related recipes like cookie dough brownies or homemade peanut butter cups for further inspiration. Technique guides on mastering baking and freezing can provide added assistance while preparing your Cookie Dough Snicklers & Reese’s Ice Cream. Learn about selecting quality ingredients, as well as recommendations for the best ice cream makers on the market to elevate your dessert game.

Seasonal variations can also inspire new creations; experimenting with various ice cream flavors could create exciting results and profound seasonal memories.

Join the Conversation

We invite you to share your Cookie Dough Snicklers & Reese’s Ice Cream experiences with us! Post your beautiful photographs or offer insights into any modifications or personal twists on the recipe. Engaging in discussions around reviews and variations only enhances our community’s shared love for this delightful treat. Join us on social media to connect with fellow dessert enthusiasts as we explore the sweet world of baking together!

The Recipe

Cookie Dough Snicklers & Reese’s Ice Cream

Serves: 12 servings

Prep Time: 20 mins

Cook Time: 15 mins

Total Time: 35 mins

Kitchen Equipment Needed

  • Mixing bowl
  • Baking sheet
  • Ice cream maker
  • Measuring cups and spoons
  • Spatula
  • Whisk

Ingredients

  • 1 cup unsalted butter, softened
  • 1 cup brown sugar, packed
  • 1/2 cup granulated sugar
  • 2 cups all-purpose flour
  • 1 teaspoon vanilla extract
  • 1 cup chocolate chips
  • 1/2 cup peanut butter chips
  • 1 quart Reese’s ice cream

Directions

  1. In a mixing bowl, combine softened butter, brown sugar, and granulated sugar; cream until fluffy.
  2. Add flour and vanilla extract to the mixture, mixing until just combined.
  3. Fold in chocolate chips and peanut butter chips until evenly distributed.
  4. Refrigerate the dough for at least 30 minutes.
  5. While dough is chilling, churn the Reese’s ice cream according to the manufacturer’s instructions if using a maker, or let it soften at room temperature if store-bought.
  6. Once chilled, scoop small pieces of cookie dough and fold them into the softened ice cream, mixing gently.
  7. Transfer the mixture into an airtight container, layering it with more cookie dough pieces as desired.
  8. Freezing for at least 4 hours or until set before serving.

Recipe Notes

  • You can store leftover cookie dough in the fridge for up to a week or freeze it for later use.
  • Experiment with different ice creams or include add-ins like crushed candy bars or nuts for variety.
  • Use parchment paper on your baking sheet for easier cleanup during the cookie dough preparation.

Delicious Maraschino Cherry Chocolate Chip Cookies Recipe to Try

Maraschino Cherry Chocolate Chip Cookies: A Delightful Twist on a Classic

⚖️
Difficulty
Easy

⏲️
Prep Time
15 mins

🕒
Cook Time
10 mins

⏱️
Total Time
25 mins

🍽️
Servings
24 cookies

The Maraschino Cherry Chocolate Chip Cookies are a luscious treat that combines rich chocolate with the sweet, tangy burst of maraschino cherries. Picture biting into a warm, gooey cookie filled with melted chocolate and juicy cherry pieces—each bite is a delightful experience that takes traditional chocolate chip cookies to a new level. Perfect for any occasion, these cookies are bound to be a hit at parties, family gatherings, or simply as a sweet indulgence at home.

What sets these cookies apart is the vibrant flavor profile where sweet meets tangy. The addition of maraschino cherries gives a refreshing twist that harmonizes beautifully with the bittersweet chocolate chips. From the moment the batter is mixed, you’ll be captivated by the enticing aroma that fills your kitchen, making it hard to resist having just one more. Whether enjoyed fresh from the oven or stored for later, Maraschino Cherry Chocolate Chip Cookies offer a memorable dessert experience.

Quick Recipe Highlights

  • Flavor Profile: These cookies blend the classic flavor of chocolate with the sweet-tart essence of maraschino cherries, creating a unique taste sensation.
  • Texture: Expect a chewy center with slightly crispy edges, complemented by the soft pieces of cherry and melted chocolate chips throughout.
  • Aroma: The sweet aroma of cherries combined with the rich scent of baking chocolate will waft through your kitchen, inviting everyone to indulge.
  • Visual Appeal: Bright red cherries contrast beautifully against the golden-brown of the cookies, making them irresistibly eye-catching.
  • Skill Level Needed: This cookie recipe is easy to follow, making it perfect for both beginners and experienced bakers alike.
  • Special Equipment: You will need a mixing bowl, a baking sheet, and an oven for this recipe, along with basic kitchen utensils.

Recipe Overview

  • Difficulty Level: The Marcashino Cherry Chocolate Chip Cookies are categorized as easy, requiring minimal cooking skills and basic baking techniques, making them perfect for novice bakers.
  • Category: These cookies fall under the dessert category and can also serve as a delightful snack or sweet treat for any time of the day.
  • Cuisine: Inspired by classic American baking traditions, this recipe integrates elements of playful creativity with dessert favorites.
  • Cost: The ingredients for these cookies are relatively budget-friendly, making this a great choice when you want to whip up something special without breaking the bank.
  • Season: These cookies can be enjoyed year-round, but their cheerful vibes make them particularly appealing during holidays and celebrations.
  • Occasion: From casual gatherings to holiday celebrations, Maraschino Cherry Chocolate Chip Cookies are always a welcome addition to any dessert table.

Why You’ll Love This Recipe

These Maraschino Cherry Chocolate Chip Cookies offer an irresistible taste and texture experience. The combination of dense chocolate chips with the chewy cherries creates a mouthwatering center that melts in your mouth. The slight crispness on the edges adds a satisfying bite that keeps you coming back for more. The unique blend of flavors will surprise and delight your palate, making these cookies a favorite among chocolate lovers and cherry enthusiasts alike.

Convenience plays a huge role in the appeal of this recipe. It requires just a few simple steps, making it easy to whip up a batch quickly. Perfect for when unexpected guests arrive or for last-minute dessert cravings, this cookie recipe is a fantastic option for those who love to bake but may not want to spend hours in the kitchen. Plus, the short cook time means you can enjoy these delightful cookies in no time.

Nutritionally, these cookies can also have their advantages, depending on how you prepare them. Substituting half of the butter with applesauce can reduce fat while maintaining moisture, and using dark chocolate chips adds antioxidants. While cookies are certainly a treat, being smart about ingredients can help you enjoy them without guilt.

Socially, these cookies are a conversation starter. Bringing a batch of Maraschino Cherry Chocolate Chip Cookies to family gatherings or parties often leads to requests for the recipe and compliments. They are perfect for sharing, creating memorable moments with loved ones as you indulge in delicious baked goods.

Cost-effectiveness and accessibility are key attributes of this recipe. Most ingredients are readily available at your local grocery store, making it easy to gather everything you need to bake. This recipe yields a generous number of cookies, ensuring that there will be plenty to share or to enjoy over a few days.

Historical Background and Cultural Significance

The Maraschino cherry has a fascinating history that dates back several centuries, originating in Croatia and becoming popular in America in the 19th century. The bright red cherry is typically preserved in a sweet syrup, which has led to its use in various desserts and cocktails. The incorporation of maraschino cherries into cookie recipes signifies a merge of various culinary traditions, emphasizing innovation in American baking.

Culturally, the Maraschino cherry is associated with celebrations and special occasions. Its bright color and sweet flavor make it a decoration for cakes and desserts, enhancing visual and taste appeal. The blend of chocolate and cherries evokes nostalgia for many, harking back to family baking sessions or holiday celebrations, signifying comfort and joy.

Over the years, the recipe for cookies using maraschino cherries has evolved, with countless variations emerging as bakers experiment and adapt it to their preferences. This evolution speaks to the ingenuity of home cooks and professional bakers alike as they strive to create the perfect balance between traditional flavors and modern tastes.

Regional variations of chocolate chip cookies are abundant, yet Maraschino Cherry Chocolate Chip Cookies stand out due to the unique combination of flavors they offer. From New York to California, bakers have embraced this charming addition, cementing its place in America’s dessert repertoire.

Ingredient Deep Dive

Cherries have been a beloved fruit for centuries, both for their sweet flavor and cultural significance. They are rich in antioxidants, vitamins, and anti-inflammatory properties, making them a wonderful addition to any diet. When selecting maraschino cherries for the recipe, look for vibrant color and firm texture, indicating quality. Store them in their syrup to maintain moisture and freshness. If maraschino cherries aren’t available, consider using dried cherries or fresh pitted cherries as substitutes, as they bring similar flavors to the cookies.

Chocolate chips, particularly dark chocolate or semi-sweet varieties, add a rich and decadent flavor to cookies. Beyond taste, chocolate offers health benefits, including antioxidants and potential heart health benefits. Select high-quality chocolate chips for the best melting and flavor experience. When baking, ensure they are stored away from heat to maintain their shape and flavor. If you’re allergic to chocolate or prefer a different taste, butterscotch or white chocolate chips can be excellent alternatives.

Butter is the foundation of many cookie recipes, providing rich flavor and a tender texture. It is essential to use unsalted butter to control the saltiness of the cookies. When storing butter, keep it in a cool place or freeze it if you plan to use it longer than a few months. In terms of substitutions, coconut oil or plant-based butters can be employed for a dairy-free option.

Flour is a crucial ingredient in achieving the desired cookie texture. All-purpose flour is commonly used, but options like whole wheat flour or gluten-free flour can also work, offering varying flavors and health benefits. When selecting flour, ensure it is fresh and stored properly to avoid spoilage. If you want to enhance the flavor of the cookies, consider using almond flour or oat flour as replacements.

Sugar rounds out the cookie’s sweetness and helps to create the perfect balance of flavors. Using brown sugar results in chewier cookies, while white sugar gives a crisper texture. It’s essential to store sugar in a sealed container to prevent moisture absorption. If you’re looking to decrease sugar intake, consider using natural sweeteners like maple syrup or agave nectar as substitutes.

Common Mistakes to Avoid

  • Overmixing the dough can lead to tough cookies. Mix just until combined to ensure a light and fluffy texture.
  • Using cold ingredients can affect the dough consistency. Ensure butter and eggs are at room temperature for better incorporation.
  • Underbaking can result in cookies that are too soft. It’s essential to follow the baking time closely to achieve the perfect chewiness.
  • Not chilling the dough may lead to spreading cookies. Allowing the dough to chill for at least 30 minutes helps firm them up for better shaping.
  • Skipping the parchment paper can lead to cookies sticking to the pan. Always line baking sheets for easy removal and cleanup.
  • Failing to measure ingredients precisely can alter the cookie’s texture and flavor. Use a kitchen scale for accuracy.
  • Not allowing cookies to cool properly can cause them to break apart. Give time on the baking sheet before transferring to a cooling rack.
  • Using expired ingredients, especially baking powder or soda, can prevent the cookies from rising properly. Always check expiration dates before use.
  • Overcrowding the baking sheet can lead to uneven baking. Space out the cookies adequately to facilitate airflow and even cooking.
  • Not testing the cookies before baking can lead to unbalanced flavors. Taste a small amount of the dough before finalizing.

Essential Techniques

Proper mixing is crucial for incorporating air into the cookie dough, leading to a desirable texture. Use a hand mixer or stand mixer on medium speed for 2-3 minutes until creamy and light. Avoid overmixing as it can lead to dense cookies. When in doubt, mix just until combined for the best results.

Correct baking time is essential for achieving the perfect cookie. Keep an eye on the cookies during the last few minutes of baking; look for golden edges as an indicator of doneness. Utilize an oven thermometer to make sure your oven is at the right temperature, as variations might occur.

Cooling cookies before storage is a key step to preserve freshness and prevent sogginess. Let cookies cool on the baking sheet for 5 minutes before transferring them to a wire rack. This process allows them to set and firm up, making them easier to handle later.

Measuring ingredients accurately is foundational for successful cookie baking. Use dry measuring cups for flour and sugar, and liquid measuring cups for liquids. Lightly spoon flour into the measuring cup and level it off with a knife for precision.

Chilling the dough can enhance the flavor and texture of the cookies. Consider wrapping the dough in plastic wrap and chilling it for at least 30 minutes, which helps to reduce spread and improves the overall bite of your cookies.

Pro Tips for Perfect Maraschino Cherry Chocolate Chip Cookies

Start with room temperature ingredients to ensure the butter and sugar blend properly, leading to a light and fluffy cookie texture.

For added flavor, consider adding a splash of vanilla extract or almond extract to the dough, enhancing the overall taste experience.

Experiment with different types of chocolate chips, such as dark, semi-sweet, or even white chocolate, to find your perfect flavor combination.

If you’re a fan of nuts, adding chopped pecans or walnuts can provide an appealing crunch and additional flavor depth.

Make sure to taste the cookie dough before baking; it allows you to adjust sweetness if needed, ensuring the final product is just right.

Consider sprinkling fleur de sel or sea salt atop cookies just before baking to enhance the flavors and create a delightful sweet-salty dynamic.

Try adding a bit of cocoa powder to the flour for an extra chocolatey cookie experience, taking your Maraschino Cherry Chocolate Chip Cookies to the next level.

Finally, always check for doneness a minute or two before the end of the baking time, as ovens can vary. Look for golden-brown edges and a soft center.

Variations and Adaptations

Regional variations can inspire unique takes on Maraschino Cherry Chocolate Chip Cookies. For instance, using local berries or fruits can infuse new flavors, aligning with seasonal harvests. Seasonal adaptations, like utilizing pumpkin puree for fall or fresh cherries during summer, can make these cookies align beautifully with the time of year.

Dietary modifications can cater to various preferences. Vegan substitutions using coconut oil and flaxseed meal can recreate the delightful qualities of the traditional cookies while maintaining dietary restrictions. Gluten-free adaptations using almond flour or oat flour not only make them accessible but also provide a different texture.

Flavor variations abound; you can incorporate spices like cinnamon or nutmeg for warmth, or orange zest for a bright citrus note that complements the cherries well. For texture modifications, try adding crushed graham crackers for a cookie with a delightful crunch.

Presentation alternatives, such as sandwiching two cookies together with whipped cream or frosting, can create an appealing dessert that impresses guests. Drizzling with melted chocolate or sprinkling with powdered sugar can elevate their aesthetic.

Serving and Presentation Guide

Plating techniques can significantly enhance the visual appeal of your Maraschino Cherry Chocolate Chip Cookies. Arrange the cookies on a rustic wooden board or a colorful platter to make them stand out. Consider mixing cookies with a variety of flavors for an inviting display.

Garnishing ideas could include dusting the cookies with powdered sugar or drizzling with melted chocolate, which adds an enticing visual touch. Traditional accompaniments like pairings with fresh fruit or vanilla ice cream can also create an inviting dessert experience.

For modern serving suggestions, consider presenting the cookies in stylish jars or gift boxes to offer them as thoughtful goodies. Temperature considerations are essential; these cookies are best served warm, but delightful at room temperature as well.

When it comes to portioning and control, serve the cookies with napkins and plates to ensure everyone indulges without making a mess. This consideration is vital during parties or gatherings to maintain cleanliness.

Wine and Beverage Pairing

Wine pairings for these delicious cookies could include light dessert wines like Moscato or Riesling, whose sweetness complements the cherries beautifully. Alternatively, consider pairing with a rich dessert wine like Port, enhancing the chocolate elements.

For non-alcoholic alternatives, milk or almond milk pairs perfectly with the cookies, balancing sweetness and providing a creamy texture. Herbal teas, like chamomile or mint, can offer refreshing contrast while enhancing the flavors of the chocolate and cherry.

When serving coffee or tea, ensure they are brewed at optimal temperatures to intensify the experience. Dipping the cookies into coffee can create an amazing flavor amalgamation as the warmth of the beverage melts the chocolate chips slightly.

Storage and Shelf Life

For optimal storage, keep your Maraschino Cherry Chocolate Chip Cookies in an airtight container at room temperature. This helps retain their moisture and prevents them from becoming hard. If properly stored, cookies can last for about a week.

For longer shelf life, consider freezing the cookies; place them in a freezer-safe container separated by parchment paper. They can be frozen for up to three months, allowing you to save some of your favorite treats for later.

Be attentive to signs of spoilage; if the cookies develop an off-smell or texture, it’s best to discard them. When reheating, place cookies in the microwave for a few seconds, or briefly in an oven, for a freshly baked taste.

If you have leftover cookie dough, you can also freeze it in balls, allowing you to bake fresh cookies whenever a craving strikes. This approach preserves freshness and ensures that warm cookies are just a few minutes away at any time.

Make Ahead Strategies

To prepare these cookies ahead of time, mix and shape the dough into balls, then refrigerate them for up to 24 hours. Chilling dough not only enhances flavor but also improves texture, ensuring that cookies bake evenly and maintain their shape.

If you’re planning for a gathering, consider baking a day in advance. Store baked cookies in an airtight container, and they will stay fresh, maintaining their deliciousness until the event.

Quality assessment is vital; freshly baked cookies typically taste better than those left for too long. If you’re making these for a specific occasion, aim to bake them on the day of or the day before for the best flavor and texture.

Add fresh elements like whipped cream or ice cream right before serving, adding a delightful contrast to the chewy cookie texture. Celebrate the homemade factor by encouraging guests to assemble their treats at the table.

Scaling Instructions

If you need to halve the recipe, simply divide each ingredient by two, but bake the cookies in smaller batches for perfect results. This approach ensures you don’t overcrowd the baking sheet.

When looking to double or triple the recipe, be mindful of bowl size and tool capacity, as large batches may require additional time and attention to detail for even baking.

Equipment adjustments may include using larger mixing bowls or additional baking sheets, ensuring that your oven has adequate space for even heat distribution.

Timing modifications might be necessary based on the batter’s consistency, so always keep an eye on the cookies, adjusting as needed to ensure they don’t overbake.

Consider storage modifications; ensure you still have sufficient airtight containers available to maintain freshness, especially when scaling up to larger batches.

Nutritional Deep Dive

The macro breakdown for Maraschino Cherry Chocolate Chip Cookies generally includes carbohydrates from flour and sugars, fat from butter and chocolate, and a small amount of protein from eggs. Approximately, each cookie contains 100-120 calories, depending on ingredients and portion size.

Micronutrient analysis reveals that these cookies may contain small amounts of potassium from cherries and calcium from milk if used. However, they are primarily a treat and should be enjoyed in moderation.

Considering health benefits, both cherries and dark chocolate provide antioxidants, supporting heart health and contributing to overall wellness. Introducing whole grains or substituting sugars enhances the nutritional profile, making it relatively healthier.

For those managing portions, consider breaking each cookie in half or sharing with friends, which allows for enjoyment without overindulgence. This moderation can still provide the satisfaction of treating oneself while being conscientious about intake.

Weight management tips could include savoring each bite, as chocolate and cherries offer rich flavors that encourage mindful eating, leading to appreciation of dessert without excessive consumption.

Dietary Adaptations

For gluten-free adaptations, consider using almond flour or a pre-mixed gluten-free blend to ensure texture and flavor remain intact while catering to dietary needs.

Dairy-free options can be explored using coconut oil or vegan butter for a similar taste and texture, allowing those with lactose intolerance to enjoy.

Vegan adaptations might involve replacing eggs with flaxseed or chia seeds to help bind the ingredients together, offering excellent results without animal products.

Low-carb versions of these cookies could use almond flour and erythritol instead of sugar, focusing on lower glycemic ingredients while maintaining sweetness.

For keto enthusiasts, incorporating sugar-free chocolate chips and reducing the overall sugar content will align perfectly with keto guidelines.

Paleo adaptations can explore alternatives like pure maple syrup or honey for sweetening and include unsweetened cocoa to keep the recipe natural and unprocessed.

Low-FODMAP adaptations should focus on ingredient selection, ensuring that good quality chocolate chips and permissible sugars are used, creating a suitable cookie treat that doesn’t trigger symptoms.

Troubleshooting Guide

Common texture issues often arise when cookies turn out too dry or crumbly. This usually indicates overbaking or possibly an incorrect flour-to-fat ratio. Always check the baking time closely and ensure accurate measurement of ingredients to achieve the desired consistency.

Flavor balance may not be perfect, especially if too much flour or sugar was used. A helpful tip here is to incorporate a pinch of salt to enhance flavors and adjust sweetness levels as needed. Consider adjusting spices, too, for added complexity.

Temperature problems usually stem from uncalibrated ovens. Keep an oven thermometer handy to ensure temperatures are consistent, making necessary adjustments when baking cookies.

Equipment challenges can include difficulties with mixers or baking sheets. Using parchment paper on your baking sheets can prevent sticking and ease the cleanup process, allowing easier removal of cookies.

If substitutions were made, the resulting change may lead to unexpected textures or flavors. Always ensure ingredients are compatible to achieve the intended outcome.

Timing concerns are also prevalent; cookies can overbake easily if left unattended. Set a timer and check on the cookies a couple of minutes before they are due to come out.

Recipe Success Stories

Community feedback often highlights how these Maraschino Cherry Chocolate Chip Cookies bring joy to family gatherings and celebrations. Many bakers love to share their variations, whether with different add-ins or unique tweaks that personalize the recipe further.

Variation successes frequently show how adding nuts or different flavor variations enhances the original recipe, proving versatile and enjoyable in countless ways. Readers have fun experimenting and often share their adaptations, proving that this recipe is beloved and flexible.

Adaptation stories often bring readers together, fostering connections as people share proud baking moments online or through social media. Photography tips are also welcomed, encouraging members to showcase their baking triumphs visually.

Encouragement through community engagement aids beginner bakers in trying out the recipe, finding success with the delightful combination of flavors.

Frequently Asked Questions

Can I use fresh cherries instead of maraschino cherries?

Absolutely! Fresh cherries can be a wonderful alternative, especially when in season. Just ensure to pit and chop them before adding to the batter.

How can I store leftover cookies?

Store cookies in an airtight container at room temperature for up to a week. For longer storage, freeze them in a freezer-safe container.

What if my dough is too sticky?

If your cookie dough is too sticky, try chilling it in the refrigerator for about 30 minutes. This will firm it up and make it easier to handle.

Can I substitute coconut oil for butter?

Yes, coconut oil can be used as a substitute for butter. It provides a unique flavor and contributes to a delightful texture.

Are these cookies suitable for freezing?

Yes! You can freeze the baked cookies or the unbaked dough. For best results, wrap them tightly in plastic wrap and store them in a freezer-safe bag.

How do I know when the cookies are done baking?

Look for golden edges and a soft center for perfect cookies. They will continue to firm up as they cool on the baking sheet.

Can I use mini chocolate chips?

Absolutely! Mini chocolate chips can be a great alternative, providing more chocolate flavor in every bite and a fun twist on texture.

Is it okay to omit the cherries?

While the cherries add a special flavor, you can omit them if desired. Consider replacing them with nuts or additional chocolate chips for alternative textures.

How can I enhance the cherry flavor?

Try adding a few drops of almond extract along with the vanilla in the recipe; it pairs wonderfully with the cherries and enhances their flavor.

What’s the best way to serve these cookies?

These cookies are best served slightly warm, perhaps with a glass of milk or a scoop of ice cream for an indulgent treat.

Additional Resources

Explore related recipes that share the same flavor profiles or showcase similar ingredients. Consider experimenting with other cookie recipes that highlight fruits or chocolate for variety.

Delve into technique guides for perfecting your baking skills, such as tips for mixing, measuring, and baking fundamentals. Expand your ingredient knowledge to appreciate the versatility of cherries, chocolate, and baking staples.

Equipment recommendations can be beneficial, ensuring you have the right tools at hand to achieve the desired cookie results while also enjoying the process of baking.

Seasonal variations can showcase how to infuse different fruits or spices into your cookies. Use holiday-themed accents like peppermint during the winter season or citrus flavors in the summer months.

Join the Conversation

Engage with the community by sharing your baking experiences, variations of Maraschino Cherry Chocolate Chip Cookies, or simply connecting over the love of baking. Social media platforms provide wonderful spaces for sharing photography tips, allowing bakers to inspire one another with stunning cookie displays.

Recipe reviews encourage feedback and foster community, allowing bakers to share their successes or seek advice on improving their skills. Be an active participant, sparking engaging discussions around favorite variations or new flavors to experiment with in future baking endeavors.

From the warmth of freshly baked cookies to the joyful connections created through sharing, these Maraschino Cherry Chocolate Chip Cookies bring everyone together in a sweet celebration of flavor and creativity.

The Recipe

Maraschino Cherry Chocolate Chip Cookies

Serves: 24 cookies

Prep Time: 15 mins

Cook Time: 10 mins

Total Time: 25 mins

Kitchen Equipment Needed

  • Mixing bowl
  • Baking sheet
  • Oven
  • Measuring cups
  • Mixing spoon or electric mixer
  • Cooling rack

Ingredients

  • 1 cup unsalted butter, softened
  • 1 cup granulated sugar
  • 1 cup packed brown sugar
  • 2 large eggs
  • 1 tsp vanilla extract
  • 3 cups all-purpose flour
  • 1 tsp baking soda
  • 1/2 tsp salt
  • 1 cup maraschino cherries, drained and chopped
  • 1 cup semi-sweet chocolate chips

Directions

  1. Preheat oven to 350°F (175°C) and line a baking sheet with parchment paper.
  2. In a mixing bowl, cream together the softened butter, granulated sugar, and brown sugar until light and fluffy.
  3. Add eggs one at a time, along with the vanilla extract, mixing well after each addition.
  4. In another bowl, whisk together the flour, baking soda, and salt. Gradually add this to the wet mixture until combined.
  5. Fold in chopped maraschino cherries and chocolate chips until evenly distributed in the dough.
  6. Drop rounded tablespoons of dough onto the prepared baking sheet, spacing them about 2 inches apart.
  7. Bake in the preheated oven for 10-12 minutes or until the edges are golden brown.
  8. Let cool on the baking sheet for a few minutes before transferring to a wire rack to cool completely.

Recipe Notes

  • For a chewier cookie, try using more brown sugar than granulated sugar.
  • Feel free to experiment with different types of chocolate chips for new flavor variations.
  • You may substitute dried cherries if fresh or maraschino cherries are not available.

Best Gooey Cinnamon Cream Cheese Muffins for Breakfast

Gooey Cinnamon Cream Cheese Muffins: Irresistibly Delicious Morning Treats

⚖️
Difficulty
Easy

⏲️
Prep Time
15 mins

🕒
Cook Time
25 mins

⏱️
Total Time
40 mins

🍽️
Servings
12 muffins

Gooey Cinnamon Cream Cheese Muffins are the perfect blend of sweet, spice, and everything nice—making them an irresistible breakfast option. Indulge in the delightful layers of warm, spiced cake hugging a hidden dollop of creamy, cinnamon-infused cream cheese. These muffins are not just a treat for the taste buds; their irresistible aroma fills the kitchen, creating a cozy atmosphere as you prepare them. Whether you’re starting your day or enjoying a mid-afternoon snack, these muffins are sure to elevate your mood.

Imagine pulling these warm muffins out of the oven, the enticing smell of cinnamon wafting through your home. Each bite reveals a soft, fluffy texture bursting with flavor and a delightful gooey center. Perfectly sweetened, they are balanced with just the right amount of spice to complement the creamy filling. These muffins have a rustic charm that invites all to gather around the table and enjoy a piece of comfort food bliss, making them a wonderful addition to your breakfast table or brunch spread.

Quick Recipe Highlights

  • Flavor Profile: Sweet cinnamon blends seamlessly with the creamy cheese filling, offering a symphony of tastes that awaken the senses.
  • Texture: Soft and fluffy on the outside with a gooey center, these muffins are a delightful combination of airy cake and creamy richness.
  • Aroma: The scent of freshly baked cinnamon and vanilla wafts through your kitchen, creating a warm and inviting atmosphere.
  • Visual Appeal: Golden tops dusted with cinnamon sugar and the alluring ease of the creamy center makes for an inviting presentation.
  • Skill Level Needed: This recipe is suitable for all skill levels, from beginners to experienced bakers, ensuring anyone can create this delicious treat.
  • Special Equipment: Simple kitchen tools are required, including a mixing bowl, muffin tin, and measuring cups, making preparation a breeze.

Recipe Overview

  • Difficulty Level: This easy recipe is perfect for home cooks looking to bake something delicious without a lot of fuss, making it accessible for everyone.
  • Category: These muffins are an excellent breakfast option or a delightful addition to a brunch gathering, perfect for sharing with friends and family.
  • Cuisine: Influenced by classic American baking, these muffins combine traditional flavors with a twist, representing home-style comfort food.
  • Cost: A budget-friendly recipe, the ingredients are common pantry staples, keeping the overall cost low while offering great flavor.
  • Season: Perfect year-round, these muffins are especially delightful in the fall and winter months when cozy flavors are at their best.
  • Occasion: Ideal for breakfast, brunches, or a sweet snack during the day, they bring a festive touch to any occasion.

Why You’ll Love This Recipe

The taste and texture of Gooey Cinnamon Cream Cheese Muffins truly set them apart.
Each muffin boasts a soft, buttery exterior, while the sweet cream cheese center provides a luscious contrast that melts in your mouth. The combination of cinnamon and sugar creates a warm, comforting flavor reminiscent of cozy family gatherings and cherished traditions. These muffins are not just food; they are an experience that you’ll want to recreate time and again.

Convenience is key when it comes to breakfast, and this recipe delivers just that. With only a few simple ingredients and minimal prep time, you can whip up a batch of muffins that will delight everyone at your breakfast table. They are quick to prepare, and the method is straightforward, making them perfect for busy mornings or impromptu gatherings. Enjoying these delicious muffins doesn’t require a lot of culinary expertise, so you can easily pass them off as a bakery treat.

Not only are these muffins incredibly tasty, but they also have nutritional benefits. Cream cheese adds a source of calcium and protein while the cinnamon can help regulate blood sugar levels. With the right balance of ingredients, these muffins allow for a treat that you can enjoy without compromising your dietary goals. Pair them with a fruit smoothie or a glass of milk for a wholesome breakfast.

Socially, these muffins have a wonderful shareability factor. Bringing a warm batch of Gooey Cinnamon Cream Cheese Muffins to a gathering is sure to make you the hit of the occasion, sparking conversations and smiles around the table. Their inviting aroma draws people in, making sharing a joyous part of the experience.

In terms of cost, this recipe is budget-friendly, requiring only common ingredients that are often already on hand. This makes it an accessible option for anyone looking to indulge in some homemade goodness without breaking the bank. The enjoyment of these muffins far outweighs the minimal expense, proving that delightful recipes don’t need to cost a fortune.

Historical Background and Cultural Significance

Cinnamon rolls and muffins have a rich history in American cooking, often associated with comfort food. The tradition of enjoying sweet baked goods has deep roots, tracing back to early settlers who adapted European recipes to create hearty treats for the family table. Gooey Cinnamon Cream Cheese Muffins reflect this cultural blending, where textures, flavors, and techniques came together to create a beloved favorite.

Culturally, cinnamon has long been celebrated for its aromatic qualities and health benefits, making it a staple in many households. Pairing it with cream cheese not only enhances the flavor but also signifies the evolution of combining sweet and savory elements that are now commonplace in American baking. These muffins can be seen as a symbol of togetherness, inviting friends and families to gather for a shared meal.

The evolution of this recipe showcases the creative spirit of home bakers who enjoy altering traditional recipes to incorporate unique flavors. Over time, several variations have emerged, from adding nuts to incorporating different spices, showing its versatility. The exploration of flavors signifies how food can evolve and yet remain comforting.

Regional variations often arise, with some areas incorporating fruits like apples or raisins into their muffins. Others may choose to swap the cream cheese for flavored options, adding their local flair to the classic recipe. This allows the Gooey Cinnamon Cream Cheese Muffins to adapt while retaining their essence, making them suitable for diverse palates and preferences.

Ingredient Deep Dive

Cinnamon is the star of this recipe and has deep cultural significance. Used for centuries, cinnamon is loved not only for its distinctive flavor but also for its numerous health benefits, including anti-inflammatory properties and the ability to lower blood sugar levels. When selecting cinnamon, look for Ceylon cinnamon for a milder taste or Cassia cinnamon for a bolder flavor. Proper storage in a cool, dark place is essential for preserving its flavor. If you can’t find cinnamon, nutmeg or allspice can serve as alternatives, but will create a different flavor profile.

Cream cheese is another key ingredient that adds a creamy, tangy element to the muffins. This cheese has its roots in the United States dating back to the 19th century. Today, cream cheese is a versatile ingredient found in many desserts and savory dishes. It provides a rich source of calcium and protein, making it a worthy addition to treat recipes. When purchasing cream cheese, ensure it’s fresh, and store it in the refrigerator. Non-dairy cream cheese alternatives can be used for a vegan twist, though they might alter the flavor slightly.

All-purpose flour serves as the base for these muffins, creating a light and fluffy texture. Its versatility makes it a go-to choice in many recipes, and it’s easy to find. Whole wheat flour can be substituted for a healthier option, while gluten-free flour blends allow for dietary adjustments. When choosing flour, check for freshness and store it in a cool, dry place to maintain its quality.

Sugar provides the necessary sweetness that complements the spices perfectly. Granulated sugar is commonly used, but brown sugar adds a hint of caramel flavor that elevates the muffins. Knowing the difference can help in choosing the right type for your baking needs. Properly sealing sugar in an airtight container helps prevent clumping and preserves its fine grain.

Eggs play a vital role in muffin recipes, providing moisture and structure. Look for fresh, high-quality eggs, and store them appropriately to ensure maximum freshness. For those avoiding eggs, flaxseed meal mixed with water can create a suitable egg replacement, providing similar binding properties.

Common Mistakes to Avoid

  • Overmixing the batter: This can lead to dense muffins. Mix just until combined for a light, fluffy texture.
  • Skipping the cream cheese filling: Ensure to create a pocket in the muffin for the cheese to achieve that gooey center.
  • Using cold ingredients: Bringing eggs, milk, and cream cheese to room temperature helps in better mixing and a smoother batter.
  • Not preheating the oven: This can lead to uneven baking. Preheating ensures a consistent rise and fluffy texture.
  • Ignoring the baking time: Muffins can quickly overbake, leading to dryness. Keep an eye on them during the last few minutes.
  • Inaccurate measurements: Baking is a science, and even slight deviations can impact the final product. Use proper measuring tools.
  • Using stale ingredients: Fresh ingredients promote the best flavor and texture in baking, so check dates before using.
  • Not cooling muffins properly: Allow the muffins to cool in the pan for a bit before transferring to a wire rack; this prevents sogginess.

Essential Techniques

Mastering batter mixing is crucial for achieving the best muffin texture. Mix the dry ingredients separately from the wet to avoid overmixing, which can produce dense muffins. Gently fold the wet mixture into the dry ingredients until just combined, remembering that it’s okay for the batter to be lumpy.

Creating the cream cheese filling is a key step. Use softened cream cheese to ensure it blends smoothly with the sugars and flavorings. Scoop some batter into the muffin cups, add the cheesecake mixture, and top with more batter to encapsulate it. This layering technique takes a bit of practice but is essential for that coveted gooey center.

Baking at the right temperature is vital for muffin success. Ensure your oven is correctly calibrated, and consider using an oven thermometer to avoid under or overbaking. Proper heat distribution leads to an even rise and desirable golden-brown tops.

Testing for doneness is an important skill. Insert a toothpick into the center of a muffin; if it comes out clean or with a few moist crumbs, they’re ready. If it’s covered in batter, they need more time. Learn to trust your judgment and adjust baking times as necessary.

Pro Tips for Perfect Gooey Cinnamon Cream Cheese Muffins

Start with high-quality ingredients to ensure the best flavor.
Make sure your cream cheese is at room temperature to blend seamlessly.
Use a muffin scoop for evenly sized muffins that bake consistently.
Adjust baking time if using mini-muffin tins, as they require less time to cook.
Add a sprinkle of coarse sugar on top before baking for a delightful crunch.
Let the muffins cool in the pan to prevent sticking and ensure an even texture.
Experiment with different spices, like nutmeg or cardamom, for a unique twist.
For an extra flavor boost, fold in chopped nuts or chocolate chips.

Variations and Adaptations

For a regional variation, consider adding diced apples or cranberries to the batter for a seasonal twist. This not only enhances the flavor but also adds a lovely texture. In the spring, you can try infusing lemon zest into the cream cheese filling for a refreshing change that brightens the muffins.

If dietary needs require adjustments, these muffins can be easily made gluten-free using a 1:1 gluten-free flour blend. For a vegan adaptation, substitute the eggs with flaxseed eggs and use dairy-free cream cheese, ensuring everyone can enjoy this delicious treat.

For flavor variations, feel free to experiment with different extracts like almond or maple to create unique profiles. Swapping traditional cinnamon for pumpkin pie spice during fall adds a seasonal flavor that many enjoy.

Texture modifications can also enhance the experience; consider adding oats to the batter for a heartier muffin or mixing in some cocoa powder for a rich chocolate version that pairs beautifully with the cream cheese filling.

Presentation alternatives could include a drizzle of glaze or a dollop of whipped cream on top if serving for a special occasion. Customize your muffins to your enjoyment!

Serving and Presentation Guide

When it comes to plating your Gooey Cinnamon Cream Cheese Muffins, opt for a rustic wooden board or a delicate cake stand for an elegant touch. Arrange the muffins in a circular pattern, and consider adding edible flowers or sprigs of mint for a pop of color.

Garnishing with a dusting of powdered sugar or a sprinkle of cinnamon adds visual appeal, as well as an extra layer of flavor. Pair them with fresh fruits like berries or citrus slices for a refreshing contrast on the plate.

For modern serving suggestions, consider offering a variety of spreads alongside, such as honey, nut butter, or flavored cream cheese, allowing everyone to customize their muffins according to their taste preferences. Remember to serve them warm for the ultimate experience.

Temperature is also essential; serving these muffins slightly warm enhances their gooey center and overall flavor profile. Offering a balance of warm muffins and chilled beverages makes for a delightful combination.

Lastly, be mindful of portion control; often, muffins can be larger than expected. Consider smaller servings for sharing or serve them alongside a fruit salad or yogurt for a well-rounded meal.

Wine and Beverage Pairing

When wondering about the perfect wine pairings for your Gooey Cinnamon Cream Cheese Muffins, consider a light, fruity sparkling wine, like a Prosecco. Its bubbles and sweetness complement the rich, cinnamon notes beautifully. Alternatively, a Riesling can offer a refreshing acidity that balances out the sweetness of the muffins.

If you’re looking for non-alcoholic options, a chai latte is an excellent choice. The spiced flavor of the chai echoes the cinnamon in the muffins, creating a harmonious breakfast experience. Alternatively, a cold brew coffee with a splash of cream could offer a delightful contrast to the warm muffins.

When enjoying these muffins for dessert, pairing them with dessert wines, such as Moscato or a light Rosé, can enhance the sweetness of the dish. Serve at the right temperature, ensuring the muffins are warm, while beverages are chilled for an enjoyable combination.

Storage and Shelf Life

To ensure the longevity of your Gooey Cinnamon Cream Cheese Muffins, store them in an airtight container at room temperature. They will stay fresh for about 2-3 days, allowing you to enjoy their sweet goodness.

If you want to extend their shelf life, consider freezing them. Let the muffins cool completely, then wrap each one individually in plastic wrap before placing them in a freezer-safe bag. They can be stored this way for up to three months. To enjoy, simply thaw at room temperature or pop in the microwave for a few seconds.

Be mindful of signs of spoilage; if the muffins develop an off odor or visible mold, it’s best to discard them. For freshness, reheat the muffins in a toaster oven or microwave, ensuring they are warm and the gooey center is revitalized.

For those who like their muffins with a crispy top, reheating in an oven rather than a microwave will help retain that texture, making them taste freshly baked again.

Make Ahead Strategies

To make your breakfast preparation easier, consider prepping your ingredients a day in advance. Measure out the dry ingredients and store them in an airtight container to save time in the morning. You can also mix the cream cheese filling and refrigerate it until you are ready to assemble.

If you prefer to bake ahead, these muffins can be made and stored for later consumption. Just ensure they are completely cooled before storing them in an airtight container. They can also be frozen and reheated, maintaining their flavor and texture.

For best quality, I recommend baking no more than two days in advance of your intended serving. If you are entertaining, consider making them the day before and reheating them slightly before serving for that freshly baked experience.

Experiment with assembly options; you could prepare the batter the night before. In the morning, simply fill the muffin tins and bake them for a lovely, quick breakfast that fills the kitchen with irresistible smells.

Scaling Instructions

Scaling your Gooey Cinnamon Cream Cheese Muffins is straightforward. If you want to halve the recipe, simply reduce the measurements of each ingredient accordingly and adjust the baking time to ensure they are done correctly, as smaller quantities may bake quicker.

Doubling or tripling the recipe is just as simple. Keep an eye on the baking time, as larger batches may require additional time in the oven. When doing so, consider baking in two separate muffin tins rather than cramming everything into one, which can lead to uneven baking.

When adjusting the recipe, pay attention to the mixing methods; the order of wet and dry ingredients remains consistent. Make sure you adjust your mixing bowls accordingly to handle larger volumes if you decide to prepare a larger batch.

Lastly, ensure you have enough oven space for your pans. If you are doubling the recipe, consider rotating the pans halfway through cooking for even baking.

Nutritional Deep Dive

Each Gooey Cinnamon Cream Cheese Muffin is a delightful indulgence, with a macro breakdown consisting primarily of carbohydrates from the flour and sugars. While these muffins are not low in calories, they can be part of a balanced diet if enjoyed in moderation.

In terms of micronutrients, cinnamon adds some health benefits, such as antioxidants and anti-inflammatory properties. Cream cheese provides calcium and vitamin A, contributing to a well-rounded treat. Those elements combined make these muffins a guilt-free pleasure when balanced with other nutritious meals throughout the day.

Health benefits can also be achieved by making ingredient swaps, such as using whole wheat flour or incorporating healthier sugars like coconut sugar. Just be mindful of the changes in taste and texture that result from these substitutions.

Portion analysis is key; recognizing the muffin as a treat rather than a daily staple will help manage caloric intake while allowing for those moments of enjoyment. Pairing these muffins with protein sources, such as nuts or yogurt, can help create a satisfying breakfast or snack.

Weight management can be supported by considering serving sizes. Enjoy one muffin with a side of fruits or a protein shake for a more balanced meal, maximizing both satisfaction and nutrition.

Dietary Adaptations

For a gluten-free adaptation of these Gooey Cinnamon Cream Cheese Muffins, simply swap all-purpose flour for a gluten-free blend. Many options are available that mimic the texture of regular flour without sacrificing taste.

To make the muffins dairy-free, substitute cream cheese with a vegan alternative made from nuts or tofu, offering a similar texture without the dairy components. Ensure that other dairy ingredients are also replaced with plant-based options.

If you are following a vegan diet, replace eggs with flaxseed or chia seeds mixed with water. This not only holds the muffins together but can also enhance the nutritional profile.

For those on a low-carb or ketogenic diet, consider using almond flour and a low-carb sweetener instead of flour and sugar. This allows for enjoying these muffins without the high carbohydrate content.

Paleo followers can replace refined sugars with natural sweeteners like maple syrup or honey, and yogurt can be swapped for non-dairy alternatives to fit this dietary approach without losing that delicious flavor.

Troubleshooting Guide

If your muffins end up too dry, consider reducing baking time or checking the oven temperature, as it could be higher than needed. Adding a bit more moisture into the batter, such as a tad more milk, can also help achieve a better balance.

Texture issues can arise if overmixed. If your muffins are dense, ensure to fold the ingredients gently and just until combined to allow for a light, airy muffin.

Flavor balance sometimes may lean towards too sweet or too bland. Adjusting the sugar content or adding a pinch of salt can enhance flavors beautifully, enhancing the overall taste.

In case of baking temperature problems, look into whether your oven is calibrated properly. An oven thermometer can help ensure accuracy and help you avoid underbaking or burning your muffins.

Ingredient substitutions can lead to failures if not done properly. If changing flours, remember that different flours absorb moistures differently, so adjusting liquid ratios might be necessary.

Timing concerns should be well managed; check your muffins a few minutes before the suggested time to avoid overbaking, ensuring they are perfectly gooey in the center.

Recipe Success Stories

The community feedback on Gooey Cinnamon Cream Cheese Muffins has been overwhelmingly positive, with many attributing their success to the simple yet effective techniques outlined in the recipe. One reader shared that they added a handful of walnuts, resulting in a lovely crunch.

Many have reported beautiful results when experimenting with the filling, with variations on cream cheese including flavored options, like strawberry or pumpkin, allowing for unique adaptations that cater to different tastes. One success story came from a grandmother who taught her entire family how to make these muffins, creating a new family tradition around baking these delicious treats.

Another reader suggested serving the muffins warm with whipped cream, a suggestion that received rave reviews from their guests at a recent brunch. The addition of various spices has inspired others to get creative, making these muffins a canvas for flavor experimentation.

Photography tips from the community have also elevated the presentation of these muffins, with photos showcasing beautifully glazed tops and warm, gooey centers that make these muffins irresistible.

Frequently Asked Questions

1. Can I freeze Gooey Cinnamon Cream Cheese Muffins?
Yes! Once they’ve cooled completely, wrap them individually in plastic wrap and place them in a freezer bag. They can last up to three months in the freezer. Thaw at room temperature or warm them in the microwave before serving.

2. Can I substitute ingredients?
Absolutely. You can swap all-purpose flour for whole wheat or gluten-free flour and use dairy-free cream cheese for a vegan version. Experiment with flavors as desired!

3. What can I serve with these muffins?
These muffins pair wonderfully with coffee, tea, or a tall glass of milk. Consider serving them with fresh fruit or a dollop of yogurt for a balanced meal.

4. How do I know when they are done baking?
Insert a toothpick into the center of a muffin; if it comes out clean or with a few moist crumbs, they are done. If the toothpick has batter on it, give them more time.

5. What can I do if my muffins are too dry?
If your muffins are dry, it may be due to overbaking. Check the baking time and ensure to adjust accordingly. Adding a little extra moisture to the batter can also help.

6. Can I make them dairy-free?
Yes, you can use vegan cream cheese and replace regular milk with almond milk or another non-dairy option maintaining similar textures and flavors.

7. How should I store leftover muffins?
Store them in an airtight container at room temperature for up to 3 days or freeze them for longer storage, ensuring they are properly wrapped.

8. Can I add different flavors to the cream cheese filling?
Definitely! Consider adding vanilla extract, cocoa powder, or fruit puree to the cream cheese mixture for a delicious twist on flavor.

9. What if I want to make a larger batch?
You can easily double or triple the recipe. Just be mindful of the baking time, as it may vary slightly with larger batches.

10. Are these muffins suitable for breakfast?
Yes, they make for a delightful breakfast option, especially when paired with a protein source like yogurt or eggs for a well-rounded meal.

Additional Resources

For those looking to expand their baking repertoire, consider exploring related recipes like Pumpkin Spice Muffins or Lemon Blueberry Muffins. These delightful variations will keep your baking adventures exciting.

Delve into technique guides that teach essential baking skills like folding properly or mastering the art of muffin-making for consistent results in all your baked goods.

Ingredient information can be helpful, particularly learning more about the benefits of spices or exploring different types of flours for your dietary needs, ensuring you can adjust recipes to fit your preferences and health goals.

Look into equipment recommendations as well; investing in quality mixing bowls, measuring cups, and muffin tins can enhance your baking experience and lead to better results in the long run.

Finally, seasonal variations based on the time of year can inspire creativity in your baking. Transitioning flavors with the seasons introduces fresh ingredients and keeps your recipes vibrant and exciting.

Join the Conversation

We invite you to share your experiences with Gooey Cinnamon Cream Cheese Muffins on social media! Capture your baking progress and the final result, and don’t forget to tag us for a chance to be featured on our page.

If you’ve tried this recipe, leave a review! Sharing your thoughts and variations helps our community grow and inspires others to get into the kitchen. Feel free to suggest what flavors you experimented with and how it turned out.

Engage with fellow bakers in the comments section; discuss tips and tricks, and share stories about your baking adventures. Your insights might just help someone else create their own delicious version of this delightful recipe!

Remember, the beauty of baking lies in creativity and community, so let’s keep the conversations going, inspire one another, and enjoy the sweet journey of creating scrumptious treats together.

The Recipe

Gooey Cinnamon Cream Cheese Muffins

Serves: 12 muffins

Prep Time: 15 mins

Cook Time: 25 mins

Total Time: 40 mins

Kitchen Equipment Needed

  • Muffin tin
  • Mixing bowls
  • Measuring cups
  • Whisk
  • Spoon or spatula
  • Toothpick for testing doneness

Ingredients

  • 2 cups all-purpose flour
  • 1 cup granulated sugar
  • 1 tablespoon baking powder
  • 1 teaspoon ground cinnamon
  • ½ teaspoon salt
  • 1 cup milk
  • ½ cup unsalted butter, melted
  • 2 large eggs
  • 8 oz cream cheese, softened
  • ½ cup powdered sugar
  • 1 teaspoon vanilla extract
  • Extra cinnamon sugar for sprinkling

Directions

  1. Preheat your oven to 350°F (175°C) and grease a muffin tin or line with paper liners.
  2. In a large mixing bowl, mix together flour, granulated sugar, baking powder, cinnamon, and salt.
  3. In another bowl, whisk together the milk, melted butter, and eggs until well combined.
  4. Pour the wet ingredients into the dry ingredients and mix until just combined (lumps are okay).
  5. In a small bowl, beat the cream cheese with powdered sugar and vanilla until creamy.
  6. Fill each muffin cup halfway with muffin batter, then add a spoonful of the cream cheese mixture, and top with additional batter to cover the filling.
  7. Sprinkle the tops with cinnamon sugar before baking.
  8. Bake for 25 minutes or until a toothpick comes out clean from the muffin tops.
  9. Allow to cool for 5 minutes in the tin before transferring to a wire rack to cool completely.

Recipe Notes

  • These muffins are best served warm, but can be stored at room temperature for up to 3 days.
  • For added flavor, consider incorporating nuts or chocolate chips into the batter.
  • Keep an eye on the muffins toward the end of the baking time to avoid overbaking.

Best Chocolate Croissant Breakfast Bake for Brunch

Chocolate Croissant Breakfast Bake: A Decadent Start to Your Day

⚖️
Difficulty
Easy

⏲️
Prep Time
15 mins

🕒
Cook Time
30 mins

⏱️
Total Time
45 mins

🍽️
Servings
8

Indulge your senses this morning with a delightful Chocolate Croissant Breakfast Bake. Perfect for a leisurely Sunday brunch or a special occasion, this recipe brings the flaky goodness of croissants and the richness of chocolate together in a warm, comforting dish. Imagine waking up to the aroma of chocolate melting into buttery layers, enticing everyone to gather around the breakfast table. The soft, custardy texture, combined with hints of vanilla and rich chocolate, delivers a sweet start to your day that is simply irresistible.

This Chocolate Croissant Breakfast Bake is not just about flavor; it is also a feast for the eyes. The golden, crispy top and the gooey chocolate peeking through the layers create an inviting presentation. Not only is it visually stunning, but this dish also offers the ease of preparation and the joy of gathering loved ones for a cozy meal. As you slice into the bake, the warm, chocolatey center oozes out, making every bite a decadent experience.

Quick Recipe Highlights

  • Flavor Profile: Rich chocolate blended with buttery croissants creates an enticing flavor that will satiate your morning cravings.
  • Texture: The bake has a heavenly combination of crispy edges and a soft, custardy center that melts in your mouth.
  • Aroma: The sweet scent of baking chocolate and warm pastry fills your kitchen and beckons everyone to join in.
  • Visual Appeal: The contrast of golden croissant layers and melted chocolate makes this dish an eye-catching centerpiece.
  • Skill Level Needed: This easy recipe is perfect for beginners and advanced bakers looking for a delicious brunch option.
  • Special Equipment: You will need a baking dish, mixing bowl, and whisk for this recipe.

Recipe Overview

  • Difficulty Level: The Chocolate Croissant Breakfast Bake is simple yet impressive, making it suitable for novice cooks and busy parents alike.
  • Category: This dish serves as a perfect breakfast or brunch option, combining sweet elements with the warmth of baked goods.
  • Cuisine: Drawing inspiration from French pastry, this bake celebrates traditional ingredients while adding a modern twist.
  • Cost: The ingredients are relatively affordable, often costing under $15 depending on your location.
  • Season: Ideal year-round, this breakfast bake delights during brunches, holidays, and special occasions.
  • Occasion: Perfect for family gatherings, holiday breakfasts, or cozy brunches with friends.

Why You’ll Love This Recipe

This Chocolate Croissant Breakfast Bake boasts an irresistible taste with its perfect harmony of rich chocolate and buttery croissants. Each bite envelops your palate with the creamy, satisfying flavor, offering a delightful treat that feels luxurious yet comforting.

The convenience of this recipe makes it a winner in any kitchen. With just a few simple steps, you can prep this bake the night before and pop it into the oven the next morning, allowing you to enjoy leisurely weekend mornings without stress. It’s a time-saving option for busy parents or last-minute guests!

Nutritionally, this breakfast bake has its perks too. While it’s a treat, pairing it with fresh berries or yogurt can enhance its health benefits, providing a balance of indulgence and nutritious options.

This Chocolate Croissant Breakfast Bake is an excellent choice for social gatherings. It fosters a sense of community as people gather around a delicious, shared meal, encouraging conversation and connection among friends and family.

Finally, consider the cost-effectiveness of this recipe. With simple ingredients that are easy to source, you don’t have to break the bank to create an impressive meal that’s sure to please a crowd.

Historical Background and Cultural Significance

The origins of croissants can be traced back to Austria, where the kipferl pastry, a crescent-shaped delight, was first introduced. French bakers adopted this pastry and transformed it into what we now know as the flaky croissant, a staple of French cuisine. The incorporation of chocolate into croissant recipes emerged as a popular variation, appealing to those with a sweet tooth.

Croissants have become symbolic of French culinary innovation and artistry. They represent not just a delicious pastry but also the sophistication of French baking techniques that have influenced cuisines worldwide. This breakfast bake takes the traditional croissant and elevates it, integrating chocolate to create a unique dish that reflects both history and modern flavor profiles.

Over time, variations of the croissant have evolved, including the addition of various fillings, from almond to chocolate. This progression showcases the adaptability of baked goods to local ingredients and tastes, allowing them to remain relevant in diverse culinary contexts across the globe.

Regional variations of this dish are common. For instance, in many Southern states, adding pecans or local fruits creates a unique twist on the traditional recipe. This adaptability ensures that the Chocolate Croissant Breakfast Bake is enjoyed in various forms around the world, making it a beloved dish in many households.

Ingredient Deep Dive

Croissants: The backbone of this recipe, croissants are distinguished by their buttery layers and flaky texture. They carry a history that dates back several centuries, originating from the Austrian kipferl. Croissants provide essential carbohydrates and fats, making them an excellent foundation for breakfast bakes. When selecting croissants, look for those that are freshly baked or available from high-quality bakeries. They should feel light and airy. Store them in an airtight container to maintain freshness for up to two days.

Chocolate: This key ingredient adds richness and flavor to the bake. Whether using dark, milk, or semi-sweet chocolate, it’s essential for creating that luscious gooey center. Dark chocolate tends to have higher cocoa content, offering antioxidants and potential health benefits when consumed in moderation. Choose chocolate bars that are evenly tempered and have a good snap when broken. Keep unused chocolate stored in a cool, dry place to inhibit melting.

Eggs: Eggs provide structure and contribute to the custardy texture of the bake. Rich in protein and nutrients, they play a significant role in many breakfast dishes. When purchasing eggs, look for organic or free-range options, which are often regarded as healthier and more humane choices. Store eggs in the refrigerator, and they can last for several weeks.

Milk: Milk hydrates the mixture and adds creaminess. Dairy also fortifies the dish, providing calcium and vitamins. For best results, use whole milk for a richer flavor, but feel free to substitute with plant-based options if preferred. Refrigerate to keep it fresh and use within the expiration date.

Common Mistakes to Avoid

  • Using stale croissants: Old croissants do not absorb the custard well, leading to a dry bake. Ensure to use fresh croissants for optimal flavor.
  • Poor custard consistency: Overbeating the eggs or not incorporating the ingredients correctly can affect the custard’s texture. Always mix gently to avoid aeration.
  • Skipping the resting time: Allowing the bake to rest before serving helps flavors meld together. Skipping this step can result in a bland dish.
  • Not preheating the oven: An adequately heated oven ensures even cooking and helps achieve a beautiful golden crust. Always preheat before baking.
  • Using low-quality chocolate: This can alter the flavor. Opt for high-quality chocolate for a decadent outcome.
  • Inadequate baking time: Pulling the bake out too soon can leave it undercooked. Follow the time guidelines carefully.
  • Wrong baking dish size: The size of the dish impacts cooking time. Ensure to use a dish that nests the croissant pieces snugly.
  • Neglecting garnish: A lack of garnish can make the dish look uninviting. Simple dusting with powdered sugar can elevate its presentation.
  • Ignoring ingredient temperature: Using ingredients that are too cold can affect how well they blend. Bring ingredients to room temperature before starting.
  • Not checking for doneness: Always test your bake with a knife or skewer to ensure it’s fully cooked. A wet knife indicates further baking is necessary.

Essential Techniques

Whisking Eggs: Whisking is crucial for creating a smooth custard. Ensure you gently beat the eggs until fully blended, incorporating air without creating bubbles. Use a fork or a whisk, and aim for a steady motion to ensure even mixing without over-whipping, which could affect the final texture.

Layering Ingredients: Pay attention to how you layer the croissant pieces in the baking dish. Begin with a layer of croissants and then pour the custard mixture evenly. This technique ensures even distribution of flavors throughout the dish while preventing any dry spots, enhancing the overall taste experience.

Baking: The baking technique is essential for achieving the perfect crust. Focus on maintaining the right oven temperature. Midway through baking, consider rotating the dish for even browning. Key visual cues to look for are a golden top and firm edges, which indicate the dish is fully cooked.

Allowing to Rest: Letting the bake rest after cooking is a critical step. This time allows the custard to set and flavors to deepen. Visual cues that suggest readiness are a slightly firm texture and a golden color. Skipping this will result in a more gooey and less satisfying end product.

Pro Tips for Perfect Chocolate Croissant Breakfast Bake

1. For an enhanced flavor profile, consider adding a teaspoon of vanilla extract to the egg mixture before pouring it over the croissants.
2. To elevate your bake, incorporate seasonal fruits like raspberries or strawberries for freshness and a colorful presentation.
3. Experiment with different types of chocolate, such as white chocolate or flavored artisan varieties, for unique variations.
4. For extra texture, sprinkle chopped nuts like almonds or hazelnuts on top before baking for added crunch.
5. Serve with a light dusting of powdered sugar and fresh berries to add visual appeal and balance the sweetness.
6. If you’re preparing this dish in advance, assemble it the night before and store it in the refrigerator to allow flavors to develop.
7. Use a food processor to crumble your croissants faster for an even layer distribution in the baking dish.
8. Consider topping your bake with a simple glaze made from powdered sugar and milk for a delightful finish.

Variations and Adaptations

For regional variations of the Chocolate Croissant Breakfast Bake, try incorporating local seasonal fruits or nuts. For instance, adding fresh blueberries gives a delightful tartness that works beautifully with the sweet chocolate.

Consider seasonal adaptations such as pumpkin spice in autumn or adding peppermint extract during the winter holidays for a festive twist. These variations can completely change the vibe of the dish while maintaining its essence.

Dietary modifications can also be made if certain ingredients need to be adjusted. For a gluten-free version, utilize gluten-free croissants or substitute with gluten-free bread while still achieving a similar texture.

Flavor variations can be achieved by creating a chocolate and caramel combination. Swirled caramel into the custard will offer an indulgent twist to the traditional recipe.

When it comes to texture modifications, crumbling the croissants instead of layering them can create new textures that absorb the custard more thoroughly for a moist breakfast bite.

Lastly, think about presentation alternatives; instead of a traditional bake, you can prepare individual ramekins for a personal touch, perfect for brunch parties!

Serving and Presentation Guide

For a beautiful presentation of the Chocolate Croissant Breakfast Bake, consider plating techniques that highlight the luscious texture of the bake. Serve it in individual portions for an elegant touch, or serve family-style in a vibrant baking dish.

Garnishing with a sprinkle of powdered sugar not only adds a decorative touch but also hints at the sweet flavors within. Pair the bake with fresh berries or a dollop of whipped cream to enhance the visual appeal and add a complementary flavor contrast.

Consider serving the bake warm alongside strong coffee or a refreshing fruit juice. The temperature balance adds to the overall breakfast experience, making each bite even more enjoyable.

For portion control, cut evenly sized squares or slices, ensuring everyone has an ample serving without creating waste.

Wine and Beverage Pairing

Pairing beverages with Chocolate Croissant Breakfast Bake can enhance the breakfast experience. A rich, creamy cappuccino complements the chocolate’s deep flavors beautifully. Alternatively, a macchiato can provide a strong, balancing coffee flavor.

If you prefer a non-alcoholic option, look for fruit-infused herbal teas that can refresh the palate while not overwhelming the dish. A light sparkling lemonade could also offer a refreshing contrast against the sweetness of the bake.

For those seeking an adult beverage, a sweet dessert wine like Moscato or a light rosé can pair exceptionally well, making it a warming option for leisurely brunches.

Pay attention to temperature when serving; hot beverages should be served as such, while drinks like sparkling lemonade should be chilled for the best experience.

Storage and Shelf Life

For optimal freshness, store any leftovers of the Chocolate Croissant Breakfast Bake in an airtight container in the refrigerator. It should keep well for up to three days but is best enjoyed fresh.

Ensure pieces of the bake are fully cooled before storing to prevent excessive moisture buildup, which can lead to sogginess. You can wrap individual portions in plastic wrap for easier storage and access.

If you have a batch that you will not finish within a few days, consider freezing it. Wrap tightly in aluminum foil or freezer-safe plastic wrap, it can maintain quality for up to three months.

To reheat leftovers, it’s best to use a conventional oven at 350°F (175°C) until heated through to maintain the pastry’s flaky texture. Be cautious when microwaving, as this can cause the croissant to become chewy.

Make Ahead Strategies

To streamline your morning preparation, consider assembling your Chocolate Croissant Breakfast Bake the night before. Once you mix the custard and layer the croissants, cover it with plastic wrap or foil and refrigerate overnight.

You can also prepare the custard ahead of time. Whisk the egg mixture and store it separately until you’re ready to assemble. This approach saves time and effort on the morning of the big day.

Assess the quality impact: allowing the ingredients to sit overnight enhances flavors as they meld together. However, if you wish for fluffier croissants, assemble and allow the bake to rest for about 30 minutes before baking.

If you’re including fresh fruits, add them just before baking to maintain their freshness and texture. This ensures a pleasant contrast to the warm, baked croissant.

Scaling Instructions

Halving the Chocolate Croissant Breakfast Bake is simple—just reduce all ingredients by half and prepare in a smaller baking dish. Maintaining the baking time will likely stay similar; however, keep an eye on the doneness.

Doubling or tripling requires a larger baking dish. Adjusting the cooking time may be necessary since a larger volume can increase the overall baking time. Keep a close watch on the bake as it’s nearing completion.

When it comes to equipment, ensure you have sufficient mixing bowls and a larger whisk if preparing bigger batches. Additionally, consider using multiple pans to finish baking simultaneously.

Timing modifications might be needed if the ingredients are prepared in bulk; having helpers can streamline the process greatly. Stampeding all preparations in unison will enhance organization and efficiency.

Lastly, remember to adjust storage considerations, ensuring you have enough space for your scaled-up recipe in the refrigerator or freezer.

Nutritional Deep Dive

Understanding the nutrition behind your Chocolate Croissant Breakfast Bake can be beneficial. Each serving typically contains an estimated breakdown of carbohydrates, fats, and proteins, given the ingredients utilized.

Eggs add a high protein content, while croissants contribute carbohydrates. The chocolate adds both sweetness and a small amount of dietary fiber, depending on the type used. Knowing the macro breakdown can help assess meal plans based on dietary goals.

Examining the micronutrient content is vital too. Chocolate is rich in magnesium and antioxidants, while eggs provide vitamins A, D, and B12. Keeping these nutrients in mind can make your meal more satisfying and balanced.

Consider the health benefits of this bake: it provides a comforting breakfast option that can support emotional well-being, particularly when shared with loved ones. Opting for dark chocolate can elevate these benefits further.

Portion analysis is important; keeping the serving size reasonable will help maintain a balanced diet without excess indulgence. A slice accompanied by fresh fruit or yogurt can make for a nutritious breakfast.

Dietary Adaptations

For a gluten-free adaptation of the Chocolate Croissant Breakfast Bake, seek out gluten-free croissants or use gluten-free bread. Ensure all other ingredients, like baking powder, comply with gluten-free standards.

Dairy-free options can include plant-based milk and dairy-free chocolate varieties. Additionally, substituting eggs with flax or chia eggs can help achieve the same consistency while accommodating vegan diets.

For a low-carb version, consider using low-carb bread alternatives, adjusting the chocolate choice, and minimizing sugar content in the custard.

Cambers of diets like keto can augment this dish by using almond flour croissants. Specializations such as paleo should focus on whole food substitutions that fit within that framework.

It is essential to communicate each modification clearly in recipes to ensure easy adaptations for diverse dietary needs without compromising taste or texture.

Troubleshooting Guide

If you encounter texture issues, revisit the egg mixture’s consistency. Overbeating can introduce excess air, while under-mixing may lead to separation. Ensuring well-blended ingredients is key for successful custard.

Flavor balance can also be tricky; if too sweet, consider balancing with a pinch of salt or a splash of citrus juice to enhance overall flavor depth. Adjust sugar levels based on your chocolate selection.

Temperature problems arise if the oven is not adequately preheated. If you discover your bake is browning too quickly, consider covering it with aluminum foil to prevent further browning while continuing to cook through.

For equipment challenges, ensure your baking dish is suited for the recipe size. If it’s too large, the bake will dry out; too small, and it could overflow, impacting your timing and cooking quality.

When faced with ingredient substitutions, always factor in moisture content, as swapping ingredients like standard chocolate for high moisture chocolate can lead to overly wet mixtures.

Timing concerns can throw off your bake; careful attention to oven time can change based on your ingredient assembly. Always use a timer and visual cues to achieve the perfect bake.

Recipe Success Stories

Throughout the community, the Chocolate Croissant Breakfast Bake has garnered glowing feedback. Many readers have shared tips and their unique takes on this recipe, delighting in the delightful ease it brings to breakfast gatherings.

Individuals have found success by swapping out common ingredients, like using different chocolate percentages, leading to personalized variations that please various palates. These concoctions often inspire innovative change, adding excitement to future bake-offs.

Recipe adaptations have showcased creativity in kitchens everywhere, with others experimenting boldly by incorporating fruits, spices, and other variations that lead to impressive dishes worthy of gatherings.

Photographic journeys shared by readers have proven how delicious this breakfast bake can look. From flattering food styling to beautiful plates, community members have united over their love for capturing the perfect slice.

Beyond the flavors, recipe reviews emphasize how this bake encourages interaction and belonging, making it a staple for celebrating life’s moments, big and small.

Frequently Asked Questions

Can I prepare this dish in advance?

Absolutely! Assembling the Chocolate Croissant Breakfast Bake the night before is a great way to save time. Just cover it and store it in the refrigerator overnight. The batter can absorb into the croissants, enhancing the flavors before baking.

How long can I store leftovers?

Leftovers can be stored in an airtight container in the refrigerator for up to three days. To maintain the best texture, reheat it in the oven to restore some of its original flakiness.

Can I freeze the Chocolate Croissant Breakfast Bake?

Yes! You can freeze it before baking. Assemble it as directed, cover tightly, and place it in the freezer for up to three months. Just make sure to thaw it in the fridge overnight before baking.

What types of chocolate work best for this recipe?

Dark, milk, or semi-sweet chocolate can all work well. Depending on your preference for sweetness and richness, choose the type of chocolate that suits your taste best for this delicious breakfast bake.

Can I add other ingredients, like fruits or nuts?

Definitely! Adding fresh fruits like berries or nuts like walnuts or almonds can add flavor and texture to the dish. Just distribute them evenly within the layers to ensure an even bake.

What are some good side dishes to serve with this bake?

Fresh fruit salad, yogurt, or a light green salad can make excellent sides. They provide a refreshing contrast to the rich, warm chocolate croissant bake.

How do I know when my bake is done?

Look for a golden-brown top and a firm custard that is set in the middle. You can also insert a knife into the center; if it comes out clean, your bake is ready!

Is this recipe suitable for a crowd?

Yes! This Chocolate Croissant Breakfast Bake is an ideal choice for feeding a crowd. It can easily serve eight, and you can double or triple the ingredients for larger gatherings.

Can I make this gluten-free?

Absolutely! Substitute gluten-free croissants or use gluten-free bread as a base to adapt the recipe to gluten-free diets without sacrificing deliciousness.

What type of baking dish should I use?

A medium-sized baking dish works best. If you have a larger batch, opt for a bigger dish, ensuring that croissants are snug without too much vacant space.

Can I use frozen croissants?

Frozen croissants work well! Be sure to thaw them completely before assembling to achieve the best texture and flavor in your breakfast bake.

Additional Resources

For further culinary exploration, consider exploring related recipes such as a classic French toast casserole or a fruit-and-nut brioche bread pudding. Each recipe offers a unique way to enjoy breakfast treats while incorporating various ingredients.

Technique guides can be invaluable; try looking for those focused on mastering custards or perfecting baking techniques that can elevate your culinary prowess.

Ingredient information can also enhance your cooking experience. Learn about different types of chocolates and their flavor profiles to select the best option for your desired recipes.

Consider investing in baking equipment, such as quality mixing bowls, perfect for executing this bake effortlessly and effectively.

Lastly, exploring seasonal variations can add excitement to your breakfast routine, keeping your dishes vibrant and fresh throughout the year.

Join the Conversation

Engage with the community by sharing your experiences with the Chocolate Croissant Breakfast Bake. Social media platforms are perfect for showcasing your brunch creations; do not hesitate to share your beautiful photographs!

Photography tips can also help others capture that ideal slice of bake, focusing on lighting and composition to display its enticing characteristics. Encourage reviews that reflect your culinary journey with this dish, promoting a rich community discussion.

Recipe variations can inspire others to adapt and innovate, sharing successful modifications and creative substitutes that keep the dish exciting. Your contributions could help others elevate their own baking adventures!

The Recipe

Chocolate Croissant Breakfast Bake

Serves: 8

Prep Time: 15 mins

Cook Time: 30 mins

Total Time: 45 mins

Kitchen Equipment Needed

  • Baking dish (9×13 inch recommended)
  • Mixing bowl
  • Whisk
  • Knife for slicing

Ingredients

  • 4-6 large croissants, cut into pieces
  • 1 cup semi-sweet or dark chocolate chips
  • 4 large eggs
  • 1 cup whole milk (or milk alternative)
  • ¼ cup sugar
  • 1 tsp vanilla extract
  • Powdered sugar for dusting (optional)

Directions

  1. Preheat the oven to 350°F (175°C).
  2. Grease the baking dish lightly with butter or non-stick spray.
  3. Layer the croissant pieces evenly in the dish, sprinkling the chocolate chips among the layers.
  4. In a mixing bowl, whisk the eggs, milk, sugar, and vanilla until combined.
  5. Pour the custard mixture evenly over the croissants, pressing lightly to soak the pieces.
  6. Let it sit for 10-15 minutes to absorb the liquid.
  7. Bake in the preheated oven for 30-35 minutes, or until the top is golden and set.
  8. Remove from the oven and allow it to cool slightly before slicing. Dust with powdered sugar if desired and serve warm.

Recipe Notes

  • Feel free to substitute with different types of chocolate based on your preference.
  • Use day-old croissants for a better result, as they absorb the custard more effectively.
  • For an extra kick, consider adding a pinch of cinnamon or nutmeg to the custard mixture.

Delightful Strawberry Icebox Pie Recipe for Easy Summer Desserts

Delicious Strawberry Icebox Pie: A Refreshing Summer Delight

⚖️
Difficulty
Easy

⏲️
Prep Time
20 mins

🕒
Cook Time
0 mins

⏱️
Total Time
4 hours (chilling)

🍽️
Servings
8

This delightful **Strawberry Icebox Pie** serves as the perfect tribute to summer, capturing the essence of juicy strawberries and cool, creamy filling all nestled in a buttery graham cracker crust. It’s the kind of dessert that will instantly transport you to sunny backyard barbecues, picnics, or simply a relaxing day on the porch. The first bite offers a burst of sweet, tangy strawberry flavor that’s beautifully balanced by the smooth and creamy filling. Each slice is like a refreshing breeze on a hot day, making it an essential addition to your summer recipe collection.

What makes this **Strawberry Icebox Pie** so appealing, aside from its vibrant color and fresh taste, is its simplicity! No baking is required, and you just need to mix your ingredients and let the pie chill until it’s ready to serve. This recipe is not only easy to follow but also incredibly satisfying for both novice and experienced bakers alike. As the crust meets the luscious filling and fresh strawberries, you will find this pie to be a delightful centerpiece for any gathering.

Quick Recipe Highlights

  • Flavor Profile: Sweet, tangy strawberries combined with a rich and creamy filling provide a refreshingly delicious experience.
  • Texture: The pie features a crunchy, buttery graham cracker crust complemented by a velvety smooth filling and juicy strawberry topping.
  • Aroma: Fresh strawberries combined with cream create a delightful sweetness that fills the air.
  • Visual Appeal: The vibrant red strawberry topping against the creamy white filling makes this pie visually striking.
  • Skill Level Needed: This pie is simple to prepare and requires no baking, making it accessible for everyone.
  • Special Equipment: You will need a pie dish and mixing bowls, along with a hand mixer or whisk.

Recipe Overview

  • Difficulty Level: This is an easy recipe that requires minimal cooking techniques, perfect for beginners and those short on time.
  • Category: A dessert that is suitable for summer gatherings, picnics, or family dinners.
  • Cuisine: This pie reflects classic American dessert tradition, focusing on fresh seasonal fruits.
  • Cost: The ingredients are budget-friendly, making this pie an economical dessert choice.
  • Season: Best made in the summer when strawberries are in peak season, ensuring maximum flavor and freshness.
  • Occasion: Ideal for birthdays, holidays, or any outdoor celebration, it’s sure to impress guests.

Why You’ll Love This Recipe

The taste and texture of this **Strawberry Icebox Pie** are unbeatable! The creamy filling perfectly complements the sweet and tart strawberries, creating a harmonious balance that dances on the palate. The crunchy graham cracker crust adds a delightful contrast, making each slice a delightful treat to savor on warm summer evenings. You’ll find yourself going back for seconds and thirds, ensuring every morsel is enjoyed.

Convenience and ease of preparation are some of the key benefits of this recipe. With only a few ingredients needed and no baking involved, you can whip up this pie in no time. It’s a great dessert for unexpected gatherings, and it allows you to spend less time in the kitchen and more time enjoying the company of friends and family.

Not only is this pie delicious, but it’s also a nutritious dessert option. Strawberries are packed with vitamins, antioxidants, and fiber, which contribute to a healthy diet. The creamy filling offers a balance of protein and healthy fats, making this dessert a guilt-free indulgence when enjoyed in moderation.

The entertaining value of this **Strawberry Icebox Pie** is undeniable. Its vibrant colors and appealing presentation make it an eye-catching addition to any dessert table. Sharing this pie with others creates joyful moments, as you all relish in the sweetness and celebrate togetherness. It’s not just about a dessert; it’s about creating memories.

Cost-effectiveness adds to the allure of this recipe. Fresh strawberries, cream cheese, and sugar are relatively inexpensive, allowing you to create this stunning dessert without breaking the bank. This pie is a simple yet elegant way to treat your loved ones without a hefty price tag.

Historical Background and Cultural Significance

The **Strawberry Icebox Pie** has become a staple in American households, particularly during the summer months. Originating in the mid-20th century, this pie evolved from traditional berry pies but utilized refrigeration instead of baking, allowing it to be a quick and easy dessert option. With fresh berries abundant in the summer, this pie became a favorite for family gatherings and celebrations.

Culturally, the pie represents the joys of summer and the bounty of fresh produce. In many families, preparing this dessert is a cherished tradition passed down through generations. It is often accompanied by stories and laughter, as loved ones gather to enjoy its delightful flavors.

Over the years, the recipe for **Strawberry Icebox Pie** has evolved with various adaptations spanning across regions. Different families have incorporated their unique touches, whether it’s swapping out the strawberries for other berries or adding additional flavors to the cream filling. These variations reflect not only personal tastes but also regional influences and seasonal availability.

Today, this pie is enjoyed in many parts of the United States, showcasing the versatility and love surrounding this classic dessert. The modern adaptation of the recipe often includes tips for using alternative sweeteners or gluten-free crust options, allowing it to remain relevant in the ever-evolving culinary scene.

Ingredient Deep Dive

Strawberries

Strawberries are not only delicious but also packed with health benefits. These juicy fruits are rich in vitamin C, manganese, and antioxidants, making them a fantastic addition to your diet. When selecting strawberries, choose ones that are bright red and fragrant, indicating ripeness. Store them in the refrigerator and enjoy them within a few days for optimal freshness, though they can also be frozen for later use.

Cream Cheese

Cream cheese adds a rich, creamy texture to the filling of the pie, enhancing its overall flavor. It has a storied history in American cuisine and is commonly used in both savory and sweet dishes. When choosing cream cheese, opt for full-fat varieties for a smoother texture. It should be stored in the refrigerator and can be softened at room temperature before use for easier mixing.

Graham Crackers

The graham cracker crust offers a sweet and crunchy base for the pie. Originally created for religious purposes, it has evolved into a popular ingredient in desserts. When making a crust, it’s important to crush the crackers finely and mix them with melted butter to achieve the right consistency. Store the crust in an airtight container if not used immediately.

Powdered Sugar

Powdered sugar is key for achieving the sweet creamy filling without grittiness. It offers a smooth texture that dissolves easily. When purchasing, ensure it is fresh and free from clumps. Store it in a cool, dry place to maintain its quality.

Whipped Topping

Whipped topping or whipped cream adds lightness to the filling, allowing it to be airy and fluffy. When choosing this ingredient, look for options with natural ingredients for the best flavor. Store whipped topping in the refrigerator, and only use as needed for optimal texture.

Common Mistakes to Avoid

  • Using overripe strawberries: Overripe fruits can result in a mushy topping and a less appealing flavor. Always select fresh, firm strawberries for the best results.
  • Preparing the crust improperly: Failing to fully crush the graham crackers or not mixing them well with butter can lead to a crust that doesn’t hold together. Ensure even mixing for a sturdy base.
  • Not chilling the pie long enough: Chilling the pie for less than four hours can lead to a runny filling. Make sure to let it set completely for the best texture.
  • Skipping the cream cheese softening: Using cold cream cheese makes it difficult to achieve a smooth filling. Always soften it to room temperature before mixing.
  • Overmixing the filling: While it’s important to mix well, overmixing can incorporate too much air and make the filling too fluffy. Mix just until combined.
  • Omitting powdered sugar: Forgetting the powdered sugar can make the filling overly tangy and unbalanced in flavor. Ensure to include it for sweetness.
  • Neglecting to taste: Not tasting the filling before pouring it into the crust can result in an unbalanced dessert. Always taste and adjust sweetness as needed.
  • Forgetting to cover: Failing to cover the pie while it chills can lead to an undesired flavor from other items in the fridge. Always cover it tightly.

Essential Techniques

Preparing the Graham Cracker Crust

For the perfect graham cracker crust, begin by finely crushing your crackers. A food processor or rolling pin works well for this step. Mixing the crumbs with melted butter is essential, as this will bind the crust together. Press the mixture firmly into the pie dish, ensuring even coverage. A good visual cue for success is when the mixture holds together when pressed and appears compact.

Making a Smooth Filling

To achieve a smooth filling, it’s crucial to soften your cream cheese and mix it well with the other ingredients. Using an electric mixer at medium speed can help break down any lumps. Always scrape down the sides of the bowl while mixing to ensure all ingredients are combined for a creamy texture. The filling should be uniform and free of lumps for the best outcome.

Layering Strawberries

When adding strawberries to the top of your pie, arrange them in a visually appealing pattern. Start from the outside and work your way in, placing the larger berries on the bottom and smaller ones on top. This not only enhances the pie’s aesthetic appeal but also ensures that every slice will have sufficient strawberry coverage.

Chilling to Perfection

Chill the pie for at least four hours or overnight. This step is crucial in allowing the filling to set properly and flavors to meld. A good visual cue is the firmness of the filling when gently pressed. Proper chilling will also ensure that serving is neat and clean, providing a stunning presentation.

Pro Tips for Perfect Strawberry Icebox Pie

– Use the freshest strawberries available to enhance flavor and texture. Look for berries that are vibrant in color and have a sweet aroma.
– For an extra touch of flavor, consider adding a splash of vanilla extract to the filling for a richer taste.
– If you prefer a sweeter filling, gradually add more powdered sugar until you achieve the desired sweetness.
– Always allow the cream cheese to reach room temperature beforehand, as this ensures a smooth consistency when mixed.
– For added visual appeal, garnish each slice with a mint leaf or a drizzle of chocolate.
– To make slicing easier, dip your knife in hot water before cutting through the pie, ensuring clean cuts.
– Consider freezing portions for a refreshing treat on hot days; the texture will remain enjoyable once thawed.
– Experiment with different fruit toppings, such as blueberries or raspberries, for a mixed berry icebox pie.

Variations and Adaptations

You can adapt this **Strawberry Icebox Pie** in numerous ways to suit seasonal flavors. For instance, during the fall, swap out strawberries for fresh apples or pears, creating a unique twist. You might consider a spiced apple variation with cinnamon and nutmeg for added warmth.

Seasonal adaptations can also enhance the recipe. In spring, for example, add zest from a lemon or lime to brighten the filling’s flavor, creating a refreshing citrus-infused treat. You can also utilize other berries, like blueberries or raspberries, to create a mixed berry icebox pie that captures the flavors of summer.

If dietary restrictions are a concern, explore gluten-free graham cracker options or use almond flour to create a crust. For a lower-carb version, consider using a nut-based crust to align with keto or paleo diets while still enjoying the creamy filling.

For those looking to tweak the flavor, consider adding some almond extract instead of vanilla, providing a delightful nutty flavor that complements the strawberries beautifully.

Serving and Presentation Guide

Presentation is key to showcasing your **Strawberry Icebox Pie**. Start by carefully slicing the pie for clean edges and consider plating it on a decorative cake stand to elevate its appearance. For garnishing, fresh mint leaves not only add a pop of color but also a refreshing touch when served.

Pair your pie with whipped cream or a dollop of yogurt for additional creaminess. When serving, consider a side of fresh strawberries arranged colorfully on the plate to enhance the visual appeal.

Temperature plays a crucial role in serving—the pie should be chilled but not frozen to ensure flavors are prominent and enjoyable. It’s essential to serve in moderate portions to maintain balance and allow guests to savor the dessert without feeling overwhelmed.

Wine and Beverage Pairing

For a perfect pairing with your **Strawberry Icebox Pie**, consider choosing a sweet white wine or a sparkling rosé. The fruity notes in these wines beautifully complement the strawberry filling, enhancing the overall dining experience. A light, fruity cocktail, such as a strawberry mojito, can also harmonize well with the pie’s flavors.

For a non-alcoholic alternative, refreshing iced tea or a sparkling lemonade offers a delightful contrast, combining well with the sweet elements of the dessert. If you enjoy coffee, opt for a light roast coffee that will not overpower the pie’s delicacy, and consider serving it with a hint of cream.

Storage and Shelf Life

To store your **Strawberry Icebox Pie**, cover it tightly with plastic wrap or aluminum foil to prevent it from absorbing odors from the refrigerator. Proper storage ensures that the pie retains its fresh flavors. Consume within 3-4 days for optimal taste, as the quality may decline over time.

For longer storage, consider freezing individual slices. Wrap each slice in plastic wrap and maintain them in an airtight container. Properly stored, the pie can successfully freeze for up to two months, allowing you to enjoy a summer treat at any time.

Upon thawing, it’s best to reintroduce the pie to the refrigerator for a few hours rather than at room temperature. This ensures that it regains its original texture without becoming soggy.

Make Ahead Strategies

You can certainly prepare your **Strawberry Icebox Pie** ahead of time! To do this, follow the recipe instructions but assemble the pie one day in advance. Chilling overnight enhances flavor and ensures a firm texture once it’s time to serve.

Consider making the crust and filling a day or two prior, and keep them stored separately in the refrigerator. When you’re ready to serve, layer the filling into the crust and add fresh strawberries on top just before presenting it.

Quality can be impacted when storing, so be sure to keep it covered and chilled until serving time. If desired, garnish with fresh mint or a sprinkle of powdered sugar for a touch of elegance just before the pie graces the table.

Scaling Instructions

If you need to adjust the quantities of your **Strawberry Icebox Pie**, you can easily scale the recipe up or down. To halve the recipe, simply divide all ingredients by two, keeping the preparation times the same. For larger gatherings, you can double the original recipe; however, you may need a larger pie dish and additional chilling time.

Equipment adjustments may be necessary if you are scaling significantly; a larger bowl or mixer ensures all ingredients incorporate evenly. Keep in mind that increased quantities might take a bit longer to chill, providing a firmer set when served.

When scaling, remember to adjust any toppings accordingly, ensuring each slice remains visually appealing. Store any leftovers as previously mentioned to maintain freshness and quality.

Nutritional Deep Dive

Analyzing the nutritional profile of the **Strawberry Icebox Pie** can guide healthy choices. On average, one slice provides a balanced ratio of macronutrients with quality carbohydrates from the crust, moderate protein from the cream cheese, and healthy fats.

Thorough micronutrient analysis reveals strawberries as a powerhouse of vitamin C, which contributes to immune health. Additionally, cream cheese provides calcium, supporting bone health, while the crust offers a good source of energy.

Enjoying one slice of this pie as a part of a balanced diet can provide a delightful treat while supporting healthy eating habits. Moderation is key, as with any dessert, to maintain wellness goals.

Dietary Adaptations

This **Strawberry Icebox Pie** is versatile enough to accommodate various dietary preferences. For those following a gluten-free diet, substitute traditional graham crackers with gluten-free options to ensure that everyone can enjoy this dessert.

Dairy-free individuals can replace cream cheese with non-dairy alternatives, such as cashew cream or a soy-based cream cheese. For a vegan twist, use coconut whipped cream in place of traditional whipped topping.

If you’re looking for a lower-carb option, swap sugar for a sugar substitute, adjusting accordingly to ensure sweetness is retained without added calories. Those on a ketogenic diet can appreciate these modifications that keep the focus on delicious flavors without sugars or grains.

Troubleshooting Guide

If you’re facing texture issues with your pie, it’s often due to overmixing the filling or not allowing it sufficient time to chill. Ensure that after mixing, you let it set in the fridge long enough; no less than four hours is recommended for optimal texture.

Flavor balance can be a concern, particularly if you find the filling too tart. Adjust the sweetness by adding more powdered sugar slowly, tasting until you achieve the desired balance of flavors that suit your palate.

Temperature problems can arise if the pie is not chilled adequately before serving. Always check the consistency before cutting to ensure it holds shape. If the pie seems overly soft, consider refrigerating it longer.

If you encounter challenges selecting ingredients, remember that freshness is key! Always aim for ripe strawberries when preparing your pie, as newer fruits yield the best flavor.

Lastly, if you need to make ingredient substitutions due to availability, ensure to adjust other recipe elements accordingly. For example, using a different sweetener may warrant adjusting overall sugar quantities.

Recipe Success Stories

Many bakers have shared their successful experiences with the **Strawberry Icebox Pie**, often noting how easy it was to prepare. Community feedback highlights the pie’s vibrant colors and refreshing taste, making it a crowd favorite at summer gatherings.

Readers have experimented with different fruits and toppings, creating variations that hit home with their families. One enthusiastic baker added a layer of chocolate ganache for an extra decadence, while another opted to incorporate citrus zest for brightness.

Photography tips from the community suggest using natural light for stunning visuals, showing off the pie’s ruby-red topping and creamy filling. By sharing these photos on social media, home bakers celebrate their creations and inspire others to try the recipe.

Family gatherings often feature this beloved pie, with success stories including mentions of kids and adults alike savoring their sweet slices—truly a dessert that brings joy at the dining table.

Frequently Asked Questions

Can I use frozen strawberries instead of fresh ones?

Yes, you can use frozen strawberries, but be sure to thaw and drain them well to avoid excess moisture in the pie, which can impact the texture.

How long can this pie be stored in the fridge?

The pie can be stored in the refrigerator for up to 3-4 days. Ensure it’s tightly covered to keep it fresh and prevent odor absorption.

Can I use a pre-made crust?

Absolutely! If you want to save time, you can use a store-bought graham cracker crust to simplify the prep process.

What can I substitute for cream cheese?

For a dairy-free option, consider using a vegan cream cheese or a mixture of blended silken tofu for a similar texture.

Is this pie suitable for outdoor events?

Yes, the pie is perfect for outdoor gatherings. However, keep it chilled until ready to serve to maintain its texture and freshness.

How do I make the pie more visually appealing?

Consider adding fresh mint leaves or a drizzle of melted chocolate over the strawberries for stylish garnishing that enhances the overall presentation.

Can I make this recipe gluten-free?

Yes! Simply substitute the regular graham crackers with gluten-free varieties, ensuring everyone can enjoy this delicious dessert.

What’s the best way to slice the pie?

When slicing, dip your knife in warm water for clean cuts. Wipe the blade off between cuts for the best slice presentation.

Can this pie be made vegan?

Yes, you can create a vegan twist by using dairy-free cream cheese and coconut whipped cream instead of traditional dairy products.

Can I freeze leftovers?

Yes, you can freeze leftover slices by wrapping them individually in plastic wrap and storing them in an airtight container for future enjoyment.

What drinks pair well with this pie?

Sweet white wine or fruity sparkling beverages pair wonderfully with the flavors of the pie. For non-alcoholic options, consider serving iced tea or lemonade.

Additional Resources

If you enjoyed this **Strawberry Icebox Pie**, you may also like similar recipes such as lemon icebox pie or no-bake cheesecake for a sweet variation. Techniques around making pie crusts are essential skills that can enhance your baking repertoire, as they provide the foundation for many delightful desserts.

Explore ingredient guides that delve deep into seasonal fruit selections, enabling you to choose the freshest options for your recipes. Investing in quality kitchen tools, like a sturdy mixing bowl and pie dish, will also elevate your cooking experiences.

Many recipes available on our blog can be adjusted for seasonal variations, allowing you to keep your dessert offerings exciting and relevant throughout the year.

Join the Conversation

We’re excited to hear from you! Share your **Strawberry Icebox Pie** photos on social media and tag us to be featured in our community roundup. Interaction in the comment section encourages engagement, where you can share your personal tips, experiences, and variations of the recipe.

Your feedback is invaluable as we continue to share delicious recipes. Each story inspires other home cooks and bakers to try out new flavors and get creative in the kitchen.

Don’t hesitate to ask questions or share your favorite tips for making this pie even more delightful. Let’s create a vibrant community of food lovers eager to experience the joys of cooking together!

The Recipe

Strawberry Icebox Pie

Serves: 8

Prep Time: 20 mins

Cook Time: 0 mins

Total Time: 4 hours (chilling)

Kitchen Equipment Needed

  • Pie dish
  • Mixing bowls
  • Electric mixer or whisk
  • Measuring cups and spoons

Ingredients

  • 1 ½ cups graham cracker crumbs
  • ⅓ cup sugar
  • ½ cup unsalted butter, melted
  • 8 oz cream cheese, softened
  • 1 cup powdered sugar
  • 8 oz whipped topping (or whipped cream)
  • 1 lb fresh strawberries, sliced

Directions

  1. In a mixing bowl, combine graham cracker crumbs, sugar, and melted butter. Mix until well combined.
  2. Press the mixture into the bottom and sides of a pie dish to form the crust. Refrigerate for 15 minutes to set.
  3. In another mixing bowl, blend softened cream cheese with powdered sugar until smooth.
  4. Fold in whipped topping until well combined, creating a creamy filling.
  5. Pour the cream cheese filling into the chilled crust and smooth the top with a spatula.
  6. Arrange fresh strawberries evenly on top of the filling.
  7. Cover the pie and refrigerate for at least 4 hours or overnight to set.
  8. Slice and serve chilled, topped with extra strawberries if desired.

Recipe Notes

  • For a twist, try adding a layer of chocolate ganache on top.
  • Consider swapping strawberries with other berries for a mixed berry icebox pie.
  • Store leftovers covered in the refrigerator for up to 4 days.

Best Strawberry Cheesecake French Toast Recipe for Brunch

Indulge in Strawberry Cheesecake French Toast: A Sweet Morning Delight

⚖️
Difficulty
Medium

⏲️
Prep Time
15 mins

🕒
Cook Time
10 mins

⏱️
Total Time
25 mins

🍽️
Servings
4

Start your mornings off right with this delightful Strawberry Cheesecake French Toast. The perfect blend of sweet and creamy flavors bursts through luscious strawberries and rich cream cheese, creating an irresistible breakfast that’s not only satisfying but visually stunning as well. Imagine sinking your teeth into a perfectly toasted slice of bread, enveloped in a heavenly cheesecake-inspired pancake batter, with silky, gooey strawberry sauce drizzled on top. This is the ideal dish for brunch gatherings or cozy family breakfasts that will surely impress both friends and loved ones.

This Strawberry Cheesecake French Toast recipe captures the essence of indulgence. Not only does it offer a beautiful presentation with vibrant red strawberries against the golden bread, but each bite reveals layers of flavor that will make your taste buds dance. It’s the ultimate comfort food, blending simplicity with a touch of decadence, perfect for those special moments when you want to treat yourself to something extraordinary.

Quick Recipe Highlights

  • Flavor Profile: Sweet strawberries combine with a rich cream cheese mixture for a dream-like flavor.
  • Texture: Crispy edges and fluffy interiors balanced with creamy cheesecake filling create a luscious mouthfeel.
  • Aroma: The delightful fragrance of vanilla and caramelized sugar fills the air, inviting you to indulge.
  • Visual Appeal: The colorful presentation of pink, red, and golden hues makes it a feast for the eyes.
  • Skill Level Needed: This recipe is beginner-friendly with straightforward steps but allows for creativity.
  • Special Equipment: A frying pan or griddle and a blender for the cream cheese mixture are needed.

Recipe Overview

  • Difficulty Level: The dish has a medium difficulty level due to its multiple components, including cream cheese filling and proper cooking techniques.
  • Category: Perfect for breakfast, brunch, or a special occasion treat.
  • Cuisine: This recipe combines American breakfast traditions with a nod to classic cheesecake desserts.
  • Cost: The average cost for this recipe falls between $10 to $15, making it a budget-friendly indulgence.
  • Season: Strawberries are in season during spring and summer, adding freshness to the dish.
  • Occasion: Ideal for celebrations, holidays, or lazy weekend brunches with family and friends.

Why You’ll Love This Recipe

Taste and texture appeal is at the core of this Strawberry Cheesecake French Toast. The combination of sweet strawberries paired with creamy cheesecake filling provides a delightful experience that tantalizes the palate. The balance of flavors makes each bite delectable and allows for a sensory explosion that lingers long after the last bite.

Convenience and preparation benefits also shine through in this recipe. Using easily accessible ingredients, this dish can be whipped up in no time. The straightforward steps ensure that even beginner cooks can create a breakfast that looks gourmet without spending hours in the kitchen. This makes it an ideal option for spontaneous gatherings or busy mornings.

Nutritional advantages come with strawberries, which are packed with vitamins and antioxidants. While this recipe is a treat, the inclusion of fresh fruit adds a touch of healthiness that balances the indulgence of the cream cheese. This allows you to savor the flavors without guilt.

The social and entertaining value of your Strawberry Cheesecake French Toast cannot be understated. Its beautiful presentation and delightful taste are sure to impress your guests, making it a talking point at any gathering. People love to share unique recipes they’ve found, and this one is sure to spark conversation and create lasting memories.

Finally, consider the cost-effectiveness and accessibility of this recipe. With a diverse range of ingredients, all of which can be found at your local grocery store, this dish becomes a staple that doesn’t break the bank. You can make it for a crowd or just for yourself and still feel satisfied with every serving.

Historical Background and Cultural Significance

The Strawberry Cheesecake French Toast combines rich culinary traditions that speak to the evolution of breakfast foods. This dish captures the sweetness of strawberries, which have been enjoyed for centuries, celebrated in various cultures and cuisines. Blueberries and strawberries have long been used in sweetening dishes, making this recipe an extension of that tradition.

Cultural importance also lies in the origins of cheesecake itself, a beloved dessert that transcends boundaries. It has roots reaching back to ancient Greece, and over time it has adapted to various regional flavors and preferences. Creating a breakfast version elevates a classic dessert into something suitable for the morning, making it an exciting fusion.

As breakfast dishes have evolved, ingredients like cream cheese have increased in availability, making this delicious concoction a reality in kitchens across America. The combination of French toast’s heartiness with cheesecake’s indulgence marries two beloved comfort foods in a way that continues to delight palates.

Regional variations exist in how strawberries and cream cheese are incorporated into breakfasts. From adding flavored syrups to experimenting with different types of bread, these adaptations showcase the versatility of the dish while paying homage to its cheesecake roots.

Ingredient Deep Dive

Strawberries, the star of this recipe, are more than just a delicious fruit. Culturally, they symbolize spring and renewal, often associated with festivities and joy. These vibrant fruits are high in vitamin C and antioxidants, making them a healthy choice for dessert and breakfast alike. When selecting strawberries, opt for firm fruits with a bright red color and check for freshness to ensure optimal flavor. Store them in a cool environment and avoid washing them until just before use to maintain their integrity and freshness.

Cream cheese is another key ingredient that brings the cheesecake essence to this French toast. Its creamy texture is essential for achieving that rich flavor profile. Nutritionally, cream cheese provides calcium and protein, making it a worthwhile addition to balance out the sweetness of strawberries. When choosing cream cheese, look for full-fat versions for the best taste and texture; however, low-fat alternatives can be used if desired. Store cream cheese in the refrigerator and ensure it remains tightly sealed to maintain freshness.

Common Mistakes to Avoid

  • Not soaking the bread long enough – This can lead to French toast that lacks moisture and flavor. Allow the bread to soak adequately in the mixture.
  • Using the wrong type of bread – Opt for thick slices of bread such as brioche or challah for best results; regular sandwich bread may not hold up as well.
  • Cooking over too high a heat – This can burn the bottom before the center is adequately cooked. Start on a medium heat and adjust accordingly.
  • Forgetting to preheat the pan – Not preheating can lead to uneven cooking. Ensure your skillet is hot before adding the soaked bread.
  • Not whipping the cream cheese mixture enough – A thorough whipping ensures a smooth filling; lumps can detract from the texture and experience.
  • Overcomplicating toppings – Stick to simple toppings such as powdered sugar or syrup to enhance, not overpower, the dish’s flavors.
  • Skipping the spices – Cinnamon or nutmeg enhances the overall taste; don’t skip these in the batter mixture.
  • Ignoring presentation – A messy plate can undermine this beautiful dish. Take time to plate with care, adding garnishes when desired.

Essential Techniques

Soaking the bread is crucial for achieving the perfect Strawberry Cheesecake French Toast. This technique allows the bread to absorb the egg and cream mixture fully, resulting in that delicious custardy texture. To master this, immerse the bread in the mixture for several seconds on each side without letting it become too soggy. Look for a balance where the bread is moist to the touch but not falling apart.

Whipping the cream cheese filling is equally important for achieving that creamy, smooth texture. Start by using a hand mixer or stand mixer to blend the cream cheese until it’s light and fluffy. Common pitfalls include not allowing the cream cheese to soften at room temperature beforehand. You’ll know you’ve mastered this technique when the mixture is creamy and free of lumps, allowing for easy spreading into the French toast.

Pro Tips for Perfect Strawberry Cheesecake French Toast

Use day-old bread for a firmer texture that holds up to the soaking process better. Fresh bread can get too soggy, compromising the final dish.

Experiment with different flavored bread, such as cinnamon raisin or banana bread, to introduce new layers of flavor to the French toast.

Incorporate vanilla extract into the egg mixture for added flavor complexity and a hint of sweetness that complements the strawberries.

For easy cleanup, consider lining your baking sheet with parchment paper before baking prepared slices in the oven, making for quick and hassle-free serving.

Don’t forget to adjust cooking times based on the thickness of your bread. Thicker slices may require slightly longer on the skillet.

For an extra touch, lightly dust the finished French toast with powdered sugar before serving, adding both sweetness and a beautiful visual element.

Offer a variety of toppings like whipped cream, nuts, or a drizzle of chocolate syrup for guests to personalize their French toast experience.

Lastly, let your French toast rest for a couple of minutes after cooking to allow the flavors to settle and the texture to firm up slightly.

Variations and Adaptations

Regional variations of this Strawberry Cheesecake French Toast can include the use of seasonal fruit or flavors based on local availability. For instance, adding peaches or blueberries gives this dish a summer twist that highlights local produce.

Seasonal adaptations allow you to embrace the best ingredients each season has to offer. In the fall, adding pumpkin spice or apple filling could transform this dish, while cranberries could provide a festive touch during the holiday season.

Dietary modifications can cater to various preferences. For a gluten-free option, choose a gluten-free bread, ensuring all other ingredients are certified gluten-free as well.

Flavor variations can broaden your recipe. You could easily add a splash of almond extract to the cream cheese for an aromatic twist or enhance the egg mixture with a touch of hazelnut liqueur for a grown-up version.

Texture modifications can involve utilizing fluffy pancakes instead of typical bread, providing a different spin on the same flavors while enhancing the visual appeal.

Consider presentation alternatives, such as stacking the French toast neatly with layers of whipped cream and strawberries for a more dramatic dessert-like look that will amaze your guests.

Serving and Presentation Guide

Plating techniques can elevate your dish from simple to spectacular. Consider using a large white plate to showcase the vibrant colors of the strawberries against the golden brown toast.

Garnishing ideas include fresh mint leaves or a light dusting of powdered sugar, adding elegance without overwhelming the dish’s natural beauty.

Traditional accompaniments might include a dollop of whipped cream or a side of maple syrup, while modern serving suggestions could incorporate flavored syrups or fruit compotes for added flair.

Temperature considerations are important; serve your French toast warm for the best experience. If you must hold it before serving, a low oven can help retain warmth without overcooking.

Portion control tips suggest slicing each French toast stack into manageable pieces for easy sharing, perfect for brunch settings where guests want to taste a little of everything.

Wine and Beverage Pairing

When considering wine pairings, a chilled Moscato or a light sparkling wine complements the sweetness of the strawberries beautifully. These wines’ effervescence enhances the overall brunch experience.

Non-alcoholic alternatives such as freshly-squeezed orange juice or a homemade strawberry lemonade can refresh the palate and provide a bright counterpoint to the richness of the French toast.

For coffee lovers, pairing this dish with a rich cappuccino or a flavored latte will create a delightful breakfast combination that balances the creaminess of the dish.

Temperature considerations for beverages suggest serving wines chilled, while coffee should be freshly brewed and served hot to complement the warm French toast.

For serving suggestions, consider offering a variety of beverages alongside the Dutch oven presentation of your French toast, encouraging guests to select their favorite accompaniment.

Storage and Shelf Life

Storage methods for your cooked Strawberry Cheesecake French Toast involve placing leftovers in an airtight container and refrigerating them for up to 3 days. Allow the French toast to cool completely before sealing to avoid condensation that can lead to sogginess.

The ideal temperature requirement for reheating is 350°F (175°C), where you can place the French toast on a baking sheet for about 10-15 minutes, ensuring it remains warm and delicious.

Container recommendations include glass or plastic Tupperware that seals tightly, preventing air from entering and preserving freshness. Avoid metal containers as they can retain odors.

Signs of spoilage can include off odors or mold growth, and it’s always best to discard any remaining portions if uncertain about their safety.

Reheating instructions suggest a microwave option for quick lunches, with 30-second intervals until warmed through. Alternatively, reheating in the oven maintains the fluffy texture.

Freezing guidelines recommend wrapping individual slices tightly in plastic wrap and then placing them in a freezer bag. Properly stored, they can last up to 2 months. When ready to eat, thaw and reheat in the oven for best results.

Make Ahead Strategies

Your prep timeline can begin by preparing the cream cheese filling the night before. Store it in an airtight container, simplifying the assembly the next morning.

Storage between steps allows for the batter to be mixed and bread to be pre-soaked. Just ensure to refrigerate soaked bread if not using immediately to prevent spoilage.

Quality impact assessment relies heavily on how well ingredients are kept. Properly stored ingredients lead to fresher flavors and textures upon cooking.

Assembly tips suggest laying out all ingredients before you start; this organization will help facilitate a seamless cooking experience.

Reheating guidelines indicate that if you make the dish ahead, you can store it uncovered in the oven at a low temperature to maintain warmth until serving time.

Adding fresh strawberries or whipped cream just before serving keeps elements bright and textures intact, enhancing the final presentation.

Scaling Instructions

Halving the recipe is straightforward and works very well for smaller portions. Just divide all ingredient amounts by two, ensuring proper ratios.

Doubling or tripling the recipe requires careful attention to cooking times; larger batches may need longer to cook through evenly.

Equipment adjustments might include using larger skillets or multiple pans simultaneously to manage a larger quantity, ensuring no one is left waiting for breakfast.

Timing modifications become essential when handling larger portions. Consider pre-soaking batches in advance or keeping cooked portions warm in the oven.

Storage considerations for scaled recipes suggest preparing and cooling batches appropriately before placing them into airtight containers for refrigerating.

Nutritional Deep Dive

Your macro breakdown of this Strawberry Cheesecake French Toast includes carbohydrates from the bread and sugars, with proteins coming from the eggs and cream cheese, providing a balanced breakfast option.

Micronutrient analysis highlights Vitamin C from strawberries and calcium from cream cheese, both essential components for a healthy breakfast.

The health benefits of this dish lie in its ability to provide energy through well-balanced ingredients, ensuring you start your day right while still indulging in something sweet.

Dietary considerations can pertain to people looking for a hearty breakfast that doesn’t necessarily compromise nutrition. It provides options to enhance its overall healthiness.

Portion analysis is crucial; understanding serving sizes can aid in weight management while allowing for enjoyment of this delicious dish without guilt.

Weight management tips suggest enjoying this dish occasionally and in moderation, pairing it with light fruit or yogurt to create a well-rounded meal.

Dietary Adaptations

For a gluten-free version of Strawberry Cheesecake French Toast, swap regular bread for gluten-free alternatives, ensuring safe ingredients for those with dietary restrictions.

For a dairy-free adaptation, consider using cream cheese alternatives or nut-based cheeses, ensuring the flavor remains rich but meets dietary needs.

The vegan option calls for plant-based milk, egg replacements such as flaxseed meal mixed with water, and coconut cream for an indulgent filling.

Low-carb modifications could feature carefully chosen low-carb bread varieties to maintain the flavor while keeping carb counts in check.

Keto alterations require a similar approach, focusing on ingredients that enhance fat content while reducing sugars, making it suitable for those on strict diets.

Paleo adaptations embrace natural sweeteners such as honey or maple syrup, substituting traditional baking elements to align with dietary guidelines.

For a low-FODMAP version, substitute cream cheese with lactose-free options and use gluten-free bread to ensure all ingredients are still delicious yet compliant.

Troubleshooting Guide

Texture issues may arise from over-soaking the bread, which can lead to sogginess. Ensure you soak just long enough for absorption without compromising structure.

Flavor balance concerns typically stem from oversweetening. Adjust your sugar content based on the natural sweetness of the strawberries used.

Temperature problems can result in undercooked interiors or burned exteriors. Assess your skillet’s heat and make adjustments for even cooking throughout.

Equipment challenges arise from insufficient space or improper tools. Ensure your skillet is large enough, using multiple pans as necessary to manage all portions.

Ingredient substitutions can often throw off a recipe; be cautious when altering cream cheese or bread types, as this can impact texture and flavor.

Timing concerns usually relate to needing longer cooking periods for thicker slices of bread, necessitating adjustments based on your specific bread style.

Recipe Success Stories

Community feedback on this Strawberry Cheesecake French Toast has been overwhelmingly positive. Many home cooks celebrate it for bridging everyday breakfasts and indulgent desserts seamlessly.

Variation successes come from experimenting with different fruits; users have reported delicious results with blackberries and raspberries, fostering a sense of creativity.

Adaptation stories often highlight the ease with which this recipe can fit into any diet, proving be versatile enough to cater to various needs and preferences.

Reader suggestions frequently include adding lemon zest or chocolate chips, augmenting flavors and enriching the overall experience of this beloved dish.

Photography tips shared among the community emphasize natural lighting and strategic plating to showcase the vibrant colors of the dish, captivating viewers on social media.

Frequently Asked Questions

Can I use frozen strawberries?

While fresh strawberries provide the best flavor and texture, frozen strawberries can also be used. Simply thaw them beforehand and drain excess liquid to avoid sogginess in your filling.

How can I make this recipe more filling?

Adding a side of Greek yogurt can increase protein content, while incorporating nut butters can enhance satiety. Additionally, serve it with a fruit smoothie to make a complete breakfast.

What type of bread is best for French toast?

Thick-cut bread such as brioche, challah, or sourdough is ideal for French toast. These types soak up the egg mixture well without falling apart during cooking.

Can I prepare the filling ahead of time?

Yes! You can prepare the cream cheese filling a day in advance and store it in the refrigerator, making assembly quicker on the actual day you plan to serve it.

What can I substitute for cream cheese?

For those looking for alternatives, mascarpone cheese or even dairy-free cream cheese is a great option that still maintains a creamy texture, ensuring delightful results.

How long does leftover French toast last?

When properly stored in the refrigerator, cooked French toast can last up to 3 days. Ensure it’s sealed tightly in an airtight container to maintain freshness.

Is this recipe suitable for kids?

Absolutely! This kid-friendly dish combines the flavors of cheesecake and the fun of French toast, making it an enjoyable breakfast option for all ages.

Can this dish be served cold?

While it is best enjoyed warm, some people do like to consume cold French toast. If serving cold, you may want to drizzle it with syrup or add fresh fruit for added sweetness.

What’s the best way to reheat leftover French toast?

The best way to reheat leftover French toast is by placing it on a baking sheet in a preheated oven at 350°F (175°C) for about 10-15 minutes.

Can I freeze this French toast?

Yes, you can freeze this dish! Wrap slices tightly in plastic wrap and store them in freezer bags. They will maintain quality for about 2 months.

Additional Resources

For those looking to expand their breakfast repertoire, consider checking out related recipes like Banana Bread French Toast or Cinnamon Roll Pancakes for delicious variations that can surprise your guests.

Technique guides such as mastering the art of French toast and different custard-making methods can enhance your overall cooking skills, ensuring each dish becomes a delightful success.

Ingredient information on the benefits of strawberries, eggs, and different types of cheese can inform your future cooking endeavors and inspire healthier adaptations.

Equipment recommendations might include investing in a non-stick skillet which greatly simplifies the cooking process for this French toast recipe.

Additionally, seasonal variations can inspire you to explore breakfasts that celebrate local ingredients and align with seasonal produce availability, fostering a deeper connection to your meals.

Join the Conversation

Social media sharing can elevate the visibility of your culinary success. Encourage friends and family to share their photos and experiences with this Strawberry Cheesecake French Toast to inspire others.

Photography tips for showcasing your dishes can greatly enhance engagement; natural light and attractive angles can make even the simplest of meals look gourmet!

Recipe reviews are invaluable; consider inviting friends to try this dish and share their opinions to create a community around your cooking endeavors.

Encourage community engagement by creating discussions around variations and modifications, fostering a shared love for cooking and creativity.

Finally, celebrate the joy of cooking by revisiting cherished family recipes, weaving them into your brunch offerings, and sharing the stories behind them to evoke nostalgia and warmth.

The Recipe

Strawberry Cheesecake French Toast

Serves: 4

Prep Time: 15 mins

Cook Time: 10 mins

Total Time: 25 mins

Kitchen Equipment Needed

  • Large mixing bowl
  • Whisk
  • Non-stick skillet or griddle
  • Spatula
  • Blender
  • Measuring cups and spoons

Ingredients

  • 8 slices of thick-cut bread (brioche or challah)
  • 4 large eggs
  • 1 cup milk (or dairy-free milk)
  • 1 teaspoon vanilla extract
  • 1 teaspoon cinnamon
  • 8 oz cream cheese, softened
  • 1 cup strawberries, sliced
  • ⅓ cup powdered sugar (plus more for serving)
  • Butter or cooking spray for the skillet

Directions

  1. In a bowl, whisk together eggs, milk, vanilla extract, and cinnamon. Set aside.
  2. In a blender, combine the softened cream cheese and powdered sugar until smooth. Fold in the sliced strawberries gently.
  3. Heat a non-stick skillet over medium heat and add butter or cooking spray to coat.
  4. Dip each slice of bread in the egg mixture, ensuring both sides are coated but not overly soaked. Transfer to the hot skillet.
  5. Cook until golden brown on each side, about 3-4 minutes per side. Repeat with remaining bread slices, adding more butter as needed.
  6. Once cooked, spread a generous amount of the cream cheese mixture between two slices, creating a French toast sandwich. Add more strawberries on top if desired.
  7. Serve warm, dusted with powdered sugar and drizzled with syrup.

Recipe Notes

  • Feel free to swap strawberries with blueberries or raspberries for a different flavor.
  • This dish can be prepared ahead; simply store the assembled French toast in the refrigerator until ready to cook.
  • Consider topping with whipped cream or extra fruit for a gourmet presentation.