Delicious No Bake Caramel Crunch Butterfinger Truffles Recipe

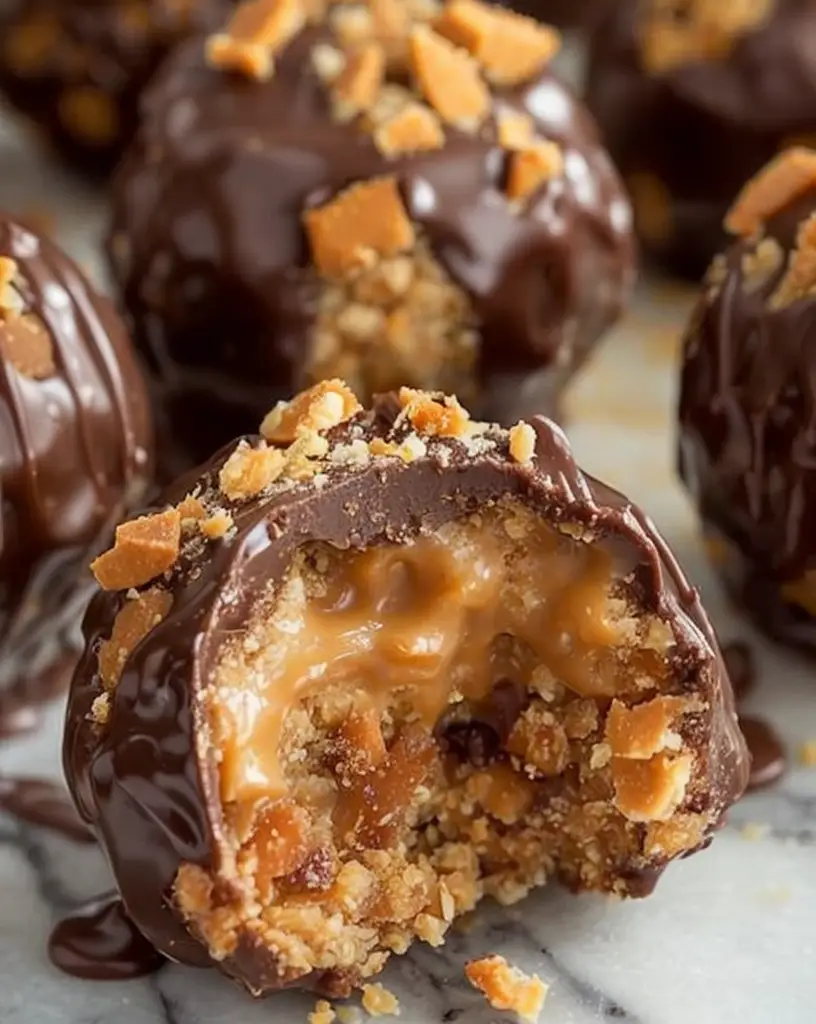
No Bake Caramel Crunch Butterfinger Truffles: A Sweet Indulgence

⚖️
Difficulty
Easy

⏲️
Prep Time
20 mins

🕒
Cook Time
0 mins

⏱️
Total Time
20 mins

🍽️
Servings
24

Indulge in the delightful symphony of flavors with our No Bake Caramel Crunch Butterfinger Truffles. These decadent truffles are a perfect blend of rich caramel and crispy butterfinger, wrapped in smooth chocolate. Whether you’re craving something sweet or looking for an easy treat to impress your guests, this no-bake recipe promises satisfaction with every bite.

Crispy, chocolatey, and infused with irresistible caramel, these truffles bring joy in simplicity. Imagine the crunch of butterfinger, paired with the gooey goodness of caramel, each covered in creamy chocolate. The combination makes for a satisfying treat that is hard to resist. Serving as an elegant dessert or a fun party favor, this recipe ensures a sweet surprise in any setting.

Quick Recipe Highlights

  • Flavor Profile: The truffles boast a rich caramel base complemented by the crisp, nutty flavor of butterfinger, delivering a sweet and slightly salty experience.
  • Texture: Each truffle reveals a delightful combination of creamy, crunchy, and silky textures that melt smoothly in your mouth.
  • Aroma: Expect an enticing bouquet of sweet caramel mingling with chocolate notes, perfect to tantalize your senses.
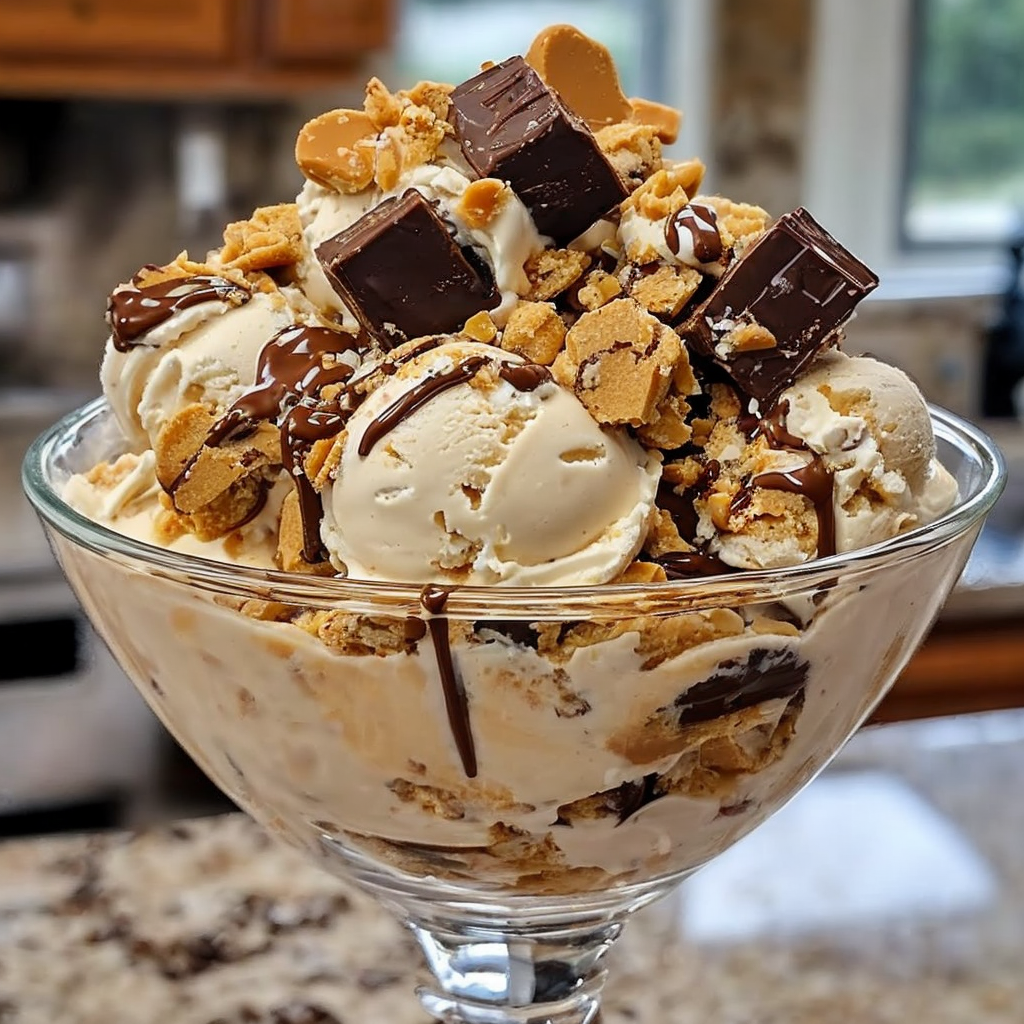
  • Visual Appeal: These truffles present beautifully with their glossy chocolate coating and a sprinkle of butterfinger crumbs for a dash of allure.
  • Skill Level Needed: Simple enough for novices but satisfying for the seasoned cook, requiring basic know-how of truffle forming techniques.
  • Special Equipment: The recipe primarily requires a mixing bowl, baking sheet, and optional food processor for exact butterfinger crumb consistency.

Recipe Overview

  • Difficulty Level: Ideal for beginners, this recipe requires no oven and features straightforward, easy-to-follow instructions perfect for any experience level.
  • Category: This delightful treat fits the dessert category, suitable for various dining occasions from casual gatherings to festive celebrations.
  • Cuisine: A classic indulgence with a twist, it integrates traditional American candy bars into a modern confection.
  • Cost: With affordable ingredients, this recipe is budget-friendly, transforming everyday candies into gourmet treats.
  • Season: Perfect year-round, these truffles are versatile, whether enjoyed cozying up in winter or as a summer treat.
  • Occasion: Ideal for parties, holiday treats, or gifting, these truffles add a touch of sweetness to any event.

Why You’ll Love This Recipe


These No Bake Caramel Crunch Butterfinger Truffles are a delectable harmony of taste and texture. They embody the mouthwatering combination of crunch from the butterfinger and the smoothness of chocolate, all complemented by the rich, buttery notes of caramel. Designed to impress both sight and palates, these truffles tempt with their allure and delight with every bite, making them a favorite for any sweet tooth.

The beauty of this recipe lies in its convenience. These no-bake truffles save time and effort, requiring only simple mixing and shaping steps. Perfect for spontaneous cravings or last-minute dessert planning, you’ll appreciate how quickly they come together without sacrificing flavor. Prepared in less than half an hour, they are a go-to solution when time is limited.

Packed with indulgent sweetness, these truffles make moderate consumption a delight while offering balanced nutrients for a dessert option. The inherent energy boost from their sugary and buttery ingredients makes them perfect for a quick pick-me-up. Their portion-controlled size helps manage intake as well, aligning with a reviewed nutritional lifestyle.

Socially, these truffles shine in gatherings. Easy to share and enjoy by guests, their universal appeal bridges diverse palates. Their bite-sized nature makes them excellent for parties, allowing guests to savor a sweet moment alongside other finger foods. As a conversation starter, they’ll have guests asking for tips or variants, engaging everyone over the shared delight.

In terms of cost, transforming common candy into gourmet truffles makes these as budget-friendly as they are delicious. Using widely available ingredients, this recipe proves that luxury can indeed be affordable. They remind us that sophistication in food doesn’t require a hefty price tag; it merely takes creativity and a little kitchen savvy to elevate the ordinary.

Historical Background and Cultural Significance


The truffle, historically rooted in European confectionery traditions, represents indulgence and luxury. Originating from French cuisine, truffles have evolved from simple ganache-coated spheres to extravagant creations featuring an array of flavors, textures, and coatings. This particular iteration, blending caramel and Butterfinger, pays homage to the rich candy heritage of America, integrating beloved modern sweets into classical forms.

Culturally, truffles have maintained their allure as symbols of elegance in the culinary world. They frequently appear in gourmet chocolate assortments and luxury brand offerings. Their connection to celebration and gifting ties to centuries-old traditions of exchanging sweets during festive occasions or special moments, marking them as tokens of affection or indulgence.

The evolution of truffles has been fascinating. From classic cocoa-dusted ganache balls to extravagant fillings and coatings, each variation showcases creativity and innovation. Our recipe leverages this evolution by incorporating Butterfinger, a distinctly American candy, adding a delightful crunch to the traditional smoothness of truffles and signaling a beautiful fusion of old and new.

In terms of regional variations, each culture flaunts its unique version of truffles by infusing local flavors and ingredients. Some countries prefer dark chocolate bases while others lean towards milk chocolate. This recipe introduces a unique twist by infusing Butterfinger, making it a distinctly American take on a classic European treat, delighting chocolate and candy lovers alike.

Ingredient Deep Dive

Butterfinger adds a distinctive taste and texture to any confection. Its crispy, flaky interior enhances the truffles by adding a satisfying crunch that contrasts the soft caramel and chocolate layers. Introduced in 1923, Butterfinger has since become an iconic American candy, recognized for its unique taste blending peanuts and corn syrup into a flaky, sweet filling topped with chocolate.

Nutritionally, Butterfinger contributes to the truffle’s energy content with its sugar and fat profile, adding a delightful indulgence. When selecting Butterfinger for this recipe, opt for fresh, intact bars with vibrant packaging signaling quality preservation. Store them in a cool, dry place to maintain their characteristic crispness and flavor until usage.

Caramel is essential in these truffles, providing a creamy, buttery depth that melds harmoniously with the chocolate and Butterfinger. Caramel’s rich history dates back thousands of years to when people first began transforming sugar into a silky, golden syrup. This versatile confection has since been adopted across cultures, used widely in both savory and sweet dishes.

Caramel’s nutritional benefit lies primarily in its energy-providing sugars. When choosing caramel, opt for smooth, golden varieties with a balanced sweetness. Store caramel at room temperature, sealed properly, to prevent hardening or crystallization. In recipes, softer forms like sauces can easily substitute for harder caramel pieces for a smoother truffle filling.

Common Mistakes to Avoid

  • Over-mixing ingredients can create overly dense truffles, losing the desired airy, light texture. Mix just until combined.
  • Using poor-quality chocolate diminishes taste, making it imperative to invest in good chocolate, ideally couverture, for a smoother, silkier finish.
  • Insufficient chilling time means truffles may not set correctly, leading to misshapen results. Respect all chilling guidelines for optimal shape.
  • Over-processing Butterfinger bars will transform their texture, making it important to pulse gently to retain the essential crunch.
  • Improperly melting chocolate can cause seizing. Melt slowly using a double boiler or intervals in a microwave to avoid burning.
  • Neglecting the coating stage results in uneven layers; roll truffles thoroughly in chocolate until completely covered.
  • Skipping ingredient preparation causes delays. Prepare all elements beforehand for efficient assembly and execution.
  • Lack of storage care impacts shelf life. Store truffles in cool, airtight conditions to preserve freshness and texture.
  • Failing to measure ingredients correctly affects proportions and taste. Ensure precise measurements for consistency in flavor and structure.
  • Rushing the process may cause errors. Take time with each step for successful results that reflect your effort and attention.

Essential Techniques


Melting chocolate correctly is vital. Poor melting can result in gritty, uneven coatings, affecting truffle presentation. Always use gentle heat and stir frequently until just melted for smooth results without burning or seizing. A double boiler or microwave in short bursts are excellent methods to maintain chocolate’s quality.

Mastering caramel is essential. A poorly prepared caramel can seize or taste burnt, disrupting flavor balance. Heat sugars slowly and stir gently to achieve the desired golden browns associated with perfectly balanced caramel. Visual cues like color and consistency are crucial indicators of success.

Consistency in portioning ensures evenly sized truffles. Use a teaspoon or truffle scoop for consistent, manageable portions, leading to even coating and predictable setting times. This also supports uniform presentation when serving guests or showcasing as gifts.

Understanding texture balance is crucial. An over-chilled base or overheated coating sets truffles too rapidly, impacting texture and appearance. Constantly monitor all elements’ temperatures, ensuring they’ve balanced properly before proceeding with the next steps.

Following proper layering techniques delivers flavor complexity. Alternately adding layers of chocolate and Butterfinger enhances flavor articulation, transforming each bite into a multi-textured delight. Visualize layering step outcomes to manage textural harmony throughout.

Recognizing setting cues is key to completing the recipe efficiently. Truffles that are adequately chilled will hold shape and slice cleanly during presentation. Following visual and tactile signals like firmness and glossiness delineate readiness for the final steps.

Pro Tips for Perfect No Bake Caramel Crunch Butterfinger Truffles


For intensified flavor, briefly toast the Butterfinger crumbs before incorporation. Light toasting enhances nutty notes and adds an extra layer of complexity to the truffles.

Consider chilling your mixing bowl before preparing the truffle mixture. This keeps the filling firm and easier to handle, especially in warmer climates or kitchens.

Add a pinch of sea salt to the caramel layer. Salt contrasts the sweetness, heightening the truffle’s depth and enriching its flavor profile.

When forming truffles, slightly wet or oil your hands to prevent sticking, allowing smoother handling and even shaping.

Vary the sweetness by opting for dark chocolate, which offsets the candy-like sweetness of the caramel and Butterfinger quite elegantly.

If creating ahead, freeze the uncoated truffle centers, then defrost them slightly before coating. This guarantees ease and reduces preparation time on serving day.

Enhance presentation by drizzling extra chocolate or scattering finely crushed Butterfinger over the set truffles, elevating them visually and texturally.

Experiment with filling variations by mixing peanut butter or adding a small square of caramel within the truffle for a molten center effect.

Variations and Adaptations


Regional twists can include incorporating spices like cinnamon or nutmeg, echoing flavors prominent in certain cultures. For a festive touch, grating orange zest into the mix adds brightness and a hint of sophistication.

Adapt these truffles seasonally by incorporating fresh fruit extracts or zest to accentuate spring or summer flavors. Citrus or berry flavorings work particularly well, balancing the richness of caramel and chocolate.

Dietary modifications cater to various needs; use allergen-free or sugar-free alternatives to accommodate restrictions without compromising taste. Dark chocolate variants may suit lower sugar preferences while maintaining indulgence.

Introduce diverse flavors by including flavored liquors or extracts into the chocolate melting stage, infusing truffles with unique, personalized undertones that enhance the core ingredients.

Adjust textures by varying the ratio of caramel to Butterfinger. Experiment with smooth or extra-crunchy finishes to complement particular tastes or match thematic culinary goals.

Enhance presentation by using colorful sprinkles or edible metallic powders, creating vibrant and eye-catching versions that suit parties, gifts, or themed events perfectly.

Serving and Presentation Guide


Plating these truffles on elegant serving dishes lined with parchment or decorative paper enhances visual appeal while preventing stickiness. Consider arranging in tiers for theatrical presentation.

Garnish with fresh mint leaves or delicate edible flowers, adding pops of color that contrast beautifully against the rich chocolate tones, enhancing their gourmet status.

These truffles pair best with fresh whipped cream or a dollop of mascarpone on the side, complementing the sweet and crunchy notes with smooth, creamy elements that refine texture.

For modern twists, serve truffles perched on small shot glasses filled with contrasting flavor sauces like raspberry coulis, inviting interactive dipping experiences.

Mind the truffle’s ideal serving temperature, typically at room temperature for optimal texture, allowing flavors to meld seamlessly without residual fridge chill.

Portion correctly to ensure plenty for all. Account for one bigger or two smaller truffles per person, gauging guest preferences and avoiding under or over-serving.

Wine and Beverage Pairing


Pairing truffles with a rich Port or sweet dessert wine enriches the caramel and chocolate nuances, complementing and elevating the sweetness without overwhelming the senses.

Alternatives like a full-bodied red wine or amber ale evoke earthy and bitter flavors that harmonize exquisitely with the truffle’s creamy, caramel layers.

Coffee aficionados will enjoy pairing with strong espresso or a robust French press brew, with coffee’s deep, toasty notes complementing caramel’s sweetness perfectly.

For non-alcoholic options, offer iced or hot tea with fruit infusions, such as peach or berry, adding a refreshing contrast to each decadent bite, catering to varying guest preferences.

Match serving temperatures of beverages and truffles, allowing both elements to display their best flavors while creating a harmonious sensory experience.

Preparing beverages alongside truffles ensures an immersive, pleasurable experience. Aim to maintain beverage selections that both cleanse and highlight the truffle’s core flavors.

Storage and Shelf Life


Store truffles in an airtight container, ideally lined with parchment paper, separating individual layers to prevent sticking or unwanted absorption of external scents.

Cookie tins or plastic containers provide excellent storage conditions, keeping truffles fresh for up to two weeks when maintained at a consistent cool room temperature.

Signs of spoilage include toughening caramel centers or bland, muted flake coatings; regular checks can prevent disappointment when intending to serve in larger settings.

Gently reheat truffles served cold for smoother, richer mouthfeel. Place them briefly in a warmer environment for a few minutes beforehand to enhance texture.

Avoid freezing if possible, as thawing can compromise texture. If necessary, limit freezing duration, practicing delicate defrosting methods for best results upon serving.

Evaluate weather conditions, particularly in summer months, to avoid over-softening chocolate coatings during storage. Maintain ambient or air-conditioned conditions for quality preservation.

Make Ahead Strategies


Prepare truffle bases ahead of hosting events, storing the formed center mixture chilled until ready for coating to streamline party prep or meal-planning schedules.

Adopt methods involving gradual steps, like setting caramel in advance, to avoid intensive single-day prep, collectively enhancing readiness for sudden serving needs.

When assembling, refrigerate varying elements separately before the final combination step to maintain structural integrity, ensuring stress-free, polished final presentation.

Pre-plan caramel cooking to produce optimal syrup consistency and avoid impromptu melting issues, delineating smoother directions for all subsequent truffle-making stages.

Reheat refrigerated components gently with methods that shield from potential moisture accumulation or chilling-induced coatings, carefully avoiding textural loss.

Integrate fresh elements like zest or herbs, ensuring those additions occur closer to serving time to preserve aromatic intensity and visualize freshness upon offering.

Scaling Instructions


Halve the recipe for personal gourmand experiences or intimate gatherings, adjusting ingredient measurements to maintain quality intact despite smaller proportions.

Doubling or tripling works excellently for large parties or gift preparations; maintain consistent quality checks amidst higher volume preparation to match initial standards.

Vary equipment scales, from bowls to trays, aligning utensil size with intended batch quantity, guaranteeing maintained mixing conditions and eventual truffle quality.

Manage timing precision with larger batches by organizing workflow into substages, establishing concise steps that accommodate higher production rates effectively.

Adapt storage approach based on truffle number, likely extending shelf life needs to larger accommodations for bulkier presentations maintained during gatherings.

Consider timeline detail variations according to guest turnout, realistically appraising ingredient adjustments to match demand without overambitious scaling touches.

Nutritional Deep Dive


The truffles offer an engaging macronutrient balance, with a particular emphasis on carbohydrates and fats originating from caramel and chocolate coatings.

Micronutrient content entails notable contributions from cocoa used within recipes; components include magnesium, calcium, and antioxidants beneficial for overall mood enhancement.

Caramel’s macro fatty attributes maintain an indulgent, energy-packed feature, promoting a delightfully thoughtful addition to treat selections within active lifestyles.

Portion control strategies emphasize delicate distribution of individual truffles despite calorically dense compositions, serving moderate offers within nutritionally conscious outlay.

Dietary considerations accommodate sugar-conscious profiles somewhat through dark chocolate utilization, offsetting Butterfinger sweetness through deeper cocoa-rich alternatives.

Decadent truffle offerings demonstrate occasional treat acceptance amid balanced dietary intentions, weaving opportunities for reasoned indulgence with nutrition-minded thought.

Dietary Adaptations


For gluten-free adaptations, employ certified gluten-free chocolate and caramel alternatives, maintaining both taste profile and dietary adherence without gluten-containing elements.

Dairy-free endeavors substitute standard chocolate with dairy-free versions, covering caramel layers with cream substitutes sans lactose, aligning creation with lactose-intolerant aims.

Vegan variants exist by utilizing plant-based butter, forgoing traditional dairy-laden truffle components to satisfy dedicated vegan explorers amid customary celebratory dishes.

Low-carb truffles incorporate less sugar-laden chocolate coupled with modified caramel substitutes yielding a transformative truffle retaining key flavor traits minus rich carb layers.

For keto adherence, craft fillings anchored firmly in coconut oil, merging fats and textures into truffles befitting ketogenic sensibilities, mirroring required carb-to-fat diet ratios.

Paired with paleo adaptation, rely on raw cocoa substitutions and natural sugar-to-date amalgamations producing delicious likeness sans processed inclusions expected elsewhere.

Low-FODMAP explores compatible ingredient restrictions, creating harmonious combinations through monitored sugar replacements, accentuating fulfilling gastro-friendly truffle developments.

Troubleshooting Guide


For overly soft truffles, chilling mishaps post-assembly often indicate less than ideal fridge time. Extend cooling to ensure accurate shape retention, or adjust formulations for firmer filling.

Confront flavor imbalance with ratios scrutinizing both Butterfinger crumbling and caramel consistency, finetuning variables until truffle taste balances harmoniously.

Temperature problems might engage unresponsive chocolate coatings; check consistency through gentle reheats, amending methods to retain uniformly smooth setup.

Equipment challenges translate into unsuitable kitchenware, propose critical selection of truffle utensils fitting batch scale aligning with ideal creative process flow.

Address ingredient substitutions comprehensively, gauging flavors and setting occurrences when inadequate alternatives produce inconsistent results amidst experimental changes.

Timing concerns involve adherence to steps outlined comprehensively, communicating projected schedules to avoid stressful or rushed preparation interruptions within recipe execution.

Recipe Success Stories


From our delightful community, user “ChocolateEnthusiast” introduced a peppermint variant over the holidays, achieving rave feedback for its refreshing twist on our soup-like classic.

Reader experiments resulted in hazelnut crumbled toppings by “NuttyForTruffles,” emulating European-inspired tastes appreciated across gatherings and beyond, highlighting nutty blends.

“TruffleTrendsetter” shared conversion experiences involving liquor-infused fillings, echoed resonance with sophisticated guests who adored slight alcoholic undertones alongside original textures.

“FoodiePhotographer” extolled intricate truffle-snapshotting techniques, illustrating essential lighting angles complemented deliberate truffle placement into mouthwatering allure worth snapshots.

With incredible feedback from “GatheringGourmet,” personal touch icing decoration ventures revealed fun truffle descriptions, adding engagements throughout public events, favorably sharing adaptations.

Frequently Asked Questions

Can I use a different type of chocolate?
Absolutely! Dark chocolate or white chocolate can be used depending on your preference, altering taste and appearance while stapling the original recipe structure.

How can I make these ahead of an event?
Prepare the truffle base days in advance, refrigerating until the day of coating, optimizing event preparation without sacrificing final flavor or texture results.

What’s the best way to crush Butterfinger bars?
Utilize a food processor or sealable bag with a rolling pin for an efficient, consistent crumb texture best suited for truffle making and step execution.

Is there a way to reduce the sugar content?
Opt for sugar-free chocolate and alternative caramel sweeteners to trim carbohydrate profiles, transforming the truffles into more balanced indulging treats.

Can I freeze truffles for longer shelf life?
Yes, albeit texture changes may occur upon defrosting. Ideally, consume shortly after prep, yet freezing remains a viable option for extensive storage needs.

How can novice bakers improve their truffle skills?
Practice through smaller batches, honing technique and command over mindful ingredient measurement, provides foundational experience for successful truffle creation.

What can replace Butterfinger for allergen concerns?
Consider allergen-free chocolate and cereal combinations, altering only the exterior, still capturing the essence of original recipes helmed within truffle centers.

How do I achieve perfect coating each time?
Temperature control, consistent stirring, and good-quality chocolate foster ideal coverage, emphasizing importance of final touches to achieve flawless truffle coatings.

Can I add alcohol to the truffle mix?
Certainly! Infusing alcohol must align with other flavors for cohesiveness; try adjusting complementary liquor ratios alongside chocolate stages for successful integrations.

What ways exist to decorate truffles uniquely?
Explore decorative contrasts through edible pigment powders, flower petals, or dessert glazes to accentuate truffle presentations amidst personal or guest-like occasions.

Additional Resources


For those eager to experiment further, refer to our guide on tempering chocolate, a pivotal technique enhancing truffle elegance and ensuring glossy, invitational finishes.

Browse related dessert recipe archives featuring variations on caramel-infused delicacies, opening up new opportunities for adaptations that expand beyond truffle kingdom aspects.

Investigate detailed ingredient information concerning chocolate sourcing practices, echoing sustainable cooking standards for mindful truffle-making pursuits comfortably paired with awareness.

Recruit quality kitchen aids, expanding specialized equipment recommendations that harmonize workflow, ideally culminating in succinct truffle presentation through concerted design investment.

Embrace seasonal experimentation tips aligning truffle transformations with moment-specific elements. From warming spice additions to hearty fruit complements, join versatile culinary paths.

Join the Conversation


Share your truffle creations using our community hashtag on social media, revealing different interpretations or inspired storytelling centralized around this flexible truffle format.

Delight in dynamic photography tips displayed by members ceaselessly capturing truffle enchantment, offering inspiring knowledge to help elevate both home presentation and professional aspirations.

Submit recipe reviews featured prominently in our community digest, acknowledging creative strides made, prominently elevating collective efforts for truffle-making experiences shared universally.

Engage wholly with engaged audience synergy, prompting conversations across platforms championing truffles constructed uniquely, where flavor variations delight and fantasize over culinary endeavors engaging.

Innovate with recipe variations entertaining dissection rooted within truffle craft details, prompting community members globally to continue exploring and intertwining transitioning culinary interests.

The Recipe

No Bake Caramel Crunch Butterfinger Truffles

Serves: 24

Prep Time: 20 mins

Cook Time: 0 mins

Total Time: 20 mins

Kitchen Equipment Needed

  • Mixing bowl
  • Baking sheet
  • Parchment paper
  • Food processor (optional)

Ingredients

  • 1 cup (about 8-10) Butterfinger candy bars, crushed
  • 1/2 cup caramel sauce
  • 12 oz semi-sweet chocolate chips
  • 1/4 cup unsalted butter
  • 1 teaspoon vanilla extract

Directions

  1. In a bowl, mix the crushed Butterfinger bars and caramel sauce until well combined.
  2. Scoop small portions of the mixture and roll into balls, placing them on a lined baking sheet.
  3. Freeze the balls for about 10 minutes to firm up.
  4. In a microwave-safe bowl, combine chocolate chips and butter. Microwave in 30-second intervals, stirring until smooth.
  5. Stir in vanilla extract and ensure the mixture is smooth.
  6. Dip each chilled truffle into the chocolate mixture, allowing excess to drip off, and place back onto the baking sheet.
  7. Chill coated truffles until the chocolate sets, about 30 minutes.

Recipe Notes

  • For a nutty variation, add chopped peanuts to the truffle mix.
  • Keep truffles refrigerated to maintain form and freshness.

Decadent Mango Cheesecake Delight: A Tropical Dessert Dream

Mango Cheesecake Delight: A Tropical Indulgence

⚖️
Difficulty
Medium

⏲️
Prep Time
30 mins

🕒
Cook Time
50 mins

⏱️
Total Time
80 mins

🍽️
Servings
8

Immerse yourself in the tropical flavors of this exquisite Mango Cheesecake Delight. With a rich, creamy filling paired with a vibrant, fruity topping, this cheesecake is a celebration of taste and texture. Each bite offers a delightful contrast of the silky cheesecake and the refreshing mango glaze, delivering a dessert experience that is both luxurious and satisfying. Whether served at a family gathering or a formal dinner, this Mango Cheesecake Delight is sure to impress and leave a lasting impression.

Quick Recipe Highlights

  • Flavor Profile: The cheesecake features the sunny sweetness of ripe mangoes, harmonized with the creamy richness of cheesecake for a delightful tropical treat.
  • Texture: Enjoy a smooth, velvety cheesecake filling complemented by an irresistible crumbly crust and luscious mango topping.
  • Aroma: This recipe boasts a fragrant aroma of fresh mangoes and creamy cheese, promising a sensory delight.
  • Visual Appeal: Presented with a glossy mango topping over a rich cheesecake base, it’s a visual masterpiece as well as a culinary delight.
  • Skill Level Needed: While this recipe is for intermediate bakers, the straightforward steps make it accessible for those willing to try.
  • Special Equipment: A springform pan is essential for perfect cheesecake shape, and a food processor will aid in crust preparation.

Recipe Overview

  • Difficulty Level: The medium-level difficulty stems from needing to balance the cheesecake’s consistency and perfecting the mango glaze. With our detailed guidance, even beginners can successfully create it.
  • Category: This recipe falls under desserts, particularly ideal for summer celebrations or tropical-themed meals.
  • Cuisine: Inspired by tropical influences, it incorporates classic cheesecake techniques with vibrant, fruity flavors from mangoes.
  • Cost: The availability of ingredients like cream cheese and mangoes may fluctuate, but overall it’s a moderately priced dessert.
  • Season: Best enjoyed in spring and summer when mangoes are in peak season, offering the freshest and most flavorful results.
  • Occasion: Perfect for special occasions like birthdays and anniversaries or as an indulgent dessert to conclude a festive meal.

Why You’ll Love This Recipe


This Mango Cheesecake Delight captivates with its luscious taste and smooth texture, offering a sophisticated dessert that impresses both the palate and eye. The use of ripe mangoes enriches the cheesecake, adding a delightful natural sweetness and radiant color that makes it a show-stopper at any gathering.

Convenience is key in this recipe, with easy-to-follow steps and minimal equipment requirements. Preparing this dessert in advance allows you to focus on enjoying your gathering, and the balance of flavors ensures it’s well-received by all guests.

Nutritionally, this cheesecake offers the benefits of mangoes, which are rich in vitamins A and C, making it not only a treat for your taste buds but also a source of essential nutrients.

Its aesthetic appeal and taste make it a favorite for entertaining, serving as a luxurious centerpiece that sparks conversations and satisfies dessert lovers’ cravings. The recipe’s cost-effectiveness, paired with readily available ingredients, ensures it is as accessible as it is delectable.

Historical Background and Cultural Significance


Cheesecake has storied origins dating back to Ancient Greece, with its creamy delight scaling continental cuisines over centuries. This variation — Mango Cheesecake Delight — introduces a tropical twist that reflects modern culinary innovation, driven by the global integration of tastes and influences.

Culturally, mangoes are cherished in many regions as symbols of prosperity and abundance, often revered in festive cuisines across Asia and South America. Marrying mangoes with traditional cheesecake speaks to a harmonious blend of cultural culinary practices.

Throughout history, recipes evolve, adapting to ingredients’ availability and regional tastes. The introduction of Mango Cheesecake Delight reflects this dynamic shift and culinary curiosity, exploring new flavors while respecting historical cheesemaking techniques.

Regional variations might involve different soft cheeses or local fruits, emphasizing this recipe’s versatility and adaptation to regional resources. Mango Cheesecake Delight, therefore, continues this tradition by incorporating beloved tropical flavors into a time-honored baking classic.

Ingredient Deep Dive


Mangoes, adored for their sweet and juicy flesh, infuse the cheesecake with natural sweetness and vibrant color. Storied as the “king of fruits,” mangoes have cultural significance in several cuisines due to their symbol of hospitality and joy. They boost flavor and dish appeal with substantial vitamin A and antioxidant content.

Selecting ripe, smooth-textured mangoes is crucial for maximum flavor. Store them at room temperature until they give slightly to gentle pressure, ensuring juiciness and sweetness. Alternatives like pineapples or peaches can substitute, though each provides distinct flavor shifts in the cheesecake’s profile.

Cream cheese forms the cheesecake’s luscious body. Choose full-fat varieties for optimal richness and texture. It stores well if refrigerated, keeping its fresh, tangy flavor intact up to a week post-purchase. Maintaining room temperature before use prevents unwanted lumps in the batter.

Cream cheese’s substitution can be tricky. Blends of Greek yogurt with sour cream can replicate textures in emergencies, but expect to adjust sweetness and tanginess accordingly. A creamy consistency ensures structure and stability for your cheesecake.

Common Mistakes to Avoid

  • Avoid overbeating the cheesecake mixture, preventing air introduction which leads to cracks during baking.
  • Ensure mangoes are ripe; underripe mangoes lack the necessary sweetness, compromising flavor.
  • Always use a warm knife to cut the cheesecake for a clean slice, preventing the cheesecake from deforming.
  • Do not forget to line the springform pan. A non-stick approach simplifies cheesecake removal, preserving its presentation.
  • Never overbake. The cheesecake should slightly jiggle, ensuring a creamy texture.
  • Allow adequate chilling time post-bake ensures proper setting and optimal bite feel.
  • Avoid refrigerating mangoes before they ripen. Chilling slows down the essential ripening processes impacting flavor.
  • Too much gelatin in the glaze results in an opaque finish rather than a beautiful translucency. Measure accurately.

Essential Techniques


Creating the perfect Mango Cheesecake Delight involves mastering the art of the water bath. This technique stabilizes temperature, aiding even cooking and minimizing undue cracking risk. Wrap your springform pan in foil to maintain dryness, and introduce water just before oven entry.

Understanding the tempering technique is crucial, especially when introducing components like gelatin. Properly tempering avoids clumping and ensures smooth integration into the mango glaze. Keeping elements at similar temperatures minimizes setting prematurely during blending.

Creating a biscuit base lends fantastic texture contrast to the cheesecake. The key is achieving the right crumb-to-butter mix. Too little butter and the crust crumbles, while excessive butter causes greasiness. Firm pressing aids a stable foundation.

Mastering mango puree creation elevates the topping, achieved by peeling, deseeding, and blending mangoes into a smooth consistency. Mesh straining ensures clarity, removing fibrous bits for that sought-after mango glaze sheen.

Utilize sensory cues for baking success. A gentle shake reveals readiness through slight central jiggles, and aroma detects doneness without overt heat exposure. Rely on these sensory signals to navigate and perfect your bake.

Pro Tips for Perfect Mango Cheesecake Delight


Allow the cheesecake to cool gradually by turning off the oven slightly ajar; this helps prevent cracks on the surface. Chill the cheesecake overnight for perfect set and flavor melding.

Use a quality springform pan that securely fastens to prevent leaks during the water bath baking process. Maneuver the knife blade around the pan’s edge post chilling for seamless release from sides without damage.

To elevate presentation, garnish with fresh mango slices, lightly toasted coconut flakes or mint leaves for an additional aesthetic allure. Opt for ripe Alphonso mangoes for a more robust, signature tropical sweetness.

Brushing the mango glaze atop the chilled cheesecake while slightly warm aids adherence and sheen, enhancing the visual appeal of your dessert. Knocking out air from the cheesecake mixture creates a dense, creamy texture.

Incorporate a dash of lime juice into the topping to balance mango’s innate sweetness with a hint of acidity, enhancing the overall flavor profile. Toasting the base crust lightly before adding batter enriches the cheesecake with a nutty aroma.

Variations and Adaptations


Adapt this recipe to regional preferences by incorporating local fruits that mimic mangoes’ sweet profile. Imagine passion fruit or persimmon variations giving a new edge to the traditional mango delight. Seasonal adaptations might involve swapping top mango puree with fresh berry coulis, making it a year-round favorite.

For dietary modifications, cream cheese can be swapped with vegan cream alternatives, ensuring inclusivity for vegan diets. Favor flavor variations by infusing traditional spices like cardamom or nutmeg for added complexity.

Presentation modifications are made by carving the mango into intricate shapes or using alternative molds for interesting patterns. Texture variations can be introduced by folding in whipped cream, offering a lighter, mousse-like finish.

For a different cultural touch, blend in native spices or vanilla bean into the base for a comforting, warm undertone. Include nuts or crust mixtures for distinct, personalized textural contrasts. Each adaptation offers unique gustatory experiences.

Serving and Presentation Guide


Impress guests with professional plating techniques by artistically arranging mango slices on top in a circular pattern, allowing the glaze to shine through. Consider modern, deconstructed presentations by serving cheesecake components in individual glasses, enhancing the novelty factor of your dessert.

Garnishing with mint leaves, edible flowers, or a drizzle of honey elevates beauty and aromatic intrigue. As traditional accompaniments, offer alongside tangy sorbets or freshly brewed coffees to cleanse and complement taste palettes.

Temperature control remains crucial; serve each slice chilled but not frozen, ensuring the creamy texture remains intact. Pay attention to portion control, offering modest servings that cater to rich flavors and guest satisfaction without heaviness.

Wine and Beverage Pairing


The tropical notes in Mango Cheesecake Delight pair elegantly with a late-harvest Riesling or a well-chilled Moscato, highlighting sweetness while not overpowering the dessert’s subtleties. For non-alcoholic alternatives, consider serving with mango-infused iced teas or ginger-lime mocktails for complementary vibrancy.

If coffee or tea is preferred, stick to light roasts or fragrant options like Earl Grey, whose floral notes harmonize beautifully with the flavors of the cheesecake. Ensure beverages are served slightly warmer than room temperature, enhancing their aromatic dispersion.

Serve wine chilled at 8-10°C (46-50°F) to fully appreciate its taste contrasting the dessert’s flavors. The inherent sweetness in these wine options aligns with the fruity essence, making each tasting session memorable.

Storage and Shelf Life


Preserve the Mango Cheesecake Delight by wrapping it in cling film or storing it in an airtight container to maintain freshness, keeping it in the refrigerator for up to five days. Refrigeration is crucial; it stabilizes the cheesecake, maintaining its moistness and preventing drying out.

When freezing, slice the cheesecake for individual portions and wrap them separately to avoid freezer burn, allowing for easy access and consistent quality. Recognize signs of spoilage by checking for off smells or unexpected dullness in color.

Reheating isn’t typically required, but bringing to room temperature ensures optimal serving texture. Thaw frozen slices gradually in the refrigerator overnight before serving. Monitor condensation on thawing, softly patting dry for pristine presentation.

Make Ahead Strategies


Advance preparation for Mango Cheesecake Delight simplifies mealtime stress. Begin by crafting the crust days ahead, storing airtight to preserve crispness. Prepare the cheesecake filling up to a day in advance for a comforting, luxuriant blend of flavors.

Store the mango topping separately when preparing in advance, applying post-refrigeration to ensure maximum freshness. Breaking down the recipe into these steps allows the cheese flavor to mature, offering culinary depth.

Reheating is unnecessary, simply serve after removing from the refrigerator. Introduce fresh elements right before presentation, like mint leaves or tropical fruit segments, adding vibrant freshness and color.

Scaling Instructions


To half the recipe, consider adjusting the springform pan size to maintain desired thickness and structure or use ramekins for individual servings, offering delightful minidesserts. When doubling the recipe, a stronger mixer may ease batter consistency maintenance.

Should you double or triple your output, adjust cooking times cautiously, factoring in potential lag due to the increased mass. Assess ingredient amounts to avoid overwhelming oven capacity, potentially staggering batches for consistency assurance.

For large gatherings, preparation and storage actively prevent last-minute complexities, ensuring an easier hosting role. Proper fridge space assessment is critical for scaling adjustments, ensuring sufficient capacity for dessert cooling and setting.

Nutritional Deep Dive


This dessert offers a macronutrient profile of high-quality fats and carbohydrates that’s central to its indulgent flavor. Enjoy the micronutrient boost from mangoes, delivering antioxidants and vitamin richness beneficial for health.

Mind the portion sizes to align with dietary goals, as modest servings provide satisfaction while preventing overconsumption. If pursuing weight management, balance slices with lighter meal components, ensuring dietary harmony.

Exploration into lighter cream cheese options may offer health-conscious bakers a lower-calorie option without a significant taste compromise. Based on dieticians’ suggestions, balance indulgence and nutrition by complementing with fiber-rich fruits or nuts.

Dietary Adaptations


For gluten-free iterations, substitute the crust with gluten-free biscuits or almond meal, maintaining flavor integrity through a nutty sweetness. Switch dairy elements seamlessly with coconut cream or dairy-free cheese, crafting a luscious, inclusive dessert.

Vegan adaptations require precision substitutions of cream cheese with plant-based alternatives, enriching flavors via naturally dried mangoes in the topping. This approach broadens dessert accessibility while respecting diverse dietary preferences.

Low-carb transformations eliminate crust in favor of nut-based layers; consider utilizing almond or coconut flours for satisfactory textures while retaining taste. Incorporate low-carb sweeteners to align with dietary directives, offering adaptable flavor depths.

strong>

Troubleshooting Guide


Encountering texture issues? Ensure essence stabilization through well-managed mixing connections, carefully integrating air without overbeating for optimal creaminess. Balance flavors with citrus zing from lime if sweetness overpowers, offering refreshing palate balance.

Faced with uneven baking? Adopt the water bath method for uniform heat distribution, preventing cracks and ensuring smooth, luscious slices. Equipment substitutions, like using a whisk instead of a mixer, can introduce lumps, resolvable by pre-softening cheese.

Tackle ingredient timing dilemmas by sticking to precise preparation guidelines, preventing unexpected results with stringent adherence to instructions. Successfully substituting components rely on texture and flavor harmony — plan accordingly for the best results.

Recipe Success Stories


Many community members rave about the Mango Cheesecake Delight’s balance of texture, flavor, and visual appeal, earning compliments during festive occasions. Creative adaptations exemplify culinary curiosity, from the introduction of passion fruit toppings to swirls of raspberry for elegant desserts with a twist.

Eager readers share successful vegan transformations, ensuring its enjoyment beyond dietary boundaries, and discovering unexpected ingredient inclusions that spark joy among friends and family. Celebrate with photography hints enhancing the beauty of the dessert, from low-angle shots capturing texture to vibrant settings highlighting color contrasts.

Frequently Asked Questions

Can I use other fruit instead of mango?
Yes, you can substitute mango with fruits such as peaches or apricots for a different yet delightful twist. Ensure fruits are ripe for the best flavor profile.
Why did my cheesecake crack?
Cheesecake cracks can occur from overbaking or sudden temperature changes. Adopting a water bath method and gradual cooling helps avert this issue.
How long can I store the cheesecake?
This cheesecake can be refrigerated for up to five days, ensuring it is wrapped tightly to preserve freshness.
Is the mango topping optional?
No, but you can switch between various toppings based on preference. Experiment with coconut glaze or mixed berry coulis.
Can I make this cheesecake without an oven?
For no-bake versions, use gelatin within the filling, setting it in the fridge overnight. This eliminates the baking phase entirely.
What size springform pan do I need?
A standard 9-inch springform pan suits this recipe, providing ample size without overwhelming filling requirements.
How do I prevent a soggy crust?
Bake the crust prior to filling addition. This pre-crunches structure prevents moisture absorption while filling sets.
Can I freeze the cheesecake?
Yes, freeze it by slicing and wrapping individually. Thaw out in the refrigerator before serving for best consistency and flavor.
Should I use canned mango puree?
Fresh is preferable for flavor and texture, but as a contingency, let puree’s quality satisfy taste expectations when seasonal availability declines.
How can I tell if the cheesecake is done?
Gentle wobble minimizes overbaking risks, indicating readiness. Its solidifying glaze sets post-oven bake, representing test stage completion.
What if I am allergic to nuts?
Replace nut base crust with biscuit choices, ensuring they meet allergen standards and still provide a crispy touch.
Why does the cheesecake have a grainy texture?
If graininess surfaces, cream cheese may have been inadequately softened or integrated. Give closer attention to base temperature conditions.

Additional Resources


Explore our portfolio of related recipes, including exotic fruit-inspired desserts and different cheesecake flavors that complement the Mango Cheesecake Delight. Delve into technique guides, helping you master baking basics, from premium equipment recommendations to seasonal variations.

Our detailed ingredient guides refine your culinary skills, while recommendations for choosing the best tools streamline preparation and expand your capacity to create exquisite desserts with ease and satisfaction.

Join the Conversation


Engage with us by sharing your Mango Cheesecake Delight experiences on social media using #MangoCheesecakeDelight. Whether you’re tweaking flavors or acing presentations, your feedback enriches our community and inspires fellow dessert lovers worldwide.

We invite you to review the recipe, suggesting innovations and improvements through the comment section below, enhancing the collective culinary repertoire. Let your creativity shine—each adaptation tells its unique story, reflecting personal tastes and crafting connections through the love of baking.

The Recipe

Mango Cheesecake Delight

Serves: 8

Prep Time: 30 mins

Cook Time: 50 mins

Total Time: 80 mins

Kitchen Equipment Needed

  • 9-inch springform pan
  • Food processor
  • Blender
  • Mixing bowls
  • Oven
  • Refrigerator

Ingredients

  • 200g digestive biscuits, crushed
  • 100g unsalted butter, melted
  • 500g cream cheese, softened
  • 200g caster sugar
  • 3 large eggs
  • 1 tbsp vanilla extract
  • 2 ripe mangoes, pureed
  • 2 tsp gelatin powder
  • Juice of 1 lime

Directions

  1. Preheat the oven to 160°C (320°F). Grease and line a 9-inch springform pan.
  2. Combine crushed biscuits and melted butter, pressing evenly into the base of the pan. Bake for 10 minutes, then cool.
  3. In a large bowl, beat cream cheese and sugar until smooth. Add eggs one at a time, mixing well after each addition. Stir in vanilla extract.
  4. Pour filling over the cooled crust. Bake for 40 minutes or until set around the edges with a slight jiggle in the center.
  5. Blend mango puree, pass it through a sieve for a smooth consistency, and set aside in a bowl.
  6. Dissolve gelatin in lime juice over low heat, then combine with mango puree.
  7. Pour the mango mix over the cheesecake, smooth the top, and refrigerate for at least 4 hours or overnight.

Recipe Notes

  • Ensure all ingredients are at room temperature for a smooth cheesecake batter.
  • You can substitute mango with other seasonal fruits like peaches or apricots.
  • If the cheesecake cracks, cover the top with additional mango slices or glaze.

Delight in Elegant White Chocolate Blueberry Cheesecake Cupcakes Recipe

Elegant White Chocolate Blueberry Cheesecake Cupcakes: A Sophisticated Treat

⚖️
Difficulty
Intermediate

⏲️
Prep Time
25 mins

🕒
Cook Time
45 mins

⏱️
Total Time
70 mins

🍽️
Servings
12 cupcakes

Imagine sinking your teeth into a moist, creamy cheesecake cupcake where luscious white chocolate perfectly complements the burst of fresh blueberries. These Elegant White Chocolate Blueberry Cheesecake Cupcakes are crafted to impress, with each bite offering a delightful balance of sweetness and tang. Whether you’re hosting a sophisticated dinner party or simply indulging yourself, this recipe will elevate your dessert game.

These cupcakes don’t just taste heavenly; they are miniature works of art. With their velvety texture, they melt in your mouth, offering a rich contrast between the luscious cream cheese filling and the ambling bite of blueberries. The gentle aroma of vanilla wafts through each cupcake, inviting you to experience sheer decadence and delight.

If you’re searching for a dessert that combines the comforting familiarity of cheesecake with a touch of elegance, these White Chocolate Blueberry Cheesecake Cupcakes are your answer. They’re perfect for special occasions, showcasing your culinary prowess with minimal fuss. With our step-by-step guidance, you’ll master this recipe in no time.

Quick Recipe Highlights

  • Flavor Profile: The cupcakes boast a harmonious blend of sweet white chocolate and tart blueberries, enhanced with a hint of vanilla.
  • Texture: Experience the creamy, smooth cheesecake filling complemented by the soft, cakey exterior.
  • Aroma: Indulge in the irresistible scent of vanilla mingling with the subtle fragrances of white chocolate and fresh blueberries.
  • Visual Appeal: Beautifully golden cupcakes crowned with plump blueberries and a drizzle of white chocolate create the perfect visual delight.
  • Skill Level Needed: An intermediate level with familiarity in basic baking techniques will suffice to execute this recipe flawlessly.
  • Special Equipment: You’ll need a muffin tray, electric mixer for smooth batter blending, and parchment paper liners.

Recipe Overview

  • Difficulty Level: These cupcakes involve multiple components and require careful handling of melted chocolate for the best results, making them moderately challenging.
  • Category: Perfect for dessert, these cupcakes make a fabulous addition to teatime spreads and celebratory feasts.
  • Cuisine: A fusion that represents classic American cheesecake influences with a modern twist of chocolate elegance.
  • Cost: While premium ingredients like white chocolate might add up, they remain a cost-effective choice for upscale homemade cupcakes.
  • Season: Best enjoyed year-round, but particularly delightful during spring when blueberries are at their peak.
  • Occasion: These sophisticated cupcakes shine at dinner parties, anniversary celebrations, and birthday gatherings.

Why You’ll Love This Recipe


Dive into the divine taste and texture of these cupcakes, where creamy cheesecake meets the fresh zestiness of blueberries, each bite delivering layers of flavor. Convenient and straightforward, the preparation involves manageable steps, suitable for a Sunday afternoon project. Nutritionally, they offer indulgence in moderation, perfect for treating yourself without guilt. Their aesthetic charm makes them impressive centerpieces at any gathering, and thanks to accessible ingredients and a forgiving recipe, they guarantee success.

White chocolate’s mellow sweetness marries beautifully with blueberries’ bright tang, resulting in a flavor mosaic uniquely decadent yet balanced. But it’s not just about taste—the quick setup and minimal cleanup enable you to enjoy the journey without the mess. Relish each nuanced layer as white chocolate and blueberry harmonize in a dessert that’s easy to assemble but substantial in its impact.

Historically, cheesecake’s origins lie in ancient Greek culture, lauded for its simplicity and richness. Through the ages, it has evolved considerably, with each region adding its flair. The merger with white chocolate and blueberries is a nod to contemporary tastes, adapting a beloved classic for modern palates.

Let’s delve deeper into the core ingredients and what makes each so special. White chocolate, prized for its rich creamy texture, adds luxurious smoothness, while blueberries, long celebrated for their antioxidant properties, provide a refreshing counterbalance.

Common Mistakes to Avoid

  • Over-mixing: This can lead to denser cupcakes. Mix just until combined.
  • Uneven baking: Ensure your oven is properly preheated for consistent results.
  • Sub-par blueberry selection: Use fresh, plump blueberries for optimal flavor.
  • Melted white chocolate mishaps: Melt gently in a double boiler to avoid scorching.
  • Incorrect liner usage: Use parchment liners to prevent sticking.
  • Overcooking: Remember to assess doneness before anticipated completion to maintain moistness.
  • Rushing the cooling: Allow cupcakes to cool gradually, preventing cracks.
  • Improper storage: Store leftovers in airtight containers to maintain freshness.

Essential Techniques


Mastering the melting of white chocolate is essential; heat too quickly, and you risk a grainy texture. Gentle, slow melting preserves the chocolate’s integrity, producing a creamy consistency vital for cheesecake’s signature silkiness. Secondly, folding incorporates air into the batter without deflating the rise, ensuring a light yet substantial cupcake. Visual cues, such as a glossy sheen and delicate peaks, guide you to technique success, affirming these cupcakes as both an art and a science.

Pro Tips for Perfect Elegant White Chocolate Blueberry Cheesecake Cupcakes


Optimize your baking by ensuring all ingredients are at room temperature before starting—this promotes even mixing and smoother batter. Pre-bake a test cupcake to fine-tune baking time according to your oven’s quirks. Incorporate a pinch of salt into your batter to accentuate flavors, countering the rich sweetness. To make them extra indulgent, pipe a swirl of vanilla bean frosting atop each for an elegant finishing touch. Alternatively, consider a sprinkle of lemon zest prior to serving for added aromatic allure. Lastly, always allow your cupcakes to cool fully before removing them from their wrappers to retain shape and clerical precision.

Variations and Adaptations


Explore regional variations by substituting cultivated blueberries for wild, enhancing their earthiness. Seasonal adaptations include adding a layer of lemon curd for a spring vitality or a hint of cinnamon for cozy autumnal warmth. For dietary considerations, swap standard cream cheese for a vegan variant to make this recipe plant-based, sacrificing none of the rich textures or flavor complexity. Alter textures by including a graham cracker crumble base for a crunchy contrast, or modify presentation by baking in mini tins to serve stylish, individual servings.

Serving and Presentation Guide


Striking presentation begins with precise plating—use sleek white dishes for a modern aesthetic that highlights the cupcakes’ vivid colors. Enhance their appeal with a blueberry compote drizzle or a scattering of fresh berries for a burst of color. Traditional accompaniments include a scoop of vanilla ice cream, adding temperature contrast, while modern suggestions might favor a dollop of whipped cream adorned with edible flowers. Portion control is effortless when serving cupcakes, allowing guests to indulge without overdoing it.

Wine and Beverage Pairing


Pair these treats with a late-harvest Riesling, where its floral notes and honeyed sweetness complement the blueberry’s tart edge. Non-alcoholic alternatives such as a chilled, lemon-infused sparkling water offer a refreshing cleanse between bites. For afternoon enjoyment, pair with a fragrant earl grey tea that echoes the cupcakes’ underlying vanilla tones, enhancing their aromatic complexity. Serve at ambient room temperature, as chilled desserts can mask the full expression of flavor.

Storage and Shelf Life


Ensure these cupcakes maintain their fresh allure by storing them in the refrigerator within an airtight container, keeping them moist and flavorful for 3-4 days. For extended enjoyment, individual servings can be flash-frozen, then transferred to freezer-safe bags for up to a month, preserving taste. Reheat by defrosting in the fridge overnight, though enjoy them at room temperature for optimum texture. Visual inspection of quality includes checking for moisture beads or discoloration, indicating potential spoilage.

Make Ahead Strategies


Increase convenience by preparing components up to two days in advance: bake the cupcake base and store refrigerated, while whipping up the cheesecake filling a day prior and storing separately. Quality assessments ensure freshness preservation and stress-free assembly on the serving day. Assemble the cupcakes a few hours before serving to allow melding of flavors, then finish with fresh toppings like berries. Reheating is unnecessary for this recipe, though adding fresh elements like zest or cream just before serving can enliven.

Scaling Instructions


For a smaller household, halve the recipe effortlessly, using the same oven time to maintain quality. Doubling requires attention to equipment, primarily ensuring your oven accommodates volume without compromising each batch’s rise through even heat distribution. Consider adjusting timing by slightly reducing each subsequent batch’s cooking time, factoring in oven warmth. Large-scale production may create storage challenges—ensure space for baking supplies and room to cool completed cupcakes.

Nutritional Deep Dive


Explore balanced nutrition with these cupcakes, where the richness of cream cheese protein fuses with health-affirming blueberry antioxidants. Despite indulgence, each cupcake contains a moderate caloric load, encouraging mindful portion enjoyment. Evaluate macros for informed dietary alignment, where a balance of healthy fats and sugars provides energetic satisfaction. Consider portion moderation and pairing with fresh fruit to enhance dietary aspirations, supporting weight goals.

Dietary Adaptations


Easily adapt the recipe to suit gluten-free requirements by swapping standard flour for almond flour, preserving moist crumb and authentic flavor. Dairy-free variants use coconut cream and non-dairy cream cheese substitutes, imbuing each bite with a gentle coconut nuance. Vegans will appreciate versions using aquafaba for egg replication, capturing the airy cupcake essence without compromise. For keto enthusiasts, erythritol sweetener alternatives ensure low-carb alignment.

Troubleshooting Guide


Address texture challenges by ensuring ingredient temperature consistency; a curdled batter suggests conflicting temperatures. Correct flavor imbalances with judicious seasoning, leveraging small taste tests throughout preparation. Resolve temperature issues with careful oven calibration, ensuring even cooking. Equipment finetuning includes adjusting mixer speeds; overly vigorous mixing can disrupt ideal texture. Substitution difficulties can be managed with thorough research into ingredient equivalents, while timing concerns warrant staggered workflow assessment for optimal alignment.

Recipe Success Stories


Transform your culinary repertoire with these cupcakes, receiving applause from enthusiastic guests who marvel at their blend of artisan craftsmanship and simplicity. Share your adaptation successes in community forums, inspiring creativity while documenting photos capturing each decorative flourish. Treasured variations often stem from reader recommendations, like substituting raspberries for a tart twist or incorporating a dusting of powdered sugar for elegant contrast. Contribute your insights to an engaged audience, propelling a tradition of shared enjoyment.

Frequently Asked Questions

Q: Can I use frozen blueberries?
A: Absolutely! Frozen blueberries work well, but be sure to thaw them thoroughly and pat them dry to avoid excess moisture in your batter.

Q: How do I prevent sinking berries?
A: Coat the blueberries in a light dusting of flour before folding into the batter to help them suspend evenly throughout the cupcake.

Q: Can these be made in advance?
A: Yes, bake the cupcakes 1-2 days ahead and store chilled. Assemble with cheesecake filling just before serving to maintain optimal texture.

Q: Is it possible to make them without white chocolate?
A: While white chocolate enhances the richness, you can substitute with equal parts cream cheese for a pure cheesecake variant.

Q: Can I add nuts?
A: Finely chopped nuts, such as pecans, can be added to the batter for added texture and flavor dimension.

Q: What’s the best way to melt white chocolate?
A: Use a double boiler or microwave in short bursts, stirring frequently, to prevent scorching and ensure a smooth melt.

Q: Are there alternatives to parchment paper liners?
A: Silicon baking cups are an excellent eco-friendly substitute, offering easy release and cleanup.

Q: Will the recipe double effectively?
A: Yes, doubling is straightforward; just maintain proportions, and consider baking in batches for even oven distribution.

Q: How do I store leftovers?
A: Store in an airtight container in the fridge for up to 3 days, or freeze for up to a month for longer storage.

Q: Can I substitute regular sugar for a healthier option?
A: Coconut sugar or maple syrup can substitute, altering flavor profiles with each application.

Additional Resources


Explore related recipes that complement these cupcakes, like lemon-zested shortbreads and rich dark chocolate brownies, each serving as bookends to your dessert repertoire. Deepen your understanding of cheesecake techniques with comprehensive guides, ensuring precision and success in every culinary endeavor. Investigate ingredient origins for appreciation of their place in the larger food tapestry, or browse equipment recommendations for better-aligned kitchen practices.

Join the Conversation


Engage with fellow foodies via social media, swapping tips and showcasing creations with pride. Gain photography skills to immortalize your culinary triumphs, sharing vivid images that capture these cupcakes’ elegance and popularity. Rate recipes and leave reviews in your community, fostering a collaborative exchange of ideas and adjustments. Contribute to evolving recipe variations that capture every personal taste and preference, expanding the collective cookbook in joyous co-creation.

The Recipe

Elegant White Chocolate Blueberry Cheesecake Cupcakes

Serves: 12 cupcakes

Prep Time: 25 mins

Cook Time: 45 mins

Total Time: 70 mins

Kitchen Equipment Needed

  • Muffin tray
  • Electric mixer
  • Parchment paper liners
  • Double boiler

Ingredients

  • 1 cup white chocolate, melted
  • 1 ½ cups fresh blueberries
  • 2 cups cream cheese, softened
  • ¾ cup granulated sugar
  • 3 large eggs
  • 1 tsp vanilla extract
  • 1 cup all-purpose flour
  • ½ tsp salt
  • 1 tsp baking powder

Directions

  1. Preheat oven to 350°F (175°C) and line muffin tray with parchment paper liners.
  2. Gently melt white chocolate using a double boiler, then set aside to cool slightly.
  3. In a large bowl, beat cream cheese and sugar together until smooth and creamy.
  4. Incorporate eggs one at a time, followed by vanilla extract, mixing well.
  5. Fold in flour, salt, and baking powder, just until combined without overmixing.
  6. Gently fold in melted white chocolate and half the blueberries.
  7. Divide batter evenly among prepared muffin cups, topping with remaining blueberries.
  8. Bake for 20-25 minutes until a toothpick inserted in the center comes out clean.
  9. Allow to cool completely on a wire rack before serving or storing.

Recipe Notes

  • Substitute blueberries with raspberries for a unique flavor twist.
  • Ensure all ingredients are at room temperature for the best results.
  • For added richness, drizzle melted white chocolate over cooled cupcakes before serving.

Irresistible Homemade Eggnog Recipe: Your Ultimate Holiday Delight

The Best Homemade Eggnog Recipe: A Festive Delight

⚖️
Difficulty
Medium

⏲️
Prep Time
15 mins

🕒
Cook Time
15 mins

⏱️
Total Time
30 mins

🍽️
Servings
6-8

Indulge in the rich and creamy delight of the best homemade eggnog recipe, a traditional festive beverage that captures the essence of the holiday season. With its velvety texture and comforting spices, this eggnog promises to be the star of your gatherings. Whether you’re hosting a Christmas party or looking for a special treat, this recipe delivers an unbeatable homemade flavor that will leave your guests asking for more.

Quick Recipe Highlights

  • Flavor Profile: Enjoy a symphony of flavors with the creamy richness of eggs and milk, nuanced by the warmth of cinnamon and nutmeg.
  • Texture: Silky and smooth, this eggnog boasts a luscious mouthfeel that is both comforting and indulgent.
  • Aroma: Inviting scents of holiday spices like cinnamon and nutmeg evoke warm and cozy gatherings.
  • Visual Appeal: A beautiful golden hue enhanced by a dusting of fragrant spices makes each glass a visually delightful treat.
  • Skill Level Needed: With moderate difficulty, this recipe is approachable for those comfortable with basic cooking techniques.
  • Special Equipment: A blender and whisk are essential tools to achieve the perfect consistency.

Recipe Overview

  • Difficulty Level: Classified as medium due to the need for precise temperature control during cooking and whisking eggs to perfection.
  • Category: This recipe falls within the beverage category, specifically a festive holiday drink.
  • Cuisine: Rooted in English culinary tradition, eggnog has become a holiday staple across many Western cuisines.
  • Cost: With easily accessible ingredients, the cost is moderate, ensuring you don’t break the bank while enjoying this festive favorite.
  • Season: Although perfect for winter festivities, this drink can be enjoyed throughout the colder months for its heartwarming qualities.
  • Occasion: Ideal for holiday gatherings, Christmas parties, and New Year’s Eve celebrations.

Why You’ll Love This Recipe


Dive into the luscious taste and texture of this homemade eggnog, where each sip offers a deliciously creamy sensation balanced by the perfect blend of warm spices. Enjoy the convenience of preparing it in just 30 minutes, making it a hassle-free choice for holiday festivities. Beyond its delightful taste, the recipe includes quality ingredients that offer a source of calcium and protein, perfect for keeping indulgence health-conscious. Share the joy by serving it at parties or as a cozy treat by the fireplace, making it a social centerpiece. Plus, with most ingredients being common household staples, this eggnog is both cost-effective and accessible for all levels of home cooks.

Historical Background and Cultural Significance


Eggnog’s origins can be traced back to Medieval Britain, with a lineage that intertwines with posset, a warm milky ale drink. Its transition from a luxury enjoyed by the elite to a popular holiday beverage in America highlights its cultural journey and adaptation. Over time, eggnog has become synonymous with festive celebrations, often featuring in Christmas traditions and toasts to the New Year. As the recipe spread globally, regional variations began to emerge, each adding local flavors and adjustments. For example, Puerto Rican coquito and Mexican rompope demonstrate how eggnog has woven itself into diverse cultural tapestries, each with its unique twist.

Ingredient Deep Dive


Eggs are pivotal in providing the rich base of this eggnog, contributing to its signature creamy texture. Historically considered a symbol of fertility and renewal, eggs are packed with essential nutrients like proteins, choline, and B vitamins. Opt for free-range eggs to ensure the best taste and ethical sourcing, keeping them refrigerated to maintain freshness. If you’re avoiding raw eggs, consider gently cooking them with the milk to a safe temperature.

Dairy milk lends its plush texture and subtle sweetness to the recipe, harmonizing beautifully with the other ingredients. Known for its calcium content, milk is integral for bone health and adds to the recipe’s nutritional profile. Choose whole or reduced-fat milk based on your dietary preferences; remember to store it in a cool environment to avoid spoilage. For those seeking dairy-free alternatives, almond or coconut milk can be suitable substitutes, offering different flavor dimensions.

Common Mistakes to Avoid

  • Avoid overheating the egg mixture to prevent curdling; maintain a gentle heat and constant stirring.
  • Do not skip tempering the eggs, which helps integrate them smoothly without scrambling.
  • Be cautious with spice seasoning; too much can overpower the drink’s delicate balance.
  • Avoid using low-fat milk if a creamy texture is desired, as fat content significantly impacts mouthfeel.
  • Ensure all ingredients are fresh, especially dairy and eggs, to prevent spoilage and off-flavors.
  • Avoid omitting alcohol if longevity is a concern, as it’s a natural preservative that extends shelf life.
  • Refrain from adding hot milk too quickly to eggs, risking a negative reaction.
  • Don’t underestimate the power of a good whisk; under-whisking can leave a flat drink lacking body.

Essential Techniques


Tempering eggs is crucial for smoothly integrating them into the warm milk without cooking them into solid bits. Begin by slowly whisking a small amount of warm liquid into the eggs, gradually adjusting them to temperature increases. This step ensures a cohesive mixture and prevents the eggs from curdling.

Strong whisking is necessary for aerating the eggnog, incorporating air, and softening the flavors. Aim for a consistent, swift motion to achieve a light, frothy texture that enhances each sip. Avoid over-mixing, as the eggnog might become overly thick.

Pro Tips for Perfect The Best Homemade Eggnog Recipe


1. Consider aging your eggnog for a couple of days in the fridge for intensified flavor depth.
2. Use freshly grated nutmeg for an aromatic burst that eclipses pre-ground spice mixes.
3. Chill all components adequately before serving for a refreshing, satisfying sip.
4. Gently fold whipped cream into the mixture prior to serving for an elevated creaminess.
5. Balance sugar to taste after chilling; sweetness can mellow over time in the fridge.
6. Incorporate a dash of vanilla for a harmonious rounding off of flavors, adding warmth and familiarity.

Variations and Adaptations


Regional variations abound, from Puerto Rico’s coquito with coconut and rum to Mexico’s rompope, marked by its unique spice blends. Each version carries cultural flair, offering alternative tastes to traditional norms. Seasonal adaptations can involve infusions of autumnal spices or lighter spring variations. Dietary modifications can be approached with almond milk or plant substitutes for a vegan option, ensuring inclusivity. To explore new flavor profiles, infuse with chocolate or go spicy with chili for a daring twist. For textural interest, try blending in fresh fruit puree or a crisp meringue topping.

Serving and Presentation Guide


Elegant glassware elevates eggnog’s visual appeal—consider using tall glasses or dessert cups for a sophisticated touch. Garnish with a sprinkle of nutmeg or cinnamon sticks for a traditional aura and aromatic warmth. Pair with gingerbread cookies or fruitcake to balance the eggnog’s creaminess with texture contrasts. Modern serving suggestions include offering small flights with varied infusions, echoing cocktail culture’s playful presentation. Keep in mind that serving eggnog slightly chilled enhances its refreshing qualities. Portion control is advised due to its rich nature, typically 5-6 oz servings suffice.

Wine and Beverage Pairing


Pairing eggnog with bold reds or sparkling wines complements the drink’s creaminess, with rich-bodied wines like Cabernet offering a balancing tartness. Non-alcoholic alternatives might include spiced apple cider, echoing warm, festive notes. Coffee pairing, such as an espresso or cappuccino, introduces robust flavors that contrast eggnog’s creaminess. For best results, serve eggnog slightly chilled, ensuring an optimal taste experience. Drinking from a small, chilled glass heightens both aromatic and taste senses, sparking holiday joy.

Storage and Shelf Life


Safely store eggnog in an airtight container in the refrigerator to maintain freshness for up to three days. Consistent refrigeration of below 40°F is essential to inhibit bacterial growth. Avoid metal containers that may react with ingredients, opting instead for glass or plastic. Look out for signs of spoilage, such as separation or off odors, and discard if encountered. For reheating, a gentle method in a double boiler can reintegrate any separation. While freezing is not recommended due to textural changes, if needed, an egg-free version can withstand freezing.

Make Ahead Strategies


Efficiently prepare the eggnog base up to three days ahead, allowing flavors to meld and marry over time. Store it securely in the refrigerator, shaking occasionally. The fresh components, such as cream or any garnishes, can be added prior to serving to maintain freshness. For quality assurance, prepare each stage as close to the intended serving time as possible, preserving intended flavors. When reheating, employ low and slow techniques to avoid texture deterioration. Incorporating fresh elements, such as a new dusting of spices, revives the drink and maintains its serving appeal.

Scaling Instructions


Halving the recipe demands attentiveness to maintaining the ratios, specifically with egg amounts. When doubling or tripling, consider employing a large pot and bowl for whisking to accommodate increased volume. Adjust cooking times to avoid overwhelming the saucepan’s heating capacity and maintain even results. Store larger batches in multiple smaller containers to distribute chilling, avoiding hot pockets inside large volumes. Use this same rule for smaller quantities in reverse, ensuring adherence to proportionate ingredient use and timing considerations.

Nutritional Deep Dive


Eggnog boasts a mix of proteins from eggs and milk, contributing to its caloric density. These proteins offer essential amino acids necessary for muscle repair and function. B vitamins and essential fats within eggnog support energy metabolism and bodily function. Be mindful of its sugar content, balancing indulgence with dietary guidelines. With calcium-rich ingredients, each serving aids in maintaining bone health. Portion control is paramount in incorporating eggnog within balanced meals, keeping track of its relatively high caloric and sugar content.

Dietary Adaptations


Eggnog’s traditional dairy and egg base can be transformed into a composite fitting diverse diets. For gluten-free, ensure all spices and mix-ins are clear of cross-contamination. Dairy-free methodologies advocate almond milk or oat milk, paired with coconut cream. Craft a vegan adaptation by utilizing plant-based creamers and egg substitutes, like aquafaba for frothing. For low-carb or keto, switch to sugar substitutes such as erythritol or stevia, moderating impact on carbohydrate intake. Specific storage and balancing seasonal fruits reflect Paleo dietary requirements.

Troubleshooting Guide


Combat textural thickness by adjusting milk type, opting for a lighter fat version should heaviness persist. Balance flavor with acidity or sweetness alterations when necessary, such as adding a citrus splash or honey variant. Avoid improper temperature storage leading to separation by maintaining consistent chilling post-preparation. Equipment woes such as blender clogging are circumvented by ensuring a well-integrated mix before final blitzing. Delay ingredient introduction until necessary stages to prevent component attachment to mixer sides, ensuring full incorporation.

Recipe Success Stories


Readers have delighted in customizing eggnog to their heart’s delight, integrating spirits such as bourbon for a cheeky adult twist. Many have enjoyed infusing eggnog days prior to special events, enhancing each unique flavor footprint. Testimonials frequently mention adapting the recipe to include various milk alternatives, serving a well-spanned audience with dietary considerations. Readers have successfully adapted non-dairy options, promoting festive joy within allergen concerns, each adjustment met with warm commendation and delight. Nonetheless, creativity reigns through community engagement, encouraging new twists and flavor explorations.

Frequently Asked Questions

Can eggnog be frozen for future use?
While not ideal due to potential texture change, freezing is possible. Remove eggs or dairy to improve results.

How can I create a non-alcoholic version?
Simply omit alcohol, and adjust sweetness and spices for bolder taste without spirits.

Is there a way to thicken eggnog?
Yes, allow chilling to naturally thicken, ensuring correct ingredient ratios for balanced texture.

Can I use a dairy alternative?
Absolutely, options like almond or coconut mimic creaminess while aligning with dietary preferences.

What are the signs of spoilage?
Issues include off smells, curdling, or an unusual hue, all indicators of eggnog gone over its prime.

How should leftover eggnog be reheated?
Employ gentle reheating methods avoiding separation, such as slow saucepan warming.

Why is alcohol included in eggnog?
Beyond flavor, alcohol serves as a preservative, extending the beverage’s refrigerated life.

Can eggnog be served warm?
Yes, gently reheating can offer a comforting warm variant, especially suited for festive gatherings.

Is it safe to consume raw eggs in eggnog?
Traditional recipes use them, but cooking the mixture to 160°F ensures safety without compromising taste.

How do I prevent curdling?
Slow and steady tempering and mixing avoids abrupt temperature shifts that lead to egg coagulation.

What’s a quick way to chill eggnog?
Submerge sealed containers in an ice bath, stirring occasionally for rapid crisping.

What’s the best serving strategy for large parties?
Pre-batch eggnog in pitchers or punch bowls enables self-service, maintaining freshness and simplicity.

Additional Resources


Explore related recipes like the creamy coquito or spiced rompope, diversifying holiday drink options. Delve into technique guides focusing on egg tempering and milk-infusing, pivotal in eggnog mastery. Ingredient spotlights on spices like cinnamon and nutmeg provide educational insights into each component’s contribution. Equipment recommendations showcase the best appliances for frothy and smooth results, promising consistency. Seasonal variations, adapted by climate and tradition, offer fresh perspectives upon foundational eggnog.

Join the Conversation


Join our vibrant community by sharing your eggnog creations across social media, contributing and drawing inspiration from fellow enthusiasts. Engage with a trove of photography tips to capture your eggnog efforts beautifully, whether it’s frosted glass or artistic garnishing. Your feedback enriches the recipe’s evolution—leave reviews and tweaks that might resonate with future readers. Communal sharing of adaptations, from bourbon blitzes to vanilla warmth, sustains an interactive and evolving festive tradition.

The Recipe

The Best Homemade Eggnog

Serves: 6-8

Prep Time: 15 mins

Cook Time: 15 mins

Total Time: 30 mins

Kitchen Equipment Needed

  • Blender
  • Saucepan
  • Whisk
  • Refrigerator storage container
  • Glasses for serving

Ingredients

  • 4 large eggs
  • 3/4 cup granulated sugar
  • 2 cups whole milk
  • 1 cup heavy cream
  • 1/2 cup bourbon (optional)
  • 1 teaspoon vanilla extract
  • 1 teaspoon ground nutmeg
  • 1/2 teaspoon ground cinnamon
  • Pinch of salt

Directions

  1. In a large bowl, whisk the eggs and sugar together until integrated and smooth.
  2. In a saucepan, heat milk, cream, vanilla, nutmeg, and cinnamon till just simmering.
  3. Temper eggs by slowly adding a small amount of hot milk while constantly whisking.
  4. Combine the tempered eggs with the remaining milk mixture in the saucepan.
  5. Gently heat, stirring continuously, until the mixture thickens slightly but does not boil.
  6. Remove from heat, add bourbon if using, and allow to cool slightly.
  7. Refrigerate to chill, ideally overnight, to let flavors blend and settle.
  8. Serve cold, garnished with extra nutmeg or cinnamon as desired.

Recipe Notes

  • For a non-alcoholic version, simply omit the bourbon.
  • Adjust spices according to personal taste preferences.
  • Aged variations may result in a deeper flavor profile, enhancing each note.

Irresistible Christmas Rocks Recipe: Perfect Holiday Treats for Festive Gatherings

Christmas Rocks: A Delightful Festive Treat

⚖️
Difficulty
Easy

⏲️
Prep Time
15 mins

🕒
Cook Time
30 mins

⏱️
Total Time
45 mins

🍽️
Servings
24 cookies

Christmas Rocks are the quintessential festive cookie that fills your kitchen with the nostalgic aroma of spices, fruit, and nuts. Imagine biting into a cookie that combines the delightful crunch of pecans with the delicate sweetness of cherries and dates. These cookies are perfect for holiday gatherings, offering a taste of homemade love in every bite. With their simple preparation and rewarding flavor, they make for a cherished holiday tradition that your friends and family will eagerly anticipate year after year.

Quick Recipe Highlights

  • Flavor Profile: A harmonious blend of sweet cherries, rich dates, and spicy cinnamon
  • Texture: A satisfying balance between the crumbly cookie base and crunchy nuts
  • Aroma: Inviting scents of cinnamon and nutmeg fill your kitchen
  • Visual Appeal: Speckled with vibrant red cherries and golden brown nuts
  • Skill Level Needed: Simple techniques suitable for all baking levels
  • Special Equipment: Standard baking tools and a sturdy mixing bowl

Recipe Overview

  • Difficulty Level: Easy enough for beginners, with minimal risk of error thanks to straightforward steps
  • Category: Perfect for desserts, holiday treats, and cookie exchanges
  • Cuisine: Rooted in traditional American home-baking with influences from holiday customs worldwide
  • Cost: Budget-friendly, with most ingredients pantry staples or easily sourced
  • Season: Best enjoyed during the winter holidays when spices and warmth are most comforting
  • Occasion: Ideal for Christmas, Hanukkah, and any festive gathering where baked goods spread cheer

Why You’ll Love This Recipe

The taste and texture of Christmas Rocks are incredibly inviting. You’ll find the sweetness of the cherries and dates well-balanced with the slight crunch of the pecans, all wrapped up in a spiced dough. These cookies are easy to prepare, making them a convenient choice for busy holiday schedules. Moreover, they offer a wholesome treat that can easily accommodate various dietary needs with simple ingredient adjustments. Preparing Christmas Rocks brings families together, providing a baking activity that’s both fun and fulfilling. Lastly, the ingredients are readily available and cost-effective, ensuring that this treat doesn’t break the holiday budget.

Historical Background and Cultural Significance

Originating from the heart of American Christmas traditions, Christmas Rocks have become a staple in holiday cookie platters. Their creation dates back decades, embodying the spirit of family and warmth. Over time, the recipe has evolved, adapting to regional flavors and personal tastes. While the cookies maintain their core ingredients, variations have emerged, showcasing a wide array of nuts and dried fruits. In essence, Christmas Rocks are a testament to culinary heritage, blending time-honored customs with contemporary flavors.

Ingredient Deep Dive

Each ingredient in Christmas Rocks plays an integral role in achieving their characteristic flavor and texture. The pecans, for instance, are rich in monounsaturated fats and essential nutrients, offering both a healthful crunch and delightful contrast to the sweetness of the fruit. Choosing the freshest pecans ensures a vibrant taste; look for nuts that are plump and uniform in color. Meanwhile, cherries and dates provide a natural sweetness and moistness that complements the spiced dough. To maintain their quality, store in a cool, dry place and inspect for signs of spoilage before use. Should you need an alternative, raisins or dried cranberries are excellent substitutes, blending just as harmoniously in the recipe.

Common Mistakes to Avoid

  • Overmixing the dough can cause the cookies to become dense instead of crumbly. Mix just until combined.
  • Using old or stale nuts can impart a rancid flavor, so always use fresh pecans.
  • Neglecting to preheat the oven may result in uneven baking. Ensure the oven is fully heated before baking.
  • Skipping parchment paper can lead to sticking; always line your baking sheets for easy removal.
  • Using too much flour will dry out the cookies; measure accurately using the spoon-and-level method.
  • Not allowing enough space between cookies can cause them to merge; space them 2 inches apart.
  • Opening the oven door frequently can cause heat loss and uneven cookies, so resist the temptation.
  • Ignoring ingredient substitutions can alter taste; choose alternatives wisely to maintain flavor balance.

Essential Techniques

Mastering the art of dough mixing is crucial for perfect Christmas Rocks. The key is to combine the ingredients lightly, preserving the airy structure necessary for a soft crumb. It’s also essential to monitor the baking time closely; removing cookies from the oven just as they begin to brown ensures they remain tender. Pay attention to the aroma—the unmistakable scent of cinnamon and nutmeg should just start wafting through your kitchen. If they smell done, they likely are.

Pro Tips for Perfect Christmas Rocks

Ensure your butter is at room temperature for easy incorporation and a smooth dough. Toasting the pecans before adding them to the mix can enhance their nuttiness, providing an even deeper layered flavor. For an added twist, incorporate a pinch of ginger for a bit more spice. To impress guests with presentation, dust finished cookies lightly with powdered sugar before serving. Consider making a double batch, as these cookies store exceptionally well and make for fantastic holiday gifts. If you’re short on time, the dough freezes well, allowing you to bake fresh cookies at a moment’s notice for surprise visitors.

Variations and Adaptations

Christmas Rocks are wonderfully adaptable, allowing bakers to express their creativity while retaining the core flavors. For a regional twist, swap pecans with walnuts or almonds, which may be more prevalent in certain areas. During the summer months, try incorporating dried blueberries or apricots, offering a lighter, fruit-forward taste while maintaining the original charm. For those on gluten-free diets, a suitable flour blend can be used without compromising on texture, offering inclusivity to holiday celebrations. To emphasize the cookies’ rustic charm, press a whole cherry or nut onto the top of each cookie before baking—this not only boosts visual appeal but also adds flavor variety.

Serving and Presentation Guide

Consider serving Christmas Rocks on a rustic wooden platter to enhance their homemade appeal. A garnish of freshly grated nutmeg or a sprinkling of edible gold dust can elevate their festive look. Pair them with traditional holiday accompaniments like hot cocoa or spiced cider, which complement the cookies’ warm flavors perfectly. Serve warm for an added touch of comfort, and feel free to portion according to guest preferences—though their irresistibility often sees them disappearing quickly.

Wine and Beverage Pairing

A light, fruity wine such as a Moscato d’Asti can complement the sweet profile of Christmas Rocks, enhancing their flavor components. For those preferring non-alcoholic options, a chai tea latte brings out the spice notes beautifully. Offering a malty beer like a brown ale can be an interesting twist, balancing sweetness with its smooth finish. Regardless of choice, serving each at a slightly chilled temperature ensures a refreshing experience against the warm cookies.

Storage and Shelf Life

Store Christmas Rocks in an airtight container at room temperature, where they’ll remain delectable for up to a week. For extended preservation, consider refrigeration, which keeps them fresh for up to three weeks. Be wary of moisture, as it may compromise their texture—always choose moisture-proof containers. If preparing in advance, freezing is an excellent option, with cookies retaining their quality for several months; just ensure they’re fully thawed before enjoying.

Make Ahead Strategies

The flexible nature of Christmas Rocks makes them perfect candidates for pre-baking preparation. The dough can be prepared and kept in the refrigerator for up to two days, allowing you to bake fresh cookies as needed. Storing dough in smaller amounts ensures consistent results and simpler handling. Freezing the dough is also viable, enabling quick thawing and baking directly from frozen, with minimal quality loss.

Scaling Instructions

Whether you’re catering for a small gathering or a large celebration, adjusting the Christmas Rocks recipe is straightforward. Halving the recipe is simple; just be mindful of maintaining ingredient ratios, particularly for spices. No need to scale back the cooking time significantly, but keep an eye on cookies during baking to prevent over-browning. For larger batches, invest in additional baking sheets and consider staggered baking to maintain even cooking while ensuring freshness for all servings.

Nutritional Deep Dive

Christmas Rocks offer a balanced array of macronutrients, with carbohydrates providing energy, and pecans contributing beneficial fats and proteins. The dried fruit ingredients are natural sweeteners, reducing the need for added sugars while offering dietary fiber for gut health. Consider enjoying as part of a balanced diet, where portion control prevents overindulgence while still satisfying sweet cravings.

Dietary Adaptations

For gluten-free adaptations, replace all-purpose flour with a gluten-free baking blend to keep your cookies safe for all diet preferences. Dairy-free alternatives include using margarine or coconut oil instead of butter, with minimal impact on flavor. Vegans can easily substitute eggs with flaxseed meal or applesauce, ensuring everyone at the table can partake in this festive tradition.

Troubleshooting Guide

If your Christmas Rocks seem too dry or crumbly, it may be due to overbaking. Adjust your baking time slightly or reduce the oven temperature. For flat cookies, ensure butter is not overly soft at the start. If flavors are muted, double-check your spice measurements, ensuring they have not gone stale. Troubleshoot texture issues by using fresh ingredients, and consider adjusting oven racks for better heat distribution.

Recipe Success Stories

Readers regularly share their own creative takes on Christmas Rocks, from adding a coconut touch to incorporating a hint of orange zest. These successes showcase the recipe’s flexibility and adaptability to different cultural flavors. Photography tips suggest using natural lighting to highlight their vibrant ingredients, bringing the cookies’ colors to life on social media posts. Engaging in community recipe swaps allows our readers to discover even more delightful adaptations, fostering a sense of community across borders.

Frequently Asked Questions

Can I use other nuts?

Yes, walnuts and almonds can be used as alternatives to pecans, offering a slight taste variation while maintaining the recipe’s integrity.

Is it possible to make the recipe vegan?

Definitely! Substitute eggs with mashed banana or flaxseed meal, and use plant-based margarine in place of butter for delicious vegan Christmas Rocks.

How do I prevent them from being too dry?

Avoid overbaking by watching their color closely. If necessary, slightly adjust the ingredient balance for a moister dough.

What’s the best way to store them?

Keep in an airtight container at room temperature or refrigerate for longer-lasting freshness, up to three weeks.

Are there any gluten-free options?

Sure! A gluten-free flour blend works well as a direct replacement for all-purpose flour, suitable for those with dietary restrictions.

Additional Resources

Discover other delightful holiday cookies through our related recipes section, where classic flavors meet modern twists. Our technique guides offer insights on achieving perfect bakes, while ingredient information helps you choose the best components for your festive treats. For a streamlined baking experience, our equipment recommendations ensure you’re always prepared with the right tools. Finally, explore seasonal variations to enjoy cookies that reflect the changing tastes of each festive occasion.

Join the Conversation

Engage with our community by sharing your Christmas Rocks creations on social media, using our hashtag to connect with other bakers. Offer reviews and feedback on the recipe, allowing for an exchange of ideas and improvement tips. We encourage our readers to explore different recipe variations, share their photography tips, and delve into the world of baking techniques with fellow enthusiasts.

The Recipe

Christmas Rocks

Serves: 24 cookies

Prep Time: 15 mins

Cook Time: 30 mins

Total Time: 45 mins

Kitchen Equipment Needed

  • Mixing bowls
  • Baking sheets
  • Parchment paper
  • Hand mixer or stand mixer
  • Measuring cups and spoons

Ingredients

  • 2 cups all-purpose flour
  • 1/2 teaspoon baking soda
  • 1/2 teaspoon cinnamon
  • 1/4 teaspoon nutmeg
  • 1/2 teaspoon salt
  • 1 cup unsalted butter, softened
  • 3/4 cup brown sugar
  • 2 large eggs
  • 1 teaspoon vanilla extract
  • 1 cup chopped pecans
  • 1/2 cup chopped dates
  • 1/2 cup chopped candied cherries

Directions

  1. Preheat your oven to 350°F (175°C) and line baking sheets with parchment paper.
  2. In a bowl, whisk together flour, baking soda, cinnamon, nutmeg, and salt. Set aside.
  3. In a large bowl, beat butter and brown sugar until light and fluffy. Add eggs one at a time, beating well after each addition. Stir in vanilla extract.
  4. Gradually add the dry ingredients to the wet mixture, beating until just combined.
  5. Fold in the chopped pecans, dates, and cherries until evenly distributed.
  6. Drop tablespoon-sized scoops of dough onto prepared baking sheets, spacing them 2 inches apart.
  7. Bake for 12-15 minutes, or until edges are golden. Cool on a wire rack.

Recipe Notes

  • Cookies can be stored in an airtight container at room temperature for up to a week.
  • For added festive touch, drizzle with melted white chocolate.
  • Nuts can be toasted beforehand to enhance flavor.

Irresistible Pecan Pie Bark Recipe: A Sweet Holiday Treat

Pecan Pie Bark: A Delightful Twist on a Classic Dessert

⚖️
Difficulty
Easy

⏲️
Prep Time
10 mins

🕒
Cook Time
25 mins

⏱️
Total Time
35 mins

🍽️
Servings
8

Indulge in a bite-sized version of a dessert classic with this Pecan Pie Bark. This recipe brings together the rich, buttery flavors of traditional pecan pie with a delightful, crunchy twist. Perfect for holiday gatherings or a special treat, each piece of pecan pie bark is a symphony of nutty, caramel goodness that melts in your mouth. Designed for ease and speed, it captures the essence of pecan pie with minimal effort—ideal for those looking to impress without stressing in the kitchen.

Dive into luscious layers of toasted pecans nestled within a golden brown sugar caramel glaze. The texture is just as impressive as the taste—crispy, creamy, and irresistibly crunchy. The aroma, with its hints of roasted nuts and sweet caramel, fills your kitchen with warmth and comfort, making every bite of this pecan pie bark feel like a cozy embrace.

Quick Recipe Highlights

  • Flavor Profile: The pecan pie bark combines nutty, caramel-like sweetness with hints of buttery richness.
  • Texture: Expect a satisfying crunch from the toasted pecans, complemented by a smooth caramel layer.
  • Aroma: A warm, inviting scent of roasted pecans and caramelized sugars wafts through your kitchen.
  • Visual Appeal: Shiny caramel-coated pecans create a tempting mosaic of golden browns.
  • Skill Level Needed: Easy—perfect for beginners or anyone short on time.
  • Special Equipment: A baking sheet, parchment paper, and a sturdy saucepan for the caramel.

Recipe Overview

  • Difficulty Level: This easy recipe leverages simple techniques to achieve that classic pecan pie taste.
  • Category: Dessert, perfect for snacks or post-dinner indulgence.
  • Cuisine: A delicious take on Southern dessert traditions, adapted for modern convenience.
  • Cost: Budget-friendly, as pecans and sugar are the primary cost factors.
  • Season: Ideal for fall and winter when pecans are in season, but delicious year-round.
  • Occasion: Great for holidays, parties, or as a homemade gift.

Why You’ll Love This Recipe


One of the most beloved aspects of pecan pie bark is its irresistible taste and texture combination. Each bite is a masterclass in flavor balance—sweet, nutty, and slightly salty, providing a depth that keeps palates intrigued. It’s a convenient dessert to whip up, requiring minimal prep and cleanup, ideal for busy festivities.

Nutritionally, while still a treat, pecan pie bark offers the benefits of pecans, a good source of healthy fats and proteins. It’s a superb choice for social gatherings, offering portioned servings that guests can easily enjoy without utensils. The cost-effectiveness of this dessert cannot be overlooked; a little goes a long way, and its ingredients are straightforward and easily accessible at most grocery stores.

Historical Background and Cultural Significance


Pecan pie, the inspiration for this recipe, hails from the American South, where pecans grow abundantly. Originally a staple in American households, variations like pecan pie bark surfaced for their convenience and portability. This dessert embodies a cultural tradition of Southern hospitality and sweet indulgence that transcends generations.

The pecan pie’s evolution involves adapting the classic pie into simpler confections like this bark, appealing to time-strapped cooks while preserving essential flavors. Regional variations have emerged, with some adding chocolate or sea salt to the traditional recipe, each tweak reflecting local tastes and creativity.

Ingredient Deep Dive


The star of the show, pecans, are steeped in history as an indigenous nut variety native to North America. Rich in heart-healthy fats, vitamin E, and antioxidants, they lend both cultural significance and nutritional value to the recipe. Select pecans that are plump and shiny for the freshest flavor, and store them in a cool, dry place to maintain their quality.

Brown sugar, the sweetener of choice for the caramel, imparts a deep molasses note that elevates the flavor profile of pecan pie bark. Store brown sugar in an airtight container to prevent it from hardening, and if you run out, white sugar mixed with molasses can serve as an effective substitute.

Common Mistakes to Avoid

  • Overcooking the caramel: Keep a close eye on the temperature to prevent burning.
  • Skipping the parchment: Always line your baking sheet to prevent sticking and ensure easy removal.
  • Not pre-toasting pecans: Adds depth to their flavor, ensuring a robust taste.
  • Using old pecans: Can be bitter—always ensure they are fresh.
  • Incorrect caramel consistency: Too thick, and it won’t spread; too thin, it won’t set.
  • Burning the caramel: Use medium heat and stir constantly to avoid scorching.
  • Cutting while hot: Allow it to cool completely before breaking it into pieces.
  • Improper storage: Seal it tightly to keep it crisp; exposure to air can lead to sogginess.
  • Ignoring portions: Overindulgence is easy, so remember balance when serving.
  • Neglecting garnishes: Optional, but sea salt or chocolate can enhance flavors.

Essential Techniques


Creating the perfect caramel requires patience and attention at every stage. Begin by combining butter and brown sugar in a saucepan, stirring until fully dissolved and bubbling. The key is to achieve a smooth, glossy consistency without graininess—this involves a gentle simmer and consistent stirring. Overheating can cause the sugars to crystallize, resulting in a gritty texture.

Mastering the art of toasting nuts depends on achieving an even golden-brown hue. Spread pecans in a single layer on a baking sheet and toast briefly until their aroma is released, enhancing their natural sweetness and adding a richer flavor to the bark.

Pro Tips for Perfect Pecan Pie Bark


Pre-toast your pecans to bring out their flavor and add a layer of textural complexity to your pecan pie bark. When preparing the caramel, be sure to use a candy thermometer to monitor the temperature closely, ensuring it doesn’t exceed the soft ball stage. This will result in a perfectly spreadable and set caramel.

For added indulgence, sprinkle a pinch of flaky sea salt over the caramel while it’s still warm, introducing a delightful contrast to the sweetness. If you’re feeling adventurous, consider drizzling melted dark chocolate over the baked bark for an elegant touch.

Variations and Adaptations


Distinct regional variations of pecan pie bark include the addition of bourbon for a Southern twist or a sprinkle of cinnamon for a holiday flavor profile. Adapt it seasonally by incorporating dried cranberries in winter or a zest of citrus in the summer months.

To accommodate dietary needs, consider using coconut sugar instead of brown sugar, or opt for dairy-free butter for a vegan version. Further flavor experiments can include adding a hint of vanilla extract to the caramel or even infusing the syrup with fresh rosemary for a fragrant herbal note.

Serving and Presentation Guide


For a charming presentation, break your pecan pie bark into rustic shards and arrange them on a decorative plate lined with parchment. Dust lightly with powdered sugar for a snowy effect or garnish with a scattering of edible flowers for a festive touch.

Pair this crisp dessert with contrasting soft elements such as whipped cream or vanilla ice cream, which can enhance the richness and balance the sweetness of the bark. Temperature plays a crucial role—serve at room temperature for the best texture.

Wine and Beverage Pairing


Pairing this pecan pie bark with a robust, oaky Chardonnay or a sweet late-harvest Riesling complements its nutty flavors and caramel sweetness. When opting for non-alcoholic options, a freshly brewed cup of strong coffee or a creamy chai latte can balance the bark’s intensity.

If serving with tea, consider a nutty Assam or a fragrant Earl Grey to enhance its aromatic profile. Ensure all beverages are served at a suitable temperature to enrich the overall tasting experience.

Storage and Shelf Life


Store your pecan pie bark in an airtight container to preserve its crunch and flavor. Keep it at room temperature for about a week, or refrigerate for longer freshness. Check for any signs of spoilage, like off-odors or changes in texture, before serving.

To reheat, place in a low oven briefly or allow it to return to room temperature naturally. For extended storage, wrap tightly and freeze for up to three months.

Make Ahead Strategies


Prepare the caramel sauce a day in advance and store it in the refrigerator to cut down on preparation time. You can also chop and toast the pecans ahead; just keep them sealed to retain freshness. When ready to assemble, gently reheat the caramel until pourable.

Assemble the bark when you’re serving close to the occasion, ensuring the freshest crunch and flavor. If there are delicate garnishes involved, add those just before serving to maintain their appeal and texture.

Scaling Instructions


This recipe can be halved easily for smaller gatherings or doubled if you’re serving to a crowd. When scaling, use appropriately sized baking sheets to avoid overcrowding, which can impact texture. Adjust cooking times slightly if using thicker layers of caramel or pecans.

Mind the caramel’s temperature and consistency with each alteration, as thicker batches may require more attention to prevent burning. Storage solutions remain unchanged in terms of container type and method, although space considerations might necessitate multiple containers when scaling up.

Nutritional Deep Dive


Pecan pie bark is a delicious treat that, while indulgent, offers the health benefits embedded in its main ingredients. Pecans provide healthy monounsaturated fats and protein, making this dessert more than just empty calories. A macro, micro, and caloric breakdown can guide those mindful of intake.

While enjoying pecan pie bark in moderation, its health score can be improved by choosing organic ingredients or substituting refined sugars. This conscious consumption approach helps integrate this delightful dessert into a balanced diet.

Dietary Adaptations


To make this recipe gluten-free, ensure all added toppings comply with gluten-free standards, including caramel and chocolate variations. For a vegan version, substitute butter with coconut oil or a plant-based alternative, and replace traditional sugars with agave or maple syrup.

For those observing a keto diet, replace brown sugar with a low-carb sweetener, and ensure all components fit within carb constraints. Adaptations for dietary needs are straightforward and ensure everyone can enjoy your pecan pie bark.

Troubleshooting Guide


If the caramel is too hard, reheating slowly and adding a splash of cream can soften it to the desired texture. Lacking flavor depth may be due to under-toasted nuts—ensure proper toasting to bring out the best in pecans. Burnt caramel issues often stem from overheating; maintain moderate heat and constant stirring.

Should your bark not set properly, revisit ingredient ratios to ensure correct proportions, especially the butter-to-sugar ratio in caramel. Equipment variations might necessitate technique adjustments—always tailor steps to available tools.

Recipe Success Stories


Home cooks have found joy in adapting pecan pie bark, enhancing it with personal twists like adding spices or different nut combinations. Community feedback highlights its ease, taste, and reception at gatherings. Share your photos and stories, inspiring others to tailor the recipe to their tastes.

Consider trying variations shared by others, such as incorporating caramel shards into ice cream, presenting an innovative take on traditional flavors. The possibilities are as endless as the creativity they inspire.

Frequently Asked Questions

Can I use other nuts besides pecans? Absolutely, walnuts or almonds make delightful alternatives, though the flavor profile will vary.

How do I prevent my caramel from crystallizing? Ensure constant stirring and gentle heating to avoid sugar reformation into crystals.

What’s the best way to store pecan pie bark? An airtight container at room temperature is ideal; for longer storage, refrigeration is recommended.

Why is my bark sticky? It may not have cooled enough. Allow it to set completely before breaking it into pieces.

Is it possible to use dark chocolate instead? Yes, dark chocolate pairs beautifully with the sweet, nutty flavors.

Can I make this sugar-free? Use sugar alternatives like erythritol, but adjust quantities to avoid overwhelming sweetness.

What should I do if my caramel burns? Start again, and use lower heat, monitoring closely with a candy thermometer.

Are there any dairy-free options? Replace butter with coconut or a dairy-free alternative for a lactose-friendly version.

Additional Resources


Explore related recipes such as traditional pecan pie, caramel-coated nuts, or holiday-themed barks. Dive into technique guides for perfect caramel making, or ingredient deep dives that enhance understanding of nuts’ roles in other culinaries.

Additionally, understanding seasonal influences can help tailor this recipe to various times of year, adapting not just ingredients but perhaps even presentation. Find equipment recommendations to optimize your cooking experience, ensuring success with each attempt.

Join the Conversation


Engage with our community by sharing your pecan pie bark creations on social media, tagging #PecanPieBarkDelight. Exchange tips and variations in the comments and discover how others are creatively adapting this classic. Leave a review to inspire others and bolster their confidence in trying this delightful recipe. Join now and be part of a vibrant culinary journey that spans taste, culture, and tradition.

The Recipe

Pecan Pie Bark

Serves: 8

Prep Time: 10 mins

Cook Time: 25 mins

Total Time: 35 mins

Kitchen Equipment Needed

  • Baking sheet
  • Parchment paper
  • Medium saucepan
  • Mixing spoon
  • Candy thermometer

Ingredients

  • 2 cups pecans, coarsely chopped
  • 1 cup unsalted butter
  • 1 cup brown sugar, packed
  • Pinch of sea salt (optional)

Directions

  1. Preheat your oven to 350°F (175°C) and line a baking sheet with parchment paper.
  2. Spread pecans in a single layer on the prepared sheet and toast in the oven for about 5-7 minutes or until fragrant.
  3. In a medium saucepan, melt the butter over medium heat. Add the brown sugar and stir until fully dissolved and bubbling. Maintain a gentle boil for 3-4 minutes, stirring constantly.
  4. Remove from heat and pour the caramel over the toasted pecans, using a spatula to spread it evenly.
  5. Let it cool completely before breaking it into pieces.

Recipe Notes

  • For added flavor, sprinkle a pinch of sea salt over the caramel while it’s still warm.
  • The pecan pie bark stores well; keep it in a cool, dry place for up to a week.

Indulge in Irresistible Heavenly Banana Cake with Cream Cheese Frosting

Heavenly Banana Cake with Cream Cheese Frosting: A Tempting Delight

⚖️
Difficulty
Medium

⏲️
Prep Time
20 mins

🕒
Cook Time
45 mins

⏱️
Total Time
65 mins

🍽️
Servings
12

Imagine a cake bursting with the natural sweetness of ripe bananas, topped with a luxurious layer of cream cheese frosting. This heavenly banana cake offers a moist, tender crumb that perfectly balances the rich and tangy frosting. It’s the kind of dessert that brings comfort and joy with every bite. Whether you’re a seasoned baker or a newbie in the kitchen, this banana cake promises impressive results that are sure to delight any crowd.

Indulging in a slice of banana cake with cream cheese frosting is like a warm hug. Its inviting aroma fills the kitchen as it bakes, creating an atmosphere of anticipation. This cake is perfect for gatherings and special occasions, offering a nostalgic taste reminiscent of family dinners and holiday celebrations.

Quick Recipe Highlights

  • Flavor Profile: This cake combines the sweet and fruity essence of bananas with a creamy, tangy frosting.
  • Texture: Expect a soft, moist crumb contrast with smooth, luscious cream cheese frosting.
  • Aroma: The comforting scent of baked bananas mingles with the rich aroma of cream cheese.
  • Visual Appeal: Light golden hues adorned with a snowy-white topping make this cake a centerpiece.
  • Skill Level Needed: A medium-level recipe requiring basic baking techniques.
  • Special Equipment: Requires standard baking tools and a mixer for the frosting.

Recipe Overview

  • Difficulty Level: Medium difficulty due to the need for precise ingredient measurements and baking timing.
  • Category: Best served as a dessert or a sweet treat at any meal.
  • Cuisine: This cake has Western influences, deeply rooted in American baking traditions.
  • Cost: Cost-effective, using pantry staples and ripe bananas.
  • Season: Best enjoyed year-round, whenever bananas are available.
  • Occasion: Perfect for birthdays, family gatherings, or holiday feasts.

Why You’ll Love This Recipe


This banana cake is all about taste and texture. The first bite reveals a moist and tender crumb, highlighting the natural sweetness of ripe bananas. Topped with creamy and tangy cream cheese frosting, the flavors meld beautifully, creating a harmonious balance that comforts the soul and excites the palate.

Convenience is another reason to love this recipe. The preparation involves basic baking skills, making it accessible for home bakers. With simple steps and common ingredients, you’ll have this cake ready in just over an hour, yet the taste promises complexity that feels gourmet and sophisticated.

Nutritionally, bananas offer natural sugars and potassium, and while this cake is a treat, it does incorporate a serving of fruit. For those looking to indulge while sneaking in a bit of nutrition, it’s a sweet compromise.

This cake shines at social gatherings. It’s not just a dessert; it’s a conversation starter. Its inviting aroma draws people in, creating a focal point for shared enjoyment and nostalgic discussions about favorite homemade treats.

Finally, it’s budget-friendly and relies on affordable ingredients typically found in most kitchens. This accessibility makes it a perfect choice when looking to impress without breaking the bank, ensuring the Heavenly Banana Cake maintains its place in your repertoire of beloved, go-to recipes.

Historical Background and Cultural Significance


Banana cake has humble beginnings, finding its roots in the frugal days of the Great Depression when resourceful home cooks sought to use every element of their groceries, including overripe bananas. This cake became a way to transform otherwise overlooked ingredients into something delicious and worthwhile.

Culturally, banana cake symbolizes comfort and home, often passed down through generations as a cherished family recipe. It is well-celebrated in various forms across the United States and beyond, each version holding a story of adaptation and love.

The recipe for banana cake has evolved over time, with modern versions including a variety of nuts, spices, or flavorings. The cream cheese frosting, while not original, has become a popular addition for its creamy, tangy counterpoint to the cake’s sweetness.

Regional variations can be seen across the globe. In the Caribbean, hints of rum or coconut may be included, adding a tropical flair. In Asian cuisines, you might find Japanese versions that add matcha or red bean paste for a unique twist on familiar flavors.

Ingredient Deep Dive


Bananas play a critical role in the cake and their history as a domesticated fruit reflects their importance in global cuisine. Once considered exotic, bananas are now a staple in many households worldwide. Their unique ability to act as a natural sweetener, while also providing moisture and flavor, makes them ideal for baking.

Nutritionally, bananas are rich in potassium and have significant dietary fiber, offering health benefits alongside their delicious taste. To select the perfect banana for baking, look for heavily speckled or fully brown bananas to ensure maximum sweetness and ease of mashing. Store bananas at room temperature for faster ripening or refrigerate to slow the process. Should you need a substitute, applesauce or pear puree can act as worthy alternatives for moisture.

The cream cheese frosting relies heavily on its main ingredient, cream cheese, which adds a tangy creaminess unmatched by other frostings. Serving as a balancing act to the sweet banana base, it ensures each slice is an experience of both complex and harmonious flavors.

When selecting cream cheese, opt for full-fat versions for the richest taste. Storage should be in the refrigerator, ensuring freshness and flavor integrity. Should a dairy-free option be necessary, vegan cream cheese can work, although it may alter the texture slightly.

Common Mistakes to Avoid

  • Using under-ripe bananas can result in a drier, less flavorful cake. Ensure your bananas are fully ripe.
  • Over-mixing the batter can lead to a dense cake. Mix until just combined to preserve a light crumb.
  • Neglecting to properly preheat your oven can lead to uneven baking.
  • Using cold cream cheese can make frosting lumpy. Ensure it’s at room temperature before mixing.
  • Omitting the use of baking powder can prevent the cake from rising properly.
  • Failing to line or grease the baking pan can cause the cake to stick and break apart.
  • Ignoring cooling time for the cake before frosting can cause the frosting to melt.
  • Storing in an airtight container is vital to maintain cake freshness.

Essential Techniques


One technique essential to mastering this cake is the proper mashing of bananas. Bananas should be mashed until smooth but with tiny chunks to provide flavor bursts throughout the cake. Over-mashing can result in an overly dense texture, while under-mashing may cause inconsistent sweetness.

Blending cream cheese frosting to the right consistency is another key technique. A smooth, spreadable consistency enhances the cake’s texture. Avoid over-beating that can cause the frosting to split and become watery. Look for a creamy and slightly thicker texture as a sign of success.

Correctly creaming the butter and sugar is critical for achieving a light, airy cake texture. This process incorporates air, helping the cake rise during baking and resulting in a tender crumb. Visual cues for success include a pale, fluffy mixture.

Pro Tips for Perfect Heavenly Banana Cake


Gradually add powdered sugar to the cream cheese for smoother frosting. This helps avoid clumping and ensures an even distribution.

Always sift flour and baking powder to avoid clumps in your cake batter and achieve a smooth, even texture.

Incorporate spices like cinnamon or nutmeg for an added depth of flavor compatible with bananas.

For even baking, ensure your batter is evenly spread in the pan and tap it gently on the counter to remove air pockets.

Opt for high-quality vanilla extract to enhance the overall flavor profile of both the cake and the frosting.

If possible, bake the cake a day in advance and frost it once cooled for more pronounced flavors as they meld together.

Variations and Adaptations


Regional variations can be explored by adding tropical flavors like shredded coconut or passion fruit in the frosting. For a mellow flavor variation, incorporate cinnamon or even chocolate chips into the batter.

Seasonal adaptations might include adding chopped walnuts or pecans for an autumnal touch, or using fresh summer fruits for a vibrant presentation.

Dietary modifications can easily be made by using gluten-free flour blends or dairy-free cream cheese to cater to dietary restrictions without sacrificing taste.

For texture modifications, pureed bananas can be swapped for chunky mashed bananas for a different texture profile. Alternatively, fold in nuts or dried fruits for added bite.

For presentation alternatives, decorate with sliced bananas or edible flowers to provide visual interest and added flavors.

Serving and Presentation Guide


For flawless plating, use a cake stand to elevate the Heavenly Banana Cake with Cream Cheese Frosting, allowing guests to admire its layers and texture. Add garnish with a light dusting of cinnamon atop the frosting, or consider slices of fresh banana strategically placed along with the frosting’s edge for a touch of vibrancy.

Traditional accompaniments like fresh-brewed coffee or tea pair beautifully with the cake’s flavors. Modern serving suggestions might include a drizzle of caramel or chocolate syrup for an extra indulgence.

Be mindful of temperature — serving this cake slightly chilled helps maintain the structure of the frosting, especially in warmer climates, while ensuring portion sizes are generous enough to enjoy the complex layers of texture and flavor in each bite.

Wine and Beverage Pairing


Pair this cake with a late harvest Riesling or a Moscato to complement its sweetness with delicate floral and fruity notes. Non-alcoholic alternative options include chai tea, whose cinnamon and spice flavors beautifully contrast with the cream cheese frosting.

For coffee enthusiasts, a freshly brewed French roast coffee provides a robust balance with the sweet richness of the cake.

Sparkling water with a splash of lemon or lime offers a light, refreshing palate cleanser, ensuring that each bite of Heavenly Banana Cake remains as delightful as the first.

Storage and Shelf Life


Proper storage is key to maintaining freshness. Store the banana cake in an airtight container and refrigerate it for up to five days.

Beware of leaving the cake at room temperature for too long, particularly in warm conditions, to prevent frosting from spoiling.

For freezing, wrap individual slices in plastic wrap before placing them in a freezer-safe container.

To reheat, allow frozen slices to thaw in the fridge overnight. You can then gently warm in the microwave for a fresh-out-of-the-oven feel, mindful of avoiding overheating which could melt the frosting.

Make Ahead Strategies


Consider making the cake layers in advance and freezing them until needed. Bake, cool, and wrap them tightly in plastic before freezing. When ready to serve, prepare the fresh cream cheese frosting and assemble the cake for that just-made taste.

Storage between steps is essential for maintaining freshness without sacrificing flavor — cover anything pre-made to avoid it drying out.

Assessing quality impact is crucial, so ensure the cake is not overly moist from freezing which might affect texture. Adding a fresh pear or apple slice to the container can help preserve moisture during storage.

Scaling Instructions


To halve the recipe, simply divide each ingredient quantity by two, being mindful of adjusting baking times since smaller cakes bake faster. Doubling or tripling the recipe is easy but requires a larger mixing bowl and possibly a stand mixer for ease.

With larger batches, ensure the baking pans you use provide enough room for batter expansion to prevent overflow. Timing will have to be adjusted — keep an eye and check frequently for a clean toothpick indicating doneness.

Even when scaling, ensure the cooled cake is moist and retains its fluffy crumb before assembly — use of consistent measuring tools is key to success.

Nutritional Deep Dive


Heavenly Banana Cake delivers a lovely balance of macronutrients and can fit into a variety of diets when consumed in moderation. Bananas contribute natural sugars and dietary fiber, key for digestive health.

Micronutrients, including potassium and vitamins B6 and C, are present in the cake. While it’s a sweet treat, it’s worth noting the health benefits from its fruit content.

Those watching their diet should focus on portion control, enjoying a slice as part of a balanced lifestyle. This includes noting the caloric consumption relative to daily activity levels and incorporating weight management practices accordingly.

Dietary Adaptations


To create a gluten-free version, simply substitute gluten-free flour blend in place of regular flour. Ensure it also includes a binding agent like xanthan gum, which helps mimic gluten’s elasticity.
A dairy-free version can use vegan cream cheese and margarine in the frosting, while using almond or coconut milk within the batter as needed.
For a low-carb adaptation, consider using sugar alternatives suitable for baking, understanding this might alter the cake structure and flavor slightly.

Troubleshooting Guide


To resolve texture issues, ensure you’re not over-mixing the batter, as this can create a dense cake. Use a light hand with ingredients and proper folding as instructed.

Balancing flavors might involve adjusting the sugar-to-banana ratio, for those preferring less sweetness, reducing sugars can help achieve this.

If you encounter temperature problems leading to raw centers, ensure the oven is evenly calibrated or consider reducing cake layers to promote quicker, balanced cooking.

Ingredient substitutions, especially in response to dietary restrictions, should focus on one-to-one replacements, remaining mindful they must fulfill similar roles in the recipe.
Timing concerns guide successful baking, try covering cake with foil if it’s browning too quickly, giving it more time to rise and finish inside without burning.

Recipe Success Stories


Many readers have used this banana cake recipe as a base for imaginative variations, incorporating ingredients that celebrate their regional tastes.

A community-favorite adaptation includes the addition of cocoa powder for a chocolate-banana hybrid delight, with several successfully integrating lavish layers of coarsely chopped nuts for texture.

Photography tips shared by successful home bakers reveal using natural daylight to achieve the cake’s best visual representation.

This recipe continues to inspire creative presentations and embellishments, from multi-tiered creations to personalized decorations echoing memorable events.

Frequently Asked Questions

Can I use frozen bananas for this cake?
Yes, just ensure they are thawed and drained before mashing to maintain correct moisture balance.

How long will this cake last?
Properly stored, this cake can last about five days in the refrigerator or up to three months when frozen.

Can I make this cake without eggs?
Yes, consider using flax eggs or a commercial egg replacer available in stores for similar binding.

How do I know when the cake is done?
Insert a toothpick into the center; it should come out clean, or with only a few moist crumbs.

What can I do if I don’t have cream cheese?
Substituting with Greek yogurt or a coconut cream base can create a similar creamy topping.

Additional Resources


Explore similar recipes including banana bread or muffins for variations on this banana-inspired theme.

Find more on technique guides for cake baking basics, ensuring even beginners feel comfortable in trying their hand at this recipe.

Deep dives into ingredient qualities, and how subtle changes in brand or origin can influence final taste, are also available.

Essential equipment recommendations, from best mixers to pan choices, can help streamline your baking process.

Join the Conversation


We encourage community feedback through shared photos, comments, and ratings to hear how this cake has brought smiles to your table.

By using social media, join others in sharing your own adaptations or stunning cake presentations.

Engage with like-minded bakers in creating personal spins or learning from shared successes, continuing the conversation about our beloved Heavenly Banana Cake.

The Recipe

Heavenly Banana Cake with Cream Cheese Frosting

Serves: 12

Prep Time: 20 mins

Cook Time: 45 mins

Total Time: 65 mins

Kitchen Equipment Needed

  • Mixing bowls
  • Electric mixer
  • 9×13-inch baking pan
  • Spatula
  • Measuring cups and spoons
  • Cooling rack

Ingredients

  • 3 ripe bananas, mashed
  • 1/2 cup unsalted butter, softened
  • 1 cup granulated sugar
  • 2 large eggs
  • 1 tsp vanilla extract
  • 1 1/2 cups all-purpose flour
  • 1 tsp baking soda
  • Pinch of salt
  • 1/2 cup sour cream
  • 1/2 cup chopped walnuts (optional)
  • For Frosting:
  • 8 oz cream cheese, softened
  • 1/4 cup unsalted butter, softened
  • 2 cups powdered sugar
  • 1 tsp vanilla extract

Directions

  1. Preheat oven to 350°F (175°C). Grease and flour a 9×13-inch baking pan.
  2. In a large bowl, cream together the butter and sugar until light and fluffy. Beat in the eggs, one at a time, then stir in the vanilla and mashed bananas.
  3. In another bowl, whisk together the flour, baking soda, and salt. Add to the banana mixture alternately with sour cream. Stir in walnuts if using. Pour batter into prepared pan.
  4. Bake in preheated oven for 45 minutes, until a toothpick inserted into the center of the cake comes out clean.
  5. For the frosting, beat cream cheese and butter until smooth. Gradually beat in powdered sugar and vanilla until creamy. Spread over cooled cake.
  6. Refrigerate until serving. Store leftovers refrigerated.

Recipe Notes

  • Make sure the cream cheese is at room temperature for the best frosting texture.
  • The cake can be made a day in advance for flavors to develop.
  • Add a splash of lemon juice to the frosting for a tangy twist.

Irresistible Cherry Cheesecake Fluff: A Quick and Easy Dessert

Delectable Cherry Cheesecake Fluff: A Sweet and Creamy Delight

⚖️
Difficulty
Easy

⏲️
Prep Time
15 mins

🕒
Cook Time
0 mins

⏱️
Total Time
15 mins

🍽️
Servings
6

Indulge yourself in the captivating taste of our Delectable Cherry Cheesecake Fluff, a luscious and velvety dessert that perfectly balances sweetness with a hint of tang. This no-bake treat brings the classic flavors of cheesecake into a fluffy, creamy concoction that’s irresistibly light yet satisfyingly rich. Perfect for any occasion, this cherry-infused delight will have your taste buds begging for more.

Our Cherry Cheesecake Fluff combines the heartwarming flavors of fresh cherries with the creamy goodness of cheesecake, creating a truly divine dessert experience. Whether you’re savoring it solo or sharing with friends and family, each spoonful promises a melt-in-your-mouth experience that is both sophisticated and comforting. Remember, there’s no oven required, making it an effortless delight to whip up!

Achieve the ultimate in dessert euphoria with our Cherry Cheesecake Fluff, a sensational creation that embraces both time-honored cheesecake traditions and the ease of modern dessert preparation. It’s a gorgeous centerpiece for casual gatherings or a luxurious close to a dinner party, leaving everyone in awe of its irresistible charm and sumptuous taste.

Quick Recipe Highlights

  • Flavor Profile: The cherry cheesecake fluff boasts a sweet, creamy flavor with subtle cherry notes that provide a delightful tanginess.
  • Texture: Experience a light and airy texture that dissolves beautifully on the palate, reminiscent of whipped cream mixed with cheesecake richness.
  • Aroma: Invoking the fragrance of fresh cherries and creamy cheesecake, it’s irresistible from the moment you stir the ingredients together.
  • Visual Appeal: The vibrant red of the cherries contrasts beautifully with the creamy white fluff, offering a delightful visual feast perfect for any dessert table.
  • Skill Level Needed: Ideal for novice cooks and seasoned chefs alike, requiring minimal culinary skill for maximum impact.
  • Special Equipment: You’ll need only basic kitchen tools, emphasizing ease of preparation without specialized appliances.

Recipe Overview

  • Difficulty Level: This recipe is classified as easy due to the simplicity of the mixing process and the absence of any cooking or baking stages.
  • Category: It’s a versatile dessert that fits snugly into categories like no-bake delights, fruit desserts, and cheesecake-inspired creations.
  • Cuisine: While inspired by cheesecake traditions, this fluff embraces a modern twist on classic American desserts.
  • Cost: Expect this recipe to be budget-friendly, given the few ingredients required and their common availability.
  • Season: We recommend crafting this fluff during cherry season to enhance the freshness, but frozen cherries work beautifully year-round.
  • Occasion: Perfect for casual get-togethers, family desserts, or festive occasions like potlucks and summer barbecues.

Why You’ll Love This Recipe


Relish the scrumptious taste and texture that the Cherry Cheesecake Fluff delivers with every mouthful. The creamy base paired with juicy, tangy cherries ensures a balanced flavor that is both refreshing and indulgent. Its light and fluffy consistency provide a delightful contrast to traditional heavy desserts, making it an appealing choice for any event.

The convenience of this dessert cannot be overstated. With no baking involved, the preparation time is minimal, making it a quick and easy recipe to assemble even at the last minute. All you need is a mixing bowl, a whisk, and your ingredients. This versatility makes it a fantastic go-to dessert when you need something delicious in a pinch.

Moreover, the Cherry Cheesecake Fluff offers various nutritional benefits, especially when using fresh or frozen cherries that are rich in vitamins and antioxidants. It serves as a lower-calorie option to traditional cheesecake, and you can adjust sugar levels to suit your dietary preferences.

Perfect for entertaining, this dessert is a crowd-pleaser that caters to a range of tastes and preferences. Its adaptability means it can be part of a casual meal or the star attraction of a dinner party. Guests will appreciate the lightness after a hearty meal, offering a refreshing end to the evening.

Furthermore, the cost-effectiveness of this recipe is a significant attraction. Most of the ingredients are staples you might already have, and cherries are readily available without breaking the bank, ensuring a delicious yet economical option.

Historical Background and Cultural Significance


The origins of cherry desserts date back centuries, with cherries being a popular component in lush pies and tarts across Europe. The cherry was first domesticated in regions of Asia Minor, eventually making its way to Greek and Roman cuisine. This eventually led to its incorporation into cheesecakes, a dessert variant beloved since ancient times.

Cheesecake itself has an illustrious history, with roots tracing back to ancient Greece. Over time, its evolution saw the emergence of various regional adaptations, culminating in the modern, indulgent cheesecakes we cherish today. The simplicity of the Cherry Cheesecake Fluff pays homage to these ancestral recipes, embracing flavors our ancestors would recognize.

As cheesecake grew in popularity across different cultures, innovations emerged, such as incorporating fresh fruits like cherries. Regional influences saw the adaptation of recipes to suit local flavors, particularly in the United States where cheesecake became synonymous with creamy, sweet indulgence.

Throughout its evolution, the Cherry Cheesecake Fluff remains a testament to versatility, simplicity, and flavor. It offers a fusion of traditional cherry desserts with modern, quick preparation methods, appealing to contemporary lifestyles while respecting culinary tradition.

Ingredient Deep Dive


Cherries hold a culturally rich history, originating from the fertile regions around the Black Sea. Their vibrant taste and rich red hue have made them a prized fruit in numerous cultures. Nutritionally, cherries are a powerhouse, loaded with antioxidants and anti-inflammatory properties, contributing to overall health and wellbeing.

Selecting the perfect cherries involves seeking out firm, plump fruits with a dark red color. Storing them properly in the fridge will help maintain their freshness, extending their shelf life. If fresh cherries aren’t available, frozen cherries serve as an excellent substitute with similar flavor retention.

Cream cheese, a hallmark of cheesecake recipes, has its origins in the United States. Known for its smooth, creamy texture, it adds richness to our fluff. Selecting full-fat varieties will offer the best flavor and texture, but light versions work if you’re seeking a lower-calorie option. Stored in a cool place, it can last a few weeks unopened.

Heavy whipping cream enriches the fluff, elevating the airy texture. Look for cream with a minimum 36% fat content for optimal results. Storage is easy, as long as it remains refrigerated until use, ensuring it stays fresh and ready to whip when you’re ready to make the dessert.

Common Mistakes to Avoid

  • Over-beating the cream: This can lead to butter formation instead of smooth fluff; keep a close eye during whipping for soft peaks.
  • Using low-fat cream cheese: This can affect the texture; opt for full-fat for a creamier consistency.
  • Skipping the chilling: Allow enough chill time for the flavors to meld and for the fluff to set up correctly.
  • Relying solely on artificial cherries: Fresh or frozen cherries bring a vibrant natural taste that canned cherries may not match.
  • Improper folding: Be gentle when incorporating ingredients to maintain the light texture of the fluff.
  • Neglecting to taste: Always taste for sweetness levels, adjusting sugar to fit your palate.
  • Inadequate cherry preparation: Ensure cherries are pitted to avoid any unpleasant surprises in texture or flavor.
  • Ignoring ingredient temperature: Keep cream cheese softened to aid in smoother mixing and avoid lumps.

Essential Techniques


Whipping cream to the right consistency is crucial, as it forms the base structure for your fluff. Start with chilled cream and use a cold vessel, whipping slowly at first before increasing speed to achieve soft peaks. Avoid over-whipping, which results in a dense texture rather than a light, airy finish.

Folding ingredients gently is vital to retain volume and creaminess. Utilize a broad spatula to fold from the outside towards the center, rotating your bowl gradually to achieve an even mix. This technique ensures the fluff remains light and uniform, without deflating the whipped components.

Proper cherry preparation enhances the overall quality of the fluff. Pitting cherries thoroughly prevents unpleasant bites. If using fresh cherries, ensure they’re rinsed well. For frozen cherries, thaw completely, draining excess moisture which can affect texture.

Pro Tips for Perfect Delectable Cherry Cheesecake Fluff


– Maintain cooler temperatures during preparation for optimal cream consistency, avoiding warm environments that can deflate your whipped mix.
– Balance cherry and sugar ratios according to tartness. Taste as you mix, adding sugar gradually for a bespoke sweetness level.
– To enhance cherry flavor, consider incorporating a touch of almond extract; a traditional companion to cherry dishes for a richer taste.
– Utilize the smallest cherries for garnishing before serving, preserving the prettiest pieces for delightful visual appeal.
– Achieve a smooth mixture by ensuring cream cheese is at room temperature before blending, avoiding pocket lumps in the final fluff.
– If transporting, keep refrigerated until ready to serve, maintaining texture integrity for best enjoyment.
– For added depth, sprinkle a hint of cinnamon into the cream mixture, highlighting the natural cherry aroma.

Variations and Adaptations


Regional variations offer an exciting twist to the traditional Cherry Cheesecake Fluff. Try incorporating local fruits alongside cherries, such as raspberries or blueberries, for a mixed berry version that beautifully complements the original flavors.

Seasonal adaptations can be easily integrated. During winter months, consider a spiced version with cardamom and nutmeg, adapting the fluff to suit cooler weather. In summer, a lemon zest infusion brightens the flavors, embracing a more refreshing profile.

Dietary modifications are also feasible. For a vegan version, substitute cream cheese and whipping cream with plant-based alternatives like coconut cream or almond cream cheese, maintaining the fluff’s texture while fitting dietary needs.

Introduce varied flavors through simple additions like vanilla or almond extracts, altering the underlying tone and creating an entirely new experience without extensive recipe changes. Additionally, a drizzle of dark chocolate transforms the fluff into a decadent delight.

For different textures, you might consider adding crushed graham crackers, offering a cheesecake crust experience within the fluff itself. Alternatively, incorporating chopped nuts or dried fruits adds unique dimensions to the smooth and airy base.

Presentation alternatives can elevate your dessert further. Serve in individual mason jars for convenient personal portions or layer it in a trifle dish for an impressive shared centerpiece that’s both elegant and inviting.

Serving and Presentation Guide


Effective plating techniques can heighten the enjoyment of Cherry Cheesecake Fluff. Opt for clear glassware to showcase the beautiful contrast between airy fluff and the reddish brilliance of the cherries, adding a visual aesthetic to your presentation.

Garnish with fresh cherries and a sprig of mint for color and aroma, highlighting its freshness before indulging. Additional options include a light dusting of powdered sugar for an elegant snowy effect that complements the fluff’s creamy texture.

Traditionally, the fluff pairs superbly with simple shortbread or graham crackers on the side, offering textural contrast to each creamy spoonful. For a contemporary touch, consider serving alongside thin almond biscotti or toasted coconut chips.

For optimal experience, serve the fluff slightly chilled to maintain its structure without hardening. This allows flavors to fully integrate while offering a cooling sensation on the palate, enhancing the cherry notes.

Portion control ensures enjoyment without unnecessary overindulgence. Allocate ½ cup servings per guest, a decadently rich amount that satisfies while avoiding excess. Embrace the fluff’s lightness, fostering a satisfying yet refined conclusion to meals.

Wine and Beverage Pairing


Perfect wine pairings for Cherry Cheesecake Fluff enhance its creamy fruitiness without overshadowing. Look to sweet, lightly effervescent wines like Moscato or a sparkling Rosé, which complement the fluff’s flavors while cleansing the palate.

Non-alcoholic alternatives abound, such as cherry-infused sparkling water or a cold ginger tea, delivering refreshing contrasts that enhance cherry notes while quenching thirst. Experiment with flavored kombuchas for an elevated pairing experience.

Consider coffee and tea pairings when serving the fluff post-dinner. A robust French roast coffee offers richness, while a gentle chamomile tea cleanses between bites. Both options offer balance and depth without detracting from the fluff’s sweet nature.

Temperature considerations dictate that both your beverage selection and the fluff should be cool to maintain unity. Chill successfully to mirror the dessert’s refreshment, whether your choice is wine or a non-alcoholic counterpart.

Serving suggestions encourage creativity. Present wines in delicate flutes or rustic goblets for a personalized touch. Alternatively, offer tea, complete with thin lemon slices for a traditional alternative, accentuating the fluff’s tangy notes.

Storage and Shelf Life


Practical storage methods ensure your Cherry Cheesecake Fluff remains fresh and delicious over time. Store securely in an airtight container, occupying the coldest part of your fridge to prolong shelf life and preserve flavor.

Temperature requirements are straightforward, as the fluff thrives in a chilled environment. Aim for storage at 35-40°F to inhibit bacterial growth while maintaining its fluffy texture and optimal taste over several days.

Select suitable containers for freshness. Opt for glass with tight-fitting lids, helping retain moisture and aromatic notes without exposure to air. Avoid mixing flavors in the refrigerator that could alter the dessert’s well-balanced composition.

Signs of spoilage include any sour aroma, discoloration, or weeping of liquid from the fluff, indicating that it might be past its prime. When in doubt, sampling a small amount will quickly reveal any off-flavors or changes in texture.

Reheating isn’t usually necessary, as the dessert is served cold. However, if overly firm, allow the fluff to sit at room temperature briefly but avoid letting it warm excessively, which could impact its structure.

When freezing, use airtight freezer-safe containers, leaving some headspace as expansion might occur. Thaw overnight in the refrigerator rather than at room temperature, allowing the fluff to reacclimate to ideal serving texture.

Make Ahead Strategies


Implement efficient make-ahead strategies to streamline preparation while maintaining flavor. Consider assembling fluff ingredients up to three days in advance, melding flavors over time without compromising texture.

Ensure secure storage between preparation steps to uphold freshness. Utilize cling film or airtight lids over your fluff base, preventing air exposure and maintaining moisture levels during chilling.

Assess quality impact carefully; the no-bake nature of this dessert ensures flavor harmonization without worrying about staleness due to the rich cream base preserving cherries’ integrity over extended cold storage.

For streamlined assembly, prepare components like whipped cream and blended cherries separately. Just before serving, fold them together for the freshest presentation with optimal texture and visual appeal.

Reheating guidelines aren’t applicable given the cold serving nature of this dessert, but if components require slight warming beforehand, ensure gentle, indirect heat to preserve the fluff’s delicacy.

When adding final touches, such as garnishes or layering elements like graham crackers, execute just before serving. This avoids sogginess and elevates freshness, ensuring each bite combines visual and flavor elements harmoniously.

Scaling Instructions


Scaling the recipe to meet more extensive crowd demands or intimate dining adjustments maintains the same exceptional quality. For halving, simply reduce ingredient quantities proportionally without altering the essential preparation steps.

Doubling or tripling the recipe involves similar proportionate ingredient increases. Pay particular attention to mixing vessels’ size to facilitate easy ingredient incorporation, retaining fluff’s airiness and volume with each batch addition.

Equipment adjustments, such as using larger bowls for whipped cream or more durable mixers for extended preparation, guarantee you’re efficiently managing both time and material resources during the expanded process.

Timing modifications depend on scaling needs. Bigger batches might slightly extend preparation due to ingredient volumes but shouldn’t necessitate structural timeline changes. Monitor assembly sophistication to ensure ultimate fluffiness is maintained.

Storage considerations must align with scaled servings. Utilize additional or larger storage containers to segregate portions individually, maintaining safety and freshness across multiple servings and ensuring accessibility when needed.

Nutritional Deep Dive


The Cherry Cheesecake Fluff offers a well-balanced macro breakdown, typically high in fats due to the cream cheese and whipping cream, while remaining relatively low in carbohydrates and proteins.

Micronutrients from the cherries add valuable vitamins like Vitamin C and antioxidants, improving overall health. This, combined with healthy fats, offers a balanced diet component when enjoyed in moderation.

Health benefits from cherries include anti-inflammatory properties and antioxidant activity, supporting organ health and fighting free radicals. Including small portions as part of a balanced diet can contribute to heart health and chronic condition prevention.

Dietary considerations involve managing portion sizes to maximize satiety without excessive caloric intake. By ensuring controlled consumption, the fluff can fit various diets where compatible, offering rich flavor in moderate amounts.

Serving portions around ½ cup provide vital portion information, avoiding excessive calorie influx while still enjoying the luxurious taste and texture. Dress up smaller servings with added accompaniments like fruits or nuts for variety.

Weight management tips encourage mindful indulgence. Serve over long periods involved in social dining settings, balancing intake seamlessly with other lifestyle components and dietary plans, ensuring satisfaction without overindulgence.

Dietary Adaptations


Opt for gluten-free alternatives by ensuring all ingredients used are certified as gluten-free. Most components, like cream, cherries, and sugar, will naturally not contain gluten, but double-check sources for mixes or flavorings used.

Dairy-free adjustments can be made using plant-based substitutes such as coconut cream and almond-based cream cheese, retaining the original fluff’s light texture while accommodating lactose intolerances or vegan preferences.

To craft a vegan version, employ plant-based whipping creams combined with alternative sweeteners and cherries, creating an accessible dessert for food values that avoid animal products. The result is equally charming and flavorful.

Low-carb options work by minimizing added sugar or utilizing natural sweeteners like Stevia or Erythritol, focusing on the cream base predominantly, resulting in reduced carbohydrates for compatible low-carb diets.

Achieve keto compatibility by adapting sugars and carbohydrate-heavy ingredients to fit within the diet parameters. Modify necessary elements to embrace fats without sacrificing texture or overall appeal.

Paleo adaptations emphasize more natural sweetening methods, staying clear of processed sugars. Incorporate honey or maple syrup for flavors that adhere to paleo’s natural and unprocessed parameters while keeping cherries a central feature.

For those adhering to a Low-FODMAP diet, reduce the amount of sweeteners or opt for alternatives that align with FODMAP guidelines, preserving primary taste essences aligned with dietary directives.

Troubleshooting Guide


Should you encounter texture issues where the fluff isn’t adequately setting, ensure whipping cream achieves soft peaks before folding. If problems persist, refrigerate briefly, allowing natural thickness through chilling.

Flavor balance concerns might arise from incorrect sugar calibration. Always taste incrementally, integrating cherries gradually and adjusting sweetness levels accordingly to suit individual preferences and flavor affinity.

Temperature problems are alleviated by consistent chilling. If serving cold, allowing gradual warm-up can resolve firmness, presenting the fluff optimally without undesired rigidity.

Equipment challenges often arise from inadequate mixing tools; prioritize robust mixers to maximize air incorporation into the fluff, helping maintain the desired airy texture.

Ingredient substitutions, particularly with sweeteners or cherries, can impact overall taste; ensure alternatives offer similar qualities to the origin, maintaining the dish’s integrity and overall profile.

Timing concerns resolve through proper preparation arrangement, especially prior to serving. Cooling and blending at controlled intervals ensures a balanced and well-prepared dish, suitable for intended presentations.

Recipe Success Stories


Throughout community interactions, we’ve seen enthusiastic responses to this Cherry Cheesecake Fluff. Readers have shared innovations and adaptations, incorporating other berries for diverse fruity outcomes or smaller pudding cups for convenient servings.

Variation successes applaud the flexibility of the base ingredients. Adjusting cherry mixtures or extraction levels results in new flavor profiles aligning with preferences without sacrificing the classic fluffy traits of the original dessert.

Many have shared adaptation stories for dietary constraints, highlighting ease in converting the fluff into allergen-friendly desserts while retaining key elements like creaminess and rich cherry flavors.

Reader suggestions often propose elements of texture integration, like mixing in small chocolate chips or chopped nuts for added crunch, enhancing each spoonful with layered experiences beyond smoothness alone.

Photography tips complete these success stories, with readers illustrating the fluff beautifully, integrating garnishes or arrangement techniques that elevate presentations effectively, captivating attention through simple visual enhancements.

Frequently Asked Questions

Can I use other fruits instead of cherries?
Yes, you can substitute cherries with other berries like blueberries or raspberries. Ensure they are similarly prepared to keep textures consistent across variations.

How do I ensure the fluff stays light and airy?
Whipping cream to soft peaks is vital. Avoid over-mixing once ingredients combine, gently folding for an airy texture that withstands serving and storage.

Is it possible to prepare this dessert a day in advance?
Yes, preparation a day ahead enhances flavors. Store securely in the fridge, cover to prevent air exposure, and serve chilled for peak enjoyment.

What alternatives can be used instead of sugar for a healthier option?
Natural sweeteners like Stevia or honey offer viable sugar replacements, adjusting quantities to taste without impacting texture negatively.

Should I thaw frozen cherries before using?
Thawing frozen cherries is recommended to remove extra moisture and ensuring optimal flavor integration. Drain well for best results.

Can I double the recipe easily?
Doubling is straightforward, but ensure adequate mixing bowl size and chilling space to accommodate increased volume without compromising quality.

What happens if the cream cheese isn’t softened?
Cold cream cheese results in uneven texture and difficult blending. Always allow it to reach room temperature before mixing for a creamy consistency.

What’s the ideal serving dish for personal portions?
Clear glassware or small dessert cups make ideal single servings, showcasing the fluff’s attractive layers and ease in portion control.

Is it necessary to refrigerate leftover fluff?
Refrigeration maintains freshness and prolongs shelf life. Store leftovers in airtight conditions to avoid drying or absorption of other odors.

Can this be frozen for later enjoyment?
Freezing is possible using airtight containers. Thaw slowly in the refrigerator to preserve texture and flavor for future delight.

Additional Resources


Explore related recipes to expand your dessert repertoire, embracing dishes complementing the consumption style seen in Cherry Cheesecake Fluff. Discover technique guides for perfectly whipping creams, enhancing skills in achieving key dessert textures.

Gain ingredient insights, refining selection and storage strategies, and broadening flavor profiles within differing contexts. Equipment recommendations follow, ensuring you’re ready to venture into other culinary creations with appropriate tools at hand.

Embrace seasonal variations of this recipe, particularly through ingredient substitutions that align with market availability, offering comprehensive coverage of showcasing fruits’ full potential matched by practical preparation tips.

Join the Conversation


Encourage social media engagement by inviting readers to share their versions and adaptations of Cherry Cheesecake Fluff, enhancing community connection and diversifying perspectives on recipe success.

Share photography tips to spotlight skills in capturing dessert beauty across platforms, generating enthusiastic responses and inspiration in presenting this delightful treat innovatively.

Welcome recipe reviews that explore this dessert’s versatility, providing insights into categorical placement and enhancements that elevate experience beyond expectations, fueling ongoing dialogue.

Emphasize community engagement by showcasing shared variations and personal touches, building a repository of insights and collaborative knowledge beneficial to both novice cooks and seasoned gourmand enthusiasts.

Champion the inclusion of recipe variations within these discussions, supporting individuals’ confidence when exploring alternatives, guaranteeing flair and creativity in every attempt at this luscious dessert.

Indulge in a Raspberry Pistachio Cheesecake for Every Occasion

Celebrate Your Special Moments with Our Raspberry Pistachio Cheesecake

⚖️
Difficulty
Intermediate

⏲️
Prep Time
30 mins

🕒
Cook Time
60 mins

⏱️
Total Time
90 mins

🍽️
Servings
8

Indulge your senses in the decadence of our Raspberry Pistachio Cheesecake. This exquisite dessert harmoniously blends the tangy burst of raspberries with the rich, nutty goodness of pistachios, encapsulated in a creamy, velvety cheesecake. Perfect for birthdays, anniversaries, or any celebratory occasion, this cake promises to be a show-stopping centerpiece that will delight your guests, leaving them craving for more. The balance of flavors and textures makes it a memorable dessert worth savoring.

Quick Recipe Highlights

  • Flavor Profile: This cheesecake is a delightful symphony of tangy raspberries contrasted with the naturally sweet, earthy flavor of pistachios, making each bite a gourmet experience.
  • Texture: Enjoy the creamy, rich texture of cheesecake against the slightly crunchy bite of pistachio, perfectly complemented by a luscious raspberry swirl.
  • Aroma: A beautiful medley of nutty pistachios and fresh, fragrant raspberries will tantalize your senses from the moment the dessert is sliced.
  • Visual Appeal: With its stunning green and red layers, accented by vibrant raspberry swirls, this cheesecake is as much a feast for the eyes as it is for the palate.
  • Skill Level Needed: While this recipe demands a moderate level of expertise, it rewards with a bakery-quality finish that impresses and satisfies.
  • Special Equipment: A springform pan and a food processor are essential tools in achieving the perfect crust and seamless blending of ingredients.

Recipe Overview

  • Difficulty Level: This recipe is categorized as intermediate due to its multiple steps and precise baking techniques, yet it remains accessible to anyone with a passion for baking.
  • Category: Positioned in the dessert category, this cheesecake is an ideal choice when you need a stunning sweet treat for luxurious dinners or celebrations.
  • Cuisine: Combining elements from both European and Middle Eastern cuisines, this dessert introduces a fusion of flavors highlighting the versatility of cheesecake.
  • Cost: With pistachios and fresh raspberries, this decadent dessert involves a moderate cost but guarantees high-end flavor satisfaction.
  • Season: Best enjoyed in spring and summer when raspberries are freshest and most flavorful, though it remains a year-round favorite with frozen substitutes.
  • Occasion: Reserve this cheesecake for weddings, holiday gatherings, or anniversaries where its opulent look and taste enhance the celebratory mood.

Why You’ll Love This Recipe


Taste and texture are at the heart of this Raspberry Pistachio Cheesecake’s appeal. Each slice offers a luxurious mouthfeel, where the smooth, creamy cheesecake is contrasted by the nuanced crunch of pistachios. The sweet-tart raspberries add a touch of bright flavor that cuts through the richness, making it a harmonious blend that your palate will appreciate.

Convenience is also a highlight, as the cheesecake can be prepared in sections ahead of time, easing the stress of last-minute preparations. With the use of a water bath technique, the baking process ensures an irresistibly creamy texture without cracking, even for novice bakers.

Nutritionally, this dessert offers a delightful indulgence with healthful aspects, as pistachios are full of heart-healthy fats and proteins, while raspberries provide antioxidants. Serving this dessert is not only a treat for taste buds but also provides some nutritional benefits.

The social aspect is inherent in its presentation; one can’t help but be impressed by the visual allure of the cheesecake, making it a conversational centerpiece when entertaining guests. Each slice served generates interest and compliments, making your event memorable.

Cost-effectiveness adds to the charm of this recipe. Considering the sophisticated flavor profile it offers, the ingredients are relatively accessible, and economical in bulk, allowing for indulgence without financial strain.

Historical Background and Cultural Significance


The ubiquity of cheesecakes dates back to ancient times when it was said that the Greeks served them to their Olympic athletes. As a beloved dessert across the globe, it has gone through numerous adaptations and renditions based on regional ingredient availability and preferences.

Culturally, the combination of raspberry and pistachio caters to a variety of taste buds, capturing the essence of European desserts’ elegance and the rich, heartfelt tradition of Middle Eastern sweets. It serves as a symbol of culinary globalization, marrying diverse flavor profiles.

Over time, the recipe has evolved to include varying cheesecake bases, from graham cracker to almond meal, each iteration bringing a unique character to the dessert. Modern innovations have led to the introduction of whimsical adaptations like this raspberry pistachio version, broadening the cheesecake’s appeal.

Regionally, you’ll find variations that incorporate local fruits and nuts, emphasizing the adaptability of cheesecake to incorporate seasonal and cultural ingredients. This enables food enthusiasts to explore and create a version that speaks uniquely to their taste while preserving the dessert’s classic roots.

Ingredient Deep Dive


Raspberries, rich in antioxidants, not only deliver a vibrant color but also provide the tartness needed to balance the cheesecake’s sweet creaminess. Choosing the freshest berries results in superior taste, while frozen can work in off-seasons. Store them dry in the fridge for longevity.

Pistachios, treasured in both savory and sweet dishes, offer a distinct buttery flavor with a hint of sweetness. Beyond culinary delight, they prose heart-healthy benefits due to their monounsaturated fat content. Opt for unsalted to maintain control over the dessert’s overall flavor profile.

Cream cheese is the pillar of any cheesecake, delivering the luscious texture that defines this dessert. Look for full-fat versions to achieve the richness this recipe demands. Storing cream cheese properly and bringing it to room temperature before use prevents lumps.

Graham crackers serve as the traditional base, providing a sweet, crumbly foundation. Alternatively, try digestive biscuits for a touch of malt flavor. Pulse them into crumbs for an even crust, combining with melted butter until it achieves the desired consistency.

Common Mistakes to Avoid

  • Overmixing the batter can introduce air bubbles, resulting in a cracked surface post-bake.
  • Skipping the water bath may cause uneven baking, leading to a dry center or burnt edges.
  • Using cold ingredients leads to a lumpy batter; room temperature is ideal for smooth mixing.
  • Undercooking the pistachio crust can lead to sogginess; ensure a firm base by monitoring baking time.
  • Neglecting the cooling process may cause the cheesecake to collapse; gradual temperature reduction is key.
  • Substituting low-fat cream cheese changes texture, making it less creamy and more rubbery.
  • Forgetting to strain raspberry sauce leads to a seed-filled experience, detracting from overall taste.
  • Inadequate chilling time before serving can result in a soft, less-structured cheesecake slice.

Essential Techniques


A crucial step in cheesecake success is mastering the water bath technique. This method prevents cracking by ensuring even baking, as the surrounding water maintains a consistent temperature around the cheesecake. Wrap the springform pan securely in foil to prevent water seepage.

Properly folding whipped cream into the batter is another technique to perfect for a light, airy texture. Use a gentle hand, slowly folding, ensuring the whipped cream maintains its volume without deflating. The result? An elegantly smooth and luscious consistency.

Pro Tips for Perfect Raspberry Pistachio Cheesecake


Toast pistachios before incorporating them into your crust for a heightened flavor profile that enhances their natural nutty undertone.

Combine lemon zest into the cheesecake batter for an extra depth of taste that complements the raspberry’s tartness subtly and beautifully.

Use a high-speed blender to purée raspberries for a silky-smooth sauce that integrates seamlessly into the cheesecake filling or for drizzling atop each slice.

Allow the cheesecake to cool slowly in the oven with the door slightly ajar for an hour before transferring it to the refrigerator. This prevents cracking by minimizing the sudden change in temperature.

Presentation is key, so garnish with whole raspberries and crushed pistachios just before serving to create a visually striking effect that tastes as good as it looks.

When slicing, a warm knife ensures clean cuts; run it under hot water, then dry before each incision to maintain a polished presentation without cheesecake sticking.

Variations and Adaptations


For a regional twist, incorporate rosewater into the raspberry layer to infuse Middle Eastern floral notes, enhancing the pistachio’s presence for a richer profile.

Adapt this dessert seasonally by substituting the raspberries with lingonberries for a Nordic approach, lending more bite and tartness to the creamy backdrop.

Create a dietary-friendly version by opting for gluten-free graham crackers in the crust and ensuring all other ingredients are cross-contamination free.

Amplify flavor in the cheesecake by swirling in a fresh raspberry reduction instead of whole berries, allowing for a more integrated, concentrated taste.

Modify the texture by employing smooth ricotta in combination with cream cheese for a lighter, fluffier result that has a slightly different mouthfeel, catering to diverse preferences.

Give your dessert a modern flair by crafting miniature cheesecakes in ramekins, allowing for personalized servings that highlight the dish’s exquisite presentation.

Serving and Presentation Guide


Artful plating is pivotal in boosting a cheesecake’s appeal. Consider serving slices on contrasting dark plates, where the vibrant raspberry and pistachio colors truly stand out.

Garnish extravagantly with a scattering of whole raspberries and a sprinkle of powdered sugar for a snow-kissed effect, adding a sophisticated touch to each slice.

Accompany with a dollop of whipped cream or a scoop of vanilla bean ice cream, complementing the cheesecake’s richness with a light, airy contrast.

Experiment with temperature by serving the cheesecake slightly chilled for a firmer slice or allow it to sit out briefly for a creamier texture that envelops each forkful.

Maintain portion control by utilizing a ring mold to serve consistent, beautifully edged portions that speak to fine dining aesthetics during your gathering.

Add a personal touch with edible flowers like violets for whimsical garnishing that infuses natural elements into the presentation, enticing guests visually and gastronomically.

Wine and Beverage Pairing


For wine lovers, pair this opulent cheesecake with a sweet Moscato or a sparkling Rosé, complementing its fruity, nutty complexity harmoniously.

Non-alcoholic alternatives like a chilled raspberry herbal tea or an elderflower cordial can match the refreshing notes, offering layers of floral and berry flavors.

If coffee is your preference, an espresso or a lightly sweetened American coffee balances the richness of the cheesecake with its naturally bold, bitter profile.

Consider balanced temperature when serving; for example, a cold Moscato accentuates the creamy coolness of the cheesecake, enhancing the tasting experience.

Opt for serving suggestions that align with dessert wines in smaller glasses, allowing guests to enjoy the complementary pairing in a refined, tasteful manner.

Storage and Shelf Life


Store the cheesecake in its springform pan, wrapped tightly in plastic wrap to maintain freshness and prevent the absorption of external odors in the refrigerator.

Kept chilled, the cheesecake can last up to five days, providing ample opportunity to savor leftovers while maintaining quality.

When seeking to extend shelf life, consider freezing. Wrap slices individually in parchment before sealing in an airtight container or freezer bag.

Recognize spoilage signs such as off smells or visible changes in color or texture. When reheating, a brief stay in the microwave restores the desired consistency.

Freezing guidelines suggest doing so only after the cheesecake is thoroughly chilled, as sudden temperature shifts may alter its texture.

Make Ahead Strategies


To streamline preparation, crust and filling can be made ahead separately, stored in the fridge overnight, and assembled just before baking.

Between steps, ensure stored components remain covered and refrigerated to maintain optimal freshness, avoiding moisture loss, or flavor degradation.

Assess the cheesecake’s quality when preparing in advance, as it benefits from a chilling period, allowing flavors to marry and achieve ideal consistency.

During assembly, focus on layering neatly to preserve the aesthetic quality that draws admiration, especially for the intricate raspberry swirls.

Follow rehearsing guidelines carefully to achieve the desired textured outcome, considering brief thawing for frozen portions before serving.

Supplement fresh elements such as raspberries or garnish only when ready to serve, as this ensures they remain vibrant and fresh.

Scaling Instructions


To halve this recipe, adjust all ingredient quantities proportionally and consider using a smaller pan to ensure even baking without compromising texture.

Doubling involves meticulous attention to measurements, as overfilling can lead to baking inconsistencies; a larger baking pan or multiple pans may be required.

Equipment adjustments might include utilizing additional mixing bowls or larger food processor capacity to manage increased ingredient quantities efficiently.

When considering cooking times, closely monitor for doneness signs, as larger cakes may require longer baking; adjust based on the achieved golden color and texture.

Storage considerations include ensuring scaled portions fit within available container space and remain organized for easy access and freshness maintenance.

Nutritional Deep Dive


This Raspberry Pistachio Cheesecake offers a balanced macro breakdown providing carbohydrates from the crust, proteins from nuts, and fats from the cream cheese.

Micronutrient analysis highlights significant contributions from raspberries’ vitamin C and pistachios’ potassium and B6 content.

Health benefits include cardiovascular support from pistachios and antioxidant properties of raspberries, contributing to a wholesome dessert profile.

Dietary considerations cater to indulgence, mindful of portion control and caloric intake, especially when cheesecake is part of a balanced meal plan.

Portion analysis advises keeping slice sizes moderate, as the cheesecake is rich, ensuring enjoyment without overwhelm.

For weight management tips, pair a reduced slice with fresh fruit or include as part of a calorie-calculated meal plan.

Dietary Adaptations


For a gluten-free alternative, choose gluten-free graham crackers and double-check all other ingredients and substitute accordingly.

Dairy-free modifications may involve substituting traditional cream cheese with a cashew-based equivalent or coconut cream for an innovative touch.

Create a vegan version by exploring vegan cream cheese and plant-based butter alternatives, maintaining deliciousness with ethical consciousness.

Adjust to a low-carb dessert diet by using almond flour for the crust and employing sugar substitutes carefully within baking requirements.

Ensure all ingredients align with a keto lifestyle by integrating higher fat substitutes and sweeteners like erythritol within compositions.

Modify to fit a paleo-friendly diet by integrating almond meal crusts and natural sweeteners, ensuring the cheesecake aligns with your nutritional goals.

Satisfy a low-FODMAP dietary need by ensuring each ingredient remains compliant with personal guidelines, focusing on ingredient quality and safety.

Troubleshooting Guide


Address texture issues by ensuring accurate measurements and proper incorporation of wet and dry elements to achieve desired creaminess.

Balance flavors by tasting raspberry reduction for sweetness or tartness adjusting with sugar or lemon juice as necessary.

Combat temperature problems by preheating ovens fully and using reliable thermometers for accuracy throughout the baking process.

Overcome equipment challenges where substitutions for springform pans might involve lined cake tins with proper containment of batter.

Navigate ingredient substitutions with care, focusing on maintaining texture and flavor as closely as possible when accommodating dietary needs.

Timing concerns can be rectified by setting timers at key intervals, ensuring baking is not interrupted prematurely or allowed excessive cooking.

Recipe Success Stories


Join our community of food lovers who have collectively experienced the joy of this Raspberry Pistachio Cheesecake. Each rendition brought a unique twist, from swapping raspberries for blueberries to celebrating a national holiday.

Readers have shared their adaptations, with many highlighting the smooth, creamy consistency achieved through careful attention to mixing techniques and ingredient handling.

Variations have included additions such as mascarpone for extra richness or crumb bases utilizing seasonal shortbreads for those wanting a bespoke flavor.

Photographs from our culinary enthusiasts capture brilliant colors, showcasing individual flair in garnishing through sliced pistachios and twisting raspberry sauces.

Experimentation suggestions have ranged from integrating a hint of cardamom for a warm, spicy balanced note to utilizing walnut crusts for a softer bite.

Frequently Asked Questions

Can I freeze Raspberry Pistachio Cheesecake?

Freezing is possible and recommended for preserving your cheesecake. Wrap slices individually to maintain quality, especially for long-term storage.

How do I avoid a cracked cheesecake top?

Employ the water bath method, ensuring even baking and avoiding overmixing air into the batter, as air bubbles trapped are often culprits of cracks.

What are some eggless options?

Explore alternatives like silken tofu, agar-agar, or flax eggs to replace traditional eggs while maintaining the integrity and texture of your bake.

What if my crust is soggy?

Baking your crust long enough and cooling it thoroughly before adding filling assists in firming its structure, reducing soggy results.

How can I make the cake denser?

Increase cheese content or reduce whipped elements in the batter for a firmer, richer texture that keeps shape more rigidly.

Are there nut-free crust options?

Try a classic graham cracker base or use cookie alternatives that exclude nuts to cater to specific dietary requirements or allergies.

Best way to swirl raspberry sauce?

Spoon sauce onto the cheesecake and use a knife or skewer to create intricate swirls gently, preventing complete inclusion for visible aesthetics.

Is a bain-marie necessary?

While not essential, it’s strongly recommended to produce a cheesecake with a smooth, crack-free finish due to uniform cooking temperatures.

How long to refrigerate before serving?

Post-bake, chill your cheesecake for a minimum of four hours, overnight refrigeration ensures it’s completely set for optimal serving presentation.

What if I over-whipped my batter?

If your batter’s whipped excessively, gentle folding can incorporate it back into manageable consistency, reducing any unwanted airiness.

Can I opt for a flavored crust?

Absolutely, experiment with flavored digestive or chocolate biscuits that complement your cheesecake filling, enriching the overall dessert experience.

How adaptable is this cheesecake recipe?

It’s highly flexible, promoting ingredient exchanges and substitutions within maintaining structure, supporting numerous dietary guidelines easily.

Additional Resources


Peruse our curated selection of related recipes that complement your Raspberry Pistachio Cheesecake artistry, offering synergistic ingredients and topping inspirations.

Delve into comprehensive technique guides, focusing on essential cheesecake-making skills such as perfecting water baths and preserving fresh fruits.

Explore ingredient information, highlighting the optimal selection and pairing of raspberries and pistachios, securing your bakery-inspired cheesecake results.

Access equipment recommendations ensuring central kitchen tools — from springform pans to blenders — enhance your capacity for creative explorations.

Consider seasonal variations and adaptations, helping harness the bounties of nature throughout the year for your cheesecake creations.

Join the Conversation


Engage with our community by sharing your Raspberry Pistachio Cheesecake endeavors through social media platforms such as Instagram or Facebook, catching and sharing your masterpiece with like-minded foodies.

Deliver exquisite photography with tips on effective plating captured through your lens, making your meticulous creation look as tantalizing as it tastes.

Offer insightful recipe reviews and reflections, documenting your cheesecake adventure step-by-step to inspire readers considering a similar culinary venture.

Encourage community engagement through feedback or alternative recommendations, fostering discussions highlighting common improvements or shared culinary knowledge.

Explore personalized recipe variations, fostering diverse interpretations that continue evolving beyond initial conceptions, contributing to rich culinary heritage.

The Recipe

Raspberry Pistachio Cheesecake

Serves: 8

Prep Time: 30 mins

Cook Time: 60 mins

Total Time: 90 mins

Kitchen Equipment Needed

  • 9-inch springform pan
  • Food processor
  • Mixing bowls
  • Hand mixer
  • Measuring cups and spoons
  • Rubber spatula
  • Bain-marie setup (large enough baking dish for the water bath)

Ingredients

  • 1 1/2 cups graham cracker crumbs
  • 1/2 cup unsalted pistachios, toasted
  • 1/3 cup melted butter
  • 24 oz cream cheese, softened
  • 1 cup sugar
  • 3 large eggs
  • 1 tsp vanilla extract
  • 1 cup fresh raspberries
  • 2 tbsp lemon juice
  • 1/4 cup confectioner’s sugar for raspberry sauce
  • Additional pistachios and raspberries for garnish

Directions

  1. Preheat your oven to 325°F (160°C). Wrap the outside of a 9-inch springform pan with aluminum foil to prevent water seepage.
  2. In a food processor, pulse graham cracker crumbs and toasted pistachios until fine. Add melted butter and pulse until combined.
  3. Press the crust mixture evenly into the bottom of the prepared springform pan. Bake for 10 minutes and let it cool.
  4. In a large bowl, beat the cream cheese and sugar together until smooth. Incorporate eggs one at a time, mixing until just blended, then stir in vanilla extract.
  5. Pour half the batter over the cooled crust. Swirl in some of the raspberry sauce made by blending raspberries, lemon juice, and confectioner’s sugar until smooth.
  6. Top with remaining batter and additional raspberry swirls. Place the pan into a bain-marie and bake for 50-60 minutes or until the center is set.
  7. Once baked, turn off the oven and let the cake cool in the oven with the door ajar for one hour to prevent cracks. Refrigerate for at least four hours or overnight.
  8. When ready to serve, top with extra raspberries and chopped pistachios. Slice with a warm knife for clean presentation.

Recipe Notes

  • Substitute graham crackers with digestive biscuits if preferred.
  • Ensure raspberries are well blended for smoother swirls.
  • Chilling thoroughly enhances flavor melding and texture solidification.
  • Adjust lemon juice to balance desired tartness in raspberry sauce.

Indulgent Snickers Reese’s Cookie Dough Ice Cream Recipe Delight

Snickers & Reese’s Cookie Dough Ice Cream Extravaganza: A Sweet Delight

⚖️
Difficulty
Easy

⏲️
Prep Time
20 mins

🕒
Cook Time
0 mins

⏱️
Total Time
20 mins + chilling

🍽️
Servings
8

Dive into the indulgence of the Snickers & Reese’s Cookie Dough Ice Cream Extravaganza, a dessert designed for those who seek the ultimate sweet experience. Imagine the delightful crunch of Snickers and the smooth, nutty goodness of Reese’s, combined with creamy cookie dough ice cream. This extravaganza is where chocolate meets caramel, peanuts, and that irresistible cookie dough taste, providing a symphony of flavors and textures in every bite.

Whether you are hosting a summer party or simply treating yourself on a lazy weekend, this ice cream extravaganza is your go-to dessert for instant happiness. The melding of chocolate and caramel with decadent peanut butter is a treat that promises to captivate your taste buds and transport you to dessert heaven.

Quick Recipe Highlights

  • Flavor Profile: This Snickers & Reese’s Cookie Dough Ice Cream blends chocolate with nutty, caramel sweetness, creating a balance that is both rich and satisfying.
  • Texture: Experience a harmony of creamy and crunchy with smooth ice cream, gooey cookie dough pockets, and the crispness of Snickers and Reese’s pieces.
  • Aroma: The inviting scents of chocolate and peanut butter waft through the air, mingling with subtle notes of vanilla and caramel.
  • Visual Appeal: This ice cream dazzles with swirls of chocolate, caramel ripples, and colorful candy pieces dotted throughout.
  • Skill Level Needed: Designed for all skill levels; even novice cooks can create this delightful dessert with minimal effort.
  • Special Equipment: An ice cream maker enhances the recipe, but it’s not required for a delicious outcome.

Recipe Overview

  • Difficulty Level: This easy recipe requires no baking or advanced culinary skills, making it accessible to anyone wanting a fun and delicious treat.
  • Category: Perfect for dessert or a sweet snack when cravings hit hard.
  • Cuisine: A delightful fusion of classic American candy flavors with modern ice cream innovation.
  • Cost: Relatively inexpensive, considering the gourmet feel, with all ingredients available at your local supermarket.
  • Season: Best enjoyed in the warmer months of spring and summer, but a treat that can delight year-round.
  • Occasion: Ideal for birthday parties, family gatherings, or simply as a delightful end to a special meal.

Why You’ll Love This Recipe


Indulge in the rich taste and varied textures of this unique ice cream creation that combines beloved candy bar flavors with creamy cookie dough. Not only is it a taste sensation, but preparing it at home offers you the freedom to tweak and perfect the balance of flavors to your liking.

Convenience is a key highlight here; with minimal prep time and no baking involved, this dessert is ready in a flash, allowing more time to enjoy with your guests or family. Using store-bought candy cuts down on time, but still delivers a homemade touch due to the custom blend of ingredients.

Nutritionally, while this treat is decadent, featuring proteins from peanuts and some fiber from cookie dough, you can easily adjust ingredients for dietary preferences or needs, like opting for sugar-free versions or lighter options.

This dessert is not just about savoring flavors; it’s also about bringing people together. Share laughter and smiles over a bowl of this ice cream—a guaranteed conversation starter and crowd-pleaser that surprises and delights.

Finally, its cost-effectiveness makes it a great choice for entertaining. Store brands and bulk ingredients ensure that the Snickers & Reese’s Cookie Dough Ice Cream Extravaganza remains budget-friendly, making it easy to enjoy without breaking the bank.

Historical Background and Cultural Significance


The Snickers & Reese’s Cookie Dough Ice Cream Extravaganza is a celebration of America’s love for candy bars and indulgent desserts. Rooted in the history of ice cream consumption, which gained huge popularity in the United States during the 20th century, this dessert continues a tradition of elevating simple ingredients into decadent treats.

Culturally, candy bars like Snickers and Reese’s encapsulate the American spirit of ingenuity and indulgence. The combination of these two iconic chocolates in an ice cream format pays homage to their longstanding place in the hearts of candy lovers everywhere.

As the recipe evolved, several regional variations emerged, influenced by local ingredient availability and flavor preferences. Some iterations feature added cookies or brownies, while others play up the caramel flavor for additional depth and sweetness.

Regional adaptations often see the inclusion of locally loved candies or even homemade versions of Snickers and Reese’s, showcasing the versatility and adaptability of this beloved dessert.

Ingredient Deep Dive


Snickers: The iconic Snickers bar has a rich history, originating in the 1930s, and represents a blend of chocolate, nougat, caramel, and peanuts. These elements not only add texture but also bring essential nutrients like fiber and plant-based protein. When selecting, look for freshness and intact bars for best integration into the ice cream.

Reese’s: Known for its pronounced peanut butter flavor, Reese’s provides a creamy and nutty profile to the dessert. Born out of a marriage between peanuts and chocolate, Reese’s cups have ensured a lasting cultural impact. For optimal use, store them in a cool, dark place to maintain texture and flavor.

Cookie Dough: This playful addition is beloved for its soft texture and sweet taste, playing into nostalgia for many who snuck bites of cookie batter. The dough’s versatility means gluten-free or vegan options can be seamlessly swapped without affecting the recipe outcome.

Ice Cream Base: The luscious vanilla base allows the rich blend of candy pieces to shine, serving as a perfect backdrop. Choosing high-quality vanilla extract enhances the overall flavor profile, while storing the base at the right temperature ensures a creamy consistency.

Chocolate Chips: Adding chocolate chips reinforces the chocolate theme. Opt for semi-sweet or dark chocolate options for a balanced flavor that complements the sweetness of Snickers and Reese’s.

Common Mistakes to Avoid

  • Overloading with candy pieces can make mixing challenging and affect texture. Balance is key.
  • Too much melted ice cream refreezing can lead to ice crystals that disrupt the creamy texture.
  • Chopping candy too finely may cause it to melt into the ice cream, losing desired chunks.
  • Skipping chilling the mixture can lead to uneven freezing and a grainy texture.
  • Using low-fat alternatives might result in less creamy ice cream. Fat content aids smoothness.
  • Not tasting along the way could lead to flavor imbalance. Always taste as you go!
  • Improper storage can lead to freezer burn or off flavors; always seal tightly.
  • Consulting store-bought or low-quality cookie dough might compromise taste. Opt for homemade or reputable brands.

Essential Techniques


The blending of your ingredients is paramount. Achieving a homogeneous mix ensures that every bite delivers a balanced taste of chocolate, caramel, and peanuts. Master this by chopping candies uniformly and adding them gradually into the ice cream base.

Maintaining the creaminess of your ice cream involves carefully managing temperature throughout the process. Ensure your freezer is set correctly and allow ample time for the ice cream to firm up without interruptions.

For the best flavor extraction, allow your ice cream base to partially freeze before folding in the candies. This prevents them from sinking and ensures even distribution as the base firms up.

Pro Tips for Perfect Snickers & Reese’s Cookie Dough Ice Cream Extravaganza


For extra flavor depth, consider adding a pinch of sea salt to your ice cream base. This enhances the caramel notes and balances the sweetness.

Try lightly toasting the peanuts before adding, for added crunch and a richer, nuttier taste.

Let your ice cream sit at room temperature for a few minutes before serving. This will make scooping easier and enhance the creaminess.

Experiment with layering. Pour half your ice cream base into the container, add candy pieces, then top with the rest for a dynamic texture contrast.

Always chill your mixing bowl and equipment before use. Cold tools help prevent premature melting during mixing.

Be patient during freezing. Rushing the process can lead to a compromise in texture and flavor development.

Variations and Adaptations


In regional variations, try using local candies or flavors to suit your taste buds. Opt for seasonal adaptions like pumpkin spice cookie dough in fall or peppermint in winter.

For dietary modifications, consider dairy-free ice cream bases made from coconut or almond milk, and gluten-free cookie dough options for inclusivity without sacrificing taste.

Play with flavor variations by adding a swirl of chocolate fudge or caramel sauce to intensify richness.

For lighter textures, experiment by adding whipped cream during preparation, and for presentation, consider serving in waffle cones or chocolate bowls for added flair.

Serving and Presentation Guide


To elevate your presentation, scoop the ice cream into a chilled glass dessert bowl, garnishing with extra candy pieces or a drizzle of caramel.

Consider pairing with traditional accompaniments like biscuits or wafers for contrasting crunch.

Serve cold, but not frozen solid, for optimal texture and taste. Achieving this can mean serving immediately out of the freezer or allowing a slight thaw period.

For portion control, use a small scoop and offer multiple smaller servings, allowing guests to indulge at their own pace while appreciating the full flavor.

Wine and Beverage Pairing


Pair your delightful ice cream with a sweet dessert wine such as a late harvest Riesling or Muscat to enhance the flavors without overpowering them.

For non-alcoholic options, consider serving with creamy hot chocolate or an iced coffee that complements the iced textures and rich flavors.

Temperature plays a key role in pairing; ensure your beverage is well-chilled or suitably warm to balance the chilled dessert.

Storage and Shelf Life


Store your ice cream in an airtight container to prevent freezer burn. Opt for shallow containers, as these allow for more even temperature control and quicker freezing.

Keep your dessert in the coldest part of the freezer, ideally at a consistent 0°F (-18°C). Avoid frequent temperature changes to maintain texture quality.

Check for signs of spoilage such as a sour smell or crystal formation. If reheating is necessary, place the container in a bowl of warm water for a few minutes.

Leftover ice cream can be piped into molds and refrozen for creative popsicles, offering fun shapes and convenient serving options.

Make Ahead Strategies


Prepare your ice cream base a day in advance to allow flavors to fully develop in cold storage.

Store chopped candy pieces in separate containers and fold them into the ice cream just before the final freeze for freshest results.

For a seamless serving experience, pre-scoop into party cups and return to the freezer, ensuring minimal service time during events.

Throughout, maintain quality by avoiding prolonged exposure to air or moisture; seal tightly between steps.

Scaling Instructions


To halve the recipe, simply adjust ingredients proportionally, ensuring precision to balance flavors.

When doubling or tripling, consider kitchen equipment capacity, opt for multiple containers if necessary, and adjust freezing times due to increased volume.

For larger batches, keep in mind potential freezer space requirements and consider investing in deeper storage options.

Timing adjustments might be needed, with careful attention paid to mixing and folding for consistency.

Nutritional Deep Dive


This dessert, though indulgent, provides a balanced macronutrient profile of carbohydrates, fats, and proteins from both dairy and candy.

Caramel, chocolate, and peanuts contribute micronutrients like calcium, magnesium, and essential fatty acids, albeit consumed in moderation for a healthier treat.

Consider portion size mindful of calorific content, while exploring healthier substitutes like reduced sugar options for lighter indulgence.

The satisfaction from this dessert can support dietary balance when shared among guests, mindful of daily intake recommendations.

Dietary Adaptations


For a gluten-free version, use gluten-free cookie dough and ensure no cross-contact with flour in your kitchen.

Dairy-free can be achieved using almond or soy-based ice cream alternatives, with taste adjustments as needed.

Nut allergies can be managed by replacing Reese’s with nut-free chocolate options and opting for seed butter alternatives.

A vegan adaptation is accessible through plant-based cookie dough, dairy substitutes, and ensuring all chocolate ingredients meet vegan criteria.

Troubleshooting Guide


If texture becomes too icy, increase the cream content for a smoother feel. If lacking flavor balance, adjust sweeteners or increase vanilla.

Incorrect temperature can lead to melting issues; always maintain a well-chilled environment and avoid overhandling during preparation.

For equipment challenges, use a sturdy mixing bowl and a reliable freezer setting to ensure even results.

Timing concerns arise mostly during mixing; patience and proper technique help avoid rushed textures.

Adapt ingredient substitutions for diet, taking care not to disrupt the flavor balance with overwhelming changes.

Recipe Success Stories


Community feedback highlights the recipe’s adaptability and the happiness it brings to various occasions. Variations included local brand adjustments and décor-inspired presentations.

Local adaptations have inspired both culinary creativity and discoveries of new flavor pairings, showcasing the dynamic and evolving nature of this recipe.

Photography tips from readers recommend capturing the vibrant colors of candy pieces against the creamy backdrop, focusing on close-ups for visual appeal.

Reader suggestions have led to beautiful innovations, such as themed ice cream bars and seasonal flavor twists, enriching the original concept.

Frequently Asked Questions

Q: Can I use a different type of candy?

A: Certainly! Feel free to experiment with your favorite candies. Just be mindful of the sweetness and texture they bring to the ice cream.

Q: How do I prevent the ice cream from becoming too hard?

A: Allow the ice cream to soften slightly before serving. You can also add a tablespoon of alcohol like vodka to the base to maintain softness.

Q: Is an ice cream maker necessary?

A: While it isn’t mandatory, an ice cream maker ensures a smoother texture and even freezing, offering a professional touch.

Q: Can I reduce the sugar content?

A: Yes, opt for sugar-free or reduced sugar candy alternatives, and consider adjusting the base sweetness to your liking.

Q: What’s the best way to store leftovers?

A: Store leftovers in a tightly sealed, shallow container to retain flavor and avoid freezer burn, placed in the coldest part of the freezer.

Additional Resources


Explore related recipes like Chocolate Fudge Brownie Ice Cream for more decadent delights, or delve into ingredient insights with our guide to perfect homemade cookie dough.

For inspiration on techniques, check our step-by-step ice cream making tutorials, ideal for mastering creamy textures.

Consider our equipment guide for insights into the best ice cream makers, ensuring you achieve perfect results every time.

Seasonal variations are explored in our summer dessert guide, providing ideas for using fresh summer fruits in ice cream recipes, offering natural sweetness and acidity.

Join the Conversation


Join us on social media to share your ice cream creations. Use #IceCreamExtravaganza for a chance to be featured. Discover photography tips for capturing stunning dessert shots, ideal for sharing your delicious results with the community.

Leave a comment or review after trying this recipe, sharing your thoughts, adaptations, or any questions with our community of dessert enthusiasts and home bakers alike.

The Recipe

Snickers & Reese’s Cookie Dough Ice Cream Extravaganza

Serves: 8

Prep Time: 20 mins

Cook Time: 0 mins

Total Time: 20 mins + chilling

Kitchen Equipment Needed

  • Mixing bowls
  • Spatula
  • Chopping board
  • Knife
  • Airtight container
  • Optional: Ice cream maker

Ingredients

  • 1 cup heavy cream
  • 1 cup whole milk
  • 1/2 cup sugar
  • 1 tsp vanilla extract
  • 1 cup chopped Snickers bars
  • 1 cup chopped Reese’s cups
  • 1 cup edible cookie dough
  • 1/2 cup chocolate chips

Directions

  1. In a large bowl, mix the heavy cream, whole milk, sugar, and vanilla extract until well combined.
  2. If using an ice cream maker, pour the mixture into the machine and churn according to manufacturer’s instructions.
  3. While the base churns, chop Snickers bars, Reese’s cups, and prepare the cookie dough.
  4. Fold in the chopped candy bars, cookies dough, and chocolate chips into the churned ice cream, ensuring even distribution.
  5. Transfer the mixture into an airtight container and freeze for at least 4 hours or until firm.
  6. Before serving, let the ice cream sit at room temperature for a few minutes for easier scooping.

Recipe Notes

  • Feel free to substitute with different candies based on preference.
  • Ensure cookie dough is specifically labeled as “edible” for safety, due to raw ingredients.
  • For a thicker consistency, reduce milk quantities appropriately.