Indulge your sweet tooth with our delicious and irresistible dessert recipes! Whether you’re craving decadent chocolate treats, fruity delights, or creamy, dreamy confections, we have something for every occasion.
From classic cakes and homemade cookies to no-bake desserts, rich cheesecakes, and festive holiday treats, our recipes are perfect for special celebrations or everyday sweet cravings.
Need something quick? Try our easy, fuss-free desserts that come together in no time. Whether you love warm baked goods, refreshing frozen sweets, or nostalgic comfort desserts, these recipes are sure to bring a little extra joy to your day! 🍰🍫🍪
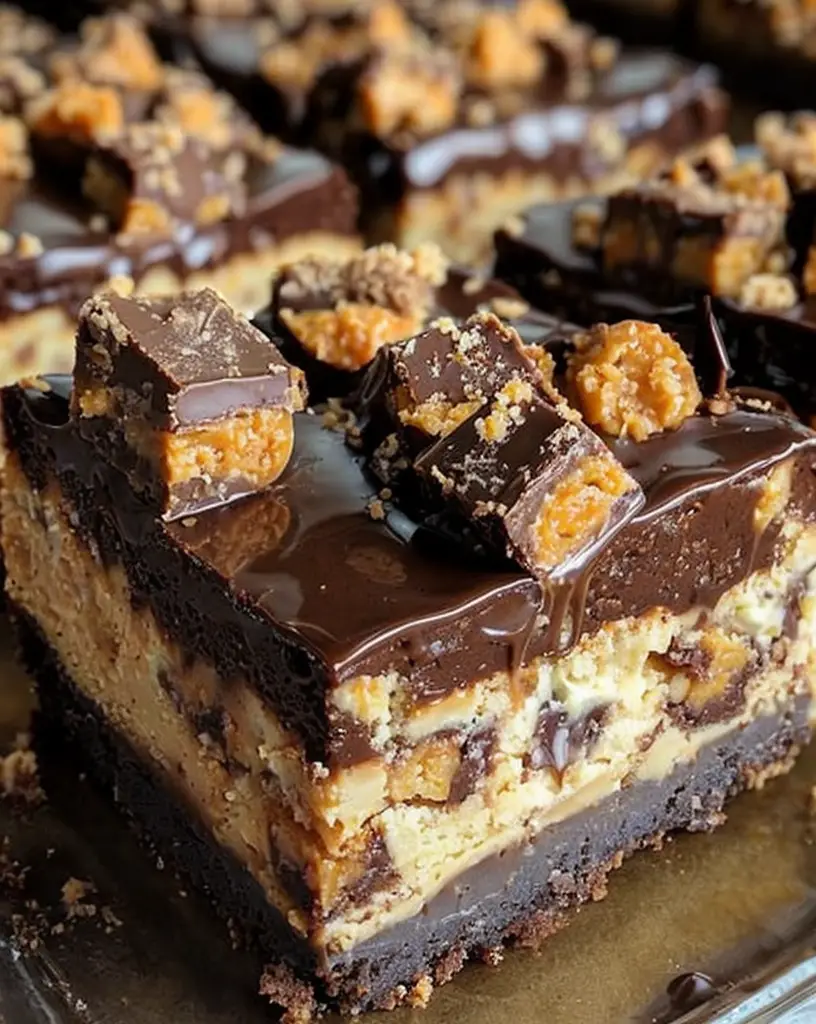
Indulge in Delicious Reese’s Butterfinger Cheesecake Bars Recipe
Reese’s Butterfinger Cheesecake Bars: A Dreamy Dessert Delight
⚖️
Difficulty
Medium
⏲️
Prep Time
30 mins
🕒
Cook Time
45 mins
⏱️
Total Time
75 mins
🍽️
Servings
12
If you’re a dessert lover, these Reese’s Butterfinger Cheesecake Bars are an irresistible treat you must try. Imagine the creamy decadence of cheesecake mingling with the peanut-buttery goodness of Reese’s and the crunchy layers of Butterfinger—this dessert takes indulgence to a whole new level. Perfect for family gatherings or just a treat-yourself moment, these bars are designed to please every palate with their rich flavors and delightful textures.
Every bite of Reese’s Butterfinger Cheesecake Bars melts in your mouth, leaving a lingering sweet, nutty flavor that is simply unforgettable. With layers of smooth cream cheese, crunchy candy bits, and a buttery graham cracker crust, these bars promise a rollercoaster of flavor. They’re ideal as a show-stopping finish to any meal or as a delightful companion to an afternoon coffee.
Quick Recipe Highlights
Flavor Profile: A harmonious blend of sweet cream, rich chocolate, and nutty peanut butter.
Texture: Creamy, smooth cheesecake with delightful crunchy candy bits throughout.
Aroma: Inviting scents of roasted peanuts and sweet chocolate.
Visual Appeal: A picture-perfect dessert with distinct layers and candy toppings.
Skill Level Needed: Moderate skill level required for creating and baking the layers perfectly.
Special Equipment: Requires a 9×13″ baking pan, mixer, and spatula.
Recipe Overview
Difficulty Level: Medium—this recipe involves several steps, including crafting a cheesecake layer and candy topping.
Category: Dessert, Snack
Cuisine: American-inspired with influences from classic candy bars.
Cost: Moderate, primarily due to candy and cheese ingredients.
Season: Perfect year-round, with a special fit for holiday gatherings.
Occasion: Suitable for any sweet-toothed occasion, especially parties and family reunions.
Why You’ll Love This Recipe
These Reese’s Butterfinger Cheesecake Bars perfectly balance taste and texture, making them a go-to dessert for any chocolate-peanut butter enthusiast. The creamy cheesecake layer contrasts with the candy’s crunchiness, creating an unforgettable treat. Plus, the recipe is straightforward and allows even a novice baker to achieve professional results. Not only do these bars taste divine, but they also hold decent nutritional value when enjoyed in moderation, providing a satisfying treat without guilt. Hosting parties becomes easier with a dessert that doubles as an engaging and delicious centerpiece.
Historical Background and Cultural Significance
The combination of cheesecake and candy bars is a modern twist on classic desserts, celebrating innovations in flavor mixing. Cheesecake, a beloved dessert with origins tracing back to ancient Greece, meets the candy bar, an American staple introduced in the early 20th century. Through the years, this blend of flavors has become a testament to the creativity and adaptability of American cuisine, representing a cultural blend of nostalgia and modern indulgence.
Ingredient Deep Dive
Cream cheese, the core of any cheesecake, offers richness and a smooth texture. It holds cultural significance as a staple in both sweet and savory dishes globally and is known for its high-fat content, contributing creaminess. Store it in the fridge to maintain its texture, and ensure it’s soft before using for better blending.
Butterfinger provides a unique crunch with its flaky, peanut-buttery layers. Originating in the United States in the 1920s, it has been a beloved candy for generations. Its brittle texture compliments soft desserts like cheesecake, giving a playful crunch in every bite.
Common Mistakes to Avoid
Overmixing the cheesecake batter can cause it to crack during baking. Mix until just combined.
Using ingredients directly from the refrigerator can lead to an uneven texture. Allow cream cheese to soften first.
Baking at incorrect temperatures can affect texture and structure. Always preheat your oven.
Skipping the cooling process can make cutting clean bars difficult. Patience yields the best slices.
Oversweetening the recipe can cause loss of balance. Stick to the recipe’s sugar ratios.
Not properly lining the pan can make removal difficult. Ensure even parchment paper coverage for easy lift-out.
Ignoring glossy appearance or jiggle cues in baking can lead to undercooked centers. Bake until edges are set but center slightly jiggles.
Incorrect candy proportions may impact bar stability. Follow the recommended candy amounts for best results.
Essential Techniques
Creating a smooth cream cheese base is essential for these bars. Allow the cheese to reach room temperature for smooth blending, preventing lumps. Mixing involves careful folding to maintain airiness without over-beating, preserving a light, creamy texture. The technique of baking to achieve a gentle jiggle indicates readiness, ensuring a firm yet tender bite.
Pro Tips for Perfect Reese’s Butterfinger Cheesecake Bars
– Use full-fat cream cheese for a richer texture.
– Substitute different candies for a customized flavor.
– Chill bars overnight for improved flavor and easier slicing.
– Line the baking dish with parchment paper to lift bars easily.
– Top with extra candy pieces before serving for eye appeal.
– Allow bars to cool completely for the best structural integrity.
Variations and Adaptations
Experiment with seasonal candies for added holiday flair or substitute gluten-free graham crackers to accommodate gluten sensitivities. Indulge keto-friendly options with almond flour crusts, replacing sugar with suitable substitutes. Adjusting texture is simple: reduce candy chunks for smoother bites or replace Reese’s with other nut butter candies for diverse flavors.
Serving and Presentation Guide
For an elegant dessert, serve each bar neatly trimmed with a hint of chocolate shavings atop. Consider plating on decorative dessert plates and accompany with a scoop of vanilla ice cream to further elevate each serving. A drizzle of chocolate sauce can amplify the visual and flavor appeal dramatically.
Wine and Beverage Pairing
Pair these cheesecake bars with a sweet dessert wine like a late harvest Riesling to enhance their nutty undertones. For a non-alcoholic option, a tall glass of iced coffee balances the sweetness. Medium-roast coffee offers a slightly bitter contrast that complements the sweet, rich indulgence of the bars.
Storage and Shelf Life
Store leftover cheesecake bars in an airtight container in the fridge to maintain their freshness and prevent absorption of other odors. They can last up to a week refrigerated. For longer storage, freeze individual portions wrapped in foil and placed in a ziplock bag; thaw in the fridge before serving.
Make Ahead Strategies
Prepare the cheesecake bars a day in advance, allowing flavors to meld and textures to settle. This allows for an easy, stress-free dessert on the day of serving. Assemble all components, then store in the fridge until needed, reducing last-minute kitchen rush.
Scaling Instructions
Doubling the recipe is straightforward; use a larger pan to ensure even cooking, or bake in two batches. Adjust the baking time, monitoring closely, to avoid overcooking. Store extra servings in the fridge for quick desserts on demand, maintaining their delicious integrity.
Nutritional Deep Dive
These cheesecake bars encompass a balance of macros with carbohydrates, proteins, and fats from both the candy and cheese components. Despite their indulgence, they provide a satisfying treat experience, contributing to a moderate caloric intake when portioned appropriately across serving recommendations.
Dietary Adaptations
For gluten-free enjoyment, substitute the graham cracker base with a mixture combining almond flour and ground nuts. Vegan options utilize plant-based cream cheese and egg substitutes for the filling, offering a compassionate take without compromising flavor or texture integrity.
Troubleshooting Guide
Common issues like over-baked edges and unset centers stem from uneven baking and over-mixing. Remedy by toggling heat settings and monitoring jiggle-test success before cooling. Replace exact measurements with approximate guesses to maintain recipe balance.
Recipe Success Stories
Readers have shared their enthusiasm for these bars, highlighting their adaptability and ease of preparation as key triumphs. Success stories emphasize achieving professional-bar results while inviting creative ingredient swapping for personal touches aligning to dietary needs.
Frequently Asked Questions
Can I use low-fat cream cheese?
Yes, but with reduced richness, they may slightly alter texture.
What if my cheesecake cracks?
Ensure a water bath is used for even baking, avoiding over-beating.
How long can I keep these bars?
Individually frozen portions last up to three months.
Can I replace Butterfinger?
Alternatives include chopped peanuts or different candy varieties.
Top with varied chocolate shavings or caramel drizzle for extra flair.
Why use parchment in baking?
Lines prevent sticking, enabling easy removal and cleaner slicing.
What size pan works best?
Use a 9×13″ pan for ideal layering height and consistent portions.
Can they be frozen fully prepared?
Yes. Fully prepare and freeze between wax paper for extended storage.
Are these adaptable to other candy varieties?
Absolutely! Play with textures and flavors using similar options.
What’s the best way to reheat after freezing?
Thaw overnight in the fridge, preserving integrity and flavor nuances.
Additional Resources
Explore related recipes pushing cheesecake boundaries with candy infusions, embracing texture experiments and cultural fusions. Delve into guides outlining cream cheese’s culinary journey and varied uses adding richness across sweet/savory divides.
Join the Conversation
Share experiences and photos of Reese’s Butterfinger Cheesecake Bars on social media to connect with fellow enthusiasts. Discuss and review creative adaptations and join a community sharing a passion for deliciously innovative dessert solutions.
The Recipe
Reese’s Butterfinger Cheesecake Bars
Serves: 12
Prep Time: 30 mins
Cook Time: 45 mins
Total Time: 75 mins
Kitchen Equipment Needed
9×13″ baking pan
Mixing bowls
Electric mixer
Spatula
Parchment paper
Ingredients
1 1/2 cups graham cracker crumbs
1/4 cup granulated sugar
1/2 cup unsalted butter, melted
3 8-oz packages cream cheese, softened
1 cup granulated sugar
3 large eggs
1 tsp vanilla extract
1 cup Reese’s Peanut Butter Cups, chopped
1 cup Butterfinger bars, chopped
Directions
Preheat your oven to 325°F (165°C) and line a 9×13″ baking pan with parchment paper.
Combine graham cracker crumbs, sugar, and melted butter, then press into the bottom of the prepared pan.
Bake crust for 10 minutes and then set aside to cool slightly.
In a large bowl, beat cream cheese and sugar until smooth.
Add eggs one at a time, beating after each addition, then mix in vanilla.
Fold in Reese’s and Butterfinger pieces, then pour mixture over the cooled crust.
Bake cheesecake for 35 minutes or until edges are set and center slightly jiggles.
Allow bars to cool completely in the pan on a wire rack, then refrigerate for at least 3 hours before slicing.
Recipe Notes
Ensure cream cheese is fully softened to simplify mixing.
For added flair, sprinkle extra Reese’s or Butterfinger pieces before serving.
Chill overnight for easiest slicing and best texture.
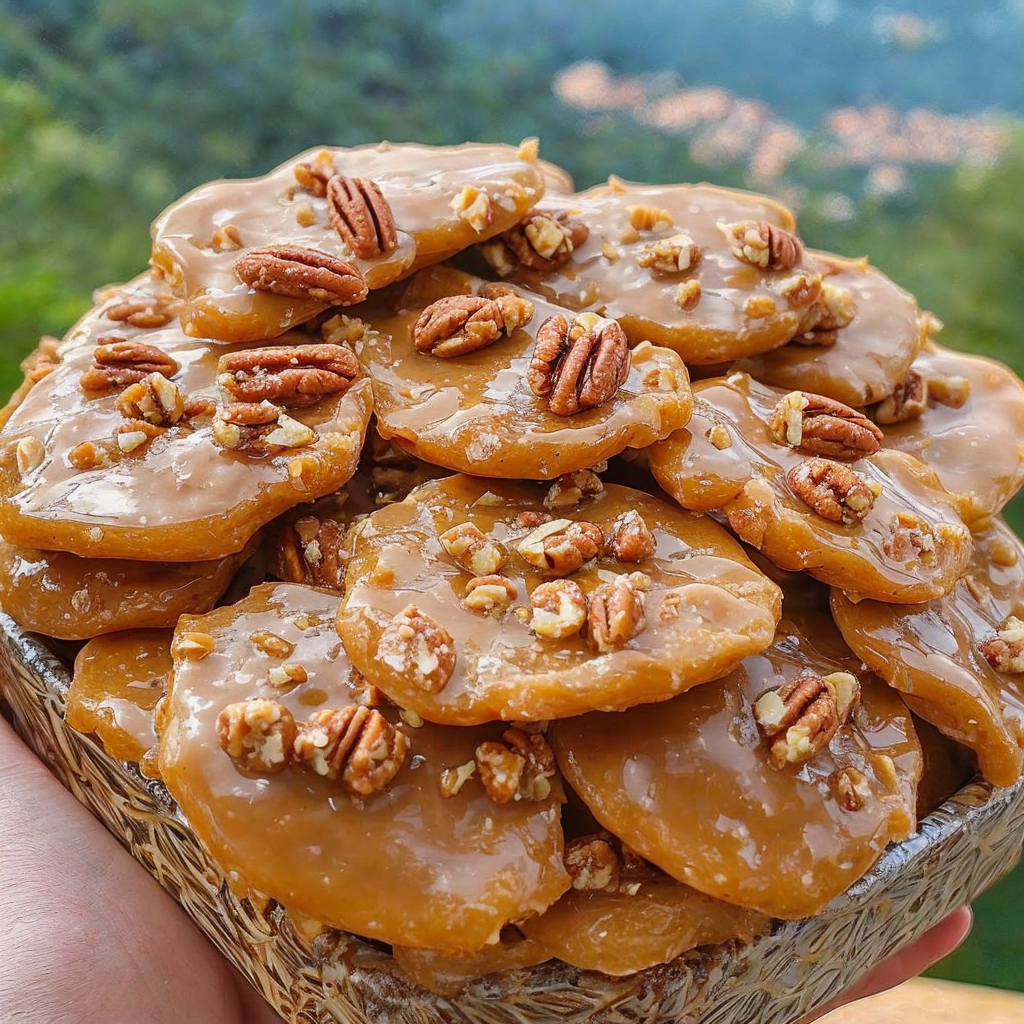
Irresistible New Orleans Pecan Pralines: A Sweet Southern Classic
New Orleans Pecan Pralines: A Sweet Southern Delight
⚖️
Difficulty
Easy
⏲️
Prep Time
10 mins
🕒
Cook Time
20 mins
⏱️
Total Time
30 mins
🍽️
Servings
24 pralines
New Orleans Pecan Pralines offer a tantalizing taste of the rich flavors of Southern traditions. These sweet confections have a creamy, caramel-like base combined with the nutty crunch of pecans, providing a melt-in-your-mouth experience. As you prepare this classic recipe, you’ll enjoy the irresistible aromas that fill your kitchen, transporting you to the heart of Louisiana where pralines are a beloved delicacy. Whether you’re recreating memories of past trips to New Orleans or experiencing this sugary treat for the first time, these pecan pralines promise to be a delightful addition to any dessert table.
Quick Recipe Highlights
Flavor Profile: The New Orleans Pecan Pralines are a harmonious blend of buttery caramel and nutty pecans, with a subtle hint of vanilla enhancing their sweetness.
Texture: Each bite reveals a delightful contrast between the smooth, creamy sugary base and the crisp, crunchy pecans.
Aroma: As they cook, the pralines release a warm and inviting scent of caramelized sugar, butter, and toasted nuts.
Visual Appeal: Golden brown and studded with pecans, these pralines present a rustic yet charming appearance, often reminiscent of the streets of New Orleans.
Skill Level Needed: This recipe is designed to be easy, making it accessible even to beginner candy-makers, with simple steps and easily achievable results.
Special Equipment: A candy thermometer is handy to ensure the sugar reaches just the right temperature for the perfect praline consistency.
Recipe Overview
Difficulty Level: Easy – By maintaining a gentle temperature and following the straightforward steps, creating these pralines is a stress-free culinary adventure, perfect for both novices and seasoned cooks.
Category: Desserts – These pralines are a sweet treat fit for dessert buffets and casual snacking alike, capturing the essence of easy yet decadent sweets.
Cuisine: Southern – Born out of the rich culinary traditions of New Orleans, these pralines are an integral part of Southern confectionery delights.
Cost: Affordable – Using commonly found ingredients, this recipe offers a budget-friendly route to enjoying a taste of New Orleans at home.
Season: Ideal for all year round – Whether it’s a festive holiday delight or a summer fair staple, pralines transcend seasonal limitations.
Occasion: Perfect for gatherings and gifts – Their sweetness makes pralines a cherished addition to holiday tables, bridal showers, and homemade gift baskets.
Why You’ll Love This Recipe
The New Orleans Pecan Praline recipe is a tantalizing fusion of taste and texture. The way the caramelized sugar dissolves in your mouth only to meet the hearty crunch of pecans is a sensation treasured by sweet-tooth enthusiasts. With this recipe’s simplicity, you have the convenience of crafting delicious confections without complex instructions or rare ingredients. Despite being a decadent treat, pralines offer nutritional benefits like antioxidants from the pecans, making it a sweet indulgence you can moderately enjoy. Sharing homemade pralines can become the centerpiece of your social gatherings, sparking conversations around this classic Southern sweet. Finally, the accessibility of the ingredients and affordability ensure that creating these pralines is an enjoyable endeavor for both experienced cooks and kitchen newcomers.
Historical Background and Cultural Significance
The origins of New Orleans Pecan Pralines date back to the 18th century when French settlers brought the original praline recipe to Louisiana. Initially made with almonds and white sugar, the recipe evolved in New Orleans by substituting pecans, indigenous to the region, and using brown sugar to create a smoother texture. Pralines hold cultural importance as they represent the inventive spirit of Creole cuisine, blending European techniques with locally available ingredients. Throughout history, pralines have evolved, influenced by African-American culinary traditions, including the shift to milk-based pralines for a creamier consistency. Across different regions, pralines have taken on various forms; in Texas, for instance, they are often made crunchier than the traditionally creamy New Orleans versions.
Ingredient Deep Dive
Sugar forms the body of the praline, and its choice (brown or white) can influence the flavor depth, with brown sugar adding a molasses hint. Its creamy textural transformation during cooking is key to praline success. Pecans are not only a nod to the local bounty of Louisiana but also provide robust texture and a rich profile of antioxidants and healthy fats. When selecting pecans, look for fresh and unshelled ones stored in a cool area to maintain their flavor integrity. Melted butter’s creamy contribution amplifies the praline’s smoothness. To achieve the best results, choose high-fat, unsalted butter and store it at a consistent temperature to avoid separation.
Common Mistakes to Avoid
Overcooking the sugar mixture can result in hard pralines; use a candy thermometer to monitor accurately.
Skipping the cooling phase can cause the pralines to spread too much; be patient and allow them to cool naturally.
Using low-quality pecans can yield bitter notes; invest in fresh, high-quality nuts for the best flavor.
Not stirring frequently enough could lead to uneven texture; maintain even stirring for a consistent mixture.
Adding pecans before reaching the right temperature can cause them to lose their crunch.
Omitting vanilla extract decreases the aromatic flavor profile; it’s an essential addition for depth.
Incorrectly measuring ingredients can throw off the delicate sugar balance, impacting texture.
Pouring onto non-parchment surfaces leads to sticking; always use parchment paper.
Essential Techniques
Understanding sugar stages is crucial; achieving the soft ball stage ensures your pralines have the ideal texture. Accurate temperature measurement with a candy thermometer is a skill worth mastering for consistently successful results. Stirring is vital to prevent burning and incorporate butter evenly; hone this technique by practicing gentle, continuous stirring. Recognize visual cues such as the mixture thickening and its glossy sheen diminishing, indicating readiness for the nut addition.
Pro Tips for Perfect New Orleans Pecan Pralines
Ensure pecans are toasted to intensify their flavor before adding; this simple step elevates the pralines’ taste. Always use a heavy-bottomed pot to maintain even heat distribution and prevent hotspots that can scorch sugar. Practicing mise en place (everything in its place) helps streamline the cooking process and ensures you can focus on fine-tuning the pralines. Consider experimenting with a dash of sea salt for a salted caramel allure. Patience is key; allow the mixture to cool slightly before spooning the pralines to ensure a thicker consistency. Store pralines in an airtight container to maintain freshness for extended periods.
Variations and Adaptations
New Orleans pralines may be adapted by incorporating regional nuts, such as walnuts or almonds, for a distinct variation. Embrace seasonal changes by adding spices like cinnamon or nutmeg during the winter holidays. For dietary needs, substitute standard butter with coconut oil to create a vegan-friendly option. For a flavor twist, introduce maple syrup for a richer, earthier sweetness. Texturally, add a chewy component by incorporating diced dried fruits like cranberries. Presentation alternatives include forming praline pieces into bars or cutting them into shapes while they’re setting.
Serving and Presentation Guide
When serving pralines, consider attractive plating on decorative platters, showcasing their rustic charm with tidy arrangements. Garnishing with a sprinkle of powdered sugar adds a festive touch and highlights their homemade appeal. Traditionally, pralines may be served alongside a steaming cup of chicory coffee, balancing bitterness with sweetness. Opt for modern presentations by crumbling pralines over ice cream or pancakes. Temperature serves a role in enjoyment; they are best served at room temperature for optimal texture. Practicing portion control ensures each guest savors these special treats without overwhelming sweetness.
Wine and Beverage Pairing
For wine pairings, consider a late harvest Riesling whose sweetness complements the pralines, while its acidity refreshes the palate. Non-alcoholic alternatives like milk offer a classic pairing, providing a creamy counterpoint to the nutty pralines. For coffee enthusiasts, serve alongside a robust French roast, whose rich, full-bodied flavor contrasts with the sugary pralines. Ensure beverages are appropriately chilled or heated to provide a harmonious serving experience. Offer pralines at the start or end of an event with a curated drink to enhance their enjoyment.
Storage and Shelf Life
Store your New Orleans Pecan Pralines in a cool, dry place using airtight containers to maintain their crunchy texture. Keep pralines away from direct sunlight and fluctuating temperatures to avoid compromising their consistency. Choose containers like tin boxes or glass jars lined with parchment paper for added protection. Be aware of signs of spoilage, such as a stale scent or unmixed sugar. To reheat, use a low oven setting to gently warm, restoring their freshly made texture. For longer storage, freezing pralines in layers separated by parchment is effective.
Make Ahead Strategies
Craft your pralines ahead of time by preparing the sugar and pecan mixture a day before serving. Store intermediates separately until final assembly to maintain optimum freshness. Assess the quality impact of early preparation; typically, pralines retain their flavor and texture well if stored correctly. Assemble pralines just before serving for ideal presentation. Reheating, when necessary, should be done in gentle heat to preserve shape and texture. Always introduce fresh elements, like a sprinkle of nuts before serving, to revitalize appearance and taste.
Scaling Instructions
Halve the recipe by accurately adjusting each ingredient to maintain flavor balance and texture. Increasing the batch requires proportionally larger pots to ensure even cooking, and attention to spreading on larger baking sheets. Cooking times may vary slightly; observe the mixture closely for correct consistency. With increased yields, consider using multiple containers for storage to prevent overcrowding and sticking. When scaling, ensure even distribution of pecans and adherence to cooking techniques for consistency across servings.
Nutritional Deep Dive
Each praline offers a satisfying mix of macronutrients, primarily carbohydrates from the sugar and fats from pecans. Micronutrients like zinc and magnesium in pecans contribute to pralines’ nutritional profile, offering health benefits like improved immune function. For dietary considerations, monitor portion sizes due to the high sugar content. Each praline is ideal for indulgent moments, providing approximately 100-150 calories per piece. Maintaining moderation is key for weight management. When consumed as part of a balanced diet, pralines provide a unique treat that aligns with personal nutritional goals.
Dietary Adaptations
For a gluten-free treat, ensure all ingredients are gluten-free certified, as pecans are naturally so. Achieving a dairy-free praline is possible by substituting butter with coconut oil, maintaining creamy texture and flavor. Vegan transformations can utilize plant-based sugars like maple syrup in place of refined sugar. Embrace a low-carb or keto diet by using sugar alternatives like erythritol or stevia. Paleo adaptations might involve combining coconut sugar with honey for a naturally sweetened version. Sensitivity to FODMAPs can be addressed by following low-FODMAP sweeteners and practicing portion control.
Troubleshooting Guide
When dealing with sugary texture, rework the cooking time to prevent crystal grain formation, ensuring a smooth finish. Unbalanced flavor might be corrected by adjusting vanilla or salt during preparation. Temperature control issues require accurate thermometer use; practice maintaining consistent boiling to achieve desired consistency. For equipment challenges, using heavy-based pans ensures even heat distribution and reduces burning risk. Substitute unavailable ingredients with similarly functioning ones, like using honey for corn syrup. Timing concerns when setting pralines can be handled by observing cooling stages and adjusting technique accordingly.
Recipe Success Stories
Enthusiastic hobbyists and seasoned cooks alike share their creations, where the New Orleans Praline recipe emerges as a community favorite. Readers highlight successful flavor variations, like adding cinnamon or dark chocolate chips, enhancing the original version for unique touches. Adaptation stories reveal gluten-free and vegan pralines becoming family-approved testaments to the recipe’s versatility. Suggestions to serve pralines on special occasions have led to them becoming star attractions at baby showers and Thanksgiving dinners. Shared photography tips encourage presentation finesse, inspiring a visual narrative of Southern confectionery on social media.
Frequently Asked Questions
Can I use other nuts than pecans for this recipe? Yes, almonds or walnuts make excellent substitutes, altering flavor slightly while maintaining a satisfactory crunch.
What’s the secret to avoiding crystallization in pralines? Maintaining a steady temperature and avoiding excessive stirring during the cooling phase helps prevent crystallization.
How do I know when the praline mixture is ready? The mixture reaches the soft ball stage when it forms pliable threads in cold water, indicating readiness for nut addition.
Can I make these without a candy thermometer? It’s possible, but challenging; achieving the perfect texture relies on precise temperature control for which a thermometer is recommended.
What’s a quick fix if my pralines turn out too hard? Microwaving on low power briefly can soften texture, but prevention through careful cooking is ideal.
Can I freeze pecan pralines? Absolutely! Wrap them individually in parchment and store in a sealed bag, thawing before serving to retain texture.
Are there any toppings I can add for extra flair? A sprinkle of sea salt or drizzle of chocolate adds an elegant touch, complementing the pralines’ sweetness.
What’s the best storage method for pralines? An airtight container in a cool space like a pantry extends shelf life while preserving flavor.
How do pralines differ from fudge? Fudge is denser and creamier due to milk components, while pralines possess a crumbly, sugary crust with robust pecan flavoring.
How can children help make pralines? Under supervision, children can assist in measuring and stirring, engaging safely in the creative process.
What’s the difference between Cajun and Creole pralines? Cajun pralines sometimes feature spices like cayenne, adding a unique, regional twist whereas Creole varieties traditionally remain sweet or nutty.
Additional Resources
For further exploration, dive into Southern sweets with related recipes like beignets, showcasing powdered sugar coatings for your dessert repertoire. Explore technique guides on sugar work to master caramelization, elevating pralines and beyond. Immerse in ingredient stories, learning the history behind pecans, sharing their role in traditional American desserts. For those interested in cookware, consider equipment reviews diving into pan durability and oven stability. Seasonal variations inspire ingredient swaps like sun-dried fruits versus pecan nuts, adapting pralines to seasonal bounty.
Join the Conversation
Engage with a community of culinary enthusiasts by sharing your praline experiences on social media platforms, fostering meaningful dialogue. Discover photography tips that help capture the warm hues and rustic elegance of pralines, adding artistic allure to your feed. Encouraging recipe reviews allows for rich discussions on adaptation successes and flavor combinations. Community engagement can build networks of praiseworthy home cooks exchanging praline secrets and serving ideas. Invite participants to share their unique cultural takes on praline recipes, celebrating the collective enjoyment of this iconic dessert.
The Recipe
New Orleans Pecan Pralines
Serves: 24 pralines
Prep Time: 10 mins
Cook Time: 20 mins
Total Time: 30 mins
Kitchen Equipment Needed
Heavy-bottomed saucepan
Candy thermometer
Wooden spoon
Baking sheet
Parchment paper
Ingredients
2 cups granulated sugar
1 cup packed light brown sugar
1/2 cup evaporated milk
1/2 cup unsalted butter
2 cups pecan halves
1 teaspoon vanilla extract
Directions
Line a baking sheet with parchment paper and set aside.
In a heavy-bottomed saucepan, combine granulated sugar, brown sugar, evaporated milk, and butter.
Cook over medium heat, stirring constantly, until the mixture reaches the soft ball stage (about 235°F on a candy thermometer).
Remove the saucepan from heat and stir in vanilla and pecans, stirring until the mixture thickens slightly.
Quickly drop spoonfuls of the praline mixture onto the prepared parchment-lined baking sheet.
Allow the pralines to cool completely before serving or storing.
Recipe Notes
For a deeper flavor, consider toasting the pecans lightly before combining them with the sugar mixture.
If the mixture begins to harden too quickly, rewarm it gently over low heat to continue spooning.
These pralines can be stored in an airtight container for up to two weeks at room temperature.
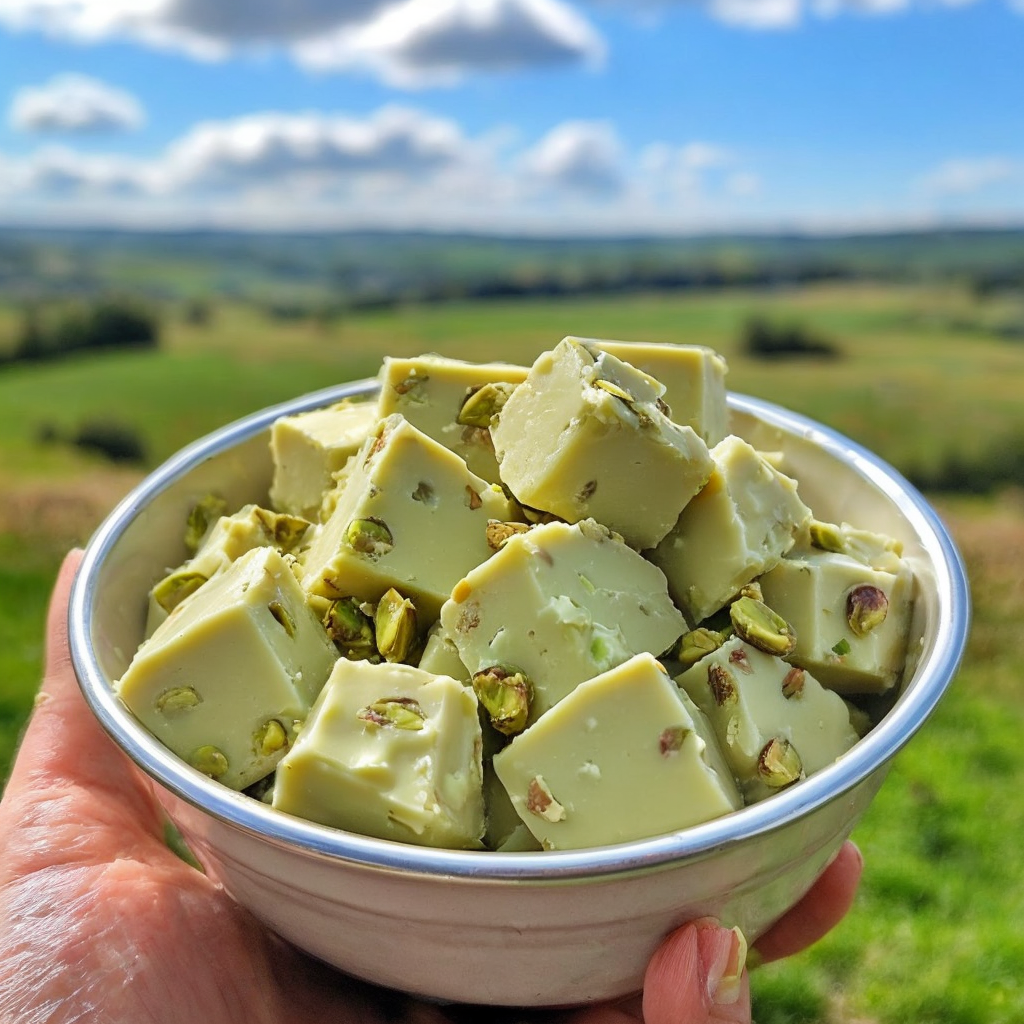
Irresistible Pistachio Fudge: Your Ultimate Sweet Delight Recipe
Pistachio Fudge: A Deliciously Nutty Delight
⚖️
Difficulty
Easy
⏲️
Prep Time
10 mins
🕒
Cook Time
5 mins
⏱️
Total Time
15 mins
🍽️
Servings
16
Indulge in the irresistible blend of creamy sweetness with crunchy pistachios that make up this Pistachio Fudge. Whether you’re a fudge aficionado or new to the delight of homemade treats, preparing this Pistachio Fudge recipe will be a journey through sumptuous textures and rich flavors. This delightful treat combines the nutty essence of pistachios with a creamy base to deliver a unique dessert experience that satisfies both the eye and the palate.
Strong pistachio notes paired with the rich creaminess of fudge create a perfectly balanced flavor profile, making this Pistachio Fudge a sensual indulgence. The preparation is surprisingly easy, making it an excellent choice for beginners and seasoned cooks alike. Let the allure of this Pistachio Fudge recipe transport you to a world of culinary wonder and delight.
Quick Recipe Highlights
Flavor Profile: The Pistachio Fudge offers a nutty, creamy taste with a perfect balance of sweetness and crunch from the pistachios.
Texture: This fudge boasts a smooth, creamy base contrasted by the delightful crunch of whole pistachios.
Aroma: The inviting, nutty aroma of roasted pistachios fills the air, enhancing the sensory experience.
Visual Appeal: The vibrant green of pistachios set against the soft fudge makes for an attractive and appetizing presentation.
Skill Level Needed: Ideal for all skill levels, this recipe requires basic cooking techniques that are easy to master.
Special Equipment: You’ll need a saucepan and a small baking dish or pan for setting the fudge.
Recipe Overview
Difficulty Level: Rated as easy, this Pistachio Fudge is simple to prepare. With clear steps and minimal equipment, it’s perfect for novice cooks.
Category: Positioned in desserts, this recipe is versatile enough to serve as a sweet treat for any occasion, from everyday indulgences to celebratory events.
Cuisine: Although a beloved American classic, the use of pistachios introduces a delightful Mediterranean twist to the traditional fudge.
Cost: With pistachios being the most premium ingredient, the cost remains moderate. Budget-friendly swaps can help manage expenses without compromising flavor.
Season: Ideal year-round, a particularly festive treat during the winter holidays, recalling warm gatherings and shared joy.
Occasion: Whether for gifting, dessert tables, or personal enjoyment, this Pistachio Fudge fits myriad occasions beautifully.
Why You’ll Love This Recipe
The Pistachio Fudge’s taste and texture make it a standout dessert. The creamy, melt-in-your-mouth base harmonizes with the nutty crunch of pistachios, offering a balanced, gourmet taste experience. Convenience is another drawing point—requiring minimal preparation and a short cooking time, this recipe is straightforward, yielding delectable results with little effort. Nutritionally, pistachios add a dose of protein and vitamins, creating a slightly more health-conscious indulgence.
For entertaining, Pistachio Fudge is a surefire crowd-pleaser that garners compliments both for its elegant presentation and delightful flavor. Economically, making it at home is cost-effective compared to specialty store-bought fudge, allowing for great flexibility in serving size and ingredient choice.
Historical Background and Cultural Significance
Fudge originated in the United States in the late 19th century, a timing coinciding with the rise of sugary confections. From its beginnings, it captured the affection of dessert lovers due to its rich texture and adaptable flavor profile. With Pistachio Fudge, the spectrum widens even more, bringing in the exotic touch of Mediterranean pistachios, revered for centuries for their distinct taste and vibrant color.
Esteemed in ancient cultures, pistachios have long held a place in desserts, merging easily into different culinary traditions. The regional variations of fudge and pistachio use demonstrate how merging traditions can create delightful innovations, with some regions adding spices or varying the nut selection.
Ingredient Deep Dive
Focusing on the star ingredient, pistachios have a literally rich history, believed to be one of the oldest flowering nut trees cultivated by humans. Originating from the Middle East, pistachios are cherished for their unique, buttery flavor and vibrant green hue.
Nutritionally, pistachios are lauded for their heart-healthy fats and high protein content. They provide a fantastic nutritional boost, especially when incorporated into sweet treats like fudge. When selecting pistachios, look for fresh ones with a vibrant green color for the best taste and appearance. Store them in an airtight container to maintain freshness, or freeze for longer shelf life.
Common Mistakes to Avoid
Skipping the lining of your baking dish can result in fudge sticking; make sure to line with parchment for easy removal.
Overcooking the fudge will make it grainy; careful timing is essential to keep it smooth.
Not stirring continuously when melting ingredients can lead to burning.
Ignoring ingredient temperatures might impede proper mixing; keep everything at room temperature before starting.
Using unsalted pistachios without adjusting salt content may lead to blandness; tweak seasoning as necessary.
Inadequate cooling time may result in fudge that doesn’t set properly; ensure full cooling for optimal texture.
Overloading with pistachios can throw off the texture balance; use recommended quantities for the best result.
Omitting a pinch of salt can cause the flavors to be overly sweet; ensure to balance the sweetness.
Rushing the melting process might cause uneven texture; melt over even, low heat for smoothness.
Forgetting to store in an airtight container leads to fudge drying out quickly; maintain freshness with proper storage.
Essential Techniques
Understanding the melting process is crucial as this ensures the fudge is smooth, not grainy. Use consistent low heat and constant stirring to prevent any scorching at the bottom of the pan, keeping the texture uniform and creamy.
Additionally, perfecting the setting process is vital. Let your fudge cool completely at room temperature before cutting, ensuring it holds its shape well and presents a professional finish when served.
Pro Tips for Perfect Pistachio Fudge
– Toast your pistachios lightly before adding them to intensify their flavor and provide an extra crunch.
– Use a candy thermometer to ensure you reach the correct soft-ball stage if you’re unsure about the timing.
– For cleaner cuts, use a sharp knife dipped in hot water before slicing.
– Add a little vanilla extract to your fudge mixture for an enhanced aroma and depth of flavor.
– A pinch of sea salt atop the finished fudge can enhance the overall flavor, balancing sweetness with a hint of savory.
– Allow the mixture to cool slightly before adding pistachios to ensure they remain evenly distributed, not sinking to the bottom.
Variations and Adaptations
Explore regional variations by incorporating Middle Eastern spices like cardamom for a unique twist. Adapt it seasonally by adding dried cranberries during the winter for a festive touch. Dietary modifications are achievable by utilizing vegan substitutes, such as plant-based condensed milk.
For those looking to explore flavor, consider adding a swirl of chocolate or caramel to alter the taste. Adjusting the fudge’s texture can be as simple as grinding pistachios for a smoother incorporation, producing a more subtle crunch. For presentation, use silicone molds for individual servings or create layers with contrasting flavors for a striking effect.
Serving and Presentation Guide
To present your Pistachio Fudge elegantly, cut it into uniform squares and arrange them neatly on a decorative plate. Garnish each piece with a single pistachio or a sprinkle of sea salt flakes for added visual appeal. For traditional accompaniment, consider pairing with a hot beverage such as coffee or spiced tea to balance the sweetness.
Modern serving suggestions include using it within a dessert platter or as part of a gift box, adding a personal touch to your offerings. When serving, ensure it’s at room temperature for the ideal texture, with portions suitably sized for ease of consumption.
Wine and Beverage Pairing
Pair your Pistachio Fudge with a light, sparkling wine such as Prosecco, which complements the sweetness without overwhelming the palate. For a non-alcoholic alternative, a robust black tea with a touch of spice works well, cutting through the richness of the fudge.
Coffee can also be a delightful pairing, especially a mild blend that enhances the nutty flavors without overpowering them. Serving the fudge at room temperature will ensure that both the texture and flavors are fully enjoyed.
Storage and Shelf Life
Store Pistachio Fudge in an airtight container at room temperature for up to a week. For longer storage, refrigeration is suitable and can extend its life for about two weeks. If you plan to freeze, wrap the fudge tightly in plastic wrap, then foil, maintaining its quality for up to three months.
Watch for signs of spoilage like changes in texture or aroma. For reheating, simply bring the fudge to room temperature and enjoy. Proper storage will preserve both flavor and texture, keeping it delicious until the last piece is enjoyed.
Make Ahead Strategies
Prepare your Pistachio Fudge in advance to save time for larger events. Assemble the ingredients and have them ready, storing in sealed containers to maintain freshness. Assembling the fudge can be done a day before serving, letting it set completely for the best texture.
If reheating slightly to soften, do so gently, ensuring the fudge doesn’t melt. Fresh elements like a pistachio garnish can be added just before serving, enhancing both taste and presentation.
Scaling Instructions
Need to adjust serving sizes? This Pistachio Fudge recipe scales well. To halve it, simply reduce ingredient quantities while maintaining the same technique and watch timing closely. Doubling it? Ensure your baking dish is large enough to accommodate and consider spreading it across two smaller dishes for even setting.
Additional equipment might include a larger saucepan for melting ingredients efficiently. Storage should be adjusted accordingly to ensure that each piece remains as fresh as possible when serving larger quantities.
Nutritional Deep Dive
The Pistachio Fudge offers a moderate calorie count, balanced by the nutritional profile of pistachios—rich in protein and healthy fats. It’s also a good source of dietary fiber, thanks to the nuts.
Portion control is key when indulging; consider pairing with other lighter desserts to create a balanced tasting experience. While this dessert isn’t low-calorie, enjoying small portions as part of a balanced diet allows you to indulge without guilt.
Dietary Adaptations
For gluten-free adjustments, ensure any additional components like chocolate chips are certified gluten-free. To make it dairy-free, swap traditional condensed milk with coconut or almond milk versions.
Vegan adaptations are straightforward using plant-based substitutes for all dairy products. Those on a low-carb or keto journey may wish to explore sugar-free sweeteners, ensuring to adjust proportions for taste and texture consistency without compromising the fudgy delight.
Troubleshooting Guide
Experiencing texture issues? Ensure all ingredients are well-mixed without overheating. For flavor imbalances, double-check ingredient measurements and taste as you go, adjusting spices or salt levels.
If you’re having trouble with temperature, invest in a reliable candy thermometer to track sugar melting phases accurately. Substitute ingredients carefully, maintaining the necessary consistency for perfect fudge. If hitting timing concerns, turn down heat to allow more control during the cooking process.
Recipe Success Stories
Our readers have shared countless success stories, often swapping ingredients based on availability and preference, such as almonds or walnuts for pistachios. Many have noted the joy shared when gifting this Pistachio Fudge during festive periods, showcasing its community value.
Experimentation with variations like adding chopped dried fruits has been a triumph, creating additional layers of flavor. Photography tips suggest using natural lighting to highlight the fudge’s characteristic sheen and vibrant nut color, enhancing its visual appeal in shared images.
Frequently Asked Questions
1. Can the fudge be made without nuts? Yes, simply omit the pistachios or replace them with nut-free extras like dried cranberries or chocolate chips.
2. What’s the best way to cut the fudge? Use a sharp knife warmed under hot water, ensuring each slice is clean and precise.
3. Can I use a different type of nut? Absolutely! Almonds or pecans make great alternatives, offering different flavor nuances.
4. Is this recipe suitable for vegans? By substituting dairy products with plant-based alternatives, the recipe becomes fully vegan-friendly.
5. How do I prevent fudge from being too soft? Ensure the mixture reaches the recommended temperature and allow sufficient cooling time to firm up.
6. Can it be stored at room temperature? Yes, in an airtight container for up to a week, but refrigerating extends its lifespan.
7. What chocolate works best? Semi-sweet or white chocolate complements the pistachios well, balancing the nutty flavor.
8. Can I freeze the fudge? Wrap securely in plastic and foil before freezing to maintain quality for up to three months.
9. How do I test for done-ness without a thermometer? Drop a bit of the mixture into cold water; it should form a soft ball when ready.
10. Can I use a microwave instead of stovetop? It’s possible, but lower power settings with frequent stirring are recommended for even cooking.
11. Are there any alternative flavor additions? A splash of almond extract or a hint of lemon zest can elevate flavors subtly.
12. How do I rescue overcooked fudge? Stirring in a bit of cream can salvage slight overcooking, restoring moisture to grainy fudge.
Additional Resources
For pistachio lovers, explore our Pistachio Ice Cream recipe, pairing delightfully with fudge. Technique guides on candy-making basics are invaluable for mastering the art of fudge creation. If seeking ingredient information, our comprehensive nut guide provides insights into flavor profiles and usage.
For equipment recommendations, browse our reviews on essential cookware, ensuring you have the tools to execute the perfect batch every time. Seasonal variations offer creative inspiration, prompting engagement with the ingredients available throughout the year.
Join the Conversation
Join like-minded enthusiasts on our social media platforms, sharing and showcasing your Pistachio Fudge creations. Utilize photography tips to capture your culinary work, sharing feedback and gaining praise from our vibrant community.
Leave reviews of the recipe, or offer potential tweaks for personalized variations. Engage with us, submitting your unique take on this delightful treat, contributing to a growing archive of Pistachio Fudge interpretations. Your creativity could inspire others, guiding fresh spins on this classic indulgence.
The Recipe
Pistachio Fudge
Serves: 16
Prep Time: 10 mins
Cook Time: 5 mins
Total Time: 15 mins
Kitchen Equipment Needed
Saucepan
Baking dish (8×8 inch recommended)
Mixing spoon
Knife for cutting
Measuring cups and spoons
Ingredients
2 cups white chocolate chips
1/2 cup sweetened condensed milk
1 cup pistachios, coarsely chopped
1 teaspoon vanilla extract
A pinch of salt
Directions
Line an 8×8 inch baking dish with parchment paper, leaving overhang for easy removal.
In a saucepan over low heat, melt the white chocolate chips with the condensed milk, stirring continuously until smooth.
Remove from heat and stir in the vanilla extract and pinch of salt.
Fold in the pistachios, reserving a few for topping.
Pour the mixture into the prepared dish, spreading evenly. Sprinkle the reserved pistachios on top.
Refrigerate until set, approximately 2 hours.
Cut into squares and serve at room temperature.
Recipe Notes
For a sweeter version, use milk chocolate instead of white chocolate.
Feel free to add a hint of almond extract for additional flavor depth.
If desired, swirl in some caramel for a flavor twist before setting.
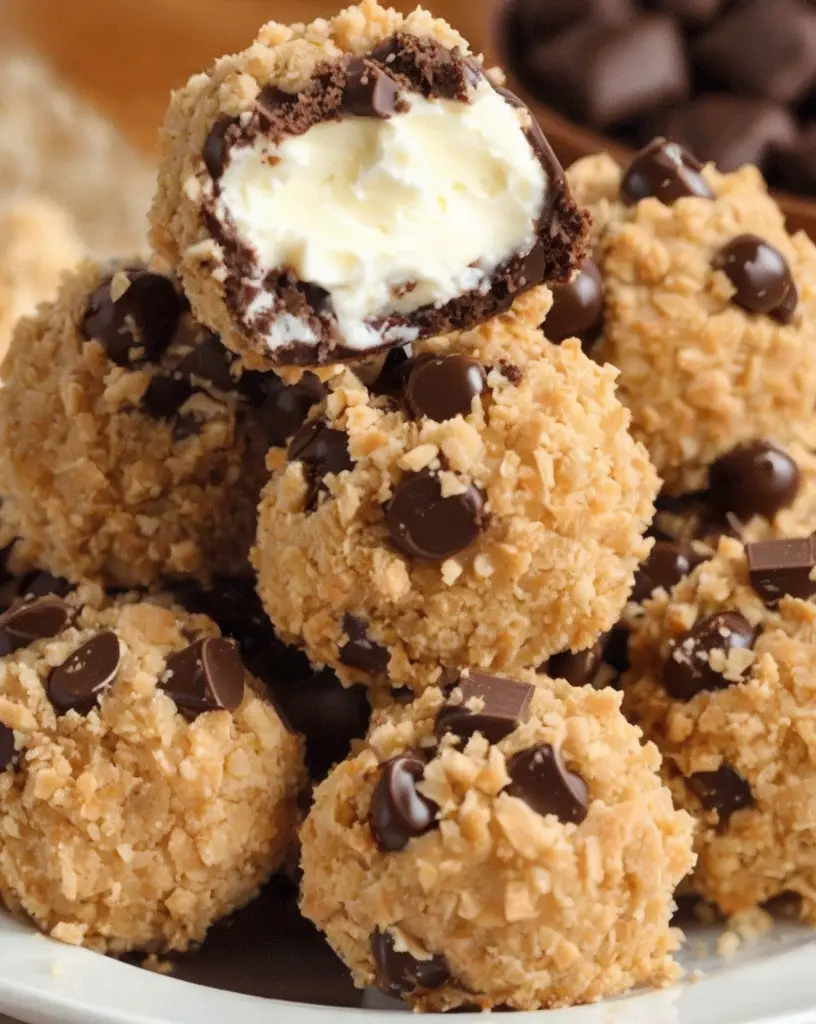
How to Make Easy Chocolate Cheesecake Crunch Truffles at Home
Easy Chocolate Cheesecake Crunch Truffles: A Deliciously Simple Delight
⚖️
Difficulty
Easy
⏲️
Prep Time
20 mins
🕒
Cook Time
10 mins
⏱️
Total Time
30 mins
🍽️
Servings
24 truffles
Easy Chocolate Cheesecake Crunch Truffles are the perfect treat for dessert lovers and chocoholics alike. These truffles blend the creamy richness of cheesecake with the bold flavor of chocolate and a satisfying crunchy texture. Whether you’re preparing a sweet gift or a quick holiday dessert, these truffles make an indulgent experience accessible and memorable.
The exciting harmony of flavors and textures sets these chocolate cheesecake crunch truffles apart. The creamy center, enveloped in a velvety chocolate shell, provides a taste of both decadence and simplicity in every bite. They’re not only easy to prepare but also offer visual appeal, thus making them an excellent choice for parties or intimate gatherings. The contrasting textures of smooth chocolate and surprising crunch will leave everyone reaching for just one more.
Quick Recipe Highlights
Flavor Profile: These truffles offer a balanced sweetness, with rich chocolate tones and a subtle tangy cheesecake flavor, perfectly tempered by a crunchy element.
Texture: The outer chocolate shell cracks delightfully to reveal a smooth, creamy filling, punctuated by occasional crunchy bites.
Aroma: Expect an enticing bouquet of cocoa with a hint of vanilla, immediately drawing attention upon presentation.
Visual Appeal: Coated in glossy chocolate, these truffles sparkle on any tray, begging to be chosen first.
Skill Level Needed: Perfect for beginners, the recipe involves basic kitchen techniques and easy assembly.
Special Equipment: A double boiler or microwave-safe bowl for melting chocolate will keep things smooth and stress-free.
Recipe Overview
Difficulty Level: As straightforward as it is, the use of readily available ingredients and familiar techniques make this recipe accessible for all cooking levels.
Category: These truffles fit beautifully into the dessert and snack category, offering a fancy touch to end a meal or serve at afternoon tea.
Cuisine: This combines the decadent elegance typical of Western dessert traditions with a touch of modern convenience.
Cost: Cost-effective and made with pantry staples, you can create a delight that’s budget-friendly and impressive.
Season: While ideal for holiday seasons and special occasions, these can be made year-round as a sweet indulgence.
Occasion: From holiday festivities to birthday celebrations, these truffles bring a bit of elegance and indulgence to any occasion.
Why You’ll Love This Recipe
The taste and texture of chocolate cheesecake crunch truffles are second to none. Each truffle delivers a velvety, creamy filling embraced by a chocolate shell, with bursts of crunchy bits providing variety to every mouthful. It’s a sensory experience that charms taste buds.
Convenience reigns supreme with this recipe. Require only a few ingredients, minimum preparation, and basic kitchen tools, these truffles assemble quickly and easily. They present significant time savings without compromising on flavor or presentation.
Nutritionally, while indulgent, they offer a small sweet fix perfect for satisfying sugar cravings without the tendency to overeat. Furthermore, the flexibility in ingredient choices allows easy modification for dietary preferences, adding a healthy twist.
In a social and entertaining setting, these truffles stand as conversation starters. Their luxurious look and satisfying flavor make them ideal to serve at events, elevating both presentation and enjoyment effortlessly.
Cost-effectiveness remains a strong point, utilizing minimal yet high-impact ingredients to produce a dessert that exudes quality and richness. Accessible to create at any time, they bring luxury at a fraction of the cost compared to store-bought alternatives.
Historical Background and Cultural Significance
Chocolate truffles, concocted in France in the late 1800s, boast a rich history. Initially simple cocoa-dusted confections, they have evolved into infinite variations while holding firm roots in French culinary prestige.
This recipe marries chocolate with cream cheese, an American invention from the 1870s. This union highlights cultural fusion, representing cheesecake’s evolution—chocolate adds depth, harmonizing both desserts’ profiles.
Evolution over time reflects culinary creativity and willingness to adapt, combining ingredients across geographical borders to create a palate-pleasing hybrid enjoyed globally.
Globally adopted, regional varieties introduce local ingredients and flavors into the basic structure. This adaptability ensures truffles remain relevant, celebrated worldwide.
Ingredient Deep Dive
Chocolate features prominently, integral to the recipe’s success. Known for its cultural importance across civilizations, from Maya to modern-day delicacies, its rich taste, and potential health benefits make it indispensable.
Cream cheese, lending creaminess and the iconic cheesecake flavor, first appeared in American cuisine. Its fat content and mild tang balance sweet and rich elements, ensuring a pleasant eating experience.
Proper chocolate tempering relies on technique influence. Melting in gentle, even heat ensures sheen and snap, avoiding common dull appearance mistakes. Tempered chocolate’s shine and firmness mark piping hot success.
Storage tips: Dark, air-tight confines suit both chocolate and cream cheese, preserving texture and flavor. Substitute luxe, like quark or mascarpone, offers exciting variations while retaining integrity.
Common Mistakes to Avoid
Overheating chocolate can cause seizing; melt gently over low heat.
Skipping refrigeration leads to too soft centers or structural issues.
Using low-quality chocolate sacrifices flavor; invest in quality.
Improper blending causes lumps; ensure smoothness before chilling.
Neglecting a clean prep surface hinders rolling and assembly.
Forgoing proper drying results in marrs, dulling the finished look.
Overcrowding storage containers risks sticking; separate by layers.
Essential Techniques
Chocolate tempering differentiates the sublime from subpar. Melt chocolate carefully using indirect heat; watch for smooth, glossy results indicating temper perfection. Mastery elevates your truffles’ appearance and texture effortlessly.
Handling cream cheese gently promotes creamy interiors. Beat until smooth, integrating sugar evenly for consistent sweetness without noticeable granules, ensuring a lush finish.
Pro Tips for Perfect Easy Chocolate Cheesecake Crunch Truffles
For uniform size, utilize a small ice cream scoop for consistent truffle shaping. Consistency aids in even coating, enhancing the visual appeal of your truffles.
Incorporate flavor enhancers like vanilla extract or a touch of liqueur to boost aromatic complexity and personal preference, ensuring they stand out at gatherings.
Experiment with coatings beyond chocolate—cocoa, chopped nuts, or coconut offer diverse textures and flavors, appealing to varied palates and dietary needs.
Chill fillings well before shaping for easier handling, providing structure and reducing melted chocolate’s mess, leading to a streamlined process.
Ensure chocolate is well-tempered to achieve the desired snap and shiny coat, a hallmark of professional candies, delighting visually and texturally.
Package creatively for gifting; cellophane wraps or decorative boxes elevate presentation, enhancing the experience for recipients.
Variations and Adaptations
Regional flavors, such as adding matcha to cream cheese or infusing chili in chocolate, provide an innovative twist and a nod to global palettes.
Switch textures with mix-ins like crushed cookies or granola for summer, including nuts or dried berries for autumn, adapting seasonally for fresh appeal.
Dietary modifications see potential in swapping cream cheese, maintaining consistency. Non-dairy solutions or sugar-free substitutes cater to different dietary needs without compromising taste or satisfaction.
Serving and Presentation Guide
Arrange truffles on a palette of color: a white marble tray enhances contrast, showcasing dark chocolate sharply. Garnishes like powdered sugar or zest add subtle elegance.
Modern layouts, such as stacked pyramids or symmetrical lines, provide visual intrigue, impressing guests at both intimate and larger gatherings.
Wine and Beverage Pairing
Pair truffles with rich dessert wines like Port or lighter choices like Moscato, enhancing the chocolate and cream cheese’s complex flavor richness.
If non-alcoholic, pair with herbal tea or a fruity iced tea, balancing sweetness, or coffee for amped satisfaction.
Storage and Shelf Life
Storage, airtight and preferably refrigerated, maintains freshness and texture. Allot three to four days shelf life without impacting quality, more with improved containment.
Prior to serving, allow acclimation to room temperature, especially if refrigerated, rekindling flavors subdued by cold.
Make Ahead Strategies
Advance preparation sees successful refrigeration of filled truffles, uncoated, ensuring they remain firm and ready to coat during assembly, enhancing efficiency.
Chill in phases, preempting last-minute pressure while safeguarding quality consistency, averting unforeseen mishaps.
Scaling Instructions
Halve the recipe for smaller yields—intimate settings or fewer occasions. For larger groups, doubling or tripling works; note ingredient adjustments for balance.
Adjust assembly timing, considering fridge constraints or ingredient availability, ensuring flavor and texture maintain consistent.
Identify glycemic load impacts when substituting, such as sugar replacements, ensuring taste or health isn’t sacrificed in pursuit of adherence.
Dietary Adaptations
Convert if necessary to suit requirements: gluten-free by ensuring coatings and mix-ins meet standards. Use non-dairy cheese, suiting lactose needs while delivering a similar experience.
Keto and low-carb adaptations maintain satisfaction while aligning with prescriptions, assuring flexibility in preparation.
Troubleshooting Guide
Texture issues arise from incorrect ratios or poor incorporation—balance ingredients and ensure thorough mixing to solve.
Stabilize flavors, adjusting sweet and tangy characteristics by tweaking, ensuring flavor remains balanced.
Recipe Success Stories
Community love shows in feedback—truffle variations abound, from birthday treats to office potlucks, sparking enthusiastic creativity and appreciation.
Reader input enriches with favorite adaptions, ensuring options sustain a rich and storied lifecycle.
Frequently Asked Questions
Q: Can I use any type of chocolate?
A: Quality counts; using a reputable brand guarantees consistency and flavor. Dark, milk, or white all offer delectable results with slight tweaks to taste and richness.
Q: How can I store extra truffles?
A: Store in layers, separated by wax paper, in airtight, chilled containers, preserving both texture and flavor while extending shelf life.
Q: Are there vegan alternatives?
A: Swap cream cheese for a plant-based option, ensuring you match density and tang while adapting chocolate to ensure dairy-free profiles.
Q: Do I require special equipment?
A: Standard kitchen tools suffice, though a small ice cream scoop can simplify scaling, ensuring uniform truffles and ease during preparation.
Q: Can I freeze these truffles?
A: Freezing remains a choice; long-term storage benefits from secure wrap and careful thawing to sustain quality, but note structural impacts.
Q: What are some mix-in recommendations?
A: Incorporate toasted nuts, coconut flakes, or crushed biscuits, adding texture and continued flavor excitement from each bite.
Q: How do I fix seizing chocolate?
A: Remedy quickly by stirring in a small amount of warm water or cream, gently encouraging bound particles to relax, returning smoothness quickly.
Q: Can I substitute gluten-free biscuits?
A: Certainly; gluten-free biscuit options broaden dietary accessibility, ensuring no sacrifice of crunch or flavor profiles.
Q: Are allergy considerations necessary?
A: Ensure ingredients suit dietary needs, engage with common allergens—nuts or dairy—to provide secure indulgence while adhering to restrictions.
Q: What yields extra flavor complexity?
A: Explore additional extracts, zest, or spices, ensuring they harmoniously meld with main profiles, bringing thoughtful enhancement.
Additional Resources
Expand exploration with related recipes, diving deeper into dessert excellence. Explore our technique guides or ingredient specifics, broadening familiar comfort zones while ensuring professional results.
Join the Conversation
Engage with a community of enthusiasts; submit photos of your creations, exchanging tips, advice, and suggestions for delightful variations. Share experiences on social platforms, contributing valued feedback while securing innovative considerations. Join us, contributing to the rich success tales and consistent exploration ensuring this recipe flourishes.
The Recipe
Easy Chocolate Cheesecake Crunch Truffles
Serves: 24 truffles
Prep Time: 20 mins
Cook Time: 10 mins
Total Time: 30 mins
Kitchen Equipment Needed
Stand mixer or hand mixer
Microwave-safe bowl or double boiler
Cooling rack
Small ice cream scoop (optional)
Wax paper or parchment paper
Ingredients
1 cup cream cheese, softened
1 cup confectioners’ sugar
1 1/2 cups dark chocolate, chopped
1 cup crunchy cereal or biscuit crumbs
1 tsp vanilla extract
Directions
In a mixing bowl, beat cream cheese until smooth using a stand mixer or hand mixer.
Add confectioners’ sugar and vanilla extract, continue beating until fully incorporated.
Gently fold in half the cereal crumbs or biscuit crumbs, ensuring an even mix.
Using a small scoop, form small balls from the mixture. Place on a baking sheet lined with wax paper.
Chill in the refrigerator for 15 minutes to help them firm up.
Melt the chopped dark chocolate in a microwave-safe bowl or over a double boiler until smooth.
Dip each chilled ball into the melted chocolate, and ensure an even coat by using a cooling rack.
Place each dipped ball back on the wax paper and sprinkle the remaining crumbs over the top for added crunch.
Refrigerate for about 10 minutes or until the chocolate sets.
Recipe Notes
Substitute dark chocolate with milk or white chocolate for a different flavor.
Add a splash of your favorite liqueur for a grown-up version.
Once set, store in the refrigerator in an airtight container.
Irresistible Christmas Gooey Butter Cookies Recipe for Holiday Cheer
Christmas Gooey Butter Cookies: A Festive Delight for Your Holiday Gatherings
⚖️
Difficulty
Moderate
⏲️
Prep Time
20 mins
🕒
Cook Time
15 mins
⏱️
Total Time
35 mins
🍽️
Servings
24 cookies
Celebrate the yuletide season with these delightful Christmas Gooey Butter Cookies 🎄✨. Perfectly soft and filled with festive charm, this recipe is a must-have for your holiday baking list. The gooey center melts in your mouth, while the sugar-dusted exterior adds a light, sweet crunch. Whether you’re hosting a Christmas party or enjoying a quiet holiday evening by the fireplace, these cookies bring warmth and joy to any occasion.
The holidays are all about indulgence and cheer. Imagine the sweet aroma of butter and vanilla wafting through your home, evoking memories of festive gatherings. These Christmas Gooey Butter Cookies are not just treats but a joyful experience, bringing families together to share smiles and sweet moments. Their compelling flavor and soft texture make them a crowd favorite, perfect for gifting or simply for leisurely enjoyment.
Creating these gooey butter cookies is an exercise in artistry. From carefully measuring the ingredients to achieving the perfect dough consistency, each step is infused with love and attention to detail. Baking these cookies is a delightful way to spend a winter afternoon, filling your kitchen with warmth and the cheerful spirit of the holiday season.
Quick Recipe Highlights
Flavor Profile: A heavenly blend of buttery richness, vanilla essence, with a delicate sweetness that perfectly captures the essence of Christmas.
Texture: Soft and chewy on the inside with a light, delicate crispness on the outside, making each bite an indulgent experience.
Aroma: Infused with the inviting scent of butter and vanilla, these cookies fill the room with a comforting holiday fragrance.
Visual Appeal: Dusted with powdered sugar, they boast an elegant and festive look, perfect to grace any holiday dessert table.
Skill Level Needed: Basic baking skills required, with a focus on achieving the right dough consistency for perfect gooey centers.
Special Equipment: No special tools needed—standard baking sheets, a mixing bowl, and a whisk/spatula suffice.
Recipe Overview
Difficulty Level: Moderate. While the steps are straightforward, achieving the perfect gooey center requires some finesse and proper timing.
Category: Desserts and baked goods. A classic and timeless choice fitting perfectly into festive celebrations.
Cuisine: American, with a touch of traditional holiday baking influences that lend warmth and cheer to the season.
Cost: Economical. Made from simple ingredients like butter, eggs, and vanilla, keeping holiday budgets intact while delivering delicious results.
Season: Best enjoyed during the winter holiday season when the warmth of home-baked goods adds comfort to the chilly weather.
Occasion: Ideal for Christmas parties, family gatherings, cookie swaps, or as a delightful holiday gift.
Why You’ll Love This Recipe
The Christmas Gooey Butter Cookies offer an unbeatable combination of flavor and texture that will captivate your taste buds. These cookies deliver a wonderful contrast of a slightly crisp exterior with a buttery, tender middle that melts away on your tongue. The balance of sweetness and the subtle notes of vanilla create a harmonious, joyous taste that is festive and satisfying.
Convenience is key during the holiday hustle, and this recipe doesn’t disappoint. Preparation is straightforward, taking only about 20 minutes, and the ingredients are common pantry staples. This means you can swiftly create a batch for unexpected guests or impromptu family baking sessions, ensuring that smiles and seasonal delights are never far away.
Not only are these cookies delicious, but they also offer a bit of a nutritional break from the often heavier holiday fare. Made with wholesome ingredients like eggs and butter, they provide a satisfying indulgence that pairs perfectly with a balanced diet. Plus, with no artificial flavors or additives, you can enjoy a natural treat filled with pure, heartfelt flavor.
These butter cookies are a hit at social gatherings, easily making new friends and family favorites alike. Their charming presentation and scrumptious taste make them the perfect icebreaker or conversation starter, helping you create memories and celebrate togetherness. They’re equally enjoyed by all ages, bridging generations through the shared love of good food.
Cost-effectiveness and accessibility play major roles in the recipe’s appeal. Using simple, cost-effective ingredients, these cookies provide a high yield that’s perfect for holiday celebrations or gift-giving without breaking the bank. Easily accessible at any grocery store, you won’t need to hunt for exotic ingredients—just simple baking magic.
Historical Background and Cultural Significance
The origins of the gooey butter cookie can be traced back to the early 20th century, a time when bakers invented gooey butter cake by happy accident. The legend goes that a St. Louis baker inadvertently mixed up ingredient proportions, leading to a rich and luscious cake—a story as heartwarming as the baked good itself. The gooey butter cookie, as an adaptation of the famous cake, carries a piece of this storied tradition.
This recipe holds a cherished spot in American holiday traditions, encompassing the spirit of creativity and resourcefulness typical of many American dessert stories. The magic of turning humble ingredients into a delectable treat symbolizes the innovation and warmth the season brings, reflected in the cookie’s widespread adoption at festive occasions.
Over the decades, these cookies have evolved from regional specialties to beloved holiday treats found across varying traditions and cultural celebrations. The transformation from a simple buttery treat to a holiday staple showcases the recipe’s versatility, adapting to diverse tastes and preferences while maintaining its rich, indulgent roots.
Across regions, variations have flourished, with each culture imparting its charm into the recipe. From including spices like cinnamon or nutmeg to adding chocolate chips or nuts, the gooey butter cookie adapts beautifully, highlighting the sweet alchemy of shared culinary heritage and personal creativity.
Ingredient Deep Dive
Butter forms the cornerstone of this cookie, historically a symbol of richness and luxury in culinary arts. Its pivotal role in baking cannot be overstated, as butter is responsible for imparting flavor, moisture, and the characteristic melt-in-mouth quality these cookies are famous for. When selecting butter, opt for unsalted, as it allows for better control over the final product’s flavor profile.
Eggs lend structure and solidity to our gooey center while also adding richness and tenderness. An essential component in binding ingredients together, eggs also contribute to the cookie’s signature gooey texture. When buying, choose fresh eggs for optimal results, and ensure they’re at room temperature before mixing to encourage even baking.
Vanilla extract infuses the dough with aromatic warmth and depth. This ingredient functions as a classic enhancer of sweet treats, activating the senses to deepen flavor intensity without overpowering other ingredients. When selecting vanilla, consider pure extract rather than imitation for a more profound, authentic taste that enriches your cookies.
Common Mistakes to Avoid
Not softening the butter properly may lead to uneven mixing, so be sure to leave it at room temperature.
Over-baking these cookies can turn the soft centers into dry, crumbly disappointments. Aim for a delicate golden hue as a visual cue for doneness.
Incorrectly measuring flour can impact texture dramatically. Use the spoon and level method to ensure precision.
Skipping room temperature eggs might lead to denser dough; they should blend smoothly with other ingredients.
Forgetting to chill the dough will result in spread-out cookies. Refrigerate for the specified time for perfect shapes.
Using cold ingredients can prevent your cookies from achieving the desired gooey texture, so gather your ingredients and let them ambiently warm.
Skipping preheating the oven can lead to uneven baking, affecting texture. Preheat thoroughly for consistent results.
Neglecting parchment paper can cause cookies to stick or burn. Always line baking sheets to ensure easy release.
Ignoring cooling times can result in breakage. Allow cookies to set on trays for a few minutes before transferring to racks.
Rushing the mixing process leads to inconsistent dough, so take your time and ensure all ingredients combine evenly.
Essential Techniques
Proper butter creaming is critical for achieving the signature light texture. This technique incorporates air into the batter, resulting in a dough that’s fluffy and airy. Mastering this requires room temperature butter and careful patience when beating—look for a pale, creamy consistency.
Accurate dough chilling stabilizes the butter, ensuring cookies don’t spread too thinly. This step is essential for maintaining structure, giving your cookies their iconic height and girth. Staying patient during this chilling process is vital for professional-looking results.
Measuring precisely is paramount for consistency. Baking is a science, and even small deviations can drastically alter textures and outcomes. Investing in a scale or using measured cups for dry and wet ingredients helps achieve balance and ensures each batch’s success.
Pro Tips for Perfect Christmas Gooey Butter Cookies
For enhanced flavor, try browning the butter slightly before incorporating. This adds a nutty, caramelized dimension that’s subtly delicious.
Incorporate a pinch of citrus zest, such as lemon or orange, to add a refreshing twist that complements the vanilla profile beautifully.
Ensure even spacing on the baking tray to allow for optimal air circulation, promoting even baking and heat distribution.
Experiment with adding a surprise ingredient like a sea salt sprinkle on top to enhance contrasts and surprise the palate with delightful undertones.
For a festive touch, lightly dust with edible glitter after cooling. This adds visual appeal and a sparkling charm to holiday presentations.
For an ultra-gooey center, slightly underbake the cookies and allow them to rest outside the oven. The residual heat will continue cooking without toughening them.
Variations and Adaptations
Regional variations might include spices, such as cinnamon or nutmeg, reflecting localized tastes. Adding dried fruits like cranberries or cherries gives a tart counterpoint to the buttery sweetness.
Seasonal adaptations invite flavor additions appropriate to the time of year. During the fall, consider incorporating pumpkin puree and spices for a warm, autumnal twist.
Dietary modifications can include using gluten-free flour blends for celiac-friendly enjoyment or substituting dairy butter with plant-based alternatives for vegan-friendly versions.
Flavor variations like adding chocolate chips or dark cocoa powder bring a deeper, richer taste to the cookies, perfect for chocoholics seeking their next fix.
Texture modifications might include adding finely chopped nuts or shredded coconut to introduce pleasant bites and interesting mouthfeels, elevating the cookie’s dimension.
Presentation alternatives could involve shaping cookies into festive designs or using colored sugar for decoration, making them visually appealing gifts in decorative tins or boxes.
Serving and Presentation Guide
When it comes to plating, consider using rustic wooden boards that contrast beautifully with the white powdered sugar finish. This natural backdrop enhances the cookies’ homemade, artisanal charm.
A fresh mint leaf or sprig of rosemary can serve as delightful garnishes, giving a pop of color that echoes festive greenery and bringing aromatic freshness into the presentation scene.
Traditionally, these cookies pair well with a warm beverage like hot cocoa or mulled wine, enhancing the holiday warmth and culinary harmony.
For modern, chic servings, consider pairing cookies with fruit preserves or dulce de leche for dipping, offering guests interactive indulgence in flavor exploration.
Ideally served slightly warm, just out of the oven or after a few minutes of cooling, these gooey butter cookies satisfy the desire for comfort and warmth on a wintery day.
Be mindful of portion control, especially if serving alongside rich desserts, ensuring guests get to savor each cookie’s flavors without overpowering their palates.
Wine and Beverage Pairing
Pair these delightful cookies with a light and aromatic white wine such as a Riesling, which complements the cookie’s buttery texture and vanilla notes beautifully.
For those avoiding alcohol, a rich, spiced chai or a cinnamon-infused apple cider offers perfect pairs, enhancing the cookie’s warm, festive character.
Coffee aficionados might consider an espresso or a creamy latte, which cuts through the butteriness while harmoniously balancing flavors.
Temperature considerations are paramount in drink pairing, where warmer beverages highlight the gooey texture, and chilled, sweet wines enhance flavor contrasts.
Presentation in matched drinkware—imagine matching your wine glasses with your festive table settings or pairing your cup and saucer set with any stylish plate for chic gatherings.
Storage and Shelf Life
Once baked, store these cookies in an airtight container lined with parchment paper, separating layers to preserve their delicate shapes and textures.
Ideally, keep them in a cool, dry place, as excessive moisture or heat can negatively impact the gooey interior, leading to dry outcomes.
Plastic or glass containers that provide a firm seal offer the best environment, prolonging freshness and preventing a stale texture.
Watch for signs of spoilage, such as an off smell or visible mold, indicating the need for disposal. Always recommend storing freshly baked cookies separately from older batches.
If needed, reheat slightly under a gentle oven or microwave heat to regain the freshly-baked warmth, ensuring residual heat doesn’t alter textures.
Freezing your dough is a great alternative. Pre-scoop and freeze individual cookies on sheets. Once solid, store them in freezer bags for longer-lasting use.
Make Ahead Strategies
For busy holiday preparations, consider making the dough ahead and storing it in the refrigerator for up to a few days before baking, letting it come to room temperature prior to use.
Between steps, use the dough-chilling phases to organize your workspace or prepare accompaniments, keeping the process efficient and seamless.
Mindfully storing between baking sessions ensures flavors and textures remain consistent, allowing you to bake fresh, delicious treats even under time pressures.
Ensure quality by closely monitoring baking times and adjusting quickly to changes in dough behavior, like spreading or browning.
Reassemble baked cookies by stacking them neatly in airtight containers, readying them for gifting or storage without compromising their dainty elegance.
For extra freshness, consider adding a seal or bag clip to prevent air exchange, further extending your cookies’ shelf life until they’re savored.
Scaling Instructions
To halve the recipe, simply divide all ingredient measurements by two, keeping baking time consistent but watching closely for any variations in batch texture or spread.
Doubling or tripling is straightforward, maintaining balance across all ingredients ensures consistent texture, while ensuring your kitchen gear accommodates larger volumes without cramping.
Be sure to adjust mix and oven space accordingly, allowing for adequate surface area and airflow when baking in batches to maintain consistent cooking across expanded amounts.
Storage after scaling should remain diligent, observing freshness cues closely as increased batches may demand additional or rotated stock to prevent staleness.
Equipment adjustments include acquiring larger mixing bowls or added baking sheets to handle scaled-up volumes efficiently without introducing process delays.
Timing may require tweaks when handling bigger batches—integrate shorter chopping breaks to retain spontaneity despite process lengthening.
Nutritional Deep Dive
The Christmas Gooey Butter Cookies offer a moderate caloric intake that’s gentle enough to indulge within seasonal tidbits while retaining balanced energy throughout holiday activities.
Each cookie provides a respectable macro breakdown between carbohydrates, fats, and proteins, with proportionate servings supporting responsible enjoyment of these treats.
Micronutrient analysis points to potential iron and vitamin A presence from key ingredients, supporting essential body functions amidst holiday cheer.
The cookies present various health benefits—consumed mindfully, they provide necessary fats and carbohydrates for energy without excessive intake, promoting a balanced holiday diet.
Portion control considerations can prevent excessive snacking, encouraging measured consumption that can easily harmonize with meals and other desserts.
Maintaining a consciousness of these cookies’ delightful contribution to holiday weight management can be simple, focusing enjoyment within the lively season’s ensemble of joyful foods.
Dietary Adaptations
For gluten-free adaptations, substitute regular flour for a gluten-free blend, ensuring flexibility and enjoyment across dietary boundaries without compromising flavor.
Opt for dairy-free recipes by incorporating plant-based spreads and milks, maintaining soft and buttery characteristics suitable for those with lactose concerns.
Vegan versions are equally gratifying, using egg replacers, plant-based butters, and thoughtful ingredient adjustments to deliver texture and gourmet flavor.
Low-carb adherents can enjoy adaptations by employing alternative sweeteners, like erythritol, and almond flour, providing nutrition without carbohydrate compromise.
Keto-friendly cookies emerge with the use of specially formulated flours or sugars, like coconut oil or monk fruit, delivering sumptuousness within dietary allowance.
Paleo dieters have flexible embraces with these cookies when utilizing grain-free flours and select sugar substitutes, maintaining flavor integrity with ease.
Low-FODMAP sufferers can enjoy alteration with modified dairy and sweetening options, offering gentle stomach experiences without compromising joy in taste.
Other specific diets see manageable conversions where flavor satisfaction aligns beautifully with varying allowance and nutritional focus, crossing boundaries graciously.
Troubleshooting Guide
For texture issues where cookies become too dense, reassess butter and sugar incorporation, guaranteeing thorough air penetration in creaming stages to avoid heavy outcomes.
Say ingredients aren’t mixing, resulting in uneven cookies—check ingredient freshness and ensure stable room temperature conditions for more balanced dough results.
With flavor balance concerns adding up, revisit ingredient potency—test extract strengths and control subtle palate influences through measured addition, refining experience.
Temperature troubles resulting in spongey cookies may call for oven recalibration, ensuring dial accuracy to suit equipment-specific demands.
Equipment issues like uneven baking surfaces should prompt review or reinvestment, aligning tool quality with baking expectations and ensuring unimpaired enjoyment.
Guard against incorrect ingredients seen in frugal use or replacements, diligently verifying recipe demands prior to commencement to ensure ingredient harmony.
Handling timing adjustments where cookies harden involves gentle reheats or moisture additions, refining results without formidable consumption impacts.
Recipe Success Stories
Many community members have revamped these festive delights by tweaking underlying spices, sharing successes of cinnamon and nutmeg introductions during the holiday haywire.
Impressive variation tales abound, featuring users rolling cookies in festive colored sugar, yielding visually stunning batches that spark festive brightness on platters.
Adaptation stories reveal various vegan efforts, creatively employing egg replacer and coconut-derived substitutes to authenticate plant-based indulgence.
Reader suggestions lean toward convention-breaking through distributed glaze toppings or nut presence within, crafting wholly unified cookies featuring warmth-inspiring enhancements.
Photography guides compiled through keen eye-sharing illuminate tips for festive arts, elucidating light techniques or prop tips to elevate cookie elegance.
Frequently Asked Questions
Q: Can I freeze the cookie dough?
A: Yes, you can freeze cookie dough for up to three months. After rolling into balls, flash freeze them on a tray, then transfer to a zip-lock bag for preservation.
Q: What type of butter is best?
A: Always aim for unsalted butter to allow full flavor control. Pure butter offers rich moisture and flavor, but for variations, plant-based options are feasible.
Q: Can this dough be used for other cookies?
A: While designed for gooey butter cookies, this base can be adapted into diverse shapes or slight allergen-free provisions—catering flexibility is an asset.
Q: Should I use a mixer or whisk by hand?
A: A mixer ensures even blending especially during butter creaming processes; however, hand whisking can suffice, promoting creativity, control, and tradition.
Q: Are there flavor substitutes for vanilla?
A: Almond or peppermint extracts provide unique alternatives should vanilla substitution arise, adding additional character to festive cookies.
Q: Can I add food coloring?
A: Certainly! Adding a few drops to the dough provides vibrant hues, but aim for natural coloring solutions if possible, minimizing adverse chemical taste influences.
Q: Why does chilling matter?
A: Chilling stabilizes fats in dough, preserving structure from excessive spreading at heat introduction and retaining the signature round cookie appearance.
Q: How do I achieve consistent sizing?
A: A kitchen scale or scoop aids precise dough measurement, unifying sizes for thorough and consistent baking durations, averting uneven results.
Q: What’s the best way to present these cookies?
A: Rustic platters or seasonal tins provide beautiful homes for your cookies, promoting both freshness retention and aesthetic harmony for displays or gifts.
Q: How do I ensure softness over time?
A: An apple slice in your cookie storage container can effectively maintain moisture levels within, combating stale tendencies and retaining gooey essence.
Additional Resources
For related recipes, explore other holiday favorites such as gingerbread and snickerdoodles, extending your festive repertoire with complementary sweet treats.
Technique guides help hone baking skills, useful for mastering butter creaming or dough chilling, pivotal for perfecting clarity within your cookies’ dough dynamics.
Ingredient insights emphasize understanding butter’s many uses, breaking down its influences within baked goods and guiding choices under varying needs.
Equipment endorsements outline top baking pan choices or silicone mats, crucial for uniform heat distribution and optimal release when encountering obstacles.
Seasonal variations illuminate festive opportunities for clearer favor pathways, hinting at pumpkin spice indulgence or citrus vibrancy for expanded enjoyment.
Join the Conversation
Engage on social media platforms, sharing moments captured during festive cookie baking sessions, using hashtags for increased visibility and connectivity to fellow peers.
Photography advice encourages creative perspectives, lighting arrangements, and plating techniques to enhance visual potential and draw attention.
Recipe reviews uncover user experiences, adjustments, and unforeseen insights, creating authentic discussions regarding this recipe’s success and impact.
Community engagements invite sharing personal interpretations yielding interesting adaptations or prompts further kitchen exploration sparking culinary delights worldwide.
Trace possible recipe variants expanding styles and hosting innovative viewpoints or collating responses in digital spaces, promoting growth and inspiration cross-culturally.
The Recipe
Christmas Gooey Butter Cookies 🎄✨
Serves: 24 cookies
Prep Time: 20 mins
Cook Time: 15 mins
Total Time: 35 mins
Kitchen Equipment Needed
Mixing bowls
Baking sheets
Parchment paper
Electric mixer or hand whisk
Measuring cups and spoons
Ingredients
1/2 cup unsalted butter, softened
1/4 teaspoon vanilla extract
1 egg
1 teaspoon baking powder
1/4 teaspoon salt
1 cup powdered sugar
1 3/4 cups all-purpose flour
Additional powdered sugar for rolling
Directions
Preheat your oven to 350°F (175°C) and line your baking sheets with parchment paper.
In a mixing bowl, cream the softened butter and vanilla extract together until light and fluffy.
Beat in the egg until well incorporated.
In another bowl, whisk the baking powder, salt, powdered sugar, and flour.
Gradually add the dry ingredients to the creamed mixture, mixing until just combined.
Chill the dough for approximately 30 minutes to firm up slightly.
Form dough into 1-inch balls and roll in powdered sugar before placing them onto prepared baking sheets.
Bake for 10 to 12 minutes, allowing the cookies to look puffed and the edges to barely brown.
Let cool on the tray for a few minutes before transferring to a wire rack to cool completely.
Recipe Notes
Substitute unsalted margarine for a dairy-free alternative.
Experiment with different extracts like almond or peppermint for a unique flavor variation.
Store cookies in an airtight container to maintain freshness for up to one week.
Deliciously Decadent German Black Forest Swiss Roll Recipe
German Black Forest Swiss Roll: A Decadent Delight
⚖️
Difficulty
Medium
⏲️
Prep Time
30 mins
🕒
Cook Time
15 mins
⏱️
Total Time
45 mins
🍽️
Servings
8
Indulge in the rich and flavorful experience of a German Black Forest Swiss Roll, a dessert that marries the bold taste of dark chocolate with the sweet and tangy notes of cherries. This scrumptious treat is perfect for any occasion, bringing a touch of European elegance to your dessert table. Whether you’re sharing it with family or savoring a slice alone, the German Black Forest Swiss Roll offers a delightful blend of textures and flavors that will leave you longing for more.
Experience the joy of creating this German specialty right in your kitchen. The moist chocolate sponge cake, paired with luscious whipped cream and an indulgent cherry filling, offers a well-balanced harmony of sweetness and richness. This delectable roll is not just a feast for the taste buds, but a visual masterpiece, with its striking layers and intricate design. Every bite is a testament to its traditional roots, yet its appeal is timeless, making it a favorite across generations.
If you’re seeking to expand your baking repertoire, the German Black Forest Swiss Roll is an excellent choice. While it may seem complex, with careful attention to each step, even novice bakers can achieve success. With its impressive appearance and irresistible flavor, this dessert is a guaranteed crowd-pleaser. So, why wait? Embrace the art of German baking and surprise your loved ones with this exquisite Swiss Roll.
Quick Recipe Highlights
Flavor Profile: The German Black Forest Swiss Roll features a deep, chocolatey base that perfectly complements the sweet and tart cherry filling, creating a harmonious balance of flavors.
Texture: Experience a delightful contrast between the soft, sponge-like cake and the smooth, creamy whipped cream filling, accented by the juicy burst of cherries.
Aroma: The enticing scent of dark chocolate mingles with the sweet, fruity fragrance of cherries, enveloping your senses in a delightful aroma.
Visual Appeal: With its striking layers of rich chocolate, vivid cherries, and whipped cream, this roll is a showstopper, offering an elegant and inviting presentation.
Skill Level Needed: Mastery of rolling techniques and careful timing is essential, but with practice, even aspiring bakers can achieve perfection.
Special Equipment: A jelly roll pan and parchment paper are essential for creating the perfect Swiss Roll, ensuring even baking and easy rolling.
Recipe Overview
Difficulty Level: Choosing a medium difficulty level is apt, as it involves multiple steps, including creating the batter, precise baking, and skillful rolling. However, with attention and patience, the process is quite manageable.
Category: This recipe falls under the dessert category, offering a sweet finish to meals and an indulgent treat during tea time or festive celebrations.
Cuisine: Rooted in traditional German cuisine, this roll is inspired by the well-loved Black Forest cake, a staple in German confectionery known for its distinct taste and rich heritage.
Cost: The components include common pantry items and a few special ingredients like cherries, making it moderately priced and accessible, particularly when cherries are in season.
Season: Ideal for late spring through summer when cherries are at their peak, yet perfect for colder months when a rich, comforting dessert is desired.
Occasion: The German Black Forest Swiss Roll suits a variety of occasions, from festive gatherings and birthdays to casual family dinners or as a special weekend treat.
Why You’ll Love This Recipe
Delight in the exquisite taste and texture of the German Black Forest Swiss Roll, where each bite offers a perfect harmony of rich chocolate and tangy cherries. The complex layers of flavors meld together seamlessly, creating a dessert that is both indulgent and satisfying. The velvety whipped cream enhances the experience, ensuring a smooth and luxurious mouthfeel that is hard to resist. Whether you’re treating yourself or impressing guests, this recipe’s flavor profile is sure to captivate.
In terms of convenience, the Swiss roll is surprisingly straightforward to prepare once you master the rolling technique. With a total preparation and cooking time of under an hour, it offers a quick turnaround for a dessert of its caliber. The use of accessible ingredients makes it a feasible option for any home cook looking to try their hand at something special without significant hassle or stress.
For those conscious of nutritional balance, this dessert provides moderate indulgence. While it is indeed a treat, the inclusion of fresh cherries offers a dose of vitamins and antioxidants. Meanwhile, the use of dark chocolate can bring some health benefits, like improved heart health when enjoyed in moderation, making it not just a tasty choice but a smart one as well.
Bring joy to your social gatherings with this crowd-pleaser. Its universal appeal to both young and old makes it an excellent choice for social events, ensuring smiles and satisfied palates. The German Black Forest Swiss Roll becomes more than just a dish—it’s a centerpiece that sparks conversation and creates memories during holidays and family occasions.
From a cost perspective, this delicacy is quite economical, leveraging a few staple ingredients from your pantry with some special additions. When cherries are in peak season, the cost-effectiveness increases, giving you more dessert for your dollar. Its affordability combined with its rich taste makes it a favorite for both budget-conscious bakers and those seeking luxurious flavors.
Historical Background and Cultural Significance
The origins of the German Black Forest Swiss Roll draw from the renowned Black Forest cake, named for the Black Forest region in Germany. While precise historical accounts vary, the roll’s development was a natural evolution, adapting the cake into a more portable and visually striking dessert. This specific adaptation of rolling the cake to encase its fillings added a new dimension to enjoying traditional flavors, widely embraced across Europe by the late 19th century.
Culturally, the Black Forest is a region steeped in rich folklore and tradition, lending its name to one of the most beloved desserts worldwide—Schwarzwälder Kirschtorte. The Swiss roll version, while a less formal interpretation, carries its own significance as a testament to German baking ingenuity. It’s a means of sharing intricate flavors in a modern, convenient form, appreciated at both everyday tables and grand celebrations.
Over the years, the German Black Forest Swiss Roll has seen numerous adaptations, reflecting changes in culinary tastes and ingredient availability. Originally prepared with the region’s iconic Kirschwasser, a cherry brandy, the roll now often opts for more accessible cherry fillings and whipped cream to cater to broader palates. These changes illustrate the global influence and adaptation of German culinary traditions.
Regional variations of the Swiss roll also capture unique interpretations, from added chocolate shavings and cherry juice to whiskey-infused cream or alternate fruit fillings, demonstrating its flexibility and enduring popularity. Each version honors the essence of the Black Forest while allowing for personalization, ensuring its place in the culinary spotlight worldwide.
Ingredient Deep Dive
Cherries, the heart of this Swiss roll, are more than just a flavorful addition; they hold cultural significance as a symbol of prosperity and friendship in many traditions. Historically cherished in European cuisines, cherries offer vibrant color and a burst of sweetness in this dessert. Beyond aesthetics, they are packed with antioxidants, vitamins, and numerous health benefits such as reducing inflammation and promoting heart health.
When selecting cherries for your German Black Forest Swiss Roll, fresh, plump, deep red ones with shiny skins are best, providing the most intense flavor and visual appeal. If fresh are unavailable, frozen or canned cherries can serve as suitable alternatives. Store fresh cherries in the refrigerator and consume them within a few days for maximum flavor. For substitutions, consider using other tart fruits like raspberries or plum slices for a new twist.
The central ingredient, chocolate, offers more than its recognizable richness—it is woven into the fabric of culinary history, symbolizing decadence and celebration. In addition to delivering a deep, satisfying taste, quality dark chocolate also contributes to health benefits like antioxidant properties and mood enhancement. Choosing a chocolate of at least 70% cocoa ensures a robust flavor and a bittersweet balance essential for this dessert.
Preserve your chocolate’s quality by storing it in a cool, dry place away from sunlight, rather than the refrigerator, which can cause it to develop a white film and affect texture. If substitutions are necessary, quality cocoa powder combined with a touch of melted butter can mimic chocolate’s richness in the cake, ensuring the Swiss roll maintains its signature, delicious character.
Common Mistakes to Avoid
Overbaking the sponge results in a dry cake and cracks when rolling. Keep a watchful eye on it and remove once it springs back to touch.
Skipping the parchment paper can lead to the cake sticking and tearing. Ensure you line the pan well before pouring in the batter.
Filling the roll while the cake is hot may cause the cream to melt. Let the sponge cool slightly before spreading your fillings.
Using low-quality chocolate reduces the dessert’s richness. Opt for high-quality dark chocolate for authentic flavor.
Rolling the cake too tightly might squeeze out the cream, leaving an uneven filling. Roll gently and evenly for best results.
Overloading on filling makes it difficult to roll and can cause tearing. Spread a moderate, even layer.
Failing to whip the cream to the right consistency can result in a runny filling. Beat until stiff peaks form for structure.
Neglecting to dust the surface with cocoa powder can result in a sticky, unattractive finish. Lightly dust before serving for presentation.
Ignoring temperature when storing may cause the roll to dry out. Wrap well and refrigerate, consuming within two days.
Not following precise measurements can unbalance flavors. Stick to the precise weights and measures for a successful bake.
Essential Techniques
The technique of rolling the cake is vital for a successful presentation and even filling distribution. This step requires finesse and patience. Start by using a clean, lightly sugared kitchen towel, and gently guide the sponge into its roll while it’s still slightly warm to prevent cracking. Watch for signs of tearing and adjust your pressure to maintain an even roll. Mastery of this skill ensures a stunning final product every time.
Chocolate ganache as a finish provides a velvety texture and rich taste that enhances the dessert. Creating ganache involves carefully melting chocolate with cream to a smooth consistency. Keep heat low and steady to prevent burning the chocolate, stirring constantly to blend both ingredients seamlessly. Ganache adds an extra layer of sophistication, turning your Swiss roll into a lavish masterpiece.
Whipping cream to the perfect consistency is crucial for the lightness of the filling. Start with cold cream and chill the mixing bowl and beaters for best results. Beat on medium speed, watching for soft peaks to firm up into a stable consistency. Avoid over-whipping to prevent a grainy texture; stop once stiff peaks form, offering the ideal blend of stability and smoothness.
Using fresh cherries provides the brightest flavor, but preparing them is key. Properly washing, pitting, and slicing your cherries ensures they integrate beautifully into the roll without overwhelming the batter. Incorporate them evenly throughout the filling mixture to maintain a consistent taste and texture across each slice of your Swiss roll.
Pro Tips for Perfect German Black Forest Swiss Roll
Bring your eggs to room temperature before starting your batter. Room temperature eggs will mix more smoothly, allowing for a more even sponge texture that is vital for rolling.
For extra cherry flavor, consider soaking fresh cherries in a little Kirsch or cherry juice before incorporation. This infusion deepens the flavor profile, enhancing the signature taste of this dessert.
Prepare your jelly roll pan by lining it with parchment paper, allowing an extra overhang on the sides. This approach ensures a seamless release of the sponge, reducing frustration and improving results.
Gently fold the flour into your sponge mixture, taking care not to overmix. Preserving the airiness of the batter is crucial for achieving a light and fluffy cake, which rolls easily and without cracking.
If time allows, chill the roll briefly after filling it. This helps the cream set, making slicing and serving much neater while maintaining the roll’s structural integrity.
A light dusting of powdered sugar or cocoa atop adds a touch of elegance and prevents sticking when covering your finished roll with plastic wrap for storage.
Offer a contrast in your whipped cream by adding a hint of vanilla or a spoonful of cherry juice. These subtle accent flavors can elevate the complexity and delight of each bite, impressing even the most discerning palates.
While cherries are essential, you can introduce chopped chocolate pieces within the filling for a unique twist on texture, offering both a visual surprise and a flavor enhancement.
Variations and Adaptations
Explore regional variations by swapping in sour cherries or adding a splash of Kirsch to intensify the German origins of the dish. Each substitution alters the flavor profile slightly, allowing for broad customization while remaining true to the roll’s roots. You might even discover a new favorite flavor combination in the process.
For a seasonal adaptation, consider using raspberries or strawberries in place of cherries during late summer or early autumn. These fruits bring a uniquely fresh sweetness while complementing the chocolate base, offering a vibrant and refreshing palate change.
To modify the recipe for dietary needs, experiment with gluten-free flours or use a dairy-free cream alternative for the filling. These changes ensure everyone can enjoy the dessert, regardless of dietary restrictions, while maintaining its renowned taste and appeal.
Add an exotic twist by incorporating cardamom or cinnamon into the chocolate sponge. These spices introduce warmth and complexity, making the Swiss Roll uniquely your own while preserving its essential decadent nature.
Texture modifications can be made by adding layers of crunchy nuts or a light drizzle of syrup atop the roll before serving. These alterations not only enhance texture but also add a visual flair, transforming the dessert into a showpiece suitable for photo-worthy presentations.
Serve your Swiss Roll with fresh berries or mint leaves as garnish to elevate the presentation. For a modern twist, slice the roll into mini portions for individual servings, perfect for elegant tea parties or intimate gatherings, offering a touch of class and finesse to your table settings.
Serving and Presentation Guide
Use a sharp serrated knife to slice the roll cleanly, revealing the layers within that are sure to impress. Present each slice on a distinct dessert plate, lightly dusted with cocoa or confectioner’s sugar, to accentuate the roll’s rich tones.
Garnish the plate with whole cherries, a drizzle of chocolate or cherry sauce, and a sprig of mint to enhance visual appeal and provide balance in flavors. These additions also give the dessert a refined look, elevating even the simplest setting.
For traditional accompaniments, offer a dollop of fresh whipped cream or a scoop of vanilla ice cream beside each slice. Their mildness pairs perfectly with the intense flavors of the roll, enhancing the overall tasting experience without overshadowing the Swiss Roll’s natural richness.
Contemporary serving suggestions include layering your roll slices over a bed of fruit coulis or yogurt, offering a new dimension of flavor while encouraging diners to explore new combinations.
Consider the temperature of the roll when serving; slightly chilled maintains its shape, while allowing the flavors to mingle as they warm on the tongue. This balance is essential for showcasing the roll’s contrast between rich and tart components.
For portion control tips, make sure to offer modest slice sizes, as the intense flavors and rich components can easily satisfy even the most substantial sweet tooth in small quantities. This approach helps manage indulgences while allowing guests to savor every bite.
Wine and Beverage Pairing
A classic wine pairing with the German Black Forest Swiss Roll is a late harvest Riesling. The wine’s sweet and slightly acidic profile complements the rich chocolate, enhancing the cherries’ natural tartness, creating a harmonious dining experience.
For non-alcoholic alternatives, serve with a freshly prepared cherry or raspberry iced tea. These beverages mirror the Swiss Roll’s fruity elements, providing a refreshing counterpoint to its richness without overpowering your palate.
Coffee is a classic companion to chocolate desserts. Pair with a robust, medium-roast coffee to highlight the roll’s depth, or offer a delicate, floral tea for a lighter refreshment that won’t compete with the bold flavors.
Serve beer such as a cherry lambic for an unconventional choice. Its tartness plays well with the roll’s cherry filling, engaging your tastebuds in an unexpected yet delightful way, appealing to adventurous diners.
Temperature considerations are key to enhancing these beverage pairings. Serve cold drinks lightly chilled, retaining their refreshing qualities, while offering coffee and teas freshly brewed and piping hot to contrast the dessert’s subtle sweetness.
For additional serving suggestions, keep glass garnishes subtle, such as a simple lemon twist or a sugared rim, to enhance without distracting from the drinks’ natural qualities and the Swiss Roll’s indulgent flavors.
Storage and Shelf Life
Proper storage ensures your Swiss Roll remains fresh and delicious over a couple of days. After serving, wrap the roll tightly with plastic wrap or store in an airtight container to prevent drying out, maintaining its moisture and freshness.
Refrigerate the dessert promptly, ensuring a consistent cool temperature of about 36 to 40°F (2 to 4°C) to extend its lifespan. While refrigeration is essential, avoid storage in areas of the fridge subject to drastic temperature changes, like the door.
For optimal storage conditions, use containers that are just slightly larger than the roll to prevent excessive air exposure, helping maintain the dessert’s moisture level and ensuring flavors remain intact.
Signs of spoilage include an off-smell, stale texture, or any visible mold growth, at which point the roll should be discarded for safety reasons, preventing consumption of spoiled food.
Reheating is typically unnecessary, as the roll is ideally enjoyed at room temperature or slightly chilled. However, if considering warming parts like the chocolate dressing before serving, do so gently over a bain-marie to prevent overheating.
While freezing may not be the best option due to potential changes in the texture of the whipped cream, if necessary, freeze slices individually wrapped and consume within a couple of weeks for best results.
Make Ahead Strategies
Creating portions of this dessert ahead of time improves time management and ensures focus during final assembly. Prepare your sponge cake and freeze, wrapped securely in parchment and plastic wrap for extended storage up to a month ahead of the event.
During the prep timeline, assemble your whipped cream and cherry filling a day in advance, chilling in airtight containers. This prep maintains their freshness and ensures a streamlined process on the day of assembly.
Between steps, particularly once filled and rolled, chilling the dessert briefly allows the flavors to meld and firm up, while reducing the risk of runny cream or uneven slices during serving.
Assess the potential quality impact of storage by sampling small test portions after refrigeration, adjusting your techniques or ingredient proportions as needed for subsequent creations to ensure the best possible outcome.
When assembling, ensure a gentle hand is used when rolling, capitalizing on the pre-chilled status of the components to facilitate smooth movement and prevent tearing during the process.
Finally, add fresh elements like garnishes immediately before serving to enhance presentation and provide a burst of flavor, ensuring the final result pleases both the eyes and mouth.
Scaling Instructions
When halving the recipe, adjust ingredient measurements proportionally, ensuring harmony between the reduced component parts for consistent taste and texture. Embrace smaller pans for baking to maintain sponge thickness suitable for rolling.
Doubling or tripling the recipe is straightforward by maintaining ingredient ratios, though one should ensure the use of a larger mixing bowl and sufficient larger baking trays to handle increased batter volumes without spillage.
Avoid overcrowding the oven, adjusting equipment placement for even heat distribution across multiple Swiss Rolls, and slightly extending baking time to accommodate temperature core variations in larger cakes.
Timing modifications are crucial; longer cooling times may be necessary for larger batches, while assembly should still follow within a tight framework, preventing melting or mishaps during rollout.
Scaling considerations also focus on storage space, with multiple rolls requiring adequate chilling room or containers to ensure all portions maintain freshness and structure before the time of serving.
If the expansion is for a grand event or catering, consider preparing batch components like whipped cream or cherry garnish in advance to streamline the process and ensure efficient assembly and presentation.
Nutritional Deep Dive
A macro breakdown analysis of the German Black Forest Swiss Roll highlights the balance between carbohydrates from sugar and flour, fats from cream, and proteins from eggs, creating a well-rounded indulgence.
In terms of micronutrient contribution, the cherries provide a wealth of vitamins A and C alongside antioxidants, complemented by the presence of iron and magnesium from quality dark chocolate.
With health benefits in mind, responsible enjoyment is encouraged, given its diverse ingredients that can contribute to improved mood, cardiovascular health, and reduced inflammation effects due to antioxidant content in moderation.
Dietary considerations suggest moderation; as such, portions should be reasonable to enjoy the flavors without excess calorie intake. A combination of smaller serving size and savoring each bite ensures satisfaction with less consumption.
For a more thorough portion analysis, smaller slices offer a guilt-free way to indulge in this delicious German treat, balancing pleasure and dietary control while still presenting an attractive, popular offering.
In weight management contexts, consider servings as shared indulgences, promoting social engagement and shared responsibility, reducing the temptation to consume in isolation, helping manage caloric intake effectively.
Dietary Adaptations
For a gluten-free adaptation, substitute traditional wheat flour with a high-quality gluten-free blend. Ensure it includes xanthan gum or similar thickeners to replicate the sponge texture required for successful rolling.
Achieving a dairy-free version involves replacing whipped cream with a coconut-based or other plant-based alternative, carefully chosen to retain the Swiss Roll’s signature creaminess without compromising on flavor or presentation.
Opting for a vegan variation would require plant-based egg substitutes such as aquafaba or flaxseeds, alongside vegan chocolate and cream alternatives to maintain flavor integrity without utilizing animal products.
Low-carb modifications can be made by experimenting with sugar replacements like erythritol and low-carb flour substitutions such as almond flour, effectively reducing carbohydrate content without sacrificing taste.
For sophisticated keto adjustments, apply a combination of nut flours and stevia to cater seamlessly to specific dietary needs, enabling keto-practicing guests to indulge in this tempting treat guilt-free.
Similarly, Paleo enthusiasts can enjoy a version aligned with their diet using raw chocolate, almond flour, and honey for sweetening, transforming it into a naturally sourced, diet-compatible indulgence.
Those following a low-FODMAP diet can replace cherries with a low-FODMAP fruit like kiwi for a safe substitution, ensuring the Swiss Roll remains an accessible and delicious option for everyone.
Consider any other specific dietary accommodations by closely analyzing ingredient compatibility before implementation to ensure successful taste preservation and dietary suitability.
Troubleshooting Guide
Address texture issues in sponge by reviewing mixing technique—overmixing or underbaking leads to undesirable results. Achieve fluffy consistency by gentle folding and precise baking times.
Balance flavor by ensuring proper cherry distribution and chocolate enhancement. Taste test fillings beforehand to adjust sweetness levels perfectly, keeping an eye on proportions for ideal taste harmony.
Combat temperature problems by maintaining consistent oven heat and preheating thoroughly. Consider using an oven thermometer for accurate monitoring and reliable baking results to prevent undercooking.
Overcome equipment challenges by ensuring the right size tools, such as pans and mixing bowls, to match recipe volume. This preparation prevents unnecessary spills or failed bakes due to overcrowding.
Ingredient substitutions should focus on maintaining texture and flavor balance, choosing alternatives with similar properties and hydration levels to preserve the Swiss Roll’s known quality characteristics.
Solve timing concerns by accurately tracking all stages; use timers or apps for reminders equivalent to task durations, thereby ensuring successful completion of steps without rushing or delay.
Recipe Success Stories
Community feedback highlights the German Black Forest Swiss Roll as a stunning centerpiece at both intimate celebrations and grand gatherings, winning accolades for taste presentation, and adding a gourmet touch to events.
Discover variation successes as bakers worldwide iterate with local fruits or infusions, sharing stories of how they made the recipe their own. These shared adaptations encourage creativity and cross-cultural flavor explorations.
Adaptation stories often include heartfelt accounts of ingredient swaps related to allergy accommodations or cultural influences, enhancing the Swiss Roll’s universal appeal while embracing individual dietary needs.
Reader suggestions introduce delightful innovations like personalized cream flavors or expanded layers, ushering in fresh perspectives on presentation and composition while maintaining traditional recipe integrity.
Photography tips range from lighting advice to innovative plating techniques, inspiring fellow bloggers or Instagram enthusiasts to document gorgeous creations, showcasing the Swiss Roll’s aesthetic potential beautifully.
Frequently Asked Questions
Can I make this Swiss Roll a day ahead? Yes, preparing the roll a day before serving can enhance flavors; simply store it wrapped in the fridge, allowing the sponge to absorb some cream moisture for perfect texture.
What cherries work best for this recipe? Fresh sour cherries are traditional but sweet or dark cherries can also yield excellent results. Adjustments in sugar may be necessary to balance sweetness levels.
What is the shelf life of a Swiss Roll? Ideally, consume within 2-3 days. Proper storage in airtight conditions and consistent refrigeration preserve its freshness and flavor during this timeframe.
Can I use canned cherries? Absolutely, ensure they are well-drained before use to avoid excess moisture in the roll. This ensures the roll maintains its stiffness and doesn’t become soggy.
How do I prevent my roll from cracking? Roll the sponge while slightly warm using parchment for guidance. If cooled, a brief microwave inner softening step can aid in gentle formation without breaks.
What alternatives to sugar can I use? For alternatives, consider using honey, agave syrup, or sugar-free substitutes like erythritol or stevia, adjusting liquid ingredients if necessary to maintain balance.
Can I add liquor to the roll? Definitely, liquors like Kirsch or brandy can be infused into cream or cherries for added depth. Limit the quantity to preserve firmness and avoid overpowering flavors.
Are there any low-fat options? Opting for a lighter filling cream or even skipping the ganache top layer can reduce caloric content while still yielding a delicious, lower-fat dessert to enjoy.
How do I slice it cleanly? Use a serrated knife and slow, steady cutting motions for neat portions. Consider chilling first before serving for easier slicing without squishing the roll down.
What if I don’t have a jelly roll pan? Substitute with a shallow baking pan of similar dimensions. Adjust baking time accordingly to compensate for differences in sponge thickness.
Additional Resources
Explore related recipes such as Black Forest Cake, Chocolate Eclairs, or Tiramisu Swiss Rolls to expand your dessert repertoire while indulging in chocolatey delights reminiscent of the Swiss Roll experience.
Dive into technique guides detailing cake rolling or whipped cream stabilizing methods, offering detailed insights for mastering skills critical to Swiss Roll creation and ensuring professional-looking results.
Enhance your ingredient information with guides on chocolate selection or cherry variety specifics, assisting in choosing the best components for every dessert endeavor, adding depth to your culinary knowledge.
Consider equipment recommendations noting high-quality pans or specialized utensils integral to successful baking, spotlighting tools worthy of investment for passionate home bakers building proficiency.
Embrace seasonal variations by investigating ingredient adaptions for each time of year, helping keep your baking fresh and relevant regardless of the season and making your dessert suitable year-round.
Join the Conversation
Share your baking triumphs and variations on social media platforms, inviting discussion and enthusiasm from fellow dessert lovers eager to exchange stories and celebrate shared successes in the kitchen.
Utilize photography tips to capture your Swiss Roll from its best angle, using natural light and creative backgrounds to showcase its charm, appealing to both Instagram users and blog photographers.
Offer recipe reviews and contribute your suggestions within online communities, helping refine baking techniques and introduce new perspectives that contribute to the collective fine-tuning of Swiss Roll artistry.
Engage in community forums or baking groups where you can share advice, gain insights, and enjoy camaraderie with fellow enthusiasts across the globe, fostering a sense of belonging and shared passion.
Transform your experiences into clear, approachable guidance that inspires others to start their own baking journey, encouraging positive interaction through culinary exploration and creativity.
The Recipe
German Black Forest Swiss Roll
Serves: 8
Prep Time: 30 mins
Cook Time: 15 mins
Total Time: 45 mins
Kitchen Equipment Needed
Jelly roll pan
Parchment paper
Sieve
Mixing bowls
Serrated knife
Whisk or electric mixer
Ingredients
6 large eggs, room temperature
1 cup granulated sugar
1 cup all-purpose flour
1/3 cup cocoa powder
1 tsp baking powder
1/4 cup butter, melted
1 tsp vanilla extract
2 cups heavy whipping cream
1 cup pitted cherries or cherry pie filling
1/2 cup cherry preserves
1/4 cup Kirsch or cherry liqueur (optional)
Directions
Preheat the oven to 375°F (190°C). Line the jelly roll pan with parchment paper.
In a large bowl, beat the eggs and sugar together until light and fluffy.
Sift flour, cocoa powder, and baking powder together, then fold into the egg mixture.
Add melted butter and vanilla extract, mixing gently to integrate evenly without deflating the batter.
Spread the batter evenly in the prepared pan. Bake for 12-15 minutes or until it springs back to touch.
Cool slightly, then turn out onto a sugared kitchen towel, peeling away the parchment. Roll up gently with the towel.
For the filling, whip the cream to stiff peaks, folding in cherries, preserves, and Kirsch if using.
Unroll the cooled sponge, spread the cream mixture over, and roll back up without the towel this time.
Chill in the fridge for at least an hour before serving. Dust with cocoa or powdered sugar before slicing.
Recipe Notes
If you do not wish to use Kirsch, enhance the filling with cherry juice or omit entirely.
Ensure cherries are well-drained to prevent excess moisture from compromising the roll’s integrity.
Irresistible Chocolate Roll Cake Recipe: A Sweet Delight
Decadent Chocolate Roll Cake: A Sweet Delight for Every Occasion
⚖️
Difficulty
Intermediate
⏲️
Prep Time
30 mins
🕒
Cook Time
20 mins
⏱️
Total Time
50 mins
🍽️
Servings
8-10
Experience pure joy with this indulgent Chocolate Roll Cake that’s perfect for any celebration. This delightful dessert is characterized by a rich chocolate sponge rolled with a creamy filling, promising a symphony of flavors with each bite. Imagine a soft, spongy roll cake that melts in your mouth, leaving a velvety chocolate aftertaste. The combination of bittersweet chocolate and sweet cream creates a balanced flavor profile that is nothing short of heavenly. Moreover, its beautiful swirl makes it a showstopper at any gathering.
Quick Recipe Highlights
Flavor Profile: The Chocolate Roll Cake offers a delightful balance between rich cocoa and light buttercream, resulting in a sweet yet subtle chocolate experience.
Texture: Expect a soft and spongy cake layer enveloping a rich, creamy filling, creating a perfect harmony of moist and fluffy textures.
Aroma: Enjoy the inviting aroma of freshly baked chocolate combining with a hint of vanilla from the whipped cream.
Visual Appeal: The elegant spiral of chocolate cake brilliantly contrasts against the lighter cream filling, making it as visually appealing as it is delicious.
Skill Level Needed: Ideal for those with moderate baking experience; mastering the cake’s rolling technique is crucial for success.
Special Equipment: You’ll need a jelly roll pan, parchment paper, and a cooling rack to create this masterpiece.
Recipe Overview
Difficulty Level: The recipe requires intermediate skills; while the steps are straightforward, precision is key for rolling the cake without cracks.
Category: This chocolate roll cake fits perfectly into the dessert category, making it an ideal sweet treat for festive occasions.
Cuisine: Rooted in European culinary traditions, this dessert has been adapted worldwide with various delicious twists.
Cost: Expect moderate costs, with quality chocolate being the primary expense, but it’s well worth the investment for the premium taste.
Season: Perfect for any season, but notably popular during festive months and winter, as chocolate provides comfort and warmth.
Occasion: An impressive choice for birthdays, anniversaries, or holiday celebrations, cherished for its classic taste and attractive presentation.
Why You’ll Love This Recipe
Taste and texture combine in an irresistible duo to make this Chocolate Roll Cake a standout. With every bite, you’ll enjoy the soft, spongy cake complemented by the rich, velvety cream filling. The flavor is neither too sweet nor too bitter, striking the perfect balance that appeals to both chocoholics and moderate dessert lovers.
Beyond taste, the Chocolate Roll Cake offers a blend of convenience and customizability. Though it requires some precision, the preparation process is rewarding and allows for creative touches to personalize the taste—such as adding a hint of coffee or a splash of rum to the filling.
Nutritionally, the Chocolate Roll Cake offers a range of ingredients like cocoa, providing antioxidants, and moderate servings of butter and sugar, allowing indulgence without guilt. Substituting with dairy-free or sugar-free options further enhances its adaptability for various diets without sacrificing flavor.
Socially, this cake serves as a conversation starter. Its appealing swirl and luscious filling invite admiration and inquiry, making it ideal for entertaining. It’s delightful to see your guests relishing each slice while complimenting the craftsmanship involved in creating such a showstopper.
Finally, the Chocolate Roll Cake remains an accessible dessert option for those desiring elegance without excessive expense. With common pantry ingredients combined with good quality chocolate, this cake can be put together without breaking the bank, summing up deliciousness and affordability in one.
Historical Background and Cultural Significance
The Chocolate Roll Cake, with its European roots, traces back to Swiss rolls crafted in the late 1800s. Known initially as “jelly rolls,” these cakes evolved from the simpler sponge cakes inspired by British baking traditions but featured innovative filling and rolling techniques.
Culturally, this cake enjoys popularity across the globe, with numerous variations appearing in countries like Switzerland and Austria. Its evolution reflects a passion for chocolatier finesse, representing an indulgence paired with sophisticated baking artistry.
Many regions add unique touches, including mascarpone or fruit jams, to traditional recipes. These adaptations show the cake’s resonance among culinary enthusiasts worldwide, with roll cakes becoming synonymous with festive cheer.
Local spins include the Japanese “chiffon roll,” lighter and airier, and the American chocolate log with decorative icing. These variations highlight not only regional palates but also innovative culinary approaches, making the Chocolate Roll Cake a beloved global phenomenon.
Ingredient Deep Dive
Examining the main ingredient, chocolate, reveals its rich history and significance. Chocolate originates from Mesoamerica, where it was revered as a sacred gift and used in both culinary and ceremonial contexts. Today, fine chocolate is celebrated for its complex flavors, determined by cocoa bean quality and processing techniques.
Nutritionally, chocolate offers antioxidants and mood-enhancing properties linked to its flavonoid content. When selecting chocolate, opt for a high cocoa percentage for intense flavor and minimal additives. Store chocolate in a cool, dry place to prevent blooming and ensure freshness.
Flour also plays a key role in the cake’s structure, specifically all-purpose flour which provides just the right gluten content for a tender crumb. Ensure you use fresh flour, stored in an airtight container to maintain its quality for this recipe.
Common Mistakes to Avoid
Overmixing the batter leads to a dense texture; gently fold until just combined for the best results.
Incorrect oven temperature can result in uneven baking; use an oven thermometer to ensure accuracy.
Skipping parchment paper is risky; it helps release the cake smoothly from the pan, preventing sticking.
Rolling while hot or too cold can cause cracks; roll while warm utilizing a damp towel to support the shape.
Inadequate cooling time can result in a soggy texture; allow the rolled cake proper rest to firm the layers.
Underbeating the cream filling may leave it loose; whip to soft peaks for perfect consistency.
Filling spread too thin can compromise the flavor; ensure an even layer for balanced bite in every slice.
Lack of refrigeration time affects setting; chilling stabilizes the cake, making it easier to slice neatly.
Essential Techniques
Mastering the roll technique is crucial for a flawless Chocolate Roll Cake. This involves carefully flipping the sponge onto a sugared towel, peeling off the parchment, and rolling it briskly with the towel to encourage shape memory. Allow it to cool in this rolled state to set the structure before unrolling and adding filling.
When whipping the cream, avoid over-whipping, which can create butter. Look for soft peaks as a visual cue for perfection. If flavors are to be infused, such as vanilla or liquor, incorporate them towards the end of the whipping process to preserve texture.
Pro Tips for Perfect Chocolate Roll Cake
Achieve a smooth roll by using stable parchment paper larger than the pan to facilitate easy lifting. While rolling, employ an even hand for a neat spiral effect, and allow the cake to cool enough before applying filling to prevent melting.
When spreading filling, start at one end, leaving a small border to account for spreading as you roll. Use quality, high-fat chocolate for best flavor, and refrigerate overnight for ideal sliceability and maintained freshness.
For a seamless finish, trim edges for evenness and dust with cocoa powder or confectioners’ sugar as a decorative touch. If slicing unevenly, dip the knife in hot water and wipe dry to cut cleanly without smearing filling.
Variations and Adaptations
The versatility of a Chocolate Roll Cake allows for creative regional variations. Enhance it with salted caramel or fruit jams for a unique spin. Seasonal berries, like raspberries or strawberries, can be added to the filling during summer for a fresh, zesty contrast.
For a dietary adaptation, use gluten-free flour and whipped coconut cream for a dairy-free option without compromising taste. Keto enthusiasts may replace sugar with erythritol and almond flour to lower carbs while preserving texture.
Presentation can vary from classic, dusted with cocoa, to lavish chocolate ganache coats or intricate patterns using chocolate molds. Known for its flexibility, this cake can suit both traditional and modern tastes alike.
Serving and Presentation Guide
Present the Chocolate Roll Cake with finesse by placing it on a decorative platter. Garnish with shavings of dark chocolate or edible gold flakes for a luxurious touch. For a berry-infused version, consider placing fresh berries and mint leaves on top for a pop of color.
Adopt traditional accompaniments like a rich vanilla custard or contrast with the tang of a berry coulis. Ensure the cake is served chilled but not too cold to preserve its luscious texture, allowing it to warm slightly to room temperature.
For portion control, slice with a sharp serrated knife, offering nice even rounds that reveal the cake’s iconic swirl, pleasing both the eyes and palate.
Wine and Beverage Pairing
Pair your Chocolate Roll Cake with a robust port or rich dessert wine such as a late-harvest Zinfandel; these enhance the chocolate’s depth and complement the creamy filling. Non-alcoholic options include hot chocolate or aromatic spiced chai, each offering warmth and variety.
Consider freshly brewed espresso to balance the sweetness, providing a delightful contrast. When serving, ensure wines are slightly chilled, and non-alcoholic options are served warm to heighten sensorial enjoyment.
Storage and Shelf Life
Store the Chocolate Roll Cake in an airtight container to maintain its moisture. Keep refrigerated but allow it to rest at room temperature for about 10 minutes before serving for optimum flavor and texture. Check for any discoloration or off smells as signs of spoilage.
Should you wish to freeze leftovers, wrap tightly in plastic followed by foil to avoid freezer burn. Defrost overnight in the fridge, rather than at room temperature, to ensure the integrity of the cake remains intact.
Make Ahead Strategies
For effortless entertaining, prepare the cake a day in advance. Make the sponge and roll with the towel; then let it rest vertically in the fridge. This cools the cake while maintaining shape, ready to unroll and fill.
Once filled and rolled, storing it wrapped in plastic will ensure freshness. For last-minute touch-ups, keep reserved fillings to pipe as garnish post-defrosting, ensuring the final presentation is as fresh as the pre-prepared cake.
Scaling Instructions
When halving the recipe, use a proportionally smaller pan to maintain the sponge layer’s thickness and adjust baking times accordingly. Doubling necessitates larger baking equipment and possibly adjusting the oven rack to accommodate heat distribution.
Consider freezer space if multiple cakes are made, as preserving them in ideal conditions ensures enjoyment remains top-notch. Adjust delays in cooling to allow each rolled cake ample time to stabilize, ensuring consistent quality regardless of batch size.
Nutritional Deep Dive
This Chocolate Roll Cake presents a nutritious balance, with cocoa offering antioxidants and moderate sugars contributing energy. While high in fats from cream, portion control can help maintain a balanced dessert option.
Emphasizing a fiber-rich filling by adding fruits can enhance the cake’s nutritional profile. Each slice should maintain a healthy indulgence, offering a micro and macronutrient balance as part of a mindful diet.
Dietary Adaptations
For gluten-free adaptations, use a trusted substitute blend that provides elasticity comparable to standard flour. Substitute dairy creams with plant-based alternatives like coconut or almond cream for a delicious dairy-free version.
Consider paleo options by replacing traditional sugars with natural sweeteners like honey or maple syrup, enhancing both flavor and nutritional profile while adhering to dietary preferences.
Troubleshooting Guide
If texture issues arise, consider adjusting the baking time or temperature; underbaking can result in collapsible cakes, while overbaking leads to dryness. For flavor imbalances, enhance with extracts or zests to adjust sweetness.
Temperature problems during cream whipping can be remedied by chilling tools beforehand. Should equipment challenges present themselves, consider multi-use tools like a food processor to simplify ingredient preparation, ensuring a smooth process.
Recipe Success Stories
Our community loves the flexibility of this Chocolate Roll Cake. One reader adapted it with matcha cream for a unique twist, while another used it as a base for a festive Yule log, complete with meringue mushrooms and chocolate bark.
Successful adaptations include berry variants for summer picnics and a non-dairy version that retains rich, chocolatey decadence. Readers suggest capturing the cake’s curve when photographing, enhancing its visual allure with lighting to bring out its glossy finish.
Frequently Asked Questions
Q: Can I use dark chocolate instead of milk chocolate for the roll cake?
A: Absolutely! Dark chocolate will lend a more intense flavor, which complements the sweetness of the cream filling beautifully.
Q: What can I use instead of cream in the filling if lactose intolerant?
A: Coconut cream is an excellent substitute, providing a similar consistency with a slight coconut undertone that pairs well with chocolate.
Q: How do I prevent the cake from cracking?
A: Roll the cake while still slightly warm with a damp towel to avoid cracks caused by dryness or brittleness.
Q: What’s the best way to store the cake if made ahead of time?
A: Wrap tightly in plastic film and keep refrigerated. It can last up to three days while maintaining its flavor and texture.
Q: Can I freeze the Chocolate Roll Cake?
A: Yes, ensure it’s tightly wrapped. Defrost in the fridge to preserve the cake’s quality.
Q: What’s a good alternative to parchment paper for rolling?
A: A silicone baking mat can work, though parchment ensures easy handling.
Q: How can I add a coffee flavor to the cake?
A: Try adding a teaspoon of instant coffee powder to the batter for a subtle mocha twist.
Q: Should I ice the cake after rolling?
A: It’s not necessary, but an extra layer of ganache or glaze can elevate both taste and presentation.
Q: Can I use icing sugar instead of granulated in the cake batter?
A: Icing sugar can alter the texture; use granulated for best structural results.
Q: How do I keep the filling from spilling out during rolling?
A: Ensure an even spread, keeping a small border to prevent overflow when rolled.
Additional Resources
Explore our other chocolate recipes, including tips for mastering the art of sponge cakes and understanding the nuanced flavors of various chocolatiers. Gain insight into equipment must-haves and learn about seasonal ingredients that pair well, ensuring your next baking project is both successful and satisfying.
Join the Conversation
Engage with us on social media, share your Chocolate Roll Cake creations, and rate the recipe. Discover variations through our community, swap tips, and inspire others. Tag us in your posts to showcase how unique your roll cake can be, paving the way for a lively baking discussion.
The Recipe
Chocolate Roll Cake
Serves: 8-10
Prep Time: 30 mins
Cook Time: 20 mins
Total Time: 50 mins
Kitchen Equipment Needed
Jelly roll pan
Parchment paper
Cooling rack
Flexible spatula
Stand or hand mixer
Ingredients
¾ cup all-purpose flour
¼ cup unsweetened cocoa powder
1 tsp baking powder
4 large eggs
¾ cup granulated sugar
2 tbsp melted butter
1 cup heavy cream
2 tbsp powdered sugar
1 tsp vanilla extract
Directions
Preheat your oven to 350°F (175°C) and line a jelly roll pan with parchment paper.
Sift together flour, cocoa powder, and baking powder in a bowl.
In a separate bowl, beat the eggs and granulated sugar until light and fluffy.
Gently fold the dry ingredients into the egg mixture, then stir in melted butter.
Spread batter evenly into the prepared pan, smoothing the top.
Bake for 10-12 minutes or until the cake springs back when touched.
Once baked, immediately invert onto a clean, sugared towel, peel away parchment, and roll up with the towel.
Allow to cool completely, then unroll and spread with whipped cream filling.
Roll the cake back up and refrigerate for at least 30 minutes before serving.
Recipe Notes
For a richer filling, incorporate a tablespoon of cocoa powder into the whipped cream.
Use fresh berries for a springtime twist.
Chill the mixing bowl and beaters before whipping cream for best results.
Delicious Christmas Log Recipe with Rich Coffee Flavor
There’s nothing quite like the aroma of freshly brewed coffee mingling with the rich scent of chocolate during the festive season. Enter the Tasty Christmas Log with a drop-to-the-ground coffee twist—a delectable dessert that beautifully marries the bold, robust notes of coffee with the comforting sweetness of a classic yule log. This delightful recipe is the perfect go-to for coffee enthusiasts looking to bring a unique flavor dimension to their holiday table this year.
This Tasty Christmas Log is a true celebration of textures and tastes. With its creamy coffee-infused ganache and moist chocolate sponge, it promises a delightful contrast in every bite. Ideal for Christmas gatherings and holiday parties, it not only impresses with its flavors but also captivates the eyes with its rustic yet elegant appearance, adorned with festive decorations.
Quick Recipe Highlights
Flavor Profile: The log combines rich chocolate with bold coffee tones, creating a deep, layered taste that excites the palate.
Texture: Expect a soft, moist sponge paired with a velvety coffee ganache, offering a luscious mouthfeel.
Aroma: The fusion of chocolate and coffee creates a warm, inviting aroma that instantly evokes holiday cheer.
Visual Appeal: With its dark chocolate exterior and festive garnishes, this log looks as indulgent as it tastes.
Skill Level Needed: A medium difficulty level requires some baking experience, involving careful attention to baking and rolling techniques.
Special Equipment: You’ll need a baking sheet, parchment paper, and a kitchen thermometer for best results.
Recipe Overview
Difficulty Level: Medium difficulty involves steps that include creating and rolling a sponge cake, which demands precision and some baking finesse.
Category: This dessert falls under the holiday treats and special occasion dessert categories.
Cuisine: Inspired by traditional European yule logs, this recipe carries modern influences with the addition of coffee.
Cost: Moderate cost due to specialty ingredients like high-quality chocolate and coffee.
Season: Best enjoyed in the winter season, particularly during the Christmas holidays when warm flavors are cherished.
Occasion: Perfectly suited for holiday feasts, winter parties, and festive gatherings.
Why You’ll Love This Recipe
This Tasty Christmas Log is a showstopper in both taste and appearance. The fusion of rich chocolate and coffee flavors delivers a delightful complexity that chocolate lovers and coffee aficionados can both celebrate. The texture contrasts between the silky ganache and the airy sponge cake offer a satisfying bite with each forkful.
Convenience is another charm of this recipe. While it appears intricate, it can be made ahead to save time on the day of your gathering, letting you focus on other hosting duties. Despite its impressive look, the step-by-step instructions make preparation straightforward.
Nutritionally speaking, this recipe uses real, high-quality ingredients, promising a purer taste and fewer additives compared to store-bought yule logs. Chocolate in moderation delivers antioxidants, while coffee is known to enhance mood and alertness, making this dessert both a treat and a perk-me-up.
Socially, this log serves as an exciting addition to any holiday dessert spread. It garners oohs and ahhs not only for its taste but for its festive look. Guests will love capturing and sharing its beauty across their social platforms, making it a conversation starter.
Finally, its cost-effectiveness stems from its yield, serving up to 12 guests per log. This ensures you can treat a larger crowd without breaking the bank, enhancing accessibility to gourmet flavors at home.
Historical Background and Cultural Significance
The tradition of the yule log dates back centuries, rooting itself in the robust heritage of European festive celebrations. Once a wooden log burnt ceremoniously to mark the start of the winter solstice, it later evolved into a culinary symbol—the Bûche de Noël.
Culturally, this transformation symbolizes warmth, community, and celebration during the coldest months, bringing people together around shared meals and flavors. It transcends borders, carrying a universal significance of joy and the closing of another year’s cycle.
Over the years, the classic yule log recipe has undergone several evolutions, transforming from an ornate sponge cake to versions imitating the log’s natural appearance, often decorated with meringue mushrooms, fondant leaves, or simply a light dusting of powdered sugar.
This version, incorporating coffee, is a nod to modern culinary trends, blending beloved traditional elements with contemporary flavors. It reflects the growing influence of fusion cuisine, revealing a cultural shift towards embracing global tastes and innovations.
Ingredient Deep Dive
The star of this dessert is undoubtedly dark chocolate, which brings depth and richness to the yule log. Historically an indulgence reserved for the elite, chocolate is now a staple in desserts across the globe. To select the finest, opt for chocolate with a high cocoa content, ensuring a powerful, bittersweet profile that complements the coffee harmony. Keep it stored in cool, dry conditions to maintain its sheen and snap.
Coffee provides a complementary bitterness that enhances the chocolate’s flavor without overpowering it. When choosing coffee for this recipe, aim for freshly ground beans from a reputable source to ensure robust, full-bodied notes. Properly store your coffee in an airtight container away from light and heat to preserve its aroma.
Common Mistakes to Avoid
Overbaking the sponge can result in a dry texture. Keep a close eye on it and use a toothpick test for doneness.
Skipping the coffee cooling step can curdle the ganache, resulting in a lumpy texture.
Rolling the cake while cold can cause it to crack. Roll it warm for that perfect shape.
Using low-quality chocolate compromises both taste and texture, so invest in the best you can afford.
Not aligning the icing sugar evenly can result in a blotched appearance, so use a sifter for dusting.
Improperly wrapped logs during chilling may lose moisture, so ensure tight wrapping with plastic.
Cutting the log immediately upon chilling can lead to cracks, allow it to reach room temperature first.
Misjudging the ganache consistency—ensure it’s thick yet spreadable for an even cover.
Overdecorating can overshadow the coffee chocolate flavor, so aim for balance in every decorative detail.
Neglecting to test coffee strength beforehand may lead to overpowering bitterness.
Essential Techniques
The art of rolling sponge cakes is a critical skill for achieving a flawless log shape. Mastery involves practicing the technique of folding parchment paper and rolling it while the sponge is still warm, as the flexibility prevents cracking. Keep your pressure even as you roll, and practice patience and precision for consistent results.
Tempering the ganache correctly ensures a glossy, smooth finish. Heat the ingredients gently in a bowl over simmering water, stirring continuously to achieve an emulsified texture. Look for gloss and teardrop-like drips as a sign it’s ready for use without oil separation or dull surface issues.
Pro Tips for Perfect Tasty Christmas Log
Begin with a clean, smooth surface for rolling your sponge to prevent unwanted tears or breaks.
When preparing the ganache, add a pinch of salt midway through melting to deepen the chocolate flavor.
Always chill your bowl and beaters if whipping cream—this aids in achieving the perfect stiff peaks for texture.
Allow ganache to cool properly before spreading to avoid melting sponges.
Decorate with restraint—minimal embellishments maintain a sophisticated look while letting core elements shine.
If new to rolling, practice on parchment paper with a test run before tackling your sponge.
Consider a serrated knife for neat, clean cuts—a critical detail for picture-perfect slices revealing the roll’s signature spiral.
Variations and Adaptations
Regional variations may include the infusion of different liqueurs like Grand Marnier or Bourbon for a unique flavor profile.
Incorporate seasonal elements by adding orange zest or dried cranberries during the winter months for a festive flair.
For a vegan twist, replace dairy with plant-based alternatives, keeping flavors intact while accommodating dietary needs.
Elevate the classic coffee notes with espresso powder or by adding a hazelnut twist for a richer palette.
Add textural contrast by including a thin caramel or nut layer inside before rolling, offering delightful surprises in every slice.
Adapt presentation for modern elegance by serving in proportioned slices, topped with minimal garnish.
Serving and Presentation Guide
To present your Tasty Christmas Log, arrange it on a platter with a carpet of shaved chocolate curls, enhancing the coffee theme. Add a light dusting of cocoa powder for an elegant touch.
For traditional flair, adorn with meringue mushrooms and sugared cranberries, striking a balance between rustic and chic. At serving, warm mugs of coffee pair beautifully, reinforcing the central flavor theme. Remember to allow slices to rest briefly at room temperature for optimal serving temperature and texture.
Proper portion control ensures each guest experiences the perfect balance of ganache to cake, so slice with deliberate, equal cuts using a warm, clean knife.
Wine and Beverage Pairing
Pair this log with a rich Cabernet Sauvignon for wine lovers, as its tannins complement the chocolate’s depth without overpowering the coffee notes.
For non-alcoholic options, a creamy latte or spiced cinnamon coffee enhances its chocolaty undertones beautifully.
If tea is your preference, an Earl Grey with a hint of bergamot offers an aromatic floral contrast.
Serve coffee hot to maintain the dessert’s warmth, enriching the dining experience on cool winter evenings.
Storage and Shelf Life
To store your Tasty Christmas Log, wrap it tightly in plastic wrap and refrigerate to maintain its moisture. Store at a consistent cool temperature, ensuring flavors remain vibrant.
Choose airtight containers for additional protection against fridge odors. Check for signs of spoilage, such as mold or off-odors, before serving if stored for extended periods.
Reheat slices gently at room temperature, avoiding microwaves to prevent ganache separation.
If you plan to freeze, wrap in layers of foil and plastic, then defrost in the fridge overnight for best texture retention.
Make Ahead Strategies
Prepare your sponge and ganache in advance, storing separately until assembly day for convenience and quality preservation.
Resting your ganache overnight enhances flavor development, providing a sturdier consistency on the assembly day.
Craft your log a day ahead to deepen flavors without cake drying out—perfect for busy holiday schedules.
Introduce fresh elements like rosemary sprigs or mint leaves on the serving day for a vibrant, aromatic touch.
Reheat slices individually if serving in thick portions, maintaining the ganache’s consistent appeal and ensuring a fresh taste.
Scaling Instructions
For smaller gatherings, halve the recipe to maintain the same quality and richness while avoiding potential waste.
To double or triple, ensure extensive workspace to accommodate increased ingredient quantities and expanded baking materials.
Monitor bake time adjustments closely; larger quantities may require a slight time extension, ensuring sponges remain moist and tender.
Balance freezer storage, adjusting space and strategy to accommodate batch sizes, maintaining freshness with appropriate packaging.
Nutritional Deep Dive
A single serving of this log provides a well-rounded macro-nutrient profile, with a delicate balance of fats, proteins, and carbohydrates.
Chocolate is a renowned source of antioxidants, providing heart-healthy flavonoids.
This dessert also contributes a number of essential micronutrients, particularly from the coffee and chocolate.
Portion awareness ensures indulgence with mindfulness, aligning with healthy dietary intimacy.
For weight management, consider smaller serving portions, integrating the log as a rare, special treat amidst a balanced diet.
Dietary Adaptations
Create a gluten-free version by substituting traditional flour with almond flour, preserving its signature taste and texture.
Dairy-free alterations can include coconut cream and plant-based margarine, ensuring sensitivity accommodations without compromise.
A vegan log adopts egg substitutes and dairy-free chocolates, presenting a flawless taste for plant-based diners.
Lower carbohydrate enthusiasts can decrease sugar, opting for gentler sweeteners to balance blood sugar responses.
The keto twist amplifies gain by using almond flour and stevia, operating harmoniously with low-carb guidelines.
Integrate paleo and low-FODMAP adaptations seamlessly through calculated ingredient adjustments, reinforcing inclusivity.
Troubleshooting Guide
Should your log lack the desired texture, revisit sponge mixing durations—overwhipping results in dryness, while underwhipping leads to moisture imbalances.
For flavor discrepancies, evaluate coffee strength—excessively robust brews may usurp chocolate’s subtler notes.
Temperature inconsistencies often derive from oven calibration errors, impacting bake quality; consider investing in an oven thermometer.
Combat equipment shortages by exploring thrift shop or rental options, curtailing full-on purchases while quickly addressing gaps.
Ingredient substitutions may alter outcomes drastically—test alternatives in miniature batches beforehand to preserve excellence.
Timing lapses can lead to undue staleness; structure preparation schedules in alignment with serving deadlines for optimum freshness.
Recipe Success Stories
Readers consistently report astonishingly positive feedback from gatherings, highlighting the visual allure and taste delight among guests.
One variation success story featured an apricot jam layer within the sponge, adding a fruity punch that guests adored.
Adaptation tales include a peanut butter twist, where peanut butter chips and swirls elevated a traditional approach to newfound heights.
Photography advice encourages focusing on garnishing details and optimal lighting, capturing the log’s essence beautifully.
Reader suggestions often advocate for serving with whipped cream dollops or espresso shots, intensifying the coffee aspect magnificently.
Frequently Asked Questions
Can I prepare this recipe without coffee?
Yes, you can replace coffee with warm water and achieve a classic chocolate log flavor without losing any texture elements.
How do I prevent the cake from cracking?
Roll the cake while it’s warm and use parchment paper to guide the roll gently without applying excess pressure.
What chocolate should I use?
Aim for a high-quality dark chocolate with at least 70% cocoa to fully capture the rich, bittersweet profile.
Can I freeze the assembled log?
Absolutely, wrap tightly in foil and freezer-safe plastic. Thaw in the fridge overnight when ready to serve for best results.
What if I can’t access espresso powder?
Substitute with strong brewed coffee reduction for similar depth and richness, ensuring you reduce water content accordingly.
How long can this log be stored?
Properly stored in the fridge, it maintains quality for up to a week, improving flavor during the first few days of resting.
How do I fix a grainy ganache?
Gently reheat it over a double boiler, whisking continuously, then allow to cool slowly, correcting separation issues.
What garnishes best suit this log?
Explore sugared rosemary, chocolate curls, and edible gold dust for an elegant, festive touch while celebrating yuletide colors.
Can I use milk chocolate?
While possible, it alters the balance between chocolate and coffee, producing a log with a sweeter edge; dark chocolate remains recommended.
Are there non-alcoholic beverage pairings?
Warm hazelnut milk lattes or chai teas complement this log beautifully, enhancing its complexity without overtaking its star flavors.
Additional Resources
Delve into our collection of holiday dessert recipes, featuring similarly indulgent flavors like peppermint bark and spiced nut brittle.
Our technique guides offer in-depth insights into sponge rolling and ganache crafting, empowering bakers at all stages with confidence.
Ingredient information highlights the origins and uses of premium baking chocolates, ensuring informed purchasing decisions.
Explore equipment recommendations that cater to novice and expert bakers, facilitating the quest for better baking setups.
Seasonal variations unlock creative liberties, inspiring exciting flavor combinations that align with each cold-weathered festivity.
Join the Conversation
Engage with our community by sharing your own Tasty Christmas Log photos on social media, using our dedicated hashtag for broader visibility.
Receive photography tips from specialized posts guiding lighting and angles for eye-catching culinary captures.
Intrigued by diverse takes? Leave a review detailing your variant, inspiring others while contributing to the shared culinary tapestry.
Explore community engagement through Q&A channels where fellow bakers exchange experiences, offering support and suggestions.
Let your alterations shine—every nuanced twist signifies creative expressions deserving recognition within our enthusiastic food-loving community.
Preheat oven to 180°C (350°F). Line a baking sheet with parchment paper.
Melt chocolate over a double boiler, then let cool.
In a large bowl, whisk eggs and 100g caster sugar until thick and pale.
Gently fold in cooled chocolate, coffee, and vanilla, followed by sifted cocoa powder and salt.
Pour batter onto prepared baking sheet, smoothing with a spatula. Bake for 15 minutes.
Remove from oven, cool slightly, then invert onto a clean sheet of parchment to roll the cake gently.
Prepare ganache by heating cream to just below boiling, then pour over remaining chocolate and whisk until smooth.
Unroll cake carefully, spread ganache evenly, and roll back tightly.
Chill in refrigeration until set.
Trim ends, dust with icing sugar, and decorate before serving.
Recipe Notes
For added flavor, infuse ganache with your favorite spirit.
Decorate with roasted coffee beans for an added aromatic touch.
This log can be made 1 day in advance, allowing flavors to deepen before serving.
Irresistible Snickers Cheesecake Pie Recipe for Indulgent Dessert Lovers
Decadent Snickers Cheesecake Pie: A Sweet Indulgence
⚖️
Difficulty
Medium
⏲️
Prep Time
20 mins
🕒
Cook Time
40 mins
⏱️
Total Time
60 mins
🍽️
Servings
8 slices
Satisfy your sweet tooth with our utterly Decadent Snickers Cheesecake Pie, a recipe that combines the creamy richness of cheesecake with the irresistible flavors of a Snickers bar. This delightful dessert blends a crunchy chocolate crust, a luscious cheesecake filling, and a rich caramel topping, making it a truly show-stopping treat. Perfect for any occasion, this cheesecake pie will impress your family and friends with its decadent taste and enticing presentation.
Prepare to be mesmerized by the sensory experience of indulging in a slice of this creamy delight. The smooth, velvety texture of the cheesecake, combined with the crispness of the chocolate crust and the gooey caramel layer, creates a perfect balance of flavors and mouthfeel. Each bite offers a burst of sweet and salty notes, thanks to the addition of chopped Snickers bars. The aroma of melted chocolate and caramel will fill your kitchen, making the anticipation hard to resist.
Quick Recipe Highlights
Flavor Profile: A perfect harmony of sweetness from caramel, chocolate richness, and a hint of nuttiness from peanuts.
Texture: Creamy and smooth cheesecake filling with a crunchy chocolate base and gooey caramel top.
Aroma: An intoxicating scent of chocolate and caramel that will fill your kitchen space.
Visual Appeal: A beautifully layered dessert that’s as pleasing to the eye as it is to the palate.
Skill Level Needed: Medium, with steps involving some baking techniques that require attention to detail.
Special Equipment: Springform pan, food processor, electric mixer.
Recipe Overview
Difficulty Level: Medium. The recipe involves creating a layered dessert, which requires precision but is achievable even for a determined beginner.
Category: This pie falls under desserts and sweet treats, perfect for after-dinner indulgence.
Cuisine: A modern American twist that blends classic cheesecake with popular candy bar flavors.
Cost: Moderately priced, as it involves purchasing specific branded chocolate bars and cream cheese.
Season: An all-season favorite, this dessert is great for any time of year.
Occasion: An ideal choice for celebrations, casual get-togethers, and even as a festive holiday dessert.
Why You’ll Love This Recipe
The Decadent Snickers Cheesecake Pie is not just a visual delight but a treat to all senses. Taste-wise, it captures the essence of a Snickers bar while taking it to a new level with the creamy cheesecake layer. The texture is perfectly balanced, with a base that provides a satisfying crunch against the creamy filling and smooth caramel. Its preparation might seem sophisticated, but fear not, as this recipe is designed for convenience with step-by-step instructions that make the process enjoyable.
Nutritionally, this dessert offers a balance of indulgence with some nutritional elements from the peanuts and cheese, permitting you a guilt-free treat in moderate servings. This pie is also a great centerpiece for social gatherings and entertaining, sure to prompt compliments and conversations. Finally, it’s cost-effective due to its ability to serve a crowd, making it an accessible choice for bakers of all levels.
Historical Background and Cultural Significance
Originating from the classic American culinary tradition of blending candies and baked goods, this cheesecake pie integrates the beloved taste of Snickers. Candy-infused desserts have long been a staple in modern American cuisine, seen as a way to elevate traditional recipes with an innovative twist. Over time, this recipe evolved to become a cherished treat, with numerous adaptations appearing in cookbooks and online culinary platforms.
The cultural impact of this recipe can be traced back to America’s love for candy bars and cheesecakes, representing a blend of comfort and indulgence in one dish. Regional variations might incorporate local sweets or adaptations to the crust using native grains. Overall, the Decadent Snickers Cheesecake Pie maintains its status as a beloved, decadent treat in both professional kitchens and home bakeries.
Ingredient Deep Dive
The primary ingredient in this tantalizing dessert is, of course, the Snickers bars. Known for their rich combination of peanuts, caramel, and nougat coated in milk chocolate, Snickers bars are a staple in American candy culture. They add not only flavor but also texture, with their nutty, chewy consistency contributing to the overall experience of the pie. When selecting these bars, ensure they are fresh and stored in a cool environment to maintain their quality.
Complementing the Snickers bars is the cream cheese, providing the creamy base of the cheesecake filling. Opt for full-fat cream cheese for optimal richness, and allow it to come to room temperature before using to facilitate smooth mixing. For storage, keep unopened cream cheese refrigerated and sealed to prevent spoilage. If you’re looking for substitutes, Neufchatel cheese can offer a lower-fat alternative with a slightly tangy flavor.
Common Mistakes to Avoid
Using cold cream cheese. Always let it reach room temperature to ensure a smooth, lump-free filling.
Overmixing the batter, which can lead to a dense cheesecake. Mix just until ingredients are combined.
Skipping the water bath can cause cracks in the cheesecake. This step ensures even cooking.
Not chilling the pie adequately. Allow sufficient time to set for the best texture.
Cutting into the cheesecake too soon. Wait for the recommended chill time for clean, neat slices.
Using a dull knife, which can ruin presentation. Always use a sharp knife for slicing.
Forgetting to cover and store leftovers properly, which can cause drying out or absorption of fridge odors.
Over-baking the crust, which can become too hard. Follow the recommended baking times closely.
Essential Techniques
Achieving the perfect cheesecake texture involves several key techniques. One critical method is the use of a water bath, which prevents the cheesecake from drying out or cracking. The gentle, moist heat evenly cooks the cheesecake, maintaining its smooth and luscious texture. It’s essential to tightly wrap the springform pan in foil to prevent water from seeping in.
Mastering the art of mixing is another crucial skill. Avoid overbeating the cream cheese and eggs, which can incorporate too much air and result in a crumbly or cracked cheesecake. Mix just until combined for the best texture. When baking, keep an eye on visual cues; a slight jiggle in the center of the cheesecake indicates it’s perfectly cooked.
Pro Tips for Perfect Decadent Snickers Cheesecake Pie
Ensure all ingredients are at room temperature for easier blending and a smoother batter.
Invest in a high-quality springform pan to avoid leaks and ensure easy removal of the cheesecake.
Don’t rush the cooling process; allow the cheesecake to cool at room temperature before refrigerating overnight.
Use a sharp knife warmed under hot water for clean slicing of the cheesecake.
Add decorative swirls of caramel or chocolate sauce for an eye-catching presentation.
Consider adding a sprinkle of sea salt on top for a deliciously contrasting flavor.
Variations and Adaptations
Regional variations might see the use of local brands of chocolate or adaptations in the crust. Incorporating seasonal ingredients such as pumpkin spice in fall can offer a delightful twist. Dietary modifications can be made by using gluten-free cookie crumbs for the crust or dairy-free cream cheese alternatives for those with special diets.
For flavor variations, consider adding a splash of vanilla extract or swapping Snickers with other favorite candy bars. Texture modifications can include adding extra peanuts for more crunch or a layer of marshmallow fluff for an added gooey dimension. Presentation alternatives might embrace individual-sized mini cheesecakes for personal servings.
Serving and Presentation Guide
When it comes to presenting your Snickers Cheesecake Pie, garnishing is key. Consider a drizzle of warm caramel or chocolate sauce over each slice for an added layer of visual appeal. For garnishing ideas, sprinkle chopped peanuts or chocolate shavings as a finishing touch. Serve the slices on dessert plates that complement the pie’s rich colors, emphasizing its decadent layers.
Provide a clean slice to each guest, ensuring just the right portion size to savor its rich flavors without overwhelming. Temperatures play an important role; serve the cheesecake chilled for the best texture and taste experience. Engage guests with modern serving suggestions, perhaps coupling the dessert with a small scoop of vanilla ice cream or a dollop of whipped cream.
Wine and Beverage Pairing
Pair this delightful cheesecake pie with a dessert wine like a rich, nutty port or a slightly acidic Riesling that cuts through the sweetness. For non-alcoholic alternatives, consider a caramel-infused latte or a simple cold brew coffee to balance the rich flavors. For a lighter option, a fragrant peppermint tea could complement the dessert’s sweetness while aiding digestion.
When serving wine, be sure to chill white wines slightly before serving, while a room-temp port will emphasize its deep, lingering aromas. Proper portioning of drink pairings can also enhance and not overpower the delicate balance of flavors in the dessert.
Storage and Shelf Life
To store your Snickers Cheesecake Pie, wrap it tightly in plastic wrap or aluminum foil and refrigerate for up to five days. Keep the temperature consistent, ideally below 40°F, to maintain freshness. For longer storage, freezing is an option; simply wrap the cheesecake tightly, then place in a freezer-safe container. When ready to serve, thaw slowly in the refrigerator.
Be mindful of signs of spoilage such as off-smells or discoloration in the cheesecake. If reheating is necessary, do so gently using a warm water bath to maintain the texture. Always encourage serving the pie fresh to preserve its creamy consistency and overall dish integrity.
Make Ahead Strategies
To streamline your preparation process, consider making each layer of the cheesecake pie separately in advance. Start by preparing the crust and refrigerating it, allowing it to set firm. The filling can be mixed and added a day prior, ensuring all flavors meld beautifully overnight. Ensure quality is maintained by wrapping securely and chilling at all stages.
Reheating is seldom needed with this recipe; however, if necessary, use a gentle water bath to gradually warm the cheesecake to serving temperature. Adding fresh elements like caramel topping just before serving enhances the presentation and taste experience.
Scaling Instructions
This recipe can be halved for a smaller serving size, perfect for a more intimate gathering. Use smaller pans and adjust baking times by reducing by approximately one-third. Doubling the recipe for a larger group is achievable with the use of larger equipment and increased ingredient quantities, ensuring baking times are extended by 10-15 minutes. Always consider storage space for scaled-up versions and maintain careful attention to mixing to preserve the cheesecake texture.
Nutritional Deep Dive
The nutritional aspects of this cheesecake pie can be examined through its rich macronutrient content, primarily from fats and sugars. The nuts provide beneficial micronutrients such as magnesium and vitamin E. Consumed in moderation, this dessert offers a permissible indulgence with protein from the cream cheese offering some balance. Be aware of portion sizes, as this is a calorie-dense dessert, and consider sharing it as a celebration or occasional treat.
Dietary Adaptations
For those seeking dietary adaptations, accommodate gluten-free needs by using gluten-free cookie crumbs in the crust. Dairy-free modifications can involve using coconut cream cheese alternatives for the filling, although this may alter texture slightly. Those adhering to a low-carb lifestyle can opt for sugar substitutes and nut-based crusts to reduce carbohydrates, fitting within keto or Paleo guidelines. Allergens such as peanuts can be substituted with other nuts or omitted according to dietary requirements.
Troubleshooting Guide
Should your cheesecake experience texture issues like dryness or cracking, consider increasing moisture through a water bath or adjusting baking times. Balance any overly sweet flavors by choosing unsweetened cream ingredients or incorporating pinch salt. Monitor temperatures closely to avoid undercooking or overcooking; aim for a slight jiggle with firmness at the edges.
If equipment challenges arise, utilize food processors for efficient ingredient blending or use a manual mixer where electric options aren’t available. Timing concerns can be mitigated by preparing ingredients and tools ahead of time, ensuring you’ll complete steps with precision.
Recipe Success Stories
Many cooks have shared their positive experiences with our Decadent Snickers Cheesecake Pie, noting the delight it brings to family gatherings and celebrations. Photographic efforts have been complemented with inventive presentation styles across social media platforms, reinforcing its visual appeal. Readers have successfully adapted the recipe to personal tastes, often attributing their fondness to the versatile, crowd-pleasing nature of this dessert.
Frequently Asked Questions
How can I prevent my cheesecake from cracking?
Ensure a water bath is used to create an even cooking environment and avoid overbeating the filling.
Can I use a different candy bar?
Absolutely, feel free to substitute with your favorite bar, keeping in mind the balance of sweetness and texture changes.
What’s the best way to slice the cheesecake pie?
Use a hot, sharp knife, cleaning between each slice for the cleanest cuts.
How do I store the cheesecake once it’s made?
Store in an airtight container or wrap tightly in plastic, kept in the refrigerator.
Can this recipe be made gluten-free?
Yes, use gluten-free cookies for the crust to accommodate dietary needs.
What should I do if my crust is too hard?
Be cautious not to overbake; use less pressure when pressing the crust into the pan next time.
How long can this cheesecake be stored?
Properly stored, it can last up to five days refrigerated or a month in the freezer.
Is it possible to freeze this pie?
Yes, wrap in foil or plastic, then place in a freezer-safe bag or container.
Will using low-fat cream cheese affect the texture?
It may result in a less creamy texture; full-fat is recommended for the best results.
Can I make this in a regular pie pan?
A springform pan is recommended for easy release, but adjustments might work for a regular pie pan with careful monitoring.
Can I prepare this recipe ahead time?
Yes, prepare each step as described in the make-ahead strategies to save time without compromising quality.
Additional Resources
Explore our related desserts for more sweet inspirations, like the Chocolate Drizzle Cheesecake or Caramel Delight Bars. Gain technique insights through our cheesecake baking guides. Learn about ingredient substitutions and equipment setups to elevate your baking skills. Seasonal adaptations and presentation ideas abound in our culinary blog, where creativity meets delicious results.
Join the Conversation
Share your slice of our Decadent Snickers Cheesecake Pie on social media, tagging us with your unique variations or photogenic success shots. We’re eager to hear your reviews and personal touches added to this recipe! Engage with our community by commenting on others’ culinary attempts, making suggestions, and sharing tips for an ongoing exchange of baking wisdom.
The Recipe
Decadent Snickers Cheesecake Pie
Serves: 8 slices
Prep Time: 20 mins
Cook Time: 40 mins
Total Time: 60 mins
Kitchen Equipment Needed
Springform pan
Food processor
Electric mixer
Baking sheet
Ingredients
1 1/2 cups chocolate cookie crumbs
2 tbsp sugar
6 tbsp melted butter
24 oz cream cheese, softened
1 cup sugar
1 tsp vanilla extract
3 large eggs
1 cup chopped Snickers bars
1/2 cup caramel sauce
1/4 cup chopped peanuts (optional)
Directions
Preheat the oven to 350°F (175°C). Wrap a springform pan in foil to prevent leaks.
Combine cookie crumbs, sugar, and melted butter, pressing into the bottom of the pan to form the crust. Bake for 10 minutes and let cool.
Beat cream cheese until smooth, then add sugar and vanilla. Mix until combined.
Add eggs one at a time, mixing gently to incorporate. Fold in chopped Snickers bars.
Pour the filling over the crust and smooth the top. Place the pan in a water bath in the oven.
Bake for 35-40 minutes until the center is slightly jiggly but set around the edges.
Remove from oven and cool at room temperature. Refrigerate at least 4 hours or overnight.
Before serving, drizzle the top with caramel sauce and sprinkle with chopped peanuts if desired.
Recipe Notes
Ensure cream cheese is softened for smoother mixing.
For an extra garnish, consider adding chocolate shavings on top of the caramel.
Experiment with different candy bars for variety in flavor.
Indulge in Decadence with the Best Dark Chocolate Mousse Cake Recipe
Dark Chocolate Mousse Cake: An Indulgent Delight
⚖️
Difficulty
Intermediate
⏲️
Prep Time
30 mins
🕒
Cook Time
45 mins
⏱️
Total Time
75 mins
🍽️
Servings
8
Unveil the rich depths of chocolate with this Dark Chocolate Mousse Cake, a dessert that promises luxury with each bite. Enveloped in a velvety mousse and resting on a feather-light sponge, this cake is a symphony for the senses. Every bite unravels layers of indulgent dark chocolate with a smooth, creamy texture that effortlessly melts in your mouth. This cake is more than a dessert; it is an experience—a conclusion to a dinner party or a special treat just because.
Imagine the delight of your guests as you serve this cake, its rich aroma filling the room, heralding the pure pleasure that’s about to be enjoyed. The balance of bittersweet dark chocolate and the airy mousse creates a harmonious blend, satisfying the chocolate lovers and traditional dessert enthusiasts alike.
For those who love to entertain, this Dark Chocolate Mousse Cake offers an exquisite presentation that transforms a simple meal into a memorable event. The contrast of the smooth mousse against the cake’s backdrop offers an elegant look that is sure to impress. And with the bonus of making it ahead, hosting becomes less stressful, allowing you to enjoy the occasion as much as your guests.
Quick Recipe Highlights
Flavor Profile: The cake boasts an intricate combination of bittersweet chocolate, enriched with a hint of vanilla that forms a luxurious, irresistible flavor.
Texture: A delightful blend of smooth mousse paired with a soft sponge provides a melt-in-your-mouth sensation.
Aroma: Rich and comforting, the chocolate aroma is heightened with hints of fresh vanilla.
Visual Appeal: Dark and decadent, with glossy mousse layers and a sponge base.
Skill Level Needed: Ideal for those with intermediate baking skills, requiring careful temperatures and folding techniques.
Special Equipment: A springform pan and a stand mixer are essential to achieve the perfect mousse texture.
Recipe Overview
Difficulty Level: This dessert is moderately challenging, tailored for bakers who are comfortable with multi-step processes and precise techniques like folding and tempering.
Category: This luscious dessert falls into the category of celebration cakes, perfect for birthdays and other milestones.
Cuisine: While rooted in French patisserie traditions, this cake enjoys global appreciation for its classic mousse preparation.
Cost: A sophisticated yet cost-effective choice, the primary expense is quality dark chocolate.
Season: Best served in cooler weather for optimal storage, yet elegant enough for holiday gatherings all year round.
Occasion: Recommended for celebratory dinners, anniversary parties, or any gathering where a show-stopping dessert is in order.
Why You’ll Love This Recipe
First and foremost is the extraordinary taste and texture combination this cake provides. The deep, luxurious taste of dark chocolate is complemented by the lightness of the mousse, creating a balance that is both indulgent and satisfying. The smoothness of the mousse contrasts beautifully with the fluffy sponge base, offering a multi-textured bite that keeps every forkful exciting.
In terms of convenience, prepping the mousse and sponge ahead of time relieves much of the day-of preparation stress. The cake can be stored in the refrigerator, making it an excellent choice for those planning ahead for events or gatherings.
Nutritionally, while the Dark Chocolate Mousse Cake is a treat, using quality ingredients like real dark chocolate offers benefits such as antioxidants. Dark chocolate, when enjoyed in moderation, can be a richer source of flavonoids than other types of desserts.
As a socially engaging dessert, this cake creates a perfect centerpiece to any dinner conversation. Paired with the right beverages, such as a rich red wine or a full-bodied coffee, it elevates the dining experience and encourages longer post-dinner conversations.
Lastly, from a cost perspective, creating a homemade Dark Chocolate Mousse Cake offers a more economical choice compared to purchasing a bakery cake of similar sophistication. You can choose the chocolate to suit your budget or dietary preferences while also controlling the quality and freshness of the cake.
Historical Background and Cultural Significance
Dark chocolate mousse cakes trace their roots back to the illustrious French culinary tradition. Mousse, deriving from the French word for ‘foam,’ was a culinary innovation that combined airy textures with rich, intense flavors, typically served in high-end patisseries.
Over the years, this dessert became synonymous with elegance and sophistication, associated with fine dining and special occasions. Its ability to adapt to different interpretations—whether a straightforward mousse or a layered cake version—demonstrates its versatility within the culinary world.
The evolution from simple chocolate mousse to intricate mousse cakes reflects broader trends in baking and dessert presentation. As techniques improved and the global palate became more open to rich desserts, the mousse cake rose in prominence for its ability to impress while satisfying cravings.
Depending on the country or region, variations might include infusions of liquors, the addition of fruits, or even layered with other desserts like brownies or biscuits. Each variation lends its own cultural spin while keeping the essence of the original mousse concept intact.
Ingredient Deep Dive
Dark chocolate is the star of this recipe, celebrated not only for its intense flavor but also its rich history. Originating from the cacao bean, dark chocolate has been crafted and consumed since ancient civilizations such as the Aztecs and Mayans, who valued it both for currency and cuisine.
Nutritionally, dark chocolate is known for its heart-health benefits, linked to its content of flavonoids, which are compounds with antioxidant properties. Look for chocolate with at least 70% cacao for maximum health benefits while maintaining that luxurious taste.
When selecting chocolate, consider the brand’s reputation and the source of the cacao beans for a balance of ethical and quality consumption. Store chocolate in a cool, dry place away from sunlight to maintain its texture and flavor over time.
Eggs provide the mousse with structure and richness. They should be as fresh as possible for whip height and consistency. A room-temperature egg helps achieve the best incorporation texture for a smoother mousse.
Incorporating vanilla adds a nuanced layer of sweetness to balance the chocolate, transforming the aroma and flavor profile of the cake. Pure vanilla extract is preferred over imitation for a more natural taste.
Common Mistakes to Avoid
Overbeating the cream can lead to a dense and grainy mousse. Aim for soft peaks to maintain its light and airy texture.
Failing to temper the chocolate properly can result in the chocolate seizing. Melt chocolate over a gentle simmer using the double boiler method.
Not using room-temperature eggs will lead to an uneven mixture, which impacts the final mousse texture.
Ignoring recommended folding techniques can deflate the mousse, ruining its light texture. Always fold with a gentle hand.
Rushing the cooling process might cause moisture in the cake, leading to a soggy base. Always allow ample time for cooling.
Improperly lining the baking pan could result in a stuck base. Use parchment paper for best removal results.
Using low-quality chocolate can compromise both flavor and texture, so choose your chocolate wisely for the best results.
Serve at the wrong temperature. Ensure the cake is slightly chilled for slicing and presentation.
Too much moisture in storage can impact the texture. Keep sealed to avoid air and moisture exposure in the refrigerator.
Failure to balance flavor by omitting salt, which spikes sweetness and enhances overall taste. Always include a pinch.
Essential Techniques
One of the most essential techniques in crafting this cake is mastering the art of folding. Folding is crucial to incorporate air without deflating your mixture, particularly when combining whipped cream with melted chocolate. The secret lies in using a wide spatula and gentle, rotating motions that cut down the mixture while turning the bowl.
Tempering chocolate is another key technique. This involves slowly melting the chocolate to ensure a shiny finish and proper texture when cooled. Always use a double boiler to carefully control the temperature, preventing it from overheating and seizing.
Knowing when egg whites form soft peaks is crucial. When whipping egg whites, the process should stop when peaks form that slightly tip over without drooping. Hitting this stage correctly provides the right structure to mousse, contributing to its lightness.
Lastly, meticulous line and bake techniques ensure even cooking. Line cake pans with parchment to prevent sticking, and test doneness with a toothpick method—insert into the cake and look for a few moist crumbs but no batter residue.
Pro Tips for Perfect Dark Chocolate Mousse Cake
Choose a high-quality chocolate with 70-85% cacao for the richest flavor. Its intense bitterness will balance beautifully with the creaminess of the mousse and sweetness of sugar.
For an airy mousse, ensure all utensils used for whipping cream or meringues are cold. This helps stabilize the peaks and maintain their fluffiness.
Incorporating a tablespoon of espresso can enhance the chocolate flavor, adding depth without affecting the overall taste.
Use unsalted butter, which allows better control over the cake’s saltiness and improves the texture by preventing excess salt crystals from altering structure.
To achieve a clean slice when serving, dip your knife in hot water, cleaning it between each cut for perfect presentation without smudged layers.
Patience is key—never rush the chilling steps. Allow the mousse and cake to set fully to maintain its structure when slicing and serving.
Experiment with subtle garnishes such as fresh berries or a sprinkle of sea salt to enhance both visual appeal and flavor profile.
A small amount of gelatin can be used to stabilize the mousse for easier serving, especially in warmer climates or if planning to transport the cake.
Variations and Adaptations
Regional variations can enhance your cake uniquely. For instance, Italian versions might incorporate mascarpone cheese into the mousse for a creamier texture, adding an Italiano flair to your cake.
Seasonal adaptations can include the addition of fruits. Fresh raspberries in summer or candied oranges in winter provide freshness or warmth, complementing the chocolate.
For dietary modifications, consider a gluten-free cake base by substituting almond flour for regular flour, retaining structure with added moisture from Greek yogurt.
Playing with flavor variations might include infusions of liqueurs such as Grand Marnier for a citrus boost or a dash of bourbon for a caramel-like depth.
Texture modifications can involve a crunchy layer, such as crushed almonds, between the sponge and mousse for delightful bites with contrast.
In terms of presentation, experiment with a dome shape for a modern edge or layer in a trifle glass for individual servings that showcase the beautiful layers.
Serving and Presentation Guide
To create a stunning presentation, consider plating slices with artistic zigzagging of chocolate sauce across the plate. This anchors the dessert aesthetically while adding extra depth.
Garnishing with a small mint sprig or edible flowers creates a pop of color against the deep chocolate hues, offering a refreshing visual and taste finish.
Consider classic pairings such as serving with a side of crème anglaise or fresh berry coulis, adding a creamy or fruity element to brighten the dish further.
For a current twist, you can present the mousse cake with shards of caramel for a modern, artistic flair or dust with a light snowfall of cocoa powder for elegance.
Temperature plays a crucial role. Serve slightly chilled for better texture while allowing the chocolate aroma to bloom as it warms gently on the plate.
Portion control is critical due to the richness of the cake. Small slices encourage savoring the dessert’s flavors and prevent overwhelming the palate.
Wine and Beverage Pairing
Rich red wines such as a mature Cabernet Sauvignon or a Port can elegantly complement the cake’s chocolate notes, their tannins balancing the richness.
For non-alcoholic options, a chilled, spiced chai tea offers warmth and spice that align effortlessly with the chocolate, enhancing the dessert experience.
Pairing with coffee, particularly espresso or an Americano, can amplify the cake’s sweetness while cleaning the palate between bites, perfect for dessert lovers.
Temperature considerations are vital—serve wines slightly chilled but not cold, around 60°F, and hot beverages above 160°F to pair perfectly with the cake.
For serving suggestions, ensure glasses are polished, and aromatic beverages are prepared just before serving to maximize aroma and freshness.
Storage and Shelf Life
Store the cake covered in the refrigerator to maintain the mousse’s consistency and prevent drying. It’s best consumed within 3 days for maximum freshness.
Ideal storage involves placing it inside an airtight cake container or wrapping it tightly with plastic wrap to avoid air exposure and potential flavor absorption from other foods.
Signs of spoilage include any noticeable off smells or water pooling, which means the mousse has lost its integrity and should not be consumed.
Reheating isn’t recommended due to the cake’s delicate mousse, which can melt. Instead, let it sit at room temperature for about 20 minutes before serving.
Freezing guidelines suggest wrapping individual slices in cling film and then placing them in a freezer bag, allowing easy thawing and portion control while preserving flavor.
Make Ahead Strategies
The entire cake can be prepared a day ahead to allow flavors to meld and the mousse to firm up, ensuring clean slicing and proper presentation.
During prep, it’s crucial to separate stages—bake the sponge base first, allow it to cool completely, then layer with mousse to prevent melting and structure loss.
Quality assessment of any make-ahead dessert focuses on texture; if mousse softens too much, gelatin may be incorporated to stabilize future batches.
Assemble the cake directly on the serving dish to minimize movement and maximize presentation structure, reducing the risk of damage during transfer.
If forehead cooling, remove the cake about 30 minutes before serving to allow flavors to develop fully but without sacrificing overall shape.
Integrating fresh elements like berries or additional garnishes should occur right before serving to maintain vibrancy and preserve their immediate taste impact.
Scaling Instructions
When halving, carefully adjust egg quantities, using a yolk or whites calculator to ensure even distribution throughout the mousse and sponge.
For doubling or tripling, ensure equipment such as mixers or bowls are large enough to handle increased volumes, preventing mixing overruns and spillage.
Timing changes only slightly as the volume of the batter increases. Monitor the cooking time towards the end as larger quantities may bake less evenly.
Consider staggered baking times for multiple layers if doubling or tripling and investing in additional pans to maintain steady oven temperatures.
Storage needs evolve with scaling; sealed portions individually help retain freshness, preventing the entire batch from being exposed each serving.
Nutritional Deep Dive
The macro breakdown for this cake highlights its carbohydrate and fat content, driven by refined sugars and cocoa butter from dark chocolate.
Micronutrients in dark chocolate, including iron, magnesium, and zinc, contribute to essential trace elements in diets with moderation.
Health benefits include potential mood-boosting properties due to serotonin regulation from specific compounds in chocolate.
Dietary considerations should align with moderation, balancing this rich dessert with lighter meals or physical activity to offset caloric intake.
Analyze portion sizes to understand nutritional impact; typically, a slice should be small, complemented with light accompaniment for balance.
Mindful consumption reflects weight management goals, recognizing indulgence with simultaneous appreciation of nutritional content and size.
Dietary Adaptations
For gluten-intolerant individuals, create a gluten-free cake by substituting almond flour or gluten-free baking blend for traditional flour without losing moisture.
Dairy-free versions are achievable by replacing heavy cream with coconut cream, providing a similar texture and subtle tropical flavor for the mousse.
Vegan adaptations require substituting eggs for aquafaba or commercial egg replacer, maintaining leavening with chemical agents for structure in the sponge.
Low-carb indices are maintained by using erythritol or stevia for sweetening while maintaining texture integrity with moisture-rich ingredients like Greek yogurt.
Keto followers might enjoy this treat by using almond flour exclusively and increasing nut milk ratios for a lower-carb profile, maintaining rich satisfaction.
Paleo enthusiasts can adapt with organic or raw dark chocolate and nut butter blends, aligning with dietary guidelines while still indulging properly.
For those following low-FODMAP, limiting portions and choosing modified ingredients like lactose-free milk alternative ensures comfort and enjoyment of the cake.
Troubleshooting Guide
Should the mousse appear grainy, it’s often because of overheating chocolate or improperly folded ingredients. Double-check chocolate melting on low heat.
For correcting flavor imbalances, a pinch of salt or teaspoon of strong brewed coffee offsets major sweetness issues without altering original flavor too much.
Temperature concerns arise; ensure ingredients like eggs are room temperature, which impacts mixing and combination stages, affecting final cake texture.
When equipment challenges occur, manual mixing techniques may substitute a stand mixer with bonus muscle work— cautiously and with capability awareness.
Ingredient substitutions need gradual introduction through batch testing, ensuring the primary structure of the cake isn’t altered adversely for texture, flavor, or bake-ability.
Timing concerns usually pertain to chocolate solidifying—it sets quickly. Always plan assembly with all elements ready, preventing seizes or unplanned setting.
Recipe Success Stories
From community input, incredible successes with this recipe often tout the incredible blend of chocolate richness and mousse lightness—perfect for family celebrations.
Adaptation stories reveal adding local ingredients such as cherry extracts or almond touches, complementing the natural flavor union of the cake imaginatively.
Reader suggestions spark further creativity; integrating crusts or additional layers underscores the versatile, iterative journey of a trusted dessert base.
Photography tips involve enhancing color contrast through plate selection—deep reds or royal blues, which visually converse with dark chocolate shades eloquently.
Encouraging culinary exploration, successes translate the core principles of this mousse cake into broader baking worlds through cake swaps or cross-region collaboration.
Frequently Asked Questions
Can I make this cake without a mixer? Yes, while a mixer eases preparation, use a whisk or manual hand beater for incorporating air. Patience matters.
Is it okay to use milk chocolate? Substitute with increased sweetness caution. Consider reducing sugar content to balance the less intense flavor of milk chocolate.
Can this be made nut-free? Absolutely, simply ensure chocolate brand is nut-free certified, and adhere to original flour without almond substitutions affecting texture.
Do I need to use gelatin in mousse? Not strictly; it’s beneficial for structural integrity but can be omitted with correct chilling time assurance.
Can it be customized with fruit layers? Fruit layers like raspberry puree can be included between mousse and sponge layers to enhance flavor dynamics.
What is the best way to store leftovers? In an airtight container, refrigerated, consuming within three days for best texture retention and freshness.
Why did my sponge collapse? Rapid cooling or unchecked folding often contributes. Ensuring a gradual cooling regime prevents structural impact.
Can this be two-tone chocolate? By splitting mousse and incorporating white chocolate variants, you achieve a dazzling two-tone effect driven by contrasting chocolate.
Are there nut-free chocolate brands suitable? Yes, several brands offer nut-free assurance, designed for dietary adherence without chocolate limitation fears.
How can I enhance mousse flavor? Adding orange zest or chili powder provides innovative taste layers, refreshing the traditional flavor anchor of chocolate mousse.
Additional Resources
For more gourmet indulgences, explore additional recipes like classic tarte au chocolat, offering technique mastery and merger of global ingredient inspirations.
Technique guides provide insight into tempering chocolate confidently, presenting step-by-step visual and textual expansions to mirror professional techniques.
Ingredient information highlights sourcing premium cocoa-backed products, ensuring informed buying decisions reflecting both budget and quality centerpiece goals.
Equipment recommendations showcase brands known for reliability and durability, providing knowledge to equip avid bakers with constant quality assurance on the countertop.
Seasonal variations are explored through blogs or culinary sites focusing on festive adaptations, granting awareness of traditional alignment with current innovative spins.
Join the Conversation
Get involved by joining our social media platforms to share your own Dark Chocolate Mousse Cake experiences, whether triumphs or experimental iterations.
Experiment with photography, using natural light and employing contrast principles to capture your cake exquisitely, showcasing baking prowess effectively.
Sharing recipe reviews fosters a collaborative community where bakers can refine approaches or recommend alternate methods enhancing the community knowledge pool.
Community engagement fans creative exploration, generating discussion about favorite ingredient substitutions or serving suggestions, enhancing collective creativity.
Encouraging recipe variations nurtures evolution, diversifying the legacy of the Dark Chocolate Mousse Cake by inviting individual perspectives into broad context interpretations.
The Recipe
Dark Chocolate Mousse Cake
Serves: 8
Prep Time: 30 mins
Cook Time: 45 mins
Total Time: 75 mins
Kitchen Equipment Needed
9-inch springform pan
Stand mixer or hand mixer
Double boiler or heatproof bowl
Spatula
Parchment paper
Ingredients
1 cup heavy cream
8 oz dark chocolate (70% cacao)
6 large eggs, separated
1/2 cup granulated sugar
1/4 teaspoon salt
1 teaspoon vanilla extract
Directions
Preheat oven to 350°F (175°C) and line the bottom of a springform pan with parchment paper.
Melt the dark chocolate using a double boiler method. Allow it to cool slightly.
In a stand mixer, whip egg whites until soft peaks form. Gradually add half the sugar, beating until stiff peaks form.
In another bowl, beat egg yolks with remaining sugar until pale and thick. Incorporate melted chocolate, then gently fold in egg whites.
Pour mixture into prepared pan and bake for 20 minutes or until a skewer inserted comes out clean. Let cool completely.
For the mousse, whip heavy cream to soft peaks and fold in melted, cooled chocolate, followed by folded egg whites until fully combined.
Spread mousse over cooled cake layer and refrigerate for at least 4 hours or overnight to set.
Recipe Notes
For added texture, consider sprinkling a tablespoon of cocoa nibs over the mousse before serving.
Serve with a dollop of whipped cream or fresh berries for additional contrast.
Hi I'm Emy
I’m passionate about sharing a diverse collection of sweet and savory recipes that I’ve meticulously tested and perfected in my own kitchen.