Delicious Zucchini Carrot Cake Cheesecake Cookies Recipe to Try Today

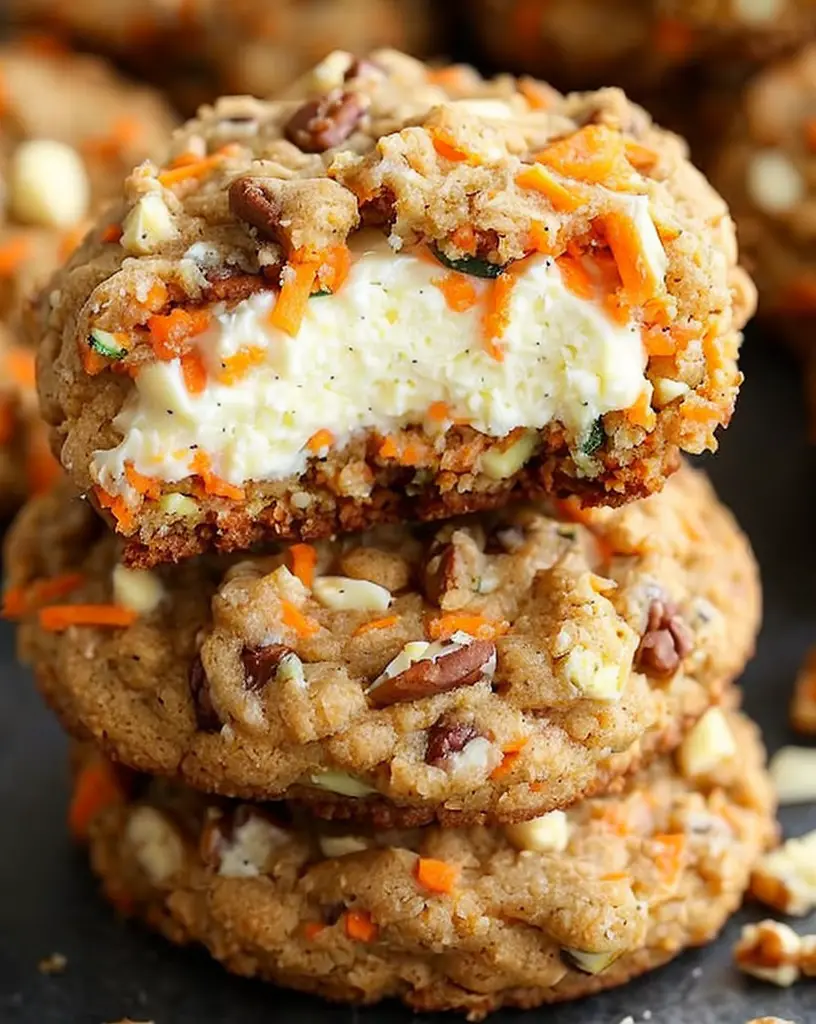
Zucchini Carrot Cake Cheesecake Cookies: A Delicious Twist on Classic Flavors

⚖️
Difficulty
Medium

⏲️
Prep Time
20 mins

🕒
Cook Time
15 mins

⏱️
Total Time
35 mins

🍽️
Servings
24 cookies

Welcome to the ultimate indulgence: Zucchini Carrot Cake Cheesecake Cookies! This unique recipe perfectly marries the flavors of zesty carrots, subtle zucchini, and creamy cheesecake all wrapped into a delightful cookie form. Imagine the tantalizing fusion of spices that dancing through your taste buds with each bite, creating an unforgettable treat that is both comforting and sophisticated. Perfectly moist and delightfully chewy, these cookies also boast a luscious cheesecake center, making them perfect for any occasion, whether it’s a family gathering, potluck, or just a sweet treat to enjoy at home.

These Zucchini Carrot Cake Cheesecake Cookies not only satisfy your sweet tooth but also add a hint of nostalgia with their playful, cake-like texture. Each cookie is an invitation to enjoy the delightful complexities of flavors with every satisfying chewy bite. The addition of fresh vegetables provides a naturally sweet and moist base, allowing you to enjoy all the decadent flavors guilt-free. Bring joy to your kitchen and delight to your taste buds with this simple yet extraordinary recipe!

Quick Recipe Highlights

  • Flavor Profile: Expect sweet notes from the carrots, earthy undertones from zucchini, and a rich creaminess from the cheesecake filling.
  • Texture: These cookies present a soft, chewy exterior with a luscious, creamy center that melts in your mouth.
  • Aroma: The warm spices of cinnamon and nutmeg create an inviting aroma that fills your kitchen.
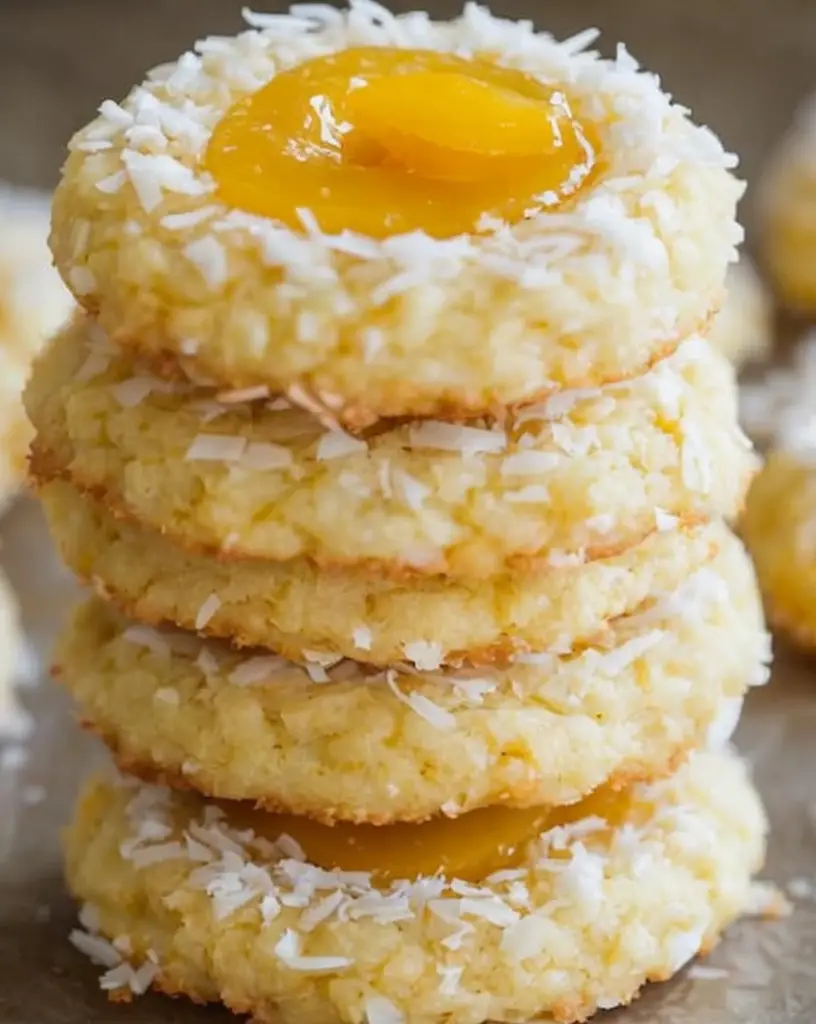
  • Visual Appeal: Vibrant orange and green flecks combined with a glistening cream filling make these cookies eye-catching.
  • Skill Level Needed: This recipe requires basic baking skills but is accessible for both novice and experienced bakers.
  • Special Equipment: A mixer, baking sheets, and parchment paper will make the process easier and more efficient.

Recipe Overview

  • Difficulty Level: This recipe is considered medium due to the multiple components involved, but is manageable with clear instructions for each step.
  • Category: These cookies are a delightful dessert that can also double as a lavish snack throughout the day.
  • Cuisine: This recipe draws from American baking traditions, blending classic carrot cake and cheesecake elements into a new format.
  • Cost: Ingredients are generally affordable, with the most significant expense being the cream cheese.
  • Season: These cookies are perfect for any season, especially spring and summer when fresh zucchini is abundant.
  • Occasion: Ideal for celebrations, casual gatherings, or as a creative treat for lunch boxes.

Why You’ll Love This Recipe

The combination of zesty flavors and soothing textures make these Zucchini Carrot Cake Cheesecake Cookies a fan favorite. The natural sweetness from the carrots and zucchini offers a unique taste profile that pairs beautifully with the creamy cheesecake interior. Each bite provides the perfect balance of sweetness and warmth, making them an irresistible indulgence for dessert lovers.

Convenience sets this recipe apart; it’s relatively quick to prepare and doesn’t require overly complicated techniques. Simply mix, scoop, and bake! For those busy days or last-minute gatherings, you can whip up these cookies in no time, offering a delicious surprise that impresses every guest.

Nutritionally, adding zucchini and carrots boosts the health factor of these cookies. Both vegetables contribute essential vitamins, minerals, and fiber while allowing you to sneak in some veggies into your treats. This makes them a little more wholesome compared to traditional cookies without sacrificing flavor.

Socially, these cookies serve as a great conversation starter. Their unique flavor and presentation will captivate your guests’ attention, encouraging them to savor and discuss this innovative take on classic desserts. Plus, they’re perfect for sharing with friends and family, helping to create memorable moments around the table.

Cost-effectiveness plays a role too. Using everyday ingredients, this recipe allows you to create impressive treats without breaking the bank. With a yield of about 24 cookies, you’re sure to have plenty to share or enjoy throughout the week!

Historical Background and Cultural Significance

The idea of combining zucchini and carrots in baked goods has roots in traditional home cooking, where frugal cooks sought to utilize seasonal produce effectively. Carrot cake, in particular, has a rich history dating back to medieval Europe when it was popular to sweeten baked goods with carrots instead of sugar. With the rise of American baking, this concept evolved, inspiring various renditions like zucchini bread, which became a staple in many households.

In America, the carrot cake gained immense popularity in the late 20th century, often enjoyed at celebrations such as birthdays and weddings. The use of zucchini in baking surged with the growth of community gardening, showcasing how people creatively used seasonal vegetables. Combining these two beloved ingredients reflects a trend in modern baking, where creative combinations are celebrated.

As recipes evolve, many aspects of the traditional carrot cake recipe have been modified, including healthier alternatives using whole grains and less sugar. The introduction of cheesecake elements adds another layer, celebrating the rich, creamy textures found in many beloved desserts.

Regional variations of carrot cake exist, with different spices, nuts, and frostings capturing the essence of local culinary traditions. Adding zucchini to the mix demonstrates the flexibility and creativity in American baking, illustrating how home cooks turn simple ingredients into delightful desserts.

Ingredient Deep Dive

In this recipe, zucchini serves not just as a filler but an important ingredient that adds moisture without overwhelming flavor. An excellent source of vitamins A and C, zucchini also provides a subtle, mild flavor that complements the sweetness of carrots. When selecting zucchini, look for firm, unblemished vegetables with a vibrant skin. For storage, keep zucchini in the fridge’s vegetable drawer for up to a week.

Carrots, a staple in many kitchens, add natural sweetness and a lovely orange hue to these cookies. Carrots are high in beta-carotene, an antioxidant that is converted to vitamin A in the body, aiding in vision and skin health. When choosing carrots, opt for smooth, firm specimens, avoiding those that feel soft. Store them in the refrigerator in a perforated plastic bag to keep them fresh longer.

Cream cheese provides the luscious cheesecake filling that steals the show in these cookies. Rich and creamy, it adds a delightful tang that balances the sweetness of the cookie. When selecting cream cheese, choose full-fat versions for best results, and store leftovers wrapped tightly in the fridge up to a week.

Flour is a foundational ingredient, offering structure and stability to the cookies. All-purpose flour usually produces great results, but for a nuttier flavor and denser texture, consider whole wheat flour. Always sift your flour before measuring to ensure accuracy in your cookie dough.

Sugar sweetens these delightful creations and also contributes to the cookies’ texture. A blend of brown and granulated sugar adds depth to the flavor profile. When making substitutions, consider alternatives like honey or maple syrup, but keep in mind that liquid sweeteners may alter the moisture balance.

Common Mistakes to Avoid

  • Overmixing the dough: This can lead to tough cookies. Mix just until combined to keep your cookies soft and chewy.
  • Using too much moisture: Excess water from zucchini can make your cookies overly wet. Squeeze out excess moisture before adding it to the batter.
  • Overbaking: Keep an eye on the baking time. Cookies should be lightly golden around the edges, but soft in the center.
  • Not chilling the dough: Allowing the dough to chill before baking can enhance the flavors and improve texture.
  • Skipping parchment paper: Using it can prevent sticking, ensuring your cookies release effortlessly from the baking sheet.
  • Ignoring oven temperature: An oven thermometer can help ensure your cookies bake correctly and thoroughly.
  • Not measuring accurately: Use measuring cups and spoons for precise measurements to yield consistent results.
  • Storing improperly: To maintain freshness, store cookies in an airtight container at room temperature. Refrigeration can lead to changes in texture.

Essential Techniques

To achieve the perfect Zucchini Carrot Cake Cheesecake Cookies, proper technique is crucial. Start by creaming the butter and sugars together until light and fluffy; this process incorporates air into the mixture, contributing to a lighter texture. Be careful not to overmix after adding the dry ingredients, which could lead to dense cookies.

Also, ensure the cream cheese filling is smooth before incorporating it into the cookie. If using chilled cream cheese, it may lead to lumps in the filling. Let it come to room temperature for a consistent mixture that blends beautifully into your cookie dough.

Regarding baking, pay special attention to oven temperatures. An accurate temperature will ensure the cookies bake evenly. If you find the tops of your cookies are browning too quickly, consider rotating the baking sheet halfway through for an even cook.

Pro Tips for Perfect Zucchini Carrot Cake Cheesecake Cookies

To achieve cookie perfection, start with room temperature ingredients, which can impact the final texture dramatically. This includes eggs, butter, and cream cheese, ensuring they mix more uniformly.

Consider adding chopped walnuts or pecans to your cookie dough for an additional crunch that contrasts beautifully with the soft cookie texture. These enhance flavor and provide a nutty richness that complements the other ingredients.

Experiment with spices. While cinnamon is a classic, consider adding a dash of ginger or a pinch of allspice for added warmth and depth. It can elevate flavors to new levels.

Utilize a cookie scoop for uniformity in size, allowing all cookies to bake evenly. It also simplifies portioning, preventing you from over or under-filling your cookies.

For an extra layer of flavor, drizzle a simple icing glaze made from powdered sugar and milk over cooled cookies, enhancing both flavor and visual appeal.

Wait until cookies have cooled on the baking sheet for a few minutes before transferring them to wire racks. This allows them to set properly, preventing crumbling during the transfer.

Finally, store cookies in an airtight container with parchment paper between layers to prevent sticking and keep them fresh longer.

Variations and Adaptations

These Zucchini Carrot Cake Cheesecake Cookies can be tailored to suit different tastes and dietary needs. For a seasonal twist, consider incorporating grated apples or pumpkin puree for a delightful flavor shift.

Vegan adaptations can be achieved by replacing eggs with flaxseed meal or applesauce, and substituting cream cheese with a vegan cream cheese alternative. This maintains the essence of the recipe while accommodating dietary preferences.

Gluten-free versions can be achieved by substituting all-purpose flour with a gluten-free flour blend. Just ensure the blend contains xanthan gum for structure; this is vital for maintaining the texture of your cookies.

Flavor variations are plentiful; try adding citrus zests like lemon or orange for a refreshing citrus contrast. You can also incorporate chocolate chips for an indulgent twist that chocolate lovers will adore.

For a unique texture, consider rolling the cookies in shredded coconut or chopped nuts before baking. This adds an exciting crunch and enhances the cookie’s visual appeal on the platter.

Finally, consider presenting these cookies on a beautiful tiered cake stand for an impressive display at gatherings; they become an eye-catching centerpiece at your dessert table.

Serving and Presentation Guide

Plating these cookies beautifully can elevate any event or gathering. Start by arranging the cookies on a beautiful platter, possibly accented with seasonal fruits or edible flowers for added color and interest.

Garnish with a drizzle of caramel or a sprinkle of powdered sugar over the top for a finishing touch that enhances visual presentation. Pair each cookie with a small scoop of vanilla ice cream or a dollop of whipped cream on the side for an elegant touch.

Consider creating a dessert bar where guests can assemble their own cookie sandwiches with cream cheese frosting, providing an interactive element at your event.

As for temperature, these cookies can be served warm or at room temperature. If serving them warm, be sure to let them sit for about 5 minutes after baking to prevent burns from the molten cheesecake center.

Finally, remember to consider portion control. These cookies can be quite rich; offering them in smaller sizes alongside a variety of other desserts encourages guests to sample and enjoy a wider array.

Wine and Beverage Pairing

Pairing beverages with Zucchini Carrot Cake Cheesecake Cookies can elevate your snack experience. A sweet Riesling complements the sweetness of the cookies while enhancing the spiced flavors beautifully.

For non-alcoholic options, consider serving a light ginger lemonade, which contrasts the cookies’ density and refreshes the palate. The spiciness of ginger in the drink pairs well with the warm spices used in the cookies.

If coffee is more your style, a rich espresso or lightly sweetened latte can enhance the creamy cheesecake filling while providing a balanced flavor profile that suits the cookies’ sweetness.

Ensure that beverages served are at the appropriate temperature. Chill white wines and serve coffees hot; this balance ensures a satisfying drinking and eating experience.

Bringing a variety of these choices to your next event keeps options open and allows everyone to find a pairing that suits their individual palate.

Storage and Shelf Life

When it’s time to store your Zucchini Carrot Cake Cheesecake Cookies, prioritize keeping them fresh and flavorful. Store them in an airtight container at room temperature for up to a week. If you require longer storage, consider refrigerating them where they can last for up to two weeks.

To prevent any texture loss, separate layers of cookies with parchment paper within the container. This practice helps air circulate, maintaining their delightful chewiness.

If you need to freeze any leftovers, wrap each cookie individually in plastic wrap and place them in a freezer-safe bag. They can be stored this way for up to three months. When ready to enjoy, simply thaw at room temperature or reheat gently in the microwave.

Look out for signs of spoilage, such as a sour smell or noticeable changes in texture. If the cookies appear dry or have developed mold, it’s best to discard them.

Reheating cookies is simple; consider using a low microwave setting or placing them in a preheated oven for a few minutes to restore their original texture.

Make Ahead Strategies

If you’re planning to make Zucchini Carrot Cake Cheesecake Cookies for an event, there are several strategies for preparation in advance. You can prepare the dough a day ahead and store it in the refrigerator, which allows the flavors to meld beautifully.

Consider baking half the batch and freezing the remaining dough for a quick treat at a later time. Shape the cookie dough, freeze the shapes on a baking sheet, then transfer to a freezer bag for later baking without thawing.

For those who enjoy hosting, prepare your filling and cookie dough separately, then assemble only when the time comes around. This method preserves freshness and allows you to customize the creamy filling by adding different flavors or spices.

Lastly, while you can bake cookies a day or two in advance, allow them to cool completely before storing. This prevents an undesired moisture lock that can impact the final texture.

Scaling Instructions

If you need to adjust the batch size of your Zucchini Carrot Cake Cheesecake Cookies, scaling is simple. To halve the recipe, divide each ingredient measurement in half, taking note that baking times may vary slightly.

If you’re looking to double or triple the cookie recipe, ensure you have a large enough mixing bowl and baking sheets. Consider an increased baking time, and remember to check for doneness, as larger batches may cook unevenly.

Equipment adjustments include using multiple baking sheets or working in batches to prevent overcrowding the oven. This helps maintain consistent temperature and timing for optimal results.

Be mindful of timing modifications, particularly if switching between small and large batches. Some adjustments might be necessary to ensure that all cookies achieve a proper bake.

When scaling, also consider your storage methods. Larger quantities may require more substantial containers for storage, ensuring that freshness is upheld across all cookies.

Nutritional Deep Dive

Analyzing the nutritional content of Zucchini Carrot Cake Cheesecake Cookies offers a delightful perspective on health benefits. Each cookie typically contains moderate amounts of carbohydrates, primarily sourced from natural ingredients such as carrots and zucchini.

You’ll find an interesting blend of macronutrients with healthy fats from butter and cream cheese, contributing to the delicious creamy center. These cookies provide protein as well, mainly from the eggs and cream cheese, aiding in muscle growth and repair.

Meanwhile, the micronutrient profile is worthy of note! Carrots deliver essential vitamins like A and K, while zucchini provides significant amounts of vitamins A and C. These nutrients support healthy vision, immune system function, and skin health.

Considering portion sizes is also vital—enjoying these cookies in moderation keeps your indulgence balanced and guilt-free. They offer a delightful treat that can fit into an overall healthy lifestyle when paired with nutrient-dense meals throughout the day.

Additionally, the fiber content from the vegetables promotes digestion, helping you feel satisfied without overeating. This enhances both the enjoyment and nutritional value of these sweet delights.

Dietary Adaptations

Accommodating diverse dietary preferences is a breeze with Zucchini Carrot Cake Cheesecake Cookies. For a gluten-free adaptation, consider using almond flour or a gluten-free blend to substitute regular flour, ensuring the texture remains soft yet sturdy.

For vegan enthusiasts, swap the eggs for flaxseed meal (1 tablespoon of flaxseed with 2.5 tablespoons water per egg) and replace cream cheese with a plant-based counterpart. These adjustments maintain flavor while catering to strict dietary guidelines.

If you’re looking for a lower-carb version, explore almond flour as a base and simply adjust sweeteners accordingly; using erythritol or similar alternatives can keep the sweetness without excess carbs.

For a Paleo approach, stick to whole food ingredients, using coconut oil in place of butter and combined alternatives for sweetening. Adjusting the recipe this way would not only fit within Paleo guidelines but offer an exciting flavor profile.

Those adhering to a low-FODMAP diet can omit certain ingredients or replace high FODMAP items with alternatives, maintaining digestive comfort. Always check product labels for hidden allergens.

The adaptability of this recipe demonstrates its versatility, making it suitable for a wide range of dietary needs without sacrificing flavor.

Troubleshooting Guide

If your Zucchini Carrot Cake Cheesecake Cookies face some roadblocks, don’t fret! Sometimes, texture issues can arise. If cookies turn out too cakey, it might be due to overly moist zucchini. Always ensure you squeeze out excess moisture before integrating it into the mix for optimal consistency.

Flavor balance can be another concern; if they seem bland, consider increasing the spices in your mix. Simply enhancing cinnamon or adding a dash of nutmeg can significantly elevate the final taste.

Temperature troubles might manifest if cookies burn on the outside while remaining undercooked in the center. Lower your oven temperature and allow for a longer baking time to achieve a perfect bake throughout.

Equipment challenges often come into play. If you don’t have a stand mixer, no need to panic! A sturdy hand mixer or even a whisk can work just fine—just ensure you’re ready to put in some extra effort.

Ingredient substitutions can cause issues; if you switch out cream cheese for a less fatty alternative, know that the texture may differ. Trial and error with substitutes is normal; keep meticulous notes for future attempts.

Lastly, maintain timing awareness during baking. If you’re adjusting quantities, it’s essential to keep an eye on the cookies, especially with larger batches to ensure even cooking throughout.

Recipe Success Stories

Many bakers have delighted in crafting Zucchini Carrot Cake Cheesecake Cookies for various occasions, and their experiences are nothing short of inspiring. Community feedback highlights how family gatherings saw these cookies become an instant hit, blending nostalgia and creativity seamlessly.

Readers love interchangeable ideas, such as incorporating chocolate chips or using different nut varieties, resulting in personalized and exciting variations. These adaptations have showcased the flexibility of the recipe, making it a crowd favorite.

Photographic successes abound as bakers capture their colorful concoctions, sharing tips on Instagram for visual appeal. Readers report fantastic turnout from visually appealing presentations, attracting more eyes and taste-testers alike.

Celebrations have ignited joyful memories around these cookies, often shared as a special treat during fall festivities, where family recipes intertwine with modern innovation.

Many recipe testers express gratitude for a treat that blends wholesome ingredients while satisfying their sweet cravings. The cookies’ delicious taste and unique twist make them perfect for sharing and spreading culinary joy.

Frequently Asked Questions

1. Can I prepare the dough in advance?

Yes! You can make the dough a day in advance and store it in the refrigerator. This allows the flavors to meld and can make the cookies even more delicious.

2. Can I freeze the cookies?

Absolutely! Bake them, let them cool, and then freeze them in an airtight container. They can last up to three months in the freezer.

3. What if I don’t like cream cheese?

If cream cheese isn’t your preference, you can swap it for mascarpone or a vegan cream cheese alternative that still maintains a creamy texture.

4. How do I avoid soggy cookies?

Make sure you thoroughly squeeze out excess moisture from the zucchini and store the cookies in an airtight container after they cool.

5. Can I add nuts to the recipe?

Definitely! Adding walnuts or pecans provides a nice crunch and enhances the overall flavor. Just remember to reduce the amount of flour slightly if you add a significant amount of nuts.

6. What’s the best way to store these cookies?

Store cookies in an airtight container at room temperature for up to a week. For longer storage, refrigerate them or freeze as mentioned.

7. Are these cookies suitable for kids?

Yes! They’re a fun way to get kids interested in vegetables, and the sweetness of the cookies will likely appeal to them!

8. Can I replace sugar with a sugar alternative?

Yes, you can substitute sugar with your favorite sugar alternative; just ensure you follow conversion ratios as necessary.

9. How can I ensure my cookies are uniformly baked?

Use a cookie scoop for even sizing and make sure to space them adequately on the baking tray to allow heat circulation.

10. What kind of zucchini should I use?

A standard green zucchini works best. Look for firm, unblemished specimens for the best texture in your cookies.

11. Can I customize the spice blend?

Absolutely! Adjust spices according to your preference. A little ginger or allspice adds an exciting twist to the flavor profile.

12. Should I chill the dough before baking?

Chilling the dough is optional, but it can enhance the texture and flavor of the cookies, resulting in a better overall end product.

Additional Resources

For those who enjoyed this recipe, you might also want to explore related recipes like classic carrot cake, zucchini bread, or cream cheese brownies. These desserts offer similar elements while providing different textures and presentations.

Consider checking out technique guides on proper cookie baking and variations to broaden your baking skills. Specific ingredient information on zucchini and carrots can enhance your understanding of these nutritious components, aiding you in making informed choices in the kitchen.

Exploring equipment recommendations for baking can also help aspiring bakers find the perfect tools for their kitchen. Investing in quality bakeware helps replicate these delicious cookies with consistency.

Lastly, observe seasonal variations where specific fruits and vegetables inspire adaptations of existing recipes, ensuring you enjoy baked goods year-round.

Join the Conversation

We invite you to share your baking experiences, insights, and tweaks to this Zucchini Carrot Cake Cheesecake Cookies recipe! Engage with us on social media by sharing your photos, results, and feedback.

We love to hear how this recipe has inspired your baking journey. Additionally, feel free to exchange ideas on flavor adaptations or special occasions where you’ve served these cookies.

Leave a comment below or tag us on Instagram with your delicious creations! Let’s create a vibrant community full of recipe enthusiasts, exchanging tips, fulfilling cravings, and inspiring one another!

The Recipe

Zucchini Carrot Cake Cheesecake Cookies

Serves: 24 cookies

Prep Time: 20 mins

Cook Time: 15 mins

Total Time: 35 mins

Kitchen Equipment Needed

  • Mixing bowls
  • Stand mixer or hand mixer
  • Baking sheets
  • Parchment paper
  • Cookie scoop
  • Measuring cups and spoons

Ingredients

  • 1 cup grated zucchini, excess moisture squeezed out
  • 1 cup grated carrot
  • 1 cup all-purpose flour
  • 1 cup brown sugar
  • 1/2 cup granulated sugar
  • 1/2 cup unsalted butter, softened
  • 1 egg
  • 1 teaspoon vanilla extract
  • 1 teaspoon cinnamon
  • 1/2 teaspoon nutmeg
  • 1/2 teaspoon baking soda
  • 1/4 teaspoon salt
  • 8 ounces cream cheese, softened
  • 1/4 cup powdered sugar

Directions

  1. Preheat the oven to 350°F (175°C) and line two baking sheets with parchment paper.
  2. In a mixing bowl, cream together the softened butter, brown sugar, and granulated sugar until light and fluffy.
  3. Add in the egg and vanilla extract, mixing until fully incorporated.
  4. In a separate bowl, whisk the flour, cinnamon, nutmeg, baking soda, and salt together.
  5. Gradually mix the dry ingredients into the wet mixture until combined.
  6. Fold in the grated zucchini and carrot until evenly dispersed throughout the dough.
  7. In another bowl, beat the cream cheese and powdered sugar together until smooth.
  8. Using a cookie scoop, drop dough onto prepared baking sheets, using your finger to create a small indentation in the center of each cookie.
  9. Fill the indentation with cream cheese mixture.
  10. Bake cookies for 12-15 minutes, or until the edges are lightly golden and the filling is set. Allow to cool on baking sheets for 5 minutes before transferring to wire racks to cool completely.

Recipe Notes

  • For a more intense flavor, consider adding chopped nuts like walnuts or pecans to the dough.
  • Feel free to swap cream cheese for a lighter or dairy-free option if desired.
  • Chill the cookie dough for at least 30 minutes before baking to help maintain shape and enhance flavor.

Delicious Hawaiian Pineapple Coconut Thumbprint Cookies Recipe to Try

Hawaiian Pineapple Coconut Thumbprint Cookies: A Tropical Delight

⚖️
Difficulty
Easy

⏲️
Prep Time
20 mins

🕒
Cook Time
15 mins

⏱️
Total Time
35 mins

🍽️
Servings
24 cookies

Indulge in a taste of the tropics with these delightful Hawaiian Pineapple Coconut Thumbprint Cookies. These cookies combine the natural sweetness of ripe pineapples with the creaminess of coconut, creating a treat that is not only delicious but also evokes memories of sun-kissed sandy beaches. Each buttery cookie is filled with a luscious pineapple filling that bursts with flavor, making them the perfect snack for any occasion.

These cookies are a wonderful fusion of tropical ingredients that provides a delightful explosion of flavor in every bite. The unique blend of sweet and savory makes them suitable for both casual gatherings and festive celebrations. With their vibrant appearance and mouthwatering aroma, these Hawaiian Pineapple Coconut Thumbprint Cookies will undoubtedly impress anyone who tries them.

Quick Recipe Highlights

  • Flavor Profile: A delicious mix of sweetness from the pineapple and coconut creates a refreshing and satisfying taste.
  • Texture: Each bite delivers a crisp exterior with a soft, chewy center and a gooey, fruity filling.
  • Aroma: A delightful fragrance of coconut and fresh pineapple wafts through the kitchen as these cookies bake.
  • Visual Appeal: Golden-brown cookies filled with vibrant pineapple filling present an inviting appearance.
  • Skill Level Needed: Suitable for beginner bakers, no complex techniques required.
  • Special Equipment: Standard baking tools like a mixing bowl, baking sheet, and parchment paper are needed.

Recipe Overview

  • Difficulty Level: These cookies are easy to make, requiring basic baking skills that are perfect for novice bakers.
  • Category: A delightful dessert perfect for cookie lovers, as well as an excellent treat for parties and gatherings.
  • Cuisine: Inspired by Hawaiian culinary traditions, these cookies celebrate the flavors of tropical fruit.
  • Cost: Generally inexpensive, most ingredients are common pantry items or easily sourced, keeping the budget friendly.
  • Season: Great for any season, particularly during summer and spring when tropical flavors shine.
  • Occasion: Ideal for birthday parties, potlucks, or casual get-togethers, bringing a touch of the islands to any event.

Why You’ll Love This Recipe

These Hawaiian Pineapple Coconut Thumbprint Cookies offer an unforgettable taste experience that balances sweetness and tartness in perfect harmony. Each cookie’s outer shell is crafted to be soft yet slightly crisp, enveloping a chewy core generously filled with a pineapple jam that captures the essence of fresh Hawaiian fruit. The addition of shredded coconut enhances the texture, giving each bite a delightful chewiness that pairs beautifully with the buttery cookie base.

Convenience plays a major role in why these cookies will become your new go-to recipe. They require minimal preparation and a short cooking time, allowing you to whip up a batch in just over half an hour. Perfect for unexpected visitors or a special treat for the family, these cookies are effective and rewarding.

From a nutritional perspective, these cookies incorporate natural sugars from fresh fruits and coconut, providing a sweet treat that comes with added benefits. Pineapple is known for its high vitamin C content, and coconut adds healthy fats and fiber. Enjoying one or two cookies can still allow for a balanced diet while indulging in a little sweetness.

These cookies shine during social gatherings, making them an inviting addition to any dessert table. Their vibrant flavors and tropical allure can serve as a conversation starter, inviting guests to try something new and delightful. Imagine the smiles and compliments when you introduce these to your friends and family!

Affordability is another reason to love this recipe. The ingredients are generally inexpensive and readily available at your local grocery store, making it easy to create a delicious, tropical treat without breaking the bank. Baking these Hawaiian Pineapple Coconut Thumbprint Cookies offers both affordability and pleasure, making them a worthwhile addition to your repertoire.

Historical Background and Cultural Significance

The origin of thumbprint cookies can be traced back centuries to various European cultures where they were known as “jam-filled biscuits.” They have evolved over time, taking on new flavors and textures based on regional ingredients. In Hawaiian cuisine, it is common to incorporate tropical fruits like pineapple and coconut, making these cookies a modern embodiment of island flavors.

Culturally, the use of fresh, local ingredients is essential in Hawaiian cooking. Pineapple holds a special place in Hawaiian traditions, symbolizing hospitality and warmth. It’s often used in various dishes and desserts, reflecting the islands’ rich agricultural landscape and importance of family gatherings.

The evolution of this cookie reflects the blending of different culinary traditions, particularly American and Hawaiian. It illustrates how classic recipes can be adapted to include local ingredients, celebrating the diversity of flavors that each culture contributes to the culinary world.

Regionally, variations of thumbprint cookies include different fillings based on seasonal fruits or personal preferences. In Hawaii, common fillings often emphasize local produce, showcasing the islands’ abundant fruit. These adaptations reflect the creativity found in island kitchens, continuously evolving and embracing both traditional and modern influences.

Ingredient Deep Dive

Pineapple
Pineapples are native to South America but have become a staple in tropical climates worldwide, especially in Hawaii. Their sweet and tangy flavor profile makes them a favorite ingredient in desserts. Nutritionally, pineapple offers a rich source of vitamin C, manganese, and dietary fiber. When selecting pineapples, look for those that are firm, plump, and fragrant, indicating freshness. Store fresh pineapples at room temperature, but once cut, refrigerate to maintain flavor.

Coconut
Coconuts are integral to many tropical cuisines and are revered in Hawaiian culture for their versatility. They provide healthy fats and fiber, enhancing the nutritional value of recipes. French or Thai coconut varieties are typically favored for their rich flavor. When selecting shredded coconut, opt for unsweetened varieties for a more natural taste. Store coconut in an airtight container in a cool, dry place to maintain freshness.

Common Mistakes to Avoid

  • Not chilling the dough: Chilling the dough before baking helps cookies maintain shape and prevents spreading.
  • Using fresh pineapple instead of canned: Fresh pineapple can be too watery; opt for canned to achieve a better filling consistency.
  • Overbaking: Keep an eye on the cookies during baking to ensure they stay soft and chewy.
  • Neglecting to mix ingredients properly: Mix until combined to avoid texture inconsistencies in the final product.
  • Using the wrong size of thumbprint: Ensuring the thumbprint is deep enough to hold the filling will prevent overflow during baking.
  • Skipping the taste test: Always taste the pineapple filling before baking, adjusting sweetness as needed.
  • Incorrect measuring of ingredients: Use precise measurements to maintain the recipe balance necessary for perfect cookies.
  • Not allowing cookies to cool: Allow the cookies to cool on the baking sheet to maintain their structure and flavor.
  • Using sweetened coconut in the batter: Sweetened coconut can make cookies overly sweet, affecting overall balance.
  • Not preheating the oven: Always preheat your oven to ensure even baking results.

Essential Techniques

Making Thumbprints
Creating the perfect thumbprint involves using your thumb to gently press the center of each cookie before baking. This technique ensures that the cookies receive the desired shape and the filling has a place to sit without overflowing. To master this, press firmly but don’t go all the way through to the bottom of the cookie.

Chilling Dough
Chilling your cookie dough is a crucial step that helps solidify the fats in the batter, creating a firmer texture. By resting the dough in the refrigerator for at least 30 minutes, you will prevent the cookies from spreading too much during baking. Look for a dough that is firm yet pliable when it’s ready to bake.

Pro Tips for Perfect Hawaiian Pineapple Coconut Thumbprint Cookies

1. Use ripe, sweet pineapples for the best filling flavor, ensuring the pinnacle of freshness and sweetness.
2. For added texture, consider adding chopped nuts to the batter alongside shredded coconut for a delightful crunch.
3. If you prefer a stronger coconut flavor, try using coconut extract in addition to shredded coconut.
4. Maintain consistency in bagging the filling by using a piping bag for easier and neater application.
5. Experiment with other tropical fruit fillings such as mango or passion fruit for a unique twist.
6. Be mindful of the baking time according to your oven’s specifications, as ovens can vary greatly in performance.
7. To enhance the visual appeal, drizzle warm cookies with a glaze made from powdered sugar and coconut milk.
8. To extend freshness, store cookies in an airtight container layered with wax paper between them to maintain softness.

Variations and Adaptations

Culinary creativity can lead you to explore various exciting adaptations of these cookies. Incorporating other tropical flavors such as fresh mango or guava into the thumbprint filling can provide a delightful twist. Seasonal adaptations may include substituting fresh fruits abundant in summer or fall, offering variety throughout the year. For dietary modifications, consider using gluten-free flour in place of all-purpose flour, and opt for dairy-free butter substitutes if required. You can also add extracts or spices to the base dough for enhanced flavors, resulting in unique variations tailored to personal preferences.

Serving and Presentation Guide

Plating these Hawaiian Pineapple Coconut Thumbprint Cookies can enhance their tropical allure. Consider stacking them on a vibrant platter surrounded by fresh pineapples or tropical flowers to evoke the spirit of Hawaii. Adding garnishes like toasted coconut flakes or mint leaves creates an inviting ambiance. Serve at room temperature to allow flavors to bloom fully. For an artistic touch, drizzle chocolate or a coconut glaze over the top of the cookies before displaying them.

Wine and Beverage Pairing

For wine pairings, a light, fruity white wine such as Riesling complements the sweetness of the cookies. Alternatively, a sparkling wine can bring out the tropical flavors beautifully. For non-alcoholic options, consider serving coconut water or tropical fruit juices to maintain the island theme. Pairing with tea, especially a citrus-flavored green tea, heightens the freshness of the flavors while balancing the sweetness of the cookies.

Storage and Shelf Life

To maximize the freshness of your Hawaiian Pineapple Coconut Thumbprint Cookies, store them in an airtight container at room temperature for up to a week. If you wish to prolong their shelf life, consider freezing them; they can last for up to three months when properly sealed. Checking for spoilage involves looking for changes in color or texture, such as hardening or an off smell. When reheating, a brief stint in the microwave or oven can restore their soft and chewy texture.

Make Ahead Strategies

For those planning ahead, the dough can be prepared in advance and stored in the refrigerator for up to three days. This approach offers flexibility during busy baking sessions. Additionally, you can make the filling a day ahead, keeping it in the refrigerator until you’re ready to bake. When assembling, ensure that the cookies are assembled shortly before baking to preserve freshness and flavor integrity.

Scaling Instructions

Scaling this recipe is straightforward; to halve it, simply divide all ingredient amounts by two. Conversely, if you wish to double or triple the recipe for a larger crowd, keep in mind that you may need to bake cookies in batches. Ensure that your baking sheets have enough space and adjust baking times slightly if using multiple sheets at once.

Nutritional Deep Dive

Analyzing these Hawaiian Pineapple Coconut Thumbprint Cookies shows a balanced macronutrient profile, making them a fun treat rather than an everyday snack. Each cookie contains carbohydrates primarily from the added sugars and flour, while healthy fats come from the coconut. Be mindful of portion sizes, especially if you’re watching caloric intake. These cookies can fit well into a balanced diet when consumed in moderation, allowing for indulgence without compromising on health goals.

Dietary Adaptations

For those following specific dietary requirements, adaptations can be easily applied. For example, to create a gluten-free version, substitute all-purpose flour with gluten-free flour blends. A vegan version can be achieved by using plant-based butter and flaxseed meal as an egg substitute. Dairy-sensitive individuals may also enjoy these cookies by removing any dairy components and opting for dairy-free products. Other diets, like keto or paleo, can be catered to by introducing alternative sweeteners or nut-based flours.

Troubleshooting Guide

Common issues when baking these cookies may include overly dry textures or lack of pineapple flavor. If the cookies become too dry, reducing the baking time slightly can help preserve moisture. For flavor balance, adjusting the sweetness of the filling by tasting and tailoring to preference is essential. Equipment challenges such as wrong oven temperatures can be addressed by using an oven thermometer for accuracy. If finding substitutions necessary, maintaining the essence of the original ingredients is key to successful troubleshooting.

Recipe Success Stories

Community feedback around the Hawaiian Pineapple Coconut Thumbprint Cookies has been overwhelmingly positive, with many bakers praising their vibrant flavors and appealing presentation. Variations shared by readers include adding lime zest to the filling and using macadamia nuts for an extra crunch. Adaptation stories recount how these cookies have become family favorites during gatherings or birthdays, showcasing the special place they hold in the hearts of many bakers.

Frequently Asked Questions

Can I use fresh pineapple instead of canned?

While fresh pineapple can be used, it may require cooking down to reduce moisture and achieve the desired consistency to prevent overly watery filling. Canned pineapple is often more practical for this recipe.

How do I store leftover cookies?

Store leftover cookies in an airtight container at room temperature for up to one week. If freezing, wrap them tightly and use within three months for best quality.

Can I freeze the dough?

Yes, you can freeze the dough! Shape it into a disc, wrap it tightly, and store it in the freezer. When ready to bake, thaw it in the refrigerator overnight and then proceed with the recipe.

What should I do if the dough is too sticky?

If the dough is too sticky, adding a little more flour can help achieve the right consistency. Make sure to mix it in gradually to avoid overdoing it.

Can I add more coconut to the recipe?

Absolutely! You can increase the shredded coconut quantity for a more intense coconut flavor. Just be mindful that it may affect the dough’s consistency slightly, so add flour if needed.

Is this recipe suitable for a vegan diet?

Yes, by substituting butter with plant-based margarine and using flax egg in place of regular eggs, you can create a delightful vegan version of these cookies.

How can I make the cookies more chewy?

To create a chewier texture, you can slightly reduce the baking time and ensure that you use brown sugar in the recipe. Brown sugar retains moisture, enhancing the chewiness.

What can I use instead of thumbprints?

If you don’t want to use your thumb for creating impressions, you can use the back of a small spoon or your index finger to create the indentations.

Can I substitute the filling with something else?

Yes, many alternatives work well in place of pineapple filling. Consider using other fruit jams or spreads like mango or passionfruit for a different but delightful twist.

How do I know when my cookies are done baking?

Cookies are typically done when they are slightly golden on the edges. A gentle touch should leave a slight indentation, but the center will appear soft, as they firm up upon cooling.

Additional Resources

To dive deeper into your baking journey, check out our related recipes such as Hawaiian Coconut Cream Pie or Tropical Fruit Salad. Technique guides like “How to Achieve the Perfect Cookie Texture” offer invaluable insights, helping you to refine your cookie-baking skills. Additionally, gaining ingredient knowledge on tropical fruits can enhance your future baking adventures, making your kitchen a hub for creative and seasonal culinary expressions.

Join the Conversation

We invite you to share your experience with making Hawaiian Pineapple Coconut Thumbprint Cookies! Capture your creations and post them on social media using our hashtag. We love receiving feedback and seeing variations you’ve experimented with, as well as any special tips you’ve discovered along the way. Join our baking community by leaving reviews and suggestions that can inspire fellow bakers and food enthusiasts worldwide.

The Recipe

Hawaiian Pineapple Coconut Thumbprint Cookies

Serves: 24 cookies

Prep Time: 20 mins

Cook Time: 15 mins

Total Time: 35 mins

Kitchen Equipment Needed

  • Baking sheet
  • Parchment paper
  • Mixing bowl
  • Wooden spoon
  • Measuring cups and spoons
  • Cookie scoop or spoon

Ingredients

  • 1 cup unsalted butter, softened
  • ¾ cup granulated sugar
  • 2 cups all-purpose flour
  • 1 cup shredded coconut
  • ½ cup pineapple filling or preserves
  • 1 large egg
  • 1 tsp vanilla extract
  • 1 tsp baking powder
  • ½ tsp salt

Directions

  1. Preheat your oven to 350°F (175°C) and line a baking sheet with parchment paper.
  2. In a mixing bowl, cream together the softened butter and sugar until light and fluffy.
  3. Mix in the egg and vanilla extract until combined.
  4. In a separate bowl, whisk together the flour, baking powder, salt, and shredded coconut.
  5. Gradually add the dry ingredients to the wet mixture, mixing until just combined.
  6. Using a cookie scoop or spoon, portion the dough onto the prepared baking sheet, spacing them evenly.
  7. Use your thumb to create an indentation in the center of each cookie.
  8. Fill each thumbprint with a small spoonful of pineapple filling.
  9. Bake for 15-18 minutes, until the edges are lightly golden.
  10. Allow the cookies to cool on the baking sheet for a few minutes before transferring them to a wire rack to cool completely.

Recipe Notes

  • You can substitute the pineapple filling with other fruit preserves such as mango or guava.
  • For added flavor, try incorporating lime or lemon zest in the dough for a tropical kick.
  • These cookies are best enjoyed fresh, but they store well in an airtight container at room temperature for several days.

Delicious No Bake Pecan Coconut Praline Cookies Recipe to Try

No Bake Pecan Coconut Praline Cookies: Easy & Delicious Treats

⚖️
Difficulty
Easy

⏲️
Prep Time
15 mins

🕒
Cook Time
0 mins

⏱️
Total Time
15 mins

🍽️
Servings
24 cookies

Indulge in the delightful taste of No Bake Pecan Coconut Praline Cookies, a scrumptious treat that comes together effortlessly. These cookies are not only easy to make, but they’re also loaded with rich flavors and satisfying textures that will leave you craving more. The combination of sweet coconut and crunchy pecans creates a perfect balance of taste that is enhanced by a hint of brown sugar, making these cookies a must-try for any dessert lover.

While most cookie recipes require baking, this easy recipe allows you to enjoy cookies without turning on the oven. Just mix, drop, and chill! As they set, the flavors deepen, resulting in a cookie that is chewy on the outside and soft in the center. Whether you need a quick snack or a sweet addition to your party platter, these no bake cookies are an excellent choice that everyone will adore.

Quick Recipe Highlights

  • Flavor Profile: The sweet and nutty flavor of pecans combined with the tropical essence of coconut creates an irresistible taste that will transport your taste buds.
  • Texture: Enjoy a delightful crunch from the pecans paired with the chewy consistency of the coconut, making each bite a textural delight.
  • Aroma: The warm aroma of caramelized sugar mingles with the nutty scents of pecans, creating a comforting and inviting fragrance.
  • Visual Appeal: These cookies have a gorgeous golden hue, dotted with pieces of pecans and flakes of coconut, making them as beautiful as they are tasty.
  • Skill Level Needed: This recipe is perfect for beginners; it doesn’t require baking skills, just a simple mixing process!
  • Special Equipment: All you need is a mixing bowl, a spoon, and a baking sheet for chilling – no fancy gadgets required!

Recipe Overview

  • Difficulty Level: This recipe is rated as easy, making it suitable for novice bakers and busy home cooks alike.
  • Category: Ideal for desserts, snacks, or party treats, these cookies fit perfectly into any gathering or afternoon tea.
  • Cuisine: Inspired by traditional Southern desserts, these cookies reflect a rich culinary heritage that celebrates nutty flavors and sweet indulgence.
  • Cost: The recipe is budget-friendly, with ingredients typically costing under $10, making it accessible for all.
  • Season: Enjoy these cookies year-round; they’re especially great for summer gatherings, as no baking is involved, keeping your kitchen cool.
  • Occasion: Perfect for birthday parties, holiday celebrations, or simply as a delightful treat to share with friends.

Why You’ll Love This Recipe

The taste and texture of No Bake Pecan Coconut Praline Cookies offer a delightful experience. The contrast between crunchy pecans and chewy coconut creates a mouthwatering treat. Each cookie delivers a burst of flavor, making them irresistible to snack on at any time of the day.

Convenience is another great aspect of these cookies. With minimal prep time and no cooking required, you can whip up a batch in a flash. They’re ideal for last-minute gatherings or satisfying sudden sweet cravings without the fuss of baking.

These cookies also come with nutritional advantages. Pecans are packed with healthy fats, protein, and essential vitamins, while coconut adds fiber and an array of nutrients. Together, they offer a tasty remedy for your sweet tooth without compromising on health.

In social scenarios, these cookies shine as a conversation starter at parties. They can be easily shared, making them perfect for gatherings. Their unique flavor profile often sparks interest that keeps guests coming back for more.

From a budget perspective, this recipe is cost-effective. With a handful of ingredients that are readily available, you can create a scrumptious dessert that won’t break the bank, making them a go-to for every occasion.

Historical Background and Cultural Significance

No Bake Pecan Coconut Praline Cookies have roots in the Southern cooking tradition, where pecans are a staple ingredient. These delectable treats reflect a culinary practice that values simplicity and taste, allowing home cooks to create indulgent desserts without extensive effort.

Culturally, pecans hold a significant place in various Southern festivities, often served during holidays and family gatherings. The use of coconut adds a tropical twist, showcasing the fusion of regional flavors that have evolved over the years.

This recipe has evolved from traditional pralines, which originally relied on cooking down sugar to achieve a caramelized state. The no-bake version offers a modern, simplified alternative, making this treat accessible to bakers of all skill levels.

Variations of these cookies exist across different regions, with some incorporating chocolate or different nuts. Each adaptation contributes to the rich tapestry of culinary creativity surrounding pecans and coconut desserts, reflecting local tastes and ingredient availability.

Ingredient Deep Dive

Pecans: Pecans are a culinary treasure in the Southern United States, known for their rich flavor and crunchy texture. Nutritionally, they are high in healthy fats, fiber, and several essential vitamins, such as vitamin E and zinc. When selecting pecans, look for plump, unblemished nuts with a rich aroma. Store them in an airtight container in a cool, dark place to maintain freshness, and consider freezing any excess for longer-term use.

Coconut: Coconut, often associated with tropical regions, provides a unique sweetness and chewiness. It’s a good source of dietary fiber, which can aid digestion, and is often used in various dessert recipes. Fresh coconut is preferred, but dried unsweetened coconut works well for cookies. For storage, keep it in an airtight container in a cool area, and feel free to substitute with other types of coconut products, such as coconut flour or coconut oil, depending on your recipe’s requirements.

Common Mistakes to Avoid

  • Using sweetened coconut: Opt for unsweetened coconut to prevent an overly sweet cookie.
  • Skipping the chilling step: Allow the cookies to set completely in the refrigerator for the best texture.
  • Not measuring ingredients accurately: Precision is key in achieving the perfect consistency.
  • Overmixing: Mix just until combined to maintain a soft texture.
  • Using stale nuts: Always use fresh pecans for the best flavor and crunch.
  • Not letting the mixture cool: If the mixture is too warm, it may not hold its shape when dropped onto the baking sheet.
  • Ignoring ingredient substitutions: Ensure that your substitutions are compatible for the best results.
  • Not spacing cookies properly: Leave enough space between the cookies on the sheet to allow for spreading.

Essential Techniques

Mixing: Proper mixing of ingredients is crucial for evenly distributing flavors. Combine the wet and dry components gradually, ensuring everything is well mixed without overworking the dough, which could lead to dense cookies. A visual cue for success is when the mixture clings together and holds its shape.

Chilling: Chilling the dough is essential for no-bake recipes to help it set properly. Use a shallow dish to ensure even cooling, and give it enough time to firm up before shaping. Look for a slightly firm mixture that can hold its shape when scooped.

Pro Tips for Perfect No Bake Pecan Coconut Praline Cookies

– Use fresh ingredients for the best flavor—fresh coconut and pecans make a significant difference in taste.
– Experiment with different types of nuts or add-ins, such as chocolate chips or dried fruits, to tailor your cookies to your liking.
– Ensure the mixture is not too hot when adding coconut; otherwise, it can cause the coconut to clump together.
– Use a cookie scoop for even-sized cookies that will chill uniformly.
– Allow ample chilling time to let the flavors meld and the texture become firm.
– For extra crunch, lightly toast the pecans before incorporating them into the mixture.
– Consider garnishing with a sprinkle of sea salt for a sweet-salty flavor twist.
– Pair these cookies with a glass of milk or a hot beverage for the perfect indulgent treat.

Variations and Adaptations

For a twist, try adding different types of nuts like walnuts or almonds, which will alter the flavor profile while maintaining the essence of the original recipe. Seasonal adaptations can include swapping out pecans for pumpkin seeds in the fall, adding cozy spices like cinnamon or nutmeg for warmth.

For dietary modifications, this recipe can easily be made vegan by using maple syrup instead of honey or agave. Additionally, you can create a low-carb version by substituting traditional sweeteners with sugar-free alternatives.

To reinvent the flavor, consider incorporating extracts such as almond or vanilla to enhance the taste. Texture modifications can include rolling the cookies in crushed nuts or coconut for an exterior crunch. For presentation, stack them neatly in a jar or plate for a rustic look that invites sharing.

Serving and Presentation Guide

When serving your No Bake Pecan Coconut Praline Cookies, consider a simple presentation on a decorative platter. Create different heights by stacking a few cookies with others set beside them. For added flair, sprinkle some toasted coconut flakes on top or around the platter to create visual interest.

Garnishing with a drizzle of chocolate can enhance the cookies’ appearance and introduce a delightful flavor contrast. Serve with a side of coffee or milk for a classic approach. Pay attention to portion sizes, as these cookies are rich and satisfying; offering two cookies per serving is often just right for guests.

Wine and Beverage Pairing

To pair beautifully with No Bake Pecan Coconut Praline Cookies, consider a light dessert wine like a Muscat, which complements the sweetness of the cookies without overwhelming them. If you’re opting for a non-alcoholic alternative, a refreshing coconut water or herbal tea can seamlessly accompany the rich flavors of the cookies.

Coffee lovers might appreciate pairing these cookies with a cup of hazelnut or caramel flavored coffee, enhancing the nutty notes of the pecans. Remember to serve beverages chilled or at room temperature to elevate the overall experience.

Storage and Shelf Life

To maintain freshness, store your No Bake Pecan Coconut Praline Cookies in an airtight container in the refrigerator. This method will keep them good for about a week. For longer storage, consider placing them in the freezer, where they can last up to three months with minimal loss of quality.

If you notice the cookies becoming sticky or losing their shape, it might be a sign that they are losing their moisture and freshness. For reheating, simply let them sit at room temperature or lightly warm them in the microwave, but avoid overheating to maintain texture.

Make Ahead Strategies

These cookies are perfect for making ahead, allowing your schedule to be more flexible. Prepare the mixture and shape the cookies, then place them on a baking sheet and store in the refrigerator. You can also make the cookie mix up to a week in advance and prepare to chill them later on.

If you want to save time on the day of serving, consider preparing the pecans and coconut ahead of time. Keep the ingredients ready for mixing, allowing for quick assembly. Just remember to incorporate fresh elements, such as coconut or nuts, right before serving for an optimal taste experience.

Scaling Instructions

Halving this no bake cookie recipe is simple; just adjust the ingredient amounts accordingly while keeping the ratios the same, allowing you to create a smaller batch when necessary. If you decide to double or triple the recipe, ensure you have extra mixing space and equipment to accommodate the larger quantity.

Timing doesn’t significantly change with batch adjustments, but expect a slight increase in chilling time for larger quantities. For storage, use larger containers to separate cookie layers with parchment paper adequately to prevent sticking.

Nutritional Deep Dive

Macro breakdown for No Bake Pecan Coconut Praline Cookies reveals a good balance of carbohydrates from the coconut and protein from the pecans. This recipe also provides healthy fats, making it a wholesome treat without excessive empty calories.

A micronutrient analysis shows these cookies contain essential vitamins and minerals, including vitamin E from the pecans and folate from coconut. The overall health benefits highlight them as a satisfying snack that can fit within most balanced dietary plans.

For portion analysis, consider sticking to one or two cookies to manage caloric intake while enjoying the rich flavors. They can be particularly satisfying as a post-workout snack, providing energy without invoking a sugar crash.

Dietary Adaptations

To cater to various dietary needs, these cookies can easily become gluten-free by ensuring all ingredients used are certified gluten-free, as coconut and pecans are naturally gluten-free. For a dairy-free alternative, simply use plant-based sweeteners instead of honey.

For vegan versions, explore the use of flaxseeds or chia seeds as binding agents in place of animal products, creating a light treat suitable for vegan diets. Keto enthusiasts can opt for sugar-free sweeteners to maintain low carbohydrate levels while enjoying this recipe without guilt.

For followers of the Paleo diet, the recipe aligns perfectly with natural, unprocessed ingredients, making it a welcome addition to their treat selections. Each dietary adaptation allows for continued enjoyment of these delicious cookies, proving their versatility.

Troubleshooting Guide

For texture issues, if the cookies aren’t firming up, increase the chilling time in the refrigerator or adjust the amount of coconut. If they become too soft, consider adding more dry ingredients like coconut flour or almond flour for stability.

If flavor balance seems off, remember that tasting the mixture before chilling can help adjust the sweetness. Adding a pinch of salt can also enhance flavors significantly. For equipment challenges, ensure your mixing bowl is appropriately sized to prevent spillage, and check that your storage containers are airtight to avoid moisture issues.

Timing concerns can affect texture; if you leave the cookies out too long before chilling, they may not set correctly. Always follow the recommended chilling time for the best results.

Recipe Success Stories

Community feedback on No Bake Pecan Coconut Praline Cookies has been overwhelmingly positive, with many praising their simplicity and delicious outcomes. Variations shared by readers often include creative ingredient exchanges, demonstrating the flexibility of the recipe in catering to personal preferences.

Adaptation stories highlight how readers have successfully incorporated different flavors and textures, offering tips for transforming the cookie mixture into bite-sized energy balls or even adding spices for a unique twist. Photography tips shared by the community have enriched presentations, guiding others to showcase their delicious cookie creations beautifully.

Frequently Asked Questions

1. How long do these cookies last?

Stored in an airtight container in the fridge, No Bake Pecan Coconut Praline Cookies stay fresh for about a week. For longer preservation, freeze them, which can extend their shelf life up to three months.

2. Can I use different nuts?

Absolutely! Feel free to substitute pecans with walnuts, almonds, or hazelnuts based on your preference. Each nut will bring its unique flavor profile to the cookies.

3. Is it possible to make these cookies vegan?

Yes, by using plant-based sweeteners instead of honey, you can easily make these delicious cookies vegan-friendly without compromising on taste.

4. How do I store these cookies?

Store the cookies in an airtight container in the refrigerator to maintain freshness, or freeze them for longer storage, ensuring they’re well-wrapped to prevent freezer burn.

5. What can I add to the mix?

You can enhance your cookies by adding chocolate chips, dried fruits, or spices like cinnamon to create unique variations that reflect your taste.

6. Do I need a mixer for this recipe?

No mixer is necessary; a mixing bowl and spoon will suffice. Just mix the ingredients by hand for the perfect consistency.

7. Can I leave out the sugar altogether?

While sugar contributes to the cookie’s flavor and texture, reducing it might change the result. Consider using natural sweeteners if you’re aiming to cut sugar completely.

8. Can I make these cookies ahead of time?

Yes! You can prepare them a day in advance and keep them chilled until you’re ready to serve. They taste even better after giving the flavors time to meld.

9. Why are my cookies falling apart?

If the cookies don’t hold together, they may need more chilling time or additional binding ingredients, such as crushed oats or coconut flour to help bind them.

10. Can I add a chocolate coating?

Definitely! After the cookies have chilled, you can dip them in melted chocolate for an indulgent chocolate-covered treat that pairs wonderfully with the flavors.

Additional Resources

Explore more recipes that feature nuts and coconut for additional inspiration in your baking. Techniques for working with sweeteners and understanding their impact will enhance your cooking skills. Ingredient information can guide you in selecting the freshest components for optimal results.

Check out related dessert recipes that are also no bake, showcasing different flavor combinations, or dive into seasonal variations that utilize specific ingredients to celebrate various occasions.

Join the Conversation

We love hearing your feedback and experiences with our No Bake Pecan Coconut Praline Cookies! Share your photos, variations, and suggestions on social media. Join our community of dessert lovers excited to engage and inspire each other with delectable treats. Your recipe reviews and experiences can help others discover the joy of creating these easy, mouthwatering cookies!

The Recipe

No Bake Pecan Coconut Praline Cookies

Serves: 24 cookies

Prep Time: 15 mins

Cook Time: 0 mins

Total Time: 15 mins

Kitchen Equipment Needed

  • Mixing bowl
  • Spoon or spatula
  • Baking sheet
  • Parchment paper (optional)

Ingredients

  • 1 cup pecans, chopped
  • 1 cup unsweetened coconut flakes
  • ½ cup brown sugar
  • ¼ cup unsweetened nut butter (peanut or almond)
  • ¼ cup honey or maple syrup
  • 1 teaspoon vanilla extract
  • Pinch of salt

Directions

  1. In a mixing bowl, combine the chopped pecans, coconut flakes, brown sugar, and salt.
  2. In a small saucepan, heat the nut butter and honey (or maple syrup) over low heat until melted. Stir in vanilla extract.
  3. Pour the melted mixture over the dry ingredients and mix until thoroughly combined.
  4. Using a cookie scoop or spoon, drop spoonfuls of the mixture onto a lined baking sheet.
  5. Chill in the refrigerator for at least 2 hours until firm.
  6. Enjoy your homemade no bake cookies!

Recipe Notes

  • For a chocolate twist, consider drizzling melted chocolate on top before chilling.
  • Substitute agave syrup for honey to make the recipe completely vegan.
  • Feel free to experiment with other nuts or add dried fruits for additional flavor.

Indulge in Irresistible Praline Upside-Down Pumpkin Cake Today

Irresistible Praline Upside-Down Pumpkin Cake: A Fall Favorite!

⚖️
Difficulty
Medium

⏲️
Prep Time
20 mins

🕒
Cook Time
40 mins

⏱️
Total Time
1 hour

🍽️
Servings
8 servings

Pumpkin season brings an abundance of warmth and comfort, and what better way to celebrate it than with a delightful Praline Upside-Down Pumpkin Cake? This recipe features fluffy pumpkin cake layered with a gooey praline topping that caramelizes beautifully as it bakes. Imagine slicing into this moist cake only to unveil the luscious praline layer adorned with toasted pecans, creating a sweet crunch that perfectly complements the tender pumpkin. This cake is not just a treat for the taste buds; it’s a glorious centerpiece that will invite compliments and warm conversations at your dining table.

With fall spices embracing the essence of pumpkin, this cake transports you to a cozy café atmosphere with each bite. Perfectly spiced, it’s ideal for celebrating harvest gatherings, holiday festivities, or simply enjoying as an afternoon indulgence with a cup of coffee. Plus, the upside-down presentation adds a charming rustic touch, making it an extraordinary addition to your dessert repertoire.

Quick Recipe Highlights

  • Flavor Profile: A harmonious blend of pumpkin, warm spices like cinnamon and nutmeg, and rich caramel undertones from the praline.
  • Texture: Light and fluffy cake balanced with a dense, caramelized topping that offers a satisfying crunch.
  • Aroma: The enchanting aroma of baked pumpkin mingled with toasted pecans and sweet caramel fills your kitchen.
  • Visual Appeal: Each slice reveals a beautiful amber glaze and golden-brown pecans that draw the eye and tempt the palate.
  • Skill Level Needed: Medium. While not overly complex, it requires attention to detail in both the cake and topping preparation.
  • Special Equipment: A 9-inch round cake pan, mixing bowls, and an electric mixer for smooth batter.

Recipe Overview

  • Difficulty Level: This Praline Upside-Down Pumpkin Cake offers a moderate challenge, perfect for bakers with some experience. The coordination of making the praline topping and ensuring the cake rises properly can be tricky but rewarding.
  • Category: A splendid dessert suitable for holidays, family gatherings, and even casual get-togethers.
  • Cuisine: This cake embodies American baking tradition, celebrating the rich harvest flavors synonymous with autumn.
  • Cost: The ingredients are reasonably priced, making it accessible for most home cooks without compromising on quality.
  • Season: Best enjoyed during the fall when pumpkins abound, but delicious any time of year.
  • Occasion: Ideal for Thanksgiving, Christmas celebrations, birthday parties, or even as a sweet finish for a cozy dinner.

Why You’ll Love This Recipe

This Praline Upside-Down Pumpkin Cake is a delightful blend of taste and texture, making it a memorable dessert. The sweetness from the praline topping combined with pumpkin’s natural flavors creates a harmonious balance that is both comforting and inviting. Each bite offers an irresistible combination of tender cake and crunchy topping, perfect for satisfying any sweet tooth.

Beyond its flavor, the convenience of preparation adds to its charm. Many of the ingredients are pantry staples, allowing you to whip it up with minimal fuss. This cake can be made in advance, making it a stress-free choice for entertaining. Moreover, this cake is incredibly versatile; it can be enjoyed warm out of the oven or served cold, always retaining its delicious flavors.

Nutritionally, pumpkin provides a wealth of health benefits, being rich in vitamins A and C and fiber. It’s a great way to sneak more vegetables into desserts without sacrificing taste. The nuts in the praline add healthy fats, taking this cake from a guilty pleasure to a treat you can feel good about enjoying.

Serving this cake at gatherings brings a sense of joy. It serves as a conversation starter, with guests eager to share their pie and cake stories as they savor the flavors. The delightful appearance and aroma make it a perfect centerpiece for any festive table.

Lastly, the cost-effectiveness of this recipe stands out. Using common ingredients, this cake is affordable without skimping on taste. It delivers a luscious dessert experience, allowing you to impress guests without breaking the bank.

Historical Background and Cultural Significance

The origins of the Praline Upside-Down Pumpkin Cake can be traced back to traditional Southern cooking, where both pralines and pumpkin-based desserts hold a special place in regional cuisine. Pralines, with their roots in French confectionery, were adapted in the American South, evolving into a beloved component of many desserts. Pumpkin, a staple in American harvest meals, especially during fall, beautifully complements the rich, sweet flavors of pralines.

Culturally, pumpkin desserts symbolize the abundant harvest season, often featured in Thanksgiving celebrations. This cake embodies the spirit of gratitude and sharing, making it ideal for festive gatherings. Over time, variations have emerged, with families often adding personal twists to the classic recipes, ensuring that the essence of home and tradition remains in each bite.

The evolution of this recipe reflects a blend of culinary influences. From the introduction of pumpkin spice to the creative use of nuts in desserts, it showcases how traditional recipes can be adapted to modern tastes while retaining their roots. Many families now share stories of how their versions of this cake have become cherished family traditions.

Regional variations of pumpkin desserts can also be found across the United States. Some areas prefer denser, more cake-like versions, while others lean towards fluffier, lighter cakes. The Praline Upside-Down Pumpkin Cake incorporates diverse influences, making it a unifying dessert during key seasonal celebrations.

Ingredient Deep Dive

Pumpkin is the star of this cake, and it carries significant historical weight. It’s deeply rooted in American culture, celebrated during the harvest season and prominently featured in numerous fall recipes. Nutritionally, pumpkin is an excellent source of vitamin A, vitamin C, antioxidants, and fiber, making it powerfully beneficial for digestive health and immunity.

When selecting pumpkin for this recipe, opt for canned pure pumpkin for convenience, ensuring it’s 100% pure without additives. If using fresh pumpkin, choose a sugar pumpkin, which has a sweeter and denser flesh ideal for baking. When stored, keep it in a cool, dark place, and once opened, transfer any remaining canned pumpkin to an airtight container and refrigerate.

Pecans are another key ingredient, valued for their rich flavor and nutritional profile. These nuts are not only delicious but also packed with healthy fats and antioxidants, promoting heart health. If possible, opt for raw pecans when making this cake for the best texture and flavor. Always inspect nuts before purchasing to ensure they are fresh and free of noise or rancidity.

In terms of storage, store pecans in a cool, dry place, ideally in an airtight container, to prevent them from going stale. If you have leftovers, it’s best to refrigerate or freeze them to maintain their quality over time. Pecans can also be easily substituted with walnuts or almonds if you prefer a different nutty flavor.

Common Mistakes to Avoid

  • Overmixing the batter: This can lead to tough cake. Mix just until the ingredients are combined to ensure a light texture.
  • Using the wrong type of pumpkin: Opt for pure pumpkin or sugar pumpkins. Avoid using pumpkin pie filling, which contains additional sugars and spices.
  • Not properly measuring ingredients: Use the correct measuring cups for dry and liquid ingredients to ensure accuracy in your ratios.
  • Skipping the praline topping: The topping adds essential flavor and texture; don’t overlook this step for the best results.
  • Using cold ingredients: Ensure your eggs and other refrigerated ingredients are at room temperature for better mixing and texture.
  • Baking at the wrong temperature: Always preheat your oven and check with a thermometer to maintain an even baking temperature.
  • Neglecting to grease the pan: Proper greasing is crucial to avoid sticking when it’s time to invert the cake.
  • Rushing cooling time: Let the cake cool in the pan before inverting to prevent it from breaking apart.
  • Using stale nuts: Always check for freshness to ensure the best flavor and texture in your praline topping.
  • Not checking for doneness: Use a toothpick inserted in the center; it should come out clean when the cake is fully baked.

Essential Techniques

In baking the Praline Upside-Down Pumpkin Cake, mastering the art of creating the perfect praline topping is essential. This technique elevates the cake, adding both flavor and visual appeal. The key is to cook the sugar in a heavy-bottom pan until it dissolves and turns a rich golden brown, then stir in unsalted butter and pecans. Achieving the right temperature is crucial, as undercooking will result in a syrupy topping, while overcooking can lead to a bitter flavor.

Additionally, ensuring that the pumpkin cake is mixed properly is important for a light and airy texture. The goal is to integrate the ingredients without overmixing, which activates the gluten in the flour and can result in a dense cake. Pay attention to visual cues; a properly mixed batter should be smooth and homogeneous, with no lumps.

Pro Tips for Perfect Praline Upside-Down Pumpkin Cake

Start by ensuring that all your ingredients are at room temperature; this helps in achieving a uniform batter. When preparing the praline topping, be vigilant; sugars can quickly transition from perfectly caramelized to burnt if unattended. As an extra layer of flavor, consider toasting your pecans before adding them to the mixture – this amplifies their nutty essence.

To prevent your cake from collapsing, avoid opening the oven door during the first 20 minutes of baking. Once your cake has sufficiently puffed, you can check for doneness. When inverting your cake, it’s best to do it while still warm to help the praline layer release easily without breaking.

If you’re looking to infuse more flavors, think about adding spices such as ginger or cloves to the cake batter for an extra kick. Lastly, consider serving with a dollop of whipped cream or a scoop of vanilla ice cream to elevate the dessert experience even further.

Variations and Adaptations

Creating variations of the Praline Upside-Down Pumpkin Cake can be a fun way to experiment with flavors and textures. For those who enjoy a deeper flavor profile, try incorporating spices such as cardamom or allspice along with the traditional cinnamon and nutmeg. Additionally, consider adding chocolate chips to the pumpkin batter for a sweet twist.

Seasonal adaptations can spice up the recipe as well. In winter, you might incorporate cranberries into the batter, providing a tart contrast that complements the sweetness of the praline. If hedging toward a more tropical flavor, mix in some ripe mashed bananas or coconut flakes for a delightful change.

For dietary modifications, vegans can swap out eggs and dairy with substitutes like flaxseed meal and almond milk. People following gluten-free diets can utilize a gluten-free flour blend to make this cake accessible for everyone while still preserving its deliciousness.

Texture modifications can also be achieved by incorporating a layer of cream cheese frosting on top instead of the praline, offering a rich and tangy experience. Alternatively, consider making mini versions of the cake in muffin tins for a fun, portable dessert.

Serving and Presentation Guide

When it comes to serving the Praline Upside-Down Pumpkin Cake, presentation is key. Consider using a cake stand for an elegant display, ensuring that everyone can see the gooey praline topping. A light dusting of powdered sugar or a drizzle of caramel can add a touch of sophistication.

Garnishing with fresh herbs, such as mint leaves or a sprinkle of cinnamon, can also enhance the visual appeal and add a fresh element to the dessert. Pair the cake slices with traditional accompaniments, including whipped cream or vanilla ice cream, which can elevate the dining experience even further.

Temperature considerations should not be overlooked; this cake is delicious warm but also holds up well at room temperature. If served cold, consider microwaving individual slices for a few seconds just before serving to release the flavors. Portion control is wise when serving at gatherings; aim for slices that are about an inch thick to ensure everyone can enjoy at least a taste.

Wine and Beverage Pairing

Pairing your Praline Upside-Down Pumpkin Cake with the right beverages can enhance the overall experience. A sweet dessert wine, such as a late-harvest Riesling or a Moscato, complements the cake’s caramel and pumpkin flavors beautifully. The sweetness of these wines balances the richness of the praline topping, making for a harmonious pairing.

For a non-alcoholic option, consider serving a spiced apple cider or a pumpkin spice latte, both of which tie in nicely with the autumnal themes of the cake. If coffee is preferred, go for a dark roast with chocolate notes that mirror the dessert’s flavors.

Always consider the temperature of the beverages; for wine, chilling is recommended, while coffee should be served hot. Offering a selection of drinks can cater to different preferences and enhance the enjoyment of this delightful cake.

Storage and Shelf Life

Storing your Praline Upside-Down Pumpkin Cake properly ensures it maintains its deliciousness over time. Allow the cake to cool completely before covering it with plastic wrap or aluminum foil to prevent it from drying out. Alternatively, keep the cake in an airtight container at room temperature for up to three days.

For longer storage, consider refrigerating the cake, in which case it can last about a week. Ensure that it’s well covered to avoid absorbing odors from the fridge. If you want to preserve the cake for an even longer period, freezing is an excellent option. Wrap individual slices in plastic wrap followed by aluminum foil to maximize freshness and prevent freezer burn, allowing the cake to last for up to three months.

Signs of spoilage include visible mold or an off smell. If you’ve kept the cake for longer than recommended or if it shows any signs of staleness, it’s best to err on the side of caution and dispose of it. When it’s time to enjoy frozen cake, thaw it in the refrigerator overnight before serving, and if desired, warm individual slices in the microwave for a comforting treat.

Make Ahead Strategies

Planning ahead with the Praline Upside-Down Pumpkin Cake makes hosting and entertaining much simpler. You can prepare the cake batter one day in advance. Simply mix the ingredients together, cover tightly, and refrigerate until you’re ready to bake. This not only saves time but allows the flavors to meld beautifully.

If you’re preparing the praline topping ahead of time, store it separately in an airtight container. Just before serving, reheat it gently to ensure it loosens when poured over the cooled pumpkin cake.

In terms of quality, the cake can be fully assembled and baked the day prior to your event. Once cooled, store it as mentioned earlier, but add the praline topping just before serving to maintain its crunchy texture. Adding fresh elements, such as whipped cream or nuts, right before serving enhances the cake’s appeal and freshness.

Scaling Instructions

Scaling this Praline Upside-Down Pumpkin Cake for gatherings is simple, thanks to its adaptable nature. If you want to halve the recipe, simply cut all the ingredient measurements in half, maintaining the same cooking time, but start checking for doneness a few minutes earlier.

Doubling or tripling the recipe is another great option, especially for larger gatherings. For a double batch, consider using a larger pan or two standard 9-inch pans to ensure even baking. Be mindful that a larger quantity may also require a bit longer in the oven, so watch the cake closely and check for doneness with a toothpick.

Adjusting your equipment according to the size of the batch is crucial. Large recipe quantities might require a commercial-sized mixing bowl for proper mixing and a larger oven for baking multiple pans. Always consider the use of multiple racks to bake several cakes simultaneously for efficiency.

When it comes to storage considerations, larger cakes can be more challenging. Make sure you have enough space in your fridge or freezer, and ensure they’re properly wrapped to prevent drying out. Leftovers from larger batches can be divided into portions for easy serving later on.

Nutritional Deep Dive

Analyzing the nutrition of the Praline Upside-Down Pumpkin Cake reveals a delightful balance of flavors and health benefits. On average, a single serving contains approximately 250 calories, with macronutrients comprising roughly 8 grams of protein, 12 grams of fat, and 30 grams of carbohydrates. The inclusion of pumpkin contributes significant dietary fiber, aiding in digestive health and promoting satiety.

In terms of micronutrients, this cake offers a solid amount of vitamin A, thanks to the pumpkin, which supports eye health, as well as vitamin C that strengthens the immune system. The pecans additionally provide healthy fats and antioxidants, beneficial for heart health.

When considering dietary restrictions, portion analysis is vital. For those monitoring caloric intake, options for smaller portions can allow enjoyment of this cake without overindulgence. Weight management can be supported by balancing the cake with healthier meals or being mindful of portion sizes particularly during special occasions.

Overall, while this cake is a delightful treat, it still offers preferable nutritional attributes that make it suitable for indulgent occasions that can fit into various dietary patterns when consumed in moderation.

Dietary Adaptations

Adapting the Praline Upside-Down Pumpkin Cake for different dietary needs can make this delightful dessert accessible to everyone. For a gluten-free version, use a gluten-free flour blend in place of all-purpose flour. Many blends do well without compromising the cake’s texture when properly measured.

Dairy-free participants can rejoice by substituting cow’s milk with almond, soy, or coconut milk, and by using non-dairy butter spread in the praline topping. Optionally, aquafaba – the liquid from canned chickpeas – can be used instead of eggs for a vegan take without losing moisture or flavor.

Keto and low-carb enthusiasts can use almond flour instead of standard flour and sugar substitutes like erythritol or stevia in the praline layer, ensuring that it remains delicious but lower in carbohydrates. Likewise, for those following a paleo lifestyle, raw honey or maple syrup makes an excellent sweetener.

If you are considering a lower-FODMAP option, be sure to limit high-FODMAP ingredients, focusing on pumpkin and nuts, while choosing suitable alternatives to the cake flour. Lastly, any nut allergies can be accommodated by replacing pecans with seeds like sunflower or pumpkin seeds, still offering a great texture to the cake.

Troubleshooting Guide

When making the Praline Upside-Down Pumpkin Cake, you might encounter a few common hurdles, but each has a straightforward solution. If your cake comes out too dense, ensure not to overmix the batter. Stir gently until the ingredients are just combined.

If the praline topping crystallizes instead of remaining a glossy liquid, check the sugar temperature while cooking; it should be melted and golden but not burnt. If you notice an unbalanced flavor with too much sweetness, balancing it with a dollop of unsweetened whipped cream can help round it out.

Should your cake sink in the center after baking, it may have been underbaked. Always check with a toothpick for doneness toward the end of the cooking time. Overbaking can lead to a dry texture, so aim for just firm edges and a slightly soft center.

Lastly, if your cake refuses to release from the pan, let it cool for a few minutes before attempting to invert it. Carefully running a knife around the edges can also help to loosen it before flipping.

Recipe Success Stories

Readers have expressed their joy and satisfaction with the Praline Upside-Down Pumpkin Cake, noting how it became a family favorite. Many have shared personal stories of successfully baking this cake for Thanksgiving gatherings, turning it into a cherished tradition in their homes.

Several bakers have also provided feedback about experimenting with different nuts in the praline topping, finding that walnuts or even pecans worked wonderfully, allowing for slight variations while maintaining the core recipe’s integrity. Other success stories include attempts at increasing the spice levels, infusing the cake with additional warmth and depth that resonated well with family and friends.

With each success, community members have shared tips on photography and presenting the cake, emphasizing the importance of good lighting and angles to capture the cake’s captivating layers. The stories highlight the cake not only as a recipe but as a medium for storytelling, teaching, and bonding over shared experiences in the kitchen.

Frequently Asked Questions

Can I use fresh pumpkin instead of canned?

Yes, you can use fresh pumpkin! Simply cook and puree the pumpkin until smooth. A sugar pumpkin is recommended for the best taste and texture.

Can this cake be made ahead of time?

Absolutely! You can bake the cake a day in advance and store it covered at room temperature. Reheat the praline topping before serving for best results.

How do I know when my cake is done?

The cake is done when a toothpick inserted in the center comes out clean or with a few moist crumbs. Be careful not to overbake.

What can I use instead of pecans?

If you have nut allergies or prefer a different flavor, you can substitute pecans with walnuts, almonds, or even sunflower seeds.

Can I freeze leftovers?

Yes, this cake freezes well! Wrap individual slices tightly in plastic wrap and aluminum foil, then store them in the freezer for up to three months.

Is it possible to modify the sweetness of the cake?

Definitely! You can adjust the sugar amount in the batter or use sugar substitutes for lower-sugar versions. Just be mindful of the moisture content.

What’s the best way to serve this cake?

This cake is delicious served warm or at room temperature. Consider adding a dollop of whipped cream or a scoop of vanilla ice cream for extra indulgence.

Can I make this gluten-free?

Yes, simply use a gluten-free flour blend in place of regular flour to accommodate gluten-free diets while keeping the flavor intact.

Can I add chocolate to the cake?

Absolutely! Adding chocolate chips to the batter or using cocoa powder in moderation can create a chocolate-pumpkin fusion that everyone will love.

How should I store the cake?

Store the cake in an airtight container at room temperature for up to three days, or refrigerate for up to a week. Be sure it’s covered well!

Additional Resources

For those who adore the flavors of autumn, consider exploring other seasonal recipes, such as spiced apple pie or maple pecan tart. Technique guides on baking fundamentals can enhance your skills, from mixing cake batter properly to mastering the praline topping. You could also check ingredient information on various pumpkins and their ideal uses in baking.

Additionally, exploring equipment recommendations can help you choose the best tools for your baking adventures. Don’t forget about seasonal variations of traditional meals that complement this cake, ensuring a complete autumn feast.

Join the Conversation

We’d love to hear your thoughts and experiences with the Praline Upside-Down Pumpkin Cake! Share your photos and variations on social media, engaging with fellow bakers as you showcase this beautiful dessert. Joining the community enriches our cooking journeys, providing support, sharing tips, and celebrating our collective love for baking. Whether it’s a warm compliment or a recommended tweak, we welcome every interaction.

The Recipe

Praline Upside-Down Pumpkin Cake

Serves: 8 servings

Prep Time: 20 mins

Cook Time: 40 mins

Total Time: 1 hour

Kitchen Equipment Needed

  • 9-inch round cake pan
  • Mixing bowls
  • Electric mixer
  • Rubber spatula
  • Toothpick for testing doneness

Ingredients

  • 1 cup canned pumpkin
  • 1 cup granulated sugar
  • ½ cup brown sugar
  • ¾ cup vegetable oil
  • 3 large eggs
  • 1 ½ cups all-purpose flour
  • 1 tsp baking powder
  • 1 tsp baking soda
  • 2 tsp pumpkin pie spice
  • ½ tsp salt
  • 1 ½ cups pecans, chopped
  • ½ cup unsalted butter
  • ½ cup light brown sugar (for praline topping)

Directions

  1. Preheat your oven to 350°F (175°C). Grease the cake pan with butter and set aside.
  2. In a mixing bowl, combine the pumpkin, granulated sugar, brown sugar, and oil. Mix until smooth.
  3. Add in the eggs one at a time, mixing well after each addition.
  4. In another bowl, whisk together the flour, baking powder, baking soda, pumpkin pie spice, and salt.
  5. Gradually add the dry ingredients to the wet mixture, folding gently until just combined.
  6. In a saucepan, melt the butter over medium heat. Stir in the brown sugar and pecans until bubbling and combined, about 3 minutes.
  7. Pour the praline mixture evenly into the bottom of the prepared cake pan.
  8. Pour the pumpkin cake batter on top of the praline layer. Smooth the top with a spatula.
  9. Bake for 40 minutes or until a toothpick inserted into the center comes out clean.
  10. Let the cake cool for 10-15 minutes before carefully inverting onto a serving plate. Serve warm or at room temperature.

Recipe Notes

  • Store any leftovers in an airtight container at room temperature for up to three days.
  • This cake freezes well; just wrap slices individually before freezing.
  • Feel free to add chocolate chips or dried cranberries for a twist!

Deliciously Easy Recipe for Juicy Pineapple Cake at Home

Juicy Pineapple Cake: A Tropical Delight for Any Occasion

⚖️
Difficulty
Medium

⏲️
Prep Time
20 mins

🕒
Cook Time
30 mins

⏱️
Total Time
50 mins

🍽️
Servings
8 slices

If you’re looking for a dessert that transports you straight to a tropical paradise, look no further than this Juicy Pineapple Cake. Bursting with sweet, succulent pineapple flavors, this delightful cake is certain to become a family favorite. Perfect for summer picnics or cozy family gatherings, this cake features light and fluffy layers infused with the bright taste of pineapple, making every bite a refreshing treat.

This Juicy Pineapple Cake is more than just a pretty dessert; it’s a delicious way to celebrate the vibrant flavors of summer. With the perfect balance of sweetness and tang, this cake is beautifully complemented by a rich cream cheese frosting that adds a silky smooth texture. Ideal for birthdays, barbecues, or any festive occasion, it’s an easy-to-make cake that will leave your guests asking for seconds!

Quick Recipe Highlights

  • Flavor Profile: A delightful mix of sweet and tangy pineapple that brightens your palate.
  • Texture: The cake is light and fluffy, complemented by a creamy, smooth frosting.
  • Aroma: The aroma of caramelized pineapple wafts through the kitchen, enhancing the anticipation.
  • Visual Appeal: With its golden hue and fluffy frosting, this cake is a feast for the eyes and a star at any dessert table.
  • Skill Level Needed: Suitable for home bakers of all levels, making it accessible and fun.
  • Special Equipment: Just basic baking tools are required, making it easy to whip up.

Recipe Overview

  • Difficulty Level: This Juicy Pineapple Cake is classified as medium difficulty, allowing even beginners to get it right with a little practice.
  • Category: This dessert belongs to the cake category, specifically fruity cakes, making it perfect for summer gatherings.
  • Cuisine: This recipe draws on tropical influences, celebrating the beloved pineapple that is popular across many cuisines.
  • Cost: The ingredients are budget-friendly, typically costing under $20 for a finished cake.
  • Season: Best enjoyed during summer when pineapples are in season, although canned pineapples can be used year-round.
  • Occasion: Perfect for birthdays, summer parties, or as an uplifting dessert after a family meal.

Why You’ll Love This Recipe

The taste of the Juicy Pineapple Cake is simply divine, combining the sweetness of ripe pineapples with a tender cake that melts in your mouth. Each slice is a burst of tropical flavor, making it perfect for those hot summer days when you crave something refreshing. The frosting, while rich, balances the cake’s sweetness, ensuring you savor every bite without feeling overwhelmed.

Convenience is another reason to love this Juicy Pineapple Cake. It comes together quickly with simple ingredients, and can be made ahead of time, freeing you up on the day of your gathering. You can bake it, frost it, and store it until you’re ready to impress your guests!

Nutritionally, pineapple is not just tasty; it’s also packed with vitamins and minerals, including vitamin C and manganese. This cake provides a delicious way to enjoy a fruit that offers significant health benefits while still satisfying your sweet tooth.

This cake serves as a great centerpiece for any gathering. Whether it’s a family reunion or a birthday party, it can elevate any occasion. The visually appealing slices will encourage guests to mingle and share their experiences, bringing people together over delicious food.

Lastly, this Juicy Pineapple Cake is cost-effective. Made with simple pantry staples and fresh fruit, you don’t need to break the bank to create a stunning dessert that gets rave reviews. It’s accessible for anyone looking to impress without overextending their grocery budget.

Historical Background and Cultural Significance

The origin of pineapple cake can be traced back to various regions, particularly within tropical climates where the fruit is abundant. Initially, this cake was a way to utilize surplus pineapples, combining the fruit with sweet batter to create a delectable treat that has stood the test of time.

Culturally, pineapple is often regarded as a symbol of hospitality and warmth, making pineapple desserts popular in gatherings and celebrations. In many cultures, the act of serving pineapple cake symbolizes welcoming guests with kindness.

As culinary trends evolved, variations of pineapple cake began to surface, featuring diverse cultural influences that incorporate local ingredients. From traditional cream cheese icing to vegan adaptations, this dessert has adapted to changing palates while retaining its fruity essence.

Regionally, pineapple cake has unique twists that reflect local tastes. For example, in certain parts of Asia, recipes may include coconut for a tropical twist, while Latin recipes often incorporate cinnamon for added warmth and depth. These variations show how the basic recipe can evolve based on cultural contexts.

Ingredient Deep Dive

Pineapple

Pineapples have a rich cultural significance in many tropical countries, where they are often a symbol of welcome. Nutritionally, pineapples contain bromelain, an enzyme that aids digestion and has anti-inflammatory properties. When selecting pineapples, look for those that are firm with a sweet aroma. Store fresh pineapples in the refrigerator to prolong their freshness, or opt for canned ones for year-round baking. As for substitutions, if fresh pineapple isn’t available, crushed canned pineapple works well.

Flour

Flour is a staple ingredient in baking, providing the structure for cakes. Whole wheat flour can offer more fiber, making it a healthier option. When selecting flour, choose all-purpose flour for versatility and consistency. Store it in a cool, dry place to prevent clumping. If gluten-free flour is needed, look for a blend that contains xanthan gum to mimic the texture of wheat flour.

Sugar

Sugar not only sweetens but also helps with the browning and moisture of the cake. Granulated sugar is typically used, but brown sugar can add a deeper flavor. Store sugar in an airtight container to prevent moisture absorption. If looking for substitutes, options like honey or agave syrup can be used, though adjustments in measurements may be necessary.

Eggs

Eggs contribute moisture and richness while helping the cake rise. Fresh eggs are preferable for their binding properties. Store them in the fridge and check for freshness by placing them in water. For egg alternatives, unsweetened applesauce or flax eggs can be good choices, providing moisture without compromising texture.

Butter

Butter adds flavor and contributes to the cake’s moist texture. Use unsalted butter for better control of salt levels. Store butter in the fridge or freezer for longevity. If vegan options are needed, alternatives like coconut oil or vegan butter can be easily substituted.

Common Mistakes to Avoid

  • Overmixing the Batter: Overmixing can lead to a dense cake; mix just until ingredients are combined.
  • Using Cold Ingredients: Cold eggs or butter can affect the batter texture; ensure they are at room temperature.
  • Wrong Oven Temperature: An incorrect oven temperature can lead to uneven baking; always preheat your oven.
  • Not Greasing the Pan: Skipping this step can cause the cake to stick; ensure pans are well-greased and floured.
  • Overbaking: Keeping the cake in too long can dry it out; check for doneness with a toothpick.
  • Ignoring Ingredient Quality: Using subpar ingredients can affect the end flavor; always choose the best quality available.
  • Not Letting the Cake Cool: Eating the cake while hot can result in a crumbly texture; let it cool completely.
  • Skipping the Frosting: While the cake is delicious on its own, the frosting is what completes the flavor profile—don’t overlook it!

Essential Techniques

Mixing Ingredients

Proper mixing is crucial for cake texture. Use gentle folding to incorporate ingredients without deflating the batter. A well-mixed batter results in a lighter cake, while overmixing can yield a tough texture. Visually, the batter should be smooth and homogeneous without lumps.

Baking

Understanding your oven’s baking characteristics can greatly impact your cake. Ensure your oven is adequately preheated and the cake is centered in the oven to allow for even heat distribution. A properly baked cake will spring back when lightly touched and pull away from the sides of the pan.

Frosting Application

Applying frosting correctly enhances visual appeal and flavor. Start by cooling the cake completely, then use an offset spatula to apply a thin layer of frosting on top before adding a thicker final layer. This technique prevents crumbs from mixing into the frosting, resulting in a cleaner finish.

Cake Storage

Knowing how to store cake effectively can keep it fresh longer. Store it in an airtight container at room temperature for up to 3 days. For longer storage, freeze slices individually wrapped in plastic. This technique preserves flavor and moisture, so it’s ready for serving later.

Pro Tips for Perfect Juicy Pineapple Cake

1. Use fresh pineapple for better flavor and moisture—fresh fruit makes a noticeable difference!

2. Sift your flour and sugar to create a lighter batter—this helps to incorporate air and achieve fluffiness.

3. Warm your eggs slightly in a bowl of warm water before using them—they blend more easily with other ingredients.

4. Watch the baking time closely; every oven varies, and it’s best to start checking a few minutes early.

5. For an enhanced flavor, add a splash of rum or coconut extract to the batter.

6. Let the cake cool in the pan for about 10 minutes before transferring to a wire rack; this helps prevent crumbling.

7. If using buttercream frosting, consider adding a bit of crushed pineapple for a unique twist to the icing.

8. Decorate with toasted coconut flakes for added texture and a beautiful presentation.

Variations and Adaptations

For a tropical twist, consider adding shredded coconut or macadamia nuts to the batter. These ingredients pair wonderfully with pineapple and enhance the cake’s tropical flavor profile. Seasonal adaptations can include substituting different fruits, like mango or peach, based on availability.

For dietary modifications, this cake can easily be adapted to be gluten-free by using a gluten-free flour blend. Additionally, swapping refined sugar for coconut sugar will appeal to those seeking a more natural sweetening option.

In terms of texture modifications, incorporating crushed pineapple directly into the batter gives a chunky and moist texture. Alternatively, baking the pineapple slices directly in the cake ensures each piece releases its juices into the batter.

Presentation alternatives could involve layering the cake with additional fresh fruit between the layers or using edible flowers as a garnish for a stunning visual appeal that’s sure to impress.

Serving and Presentation Guide

For plating techniques, consider using a cake stand to elevate your Juicy Pineapple Cake, offering an impressive display. A simple dusting of powdered sugar over the top enhances visual appeal without overwhelming flavors.

For garnishing, use fresh mint leaves, edible flowers, or thinly sliced fresh fruit to create an eye-catching presentation. Modern serves can include individual slices plated with a scoop of ice cream or whipped cream on the side.

Temperature considerations are essential; serving the cake chilled enhances its refreshing nature, especially in warmer months. However, for an optimal taste experience, ensure it is not too cold, allowing the flavors to shine upon serving.

Lastly, portion control is important when serving this indulgent cake—slices should be generous yet manageable, allowing guests to enjoy without overindulgence.

Wine and Beverage Pairing

For wine pairings, a light Moscato or Riesling complements the sweetness of the Juicy Pineapple Cake beautifully. These wines enhance the fruit flavors and offer refreshing contrasts. Alternatively, a crisp Prosecco adds a celebratory feel to any occasion.

Non-alcoholic alternatives can include iced pineapple or passionfruit tea, which echo the cake’s tropical notes. Homemade lemonade offers another refreshing pairing, balancing sweetness with a light tartness.

If coffee or tea is preferred, opt for a lightly brewed green tea that pairs nicely with the cake’s sweetness or a mellow coffee to enjoy alongside.

When serving beverages, consider temperature; wines should be chilled, while teas can be served either hot or cold, depending on preference.

Storage and Shelf Life

For storing Juicy Pineapple Cake, keep it in an airtight container at room temperature for up to 3 days, or refrigerate it for up to a week. Make sure to separate layers with parchment paper to prevent sticking.

Signs of spoilage include off-smells or a significant change in texture; if the cake looks dry or has developed a crust, it’s best to discard it. Reheating instructions should also involve low heat in the oven to preserve moisture rather than using a microwave.

If planning to freeze the cake, wrap individual slices in plastic wrap and store in an airtight container for up to three months. Thaw at room temperature for the best texture upon serving.

Make Ahead Strategies

To prepare ahead of time, bake and cool the cakes a day in advance and wrap them tightly in plastic wrap before placing them in the fridge. This improves moisture retention and allows the flavors to meld.

For storage between steps, it’s effective to frost the cake on the day of serving to maintain the visual quality and avoid sogginess. However, you can also prepare the frosting a day in advance and refrigerate it—just re-whip before applying.

Assessing the quality impact is crucial; while cakes can be frozen or made in advance, freshness contributes to flavor, so aim to serve within a few days for best results.

When assembling, ensure all components are at room temperature before doing so, to allow better adhesion of frosting to the cake layers. Fresh elements, like fruit garnishes, should be added just before serving for vibrant results.

Scaling Instructions

To halve the recipe, simply divide each ingredient measurement by two, but ensure to adjust baking time as the smaller cake may bake faster.

For doubling or tripling the recipe, use larger pans and consider the oven’s capacity—baking in batches may be necessary to prevent overcrowding that could lead to uneven baking.

Equipment adjustments may include using larger mixing bowls or additional utensils to handle increased quantities. Timing modifications should account for varying bake times and should include periodic checks for doneness.

When storing larger quantities, ensure all layers are correctly sealed to prevent drying out and maintain freshness for longer periods.

Nutritional Deep Dive

The Juicy Pineapple Cake offers a fun way to enjoy dessert while still being mindful of nutritional intake. Each slice provides carbohydrates primarily from sugar and flour, essential for energy, with some dietary fiber from the pineapple.

In terms of micronutrients, the cake contributes vitamins from pineapple, particularly vitamin C. Each serving contains a good balance of proteins from eggs and fats from butter, integral for a balanced diet.

Health benefits can include improved digestive health from pineapple’s bromelain, while portion control allows you to indulge without excessive calorie intake. Pairing with nutritious sides, like yogurt or fruit, can enhance health benefits significantly.

When considering dietary needs, remember that moderation is key; creating smaller servings can allow for enjoyment without impacting overall dietary goals.

Dietary Adaptations

For gluten-free options, substitute all-purpose flour with a blend of gluten-free flours, ensuring to include ingredients like xanthan gum for structure.

Dairy-free variations may involve replacing butter with coconut oil and using plant-based milk and cream cheese for the frosting.

For a vegan version, you can substitute eggs with flaxseed meal or applesauce, and use a non-dairy butter alternative, ensuring the cake remains moist and flavorful.

Low-carb or keto enthusiasts can easily adapt the recipe using almond or coconut flour and sugar alternatives like erythritol.

Paleo adaptations can eliminate refined sugars entirely, using natural sweeteners like honey or maple syrup and ensuring all ingredients align with paleo guidelines.

Troubleshooting Guide

If your cake isn’t rising, check your baking powder for freshness; expired leavening agents can lead to flat cakes. Additionally, ensure you didn’t overmix, which can cause deflation.

Flavor balance issues often arise from not incorporating enough sweetness; adjusting sugar levels in the batter or frosting can help. Always taste as you go to find the right harmony.

Temperature problems can be identified through over-browning or undercooking; use an oven thermometer to check accuracy and ensure your cake is perfectly baked.

If you encounter equipment challenges, such as a malfunctioning mixer, hand mix the batter carefully, or use a whisk for small batches until repairs are made.

For ingredient substitutions causing texture changes, adapt by using similar ingredients; for example, if butter is replaced with oil, decrease liquid in the recipe to keep consistency intact.

Recipe Success Stories

Reader feedback highlights various success stories, with many praising the cake for its moistness and flavor profile. Adjustments suggested by readers, like adding shredded coconut, have found their way into many kitchens!

Variation successes have also been shared, with bakers experimenting with different fruits, leading to personalized creations that resonate with their taste preferences.

Many readers have submitted stunning photographs of their Juicy Pineapple Cake creations, showcasing delicious icing swirls and garnished presentations that inspire the community.

Feedback on cooking times and techniques continuously aligns with the successes shared, reinforcing best practices for baking this beloved dessert.

Frequently Asked Questions

1. Can I use canned pineapple for this recipe?

Yes, canned pineapple works wonderfully if fresh is unavailable. Ensure to drain it thoroughly to prevent excess moisture.

2. How do I prevent the cake from sticking to the pan?

Greasing the pan with butter and dusting it lightly with flour creates a non-stick surface, ensuring easy removal.

3. Can I freeze this cake?

Yes! Wrap it tightly in plastic wrap and store in an airtight container for up to 3 months for best quality.

4. How can I make this cake vegan?

Simply replace the eggs with flaxseed meal or applesauce and use plant-based butter and cream cheese for the frosting.

5. What is the best way to store leftovers?

Store leftover slices in an airtight container at room temperature for a few days, or refrigerate for longer freshness.

6. Can I add nuts to the recipe?

Definitely! Chopped walnuts or pecans add a lovely crunch and can be incorporated into the batter or as a topping.

7. How can I make this cake less sweet?

Reduce the sugar in the cake and frosting, and enhance flavor by adding a splash of lemon juice or zest.

8. Is this cake suitable for children?

Absolutely! The Juicy Pineapple Cake can be a fun treat for kids, especially when served at parties or celebrations.

9. What types of frosting pair well with this cake?

While cream cheese frosting is traditional, whipped cream or a light coconut frosting also complement the flavors beautifully.

10. Can I double this recipe?

Yes! Just be sure to adjust baking times and use larger pans to accommodate the increased batter.

11. What can I use instead of cream cheese frosting?

For buttercream frosting, you can use coconut cream mixed with powdered sugar for a tropical twist.

12. Can I add additional flavors to the cake batter?

Yes! Consider adding vanilla extract or citrus zest for an extra layer of flavor that complements the pineapple.

Additional Resources

For a delicious journey through similar flavors, check out our recipes for tropical fruit salads, coconut cupcakes, and more fruity cakes. Each recipe celebrates the beauty of fresh ingredients while offering unique pairings and serving ideas.

Explore our technique guides that delve deeper into baking fundamentals, providing skill-building insights for beginners and experienced bakers alike.

Seasonal variations are also available, encouraging readers to incorporate fresh, locally-sourced produce for enhanced flavors in all their baking endeavors.

Lastly, equipment recommendations help identify the must-have tools to create your perfect cakes, ensuring each baking experience is a success.

Join the Conversation

We love to hear about your baking adventures! Share your Juicy Pineapple Cake experiences on social media and tag us to showcase your creations. Join the community by posting reviews and sharing your adaptations of the recipe.

Photography tips can help you capture incredible images of your baking results; remember to shoot in natural light and experiment with angles to showcase details.

Engage with other bakers by sharing tips and favorite variations, creating a supportive network that fuels creativity in baking!

The Recipe

Juicy Pineapple Cake

Serves: 8 slices

Prep Time: 20 mins

Cook Time: 30 mins

Total Time: 50 mins

Kitchen Equipment Needed

  • Mixing bowls
  • Whisk or electric mixer
  • Measuring cups and spoons
  • 9-inch round cake pans
  • Offset spatula for frosting
  • Cooling rack

Ingredients

  • 2 cups all-purpose flour
  • 1 cup granulated sugar
  • 1/2 cup butter, softened
  • 3 eggs
  • 1 cup crushed pineapple, drained
  • 1/2 cup buttermilk
  • 2 teaspoons baking powder
  • 1 teaspoon vanilla extract

Indulge in Decadent Crème Brûlée Cake: A Luxurious Dessert

Crème Brûlée Cake – A Decadent Custard & Caramel Dessert

⚖️
Difficulty
Medium

⏲️
Prep Time
30 mins

🕒
Cook Time
50 mins

⏱️
Total Time
80 mins

🍽️
Servings
8

Indulge in the luxurious flavors of our Crème Brûlée Cake, a divine confection that marries the classic elements of crème brûlée with the comforting richness of cake. This exquisite dessert features layers of velvety custard, a golden caramel topping, and a tender cake base—all harmonizing to create an unforgettable experience for your taste buds. Each slice offers a delightful contrast between the creamy custard and a crisp, sugar-crusted exterior, inviting you to savor every bite.

The preparation of Crème Brûlée Cake is a celebration of culinary art, balancing technique and creativity. The process begins with crafting a smooth custard base, which is then poured over a buttery cake layer, resulting in a dessert that is both impressive and indulgent. With its charming presentation and rich flavors, this cake is perfect for special occasions or a sophisticated treat after dinner, ensuring that it will be a hit among friends and family alike.

Quick Recipe Highlights

  • Flavor Profile: Expect a delightful blend of vanilla, cream, and caramel notes, elevating your taste experience.
  • Texture: The cake is moist and supple, while the caramel topping provides a satisfying crunch.
  • Aroma: The enticing scent of baked vanilla and caramel wafts through the air, promising a heavenly taste.
  • Visual Appeal: Its golden-brown crust atop a creamy base creates an elegant visual, perfect for any dessert table.
  • Skill Level Needed: This recipe requires medium-level baking skills, ideal for those looking to enhance their culinary repertoire.
  • Special Equipment: A kitchen torch is essential for achieving the signature crunchy crème brûlée topping.

Recipe Overview

  • Difficulty Level: While crafting this Crème Brûlée Cake may seem daunting, the steps are straightforward, making it accessible to intermediate bakers willing to invest time.
  • Category: This dessert fits perfectly into sweet indulgences or as a show-stopping centerpiece for evening gatherings.
  • Cuisine: This cake draws inspiration from French culinary traditions, renowned for their rich pastries and desserts.
  • Cost: The ingredients are relatively affordable, with most pantry items and a few specialty items like vanilla beans forming the base.
  • Season: Ideal for all seasons, this cake shines particularly during festive gatherings where indulgence is welcomed.
  • Occasion: Perfect for anniversaries, birthdays, or dinner parties, it adds a touch of elegance to any occasion.

Why You’ll Love This Recipe

The Crème Brûlée Cake is a culinary delight that offers a rich taste and an enchanting texture. The creamy custard layer, complemented by a novel cake base, creates an interplay of indulgent flavors that will leave you craving for more. The contrast of a crisp caramelized top layer adds intrigue, ensuring your palate is treated with a variety of mouthfeel elements.

One of the most alluring aspects of this recipe is its manageable preparation. The relatively simple steps empower you to create an impressive dessert without excessive worry, making it an ideal choice for those who want to impress guests with minimal fuss. The combination of a classic recipe and a contemporary twist offers a rewarding baking experience without compromising flavor.

Beyond its magnificent flavor, this cake can provide advantages for those looking to enjoy a rich dessert without excessive portions. It encourages moderation—one slice will satisfy your sweet tooth and provide that luxurious crème brûlée experience without overwhelming your senses, making it a more mindful indulgence.

This Crème Brûlée Cake also serves as an excellent centerpiece for social gatherings. The moment you bring it to the dessert table, it becomes the talk of the evening, encouraging conversation and admiration. The shared experience of lightly caramelizing the sugar top adds excitement to dinner parties, making the preparation an interactive affair.

Lastly, the ingredients are versatile and accessible, ensuring that you can recreate this delightful dessert without breaking the bank. Many of the components can be found in your pantry, and with just a few fresh items, you can transform them into something truly extraordinary, making it a cost-effective choice for both everyday celebrations and special occasions.

Historical Background and Cultural Significance

Crème Brûlée has a fascinating history that traces back to the late 17th century in France, where it was first referenced in culinary texts. The term itself translates to “burnt cream,” aptly describing the dessert’s iconic crust and creamy base. Initially served as a simple dish among the wealthy upper classes, its allure began to spread across Europe, becoming a staple of patisserie.

Culturally, Crème Brûlée represents opulence and celebration. It was often featured in French banquets, symbolizing culinary excellence and sophistication. This cake adaptation adds a modern twist while preserving the traditional flavors that have elevated it through the ages, making the dessert both timeless and innovative.

The evolution of Crème Brûlée has inspired countless versions and adaptations, including the Crème Brûlée Cake. As bakers experiment and reinterpret classic recipes, they take influences from various global cuisines, leading to an exciting culinary evolution that blends tradition with creativity.

Regionally, you can find variants of Crème Brûlée across various cultures, each bringing unique spices and flavors to the basic recipe. From the creamy textures of classic French crème brûlée to adaptations that incorporate local ingredients, these variations showcase the versatility of this beloved dessert in different culinary landscapes.

Ingredient Deep Dive

– **Heavy Cream**: Heavy cream is essential for creating that rich custard base. Its high-fat content contributes to a smooth and luscious texture, making it a crucial ingredient in the Crème Brûlée Cake. Nutritionally, cream provides a good source of calcium, essential for bone health. When selecting cream, opt for pasteurized varieties, and store it in the refrigerator. If you need to substitute, half-and-half can work in a pinch but may not provide the same creaminess.

– **Egg Yolks**: Egg yolks play a pivotal role in crafting the custard. They add richness and the characteristic yellow pigmentation that brings warmth to the dish. When sourcing eggs, opt for organic or free-range when possible for better flavor and nutritional benefits. Store them in the refrigerator to maintain freshness. If you’re looking for substitutes, custard powder or silken tofu can work in specific recipes, although the texture will differ.

– **Granulated Sugar**: This key ingredient sweetens the custard and is essential for creating the crisp caramel topping. Besides adding sweetness, granulated sugar aids in the texture of the cake, making it light and fluffy. For optimal results, choose a high-quality sugar for your recipes. To keep granulated sugar fresh, store it in an airtight container. Brown sugar can be used as a substitute, giving the cake a richer flavor profile, though it may alter the color.

– **Vanilla Beans**: The use of vanilla beans elevates the flavor profile to luxurious levels. Beans contain tiny seeds, which provide bold, aromatic characteristics that are essential for a dessert like Crème Brûlée. When selecting vanilla beans, look for plump and shiny ones, indicating freshness and flavor. Store them in a cool, dark place to preserve their potency. Vanilla extract can be a substitute; however, the flavor will not be as intense and aromatic.

Common Mistakes to Avoid

  • Not tempering the egg yolks: Failing to temper the yolks when adding hot cream can result in scrambled eggs instead of a smooth custard.
  • Overmixing the batter: Liquid ingredients should be just combined; overmixing may lead to a dense cake, deviating from the desired light texture.
  • Using cold ingredients: Ensure that eggs and cream are at room temperature to achieve a better emulsion and consistency in your batter.
  • Ignoring oven temperature: An oven that is too hot can cause the custard to set improperly, while one that is too cool may not cook the cake through.
  • Burning the sugar: When caramelizing the sugar topping, keep a close watch; the sugar can quickly go from perfectly caramelized to burnt if left unattended.
  • Not using the right baking dish: The type of pan can affect how heat distributes, potentially leading to uneven cooking.
  • Skipping the cooling phase: Allowing the cake to cool completely is crucial; cutting it warm can lead to a messy presentation.
  • Using too much sugar for the topping: A thick layer of sugar can lead to difficulty in obtaining the desired caramelization.

Essential Techniques

– **Tempering the Eggs**: This technique is vital for creating a smooth custard. By gradually introducing hot cream to the egg yolks, you prevent the yolks from cooking too quickly. To master this technique, whisk the yolks continuously while slowly pouring in the cream. Look for a silky, even texture—if the mixture is grainy, it’s an indicator of overcooked yolks.

– **Caramelizing Sugar**: Achieving a perfectly caramelized crust requires patience and attention. Use a kitchen torch for even caramelization, moving in circular motions to avoid burning any one spot. The final texture should be crisp to the touch yet not too thick. Practice will help hone your technique, and visual cues include a bright amber color before it reaches the point of caramelization.

Pro Tips for Perfect Crème Brûlée Cake

– Always sift your flour before incorporation to remove clumps and ensure a lighter, fluffier cake.
– Experiment with different flavored sugars for the caramel topping, such as cinnamon or cocoa, for a unique twist.
– Use a high-quality vanilla extract if vanilla beans are unavailable, but note the flavor may differ.
– Set up the kitchen torch ahead of time and practice before caramelizing the cake to feel confident in achieving the desired result.
– Blend the custard mixture thoroughly but avoid incorporating too much air, which can cause bubbles in the final texture.
– Invest in an oven thermometer to ensure accurate temperature readings and consistent baking results.
– Allow the cake to chill completely before topping with sugar for a better surface for caramelization.
– Consider chilling the cake overnight; it enhances the flavors and promotes a smoother custard.

Variations and Adaptations

– **Regional variations**: Explore flavors from various cultures by adding lavender or coconut, inspired by French or tropical desserts.
– **Seasonal adaptations**: Substitute seasonal fruits like raspberries or mangoes in the cake batter for a fresh twist.
– **Dietary modifications**: Create gluten-free versions by substituting regular flour with almond or coconut flour, achieving a nutty flavor.
– **Flavor variations**: Experiment with chocolate, matcha, or espresso powder in the batter to infuse unique flavors.
– **Texture modifications**: Consider chilling the custard longer for a firmer consistency, perfect for those who enjoy a more set dessert.
– **Presentation alternatives**: Serve in individual ramekins for a personal touch, garnished with fresh berries or mint leaves for added allure.

Serving and Presentation Guide

To create an eye-catching presentation, consider plating techniques that highlight the Crème Brûlée Cake’s elegant design. Start by carefully slicing the cake with a serrated knife, ensuring a clean edge. Arrange each slice on a stylish dessert plate, allowing the glossy top layer to shine.

For garnishing, consider topping with lightly whipped cream or a scoop of vanilla ice cream for an indulgent touch. Fresh seasonal fruits, such as berries or citrus slices, can add color and enhance flavor, while sprigs of mint can provide a vibrant contrast. For a more modern approach, serve with a drizzle of chocolate or caramel sauce along the plate, adding depth to the presentation.

Temperature is crucial; this cake shines when served slightly chilled, allowing the flavors to develop while ensuring the custard remains creamy. Keep portion control in mind; this dessert is rich, and a smaller slice can be just as satisfying, especially when served with accompanying flavors that complement its richness.

Wine and Beverage Pairing

The right pairing can elevate your Crème Brûlée Cake experience. A sweet dessert wine such as a Sauternes or Moscato complements the cake’s rich vanilla and caramel flavors beautifully. The sweetness in these wines aligns with the dessert, creating a harmonious taste sensation.

For non-alcoholic alternatives, consider serving sparkling water infused with citrus or herbal notes, which can cleanse the palate between bites. A well-brewed cup of coffee can also enhance the experience, particularly if it features slight bitterness to balance the cake’s sweetness.

Temperature considerations are vital in pairing; serve dessert wines chilled, while coffee should be hot for optimal flavor release. Offering a variety of drink options ensures that your guests find the perfect compliment to their slice of heaven.

Storage and Shelf Life

When it comes to storage, keep your Crème Brûlée Cake in the refrigerator, where it can last for up to 4 days. Place it in an airtight container or cover it tightly with plastic wrap to prevent it from absorbing other flavors.

Monitor the cake for signs of spoilage, such as an off smell or changes in texture—both can indicate it’s time to discard the dessert. Reheating the cake is not recommended, as it can alter the desired creamy texture of the custard.

If you wish to freeze the cake, wrap each slice in plastic wrap followed by aluminum foil for an extended shelf life of about 3 months. When ready to enjoy, allow it to thaw in the refrigerator overnight for optimal taste and texture.

Make Ahead Strategies

If you’re planning for a special occasion, preparing the Crème Brûlée Cake a day ahead is an excellent strategy. You can bake the cake and prepare the custard, then chill them together to allow the flavors to meld beautifully.

Between steps, make sure to store the layers covered to prevent drying out. Assess the quality impact; chilling overnight enhances the flavors, making it even more indulgent. When it’s time to serve, quickly sprinkle and caramelize the sugar top right before plating to maintain the crunchiness.

Consider adding garnishes, such as whipped cream or fresh fruits, just prior to serving to maintain their freshness and visual appeal.

Scaling Instructions

Scaling the Crème Brûlée Cake recipe can be easily adapted to suit the number of servings you need. If halving the recipe, use smaller baking pans to ensure an even bake. Keep in mind that cooking times may vary, so it’s crucial to monitor doneness closely.

Conversely, if you are doubling or tripling the recipe, ensure you have sufficient mixing bowls and baking pans on hand. Adjusting cooking times might be necessary if you are using larger pans, so always conduct the toothpick test to check for doneness.

Consider storage space when scaling; a larger batch may require more refrigerator space for proper storage, especially if you plan to chill the cake or need to store unrefrigerated items separately.

Nutritional Deep Dive

Analyzing the macro breakdown reveals that the Crème Brûlée Cake is largely carbohydrate-based due to the sugar content, along with a significant amount of fats from the cream and butter. Protein primarily comes from the eggs, offering a slight balance to the overall dessert.

With regards to micronutrient analysis, the cake provides calcium and vitamins A and D from the essence of heavy cream and eggs, contributing to overall health benefits. Moderation is key, as the richness of the cake makes it a treat rather than a staple.

For those mindful of dietary considerations, breaking down the serving size is essential. Enjoying a small slice provides enjoyment without excessive calorie intake. Weight management becomes manageable when treats like this are savored, rather than consumed in heavy portions.

Dietary Adaptations

For gluten-free enthusiasts, substitute conventional flour with almond flour or a gluten-free blend in the cake batter. These alternatives maintain the cake’s fluffiness while accommodating dietary needs.

Dairy-free options can be created using coconut cream combined with almond or oat milk for a unique flavor that aligns with the essence of crème brûlée. Substitute vegan butter for a comparable richness while still keeping it plant-based.

Those following a low-carb or keto diet can use erythritol or stevia as sugar substitutes, ensuring you maintain that sweet indulgence without the carbohydrates. In contrast, paleo followers would appreciate a recipe swap emphasizing nut flours and natural sweeteners.

If you need to accommodate other specific diets, such as low-FODMAP, consider checking ingredient compatibility thoroughly to ensure everyone can join in the feast without concern.

Troubleshooting Guide

– **Texture issues**: If your cake is too dense or gummy, consider revisiting your mixing technique; overmixing should be avoided to maintain tenderness.
– **Flavor balance**: Should your cake taste overly sweet, balance it with a pinch of salt or by serving it with tart fruits to counteract the sweetness.
– **Temperature problems**: Make sure your oven isn’t running hot or cold by utilizing an oven thermometer; an inaccurate oven can lead to undesirable baking results.
– **Equipment challenges**: If your kitchen torch fails when caramelizing sugar, utilize the broiler option, but keep a close eye to prevent burning.
– **Ingredient substitutions**: When replacing custard staples, always consider the moisture content and adjust other ingredients as needed to maintain integrity.
– **Timing concerns**: If you notice your custard isn’t setting up, it may need additional baking time or a slight oven adjustment; monitor closely for best results.

Recipe Success Stories

Our readers have shared numerous success stories following the Crème Brûlée Cake recipe, sharing how they wowed their friends and family with this indulgence. Many have enjoyed customizing the flavors, such as adding espresso powder for a coffee-infused twist.

Photography enthusiasts have embraced showcasing their creations, often capturing the perfect caramelized surface, leading to inspiring new entries on social media platforms. Feedback comes filled with creativity, suggesting variations with vibrant fruits or seasonal herbs for added flair.

The community engagement surrounding this recipe highlights the joy of baking and sharing; readers have come forward with suggestions that have enriched the recipe refinement process. Each success story adds a rich layer to the Crème Brûlée Cake legacy.

Frequently Asked Questions

Can I make the Crème Brûlée Cake ahead of time?
Yes, this cake can be made a day in advance. Just ensure that it is kept in the refrigerator until ready to serve to maintain freshness.

What is the best way to store leftover cake?
Store any leftover cake in an airtight container in the refrigerator for up to 4 days.

How do I achieve the perfect caramelization on top?
Use a kitchen torch for the best results, moving in circular motions until you achieve a crisp, golden layer. If you don’t have a torch, you can carefully use the broiler.

Can I freeze the Crème Brûlée Cake?
Yes, but it’s best to freeze it sliced. Wrap individual portions tightly in plastic then foil to prevent freezer burn.

What can I use instead of egg yolks?
For a vegan alternative, silken tofu can be blended until smooth to mimic the custard consistency, although it won’t have an exact flavor match.

Why is my custard lumpy?
This usually occurs if the egg yolks were cooked too rapidly. Always temper the yolks gradually with the hot cream to avoid this issue.

What are common flavor variations for this cake?
Popular flavor variations include chocolate, orange zest, and coffee, all of which pair beautifully with the custard base.

How can I reduce the sugar content in the recipe?
You can experiment with sugar alternatives like monk fruit sweetener or stevia to match your preferred sweetness without the excess calories.

What is the key to prevent the custard from cracking?
Bake the cake in a water bath to keep the temperature even and help maintain moisture while cooking.

Can I substitute heavy cream with another dairy?
Yes, half-and-half or light cream can substitute heavy cream, although the richness may be reduced slightly.

Additional Resources

Looking to explore more? Discover related recipes that will complement your newfound baking skills, such as classic French tarts or rich cheesecakes. Enhance your culinary toolkit with technique guides ranging from basic baking methods to advanced pastry techniques, offering various ways to elevate your dessert game.

Learn about ingredients to understand the nuances and best practices for ensuring high-quality components in your recipes. With the right equipment recommendations at your fingertips, you can confidently navigate your way through various culinary endeavors.

Lastly, keep an eye out for seasonal variations, as these can inspire fresh takes on classic recipes, breathing new life into your baking repertoire.

Join the Conversation

Your culinary journey is just beginning! Join us on social media to share your own Crème Brûlée Cake creations—use the hashtag #CrèmeBrûléeCakeSuccess to connect with other baking enthusiasts. Photography tips abound, allowing you to capture the beauty of your baked goods while sharing with the world.

Engage in recipe reviews as you refine your baking skills, and be sure to contribute your unique twists on this classic dessert. Community engagement is what makes baking a joyful endeavor, allowing everyone to partake in the delicious experiences that great food can offer.

The Recipe

Crème Brûlée Cake

Serves: 8

Prep Time: 30 mins

Cook Time: 50 mins

Total Time: 80 mins

Kitchen Equipment Needed

  • Mixing bowls
  • Whisk
  • Kitchen torch
  • Baking dish
  • Oven thermometer
  • Rubber spatula

Ingredients

  • 2 cups heavy cream
  • 4 large egg yolks
  • 3/4 cup granulated sugar, divided
  • 1 vanilla bean, split and seeded
  • 1/2 cup all-purpose flour
  • 1/2 cup unsalted butter, softened
  • 1/4 teaspoon salt

Directions

  1. Preheat oven to 325°F (163°C) and prepare a baking dish for a water bath with hot water.
  2. In a saucepan, heat cream and vanilla bean over medium heat until simmering. Remove from the heat and let steep.
  3. In a bowl, whisk egg yolks and 1/2 cup sugar until pale and thick.
  4. Gradually whisk in the hot cream, tempering the yolks. Strain the mixture to remove lumps.
  5. In another bowl, combine flour, butter, remaining sugar, and salt until smooth. Combine with custard mixture.
  6. Pour into prepared dish and place in the water bath. Bake for 50 minutes or until set.
  7. Cool at room temperature before chilling in the fridge for at least 4 hours.
  8. Before serving, sprinkle a thin layer of sugar on top and use a kitchen torch to caramelize until golden.

Recipe Notes

  • For added flavor, consider adding a pinch of espresso powder to the cake mixture.
  • Ensure that the cream does not boil, as it can affect the custard’s texture.
  • Individual ramekins can be used instead of one large dish for personal servings.

Decadent Chocolate Swirl Cheesecake Slice Recipe You’ll Love

Chocolate Swirl Cheesecake Slice: Decadent Dessert Delight

⚖️
Difficulty
Medium

⏲️
Prep Time
20 mins

🕒
Cook Time
50 mins

⏱️
Total Time
70 mins

🍽️
Servings
12 slices

Indulging in a slice of Chocolate Swirl Cheesecake is an experience that tantalizes the senses. The rich, velvety cream cheese filling laced with a decadent chocolate swirl offers a perfect balance of flavors and textures. This delightful dessert is not just a feast for your palate; it’s a visual masterpiece with its marbled chocolate presentation. Whether you’re hosting a dinner party or simply treating yourself to a sweet escape, this cheesecake slice is bound to impress.

Every bite of this Chocolate Swirl Cheesecake Slice is a celebration of sweet and creamy goodness. The luscious chocolate counterbalances the tangy flavor of the cheese, making it a delightful combination. The crust, with its buttery crunch, provides the perfect foundation for the creamy filling. As the cheesecake bakes, the aroma fills the kitchen, teasing everyone nearby and increasing anticipation for that first heavenly slice.

Quick Recipe Highlights

  • Flavor Profile: Rich chocolate paired with a creamy, tangy filling creates an irresistible combination.
  • Texture: Smooth cheesecake with a velvety body and a crunchy graham cracker crust.
  • Aroma: A heavenly blend of chocolate and baked cream cheese that wafts throughout your kitchen.
  • Visual Appeal: Beautifully marbleized slices that showcase the chocolate and cream cheese swirls.
  • Skill Level Needed: Medium difficulty; requires some baking experience but is accessible to all.
  • Special Equipment: A springform pan is recommended for perfect baking and presentation.

Recipe Overview

  • Difficulty Level: This recipe is classified as medium. While it doesn’t require specialized skills, attention to detail in the mixing and baking processes is essential for achieving that perfect swirl.
  • Category: Dessert – perfect for any sweet occasion, ranging from family gatherings to elegant dinners.
  • Cuisine: Combining classic ingredients from traditional cheesecake recipes with contemporary flair, this dessert transcends cultural boundaries with its universal appeal.
  • Cost: Approximately $15 for 12 servings, making it both an economical and delightful way to satisfy your sweet tooth.
  • Season: Great for any season, but especially delightful during celebratory occasions such as holidays and birthdays.
  • Occasion: Ideal for birthday parties, holiday feasts, or even a cozy night in to pamper yourself with a sweet treat.

Why You’ll Love This Recipe

Each bite of this Chocolate Swirl Cheesecake Slice offers a blissful medley of flavors that dance on your taste buds. The combination of chocolate’s sweetness with the creaminess of the cheese creates a dessert that’s totally irresistible. The rich velvety texture complements the slight crunch of the crust, giving you a proper mouthfeel that enhances the overall experience.

This cheesecake not only captivates the palate but is also convenient to prepare. With simple steps and straightforward ingredients, it allows both novice and experienced bakers to create a show-stopping dessert without excessive effort. Once you master this recipe, you’re left with a foundational idea that you can adapt and experiment with.

Nutritionally, cheesecake can offer certain benefits depending on ingredient selections. Using lower-fat cream cheese can reduce the calorie count while still providing a rich and satisfying dessert. Additionally, you can enhance its nutritional value by incorporating yogurt for added probiotics.

Gathering friends or family around a beautiful cheesecake creates an inviting atmosphere perfect for socializing and sharing. The process of serving and enjoying cheesecake together can make any occasion feel special, turning an ordinary get-together into a memorable celebration.

Lastly, this Chocolate Swirl Cheesecake Slice is cost-effective while impressing guests with its gourmet feel. With a few staple ingredients, you can create a restaurant-quality dessert right at home, proving that delightful indulgence doesn’t always have to break the bank.

Historical Background and Cultural Significance

The origins of cheesecake can be traced back to ancient Greece, where it was served to athletes during the first Olympic games. This early version utilized simple ingredients like cheese and honey, showcasing the culinary simplicity of the time. As recipes evolved, the delightful dessert took new shapes depending on regional preferences, with variations flourishing across different cultures.

In the United States, cheesecake gained popularity in the 19th century, particularly with the introduction of cream cheese as a key ingredient. This shift allowed for the creation of what we now think of as the traditional New York-style cheesecake, which paved the way for innovative variations like our Chocolate Swirl Cheesecake.

Cheesecake’s cultural significance extends beyond its delicious taste; it often symbolizes celebration and togetherness. From weddings to festivals, cheesecake has found its place in heartfelt gatherings, representing happiness and indulgence.

Modern adaptations of cheesecake recipes evolve yet remain rooted in tradition. Chefs around the world experiment with flavors and styles, incorporating local ingredients to craft unique versions that appeal to a wider audience, such as this rich chocolate variation.

Ingredient Deep Dive

Chocolate serves as the star ingredient for this cheesecake, adding richness and depth. This beloved treat has ancient roots, with cacao being cultivated by the Mesoamerican civilizations as early as 1500 BC. The modern chocolate we use today is loaded with antioxidants and has been linked to numerous health benefits, including improved heart health and mood enhancement. When selecting chocolate for this recipe, opt for high-quality dark chocolate for deeper flavor and richness, and remember to store it in a cool, dark place to maintain freshness.

Graham cracker crumbs create the crust, providing a satisfying crunch and a subtle sweetness. Originating from the invention of Graham flour by Sylvester Graham in the 19th century, graham crackers became a pantry staple for many desserts. Nutritionally, they offer fiber while delivering those beloved crisp textures. When storing leftover crumbs, keep them in an airtight container to maintain freshness, and feel free to substitute with digestive biscuits for a twist.

Lastly, cream cheese is crucial for the filling. With origins linked to early American civilizations, this creamy cheese has revolutionized dessert practices around the globe. Cream cheese is rich in calcium and can be found in reduced-fat versions, making it a versatile addition to desserts. Choosing a high-fat version yields a richer flavor, while lower-fat options can help cut calories. Keep it refrigerated and use it by the expiration date for optimal flavor.

Common Mistakes to Avoid

  • Not letting the cream cheese soften: Starting with cold cream cheese can lead to a lumpy filling. Always allow it to come to room temperature first.
  • Overmixing the batter: Overmixing can incorporate too much air, leading to cracks in the cheesecake. Mix until just combined.
  • Skipping the water bath: A water bath helps stabilize the cheesecake during baking. If omitted, uneven baking or cracking may occur.
  • Not allowing the cheesecake to cool properly: Rapid temperature changes can cause cracks. Allow it to cool gradually before refrigerating.
  • Cutting too soon: Slicing the cheesecake before it has fully set can result in a messy presentation. Give it at least 4 hours in the fridge before cutting.
  • Forgetting to line the pan: Always line the bottom and sides of your pan with parchment paper for easy removal.
  • Using the incorrect pan size: Stick to the specified pan size in the recipe to ensure proper cooking times and proportions.
  • Not measuring ingredients correctly: Baking is a science, so precise measurements are crucial for your cheesecake’s success.
  • Neglecting decorations: A well-presented cheesecake enhances its appeal. Always consider how you want to garnish your cheesecake before serving.

Essential Techniques

Understanding the art of making a cheesecake requires mastering the technique of mixing ingredients. Incorporating everything at room temperature, followed by careful mixing, ensures a smooth batter. Avoiding overmixing will prevent undesirable air pockets, leading to a cheesecake that remains level as it bakes, without unsightly cracks.

The water bath technique is paramount in creating the perfect cheesecake. It helps maintain an even temperature and moisture level during baking, promoting even cooking. Learn to wrap the springform pan securely in foil to prevent water from entering while providing a gentle environment that enhances texture.

Pro Tips for Perfect Chocolate Swirl Cheesecake Slice

For guaranteed success, always use high-quality chocolate for the best flavor. Melt and let it cool before swirling into the cheesecake mixture for effortless mixing.

When preparing your crust, use finely crushed crumbs and mix with melted butter until even. This ensures a firm base that holds together upon slicing.

To create beautiful swirls, drop spoonfuls of chocolate on top of your cheesecake batter, then use a knife or skewer to swirl gently. Too much mixing will destroy the visual effect.

Equip yourself with a cake tester or toothpick to check for doneness; the cheesecake should be set but still slightly jiggly in the center.

Once the cheesecake is fully cooked, let it cool in the oven with the door ajar for at least an hour. This helps prevent cracking due to sudden temperature changes.

Always refrigerate your cheesecake overnight, as this helps improve flavor and allows it to set properly, making it easier to slice.

Enjoy serving with a dollop of whipped cream and fresh berries for added flair that complements the rich chocolate.

When cutting, use a hot knife for clean slices, dipping it in hot water and wiping it dry between cuts.

Variations and Adaptations

Consider experimenting with seasonal adaptations, such as adding pumpkin spice for a fall-inspired dessert or incorporating fresh berries in the summer to balance flavors beautifully. These can add a refreshing twist while maintaining the core structure of your cheesecake.

For those watching their carb intake, a low-carb sweetener can easily substitute for regular sugar in the filling. This yields a dessert that doesn’t compromise on taste while accommodating dietary preferences.

Certain variations focus on flavor combinations, like espresso for a mocha cheesecake or salted caramel for an added layer of sweetness and savory depth. Don’t shy away from mixing flavors before pouring them into the crust.

Texture modifications can include adding a layer of chocolate ganache on top for a luscious finish or sprinkling sea salt for a balanced flavor punch. Presentation enhancements, such as chocolate shavings or edible flowers make for stunning visual options.

Serving and Presentation Guide

For a delightful presentation, plate your cheesecakes with artistry. Consider using a dessert plate for each slice to create a pleasing visual appeal. Garnish with fresh whipped cream, chocolate shavings, or berries to enhance its appearance and flavor profiles.

Use a warm knife to slice through your cheesecake smoothly, ensuring clean edges and enhancing the aesthetic for your guests. A drizzle of chocolate sauce or caramel around the edges of the plate can elevate the overall presentation.

Serving temperature matters—cheesecakes are best served slightly chilled, allowing the flavors to bloom without being too cold. Aim to remove them from the refrigerator about 30 minutes before serving for optimal texture.

When considering portion control, keep slices reasonable to maintain balance with sweetness. Each slice should be satisfying but leave room for more flavors, as portioning can create a more enjoyable eating experience.

Wine and Beverage Pairing

Pair your Chocolate Swirl Cheesecake with a dessert wine like a port or a rich ruby merlot, enhancing the chocolate’s sweetness. Their deep flavors complement the richness of the cheesecake and provide a luxurious taste experience.

If you are looking for non-alcoholic options, a rich hot chocolate or coffee can beautifully complement the dessert, enhancing the rich chocolate notes.

For tea lovers, consider pairing with a strong chai or an Earl Grey, where the aromatic spices can contrast delightfully with the creamy cheesecake.

Ensure beverages are served at ideal temperatures; chilled wines enhance the sweetness while hot beverages can negate strong flavors when paired.

Storage and Shelf Life

To preserve the integrity of your Chocolate Swirl Cheesecake Slice, store it in an airtight container in the refrigerator. Proper cooling can extend longevity up to a week while maintaining its delicious flavors.

If you anticipate leftovers, consider freezing individual slices; wrapping them in plastic wrap followed by foil ensures both moisture retention and flavor preservation. Thaw each slice overnight in the fridge before enjoying once more.

Watch for signs of spoilage, including off-odors, undesirable changes in texture, or unusual discoloration. If any signs appear, it’s best to err on the side of caution and discard.

Reheating is straightforward—allowing the cheesecake to come to room temperature before serving will restore its original creaminess and enhance flavors, avoiding the need for heating.

Make Ahead Strategies

For those hosting events, consider creating your cheesecake the day before. This allows overnight chilling, which improves flavors through marination. It also offers convenience, reducing stress on the event day.

Storage between steps is straightforward; the crust can be made and stored in the refrigerator or freezer while mixing the filling can be done separately until ready to bake.

Assessing quality impacts means understanding that some flavors intensify overnight, while ensuring a proper seal during refrigeration keeps moisture locked in, maintaining the texture.

Assembly tips include assembling your cheesecake on the serving plate to avoid damage during transfer. This prevents breaking and maintains a perfect slice.

Fresh elements, like whipped cream or fruit toppings, should be added right before serving to keep them at optimal freshness.

Scaling Instructions

Scaling this recipe up or down is simple. Halving the recipe translates into smaller parties, whereas doubling for a big gathering ensures everyone enjoys a slice.

Equipment adjustments are crucial when scaling; be mindful of baking times and sizes, ensuring you follow through with suitable pan changes to fit any new quantity.

If you’re doubling or tripling the recipe, keep an eye on cooking times to accommodate extra batter. Adjustments accordingly in your oven may be required, particularly when needing to increase overall baking time.

When it comes to storage considerations, remember to allow for more space in your fridge or freezer for larger batches. Properly label each container to identify servings and dates.

Nutritional Deep Dive

This cheesecake offers a delightful macro breakdown with protein from cheese, fat from cream, and carbohydrates from sugar and crust. Each slice provides a satisfying balance that contributes to dietary needs in moderation.

Micronutrient analysis reveals essential vitamins such as calcium from cream cheese, promoting bone health while monitoring sugar intake promotes better energy levels when indulging responsibly.

Nutritional advantages arise from considering ingredient modifications; using yogurt increases protein without excessive calories, while darker chocolate enhances antioxidants.

Be mindful of portion analysis. Control your servings by considering the richness of the cheesecake; a small slice can suffice for a sweet craving.

Weight management tips suggest enjoying this dessert occasionally helps balance strict diets with indulgent treats, emphasizing moderation over restriction.

Dietary Adaptations

If you aim for gluten-free options, you can substitute regular graham crackers with gluten-free versions to maintain that delightful crust. Many stores offer gluten-free alternatives that work perfectly in this recipe.

For those seeking dairy-free options, using plant-based cream cheese available on the market can make this cheesecake accessible while keeping the flavor profile intact.

Vegan enthusiasts can replace the eggs with a mixture of silken tofu or a commercially available egg substitute, ensuring that you can enjoy this dessert without animal products.

Low-carb dieters can explore recipes using almond flour for the crust and erythritol for sweetening to align with their nutritional goals.

If you follow a keto or paleo diet, this recipe can be adapted to eliminate excess sugars and utilize natural sweeteners that meet those strict dietary frameworks.

For those on low-FODMAP diets, using lactose-free cream cheese is a simple yet effective way to adapt this recipe to fit dietary restrictions without sacrificing flavor.

Troubleshooting Guide

If you encounter texture issues, like a dense consistency, double-check your mixing methods; excessively beating introduces too much air. Keep it gentle for a silky smooth batter.

Flavor balance problems often arise from adjusting sugar levels; carefully taste as you add sweeteners, striving for the right balance without overpowering the cheesecake’s creamy finesse.

Temperature problems can arise if the oven is miscalibrated or opened during baking. Consider investing in an oven thermometer for accurate cooking results as well as allowing the cheesecake to rest once removed from heat.

If you run into equipment challenges, ensure that your tools are to the specifications required in the recipe; using a mixer that isn’t powerful enough could lead to undesirable textures and blends.

Ingredient substitutions may lead to disparities; understanding that not all ingredients perform the same can impact final results. Stick close to the recipe as much as possible to navigate these changes successfully.

Timing concerns can throw off your baking; utilizing timers while multi-tasking helps ensure that your cheesecake doesn’t over or under-cook, protecting its rich features.

Recipe Success Stories

The community feedback surrounding this Chocolate Swirl Cheesecake Slice is incredibly encouraging. Many have raved about the perfect combination of flavors, highlighting it as a standout dessert for various occasions.

Variation successes often arise from folks adapting the recipe to include their favorite flavors, with stories of delicious berry swirls and festive peppermint additions garnering wide applause.

Reader suggestions seen in online communities have led to fresh fruit toppings or adding zest layers that enhance traditional flavors, making the dessert even more vibrant.

Photography tips shared among readers include showcasing the marbled patterns well, with many encouraging a dark background to highlight the rich colors of the cheesecake.

Frequently Asked Questions

Q: Can I make this cheesecake in advance?
A: Yes! In fact, making it a day before helps develop flavor and ensures that it sets perfectly. Store it covered in the fridge until you’re ready to serve.

Q: What size pan should I use?
A: A 9-inch springform pan is recommended for this recipe. This size allows for the cheesecake to bake evenly and helps with easy removal.

Q: How do I prevent cracks in my cheesecake?
A: Cracks are often caused by rapid temperature changes. Bake your cheesecake in a water bath and avoid sudden peaks in heat for even baking.

Q: What’s the best way to store leftovers?
A: Keep any leftover cheesecake covered in an airtight container in the refrigerator for up to a week. It’s great for quick snacking!

Q: Can I freeze this cheesecake?
A: Absolutely! Wrap individual slices tightly in plastic wrap and place them in a freezer bag. They can last up to three months.

Q: What happens if I overbake the cheesecake?
A: Overbaking can lead to a dry and crumbly texture. Bake until the edges are set and the center is just slightly jiggly to prevent this.

Q: How can I add flavor variations to the cheesecake?
A: You can incorporate different flavorings like vanilla extract, espresso, or citrus zest for a unique twist on the classic cheesecake flavor.

Q: Is this cheesecake suitable for vegans?
A: Yes, you can modify the recipe to be vegan-friendly by using plant-based cream cheese and substitutes for eggs.

Q: Why is my cheesecake too dense?
A: This could result from overmixing the batter. Always mix gently to keep air pockets in check for a light and fluffy cheesecake.

Q: Can I use a different type of crust?
A: Yes! Feel free to try an Oreo crust or any other favorite cookie to change things up while still getting a delicious base!

Additional Resources

For more delightful treats, explore related recipes such as strawberry shortcake cupcakes or pumpkin spice tartlets that are sure to impress. Each offers unique flavors and presentations that can complement this cheesecake.

If you’re interested in mastering more techniques, our baking guides cover everything from perfecting crusts to glazing your desserts for visual appeal. Discover how to elevate your baking game today!

Ingredient information provides insights into seasonal or locally sourced alternatives for various ingredients, helping you maintain freshness while embracing adventurous cooking.

Equipment recommendations are available to assist with choosing the right tools for baking fantastic desserts at home, including mixers, pans, and quality baking sheets.

Don’t miss out on seasonal variations that highlight seasonal fruits or spices, allowing you to adapt your recipes based on what’s fresh and abundant.

Join the Conversation

Share your experiences with this recipe on social media, we love seeing how your versions turn out! Tag us using your photos of the beautiful Chocolate Swirl Cheesecake Slices you’ve made.

Photography tips shared by our community can offer insight into capturing the perfect angles to show off your finished product. A little attention to detail can make a big difference!

Be a part of the community by reviewing the recipe and sharing your ideas for possible adaptations or suggestions. This collaborative approach enriches the cooking experience for everyone involved.

Engagement with fellow bakers helps foster inspiration, whether through seeking advice or offering your unique variations that may inspire others!

The Recipe

Chocolate Swirl Cheesecake Slice

Serves: 12 slices

Prep Time: 20 mins

Cook Time: 50 mins

Total Time: 70 mins

Kitchen Equipment Needed

  • 9-inch springform pan
  • Mixing bowls
  • Electric mixer
  • Rubber spatula
  • Oven
  • Water bath setup (baking dish)

Ingredients

  • 1 1/2 cups graham cracker crumbs
  • 1/2 cup unsalted butter, melted
  • 4 (8-ounce) packages cream cheese, softened
  • 1 cup granulated sugar
  • 4 large eggs
  • 2 teaspoons vanilla extract
  • 1 cup sour cream
  • 1 cup dark chocolate, melted

Directions

  1. Preheat the oven to 325°F (160°C). Prepare the springform pan by lightly greasing it or lining with parchment paper.
  2. In a mixing bowl, combine graham cracker crumbs and melted butter until evenly moistened. Press the mixture into the bottom of the pan to form the crust.
  3. In a large mixing bowl, use an electric mixer to beat the cream cheese until smooth. Gradually add the sugar, continuing to mix until well fused.
  4. Add the eggs one at a time, ensuring each is fully combined before adding the next one. Mix in the vanilla extract and sour cream until smooth and creamy.
  5. Pour half of the cheesecake mixture into the prepared crust. Swirl in half of the melted chocolate, and then pour in the remaining cream cheese mixture.
  6. Add the remaining melted chocolate on top and use a knife to create the beautiful swirls in the batter. Do this gently to avoid mixing too much.
  7. Place the springform pan into a larger baking dish filled with hot water to create a water bath, then carefully place it in the oven.
  8. Bake for 50 minutes or until the edges are set and the center slightly jiggles. Turn off the oven and let the cheesecake cool in the oven with the door shut for one hour.
  9. Remove from the oven and let it cool completely before transferring to the refrigerator to chill for at least 4 hours or overnight for the best results.
  10. Once chilled, carefully remove the sides of the springform pan. Slice and serve with whipped cream and chocolate shavings if desired.

Recipe Notes

  • Feel free to experiment with flavored extracts like almond or orange.
  • If you wish, you can decorate the cheesecake with fresh berries or mint leaves for garnish.
  • Store leftovers covered in the refrigerator for up to a week or freeze for up to three months.
  • This recipe is easily adjustable; consider swapping out ingredients to suit your taste or dietary needs.

Indulge in Irresistible Mini Chocolate Peanut Butter Pies Today

Irresistible Mini Chocolate Peanut Butter Pies: A Decadent Delight

⚖️
Difficulty
Easy

⏲️
Prep Time
20 mins

🕒
Cook Time
10 mins

⏱️
Total Time
30 mins

🍽️
Servings
12 mini pies

Imagine sinking your teeth into a rich, creamy mini chocolate peanut butter pie that perfectly balances sweetness and saltiness. With each bite, the decadent layers of chocolate and velvety peanut butter dance on your palate, leaving you craving more. These mini indulgences are not only delicious but also incredibly easy to prepare, making them the perfect treat for any occasion. Whether you’re celebrating a birthday, hosting a holiday gathering, or simply satisfying your sweet tooth, these irresistible mini chocolate peanut butter pies are sure to impress.

These delightful miniature pies are made with a buttery graham cracker crust that crumbles deliciously, complementing the smooth, rich filling. Each mini pie is topped with a luscious chocolate ganache, providing an elegant finish that will have your guests coming back for seconds. The delightful combination of flavors and textures creates an unforgettable dessert experience that is both satisfying and indulgent.

Quick Recipe Highlights

  • Flavor Profile: The pleasing contrast of rich chocolate and nutty peanut butter creates a sensational flavor experience.
  • Texture: Enjoy the crunch of the crust paired with the smoothness of the filling and the glossy finish of the ganache.
  • Aroma: The warm scent of baked cookies mixed with the sweet aroma of chocolate and peanut butter fills your kitchen.
  • Visual Appeal: Cute and dainty, these mini pies boast a gorgeous chocolate glaze that catches the eye.
  • Skill Level Needed: This simple recipe requires minimal skills, perfect for both novice and experienced bakers alike.
  • Special Equipment: You only need a muffin tin, mixing bowls, and a whisk for successful preparation.

Recipe Overview

  • Difficulty Level: These mini chocolate peanut butter pies are labeled easy due to their straightforward steps and minimal cooking time.
  • Category: This recipe falls under desserts, specifically no-bake treats that are creamy and sweet.
  • Cuisine: While these pies have American roots, their combination of chocolate and peanut butter resonates with various culinary influences.
  • Cost: The approximate cost is budget-friendly, making use of common pantry staples like graham crackers, chocolate, and peanut butter.
  • Season: These mini pies are perfect for any season but shine during summer gatherings and holiday parties.
  • Occasion: Whether it’s a picnic, potluck, or birthday bash, these bite-sized desserts fit beautifully into any celebration.

Why You’ll Love This Recipe

These mini chocolate peanut butter pies will capture your heart with their delightful taste and texture. The rich, chocolatey filling pairs perfectly with the creamy peanut butter, creating a balanced and satisfying dessert. Their small size allows for guilt-free indulgence, making it easy for everyone to enjoy this treat without feeling overwhelmed.

The convenience of this recipe sets it apart. It requires no baking time, making it simple to prepare ahead of time. You can whip them up quickly and refrigerate until ready to serve, ensuring you can enjoy your guests without fussing over the dessert at the last minute.

Nutritionally, the inclusion of peanut butter provides protein, while the rich chocolate satisfies your sweet cravings. The balance of flavors also ensures you don’t overindulge, making these pies a sweet treat you can feel good about.

Social gatherings will become even more special with these mini pies making an appearance. Their eye-catching presentation and delightful taste will undoubtedly earn you compliments and requests for the recipe, making them a signature dish for dessert tables.

Lastly, this recipe is cost-effective. Using simple ingredients that are often already in your pantry, you can create an impressive dessert that won’t break the bank. It’s an accessible option for anyone seeking to make a delicious homemade treat without high costs.

Historical Background and Cultural Significance

The origin of chocolate and peanut butter desserts dates back to the early 20th century when chocolate became widely available to American households. Peanut butter, initially a health food served in elite circles, soon found its way into everyday cooking and baking. The merging of these two beloved ingredients has created a dessert staple that has won over dessert enthusiasts for generations.

Culturally, these mini chocolate peanut butter pies resonate with the American love for comfort food and sweet indulgences. They reflect a trend in modern American cuisine that embraces the combination of flavors and textures, ultimately satisfying a wide range of palates. The mini version of traditional pies allows everyone to partake in the delicious experience without the commitment of a larger pie.

As the recipe has evolved, variations have emerged, leading to unlimited possibilities for flavors, crusts, and toppings. Classic recipes have found modern twists, including vegan substitutes or gluten-free options, allowing more people to enjoy this treat.

Regional variations highlight local ingredients and preferences, showcasing the versatility of the chocolate and peanut butter combination. In the South, for instance, chocolate and peanut butter desserts often integrate Southern pecans or local favorites, adding a unique layer of flavor and culture to each recipe.

Ingredient Deep Dive

Chocolate: Chocolate holds significant cultural importance, especially in the United States, where it has transformed from a luxury item into a beloved everyday ingredient. Nutritionally, dark chocolate provides antioxidants and can improve heart health. When selecting chocolate, look for high-quality options with minimal additives, and store it in a cool, dry place. You can substitute chocolate chips with cacao powder if desired, but adjustments to sugar content will be necessary.

Peanut Butter: Peanut butter has its roots in the Americas, where it has been a staple for many decades, particularly during the rise of health foods in the early 20th century. Nutritionally, it is rich in protein and essential fats, making it a popular choice for energy. Look for brands with minimal added sugars and oils. Peanut butter should be stored in a cool location and can be substituted with almond butter for a different flavor profile.

Common Mistakes to Avoid

  • Overmixing the filling can lead to a dense texture instead of the desired creamy consistency.
  • Using sweetened peanut butter can make the pies overly sweet; opt for natural varieties for better balance.
  • Failing to cool the ganache properly can result in it being too runny when attempting to top the pies.
  • Using the wrong size muffin tin can affect cooking time; always check that you’re using standard mini sizes.
  • Not chilling the pies long enough before serving can lead to a messy presentation.
  • Ignoring the crust’s baking time can result in a burnt or bland flavor, so keep an eye on it.
  • Using low-quality chocolate can diminish the flavor; always choose good quality for the best results.
  • Rushing the cooling process can affect both the flavors developed and the overall texture.
  • Forgetting to account for the filling spreading when adding the ganache can lead to overflow.
  • Using non-stick spray instead of butter can affect the texture of the crust negatively.

Essential Techniques

Making the Graham Cracker Crust: This step is crucial as it provides the foundational flavor and texture. Begin by finely crushing the graham crackers to ensure an even texture. Mixing with melted butter helps bind the crumbs together, creating a crumbly but cohesive crust. A common pitfall is under- or over-pressing the crust; you want it dense enough to hold together but not packed so tightly that it becomes hard.

Preparing the Chocolate Ganache: Mastering ganache is key to achieving a glossy finish. The cream should be heated until almost boiling before pouring it over the chopped chocolate, allowing for a smooth melt. A common mistake is not letting it sit long enough, leading to a grainy texture. You want it to meld beautifully, and visual cues include a silky sheen and the absence of unmelted chocolate pieces.

Pro Tips for Perfect Irresistible Mini Chocolate Peanut Butter Pies

1. Use high-quality ingredients for the best flavor; rich chocolate and natural peanut butter make a significant difference.
2. Make sure to chill the filling properly before topping with ganache for clean, defined layers.
3. Experiment with various flavor combinations, such as adding a pinch of sea salt on top for a sweet-salty experience.
4. Consider making a gluten-free crust using almond flour or gluten-free cookies for those with dietary restrictions.
5. Always taste your filling and adjust sweetness accordingly before pouring it into the crust.
6. If making ahead, keep ganache and filling separate until ready to serve for the freshest results.
7. Use silicone muffin pans for easy removal and cleaner presentation.
8. Allow your pies to sit at room temperature for a few minutes before serving to enhance flavors.

Variations and Adaptations

If you’re looking to mix things up, consider regional variations such as using different types of nut butter instead of peanut butter, such as almond or cashew for a new twist. For seasonal adaptations, you could add a hint of peppermint during the holidays or pumpkin spice in the fall to align with seasonal flavors.

Dietary modifications can easily be made with this recipe. For a vegan version, you can substitute the butter and chocolate with dairy-free alternatives. If you’re looking for lower-carbohydrate options, consider using a sugar substitute in the filling and opting for a nut-based crust.

Texture modifications are unlimited as well; consider tossing in a handful of crushed nuts or a layer of whipped cream for added depth. Presentation alternatives include serving them in elegant dessert cups or on a beautiful platter to enhance visual appeal at gatherings.

Serving and Presentation Guide

These mini chocolate peanut butter pies should be plated with care. When serving, consider using paper liners to enhance their look and make serving easier. Garnishing with a dollop of whipped cream, a sprinkle of crushed peanuts, or a drizzle of chocolate sauce will elevate the presentation significantly.

When it comes to traditional accompaniments, a fresh fruit salad can provide a light counterbalance to the richness of the pies. For modern servings, consider pairing them with coffee or espresso to enhance the chocolate flavors.

Be conscious of temperature considerations; serving the pies chilled allows for the best flavor and texture. For portion control, offer them on small plates, allowing guests to indulge without overwhelming their appetites.

Wine and Beverage Pairing

To complement the rich flavors of the mini chocolate peanut butter pies, consider pairing them with a sweet dessert wine like port or a rich red wine such as Cabernet Sauvignon. These wines can enhance the dessert’s chocolate notes while balancing its sweetness.

For non-alcoholic alternatives, a creamy hot chocolate or a classic milkshake would be a delicious pairing. Additionally, a cup of freshly brewed coffee or strong tea provides a lovely contrast, cutting through the richness.

Remember temperature considerations; serving wines chilled and hot drinks steaming enhances both experience and enjoyment.

Storage and Shelf Life

These mini chocolate peanut butter pies can be stored in the refrigerator, covered with plastic wrap or in an airtight container to keep them fresh. The ideal storage temperature is below 40°F. They can typically last up to a week, but for the best flavor, enjoy them within three days.

Signs of spoilage include an off smell, changes in texture, or the development of mold. If the chocolate ganache becomes dull or grainy, that can also indicate spoilage. Reheating isn’t necessary, but if you prefer a softer pie, let them sit at room temperature for a few minutes before enjoying.

For freezing, these pies can last up to three months. Ensure they are properly wrapped to prevent freezer burn. When ready to serve, let them defrost in the refrigerator overnight for best results.

Make Ahead Strategies

To save time, prep the filling and crust ahead and store them separately in the fridge. Make the crust up to two days in advance; it will hold up nicely, which makes assembly a breeze when you’re ready to create the pies.

When planning an event, assemble the mini pies the day before, topping them with ganache, and store in the refrigerator until you’re ready to serve. Keeping the layers separate until serving time helps maintain optimal texture and freshness.

Avoid compromising on quality by waiting to add any fresh toppings, such as whipped cream or nuts, until just before serving. This will keep them light and delightful.

Scaling Instructions

When scaling the recipe, halving it is straightforward; simply divide each ingredient by two for a smaller batch. For doubling or tripling, adjust your kitchen tools and advise how larger muffin tins may be necessary to accommodate.

Timing modifications may be required; larger quantities may need slightly longer chilling times. Ensure to taste the filling and adjust sweetness as needed when increasing the volume.

For storage considerations, ensure each scaled-up batch is stored separately in airtight containers to maintain freshness, particularly since mini pies can be cold dense.

Nutritional Deep Dive

Analyzing the macros of these mini chocolate peanut butter pies reveals a balanced mix of fats, carbohydrates, and protein. While they are considered a treat, moderation is necessary due to the sugar content from chocolate and crust.

Micronutrient analysis shows that peanut butter brings essential vitamins and minerals, such as Vitamin E and magnesium, contributing to overall nutritional value.

Health benefits include the potential heart benefits of dark chocolate and the energy-boosting properties of peanut butter, making it a satisfying treat when enjoyed in moderation.

Dietary considerations can vary; for those observing sugar intake or dietary restrictions, consider adjusting the recipe with natural sweeteners or low-carb options.

For portion analysis, stick to one pie as a serving in moderation to keep within calorie guidelines if weight management is a concern.

Dietary Adaptations

These mini chocolate peanut butter pies can easily be adapted for various dietary needs. To make them gluten-free, opt for gluten-free graham crackers or ground nuts for the crust base.

For dairy-free options, select a dairy-free chocolate for the ganache and use a plant-based butter substitute in the crust. Vegans can indulge with these mini pies by using coconut cream in lieu of traditional dairy products.

Low-carb and keto modifications may involve substituting peanut butter with almond or another low-carb nut spread while also adjusting the sweetener.

For a paleo-friendly version, replace traditional ingredients with those allowed on the paleo diet, ensuring to avoid processed sugars and use only natural sweeteners.

Low-FODMAP adaptations can include using suitable alternatives like coconut cream with caution around peanut butter if sensitive to certain legumes.

Troubleshooting Guide

If you’re experiencing texture issues, ensure your filling achieves a smooth consistency by mixing fully; a grainy texture usually indicates under-mixing or poor-quality chocolate.

Flavor balance can be adjusted by tasting before adding all ingredients; sometimes, an extra pinch of salt may enhance the overall flavor profile.

If temperature problems arise during creating the ganache, remember to let the cream almost boil before adding — this ensures a proper melt that won’t separate.

Equipment challenges are often solved by ensuring proper non-stick sprays are used and muffin pans are greased adequately to prevent sticking during removal.

Ingredient substitutions should be approached with caution, as significant differences in flavor and texture can occur. Be prepared to experiment with quantities and flavors if considering alternative ingredients.

Timing concerns can affect the final product, so always keep an eye on the chilling time of the layers before moving on to the next step; patience can significantly improve results.

Recipe Success Stories

Community feedback on these indulgent mini chocolate peanut butter pies has been overwhelmingly positive. Many find themselves amazed by how an easy recipe can yield restaurant-quality desserts right at home.

Variation successes abound, from those who have added chili to a chocolate topping for a surprising kick to those who had successfully made them gluten-free without compromising texture or flavor. Each unique attempt emphasizes the recipe’s flexibility and adaptability.

Reader suggestions about topping ideas have often included crushed pretzels or caramel drizzle, showcasing a fun way to add personalization to this classic dessert. Many have shared that these modifications have been a hit at gatherings.

Photography tips from the community highlight the beautiful contrast of colors these mini pies offer; a recommendation includes using natural light for the best shots, emphasizing textures and layers with simplicity.

Ultimately, this recipe serves as a platform for culinary creativity, fostering community bonds through shared experiences in the kitchen.

Frequently Asked Questions

1. Can I use a different type of nut butter?
Yes! Almond butter or cashew butter can be excellent substitutes for peanut butter. Just keep in mind that each nut butter has its own flavor profile, so it will slightly alter the overall taste of the pies.

2. How can I store leftover pies?
Store your mini chocolate peanut butter pies in an airtight container in the refrigerator. They should last for about a week. It’s best to enjoy them within 3–4 days for optimal flavor and freshness.

3. Can I freeze these mini pies?
Yes, you can freeze them for up to 3 months! Just be sure they are well-wrapped or in a freezer-safe container to prevent freezer burn. Thaw them in the refrigerator overnight before serving.

4. What if I want to make these pies vegan?
To make these pies vegan, simply use dairy-free chocolate and coconut cream instead of heavy cream for the ganache. Ensure your peanut butter is also free from additives.

5. How can I make the crust gluten-free?
You can make a gluten-free crust by substituting regular graham crackers with gluten-free alternatives or ground nuts. Just ensure all ingredients used are certified gluten-free.

6. Can I add more chocolate to the filling?
Absolutely! Adding more melted chocolate to the filling will intensify the chocolate flavor. Just be careful not to overtighten the filling to avoid it becoming too firm.

7. What’s the difference between using chocolate chips and chocolate bars?
Chocolate bars often have a higher cocoa content and can have a richer flavor than chocolate chips. Chocolate chips may contain stabilizers meant to prevent them from melting, making them less flavorful when used in recipes.

8. Can I customize the flavor of the ganache?
Yes! Add a splash of vanilla extract or flavored extracts like hazelnut or peppermint to the ganache to infuse additional flavor.

9. How do I know when the pies are done chilling?
The pies are ready when the filling has fully set and is firm to the touch. It’s typically best to chill them for at least 2 hours or until completely cooled.

10. What can I replace if I don’t have graham crackers?
You can use crumbled cookies, digestive biscuits, or a nut-based crust made with ground nuts and coconut oil as an alternative for a gluten-free version.

Additional Resources

If you enjoyed the mini chocolate peanut butter pies, you might also be interested in similar recipes like no-bake cheesecake bites or chocolate mousse cups. Exploring technique guides can help refine your baking skills and expand your dessert repertoire.

For more ingredient information, understanding the differences between various chocolate types can further enhance your selections, providing richer culinary experiences. Ensure you have the right kitchen tools for successful baking by investing in high-quality equipment, especially for dessert preparation.

When seeking seasonal variations, consider utilizing fresh seasonal fruits like strawberries or peaches to complement your dessert spread. Seasonal adaptations can really elevate your gatherings!

Join the Conversation

We would love to see your take on these Irresistible Mini Chocolate Peanut Butter Pies! Share your creations on social media with us. If you’ve made variations or added toppings, please share your tips and photos to inspire others.

Recipe reviews help foster community engagement and provide valuable feedback for recipe developers. If you have suggestions for future recipes or techniques you’d like to learn, let us know!

Engaging with our community through recipe variations promotes creativity, ensuring everyone can enhance their culinary skills and enjoy their favorites in new ways.

The Recipe

Irresistible Mini Chocolate Peanut Butter Pies

Serves: 12 mini pies

Prep Time: 20 mins

Cook Time: 10 mins

Total Time: 30 mins

Kitchen Equipment Needed

  • Muffin tin (mini size)
  • Mixing bowls
  • Whisk
  • Double boiler or microwave-safe bowl
  • Measuring cups and spoons

Ingredients

  • 1 ½ cups graham cracker crumbs
  • ½ cup melted butter
  • 1 cup creamy peanut butter
  • ½ cup powdered sugar
  • ½ cup heavy cream
  • 1 cup semi-sweet chocolate chips
  • Pinch of salt

Directions

  1. Preheat the oven to 350°F (175°C). In a bowl, combine graham cracker crumbs and melted butter. Stir until evenly combined.
  2. Press the mixture into the mini muffin tin to create a crust, about 1/4 inch thick. Bake for 10 minutes and let cool.
  3. In a bowl, mix peanut butter, powdered sugar, and a pinch of salt until smooth. Spoon evenly into each cooled crust.
  4. For the ganache, heat heavy cream in a double boiler until just about to boil. Pour over chocolate chips and let sit for a minute, then stir until smooth.
  5. Pour the ganache over each pie, ensuring an even layer. Refrigerate for at least 2 hours until set.

Recipe Notes

  • For extra flavor, add a splash of vanilla extract to the peanut butter filling.
  • Feel free to substitute other nut butters if desired.
  • If you want to make these gluten-free, use gluten-free graham cracker crumbs or almond flour for the crust.

Indulge in a Quick Cinnamon Roll Mug Cake Delight

Cinnamon Roll Mug Cake: A Quick and Delightful Treat

⚖️
Difficulty
Easy

⏲️
Prep Time
5 mins

🕒
Cook Time
1-2 mins

⏱️
Total Time
6-7 mins

🍽️
Servings
1

Indulge in the warm, gooey delight of a Cinnamon Roll Mug Cake! This quick and easy dessert is perfect for satisfying your sweet tooth in a matter of minutes. Imagine the comforting flavors of cinnamon and sugar mingling with soft, fluffy cake. It’s like having a mini cinnamon roll ready to enjoy right in your own mug.

Perfect for those late-night cravings or a sweet treat during your busy day, this mug cake recipe requires minimal ingredients and just a few minutes of your time. Fluffy and warm, each bite is a melt-in-your-mouth experience that not only delights the palate but also warms the heart. With its rich aroma filling your kitchen, this delightful dessert is sure to impress anyone lucky enough to enjoy a spoonful.

Quick Recipe Highlights

  • Flavor Profile: This mug cake combines the sweet warmth of cinnamon and sugar with a hint of vanilla, creating a delicious balance of flavors that evokes the classic cinnamon roll experience.
  • Texture: Enjoy a light, fluffy, and moist cake that pulls apart like a freshly baked cinnamon roll, offering a delightful mouthfeel with every bite.
  • Aroma: The aroma of cinnamon and sugar wafting through the air as it cooks is truly irresistible, making it hard to wait for your delicious treat!
  • Visual Appeal: Served in a cute mug, this cake showcases a beautiful golden-brown top, speckled with cream cheese frosting swirls or a sprinkle of powder sugar, highlighting its mouthwatering nature.
  • Skill Level Needed: This recipe is ideal for novice bakers as it requires simple methods and commonly available ingredients.
  • Special Equipment: All you need is a microwave-safe mug and a spoon, making this recipe extremely accessible.

Recipe Overview

  • Difficulty Level: With its easy-to-follow steps, this recipe is perfect for beginners or anyone looking for a last-minute dessert option.
  • Category: This mug cake fits perfectly into the dessert category, making a sweet ending to any meal.
  • Cuisine: Though inspired by traditional cinnamon rolls, this quick dessert embodies a modern twist suited for today’s fast-paced lifestyle.
  • Cost: The ingredients are budget-friendly, keeping costs low without compromising on flavor or enjoyment.
  • Season: Ideal for all seasons, this mug cake is especially comforting during colder months when you desire something warm and sweet.
  • Occasion: Perfect for any occasion—from a satisfying weeknight indulgence to a special treat during family gatherings.

Why You’ll Love This Recipe

One of the standout features of this Cinnamon Roll Mug Cake is its fantastic taste and texture. The combination of sweet cinnamon and a moist, fluffy cake creates a delightful experience that feels indulgent yet is ready in just minutes. You won’t have to wait for the oven to preheat or worry about complicated baking techniques—it’s almost instant gratification in dessert form.

The convenience factor is another reason to love this recipe. Need a quick dessert after a long day? This mug cake is as easy as mixing a few ingredients, microwaving for a couple of minutes, and voila—you have a delicious dessert. The minimal prep and cook time make it an excellent choice for busy weekdays or spontaneous celebrations.

Nutritionally, it offers a sweet treat without the guilt often associated with larger, richer desserts. Moreover, the ability to enjoy this cake single-serve helps you maintain portion control, allowing you to indulge without overdoing it.

Socially, this recipe has great entertaining value, too. Imagine having friends over for a movie night and catching them off guard by serving them a warm, comforting mug cake in minutes. It’s a fantastic conversation starter and offers a rustic, homemade touch to your gatherings.

Finally, cost-effectiveness is key here. With common pantry ingredients like flour, sugar, and cinnamon, you won’t break the bank making this delightful dessert. It’s accessible to anyone, which means you can enjoy delicious flavors without a hefty price tag.

Historical Background and Cultural Significance

The origins of cinnamon rolls date back centuries, with historical records suggesting they may have started in ancient Greece, where they flavored bread with various spices, including cinnamon. Over time, as the popularity of spices grew, so did the evolution into the sweet, sticky treat we know today as the cinnamon roll.

Culturally, cinnamon rolls hold a special place in various traditions around the world. In Scandinavia, for instance, they are a beloved pastry served during coffee breaks known as “fika.” The communal aspect of enjoying cinnamon rolls highlights their significance in bringing people together, making them more than just a baked good.

The recipe for cinnamon rolls has evolved dramatically, with numerous adaptations reflecting regional preferences and ingredient availability. With recipes varying from sticky buns to the more traditional roll format, each culture has contributed to this delightful pastry’s development, showcasing its universal appeal.

Today, you can find countless variations of cinnamon rolls, from classic recipes to modern adaptations like this quick mug cake, showcasing the versatility of this beloved treat in contemporary dessert culture.

Ingredient Deep Dive

Flour: Flour is the foundation of this recipe; it provides structure and stability to the cake. Whole wheat or gluten-free alternatives can add nutrition or cater to dietary preferences. Storing flour in an airtight container in a cool, dry place extends its shelf life.

Sugar: The sweetness of sugar elevates the flavors of the cake. Brown sugar is often preferred for its rich caramel notes, enhancing depth. Proper storage in a sealed container helps prevent it from hardening.

Cinnamon: This spice is the star of the show, infusing the cake with warming, aromatic flavors. Cinnamon also packs health benefits, including anti-inflammatory properties. Always look for fresh, high-quality cinnamon to get the best flavor.

Milk: Milk adds moisture, contributing to the mug cake’s tender crumb. You can use alternatives like almond or oat milk to cater to dietary restrictions. It’s essential to store milk properly to maintain freshness and prevent spoilage.

Butter: The addition of melted butter in the cake enhances richness and flavor. Using unsalted butter allows for better control over the overall saltiness of the cake. Properly store butter in the fridge for optimal freshness.

Vanilla extract: This ingredient brightens the flavors in the cake, providing a lovely aroma. Using a pure vanilla extract is highly recommended for the best results. Keep it in a cool, dark place to maintain its quality.

Common Mistakes to Avoid

  • Overmixing the batter: This can result in a dense and chewy texture rather than a soft, fluffy cake. Mix just until combined.
  • Using the wrong mug: Ensure your mug is microwave-safe; metal or plastic can be hazardous in the microwave.
  • Microwaving for too long: Overcooking can dry out the cake, so start with short bursts of cooking time and check frequently.
  • Not greasing the mug: Skipping this step may lead to difficulties in removing the cake and visually unappealing results.
  • Skipping the resting time: Letting the cake sit for a minute after cooking helps enhance the flavors and makes it easier to eat.
  • Not adjusting for different microwaves: Microwave wattage varies, so you may need to adjust the cooking time to achieve the best texture.
  • Using cold ingredients: Room temperature ingredients help the cake mix better, contributing to a more uniformly cooked texture.
  • Incorrect ingredient measurements: Always measure ingredients accurately to maintain the recipe’s balance and achieve consistent results.
  • Omitting toppings: Adding a swirl of frosting or a sprinkle of sugar elevates the mug cake from good to great.
  • Ignoring storage instructions: If you have leftovers, store them properly to maintain freshness and avoid spoilage.

Essential Techniques

Mixing Techniques: Proper mixing is crucial for a fluffy cake texture. Combine dry and wet ingredients gently and avoid overmixing, which can lead to a tough texture. Watch for a smooth mixture with no dry pockets.

Microwave Cooking: Getting to know your microwave is essential for successful mug cakes. Start with shorter cooking increments and adjust based on your microwave’s wattage. This ensures that the cake cooks evenly without becoming dry.

Ingredient Preparation: Use ingredients at room temperature for better integration. Cold ingredients can affect the final texture. Let eggs and milk reach room temperature before mixing to ensure better emulsification.

Frosting Application: Adding frosting (if desired) while the cake is still warm allows it to melt slightly, creating a deliciously gooey finish. Use a butter knife to spread frosting evenly on top for a beautiful presentation.

Garnishing Techniques: Experiment with toppings such as chopped nuts or fresh berries for extra texture and flavor. A dusting of powdered sugar adds a finishing touch, elevating the mug cake’s visual appeal.

Pro Tips for Perfect Cinnamon Roll Mug Cake

1. Always use a mug that’s larger than you think you need; the cake rises as it cooks.
2. Try adding a scoop of ice cream or whipped cream on top once it’s cooled for an extra indulgent dessert.
3. Swirl in some cream cheese frosting before microwaving for a deliciously rich center.
4. Don’t forget to adjust cooking times based on the wattage of your microwave; lower wattage will need a bit more time.
5. To enhance flavor, you can add a touch of nutmeg to the sugar and cinnamon mixture.
6. Make sure all your ingredients are fresh—this will ensure the best taste and texture.
7. If you want to double the recipe, it’s best to make two separate mug cakes rather than doubling in one mug.
8. Experiment with toppings such as crushed pecans or sprinkles for additional flavor and color.

Variations and Adaptations

For a regional variation, try a pumpkin spice version by adding pumpkin puree and spices, perfectly suited for autumn. Seasonal adaptations can also include utilizing eggnog in place of milk during the holiday season, enhancing the cake’s flavor profile.

Dietary modifications are simple, too; replace dairy ingredients with vegan alternatives for a plant-based version. Additionally, try a gluten-free flour blend to cater to those with gluten sensitivities, ensuring everyone can enjoy this delicious mug cake.

Flavor variations like adding chocolate chips or fruit can take this dessert to new heights. Consider incorporating ingredients such as blueberries or white chocolate for bursts of flavor, enhancing the cake’s sweetness.

Lastly, presentation alternatives can include serving in fancy cups or adding fresh herbs like mint for color contrast, making it visually appealing for guests.

Serving and Presentation Guide

Plating techniques for a mug cake can be as simple or elaborate as you wish. Serve directly in the mug or transfer to a small plate for an elegant touch. Traditional accompaniments like a scoop of ice cream or dollop of whipped cream create an inviting dessert.

For garnishing ideas, sprinkle powdered sugar, drizzle chocolate sauce, or place fresh berries on top. Modern serving suggestions include pairing the mug cake with a warm beverage for a cozy experience, especially during cold months.

Temperature considerations are key; serving immediately while warm enhances the flavor and texture. Portion control tips suggest enjoying a one-mug serving to avoid consuming too much at once, keeping the dessert indulgent yet manageable.

Wine and Beverage Pairing

With a rich and sweet dessert like a Cinnamon Roll Mug Cake, a glass of dessert wine, such as a late harvest Riesling or a light sparkling wine, pairs wonderfully to complement the spice flavors.

For non-alcoholic alternatives, consider pairing it with a spiced apple cider or a creamy vanilla milkshake to match the comforting elements of the cake.

If you’re a coffee enthusiast, serving with a small cup of freshly brewed coffee or a spiced latte enhances the dessert experience, particularly in the morning or during brunch.

When pairing beverages, consider temperature—serve your drink choices warm to complement the warm cake for an overall delightful experience.

Storage and Shelf Life

For the best storage methods, keep leftovers in an airtight container to maintain freshness. Ideally, consume within 1-2 days as the mug cake tastes best when freshly made.

Reheating the mug cake can be done in the microwave at low power for short intervals to avoid drying it out. Monitor closely to maintain that soft and moist texture.

Freezing is not recommended for this dessert due to its texture, but if necessary, allow it to cool completely before wrapping tightly in plastic wrap and freezing for up to a month. When ready to eat, let it thaw in the refrigerator before reheating.

Make Ahead Strategies

To make this dessert more convenient, you can prepare the dry ingredients ahead of time and store them in a sealed bag. When you’re ready to enjoy the cake, simply add the wet ingredients, mix, and microwave.

Create a prep timeline by measuring and combining ingredients during any downtime you have in the kitchen, streamlining the process when dessert time rolls around.

While this recipe is best enjoyed fresh, you can assemble the ingredients the night before, making it quick and easy to whip it up in the morning or after a long day.

Incorporate fresh elements like fruits or whipped cream just before serving for added flavor and visual appeal.

Scaling Instructions

When halving the recipe, use a smaller mug and adjust the cooking time accordingly. This ensures even cooking without losing the delicious flavors.

For doubling or tripling, it’s best to prepare multiple mugs, as cooking all at once in a single mug may cause uneven cooking.

Equipment adjustments may include larger or additional microwaves to accommodate more servings.

Timing modifications are essential; monitor closely during the testing phase to find the perfect cooking time for a larger yield without losing quality.

Nutritional Deep Dive

The macro breakdown for a serving of this mug cake largely consists of carbohydrates from the sugar and flour, along with fats and proteins from the butter and milk. This balance creates a satisfying treat that can fit into a variety of dietary lifestyles.

A micronutrient analysis shows that while this dessert is primarily indulgent, the use of whole ingredients like cinnamon adds antioxidants and health benefits, counteracting some of the sugar content.

For those keeping an eye on their health, enjoying this treat in moderation can help satisfy cravings without completely derailing larger nutritional goals.

Portion analysis is critical; this single-serving dessert provides a guilt-free way to indulge without the risk of overindulgence that larger cakes present.

Weight management tips suggest being mindful of toppings and additional ingredients to keep the treat enjoyable without excessive calories.

Dietary Adaptations

For gluten-free adaptations, consider using almond flour or a gluten-free flour blend, ensuring that everyone can enjoy this delicious treat without dietary restrictions.

Dairy-free options can be easily achieved by swapping butter and milk for plant-based alternatives, broadening the cake’s accessibility to those with lactose sensitivities or preferences.

Creating a vegan version requires substituting dairy with alternatives like coconut oil and plant-based milk, while also ensuring any frosting used is dairy-free as well.

Low-carb variations can be crafted by using almond flour and sugar substitutes to create a satisfying dessert that fits into a keto diet lifestyle.

Continuing with paleo or low-FODMAP modifications can involve adjusting ingredients to align with specific dietary goals without losing the essence of a delicious mug cake.

Troubleshooting Guide

For texture issues, if the mug cake turns out too dense, ensure that flour measures are accurate, and avoid overmixing the batter.

If flavor balance seems off, consider adjusting sugar or spice levels next time based on personal preferences to achieve the ideal taste.

Temperature problems arise when the mug cake is either undercooked or overcooked; monitor microwave time closely to find that sweet spot based on your microwave’s wattage.

If an ingredient substitution results in unexpected outcomes, take note of how different ingredients interact to improve future attempts at the recipe.

When timing concerns arise, pre-preparing ingredients and using a timer can significantly influence the cooking success.

Recipe Success Stories

Community feedback often lauds this quick dessert for its convenience and taste. Many enjoy adapting the recipe, sharing their variations, and discovering new flavor combinations that work for them.

These variations highlight how versatile the base recipe is, proving successful modifications for dietary restrictions and personal tastes.

Adaptation stories frequently emerge from families, where everyone adds their twist, making it a fun activity that transforms a simple dessert into a cherished tradition.

Readers often share photography tips when showcasing their creations on social media, igniting creativity as others replicate their beautiful presentations.

Frequently Asked Questions

Can I make this mug cake dairy-free?
Absolutely! Use plant-based milk and dairy-free butter alternatives for a delicious dairy-free option that maintains flavor and texture.

How do I know when my mug cake is done?
The mug cake should be firm to the touch and slightly springy. If it’s still wet in the center, give it another 10-20 seconds in the microwave.

Can I make this in advance?
While it’s best enjoyed immediately, you can prepare the dry ingredients in advance. When you’re ready, just mix with the wet ingredients and cook.

What type of mug should I use?
Use a microwave-safe ceramic or glass mug to ensure even cooking without risking meltdowns. Avoid using metal mugs altogether.

Can I freeze the mug cake?
Freezing is not recommended as it may affect the texture. However, you can store it in the fridge for up to two days.

Is this recipe suitable for kids to make?
Yes! This recipe is straightforward and fun for kids. Just supervise them around the microwave for safety.

What kind of toppings work best?
Toppings like whipped cream, frosting, or a drizzle of caramel enhance the flavor and presentation. Feel free to experiment with your favorites!

Can I customize flavors?
Definitely! Add chocolate chips, nuts, or fresh fruits to create a personalized version that suits your taste.

Does the cooking time vary for different microwaves?
Yes, microwave wattage varies, so adjust the cooking time according to your appliance for optimal results.

How many servings does this recipe yield?
This recipe is a single serving, perfect for a quick treat when you’re craving something sweet without making a full-sized cake.

Can this recipe be doubled?
It’s best to make two separate mugs instead of doubling the batter in one mug to ensure proper cooking.

Additional Resources

If you’re looking for related recipes, be sure to check out other quick mug cakes or simple dessert options for those moments when you crave something sweet.

For technique guides, refer to resources on microwave cooking basics, which can help you achieve perfect results with any mug recipe you try.

Ingredient information on baking basics can deepen your understanding of how each component contributes to your dessert, enhancing your baking skills.

Should you be in need of equipment recommendations, there are plenty of affordable microwave-safe mugs with various styles, perfect for your kitchen.

Seasonal variations of this mug cake can inspire your baking with new flavors and ingredients, embracing what each season has to offer.

Join the Conversation

Feel free to share your own cinnamon roll mug cake photos and modifications on social media to inspire others. Engaging with fellow bakers creates a sense of community around this simple treat.

Don’t hesitate to leave a review below, comment on what worked for you, or suggest additional variations for others to try! Your ingredient suggestions and feedback can offer valuable insights to your fellow foodie friends.

With such a versatile recipe, documenting your adventures with this mug cake provides encouragement for others to jump in and try their hand at baking, enhancing their dessert experiences.

The Recipe

Cinnamon Roll Mug Cake

Serves: 1

Prep Time: 5 mins

Cook Time: 1-2 mins

Total Time: 6-7 mins

Kitchen Equipment Needed

  • Microwave-safe mug
  • Mixing spoon
  • Measuring cups and spoons

Ingredients

  • 4 tablespoons all-purpose flour
  • 2 tablespoons granulated sugar
  • 1/2 teaspoon baking powder
  • 1/4 teaspoon cinnamon
  • 1/8 teaspoon salt
  • 3 tablespoons milk
  • 2 tablespoons melted butter
  • 1/4 teaspoon vanilla extract
  • Optional: frosting for topping

Directions

  1. In a microwave-safe mug, combine flour, sugar, baking powder, cinnamon, and salt, and mix until combined.
  2. Add milk, melted butter, and vanilla extract into the mug and stir until the mixture is smooth and lump-free.
  3. Microwave on high for 1 minute. Check if the cake is set; if not, microwave in increments of 10-15 seconds until done.
  4. Let the mug cake cool for a minute before adding your favorite frosting or toppings.

Recipe Notes

  • For best results, use room temperature ingredients.
  • Feel free to add chocolate chips or nuts for an extra twist.
  • Store any leftovers in an airtight container for up to 2 days.

Indulge in Delicious German Chocolate Pecan Pound Cake Recipe

Mouthwatering German Chocolate Pecan Pound Cake: A Decadent Delight

⚖️
Difficulty
Moderate

⏲️
Prep Time
25 mins

🕒
Cook Time
50 mins

⏱️
Total Time
75 mins

🍽️
Servings
12 slices

Indulge your sweet tooth with this Mouthwatering German Chocolate Pecan Pound Cake! This remarkable dessert beautifully intertwines the rich flavors of chocolate, nutty pecans, and a hint of coconut, making it a delightful treat for any occasion. This pound cake exceeds the ordinary, presenting layers of moist, tender cake and a divine frosting that crowns it perfectly. Every bite invites you into a world where classic chocolate cake meets a Southern pecan pie charm, leaving you wanting more.

Perfect as an after-dinner delight or as the star of your next celebration, this cake showcases not only extraordinary flavor but also stunning visual appeal. Its beautifully textured layers, adorned with toasted pecans and swirls of chocolate, serve as a feast for the eyes, while the luscious aroma wafting from the oven gets everyone excited for a slice. It’s time to gather your ingredients and bring a touch of gourmet baking into your kitchen with this irresistible German Chocolate Pecan Pound Cake!

Quick Recipe Highlights

  • Flavor Profile: Sweet, chocolatey, with nutty undertones from pecans and a hint of tropical coconut.
  • Texture: A rich, moist cake with a crumbly exterior, complemented by crunchy toasted nuts and a creamy frosting.
  • Aroma: Inviting notes of chocolate mixed with the warm scent of baked nuts and vanilla.
  • Visual Appeal: A gorgeous dark chocolate hue contrasted by a white coconut frosting, adorned with shiny pecan halves.
  • Skill Level Needed: Requires basic baking skills with some hands-on frosting techniques.
  • Special Equipment: A quality bundt pan, stand mixer, and cooling rack for optimal results.

Recipe Overview

  • Difficulty Level: Moderate; this recipe involves multiple steps, including baking and frosting, but can be handled by any home baker with some experience.
  • Category: Perfect for dessert, this German Chocolate Pecan Pound Cake excels at any celebration, from birthdays to holidays.
  • Cuisine: Rooted in German traditions, this cake showcases the distinct flavor of German chocolate, enriched by American pecan pie influences.
  • Cost: Ingredients like chocolate and pecans may yield a moderately priced cake, typically around $15 to $20 depending on local prices.
  • Season: Ideal year-round, though the warm flavors resonate especially well during the fall and holiday seasons.
  • Occasion: A perfect offering for gatherings, holiday dinners, or even as a comforting treat for weekday indulgence.

Why You’ll Love This Recipe

Delighting your senses with both taste and texture, this German Chocolate Pecan Pound Cake is a celebration in itself. The rich, melt-in-your-mouth chocolate paired with the crunchy bite of pecans creates a delectable contrast that is simply irresistible. Whether served warm out of the oven or chilled, each slice promises satisfaction, making it a go-to for both dessert enthusiasts and casual eaters alike.

The convenience of this recipe also shines through, as it is relatively straightforward to prepare, utilizing common baking techniques that can enhance your culinary confidence. The cake’s preparation can be segmented into manageable parts, allowing for flexibility in your baking schedule, perfect for busy bakers looking to impress without extensive time commitments.

In terms of nutrition, pecans provide a wealth of healthy fats and antioxidants, while the chocolate brings energy. Indulging in this cake allows you to enjoy a treat that offers not only pleasure but also some nutritional benefits.

This cake also excels in social settings, providing a rich centerpiece for any gathering. Imagine the compliments and conversations sparked as friends and family relish every mouthful. Sharing this cake elevates the experience, making celebrations even more memorable.

From a financial perspective, this versatile recipe demonstrates cost-effectiveness. With just a handful of ingredients, you can create an opulent cake that rivals bakery offerings, providing excellent value for your effort.

Historical Background and Cultural Significance

The origins of German Chocolate Cake can be traced back to an American named Samuel German, who developed a dark-baking chocolate for Baker’s Chocolate Company in 1852. This unique chocolate was later named after him, and over time, it became the hero ingredient of this delectable cake. While it carries a German name, the cake’s recipe evolved in the United States, leading to the creation of numerous variations.

German Chocolate Pecan Pound Cake showcases its cultural importance through celebratory gatherings where it is frequently served. It embodies comfort and indulgence, often linked to family traditions and holiday festivities. This cake transcends its simple ingredients, representing warmth and connection between loved ones.

As time went on, recipes began to evolve, reflecting regional preferences and available ingredients. The addition of pecans and coconut frosting is reminiscent of Southern baking traditions, where these ingredients are prevalent. This adaptation highlights the integration of culinary influences that make the cake uniquely American.

Regional variations abound; in some areas, the cake may be layered with cream cheese, while others might incorporate fruits or different nuts. These adaptations not only signify regional tastes but also showcase the creativity that can be found in the kitchen, reinforcing the bond between food and culture.

Ingredient Deep Dive

German Chocolate: This specific type of chocolate brings a distinct sweetness and depth that sets German Chocolate Pound Cake apart from others. Made with less cocoa than traditional chocolate, it has a rich, earthy flavor. For those looking to substitute, semisweet chocolate can work, although the taste profile will be slightly altered.

Pecans: Native to North America, these nuts add crunch and a buttery flavor to the cake. In addition to their deliciousness, pecans are a great source of healthy fats, proteins, and various vitamins. When selecting pecans, opt for those with a fresh aroma and avoid any that smell rancid. Store them in an airtight container in the refrigerator to prolong their freshness.

Coconut: Coconut in the frosting lends a tropical sweetness that balances the rich chocolate. Shredded coconut possesses fiber and offers a low-calorie option for adding texture to baked goods. When selecting coconut, shredded pieces that are unsweetened can provide a more balanced flavor profile, and they can be stored in a cool, dry place to maintain their freshness.

Common Mistakes to Avoid

  • Overmixing the batter can lead to a dense cake. Mix just until the ingredients are combined.
  • Not letting butter and eggs come to room temperature may prevent the cake from rising properly.
  • Skipping the greasing of the pan can cause the cake to stick, resulting in broken pieces.
  • Using cold ingredients can lead to a heavy texture; always use room-temperature eggs and butter.
  • Underbaking the cake can create a gooey center, while overbaking can dry it out; use a toothpick to test doneness.
  • Neglecting to cool the cake before frosting can cause the frosting to melt off the cake.
  • Piling frosting too thickly on one side can make it drip; use an offset spatula for even distribution.
  • Not properly measuring ingredients can alter flavor and texture; always use accurate measurements.
  • Skipping the cooling step after baking can affect the cake’s overall structure.
  • Assuming all ovens bake the same leads to inconsistencies; adjust baking times based on your oven’s calibration.

Essential Techniques

Mixing: Proper mixing techniques ensure the ingredients are well incorporated without developing gluten. Start with creaming the butter and sugar until light and fluffy, which creates air pockets that help the cake rise. Be careful not to overmix; stop as soon as you see the flour integrated.

Baking: Understanding the science of baking powder’s activation can greatly improve your results. Ensure you properly measure and add the leavening agent to make your cake rise correctly. A common pitfall is not preheating the oven; doing so allows for the perfect temperature for baking.

Pro Tips for Perfect Mouthwatering German Chocolate Pecan Pound Cake

– Use high-quality German chocolate for a profound flavor experience; choosing gourmet chocolate can elevate your cake.
– Toast the pecans before adding them to the batter; this intensifies their flavor and adds crunch.
– Consider adding a pinch of sea salt to the frosting; it enhances sweetness and adds depth.
– Substitute half of the all-purpose flour with cake flour for a lighter, more tender crumb.
– Allow the cake to cool in the pan for about 10 minutes before transferring to a wire rack for complete cooling.
– Don’t rush the frosting; allow the cake to cool fully before frosting to prevent melting.
– For added flair, drizzle a chocolate ganache over the frosted cake before garnishing with extra pecans.
– Experiment with adding coconut extract to enhance the flavor profile.

Variations and Adaptations

If you’re feeling adventurous, try incorporating different nuts like walnuts for a unique twist, or utilize almond extract in place of vanilla for a different flavor dimension. Seasonal adaptations can include adding pumpkin spice during the fall for a festive touch.

For those requiring dietary modifications, consider using gluten-free flour blends to adapt the recipe for gluten-free diets. Vegan alternatives, such as applesauce as an egg substitute or almond milk instead of dairy products, can also offer delicious results.

Enhancing flavor can be achieved by infusing the cake with coffee or espresso for a mocha variation. If you prefer a richer texture, replace some of the flour with ground almonds; this results in a denser, butnutty cake.

Presentation is key; consider making mini versions of the pound cake for an elegant touch at gatherings or layering slices with whipped cream and fresh berries for a stunning dessert display.

Serving and Presentation Guide

To plate the German Chocolate Pecan Pound Cake elegantly, slice it carefully while ensuring even portions. Garnish with a dusting of powdered sugar, or drizzle chocolate ganache over the top for visual appeal.

Consider serving with fresh berries or a scoop of vanilla ice cream for a delightful contrast in flavor and temperature. Seasonal fruits such as raspberries or strawberries can complement the richness of the cake beautifully.

When it comes to temperature, serving the cake at room temperature allows all flavors to shine. If the cake has been refrigerated, allow it to sit out for a bit before serving to restore its natural moisture and flavor.

Portion control is important; consider providing smaller slices if serving to a larger group to encourage tasting multiple dishes and maintain lower calorie intake per serving.

Wine and Beverage Pairing

When it comes to pairing wines with your German Chocolate Pecan Pound Cake, look for a sweet dessert wine like Riesling, which balances the cake’s sweetness. A port wine can also offer deep flavor notes that complement the chocolate beautifully.

For non-alcoholic alternatives, consider serving the cake with freshly brewed coffee or a rich, dark hot chocolate to enhance the chocolate flavors.

If tea is your beverage of choice, a robust black tea or an aromatic chai can provide a wonderful warming contrast to the cake’s richness.

Temperature matters; serve your beverages at their ideal temperatures to ensure a delightful dining experience.

Storage and Shelf Life

To store your German Chocolate Pecan Pound Cake properly, cover it with plastic wrap and keep it in an airtight container at room temperature for up to three days. For longer storage, wrap the cake in aluminum foil and place it in the refrigerator, where it will last up to a week.

If you’d like to freeze your cake, make sure it’s thoroughly cooled, and wrap it securely in plastic wrap and then in aluminum foil. It can be frozen for up to three months for optimal freshness.

Always look for signs of spoilage before consumption; if the cake develops an off smell, discoloration, or strange texture, it’s best to discard it.

Reheating slices can be done in the microwave for about 10-15 seconds or in the oven at 350°F for a few minutes to enjoy the cake warm.

Make Ahead Strategies

For efficient meal preparation, consider making the cake one or two days in advance. This allows the flavors to mature and meld together, enhancing the overall taste.

To store between steps, bake and cool the cake, then wrap it tightly and refrigerate until the day of serving. Frosting can be prepared a day ahead, stored in an airtight container in the refrigerator, and brought to room temperature before using.

Assess the quality after storage; cakes may become denser when chilled, so try to keep the frosting at room temperature if possible to avoid texture issues.

Assembly should happen shortly before serving to maintain freshness; however, you can frost the cake a few hours in advance, setting it covered in a cool spot.

Adding fresh elements, such as fruit or whipped cream, can be done right before serving for a touch of freshness and color.

Scaling Instructions

To halve the recipe, simply cut all ingredient measurements in half and retain the same steps. Baking time may slightly reduce; start checking on the cake a few minutes earlier than suggested.

If you wish to double or triple the ingredients, consider the capacity of your mixing equipment and divide the batches accordingly to ensure thorough mixing.

Keep in mind that baking times will vary; larger batches might require longer baking times, so it’s essential to perform doneness testing with a toothpick or cake tester.

Storage can be adjusted, as larger cakes may require more space; ensure you have the appropriate containers available.

Adjustments may be needed for frosting and decorating; you’ll likely need proportionally more frosting for larger cakes to cover properly.

Nutritional Deep Dive

In understanding the nutritional aspects of Mouthwatering German Chocolate Pecan Pound Cake, let’s analyze the macro breakdown. Each slice typically contains a healthy portion of carbohydrates, balanced by protein from eggs and fats from butter and pecans, contributing to its rich texture.

Micronutrient analysis reveals healthy amounts of Vitamin E and B vitamins, primarily derived from nuts, providing essential nutrients beneficial for metabolism.

Notably, pecans bring a host of health benefits, including antioxidants and healthy monounsaturated fats, supporting heart health and weight management when consumed in moderation.

Dietary considerations are crucial; for those watching their intake, incorporating smaller portion sizes is key. The richness of the cake allows for a satisfying experience even with reduced servings.

When it comes to weight management tips, consider pairing a slice of the cake with a fruit or low-calorie side to balance indulgence and nutrition, making your dessert experience complete.

Dietary Adaptations

For gluten-free adaptations, substitute regular flour with gluten-free flour blends to ensure that everyone can enjoy this delightful cake.

If dairy is a concern, replace butter with coconut or almond butter; dairy-free alternatives for icing can also provide similar creaminess.

Vegans can easily adapt by using flax eggs (1 tablespoon flaxseed meal mixed with 3 tablespoons water = 1 egg) and substituting almond milk for buttermilk, yielding impressive results.

For low-carb or keto adaptations, consider using almond flour instead of all-purpose flour, alongside a sugar substitute to reduce carb content while maintaining flavor.

Paleo modifications may involve swapping refined sugar for natural sweeteners like honey or maple syrup, avoiding processed ingredients for a more health-conscious option.

If following a low-FODMAP diet, keep servings moderate and opt for lactose-free alternatives in your frosting.

Troubleshooting Guide

If your cake has texture issues, it may be due to overmixing; next time, mix only until combined.

For flavor balance, if the cake turns out too sweet, consider reducing the sugar in the frosting or adding a hint of salt to balance it out.

In case of temperature problems, always ensure the oven is preheated before placing your cake, as it affects the rise and texture significantly.

If your equipment presents challenges, ensure your baking pan fully fits the portion you’re making to avoid uneven cooking.

Ingredient substitutions can lead to challenges; always research or test small batches when trying new ingredients to ensure they yield the desired results.

Timing concerns are common; accurately note the baking time and check at the lower suggested time to avoid overbaking.

Recipe Success Stories

Community feedback on this delightful recipe has been overwhelmingly positive, with numerous adaptations and personal stories shared. Many readers have reported excellent results, praising both the simplicity of the preparation and the rich flavors achieved.

Variation successes have been highlighted, especially with those opting to try different nuts like macadamia or walnuts, enhancing the unique taste profile of the cake.

Several bakers have adapted this recipe to sugar-free versions and reported similar textures and flavors, showcasing the cake’s versatility.

Photography tips from the community suggest natural lighting to showcase the beautiful layers and highlighting frosting details; these visual cues often entice others to recreate the recipe.

Readers universally appreciate the cake’s aesthetic appeal, with some even transforming it into a tiered cake for special occasions.

Frequently Asked Questions

Can I use other types of chocolate in this pound cake? Absolutely! While German chocolate gives a specific flavor, you can substitute it with semisweet or dark chocolate for a different profile, though it will change the overall taste.

How do I know when the cake is done? A simple test is to insert a toothpick into the center; if it comes out clean or with just a few crumbs, the cake is done.

Can I freeze this cake? Yes! Wrap it tightly in plastic wrap and foil and place it in the freezer for up to three months. Be sure to defrost in the refrigerator for best results.

What’s the best way to store leftovers? Store leftovers in an airtight container at room temperature for up to three days, or in the refrigerator for up to a week.

Can I use coconut in the batter instead of the frosting? Yes! You can add shredded coconut to the batter for an anytime flavor enhancement or adjust the amount in the frosting for a textured effect.

How does the cake improve over time? The flavors meld and develop over time; making it a day in advance can help enhance the taste.

Is it necessary to frost the cake? Not at all! This pound cake is delightful on its own, or you can simply dust it with powdered sugar for a simpler presentation.

What other nuts can I use in the recipe? You can substitute pecans with walnuts, almonds, or even hazelnuts for a different twist while still retaining the cake’s core flavors.

Can I make this cake gluten-free? Yes, use a gluten-free flour blend to substitute for all-purpose flour, ensuring that your baking powder is gluten-free as well.

What can I do if the cake is too dry? If your cake turns out dry, ensure you’re measuring the flour correctly and not overbaking it. Adding a layer of simple syrup during frosting can also help retain moisture.

Additional Resources

Looking for more delicious recipes? Explore our collection of baking recipes perfect for both amateurs and seasoned bakers, from chocolate chip cookies to delectable cheesecakes.

For technique guides, learn about the essential methods that can elevate your baking skills, such as mastering the art of whipping and folding to create airy textures.

Understanding ingredients can also enhance your baking; familiarize yourself with substitutions and find out how different flours and sweeteners interrupt your recipes.

Equipment recommendations can also help streamline your baking experience; invest in quality pans, mixers, and tools that can make all the difference in your results.

Seasonal variations guide allows you to adapt the recipe to incorporate available fruits and flavors throughout the year, giving a twist to classic desserts.

Join the Conversation

We invite you to share your experience with Mouthwatering German Chocolate Pecan Pound Cake! Engage with us on social media and share your baking accomplishments, photos, and unique adaptations.

Join our community discussions to exchange tips or suggestions on baking techniques and flavor enhancements, enriching everyone’s culinary journey.

Your feedback on this recipe is essential; let us know how it turned out for you, and feel free to leave comments about your variations and preferences!

We also encourage photography tips; capturing the beauty of your baked goods can inspire others to try their hand at this delightful cake.

Let’s create a rich tapestry of shared culinary experiences, celebrating the joys of baking together!

The Recipe

Mouthwatering German Chocolate Pecan Pound Cake

Serves: 12 slices

Prep Time: 25 mins

Cook Time: 50 mins

Total Time: 75 mins

Kitchen Equipment Needed

  • Bundt pan
  • Stand mixer or hand mixer
  • Cooling rack
  • Mixing bowls
  • Measuring cups and spoons
  • Spatula

Ingredients

  • 1 cup unsalted butter, softened
  • 2 cups granulated sugar
  • 4 large eggs
  • 1 teaspoon vanilla extract
  • 2 cups all-purpose flour
  • 1 teaspoon baking powder
  • 1/2 teaspoon salt
  • 1 cup German chocolate, melted
  • 1 cup chopped pecans, toasted
  • 1 cup shredded coconut
  • 1 cup powdered sugar (for frosting)
  • 1/4 cup heavy cream (for frosting)
  • 1/2 teaspoon vanilla extract (for frosting)

Directions

  1. Preheat the oven to 350°F (175°C) and grease the bundt pan.
  2. In a large mixing bowl, cream together the butter and sugar until light and fluffy.
  3. Add the eggs one at a time, mixing well after each addition. Stir in vanilla extract.
  4. In another bowl, mix the flour, baking powder, and salt together.
  5. Gradually add the flour mixture to the butter mixture, alternating with the melted chocolate.
  6. Fold in the toasted pecans and shredded coconut until just combined.
  7. Pour the batter into the prepared bundt pan and smooth the top.
  8. Bake for 45-50 minutes, or until a toothpick inserted in the center comes out clean.
  9. Allow the cake to cool in the pan for 10 minutes before transferring to a cooling rack to cool completely.
  10. For the frosting, whip the heavy cream, powdered sugar, and vanilla extract until soft peaks form; spread over the cooled cake.
  11. Garnish with additional pecans and shredded coconut if desired.

Recipe Notes

  • For a richer frosting, add more cream for a silky texture.
  • Adjust sugar in the frosting based on sweetness preference.
  • This cake can be stored at room temperature or refrigerated for longer freshness.