Delicious Crunchy Oreo White Chocolate Cookies Recipe You’ll Love

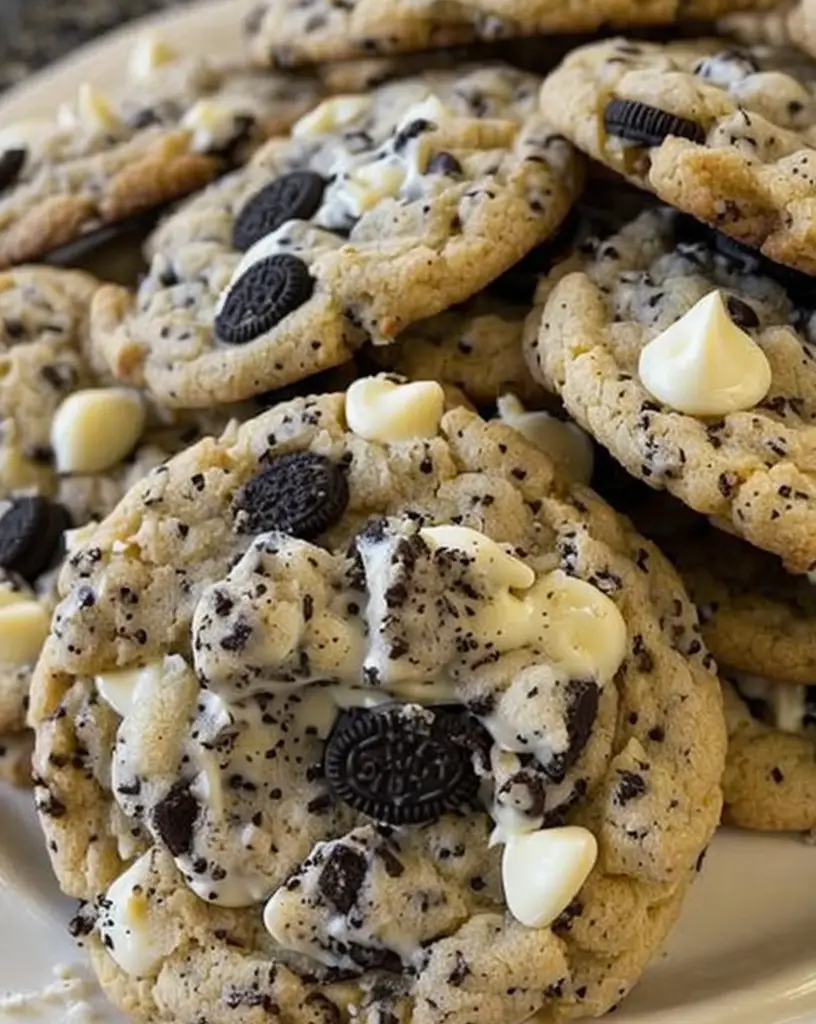
Crunchy Oreo White Chocolate Cookies: Indulge in a Heavenly Treat

⚖️
Difficulty
Easy

⏲️
Prep Time
15 mins

🕒
Cook Time
12 mins

⏱️
Total Time
27 mins

🍽️
Servings
24 cookies

If you’re on the hunt for a delightful cookie recipe that combines classic flavors with a sweet twist, look no further! Our Crunchy Oreo White Chocolate Cookies are sure to captivate your senses with their rich taste and satisfying texture. Imagine biting into a perfectly baked cookie, crispy on the outside, yet gooey and soft in the center, studded with crunchy Oreo pieces and a creamy white chocolate drizzle. This simple recipe brings the beloved flavors of Oreo cookies to a whole new level of indulgence!

Whether you’re preparing for a family gathering, a coffee break with friends, or simply satisfying your own sweet tooth, these cookies will not disappoint. With each batch, the kitchen fills with an irresistible aroma reminiscent of freshly baked treats. Perfect for dunking in milk or enjoying on their own, these cookies are the ultimate comfort food. So roll up your sleeves and let’s bake these delightful Crunchy Oreo White Chocolate Cookies!

Quick Recipe Highlights

  • Flavor Profile: These cookies offer a mouthwatering blend of chocolatey goodness from Oreos and sweet creaminess from white chocolate.
  • Texture: Enjoy a delightful crunch from the cookies paired with a soft and chewy interior, creating a perfect contrast.
  • Aroma: The warm, sweet scent of vanilla and chocolate wafts through the air, enticing everyone nearby.
  • Visual Appeal: With their striking black and white colors, these cookies are as pleasing to the eye as they are to the palate.
  • Skill Level Needed: An easy recipe perfect for both beginner bakers and seasoned pros looking for a fun treat.
  • Special Equipment: No complicated equipment required—just your trusted baking sheets and mixer.

Recipe Overview

  • Difficulty Level: This recipe is rated easy, making it accessible for bakers of all skill levels. Whether you’re just starting out or looking to share baking experiences with children, this delight is straightforward and enjoyable to make.
  • Category: Perfect as a dessert, snack, or party treat, these cookies fit well in various settings for any time cravings.
  • Cuisine: While these cookies draw inspiration from classic American recipes, they incorporate global flavors through the well-loved Oreo cookie.
  • Cost: Approximately $10-$15 for the whole batch, making it a budget-friendly treat for everyone.
  • Season: Enjoy these cookies year-round; their comforting flavors make them perfect for any season, whether cozying up in winter or having summer picnics.
  • Occasion: Ideal for birthdays, holiday gatherings, or casual get-togethers—these cookies elevate any occasion.

Why You’ll Love This Recipe

The combination of crunchy and chewy will delight your taste buds, making every bite a joyful experience. The richness of white chocolate, complemented by the Oreo cookie flavor, creates an indulgent treat that’s hard to resist. Whether you prefer them crispy or slightly soft, you can easily adjust the baking time to get the desired texture.

In addition to being delicious, these cookies are incredibly easy to prepare. With a prep time of just 15 minutes, you can whip up a batch and have them fresh out of the oven in no time. The minimal ingredients also mean you won’t break the bank on costly items, making this recipe a favorable option for spontaneous baking sessions.

Nutritionally, while these cookies are a treat, they can also be enjoyed in moderation as part of a balanced diet. The combination of Oreos and white chocolate can add a hint of joy without severely jeopardizing your nutritional goals.

Certainly, these cookies are not just for solo enjoyment. They are perfect for sharing at gatherings or parties, allowing you to showcase your baking skills and bring joy to your friends and family. Their attractive presentation and delicious taste make them great conversation starters.

Finally, with the simplicity of the ingredients used, you can always find substitutes based on what’s available in your pantry—ensuring you can whip up a mouthwatering batch whenever the craving strikes!

Historical Background and Cultural Significance

The Oreo cookie was created in 1912 and has since become one of the best-selling cookies in America. Its unique combination of chocolate wafer cookies with a creamy filling has inspired countless recipes, including the beloved Crunchy Oreo White Chocolate Cookies.

In American culture, the Oreo has transcended its role as merely a snack, becoming a symbol of indulgence shared among friends and family. Whether dunked in milk or creatively incorporated into various desserts like our featured recipe, Oreos hold a special place in many hearts.

This cookie recipe has evolved over the years, adapting to modern tastes while preserving the essence of the original Oreo cookie. The addition of white chocolate brings a contemporary twist that enhances the overall flavor and visual appeal.

Regional variations of the Oreo cookie recipe have emerged, each adding local flair—adding a layer of cultural richness to this universally loved treat. From incorporating local ingredients to altering textures, these adaptations celebrate creativity and tradition.

Ingredient Deep Dive

Oreos: These cookies have become a staple in many households, not just as a snack but as a key ingredient in numerous desserts. Rich in flavor, they boast a blend of chocolate and cream that resonates with both children and adults. When selecting Oreos, ensure they are fresh for optimal flavor. Store them in an airtight container to maintain their crunch. You can substitute classic Oreos with other flavors for a unique twist.

White Chocolate: Known for its creaminess and sweetness, white chocolate adds a rich layer to the cookies. Although it lacks cocoa solids, its buttery flavor complements the chocolatey Oreos perfectly. When choosing white chocolate, look for high-quality brands to avoid overly sweet or waxy options. Properly stored white chocolate can last up to a year when kept in a cool, dry place.

Common Mistakes to Avoid

  • Overmixing the dough can lead to tough cookies, so mix just until combined.
  • Not chilling the dough may cause the cookies to spread too much during baking.
  • Using expired baking soda can affect the rise of the cookies.
  • Baking at the wrong temperature can result in uneven cooking—always check your oven settings.
  • Pressing the dough too flat may result in overly crispy cookies instead of chewy ones.
  • Not using parchment paper can cause cookies to stick to the pan.
  • Skipping cooling time can lead to crumbly cookies that fall apart.
  • Using low-quality chocolate can affect the overall taste, so opt for good quality when possible.
  • Not measuring ingredients accurately can throw off the cookie’s texture and flavor balance.
  • Forgetting to preheat the oven can significantly impact baking time and texture.

Essential Techniques

Mixing Ingredients: Achieving the right consistency is essential. Start by creaming together the butter and sugars until light and fluffy, which incorporates air for a lighter cookie. Miss this step, and the cookies may turn out dense and flat.

Chilling the Dough: This crucial step prevents the cookies from spreading too much while baking, preserving the desired shape and texture. Aim for at least 30 minutes in the refrigerator. If time permits, even longer chilling can enhance the flavor as well.

Pro Tips for Perfect Crunchy Oreo White Chocolate Cookies

1. Always use room temperature ingredients for a smooth and consistent dough.

2. For a deeper flavor, add a pinch of sea salt to the dough.

3. Try mixing in chopped nuts for extra crunch and flavor.

4. Adjust the baking time to achieve your desired texture; a shorter bake yields chewier cookies while a longer time makes them crispier.

5. Allow the cookies to rest on the baking tray for a few minutes post-baking to set before transferring them to a cooling rack.

6. Aim for uniform cookie sizes to ensure even baking throughout.

7. Be creative! Incorporate various toppings like sprinkles or flavored chocolate drizzles.

8. Store cookies in an airtight container with a slice of bread to help maintain their softness.

Variations and Adaptations

For those looking to add regional variations, consider using different flavors of Oreos, such as mint or lemon. Seasonal adaptations can include adding pumpkin spice during the fall or crushed peppermint during the winter holidays. Dietary modifications include using gluten-free Oreos and dairy-free chocolate options for those with specific dietary needs. For extra texture, mix in pretzel pieces for a salty-sweet experience or add shredded coconut for an island twist. Experimenting with different drizzles or toppings can also create exciting new presentations.

Serving and Presentation Guide

When plating your cookies, stack them tall for visual drama or arrange them on a decorative platter. Consider dusting them with powdered sugar or drizzling with additional melted white chocolate for a gourmet touch. Pair them with a glass of cold milk or a scoop of ice cream for a delightful dessert experience. For a modern twist, serve alongside fresh berries or a fruit compote, balancing the sweetness nicely.

Wine and Beverage Pairing

To complement the rich flavors of these cookies, consider pairing them with dessert wines like Moscato or port. For non-alcoholic options, a hot cup of chocolate or a classic glass of milk works perfectly. If you enjoy coffee, a smooth espresso can enhance the cookies’ chocolatey flavors beautifully. Make sure to serve beverages at the appropriate temperatures to maximize the experience.

Storage and Shelf Life

Store your cookies in an airtight container at room temperature for up to a week to maintain their freshness. For longer storage, consider freezing them for up to three months. To do this, ensure they are completely cooled, wrap them in plastic wrap, and place in a freezer-safe container. Signs that your cookies may be going bad include changes in texture or an off smell. When ready to eat frozen cookies, simply thaw them at room temperature or pop them in the microwave for a few seconds.

Make Ahead Strategies

These cookies can be prepped ahead of time, allowing for quick baking when the craving strikes. You can prepare the dough and refrigerate it for up to 24 hours or freeze it for up to three months. Just remember to label your dough with the date! For freezing, scoop the cookie dough into balls and freeze them on a baking sheet before transferring to a zip-top bag. When ready to bake, simply add a minute or two to the baking time.

Scaling Instructions

If you want to halve or double the recipe, simply adjust the measurements proportionally. Most of the ingredients will work well in larger or smaller batches, although you may need to tweak baking times depending on the size of your cookies. If you find your dough becoming too soft in larger batches, let it chill in the refrigerator for a bit longer to ease handling.

Nutritional Deep Dive

These cookies offer a satisfying treat, but understanding their nutritional profile ensures you enjoy them responsibly. They predominantly consist of carbohydrates and sugars, providing a quick source of energy. However, they also contain fats from butter and chocolate, which can help keep you full. When considering dietary needs, moderation is key; enjoy a couple of cookies for a treat while balancing them with nutrient-dense foods throughout the day.

Dietary Adaptations

For those seeking gluten-free options, use gluten-free Oreos and flour. If dairy is a concern, opt for dairy-free chocolate and substitutes for butter. Vegan bakers can replace eggs with flaxseed meal or applesauce, achieving similar binding results. Low-carb enthusiasts can utilize keto-friendly cookies or almond flour alternatives to modify the recipe. Always ensure that all substitutes adhere to specific dietary needs for a safe and enjoyable treat.

Troubleshooting Guide

If your cookies turn out too flat, consider checking your baking powder’s freshness or chilling the dough to firm it up. If the cookies are too hard after baking, slightly underbake them next time to ensure a chewy texture. For flavor imbalance, a pinch of salt can elevate sweetness and richness. If baking at high altitudes, increase flour slightly to account for lower air pressure, which can cause cookies to rise quickly and then collapse.

Recipe Success Stories

Many bakers have reported rave reviews for these cookies, with some sharing stories of modifications they made that turned out delightful! Community members love experimenting with different Oreo flavors, leading to unique creations like peppermint or birthday cake versions. Photos shared online show beautiful cookie platters, inspiring others to try their hand at this simple but rewarding baking project. Feedback often highlights the cookies’ flavor profile and how they’ll be requested at future gatherings!

Frequently Asked Questions

Can I use dark chocolate instead of white chocolate? Absolutely! Dark chocolate provides a lovely contrast to the creamy Oreo flavor and can appeal to chocolate lovers.

How long can I store these cookies? These cookies can be stored at room temperature for up to a week or frozen for up to three months.

Can I substitute ingredients? Yes, feel free to experiment with different types of chocolate or even nut alternatives based on your preferences.

Do these cookies require chilling before baking? Chilling the dough is recommended as it helps control the spread during baking, giving you perfectly shaped cookies.

What can I do if my dough is too sticky? If the dough feels overly sticky, adding a bit more flour can help achieve the right consistency.

Are these cookies suitable for parties? Definitely! Their delicious flavor and appealing look make them a great addition to any social gathering.

Can I make these without eggs? Yes, you can replace eggs with a flaxseed mixture or applesauce for a vegan version.

What temperature should I serve these cookies at? These cookies are best served warm, shortly after baking, or at room temperature for enjoyable texture.

Can I add different mix-ins to the dough? Yes, adding nuts, different types of chocolate, or even spices can enhance the flavor profile.

How can I improve the presentation of these cookies? Consider drizzling melted chocolate on top or dusting them with powdered sugar before serving for a refined look!

Additional Resources

If you’re looking to expand your baking repertoire, consider checking out other cookie recipes that offer unique flavors and textures. Pair this recipe with techniques like cookie decoration or advanced baking methods to elevate your skills. For ingredient-specific information and alternatives, explore guides on various types of chocolate, flours, or specialized equipment. Seasonal variations can also inspire you to adapt and enhance your baking experiences!

Join the Conversation

We encourage you to share your cookie creations on social media! Don’t hesitate to tag us in your baking adventures to inspire others or ask questions. Every baking story adds to our community and enhances the joy of baking. Let’s engage with each other by sharing tips, feedback, or variations of this Crunchy Oreo White Chocolate Cookies recipe!

The Recipe

Crunchy Oreo White Chocolate Cookies

Serves: 24 cookies

Prep Time: 15 mins

Cook Time: 12 mins

Total Time: 27 mins

Kitchen Equipment Needed

  • Baking sheet
  • Parchment paper
  • Mixer
  • Mixing bowl
  • Measuring cups and spoons
  • Cooling rack

Ingredients

  • 1 cup unsalted butter, softened
  • 3/4 cup granulated sugar
  • 3/4 cup packed brown sugar
  • 2 large eggs
  • 1 teaspoon vanilla extract
  • 2 1/4 cups all-purpose flour
  • 1 teaspoon baking soda
  • 1/2 teaspoon salt
  • 1 cup crushed Oreo cookies
  • 1 cup white chocolate chips

Directions

  1. Preheat your oven to 350°F (175°C) and line a baking sheet with parchment paper.
  2. In a mixing bowl, cream together the softened butter, granulated sugar, and brown sugar until smooth and fluffy.
  3. Add in the eggs one at a time, incorporating them fully before adding the next. Stir in the vanilla extract.
  4. In another bowl, whisk together the flour, baking soda, and salt.
  5. Gradually add the dry ingredients to the wet mixture, mixing just until combined.
  6. Fold in the crushed Oreos and white chocolate chips gently.
  7. Drop rounded tablespoons of dough onto the prepared baking sheet, spacing them about 2 inches apart.
  8. Bake for 10-12 minutes, or until the edges are lightly golden. The centers may look slightly underbaked but will firm up as they cool.
  9. Remove from the oven and let cool on the baking sheet for about 5 minutes before transferring to a cooling rack.

Recipe Notes

  • Feel free to replace the white chocolate with dark or milk chocolate for a different flavor.
  • You can add a pinch of sea salt on top before baking for a delightful sweet-salty contrast.
  • For a fun twist, consider adding some mini marshmallows or nuts into the mix.

Indulge in Blueberry Cheesecake Heaven Rolls for Dessert Bliss

Blueberry Cheesecake Heaven Rolls: A Sweet Indulgence

⚖️
Difficulty
Medium

⏲️
Prep Time
30 mins

🕒
Cook Time
25 mins

⏱️
Total Time
55 mins

🍽️
Servings
12 rolls

Indulge your senses with our Blueberry Cheesecake Heaven Rolls, a delightful fusion of flavors sure to enchant dessert lovers. Imagine trying a soft, fluffy roll infused with creamy cheesecake and bursting with fresh blueberries. Each bite delivers a perfect balance of sweetness and tanginess that will have you dreaming of summer days filled with sun and berry picking. These rolls are perfect for special occasions or simply to treat yourself and your loved ones.

Blueberry Cheesecake Heaven Rolls not only taste divine, but they also bring a warm, inviting aroma to your kitchen as they bake. The rich scent of cheesecake mingles with the fruity essence of blueberries, making them a tempting addition to any dessert spread. Whether you’re hosting a brunch, celebrating a birthday, or just enjoying a cozy evening at home, these rolls will leave a lasting impression.

Quick Recipe Highlights

  • Flavor Profile: A heavenly combination of sweet blueberries and rich, creamy cheesecake centers that offer a burst of flavor in every roll.
  • Texture: Soft, pillowy rolls that contrast beautifully with the velvety cheesecake filling.
  • Aroma: The sweet scent of fresh blueberries combined with buttery dough creates an irresistible fragrance.
  • Visual Appeal: These rolls boast a gorgeous golden-brown exterior, with blueberry drizzles and a creamy glaze for a stunning finish.
  • Skill Level Needed: While beginner-friendly, these rolls require a few simple baking techniques, making it a rewarding challenge for novice bakers.
  • Special Equipment: A rolling pin, a mixing bowl, and a baking sheet are all you need to create these scrumptious rolls.

Recipe Overview

  • Difficulty Level: This recipe is rated medium in difficulty, perfect for aspiring bakers looking to enhance their skills while working with yeast dough.
  • Category: These rolls can be categorized as a dessert or breakfast treat, making them versatile for any meal.
  • Cuisine: While inspired by classic American desserts, the influence of global baking traditions makes these rolls a delightful treat.
  • Cost: With common pantry ingredients, this recipe is budget-friendly, costing approximately $10 to $15 for 12 rolls.
  • Season: Blueberry Cheesecake Heaven Rolls are best enjoyed in late spring and summer when blueberries are fresh and plentiful.
  • Occasion: Ideal for family gatherings, brunches, or as a sweet ending to dinner parties, these rolls are perfect for anytime you want to indulge.

Why You’ll Love This Recipe

Creating the perfect Blueberry Cheesecake Heaven Rolls elevates your baking game while offering delightful layers of taste and texture. The luscious creaminess of the cheesecake filling paired with juicy blueberries ensures a rich, satisfying experience. Each roll is a bite-sized piece of heaven that melts in your mouth, transporting you to dessert bliss.

You’ll love the convenience of this recipe as it comes together easily, perfect for beginner bakers. With straightforward steps and readily available ingredients, it’s a fantastic way to perfect basic baking skills while impressing family and friends with your culinary prowess. Plus, the joy of pulling freshly baked rolls from the oven adds a special touch to the whole baking experience.

Nutritionally, blueberries are celebrated superfoods, packed with antioxidants, vitamins, and fiber. Incorporating them into dessert not only satisfies your sweet cravings but also adds health benefits that you can feel good about. The cheesecake filling adds a dose of calcium and protein, making this treat slightly more guilt-free.

These rolls shine in social settings, bringing people together around your table. As they are served warm and fresh, they serve as a conversation starter, allowing you to share your baking triumphs. Plus, they are a fantastic dessert to share, making guests feel special and appreciated.

Cost-effectiveness is another significant factor. You can make a dozen delectable rolls for just a fraction of what you would spend at a bakery. This accessibility allows you to treat yourself and others without breaking the bank, making baking both a pleasurable and economical endeavor.

Historical Background and Cultural Significance

The origins of rolls like these can be traced through various baking traditions, often linked to home cooking and family gatherings. The combination of sweet and savory in a single roll resonates with many cultures that embrace fusion flavors. In culinary history, cheesecakes have roots in ancient Greece, showcasing the enduring popularity of cheese-based desserts.

Culturally, blueberries hold a special place in American cuisine, symbolizing summer and local harvests. Blueberry picking is a cherished activity, allowing families to connect with nature and each other, enhancing the enjoyment of seasonal ingredients. This recipe embraces that significance by showcasing fresh blueberries in a delightful dessert format.

Over the years, the evolution of cheesecake recipes reflects changing tastes and culinary developments. From traditional New York-style cheesecakes to more creative interpretations like these rolls, the dessert continues to inspire innovative baking adventures. As both a comfort food and a special occasion dessert, it offers a nostalgic touch for many.

Regional variations of blueberry rolls showcase how different cultures personalize traditional recipes. From sweet to savory interpretations, these rolls adapt based on local flavors and preferences, creating a delightful variety that can be enjoyed around the world.

Ingredient Deep Dive

Blueberries are often referred to as a superfruit, celebrated for their rich antioxidant properties. They play a vital role in reducing oxidative stress while supporting heart health. When selecting blueberries, look for plump, firm berries that are bright in color; avoid those that appear wrinkled or moldy. Store them in the refrigerator and consume within a week for optimal freshness. If fresh blueberries are scarce, frozen options work beautifully in this recipe.

Cream cheese, the star of our cheesecake filling, has a delightful creamy texture and a tangy flavor. Used in desserts for centuries, its classic pairing with sugar creates a luscious filling. Opt for full-fat cream cheese for a rich and velvety experience, and remember to let it soften before use for easy mixing. Store any leftovers in the refrigerator and consume within two weeks, or freeze for future baking endeavors.

All-purpose flour is a staple in baking, providing structure and stability to our rolls. When measuring flour, spoon it into your measuring cup and level it off with a knife for accuracy. For the best results, store flour in a cool, dry place in an airtight container. If you’re looking for alternatives, consider using whole wheat flour or gluten-free blends, keeping in mind that adjustments may be necessary for the texture.

Active dry yeast is the leavening hero in our rolls, enabling them to rise beautifully. Yeast requires sugar as food and warm water to activate. Always check the expiration date before use, and remember to proof it in warm water to ensure it’s alive. For those who prefer, instant yeast can be used as a substitute with slightly different activation methods. Store dry yeast in the refrigerator for longer-lasting freshness.

Common Mistakes to Avoid

  • Not proofing the yeast: Always proof your yeast in warm water before adding it to your dough to ensure it’s active. If your yeast isn’t bubbly after 5-10 minutes, it’s best to start over with new yeast.
  • Inaccurate ingredient measurements: Baking is a science; precise measurements are crucial. Use a digital kitchen scale for the best accuracy when baking.
  • Overworking the dough: Mixing the dough too much can lead to tough rolls. knead just until the ingredients are combined and a smooth texture forms.
  • Using cold ingredients: For a successful cheesecake filling, ensure your cream cheese is softened to room temperature. Cold cream cheese can create lumps in the filling.
  • Skipping the rising time: Allow the dough enough time to rise; shape perfection and airy rolls depend on this crucial step.
  • Failing to preheat the oven: Ensure your oven is fully preheated before baking to achieve an evenly cooked product.
  • Not cooling before frosting: Allow rolls to cool completely before applying any glaze; this ensures it sets correctly.
  • Using too much filling: Overstuffing your rolls can cause them to burst during baking. Stick to the recommended measurements for a perfect balance.
  • Not using parchment paper: This will help prevent sticking and ensure easy removal from the baking sheet.
  • Serving rolls too soon: Allow these rolls to cool slightly before serving; this enhances their overall texture and flavor.

Essential Techniques

Yeast activation is vital for light, fluffy rolls. To master this technique, always check the expiry date of your yeast and use a thermometer to ensure water is at the appropriate temperature, ideally between 100°F – 110°F. Look for foamy bubbles after proofing as a visual cue of success.

Kneading the dough properly encourages gluten development, crucial for texture. Use the heel of your palm to push the dough away from you, folding it back over itself. Knead for about 8-10 minutes until smooth and elastic. Take care not to add too much flour, as this can lead to dense rolls rather than soft ones.

Filling the rolls with cheesecake mixture requires practice for even distribution. A piping bag can provide excellent control but using a spoon works as well. Carefully spoon the filling into the center of each dough piece; less is more here to prevent overflow.

Baking at the right temperature ensures rolls cook thoroughly without burning. Invest in an oven thermometer to verify your oven’s heat accuracy. Always position the rolls in the center of the baking rack for even heat distribution.

Rolling the dough is essential for achieving uniformity in size and texture. Dust your work surface with flour to prevent sticking and ensure an even thickness of about ½ inch. A rolling pin helps achieve this while maintaining the integrity of the dough.

Applying the glaze should be done once the rolls are completely cool to enhance the presentation and flavor. A spoon or a food-grade brush can evenly distribute the glaze without compromising the rolls’ shape.

Pro Tips for Perfect Blueberry Cheesecake Heaven Rolls

1. Use fresh blueberries whenever possible; they yield the best flavor and texture. If fresh is unavailable, frozen blueberries can also work, but be sure to thaw and drain excess liquid beforehand.
2. For an extra creamy filling, consider adding a splash of vanilla extract to the cheesecake mixture for added depth of flavor.
3. Allow the dough to rest for at least 5 minutes after mixing to promote gluten relaxation, making it easier to roll out.
4. If you’re short on time, you can prepare the dough the night before; just refrigerate it after the first rise and allow it to come to room temperature before shaping.
5. Brush the tops of the rolls with melted butter immediately after baking for a beautiful golden sheen and added richness.
6. To enhance flavor, consider adding lemon zest to both the dough and filling for a refreshing twist that complements the blueberries.
7. Store any leftovers in an airtight container to keep them soft and fresh for days.
8. You can serve these rolls with a scoop of vanilla ice cream or a dollop of whipped cream for an indulgent dessert experience.

Variations and Adaptations

Regional variations of blueberry rolls can include unique spices or local fruit additions, offering a delightful twist on this traditional recipe. In the South, for instance, you might encounter a variation that includes sweet pecans for added crunch and flavor depth.

Seasonal adaptations could involve using other berries such as raspberries or blackberries during their peak seasons, allowing for flexible flavor profiles throughout the year. Consider making a mixed berry version by combining different summer fruits for a colorful dessert.

Dietary modifications can cater to specific needs, like substituting gluten-free flour for those with gluten sensitivities. Ensure to follow a reliable gluten-free flour blend that includes xanthan gum for a proper structure.

Flavor variations include using flavored cream cheese or incorporating spices such as cinnamon or nutmeg into either the dough or filling. This adds a new dimension and can be tailored to personal preferences.

For texture modifications, try incorporating shredded coconut into the filling to create a unique coconut blueberry cheesecake fusion. Coconut adds a wonderful chewiness that complements the creaminess of the cheese.

Presentation alternatives might involve using a muffin tin to shape rolls, resulting in individual servings that are equally charming and perfect for parties or family gatherings.

Serving and Presentation Guide

To plate your Blueberry Cheesecake Heaven Rolls beautifully, arrange them on a large serving platter, layering them in a circle for a beautiful presentation. Drizzling raspberry sauce or a simply made berry compote enhances their visual allure and adds a tangy contrast.

Garnishing with fresh mint leaves adds a pop of color and freshness to your dessert table. Alternatively, a sprinkle of powdered sugar can heighten the charm, giving them a classic and elegant look.

Traditional accompaniments often include a scoop of vanilla ice cream or whipped cream, enhancing the overall dessert experience. Separately serve additional blueberries on the side for a beautiful touch that complements the flavor profile.

Modern serving suggestions include placing rolls in individual ramekins or dessert cups for a more personal touch, perfect for larger gatherings. This ensures each guest has their own serving while adding an elegant twist.

Consider temperature when serving: these rolls are best enjoyed slightly warm or at room temperature, as this showcases the creamy filling while offering a comforting experience.

Finally, portion control is essential for managing serving sizes. Each roll can serve as a generous individual dessert, so consider letting guests take one or two rolls to enjoy alongside other desserts to balance flavors.

Wine and Beverage Pairing

Pair your Blueberry Cheesecake Heaven Rolls with a sweet dessert wine such as Riesling or Moscato, which complements the fruity flavors excellently. The sweetness of these wines elevates the entire experience without overwhelming the dessert.

For non-alcoholic alternatives, consider serving a refreshing lemonade or iced tea with a hint of mint to create a light and vibrant pairing. These options can enhance the fresh berries and creamy notes beautifully.

Coffee enthusiasts will find a well-brewed cup of coffee or an espresso to be a lovely accompaniment. The bitterness in coffee beautifully balances the sweetness of the cheesecake rolls, creating a satisfying finale to a meal.

When considering temperature, serve wines chilled to enhance their refreshing nature. For coffee, either serve it hot or make an iced version to complement the summer vibe.

For serving suggestions, consider crafting a dessert bar where guests can assemble their own plates with the rolls and chosen beverages, allowing for a fun and engaging dining experience.

Storage and Shelf Life

To store leftover Blueberry Cheesecake Heaven Rolls, place them in an airtight container at room temperature for up to 2 days to maintain their softness. After that, it’s best to refrigerate them to extend their shelf life.

Keep the rolls in the fridge for up to one week; ensure they’re adequately covered to prevent drying out. When ready to enjoy, warm them up slightly in the microwave or oven.

If you have a larger batch, consider freezing them for longer storage. Wrap the rolls in plastic wrap and then place them in a freezer-friendly container for up to 3 months.

Signs of spoilage include an off smell, dry texture, or visible mold; discard any rolls that appear less than fresh.

Reheating instructions are simple: wrap rolls in a damp paper towel and microwave for about 10-15 seconds to bring back their original softness. Alternatively, preheat your oven to 350°F and warm for about 10 minutes.

Freezing guidelines recommend thawing overnight in the fridge before reheating to retain moisture and flavor.

Make Ahead Strategies

To streamline your baking process, consider prepping the dough the night before. You can allow it to rise in the refrigerator, and then shape and bake it the next day, saving time while maintaining freshness.

You can store the cheesecake filling in a sealed container in the refrigerator for up to 2 days. This allows you to efficiently assemble your rolls without delay when you’re ready to bake.

Your prep timeline should include scheduling time for the dough to rise fully; plan on two hours in total for the first rise and rolling out. Additionally, preparing the rolls should take about 30 minutes, allowing for assembly without pressure.

Keep quality in mind: while you can have dough rise too long, it’s better to refrigerate for slower fermentation than to rush it. A cold rise can enhance the dough’s flavor profile and texture.

For assembly tips, pre-measure your ingredients and divide them into bowls. Having everything organized can make the actual preparation process smoother and more enjoyable.

If adding fresh elements like blueberries after baking, ensure you have them ready to go at serving time for freshness and flavor enhancement in each roll.

Scaling Instructions

When halving the Blueberry Cheesecake Heaven Rolls recipe, ensure that you divide each ingredient accurately for consistent results. This applies to yeast and flour for proper consistency and texture.

If doubling or tripling the recipe, allow sufficient mixing and rising space. You might need to adjust your baking time slightly, as larger batches can cook unevenly.

Adjusting equipment may include utilizando deeper or larger baking trays if scaling substantially; if using a smaller kitchen tool, consider baking in batches to maintain the quality.

Timing modifications are crucial; check on your rolls early when baking a larger batch to ensure they do not overcook.

Storage considerations become important when scaling; ensure that you have enough storage containers ready if making a larger quantity that would need to be stored or frozen.

Nutritional Deep Dive

Understanding macros in your Blueberry Cheesecake Heaven Rolls allows you to appreciate their nutritional profile. These delightful rolls contain carbohydrates primarily from flour and sugars, alongside healthy fats from the cream cheese.

Micronutrient analysis reveals that blueberries are rich in vitamins C and K, while cream cheese offers essential calcium. Together, they contribute to a balanced dessert that satisfies both taste and nutritional needs.

Consider the health benefits; blueberries may support heart health and cognitive function, while consuming moderate amounts of cream cheese adds beneficial fats necessary for proper nutrient absorption.

Dietary considerations are essential: keep aware of serving sizes to monitor calorie intake. Serving size can play a crucial role in maintaining a balanced diet while enjoying your favorite treats.

Finally, weight management tips suggest enjoying these rolls in moderation, perhaps savoring them on special occasions or sharing with friends to balance indulgence with wellness.

Dietary Adaptations

For gluten-free adaptations of Blueberry Cheesecake Heaven Rolls, swap all-purpose flour with a 1:1 gluten-free blend. Ensure the blend contains xanthan gum for proper dough strength and texture.

Dairy-free modifications can be achieved by using soy or almond cream cheese in place of traditional cream cheese. Many brands now offer rich, creamy alternatives that maintain similar flavors in baked goods.

For a vegan version, use a plant-based substitute for cream cheese and replace eggs with silken tofu or flaxseed meal for binding properties, ensuring the same delightful texture and taste.

If you follow a low-carb or keto diet, consider using almond flour or coconut flour to create a lower-carb roll. Adjust sweetener types for a suitable Keto-friendly option.

Paleo enthusiasts will need to substitute with almond flour and coconut sugar for a paleo-friendly dessert that stays true to ancient dietary principles without losing flavor.

For specific diets such as Low-FODMAP, consider eliminating certain ingredients and opting for lactose-free cream cheese. Always consult with dietary guidelines to ensure safety and enjoyment.

Troubleshooting Guide

If your rolls have a dense texture, it may be due to over-kneading. Next time, knead just until combined to keep them soft and airy.

Struggling with flavor balance? Incorporate a pinch of salt into the filling to enhance sweetness while counteracting overly ripe berries.

Temperature problems can occur during baking; invest in an oven thermometer to ensure proper heat settings for consistent baking results.

If equipment challenges arise, remember you can modify tools. Use a sturdy glass or a bottle in place of a rolling pin if one isn’t available.

Ingredient substitutions are possible, but understand how they affect the outcome. Knowing the role of each ingredient helps you adapt wisely for success.

Timing concerns can lead to over-baking. Keep a close eye on your rolls during the final minutes of baking, aiming for a golden hue without burning.

Recipe Success Stories

Community feedback often highlights the wondrous aroma that fills homes while these rolls bake. Many bakers report that their families can hardly wait for the rolls to cool before diving in.

Variation successes, such as adding chocolate chips or nuts, are also widely shared. Tweaking this basic recipe opens up endless possibilities that allow bakers to make it their own.

Readers suggest perfecting their photography skills by capturing these rolls fresh out of the oven. A light background with focused lighting can enhance the colors and make for an enticing image.

Sharing adaptation stories from crafting gluten-free or vegan versions encourages others to explore solutions for dietary restrictions while still enjoying delicious treats.

Engagement extends to social media, where bakers share pictures of their creations and celebrate successes with the wider community, inspiring others to recreate these rolls.

Frequently Asked Questions

Can I use frozen blueberries in this recipe?

Absolutely! Frozen blueberries can be used in this recipe, but make sure to thaw and drain them before use to avoid excess moisture in the filling.

How do I prevent my rolls from burning?

Keep a close eye on your rolls as they bake and consider rotating them halfway through baking. Using parchment paper on your baking tray can also help prevent sticking or burning.

Can I make these rolls the night before?

You can prepare the dough and filling the night before. Allow the rolls to rise in the refrigerator overnight, then bake them in the morning when ready to enjoy.

What should I do if my dough isn’t rising?

If your dough isn’t rising, it could be due to old yeast or the temperature being too cold. Ensure your yeast is active and keep the dough in a warm spot to facilitate proper rising.

What can I use instead of cream cheese?

For a dairy-free option, you can use nut-based cream cheese or a combination of silken tofu and citrus for tangy flavor. Be aware of the texture change, ensuring it remains smooth.

How long do these rolls last?

When stored properly in an airtight container at room temperature, these rolls stay fresh for about 2 days. Refrigerating them extends their life to about one week.

Can I freeze the rolls?

Yes! You can freeze these rolls by packaging them in an airtight container or freezer bag, where they can maintain their quality for up to 3 months.

What is the best way to reheat the rolls?

The best way to reheat rolls is to wrap them in a damp paper towel and microwave for 10-15 seconds. Alternatively, heat them in a preheated oven at 350°F for about 10 minutes.

Can I add more filling to the rolls?

You can, but be cautious as overfilling can lead to spills during baking. Stick to the recommended amounts for even baking results.

How do I ensure my rolls are soft?

To achieve soft rolls, be mindful of kneading time and avoid adding too much flour during the process. Let them rise long enough, and cover them with a cloth to maintain moisture as they cool.

Additional Resources

Explore related recipes on our blog for a comprehensive baking experience. From other fruit-infused rolls to delightful cheesecakes, there’s a recipe for every sweet tooth.

Technique guides can help refine your skills in baking, with tips for working with yeast, managing dough, and enhancing flavor profiles.

Ingredient information can provide deep insight into the nutritional benefits and uses of key ingredients in your favorite recipes, making you a well-rounded cook.

Finding the right equipment is crucial; check out our recommended list of baking tools to maximize your success in the kitchen and inspire creativity.

Seasonal variations of recipes keep the culinary experience fresh and exciting, allowing you to explore new flavors that reflect seasonal produce.

Join the Conversation

Your feedback and experiences enrich our community! Share your journey with Blueberry Cheesecake Heaven Rolls on social media to inspire others to try this delicious recipe.

Photography tips can enhance your culinary journey, allowing others to appreciate your creations. Don’t hesitate to showcase your baking talents through stunning images of your rolls.

Engage in conversation through recipe reviews, sharing what worked well and any twists you made to the original recipe, fostering a spirit of creativity.

Join in recipe variations, contributing your ideas or adaptations for others to explore and possibly incorporate into their versions of this delicious treat. Let’s create a thriving community where everyone feels inspired to bake!

The Recipe

Blueberry Cheesecake Heaven Rolls

Serves: 12 rolls

Prep Time: 30 mins

Cook Time: 25 mins

Total Time: 55 mins

Kitchen Equipment Needed

  • Mixing bowls
  • Rolling pin
  • Baking sheet
  • Parchment paper
  • Piping bag (optional)
  • Measuring cups and spoons
  • Oven thermometer (optional)

Ingredients

  • 2 cups all-purpose flour
  • 1 packet active dry yeast
  • 1/2 cup warm water (110°F)
  • 1/4 cup sugar
  • 1/4 cup melted butter
  • 1 egg
  • 1/2 tsp salt
  • 8 oz cream cheese, softened
  • 1 cup fresh blueberries
  • 1/2 cup powdered sugar (for glaze)
  • 1-2 tbsp milk (for glaze)

Directions

  1. In a mixing bowl, combine warm water and yeast, letting it proof for about 5 minutes until bubbles form.
  2. In a large bowl, mix flour, sugar, and salt, then add the yeast mixture, melted butter, and egg. Knead until smooth.
  3. Cover the dough with a towel and let it rise in a warm place for about 1 hour or until doubled in size.
  4. For the filling, mix softened cream cheese, sugar, and blueberries until smooth.
  5. Once dough has risen, punch it down and roll it out to about 1/2 inch thickness.
  6. Cut the dough into squares and place a spoonful of filling in the center of each square. Fold corners over filling and seal.
  7. Place rolls seam-side down on a baking sheet lined with parchment paper. Let rise for 30 minutes.
  8. Preheat your oven to 350°F and bake rolls for 25 minutes or until golden brown.
  9. For glaze, mix powdered sugar and milk until smooth. Drizzle over cooled rolls.

Recipe Notes

  • Store leftovers in an airtight container for up to 2 days at room temperature or freeze for later.
  • Substituting cream cheese with dairy-free varieties works well for those with dietary restrictions.
  • Experiment with adding lemon zest to the filling for an extra flavor kick.

Ultimate Hot Fudge Brownie Bread: The Perfect Chocolate Indulgence

Hot Fudge Brownie Bread Recipe: The Ultimate Chocolate Treat

⚖️
Difficulty
Intermediate

⏲️
Prep Time
15 mins

🕒
Cook Time
30 mins

⏱️
Total Time
45 mins

🍽️
Servings
8 servings

Welcome to the world of decadent desserts, where our Hot Fudge Brownie Bread Recipe stands out as the ultimate chocolate treat! Imagine biting into a luscious, moist brownie that has taken the shape of an inviting loaf. This recipe combines the rich flavor of chocolate with gooey fudge, creating a delightful experience with every slice. Perfect for satisfying your sweet cravings, this brownie bread is not just a dessert; it’s a heartfelt indulgence you can enjoy anytime.

With its intense chocolate flavor and fudgy texture, this brownie bread is an explosion of taste and tenderness. The aroma it releases while baking fills your kitchen with a wonderful warmth, enticing everyone around. Whether you’re hosting a gathering or simply treating yourself, this Hot Fudge Brownie Bread is sure to be a crowd-pleaser!

Quick Recipe Highlights

  • Flavor Profile: Rich chocolate flavor with notes of warm fudge that melt in your mouth.
  • Texture: Moist and dense like a brownie yet soft enough for slicing.
  • Aroma: Inviting chocolate scent with hints of vanilla that waft through the kitchen.
  • Visual Appeal: Dark, chocolatey bread with a glossy fudge layer on top, perfect for presentation.
  • Skill Level Needed: Intermediate; requires attention to detail for texture and baking time.
  • Special Equipment: Loaf pan and mixing bowls are essential for crafting this treat.

Recipe Overview

  • Difficulty Level: While this recipe is classified as intermediate due to the need for precise measurements and timing, it’s achievable for those with a little experience in baking.
  • Category: Perfect as a dessert, snack, or even as a sweet breakfast item, making it versatile for any occasion.
  • Cuisine: This recipe is a modern twist on classic American baking traditions that celebrate chocolate desserts.
  • Cost: Generally budget-friendly, using everyday pantry items to create a brunch-worthy treat.
  • Season: Great year-round, but especially appealing in fall and winter during holidays or cozy gatherings.
  • Occasion: A delightful addition to birthdays, holiday celebrations, or even a cozy homemade gift for friends!

Why You’ll Love This Recipe

This Hot Fudge Brownie Bread is not just about the taste; it’s a symphony of flavors and textures that come together in each slice. The luscious velvety chocolate is complemented by a rich fudgy topping, making it a treat for chocolate lovers. Each bite provides a satisfying gooeyness, reminding you of the best brownies you’ve ever tasted, while its bread-like structure makes it perfect for those who enjoy a comforting, hearty dessert.

Convenience is another reason to love this recipe. With simple preparation steps and a straightforward baking process, you can whip this up quickly. It’s an ideal solution for last-minute gatherings or as a delightful treat anytime you crave something sweet. The delightful smell that fills your kitchen while it bakes adds to the experience, luring everyone to the table before it’s even ready!

Not only is this brownie bread delectable, but it also has some nutritional advantages. While it’s certainly a dessert, it features familiar ingredients like eggs and cocoa that contribute to its nutritional profile. It can offer a welcome balance of energy and indulgence, particularly when served in moderation as part of a well-rounded diet.

Sharing is caring, and this Hot Fudge Brownie Bread is perfect for social gatherings. Whether you’re hosting a brunch, a dinner party, or a simple get-together, everyone will appreciate the delicious offering. It’s definitely a conversation starter, as guests marvel at its rich texture and flavor while passing around the loaf for second helpings!

Finally, this recipe is cost-effective. The ingredients are typically found in any kitchen, making it easy to bake even on a budget. The outcome, a rich and satisfying dessert, is sure to please everyone without breaking the bank. With minimal investment, you get a maximum return on enjoyment!

Historical Background and Cultural Significance

The origin of brownie bread is rooted in the deep love for chocolate-based desserts in American culinary history. Traditionally, brownies evolved from the desire to mix the qualities of a cake and a cookie. Over the years, bakers have tinkered with the delightful dessert, giving rise to variations like brownie bread. Such developments celebrate the shared love for chocolate across various cultures, particularly in America where dessert creativity knows no bounds.

Culturally, bread and baking have brought families together for generations. This Hot Fudge Brownie Bread reflects the idea of comfort food, offering warmth and joy. Sharing such treats at family gatherings or festive events highlights the integral role that desserts play in creating cherished memories with loved ones.

The evolution of the recipe over the years boasts numerous iterations, introducing healthier alternatives and creative blends with fruits and nuts. These adaptations show how the core love for chocolate treats remains strong, yet flexible to accommodate varying dietary preferences and innovations in cooking.

Regional variations within the United States have also showcased different interpretations of brownie bread. From variations that include nuts to those with a cream cheese swirl, each version tells a story unique to its region, celebrating local flavors and ingredients that elevate the traditional recipe.

Ingredient Deep Dive

Chocolate: Without question, chocolate is the star here. It has a deep-rooted history, originating from cacao plants, revered for their rich and bold flavor. Nutritionally, it is high in antioxidants, providing benefits such as improved heart health. When selecting chocolate for this recipe, opt for high-quality dark chocolate for depth of flavor. Store chocolate in a cool, dark place and consider substitutions like cocoa powder if needed.

Sugar: Essential in balancing the bitterness of chocolate and enriching the bread’s sweetness, sugar also adds to its moistness. Historically, sugar has played a significant role in dessert-making, transforming flavors through its ability to caramelize and provide depth. For healthier alternatives, consider coconut sugar or honey, but be mindful of the liquid ratios. Always store sugar in a sealed container to keep it fresh and free from moisture.

Common Mistakes to Avoid

  • Overmixing the batter: This can lead to dense bread. Mix until just combined.
  • Using low-quality chocolate: The flavor greatly depends on the quality of chocolate used. Choose high-quality chocolate for the best results.
  • Not measuring ingredients accurately: Baking is a science, so weigh and measure for success.
  • Opening the oven door too soon: This can cause the bread to deflate. Wait until the minimum baking time has passed.
  • Not letting it cool before slicing: Cutting too soon can lead to messy servings; let it set for at least 10 minutes.
  • Baking at the wrong temperature: Ensure your oven is calibrated accurately as too high or low can affect baking times.
  • Using a non-stick pan without greasing: This can lead to sticking. Always prep your pan accordingly.
  • Skipping the ganache topping: The fudge layer is what makes this bread truly special; don’t skip it!
  • Not giving the bread enough time to bake: If it still seems wet, it likely needs more time in the oven. Check with a skewer.
  • Using expired ingredients: Always check the expiration dates, especially for baking powder and baking soda.

Essential Techniques

Mixing the Batter: This is crucial for achieving the perfect texture. Mixing too much activates gluten, leading to a chewy result instead of delightful fudgy bread. To master this, mix your dry ingredients first before combining with wet, and stir until just combined. Look for a few lumps remaining in the batter for the best outcome.

Temperature Control: Understanding your oven’s temperature is vital. Baking at the right temperature ensures even cooking and a good rise. Use an oven thermometer to check accuracy and avoid cool or hot spots, which can lead to uneven baking and undesirable textures.

Pro Tips for Perfect Hot Fudge Brownie Bread

1. Invest in high-quality chocolate for a deeply satisfying flavor.

2. Experiment with different add-ins like nuts or chocolate chips for texture variety.

3. Allow the bread to cool completely before slicing to maintain structure.

4. Enhance flavors with a pinch of espresso powder, elevating chocolate intensity.

5. Serve warm, with a scoop of ice cream on the side for an unforgettable dessert experience.

6. Use a serrated knife to slice the bread cleanly without tearing.

7. Wrap leftovers tightly to retain moisture and flavor for days.

8. Get creative with toppings; consider drizzling caramel or dusting powdered sugar for added flair.

Variations and Adaptations

Regional variations of brownie bread can include different nuts like walnuts or pecans for added crunch. Seasonal adaptations could incorporate spices like pumpkin spice in the fall, shifting the flavor profile appropriately. For dietary modifications, consider making the recipe gluten-free using almond flour and dairy-free chocolate to cater to those with allergies. Experimenting with texture modifications, such as incorporating a swirl of peanut butter or cheesecake, can bring new layers of flavor to this classic treat.

Serving and Presentation Guide

Presenting your Hot Fudge Brownie Bread can be as delightful as eating it! Utilize a wooden cutting board as your backdrop and slice the bread neatly. Sprinkle with powdered sugar or arrange dark chocolate shavings on top for a professional touch. Serve with a scoop of vanilla ice cream or a drizzle of chocolate syrup to enhance its irresistible appeal. Consider serving it warm, as the fudge topping will slightly melt, creating a gooey experience that’s hard to resist!

Wine and Beverage Pairing

For a delightful pairing, rich red wines, such as Cabernet Sauvignon or Merlot, complement the chocolate flavors beautifully. If you desire non-alcoholic options, consider serving it with a bold coffee or a decadent hot chocolate for an indulgent experience. For tea lovers, a strong chai or peppermint tea creates a flavor contrast that balances the sweetness of the bread, making for a perfect afternoon treat.

Storage and Shelf Life

This Hot Fudge Brownie Bread can be stored in an airtight container for up to five days at room temperature. For longer shelf life, consider freezing slices individually wrapped in plastic wrap, followed by aluminum foil, for up to 3 months. When reheating, simply warm it in the oven or microwave for a few seconds to regain that soft texture. Always check for signs of spoilage, such as sour smells or visible mold, before consuming.

Make Ahead Strategies

To save time, prepare the batter and store it in the refrigerator for up to 24 hours; just remember to bring it to room temperature before baking. You can also bake it ahead of time and freeze the entire loaf — simply slice it before freezing for easy access. This allows for fresh-baked treats any time of the week, especially when entertaining guests unexpectedly, ensuring you always have a delicious offering on hand!

Scaling Instructions

If you need to halve or double this Hot Fudge Brownie Bread recipe, adjust your ingredient amounts accordingly while keeping an eye on baking times. For a smaller loaf, use a smaller pan, which will speed up the cooking time. Conversely, if tripling the recipe, consider using multiple loaf pans or a larger oven-safe dish to ensure even baking. Maintain the cooking temperature but make sure to test for doneness, adjusting times as needed.

Nutritional Deep Dive

This Hot Fudge Brownie Bread, while a treat, can still be appreciated for its nutritional content. Each slice contains essential nutrients from chocolate and eggs. With a higher caloric count due to sugar and chocolate, it’s suited for a moderate indulgence rather than excess. Understanding the macro breakdown of fats, carbohydrates, and proteins in chocolate can help you make informed choices regarding portion sizes, especially for those watching dietary intake.

Dietary Adaptations

To make this treat gluten-free, substituting regular flour for almond flour or coconut flour can yield a delightful result. For a dairy-free version, use plant-based butter and dark chocolate with no dairy. Vegan adaptations can be achieved by replacing eggs with flax eggs and ensuring all other ingredients are plant-based. With these simple modifications, anyone can enjoy this decadent chocolate delight regardless of dietary needs!

Troubleshooting Guide

Texture issues like overly dry bread can stem from overbaking, while too gooey bread indicates underbaking. Ensure you’re using the correct baking time and an accurate oven temperature for the best results. If there are flavor imbalances, revisiting sugar levels and chocolate quality can help; those elements define the bread’s core taste. Timing concerns, about baking or cooling, can easily be fixed with practice and patience, learning the visual cues that indicate doneness.

Recipe Success Stories

Community feedback highlights how this Hot Fudge Brownie Bread has been a crowd-pleaser with many praising its rich chocolate flavor. Some readers have shared their adaptations, including variations with peanut butter or crunchy hazelnuts, presenting incredible results. The combination of traditional recipes with personal touches showcases the versatility of this bread, keeping it exciting. Sharing cooking photography tips also offers inspiration for presenting this bread beautifully, making it an eye-catching addition to any dessert table.

Frequently Asked Questions

Can I make this recipe gluten-free? Yes, simply substitute regular all-purpose flour with a gluten-free flour blend or almond flour to enjoy this treat without gluten.

How should I store leftover brownie bread? Keep it in an airtight container at room temperature for up to five days, or freeze it for longer storage.

Can I freeze brownie bread? Absolutely! Wrap individual slices in plastic wrap and foil, then place them in a freezer bag for up to three months.

What if my brownie bread is undercooked? If it seems too wet in the center, return it to the oven for a few additional minutes and keep checking for doneness.

How do I know when my brownie bread is done baking? Insert a toothpick in the center; it should come out with a few moist crumbs but not wet batter.

Can I add nuts to the brownie bread? Yes! Add in chopped nuts like walnuts or pecans for added texture and flavor.

Is it necessary to add the ganache topping? While the brownie bread is delicious on its own, the ganache adds an extra layer of fudgy richness that makes it irresistible!

How can I make this recipe vegan? Substitute the eggs with flaxseed meal mixed with water, and ensure you use plant-based butter and vegan chocolate.

Can I use cocoa powder instead of chocolate? While using cocoa powder is an option, the taste and texture will differ; consider using a combination of cocoa powder and vegetable oil.

What beverage pairs well with brownie bread? A rich red wine or a cup of coffee enhances the chocolate flavors beautifully.

How long does it take to make this brownie bread? The total time from start to finish is about 45 minutes, including preparation and baking!

Additional Resources

For those interested in expanding their baking repertoire, consider exploring related recipes such as chocolate chip cookies or fudge brownies. It’s also useful to review technique guides on melting chocolate or baking essentials to enhance your skills. Dive deeper into ingredient information to better understand chocolate’s various forms and how they influence flavor. Lastly, equipping your kitchen with the right baking equipment will streamline your process, contributing to better baking outcomes!

Join the Conversation

We love hearing about your baking experiences! Share your Hot Fudge Brownie Bread creations on social media with us. Photography tips, variations you’ve tried, and recipe reviews add to our community’s knowledge and joy. Engage with fellow bakers to discover new ideas or share your thoughts on this delightful recipe, fostering an environment where everyone is encouraged to experiment and have fun in the kitchen.

The Recipe

Hot Fudge Brownie Bread

Serves: 8

Prep Time: 15 mins

Cook Time: 30 mins

Total Time: 45 mins

Kitchen Equipment Needed

  • Loaf Pan
  • Mixing Bowl
  • Measuring Cups and Spoons
  • Spatula
  • Offset Knife for Frosting

Ingredients

  • 1 cup dark chocolate chips
  • 1/2 cup unsalted butter
  • 1 cup all-purpose flour
  • 1 cup granulated sugar
  • 1/2 cup brown sugar
  • 3 large eggs
  • 1/2 cup unsweetened cocoa powder
  • 1 teaspoon vanilla extract
  • 1/4 teaspoon salt
  • 1/2 cup hot fudge sauce for topping

Directions

  1. Preheat your oven to 350°F (175°C) and grease a loaf pan.
  2. Melt the butter and dark chocolate together in a mixing bowl over simmering water.
  3. Remove from heat and stir in granulated sugar and brown sugar until fully combined.
  4. Add eggs one at a time, mixing well after each addition, followed by the vanilla extract.
  5. In another bowl, whisk flour, cocoa powder, and salt together. Gradually fold into the wet mixture.
  6. Pour the batter into the prepared loaf pan and spread evenly.
  7. Bake for 25-30 minutes. Use a toothpick to check for doneness.
  8. Once baked, let it cool for 10 minutes before removing from the pan.
  9. Drizzle hot fudge sauce on top before serving.

Recipe Notes

  • You can store leftover brownie bread tightly wrapped at room temperature for up to five days.
  • If you wish, you may incorporate chopped nuts or chocolate chips into the batter.
  • For a richer chocolate flavor, increase the amount of cocoa powder slightly.

Delicious Maraschino Cherry Chocolate Chip Cookies Recipe to Try

Maraschino Cherry Chocolate Chip Cookies: A Sweet Indulgence

⚖️
Difficulty
Easy

⏲️
Prep Time
15 mins

🕒
Cook Time
10 mins

⏱️
Total Time
25 mins

🍽️
Servings
24 cookies

Indulge yourself in the delectable flavors of Maraschino Cherry Chocolate Chip Cookies! This delightful recipe combines the richness of chocolate with the unique sweetness of maraschino cherries, resulting in a cookie that tantalizes your taste buds. The burst of fruity flavor contrasts perfectly with the decadent chocolate chips, making every bite an explosion of joy. These cookies are not only a treat for your palate but also bring an emotional connection to joyful moments and celebrations.

Whether you’re sharing them with friends at a gathering or savoring them alone with a cup of coffee, these cookies offer a delightful experience. Imagine tearing into a warm cookie, the gooey chocolate melting into a sweet cherry-infused delight. The bright red cherries pop against the golden brown cookie dough, presenting an eye-catching treat that elevates any dessert table.

Quick Recipe Highlights

  • Flavor Profile: This cookie recipe balances sweetness with a hint of tartness from the cherries, complemented by rich semi-sweet chocolate.
  • Texture: Expect a wonderfully chewy cookie, with soft centers and slightly crisp edges that make each bite satisfying.
  • Aroma: The inviting scent of fresh cookies baking, combined with a sweet cherry fragrance, enhances the anticipation and warmth of homemade treats.
  • Visual Appeal: With vibrant red cherries peeking through golden dough, these cookies are as beautiful as they are delicious, perfect for any occasion.
  • Skill Level Needed: This recipe is approachable for bakers of all skill levels, allowing anyone to create delicious cookies.
  • Special Equipment: Just basic baking tools are needed, like a mixing bowl, baking sheet, and measuring cups.

Recipe Overview

  • Difficulty Level: This easy recipe is perfect for beginner bakers looking to experiment with new flavors without complex techniques.
  • Category: These cookies fall under dessert and snack categories, suitable for various occasions.
  • Cuisine: Influenced by American baking traditions, these cookies embody the creativity and simplicity of home cooking.
  • Cost: The ingredients are typically affordable, making this an economical baking project for everyone.
  • Season: While delightful year-round, these cookies shine during holidays and celebrations when the desserts take center stage.
  • Occasion: Ideal for parties, cookie swaps, or simply to enjoy at home while watching a movie.

Why You’ll Love This Recipe

The flavor and texture of Maraschino Cherry Chocolate Chip Cookies create a delightful balance of sweetness and richness that will have you reaching for just one more cookie. Each bite provides a perfectly chewy experience, enhanced by melty chocolate chips and pieces of cherry that burst with flavor. This exciting combination not only satisfies your sweet tooth but also presents a contrast of textures that is irresistible. The bright pops of red cherries bring a festive feeling, transforming regular cookie time into a party!

Preparation of these cookies is quick and straightforward, making it an ideal recipe for busy days when you need a sweet treat without spending hours in the kitchen. With just a few minutes of mixing and baking, you can enjoy freshly baked cookies in no time. This convenience allows you to whip up a batch whenever the craving hits or when unexpected guests arrive.

Nutritionally, while cookies are typically regarded as indulgent treats, these Maraschino Cherry Chocolate Chip Cookies can offer moments of joy and happiness, bringing people together. Sharing these cookies can enhance social interactions and create warm memories with friends and family. And, let’s not forget, they remain a crowd-pleaser among both kids and adults alike, making them perfect for gatherings.

The recipe is cost-effective, utilizing simple ingredients that are often readily available in your pantry. This affordability makes these cookies accessible to everyone, allowing you to indulge without breaking the bank. With minimal investment, you can create a delightful homemade treat that impresses family and friends.

Finally, these cookies are customizable. Feel free to add nuts, modify the type of chocolate, or even swap in dried fruits if cherries aren’t your favorite. This versatility allows you to tailor the recipe to your specific tastes or dietary needs, making it a true go-to cookie base.

Historical Background and Cultural Significance

The classic chocolate chip cookie was invented in the 1930s by Ruth Wakefield, who famously added chunks of chocolate to her butter drop cookie recipe. However, the addition of maraschino cherries brings a creative twist that adds both color and a unique flavor profile to this beloved classic. Cherries have long been associated with festive desserts, often used in pies and cakes, making them a natural addition to cookies.

Culturally, these cookies represent a blend of classic American baking traditions infused with modern creativity. The juxtaposition of chocolate with bright maraschino cherries mirrors broader culinary trends that celebrate vibrant flavors and visual appeal. This evolution showcases the fun and playful nature of baking today, where creativity knows no bounds.

The recipe for Maraschino Cherry Chocolate Chip cookies has evolved, prompting variations with nuts, specific chocolate types, or even alternative flours reflecting contemporary dietary preferences. Each adaptation offers bakers unique ways to express themselves while showcasing the versatility of cookies.

In different regions, you may find local spins on this recipe, perhaps by incorporating local fruits or types of chocolate, demonstrating how adaptable this classic treat can be across various culinary landscapes.

Ingredient Deep Dive

Flour is the backbone of any cookie, providing structure. Choose all-purpose flour for its versatility, or try whole wheat flour for added nutrition and a nuttier flavor. When selecting flour, store it in a cool, dry place to maintain freshness and avoid spoilage. Consider sifting flour before use for lighter cookies, and always reserve some for dusting baking sheets.

Maraschino cherries contribute sweetness and a pop of color to the cookie. Unlike fresh cherries, maraschino cherries are preserved in syrup, giving them a distinct taste. Look for high-quality brands without artificial colors for a more natural flavor. Store them in their syrup in the refrigerator once opened, and they can last for months.

Common Mistakes to Avoid

  • Overmixing the dough can result in tough cookies. Mix just until the ingredients are combined.
  • Using cold butter can lead to spreading during baking. Ensure your butter is at room temperature for optimal texture.
  • Skipping the chilling step can cause cookies to spread too much. Chill the dough for at least 30 minutes for thicker cookies.
  • Not measuring ingredients accurately may affect the cookie’s texture. Use weight measurements for consistency.
  • Ignoring oven temperature can result in undercooked or burnt cookies. Check your oven’s accuracy with a thermometer.
  • Not using parchment paper can cause cookies to stick to the baking sheet. Always line your pans for easy removal.
  • Using stale or expired ingredients can affect flavor. Fresh ingredients create the best-tasting cookies.
  • Not letting cookies cool on the sheet before transferring them may lead to breakage. Allow them to set for a few minutes first.
  • Using too much flour can make cookies dry. Spoon flour into measuring cups without packing it down.
  • Not enjoying the cookie-making process can diminish the overall experience. Relax and have fun while baking!

Essential Techniques

Knowing how to cream butter and sugar together is crucial for any cookie recipe. Creaming incorporates air into the mix, resulting in a light and fluffy texture. Aim for a pale and creamy mixture before adding other ingredients. If you notice your dough turning gritty, you may not have creamed your butter long enough.

Measuring ingredients accurately is fundamental to baking success. Use the spoon and level method for dry ingredients and liquid measuring cups for wet ones. A digital scale can significantly enhance precision, ensuring your cookies turn out perfectly every time.

Pro Tips for Perfect Maraschino Cherry Chocolate Chip Cookies

1. Try chilling your cookie dough overnight for enhanced flavor and a thicker texture when baked.

2. Substitute dark chocolate chips instead of semi-sweet for a deeper chocolate flavor.

3. Always preheat your oven to ensure even baking. This sets the structure of your cookies right.

4. Experiment with sprinkle toppings for added color and fun during special occasions.

5. Use a cookie scoop for uniform cookie sizes, ensuring even baking.

6. Add extra cherries on top before baking for a visually stunning presentation.

7. Store cookies in an airtight container with a slice of bread to maintain moisture.

8. For a fun twist, drizzle melted white chocolate on top after they cool.

Variations and Adaptations

Regional variations of these cookies can include local fruits that are more prominent in specific areas, such as adding pecans for a Southern twist or adapting the chocolate used to represent different holidays. Seasonal adaptations may involve spices like cinnamon or pumpkin pie seasoning during fall for a festive touch. Additionally, dietary modifications like using gluten-free flour or low-carb sweeteners can accommodate various eating preferences.

Serving and Presentation Guide

Plating techniques for your cookies can elevate the experience. Arrange them on a decorative platter, interspersed with fresh cherries or mint leaves for color. Garnishing ideas include a dusting of powdered sugar or a sprinkle of sea salt to enhance flavors. Cookies can be served individually or stacked in a clear jar for an inviting visual appeal. Ensure cookies are served warm during gatherings for that home-baked comfort feeling.

Wine and Beverage Pairing

Pairing these delightful cookies with a glass of sweet dessert wine can enhance the overall tasting experience. A fruity Riesling or a sparkling Moscato complements the cherries beautifully. For non-alcoholic options, consider pairing with cherry or cola beverages. Chocolate chip cookies and coffee are timeless, so a fresh brew can balance the sweetness perfectly.

Storage and Shelf Life

To store your cookies effectively, keep them in an airtight container at room temperature for up to one week. For longer shelf life, you can freeze baked cookies for up to three months. To store unbaked dough, it can also be frozen and baked directly from the freezer, extending your cookie enjoyment. Always check for signs of spoilage, such as an off smell or moisture. When reheating, a quick pop in the microwave for 10-15 seconds will revive their gooey goodness.

Make Ahead Strategies

To make these cookies ahead of time, prepare the dough and refrigerate it for up to three days, or freeze it for up to three months. When ready to bake, simply thaw in the refrigerator overnight if frozen. Prep timelines are flexible, allowing for easy schedule management while assembling other dishes for events.

Scaling Instructions

If you’re looking to adjust the batch size, halving or doubling the recipe is straightforward. Keep an eye on the baking time if you’re making larger batches, as they may need an extra minute or two. Use larger mixing bowls or multiple sheets for assembly to avoid overcrowding. Lastly, adjust your ingredient quantities based on the desired cookie count for the best outcome.

Nutritional Deep Dive

Analyzing the macros in a single Maraschino Cherry Chocolate Chip Cookie reveals approximately 150 calories. The balance of fats from butter and chocolate, carbohydrates from sugar and flour, makes these cookies a delightful treat in moderation. Additionally, the inclusion of cherries adds a unique source of antioxidants, offering some health benefits among the indulgence. Portion analysis regarding 2-3 cookies can provide an enjoyable experience without exceeding caloric goals.

Dietary Adaptations

For gluten-free cookies, substitute regular flour with a gluten-free blend, ensuring a successful texture. Dairy-free bakers can opt for coconut oil or dairy-free spreads and use vegan chocolate chips. If you’re following a keto diet, consider using almond flour and sugar substitutes to maintain lower carb counts while enjoying the textures and flavors.

Troubleshooting Guide

If your cookies come out too flat, assess the butter temperature; it should be softened but not melted. If they are too dry, it may be due to overly packed flour—spoon flour lightly into the measuring cup for accuracy. If you’re dealing with burnt edges, lowering the oven temperature slightly can prevent further issues in future bakes. Monitor bake times closely and conduct the toothpick test to check doneness without risking overbaking.

Recipe Success Stories

Many bakers have shared their love for Maraschino Cherry Chocolate Chip Cookies, noting how easily they share the joy of baking with friends and family. Variations have flourished among the community, including experimenting with different types of chocolate and introducing nut toppings, inspiring creativity. Readers often highlight how these cookies have become a staple at gatherings, sparking conversations and creating lasting memories centered around delicious treats.

Frequently Asked Questions

Can I use fresh cherries instead of maraschino cherries?

While fresh cherries can be used, they will alter the texture and flavor, as they lack the sweetness and syrupy goodness of maraschino cherries. Consider adjusting the sugar content if opting for fresh ones.

How do I keep my cookies from spreading?

Chilling your cookie dough before baking helps prevent excessive spreading. Also, ensure you’re using the correct flour measurement and appropriate butter temperatures.

Can I freeze the cookie dough?

Absolutely! You can freeze the cookie dough for up to three months. Shape the dough into balls, freeze them on a baking sheet, then transfer to a ziplock bag for easy storage, baking as needed.

Why are my cookies dry?

Dry cookies can result from overbaking or measuring too much flour. Always level your flour and monitor the baking time closely, pulling cookies when just set.

What’s the best way to store cookies?

Store cookies in an airtight container at room temperature for up to a week. To maintain softness, place a slice of bread in the container with them.

Can I add nuts to this recipe?

Adding nuts can provide a delightful crunch and flavor contrast. Toasted pecans or chopped walnuts would complement the sweet cherries and chocolate well.

How can I make these cookies healthier?

Consider substituting some of the butter for applesauce, using whole wheat flour instead of all-purpose flour, and reducing the sugar slightly to introduce a healthier twist.

What if I don’t have baking soda?

You can replace baking soda with baking powder. Use three times as much baking powder, but keep in mind this may alter the cookie’s texture slightly.

How should I reheat leftover cookies?

To revive your cookies, pop them in the microwave for about 10-15 seconds. If you prefer, you can also warm them in the oven at a low temperature for a few minutes.

Can I make these cookies vegan?

Yes! Substitute the butter with coconut oil or a vegan butter alternative and use aquafaba or flaxseed meal as an egg substitute to maintain the right consistency.

Additional Resources

If you’re interested in exploring more cookie recipes, consider trying classic chocolate chip cookies, oatmeal raisin, or sugar cookies. Technique guides on creaming butter, measuring flour accurately, and cookie decorating can be highly beneficial. Look into ingredient information for substitutes that can modify flavors while preserving texture, and don’t forget equipment recommendations for kitchen essentials to help in your baking adventures.

Join the Conversation

We invite you to share your baking adventures on social media! Post your photographs, swap tips, and tell us about your experience making Maraschino Cherry Chocolate Chip Cookies. Engaging with our recipe community can offer inspiration, while reviews and suggestions from others enhance your baking journey. Have fun experimenting and enjoy your sweet treats together!

The Recipe

Maraschino Cherry Chocolate Chip Cookies

Serves: 24 cookies

Prep Time: 15 mins

Cook Time: 10 mins

Total Time: 25 mins

Kitchen Equipment Needed

  • Mixing bowl
  • Hand or stand mixer
  • Measuring cups and spoons
  • Baking sheet
  • Parchment paper

Ingredients

  • 1 cup (226g) unsalted butter, softened
  • 1 cup (200g) granulated sugar
  • 1 cup (220g) packed brown sugar
  • 2 large eggs
  • 1 tsp vanilla extract
  • 3 cups (360g) all-purpose flour
  • 1 tsp baking soda
  • 1/2 tsp salt
  • 1 cup (175g) semi-sweet chocolate chips
  • 1 cup maraschino cherries, chopped and drained

Directions

  1. Preheat the oven to 350°F (175°C) and line a baking sheet with parchment paper.
  2. In a mixing bowl, cream together the softened butter, granulated sugar, and brown sugar until light and fluffy.
  3. Add in the eggs one at a time, mixing well after each addition. Stir in vanilla extract.
  4. In a separate bowl, whisk together the flour, baking soda, and salt.
  5. Gradually add the dry ingredients to the wet mixture, mixing just until combined.
  6. Fold in the chocolate chips and chopped maraschino cherries.
  7. Drop tablespoonfuls of dough onto the prepared baking sheet, spacing them about 2 inches apart.
  8. Bake for 10-12 minutes until the edges are lightly golden but the centers are still soft.
  9. Remove from oven and let cool on the baking sheet for a few minutes before transferring to a wire rack to cool completely.

Recipe Notes

  • For extra flavor, consider adding a touch of almond extract along with the vanilla.
  • Ensure the maraschino cherries are well-drained to prevent excess liquid in the dough.
  • Cookies can be stored in an airtight container for up to a week or frozen for longer preservation.

Delicious Hawaiian Pineapple Carrot Cream Cake Recipe You’ll Love

Hawaiian Pineapple Carrot Cream Cake: A Tropical Delight

⚖️
Difficulty
Medium

⏲️
Prep Time
30 mins

🕒
Cook Time
40 mins

⏱️
Total Time
1 hr 10 mins

🍽️
Servings
12 slices

If you’re craving a sweet treat that bursts with tropical flavors, look no further than this Hawaiian Pineapple Carrot Cream Cake. This delightful cake beautifully combines the sweetness of fresh pineapple with the earthy notes of carrots, creating a harmonious balance that will transport your taste buds straight to the beaches of Hawaii. Topped with a luscious cream cheese frosting, this cake is not just a feast for your taste buds, but also a visual delight, making it the perfect centerpiece for any celebration or gathering.

With its moist and flavorful layers, this Hawaiian Pineapple Carrot Cream Cake is sure to leave everyone asking for seconds. The combination of crunch from the carrots and the juicy pineapple offers a wonderful texture contrast that adds to the overall appeal. Whether you’re celebrating a special occasion or simply want to enjoy a slice of paradise at home, this recipe is a must-try for cake lovers everywhere.

Quick Recipe Highlights

  • Flavor Profile: A sweet and tangy fusion featuring luscious pineapple and spicy carrot notes.
  • Texture: Delightfully moist layers with a soft crumb and creamy frosting topping.
  • Aroma: Inviting tropical aromas from pineapple mixed with warm carrot spice.
  • Visual Appeal: Beautifully layered with a vibrant orange hue, topped with creamy white frosting.
  • Skill Level Needed: Suitable for home bakers with moderate experience.
  • Special Equipment: You’ll need mixing bowls, a whisk, a cake pan, and an electric mixer.

Recipe Overview

  • Difficulty Level: This cake leans toward medium difficulty, as it involves layering and frosting, but is manageable for most bakers.
  • Category: A fantastic dessert perfect for afternoon tea or festive occasions.
  • Cuisine: This dish showcases Hawaiian influences, combining tropical ingredients with traditional cake techniques.
  • Cost: Ingredients are generally affordable, with a cost range of $15-$20 depending on local prices.
  • Season: Ideal for spring and summer when fresh pineapple is abundant and seasonal vibes call for tropical flavors.
  • Occasion: Perfect for birthday parties, potlucks, and holiday gatherings, bringing a slice of sunshine to any event.

Why You’ll Love This Recipe

This Hawaiian Pineapple Carrot Cream Cake is a cake lovers’ paradise, primarily due to its unique taste and appealing texture. The vibrant combination of flavors creates a moist cake that is both refreshing and satisfying. The natural sweetness of the pineapple balances wonderfully with the warm spices from the carrots, making each bite irresistible. Also, the cream cheese frosting adds a tangy contrast, enhancing the overall cake experience and making it a hit for dessert lovers of all ages.

Preparation is straightforward, which makes this recipe a wonderful choice for both novice and seasoned bakers. With a clear set of instructions and simple techniques required, it allows for a stress-free baking experience that yields impressive results. Once baked, the cake can be enjoyed right away or saved for later, ensuring flexibility in serving.

From a nutritional standpoint, this cake offers some benefits. Carrots provide essential vitamins and fiber, while pineapple adds a boost of vitamin C. Though it’s a treat, this cake can be seen as a slightly healthier indulgence compared to more overly sweet desserts. The fresh fruit elements present a great way to incorporate natural ingredients into your treat.

This recipe shines during social gatherings, effortlessly impressing guests with its tropical charm. Being a dessert full of flavor and visual allure makes it perfect for sharing. Any get-together can be enhanced by a slice of this cake, inviting delightful conversations and a sense of community around the dessert table.

Lastly, its cost-effectiveness and accessibility allow this cake to make frequent appearances in various settings. The ingredients are readily available at local stores, ensuring that whipping up a delicious sprinkle of Hawaiian flair in your kitchen is both economical and simple.

Historical Background and Cultural Significance

The Hawaiian Pineapple Carrot Cream Cake has origins rooted in the tropical regions of the world, particularly influenced by the agricultural abundance of Hawaii. The use of pineapple in desserts has strong ties to Hawaiian hospitality, reflecting the islanders’ love of fresh ingredients and their commitment to creating delightful experiences for guests.

Culturally, pineapple has always held significant value in Hawaiian society, symbolizing hospitality and friendship. This cake not only highlights local pride in pineapple production but also expands its reach by incorporating the familiar flavors of carrot cake, which have become a beloved favorite in American baking traditions. Together, they create a sweet narrative celebrating Hawaiian culture and culinary history.

Over the years, this recipe has evolved from traditional carrot cake recipes by introducing tropical twists that showcase local flavors. While many variations may exist, the foundational elements remain the same: a moist cake layered generously with cream cheese frosting, bringing smiles to faces around the world.

Variations of this cake can often be found in regional community cookbooks in Hawaii, showcasing the unique presentations and adaptations made by local families. Whether it’s adding macadamia nuts or variations in spices, each version tells a story of creativity and community love.

Ingredient Deep Dive

The pineapple used in this recipe carries a rich history, believed to have originated from South America before making its way to Hawaii in the 19th century. Nutritionally, pineapple is an excellent source of vitamin C and manganese, making it a healthy addition to desserts. Whether using fresh or canned pineapple, choosing ripe, sweet fruits enhances the final flavor. For best results, store fresh pineapple in the refrigerator and use within a few days while canned pineapple should be kept in a cool, dry place until opened.

Carrots are a quintessential ingredient in many desserts and have been cultivated for thousands of years. Sweet, crunchy, and vibrant in color, they bring both taste and nutrition into the mix. Carrots are packed with beta-carotene, fiber, and antioxidants, which contribute to various health benefits. When selecting, go for firm, unblemished carrots and store them in a cool place to maintain their freshness. If you find yourself short on carrots, consider using zucchini or pumpkin as a substitute for a delightful twist.

Cream cheese, a key element in the frosting, is creamy and rich, providing a tangy flavor that complements the sweetness of the cake. Cream cheese originated in the U.S. in the 19th century and has since become a staple in American baking. It’s important to use softened cream cheese for smooth mixing, and storing it in the refrigerator will keep it fresh for several weeks. For a dairy-free alternative, consider using a plant-based cream cheese to keep the flavor while adjusting to dietary needs.

Common Mistakes to Avoid

  • Overmixing the batter: This can lead to tough, dense cake layers instead of the desired light, moist texture. Mix just until ingredients are combined.
  • Not measuring ingredients accurately: Baking is precise, and incorrect measurements can throw off your recipe. Use a kitchen scale or measuring cups to ensure accuracy.
  • Using cold ingredients: Always bring your eggs and cream cheese to room temperature before combining to achieve a smooth batter and frosting.
  • Baking at incorrect temperatures: Double-check your oven temperature to prevent uneven baking. An oven thermometer can help ensure accuracy.
  • Skipping the cooling process: Allow your cake to cool completely before frosting. A warm cake can cause the frosting to melt or slide off.
  • Neglecting to line the cake pan: Greasing and lining the pan helps prevent the cake from sticking and allows for easy removal.
  • Frosting too soon: Wait until the cake has cooled down; this avoids melting the frosting and creating a messy presentation.
  • Over-baking: Keep an eye on your cake and do a toothpick test. Over-baked cake turns dry and crumbly, lacking the desired moisture.
  • Not tasting as you go: Always taste your batter before baking to check for sweetness and balance in flavor.
  • Forgetting to adjust for high altitudes: If baking at high altitudes, consider reducing sugar and increasing flour to maintain cake structure.

Essential Techniques

One essential technique for this recipe is cream mixing. Achieving the right amount of incorporation of air into the batter is crucial as it affects cake loftiness. Use a handheld or stand mixer at medium speed, and beat until the mixture becomes fluffy and light. A common pitfall is mixing too long, which can lead to a dense cake. Look for a lightened batter as a visual cue for success.

Another key technique is the frosting application. A well-crafted frosting can elevate your cake both visually and in taste. Start with a crumb coat—a thin layer of frosting to seal in crumbs—before applying the final coat. This not only provides a clean finish but also prevents loose crumbs from being visible. Watch for even distribution of frosting as a visual indicator of a perfectly frosted cake.

Pro Tips for Perfect Hawaiian Pineapple Carrot Cream Cake

1. For added moisture, consider soaking the dried pineapple in rum or pineapple juice before incorporating it into the batter.
2. Enhance the flavor by adding a pinch of cinnamon or nutmeg to the batter for a traditional spice cake profile.
3. Use a food processor to finely shred the carrots for a smoother texture in the cake.
4. Let the cream cheese frosting sit at room temperature for 10 minutes before frosting the cake to make spreading easier.
5. Decorate with toasted coconut or chopped nuts on top of the frosting for added texture and taste.
6. If you find the cake layers rise unevenly, trim the tops with a serrated knife before frosting for a flat finish.
7. Consider chilling the cake for about an hour after frosting to set the cream cheese frosting properly, making it easier to slice.
8. Use fresh, ripe pineapple for the best flavor and a delightful tropical aroma.

Variations and Adaptations

For a regional twist, try incorporating macadamia nuts or coconut flakes into the batter for a local Hawaiian flavor. Additionally, swapping out the pineapple for other tropical fruits such as mangoes or bananas can give your cake a different yet delicious profile.

Seasonal adaptations also exist, such as adding seasonal spices—like pumpkin spice in the fall—as well as variations in frosting by replacing cream cheese with whipped cream for a lighter dessert option during summer months.

If dietary modifications are desired, opt for gluten-free flour blends or substitute honey for sugar for a healthier touch. Vegan options can be created by replacing eggs with flaxseed or chia seeds and using a dairy-free cream cheese substitute.

Texture modifications can be made by adding crushed pineapple but draining it well to prevent the cake from becoming too wet, lending it a unique texture without sacrificing flavor.

Finally, for a more elegant presentation, consider layering with fruit compote or serving with a side of tropical fruit on the plate for a beautiful dining experience.

Serving and Presentation Guide

When serving your Hawaiian Pineapple Carrot Cream Cake, opt for simple plating that allows the cake’s colorful layers to shine. A clean white plate can enhance the vibrant colors of the cake, while a light dusting of powdered sugar adds a touch of elegance.

Garnishing ideas include fresh shredded coconut, a slice of pineapple, or mint leaves that can elevate the visual appeal while enhancing the tropical theme. Traditional accompaniments such as a scoop of vanilla ice cream or a dollop of whipped cream can provide a delightful contrast to the cake’s richness.

Consider temperature when serving; letting the cake sit at room temperature for about 20 minutes before serving allows flavors to bloom, while also ensuring a pleasant texture for the cream cheese frosting.

Lastly, keep portion control in mind. A slice of cake around 1-2 inches wide is a good serving size, allowing guests to enjoy it without feeling overwhelmed.

Wine and Beverage Pairing

Pairing this Hawaiian Pineapple Carrot Cream Cake with the right beverages can enhance the overall experience. For a wine pairing, consider a sweet Riesling or a light Merlot—both complement the tropical and sweet flavors of the cake.

For those preferring non-alcoholic alternatives, a refreshing pineapple or passion fruit punch can work beautifully, bringing out the fruity notes in the cake.

If coffee or tea is more your style, a light herbal tea or a smooth cup of cold brew coffee can balance the sweetness and complement the cake flavors well.

Always serve beverages chilled to balance the richness of the cream cheese frosting while enhancing the overall tropical experience of the dessert.

Storage and Shelf Life

To store your Hawaiian Pineapple Carrot Cream Cake, place it in an airtight container at room temperature for up to two days. If storing longer, keep it refrigerated to maintain freshness, which allows it to last up to one week.

Using a cake carrier also preserves the cake’s moisture and protects it from external elements. If you notice any bubbling or moisture on the frosting, it may indicate spoilage; always check for visual signs of mold or change in smell.

When reheating, cover slices loosely with a damp paper towel and microwave for short intervals to retain moisture without drying it out. Freezing the cake is also possible; wrap it tightly in plastic wrap, followed by aluminum foil, and it can last up to three months in the freezer.

For best results, thaw the cake in the refrigerator overnight before serving for optimum flavor.

Make Ahead Strategies

When preparing for an event, making the Hawaiian Pineapple Carrot Cream Cake ahead of time is certainly achievable. You can bake the layers a day before and store them wrapped in plastic wrap to maintain moisture.

If you’d like to make the frosting ahead of time, store it in the refrigerator in an airtight container, and let it soften before spreading it on the cake when ready to serve.

To streamline final assembly, chill the layers for easy handling and to keep the cake from crumbling during construction. Assemble and frost the cake the day of serving for the freshest taste and visual appeal.

Finally, consider adding fresh fruits or garnishing on the day of serving to maintain their color and texture, ensuring your cake looks vibrant and inviting on the dessert table.

Scaling Instructions

Scaling your Hawaiian Pineapple Carrot Cream Cake recipe is simple and rewarding. To halve the recipe, reduce all ingredient quantities by 50%, using a smaller pan, like an 8-inch round pan, to achieve the same impressive appearance.

For a larger gathering, doubling or tripling the recipe can be accommodated. Make sure to adjust the baking time, as larger batches may need additional time to cook through fully, testing with a toothpick for doneness.

Consider equipment adjustments, such as using multiple pans or a larger mixer, to handle the increased volume without compromising the mixing process.

Additionally, plan for proper storage considerations, especially if baking large quantities. Store extra layers or frosted cakes as mentioned prior for convenience and freshness.

Nutritional Deep Dive

The Hawaiian Pineapple Carrot Cream Cake provides a rich macro breakdown. Each slice generally contains carbohydrates derived from flour and sugar, while the cream cheese adds richness through fats. Keep an eye on portion sizes to enjoy its deliciousness while managing caloric intake.

Micronutrient analysis reveals vitamins from fresh ingredients, particularly the carrots which add beta-carotene, equating to its vibrant orange color and health benefits. The pineapple further enhances the cake’s profile with vitamin C, crucial for immune health.

Dietary considerations can be made for those looking to include healthier options; swapping out sugars for natural sweeteners like honey can enhance flavors while reducing refined sugar content. This cake caters to various dietary needs, allowing for adaptable recipes.

Finally, portion analysis is vital. A typical serving size of 1 slice of cake should contain approximately 250-300 calories, making it a treat best enjoyed in moderation for weight management strategies.

Dietary Adaptations

This recipe can be easily adapted for various dietary preferences. For gluten-free options, consider using almond flour or a commercially available gluten-free blend to replace traditional flour.

To create a dairy-free version, swap out cream cheese with plant-based alternatives and use coconut milk for moisture instead of buttermilk.

Vegan adaptations can be achieved by utilizing flax eggs or chia eggs and employing oil instead of butter for a deliciously moist texture without animal products.

Low-carb enthusiasts can substitute the sugar with erythritol or stevia to create a cake that fits low-carb diets without sacrificing flavor.

Other specific diets, such as Paleo, can also enjoy a modified version by using healthy oils like coconut oil, eliminating refined sugar, and adding nuts for flavor and texture.

Troubleshooting Guide

If your Hawaiian Pineapple Carrot Cream Cake’s texture is denser than expected, it likely means the batter was overmixed or the ingredients were overmeasured, leading to excess flour. Always combine gently to maintain airiness.

For flavor balance issues, if the cake is too sweet, consider reducing the sugar next time or adding a pinch of salt to counteract sweetness. Adjustments highlight flavor elements alongside sweetness for a perfect bite.

If your cake has risen unevenly, it could be due to inaccurate oven temperatures. Always check that your oven is correctly calibrated to prevent over- or under-baking, while also ensuring even heat distribution during baking.

Equipment challenges might also arise. For instance, if your cake sticks to the pan, ensure proper greasing and maybe consider parchment lining for easy release.

Finally, timing concerns, such as a cake that collapses after baking, often results from removing it from the oven too soon or not allowing it to cool properly.

Recipe Success Stories

Community feedback often highlights this Hawaiian Pineapple Carrot Cream Cake for its tropical flair and moist texture, making it an instant fan favorite. Readers have shared variations, such as adding ginger for extra warmth, showcasing the adaptability of the recipe.

Variation successes have emerged, with others excitedly sharing their success in using different fruits or nuts, allowing the recipe to cater to a broader audience while staying true to its Hawaiian roots.

Adaptation stories have illuminated the ways in which readers use this recipe in their local neighborhoods, creating new family traditions that honor both the cake and their unique cultural practices.

Additionally, tips shared by readers often include capturing the cake on camera before guests arrive, ensuring visual documentation of a beloved dessert that captivates both taste buds and eyes alike.

Frequently Asked Questions

Can I use canned pineapple for this recipe?

Yes, you can use canned pineapple. Just make sure to drain it well to avoid excess moisture in your batter, which could affect the cake’s texture.

How do I store leftovers?

Store leftovers in an airtight container in the refrigerator for up to a week. Make sure to let the cake sit at room temperature for about 20 minutes before serving for best flavor.

Can I freeze the cake?

Yes, you can freeze this cake! Wrap it tightly in plastic wrap and then in foil. It will stay fresh for about three months in the freezer.

What can I use instead of cream cheese for frosting?

You can substitute cream cheese with mascarpone or a plant-based cream cheese product if you need a dairy-free option.

Is there a way to make this cake gluten-free?

Absolutely! Replace all-purpose flour with a gluten-free flour blend or almond flour for a delicious gluten-free version.

How long does it take to bake the cake?

This cake typically takes about 40 minutes to bake. Check for doneness with a toothpick inserted in the center; it should come out clean.

Can I add nuts to the batter?

Yes, feel free to add chopped walnuts or macadamia nuts for an extra layer of flavor and texture.

What’s the best way to frost a layered cake?

Start with a crumb coat to seal the crumbs, then refrigerate for about 15 minutes before applying the final layer of frosting for a beautiful finish.

Can the recipe be halved or doubled?

Yes, you can easily halve or double the recipe. Just remember to adjust your baking times accordingly, especially if you’re using different-sized pans.

What should I do if the cake sinks in the middle?

If your cake sinks, it may be due to underbaking or not cooling it properly in the oven. Ensure even baking and allow the cake to cool gradually.

Additional Resources

For those inspired by this Hawaiian Pineapple Carrot Cream Cake, you might also enjoy trying your hand at other fruity cake recipes, such as coconut layer cake or a tropical fruit tart. Explore technique guides that delve into frosting techniques or cake decorating to elevate your baking game.

Ingredient information, especially regarding seasonal produce, can enhance your baking experience and provide new ideas for delicious desserts. Explore recommendations for essential kitchen equipment, from mixers to high-quality baking pans, ensuring you have the right tools for success.

Join the Conversation

We’d love to hear from you! Share your own experiences with this recipe or suggestions for variations you’ve tried in the comments below. Don’t forget to share your photos on social media with our hashtag for a chance to be featured in our next recipe round-up.

Your reviews help other bakers find success, so let’s keep the conversation going about this delightful Hawaiian Pineapple Carrot Cream Cake and other delicious recipes you love to create!

The Recipe

Hawaiian Pineapple Carrot Cream Cake

Serves: 12 slices

Prep Time: 30 mins

Cook Time: 40 mins

Total Time: 1 hr 10 mins

Kitchen Equipment Needed

  • Mixing bowls
  • Handheld or stand mixer
  • 9-inch round cake pans
  • Measuring cups and spoons
  • Whisk
  • Rubber spatula
  • Cooling rack
  • Plastic wrap

Ingredients

  • 2 cups all-purpose flour
  • 1 ½ cups granulated sugar
  • 1 cup vegetable oil
  • 4 large eggs
  • 2 cups finely grated carrots
  • 1 cup crushed pineapple, drained
  • 1 tsp baking powder
  • 1 tsp baking soda
  • 1 tsp ground cinnamon
  • ½ tsp salt
  • 8 oz cream cheese, softened
  • 2 cups powdered sugar
  • 1 tsp vanilla extract

Directions

  1. Preheat your oven to 350°F (175°C) and grease and line three 9-inch round cake pans with parchment paper.
  2. In a large mixing bowl, combine flour, sugar, baking powder, baking soda, cinnamon, and salt, stirring well.
  3. In another bowl, whisk together the eggs, oil, and vanilla extract until combined.
  4. Gradually add the wet mixture to the dry ingredients, stirring just until combined.
  5. Fold in the grated carrots and crushed pineapple gently until well incorporated.
  6. Divide the batter evenly among the three prepared pans and smooth the tops.
  7. Bake for 30-35 minutes or until a toothpick comes out clean when inserted in the center.
  8. Remove the cakes from the oven and let cool in pans for 10 minutes before transferring to a wire rack to cool completely.
  9. Meanwhile, prepare the cream cheese frosting by beating the softened cream cheese and powdered sugar until smooth and creamy.
  10. Once the cakes are completely cool, frost the top of one layer, add the second layer, and frost that as well. Repeat this for the final layer, frosting the entire outside of the cake.
  11. Chill the cake for about an hour to set the frosting before serving. Enjoy!

Recipe Notes

  • For a lighter frosting, consider using whipped cream instead of cream cheese.
  • You can customize by adding nuts or raisins to the batter for more texture and flavor.
  • Store leftovers in an airtight container for optimal freshness.

Indulge in This Gooey Chocolate Pecan Dream Cake Recipe

Gooey Chocolate Pecan Dream Cake Recipe: A Chocolate Lover’s Paradise

⚖️
Difficulty
Intermediate

⏲️
Prep Time
20 mins

🕒
Cook Time
40 mins

⏱️
Total Time
60 mins

🍽️
Servings
12 servings

Indulge your senses with this Gooey Chocolate Pecan Dream Cake Recipe, where rich chocolate combines with buttery pecans creating a symphony of flavors that will leave every chocolate lover breathless. This cake is not just a dessert; it’s an experience to savor. The melt-in-your-mouth chocolate ganache contrasts beautifully with the crunchy pecans, elevating this cake beyond the ordinary into the realm of the extraordinary. Perfect for special occasions or simply to treat yourself, this cake is guaranteed to impress your friends and family.

The texture of this Gooey Chocolate Pecan Dream Cake is what dreams are made of; it boasts a dense yet moist crumb that offers a rich chocolatey foundation. As you take your first bite, the fudgy layer gives way to the delightful crunch of toasted pecans, creating a balance that’s satisfying and indulgent. The sweet, nutty aroma that wafts through your kitchen while this cake is baking sets the stage for a mouthwatering dessert experience.

Quick Recipe Highlights

  • Flavor Profile: Rich chocolate with a hint of nuttiness from pecans creates a deep, satisfying taste.
  • Texture: Fudgy interior with a delightful crunch from the pecans offers a perfect bite.
  • Aroma: The combination of baking chocolate and toasted nuts fills your kitchen with warmth.
  • Visual Appeal: A glossy chocolate ganache drapes the cake, garnished with pecan halves for presentation.
  • Skill Level Needed: Intermediate level, with essential baking skills required for a perfect outcome.
  • Special Equipment: A springform pan helps achieve the desired texture and presentation.

Recipe Overview

  • Difficulty Level: This Gooey Chocolate Pecan Dream Cake requires intermediate baking skills, including mixing techniques and oven management to achieve the gooey center.
  • Category: This dessert fits perfectly into any gathering or special occasion, making it an excellent choice for potlucks or birthdays.
  • Cuisine: While primarily a Western dessert, it draws inspiration from classic Southern pecan pie, blending two beloved treats into one decadent dessert.
  • Cost: The main ingredients—chocolate, pecans, and pantry staples—come together to create a reasonably priced yet elegant dessert.
  • Season: Perfect for the cooler months when rich flavors come to life, though timeless enough to enjoy any time of year.
  • Occasion: Ideal for birthdays, holidays, or any celebration where you want to delight your guests with something unforgettable.

Why You’ll Love This Recipe

This Gooey Chocolate Pecan Dream Cake is a perfect blend of chocolate and nuts that creates a harmonious flavor experience that will leave your taste buds yearning for more. The intense chocolate pairs seamlessly with the buttery, toasted pecans, making it a crowd-pleasing dessert for gatherings. No matter what the occasion, this cake will be the star of the dessert table.

Convenience is another aspect of this recipe. With just a handful of ingredients and straightforward steps, you can whip up this dessert without spending hours in the kitchen. The aroma of baking chocolate combined with the toasty scent of pecans fills your home with warmth, allowing you to enjoy the process of baking as much as the final product.

Nutritionally, while indulgent, this cake does offer some benefits due to the presence of pecans. These nuts are rich in healthy fats and contain antioxidants, which helps to balance out the sweetness of the cake. Moreover, serving this cake can help promote social interactions as people gather around to enjoy a slice together.

Hosting a party or event? This cake is an excellent choice for entertaining. It not only tastes great but also looks beautiful, making it a visually stunning centerpiece on your dessert table. Your guests will talk about this cake long after they’ve left.

Finally, it’s worth mentioning that this Gooey Chocolate Pecan Dream Cake is cost-effective. Given that the ingredients are easily accessible and the serving yield is generous, it provides excellent value for the satisfaction it delivers, making it a smart choice for anyone looking to impress without breaking the bank.

Historical Background and Cultural Significance

The origins of chocolate cake can be traced back to the 18th century when chocolate was first introduced into European desserts. However, the fusion of chocolate with pecans reflects the Southern culinary tradition of using local ingredients. Pecan trees flourish in the Southern United States, making them a staple in desserts like pies and cakes.

Culturally, pecans are not just a ingredient; they embody the hospitality of Southern cuisine. They’re often used in gatherings and celebrations, reinforcing the idea that food brings people together. Pecan pie has been a hallmark dish of American Thanksgiving dinners, and this cake draws on that tradition, blending two beloved desserts into a single, impactful experience.

Over the years, this cake has evolved to cater to contemporary tastes, with various adaptations emerging, such as gluten-free versions and different chocolate bases. This evolution not only demonstrates the versatility of the recipe but also its enduring popularity among dessert enthusiasts.

Regional variations exist, with some using different types of nuts or adding unique spices, but the essence of the cake—being a rich, chocolatey delight—remains constant. This reflects a lovely adaptability that ensures everyone can enjoy a slice of this decadent dream.

Ingredient Deep Dive

– **Chocolate**: Chocolate brings its deep flavor and rich history, dating back to ancient Mesoamerican cultures where cacao was revered. Nutritionally, it is packed with antioxidants. When selecting chocolate for baking, opt for high-quality dark chocolate for richer flavor, and store it in a cool, dark place.

– **Pecans**: Pecan trees are native to North America and have significant cultural importance in Southern cuisine. They’re rich in monounsaturated fats and beneficial nutrients. When buying pecans, look for fresh, plump nuts, and store them in the refrigerator to maintain their crispness. If unavailable, walnuts can serve as a substitute.

Common Mistakes to Avoid

  • Not measuring ingredients accurately can lead to a dense or overly dry cake. Use the correct measuring tools for both wet and dry ingredients.
  • Overmixing the batter can introduce too much air, leading to a less fudgy texture; mix just until combined.
  • Skipping the cooling time before serving can result in a messy slice; let the cake cool adequately to set.
  • Using low-quality chocolate can significantly affect flavor; always choose quality chocolate for baking.
  • Not greasing the pan well enough can cause the cake to stick; ensure to use butter or parchment paper for easy removal.
  • Substituting ingredients without understanding their role can lead to unexpected results; stick to the recipe for best outcomes.
  • Opening the oven door too often can affect baking time; only open when necessary to check on your cake.
  • Serving the cake too warm can mask the flavors; wait until it has cooled before slicing and serving.

Essential Techniques

To achieve a perfect Gooey Chocolate Pecan Dream Cake, it’s essential to master the art of melting chocolate. This technique not only unlocks flavor but also ensures a smooth texture. Use a double boiler or microwave, stirring frequently, and take care to prevent any water from touching the chocolate, which will seize it up.

Proper mixing techniques are crucial for a consistent batter. Begin by creaming your sugar and butter until light and fluffy. This step helps incorporate air, resulting in a light cake. Add eggs one at a time, and be careful not to overmix once you add the dry ingredients. Look for visual cues such as a smooth, thick batter before pouring it into the pan.

Pro Tips for Perfect Gooey Chocolate Pecan Dream Cake

1. For added flavor, toast the pecans before adding them to the batter. This will enhance their nuttiness and bring out their natural oils.
2. Consider adding a splash of vanilla extract to the batter to elevate the cake’s flavor profile.
3. Use a kitchen thermometer to ensure you don’t overbake your cake; it should be gooey in the center, around 200°F.
4. If using store-bought chocolate, opt for semi-sweet for a balanced taste that adults and children will enjoy.
5. Experiment with adding a layer of caramel sauce between the cake and the ganache for an extra layer of richness.
6. Let the cake set in the fridge for a few hours after baking for easy slicing and a more defined texture.
7. Pair with fresh berries to contrast the rich chocolate flavor when serving.
8. Use a serrated knife to slice the cake; this will give you clean edges.

Variations and Adaptations

This Gooey Chocolate Pecan Dream Cake is versatile and can be adapted for various tastes and dietary needs. For a regional twist, try substituting pecans with hazelnuts or macadamia nuts, both of which render a unique flavor profile that’s equally decadent.

Seasonally, adjust your recipe by incorporating pumpkin puree for a fall-inspired version, bringing a warm spice to the cake alongside the chocolate. You can also enhance the texture by folding in some chocolate chips or differing nut varieties directly into the batter for added crunch.

Dietary modifications are easy; replace regular flour with almond flour for a gluten-free version or dairy-free chocolate for lactose-intolerant guests. For a healthier twist, use applesauce in place of some of the butter in your recipe.

Experiment with flavor variations such as adding orange zest for a citrusy zing or a splash of espresso for a mocha-flavored cake. Each addition accommodates different taste preferences while maintaining the essence of the original recipe.

Serving and Presentation Guide

The presentation of your Gooey Chocolate Pecan Dream Cake can elevate the entire dessert experience. For plating, consider using a cake stand that showcases the glossy ganache atop the cake. Garnish with a dusting of cocoa powder or powdered sugar for an elegant touch, and scatter some toasted pecans around the base for visual allure.

Drizzling chocolate sauce or caramel over each slice just before serving complements the presentation while enhancing taste. If desired, top with whipped cream or a scoop of vanilla ice cream alongside each slice for a delightful contrast in temperature and texture.

Serve at room temperature for the best taste; this allows the fudgy center to shine through. In terms of portion control, aim for slices that are sizable yet manageable, encouraging everyone to savor the flavor without overwhelming their palate.

Presenting the cake with seasonal fruits such as fresh raspberries or strawberries will not only enhance the visual appeal but also add a tart balance to the rich chocolate and pecan flavors in each bite.

Wine and Beverage Pairing

When selecting the perfect beverage to accompany your Gooey Chocolate Pecan Dream Cake, opt for a rich red wine like Cabernet Sauvignon or a sweet dessert wine such as Port. These wines bring out the deep chocolate flavors beautifully.

Non-alcoholic alternatives like rich hot chocolate or a creamy chai latte can enhance the cozy vibe when serving this cake. Consider pairing with a dark roast coffee, which balances the sweetness and complements the nuttiness of the pecans superbly.

Ensure that beverages are served at appropriate temperatures; wines chilled slightly and coffees served hot add an inviting touch to the overall experience. Creating a small beverage station alongside your dessert table can further enhance guest engagement and enjoyment.

Storage and Shelf Life

To preserve your Gooey Chocolate Pecan Dream Cake, store it in an airtight container at room temperature for up to three days. If you need to keep it longer, it can be refrigerated for up to a week.

For best results, wrap slices in plastic wrap to prevent drying, or consider freezing the cake. When freezing, ensure it is completely cool, slice it if preferred, and store in a freezer-safe container. The cake can be frozen for up to three months; simply thaw in the refrigerator when ready to serve.

Be mindful of signs of spoilage, including any off smells or changes in texture, particularly when left at room temperature for an extended time. Reheat individual slices in the microwave for about 15 seconds to bring back some of that gooey goodness before serving.

Make Ahead Strategies

If planning a gathering, consider making your Gooey Chocolate Pecan Dream Cake a day in advance. This will enhance the flavors while allowing you to relax on the day of the event. Make the cake and store it properly as described above; it can even taste better after resting as the flavors meld over time.

To streamline your baking process, you can prepare the ganache a day ahead and store it in the refrigerator. You’ll need to warm it slightly before using. If making the cake ahead, store it un-frosted until the day of serving to maintain texture and prevent drying.

When assembling, wait to garnish until just before serving to ensure freshness and aesthetic appeal. Adding fresh elements like whipped cream or edible flowers will significantly enhance the time you spend preparing for your event.

Scaling Instructions

If you plan on serving a larger crowd, doubling or tripling this Gooey Chocolate Pecan Dream Cake recipe is simple. Just ensure to adjust your baking time accordingly, as larger cakes may require extra time to set. Use larger baking pans and ensure the batter remains well-mixed for an even consistency.

When halving the recipe, use smaller pans to achieve similar results, and reduce baking time accordingly. Keep an eye on the cake as it bakes to avoid overcooking.

For best results, utilize a kitchen scale to ensure accurate ingredient measurements, particularly when scaling recipes up or down. Adjust any baking sheets or pans you use according to your adjustments to maintain effective cooking times.

Nutritional Deep Dive

In a single slice of Gooey Chocolate Pecan Dream Cake, you receive a balanced mix that can provide energy through carbohydrates while being rich in healthy fats from pecans. This cake typically contains several grams of protein per serving, depending on the specific ingredients used, making it a more filling dessert option.

A closer examination of micronutrients reveals valuable minerals such as magnesium, potassium, and iron predominantly from the chocolate and nuts. Each ingredient contributes to a better overall health profile, promoting heart health and digestion when enjoyed in moderation.

Weight management can be effectively managed by being conscious of portion sizes, as decadent desserts can easily lead to calorie overload. By serving smaller slices alongside fresh fruit or lighter accompaniments, you can maintain a balance between indulgence and dietary restraint.

Ultimately, while this treat should be savored, understanding its nutritional aspects can contribute to a more mindful dessert experience.

Dietary Adaptations

For those following a gluten-free diet, substituting all-purpose flour with almond flour or gluten-free flour blends will allow you to enjoy this cake without any issue. Ensure all other ingredients, like chocolate, are certified gluten-free.

Dairy-free variations can be easily achieved by using plant-based butter and dairy-free chocolate. This adaptation allows those with lactose intolerance or vegan preferences to indulge in this incredible dessert without compromising flavor.

For a low-carb or keto variation, consider using almond flour or coconut flour and a low-carb sweetener like erythritol or stevia, producing a cake that’s satisfying without the added sugars.

Paleo enthusiasts can enjoy this chocolate cake by swapping traditional chocolate with unsweetened cocoa and using honey or maple syrup for sweetness while still delivering on that rich chocolate essence everyone loves.

This cake can also accommodate vegan diets by substituting eggs with flaxseed meal or applesauce, maintaining a moist and gooey texture while remaining entirely plant-based.

Troubleshooting Guide

If you find that your cake is too dry, it may have been baked too long. Use a toothpick to check for doneness; it should come out slightly sticky, indicating that gooeyness you want.

For overly gooey centers that don’t set, try lowering your oven temperature and extending the cooking time. This adjustment allows the cake to cook through without burning the edges.

If the flavor isn’t as rich as expected, consider increasing the quality of chocolate used or adding an extra pinch of salt to balance the sweetness.

Common equipment challenges such as the springform pan leaking can be avoided by wrapping the base in aluminum foil or placing it on a baking sheet to catch drips.

Ingredient substitutions can alter the desired outcome; ensure substitutes have similar characteristics in flavor and consistency to maintain the integrity of the recipe.

Timing concerns are significant; always set a timer to avoid checking prematurely or leaving for too long, which can affect the final texture.

Recipe Success Stories

Community feedback on this recipe often highlights the delightful balance of flavors and the perfect gooeyness that leaves them craving more. Many readers have shared their adaptations, creating variations that suit different dietary restrictions while maintaining the essence of the cake.

Variations shared by the community include adding bananas or peanut butter for a fun twist; these adaptations illustrate the versatility of this recipe while fostering creativity in the kitchen.

Photography tips also frequently circulate, encouraging home bakers to capture the melty ganache and beautifully arranged slices, enticing others to try their hand at recreating this cake.

Readers also rave about the presentation, encouraging new bakers to include whipped cream and fruit garnishes that add color and contrast, enhancing the dining experience for their guests.

Overall, the stories of how this cake has brought families and friends together during celebrations further emphasize its irresistible charm and community significance.

Frequently Asked Questions

Can I make this cake gluten-free?

Absolutely! Use gluten-free all-purpose flour as a substitute for regular flour to ensure a delicious outcome without the gluten.

How do I store leftovers?

Store any leftover cake in an airtight container at room temperature for up to three days or refrigerate for a week.

Can I freeze this cake?

Yes, you can freeze the cake. Wrap it tightly in plastic wrap and foil and store in the freezer for up to three months. Thaw in the refrigerator before serving.

What can I use instead of pecans?

You may substitute pecans with walnuts or almonds if you prefer, though the flavor profile will change slightly.

How can I enhance the chocolate flavor?

Add a teaspoon of instant coffee granules to the batter, as it intensifies the chocolate flavor beautifully.

Is there a vegan version of this recipe?

Yes, you can easily create a vegan version by using plant-based butter, dairy-free chocolate, and flaxseed meal or applesauce as an egg substitute.

Can I add frosting on top?

While a ganache is already used, you can also top it with whipped cream or additional chocolate frosting if you’d like an extra indulgent layer.

How do I know when the cake is done?

Perform the toothpick test; insert a toothpick in the center and it should come out slightly sticky to indicate a gooey center, but not wet.

What temperature should I bake the cake at?

The recommended baking temperature is 350°F (175°C) for optimal results.

How long can it sit out after baking?

Once baked, the cake can sit out at room temperature for a few hours before needing to be stored; however, always consider refrigerating leftovers after serving.

Additional Resources

If you enjoyed this Gooey Chocolate Pecan Dream Cake recipe, consider exploring related recipes like classic chocolate cake or pecan pie. Additionally, dive into our technique guides for tips on mastering the perfect ganache or achieving fluffy cupcakes.

Understanding ingredient information can also enhance your baking adventures; familiarize yourself with various types of chocolate or how to select quality nuts.

For seasonal variations, check out our autumn-inspired desserts that incorporate flavors like pumpkin or apple to diversify your baking repertoire throughout the year.

Lastly, discover equipment recommendations that can elevate your kitchen game, ensuring you have everything you need for the best baking experiences.

Join the Conversation

We would love to hear from you! Share your experiences with this Gooey Chocolate Pecan Dream Cake on our social media channels. Post your pictures and tell us about your personal adaptations in the comments.

Photography tips can help elevate your dessert game, and we encourage you to show off the finished product in all its delectable glory.

Your feedback is invaluable in creating a vibrant community of baking enthusiasts, so don’t hesitate to leave recipe reviews and suggestions. Your insight may help another baker discover their new favorite dessert.

Don’t forget to try your hand at variation ideas you dream up, and share those with us as well. Together, we can create a culinary space full of inspiration and creativity!

The Recipe

Gooey Chocolate Pecan Dream Cake

Serves: 12 servings

Prep Time: 20 mins

Cook Time: 40 mins

Total Time: 60 mins

Kitchen Equipment Needed

  • Springform pan
  • Mixing bowls
  • Electric mixer
  • Rubber spatula
  • Double boiler or microwave-safe bowl
  • Cooling rack

Ingredients

  • 1 cup unsalted butter
  • 1 ½ cup granulated sugar
  • 4 large eggs
  • 1 cup all-purpose flour
  • ½ cup unsweetened cocoa powder
  • 1 cup chopped pecans
  • 8 oz semi-sweet chocolate, melted
  • 1 tsp vanilla extract
  • ½ tsp salt

Directions

  1. Preheat the oven to 350°F (175°C) and grease your springform pan.
  2. In a mixing bowl, cream the butter and sugar until light and fluffy.
  3. Add eggs one at a time, mixing well after each addition.
  4. Sift together flour, cocoa, and salt. Add this mixture gradually to the wet ingredients.
  5. Fold in melted chocolate and vanilla extract, stirring until combined.
  6. Gently fold in chopped pecans, ensuring they are evenly distributed.
  7. Pour the batter into the prepared springform pan and smooth the top.
  8. Bake for 40-45 minutes, or until the center is set but still gooey.
  9. Let the cake cool in the pan for 10 minutes, then remove the sides and cool completely on a rack.
  10. Prepare a ganache with 6 oz chocolate and ½ cup cream; top the cooled cake with it.

Recipe Notes

  • Feel free to substitute pecans with other nuts to suit your taste.
  • Store leftovers in an airtight container for up to 3 days.
  • Consider adding a drizzle of caramel sauce on top for extra sweetness.

Delicious Strawberry Cheesecake Dump Cake: Easy Recipe Inside

Delicious Strawberry Cheesecake Dump Cake: A Sweet Delight

⚖️
Difficulty
Easy

⏲️
Prep Time
15 mins

🕒
Cook Time
45 mins

⏱️
Total Time
60 mins

🍽️
Servings
8 servings

This Strawberry Cheesecake Dump Cake is the perfect blend of fresh strawberries and creamy cheesecake, topped with a buttery cake layer. It’s an effortless dessert that comes together quickly and relies on the delicious flavor of ripe strawberries to shine. Imagine digging into a warm slice of this creation, where each bite reveals a soft, sweet base complemented by the velvety texture of cheesecake filling. Whether you’re celebrating a special occasion or just satisfying a sweet tooth, this dessert will leave everyone asking for seconds.

Not only is this dessert delicious, but it’s also incredibly easy to make—no baking expertise is required. Just layer the ingredients, and let your oven do the magic. The delightful aroma of strawberries mingling with the warm cake fills your kitchen, setting the perfect ambiance for family time. This comforting dessert not only presents beautifully on the table but also brings warmth to the heart as you share it with loved ones.

Quick Recipe Highlights

  • Flavor Profile: The combination of tangy cream cheese and sweet strawberries creates a perfect flavor balance that’s both refreshing and indulgent.
  • Texture: Enjoy a delightful contrast between the fluffy cake layer on top and the creamy, rich cheesecake underneath.
  • Aroma: The sweet scent of strawberries baking alongside buttery cake is undeniably inviting.
  • Visual Appeal: This dessert boasts vibrant red strawberries peeking through a golden, crumbly layer, making it a stunning addition to any spread.
  • Skill Level Needed: This recipe is accessible for all skill levels—perfect for beginners or seasoned bakers looking for a quick win.
  • Special Equipment: All you need is a baking dish and a mixing bowl—no fancy gadgets required!

Recipe Overview

  • Difficulty Level: Making Strawberry Cheesecake Dump Cake is simple enough for anyone to master, as it involves minimal steps, which makes it a go-to recipe for potlucks and family gatherings.
  • Category: This dessert fits perfectly into the dessert category, fulfilling those sweet cravings while being versatile enough for any occasion.
  • Cuisine: While this dessert can be traced back to classic American desserts, its universal appeal makes it popular in various culinary traditions, merging the flavors of cheesecake and fruit.
  • Cost: Depending on seasonal availability, this recipe is quite economical, as strawberries and other ingredients can be bought at reasonable prices.
  • Season: The best time to enjoy this cake is during the strawberry season, which typically spans late spring and early summer, ensuring the fruits are ripe and bursting with flavor.
  • Occasion: Ideal for celebrations, family gatherings, and summer picnics, it’s a dessert that brings joy to any event.

Why You’ll Love This Recipe

The delightful taste and texture of Strawberry Cheesecake Dump Cake will make it a favorite among your family and friends. The creamy cheesecake layer pairs perfectly with the strawberry topping, creating a dessert that is both satisfying and refreshing. The ease of preparation and the minimal ingredients required make it a convenient choice for busy days or sudden cravings.

Not only is this dessert delicious, but it also has some nutritional advantages due to the fruit content. Strawberries are rich in vitamins and antioxidants, providing a healthier aspect to your dessert indulgence. When serving this cake, it has a social and entertaining value, sparking conversations and smiles, making it a hit at any gathering.

Cost-effectiveness is just another bonus, as you can prepare this delicious dessert without breaking the bank. Using in-season strawberries can greatly reduce costs while enhancing the flavor, making this dessert both accessible and approachable.

Historical Background and Cultural Significance

Strawberry cheesecake has a rich history that traces back to the ancient Greeks, who first created a cheese-based dessert. Over the centuries, recipes evolved, leading to the modern cheesecake we know today. The incorporation of strawberries adds a delightful twist and a refreshing element.

Culturally, this dessert is significant in many American households, often associated with summer barbecues and family reunions. The striking colors and flavors symbolize warmth, joy, and togetherness during these special occasions.

The evolution of the recipe has led to various adaptations and innovations, like the dump cake variety we have today, where the ingredients are layered and baked without the need for extensive preparation. This unique take has made it a beloved choice among home bakers looking for a quick and delicious dessert.

Regional variations are also quite common, with some regions adding their local fruits or flavors, showcasing how versatile and enjoyable this dessert can be.

Ingredient Deep Dive

  • Strawberries: Strawberries are not only a staple in desserts but also carry cultural significance as symbols of summer and warmth. Nutritionally, they are low in calories and rich in fiber, vitamins C and K, and antioxidants. When selecting strawberries, look for bright red, firm berries with no green or white patches. For storage, keep them unwashed in the refrigerator for up to a week. For an alternative, consider using other berries like blueberries or raspberries.
  • Cream Cheese: This key ingredient provides richness and creaminess to the cheesecake layer. Cream cheese has a long history in American desserts, often used in cheesecakes and frostings. It’s a good source of protein, but when choosing, go for blocks rather than spreads for a thicker consistency. Store cream cheese in the refrigerator and use within a few weeks of opening. For a lighter version, use low-fat or Neufchâtel cheese as a substitute.
  • Cake Mix: The versatility of cake mix allows for easy preparation and can drastically cut down baking time. Cake mixes have been popularized in the 20th century, making baking accessible to all. Opt for a yellow or white cake mix for best results in this recipe. Cake mixes can be stored in a cool, dry place for a long time, making them a pantry staple. You can also make your own cake mix from scratch using flour, sugar, baking powder, and salt.

Common Mistakes to Avoid

  • Using underripe or overripe strawberries can interfere with overall taste—choose strawberries that are fresh, bright, and firm.
  • Not letting the cream cheese soften before mixing can result in a lumpy texture; always bring it to room temperature.
  • Skipping the layer technique may cause thick spots instead of a cohesive texture, so ensure layers are well distributed.
  • Overmixing the batter can lead to dense rather than fluffy cake—mix just until incorporated.
  • Baking at incorrect temperatures can yield undesired results; always preheat your oven and check that it’s calibrated.
  • Not checking for doneness can leave you with undercooked layers; a toothpick should come out clean from the center when done.
  • Using a pan that is too small can cause spillage and even uneven baking; ensure you use the recommended size.
  • Not allowing the cake to cool slightly before serving can cause it to crumble or fall apart; let it set for at least 10 minutes.
  • Neglecting to double-check ingredient measurements can result in off flavors and textures; precision is key in baking.
  • Forgetting to prepare your pan can lead to sticking; make sure to grease it properly to allow for easy removal.

Essential Techniques

Using the layering technique is crucial in this dump cake to achieve the desired texture. Start by evenly distributing ingredients to ensure all flavors blend harmoniously. When mixing the cheesecake layer, it is essential to whip until smooth, incorporating enough air to keep it light. Remember to avoid overmixing, as this can lead to a denser texture.

Pay attention to oven temperature and time. This recipe requires patience; allow the cake to cool appropriately to maintain its shape. The visual cues, like a golden crust on top and bubbling around the edges, are indicators that your cake is ready to be taken out.

Pro Tips for Perfect Strawberry Cheesecake Dump Cake

– Always select the freshest strawberries to elevate the dessert’s flavor; visiting a local farmer’s market can yield the best picks.
– Enhance flavor by adding a teaspoon of vanilla extract to the cream cheese mixture for an extra layer of depth.
– Allow the dump cake to cool before serving for better slicing; this avoids a messy presentation.
– For added crunch, consider sprinkling toasted nuts over the top just before serving.
– If you enjoy a tart flavor, a drizzle of balsamic reduction over the final presentation can complement the dessert beautifully.
– Storing leftovers in an airtight container in the fridge will keep it fresh for several days.
– For variations, incorporate lemon zest into the cheesecake layer for a refreshing twist.
– Transform your dump cake into individual servings by layering it in jars for a beautiful presentation.

Variations and Adaptations

This Strawberry Cheesecake Dump Cake is wonderfully versatile. For regional variations, consider swapping strawberries with other summer fruits, such as peaches or cherries, to create a different flavor experience. Seasonal adaptations allow you to adjust the recipe according to what’s fresh, giving you creative leeway year-round.

Dietary modifications are also an excellent approach; for gluten-free options, use gluten-free cake mix, and for dairy-free versions, alternative cream cheeses can easily be swapped in. Flavor variations may include adding a pinch of cinnamon or almond extract to enhance the existing flavors.

You can also play around with texture; integrate crushed cookies or graham cracker crumbs into the topping before baking. For a sophisticated touch, serve the dessert in elegant dishware with a dollop of whipped cream on top.

Serving and Presentation Guide

Plating techniques for this dump cake can elevate your dessert experience. Consider using a large, flat spatula to serve pieces onto plates, showcasing the layers beautifully. Garnishing ideas might include fresh mint leaves or a dusting of powdered sugar for a visually appealing finish and enhanced flavor.

Traditional accompaniments include a scoop of vanilla ice cream or a drizzle of whipped cream. Modern serving suggestions could involve presenting in individual cups or jars to offer guests a personal touch. Temperature considerations are essential as well; serving the cake warm with cold toppings provides a delightful contrast.

Lastly, portion control tips suggest cutting slices into smaller sizes if served as part of a larger dessert table, allowing guests to sample various options.

Wine and Beverage Pairing

When pairing wine with Strawberry Cheesecake Dump Cake, consider a sweet dessert wine, such as Moscato or Riesling, that enhances the fruity flavors. If you prefer a non-alcoholic alternative, a refreshing strawberry lemonade or iced herbal tea can complement the dessert beautifully.

If coffee or tea is preferred, opt for a creamy cappuccino or a light chamomile tea, which pairs well with the rich cheesecake flavors. Temperature considerations play an essential role; beautifully chilled wines or warm beverages offer a delightful contrast to the cold dessert.

Serving suggestions include using vintage glassware for the wine or unique cups for the iced drinks, enhancing the overall dining experience.

Storage and Shelf Life

Proper storage methods are crucial to maintaining the quality of the Strawberry Cheesecake Dump Cake. After cooling, store it in an airtight container in the refrigerator to keep it fresh for up to 3-4 days. Ensure the cake is well-covered to prevent drying out and exposure to other fridge odors.

For reheating, gently warm individual slices in the microwave for a few seconds. The cake can also be frozen; wrap tightly in plastic wrap and then in aluminum foil, which keeps it fresh for up to 3 months. When thawing, leave it in the refrigerator overnight for best texture maintenance.

Watch for signs of spoilage, including a sour smell or mold growth, which could suggest the cheesecake layer has gone bad. If you didn’t eat it all before it loses quality, repurposing leftover cake into a trifle can be a delicious option.

Make Ahead Strategies

To streamline your preparation, consider making the strawberry topping ahead of time. Store it in the refrigerator, allowing the flavors to meld beautifully, while preparing the cheesecake layer can also be completed a day in advance. This minimizes the day-of workload significantly.

Assembly tips include layering the cake mix, strawberries, and cheesecake mixture just before baking to ensure freshness. Once baked, store the cake in the refrigerator until ready to serve, as it holds well overnight.

Quality impact assessment shows that fresh strawberries maintain their flavor and texture better if added just before baking. For reheating, ensure you bring it to room temperature before placing it in the oven to avoid shock.

Scaling Instructions

Scaling this recipe is easy and can accommodate various gatherings. For halving the recipe, simply divide each ingredient by two and use a smaller pan for baking. If doubling or tripling, increase the ingredients proportionately but consider larger baking sheets to prevent overflows.

Equipment adjustments may be necessary; larger mixers can accommodate larger batches more efficiently, which reduces preparation time. Timing modifications should account for additional cooking time, so check for doneness by inserting a toothpick into the center as baking times may vary.

Storage considerations become essential if you plan on making multiple batches—label containers to help keep track of each variation for best management.

Nutritional Deep Dive

Analyzing macro breakdown, this dessert includes healthy fats from cream cheese, carbohydrates from the cake mix, and natural sugars from strawberries. The creamy layer offers protein content, while the fruity topping provides fiber.

Micronutrient analysis reveals significant amounts of vitamins and antioxidants, particularly from strawberries, which contribute to heart health and improved immune function. Making dietary considerations easier, this dessert can be tweaked for specific dietary needs, maintaining delicious flavors while fulfilling nutritional requirements.

Portion analysis ensures you enjoy this dessert without guilt; a standard serving can easily fit within a balanced diet when paired thoughtfully with other meals. Weight management tips suggest enjoying smaller portions or adding fresh fruit to enhance volume without added calories.

Dietary Adaptations

This Strawberry Cheesecake Dump Cake can easily cater to various dietary restrictions. For gluten-free options, select a gluten-free cake mix and ensure all other ingredients are certified gluten-free. For dairy-free adaptations, non-dairy cream cheese can successfully replace traditional cream cheese, making it vegan-friendly.

Low-carb enthusiasts can substitute low-carb sweeteners for sugar and incorporate almond flour for the cake mix, creating a cake indulgence that aligns with keto requirements. For those on a paleo diet, using almond flour for the cake base can maintain the dessert’s integrity while keeping it compliant.

If you’re avoiding FODMAPs, replace strawberries with servings of blueberries and ensure any cream cheese substitutes fit your dietary profile, allowing for a delicious treat that considers individual dietary needs.

Troubleshooting Guide

Should you encounter texture issues, ensure cream cheese is blended until smooth before mixing with other ingredients. If you find that your cake is too dense, it might be due to overmixing—aim for gentle folding rather than vigorous stirring.

For flavor balance, taste the strawberry mixture before baking; if it seems bland, a touch of sugar or lemon juice can elevate flavors remarkably. Temperature problems arise when ovens are not calibrated properly—always invest in an oven thermometer for accuracy.

Ingredient substitutions can lead to unexpected results, so whenever trying a new ingredient, start with small batches to see how the flavors meld. Timing concerns during baking can often be solved with careful monitoring, ensuring doneness is achieved without burnt edges or undercooked centers.

Recipe Success Stories

Community feedback for this Strawberry Cheesecake Dump Cake is overwhelmingly positive, with readers praising its simplicity and delightful flavor. Sharing variations such as added spices or pecans gives others inspiration to try their unique spins on the classic dessert.

Adaptation stories highlight how readers have transformed the recipe to meet seasonal availability; many have had success using peaches in the summer or apples during fall.

Photography tips suggest presenting the dump cake on beautiful heirloom plates, with a scoop of ice cream, to create appetizing visuals that draw attention and compliments alike.

Frequently Asked Questions

Can I use frozen strawberries instead of fresh? Yes, you can use frozen strawberries, but they should be thawed and drained to prevent excess moisture from affecting the cake’s texture.

How do I know when the cake is done? The cake is done when golden brown and a toothpick inserted in the center comes out clean.

Can I make this dessert vegan? Absolutely! Use non-dairy cream cheese and a vegan cake mix for a delicious vegan-friendly option.

Is it okay to prepare this dessert the night before? Yes, this cake can be assembled in advance and baked the next day for convenience.

Can I reduce the sugar in this recipe? Yes, you can adjust the sugar to your taste, but be mindful that it may affect the final texture and sweetness.

How should I store leftover cake? Store leftovers in an airtight container in the refrigerator for up to four days for best freshness.

Can I add other fruits to the cake? Yes, feel free to add berries, peaches, or even tropical fruits to customize your flavor experience.

What kind of pan should I use? A 9×13-inch baking dish is recommended for even cooking.

Can I freeze the dump cake? Yes, you can freeze it once baked and cooled. Wrap tightly in plastic wrap before placing it in the freezer for optimal freshness.

How long will the cake last in the fridge? It should last about 3 to 4 days in the refrigerator but is best enjoyed fresh.

Additional Resources

To expand your dessert repertoire, explore related recipes like classic cheesecake, fruit cobbler, or easy dump cakes with other fruits. Technique guides on baking basics can enhance your skills and confidence in the kitchen, while ingredient-specific information will help you make the most out of fresh produce.

Investing in essential kitchen equipment can enhance your baking experience, so check out mixers or quality bakeware. Seasonal variations invite you to adjust ingredients based on what’s in season, delivering the freshest flavors to your table.

Join the Conversation

We encourage you to share your experiences with Strawberry Cheesecake Dump Cake! Snap pictures of your creations and share them on social media with relevant tags for a chance to connect with fellow bakers.

Leave your reviews and feedback, as community engagement enriches the recipe experience, bringing new adaptations and inspirations to light. Don’t hesitate to suggest your unique variations; sharing ideas helps everyone improve their baking journeys.

The Recipe

Strawberry Cheesecake Dump Cake

Serves: 8 servings

Prep Time: 15 mins

Cook Time: 45 mins

Total Time: 60 mins

Kitchen Equipment Needed

  • 9×13-inch baking dish
  • Mixing bowls
  • Measuring cups and spoons
  • Spatula

Ingredients

  • 1 pound fresh strawberries, hulled and sliced
  • 8 ounces cream cheese, softened
  • 1 cup sugar
  • 1 teaspoon vanilla extract
  • 1 box yellow cake mix
  • 3/4 cup unsalted butter, melted
  • 1/4 cup milk

Directions

  1. Preheat the oven to 350°F (175°C).
  2. Spread sliced strawberries evenly in the bottom of the baking dish.
  3. In a bowl, beat together cream cheese, sugar, and vanilla until smooth. Spread over the strawberries.
  4. In another bowl, combine the cake mix, melted butter, and milk. Pour this mixture over the cream cheese layer.
  5. Bake for 45 minutes, or until the top is golden brown and a toothpick comes out clean.
  6. Let cool for 10 minutes before serving.

Recipe Notes

  • Feel free to substitute other berries for a different flavor!
  • Add lemon zest for a slightly zesty kick.
  • Store leftovers in the refrigerator for up to 4 days.

Indulge in This Easy Cherry Cheesecake Fluff Recipe Today

Delectable Cherry Cheesecake Fluff: A No-Bake Delight

⚖️
Difficulty
Easy

⏲️
Prep Time
15 mins

🕒
Cook Time
0 mins

⏱️
Total Time
15 mins

🍽️
Servings
6 servings

Cherry Cheesecake Fluff is a luscious and creamy dessert that embodies the classic flavors of cherry cheesecake without all the fuss of baking. Imagine a light, airy mixture of cream cheese and whipped topping swirled with sweet cherry filling, all sitting atop a graham cracker crust that adds the perfect crunch. This delightful treat is ideal for summer gatherings, picnics, or whenever you crave a refreshing dessert that’s easy to make. The vibrant color and delicious flavor combination will wow your guests and leave them asking for seconds.

This recipe captures the essence of a rich cherry cheesecake in a fluffy, no-bake form. The tartness of the cherries perfectly complements the sweetness of the cream cheese mixture, creating a balanced flavor that is utterly enjoyable. With minimal effort required, you can whip this dessert together in just a few minutes, making it an excellent choice for both novice cooks and seasoned bakers who want something quick and delicious. Prepare yourself for a treat that is as pleasing to the eyes as it is to the palate!

Quick Recipe Highlights

  • Flavor Profile: Delightfully sweet with a perfect balance of tart cherries and creamy cheesecake.
  • Texture: Light and fluffy, combined with a crunchy graham cracker crust.
  • Aroma: Inviting notes of fresh cherries and creamy vanilla make this dessert irresistible.
  • Visual Appeal: The rich red of the cherry topping against the creamy filling is visually striking.
  • Skill Level Needed: This easy recipe requires no baking skills, making it perfect for beginners.
  • Special Equipment: A mixing bowl, whisk, and a dish for serving are all you need.

Recipe Overview

  • Difficulty Level: The Delectable Cherry Cheesecake Fluff is considered easy and requires minimal kitchen skills.
  • Category: This dessert fits perfectly as a summer treat or a satisfying end to any meal.
  • Cuisine: Inspired by classic American desserts, it features traditional flavors found in cheesecake recipes.
  • Cost: Ingredients are budget-friendly, typically costing around $10-$15 for the whole recipe.
  • Season: Best enjoyed during warmer months when cherries are in season and a refreshing dessert is ideal.
  • Occasion: Perfect for family gatherings, potluck dinners, or casual get-togethers.

Why You’ll Love This Recipe

The Delectable Cherry Cheesecake Fluff stands out thanks to its wonderfully appealing taste and texture. The fluffy cream cheese combines seamlessly with the sweet cherry topping to deliver a dessert that tastes indulgent yet remains light on the palate. Each bite reveals the creamy filling mixed with crunchy graham cracker bits and juicy cherries, inviting you to savor the intricacies of every layer.

Convenience is another excellent aspect of this recipe. With just a few simple steps, you can assemble this dessert without ever turning on the oven. This quality makes it a fantastic last-minute option for unexpected guests or those days when you just want to treat yourself without a significant commitment in the kitchen. Additionally, the quick prep time means you can have this dessert chilling while preparing your main course.

Nutritionally, this dessert can be made lighter by selecting low-fat cream cheese and whipped topping, allowing you to enjoy a sweet treat without the guilt. Plus, cherries are packed with antioxidants, making this creamy delight not just a tasty choice but a somewhat healthier one in moderation. It’s a dessert you can feel good about serving to friends and family.

When it comes to entertaining, the Delectable Cherry Cheesecake Fluff is not only a showstopper but also a conversation starter. Its beautiful presentation and inviting aroma draw guests in, making it an excellent choice for gatherings. Serving this fluff dessert demonstrates thoughtfulness in catering to diverse palates, ensuring that everyone can enjoy a piece of this delicious treat.

Finally, this recipe is incredibly cost-effective. The ingredients are usually staples in most kitchens and can often be found on sale, making this a budget-friendly dessert option. The ability to create such a delightful and impressive dessert without breaking the bank is a huge plus for home cooks.

Historical Background and Cultural Significance

The origins of cheesecake can be traced back to ancient Greece, where the sweet dessert was made with cheese, flour, and honey. However, it is the American cheesecake that revolutionized how we see this dessert today, evolving into various styles and interpretations. The introduction of cream cheese in the 19th century marked a significant turn, leading to the rich and creamy texture we associate with cheesecake now.

Cheesecake has become an integral part of American culinary culture, especially during celebrations and holidays. It is often featured in family gatherings, birthdays, and holidays, symbolizing good luck and prosperity. Cherry topping, in particular, adds a touch of seasonal freshness, making it a favorite in summer months when cherries are at their peak.

As recipes for cheesecakes evolved, many variations emerged, including the fluff style, which focuses on lightness and ease of preparation. The Cherry Cheesecake Fluff is a contemporary twist that allows people to enjoy cheesecake flavors without the complicated process of baking a traditional cheesecake. This native adaptation speaks to the adaptability of culinary practices across cultures and generations.

Regional variations of cheesecake exist worldwide, from the Italian ricotta cheesecake to the Japanese cotton cheesecake, showcasing how this dessert has adapted to different cultures and tastes. The Cherry Cheesecake Fluff combines these influences, melding classic elements with modern convenience, making it accessible to new generations who enjoy experimenting in the kitchen.

Ingredient Deep Dive

Cherry Filling: Cherries have significant cultural and historical value, often celebrated in various traditions and cuisines. They are rich in vitamins and antioxidants, providing numerous health benefits, including reducing inflammation and promoting heart health. When selecting cherries, opt for bright, firm fruit with a sweet aroma. They can be stored in the fridge for up to a week, and if you need a substitute, canned cherries or cherry pie filling can work well.

Cream Cheese: This essential ingredient creates that creamy characteristic associated with cheesecakes. First developed in the United States in the late 19th century, cream cheese has become a staple in many desserts. It is high in fat but provides essential nutrients like calcium. When purchasing cream cheese, look for blocks without additives. Store it in the fridge, and if you’re avoiding dairy, vegan cream cheese is a wonderful substitute that mimics the texture and flavor.

Common Mistakes to Avoid

  • Using warm cream cheese: Always ensure cream cheese is at room temperature for the right consistency and smooth blending.
  • Not mixing enough: Insufficient mixing can lead to lumps in the fluff; beat until fully incorporated for smoothness.
  • Overwhipping the cream: Whipping cream too much can turn it into butter; stop when you achieve soft peaks.
  • Forgetting the crust: Always prepare the crust in advance to allow it to set and achieve the right texture.
  • Using too much cherry filling: While cherries add flavor, excessive filling can make the dessert runny; balance is key.
  • Skipping refrigeration: Refrigerate the fluff for at least 2 hours to develop flavor and ensure the right texture.
  • Not tasting: Always taste your mixture before assembling to ensure the flavor balance is to your liking.
  • Poor storage: Store leftovers in an airtight container to keep them fresh; avoid vacuum sealing as it can change the texture.

Essential Techniques

Mixing Ingredients: Mixing is crucial for achieving a light and airy texture. Start with soft cream cheese to prevent lumps and gradually fold in whipped cream for better incorporation. Watch for consistency and avoid overmixing to retain the fluffiness of your dessert.

Layering: Proper layering creates beautiful visual appeal and flavor balance. Alternate layers of crust, cheesecake filling, and cherry topping for a stunning effect. Gently spread each layer, ensuring even distribution to enhance the taste with each bite.

Pro Tips for Perfect Delectable Cherry Cheesecake Fluff

1. Experiment with different fruit toppings like blueberries or strawberries for a unique twist on the classic recipe.

2. For added flavor, consider mixing a teaspoon of almond extract into the cream cheese mixture.

3. Chill your mixing bowl and beaters before whipping cream for better volume and a fluffier texture.

4. Use a food processor to crush graham crackers for the crust for an even texture.

5. Feel free to add mini chocolate chips to the cream cheese mixture for a chocolate version.

6. Make it individual: Serve the fluff in small cups for parties; this makes for beautiful presentations.

7. Use fresh mint leaves as a garnish for a touch of elegance and freshness.

8. If you have leftovers, consider using them as a topping for pancakes or waffles the next morning!

Variations and Adaptations

Regional variations could feature different fruit toppings based on local availability—consider peach, raspberry, or blueberry fluff instead of cherry for unique flavor profiles. Seasonal adaptations include using pumpkin puree during fall or rich chocolate ganache during winter holidays, making this dessert adaptable year-round.

Dietary modifications can be made by using gluten-free graham crackers for a gluten-free dessert, or utilizing dairy-free cream cheese and whipped cream for a vegan version. Flavor variations are endless: add peanut butter for a nutty twist or caramel sauce for a decadent treat.

Texture modifications, such as mixing in crushed nuts for crunch or adjusting the cream-to-filling ratio, allow experimentation for different mouthfeels. Presentation alternatives include parfait-style layers in clear cups that show off the colors beautifully for entertaining.

Serving and Presentation Guide

For plating techniques, consider using a clear glass dish to showcase the beautiful layers of the cheesecake fluff. Garnish with fresh cherries and mint leaves for an added pop of color. Traditional accompaniments like whipped cream can enhance the dessert’s creamy texture, while drizzling chocolate sauce adds a luxurious touch.

Modern serving suggestions include individual-sized jars or cups for a trendy look. Ensure the temperature is well-cooled before serving for a refreshing treat, and portion control can be easily managed by serving in small glasses, ensuring everyone enjoys a treat without overindulgence.

Wine and Beverage Pairing

Pair your Delectable Cherry Cheesecake Fluff with a sweet Riesling or Moscato, which complements the cherry flavors beautifully. For a non-alcoholic alternative, consider sparkling water with a splash of cherry syrup for a refreshing drink. If you prefer coffee, a medium roast with smooth notes pairs perfectly to cut through the dessert’s richness.

Storage and Shelf Life

Store any leftovers covered tightly with plastic wrap in the refrigerator for up to 3 days. It is best served fresh, but if necessary, carefully transfer to an airtight container for storage. Ensure it is well-chilled before serving again to maintain flavor and texture, avoiding temperature-related spoilage.

Make Ahead Strategies

For a successful make-ahead dessert, prepare the whipped cream and cream cheese mixture the night before and store it in the refrigerator. Assemble the cherry topping on the day of serving to maintain the freshness of the cherries. This timeline can help simplify your hosting duties on the big day.

Scaling Instructions

To halve the recipe, simply divide all ingredient measurements by two, ensuring that the assembly technique remains the same. If you need to double or triple the recipe, utilize larger mixing bowls and make sure you have a larger dish for presentation. Keep an eye on chilling times, as larger quantities may require slightly longer to set properly.

Nutritional Deep Dive

The Delectable Cherry Cheesecake Fluff is rich in macros, providing a good balance of fats, carbohydrates, and proteins primarily from cream cheese and whipped topping. Each serving offers crucial micronutrients, including calcium from the cream and vitamin C from the cherries, which are essential for overall health benefits. Understanding portion sizes can help control calorie intake without sacrificing sweet indulgence.

Dietary Adaptations

To make this dessert gluten-free, use gluten-free graham crackers for the crust. For those who are dairy-free, consider using vegan cream cheese and coconut whipped topping, resulting in a delicious similar texture and flavor. A low-carb adaptation can replace sugar with a sugar substitute, adjusting the recipe for keto-friendly needs without sacrificing taste.

Troubleshooting Guide

If you find your cheesecake fluff too runny, ensure that the cream cheese is well-blended and the whipped cream remains fluffy to hold its structure. For flavor balance issues, try adding a little more sweetness or acidity from lemon juice for better taste. Additionally, if your filling is too thick, consider thinning it with a splash of milk until you achieve the desired consistency.

Recipe Success Stories

Community feedback has been overwhelmingly positive, with many people sharing their successful adaptations, such as incorporating different seasonal fruits and flavorings. Readers particularly enjoy how this dessert can be made with simple ingredients found around the house, making it accessible and adaptable for any family event or personal craving. Photography tips suggest focusing on natural light and vibrant contrast to showcase the beautiful layers of this fluff dessert, making it more appealing for social sharing.

Frequently Asked Questions

Can I make this dessert in advance? Absolutely! This fluff can be made a day ahead; just avoid adding the cherry topping until shortly before serving for the freshest taste.

How long can I keep leftovers? Leftovers can be kept in the fridge for about 3 days. Just ensure it’s covered to maintain freshness.

What if I don’t have graham crackers? You can substitute them with crumbled cookies or crushed nuts for a different flavor profile.

Can I substitute the cherries? Yes, any fruit topping works wonderfully, and you can even use canned or frozen fruit for convenience.

Is it suitable for gluten-free diets? Definitely! Just opt for gluten-free graham crackers for the crust.

What thickness should the cheesecake fluff be? The fluff should be light and airy, not overly dense. Whipped cream should be soft and just incorporated into the cream cheese.

What’s the best way to serve it? Serving it in individual cups or a big dish are both great methods; choose based on the occasion.

Can I freeze the cheesecake fluff? Freezing is not recommended due to the texture of the whipped cream. It’s best when fresh.

How can I adjust the sweetness? You can taste the mixture before adding the cherry topping, adjusting sweetness with sugar or sweeteners as needed.

What’s the best way to incorporate flavors? Mixing in extracts, like almond or vanilla, can elevate the flavors beautifully.

Additional Resources

For more delightful dessert recipes, check out our tutorials on making traditional cheesecakes, ingredient guides, or explore creative layering techniques that can enhance your dessert presentations. We also provide tips on selecting the freshest seasonal fruits to incorporate into your baking, ensuring your desserts are always flavorful and appealing.

Join the Conversation

We would love to hear your thoughts! Share your variations, photographs, or any cooking tips you developed while making this Delectable Cherry Cheesecake Fluff. Engage with us on social media to showcase your creations, join our community discussions about favorite recipes, and provide feedback on what you’d like to see more of in the future!

The Recipe

Delectable Cherry Cheesecake Fluff

Serves: 6 servings

Prep Time: 15 mins

Cook Time: 0 mins

Total Time: 15 mins

Kitchen Equipment Needed

  • Mixing bowls
  • Hand mixer or stand mixer
  • Measuring cups and spoons
  • Spatula
  • 9-inch pie dish or equivalent serving container

Ingredients

  • 1 package (8 oz) cream cheese, softened
  • 1 cup heavy whipping cream
  • 1 cup cherry pie filling
  • ½ cup powdered sugar
  • 1 tsp vanilla extract
  • 1 ½ cups graham cracker crumbs
  • ½ cup melted butter

Directions

  1. In a bowl, combine graham cracker crumbs and melted butter. Press into the bottom of the pie dish.
  2. In a separate bowl, beat cream cheese until smooth. Add powdered sugar and vanilla, mixing until blended.
  3. In another bowl, whip the heavy cream until soft peaks form. Gently fold into the cream cheese mixture.
  4. Spread the cheesecake filling over the crust in the pie dish evenly.
  5. Top with cherry pie filling, spreading it gently over the cheesecake layer.
  6. Refrigerate for at least 2 hours before serving to allow it to set properly.

Recipe Notes

  • Feel free to replace cherry pie filling with your favorite fruit topping.
  • This recipe can be made gluten-free by using gluten-free graham crackers.
  • For a richer flavor, you can add a touch of almond extract to the cream cheese mixture.
  • Keep leftovers in an airtight container in the refrigerator for up to three days.

Irresistible No Bake Blueberry Dream Cheesecake Recipe You’ll Love

Irresistible No Bake Blueberry Dream Cheesecake: A Refreshing Dessert Delight

⚖️
Difficulty
Easy

⏲️
Prep Time
20 mins

🕒
Cook Time
0 mins

⏱️
Total Time
4 hours (chill time)

🍽️
Servings
8 servings

Indulging in a slice of our Irresistible No Bake Blueberry Dream Cheesecake is like savoring a bright summer day. This decadent dessert features a luscious, creamy cheesecake filling that promises to be a delightful lightness on your palate, all served on a crunchy graham cracker crust. The burst of fresh blueberries adds a layer of vibrant color and refreshing taste, making this no-bake cheesecake an ideal treat for warm days or special occasions.

What sets this recipe apart is its simplicity. Forget about baking and the need for extensive kitchen tools; this dessert comes together effortlessly and can be made in advance. The combination of cream cheese and whipped cream creates a smooth and airy texture, while the tangy sweetness of blueberries balances the richness beautifully. Each bite is a perfect mix of creamy, fruity, and crunchy, ensuring you’ll crave more!

Quick Recipe Highlights

  • Flavor Profile: This cheesecake combines the sweetness of cream with the tartness of fresh blueberries for a balanced dessert.
  • Texture: Expect a heavenly creamy filling set against a crunchy graham cracker crust, providing a delightful contrast.
  • Aroma: The aroma of fresh blueberries and creamy cheese wafts through the kitchen, tantalizing your senses.
  • Visual Appeal: The cheesecake’s striking blue hue interspersed with creamy white makes it a stunning centerpiece.
  • Skill Level Needed: Perfect for beginners, this recipe requires no baking skills—just a little mixing and chilling.
  • Special Equipment: A springform pan is recommended for easy removal, along with basic mixing bowls.

Recipe Overview

  • Difficulty Level: This no-bake cheesecake is categorized as easy, making it suitable for all levels of home cooks.
  • Category: Ideal for desserts, this cheesecake can be enjoyed year-round.
  • Cuisine: This recipe is influenced by classic American dessert traditions, incorporating fresh local ingredients.
  • Cost: Estimated costs for this cheesecake are budget-friendly, with most ingredients easily accessible.
  • Season: Enjoy this refreshing dessert in warmer months when blueberries are in season for the best flavor.
  • Occasion: Perfect for summer barbecues, birthday parties, or any celebrations that call for a delightful treat.

Why You’ll Love This Recipe

The creamy filling combined with the burst of fresh blueberries makes this cheesecake a celebration of flavors. The balance of sweet and tangy will leave your taste buds dancing, making it a fantastic end to any meal. The texture is unbelievably light and creamy, ensuring that each bite melts in your mouth, while the crust provides satisfying crunchiness.

Convenience is another reason to love this recipe. With no baking required, it caters to those who prefer simpler methods in the kitchen. Just mix, layer, and chill—the dessert practically makes itself! Plan ahead, and you can have a stunning dessert ready in no time, allowing you to enjoy time with your guests instead of being stuck in the kitchen.

Nutritionally, blueberries are packed with antioxidants, vitamins, and minerals, making this cheesecake a relatively healthier indulgence. Coupled with the protein from the cream cheese, you can enjoy a guilt-free slice. This recipe also appeals to those looking for simple yet delicious desserts that can accommodate various dietary preferences.

Social gatherings are an excellent opportunity to showcase this cheesecake. Its stunning appearance and delicious flavor make it a crowd-pleaser, often leading to compliments and requests for the recipe. It’s an ideal dessert for sharing and enjoying with family and friends, fostering connection over good food.

Cost-effectiveness is yet another highlight of this recipe. Using affordable ingredients that are widely available means you won’t break the bank while making a delightful dessert. Its freshness and simplicity reflect a thoughtful approach to dessert making that doesn’t compromise on taste or indulgence.

Historical Background and Cultural Significance

The origin of cheesecake dates back to ancient Greece, where it was served to athletes during the first Olympic Games. This early version, made with fresh cheese and honey, laid the foundation for many variations later developed. The modern no-bake version gained popularity in the United States in the 20th century, providing a simplified approach that many home cooks embraced.

In American culture, cheesecake remains a beloved dessert, often synonymous with special occasions and gatherings. Blueberries, in particular, have deep-rooted significance, especially in regions like New Jersey, where they are cultivated extensively. This fruit not only adds flavor but also connects people to local agricultural traditions.

Over the years, cheesecake recipes have evolved, showcasing diverse flavors and ingredients. The no-bake cheesecake variant emerged as a convenient option for home bakers, facilitating easy preparation without the hassle of baking, thus broadening its appeal.

Blueberry cheesecake, specifically, captures the essence of summer, making it popular at barbecues and celebrations in warmer months. Each bite is a reminder of spending time in the sun with loved ones, drawing on nostalgic feelings of joy.

Ingredient Deep Dive

  • Blueberries: These tiny powerhouses are rich in antioxidants, known for promoting heart health and aiding in brain function. When selecting blueberries, look for firm, plump ones with a deep blue hue. Store them in the refrigerator to maintain freshness, and consider freezing extras to use in smoothies or baked goods later.
  • Cream Cheese: A staple in cheesecake recipes, cream cheese provides that signature creamy, tangy flavor. Opt for full-fat varieties for a richer taste, but consider lighter options if you’re watching calories. Be sure to let it soften at room temperature for easier mixing; this prevents lumps in your cheesecake.
  • Graham Crackers: These provide the base for the cheesecake crust. Choose brands without added sugars for a healthier option. Store leftovers in a cool, dry place, and they can serve as a crunchy topping when crushed over ice cream or yogurt.
  • Sugar: Adding sweetness to your cheesecake, sugar is essential for balancing flavors. Experiment with alternatives like honey or maple syrup for a unique twist, while keeping an eye on the sweetness level to maintain flavor balance.
  • Whipped Cream: Light and airy, whipped cream transforms the cheesecake into a dreamlike dessert. Use heavy cream for the best results, and chill your beaters beforehand to ensure fluffy peaks. Whipped cream can also be flavored with vanilla, which enhances the overall taste of your cheesecake.

Common Mistakes to Avoid

  • Overmixing the cheesecake filling, which can lead to a dense texture instead of airy and light. Mix until just combined to keep it fluffy.
  • Not allowing the cream cheese to soften at room temperature. This can cause lumps in the batter; always plan ahead and let it sit out for 30 minutes.
  • Skipping the chilling time can result in a cheesecake that’s too soft to slice properly. Ensure you let it chill for at least four hours, preferably overnight.
  • Using stale or crumbled graham crackers for the crust, leading to a less-than-ideal texture. Ensure your crackers are fresh and finely crushed.
  • Forgetting to line the springform pan can lead to a messy release. A layer of parchment paper can save you from potential heartbreak.
  • Not tasting the filling before setting it—there may need to be more sugar or vanilla to enhance flavor. Always sample and adjust before chilling.
  • Using low-quality ingredients can diminish the overall flavor. Invest in good quality cream cheese and fresh blueberries for the best results.
  • Cutting the cheesecake too soon after chilling, leading to messy slices. Let it sit for a few minutes at room temperature for easier cutting.

Essential Techniques

The art of mixing is crucial in perfecting your cheesecake. It’s important to avoid overmixing your ingredients; doing so can lead to dense and heavy textures. To master this technique, start slowly and gradually increase speed until just combined. Look for a smooth consistency without lumps, which indicates you’ve achieved the right balance.

Chilling the cheesecake is vital for getting that perfect set. It’s essential to wrap your cheesecake appropriately for chilling, ensuring no moisture can enter. Always use plastic wrap or a tight lid on your springform pan. You’ll know it’s ready when the surface feels firm and holds its shape when touched.

Pro Tips for Perfect Irresistible No Bake Blueberry Dream Cheesecake

– Use high-quality cream cheese for a richer flavor that elevates your cheesecake.
– Allow your cream cheese, and any other refrigerated ingredients, to come to room temperature for better mixing integration.
– Try blending the blueberries into the filling for a vibrant color throughout the cheesecake.
– Enhance flavor by adding lemon zest to the cheesecake filling, which pairs beautifully with blueberries.
– For added sweetness, drizzle honey over the top or mix it into the whipped cream before topping.
– Use decorative piping for whipped cream around the edges for an elegant presentation.
– Make it ahead of time; flavors deepen and improve after chilling overnight.
– Always keep an eye on portion sizes; a little goes a long way with rich desserts.

Variations and Adaptations

If you’re looking to diversify the cheesecake flavor, consider making a mixed berry version by exchanging blueberries for strawberries or raspberries in the filling. Seasonal variations can also be entertaining; try incorporating peaches or plums in a summer variation for a sweet twist.

For dietary modifications, you can substitute the cream cheese with a dairy-free counterpart, like cashew cheese, for a vegan option. Alternatively, for a low-carb version, use a nut-based crust instead of graham crackers, ensuring the recipe caters to various dietary needs.

Flavor balances can be adjusted based on personal taste; mix in spices like cinnamon or nutmeg for a spiced kick, creating a different sensory experience.

Lastly, consider changing the presentation by serving in individual jars for easy serving, or by topping with a berry compote and fresh mint leaves for an appealing contrast.

Serving and Presentation Guide

Plating your cheesecake beautifully is all about presentation. For a classic appearance, slice the cheesecake and arrange the segments on a serving platter. Consider adding a drizzle of blueberry sauce or a dollop of whipped cream to each slice for extra flair.

Garnishing with mint leaves or edible flowers can elevate the visual appeal tremendously. Alternatively, fresh blueberries placed strategically on top can give it a rustic yet elegant touch.

For a modern twist, consider serving individual portions in mason jars, making it easy to grab and enjoy. Pay attention to temperature; cheesecake is best served chilled, so keep it in the fridge until serving.

Be mindful of portion sizes; smaller slices not only look appealing but also encourage guests to sample multiple desserts.

Wine and Beverage Pairing

When it comes to wine pairings, a sweet Riesling complements the blueberries beautifully, enhancing their natural sweetness without overpowering the cheesecake. Similarly, a sparkling wine can provide a refreshing contrast that cleanses the palate.

For non-alcoholic alternatives, a lightly brewed herbal tea, like chamomile, pairs wonderfully with the rich flavor of the cheesecake. You can also serve it alongside lemonade for a refreshing and bright contrast that enhances the dessert’s summery feel.

Coffee can also make a delightful pairing; consider a light roast that won’t overshadow the flavors of the cheesecake. Serve temperatures should remain cool, maintaining freshness and enhancing flavors during the tasting experience.

Storage and Shelf Life

Proper storage is essential to keep your cheesecake fresh. It should be kept in the refrigerator, covered with plastic wrap or in an airtight container, to maintain its creamy texture and flavor.

When stored correctly, the cheesecake can last up to 5 days. Always check for signs of spoilage, such as off smells or changes in texture.

Reheating is generally not recommended, as cheesecake is best enjoyed chilled. If you must, do so very briefly in the refrigerator to soften.

Freezing is an option if you aim to keep it longer. Cut it into individual portions and wrap each slice tightly in plastic wrap before placing it in an airtight container. It can be frozen for up to 3 months.

Make Ahead Strategies

This cheesecake is ideal for preparation in advance. When making it ahead, plan for chilling time; it should ideally set overnight for the best flavor and texture.

Store components separately as you prepare; for instance, keep the crust in the fridge until you’re ready to assemble.

To maintain quality, consider assembling the cheesecake the day before a celebration so flavors meld beautifully overnight.

If you’re planning to garnish, hold off on adding fresh berries or whipped cream until just before serving to maintain their freshness.

Lastly, consider adding a fresh element upon serving, like a sprig of mint or a drizzle of sauce, ensuring it remains visually appealing when presented to guests.

Scaling Instructions

If you need to adjust the recipe, halving it is as simple as dividing all ingredients by two but maintaining the same preparation and chilling times. This flexibility makes it easy for smaller gatherings.

To double or triple the recipe, ensure you have a larger springform pan or multiple pans on hand. Adjust your mixing time as needed; larger batches may require more mixing time for even distribution.

Always keep equipment adjustments in mind; larger quantities may require the use of stand mixers or food processors for efficiency.

When considering timing, expect longer chilling times for larger cheesecakes. Store considerations will vary based on portion size, so think about how you’ll store extra portions when scaling.

Nutritional Deep Dive

This blueberry cheesecake offers a balanced profile of carbohydrates, fats, and protein. A slice typically contains about 320 calories, making it a moderate treat.

Micronutrient content, particularly from blueberries, can boost your intake of vitamin C and antioxidants, offering health benefits beyond just dessert.

For those on a nutritional journey, portion control is key; indulging in a single slice can keep you satisfied without going overboard. It’s advisable to enjoy this dessert on special occasions to balance diet with indulgence.

Weight management strategies can also revolve around the cheesecake’s cream cheese content; consider lighter options for lower calorie counts without losing flavor.

Dietary Adaptations

– **Gluten-free:** Substitute graham crackers with gluten-free options like almond flour or gluten-free cookie varieties.
– **Dairy-free:** Use coconut cream or other non-dairy cream cheese alternatives to make the filling suitable for a dairy-free diet.
– **Vegan:** Consider flax eggs or aquafaba to replace traditional ingredients, ensuring all elements are plant-based.
– **Low-carb/Keto:** Use a nut-based crust and low-carb sweeteners to keep your cheesecake suitable for low-carb lifestyles.
– **Paleo:** Opt for natural sweeteners like honey and use almond flour for the crust to maintain a paleo-friendly profile.
– **Low-FODMAP:** Focus on low-FODMAP fruits and sweeteners for those with dietary restrictions.

Troubleshooting Guide

If your cheesecake is too dense, it may be a result of overmixing the filling. To remedy this, ensure you mix gently until just combined.

For flavor balance, if the cheesecake tastes overly sweet or tangy, you can add a squeeze of lemon juice or a pinch of salt; both enhance flavor depth.

If your crust crumbles too much or doesn’t hold together, ensure you press it firmly into the pan and consider adding a little melted butter to bind it better.

If you encounter issues during assembly—like your filling being too loose—ensure your cream cheese is thoroughly softened and well-mixed before adding other liquids.

For timing concerns, if your cheesecake doesn’t seem set after the recommended chilling time, give it additional time in the fridge, especially in warm rooms where it may take longer to firm up.

Recipe Success Stories

Community feedback often highlights how this recipe becomes a hit during gatherings. Many home cooks have praised its simplicity and impressive presentation.

Variations abound, with readers sharing their unique takes, such as using different fruits or flavored extracts, enhancing their culinary skills by experimenting with flavors.

Adaptation stories reveal how families pass this recipe down, often becoming a cherished tradition during holidays and special celebrations.

Readers suggest adding unique garnishes, such as lemon zest or mint leaves, making every cheesecake truly their own masterpiece.

Photography tips often revolve around capturing the vibrant colors, suggesting natural light and clean backgrounds to make the cheesecake pop in visuals shared on social media.

Frequently Asked Questions

Can I freeze my no-bake cheesecake?

Yes, you can freeze no-bake cheesecake. Wrap individual slices in plastic and store them in an airtight container to keep them fresh for up to 3 months.

How long does the cheesecake need to chill?

The cheesecake should chill for at least four hours, but overnight is recommended for the best texture and flavor.

What can I substitute for blueberries?

You can substitute blueberries with strawberries, raspberries, or even peaches for a varied flavor profile.

Is it possible to make this cheesecake gluten-free?

Absolutely! Using gluten-free graham crackers or a nut-based crust is an excellent alternative.

Can I use low-fat cream cheese?

Yes, low-fat cream cheese is a suitable option, though it might alter the creaminess slightly. Full-fat options are recommended for best results.

What is the best way to cut the cheesecake?

For clean slices, dip a sharp knife in hot water, wipe it dry, and cut through the cheesecake. Repeat for each cut to maintain a clean edge.

Can I use frozen blueberries?

Yes, frozen blueberries can be used but should be thawed first and drained to prevent excess moisture from affecting the cheesecake.

How do I store cheesecake leftovers?

Store any leftover cheesecake in the fridge, covered with plastic wrap or in an airtight container, for up to 5 days.

What type of pan is best for this cheesecake?

A springform pan is ideal as it allows for easy removal of the cheesecake without damaging its structure.

Can I add flavor extracts to the cheesecake?

Absolutely! Vanilla extract or almond extract can enhance the flavor; just be sure to adjust to taste.

Additional Resources

If you’re looking for more delightful dessert recipes, consider trying variations of cheesecake, like pumpkin spice or chocolate.

For technique guides, you may find it helpful to explore no-bake desserts, mastering different types of chilled treats suitable for warmer months.

Ingredient breakdowns can be invaluable for understanding the benefits of berries and other fruits, providing insight into seasonal selections.

Investing in the right kitchen equipment, like quality mixing bowls and a sturdy springform pan, will enhance your baking experience.

Seasonal variations can also inspire new desserts; consider autumn flavors or winter themes for your next culinary adventure.

Join the Conversation

Share your cheesecake creations on social media to engage with others who appreciate this delicious dessert.

Consider offering photography tips to help others capture the beauty of desserts, making it a community learning experience.

Encourage recipe reviews by inviting feedback from friends and family, creating a dialogue around your cooking adventures.

Ask followers for their unique recipe variations, inviting creativity and collaboration in the kitchen.

Finally, create engagement by posting polls or questions about favorite cheesecake flavors, enhancing community interaction around dessert making.

The Recipe

Irresistible No Bake Blueberry Dream Cheesecake

Serves: 8 servings

Prep Time: 20 mins

Cook Time: 0 mins

Total Time: 4 hours (chill time)

Kitchen Equipment Needed

  • Springform pan
  • Mixing bowls
  • Electric mixer
  • Spatula
  • Measuring cups and spoons

Ingredients

  • 1 ½ cups graham cracker crumbs
  • ½ cup unsalted butter, melted
  • 2 cups cream cheese, softened
  • 1 cup powdered sugar
  • 1 teaspoon vanilla extract
  • 2 cups whipped cream
  • 2 cups fresh blueberries

Directions

  1. In a mixing bowl, combine graham cracker crumbs and melted butter until well mixed. Press firmly into the bottom of a springform pan.
  2. In another bowl, beat softened cream cheese with powdered sugar and vanilla extract until smooth.
  3. Fold in the whipped cream until just combined, being careful not to deflate the mixture.
  4. Gently fold in the fresh blueberries to incorporate throughout the filling.
  5. Pour the cheesecake mixture over the crust in the springform pan, smoothing out the top.
  6. Chill in the refrigerator for at least four hours or until set.
  7. Once set, remove the sides of the springform pan and serve cold.

Recipe Notes

  • For an added twist, experiment with other berries or fruit purees.
  • Keep leftovers in the fridge for up to five days.
  • For a richer flavor, add lemon zest to the filling.

Delicious Cream Cheese and Cherry Danish Recipe Made Easy

Cream Cheese and Cherry Danish: A Delightful Pastry Experience

⚖️
Difficulty
Intermediate

⏲️
Prep Time
25 mins

🕒
Cook Time
20 mins

⏱️
Total Time
45 mins

🍽️
Servings
12 pastries

Indulging in a Cream Cheese and Cherry Danish is like taking a step into a cozy bakery where the sweet aroma of baked goods fills the air. As you take a bite, the flaky, buttery pastry melds harmoniously with the velvety cream cheese filling, and the vibrant sweetness of cherries adds a delightful burst of flavor. This pastry is not just a treat; it’s a warm embrace that brings nostalgia and joy, making it a perfect addition to your morning coffee or an afternoon delight.

This recipe invites you to celebrate the simple pleasures of life—such as sharing delectable pastries with family during a Sunday brunch or surprising a friend with homemade goodies. Each layer of this Danish is crafted with care, ensuring that every bite is a perfect balance of sweetness and richness. Whether you’re an experienced baker or just starting out, the Cream Cheese and Cherry Danish is an enriching experience that will fill your kitchen with mouth-watering fragrances and happy chatter.

Quick Recipe Highlights

  • Flavor Profile: The luscious cream cheese and tart cherry filling create a delightful contrast, while a hint of vanilla enhances the sweetness.
  • Texture: Flaky pastry layers surrounding a creamy core provide a satisfying mouthfeel with every bite.
  • Aroma: The warm scent of baked pastry and cherries caramelizing in the oven will awaken your senses.
  • Visual Appeal: Golden-brown, beautifully shaped pastries filled with vibrant red cherries are a feast for the eyes.
  • Skill Level Needed: This recipe requires intermediate baking skills, focusing on dough handling and filling techniques.
  • Special Equipment: A rolling pin, pastry brush, and a baking sheet will simplify the cooking process.

Recipe Overview

  • Difficulty Level: This cream cheese and cherry Danish is categorized as an intermediate recipe, perfect for those who have a basic understanding of pastry-making techniques.
  • Category: These pastries can be enjoyed for breakfast, brunch, or as a delightful dessert, fitting into various meal categories.
  • Cuisine: Danish pastry is a renowned part of Scandinavian cuisine, combining rich baking traditions with modern flavors.
  • Cost: Approximate costs for ingredients are affordable, making this an accessible recipe for many home bakers.
  • Season: Spring and summer are ideal seasons for enjoying cherry Danish pastries, as fresh cherries are at their peak during these months.
  • Occasion: Perfect for gatherings, holidays, or as a special treat for yourself on any day that calls for a little indulgence.

Why You’ll Love This Recipe

With its perfect blend of unmistakable taste and appealing texture, the Cream Cheese and Cherry Danish is sure to become a favorite. The buttery pastry gives way to the creamy filling and tangy cherries, ensuring that every bite is satisfying and delicious. The delightful contrasts will have your taste buds dancing with joy, making this decadent treat hard to resist.

Convenience also plays a role in why you’ll adore this recipe. Preparing these pastries at home allows you to control the ingredients, ensuring freshness and avoiding preservatives found in store-bought alternatives. The process, while slightly intricate, is rewarding and leaves you with a sense of accomplishment as you create something beautiful and delicious.

From a nutritional standpoint, cream cheese can provide a satisfying source of protein and fat, especially when balanced with the natural sweetness of fresh cherries. Together, they create a treat that is indulgent yet can fit into a balanced diet when enjoyed in moderation.

Socially, the Cream Cheese and Cherry Danish offers great value. It’s an ideal snack for gatherings, allowing guests to indulge in a delightful pastry that pairs beautifully with coffee or tea. Sharing these pastries can foster connections and create lasting memories with friends and family.

Finally, considering cost-effectiveness, this cream cheese and cherry Danish can be made with readily available ingredients, making it an accessible baking project. Additionally, making pastries at home is generally less expensive than purchasing them from bakeries, allowing you to treat yourself or loved ones without breaking the bank.

Historical Background and Cultural Significance

The Cream Cheese and Cherry Danish pastry has its roots in the Danish pastry tradition, which dates back to the 19th century. Originally brought to America by immigrants from Denmark, this popular pastry has evolved to incorporate local ingredients and flavors, making it a beloved treat across different cultures. Its popularity skyrocketed, especially in café culture, where it became synonymous with comforting baked goods enjoyed alongside coffee.

Culturally, Danish pastries represent celebration and leisure. They are often associated with holiday gatherings and special occasions, symbolizing hospitality and warmth. Families and friends gather over pastry platters, creating memories that last a lifetime, fostering traditions that are passed down through generations.

The recipe’s evolution reflects broader culinary trends, where pastry-making has become an art form in its own right. Over time, adaptations have emerged, from different fillings to various ways of shaping the pastry, aligning with modern tastes while respecting traditional methods.

Regional variations of the Danish pastry are enormous, showcasing unique ingredients influenced by local cultures. In the U.S., for example, cherry fillings became popular due to the abundance of cherries in certain regions, adding a distinctly American twist to the classic recipe.

Ingredient Deep Dive

Cream cheese is a key component of this recipe, known for its rich, creamy texture. This ingredient originated in the United States during the 19th century and has become a pastry staple. Nutritionally, cream cheese is high in protein and provides a source of calcium. When selecting cream cheese, look for fresh products without additives for the best results. Store it in the refrigerator and be aware that it can spoil if left out for too long. Substitutes like mascarpone or ricotta can also be used for a slightly different flavor.

Cherries, whether fresh or tart, bring a burst of flavor and vibrant color to your Danish. Packed with antioxidants, cherries are known for their health benefits, including anti-inflammatory properties. Look for plump, firm cherries when selecting your fruit and consider freezing excess during peak seasons to enjoy later. If fresh cherries are not available, canned cherries in juice or frozen cherries without added sugar can be excellent alternatives for this recipe.

Common Mistakes to Avoid

  • Overworking the dough can lead to tough pastries; handle it gently and only roll it out as necessary.
  • Not chilling the dough can result in poor texture; always refrigerate the dough before baking to ensure flakiness.
  • Using stale or expired ingredients can negatively impact flavor; always check your expiration dates before baking.
  • Neglecting to preheat the oven can lead to uneven cooking; always ensure that the oven is at the correct temperature before placing in the oven.
  • Filling the pastries too much can cause them to overflow; use a moderate amount of filling for each Danish.
  • Skipping the egg wash will diminish the pastry’s golden color; don’t overlook this step for the best appearance.
  • Using a baking sheet that’s not lined can lead to sticking; always line with parchment paper for easy removal.
  • Baking at the wrong temperature can affect cooking times; ensure your oven is calibrated for accurate baking.
  • Not allowing the pastries to cool before serving can result in messy filling; let them sit for a few minutes.
  • Forgetting to adjust baking time for larger or smaller pastries can lead to over- or undercooked results.

Essential Techniques

Rolling pastry dough properly is essential for achieving a flaky texture. The key is to roll from the center outwards, applying even pressure. Avoid over-flouring the surface, which can toughen the dough. Mastery involves practice, where visual cues such as the dough’s elasticity indicate readiness.

Filling and shaping the Danish correctly is crucial. Make sure not to overfill, as it can burst during baking. Creating a small pocket for the filling with a well-defined border helps maintain shape. Common pitfalls include misjudging the amount of filling and not sealing the edges properly, which can lead to spills while baking.

Pro Tips for Perfect Cream Cheese and Cherry Danish

1. Use high-quality butter for optimal flakiness in the dough; good fat makes a significant difference in texture.
2. Chill all ingredients, including the cream cheese, before use; this prevents the butter from melting prematurely.
3. Experiment with flavor add-ins such as almond extract or lemon zest for a unique twist.
4. Always keep a close eye on pastries as they bake; ovens can vary, and pastries can quickly go from perfect to overdone.
5. Consider serving the Danish warm for an extra-enhanced experience; they taste divine right out of the oven!
6. Play around with different fruit fillings beyond cherry; try blueberry or mixed berries for new tastes.
7. Enjoy the Danish with a drizzle of icing for added sweetness; it provides a beautiful decorative finish.
8. Brush with cream or milk after baking for a shiny, appetizing look that enhances presentation.

Variations and Adaptations

Regional variations of the Danish can lead to delightful outcomes. For example, adding spices such as cinnamon or nutmeg can enhance the flavor profile and create a warming effect. Seasonal adaptations are also exciting; for instance, using pumpkin purée in the fall can create a comforting autumn treat.

Dietary modifications can cater to specific preferences; gluten-free pastry alternatives made from almond flour or oat flour can offer inclusivity. If avoiding dairy, using coconut cream can replicate the cream cheese texture with a unique flavor twist.

Exploring flavor variations can open a world of new possibilities. Consider incorporating lemon curd or chocolate chips, which can elevate the Danish to an entirely new dessert experience. For presenting the pastry, use fresh fruit garnishes or a sprinkle of powdered sugar for visual appeal.

Serving and Presentation Guide

To plate your Danish beautifully, consider a simple arrangement on a cake stand or a decorative platter. A dusting of powdered sugar or a drizzle of melted chocolate can enhance visual appeal significantly. Fresh cherries or mint leaves can serve as charming garnishes, adding color and freshness to the plate.

Accompany the pastries with traditional beverages like coffee or tea, creating a classic café experience. For modern serving suggestions, consider pairing them with flavored syrups or flavored creamers that align with the cherry profile.

Temperature plays a vital role in the enjoyment of pastries; serving them slightly warm can enhance the flavors. Avoid overcrowding on the plate to maintain an elegant presentation and consider portion control for balance.

Wine and Beverage Pairing

When it comes to wine pairings, a light Riesling or a fruity Sauvignon Blanc perfectly complements the sweet and tangy flavors of the Cream Cheese and Cherry Danish. These wines are crisp, enhancing the delicate pastry without overpowering it.

For those seeking non-alcoholic alternatives, consider pairing with a refreshing cherry lemonade or a sparkling water with a hint of cherry for a lively mix. If coffee is preferred, a medium roast that balances sweetness will create a delightful contrast with the creamy cheese and tart cherries.

Serving suggestions include chilling wines slightly and ensuring non-alcoholic beverages are served cold for a refreshing experience. The right beverage can enhance the overall enjoyment of this delightful pastry.

Storage and Shelf Life

Proper storage is essential to maintain the quality of your Cream Cheese and Cherry Danish. Store in an airtight container at room temperature for up to two days. For longer storage, consider refrigerating the pastries, which can extend their shelf life for about four days.

Ensure to check for signs of spoilage such as changes in texture or off odors, particularly with cream cheese fillings. If reheating, a few minutes in a preheated oven can revive the pastry’s flaky texture.

Freezing the Danish is also an option for longer-term storage. Wrap each pastry tightly in plastic wrap and place in a freezer-safe bag for up to three months. When ready to enjoy, thaw in the refrigerator overnight and reheat gently before serving.

Make Ahead Strategies

To streamline your baking process, consider preparing the cream cheese filling a day in advance. Store it in the refrigerator, allowing the flavors to meld together beautifully. You can also prepare and shape the pastries the night before, covering them and keeping them in the fridge until baking the next morning.

When storing between steps, ensure all elements are kept cool to maintain the integrity of the dough. Quality assessment is critical; keep an eye on the dough’s consistency to ensure it doesn’t become too soft.

For assembly, have all your ingredients prepped and organized, helping ensure a seamless baking experience. Lastly, opt to add fresh elements such as a sprinkle of powdered sugar just before serving for a beautiful, eye-catching finish.

Scaling Instructions

If you want to halve the recipe, simply divide all ingredients by two, which will adjust cooking times slightly; check for doneness a few minutes earlier. Conversely, doubling or tripling the recipe allows you to serve a larger crowd. Ensure you have sufficient baking sheets to accommodate the extra pastries.

When scaling, be mindful of the equipment adjustments; you may need to use larger mixing bowls or bake in batches. Timing modifications are essential, as larger quantities might take longer to bake through.

For storage considerations, remember that scaled-up recipes might require more space in the refrigerator or freezer, so plan accordingly. Whether scaling up or down, the delicious essence of the Danish remains constant.

Nutritional Deep Dive

Analyzing the macros of the Cream Cheese and Cherry Danish reveals a balance of carbohydrates, fats, and proteins. Each pastry generally packs around 200 calories, primarily from the pastry dough and creamy filling.

Micronutrient analysis shows a good source of calcium from the cream cheese and additional vitamins from the cherries, such as vitamin C and fiber. Baking with fresh ingredients not only boosts flavors but also provides health benefits through their nutrient content.

From a dietary perspective, consider portion analysis; enjoying one pastry at a time can help manage caloric intake. Weight management tips include pairing with healthier options like fruit or yogurt to balance indulgence.

Dietary Adaptations

Those following a gluten-free lifestyle can switch to gluten-free pastry mixes or create almond flour-based pastry dough to enjoy the Cream Cheese and Cherry Danish without compromise. For dairy-free options, substituting cream cheese with cashew cream or a thick coconut yogurt can maintain the creamy texture while catering to lactose intolerance.

Vegan variations can be achieved using plant-based cream cheese and ensuring that the pastry dough contains no eggs. Low-carb enthusiasts might consider using a dough made from almond flour or coconut flour, adapting the recipe to their dietary needs.

Keto dieters can find success by focusing on higher-fat fillings and minimizing sugar; using erythritol or stevia in your cherry filling can keep sugar content low while still providing sweetness.

Troubleshooting Guide

Texture issues can arise if the dough is overworked; to rectify, ensure you handle it gently and allow it to rest if it becomes tough. If the filling is too runny, consider draining excess liquid from the cherries before use to prevent soggy pastries.

Flavor balance can be adjusted by incorporating more sugar if overly tart; sampling the filling before assembly is crucial for achieving your desired flavor. In cases of temperature problems, investing in an oven thermometer helps ensure consistent results.

Equipment challenges may include lacking the right tools; improvisating with common kitchen items can be useful in a pinch. If ingredient substitutions lead to unsatisfactory results, take note of flavors and textures for future adjustments.

Timing concerns may occur if you overlap baking items; using a timer to keep track of multiple pastries will help stay organized while baking.

Recipe Success Stories

Community feedback on the Cream Cheese and Cherry Danish is glowing. Many bakers have shared their successful adaptations, exploring various fillings ranging from pumpkin spices to berry blends—demonstrating the recipe’s flexibility for creativity.

Readers often highlight the nostalgic connection to their childhood, recalling how sharing pastries with family brought joy and comfort. Many relate stories of gatherings centered around delicious Danish pastries, fostering connections and creating lasting memories.

Photography tips have also become a focal point, with followers sharing their beautifully styled Danish cakes on social media platforms, inspiring others to try their hand at this beloved recipe.

Encouraging adaptation tales reveal how each cook adds personal touches to the classic Danish, ensuring that every batch embodies their unique flair and love for baking.

Frequently Asked Questions

Can I freeze the Cream Cheese and Cherry Danish?

Absolutely! You can freeze the Danish before baking or after. Simply wrap them tightly and keep them in a freezer-safe container. When you’re ready to enjoy, thaw in the refrigerator overnight and bake as required.

What are good alternatives to cherries?

Feel free to use any fresh fruit like blueberries, raspberries or even apples. You could also try preserves or pie filling, depending on your flavor preferences.

How can I make the pastry vegan-friendly?

Substitute the cream cheese with a plant-based version and use a dairy-free butter for the pastry dough. Ensure to check all ingredient labels to avoid animal products.

What’s the best way to store leftovers?

Store the leftovers in an airtight container at room temperature for up to two days, or refrigerate for up to four days. Be sure to let them cool completely before storing.

Why are my pastries not rising properly?

Improper oven temperature is often the culprit; make sure your oven is preheated to the correct temperature before baking. Additionally, make sure your ingredients, especially yeast, are fresh.

Can I substitute the cream cheese with ricotta?

Yes! Ricotta can be used instead of cream cheese, offering a lighter flavor and texture. Just ensure it’s well-drained to avoid excess moisture.

What should I do if the filling leaks out while baking?

To prevent leaks, be cautious not to overfill the pastries. Ensuring the edges are well-sealed will also help contain the filling during baking.

Is this recipe suitable for beginner bakers?

This recipe is best suited for intermediate bakers due to the dough handling involved. However, with patience and practice, beginners can definitely tackle it!

How can I make the filling sweeter?

If you find the cherry filling too tart, you can add more sugar or a flavored syrup to it. Taste-testing before sealing your danishes allows for personal preference adjustments.

What kitchen equipment do I need?

A rolling pin, baking sheet, and mixing bowls are essential. If you have a pastry brush, it will be helpful for applying the egg wash for a shiny finish.

Can I make the dough ahead of time?

Yes! The dough can be made in advance and chilled in the refrigerator. Allow it to come to room temperature before rolling it out for use.

Additional Resources

If you enjoyed this recipe, explore related recipes that incorporate fruit and cream cheese, such as cheesecake bars or fruit tarts. Also, check out our technique guides on pastry making and dough handling to boost your baking skills further.

Information on seasonal fruits can help you choose the best ingredients throughout the year, adjusting your recipes based on what’s in season. Equipment recommendations for baking tools will help you build a kitchen that supports your baking creations efficiently.

Join the Conversation

We invite you to share your Cream Cheese and Cherry Danish creations on social media, using the hashtag #DanishDelight. Join our community by leaving your feedback and sharing your stories; we love to hear about your baking adventures.

Capturing the process of making these delightful pastries can inspire fellow bakers; sharing photos and tips not only builds connections but also enriches the experience for all. Together, let’s celebrate baking and the joy of sharing food with loved ones.

The Recipe

Cream Cheese and Cherry Danish

Serves: 12 pastries

Prep Time: 25 mins

Cook Time: 20 mins

Total Time: 45 mins

Kitchen Equipment Needed

  • Rolling pin
  • Baking sheet
  • Mixing bowls
  • Pastry brush
  • Measuring cups and spoons

Ingredients

  • 2 cups all-purpose flour
  • 1/2 cup unsalted butter, cold
  • 1 tsp salt
  • 1/4 cup sugar
  • 1/4 cup milk
  • 1/2 cup cream cheese, softened
  • 1 cup fresh cherries, pitted and halved
  • 1 egg (for egg wash)
  • 1 tsp vanilla extract
  • Powdered sugar (optional, for dusting)

Directions

  1. In a large bowl, combine the flour, sugar, and salt. Cut in the cold butter until the mixture resembles coarse crumbs.
  2. Add the milk gradually until a dough forms. Refrigerate for at least 30 minutes.
  3. Preheat the oven to 375°F (190°C) and line a baking sheet with parchment paper.
  4. Roll out the chilled dough on a floured surface to about 1/8 inch thick.
  5. Cut the dough into squares (about 4×4 inches) and place a small spoonful of cream cheese and cherries in the center of each square.
  6. Fold the corners over the filling and seal the edges with a fork or by pinching them closed.
  7. Place the Danish on the prepared baking sheet and brush the tops with beaten egg.
  8. Bake for 20 minutes or until golden brown. Allow to cool slightly before serving.
  9. Dust with powdered sugar before serving, if desired.

Recipe Notes

  • This Danish can be customized with your favorite fruit fillings.
  • Consider adding almond extract for additional flavor in the cream cheese mixture.
  • Filling can be prepared ahead of time and stored in the refrigerator for convenience.