Homemade Amaretto Chocolate Truffles with Rich Flavor

Indulge in Decadence: Amaretto Chocolate Truffles Recipe

⚖️
Difficulty
Moderate

⏲️
Prep Time
30 mins

🕒
Cook Time
15 mins

⏱️
Total Time
45 mins

🍽️
Servings
24 truffles

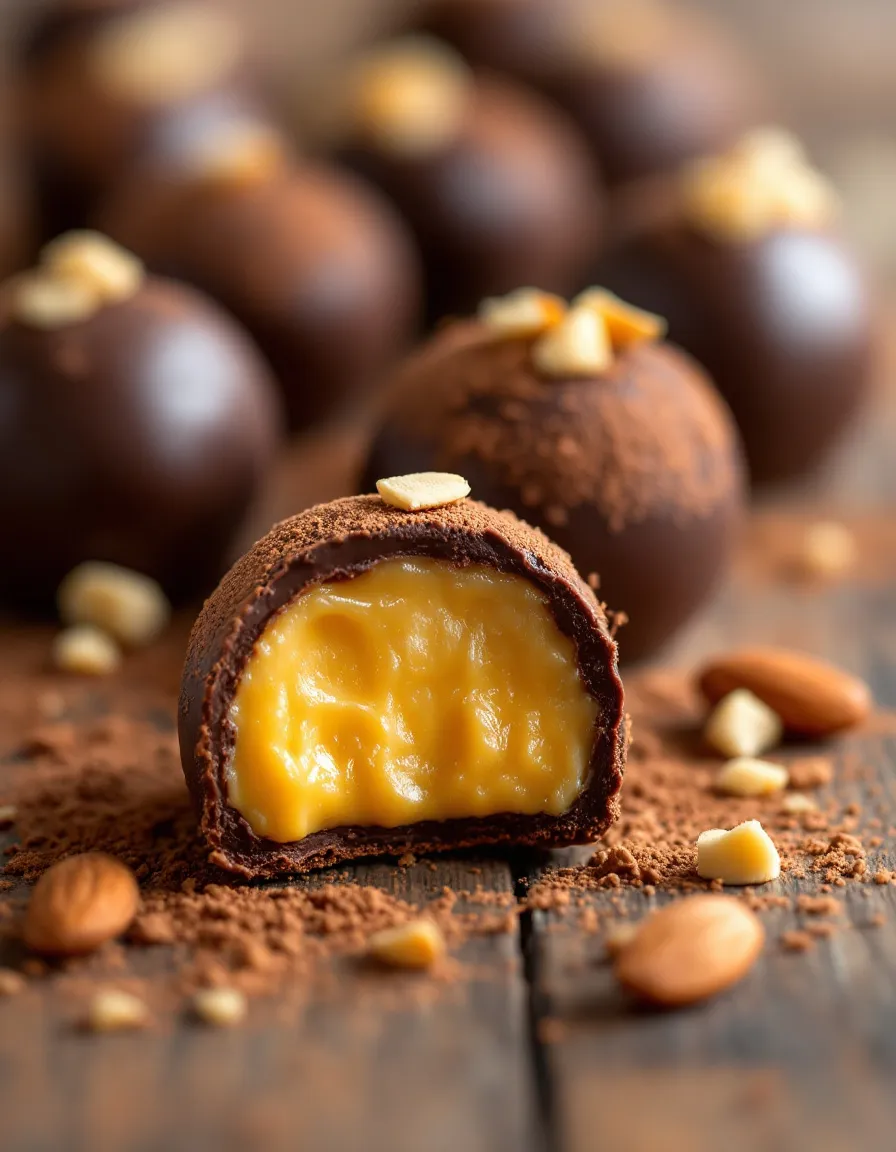
If you’re searching for an exquisite treat that combines rich chocolate with a hint of almond flavor, you’ll love this Amaretto Chocolate Truffles recipe. These delectable truffles melt in your mouth, revealing a decadent inner filling infused with the sweet allure of amaretto liqueur. Perfect for any occasion, these truffles can elevate your dessert game, impressing guests at parties or indulging yourself after a long day. The combination of smooth chocolate and aromatic amaretto creates an unforgettable taste experience.

Making these truffles is not only a rewarding culinary adventure but also a fantastic way to impress friends and family. Picture a delightful platter showcasing these handcrafted treats, dusted in cocoa powder or embellished with crushed nuts. Each bite delivers a perfect balance of sweetness and a subtle crunch, enhancing their elegant presentation. As you prepare these Amaretto Chocolate Truffles, the delightful aromas of melting chocolate and warming liqueur will fill your kitchen, promising a very sweet reward when they’re done.

Quick Recipe Highlights

  • Flavor Profile: Rich dark chocolate pairs beautifully with the nutty, sweet notes of amaretto, creating a sophisticated dessert for chocolate lovers.
  • Texture: These truffles feature a silky ganache center that contrasts wonderfully with a smooth outer shell, delivering a delightful mouthfeel.
  • Aroma: The fragrance of roasted almonds from the amaretto complements the rich scent of cocoa, evoking warmth and elegance.
  • Visual Appeal: Dusted with cocoa powder or rolled in chopped nuts, these truffles are visually stunning and sure to catch the eye.
  • Skill Level Needed: With moderate skill, anyone can craft these charming treats, from beginners to experienced bakers.
  • Special Equipment: You’ll need a double boiler, mixing bowls, and a sweet tooth for this luxurious recipe!

Recipe Overview

  • Difficulty Level: Moderate, as it involves melting chocolate and rolling truffles to perfection, but achievable for most home cooks.
  • Category: Perfect for desserts or sweet snacks, these truffles fit well into any meal plan for both fancy gatherings and casual family nights.
  • Cuisine: These truffles draw inspiration from Italian traditions, making them a great addition to any European-inspired dessert table.
  • Cost: The ingredients are reasonably priced, making this indulgent treat both accessible and affordable for any chocolate enthusiast.
  • Season: Ideal for winter and holiday entertaining, but delightful anytime you want a sweet treat.
  • Occasion: Perfect for birthdays, anniversaries, or holiday gatherings, these truffles can shine as elegant gifts as well.

Why You’ll Love This Recipe

Indulging in Amaretto Chocolate Truffles is a delightful experience that combines taste and luxury. The rich, velvety chocolate mastery envelops a flavorful amaretto center, leaving your palate satisfied. Each truffle encapsulates a sweet moment, making them ideal for special occasions or just because. The harmonious blend of flavors not only pleases the taste buds but creates a sensory delight that invites you back for more.

Convenience is key in today’s kitchen, and the preparation of these truffles is straightforward. The simplicity of the process is one of the reasons this recipe has become a favorite among home bakers. Even for novice cooks, the steps involve minimal equipment and can be achieved without any specialized skills. Furthermore, the truffles can be made ahead of time, allowing you to prepare for gatherings without last-minute stress.

Not only are these truffles a sweet indulgence, but they also provide nutritional benefits from the quality chocolate and almonds. Dark chocolate contains antioxidants, while amaretto offers a hint of the almond flavor that is both soothing and rich. The small serving sizes make it easy to savor the treat without overindulging, aligning well with various dietary preferences.

The social aspect of sharing these delightful truffles adds to their charm. Imagine presenting them on a platter during a gathering, inviting friends and family to enjoy a taste of luxury together. Their elegant look and delicious flavor make them a conversation starter, encouraging guests to share their own sweet stories.

With cost-effectiveness in mind, this recipe allows you to create gourmet-style truffles at home without the expense of buying them from a high-end chocolatier. The ingredients are easily accessible and can be found at local grocery stores, making this dessert an attainable luxury anyone can create.

Historical Background and Cultural Significance

The origins of chocolate truffles can be traced back to the 19th century in France, initially crafted by pastry chefs using a mixture of chocolate and cream. As this delicacy spread across Europe, variations emerged, incorporating local ingredients such as amaretto, resulting in the delightful Amaretto Chocolate Truffle. This particular version emphasizes the marriage of chocolate and almond flavors, deeply rooted in Italian traditions.

Within Italian cuisine, amaretto liqueur has a distinctive place, celebrated for its sweet, nutty flavor derived from almonds. It not only enhances desserts but also symbolizes the craft of Italian distillation. Including amaretto in chocolate creations intertwines culinary histories, demonstrating how local ingredients can elevate traditional sweets.

As food trends evolved, chocolate truffles became synonymous with gourmet desserts, showcasing the artistry of confectionery. The muddy exterior and creamy center of truffles have made them a festive treat, especially appreciated during the holiday seasons, embodying the essence of sharing and celebration.

Regional variations of these truffles can be found in different countries, showcasing unique flavor correlations such as the addition of spices, fruits, or liqueurs. These adaptations represent the creativity of local bakers, expanding the truffle repertoire beyond its French beginnings.

Ingredient Deep Dive

Dark Chocolate
Dark chocolate is a fundamental component in most truffle recipes, known for its rich flavor and health benefits. Originating from the cacao bean, dark chocolate has gained popularity for its antioxidant properties, making it a favored choice among health-conscious consumers. When selecting dark chocolate for truffles, aim for high-quality chocolate with at least 70% cacao, as it enhances the flavor profile significantly. Store your chocolate in a cool, dark place to maintain its integrity, and consider using it within six months for optimum freshness.

Amaretto Liqueur
Amaretto is an almond-flavored liqueur that enriches the flavor of various dishes and desserts. Its origins can be traced back to Italy in the 16th century, where it was initially created as a transitional drink for many festive occasions. Nutritional-wise, while imbibed in moderation, amaretto can provide a hint of flavor without overpowering sweetness. When choosing amaretto, look for recognizable brands for authentic taste and quality. Always keep the liqueur sealed, stored in a cool area, and used within a year for the best flavor.

Common Mistakes to Avoid

  • Using low-quality chocolate: Choosing inferior chocolate can affect both the flavor and texture of your truffles significantly.
  • Not letting ganache cool sufficiently: Skipping this step can make the ganache too soft, making it difficult to shape your truffles.
  • Overheating chocolate: Chocolate should be melted slowly to prevent burning; a double boiler is ideal for this process.
  • Rushing the chilling process: Truffles need ample time to set in the refrigerator, so avoid the temptation to skip this step.
  • Inconsistent truffle size: Use a cookie scoop to ensure your truffles are uniform for even cooking and presentation.
  • Dipping in chocolate without tempering: If covering with chocolate, make sure it is tempered for a glossy finish.
  • Forgetting to wash hands: A gentle rolling and shaping method with clean hands prevents extra messes.
  • Using stale or expired ingredients: Always check your chocolate and liqueur are fresh to maintain quality.
  • Neglecting cocoa dusting: This adds not only visual appeal but also balances the sweetness effectively.
  • Failing to get creative: Don’t hesitate to personalize with different flavorings or garnishes for unique variations.

Essential Techniques

Tempering Chocolate
Tempering chocolate is crucial for achieving a shiny finish and firm texture. To master this technique, melt two-thirds of your chocolate to the right temperature, then add the remaining chocolate to bring it down to a suitable dipping temperature. Ensure not to overheat, as burning the chocolate can ruin its quality and flavor. Look for a glossy appearance and a snap when you break a piece as signs of successful tempering.

Creating Ganache
Ganache is the heart of any chocolate truffle recipe, blending cream and chocolate to form a rich filling. To make ganache, heat the cream until it’s steaming and pour it over chopped chocolate, allowing it to sit before stirring. This method will yield a smooth, velvety texture when mixed properly. Watch for a silky consistency and make sure the chocolate is fully melted for the best results.

Pro Tips for Perfect Amaretto Chocolate Truffles

1. Use high-quality chocolate to ensure your truffles taste gourmet.
2. Chill the ganache thoroughly before rolling; this will make your life easier when shaping.
3. Experiment with flavors by adding extracts or different liqueurs to customize your truffles.
4. Utilize a pastry bag for filling molds for unique shapes and designs.
5. Always wear gloves when rolling the truffles for a polished look.
6. Consider freezing extra truffles for later enjoyment; they freeze beautifully.
7. Garnish with colorful toppings for an attractive presentation; think crushed pistachios or edible gold leaf.
8. Store in an airtight container in a cool place to maintain freshness.

Variations and Adaptations

For those seeking regional variations, consider infusing your truffles with a hint of espresso for an Italian twist. For seasonal adaptations, add festive flavors like peppermint for the winter holidays. Dietary modifications might include using dairy-free chocolate for a vegan version or swapping out the amaretto for a non-alcoholic vanilla extract for those wishing to omit alcohol. Explore flavors by introducing additional spices, such as cinnamon or cardamom, for an exotic touch. Lastly, serving these truffles in different presentations, like on mini dessert spoons or in elegant paper cups, can elevate any gathering.

Serving and Presentation Guide

When serving Amaretto Chocolate Truffles, consider using elegant platters for a refined display. Arrange truffles neatly, allowing space for guests to take their favorites without making a mess. Garnishing with chocolate shavings or crushed nuts adds visual lushness. Traditional accompaniments include a robust coffee or dessert wine that pairs beautifully with the rich flavors. Temperature also plays a role—serve at room temperature for the best texture. For portion control, consider offering truffle boxes of assorted flavors during gatherings to encourage sharing.

Wine and Beverage Pairing

Pair these luxurious Amaretto Chocolate Truffles with full-bodied red wines, such as Cabernet Sauvignon or Merlot, to complement their deep chocolate tones. For a sweeter option, try dessert wines like Port or Moscato, which harmonize nicely with the almond notes of the amaretto. Non-alcoholic beverages, such as espresso or herbal teas, can also enhance the dessert experience, providing a nice balance to the sweetness. Keep your drinks chilled or warm, depending on your serving preference, for maximum enjoyment.

Storage and Shelf Life

Store your Amaretto Chocolate Truffles in an airtight container at room temperature for up to one week, or refrigerate them for prolonged freshness. Ensure they are fully cooled before sealing to prevent condensation. If you decide to freeze them, use a freezer-safe container, storing them between layers of parchment paper. Truffles can last in the freezer for up to three months. Always watch for signs of spoilage, such as taste changes or unusual odors, particularly if they’ve been stored beyond the recommended times.

Make Ahead Strategies

To streamline your preparation, consider making the truffles up to a week in advance. Plan to make the ganache and roll the truffles, then store them in an airtight container. Chilling the truffles for a couple of hours enhances their firmness for easier handling. If you want to preserve that “just-made” taste, you can coat them in chocolate just before serving. Refresh the presentation with garnishes for added flair right before guests arrive.

Scaling Instructions

Scaling the Amaretto Chocolate Truffles recipe is simple. For halving the batch, reduce all ingredient measurements by 50%, but be mindful of the chilling times, as smaller batches may set more quickly. For doubling or tripling the recipe, ensure your mixing bowl is large enough to accommodate the larger volume, and adjust chilling space accordingly. If you’re preparing a larger batch, you may want to use two baking sheets for easier rolling and chilling logistics.

Nutritional Deep Dive

The Amaretto Chocolate Truffles offer rich flavors, but they also come with a variety of nutritional components. Dark chocolate holds a significant amount of antioxidants and healthy fats while providing a richness in flavor. Each truffle, while indulgent, can be enjoyed in moderation as part of a balanced diet. Consider their caloric content and portion sizes for mindful consumption. The inclusion of almonds through the amaretto adds nutritional value, including protein and fiber, which enhances their overall health profile when enjoyed sparingly.

Dietary Adaptations

For gluten-free baking, ensure all ingredients are certified gluten-free, especially your chocolate. For dairy-free options, select appropriate dairy-free chocolate varieties to create equally decadent truffles. Vegan adaptations can be made by substituting the regular cream with coconut cream, yielding a deliciously smooth result. Those on a low-carb or keto diet can explore using sugar-free chocolate, but keep in mind that this may alter the taste and texture. For a lighter treat, consider reducing the size of each truffle or substituting part of the chocolate with fruit purees for natural sweetness.

Troubleshooting Guide

If your truffles are too soft, ensure that the ganache has sufficiently chilled before rolling. If the exterior chocolate doesn’t set properly, check that you tempered your chocolate correctly. When truffles turn out too sweet, dusting with cocoa powder or adding a sprinkle of sea salt can help balance flavors. If you’re facing issues with ingredient substitutions, always test out new options in small batches before making large quantities. Lastly, overcooked ganache can lead to a grainy texture, so monitor your heat carefully during preparation.

Recipe Success Stories

Community feedback around the Amaretto Chocolate Truffles recipe praises their rich flavor and elegant presentation. Many home cooks have shared their-adaptations, such as incorporating additional spices or using flavored chocolate. A photography enthusiast even mentioned the truffles making an excellent subject, showing off different plating techniques in dessert photos. The recipe’s flexibility in adapting to seasonal ingredients has also resonated with those who try to keep their baking fresh and exciting.

Frequently Asked Questions

Can I make truffles without amaretto?

Absolutely! You can replace amaretto with vanilla extract or any other liqueur that you prefer, tailoring it to your taste.

How long do these truffles last?

When stored in an airtight container at room temperature, the truffles can last for up to one week. Refrigeration can extend their freshness for longer.

Can I store these chocolate truffles in the freezer?

Yes, you can freeze your truffles! Just be sure to place them in a freezer-safe container, layered with parchment paper, for up to three months.

How do I know if my ganache is set?

Your ganache should be firm to the touch and hold its shape when rolled into balls. Chilling it for a couple of hours helps achieve this consistency.

Can I add different flavors to the truffles?

Certainly! You can personalize your truffles with different liqueurs, nuts, or spices to find your perfect flavor combinations.

What should I do if my chocolate is too thick?

If your melted chocolate seems too thick, you can gently stir in a little bit of oil or tempered chocolate to thin it out.

Are these truffles suitable for children?

If made with alcohol, it is advisable to reserve these for adult consumption. However, you can create a non-alcoholic version for kids by replacing amaretto with flavored extracts.

What equipment do I need to make truffles?

You’ll need basic kitchen tools such as a double boiler, mixing bowls, a whisk, and a cookie scoop for shaping your truffles.

Can I make these truffles vegan?

Yes! Substitute dairy cream with coconut cream and ensure to use dairy-free chocolate to keep your truffles vegan-friendly.

Is it necessary to temper the chocolate?

While not mandatory, tempering chocolate will give your truffles a nice glossy finish and improve texture. It’s worth taking the extra time!

What’s the best way to dust the truffles?

Use cocoa powder or finely chopped nuts by rolling the truffles in the chosen dusting material gently to cover them evenly for the fancy finish.

Additional Resources

For those eager to discover more, consider exploring related recipes such as peppermint bark or assorted flavored bonbons, which provide an array of tastes to indulge in. Kitchen technique guides can further enhance dessert-making skills, teaching you the nuances of tempering chocolate or creating specialty fillings. Dive deeper into ingredient information to learn about the origins and health benefits of each component, and get recommendations on essential baking equipment to streamline your process. Plus, look out for seasonal variations that allow you to adjust flavors and presentations to match festive occasions throughout the year.

Join the Conversation

Engagement with the baking community can enhance your experience in making Amaretto Chocolate Truffles. Share your creations on social media with beautiful photos that showcase your culinary artistry, using hashtags that connect you with other dessert lovers. Recipe reviews can provide invaluable insights and inspire others, while discussions about ingredient variations encourage creativity and expand flavor perspectives. Your journey into truffle-making is enriched by the joy of sharing and experiencing the confections created by other passionate bakers.

The Recipe

Amaretto Chocolate Truffles

Serves: 24 truffles

Prep Time: 30 mins

Cook Time: 15 mins

Total Time: 45 mins

Kitchen Equipment Needed

  • Double boiler
  • Mixing bowls
  • Whisk
  • Cookie scoop
  • Airtight container for storage

Ingredients

  • 8 oz dark chocolate, chopped
  • ½ cup heavy cream
  • ¼ cup amaretto liqueur
  • Cocoa powder for dusting
  • Finely chopped nuts for optional coating

Directions

  1. In a double boiler, melt dark chocolate gently over simmering water, stirring occasionally.
  2. In a separate saucepan, heat the heavy cream until just boiling, then pour it over the chopped chocolate.
  3. Let the mixture sit for 5 minutes before stirring until smooth.
  4. Add amaretto liqueur and stir until fully incorporated.
  5. Transfer the ganache to a bowl and refrigerate for about 1-2 hours until firm.
  6. Using a cookie scoop, portion out the ganache and roll it into balls quickly using your hands.
  7. Roll each truffle in cocoa powder or finely chopped nuts to coat.
  8. Store truffles in an airtight container in the refrigerator until ready to serve.
  9. Allow truffles to come to room temperature before serving for best texture.

Recipe Notes

  • You can customize the flavor by using different liqueurs or extracts.
  • Make sure to work with cold hands to prevent the ganache from melting too quickly.
  • For a festive touch, consider rolling the truffles in colored sprinkles for special occasions.

Best Paris Hot Chocolate – Rich, Creamy, and Authentic

Indulge in Paris Hot Chocolate: A Decadent Treat

⚖️
Difficulty
Medium

⏲️
Prep Time
10 mins

🕒
Cook Time
10 mins

⏱️
Total Time
20 mins

🍽️
Servings
4 servings

Welcome to a world of irresistible indulgence with Paris Hot Chocolate, a rich and velvety drink that captures the essence of luxury in every sip. This decadent beverage, rooted in the heart of French culture, is made with the finest dark chocolate, creating a robust flavor profile that will enchant your taste buds. Imagine curling up with a mug of this delightful concoction on a chilly afternoon, steam rising as each sip envelopes you in a comforting embrace. With its divine taste and creamy texture, it’s a perfect treat to turn any day into an extraordinary occasion.

The magic of Paris Hot Chocolate lies not just in its luxurious chocolate depth but also in its inviting aroma and inviting visual appeal. As you pour it into your favorite mug, the glossy, rich liquid invites you to indulge, enhanced by a sprinkle of whipped cream or a dash of cinnamon. The combination of flavors, textures, and aromas creates a symphony that delights the senses. Once you experience this hot chocolate, it will become a staple in your recipe book for cozy evenings, gatherings, or simply when you need a comforting treat.

Quick Recipe Highlights

  • Flavor Profile: This Paris Hot Chocolate boasts a rich, intense chocolate flavor tempered with velvety creaminess, perfect for chocolate lovers.
  • Texture: Expect a luxuriously smooth and creamy mouthfeel that coats your palate in every sip.
  • Aroma: The enticing aroma of melted chocolate mingled with a hint of vanilla adds to the sensory experience.
  • Visual Appeal: The silky appearance, garnished with whipped cream or chocolate shavings, makes it a feast for the eyes.
  • Skill Level Needed: This recipe is accessible for both novice and experienced cooks, requiring only basic kitchen skills.
  • Special Equipment: A stovetop or microwave for heating the ingredients and a whisk for mixing is all you need!

Recipe Overview

  • Difficulty Level: This medium difficulty recipe requires minimal techniques, making it ideal for many home cooks.
  • Category: Suitable as a beverage, it’s perfect for afternoon treats or dessert settings.
  • Cuisine: Originating from Paris, this hot chocolate reflects the rich culinary tradition of French chocolatiers.
  • Cost: The ingredients are relatively affordable, costing around $10-15 for a cozy gathering.
  • Season: Best enjoyed in the cooler months when a warm beverage hits the spot.
  • Occasion: Delightful for winter parties, romantic date nights, or holiday celebrations.

Why You’ll Love This Recipe

Paris Hot Chocolate is irresistibly rich and creamy, making it the perfect comfort drink for chocolate enthusiasts. Featuring high-quality dark chocolate, the flavor is robust yet balanced, providing a satisfying experience that warms the heart. Each sip envelops you in velvety goodness, ensuring you savor the moment.

The convenience of making this beverage makes it even more special. In just 20 minutes, you can whip up a batch that serves four, making it an efficient choice when hosting friends or enjoying a quiet night in. Plus, gathering around the table with mugs of Paris Hot Chocolate brings a sense of connection and warmth, enhancing any gathering.

Nutritionally, using dark chocolate provides not only a treat for the taste buds but also a boost of antioxidants, which can promote heart health. You can indulge in this hot chocolate with less guilt, savoring its richness while benefiting from some nutritional value.

This recipe is also versatile for entertaining, as it can be easily adapted with various toppings like marshmallows, flavored syrups, or spices. Sharing Paris Hot Chocolate at gatherings creates memorable moments, whether it’s a casual meetup or a festive celebration.

Historical Background and Cultural Significance

Paris Hot Chocolate has its origins in the French capital, where the art of chocolatier began centuries ago. French chocolatiers meticulously crafted this drink, combining their expertise with rich chocolate sourced from far-flung places. Over time, Paris Hot Chocolate evolved into a revered drink enjoyed in cafés and homes alike.

This drink signifies comfort and warmth, especially during the long, harsh winters of Europe. Its cultural importance is reflected in Parisian café culture, where people gather to enjoy conversations over steaming mugs. The tradition of sipping chocolate warms both body and spirit, creating connections and memories in the heart of Paris.

As the recipe has evolved, variations have emerged, each offering a unique twist. Modern variations now include different types of chocolate and flavor infusions, contributing to the drink’s ongoing legacy as a luxurious treat appreciated by chocolate lovers everywhere.

Ingredient Deep Dive

Dark Chocolate: This ingredient is the star of the recipe, offering a deep flavor and richness. Historically cherished for its luxurious taste, dark chocolate is also celebrated for its health benefits, including antioxidants. When selecting chocolate, look for high cocoa percentages to ensure a robust flavor. Store in a cool, dry place, and it can last for months; however, avoid exposure to moisture.

Milk: Fresh whole milk adds creaminess to the hot chocolate, creating that smooth texture. Milk has been a staple in recipes for centuries, providing not only flavor but also nutrition, including calcium and vitamin D. Choose fresh milk for the best flavor and keep it refrigerated. Those with lactose intolerance can opt for lactose-free milk or plant-based alternatives.

Common Mistakes to Avoid

  • Using low-quality chocolate: Always opt for high-quality dark chocolate for richer flavor and better texture.
  • Heating the chocolate too quickly: Slow heating helps to avoid burning and ensures smooth melding.
  • Not whisking enough: Proper whisking is essential for combining ingredients seamlessly and achieving a creamy consistency.
  • Overcrowding the recipe: Stick to the recommended servings to maintain the drink’s quality.
  • Skipping garnishes: Don’t underestimate how toppings elevate the drink visually and in flavor.
  • Using cold milk: Always heat your milk to contribute to the creamy texture of the hot chocolate.
  • Not tasting during preparation: Adjust sweetness levels as needed throughout cooking for flavor balance.
  • Neglecting presentation: Serve in appealing mugs and consider decorative touches for an inviting experience.

Essential Techniques

Whisking: This technique is critical for achieving a smooth consistency in Paris Hot Chocolate. It helps to blend the chocolate with the milk seamlessly. Use a standard whisk and form a gentle whirl while mixing; visual cues include the disappearance of lumps and a glossy finish.

Slow Heating: Heating the chocolate and milk slowly over low flame is essential to prevent burning and maintaining flavor. Use a stovetop and keep an eye on it. When the chocolate starts to melt without sputtering or smoking, you know you’re doing it right.

Pro Tips for Perfect Paris Hot Chocolate

1. Use different types of chocolate: Mixing dark and milk chocolate can create a unique flavor.

2. Add flavors: Consider adding spices like cinnamon or nutmeg for a warming kick.

3. Taste as you go: Always adjust the sweetness to match your preferences.

4. Use whipped cream: Top with fresh whipped cream for added creaminess and visual appeal.

5. Try flavored syrups: A splash of vanilla or hazelnut syrup can take this drink to the next level.

6. Serve at a perfect temperature: Aim for serving hot but not scalding to effectively enjoy the flavors.

7. Complement with snacks: Pair with shortbread cookies or croissants for a delightful experience.

8. Experiment with toppings: Chocolate shavings or a sprinkle of sea salt can elevate your hot chocolate.

Variations and Adaptations

There are many delightful variations of Paris Hot Chocolate. For instance, a white chocolate version adds a sweeter, creamier twist. Alternatively, for spicier tones, consider infusing chili powder or cayenne pepper. Seasonal adaptations can also be made, like adding pumpkin spice for fall.

If dairy-free options are needed, swap whole milk for almond or coconut milk, while keeping the rich chocolate flavor intact. For a decadent dessert, you could serve chocolate with a velvety chocolate ice cream swirl for an indulgent treat. Lastly, presentation can shift if you use fun serving vessels or creative garnishes like edible flowers or colorful sprinkles.

Serving and Presentation Guide

When serving Paris Hot Chocolate, choosing the right vessel enhances the experience. Opt for oversized mugs that emphasize its richness. When garnishing, a dollop of whipped cream, a sprinkle of cocoa powder, or a few chocolate shavings create an inviting display. Serve it hot, and consider accompanying it with complimentary snacks like biscotti or pastries to provide guests with texture and flavor variety.

Wine and Beverage Pairing

Pairing Paris Hot Chocolate with wine can enhance the experience. A fruity red wine such as Merlot complements the chocolate’s rich notes while balancing sweetness. For non-alcoholic options, consider pairing it with a rich chai latte, which echoes the spices and warmth of the hot chocolate.

Storage and Shelf Life

To store leftover Paris Hot Chocolate, ensure it cools to room temperature before sealing it in an airtight container in the refrigerator. Enjoy it within 3-5 days. When reheating, do so slowly on the stovetop, maintaining a careful eye to prevent scorching. For longer storage, consider freezing the chocolate in ice cube trays and thawing portions as needed.

Make Ahead Strategies

To simplify preparation, consider making a large batch of the hot chocolate ahead of time and storing it in the fridge. This drink can be stored tightly covered. Before serving, gently reheat and stir to maintain its creamy texture. For gatherings, prepare toppings in advance, making it easy to serve with minimal preparation when guests arrive.

Scaling Instructions

If you want to halve or triple your Paris Hot Chocolate recipe, adjust the quantities of each ingredient accordingly. Keep in mind that cooking times may vary slightly with larger or smaller batches, so monitoring the consistency as it heats is key. For large gatherings, consider using a slow cooker for distribution.

Nutritional Deep Dive

Each serving of Paris Hot Chocolate delivers a delightful treat with a macro breakdown focusing mainly on carbohydrates from the sugar and chocolate. While exact values may vary, it contains beneficial elements such as protein and calcium from milk. For those monitoring their diet, be aware of the sugar content, and consider using dark chocolate with higher cocoa percentages for added health benefits.

Dietary Adaptations

This recipe can be easily adapted to meet various dietary needs. For dairy-free options, substitute with almond or oat milk; both maintain a delightful flavor and creamy texture. Additionally, those on a vegan diet can use plant-based chocolates and whipped coconut cream. For low-carb diets, consider using sugar-free chocolate and alternative sweeteners to reduce calorie count.

Troubleshooting Guide

If your hot chocolate turns out too thick, adding a splash more milk during stirring can solve the issue. For sweetness balance, taste during preparation to prevent over or under-sweetening. If the chocolate clumps, stirring vigorously while heating can break them up; ensure low heat helps maintain a smooth consistency.

Recipe Success Stories

Many readers love this recipe for its luxurious taste and easy preparation, often sharing their variations on social media. Success stories show how simple adjustments like adding sea salt have made this drink a family favorite. User-submitted photographs reveal delicious presentation ideas, showcasing the drink’s versatility in gatherings.

Frequently Asked Questions

Can I use milk alternatives in this recipe? Absolutely! Almond milk, coconut milk, or oat milk work well and maintain a creamy consistency while being dairy-free.

How do I make my hot chocolate sweeter? You can add more sugar or sweetened chocolate to achieve your desired level of sweetness while preparing.

Can this recipe be doubled or halved? Yes, you can easily adjust the servings as needed, keeping the same ratios. Just watch for slight discrepancies in cooking time.

Is Paris Hot Chocolate good for making in batches? Definitely! You can store it in an airtight container for a few days and reheat as needed.

What toppings do you recommend? Whipped cream, chocolate shavings, or a sprinkle of cinnamon add a delicious flair and enhance the flavor!

Can I add spices to my hot chocolate? Yes! Consider cinnamon, nutmeg, or even a pinch of cayenne for added warmth and complexity.

Is there a non-dairy whipped cream alternative? Yes, there are several brands of coconut whipped cream available, or simply whip up some coconut cream for a dairy-free topping!

What’s the best way to reheat leftover hot chocolate? Reheat gently on the stove over low heat, stirring frequently to ensure even warmth without scorching.

Can this recipe be made vegan? Yes! Use plant-based chocolate and milk alternatives to make it vegan-friendly.

Are there any great pairings with Paris Hot Chocolate? It pairs beautifully with pastries, cookies, or even a light berry tart to cut through the richness.

Additional Resources

For those looking to explore further, check out related recipes that celebrate chocolate, such as Chocolate Lava Cake or Mocha Brownies. Explore technique guides to improve your whipping and chocolate melting skills. Investments in quality kitchen tools will pay off, including heavy-bottomed pots and high-quality whisks that make your hot chocolate-making experience smoother.

Join the Conversation

We invite you to share your Paris Hot Chocolate experiences on social media! Post your photographs using the hashtag #ParisHotChocolate, and join our community of passionate cooks. Provide your feedback, suggest variations you’ve tried, and engage with others who love this decadent drink.

The Recipe

Paris Hot Chocolate

Serves: 4 servings

Prep Time: 10 mins

Cook Time: 10 mins

Total Time: 20 mins

Kitchen Equipment Needed

  • Stovetop or microwave
  • Whisk
  • Airtight container for storage (optional)
  • Mugs for serving

Ingredients

  • 8 oz dark chocolate, chopped
  • 4 cups whole milk
  • 1/2 cup heavy cream (optional for extra creaminess)
  • 1/4 cup sugar (adjust to taste)
  • 1 teaspoon vanilla extract
  • Pinch of salt

Directions

  1. In a saucepan, combine milk and sugar over medium heat, stirring until warm.
  2. Add chopped chocolate and salt to the warm milk, whisk continuously until melted and smooth.
  3. Once melted, stir in the vanilla extract and heavy cream, mixing well.
  4. Pour into mugs, and top with whipped cream or chocolate shavings if desired.

Recipe Notes

  • Feel free to adjust sweetness to your preference.
  • Experiment with different types of toppings for variety.
  • Store leftovers in the fridge for up to five days.

Best Malteser Cheesecake – Creamy and Crunchy Dessert

Decadent Malteser Cheesecake: A Delightful No-Bake Treat

⚖️
Difficulty
Easy

⏲️
Prep Time
30 mins

🕒
Cook Time
0 mins

⏱️
Total Time
30 mins

🍽️
Servings
8

If you’re looking for a deliciously easy dessert to impress your friends and family, look no further than this Malteser Cheesecake. Imagine sinking your spoon into a creamy and smooth cheesecake infused with the rich, malty flavor of Maltesers. The gentle sweetness, paired with a crunchy biscuit base, makes each bite an indulgent treat that is perfect for any occasion.

This no-bake Malteser Cheesecake is not only simple to prepare but also requires no baking, making it an ideal recipe for warm days or when you’re short on time. With a light and airy texture, the cream cheese filling is enhanced with crushed Maltesers and whipped cream, creating a dessert that balances sweetness and richness with every mouthful. Serve it chilled for an indulgent delight that everyone will love.

Quick Recipe Highlights

  • Flavor Profile: This cheesecake features a delightful combination of sweet and malty flavors from the Maltesers and cream cheese.
  • Texture: The creamy filling contrasts beautifully with the crunchy biscuit base and the added Malteser pieces, providing a unique mouthfeel.
  • Aroma: The dessert delivers a sweet, inviting aroma that hints at its sugary goodness.
  • Visual Appeal: The cheesecake is visually stunning, adorned with whole Maltesers and a glossy chocolate drizzle, making it a showstopper on any table.
  • Skill Level Needed: This recipe is beginner-friendly, requiring no advanced techniques, just some creativity.
  • Special Equipment: All you need is a springform pan, a mixing bowl, and an electric mixer.

Recipe Overview

  • Difficulty Level: Easy to make, this Malteser Cheesecake is perfect for beginner bakers. There’s minimal cooking involved, making it accessible to everyone.
  • Category: This dessert fits perfectly into the sweet course category, ideal for gatherings or as a family treat.
  • Cuisine: Drawing inspiration from British dessert traditions, this cheesecake adds a playful twist with the beloved Malteser chocolate.
  • Cost: The approximate cost for this recipe is around $15, making it budget-friendly.
  • Season: It’s perfect for any season, but particularly delightful in summer when chilled desserts are sought after.
  • Occasion: Great for parties, holiday celebrations, or as a treat just because; this cheesecake will always be a hit.

Why You’ll Love This Recipe

Malteser Cheesecake stands out for its delicious taste and appealing texture. The combination of a creamy, rich filling dotted with crushed Maltesers creates a delightful contrast to the crunchy biscuit base. Every bite is a harmonious blend of flavors, making it hard to resist going back for seconds.

This cheesecake is extremely convenient to prepare. With minimal cooking required, you can whip it up in just 30 minutes and allow it to set in the fridge while you focus on other tasks. This makes it a perfect dessert for busy weekdays or spontaneous gatherings.

Nutritionally, it offers a balance of indulgence and enjoyment. While it is a treat that is higher in calories, the cream cheese provides some calcium, and with portions controlled, it can be enjoyed guilt-free as part of a varied diet.

Socially, this dessert is a crowd-pleaser, inviting comments and conversations among friends and family. Sharing a slice is a wonderful way to connect, while the visual appeal makes it a centerpiece at any dessert table.

Finally, this cheesecake offers fantastic cost-effectiveness. With a few key ingredients and straightforward preparation, you can create a luxurious dessert that serves eight or more, proving that delightful treats don’t have to break the bank.

Historical Background and Cultural Significance

The cheesecake, in its many forms, has a rich history that dates back to ancient Greece, but the no-bake version gained popularity in the 20th century as refrigeration became common. The Malteser candy itself, developed in the UK in the 1930s, quickened the pace of dessert innovations, allowing sweet lovers to explore flavor combinations that pushed boundaries.

As a part of British culture, Maltesers have become synonymous with shared experiences—whether during movie nights or family gatherings, their inclusion in desserts like the Malteser Cheesecake adds a layer of nostalgia and warmth, resonating deeply with many individuals.

Malteser Cheesecake has evolved over time with various creative takes, often featuring other chocolate varieties, making it a versatile dessert that keeps up with changing tastes and trends. It symbolizes adaptability within the global culinary landscape.

Regional variations of this cheesecake exist, where local flavors can be incorporated. For instance, in Australia, adding Tim Tams instead of Maltesers creates an equally delightful twist on this beloved dessert.

Ingredient Deep Dive

Maltesers: These chocolate-covered malt balls have a rich history and are a staple in British sweets. Great for snacking, they also add a nostalgic flavor to desserts. Nutritionally, they are energy-dense and provide some minerals but should be consumed in moderation.

Cream Cheese: This ingredient is foundational to many cheesecakes, providing a creamy texture and tangy flavor. It’s rich in calcium and protein, contributing to bone health. When selecting cream cheese, check for freshness and aim for full-fat varieties for the best texture in your cheesecake.

Digestive Biscuits: These biscuits serve as the base for the cheesecake. Originating from the UK, they have a slightly sweet and crumbly texture that pairs beautifully with the creamy filling. Their whole grain component offers fiber, although they should again be eaten in moderation.

Whipped Cream: Adding lightness to the cheesecake, whipped cream enhances the flavor and gives it a delightful texture. It’s a source of calcium but should be used sparingly due to its fat content. When choosing whipped cream, opt for fresh over canned for best flavor.

Common Mistakes to Avoid

  • Not properly softening cream cheese: Ensure your cream cheese is at room temperature for a smooth filling; otherwise, it will be lumpy.
  • Using too much gelatin: If you decide to add gelatin to firm the cheesecake, remember that less is more to avoid a rubbery texture.
  • Not letting the cheesecake chill long enough: For best results, allow the cheesecake to set for at least 4 hours, or overnight if possible.
  • Skipping the biscuit base: The base adds structure and texture; don’t omit it.
  • Not crushing the biscuits finely: For an even base that holds together well, crush the biscuits into fine crumbs.
  • Over-mixing the filling: Mix just until combined to maintain a light, airy texture.
  • Using flavored cream cheese: Stick with plain cream cheese to keep the authentic taste of the cheesecake.
  • Serving while too warm: Ensure the cheesecake is well-chilled before serving for the best flavor and texture.
  • Not adjusting sweetness: Taste the filling before setting it in the fridge, and adjust the sugar to your preference.
  • Using stale biscuits: For the best taste, always use fresh digestive biscuits.

Essential Techniques

Mixing Ingredients: It’s essential to combine all ingredients evenly to maintain a harmonious flavor. Use an electric mixer and avoid over-beating to keep the filling light. Look for a creamy consistency for the perfect cheesecake filling.

Chilling: Proper chilling is crucial. Allowing the cheesecake to firm up in the refrigerator enhances the texture. Aim for a minimum of 4 hours of chill time to ensure the cheesecake is set and flavors meld together harmoniously.

Pro Tips for Perfect Malteser Cheesecake

1. Use high-quality Maltesers for richer flavor. The better the chocolate, the more delicious your cheesecake will be.

2. Consider adding a layer of melted chocolate on top for extra decadence – it pairs beautifully with the creamy filling.

3. Add an extra sprinkle of crushed Maltesers on top before serving for a beautiful presentation.

4. Ensure you’re using full-fat cream cheese for a creamy texture; low-fat versions can become grainy.

5. Don’t rush the chilling process – quality improves significantly with longer chill times.

6. For a fancy presentation, serve slices with fresh berries on the side.

7. Always taste the filling before pouring it into the crust to ensure it meets your sweetness preferences.

8. Store any leftovers covered in the fridge; it can last up to 3 days without losing flavor.

Variations and Adaptations

1. Swap Maltesers with your favorite chocolate candy bars for a unique twist tailored to your tastes.

2. For a fruitier option, mix in chopped strawberries or raspberries into the filling for added freshness.

3. Add a layer of caramel sauce on top for a delightful contrast against the chocolate flavor.

4. Try a cookie crust alternative, such as Oreos or graham crackers, for different flavor profiles.

5. Create a gluten-free version with gluten-free biscuits to cater to dietary restrictions.

6. Infuse the filling with flavors such as vanilla or orange zest for an aromatic upgrade.

7. For a lighter version, substitute half of the cream cheese with Greek yogurt.

8. Drizzle with a chocolate ganache for an elegant touch during special occasions.

Serving and Presentation Guide

Plating techniques can enhance the cheesecake’s visual appeal. Serve slices on clean plates with a drizzle of chocolate or caramel sauce around the edges for an elegant presentation. Fresh toppings, such as whipped cream or berries, can elevate the look and freshness of your cheesecake.

Garnishing ideas include a sprinkle of crushed Maltesers on top or fresh mint leaves for color contrast. Traditionally, this cheesecake pairs perfectly with a dollop of whipped cream, but modern favorites include serving it with a side of fruit coulis.

For temperature considerations, ensure the cheesecake is thoroughly chilled before serving. Cut clean slices with a warm knife for an immaculate look.

Lastly, being mindful of portion control can enhance the dining experience, serving smaller slices can help moderate indulgence while still satisfying the sweet tooth.

Wine and Beverage Pairing

For wine lovers, a rich dessert wine like a late harvest Riesling or a sweet Moscato pairs beautifully with the Malteser Cheesecake, as their sweetness complements the flavors of the cheesecake.

If you’re looking for non-alcoholic alternatives, consider serving a chilled raspberry or vanilla soda that mimics the hints of maltiness in the dessert.

Additionally, rich coffee or espresso can act as a lovely counterpoint to the sweet cheesecake. Always consider temperature; serve your coffee hot to contrast with the chilled dessert effectively.

Storage and Shelf Life

To maintain the cheesecake’s freshness, store it in an airtight container in the refrigerator. It can last for up to 3 days without losing its flavor or quality, although it’s best enjoyed freshly made.

The key to storage is temperature; make sure your fridge is set correctly to prevent spoilage. If freezing is needed, wrap the cheesecake tightly in plastic wrap and then foil to protect it — it can be frozen for up to 2 months.

When reheating, allow it to thaw overnight in the refrigerator before serving again. Avoid microwaving; instead, serve cool directly from the fridge for optimal texture.

Make Ahead Strategies

Preparing this Malteser Cheesecake ahead of time can save you effort when entertaining. You can make the cheesecake a day or two in advance, allowing it to chill and set properly in the fridge.

If you’re planning an event, prepare the biscuit base the night before for easy assembly. Keeping the filling and base separate until the day of serving can help maintain the texture and flavor.

For the best flavor, avoid adding any fresh garnishes until just before serving. This includes whipped cream and fresh fruits, which can wilt or lose their texture if prepped too far in advance.

Scaling Instructions

Should you wish to adjust the serving size, halving the ingredients will still yield a delicious cheesecake but be mindful to adjust chilling times as needed.

Doubling or tripling the recipe is also feasible; just ensure your mixing bowl is large enough to accommodate the increased volume. You may need to adjust the size of your baking equipment according to the yield.

When scaling, it’s crucial to maintain accurate measurement ratios. If you find your cheesecake coming out too firm or too soft, revisit your calculations for ingredient proportions.

Nutritional Deep Dive

When enjoying Malteser Cheesecake, each slice generally contains a moderate amount of calories primarily from sugar and fat. A single serving can provide 300-400 calories depending on the serving size and ingredient ratios.

This cheesecake is rich in carbohydrates, providing a quick energy boost, while cream cheese offers protein and some calcium, contributing to dietary needs.

For those monitoring their intake, consider serving smaller portions to still enjoy the flavors while regulating consumption. Pairing with fresh fruit can complement the dessert while adding fiber.

Dietary Adaptations

For a gluten-free Malteser Cheesecake, use gluten-free digestive biscuits or cereals in the base, ensuring all other ingredients are verified as gluten-free.

Dairy-free adaptations can involve using dairy-free cream cheese and alternatives to heavy cream, ensuring that all toppings are also non-dairy.

For vegan adaptations, opt for vegan cream cheese and coconut whipped cream, making sure that your Maltesers or similar candies align with vegan principles.

A low-carb or keto version can be formulated using almond flour for the crust and sugar substitutes for sweetness, while maintaining a custard-like consistency.

Troubleshooting Guide

Texture issues, such as a crumbly filling, can often arise from overmixing or not allowing ingredients to reach room temperature before combining. Aim for a smooth consistency when blending.

If flavor is unbalanced, consider adjusting sweetness levels during the mixing process, as the primary flavor profile often needs tweaking before chilling.

Temperature problems can affect texture; ensure your cheesecake sets fully in the refrigerator without being disturbed for a cohesive firmness.

If equipment challenges arise, like a difficult springform pan, be patient and consider lining it with parchment paper for easier serving.

Ingredient substitutions, like using flavored cream cheese, can drastically change the profile. Keeping it classic often yields the most successful result.

Recipe Success Stories

Many have shared their fond experiences with Malteser Cheesecake, celebrating successful parties where this dessert was the star. A simple recipe has helped home bakers create impressive dessert tables.

Variation successes abound, with readers substituting Maltesers with other candies and witnessing delightful outcomes that sparked creativity.

Readers often share suggestions for modifications, enriching the community with their unique takes and innovative twists on the traditional cheesecake.

Photography tips for aesthetic social media posts focusing on the rich chocolate and creamy texture have inspired many to document their culinary creations beautifully.

Frequently Asked Questions

Can I use other chocolates instead of Maltesers?

Absolutely! You can experiment with various chocolate candies like Snickers or M&Ms for a different flavor profile.

How long does the cheesecake last in the fridge?

If properly stored, the cheesecake can last for up to 3 days in the refrigerator, but it’s best enjoyed fresh.

Can I make this cheesecake vegan?

Yes, substitute dairy products with vegan alternatives, such as coconut whipped cream and vegan cream cheese, for a great outcome.

How do I know when the cheesecake is set properly?

The cheesecake should feel firm to the touch but still slightly jiggly in the center. A good rule of thumb is allowing at least four hours in the fridge.

Can I freeze the cheesecake?

Yes, you can freeze the cheesecake for up to 2 months. Just be sure to wrap it tightly in plastic wrap and foil.

What can I do if the filling is too dry?

If your filling feels too dry, try adding a bit of whipped cream or milk during mixing to restore moisture.

Can I use a different crust?

Yes! You can use cookie crusts or even a gluten-free option for those with dietary restrictions.

Is it necessary to use gelatin?

No, gelatin is not necessary for this recipe unless you want a firmer texture. The cheesecake can set beautifully without it.

Can I make a smaller version of this cheesecake?

Definitely! Just halve the ingredients for a smaller cheesecake, adjusting the chilling time accordingly.

How can I decorate the cheesecake?

You can decorate with fresh fruit, crushed Maltesers, or a drizzle of chocolate sauce for a beautiful finishing touch.

Additional Resources

Explore related recipes that complement your Malteser Cheesecake, including other no-bake treats and chilled desserts. Consider browsing our technique guides for tips on cheesecake making and ingredient information like chocolate varieties.

Check out equipment recommendations for essential baking tools that will enhance your culinary experience whether you’re a novice or a pro.

Seasonal variations are also worth exploring, making the most of fresh ingredients throughout the year to keep your cheesecakes exciting.

Join the Conversation

Share your Malteser Cheesecake creations on social media! We would love to see your interpretation and hear about your baking experiences. Engage with our community through recipe reviews and feedback, thus enriching our collective culinary journey.

Don’t forget to capture the beauty of your dessert; photography tips can help enhance your shots, featuring the delectable layers and textures of this stunning cheesecake.

The Recipe

Malteser Cheesecake

Serves: 8

Prep Time: 30 mins

Cook Time: 0 mins

Total Time: 30 mins

Kitchen Equipment Needed

  • Springform pan
  • Mixing bowl
  • Electric mixer
  • Spatula
  • Measuring cups

Ingredients

  • 200g Digestive biscuits
  • 100g unsalted butter, melted
  • 600g cream cheese, softened
  • 200ml heavy whipping cream
  • 150g powdered sugar
  • 100g Maltesers, roughly crushed
  • Additional Maltesers for topping

Directions

  1. Crush the digestive biscuits into fine crumbs and mix with melted butter.
  2. Press the mixture into the base of a springform pan to form the crust.
  3. In a mixing bowl, beat the softened cream cheese and powdered sugar until smooth and creamy.
  4. In another bowl, whip the heavy cream until soft peaks form, then fold into the cream cheese mixture.
  5. Gently fold in the crushed Maltesers until evenly distributed.
  6. Pour the filling over the crust and smooth the top.
  7. Chill in the refrigerator for at least 4 hours, or overnight, until set.
  8. Before serving, decorate the top with additional Maltesers and a drizzle of chocolate if desired.

Recipe Notes

  • For a richer flavor, consider using a combination of milk and dark chocolate Maltesers.
  • This cheesecake can be made a day in advance and stored in the fridge.
  • Feel free to adjust sweetness by varying the amount of powdered sugar.

Best Chocolate Chip Cookies Recipe – Soft and Chewy

Delicious Chocolate Chip Cookies: The Ultimate Comfort Treat

⚖️
Difficulty
Easy

⏲️
Prep Time
15 mins

🕒
Cook Time
10 mins

⏱️
Total Time
25 mins

🍽️
Servings
24 cookies

Chocolate chip cookies are a timeless dessert that resonates with people of all ages. The moment you pull a batch out of the oven, the warm, gooey chocolate chips melt and create the perfect comfort food experience. Imagine biting into a soft, chewy cookie with a slightly crisp edge, where the rich chocolate flavors dance on your taste buds. These cookies not only satisfy your sweet cravings but also evoke nostalgic memories of home, family gatherings, and baking adventures in the kitchen.

This irresistible recipe provides a classic chocolate chip cookie experience with minimal fuss. Using simple ingredients, you can create a batch in just 25 minutes. The aroma of freshly baked cookies wafting through your home is undeniably inviting, making it difficult to resist having just one more. Perfect for afternoon snacks, parties, or simply a late-night treat, these cookies are sure to delight everyone, whether enjoyed solo or shared with friends and family.

Quick Recipe Highlights

  • Flavor Profile: Rich and buttery with sweet, melting chocolate throughout.
  • Texture: Chewy centers with slightly crispy edges make each bite satisfying.
  • Aroma: The warm, sweet scent of vanilla and chocolate fills the air.
  • Visual Appeal: Golden brown cookies studded with glistening chocolate pieces.
  • Skill Level Needed: Perfect for novice bakers and seasoned chefs alike.
  • Special Equipment: Just a mixing bowl, baking sheet, and oven are needed!

Recipe Overview

  • Difficulty Level: This chocolate chip cookie recipe is easy, making it ideal for beginners looking to hone their baking skills. The straightforward steps allow for quick preparation, so you’ll be less likely to feel overwhelmed in the kitchen.
  • Category: These cookies belong to the dessert category and are perfect for any occasion, from casual family gatherings to festive celebrations.
  • Cuisine: While originating from America, chocolate chip cookies have gained global popularity and have various adaptations inspired by different cultures.
  • Cost: This recipe is budget-friendly, with ingredients that are generally inexpensive and easily sourced from your local grocery store.
  • Season: Chocolate chip cookies can be enjoyed year-round, but they are especially festive during the holiday season where they can be gifted or shared at gatherings.
  • Occasion: Perfect for celebrations, potlucks, cookie swaps, or cozy nights in with friends and family.

Why You’ll Love This Recipe

The taste and texture of these cookies are undeniably appealing. Each bite provides a perfect balance of sweetness and richness, while the soft, chewy center contrasts beautifully with the slightly crispy edges. The melting chocolate creates a luxurious indulgence that leaves a lasting impression on your palate.

Preparation of these chocolate chip cookies is quick and easy, allowing you to satisfy your cookie cravings without hassle. With just a few simple steps, you can have freshly baked cookies ready to enjoy in no time. The convenience of this recipe makes it a go-to for busy bakers looking to whip up something delightful.

Nutritionally, these cookies offer a special treat that can be a part of a balanced diet when enjoyed in moderation. While indulging in sweets isn’t typically associated with health benefits, using high-quality chocolate and butter can enhance your experience. Plus, baking at home allows you to control ingredients, ensuring better quality.

Socially, chocolate chip cookies hold a special place in gatherings and celebrations. They encourage sharing and create joy among friends and family, making them a perfect centerpiece for any occasion. Their universal appeal often leads to shared experiences and conversations, bringing people together over warm, delicious treats.

Cost-effectiveness plays another strong role in why you’ll love this recipe. With common pantry staples and minimal expense, you won’t break the bank while indulging in these delightful treats. They are an affordable dessert option that can feed a crowd and are perfect for baking enthusiasts on a budget.

Historical Background and Cultural Significance

Chocolate chip cookies originated in the United States in the 1930s, credited to Ruth Wakefield, who created them in her Massachusetts inn. Initially intended as a variation on chocolate butter drop cookies, the addition of chocolate chunks became an instant hit. Ruth’s innovative recipe was later published in a cookbook, popularizing the treat and leading to the establishment of the Toll House brand.

Culturally, chocolate chip cookies have become a staple in American dessert cuisine. These cookies are often associated with nostalgia, evoking memories of childhood and home baking. They represent comfort food and familial warmth, often passed down through generations as cherished family recipes.

Over the years, the chocolate chip cookie has evolved into countless variations, with bakers experimenting with flavors, ingredients, and textures. From crispy to chewy, dark chocolate to gourmet mixes, these variations reflect personal tastes and regional influences, showcasing the versatility of the classic cookie.

Regional variations also emerge, with different areas putting their unique spin on the recipe. For instance, some might incorporate nuts or spices, while others try the latest health trends like gluten-free options, highlighting the cookie’s adaptability to suit local preferences and dietary considerations.

Ingredient Deep Dive

Flour: A staple in baking, flour provides structure to the cookies. The type of flour used can greatly affect the texture. All-purpose flour is commonly used, but alternatives like whole wheat can add flavor and nutrition. When selecting flour, choose high-quality brands for the best results. Store it in a cool, dry place to ensure freshness.

Sugars (Brown and Granulated): Both brown and granulated sugars contribute to the sweetness and texture of the cookie. Brown sugar adds moisture and a rich flavor due to its molasses content, while granulated sugar helps create a crispy exterior. When substituting, you can use one for the other, but adjusting quantities may be necessary to maintain texture.

Common Mistakes to Avoid

  • Not measuring ingredients accurately can lead to flawed recipes. Always use a kitchen scale or measuring cups for precision.
  • Using cold butter instead of room temperature can hinder the creaminess needed for your cookie dough.
  • Overmixing the dough can result in tough cookies due to gluten development, so mix just until combined.
  • Skipping the chilling of the dough can lead to overly flat cookies; be sure to chill for the time specified.
  • Not preheating the oven can affect baking times and alter the cookie’s texture.
  • Using expired baking soda or powder will prevent the cookies from rising properly.
  • Leaving cookies on the baking sheet for too long can cause them to overbake; transfer them to a cooling rack promptly.
  • Not using parchment paper can lead to sticking and uneven baking.
  • Ignoring the cooling time affects how the cookies set; make sure to let them sit before moving.
  • Not tasting the dough can be a missed opportunity for perfecting your flavor profile before baking!

Essential Techniques

Creaming Butter and Sugar: This technique is vital for creating light, fluffy cookies. It incorporates air, which is essential for leavening. Be sure the butter is softened, and beat the mixture until it is pale and fluffy, which usually takes about 2-3 minutes.

Chilling the Dough: Chilling your cookie dough enhances the flavor and texture. This allows the butter to solidify, resulting in cookies that spread less. Chill for at least 30 minutes, but longer is even better. Look for visible firmness in the dough when it’s ready to go into the oven.

Pro Tips for Perfect Chocolate Chip Cookies

1. Always use high-quality chocolate chips or chunks for richer flavor. Dark chocolate can elevate the taste profile.
2. Consider using a mix of both brown and white sugars for complex sweetness.
3. Add a pinch of sea salt on top of the cookies before baking for a delightful contrast to the sweetness.
4. Try incorporating nuts or oats to add texture and flavor diversity.
5. Experiment with different flavor extracts, such as almond or orange, to create a unique twist on the classic recipe.
6. Make sure not to overbake your cookies; pull them out while they still appear slightly underbaked to retain that soft, chewy texture.
7. If you prefer softer cookies, try using cake flour instead of all-purpose flour for a lighter, fluffier texture.
8. Keep an extra sheet of dough in the freezer for unexpected cravings—bake them fresh any time!

Variations and Adaptations

Chocolate chip cookies can be adapted to fit regional tastes. For example, in the Southern United States, pecans or walnuts can be added for extra crunch. In contrast, in regions focusing on health, alternatives such as almond or oat flour can replace regular flour, catering to gluten-free needs.

Seasonal adaptations abound with the introduction of spices like cinnamon or gingerbread flavors during the fall. Try swapping chocolate chips for seasonal ingredients, such as pumpkin spice or mint for a festive touch.

Dietary modifications allow for significant versatility; you can create vegan cookies using coconut oil and flax seeds instead of traditional butter and eggs. Similarly, using dark chocolate or keto-friendly sweeteners can provide options for those following low-carb or sugar-free diets.

There are unlimited flavors to explore! Add peanut butter chips, butterscotch chips, or even dried fruits for diverse flavor profiles, making your batch unique every time.

Presentation can also vary; try forming cookie bowls or stacking them high with a drizzle of melted chocolate on top for stunning visual appeal at parties.

Serving and Presentation Guide

When serving chocolate chip cookies, consider various plating techniques that enhance their appeal. Place cookies on a beautiful serving platter and sprinkle a light dusting of powdered sugar for a hint of elegance.

Garnishing ideas include pairing cookies with a scoop of ice cream or a dollop of whipped cream on the side, ideal for dessert presentations. For traditional accompaniments, serve them with a glass of cold milk or coffee, which adds a delightful contrast to the sweetness.

Temperature considerations are significant; serve cookies warm from the oven for optimal texture and flavor, or let them cool completely if packing them for later consumption.

Portion control tips suggest serving individual cookies in clear bags or boxes for gatherings, making it easy for guests to grab and enjoy while mingling!

Wine and Beverage Pairing

Pairing chocolate chip cookies with wine can be a delightful experience. A rich, fruity red wine, such as a Merlot or Zinfandel, complements the sweetness of the cookies beautifully.

For non-alcoholic alternatives, pair your cookies with freshly brewed coffee or tea; a dark roast coffee balances the sweeter notes, while a glass of milk enhances the chocolatey flavors.

Temperature considerations are crucial; serve cookies warm while enjoying them alongside your chosen beverage, creating a cozy and indulgent experience.

If you’re feeling adventurous, consider pairing them with a sweet dessert wine, which can enhance the chocolate flavors and make for a sophisticated dessert option.

Storage and Shelf Life

Chocolate chip cookies can be stored in an airtight container at room temperature for about one week. For longer shelf life, consider freezing them. Place fully cooled cookies in a zip-top freezer bag, ensuring to remove excess air.

Temperature requirements for storage should be cool and dry; if cookies get too warm, they may become soft and lose their delightful texture.

Use rigid containers to prevent breakage while storing. Keep an eye out for signs of spoilage, like an off smell or changes in texture, signaling it’s time to toss them.

Reheating guidelines suggest placing cookies in a microwave for about 10-15 seconds to revive their warmth and softness without compromising the texture. Freezing is a great option too—when ready to eat, allow cookies to thaw at room temperature or lightly warm them in the oven.

Make Ahead Strategies

Planning to bake chocolate chip cookies ahead of time can save you from last-minute stress. You can prepare the dough in advance and store it in the refrigerator for up to three days or freeze it for up to three months.

When preparing, divide dough into individual cookie portions and freeze them. This allows for easy baking: just take out the desired amount and bake on demand.

Quality impact assessment is essential; chilled dough often yields better flavors as it allows the ingredients to meld over time. Assembly tips include pre-scooping and sealing portions for quick access on baking day.

Ensure to freshen up cookies before serving; adding a few extra chocolate chips on top can refresh their appearance, making them irresistible for an event.

Scaling Instructions

Scaling chocolate chip cookie recipes is quite simple. To halve the recipe, ensure to adjust each ingredient accordingly, targeting precise measurements to maintain the flavor profile.

Doubling or tripling the recipe requires you to use larger mixing bowls and baking sheets. Keep an eye on baking time, as cookies may need a minute longer when more are in the oven.

Equipment adjustments might be necessary; larger batches benefit from multiple sheets, rotating them in the oven for even baking.

Timing modifications are essential too; check for doneness as cookies may bake differently depending on the oven’s capacity, ensuring to rotate trays mid-bake for optimal results.

Always consider storage; ensure to have ample space for remaining cookies if baking in bulk!

Nutritional Deep Dive

Understanding the nutritional breakdown of chocolate chip cookies is vital for mindful indulgence. These cookies generally consist of simple carbohydrates, primarily from flour and sugars, offering a quick energy supply.

Micronutrient analysis reveals essential vitamins found in the ingredients, such as Vitamin B from flour and calcium from chocolate. However, be mindful that cookies also contain sugars and fats, calling for moderation.

Health benefits can arise from choosing quality ingredients; using dark chocolate provides antioxidants and may appeal to some health-conscious bakers looking to enhance their baked goods.

Dietary considerations such as portion size should be observed—one or two cookies can complement most diets without overindulging.

For those managing weight, assess calorie intake while savoring these treats, balancing them with nutrient-rich meals throughout the day.

Dietary Adaptations

For gluten-free enthusiasts, opt for almond flour or gluten-free flour blends, ensuring to maintain the recipe’s flavor profile while accommodating dietary restrictions.

Dairy-free options include substituting butter with coconut oil or using dairy-free chocolate chips, perfect for vegans looking to enjoy chocolate chip cookies without compromising their lifestyle.

Low-carb or ketogenic diets may implement almond flour and sugar substitutes like erythritol, allowing for a low-sugar delicious treat that fits their regimen.

For paleo adherents, substitute traditional ingredients with coconut or almond flour, along with honey or maple syrup as sweeteners, aligning the recipe with clean eating principles.

Experiment with other specific diets such as low-FODMAP by adjusting the ingredients to fit digestive needs and preferences.

Troubleshooting Guide

If your cookies turn out too flat, it could be due to melted butter; ensure your butter is at room temperature but not melted. Chilling the dough can also help maintain the cookie shape.

For texture issues, such as cookies being too dry, it’s essential to be mindful of flour measurements; excess flour can lead to a dense outcome. Consider adding a spoonful of milk or an extra egg to enhance moisture levels.

If flavor balance is off, examine your sugar ratios or the quality of your chocolate; experimenting with different brands can elevate taste significantly.

Addressing equipment challenges involves ensuring your baking sheets are not too hot when you place the dough, allowing effective baking without premature spreading.

Timing concerns should be noted, especially if you open the oven door too frequently; each peek can lower oven temperatures and affect baking consistency.

Recipe Success Stories

Our community has shared countless heartwarming anecdotes regarding their baking endeavors with chocolate chip cookies. Family gatherings often center around this delightful treat, weaving stories of grandmothers passing down recipes and children marveling at their first baking experiences.

Many readers report variations that became family favorites, such as incorporating their children’s favorite candies or unique nuts. These adaptations allow for endless creativity, with every batch reflecting the baker’s personality.

Celebrating successes with these cookies has led to numerous photography tips, showcasing the warm, buttery delight in various stages—from dough to the finished product—resulting in beautifully captured memories.

Your engagement in the recipe can spark a shared connection with others, leading to tips, adaptations, and lots of excitement in our community of bakers who cherish every twist and turn along the way!

Frequently Asked Questions

Can I freeze the cookie dough?
Absolutely! You can freeze the cookie dough balls for up to three months. Just place them in a single layer on a baking sheet to freeze, then transfer them to an airtight container.

Why did my cookies spread too much?
This could happen due to melted butter or using too much sugar. Ensure your butter is softened and when in doubt, chill the dough before baking!

Can I use whole wheat flour?
Yes, you can substitute some or all of the all-purpose flour with whole wheat flour for a nuttier flavor and added nutrients. Just expect a denser cookie.

How do I make my cookies chewy?
Use more brown sugar than white sugar, and avoid overbaking them. Taking them out when they’re just undercooked will help ensure a chewy texture.

What should I do if I don’t have brown sugar?
You can make a quick substitution by combining white sugar with molasses or using just white sugar, although it may change the flavor slightly.

Can I add nuts?
Yes! Chopped nuts such as walnuts or pecans can be added to the dough for an extra crunch and flavor, making the cookies even more delightful.

How can I achieve a fluffier cookie?
Incorporating more air into the dough through the creaming process is key. Ensure you beat the butter and sugar together sufficiently until fluffy and light.

Do I need to chill the dough?
While not mandatory, chilling the dough for at least 30 minutes can help improve flavor and texture, making the cookies thicker and less prone to spreading.

What’s the best way to store my cookies?
Store your cookies in an airtight container at room temperature for up to a week or freeze them for longer shelf life. They can remain fresh and delicious!

How should I reheat my cookies?
You can quickly reheat cookies in the microwave for about 10 seconds for that warm, fresh-baked feel without changing their consistency.

Additional Resources

Explore related recipes that might pique your interest, such as oatmeal cookies or snickerdoodles, offering variety to your baking repertoire.

Individuals keen on mastering cooking techniques can check out guides on measuring dry ingredients or mastering the art of baking with precision.

Learning about ingredient information can also enhance your understanding of why certain elements work in conjunction with one another in baking applications.

For enriching your baking experience, consider investing in quality kitchen equipment, such as non-stick baking sheets and silicone mats that aid in cookie preparation.

Finally, adapting recipes seasonally can inspire creativity, using fresh ingredients and local finds to enhance your cookie offerings!

Join the Conversation

We invite you to share your chocolate chip cookie baking experiences on social media, using the hashtags #ChocolateChipCookieLovers and #BakingWithLove.

Sharing your photography tips and inviting fellow bakers into your home kitchen adds a sense of community to our baking discussions.

Don’t hesitate to review the recipe, suggesting modifications or sharing your unique variations and adaptations to start a conversation with fellow baking enthusiasts!

Every contribution helps build a rich tapestry of shared experiences, memories, and culinary joy woven together through our love for baking.

The Recipe

Chocolate Chip Cookies

Serves: 24 cookies

Prep Time: 15 mins

Cook Time: 10 mins

Total Time: 25 mins

Kitchen Equipment Needed

  • Mixing bowl
  • Whisk
  • Baking sheets
  • Parchment paper (optional)
  • Cooling rack

Ingredients

  • 2 1/4 cups all-purpose flour
  • 1/2 tsp baking soda
  • 1 cup unsalted butter, softened
  • 3/4 cup granulated sugar
  • 3/4 cup brown sugar, packed
  • 1 tsp salt
  • 2 tsp vanilla extract
  • 2 large eggs
  • 2 cups semi-sweet chocolate chips

Directions

  1. Preheat the oven to 350°F (175°C) and line baking sheets with parchment paper.
  2. In a bowl, whisk together flour and baking soda; set aside.
  3. In a large mixing bowl, cream the butter, granulated sugar, brown sugar, and salt until light and fluffy.
  4. Add the eggs one at a time and mix until well combined, then stir in the vanilla.
  5. Gradually add the flour mixture to the wet ingredients until just combined.
  6. Fold in the chocolate chips until evenly distributed.
  7. Scoop tablespoon-sized portions of dough onto prepared baking sheets, spacing them apart.
  8. Bake for 9-11 minutes or until the edges are golden brown. Be careful not to overbake!
  9. Remove from the oven and allow cookies to cool on the baking sheet for 5 minutes, then transfer to a wire rack to cool completely.

Recipe Notes

  • For a chewier cookie, use more brown sugar.
  • Chilling the dough for at least 30 minutes can enhance flavor and texture.
  • Feel free to substitute chocolate chips with your favorite mix-ins such as nuts or dried fruits.
  • Store leftover cookies in an airtight container at room temperature.

Best Chocolate Chip Cookies – Soft, Chewy, and Buttery

Deliciously Irresistible Chocolate Chip Cookies: A Sweet Treat for Everyone

⚖️
Difficulty
Easy

⏲️
Prep Time
10 mins

🕒
Cook Time
15 mins

⏱️
Total Time
25 mins

🍽️
Servings
12 cookies

If you’re looking for a classic treat that never goes out of style, these Chocolate Chip Cookies are exactly what you need. The warm, gooey chocolate melty goodness combined with a golden, crisp edge and a chewy center makes these cookies a perfect indulgence for any gathering or cozy night in. From the moment you pull them out of the oven, the aroma fills your kitchen, creating a warm and inviting atmosphere that no one can resist.

Biting into one of these soft and chewy cookies is truly an experience. The rich, sweet caramel notes of the chocolate chips complement the buttery, vanilla-infused dough perfectly. These Chocolate Chip Cookies not only cater to your sweet tooth but also create lovely memories with family and friends. Gather your loved ones around the kitchen as you enjoy baking these delicious treats together.

Quick Recipe Highlights

  • Flavor Profile: Expect a perfect balance of sweet, buttery dough and rich chocolate. The mix of semi-sweet and dark chocolate contributes to a depth of flavor, making each bite an absolute delight.
  • Texture: Crisp on the outside, soft and chewy on the inside, these cookies deliver a satisfying melt-in-your-mouth sensation that is simply irresistible.
  • Aroma: The heavenly scent of freshly baked cookie dough combined with chocolate fills the air, creating an enticing invitation for taste testers.
  • Visual Appeal: Golden brown with large pools of melted chocolate, these cookies are a beautiful addition to any dessert platter.
  • Skill Level Needed: This recipe is beginner-friendly, requiring only basic measuring and mixing techniques to achieve delightful results.
  • Special Equipment: You’ll only need standard kitchen tools such as a mixing bowl, baking sheet, and cookie scoop for easy drop cookies.

Recipe Overview

  • Difficulty Level: This Chocolate Chip Cookies recipe is easy enough for beginners yet allows for advanced bakers to get creative with added flavors and textures.
  • Category: These cookies are categorized as desserts and snacks, perfect for any time of day.
  • Cuisine: A beloved classic in American baking, Chocolate Chip Cookies originated in the United States and remain a staple in homes across the country.
  • Cost: The ingredients are affordable, making this cookie recipe an economical choice for treating yourself or others.
  • Season: While delicious year-round, these cookies shine particularly during holidays and gatherings.
  • Occasion: Serve these cookies at birthdays, holiday parties, or simply bake a batch for a casual family movie night.

Why You’ll Love This Recipe

The appeal of Chocolate Chip Cookies lies in their delightful taste and texture. Sweet, buttery dough paired with melting pockets of chocolate creates a perfect harmony that keeps everyone coming back for more. With each bite, you experience the crispy edges giving way to a soft and chewy center, making it an unforgettable treat.

The convenience of this recipe cannot be overstated. With just a few common ingredients and straightforward instructions, you can whip up a batch of cookies in just 25 minutes. It’s a quick solution for satisfying a chocolate craving or for when unexpected guests arrive.

Nutritionally, these Chocolate Chip Cookies offer a boost from dark chocolate, which contains antioxidants. While indulging, you can feel a bit better knowing you’re also treating yourself to some beneficial ingredients.

These cookies are sure to steal the spotlight at any gathering. Whether served warm and fresh out of the oven or a day or two later, they provide the comfort and familiarity people love. Sharing them with friends and family during gatherings enhances their social value.

Economically, Chocolate Chip Cookies are an accessible dessert option. The basic ingredients are inexpensive and widely available, making it easy for anyone to enjoy these delicious treats without breaking the bank.

Historical Background and Cultural Significance

The origin story of Chocolate Chip Cookies dates back to the 1930s when Ruth Wakefield, the owner of the Toll House Inn, decided to experiment with chocolate in her butter cookie recipe. She expected the chocolate to melt and spread evenly, but instead, it retained its shape, creating the first-ever chocolate chip cookie.

Since then, Chocolate Chip Cookies have become an iconic American staple. Their immediate popularity led to partnerships with chocolate manufacturers, most notably Nestlé, who began producing the chocolate chips we know today. This cookie is now a fundamental part of American baking culture.

Over the years, the recipe has evolved, witnessing numerous adaptations and variations. Whether incorporating nuts, oatmeal, or diverse chocolate flavors, the classic cookie’s popularity endures, allowing for endless personal interpretations.

Regionally, variations of Chocolate Chip Cookies can be found across the United States, with some areas favoring specific chocolate types or additional ingredients like coconut or peanut butter chips. This adaptability speaks to the cookie’s universal appeal and cultural significance.

Ingredient Deep Dive

All-Purpose Flour:
All-purpose flour is the backbone of most baking recipes, providing structure and stability to cookie dough. It is essential for achieving the right texture and hold when baked. To ensure quality, choose high-protein brands for a chewy cookie and consider sifting to avoid clumps.

Granulated Sugar and Brown Sugar:
Using both sugars creates a balanced sweetness and contributes to a rich flavor and chewy texture. Brown sugar adds moisture with its molasses content, while granulated sugar helps achieve that coveted crispy edge. Always check for clumps when measuring and store sugars in airtight containers to maintain their consistency.

Butter:
Butter provides moisture and a rich flavor essential to delicious cookies. For best results, use unsalted butter, allowing better control over the recipe’s sweetness. Ensure your butter is at room temperature for easy creaming with sugars; if you run out, substituting with margarine can work in a pinch.

Chocolate Chips:
Chocolate chips come in various types, such as semi-sweet, dark, or even milk chocolate. Each adds distinct sweetness levels and flavor profiles to your cookies. Store chocolate chips in a cool, dry place to prevent melting, and consider swapping out for chunks or even white chocolate for unique twists.

Common Mistakes to Avoid

  • Not measuring ingredients accurately can lead to incorrect ratios and result in flat or overly dense cookies. Always measure flour by spooning it into a cup and leveling it off.
  • Using cold butter instead of softened butter will prevent proper creaming, affecting the overall texture. Allow butter to sit out for about 30 minutes before baking.
  • Overmixing the dough can create tough cookies due to gluten development. Mix just until combined for tender results.
  • Not chilling the dough can lead to cookies spreading too thin during baking. A 30-minute chill allows for better texture and flavor.
  • Baking cookies on an ungreased baking sheet can cause them to stick; use parchment paper for easy release.
  • Ignoring oven temperature can cause cookies to bake unevenly. Always preheat your oven and use an oven thermometer for accuracy.
  • Baking them for too long can lead to overly crunchy cookies. Keep an eye on them; they should look slightly underbaked to achieve a chewy finish.
  • Forgetting to rotate baking sheets halfway through cooking can lead to uneven baking. Make this a habit for consistent results.
  • Using expired baking soda or powder will affect the rise of your cookies. Always check expiration dates and store them properly.
  • Failing to let cookies cool on the sheet before transferring can result in breakage. Allow them to set for a few minutes first.

Essential Techniques

Creaming Butter and Sugar:
This fundamental technique is crucial as it introduces air, resulting in a light texture. To master this, mix softened butter with granulated and brown sugar until it becomes pale and fluffy. Avoid over-beating, which can lead to a greasy texture.

Chilling the Dough:
Chilling the cookie dough strengthens the fats, leading to a thicker cookie. To achieve this, simply wrap the dough in plastic wrap or place it in a covered bowl for at least 30 minutes. Watch for dough that feels firm but not frozen.

Correct Baking Times:
Baking cookies just until golden around the edges while remaining soft in the center is vital. Oven temperatures can vary, so utilize visual cues, such as slight browning, for optimal results. Rotate trays halfway through to ensure even cooking.

Pro Tips for Perfect Chocolate Chip Cookies

1. Consider using a mix of chocolate types for added flavor complexity – dark, milk, and white chocolate create an exciting array of tastes.
2. Experiment with different extracts like almond or hazelnut to enhance the overall flavor profile of your cookies.
3. For a chewy texture, slightly underbake your cookies and let them rest on the baking sheet before transferring them to a cooling rack.
4. Adding a pinch of flaky sea salt on top just after baking accentuates the sweetness and richness of the cookies.
5. For uniform cookies, use a cookie scoop for consistent sizing, allowing for even baking and presentation.
6. Use parchment paper instead of greasing the pan to easily lift cookies without sticking or breaking.
7. Try incorporating nuts or dried fruits for a unique twist and added texture.
8. If you’re after a deeper flavor, brown your butter before mixing it into the dough for a nutty finish.

Variations and Adaptations

Chocolate Chip Cookies can be customized to suit any taste preference or dietary need. Seasonal variations might include adding spices such as cinnamon or nutmeg for a festive touch during the holidays.

For those with dietary considerations, you can create gluten-free options by using almond flour or a gluten-free flour blend. Dairy-free alternatives can be achieved by substituting regular butter and chocolate with plant-based options.

Explore flavor variations by integrating peanut butter or Nutella swirls throughout the dough. Texture modifications could involve adding oats or crispy rice cereal for a delightful crunch. Presenting the cookies on vibrant plates or garnished with sprigs of mint can also elevate their appearance.

Serving and Presentation Guide

When plating Chocolate Chip Cookies, consider stacking them in groups of three or five for a visually striking display. Garnishing with a light dusting of powdered sugar or a sprinkle of sea salt can enhance their appeal.

Traditional accompaniments include a glass of cold milk, but for a modern twist, serve with coffee or a scoop of vanilla ice cream for an indulgent dessert.

Managing temperature is key; serve cookies warm from the oven for an at-home café experience or allow them to cool completely and pack in attractive treat boxes for gifting. Portion control can be achieved by using a cookie scoop for equal sizes every time.

Wine and Beverage Pairing

For a delightful dessert experience, consider pairing your Chocolate Chip Cookies with a glass of dessert wine, such as a late harvest Riesling or sweet red blends that complement chocolate’s richness.

For non-alcoholic alternatives, a rich mocha or herbal tea can beautifully balance the flavors of the cookies.

If you enjoy warm beverages, a rich chai tea or cold brew coffee can drink seamlessly alongside these sugary delights. Always consider serving temperatures to enhance taste – slightly chilled wines and warm drinks provide the best balance.

Storage and Shelf Life

To store your Chocolate Chip Cookies, place them in an airtight container at room temperature for up to a week. For extended freshness, store them in the refrigerator, where they can last up to two weeks.

Make sure cookies are completely cooled before transferring them to a storage container to prevent moisture buildup. If you notice any visible signs of spoilage, such as changes in texture or odor, it’s time to discard.

To reheat, simply pop them in the microwave for 10-15 seconds to regain that gooey texture or bake at 350°F for a few minutes. For longer storage, freeze unbaked cookie dough shaped into balls and store them in a freezer-safe bag; simply bake from frozen when the craving hits.

Make Ahead Strategies

You can easily prepare your Chocolate Chip Cookie dough ahead of time. Mix and form into balls, then refrigerate or freeze for later baking.

If freezing, allow dough rounds to harden on a baking sheet before transferring them to a sealed bag, which prevents them from sticking together.

This method helps retain freshness and flavor, ensuring that your cookies taste as if they were just baked.

When ready to bake, simply adjust cooking times by a couple of minutes to account for the chilled dough. Adding a sprinkle of salt on top just before baking boosts the flavors.

Scaling Instructions

If you want to halve the Chocolate Chip Cookie recipe, simply divide all ingredients in half, ensuring you have enough leavening agent to maintain texture.

For doubling or tripling, keep the ratios consistent and consider using multiple baking sheets for efficiency.

Be mindful of your mixing bowls; as the recipe scales up, you may require larger containers. Always cook a test batch to adjust timing to your liking, and ensure enough baking space.

When storing scaled cookies, keep in mind that larger batches may require separate containers to maintain freshness and texture.

Nutritional Deep Dive

In terms of macronutrient breakdown, a standard Chocolate Chip Cookie generally contains carbohydrates primarily from sugar and flour, fats from butter and chocolate, and a small amount of protein from flour.

Evaluating micronutrient content reveals that cookies are not a significant source of vitamins and minerals, though dark chocolate can offer antioxidants.

For those watching their intake, consider portion sizing; enjoying one cookie at a time can fit within a balanced diet.

On a weight management note, homemade cookies tend to be less caloric than store-bought ones, giving you control over added sugars and fats. Increasing the number of healthier add-ins like oats or nuts can improve nutritional value without sacrificing flavor.

Dietary Adaptations

For gluten-free Chocolate Chip Cookies, substituting with almond flour or a gluten-free all-purpose blend maintains texture and flavor without wheat.

Dairy-free options can be created using margarine and dairy-free chocolate to cater to lactose intolerance.

Vegan adaptations can include flax eggs as an alternative binding agent, and using maple syrup for sweetening.

Low-carb or keto variations involve substituting sugars with erythritol or stevia and wheat flour with coconut flour, maintaining great flavor while accommodating dietary preferences. Always test these substitutions for best results!

Troubleshooting Guide

If your cookies come out too flat, it may be due to excessive butter or not enough flour. Measure accurately and ensure butter is at room temperature.

An overly chewy cookie can result from under-baking; aim for nice golden edges while leaving the center soft.

If flavors are off-balance or lacking, consider adjusting your sugar ratios or adding a pinch of salt to enhance overall sweetness.

Oven temp discrepancies can lead to issues; always check with an thermometer if baking results vary.

For substituting ingredients, make sure alternate choices align closely with the original’s properties to maintain cookie integrity.

If your cookies seem too dry, this can be corrected with proper storage in an airtight container to retain moisture.

Recipe Success Stories

The community has embraced this Chocolate Chip Cookie recipe, with numerous readers sharing photos of their delightful results. Personalized adaptations have led to unique variations, showcasing how these cookies can evolve while still holding true to the classic original.

A number of readers have successfully introduced different flavors, receiving rave reviews. The flexibility of this recipe makes it an ideal starting point for creative experimentation.

Many bakers also highlight the joy of sharing warm cookies with loved ones, creating heartwarming experiences that resonate through the comments.

Feedback has repeatedly noted satisfaction with simplicity, affirming its accessibility for home bakers of all skill levels wanting to create memories through cooking.

Frequently Asked Questions

Can I freeze the dough? Yes, cookie dough freezes beautifully. After shaping it into balls, place them on a baking sheet until firm, then transfer to a freezer-safe bag. Bake directly from the freezer when you’re ready, adjusting bake time slightly longer.
How do I know when my cookies are done? Look for a golden brown edge with a slightly soft center. They’ll continue to cook on the baking sheet once removed from the oven for a perfect chewy texture.
Can I substitute brown sugar for granulated sugar? Yes, substituting brown sugar will add moisture and a caramel-like flavor to your cookies. However, keep in mind it may affect the texture slightly.
Can I use chocolate chunks instead of chips? Absolutely! Chocolate chunks offer a different texture and can melt beautifully, creating pockets of chocolate in your cookies.
What can I do if my cookies don’t spread out? This could be due to overly chilled dough or too much flour. If your dough is too stiff, let it sit at room temperature for a short time before baking.
Should I use a baking mat or parchment paper? Parchment paper is recommended for easy release. A baking mat can work similarly, but ensure it’s non-stick for the best results.
What is the secret to soft cookies? Softer cookies usually result from using a blend of sugars, adding an extra egg yolk, and slightly underbaking them – let them cool on the baking sheet to finish the setting process.
How long will the cookies last? If stored properly in an airtight container, these cookies will last about a week at room temperature or up to two weeks in the refrigerator.
Can I add nuts or other mix-ins? Yes! Feel free to incorporate nuts, dried fruit, or even crushed candies to customize your cookies to your liking.
What’s the best way to store leftover cookies? The best way to keep them fresh is in an airtight container at room temperature. For longer storage, consider freezing them.

Additional Resources

For further exploration of Chocolate Chip Cookies, check out our related recipes like oatmeal chocolate chip cookies or funfetti cookies for variety.

Dive deeper into your baking skills with our technique guides covering perfecting cookie texture or mastering the art of baking.

Discover ingredient-specific information to elevate your baking with seasonal ingredients, ensuring you make the most of local and fresh products.

Additionally, investing in quality equipment can significantly help your baking results. We recommend reliable mixing bowls, flexible spatulas, and sturdy baking sheets for the best outcome.

Join the Conversation

We’d love to hear your thoughts! Share your experiences with our Chocolate Chip Cookie recipe on social media. Include your baking photos, modifications, and feedback to engage with the baking community.

Join in on our discussions about recipe variations and suggestions, and explore how our readers have enjoyed their cookie baking adventures.

Stay connected for more tips and tricks to enhance your baking journey and feel free to share your own favorite cookie recipes along the way!

The Recipe

Chocolate Chip Cookies

Serves: 12 cookies

Prep Time: 10 mins

Cook Time: 15 mins

Total Time: 25 mins

Kitchen Equipment Needed

  • Mixing bowl
  • Baking sheet
  • Cookie scoop
  • Spatula
  • Measuring cups and spoons

Ingredients

  • 1 cup (2 sticks) unsalted butter, softened
  • 3/4 cup granulated sugar
  • 3/4 cup packed brown sugar
  • 1 teaspoon vanilla extract
  • 2 large eggs
  • 2 1/4 cups all-purpose flour
  • 1 teaspoon baking soda
  • 1/2 teaspoon salt
  • 2 cups chocolate chips

Directions

  1. Preheat the oven to 350°F (175°C) and line a baking sheet with parchment paper.
  2. In a mixing bowl, cream together the softened butter, granulated sugar, brown sugar, and vanilla until smooth.
  3. Add in the eggs one at a time, mixing well after each addition.
  4. In a separate bowl, whisk together flour, baking soda, and salt.
  5. Gradually add the flour mixture to the butter mixture, blending until just combined. Avoid overmixing.
  6. Fold in the chocolate chips using a spatula or wooden spoon.
  7. Drop rounded tablespoons of dough onto the prepared baking sheet, spacing them about 2 inches apart.
  8. Bake for 10-12 minutes or until the edges are lightly golden, and the centers appear soft but set.
  9. Remove from the oven and let cool on the baking sheet for about 5 minutes before transferring to a wire rack to cool completely.

Recipe Notes

  • For softer cookies, be careful not to overbake; they will continue to cook while cooling.
  • Store leftover cookies in an airtight container at room temperature for up to a week.
  • Feel free to experiment and add nuts or dried fruit for additional flavor and texture!

Classic Spaghetti Carbonara – Easy, Creamy, and Authentic

Classic Spaghetti Carbonara: A Timeless Italian Delight

⚖️
Difficulty
Medium

⏲️
Prep Time
15 mins

🕒
Cook Time
20 mins

⏱️
Total Time
35 mins

🍽️
Servings
4 servings

Classic spaghetti carbonara is a dish that epitomizes Italian comfort food, rich in flavor and tradition. With its creamy texture and the delightful salty kick from guanciale or pancetta, this pasta dish brings a taste of Rome right to your dinner table. The simplicity of its ingredients—spaghetti, eggs, cheese, and cured pork—allows each component to shine, creating a harmonious blend that is both satisfying and indulgent.

As you twirl the strands of spaghetti around your fork, the shiny coating of the sauce clings perfectly, creating a velvety mouthfeel that is irresistible. Each bite reveals the slight crispness of the pork, which contrasts beautifully with the silky sauce. The fragrance of freshly cracked black pepper adds an invigorating aroma, enhancing the overall experience. This classic meal not only fills your tummy but also warms your heart, making it perfect for family dinners or special occasions.

Quick Recipe Highlights

  • Flavor Profile: Rich, savory, with a hint of pepper and cheese.
  • Texture: Creamy, with a satisfying chew from the al dente pasta.
  • Aroma: Inviting and robust, featuring cured pork and freshly cracked black pepper.
  • Visual Appeal: A glossy pasta dish adorned with flecks of black pepper and golden cheese.
  • Skill Level Needed: Intermediate; requires proper timing to blend the ingredients without scrambling the eggs.
  • Special Equipment: A large pot for boiling pasta and a frying pan for cooking the pork.

Recipe Overview

  • Difficulty Level: This recipe sits at a medium difficulty. It demands attention for precise timing and technique, especially when combining the warm pasta with the egg mixture without cooking the eggs fully.
  • Category: This dish is ideal for main courses, making it a staple in Italian households, particularly for families gathering at the dinner table.
  • Cuisine: Originating from Italy, specifically Rome, spaghetti carbonara is a testament to the brilliance of Italian cuisine—simple ingredients transformed into something extraordinary.
  • Cost: Generally, this recipe is cost-effective, requiring basic pantry staples and a few fresh items; it can be made for under $15, depending on ingredient quality.
  • Season: Carbonara is perfect year-round but is particularly comforting in winter and fall when hearty meals are cherished.
  • Occasion: Ideal for any occasion, from casual family dinners to festive gatherings with friends, carbonara is sure to impress anyone at the table.

Why You’ll Love This Recipe

The classic spaghetti carbonara has a universal appeal due to its wonderful taste and rich texture. The combination of creamy egg sauce and crispy pancetta makes for an indulgent dish that feels luxurious yet is simple to prepare. You can prepare it in under 30 minutes if you get your ingredients ready in advance, making it a perfect weeknight dinner.

Not only is carbonara incredibly delicious, but it also has nutritional benefits. Eggs provide a good source of protein while the pasta offers carbohydrates for energy. Using a quality cheese such as Pecorino Romano adds calcium and other essential nutrients, making this dish more than just comfort food.

This recipe is also a fantastic choice for entertaining. It is easy to replicate for larger gatherings, and its impressive presentation will leave your guests raving about your culinary skills. Sharing delicious meals builds connections and creates lasting memories around the table.

Moreover, spaghetti carbonara is versatile and cost-effective compared to dining out. You can easily make this gourmet dish at home without overspending, allowing you to enjoy a fine Italian meal whenever you crave it.

Finally, the cultural heritage of spaghetti carbonara enhances its appeal. Each bite is intertwined with the essence of Italian tradition, connecting you to the rich culinary history of Rome, making every forkful more meaningful.

Historical Background and Cultural Significance

The origins of spaghetti carbonara are somewhat shrouded in mystery. It’s widely believed to have emerged after World War II when the American troops stationed in Italy combined their rations of bacon and eggs with pasta, creating a dish that quickly became beloved among locals. The simplicity and heartiness of carbonara made it a symbol of resourcefulness in the culinary arts.

This dish holds great significance in Italian culinary culture, especially in Rome, where it is often considered a staple. The combination of pasta and eggs pays homage to Italy’s agricultural heritage, showcasing how basic ingredients can transform into a harmonious meal. Today, many Roman restaurants pride themselves on their carbonara, each boasting their unique twist while still adhering to the classic method.

Over the years, spaghetti carbonara has evolved, incorporating variations that highlight local ingredients and individual chef preferences. Despite these adaptations, the fundamental elements remain the same, ensuring the integrity of this beloved dish is maintained.

Carbonara also has numerous regional variations across Italy. Some argue for the inclusion of cream, while others insist that real carbonara must stay true to its origins—pasta, eggs, and pork. This lively debate adds to the charm and cultural richness surrounding the dish, making it more than just a meal but a topic of passionate discussion.

Ingredient Deep Dive

Spaghetti

Spaghetti is the backbone of this dish, providing the necessary structure to hold the sauce. It is a traditional Italian pasta that has a long and slender shape, making it perfect for twirling. Choosing high-quality durum wheat spaghetti can enhance the texture and taste of the dish significantly.

Nutritional benefits include being a good source of carbohydrates essential for energy. When selecting spaghetti, look for brands that use 100% semolina to ensure you receive the best quality. Store uncooked spaghetti in a cool, dry place in an airtight container to prolong its shelf life.

Pancetta or Guanciale

Pancetta, an Italian cured meat similar to bacon, delivers the salty, umami flavor central to carbonara. Guanciale, made from pork cheek or jowl, is the traditional choice and provides a richer taste and texture. Both options elevate the dish, adding depth that complements the creamy sauce.

These meats are rich in flavor and fats, contributing to the overall richness of the dish. When selecting, opt for high-quality cuts from a reputable butcher. They should be stored in the refrigerator and consumed within a few days for optimal freshness.

Eggs

Eggs are crucial in making the sauce creamy and rich without the need for cream. They provide emulsification, which helps in blending all the ingredients smoothly. High-quality, fresh eggs will give the best flavor and color.

Eggs are also a powerhouse of protein, containing essential amino acids. When purchasing, choose eggs that have been farm-fresh, as they tend to have better flavor and yolk color. Store eggs in their original carton in the refrigerator.

Pecorino Romano

Pecorino Romano is a hard Italian cheese made from sheep’s milk and is traditionally used to finish carbonara. Its sharp and salty flavor enhances the dish dramatically, bringing all the elements together harmoniously.

This cheese is also rich in calcium and protein, making it a nutritious addition. When selecting Pecorino Romano, look for freshly grated or rind-off options for the best flavor. Store unused cheese wrapped tightly in the refrigerator.

Black Pepper

Freshly cracked black pepper is the key seasoning that brings a lovely warmth and complexity to the dish. It balances the richness of the sauce and enhances the overall flavor profile.

Using fresh whole peppercorns and a peppermill can significantly improve flavor, as ground pepper tends to lose its potency over time. Store whole peppercorns in an airtight container in a cool, dark place for longer shelf life.

Common Mistakes to Avoid

  • Using cold eggs: Always make sure your eggs are at room temperature before incorporating them into the sauce to prevent scrambling.
  • Overcooking the pasta: Aim for al dente texture by checking the pasta a minute or two before the package instructions suggest.
  • Adding cream: Authentic carbonara doesn’t require cream; the creaminess comes from the emulsification of eggs and cheese.
  • Not reserving pasta water: This starchy water is vital for adjusting sauce consistency and helps it adhere better to the pasta.
  • Skipping the black pepper: Freshly cracked black pepper is essential for balancing flavors; don’t omit or be stingy with it.
  • Under-seasoning correctly: Salting your pasta water is crucial for flavor; it should taste like the sea for perfect pasta.
  • Overcooking the guanciale/pancetta: You want it crispy, not burnt; consider cooking it slowly to render the fat.
  • Using low-quality ingredients: Stick to the best ingredients—fresh eggs, quality cheese, and authentic cured meat make a significant difference.
  • Not mixing quickly enough: Once you combine pasta and sauce, work quickly to prevent the sauce from clumping.
  • Serving at the wrong temperature: Carbonara is best served hot; ideally, serve it immediately after preparation.

Essential Techniques

Emulsification

Emulsification is key to making the carbonara sauce creamy without the use of cream. To master this technique, combine the pasta and egg mixture while the pasta is still hot, allowing the heat to gently cook the eggs. A common pitfall is not working quickly enough, leading to scrambled eggs instead of a smooth sauce. Look for a glossy, thickened sauce that clings to the pasta as your cue for success.

Cooking Pasta to Al Dente

Cooking pasta to al dente is crucial for texture and flavor. Al dente means the pasta will have a slight bite, which pairs perfectly with the creamy sauce. To achieve this, always taste the pasta a minute before the package’s suggested cooking time. If overcooked, the pasta will turn mushy, failing to hold the sauce well; the ideal texture should spring back when bitten, offering a delightful chew.

Proper Timing

Timing is vital in carbonara preparation. The key is to have the pasta ready at the right moment so that the sauce doesn’t lose its smoothness. A common pitfall is allowing the pasta to sit while preparing the sauce, which can lead to overcooked noodles. Ensure your guanciale is cooked and crispy while your pasta boils so that you can combine everything seamlessly.

Rendering Fat

Rendering fat from guanciale or pancetta is an essential technique that adds flavor to the dish. Cook over low heat to allow the fat to melt slowly, resulting in crispy pieces packed with savory goodness. A common mistake is using high heat, which can burn the meat before the fat has a chance to render properly. Look for golden-brown pieces that give off tantalizing aromas, ensuring the meat remains tender.

Pro Tips for Perfect Classic Spaghetti Carbonara

Use the freshest eggs possible for a richer, more flavorful sauce. The yolks will provide a vibrant color and texture, enhancing the overall dish.

Don’t skip the reserved pasta water; it can be crucial for adjusting the sauce’s consistency. Add it gradually to achieve your desired texture while ensuring the sauce clings beautifully to the pasta.

Invest in good quality cheese; Pecorino Romano is your best bet for authenticity. Freshly grating it will release more flavors than pre-packaged options.

Pasta should always be salted liberally in boiling water to enhance flavor—this is your only opportunity to season the noodles directly.

When mixing the pasta with the sauce, use tongs to toss it thoroughly. This helps combine all the flavors evenly while maintaining the delicate integrity of the pasta.

If you’re serving a crowd, double the ingredients and prepare in batches, ensuring everything stays as fresh as possible.

Experiment with additional toppings like fresh herbs or a squeeze of lemon to add brightness and elevate the flavors.

Lastly, serve immediately after preparation for the best taste and texture, as carbonara can lose its creaminess if allowed to sit.

Variations and Adaptations

Regional variations of spaghetti carbonara can include the addition of peas or mushrooms, offering a twist that complements the rich flavors. Adding seasonal ingredients can also enhance the dish; asparagus in spring or butternut squash in fall could provide an interesting texture and flavor contrast.

For those with dietary restrictions, adaptations like gluten-free pasta or dairy-free cheese can easily substitute traditional ingredients without losing too much of the classic flavor profile. It’s a versatile dish that can fit numerous dietary needs, keeping it inclusive for gatherings.

Flavor variations are also popular—adding fresh herbs or a hint of garlic can personalize your carbonara. Explore crushed red pepper flakes for a spicy kick or different types of cheese for unique flavor profiles.

Texture modifications like adding toasted breadcrumbs or crispy fried onions can create an exciting crunch that contrasts with the creamy sauce, providing an extra layer of appeal.

Finally, when it comes to presentation, consider serving in individual bowls topped with freshly cracked pepper and a sprinkle of cheese for a sophisticated touch.

Serving and Presentation Guide

When serving spaghetti carbonara, twirl the pasta into tidy nests on each plate for aesthetic appeal. Choose shallow bowls for modern presentation, allowing ample room for twirling and sauce visibility.

Garnishing ideas include a light sprinkling of fresh parsley or a drizzle of high-quality olive oil to add visual interest and aroma. Traditional accompaniment with crusty bread can provide a delightful textural contrast to the creamy pasta, ensuring every bite is fulfilling.

Temperature considerations are key; serve carbonara immediately after preparation for the best taste. The pasta should be warm and the sauce, creamy but not runny, providing an ideal dining experience.

Portion control tips recommend serving around 3 to 4 ounces of pasta per person, allowing guests to enjoy their meal without feeling overly indulgent.

Wine and Beverage Pairing

When pairing wine with classic spaghetti carbonara, opt for a crisp white wine like Pinot Grigio, which balances the richness of the dish beautifully. Alternatively, a light Italian red like Chianti can also complement the flavors effectively without overshadowing them.

For non-alcoholic alternatives, sparkling water with a slice of lemon can provide a refreshing contrast to the savory pasta. Consider light herbal teas as well, which offer a fragrant accompaniment to the meal.

For coffee lovers, a lightly roasted espresso can serve as a perfect finishing touch after a satisfying meal, enhancing the overall Italian dining experience.

Storage and Shelf Life

To store leftover spaghetti carbonara, allow it to cool and transfer it to an airtight container. Refrigerate for up to three days. The creamy texture may change upon reheating; add a touch of reserved pasta water to help restore creaminess when warming up.

Signs of spoilage include sour smell or changes in color, indicating it is time to discard the leftovers. For longer storage, consider freezing, but consume within 1-2 months for the best taste; reheating should be done gently on the stove or in the microwave.

Make Ahead Strategies

To ease weeknight cooking, you can prepare the sauce components separately. Cook the pancetta and store it in the fridge; it can be quickly reheated just before mixing with the pasta. Additionally, you can pre-grate cheese and keep the pasta cooked al dente up to a few hours ahead.

Quality impact assessments suggest that while fresh ingredients are best, assembling the components and waiting until serving helps maintain the integrity of the dish. Be sure to reserve some pasta water on serving day, as this will help bring the sauce together quickly.

Scaling Instructions

To halve the recipe, simply divide all ingredient measurements by two and follow the cooking processes as directed. This is ideal for solo dining or a cozy meal.

Doubling or tripling the recipe works well for larger gatherings. Just ensure you have a pot large enough to accommodate the pasta and adjust timing slightly, as higher quantities may take longer to cook.

Storage considerations are important; keep in mind the leftovers can always be shared with friends or mixed into other meals, adding versatility to your meal prep.

Nutritional Deep Dive

This dish provides a well-rounded macro breakdown that includes carbohydrates, proteins from the eggs and cheese, and fats from the guanciale or pancetta. It serves as a satisfying meal that can fuel dinner guests or family members after a long day.

The micronutrient analysis yields essential vitamins and minerals, including calcium from the cheese and B vitamins from the eggs. Keeping portion sizes in mind helps maintain dietary plans without skimping on flavor.

Dietary Adaptations

For gluten-free adaptations, substitute traditional spaghetti with gluten-free pasta, offering similar texture and flavor without compromising dietary restrictions.

Dairy-free options can include using vegan cheese for a lactose-free meal, ensuring creamy texture while being mindful of dairy sensitivities.

For a vegan version, use a plant-based alternative for eggs and cheese to replicate the creaminess and flavor profile of traditional carbonara.

Low-carb and keto eaters can utilize zucchini noodles or spaghetti squash instead of traditional pasta, significantly reducing carbohydrate intake without giving up delicious flavors.

Paleo dieters can swap traditional pasta for spiraled vegetables and use compliant bacon instead of guanciale. Each variation can still provide a taste of carbonara while aligning with diverse eating lifestyles.

Troubleshooting Guide

If your carbonara has a grainy texture, it likely indicates the eggs were too hot when mixed, resulting in scrambled eggs. Ensure continuous mixing and combine while still hot but off the heat.

If the flavor isn’t balanced, consider adding more cheese or a touch of salt to refine and enhance the overall profile. Adjusting these elements can pull the dish together.

Temperature problems can be common; monitor the heat while cooking the guanciale. Too high can lead to burnt bits, while too low won’t render sufficient fat. The goal is crispy but tender goodness.

If ingredients didn’t mix well, it may stem from undercooking the pasta or not reserving enough water; ensuring appropriate amounts lead to silky consistency.

For those using alternative pastas, timing can vary widely from standard spaghetti. Make sure to adjust cooking times accordingly to maintain dish quality.

Recipe Success Stories

Readers often share their experiences with this recipe, highlighting how they enjoyed the instant fame among family members who raved about the meal. Many add personal touches, like using heirloom tomatoes or fresh herbs as a garnish.

Variations created by users often include spin-offs with seasonal ingredients, showcasing how versatile and adaptable spaghetti carbonara can be without losing its core appeal.

Adaptation stories speak of recreating this classic dish in different corners of the globe, proving its universal love and ability to unite people around food regardless of location.

Additionally, readers frequently provide insights into photography tips, ensuring they capture the beauty of carbonara, making it appealing for social media sharing and creating a sense of community.

Frequently Asked Questions

Can I use cream in my carbonara?

While some versions of carbonara may incorporate cream, traditional recipes from Rome do not include it. The creaminess comes from the emulsification of eggs and cheese with pasta water.

What is guanciale, and can I substitute it?

Guanciale is an Italian cured meat made from pork cheek. If you cannot find it, pancetta is a suitable substitute, though it has a different flavor profile.

How can I make my carbonara sauce creamier?

Reserving pasta water when cooking is essential—add it slowly to the mixture to achieve the desired creaminess. Use fresh eggs and high-quality cheese to enhance the sauce’s texture.

Can spaghetti carbonara be reheated?

Yes, it can be reheated but may lose some creaminess. Add a splash of reserved pasta water and heat gently on the stove or in the microwave.

Is spaghetti carbonara a healthy option?

Spaghetti carbonara can be part of a balanced diet if served in moderation. It contains protein, calcium, and other beneficial nutrients, especially when made with whole food ingredients.

What type of pasta works best for carbonara?

Traditional spaghetti is the classic choice, but other long pasta types like fettuccine or bucatini can also work well, holding the sauce nicely.

How long can I store spaghetti carbonara in the fridge?

Cooked spaghetti carbonara can be stored in an airtight container in the refrigerator for up to three days, but it is best enjoyed fresh.

What should I serve with spaghetti carbonara?

Pair spaghetti carbonara with a side salad or garlic bread for a delightful Italian meal experience. A light vegetable dish complements the richness of carbonara nicely.

Can I make spaghetti carbonara vegetarian?

While traditional carbonara is not vegetarian, you can create a vegetarian version using sautéed mushrooms or smoky tempeh to mimic the meat texture while maintaining flavor.

What kind of cheese is best for spaghetti carbonara?

Pecorino Romano is the traditional choice, but you can substitute with Parmigiano-Reggiano if necessary. Freshly grated cheese always elevates the flavors.

Additional Resources

For those eager to explore more, check out related recipes such as fettuccine Alfredo or penne alla vodka, which, like spaghetti carbonara, celebrate Italian flavors. Technique guides on making fresh pasta or proper knife skills can also enhance your Italian cooking repertoire.

Ingredient information regarding the various types of pasta or cured meats can be valuable for cooking enthusiasts interested in diving deeper into Italian cuisine. Recommendations on kitchen equipment like pasta machines or quality knives can elevate your cooking experience and efficiency.

Seasonal variations can inspire creating dishes that align with available produce, encouraging local sourcing to maintain freshness and flavor integrity in your meals.

Join the Conversation

We invite you to share your experiences and results with this classic dish on social media. Photographs, personal tweaks, and feedback help build a community around our love for spaghetti carbonara and Italian cuisine.

Recipe reviews not only inspire others but also enhance the dish by incorporating family stories and unique takes on this timeless favorite. Sharing your adaptations and suggestions fosters engagement and helps create an enduring conversation about cooking and culture.

The Recipe

Classic Spaghetti Carbonara

Serves: 4 servings

Prep Time: 15 mins

Cook Time: 20 mins

Total Time: 35 mins

Kitchen Equipment Needed

  • Large pot for boiling pasta
  • Frying pan for cooking the pancetta or guanciale
  • Mixing bowl for the sauce
  • Tongs for tossing pasta
  • Grater for cheese

Ingredients

  • 400g spaghetti
  • 150g guanciale or pancetta, diced
  • 3 large eggs
  • 100g Pecorino Romano, grated
  • Freshly cracked black pepper, to taste
  • Salt, for pasta water

Directions

  1. Bring a large pot of salted water to boil and cook the spaghetti according to package instructions until al dente.
  2. In a frying pan, cook the diced guanciale or pancetta over medium heat, stirring occasionally until crispy and golden brown, then remove from heat.
  3. In a mixing bowl, whisk together the eggs and grated Pecorino Romano until well combined. Set aside.
  4. When the pasta is done, reserve 1 cup of pasta water and then drain the pasta quickly.
  5. Add the hot pasta to the frying pan with the guanciale, combining them thoroughly over low heat.
  6. Remove from heat, add the egg and cheese mixture immediately, and toss quickly to create a creamy sauce, adding reserved pasta water as needed to achieve desired consistency.
  7. Season generously with freshly cracked black pepper and serve immediately with extra cheese on the side.

Recipe Notes

  • For a lighter version, consider using less pasta and more vegetables.
  • To make it saucier, adjust the amount of reserved pasta water during mixing.
  • Feel free to experiment with flavors by adding garlic or herbs.
  • If you can’t find Pecorino Romano, Parmigiano-Reggiano is a suitable alternative.

Classic Spaghetti Carbonara – Creamy & Authentic Recipe

Spaghetti Carbonara: A Classic Italian Delight

⚖️
Difficulty
Easy

⏲️
Prep Time
10 mins

🕒
Cook Time
20 mins

⏱️
Total Time
30 mins

🍽️
Servings
4 servings

Indulge in the delightful flavors of traditional Italian cuisine with our Spaghetti Carbonara recipe. This classic pasta dish is known for its creamy texture and robust flavor profile, making it a beloved favorite across the globe. The harmonious blend of crispy pancetta, rich eggs, and aged Pecorino Romano cheese creates a velvety sauce that coats the spaghetti perfectly.

Not only is Spaghetti Carbonara quick and easy to make, but it also requires minimal ingredients, commonly found in most kitchens. With its comforting embrace and mouthwatering aroma, this dish is perfect for a weekday dinner or a special occasion. Once you try this recipe, you’ll understand why it remains a timeless staple in households worldwide.

Quick Recipe Highlights

  • Flavor Profile: The salty pancetta balances beautifully with the creamy egg mixture, creating a savory richness that is utterly irresistible.
  • Texture: The spaghetti offers a delightful al dente bite, while the sauce provides a silky texture that envelopes each strand.
  • Aroma: Aromatic garlic and rendered fat from the pancetta form an enticing aroma that fills the kitchen, drawing everyone to the table.
  • Visual Appeal: A generous showering of black pepper and bright cheese gives the dish an inviting and appetizing appearance.
  • Skill Level Needed: This recipe is beginner-friendly, requiring only basic cooking techniques, making it accessible for all.
  • Special Equipment: All you need is a pot for pasta, a frying pan, and a mixing bowl. No fancy gadgets required!

Recipe Overview

  • Difficulty Level: Spaghetti Carbonara is relatively easy to prepare and does not demand advanced culinary skills. The key is to balance the temperature when mixing the sauce with the pasta.
  • Category: This dish falls under the pasta category, perfect for either lunch or dinner, and shines as a weeknight meal.
  • Cuisine: Originating from Rome, this recipe reflects the heart of Italian culinary tradition with its simple approach and quality ingredients.
  • Cost: The ingredients are typically affordable, making it a budget-friendly meal option while still being impressive.
  • Season: Spaghetti Carbonara is a year-round favorite, ideal for any season due to its hearty nature.
  • Occasion: Great for casual family dinners, romantic nights in, or whenever you crave a hearty pasta dish.

Why You’ll Love This Recipe

The taste and texture of Spaghetti Carbonara are simply irresistible. The combination of crispy pancetta delivers a delightful crunch that contrasts beautifully with the creamy egg sauce. Each bite provides a rich umami flavor that is deeply satisfying, making it an ideal comfort food.

Convenience is another reason to adore this recipe. It comes together in just 30 minutes, making it perfect for busy weeknights when you still want a gourmet experience at home. The straightforward process ensures that even novice cooks can shine in the kitchen.

Nutritionally, Spaghetti Carbonara offers a good balance of carbohydrates and protein, especially when made with high-quality ingredients. The eggs provide essential vitamins while the cheese adds calcium, making this dish as nutritious as it is delicious.

Socially, whipping up a large pot of Spaghetti Carbonara creates an inviting atmosphere for gatherings. It’s a fantastic dish to share with friends and family, sparking conversations and creating lasting memories over hearty bites of pasta.

Considering its cost-effectiveness, this recipe uses affordable ingredients that yield generous servings, making it an economical choice for feeding a crowd without breaking the bank. You can indulge in the richness of a restaurant-style meal right at home.

Historical Background and Cultural Significance

Spaghetti Carbonara has an intriguing origin story that many food historians debate. Popular belief attributes the creation of this dish to Italian coal miners, who needed a hearty meal that could be prepared quickly. The dish symbolizes both simplicity and indulgence, marrying basic pantry items with rich flavors.

The cultural importance of Carbonara in Italian society cannot be overstated. It’s a testament to the tradition of using minimal ingredients to create robust flavors. This dish connects generations of Italian families, often served during gatherings and Sunday dinners, reinforcing family bonds through shared meals.

Over the years, the recipe has evolved from its rustic beginnings into a gourmet delicacy featured on menus worldwide. Each chef brings their unique flair to the dish, resulting in various interpretations while still honoring the classic elements that make Carbonara so beloved.

Regional variations of Carbonara also exist, featuring different types of pasta or incorporating local ingredients. These adaptations showcase Italy’s diverse culinary landscape while staying true to the dish’s essence.

Ingredient Deep Dive

Pasta: Traditionally, spaghetti is used in Carbonara, serving as the perfect vehicle for the sauce. When selecting pasta, look for high-quality dried varieties. Whole grain options can add additional nutrients, while gluten-free pasta is available for those with dietary restrictions. Store pasta in a cool, dry place, and it can last for years.

Pancetta: This Italian cured meat adds essential flavor to the dish. Choose pancetta that is well-marbled for a rich taste. If unavailable, bacon can be a substitute, offering a smoky element. Store uncooked pancetta in the refrigerator and use it within a week once opened.

Eggs: The heart of the Carbonara sauce, eggs provide creaminess and flavor. Use fresh, organic eggs for the best results, as they contribute to the dish’s richness. Store eggs in the refrigerator and be cautious of using very old eggs for this recipe.

Pecorino Romano: This robust cheese is essential for authentic Carbonara. It enhances the dish with its saltiness and flavor. When selecting cheese, opt for freshly grated varieties for the best results. Store cheese in the refrigerator, wrapped properly to maintain freshness.

Common Mistakes to Avoid

  • Using pre-grated cheese: It lacks the fresh flavor and texture needed for a true Carbonara.
  • Cooking the eggs too long: Adding them to hot pasta is key; otherwise, you risk scrambling them.
  • Overcooking the pasta: Always cook to al dente for the best texture.
  • Not reserving pasta water: This starchy water is crucial for achieving the desired sauce consistency.
  • Skipping the black pepper: Freshly cracked pepper adds needed spice and flavor depth.
  • Using cold ingredients: Everything should be warm when you combine them to ensure the right sauce consistency.
  • Rushing the cooking process: Allow the pancetta to crisp up without slacking off for maximum flavor.
  • Not tasting: Always taste and adjust seasoning before serving for the best flavor.

Essential Techniques

Creating a Creamy Sauce: The key to the creamy Carbonara sauce lies in tempering the eggs with warm pasta. This is crucial to avoid scrambling. Remember to combine everything off the heat to ensure a smooth texture.

Cooking Pasta Properly: Mastering pasta cooking allows for the ideal texture in your Carbonara. Following package instructions for al dente is essential; remember to reserve some pasta water for the sauce.

Pro Tips for Perfect Spaghetti Carbonara

1. Use the freshest ingredients possible for the best flavor. Fresh eggs, high-quality cheese, and artisanal pasta are worth the investment.

2. Balance flavors by tasting the sauce before serving. Adjust seasoning as needed, especially with the cheese, which can be quite salty.

3. Save your pasta water! Adding a splash can enhance the sauce’s creaminess and help it adhere to the pasta.

4. Embrace the pepper. Freshly cracked black pepper not only adds heat but also complements the creamy sauce beautifully.

5. Consider a finishing touch of extra cheese just before serving for added richness.

6. Serve immediately after tossing to prevent the sauce from thickening too much, keeping it creamy and luscious.

7. Don’t be afraid to experiment with different types of pork, such as guanciale, for an authentic Italian experience.

Variations and Adaptations

For a regional variation, try using rigatoni instead of spaghetti for a different texture; it holds the sauce well. Moreover, you can adapt the recipe for seasonal variations by incorporating vegetables such as peas or asparagus for added freshness.

If you’re looking for dietary adjustments, consider gluten-free pasta options, or for a lower-calorie version, substitute whole eggs with egg whites. For those on a dairy-free diet, vegan cheese could work as a replacement for Pecorino Romano.

In terms of flavor, adding garlic or crushed red pepper can spice up your dish, while nutmeg can provide additional warmth to the sauce.

Presentation can also be varied; consider serving in individual bowls or using fresh herbs as a garnish for a touch of freshness.

Serving and Presentation Guide

Plating your Spaghetti Carbonara can enhance the dining experience significantly. Twirl the pasta onto a fork and lift it gently onto your plate, creating height and visual appeal. Garnish with a sprinkle of fresh parsley or a few shavings of cheese on top for color.

For traditional accompaniments, a simple green salad and crusty bread can help balance the richness of the Carbonara. Modern serving suggestions might include serving alongside a glass of Pinot Grigio.

Ensure the dish is served hot immediately after preparation, retaining the sauce’s luscious creaminess. Portion control can also be considered; a typical serving is about one cup of pasta, making it easy to moderate servings.

Wine and Beverage Pairing

For an ideal wine pairing, a crisp white, such as Pinot Grigio or Chardonnay, works beautifully as it complements the richness of the Carbonara. The acidity in these wines refreshes the palate, balancing the creamy texture.

If you prefer non-alcoholic beverages, consider pairing with sparkling water infused with citrus, which can cleanse the palate without overpowering the dish. If you enjoy tea or coffee, a light herbal tea would work well.

Serving temperature is also key; chilled white wine enhances the overall experience when dining on this rich pasta dish.

Storage and Shelf Life

For proper storage, leftovers can be kept in an airtight container in the refrigerator for up to 3 days. Be mindful that the pasta may absorb the sauce, thickening it significantly.

When reheating, add a splash of reserved pasta water or cream to restore its original texture. Avoid freezing the dish, as dairy-based sauces do not hold up well to freezing and may separate when thawed.

Signs of spoilage include an off smell or discoloration. Always reheat to a safe internal temperature before consuming.

Make Ahead Strategies

While Spaghetti Carbonara is best enjoyed freshly made, you can prep some elements ahead. Cook the pasta and pancetta in advance, storing them separately in the fridge. Prepare your cheese and eggs mixture to speed up last-minute preparations.

When ready to serve, reheat the pancetta and combine with hot pasta. Then, temper the eggs and mix everything off the heat for a quick finish!

Scaling Instructions

To halve the recipe, simply divide the quantities by two, adjusting timing as needed. Scaling up is possible, too; just ensure you have a large enough pot to accommodate additional pasta while maintaining even cooking.

For larger groups, consider using a big pot or two, and always taste as you adjust seasoning. Remember to keep cooking time in check as larger amounts might require more cooking, but overall, the method remains the same.

Nutritional Deep Dive

Each serving of Spaghetti Carbonara typically contains a balanced macronutrient profile, comprising carbohydrates from the pasta, protein from the eggs and pancetta, and fat from the cheese. This balance makes it a wholesome meal when enjoyed in moderation.

Micronutrient analysis indicates a healthy dose of calcium from cheese, B vitamins from pasta, and essential amino acids from eggs. For those monitoring calories or following specific diets, consider adjusting portion sizes to maintain caloric balance without sacrificing satisfaction.

Dietary Adaptations

For gluten-free adaptations, choose suitable pasta alternatives, such as rice or chickpea pasta, ensuring the same delicious flavor and texture without the gluten. Dairy-free requires using plant-based cheeses and nutritional yeast for a similar flavor.

Vegans can recreate this dish by using tofu for protein and cashew cream as an egg replacement, allowing for a creamy sauce without the use of animal products.

For low-carb diets, zucchini noodles can be a fantastic substitute, giving that “pasta” experience with fewer carbs, while maintaining the Carbonara’s rich flavors.

Troubleshooting Guide

If your sauce turns out too thick, adding reserved pasta water helps achieve the right consistency. For a too-salty dish, incorporating a dash of cream can balance it out.

Texture issues such as overly crisp pancetta can be solved by cooking it at a lower temperature; this way, renders the fat while maintaining the right chewiness. If the pasta is undercooked, remember to add it to boiling water longer but keep a close eye to avoid overcooking.

For flavor balance, if the dish lacks depth, additional cheese or a touch of lemon juice can elevate the taste profile effectively; taste and adjust as necessary.

Recipe Success Stories

Community feedback for this Spaghetti Carbonara recipe has been overwhelmingly positive, with many enjoying its simplicity and elegance. Readers have reported back on their variations, with some incorporating sautéed mushrooms or spring peas for an added pop of color and flavor.

Photographers have shared beautiful images of their plates, showcasing the creamy texture and inviting presentation. Others have experimented with garnishes, creating stunning plates that look as good as they taste.

Frequently Asked Questions

Can I use other types of pasta?

While spaghetti is traditional, you can use other pasta varieties, such as fettuccine or penne. Just remember to adjust cooking times accordingly.

Is it safe to eat raw eggs in Carbonara?

Using fresh, high-quality eggs minimizes risks. For added safety, use pasteurized eggs that reduce the chance of foodborne illness.

How can I make my Carbonara vegetarian?

You can replace pancetta with mushrooms or smoked tofu, retaining that umami flavor without meat.

Can I prepare Carbonara ahead of time?

While best fresh, you can prep ingredients (like pasta and sauce) separately and combine just before serving to maintain the desired texture.

What can I serve with Carbonara?

A simple green salad and a glass of white wine complement the richness of Carbonara beautifully.

How do I ensure a creamy Carbonara?

Temper the eggs with the warm pasta and make sure to mix everything off the heat to create the sauce without scrambling eggs.

What’s the best cheese for Carbonara?

Pecorino Romano is traditional, but a mix with Parmigiano Reggiano can add depth and richness.

Can I freeze Carbonara?

It is not recommended to freeze Carbonara due to the creamy sauce’s tendency to separate upon thawing.

How spicy is Carbonara?

The spice level primarily depends on the amount of black pepper used; feel free to adjust to suit your taste!

Are there variations to Carbonara?

Absolutely! Regional adaptations include adding vegetables or using different types of cured meats.

Additional Resources

Explore related recipes such as Fettuccine Alfredo or Penne Arrabbiata for more pasta ideas. Learn essential techniques like making your own pasta or proper cheese grating skills for better results in your culinary adventures.

Check out ingredient information for details on selecting quality pasta and understanding the varieties of cheese available. Investing in the right kitchen equipment can also make a significant difference in your cooking experience, so consider recommendations tailored specifically for pasta dishes.

Join the Conversation

We love hearing from our readers! Share your experience with this Spaghetti Carbonara recipe on social media or leave your thoughts in the comments below. Share photos of your homemade dishes and connect with other food enthusiasts who appreciate the flavors of Italy.

Recipe reviews help us improve and refine our content. Tell us about any variations you’ve incorporated or tips that worked for you. Join our growing community of pasta lovers and celebrate the joy of cooking!

The Recipe

Spaghetti Carbonara

Serves: 4 servings

Prep Time: 10 mins

Cook Time: 20 mins

Total Time: 30 mins

Kitchen Equipment Needed

  • Large pot for boiling pasta
  • Frying pan or skillet
  • Mixing bowl
  • Colander
  • Tong or serving fork

Ingredients

  • 400g spaghetti
  • 150g pancetta, diced
  • 3 large eggs
  • 100g Pecorino Romano cheese, grated
  • Black pepper, freshly cracked
  • Salt, to taste

Directions

  1. Boil salted water in a large pot and cook the spaghetti according to package instructions until al dente. Reserve 1 cup of pasta water before draining.
  2. In a frying pan, cook the pancetta over medium heat until crispy, then remove from heat.
  3. In a mixing bowl, whisk together the eggs and Pecorino Romano cheese until smooth. Add a generous amount of black pepper.
  4. Add hot pasta to the pan with pancetta and toss to combine. Remove from heat.
  5. Quickly pour the egg mixture over the pasta, mixing vigorously to create a creamy sauce. Add reserved pasta water a little at a time to achieve desired consistency.
  6. Test seasoning and serve immediately with extra cheese and pepper on top.

Recipe Notes

  • For added flavor, consider adding garlic when cooking the pancetta.
  • Substitutions can be made with bacon or guanciale if needed.
  • Try adding peas or asparagus for a seasonal twist.

Best Chocolate Chip Cookies Recipe – Soft & Chewy

Chocolate Chip Cookies: The Ultimate Indulgence

⚖️
Difficulty
Easy

⏲️
Prep Time
15 mins

🕒
Cook Time
10 mins

⏱️
Total Time
25 mins

🍽️
Servings
24 Cookies

Chocolate chip cookies are the quintessential sweet treat that brings comfort and joy with every bite. Their warm, gooey centers and crisp edges are a delightful contrast that tantalizes your taste buds. The rich flavor of melted chocolate mingles with the buttery cookie base, creating an irresistible harmony that evokes nostalgic memories of childhood baking sessions. Whether enjoyed fresh out of the oven or a few days later, these cookies never fail to impress.

Imagine the warm aroma wafting through your kitchen as you bake these classic chocolate chip cookies. That tantalizing scent, a mixture of rich chocolate and buttery goodness, wraps around you like a cozy hug. The moment you pull the tray out of the oven and see the cookies’ beautiful golden-brown tops, it becomes impossible to resist. Paired with a glass of cold milk or coffee, these cookies are simply divine, making them perfect for gatherings, gifts, or simply satisfying your sweet tooth.

Quick Recipe Highlights

  • Flavor Profile: Sweet, buttery cookies balanced with rich, semi-sweet chocolate.
  • Texture: Soft and chewy in the center with a crispy edge, making each bite a delight.
  • Aroma: Warm vanilla and chocolate notes fill the air, creating an inviting atmosphere.
  • Visual Appeal: Golden brown cookies dotted with melted chocolate chunks create an irresistible sight.
  • Skill Level Needed: Perfect for beginners, this cookie recipe is simple and quick to master.
  • Special Equipment: Only basic kitchen tools are required – a mixing bowl, baking sheet, and measuring cups.

Recipe Overview

  • Difficulty Level: Easy, allowing anyone to whip up a batch of delicious cookies in no time.
  • Category: Dessert, ideal for satisfying sweet cravings after meals.
  • Cuisine: Classic American, rooted in home baking traditions popularized in the mid-20th century.
  • Cost: Budget-friendly with basic ingredients that are readily available at most grocery stores.
  • Season: Perfect year-round, but especially delightful during holidays and family gatherings.
  • Occasion: Ideal for parties, potlucks, or any casual get-together where sweets are appreciated.

Why You’ll Love This Recipe

These chocolate chip cookies embody a perfect balance of taste and texture, making them irresistible. The contrasting sensations, from the chewy dough to the melty chocolate, create a delightful experience with every bite. Whether you prefer them soft and gooey or a bit crunchier, this recipe grants you the flexibility to customize the baking time for your perfect chocolate chip cookie.

Convenience and ease characterize this recipe, making it an excellent choice for busy bakers. With minimal prep time and ingredients, you can enjoy fresh-baked cookies in under 30 minutes! This simplicity allows for spontaneous baking, perfect for when you crave a sweet treat but don’t want a lengthy process.

In terms of nutrition, while these cookies are indulgent, using quality ingredients can offer some benefits. Choosing dark chocolate can add beneficial antioxidants, making this treat a bit more rewarding. This recipe can also be tweaked to use whole wheat flour or added oats for a slight nutritional boost.

Serving delicious homemade chocolate chip cookies is a fantastic way to bring people together. Whether shared with family or friends, they foster a sense of community and celebration. Sharing treats has always been a way to connect with others, making these cookies not just any dessert, but a centerpiece of gatherings.

Finally, this recipe is cost-effective. The ingredients are pantry staples, and making cookies at home is often much cheaper than buying them from a store. Plus, the satisfaction of creating baked goods from scratch is priceless, allowing you to enjoy a tasty treat without breaking the bank.

Historical Background and Cultural Significance

Chocolate chip cookies, a beloved American treat, originated in the 1930s when Ruth Wakefield created the first batch. Working at the Toll House Inn, she combined chunks of semi-sweet chocolate with her butter drop cookies, inadvertently creating a classic that swept the nation. The recipe quickly gained popularity, resulting in Nestlé purchasing the rights and printing it on their chocolate bars, leading to the mass production of chocolate chip cookies.

The cultural significance of chocolate chip cookies in America cannot be overstated. They have become synonymous with home baking and comfort food. From children to adults, everyone has warm memories associated with these cookies, often linked to family gatherings or festive seasons. They have also inspired numerous adaptations and variations, solidifying their status in the world of desserts.

Over the years, chocolate chip cookies have evolved from their original recipe to include a myriad of flavors and twists. With the advent of modern baking, innovative bakers have introduced variations such as gluten-free or vegan options, ensuring that everyone can enjoy this classic treat regardless of dietary preferences. Regional variations have also emerged, featuring ingredients unique to different locales, enriching the chocolate chip cookie legacy.

Today, chocolate chip cookies are not just a treat; they represent a slice of American culture that transcends generations. Beyond their delicious taste, they embody notions of togetherness, nostalgia, and the joy of baking. This beloved sweet continues to invite bakers to experiment and explore new possibilities, cementing its place in dessert history.

Ingredient Deep Dive

Flour: The backbone of any cookie, flour provides the structure and texture. All-purpose flour is commonly used, but opting for whole wheat can introduce more fiber and nutrients. When selecting flour, look for a fine texture with no clumps, and store it in a cool, dry place to extend its shelf life. If you’re in need of a substitute, almond flour or coconut flour can provide gluten-free options.

Butter: Butter adds moisture and richness, crucial for flavor and texture. Using unsalted butter gives you better control over the salt level in the recipe. To ensure freshness, store butter in the refrigerator and use it within its sell-by date. If you need a substitute, coconut oil or margarine can work but may alter the flavor slightly.

Brown Sugar: Brown sugar contributes to the cookies’ moisture and chewiness due to its molasses content. It adds depth and a rich, caramel flavor. When using brown sugar, pack it into your measuring cup to ensure accuracy. For storage, keep it airtight to prevent it from hardening. If brown sugar is unavailable, you can substitute with white sugar mixed with a bit of molasses.

Chocolate Chips: The star ingredient, chocolate chips provide sweetness and decadence. Semi-sweet chips are the traditional choice, but feel free to experiment with dark or white chocolate chips for different flavors. Store chocolate chips in a cool, dry place. If you prefer a healthier option, consider using dark chocolate, rich in antioxidants and lower in sugar.

Common Mistakes to Avoid

  • Not measuring ingredients accurately: Use measuring cups and spoons for precision. Baking is a science; a small deviation can alter the final product.
  • Overmixing the dough: Overmixing can lead to tough cookies. Mix until just combined to achieve a tender texture.
  • Using cold butter directly from the fridge: Cold butter doesn’t blend well and can cause uneven mixing. Allow it to soften at room temperature for optimal results.
  • Baking on an ungreased or poorly prepared pan: Ensure your baking sheet is lined or greased to prevent sticking and promote even baking.
  • Skipping the chilling stage: Chilling the dough helps prevent spreading and enhances flavor. Don’t rush this step for better results.
  • Not monitoring baking time: Every oven is different, so watch your cookies closely. Pulling them out just as they turn golden will ensure a chewy center.
  • Using expired leavening agents: Make sure your baking soda and baking powder are fresh for the best rise.
  • Leaving cookies out to cool too long: Allowing cookies to cool on the pan can lead to overbaking. Transfer them to a cooling rack immediately after baking.
  • Assuming all chocolate chips are equal: Using quality chocolate chips can significantly influence taste. Opt for high-quality brands for the best flavor.
  • Using the wrong kind of sugar: Using only white sugar can lead to crispy cookies without the desired chewiness. Follow the recipe’s sugar ratios closely for the best results.

Essential Techniques

Measuring Ingredients: Accurate measurement is fundamental in baking. Always use the appropriate measuring cups for liquids and solids. For dry ingredients, spoon them into the measuring cup and level off with a knife instead of scooping directly, which compresses the flour. Visual cues for success include a consistent texture throughout the dough, free from lumps or dry pockets.

Mixing the Dough: Mixing thoroughly but not excessively is crucial. Hand mixers or a stand mixer at low speed work well. The visual cue for success is a smooth, uniform dough without streaks of flour, ensuring every component is evenly distributed. Pay attention to the consistency; it should be soft but not overly sticky.

Baking: Proper baking temperature is key. Preheating your oven ensures even cooking. Use the middle rack for the best airflow around the cookies. Visual cues for doneness include slightly golden edges, with centers looking just set but still soft. Remove them from the oven at this point to avoid overbaking.

Pro Tips for Perfect Chocolate Chip Cookies

  • Chill Dough: Allowing the dough to rest in the refrigerator for at least 30 minutes enhances flavor and texture.
  • Use Parchment Paper: Lining your baking sheet with parchment prevents sticking and promotes even cooking.
  • Experiment with Mix-ins: Add nuts, dried fruit, or different types of chocolate chips for unique flavors.
  • Don’t Skip the Salt: A pinch of sea salt on top before baking enhances the chocolate flavor.
  • Adjust Baking Time: For chewier cookies, bake for a shorter time. For crisp cookies, add a minute or two.
  • Try Different Chocolate Types: Mixing milk chocolate with dark chocolate can create a complex flavor profile.
  • Let Cookies Cool on Pan: Allow them to firm up for a few moments before transferring them to a cooling rack.
  • Use Room Temperature Ingredients: Ensure all your ingredients are at room temperature for better mixing.

Variations and Adaptations

Chocolate chip cookies can be customized in various ways. For regional variations, consider adding spices like cinnamon or nutmeg for warmth, or even using almond extract for a unique flavor twist. Seasonal adaptations can include pumpkin spice during the fall or peppermint for the winter holidays, allowing these cookies to cater to festive moods.

Dietary modifications are also easy to implement. For gluten-free options, replace regular flour with a gluten-free blend or almond flour. Vegan adaptions can use plant-based butter and flax eggs instead of traditional eggs. This adaptability ensures that everyone can enjoy chocolate chip cookies, regardless of dietary restrictions.

Flavor variations can include using different chocolate types—white chocolate or butterscotch chips transform the classic cookie into something new. Texture modifications, like adding oats, can create a heartier feel. For presentation alternatives, consider drizzling melted chocolate over the cooled cookies or sprinkling them with sea salt before baking for an enhanced look!

Serving and Presentation Guide

Plating techniques can elevate your cookie presentation. Use a clean, white plate to showcase the golden cookies beautifully. Garnishing with a sprinkle of sea salt not only adds flavor but also makes them visually appealing. Traditional accompaniments like milk or coffee can enhance the experience, while modern serving suggestions could involve pairing with ice cream for an indulgent dessert.

Temperature considerations are essential—serve cookies slightly warm for the ultimate melt-in-your-mouth experience. If storing for later, consider portion control tips by individually wrapping cookies in plastic wrap to keep freshness intact. This also makes for delightful gifts!

Wine and Beverage Pairing

When it comes to wine pairings, a sweet dessert wine like a Sauternes or a light-bodied red such as Pinot Noir complements chocolate chip cookies flawlessly. Non-alcoholic alternatives might include chilled almond milk or a rich hot chocolate, creating a cozy atmosphere. If you’re a coffee lover, a smooth, dark roast with chocolate undertones pairs exceptionally well, enhancing the cookie’s richness.

Storage and Shelf Life

Proper storage methods are crucial to maintaining the freshness of your chocolate chip cookies. Store them in an airtight container at room temperature for up to a week. For longer shelf life, consider freezing them; just ensure they are completely cooled before placing them in a freezer-safe bag. Signs of spoilage include a stale smell or a dry texture, indicating that it’s time to toss them.

Reheating thawed cookies is simple: pop them in a preheated oven for about 5 minutes at 350°F to restore their soft texture. You can also microwave them for a few seconds for a quick fix. Freezing cookie dough is another great option—shape and freeze them before baking so you can enjoy freshly baked cookies anytime!

Make Ahead Strategies

A great make-ahead strategy starts with prepping the dough. You can mix everything and refrigerate it for up to three days, allowing flavors to develop even further. For longer storage, roll the dough into balls and freeze them, then bake straight from the freezer, adding an extra minute or two to the baking time. This method preserves flavor and ensures a quick treat is always at hand.

Quality is key when it comes to dough storage. Assess the dough’s quality before freezing and avoid including any add-ins that won’t freeze well. Once frozen, the dough will maintain its integrity; remember to keep track of your dough’s freeze date to ensure freshness, allowing you to enjoy perfectly baked cookies whenever you please.

Scaling Instructions

Scaling your chocolate chip cookie recipe can be done easily. To halve the recipe, simply divide all the ingredients by two, ensuring that measuring is precise for consistent results. Doubling or tripling the batch is just as straightforward—use larger mixing bowls and ensure consistent baking times with multiple trays in the oven.

Equipment adjustments may be necessary; larger batches might require a stand mixer for even mixing. Also, keep an eye on the timing—cookies may need slightly longer to bake if you crowd the oven. Remember to stagger baking trays if doubling or tripling to avoid uneven cooking and ensure everyone enjoys perfectly baked cookies!

Nutritional Deep Dive

The macro breakdown of chocolate chip cookies typically reveals high carbohydrates from sugar and flour, combined with moderate fats from butter. For those watching their macros, consider alternatives like substituting some flour with rolled oats for increased fiber content. Be mindful of portion sizes; even though they are delicious, moderation is key to maintain a balanced diet.

Micronutrient analysis shows that chocolate chip cookies can provide small amounts of essential vitamins and minerals, especially if you opt for enriched flour. Additionally, using quality dark chocolate can provide antioxidants. For health-conscious bakers, briefly considering dietary considerations will allow for enhanced cookies without sacrificing flavor.

Dietary Adaptations

For gluten-free adaptations, using alternatives like almond flour or a certified gluten-free flour blend ensures that everyone can indulge without worry. For a dairy-free solution, coconut oil can replace butter, and dairy-free chocolate chips can be used, enabling this classic treat to fit various dietary needs.

Vegan versions can simply exclude eggs, replacing them with flaxseed meal mixed with water as a binding agent. Other adaptations can include low-carb versions by utilizing almond flour and sugar substitutes, or paleo-friendly options that incorporate nut butter and natural sweeteners. These variations maintain the essence of chocolate chip cookies while accommodating diverse diets.

Troubleshooting Guide

Texture issues often arise when proper measurements are not observed—overly dry cookies could signal too much flour was used. If the dough doesn’t hold together, it might need a little extra moisture. A common flavor balance issue is using too much brown sugar without the right salt balance; always include a pinch of sea salt.

Temperature problems can affect baked goods greatly. If cookies spread too much, refrigerating the dough for a period will help firm it up before baking. With equipment challenges, double-check your oven’s calibration; inconsistent baking times often result from incorrect temperatures. Lastly, timing concerns can be solved by setting a timer, checking cookies frequently to achieve that perfect ‘just baked’ look.

Recipe Success Stories

Love for chocolate chip cookies shines through in countless success stories. Many home bakers share tales of their first attempts at these delectable cookies, often highlighting how friends and family loved them. Recipe variations often emerge too, with readers experimenting by adding unique ingredients while maintaining the classic flavor.

Adaptation stories also reveal how traditional recipes can evolve into gluten-free or vegan delights, proving the cookie’s versatility. Readers often report turning these cookies into community events, baking together with family members, cultivating a sense of togetherness and joy over mixing ingredients.

Frequently Asked Questions

Can I use margarine instead of butter?

Yes, you can use margarine as a substitute for butter, although it may alter the flavor slightly. However, make sure to choose a good-quality margarine for the best results.

How can I store leftover cookies?

Store leftover cookies in an airtight container at room temperature for up to a week. For longer shelf life, consider freezing them.

Can I freeze the cookie dough?

Absolutely! Freezing cookie dough is a great way to enjoy freshly baked cookies anytime. Shape the dough into balls and freeze in a single layer.

What’s the difference between semi-sweet and milk chocolate chips?

Semi-sweet chocolate chips have a richer, deeper chocolate flavor with less sugar, while milk chocolate chips are sweeter and creamier.

What can I use as an egg substitute?

For an egg substitute, you can use a flaxseed meal mixed with water, mashed banana, or applesauce, depending on the consistency you’re aiming for.

Why are my cookies flat?

Flat cookies can result from too much butter, not enough flour, or not chilling the dough. Make sure to follow the recipe closely for best results.

Can these cookies be made gluten-free?

Yes, by substituting all-purpose flour with a gluten-free blend or almond flour, you can make these chocolate chip cookies gluten-free.

How do I know when my cookies are done baking?

Cookies are done when the edges are slightly golden, and the centers look just set. They’ll continue to cook a bit after being removed from the oven.

Can I add nuts to my cookies?

Adding nuts can enhance the texture and flavor of your cookies. Walnuts and pecans are popular choices, but feel free to experiment with your favorites!

How can I make my cookies chewier?

For chewier cookies, try using more brown sugar than white sugar, and avoid overbaking. Chilling the dough before baking also helps maintain chewiness.

What’s the best way to reheat cookies?

To reheat cookies, place them in a preheated oven at 350°F for about 5 minutes, or microwave them for a few seconds to regain their freshness.

Additional Resources

For more sweet treats, check out my related recipes like classic oatmeal cookies or peanut butter cookies. Additionally, explore my technique guides on proper baking methods or ingredient information to enhance your baking skills. If you’re looking for seasonal variations, try my holiday-themed cookies that include festive spices and toppings!

Join the Conversation

Engage with the community by sharing your chocolate chip cookie photos on social media! Your feedback and reviews help others discover the joy of baking. Feel free to share your variations, adaptations, and any unique twists you’ve incorporated into the recipe. Together, let’s celebrate the joy of baking and enjoy this classic treat!

The Recipe

Chocolate Chip Cookies

Serves: 24 Cookies

Prep Time: 15 mins

Cook Time: 10 mins

Total Time: 25 mins

Kitchen Equipment Needed

  • Mixing bowl
  • Measuring cups
  • Whisk or mixing spoon
  • Baking sheet
  • Parchment paper
  • Cooling rack

Ingredients

  • 2 1/4 cups all-purpose flour
  • 1/2 teaspoon baking soda
  • 1 cup unsalted butter, softened
  • 3/4 cup granulated sugar
  • 3/4 cup brown sugar, packed
  • 1 teaspoon salt
  • 2 teaspoons pure vanilla extract
  • 2 large eggs
  • 2 cups semi-sweet chocolate chips

Directions

  1. Preheat your oven to 350°F (180°C).
  2. In a mixing bowl, combine flour and baking soda; set aside.
  3. In another bowl, beat together butter, granulated sugar, brown sugar, and salt until creamy.
  4. Add vanilla and eggs, one at a time, mixing well after each addition.
  5. Gradually mix in the flour mixture until combined.
  6. Stir in chocolate chips by hand.
  7. Drop tablespoonfuls of dough onto prepared baking sheets, spaced evenly apart.
  8. Bake for 9 to 11 minutes or until the edges are golden.
  9. Remove from the oven and let cool on baking sheets for 5 minutes before transferring to a cooling rack.

Recipe Notes

  • For softer cookies, underbake slightly, allowing them to set as they cool.
  • Replace half of the chocolate chips with nuts for added texture.
  • If using salted butter, reduce the added salt in the recipe.

Best Chocolate Chip Cookies – Soft, Chewy, and Delicious

Chocolate Chip Cookies: The Ultimate Comfort Snack

⚖️
Difficulty
Easy

⏲️
Prep Time
15 mins

🕒
Cook Time
10 mins

⏱️
Total Time
25 mins

🍽️
Servings
24 cookies

Chocolate chip cookies have become a beloved classic in households across the globe, establishing themselves as the quintessential comfort snack. Whether you are reminiscing about childhood memories or creating new traditions, the warm scent of freshly baked cookies can evoke a myriad of emotions, turning an ordinary moment into something truly special. With their irresistible combination of rich chocolate and a buttery, crumbly texture, these cookies will have you reaching for one after another.

The process of baking chocolate chip cookies is not only rewarding but also remarkably straight-forward. As you dive into this delightful recipe, get ready for an engaging culinary experience that fills your kitchen with enticing aromas. In just a short amount of time, you will create a batch of cookies that are not only visually appealing but also a taste sensation, perfect for sharing with friends and family or indulging in all on your own!

Quick Recipe Highlights

  • Flavor Profile: The rich sweetness of caramelized sugar harmonizes perfectly with the chocolate chunks, creating a balanced flavor experience.
  • Texture: Expect a delightful contrast between the crispy edges and soft, gooey center that melts in your mouth.
  • Aroma: A warm, inviting scent of buttery cookies and toasted chocolate wafts through your kitchen as they bake.
  • Visual Appeal: Mouthwatering golden-brown cookies studded with luscious chocolate pieces make for an eye-catching treat.
  • Skill Level Needed: This recipe is incredibly user-friendly, making it perfect for novice bakers and seasoned pros alike.
  • Special Equipment: Just a few basic kitchen tools are all you need, including a mixing bowl, baking sheets, and a whisk.

Recipe Overview

  • Difficulty Level: With straightforward steps and minimal ingredients, this recipe is suitable for anyone ready to bake.
  • Category: Chocolate chip cookies fall under the dessert category, perfect for any sweet tooth craving.
  • Cuisine: This beloved treat is a staple of American baking, reflecting its cultural significance in family gatherings.
  • Cost: This recipe utilizes basic pantry staples, making it budget-friendly for all home cooks.
  • Season: While perfect year-round, chocolate chip cookies shine during holidays and festivities, bringing cheer and warmth.
  • Occasion: Ideal for celebrations, bake sales, or simple family nights, they are universally loved across generations.

Why You’ll Love This Recipe

Biting into a freshly baked chocolate chip cookie is like indulging in a hug from the inside. The combination of soft buttery dough with pockets of melted chocolate tantalizes your taste buds and creates an experience that is delightful both in flavor and texture. Each cookie promises a sweet, comforting moment that can lift your spirits and satisfy cravings, making it a timeless treat.

One of the most appealing aspects of this chocolate chip cookie recipe is its convenience. With a quick prep and bake time, you can whip up a batch for unexpected guests or a spontaneous dessert craving. The straightforward steps ensure that even a beginner can successfully create delicious cookies, while the familiar flavors warm the hearts of everyone around the table.

Additionally, chocolate chip cookies can be made healthier by opting for alternative sugars or adding oats. While they are certainly a treat, they can be enjoyed in moderation, providing a source of carbohydrates and energy for your day. Through mindful ingredient choices, you can bring a balance of indulgence and nutrition into your baking.

Sharing a batch of freshly baked cookies can foster community and create lasting memories. Whether bringing them to a potluck or enjoying them with family, chocolate chip cookies can serve as icebreakers, sparking conversations and laughter. Their nostalgic value encourages connections and moments that are often cherished for years to come.

When considering cost, chocolate chip cookies are one of the most accessible desserts. Using basic pantry staples like sugar, flour, and chocolate chips, you can satisfy a group without breaking the bank. Their affordability makes them a popular choice for treats at any gathering or celebration, allowing everyone to enjoy a bite of homemade goodness.

Historical Background and Cultural Significance

The origin of chocolate chip cookies dates back to the 1930s when Ruth Wakefield invented the recipe at her Toll House Inn. Initially called “Toll House Chocolate Crunch Cookies,” they quickly became a sensation across the United States as people fell in love with the delightful combination of buttery dough and melted chocolate pieces. Interestingly, Nestlé eventually collaborated with Ruth, leading to the iconic Toll House cookie brand that remains famous to this day.

This cookie holds a significant place in American culture as it encapsulates the essence of home baking. Often associated with family gatherings and holiday celebrations, the chocolate chip cookie has become a symbol of comfort and warmth that resonates with people from all backgrounds. Its presence on cookie platters at Christmas and during bake sales showcases its importance in fostering community ties through sharing food.

Over the decades, the chocolate chip cookie recipe has evolved as bakers have sought to experiment with new ingredients and flavors. From adding nuts to experimenting with different types of chocolate, variations abound today, allowing each cookie enthusiast to put their personal twist on this classic treat. This evolution reflects the ongoing love for chocolate chip cookies and the creativity of home bakers everywhere.

Regional variations also highlight the cultural significance of chocolate chip cookies. For instance, in New England, you’ll often find the addition of cranberries, while southern states might incorporate pecans or even local spices. These regional adaptations showcase how versatile the chocolate chip cookie can be, ensuring its relevance in diverse culinary traditions.

Ingredient Deep Dive

Chocolate Chips
Chocolate chips are the stars of this recipe, providing the essential sweet and rich flavor profile that is synonymous with chocolate chip cookies. Historically, chocolate has held value not just as a treat but also as a luxury item. Selecting high-quality chocolate chips or even experimenting with dark chocolate can elevate the flavor of your cookies. Proper storage in a cool, dry place ensures that they maintain their quality and can be substituted with other types of chocolate, like white or even butterscotch chips, for unique flavor profiles.

Flour
Flour acts as the base of the cookie dough, providing structure and texture. Depending on the type of flour used, the cookie’s final texture can shift from soft and chewy to crisp and crunchy. Flour selection also influences the nutritional value of the cookies, with whole wheat flour providing added fiber. Storing flour in airtight containers helps maintain its freshness while offering a variety of substitutes for gluten-sensitive bakers.

Brown Sugar
Brown sugar infuses moisture and flavor into the cookie dough, contributing to the signature chewy texture. The molasses in brown sugar enhances the overall sweetness and adds depth to the cookies. Understanding the difference between light and dark brown sugar can be useful, as dark brown sugar yields a richer flavor. When stored properly in a sealed container, brown sugar can last for a long time, and alternatives such as maple syrup can adapt the sweetness level.

Butter
Butter is responsible for the rich flavor and tender crumb of the cookies. Using unsalted butter allows you to control the saltiness of the recipe. The temperature of the butter is critical; softened butter incorporates air during mixing, helping to create a light texture. For those looking for dairy-free options, substitutes like coconut oil or margarine can be used. Storing butter in a cool place ensures its quality, and understanding proper methods for browning butter can impart a deliciously nutty flavor.

Common Mistakes to Avoid

  • Not softening butter: Using cold butter will result in a dense cookie instead of a light and fluffy one.
  • Overmixing the dough: Mixing too long can lead to tough cookies due to gluten development.
  • Skipping the chilling step: Chilling the dough allows flavors to meld and gives the cookies a better shape during baking.
  • Using stale ingredients: Always check the freshness of your baking soda and flour for optimal results.
  • Baking on an ungreased sheet: Not greasing the baking sheet can result in cookies sticking, making cleanup a hassle.
  • Not measuring ingredients accurately: Use a kitchen scale for precision, especially with flour and sugar.
  • Baking for too long: Overbaking can turn moist cookies into a dry, crumbly snack.
  • Not letting cookies cool properly: Allow cookies to rest on the baking sheet for a few minutes before transferring to a wire rack; this helps set their structure.
  • Using the wrong type of chocolate: Using chocolate bars instead of chips can lead to uneven melting and a different texture.
  • Not preheating the oven: Baking in a non-preheated oven can alter cooking times and texture.

Essential Techniques

Whipping Butter and Sugar
Whipping butter and sugar together is a cornerstone technique that helps create the light airy texture that we desire in cookies. The process incorporates air into the mixture, giving the cookies their desirable lift. To master this technique, combine softened butter with sugar using an electric mixer until it becomes fluffy, typically taking about 3-5 minutes. Watch for visual cues such as a pale yellow color and fluffy consistency to ensure success.

Proper Dough Chilling
Chilling cookie dough is critical to prevent spreading and develop flavor. This technique allows the fats to solidify, giving the cookies structure during baking. To master it, wrap the prepared dough tightly and refrigerate for at least 30 minutes before baking. This step can be paired with visual cues, such as the dough feeling firm and slightly cool to touch upon shaping into balls.

Pro Tips for Perfect Chocolate Chip Cookies

1. Use weighted measurements for precision in baking, ensuring the best texture and consistency for your cookies.
2. Experiment with different types of chocolate chips – mix semisweet with dark chocolate for depth of flavor.
3. For an extra chewy texture, try using bread flour instead of all-purpose flour; its higher protein content helps with chewiness.
4. Bake just until the edges are golden; the cookies will continue to cook as they cool on the baking sheet.
5. Allow the dough to rest overnight in the fridge; this enhances the flavors and allows for better texture in the final cookies.
6. Try adding a pinch of sea salt on top before baking to balance the sweetness and enhance flavor.
7. Keep a watchful eye on your oven temperature using an oven thermometer to ensure accurate baking.
8. For those with access to vanilla bean paste, use it instead of extract for an intense and rich vanilla flavor.

Variations and Adaptations

Chocolate chip cookies can easily be adapted to accommodate various preferences. One popular variation is incorporating nuts, such as walnuts or pecans, adding nutritional value and a delightful crunch. Seasonal adaptations exist as well; during the fall, pumpkin spice chips can introduce a festive flair, while summertime may call for a sprinkle of sea salt to enhance the flavors amidst heat.

For those with specific dietary needs, there are countless modifications. Gluten-free variations can be created by using alternative flours, while vegan choices can be achieved with egg substitutes and plant-based margarine. Each adaptation maintains the core identity of the classic cookie while catering to modern eating habits.

Flavor variations abound as well; adding a hint of espresso powder can intensify the chocolate flavor, or experiment with different types of extract such as almond or orange for unique profiles. Presentation alternatives, such as making cookie sandwiches with frosting filling between, can create a new treat entirely.

Serving and Presentation Guide

Plating the cookies can make a simple treat feel extra special. Use a crisp white platter to contrast the rich browns of the cookies for a classic look. Garnishing with fresh berries or a dusting of powdered sugar can add a pop of color. Traditional accompaniments such as milk or coffee can enhance the experience, while more modern suggestions like ice cream or fruit can elevate the dessert further.

Temperature plays an essential role in serving chocolate chip cookies. Allow them to cool slightly before serving to maintain the gooey texture and flavor. For portion control, consider using cookie scoops to ensure uniform sizes, making them easy to share among friends and family.

Wine and Beverage Pairing

When pairing beverages with chocolate chip cookies, consider a glass of dessert wine, such as a sweet Riesling or Port, which complements the sweetness of the cookies. For a non-alcoholic alternative, a glass of cold milk is the classic choice that balances the richness of the cookies. For coffee lovers, a bold espresso pairs beautifully with chocolate chip cookies, offering a delightful contrast of flavors.

When it comes to temperature, enjoy the cookies warm right out of the oven for maximum indulgence. However, if you have leftovers, reheating them slightly before serving can restore the delicious melted chocolate experience that first made them a hit.

Storage and Shelf Life

To maintain the freshness of your chocolate chip cookies, store them in an airtight container at room temperature. This method protects them from drying out and allows them to maintain their delicious texture. Cookies can last up to one week stored this way. For longer storage, consider freezing them in a single layer on a baking sheet, then transferring to a sealed container, where they can stay fresh for up to 3 months.

Signs of spoilage include an off-putting smell or hardening. When it’s time to reheat, place them in a warm oven for a few minutes or microwave for 10-15 seconds to soften them up again. Remember that storage recommendations can vary based on the specific ingredients used, especially if you try any variations.

Make Ahead Strategies

Creating a strategic prep timeline can simplify your baking process. Prepare the dough in advance and refrigerate it for up to 72 hours; this allows flavors to deepen. You can also scoop the cookie dough into balls and freeze them individually; this way, you can bake fresh cookies as needed.

While storing the dough, divide it into servings, wrapped well to ensure freshness. Quality will be maintained if the cookies are not baked in too long before freezing or chilling. Fresh elements, such as a sprinkle of flaky sea salt, can be added just before baking to enhance taste and presentation.

Scaling Instructions

Scaling chocolate chip cookie recipes is incredibly straightforward. If you’d like to halve the recipe, divide all measurements by two, ensuring the baking time stays consistent. For doubling or tripling, consider the capacity of your mixing bowls and adjust the baking sheets you’ll need accordingly.

Be mindful of the timing, as larger batches may necessitate longer baking times; watch for visual cues for proper doneness. Proper storage afterward becomes essential, ensuring all cookies are sealed correctly to maintain freshness regardless of quantity.

Nutritional Deep Dive

Each chocolate chip cookie contains essential macros, primarily carbohydrates from the sugars and flour, fats from the butter, and proteins from the eggs. Understanding the micro-nutrient analysis can help focus on healthier variations without sacrificing taste. Providing a nutritional breakdown can lead to more informed choices, especially if cookies are included regularly in your diet.

Health benefits, like satisfied cravings and enhanced mood from sweet treats, are vital but should be weighed against dietary considerations, such as sugar or caloric intake for those managing weight. Portion analysis allows for healthier indulgence, ensuring balance while enjoying the delicious treat.

Dietary Adaptations

For those following specific diets, chocolate chip cookies can be adapted in various ways. Gluten-free options exist using alternatives like almond or oat flour, while those wanting a dairy-free experience can use coconut oil in place of butter. Vegan adaptations can substitute flax eggs for traditional eggs, ensuring everyone can enjoy the treat.

Low-carb and keto-friendly variations are achievable through sugar alternatives such as erythritol or monk fruit sweetener, while still maintaining a delicious flavor. Exploring paleo versions allows for clean, whole-food ingredients, making it possible for anyone to enjoy this classic cookie regardless of dietary restrictions.

Troubleshooting Guide

If encountering texture issues, consider how long the butter was creamed; too long can yield tough cookies, while too short may lead to flat ones. For flavor balance, adjust the salt or sugar levels as necessary to align with personal preferences.

Temperature problems arise frequently and can be adjusted by ensuring the oven is preheated adequately before placing the cookies inside. If ingredients are substituted, keep in mind how they may affect the overall flavor and consistency, and valiantly monitor baking times as necessary.

Recipe Success Stories

The community has shared numerous success stories from trying new variations on this classic recipe. Readers often report baking chocolate chip cookies for special occasions, garnering compliments from family and friends. Additionally, many share excitement over successfully adapting the recipe for dietary needs, demonstrating the flexibility of the cookies.

Feedback often revolves around how easily this recipe can be adapted, with many readers sharing suggestions for unique flavor additions or personalizing their cookie texture. These anecdotes enrich the recipe’s legacy, allowing for an ever-evolving community of bakers engaged with this timeless treat.

Frequently Asked Questions

Can I freeze chocolate chip cookie dough?

Yes! You can freeze cookie dough by scooping it into balls and placing them on a baking sheet until solid. Once frozen, transfer them to an airtight container or bag and store in the freezer for up to 3 months.

What’s the best way to store baked cookies?

Baked cookies should be stored in an airtight container at room temperature. This keeps them fresh and soft for several days. If you want to keep them longer, consider freezing them.

How do I make cookies chewier?

To achieve a chewier texture, you can slightly increase the brown sugar ratio, use bread flour instead of all-purpose, and avoid overbaking the cookies. Letting the dough rest overnight can also enhance chewiness.

Can I substitute ingredients in the recipe?

Absolutely! You can substitute unsalted butter for margarine, and replace all-purpose flour with gluten-free flour. Adjust sugars based on your sweetness preference, but keep in mind the effect on texture.

How do I prevent cookies from spreading too much?

To prevent spreading, chill the cookie dough for at least 30 minutes before baking. You can also add a bit more flour to the dough if it’s still too wet and experiment with different baking temperatures.

Are chocolate chip cookies healthy?

While chocolate chip cookies are a treat and can be high in sugars and fats, healthier modifications using whole grain flours, natural sweeteners, and added oats can make them a better option for occasional indulgences.

What type of chocolate works best?

Semisweet chocolate chips are traditional, but you can experiment with dark, milk, or even white chocolate varieties based on your preference.

Can this recipe be doubled?

Yes, you can double the recipe. Just be sure to mix it in a large bowl and batch bake accordingly to avoid overcrowding your oven.

What’s the best way to serve chocolate chip cookies?

For a delightful experience, serve them warm with a glass of cold milk, alongside coffee, or even take it up a notch by making cookie ice cream sandwiches.

How long do the cookies last?

Homemade chocolate chip cookies can last for about a week at room temperature when stored properly in an airtight container. Freezing extends their freshness to about 3 months.

Additional Resources

For more delicious baking, check out related recipes such as oatmeal chocolate chip cookies, peanut butter cookies, or festive snickerdoodles. Dive deeper into technique guides for mastering cookie baking, and explore ingredient information to learn more about substitutions and shopping tips. Explore equipment recommendations that can enhance your baking experience, whether you are upgrading your mixer or investing in high-quality baking sheets.

Join the Conversation

We encourage you to share your success with this chocolate chip cookie recipe on social media! Snap a picture of your final creation or a family gathering filled with laughter and delicious cookies. Engage with our community by sharing stories of your baking adventures, variations, or even tips on perfecting these delightful treats. We love hearing how food creates connections and warms hearts!

The Recipe

Chocolate Chip Cookies

Serves: 24 cookies

Prep Time: 15 mins

Cook Time: 10 mins

Total Time: 25 mins

Kitchen Equipment Needed

  • Mixing bowl
  • Baking sheets
  • Electric mixer
  • Cookie scoop or tablespoon
  • Wire rack

Ingredients

  • 2 ¼ cups all-purpose flour
  • 1 teaspoon baking soda
  • ½ teaspoon salt
  • 1 cup unsalted butter, softened
  • ¾ cup granulated sugar
  • ¾ cup packed brown sugar
  • 1 teaspoon vanilla extract
  • 2 large eggs
  • 2 cups semisweet chocolate chips

Directions

  1. Preheat your oven to 350°F (175°C) and line baking sheets with parchment paper.
  2. In a mixing bowl, cream together the softened butter, granulated sugar, brown sugar, and vanilla extract until light and fluffy.
  3. Add the eggs one at a time, mixing well after each addition.
  4. In another bowl, whisk together the flour, baking soda, and salt. Gradually mix the dry ingredients into the wet mixture until combined.
  5. Fold in the chocolate chips gently until evenly distributed.
  6. Drop rounded tablespoons of dough onto prepared baking sheets, leaving space for spreading.
  7. Bake for 9-11 minutes, or until the edges are golden brown but the center remains soft.
  8. Remove from the oven and allow to cool on the baking sheets for 5 minutes before transferring to a wire rack to cool completely.

Recipe Notes

  • For a richer flavor, try browning the butter before mixing it into the dough.
  • Use dark chocolate chips for a deeper flavor contrast.
  • The dough can be chilled to prevent excessive spreading during baking.

Classic Spaghetti Carbonara – Creamy and Authentic Recipe

Classic Spaghetti Carbonara: A Timeless Italian Delight

⚖️
Difficulty
Medium

⏲️
Prep Time
10 mins

🕒
Cook Time
20 mins

⏱️
Total Time
30 mins

🍽️
Servings
4

Classic Spaghetti Carbonara is an Italian masterpiece that captures the essence of comfort food. This dish combines simple ingredients to create an unforgettable flavor experience that is rich, creamy, and utterly satisfying. Imagine twirling your fork around al dente spaghetti coated in a velvety sauce made of eggs, pecorino cheese, and crispy pancetta. Each bite brings together the saltiness of the cheese and meat with the smoothness of the egg, creating a harmony of taste that lingers on your palate. It’s not just a meal; it’s an experience that transports you to the streets of Rome.

The beauty of Spaghetti Carbonara lies in its simplicity and the quality of its ingredients. As you gather around the table with family or friends, the aroma of sizzling pancetta and fragrant garlic fills the air, setting the stage for a delightful evening. Whether it’s a romantic dinner or a casual get-together, this classic Italian dish promises to impress and satisfy even the most discerning food lovers. With its rich flavors and creamy texture, it’s no wonder that Carbonara is a favorite among many around the globe.

Quick Recipe Highlights

  • Flavor Profile: This dish offers a beautifully balanced blend of savory, creamy, and slightly tangy flavors, making every bite a delight.
  • Texture: The spaghetti’s chewiness contrasts beautifully with the crispiness of the pancetta and the luscious creaminess of the sauce.
  • Aroma: The dish is aromatic, featuring notes from the garlic and the sizzling pancetta that tantalize your senses.
  • Visual Appeal: The plating is stunning, with golden pasta glistening under a sprinkle of freshly cracked pepper and a sprinkle of cheese.
  • Skill Level Needed: Although it seems complex, creating a perfect Carbonara is achievable for home cooks with basic skills, making it accessible and rewarding.
  • Special Equipment: All you need is a pot, a pan, and a mixing bowl to whip up this incredible dish, no fancy gadgets required!

Recipe Overview

  • Difficulty Level: This recipe is classified as medium difficulty due to the timing of cooking processes, but with careful attention, you can achieve perfect results.
  • Category: Classic Spaghetti Carbonara fits perfectly in the pasta category and is a popular choice for main meal sections in Italian cuisine.
  • Cuisine: Italian cuisine is celebrated for its rich flavors and fresh ingredients, and Carbonara exemplifies the heart of this culinary tradition.
  • Cost: The ingredients for Carbonara are generally affordable, making it a cost-effective option for a hearty meal.
  • Season: This dish is enjoyed year-round but is particularly comforting during the cooler months when warmer meals are desired.
  • Occasion: Spaghetti Carbonara is ideal for family dinners, social gatherings, or even a special date night; it’s a versatile dish for varied occasions!

Why You’ll Love This Recipe

The classic Spaghetti Carbonara is a dish that excites the taste buds with its dynamic flavor profile. The creamy sauce envelops the pasta perfectly, while the savory pancetta adds a satisfying crunch with each bite. The simplicity of the ingredients only enhances the overall experience, allowing each flavor to shine brightly. You might find it hard to resist a second helping!

In addition to its delicious taste, this recipe offers convenience and quick preparation. With a total time of about 30 minutes, it’s perfect for busy weeknights or impromptu gatherings. You can have a gourmet meal on the table without extensive prep work. The straightforward steps make it easy for anyone to replicate this dish in their own kitchen, ensuring that you can enjoy a restaurant-quality meal at home.

Nutritionally, Carbonara can be a balanced meal when paired with a side of vegetables or a fresh salad. The use of eggs provides a great source of protein, while the pasta offers carbohydrates for energy. When made thoughtfully, this dish can cater to various dietary needs while satisfying hunger with its richness.

Practically, Spaghetti Carbonara holds a social aspect as well. It’s a dish that brings people together around the table, encouraging laughter and conversation over shared plates. The communal experience of enjoying a classic Italian dish fosters connection and warmth, making it a great choice for entertaining friends and family.

Lastly, the affordability of the ingredients makes this recipe accessible to many. Even while enjoying a fine culinary experience, you won’t stretch your budget. Classic Spaghetti Carbonara is a fine example of how simple ingredients can create something truly delightful, proving that cooking can be both an art and a joy.

Historical Background and Cultural Significance

Spaghetti Carbonara has its origins deeply rooted in Italian cuisine, particularly in the Lazio region, where Rome is located. Its invention is often attributed to the mid-20th century, with tales suggesting that it was created by Italian charcoal workers (‘carbonari’). The simplicity of the dish reflects the practicality of these workers who needed a satisfying, energy-rich meal.

Culturally, Carbonara is not just a meal; it represents a piece of Italy’s culinary heritage. It embodies the Italian philosophy of “fare la scarpetta,” which means to savor every last bite of food, often using bread to wipe the plate clean. Carbonara encourages sharing and savoring, emphasizing community and connection.

Over the years, the recipe has evolved, with various regions of Italy adding their personal twists. While traditionalists hold firm to the original components of eggs, cheese, pepper, and pork, modern variations have emerged, introducing ingredients like cream or vegetables. These adaptations showcase cooking’s adaptability and the creativity of home cooks exploring outside traditional limits.

Regional variations further highlight the dish’s significance across Italy and beyond. Different provinces may use unique local ingredients or methods, reflecting their culture and contributing to the global appreciation for this delicious carbonara. The dish celebrates the diverse history of Italian cuisine while maintaining a beloved status among food lovers worldwide.

Ingredient Deep Dive

Spaghetti is the heart of Carbonara, providing the base for the dish. Roman tradition calls for spaghetti, but you can also use fettuccine or bucatini. As a staple in Italian cuisine, it has historical significance dating back to the 12th century. Spaghetti contains carbohydrates which are a primary energy source for the body, making it an excellent inclusion in any meal. When selecting spaghetti, look for high-quality, durum wheat pasta for better texture and flavor, and ensure to store it in a cool, dry place.

Pancetta plays a crucial role in imparting rich flavor to the dish. This Italian bacon adds a delightful saltiness and texture, key to the overall experience of Carbonara. Pancetta is often sold in thin slices and is made by curing pork belly with spices, enhancing its flavor. Nutritionally, it contributes protein and fat, so it’s important to use it judiciously. When choosing pancetta, always select a good quality product, preferably from an Italian supplier. Store it in the fridge and use it within a week for freshness.

Eggs are vital for creating the creamy sauce that binds the dish. Traditionally, fresh eggs from free-range chickens are preferred for the best color and flavor. Eggs are a great source of protein and contain numerous vitamins and minerals, making them an essential part of a well-balanced diet. To achieve the perfect sauce, use high-quality eggs, ideally from a local farmer’s market. Store eggs in the refrigerator and aim to use them within their expiration date to ensure their quality.

Pecorino Romano cheese adds the characteristic tangy flavor to Carbonara. This hard cheese, made from sheep’s milk, not only enhances the taste but also adds richness and depth. It’s a source of protein and essential fatty acids. When selecting cheese, look for an authentic Pecorino Romano rather than generic hard cheese for the best results. Store any leftover cheese in the refrigerator, wrapped tightly to maintain freshness.

Common Mistakes to Avoid

  • Using low-quality ingredients: Opting for subpar ingredients can lead to an unsatisfactory end product. Always choose the freshest eggs, high-quality cheese, and quality pasta.
  • Overcooking the pasta: Cooking pasta until mushy will ruin the texture of your dish. Always aim for al dente, as it will continue to cook slightly when mixed with the sauce.
  • Adding cream: Traditional Carbonara relies solely on eggs and cheese for creaminess. Adding cream can alter the authentic taste and texture of this classic dish.
  • Not mixing the sauce properly: Failing to blend the egg mixture with hot pasta can lead to scrambled eggs. Mix them off the heat for smooth results.
  • Using precooked pancetta: Pre-cut or precooked pancetta may lack flavor. Freshly sauté it to develop deeper flavors essential for Carbonara.
  • Forget to reserve pasta water: Not saving some pasta water can leave your sauce too thick. Use it to adjust the sauce’s consistency when needed.
  • Inadequate seasoning: Pasta needs seasoning! Ensure you’re adding enough salt to the water and seasoning your sauce to enhance flavors.
  • Rushing the process: Cooking Carbonara requires some care in timing, especially when combining the sauce with the pasta. Take your time for the best results.

Essential Techniques

Cooking the Pasta: Cooking pasta is fundamental to this dish. Learn to master the timing and don’t forget to salt the water well to enhance the pasta’s flavor. Always test for doneness a minute before the package suggests. Look for a firm bite, known as al dente.

Making the Sauce: The key to a creamy sauce without scrambling the eggs is to mix them off the direct heat. Once you add the hot pasta, the residual heat will cook the eggs just enough without overcooking them. Visual cues include a smooth, glossy sauce that clings to the spaghetti.

Pro Tips for Perfect Classic Spaghetti Carbonara

One essential tip is to use room temperature eggs for a smoother emulsion when making the sauce. Cold eggs can shock and curdle when they come in contact with hot pasta.

Always mix the eggs and cheese together before adding them to the pasta. This method ensures an even distribution of cheese throughout the dish, enhancing each bite.

Try using a combination of Pecorino Romano and Parmigiano-Reggiano for a sought-after flavor balance. This mix brings out a nutty richness that complements the salty pancetta beautifully.

When sautéing the pancetta, ensure it’s crisp, as this adds a delightful crunch that contrasts with the creamy pasta. A dash of black pepper brings just the right amount of heat.

Reserve more pasta water than you think you’ll need, as it helps adjust the consistency of the sauce without compromising flavor. The starch from the pasta water helps bind the sauce to the noodles for a better overall texture.

Serve Carbonara immediately after plating to enjoy it at its peak temperature. The sauce thickens quickly, and the ingredients taste best when fresh.

Finally, consider adjusting the recipe for personal taste by experimenting with the type of pasta or cheese you use. Exploring different pasta shapes can add a fun twist to this classic dish!

Variations and Adaptations

Classical variations of Spaghetti Carbonara can include different types of meats such as guanciale or bacon, each imparting unique flavors while preserving the dish’s essence. Incorporating seasonal vegetables like peas or asparagus can add a refreshing twist, enhancing its nutritional profile without sacrificing flavor.

For those looking for dietary modifications, a gluten-free pasta option can be a great substitute. The use of zoodles or spaghetti squash can easily create a low-carb version while maintaining the spirit of the dish.

If you’re aiming for a vegetarian adaptation, consider omitting the meat entirely and using smoked paprika to mimic the smoky flavor traditionally provided by pancetta.

For an explosion of flavor, adding truffle oil or fresh herbs like basil or parsley can elevate your Carbonara experience in unexpected yet delightful ways.

Finally, consider plating your Carbonara in unique ways such as serving it in a Parmesan cheese bowl for a dramatic presentation, making it as pleasing to the eyes as to the palate.

Serving and Presentation Guide

Presentation is critical when serving Classic Spaghetti Carbonara. Start by twisting the spaghetti into a nest on the plate for a refined look. Finish it off with a generous grating of Pecorino Romano and a sprinkle of fresh cracked pepper on top.

Garnishing with fresh herbs, such as parsley, will add a pop of color and freshness to the dish, enhancing its visual appeal. Remember, presentation matters—presenting the pasta artfully will invite people to dig in!

For a more rustic approach, serve Carbonara in individual bowls, allowing guests to customize their plates with extra cheese or pepper to taste.

Temperature plays a crucial role, too; ensure the pasta is piping hot as it greatly enhances the overall flavor experience. A side of garlic bread or a light salad complements the main dish beautifully.

Portion control is essential to keep guests satisfied without overwhelming them. A typical serving is about 2 ounces of dry pasta per person, allowing for a hearty meal with room for sides without going overboard.

Wine and Beverage Pairing

When selecting the perfect wine to pair with Classic Spaghetti Carbonara, a white wine like Pinot Grigio or a light red like Chianti will complement the dish beautifully. The acidity of the wine cuts through the richness of the sauce, enhancing both the meal and the drink.

For a non-alcoholic alternative, consider sparkling water with a slice of lemon. This refreshingly light option will cleanse your palate and keep the meal feeling light.

If you enjoy coffee, a smooth cappuccino can serve as an excellent pairing after the meal, mirroring the creaminess found in the Carbonara while offering a delightful contrast in flavor.

Serve these beverages chilled to enhance your dining experience, and don’t hesitate to offer a variety, allowing your guests to choose their preference.

Storage and Shelf Life

Storing leftover Classic Spaghetti Carbonara properly is essential to maintain its flavor and texture. Make sure to transfer it to an airtight container soon after the meal. It can be refrigerated for up to 2 days.

When reheating, avoid microwaving directly, as it may overcook the eggs and ruin the creamy texture. Instead, gently warm it on the stovetop over low heat, adding a splash of reserved pasta water to revive the sauce.

Frozen Carbonara is not recommended due to the quality of the eggs; freezing may cause them to separate when thawed. However, if you must freeze it, store it for no more than a month.

Always check for signs of spoilage before consuming leftovers. If you notice an off smell or discoloration, it’s best to err on the side of caution and discard it.

Make Ahead Strategies

To save time in preparing Classic Spaghetti Carbonara, consider prepping the ingredients ahead of time. Chop the pancetta, measure out your cheese, and have your garlic peeled and ready to go. This will streamline the cooking process and allow for a swift assembly once you’re ready to cook.

You can also cook the pasta al dente earlier in the day. Shock the pasta in ice water to stop the cooking process and toss it with a small amount of oil to prevent sticking. When it’s time to heat, just warm it in your sauce.

Assemble everything just before serving for the best flavor; this preserves the dish’s creamy texture without any compromise.

When reheating, you can enhance freshness by adding a touch of grated cheese or freshly cracked pepper during the warming process.

Fresh herbs can also be added just before serving to add a burst of flavor and aroma that elevates your Carbonara for your guests!

Scaling Instructions

If you wish to scale Classic Spaghetti Carbonara, it can be done easily! For halving the recipe, reduce all ingredients by 50%, and this will help with maintaining the balance of flavors and textures.

For doubling or tripling the recipe, ensure you have larger pots and pans to accommodate the extra pasta. Adjust the cooking time slightly, but keep an eye on the pasta for doneness since the cooking time may vary with larger quantities.

When preparing large batches, consider cooking in shifts to manage the timing more effectively and to avoid overcrowding the pot.

Ensure that you have enough sauce; double-check the egg and cheese ratio to match the increased pasta quantity. It’s crucial to preserve its creamy texture, so always adjust the ingredients accordingly.

Finally, pay extra attention to storage; larger quantities may require different containers, so plan for adequate packaging to maintain freshness!

Nutritional Deep Dive

Classic Spaghetti Carbonara offers a balanced nutritional profile. With a macro breakdown, one serving typically provides around 400 calories, comprising healthy carbohydrates from the pasta, protein from the eggs and pancetta, and fats from the cheese.

In terms of micronutrient analysis, eggs provide essential vitamins like B12 and D, while pecorino adds calcium and Vitamin A. These nutrients are vital in supporting overall health and metabolic functions.

Eating Carbonara in moderation can offer health benefits, allowing for a rich serving of protein that gives energy and keeps you feeling full. Pairing with a salad or veggies can enhance the meal’s nutritional value and balance.

When considering portion size, a typical serving is about 2 ounces of dry pasta, which can keep the meal within reasonable calorie limits while still enjoying the rich flavors.

For those mindful of weight management, consider adjusting ratios or adding vegetables to increase the fiber content, which is beneficial for maintaining a balanced diet.

Dietary Adaptations

If you’re following a gluten-free diet, using gluten-free pasta is an excellent adaptation for Classic Spaghetti Carbonara while maintaining the integrity of the dish. Ensure that the pasta is certified gluten-free to avoid cross-contamination.

For a dairy-free option, though challenging for a traditional carbonara, you can utilize plant-based cheese alternatives, and coconut cream can add a creamy texture as a substitute for traditional cheese.

Vegans can take a creative approach by replacing this recipe’s components with tofu or chickpea flour to mimic the texture of eggs, while nutritional yeast can provide a cheesy flavor profile.

Low-carb dieters can replace spaghetti with zucchini noodles or spaghetti squash, offering a similar texture and flavor without the extra carbohydrates.

Adapting to the keto lifestyle can be achieved by sticking with alternatives such as cauliflower rice or shirataki noodles, maintaining the core flavors while adjusting the carbohydrate content significantly.

For others on specific diets like low-FODMAP, you can focus on using garlic-infused oil instead of whole garlic and reducing cheese to ensure that the meal aligns with dietary restrictions while still being enjoyable!

Troubleshooting Guide

Should you encounter texture issues, ensure that you’re mixing the eggs properly with the pasta away from direct heat. This step is essential to avoid scrambling the eggs while achieving a creamy consistency.

If the flavor balance is off—too salty or bland—add a touch of fresh black pepper or a hint of lemon juice to enhance and round out the flavors, providing brightness without overpowering.

Temperature problems may arise if the pasta is clumped together or the sauce is too cold. A quick dip in boiling water or a gentle reheating with added pasta water can alleviate this issue.

For equipment challenges, ensure your stovetop pans are the right size; if they’re too small, prevent even cooking and proper mixing. Upgrading to a larger pan can help avoid these problems.

If using ingredient substitutions, pay attention todo potential flavor clashes. Test different ratios slowly until you find the ideal balance without compromising the dish’s essence.

Lastly, timing concerns can be effectively managed by prepping ingredients in advance and setting a timer to maintain focus during critical cooking steps, ensuring an easier experience and successful results.

Recipe Success Stories

Readers have flooded in with community feedback praising Classic Spaghetti Carbonara for its comfort and simplicity. Many have shared that they’ve successfully recreated the dish using fresh ingredients from local markets, leading to personal triumphs in their culinary endeavors.

Variations on the recipe have sparked creativity; some have shared adaptations like adding spices or seasonal vegetables, enriching their Carbonara recipes while staying true to the original essence. These reader suggestions broaden the spectrum of this classic dish.

Photography tips from the community have encouraged the use of natural light and simple backgrounds to showcase the beautiful textures and colors of the pasta, inspiring others to document their experiences with Carbonara.

Adaptation stories reveal that many home cooks initially feared the complexity but found joy in the easy instructions, paving the way for confidence in creating traditional Italian dishes in their kitchens.

The enjoyment of creating this dish that brings family together has led to a greater appreciation for cooking at home. Many appreciate the shared moments around the table and the laughter that occurs when enjoying a beautiful meal like Spaghetti Carbonara.

Frequently Asked Questions

Can Carbonara be made in advance?
Yes, you can prepare the ingredients beforehand. However, it’s best to cook and combine them right before serving to maintain the creamy texture.

What can I substitute for pancetta?
You can substitute pancetta with guanciale for authenticity or bacon; however, be cautious of adjusting seasoning as bacon may be saltier.

Is it necessary to use eggs?
Yes, eggs are a key component in creating the sauce’s creamy texture, but vegan alternatives like silken tofu might work as a substitute.

How do I know when the pasta is done?
Pasta should be al dente, which means it should be cooked but still have a slight bite. Regularly taste it to avoid overcooking!

Can leftovers be reheated?
Yes, reheating is possible, but use gentle heat on the stovetop and add a splash of pasta water to maintain creaminess.

Can I use other types of cheese?
While Pecorino Romano is traditional, mixing it with Parmesan or using a lactose-free cheese can provide tasty alternatives.

Is it okay to add cream to Carbonara?
Traditional Carbonara does not include cream. It’s cherished for its simple, creamy texture achieved through eggs and cheese alone.

How can I make a vegetarian version?
Omit pancetta and incorporate sautéed mushrooms or smoked paprika to obtain smoky flavors without meat.

Can I freeze Carbonara?
Freezing is not recommended due to the egg content. The sauce may break when thawed, leading to a less-than-ideal texture.

How do I prevent clumping when reheating?
Add a small amount of reserved pasta water while gently reheating on low heat to loosen the sauce and incorporate moisture back in.

Additional Resources

For those eager to delve deeper into culinary adventures, check out related recipes such as Fettuccine Alfredo or Classic Lasagna, which embody the