Best Pumpkin Chocolate Chip Cookies – Soft & Chewy

Pumpkin Chocolate Chip Cookies: A Fall Favorite

⚖️
Difficulty
Easy

⏲️
Prep Time
15 mins

🕒
Cook Time
12 mins

⏱️
Total Time
27 mins

🍽️
Servings
24 cookies

If you’re looking for a delightful treat that embodies the essence of autumn, these Pumpkin Chocolate Chip Cookies are the perfect choice. Combining the warm, rich flavors of pumpkin with the sweetness of chocolate, they offer a unique twist on a classic cookie recipe. Whether enjoyed as an afternoon snack or as a sweet addition to your fall gatherings, these cookies are sure to please both kids and adults alike.

As the weather turns cool and the leaves begin to change, these cookies bring warmth and a sense of comfort to your home. The aroma of cinnamon and nutmeg wafts through your kitchen as they bake, creating an inviting atmosphere that everyone will love. The incredible combination of soft, chewy edges and melty chocolate chunks in every bite makes these cookies irresistible. Get ready to cozy up with a glass of milk and enjoy this scrumptious fall favorite!

Quick Recipe Highlights

  • Flavor Profile: The blend of sweet pumpkin purée, rich chocolate chips, and warm spices creates a flavorful explosion that captures the essence of fall.
  • Texture: Soft, chewy interiors with slightly crispy edges offer the perfect mouthfeel, making each bite a delightful experience.
  • Aroma: The inviting smell of cinnamon, nutmeg, and baked pumpkin fills the air, signaling that something delicious is on the way.
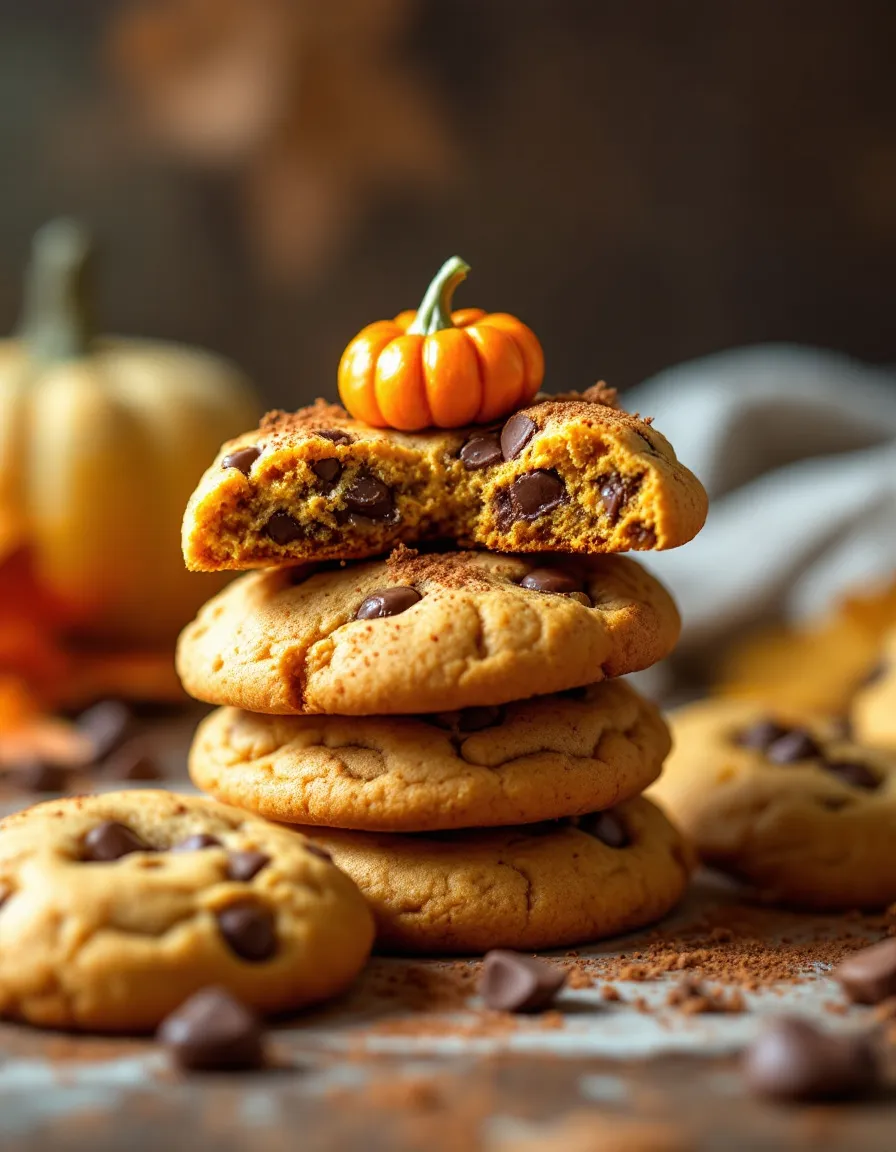
  • Visual Appeal: Stunningly golden-brown with chocolate chunks peeking through, these cookies are as pleasing to the eye as they are to the palate.
  • Skill Level Needed: This easy recipe is perfect for bakers of all skill levels, making it a great project for you and your family.
  • Special Equipment: You will need basic mixing bowls, measuring cups, and baking sheets to whip up these tasty treats.

Recipe Overview

  • Difficulty Level: This recipe is considered easy due to its straightforward ingredients and simple methods, making it accessible for novice bakers.
  • Category: Fall Treats – These cookies are perfect for seasonal celebrations, potlucks, or just cozying up at home.
  • Cuisine: American – This recipe reflects the warm, comforting traditions of American home baking, especially popular during the autumn months.
  • Cost: The ingredients are budget-friendly, with pumpkin purée and pantry staples often costing around $10 total for up to 24 cookies.
  • Season: Best enjoyed in the fall when pumpkins are in season and the weather cools, inviting hearty flavors.
  • Occasion: Perfect for Halloween parties, Thanksgiving dessert spreads, or simply enjoying on a crisp autumn afternoon.

Why You’ll Love This Recipe

There are countless reasons to love these Pumpkin Chocolate Chip Cookies, starting with their perfect balance of flavor and texture. The combination of sweet and savory is balanced beautifully, with just the right hint of spice. Each bite is a delightful mixture of pumpkin and creamy chocolate that leaves a lasting impression. Moreover, they are incredibly satisfying, making them a favorite for anyone with a sweet tooth.

These cookies are also convenient to prepare. The straightforward steps require minimal kitchen gear, allowing for easy clean-up. They also bake quickly, meaning you can enjoy fresh cookies in less than half an hour. This makes them ideal for those spontaneous cravings or last-minute gatherings when you need a sweet solution.

Nutritionally, pumpkin is a powerhouse ingredient, rich in vitamins A and C, fiber, and antioxidants. These cookies allow you to enjoy something sweet while also sneaking in some health benefits, making this treat just a little less guilty.

Socially, these cookies are perfect for sharing. Whether at a family gathering, a bake sale, or a casual get-together, they provide a comforting, homemade touch. The inviting aroma and friendly appearance are sure to spark conversations and smiles all around.

Lastly, the cost-effectiveness of this recipe should not be overlooked. Many of the ingredients can be found in your pantry, reducing the need for expensive specialty items. This makes it an accessible recipe to whip up for any occasion, without breaking the bank.

Historical Background and Cultural Significance

The origin of pumpkin cookies can be traced back to the early days of American pumpkin cultivation. Native Americans were among the first to use pumpkin in various recipes, and its integration into sweets and baked goods emerged as simple and satisfying comfort foods. Over the years, pumpkin has gained immense popularity as a key ingredient in many seasonal recipes, particularly during the fall.

In American culture, pumpkin flavors symbolize the fall season, which is associated with harvest festivals and Thanksgiving celebrations. The evolution of the pumpkin cookie has mirrored changing food trends, moving from homemade sweets to store-bought varieties, yet the homemade versions remain a cherished tradition, evoking nostalgia and warmth.

Regional variations exist, with some incorporating unique spices based on local preferences, while others might blend in additional ingredients like nuts or dried fruits. Regardless of the variations, pumpkin cookies maintain a significant cultural hold in autumn festivities across the country.

As these cookies have evolved, they have established themselves not just as a seasonal favorite, but as a staple in American baking. Their ability to adapt to modern dietary preferences, such as gluten-free or vegan variations, reflects their lasting popularity and cultural relevance.

Ingredient Deep Dive

Pumpkin, a key ingredient in these cookies, is celebrated for its versatility and nutritional value. Rich in vitamins A and C, it supports eye health and boosts the immune system. Selecting pumpkin purée from reputable brands ensures you get the right texture and flavor, while canned options offer convenience. To store, keep in the refrigerator for up to a week or freeze for longer use.

Chocolate chips provide the sweet contrast that pairs so well with pumpkin. Opt for semi-sweet or dark chocolate varieties to elevate flavor depth. Look for high-quality brands that are labeled fair trade or organic for an ethical choice. Store chocolate chips in a cool, dry place to keep them fresh for baking.

Flour is the backbone of this cookie recipe. All-purpose flour will give you the best results, but alternatives like whole wheat flour can add a nutty flavor and added fiber. Always check the expiration date to ensure freshness, and store in a sealed container to prevent moisture absorption.

Cinnamon, nutmeg, and ginger bring the signature warm flavors of fall. These spices not only enhance the taste profile but also offer health benefits like anti-inflammatory properties. For the best flavor, purchase whole spices and grind them fresh. Store your spices in a dark, cool place to maintain potency.

Common Mistakes to Avoid

  • Measuring pumpkin incorrectly can lead to dry or overly wet cookies. Always use a kitchen scale or measuring cups for accuracy.
  • Overmixing the dough can result in tough cookies. Mix just until ingredients are combined to keep them soft and chewy.
  • Baking at an incorrect temperature causes uneven cooking. Always preheat your oven for optimal results.
  • Skipping the parchment paper may lead to cookies sticking to the baking sheet. It’s an easy way to ensure easy removal.
  • Not letting the cookies cool properly can make them fall apart. Allow them to set on the tray for a few minutes before transferring to a wire rack.
  • Using expired spices can dull the flavor profile. Always ensure your spices are fresh for the best taste.
  • Neglecting to check for doneness can lead to underbaked cookies. Look for slight browning on the edges as a cue.
  • Overloading on chocolate chips can overshadow the pumpkin flavor. Stick to the recommended amount for a well-balanced taste.
  • Not cookie-proofing your ingredients can lead to unexpected flavors. Always taste as you go to adjust spices and sweetness.
  • Ignoring storage methods can reduce freshness. Store cookies in an airtight container to maintain their texture and flavor.

Essential Techniques

Creaming butter and sugar is vital for giving cookies their classic texture. This process incorporates air, making cookies light and fluffy. To master this technique, ensure your butter is at room temperature and mix until pale and fluffy. Avoid overmixing once you add dry ingredients, as this can lead to tough cookies, and watch for visual cues like a smooth consistency.

Measuring ingredients accurately is essential for baking success. Use dry measuring cups for flour and sugars and liquid measuring cups for wet ingredients. To prevent sticking, spoon flour into your measuring cup and level it off. This guarantees you avoid oversized cookies or dough too wet to hold shape.

Chilling the dough may sound optional, but it enhances flavor and texture. By chilling for 30 minutes, you allow the butter to firm up, resulting in a more developed flavor and less spreading in the oven. Always wrap the dough in plastic wrap to prevent drying.

Monitoring baking time and temperatures ensures you achieve the perfect cookie. Rotate your baking sheets halfway through if baking multiple sheets at once. Cookies typically need to be slightly under-baked when removed for a chewy interior. Visuals like edges that are set but the center slightly soft can help you figure out timing.

Pro Tips for Perfect Pumpkin Chocolate Chip Cookies

Use room temperature ingredients for a smooth mixture, which helps with uniform texture.
Consider adding a pinch of salt to elevate the overall flavor and balance the sweetness.
Experiment with different types of chocolate chips, such as milk, dark, or even white chocolate for unique flavors.
Substituting half of the all-purpose flour with whole wheat flour adds fiber without sacrificing taste.
Add walnuts or pecans for an added crunch and enhanced nutritional value, perfect for texture lovers.
Try blending in oats for added substance; this will also lend a chewy texture to the final cookie.
For a fall twist, incorporate a bit of maple syrup for additional sweetness and depth of flavor.
If time allows, let the cookies rest overnight. It allows flavors to meld and can enhance chewiness.

Variations and Adaptations

Pumpkin cookies can be easily adapted based on personal preferences and seasonal ingredients. For a spice twist, try adding chai spices like cardamom and cloves to enhance warmth and depth. A seasonal adaptation could involve including chopped apples or dried cranberries for additional fruitiness that complements the pumpkin.

Dietary modifications also allow for flexibility; swapping out regular flour for gluten-free blends ensures that those with dietary restrictions can enjoy these cookies too. Vegan options can be crafted using flaxseed meal in place of eggs, while maple syrup can be used instead of sugar for a more natural sweetness.

Flavor variations are endless. Incorporating citrus zest can brighten the flavor profile, while a touch of espresso powder can deepen the chocolate’s richness. For a fun twist, consider adding peanut butter or almond butter to the dough for nutty undertones.

Presentation alternatives include fun fall-themed cookie cutters or decorating with festive sprinkles before baking. Letting your creativity shine through not only tastes good but can also make the cookies a hit at gatherings.

Serving and Presentation Guide

Present your pumpkin chocolate chip cookies on a rustic wooden platter for a cozy fall vibe. Garnishing with a light sprinkle of cinnamon sugar adds a lovely touch and enhances visual appeal. Pairing them with a steaming cup of apple cider or hot chocolate is a seasonal favorite that complements the flavors beautifully.

When it comes to portion control, consider serving them with a dollop of whipped cream or ice cream on the side, transforming them into an indulgent dessert. Offering them alongside a cheese platter provides an intriguing flavor contrast that can surprise and delight guests.

For special occasions, packaging the cookies in clear, festive bags tied with twine makes for thoughtful homemade gifts. Attach a tag to share your recipe or festive greetings, marrying great taste with creativity.

For maximum enjoyment, serve these cookies warm from the oven or slightly cooled to allow the chocolate chips to stay gooey and melty. The inviting aroma and comforting warmth they exude will keep guests coming back for more.

Wine and Beverage Pairing

Pairing pumpkin chocolate chip cookies with a sweet dessert wine like a late-harvest Riesling enhances the sweetness of the cookies beautifully. The acidity of the wine balances out the richness of the chocolate while emphasizing the pumpkin’s flavors. Alternatively, a spiced cider complements the warm spices in the cookie, serving as a comforting beverage choice.

For non-alcoholic options, pairing with a warm chai latte provides a wonderful flavor match, echoing the spices in the cookies while adding creamy texture. Adding a splash of vanilla syrup can elevate the chai experience and enhance the sweetness of your pairing.

Coffee lovers should consider a dark roast coffee or mocha, which will balance the sweetness of the cookies while providing an energizing kick. The rich flavors enhance the experience of the cookies, making it a comforting afternoon treat.

Served at a slightly warmer temperature than room temperature allows the cookies to shine, especially if served with a dip of chocolate for added decadence.

Storage and Shelf Life

Proper storage of your pumpkin chocolate chip cookies ensures they remain soft and fresh longer. Place them in an airtight container at room temperature, where they can last up to a week. Storing them with a slice of bread effectively keeps them moist, as the bread will absorb excess moisture.

If you need to store the cookies for a longer period, freezing them is an excellent option. Place the baked cookies in a single layer in a freezer-safe bag or container. They will maintain their quality for up to three months. Thawing can be done overnight in the refrigerator or on the counter for a couple of hours.

Avoid refrigerating cookies, as this can make them dry and hard. While it might seem logical, refrigeration alters the texture negatively due to the cold air impacting moisture retention.

When reheating, do so in the microwave for a few seconds, just until warm. This method revives the gooeyness of the chocolate and the softness of the cookie without compromising quality.

Make Ahead Strategies

Preparing pumpkin chocolate chip cookies ahead of time can save you stress during busy gatherings. You can prepare the cookie dough a day in advance, storing it in the refrigerator wrapped tightly. This not only allows for ease on the day of baking but can enhance the flavors as they meld overnight.

Another tactic is to freeze unbaked cookie dough balls on a baking sheet. Once solid, transfer into a freezer-safe bag to bake fresh cookies on demand. This versatility allows you to serve warm cookies straight from the oven whenever the mood strikes.

Allowing frozen cookies to bake straight from the freezer is also possible, adjusting the baking time by a couple of extra minutes. This decision brings fresh warmth to any gathering or family moment.

Keep track of your cookie schedule or timeline, allowing for fresh cookie batches on exactly when they are desired. Mark your calendars for upcoming events for proactive baking that can feed a group of guests effortlessly.

Scaling Instructions

Scaling your pumpkin chocolate chip cookies recipe can easily be done for larger gatherings or smaller family treats. Halving the recipe is straightforward; simply divide each ingredient by two, adjusting your mixing and baking times as necessary.

If you wish to double or triple the recipe for a big event, be mindful of your mixing bowl size. Bulk batches may require multiple bowls or longer mixing times if done all together, which can introduce excess air.

Baking time adjustments may be necessary when scaling up. Larger batches might mean more trays in the oven, calling for an additional five minutes for even baking. Keep a close watch on cookie progress by checking for light golden edges.

When scaling, storage considerations become crucial too. Ensure you have adequate storage containers ready, especially if making large batches, to maintain freshness for longer.

Nutritional Deep Dive

Each pumpkin chocolate chip cookie provides a delightful balance of macronutrients that can contribute to a satisfying snack or dessert. Typically, a single cookie offers around 100-120 calories, depending on specific ingredient quantities. Understanding this macro breakdown allows you to manage portion sizes effectively, as well as plan snacks during the day.

The use of pumpkin adds significant nutritional benefits, including fiber and vitamins A, C, and E. These micronutrients promote healthy skin, immunity, and proper digestion while the chocolate provides antioxidant benefits. However, mindful of sugar content, moderation is key to maintaining an overall healthy diet.

Focusing on portion analysis can highlight healthier patterns. Enjoying one or two cookies alongside fruits or nuts can create a balanced snack, while also managing cravings effectively.

For those on specific diets, pumpkin cookies can be tailored to fit into meal plans, with options for reduced or natural sweeteners to cut sugar levels.

Weight management can be encouraged through mindful eating practices with cookies. Pairing with protein or healthy fats can provide satiety and prevent overindulgence.

Dietary Adaptations

For gluten-free adaptations, substitute all-purpose flour with a 1:1 gluten-free flour blend. Many brands, like Bob’s Red Mill or Cup4Cup, work beautifully and ensure an equally satisfying cookie experience. Be mindful to check for cross-contamination if you have severe allergies.

To achieve a dairy-free cookie, opt for coconut oil or plant-based butter in place of traditional butter and use non-dairy chocolate chips. The cookies will maintain their chewy texture while catering to alternative dietary needs.

Vegan versions can be created by replacing eggs with flax or chia seed “eggs”, created by mixing one tablespoon of ground seeds with three tablespoons of water. This ensures binding without using animal products.

For low-carb or keto-friendly cookies, replacing flour with almond or coconut flour can dramatically reduce carbs while still providing a delicious treat. Sweeten with erythritol or stevia for a guilt-free indulgence.

Additionally, for those following a paleo diet, eliminate refined sugars and substitute with natural sweeteners like maple syrup or honey. This not only complements the pumpkin flavor but also keeps the recipe aligned with natural food principles.

Troubleshooting Guide

Texture issues can arise when cookies are too dry or crumbly. This can be resolved by adjusting the flour measurements or ensuring proper measuring methods are used, as excess flour can dry out the dough. Adding a tablespoon of milk or another egg can remedy overly dry cookies.

Flavor balance might feel off if cookies are either too sweet or lacking depth. To manage sweetness, try reducing sugar slightly and enhancing flavors with spices or a pinch of salt to accentuate the taste of pumpkin and chocolate evenly.

Temperature problems often stem from inconsistent oven settings or improper preheating. Always check an oven thermometer to ensure accuracy, making adjustments based on the oven’s specific tendencies.

Equipment challenges can be addressed by ensuring baking sheets are in good condition, as worn pans can lead to uneven baking. Invest in good quality, non-stick cookware or line sheets with parchment or silicone mats.

Ingredient substitutions can lead to unforeseen taste profiles. Always test substitutes in small batches to adjust flavors effectively before committing to large quantities.

Timing concerns can be resolved by closely watching the cookies in the last few minutes of baking, especially if baking in batches. Adjust times based upon oven performance and how many trays are in the oven at once.

Recipe Success Stories

Community feedback around pumpkin chocolate chip cookies has been overwhelmingly positive. Many home bakers rave about how easy they are to prepare, making them a go-to recipe for busy families and last-minute events. Readers often share that these become a staple in their autumn baking repertoire.

Variation successes are common, with individuals sharing adaptations they’ve made. Whether it’s adding nuts, changing spices, or using different chocolate types, bakers consistently find joy in experimenting while maintaining the core aspects of the recipe’s deliciousness.

Adaptation stories often highlight exciting moments, like baking these cookies for a child’s school event or a family gathering, showcasing the joy these treats can bring to social settings. The impact of such simple recipes highlights their importance in community and family traditions across generations.

Photography tips abound online, with many home bakers showcasing their cookie creations. It encourages creativity in both baking and presentation, inspiring others to embark on their own pumpkin cookie adventures.

Frequently Asked Questions

Can I use fresh pumpkin instead of canned? Yes, using fresh pumpkin is a great alternative! Just ensure it is cooked and properly puréed for optimal results.

What can I use in place of chocolate chips? Feel free to substitute chocolate chips with butterscotch chips, white chocolate, or even raisins for different flavors and textures.

How do I store leftover cookies? Store cookies in an airtight container at room temperature for up to one week. You can also freeze them for long-term storage up to three months.

Can I make these cookies gluten-free? Yes! Simply replace the flour with a gluten-free flour blend for delicious results.

Can I prepare the dough in advance? Absolutely! You can prepare and store dough in the fridge for up to three days or freeze it for longer storage.

What’s the best way to ensure soft cookies? To achieve soft cookies, do not overbake them, and allow them to cool on the baking sheet for a few minutes before transferring them to a wire rack.

Are these cookies suitable for vegans? Yes! Replace eggs with flaxseed meal and use plant-based butter and chocolate chips for a vegan version.

How do I adjust baking time for smaller or bigger cookies? If you’re making smaller cookies, decrease the baking time by a few minutes; conversely, larger cookies will require a lengthened baking time.

Can I add other mix-ins? Absolutely! Feel free to incorporate nuts, dried fruit, or even a swirl of cream cheese into the dough.

What temperature should I preheat my oven? Preheat your oven to 350°F (175°C) for optimal baking of these cookies.

Additional Resources

For those interested in related recipes, consider exploring caramel apple cookies, maple pecan bars, or spiced gingerbread. Each offers unique flavors that complement the autumn spirit.

Technique guides on cookie baking, such as tips for achieving chewy textures or experimenting with spices, can enhance your overall baking skills. Mastering these techniques also heightens the ability to adapt recipes creatively.

Ingredient information can prove useful as you explore the benefits and uses of pumpkin, chocolate, and the various spices utilized in these cookies. Knowledge of these can empower you to create more enriched flavors in your baking.

When it comes to equipment recommendations, utilizing high-quality baking sheets and mixers can transform your baking experience, ensuring successful results each time. Investing in good cookie sheets will contribute to even baking and easier removal.

Finally, keep seasonal variations in mind while baking. Embracing changes in flavors, such as switching from pumpkin to sweet potatoes or pecans to walnuts, can keep your baking fresh and exciting throughout the year.

Join the Conversation

Engage with us on social media by sharing your own pumpkin chocolate chip cookie creations using specific hashtags. We’d love to see your versions of this fall favorite and hear your feedback.

Photography tips can help elevate your cookie presentations, inspiring others to replicate your delicious-looking treats. Sharing images can create a sense of community amongst fellow bakers who enjoy similar culinary adventures.

Recipe reviews are always welcomed! After trying out the cookie recipe, let us know what you thought in the comments. Your input helps build a thriving community of bakers eager to explore new foods.

Do you have an inspiring recipe variation? Sharing your adaptations is a great way to connect with other bakers who may be looking for creative twists on classic recipes.

Feel free to ask any questions or share ideas with fellow baking enthusiasts. Your input can enrich the experience of our community as we explore the world of baking together.

The Recipe

Pumpkin Chocolate Chip Cookies

Serves: 24 cookies

Prep Time: 15 mins

Cook Time: 12 mins

Total Time: 27 mins

Kitchen Equipment Needed

  • Mixing Bowls
  • Measuring Cups
  • Baking Sheets
  • Silicone Spatula
  • Cookie Scooper or Spoon

Ingredients

  • 1 cup pumpkin purée
  • 1 cup brown sugar
  • 1/2 cup white sugar
  • 1/2 cup butter, softened
  • 1 egg
  • 1 tsp vanilla extract
  • 2 cups all-purpose flour
  • 1 tsp baking soda
  • 1 tsp baking powder
  • 2 tsp cinnamon
  • 1/2 tsp nutmeg
  • 1/4 tsp ginger
  • 1/2 tsp salt
  • 1 cup chocolate chips

Directions

  1. Preheat your oven to 350°F (175°C) and line a baking sheet with parchment paper.
  2. In a mixing bowl, cream together the softened butter, brown sugar, and white sugar until fluffy.
  3. Add in the pumpkin purée, egg, and vanilla extract, mixing until well combined.
  4. In another bowl, whisk together the flour, baking soda, baking powder, cinnamon, nutmeg, ginger, and salt.
  5. Gradually add the dry ingredients to the pumpkin mixture, stirring until just combined.
  6. Fold in the chocolate chips until evenly distributed throughout the dough.
  7. Using a cookie scoop or spoon, drop rounded tablespoons of dough onto the prepared baking sheet.
  8. Bake in the preheated oven for 10-12 minutes, or until the edges are lightly golden.
  9. Remove from the oven and let the cookies cool on the baking sheet for a few minutes before transferring them to a wire rack to cool completely.

Recipe Notes

  • Store cookies in an airtight container for up to one week.
  • Dough can be prepared in advance and refrigerated for up to three days.
  • For a gluten-free version, substitute all-purpose flour with a gluten-free blend.

Easy Lemon and Blueberry Soufra with Flaky Phyllo Layers

Lemon and Blueberry Soufra: A Refreshing Delight

⚖️
Difficulty
Medium

⏲️
Prep Time
20 mins

🕒
Cook Time
40 mins

⏱️
Total Time
60 mins

🍽️
Servings
8 servings

The delightful blend of lemony zing and sweet blueberries makes this Lemon and Blueberry Soufra a must-try dessert for any occasion. The naturally sweet blueberries pair perfectly with the tartness of fresh lemons, creating an explosion of flavor that dances on your taste buds. This refreshing dish is not only a treat for the taste senses but also a feast for the eyes, with vibrant colors that promise sunshine on any plate.

As you indulge in this Lemon and Blueberry Soufra, the creamy texture enhances the experience, melting in your mouth with every bite. Ideal for brunches, summertime gatherings, or festive celebrations, this dessert evokes nostalgia while providing a modern twist. Preparing this dish is straightforward; even novice bakers can achieve impressive results, allowing everyone to enjoy the delicious flavors without stress.

Quick Recipe Highlights

  • Flavor Profile: The balance of tart lemon and sweet blueberry creates a refreshing and delightful dessert that satisfies sweet cravings.
  • Texture: This soufra boasts a creamy texture mixed with juicy blueberries, offering a perfect mouthfeel and a burst of flavor with every bite.
  • Aroma: The bright, citrusy notes of lemon combined with the sweet scent of blueberries fill your kitchen with enticing aromas.
  • Visual Appeal: Visually striking, the vibrant yellow and deep blue colors create a stunning contrast that enhances any dessert table.
  • Skill Level Needed: Suitable for those with moderate baking skills; the techniques are easy to master with minimal practice.
  • Special Equipment: You will need a large mixing bowl, a baking dish, and a whisk, making it accessible for most home cooks.

Recipe Overview

  • Difficulty Level: The Lemon and Blueberry Soufra is classified as medium difficulty. While the process is straightforward, careful attention is needed to achieve the perfect balance of flavors and textures.
  • Category: This recipe falls into the dessert category, offering a deliciously sweet end to any meal or a delightful snack on its own.
  • Cuisine: This dish draws inspiration from Mediterranean flavors, where citrus fruits and fresh berries are a staple in many desserts, melding tradition with modern cooking.
  • Cost: The ingredients for this soufra are generally affordable, making it a budget-friendly dessert option for families and entertainers alike.
  • Season: Perfect for summer when lemons and blueberries are in peak season, this dessert brings freshness and flavor that reflects the brighter, warmer months.
  • Occasion: Ideal for birthdays, holiday gatherings, bridal showers, or any festive event where you want a light, flavorful dessert to impress.

Why You’ll Love This Recipe

The harmonious combination of lemon and blueberries in this soufra not only provides a burst of refreshing flavors but also creates an enjoyable texture that enhances the overall experience. The creamy base contrasts beautifully with the pop of juicy berries, contributing to a delightful taste sensation that lingers on the palate.

Convenience is another great reason to love this recipe. With straightforward instructions, you can whip up a stunning dessert without spending hours in the kitchen. Coupled with an enticing aroma that fills your home, this soufra increases anticipation as it bakes, making it a joy to prepare and serve.

From a nutritional perspective, using fresh ingredients like lemons and blueberries adds health benefits to your indulgence. Blueberries are known for their antioxidant properties, while lemons contribute vitamin C and health benefits, allowing you to enjoy dessert guilt-free.

Socially, the Lemon and Blueberry Soufra serves as a perfect centerpiece for gatherings, serving as a conversation starter while tantalizing guests’ taste buds. It encourages sharing and enjoying moments with friends and family, enhancing any occasion.

Finally, this recipe is incredibly cost-effective, utilizing ingredients that are usually on hand or easy to find. With minimal investment, you can create a show-stopping dessert that will have everyone asking for seconds.

Historical Background and Cultural Significance

The origins of lemon and blueberry combinations can be traced back to various cultures, each utilizing locally available fruits to create sweet treats. In Mediterranean cuisine, lemons are commonly used in desserts, often paired with berries that offer a sweet contrast. This tradition has evolved with modern interpretations focusing on lightness and freshness.

Culturally, lemon and blueberry dishes highlight the bounty of summer harvests. In many regions, blueberries are revered not only for their flavor but also for their health benefits, making them a popular choice for various culinary creations. This historical significance brings a sense of pride when serving dishes made with such revered ingredients.

Throughout the years, recipes have evolved, incorporating women’s creativity in the kitchen. This Lemon and Blueberry Soufra is a result of centuries of culinary innovation, reflecting changing tastes and ingredients that embrace modern lifestyles while still honoring traditional roots.

Variations can also be found across different regions, where local ingredients may alter the basic soufra recipe. This variety adds richness to the culinary landscape, making each version unique and culturally significant.

Ingredient Deep Dive

The main ingredients for the Lemon and Blueberry Soufra are lemons and blueberries. Each serves a unique purpose in flavor, texture, and nutritional profile.

Lemons, known for their bright acidity, are a staple in many global cuisines. They are rich in vitamin C, which supports the immune system and adds a refreshing zest to dishes. When selecting lemons, look for those that are bright yellow and firm, avoiding any that feel soft or have blemishes. Properly stored in a cool, dry place, they can last much longer than expected.

Blueberries, hailed for their antioxidant properties, are another star ingredient. They contribute sweetness and moisture, enhancing both the flavor and visual appeal of the soufra. When selecting blueberries, choose plump, firm berries that are deep blue in color. Store them in the refrigerator and consume them within a week for optimal freshness.

Common Mistakes to Avoid

  • Not measuring ingredients accurately: Precision is vital in baking, so ensure all ingredients are measured correctly to achieve the desired texture.
  • Overbaking the soufra: Keep a close eye on the baking time, as an overbaked soufra can become dry and lose its creamy texture.
  • Using old blueberries: Always use fresh blueberries for the best flavor. Check for spoilage before using them in the recipe.
  • Not zesting the lemons properly: The zest adds a concentrated lemon flavor, so use a microplane or zester for the best results.
  • Skipping the resting time: Allow the soufra to cool completely before serving; this helps enhance the flavor and makes slicing easier.
  • Not using room temperature ingredients: Ingredients like eggs and cream whip better and incorporate more smoothly at room temperature, so take them out of the fridge in advance.
  • Not preheating the oven: Preheating ensures even baking. Skipping this step can lead to uneven cooking.
  • Ignoring visual cues: Always look for color changes and texture signs that indicate whether your soufra is cooked to perfection.

Essential Techniques

One essential technique for this recipe is properly zesting the lemons. Zesting adds remarkable flavor to the soufra; only the outer yellow skin should be used as the white pith can be very bitter. Use a microplane to zest efficiently, being careful not to take too much of the pith along with the zest.

Another critical technique involves folding the egg whites into the creamy mixture. This step is significant as it adds air to the soufra, creating a lighter texture. To master this technique, use a gentle folding motion with a spatula, being careful not to deflate the air bubbles formed in the whites. Look for a uniform color and a light, fluffy consistency for success.

Pro Tips for Perfect Lemon and Blueberry Soufra

To ensure your Lemon and Blueberry Soufra turns out perfectly, consider these pro tips:

1. Always use fresh blueberries for the best flavor. Frozen blueberries can release too much moisture.
2. Allow your soufra to cool for a bit before serving, enhancing the flavors and making it easier to slice.
3. If you desire a sweeter taste, you can add a little more sugar to the creamy base but be mindful of balancing flavors.
4. Pair this dessert with a dollop of whipped cream or a scoop of vanilla ice cream for a delightful contrast.
5. For a green touch, garnish with a sprinkle of mint leaves before serving to add aromatic freshness.
6. Use a clean bowl for whipping egg whites to ensure they reach maximum volume when beaten.
7. Experiment with different types of berries for variations; raspberries or strawberries can also work beautifully.
8. Consider serving your soufra in individual cups for a modern twist on presentation.

Variations and Adaptations

There are numerous variations to the Lemon and Blueberry Soufra that cater to different tastes and dietary needs. For seasonal adaptations, consider incorporating strawberries or raspberries when they are in season, providing a similar burst of sweetness and color.

Dietary modifications can be made by using dairy-free cream substitutes alongside gluten-free alternatives. This ensures that those with dietary restrictions can also enjoy the soufra. If you wish to enhance the flavor, try adding extracts such as vanilla or almond, creating a subtle complexity that compliments the primary flavors.

For texture variations, consider incorporating a layer of graham cracker crumbs or crushed nuts at the base, adding a delightful crunch. Additionally, you could play with the presentation by serving the soufra in individual cups or jars, making it attractive for personal servings.

Serving and Presentation Guide

Plating your Lemon and Blueberry Soufra can elevate its appeal. Use a simple yet elegant serving dish, and consider adding a sprig of mint or a dusting of powdered sugar on top to enhance its look. Pair the soufra with contrasting sides like lemon curd or a fresh berry compote for added flavor and visual interest.

Traditional accompaniments include freshly whipped cream or a scoop of vanilla ice cream for a classic touch. Modern serving suggestions could involve using mason jars for individual servings, appealing to those who enjoy a more casual dining experience. Remember to consider temperature when serving; it’s best served slightly chilled or at room temperature.

Portion control can be managed by cutting the soufra into small slices, allowing for smaller servings that satisfy guests while leaving room for other dishes possibly on the dessert table.

Wine and Beverage Pairing

When it comes to pairing beverages with your Lemon and Blueberry Soufra, consider a light-bodied white wine such as a Sauvignon Blanc or a sparkling Prosecco. These wines offer a crisp and refreshing counterpart that enhances the dessert’s bright flavors.

For non-alcoholic alternatives, a refreshing lemon-lavender iced tea can complement the dessert beautifully. If you’re serving the soufra with breakfast, pairing it with a rich cup of Earl Grey tea or a smooth coffee can also provide a lovely experience. Always serve these beverages chilled or hot, respectively, to enhance their optimal flavor profiles.

Storage and Shelf Life

To store your Lemon and Blueberry Soufra, keep it in an airtight container in the refrigerator, which will help maintain freshness. The soufra can generally last for up to 3-4 days if stored properly.

Temperature requirements should be maintained in the fridge, ensuring the dessert does not spoil. A glass container is often the best option for storage, preventing any potential absorbing of odors from other foods.

Signs of spoilage include a change in scent, discoloration, or excess moisture accumulation. When reheating individual portions, it’s recommended to use a microwave for quick warming, but be cautious not to overheat, as this can alter the texture.

For those looking to freeze the soufra, make sure to wrap it tightly in plastic wrap and then place it in an airtight container; it can last for one month in the freezer. Thaw in the refrigerator overnight when ready to serve.

Make Ahead Strategies

Preparing your Lemon and Blueberry Soufra ahead of time can save time when hosting guests. You can make the base and bake it the day before an event; simply cover it tightly and refrigerate until serving. This method not only saves time but allows the flavors to meld beautifully overnight.

If you’re using fresh ingredients, store them separately to maintain their freshness until you’re ready to combine. Quality will remain intact, ensuring that your dessert tastes as delightful as when freshly prepared.

Consider assembling the soufra by layering your ingredients rather than fully mixing them to keep the texture intact. When ready to serve, simply slice and garnish with fresh blueberries or a dusting of powdered sugar for that freshly made appeal.

Scaling Instructions

Should you need to alter the serving size of your Lemon and Blueberry Soufra, halving or doubling the recipe is simple. For the best results, maintain the same ratios of ingredients – particularly for the liquids.

When doubling, ensure you have a sufficiently large baking dish to accommodate the increased volume. Equipment adjustments may be needed, such as using larger bowls or doubling your baking time by monitoring the internal temperature.

Timing modifications may be necessary as well; larger quantities may require additional time in the oven. Always check for doneness by inserting a toothpick into the center and watching for a clean return.

Proper storage considerations are crucial after scaling. Be mindful of any potential leftovers and how best to keep them long-lasting without sacrificing texture or flavor.

Nutritional Deep Dive

In terms of macros, each serving of Lemon and Blueberry Soufra is low in fat but high in carbohydrates, primarily from the blueberries and any added sugars. Each serving provides a refreshing dose of sweetness without overwhelming the senses.

Micronutrient analysis reveals that this dessert is packed with vitamin C, particularly from the lemons, alongside crucial antioxidants found in blueberries. These properties contribute to numerous health benefits, including enhanced immunity and improved heart health.

When considering health benefits, this dessert can be a part of a balanced diet, especially when fueling your sweet tooth with fresh fruit and cream rather than overly processed sweets. Portion control is necessary to maintain a healthy intake, making moderation key.

Weight management is also a possibility with this recipe; as long as you keep portions reasonable, you can enjoy this delightful treat without compromising dietary goals.

Dietary Adaptations

For those with gluten sensitivities, simply ensure that all ingredients are certified gluten-free, making adjustments as necessary, particularly when selecting any pre-made components. Similarly, for dairy-free options, coconut or almond milks can be excellent substitutes that maintain a creamy texture without the lactose.

Vegans can also enjoy this recipe by substituting eggs with chia or flaxseed meal. The resulting texture will be slightly different but equally delicious! Low-carb and keto enthusiasts can swap out sugar for low-carb sweeteners, adjusting flavors to fit lifestyle choices without compromising enjoyment.

Paleo dieters can focus on utilizing whole food ingredients, swapping out dairy for nut-based creams or avoid sugar altogether by relying on the natural sweetness of the fruit. Low-FODMAP diets can be accommodated by minimizing added sugars and ensuring that all ingredients meet dietary guidelines.

Troubleshooting Guide

Texture issues can arise if the soufra is overmixed, leading to denser results rather than the desired lightness. Be cautious while folding in ingredients, using a gentle motion to avoid deflation.

For flavor balance, if the soufra tastes too tart, consider adding a touch more sugar or a hint of vanilla to round out the flavors. If it’s too sweet, a dash of lemon juice can help cut through the richness.

Temperature problems can occur if the soufra is not baked evenly; be sure to rotate the dish halfway through baking to ensure that it cooks uniformly.

If you have ingredient substitution inquiries, remember that while berries can generally be swapped, ensure you maintain the primary flavors by selecting fruits that complement rather than overpower the lemon base.

Timing concerns should also be heeded; if your soufra isn’t set after the recommended time, give it additional baking time while monitoring closely to avoid overcooking.

Recipe Success Stories

Community feedback is overwhelmingly positive for this Lemon and Blueberry Soufra, with many attesting to its deliciousness and ease of preparation. Readers frequently share how they excitedly experiment with variations, sparking inspiration for others.

Variation successes include comments on experimenting with different berries or adding herbs like basil, enhancing the dish in delightful ways. Adaptation stories tell of families passing down their versions of this dessert, creating timeless memories around the dining table.

Photography tips from the community highlight the importance of natural lighting and simple backdrops to present the vibrant colors of the soufra beautifully.

Frequently Asked Questions

Q1: Can I use frozen blueberries?

A1: You can use frozen blueberries, but be aware they may release excess moisture. It’s best to slightly thaw them and drain excess liquid before adding to the batter.

Q2: How can I make my soufra less sweet?

A2: To reduce sweetness, consider cutting back on the sugar used or balancing it with a touch of extra lemon juice for acidity.

Q3: How do I know when the soufra is done?

A3: The soufra is done when the edges have set, and a toothpick inserted in the center comes out clean or with just a few moist crumbs.

Q4: Can I make the soufra a day in advance?

A4: Yes, you can prepare the soufra a day in advance. Refrigerate it after baking, and allow it to come to room temperature before serving.

Q5: What can I substitute for cream?

A5: Non-dairy milk or coconut cream can be substituted to keep the recipe dairy-free while maintaining creamy consistency.

Q6: Can I add other fruits?

A6: Absolutely! Feel free to add raspberries, strawberries, or peaches, adjusting sugar levels accordingly based on their sweetness.

Q7: How long does the soufra last in the fridge?

A7: The Lemon and Blueberry Soufra will last for 3-4 days in the refrigerator when properly stored in an airtight container.

Q8: Is this recipe gluten-free?

A8: The recipe is naturally gluten-free if you use gluten-free flour. Always check labels on pre-made ingredients to ensure compliance.

Q9: Can I skip the egg whites?

A9: Skipping egg whites may alter the texture; if you’re looking for an alternative, chia or flax eggs are great substitutes in certain baking contexts.

Q10: What’s the best way to serve this soufra?

A10: The soufra is best served chilled or at room temperature, garnished with additional bluebs, lemon zest, or whipped cream for added flair.

Additional Resources

If you’re looking for related recipes, be sure to check out our blog sections on light summer desserts and berry-based dishes. Technique guides on baking and flavor balancing also provide valuable insights that can elevate your culinary skills. Explore our ingredient information sections for tips on selecting fresh fruits and creative uses in other dishes.

Equipment recommendations can assist in making this dessert preparation easier and more enjoyable; consider investing in quality mixing tools and baking pans for the best results. Additionally, seasonal variations may introduce delightful ways to incorporate other fruits or flavors into your Lemon and Blueberry Soufra.

Join the Conversation

We invite you to participate in our growing community of culinary enthusiasts by sharing your experience with the Lemon and Blueberry Soufra. Post your photography and recipes on social media, using a dedicated hashtag for the dish. Engage with fellow cooks by sharing tips, discovering adaptations, and exchanging thoughts on variations that suit your palate.

We’re excited to hear about your baking successes and encourage you to leave reviews below for others to see. Discussion about recipe modifications and improvements can be a valuable resource for us all as we explore this delightful dessert together.

The Recipe

Lemon and Blueberry Soufra

Serves: 8 servings

Prep Time: 20 mins

Cook Time: 40 mins

Total Time: 60 mins

Kitchen Equipment Needed

  • Large mixing bowl
  • Baking dish (9×13)
  • Whisk
  • Microplane or zester
  • Spatula

Ingredients

  • 1 cup blueberries, fresh or frozen
  • 2 lemons, zested and juiced
  • 3/4 cup sugar
  • 1 cup heavy cream
  • 3 large eggs, separated
  • 1 teaspoon vanilla extract
  • 1/4 teaspoon salt
  • Optional: Extra blueberries and lemon slices for garnish

Directions

  1. Preheat your oven to 350°F (175°C) and prepare your baking dish by greasing it lightly.
  2. In a large mixing bowl, combine the egg yolks, sugar, lemon zest, and juice. Whisk until light and fluffy.
  3. In another bowl, whip the heavy cream until soft peaks form, then gently fold it into the egg mixture.
  4. In a separate bowl, whip the egg whites until they form stiff peaks. Carefully fold the egg whites into the creamy mixture.
  5. Gently fold in the blueberries to evenly distribute them throughout the batter.
  6. Pour the combined mixture into the prepared baking dish and bake for 30-40 minutes, or until the edges are set and the middle is slightly jiggly.
  7. Remove from the oven and allow it to cool completely before refrigerating for at least 2 hours before serving.
  8. Garnish with extra blueberries and lemon slices if desired before slicing and serving.

Recipe Notes

  • For an enhanced flavor experience, consider letting the soufra set overnight in the fridge.
  • Feel free to experiment with other berries and flavors to create your own variations of this delightful dessert.

Best Brown Sugar Layer Cake with Peach Filling

Brown Sugar Layer Cake with Peach Filling: A Heavenly Delight

⚖️
Difficulty
Medium

⏲️
Prep Time
30 mins

🕒
Cook Time
45 mins

⏱️
Total Time
1 hr 15 mins

🍽️
Servings
8-10

Brown Sugar Layer Cake with Peach Filling is a delightful dessert that perfectly balances the richness of brown sugar with the juicy sweetness of fresh peaches. This layered cake offers a moist, tender crumb that is reminiscent of a warm summer day, making it a perfect centerpiece for gatherings. Each slice reveals beautiful layers of fluffy cake enhanced by the natural sweetness and vibrant color of the peach filling that practically sings of sunny afternoons.

The combination of flavors in this cake brings together the depth of brown sugar, with caramel notes that are beautifully complemented by the fruity and fragrant peach filling. Whether paired with a dollop of whipped cream or served plain, each bite will transport you to a blissful culinary experience. This recipe is great for those who love baking, and it provides a wonderful opportunity to impress family and friends with your skills in the kitchen.

Quick Recipe Highlights

  • Flavor Profile: The rich, caramel notes of brown sugar meld exquisitely with the sweet, tangy peaches for a delightful taste explosion.
  • Texture: This cake features a soft and luscious crumb that pairs beautifully with the smooth, rich peach filling.
  • Aroma: The inviting scent of baked brown sugar and fresh peaches fills the air, creating a warm and welcoming atmosphere.
  • Visual Appeal: With its golden layers accentuated by rich peach filling, this cake is as stunning as it is delicious.
  • Skill Level Needed: Intermediate baking skills are recommended, especially for mastering the layer assembly.
  • Special Equipment: A round cake pan set and an electric mixer are essential for achieving the best results.

Recipe Overview

  • Difficulty Level: This recipe is rated as medium difficulty due to the need for precise baking techniques and layering.
  • Category: Ideal for desserts and celebratory events, this cake can be served at birthdays, weddings, or any festive occasion.
  • Cuisine: This cake is inspired by traditional American baking, embracing both homey simplicity and festive celebration.
  • Cost: This cake is budget-friendly, with most ingredients being pantry staples; expect a total cost of around $15.
  • Season: Summer is the best season for this recipe, as peaches are in peak season, ensuring your cake is bursting with flavor.
  • Occasion: Perfect for summer picnics, family reunions, or potlucks, this cake brings everyone together.

Why You’ll Love This Recipe

This Brown Sugar Layer Cake with Peach Filling delights the senses with its incredible taste and unique texture. The rich sweetness of the brown sugar gives the cake a deep flavor profile, while the fresh peaches provide a juicy contrast that keeps your taste buds dancing. The balance between sweetness and acidity in the filling enhances the overall experience, making every slice irresistible.

Convenience is a key benefit of this recipe, as it can be prepared in stages. Bake the layers in advance, and whip up the filling while they cool. This strategy not only ensures that the cake comes together smoothly, but it also allows you to prepare ahead of time, reducing stress for your special event.

From a nutritional standpoint, this cake offers benefits of fresh fruit combined with the wholesome qualities of whole grains if you choose to incorporate them. Using natural ingredients translates to a treat you can enjoy guilt-free. The peaches are rich in vitamins A and C, while brown sugar offers trace minerals that are often absent in white sugar.

Socially, serving this cake at gatherings brings an element of warmth and relish as it evokes nostalgia and comfort. Its delightful flavor encourages sharing and conversation, making it an ideal centerpiece for gatherings.

Lastly, this recipe’s cost-effectiveness is a huge plus. With simple ingredients and straightforward steps, it’s accessible for most home bakers. It’s the perfect way to create an impressive dessert without breaking the bank.

Historical Background and Cultural Significance

The origin of layer cakes in American cuisine can be traced back to the late 19th century, when intricate cakes began to symbolize sophistication in dessert making. The introduction of baking powder allowed for lighter cakes and opened the door for various flavor combinations, including the standout flavors found in this brown sugar layer cake.

Layer cakes, particularly those filled with fruit, hold cultural importance in many American households. They bring to mind gatherings and celebrations where families come together to share in their fond culinary traditions. The use of seasonal fruits like peaches illustrates regional agricultural traditions, especially in Southern cuisine.

Over time, layer cakes have evolved from simple home baking to gourmet dessert presentations. Chefs have taken classic recipes and infused them with modern twists, such as unique flavor pairings and artistic decorations. This Brown Sugar Layer Cake with Peach Filling is a nod to those traditions while also embracing contemporary tastes.

In different regions, variations of fruit-filled layer cakes abound, showcasing local fruits and ingredients. From peach cobbler cakes to apple spice layers, the essence of celebrating bounty is ever-present in these delightful desserts.

Ingredient Deep Dive

Brown Sugar: Brown sugar, with its molasses content, offers a deep flavor that white sugar cannot replicate. Historically, brown sugar has been essential in American baking, providing moisture and subtle caramel notes. When selecting brown sugar, opt for tightly packed varieties for optimal moisture. Store it in an airtight container to prevent hardening. You can substitute white sugar combined with molasses in a pinch for similar results.

Peaches: Peaches are a quintessential summer fruit, celebrated for their delicious sweetness and juicy texture. They are a staple in Southern cuisine and are often used in desserts ranging from pies to cakes. When choosing peaches, select those that give slightly to the touch for optimal ripeness. Store them at room temperature until ripe, then refrigerate. Fresh peaches can be substituted with canned or frozen, though fresh offers the best flavor.

Common Mistakes to Avoid

  • Not measuring ingredients accurately can lead to inconsistent texture and taste.
  • Overmixing the batter- this can yield a tough cake. Mix just until combined.
  • Not allowing cakes to cool completely before frosting can melt the filling and lead to a mess.
  • Using unripe peaches may result in a filling that lacks sweetness and flavor.
  • Ignoring oven temperature preheating can impact the rise and bake of your cake.
  • Forgetting to sift dry ingredients can lead to clumping and uneven mixing.
  • Using too much filling may cause the layers to slide apart; moderation is key.
  • Failing to level the cake layers can make stacking difficult and unstable.
  • Not following the recipe precisely in ingredient ratios can disrupt the balance of flavor and texture.
  • Skipping cooling and resting times can negatively affect the final product.

Essential Techniques

Layering Cakes: Proper layering involves leveling your cake layers to ensure stable construction. Use a serrated knife for an even cut. Also, placing the thickest layer at the bottom provides a sturdy base for the top.

Making Fruit Fillings: To achieve a well-rounded peach filling, cook the fruit gently with sugar until it thickens. Stir constantly to prevent burning, and look for a glossy finish as a visual cue for doneness.

Pro Tips for Perfect Brown Sugar Layer Cake with Peach Filling

– Use room temperature ingredients for better continuity in baking.
– Bake on a parchment-lined pan for easy removal.
– Cool layers upside down on a wire rack to maintain a flat surface.
– Brush the cake layers with a simple syrup for added moisture.
– Allow the filling to cool before using it to prevent melting.
– Add a pinch of salt to enhance the sweetness of the peach filling.
– Experiment with different flavor additions to the cake, such as almond or vanilla extracts.
– Decorate with fresh peaches or cream for an appealing presentation.

Variations and Adaptations

You can explore regional variations of this cake by using seasonal fruits. For instance, substitute peaches with plums or berries for a new taste. Consider adding spices like cinnamon or nutmeg for a cozy autumn adaptation.

Adopting dietary modifications is simple with this recipe. Easily create a gluten-free version by using almond flour or a gluten-free blend. To make it vegan, substitute eggs with flaxseed meal or applesauce and replace dairy with plant-based milk.

For texture modifications, add a layer of nuts or chocolate chips between the cake layers for extra crunch. Presentation can be altered through different icing techniques or garnishing with edible flowers for a stunning visual display.

Serving and Presentation Guide

To create an appealing presentation for your Brown Sugar Layer Cake with Peach Filling, consider using a cake stand to elevate its stature. Opt for a simple yet sophisticated frosting technique such as the naked cake style, allowing the filling to peek through.

Garnishing the top with fresh peach slices adds a touch of freshness. Consider adding herbs like mint or lemon balm for color contrast. For a modern touch, serve individual slices on elegant plates alongside a small scoop of vanilla ice cream or whipped cream.

Serving temperature plays a vital role; allow the cake to come to room temperature for the best flavor experience. Portion control tips suggest cutting slices into equal pieces, allowing guests to enjoy without feeling overwhelmed.

Wine and Beverage Pairing

Pairing your dessert with wine can elevate the experience. A late harvest Riesling complements the sweetness of the peach filling beautifully. If you prefer red, a light Pinot Noir works wonders, balancing the richness of brown sugar without overwhelming the palate.

For those seeking non-alcoholic alternatives, consider serving the cake with light iced teas or lemonades. If you’re a coffee enthusiast, a light roast coffee can enhance the flavors of the cake, particularly those of brown sugar.

Serve beverages slightly chilled to balance the warmth of the cake. This allows for a refreshing palate cleanser in between bites.

Storage and Shelf Life

For optimal storage of your Brown Sugar Layer Cake with Peach Filling, wrap it securely with plastic wrap or store it in an airtight container to retain moisture. It can last at room temperature for about 2-3 days, but for longer freshness, refrigerate it.

Ensure the cake is completely cooled before refrigeration to prevent condensation. Signs of spoilage include an off smell and changes in texture. For those wishing to extend shelf life, this cake can be frozen for up to three months. Slice it and wrap individual pieces for convenient serving later.

When reheating, a short burst in the microwave can warm the cake without drying it out. If who prefer a freshly baked taste, warming in an oven at low temperature can restore its fluffiness.

Make Ahead Strategies

To effectively make ahead this Brown Sugar Layer Cake, you can prepare the layers a day in advance. Keep the cooled layers tightly wrapped to prevent drying. Make the peach filling and store it in the refrigerator to enhance flavor.

During the assembly, allow all components to rest at room temperature. This helps in achieving a smooth frosting layer. For added charm, consider assembling the cake shortly before serving, so it remains fresh and visually appealing.

If you want to add elements like whipped cream or fresh fruit just before serving to maintain freshness, it avoids any sogginess.

Scaling Instructions

This recipe can be scaled easily for larger gatherings or smaller portions. To halve the recipe, reduce each ingredient accordingly, and keep an eye on baking times, as smaller cakes may bake quicker.

For larger gatherings, doubling or tripling ingredients can work, but consider adjusting baking time and checking with a toothpick for doneness. Ensure you have a larger mixing bowl, and it may help to bake in batches if you lack sufficient equipment.

When storing scaled cakes, keep the proportions in mind and separate layers, ensuring they are cooled properly for the best results.

Nutritional Deep Dive

In terms of macros, this cake offers a harmonious blend of carbohydrates from sugar and flour, along with healthy fiber derived from the peaches. This makes it a satisfying option to indulge in without completely straying from nutritional balance.

Micronutrient analysis reveals the presence of vitamin A and C from peaches, contributing to overall health benefits. It is essential to enjoy this dessert in moderation, especially for those monitoring sugar intake.

Dietary considerations should include mindful portion sizes to align with weight management goals, yet the balanced flavors of fruits and sugars encourage enjoyment without guilt.

Dietary Adaptations

For a gluten-free version of this cake, consider using almond flour or a certified gluten-free flour blend. When craving a dairy-free option, you can substitute milk with almond or coconut milk, and use vegan butter for frosting.

Followers of a low-carb lifestyle can explore using erythritol or stevia in place of sugar while also opting for almond flour for the base. The cake can also be tailored to fit a keto diet by ensuring sugar content is kept to a minimum.

Adapting to a vegan diet involves replacing eggs with flaxseed meal or chia seeds mixed with water, maintaining similar texture while endorsing ethical eating practices.

Troubleshooting Guide

Texture issues can often arise from overmixing; if your cake turns out dense, remember to mix just until combined. If it crumbles, it may have been overbaked, so check for doneness earlier next time.

Flavor balance problems often stem from incorrect measurements. If a cake turns too sweet, you can enhance it with a little salt in your frosting or a tart fruit on the side. Always taste as you combine flavors to create an enjoyable experience.

Common equipment challenges involve your oven’s heat emission. If baked goods unevenly brown, consider investing in an oven thermometer for accurate temperature readings. Timing concerns, like items burning, require adjusting the time to fit your specific oven’s quirks.

Recipe Success Stories

Community feedback is a vital part of any recipe’s evolution. Many home bakers have reported receiving rave reviews when they serve this Brown Sugar Layer Cake at gatherings, with family and friends returning for seconds.

Readers have shared their personal adaptations, such as using seasonal berries instead of peaches, proving that the recipe stands up to experimentation while retaining its charm.

Photography tips suggest showcasing the cake’s layers and vibrant filling, encouraging engagement on social platforms while inspiring others to try their hand at this delightful cake.

This sharing of experiences fosters a community of bakers eager to explore and create new versions of this beloved dessert.

Frequently Asked Questions

Can I use frozen peaches for the filling?
Yes, frozen peaches can be used, but ensure they are thawed and drained before cooking them down for the filling for the best texture.
How can I make the cake less sweet?
Reduce the amount of brown sugar slightly or add a layer of tart fruit to balance the flavors.
Can I make this cake gluten-free?
Absolutely! Simply substitute the all-purpose flour with a gluten-free blend, and remember to check your baking powder for gluten content.
What’s the best way to store this cake?
Wrap the cake tightly in plastic wrap and store it in an airtight container. For longer shelf life, refrigerate it.
Can I freeze the cake layers?
Yes, you can freeze the layers individually for up to three months. Make sure they are well-wrapped to prevent freezer burn.
How long will the cake last at room temperature?
The cake can last up to 2-3 days at room temperature, but for more extended freshness, refrigerate it.
Is there a substitute for brown sugar?
You can use white sugar with a bit of molasses mixed in to emulate the depth of flavor that brown sugar provides.
What frosting pairs well with this cake?
Cream cheese frosting or whipped cream are classics that pair wonderfully with the sweet and fruity layers of this cake.
Can I add nuts to the cake?
Yes, chopped nuts like pecans or walnuts can be a delightful addition to the cake layers for added texture and flavor.
How should I frost the cake?
Frost between the layers with peach filling, then cover the outside with whipped cream or a simple buttercream to keep it light and delicious.

Additional Resources

Explore related recipes on our blog for seasonal fruits, like peach cobbler or berry tart recipes, that elevate your baking repertoire. We also provide comprehensive guides for mastering essential techniques like making fillings and frostings.

For ingredient information, check out our detailed posts on sourcing fresh peaches and tips for baking with brown sugar to enhance your culinary skills. Equipment recommendations focus on the best cake pans and mixers suited for baking larger cakes, ensuring you have the right tools for success.

For seasonal variations, discover how to incorporate fruits from each season into your baking, expanding your dessert options year-round.

Join the Conversation

We invite you to share your experiences with our Brown Sugar Layer Cake with Peach Filling on social media! Use our hashtag, and don’t forget to tag us in your photos to inspire others in the community.

Leave your recipe reviews and suggestions in the comments, and let us know how you’ve made this recipe your own with personal twists and adaptations. Sharing your story contributes to a vibrant community passionate about baking and sharing delicious treats.

The Recipe

Brown Sugar Layer Cake with Peach Filling

Serves: 8-10

Prep Time: 30 mins

Cook Time: 45 mins

Total Time: 1 hr 15 mins

Kitchen Equipment Needed

  • Round cake pans
  • Mixing bowls
  • Electric mixer
  • Spatula
  • Cooling rack

Ingredients

  • 2 ½ cups all-purpose flour
  • 2 cups brown sugar, packed
  • ½ cup unsalted butter, softened
  • 1 cup milk
  • 4 eggs
  • 1 tablespoon baking powder
  • 1 teaspoon vanilla extract
  • 3 cups fresh peaches, diced
  • 1 cup sugar (for peach filling)
  • 2 tablespoons lemon juice

Directions

  1. Preheat your oven to 350°F (175°C) and prepare your cake pans with cooking spray or parchment paper.
  2. In a mixing bowl, cream the butter and brown sugar until light and fluffy.
  3. Add eggs, one at a time, mixing well after each addition. Stir in vanilla.
  4. In another bowl, sift together flour and baking powder.
  5. Alternate adding flour mixture and milk to the sugar mixture, ending with flour. Mix until just combined.
  6. Pour the batter evenly into the prepared cake pans and bake for 25-30 minutes or until a toothpick inserted comes out clean.
  7. While the cake cools, prepare the peach filling by combining peaches, sugar, and lemon juice in a saucepan over medium heat. Cook until soft, about 10-15 minutes. Let cool.
  8. Once cakes have cooled, level the tops if necessary.
  9. Spread a layer of peach filling between the cakes and frost the outside as desired. Serve and enjoy!

Recipe Notes

  • Feel free to enhance the frosting with cream cheese for added richness.
  • Make ahead of time, and assemble shortly before serving to maintain cake freshness.
  • Substitute with seasonal fruits for a personalized twist.

Easy Strawberry Cheesecake Dip – Perfect for Parties

Delicious Strawberry Cheesecake Dip: A Creamy, Fruity Delight

⚖️
Difficulty
Easy

⏲️
Prep Time
10 mins

🕒
Cook Time
0 mins

⏱️
Total Time
10 mins

🍽️
Servings
6

Are you looking for a quick and indulgent dessert that will impress your guests? This Strawberry Cheesecake Dip is the perfect solution. With its rich and creamy texture, combined with the refreshing sweetness of strawberries, this dip is sure to tantalize your taste buds. Perfect for parties, family gatherings, or a sweet treat after dinner, this dip brings the classic flavors of cheesecake into a fun and shareable form.

The best part? You can whip this up in just 10 minutes! No baking required, making it an incredibly easy dessert option for those who want to keep it simple without sacrificing flavor. Imagine dipping fresh fruit, graham crackers, or even cookies into this delightful concoction. The flavors meld together beautifully, creating a creamy dip that is both satisfying and light. Your friends and family will be begging for the recipe!

Quick Recipe Highlights

  • Flavor Profile: The Strawberry Cheesecake Dip features a delightful blend of creamy cheese, sweet strawberries, and a hint of vanilla, making each bite pure bliss.
  • Texture: This dip is decadently smooth, offering a perfect contrast to the crunch of dippers like graham crackers and fruits.
  • Aroma: The inviting aroma combines rich cream cheese with sweet strawberries and a hint of vanilla, creating a mouthwatering experience even before the first bite.
  • Visual Appeal: The vibrant red from the strawberries mingling with the creamy white dip makes this recipe a feast for the eyes, perfect for any party platter.
  • Skill Level Needed: This recipe is incredibly easy and requires no special skills, making it accessible to anyone from beginners to seasoned cooks.
  • Special Equipment: All you need is a mixing bowl and a hand mixer to create this delectable dip.

Recipe Overview

  • Difficulty Level: This dip is categorized as easy, suitable for both novice cooks and experienced chefs looking for a quick treat.
  • Category: This recipe fits well into the dessert category, making it a sweet addition to any meal.
  • Cuisine: While inspired by classic American dessert flavors, this dip integrates fresh, seasonal fruit, making it a popular choice in contemporary settings.
  • Cost: The ingredients for this Strawberry Cheesecake Dip are reasonably priced, allowing you to create a luxurious dessert without breaking the bank.
  • Season: Spring and summer are ideal for this recipe, as strawberries are at their sweetest and most flavorful.
  • Occasion: Whether it’s a summer barbecue, birthday party, or casual get-together, this dip is perfect for any occasion.

Why You’ll Love This Recipe

The taste and texture of the Strawberry Cheesecake Dip is a perfect balance of sweet and creamy. Each dip transports you into a realm of indulgence, where the smoothness of the cream cheese blends perfectly with the tangy sweetness of fresh strawberries. You can serve this dip with multiple dippers, allowing everyone to customize their experience, making it not only delicious but also interactive.

For those who appreciate convenience, the prep time for this recipe is minimal. You can mix the ingredients in a matter of minutes, allowing you to enjoy precious time with your guests rather than being trapped in the kitchen. Plus, it’s a no-bake recipe, which means you won’t heat up your kitchen on a warm day.

From a nutritional perspective, this dip can be a lighter dessert alternative if you choose low-fat cream cheese. Strawberries provide vitamins and antioxidants, giving you a sweet treat that doesn’t entirely break the calorie bank. Pair it with whole-grain crackers or fresh fruits for a more balanced snack.

This dip embodies the spirit of socializing, making it a great dish for sharing. Whether you’re hosting a gathering or attending a potluck, the dip invites conversation and camaraderie, as everyone enjoys dipping and sharing their favorites!

Finally, consider the cost-effectiveness of this recipe. Using just a few simple ingredients, you create a stunning and delicious dip that rivals more elaborate desserts in flavor and presentation. Everyone will appreciate the creativity and taste without the hefty price tag.

Historical Background and Cultural Significance

The history of cheesecake can be traced back to ancient Greece, where it was served to athletes at the first Olympic Games. Over the centuries, cheesecake recipes have evolved, ranging from dense, baked versions to lighter no-bake styles. The Strawberry Cheesecake Dip falls within the modern interpretation, aiming for a more accessible and quick dessert option.

In American cuisine, strawberries are among the most popular fruits in desserts. Their natural sweetness and vibrant color enhance many dishes. This dip represents a fusion of cultures, combining the cheesecake tradition with the fresh fruit lovers’ ideals of health and simplicity.

As the dessert industry has evolved, so too have variations of classic recipes. The no-bake cheesecake has gained immense popularity, especially during the summer months when no one wants to turn on the oven. The Strawberry Cheesecake Dip exemplifies this trend, allowing for easy preparation without sacrificing flavor.

Regional variations of this recipe may include substitutions for seasonal fruits or different flavorings, showcasing local tastes and available ingredients. From citrus infused dips to tropical fruit blends, the versatility of this dish makes it a favorite across different regions.

Ingredient Deep Dive

Cream Cheese: Cream cheese is a foundational element of cheesecakes and dips, providing a rich and smooth texture that is essential to the final product. Traditionally made from a blend of milk and cream, it was first produced in the United States in the late 19th century. Nutritionally, it offers calcium and vitamin A. When selecting cream cheese, look for a smooth texture and check the expiration date. Store in the refrigerator and use within two weeks for the best quality. For a lighter version, choose low-fat cream cheese or Neufchâtel cheese.

Strawberries: Strawberries are not only visually appealing but also packed with nutrients, including vitamin C, fiber, and antioxidants. They are cultivated in various regions around the world and have become a beloved fruit, particularly in the summer. When choosing strawberries, look for bright red color with a sweet fragrance and avoid any that are mushy or have dark spots. Store them in the refrigerator and wash just before use to preserve freshness. If fresh strawberries are out of season, consider using frozen, thawed strawberries as a substitute.

Common Mistakes to Avoid

  • Using cold cream cheese: Be sure to let the cream cheese come to room temperature before mixing, as this will ensure a smoother, creamier dip without lumps.
  • Overmixing the dip: Mixing for too long can introduce excess air, making the dip fluffy instead of creamy. Mix until just combined.
  • Not adjusting sweetness: Taste the dip before serving; if it’s not sweet enough for your liking, add a bit more sugar to enhance the flavor.
  • Substituting fresh strawberries with jam: While tasty, using jam will change the flavor profile significantly and can make the dip too sweet.
  • Neglecting to chill: Allowing the dip to chill in the fridge for at least 30 minutes before serving can enhance the flavors and make it more refreshing.
  • Choosing the wrong dippers: Dippers such as fruit or graham crackers are preferred; avoid using overly sweet cookies which may overwhelm the dip’s flavor.
  • Adding too much liquid: Be cautious when adding liquids like milk or cream; too much can make the dip runny.
  • Forgetting garnish: A sprinkle of crushed graham crackers or a few fresh strawberry slices on top enhances visual appeal.

Essential Techniques

Mixing: Proper mixing is essential to achieve the creamy texture desired in this dip. Use a hand mixer or stand mixer to beat the cream cheese until smooth, ensuring no lumps remain. Be careful not to overmix, which can result in a fluffy rather than smooth consistency. A visual cue for success is a glossy and uniform mixture.

Chilling: Chilling the dip allows the flavors to meld together beautifully. After preparing it, cover the bowl tightly with plastic wrap and place it in the refrigerator for at least 30 minutes. This also results in a firmer texture which enhances the overall eating experience. A visual cue for adequate chilling is when the dip holds its shape better when served.

Pro Tips for Perfect Strawberry Cheesecake Dip

1. Use high-quality cream cheese for the best flavor and texture. Cheaper brands may have a different consistency.

2. Consider adding a splash of lemon juice to brighten the flavors and balance the sweetness of the strawberries.

3. Top the dip with a drizzle of chocolate or a sprinkle of crushed graham crackers for extra visual appeal.

4. For a unique twist, include a dash of almond extract for added depth of flavor.

5. Make the dip a day in advance for even stronger flavor development.

6. Pair with a variety of dippers, including pretzels for a salty contrast.

7. Remember to adjust the sweetness level based on the ripeness of your strawberries.

8. Experiment with different berries to create a mixed-berry cheesecake dip that’s equally delightful.

Variations and Adaptations

Consider creating a tropical twist by adding crushed pineapple to the dip, giving it a refreshing and fruity flavor that transports you to a beach getaway. Alternatively, you can create a chocolate version by folding in melted chocolate or cocoa powder for a chocolate cheesecake dip that chocolate lovers will adore.

For seasonal adaptations, use raspberries or blueberries when strawberries are no longer in season. This not only keeps the dish fresh but allows for different flavor profiles. You might also consider a Grahams cracker crust on the bottom of the serving dish for an extra texture layer.

In terms of dietary modifications, you can replace the cream cheese with vegan cream cheese or cashew cream for a dairy-free option. Additionally, using a different sweetener, such as honey or maple syrup, can cater to those with various dietary needs.

Experiment with various textures by adding finely chopped nuts, such as pecans or walnuts, which can add a delightful crunch to each bite, enhancing the overall experience of the dip.

Serving and Presentation Guide

When plating your Strawberry Cheesecake Dip, consider using a glass bowl to showcase the beautiful colors and layers of the dip. A clay or ceramic bowl can also add a rustic touch. Garnish with fresh strawberries or a sprinkling of graham cracker crumbs on top for an appealing finish. You can arrange assorted dippers around the bowl for a beautiful presentation on a platter.

For a fun twist, create individual serving cups filled with the dip, topped with strawberries, and placed on a decorative tray. This adds a touch of elegance and allows for easy serving. Be mindful of temperature; serve the dip chilled to maintain the fresh flavor and creamy texture.

Portion control is simple with this dip; consider serving in ¼ cup servings to manage portion sizes while providing an ample amount to satisfy everyone’s cravings.

Wine and Beverage Pairing

For wine pairings, a light Moscato or a sparkling Riesling complements the sweetness of the strawberries while balancing the richness of the cream cheese. A rosé wine also adds a lovely touch and pairs well with the flavors in the dip.

If you prefer non-alcoholic alternatives, consider serving the dip with a refreshing sparkling lemonade or iced tea. These options enhance the fruity notes without overshadowing the flavor of the dip.

If coffee is more your style, a light-bodied brew or vanilla latte can offer a nice contrast, adding warmth to the cool, creamy dip.

Storage and Shelf Life

To store your Strawberry Cheesecake Dip, place it in an airtight container and refrigerate. It will typically last for 3-4 days, but for the best taste and texture, consume within 2 days. Avoid leaving it out at room temperature for extended periods to maintain freshness.

When reheating, use a microwave for small portions if it solidifies. However, we recommend enjoying it cold as the flavors are more pronounced. If you wish to freeze the dip, keep in mind that it may alter the texture. Thaw it in the refrigerator overnight before serving again.

Make Ahead Strategies

This Strawberry Cheesecake Dip is ideal for making ahead. Prepare the dip a day in advance and refrigerate it overnight to enhance the flavors. This allows the ingredients to meld, resulting in a richer flavor when served the next day.

Store the prepared dip in a tightly sealed container to prevent it from absorbing other odors from the fridge. If transporting, keep it chilled in a cooler bag until ready to serve. Consider adding fresh element additions, such as sliced strawberries or toppings, just before serving to maintain their visual appeal and freshness.

Scaling Instructions

If you’re looking to halve the recipe, simply divide all ingredients by two, keeping in mind that the mix times will remain the same. For doubling or tripling, be aware that larger quantities may require a larger mixing bowl and longer mixing time to achieve the desired creamy consistency.

Ensure that your refrigerator or serving area has enough space for the increased quantities and adjust any serving dishes accordingly. Always taste and adjust seasoning and sweetness when scaling the recipe, as ingredient ratios might slightly change.

Nutritional Deep Dive

This Strawberry Cheesecake Dip provides a delightful balance of macronutrients. With primarily carbohydrates from the strawberries and sugar, the dip also contains fats from the cream cheese, contributing to a satiating dessert option. The fat content provides a rich mouthfeel, ensuring that each bite feels indulgent, while the strawberries add fiber and vital vitamins.

In terms of micronutrient analysis, strawberries are an excellent source of vitamin C and manganese. The dip can be made more nutritious by incorporating Greek yogurt for additional protein, enhancing its health benefits while maintaining the creamy texture.

Dietary Adaptations

This dip can be easily adapted for gluten-free diets by ensuring that the dippers, such as graham crackers or cookies, are certified gluten-free. For a dairy-free variation, substitute the cream cheese for a nut-based cream cheese or a blended cashew mixture.

If you’re looking to make it vegan, simply swap out the cream cheese for vegan alternatives, and use maple syrup instead of granulated sugar. This maintains the sweetness without animal products, allowing everyone to enjoy this delicious dip.

Low-carb and keto dieters can use sugar substitutes, such as erythritol or stevia, to sweeten the dip while keeping carbohydrate counts low. The strawberries can also be reduced or replaced with lower-carb fruits like blackberries for a satisfying treat.

Troubleshooting Guide

If your dip turns out too runny, consider adding more cream cheese or sifted powdered sugar to thicken it up. Conversely, if it’s too thick, a bit of milk or cream can help achieve the desired consistency.

Should you find the flavor too bland, round out the sweetness by adding a bit of vanilla extract or citrus zest to elevate the flavors further. This can provide a fresh kick that makes all the difference.

For texture issues, ensure your cream cheese is at room temperature before mixing; cold cream cheese can lead to lumps. In the case of ingredient substitutions, always taste as you go to ensure the flavors are balanced.

Recipe Success Stories

Many fans of this Strawberry Cheesecake Dip have shared their successes on social media, highlighting how well it was received at gatherings. Variations included everything from adding crushed Oreos for a cookies-and-cream twist to utilizing fresh tart berries in place of strawberries, showcasing the versatility of this recipe.

Readers often suggest adapting the dip for dietary restrictions, proving its flexibility. Some have shared how it became a staple at their family functions, delighting adults and kids alike. The ease of preparation combined with its appeal makes it a winner for all celebrations.

Frequently Asked Questions

Q1: Can I use frozen strawberries?

A1: Yes, you can use frozen strawberries. Just make sure to thaw them completely and drain any excess liquid before mixing them into the dip.

Q2: How long does this dip last?

A2: The dip can last in the refrigerator for about 3-4 days when stored in an airtight container.

Q3: Can I make this dip ahead of time?

A3: Absolutely! Making it a day in advance allows the flavors to develop beautifully.

Q4: Is there a dairy-free version?

A4: Yes, you can use vegan cream cheese and adjust the sweetener to make it dairy-free.

Q5: What can I use as dippers?

A5: Fresh fruits, graham crackers, pretzels, or even cookies work wonderfully as dippers.

Q6: Can this recipe be doubled?

A6: Yes, feel free to double the recipe for larger gatherings, adjusting the mixing equipment accordingly.

Q7: How do I know if my dip is too thick?

A7: If the dip doesn’t spread easily or looks more like a ball, it might need thinning with a bit of milk or cream.

Q8: Can I add chocolate to the dip?

A8: Absolutely! You can fold in melted chocolate or cocoa powder for a chocolate strawberry cheesecake variation.

Q9: Should I cover the dip while it’s in the fridge?

A9: It’s best to cover it to maintain freshness and prevent it from absorbing other odors.

Q10: What if I don’t have vanilla extract?

A10: You can skip it, or substitute with almond extract or lemon zest for a different flavor profile.

Additional Resources

For those interested in expanding their dessert repertoire, check out our recipes for no-bake cheesecakes, fruit-based desserts, or even fun summer party treats. Additionally, our technique guides provide insights into the best practices for mixing and flavoring desserts.

If you’re looking to enjoy seasonal variations, consider our recipes featuring different fruits like raspberries and peaches for refreshing alternatives. Explore equipment recommendations to find the best tools to assist you in creating wonderful desserts with ease!

Join the Conversation

We’d love to hear your experiences with the Strawberry Cheesecake Dip! Share your photos on social media, tag us, and inspire others with your creative variations. Writing reviews helps build community engagement and gives valuable feedback to fellow chefs. Whether you enjoyed the original recipe or made it your own, your stories will resonate with many!

The Recipe

Strawberry Cheesecake Dip

Serves: 6

Prep Time: 10 mins

Cook Time: 0 mins

Total Time: 10 mins

Kitchen Equipment Needed

  • Mixing bowl
  • Hand mixer or stand mixer
  • Spatula
  • Airtight container for storage

Ingredients

  • 8 oz cream cheese, softened
  • 1/2 cup powdered sugar
  • 1/2 tsp vanilla extract
  • 1 cup fresh strawberries, hulled and chopped

Directions

  1. In a mixing bowl, beat the softened cream cheese until smooth.
  2. Gradually add powdered sugar and vanilla extract, mixing until well combined.
  3. Gently fold in the chopped strawberries until evenly distributed.
  4. Transfer the mixture to a serving bowl and chill in the refrigerator for at least 30 minutes before serving.
  5. Serve with assorted dippers like fruit, graham crackers, or cookies.

Recipe Notes

  • For an extra touch, sprinkle crushed graham crackers on top before serving.
  • Feel free to substitute strawberries with other seasonal berries.
  • Adjust sweetness based on the ripeness of your strawberries for an optimal flavor.

Easy Shamrock Swirl Pie with Creamy Mint Filling

Shamrock Swirl Pie: A Festive Delight for St. Patrick’s Day

⚖️
Difficulty
Medium

⏲️
Prep Time
30 mins

🕒
Cook Time
60 mins

⏱️
Total Time
90 mins

🍽️
Servings
8 servings

Creating a Shamrock Swirl Pie is not just about baking; it’s about celebrating the vibrant flavors of St. Patrick’s Day with a dessert that dazzles both the eyes and taste buds. This luscious pie features a rich green swirl of minty filling spiraled beautifully into a classic creamy base, all nestled within a buttery crust. The combination of smooth, silky textures and the refreshing mint flavor makes it a delightful treat for both kids and adults alike.

As you slice into this stunning pie, the colors reveal themselves in a beautiful dance that mirrors the festive spirit of the holiday. Whether served at a family gathering or a friendly celebration, this pie adds a dash of fun and festivity to your table. Imagine enjoying each bite, with the sweet and minty notes ticking all the right boxes for a perfect dessert.

Quick Recipe Highlights

  • Flavor Profile: This Shamrock Swirl Pie surprises with a blend of creamy sweetness and refreshing mint, creating a nuanced taste experience.
  • Texture: The pie balances a crunchy crust with a smooth filling that melts in your mouth, giving it a delightful contrast.
  • Aroma: The aroma of fresh mint permeates the kitchen, complemented by the inviting scent of baked crust.
  • Visual Appeal: This pie is a celebrating centerpiece, showcasing a vibrant swirl of green against a rich, creamy white backdrop.
  • Skill Level Needed: While it’s categorized as medium difficulty, the instructions are straightforward and can be accomplished by novice bakers with confidence.
  • Special Equipment: A pie dish is essential, and an electric mixer makes whipping the filling a breeze.

Recipe Overview

  • Difficulty Level: The medium difficulty rating comes from needing to achieve the perfect swirl, but with patience and practice, anyone can master it.
  • Category: Ideal as a dessert for the St. Patrick’s Day festivities, this pie also fits well into any celebration needing a splash of color.
  • Cuisine: This pie draws from American dessert traditions while incorporating mint, a flavor often associated with Irish cuisine.
  • Cost: This Shamrock Swirl Pie is budget-friendly, with most of the ingredients being common pantry staples.
  • Season: Though perfect for spring and St. Patrick’s Day, the refreshing mint makes it a fantastic treat all year round.
  • Occasion: It’s ideal for gatherings, birthday parties, or any cheerful event calling for a sweet touch.

Why You’ll Love This Recipe

Biting into a slice of Shamrock Swirl Pie delivers an explosion of flavor and fun. The creamy mint flavor is irresistible, making it a favorite among both young and old. Its unique minty freshness is perfect for spring, capturing the spirit of the season in every slice. This pie brings delightful joy and can also satisfy a sweet tooth craving without being overly rich.

The convenience of preparation is another reason to love this dessert. While it may appear intricate, the steps are easy to follow, allowing you to create an impressive pie with relatively little effort. The ingredients combine quickly, making it an excellent choice if you’re short on time but still want to impress your guests.

From a nutritional standpoint, mint offers excellent digestive benefits, providing a refreshing quality to what can often feel like a heavy meal during celebrations. It’s a lovely way to add a touch of healthiness to your dessert options without sacrificing flavor or enjoyment.

Socially, the Shamrock Swirl Pie acts as a conversation starter. Its vibrant colors and unique appearance draw people in, making it the centerpiece of dessert tables. Sharing recipes and adaptations with friends makes for great community engagement, and watching the smiles as people dig in is incredibly rewarding.

This recipe is also economical, using readily available ingredients from local grocery stores. It’s accessible to anyone wanting to bring a taste of St. Patrick’s Day spirit into their home without breaking the bank.

Historical Background and Cultural Significance

The Shamrock Swirl Pie, while it may seem modern, draws its inspiration from traditional Irish ingredients. The shamrock itself is a symbol of Ireland and is often used to celebrate St. Patrick’s Day. Its vibrant green color not only signifies freshness but also evokes feelings of hope and renewal associated with spring.

Culturally, this pie emphasizes the importance of community and togetherness, particularly during celebrations when families gather. Mint, a key ingredient, has deep roots in various cuisines but often shines during festive occasions. Adding it to desserts is a clever way to incorporate beloved flavors into everyday life.

Over the years, the Shamrock Swirl Pie has evolved from simple custard desserts into an eye-catching, invigorating option that pleases both the palate and the eyes. The swirling technique showcases the artistry that can exist in pie-making, encouraging home bakers to explore their creativity.

Regional adaptations have arisen, with some using natural food colorings or incorporating local flavors, which showcases how this pie can be tailored to fit various tastes while retaining its celebratory essence.

Ingredient Deep Dive

– **Mint**: This vibrant herb isn’t only a culinary favorite but also serves as a digestive aid in traditional medicine. When choosing mint for this recipe, opt for fresh leaves as they provide the most robust flavor. Store them in a cool, dry place, and they can last up to a week. For substitutions, peppermint extract can work in a pinch, but adjust to taste.

– **Cream Cheese**: A staple in many desserts, cream cheese adds a rich, smooth texture that holds the pie together. It’s essential for both flavor and consistency. Always ensure it’s at room temperature to facilitate easy mixing. If you’re looking for a dairy substitute, consider using a plant-based cream cheese alternative for similar results.

Common Mistakes to Avoid

  • Using warm cream cheese: It’s vital to let your cream cheese come to room temperature. Cold cream cheese can result in a lumpy filling that won’t blend well.
  • Over-mixing the filling: While thorough mixing is essential, over-mixing can incorporate too much air into the filling, leading to cracks after baking.
  • Neglecting to chill the pie: Skipping the chilling step can lead to a filling that doesn’t set properly, resulting in a mushy pie.
  • Not tasting the filling: Always taste your filling before pouring it into the crust, adjusting sweetness or mint levels if necessary.
  • Ignoring baking times: Each oven heats differently; relying solely on time may result in an undercooked or overcooked pie. Always check for doneness.
  • Skipping the crust pre-bake: Pre-baking the crust helps prevent a soggy bottom, ensuring a crisp texture.
  • Not letting the pie cool before slicing: Cutting too soon can ruin the aesthetic presentation and texture of your pie.
  • Forgetting presentation: A well-presented pie is essential for enjoyment, so don’t skip garnishing with whipped cream or fresh mint for that final touch.

Essential Techniques

To achieve the perfect pie crust, start with chilled ingredients. This ensures that the butter remains solid, leading to a flaky texture. Remember to handle the dough gently to avoid toughening it. After rolling out the dough, let it rest in the fridge for at least 30 minutes before baking, which helps keep the crust from shrinking.

Creating the swirl effect is a key technique for visual appeal. Once your filling ingredients are mixed, reserve a portion and color it with green food coloring. Pour the white filling into the crust and then dollop the green filling on top. Use a toothpick or knife to gently swirl the two together, being careful not to over-mix. This will create the beautiful marbled effect characteristic of Shamrock Swirl Pie.

Pro Tips for Perfect Shamrock Swirl Pie

1. Always measure your ingredients precisely, especially for baking, to ensure a consistent outcome.
2. For a stronger mint flavor, consider adding a few drops of mint extract to the filling.
3. Use high-quality food coloring to achieve a bright, festive color, but start with small amounts to avoid overpowering the flavor.
4. Chill your pie for at least four hours or overnight for the best texture.
5. Garnish with whipped cream or a sprig of mint for an elegant presentation.
6. For a deeper flavor, consider adding a splash of vanilla extract to the filling mixture.
7. If you’re making this in advance, freeze the pie without garnishes, adding them just before serving.
8. Enjoy with a side of chocolate sauce for a rich twist on flavor.

Variations and Adaptations

For those looking to add regional flair, consider incorporating local flavors into the filling. For instance, using a hint of whiskey could evoke Irish flavors while enhancing the overall dessert experience. Seasonally, you can swap the mint for different flavor profiles based on the time of year. Lavender in spring or pumpkin spice in fall could offer delightful alternatives.

If dietary restrictions need addressing, a gluten-free crust can be made using almond flour or gluten-free all-purpose flour, ensuring everyone can enjoy the pie. Additionally, for a refined taste experience, replace the whipped cream topping with a light meringue for a touch of elegance.

Texture modifications can also enhance the eating experience. Consider folding in crushed cookies or nuts into the filling for added crunch. Visually, seasonal garnishes, such as edible flowers in spring or colored sprinkles during festive periods, can elevate the presentation.

Serving and Presentation Guide

When serving Shamrock Swirl Pie, consider warm temperatures to allow the filling to set perfectly while still maintaining a cool treat. To plate the pie, slice it with a sharp, wet knife for clean cuts. Garnishing with a dollop of whipped cream and a sprinkle of mint or chocolate shavings can create a striking contrast against the green swirls.

For those looking for modern serving suggestions, consider pairing slices with fresh fruit or a side of tangy yogurt. Traditional accompaniments like Irish cream coffee add a nice touch, enhancing the overall flavor profile. Pay attention to portion control by slicing smaller pieces, making it easier for guests to enjoy more than one serving without overindulgence.

Wine and Beverage Pairing

For a refreshing accompaniment to your Shamrock Swirl Pie, consider a sweet dessert wine like Riesling or Moscato, which will complement the mintiness without overwhelming the senses. If you’re preferring non-alcoholic options, a sparkling apple cider can provide a festive touch while balancing the sweetness of the pie.

For coffee lovers, pairing your pie with a rich espresso or a mint-infused coffee can enhance the dessert experience. When serving beverages, consider the temperature; chilled drinks pair best with the cool pie, creating a pleasing contrast.

Storage and Shelf Life

To ensure the best flavors and textures, store the Shamrock Swirl Pie in an airtight container in the refrigerator for up to five days. If left at room temperature, it should be consumed within two days to maintain freshness. Proper storage typically involves a glass or plastic pie container to prevent moisture loss.

If possible, aim to consume the pie within a few days for optimal taste, but it can also be frozen for up to three months. To freeze, wrap slices individually in plastic wrap and then place them in a freezer-safe container. For reheating, allow to thaw in the refrigerator overnight and serve cold, or gently warm in the oven for 10 minutes before serving.

Make Ahead Strategies

To prepare your Shamrock Swirl Pie efficiently, consider creating the crust a day in advance. Simply pre-bake it and store it at room temperature before filling it. The filling can also be made ahead of time; just blend the ingredients and refrigerate them until you’re ready to assemble the pie.

When planning for gatherings, think about preparing components in advance. The pie can be assembled the night before, allowing for overnight chilling to ensure the pie sets perfectly. For added freshness, consider garnishing right before serving, which maintains visual appeal and adds a touch of vibrancy.

If you’re looking to maintain the pie’s freshness when making it too far ahead, consider adding the whipped cream topping only when serving. Additionally, having all ingredients prepared in individual bowls can help streamline the assembly process.

Scaling Instructions

To scale the Shamrock Swirl Pie recipe, consider the size of your baking dish. If you’re halving the recipe, a smaller pie dish will do well, and the bake times will adjust slightly. For doubling or tripling the recipe, larger commercial pie plates or deep-dish tools work best.

When increasing the recipe size, it’s important to monitor baking times closely, as larger quantities may retain heat differently and require adjustments to ensure even baking. It’s also advisable to lay out all ingredients before beginning to ensure an organized workflow, minimizing potential mishaps.

Remember that larger pies not only take longer to bake but may also require longer cooling times, so factor this in when planning.

Nutritional Deep Dive

One slice of Shamrock Swirl Pie offers a delightful balance of macronutrients. With a mindful approach, you can include healthier fats from cream cheese and essential carbohydrates from the crust. While indulgent, the use of mint adds a refreshing, flavorful calorie-conscious touch.

Micronutrient analysis reveals that mint not only flavors the dessert but also brings antioxidants, supporting digestive health. The cream cheese adds calcium and protein, providing a boost to the overall nutrition of the dessert.

When considering dietary needs, keeping portion control in mind can help with weight management. Sharing slices among friends and family can reduce the calorie burden while still enjoying this festive treat.

Dietary Adaptations

For those following a gluten-free lifestyle, swapping regular flour for almond flour or a gluten-free blend can ensure everyone enjoys this festive pie. When making a dairy-free version, consider using coconut cream or a vegan cream cheese alternative for a similar taste and texture without compromising flavor richness.

If vegan adaptations are required, you can replace any cream-influencing ingredients with plant-based counterparts, ensuring robust flavors while aligning with dietary choices. Low-carb and keto options could include using almond flour for the crust and a sugar alternative in the filling.

Those following low-FODMAP diets can enjoy this pie by keeping serving sizes small and ensuring no added high-FODMAP ingredients. These variations ensure all guests feel included at festive gatherings.

Troubleshooting Guide

If your Shamrock Swirl Pie turns out too watery, it often stems from not allowing it to cool sufficiently or improperly measuring the filling ingredients. Make sure to chill your pie properly, allowing the filling to set.

Should the crust become too dry or crumbly, this may be due to overworking the dough. Always handle it delicately and avoid excessive mixing. Conversely, if the crust is too soft, it may not have been pre-baked long enough.

For overly sweet pies, consider reducing sugar in the filling or adding a touch of salt to balance the sweetness. It’s important to adjust flavors to personal preferences in the future.

Recipe Success Stories

Feedback from the community has shown that the Shamrock Swirl Pie is often a hit at potlucks and family dinners. Many home bakers have praised the vibrant appearance, enhancing their gatherings’ festivities while bringing smiles to everyone’s faces.

Adaptation stories often showcase personal twists, such as incorporating chocolate swirl designs or flavors like Irish cream that resonate with family traditions. These customizations highlight the pie’s versatility and capability to bring people together through shared culinary experiences.

For photography enthusiasts, many have enjoyed capturing their creations, showcasing their lovely swirls. Sharing these photographs online has encouraged others to try their hands at this delightful recipe and innovate even further.

Frequently Asked Questions

Q1: Can I make this pie ahead of time?

A1: Absolutely! You can prepare the pie up to two days in advance. Just be sure to store it in the refrigerator and add any toppings right before serving.

Q2: What if I don’t like mint?

A2: If mint isn’t your favorite, feel free to substitute it with other flavorings such as lemon or vanilla for a different twist.

Q3: Can I freeze this pie?

A3: Yes! You can freeze the pie for up to three months. Just make sure it’s well-wrapped and stored in an airtight container.

Q4: How do I ensure a perfect swirl?

A4: To achieve a beautiful swirl, begin by dolloping the colored filling over the white filling generously and then gently swirl together with a toothpick or handle of a spoon without over-mixing.

Q5: What’s the best way to store leftovers?

A5: Store leftovers in an airtight container in the refrigerator for up to five days to keep freshness.

Q6: What is the best way to serve this pie?

A6: This pie is best served chilled with a dollop of whipped cream and possibly garnished with fresh mint leaves for an appealing presentation.

Q7: Can I use a store-bought crust?

A7: Yes, using a store-bought pie crust is a great time-saver and works well for this recipe.

Q8: How do I know when the pie is done baking?

A8: The pie is set when the filling is firm but still slightly jiggly in the center. It will firm up as it cools.

Q9: What can I substitute for cream cheese?

A9: Plant-based cream cheese or a thick coconut yogurt can make excellent substitutes for dairy-free alternatives.

Q10: How can I ensure the crust doesn’t get soggy?

A10: Pre-baking the crust for about 10-15 minutes before adding the filling helps keep it crisp.

Additional Resources

If you enjoyed making this Shamrock Swirl Pie, explore related recipes such as a classic Key Lime Pie for a zesty twist or a rich Chocolate Cream Pie for chocolate lovers. Consider checking out technique guides on making the perfect pie crust or whipped cream.

For ingredient information, tools like a kitchen scale can help with precise measurements, ensuring your pie turns out perfectly every time. Explore seasonal variations that highlight different flavors using fresh fruits and herbs available throughout the year.

Join the Conversation

We invite you to share your own experiences making the Shamrock Swirl Pie! Share your photos on social media with us and participate in the community by leaving your reviews and suggestions for variations or improvements. Your stories and creativity can inspire others to explore baking this delightful pie!

The Recipe

Shamrock Swirl Pie

Serves: 8 servings

Prep Time: 30 mins

Cook Time: 60 mins

Total Time: 90 mins

Kitchen Equipment Needed

  • 9-inch pie dish
  • Mixing bowls
  • Electric mixer
  • Whisk
  • Measuring cups and spoons

Ingredients

  • 1 pre-made pie crust
  • 8 oz cream cheese, softened
  • 1 cup powdered sugar
  • 1 cup heavy cream
  • 1 tsp peppermint extract
  • Green food coloring
  • Fresh mint for garnishing (optional)

Directions

  1. Preheat your oven to 350°F (175°C).
  2. Blind bake the pie crust according to package instructions until golden brown, then let it cool.
  3. In a mixing bowl, blend together softened cream cheese and powdered sugar until smooth.
  4. In another bowl, whip the heavy cream to soft peaks and gently fold into the cream cheese mixture.
  5. Add peppermint extract and mix well.
  6. Divide the filling in half. Color one half green with food coloring.
  7. Spoon the white filling into the cooled crust, followed by dollops of the green mixture on top.
  8. Using a toothpick, swirl the green filling into the white, creating a marbled pattern.
  9. Chill the pie for at least 4 hours or until set properly.
  10. Before serving, top with whipped cream and fresh mint as desired.

Recipe Notes

  • This pie can be made up to two days in advance.
  • Try using different colors for a creative twist!
  • Store any leftovers in the refrigerator for up to five days.

Best Black Forest Cheesecake Symphony with Rich Chocolate

Black Forest Cheesecake Symphony: A Decadent Chocolate Delight

⚖️
Difficulty
Moderate

⏲️
Prep Time
30 mins

🕒
Cook Time
50 mins

⏱️
Total Time
80 mins

🍽️
Servings
10 slices

With its luscious layers of smooth cream cheese, rich chocolate, and succulent cherries, the Black Forest Cheesecake Symphony is a dessert that beautifully merges the classic flavors of the renowned Black Forest cake with the creamy texture of cheesecake. This decadent treat is perfect for any gathering, taking your taste buds on a delightful journey. Imagine cutting into this cheesecake, revealing the deep chocolate and vibrant cherry layers, enticing your guests with its stunning presentation and mouthwatering aroma.

As you take your first bite of the Black Forest Cheesecake Symphony, the creamy texture melds perfectly with the deep chocolate and tart cherries, creating a flavor profile that is both indulgent and refreshing. The hints of vanilla from the cheesecake base elevate the overall experience, making every slice a memorable delight. Rich and satisfying, this dessert is not just a feast for the stomach but also a visual treat that celebrates the beloved ingredients of the classic Black Forest cake.

Quick Recipe Highlights

  • Flavor Profile: The cheesecake is a harmonious blend of chocolate sweetness and tart cherry notes, striking the perfect balance between rich and refreshing.
  • Texture: The silky smooth cream cheese layer contrasts beautifully with the crunchy chocolate crust and juicy cherries, offering a delightful mouthfeel.
  • Aroma: The warm scent of baking chocolate combined with the fruity aroma of cherries creates an irresistible appeal throughout your kitchen.
  • Visual Appeal: The layers of dark chocolate and bright red cherries create a stunning visual contrast, showcasing a dessert that looks as good as it tastes.
  • Skill Level Needed: This recipe requires a moderate level of baking skill, focusing on attention to detail and layering techniques.
  • Special Equipment: A springform pan is essential for achieving the perfect cheesecake shape and maintaining its beautiful layers.

Recipe Overview

  • Difficulty Level: This Black Forest Cheesecake Symphony is considered moderate due to the multiple layers and techniques involved in preparing the filling and crust.
  • Category: This dessert falls under the categories of cheesecake and cake, making it a versatile option for various occasions.
  • Cuisine: The Black Forest cheesecake is inspired by German culinary traditions, known for its rich desserts featuring chocolate and cherries.
  • Cost: The approximate cost of ingredients is moderate, with high-quality chocolate and fresh cherries being the most significant investments.
  • Season: Best enjoyed in the spring and summer, the cheesecake highlights fresh cherries that are at their peak during these seasons.
  • Occasion: Ideal for birthdays, holidays, or elegant gatherings, this cheesecake serves as an impressive centerpiece for any dessert table.

Why You’ll Love This Recipe

The Black Forest Cheesecake Symphony delights the taste buds with its perfect balance of flavors and textures. The combination of rich chocolate and tart cherries makes for a unique dessert that stands out. Every slice offers a taste of nostalgia, invoking fond memories of traditional Black Forest cake. The creamy, velvety consistency makes it a comforting treat, perfect for indulgent days.

Preparation is surprisingly simple, allowing even novice bakers to impress their friends and family with a gourmet dessert. Creating this masterpiece can be achieved in just a few straightforward steps. The cheesecake can also be made in advance, giving you more time to relax and enjoy the company of your guests.

This cheesecake also carries nutritional benefits thanks to the ingredients used. Cream cheese provides a source of calcium, while cherries are packed with antioxidants. When crafted thoughtfully, dessert can not only satisfy cravings but also offer some health benefits.

Socially, this cheesecake serves as the ideal dessert for entertaining. Its stunning appearance is sure to spark conversation, while its delicious flavor will have everyone coming back for seconds. Sharing this cheesecake will create joyful memories around the table, elevating any event.

Cost-effectiveness plays a role as well; while the initial expense for high-quality ingredients may be higher, the overall satisfaction and ability to serve several people make it worthwhile. You will be able to serve a delightful dessert that your guests will remember long after the plates are cleared.

Historical Background and Cultural Significance

The origins of Black Forest cake, from which this cheesecake derives its inspiration, can be traced back to the Black Forest region of Germany. This area is renowned for its cherry orchards, and the cake’s flavor profile is a tribute to local ingredients. Traditional Black Forest cake is a layered chocolate cake filled with cherries and whipped cream, which has evolved into various forms, including this cheesecake.

In German culture, the Black Forest cake holds a special place as a celebratory dessert. It’s often served at birthdays and weddings, making it a symbol of joy and festivity. The use of cherries, chocolate, and cream reflects the abundant offerings of the region, showcasing the local gastronomy and traditions.

The evolution of the cheesecake as a culinary delight has been influenced by various cultures, yet it has retained some original features since ancient times. This fusion of cheesecake and Black Forest elements creates an innovative dessert that honors its roots while tempting modern palates.

Regional variations of this dessert can also be found across the globe, with each culture adding its own twist. From using alternative fruits to adjusting sweetness levels, these adaptations offer different tastes while celebrating the beloved flavors of chocolate and cherries.

Ingredient Deep Dive

Cream Cheese
Cream cheese is essential for creating the rich and creamy texture of the cheesecake layer. Originating from the United States, this soft cheese has become a staple in many desserts. Culturally, cream cheese has been used in a variety of dishes, providing a luxurious mouthfeel and rich flavor. Nutritionally, cream cheese contains calcium and vitamin A. When selecting cream cheese, choose high-quality products that are fresh. Proper storage at a consistent refrigerator temperature is essential to maintain its quality.

Chocolate
Chocolate, particularly dark chocolate, is the heart of this dessert, adding deep flavor and richness. Its origins date back to ancient Mesoamerica, where it was consumed as a beverage before evolving into the beloved confection we know today. Dark chocolate is high in antioxidants, promoting heart health and enhancing mood. For the best flavor, select chocolate with at least 70% cocoa. Store it in a cool, dark place, away from strong odors to preserve its quality. You can substitute it with cocoa powder in recipes for a similar chocolate flavor.

Cherries
Cherries bring a burst of flavor and vibrant color to the Black Forest Cheesecake Symphony. These juicy fruits are often associated with summer, thanks to their sweet and tart profile. Cherries have antioxidant properties and are beneficial for promoting sleep and reducing inflammation. When selecting cherries, look for firm, plump fruits with a deep color. For storage, keep them dry in the refrigerator, away from other fruits to prevent spoilage. If fresh cherries are unavailable, frozen cherries can be a viable option in this recipe.

Common Mistakes to Avoid

  • Overmixing the cheesecake batter can lead to a dense texture; mix just until combined.
  • Not allowing the cream cheese to reach room temperature before mixing can result in lumps.
  • Baking at too high a temperature may cause the cheesecake to crack; always bake at a moderate temperature.
  • Skipping the chilling step after baking can result in a less set cheesecake.
  • Using low-quality chocolate can affect the overall flavor; opt for high-quality options for best results.
  • Not using parchment paper while baking can lead to sticking; ensure you line the pan properly.
  • Overbaking the cheesecake will lead to dryness; check for doneness by gently shaking the pan.
  • Using unripe or overly soft cherries can alter the flavor balance; always use ripe cherries for the best taste.
  • Neglecting refrigeration for leftovers can compromise freshness; ensure proper storage to maintain flavor.
  • Not garnishing appropriately can make your dessert less visually appealing; take time to style your cheesecake.

Essential Techniques

Mixing Ingredients
Properly mixing the cheesecake ingredients is crucial to avoid lumps and ensure a smooth texture. Begin by combining room temperature cream cheese and sugar until light and fluffy. Incorporate eggs gently to keep the batter airy. Watch for visual cues such as the batter’s consistency becoming smooth and cohesive, which indicates that you have achieved the right texture.

Baking in a Water Bath
Baking your cheesecake in a water bath helps maintain moisture and regulate the temperature. To master this technique, wrap the springform pan in foil and place it in a larger pan filled with hot water. This method prevents cracking and ensures even baking. Look for the edges to be slightly set while the center remains a bit wobbly for the perfect doneness.

Pro Tips for Perfect Black Forest Cheesecake Symphony

Using high-quality chocolate not only enhances the flavor but elevates the entire dessert experience. Allow your cheesecake to cool completely before refrigerating; this helps to set it properly. When adding cherries, ensure they are pitted and chopped for even distribution. For a fun twist, consider folding in some cherry liqueur into the batter to intensify the flavor.

Opt for crushed chocolate cookies for an extra crunchy crust instead of graham crackers for a delightful variation. Always refrigerate your cheesecake for at least 4 hours, or preferably overnight, to let the flavors meld and set perfectly. For an elegant finish, drizzle melted chocolate over the top just before serving for a visual and flavor boost.

Variations and Adaptations

Regional Variations
Consider local influences by using seasonal fruits, such as strawberries or raspberries, to flavor the cheesecake. This not only adds a unique twist but keeps the dessert fresh and relevant to the time of year. You can explore recipes that incorporate different nuts or spices for a regional flair.

Seasonal Adaptations
Adjust the fruit layer according to the season by incorporating peaches or apples during the fall. These adaptations celebrate the flavors available in specific months, allowing you to serve your cheesecake year-round with a fresh perspective.

Dietary Modifications
To create a gluten-free version, swap out regular cookies for gluten-free alternatives when making the crust. This ensures everyone can enjoy this delicious dessert regardless of dietary restrictions.

Flavor Variations
Add vanilla bean paste to the cheesecake mixture for an extra depth of flavor. You may also consider adding coffee extract for a mocha variation, appealing to those who enjoy both chocolate and coffee.

Texture Modifications
For a lighter cheesecake, whip some cream separately and fold it into the filling before baking; this adds a fluffy texture that contrasts beautifully with the creamy components.

Presentation Alternatives
For a unique presentation, consider serving the cheesecake in individual cups or jars, garnishing them with fresh cherry compote and chocolate shavings for a stunning visual appeal.

Serving and Presentation Guide

When plating the Black Forest Cheesecake Symphony, carefully slice through the layers to showcase the vibrant cherries and rich chocolate. Using a spatula, serve individual slices neatly onto plates. Garnish each slice with a sprinkle of chocolate shavings and a fresh cherry on top.

You may also consider using a drizzle of cherry compote or chocolate sauce around the plate for added flair. Serve the cheesecake chilled, as this enhances its creamy texture and helps offset the richness. Modify portion sizes based on the occasion; cut larger or smaller slices depending on whether it’s a formal event or casual gathering.

Temperature plays a crucial role; aim to serve the cheesecake cold, straight from the refrigerator, for the best taste experience. For beverages, consider pairing it with a rich coffee or a sweet dessert wine to elevate the experience.

Wine and Beverage Pairing

When it comes to pairing wine with the Black Forest Cheesecake Symphony, opt for a sweet dessert wine, such as a Late Harvest Riesling or Sauternes. These lighten the richness of the cheesecake while complementing the chocolate and cherry flavors.

Non-alcoholic alternatives like cherry soda or iced chai lattes work beautifully alongside this dessert, enhancing the cherry notes. Additionally, consider a rich espresso or cappuccino as an excellent finish to the meal, balancing the sweetness with its bold flavor.

Temperature is key; serve sweet wines chilled, while ensuring coffee is hot to contrast with the cool cheesecake effectively.

Storage and Shelf Life

For appropriate storage, wrap the Black Forest Cheesecake Symphony tightly in plastic wrap or store it in an airtight container. Keep it in the refrigerator, where it will maintain its freshness for up to five days.

Observe the cheesecake for signs of spoilage, such as off smells or changes in texture. If you wish to preserve it longer, freezing is an option; simply cut the cheesecake into portions and wrap each slice in plastic wrap. Store in a freezer-safe container, where it can last up to two months.

When reheating, it’s best to allow the cheesecake to thaw overnight in the refrigerator to preserve its texture and flavor. If a warmer slice is desired, serve it at room temperature for a short time before enjoying.

Make Ahead Strategies

To ensure seamless preparation, consider making the Black Forest Cheesecake Symphony a day in advance. Prepare the crust ahead and store it covered at room temperature. For the filling, you can mix it the night before as well, refrigerating it until ready to bake.

For optimal results, allow the cheesecake to chill overnight after baking, which provides ample time for flavors to meld and set. Prior to serving, consider adding any garnishes, like whipped cream or cherries, to maintain their freshness and appearance.

If you need to save time on the day of the event, prepare the topping separately and store it in the refrigerator. This will allow for easy assembly just before serving, keeping the dessert looking fresh and appealing.

Scaling Instructions

If you want to halve the recipe for a smaller gathering, simply adjust the ingredient quantities accordingly and use a smaller springform pan, like a 6-inch one. Baking time may decrease, so keep an eye on the cheesecake while it’s in the oven.

For larger gatherings, doubling or tripling the recipe works as well; however, ensure that your equipment can handle larger volumes. You may need to bake the cheesecake in two pans or bake in batches, adjusting the baking time if necessary.

Make sure to store any leftover cheesecake appropriately. Place it in a larger storage container, or individually wrap slices to ensure they maintain freshness as you handle scaling.

Nutritional Deep Dive

In terms of a macro breakdown, a typical slice of Black Forest Cheesecake Symphony contains a balance of carbohydrates, fats, and proteins. The cream cheese contributes to dietary fats along with sugars from the cherries, while the chocolate provides carbohydrates.

Micronutrient analysis reveals that the cheesecake offers calcium from the cream cheese, along with antioxidants from the cherries, contributing to overall health benefits. Regular consumption in moderation can actually enhance mood due to the uplifting properties of chocolate.

When considering dietary needs, be mindful of portion sizes. A typical serving should satisfy a sweet craving without overindulgence. Weight management is achievable through mindful eating and enjoying the dessert as an occasional treat rather than a daily indulgence.

Dietary Adaptations

To create a gluten-free version of the Black Forest Cheesecake Symphony, utilize gluten-free chocolate cookies for the crust. This adaptation allows those with gluten sensitivities to enjoy the dessert without compromising flavor.

For a dairy-free approach, replace cream cheese with a cashew cream or tofu-based alternative. These substitutions can still yield a creamy texture while accommodating different dietary preferences.

Those following a vegan lifestyle can use flaxseed meal combined with water as an egg substitute in the cheesecake filling. Opt for plant-based chocolate to maintain the dessert’s flavor profile while keeping it entirely vegan-friendly.

Low-carb adaptations are achievable by using almond flour for the crust and low-carb sweeteners to cut down on sugar content, making it ideal for those on ketogenic diets.

Troubleshooting Guide

If your cheesecake turns out overly dense, it may be a result of overmixing. Ensure to combine ingredients just until smooth, and avoid overwhipping the cream cheese. If the top of your cheesecake cracks, it’s likely due to baking at a high temperature; lower the heat and use a water bath for even cooking.

In case the flavor feels unbalanced, adjusting the sugar or adding a hint of salt can elevate the overall taste. If you find your crust crumbling too much, try chilling it more after preparing; this allows the butter to firm up better.

If your cherries are not as flavorful as expected, consider adding a bit of cherry liqueur to enhance the taste. Lastly, if the cheesecake is too soft, allow it to chill longer in the refrigerator to firm up properly before serving.

Recipe Success Stories

Community feedback is a testament to the appeal of the Black Forest Cheesecake Symphony. Many bakers express joy in crafting this complex dessert, revealing their variations that have sparked interest among friends and family.

Read about success stories where readers have adapted the recipe for special diets, substituting ingredients while still paying homage to the original. These adaptations not only encourage creativity but foster a sense of community around this popular dessert.

Photographers often share their stunning pictures of the finished product, showcasing garnishing techniques and centerpiece presentations that inspire others. These visuals serve as motivation for those considering baking their own cheesecake.

Viewer suggestions often lead to helpful tips, allowing for smoother baking processes or different ways to present the dessert. Encouraging feedback cultivates a welcoming environment where bakers can thrive and share in their cheesecake adventures.

Frequently Asked Questions

Can I use frozen cherries for this recipe?

Yes, frozen cherries work well in this cheesecake recipe. Make sure to thaw them first and drain excess moisture to avoid watery layers in your dessert.

How can I tell when my cheesecake is done?

Your cheesecake is done when the edges are set, and the center has a slight jiggle. It will firm up while cooling, so don’t overbake it.

Can I make this cheesecake in advance?

Absolutely! This cheesecake can be made a day or two in advance, allowing flavors to develop and the cheesecake to set properly in the refrigerator.

What can I substitute for cherry liqueur?

If you prefer not to use alcohol, a splash of cherry extract can provide similar flavor notes without the added liqueur.

What’s the best way to cut a cheesecake?

To cut a cheesecake cleanly, dip a sharp knife in hot water, drying it before making each cut. This technique prevents sticking and creating messy edges.

Can I freeze leftovers?

Yes, you can freeze leftover cheesecake for up to two months. Wrap individual slices tightly and store them in an airtight container.

What’s the best way to store leftover cheesecake?

Store the cheesecake in the refrigerator in an airtight container. Keep it wrapped well to maintain freshness for up to five days.

Can I make a gluten-free version of this cheesecake?

Yes, use gluten-free cookies for the crust, and ensure all other ingredients are gluten-free to accommodate dietary restrictions.

How long should I let the cheesecake cool before refrigerating?

Allow the cheesecake to cool completely at room temperature for about an hour before transferring it to the refrigerator.

What’s the best way to serve this cheesecake?

Serve the cheesecake chilled, garnished with whipped cream and fresh cherries for a stunning presentation and delightful flavor pairing.

Additional Resources

If you enjoyed making the Black Forest Cheesecake Symphony, explore related recipes such as traditional Black Forest cake or chocolate mousse for further delight.

Consider seeking technique guides to perfect your baking skills, especially for cheesecakes and layered desserts. For ingredient insights, delve deeper into chocolate and cherry selections to enhance your culinary knowledge.

Equipment recommendations are helpful for those starting; invest in quality springform pans, measuring tools, and spatulas to improve the baking process. Seasonal variations of the recipe can introduce new flavors, keeping your dessert offerings exciting and fresh.

Join the Conversation

Engage with us on social media by sharing your creations and experiences with the Black Forest Cheesecake Symphony. We encourage you to post photographs of your completed cheesecake and share any variations you’ve made.

Your feedback and suggestions foster a community of enthusiastic bakers and dessert lovers who inspire each other through creativity and culinary adventures. Let’s make this recipe a part of shared celebrations and dessert success stories together!

The Recipe

Black Forest Cheesecake Symphony

Serves: 10 slices

Prep Time: 30 mins

Cook Time: 50 mins

Total Time: 80 mins

Kitchen Equipment Needed

  • Springform pan
  • Mixing bowls
  • Electric mixer
  • Rubber spatula
  • Baking pan for water bath
  • Measuring cups and spoons

Ingredients

  • 1 ½ cups chocolate cookie crumbs
  • ½ cup unsalted butter, melted
  • 24 oz cream cheese, softened
  • 1 cup granulated sugar
  • 3 large eggs
  • 2 tsp vanilla extract
  • 1 cup fresh or canned cherries, pitted
  • 1 cup heavy cream
  • ¼ cup dark chocolate shavings

Directions

  1. Preheat the oven to 325°F (165°C).
  2. In a mixing bowl, combine chocolate cookie crumbs with melted butter; press the mixture into the bottom of a greased springform pan.
  3. In another bowl, blend cream cheese and sugar until smooth; add eggs one at a time, then mix in vanilla extract.
  4. Fold in cherries gently to avoid breaking them.
  5. Pour the cream cheese mixture over the crust in the springform pan.
  6. Fill a larger baking pan with boiling water and place the springform pan inside for a water bath.
  7. Bake for 50 minutes or until the edges are set and the center is slightly jiggly. Remove from the oven and allow to cool to room temperature.
  8. Chill in the refrigerator for at least 4 hours or overnight.
  9. Whip heavy cream and spread it on top of the chilled cheesecake.
  10. Garnish with dark chocolate shavings before serving.

Recipe Notes

  • This cheesecake can be made a day in advance for best results.
  • Feel free to experiment with other fruits or flavorings in place of cherry.

Best Mini Crème Brûlée Cheesecakes – Rich and Creamy Dessert

Mini Crème Brûlée Cheesecakes: A Delightful Twist on a Classic Dessert

⚖️
Difficulty
Intermediate

⏲️
Prep Time
30 mins

🕒
Cook Time
30 mins

⏱️
Total Time
60 mins

🍽️
Servings
12 mini cheesecakes

Indulge in the luxurious flavors of Mini Crème Brûlée Cheesecakes, a modern twist on the classic French dessert. This delightful recipe merges the rich, creamy texture of cheesecake with the smoky, caramelized top typical of crème brûlée, making each small bite a heavenly experience. Imagine the first taste: the smooth custard melts in your mouth, balanced beautifully by the sweet crunch of the burnt sugar topping.

Perfect for dinner parties, special occasions, or just a weekend treat, these cheesecakes are not only delicious but also visually stunning. The delicate layer of caramelized sugar atop each cheesecake adds an element of sophistication, sure to impress your guests. Whether served in elegant ramekins or mini tart shells, they offer a delightful presentation that invites you to dig in.

Quick Recipe Highlights

  • Flavor Profile: Rich and creamy with notes of vanilla, complemented by the sweetness and slightly bitter flavor of caramelized sugar.
  • Texture: Smooth cheesecake base with a luxurious mouthfeel, contrasted by a crunchy, brittle layer on top.
  • Aroma: A warm, inviting aroma of vanilla and caramel that draws you in as they bake.
  • Visual Appeal: Beautiful mini cheesecakes with a shiny golden top that glistens enticingly.
  • Skill Level Needed: Requires some baking skills but is approachable for home cooks looking to elevate their dessert game.
  • Special Equipment: Ramekins or mini tart pans, a kitchen torch for caramelizing sugar, and an electric mixer for the cheesecake batter.

Recipe Overview

  • Difficulty Level: This recipe is rated intermediate due to the baking involved and the caramelization step, but clear instructions make it manageable.
  • Category: Ideal for desserts, especially after-dinner treats or festive gatherings.
  • Cuisine: These cheesecakes blend French and American dessert traditions, bringing a gourmet feel to everyday ingredients.
  • Cost: Approximated cost is moderate; the quality ingredients used will ensure a delicious outcome without breaking the bank.
  • Season: Best enjoyed anytime, particularly during holidays and celebrations when you want to impress.
  • Occasion: Perfect for birthday parties, holiday gatherings, or an elegant dinner with friends.

Why You’ll Love This Recipe

Discover the irresistible allure of Mini Crème Brûlée Cheesecakes, a dessert that promises to tantalize your taste buds. The combination of flavors and textures creates an unforgettable experience with each bite. The creamy cheesecake fills your palate, enhanced by the sweet caramel that adds depth and satisfies your sweet tooth perfectly.

Convenience is another major allure of this recipe. With a straightforward preparation process, you can whip up these mini delights in about an hour, making them a great choice for any occasion. Once they are baked, they require minimal cooling time, allowing you to focus on what matters most—enjoying the company of your guests.

On top of taste and convenience, these cheesecakes also come with nutritional bonuses. Cheesecake can offer a source of protein from cream cheese while allowing indulgence in moderation. Pair them with fresh berries for added dietary benefits like fiber and antioxidants.

The social aspect of serving Mini Crème Brûlée Cheesecakes cannot be understated. Their elegant presentation elevates any gathering, sparking conversations among your guests. They express thoughtfulness and creativity, making you the star of your event with a delicious, homemade treat.

Cost-effectiveness is a significant advantage of this dessert. Most ingredients are pantry staples; the recipe is relatively inexpensive to make compared to dining out or buying pre-made desserts. You get high-quality dessert at a fraction of the price, perfect for budget-conscious foodies.

Historical Background and Cultural Significance

The history of crème brûlée dates back to the 17th century, with various cultures claiming its creation. Originally known as “crème anglaise” in England, it has evolved into a beloved dessert globally. The technique of caramelizing the sugar on top is what gives it its distinctive finish and character.

Culturally significant, crème brûlée evokes a sense of classic French culinary artistry. It symbolizes luxury and indulgence, often associated with fine dining experiences. Serving these mini cheesecakes allows for an accessible celebration of this rich tradition.

Over time, the recipe has adapted and evolved, leading to numerous variations that reflect regional tastes. From infused flavors like coffee and chocolate to fruit toppings, variations show the versatility of this gourmet dessert.

Regional variations tell diverse stories. In Spain, a similar dessert known as “crema catalana” showcases local preferences with unique spices like cinnamon. These adaptations highlight how classic desserts can be personalized to fit cultural and individual tastes.

Ingredient Deep Dive

– **Cream Cheese**: A staple for cheesecakes, cream cheese provides the creamy texture that makes this dessert a standout. It’s high in protein and calcium, making it a more nutritious choice. Choose blocks of cream cheese for the best consistency, and store in the refrigerator for freshness. You can substitute it with mascarpone for a richer flavor.

– **Granulated Sugar**: Essential for sweetness, sugar balances the richness of the cream cheese. It caramelizes beautifully under heat, providing that iconic brûlée top. Store sugar in a cool, dry place to maintain its quality. For a healthier alternative, try coconut sugar or a sugar substitute, adjusting quantities as necessary.

Common Mistakes to Avoid

  • Skipping the cooling step: Allowing the cheesecakes to cool properly before attempting to torch the sugar is crucial. Otherwise, they can melt instead of caramelizing.
  • Using cold ingredients: Make sure all your dairy ingredients are at room temperature; this helps create a smoother batter.
  • Overmixing: When combining the ingredients, mix just until smooth. Overmixing can incorporate too much air, causing cracks in the cheesecake.
  • Using too much sugar: While sweetness is key, adding too much sugar will result in an overly sweet dessert that loses its balance and elegance.
  • Not preparing a water bath: A water bath during baking helps regulate temperature, preventing cracks and ensuring even cooking.
  • Underestimating the chill time: Make sure to chill the cheesecakes well; they should be firm before you attempt to add the brûlée topping.
  • Not using a kitchen torch: If you don’t have a torch, broil the cheesecakes but watch closely to avoid burning.
  • Neglecting garnishes: Fresh fruit or a mint leaf can elevate the presentation dramatically; don’t skip the finishing touches!
  • Ignoring ingredient substitutions: If you need to modify ingredients due to dietary needs, choose options that still align with the recipe for the best results.
  • Serving too warm: Allowing the cheesecakes to rest gives the caramelized sugar time to harden, creating that satisfying crunch you desire.

Essential Techniques

To achieve the perfect Mini Crème Brûlée Cheesecakes, mastering a few key techniques is essential.

– **Baking in a Water Bath**: This technique ensures even baking by moderating the temperature around the cheesecakes. Always set your ramekins in a larger baking dish filled with hot water to create a perfect steam environment. Check frequently to ensure the water does not evaporate while baking.

– **Torching the Sugar**: Using a kitchen torch to caramelize the sugar on top creates that iconic crunchy layer. It’s important to maintain a consistent distance and movement while torching to avoid burning certain areas. A visual cue for success is when the sugar turns a rich amber color.

Pro Tips for Perfect Mini Crème Brûlée Cheesecakes

Achieving the ultimate Mini Crème Brûlée Cheesecakes is about technique and precision.

1. Use high-quality cream cheese, which leads to a smoother and richer cheesecake filling.
2. Ensure your eggs are fresh; they help create a light and airy texture in the cheesecake.
3. Opt for pure vanilla extract for a more authentic and deep flavor instead of imitation.
4. Blend the ingredients on low speed to avoid incorporating too much air into the mixture.
5. Allow your cheesecakes to cool gradually to room temperature; this helps prevent cracks.
6. Prepare additional caramelized sugar in case you need to re-torch after the cheesecakes cool, as sugar can be temperamental.
7. Chill the cheesecakes overnight for the best texture and flavor as flavors deepen when rested.
8. Don’t overbake; the centers should slightly jiggle when you take them out so they can set properly in the fridge.

Variations and Adaptations

There are so many ways to customize your Mini Crème Brûlée Cheesecakes to suit different tastes.

– **Regional Variations**: Consider adding ingredients that reflect your local cuisine, such as a hint of citrus like lemon or orange for a fresh twist.
– **Seasonal Adaptations**: In fall, infuse your cheesecakes with pumpkin spice or apple cider for a seasonal flavor that delights.
– **Dietary Modifications**: For a gluten-free option, use almond flour for the crust or forgo the crust entirely to make it a crustless cheesecake.
– **Flavor Variations**: Experiment by mixing in pureed fruits or flavored extracts like almond, coffee, or hazelnut for unique flavor profiles.
– **Texture Modifications**: Consider incorporating a topping of fresh berries or a fruit compote for added texture and freshness.
– **Presentation Alternatives**: Use clear cups to serve mini cheesecakes, showing off the layers and garnishes for an appealing look.

Serving and Presentation Guide

Serving your Mini Crème Brûlée Cheesecakes beautifully enhances their appeal.

– **Plating Techniques**: Presenting a dessert can elevate its status; consider a slate plate for a modern touch or a classic white plate for elegance.
– **Garnishing Ideas**: Add fresh mint leaves or edible flowers for color. A drizzle of chocolate sauce or berry compote can add a pop of flavor.
– **Traditional Accompaniments**: Serving with a dollop of whipped cream or a scoop of vanilla bean ice cream balances the flavors perfectly.
– **Modern Serving Suggestions**: You can also use mini jars for a rustic twist, making it easy for guests to enjoy individually.
– **Temperature Considerations**: Ensure that the cheesecakes are chilled adequately before serving, offering the best flavor and texture.
– **Portion Control Tips**: Use mini ramekins or muffin tins to keep portion sizes consistent, ensuring everyone has an equal share.

Wine and Beverage Pairing

Enhance your dessert with delightful beverage pairings.

– **Wine Pairings**: A sweet dessert wine like Sauternes or a light sparkling wine complements the richness of the cheesecakes delightfully.
– **Non-alcoholic Alternatives**: Sparkling water with a hint of citrus can cleanse the palate without overpowering the flavors of the dessert.
– **Coffee/Tea Pairings**: A cup of rich coffee or espresso could enhance the sweetness of the cheesecake, while herbal teas add a refreshing contrast.
– **Temperature Considerations**: Serve wines slightly chilled to enhance their crispness, which can balance the richness of the cheesecake.
– **Serving Suggestions**: Consider serving beverages in elegant glassware to match the sophisticated vibe of the cheesecakes.

Storage and Shelf Life

Proper storage ensures your Mini Crème Brûlée Cheesecakes stay fresh.

– **Storage Methods**: Store cheesecakes in an airtight container to prevent drying or absorbing other flavors from the fridge.
– **Temperature Requirements**: Keep them refrigerated; they can typically last up to 3-4 days when properly stored.
– **Container Recommendations**: Glass containers are ideal; they allow you to see the delicious layers while also keeping the cheesecakes fresh.
– **Signs of Spoilage**: Look for off smells, changes in texture, or excessive moisture to indicate spoilage.
– **Reheating Instructions**: Generally, these cheesecakes are best enjoyed cold; reheat only if necessary and do so gently.
– **Freezing Guidelines**: If you need to freeze them, do so without the caramelized topping. Thaw in the refrigerator overnight before serving.

Make Ahead Strategies

Planning ahead makes the process easier.

– **Prep Timeline**: You can prepare the cheesecakes a day in advance, giving them ample time to chill in the fridge.
– **Storage Between Steps**: Keep the uncooked crust and fillings cold until you’re ready to assemble.
– **Quality Impact Assessment**: Cheesecakes actually improve in flavor after a day in the fridge, making them great for a make-ahead option.
– **Assembly Tips**: If you’re batching desserts, divide the filling into portions to make filling the crust easier and consistent.
– **Reheating Guidelines**: Avoid reheating once chilled; if you want to add the brûlée top, consider adding it fresh before serving.
– **Fresh Element Additions**: Always add fruit garnishes just before serving to maintain their freshness and vibrant colors.

Scaling Instructions

Adapting the recipe for larger groups is simple.

– **Halving the Recipe**: To make fewer cheesecakes, simply halve the ingredient quantities while keeping baking time similar.
– **Doubling or Tripling**: For larger gatherings, double or triple ingredients while maintaining the same method. Adjust baking times as needed, keeping an eye on doneness.
– **Equipment Adjustments**: Ensure you have enough ramekins or pans available for larger batches; consider using larger baking sheets to accommodate multiple trays.
– **Timing Modifications**: Monitor closely in case more batches require longer baking. Use a toothpick to check doneness.
– **Storage Considerations**: Keep an eye on how long any leftover cheesecake will stay fresh, adjusting accordingly based on the number of servings made.

Nutritional Deep Dive

Understanding the nutritional aspects of your dessert is essential.

– **Macro Breakdown**: Each mini cheesecake offers a balance of carbohydrates, fats, and proteins, making it a satisfying treat without excessive guilt.
– **Micronutrient Analysis**: While rich in dairy, they can also contribute small amounts of essential vitamins and calcium.
– **Health Benefits**: In moderation, they can fit into a balanced diet, promoting satisfaction over restrictive eating.
– **Dietary Considerations**: Always consider dietary needs when serving, ensuring that everyone can enjoy the treat.
– **Portion Analysis**: Mini portions allow for indulgence without overwhelming caloric intake, making them a sensible choice.
– **Weight Management Tips**: Focus on enjoying these cheesecakes mindfully; savor each bite to enhance satisfaction.

Dietary Adaptations

Accommodating diverse dietary preferences is easy with these adaptations.

– **Gluten-free**: Substitute the traditional crust with crushed gluten-free cookies or skip the crust altogether.
– **Dairy-free**: Use vegan cream cheese alternatives for a dairy-free version, ensuring a similar texture.
– **Vegan**: Replace eggs with aquafaba or flaxseed meal mixed with water for binding without using animal products.
– **Low-carb**: Opt for a nut crust and sugar-free sweeteners to cater to low-carb diets without sacrificing flavor.
– **Keto**: Choose high-fat ingredients and sugar alternatives to maintain low carb, high-fat ratios while still enjoying dessert.
– **Paleo**: Use natural sweeteners and nut-based crusts to create a cheesecake that fits paleo lifestyles.
– **Low-FODMAP**: Aim for lactose-free cream cheese and limited sweetener to cater to specific dietary needs.
– **Other specific diets**: Always assess individual needs and preferences to create a version that’s inclusive and enjoyable.

Troubleshooting Guide

Encountering challenges can be part of the cooking experience.

– **Texture Issues**: If the cheesecakes appear too dense, ensure your cream cheese is well-blended and not overmixed to prevent air incorporation.
– **Flavor Balance**: If the cheesecake is too sweet, consider adding a touch of salt to enhance flavor depth.
– **Temperature Problems**: If cheesecakes crack, it may be due to overbaking or sudden temperature changes; invest in a thermometer for balance.
– **Equipment Challenges**: If the torch isn’t working properly, try placing the sugar under the broiler, but watch closely to prevent burning.
– **Ingredient Substitutions**: Be cautious when substituting key ingredients, as it may alter the texture; test first with smaller batches.
– **Timing Concerns**: If baking takes longer than expected, don’t hesitate to check with a toothpick for proper doneness; adjust time accordingly.

Recipe Success Stories

Celebrating the community’s shared love for this recipe is part of its charm.

– **Community Feedback**: Many readers rave about how easy the recipe is, with some sharing their own variations that delight.
– **Variation Successes**: Some home cooks have impressively infused unique flavors like lavender or espresso, appealing to adventurous palates.
– **Adaptation Stories**: Followers often share tales of how they modified the recipe for dietary restrictions and still achieved delicious outcomes.
– **Reader Suggestions**: Many detail tips passed down from family members that enhance their experience, contributing to an evolving recipe tradition.
– **Photography Tips**: Home cooks value capturing their creations, sharing tips for lighting and angles that showcase the beauty of these mini cheesecakes.

Frequently Asked Questions

Can I use a different type of cheese for this recipe? Yes, while cream cheese gives the best flavor and texture, mascarpone can be used for a richer, more decadent taste. Be mindful that other cheeses might alter the final product consistency and flavor.

How long should I chill these cheesecakes? For optimal results, chill the mini cheesecakes for at least 4 hours or overnight. This allows them to set properly and enhances their flavor.

Is it necessary to use a water bath while baking? A water bath is recommended to ensure even cooking and prevent cracking. If you don’t have a large enough dish, consider baking directly, but monitor closely.

Can I freeze these cheesecakes? Yes, you can freeze them after baking, but avoid caramelizing the topping until you’re ready to serve. Freeze them tightly sealed in an airtight container for up to 2 months.

What’s the best way to reheat them? It’s best to serve them chilled; however, if you prefer a warmed cheesecake experience, place them in a preheated oven at a low temperature for a few minutes.

How can I achieve the perfect brûlée crust? Ensure your sugar is evenly distributed across the cheesecake surface. Use a torch, holding it at a slight angle to caramelize evenly, achieving that golden top.

Can I make these vegan-friendly? Absolutely! Substitute cream cheese with vegan cream cheese and use a flax egg or aquafaba as a binding agent to replace the eggs.

What are some good topping ideas? Fresh fruits, chocolate shavings, and a dollop of whipped cream are great toppings. For a twist, consider a flavored compote, adding freshness.

How do I prevent my cheesecake from cracking? Keep an eye on the baking time, ensuring they are not overbaked. The center should slightly jiggle when pulled from the oven, as they will continue to firm up while cooling.

Can I double this recipe? Yes, you can double the ingredients and baking time; just be mindful of your oven space and adjust baking time if using multiple trays.

Additional Resources

Explore more delightful recipes and techniques!

– **Related Recipes**: Check out our classic New York cheesecake and unique fruit tart recipes for similar flavors with a different twist.
– **Technique Guides**: Don’t miss our guide on mastering the art of caramelizing sugar to elevate your dessert game.
– **Ingredient Information**: Dive into our resources on selecting quality cream cheese and different types of sweeteners for your baking.
– **Equipment Recommendations**: Explore our top picks for kitchen tools that simplify baking and enhance your cooking experience!
– **Seasonal Variations**: Discover how to incorporate fall spices or summer fruits into your cheesecakes for delightful seasonal twists.

Join the Conversation

We want to hear from you!

– **Social Media Sharing**: Share your cheesecake creations with #MiniCremeBruleeCheesecakes. We love seeing your beautiful desserts!
– **Photography Tips**: Tag us for tips on photographing your miniature masterpieces—lighting and angles can make all the difference in showcasing their elegance.
– **Recipe Reviews**: Leave your feedback and share your thoughts! Your insights help others in the community discover and enjoy new recipes.
– **Community Engagement**: Join our community discussions to exchange variations, tips, and ideas for making these cheesecakes truly unique.
– **Recipe Variations**: If you’ve made adaptations or unique versions, share your stories with us. We appreciate creative innovation in the kitchen!

The Recipe

Mini Crème Brûlée Cheesecakes

Serves: 12 mini cheesecakes

Prep Time: 30 mins

Cook Time: 30 mins

Total Time: 60 mins

Kitchen Equipment Needed

  • Ramekins or mini tart pans
  • Mixing bowl
  • Electric mixer
  • Kitchen torch
  • Baking dish for water bath

Ingredients

  • 16 oz cream cheese, softened
  • 1 cup granulated sugar
  • 3 large eggs
  • 1 tsp vanilla extract
  • 1/2 cup heavy cream
  • 1/4 cup granulated sugar for topping

Directions

  1. Preheat your oven to 325°F (160°C). Prepare the water bath by filling a larger baking dish with boiling water.
  2. In a mixing bowl, beat together softened cream cheese and 1 cup of sugar until smooth and creamy.
  3. Add in the eggs one at a time, mixing on low speed after each addition to ensure incorporation without too much air.
  4. Stir in the vanilla extract and heavy cream until the mixture is well combined and smooth.
  5. Pour the cheesecake filling into greased ramekins about 3/4 full. Place these ramekins in the prepared water bath.
  6. Bake for about 25 to 30 minutes, until the edges are set but the centers still jiggle slightly.
  7. Remove from the oven and let cool in the water bath for at least 30 minutes.
  8. Chill the cheesecakes in the refrigerator for at least 4 hours or overnight.
  9. Before serving, sprinkle an even layer of granulated sugar on top of the chilled cheesecakes and use a kitchen torch to caramelize the sugar until it’s golden brown.
  10. Let the caramelized sugar cool and harden, then serve immediately for the best texture.

Recipe Notes

  • For an enhanced flavor, consider infusing the cream with citrus zest or spices.
  • If you can’t find a kitchen torch, broil the centered sugar under the oven for a few minutes, watching closely to avoid burning.
  • You can substitute with dairy-free cream cheese for a lactose-free version; check labels for vegan options.

Easy Strawberry Icebox Pie with Creamy Filling

Delightful Strawberry Icebox Pie: A Refreshing Dessert for All Occasions

⚖️
Difficulty
Easy

⏲️
Prep Time
15 mins

🕒
Cook Time
5 mins

⏱️
Total Time
4 hours

🍽️
Servings
8 servings

Strawberry Icebox Pie is the epitome of a refreshing dessert, perfect for hot summer days but delightful any time of the year. The moment you dive into that first slice, you’re met with an explosion of sweet strawberries paired beautifully with a creamy filling. This easy-to-make dessert offers a cool and creamy experience that your taste buds will crave time and time again. Whether you’re hosting a summer barbecue or looking for a delicious family treat, this pie is sure to steal the show.

The bright red strawberries not only create a stunning visual appeal, but they also bring a natural sweetness that pairs perfectly with the fluffy whipped topping. The graham cracker crust offers a satisfying crunch that balances the smooth filling, making each bite an irresistible combination of textures and flavors. This Strawberry Icebox Pie will transport you to a world of indulgence, where every forkful is a reminder of how simple ingredients can create extraordinary moments.

Quick Recipe Highlights

  • Flavor Profile: The pie melds the natural sweetness of strawberries with a creamy filling, creating a balance that’s both rich yet refreshing.
  • Texture: You’ll enjoy a crunchy graham cracker crust, creamy filling, and juicy strawberries, making it a delightful treat for the palate.
  • Aroma: The fresh strawberries’ scent wafts through the air, complemented by hints of vanilla and cream that invite you to indulge.
  • Visual Appeal: Bright red strawberries atop a creamy, pale filling create an eye-catching dessert that’s as appealing as it is delicious.
  • Skill Level Needed: This recipe is easy and approachable for all skill levels, making it perfect for novice cooks and experienced bakers alike.
  • Special Equipment: A standard pie dish and an electric mixer are all you need to create this delightful dessert.

Recipe Overview

  • Difficulty Level: This Strawberry Icebox Pie is easy to prepare, requiring no baking skill, making it ideal for beginners.
  • Category: This pie fits perfectly into the dessert category and is an excellent option for picnics and gatherings.
  • Cuisine: This dessert draws inspiration from classic American recipes, emphasizing fresh, seasonal ingredients that are often celebrated in summertime.
  • Cost: The estimated cost for this dessert is approximately $15, making it an economical choice for entertaining.
  • Season: Best enjoyed in the spring and summer months when strawberries are juicy and at their peak flavor.
  • Occasion: Ideal for birthdays, potlucks, or even casual family dinners—any event that calls for a sweet finish.

Why You’ll Love This Recipe

Strawberry Icebox Pie is undoubtedly a favorite for its exquisite taste and texture. The natural sweetness of fresh strawberries is enhanced by the creamy filling, providing a dessert that dances on the palate. The addition of the whipped topping gives a lightness that balances the richness of the pie, allowing you to indulge without feeling overwhelmed. This dessert not only tastes fantastic but also evokes feelings of nostalgia and warmth reminiscent of summer days spent with family and friends.

Convenience is another reason this recipe is a hit. With minimal prep time and no baking required, you can whip this pie together in just a few moments, allowing you to spend more time entertaining your guests. The icebox feature means you can make it ahead of time, letting it chill in the fridge until it’s ready to be served, ensuring you are stress-free when it comes to dessert!

Nutritionally, strawberries offer a wealth of antioxidants and vitamins. Coupled with the wholesome ingredients in this pie, it provides a sweet treat that you can feel good about serving. The use of fresh strawberries not only enhances the flavor but promotes health benefits, making this dessert as smart as it is delicious.

When it comes to entertaining, this dessert shines. Its vibrant appearance and delightful taste make it perfect for sharing. The refreshing nature of the pie sparks conversation, resulting in a warm, inviting atmosphere that encourages guests to linger and enjoy each bite together.

Finally, cost-effectiveness is a key advantage of this Strawberry Icebox Pie. With affordable ingredients that yield a delicious result, it’s an accessible dessert option that allows you to treat your loved ones without breaking the bank. It truly combines affordability with gourmet appeal, making it a winner for any occasion.

Historical Background and Cultural Significance

Strawberry Icebox Pie has origins deeply rooted in American culinary history, particularly during the mid-20th century when refrigeration became more common. This dessert reflects the era’s emphasis on easy, no-bake recipes that could be prepared quickly. As families began hosting outdoor gatherings and barbecues, the pie emerged as a go-to option for dessert that could be made ahead of time, allowing hosts to focus on entertaining.

Culturally, the popularity of Strawberry Icebox Pie is a testament to summer traditions in the United States. Strawberry picking is a beloved activity in many regions, and this pie is often the delightful conclusion to a day spent in the fields. It represents the joy of seasonal produce and celebrates the bounty of summer fruit, which many families look forward to enjoying together.

As the recipe evolved, variations emerged to adapt to regional tastes and available ingredients. Some variations include different types of nuts or fruit in the crust, while others introduce alternative fillings such as lemon or blueberry. These adaptations illustrate how traditional dishes transform and grow, reflecting local flavors while keeping the essence of the original recipe intact.

Today, Strawberry Icebox Pie continues to be a favorite dessert served at summer gatherings, potlucks, and holiday celebrations. It signifies warm memories and cherished moments, connecting people through the shared experience of enjoying a delicious homemade treat.

Ingredient Deep Dive

Strawberries: Strawberries are not just a delicious addition to this icebox pie but also carry cultural significance as a symbol of summer. Packed with vitamin C and antioxidants, they are an excellent choice for health-conscious individuals. When selecting strawberries, look for vibrant colors and a fresh scent; avoid any that show signs of mold. For storage, keep them unwashed in the fridge in a breathable container. If you’re looking for substitutions, consider using other berries for a similar flavor.

Graham Crackers: The graham cracker crust gives this pie its delightful crunch. Graham crackers were originally created in the early 19th century as a health food by Reverend Sylvester Graham. They provide a wonderful texture contrast to the creamy filling. Select packages with whole grains for added nutritional benefits, and store them in a cool, dry place. If you’re short on graham crackers, you can substitute with crushed cookies or even pretzels for a unique twist.

Whipped Topping: The whipped topping in this recipe contributes to the pie’s creamy texture. While it adds lightness to the dessert, making homemade whipped cream with heavy cream offers a fresher taste. Whipped topping is an easy option that requires no special skills, making it accessible for everyone. As a dairy product, refrigerate any leftovers and consume them within a week. If you’re looking for a dairy-free option, coconut whipped cream can work beautifully here.

Common Mistakes to Avoid

  • Using overripe strawberries can lead to a mushy pie. Ensure your strawberries are perfectly ripened for the best texture and flavor.
  • Not chilling the pie for long enough can result in a watery filling. Be sure to give your pie time to set in the refrigerator for at least four hours.
  • Measuring ingredients inaccurately can throw off the balance of the pie. Use standard measuring cups and spoons for precision.
  • Overmixing the whipped cream can lead to a grainy texture. Mix just until soft peaks form for a smooth and creamy consistency.
  • Using stale graham crackers can diminish the crust’s flavor. Check the expiry date and consider fresh options for the best taste.
  • Neglecting to line the pie dish can cause the crust to stick. Always remember to grease your dish lightly before adding the crust.
  • Skipping the step of crushing the graham crackers uniformly leads to uneven texture. Aim for a consistent crumb for the best crust.
  • Using an unchilled bowl for whipping cream can affect its ability to whip up thick. Chill your mixing bowl beforehand for best results.
  • Not tasting the filling before assembling can lead to an imbalance of flavors. Always sample your filling and adjust sweetness if necessary.
  • Forget to allow the pie to breathe in the refrigerator can cause condensation issues. Loosely cover your pie while chilling to manage moisture.

Essential Techniques

Crust Preparation: Preparing the graham cracker crust is essential for a successful pie. Start by finely crushing the crackers and mixing them with melted butter and sugar. Press the mixture firmly into the bottom and up the sides of your pie dish to ensure a sturdy base. The crust should hold its shape while providing a delightful crunch with each bite.

Whipping Cream: Mastering the technique of whipping cream is crucial for achieving the perfect consistency. Use cold heavy cream and a cold mixing bowl. Begin on low speed and gradually increase to high until soft peaks form. Watch for visual cues such as a slight thickness, ensuring you don’t overwhip it into butter.

Pro Tips for Perfect Strawberry Icebox Pie

1. Choose fresh, in-season strawberries for the best flavor; seek out local markets for the ripest fruit.
2. Opt for homemade whipped cream instead of store-bought for a fresher taste and texture.
3. Ensure your graham cracker crust is packed tightly for stability and to prevent crumbling when serving.
4. Allow the pie to chill overnight for intensified flavors and a firmer texture, making slicing easier.
5. Use a hot knife to cut neat slices; dip it in hot water and wipe dry before slicing to minimize mess.
6. Garnish with extra fresh strawberries or mint leaves to elevate presentation and flavor for serving.
7. Experiment with a dash of vanilla extract in the filling to enhance the overall flavor profile.
8. Consider adding a layer of lemon zest to the cream to brighten the overall taste of the pie.

Variations and Adaptations

Exploring variations of the Strawberry Icebox Pie can enhance flavors and adapt to seasonal ingredients. You could incorporate a mix of berries, like blueberries or raspberries, to diversify the flavor profile. Seasonal adaptations include layering in fresh peaches or cherries for stunning color contrasts and flavors.

For dietary modifications, consider using gluten-free graham crackers for a celiac-friendly dessert. If you aim to create a lower-calorie version, replace sugar with a natural sweetener and use a light whipped topping. Texture variations can also be explored; try adding finely chopped nuts to the crust for extra crunch or a creamy avocado layer for a unique twist.

Lastly, presentation alternatives are limitless. Prepare individual servings in jars or parfaits for a modern touch, using clear glassware to showcase the colorful layers beautifully.

Serving and Presentation Guide

Plating your Strawberry Icebox Pie can enhance its appeal significantly. Consider serving it on a colorful plate to contrast with the pie’s vibrant colors. A clean slice can be achieved by using a hot knife, ensuring presentation is as impressive as the taste.

For garnishing ideas, top each slice with a dollop of whipped cream and a fresh strawberry for that extra touch. Accompanying traditional options include a scoop of vanilla ice cream on the side or drizzled chocolate sauce, appealing to all ages.

Temperature considerations play a crucial role in serving. Ensure the pie is well-chilled before cutting—this helps maintain its structure. Lastly, portion control is vital; consider serving smaller slices, allowing guests to indulge without overwhelming their appetites.

Wine and Beverage Pairing

When pairing beverages with your Strawberry Icebox Pie, consider a light, fruity white wine like a Riesling or Moscato that complements the sweetness of the strawberries. Alternatively, a sparkling rosé can align perfectly, enhancing the refreshing experience of the dessert.

For non-alcoholic options, serve chilled iced tea or a refreshing lemonade for a layered taste experience. If coffee is more your style, an iced coffee can contrast nicely against the creaminess of the pie, providing a delightful balance of flavors.

It’s essential to serve these beverages slightly chilled to enhance their refreshing qualities, matching the cold and creamy essence of the pie.

Storage and Shelf Life

To maximize the freshness of your Strawberry Icebox Pie, proper storage is key. Cover the pie loosely with plastic wrap or foil, ensuring it doesn’t stick to the filling while stored in the refrigerator. Ideally, this pie should be consumed within 3-4 days to maintain optimal flavor and texture.

For longer storage, consider freezing individual slices. Wrap each slice tightly in plastic wrap and then place them in an airtight container to prevent freezer burn. When ready to enjoy, thaw the slices in the fridge for several hours or overnight for the best result.

Signs of spoilage include an off smell or a change in the texture of the strawberries—watch for any signs of excessive moisture or separation of the cream filling.

Make Ahead Strategies

Making the Strawberry Icebox Pie ahead of time significantly enhances the flavor as it has time to set and meld. Prepare the pie up to two days in advance, allowing it to chill in the refrigerator. This pie stores well, and making it ahead helps you save time on the day of your event.

When preparing, keep the components separate if you plan to make it a day in advance. For instance, you can mix the filling but wait to assemble until you’re closer to serving for maximum freshness. The same goes for whipped cream; wait to add it until just before serving for the best texture.

For assembly, divide the chilling time—consider chilling the crust before adding the filling for a firmer structure. Fresh elements like strawberries can be added just before serving for an vibrant presentation.

Scaling Instructions

Scaling your Strawberry Icebox Pie is simple and flexibility is key. If you want to halve the recipe, use a smaller pie dish and adjust your ingredient amounts accordingly. Doubling or tripling the recipe can be done seamlessly; simply ensure you have larger containers for the filling and additional graham crackers for the crust.

Keep in mind that the chilling time may vary based on the size of the pie. Larger pies often require more time to fully set. Use a deep-dish pie plate for larger servings while ensuring you have an appropriate chilling space in your refrigerator for larger batches.

For ingredient adjustments, maintain the ratios to ensure the pie remains flavorful. Lastly, consider how many guests you plan on serving to properly calculate your serving sizes and guarantee each guest gets to indulge.

Nutritional Deep Dive

Understanding the nutritional benefits of Strawberry Icebox Pie helps in maintaining a balanced approach to dessert. Each serving typically delivers a good dose of macronutrients, including carbohydrates from the crust and fats from the cream.

Analyzing micronutrients, strawberries are rich in vitamin C, manganese, and folate, promoting overall health while offering antioxidants that can aid in disease prevention. The whipped topping, depending on the brand, can add sugars and fats, making it crucial to consider portion sizes when enjoying.

For health-conscious individuals, assessing the total caloric content is important; be mindful of serving sizes and opt for lower-sugar options when available to manage overall caloric intake. Looking to monitor portion sizes can also assist in weight management while still enjoying this delightful dessert.

Dietary Adaptations

For those following specific dietary plans, adapting the Strawberry Icebox Pie is entirely possible. For a gluten-free version, replace standard graham crackers with gluten-free alternatives made from almond or coconut flour.

If you’re aiming for a dairy-free option, using full-fat coconut milk in place of the whipped topping can still yield a creamy, delightful experience. A vegan adaptation can be achieved by using aquafaba or egg substitutes for the filling, maintaining the same delicious flavors.

Low-carb and keto enthusiasts can experiment with almond flour for the crust and sugar substitutes to maintain sweetness without excess carbohydrates. Consideration for paleo diets focuses on using simple, whole ingredients, replacing sugar with natural sweeteners.

Troubleshooting Guide

If you encounter texture issues with your pie, it may be due to overwhipped cream or not chilling long enough. Keep an eye on your cream while mixing and ensure adequate chilling initializes a firmer texture before cutting into it.

Flavor balance can shift if too much sugar is added. If your filling tastes overly sweet, a small pinch of salt can help enhance flavors and balance sweetness. On the other hand, if it lacks sweetness, consider adding a bit of confectioners’ sugar to enhance flavor without affecting texture.

Temperature problems may arise if the pie is served too warm. Ensure it has spent enough time in the refrigerator for a proper chill before serving.

Equipment challenges can occur if your mixer isn’t powerful enough for whipping. Directions may require patience—consider alternating manual whipping for better control in such cases.

Lastly, ingredient substitutions can lead to cooking timing concerns. Keep an eye on the overall mix and adapt your chilling and preparation route accordingly for best results.

Recipe Success Stories

Our community is filled with delightful feedback regarding the Strawberry Icebox Pie. Many home cooks have shared their adaptations and variations, showing ingenuity with alternative berries or different crust types, resulting in varied taste experiences while retaining the core elements.

Several readers have mentioned how easy this pie became their go-to for summer celebrations, often reflecting fond memories associated with family gatherings, which speaks volumes about its nostalgic value.

Photography tips emerged from readers who captured stunning shots of their icebox pies, showcasing garnishing with mint leaves for a fresh touch and bright red strawberries that pop against the creamy backdrop.

Recipes shared with unique twists, such as layer variations, have created excitement within the community, encouraging experimentation and bringing new flavors to the familiar pie.

The journey continues, as many attempt their unique presentations and take pride in sharing their culinary creations with loved ones, fueling their creativity through this simple yet beloved recipe.

Frequently Asked Questions

1. Can I use frozen strawberries for this recipe? Yes, you can use frozen strawberries, but be sure to thaw and drain excess liquid before mixing them into the filling to avoid making the pie watery.

2. How long does the Strawberry Icebox Pie last? It is best consumed within 3-4 days if stored properly in the refrigerator. After that, the texture and flavor may begin to degrade.

3. Can I make this pie gluten-free? Absolutely! Substitute gluten-free graham crackers or use a mixture of almond or coconut flour for the crust to make it gluten-friendly.

4. What can I use as a dairy-free replacement for whipped topping? You can use coconut whipped cream, which provides a creamy consistency and rich flavor that complements the pie beautifully.

5. Is it possible to make this pie in advance? Yes! This pie is perfect for making ahead of time as it requires several hours to chill, making it convenient for parties and gatherings.

6. How can I adjust this recipe for a smaller or larger crowd? You can easily halve or double the ingredients based on the number of servings you need. Adjust chilling time as needed for larger pies.

7. Can I substitute the strawberries with other fruits? Yes, feel free to use other berries like blueberries or raspberries for a different flavor profile, or mix and match for a lovely berry medley.

8. What’s the best way to store leftovers? Cover the pie loosely in the refrigerator, or if you want to freeze slices, wrap them tightly in plastic wrap and store in an airtight container.

9. Can I use less sugar in the filling? Yes! You can adjust the sugar to your taste, but it may affect the overall sweetness balance of the pie, so start with small reductions.

10. Is there an alternative to graham cracker crust? Yes, you can make a crust with crushed cookies, oats, or even a nut-based crust for a gluten-free or grain-free option.

Additional Resources

If you enjoyed this recipe, you might also like our related recipes featuring fresh summer fruits, like a classic Blueberry Pie or refreshing Lemon Icebox Cake. Each offers its own unique twist on beloved summertime desserts.

Explore technique guides that will enhance your baking skills, such as mastering other types of no-bake desserts or perfecting your pie crust game. For ingredient information, delve deeper into the benefits of using seasonal fruits and how to select fresh ingredients that elevate all your dishes.

Invest in highly recommended kitchen equipment like a sturdy pie dish or reliable electric mixer that will make your dessert preparation smooth and enjoyable. Seasonal variations of icebox pies also enrich your dessert menu; don’t hesitate to experiment with autumn fruits like apples or pears!

Join the Conversation

We’d love you to share your experience with Strawberry Icebox Pie on social media! Tag us with your beautiful creations and unique takes on this beloved dessert. Connect with us for photography tips, gather inspiration, and engage with our community through recipe reviews and blood suggestions.

Your contributions shape our vibrant community, encouraging culinary creativity and sharing joy through delicious meals. Join us and be part of a delightful journey discovering how simple yet satisfying this Strawberry Icebox Pie can be!

The Recipe

Strawberry Icebox Pie

Serves: 8 servings

Prep Time: 15 mins

Cook Time: 5 mins

Total Time: 4 hours

Kitchen Equipment Needed

  • Mixing bowls
  • Electric mixer or whisk
  • Pie dish
  • Measuring cups and spoons
  • Plastic wrap or foil for storage

Ingredients

  • 1 ½ cups crushed graham crackers
  • ½ cup unsalted butter, melted
  • ¼ cup granulated sugar
  • 2 cups fresh strawberries, diced
  • 8 oz whipped topping
  • 1 cup sweetened condensed milk
  • ½ cup cream cheese, softened
  • 1 tsp vanilla extract

Directions

  1. In a bowl, combine crushed graham crackers, melted butter, and sugar. Mix until well combined.
  2. Press the mixture firmly into the bottom and up the sides of a pie dish to form your crust.
  3. In another bowl, mix together condensed milk, softened cream cheese, and vanilla until smooth.
  4. Fold in the whipped topping until combined, being careful not to overmix.
  5. Stir in diced strawberries gently into the filling mixture.
  6. Pour the filling into the prepared graham cracker crust.
  7. Cover loosely with plastic wrap and chill in the refrigerator for at least 4 hours or until set.
  8. Slice and serve with additional fresh strawberries or whipped cream on top.

Recipe Notes

  • Feel free to substitute with other berries or a mixture for a unique flavor.
  • For a stronger strawberry flavor, consider adding a layer of strawberry puree before filling.
  • This pie freezes well; ensure it’s tightly wrapped for best results if freezing.

Easy Cream Puff Cake with Light and Fluffy Filling

Cream Puff Cake: A Delightfully Light Dessert for Any Occasion

⚖️
Difficulty
Medium

⏲️
Prep Time
30 mins

🕒
Cook Time
25 mins

⏱️
Total Time
55 mins

🍽️
Servings
12 slices

Indulging in a delicious slice of Cream Puff Cake is an experience that transcends ordinary dessert moments. This cake combines the airy richness of cream puffs with a luscious filling that will leave your taste buds dancing with delight. Imagine layers of golden, fluffy goodness, generously filled with a creamy custard and beautifully topped with a light dusting of powdered sugar—a true showstopper for any occasion. Whether you are celebrating a special event or simply treating yourself to a delightful dessert, this Cream Puff Cake promises to bring joy and sweetness to the table.

As you embark on the journey of creating this remarkable cake, you’ll discover the ease of preparation paired with the impressive presentation. It has the charm of intricate desserts but can be made without a culinary degree. Let’s dive into the enchanting realm of flavors, textures, and simple techniques that make this Cream Puff Cake a must-try recipe for both novices and experienced bakers alike.

Quick Recipe Highlights

  • Flavor Profile: This cake features a harmonious blend of vanilla, cream, and subtle nutty undertones from the buttery pastry.
  • Texture: Enjoy a delightful contrast between the light, airy cake and the creamy filling, creating a melt-in-your-mouth experience.
  • Aroma: The warm waft of baked pastry, accompanied by the sweet scent of vanilla, welcomes all who enter the kitchen.
  • Visual Appeal: A golden-brown exterior, accented with smooth cream and a dusting of powdered sugar, makes this cake irresistibly inviting.
  • Skill Level Needed: Although it involves a few steps, the skill level remains approachable for most home bakers.
  • Special Equipment: Basic baking tools such as mixing bowls, an electric mixer, and a baking dish will suffice.

Recipe Overview

  • Difficulty Level: This Cream Puff Cake is classified as medium difficulty, primarily due to the preparation of the cream filling and the choux pastry layers, but the process is straightforward for those with basic skills.
  • Category: It fits perfectly into dessert categories, ideal for both casual family meals and festive gatherings.
  • Cuisine: Rooted in classic French patisserie traditions, this cake embodies a sophisticated yet approachable dessert style that has captivated palates worldwide.
  • Cost: The cost of ingredients is quite reasonable, allowing for a delightful treat without breaking the bank.
  • Season: Perfect for any season, but especially welcomed during celebrations and holidays due to its celebratory appearance.
  • Occasion: This cake shines at events ranging from birthday parties to holiday gatherings and potlucks.

Why You’ll Love This Recipe

The taste and texture of this Cream Puff Cake will leave you craving more after the very first bite. The tender, fluffy cake pairs beautifully with the rich, creamy filling that encapsulates the essence of indulgent desserts. Each slice offers layers of lightness and richness that make it extremely satisfying without being overly heavy.

Preparation benefits are also a highlight; this recipe offers convenience as it can be made ahead of time, freeing you up for other tasks. The components can be prepared separately and assembled just before serving, ensuring that your cake is fresh and delightful when it reaches the table.

From a nutritional standpoint, while indulgent, this cake can offer a satisfying dessert option that can fit into varied meal plans in moderation. Cream puffs contribute to energy intake while also delivering a bit of protein from the eggs and dairy used in the pastry and filling.

Socially, Cream Puff Cake is fantastic for gatherings. Its impressive presentation naturally draws people in, sparking conversation and enjoyment among guests. Sharing slices of this cake can enhance any gathering, bringing a sense of festivity and joy.

Cost-effectiveness is a noteworthy aspect; most ingredients are pantry staples, and crafting something so decadent at home can save you money compared to purchasing similar gourmet desserts from a bakery.

Historical Background and Cultural Significance

Historically, the origins of the cream puff date back to 16th century France, known as “choux pastry.” This lightweight pastry was created by the chef of Catherine de’ Medici. The technique was refined over time, and the cream puff evolved into a beloved treat worldwide, presenting various cultural adaptations.

Cream puffs hold cultural significance in numerous cuisines, often enjoyed during celebrations and festive occasions. Particularly in pastry traditions, this dessert represents skill and artistry, with bakers taking pride in creating perfect pastries filled with rich creams.

The recipe itself has evolved into various forms, such as éclairs or the celebrated Cream Puff Cake. Each adaptation brings unique flavors and styles while maintaining the classic airy texture emblematic of choux pastry.

Regional variations abound, with each culture enriching the basic concept of cream puffs. Countries around the world have adapted flavors and fillings to reflect local tastes, showcasing the cake’s versatility and global appeal.

Ingredient Deep Dive

– Flour: The backbone of the choux pastry, providing structure. Look for all-purpose flour, which offers the right balance for texture. Store it in a cool, dry place to maintain its quality.

– Eggs: Essential for leavening and rich flavor, eggs add moisture and binding to the recipe. Free-range eggs are often preferred for their taste. Store eggs in the refrigerator and use them as fresh as possible.

– Butter: Imparts a rich flavor and tenderness. Choose unsalted butter to control the cake’s overall saltiness. Keep butter refrigerated, and it can also be frozen for longer shelf life.

– Milk: Contributes to the creaminess of the filling. Whole milk is recommended for a rich texture. Store it properly to avoid spoilage, and use within its expiration date.

– Sugar: Enhances sweetness and flavor. Granulated sugar is a standard choice; store it in a cool, dry area to maintain freshness.

Common Mistakes to Avoid

  • Skipping the Egg Cooling Process: It’s crucial to let your eggs cool slightly before adding them to your warm choux mixture; this ensures they incorporate smoothly without scrambling.
  • Overmixing the Batter: Mixing too long can lead to tough pastry; mix until fully combined without overworking.
  • Not Preheating the Oven: Ensure your oven is preheated to create the right puffing environment; an unheated oven can lead to flat pastries.
  • Incorrect Oven Temperature: Using either too high or too low of a temperature can affect the puffing process; invest in an oven thermometer to ensure accuracy.
  • Not Allowing Pastry to Cool: Removing the pastries too early can result in sogginess; allow the choux to cool fully before filling.
  • Filling Too Soon: Fill the cream puffs while they are still warm to prevent a soggy texture; opt to fill just before serving.
  • Choosing the Wrong Flour: Use all-purpose flour for the best puff; other flours may not provide adequate structure for rising.
  • Ignoring the Egg Wash: An egg wash can enhance the color and shine of the pastry; don’t skip this step for an appealing finish.

Essential Techniques

Creating choux pastry requires mastering a few essential techniques. First, ensure you understand the importance of cooking the flour mixture correctly—cook it until the dough pulls away from the sides of your saucepan. This activates the starch needed for proper puffing.

When incorporating eggs, add one at a time, ensuring each is fully mixed before adding the next. Visual cues for success include a smooth, glossy dough that drops from the spoon without falling apart. This consistency is vital for achieving the lovely puffs you desire.

Being patient during baking is also key; resist the urge to open the oven door, which can cause the pastries to deflate. Finally, be mindful of cooling—let the puffs rest before filling to enhance texture and prevent sogginess.

Pro Tips for Perfect Cream Puff Cake

1. Use fresh ingredients for the best flavors; check expiration dates on dairy products and eggs.
2. Allow your baked puff to cool completely before filling for optimal texture.
3. Experiment with flavor infusions in your cream filling; almond or chocolate can elevate your cake.
4. Keep the pastries away from moisture until serving to maintain their crispness.
5. For easy filling, use a piping bag fitted with a large round tip to control the flow better.
6. Chill the filled pastries briefly before serving for a refreshing touch.
7. Practice patience—allowing the dough to rest helps develop richer flavors.
8. For an eye-catching finish, dust the top with cocoa powder or colored sugar before serving.

Variations and Adaptations

This Cream Puff Cake can adapt beautifully to various tastes. For regional variations, consider replacing the vanilla filling with rich chocolate ganache or fragrant lemon curd, which offer unique flavors while keeping the traditional structure.

Seasonal adaptations can include fresh fruit fillings or whipped cream flavored with seasonal spices like cinnamon or nutmeg during fall. For dietary modifications, explore dairy-free options using plant-based milk and butter alternatives to indulge all guests.

Texture modifications can be made by adding crispy toppings or layers of crushed cookies between the puffs for additional crunch. Furthermore, presentation alternatives such as serving in a beautiful glass dish can make the cake visually striking.

Serving and Presentation Guide

Plating techniques for your Cream Puff Cake can include showcasing individual servings on elegant dessert plates or assembling the entire cake on a large pedestal dish for a more dramatic effect. Garnish with fresh berries, edible flowers, or sprigs of mint for a pop of color.

Traditional accompaniments like a dollop of whipped cream or fruit coulis offer delightful contrasts to the cake’s richness while modern serving suggestions might include pairing with a scoop of ice cream for those craving something extra indulgent.

When it comes to temperature considerations, serving it chilled can enhance the refreshing taste, especially during warmer months. Portion control tips suggest cutting the cake into smaller slices; this not only enhances presentation but allows guests to enjoy more variety.

Wine and Beverage Pairing

Pairing this Cream Puff Cake with beverages can elevate the dining experience. For wine lovers, a light sparkling wine such as Prosecco complements the sweetness beautifully.

Non-alcoholic alternatives can include a refreshing raspberry lemonade or floral herbal teas, both of which harmonize wonderfully with the cake’s flavor profile. If coffee or tea is more to your liking, opt for lightly roasted coffees or a classic Earl Grey tea, which pairs nicely with the creamy richness.

Always consider temperature, preferably serving drinks chilled alongside the cake, as this will enhance the dessert’s flavors. Balance is key—ensure the beverage does not overpower the delicate flavors of the Cream Puff Cake.

Storage and Shelf Life

For optimal freshness, store your Cream Puff Cake in an airtight container in the refrigerator. The cake is best enjoyed within three days of preparation, as moisture can affect the pastry’s crispness.

When storing, separate filled and unfilled pastries if possible; this will maintain the integrity of the dough. Ensure to keep your cakes at a consistent refrigerating temperature to minimize spoilage risks.

Signs of spoilage include changes in color, an off scent, or a slimy texture. If you’ve made extra, these pastries can also be frozen before filling; ensure they are well-wrapped to avoid freezer burn.

For reheating, place filled pastries in a preheated oven at low temperature for a few minutes to revive some of their original textures before serving.

Make Ahead Strategies

When planning ahead, consider preparing your choux pastry up to a day in advance. Store the unfilled baked pastry in an airtight container at room temperature to preserve its lightness and fluffiness.

You can also prepare the cream filling a day before; this allows flavors to meld beautifully. Keep it refrigerated until you’re ready to fill your desserts.

Quality is key, however; only fill the pastries right before serving to avoid sogginess. If reassembling is required, consider warming the pastries slightly in the oven to crisp them up before filling.

Incorporate fresh elements such as fruits or whipped cream just before serving for an added layer of flavor and freshness.

Scaling Instructions

Scaling the recipe can be done seamlessly. To halve the recipe, simply divide each ingredient by two, adjusting bake times as necessary for smaller portions.

For larger gatherings, doubling or tripling the recipe is feasible as well. Be mindful that oven space and bake times will require adjustments based on the size of your baking sheets and the number of pastries being baked.

Mise en place is crucial when scaling—pre-measure all ingredients and time adjustments before you begin to streamline your cooking process. Additionally, be aware of storage considerations; larger quantities may require multiple containers.

Nutritional Deep Dive

This Cream Puff Cake offers a balance of macronutrients—primarily carbohydrates from the pastry, fats from butter, and protein from the eggs. Estimating portion sizes will help understand the cake’s caloric contributions while allowing for more mindful eating.

Micronutrient analysis reveals a good source of vitamins A and D from dairy; variations using richer creams can enhance these benefits further.

Incorporating this cake into a balanced diet means enjoying it in moderation, as its rich ingredients lend themselves to indulgent eating experiences. Portion analysis is vital; a modest slice can satisfy sweet cravings without overwhelming dietary needs.

For weight management, consider pairing with fresh fruits or lighter accompaniments to balance richness, promoting portion control and enjoyment of flavors.

Dietary Adaptations

Prepare a gluten-free version of this Cream Puff Cake using specific gluten-free flour blends. Ensure that the baking powder utilized is also gluten-free to maintain the cake’s integrity.

For a dairy-free adaptation, substitute traditional dairy components with coconut cream and almond milk, enriching the cake with tropical undertones that maintain its delightful texture.

Vegan variations can be created by utilizing aquafaba in place of eggs for the choux pastry and plant-based creams, achieving a similar lightness and flavor without animal products.

Low-carb adaptations might involve practicing alternative flours like almond or coconut flour, and sweeteners like erythritol while keeping an eye on texture changes in the base recipe.

For other dietary modifications, lean on naturally existing flavors and textures—experimenting with flavor options ensures that diverse dietary needs can be satisfied without losing the essence of this delightful dessert.

Troubleshooting Guide

If texture issues arise with your Cream Puff Cake, consider examining baking processes. Undercooking can yield dense pastries that fail to rise. Ensure your oven temperature is accurate, utilizing a thermometer to avoid surprises.

Flavor balance can be adjusted by taste testing your fillings; an overly sweet filling can contrast unpleasantly with the delicate pastry. Add a pinch of salt or lemon juice to flavors to enhance them dynamically.

Temperature problems may arise if the filling is too warm when piped into the pastries—this can cause them to deflate. Always ensure a cooling period before injecting any cream.

If using new equipment, calibration can lead to timing concerns—do thorough tests beforehand to eliminate timing discrepancies that could affect baked goods.

Common ingredient substitutions can sometimes lead to unexpected results—know your alternatives well to avoid pitfalls when seeking to adjust recipes.

Recipe Success Stories

Community feedback regarding the Cream Puff Cake speaks to its delightful taste and ease of preparation. Many bakers have praised how the recipe balances flavor and texture seamlessly, making it a favored choice for gatherings.

Adjustments are often a topic, with readers experimenting with seasonal fruit fillings or integrating new flavors into the cream. This openness inspires creativity within a traditional framework.

Success stories frequently highlight presentation—sharing photos of beautifully plated cakes on social media further encourages others to try their hand at this recipe.

Readers often suggest engaging in collaborative baking events, which not only helps build confidence but allows for delightful sharing of baking tips and personal variations, fostering a cheerful community atmosphere.

Photography tips also circulate; enhancing visual appeal through effective lighting and vibrant plating has shown to ignite enthusiasm, encouraging more to undertake the baking journey.

Frequently Asked Questions

Can I freeze leftover Cream Puff Cake?

Yes, you can freeze the unfilled cream puff pastries for later use. Once they are completely cooled, store them in an airtight container or freezer bag. It’s best to fill them right before serving to maintain texture.

What is the key to a successful choux pastry?

The key to successful choux pastry lies in cooking the flour correctly and properly incorporating the eggs. The dough should pull away from the sides of the pot and have a smooth texture before piping.

How do I make the filling ahead of time?

Simply prepare your cream filling a day in advance, storing it in the refrigerator. This allows the flavors to deepen while keeping the filling fresh and ready for assembly before serving.

Can I use a different type of filling?

Absolutely! This cake is versatile. Feel free to experiment with fillings such as pastry cream, whipped cream, or even fruit curds for a delightful twist on the original.

What can I substitute for eggs in the choux pastry?

To make a vegan version, you can use aquafaba. For best results, combine it with a thickener like cornstarch or a commercial egg replacer to achieve a similar texture and puff.

How do I know when the choux is done baking?

Choux is done when it is golden brown and has risen well. A well-cooked pastry should sound hollow when tapped on the bottom, indicating that it has cooked through.

Is it possible to make this cake gluten-free?

Yes! Simply use a gluten-free flour blend in place of all-purpose flour. Ensure all other ingredients are also gluten-free to maintain the integrity of the recipe.

How can I enhance the flavor of the cream filling?

Add flavorings such as vanilla extract, citrus zest, or even a hint of liquor. This will add depth to your filling, taking the cake to the next level.

What is the best way to serve Cream Puff Cake?

This cake is best served chilled, which enhances the flavors and provides a refreshing contrast to the rich pastry. Accompaniments such as fresh berries or a sprinkle of powdered sugar elevate the presentation.

Can I use non-dairy alternatives in the recipe?

Yes! Substitute dairy products with plant-based options such as coconut cream for whipping or almond milk for baking. Ensure your other ingredients follow suit for a fully non-dairy adaptation.

Additional Resources

Explore related recipes that highlight the versatility of choux pastry and cream desserts. Additionally, consider visiting technique guides that walk you through essential pastry skills, from cream filling to mastering the art of puff pastry.

For ingredient information, engaging in discussions about flour types, dairy alternatives, and sweeteners can help broaden your baking knowledge, paving the way for more refined creations.

Lastly, check out equipment recommendations for essential baking tools, such as piping bags or specialty pans that can make your baking journey easier and more enjoyable.

Join the Conversation

Engage with fellow baking enthusiasts on social media by sharing your own experiences with Cream Puff Cake. Utilize photography tips to capture the elegance of your creations, inspiring others in the community to explore their baking potential.

Leave reviews and feedback on this recipe, as your insights can motivate new bakers to try this delightful dish. Participating in discussions and sharing your personal touches encourages a lively exchange of ideas within the baking world.

Coordinate with friends or family members for collaborative baking sessions to build connections through food, fostering an enjoyable environment and deepening bonds through shared culinary experiences.

The Recipe

Cream Puff Cake

Serves: 12 slices

Prep Time: 30 mins

Cook Time: 25 mins

Total Time: 55 mins

Kitchen Equipment Needed

  • Medium saucepan
  • Mixing bowls
  • Electric mixer
  • Piping bag with round tip
  • Baking sheet lined with parchment paper

Ingredients

  • 1 cup all-purpose flour
  • 1/2 cup butter
  • 1 cup water
  • 4 large eggs
  • 1 cup heavy cream
  • 1/2 cup confectioners’ sugar
  • 1 tsp vanilla extract
  • Pinch of salt
  • Powdered sugar for dusting

Directions

  1. Preheat your oven to 400°F (200°C).
  2. In a medium saucepan, combine water, butter, and salt. Bring to a boil.
  3. Remove from heat, add flour, and stir vigorously until a dough forms.
  4. Let the dough cool slightly, then add eggs one at a time, mixing well after each addition.
  5. Pipe the dough onto a baking sheet in small mounds.
  6. Bake for 20-25 minutes until golden brown and puffed.
  7. While cooling, whip the heavy cream and fold in the vanilla extract and confectioners’ sugar.
  8. Once the puff pastries are cool, use a piping bag to fill each with cream.
  9. Dust with powdered sugar before serving.

Recipe Notes

  • For richer flavor, consider adding almond extract to the cream filling.
  • Refrigerate leftovers and consume within three days for best quality.
  • You can also serve with fresh fruits for added texture and flavor.
  • Pre-built puffs can be frozen before filling if planning for future use.

Easy Baileys No-Bake Cheesecake – Creamy and Delicious

Delicious Baileys No-Bake Cheesecake: The Ultimate Dessert Delight

⚖️
Difficulty
Easy

⏲️
Prep Time
20 mins

🕒
Cook Time
0 mins

⏱️
Total Time
20 mins

🍽️
Servings
8

The Baileys No-Bake Cheesecake is an indulgent dessert that brings the rich flavors of Irish cream liqueur into a creamy, dreamy cheesecake form. Imagine slicing into a luscious, no-bake cheesecake that is both light yet decadent, topped with a drizzle of chocolate or a sprinkle of cocoa powder. This dessert not only satisfies your sweet tooth but also provides an element of sophistication, making it perfect for special gatherings or a cozy night in.

With its delightful combination of smooth cream cheese, sweetened condensed milk, and a generous splash of Baileys, this no-bake cheesecake is as easy to make as it is impressive to serve. You won’t need an oven, which allows you to keep your kitchen cool and focus on the fun part—enjoying the moment with family and friends. Whether enjoyed as a celebratory centerpiece or a simple treat after dinner, this cheesecake is sure to impress.

Quick Recipe Highlights

  • Flavor Profile: The Baileys No-Bake Cheesecake offers a harmonious blend of creamy, sweet, and slightly boozy flavors that dance on your palate, creating an unforgettable taste experience.
  • Texture: With its rich and velvety texture, this cheesecake melts in your mouth, providing a luxurious feel that contrasts beautifully with the crispiness of the biscuit base.
  • Aroma: The inviting aroma of sweet cream and hints of cocoa creates a warm, comforting feeling, making it hard to resist taking a slice right away.
  • Visual Appeal: Beautifully set in a round cheesecake pan, the creamy filling boasts a smooth surface that lends itself perfectly to artistic garnishing.
  • Skill Level Needed: Perfect for all levels of home cooks, this cheesecake requires no baking skills, just a little patience for chilling.
  • Special Equipment: A mixing bowl and an 8-inch springform pan are essential, making this dessert accessible to anyone.

Recipe Overview

  • Difficulty Level: The Baileys No-Bake Cheesecake is designated as easy, requiring only simple steps and minimal equipment. It’s perfect for novice bakers who are eager to impress.
  • Category: This recipe falls under the dessert category, and it makes a fantastic end to any meal, especially served at gatherings.
  • Cuisine: Inspired by traditional Irish flavors, particularly the beloved Baileys Irish Cream, this cheesecake is a reflection of global culinary influences.
  • Cost: The estimated cost of making this cheesecake is budget-friendly, with key ingredients like cream cheese and biscuits being easily accessible.
  • Season: This dessert is a year-round favorite but really shines during festive occasions like holidays and parties.
  • Occasion: Ideal for celebrations, dinner parties, or simply as a delightful indulgence after dinner, it’s a versatile treat.

Why You’ll Love This Recipe

The Baileys No-Bake Cheesecake is truly a celebration of flavor and texture, bringing together a luscious creaminess with a hint of sweetness in every bite. The rich taste of Baileys enhances the cheesecake, making it a decadent choice for dessert lovers. The sensory experience of savoring the creaminess paired with chocolate notes adds a depth that makes it irresistible.

Convenience is another great aspect of this no-bake cheesecake. Without the need for an oven or extensive cooking time, you can whip up this dessert quickly, making it an ideal option for spontaneous gatherings or last-minute celebrations. Plus, it can be prepared in advance, allowing you to spend more time with your guests rather than hustling in the kitchen.

Nutritionally, the ingredients of this cheesecake can be tailored, allowing for lower fat or sugar options while still maintaining its delicious flavor profile. This flexibility makes it a sound choice for those watching their dietary intake, ensuring a guilt-free treat.

Socially, serving this cheesecake can elevate your hosting duties; it’s a dessert that many can enjoy, and it often starts conversations. Sharing the joy of a creamy, flavorful cheesecake over coffee or after dinner creates memorable moments with friends and loved ones.

Finally, with its accessible ingredients and low-cost preparation, this cheesecake provides great value and satisfaction for your kitchen investment. You’ll find every guest raving about the dessert, making it a cherished recipe for years to come.

Historical Background and Cultural Significance

The origins of the cheesecake can be traced back to ancient Greece, where it was served to athletes during the first Olympic Games. The concept of cheesecake has evolved dramatically over the centuries, with variations emerging in different cultures around the world. The Baileys No-Bake Cheesecake incorporates a modern twist to this traditional dessert, proudly showcasing the flavors of Ireland.

Culturally, Baileys Irish Cream has become synonymous with indulgence and comfort, making it a popular choice for celebrations of all kinds. The smooth and creamy texture of Baileys enriches countless desserts, seamlessly blending into the culinary landscape of sweet treats.

Over the years, no-bake cheesecakes have gained popularity due to their ease of preparation, allowing for quick assembly without sacrificing taste. This shift toward no-bake recipes reflects a modern approach to desserts, catering to busy lifestyles while enjoying rich flavors.

Regional variations of cheesecakes can be found worldwide, each influenced by local ingredients and customs. The Baileys No-Bake Cheesecake stands out, encapsulating the essence of its Irish roots and appealing to palates eager for a luscious treat.

Ingredient Deep Dive

  • Baileys Irish Cream: Known for its rich history from Ireland, Baileys not only serves as a dessert ingredient but also holds cultural value. Nutritionally, it contains cream and sugar, providing a sweet flavor that complements desserts beautifully. When selecting Baileys, look for the original liqueur for the best taste in recipes. Store it in a cool place and consume within a year for freshness. Alternatives can include other cream liqueurs for different flavor profiles.
  • Cream Cheese: A staple in cheesecakes, cream cheese has its roots in the United States and is famed for its creamy texture. It is a good source of calcium and fat, providing a one-of-a-kind consistency to baked goods. When choosing cream cheese, ensure it is fresh and full-fat for the best results. Store it sealed in the fridge and consider freezing leftovers. Neufchâtel cheese can serve as a lower-fat alternative without sacrificing quality.
  • Digestive Biscuits: Commonly used in cheesecakes, these biscuits originated in the UK and add a crunchy base. They are simple to make with whole grain ingredients, offering fiber and other health benefits. For the best texture, select finely crushed biscuits; store in an airtight container to maintain crispness. Graham crackers can be used as an alternative for a sweeter base.

Common Mistakes to Avoid

  • Skipping the chilling time: Proper chilling allows the cheesecake to firm up, ensuring perfect slices.
  • Not using room temperature cream cheese: Cold cream cheese won’t blend properly, leading to a lumpy texture.
  • Overmixing the filling: Overmixing can incorporate too much air, causing the cheesecake to crack as it sets.
  • Inadequate crust preparation: A well-pressed and chilled crust is essential for stability in the cheesecake.
  • Incorrect measuring of ingredients: Accurate measurements are crucial for balanced flavors and textures.
  • Using low-quality ingredients: Quality matters, especially with dairy products that define the flavor of the cheesecake.
  • Not tasting the filling: Ensure the sweetness and flavor levels are to your liking before setting the cheesecake.
  • Skipping the water bath for other cheesecakes: Although this recipe is no-bake, ensure you understand specific techniques if you explore baked versions.
  • Not allowing it to set properly: Patience is key; a fully set cheesecake is crucial for successful serving.
  • Improper storage: Ensure the cheesecake is covered well to avoid drying out and absorbing fridge odors.

Essential Techniques

Mixing Your Filling: It’s important to blend all ingredients until smooth but avoid overmixing, which can introduce air bubbles. Use a hand mixer on medium speed for a creamy consistency, stopping to scrape the sides to ensure an even blend. Common pitfalls include incorporating too much air, visible lumps, and uneven mixing, so keep an eye on the texture for a beautiful finish.

Pressing and Setting the Crust: Properly pressing the crust into a pan is essential for a solid base. Use the bottom of a flat measuring cup or glass to evenly pack the biscuit crumbs. Look for a golden crust that feels firm to the touch. Avoid skipping the chilling step, as this helps the crust firm up further and makes slicing easier.

Pro Tips for Perfect Baileys No-Bake Cheesecake

1. Chill all your ingredients before starting; this helps in achieving a smoother filling.
2. Invest time in crushing biscuits finely for a more cohesive crust.
3. Consider adding chocolate shavings on top as a delicious garnish.
4. Allow the cheesecake to rest in the fridge longer for enhanced flavors.
5. Experiment with different toppings, like berries or caramel, for variety.
6. Always taste the filling before setting to ensure it meets your sweetness preference.
7. Use a hot knife to slice for cleaner, beautiful cuts before serving.
8. Store any leftover cheesecake covered tightly; it can last up to a week.

Variations and Adaptations

For a seasonal touch, consider adding pumpkin puree during the fall or using peppermint extract during the winter holidays. To accommodate dietary restrictions, you can substitute regular cream cheese with a dairy-free alternative and use digestive biscuits for gluten-free variations. Additionally, try swapping Baileys for other flavored liqueurs to create exciting new flavors.

For those looking to reduce sugar, replace sweetened condensed milk with a natural sweetener or sugar-free equivalent. If a denser texture is preferred, add a bit of gelatin to the filling. For presentation, layer slices with fresh fruit or drizzle with chocolate sauce for a touch of elegance.

Serving and Presentation Guide

To plate your Baileys No-Bake Cheesecake, simplicity is key: slice into even portions and rotate the cake for a clean presentation. Garnishing with shavings of dark chocolate or a sprinkle of cocoa powder can elevate the look. Consider serving with a dollop of whipped cream and fresh berries for additional visual appeal and flavor contrast. Temperature-wise, serve straight from the fridge but allow it to sit out for a few minutes for an ideal creamy consistency.

For portion control, consider cutting the cheesecake into bite-sized pieces, which allows guests to sample without overindulging. Modern serving suggestions can include small glass jars, making each guest feel special with their personal dessert.

Wine and Beverage Pairing

Baileys No-Bake Cheesecake pairs beautifully with dessert wines such as late harvest Riesling or Moscato, enriching the sweetness of the cheesecake. For non-alcoholic options, consider serving it with a rich chocolate or vanilla flavored coffee, which complements the creamy texture of the dessert wonderfully. Additionally, a hot cup of herbal tea adds a comforting touch when enjoying this cheesecake after a meal.

Temperature considerations are essential; both wine and coffee should be served at the right temperature to enhance the overall flavor experience with the cheesecake.

Storage and Shelf Life

To maintain the quality of your Baileys No-Bake Cheesecake, store it in the refrigerator covered with plastic wrap or in an airtight container. This keeps moisture in and prevents drying out. It can last up to a week in the fridge, provided it’s properly stored. Signs of spoilage include off-smells or a change in texture, so always inspect before serving.

If you wish to store it longer, freezing is an option. Wrap it tightly in plastic wrap followed by aluminum foil to protect it from freezer burn. When ready to enjoy, allow it to thaw in the fridge overnight for the best texture.

Make Ahead Strategies

To simplify meal prep, consider making your Baileys No-Bake Cheesecake the day before you plan to serve it. Assemble the crust and filling, then chill in the refrigerator to set overnight. This not only enhances flavor but also ensures that you can spend more time with guests and less time in the kitchen on the day of your gathering.

If you’re preparing additional elements, like toppings, consider prepping those in advance as well. Simply store them in separate containers until it’s time to serve. This strategy allows for easy assembly, ensuring that your dessert remains fresh and visually appealing, even when made ahead.

Scaling Instructions

For smaller gatherings, halving the Baileys No-Bake Cheesecake recipe works beautifully, fitting in a smaller pan. However, if you’re serving a crowd, consider doubling the recipe and using a larger springform pan. Remember to adjust chilling times as larger portions may require more time to set.

When scaling ingredients, maintain the same ratios, especially for the crust to filling. Be mindful of equipment adjustments, such as using a deeper pan, which may affect the overall setting time. With careful adjustments, your cheesecake will be a hit, irrespective of the number of servings!

Nutritional Deep Dive

The Baileys No-Bake Cheesecake provides a delightful combination of macronutrients, primarily from the cream cheese and sweetened condensed milk. A typical slice contains moderate amounts of fat and sugar, making it a treat to enjoy occasionally rather than daily. The indulgence can be balanced with greater portion control, allowing you to relish every bite without surpassing daily calorie recommendations.

Micronutrient analysis shows that cream cheese adds calcium, which is beneficial for bone health. The addition of flavorings can also introduce varying vitamins depending on what alterations you incorporate. Always consider the nutritional aspects when enjoying dessert but remember that treats like this cheesecake should encourage celebration and enjoyment rather than guilt.

Dietary Adaptations

For those requiring gluten-free options, switch out the digestive biscuits for gluten-free alternatives, ensuring a similar texture. If you’re aiming for dairy-free, consider using dairy-free cream cheese and coconut cream to achieve a similar richness without lactose.

Vegan modifications can involve using plant-based whipped cream and substituting Baileys with a non-alcoholic cream liqueur. For low-carb diets, explore alternatives such as almond flour for the crust. Regardless of dietary needs, the essence of the Baileys No-Bake Cheesecake can be adapted to suit various lifestyles without losing its delightful taste.

Troubleshooting Guide

Texture issues can be avoided by ensuring all ingredients are at room temperature, especially the cream cheese. If your cheesecake is not firming up, it may need more chilling time or additional stabilizers like gelatin. Common problems regarding flavor balance can often be fixed by adding a pinch of salt to enhance sweetness.

Temperature problems can arise if the cheesecake hasn’t cooled properly; always check the setting time and give it extra hours in the fridge if needed. Ingredient substitutions should be made with caution; not all replacements yield the same results.

Timing concerns are essential, especially when preparing for events. Always calculate chilling times in advance to avoid unexpected delays, ensuring your cheesecake is ready for serving when your guests arrive.

Recipe Success Stories

Community feedback highlights the versatility of the Baileys No-Bake Cheesecake, with many readers sharing their adaptations, from adding fresh fruits to experimenting with different liqueurs. Enthusiasts have had success in hosting parties where the cheesecake became the star, delighting guests and sparking conversations about recipe tweaks.

Photographers among the community have captured stunning images of their cheesecakes, showcasing creative garnishes and beautiful plating. Many readers appreciate the simplicity of the recipe, which allows them to explore creativity without stressful preparations.

Share your own success stories and photography tips within the community, inspiring others to create their unique versions of this beloved dessert.

Frequently Asked Questions

Can I make this cheesecake ahead of time?

Yes, making the Baileys No-Bake Cheesecake a day before serving is recommended. It allows the flavors to meld beautifully and ensures it sets properly.

How long can I store leftovers?

Properly stored in an airtight container, the cheesecake can last up to a week in the refrigerator.

Can I freeze this cheesecake?

Yes, it can be frozen for up to 2 months. Ensure it’s tightly wrapped to prevent freezer burn.

What can I use if I can’t find Baileys?

You can use other flavored cream liqueurs or a non-alcoholic cream substitute mixed with coffee flavoring for similar taste.

Is it necessary to use a springform pan?

A springform pan makes removal easier, but you can also use a regular round cake pan lined with parchment paper.

Can I substitute the cream cheese?

For a dairy-free option, use plant-based cream cheese, which works well in this recipe without compromising flavor.

How do I know when the cheesecake is ready to serve?

The cheesecake should be firm to the touch and set completely. A gentle jiggle is acceptable in the center.

What toppings do you recommend?

Great options include whipped cream, chocolate shavings, fresh berries, or a drizzle of caramel sauce.

Can I adjust the sweetness?

Absolutely! Before pouring the filling into the crust, taste it and adjust the sweetness according to your preference.

Is it safe for children to consume Baileys?

Baileys contains alcohol, so it’s not advisable for children. However, you can make a non-alcoholic version using cream and flavors without the liqueur.

Additional Resources

For those intrigued by the world of no-bake desserts, check out related recipes like classic Strawberry Cheesecake and Nutella Mousse. These recipes also allow for creative presentation and flavor combinations. Additionally, explore technique guides on setting fillings and crust preparation for all types of cheesecakes.

Ingredient information for cream liqueurs and substitutes will help enhance your baking repertoire, while equipment recommendations ensure you’re prepared for any dessert endeavor. Lastly, seasonal variations of recipes will inspire you to incorporate fresh produce into your desserts.

Join the Conversation

Get involved by sharing your Baileys No-Bake Cheesecake experiences! Post your photos on social media and tag friends to encourage them to try their hand at this delightful dessert. Recipe reviews can inspire others to make this cheesecake a staple in their homes.

Engage with the community through comments and suggestions for variations you’ve tried, and share any unique plating or garnishing ideas. Let’s create a space for culinary creativity and shared enjoyment of this delicious cheesecake experience!

The Recipe

Baileys No-Bake Cheesecake

Serves: 8

Prep Time: 20 mins

Cook Time: 0 mins

Total Time: 20 mins

Kitchen Equipment Needed

  • Mixing bowl
  • Springform pan
  • Electric mixer
  • Measuring cups and spoons
  • Spatula

Ingredients

  • 200g digestive biscuits
  • 100g unsalted butter, melted
  • 500g cream cheese
  • 200ml sweetened condensed milk
  • 150ml Baileys Irish Cream
  • 1 tsp vanilla extract
  • Cocoa powder (for dusting)

Directions

  1. Crush the digestive biscuits into fine crumbs and mix with melted butter.
  2. Press the mixture firmly into the base of a springform pan and chill in the fridge for 10 minutes.
  3. In a mixing bowl, beat the cream cheese until smooth.
  4. Gradually add sweetened condensed milk, Baileys, and vanilla extract, mixing until well combined.
  5. Pour the filling onto the chilled crust and smooth out the top with a spatula.
  6. Cover and refrigerate for at least 4 hours or until set.
  7. Dust with cocoa powder before serving and enjoy!

Recipe Notes

  • Feel free to substitute Baileys with your favorite cream liqueur or omit it for a non-alcoholic version.
  • Top with chocolate shavings, berries, or whipped cream for added flair.