Easy Chocolate Coconut Truffles – Perfect for Gifting

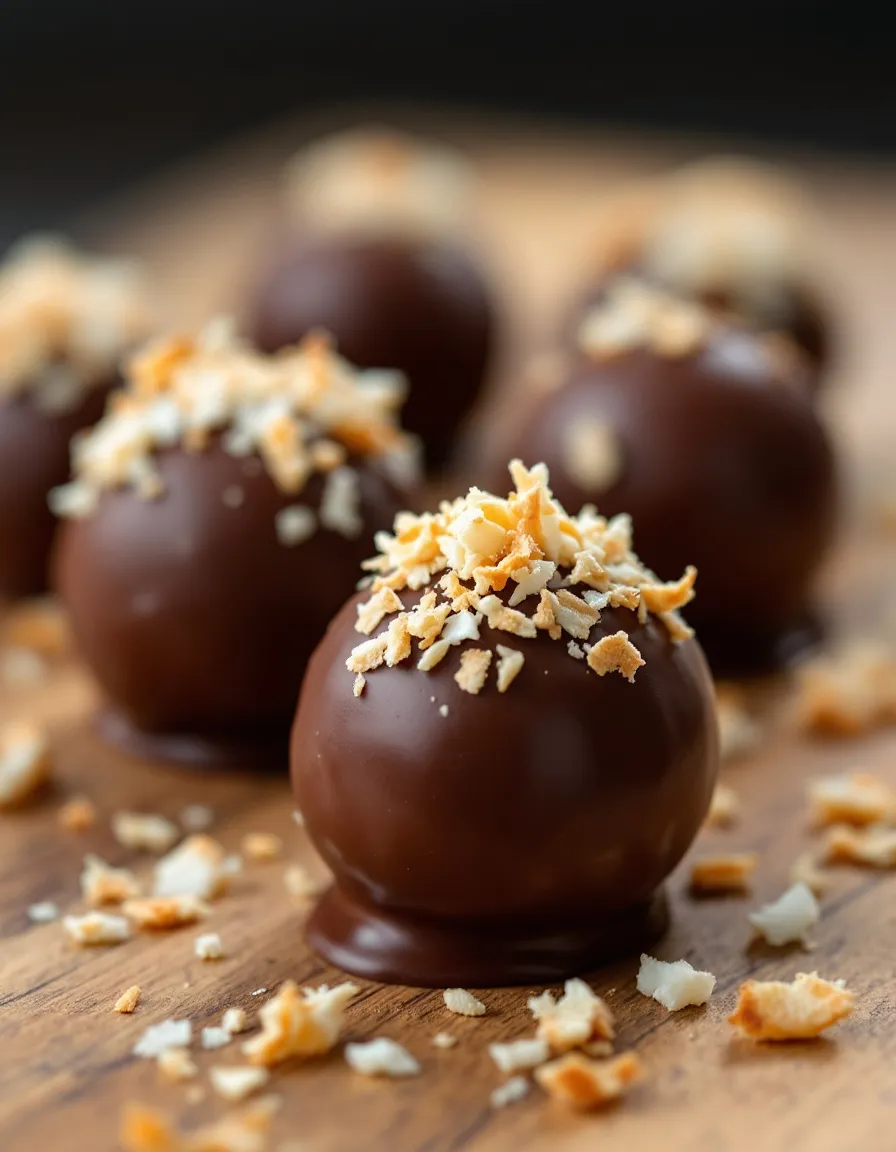
Delicious Chocolate Coconut Truffles: A Blissful Treat

⚖️
Difficulty
Easy

⏲️
Prep Time
20 mins

🕒
Cook Time
10 mins

⏱️
Total Time
30 mins

🍽️
Servings
12 truffles

Chocolate Coconut Truffles are indulgent little bites that transport you to a tropical paradise with each delicious mouthful. This easy-to-follow recipe combines rich dark chocolate with creamy coconut, creating a harmonious blend of flavors and textures that promises to satisfy any sweet tooth. Imagine the silky smoothness of chocolate melting in your mouth, paired with the delightful chew of shredded coconut—it’s a match made in dessert heaven!

Not only are these truffles a joy to eat, but they are also simple to prepare, making them an ideal choice for both novice and experienced bakers. Perfectly sized for sharing or indulging on your own, these truffles shine at any gathering, from cozy family get-togethers to lavish celebrations. The enchanting aroma of cocoa and coconut wafting through your kitchen will have everyone eagerly anticipating the first bite.

Quick Recipe Highlights

  • Flavor Profile: Rich chocolate harmonizes with sweet, nutty coconut for a dreamy treat.
  • Texture: Creamy and smooth on the inside with a delightful outer shell.
  • Aroma: A tantalizing combination of cocoa and coconut that fills the air.
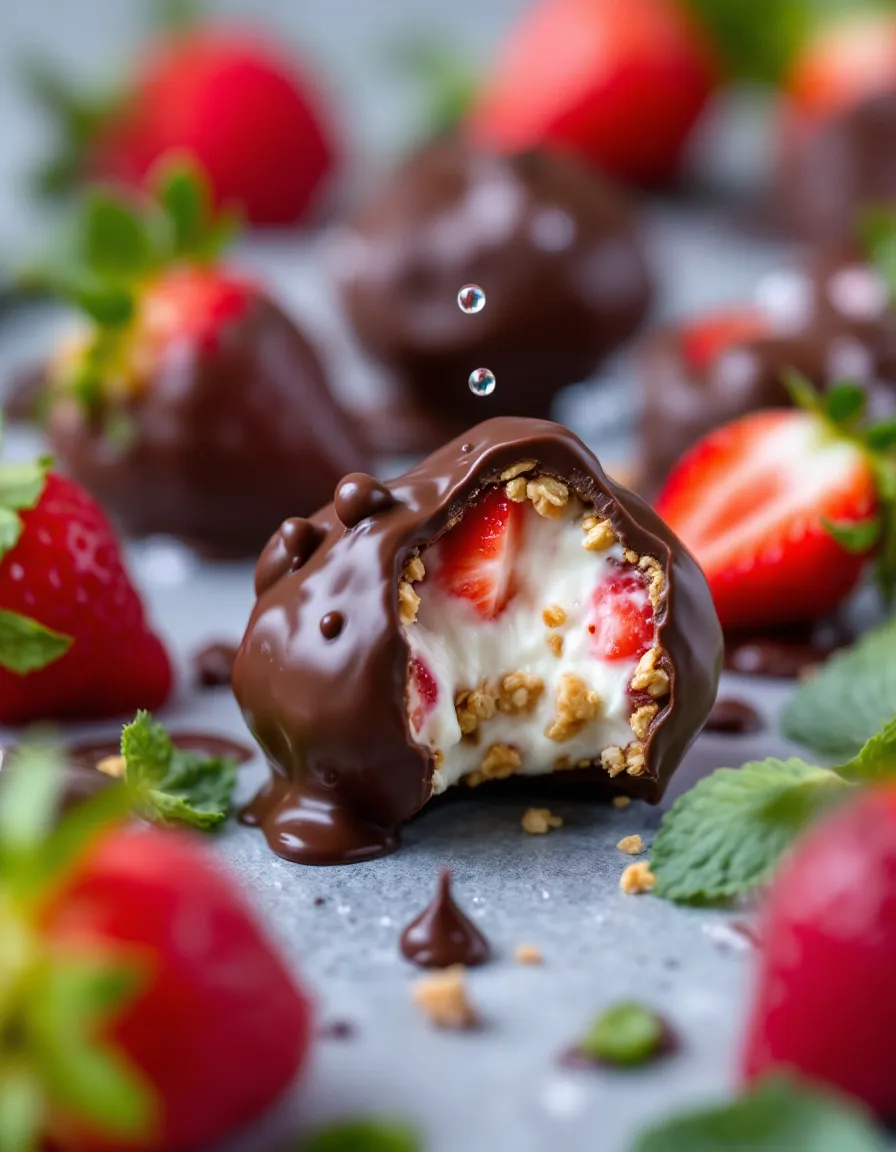
  • Visual Appeal: Glossy chocolate coating with a sprinkle of coconut flakes adds charm.
  • Skill Level Needed: Ideal for beginners with straightforward steps.
  • Special Equipment: No special tools needed, just basic kitchen items.

Recipe Overview

  • Difficulty Level: This recipe is easy enough for anyone to tackle, requiring minimal skill and just a few straightforward steps.
  • Category: These truffles fall under the dessert category, perfect for satisfying sweet cravings.
  • Cuisine: While they have a delightful tropical twist, these truffles blend influences from various culinary traditions.
  • Cost: Ingredients are affordable, making this a budget-friendly treat that impresses.
  • Season: Ideal year-round, but especially festive during holidays and celebrations.
  • Occasion: Great for gifting, parties, or as a personal treat to enjoy at home.

Why You’ll Love This Recipe

Chocolate Coconut Truffles tantalize your taste buds with their divine combination of flavors and textures. Each bite delivers a comforting blend of rich chocolate and sweet, chewy coconut, making them truly irresistible. These truffles make the perfect dessert for chocolate lovers, transforming ordinary moments into delightful ones. The convenience of this recipe allows you to whip up a batch in no time, ensuring you always have a delicious treat on hand for unexpected guests or sweet cravings.

Not only are these truffles indulgent, but they also carry some nutritional advantages. Made with quality ingredients, you can enjoy them guilt-free. Coconut provides healthy fats and fiber, making each truffle a more balanced treat. When it comes to hosting, these delightful truffles serve as an impressive centerpiece, inviting conversations and sharing among guests. Their cost-effectiveness ensures you can treat your friends and family without breaking the bank, making them accessible for everyone.

In addition, preparing a batch of Chocolate Coconut Truffles opens the door to creativity. You can customize each truffle’s flavor by adding different fillings or experimenting with coatings, such as crushed nuts or colorful sprinkles. This flexibility in presentation and taste keeps the dessert exciting and unique every time you make it. Whether you enjoy them solo or share them, these truffles provide a delightful experience that delights all senses!

Historical Background and Cultural Significance

The roots of chocolate can be traced back to ancient Mesoamerica, where it was revered not just for its flavor, but also for its health benefits and energizing properties. Indigenous cultures like the Aztecs were known to use cacao in their rituals and ceremonies. Meanwhile, coconuts, native to tropical regions, have long been celebrated for their versatility in cooking and health. When combined into tasty desserts like Chocolate Coconut Truffles, they showcase the rich traditions and flavors shared across cultures.

This recipe reflects the evolution of dessert-making, with modern adaptations often reflecting health trends, such as reduced sugar or the inclusion of superfoods. Today, Chocolate Coconut Truffles are enjoyed worldwide, symbolizing indulgence and celebration. Making them at home also allows people to connect with culinary traditions, whether it’s through family recipes or creating their own variations.

While popular in many regions, these truffles can have unique twists based on local ingredients and preferences. For instance, in some cultures, nuts are frequently incorporated within or as an exterior coating, adding additional flavors while enhancing the crunchy texture. Such variations show how these delightful treats adapt and grow with each generational leap, keeping traditions alive.

Ingredient Deep Dive

Chocolate: Cocoa is revered historically for its luxurious qualities and health benefits—rich in antioxidants and, when chosen wisely, dark chocolate can provide numerous health advantages. When selecting chocolate, opt for high-quality brands with a cocoa content of at least 70% for intense flavor. Store dark chocolate in a cool, dry place to maintain its quality and flavor.

Coconut: This versatile ingredient has been an essential part of tropical diets for centuries. Beyond its sweet flavor, coconut is rich in healthy fats and fiber. When purchasing, choose unsweetened shredded coconut to reduce sugar content. Keep it in an airtight container in a cool, dry spot, or freeze it to extend shelf life.

Common Mistakes to Avoid

  • Not using quality chocolate: Lower-quality chocolates can affect flavor significantly. Always choose high-quality chocolate for rich taste.
  • Inconsistent truffle size: Use a scoop to ensure each truffle is the same size, allowing for uniform cooking and presentation.
  • Skipping refrigeration: Failing to chill the truffles can make them difficult to work with. Refrigerate until firm before coating.
  • Using fine coconut flakes instead of shredded: This can alter texture. Use shredded, as it gives the truffles a delightful chew.
  • Overheating chocolate: This can cause it to seize. Use gentle heat to melt chocolate slowly, stirring continuously.
  • Improperly measuring ingredients: Accurate measurements are crucial for balance. Use a kitchen scale when possible.
  • Not letting the chocolate set properly: Allow adequate time for the coating to firm up to ensure the best texture.
  • Forgetting to allow the truffles to come to room temperature: Cold truffles can taste muted; let them sit at room temperature before serving.
  • Being too quick to work with the melted chocolate: Patience is key; let it cool slightly to avoid burning your hands.
  • Neglecting flavor additions: Explore extras like spices or flavored extracts to elevate the truffles.

Essential Techniques

Melted Chocolate Mastery: Melting chocolate properly is crucial for achieving that silky texture. Always use a double boiler or microwave to slowly melt chocolate, stirring frequently. This helps maintain the chocolate’s glossy finish and prevents it from seizing. Look for visual cues—a smooth, glossy consistency indicates perfect melting.

Truffle Rolling Technique: When rolling the melted chocolate mixture into balls, ensure your hands are slightly wet to prevent sticking. This technique helps in forming smooth, round truffles. Pay attention to the size consistency for a professional look – smaller sizes are ideal for elegant plating!

Pro Tips for Perfect Chocolate Coconut Truffles

1. Invest in quality ingredients – the flavor of your truffles depends heavily on chocolate and coconut used.

2. Chill the truffle mixture properly before forming to prevent melting during rolling.

3. Experiment with coatings, like nuts or sprinkles, for added texture and flavor.

4. Allow truffles to set at room temperature before serving for the best flavor experience.

5. Don’t skimp on refrigeration time; fully chilled truffles are easier to coat and handle.

6. Try adding a pinch of sea salt to enhance the sweetness and balance the flavors.

7. Use flavored extracts like vanilla or almond for a unique twist.

8. Consider incorporating your favorite liqueurs into the filling for a fun adult version of truffles.

Variations and Adaptations

Chocolate Coconut Truffles provide flexibility to satisfy diverse tastes. For a regional twist, try incorporating local nuts or spices that reflect your culinary landscape. Seasonal adaptations can include pumpkin spice during fall or crushed peppermint during winter holidays. Dietary modifications make these truffles accessible to those with specific needs; consider coconut milk for a vegan option, or use nut-free chocolate if allergies are a concern. For flavor variations, add zests of citrus for brightness or even coffee granules for depth. Texture modifications like adding crunchy graham cracker bits can enhance the mouthfeel, while presentation alternatives like decorating with fresh fruit or serving on elegant platters add an eye-catching element!

Serving and Presentation Guide

The unassuming charm of Chocolate Coconut Truffles often catches attention, yet their presentation can elevate them further. For plating, consider using tiered dessert stands to create an attractive display or contrasting colors on a white plate to make the truffles pop. Garnish with mint leaves for freshness and to invite intrigue. When serving, consider pairing them with a light dessert wine or coffee. With portion control, offer two or three truffles per serving for a lovely balance of indulgence and moderation.

Wine and Beverage Pairing

Pairing beverages with Chocolate Coconut Truffles can enhance the tasting experience significantly. A rich dessert wine like Port or a sweet Moscato complements the dark chocolate beautifully. For non-alcoholic options, consider a sweet chai tea or a rich hot chocolate; both enhance the dessert experience. Temperature is crucial; serve wine chilled and ensure hot beverages are steaming but not scalding to provide a delightful contrast. Presentation, such as serving in elegant glassware, can also add to the overall indulgent feel.

Storage and Shelf Life

To ensure the longevity of your Chocolate Coconut Truffles, store them in an airtight container in the fridge. This helps maintain freshness and flavor. They can typically last up to two weeks when properly stored, but it’s always best to consume them within a week for the best texture. Signs of spoilage include a change in texture or off flavors. Reheating suggestions aren’t necessary; rather, allow them to return to room temperature before serving for optimal taste. If you plan to make ahead, truffles generally freeze well; allow them to thaw overnight in the fridge when ready to enjoy.

Make Ahead Strategies

Making Chocolate Coconut Truffles ahead of time is a wonderful way to save effort on busy occasions. You can prepare the base mixture a day or two in advance and refrigerate it, making rolling and coating easier. However, store them in suitable containers to prevent a dry surface. Quality is essential, so assess the texture after they have been made ahead. When you’re ready to serve, simply allow them to come to room temperature and garnish for a fresh touch. Incorporating fresh elements, like fruits, can also add vibrancy and freshness just before serving, enhancing presentation and taste.

Scaling Instructions

Scaling your Chocolate Coconut Truffles recipe is easy! Halve the ingredients for a smaller batch, or double them for a larger crowd without extensive adjustments to the process. However, if you double the recipe, ensure you have adequate cooling space in your refrigerator, as a larger batch may require longer to set due to increased mass. Adjustment of your mixing bowl size may also be necessary to accommodate bigger batches while preventing any overflow during combining. Timing does not change drastically, but monitor chocolate melting carefully to avoid issues with texture or taste. Finally, consider how you store your truffles post-preparation to maintain quality.

Nutritional Deep Dive

When analyzing the nutritional profile of Chocolate Coconut Truffles, the balance of macronutrients stands out. While they do contain fats from chocolate and coconut, they bring some fiber and antioxidants that can be beneficial in moderation. Specifically, dark chocolate holds flavonoids, which are known to promote heart health when consumed responsibly. Micronutrient analysis also reveals the benefits of coconut, which is high in magnesium and potassium, contributing positively to daily intake. In terms of portion analysis, enjoying one to two truffles can effectively satisfy cravings while keeping within balanced dietary goals, important for managing portion sizes as well.

Dietary Adaptations

Those following specific diets can easily adapt Chocolate Coconut Truffles without losing flavor. For gluten-free needs, offer these truffles as they are since they contain no flour. Additionally, substituting dairy chocolate with dark vegan chocolate ensures a beautiful vegan truffle, while using coconut cream instead of heavy cream can maintain deliciousness. A low-carb or keto audience can enjoy these truffles by utilizing sugar-free chocolate; they can stay satisfying without excess carbs. If needed, modifications for paleo and low-FODMAP diets can also be easily achieved by carefully selecting ingredient brands and checking for sugar content, allowing diverse followers to enjoy these truffles!

Troubleshooting Guide

If your Chocolate Coconut Truffles seem too soft or difficult to roll, chilling the mixture further may help with cohesiveness. For flavor balance issues, consider adding more coconut or adjusting sugar for extra sweetness. If you face melting during chocolate coating, chill the truffles beforehand and work with cooler chocolate to prevent them from becoming too difficult to handle. Equipment challenges like lacking a double boiler can be solved by using a microwave on low power. In the case of ingredient substitutions affecting final texture, be prepared to experiment with ratios to maintain the ideal consistency, always checking with visual cues.

Recipe Success Stories

Thousands of home bakers have delighted in trying their hand at making these Chocolate Coconut Truffles, sharing stories of success. One community reader reports their entire family fell in love upon first bite, leading to quick requests for more! Various adaptations, such as adding espresso powder, have led to unique tastes that have impressed dinner guests. Many have also documented their variations on social media, showcasing stunning photography that captures the tempting charm of these truffles. With tips shared through reviews, novice bakers are often encouraged to make these truffles their own while celebrating the community’s rich culinary explorations.

Frequently Asked Questions

Q: Can I use milk chocolate instead of dark?

A: Yes! However, keep in mind that milk chocolate will make the truffles sweeter and less intense, so adjust sugar levels accordingly.

Q: How can I add flavor variations to the truffles?

A: Consider adding flavored extracts like vanilla or almond. You could also try incorporating zests from citrus fruits for a refreshing twist!

Q: Are these truffles suitable for vegan diets?

A: Absolutely! Use vegan chocolate and coconut cream or other dairy-free ingredients to ensure they fit a vegan diet.

Q: How do I prevent the chocolate from seizing?

A: Melt chocolate slowly in a double boiler or micro-heat at low powers. It’s best to avoid moisture contact with chocolate during melting.

Q: Can I freeze the truffles?

A: Yes, these truffles freeze well! Store them in an airtight container and they can last up to three months in the freezer.

Q: How long do the truffles last in the fridge?

A: When stored in an airtight container, the truffles can last up to two weeks in the refrigerator; however, they are best enjoyed within the first week.

Q: What should I do if my truffles are too soft?

A: If your truffles are overly soft, chill them for longer or incorporate a bit more coconut to achieve the right texture.

Q: What type of coconut should I use?

A: Use unsweetened shredded coconut for the best results; it adds natural sweetness without overly sweetening your truffles.

Q: Can I add alcohol to my truffles?

A: Yes! Adding a splash of liqueur like coconut rum or chocolate liqueur can enhance flavor—just be mindful of the overall moisture content.

Q: How do I get the chocolate coating shiny?

A: To achieve a shiny coating, ensure to melt chocolate slowly and avoid any water contact during the melting process.

Additional Resources

For those looking to explore similar recipes, consider checking out peanut butter truffles, matcha truffles, or even fruit-infused chocolate bites. Each offers a unique twist on the classic truffle, ensuring a delightful exploration of flavors. To elevate your dessert-making skills further, invest time in learning about proper melting techniques and chocolate tempering. Additionally, consider essential kitchen tools like quality non-stick baking sheets and silicone molds, which assist greatly in the process. Seasonal variations can also be helpful; think about recipes that complement or play off the seasons, ensuring fresh and enjoyable treats!

Join the Conversation

We would love to hear your thoughts on your experience making these Chocolate Coconut Truffles! Sharing your beautiful truffle photos on social media helps inspire others and invites delightful comments from the community. Consider offering recipe reviews and adjustments based on your personal touch, as we believe every contribution brings something unique. Engage with fellow bakers about your variations, ingredients, and techniques. Let’s spread the joy of baking and indulge in chocolate together!

The Recipe

Chocolate Coconut Truffles

Serves: 12 truffles

Prep Time: 20 mins

Cook Time: 10 mins

Total Time: 30 mins

Kitchen Equipment Needed

  • Mixing bowl
  • Double boiler or microwave
  • Sheet pan
  • Parchment paper
  • Measuring cups and spoons
  • Cooling rack

Ingredients

  • 1 cup dark chocolate chips
  • 1/2 cup shredded coconut, unsweetened
  • 1/4 cup coconut cream
  • 2 tablespoons honey or maple syrup
  • 1 teaspoon vanilla extract
  • Extra shredded coconut for coating

Directions

  1. Melt the dark chocolate chips in a double boiler or microwave, stirring until smooth.
  2. In a mixing bowl, combine melted chocolate, shredded coconut, coconut cream, honey (or syrup), and vanilla extract until mixed well.
  3. Chill the mixture in the refrigerator for about 15 minutes until firm.
  4. Once firm, scoop out small portions and roll them into balls.
  5. Roll the truffle balls in the extra shredded coconut until fully coated.
  6. Place the coated truffles on a lined sheet pan and refrigerate for at least one hour to set.
  7. Serve cold or at room temperature, enjoy!

Recipe Notes

  • Feel free to use milk chocolate, but adjust the sweetness accordingly!
  • Experiment with different flavorings, like coconut rum or espresso powder, for a twist.
  • Store in an airtight container in the fridge for up to two weeks or freeze for up to three months.

Best Chocolate Caramel Cream Pie – Rich and Decadent Dessert

Chocolate Caramel Cream Pie: A Decadent Delight

⚖️
Difficulty
Medium

⏲️
Prep Time
30 mins

🕒
Cook Time
45 mins

⏱️
Total Time
1 hour 15 mins

🍽️
Servings
8 servings

Indulging in a slice of Chocolate Caramel Cream Pie is a delightful experience that combines smooth textures and bold flavors. This stunning pie features layers of silky chocolate cream and rich caramel filling, all enveloped in a buttery, flaky crust. Each bite offers a perfect balance between sweetness and richness, making it the perfect dessert for any occasion. Whether you’re celebrating a special event or simply satisfying your sweet tooth, this pie will impress family and friends alike.

The harmonious blend of chocolate and caramel creates an indulgent harmony that dances on your taste buds. It’s not just a treat for the palate; the presentation alone, with its glossy top and creamy layers, makes it worthy of being the centerpiece at your dessert table. As the pie sets in the fridge, the luscious ingredients meld together, intensifying the flavors and elevating the pie to a truly gourmet experience.

Quick Recipe Highlights

  • Flavor Profile: Rich chocolate meets luxurious caramel in a symphony of flavors.
  • Texture: Silky smooth cream contrasts elegantly with a crunchy pie crust.
  • Aroma: Sweet aromas of chocolate and caramel fill the air, enticing anyone nearby.
  • Visual Appeal: The glossy caramel layer on top accentuates the creamy chocolate underneath.
  • Skill Level Needed: This recipe requires intermediate skills and patience for layer preparation.
  • Special Equipment: A pie pan and mixer for whipping cream are essential for this recipe.

Recipe Overview

  • Difficulty Level: The Chocolate Caramel Cream Pie is considered medium in difficulty due to its multi-layered assembly that requires attention to detail.
  • Category: This dessert fits perfectly in the category of pies, especially those celebrating chocolate and caramel flavors.
  • Cuisine: This recipe draws inspiration from American dessert traditions, showcasing the love for creamy, indulgent sweets.
  • Cost: The costs breakdown includes affordable ingredients, making this an accessible treat for most home bakers.
  • Season: Chocolate Caramel Cream Pie is an excellent choice for any season, especially during holidays and family gatherings.
  • Occasion: Ideal for parties, birthdays, or as a decadent after-dinner treat to impress guests.

Why You’ll Love This Recipe

Indulging in this Chocolate Caramel Cream Pie is not just about the flavors; it is a delightful experience that awakens every sense. The rich taste of chocolate cream combined with the buttery caramel creates a luxurious dessert perfect for any occasion. Each forkful melts in your mouth, offering contrasting yet complementary textures that make every bite a pleasure.

The convenience of this recipe allows for easy preparation without sacrificing quality. You can make the crust and fillings in advance, giving you more time to enjoy your guests’ company without stress. The layered pie not only looks stunning but can be prepared ahead of time, saving you from last-minute rush.

Nutritionally, while this pie is a treat, using quality ingredients allows for some degree of satisfaction without guilt. The benefits of dark chocolate provide antioxidants, and when paired with homemade caramel, you know exactly what goes into your dessert. Enjoying this pie can provide a unique balance of indulgence and moderation.

Socially, serving a Chocolate Caramel Cream Pie can enhance any gathering. It is a dessert that provokes conversation, invites sharing, and offers a touch of elegance that elevates your hosting status. Friends and family will appreciate the love and effort put into creating such a delightful treat.

In terms of cost, this pie is a worthwhile investment. While gourmet desserts can be pricey when bought from a bakery, making this Chocolate Caramel Cream Pie at home allows you to create an elegant dessert at a fraction of the price while enjoying the satisfaction of home-baked goodness.

Historical Background and Cultural Significance

The Chocolate Caramel Cream Pie’s history intertwines with the love for desserts in American cuisine. Its origins trace back to classic French pastry-making techniques combined with American adaptations that focus on rich, decadent sweets. This pie exemplifies how cultures can meld, bringing a taste of European sophistication into homemade desserts that Americans cherish.

Culturally, the pie represents not just a dessert but a shared experience. It has become a staple at family gatherings and special occasions across the United States. Each family may add its twist, showcasing how personal recipes can evolve into cherished traditions.

Over the years, the actual recipe for Chocolate Caramel Cream Pie has evolved from basic variations to elaborate versions involving different types of chocolates and flavors like sea salt caramel. The adaptability of this dessert means that families can put their mark on the recipe, ensuring that each pie is unique to its creator.

Regional variations of chocolate pies often introduce different ingredients based on local availability, preferences, and culinary influences. From more traditional recipes in New Orleans using praline components to deviations incorporating fruits or spices, the Chocolate Caramel Cream Pie remains a beloved dessert in diverse American households.

Ingredient Deep Dive

Chocolate serves as the star ingredient of this recipe, offering a deep, rich flavor that many dessert lovers flock to. The cultural significance of chocolate dates back to ancient Mesoamerican civilizations that revered cacao and used it in their rituals. Today, it plays a huge role in desserts globally. Nutritionally, dark chocolate contains antioxidants that are beneficial for health, and quality selections can elevate your pie. When choosing chocolate for your recipe, opt for high-quality chocolate bars with at least 70% cocoa content. For storage, keep it in a cool, dry place, away from strong odors. If dark chocolate isn’t to your taste, semi-sweet chocolate or even white chocolate can serve as substitutes depending on your preference.

Caramel is another key component that brings sweetness and a gooey texture to the pie. The history of caramel can be traced back to the 1800s when it began to gain popularity in confectionery. This sugary delight is not only pleasing to the taste but also offers a comforting nostalgia. The richness of homemade caramel is unmatched; using a blend of sugars can add depth to its flavor. When selecting ingredients, aim for unrefined sugars for the best results. For storage, caramel can be kept in an airtight container in the refrigerator for a week. For those looking for alternatives, store-bought caramel sauce can work in a pinch, although homemade flavor will always shine.

Finally, the pie crust, often underestimated, provides the foundation for this dessert. The origins of pie crust can be traced back to ancient times when early bakers experimented with flour and fat. A good pie crust delivers the essential crunch needed to complement the cream filling. When choosing your flour, look for a high-fat content for the best flakiness. To store your crust, keep it wrapped in plastic in the fridge until ready to use. While traditional pie crust is delightful, graham cracker crust or even a chocolate cookie crust can add delicious flavors and textures.

Common Mistakes to Avoid

  • Not letting the crust cool completely before adding fillings can lead to a soggy bottom.
  • Overheating the caramel can cause it to harden too much; stick to a low flame.
  • Using low-quality chocolate results in a less flavorful cream; always opt for the best chocolate you can find.
  • Rushing the cooling time can affect the texture; patience is key with cream pies.
  • Whipping cream too much can lead to curdling, so stop once you achieve soft peaks.
  • Adding fillings before they cool can create an unintended melting effect.
  • Skipping the refrigeration step can leave the pie too soft and unstable.
  • Not tasting your caramel can result in an unbalanced flavor; always adjust sweetness as needed.
  • Neglecting to adjust for your oven’s temperature inconsistencies can lead to an uneven bake on the crust.
  • Not reading through the recipe before starting can cause missteps; always prep first!

Essential Techniques

Making the pie crust perfectly is essential for a great Chocolate Caramel Cream Pie. A good pie crust provides the foundation and must be flaky yet sturdy enough to hold layers of filling. To master this technique, use chilled ingredients and handle them as little as possible to ensure that the dough doesn’t become tough. Aim for a golden-brown finish, which indicates doneness. Common pitfalls include overworking the dough and not cooling the crust properly before adding fillings—a prerequisite for the ultimate texture.

Creating smooth caramel is another critical technique. Caramel should be cooked patiently over low heat to achieve the right consistency without burning. The key is to watch the sugar closely as it melts; swirling frequently can help avoid hot spots. Pay attention to color change as your guide to doneness. Additionally, avoid stirring the caramel once it has started boiling, as this can lead to crystallization, ruining your smooth texture.

Pro Tips for Perfect Chocolate Caramel Cream Pie

Choosing the right chocolate is crucial; look for high-quality dark chocolate for the best flavor. Consider using a mixture of semi-sweet and dark chocolate for complexities in taste. When making caramel, use a candy thermometer to monitor temperature precisely, ensuring the right consistency without burning. Opt for a springform pan if you’re worried about the pie sticking to the dish, making it easier to remove. Let each layer cool fully before adding the next one; this helps maintain structural integrity. When topping the pie, consider using shaved chocolate or a sprinkle of sea salt for added texture and flavor contrast. Whipped cream can also be flavored with a bit of vanilla to complement the chocolate and caramel layers beautifully. Lastly, chill the pie overnight for optimal flavor melding before serving; it enhances the overall experience.

Variations and Adaptations

Exploring regional variations, many cultures have adapted the concept of cream pies into unique creations. For instance, adding a layer of fresh fruit like strawberries or bananas can introduce freshness and acidity that balance the richness of chocolate and caramel. Seasonal adaptations include pumpkin spice flavors during the fall or peppermint during the holiday season—always experimenting with flavors keeps the dessert exciting.

Dietary modifications are also possible; for a gluten-free version, substitute traditional pie crust with almond flour or gluten-free cookies. For a vegan adaptation, consider using coconut cream in place of whipped cream and a plant-based buttery option for the crust. Flavor variations could involve infusing the chocolate cream with orange or coffee for added depth. Experiment with different types of nuts for texture modifications, such as pecans or walnuts, either incorporated into the pie or as a topping. Presentation alternatives could involve serving in individual jars for a trendy dessert experience, allowing for a fun element at parties.

Serving and Presentation Guide

Plating techniques can greatly enhance the visual appeal of your Chocolate Caramel Cream Pie. Serve slices upright on elegant dessert plates, garnished with a dollop of whipped cream and a drizzle of chocolate or caramel sauce to elevate presentation. Use a sharp, hot knife for clean cuts, ensuring each slice maintains its appearance. Experiment with garnishing ideas such as shaved chocolate or a sprinkle of cocoa powder for added flair.

Traditional accompaniments include coffee or a scoop of vanilla ice cream to complement the pie’s richness. For modern serving suggestions, consider pairing it with a fruit compote or sherbet, which offers a refreshing contrast. Temperature considerations are important; serve the pie chilled from the refrigerator to enhance the creaminess while preventing excessive softness. Lastly, keep portion control in mind; serve moderate slices to allow guests to enjoy without overwhelming them, ensuring everyone can appreciate the entire meal.

Wine and Beverage Pairing

Pairing wine with desserts can elevate the tasting experience. A rich port or a sweet dessert wine, like a late-harvest Riesling, complements the sweet notes of the Chocolate Caramel Cream Pie beautifully. For red wine enthusiasts, consider a robust Zinfandel, as its jammy character pairs well with chocolate desserts.

For a non-alcoholic alternative, opt for a rich, dark hot chocolate or a flavored soda that echoes the dessert’s sweetness. Coffee lovers will enjoy a freshly brewed cup of dark roast coffee, as its bitterness contrasts nicely with the sweetness of the pie. Temperature should be considered; if enjoying warm beverages alongside, ensure they are brewed shortly before serving for optimal enjoyment.

Storage and Shelf Life

To maintain the freshness of your Chocolate Caramel Cream Pie, proper storage techniques are essential. After baking, allow the pie to cool completely at room temperature before refrigerating to preserve textures. Store it in an airtight container or cover with plastic wrap to prevent drying out. The pie can last in the refrigerator for about 3-4 days.

For longer shelf life, you can freeze individual slices of the pie. Wrap them tightly in plastic wrap and place them in a freezer-safe container. This method allows for keeping the pie fresh for up to 2 months, ensuring you can enjoy a slice whenever the craving strikes. When reheating, allow the pie to thaw in the refrigerator overnight and then serve chilled for the best quality. Watch for signs of spoilage such as off smells or changes in texture, which indicate it’s time to discard.

Make Ahead Strategies

Planning ahead can make enjoying the Chocolate Caramel Cream Pie even more delightful. Start by preparing the crust one day in advance; let it cool and store it in the refrigerator until you’re ready to fill it. The chocolate and caramel layers can also be prepared a day ahead, allowing flavors to deepen as they sit.

Assembly can be done up to 24 hours in advance. Refrigerate the pie covered to allow the layers to set properly. Before serving, add any fresh whipped cream or garnishes to maintain their texture. Remember to factor in chilling times—allow the pie to chill in the fridge for at least 4 hours or overnight for optimal results. Lastly, keep in mind that adding fresh elements or toppings right before serving will ensure they remain vibrant and appealing.

Scaling Instructions

Adjusting the recipe for different servings can easily accommodate larger gatherings. To halve the Chocolate Caramel Cream Pie recipe, simply divide all ingredient quantities by two and use a smaller pie pan. Remember that baking time may need slight adjustments—start checking for doneness at the original time but be mindful that smaller sizes often cook quicker.

For larger gatherings, doubling or tripling the recipe can deliver a crowd-pleasing dessert. Use a larger baking dish or multiple pie pans to achieve the desired quantities. Be sure to adjust the baking time by keeping an eye on texture and browning. For equipment adjustments, consider whether your mixer can handle larger batches or if you may need to blend ingredients in stages.

Timing modifications are crucial; manage the cooking and chilling times by staggering the preparation of layers so everything is ready for assembly when you need it. To ensure even cooling, consider using slab pans for larger quantities of filling.

Nutritional Deep Dive

A macro breakdown of the Chocolate Caramel Cream Pie reveals a delightful range of nutrients when made with quality ingredients. The chocolate offers healthy fats and antioxidants, while the cream contributes calcium and high energy. Despite its rich nature, it’s important to consider portion sizes, as reaching for just one slice can satisfy the sweet cravings without overindulgence.

Micronutrient analysis shows that dark chocolate can also lead to some beneficial health effects, like improved heart health when consumed in moderation. A balanced consideration of this dessert means enjoying its delightful flavors while incorporating nutrition-based choices like using lower-fat cream or organic sugar.

Health benefits can still be enjoyed by pairing the pie with fresh fruits or berries, which enhance flavor while providing dietary fiber. Be mindful of dietary considerations and adjust ingredients based on overall health goals. Portion analysis can aid in understanding serving sizes; a generous slice can easily be shared, allowing everyone to enjoy a little indulgence without straying from healthful eating habits.

Dietary Adaptations

Creating a gluten-free version of the Chocolate Caramel Cream Pie is achievable by substituting traditional crust ingredients with gluten-free options such as almond flour or gluten-free cookies. For those who are dairy-free, consider using coconut cream and alternative buttery products that achieve desired textures while keeping the flavor intact.

In a vegan adaptation, opt for aquafaba in place of whipped cream and choose a plant-based butter alternative for the crust. If you’re aiming for low-carb or keto versions, a pecan crust could serve as an excellent base, while sugar substitutes can contribute sweetness to the pie’s filling without impacting glycemic readings.

Lastly, a low-FODMAP adaptation may require keeping ingredients simple, eliminating any high-FODMAP components and ensuring all products fit dietary needs. Each modification allows this versatile dessert to be enjoyed by various dietary preferences while maintaining its core decadence.

Troubleshooting Guide

Experiencing texture issues with the pie often stems from not allowing layers to cool adequately. Ensure each layer is at room temperature before adding it to the next to prevent slippage or melting. If the chocolate filling is too thick, it can make the pie difficult to slice; consider blending a little more cream into the mixture to achieve the right consistency.

If your caramel isn’t sweet enough, this can often be resolved by adding a touch of cream or sweetener. For flavor balance, ensuring the quantities of chocolate and caramel are correct during preparation can safeguard against one overpowering the other.

Temperature problems can arise if the pie isn’t chilled long enough; patience in allowing the pie to set is key. If you encounter equipment challenges, such as a mixer not blending properly, revisiting prep work may reveal that dryer or cooler ingredients weren’t achieving proper emulsion.

Ingredient substitutions may require a little experimentation; different brands can react differently during cooking, so always test by making small portions first. Finally, timing concerns, like slicing too soon, can affect presentation; allow the pie to sit for a few minutes at room temperature before cutting for optimal results.

Recipe Success Stories

Readers have delighted in crafting their versions of the Chocolate Caramel Cream Pie, sharing various experiences through social media. Many have documented their successes with beautiful photography that highlights not just the sumptuous final product but also the delightful process of making it. Variations have sparked creativity, with some opting for fruity layers while others play with flavoring creams.

Community feedback often includes stories about unexpected ingredient swaps leading to flavorful surprises. A reader once used a flavored liqueur in their whipped cream, resulting in a dessert that impressed every guest at a dinner party. Adaptation stories reveal the joy of personalizing the recipe—swapping caramel for butterscotch or integrating different nut toppings has led others to discover new family favorites.

Photography tips shared by readers highlight the importance of light when capturing desserts; natural light brings out the richness of the chocolate while enhancing the pie’s appeal. Overall, these success stories bring a sense of triumph to the kitchen yet underscore the ease of creating a stunning dessert with heartfelt flavors.

Frequently Asked Questions

Q1: How can I prevent my crust from becoming soggy?

A: To avoid a soggy crust, ensure it’s blind-baked properly and allow it to cool completely before adding the filling. You can also brush it with a bit of melted chocolate, creating a barrier that minimizes moisture absorption.

Q2: Can I make this pie in advance?

A: Absolutely! The Chocolate Caramel Cream Pie can be made a day ahead. Just remember to keep it refrigerated. This gives all the flavors time to meld, making it even more delicious!

Q3: What type of chocolate should I use?

A: For the best flavor, opt for high-quality dark chocolate with at least 70% cocoa content. However, semi-sweet or milk chocolates can also be used based on personal preference.

Q4: Is it possible to make a sugar-free version?

A: Yes! You can use sugar substitutes to create a sugar-free version of the pie – just ensure they’re suitable for baking and follow the conversion suggestions provided by the brands.

Q5: Can I use store-bought caramel for this recipe?

A: While homemade caramel offers the richest flavor, store-bought caramel can be a convenient option. Just pour it directly into the pie as directed, adjusting amounts to suit your taste.

Q6: How can I fix runny cream filling?

A: If your cream filling has turned runny, re-whipping it with a touch of powdered sugar can help stabilize it. Additionally, incorporating a little gelatin can enhance the texture.

Q7: What’s the best way to serve this pie?

A: Serve it chilled with a dollop of whipped cream and additional caramel drizzle on top. Garnishing with shaved chocolate or nuts can elevate the visual presentation.

Q8: Can I freeze the leftovers?

A: Yes, you can freeze the Chocolate Caramel Cream Pie! Slice it and wrap each piece tightly in plastic wrap, then store in an airtight container for up to 2 months.

Q9: How long will this pie last in the fridge?

A: The pie can last about 3-4 days in the refrigerator when stored in an airtight container. Make sure to cover it properly to retain freshness.

Q10: Is there a vegan alternative for this recipe?

A: Yes! You can use coconut cream for the filling and non-dairy butter for the crust. Many plant-based products are now available to help you create this pie deliciously vegan.

Additional Resources

For those looking to explore more of what the kitchen has to offer, consider checking out related recipes like classic chocolate mousse, or caramel flan for additional inspiration. Technique guides focusing on pie-making can enhance your pastry arts, while ingredient information will help you better select and store essential components.

Investing in quality kitchen equipment is crucial for achieving the ideal results; consider exploring pastry tools or high-quality mixers suitable for your baking needs. Finally, keep up with seasonal variations in ingredient availability; embrace the bounty of fresh seasonal fruits to elevate any dessert.

Join the Conversation

We encourage readers to share their experiences and adaptations of the Chocolate Caramel Cream Pie through social media platforms. Post your creations and thoughtful variations for feedback, and engage with a community of fellow dessert lovers. Tagging your photos brings people together through shared culinary experiences, while conversations around flavors can lead to exciting new variations.

Engaging with readers means creating a sense of community centered around food. Whether it’s through recipe reviews, sharing photography tips, or discussing the variations you pretentiously enjoyed, join in and celebrate the joy of baking together. Your efforts in creating such a delightful dessert deserve to be recognized and celebrated!

The Recipe

Chocolate Caramel Cream Pie

Serves: 8 servings

Prep Time: 30 mins

Cook Time: 45 mins

Total Time: 1 hour 15 mins

Kitchen Equipment Needed

  • Pie dish or springform pan
  • Mixing bowls
  • Electric mixer
  • Whisk
  • Measuring cups and spoons

Ingredients

  • 1 pre-baked pie crust
  • 1 cup heavy whipping cream
  • 1 cup dark chocolate, chopped
  • 1 cup granulated sugar (for caramel)
  • 1/4 cup water
  • 1/2 cup butter
  • 1/4 cup heavy cream (for caramel)
  • Pinch of salt
  • 1/2 teaspoon vanilla extract

Directions

  1. Start by preparing your crust and letting it cool completely. Pre-bake it according to standard instructions.
  2. In a saucepan, combine 1 cup of sugar and water over medium heat. Allow it to cook without stirring until it turns a golden color, creating caramel.
  3. Once caramelized, carefully add butter and 1/4 cup of cream, whisking until smooth. Let it cool slightly, then pour into the cooled pie crust.
  4. In a separate bowl, melt dark chocolate until smooth, then let it cool to room temperature.
  5. In a mixing bowl, whip 1 cup of heavy cream until soft peaks form; fold into the melted chocolate until fully combined.
  6. Layer the chocolate cream on top of the caramel layer in the crust. Refrigerate for at least 4 hours or until set.
  7. Before serving, whip more cream for topping, if desired, and garnish with additional caramel sauce and chocolate shavings.

Recipe Notes

  • Feel free to adjust the level of sweetness based on personal preference.
  • For additional flavor, consider adding sea salt to the caramel before it sets.
  • This pie can be made a day in advance for an even better flavor depth.

Easy Cheesecake Cupcakes – Perfect for Any Occasion

Easy Cheesecake Cupcakes: A Delightful Dessert Treat

⚖️
Difficulty
Easy

⏲️
Prep Time
15 mins

🕒
Cook Time
20 mins

⏱️
Total Time
35 mins

🍽️
Servings
12 cupcakes

Cheesecake Cupcakes are a delightful dessert that perfectly captures the creamy, rich flavor of traditional cheesecake, all while being presented in individual cupcake form. These make for an exceptional treat at parties, family gatherings, or even a cozy night in. You will love how easy they are to prepare and the way they set perfectly to create a delicious bite-sized dessert that everyone can enjoy.

The allure of these Easy Cheesecake Cupcakes lies not only in their heavenly taste but also in their versatility. You can drape them in a rich fruit topping, drizzle with chocolate, or keep them simple with a dusting of powdered sugar. The texture is wonderfully creamy, with a luscious filling that contrasts beautifully against a graham cracker crust.

Quick Recipe Highlights

  • Flavor Profile: These cupcakes blend rich cream cheese and sweet vanilla to create a perfectly balanced flavor.
  • Texture: You’ll experience a creamy and smooth filling with a crunchy graham cracker base.
  • Aroma: Each bite emits sweet notes of vanilla and buttery graham cracker.
  • Visual Appeal: The classic white of the cheesecake filling contrasts wonderfully with the golden crust.
  • Skill Level Needed: This is an ideal recipe for beginners, requiring no special baking techniques.
  • Special Equipment: You will need a muffin tin and cupcake liners for easy baking.

Recipe Overview

  • Difficulty Level: This recipe is designed for bakers of all levels, especially for those just starting out, as it simplifies the cheesecake-making process.
  • Category: This dessert falls into the categories of both party treats and sweet snacks, perfect for any occasion.
  • Cuisine: Inspired by classic American dessert tradition, these cupcakes are a favorite in many households.
  • Cost: This dessert is budget-friendly, with most ingredients being pantry staples.
  • Season: Cheesecake is enjoyed year-round, making it perfect for any season, particularly summer gatherings.
  • Occasion: They shine as a dessert for birthdays, holidays, and special celebrations.

Why You’ll Love This Recipe

The creamy filling of these Easy Cheesecake Cupcakes delivers a delightful taste that will tantalize your taste buds. It’s a combination of sweet and tangy that makes every bite utterly addictive. Unlike traditional cheesecakes that need to be sliced, these cupcakes provide a portioned treat that is perfect for serving guests or enjoying as a late-night snack.

Convenience is another reason to adore this recipe. These cupcakes can be whipped up in under an hour, making them a fantastic option for impromptu gatherings or sweet cravings. The use of familiar ingredients means minimal preparation time and less mess, making them accessible for even the busiest schedules.

From a nutritional standpoint, these Easy Cheesecake Cupcakes can be made with low-fat cream cheese or natural sweeteners, allowing you to tailor the recipe to your dietary needs without sacrificing flavor.

When entertaining, these cupcakes are sure to impress. Their individual portions eliminate the fuss of slicing a traditional cheesecake, allowing guests to enjoy them at their own pace. The appealing texture and flavor profile will have everyone asking for the recipe.

Finally, the cost-effectiveness of this recipe can’t be overlooked. With simple and economical ingredients, these cupcakes can be made in bulk for less than the price of store-bought desserts, providing a homemade touch to any occasion without breaking the bank.

Historical Background and Cultural Significance

Originating from the ancient Greeks, cheesecake has undergone several transformations over the centuries. In America, cheesecakes became popular in the 19th century with the introduction of cream cheese, which revolutionized the recipe. This led to the creation of today’s deliciously fluffy cheesecake variation that we adore in cupcakes.

Cheesecake holds a special cultural significance in numerous traditions, often served as a celebratory dish at weddings and communal feasts. The variety of toppings, including fruits and chocolates, reflects regional preferences and culinary innovations.

As the cheesecake evolved, it adapted to the tastes and ingredients available in different parts of the world. Each region added its unique twist, leading to the plethora of cheesecake styles we see today, from New York-style dense cheesecakes to airy mousse-like versions.

The cupcake variation emerged in the late 20th century as baking became trendy, highlighting the practicality of portion-control desserts. This adaptation brought the indulgence of classic cheesecake into a format suitable for modern lifestyles, further cementing its popularity at events and casual get-togethers.

Ingredient Deep Dive

For the cream cheese, it provides the rich flavor and creamy texture essential to any cheesecake. When selecting cream cheese, look for brands that use fresh ingredients without fillers to ensure the best taste. It’s best stored in the refrigerator and consumed before its expiration date, but can also be frozen for future use.

Sugar is the sweetener of choice, and using granulated sugar results in a smooth texture. You can substitute some of the sugar with natural sweeteners, like honey or maple syrup, for a healthier twist.

Graham crackers create the signature crust. Opt for plain graham crackers for a neutral flavor that pairs well with the creamy filling. These should be kept sealed in an airtight container to preserve their crunch.

Common Mistakes to Avoid

  • Overmixing the cream cheese can cause the texture to become grainy. Mix just until smooth for the best consistency.
  • Not letting the cream cheese come to room temperature can result in lumps in the batter. Always let it warm up before mixing.
  • Using low-quality ingredients can affect the flavor; always choose fresh, high-quality products.
  • Skipping the cooling time can lead to cracks in the cupcakes. Allow them to cool properly before serving.
  • Overbaking can dry out the cupcakes; remove them once they are just set.
  • Not lining the muffin tin may cause the cupcakes to stick. Always use cupcake liners.
  • Forgetting to preheat the oven can lead to uneven baking. Ensure your oven is at the right temperature before starting.
  • Not checking for doneness with a toothpick can result in undercooked centers; make sure it comes out mostly clean.

Essential Techniques

Mixing properly is key to achieving a smooth filling. Always use a hand mixer or stand mixer on low to avoid incorporating too much air, which can cause cupcakes to rise excessively and crack.

Cooling your cupcakes is another important step. Once out of the oven, let them rest at room temperature, then refrigerate to allow the creaminess to develop and set, leading to a better flavor.

Pro Tips for Perfect Easy Cheesecake Cupcakes

Use room temperature ingredients to create a creamy filling without lumps. This ensures a smooth batter and an even bake.

Experiment with flavors by adding citrus zest or extracts, such as almond or coconut, to customize the taste of your cupcakes.

Don’t be afraid to top your cupcakes with your favorite sauces, be it chocolate ganache, caramel, or fruit compote for added indulgence.

Keep your cupcakes covered in the refrigerator to maintain freshness and avoid them absorbing any odors.

For a colorful presentation, consider using fresh berries or edible flowers as garnishes on top of the cupcakes.

Allow your cupcakes to chill overnight to enhance the flavor and texture before serving; they taste even better the next day.

Variations and Adaptations

You can enjoy these Easy Cheesecake Cupcakes with different flavored crusts. Consider using chocolate cookies or even crushed nuts for a unique twist.

Seasonal adaptations allow you to switch up the toppings; think pumpkin puree in the fall or fresh strawberries in the spring for a festive touch.

If you have dietary restrictions, such as a gluten-free diet, substitute the graham crackers with gluten-free alternatives while keeping the other ingredients constant for a deliciously safe treat.

Explore different flavor profiles by adding spices like cinnamon or nutmeg to the batter for a deeper taste experience.

Consider making mini versions of the cupcakes for bite-sized treats perfect for events and gatherings, simply adjust the baking time.

To give your cupcakes a sophisticated touch, try drizzling with white chocolate or topping with a dollop of whipped cream for an elegant presentation.

Serving and Presentation Guide

Presentation is key when serving desserts, and with these Easy Cheesecake Cupcakes, consider using decorative cupcake liners that merit a beautiful display.

To garnish, fresh fruits or a light dusting of powdered sugar can add color and vibrancy, making them even more inviting.

For a modern twist, serve with a small scoop of ice cream on the side for an added delight, particularly during warmer months.

Keep portion sizes in mind; a single cupcake per person is perfect, especially if you have other desserts on the table.

Cupcakes should be served chilled for the best taste and texture; providing them straight from the refrigerator offers a refreshing treat.

Wine and Beverage Pairing

Pair your Easy Cheesecake Cupcakes with a sweet white wine, like Riesling or Moscato, whose fruity flavors complement the rich cheesecake filling wonderfully.

For a non-alcoholic alternative, a sparkling lemonade or iced tea can refresh the palate and enhance the dessert experience.

If you prefer coffee or tea, a light roast coffee or chamomile tea works well, providing a nice contrast to the sweet and creamy cupcakes.

When serving wine, make sure it’s chilled to enhance the overall understanding of the cupcake flavors.

Storage and Shelf Life

These cupcakes can be stored in an airtight container in the refrigerator for up to one week, maintaining their freshness and flavor.

It is advisable to keep them covered to avoid unintentional drying or the absorption of other refrigerator odors.

For longer storage, consider freezing them; they can last up to two months. Make sure to wrap them well to prevent freezer burn.

To thaw, place them in the refrigerator overnight, preserving their texture and taste.

Make Ahead Strategies

You can prepare the filling the night before and store it in the refrigerator, saving time on the day of baking.

Once baked, these cupcakes keep well in the fridge, making them an ideal make-ahead dessert for parties.

Consider assembling the cupcakes in advance and topping them right before serving to maintain freshness and flavor.

If you have leftover cupcake batter, use muffin tins to bake additional mini cheesecakes as treats for later.

Scaling Instructions

When scaling the recipe, doubling or tripling the ingredients works without any drastic changes, making it easy to create more cupcakes for larger gatherings.

Ensure you have enough muffin tins available or consider baking in batches to accommodate the recipe scale.

Adjust the baking time if you use a different-sized muffin tin or if you bake in a larger batch, checking for doneness consistently.

Leftover batter can be refrigerated for up to 24 hours, providing flexibility when scaling the recipe.

Nutritional Deep Dive

Each Easy Cheesecake Cupcake is a delightful balance of creamy richness and sweetness that can serve as a satisfying treat without excessive calories.

The nutritional composition will vary depending on the brand and type of ingredients you choose; consider low-fat cream cheese for a lighter version.

With the use of healthier crust options like nut-based crusts, the overall carbohydrate count can be adjusted for those mindful of sugar intake.

Portion control is also a great advantage, allowing for a satisfying dessert without overindulging.

Dietary Adaptations

For a gluten-free option, use gluten-free graham crackers or almond flour to create the crust, maintaining the delicious flavor without compromising dietary needs.

Dairy-free adaptations can be made by substituting traditional cream cheese with a plant-based alternative, resulting in a vegan-friendly treat.

For those on a low-carb or Keto diet, consider using erythritol or other sugar substitutes to maintain the sweetness without the carbs.

With the right substitutions, you can cater to a variety of dietary preferences without sacrificing flavor or texture.

Troubleshooting Guide

If you encounter texture issues, like graininess, ensure your cream cheese is thoroughly softened before mixing.

For flavor imbalance, consider adjusting the level of sweetener or adding a teaspoon of lemon juice for a fresh balance.

If your cupcakes sink in the middle, they may have been overmixed; ensure to mix just until combined.

Temperature problems can arise if your oven is not calibrated—always check the internal temperature or use an oven thermometer for accuracy.

Ingredient substitutions can lead to unexpected results; be cautious when swapping ingredients and test in smaller batches first.

Keep an eye on the baking time; underbaking can cause a soggy bottom while overbaking can dry them out.

Recipe Success Stories

Readers have shared their successes with this cheesecake cupcake recipe, often mentioning how easy it is to impress guests who think they are store-bought.

Some bakers have experimented with flavors, creating chocolate or pumpkin variations that received rave reviews from friends and family.

Photography tips from the community suggest capturing the cupcakes in natural light to highlight their inviting appearance perfectly.

Variations, such as topping with fruit preserves or drizzling caramel, have encouraged some to experiment more with this versatile recipe.

The feedback highlights how adaptable and forgiving this recipe is; whether for beginner bakers or experienced chefs, the Easy Cheesecake Cupcakes continue to be a hit.

Frequently Asked Questions

Can I use homemade crust instead of graham crackers?

Absolutely! Using a homemade crust can elevate the flavor. Just ensure it balances the cheesecake filling with the right texture and sweetness.

How do I know when my cupcakes are done baking?

Check for doneness by inserting a toothpick into the center; it should come out mostly clean with a few moist crumbs. They may still feel slightly jiggly but will firm up as they cool.

Can I make these cupcakes dairy-free?

Yes, substituting with dairy-free cream cheese and a suitable butter alternative will yield delicious results, maintaining the essence of cheesecake.

What toppings work best for cheesecake cupcakes?

Fruit compote, chocolate ganache, or whipped cream are all excellent topping choices that add flavor and visual appeal.

How should I store leftovers?

Store in an airtight container in the refrigerator for up to a week to keep them fresh and delicious.

Can I freeze these cupcakes?

Yes! They freeze well for up to two months; just ensure they are stored properly to prevent freezer burn.

What is the difference between these and regular cheesecake?

The main difference lies in portion size and ease of serving. Cheesecake cupcakes offer a more manageable, individual serving while retaining the same flavor profile.

Is it okay to use low-fat cream cheese?

Absolutely! Low-fat cream cheese can still provide a creamy texture and flavor, making for a lighter dessert option.

What are some flavor variations I can try?

Mix in fruit purees, chocolate chips, or spices like cinnamon and nutmeg to customize your cupcakes to your liking. The options are endless!

Can I make mini versions of these cupcakes?

Yes, mini versions work beautifully! Just adjust the baking time and keep an eye on them as they bake.

Additional Resources

Explore more recipes from our collection to expand your baking repertoire. For technique guides, consider learning about basic cake decorating to elevate your presentation skills. You might also find ingredients like high-quality vanilla and cream cheese essential in many dessert recipes. Don’t forget to view seasonal variations that can inspire unique twists on traditional recipes!

Join the Conversation

We want to hear your experiences, so please share your photos on social media! Engage with our community by sharing your adaptations and creative variations of the recipe. Leaving reviews helps fellow bakers learn more about this recipe, inspiring all to get in the kitchen and create something delicious. Your suggestions can spark new ideas within our growing community!

The Recipe

Easy Cheesecake Cupcakes

Serves: 12 cupcakes

Prep Time: 15 mins

Cook Time: 20 mins

Total Time: 35 mins

Kitchen Equipment Needed

  • Muffin tin
  • Cupcake liners
  • Mixing bowl
  • Hand mixer or stand mixer
  • Measuring cups and spoons

Ingredients

  • 8 oz cream cheese, softened
  • 1/2 cup granulated sugar
  • 1 tsp vanilla extract
  • 2 large eggs
  • 1 cup graham cracker crumbs
  • 1/4 cup butter, melted

Directions

  1. Preheat your oven to 325°F (163°C). Line a muffin tin with cupcake liners.
  2. In a mixing bowl, combine graham cracker crumbs and melted butter, then spoon into each prepared liner to form the crust.
  3. In another bowl, beat the softened cream cheese with sugar and vanilla until smooth. Beat in eggs one at a time.
  4. Pour the cream cheese mixture over the crusts in the muffin tin.
  5. Bake in the preheated oven for about 20 minutes, or until set around the edges and slightly jiggly in the center.
  6. Remove from the oven and let cool at room temperature. Refrigerate for at least 2 hours before serving.

Recipe Notes

  • For a chocolate version, add cocoa powder to the cream cheese mixture.
  • You can substitute some of the cream cheese with sour cream for a tangy flavor.
  • Top with fresh berries or fruit preserves before serving for added flavor.

Best Strawberry Chocolate Thumbprint Cookies Recipe

Strawberry Chocolate Thumbprint Cookies: A Delicious Treat for Any Occasion

⚖️
Difficulty
Moderate

⏲️
Prep Time
25 mins

🕒
Cook Time
15 mins

⏱️
Total Time
40 mins

🍽️
Servings
24 cookies

Indulge your sweet tooth with these delightful Strawberry Chocolate Thumbprint Cookies. These charming cookies are a perfect combination of buttery sweetness and luscious chocolate, with a fruity burst of strawberry filling in the center. The moment you take a bite, you’ll savor the rich chocolate paired with the refreshing tartness of fresh strawberries, creating a symphony of flavors that dances on your palate. Whether you’re baking for a special occasion, a family gathering, or simply treating yourself, these cookies will surely impress everyone around you.

What makes these Strawberry Chocolate Thumbprint Cookies truly irresistible is their delightful texture. The cookies are soft and slightly chewy, offering a comforting mouthfeel with every bite. The melted chocolate chip center contrasts perfectly with the crumbly cookie base, further enhancing your dessert experience. Not only are they delicious, but they also look stunning on a platter, with bright red strawberry filling beautifully framing the glossy chocolate in the center. These cookies are guaranteed to become a favorite in your recipe collection.

Quick Recipe Highlights

  • Flavor Profile: The buttery flavor of the cookie, the richness of the chocolate, and the fresh tartness of strawberries create a delectable taste sensation.
  • Texture: Crisp on the outside, delightfully soft on the inside, with a gooey chocolate center gives these cookies a satisfying mouthfeel.
  • Aroma: These cookies fill your kitchen with a delightful aroma of buttery vanilla mingling with the sweetness of strawberries and rich chocolate.
  • Visual Appeal: The vibrant red of the strawberry filling against the golden cookie and dark chocolate creates an eye-catching treat that is incredibly inviting.
  • Skill Level Needed: These cookies are moderately easy to make, perfect for novice bakers looking to expand their skills.
  • Special Equipment: A mixing bowl, baking sheet, and a spoon for scooping out the dough will suffice; no fancy tools are needed.

Recipe Overview

  • Difficulty Level: While these cookies are relatively straightforward, the precise thumbprint technique may require a little practice to achieve the perfect indentation.
  • Category: They fit perfectly into the dessert category, ideal for sweet tooth cravings and special occasions.
  • Cuisine: This cookie draws inspiration from traditional cookies, blending classic flavors with a modern twist using seasonal strawberries.
  • Cost: Ingredients are affordable, making this recipe accessible to most home cooks without compromising quality.
  • Season: Best made during strawberry season when the fruit is freshest and most flavorful.
  • Occasion: A wonderful treat for holidays, birthday parties, or simply as an afternoon snack with tea or coffee.

Why You’ll Love This Recipe

The taste and texture of these Strawberry Chocolate Thumbprint Cookies are truly exceptional. With the rich flavor of chocolate complemented by sweet strawberries, each bite offers a delightful burst of flavor that tantalizes your taste buds. The buttery cookie provides a soft, chewy base that perfectly balances the sweet fillings, making them an indulgent treat anyone would love.

Convenience and preparation benefits also add to their appeal. These cookies come together quickly, with no complicated steps involved. Simply mix, scoop, and bake! This makes them an excellent option for last-minute gatherings or when you need to satisfy a sudden sweet craving.

Nutritionally, they contain wholesome ingredients like fresh strawberries, making them a slightly healthier option than other desserts. They offer a delightful way to enjoy fruit in dessert form while still being indulgent, striking a balance between health and hedonism.

Socially, these cookies make for great conversation pieces. Their unique look and delicious flavor can be a perfect icebreaker at parties, inviting your guests to enjoy something delicious together and even swap their favorite cookie recipes.

Finally, the cost-effectiveness of this recipe cannot be overstated. With easily accessible ingredients, you can produce a batch of impressively tasty cookies without breaking the bank. They’ll be a hit at gatherings, providing great value for the quality of the dessert.

Historical Background and Cultural Significance

Thumbprint cookies have a long history, with variations found in many cultures around the globe. While the exact origin is debatable, it is believed they date back to Eastern European countries, where cookies were often filled with fruit jams or preserves. These delectable treats have traveled through time, evolving in flavor and presentation while maintaining their beloved shape.

In different cultures, thumbprint cookies symbolize love and hospitality. They are often shared during family gatherings, celebrations, and holidays, reflecting warmth and togetherness. The act of making and distributing these cookies embodies the spirit of giving and sharing.

The evolution of thumbprint cookies over the years has introduced new flavors, fillings, and techniques, allowing bakers to experiment with ingredients. Modern recipes often incorporate different fruits or creative flavors to cater to diverse palates, showcasing the beautiful adaptability of this classic treat.

Regional variations of thumbprint cookies have emerged in various countries, showcasing local ingredients and preferences. For instance, in Scandinavian countries, you might find these cookies filled with lingonberries, while in the United States, variations often include chocolate, peanut butter, or caramel. This adaptability has kept them relevant, ensuring their place in diverse baking traditions.

Ingredient Deep Dive

Strawberries: Strawberries are not just a delicious component of this recipe; they are also steeped in cultural significance. Known for their vibrant color and sweet-tart flavor, they symbolize love and passion in many cultures. Nutritionally, they are loaded with vitamins, fiber, and antioxidants. When selecting strawberries, opt for fresh, firm ones with a bright red color and green leaves, and store them in the refrigerator to maintain freshness. If fresh strawberries are not available, you could substitute them with strawberry preserves or even other berry varieties.

Chocolate: Chocolate, a universal favorite, adds depth and richness to these cookies. It has historical roots dating back thousands of years to Mesoamerican cultures. Rich in antioxidants, chocolate can offer some health benefits when consumed in moderation. For the best quality, choose high-cocoa-content chocolate and store it in a cool, dry place. If you’re looking for substitutions, dark chocolate can be swapped for milk chocolate, or you could use dairy-free chocolate to cater to dietary restrictions.

Common Mistakes to Avoid

  • Overmixing the dough can lead to tough cookies, so mix just until combined.
  • Not letting the cookies cool completely before filling can cause the chocolate to melt too much.
  • Using room temperature butter instead of softened butter can affect the texture of the cookies.
  • Not pressing down the thumbprint deep enough may prevent it from holding the filling.
  • Skip the chilling time for the dough if required, which can help maintain shape during baking.
  • Using preserved or artificially flavored strawberry may compromise the cookie’s freshness.
  • Not measuring ingredients correctly can lead to unexpected results, so use measuring cups and spoons.
  • Overbaking can result in dry cookies; keep an eye on them in the last couple of minutes in the oven.

Essential Techniques

Mastering the thumbprint technique is crucial for achieving the perfect cookie shape. Pressing your thumb gently into the center of the cookie before baking creates a perfect indentation for the filling. Make sure to not press too hard, as you want to leave enough dough around the edges for stability. A common pitfall is overfilling the thumbprint, which can cause the filling to overflow during baking; instead, aim for a small amount that holds its shape.

Mixing the dough correctly is also essential. Start with softened butter and cream it thoroughly with sugar until light and fluffy. This technique introduces air into the dough, resulting in a lighter cookie. Overmixing can lead to a dense cookie, so only mix until the ingredients are just combined. Look for the dough to be slightly sticky, but not overly wet.

Pro Tips for Perfect Strawberry Chocolate Thumbprint Cookies

1. Use high-quality butter for a richer flavor in your cookies. Substitute for unsalted butter to control the saltiness.

2. Chill the dough for at least 30 minutes before baking. This step helps the cookies maintain their shape and texture.

3. Experiment with different fillings such as raspberry preserves or lemon curd for a unique twist.

4. For added flair, drizzle melted chocolate over the cooled cookies for a beautiful presentation.

5. Ensure your baking sheet is lined with parchment paper for easy cleanup and to prevent sticking.

6. Keep an eye on the baking time; each oven is different, so check for a light golden color for optimal results.

7. Allow the cookies to cool on the baking sheet briefly before transferring them to a cooling rack for even cooling.

Variations and Adaptations

You can easily modify the strawberry chocolate thumbprint cookies to cater to different tastes or dietary needs. For a vegan version, substitute the butter with coconut oil or vegan butter and use an egg replacer for binding.

Seasonal adaptations can also be applied; try using crushed pumpkin filling for an autumn twist or peppermint extract with chocolate during the holidays for a festive flavor. Additionally, you might experiment with frosting the entire cookie for more elegance or using nuts in the dough for a crunchier texture.

Serving and Presentation Guide

When it comes to serving, presentation is key. Arrange your thumbprint cookies on a decorative platter; a touch of fresh mint can add a pop of color. For a more rustic look, consider dusting them with powdered sugar.

Garnishing with a drizzle of melted chocolate not only enhances the aesthetics but also adds an extra layer of indulgence. Serving them warm, straight from the oven, invites delightful aromas and elevates the overall experience. Don’t forget to pair these cookies with a chilled glass of milk or your favorite tea for the perfect afternoon treat.

Wine and Beverage Pairing

Pairing these delightful strawberry chocolate thumbprint cookies with the right beverage elevates the experience. For a delightful evening treat, consider a sweet dessert wine like Moscato or a rich Ruby Port, which complements the berry flavors beautifully.

For non-alcoholic options, a chilled herbal tea or a sparkling water with a splash of lemon can enhance the overall flavor experience without overpowering the cookies. Crafting the perfect pairing is all about balancing sweetness and ensuring your beverage does not overshadow the delightful flavors within the cookies.

Storage and Shelf Life

For proper storage, keep your thumbprint cookies in an airtight container at room temperature. They will last for about a week, making them an ideal treat to prepare in advance. If you want to extend the shelf life, consider freezing the cookies. Make sure they are fully cooled before placing them in a freezer-safe bag, where they can be stored for up to three months.

To thaw, simply take them out of the freezer and let them come to room temperature. If desired, briefly reheat in a microwave for a few seconds for that freshly baked taste. Be mindful of signs of spoilage, such as altered texture or an off smell, and discard if any of these occur.

Make Ahead Strategies

To simplify your baking process, consider preparing your dough in advance. You can chill it overnight, reducing time the next day. Just remember to bring it back to room temperature before rolling into balls for thumbprints.

Another great strategy is to pre-bake the cookies without the filling. Once cooled, they can be stored in an airtight container, and filled with chocolate and strawberries right before serving to maintain freshness.

Scaling Instructions

If you’re looking to make a smaller batch, simply halve the ingredients and make a delicious dozen. Conversely, if you’re preparing for a large event, feel free to double or triple the recipe. Just ensure your baking sheets can accommodate the larger batch and adjust the baking times accordingly, checking for doneness as needed.

When scaling up, ensure that your mixing bowl is large enough to accommodate the increased quantities, as you want to maintain proper mixing. Similarly, if using different ovens, be aware that baking times may increase or decrease based on the number of trays in the oven.

Nutritional Deep Dive

These Strawberry Chocolate Thumbprint Cookies offer a delightful combination of macronutrients, with a balance of fats from butter and chocolate, carbohydrates from the flour and sugar, and fiber from the strawberries. Each cookie provides a fulfilling treat that can satisfy both sweet cravings and nutritional needs.

Micronutrient analysis reveals that strawberries contribute essential vitamins like Vitamin C and folate, while chocolate can provide antioxidants and minerals such as magnesium. For those monitoring their caloric intake, understanding portion sizes is key, allowing each individual to enjoy these treats responsibly.

Dietary Adaptations

For those following a gluten-free diet, you can easily substitute regular flour for a gluten-free blend, ensuring everyone can enjoy these delicious cookies.

Dairy-free options are also achievable by using almond milk chocolate and coconut oil instead of butter, allowing for an equally enjoyable experience. Vegans can enjoy the recipe with a flax egg substitution or other egg replacements, ensuring flavorful cookies for all dietary preferences.

Troubleshooting Guide

If your cookies come out too tough, check your mixing method—overmixing can lead to a dense result. Ensure you’re using softened butter to enhance texture.

For flavor balance, if the cookies are excessively sweet, consider reducing sugar next time or adding a pinch of salt to enhance other flavors. If your oven’s temperature seems inconsistent, investing in an oven thermometer can help maintain accuracy in baking.

Recipe Success Stories

Many community members have shared their joy of making Strawberry Chocolate Thumbprint Cookies, noting how simple yet satisfying they are to bake. The ability to customize the filling with unique flavors has led to varied successes, with some experimenting successfully with lemon curd or hazelnut spreads.

Photography tips from our readers highlight that taking the time to style and plate the cookies beautifully enhances not only their visual appeal but also makes them more enjoyable to share socially. Users noted that these cookies have been a hit every time they made them, solidifying their place as a beloved recipe in many kitchens.

Frequently Asked Questions

Can I use frozen strawberries for the filling? While fresh strawberries are preferred, frozen strawberries can be used; just make sure to thaw them and drain any excess liquid before filling the cookies.

What chocolate works best for the thumbprint? Dark chocolate provides a rich flavor, but feel free to use semi-sweet or milk chocolate depending on your preference.

How should I store the cookies after baking? Keep the cookies in an airtight container at room temperature for up to a week. They can also be frozen for longer storage.

Can I make these cookies vegan? Absolutely! Substitute the butter with coconut oil and use a flax egg for a delightful vegan twist on the classic recipe.

What if my thumbprint isn’t holding the filling? Ensure you gently press down into the cookie dough. If they spread too much during baking, chilling the dough can help maintain shape.

Can I add nuts to the cookie dough? Yes! Chopped pecans or walnuts can be incorporated into the dough for a crunchy texture and additional flavor.

What’s the best way to serve these cookies? These cookies are best served at room temperature, but for an extra treat, warm them slightly before serving.

Can I double this recipe? Yes! Just ensure your mixing bowl is large enough, and adjust baking times as needed for larger batches.

Do I have to use a specific type of flour? All-purpose flour works best, but you can substitute with gluten-free flour for a gluten-free version.

What occasions are these cookies suited for? They’re perfect for holidays, birthdays, bake sales, or as a sweet treat for afternoon tea.

Additional Resources

For more delightful recipes, check out our collection of cookie recipes that offer various flavors and techniques. Enhance your baking skills with our technique guide to mastering dough mixing and cooking times. If you’re curious about ingredient information, we provide detailed insights on different types of flour and their uses in baking.

Join the Conversation

We invite you to share your baking successes and variations of the recipe on social media. Post your photos and tag us to connect with fellow baking enthusiasts who appreciate creative variations. Leave feedback in the comments about your experience and any tips you discovered along the way. Together, let’s celebrate the joy of baking!

The Recipe

Strawberry Chocolate Thumbprint Cookies

Serves: 24 cookies

Prep Time: 25 mins

Cook Time: 15 mins

Total Time: 40 mins

Kitchen Equipment Needed

  • Mixing bowl
  • Baking sheet
  • Parchment paper
  • Measuring cups and spoons
  • Spoon for scooping

Ingredients

  • 1 cup unsalted butter, softened
  • ¾ cup granulated sugar
  • 2 cups all-purpose flour
  • ½ teaspoon vanilla extract
  • 1 cup chocolate chips
  • ½ cup strawberry preserves

Directions

  1. Preheat your oven to 350°F (175°C) and line a baking sheet with parchment paper.
  2. Cream together butter and sugar in a mixing bowl until light and fluffy.
  3. Mix in vanilla extract and flour until combined, making a soft dough.
  4. Using a spoon, scoop out portions of the dough and roll into balls.
  5. Place the balls on the baking sheet and gently press your thumb into the center of each cookie to create an indentation.
  6. Bake for 12-15 minutes until slightly golden around the edges.
  7. Allow cookies to cool slightly before filling the centers with chocolate chips and strawberry preserves.
  8. Cool fully on a wire rack before serving.

Recipe Notes

  • Arrange the filled cookies on a platter for better presentation.
  • Try replacing strawberry preserves with your choice of fruit jams for different flavors.
  • Cookies can be frozen after baking; simply thaw before serving.

Best Linzer Strawberry Heart Cookies for Any Occasion

Linzer Strawberry Heart Cookies: A Delightful Treat for All Occasions

⚖️
Difficulty
Medium

⏲️
Prep Time
30 mins

🕒
Cook Time
15 mins

⏱️
Total Time
45 mins

🍽️
Servings
24 cookies

Linzer Strawberry Heart Cookies are not just a delightful dessert; they are a heartfelt expression of love and affection, perfect for special occasions like Valentine’s Day or any gathering with friends and family. The rich flavors of almond and the sweetness of strawberry jam create a harmonious balance that dances on your palate. Each bite offers a combination of buttery richness and delightful acidity from the jam, ensuring a delightful surprise that will leave everyone craving more.

The vibrant red of the strawberry jam peeking through the heart-shaped cookies adds a visually appealing touch that exudes warmth and charm. More than just a treat, these cookies symbolize care and thoughtfulness—from the meticulous preparation to the final presentation. Making these cookies from scratch reveals the essence of true baking; it’s an experience filled with the joyful anticipation of sharing something joyous and satisfying.

Quick Recipe Highlights

  • Flavor Profile: The buttery almond flavor pairs perfectly with the tartness of the strawberry jam, creating a rich yet balanced taste sensation that tickles your taste buds.
  • Texture: A delicate crunch meets a soft and chewy center, giving each cookie a wonderful mouthfeel that is satisfying and delightful.
  • Aroma: The warm scent of baking almonds fills your kitchen, complemented by the sweet and inviting fragrance of strawberry, making it hard to resist.
  • Visual Appeal: Their heart shape and the ruby-red jam create visually stunning cookies that are bound to steal the show on any dessert table.
  • Skill Level Needed: While they require some attention to detail, the process is enjoyable, making it accessible for bakers with a medium skill level.
  • Special Equipment: You’ll need a rolling pin, a heart-shaped cookie cutter, and parchment paper to create these cookies with ease.

Recipe Overview

  • Difficulty Level: The medium difficulty makes this recipe fun for both novice and experienced bakers. With the steps clearly defined, anyone can achieve delicious results.
  • Category: These cookies fit perfectly into the dessert category, delightful for both everyday snacking or special events.
  • Cuisine: An Austrian classic, Linzer cookies are deeply rooted in European baking traditions, often made during festive seasons and special occasions.
  • Cost: The ingredients are relatively affordable, with pantry staples like flour, butter, and sugar, making this an economical baking choice.
  • Season: While a delightful treat any time of the year, they particularly shine in winter and spring celebrations.
  • Occasion: Iconic for Valentine’s Day, anniversaries, or as gifts, they are ideal cookies for showcasing affection.

Why You’ll Love This Recipe

These Linzer Strawberry Heart Cookies are a perfect blend of taste and texture. The almond cookie base is soft yet crunchy, offering a delightful contrast to the luscious strawberry jam filling. They not only serve as a delicious treat but also evoke feelings of nostalgia. The sweet almond aroma wafting from the oven makes baking an experience worth cherishing.

This recipe is as convenient as it is delicious; preparing the cookie dough in advance allows you to save time on the day of serving. The cookies can be beautifully packaged and gifted, making them a thoughtful addition to any celebration or holiday gathering. Their appeal goes beyond taste, making them perfect for any event where you want to impress your guests.

Nutritionally, these cookies provide a homemade option without artificial ingredients commonly found in store-bought alternatives. Using high-quality almond flour adds a nutritional boost, along with heart-healthy fats from the butter. Plus, indulging in a sweet treat occasionally is a key part of a balanced diet.

Socially, baking these cookies engages the entire family, offering a fun kitchen activity that spreads joy. Picture the laughter and joy as kids help roll out the dough or use cookie cutters. The cookies become a centerpiece for gatherings, inviting friends and family to share stories and create memories.

Finally, their cost-effectiveness is hard to ignore. Homemade Linzer cookies are a fraction of the price compared to gourmet bakeries, offering exceptional value without compromising on taste or quality.

Historical Background and Cultural Significance

Linzer cookies have a rich history that traces back to Linz, Austria, dating to the 17th century. Originally, this recipe was made with a variety of fruits and nuts, showcasing the regional availability of ingredients. The heart shape in the cookies symbolizes love and affection, making them a popular choice during festive seasons.

In Austria and Germany, these cookies play an essential role in their cultural baking traditions. They are often associated with Christmas and other holidays, serving as a treat to share with family and friends. The meticulous crafting of these cookies reflects the care that families have for one another, highlighting their importance in social gatherings.

Over time, the recipe has evolved, embracing various regional influences while maintaining its core characteristics. While strawberry jam is the traditional filling, many variations have emerged, featuring everything from raspberry to apricot, adapting to local preferences.

Regional variations reflect the versatility of the Linzer cookie. Each culture has added its unique twist, demonstrating the cookie’s adaptability while preserving the same essential love and care that goes into its creation.

Ingredient Deep Dive

Almond Flour: Almond flour is a key ingredient in Linzer cookies. Its nutty flavor contributes to the cookie’s unique taste profile, while its gluten-free nature makes it a great option for those with dietary restrictions. When selecting almond flour, look for finely ground options to ensure a smooth texture. Store it in an airtight container in a cool, dark place to maintain freshness. Suitable substitutions include all-purpose flour for non-gluten-free versions.

Butter: High-quality unsalted butter is essential for a rich flavor and tender texture. Butter not only adds creaminess but also aids in achieving the cookies’ crisp edges. When selecting butter, opt for European-style for a higher fat content for even better taste. Store butter in the refrigerator and use within its indicated date. If needed, alternatives like coconut oil or margarine will work, though they may alter the taste slightly.

Strawberry Jam: Used for filling, strawberry jam brings sweetness and vibrant color to the cookies. Opt for a low-sugar or organic variety for a healthier choice. Homemade jam can also be employed for the freshest taste. Always check for visible mold or off-smells when it comes to storage. Alternative fruit jams can create exciting flavor twists, from raspberry to apricot, expanding the cookie’s appeal.

Common Mistakes to Avoid

  • Overworking the Dough: Kneading the dough too much can lead to tough cookies. Keep mixing to a minimum to maintain the right texture.
  • Not Chilling the Dough: Skipping the chilling phase may cause your cookies to spread too much during baking. Ensure thorough chilling for perfect shapes.
  • Using Low-Quality Ingredients: Subpar ingredients will result in a less flavorful cookie. Invest in high-quality butter, flour, and jam for optimal flavor.
  • Incorrect Baking Time: Overbaking will lead to dry cookies. Keep an eye on them and remove them from the oven as soon as the edges turn lightly golden.
  • Ignoring the Thickness of Dough: Roll the dough inconsistently, and you’ll get uneven cookies. Aim for uniform thickness across the entire cookie.
  • Filling Too Much Jam: Overfilling can make cookies messy and difficult to handle. Ensure just the right amount for easy enjoyment.
  • Neglecting to Preheat the Oven: An unheated oven can affect baking consistency, leading to uneven results. Always allow the oven to reach the proper temperature.
  • Using Incorrect Cookie Cutters: If the edges are not sharp enough, they may not cut through the dough properly. Choose well-made cutters for best results.
  • Forgetting to Test for Doneness: Relying solely on time without checking your cookies can lead to surprises. Look for visual cues like color and firmness.
  • Not Following Measurements: Baking is a science; improper measurements may alter the outcome. Always use precise amounts for ingredients.

Essential Techniques

Chilling the Dough: This technique is crucial for achieving cookies that hold their shape when baked. Chilling the dough firms up the fat, preventing the cookies from spreading too much in the oven. To master this technique, ensure you wrap the dough tightly before refrigerating. Visual cues include the dough feeling firm instead of sticky.

Creaming Butter and Sugar: This step is essential for achieving a light and airy cookie texture. Using room-temperature butter allows for optimal incorporation of air. To master this technique, blend until the mixture turns pale and fluffy, indicating that sufficient air has been added. Over-creaming can lead to overly puffed cookies, while under-creaming yields denser treats.

Pro Tips for Perfect Linzer Strawberry Heart Cookies

1. Use high-quality butter for an irresistible flavor that enhances the overall cookie experience.
2. Adjust the sweetness of the jam to your preference by selecting a properly balanced product.
3. Keep your baking surface lightly floured to prevent dough sticking without impacting the cookie texture.
4. Have fun with shapes – explore various themed cookie cutters to make different holiday shapes.
5. Allow cookies to cool completely before applying the jam to prevent it from melting and getting messy.
6. Experiment with different fruit jams to add unique flavors to your cookies.
7. Consider adding a sprinkle of powdered sugar on top for an exquisite finish that enhances your cookie’s visual appeal.
8. Always keep an eye on your cookies towards the end of baking to achieve the perfect golden hue.

Variations and Adaptations

You can adjust these Linzer Strawberry Heart Cookies to suit various regional preferences. In Austria, it’s common to replace strawberry jam with raspberry or apricot, offering diverse flavors while keeping the essence of the Linzer cookie intact. Seasonal adaptations can also shine; using seasonal fruits for filling not only brings freshness but also creates a unique flavor profile that reflects different times of the year.

Dietary modifications are also possible; for gluten-free options, substitute almond flour with a gluten-free blend that mimics similar textures and flavors while keeping the cookie true to its roots. Flavor variations are endless; consider adding spices like cinnamon or nutmeg to the dough for additional warmth and depth. Texture modifications can create interesting experiences—by making them thicker, you can enjoy denser cookies or thinner for a delightfully crisp bite.

For presentation alternatives, try sandwiching the cookies with different colored jams for a fun, visually appealing treat. A dusting of confectioners sugar or drizzling white chocolate on top can elevate your cookies to an entirely new level, making them suitable for any dessert platter.

Serving and Presentation Guide

When it comes to serving your Linzer Strawberry Heart Cookies, consider creative plating techniques. A simple yet elegant display on a cake stand offers a striking centerpiece that draws attention. Garnishing ideas like edible flowers or fresh fruit beside the cookies can add a pop of color and create an inviting atmosphere.

Traditional accompaniments include coffee or tea, which serves as the perfect beverage duo for indulging in these sweet treats. Modern serving suggestions can include unique packaging for gifting, using decorative boxes tied with a ribbon that adds a personal touch. Temperature considerations are vital—serve them at room temperature for the best flavor experience.

Portion control tips also play a significant role; consider serving smaller portions for gatherings, allowing guests to sample a variety, enhancing their overall dessert experience.

Wine and Beverage Pairing

To complement your Linzer Strawberry Heart Cookies, consider pairing them with a light sparkling wine, such as Prosecco, which enhances the sweet flavors without overpowering them. For a more casual approach, a refreshing iced tea with lemon showcases the cookies’ fruity aspects while providing a delightful balance.

Non-alcoholic options like sparkling cider make a lovely pairing as well, amplifying the cookies’ flavors with its fruity notes. If coffee or tea is more your style, a rich dark roast or herbal tea can create an invigorating and calming contrast to the sweetness of the cookies.

Ensure beverages are served at optimal temperatures to enhance flavors: chilled for sparkling options while warm for coffee or tea complements the cookies beautifully.

Storage and Shelf Life

Proper storage ensures your Linzer Strawberry Heart Cookies remain fresh for days. Store them in an airtight container at room temperature to maintain their texture. For longer storage, consider freezing them before adding the jam; this allows for optimal freshness. Use parchment paper between layers to prevent sticking.

Keep an eye on expiration dates for ingredients like jam, as spoilage could compromise flavor. Signs of spoilage in the cookies appear as a dry texture or a change in color or smell. When reheating, low temperatures will help retain moisture and flavor without overcooking the cookies. As a guideline, frozen cookies can last up to three months.

Make Ahead Strategies

Creating your Linzer Strawberry Heart Cookies can be eased through a few simple make-ahead strategies. Begin by preparing the dough in advance and refrigerating it, allowing you to bake fresh cookies when desired. Roll the cookies and freeze them on a baking sheet before transferring them to an airtight container for later baking.

Assembling the cookies is another area where you can save time; consider preparing the cookies and storing the jam separately. When ready to serve, simply sandwich them together without compromising on quality.

Keep the ingredients fresh throughout the process for optimal flavor, and add fresh garnishes right before serving to maintain their vibrant appearance.

Scaling Instructions

Scaling your Linzer Strawberry Heart Cookies is easy. To halve the recipe, adjust each ingredient accordingly while keeping cooking times consistent. For doubling or tripling, ensure you have adequate kitchen space and larger baking sheets.

Equipment adjustments may be necessary, consider using multiple trays for baking simultaneously if you’re increasing the quantity. Timing modifications are subtle, but check for doneness more frequently as larger batches may bake unevenly. Finally, be mindful in storage considerations, ensuring you have ample containers available for your delicious creations.

Nutritional Deep Dive

Understanding the nutritional content of your Linzer Strawberry Heart Cookies can enrich your baking experience. Each cookie provides a moderate balance of macronutrients, with healthy fats from almond flour and butter contributing to its energy density.

Micronutrient analysis reveals the richness of vitamins and minerals in almonds, alongside the antioxidants present in strawberries, offering health benefits despite the indulgent essence.

Portion analysis is crucial in maintaining balance; enjoying cookies in moderation allows for enjoyment without the guilt, promoting healthier eating habits. Incorporating them into a balanced diet can be part of a thoughtful approach to weight management.

Dietary considerations such as gluten-free adaptations increase accessibility to various individuals, allowing everyone the chance to experience the joy of linzer cookies.

Dietary Adaptations

For those with gluten sensitivities, creating gluten-free Linzer Strawberry Heart Cookies is achievable by substituting almond flour with a certified gluten-free flour blend. This adds versatility without sacrificing taste or texture.

Dairy-free versions can be crafted using plant-based butters, ensuring everyone enjoys these cookies at gatherings. A vegan adaptation can replace eggs with flaxseed meal or applesauce, providing moisture and binding without animal products.

Low-carb or keto variations can involve replacing sugar with erythritol or another sweetener, while almond flour retains healthy fat content. Each dietary conversion encourages exploration, making the Linzer cookie inclusive for various lifestyles and preferences.

Troubleshooting Guide

Addressing common texture issues, underbaking can lead to a doughy result. Ensure that cookies are baked until just golden for a perfect balance of softness and structure.

Flavor balance can be challenged by overly sweet or tart ingredients. Taste your dough and jam before assembly to ensure proportions are pleasing.

Temperature problems arise with uneven baking; rotating trays halfway through baking time helps to ensure even exposure to heat. Equipment challenges, such as cookie cutters not working effectively, can be mitigated by keeping the dough well-floured.

Ingredient substitutions may lead to different textures; if using different flours, be mindful of moisture content. Finally, timing concerns, particularly with chilling, should not be overlooked—adequate chilling helps with both dough consistency and baking quality.

Recipe Success Stories

Community feedback highlights the delight of baking Linzer Strawberry Heart Cookies among families. Many have shared their variations, infusing local flavors and personal touches that create new traditions while maintaining the heart of the original recipe.

Photographers enjoy capturing the beauty of these heart-shaped cookies, showcasing how they fit into holiday celebrations and gatherings. The stories behind these cookies often feature family memories, bringing the generations together through shared baking experiences.

Readers often suggest fun activities to accompany, such as decorating cookies during family gatherings, making the process both engaging and enjoyable.

Adapting the recipe for different themes has created numerous success stories, from wedding favors to festive holiday treats, proving the cookie’s versatility is endless.

Frequently Asked Questions

Can I use a different type of flour?

Yes! While almond flour is traditional for Linzer cookies, you can use all-purpose flour or a gluten-free blend to meet dietary needs. Just be aware that texture may vary slightly.

How do I store leftover cookies?

Store cooled cookies in an airtight container at room temperature for up to a week. For extended freshness, freeze them prior to adding the jam and enjoy later!

Can I make the dough ahead of time?

Absolutely! You can prepare the dough up to two days in advance and keep it covered in the refrigerator until you’re ready to roll and bake the cookies.

Is it necessary to chill the dough?

Chilling the dough is essential. It helps solidify the butter, ensuring your cookies maintain their shape when baked. It’s highly recommended for the best results.

What if I don’t have a cookie cutter?

No problem! You can use a knife to cut out heart shapes or even any shape you like. Just be creative!

Can I substitute the filling?

Yes! Feel free to use any fruit jam of your choice, from raspberry to apricot—each will bring different flavors to your cookie treat.

Do I need to sift the flour?

Sifting is usually not necessary when using almond flour. However, for all-purpose flour, sifting can help prevent clumping.

Can I add nuts or spices to the dough?

Definitely! Incorporating finely chopped nuts or spices like cinnamon can enhance the flavor profile, making your cookies even more unique.

Do these cookies freeze well?

Yes, you can freeze the baked cookies without the jam. They can last up to three months. Just remember to thaw and add the jam when you’re ready to serve.

How can I achieve perfect cookie shapes?

Using well-floured surfaces and cookie cutters helps create clean edges. Also, ensure that your dough is rolled evenly for consistent thickness.

Additional Resources

Explore related recipes that complement your Linzer Strawberry Heart Cookies, such as almond tarts or shortbread variations, providing a deeper dive into your dessert repertoire.

Seek technique guides focusing on cookie-making basics to enhance your baking skills, ensuring success with every batch. Additionally, ingredient information like almond flour benefits and proper usage will help you make informed choices in your baking.

Equipment recommendations can assist in selecting the best tools for your kitchen, enhancing not only convenience but the quality of your baked goods. Also, consider seasonal variations in fruits and ingredients to maintain freshness and encourage creativity in your baking endeavors.

Join the Conversation

We invite you to share your Linzer Strawberry Heart Cookies experiences across social media platforms! Tag us with your beautiful photos and adaptations of this delightful recipe. Share your baking tips, variations, and thoughts on what makes these cookies special to you.

Participate in the comments section to engage with others who have tried this recipe. Your insights could inspire fellow bakers to explore their versions, creating a sense of community and shared love for baking.

Don’t forget to leave a review or star rating to help others navigate their own baking journey with these cookies. Happy baking!

The Recipe

Linzer Strawberry Heart Cookies

Serves: 24 cookies

Prep Time: 30 mins

Cook Time: 15 mins

Total Time: 45 mins

Kitchen Equipment Needed

  • Mixing bowl
  • Rolling pin
  • Heart-shaped cookie cutter
  • Baking sheet
  • Parchment paper

Ingredients

  • 2 cups almond flour
  • ½ cup all-purpose flour
  • ¾ cup unsalted butter, softened
  • ½ cup powdered sugar
  • 1 egg yolk
  • 1 tsp vanilla extract
  • 1 tsp almond extract
  • ¼ tsp salt
  • ½ cup strawberry jam

Directions

  1. In a mixing bowl, cream together the softened butter and powdered sugar until smooth and fluffy.
  2. Add egg yolk, vanilla extract, and almond extract, mixing until well combined.
  3. Gradually add both flours and salt, stirring until a dough forms.
  4. Chill the dough in the refrigerator for at least 1 hour.
  5. Preheat the oven to 350°F (175°C) and line baking sheets with parchment paper.
  6. Roll out the dough on a floured surface to about ¼ inch thick.
  7. Using the heart-shaped cookie cutter, cut out cookies and transfer them to the lined baking sheets.
  8. Cut out the center of half of the cookies using a smaller heart cutter.
  9. Bake for 12-15 minutes or until lightly golden, then cool completely.
  10. Spread strawberry jam on the bottom side of the solid cookies and sandwich with the cookies with cut-outs.

Recipe Notes

  • For a twist, try different fruit jams based on preference.
  • Ensure cookies cool completely before applying the jam to avoid melting.
  • Your dough may require a little flour while rolling—not too much to prevent tough cookies.

Best Red Velvet Cake Minis – Perfect for Parties

Red Velvet Cake Minis: The Perfect Bite-Size Indulgence

⚖️
Difficulty
Easy

⏲️
Prep Time
20 mins

🕒
Cook Time
15 mins

⏱️
Total Time
35 mins

🍽️
Servings
12 minis

Welcome to a joy-infused journey with these delightful Red Velvet Cake Minis! Often hailed for their unique charm, these bite-sized treats combine the classic flavors of rich red velvet cake with the velvety cream cheese frosting that makes your taste buds dance. The vivid hue of deep red contrasted with the creamy white frosting not only appeals visually but also heightens the anticipation of the first bite, a moment that’s pure bliss for any dessert lover.

Each mini cake is an art piece, capturing the essence of celebration and indulgence. Whether planning a special event, a cozy gathering, or simply treating yourself, these Red Velvet Cake Minis bring a touch of elegance that makes any occasion memorable. The soft, moist texture melts in your mouth while the luscious frosting complements the cake perfectly, making every bite a heavenly experience. Don’t be surprised if you find yourself reaching for a second, or even a third mini; they’re just that irresistible!

Quick Recipe Highlights

  • Flavor Profile: Enjoy the subtle cocoa, combined with a hint of tanginess from the cream cheese that elevates each mini to a new level of deliciousness.
  • Texture: These mini cakes feature a moist and tender crumb, contrasted with the smooth and creamy texture of the frosting.
  • Aroma: The delightful aroma of baked cocoa and vanilla wafts through your kitchen, inviting everyone to indulge.
  • Visual Appeal: The striking red color of the cake, topped with a generous swirl of white frosting, creates a stunning presentation.
  • Skill Level Needed: This easy recipe is perfect for both beginners and seasoned bakers looking to whip up something special with minimal fuss.
  • Special Equipment: A mini cupcake tray and piping bags are ideal for achieving that perfect presentation.

Recipe Overview

  • Difficulty Level: Red Velvet Cake Minis are surprisingly easy to make, requiring basic baking skills. If you can mix batter and frost a cupcake, you can create these delectable treats.
  • Category: These minis fall into the dessert category, perfect for any sweet tooth looking for a bite-sized treat.
  • Cuisine: Originating in the Southern US, red velvet cake carries a rich culinary tradition and is often served during celebrations and festive gatherings.
  • Cost: Generally, the cost of ingredients is quite reasonable, making it an accessible dessert for everyone.
  • Season: These delightful muffins can be enjoyed year-round, but they’re especially popular during holidays and special occasions like Valentine’s Day.
  • Occasion: Perfect for gatherings, birthdays, and holidays, or just a special treat for yourself on any day!

Why You’ll Love This Recipe

The taste and texture of these Red Velvet Cake Minis are outrageously captivating. The initial sweetness paired with a subtle hint of cocoa creates a balance that’s both satisfying and indulgent. The tangy cream cheese frosting adds a wonderful depth, ensuring that each bite is dynamic and thoroughly enjoyable.

Convenience is a strong selling point as well. With a straightforward recipe and quick preparation, you can have these mini delights whipped up in no time. They bake swiftly, making them an excellent choice for last-minute gatherings or when craving a sweet treat.

From a nutritional standpoint, while delightful sweets should be enjoyed in moderation, these minis can provide a touch of joy and indulgence in your diet. Incorporating traditional uplifting ingredients means they can bring a moment of happiness, especially during gatherings.

The social aspect of these minis is notable. They are not only perfect for personal enjoyment but encourage sharing and bringing people together, whether on a special occasion or casual get-togethers. Everyone loves a good dessert, and these will undoubtedly foster conversations and smiles.

Lastly, cost-effectiveness cannot be overlooked. With easily obtainable ingredients, these Red Velvet Cake Minis present an affordable way to create a dessert that feels fancy and special without breaking the bank.

Historical Background and Cultural Significance

The origin of red velvet cake can be traced back to the 1800s, believed to be a product of the Southern U.S. This cake became famous thanks to its unique color and texture, which became a signature characteristic that many sought after for celebrations and events.

Culturally, red velvet cake has evolved into a symbol of indulgence and festivity. It is often associated with love and emotions, making it a favorite for Valentine’s Day and weddings, where the depth of the red color evokes romantic sentiments.

Over time, the classic recipe has transformed as bakers began to experiment, often incorporating buttermilk or a dash of cocoa to enhance flavors. This slight evolution only increased its appeal and made it a staple in many households across the country.

Regionally, variations exist that explore different textures, flavors, and frostings. From classic cream cheese icing to buttercream or whipped cream, regional preferences often shape how red velvet cake is presented and enjoyed.

Ingredient Deep Dive

**Flour:** Essential for the cake structure, all-purpose flour creates a tender crumb. It’s important to sift the flour to avoid clumps and enhance the lightness of the cake. Store it in a cool, dry place for longevity.

The nutritional benefits include being a source of carbohydrates for energy. When choosing flour, opt for a brand known for consistent quality to ensure the best results.

**Sugar:** Sugar sweetens the cake, balancing the cocoa’s bitterness and creating moistness via caramelization during baking. Store your sugar in a sealed container to keep it dry and free-flowing.

Nutritionally, sugar should be consumed in moderation due to its high caloric content. It’s vital to select the highest quality for a pronounced sweetness, which directly impacts the cake’s overall flavor.

Common Mistakes to Avoid

  • Overmixing the batter can result in a tough cake. Mix until just combined to keep it tender.
  • Not measuring ingredients accurately can throw off the balance of the recipe. Always use a kitchen scale for precision.
  • Underbaking can lead to cakes that are too moist or gummy. Use a toothpick to check for doneness.
  • Skipping the sifting process can lead to clumpy batter. Always sift dry ingredients for an even mixture.
  • Ignoring the importance of room temperature ingredients can yield disappointing results. Allow eggs and butter to come to room temperature before mixing.
  • Not letting the cakes cool properly before frosting can cause the icing to melt. Allow them to cool completely on a wire rack.
  • Using the wrong type of cocoa powder might affect flavor. Stick to Dutch-processed cocoa for rich taste.
  • Forget to preheat the oven can lead to uneven baking. Always double-check the oven temperature before placing the cakes in.

Essential Techniques

**Baking:** Proper baking technique is crucial. Preheat your oven adequately for even rising and consider using an oven thermometer for accuracy. Always double-check if your baking powder and baking soda are fresh to ensure optimal leavening.

**Frosting Application:** When applying frosting, a crumb coat helps seal in any loose crumbs for a cleaner finish. Use a spatula to spread frosting evenly, working from the center outward.

Pro Tips for Perfect Red Velvet Cake Minis

Ensure all ingredients are at room temperature for a smoother batter. This helps in better blending, yielding a finer texture.

Use high-quality cocoa powder for a richer flavor. Dutch-processed cocoa brings out the deep flavors that make red velvet unique.

Consider chilling the frosted minis briefly before serving for better structure. This helps the cream cheese frosting hold up and stays nicely presented.

Don’t be afraid to decorate! Using sprinkles or edible glitter adds an amazing visual touch to these elegant treats.

Experiment with flavor variations by adding almond extract for an interesting twist on traditional vanilla.

Always taste your frosting before applying to adjust sweetness if needed. A balance between sweetness and tanginess will delight the palate.

Variations and Adaptations

For a twist, consider a chocolate variation by incorporating melted dark chocolate into the batter. This addition enhances the cake’s richness while keeping its signature color.

Seasonal adaptations might include adding spices like cinnamon or pumpkin puree during the fall for a seasonal flair.

If dietary modifications are needed, consider substituting gluten-free flour to accommodate those with gluten sensitivities while maintaining a delicious taste.

Explore flavor variations by adding a hint of coffee to enhance the chocolate profile in the cake batter for an added depth.

To change the texture, you can experiment with almond flour in place of some all-purpose flour for a unique nutty flavor.

For presentation alternatives, consider serving these minis on a tiered cake stand, creating an eye-catching focal point for any dessert table.

Serving and Presentation Guide

Plating these mini cakes can be a show-stopper at any gathering. Consider using colorful cupcake liners for added flair when serving directly from the tray.

Garnishing ideas include fresh berries or mint leaves to bolster visual appeal and enhance flavors. Aim for a combination of textures and colors for an attractive presentation.

Classic accompaniments consist of a scoop of vanilla ice cream or drizzle of chocolate sauce, enhancing the overall indulgence of your dessert.

For modern serving suggestions, consider creating mini dessert cups layered with cake crumbs and frosting, creating a parfait-style treat.

Temperature considerations are essential; serve these minis at room temperature to enjoy the cake’s softness and the frosting’s creaminess.

Portion control tips suggest serving these in sets of two or three to encourage tasting without overwhelming guests.

Wine and Beverage Pairing

Pairing these Red Velvet Cake Minis with a sweet dessert wine, like a late-harvest Riesling, will enhance the sweetness of the cake.

For a non-alcoholic alternative, consider pairing with creamy vanilla milkshakes or iced coffee, which complements the rich flavors beautifully.

When considering tea, a light Earl Grey enhances the cake’s richness while offering complementary citrus notes.

Temperature-wise, serve wines chilled to create a beautiful contrast against the decadent warmth of the mini cakes.

Creative serving suggestions for drinks include unique flavor combinations, like a mocha latte, which echoes the cake’s cocoa profile.

Storage and Shelf Life

Proper storage methods involve keeping these minis in an airtight container to maintain their freshness and moisture. Stored correctly, they can last up to 3 days at room temperature.

Refrigeration may prolong their shelf life, but it can alter the texture of the frosting. If you choose to refrigerate, let them come to room temperature before serving for the best experience.

Signs of spoilage include an off smell or discoloration. Always observe the aesthetics and aroma to ensure they are still fresh.

If you need to freeze them, slicing them into sections before freezing may help for easy portioning later on. These can last several months when properly wrapped.

Make Ahead Strategies

To streamline your efforts, consider baking the mini cakes a day ahead and storing them in airtight containers. This will maintain their taste and texture.

If you plan to frost later, keep the cakes un-frosted in the fridge and frost them just before serving for optimal presentation and flavor.

Separate components can be stored for enhanced quality, such as storing frosting in the fridge in an airtight container. This allows for fresh assembly on the serving day.

Fresh elements like fruit toppings can be added right before serving; strawberries or raspberries add a great flavor contrast.

Scaling Instructions

Halving the recipe is straightforward; just divide each ingredient by two, making it an excellent option for smaller gatherings.

Doubling or tripling requires careful measurement to ensure consistent results; be mindful of baking times as larger quantities may extend the cooking time slightly.

For equipment, make sure to use larger trays if significantly scaling up to handle the extra batter efficiently.

Timing modifications are essential; larger batches may take additional time to bake, so keep an eye on them toward the end of the baking window.

Always consider storage considerations when making larger batches, ensuring you have ample space for cooling and storing your creations.

Nutritional Deep Dive

The macro breakdown for these Red Velvet Cake Minis involves a consideration of carbohydrates, fats, and proteins due to their indulgent nature. Each mini cake provides a mix that caters to sugar cravings while offering energy from carbs.

Micronutrient analysis can reveal benefits such as iron from cocoa and calcium from dairy-based frosting. Each ingredient plays a role in providing essential nutrients.

Health benefits include the joy of indulging in a sweet treat that can lift your spirits, making them a perfect addition to celebrations.

Dietary considerations typically revolve around moderation, ensuring that while indulging, you remain mindful of portion sizes.

For weight management, consider serving these in smaller portions or sharing them at gatherings to satisfy your sweet tooth without overwhelming calorie intake.

Dietary Adaptations

For gluten-free adaptations, use a 1:1 gluten-free flour substitute. This ensures that those with gluten sensitivities can still enjoy these delectable treats.

Dairy-free adaptations can involve substituting plant-based butter and non-dairy cream cheese. This allows for a lactose-free option without sacrificing taste.

To create a vegan version, swap eggs for flax eggs and use almond milk instead of traditional dairy milk, thus including everyone in your dessert experience.

For low-carb options, consider using alternative sweeteners like erythritol for sweetness while keeping the carbs in check.

The keto approach can be achieved with almond flour in place of all-purpose flour, creating a much lower carbohydrate cake that stays true to form.

Paleo variations can involve using honey or maple syrup as sweeteners and avoiding processed sugars, staying true to whole food principles.

Troubleshooting Guide

If you encounter texture issues, ensure batter mixing is only to combine ingredients. Overmixing can lead to dense textures.

Flavor balance can be correct by adjusting sugar levels; always taste your batter before baking, ensuring a happy medium between sweetness and cocoa flavor.

Temperature problems could arise from oven miscalibration. Always use an oven thermometer to confirm the set temperature for even baking.

Common equipment challenges include improper measuring tools. Invest in a reliable scale to achieve precise measurements for better outcomes.

If using substitutions, be aware of how they can affect moisture levels; consider adjusting liquid ingredients accordingly.

Timing concerns should be noted; always check for doneness using a toothpick rather than relying solely on time.

Recipe Success Stories

Community feedback highlights a sense of joy and satisfaction, with many sharing their variations and adaptations on social media.

Readers have embraced the opportunity to customize these minis, adding personal touches that often lead to delightful surprises.

Success stories often include images of stunning presentations, demonstrating the versatility of these treats as eye-catching centerpiece desserts.

Photography tips suggest natural lighting for capturing the vibrant red of these cakes, making them even more enticing for sharing.

Frequently Asked Questions

1. Can I use buttermilk instead of regular milk?
Yes! Buttermilk adds a lovely tanginess and enhances the cake’s tenderness.

2. How do I achieve a richer red color?
Increase the amount of red food coloring slightly but do not overdo it to maintain balance.

3. Can I freeze these minis?
Absolutely! Just ensure they are sealed well to prevent freezer burn, and thaw before serving.

4. How long do they stay fresh?
They can last up to 3 days at room temperature or about a week in the fridge.

5. What can I substitute for eggs?
Options include flax eggs, applesauce, or commercial egg replacers.

6. Is there a gluten-free version of this recipe?
Yes! Simply use gluten-free flour to accommodate gluten-free diets.

7. What should I do if my frosting is too runny?
Chill it for a bit to thicken, or add more powdered sugar until the desired consistency is reached.

8. Can I add chocolate chips?
Certainly! Chocolate chips can enhance the chocolaty flavor of the cake for added deliciousness.

9. How can I make these cake minis more festive?
Add colored sprinkles or edible glitter on top after frosting for a celebratory touch.

10. What’s the best way to transport these minis?
Use cupcake boxes or containers that allow for stacking without crushing the frosting.

Additional Resources

For more delicious recipes, check out our collection of cupcake and mini dessert recipes to expand your baking repertoire.

Technique guides that delve into frosting methods and advanced baking strategies will help you fine-tune your skills.

Ingredient information can assist with choices when selecting the best cocoa powder or cream cheese for your recipes.

Don’t forget our equipment recommendations, which can help you equip your kitchen for successful baking adventures.

Seasonal variations can inspire more mini dessert ideas, from pumpkin spice to summer berry creations, diversifying your dessert offerings.

Join the Conversation

We’d love to see your creations! Share your photos on social media, and don’t forget to tag us. Your successful bakes inspire our community!

Knowing your tips and recipes are being enjoyed by others is fulfilling. Share your experience and suggestions in the comments section of the recipe post.

Engage with fellow bakers and exchange photography tips that can help elevate your dessert showcase.

Encouragement for recipe reviews and comments helps foster a supportive community where everyone can thrive.

The Recipe

Red Velvet Cake Minis

Serves: 12 minis

Prep Time: 20 mins

Cook Time: 15 mins

Total Time: 35 mins

Kitchen Equipment Needed

  • Mini cupcake tray
  • Mixing bowls
  • Electric mixer
  • Piping bag and tips
  • Measuring cups and spoons

Ingredients

  • 1 ¾ cups all-purpose flour
  • 1 cup granulated sugar
  • 1 teaspoon cocoa powder
  • 1 teaspoon baking soda
  • ½ teaspoon baking powder
  • ½ teaspoon salt
  • 1 cup vegetable oil
  • 1 cup buttermilk
  • 2 large eggs
  • 2 tablespoons red food coloring
  • 1 teaspoon vanilla extract
  • ½ teaspoon white vinegar
  • 1 package cream cheese frosting

Directions

  1. Preheat the oven to 350°F (175°C) and grease a mini cupcake tray.
  2. In a large bowl, combine flour, sugar, cocoa powder, baking soda, baking powder, and salt.
  3. In another bowl, whisk together oil, buttermilk, eggs, food coloring, vanilla extract, and vinegar until well blended.
  4. Gradually add the wet ingredients into the dry ingredients and mix until just combined.
  5. Pour batter into the prepared mini cupcake tray, filling each cup about 2/3 full.
  6. Bake for 12-15 minutes, or until a toothpick inserted comes out clean.
  7. Allow to cool in the tray for a few minutes before transferring to a wire rack to cool completely.
  8. Once cooled, frost with cream cheese frosting using a piping bag.

Recipe Notes

  • For added flavor, you can replace some of the vegetable oil with melted butter.
  • Store leftovers in an airtight container in the refrigerator for up to 3 days.
  • Feel free to experiment with different flavored frostings or add-ins like chocolate chips.

Easy Strawberry Cream Cheese Heart Danishes – So Flaky!

Strawberry Cream Cheese Heart Danishes: A Delightful Treat for Any Occasion

⚖️
Difficulty
Medium

⏲️
Prep Time
20 mins

🕒
Cook Time
25 mins

⏱️
Total Time
45 mins

🍽️
Servings
12 danishes

These Strawberry Cream Cheese Heart Danishes are not just delicious; they appeal to the heart too! Perfect for any gathering, whether it’s a brunch, a Valentine’s Day celebration, or just a sweet afternoon treat, these danishes ooze with a rich cream cheese filling and fresh strawberries nestled in a flaky pastry. Imagine piercing through the golden brown exterior to reach the sweet, tangy cream cheese interior, delighting your taste buds with every bite.

The beauty of these charming danishes lies not just in their flavor but also in their presentation. Shaped like hearts, they add a touch of love and whimsy to any platter. The vibrant red strawberries and the creamy, slightly sweet filling contrast beautifully against the golden pastry. As they bake, the aroma of buttery dough mingles with notes of fresh fruit and cream, drawing everyone into the kitchen. Prepare to impress your guests and indulge your family with this delightful recipe that transforms simple ingredients into a heartwarming dessert!

Quick Recipe Highlights

  • Flavor Profile: These danishes combine sweet strawberries, creamy cheese, and buttery pastry for a blissfully balanced taste.
  • Texture: Enjoy a mix of flaky pastry and a smooth, creamy filling that melts in your mouth.
  • Aroma: The enticing scent of baked pastry paired with strawberries will fill your kitchen.
  • Visual Appeal: With their heart shapes and vibrant colors, these danishes are perfect for any special occasion.
  • Skill Level Needed: Intermediate baking skills are recommended to create perfectly golden danishes.
  • Special Equipment: You will need a rolling pin, a baking sheet, and heart-shaped cutters for optimal results.

Recipe Overview

  • Difficulty Level: Although considered medium, making these danishes is an enjoyable and rewarding process for those who delight in baking.
  • Category: These Strawberry Cream Cheese Heart Danishes fall under pastries and desserts, making them an excellent choice for both breakfast and dessert.
  • Cuisine: This recipe is a charming reflection of European pastry-making traditions, hailed for its delightful flavors and creative presentations.
  • Cost: Ingredients for these danishes are relatively inexpensive, with strawberries being the most variable cost depending on the season.
  • Season: Spring and summer are ideal for showcasing fresh strawberries, although you can enjoy this treat any time of year.
  • Occasion: Perfect for holidays like Valentine’s Day, anniversaries, or just as a sweet surprise for loved ones.

Why You’ll Love This Recipe

The taste of these Strawberry Cream Cheese Heart Danishes is a festival of flavors. The combination of the sweet strawberries and the creamy cheese filling creates a harmonious blend that pleases everyone. Each bite offers a satisfying crispness thanks to the flaky pastry, contrasting beautifully with the smooth texture inside. The use of fresh strawberries elevates the sweetness to a natural level, ensuring that each danish is indulgent yet light.

In terms of convenience, this recipe allows for some make-ahead options. You can prepare the filling in advance and store it in the fridge. This means you can whip up the danishes for a gathering or special occasion with ease, minimizing your prep time on the day of the event. This flexibility is a major advantage for busy bakers who don’t want to compromise on flavor or quality.

Nutritionally, these danishes offer a delightful way to enjoy fruit in your baked goods. Strawberries are rich in vitamins and antioxidants, promoting overall health. Paired with cream cheese, which contains calcium and protein, these pastries allow you to indulge without completely straying from balanced nutrition.

From a social standpoint, presenting these charming danishes at a gathering is sure to impress your guests, sparking conversation and compliments. Their heart shape is a wonderful icebreaker and they look stunning arranged on a serving platter alongside coffee or tea, adding elegance to your table setting.

Lastly, cost-effectiveness plays a significant role. With easily accessible ingredients and simple preparation methods, you can create a high-end dessert that rivals those from a bakery without breaking the bank. This makes these danishes not only a guilty pleasure but also a smart investment for any home baker.

Historical Background and Cultural Significance

The origins of pastry go back centuries, with recipes evolving across cultures focused on flaky textures and sweet fillings. The tradition of baking danishes in heart shapes embodies a gesture of love and care, reminiscent of how pastries were gifted among loved ones in the past. The heart shape has become emblematic of affection in many cultures, making these danishes a perfect treat for expressing love.

Culturally, danishes have European roots, specifically in Denmark where the pastry is celebrated. Over time, this delightful pastry has been embraced by various nations, each putting its unique spin on the fillings and shapes. The addition of fresh strawberries aligns with fondness for seasonal and fresh ingredients cherished in various culinary traditions.

The evolution of this recipe reflects contemporary tastes, where lighter options with fresh fruit fillings have gained popularity. Today, heart-shaped pastries symbolize romantic gestures, making them fitting for anniversaries and Valentine’s Day, seamlessly blending history with modern culinary arts.

Regional variations of heart-shaped danishes can be found worldwide, with different fruits, fillings, and creams being incorporated, shedding light on how traditional recipes can transform yet remain adored. Each culture adds its identity to this timeless pastry form, reinforcing its continued relevance and universal appeal.

Ingredient Deep Dive

Strawberries, as a primary ingredient, have been cultivated for centuries and are celebrated for their sweetness and versatility. Rich in vitamin C and antioxidants, they offer numerous health benefits, including improved heart health. For selection, choose berries that are bright red with a fragrant aroma, and avoid overly soft ones. Store strawberries in the refrigerator but consume them within a few days to maintain freshness. You can substitute with raspberries or blueberries for a different yet delightful flavor.

Cream cheese, another essential ingredient, has a rich culinary history dating back to the 19th century in the U.S. It brings a rich, creamy texture to the danishes while contributing calcium and protein. When selecting cream cheese, opt for full-fat versions for a creamier filling. Store it in the refrigerator and use it within a few weeks. For lower-fat options, consider ricotta mixed with a bit of sour cream as a tasty substitute.

Common Mistakes to Avoid

  • Overworking the dough: This can lead to tough pastries instead of the desired flakiness. Handle the dough gently and only as needed.
  • Incorrect oven temperature: Ensure your oven is properly calibrated to prevent undercooked or burnt pastries. Use an oven thermometer for accuracy.
  • Not chilling the dough: Skipping the chilling step affects the texture. Cold dough will create a flakier pastry.
  • Poorly measuring ingredients: Precision is key in baking. Use a kitchen scale for best results.
  • Using too much filling: Overloading can make danishes spill over; ensure to use the right amount for even cooking.
  • Neglecting to preheat the oven: Always preheat to create even baking conditions for flaky pastries.
  • Wrong baking time: Keep a close eye during baking, as each oven is different; set a timer and check for golden tops.
  • Using stale ingredients: Always check for freshness in your ingredients, particularly baking powder and flour.
  • Failing to egg wash: An egg wash enhances color and shine. Don’t skip this step for polished danishes.
  • Not allowing to cool: Cooling on a wire rack ensures they maintain their texture and don’t become soggy.

Essential Techniques

Rolling pastry dough is crucial for achieving the right thickness for your danishes. Using a light touch, roll from the center outwards and rotate the dough frequently to maintain evenness. Avoid too much flour, which can result in tough pastry.

Moreover, properly preparing the filling is essential to achieve a balanced flavor. Mix cream cheese, sugar, and a hint of vanilla to create a smooth filling. Ensure it’s at room temperature for easy blending, allowing for a creamy texture that spreads beautifully.

Pro Tips for Perfect Strawberry Cream Cheese Heart Danishes

1. Chill your ingredients: Use cold butter and cream cheese for a flakier pastry. This will contribute to lighter danishes that puff up beautifully.

2. Infuse flavors: Consider adding citrus zest to the cream cheese for a refreshing twist that complements the strawberries perfectly.

3. Experiment with toppings: A sprinkle of powdered sugar or a drizzle of icing on top can elevate the aesthetic and flavor significantly.

4. Opt for fresh strawberries: Using fresh strawberries instead of frozen will create a more vibrant flavor and texture.

5. Bake in small batches: If your oven tends to cook unevenly, baking smaller batches can help ensure each danish bakes uniformly.

6. Create an egg wash for shine: A mixture of egg and milk brushed over the surface before baking results in a beautiful golden finish.

7. Try alternative crusts: Using phyllo dough or puff pastry can offer different textures and make this recipe versatile.

8. Keep a close eye: Since ovens vary, check for doneness a few minutes before the suggested baking time to prevent burning.

Variations and Adaptations

Regional variations of heart danishes can include different fruit fillings like cherry, blueberry, or peach. For seasons, consider incorporating autumn flavors like spiced apple or pumpkin cream cheese during the fall months.

For dietary modifications, explore gluten-free pastry options using almond flour or gluten-free all-purpose flour to cater to gluten intolerances.

Flavor variations can also come from experimenting with cheese types; for instance, using mascarpone instead of cream cheese can provide a different richness to the filling.

Texture modifications can enhance the experience; try adding a crumble topping for added crunch or serve with a scoop of ice cream for a delicious dessert twist.

For presentation alternatives, consider serving these pastries in a tiered dessert stand, alongside fresh fruit or whipped cream, for added elegance.

Serving and Presentation Guide

When plating these Strawberry Cream Cheese Heart Danishes, arrange them on a decorative plate, with some fresh mint leaves nearby for a pop of color. Dust with powdered sugar just before serving for a touch of elegance.

Garnish ideas might include a berry compote or a drizzle of melted chocolate for a more decadent touch, enhancing both the flavor profile and the visual appeal of the dish.

Traditional accompaniments like a cup of coffee or tea can complement the danishes beautifully, while modern serving suggestions might include pairing them with a light fruit salad for a refreshing contrast.

Temperature considerations are important; serve these danishes slightly warm for the best flavor and texture experience. Keeping portion control in mind, offering smaller pieces can allow guests to sample more treats, enhancing their overall experience.

Wine and Beverage Pairing

For a delightful wine pairing, consider a light, moderately sweet wine such as Riesling or Moscato, which complements the sweetness of the strawberries while balancing the creaminess of the cheese.

For non-alcoholic alternatives, sparkling water with a splash of fruit juice can enhance the freshness of the danishes without overshadowing their flavors.

If you enjoy coffee, a light roast coffee would nicely accompany your danishes, offering a mellow flavor that complements the pastry without overpowering it.

Temperature considerations are key; serve wines chilled and enjoy coffee brewed hot to create a satisfying taste contrast.

For an intimate presentation, consider serving these beverages in lovely glassware or vintage mugs to elevate the entire dining experience.

Storage and Shelf Life

To store these Strawberry Cream Cheese Heart Danishes, place them in an airtight container at room temperature if consumed within two days. For additional shelf life, refrigeration is recommended, but consume within a week to maintain freshness.

Freezing danishes is also an option. Wrap each pastry tightly in plastic wrap and store them in a freezer bag. They can be frozen for up to three months. To reheat, simply bake from frozen at 350°F (175°C) for about 20 minutes or until warmed through.

Signs of spoilage include a sour scent or unusual texture changes, so it’s always essential to check before consuming, especially after a few days of storage.

Make Ahead Strategies

To make these delightful danishes ahead of time, you can prepare the dough and filling in advance. Chill the dough for up to two days before rolling out and shaping danishes. The filling can be made a day earlier and stored in the refrigerator, allowing you to enjoy the baking day without last-minute stresses.

When assembling, keep pastries unbaked and covered until ready to bake, which maintains their freshness. Avoid baking more than a day in advance, as baked danishes are best fresh for optimal texture and flavor.

For reheating guidelines, if baked ahead of time, place them in a preheated oven at 350°F (175°C) for about 10 minutes or until heated through to restore original flakiness.

Fresh element additions like new berries or whipped cream can be added just before serving, ensuring a fresh appeal even if the pastries were prepared earlier.

Scaling Instructions

If you need to halve the recipe, simply divide each ingredient in half. Keep in mind that baking time might require minor adjustments, so monitor closely for golden brown perfection.

For doubling or tripling, ensure you have a large enough workspace and aligning baking sheets available. Larger batches may require additional time in the oven to achieve that perfect bake.

Equipment adjustments may involve using multiple baking sheets and rotating them halfway through baking to ensure even cooking.

Ultimately, always consider storage when scaling; larger batches can be made, but ensure you have the space to store unbaked danishes if necessary.

Nutritional Deep Dive

The macro breakdown of these danishes reveals a balanced combination of carbohydrates from the pastry, fats from the cream cheese, and natural sugars from the strawberries. Each serving contains a healthy mix of these essential nutrients while allowing for a satisfying dessert option.

Micronutrient analysis highlights vitamins A and C from the strawberries, alongside calcium and vitamin B from cream cheese. This makes these danishes not only delicious but also a somewhat healthier treat than many other desserts.

Nutritional benefits include the antioxidant properties of strawberries, known to promote heart health. These pastries can be incorporated into a balanced diet, offering enjoyment without significant guilt.

Portion analysis suggests maintaining a mindful approach; one or two danishes paired with a side of fruit can provide a delightful treat while keeping sugars in check. For weight management, enjoying these pastries in moderation is key to maintaining a healthy lifestyle while satisfying sweet cravings.

Dietary Adaptations

For gluten-free adaptations, substitute regular flour with a gluten-free blend to create a similar texture without the gluten. Ensure baking powder is also gluten-free for best results.

To make these danishes dairy-free, substitute cream cheese with a dairy-free alternative such as cashew cream or a vegan cream cheese option, ensuring you maintain the flavor profile.

For a vegan version, replace the egg wash with a plant-based milk option for brushing and choose a dairy-free cream for the filling, such as coconut cream, for a delicious and cruelty-free treat.

Low-carb adaptations can feature protein-rich nut flours, offering a denser option while maintaining flavors. Adapt sweetness with sugar-free alternatives to keep carbs lower.

Paleo fans might enjoy creating pastry using almond flour and coconut oil to replace traditional ingredients while retaining a flaky texture.

Low-FODMAP dieters can experiment with substituting strawberries with lower-FODMAP fruits like blueberries in moderation, maintaining the spirit of the pastry while adapting to dietary needs.

Troubleshooting Guide

If your danishes are overly dense, reconsider your dough handling; over-kneading may have occurred, inhibiting rise. Use a light, loving touch when rolling out.

To counteract flavor balance issues, adjust sweetness by sprinkling sugar over the filling or adding a bit of lemon zest to brighten flavors and cut through richness.

Temperature problems in baking can often be corrected by ensuring the oven is preheated and properly calibrated. If pastries aren’t browning, consider raising the oven temperature slightly.

Overcoming equipment challenges may require investing in a quality rolling pin with measurements or trying different baking sheets if you notice uneven results.

If you find your filling too runny, add a bit of cornstarch or allow it to chill longer before using to stabilize consistency for stuffing inside pastries.

Finally, timing concerns can be mitigated with better scheduling; prepare ingredients ahead of time and align your cooking schedule to avoid unnecessary rush.

Recipe Success Stories

Our community has seen wonderful feedback praising these Strawberry Cream Cheese Heart Danishes for their delightful taste and beautiful presentation. Many home bakers have reported success using alternative fruit fillings and varying the shapes to celebrate different occasions.

Variations suggested by readers often include experimenting with different types of fruit preserves as fillings, creating unique combinations that highlight personal preferences in flavor.

Readers have shared remarkable stories of creating these danishes for special family events, often noting how they have become a treasured tradition for seasonal gatherings.

Photography tips also circulate in the community, encouraging bakers to capture the delicate, golden hues and brilliant red strawberries to inspire others in their baking journey.

Frequently Asked Questions

Can I use frozen strawberries for the filling?
Yes, you can use frozen strawberries, but ensure to thaw and drain excess moisture to prevent a soggy filling.

How long can I store baked danishes?
Baked danishes can be stored at room temperature for 1-2 days or refrigerated for up to a week in an airtight container.

Is it necessary to chill the dough before baking?
Yes, chilling the dough helps create a flakier pastry as it allows the butter to solidify before baking.

Can I substitute cream cheese?
Yes, mascarpone or ricotta can be great substitutes for a different flavor and texture, while keeping the filling rich.

What is the best way to reheat leftover danishes?
Reheat in a preheated oven at 350°F until warm, about 10-15 minutes, to regain crispiness.

Can I make these danishes ahead of time?
Absolutely! Prepare the filling and dough ahead of time to streamline the process on the day you plan to serve.

What if my filling is too runny?
If your filling is runny, adding cornstarch can help thicken it before spreading it onto the pastry.

Are these danishes suitable for freezing?
Yes, danishes can be frozen unbaked or baked; just ensure they’re well wrapped to prevent freezer burn.

What’s the best way to serve these danishes?
Serve them warm with a sprinkle of powdered sugar on top, alongside fresh fruit or whipped cream for added delight.

What’s the secret to flaky pastry?
Using cold butter and minimal handling of the dough are key to achieving those desirable flaky layers.

Additional Resources

For more delightful recipes, check out our collection of pastry-related desserts and tasty treats. You can also explore our technique guides to master the art of creating beautiful pastries at home.

Ingredient information is available for anyone looking to understand more about baking essentials and exciting additions to elevate your danishes.

We also recommend our favorite kitchen tools that will enhance your baking experience, ensuring you have the best equipment for success in creating these pastries.

Seasonal variations are a taste to explore; consider adding festive flavors or fillings based on the occasion to keep your baking fresh and exciting.

Join the Conversation

We love hearing from our readers! Share your creations on social media with the hashtag #HeartDanishAdventure. Don’t forget to snap and share your photography tips and feedback after trying the recipe!

Your recipe reviews and community engagement help us create content catering to your baking needs, and we encourage readers to share twists and variations that worked for them.

Connecting with fellow bakers inspires creativity and camaraderie as we support each other in this delicious journey, making every kitchen a lively and fun space.

The Recipe

Strawberry Cream Cheese Heart Danishes

Serves: 12 danishes

Prep Time: 20 mins

Cook Time: 25 mins

Total Time: 45 mins

Kitchen Equipment Needed

  • Mixing bowl
  • Rolling pin
  • Baking sheet
  • Heart-shaped cookie cutter
  • Measuring cups and spoons
  • Parchment paper

Ingredients

  • 1 package puff pastry, thawed
  • 8 oz cream cheese, softened
  • 1 cup fresh strawberries, chopped
  • ½ cup powdered sugar
  • 1 tsp vanilla extract
  • 1 egg (for egg wash)
  • 1 tbsp milk (for egg wash)
  • Additional powdered sugar for dusting

Directions

  1. Preheat your oven to 375°F (190°C) and line a baking sheet with parchment paper.
  2. In a mixing bowl, combine the softened cream cheese, powdered sugar, and vanilla extract. Mix until smooth.
  3. Roll out the thawed puff pastry on a lightly floured surface and cut out heart shapes using the cookie cutter.
  4. Place half the hearts on the baking sheet, leaving space between each.
  5. On each heart, add a spoonful of the cream cheese mixture followed by a few pieces of chopped strawberries.
  6. Top each filled heart with another heart-shaped pastry and press the edges to seal.
  7. In a small bowl, beat together the egg and milk, creating an egg wash, and brush it over the top of each danish.
  8. Bake in the preheated oven for 20-25 minutes or until golden brown.
  9. Allow to cool slightly before dusting with powdered sugar and serving.

Recipe Notes

  • Make sure to let the strawberries drain if they have excess moisture.
  • Refrigerate any leftover danishes in an airtight container.
  • This recipe can be made ahead; freeze unbaked danishes and bake them fresh when you’re ready!

Best Hawaiian Pineapple Coconut Dream Cake – Moist & Fluffy

Hawaiian Pineapple Coconut Dream Cake: A Tropical Delight

⚖️
Difficulty
Medium

⏲️
Prep Time
20 mins

🕒
Cook Time
40 mins

⏱️
Total Time
1 hour

🍽️
Servings
12 servings

Indulge in the heavenly flavors of the Hawaiian Pineapple Coconut Dream Cake, a true celebration of tropical goodness. Each bite brings the taste of sweet pineapple and creamy coconut, delivering a refreshing escape to an island paradise. This cake captures the essence of sunny beaches and swaying palm trees, making it the perfect dessert for summer gatherings, birthday celebrations, or simply as a delightful treat for yourself. The combination of moist cake, luscious frosting, and a hint of toasted coconut makes it a standout dessert that is sure to impress.

The allure of the Hawaiian Pineapple Coconut Dream Cake lies not only in its flavor but also in its captivating presentation. The vibrant colors of the cake, coupled with the rich textures, create an eye-catching display that can brighten any table. As you prepare this cake, the enticing aroma of baking coconut and pineapple will fill your kitchen, invoking memories of vacation moments and carefree days. This cake is not just a dessert; it’s an experience that evokes joy and nostalgia.

Quick Recipe Highlights

  • Flavor Profile: Bursting with tropical sweetness from ripe pineapple and creamy coconut, this cake balances sweetness with refreshing hints of vanilla.
  • Texture: The cake is velvety and moist, complemented by a rich coconut frosting that adds a luscious creaminess.
  • Aroma: The delightful smell of toasted coconut mingles with sweet pineapple, creating a fragrant bouquet that teases the senses.
  • Visual Appeal: The cake features a beautiful golden hue, speckled with tiny bits of pineapple, and is elegantly topped with coconut shavings.
  • Skill Level Needed: This recipe is accessible to home bakers with basic skills, making it perfect for those eager to try something special.
  • Special Equipment: You’ll need standard baking equipment, such as mixing bowls, a cake pan, and an electric mixer.

Recipe Overview

  • Difficulty Level: This cake is rated medium in difficulty, requiring some mixing and baking techniques, but it is manageable for most bakers.
  • Category: This dish fits perfectly into the dessert category and can be served after meals or as a sweet snack at any time.
  • Cuisine: Drawing influence from Hawaiian cuisine, this cake incorporates tropical ingredients, reflecting the islands’ culinary traditions.
  • Cost: Ingredients such as coconut and pineapple are reasonably priced, making this cake budget-friendly for group gatherings.
  • Season: Best enjoyed during warmer months, the bright flavors of pineapple and coconut make it an ideal summer dessert.
  • Occasion: Perfect for parties, potlucks, or family gatherings, this cake is sure to be a crowd-pleaser on any occasion.

Why You’ll Love This Recipe

Every bite of the Hawaiian Pineapple Coconut Dream Cake is a taste of paradise. The unique blend of flavors creates a refreshing dessert experience, offering a delightful escape to the tropics. The moist cake pairs beautifully with the rich coconut frosting, enhancing texture and taste. Each forkful provides a burst of fruity sweetness balanced by the creaminess of coconut, leaving a lasting impression on your palate.

Preparation is straightforward, making this cake a convenient dessert option for any baker. With minimal steps involved, you can enjoy the process of mixing and baking while anticipating the delicious results. This cake is perfect for spontaneous baking sessions or planned events, offering flexibility in time management and preparation.

Nutritionally, this cake offers an array of benefits thanks to its fresh fruit ingredients. Pineapple is known for its vitamin C content and health-promoting properties, while coconut provides healthy fats and enhances the cake’s moisture. Indulging in a slice allows you to enjoy a treat while also nourishing your body.

Moreover, serving this cake during social gatherings adds a special touch. It’s an ideal centerpiece for parties, ensuring that friends and family leave with fond memories. Whether it’s a summer barbecue or a festive holiday, the cake’s tropical essence fosters a joyful atmosphere, bringing people together.

Cost-effectiveness is another significant advantage of this recipe. With readily available ingredients, you can bake a show-stopping dessert that doesn’t break the bank. This makes it an excellent choice for budget-conscious bakers who still want to create a stunning dessert.

Historical Background and Cultural Significance

The origins of Hawaiian pineapple cakes can be traced to the early 1900s when pineapple became a commercially viable crop in Hawaii. The influx of sugar plantation workers from various cultures influenced cooking styles and flavors, leading to unique Hawaiian desserts that blended local ingredients with diverse culinary traditions. Pineapple and coconut quickly became signature ingredients, celebrated for their tropical flavors.

Culturally, this cake is a testament to the Aloha spirit, representing warmth and hospitality. In Hawaiian gatherings, sharing food is a fundamental way to connect with others, and desserts like this cake play a vital role in these social traditions. The cake is often served during luaus and celebrations, symbolizing good fortune and joy.

As recipes for this cake have evolved, so have techniques and variations. Originally simpler in construction, modern adaptations incorporate elaborate frosting and decoration styles. This evolution reflects the influence of international dessert trends while retaining the cake’s core tropical identity.

Regional variations of the Hawaiian Pineapple Coconut Dream Cake include the addition of macadamia nuts or different frostings using local ingredients. Each variation offers a unique interpretation while honoring the central theme of the original cake—celebrating the essence of Hawaiian flavors.

Ingredient Deep Dive

Pineapple: Hailing from South America, pineapple’s introduction to Hawaii in the early 20th century revolutionized local agriculture. This tropical fruit is rich in vitamin C and digestive enzymes. When selecting pineapple, choose a fruit that is fragrant, with a firm exterior and slightly yielding at the stem end. For storage, keep uncut pineapple at room temperature and refrigerate once sliced. For substitution, use canned pineapple in its own juice, ensuring to drain excess liquid.

Coconut: Coconut is a staple in tropical cuisines worldwide and has health benefits rich in fiber and healthy fats. When selecting coconut, fresh coconuts offer the best flavor, while dried flaked coconut is convenient for baking. Store coconut in a cool, dry place, and consider refrigerating after opening to maintain freshness. For those allergic to coconut, almond flour can be used as a substitute in the cake base.

Common Mistakes to Avoid

  • Using under-ripe pineapple can lead to a lack of sweetness and flavor in your cake. Always choose ripe, sweet pineapple for the best results.
  • Overmixing the batter can result in a dense texture. Mix just until ingredients are combined to keep the cake light and fluffy.
  • Not greasing the pan properly can cause the cake to stick. Ensure you thoroughly grease and flour your cake pan to promote easy release.
  • Adjusting oven temperatures can lead to inadequate cooking. Always preheat your oven and bake at the recommended temperature for even results.
  • Skipping the meringue step for the frosting can lead to a less airy texture. Take your time to achieve the right consistency for a light frosting.
  • Using non-fresh coconut can detract from the cake’s flavor. Always opt for fresh or high-quality dried coconut for optimal taste.
  • Cutting into the cake too soon can yield messy slices. Allow the cake to cool completely for clean, professional-looking slices.
  • Not letting the frosting set can lead to smudged presentation. Refrigerate the frosted cake for a bit before serving for a neater appearance.
  • Assuming all coconuts are the same can lead to flavor discrepancies. Familiarize yourself with different types of coconut, such as sweetened versus unsweetened.
  • Ignoring ingredient measurements can affect the baking process. Always use measured ingredients for consistency in results.

Essential Techniques

Understanding the creaming method is essential for achieving a light cake. This technique involves beating sugar and fat together to incorporate air, resulting in a fluffy texture. To master this, ensure your butter is at room temperature and beat until light and pale, and avoid overmixing the batter afterward.

Properly folding in ingredients is crucial when adding fruit or dry ingredients to the batter. This gentle mixing ensures that air is retained, preventing a dense cake. Use a spatula to scrape from the bottom and fold over the top, repeating until ingredients are just combined.

Pro Tips for Perfect Hawaiian Pineapple Coconut Dream Cake

To achieve perfect results, use fresh pineapple for a burst of flavor in every bite. The quality of the pineapple drastically enhances the overall taste of the cake.

If you’d like a richer coconut flavor, consider toasting the coconut flakes before adding them to the frosting. This simple step elevates the taste and adds a delightful crunch to your cake.

Experiment with garnishing the cake using candied pineapple slices or maraschino cherries for an elegant touch that enhances visual appeal.

Allow the cake to chill in the fridge after frosting. This helps the flavors to meld together and makes for cleaner slices when serving.

For those seeking a lower-fat option, substitute some of the butter in the cake with unsweetened applesauce. This maintains moisture while reducing calories.

Using a stand mixer can speed up the process and provide a more consistent mix when creaming butter and sugar.

For special occasions, consider making mini Hawaiian cakes using cupcake pans for individual servings that are festive and fun.

Finally, encourage creativity by inviting kids to help decorate the cake with fruits and edible flowers, ensuring a memorable baking experience.

Variations and Adaptations

Hawaiian Pineapple Coconut Dream Cake can be made gluten-free by substituting regular flour with a gluten-free blend, allowing those with dietary restrictions to enjoy this tropical treat. Additionally, adjustments can be made to cater to various flavor preferences, such as adding shredded carrots for a delightful twist.

Seasonal adaptations can include incorporating berries during spring and summer to complement the tropical flavors, enhancing both visual appeal and taste.

If you’d like to create a lower sugar version, consider substituting half the sugar with ripe bananas, adding natural sweetness and even more fruity flavor.

For a different texture, experiment with a layered version of the cake, alternating layers of pineapple and coconut, or creating mini trifle desserts for individual servings.

Presentation alternatives can involve serving the cake in a coconut shell for an authentic Hawaiian experience or using palm leaf plates for a more tropical feel.

Serving and Presentation Guide

When serving Hawaiian Pineapple Coconut Dream Cake, opt for clean, straight edges for slices by using a hot knife dipped in water. This method minimizes crumb wastage and preserves the cake’s appearance.

Garnish with toasted coconut flakes on top and strategically place pineapple slices for added color and a tropical touch. For an extra indulgence, drizzle a simple coconut glaze over the top.

Traditional accompaniments like vanilla ice cream or whipped cream not only enhance flavor but also add a delightful creaminess that complements the cake’s texture.

During festive occasions, consider serving with tropical fruits like mango or passionfruit on the side to enhance the overall flavor experience.

Present the cake on a colorful cake stand or a wooden platter for a rustic aesthetic that resonates with the cake’s tropical theme.

Lastly, keep in mind temperature considerations; serve the cake at room temperature for a perfect texture that melts in your mouth.

Wine and Beverage Pairing

Pair this cake with a crisp Riesling or a light white wine, which will complement the tropical flavors while enhancing the overall dessert experience. The natural sweetness of the wine balances well with the cake’s flavors.

For non-alcoholic alternatives, consider pairing with coconut-infused sparkling water or a tropical fruit punch to match the theme of the cake and quench your thirst.

Coffee lovers may enjoy this cake with a smooth, creamy latte; the coffee’s bitterness beautifully contrasts the cake’s sweetness and richness.

Ensure beverages are served chilled; serve wines in wine glasses and punch in clear pitchers to keep everyone refreshed while enjoying their dessert.

If opting for a brunch occasion, consider serving this cake with mimosas for a festive twist, making it a perfect celebration centerpiece.

Storage and Shelf Life

To store Hawaiian Pineapple Coconut Dream Cake, cover it in an airtight container or wrap it tightly in plastic wrap. This helps maintain its moisture and freshness for up to three days at room temperature or up to a week in the refrigerator.

For longer storage, you may freeze slices of the cake individually. Wrap each slice well in plastic wrap and then again in foil to prevent freezer burn, allowing the cake to last for about three months.

Signs of spoilage include a sour smell, dark discoloration of the frosting, or an overly dry texture. If these occur, it’s best to err on the side of caution and discard the cake.

When reheating, utilize an oven set to low heat, preferably wrapped in foil to prevent drying out. Alternatively, microwave individual slices on low power for about 10-15 seconds.

If you notice any excess moisture during freezing, blot it gently with a paper towel before sealing to preserve the cake’s texture.

Make Ahead Strategies

To make Hawaiian Pineapple Coconut Dream Cake ahead of time, consider baking the cake layers the day before serving. Once cooled, wrap them in plastic wrap and store them in the fridge to keep them fresh and moist.

Prepare the frosting in advance as well, allowing it to chill in the refrigerator overnight. This makes it easier to spread and pipe once you’re ready to assemble the cake.

When assembling, construct the cake but leave the frosting and garnishes off if you plan on serving it later. Keep it covered until ready to frost to minimize drying out.

On the day of serving, simply frost the chilled layers and add any toppings or garnishes right before presenting it to guests to ensure freshness.

Quality impact can be mitigated with this strategy, as both the cake layers and frosting can age in flavor, melding beautifully without sacrificing freshness.

Scaling Instructions

When scaling the Hawaiian Pineapple Coconut Dream Cake recipe, you can easily halve the ingredients to create a smaller cake suitable for intimate gatherings. Adjust your baking time to ensure it cooks thoroughly, usually requiring less time in the oven.

To double or triple the recipe, be mindful of your mixing bowl size. Use a larger capacity bowl to accommodate the increased volume and avoid overflow while mixing.

Timing modifications may be necessary as well. Larger cakes often need additional baking time, so check with a toothpick for doneness in the center.

When considering storage, remember to adjust your containers accordingly—having enough space for multiple layers or larger cakes without compromising freshness.

Finally, make sure to scale your frosting recipe to match, as you wouldn’t want to run out mid-assembly with a large batch.

Nutritional Deep Dive

A slice of Hawaiian Pineapple Coconut Dream Cake offers a delightful array of macronutrients, primarily coming from its base of flour, sugar, and eggs. The carbohydrates from the cake and sugar provide the energy needed for an active lifestyle.

Micronutrient analysis reveals benefits from the fresh pineapple and coconut, rich in vitamin C, manganese, and dietary fiber. These nutrients contribute to overall health, promoting immune function and digestive health.

When considering health benefits, the use of pineapple not only enhances flavor but also provides antioxidants that combat inflammation. Coconut, in moderation, offers healthy fats beneficial for heart health.

Portion analysis is key with desserts; keeping servings moderate allows for enjoyment without excessive calorie counts, ideally aligning with a balanced diet.

Weight management tips suggest savoring smaller slices and pairing with fresh fruits or a light yogurt to enhance meal satisfaction while being mindful of sugar intake.

Dietary Adaptations

For a gluten-free version of the Hawaiian Pineapple Coconut Dream Cake, substitute regular flour with gluten-free all-purpose flour. This adaptation does not compromise the cake’s delightful taste while accommodating those with gluten sensitivities.

Dairy-free variations are possible by replacing the butter with coconut oil and using non-dairy milk in the cake mixture. Tofutti cream cheese works wonderfully as a frosting alternative for a creamy finish.

Vegans can enjoy this cake by substituting eggs with flaxseed meal mixed with water for binding or using applesauce. Coconut cream makes for an excellent vegan frosting option.

Low-carb and keto adaptations can involve using almond flour instead of regular flour and adjusting the sugar content with keto-friendly sweeteners for a lower-carb treat.

For paleo followers, opt for coconut sugar and use simple ingredients such as almond milk, avoiding any processed elements to fit within the guidelines of this diet.

Low-FODMAP versions can leverage lactose-free dairy to cater to those with sensitivities, ensuring that everyone can enjoy this cake without digestive distress.

Troubleshooting Guide

Texture issues may arise if the cake turns out too dense or gummy. This can be mitigated by ensuring your ingredients are measured accurately and not overmixing the batter during preparation.

Flavor balance can be tricky; if your cake tastes too sweet, consider incorporating an acidic component like lemon juice to cut through the sweetness and enhance the tropical flavors.

Temperature problems such as underbaking can be remedied by using an oven thermometer to ensure even baking and accurate temperature readings, preventing soggy centers.

Equipment challenges, such as using a non-stick pan, can lead to cakes sticking. Always experiment with different pans and ensure they are properly greased and floured.

Ingredient substitutions can occasionally lead to unexpected results; always opt for comparable ingredient types to avoid drastic changes in the outcomes.

Timing concerns can affect texture; if the cake is overbaked, it will become dry. Always keep an eye on baking time towards the end to ensure perfect doneness.

Recipe Success Stories

Community feedback highlights the Hawaiian Pineapple Coconut Dream Cake as a favorite among tropical dessert lovers. Many readers have enjoyed attempting the recipe, sharing their delightful results on social media.

Variation successes also shine through with stories of adapting the recipe, such as including chocolate chips or additional fruit layers for added flavor and richness that resonates with everyone.

Photographic tips have emerged from readers showcasing their unique presentations and sharing modifications, demonstrating the versatility of the cake.

Suggestions from readers include experimenting with different frostings, such as cream cheese frosting or lemon glaze, adding depth and character to the original recipe.

The beauty of this cake brings families together, with many stories shared about baking together, emphasizing the emotional connections formed around this delightful dessert.

Frequently Asked Questions

Q: Can I use canned pineapple instead of fresh?
Yes! You can absolutely use canned pineapple. Just be sure to drain it well to avoid excess moisture in your cake.

Q: How can I make this cake healthier?
You can substitute some of the sugar with unsweetened applesauce and use whole grain flour for added nutrition.

Q: Can I freeze this cake?
Yes! The cake freezes well. Just make sure to wrap it tightly in plastic wrap and store it in an airtight container.

Q: What is the best way to decorate this cake?
Consider topping it with toasted coconut flakes, fresh pineapple slices, or a drizzle of coconut cream for a beautiful presentation.

Q: How do I know when the cake is done baking?
A toothpick inserted into the center of the cake should come out clean or with a few moist crumbs clinging to it.

Q: Can I make this cake ahead of time?
Yes! You can bake the layers a day in advance and frost them on the day of serving for best results.

Q: Is it necessary to toast the coconut for the frosting?
While not necessary, toasting the coconut adds a deeper flavor and enhances the overall taste of the cake.

Q: What other fruits could I add to this cake?
You could incorporate diced mango, chopped bananas, or even macadamia nuts for added flavor and texture.

Q: How should I store leftovers?
Store leftover cake in an airtight container in the refrigerator for up to three days. You can also freeze slices for longer storage.

Q: Can I adjust the sweetness of the frosting?
Absolutely! Feel free to add more or less sugar to the frosting according to your taste preference.

Additional Resources

For more delicious tropical recipes, check out our section on fruity desserts, which features cakes, tarts, and custards showcasing fresh produce. Technique guides on cake decoration and frosting tips are also available to enhance your baking skills.

Ingredient information can help you better understand how to choose the finest pineapple and coconut, ensuring the best outcomes with vibrant flavors and textures.

If interested in different types of cuisines, explore our archive of Hawaiian-inspired dishes that celebrate the rich culinary traditions of the islands across various meal categories.

Lastly, don’t miss our suggestions for seasonal variations, which can inspire your baking year-round with fresh, available ingredients for different climates.

Join the Conversation

We invite you to share your experience with the Hawaiian Pineapple Coconut Dream Cake by leaving a comment or tagging us on social media. Your feedback and suggestions enrich our community and inspire future recipes.

Photography tips on presenting your cake attractively are highly encouraged, as showcasing your baking creations brings others into your culinary journey.

Engage with fellow bakers and exchange recipe variations or ingredient substitutions to foster greater creativity and inspiration in the kitchen.

Feel free to share any unique stories related to baking this cake or hosting tropical-themed gatherings centered around desserts. We love to hear your experiences!

Don’t forget to leave reviews after trying the recipe, as your insights help fellow bakers discover the magic of this delightful tropical treat.

The Recipe

Hawaiian Pineapple Coconut Dream Cake

Serves: 12

Prep Time: 20 mins

Cook Time: 40 mins

Total Time: 1 hour

Kitchen Equipment Needed

  • Mixing Bowl
  • Cake Pan (9-inch)
  • Electric Mixer
  • Spatula
  • Measuring Cups and Spoons

Ingredients

  • 2 cups all-purpose flour
  • 2 cups sugar
  • 1 cup coconut milk
  • 1 cup crushed pineapple, drained
  • 1/2 cup unsalted butter, softened
  • 4 large eggs
  • 2 teaspoons baking powder
  • 1/2 teaspoon salt
  • 1 teaspoon vanilla extract
  • 2 cups shredded coconut (sweetened)

Directions

  1. Preheat your oven to 350°F (175°C) and grease your cake pan.
  2. In a mixing bowl, cream the butter and sugar until light and fluffy.
  3. Add the eggs one at a time, mixing well after each addition. Stir in the vanilla extract.
  4. Sift the flour, baking powder, and salt, then gradually add to the butter mixture alternately with coconut milk.
  5. Fold in the crushed pineapple and shredded coconut until combined.
  6. Pour the batter into the prepared cake pan and smooth the top with a spatula.
  7. Bake for 35-40 minutes or until a toothpick inserted into the center comes out clean.
  8. Let the cake cool in the pan for 10 minutes before transferring it to a wire rack to cool completely.
  9. Frost with coconut frosting and sprinkle toasted coconut on top before serving.

Recipe Notes

  • Replace crushed pineapple with diced fresh pineapple for more texture.
  • For a vegan version, use flax eggs and coconut yogurt instead of dairy products.
  • This cake can be made ahead and freezes well up to three months.
  • Decorate with fresh fruit for added flavor and beauty.

Easy Frozen Fruit Salad with Creamy Dressing

Easy Frozen Fruit Salad: A Refreshing Summer Delight

⚖️
Difficulty
Easy

⏲️
Prep Time
15 mins

🕒
Cook Time
0 mins

⏱️
Total Time
15 mins

🍽️
Servings
4-6 servings

Frozen fruit salad is the ideal dish to serve on a hot summer day, bringing together a perfect blend of sweetness, chill, and vibrant colors. This Easy Frozen Fruit Salad recipe is not only simple to prepare but also refreshingly tasty. With an array of fruits featured, including berries, bananas, and mango chunks, this dish bursts with flavor and is visually enticing. The icy texture is complemented by the natural sweetness of the fruits, making each bite a delightful experience.

Imagine sitting on a patio, enjoying the sun, with a bowl of this adventurous yet straightforward salad in hand. The variety of fruits creates a symphony of flavors, ensuring there’s something for everyone’s palate, whether you’re a fan of tangy or sweet notes. This Easy Frozen Fruit Salad serves as a perfect dessert for parties or a healthy snack for family gatherings, catering to those who love a light and refreshing treat.

Quick Recipe Highlights

  • Flavor Profile: Sweet and tangy with a hint of freshness from citrus juices.
  • Texture: Icy and crunchy with a delightful chew from various fruits.
  • Aroma: Inviting sweetness of ripe fruit complemented by refreshing citrus notes.
  • Visual Appeal: A colorful medley of fruits that are as pleasing to the eyes as they are to the palate.
  • Skill Level Needed: Perfect for all skill levels, this recipe requires minimal cooking techniques.
  • Special Equipment: A blender or food processor for smooth blending and a freezer-safe container for freezing.

Recipe Overview

  • Difficulty Level: This Easy Frozen Fruit Salad is a beginner-friendly recipe that takes minimal effort to prepare.
  • Category: Ideal for summer desserts, snacks, or as a side for breakfast.
  • Cuisine: A fusion of flavors, influenced by tropical and fresh fruit culture prevalent in many cuisines.
  • Cost: Economically friendly, utilizing seasonal fruits can keep costs down to a minimum.
  • Season: Best enjoyed in summer when fruits are at their peak freshness and flavor.
  • Occasion: Perfect for picnics, barbecues, or as a light dessert after a hearty meal.

Why You’ll Love This Recipe

Frozen fruit salad offers a delightful way to enjoy seasonal fruits in a refreshing format. The combination of flavors creates a harmonious blend that highlights each fruit’s unique taste profile. The icy texture is invigorating on hot days, making it an essential treat in your summer repertoire. Furthermore, the ease of preparation means you can whip this up in a matter of minutes, freeing up time to relax and enjoy the sunshine.

The nutritional advantages of this salad are significant, as it provides vitamins, minerals, and antioxidants commonly found in fresh fruits. Each bowl brimming with strawberries, blueberries, and bananas not only tastes great but also supports a healthy diet, making it guilt-free indulgence. This fruit salad is convenient and can even be tailored to suit dietary needs, from being made gluten-free to accommodating vegan preferences.

Social gatherings benefit from this visually appealing dish; it can serve as a conversation starter, as friends and family gather around to enjoy a shared experience. Making it a budget-friendly dessert ensures you don’t compromise taste for value, allowing you to serve a delicious dish without breaking the bank. You’ll find that this Easy Frozen Fruit Salad will quickly become a favorite among your guests and family alike.

Historical Background and Cultural Significance

The origins of fruit salads have deep roots in various culinary traditions, with each culture having its unique take on the concept. From ancient Roman fruit platters to modern frozen variations, fruit salads have evolved into a versatile dish that continues to cater to different tastes and occasions. This particular Easy Frozen Fruit Salad draws influence from tropical regions where fruit is celebrated for its health benefits and refreshing properties.

In many cultures, fruit has prominent symbolism, often associated with themes of renewal and positivity. Serving fruit dishes is a common practice during celebrations and gatherings, adding sweetness and joy to the festivities. As global connectivity increases, combinations like this Easy Frozen Fruit Salad allow for a melange of flavors to highlight the best of various fruits.

With the advent of the frozen dessert trend, the frozen fruit salad has found its way into homes as a creative way to preserve fruits while making them more enjoyable during hotter seasons. Today, it’s not just a dish but part of a lifestyle that embraces fresh, seasonal ingredients and encourages social sharing of delicious meals.

Ingredient Deep Dive

For this Easy Frozen Fruit Salad, the main ingredients include strawberries, blueberries, bananas, and a squeeze of lime juice.

**Strawberries**: Known as a powerhouse of antioxidants, strawberries are not only delicious but also contribute to heart health and improved skin quality. To select the best strawberries, look for bright red color with a natural sheen and sweet aroma. Store them unwashed in the fridge in a paper bag for up to five days.

**Blueberries**: These tiny gems are packed with vitamins C and K, making them a bargain for nutrition. When selecting blueberries, seek out firm, plump ones and avoid those that are mushy. They can last up to two weeks when stored properly in a closed container in the refrigerator.

**Bananas**: Bananas are a great source of potassium and are perfect for adding creaminess to frozen fruit mixes. When selecting bananas, pick those that are a consistent yellow, avoiding any that show signs of browning or squishiness. Store bananas at room temperature and avoid refrigeration to slow their ripening process.

**Lime Juice**: This bright, zesty juice not only adds flavor but also acts as a preservative for the fruits. Always choose fresh limes for the best taste. Once cut, lime juice should be stored in the fridge and used within a week for optimal flavor.

Common Mistakes to Avoid

  • Using overripe fruit: Overripe fruit can alter the flavor and texture of the salad, making it mushy. Always select ripe but firm fruits for the best results.
  • Not freezing long enough: The fruit salad needs sufficient time in the freezer to firm up correctly. Aim for at least 4-6 hours for optimal texture.
  • Skimping on flavoring: A little lime juice not only enhances flavor but also helps prevent browning in fruits like bananas.
  • Mixing incompatible flavors: While creativity is great, overly strong flavors can compete and detract from the freshness of the salad.
  • Ignoring texture variety: Incorporating fruits that have different textures will improve the eating experience, so mix soft and crunchy fruits.
  • Overpacking the container: This can lead to uneven freezing and clumping of the fruits. Use a container that allows space for expansion during freezing.
  • Cutting fruits too small: Small fruit pieces can freeze excessively and lose their characteristic texture. Aim for uniform, medium-sized pieces.
  • Not considering serving temperature: Serve it straight from the freezer for the best icy texture, allow it to sit for a brief moment only before serving.

Essential Techniques

Proper freezing technique is crucial for achieving the best results in your Easy Frozen Fruit Salad. First, ensure all fruits are dried after washing to prevent ice crystals from forming. Next, mix all ingredients with precision, ensuring an even distribution to allow flavors to meld beautifully. Using a freezer-safe container helps maintain the shape and moisture level of the salad during the freezing process.

Blending or mashing the fruits can be tempting, but it’s important to preserve the individual textures while allowing for slight crushing to combine the flavors. Aim to leave some chunks for that delightful experience in each spoonful. Finally, keep an eye on your frozen fruit salad as it sets; avoiding ice crystals is vital for a smooth tasting experience.

Pro Tips for Perfect Easy Frozen Fruit Salad

Use ripe fruits for the best flavor and natural sweetness. Consider sweetening your fruit salad with a touch of honey or maple syrup if desired. For added texture and flavor, toss in a handful of nuts or shredded coconut before freezing.

Layer your colorful fruits creatively in the serving bowl to enhance visual appeal; it makes a striking presentation. For varieties, consider using seasonal fruits that you enjoy or have on hand; versatility is key! Always serve immediately from the freezer for that icy sensation that is both refreshing and exhilarating.

For an adult-friendly variation, a splash of fruit juice or alcohol can elevate the flavor experience. If you’re serving this at parties, consider creating individual servings in cups to make it easier for guests to grab. Lastly, don’t shy away from garnishes like mint or fresh citrus slices for an aromatic finish.

Variations and Adaptations

This Easy Frozen Fruit Salad can easily adapt to the fruits available in your kitchen or local market. For instance, try adding kiwi or pineapple to bring tropical flavors into the mix. Seasonal adaptations can also include using fall fruits like apples or pears for a unique twist.

Dietary modifications can make this salad accommodating to various preferences; substituting with coconut cream for creaminess or serving it over a yogurt base offers interesting variations while keeping it healthy. For those looking for flavor variations, consider adding a hint of cinnamon or nutmeg for warmth.

Texture modifications could involve incorporating chia seeds for added crunch or creaminess. Presentation can be altered by serving them in ice cream cones or popsicle molds for a fun, playful experience. The flexibility of this recipe is truly boundless, allowing you to make it personal while maintaining the delightful essence of the original.

Serving and Presentation Guide

Plating your Easy Frozen Fruit Salad should be as delightful as eating it! Use clear glasses or bowls to showcase the colorful fruits while avoiding stacking to maintain their distinct textures. Garnish with a sprig of mint, a sprinkle of nuts, or even a dollop of whipped cream for an enticing finish.

Consider using a beautiful serving platter or tiered stand to elevate the presentation for parties, making it a centerpiece for your summer gathering. Temperature is vital; serve right from the freezer for that surprise chill that guests love.

Portion control is essential; think of fun serving sizes with measuring cups for a light treat or larger bowls if it’s the star of your meal. Dynamic serving ideas can include pairing with a scoop of sorbet or yogurt for a refreshing dessert combo, elevating the overall experience.

Wine and Beverage Pairing

When pairing beverages with your Easy Frozen Fruit Salad, consider light and refreshing options. A crisp, dry sparkling wine, such as Prosecco or a fruity white wine like Sauvignon Blanc will complement the fruit flavors without overpowering them.

For those preferring non-alcoholic options, sparkling water infused with citrus or berries can enhance the fresh taste. Iced tea with a splash of fruit juice can be a fantastic accompaniment as well.

Serve drinks chilled to match the fruit salad’s refreshing essence. If you enjoy coffee or tea, opt for lighter brews, like green tea or cold brew coffee, which can refresh without competing flavors. These pairings intensify the snacking experience while keeping it light and breezy.

Storage and Shelf Life

For preserving your Easy Frozen Fruit Salad, proper storage is key. Place the salad in a sealed, freezer-safe container, ensuring minimal exposure to air to prevent freezer burn. Freeze the salad immediately after preparing to lock in flavors and maintain freshness.

Typically, your fruit salad will last in the freezer for up to three months. While it may remain safe beyond that time, it’s best enjoyed fresh for optimal taste. Signs of spoilage include frost build-up or off smells, indicating it’s time to be discarded.

Reheating isn’t necessary as it should be enjoyed frozen, but if texture changes occur after thawing, consider blending it into a smoothie for a delightful alternative. If you find yourself with leftover fruit after serving, store those in separate containers to extend their life before they spoil.

Make Ahead Strategies

Making your Easy Frozen Fruit Salad ahead of time can simplify your summer gatherings. Prepare the salad a day in advance to ensure it’s perfectly frozen and ready to serve upon guests’ arrival. The fruits will remain fresh and vibrant with minimal adjustments.

During preparation, remember to freeze the elements individually if you have multiple fruits; this technique helps avoid clumping. You can also prepare ingredients a few hours before the assembly for even fresher flavors.

Consider storing components in separate containers and combining them just moments before serving for optimal texture. Another strategy is to portion out servings in advance, allowing for easy access when you’re in a hurry or on a busy day.

Scaling Instructions

Scaling your Easy Frozen Fruit Salad is as simple as adjusting ingredient quantities. Halving or doubling the recipe can easily be done based on your gathering size. Simply modify the ingredient measurements proportionally while maintaining the same preparation process.

For larger gatherings, consider using a bigger mixing bowl to accommodate for the increased volume, and ensure even mixing by tossing thoroughly. Your freezer should also be able to handle the volume without overcrowding which can lead to uneven freezing.

Be mindful of timing adjustments based on your assembly; larger portions might take longer to freeze. Always taste test for flavor consistency when scaling, and keep a record of successful adjustments for future reference.

Nutritional Deep Dive

The nutritional analysis of your Easy Frozen Fruit Salad highlights an array of benefits derived from its fresh ingredients. Each serving is packed with vitamins and minerals, making it a smart option for health-conscious eaters. Fruits like strawberries and blueberries provide an excellent source of vitamin C and antioxidants.

From a macro perspective, each serving contains moderate carbohydrates sourced mainly from natural sugars, making them an energy-efficient snack option. Additionally, the dietary fiber present in these fruits supports digestive health while providing a sense of fullness.

Caloric values remain low, particularly when compared to traditional sugary desserts. Portion monitoring helps ensure that indulging in this refreshing treat remains within healthy calorie limits, supporting weight management goals without sacrificing satisfaction.

Dietary Adaptations

The Easy Frozen Fruit Salad can easily be adapted to meet various dietary needs. For those avoiding gluten, this recipe is inherently gluten-free, allowing everyone to enjoy without concern. To make it dairy-free, simply not include any dairy toppings and use non-dairy yogurt if desired.

Vegan enthusiasts will appreciate the fruit salad as it uses only plant-based ingredients resulting in a delicious treat accessible to all dietary preferences. Those following low-carb or Keto diets can limit the fruit choices to lower-carb options, such as berries.

For Paleo followers, simply use organic fruits and avoid additional sweeteners, maintaining its wholesome integrity. Adjusting for low-FODMAP diets can be done by selecting smaller portions of certain fruits to meet those specific needs while still enjoying the flavors.

Troubleshooting Guide

If you find your Easy Frozen Fruit Salad has texture issues, it might be due to improper freezing. Ensure fruits are adequately covered and stored flat in the freezer for best results. Being aware of freezing times helps protect against unwanted slushiness.

For flavor balance, you can balance out sweetness with additional acidic components, like lime juice, ensuring you’re never overwhelmed by a single flavor. If you’re facing temperature problems, ensure the freezer is set to the appropriate level to maintain the frozen state of your salad.

If you encounter challenges with your equipment while blending, check your blender settings to ensure optimal mixing speeds that won’t compromise fruit integrity. Timing concerns, like under-freezing, might require added patience, ensuring that your fruit is solidified thoroughly before serving.

Recipe Success Stories

Community feedback on the Easy Frozen Fruit Salad is overwhelmingly positive, with many readers sharing adaptations they’ve made. Variations using different seasonal fruits have led to new successes, with some swapping strawberries for peaches and achieving delightful results.

Families have shared heartwarming stories of enjoying this refreshing treat during summer barbecues, turning it into a staple for gatherings. Readers often suggest photography tips, emphasizing how vibrant colors can enhance the presentation online, leading to increased interest in this easy, delicious recipe.

Adaptation stories continue to inspire creativity, with many experimenting with additional toppings, like granola or yogurt, finding exciting ways to personalize this dish.

Frequently Asked Questions

Can I use frozen fruit instead of fresh?

Yes, you can! Frozen fruit can make a great alternative, especially during off-seasons when fresh fruit might be harder to come by. Just be sure to thaw slightly before preparing your salad for the best texture.

How long does the fruit salad last in the freezer?

Your Easy Frozen Fruit Salad can last in the freezer for up to three months if stored properly in a sealed container. For peak freshness, try to consume it within a month.

Can I add other fruits to this recipe?

Absolutely! This recipe is versatile, and you can add any of your favorite fruits like pineapple, kiwi, or even mango for a tropical twist. Just keep in mind how each fruit freezes and its natural sweetness.

Is this recipe suitable for kids?

Yes, this fruit salad is a fun and healthy option for kids! You can even involve them in the preparation process, letting them choose their favorite fruits to include.

Can I prepare this salad without a blender?

Yes, if you don’t have a blender, simply chop the fruits into small pieces and mix them by hand. This might take a bit longer, but you’ll still achieve a delicious result.

Is there a way to make it less sweet?

If you’d like to reduce sweetness, consider using less sweet fruits, or adding apple cider vinegar or a citrus juice like grapefruit to balance out the flavors.

What’s the best way to serve the fruit salad?

Serve the fruit salad in chilled bowls or glasses for a refreshing presentation. Consider garnishing with fresh mint or coconut shavings for an extra touch!

Can I make this salad ahead of time?

Yes, this salad is perfect for making ahead. You can prepare it a few hours or even the day before, giving it ample time to freeze properly before serving.

Can I use fruit juice instead of lime juice?

You can use fruit juice for flavor, but keep in mind that lime juice also helps prevent browning in fruits, particularly bananas. A splash of lemon juice could work as an alternative.

Are there any particular fruits that should be avoided?

Avoid fruits that don’t freeze well, such as watermelon or lettuce. They tend to become mushy upon thawing and might not provide the desired texture in your salad.

Additional Resources

If you’re interested in exploring related recipes, consider checking out our summer-inspired dishes like Strawberry Sorbet and Tropical Smoothie Bowls that complement the vibrant flavors of your Easy Frozen Fruit Salad. Want to deepen your knowledge? Take a look at our guide on seasonal fruits, which can help with the best options for making this salad year-round.

Looking for kitchen equipment recommendations? Explore tools like food processors that can simplify your fruit preparation. Engaging with seasonal variations can inspire creativity in your summer menu, making fruit salads a must-have item during barbecue season.

Join the Conversation

We’d love for you to share your experience with our Easy Frozen Fruit Salad! If you’ve made any unique variations or adaptations, please share your tips and tricks. Join our community on social media, where we encourage sharing photography of your creations—it’s a great way to showcase the beautiful colors and encourage others to join in on this refreshing treat!

Engage with us and let us know your favorite ways to enjoy this frozen dessert, along with any suggestions for other fruits or configurations you’ve discovered!

The Recipe

Easy Frozen Fruit Salad

Serves: 4-6 servings

Prep Time: 15 mins

Cook Time: 0 mins

Total Time: 15 mins

Kitchen Equipment Needed

  • Blender or food processor
  • Freezer-safe container
  • Mixing bowl
  • Measuring cups

Ingredients

  • 2 cups fresh strawberries, hulled and halved
  • 2 cups fresh blueberries
  • 2 ripe bananas, sliced
  • 1 tablespoon fresh lime juice

Directions

  1. In a mixing bowl, combine the strawberries, blueberries, and banana slices.
  2. Add the fresh lime juice and gently toss to coat the fruits evenly.
  3. Transfer the mixture to a freezer-safe container, spreading it out evenly.
  4. Cover the container tightly and freeze for at least 4-6 hours until fully set.
  5. To serve, scoop out portions directly from the freezer, or let it sit for a couple of minutes to soften slightly.

Recipe Notes

  • Feel free to adjust the fruit quantities and types according to your taste and what’s in season.
  • For a sweeter option, consider adding honey or maple syrup to the fruit mix before freezing.
  • Garnish with fresh mint or shredded coconut before serving for extra flair.

Easy Chocolate-Covered Strawberry Yogurt Clusters

Chocolate-Covered Strawberry Yogurt Clusters: A Decadent and Healthy Treat

⚖️
Difficulty
Easy

⏲️
Prep Time
20 mins

🕒
Cook Time
10 mins

⏱️
Total Time
30 mins

🍽️
Servings
12 clusters

Chocolate-covered strawberry yogurt clusters are an irresistible treat that combine the tartness of strawberries with the sweetness of yogurt and the richness of chocolate. These delightful snacks are perfect for any occasion, whether you need a quick dessert, a sweet addition to a party platter, or a healthy snack to satisfy your cravings. Each bite offers a luscious explosion of flavors that will leave you yearning for more.

The vibrant colors and creamy textures of these clusters not only tantalize your taste buds but also create an inviting visual appeal. Imagine showcasing a beautiful plate of these clusters at your next gathering, where the glossy chocolate contrasts beautifully with the fresh red strawberries. The combination is simply mouthwatering and makes a fantastic centerpiece for any dessert table.

Quick Recipe Highlights

  • Flavor Profile: The clusters feature a delightful balance of sweet and tart from the yogurt and strawberries, complemented by a rich chocolate coating that adds depth.
  • Texture: The creamy yogurt combined with crunchy chocolate creates an addictive texture that melts in your mouth.
  • Aroma: The aroma of fresh strawberries mingled with the sweet scent of melted chocolate will have your kitchen smelling heavenly.
  • Visual Appeal: These clusters are visually stunning with their bright red strawberries and shiny chocolate coating, making them an eye-catching treat.
  • Skill Level Needed: No prior cooking skills are needed, making this recipe accessible for everyone, from beginners to experienced cooks.
  • Special Equipment: You will need a baking sheet and parchment paper to prevent sticking while making these delicious clusters.

Recipe Overview

  • Difficulty Level: The recipe is classified as easy due to its simple ingredients and straightforward steps. It’s perfect for those who want to whip up a batch of sweet treats without the hassle.
  • Category: This dessert falls under the category of snacks or desserts, making it suitable for various occasions, from casual munching to formal gatherings.
  • Cuisine: While chocolate and strawberries are popular worldwide, this recipe takes inspiration from classic American dessert traditions, where sweet treats are loved and celebrated.
  • Cost: The approximate cost for making this recipe is quite economical, with strawberries, yogurt, and chocolate being readily available and budget-friendly ingredients.
  • Season: Enjoy these clusters year-round, although they are particularly great in spring and summer when strawberries are in season and at their sweetest.
  • Occasion: Perfect for parties, picnics, or simply as a delightful treat to cheer up your day, these clusters are versatile for any occasion.

Why You’ll Love This Recipe

Indulging in chocolate-covered strawberry yogurt clusters not only delights your taste buds but also provides a unique combination of flavors and textures. The sweetness of the chocolate, the tartness of the yogurt, and the juicy freshness of the strawberries create a harmony that is simply unmatched. Every bite brings different sensations, making this treat enjoyable.

The convenience of preparing these clusters adds to their appeal. With just a few ingredients and minimal cooking time, you can create a gourmet dessert in your own kitchen. The easy preparation makes it an excellent choice for spontaneous gatherings or when you’re craving something sweet but don’t want to spend hours in the kitchen.

From a health perspective, these clusters can be a better alternative to traditional sweets. Yogurt provides probiotics and calcium, while strawberries are packed with antioxidants. Together, they create a dessert that is not only delicious but also a more nutritious option compared to store-bought candies or pastries.

Socially, these clusters are a fantastic addition to any gathering. They’re easy to share, and their beautiful presentation will get everyone talking. Friends and family will appreciate the effort you put into creating a treat that is both visually appealing and delicious.

Lastly, the cost-effectiveness of this recipe makes it even more worthwhile. With inexpensive ingredients readily available at most grocery stores, you can whip up a batch of these chocolate-covered strawberry yogurt clusters without breaking the bank, ensuring that you have a delightful treat ready whenever you want it.

Historical Background and Cultural Significance

Chocolate-covered desserts have a rich historical background, dating back to ancient civilizations. Mesoamerican cultures revered chocolate, utilizing it for its medicinal properties and as a ceremonial ingredient. Over centuries, chocolate transformed into the sweet treat we know today, often paired with fruits such as strawberries, which gained popularity in Europe after being introduced from the Americas.

Culturally, strawberries symbolize love and passion, often celebrated in various traditions and festivals. Chocolate-covered strawberries emerged as a luxurious dessert in the 20th century, becoming a hallmark of romance, especially on special occasions like Valentine’s Day. The combination is synonymous with indulgence and has secured its place in dessert menus worldwide.

This recipe is a modern twist, incorporating yogurt that brings an additional layer of healthiness and creaminess to the traditional chocolate-dipped fruit. The evolution of this dessert continues as healthier ingredients are sought after, making it a perfect treat to satisfy modern cravings.

Regional variations of chocolate-covered strawberries exist, with different countries adding their unique spins. In some places, they may be drizzled with white chocolate or adorned with nuts, highlighting how this beloved treat adapts to various culinary histories worldwide.

Ingredient Deep Dive

Chocolate: Chocolate has a long-standing cultural significance, being revered for its complex flavors and occasional medicinal qualities. It’s regarded as a symbol of luxury in many cultures, especially in desserts. Nutritionally, dark chocolate provides antioxidants and may benefit heart health. For the best flavor, select high-quality chocolate with a cocoa content of at least 70%. Store it in a cool, dark place, and for substitutions, consider using vegan chocolate for a dairy-free option.

Strawberries: Strawberries are one of the most popular fruits globally, known for their vibrant red color and sweet flavor. They provide many health benefits, including high levels of Vitamin C and fiber which improve digestion. When choosing strawberries, look for firm berries with vibrant color and fresh green caps. For storage, keep them in the refrigerator but consume them within a few days for the best flavor. If strawberries are unavailable, consider using other fresh berries for a delightful variation.

Yogurt: Yogurt has roots in many cultures, being used for thousands of years for its nutritional benefits and culinary versatility. It’s rich in probiotics, promoting gut health and digestion. Choose plain yogurt for a healthier option, or use flavored varieties for added sweetness. Yogurt should be stored in the fridge and consumed by its expiration date to ensure freshness. For a dairy-free alternative, opt for coconut or almond yogurt, which can beautifully complement the chocolate and strawberries.

Common Mistakes to Avoid

  • Using low-quality chocolate: Low-grade chocolate may not melt smoothly, affecting the overall texture and taste of your clusters. Always opt for high-quality chocolate for best results.
  • Overheating the chocolate: Heating chocolate too quickly can burn it. Use a double boiler or microwave it in short bursts, stirring in between.
  • Not drying the strawberries: Moist strawberries can cause chocolate to slip off. Be sure to dry them thoroughly before dipping.
  • Clumping of yogurt: If yogurt is too thick, it may not coat the strawberries smoothly. Balance the thickness by stirring it well and considering lightening it with a splash of milk.
  • Skipping refrigeration: Not chilling the clusters before serving can result in melting chocolate. Make sure they are properly set in the refrigerator.
  • Neglecting temperature: Be cautious of exposing chocolate-covered treats to heat. Keep them in a cool spot to prevent the chocolate from melting.
  • Using overly ripe fruit: Overripe strawberries can be mushy and affect the texture of your clusters. Choose firm, vibrant strawberries for optimal results.
  • Forget to garnish: While optional, adding nuts or sprinkles enhances both taste and presentation. Don’t skip this step if you want an added crunch or visual appeal.

Essential Techniques

Melting Chocolate: Mastering the technique of melting chocolate is crucial for making beautiful clusters. It’s important to use gentle heat to avoid burning. The double boiler method is preferred, but you can also use a microwave in short intervals, stirring regularly. Look for a smooth, glossy texture when it’s perfectly melted.

Dipping Techniques: Dipping strawberries into melted chocolate requires a few techniques to ensure even coverage. Hold the strawberry by the green stem and dunk it into the chocolate, allowing excess chocolate to drip off. Use a fork or toothpick to help place the dipped strawberries onto parchment without making a mess. The key is to make sure the chocolate covers the fruit evenly.

Pro Tips for Perfect Chocolate-Covered Strawberry Yogurt Clusters

– Always use fresh, high-quality ingredients for the best flavor and presentation.
– Chill your yogurt slightly before dipping to create a thicker coating.
– Consider adding a touch of sea salt on top after chocolate dipping for an enhanced flavor contrast.
– Experiment with different types of chocolate to find your perfect pairing.
– Allow clusters to set completely in the refrigerator for best texture and taste.
– Try adding flavors to your yogurt, such as vanilla or honey, for an unexpected twist.
– Don’t overcrowd your baking sheet; spacing them out will make for easier handling and presentation.
– For extra pizzazz, drizzle melted white chocolate over the clusters once the dark chocolate has set.

Variations and Adaptations

Chocolate-covered strawberry yogurt clusters can easily be adapted to suit various tastes. You might add a drizzle of caramel for a sweet twist, or sprinkle them with crushed nuts for added crunch. Seasonal adaptations can include using different fruits, such as bananas or raspberries, depending on what’s fresh and ripe. Dietary modifications are also easy; swap regular yogurt for dairy-free alternatives to cater to vegan or lactose-intolerant guests. Additionally, experiment with different chocolate types, such as white, milk, or even flavored chocolates, for unique taste variations.

Serving and Presentation Guide

To make your chocolate-covered strawberry yogurt clusters visually appealing, consider using a beautiful platter for serving. Place clusters artfully around the plate, and add fresh mint leaves for a pop of color. Garnish with a light dusting of powdered sugar or cocoa for additional elegance. For a modern twist, consider serving them on a vertical stand or in decorative cups. Be mindful of serving them chilled to maintain their taste and texture, while considering portion sizes to ensure guests enjoy, but not overindulge.

Wine and Beverage Pairing

When it comes to pairing drinks with chocolate-covered strawberry yogurt clusters, consider a light sparkling wine like Prosecco or a fruity Rosé. These options complement the sweetness of the dessert without overpowering it. For non-alcoholic choices, a refreshing iced tea or a strawberry lemonade would echo the flavors and provide a delightful balance. Ultimately, choose a drink that enhances the sensory experience of enjoying these delicious treats.

Storage and Shelf Life

To ensure your chocolate-covered strawberry yogurt clusters stay fresh, store them in an airtight container in the refrigerator. This will help them maintain their flavor and texture. The clusters are best enjoyed within 2 to 3 days after preparation, as strawberries can lose their freshness quickly. Signs of spoilage include a change in color or an off smell. If you decide to freeze them, ensure they are well-wrapped, though the texture may change after thawing.

Make Ahead Strategies

For those planning ahead, you can prepare the yogurt-covered strawberries a day in advance and store them in the fridge. Melt the chocolate the day of serving for optimal freshness and texture. If you’re short on time, consider preparing the chocolate early and dipping your strawberries just before guests arrive. Keep the yogurt mixture in a sealed container, so it’s ready to go when you’re set to assemble.

Scaling Instructions

When scaling the recipe, keep proportions consistent. For half the recipe, simply reduce the quantity of strawberries and yogurt accordingly. If you’re doubling or tripling, ensure you have suitable equipment to accommodate the increased volume, such as larger bowls or baking sheets. Adjust timing based on how quickly you can manage dipping and setting the clusters, as batching can streamline the process.

Nutritional Deep Dive

When considering the nutritional benefits of chocolate-covered strawberry yogurt clusters, you’d find them favorable. The blend of yogurt and strawberries provides essential vitamins, fiber, and probiotics. Each cluster has a balanced proportion of macronutrients, primarily driven by the yogurt base. Monitor the added sugars from chocolate, as selecting dark varieties can provide health benefits, such as improved heart health due to antioxidants. This blend also supports weight management due to the satiating nature of protein-rich yogurt.

Dietary Adaptations

For those following specific dietary restrictions, adapting this recipe is accessible. To make it gluten-free, ensure all your ingredients are labeled as gluten-free. For a dairy-free or vegan option, coconut yogurt and dairy-free chocolate work fabulously. To cater to a low-carb audience, sugar-free chocolate can substitute regular chocolate, while incorporating ricotta can add creaminess. If following a paleo diet, use raw chocolate and organic yogurt alternatives.

Troubleshooting Guide

If your chocolate-covered clusters end up with an unattractive finish, it might have been improperly cooled or overheated during melting. Ensure you melt chocolate gently and allow a proper cooling period for a smooth finish. If your yogurt was too thick, and did not coat well, mixing in a splash of milk can remedy this. Lastly, if your clusters are too soft, ensure they are fully chilled in the fridge before serving to maintain their shape.

Recipe Success Stories

Many readers have successfully made variations of chocolate-covered strawberry yogurt clusters, experimenting with different fruits and yogurt flavors. Feedback often highlights how satisfying they are for both entertaining guests and personal snacking. Community members have shared tips about featuring them at gatherings, praising their popularity and appeal. Successfully capturing the vibrant colors for photography is another common topic, with many eager to showcase their delicious creations on social media.

Frequently Asked Questions

1. How long do chocolate-covered strawberry yogurt clusters last?
The clusters can last about 2 to 3 days in the refrigerator if stored in an airtight container to maintain freshness.
2. Can I use frozen strawberries?
It’s best to use fresh strawberries for optimal texture and flavor. Frozen strawberries can become mushy when defrosted, impacting the final product.
3. What type of yogurt works best?
Plain yogurt is ideal for this recipe, but you can use flavored varieties for added sweetness. Greek yogurt will yield a thicker coating.
4. Can I add other fruits?
Absolutely! You can use any fruit, such as bananas, cherries, or blueberries, to create varied flavor combinations.
5. Is this recipe suitable for kids?
Yes, it’s a fun and healthy treat for kids and is easy to make together as a family activity.
6. Can I use milk chocolate instead of dark?
Yes, using milk chocolate will create a sweeter dessert. Adjust the sweetness of the yogurt accordingly if needed.
7. How can I make these more festive?
Consider adding sprinkles or edible glitter on top of the chocolate for a fun, celebratory twist.
8. Is it necessary to refrigerate the clusters?
While it’s not necessary, chilling helps maintain their shape and enhances their texture.
9. Can I make these ahead of time?
Yes, you can prepare them a day in advance; just store them in the refrigerator until serving.
10. What if my chocolate seizes up?
If chocolate seizes, adding a small splash of oil can help smooth it out. However, avoid overheating to prevent this issue.

Additional Resources

If you enjoyed making chocolate-covered strawberry yogurt clusters, you might also like related recipes like chocolate truffles or yogurt parfaits. This blog has guides on essential dessert techniques, including tempering chocolate and making yogurt from scratch. Additionally, look for equipment recommendations that can enhance your dessert-making experience, such as quality mixing bowls and silicone molds for more intricate designs.

Join the Conversation

We encourage you to share your chocolate-covered strawberry yogurt cluster creations on social media! Tag your photos with our hashtag and engage with fellow food enthusiasts who appreciate the joy of simple yet delicious desserts. Sharing recipe reviews and variations can inspire our community, helping everyone to explore this delightful treat from various angles. Don’t hesitate to join our community forum for tips, tricks, and feedback on your beautiful clusters.

The Recipe

Chocolate-Covered Strawberry Yogurt Clusters

Serves: 12 clusters

Prep Time: 20 mins

Cook Time: 10 mins

Total Time: 30 mins

Kitchen Equipment Needed

  • Baking sheet
  • Parchment paper
  • Double boiler or microwave-safe bowl
  • Mixing spoon
  • Fork or toothpick

Ingredients

  • 1 cup fresh strawberries, hulled
  • 1 cup plain yogurt
  • 8 oz dark chocolate, chopped
  • Optional toppings (sprinkles, nuts, sea salt)

Directions

  1. Prepare a baking sheet by lining it with parchment paper.
  2. In a double boiler or microwave, melt the chocolate until smooth.
  3. Dip each strawberry into yogurt, allowing excess to drip off.
  4. Then, dip the yogurt-coated strawberry into melted chocolate, covering completely.
  5. Place the chocolate-coated strawberry onto the prepared baking sheet.
  6. Sprinkle any additional toppings on top before the chocolate sets.
  7. Once all strawberries are coated, refrigerate for about 15 minutes to set the chocolate.

Recipe Notes

  • Make sure strawberries are dry before dipping to help the chocolate adhere better.
  • Use quality chocolate for best taste.
  • These can be made ahead of time and stored for up to 3 days.