Ultimate S’mores Cake with Gooey Chocolate and Marshmallow

S’mores Cake: A Delicious Twist on a Campfire Classic

⚖️
Difficulty
Medium

⏲️
Prep Time
30 mins

🕒
Cook Time
25 mins

⏱️
Total Time
55 mins

🍽️
Servings
12

S’mores Cake is a delightful dessert that brings the classic campfire treat into a moist, layered cake perfect for any occasion. The familiar flavors of graham crackers, chocolate, and toasted marshmallows meld together to create a harmonious blend that evokes nostalgia and comfort. Imagine slicing into a velvety cake that reminds you of cozy nights spent around a fire, making this dessert not just a recipe, but an experience.

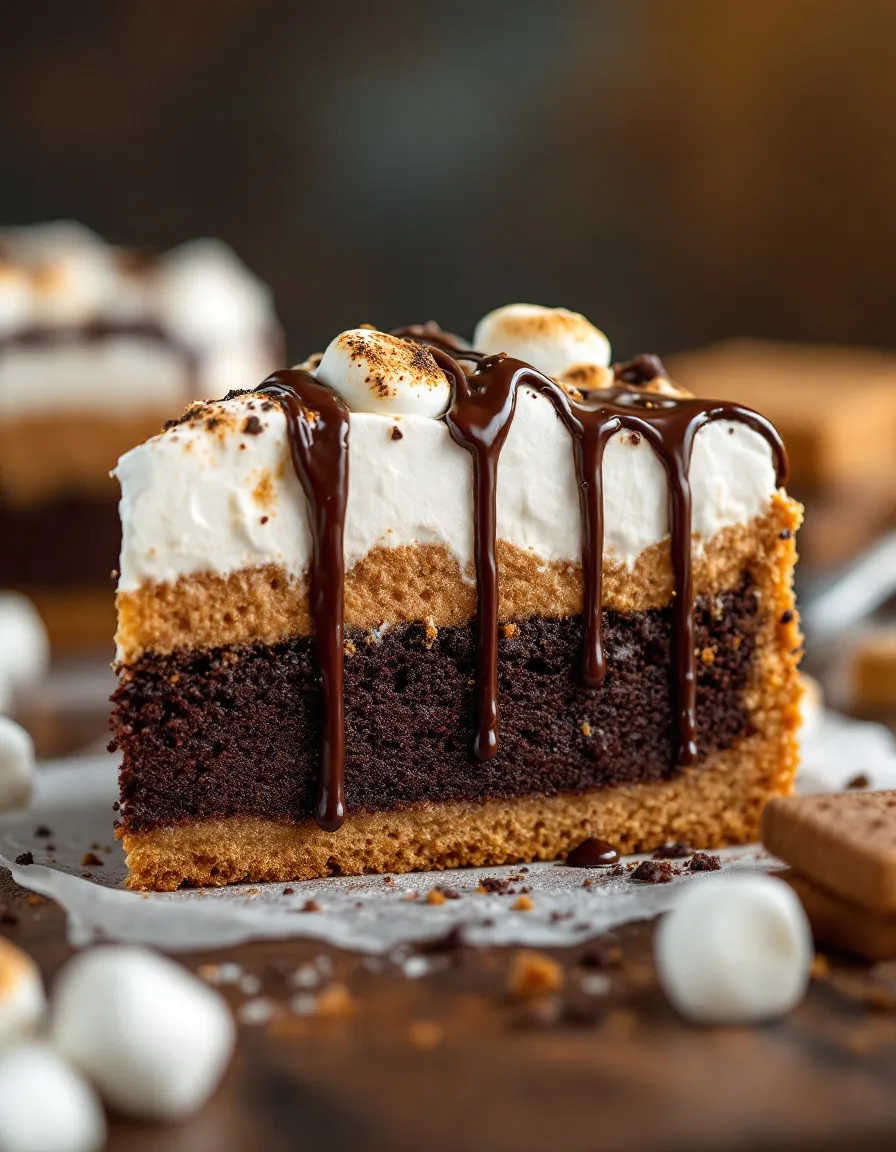
The cake’s rich chocolate layers are complemented by creamy marshmallow frosting and a crust resembling the traditional graham cracker base. Each bite is an explosion of flavors and textures, tantalizing your taste buds with every forkful. This cake is not only visually appealing with its layers but also a crowd-pleaser that will leave everyone craving a second slice.

Quick Recipe Highlights

  • Flavor Profile: This cake combines sweet, rich chocolate with a hint of nuttiness from graham crackers and a light, airy marshmallow taste.
  • Texture: The soft, spongy cake contrasts beautifully with the smooth frosting and crunchy graham cracker crumble, creating a delightful mouthfeel.
  • Aroma: The intoxicating aroma of melting chocolate and toasty marshmallows fills the air as it bakes, making it hard to resist this sweet treat.
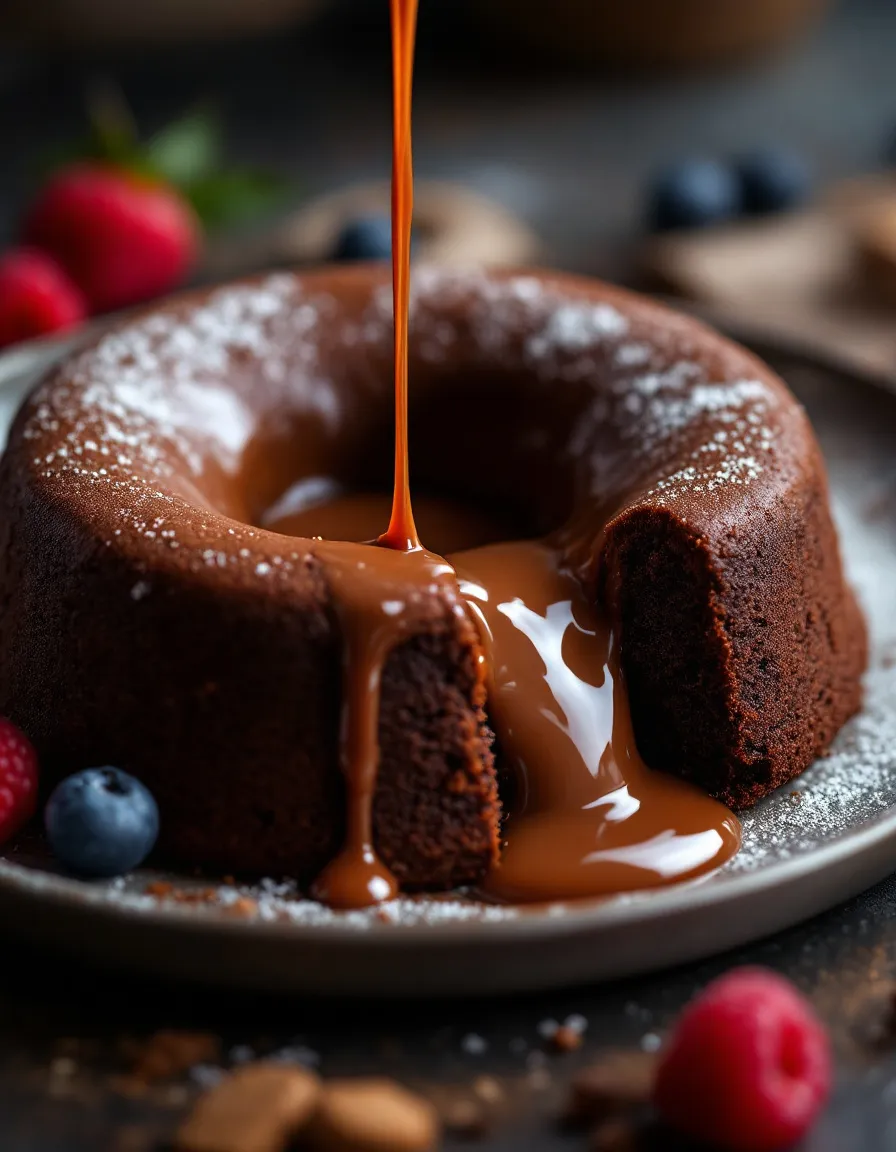
  • Visual Appeal: Layers of chocolate cake topped with fluffy white frosting and drizzled with chocolate ganache make this cake as beautiful as it is tasty.
  • Skill Level Needed: This is a medium-difficulty recipe that requires basic baking skills and some assembly technique.
  • Special Equipment: Prepare to use a mixer, cake pans, and a cooling rack to ensure perfect results.

Recipe Overview

  • Difficulty Level: The S’mores Cake is rated as medium difficulty, suitable for experienced bakers who are familiar with layer cakes.
  • Category: This dessert falls under the category of cakes, but it can also be considered a special occasion treat.
  • Cuisine: S’mores Cake draws inspiration from American desserts, often associated with camping and outdoor gatherings.
  • Cost: The approximate cost to make this cake is relatively low, primarily due to pantry staples like flour and sugar, with a few extra expenses for chocolate and marshmallows.
  • Season: Perfect year-round, this cake is particularly popular in summer during barbecue season, as it brings outdoor flavors indoors.
  • Occasion: This cake is ideal for birthday parties, family gatherings, or any celebration that calls for a sweet treat.

Why You’ll Love This Recipe

The S’mores Cake offers a unique sweet experience that combines familiar flavors in a new format. With each bite, the combination of rich chocolate and fluffy frosting transports you to a summer evening. The nostalgic essence of this cake sparks joyful memories of campfire gatherings, making it a beloved dessert for both kids and adults.

Preparation is a breeze, as the recipe is straightforward and doesn’t demand an extensive amount of time or effort. You’ll appreciate how quickly you can create an impressive dessert that looks as good as it tastes. Baking the layers ahead of time allows flexibility in your schedule, making it a convenient option for busy days.

Not only is this cake a feast for the palate, but it can also be adapted with healthier ingredients, making it a guilt-free indulgence. By substituting certain elements, you can create a version of this dessert that aligns with your dietary preferences without losing its signature flavors.

This S’mores Cake is the perfect centerpiece for any gathering, guaranteed to impress your guests. Sharing slices of this dessert can initiate conversations about favorite campfire memories, further adding to its entertaining value. Its engaging presentation and rich taste make it a conversation starter while you enjoy it with family and friends.

Lastly, the cost-effectiveness of this recipe makes it accessible for those on a budget. With simple ingredients that are often already in your pantry, you can whip up this delicious treat without breaking the bank. Enjoying homemade delight, especially one as popular as S’mores Cake, is truly rewarding.

Historical Background and Cultural Significance

The S’mores dessert has its roots in American outdoor culture, first documented in the 1920s. The delightful treat initially gained popularity among campers who made it over a fire, with recipes circulating in various cookbooks. This nostalgic treat showcases the joy of sharing simple pleasures around a campfire, evolving into the S’mores Cake variant today.

Culturally, S’mores symbolize outdoor adventures and family bonding experiences. Whether roasting marshmallows or baking during family gatherings, this dessert has become deeply embedded in American traditions. It reflects a time when families gathered outdoors, creating joyful memories that last a lifetime.

As time progressed, the S’mores recipe evolved significantly, leading to numerous adaptations. The cake version emerged as a modern twist, encapsulating the essence of the original treat while presenting a more elegant option for celebrations. This adaptation appeals to both the younger generation and adults who cherish fond memories of roasting marshmallows.

In regions across America, variations of S’mores exist, from adding peanut butter cups to incorporating local flavors. This adaptability showcases the universal appeal of the dessert, allowing different cultures to put their unique spin on it while still maintaining the essence of a cherished treat.

Ingredient Deep Dive

Graham Crackers

Graham crackers, a staple in many households, have a rich history dating back to the 19th century when they were developed as a health food. Initially created by Sylvester Graham, these biscuits were touted for their health benefits, making their way into many recipes, including the classic S’mores. In terms of nutrition, they provide a source of whole grains and dietary fiber. When selecting graham crackers for your S’mores Cake, look for varieties made with whole wheat for a nuttier flavor.

When it comes to storage, graham crackers should be kept in a cool, dry place to maintain their crispness. If you need to substitute them, crushed digestive biscuits or vanilla wafers can work well. Each alternative will slightly adjust the flavors, yet they can still create a delicious base for your cake.

Chocolate

Chocolate is at the heart of many desserts, and its rich history dates back thousands of years to ancient Mesoamerican cultures where it was revered. The nutritional values of chocolate vary based on its type; dark chocolate, for example, is rich in antioxidants and may provide heart health benefits. When choosing chocolate for this cake, opt for high-quality chunks or bars for the best melting and flavor improvement.

For those who have chocolate allergies or prefer alternatives, carob can be a reasonable substitution representing a similar flavor profile, albeit with a distinctly different taste. Proper storage of chocolate involves keeping it in a cool environment to maintain its texture and prevent blooming.

Marshmallows

Marshmallows have their roots in ancient cultures where the sap of the marshmallow plant was used to soothe coughs and sore throats. Today, they’re a popular sweet treat that adds a nostalgic element to S’mores. Though marshmallows are primarily sugar, they can be enjoyed in moderation. Look for artisanal marshmallows with natural ingredients for the best flavor.

Storing marshmallows requires airtight containers to ensure they maintain their puffy texture. If you’re looking for substitutes, consider vegan marshmallows made from alternative ingredients like agave or gelatin-free options. This maintains the marshmallow flavor without the animal product.

Butter

Butter is a key ingredient that adds moisture and richness to baked goods. Having a history that dates back to ancient times, it’s an essential component in many classic recipes. Nutritionally, butter contains fat-soluble vitamins while also being a source of saturated fat; however, it can enhance flavors significantly when used in baking.

To select quality butter, look for unsalted varieties for better control over your sweet recipe. When storing, keep butter in a cool place or the refrigerator to prolong its shelf life. If necessary, vegetable oils can be used as substitutes, though they may alter the cake’s final texture slightly.

Common Mistakes to Avoid

  • Overmixing the batter: This can lead to a dense cake rather than a light and fluffy texture. Try mixing just until the ingredients are combined.
  • Underbaking: Ensure the cake is baked through by checking with a toothpick. A little bit of moist crumb is fine, but too wet could mean raw batter.
  • Not leveling the cake layers: Unleveled cakes can cause uneven stacking and a crooked cake. Use a serrated knife to ensure that each layer is flat.
  • Skipping the cooling step: Removing the cake from the pans too soon can lead to breakage. Always let the cakes cool for a bit before transferring them.
  • Using low-quality ingredients: The best flavors come from high-quality chocolate, butter, and other ingredients. Don’t skimp on quality for the best taste.
  • Incorrect oven temperature: Always preheat your oven and use an oven thermometer if necessary to ensure it’s at the right temperature.
  • Rushing the frosting: Allow the cake to cool completely before frosting to prevent the frosting from melting. Patience is key for a beautiful finish.
  • Not letting the cake settle: Allowing the cake layers to rest helps flavors meld together. Serve them after allowing some time to settle.
  • Ignoring storage guidelines: Improper storage can result in dry or stale cake. Keep it in airtight containers to maintain freshness.
  • Forgetting toppings: Don’t forget the finishing touch. Adding toasted marshmallows or chocolate drizzle enhances the dessert’s appeal.

Essential Techniques

The process of making a layered cake involves several essential techniques that ensure each layer turns out just right. One is the creaming method, where you beat the butter and sugar together until light and fluffy. This method incorporates air into your batter, giving your cake a rise. To master this, beat on medium speed for about 2-3 minutes until it looks pale and fluffy, being careful not to overmix.

Another technique is cake layering, which requires the patience to cool each layer thoroughly before stacking. This not only prevents melting frosting but also ensures that the layers adhere effectively. Using a cake leveler or serrated knife helps create even layers for a professionally stacked cake, ensuring each slice is perfect and neat.

Pro Tips for Perfect S’mores Cake

Choose high-quality chocolate and butter to deepen flavor profiles in the cake and frosting. Incorporate a bit of espresso powder or instant coffee into the chocolate batter to enhance the chocolate’s richness. For visual appeal, toast marshmallows just before serving, creating a dynamic look and flavor contrast. Layer the cake with different chocolate textures using ganache in between layers while saving some of the graham cracker crust for the outer layer. Allow the cake to chill in the fridge before serving; this helps the flavors marry. Lastly, serve with whipped cream and a sprinkle of graham cracker crumbs for added texture and presentation.

Variations and Adaptations

For regional variations, consider incorporating local flavors like pecans for southern flair or coconut flakes for a tropical twist. Seasonally, adapt your S’mores Cake to a pumpkin spice version by adding pumpkin puree and spices. Dietary modifications allow for gluten-free options using almond flour or a gluten-free cake mix, ensuring everyone can enjoy it. Flavor variations like adding mint extract or orange zest can elevate the aromas, while texture modifications such as adding chocolate chips or nut pieces add more crunch. In presentation, consider serving mini cakes in jars or cupcake form for fun, individual-sized portions for gatherings.

Serving and Presentation Guide

To present your S’mores Cake beautifully, use a rotating cake stand to achieve even frosting and perfect decorating. Garnish with toasted marshmallows on top, providing a delightful contrast in textures and a nostalgic appeal. Drizzling remaining chocolate ganache over the top before serving will enhance the visual and taste experience. Consider serving individual slices with a side of graham cracker crumbs for extra crunch and decor. When it comes to temperature, ensure the cake is moderately chilled for the best serving experience, which helps prevent the frosting from becoming too soft.

Wine and Beverage Pairing

Pairing the S’mores Cake with dessert wines like a rich port or sweet dessert wine beautifully complements its chocolatey flavors. Alternatively, a bold, fruity red wine enhances the cake without overpowering its sweetness. For non-alcoholic beverages, consider serving with a rich hot chocolate that echoes the dessert’s flavors or a refreshing iced coffee. When serving with coffee or tea, opt for a rich espresso or a creamy chai that brings warmth and spice. These carefully selected pairings will elevate the dessert experience.

Storage and Shelf Life

Proper storage of S’mores Cake is essential for maintaining freshness. Keep it in an airtight container at room temperature for up to three days, or refrigerate for up to a week. Avoid leaving cake unwrapped, as it can dry out quickly. If you notice any signs of spoilage like a dried-out crust or unusual smells, it’s best to discard it. When reheating, do so gently in the microwave to keep the texture intact. For longer storage, consider freezing portions wrapped tightly in plastic and aluminum foil; it will maintain its best quality for up to three months.

Make Ahead Strategies

To make your S’mores Cake ahead of time, bake the layers one or two days before the event. Wrap the cooled layers in plastic wrap and store them in the refrigerator. The night before serving, frost the cake while the layers are still cold for easier handling. Ensure you keep the frosting separate until you are ready to assemble to maintain its texture. This approach allows the flavors to deepen while preserving the cake’s moisture. You can also prepare a compote or supplementary chocolate sauce up to a week before for added flavor on the day of serving.

Scaling Instructions

Scaling the S’mores Cake recipe involves simple adjustments to ingredients and equipment. For halving, use an 8-inch cake pan; the baking time may need reducing slightly. Doubling or tripling the recipe can be easily done using larger pans, like 12-inch rounds, adjusting cooking times depending on the oven. When doubling, make sure to mix in batches if your mixer can’t handle larger amounts. Always check for doneness using the toothpick method, as thicker layers may require longer bake times. Ensure proper storage allowances for larger batches to prevent spoilage.

Nutritional Deep Dive

Breaking down the nutrition in S’mores Cake involves analyzing macronutrients, where the cake contains a balance of carbs from the sugar and flour, fats from butter and chocolate, and minimal protein. It’s vital to consider micronutrients like calcium and iron derived from chocolate and graham crackers. While indulgent, enjoying this cake in moderation can fit into various diets by managing portion sizes. Consider using lighter substitutions for ingredients to lower calorie counts or boost health benefits while keeping enjoyment high. Understanding these factors can help balance indulgence with healthier choices.

Dietary Adaptations

For dietary adaptations, consider gluten-free variations using almond or oat flour to create a delightful gluten-free S’mores Cake version without compromising flavor. Those avoiding dairy can opt for coconut cream for frosting or vegan butter for a fully dairy-free cake. A vegan recipe can also replace eggs with substitutions like applesauce or flaxseed meal. For low-carb or keto diets, alternatives can include almond flour for a lighter base and sugar substitutes like erythritol for sweetness. Each of these dietary modifications ensures that everyone can enjoy this delightful dessert regardless of their dietary restrictions.

Troubleshooting Guide

If you encounter texture issues such as a tough cake, it may have been overmixed; ensure mixing stops once just combined. A dry cake often results from overbaking; always monitor baking times closely. If flavor balance is off, consider enhancing sweetness with powdered sugar or balancing bitterness with a touch of salt. Temperature problems may arise if using multiple oven racks or not preheating properly; always give enough time for complete preheating. For ingredient substitutions affecting taste, always taste-test while adjusting to find the best replacements, ensuring a delicious outcome.

Recipe Success Stories

Community feedback highlights how S’mores Cake has become a favorite for potlucks and family gatherings, with many sharing their personal adaptations. Readers have tried variations like incorporating caramel sauce with positive testimonials about its rich flavor. Others suggest using fondant for decorative purposes while maintaining the plushness of the cake. Photography tips from readers include highlighting the cake’s layers by slicing through the middle or showcasing the toasty marshmallows as a topping. These stories build a connection around shared experiences with this beloved recipe.

Frequently Asked Questions

Can I make S’mores Cake ahead of time?
Yes, you can prepare the cake layers in advance and frost them the day of serving for optimal freshness.

What can I use instead of graham crackers?
Alternatives include crushed digestive biscuits or vanilla wafers for a similar texture and flavor.

How should I store leftovers?
Store any leftover S’mores Cake in an airtight container at room temperature for up to three days or refrigerate for up to a week.

Can I freeze S’mores Cake?
Yes, you can freeze the cake. Wrap it tightly in plastic wrap and aluminum foil to maintain freshness, lasting up to three months.

Is there a vegan version of this cake?
Yes, you can replace eggs with flaxseed meal and use vegan butter and dairy-free chocolate for a vegan S’mores Cake.

How can I adjust sweetness?
Adjust the sweetness by adding more powdered sugar to the frosting or using a sugar substitute for the cake.

What temperature should I bake at?
Bake the S’mores Cake at 350°F (175°C) for best results.

How can I get the perfect frosting consistency?
Ensure your butter is at room temperature before mixing to achieve the right texture. Adding a bit of milk can also help if it’s too thick.

Can I make a gluten-free version?
Yes, substituting regular flour for gluten-free flour blends works well in this recipe.

What drinks pair well with S’mores Cake?
Rich dessert wines, hot chocolate, or iced coffee enhance the flavor of this delightful cake.

Additional Resources

For those looking to explore more delicious recipes, check out our collection of decadent chocolate desserts, or dive into technique guides that help with baking fundamentals. You might also be interested in ingredient-specific articles that discuss the best types of chocolate to use or how to choose the right marshmallows. Recommendations for necessary cooking equipment can assist in successfully making this cake and many others. Don’t hesitate to explore seasonal variations to keep your dessert game fresh and exciting year-round.

Join the Conversation

We love to hear from you! Feel free to share your bakery adventures, adaptations of this S’mores Cake, or creative serving ideas on our social media platforms. You can also submit your photography tips and recipe reviews for a chance to be featured. Engage with fellow baking enthusiasts for community support and inspiration, and share your variations to create a wider array of delicious delights!

The Recipe

S’mores Cake

Serves: 12

Prep Time: 30 mins

Cook Time: 25 mins

Total Time: 55 mins

Kitchen Equipment Needed

  • Mixing bowl
  • Electric mixer
  • Cake pans (9-inch)
  • Cooling rack
  • Spatula
  • Rubber scraper

Ingredients

  • 1 ¾ cups all-purpose flour
  • 1 ¾ cups granulated sugar
  • ¾ cup unsweetened cocoa powder
  • 1 ½ teaspoons baking powder
  • 1 ½ teaspoons baking soda
  • 1 teaspoon salt
  • 2 large eggs
  • 1 cup milk
  • ½ cup vegetable oil
  • 2 teaspoons vanilla extract
  • 1 cup boiling water
  • 2 cups mini marshmallows
  • 1 cup chocolate chips
  • 1 cup crushed graham crackers
  • 1 cup unsalted butter, softened
  • 4 cups powdered sugar
  • 1 teaspoon vanilla extract (frosting)

Directions

  1. Preheat the oven to 350°F (175°C). Grease and flour two 9-inch cake pans.
  2. In a large mixing bowl, combine flour, sugar, cocoa powder, baking powder, baking soda, and salt.
  3. Add eggs, milk, oil, and vanilla extract to the dry ingredients and mix until smooth.
  4. Stir in boiling water gradually to thin the batter.
  5. Divide the batter evenly between the prepared cake pans.
  6. Bake for 25-30 minutes, or until a toothpick inserted comes out clean. Allow to cool.
  7. For the frosting, beat the softened butter until creamy. Gradually add in powdered sugar and vanilla, mixing until well combined and fluffy.
  8. Once the cakes are cool, place one layer on a serving plate. Spread a layer of frosting on top and sprinkle with mini marshmallows and chocolate chips.
  9. Top with the second cake layer. Frost the top and sides of the cake, using the remaining frosting to cover.
  10. Garnish by sprinkling crushed graham crackers and additional mini marshmallows on top.

Recipe Notes

  • Store leftover cake in an airtight container to retain moisture.
  • This cake can be made vegan by substituting flax eggs for eggs and using vegan butter.
  • For an ultra chocolatey experience, use chocolate frosting instead of vanilla.
  • You can toast the marshmallows on top slightly under a broiler just before serving for a beautiful finish.

Best Vanilla French Beignets – Light, Fluffy, and Delicious

Delicious Vanilla French Beignets: A Sweet Journey to New Orleans

⚖️
Difficulty
Medium

⏲️
Prep Time
30 mins

🕒
Cook Time
15 mins

⏱️
Total Time
45 mins

🍽️
Servings
12 Beignets

Indulge in the delightful experience of making and tasting Vanilla French Beignets, a treat that transports you straight to the vibrant streets of New Orleans. These soft, pillowy pastries are not just a sweet snack; they are a cultural staple steeped in history and tradition. The moment you bite into a warm beignet, you’re greeted with a delicate crunch on the outside, giving way to a tender, fluffy interior, all beautifully dusted with powdered sugar. The aroma of fried dough combined with a hint of vanilla essence creates an irresistible allure that beckons you for more.

Beignets have a rich and savory history, originally brought to the United States by French settlers who embraced the art of pastry-making. Each bite is a taste of nostalgia, evoking vivid memories of festive gatherings and joyful celebrations. Whether served with coffee for breakfast or as a delightful dessert, Vanilla French Beignets promise a unique culinary adventure that’s both satisfying and enjoyable.

Quick Recipe Highlights

  • Flavor Profile: These beignets are sweet with a warm hint of vanilla, making them addictive and perfect for any sweet tooth.
  • Texture: Experience a delightful contrast between the crisp exterior and the soft, airy center, making each bite a joy.
  • Aroma: The heavenly scent of fried dough and sweet vanilla fills the air while cooking.
  • Visual Appeal: Beautifully dusted with powdered sugar, these beignets are a feast for the eyes, accentuating their pillowy charm.
  • Skill Level Needed: Even beginner bakers can make these beignets with ease, making it a perfect recipe for everyone to try.
  • Special Equipment: Use a deep fryer or a heavy-bottom pot for frying to achieve the perfect golden-brown color.

Recipe Overview

  • Difficulty Level: While classified as medium, this recipe is straightforward, guided by simple steps that encourage experimentation in the kitchen.
  • Category: This recipe fits perfectly into the breakfast or dessert category, captivating taste buds any time of day.
  • Cuisine: A traditional French pastry with strong ties to Cajun and Creole culture, offering a distinct taste of New Orleans.
  • Cost: Ingredients like flour, sugar, eggs, and vanilla are relatively inexpensive and widely available, making beignets a budget-friendly treat.
  • Season: Perfect for enjoying year-round, especially during festive occasions or lazy weekends where you crave something sweet.
  • Occasion: Ideal for brunch parties, family gatherings, or simply as a delightful self-treat that adds joy to your day.

Why You’ll Love This Recipe

Enjoying Vanilla French Beignets offers not just a great taste but also a unique texture that everyone loves. The airy, pillowy inside meets the crispy outside, creating a delightful combination that is irresistible whether you’re enjoying them warm or at room temperature. Made with accessible ingredients, this recipe invites anyone, regardless of baking skill, to enjoy a homemade treat.

One of the most appealing aspects of beignets is their convenience. Prep is quick and easy, allowing for spontaneous gatherings or cozy breakfasts without planning. The beignets can be prepared in advance for parties or events, simply dusted with sugar right before striking up the occasion.

Nutritionally, these lovely pastries bring a sense of indulgence to your eating experience. While they are ultimately a treat, using good-quality ingredients can make a noticeable difference, providing a better flavor and texture profile than store-bought alternatives.

Socially, beignets bring people together. There’s something about sharing warm pastries, often served with a hot cup of coffee or tea, that creates a warm atmosphere. They make for perfect conversation starters and are often seen at celebratory brunches where deliciousness is a must.

Cost-effectiveness further enhances their allure, as the ingredients are very pocket-friendly. You can serve a crowd with just a small investment, truly impressing guests while keeping within budget, which is always a win in the kitchen!

Historical Background and Cultural Significance

Vanilla French Beignets have a fascinating origin, tracing back to the 18th century French settlers in New Orleans. As these chefs adapted traditional French recipes to local ingredients and preferences, beignets took shape as an irresistible treat filled with cultural significance.

New Orleans played a crucial role in the evolution of beignets into a beloved staple of American cuisine. This city, rich in history and culture, embraced these pastries as part of its culinary identity, blending French influences with local traditions.

Over time, variations of beignets emerged, leading to distinct regional versions infused with flavors representative of their origin. Whether it’s sweet beignets during Mardi Gras or savory alternatives filled with various fillings, each adaptation tells a story of its own.

Today, beignets symbolize the spirit of celebration and joy closely linked with the vibrant culture of New Orleans. They are cherished not only for their flavor but also as an emblem of culinary connection amongst different cultures.

Ingredient Deep Dive

Flour, the backbone of any pastry, holds cultural significance as a staple ingredient in many cuisines. Rich in carbohydrates, it fuels energy and gives structure, ensuring the beignets rise beautifully during frying. When selecting flour, opt for all-purpose flour for versatility, and store it in a cool, dry place to maintain freshness.

Sugar plays a vital role in beignets, contributing to their sweetness and rich flavor. A natural source of energy, sugar not only enhances taste but also aids in browning. Choose granulated sugar for the mixture and powdered sugar for dusting. Store in an airtight container to prevent clumping and ensure it remains dry.

Eggs act as a binding agent, providing moisture, richness, and a beautiful golden hue to the beignets. Their proteins contribute to the structure and stability. For optimal freshness, look for eggs that are clean and intact. They should be stored in a refrigerator and best used within a few weeks of purchase.

Vanilla extract is a key ingredient that delivers fragrant notes and a distinct flavor to the beignets. Opt for pure vanilla extract for the best quality, as it significantly enhances the overall flavor profile. Always keep it stored in a dark, cool location to preserve its aromatic properties.

Yeast is responsible for the rise and fluffy texture of the beignets. Use fresh, active yeast for optimal fermentation, ensuring your dough rises perfectly. Store in a cool, dark place or the refrigerator and check the expiration date for the best results.

Common Mistakes to Avoid

  • Using old yeast: Always check the expiration date before using yeast as old yeast won’t activate properly, leading to dense beignets.
  • Incorrect frying temperature: If the oil is too hot, beignets will burn on the outside while remaining raw inside. Use a thermometer to check temperatures between 350-375°F.
  • Overworking the dough: Knead the dough just enough to combine ingredients; overworking can lead to tough beignets instead of light and airy ones.
  • Not dusting with powdered sugar before serving: Leaving the beignets dry diminishes their appeal, and they should be dusted just before serving to keep the sugar from getting soggy.
  • Skipping the resting time: Allowing the dough to rise is essential for achieving the fluffy texture; don’t rush this important step.
  • Not using a deep-fryer or heavy-bottom pot: Using a flimsy pot can create uneven heat and lead to inconsistent frying.
  • Using a dark-colored frying pot: Dark pots can absorb heat and make it difficult to gauge oil temperature, resulting in uneven cooking.
  • Filling the pot too full when frying: Beignets need space to expand; overcrowding can lower the oil temperature and cause sogginess.

Essential Techniques

Mastering the technique of frying is crucial when making Vanilla French Beignets. Achieving the right temperature ensures that beignets develop a crispy outer layer while remaining light and fluffy inside. To master this technique, use a thermometer, and test with a small piece of dough before frying the entire batch.

Kneading is essential to develop gluten in the dough, giving beignets their structure. However, it’s important to knead only until combined to avoid creating a dense texture. Practicing this technique will help you identify when the dough is ready, focusing on achieving smoothness without overworking.

Shaping your beignets is key to achieving consistent size and cooking evenness. Roll out the dough to an even thickness before cutting to ensure uniform cooking and presentation. Pay attention to shaping sizes so that they don’t stick together during frying.

Dusting with powdered sugar right before serving is a finishing technique used to enhance the visual appeal of beignets. This step not only adds sweetness but also elevates the overall dining experience, making them irresistible.

Pro Tips for Perfect Vanilla French Beignets

Always check the temperature of your oil with a thermometer to avoid burning your beignets. A consistent frying temperature of about 365°F is key for achieving that perfect golden brown.

For an extra flavor boost, infuse the dough with additional spices like cinnamon or nutmeg for memorable beignets. This can add an interesting twist for those wanting something beyond the classic vanilla flavor.

Letting the dough rise in a warm area will yield better results. A warm kitchen or a simple oven with the light on provides the perfect environment for yeast activation.

If you’re short on time, don’t hesitate to use store-bought dough as a base for your beignets. These can be transformed into delightful pastries with a simple frying technique.

Remember to allow your beignets to cool slightly before dusting them with powdered sugar. This prevents the sugar from melting and losing its beautiful presentation.

Experiment with flavored sugars by mixing powdered sugar with citrus zest or spices to create unique variations of traditional beignets.

Always serve beignets fresh, as they taste best straight out of the fryer. Preparing them near dessert time ensures they maintain their signature fluffy texture.

Lastly, engage your family or friends in the process. Have fun together making beignets, creating lasting memories around the kitchen counter as you share, laugh, and enjoy the outcome together.

Variations and Adaptations

Consider adding fillings to your beignets, such as chocolate, pastry cream, or fruit preserves, to create filled variations that elevate the experience. This allows for creativity and personal touches that can appeal to different taste preferences.

For seasonal adaptations, you can incorporate fall spices like pumpkin or chai flavors during autumn, enhancing the festive spirit while enjoying your beignets. The addition of colorful toppings during different holidays can also enhance visual appeal.

Dietary modifications can also be made by experimenting with gluten-free flour blends for those with gluten sensitivities. Substitute regular sugar with coconut sugar or alternative sweeteners for a healthier option without sacrificing taste.

Flavor variations can be achieved by infusing the dough with citrus zest or by substituting vanilla extract with almond or orange blossom water for a unique twist. Each of these alterations transforms the classic beignet into a new experience.

Texture modifications can include making a lighter, fluffier dough by beating the eggs separately, then folding them into the mixture just before frying. This technique can enhance the pastry’s overall feel.

Finally, consider presentation alternatives by stacking the beignets on a tiered platter for special occasions, drizzling with warm chocolate or caramel sauce, and garnishing with fresh fruits or edible flowers for a show-stopping display.

Serving and Presentation Guide

For plating, arrange beignets in a lovely basket lined with a paper napkin, ensuring they appear inviting. Dust them generously with powdered sugar right before serving for a delightful visual appeal.

Consider garnishing with fresh fruits like slices of strawberries or blueberries to encourage an inviting color contrast while adding a hint of freshness that complements the rich sweetness of beignets.

Traditional accompaniments include serving beignets with a side of café au lait, creating an authentic New Orleans experience. Alternatively, offer a selection of flavored dipping sauces such as chocolate or caramel for a modern twist.

Modern serving suggestions involve pairing with ice cream for a delightful dessert experience. Placing a scoop of vanilla bean ice cream atop warm beignets creates a delicious contrast in temperature and texture.

Remember that the best serving temperature for beignets is warm, ideally enjoyed fresh out of the fryer. This ensures that the delightful crunch and tenderness are experienced to their fullest.

Portion control is important; while they are irresistibly delicious, it helps to serve smaller sizes or limit individual servings to avoid overwhelming guests or yourself with too many at once!

Wine and Beverage Pairing

Complement your Vanilla French Beignets with a light dessert wine, such as Moscato or a sparkling wine, to enhance their sweetness while adding a refreshing contrast. The bubbles from sparkling wines help cleanse the palate between bites.

For non-alcoholic alternatives, opt for a rich hot chocolate or vanilla bean latte. These beverages align beautifully with the flavor profile of the beignets while offering warmth and comfort.

Coffee pairs excellently with beignets, especially a well-brewed espresso or café au lait, which not only balances the sweetness but also creates a harmonious breakfast experience reminiscent of New Orleans cafés.

Consider temperature when serving beverages, as warm drinks tend to enhance the sensory experience when paired with hot beignets. Ensure drinks are freshly brewed to combine flavors delightful.

Presentation can be enhanced further with the use of colorful mugs or glassware; this makes for an aesthetically pleasing serving experience that compliments the beignets’ charm.

Storage and Shelf Life

To store beignets, keep them in an airtight container at room temperature for up to 2 days. After this time, the texture may begin to decline, losing crispiness and softness.

For longer storage, consider freezing the un-fried dough for up to 2 months. Wrap it tightly in plastic wrap and place it inside a freezer bag, providing convenience for those spontaneous cravings.

Signs of spoilage include any off smells or the dough developing a discolored appearance. If any signs are present, it’s best to discard them to ensure safe consumption.

To reheat your beignets, place them in a preheated oven at 350°F for 10 minutes until they are warmed through. This brings back their crispy exterior and soft insides, making them feel freshly made.

Do not refry beignets because they will become greasy and lose the desired texture. Instead, just a light oven warming is sufficient to reinstate a lovely, fresh flavor.

Freezing fully cooked beignets is also an option; however, wrap them well to prevent freezer burn. Warm them in the oven before serving to retain the texture.

Make Ahead Strategies

To maximize efficiency, consider preparing the dough ahead of time, allowing it to rise in the refrigerator overnight. This not only saves you time but also allows the flavors to deepen.

Storing the formed dough balls in the fridge before frying can also work wonders. This can keep them fresh for several hours, allowing flexibility with your timing when hosting parties or gatherings.

Quality impact assessment is crucial; it’s best to ensure that the dough is still active and has risen properly. If the dough seems too cold, allow it to sit for a while before frying.

When assembling the beignets, prepare the filling (if using) the night before, ensuring flavors infuse well while you rest. Simply fill before frying to minimize preparation time on the day of serving.

Reheating in bulk for events can be planned by frying them in batches, keeping the rest warm in the oven. Just monitor the timing to ensure they do not become overcooked.

Lastly, consider adding fresh elements like fruits or flavored sauces just before serving for an improved dining experience, ensuring everything is fresh and vibrant upon presentation.

Scaling Instructions

To halve the recipe for a smaller group, simply divide all ingredients by two, ensuring frying times are adjusted as smaller batches may cook faster.

Doubling or tripling the recipe can be done seamlessly. Be mindful of your frying capacity when scaling up to ensure you maintain the oil temperature and achieve perfectly cooked beignets.

Equipment adjustments may include using a larger pot or additional frying equipment to manage the higher volume. Keeping a close eye on oil temperature is vital as batch sizes increase.

Timing modifications can be necessary for larger batches, as they can take longer to fry; be sure to test the temperature in between to maintain quality.

Consideration of storage for leftovers is also important. Doubling the dough means you may have extra. Ensure to freeze or store properly following guidelines to maintain freshness.

Before frying a larger batch, consider testing a small sample to ensure taste and texture meet your standards. Adjust seasoning if necessary before progressing with the larger quantity.

Nutritional Deep Dive

The macro breakdown of Vanilla French Beignets typically consists of carbohydrates as the primary source, complemented by fats from frying and some protein content from eggs. Understanding these ratios helps to balance your meal when pairing with lighter sides.

Micronutrient analysis shows that while beignets are not a significant source of vitamins or minerals, they can provide some calcium and iron depending on the ingredients used. Pairing with nutrient-rich accompaniments can improve the overall meal.

Health benefits can include the satisfaction and joy derived from indulging in sweet treats in moderation, fostering positive emotional connections during celebratory occasions while enjoying these lovely pastries.

Dietary considerations are necessary for enjoyment at social gatherings; beignets can fit into many eating plans when portion sizes are controlled, allowing for deliciousness without excess.

Portion analysis encourages enjoying beignets as a special treat rather than a regular indulgence due to their calorie density. Balancing their rich flavors with lighter options helps maintain a healthier lifestyle.

Weight management tips suggest enjoying beignets with fresh fruit or herbal tea to provide balance while keeping the indulgence lighter, ensuring you still enjoy life’s sweet moments without compromising health.

Dietary Adaptations

To create gluten-free Vanilla French Beignets, substitute regular flour with a gluten-free flour blend specifically designed for baking. Ensure to check compatibility with your other ingredients.

For those requiring dairy-free options, choose plant-based milk alternatives in the dough and use dairy-free butter to achieve a similar texture without compromising taste.

Vegans can enjoy these beignets by replacing eggs with a chia or flaxseed mixture, stabilizing the dough without sacrificing moisture and flavor typically contributed by eggs.

Low-carb and keto adaptations involve replacing flour with almond flour or coconut flour, providing a unique texture while significantly reducing carbohydrate content.

Paleo dieters can achieve a suitable version using coconut flour, eggs, and natural sweeteners like honey or maple syrup, aligning with paleo dietary principles.

Low-FODMAP substitutions can be made by adjusting the type of sweeteners used and ensuring all other ingredients align with a low FODMAP protocol.

Other specific diets may call for individual adjustments based on restrictions or preferences, emphasizing the adaptability of beignets to accommodate various needs while keeping their delightful flavor intact.

Troubleshooting Guide

Texture issues often arise from incorrect frying temperatures; if beignets turn out too oily or dense, too low a temperature may be the culprit. Adjust the oil temperature and allow for proper cooking times to remedy this.

Flavor balance concerns can often be adjusted by enhancing seasonings in both the dough and dusting for a richer taste. A touch of salt can counterbalance sweetness for a more enjoyable flavor profile.

Temperature problems post-frying may require minor adjustments when reheating; ensure beignets are warmed gently to maintain crispness rather than subjecting them to drastic temperature changes.

Equipment challenges, such as using inadequate frying pans, can lead to poor results. Investing in a heavy-bottomed pot or a deep fryer improves frying quality and safety.

Ingredient substitutions necessitate careful consideration; some replacements may not provide the same flavor or texture. Test small samples to evaluate any changes before committing to larger batches.

Timing concerns are critical to avoid serving undercooked or burnt beignets. Utilize a timer and conduct small tests to gauge cooking times based on your frying method.

Recipe Success Stories

Community feedback on Vanilla French Beignets has consistently been positive, with readers praising their delightful texture and wonderful flavor. Many have shared their own adaptations, adding personal twists that create unique flavor combinations.

Variation successes highlight how easy it is to modify the recipe. Testimonials reveal that changing up the fillings or adding spices has become a fun tradition in family kitchens across many households.

Adaptation stories abound, with various readers recounting their experiences of creating beignets for special occasions, celebrating triumphs while mastering this classic recipe that is enjoyed by all.

Photography tips from reader submissions often showcase beautifully styled beignets, inspiring creativity in food presentation and igniting new passions for baking amongst aspiring chefs.

Shared success on social platforms encourages more home bakers to experiment with beignets, fostering a sense of community where everyone shares ideas, photos, and variations, creating a supportive baking environment.

Frequently Asked Questions

1. Can I make the dough in advance?

Yes! You can prepare the dough ahead of time and let it rise in the refrigerator overnight. Just make sure to allow it to sit at room temperature before frying.

2. What is the best way to store beignets?

Beignets can be stored in an airtight container at room temperature for up to two days. For longer freshness, freeze the un-fried dough or cooked beignets in a freezer-safe container.

3. Can I bake beignets instead of frying?

While traditional beignets are fried for the perfect texture, you can bake them at a high temperature, but they won’t achieve the same crispy result.

4. Can I freeze cooked beignets?

Yes, cooked beignets can be frozen. Wrap them individually and store in an airtight container, reheating them in the oven before serving for best results.

5. What’s the key to perfect frying?

Maintaining the correct oil temperature (around 365°F) is essential for frying beignets. Use a thermometer to ensure consistent temperatures for the best results.

6. Can I make gluten-free beignets?

Absolutely! Use a gluten-free flour blend designed for baking, and ensure that all other ingredients are gluten-free as well.

7. What should I dust the beignets with?

The classic choice is powdered sugar, but you can also experiment with flavored sugars or even edible glitter for special occasions!

8. How do I know when beignets are done frying?

Beignets are done when they puff up and turn a golden brown color, usually taking about 2-3 minutes on each side. A small test batch can help gauge frying time.

9. Can I use other flavorings besides vanilla?

Yes! Feel free to experiment with other extracts like almond or coconut, or add spices to the dough for unique flavor profile adaptations.

10. What is the origin of beignets?

Beignets have their roots in French cuisine, introduced to America by French settlers and have become a cultural staple in New Orleans.

Additional Resources

Explore related recipes such as Classic Crepes or Profiteroles, both sharing similarities in preparation with delightful results. These can help expand your pastry-making skills.

Technique guides for frying can enhance your knowledge and confidence, ensuring each time you pick up a frying pan, you achieve top results when cooking light pastries or other foods.

Ingredient information on types of flour and their properties provides deeper understanding and knowledge when it comes to baking and selecting the right products for specific recipes.

Equipment recommendations such as investing in a reliable thermometer, deep fryer, or heavy-duty pot can significantly elevate your experiences in deep frying at home.

Seasonal variations can inspire creative twists on traditional recipes, encouraging adapting these beignets based on local ingredients and flavors to keep things fresh and enjoyable.

Join the Conversation

We encourage interactions through social media sharing where you can post your own beignet creations! Tag us with your photographs to inspire fellow bakers to try their hand at these delicious treats.

Photography tips from fellow readers emphasize lighting and angle for showcasing not just the beignets but also the joyous experiences around making and sharing food with loved ones.

Recipe reviews and experiences encourage readers to share successes, tips, and personal stories, creating a vibrant community that inspires culinary experimentation.

Engaging community forums provide an open platform for discussions about baking tips, personal adaptations, and successful flavor experiments, encouraging active participation from home bakers everywhere.

Lastly, keep the conversation going through our newsletters, where we share favorite tips, new recipes, and updates to keep everyone involved in the joy of cooking and sharing delicious beignets!

The Recipe

Vanilla French Beignets

Serves: 12 Beignets

Prep Time: 30 mins

Cook Time: 15 mins

Total Time: 45 mins

Kitchen Equipment Needed

  • Deep frying pot or heavy-bottom pot
  • Thermometer
  • Mixing bowl
  • Rolling pin
  • Sharp knife or pastry cutter
  • Slotted spoon
  • Airtight container for storage

Ingredients

  • 2 cups all-purpose flour
  • 1/4 cup granulated sugar
  • 1 packet (2 1/4 tsp) active dry yeast
  • 1/2 cup warm milk
  • 1/4 cup unsalted butter, melted
  • 1 large egg
  • 1 tsp vanilla extract
  • 1/4 tsp salt
  • Powdered sugar for dusting

Directions

  1. In a mixing bowl, combine warm milk and yeast. Let it sit for about 5 minutes until foamy.
  2. Add melted butter, granulated sugar, egg, vanilla extract, and salt to the yeast mixture and mix well.
  3. Gradually add flour, mixing until a soft dough forms.
  4. Knead for 5-7 minutes until dough becomes smooth and elastic.
  5. Place the dough in a greased bowl, cover, and let it rise in a warm place until doubled, about 1 hour.
  6. Once risen, roll out dough to 1/4-inch thickness and cut into squares or rounds.
  7. Heat oil to 365°F in your frying pot. Fry beignets in batches for 2-3 minutes on each side until golden brown.
  8. Remove beignets with a slotted spoon and drain on paper towels.
  9. Dust with powdered sugar before serving and enjoy warm!

Recipe Notes

  • For filled beignets, consider adding chocolate or jam before sealing the dough.
  • Experiment with flavored extracts to change the taste profile, such as almond or lemon.
  • Keep the beignets dusted with sugar until serving to maintain their appealing look.

Best Pineapple Paradise Cake – Moist and Tropical Flavor

Pineapple Paradise Cake: A Tropical Delight for Every Occasion

⚖️
Difficulty
Medium

⏲️
Prep Time
20 mins

🕒
Cook Time
30 mins

⏱️
Total Time
50 mins

🍽️
Servings
12

Pineapple Paradise Cake is a delightful treat that brings a taste of the tropics to your kitchen. This cake features layers of moist, fluffy cake infused with fresh pineapple, making it an irresistible dessert for any occasion. The combination of pineapple and cream cheese frosting not only satisfies your sweet tooth but also provides a refreshing twist that makes it ideal for summer gatherings or festive celebrations.

The flavor profile is perfect for those who enjoy fruity desserts. The tartness of the pineapple balances beautifully with the sweet, creamy frosting, creating an explosion of flavor with every bite. As you slice into the cake, you’ll notice the vibrant yellow and white layers, inviting you to indulge in its tropical goodness. Each bite melts in your mouth, making it a memorable experience for your taste buds.

Quick Recipe Highlights

  • Flavor Profile: The combination of sweet pineapple and rich cream cheese offers a perfect balance of sweetness and tartness.
  • Texture: The cake is incredibly moist with a light, fluffy crumb, complemented by the creamy smooth frosting.
  • Aroma: The sweet aroma of baked pineapple and vanilla wafts through your kitchen as the cake bakes.
  • Visual Appeal: The golden yellow layers are beautifully contrasted with the white frosting, making it a stunning centerpiece.
  • Skill Level Needed: A medium skill level is required, as the recipe involves layering and frosting techniques.
  • Special Equipment: You’ll need standard baking equipment and a cake stand for cold storage and presentation.

Recipe Overview

  • Difficulty Level: This recipe is categorized as medium difficulty due to the layering and frosting process, but clear instructions make it manageable for home bakers.
  • Category: This cake fits perfectly within dessert categories, specifically birthday cakes, party cakes, and special occasion desserts.
  • Cuisine: Influenced by tropical flavors, this cake showcases the culinary traditions of various Caribbean and Hawaiian regions.
  • Cost: The ingredients are relatively inexpensive, with pineapple being the star, costing around $3, while other basic ingredients like flour and sugar are budget-friendly.
  • Season: Ideal for summer when fresh pineapples are in season, but can be enjoyed year-round with canned or frozen options.
  • Occasion: Perfect for celebrations, barbecues, summer picnics, or simply as a sweet indulgence at home.

Why You’ll Love This Recipe

The Pineapple Paradise Cake delivers an exceptional taste and texture that will enchant any dessert lover. The moistness of the cake is a direct result of the pineapple juice and chunks incorporated into the batter. Every forkful of this cake melts in your mouth, with layers that boast the perfect balance of flavors. This cake is an uplifting and flavorful treat that’s hard to resist, making it a hit during any gathering.

Preparation is a breeze, and you can whip it up in under an hour. The simple steps and the use of common ingredients mean you can easily make this cake for unexpected guests or special occasions. The versatility of the recipe allows for personal touches, making it convenient for any home cook looking to add a tropical flair to their dessert repertoire.

This cake isn’t just about indulgence; it’s packed with nutritional benefits as well. Pineapple is rich in Vitamin C, antioxidants, and bromelain, which may aid digestion. This makes your dessert not just delicious but also a small nod toward healthy eating, allowing you to feel a bit better about indulging your sweet tooth.

Socially, the Pineapple Paradise Cake can be a showstopper at birthdays or summer parties. Whether you’re serving slices to friends at a backyard barbecue or presenting it at a family birthday gathering, this cake is sure to spark conversations and smiles. Its visual presentation coupled with tropical flavor means it’s not just dessert; it’s a celebration.

Moreover, this recipe is cost-effective by utilizing easily accessible ingredients, with pantry staples and fresh produce that won’t break the bank. The favorable price points of ingredients mean you can share this indulgence widely without worrying about excess spending, making it an economical choice for large gatherings.

Historical Background and Cultural Significance

Pineapple Paradise Cake draws its essence from the tropical regions known for their sweet pineapples, particularly Hawaii and parts of the Caribbean. Pineapples have a rich history associated with hospitality and celebration since colonial times. This cake reflects cultural traditions of using fresh fruits in desserts, which signifies abundance and merriment during gatherings.

Over time, cake recipes began incorporating fruits, leading to an evolution toward what we see today. The sweet, tangy profile of pineapple has made it a popular ingredient in desserts, and this cake is an excellent representation of its versatility. Locally sourced ingredients paired with the cake’s inviting flavor have kept it popular through generations.

Regional variations of this cake can be found in many tropical places, often adapted with local ingredients or different frostings. Some areas use coconut or other fruits, showcasing the flexibility of the pineapple cake tradition as it travels through various cuisines.

Today, Pineapple Paradise Cake remains a staple in many households, connecting generations with memories of lush flavors and joyful celebrations. Whether it’s birthdays, seasonal festivals, or simply a day to brighten, this cake continues to represent happiness and community.

Ingredient Deep Dive

  • Pineapple: This fruit is not only delicious but also packed with Vitamin C and manganese. When selecting fresh pineapple, look for a firm, fragrant fruit with vibrant green leaves. Store it at room temperature until ripe, then refrigerate for short-term storage. If fresh is not available, canned pineapple can be used as a substitute, but be aware of added sugars.
  • All-Purpose Flour: The backbone of cake batter, flour gives structure. Opt for unbleached all-purpose flour for optimal results, ensuring it is stored in a cool, dry place. You can substitute it with cake flour for a lighter texture or use gluten-free blends for dietary restrictions.
  • Sugar: Sugar provides sweetness and moisture. Granulated sugar is commonly used, but brown sugar adds a hint of caramel flavor. Store in an airtight container to avoid clumping, and use sparingly if you want to lower the overall sweetness by adjusting the sugar amount.
  • Butter: Butter contributes to the cake’s moistness and flavor. Choose high-quality unsalted butter for balanced flavor. To achieve consistent results, butter should be softened to room temperature before use, which allows for proper creaming with sugar.
  • Cream Cheese: The creamy frosting base is essential for adding richness. Cream cheese provides tanginess and sweetness, making it an ideal partner for pineapple. Always check for freshness and store opened cream cheese in the refrigerator for up to two weeks.
  • Eggs: Essential for binding, eggs contribute to the texture and flavor of the cake. Fresh eggs are always best, and for a fluffier cake, allow them to reach room temperature before adding to the batter.

Common Mistakes to Avoid

  • Overmixing the Batter: Mixing too vigorously can result in a dense cake. Mix just until ingredients are combined for a lighter texture.
  • Not Measuring Ingredients Properly: Use the right measuring tools for dry and wet ingredients. Improper measurements can lead to flavor imbalances.
  • Using Cold Ingredients: Ensure that eggs and butter are at room temperature to create a smoother batter and improved volume.
  • Underbaking or Overbaking: Keep an eye on baking time; use a toothpick to check for doneness in the center of the cake.
  • Neglecting to Cool Completely: Allow the cake to cool before frosting to prevent the frosting from melting and sliding off.
  • Ignoring Flavoring: Don’t skip vanilla extract; it adds depth to the flavor profile of the cake.
  • Frosting Too Early: Frost the cake only when it’s completely cool to avoid a soupy mess.
  • Overloading on Toppings: Keep frostings and toppings to a sensible amount for balanced flavors and a polished look.
  • Not Chilling the Cake: Refrigerating the cake before serving can enhance flavors and improve texture.
  • Making Last-Minute Adjustments: Avoid making changes to the recipe on the first attempt to understand how flavors come together.

Essential Techniques

The key technique in creating the Pineapple Paradise Cake lies in mixing. Proper mixing allows air to incorporate, resulting in a light, fluffy cake. Cream together butter and sugar until light and fluffy, ensuring the cake’s structure. Overmixing after adding flour can lead to toughness, so mix gently once flour is introduced.

Layering is another vital aspect that transforms a simple cake into a stunning centerpiece. Carefully distribute frosting between layers using an offset spatula for an even spread. This method aids in achieving a smooth frosting layer, enhancing both appearance and taste.

Frosting the cake efficiently requires cold temperatures. Allowing the cake to cool completely before frosting ensures stability. A crumb coat that locks in loose crumbs creates a clean final layer, preventing an unsightly cake appearance.

Pro Tips for Perfect Pineapple Paradise Cake

1. Use fresh, ripe pineapples for optimal sweetness and tartness; it significantly enhances the cake’s flavor profile.
2. Consider chilling the cake layers for easier handling during assembly and frosting.
3. Experiment with lime zest in the frosting for a zesty kick that complements the pineapple perfectly.
4. For added texture, mix nuts or shredded coconut into the batter or sprinkle on top of the frosting.
5. Let the frosted cake sit an hour in the fridge before serving for improved slicing and enhanced flavors.
6. If slicing the cake appears challenging, a sharp serrated knife makes cleaner cuts through frosting and layers.
7. You can toast coconut flakes and use them to garnish the cake for an attractive finish.
8. Always taste the frosting as you go, adjusting sweetness according to personal preference.

Variations and Adaptations

You can explore various adaptations of the Pineapple Paradise Cake according to seasonal fruits or personal taste. For a summery twist, integrate fresh blueberries or strawberries between layers, giving bursts of flavor and vibrant color. Alternatively, during holidays, add spices like cinnamon or nutmeg to the frosting for a warming touch.

If you prefer a healthier option, substitute cake flour for whole wheat flour and reduce sugar by using honey or maple syrup instead. For a vegan adaptation, you can replace eggs with flaxseed meal and use plant-based butter and cream cheese alternatives, ensuring everyone at the table can indulge.

For individuals who savor very rich desserts, consider layering with chocolate ganache to add a decadent twist to the tropical flavor. Don’t forget to try using different flavored extracts, such as coconut or almond, in the batter for varied taste experiences.

Serving and Presentation Guide

Serving Pineapple Paradise Cake can be both fun and visually appealing. Consider using a cake stand for an elegant look, and plate individual slices with a drizzle of pineapple sauce for a touch of sophistication. A sprinkle of toasted coconut on top gives the final presentation a delightful crunch and tropical flair.

Garnishing with fresh pineapple chunks or mint leaves can elevate the look. When it comes to temperature, serve the cake slightly chilled to enhance the sweetness of the pineapple and the creaminess of the frosting. Always use a clean, sharp knife to slice the cake for clean edges and a beautiful appearance.

Portion control can easily be managed using pre-cut templates or cake templates to ensure uniform sizes. This not only gives a professional touch to your event but also allows for strategic planning of servings.

Wine and Beverage Pairing

When pairing beverages with Pineapple Paradise Cake, consider a light white wine, such as Riesling or Pinot Grigio, which complements the sweetness of the pineapple without overwhelming it. If you prefer a non-alcoholic option, a refreshing iced tea or lemonade enhances the tropical notes of the cake.

For those who wish to indulge in a coffee experience, a smooth espresso or vanilla-flavored latte creates a beautiful flavor contrast with the cake. Temperature plays a significant role; serve wines chilled and ensure your coffee drinks are hot for enjoyment.

Don’t hesitate to experiment with mocktails featuring tropical juices and hints of elderflower cordial for an extravagant touch at parties, appealing both visually and tastefully.

Storage and Shelf Life

To store the Pineapple Paradise Cake properly, cover it with plastic wrap or place it in an airtight container to maintain freshness. Keeping the cake in the refrigerator can extend its shelf life for up to five days, while room temperature storage is best for short-term enjoyment (2-3 days).

Always check for signs of spoilage, such as changes in color, texture, or an off smell, which indicate that the cake should no longer be consumed. Reheating the cake can easily be achieved using a microwave for a few seconds if you’ve stored it in the fridge.

If needed, you can also freeze the cake for longer storage. Wrap the sliced cake pieces in plastic wrap, followed by aluminum foil, which preserves the cake’s moisture. Properly stored, the cake remains delicious for up to three months in the freezer.

Make Ahead Strategies

For those looking to prepare ahead of time, you can bake the cake a day or two before your desired serving date. This allows the flavors to meld beautifully, providing an enhanced taste experience. Allow each cake layer to cool completely, then wrap them securely in plastic wrap for refrigerating.

You can make the frosting a day in advance, storing it in an airtight container in the refrigerator. Just remember to bring it to room temperature before attempting to spread it on the cake.

As for assembly, consider preparing a simple syrup with pineapple juice and brushing it onto the cake layers before frosting. This keeps the cake moist and infuses even more flavor. Finally, assemble the cake the day of serving for a fresh taste, but individual slices can be pre-cut for easy serving.

Scaling Instructions

If you need to adjust the recipe for larger gatherings, doubling or tripling the cake ingredients works seamlessly. Ensure that you use appropriately sized baking pans to accommodate larger volumes.

Monitor baking times closely; larger cakes may require additional baking time, so check for doneness with a toothpick. If halving the recipe, consider using smaller pan sizes to maintain the cake’s height and texture.

When storing larger portions or multiple layers, ensure there’s sufficient separation during refrigeration to avoid sticking or damage. Finally, adjust servings accordingly—keeping in mind that larger cakes may need more strategic slicing to ensure consistent portions.

Nutritional Deep Dive

Pineapple Paradise Cake can be savored without guilt, especially considering its benefits from key ingredients. The pineapple brings a natural sweetness, along with essential vitamins and minerals, fulfilling nutritional needs while satisfying dessert cravings.

A typical slice contains a fair amount of carbohydrates primarily from the sugar and flour, making it a quick energy source. However, dietary choices should be considered if you’re managing sugar intake; substituting or reducing sugar can yield a lighter version without losing flavor.

Micronutrients such as Vitamin C derived from the pineapple help bolster the immune system. The cake can also be modified to fit specific dietary needs, thus maintaining its delicious appeal while accommodating various health considerations and preferences.

Finally, weighing your slice allows for understanding portion sizes and calorie intake, empowering you to enjoy dessert in moderation while enhancing your overall dining experience.

Dietary Adaptations

Pineapple Paradise Cake can be tailored for various dietary needs without sacrificing taste. For gluten-free options, swap traditional flour for a quality gluten-free blend, ensuring that the cake retains its soft, moist texture.

If you require a dairy-free version, consider using plant-based butter and a dairy-free cream cheese alternative. Using flax eggs can effectively replace traditional eggs in baking while keeping the cake light and fluffy.

For vegan adaptations, additional options, such as replacing sugar with coconut sugar or maple syrup, can further enhance the cake’s tropical flavor. Non-traditional sweeteners not only balance the cake but can also cater to a wide array of palate preferences.

Your substitutions and adaptations ultimately have the potential to create a versatile version of the Pineapple Paradise Cake that maintains the delightful essence of the original recipe while accommodating diverse dietary requirements.

Troubleshooting Guide

If your cake turns out denser than expected, it’s likely due to overmixing the batter. Gently fold in the flour until just combined to avoid developing excess gluten, which toughens the texture.

A common flavor imbalance can arise from using overly sweet frosting. To correct this, consider adding a pinch of salt or a splash of lime juice; these can tone down the sweetness while enhancing the overall profile of flavors.

If your frosting is too runny, chilling it for a few minutes will help stabilize it. Alternatively, adding powdered sugar can thicken it without altering the taste significantly.

Problems with uneven cake layers can frequently be attributed to improper oven temperature settings. Invest in an oven thermometer to ensure accurate baking conditions. If the cake domes in the center, level it off using a serrated knife for even layering.

Time management often proves challenging; ensure to plan your baking and cooling times effectively to avoid rushing through the frosting process. For those working with different flours, be cautious of the moisture levels to ensure a balanced final product.

Recipe Success Stories

Community feedback has shown that many bakers have successfully adapted the Pineapple Paradise Cake to fit personal preferences. One reader noted how adding chunks of fresh strawberries transformed the cake into a delightful mixed fruit masterpiece, perfect for summer gatherings.

Another success story highlighted using a gluten-free flour blend, which maintained the cake’s moist texture and vibrant flavors. This reader appreciated how easily the recipe could be adjusted without compromising quality, allowing more people to enjoy its tropical vibes.

Photography tips also surfaced, with users sharing how food styling with fresh tropical fruits enhances presentation. They noted that a slice of the cake accompanied by colorful fruits elevated their social media posts, drawing attention and engagement.

Community adaptations have encouraged variations, ranging from different frostings to unexpected flavor additions, helping users share their creativity and make this cake a future favorite for gatherings and celebrations.

Frequently Asked Questions

Can I use canned pineapple for this recipe?

Yes, canned pineapple works well if fresh isn’t available. Just avoid extra syrup, and thoroughly drain before use to maintain cake texture.

How long does the cake last after baking?

The Pineapple Paradise Cake can be stored in the refrigerator for up to five days or frozen for up to three months.

Can I replace sugar with a sugar substitute?

A sugar substitute can be used, but be sure to check conversion ratios as different substitutes have varying levels of sweetness.

How can I enhance the pineapple flavor?

Consider adding pineapple juice to the frosting or more crushed pineapple to the batter for a stronger flavor.

Is it possible to make it ahead of time?

Absolutely! The cake can be baked a day or two in advance and stored well covered in the refrigerator until ready to serve.

What is the best way to frost the cake?

For a smooth finish, apply a crumb coat first and allow it to chill before adding a final layer of frosting.

Can I use other fruits in this recipe?

Yes! Feel free to experiment with other fruits like mango or strawberries for a unique twist.

What can I do if my frosting becomes too soft?

If your frosting is too soft, refrigerate it briefly, or gradually add powdered sugar until you reach the desired consistency.

Will this recipe work for cupcakes?

Definitely! You can convert this into cupcakes; adjust baking time to around 18-20 minutes or until a toothpick comes out clean.

Can I freeze the cake?

Yes! Wrap the cake slices in plastic wrap and then aluminum foil to prevent freezer burn; it can be stored this way for up to three months.

Additional Resources

If you’re interested in more fruity desserts, check out our collection of vibrant berry cakes and citrus-based desserts. Technique guides on cake assembly and frosting can also enhance your baking skills. Knowledge on each ingredient can help you choose fresh produce and high-quality items, ensuring the best outcomes in your baking adventures.

When considering seasonal variations, think about integrating flavors like pumpkin during fall or cranberries during winter; this cake can become a versatile year-round choice. Equipment recommendations for essential baking tools can be beneficial for mastering this recipe and many other similar ones.

Join the Conversation

We’d love to hear about your experiences with Pineapple Paradise Cake! Share your photos and modifications on social media to inspire others. Engaging with our community through recipe reviews and suggestions allows us to grow together and explore the variety this cake can offer.

Don’t forget to contribute your unique flavors and techniques to make this recipe your own. We invite you to share your successes and tips to encourage fellow bakers hunting for the perfect tropical treat!

The Recipe

Pineapple Paradise Cake

Serves: 12

Prep Time: 20 mins

Cook Time: 30 mins

Total Time: 50 mins

Kitchen Equipment Needed

  • Cake pans (2 round 9-inch)
  • Mixing bowls
  • Electric mixer
  • Spatula
  • Cooling rack
  • Offset spatula for frosting

Ingredients

  • 2 cups all-purpose flour
  • 1 ½ cups granulated sugar
  • ½ cup unsalted butter, softened
  • 1 cup crushed pineapple, drained
  • 4 large eggs
  • 1 tsp baking powder
  • 1 tsp baking soda
  • ½ tsp salt
  • 1 tsp vanilla extract
  • 8 oz cream cheese, softened
  • ½ cup powdered sugar
  • 1 tsp lemon juice

Directions

  1. Preheat your oven to 350°F (175°C). Grease and flour the cake pans.
  2. In a large mixing bowl, cream the butter and sugar together until light and fluffy.
  3. Add the eggs one by one, mixing well after each addition.
  4. Sift together the flour, baking powder, baking soda, and salt. Gradually add this to the mixture, alternating with crushed pineapple.
  5. Stir in the vanilla extract until well combined.
  6. Pour the batter evenly into prepared pans and smooth the tops.
  7. Bake for 25-30 minutes, or until a toothpick inserted into the center comes out clean.
  8. Allow the cakes to cool in the pans for 10 minutes; then transfer to wire racks to cool completely.
  9. For the frosting, beat together cream cheese, powdered sugar, and lemon juice until smooth.
  10. Once the cakes are completely cooled, frost the top of one layer, then stack the second layer on top and frost the top and sides with remaining frosting.
  11. Garnish with additional pineapple or your choice of toppings.

Recipe Notes

  • For a richer flavor, consider adding toasted coconut or nuts in between layers.
  • This cake can also be made a day ahead; just keep it covered in the fridge.

Easy No-Bake Peanut Butter Cheesecake Balls

No-Bake Peanut Butter Cheesecake Balls: A Delicious and Easy Dessert Treat

⚖️
Difficulty
Easy

⏲️
Prep Time
15 mins

🕒
Cook Time
0 mins

⏱️
Total Time
15 mins

🍽️
Servings
24 balls

Peanut butter cheesecake balls are a delightful no-bake dessert that combines the rich flavors of creamy peanut butter and smooth cream cheese. These bite-sized treats are perfect for satisfying your sweet tooth without the fuss of traditional baking. With a crunchy finish from graham cracker crumbs, each ball offers a delightful balance of sweetness and nuttiness that is sure to please any crowd.

Not only are these no-bake peanut butter cheesecake balls quick to prepare, but they also make for a great dessert option for parties, family gatherings, or just as a special treat to enjoy at home. Imagine indulging in these rich, creamy delights as they melt in your mouth, leaving behind the perfect hint of peanut butter flavor that makes every bite unforgettable.

Quick Recipe Highlights

  • Flavor Profile: Each bite is a harmonious blend of creamy peanut butter complemented by a hint of sweetness from the sugar, making them irresistible.
  • Texture: These cheesecake balls have a smooth and creamy center with a crunchy graham cracker coating that provides the perfect contrast.
  • Aroma: The rich, nutty aroma of peanut butter fills the air, enticing anyone nearby to indulge in these treats.
  • Visual Appeal: Coated with graham cracker crumbs, these balls have an inviting golden color that makes them visually striking.
  • Skill Level Needed: With simple steps and no baking required, even novice cooks can easily master this recipe.
  • Special Equipment: Only a mixing bowl and a baking sheet lined with parchment paper are needed, making cleanup a breeze.

Recipe Overview

  • Difficulty Level: These no-bake peanut butter cheesecake balls are considered easy, making them accessible for cooks of all skill levels. The straightforward instructions allow anyone to create a delicious treat without stress.
  • Category: This dessert fits perfectly into the sweet treat category, making it ideal for any occasion when something sweet is desired.
  • Cuisine: Drawing on American dessert traditions, these cheesecake balls blend classic ingredients to create unforgettable flavors.
  • Cost: The ingredients are budget-friendly and widely available, making this an economical dessert option for households.
  • Season: While perfect for any time of year, these treats shine during summer months when baking isn’t as appealing.
  • Occasion: No-bake peanut butter cheesecake balls are ideal for potlucks, birthday parties, holiday gatherings, or simply enjoying at home.

Why You’ll Love This Recipe

The taste and texture of these no-bake peanut butter cheesecake balls will leave you wanting more. The creamy filling melts in your mouth with each delectable bite, while the graham cracker coating adds a delightful crunch. The richness of peanut butter combined with cream cheese creates a flavor explosion that’s hard to resist, making these treats perfect for both kids and adults.

Convenience is key when it comes to desserts, and this recipe promises just that. With only 15 minutes of prep work and no baking required, you can whip up a batch of these heavenly bites in no time. They can easily be made ahead of time and stored in the fridge, allowing you to enjoy them whenever the craving strikes.

These peanut butter cheesecake balls are also packed with nutritional benefits. Incorporating peanut butter means they provide a good source of protein and healthy fats, making them a more satisfying choice than some other sweet treats. Additionally, using cream cheese adds a layer of decadence while offering some calcium.

Socially, these bites are a hit at gatherings. Their bite-sized nature makes them easy for guests to sample, while their visually appealing presentation means they look great on dessert tables. Sharing these no-bake peanut butter cheesecake balls is guaranteed to spark conversations and compliments among friends and family.

Cost-effectiveness is another major point in favor of this recipe. The ingredients are not only simple but affordable, which makes it easy to double or triple the batches for larger gatherings without breaking the bank. You don’t have to compromise on flavor or texture, even when sticking to a budget.

Historical Background and Cultural Significance

Peanut butter has a rich history that dates back to ancient civilizations that ground peanuts into a paste. The modern interpretation of peanut butter that we know and love became popular in the late 19th century and has since evolved into a staple in American kitchens. The introduction of cream cheese as a dessert ingredient in the United States further cemented its place in sweet dishes.

Culturally, peanut butter and cream cheese reflect broader trends in American cooking, emphasizing convenience and comfort. Dishes using these ingredients bridge gaps across generations, with many families passing down their favorite recipes—no-bake desserts included. The popularity of no-bake recipes surged as busy lifestyles grew, allowing everyone the chance to enjoy desserts without the extensive time commitment traditionally associated with baking.

As this recipe evolved, variations emerged, adapting to local ingredients and tastes. Influences from various culinary traditions have led to new combinations and techniques, showcasing the versatility of peanut butter and cream cheese in desserts. Today, they inspire countless dessert creations, making them beloved ingredients in homes across the country.

Regionally, no-bake treats have grown in popularity, particularly in areas where warm climate conditions make baking less appealing. The convenience and delicious results of no-bake recipes resonate, leading to an influx of innovations surrounding these quick and easy desserts, including many nods to classic flavors, like chocolate and fruit.

Ingredient Deep Dive

Peanut Butter: Peanut butter has its roots in South America, where peanuts were cultivated by indigenous peoples. Today, it is recognized not only for its rich taste but also for its numerous health benefits. It is high in protein, vitamins, and antioxidants, contributing to heart health and healthy weight management. When selecting peanut butter, look for natural varieties with minimal added ingredients. Store opened jars in a cool, dark place, and if you choose to substitute, almond or cashew butter can offer similar results in texture and flavor.

Cream Cheese: Cream cheese has a fascinating history, emerging as one of the first soft cheeses produced in America in the 19th century. Nutritionally, it’s a source of calcium, providing a creamy texture that enhances the richness of desserts. When purchasing, check the fat content and freshness of the product. If you need an alternative, consider using mascarpone or a dairy-free cream cheese for a similar consistency in recipes. Store cream cheese wrapped tightly in its original packaging or in an airtight container to maintain its freshness.

Common Mistakes to Avoid

  • Using old or expired peanut butter can lead to an off flavor and texture, ruining the dish. Always check the expiration date and smell before using.
  • Not chilling the mixture for a short time can cause the balls to fall apart. Refrigerate for at least 30 minutes before rolling to help them hold their shape.
  • Using sweetened peanut butter can make the cheesecake balls overly sweet. Opt for unsweetened varieties to control the sweetness.
  • Skipping the graham cracker coating results in a flat taste and texture. Always coat the balls generously for added crunch and flavor.
  • Failing to measure ingredients accurately may impact the ratio and texture of the mixture. Use measuring cups and spoons to ensure proper proportions.
  • Not using parchment paper can lead to a sticky mess when trying to roll out the balls. Always line your baking sheet for easy cleanup.
  • Under-mixing or over-mixing the filling can affect the creaminess of the texture. Mix just until combined for best results.
  • Skipping the taste test can prevent adjustments for sweetness or peanut flavor. Always sample your mixture before rolling into balls to ensure it’s to your liking.
  • Using too warm of ingredients can result in a runny mixture that won’t hold its shape. Ensure the peanut butter and cream cheese are at room temperature yet not melted.
  • Setting unrealistic expectations for presentation will lead to disappointment. These no-bake bites are meant to be a bit rustic in appearance, so embrace their charm!

Essential Techniques

Mixing: Mixing the cream cheese and peanut butter properly is crucial for achieving a smooth filling. Start at a low speed and gradually increase to avoid splattering. Use a spatula to scrape the sides, ensuring all ingredients are evenly incorporated.

Chilling: Chilling the mixture helps the flavors meld together and solidifies the filling, making it easier to roll into balls. Aim for at least 30 minutes in the refrigerator. If the mixture becomes too hard, let it sit at room temperature briefly before rolling.

Pro Tips for Perfect No-Bake Peanut Butter Cheesecake Balls

1. Experiment with different types of peanut butter—smooth, crunchy, or even flavored varieties—to discover your favorite taste.
2. Roll the balls in different toppings such as coconut flakes, cocoa powder, or melted chocolate for added flavor and crunch.
3. Use mini muffin liners to serve the cheesecake balls—they add a cute presentation while keeping them neat and tidy.
4. For a healthier twist, substitute sugar with honey or maple syrup for natural sweetness.
5. Consider adding a pinch of salt to enhance the flavors of the peanut butter and balance sweetness.
6. Create dessert skewers by threading the cheesecake balls onto sticks alongside fruits or marshmallows for a fun presentation.
7. Experiment with different nut butters for a twist on flavor—try almond or cashew butter for variety.
8. Don’t hesitate to play with flavor extracts, like vanilla or almond extract, for a unique spin on the classic recipe.

Variations and Adaptations

For an exciting twist, consider adding a chocolate layer by dipping the rolled balls in melted chocolate. You can also create a mint version by adding peppermint extract to the filling for a refreshing contrast. If you want a fruitier take, try mixing in small bits of dried fruits like cranberries or raisins for added texture and flavor.

Dietary modifications can easily adapt this recipe. For a vegan version, replace the cream cheese with a plant-based alternative and use maple syrup in place of sugar. Additionally, swap out peanut butter for sun butter to create a nut-free variation suitable for those with allergies. Seasonal adaptations can lead to creative flavor additions—try adding pumpkin puree and spice for a fall-inspired bite or fresh berries for a touch of summer.

When it comes to presentation, consider serving the cheese balls on a beautiful platter adorned with fresh berries or a drizzle of chocolate sauce. This adds an elegant touch, making these treats suitable for any gathering.

Serving and Presentation Guide

For an appealing presentation, arrange the no-bake peanut butter cheesecake balls on a colorful platter. Adding a garnish of fresh mint or a dusting of cocoa powder elevates the visual impact. Consider using cupcake liners for an organized look that adds charm to your serving.

When garnishing, try placing a small dollop of whipped cream atop each ball for a delightful finishing touch. If serving at an event, use small decorative skewers, making it easy for guests to grab and enjoy while mingling.

Serve these treats at room temperature for optimal flavor. If chilled, allow them to sit out for a few minutes before serving to enhance the taste and soften the texture slightly. Maintain appropriate portion sizes by pre-rolling the balls and using a mini scoop to ensure each one is similar in size.

Wine and Beverage Pairing

Pairing these dessert balls with the right beverages can elevate the overall experience. Rich dessert wines like Port or even a sweet Riesling beautifully complement the creamy and nutty flavors. For those who prefer something lighter, a sparkling wine can balance the density, providing a refreshing contrast.

For non-alcoholic options, consider pairing the cheesecake balls with a rich chocolate milk or a creamy vanilla bean latte. The combination creates a satisfying sweet treat that’s perfect for any occasion. When serving, offer a chilled option for wine or sparkling drinks to enhance the dessert experience further.

Storage and Shelf Life

To store your no-bake peanut butter cheesecake balls, place them in an airtight container in the fridge. They can typically last for up to one week when properly stored, maintaining their delightful flavors and textures. Ensure the container is sealed tightly to prevent drying or absorbing odors from other foods in the fridge.

If you want to extend their shelf life, consider freezing the cheesecake balls. Lay them on a baking sheet to freeze individually before transferring to a freezer-safe bag or container. Properly stored, they can keep for up to three months. When ready to enjoy, allow them to thaw in the refrigerator for a few hours before serving.

Watch for signs of spoilage, such as changes in texture or an off odor. If they appear discolored or develop any off-flavors, it’s best to discard them. Reheat instructions are unnecessary, as these treats are best enjoyed cold.

Make Ahead Strategies

Making these cheesecake balls in advance is an excellent strategy, especially for busy events. Prepare the mixture and roll the balls, then store them in the fridge for up to three days before serving. This allows the flavors to meld together, enhancing the taste.

If you plan to make them further ahead, consider freezing them as mentioned earlier. When ready to serve, simply thaw them the night before, leaving them in the fridge. For added flavor, consider adding fresh toppings, like a chocolate drizzle or chopped nuts, just before serving.

Keep track of your prep timeline and make sure to include time for chilling the mixture before rolling. This ensures that the balls hold their shape and texture when served, making the overall presentation more appealing.

Scaling Instructions

Scaling this no-bake peanut butter cheesecake balls recipe is simple and effective. For smaller gatherings, halving the recipe works seamlessly; just adjust the measurements accordingly. If you’re planning a larger event, doubling or even tripling the recipe is easy, and it can typically fit within your mixing bowl capacity.

When scaling up, be sure to check that your mixing equipment is large enough to handle the increased quantities without overflowing. The time commitment may not change significantly, but allow for some additional chilling time if you make a large batch.

Consider your storage options, as larger batches will require more space in the refrigerator or freezer. Pre-portioning, or using multiple containers, can make serving much easier and more organized.

Nutritional Deep Dive

These no-bake peanut butter cheesecake balls provide a satisfying balance of macronutrients. Each serving is packed with protein from the peanut butter and cream cheese, helping you feel full and satisfied. The healthy fats present in peanut butter support heart health and provide a nutritious component that can help fuel your day.

Furthermore, these balls include essential micronutrients, such as vitamin E, magnesium, and phosphorus, which are beneficial for overall health. They serve as great snacks, especially for those who lead active lifestyles, as they provide sustained energy without the sugar crash that comes from overly sweet treats.

Portion control is essential when indulging in these rich desserts. While their nutritional profile is balanced compared to traditional sweets, it’s still important to be mindful of serving sizes. A couple of cheesecake balls can make for a satisfying dessert, keeping you aligned with balanced dietary practices while enjoying indulgent treats.

Dietary Adaptations

These no-bake peanut butter cheesecake balls can easily adapt to fit various dietary needs. For gluten-free options, ensure you choose gluten-free graham crackers for the coating and confirm that all other ingredients are also certified gluten-free.

For those who are dairy-free, substitute the cream cheese with a dairy-free alternative made from cashews or nuts, and use a non-dairy version of peanut butter if desired. This maintains the texture while accommodating your dietary preferences.

Vegans can enjoy these treats as well; simply opt for plant-based cream cheese and maple syrup as a natural sweetener instead of sugar. Those following a low-carb or keto diet can experiment with using sugar substitutes and almond flour instead of graham crackers for a similar crunchy exterior.

Troubleshooting Guide

If your cheesecake balls have a texture issue, such as being too crumbly, try adding a touch more peanut butter or a splash of milk to help bind the mixture effectively.

If the flavor balance seems off, perhaps too sweet or too salty, consider adjusting by incorporating a bit of vanilla extract or a pinch of salt to enhance the overall taste.

Temperature problems can present challenges in the final product. If the mixture is too warm, allow it to chill longer in the fridge before attempting to roll into balls. For overly firm mixtures, let them sit at room temperature for a short while to soften.

If equipment challenges arise, such as not having an electric mixer, use a strong whisk along with elbow grease for mixing.

Ingredient substitutions can impact the final taste and texture. If you switch out peanut butter for another nut or seed butter, consider trying a touch more sweetness to maintain the flavor profile.

Timing concerns, like remembering to chill, can be avoided by setting a timer or rearranging your schedule to ensure ample chilling time before presentation.

Recipe Success Stories

Our community of readers has shared countless feedback and success stories regarding these no-bake peanut butter cheesecake balls. Many find them to be a go-to recipe for quick desserts that never fail to impress guests. They also appreciate how easily the recipe adapts to their needs, allowing for variations that cater to different dietary restrictions.

Variations have sparked creativity among cooks; one reader replaced peanut butter with almond butter, resulting in a unique flavor that became a crowd favorite at their family gatherings. The adaptability of flavors has allowed readers to share their own adaptations, like adding dark chocolate chips for extra indulgence.

Photography tips shared by the community highlight using natural lighting and colorful plates to make these delectable treats pop in photos. Many recipes reflect their personal touches, showcasing the fun and creativity that come along with making these delicious bites.

Frequently Asked Questions

Can I use crunchy peanut butter instead of creamy? Yes, crunchy peanut butter can be used in this recipe for added texture. Just keep in mind that it may slightly alter the smoothness of the filling.

How do I store leftovers? Leftovers should be stored in an airtight container in the refrigerator, where they will stay fresh for about a week. You can also freeze them for up to three months.

Can I make these cheesecake balls in advance? Absolutely! These treats actually taste better when made ahead of time, as chilling allows the flavors to meld beautifully. Just make sure to store them properly!

What can I use instead of cream cheese? If you’re looking for a dairy-free option, consider using cashew cream cheese or a store-bought vegan cream cheese alternative.

Are these vegan-friendly? You can make them vegan by substituting regular cream cheese with a plant-based version, and using maple syrup in place of granulated sugar.

Can I use sugar substitutes? Yes, alternatives like stevia or erythritol can work, but be sure to follow the specific conversion recommendations since different substitutes have varying sweetness levels.

What toppings can I add to these balls? Feel free to get creative with toppings! Options include melted chocolate, chopped nuts, or even a sprinkle of sea salt for a sweet-salty contrast.

What’s the best way to serve them? Serve them chilled on a platter. You can enhance the presentation with some fresh fruit or a dusting of cocoa powder for visual appeal.

Can I double the recipe? Yes, you can easily double the ingredients to make a larger batch; just ensure you have appropriate mixing bowls and storage containers.

What if the mixture seems too dry? If the mixture feels too dry to form into balls, consider adding a tiny bit more peanut butter or a splash of milk to help it come together.

Additional Resources

For other recipes that complement these no-bake peanut butter cheesecake balls, consider checking out our collection of no-bake desserts or finger foods that are perfect for parties. Exploring technique guides on mixing or chilling can further enhance your dessert skills. Understanding more about ingredient substitutions can also ensure you’re prepared for any dietary need. Recommendations on kitchen tools that simplify your cooking can elevate your experience, making the preparation of these delightful treats even easier!

Join the Conversation

We would love to hear how you and your family enjoyed the no-bake peanut butter cheesecake balls! Share your experiences and any personal twists you added to the recipe.

Photos of your completed treats are appreciated, as they inspire others in the community! Don’t hesitate to leave a review of your experience, as this helps others discover and perfect their own versions of this delightful dessert. Engage with fellow food lovers by asking questions, giving feedback, and creatively sharing your recipe variations.

The Recipe

No-Bake Peanut Butter Cheesecake Balls

Serves: 24 balls

Prep Time: 15 mins

Cook Time: 0 mins

Total Time: 15 mins

Kitchen Equipment Needed

  • Mixing bowl
  • Electric mixer or whisk
  • Baking sheet
  • Parchment paper

Ingredients

  • 1 cup creamy peanut butter
  • 8 oz cream cheese, softened
  • 1/2 cup granulated sugar
  • 1 teaspoon vanilla extract
  • 1 ½ cups graham cracker crumbs (for coating)

Directions

  1. In a large mixing bowl, combine the peanut butter, softened cream cheese, sugar, and vanilla extract. Mix until smooth and well combined.
  2. Chill the mixture in the refrigerator for about 30 minutes to firm it up for easier handling.
  3. Roll the chilled mixture into small balls, about 1-inch in diameter.
  4. In a separate bowl, place the graham cracker crumbs. Roll each ball in the crumbs until well coated.
  5. Place the coated cheesecake balls on a baking sheet lined with parchment paper. Return them to the refrigerator to set for at least 30 minutes before serving.
  6. Enjoy your delicious no-bake peanut butter cheesecake balls!

Recipe Notes

  • For a chocolate version, dip the balls in melted chocolate before chilling.
  • Feel free to roll the balls in other coatings like crushed nuts or coconut flakes.
  • These can be made ahead of time and stored in the fridge or freezer for later enjoyment.

Easy Mini Cheesecakes – Creamy and Perfect for Any Occasion

Mini Cheesecakes: Delightful Bites of Creamy Indulgence

⚖️
Difficulty
Easy

⏲️
Prep Time
15 mins

🕒
Cook Time
25 mins

⏱️
Total Time
40 mins

🍽️
Servings
12

Mini cheesecakes are the ultimate treat for any dessert lover, offering the rich, creamy texture of traditional cheesecake but in a bite-sized form. These delightful morsels combine a buttery graham cracker crust with a smooth cream cheese filling, creating a symphony of flavors that dance on your taste buds. Perfect for parties, picnics, or even an indulgent after-dinner treat, mini cheesecakes are versatile enough to accommodate a variety of toppings, making them a favorite for both kids and adults alike.

Imagine the first bite of a mini cheesecake: the creamy filling melts in your mouth, balanced perfectly with the crunch of the crust. Each mini cheesecake delivers a perfect portion that allows everyone around the table to enjoy a little slice of heaven. The ease of preparation adds to their charm, making them a go-to recipe for any occasion. With this simple recipe, you can create a dessert that is as impressive as it is delicious.

Quick Recipe Highlights

  • Flavor Profile: A blend of tangy cream cheese and sweet sugar, harmonized with hints of vanilla.
  • Texture: Creamy and smooth filling contrasted with a crunchy, buttery graham cracker crust.
  • Aroma: Sweet, fragrant notes of vanilla and caramelized sugar fill the air.
  • Visual Appeal: Beautifully topped with fresh fruit or a drizzle of chocolate, these cheesecakes are a feast for the eyes.
  • Skill Level Needed: Perfect for beginners, requiring just a few simple steps to achieve perfection.
  • Special Equipment: Only a muffin pan and an electric mixer are needed for these delightful treats.

Recipe Overview

  • Difficulty Level: The recipe is straightforward and doesn’t require professional baking skills, making it ideal for novice bakers.
  • Category: A dessert suitable for any meal, perfect for celebrations or casual gatherings.
  • Cuisine: American desserts; these mini cheesecakes reflect the sweet indulgence typical of American cuisine.
  • Cost: An affordable dessert; with minimal ingredients, you can create something impressive without breaking the bank.
  • Season: Enjoyable year-round, but especially fitting during holidays or summer gatherings.
  • Occasion: Great for birthdays, holidays, or as a delightful treat at family gatherings.

Why You’ll Love This Recipe

These mini cheesecakes are not only delicious but also a wonderful textural experience. Creamy filling meets a satisfying crunch in each bite, making them irresistible. The balanced flavors of sweet and tangy will have your taste buds dancing, and it’s hard to eat just one! They are perfect for sharing or enjoying alone.

Convenience is key with these mini cheesecakes; prepare them in advance, chill, and serve. They’re a lifesaver for busy hosts who want to impress without spending the entire day in the kitchen. Plus, the ingredient list is simple, which means less hassle and more time for enjoyment.

Nutritionally, mini cheesecakes can be made with low-fat cream cheese or Greek yogurt, giving you the chance to indulge without the guilt. They hold a decent amount of protein thanks to the cream cheese, and you can even add fresh fruit toppings for additional vitamins and fiber.

Socially, mini cheesecakes are a great conversation starter at gatherings. Guests will marvel at your baking skills, and they offer a fun way to customize flavors with toppings like berries, caramel, or chocolate.

Finally, cost-effectiveness plays into the charm of these mini cheesecakes. With common pantry ingredients, you can create a stunning dessert that doesn’t strain your wallet, making these perfect for frequent entertaining or last-minute gatherings.

Historical Background and Cultural Significance

The cheesecake’s history dates back to ancient Greece, but mini cheesecakes as we know them emerged in American kitchens in the mid-20th century. As baking technology and refrigeration improved, bakers began exploring new ways to enjoy cheesecake, leading to the delightful mini version that is now popular worldwide.

Culturally, cheesecakes have always been a staple dessert in American celebrations. Their rich and creamy flavor has made them a favorite at events ranging from birthdays to weddings. These mini versions make the classic dessert accessible for more intimate settings.

Over time, mini cheesecakes have evolved, with countless variations and flavor profiles introduced, reflecting different regional ingredients and traditions. Today, it’s not uncommon to find mini cheesecakes flavored with seasonal ingredients such as pumpkin, peppermint, or fresh summer berries.

Today, variations of mini cheesecakes are celebrated in various culinary settings. Regional differences in toppings and flavors celebrate local ingredients, creating a rich tapestry of flavors within the mini cheesecake tradition.

Ingredient Deep Dive

Cream Cheese: Cream cheese serves as the primary ingredient in mini cheesecakes, celebrated for its creamy texture and mild flavor. Known for its high-fat content, cream cheese is an essential part of the filling that ensures a smooth mouthfeel. When selecting cream cheese, opt for full-fat versions for the best taste, and be sure to check the expiration date. Store unopened packages in the refrigerator, and once opened, consume within 10 days.

Graham Crackers: This pantry staple adds crunch to the base of mini cheesecakes. The slight sweetness and toasted flavor of graham crackers complement the tanginess of the cream cheese filling beautifully. Look for finely crushed graham crackers for an even crust. When storing, keep them in a dry place to avoid sogginess, and if you’d like to substitute them, crushed vanilla cookies or digestive biscuits work wonderfully too.

Common Mistakes to Avoid

  • Using cold cream cheese: Ensure the cream cheese is at room temperature for a smooth and lump-free filling.
  • Overmixing: Beat the cream cheese just until smooth to avoid incorporating too much air, which can cause cracks.
  • Skipping the water bath: If baking in the oven, a water bath is essential to prevent the mini cheesecakes from drying out.
  • Not preheating the oven: A preheated oven ensures even cooking and a perfect texture.
  • Overbaking: Keep an eye on the cheesecakes to achieve a creamy center; they should jiggle slightly when done.
  • Inadequate cooling: Allow them to cool in the oven with the door slightly ajar before refrigerating for the best texture.
  • Not lining the pan: Use liners in the muffin pan for easier removal of the mini cheesecakes.
  • Ignoring toppings: A simple fruit topping or drizzle adds flavor and makes for a stunning presentation.

Essential Techniques

Mixing: Proper mixing ensures a smooth filling. Use an electric mixer and start on low to avoid splatter; gradually increase speed. It’s important to stop mixing once incorporated to avoid over-aeration.

Baking in a Water Bath: This technique helps maintain moisture during baking. To create a water bath, place the muffin pan in a larger pan filled with hot water, which provides gentle heat and prevents the cheesecakes from cracking.

Cooling: After baking, cheesecake needs to cool gradually to avoid sudden temperature changes that can cause cracks. Leave them in the oven with the door ajar before transferring to a wire rack to cool completely.

Pro Tips for Perfect Mini Cheesecakes

1. Always use full-fat cream cheese for the creamiest texture.
2. Make sure your graham cracker crust is compacted firmly to prevent crumbling.
3. Experiment with flavored extracts, like almond or lemon, for different taste profiles.
4. Chill the mini cheesecakes overnight for the best flavor development.
5. Top with your favorite fruits or caramel sauce just before serving for an eye-catching finish.
6. Avoid overbaking; the cheesecakes should look set but with a slight jiggle.
7. Use paper liners to make serving and cleanup easier.
8. Toast the graham crackers for an enhanced flavor profile.

Variations and Adaptations

Regional variations of mini cheesecakes can introduce unique flavors; for instance, key lime cheesecake mini versions can be a refreshing twist. Seasonal adaptations allow for pumpkin spice in fall or berry-infused options during summer months.

Dietary modifications can be explored, such as dairy-free mini cheesecakes using coconut cream or nut-based cheeses, which are perfect for vegan diets. Low-carb adaptions with almond flour crusts maintain the flavor while being kinder on dietary restrictions.

Flavor variations could include chocolate chip mini cheesecakes or Mocha-infused options for coffee lovers. Other textural modifications might involve adding a layer of chocolate ganache or a crunchy nut topping.

Presentation alternatives are endless; serve mini cheesecakes in clear cups for a stunning visual, or attempt a layered approach with different flavor fillings.

Serving and Presentation Guide

For a stunning plate, consider stacking mini cheesecakes and securing them with a toothpick, or serve them individually topped with seasonal fruits and a dollop of whipped cream. Garnishing with fresh mint leaves adds a pop of color and freshness.

Traditional accompaniments might include a drizzle of chocolate or caramel, while modern suggestions could involve a sprinkling of crushed nuts or edible flowers for a sophisticated touch.

Temperature is key; mini cheesecakes are best served chilled to enhance their creamy texture. When plating, consider portion control to allow guests to indulge without overwhelming them with dessert.

Wine and Beverage Pairing

For a perfect pairing, opt for sweet dessert wines like Moscato or a fruity Riesling; both complement the rich creaminess of mini cheesecakes beautifully. Non-alcoholic alternatives include iced tea infused with fresh fruit, providing a refreshing contrast to the sweetness.

If you enjoy coffee, consider pairing your mini cheesecake with a bold espresso or a milky cappuccino to enhance the dessert experience.

Always serve drinks at the appropriate temperatures to ensure they meld well with the flavors of the cheesecakes; chilled wines pair nicely with these sweet bites.

Storage and Shelf Life

To store mini cheesecakes, place them in an airtight container and refrigerate for up to five days. Ensuring they remain sealed will prevent them from drying out or absorbing unwanted odors from the fridge.

Signs of spoilage to watch out for include changes in texture, odor, or discoloration. If mini cheesecakes have been left out at room temperature for more than two hours, it’s best to discard them.

For longer storage, consider freezing mini cheesecakes. Wrap each one in plastic wrap, then place them in a freezer-safe container. When ready to enjoy, thaw in the refrigerator before serving.

Make Ahead Strategies

To prep mini cheesecakes in advance, make the crust a day ahead and store them in a container. Prepare the filling just before baking, ensuring it’s freshly mixed for smooth results.

Quality may be impacted by freezing, as the texture can change. To maintain freshness, assemble and bake the cheesecakes, then freeze them if necessary. Allow plenty of time to thaw, and add fresh toppings just before serving for the best experience.

Reheating is not necessary as mini cheesecakes are best served cold, so use the chilling time to enhance flavor.

Scaling Instructions

Scaling mini cheesecakes is straightforward. To halve the recipe, simply divide each ingredient by two. For larger gatherings, doubling or tripling the recipe works well, ensuring you have enough for everyone.

Adjust baking times if increasing the recipe significantly. Keep an eye on the texture; larger batches might require slightly longer to set.

When storing leftovers or expanded portions, use appropriately sized containers to ensure they remain fresh and ready to enjoy later.

Nutritional Deep Dive

A macro breakdown of mini cheesecakes shows a good balance of fats, carbs, and a moderate amount of protein due to the cream cheese. They can be enjoyed as an indulgent treat while still fitting into many balanced diet plans.

Micronutrient analysis reveals essential vitamins derived from ingredients like cream cheese and optional fruit toppings. Healthy fats and calcium are significant benefits of these delightful bites.

Being mindful of portion sizes can help in weight management, as these mini desserts provide a satisfying end to any meal without overindulging.

Dietary Adaptations

Mini cheesecakes are easily customizable for different dietary needs. For gluten-free diets, substitute graham crackers with gluten-free options like almond flour or gluten-free cookies.

Dairy-free versions can be made using cashew cream in place of cream cheese, keeping the consistency creamy and luscious. For those on vegan diets, ensure all ingredients are plant-based.

Low-carb and Keto adaptations can be created using alternative sweeteners and crusts made from nuts, providing a sweet treat without excessive sugars.

Paleo recipes might include honey or maple syrup as sweeteners and focus on whole food ingredients, while Low-FODMAP variations might exclude certain dairy products.

Troubleshooting Guide

In the event of texture issues, ensure that cream cheese is well softened and properly mixed to avoid lumps. Over-mixing can introduce air into the mixture, leading to cracks during baking.

Flavor balance may be off if too much sugar is used; adjust accordingly with lemon juice or zest to add brightness. For temperature issues, consider closely monitoring your oven, as temperature inconsistencies can lead to uneven baking.

Ingredient substitutions can impact outcomes; always choose direct replacements where possible to ensure balance in flavors and textures. If baking time seems off, check for doneness by the slight jiggle test.

Recipe Success Stories

Community feedback has shown overwhelming love for these mini cheesecakes, with many sharing their variations. Many readers have reported success using seasonal fruits, such as strawberries, to enhance flavors.

Adaptation stories are plentiful, with individuals substituting their personal favorite ingredients to create unique versions. For example, chocolate lovers often make a chocolate ganache topping to further elevate their treats.

Photography tips suggest using natural light to capture the beauty of these desserts, showing off the textures and colors that make them stand out at any gathering.

Frequently Asked Questions

Can I use low-fat cream cheese?

Yes, low-fat cream cheese can be used, though it may slightly alter the texture. The taste will remain similar, ensuring you still enjoy this delightful dessert.

How do I know when my mini cheesecakes are done?

When cooked, mini cheesecakes should be slightly jiggly in the center but firm around the edges. They will continue to set as they cool.

Can I freeze mini cheesecakes?

Absolutely! To freeze, wrap each cheesecake individually and store in a freezer-safe container. They can last up to three months in the freezer.

How long do they last in the fridge?

When stored in an airtight container, mini cheesecakes can last for up to five days in the refrigerator.

Can I use different types of crusts?

Yes, feel free to get creative! Alternatives such as chocolate cookie crusts or nut-based crusts can add unique flavor to your mini cheesecakes.

What’s the best way to remove them from the muffin tin?

Use paper liners for easy removal. If not using liners, let the cheesecakes cool completely before carefully running a knife around the edges to help release them.

Can I make variations of flavors?

Certainly! Mini cheesecakes are the perfect canvas for flavors—consider experimenting with chocolate, pumpkin, or peanut butter fillings.

Do I need to use a water bath?

While not absolutely necessary, a water bath can help avoid cracks and ensure a creamy texture, especially for baked cheesecakes.

What are some good toppings for mini cheesecakes?

Toppings can include fresh fruit, whipped cream, chocolate ganache, or caramel. Choose whatever appeals to your palate!

Is this recipe adaptable for vegan diets?

Yes, you can replace cream cheese with vegan options like cashew cream or vegan cream cheese to achieve a similar texture and taste.

Additional Resources

Explore related recipes for a full dessert spread, including classic New York-style cheesecakes, fruit tarts, and other bite-sized treats.

Additionally, consider technique guides for mastering pie crusts or different baking methods to elevate your baking skills further.

Dive into ingredient information focused on the versatility of cream cheese or explore the world of dessert wines that pair beautifully with your mini creations.

Lastly, seasonal variations can keep your dessert repertoire fresh, introducing unique flavors that celebrate local produce throughout the year.

Join the Conversation

We invite you to share your experiences with this recipe on social media! Tag us with your mini cheesecakes, and feel free to share your variations to inspire others.

Photography tips to capture your creations can help showcase the beauty of these treats, allowing other bakers to see the true allure of your hard work.

Leave reviews or comments on how you personalized the recipe or any tips that might help future bakers achieve perfection. Join our community engaged in swapping ideas and sharing delicious twists on classic recipes!

The Recipe

Mini Cheesecakes

Serves: 12

Prep Time: 15 mins

Cook Time: 25 mins

Total Time: 40 mins

Kitchen Equipment Needed

  • Muffin pan
  • Electric mixer
  • Mixing bowls
  • Measuring cups and spoons
  • Spatula

Ingredients

  • 1 cup graham cracker crumbs
  • 1/4 cup unsalted butter, melted
  • 2 cups cream cheese, softened
  • 1/2 cup granulated sugar
  • 1 tsp vanilla extract
  • 2 large eggs
  • 1/4 cup sour cream (optional)

Directions

  1. Preheat your oven to 325°F (160°C) and line a muffin pan with paper liners.
  2. In a bowl, combine graham cracker crumbs and melted butter, then mix until well combined.
  3. Press the mixture evenly into the bottom of each muffin cup to form the crust.
  4. In a separate bowl, beat the cream cheese until smooth and creamy.
  5. Add sugar, vanilla extract, and sour cream, mixing until well combined.
  6. Add eggs one at a time, mixing just until incorporated to avoid overmixing.
  7. Pour the cheesecake batter over the crust in each muffin cup.
  8. Bake for about 20-25 minutes, or until the centers are set but slightly jiggly.
  9. Turn off the oven, crack the door open, and let the cheesecakes cool in the oven for 10 minutes before transferring to a wire rack.
  10. Once cool, refrigerate for at least 2 hours before serving.

Recipe Notes

  • Feel free to add fruit toppings or chocolate drizzle before serving.
  • These mini cheesecakes can be made several days in advance, making them a convenient dessert option.

Easy Cherry Delight Recipe with Creamy Cheesecake Filling

Cherry Delight: A Refreshing Taste of Summer

⚖️
Difficulty
Easy

⏲️
Prep Time
20 mins

🕒
Cook Time
5 mins

⏱️
Total Time
25 mins

🍽️
Servings
8 servings

Cherry Delight is a timeless dessert that embodies the essence of summer with its vibrant flavors and delightful textures. Imagine biting into a luscious cherry-topped treat that offers a perfect blend of tanginess and sweetness, satisfying your sweet tooth while refreshing your senses. This dessert is an ideal way to celebrate the berry season and is perfect for gatherings, picnics, or just a simple indulgence at home.

The beauty of Cherry Delight lies not only in its taste but also in its ease of preparation. With minimal cooking time, you can have a stunning dessert ready to impress your friends and family. As your layers of creamy goodness and bright red cherries come together, this dessert transforms any occasion into a celebration. Its vibrant appearance is sure to catch the eye and spark joy in every bite you take.

Quick Recipe Highlights

  • Flavor Profile: A delightful mix of sweet and tangy cherries with a rich, creamy base.
  • Texture: A smooth, velvety layer topped with a burst of juicy cherries, creating a perfect mouthfeel.
  • Aroma: The inviting scent of fresh cherries combined with a hint of vanilla creates an irresistible aroma.
  • Visual Appeal: This dessert features bright red cherries on a creamy white layer, making it a feast for the eyes.
  • Skill Level Needed: A straightforward recipe that requires no baking skills, making it accessible to all cooks.
  • Special Equipment: Just a mixing bowl and a baking dish are needed for this simple recipe.

Recipe Overview

  • Difficulty Level: Cherry Delight is classified as an easy recipe, perfect for novice cooks as well as seasoned chefs looking for a quick dessert option.
  • Category: This dessert is an excellent choice for summertime, potlucks, and family gatherings, adding a refreshing touch to any meal.
  • Cuisine: While it has roots in classic American desserts, variations can be found in many cultures that embrace seasonal fruits.
  • Cost: The ingredient costs are fairly low, making this recipe economical and accessible for everyone.
  • Season: Best enjoyed in summer when cherries are in season, offering the freshest and most flavorful cherries.
  • Occasion: Perfect for BBQs, birthdays, or any casual get-together, Cherry Delight is a crowd-pleaser.

Why You’ll Love This Recipe

Cherry Delight stands out for its incredible taste and texture. The balance of the tart cherries against the rich, creamy filling creates an exciting flavor experience. Each spoonful provides a delightful mix of smoothness and juicy bursts that keep you coming back for more. It’s the antidote to any hot day, leaving you feeling refreshed and satisfied.

The convenience of this dessert cannot be overstated. With a quick prep time and no baking required, it’s an ideal option for those busy days when you want to create something special without the hassle. You can whip it up in just 25 minutes, putting more time back into your day for enjoyment with friends and family.

Nutritionally, cherries are packed with health benefits, including antioxidants and vitamins, contributing a healthy touch to this classic dessert. By making Cherry Delight, you can indulge without the guilt, knowing you’re enjoying a treat with some nutritional perks.

This dessert is also fantastic for social occasions. It’s easy to serve and can be made ahead of time, allowing you to enjoy the party rather than spend all your time in the kitchen. Its beautiful presentation will also impress your guests, elevating your hosting game.

Lastly, the cost-effectiveness of this recipe is a bonus. Cherry Delight can feed many for a low cost, allowing you to indulge without breaking the bank. The primary ingredients are simple and affordable, making it a great option for anyone looking to host an event on a budget.

Historical Background and Cultural Significance

The origin of Cherry Delight can be traced back to classic American desserts, which have evolved over the decades. Typically featuring seasonal fruits, these desserts celebrated the harvest and brought families together around the dining table, fostering community and sharing.

Culturally, cherry desserts hold a special place in many traditions, particularly in regions where cherries are abundant. Celebrating harvest festivals often includes cherry-based treats, highlighting their importance in regional cuisines and local economies.

Over the years, the recipe for Cherry Delight has seen numerous adaptations. While the core ingredients remain the same, variations that cater to contemporary tastes have emerged, including low-calorie and dairy-free versions. This evolution demonstrates the versatility of the dish and its capacity to adapt to changing dietary preferences.

Regional variations of Cherry Delight can also be found, from custard bases in the Midwest to cream cheesed adaptations on the coasts. Each version reflects local ingredients and culinary traditions, adding depth to this simple yet beloved dessert.

Ingredient Deep Dive

Cherries are the star of this dessert. Historically, they symbolize prosperity and renewal in many cultures. Nutritionally, cherries are low in calories and packed with antioxidants, making them a healthful addition to any diet. When selecting cherries, look for firm, plump fruits without blemishes or soft spots. Store them in the fridge for up to a week, or freeze them for extended use. If you can’t find fresh cherries, feel free to substitute with frozen cherries, just ensure to drain excess liquid.

Cream cheese provides a rich, creamy texture to the filling. It has a long history in culinary art, tracing back to ancient civilizations. Cream cheese is a good source of calcium and protein but should be enjoyed in moderation due to its higher fat content. Opt for full-fat versions for the best flavor and texture, but low-fat variations can be used too. Store cream cheese in the refrigerator and consume within a week after opening.

Additionally, whipped cream is essential for adding lightness and fluffiness to the dessert. Whipped cream enhances not just the texture but also the flavor of the dish. You can use homemade or store-bought varieties. For the healthiest options, make your own from heavy cream and avoid additives found in pre-packaged products.

Common Mistakes to Avoid

  • Not using fresh or ripe cherries: Always opt for fresh cherries to enhance the flavor and texture of the dessert.
  • Overmixing the filling: Overmixing can lead the cream cheese to become too runny instead of maintaining a thick consistency.
  • Skipping the chilling time: Allowing the dessert to chill is crucial for proper setting; skip this at your peril!
  • Using low-quality cream cheese: Invest in a good brand for the best flavor; this will significantly affect the overall taste.
  • Not draining cherries: If using canned cherries, make sure to drain them well to avoid excess moisture.
  • Using too much sugar: Balancing the sweetness is essential; too much sugar can overshadow the flavor of the cherries.
  • Neglecting to taste: Always taste as you go to adjust flavors before final assembly.
  • Skipping garnishing: A dash of creativity in garnishing can elevate the presentation of your dish.

Essential Techniques

Whipping cream is a vital technique for achieving the perfect fluffiness in your Cherry Delight. To master it, ensure your bowl and whisk attachments are cold before starting. Whip until soft peaks form; avoid overwhipping, as this can lead to grainy texture. The key visual cue is when the cream holds its shape yet still has a soft, silky appearance.

Blending cream cheese smoothly is crucial for a creamy filling. Allow the cream cheese to come to room temperature before mixing, making it easier to combine without lumps. Use a hand mixer or stand mixer for the best results, watching for a smooth, even consistency without visible lumps, which can be a sign of insufficient blending.

Pro Tips for Perfect Cherry Delight

Use fresh, seasonal cherries for the best flavor. If not in season, consider using frozen cherries, but ensure they are well-drained to avoid excess liquid.
Experiment with flavored extracts like almond or vanilla to elevate the taste of the filling.
Adjust the sweetness based on your cherry type; some can be sweeter than others.
Chill the dessert overnight for enhanced flavors; it allows the filling to set perfectly.
For added texture, sprinkle crushed nuts on top before serving; they provide a lovely crunch against the creamy layers.
Serve with a scoop of vanilla ice cream on the side for extra indulgence.

Variations and Adaptations

Cherry Delight can be adapted for different regions by using local fruit varieties. Consider substituting cherries with berries like strawberries or blueberries for a delightful twist. Seasonal adaptations can incorporate autumn flavors, with ingredients like pumpkin spice or apple filling adding a cozy element.

For dietary modifications, a gluten-free crumb crust can replace traditional graham cracker crusts, and vegan cream cheese is an excellent substitute for dairy-free options. Flavor variations can also be introduced by adding citrus zest or spices such as cinnamon for warmth.

When it comes to texture modifications, incorporating a layer of meringue on top provides an airy contrast to the creamy filling. Finally, presentation alternatives can enhance visual appeal—consider serving in individual cups for a more elegant showcase.

Serving and Presentation Guide

Plating Cherry Delight beautifully can transform it from a simple dessert to a stunning centerpiece. Use a clear glass dish to showcase the layers, or serve in cocktail glasses for an upscale presentation. Garnish each serving with a sprig of mint for a pop of color and freshness.

When garnishing, opt for fresh cherries on top, either whole or sliced, for added visual appeal. Drifting powdered sugar lightly on top can give it a snowy, elegant look as well. For traditional accompaniments, serve with whipped cream or a scoop of vanilla ice cream on the side to enhance flavors and create a delightful combination.

Controlling portions is essential, especially for larger gatherings. Use a measuring cup or ladle to scoop out portions evenly, ensuring each guest receives an equal share of this delightful treat.

Wine and Beverage Pairing

Wine pairings for Cherry Delight can enhance the overall flavor experience. A sweet Riesling or a light Pinot Noir complement the tart cherries beautifully. For sparkling lovers, a semi-sweet Prosecco adds a delightful effervescence that pairs perfectly with cream-based desserts.

If you prefer non-alcoholic options, consider a refreshing cherry lemonade or iced tea for a cool, tangy contrast. For coffee lovers, serve with a light roast coffee, which balances the sweetness of the dessert without overpowering it.

Temperature considerations play a role in serving. Ensure that beverages served alongside are chilled, which provides a cooling complement to the dessert.

Storage and Shelf Life

Cherry Delight should be stored in the refrigerator due to its creamy filling and fresh fruit components. Use an airtight container to maximize freshness, and it can last up to 3-4 days. Always check for signs of spoilage, such as off-smells, discoloration, or an overall change in texture before consumption.

For reheating, avoid microwaving as it can affect the cream’s consistency—enjoy it cold instead. If considering freezing, be aware that the texture may not hold up well upon thawing, especially the cream layer; however, the separate components can be frozen and assembled fresh.

Make Ahead Strategies

To make the preparation of Cherry Delight even easier, consider making the cherry layer in advance. Allowing flavors to meld improves the overall taste. Store it in an airtight container, and combine it with the cream layer just before serving.

For a more efficient prep timeline, you can prepare the cream filling while the cherries are cooking or cooling. Quality is not compromised by preparing in advance, as long as proper storage is maintained.

Finally, consider timing the assembly so you have a fresh dessert ready shortly before serving—this keeps the layers distinct and enhances freshness in each bite.

Scaling Instructions

If you need to serve a larger crowd, Cherry Delight scales beautifully. To double the recipe, use a larger dish and ensure you increase the ingredient quantities accordingly. Adjust cooking time slightly, as larger volumes may require more time for the flavors to meld.

For halving the recipe, simply cut all ingredient amounts in half and choose a smaller baking dish to maintain height and presentation quality.

When scaling, consider that timing modifications might be needed, particularly when it comes to chilling time. Ensure you adjust your prep accordingly to guarantee the same delicious outcome.

Nutritional Deep Dive

Understanding the macro breakdown of Cherry Delight reveals a balance of carbohydrates from the crust and sugars from the cherries, fats from cream cheese, and whipped cream. Portion control is essential since enjoying indulgent desserts in moderation aids in maintaining a wholesome diet.

The micronutrient analysis showcases the antioxidants and vitamins available in cherries, providing anti-inflammatory properties and potential health benefits. Other ingredients like cream cheese contribute calcium while ensuring flavor is not compromised.

Weight management tips include serving smaller portions and complementing with fresh fruit or a light salad on the side. This helps balance indulgence with nutrition for a guilt-free experience.

Dietary Adaptations

Cherry Delight can easily be adapted to suit various dietary needs. For those needing gluten-free options, use almond flour or gluten-free graham crackers for the crust. Dairy-free individuals can substitute with plant-based cream cheese and whipped cream alternatives for a delicious, inclusive treat.

Vegans can enjoy this dessert by utilizing aquafaba or coconut cream instead of eggs or traditional dairy products. Low-carb enthusiasts can experiment with alternative sweeteners and a nut crust for a satisfying, sugar-free dessert option.

Following these adaptations ensures that Cherry Delight can be enjoyed by a broader audience without compromising on taste or texture.

Troubleshooting Guide

If the texture of your Cherry Delight appears too runny, it may be due to overmixing the filling. Ensure you mix just until combined. Conversely, if it feels overly thick, consider adding a splash of milk or cream to thin it out.

Balancing flavors can be tricky—if it tastes too sweet, consider adding a pinch of salt or a squeeze of lemon juice to elevate the flavor profile.

Temperature problems can arise if the dessert is not chilled long enough. Make sure you give it adequate time to set in the refrigerator to achieve the expected creamy consistency.

If you’re facing challenges with ingredients, check for substitutions based on availability. Often, fresh ingredients can be interchanged with frozen options, just remember to adjust sugar levels.

Timing concerns can arise if you haven’t prepped enough in advance. Try to work on other components while one part is cooling to save time, keeping the process flowing smoothly.

Recipe Success Stories

Community feedback has been overwhelmingly positive for Cherry Delight. Many readers share their excitement and success adapting the recipe for personal tastes. From adding extra layers of flavor to presenting it at family gatherings, readers have embraced this dessert wholeheartedly.

Variation successes have also been plentiful. One reader created a decadent chocolate version, using cocoa powder in the crust, while others have explored using seasonal fruit varieties, resulting in delicious outcomes that showcase versatility.

Adaptation stories often involve combining the Cherry Delight with other favorite desserts, leading to creative hybrids that are just as delightful and tempting.

Social media sharing allows viewers to showcase their takes on Cherry Delight, with stunning photography highlighting the dessert’s beauty and elegance.

Frequently Asked Questions

Can I use frozen cherries instead of fresh?

Yes, but make sure to drain excess liquid to maintain the dessert’s texture and avoid it becoming too runny.

How long can Cherry Delight be stored in the fridge?

Cherry Delight generally stays fresh in the fridge for about 3-4 days in an airtight container.

Is it possible to make this recipe vegan?

Certainly! Substitute cream cheese and whipped cream with dairy-free alternatives, and you’ll have a vegan-friendly version.

What can I use instead of graham crackers for the crust?

Alternative options include almond flour, coconut flour, or even crushed oats for a gluten-free crust.

Can Cherry Delight be made ahead of time?

Absolutely; it’s a great make-ahead recipe! Just be sure to keep it in the fridge until you’re ready to serve.

What are some serving suggestions for this dessert?

Cherry Delight pairs beautifully with vanilla ice cream and fresh mint as garnishing for added elegance.

Can I add other fruits to this dessert?

Yes, you can get creative! Substitute or mix in fruits like strawberries, blueberries, or raspberries for an exciting twist.

How do I know when the filling is ready?

The filling is ready when it’s smooth and creamy without lumps; taste as you go to achieve the desired flavor and consistency.

Is it necessary to chill the dessert overnight?

While not required, chilling overnight enhances the flavors and helps the layers set for better slicing.

What if my cherries are very sweet?

Adjust the sugar in the filling accordingly, to balance the overall sweetness of the dessert and highlight the natural cherry flavor.

Can I Freeze Cherry Delight?

While it can be frozen, the texture may suffer upon thawing. It’s best enjoyed fresh, though filling and crust can be frozen separately.

Additional Resources

If you’re looking to explore more delightful recipes similar to Cherry Delight, consider checking out fruit-based desserts and creamy treats on our blog. Technique guides on perfecting whipped cream and balancing flavors will come in handy as well.

For those interested in ingredient information, delve into guides about seasonal fruits and how to choose the best ones. Equipment recommendations can also aid in finding the right tools to make your time in the kitchen efficient and enjoyable.

Seasonal variations of recipes, tapping into spring and fall favorites, will expand your dessert repertoire.

Join the Conversation

We’d love to hear your thoughts on Cherry Delight! Share your reviews, adaptations, and photographs on social media or in the comments below. Engaging with our community enriches the cooking experience, and we encourage you to share your unique twists on this recipe as well.

Celebrate culinary creativity by sharing how Cherry Delight has graced your table, mapping out your recipe journey. Join us in exploring the world of delightful desserts and engage with like-minded cooking enthusiasts!

The Recipe

Cherry Delight

Serves: 8 servings

Prep Time: 20 mins

Cook Time: 5 mins

Total Time: 25 mins

Kitchen Equipment Needed

  • Mixing bowl
  • Whisk or electric mixer
  • 9×9-inch baking dish
  • Measuring cups and spoons

Ingredients

  • 2 cups fresh cherries, pitted and halved
  • 8 oz cream cheese, softened
  • 1/2 cup powdered sugar
  • 1 cup whipped cream
  • 1 cup graham cracker crumbs
  • 1/2 cup unsalted butter, melted

Directions

  1. In a mixing bowl, combine graham cracker crumbs and melted butter until well blended. Press firmly into the bottom of a greased baking dish to form the crust.
  2. In another bowl, beat the softened cream cheese and powdered sugar until smooth and creamy.
  3. Gently fold in the whipped cream until well combined.
  4. Spread the cream mixture over the graham cracker crust evenly.
  5. Top with halved cherries, distributing them evenly over the cream layer.
  6. Chill the dessert for at least 3 hours or overnight for best results.
  7. Slice and serve chilled, enjoying the refreshing flavors of summer.

Recipe Notes

  • For added flavor, try mixing in a splash of vanilla extract to the cream cheese mixture.
  • You can substitute cherries with other seasonal fruits like strawberries or blueberries.
  • Store leftovers in an airtight container in the refrigerator for up to 3-4 days.

Best M&M’s Brownies – Chewy, Fudgy, and Colorful Treat

M&M’s Brownies: The Ultimate Indulgent Dessert

⚖️
Difficulty
Easy

⏲️
Prep Time
15 mins

🕒
Cook Time
25 mins

⏱️
Total Time
40 mins

🍽️
Servings
16 brownies

Brownies can elevate any occasion, and these M&M’s Brownies take indulgence to the next level. Picture the rich, fudgy chocolate infused with melted chocolate chips, topped delightfully with vibrant M&M candies that not only add sweetness but also a pop of color. The moment you bite into a piece, you feel the heavenly combination of chocolate richness melting in your mouth, balanced beautifully by the crunchy candy shell. Each bite is like a celebration, making these brownies perfect for birthday parties, family gatherings, or even a cozy night in.

These M&M’s Brownies are incredibly inviting not just for kids but for adults alike. The delightful swirl of chocolate and the unexpected crunch of M&M’s evoke childhood memories, ensuring that each piece is nostalgic and fun. Easy to prepare, they require minimal ingredients and time but deliver maximum satisfaction. Whether you enjoy them warm with a scoop of ice cream or at room temperature, these brownies are a treat no one can resist.

Quick Recipe Highlights

  • Flavor Profile: Rich chocolate flavor with bursts of sweetness from the M&M’s.
  • Texture: Fudgy and moist with a slightly crisp top layer.
  • Aroma: A heavenly scent of baked chocolate that fills your kitchen.
  • Visual Appeal: Rich brown color topped with colorful M&M’s, making them a feast for the eyes.
  • Skill Level Needed: This recipe requires basic baking skills, making it suitable for all bakers.
  • Special Equipment: A mixing bowl, spatula, and baking pan are all you need.

Recipe Overview

  • Difficulty Level: These M&M’s Brownies are categorized as easy due to their straightforward steps and minimal ingredients, making them perfect for novice bakers and children.
  • Category: These sweet treats fit beautifully into dessert or snack categories, ideal for any sweet tooth.
  • Cuisine: While brownies have American origins, adding M&M’s gives them a playful twist enjoyed globally.
  • Cost: The ingredients for these brownies are relatively inexpensive, making them accessible for all budgets.
  • Season: Year-round, these brownies shine, but especially during celebrations and holidays.
  • Occasion: Perfect for birthday parties, bake sales, or simply as a treat to enjoy at home.

Why You’ll Love This Recipe

The appeal of M&M’s Brownies is not just in their taste but also in their character. The blend of rich chocolate and the sweetness from the M&M’s creates a dessert that is immensely satisfying. The fudgy texture combined with crunchy candies results in a delightful mouthfeel. Plus, they are irresistibly comforting, making them a go-to dessert for any chocolate lover.

In terms of convenience, this recipe takes very little time to whip up, making it attainable after a long day. The straightforward method allows anyone to indulge in homemade decadence without fuss. You can prepare the batter in under 15 minutes, throwing it in the oven for delicious brownies in no time.

Nutritionally, these brownies can be a treat that you enjoy in moderation. With a good balance of ingredients, they are satisfying without being overly heavy. They can be made with variations like dark chocolate or even using lower sugar options if desired, appealing to health-conscious individuals.

Socially, M&M’s Brownies make for an excellent dessert to share. They serve beautifully at gatherings and celebrations, creating a sense of joy and community when shared. There’s something about enjoying sweets together that brings people closer, and these brownies are sure to be a hit.

Finally, the cost-effectiveness of this recipe is undeniable. With basic pantry ingredients and a bag of M&M’s, you can whip up a batch that serves many, making them a great option for treats at gatherings or snacks throughout the week.

Historical Background and Cultural Significance

The tradition of baking brownies can be traced back to the United States in the late 19th century. It was developed as an easy-to-make dessert that utilizes cocoa and is typically chocolate-based, making it a staple at many family gatherings and events. In the evolution of recipes, bakers began incorporating different mix-ins, and M&M’s became a playful favorite.

Culturally, brownies hold a place of significance in American dessert history. With their dense texture and rich flavor, they have been embraced by families across generations. The addition of M&M’s to brownies transforms a classic into an appealing treat, symbolizing childhood joy and nostalgia.

Over the years, the basic brownie recipe has evolved, leading to various interpretations and flavor additions, including the delicious M&M variation. This evolution reflects the creativity and innovation present in home baking, empowering bakers to personalize their artisanal creations.

Regionally, variations of brownies can be found across different cultures, showcasing diverse flavor profiles. Some areas capitalize on local ingredients, while others incorporate nuts or other candies alongside M&M’s, each adding a unique spin to this beloved treat.

Ingredient Deep Dive

Chocolate:
Chocolate contributes to the rich taste profile of brownies. Originating from the cacao plant, chocolate has been revered for centuries not just for its delicious flavor but also for its health benefits, including antioxidants. When selecting chocolate for brownie recipes, opt for high-quality semisweet or dark chocolate for the best flavor. To store chocolate, keep it in a cool and dry place, away from strong odors. If you’re looking for variations, consider using white chocolate or flavored chocolates to give your brownies a unique twist.

M&M’s:
M&M’s are a playful addition, celebrated for their vibrant colors and satisfying crunch. Introduced in 1941, they have become a staple in desserts, symbolizing fun and joy. M&M’s not only add sweetness but also invite creativity with their spectrum of colors. When selecting M&M’s, you can choose from classic, peanut, or even crispy varieties based on your preference. Store them in a dry area to maintain their texture, and if you wish to experiment with your brownies, consider swapping them with other candies like Reese’s Pieces or chocolate chips.

Common Mistakes to Avoid

  • Overmixing the batter: This can lead to dense brownies. Mix until just combined to ensure they stay light and fudgy.
  • Not preheating the oven: Skipping this step can lead to uneven baking. Always make sure your oven is properly preheated.
  • Using expired ingredients: Always check the freshness especially for baking powder and chocolate, which can lose potency over time.
  • Not measuring accurately: Baking is precise. Use a kitchen scale for the most accurate outcomes, particularly with flour and sugar.
  • Baking in a cold pan: A cold pan can lead to uneven cooking. Always ensure your baking pan is preheated when necessary.
  • Opening the oven door too soon: This can cause brownie collapse. Wait until the baking time is almost finished before checking.
  • Not letting them cool: Cutting brownies too soon can lead to messy slices. Allow them to cool for at least 15 minutes after baking.
  • Skipping parchment paper: This can result in brownies sticking to the pan, making them challenging to remove. Always line your pan for easy removal.
  • Not using enough chocolate: This can make brownies lack flavor. Use high-quality chocolate for the richest taste.
  • Storing them improperly: Not sealing brownies can lead to drying out. Keep them in an airtight container to maintain moisture.

Essential Techniques

Folding ingredients:
Folding is an essential technique when making brownies, as it helps to incorporate dry ingredients without deflating the batter. To master it, use a spatula to scoop from the bottom and gently lift the mixture over itself. Avoid vigorous mixing, which can lead to tough brownies. Look for a uniform color and no visible flour; these cues indicate you have successfully folded the ingredients.

Measuring accurately:
Proper measurement is crucial in baking. Use a kitchen scale for dry ingredients, ensuring precision for the best outcome. When using cups, spoon the flour into the measuring cup and carefully level it off. Overpacking flour can lead to dry brownies. A well-measured ingredient list results in perfectly fudgy and moist brownies.

Pro Tips for Perfect M&M’s Brownies

1. Use high-quality chocolate for the best flavor. Semisweet chocolate can elevate the overall taste of your brownies.
2. Experiment with different variations of M&M’s, such as peanut butter or almond M&M’s, to add unique flavors.
3. For added richness, consider mixing in nuts like walnuts or pecans for a delightful crunch.
4. Don’t overbake; keep an eye on the brownies to ensure they remain fudgy and moist.
5. Let brownies cool completely before slicing to ensure clean cuts and a beautiful presentation.
6. Serve warm with ice cream on top for a decadent dessert experience.
7. Store left-over brownies in an airtight container at room temperature for maximum freshness.
8. For an extra touch, drizzle melted chocolate over the cooled brownies before adding the M&M’s for added decoration and flavor.

Variations and Adaptations

In terms of regional variations, classic M&M’s Brownies can morph into festive treats by swapping seasonal M&M’s for different holidays; for example, red and green M&M’s for Christmas. Seasonal adaptations can also explore incorporating pumpkin puree for a fall-themed twist, leading to a unique flavor profile.

For dietary modifications, gluten-free flour can be used to create a gluten-free version of M&M’s Brownies, catering to those with gluten-sensitivity without sacrificing flavor or texture. To take it a step further, you can also make vegan brownies by substituting eggs with flaxseed meal and using dairy-free chocolate.

Flavors can also be modified by adding extracts like peppermint or almond, giving a fresh take on the typical chocolate flavor. Texture modifications using crushed cookies or graham crackers mixed into the batter can provide additional crunch.

Lastly, variations in presentation can bring these brownies to life; consider cutting them into fun shapes with cookie cutters or serving them in muffin tins for individual portions, making them an ideal treat for gatherings.

Serving and Presentation Guide

When plating M&M’s Brownies, a simple yet elegant approach is best. Use a sharp knife to cut the brownies into evenly sized squares, allowing for easy serving. For an extra touch, you can drizzle melted chocolate or a simple icing over the top before adding a few more M&M’s for decorative flair.

Garnishing ideas include dusting with powdered sugar or serving alongside a scoop of vanilla ice cream or whipped cream. Traditional accompaniments such as fresh fruit can elevate the dessert, balancing out the richness.

Modern serving suggestions can incorporate creative elements like skewering brownie bites with colorful toothpicks and serving them on a stylish platter for parties. Temperature considerations are essential; brownies are best served at room temperature or slightly warm.

Finally, for portion control, consider serving them in smaller, bite-sized pieces to encourage moderation while enjoying this rich treat.

Wine and Beverage Pairing

For wine pairings with M&M’s Brownies, a fruity red like Pinot Noir enhances the chocolate while balancing sweetness. Alternatively, a sweet dessert wine, such as a Ruby Port, complements the rich flavors beautifully.

For a non-alcoholic alternative, a freshly brewed coffee balances the sweetness, enhancing the chocolate’s flavors. If you prefer tea, a cup of rich chai or an earthy herbal tea would pair well.

Temperature considerations are crucial for pairing; serve wine slightly chilled or at room temperature, while coffee should be brewed hot for the best tasting experience.

Storage and Shelf Life

Storing M&M’s Brownies is straightforward. Keep them in an airtight container at room temperature for up to 4-5 days. If you need to store them for longer, consider freezing them. Flash-freezing brownies before placing them in a freezer-safe bag can help retain their texture; ensure they are well-wrapped to prevent freezer burn.

Regularly check for signs of spoilage, which may include a dry appearance or stale smell. When reheating, use a microwave for a few seconds or an oven preheated to 350°F for about 5-10 minutes to restore their fudgy texture.

Make Ahead Strategies

For those planning a dinner party or event, M&M’s Brownies can be made ahead of time. Prepare the brownie batter and store it in the refrigerator for up to 2 hours before baking. Allowing the batter to chill enhances texture.

Another strategy is to bake and freeze the brownies, allowing them to cool completely before wrapping them up. When it comes time to serve, simply thaw them at room temperature or reheat briefly in the oven.

Consider adding fresh elements like whipped cream, ice cream, or fresh fruits just before serving to keep the dessert feeling fresh and exciting.

Scaling Instructions

Scaling this M&M’s Brownies recipe is an effortless task. To halve the recipe, simply divide each ingredient amount by two while using a pan size of approximately 8×8 inches instead of the standard 9×9 inches.

For doubling or tripling, ensure to adjust your ingredient measurements accordingly. A larger baking pan or multiple pans will be necessary depending on how much you choose to scale the recipe.

Timing modifications may be needed, as larger batches may require an increased baking time. Always perform a toothpick test to ensure doneness throughout the entire batch.

For storage considerations when scaling, ensure to allow ample cooling time before packing into containers to keep freshness intact.

Nutritional Deep Dive

When looking at the macro breakdown of M&M’s Brownies, they are primarily composed of carbohydrates from sugar and flour, fats from butter and chocolate, and a small amount of protein from eggs. Balancing portions ensures enjoyment without excessive caloric intake.

In terms of micronutrients, the inclusion of chocolate provides minerals such as magnesium and iron, while the M&M’s contribute small amounts of vitamins. Regularly enjoying desserts like these should focus on balance rather than deprivation.

Health benefits can also be acknowledged through the moderation of portion size; enjoying brownies with fresh fruit can enhance nutrient intake. For those managing weight, considering lighter variations or limiting portion sizes can be beneficial.

Lastly, understanding the importance of a balanced diet can help in enjoying these brownies while staying aligned with personal health goals.

Dietary Adaptations

For those on a gluten-free diet, using gluten-free flour blends will allow you to enjoy M&M’s Brownies without the gluten. Many blends today mimic regular flour well in baked goods.

Dairy-free adaptations can involve substituting butter with coconut oil or a plant-based butter, pairing it with dairy-free chocolate for those avoiding dairy.

Vegan options are achievable by utilizing flaxseed meal as an egg substitute and ensuring all chocolate is dairy-free. These adaptations help maintain moisture and texture while meeting dietary restrictions.

For low-carb and keto diets, consider using almond flour and low-carb sweeteners like erythritol for an alternative take on these brownies. Opt for sugar-free chocolate or pure cocoa powder to keep carbs low while enjoying a delicious treat.

Troubleshooting Guide

If the texture of the brownies is undesirably dry, this may be due to overbaking or incorrect ingredient measurements. Ensuring precise ingredients and conducting a toothpick test before exceeding baking time can help achieve the ideal fudgy consistency.

The flavor balance is key; if the brownies are overly sweet, consider reducing the sugar in your next batch. Always taste and adjust on the pre-mixing end for the next preparation.

Temperature problems may arise if your oven is not calibrated. Investing in an oven thermometer can prevent miscalculations in cooking time and temperature for future baking endeavors.

Equipment challenges can also occur; if you don’t have a suitable pan, baking in a muffin tin for individual servings can be a perfect workaround. Just be mindful of the adjusted timing.

Ingredient substitutions, while creative, can lead to unexpected flavors or textures. Always ensure that replacements align closely with the texture and moisture content needed for brownies.

Timing concerns should be approached with patience; allow sufficient cooling time for brownies to set up before cutting to avoid crumbly edges.

Recipe Success Stories

The community has shared numerous success stories about making M&M’s Brownies. Many have added their personal twists, such as different mix-ins or frosting, which turned out to be popular hits at family gatherings.

Variations featuring peanut butter or caramel swirls have been especially loved among bakers, highlighting the versatility of the brownie base. Others have suggested pairing the brownies with ice cream for an indulgent dessert platter, creating delightful presentations.

Readers often provide feedback on photography and icing techniques, which inspire more creative presentations. Documenting these tips enhances the community’s ability to enjoy and innovate with the classic brownie recipe, leading to even more interactive cooking experiences.

Frequently Asked Questions

Q1: Can I make these brownies egg-free?

A1: Yes, you can substitute the eggs with flaxseed meal or applesauce to create an egg-free version of these brownies.

Q2: How do I store leftover brownies?

A2: Keep them in an airtight container at room temperature for up to 4-5 days, or freeze them for longer storage.

Q3: Can I use dark chocolate instead of semisweet?

A3: Absolutely! Dark chocolate will give the brownies a richer flavor while still retaining their fudgy texture.

Q4: What can I use if I don’t have M&M’s?

A4: You can use other candies like chocolate chips, peanut butter cups, or chopped up candy bars for a delicious twist.

Q5: How do I know when the brownies are done?

A5: Insert a toothpick in the center; it should come out with a few moist crumbs but not wet batter.

Q6: Can I make these brownies in advance?

A6: Yes, you can prepare the batter ahead of time and store it in the fridge before baking.

Q7: What’s the best way to cut brownies?

A7: Use a sharp knife and cut while the brownies are slightly warm for clean edges, or refrigerate them until set for easier cutting.

Q8: Can I use less sugar in the recipe?

A8: Yes, you can reduce the sugar if you’d like, but this may affect the texture slightly.

Q9: Are M&M’s Brownies healthy?

A9: These brownies are a treat and should be enjoyed in moderation. Consider using healthier alternatives for a lighter version.

Q10: How should I serve these brownies?

A10: Serve them warm, topped with ice cream, or dusted with powdered sugar for a beautiful presentation!

Additional Resources

For those looking to explore more recipes similar to M&M’s Brownies, consider checking out related brownie variations like fudgy walnut brownies or blondies. Technique guides on achieving the perfect brownie texture can enhance your baking skills for future endeavors.

Additionally, gaining insight into various chocolate types and their flavor profiles will aid in ingredient selection for other desserts. Don’t forget to explore equipment recommendations; investing in quality baking pans can significantly improve your baking outcomes.

If you’re looking for seasonal variations, consider holiday-themed brownies or summer-inspired treats to keep things exciting year-round.

Join the Conversation

Baking is a communal experience, and we’d love to hear your thoughts! Share your experiences, tips, and variations of M&M’s Brownies with us on social media. Post your beautiful photos, and be sure to tag us so we can celebrate your baking successes! Engage in recipe reviews and connect with others who have enjoyed this delightful treat, sharing a sense of community through food.

Let’s spread the joy of baking M&M’s Brownies and inspire each other to create delicious memories, one batch at a time!

The Recipe

M&M’s Brownies

Serves: 16 brownies

Prep Time: 15 mins

Cook Time: 25 mins

Total Time: 40 mins

Kitchen Equipment Needed

  • Mixing bowl
  • Spatula
  • Baking pan (9×9 inches)
  • Measuring cups and spoons
  • Oven mitts

Ingredients

  • 1 cup unsalted butter, melted
  • 2 cups granulated sugar
  • 4 large eggs
  • 1 teaspoon vanilla extract
  • 1 cup all-purpose flour
  • 1 cup unsweetened cocoa powder
  • 1 teaspoon baking powder
  • 1/2 teaspoon salt
  • 1 cup M&M’s

Directions

  1. Preheat your oven to 350°F (175°C) and grease a 9×9 inch baking pan.
  2. In a mixing bowl, combine melted butter and sugar together until well blended.
  3. Add eggs and vanilla extract, mixing until combined.
  4. In a separate bowl, whisk together flour, cocoa powder, baking powder, and salt.
  5. Gradually add the dry ingredients to the wet ingredients, folding until just combined.
  6. Gently fold in 3/4 cup of the M&M’s, reserving the rest for topping.
  7. Pour the batter into the prepared pan and spread evenly.
  8. Bake for 25-30 minutes or until a toothpick inserted in the center comes out with a few moist crumbs.
  9. Cool in the pan for 15 minutes before slicing into squares.
  10. Top with additional M&M’s while still warm.

Recipe Notes

  • Try adding nuts like walnuts for added flavor and crunch!
  • Adjust the baking time based on your oven to achieve the desired brownies’ tenderness.
  • For a richer chocolate flavor, swap some of the flour for an additional 1/4 cup of cocoa powder.

Best Apple Crisp Recipe with a Buttery Crunch Topping

Delightful Homemade Apple Crisp Recipe: A Comforting Classic Dessert

⚖️
Difficulty
Easy

⏲️
Prep Time
20 mins

🕒
Cook Time
30 mins

⏱️
Total Time
50 mins

🍽️
Servings
8

Whether it’s a chilly autumn evening or a summer picnic, nothing beats the sweet aroma of a freshly baked Apple Crisp wafting through the kitchen. This beloved dessert combines juicy, tender apples with a crispy oat topping, providing a delightful contrast that will have your taste buds dancing. With every spoonful, you’re treated to layers of flavor, from the natural sweetness of the apples to the buttery, crumbly oat topping that holds it all together. Perfectly paired with a scoop of vanilla ice cream or a dollop of whipped cream, this Apple Crisp is comfort food at its finest.

The beauty of this Apple Crisp recipe lies not only in its delicious flavors but also in its simplicity. You can whip it up in no time with just a few pantry staples. The easy-to-follow instructions make it a great choice for both novice cooks and seasoned bakers alike. Watch your loved ones gather around the dessert table, eyes lighting up at this homemade treat that’s sure to evoke feelings of nostalgia and warmth.

Quick Recipe Highlights

  • Flavor Profile: This Apple Crisp features sweet and tart apples, combined with warm cinnamon and nutmeg, delivering a classic fall flavor.
  • Texture: The tender baked apples are complemented by a crunchy, buttery oatmeal topping, creating a perfect contrast.
  • Aroma: The dish offers a warm and inviting aroma from baking cinnamon-apples, creating a homely atmosphere.
  • Visual Appeal: With its golden oat topping and juicy apple filling peeking through, this dessert is both rustic and inviting.
  • Skill Level Needed: This recipe is beginner-friendly, requiring basic baking skills and minimal specialized equipment.
  • Special Equipment: You’ll need a baking dish, a mixing bowl, and a sturdy knife for slicing apples.

Recipe Overview

  • Difficulty Level: This Apple Crisp is classified as easy, making it ideal for anyone who wants to bake something delicious without complex techniques.
  • Category: This recipe fits perfectly in the dessert category, especially for cozy gatherings and family dinners.
  • Cuisine: Rooted in American culinary tradition, Apple Crisp has its origins in colonial cooking, showcasing the importance of local fruits.
  • Cost: The approximate cost of this recipe is low, as apples and pantry staples like oats and flour are economical.
  • Season: Best enjoyed in the fall when apples are in season, but it can be made year-round with a variety of apple types.
  • Occasion: Perfect for family gatherings, holiday celebrations, or as a simple but delicious weeknight dessert.

Why You’ll Love This Recipe

This Apple Crisp is not just a dessert; it’s an experience that combines flavor, nostalgia, and nourishment. The perfect melding of tart and sweet apples creates a harmonious taste that is undeniably comforting. Each bite brings a delightful crunch atop the tender fruit. This combination makes it an irresistible option for any chocolate lover looking for a change. Its simplicity allows you to prepare this delightful treat quickly without sacrificing taste.

In today’s busy life, convenience matters. This Apple Crisp recipe can be prepared in less than an hour, making it an excellent choice for last-minute gatherings. The ingredients are often readily available in most kitchens, allowing you to create a homemade dessert without needing a special trip to the store. Plus, once it’s in the oven, you’ll have time to spend with your guests or family, which is the heart of any meal.

Nutrition-wise, the Apple Crisp offers some redeeming benefits. Apples are rich in dietary fiber and vitamins, making it a slightly healthier dessert option compared to processed sweets. The oats add an extra dose of fiber, promoting a feeling of fullness while also being a source of healthy carbs. Enjoying this dessert in moderation makes it a deliciously satisfying option.

This recipe also shines in social situations. Sharing a homemade dessert brings warmth and connection to dining experiences. Imagine friends and family gathered around, sharing stories while savoring the comforting flavors of freshly baked Apple Crisp. It’s a dessert that invites laughter and connection, fostering memories that last long after the last bite.

Moreover, this recipe is cost-effective, ensuring that treating yourself and your loved ones to a delightful dessert doesn’t break the bank. With inexpensive ingredients, you can whip up a generous serving, perfect for feeding a crowd or enjoying leftovers over the next few days.

Historical Background and Cultural Significance

The origins of Apple Crisp can be traced back to colonial America, where apple trees were plentiful and a variety of apples were cultivated to withstand various climates. Early settlers made use of these apples to create simple desserts, combining them with available grains and sweeteners. This recipe embodies the spirit of resourcefulness, showcasing the beauty of using what you have on hand.

Culturally, Apple Crisp symbolizes comfort food in the American diet. It evokes memories of family gatherings and celebrations, reinforcing bonds through shared traditions and flavors. This dessert encourages a homey atmosphere, often enjoyed after hearty meals during gatherings or family celebrations.

Over the years, recipes for Apple Crisp have evolved, incorporating various regional influences that reflect local tastes and available ingredients. Variations have emerged around the country, with some opting for more spice or different toppings. Each version brings a unique spin, while still honoring the classic base of baked apples and crumbly topping.

Today, Apple Crisp remains a staple in American households, often gracing dessert tables during Thanksgiving and other festive occasions. It represents a fusion of history, culture, and comfort, ensuring its place in culinary tradition for generations to come.

Ingredient Deep Dive

  • Apples: Apples are not just delicious; they are historically significant in various cultures. Rich in vitamins and minerals, they promote health and wellness. When selecting apples, look for firm, unbruised ones. Storage in a cool, dry place prolongs freshness, and various apple varieties can change the flavor profile of your crisp.
  • Oats: Oats carry immense nutritional benefits, being high in soluble fiber, which aids digestion. These can be traced back to ancient cultures for their health benefits. Opt for rolled or old-fashioned oats for the best texture. Store them in an airtight container to maintain freshness, and they can easily be substituted with gluten-free oats for dietary needs.
  • Brown Sugar: Brown sugar contributes to the dish’s warmth and sweetness, adding a hint of molasses flavor. It has historical connotations tied to the sugar trade, showing the significance of sweeteners in globalization. Store it in a cool, dry place, and when it hardens, soften it in the microwave with a damp paper towel. Brown sugar can often be substituted with a sugar alternative, but it may change the flavor.

Common Mistakes to Avoid

  • Using the wrong type of apples: It’s crucial to select a mixture of sweet and tart apples, such as Granny Smith and Honeycrisp, to achieve a balanced flavor.
  • Overbaking the topping: Keep an eye on the topping as it can burn quickly. You want a golden brown color for ideal texture and flavor.
  • Not peeling the apples: Leaving the skin on can result in a chewy texture that detracts from the overall mouthfeel of the dessert.
  • Skipping the spices: A blend of cinnamon and nutmeg enhances apple flavor immensely, so don’t skip these crucial flavor components.
  • Using too much sugar: While sweetness is important, too much can cause the dessert to be overly sweet and syrupy.
  • Not allowing it to cool: Letting the crisp cool for a bit allows the juices to settle, making it easier to serve.
  • Serving it too hot: This dessert is best at a warm but not hot temperature, as excessive heat can mask the flavors.
  • Not considering the topping: A crumbly topping should be evenly distributed, and if too loose, it can fall apart during serving.
  • Ignoring dietary preferences: Make sure to consider guests’ dietary restrictions by preparing a variation that accommodates them.
  • Not pairing with accompaniments: Adding ice cream or whipped cream enhances the overall experience immensely and completes the dish.

Essential Techniques

  • Chopping Apples: Cutting evenly ensures that all pieces bake uniformly. Use a sharp knife and chop them into similar sizes to avoid uneven cooking. Always remember to remove the core and seeds to enhance safety and texture.
  • Mixing Topping Evenly: The key to a great topping is to combine oats, flour, and sugar until well blended. Using cold butter is crucial for achieving that crumbly texture. Break up any large clumps to ensure even coverage over the fruit.
  • Checking for Doneness: The crisp is finished when the topping is golden brown and the filling is bubbly. You can poke a fork through the topping as a visual cue to check for doneness.
  • Layering Ingredients: Proper layering of apples and topping creates a delicious contrast. Start with the apples at the bottom and generously cover with the topping to lock in flavors.

Pro Tips for Perfect Apple Crisp

  • Mix apple varieties for a richer flavor profile, combining sweet and tart apples.
  • Experiment with different spices like allspice and cardamom to elevate your crisp.
  • Use chilled butter to create a flakier topping that is more enjoyable.
  • Add a pinch of salt to the topping to enhance sweetness.
  • Before serving, let the crisp rest for at least 15 minutes to improve stability.
  • For added texture, sprinkle some chopped nuts into the topping.
  • Make it ahead of time, and bake just before serving for a fresh experience.
  • Consider a colorful fruit salad on the side for added freshness.

Variations and Adaptations

  • Regional variations include adding cranberries for a tart twist or using peaches instead of apples for a summer version.
  • Seasonal adaptations invite using seasonal spices like pumpkin spice for the autumn months.
  • Dairy-free versions can be achieved by using coconut oil or margarine in the topping.
  • Flavor variations can admit extracts like vanilla or almond for an extra flavor dimension.
  • Texture modifications may include mixing in quick oats for a different crunch level.
  • Presentation alternatives could include layering ingredients in jars for an individual serving approach.

Serving and Presentation Guide

  • When plating, use a rustic pie dish to highlight the homemade nature of the dessert.
  • Consider garnishing with fresh mint leaves or a sprinkle of cinnamon on top of each serving.
  • Pair with vanilla ice cream for a classic combination that everyone loves.
  • For a modern twist, serve in small bowls or mason jars for an elegant presentation.
  • Serve warm but not hot, as too much heat can mask the flavors and make it difficult to enjoy.
  • Provide small scoops to control portions, as this dessert can be rich and filling.

Wine and Beverage Pairing

  • Pair your Apple Crisp with a sweet Riesling, which complements the tartness of the apples.
  • For non-alcoholic options, consider serving it with spiced apple cider or fresh lemonade for a refreshing contrast.
  • Coffee lovers might enjoy a rich cappuccino alongside for a delightful after-meal treat.
  • Tea lovers can enjoy a warm chai latte to bring out the spice flavors.
  • Temperature matters: serve wines chilled, while teas and coffees should be piping hot.

Storage and Shelf Life

  • Store leftover Apple Crisp in the fridge, covered with foil or in an airtight container, to maintain freshness for up to 3-4 days.
  • Ensure to refrigerate it promptly after it cools to avoid spoilage.
  • Signs of spoilage include an off smell or visible mold; always inspect before consuming.
  • Reheat individual portions in the microwave for a quick treat or warm the entire dish in the oven at 350°F until heated through.
  • If you’d like to freeze, wrap portions well and store them in a freezer-safe container, where they can last up to 3 months.

Make Ahead Strategies

  • Prepare the topping in advance and store it in the refrigerator until ready to bake.
  • Chop the apples a few hours ahead of time to save effort, just toss them with lemon juice to prevent browning.
  • Assess the quality impact carefully; the crisp is best when fresh, but make ahead steps can save time.
  • Assemble the dish in the evening before a gathering and refrigerate until you’re ready to bake.
  • Add fresh elements like nuts or berries right before baking for better texture and freshness.

Scaling Instructions

  • To halve this recipe, simply reduce all ingredients by 50% while keeping the baking time roughly the same.
  • Doubling or tripling requires adjusting baking dish sizes and oven space accordingly.
  • Be mindful of timing modifications; larger batches may need extra time in the oven.
  • If increasing the recipe, consider using larger apples or mixing different varieties to maintain flavor balance.
  • When scaling up, ensure you have sufficient oven space and a bigger dish for even cooking.

Nutritional Deep Dive

  • This recipe typically serves up a delightful balance of macros, with each serving offering a good source of carbohydrates from the fruit and oats.
  • The apples provide essential micronutrients, including Vitamin C and dietary fiber, contributing to overall health.
  • With moderate sugar and fat content, it can fit into most balanced diets when enjoyed occasionally.
  • Portion control is key; being mindful of serving sizes can help maintain dietary goals while still enjoying this treat.
  • This dessert can be part of a strategy focused on weight management without compromising on enjoyment.

Dietary Adaptations

  • Gluten-free: Use certified gluten-free oats and flour to tailor this recipe for gluten sensitivities.
  • Dairy-free options can substitute regular butter with coconut oil or margarine.
  • This recipe can easily be made vegan by using plant-based butter and ensuring no animal-derived ingredients in the sugar.
  • Low-carb diets may involve swapping regular sugar for stevia or erythritol, adjusting to taste.
  • Keto diets may require further modifications, such as using nut flour for the topping instead of oats.
  • Paleo variations could center on using honey or maple syrup as a natural sweetener instead of processed sugar.
  • Low-FODMAP diets may need to limit certain apple types or adjust serving sizes.

Troubleshooting Guide

  • If the topping is too crumbly, it might require additional butter for consistency; here, a small amount at a time can help.
  • For texture issues, undercooked apples can be solved by ensuring they are diced uniformly and par-cooked briefly.
  • Flavor balance can be adjusted following taste tests. If too sweet, a squeeze of lemon can remedy this.
  • Temperature problems during baking may stem from uneven oven heat; rotating the dish midway helps achieve even cooking.
  • Equipment challenges could arise without proper measuring tools; investing in good measuring cups can aid accuracy.
  • Timing concerns typically arise from larger batches; ensuring even bake time will result in ideal consistency and taste.

Recipe Success Stories

  • Readers have raved about their experiences making this Apple Crisp, often sharing delightful variations that add unique twists.
  • Success stories often highlight the joy of sharing this dessert at family gatherings, igniting cherished memories.
  • Adaptation tales showcase how creative cooks have introduced their favorite ingredients, making it personal and special.
  • Many have shared tips for photographic presentations, recommending natural lighting to truly capture this delicious dessert.

Frequently Asked Questions

Can I use frozen apples?

Yes, you can use frozen apples, but ensure they are thawed and drained before baking to prevent excess liquid in the crisp.

What is the best way to store Apple Crisp?

Store Apple Crisp in an airtight container in the refrigerator for up to four days. Reheat before serving for best results.

Can I make this recipe gluten-free?

Absolutely! Just swap regular oats and flour with certified gluten-free alternatives for a delicious gluten-free dessert.

How can I make the topping more crunchy?

For a crunchier topping, consider adding chopped nuts or an extra sprinkle of sugar on top before baking.

What are some good substitutions for apples?

Pears or stone fruits like peaches or nectarines can be excellent alternatives when you want a change of flavor.

Can I add other fruits to the Apple Crisp?

Yes, feel free to mix in berries, cherries, or even rhubarb for a delicious twist on the classic recipe.

Is Apple Crisp better warm or cold?

Apple Crisp is best when served warm, allowing the flavors to meld beautifully with a scoop of cold ice cream.

How long does it take to bake?

Typically, it takes about 30 minutes to bake, but ovens vary, so keep an eye until the topping is golden brown.

Can I double the recipe?

Yes, doubling the recipe works well; just make sure to use a larger baking dish and monitor the baking time.

What should I serve with Apple Crisp?

Vanilla ice cream, whipped cream, or a drizzle of caramel sauce makes an excellent pairing with Apple Crisp.

Additional Resources

  • Explore related recipes like Spiced Pear Crisp or Cherry Crumble that use similar techniques.
  • Check out technique guides to learn more about achieving the perfect crumb topping.
  • Ingredient information can help you choose the best types of apples for this recipe.
  • Equipment recommendations for the best tools to use will enhance your baking experience.
  • Seasonal variations can inspire new takes on this classic Apple Crisp throughout the year.

Join the Conversation

  • Share your Apple Crisp creations on social media and tag us for a chance to be featured!
  • Photography tips can help you capture your own stunning images of this delicious dessert.
  • Leave a review and let us know what you loved about this recipe or how you adapted it to your taste!
  • Engage with the community by sharing your personal stories and tweaks to the original recipe, fostering a connection through food.

The Recipe

Classic Apple Crisp

Serves: 8

Prep Time: 20 mins

Cook Time: 30 mins

Total Time: 50 mins

Kitchen Equipment Needed

  • Baking dish
  • Mixing bowl
  • Knife
  • Measuring cups and spoons
  • Oven mitts

Ingredients

  • 6 cups of peeled, sliced apples (about 6 medium apples)
  • 1 cup of brown sugar
  • 1 teaspoon of ground cinnamon
  • ½ teaspoon of nutmeg
  • 1 cup of rolled oats
  • ¾ cup of all-purpose flour
  • ½ cup of softened butter
  • 1 tablespoon of lemon juice

Directions

  1. Preheat your oven to 350°F (175°C).
  2. In a large bowl, toss apples with lemon juice, ½ cup of brown sugar, cinnamon, and nutmeg. Spread evenly in the baking dish.
  3. In another bowl, mix oats, flour, and remaining brown sugar. Add softened butter and mix until crumbly.
  4. Sprinkle the oat mixture evenly over the apples.
  5. Bake for 30-35 minutes or until the topping is golden brown and apples are tender.
  6. Let it cool slightly before serving. Enjoy warm with ice cream!

Recipe Notes

  • Feel free to mix different varieties of apples for a more complex flavor.
  • Add nuts or coconut to the topping for extra crunch.
  • This recipe can be made ahead and frozen—just bake it straight from the freezer, adding extra baking time.

Best Striped Peppermint Sandwich Cookies for the Holidays

Striped Peppermint Sandwich Cookies: Festive Cookies with a Minty Twist

⚖️
Difficulty
Moderate

⏲️
Prep Time
30 mins

🕒
Cook Time
15 mins

⏱️
Total Time
45 mins

🍽️
Servings
24 cookies

The holiday season is the perfect time to indulge in festive treats, and what better way to celebrate than with Striped Peppermint Sandwich Cookies? These delightful cookies feature a soft, buttery texture sandwiched around a minty filling, making them a treat that captures the essence of winter celebrations. Each cookie is beautifully decorated with a striped coating of chocolate, adding to their visual appeal and creating a lovely contrast with the vibrant red and white of peppermint.

With each bite, you’ll experience a wonderful balance of flavors—the rich, creamy filling pairs perfectly with the refreshing mint. These cookies aren’t just a dessert; they invite joy and warmth into your home, making them ideal for sharing with friends and family. Perfectly festive, they embody the spirit of the season and will leave everyone asking for seconds!

Quick Recipe Highlights

  • Flavor Profile: These cookies deliver a delightful combination of buttery sweetness and refreshing peppermint. The rich chocolate coating enhances the overall taste, creating a delectable sweet treat.
  • Texture: Soft and chewy, these cookies sandwich a creamy peppermint filling. The contrast of smooth chocolate adds an exciting texture that will satisfy your sweet tooth.
  • Aroma: Expect an inviting aroma that combines hints of warm vanilla, rich chocolate, and refreshing peppermint, creating a sensory experience that resonates with the holiday spirit.
  • Visual Appeal: The cookies are strikingly beautiful with their striped chocolate coating and soft pastel filling, making them perfect for holiday platters and gatherings.
  • Skill Level Needed: This recipe requires moderate baking skills, including cookie dough preparation and basic decorating techniques for the chocolate stripes.
  • Special Equipment: You will need basic baking supplies such as baking sheets, parchment paper, mixing bowls, and a piping bag for the filling.

Recipe Overview

  • Difficulty Level: Moderate baking skills are required, particularly in the rolling of cookie dough and achieving smooth chocolate coatings. Practice will make you more proficient at these techniques!
  • Category: This recipe falls under dessert and baking, perfect for festive occasions and holiday meals.
  • Cuisine: Drawing from traditional holiday treats, this recipe incorporates classic ingredients like peppermint and chocolate, often associated with festive baking in many cultures.
  • Cost: Budget-friendly, the primary ingredients—flour, sugar, butter, and peppermint—are affordable, making this recipe accessible for everyone.
  • Season: Best enjoyed during the winter holiday season, these cookies evoke feelings of joy and celebration, making them a seasonal favorite.
  • Occasion: Perfect for holiday gatherings, cookie exchanges, and family celebrations, they are sure to impress guests and create lasting memories.

Why You’ll Love This Recipe

These Striped Peppermint Sandwich Cookies are a delightful way to satisfy your seasonal cravings. The perfect blend of flavors comes together to create an irresistible treat that appeals to all ages. Each bite is a burst of sweetness combined with the refreshing notes of peppermint, making them an unforgettable addition to your dessert table.

Convenience is another appealing aspect of this recipe, as the cookies can be made in advance and stored. This means less stress in the kitchen during busy holiday times. Plus, the dough can be prepared ahead of time and frozen for later use, allowing you to bake fresh cookies whenever the mood strikes.

Nutritionally, while they are a treat, the use of butter and sugar can be balanced with mindful portion control. These cookies can offer a joyful experience without overindulgence, especially when shared with loved ones during festive gatherings.

Socially, these cookies serve as the perfect conversation starter. Gift them to neighbors, bring them to parties, or enjoy them with friends over warm drinks. Sharing baked goods is a wonderful tradition that spreads happiness and connection.

Finally, the cost-effectiveness of this recipe cannot be overlooked. With basic pantry staples and minimal special ingredients required, these cookies are both a delicious and economical option for holiday treats, allowing you to indulge without breaking the bank.

Historical Background and Cultural Significance

The origins of peppermint in baking can be traced back hundreds of years, with various cultures embracing its flavor for both culinary and medicinal purposes. The combination of mint and chocolate has roots in traditional holiday treats, making these Striped Peppermint Sandwich Cookies a contemporary tribute to local customs and preferences.

Culturally, peppermint has been associated with winter and festive celebrations, often regarded as a symbol of warmth and comfort during the cold months. As families gather around holiday tables, these cookies serve to evoke memories of shared moments and warm gatherings.

The evolution of sandwich cookies has seen many iterations, with various fillings and flavor combinations capturing the imagination of bakers everywhere. These peppermint cookies blend classic elements with modern twists, crafting a unique take on a timeless recipe.

Regional variations abound, with peppermint-flavored treats showcasing local ingredients and traditions. From peppermint bark to mint chocolate desserts, these cookies represent a delicious connection to a broader culinary heritage that unites many food lovers.

Ingredient Deep Dive

– Flour: As the backbone of the cookie, flour provides structure. Opt for all-purpose flour for the best texture. Look for brands that offer fine milling, as this will contribute to a smoother dough. Store in a cool, dry place and check for signs of spoilage such as clumping or an off smell.

– Butter: The key to achieving a rich, buttery flavor. Use unsalted butter for control over saltiness. When selecting butter, choose high-quality brands that prioritize flavor. Refrigerate butter and use it within a month for optimal freshness.

– Peppermint Extract: This essential ingredient lends its refreshing flavor to the filling. Make sure to choose pure peppermint extract for the best taste. To preserve its potency, store in a cool, dark place. It can be substituted with peppermint oil, but use it sparingly, as it is much more concentrated.

– Chocolate: A critical element that brings everything together. High-quality chocolate chips or bark work best for coating. When choosing chocolate, consider varieties with at least 60% cacao for a rich, deep flavor that compliments the peppermint. Store chocolate in a cool, dry location to maintain its texture and flavor.

Common Mistakes to Avoid

  • Using cold butter: Always start with softened butter as it ensures the proper texture. Cold butter can lead to dense cookies that don’t rise properly.
  • Skipping chilling the dough: Chilling the cookie dough is crucial for preventing spreading during baking. Plan ahead to let your dough rest for at least an hour.
  • Not measuring ingredients accurately: Baking is a science, so precise measurements are essential. Use a kitchen scale for accuracy when possible.
  • Overmixing the dough: Mix until ingredients are just combined to avoid tough cookies. Overmixing can lead to gluten development, creating a chewy texture instead of a soft one.
  • Baking on an ungreased pan: To prevent sticking, always use parchment paper or a silicone baking mat on your pan.
  • Ignoring oven temperatures: Make sure to preheat your oven to ensure even baking. An oven thermometer can help you monitor the temperature accurately.
  • Undercooking the cookies: Remove cookies only when they are lightly golden around the edges. Underbaked cookies can become overly soft and difficult to handle.
  • Not allowing cookies to cool properly: Allow cookies to cool on the baking sheet for a few minutes before transferring them to a wire rack to prevent breakage.
  • Skipping the cooling method for chocolate: To achieve smooth chocolate stripes, be patient and allow the chocolate to cool slightly before drizzling to avoid it melting your cookie surfaces.
  • Neglecting flavor adjustments: Taste your peppermint filling and adjust accordingly, especially if using different brands of extract, as they can vary in strength. More is not always better!

Essential Techniques

Proper mixing is essential for achieving the perfect cookie dough. Mix the ingredients enough to combine but avoid overmixing, which can toughen the cookies.

Chilling the dough helps firm it, making it easier to handle and shape into cookies. It also prevents excessive spreading during baking.

Tempering chocolate for the stripes creates a glossy finish and ensures it hardens properly. Melt chocolate carefully using low heat or a double boiler for the best results.

Piping the filling requires practice for precision and even distribution. Use a piping bag fitted with a plain round tip for best results.

Pro Tips for Perfect Striped Peppermint Sandwich Cookies

1. Invest in high-quality chocolate for coating; it dramatically impacts the flavor and appearance of your finished cookies.
2. Experiment with colored chocolate melts for a festive twist on the traditional striped design.
3. Reduce the peppermint extract slightly if serving guests who prefer milder flavors.
4. To prevent chocolate stripes from smudging, allow the cookies to cool completely before decorating.
5. Store the assembled cookies in an airtight container to keep the filling fresh and the cookies soft.
6. Consider adding crushed candy canes on top of the chocolate for an extra festive crunch and decoration.
7. Use different cookie shapes using cookie cutters for a unique twist—stars, hearts, or holiday-themed shapes add charm.
8. Create a double batch and freeze unfilled cookies; simply thaw and fill them to enjoy cookies fresh at any time.

Variations and Adaptations

This recipe is versatile, allowing for creative adaptations. Consider trying different fillings, such as chocolate ganache or cream cheese frosting, to personalize your treat. You could also pitch in flavors like vanilla or almond extract for a unique twist.

Seasonal adaptations can include holiday-themed decorations, such as colored drizzle for Easter or autumn spices, transitioning these cookies into festive treats for any occasion.

For dietary modifications, gluten-free flour can be substituted to make these cookies suitable for those with gluten sensitivities. Dairy-free butter and chocolate can also be used to cater to dairy-free diets while preserving the delicious taste.

Textural modifications such as adding crushed nuts or sprinkles to the filling or chocolate could be introduced for an exciting crunch. This helps customize your cookies to suit your texture preferences.

Finally, presentation alternatives like serving the cookies on a pretty platter lined with festive napkins can enhance the visual appeal, making them a centerpiece at your gatherings.

Serving and Presentation Guide

Plating techniques can elevate your Striped Peppermint Sandwich Cookies. Consider stacking cookies at varying angles on a tiered serving plate for an appealing centerpiece.

Garnish ideas might include a sprinkle of powdered sugar or cocoa powder over the cookies for an elegant touch.

Serving suggestions involve pairing these cookies with warm drinks such as hot chocolate or spiced cider for a comforting experience during chilly winter nights.

Consider the temperature of the cookies when serving; they are best enjoyed at room temperature for optimal flavor.

Portion control tips suggest serving these delightful cookies two at a time for guests to savor the flavor without overindulgence, making for a more enjoyable experience.

Wine and Beverage Pairing

For wine pairings, consider serving a sweet dessert wine such as Riesling or spätlese, which balances the sweetness of the cookies with refreshing acidity.

Non-alcoholic alternatives like spiced apple cider or peppermint hot cocoa can complement the cookies beautifully, providing a comforting holiday flavor profile.

If you enjoy coffee or tea, opt for a rich dark roast or a mint-infused tea to enhance the cookie’s peppermint flavor profile.

Always consider serving your beverages at the appropriate temperatures—warm cocoas and ciders can provide a cozy counterpart to these chilled cookies.

Storage and Shelf Life

For optimal freshness, store your Striped Peppermint Sandwich Cookies in an airtight container at room temperature, best consumed within 5 days.

For longer shelf life, freeze unfilled cookies, and they will keep for up to 3 months. Just be sure to layer them with parchment paper to avoid sticking.

Utilize glass or plastic containers that seal tightly and prevent air exposure to maintain cookie texture and flavor for an extended period.

Signs of spoilage include a change in texture or off-putting smells; always smell and taste before consuming if unsure.

When ready to enjoy frozen cookies, simply thaw at room temperature and fill them for a freshly made treat!

Make Ahead Strategies

To save time, prepare the cookie dough ahead of time. You can refrigerate the dough for up to 2 days or freeze it for later baking.

Consider making the filling in advance as well and keeping it in the fridge. It can be easily piped into cookies after a quick stirring to ensure smoothness.

To assess quality impact, note that chilling the dough enhances flavors as it rests, resulting in improved texture and taste.

When assembling cookies, allow the filling to warm slightly for easy spreading, ensuring it doesn’t crack the cookies.

Lastly, consider adding fresh mint leaves or light sprinkles right before serving to provide a fresh look without compromising previously prepared cookies.

Scaling Instructions

If you’d like to halve the recipe, simply adjust the measurements accordingly; most ingredients can be simply reduced by half without concern.

Doubling or tripling can yield extra batches for larger gatherings, but consider oven space and baking time adjustments necessary for larger cookie amounts.

Equipment adjustments might involve using multiple baking sheets to manage cooking efficiently without overcrowding.

One key timing modification is monitoring cookies more closely, as added batches may bake faster or slower depending on their arrangement in the oven.

Finally, ensure that you have adequate storage options for your increased batch size, with airtight containers to maintain freshness.

Nutritional Deep Dive

Analyzing the macros reveals a satisfying balance of carbohydrates, fats, and proteins in these cookies. The butter and sugar elevate their calorie content, hence enjoying them in moderation is ideal.

On the micronutrient side, consider the nutritional benefits of peppermint as a digestive aid, which can help balance the indulgence of sweets.

Dietary considerations include the presence of gluten in traditional flour; however, alternatives are available to ensure everyone can enjoy these treats.

A portion analysis indicates that one-two sandwich cookies provide a satisfying treat without excessive calories, making it easy to appreciate this dessert guilt-free.

Employing weight management tips like mindful serving sizes can help in balancing enjoyment and health-conscious eating during the holiday season.

Dietary Adaptations

For gluten-free adaptations, substitute all-purpose flour with almond flour or a 1:1 gluten-free flour blend, ensuring a delightful texture.

Make these cookies dairy-free by using coconut oil or vegan butter in place of traditional butter and dairy-free chocolate options.

For a vegan version, use flax eggs instead of conventional eggs along with aguave nectar as a sweetener.

Low-carb or keto-friendly sweeteners can be substituted for sugar, ensuring that cookie lovers on restrictive diets still can enjoy the sweet indulgence.

Paleo enthusiasts can swap traditional ingredients for their paleo counterparts. Use almond butter instead of butter, and maple syrup instead of sugar for a paleo-friendly adaptation.

Consider the low-FODMAP diet too by leveraging suitable sweeteners and ensuring ingredient selections are compliant with FODMAP guidelines for minimal digestive disruptions.

Troubleshooting Guide

If the cookies come out too hard, check your baking time as overbaking can lead to dryness. Monitor cookies closely to prevent this issue.

For too soft cookies, ensure your dough was adequately chilled, and check your oven temperature for accuracy, as too low temps can prevent proper baking.

If the chocolate coating doesn’t adhere well, ensure that your cookies are cooled completely before dipping to allow the chocolate to stay firm once set.

In cases of flavor imbalance, reducing peppermint extract the next time can help; sometimes too much can overpower the delicate balance between sweetness and mintiness.

Should you experience difficulties with your dough sticking, a light dusting of flour on your work surface can ease the process.

If timing concerns arise and cookies need to bake more quickly, consider spreading your baking out on multiple trays to allow airflow, which facilitates faster baking times.

Recipe Success Stories

Community feedback on these cookies is overwhelmingly positive, with many praising their festive look and delicious buttery flavor.

Readers have successfully tried variations like using orange zest in place of peppermint for a unique spin during other seasons, leading to delightful results.

Adaptation stories include readers sharing their tweaks based on dietary preferences, showcasing that creativity in the kitchen often results in delicious innovations.

Suggestions for enhancing flavor balance have been shared, with users noting that even a touch of sea salt over the final chocolate layer creates an exquisite contrast.

Photography tips from enthusiastic bakers have led to some stunning presentations of these cookies, inspiring others to join in celebrating their successful cookie baking adventures!

Frequently Asked Questions

Can I freeze Striped Peppermint Sandwich Cookies?

Yes! You can freeze unfilled cookies for up to three months. Just be sure to place them in an airtight container and layer them with parchment paper to prevent sticking.

Can I substitute the peppermint extract?

Absolutely! You can use peppermint oil, but remember to reduce the quantity since it is much more concentrated. Vanilla extract can work as a substitute for a different flavor.

How can I make these cookies gluten-free?

To make gluten-free Striped Peppermint Sandwich Cookies, substitute all-purpose flour with a gluten-free blend, ensuring it contains xanthan gum for better texture.

How long can I store these cookies?

Stored in an airtight container at room temperature, these cookies are best enjoyed within five days for optimal freshness. Frozen unfilled cookies can last up to three months.

Can I use a different filling?

Definitely! Feel free to experiment with different fillings like chocolate ganache, cream cheese frosting, or even a simple vanilla buttercream to suit your taste.

What’s the best way to melt chocolate for coating?

The best way to melt chocolate is in a double boiler or using a microwave in short bursts, stirring in between to prevent it from burning.

How can I get perfect chocolate stripes?

To achieve perfect chocolate stripes, let the cookies cool completely before decoration and temper the chocolate for a glossy finish that sets well.

Is it necessary to chill the dough?

Yes, chilling the dough is essential. It helps prevent the cookies from spreading excessively during baking, leading to a chewier texture.

Can I make the dough ahead of time?

Absolutely! You can make the dough ahead of time and refrigerate it for up to two days or freeze it for longer storage before baking.

What type of chocolate should I use?

We recommend using high-quality semi-sweet or dark chocolate chips to create a rich and delicious coating for your cookies.

Additional Resources

For more delightful holiday recipes, check out our baking section featuring cookies, cakes, and pies perfect for the festive season.

Technique guides on cookie baking can enhance your skills and confidence, ensuring you produce delicious treats every time.

Explore information on using quality ingredients and equipment to elevate your baking game and achieve professional results.

Keep an eye out for seasonal variations, showcasing treats that reflect the best flavors and traditions of each holiday month.

Join the Conversation

We love hearing from our readers! Share your experiences making Striped Peppermint Sandwich Cookies and tips you’ve discovered along the way.

Social media sharing allows you to showcase your creations and connect with fellow baking enthusiasts, inspiring others to try out the recipe.

Consider sharing your photography tips to elevate presentation skills, allowing others to appreciate the beauty of their baked goods.

We encourage recipe reviews to enrich the community experience and provide feedback that improves our collective baking journey.

Join our baking community by sharing variations you’ve tried or ideas for seasonal adaptations, making this recipe even more enjoyable for everyone!

The Recipe

Striped Peppermint Sandwich Cookies

Serves: 24 cookies

Prep Time: 30 mins

Cook Time: 15 mins

Total Time: 45 mins

Kitchen Equipment Needed

  • Baking sheets
  • Parchment paper
  • Mixing bowls
  • Piping bags
  • Double boiler or microwave-safe bowl
  • Wire rack for cooling

Ingredients

  • 2 1/2 cups all-purpose flour
  • 1 teaspoon baking powder
  • 1/2 teaspoon salt
  • 1 cup unsalted butter, softened
  • 1 1/2 cups granulated sugar
  • 2 large eggs
  • 1 teaspoon vanilla extract
  • 1/2 teaspoon peppermint extract
  • 1 1/2 cups chocolate chips (for coating)
  • 3 tablespoons crushed peppermint candies (for garnish, optional)

Directions

  1. Preheat your oven to 350°F (175°C) and line baking sheets with parchment paper.
  2. In a bowl, whisk together flour, baking powder, and salt. Set aside.
  3. In a large mixing bowl, cream the softened butter and sugar until light and fluffy.
  4. Add eggs one at a time, mixing well after each addition, followed by vanilla and peppermint extracts.
  5. Gradually mix in the flour mixture until just combined. Avoid overmixing.
  6. Chill dough in the refrigerator for 1 hour to prevent spreading during baking.
  7. Roll dough into 1-inch balls and place on prepared baking sheets, spaced apart.
  8. Bake for 10-12 minutes until the edges are lightly golden. Let cool on baking sheets.
  9. Meanwhile, melt chocolate in a double boiler or microwave until smooth.
  10. Once cookies are cooled, spread a layer of peppermint filling between two cookies and dip the edges in melted chocolate, allowing excess to drip off.
  11. Place dipped cookies on a wire rack and sprinkle crushed peppermint candies on top while chocolate is still warm.
  12. Allow chocolate to set before enjoying.

Recipe Notes

  • For a more intense peppermint flavor, add an additional 1/4 teaspoon of extract.
  • These cookies can be frozen unfilled and assembled before serving.
  • Experiment with different cookie shapes using cookie cutters for unique looks.
  • Flavor variations can be introduced by substituting different fillings or extract flavors.

Easy Chocolate Lava Cakes – Rich, Gooey & Ready in 30 Min

Decadent Chocolate Lava Cakes: The Perfect Indulgence

⚖️
Difficulty
Medium

⏲️
Prep Time
20 mins

🕒
Cook Time
12 mins

⏱️
Total Time
32 mins

🍽️
Servings
4

Chocolate Lava Cakes are a delightful way to impress your family and friends with a dessert that is as indulgent as it is simple to make. These mini cakes, with their gooey molten centers, provide a chocolate experience that is sure to satisfy even the most discerning chocoholics. Picture a rich, dark chocolate cake, baked just enough to create a firm shell around the molten chocolate inside, which flows out with every spoonful. The interplay of rich chocolate and a warm, oozy center creates an unforgettable flavor and texture experience.

The beauty of these Chocolate Lava Cakes lies not only in their taste but also in their ability to evoke a sense of comfort and joy. They are perfect for special occasions such as anniversaries or romantic dinners, but can easily be made for an everyday treat. Serve them warm with a scoop of vanilla ice cream or a dollop of whipped cream, and you’ll create a dessert that transforms any meal into a memorable event.

Quick Recipe Highlights

  • Flavor Profile: Rich, dark chocolate with hints of sweetness and a decadent molten center.
  • Texture: A delicate exterior that gives way to a gooey chocolate core; a perfect balance of smooth and fudgy.
  • Aroma: Intense chocolate accompanied by a buttery, sweet fragrance as they bake.
  • Visual Appeal: Elegant and sophisticated, with a bright chocolate center peeking out from a cake shell.
  • Skill Level Needed: Requires basic baking skills and attention to timing for optimal results.
  • Special Equipment: Ramekins or individual baking dishes for the perfect form and presentation.

Recipe Overview

  • Difficulty Level: Chocolate Lava Cakes are classified as medium difficulty, requiring precise timing to achieve the molten interior without overbaking.
  • Category: A dessert ideal for both casual and formal occasions, showcasing a refined taste for chocolate lovers.
  • Cuisine: This dessert hails from French pastry tradition, known for its rich flavors and artistic presentation.
  • Cost: Moderate, as the primary ingredients include high-quality chocolate and butter, essential for deep flavor.
  • Season: Best enjoyed year-round, but especially delightful during colder months when a warm dessert is comforting.
  • Occasion: Perfect for celebrations, dinner parties, or a cozy night in with loved ones.

Why You’ll Love This Recipe

You will adore the Taste and Texture appeal of Chocolate Lava Cakes. The intense flavor of high-quality chocolate paired with the soft, fluffy outer cake and the decadent, flowing center creates a dessert that is almost too good to be true. Each bite is an experience, combining sweetness and richness with a sensuous mouthfeel that you will crave again and again.

The Convenience and Preparation benefits are undeniable. Unlike many other desserts that require extensive time and skills, these lava cakes come together quickly in a few simple steps. The majority of the time is spent allowing the cakes to bake, giving you plenty of opportunities to set the table or pour a glass of wine while the dessert does its magic in the oven.

Health-wise, while these cakes cater mainly to indulgence, they do contain key ingredients that can be beneficial when consumed in moderation. Dark chocolate, for example, is known for its antioxidants and potential heart health benefits. Pairing with fresh fruits can balance the richness and enhance the nutritional profile.

From a Social and Entertaining perspective, Chocolate Lava Cakes are a showstopper. They offer a dramatic presentation, with the molten chocolate ready to flow out when you slice into them. They are also an interactive dessert; guests love the moment of digging in and discovering the luscious center, making it a great conversation starter.

Lastly, their Cost-Effectiveness and Accessibility make these cakes a fantastic choice. High-quality chocolate is accessible to most, and the other ingredients—like eggs and butter—are staples in many kitchens, so you won’t need to make an elaborate grocery run to whip up this dessert.

Historical Background and Cultural Significance

Chocolate Lava Cakes, or “Molten Chocolate Cake,” have a storied origin that reflects their luxurious taste and texture. They are believed to have been created by chef Michel Bras in the late 1980s, revolutionizing the dessert world with their innovative structure. The idea of a cake that holds a gooey center was groundbreaking, leading to a new genre of desserts that emphasize the delight of contrasting textures.

The Cultural Importance of Chocolate Lava Cakes is profound, particularly in French cuisine, where desserts hold a special place. These cakes are often associated with fine dining and gourmet experiences. Their popularity has led to a global appreciation for chocolate desserts, sparking countless variations around the world, from casual dessert bars to high-end restaurant menus.

Over the years, the Evolution of the recipe has seen many adaptations that bring unique spins to the classic. Chefs worldwide have experimented with flavor infusions, using ingredients like espresso, orange zest, or spices to create new profiles within the beloved template. Each version reflects local tastes while maintaining the original’s charm.

Regional Variations are abundant, with countries offering their takes on this magnificent dessert. In the U.S., it’s often served in high-end restaurants, while in Italy, a similar dessert known as “torta oreo” combines chocolate with other rich flavors, showcasing how this simple concept can be embraced and transformed by various cuisines.

Ingredient Deep Dive

Chocolate is the star of Chocolate Lava Cakes, often made with high-quality dark chocolate that provides both flavor and decadence. Dark chocolate boasts a range of health benefits due to its antioxidant properties; it can enhance heart health, support brain function, and even improve mood. When selecting chocolate, aim for at least 60% cocoa content to ensure the richness is pronounced. Store it in a cool, dark place away from moisture, and use it within its expiration date for the best quality.

Butter, another crucial ingredient, is often sourced from grass-fed cows to create a richer flavor profile. Its creamy texture is essential for achieving that luscious mouthfeel. Butter also plays a role in baking by giving structure while keeping the cakes moist. When baking, ensure you use room-temperature butter for optimal mixing. If you have leftover butter, it can be stored in the freezer for later use, enhancing its longevity in your kitchen.

Eggs serve multiple purposes in the baking process, providing moisture, structure, and richness. They can act as binders, ensuring the ingredients mix well and achieve the desired texture. When selecting eggs, consider using free-range or organic varieties for better taste and quality. Eggs can be stored in their shell for several weeks in the refrigerator but should always be checked for freshness when used.

Flour, though a minor component, is needed for structure. A simple all-purpose flour works well, but whole wheat flour can offer a nutty flavor and additional nutrients. Store flour in a cool and dry place, and make sure to use it within its recommended use timeframe, as stale flour can affect the baking process significantly.

Common Mistakes to Avoid

  • Overmixing the batter can lead to tough cakes; combine ingredients just until smooth.
  • Skipping the greasing of ramekins may cause the cakes to stick; ensure to generously coat them with butter or cooking spray.
  • Not preheating the oven can cause uneven baking; always ensure your oven reaches the desired temperature before placing the cakes inside.
  • Using low-quality chocolate can result in a lackluster flavor; invest in good chocolate for maximum impact.
  • Underbaking or overbaking the cakes can ruin the signature lava effect; keep track of baking time closely and start with a timer.
  • Failing to let the cakes rest for a moment can lead to a messy plate; give them a minute before serving for ease.
  • Not serving the cakes warm can minimize the molten experience; they are best enjoyed straight from the oven.
  • Disregarding presentation may lead to a lack of elegance; use fresh berries or whipped cream to elevate the visual appeal.
  • Setting the password too high or low can result in incorrect baking; stick to the recommended temperatures for perfect results.
  • Forgetting to sprinkle with powdered sugar or cocoa powder can diminish presentation; this small detail adds a charming touch.

Essential Techniques

Mastering the technique of melting chocolate is crucial for achieving the right consistency and flavor in Chocolate Lava Cakes. Melting chocolate can be done using a double boiler or microwave. When using a microwave, heat in short bursts to prevent scorching—stirring in between. The consistency should be smooth and glossy, indicating that it’s ready to be mixed into the batter.

Proper folding techniques are essential for combining ingredients without losing air. When mixing in eggs or flour, use a gentle hand to maintain the volume of the batter. This technique ensures that your lava cakes are fluffy and light, yielding a wonderful texture once they are baked.

Timing your baking correctly is key. Overbaking will eliminate the gooey center, while underbaking may leave the cakes too soft. The visual cue to look for is a set outer edge while the center appears slightly jiggly; this will ensure the lava effect remains intact upon serving.

Cooling the cakes for just a minute before serving is important as it allows for the interior to settle slightly, making them easier to plate. This technique also prevents torrents of molten chocolate from spilling out, creating a lovely presentation when served.

Pro Tips for Perfect Chocolate Lava Cakes

To ensure your Chocolate Lava Cakes turn out perfectly every time, consider these expert tips:
– Use high-quality chocolate for the best flavor; brands like Valrhona or Ghiradelli provide depth and richness.
– Always grease your ramekins generously to prevent sticking, ensuring the cakes come out easily once baked.
– Experiment with flavor infusions; adding a splash of espresso, orange zest, or a pinch of sea salt can enhance the chocolate experience significantly.
– Preheat your oven and use an oven thermometer to confirm the actual temperature; consistent baking temperature is crucial for lava cakes.
– Set timer alerts for 2 minutes before the time is up so you can monitor the doneness closely and avoid overbaking.
– Allow the cakes to cool in the ramekin for a minute before inverting to serve; this helps them retain their shape.
– Garnish the molten cakes with fresh berries, mint leaves, or a dusting of powdered sugar for a stylish finish.
– Serve with whipped cream or ice cream for an indulgent contrast to the warm chocolate.

Variations and Adaptations

Consider regional variations, such as using Mexican chocolate to add spices like cinnamon for a warm twist on the classic. Seasonal adaptations can include infusing pumpkin spice during fall or peppermint during winter holidays, giving a festive spin on the original recipe to appeal to seasonal cravings.

For dietary modifications, there are gluten-free options available; almond flour can serve as a substitute for all-purpose flour. Vegan adaptations are also possible, swapping eggs with flax eggs and using plant-based butter, providing a delicious alternative without compromising flavor.

Changing flavor profiles can create exciting new desserts. Incorporate ingredients like peanut butter for a creamy texture or raspberry puree for a pop of fruit flavor combined with chocolate. Substituting different types of chocolate can result in a sweeter or darker dessert depending on taste preferences.

Presentation alternatives like serving in clear jars with layers of cake and lava can create a stunning visual while being easy to eat. Another idea is to bake the mixture in a silicone mold for shapes that are fun and engaging for any occasion.

Serving and Presentation Guide

Presentation plays a crucial role in elevating the experience of Chocolate Lava Cakes. For plating, consider using flat white plates to ensure the dessert stands out. Carefully invert the ramekin onto the plate, tapping gently to release the cake, and pour a ribbon of warm chocolate sauce around it for a refined look.

Garnishing ideas like fresh raspberries, a sprig of mint, or a dusting of powdered sugar add pops of color that contrast beautifully with the deep chocolate. Serving a scoop of vanilla bean ice cream on the side not only adds a creamy counterpart but also visually enhances the dessert.

Modern serving suggestions include individual glass jars for a trendy approach; layer cake and sauce for an eye-catching dessert. Providing an array of toppings, like crushed nuts, whipped cream, or chocolate shavings, allows guests to personalize their experience and adds to the visual appeal of the dessert.

Temperature considerations are paramount; ensure the lava cakes are served hot for the signature molten effect. If holding before serving, place them in a warm oven to prevent them from cooling down too much. Portion control is also essential, as these cakes are rich; serving smaller sizes can make them feel more approachable, regardless of occasion.

Wine and Beverage Pairing

Pairing beverages with Chocolate Lava Cakes can enhance the overall dining experience. A robust red wine like Cabernet Sauvignon or a rich Merlot complements the chocolate beautifully, enhancing its flavors. A chocolate stout or port can also create a rich pairing, intensifying the chocolate experience.

For a non-alcoholic option, pairing with a rich coffee or espresso can echo the depth of the chocolate and balance the sweetness, creating a harmonious experience. Dark roast coffees and rich lattes offer contrast and add to the indulgence of the dessert.

For tea lovers, consider pairing it with a strong black tea like Assam or Earl Grey, which can cut through the richness of the cake and refresh the palate. Maintain appropriate serving temperatures for beverages, with red wine served slightly below room temperature for optimal enjoyment.

Storage and Shelf Life

Storage methods for Chocolate Lava Cakes are straightforward. If you have leftovers, they can be stored in the refrigerator in their ramekins or transferred to an airtight container. When properly stored, they will last for about 2-3 days in the fridge.

Temperature requirements are important; keep the cakes refrigerated but allow them to come to room temperature before reheating. Reheating should be done gently in the microwave or oven to avoid overcooking; the center needs to be warm but remain molten for the best experience.

For longer storage, freezing is an option. Wrap each spare lava cake tightly in plastic wrap, then place in a freezer bag. They can be kept for up to 2 months. When ready to eat, thaw in the fridge overnight and reheat gently in the oven to return them to their original glory.

Signs of spoilage include unusual odors or changes in texture. Always check for any off smells or the appearance of mold before consuming leftovers, and when in doubt, it’s better to err on the side of caution.

Make Ahead Strategies

Making Chocolate Lava Cakes ahead of time can streamline your dessert serving for events. One effective prep timeline involves preparing the batter and pouring it into greased ramekins up to a day in advance. Simply cover and store in the fridge until you are ready to bake. This helps in managing time on busy days.

Storage between steps is straightforward; if the cakes are assembled and chilled properly, they maintain their quality. However, take into consideration that they may require a few additional minutes to bake from cold.

Quality impact assessment is essential. The cakes may lose some volume if stored for too long, affecting the final lava texture. Assembling the cakes close to the serving time allows them to maintain their signature gooey center.

Reheating guidelines suggest placing cooled cakes back in a preheated oven for about 8-10 minutes at 350°F (175°C) before serving. Fresh elements like whipped cream or fresh fruit should also be added just prior to serving to maintain freshness and enhance flavors.

Scaling Instructions

Scaling Chocolate Lava Cakes can accommodate various occasions and guest counts. Halving the recipe is simple; just divide each ingredient by two while maintaining the same preparation method. The baking time may remain roughly the same but watch the cakes closely.

When doubling or tripling, using larger mixing bowls and multiple ramekins is advisable to ensure even mixing and baking. Be prepared to adjust baking times slightly, keeping in mind that the volume of batter may require longer baking.

Equipment adjustments may be necessary if doubling; consider using larger or multiple baking sheets to accommodate additional ramekins. Ensure there’s enough space between them for accurate baking.

Timing modifications should allow you to bake multiple trays simultaneously without overcrowding, as this can lead to uneven cooking. Simply monitor each tray closely, as they may not all bake at the same rate.

For scaled storage considerations, remember that larger quantities may take longer to cool down, so plan storage methods accordingly to maintain food safety while ensuring the cakes are ready for serving later.

Nutritional Deep Dive

Understanding the nutritional composition of Chocolate Lava Cakes can aid in mindful eating. A standard serving typically contains around 400-500 calories, depending on portion size and ingredients used. The macro breakdown sheds light on potential sources of fat, carbohydrates, and protein, emphasizing mindful consumption.

The micronutrient analysis highlights the benefits of dark chocolate, which provides vitamins such as B12 and minerals like magnesium. The addition of eggs contributes protein and healthy fats, while butter adds flavor and is a source of Vitamin A.

When evaluating health benefits, moderate indulgence in chocolate has been linked to improved mood and cardiovascular health due to flavonoids. The cakes can be modified to include healthier fats or fruit options, enhancing nutritional value.

Dietary considerations should be addressed—gluten-free or lower-sugar adaptations can cater to those with dietary restrictions, making them accessible to a wider audience.

Portion analysis is critical; enjoying a smaller serving can satisfy sweet cravings without overindulging. For weight management tips, balance this dessert with lighter meals throughout the day or incorporate exercise to offset occasional indulgences.

Dietary Adaptations

For Gluten-Free adaptations, substitute all-purpose flour with gluten-free blends or almond flour, ensuring cake consistency remains intact without losing flavor. This adaptation allows those with gluten sensitivities to enjoy this delightful dessert without worry.

Dairy-Free options can be made using plant-based butters and substitutes for milk, ensuring full flavor while adhering to dietary choices. Many high-quality dairy-free chocolates are available that can replicate the authentic taste perfectly, allowing for a rich dessert.

Vegan versions can replace eggs with flaxseed meal or applesauce and utilize vegan chocolate. These ingredients can work together to create the same luxurious texture that you expect.

Low-Carb and Keto adaptations often require sugar substitutes like erythritol or almond flour, maintaining sweetness while lowering the carb count. Careful measurement is essential to achieve the right consistency without compromising taste.

Paleo options can utilize coconut flour and natural sweeteners such as honey or maple syrup, which aligns with the values of the diet, while still providing a rich dessert experience.

Low-FODMAP adaptations focus on avoiding certain ingredients; check chocolates for inclusivity options and utilize safe alternatives like cocoa powder to maintain the chocolate flavor without triggering sensitivities.

Troubleshooting Guide

Addressing Texture issues may arise such as overly dry cakes; this can occur from overbaking. To improve texture, reduce baking time, or check with a toothpick a few minutes prior to finishing time. Moisture can also be added with flavored syrups or luscious ganache atop the cooled cakes.

Flavor balance may falter if using subpar chocolate. Ensure high-quality chocolate is utilized and taste the batter before baking. Adjusting sugar levels is critical to achieving a sweet yet balanced dessert.

Temperature problems can stem from an oven that’s too hot or cold. To avoid this, use an oven thermometer to ensure accurate baking temperatures and conditions, allowing for precise lava cake creations.

Equipment challenges often come from using mismatched ramekins. Uniform size ensures even baking; if smaller ramekins are used, reduce baking time accordingly to maintain that gooey texture.

Ingredient substitutions may affect consistency and oven behavior. If substituting flour types or fat, remember they will behave differently; testing small batches can be beneficial.

Lastly, timing concerns revolve around the critical balance of not underbaking and overbaking. Set multiple timer alerts during baking for precise tracking to perfect your results.

Recipe Success Stories

Feedback from the community emphasizes how Chocolate Lava Cakes have become a staple at celebrations and gatherings. Readers share their experiences of serving them at birthday parties, wedding anniversaries, and cozy family dinners, creating joyful moments that linger.

Variation successes are celebrated as home bakers experiment with flavors and ingredients, enhancing the traditional recipe with fruits or spices that reflect their personal tastes. The flexibility of the recipe encourages creativity, making it a favorite among home cooks.

Adaptation stories highlight the triumphs of those with dietary restrictions who successfully utilize alternative ingredients to create suitable versions of the dessert that everyone can enjoy together.

Reader suggestions have transformed the experience of cooking; photography tips shared from those who made the cakes have led to beautiful visual representations, showcasing the appeal of the dessert on social media.

Sharing these stories creates a community around the recipe, encouraging engagement and inviting others to share their dessert journeys with Chocolate Lava Cakes, bringing people closer around shared experiences of indulgence and joy.

Frequently Asked Questions

Can I prepare Chocolate Lava Cakes in advance?

Yes! You can prepare the batter and pour it into ramekins a day ahead, cover tightly and refrigerate. Just bake them fresh before serving.

How do I know when my cakes are done?

The outer edge should be set, but the center should still look soft and slightly jiggly. Trust your timing and check early.

Can I use milk chocolate instead of dark chocolate?

While you can use milk chocolate, it might alter the flavor and sweetness, making the cakes less rich. Dark chocolate is preferred for depth.

What can I serve with Chocolate Lava Cakes?

A scoop of vanilla ice cream, fresh berries, or whipped cream makes excellent accompaniments to enhance the dessert experience.

Can these cakes be frozen?

Yes, you can freeze the cakes wrapped tightly in plastic. They can be stored for about 2 months, but be careful when reheating.

What happens if I overbake the cakes?

Overbaked cakes will not have the signature molten center and will be dry. Always check them a few minutes before the suggested baking time.

Are they gluten-free?

They can be made gluten-free by substituting traditional flour with almond flour or a gluten-free blend. Adjust measurements accordingly.

Can I use silicone molds instead of ramekins?

Absolutely! Silicone molds work well as they allow for easy removal. Just make sure they’re well greased to prevent sticking.

What is the best way to store leftovers?

Store leftover cakes in an airtight container in the refrigerator for up to 2-3 days, or freeze them to enjoy them later.

Is it necessary to let the cakes cool before serving?

Letting them sit for just a minute allows the molten center to settle slightly for easier serving but should be eaten warm.

Additional Resources

For those interested in further exploration, consider related recipes such as Classic Chocolate Cake or Chocolate Fondant. These desserts share similar ingredients and techniques, making for a delightful dessert journey.

Technique guides on mastering chocolate tempering or baking basics can elevate your skills further, ensuring that every dessert you create is a success. Ingredient information on sourcing quality chocolates and butters will enhance the experience of making these rich desserts.

Equipment recommendations also come into play; investing in good-quality ramekins and baking sheets will ensure durability and consistent results. Seasonal variations can be embraced by pairing Chocolate Lava Cakes with flavors like strawberry in spring or pumpkin in the fall, establishing a delightful connection with the seasons.

Join the Conversation

We love hearing about your baking adventures! Share your experiences with Chocolate Lava Cakes on social media, and don’t forget to post your photos. Engaging with others through recipe reviews can offer insights and tips for perfecting this dessert.

Encourage community engagement by sharing your thoughts on variations and adaptations you’ve tried. Whether you’ve added spices, flavors, or tackled dietary restrictions, these stories can inspire fellow bakers to experiment. Together, we can create a rich tapestry of delicious experiences centered around the indulgent joy of Chocolate Lava Cakes.

The Recipe

Chocolate Lava Cakes

Serves: 4

Prep Time: 20 mins

Cook Time: 12 mins

Total Time: 32 mins

Kitchen Equipment Needed

  • Ramekins (4, ideally 6 oz each)
  • Mixing bowl
  • Whisk
  • Double boiler or microwave-safe bowl
  • Measuring cups and spoons
  • Spatula
  • Baking tray

Ingredients

  • 1/2 cup unsalted butter
  • 1 cup dark chocolate (at least 60% cacao)
  • 2 large eggs
  • 2 large egg yolks
  • 1/4 cup granulated sugar
  • 1 tsp vanilla extract
  • 1/4 cup all-purpose flour
  • Powdered sugar for dusting

Directions

  1. Preheat the oven to 425°F (220°C) and grease your ramekins.
  2. Melt the butter and dark chocolate together in a double boiler or microwave, stirring until smooth.
  3. In a mixing bowl, whisk together the eggs, egg yolks, vanilla, and granulated sugar until pale and thick.
  4. Slowly add the melted chocolate mixture into the egg mixture, folding gently with a spatula.
  5. Sift the flour over the mixture and fold until just combined.
  6. Divide the batter evenly among the prepared ramekins and place on a baking tray.
  7. Bake for 12 minutes, or until the edges are firm and the center is soft.
  8. Let sit for one minute, then carefully invert onto plates and dust with powdered sugar.
  9. Serve immediately, ideally with ice cream or whipped cream.

Recipe Notes

  • Ensure not to overbake; adjust times based on your oven’s performance.
  • Use high-quality chocolate for the best results.
  • Create flavor variations by adding espresso, orange zest, or chili powder to the batter.
  • Preparation can be done ahead; simply chill the filled ramekins until ready to bake.