Irresistible Salted Caramel Pecan Muffins Perfect for Fall Baking

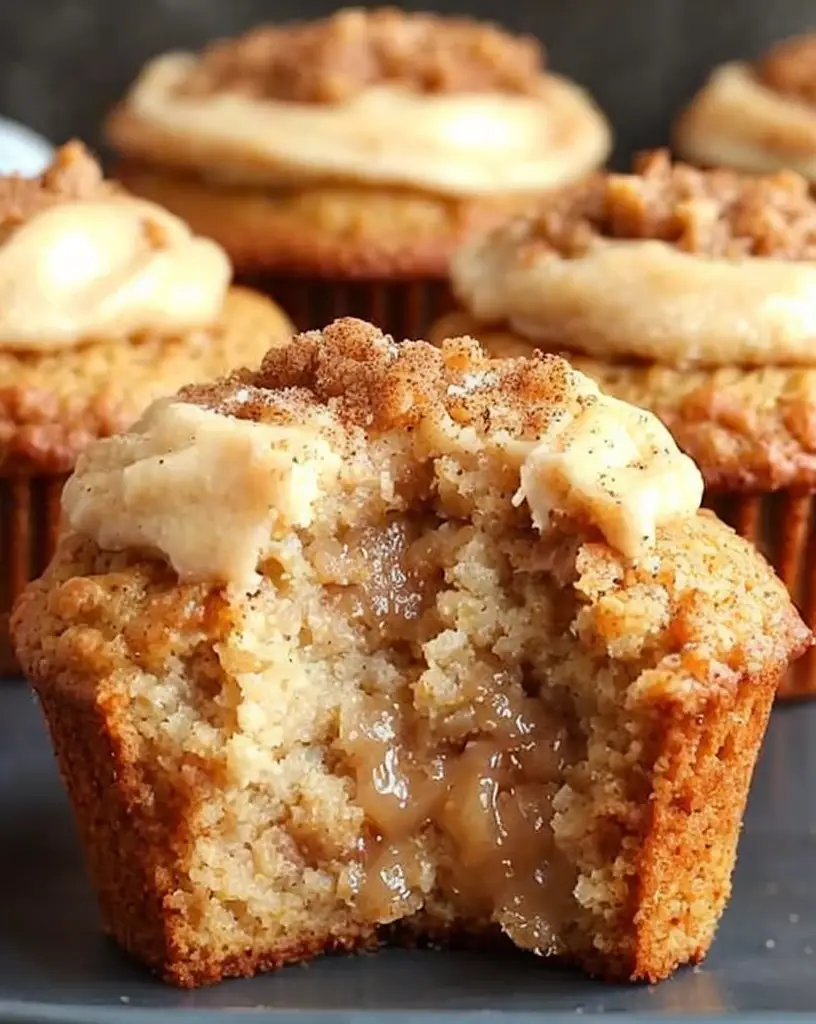
Salted Caramel Pecan Muffins: A Sweet and Savory Delight

⚖️
Difficulty
Medium

⏲️
Prep Time
20 mins

🕒
Cook Time
25 mins

⏱️
Total Time
45 mins

🍽️
Servings
12

Get ready to indulge in the heavenly taste of Salted Caramel Pecan Muffins. Imagine a warm, fluffy muffin infused with the rich, buttery flavor of caramel and the delightful crunch of toasted pecans. These muffins strike the perfect balance between sweet and savory, making them a favorite for any occasion. Whether you’re serving them as a breakfast treat or as a decadent dessert, these muffins are sure to leave everyone wanting more.

The beauty of Salted Caramel Pecan Muffins lies in their simplicity yet profound flavor profile. The combination of caramel’s velvety sweetness with a touch of sea salt creates a mouth-watering sensation that’s hard to resist. The pecans add an earthy note, enhancing the overall depth of flavor. Each bite delivers a delightful contrast of textures – fluffy, moist muffin enriched with crunchy pecans. This harmonious blend will delight your taste buds and make your kitchen smell like a bakery.

Quick Recipe Highlights

  • Flavor Profile: These muffins combine sweet caramel with a hint of salt and a nutty pecan finish, creating a complex and satisfying taste experience.
  • Texture: The muffins are soft and tender, complemented by the crunchy texture of the pecans, offering a pleasing mouthfeel.
  • Aroma: Experience the enticing aroma of freshly baked caramel and roasted pecans filling your kitchen.
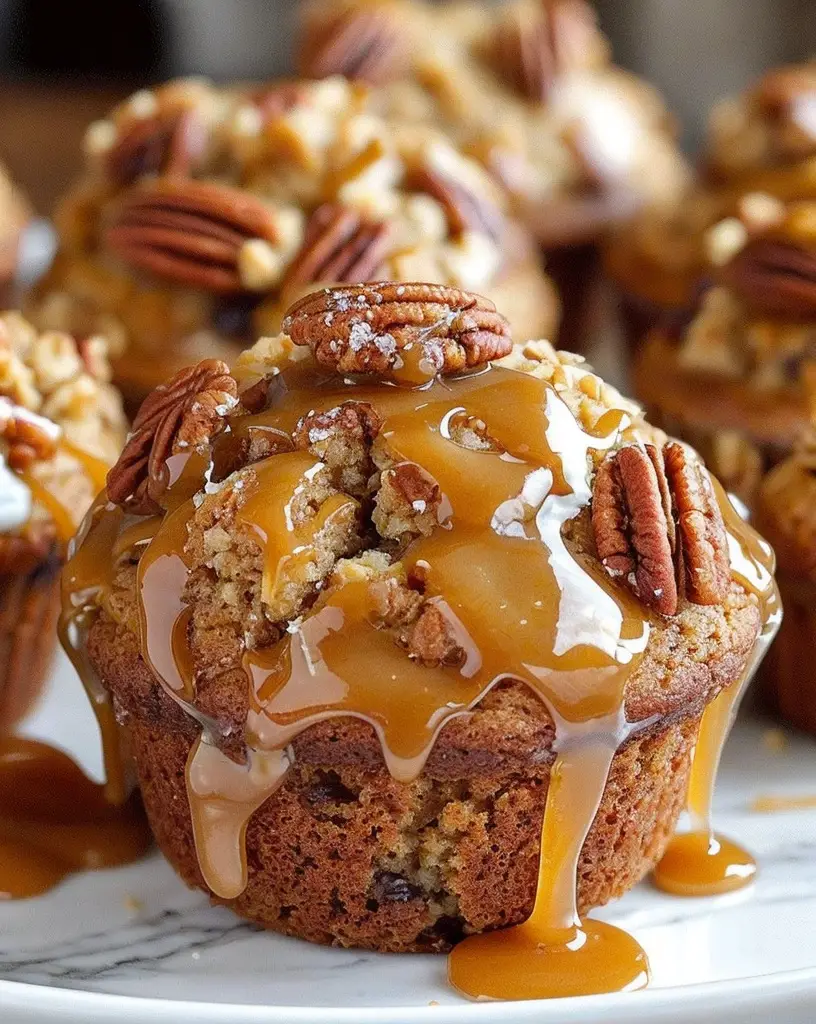
  • Visual Appeal: Caramel drizzles and pecan pieces offer a rustic yet inviting look, making each muffin a visual treat.
  • Skill Level Needed: Moderate baking skills are required to caramelize sugar and evenly bake the muffins without overcooking.
  • Special Equipment: Use a muffin tin, an electric mixer, and a caramel saucepan to achieve the best results.

Recipe Overview

  • Difficulty Level: This recipe is moderately difficult, involving caramel creation and precise baking times to ensure perfect muffins.
  • Category: Ideal for breakfast or brunch menus, but equally delightful as a sweet snack or dessert.
  • Cuisine: Inspired by Southern baking traditions, these muffins incorporate classic American flavors.
  • Cost: The primary ingredients are affordable, though pecans can be slightly pricier depending on seasonality.
  • Season: While enjoyable year-round, these muffins are particularly comforting in the fall due to their warm, nutty flavors.
  • Occasion: Perfect for holiday gatherings, family breakfasts, or treat-yourself weekends.

Why You’ll Love This Recipe


The Salted Caramel Pecan Muffins are a treat for the senses. The combination of sweet caramel with nutty pecans and a hint of salt delivers a depth of flavor that is both comforting and exciting. The muffins’ texture is a delightful contrast between moist cake and crunchy nuts, making each bite a unique experience.

Besides their tempting taste, these muffins are convenient to prepare. The recipe won’t keep you in the kitchen for too long, and it’s simple enough for those who don’t bake often. With just a few common ingredients and a couple of special touches, you’ll create a bakery-worthy treat in your own home.

From a nutritional standpoint, pecans provide healthy fats and essential minerals, while the homemade caramel allows you to control sugar content, making these muffins a relatively moderate indulgence. Enjoy them with a coffee for a satisfying breakfast or an afternoon pick-me-up.

Socially, serving these muffins automatically makes any occasion feel special. Whether it’s a holiday brunch with family or a picnic with friends, they are a versatile treat that fits any setting. They are also great for gifting, wrapped up beautifully for a homemade present.

Despite their luxurious taste, these muffins are an affordable treat. Most of the ingredients may already be in your pantry, and the recipe yields a dozen muffins, offering excellent value for a gourmet snack.

Historical Background and Cultural Significance


The Salted Caramel Pecan Muffins draw inspiration from Southern culinary traditions, where pecans and caramel feature prominently in many beloved dishes. Pecans, native to North America, have been a staple in Southern desserts for centuries, often showcased in pies and pralines.

Culturally, these muffins bring together the comforting elements of home baking with the sophistication of caramel’s gourmet appeal. Originating as a way to use local ingredients, the recipe has evolved to incorporate modern techniques and variations, showcasing the versatility of classic flavors in contemporary baking.

The combination of caramel and sea salt has taken the culinary world by storm in recent years, building on traditional flavors to create a sensation of rich sweetness meeting crispy saltiness. This has led to an evolution in how these ingredients are used, transitioning from fine dining restaurants to everyday home baking.

Regional variations of this recipe might include additions like cinnamon for warmth or chocolate chips for an extra touch of indulgence. Each baker can personalize the muffins to suit their taste or reflect their regional preferences, making the recipe a canvas for creativity.

Ingredient Deep Dive

Flour: Adding to the structure of the muffins, all-purpose flour is a staple in baking due to its balanced protein content, contributing to both texture and height. Store in an airtight container to maintain freshness.

Pecans: Pecans bring not only a nutty flavor but also health benefits, such as heart-healthy fats and antioxidants. Look for plump, uniformly colored pecans for the best taste and store them in a cool, dry place to prevent them from turning rancid.

Caramel: Homemade caramel provides a richness that ties the flavors together. To achieve perfect caramel, heat sugar gently and stir continuously to prevent burning. Adjust sweetness by altering the sugar content according to preference.

Common Mistakes to Avoid

  • Overcooking the caramel can lead to a bitter taste. Watch the caramel closely and remove from heat as soon as it turns amber.
  • Using cold ingredients directly from the refrigerator may prevent the batter from developing the correct texture. Bring all ingredients to room temperature.
  • Overmixing the batter can result in tough muffins. Mix just until the dry ingredients are incorporated.
  • Neglecting to toast the pecans beforehand can minimize their flavor. Lightly roast them to enhance their natural oils and taste.
  • Filling the muffin tins too high risks overflow and uneven baking. Fill each cup about two-thirds full for best results.
  • Skipping the cooling step will affect the caramel’s setting, resulting in a runny top. Allow muffins to cool fully before serving.
  • Forgetting to line or grease the muffin tin can lead to sticking. Use paper liners or generously grease each cup.
  • Using aluminum pans may cause uneven heating. Opt for silicone or high-quality metal pans for consistent results.
  • Ignoring precise measurements may lead to an imbalance in flavors. Use measuring cups and spoons for accuracy.
  • Not checking oven calibration can result in over-baking. Use an oven thermometer for an accurate temperature reading.

Essential Techniques


Caramelizing sugar is the cornerstone of this recipe, essential for achieving that distinct sweet and slightly bitter flavor profile. To master this technique, use a heavy-bottomed pan to distribute heat evenly and stir continuously. Visual cues like color change from white to amber indicate readiness. Avoid stirring too quickly, which can incorporate unwanted air bubbles and result in crystallization.

Pro Tips for Perfect Salted Caramel Pecan Muffins


Use high-quality sea salt for the salted caramel to enhance the overall flavor without overpowering the sweetness. Opt for finely ground salt for an even distribution.

Roast your pecans before incorporating them into the batter to bring out their full nutty flavor. Layer them on a baking sheet and toast for a few minutes until fragrant.

If you like a little extra richness, add a touch of vanilla extract to the batter alongside the eggs. This deepens the muffins’ flavor profile even further.

To create an upscale presentation, drizzle additional caramel sauce over the muffins before serving. This gives them an irresistible glossy finish.

For an even bake, ensure all ingredients are at room temperature, promoting even heat distribution in the oven.

Experiment with adding a pinch of cinnamon or nutmeg to the batter for a warm, spiced variation that’s perfect for colder months.

Variations and Adaptations


To add a regional twist, vary the nuts based on local preferences or availability. Walnuts or almonds can be substituted for pecans for a different nutty note.

Incorporate dried fruits such as cranberries or raisins during fall for seasonally inspired sweetness. This adds a chewy texture alongside the crunch of pecans.

For a dietary adjustment, replace all-purpose flour with a gluten-free baking mix, adjusting liquid ratios as necessary to maintain the batter’s consistency.

Increase the sweetness or adjust the overall sugar content to fit personal preference, keeping in mind that altering the caramel might require practice for perfect consistency.

In terms of presentation, serve these muffins on a wooden platter for a rustic look or individually wrapped as gifts during the holiday season. A sprinkle of powdered sugar can also add an appealing touch.

Serving and Presentation Guide


Plate these muffins on a tiered stand for a sophisticated brunch presentation. This visual appeal works perfectly when serving at parties or gatherings, encouraging guests to indulge.

For garnishing, a light dusting of powdered sugar or a drizzle of additional caramel sauce can elevate the aesthetic, making them even more inviting.

Pair these muffins with coffee or a rich caramel latte for a harmonious blending of flavors, enhancing the caramel notes in both muffin and beverage.

Consider serving these muffins with fresh fruit for a balanced breakfast option, adding a touch of brightness alongside the rich, decadent muffin.

For controlled portions at events, pre-slice muffins into halves or quarters, allowing guests to sample alongside other treats without overindulging.

Wine and Beverage Pairing


A sweet, slightly chilled Moscato complements the saltiness and sweetness of the caramel, providing a refreshing contrast to the rich flavors of the muffins.

If you prefer non-alcoholic options, choose a creamy chai latte to mirror the spices and deepen the caramel’s richness with aromatic nuances from the tea.

For coffee lovers, a cappuccino or an espresso pairs beautifully with the muffins’ sweetness, offering a classic and comforting experience alongside your morning muffin.

Frequent enjoyment of these muffins with green tea brings out their sophisticated notes, introducing a subtle herbal layer to their flavor profile.

Servers should consider room temperature as a key factor—chilling wine or opting for warm beverages based on the season enhances the dining experience.

Storage and Shelf Life


To maintain the muffins’ freshness, store them in an airtight container at room temperature for up to three days. Keeping them sealed prevents moisture loss and staleness.

For longer storage, freeze muffins individually wrapped for up to three months. Thaw at room temperature for a quick and delicious treat whenever you crave one.

Monitor for signs of spoilage, such as mold or an off-smell, especially in humid climates where baked goods may spoil faster.

Reheat muffins in the oven at a low temperature for a fresh-baked feel, or enjoy them at room temperature for a quick snack.

Avoid refrigeration if possible, as it may dry out the muffins. Storing at room temperature or freezing preserves the texture best.

Make Ahead Strategies


Prepare the muffin batter a day in advance, storing it in the refrigerator overnight. This enhances the flavors as they meld before baking, offering intense taste.

Complete all caramel preparation the day before, ensuring it’s stored in a refrigerator-safe container to retain its texture and flavor until needed.

While advance preparation may slightly alter texture, enjoying them fresh ensures the optimal taste and feel. Consider adding fresh pecans or a caramel drizzle right before serving.

If reheating, gently warm muffins in an oven or toaster oven to bring back their delightful fresh-baked taste. This little step makes all the difference for meal presentations.

Emphasize fresh components like extra pecans or a final pinch of sea salt to reintroduce bright notes and delightful contrast with advanced preparation.

Scaling Instructions


When halving the recipe, maintain accurate and proportional ingredient division to uphold proper flavor balance. Use a smaller muffin tin to scale down output accordingly.

For doubling or tripling, increase ingredients proportionately but measure carefully to prevent overwhelming batter with excess mix. Opt for batch baking to ensure even baking and consistent texture.

Adjust mixing equipment if necessary, using a larger bowl or stand mixer for increased ingredients. This supports efficient mixing without compromising consistency.

Timing may vary, so always check for doneness with a toothpick inserted into the muffins, ensuring consistent results without undercooking or overbaking.

Consider additional storage solutions for larger batches, possibly using dedicated muffin carriers for transport if sharing treats with others.

Nutritional Deep Dive


These muffins offer a blend of macronutrients, including carbohydrates for energy, healthy fats from pecans, and slight protein content from eggs and nuts.

Pecans add significant micronutrients like magnesium and vitamin E, supporting overall health and providing antioxidant benefits contrasted with the sugars in caramel.

While indulgent, moderation is vital—enjoying these muffins as a part of a balanced diet minimizes any dietary concerns regarding sugar or fat intake.

Consideration for portion size helps manage weight, allowing enjoyment without affecting dietary goals. Incorporating mindful eating strategies complements this balanced approach.

Portion control advice includes savoring each bite to fully appreciate the taste and texture, helping prevent overindulgence and maintaining dietary commitments.

Dietary Adaptations

Gluten-Free: Substitute all-purpose flour with gluten-free baking flour, ensuring other ingredients are gluten-safe to maintain compliance with dietary needs.

Dairy-Free: Swap butter with plant-based alternatives and ensure caramel ingredients are free from dairy substances for a delicious, inclusive version of the muffins.

Vegan: Use flax eggs and non-dairy margarine for a compassionate twist on this recipe. Ensure caramel is vegan or make it using coconut cream for a luscious finish.

Low-Carb: Seek specialized low-carbohydrate flour and sugar alternatives to align with dietary restrictions, maintaining flavor without carbohydrates as a focus.

Keto: Focus on reducing sugar intake and increasing pecan content. Consider coconut flour for a keto-oriented adaptation that retains key nutritional qualities.

Paleo: Embrace natural sweetening options with honey or maple syrup, ensuring the balance of flavors while fitting within paleolithic dietary preferences.

Low-FODMAP: Minimize high-FODMAP ingredients, focusing on pecan portion control and suitable low-FODMAP alternatives to maintain gut health without sacrifice.

Troubleshooting Guide

Texture Issues: If muffins turn out dense, check if overmixing the batter or using cold ingredients occurred. Switch to room-temperature elements and gentle mixing.

Flavor Balance: Lessen sugar or salt based on taste feedback, adjusting quantities to perfect the balance of sweet and savory notes for varied preferences.

Temperature Problems: Constant temperature monitoring prevents baking discrepancies. Equip yourself with an oven thermometer for precision cooking.

Equipment Challenges: Mismatched baking equipment affects results. Consider investing in uniform muffin tins and reliable baking sheets for consistency across batches.

Ingredient Substitutions: Mix dry and wet ingredients separately to match replacement flour textures for seamless adaptation when alternative ingredients are used.

Timing Concerns: Finish baking by checking muffin doneness with proper timing, gaining insight into recipe modifications if timing differs based on home equipment.

Recipe Success Stories

Community Feedback: Many home bakers report satisfying results when adding personal touches, like extra caramel drizzle or a pecan praline topping, creating unique muffins.

Variation Successes: A successful adaptation involves adding apples for a fruity accent which complements the caramel, popular during autumn gatherings and holidays.

Adaptation Stories: Various bakers transformed the muffins into a cake form, employing same-ingredient ratios in a cake pan, offering impressive serving alternatives.

Reader Suggestions: Readers rave about incorporating chopped dark chocolate for further depth or golden raisins for sweet surprise bites within each muffin.

Photography Tips: Capturing muffin textures can highlight their appeal. Consider close-up shots with natural lighting and a contrasting backdrop for picturesque, inviting photos.

Frequently Asked Questions

Q1: Can I make these muffins without nuts?
A1: Yes, simply omit the pecans or replace them with a different ingredient, such as chocolate chips or dried fruits, for an alternative texture and flavor.

Q2: What’s the best way to store leftover muffins?
A2: Store muffins in an airtight container at room temperature for up to three days. For longer storage, freezing in an airtight container is recommended.

Q3: How can I ensure my caramel doesn’t burn?
A3: Monitor the caramel closely, using medium heat and constant stirring. When the sugar reaches amber color, promptly remove from heat to avoid burning.

Q4: Is it possible to make a sugar-free version?
A4: Experiment with sugar alternatives like stevia or erythritol in place of regular sugar. Be mindful of substitution ratios to maintain the expected sweetness.

Q5: Can these muffins be made in advance for a party?
A5: Yes, prepare them the night before, ensuring they’re stored in an airtight container. Refresh by lightly warming them before serving at your event.

Q6: Do I need to use fresh pecans?
A6: While fresh pecans offer optimum flavor, you can use packaged pecans as long as they are stored properly and maintain their nutty taste.

Q7: Can I use maple syrup instead of caramel?
A7: While maple syrup has a different flavor profile, it can be used as a substitute, providing a distinct sweetness. Adjust the quantity to avoid overly wet batter.

Q8: How do I prevent muffins from sticking to the pan?
A8: Use paper muffin liners or grease the muffin tin thoroughly before adding the batter. Silicone baking cups offer a non-stick alternative to traditional tins.

Q9: Why are my muffins sinking in the middle?
A9: This may be due to underbaking or overmixing. Ensure proper baking time and handle the batter gently to maintain structure.

Q10: Can these muffins be transformed into a loaf?
A10: Absolutely, extend baking time as needed and cover with foil midway through to prevent the top from over-browning while the center bakes.

Additional Resources


For those looking to explore complementing recipes, consider trying a pecan-infused bread or caramel sauce. These additions can enrich your baking repertoire and provide delectable pairings.

Technique guides are invaluable for further mastering caramelization or exploring creative baking techniques that enhance your muffin-making skills.

Ingredient information provides insights into substitutions and enhancements while elevating the familiar experience. Investigating pecans’ nutritional value can inspire dietary adjustments.

Explore equipment recommendations to tailor your kitchen setup, supporting consistent, professional results with each batch of muffins you bake.

Take advantage of seasonal variations, using fresh produce available in your area to adapt recipes while maintaining the integrity and expected taste of your baked goods.

Join the Conversation


Engage with fellow baking enthusiasts and share your experiences on social media platforms, using hashtags to connect with like-minded muffin lovers.

Consider photography tips for capturing your freshly baked muffins, enhancing their presentation through creative techniques and natural lighting.

Writing recipe reviews offers vital feedback to others in the community, assisting newcomers in expectations and variations they might try for themselves.

Community engagement fosters a collective creativity, encouraging recipe variations from shared experiences. Discover new ideas and inspiration with each interaction.

Welcome suggestions for adaptations, whether through comments or forums, enabling continual learning and innovation in the shared love of baking.

The Recipe

Salted Caramel Pecan Muffins

Serves: 12

Prep Time: 20 mins

Cook Time: 25 mins

Total Time: 45 mins

Kitchen Equipment Needed

  • Muffin tin
  • Electric mixer
  • Caramel saucepan
  • Baking sheet
  • Cooling rack

Ingredients

  • 1 cup all-purpose flour
  • 1/2 cup granulated sugar
  • 1/2 cup unsalted butter, softened
  • 2 large eggs
  • 1/2 cup milk
  • 1 tsp vanilla extract
  • 1/2 tsp baking powder
  • 1/4 tsp baking soda
  • 1/4 tsp salt
  • 1 cup pecans, toasted and chopped
  • 1/2 cup homemade caramel sauce, plus extra for drizzling

Directions

  1. Preheat your oven to 350°F (175°C) and line a muffin tin with paper liners.
  2. Using an electric mixer, beat butter and sugar until light and fluffy. Add eggs, one at a time, mixing well after each addition.
  3. Mix in vanilla extract. In a separate bowl, whisk flour, baking powder, baking soda, and salt.
  4. Gradually add dry ingredients to the wet mixture, alternating with milk, starting and ending with dry ingredients. Fold in pecans and caramel sauce.
  5. Divide batter evenly among muffin cups, filling about two-thirds full. Drizzle tops with additional caramel sauce if desired.
  6. Bake for approximately 20-25 minutes or until a toothpick inserted into the center of a muffin comes out clean.
  7. Allow muffins to cool in the pan for 5 minutes before transferring to a cooling rack.

Recipe Notes

  • Ensure eggs and butter are at room temperature for smooth blending.
  • For a deeper flavor, consider using dark caramel sauce.
  • Experiment with different types of nuts for variation.
  • Muffins are best served the day they are baked but can be stored for later enjoyment.

Irresistible Cinnamon Roll French Toast Bites Perfect for Brunch

Cinnamon Roll French Toast Bites: A Delectable Breakfast Delight

⚖️
Difficulty
Easy

⏲️
Prep Time
10 mins

🕒
Cook Time
15 mins

⏱️
Total Time
25 mins

🍽️
Servings
4

Indulge your taste buds with the delightful flavors of Cinnamon Roll French Toast Bites. Imagine the comforting taste of cinnamon rolls merged with the satisfying crispness of French toast. This heavenly breakfast treat transforms ordinary mornings into something special. Each bite offers a symphony of warm cinnamon, creamy glaze, and golden, toasted perfection.

The balance of sweet and spicy notes makes these bites irresistible. Not only do they fill your kitchen with an intoxicating aroma, but they also provide a visually appealing feast. The enticing swirls of cinnamon dance on a canvas of crispy, golden bread. Enjoy these bites with a side of fresh fruit or a dollop of whipped cream to elevate your breakfast experience.

Our Cinnamon Roll French Toast Bites are designed with simplicity in mind, requiring just a few ingredients and minimal time. It’s a dish that brings joy with every scrumptious bite. Whether you’re preparing breakfast for a special occasion or treating yourself on a regular morning, this recipe delivers in flavor, convenience, and visual appeal.

Quick Recipe Highlights

  • Flavor Profile: Sweet, warm notes of cinnamon combined with the rich taste of eggy French toast. Perfectly balanced with buttery undertones.
  • Texture: A crispy exterior gives way to a soft, tender interior, creating a delightful mouthfeel.
  • Aroma: Inviting scents of cinnamon and butter fill the air, reminiscent of home-baked treats.
  • Visual Appeal: Swirls of cinnamon and a golden-brown finish make for a stunning presentation.
  • Skill Level Needed: Easy enough for beginners yet satisfying to seasoned cooks wanting a quick fix.
  • Special Equipment: No special equipment required, just a skillet or griddle and mixing tools.

Why You’ll Love This Recipe

The Cinnamon Roll French Toast Bites boast an incredible taste that satisfies even the pickiest eaters, combining the comforting flavors of cinnamon and buttery richness. With a crisp exterior and a soft interior, each bite delivers taste and texture harmony. These bites bring warmth and happiness every morning, making them a go-to breakfast luxury.

Preparation is a breeze, taking only a few minutes of your time. The process is straightforward and caters to both quick weekday breakfasts and lazy weekend brunches. Plus, the simple ingredient list makes it an accessible recipe for all culinary skill levels. These bites are even perfect for getting kids involved in the kitchen!

Nutritionally, the recipe provides a balanced start to your day, offering protein from eggs and carbs for energy. Enjoy with fruits for a well-rounded meal or indulge guilt-free. The bites are not only delicious and quick but can also be accommodated into various dietary needs with minor tweaks.

Serving these at family gatherings or brunch parties instantly elevates your hosting game. They encourage communal enjoyment, sparking conversations and connections over shared deliciousness. With customizable toppings, everyone gets to personalize their dish to their preference, adding more fun to your table.

Finally, Cinnamon Roll French Toast Bites are a cost-effective breakfast option. They utilize pantry staples, minimizing the need for elaborate ingredients. Whether you’re feeding a crowd or having a solo breakfast feast, the economic advantage of this recipe truly shines.

The Recipe

Cinnamon Roll French Toast Bites

Serves: 4

Prep Time: 10 mins

Cook Time: 15 mins

Total Time: 25 mins

Kitchen Equipment Needed

  • Mixing bowl
  • Whisk
  • Skillet or griddle
  • Spatula

Ingredients

  • 1 can of refrigerated cinnamon rolls
  • 2 eggs
  • 1/4 cup milk
  • 1 teaspoon vanilla extract
  • Butter, for cooking
  • Optional toppings: syrup, powdered sugar, whipped cream

Directions

  1. Preheat your skillet or griddle over medium heat and lightly grease with butter.
  2. In a mixing bowl, whisk together eggs, milk, and vanilla extract until well combined.
  3. Open the cinnamon rolls and cut each roll into four pieces.
  4. Dip the cinnamon roll pieces into the egg mixture, ensuring they are well-coated.
  5. Place the coated pieces on the skillet, cooking in batches if necessary. Cook each side for 2-3 minutes until golden brown.
  6. Remove from heat and serve with your choice of toppings.

Recipe Notes

  • You can easily double this recipe to accommodate more guests.
  • For a richer flavor, substitute cream for milk.
  • Add a pinch of nutmeg for a warm, spiced undertone.

Deliciously Simple Egg Salad Sandwich Recipe for Quick Meals

Easy Egg Salad Sandwich Recipe: Simple Yet Delicious Delight

⚖️
Difficulty
Easy

⏲️
Prep Time
10 mins

🕒
Cook Time
10 mins

⏱️
Total Time
20 mins

🍽️
Servings
4

Egg salad sandwiches are a classic lunch option, beloved for their creamy and savory goodness. In this recipe, we’ve perfected the balance of flavors and textures to make a truly special sandwich. With soft-boiled eggs at the base, this Easy Egg Salad Sandwich comes together in just minutes, creating a filling and satisfying meal perfect for any day.

This dish combines the rich flavors of mayonnaise with the zesty crunch of celery and onions, all sandwiched between your favorite bread slices. Ideal for a picnic, work lunch, or casual family gathering, this sandwich brings smiles to any table.

Quick Recipe Highlights

  • Flavor Profile: This sandwich focuses on a rich, creamy base with the sharpness of mustard and the slight tang of mayonnaise bringing depth to each bite.
  • Texture: Enjoy the combination of creamy egg salad with a slight crunch from diced celery and onion, all between soft, yielding bread.
  • Aroma: Experience the comforting aroma of eggs bathing in a light undertone of mustard and a hint of mustard’s pungency.
  • Visual Appeal: Bright yellow eggs mingle with fresh herbs, celery, and onions, creating a colorful, appetizing filling.
  • Skill Level Needed: This is beginner-friendly with simple chopping and mixing techniques, requiring minimal cooking knowledge.
  • Special Equipment: No special equipment needed, just your basic kitchen items such as a pot and a mixing bowl.

Recipe Overview

  • Difficulty Level: The recipe is straightforward, involving boiling eggs and mixing ingredients, making it perfect even for cooking novices.
  • Category: This sandwich is ideal for lunch or a light dinner and can even work as a nutritious snack.
  • Cuisine: Rooted in American culinary tradition, this sandwich draws on the love of creamy, filling comfort foods.
  • Cost: Very budget-friendly, mainly using staples like eggs, mayonnaise, and bread, making it an economical choice for families.
  • Season: Perfect for all seasons, particularly delightful in spring and summer when fresh herbs are abundant.
  • Occasion: Great for casual lunches, picnics, and impromptu gatherings, offering a comforting yet presentational dish.

Why You’ll Love This Recipe


Egg salad sandwiches are a great tasting treat, providing a satisfying mix of rich, creamy mayonnaise mingling with the delicate texture of eggs. Each bite offers a balanced taste of tang, saltiness, and the subtle sweetness of onions, leaving a delectable impression.

Preparation couldn’t be easier with this recipe – you’ll have flavorful sandwiches ready in just 20 minutes. The simplicity of execution makes it perfect for a quick lunch, whether you’re at home or packing a meal. The lack of complex cooking steps ensures this recipe is accessible for anyone, even those with limited kitchen experience.

Eggs are not only delicious but are packed with essential nutrients like protein and healthy fats. This sandwich is both a savory indulgence and a nutritious choice, providing your body with energy and sustenance without any guilt.

Perfect for entertaining and quick family meals, egg salad sandwiches are versatile and universally loved. These handcrafted delights can be served as half-sandwich cocktail bites or whole for a full meal, pleasing various palates and dietary preferences.

Egg salad sandwiches are cost-effective, featuring easily accessible ingredients commonly found in most kitchens. It proves that you don’t need to break the bank for flavorful, nutritious meals, making it a staple in many households.

Historical Background and Cultural Significance


The origins of egg salad trace back to when mayonnaise became popular in the late 19th century. This dish quickly grew in acceptance during the early 20th century as part of cafeteria lunches for its cheap, nutritious value.

Egg salad sandwiches hold a beloved place in many cultures, often linked to casual dining and quick fulfilling meals. Its popularity soared due to its comfort food aspect, commonly appearing in American culinary traditions.

Over time, the egg salad sandwich has evolved, with variations in ingredients like paprika, dill, and more exotic choices such as curry powder or bacon bits. Its adaptability led to its continued relevance in modern cuisine as preferences and trends shift.

In every region, the sandwich carries slight twists, reflecting local tastes. From the added crunch of pickles in southern regions to the unique herbs used in northern areas, this adaptability fosters a communal bond of sharing and enjoying simple pleasures.

Ingredient Deep Dive


Eggs are the heart of this dish, celebrated for both their taste and nutrition. They are a symbol of nourishment and culinary versatility, considered a staple in many cuisines globally. Ensure you choose fresh, preferably organic eggs for richness in flavor.

Celery offers more than just crunch; it is a refreshing palate cleanser with low calories and lots of vitamins. Choose firm stalks and refrigerate them to maintain their crispness, vital for adding texture to your salad.

Mayonnaise’s creamy texture can make or break your egg salad, adding the essential lusciousness to every bite. Opt for quality brands or homemade to avoid excessive preservatives and achieve a smooth consistency.

Mustard offers a zesty punch that elevates the entire dish, providing necessary acidity to balance the flavors. Store it in the fridge to maintain its sharp taste and prevent spoilage.

Do not underestimate the raw onion, adding depth with its sharp, pungent flavor. Choose sweet or yellow varieties for subtlety or red for added vibrancy of color and sharpness in the palate.

Common Mistakes to Avoid

  • Overcooking the eggs can result in a rubbery texture. Ensure to boil gently and cool rapidly to maintain their softness.
  • Using too much or too little mayonnaise may affect consistency. Aim for a balanced amount for creaminess without overpowering the other flavors.
  • Failing to season adequately can lead to a bland sandwich. Taste and adjust salt and pepper levels as needed.
  • Chopping ingredients unevenly may result in inconsistent texture. Aim for uniform pieces to achieve balanced bites.
  • Skipping the cooling phase of eggs can jeopardize egg salad quality. Make sure eggs are completely chilled to avoid mashy results.
  • Not using fresh ingredients, especially eggs and herbs, may dull the flavor profile. Always choose fresh for the best results.
  • Using overly soft bread can make the sandwich soggy. Select a more robust bread to handle the salad moisture.
  • Over-mixing can break apart egg whites excessively. Stir gently to keep some chunks intact for a more pleasant mouthfeel.
  • Forgetting to toast bread can result in a lack of textural contrast. Lightly toast for a delightful crispiness against the creamy salad.
  • Rushing preparation may overlook certain nuances of taste balance. Give time to taste and adjust ingredients appropriately.

Essential Techniques


Boiling the perfect egg is key in this sandwich. Perfectly cooked eggs have tender whites and creamy yolks that contribute massively to flavor and texture. Master by starting eggs in cold water, bringing to a rolling boil, and then allowing them to rest covered off the heat for optimal results.

Chopping ingredients to similar sizes ensures that each scoop delivers a balanced burst of flavor and textural variety. Focus on consistent knife skills and utilize a good-quality knife to achieve this effortlessly.

Mixing is crucial but can be tricky; too much mix can crush the eggs into a paste, destroying the desired chunkiness. Employ a gentle fold rather than a vigorous stir to maintain desired structure with just a touch of smoothness needed.

Choosing the right bread – from sturdy ryes to soft whole grains, the bread should complement without overshadowing the egg salad. Consider lightly toasting to avoid sogginess and enhance flavor.

With mayonnaise as the binding agent, achieving a perfect balance is crucial in maintaining desired consistency. Introduce it gradually to control moisture, allowing for fine-tuning of the sandwich’s final mouthfeel.

Pro Tips for Perfect Easy Egg Salad Sandwich


Use older eggs for easier peeling as their thicker skin allows shells to separate more smoothly from the whites. Proper cooling immediately post boiling aids in separating shells cleanly.

Experiment with additional flavor elements such as paprika or curry for subtle but noticeable changes. Adjust these spices in increments until you reach your desired exotic touch.

Include fresh herbs like dill or parsley for enhanced freshness, uplifting flavor complexity while adding visual appeal. Use sparingly, finely chopped, and added last to maintain vibrancy.

Swap half of the mayonnaise with Greek yogurt for added tang and reduced calories without sacrificing creaminess. This modification introduces a protein boost and a creamy texture perfect for summer flavors.

Toasted nuts or seeds provide texture contrast, introducing a delightful crunch that beautifully contrasts the soft essence of the egg salad. Consider options like sliced almonds or sunflower seeds.

A touch of lemon juice can subtly heighten the dish’s overall flavor. Its mild acidity brightens the egg salad, lifting it to a fresher palate.

Customize your egg salad sandwich by incorporating complementary sandwich ingredients like pickles or avocado. Balance the originality while still savoring the classic taste.

Portion control can significantly impact the enjoyment of your sandwich. Practice cutting edges into triangles or adding different slices for variety and suitability across ages and preferences.

Variations and Adaptations

Regional variations of egg salad sandwiches reflect cultural diversity. For instance, adding avocado is popular in California, providing a creamier, healthier twist with additional nutrition.

During winter, consider incorporating a hint of spicy sriracha or hot sauce, creating warmth and bold flavors. This contrast counters external chill while adding vibrant taste interest.

For dietary considerations, replace mayonnaise with vegan alternatives and use tofu as an egg substitute, crafting an entirely plant-based version that doesn’t compromise taste.

Create a heightened flavor profile by exploring additions such as bacon bits or smoked salmon. This unconventional take provides rich umami and complements the inherent creaminess.

Achieve different textures by using various bread types or wraps, lending visual appeal and varying the chewiness factor to satisfy individual preferences unique to your particular sandwich.

For diners with gluten intolerance, simply substitute with gluten-free bread options, enabling everyone to enjoy this delightful dish without dietary restrictions.

Serving and Presentation Guide


Plating technique can turn a simple sandwich into an inviting culinary experience. Cut sandwiches into triangles or squares, arranging artfully on a plate for visual interest.

Garnishing with a sprig of fresh herb or a circle of chopped scallions on top enhances the sandwich’s visual appeal and acts as a fragrance enhancer.

Traditional accompaniments like chips or a crisp side salad balance the meal. The crispness contrasts the creamy sandwich, creating a balanced and satisfying plate.

For a modern presentation, try serving the salad open-faced on toast with microgreens on top, allowing colors and textures to shine clearly.

Temperature matters; serve these sandwiches cool or at room temperature for optimal flavor enjoyment.

Portion control is key as excessive filling can spill, leading to messiness. Add enough salad for a hearty serving, avoiding overflow and ensuring a neat eating experience.

Wine and Beverage Pairing


Consider a light white wine like Pinot Grigio to complement this sandwich, balancing the richness of the egg salad with refreshing, zesty notes.

For non-alcoholic alternatives, opt for iced tea or lemonade, offering a cooling quality that cuts through the creamy richness of the filling.

If you enjoy coffee or tea with your meals, select subtle teas like green tea or lightly roasted coffee that won’t overpower the egg salad’s elegant flavors.

Serve beverages chilled, providing a contrast to the creamy warmth of the sandwich, enhancing refreshment while maintaining flavor cohesion.

Present drinks in fine glassware or coordinated pitchers to complete your meal’s visual harmony while ensuring elegance.

Storage and Shelf Life


Leftovers should be stored in an airtight container in the refrigerator, preserving the egg salad’s freshness and safeguarding against spoilage.

Keep under optimal temperatures (below 40°F) in the fridge and use within 3-5 days to enjoy peak flavor and avoid any health risks.

Utilize food-safe glass or plastic containers to prevent cross-flavor contamination and preserve aromatic qualities.

Signs of spoilage include sour odors or liquid separation, indicating it’s past safe consumption – always trust your senses.

If preparing in advance, avoid pre-mixing herbs or dice onions until serving time to maintain freshness and crisp textures.

Make Ahead Strategies


Prepare eggs and allow them to cool a day ahead, storing them peeled in cold water, ready for easy assembling the following day.

Create the salad base, storing it covered in the fridge, while separately storing added textures like celery or herbs until serving to maintain crunch.

Assess quality impacts on flavor cohesion; pre-mixing components risks making flavors dull over time, so incorporate final touches before serving to keep fresh.

Store assembly components separately whenever possible, combining only as needed, to preserve texture and prevent overpowering flavors from blending prematurely.

Use prepared ingredients to assemble sandwiches promptly; waiting or cooling can lead to staling or sogginess, reducing overall enjoyment.

Adding fresh lettuce or tomato slices right before serving ensures vibrancy, contributing to texture and flavor elevation, otherwise missed by advance preparation.

Scaling Instructions

If making for two, halve ingredient quantities accordingly while maintaining the same methodology for consistent results.

For larger gatherings, double or triple recipe ingredients, ensuring adequate equipment and space to accommodate preparation without overwhelming your kitchen.

Adjust equipment size accordingly – use larger bowls and pans for bigger batches to ensure even mixing and consistent cooking of eggs.

Timing may require modifications; boiling larger quantities of eggs may need extending to guarantee uniform doneness throughout all eggs.

Consider prepared eggs’ storage when planning; use larger containers to accommodate increased egg salad amounts and store the additional components conveniently.

Freezing is generally not recommended as texture and mouthfeel may alter, but chilling for immediate consumption provides wonderfully preserved taste and satisfaction.

Nutritional Deep Dive

This egg salad sandwich provides essential macros, primarily from eggs and mayonnaise, serving as a protein-rich meal suitable for energy sustenance.

Vitamins and minerals from vegetables like celery and onions contribute beneficial micronutrients including Vitamin C and fiber, promoting immune health and digestive comfort.

As with any creamy dish, manage saturated fat intake by moderating mayonnaise amounts or incorporating healthier substitutes.

Portion control ensures balanced consumption, preventing overindulgence while still enjoying abundant flavor without unnecessary calorie increase.

Egg salad’s thoughtful ingredients offer heart-healthy benefits, promoting cholesterol management and weight control, ideal for health-conscious individuals.

Dieters benefit from selecting whole grain bread, adding superior fiber content enhancing fullness, and sustaining energy levels throughout the day.

Dietary Adaptations

Craft a gluten-free version by substituting regular bread with alternatives like gluten-free wraps or breads widely available at health food stores.

Dairy-free seekers can explore mayo alternatives such as avocado or coconut yogurt, presenting different textural and flavor experiences, accommodating dietary needs.

Vegans can transform the recipe by substituting eggs with scrambled tofu, seasoned similarly, paired with vegan mayonnaise to recreate the classic essence sans animal products.

Low-carb enthusiasts may forego bread entirely, opting to serve lettuce wraps full of savory egg salad, offering substantial flavor without carbs present in traditional versions.

Keto adaptors find traditional egg salad components well-aligned with their low-carb criteria, benefitting from its high-fat, adequate-protein profile suitable for maintaining ketosis.

For Paleo adherents, exclude processed elements, opt for homemade mayonnaise variants, and integrate almond flour bread, aligning with whole, unrefined ingredient principles.

Low-FODMAP followers can reduce onion quantities while increasing safe herbs like parsley to accommodate their sensitivities without sacrificing intense flavor experiences.

Troubleshooting Guide


Achieve perfect texture by ensuring you don’t mash the eggs too much – portrait consistent chunks that provide a satisfying bite rather than a homogenized mush.

Balance flavors deftly, adjusting mustard or lemon to cut through creaminess, equalizing contrast seamlessly rather than defaulting to salt alone. This adds depth and character.

Temperature moderation ensures eggs remain creamy rather than congealing or drying out. Store appropriately to preserve ideal texture and flavor longer.

Use reliable mixing tools, as variance in tools may impact consistency – choose a sturdy spatula for smooth blending without over-mixing, maximizing ingredient integrity.

Ingredient substitutions like yogurt for mayo necessitate recalibration; stick to similar textures for optimal adjustability without loss of anticipated creaminess.

Address timing concerns promptly, refrigerating solely when ready-made, avoiding pre-mix oxidation problematics causing dull residual tastes, detracting from enjoyment.

Recipe Success Stories


Our egg salad sandwich recipe has warmed the hearts of many, with stories of recognition at family gatherings and quick lunches at offices, proving its versatility and universal appreciation.

Innovative adaptations have poured in from readers, exploring ingredients like jalapeños for spice enthusiasts or capers for added tang – showcasing individuality and creative potential.

Readers have delighted in photography tips showing sandwich setups garnished and plated creatively, leading to visually appealing presentations shared on social media.

Recipe suggestions have surfaced, highlighting varied regional turns or dietary preferences, vibrating proudly in culinary evolution while respecting classic roots.

Exciting adaptations spotlight new preferences like using quinoa as salad add-ons or additional herbs popular in local settings, embracing diversity in food exploration.

Frequently Asked Questions

Q: Can I prepare egg salad the night before?

A: Yes, you can prepare it a day ahead to save time. Store it covered in the refrigerator and stir fresh herbs before serving to maintain a lively flavor and texture.

Q: Is there a specific type of egg beneficial for this recipe?

A: While fresh eggs are optimal, slightly aged ones peel easier after hard boiling. Choose high-quality, organic eggs to enhance the salad’s flavor profile.

Q: How do I make this recipe healthier?

A: Substitute half the mayo with Greek yogurt or avocado for a lower calorie, higher protein content, amplifying health benefits without affecting rich, creamy mouthfeel.

Q: Can I freeze egg salad?

A: Freezing isn’t recommended due to potential alterations in texture and flavor. This dish is best enjoyed fresh or stored chilled and consumed within days for optimal taste.

Q: How long does the prepared salad last?

A: Stored properly in an airtight container in the fridge, it remains delicious for 3-5 days. Always note signs of spoilage for safety before consumption.

Q: How can I make this spicy?

A: Adding a dash of hot sauce or blending chopped jalapeños into the salad elevates heat levels. Adjust to personal preference while considering necessary cooling elements.

Q: What bread complements egg salad sandwich best?

A: Select sturdy bread like country white or multi-grain, considering offerings like rye for unique notes, ensuring a balance of texture and flavor against egg salad’s creaminess.

Q: Are there vegan alternatives for this recipe?

A: Absolutely! Swap in scrambled tofu or chickpeas for eggs, employ vegan mayo options for texture, allowing vegan adherence while savoring rich tastes.

Q: Can I use pickle relish?

A: Yes, adding pickle relish infuses an additional tangy sweetness which pairs harmoniously with mustard for flavor emphasis—introduce gradually to taste.

Q: How do I avoid a soggy sandwich?

A: Toasting bread adds structural support, preventing moisture retention. Also, serve chilled, or room temperature allowing for adequate salad thickening during resting.

Additional Resources

Explore related recipes like chicken salad or tuna salad sandwiches, offering similar creamy blends with varying protein bases, broadening culinary diversity.

Our technique guides illuminate different aspects of sandwich-making from essentials like proper egg boiling to nuanced garnishing, assisting in mastering creativity in simplicity.

Discover ingredient information promoting sustainable choices and nutritional awareness, emphasizing each component’s role in elevating and maximizing the recipe potential.

Dive into equipment recommendations for ease of preparation, ensuring durable kitchen apparatus aids, contributing to smoother, time-efficient culinary experiences.

Investigate seasonal variations enriching the recipe with complementary ingredients alongside seasonal ingredients, maximizing freshness and adding dynamic culinary connections.

Join the Conversation

Engage on social platforms to share your creations, inspire change in routine preferences while connecting with fellow enthusiasts exploring culinary worlds.

Capture memorable moments by perfecting the art of food photography, showcasing beautifully crafted sandwiches, celebrating visual appeal and creativity.

Rate your experiences and drop reviews, contributing constructive feedback or exploring alternative version successes to enrich collective appreciation.

Engage within our community, exchanging culinary journey highs and discoveries, continually expanding gastronomic capabilities and inspiring shared spirited interest.

Explore recipe variations and personal twists, invite others to embark on culinary experiments, and celebrate innovation while respecting nostalgic remembrances.

The Recipe

Easy Egg Salad Sandwich

Serves: 4

Prep Time: 10 mins

Cook Time: 10 mins

Total Time: 20 mins

Kitchen Equipment Needed

  • Medium pot
  • Mixing bowl
  • Cutting board
  • Knife
  • Spatula or mixing spoon

Ingredients

  • 6 large eggs
  • 1/4 cup mayonnaise
  • 1 teaspoon mustard
  • 1/4 cup diced celery
  • 1/4 cup chopped onion
  • Salt and pepper to taste
  • 4 slices bread of choice
  • Optional: fresh herbs for garnish

Directions

  1. Place eggs in a medium pot and cover with cold water. Bring to a boil over medium-high heat.
  2. Once boiling, cover the pot and remove it from heat. Let eggs sit for 10 minutes for a soft boil.
  3. Drain the water from the pot and transfer eggs to a bowl of ice water to cool thoroughly.
  4. Peel the eggs and chop them into small chunks.
  5. In a mixing bowl, combine chopped eggs, mayonnaise, mustard, celery, and onion. Mix gently to combine.
  6. Add salt and pepper to taste and mix lightly until evenly distributed.
  7. Spoon the egg salad onto bread slices, garnish with fresh herbs if desired, and assemble sandwiches.
  8. Serve sandwiches cut in halves for easy handling.

Recipe Notes

  • For vegan option, consider substituting eggs with tofu and mayonnaise with vegan alternatives.
  • Avoid overchopping eggs for a chunkier salad.
  • To prevent sogginess, toast bread lightly before assembly.

Authentic German Potato Pancakes: A Deliciously Crispy Tradition

Authentic German Potato Pancakes: Crispy, Savory Perfection

⚖️
Difficulty
Easy

⏲️
Prep Time
15 mins

🕒
Cook Time
20 mins

⏱️
Total Time
35 mins

🍽️
Servings
4

Bringing the taste of Germany to your kitchen, these German Potato Pancakes, also known as Kartoffelpuffer, are a beloved traditional dish. Perfectly crispy on the outside and tender on the inside, these pancakes are a delightful fusion of rustic flavors and simple ingredients. Whether you’re hosting a brunch or just craving a hearty snack, these pancakes offer a savory bite that hits all the right notes.

Dig into these authentic German Potato Pancakes and experience a taste that’s both familiar and unique. The golden, crispy exterior gives way to a soft and flavorful interior, offering a wonderful combination of textures in every mouthful. Served warm, they pair beautifully with a variety of accompaniments, making them a versatile addition to any meal.

Let’s explore the steps to creating these incredible German Potato Pancakes, including the tips and tricks you need to master this classic dish. With a few simple ingredients and essential cooking techniques, you’ll be able to recreate this cozy German treat right at home.

Quick Recipe Highlights

  • Flavor Profile: A delightful blend of savory potato with a hint of onion and seasoning.
  • Texture: Crispy outside with a soft, tender interior.
  • Aroma: Earthy potato notes with a touch of onion.
  • Visual Appeal: Golden-brown and perfectly crisp.
  • Skill Level Needed: Basic frying skills required for a crispy result.
  • Special Equipment: A large frying pan and a grater.

Recipe Overview

  • Difficulty Level: Easy. Suitable for novice cooks, requiring basic frying techniques.
  • Category: Breakfast or Snack. Perfect for any time of day.
  • Cuisine: German. Rooted in traditional German home cooking.
  • Cost: Budget-friendly. Potatoes and onions are inexpensive and widely available.
  • Season: Best in winter, but delicious year-round.
  • Occasion: Great for family meals or when you want to impress with simple comfort food.

Why You’ll Love This Recipe


German Potato Pancakes offer a tantalizing mix of crispy edges and a soft, flavorful core. Each bite is a harmonious blend of savory flavors, enriched with simple seasonings that highlight the natural taste of the potatoes. It’s a comforting dish that brings joy to dining tables with its warm, inviting characteristics.

The convenience of this recipe lies in its simplicity. With minimal prep time and straightforward cooking steps, these potato pancakes come together quickly, making them ideal for both quick snacks and large gatherings. They require common pantry ingredients, ensuring ease of preparation whenever the craving strikes.

Nutritionally, these pancakes are packed with the wholesome goodness of potatoes, providing a good source of carbohydrates and fiber. When paired with lighter sides, they offer a balanced meal option that can be enjoyed as part of a healthy diet.

Socially and culturally, serving these pancakes taps into a shared culinary heritage, bringing a touch of European tradition into modern homes. They are a fantastic option for entertaining guests, as their unique flavor profile and satisfying texture are sure to be a hit.

Cost-effectiveness is another benefit. Potatoes, onions, and flour are economical and accessible ingredients. This makes German Potato Pancakes not only delicious but also an affordable choice for individuals and families alike, proving that comfort food doesn’t need to break the bank.

Historical Background and Cultural Significance


The origin of German Potato Pancakes can be traced back to rural German kitchens, where they served as a staple during harsh winters. Potatoes were a reliable crop, and the ease of preparation made these pancakes a go-to meal for farmers looking for a hearty, fulfilling dish.

Culturally, these pancakes hold a cherished place in German cuisine, embodying the rustic, home-cooked meals that are often passed down through generations. They represent a connection to the land and the simplicity of traditional cooking methods.

Over the years, the recipe has evolved, with variations appearing across different German regions. Each locality brings its own twist by incorporating local ingredients, adjusting the thickness, or serving them with distinct condiments like applesauce or sour cream.

Regional variations continue to thrive today, showcasing the diversity of German culinary practices. Whether enjoyed at a local festival or made in a home kitchen, these pancakes offer a delicious window into German food culture and heritage.

Ingredient Deep Dive


Potatoes serve as the heart of the German Potato Pancakes, celebrated for their versatility and comfort. Historically, potatoes have been a reliable food source across Europe, vital during periods of economic hardship. They are rich in vitamin C, potassium, and B vitamins, making them a nutritious base.

Selecting the right potato is crucial. Waxy potatoes are recommended for their low starch content and ability to hold shape, ensuring the pancakes achieve a delightful crispness. Store potatoes in a cool, dry place, away from light to maintain their quality.

For a different take, substitute potatoes with sweet potatoes for a subtly sweet flavor profile. Alternatively, shredded carrots can add extra color and nutrition. Creativity with the type of potato will allow you to experiment while staying true to the essence of the dish.

Onions provide a beautiful depth of flavor, complementing the starchy potatoes. A cornerstone in many traditional German recipes, onions bring an aromatic sweetness when cooked, elevating the overall taste.

Choosing the right onion involves considering sweetness level and storage. Yellow onions are ideal for these pancakes, offering both savoriness and a hint of sweetness. Dryer storage areas are best to prolong shelf life and maintain freshness.

A substitute such as green onions can be used to add a subtle sharpness, or shallots for a more delicate and sweeter flavor variation. Each variation alters the final taste, so feel free to customize based on personal preference.

Common Mistakes to Avoid

  • Not draining potatoes: Excess moisture can prevent crispiness.
  • Using the wrong potato type: Choose waxy potatoes for the best result.
  • Overcrowding the pan: This leads to steaming instead of frying.
  • Not enough oil: Ensures proper frying and crisp texture.
  • Improper heating: Pan should be hot before adding pancakes.
  • Skipping seasonings: Balance flavors with salt and pepper.
  • Thick pancakes: Keep them thin for even cooking and crispiness.
  • Not grating finely: Even shreds cook uniformly for better results.
  • Skipping resting step: Allows starch to bind for cohesive pancakes.
  • Ignoring test pancakes: Start with one to adjust seasoning if needed.

Essential Techniques


Grating potatoes finely ensures they cook evenly and bind together during frying, leading to a cohesive pancake structure. A box grater or a food processor can help achieve the desired texture, which is vital for uniform cooking and ultimate crispness.

Draining excess water from grated potatoes is crucial. Excess moisture can hinder the frying process, resulting in soggy pancakes. Use a clean kitchen towel or cheesecloth to squeeze out as much water as possible, ensuring each pancake turns crispy and delightful.

Frying is the key cooking method for German Potato Pancakes, giving them their signature golden crust. Maintain a consistent medium-high heat and enough oil in the pan to ensure the pancakes fry rather than steam. The right technique results in a beautifully textured finish.

Cooking in batches prevents overcrowding in the pan, ensuring each pancake receives the necessary heat exposure for even browning. It’s best to fry a few at a time, flipping them carefully once the edges turn golden and start to crisp.

Test pancakes are a strategy used by experienced cooks to adjust seasoning. Cooking a small pancake allows you to taste and tweak salt or spices before committing to a full batch, ensuring the final product is perfectly seasoned.

Pro Tips for Perfect German Potato Pancakes


Always start with a hot pan to avoid sticking and ensure a golden crust. Preheating your frying pan and oil will make a noticeable difference in the texture of the pancakes.

Opt for a non-stick or well-seasoned cast-iron skillet for uniform heat distribution. This helps achieve the ideal level of crispness without the frustration of pancakes adhering to the pan.

Enhance flavors by mixing in herbs like chives or parsley, which bring fresh and aromatic notes to the pancakes without overpowering the traditional taste.

Add a touch of flour or potato starch to the potato mixture for better binding, especially if the potatoes seem overly moist. This helps maintain structure during frying.

Use two spatulas for flipping. Gently slide one under the pancake while holding it in place with the other, ensuring a neat and controlled turn.

Serve immediately after frying for the best texture experience. The contrast between the hot, crispy outside and the soft, warm interior is most pronounced just off the stove.

Experiment with toppings like crème fraîche or smoked salmon for a gourmet touch. While traditional, you can elevate the dish by adding toppings that complement the base flavors.

Variations and Adaptations


In different German regions, the addition of ingredients like garlic or spicy peppers can be found, offering a unique twist to the basic recipe. These regional adaptations highlight the diversity in local culinary practices across Germany.

Seasonal adaptations involve incorporating ingredients like zucchini or pumpkin during respective harvests. This not only adds diverse flavor but also vibrant color to the traditional pancakes.

For dietary modifications, gluten-free flour can be substituted for regular flour to make the dish accessible for those with gluten sensitivities. Oat flour or almond flour both serve as excellent alternatives.

Experiment by including grated cheese into the mix for a rich, cheesy flavor layer. Varieties like Parmesan or Gruyère can introduce complexity without overpowering the signature potato base.

Adjust the texture by blending part of the potato mixture for a smooth consistency and leaving the rest finely grated. This combination allows for a creamy interior wrapped in a crisp shell.

Presentation alternatives might include mini pancakes for appetizers or a breakfast platter with different savory toppings. Subtly altering the shape or size makes the pancakes suitable for various serving occasions.

Serving and Presentation Guide


Plating techniques involve arranging pancakes in an overlapping pattern for an appealing presentation. This resembles a neat stack, making the dish visually engaging on any dinner table.

Garnishing ideas include the use of fresh herbs or a light dusting of paprika for an added visual allure. A sprinkle of parsley can accentuate the golden hue of freshly cooked pancakes.

Traditional accompaniments like applesauce offer a sweet contrast to the savory pancakes, balancing flavors beautifully. Alternatively, pair them with sour cream for a creamy and tangy addition.

Modern serving suggestions involve constructing a potato pancake breakfast sandwich with eggs and bacon, creating a meal that’s both hearty and adventurous. This fusion highlights the versatility of the pancake.

Temperature considerations emphasize that German Potato Pancakes are best served warm to enjoy the textural contrast. Avoid pre-cooking them too far in advance, as they may lose their characteristic crispness.

Portion control tips revolve around serving size recommendations of two to three pancakes per person. Adjust according to appetite and the number of side accompaniments available for a balanced meal experience.

Wine and Beverage Pairing


Wine pairings for German Potato Pancakes often include a crisp Riesling due to its acidity and slight sweetness, which complement the savory, starchy potatoes seamlessly. The wine’s fruity undertones balance well with the pancakes.

Non-alcoholic alternatives include traditional apple cider, which mimics the applesauce pairing and enhances the sweetness offered by accompaniments. Iced tea with a hint of lemon also provides a refreshing counterpart.

For coffee or tea pairings, a light, bright tea such as green or white tea complements the flavors without overpowering the subtlety of the onions and potatoes in the dish.

Serve these beverages chilled or at room temperature to maintain a pleasant contrast with the hot, hearty pancakes. Experimenting with different temperatures can create unique tasting experiences.

Consider small tasting portions for guests to explore various beverage pairings. This approach encourages diners to engage more deeply with the meal and discover personal flavor connections.

Storage and Shelf Life


Proper storage for German Potato Pancakes involves refrigerating any leftovers in an airtight container. Lay parchment paper between layers to prevent sticking and maintain rectangular crisp outlines.

Temperature requirements suggest storing at or below 40°F (4°C) to ensure safety and shelf life. This helps preserve texture and prevent spoilage due to ambient moisture and bacteria.

Use containers designed specifically for storage, like glass or quality plastic tubs with secure lids, to maintain freshness. This reduces exposure to air and moisture, keeping pancakes appetizing until ready to eat.

Signs of spoilage include any unpleasant odors or discoloration. If in doubt, it’s safer to discard the refrigerated pancakes rather than risk foodborne illness from spoiled leftovers.

Reheating instructions recommend using an oven or air fryer to restore crispness without drying them out. Aim for a medium heat setting and monitor closely.

For freezing, allow pancakes to cool completely, then freeze individually on a baking sheet. Once firm, store in a freezer bag or container for up to three months. Reheat directly from frozen to retain quality.

Make Ahead Strategies


A prep timeline involves grating and mixing the potato mixture up to a day ahead, storing in the fridge until ready to cook. This allows flavors to meld and starch to settle for better binding.

Storage between steps means keeping the uncooked pancake mixture covered and cool. Utilize a sealed container to avoid exposure to air and moisture, ensuring the mixture remains fresh until used.

Quality impact assessment involves recognizing that cooked pancakes retain quality well but are best fresh. anticipate slight declines in crispness with reheated batches and adjust methods accordingly.

Assembly tips focus on shaping patties before frying in uniform sizes. This promotes even cooking by ensuring that each pancake receives consistent heat during its time in the pan.

Reheating guidelines highlight reinvigorating crispness using dry heat methods like oven warming or a skillet. Avoid microwaving, as this can result in a soggy texture.

For incorporating fresh element additions, consider reserving some finely chopped fresh herbs to sprinkle on just before serving. This infuses the pancakes with a burst of color and flavor.

Scaling Instructions


To halve the recipe, simply reduce each ingredient proportionally. This is particularly useful for smaller gatherings or individual servings without unnecessary leftovers.

Doubling or tripling requires careful attention to cooking batch size. Avoid crowding the pan by frying in manageable numbers, and utilize two pans if necessary for efficiency.

Equipment adjustments may include investing in a larger grater or food processor for quicker ingredient prep when scaling up the recipe. Larger pans and utensils help maintain frying speed and consistency.

Timing modifications might involve assembling the pancakes at slightly staggered intervals, ensuring freshly made batches are hot and ready when needed for serving.

Storage considerations should include expanded container sizes to handle increased quantities of both prepared and leftover pancakes, especially when hosting larger events or preserving meals.

Nutritional Deep Dive


A macro breakdown reveals each pancake’s balance of carbohydrates from potatoes and flour, moderate fats from frying, and low yet valuable protein contributions. This balance emphasizes energy provision.

Micronutrient analysis highlights key vitamins like C and B6 alongside minerals such as potassium. These contribute positively to daily nutritional requirements and support overall health.

Health benefits include dietary fiber from potatoes and onions, aiding digestion and maintaining heart health when consumed within balanced diets.

Dietary considerations for this dish encompass options for reducing frying oil quantity or transitioning to a higher-quality oil for improved heart health aspects and nutritional value enhancement.

Portion analysis underscores serving size awareness to calculate caloric intake accuracy. Use information per serving to align with diet goals positively.

Weight management tips recommend pairing German Potato Pancakes with lighter sides like salad or steamed vegetables, maintaining a balanced meal approach.

Dietary Adaptations


For gluten-free adaptations, replace regular flour with a suitable alternative like rice flour or certified gluten-free oat flour, ensuring safety for those with gluten intolerance.

Dairy-free versions involve omitting any milk or cream typically used to enhance the potato mixture or toppings, focusing on alternate binder ingredients.

Transitioning to vegan recipes necessitates the removal of any animal-derived products, such as eggs, replacing them with flax or chia seed ‘eggs’ for binding.

By adhering to a low-carb diet, consider substituting flour altogether with almond flour or reducing potato quantity while introducing more protein-packed veggies for balance.

Keto adjustments see further potato reduction, increasing of eggs and high-fat alternatives like cheese or butter for frying, adhering to macronutrient guidelines.

Incorporating paleo lifestyles would involve focusing on whole, unprocessed potatoes while avoiding non-paleo binders, aligning closely with conventional methods.

Low-FODMAP modifications might include reducing onion amounts or substituting with scallion tops for milder, digestive-friendly flavor.

For other specific diets, ingredient understanding and swapping ensure adherence to dietary preferences while retaining the traditional preparation method.

Troubleshooting Guide


Address texture issues by spacing out frying batches, ensuring warmth and even oil distribution to achieve crisp outside and well-cooked inside while avoiding overcrowding.

Flavors balance may require initial taste testing of the mixture and adjusting salt, spices, or additional herbs before declaring finished. Fresh sampling ensures seasoning precision.

Temperature problems are managed through gradual heating adjustments, confirming oil’s hotness before pancake introduction and avoiding flipping until bases are visibly set.

When facing equipment challenges like sticking pans, ensure thorough preheating and adequate oil usage alongside potentially cooking on non-stick surfaces or cast iron pans.

Ingredient substitutions consider mindful replacements maintaining dish integrity. Choose from lists of proven alternatives like potato types before adapting, ensuring close alignment.

Timing concerns for meal coordination involve holding cooked pancakes on a warming plate until full readiness is achieved. Stagger production within guidelines of optimal freshness.

Recipe Success Stories


Community feedback highlights German Potato Pancakes as a consistently popular choice, sparking shared memories and cultural connections in households around the globe.

Variation successes reveal burgeoning creativity among cooks, trying inventive toppings from smoked salmon to tangy marmalades, demonstrating the range and adaptability of flavor pairings.

Adaptation stories depict adventurous endeavors exploring complementary components like grated colorful vegetables, adding not only novelty and nutrition but new dimensions to family classics.

Reader suggestions often express enthusiasm for adaptation, encouraging tweaks to accommodate local ingredients or dietary needs, celebrating shared culinary evolution through community learning.

Photography tips emphasize capturing the pancakes’ golden hue and contrasting textures, offering sharpness-focused images in well-lit conditions broadly shared across platforms.

Frequently Asked Questions

How do I get my pancakes to stay together without falling apart?
Ensure that excess moisture is sufficiently drained, and consider adding a binding agent like flour or egg. Fry at a moderate temperature to allow proper shaping.

Can I prepare the batter ahead of time and cook later?
Yes, prepare the batter up to a day in advance and store covered in the refrigerator. Drain any additional moisture before frying.

What potatoes work best for German Potato Pancakes?
Waxy potatoes like Yukon Golds maintain their shape and achieve the desired crispy texture, avoiding overly starchy or mealy varieties.

Are there traditional occasions for serving these pancakes?
German Potato Pancakes are popular at holiday markets or family gatherings as casual snacks or meal components, available in diverse cultural contexts.

What’s the best way to reheat leftovers and retain crispness?
Reheat using an oven or air fryer for optimal texture restoration, avoiding sogginess common with microwaving owing to transient sudden reheating.

How can I make these pancakes healthier without compromising taste?
Transition to using lower-sodium seasonings, baking instead of frying, or minimizing addition of oil for lighter preparation without overwhelming change.

Can I freeze cooked German Potato Pancakes?
Yes, follow cooling before individual freezing methods and reheat thoroughly from frozen to preserve taste, maintaining separation for non-stick layers.

What variations pair well with traditional potato pancake flavor?
Regional jumps to sweet or spicy additives, and embracing seasonal veggies offer depth, allowing your dish to remain contemporarily inventive yet authentic.

Should I peel the potatoes before grating?
Peeling is advisable for predictability, minimizing skin texture interference and ensuring consistent golden finishes while accommodating personal preferences.

Are there ideal toppings for these pancakes?
Applesauce and sour cream are traditional, providing sweet-spicy contrasts or rich creaming, respectively; explore varied condiments respecting individual palates.

Is there a gluten-free option for these pancakes?
Yes, substitute flour with gluten-free alternatives like rice flour or almond flour while maintaining structural integrity during frying.

What’s an effective way to control portion distortion?
Aim to keep individual pancake sizes uniform with imposed circular shaping; monitor proportions visually by consistent initial scoop approximation.

Additional Resources


Explore related recipes, such as latkes or hash browns, offering different national takes on simple shredded potato dishes, helping expand your cultural hit list.

Technique guides on precise grating and frying illustrate step-by-step mastery, presenting additional knowledge and confidence beyond simple written instructions.

Ingredient information touts selections, alternatives, and optimum alternatives while providing historical context, fostering informed decision-making around culinary choices and their impacts.

Equipment recommendations include well-reviewed kitchen gadgets enhancing preparation and reliability, keeping ingredient orchestration smooth and uninterrupted.

Seasonal variations emphasize capitalizing on harvest months, creatively shifting recipes towards peak flavor and nutritional potency alongside respecting temporal climates.

Join the Conversation


Sharing your experience creates a vibrant community of recipe enthusiasts, offering a global stage for engaging through virtual gatherings on platforms for food-lovers.

Photography tips encompass creating setups that showcase recipe successes, highlighting crispy textures and presentation prowess to enrich scenery and flavor translation.

Recipe reviews provide invaluable feedback and adaptations for others, inspiring creativity, knowledge-building, enthusiasm while impacting positive global culinary exchange.

Sparking engagement encourages dialogue, resource-sharing, and reassurance for culinary abilities with mutual support, recognizing collective contributions towards fulfilling culinary journeys.

Recipe variations nurtured through shared experiments encourage feet into unexplored territory, sparking illumination and appreciative nods to a collective appreciation of heritage meals.

The Recipe

German Potato Pancakes

Serves: 4

Prep Time: 15 mins

Cook Time: 20 mins

Total Time: 35 mins

Kitchen Equipment Needed

  • Large frying pan
  • Grater
  • Mixing bowl
  • Spatula
  • Kitchen towel or cheesecloth

Ingredients

  • 4 medium waxy potatoes, peeled and grated
  • 1 small onion, grated
  • 1 egg
  • 3 tablespoons flour
  • Salt and pepper to taste
  • Vegetable oil for frying

Directions

  1. Grate the potatoes and onion, then carefully drain the excess liquid using a kitchen towel or cheesecloth.
  2. In a mixing bowl, combine grated potatoes, onion, egg, flour, salt, and pepper. Mix until ingredients are well incorporated.
  3. Heat oil in a large frying pan over medium-high heat.
  4. Scoop a spoonful of the potato mixture and shape it into a pancake. Carefully place it in the hot pan.
  5. Cook each side for about 3-4 minutes, or until beautifully golden brown.
  6. Serve warm with applesauce or sour cream, as desired.

Recipe Notes

  • For added flavor, consider incorporating fresh herbs like chives or parsley into the mixture.
  • If the mixture seems too wet, add a bit more flour to aid binding.
  • Leftovers can be reheated in the oven to preserve crispness.

Delicious Homemade Sausage and Cheese Bread Recipe for Every Meal

Sausage and Cheese Bread: A Delightful Savory Treat

⚖️
Difficulty
Medium

⏲️
Prep Time
20 mins

🕒
Cook Time
40 mins

⏱️
Total Time
60 mins

🍽️
Servings
8

Imagine a warm, savory loaf of sausage and cheese bread, rich with the aroma of sizzling sausages and melted cheese enveloped in a golden-brown crust. It is the perfect addition to brunches, hearty enough to stand alone for breakfast, or as a delightful side at dinner. This sausage and cheese bread recipe celebrates the union of two beloved ingredients, balancing the slight saltiness of sausage with creamy, gooey cheese to create an irresistibly delicious bread experience.

The texture of our sausage and cheese bread is unparalleled, with a crust that provides the necessary crunch and a soft, cheesy interior that satisfies. The combination of cheeses melts to perfection, enveloping the spicy sausage with a blanket of rich flavor. It is not only a feast for your taste buds but also for your senses, as each element comes together with every bite, drawing you into its comforting embrace.

Making sausage and cheese bread is not just about baking; it is a journey of culinary indulgence. Whether you are looking to impress guests, nourish your family, or simply enjoy a personal treat, this bread fits all occasions. From the bustling kitchen table for a family brunch to a quick, indulgent snack, this recipe’s versatility makes it a household favorite.

Quick Recipe Highlights

  • Flavor Profile: A delightful blend of savory sausage and creamy cheese creates a symphony of flavors that tantalize the taste buds.
  • Texture: The bread boasts a crunchy crust with a soft, cheese-laden interior, offering a pleasing contrast with every bite.
  • Aroma: The medley of melted cheese and spices from the sausage fills the air with a warm, inviting scent that tempts even the fullest of appetites.
  • Visual Appeal: The golden-brown crust kissed by melted cheese spots provides an irresistible visual delight that makes serving it a special occasion in itself.
  • Skill Level Needed: Intermediate skills are perfect for this recipe; familiarity with kneading and dough preparation is helpful.
  • Special Equipment: A good loaf pan and a sturdy mixer for dough are recommended to ensure even cooking and perfect texture.

Recipe Overview

  • Difficulty Level: This recipe sits at an intermediate level, ideal for those who have some experience with dough preparation. Although it involves multiple steps, each step is straightforward.
  • Category: Perfect as a breakfast, brunch, or party appetizer, sausage and cheese bread excels as a multipurpose crowd-pleaser.
  • Cuisine: While having roots in American comfort food traditions, this bread embraces influences from European charcuteries and cheese craftsmanship.
  • Cost: Approachable and budget-friendly, most of the ingredients are pantry staples and affordable deli options, making it easy on your wallet.
  • Season: Enjoy the bread year-round; it pairs well with any seasonal produce or soup.
  • Occasion: From casual family gatherings to fancy soirées, this bread finds a seat at every table, arguably improving any dish it accompanies.

Why You’ll Love This Recipe


The taste and texture of this sausage and cheese bread are truly the showstoppers. With the crust giving way to the melt-in-your-mouth softness of cheese blended perfectly with the hearty sausage, each bite promises comfort and satisfaction. The preparation is straightforward, giving you the ability to whip up a fresh loaf in just about an hour, providing you a convenient yet impressive homemade bread option.

You’ll appreciate how nutritionally satisfying this bread can be, packing in protein-rich sausage and cheese that offer not only taste but substantial nutrition. Serving this at social events or friendly gatherings can transform any scene into a warm and welcoming atmosphere, inviting guests to indulge and engage over shared enjoyment.

The economical value cannot be overstated; with affordable ingredients readily available in most homes, creating this hearty bread is both cost-effective and indispensable for those who love to cook efficaciously. Each slice can be counted on for filling goodness, making it a wholesome, trustworthy choice for your culinary repertoire.

Historical Background and Cultural Significance


The fusion of sausage and cheese into one delectable bread is a modern invention while drawing on the culinary heritage of meat-filled breads. Historically, the concept of bread filled with meats is found globally, from Italian stromboli to Chinese pork buns, signifying a universal love for hearty, portable meals. The sausage and cheese bread combines these elements into a distinctly contemporary form.

Culturally, this recipe embodies adaptability. American cooking often reflects the innovation born from diverse food traditions merging into singular new dishes. The rise of artisan bread and gourmet indulgences in the 21st-century food scene paved the way for such creative combinations to become mainstream.

Although variations of savory breads exist worldwide, the inclusion of rich cheeses in baking owes much to European dairying techniques and charcuterie that celebrate the art of fermentation and aged meats. Over time, regional adaptations have emerged, making this a canvas for personal tastes and local ingredients.

Ingredient Deep Dive


Sausage, a seasoned meat product traditionally enjoyed across European and American cuisines, brings not only flavor but cultural heritage to the bread. When choosing sausages, consider those with natural casings and a blend of spices that appeal to you, whether spicy, sweet, or herbed. Store sausage in a refrigerator and use promptly after buying, as it has a short shelf life to prevent spoilage.

Cheese, in its varied forms, adds the creamy texture and flavor a good sausage bread demands. Cheddar, mozzarella, or even gouda can be used interchangeably, each providing a unique taste element. When purchasing cheese, opt for blocks instead of pre-shredded to avoid added fillers and to ensure the freshest flavor. Store cheese in wax paper for the longest life and use freshly shredded or diced for this recipe.

Common Mistakes to Avoid

  • Overworking the dough can lead to a tough texture. Knead just until smooth and elastic.
  • Using cold ingredients might slow yeast activation; let them come to room temperature before starting.
  • Skipping the dough rest may result in a dense bread. Allow it to double in size for fluffiness.
  • Neglecting to properly preheat the oven could lead to uneven cooking.
  • Being hasty with the cooking time check can leave the bread undercooked in the center.
  • Using low-quality sausage or cheese can affect flavor. Opt for those with enriched spices or natural profiles.
  • Not greasing the pan sufficiently could make removal difficult and damage the loaf.
  • Skipping the cooling process may cause the bread to crumble under a knife.

Essential Techniques


Kneading is paramount, it develops gluten which is the bread’s structure. Master it by adopting a rhythmic, pressure-driven motion. Too little kneading results in weak structure; too much makes the bread rubbery. Aim for a dough that springs back when poked lightly.

Yeast activation requires a delicate touch with warm water – not hot – since it jumpstarts rising. Stir gently to dissolve but avoid overheating, as this will kill the yeast. Watch for small bubbles forming, indicative of proper activation.

Pro Tips for Perfect Sausage and Cheese Bread


For an extra-crisp crust, consider a light egg wash before baking. This adds a sheen and slight texture shift, playing up the visual appeal. When using different types of cheese, mix them thoroughly for an evenly distributed cheesy experience.

Trying a spicy sausage or adding peppers can give your bread a delicious kick, transforming it into a fiery entrée or side dish. Incorporate garlic or herbed cheese for an elevated culinary element. Remember, the simpler the dough, the more pronounced the added flavors.

Variations and Adaptations


Different meats such as chorizo or turkey sausage can replace traditional pork, catering to varying taste profiles or dietary restrictions. Seasonal ingredients, like sundried tomatoes or spinach, can be added for a fresh take during specific times of the year.

For those avoiding gluten, gluten-free flour variants can be used, although adjustments in liquids may be needed. Vegetarian versions can feature plant-based sausages, which emulates the familiar texture while providing an ethical alternative.

Serving and Presentation Guide


Slice this loaf into generous pieces and arrange them on a rustic wooden board for a charming, homey display reminiscent of artisanal bread shops. Garnish each slice with fresh herbs or a light parmesan sprinkle for a refined touch. Serve warm for maximum flavor impact, pairing well alongside fresh salads or a bowl of hearty soup.

Wine and Beverage Pairing


Complement the rich tones of this bread with a medium-bodied red wine like a Chianti or Merlot, accentuating the hearty elements of sausage without overshadowing the delicate cheese. Non-alcoholic options such as iced tea with hints of citrus or a spicy ginger ale offer refreshing counterpoints.

Storage and Shelf Life


Store this bread within a tight-sealing, food-safe container to prevent air exposure. Refrigeration is suitable for up to five days, while gentle reheating can restore its softness. Avoid moisture-laden environments which hasten spoilage and reduce shelf-life significantly.

Freezing is possible for longer preservation, best done before baking to preserve the texture after thawing. When reheating, use a low oven or toaster to maintain crispness without over-drying the bread’s interior.

Make Ahead Strategies


Consider preparing multiple loaves, freezing them before their final rise. This allows flexibility in using the bread on demand with only minimal notice, maximizing freshness through deferred baking.

Plan to bake extra and store in portions conducive to individual meals. This ensures that, whether entertaining or enjoying alone, your preparation and enjoyment time are efficiently balanced.

Scaling Instructions


When scaling up or down, remember to adjust the yeast proportionately to maintain proper rising times. Use larger pans for increased yields or multiple small pans for control over bread dimensions.

Timing must adapt to any significant changes in bread size, potentially impacting cooking times based on volume and pan size, so careful monitoring remains crucial.

Nutritional Deep Dive


A thorough breakdown reveals that in moderation, sausage and cheese bread can be part of a balanced diet. With proteins drawing from both sausage and cheese, the bread supports muscle maintenance while also offering essential fats.

Analysis of micronutrients such as calcium and iron shows positive contributions, especially in fortification via cheese, supporting bone health and red blood cell formation, respectively.

Dietary Adaptations


By introducing alternative flours, gluten-conscious eaters can enjoy this bread with suitable consistencies easily achievable through trial and error. Dairy-free adaptions using substitutes like almond cheese provide similar textures when prepared with binder agents like agar.

For those seeking a vegan approach, exclude animal products entirely by substituting veggie sausages and cheeses. These plant-based alternatives are respectably close to authentic taste when paired correctly.

Troubleshooting Guide


If a dense texture arises, extended kneading or improper yeast activation may be responsible. Ensure both practices follow exact instructions for best results. When flavor falls flat, experimenting with herbaceous seasonings or spicier sausage variations can salvage the dish.

For bread that’s overly dry, heed to moisture ratios in ingredients and remember that resting time may be increased if environmental factors hasten dryness.

Recipe Success Stories


Feedback from our community highlights how varying component levels has created uniquely successful versions of this bread. Many users report that using cheddar and pepper jack combinations boosts flavor complexity immensely, earning high praise at shared events.

Photos of finished products, presented with garnish attachments, emphasize the artistic culinary creativity among our engaged readers. The combination of personal ideas and foundational recipe elements continually spurs new interest.

Frequently Asked Questions

Q: Can this bread be made a day in advance?
A: Yes, simply store it in a cool space and reheat gently before serving to maintain texture and warmth.

Q: Is there a vegan sausage you recommend?
A: Beyond Meat and Tofurky both present excellent plant-based sausage options suitable for this dish.

Q: What types of cheese work best for melting?
A: Mozzarella, cheddar, and gouda are all optimal choices, providing creamy melting qualities and a rich taste.

Q: How can I prevent my bread from sticking?
A: Liberal use of oil or butter on the pan edges beforehand typically ensures clean, easy release.

Q: Are there any spice combinations worth trying?
A: Adding chili flakes or garlic powder to the dough can really kick up the flavor profile uniquely.

Q: How to handle dough that is too sticky?
A: Add flour sparingly, tablespoon by tablespoon, kneading each time until achieving desired consistency.

Q: What container works best for storage?
A: Airtight plastic or glass containers preserve softness while inhibiting mold growth effectively.

Q: Is parchment paper needed for baking?
A: It’s optional, yet using it helps prevent browning too fast on the underside, offering even cook results.

Q: Can the bread be grilled?
A: Stretch dough longer before assembly, and lightly grill each side for a distinct, charred enhancement.

Q: Why hasn’t my bread risen properly?
A: Ramifications can include insufficient yeast level, wrong water temperature, or constrained resting conditions.

Additional Resources


Explore related recipes that can complement your sausage and cheese bread, such as hearty soups and lemony salads that bring freshness and balance to your meal. Dive into guides on yeast activation or perfecting bread crust textures for those eager to elevate their baking proficiency.

Our ingredient spotlights delve into sourcing and storing pantry staples, promoting ideas for curated kitchen setups capable of executing recipes like this one flawlessly. Such resources enrich understanding and foster greater confidence in striving for culinary excellence.

Join the Conversation


Share your own creations on social media using our unique hashtag to connect with fellow bread lovers. Engage with community posts, exchange tips, and submit photos, turning experience exchange into an inspiring culinary community dialogue.

Our forum invites critiques, variations, and constructive exchanges to continuously push the boundaries of what is possible with this versatile recipe, nurturing dynamic discussions and stories worth telling.

The Recipe

Sausage and Cheese Bread

Serves: 8

Prep Time: 20 mins

Cook Time: 40 mins

Total Time: 60 mins

Kitchen Equipment Needed

  • Loaf pan
  • Mixing bowls
  • Rolling pin
  • Baking sheet
  • Sharp knife
  • Brush (for washing)

Ingredients

  • 3 cups all-purpose flour
  • 1 packet active dry yeast
  • 1 cup warm water
  • 2 tablespoons sugar
  • 1 teaspoon salt
  • 1 egg, beaten
  • 1 pound sausage, cooked and crumbled
  • 1 cup shredded cheese (cheddar or mozzarella recommended)
  • 2 tablespoons melted butter

Directions

  1. Preheat your oven to 375°F (190°C). Grease a loaf pan generously.
  2. In a small bowl, dissolve the yeast and sugar in warm water. Let stand until frothy, about 10 minutes.
  3. In a large bowl, combine flour and salt. Stir in the yeast mixture and egg until the dough forms.
  4. Knead on a lightly floured surface for about 8-10 minutes until smooth and elastic.
  5. Place the dough in a greased bowl, cover with a damp cloth, and let rise until doubled, about 1 hour.
  6. Roll the dough into a rectangle. Sprinkle with sausage and cheese, then roll tightly from the long edge, sealing the seam.
  7. Place the rolled dough seam-side down in the prepared loaf pan. Allow to rise while you preheat the oven.
  8. Brush the top with melted butter and bake for 30-40 minutes, until golden brown and deeply fragrant.
  9. Cool in the pan for 10 minutes before turning onto a wire rack.

Recipe Notes

  • For added variety, consider adding roasted peppers or olives to the filling.
  • The bread can also be cooked on a baking sheet for a crisper edge.

Deliciously Moist Cinnamon Applesauce Muffins: Perfect for Breakfast

Cinnamon Applesauce Muffins: A Warm and Cozy Delight

These Cinnamon Applesauce Muffins are the perfect comforting treat for any time of the day. With the main keyword cinnamon applesauce muffins, this recipe offers an irresistible combination of warm spices and moist texture. Imagine the sweet and spicy aroma wafting through your kitchen as you prepare these delightful muffins.

Why You’ll Love This Recipe

These Cinnamon Applesauce Muffins are a healthy twist on classic muffins, offering a moist texture without excess oil or sugar. They are perfect for breakfast, a snack, or even as a light dessert. The muffins are infused with the comforting flavor of cinnamon, balanced with the natural sweetness of applesauce. Suitable for any occasion, they’re a versatile addition to any baker’s repertoire, guaranteed to delight kids and adults alike.

What’s truly special about these muffins is how quick and easy they are to make. Whether you’re a seasoned baker or a kitchen novice, you’ll find this recipe simple and rewarding. Plus, they’re a great way to use up any leftover applesauce, turning a simple ingredient into a truly delightful baked good.

Context/Background

Cinnamon Applesauce Muffins have a long history rooted in traditional American baking. Applesauce has been used for centuries as a natural sweetener and moisture enhancer in baked goods. The technique of using applesauce in place of oil or butter not only makes the muffins healthier but also adds a depth of flavor that plain fats cannot provide. Cinnamon, known as the “spice of life,” has been cherished for its warm and inviting aroma, making it a staple in many autumn-inspired dishes.

Recipe Details

Serves: 12 muffins

Prep Time: 10 minutes

Cook Time: 20 minutes

Total Time: 30 minutes

Ingredients

  • 1 1/2 cups all-purpose flour
  • 1 cup unsweetened applesauce
  • 1/2 cup granulated sugar
  • 1/4 cup vegetable oil
  • 1 teaspoon vanilla extract
  • 1 large egg
  • 1 teaspoon baking soda
  • 1/2 teaspoon salt
  • 1 teaspoon ground cinnamon
  • 1/4 teaspoon nutmeg

Directions

  1. Preheat your oven to 350°F (175°C) and line a 12-cup muffin tin with paper liners.
  2. In a large bowl, whisk together the applesauce, sugar, oil, vanilla extract, and egg until smooth.
  3. In another bowl, combine the flour, baking soda, salt, cinnamon, and nutmeg.
  4. Gradually add the dry ingredients to the wet ingredients, stirring until just combined.
  5. Spoon the batter evenly into the prepared muffin tin.
  6. Bake for 18-20 minutes, or until a toothpick inserted into the center of a muffin comes out clean.
  7. Allow the muffins to cool in the tin for 5 minutes before transferring to a wire rack to cool completely.

Tips for Perfect Cinnamon Applesauce Muffins

  • Do not over-mix the batter; this ensures the muffins are soft and tender.
  • Use fresh, high-quality cinnamon to enhance the muffins’ flavor.
  • Consider adding chopped nuts or raisins for added texture.
  • For a lower sugar option, reduce the sugar by half or use a sugar substitute.

Serving Suggestions

Serve these muffins warm with a pat of butter, or enjoy them with a cup of coffee or tea. They also make a delightful addition to a brunch spread alongside fresh fruit and yogurt.

Storage and Leftovers

Store the muffins in an airtight container at room temperature for up to 3 days. For longer storage, freeze them for up to 2 months. To thaw, leave at room temperature for several hours or microwave individually for a quick warm-up.

Final Thoughts

These Cinnamon Applesauce Muffins are not only easy to make but also incredibly satisfying. Their unique taste and texture make them a must-try. Perfect for any time of year, they offer a comforting taste of home. Give this recipe a try and experience the cozy warmth of cinnamon combined with the delightful sweetness of applesauce.

Recipe Notes

  • For a vegan version, replace the egg with a flaxseed egg.
  • Whole wheat flour can be used for a heartier muffin.
  • Experiment with spices – adding ginger or cloves can provide a festive twist.

Irresistible Maraschino Cherry Chocolate Chip Cookies for Sweet Lovers

“`html

Maraschino Cherry Chocolate Chip Cookies: A Sweet Twist on a Classic Treat

If you’re a fan of chocolate chip cookies but are looking for a delightful twist, these Maraschino Cherry Chocolate Chip Cookies are the perfect answer. Combining the chewy goodness of classic cookies with the sweet, slightly tart flavor of maraschino cherries, this recipe is sure to become a favorite.

Why You’ll Love This Recipe

These Maraschino Cherry Chocolate Chip Cookies are a must-try for anyone who loves a bit of a surprise in their baked goods. The cherries add a burst of color and flavor, making them ideal for festive occasions or as an unexpected addition to your cookie repertoire. Not only are they visually appealing, but the combination of chocolate and cherry creates a mouthwatering taste profile that is hard to resist.

Whether you’re baking for a holiday, a family gathering, or just because you have a sweet tooth, these cookies are versatile enough to fit any occasion. Their charming appearance and delectable taste make them perfect for sharing and spreading joy.

Context/Background

The idea of adding maraschino cherries to cookies isn’t entirely new but tends to surprise those who try them for the first time. Maraschino cherries, known for their sweet, preserved flavor, originated in Europe and became a popular cocktail and dessert garnish in America during the early 20th century. This recipe takes that nostalgic taste and blends it with the all-American chocolate chip cookie tradition, creating a delicious fusion that honors both ingredients.

Recipe Details

Serves: 24 cookies

Prep Time: 15 minutes

Cook Time: 12 minutes

Total Time: 27 minutes

Ingredients

  • 1 cup unsalted butter, softened
  • 3/4 cup granulated sugar
  • 3/4 cup brown sugar, packed
  • 2 large eggs
  • 1 teaspoon vanilla extract
  • 2 1/4 cups all-purpose flour
  • 1 teaspoon baking soda
  • 1/2 teaspoon salt
  • 1 cup semisweet chocolate chips
  • 1 cup chopped maraschino cherries, drained

Directions

  1. Preheat your oven to 350°F (175°C). Line baking sheets with parchment paper.
  2. In a large mixing bowl, cream together the butter, granulated sugar, and brown sugar until light and fluffy.
  3. Add the eggs and vanilla extract, mixing until combined.
  4. In a separate bowl, whisk together the flour, baking soda, and salt. Gradually add to the wet ingredients, mixing just until incorporated.
  5. Fold in the chocolate chips and maraschino cherries.
  6. Drop rounded tablespoons of dough onto the prepared baking sheets, leaving space between each cookie.
  7. Bake for 10-12 minutes, or until the edges are lightly golden. Allow cookies to cool on the baking sheet for a few minutes before transferring to a wire rack to cool completely.

Tips for Perfect Maraschino Cherry Chocolate Chip Cookies

  • Ensure the butter is at room temperature to facilitate easy creaming.
  • Drain the maraschino cherries thoroughly to prevent excess moisture in the dough.
  • For an extra depth of flavor, consider adding a pinch of almond extract.
  • Chill the cookie dough for at least 30 minutes to prevent spreading during baking.

Serving Suggestions

These cookies are delicious when served with a glass of milk or alongside a scoop of vanilla ice cream. They also make a fantastic addition to a holiday cookie platter or as a sweet gift for friends and family.

Storage and Leftovers

Store the cookies in an airtight container at room temperature for up to a week. You can also freeze the dough for up to three months; simply thaw in the refrigerator before baking.

Final Thoughts

Don’t miss out on trying these Maraschino Cherry Chocolate Chip Cookies. Their unique taste and fun appearance make them a standout treat. Whether shared or enjoyed alone, they promise to bring a smile to anyone’s face.

Recipe Notes

  • For a less sweet version, consider using dark chocolate chips instead of semisweet.
  • You can substitute a gluten-free flour blend to accommodate dietary restrictions.
  • For a nutty twist, add a half-cup of chopped almonds or pecans to the dough.

“`

Delicious Pomegranate Raspberry Chia Dessert: A Fresh and Tangy Delight

“`html

Pomegranate Raspberry Chia Parfait: A Refreshing Dessert Delight

Savor the freshness of raspberries and the tang of pomegranate in one delectable dessert. Our Pomegranate Raspberry Chia Parfait combines these flavors into a nutritious and beautiful dish perfect for any occasion or snack time. Discover how the lush flavors of these vibrant fruits come together with chia seeds to create an irresistible treat.

Why You’ll Love This Recipe

This Pomegranate Raspberry Chia Parfait is not only a feast for the taste buds but also a visual delight. The bright colors and layered textures make it both pleasing to the eye and to the palate. It’s packed with antioxidants, fibers, and essential nutrients, making it a healthy dessert choice. Whether you’re hosting a brunch or simply indulging in an evening treat, this parfait stands out with its unique blend of flavors.

Raspberries bring a burst of juicy sweetness, while the pomegranates add a tart flavor. Combined with the creaminess of chia seeds soaked overnight, these ingredients create a perfectly balanced and satisfying dessert. It’s an ideal make-ahead dish for dinner parties or an on-the-go breakfast solution.

Context/Background

The concept of chia pudding originated from ancient Aztec and Mayan cultures, where chia seeds were revered for their energy-boosting properties. This Pomegranate Raspberry Chia Parfait gives a modern twist to traditional chia pudding by incorporating fresh fruits that not only enhance its taste but also pack a powerful nutritional punch. This combination offers both a taste of ancient tradition and contemporary culinary innovation.

Recipe Details

Serves: 4

Prep Time: 15 minutes

Cook Time: 0 minutes

Total Time: 4 hours 15 minutes (including chilling time)

Ingredients

  • 1/2 cup chia seeds
  • 2 cups almond milk (or milk of choice)
  • 1 tablespoon honey or maple syrup
  • 1 teaspoon vanilla extract
  • 1 cup fresh raspberries
  • 1 cup pomegranate seeds
  • Mint leaves, for garnish

Directions

  1. In a large bowl, mix chia seeds, almond milk, honey, and vanilla extract. Whisk well to prevent clumping.
  2. Cover and refrigerate for at least 4 hours or overnight, until the mixture is thick and creamy.
  3. Once the chia pudding is set, layer it with raspberries and pomegranate seeds in serving glasses or bowls.
  4. Garnish with fresh mint leaves before serving.

Tips for Perfect Pomegranate Raspberry Chia Parfait

  • Ensure to stir the chia mixture occasionally in the first hour to prevent lumps.
  • For a sweeter parfait, increase the amount of honey or maple syrup.
  • Use fresh, ripe raspberries for the best flavor and presentation.
  • Experiment by adding layers of yogurt for an extra creamy texture.

Serving Suggestions

Serve the parfait as a light dessert after a summer meal, or enjoy it as a refreshing breakfast with a spoonful of Greek yogurt on the side. It’s also great as a mid-afternoon snack paired with a hot cup of tea.

Storage and Leftovers

Store any leftovers in an airtight container in the refrigerator for up to 2 days. The chia pudding can also be made in advance and stored for up to 5 days before layering with fruits before serving.

Final Thoughts

Try this Pomegranate Raspberry Chia Parfait for a delightful balance of flavors and textures with every spoonful. Its freshness and zing make it irresistible, offering a perfect way to enjoy healthy ingredients in a delicious dessert form.

Recipe Notes

  • For a vegan version, ensure honey is not used; stick with maple syrup instead.
  • Substitute almond milk with your preferred plant-based milk option.
  • Feel free to add extra fruits like blueberries or sliced kiwi for more variety.

“`

Elegant White Chocolate Blueberry Cheesecake Cupcakes: A Decadent Dessert Delight

“`html

Elegant White Chocolate Blueberry Cheesecake Cupcakes: A Luxurious Dessert Experience

Indulge in the decadent flavors of our White Chocolate Blueberry Cheesecake Cupcakes. These mini delights combine the creamy richness of white chocolate with the tart burst of blueberries, all in a perfectly portioned size. Whether you’re hosting a gathering or simply treating yourself, these cupcakes offer a blend of flavors that are sure to impress.

Why You’ll Love This Recipe

You’ll adore these White Chocolate Blueberry Cheesecake Cupcakes for their elegant presentation and sophisticated flavor profile. The combination of smooth, creamy cheesecake and sweet, tangy blueberries makes every bite a tantalizing experience. These cupcakes are perfect for special occasions or as a gourmet treat to savor with your favorite cup of tea.

Moreover, these cupcakes are incredibly versatile, allowing you to personalize them with various toppings or by adjusting sweetness levels. You’ll love how easy they are to make, with simple, straightforward steps that ensure perfect results every time.

Context/Background

The White Chocolate Blueberry Cheesecake Cupcake is a modern twist on the classic cheesecake, inspired by European dessert traditions. The use of white chocolate in desserts dates back to the early 20th century, adding a creamy and subtle sweetness that pairs beautifully with the tartness of fresh blueberries.

Blending these elements into individual cupcakes allows for a sophisticated presentation, making it a popular choice at weddings, brunches, or high teas. The accessibility of the recipe ensures that these gourmet cupcakes can be easily recreated at home, bringing a slice of refined patisserie to your kitchen.

Recipe Details

Serves: 12

Prep Time: 20 minutes

Cook Time: 25 minutes

Total Time: 45 minutes

Ingredients

  • 1 cup graham cracker crumbs
  • 4 tablespoons unsalted butter, melted
  • 1 cup white chocolate chips
  • 16 oz cream cheese, softened
  • 1/2 cup granulated sugar
  • 2 large eggs
  • 1 teaspoon vanilla extract
  • 1 cup fresh blueberries

Directions

  1. Preheat the oven to 325°F (160°C) and line a cupcake tin with 12 paper liners.
  2. In a medium bowl, combine the graham cracker crumbs and melted butter. Press about 1 tablespoon of the mixture into the bottom of each liner.
  3. Melt the white chocolate chips in a microwave-safe bowl, stirring every 20 seconds until smooth. Set aside to cool slightly.
  4. In a large bowl, beat the cream cheese and sugar until smooth and creamy. Add the eggs one at a time, beating well after each addition.
  5. Mix in the vanilla extract and melted white chocolate. Fold in the fresh blueberries gently.
  6. Pour the cheesecake batter over the prepared crusts, filling each liner about 3/4 full.
  7. Bake for 20-25 minutes, or until the centers are just set. Let them cool completely in the pan, then refrigerate for at least 2 hours before serving.

Tips for Perfect Elegant White Chocolate Blueberry Cheesecake Cupcakes

  • Ensure the cream cheese is well-softened to achieve a smooth mix.
  • Allow the melted white chocolate to cool slightly before adding to the cheesecake batter, to prevent curdling.
  • Gently fold in the blueberries to avoid breaking them and staining the batter.
  • Refrigerate the cupcakes thoroughly for the best texture and flavor.

Serving Suggestions

Serve these White Chocolate Blueberry Cheesecake Cupcakes chilled, ideally with a drizzle of blueberry syrup or a dollop of whipped cream on top. Pair with a herbal tea or a glass of sweet dessert wine for an enhanced flavor profile.

Storage and Leftovers

Store any leftover cupcakes in an airtight container in the refrigerator for up to 5 days. For longer storage, you can freeze them individually wrapped in plastic wrap, placed in a freezer-safe bag, for up to 2 months. Thaw overnight in the fridge before serving.

Final Thoughts

These Elegant White Chocolate Blueberry Cheesecake Cupcakes are a must-try for any dessert lover seeking a sophisticated treat. The delightful mix of flavors and textures makes it a standout dessert ideal for any occasion. We urge you to try this recipe and bring a touch of elegance to your dessert table!

Recipe Notes

  • Substitute raspberries or strawberries for a different berry twist.
  • Add a splash of lemon juice to accentuate the blueberry flavor.
  • For a gluten-free version, use gluten-free graham cracker crumbs.

“`

Indulge in a Frosted Raspberry Lemon Drop Citrus Dream Recipe

“`html
Jump to Recipe

Frosted Raspberry Lemon Drop: A Citrus Dream!

Immerse yourself in a world of tantalizing flavors with our Frosted Raspberry Lemon Drop. This Citrus Dream is a delightful fusion of tangy lemon and sweet raspberry, enveloping your senses with every bite. Let the zesty aroma and vibrant colors transform your kitchen into a bakery of sweet indulgence. This recipe is a harmonious blend of moist yellow cake with a luscious raspberry lemon filling, making it a must-try for all dessert enthusiasts!

Why You’ll Love This Recipe

This recipe is perfect for those who crave a balance of flavors in their desserts. The bright pop of lemon paired with the sweet and slightly tart raspberries creates an irresistible combination that delights the palate. These cupcakes are not only delicious but also incredibly easy to prepare, making them ideal for both novice and experienced bakers. Whether it’s a casual get-together or a festive celebration, these cupcakes promise to impress. Plus, using a yellow cake mix as a base saves time while ensuring a consistently moist crumb.

Beyond its deliciousness, the Frosted Raspberry Lemon Drop is versatile, offering the flexibility to adapt to various occasions. Its vibrant presentation evokes the joys of spring and summer, while the comforting, familiar flavors make it a year-round favorite. Each bite is a delightful reminder of cherished moments shared with loved ones over a sweet treat.

Personal Story/Connection

A dear family member used to make a version of these cupcakes every summer. They were the highlight of any gathering, synonymous with laughter, warmth, and sunshine. While experimenting in my kitchen one day, I decided to recreate this memory. The first taste was like a reunion with old friends—an instant rush of joy and nostalgia. Sharing this recipe with you allows these fond memories to live on, one cupcake at a time.

Context/Background

The combination of lemon and raspberry is timeless. Historically, lemon desserts have been celebrated for their refreshing quality and ability to cleanse the palate. Paired with raspberries, which have long been a symbol of summer, this cupcake embodies the best of both worlds. Over time, bakers worldwide have adapted these flavors into various desserts, appreciating their natural synergy.

This recipe draws inspiration from classic citrus cakes and infuses them with a modern twist, using easily accessible ingredients and straightforward techniques. It’s a testament to how delightful things can arise from simple origins.

Tips for Perfect Frosted Raspberry Lemon Drop

  • Ensure the raspberry mixture thickens properly by simmering it gently. This prevents it from soaking through the cupcake.
  • Zest the lemon finely to maximize the aromatic oils, enhancing the cake’s flavor.
  • Crack eggs individually into a separate bowl before adding them to the batter to avoid shell pieces.
  • For a richer taste, substitute water in the raspberry mixture with a splash of white wine or a favorite liqueur.
  • Strain the raspberry mixture thoroughly to ensure a smooth, seedless filling.

Serving Suggestions

These charming cupcakes are perfect for a garden party, baby shower, or bridal brunch. For an elegant presentation, serve them on a tiered cake stand, garnished with fresh raspberries and lemon zest. Pair them with a pot of Earl Grey tea or a refreshing glass of iced lemon water for a complete experience.

For extra flair, consider topping the cupcakes with a swirl of whipped cream or a dollop of mascarpone cheese. This added richness complements the citrus and berry notes perfectly, offering a delightful contrast in both flavor and texture.

Storage and Leftovers

Store any leftover cupcakes in an airtight container at room temperature for up to three days. To keep them fresh longer, refrigerate them, especially in warmer climates. Before serving, allow the cupcakes to return to room temperature to restore their luscious texture.

If you have more cupcakes than you can consume, consider freezing them. Wrap each cupcake individually in plastic wrap and store in a freezer bag. To enjoy, thaw them at room temperature and dust with powdered sugar before serving.

Recipe Variations and Substitutions

  • Gluten-Free: Use a gluten-free yellow cake mix and follow the same instructions for delectable gluten-free treats.
  • Vegan: Substitute eggs with flax eggs (1 tablespoon ground flaxseed mixed with 2.5 tablespoons water per egg) and use a vegan cake mix.
  • Spicy Twist: Add a pinch of cayenne pepper to the raspberry mixture for a surprising spicy kick.
  • Berry Swap: Try using blackberries or blueberries instead of raspberries for a different berry experience.

FAQ

Can I make this ahead of time? Yes, you can prepare the cupcakes a day in advance. Store them in an airtight container and dust with powdered sugar just before serving.

What substitutions can I use for lemon juice? Lime or orange juice can be used instead, though the flavor will change slightly.

How do I make this gluten-free or vegan? Use gluten-free or vegan cake mixes and appropriate substitutes for eggs and any dairy products used in frosting.

Optional Nutritional Information

Each cupcake contains approximately 180 calories, 30g carbohydrates, 5g fat, and 2g protein. Nutritional values may vary based on ingredient brands and substitutions used.

Final Thoughts

The Frosted Raspberry Lemon Drop is more than just a dessert—it’s a celebration of flavor, nostalgia, and joy. Whether you’re a seasoned baker or new to the kitchen, this recipe’s simplicity and elegance make it a perfect choice. Delight your friends and family with a Citrus Dream that they’ll talk about long after the last bite. We’d love to hear about your experiences and any creative variations—share them below!

Recipe Section

Serves: 12 | Prep Time: 15 minutes | Cook Time: 18-20 minutes | Total Time: 35 minutes

  • 1 cup fresh raspberries
  • 1/2 cup lemon juice
  • 1/4 cup sugar
  • 1/2 cup water
  • 1 lemon, zested
  • 1 package yellow cake mix
  • 3 eggs
  • 1/3 cup vegetable oil
  • 1/2 cup powdered sugar
  1. Preheat the oven to 350°F and line a muffin tin with cupcake liners.
  2. In a small saucepan, combine raspberries, lemon juice, sugar, and water. Simmer over low heat until raspberries break down and mixture thickens, then strain out the seeds and set aside.
  3. In a large bowl, mix together lemon zest, yellow cake mix, eggs, and vegetable oil until well combined.
  4. Fill each cupcake liner halfway with batter, then add a spoonful of the raspberry lemon mixture on top.
  5. Bake for 18-20 minutes or until a toothpick inserted comes out clean.
  6. Let the cupcakes cool completely, then dust with powdered sugar before serving.

Enjoy your Frosted Raspberry Lemon Drop—a true Citrus Dream!

“`