Best Crumbl Pecan Pie Cookies with Sugar Cookie Base

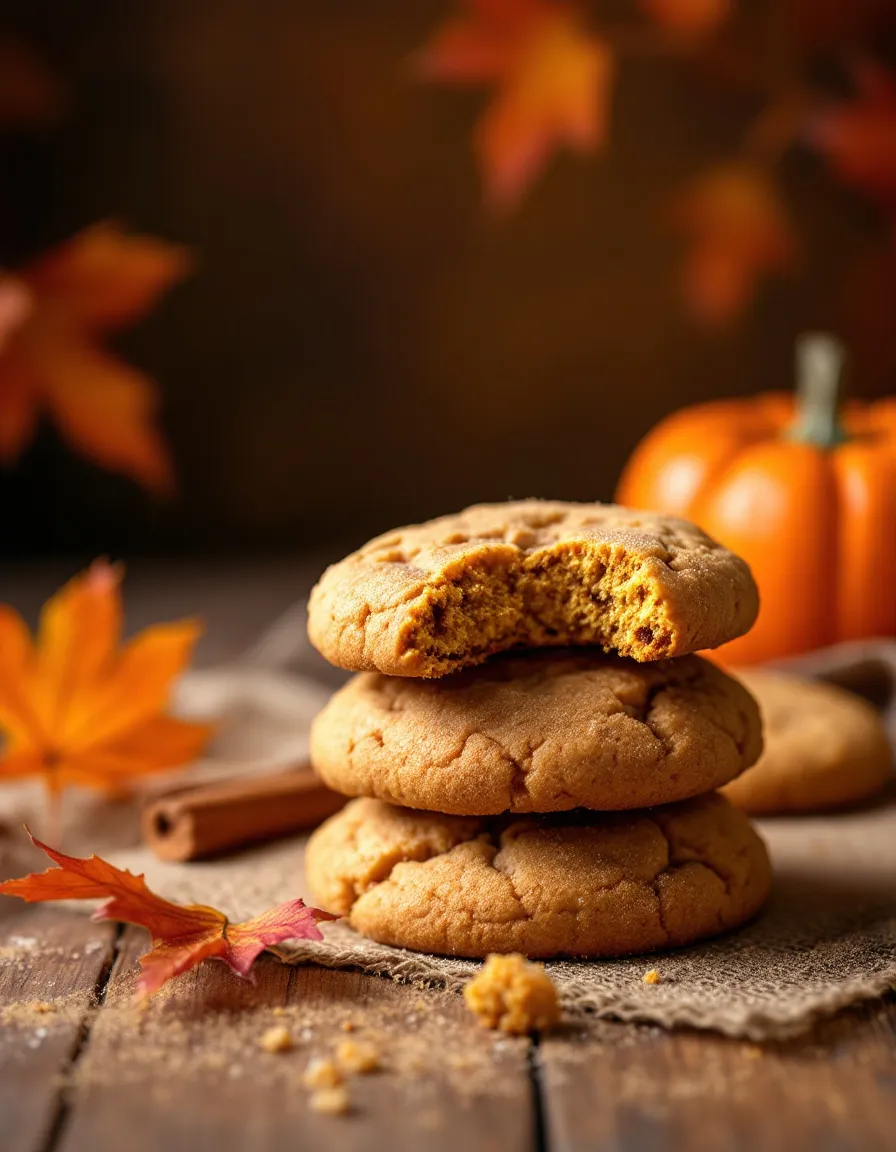
Crumbl Pecan Pie Cookies: A Delectable Twist on a Classic Treat

⚖️
Difficulty
Moderate

⏲️
Prep Time
20 mins

🕒
Cook Time
15 mins

⏱️
Total Time
35 mins

🍽️
Servings
24 cookies

Crumbl Pecan Pie Cookies marry two beloved desserts into one delightful treat that’s sure to be a hit at any gathering. Imagine the warm, nutty flavor of pecan pie, combined with the sweet, soft texture of sugar cookies. Each bite is a crunchy, yet tender treat bursting with sweetness, reminiscent of fall celebrations and family gatherings. This recipe not only pleases the palate but also brings warmth and coziness to your kitchen, wrapping you in nostalgia with each mouthful.

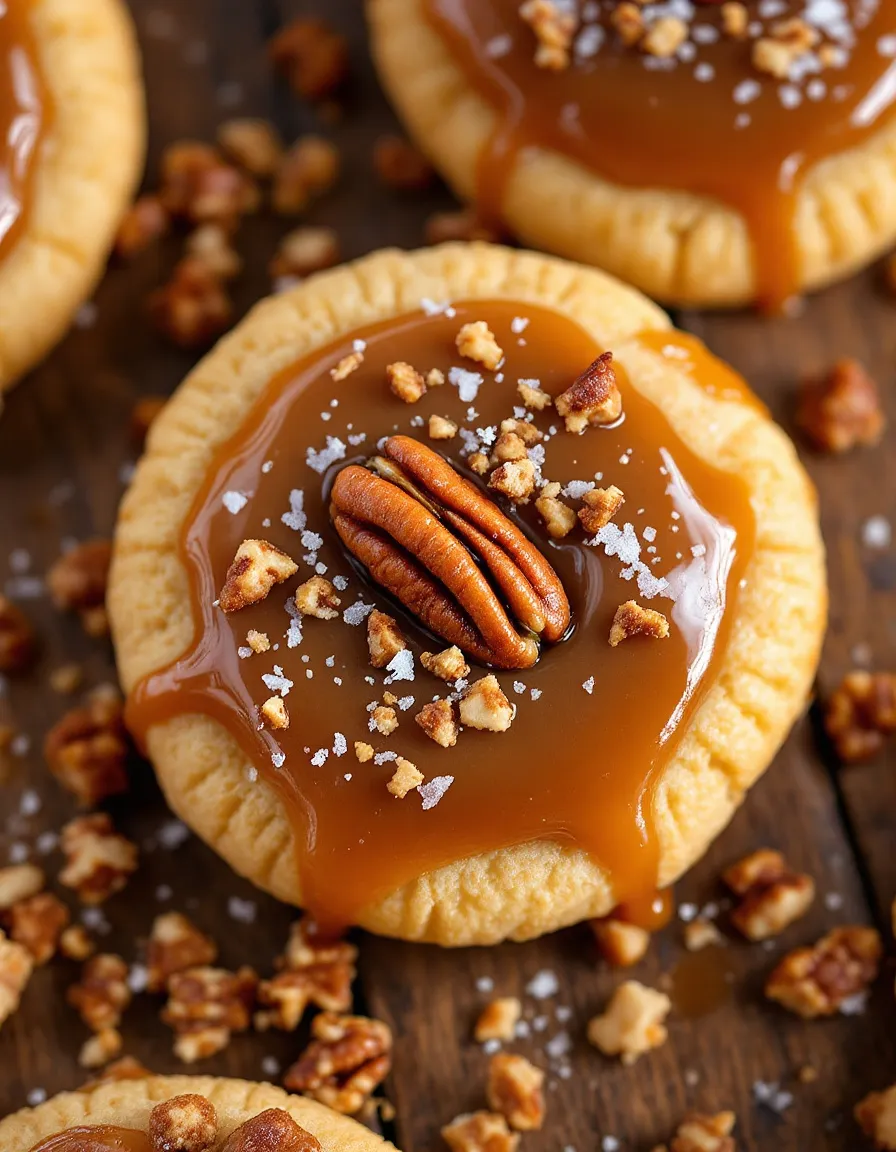
The cookies are perfectly complemented by a drizzle of buttery caramel and a sprinkle of flaky sea salt, delivering a symphony of flavors and textures. The contrast between the crunchy pecans and soft sugar cookie base creates a delicious mouthfeel that will leave you craving more. Whether served at a holiday party or enjoyed as an afternoon treat, these cookies elevate any occasion with their decadent taste and charming appearance.

Quick Recipe Highlights

  • Flavor Profile: These cookies bring a delightful blend of rich, buttery sweetness and nutty depth, echoing the flavors of traditional pecan pie.
  • Texture: Expect a soft, chewy center with a crispy edge, crowned with crunchy pecans for an irresistible bite.
  • Aroma: The inviting scent of brown sugar, vanilla, and toasted nuts fills your kitchen, creating a warm, festive atmosphere.
  • Visual Appeal: Golden brown cookies adorned with glistening caramel and chopped pecans make for an appealing presentation.
  • Skill Level Needed: This recipe requires basic baking skills and attention to detail, making it attainable for home bakers.
  • Special Equipment: Standard baking tools like mixing bowls, a mixer, and an oven are essential for perfecting this cookie recipe.

Recipe Overview

  • Difficulty Level: These Crumbl Pecan Pie Cookies are categorized as moderate due to their multi-step preparation, but the process is straightforward and rewarding.
  • Category: Ideal for dessert or snacks, they are a perfect addition to any cookie platter alongside other sweet treats.
  • Cuisine: This recipe is inspired by Southern American traditions, where pecan pie is a beloved staple often enjoyed during festive seasons.
  • Cost: Ingredients are relatively affordable, costing around $10 to $15 for a batch yielding two dozen cookies.
  • Season: Fall is the best season to enjoy these cookies, aligning with peak pecan harvests and festive gatherings.
  • Occasion: Perfect for Thanksgiving, Christmas, or any family get-together, these cookies are sure to impress guests.

Why You’ll Love This Recipe

The distinct taste and texture of Crumbl Pecan Pie Cookies create a delightful experience for your taste buds. With every bite, you enjoy the luscious blend of sweet sugar cookie and savory pecans. This combination not only satisfies sweet cravings but also brings the comfort of a classic pecan pie in a cookie form. The drizzle of caramel adds a luscious finish that rounds out the flavor profile, making these cookies an irresistible treat.

Convenience is another factor that makes this recipe stand out. Unlike traditional pecan pie, which requires a lengthy baking time and process, these cookies come together quickly and easily. Preparation is simple, with no pie crust rolling or lengthy cooling times involved. You’ll have warm cookies to enjoy in just 35 minutes, making them an excellent choice for spontaneous cravings or last-minute gatherings.

From a nutritional perspective, pecans are packed with healthy fats and protein, providing a more balanced treat compared to other sugary options. Incorporating nuts into your baking not only satisfies hunger but also adds valuable nutrients. While these cookies are still a dessert, the presence of nuts gives them a nutritional edge.

For social occasions, Crumbl Pecan Pie Cookies serve as a fantastic conversation starter at gatherings. Their unique combination of flavors draws attention, inviting guests to indulge and share their thoughts. Baking these cookies can also become a fun group activity, allowing friends and family to bond over mixing, shaping, and tasting.

Lastly, the cost-effectiveness of this recipe makes it accessible to everyone. With minimal ingredients that are usually staples in your pantry, you won’t need to break the bank to treat yourself or your loved ones to something special. These cookies provide high satisfaction for relatively low investment, making them a go-to dessert option.

Historical Background and Cultural Significance

The origin of pecan pie dates back to the 19th century in the Southern United States, where pecans were abundant. Initially, the pie was made by early settlers who took advantage of the local nut trees. Over the years, it evolved into a favorite during holiday feasts, symbolizing warmth and family togetherness.

In Southern culture, pecan pie holds a special place, often seen as a staple dessert at holidays and gatherings. Its sweet, nutty flavor evokes comfort and nostalgia, reminding many of cherished family traditions. The cookie version amplifies this sentiment, making the experience of enjoying pecan treats more accessible to those who may not have the time or resources to bake a full pie.

The adaptation of the traditional pie into cookies showcases the evolution of desserts, emphasizing creativity in the kitchen. As home bakers seek to satisfy cravings with less time and effort, recipes like the Crumbl Pecan Pie Cookies flourish, allowing the enjoyment of rich flavors in a convenient format.

Regional variations exist, with some incorporating chocolate or different nuts, adapting the same basic principles of balance and richness. These variations emphasize the versatility of the pecan and demonstrate how it can be showcased in various forms beyond just pie.

Ingredient Deep Dive

Pecans: Pecans are not just a delicious addition; they are also rich in healthy fats, protein, and antioxidants. They provide heart-healthy monounsaturated fats, which can help lower cholesterol levels. When selecting pecans, choose fresh, raw nuts for the best flavor and nutritional benefits. Store them in an airtight container in a cool, dark place to maintain freshness and avoid rancidity. If you’re in need of substitutions, walnuts or almonds can be used, although they will impart a different flavor profile.

Baking Powder: This leavening agent is crucial for achieving the chewy, soft texture of the cookies. It helps the cookies rise, giving them that desirable lift and mouthfeel. When selecting baking powder, ensure it’s fresh; an expiration date can greatly impact the rise of your cookies. Store it in a dry area and consider substituting it with baking soda if necessary, adjusting quantities accordingly.

Brown Sugar: The use of brown sugar adds moisture and a deep, caramel flavor, enhancing the overall sweetness of the cookies. Light brown sugar works well, but dark brown sugar can intensify the flavor. When selecting brown sugar, look for finely packed options. Store it in an airtight container to prevent hardening, and if you run out, white sugar mixed with a bit of molasses can serve as a quick substitute.

Butter: Butter provides richness and moisture, crucial for a soft and chewy cookie. It also contributes to the cookies’ flavor. Using unsalted butter allows for better control of the saltiness. Keep butter stored in the refrigerator; you can even freeze it for longer storage. If you need dairy-free alternatives, coconut oil or vegan butter can be effective substitutes, although they may alter the taste slightly.

Common Mistakes to Avoid

  • Not measuring ingredients accurately can result in a poorly textured cookie. Use a kitchen scale or proper measuring cups for precision.
  • Overmixing the dough, which can lead to tough cookies. Mix only until the ingredients are combined.
  • Using cold butter instead of softened butter affects the dough consistency, leading to cookies that don’t spread properly.
  • Baking at the wrong temperature can cause cookies to bake unevenly. Always preheat the oven for best results.
  • Not chilling the dough can result in cookies spreading too much, impacting their texture. A quick chill can enhance flavor and shape.
  • Skimping on the pecans often leads to a less flavorful cookie. Use a generous amount for a nutty experience.
  • Ignoring the baking time can result in burnt edges or uncooked centers. Keep a close eye on cookies in the oven.
  • Not letting the cookies cool on the baking sheet can lead to breakage. Allowing them to set before transferring ensures they hold shape.
  • Using outdated ingredients, especially baking powder, can result in poor rising. Always check freshness before use.
  • Failing to line the baking sheet with parchment paper can lead to sticking and uneven baking. Always line or grease the trays well.

Essential Techniques

Mixing Ingredients: Proper mixing ensures that all ingredients are adequately combined without overworking the dough. To master this, start by mixing the butter and sugars until light and fluffy before adding other wet ingredients. Combine dry ingredients separately to minimize clumping. Visual cues for success include a smooth, uniform mixture with no lumps.

Chilling the Dough: Chilling helps solidify the fats, leading to a softer and more flavorful cookie. To master this technique, shape the dough into a log or disks and wrap in plastic wrap, refrigerating for at least 30 minutes. A well-chilled dough will yield cookies that spread perfectly while baking.

Pro Tips for Perfect Crumbl Pecan Pie Cookies

1. Use high-quality, fresh pecans for the best flavor and crunch, preferably toasting them lightly to enhance their nuttiness.
2. Allow precise cooling times; let cookies sit on the baking sheet for a few minutes before transferring them to a wire rack.
3. Double the recipe for larger gatherings, and freeze a portion for future cravings—baked cookies freeze well.
4. For added flavor, experiment with different types of sugars, such as using part light brown and part dark brown sugar.
5. Don’t skip the salt; a pinch enhances the sweetness and balances flavors beautifully.
6. If you want an extra touch, drizzle melted chocolate over the cookies once cool for a decadent twist.

Variations and Adaptations

For a regional twist, try adding chocolate chips for a chocolate-pecan pairing reminiscent of turtle desserts. Seasonal adaptations can include adding cinnamon or nutmeg during the fall to enhance that warm flavor profile. For those who follow specific dietary habits, consider gluten-free flour blends or sugar-free alternatives to cater to dietary needs without sacrificing flavor. If you want a crunchier texture, experiment with toasting the flour slightly before use or adding crushed cookies or cereal to the mixture.

Serving and Presentation Guide

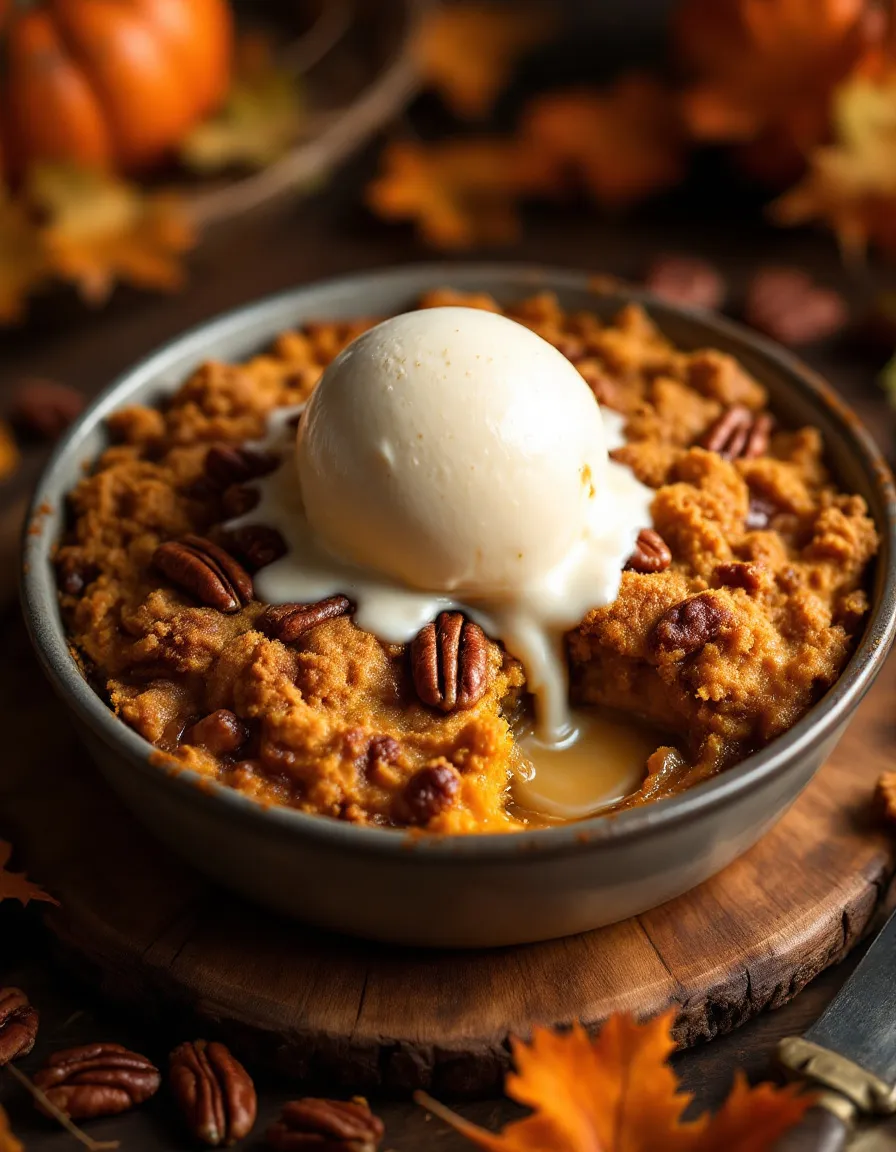
To present your Crumbl Pecan Pie Cookies beautifully, stack them on a decorative cake stand or serve them on a rustic wooden board. A drizzle of caramel sauce or melted chocolate can provide an eye-catching garnish. Adding fresh pecans around the cookies not only enhances the aesthetic but also invites your guests to indulges. For an elegant touch, serve with a scoop of vanilla ice cream alongside the warm cookies, providing a delightful contrast in temperature and taste.

Wine and Beverage Pairing

These cookies pair wonderfully with a glass of dessert wine, such as a sweet Riesling or a rich port wine, where the sweetness complements the pecan flavors. For non-alcoholic options, consider serving apple cider, which echoes the warm spices of the cookie. To enhance flavors during special occasions, a well-brewed cup of coffee or a creamy cup of hot cocoa can create a perfect afternoon pairing.

Storage and Shelf Life

Store Crumbl Pecan Pie Cookies in an airtight container at room temperature for up to a week. For longer freshness, consider freezing them; place the cookies in a single layer on a baking sheet, freeze until solid, then transfer to a zip-top bag for up to three months. Always check for any signs of spoilage, such as dryness or off-odors, before consuming. When reheating, simply warm them in the microwave for a few seconds to restore softness.

Make Ahead Strategies

To streamline the process, prepare the cookie dough in advance and chill it, allowing the flavors to meld overnight. This not only enhances flavor but also makes baking a quick process on the day of serving. Alternatively, you can bake the cookies and freeze them to enjoy later, ensuring you always have a treat on hand. If you intend to serve the cookies later, hold off on adding any frosting or toppings until just before serving to maintain texture and freshness.

Scaling Instructions

If you’d like to halve the recipe, keep the ingredient proportions consistent while breaking down the amounts. For doubling or tripling, ensure you have sufficient baking sheets and oven space, adjusting the baking time if necessary as multiple sheets can impact cooking efficiency. Pay attention to mixing times, as larger batches may need more time for thorough incorporation of ingredients. Adjust storage materials based on batch size, ensuring cookies remain fresh and protected.

Nutritional Deep Dive

Crumbl Pecan Pie Cookies provide a satisfying macro ratio, making them a balanced choice for a treat. Each cookie includes healthy fats from pecans, a source of protein, and carbohydrates primarily from sugar and flour, catering to energy needs. They also supply vitamins and minerals present in nuts, such as Vitamin E and magnesium, offering additional health benefits beyond mere indulgence. Practicing portion control can further enhance their role as a guilt-free dessert option in your diet.

Dietary Adaptations

To make these cookies gluten-free, substitute traditional flour with a gluten-free blend, keeping ratios in mind to maintain texture. For a dairy-free option, use vegan butter and dairy-free chocolate chips if adding chips. Adapting this recipe for those following a low-carb or keto diet involves using almond flour and a sugar substitute, ensuring necessary sweetness without unnecessary carbs. If you have specific dietary restrictions, explore these substitutions to make the cookies accessible to all.

Troubleshooting Guide

For texture issues, adjusting the mixing process can often lead to better results—overmixing can yield tough cookies. If your cookies spread too much, check that your butter is at room temperature, not melted. Flavor balance can be tweaked by adjusting the sugar content or adding a pinch of salt if the cookies taste overly sweet. Equipment challenges, such as uneven oven temperatures, can be resolved by rotating baking sheets mid-bake. Explore each aspect to perfect your baking technique.

Recipe Success Stories

Community feedback has been overwhelmingly positive, with many praising the delightful combination of flavors and textures. Some readers have experimented with nut toppings and fillings, successfully adapting the recipe to suit their tastes and preferences. Photographic submissions showcase beautifully styled cookies, inspiring others to recreate the recipe with their artistic spin. Sharing personal stories about making these cookies has sparked recipe swaps, building a sense of community among bakers exploring variations together.

Frequently Asked Questions

Can I replace pecans with walnuts? Yes! Walnuts can be used, but keep in mind they have a different flavor profile and will alter the taste slightly.

How do I keep cookies from spreading? If your dough spreads too much, chill it for 30 minutes before baking. The solid fats will help maintain their shape.

Can I freeze the dough? Absolutely! You can freeze the dough for up to three months, allowing you to bake fresh cookies when cravings hit.

What’s the best way to store these cookies? Keep them in an airtight container at room temperature, or freeze them for longer freshness.

Are these cookies suitable for gift giving? Yes! They make a thoughtful and delicious gift, especially when beautifully packaged in a decorative tin.

What variations can I try? Feel free to add chocolate chips, change up the nuts, or add spices like cinnamon for fun twists on the original recipe.

How can I adjust the sweetness? You can reduce the sugar slightly to suit your taste or opt for a sugar substitute when baking.

What other nuts can I use? Besides walnuts, almonds or hazelnuts can substitute, but they will create a distinct flavor variation.

Can these cookies be made vegan? Yes! Using vegan butter and a flax egg is an excellent substitute to make these cookies vegan.

How long do they stay fresh? These cookies remain fresh for about one week at room temperature, or up to three months if frozen.

Additional Resources

Explore related recipes featuring pecans or cookies to expand your sweet collection. Technique guides related to cookie baking can be helpful for mastering essential skills. Gather ingredient information to understand the best practices for selection and storage. If equipment is a concern, consider recommendations for baking sheets or mixers that yield the best results. Keep an eye out for seasonal variations in ingredients that can inspire creativity in your baking endeavors.

Join the Conversation

Engage with us by sharing your own experiences with these Crumbl Pecan Pie Cookies on social media. Upload your photographs and recipe reviews to inspire others in your cooking journey. Join our community discussion by exchanging tips on variations you’ve found successful. We love hearing personal adaptations and suggestions, enhancing this culinary adventure together!

The Recipe

Crumbl Pecan Pie Cookies

Serves: 24 cookies

Prep Time: 20 mins

Cook Time: 15 mins

Total Time: 35 mins

Kitchen Equipment Needed

  • Baking sheet
  • Parchment paper
  • Mixing bowls
  • Electric mixer
  • Measuring cups and spoons
  • Spatula

Ingredients

  • 1 cup unsalted butter, softened
  • 1 cup brown sugar, packed
  • 1/2 cup granulated sugar
  • 2 eggs
  • 2 teaspoons vanilla extract
  • 3 cups all-purpose flour
  • 1 teaspoon baking powder
  • 1/2 teaspoon salt
  • 1 cup pecans, chopped
  • 1 cup caramel sauce for drizzling
  • Flaky sea salt for garnish

Directions

  1. Preheat your oven to 350°F (175°C) and line a baking sheet with parchment paper.
  2. In a large mixing bowl, cream together the softened butter, brown sugar, and granulated sugar until light and fluffy.
  3. Add in eggs and vanilla, mixing until combined.
  4. In another bowl, whisk together flour, baking powder, and salt.
  5. Gradually add the dry ingredients to the wet mixture, folding until just combined.
  6. Stir in the chopped pecans gently.
  7. Drop tablespoon-sized portions of dough onto the prepared baking sheet, spacing them a few inches apart.
  8. Bake for approximately 10-12 minutes or until the edges are lightly golden.
  9. Remove from the oven, allow them to cool on the baking sheet for a few minutes before transferring to a wire rack.
  10. Once cooled, drizzle with caramel sauce and sprinkle with flaky sea salt.

Recipe Notes

  • For a deeper flavor, consider toasting the pecans before adding them to the dough.
  • Feel free to adjust the sweetness by reducing both sugars slightly if preferred.
  • The dough can be prepared a day in advance and stored in the refrigerator for enhanced flavor.
  • These cookies can be frozen; just follow the storage guidelines for best results.

Easy Pumpkin Pie Tacos – Perfect for Fall Desserts

Pumpkin Pie Tacos: An Unforgettable Autumn Treat

⚖️
Difficulty
Moderate

⏲️
Prep Time
30 mins

🕒
Cook Time
20 mins

⏱️
Total Time
50 mins

🍽️
Servings
12 tacos

Pumpkin Pie Tacos are a delightful twist on a classic favorite, merging the comforting flavors of pumpkin pie with the fun experience of tacos. Each bite is filled with the rich, creamy pumpkin filling seasoned with warm spices that echo the essence of fall. The tender taco shell cradles the filling perfectly while providing a subtle crunch, creating a satisfying taste and texture balance. As you take your first bite, you’ll be enveloped in the sweet and savory dance of cinnamon, nutmeg, and the natural sweetness of pumpkin, making it an irresistible dessert option.

Not only do these tacos look visually appealing, adorned with a drizzle of caramel and whipped cream, but they also evoke feelings of nostalgia and warmth, reminiscent of cherished family gatherings during the autumn season. They are perfect for sharing with friends and family, heralding a festive atmosphere with their festive presentation and delightful taste that pleases the palate. These Pumpkin Pie Tacos will quickly become a beloved addition to your dessert repertoire.

Quick Recipe Highlights

  • Flavor Profile: Creamy pumpkin filling with hints of cinnamon and nutmeg, balanced by a slight crunch from the taco shell.
  • Texture: A delightful combination of creamy and crunchy, offering a satisfying mouthfeel.
  • Aroma: The warm spices wafting through the kitchen create an inviting and cozy atmosphere, perfect for fall.
  • Visual Appeal: A vibrant orange filling nestled in a golden taco shell, topped with whipped cream and caramel for feast-worthy beauty.
  • Skill Level Needed: Moderate; requires basic knowledge of different cooking techniques.
  • Special Equipment: Basic baking utensils, a mixer for the filling, and taco molds or a baking tray.

Recipe Overview

  • Difficulty Level: Moderate, this recipe involves a couple of different steps and requires attention to detail to achieve the perfect texture.
  • Category: This recipe is a dessert and is a great addition to holiday feasts, potlucks, or festive celebrations.
  • Cuisine: A fusion concept, blending classic American dessert elements with playful taco aesthetics.
  • Cost: Relatively affordable, with ingredients typically costing around $10-$15 for a full batch.
  • Season: Perfect for fall, as it captures the essence of pumpkin and spiced desserts enjoyed during this season.
  • Occasion: Ideal for Thanksgiving gatherings, Halloween parties, and cozy family dinners.

Why You’ll Love This Recipe

Pumpkin Pie Tacos provide a wonderful marriage of flavors that celebrate the bold, warming essence of seasonal pumpkin. The creamy filling bursting with spices offers a rich taste, while the taco shell brings an exciting crunch that elevates the dessert experience. This unique combination of textures will undoubtedly impress your guests, as they relish every bite, savoring both the warmth of pumpkin spices and the fun of eating tacos.

The preparation process is relatively simple, making it accessible for home cooks. With just a bit of mixing and assembling, you can have these delicious tacos ready to impress your family and friends. The versatility of this recipe allows for easy adjustments if you want to add your own twist. You control the sweetness, spice levels, and even the presentation, making them a fun culinary project, especially during family gatherings.

Aside from their taste and ease of preparation, Pumpkin Pie Tacos also hold nutritional advantages. Pumpkin is a powerhouse of vitamins A and C, fiber, and antioxidants, providing a delicious way to enjoy a treat that is more nourishing than traditional desserts. With healthy ingredients, you can indulge in a satisfying dessert without feeling guilty.

These tacos are not only delightful to eat, but they are also fantastic for social gatherings. The interactive nature of taco assembly makes them perfect for parties, where guests can customize their own tacos with toppings like whipped cream or candied pecans. They serve as a conversation starter, uniting everyone around a shared love for creative desserts.

Finally, the cost-effectiveness of Pumpkin Pie Tacos is noteworthy. With a few affordable ingredients, you can serve a crowd, making them a budget-friendly option for celebrations. They exemplify the idea of creating memorable dishes that don’t break the bank, allowing you to celebrate the season fully without financial stress.

Historical Background and Cultural Significance

The origins of pumpkin pie date back to the early colonial days in America, where pumpkins were plentiful and a staple in the diets of early settlers. As these settlers blended traditional European dessert styles with what was available in the New World, pumpkin pie emerged as a beloved dessert, often featured during harvest celebrations and Thanksgiving feasts.

In American culture, pumpkin pie symbolizes warmth, family, and tradition—embedded in the lives of many, especially during fall festivities. Over the years, the recipe has evolved, with various adaptations reflecting regional preferences. Incorporating the taco format offers a refreshing deviation from tradition, making it relevant in modern culinary trends focused on fusion cuisine.

The concept of utilizing tacos for a dessert is not entirely new; it echoes the rich tradition of creative reimaginings in cooking. The melding of cultures through food fosters a deeper appreciation for culinary arts, allowing for playful interpretations that delight the senses. These Pumpkin Pie Tacos reflect the zeitgeist of modern cooking, where innovation meets nostalgic flavors.

Regional variations of pumpkin pie and tacos inspire the versatility of this dish. For example, in the Southwest, spices and additional flavors like chocolate and chilies may be incorporated, showcasing the endless possibilities of flavor combinations that pay homage to different culinary traditions. This adaptability ensures that Pumpkin Pie Tacos can be personalized to suit a range of palates and preferences.

Ingredient Deep Dive

Pumpkin Puree
Pumpkin puree is the star ingredient in Pumpkin Pie Tacos, steeped in a rich cultural history. Hailing from the Americas, pumpkins were first cultivated by indigenous peoples and were valued for their nutritional qualities. High in beta-carotene, they also offer a variety of vitamins and minerals beneficial for health. When selecting pumpkin puree, look for 100% pure canned pumpkin without added sugars or spices for the best flavor.

When storing pumpkin puree, keep it sealed in an airtight container in the refrigerator for up to one week. Alternatively, it can be frozen for up to three months, allowing for convenient use in future recipes. If you don’t have pumpkin puree, consider using mashed butternut squash or sweet potato as delicious substitutes.

Spices (Cinnamon and Nutmeg)
Cinnamon and nutmeg are quintessential spices used to flavor pumpkin desserts, each bringing unique warmth and comfort. Both have deep historical roots; cinnamon is praised in various cultures for its medicinal properties, while nutmeg has been a prized spice since the Middle Ages, highly sought after in European culinary traditions. These spices not only enhance the flavor of pumpkin but also provide antioxidant benefits, which can aid digestion and reduce inflammation.

When selecting spices, opt for whole spices whenever possible, as they offer more robust flavors than pre-ground varieties. Store spices in a cool, dry place in an airtight container to maintain their potency. If you’re out of cinnamon or nutmeg, ginger, allspice, or pumpkin pie spice can serve as suitable alternatives.

Common Mistakes to Avoid

  • Using pumpkin filling instead of pure pumpkin puree can lead to an overly sweet and artificial flavor; always opt for 100% pure ingredients.
  • Not measuring spices accurately can result in an imbalanced flavor profile; take care to adhere to the suggested spice amounts.
  • Overmixing the filling can lead to a tough texture; aim for just combined, maintaining creaminess.
  • Allowing the taco shells to cool too much before filling them can make them break when assembling; work when they are still warm.
  • Using cold ingredients can affect the final texture; ensure all ingredients are at room temperature for the filling.
  • Not preheating the oven can lead to uneven baking; always allow your oven to reach the right temperature before placing your dish inside.
  • Skipping the chilling time after assembling can make them difficult to eat; chilling allows flavors to meld together.
  • Ignoring presentation can diminish the overall appeal; garnishing toppings enhance both flavor and aesthetics.
  • Using overly ripe pumpkins can lead to a watery filling; pick fresh, firm pumpkins for the best results.
  • Neglecting to taste and adjust flavors during preparation may result in an unbalanced dish; always perform taste tests as you cook.

Essential Techniques

Mixing
Mixing is essential when creating the creamy filling for your tacos. Properly blending ensures a consistent flavor and texture. To master this technique, combine your ingredients slowly, incorporating air gently without overmixing. A common pitfall is rapid mixing, which can result in undesirable toughness. Visual cues for success include a smooth, creamy consistency without lumps.

Baking
Baking your taco shells to achieve that perfect golden brown takes care and patience. An important part of the baking process, it contributes to the crispy texture that sets off the creamy filling. Pay attention to the color of the shells; they should be lightly golden and not overly browned. Rotating your baking tray halfway through the cooking process can help ensure even browning for the best final product.

Pro Tips for Perfect Pumpkin Pie Tacos

1. Use homemade pumpkin puree for a fresher flavor; simply roast a pumpkin, remove the seeds, and blend the pulp until smooth.
2. Add a pinch of salt to your filling to enhance the sweetness of the pumpkin and spices; it truly makes a difference.
3. Chill the filled tacos for at least an hour before serving; this allows the flavors to meld beautifully.
4. Experiment with different toppings like crushed pecans or sprinkles for added crunch and visual appeal.
5. For a lighter version, consider using Greek yogurt or coconut cream instead of whipped cream.
6. Keep your taco shells warm in the oven just before serving; this keeps them pliable and ready to fill.
7. Use a quality food processor for the best texture when blending your filling; this will eliminate any lumps.
8. Serve with a side of warm caramel sauce for drizzling; it elevates the experience and adds a decadent touch.

Variations and Adaptations

The beauty of Pumpkin Pie Tacos lies in their versatility. For regional variations, consider using spices that reflect your heritage, such as adding chili powder for a southwest twist. Seasonal adaptations can include swapping in cranberries or apples for added texture and tartness during the fall. Vegan modifications can be achieved by using coconut cream and plant-based taco shells, allowing everyone to enjoy this fabulous treat.

Flavor variations can expand beyond the basic pumpkin filling; try infusing chocolate or pecan flavors for diverse taste experiences. If your guests prefer a softer dish, opt for baked tortillas instead of fried, offering a different texture. Presentation alternatives might include stacking the tacos like a cake or serving them in individual dessert cups, ensuring a stunning display on any table.

Serving and Presentation Guide

Plating your Pumpkin Pie Tacos in an eye-catching manner can enhance the overall dining experience. Arrange the tacos neatly on a large platter and drizzle sun-kissed caramel sauce over the tops for elegance. Garnishing with a sprinkle of cinnamon and nutmeg not only adds visual flair but also tells eaters what delightful flavor they can expect.

Consider serving the tacos alongside a dollop of whipped cream or cinnamon-infused yogurt for a contrasting texture. Modern serving suggestions may include elegantly layered parfaits instead of traditional tacos; this makes for a trendy twist and allows for a beautiful presentation. Be aware of temperature considerations; serving these treats slightly warm will enhance their flavorful profiles. Lastly, careful portion control can keep guests satisfied without overwhelming their taste buds.

Wine and Beverage Pairing

For an elegant pairing, consider a sweet Riesling that complements the dessert’s sweetness without overpowering its subtler flavors. A sparkling cider offers a refreshing non-alcoholic alternative, accentuating the festive fall spirit. If coffee is your preferred beverage, the nutty undertones of a medium roast espresso serve as a delightful companion, enhancing the taco’s rich pumpkin filling.

For those who enjoy tea, a spiced chai or Earl Grey can beautifully complement the warm spice notes found within the dish. Serve beverages chilled or at room temperature to maintain their integrity and flavor balance. Remember to offer both light and dark options, catering to different palates and preferences within your gathering.

Storage and Shelf Life

To ensure the freshness of your Pumpkin Pie Tacos, store them in an airtight container in the refrigerator for up to three days. If you have leftovers, keep fillings and taco shells separate to maintain texture. For long-term storage, tacos can be frozen; wrap them tightly in plastic, and then place them in a freezer-safe bag for up to three months.

Always label your containers with the date prepared for easy reference. Signs of spoilage include off smells or visible mold. To reheat, place them in a preheated oven at 350°F (175°C) until warmed through, which will keep the shells crisp while warming the filling. If using a microwave, heat in 30-second intervals to prevent sogginess.

Make Ahead Strategies

When preparing Pumpkin Pie Tacos in advance, consider making the pumpkin filling a day or two prior to serving. This allows flavors to deepen and develop, creating a more robust taste. Store the filling in an airtight container in the refrigerator and assemble the tacos just before serving for optimal freshness.

To maintain quality, prepare the taco shells separately and store them in an airtight container. Assembly of the tacos can be made a couple of hours ahead of time, but remember to keep them covered to avoid drying out. Adding whipped cream or toppings just before serving keeps everything attractive, delicious, and fresh.

Scaling Instructions

Scaling your Pumpkin Pie Tacos is simple, allowing you to accommodate various guest counts. To halve the recipe, simply divide all ingredient quantities by two and adjust cooking times as necessary. For doubling or tripling, maintain ingredient ratios but keep an eye on the mixing and baking times to ensure even cooking.

When increasing batches, use more than one baking tray if needed to allow shells enough space in the oven. Consider the storage space in your refrigerator or freezer when planning larger quantities, as this may influence your approach to leftovers. Always double-check that your mixing tools and baking equipment are sufficient for batch scaling to prevent any last-minute hiccups.

Nutritional Deep Dive

Each serving of Pumpkin Pie Tacos provides a substantial range of macronutrients, with pumpkin puree offering healthy carbohydrates and fiber that promotes digestive health. The added spices like cinnamon contribute antioxidants, which bolster the immune system. Portion control is crucial; be mindful of serving sizes for managing overall caloric intake.

In terms of micronutrient analysis, pumpkin is rich in vitamins A, C, and E, essential for skin health and bolstering eye function. It’s also beneficial for maintaining youthful skin, giving this dessert an added health appeal. Incorporating nuts or yogurt as toppings can boost protein content, offering a more balanced treat that satisfies without overindulgence.

For those focusing on weight management, consider baking your taco shells with less oil or opting for baked tortilla alternatives. These tacos could be an integral part of a balanced diet when enjoyed in moderation and with mindful ingredients.

Dietary Adaptations

For gluten-free variations, choose gluten-free taco shells or make your own using almond flour. This allows individuals with gluten intolerances to enjoy the treat without worry. For a dairy-free adjustment, use coconut cream for whipping instead of traditional dairy products, arriving at an equally delightful creamy texture.

Vegan adaptations involve omitting eggs and dairy, ensuring that the same vibrant flavors from the pumpkin remain in place. Low-carb or keto adaptations can utilize alternatives like almond flour for the taco shells while replacing traditional sugars with erythritol or stevia.

Paleo enthusiasts may benefit from utilizing natural sweeteners instead of granulated sugar, ensuring that all ingredients align with paleo guidelines. These adaptations allow for a wide-ranging audience to enjoy the Pumpkin Pie Tacos while remaining true to dietary restrictions.

Troubleshooting Guide

One common texture issue arises if the filling turns out too watery; this can be resolved by ensuring that the pumpkin puree is well-drained and not overly ripe before cooking. An imbalance in flavor may occur; taste as you go to adjust sweetness levels as needed, particularly if you substitute any sugar.

Temperature problems may surface during cooking if the taco shells are left in the oven too long, leading to over-browning. Watch closely and rotate trays if necessary to ensure even cooking. If you encounter equipment challenges, ensure that your baking sheets are non-stick or adequately greased to prevent shells from sticking.

Ingredient substitutions can often alter taste; if you’re replacing spices, make sure to familiarize yourself with their intensities to maintain the original desired profile. Lastly, timing concerns can be alleviated by prepping elements in advance and ensuring all cooking tools and ingredients are ready before starting.

Recipe Success Stories

The community feedback surrounding Pumpkin Pie Tacos has been overwhelmingly positive, with many sharing their delightful experiences. Readers often express how the unique dessert provided an exciting surprise during their gatherings, delighting everyone from adults to children. Those who have adapted the recipe have shared variations, including added chocolate or using homemade graham cracker taco shells.

Adaptation stories frequently highlight families who have made Pumpkin Pie Tacos a new tradition, exploring flavor combinations that reflect their cultures while keeping the festive spirit alive. Photography tips have been shared in numerous online forums, suggesting the incorporation of natural light and playful angles to capture the vibrant colors and textures of these delightful treats.

Frequently Asked Questions

Can I use fresh pumpkin instead of canned?

Yes, but you’ll need to roast and puree the pumpkin first to ensure a smooth consistency. Fresh pumpkin can add a delicious vibrancy to the tacos.

How long can I store leftover tacos?

Tacos can be stored in the refrigerator for up to three days if kept in an airtight container. Reassemble before serving for best results.

Can I freeze these tacos?

Yes, you can freeze the assembled tacos, but it’s recommended to freeze the filling and shells separately to maintain texture. They last up to three months in the freezer.

What toppings are best for these tacos?

Common toppings include whipped cream, caramel drizzle, crushed nuts, or even a sprinkle of cocoa powder for an extra layer of flavor.

Can I make the filling ahead of time?

Absolutely! The filling can be made one to two days in advance; just store it in the refrigerator until you’re ready to assemble the tacos.

What is the best way to reheat these tacos?

To retain their crispy texture, reheat tacos in the oven at 350°F for about 10-15 minutes. Avoid microwaving, as this can lead to sogginess.

Are these tacos suitable for children?

Yes! The sweet flavors and fun taco format will make them appealing to children. Just manage the spice levels to suit younger palates.

Can I substitute the taco shells?

Certainly! You can use store-bought taco shells, homemade tortillas, or even graham cracker shells for a fun twist.

What spices can I use to modify the flavor?

Feel free to experiment with spices like ginger, cardamom, or clove to bring a unique twist to the traditional flavor profile.

How can I make these tacos more festive?

Consider decorating the plate with seasonal foliage or serving them with fall-themed decorations to enhance the presentation and overall atmosphere.

Additional Resources

For those looking to expand their culinary journey, consider exploring related recipes that celebrate seasonal flavors, such as apple cider donuts or spiced pecan pie. Check out technique guides on how to perfect pumpkin puree or various ways to adjust recipes for dietary preferences. Ingredient information on the benefits of seasonal produce will also enrich your understanding of healthier cooking.

If you’re looking for equipment recommendations, tools specifically for baking desserts or taco assembly can elevate your cooking experience. Emphasizing seasonal variations will guide you to utilize what’s fresh and available, thereby creating delicious, inspired meals throughout the year.

Join the Conversation

We would love to see how you enjoy your Pumpkin Pie Tacos! Share your creations on social media, and don’t forget to tag us to enter our community of enthusiastic home cooks. Photography tips can help showcase your dishes beautifully—natural lighting and close-up angles capture the vibrant colors and textures that make these tacos so appealing.

Your feedback and recipe reviews are invaluable to our culinary community. Share your own twists or adaptations and connect with others who appreciate the fun of cooking. Let’s explore together the endless possibilities of turning classic desserts into innovative dishes capable of sparking joy during any occasion.

The Recipe

Pumpkin Pie Tacos

Serves: 12 tacos

Prep Time: 30 mins

Cook Time: 20 mins

Total Time: 50 mins

Kitchen Equipment Needed

  • Baking sheet
  • Mixing bowl
  • Whisk or electric mixer
  • Taco mold or tray
  • Airtight containers for storage

Ingredients

  • 2 cups pumpkin puree
  • 1 cup heavy cream
  • 3/4 cup granulated sugar
  • 2 teaspoons cinnamon
  • 1/2 teaspoon nutmeg
  • 1/4 teaspoon salt
  • 12 taco shells
  • Whipped cream for topping
  • Caramel sauce for drizzling
  • Optional toppings: nuts, sprinkles

Directions

  1. Preheat your oven to 375°F (190°C).
  2. In a mixing bowl, combine pumpkin puree, cream, sugar, cinnamon, nutmeg, and salt until well blended.
  3. Place taco shells in a tray or taco mold and bake for 10 minutes until slightly crispy.
  4. Remove the taco shells from the oven and allow them to cool slightly.
  5. Fill each taco shell with the pumpkin filling evenly.
  6. Chill the filled tacos in the refrigerator for at least one hour.
  7. Before serving, top with whipped cream, caramel sauce, and optional toppings like nuts or sprinkles.

Recipe Notes

  • Feel free to adjust sweetness in the filling to meet your personal taste.
  • Storing tacos assembled will result in sogginess; store filling separately if not serving immediately.
  • Consider variations in spices based on preference or availability; it makes the dish uniquely yours.

Best Pumpkin Pecan Cobbler – Warm, Gooey, and Delicious

Pumpkin Pecan Cobbler: A Comforting Fall Delight

⚖️
Difficulty
Easy

⏲️
Prep Time
15 mins

🕒
Cook Time
45 mins

⏱️
Total Time
60 mins

🍽️
Servings
8

Pumpkin Pecan Cobbler is a delightful dessert that captures the essence of fall. This dessert is a harmonious blend of warm pumpkin and crunchy pecans, creating a soul-soothing indulgence that is perfect for cozy gatherings and festive occasions. The rich flavors of cinnamon and nutmeg evoke a sense of nostalgia, reminding you of family gatherings and autumn celebrations. As you sink your spoon into this cobbler, the golden pumpkin filling combined with the crumbly topping will bring warmth to your heart and joy to your taste buds.

The texture of this cobbler is an irresistible combination of soft and crunchy. The bottom layer features a velvety pumpkin filling that is spiced to perfection, while the pecan topping adds a delightful crunch with every bite. Together, they create a wonderful contrast that keeps you returning for more. Serve it warm with a scoop of vanilla ice cream or a dollop of whipped cream for an unforgettable dessert experience that is sure to impress your friends and family.

Quick Recipe Highlights

  • Flavor Profile: The sweet and spiced pumpkin mingles beautifully with the nutty flavor of pecans, creating a balanced dessert that appeals to all taste buds.
  • Texture: Enjoy the creamy, soft pumpkin filling topped with a crunchy, golden-brown pecan layer, providing a satisfying contrast in every mouthful.
  • Aroma: The warm scent of cinnamon and nutmeg wafts through your kitchen, inviting everyone to gather around the table.
  • Visual Appeal: The dish’s warm oranges and browns create a visually stunning presentation, perfect for autumn-themed celebrations.
  • Skill Level Needed: This recipe is designed for all skill levels, making it a great choice for beginner cooks and seasoned bakers alike.
  • Special Equipment: A medium baking dish and mixing bowls are all you need to create this comforting dessert.

Recipe Overview

  • Difficulty Level: This Pumpkin Pecan Cobbler is classified as easy, requiring minimal skills and time, making it accessible for home bakers of all experience levels.
  • Category: This dish falls under the dessert category, specifically as a sweet bread or cobbler that perfectly complements a fall meal.
  • Cuisine: Its roots are deeply embedded in American cuisine, showcasing the use of seasonal ingredients such as pumpkin and nuts that are traditional in Southern cooking.
  • Cost: The approximate cost of preparing this cobbler is budget-friendly, thanks to readily available ingredients such as pumpkin puree and pecans.
  • Season: Fall is the ideal season for this dessert, aligning with pumpkin harvesting and festive autumn celebrations.
  • Occasion: Perfect for Thanksgiving dinners, family gatherings, or cozy dessert nights at home, enhancing any occasion with its warmth and flavor.

Why You’ll Love This Recipe

This Pumpkin Pecan Cobbler combines warm spices with the creamy texture of pumpkin, making it an irresistible dish to enjoy with family and friends. The amalgamation of flavors brings comfort and joy that is quintessential for autumn celebrations. As it bakes, your kitchen fills with a delightful aroma that heralds the arrival of the fall season, making each bite a heartwarming experience.

Preparing this cobbler is incredibly convenient, requiring only a handful of ingredients and minimal effort. It’s as simple as mixing the pumpkin filling and topping it with pecans. This ease of preparation allows you to whip it up ahead of time, freeing you to focus on other dishes or enjoy time with loved ones while it bakes to perfection in the oven. Plus, it’s an excellent way to use leftover pumpkin puree!

Nutritionally, this recipe stands out as it utilizes pumpkin, which is a nutrient-dense food rich in vitamins A and C along with antioxidants. Coupled with pecans that provide healthy fats and protein, this cobbler, when enjoyed in moderation, can be a delightful way to add some nutrition to your dessert table while satisfying sweet cravings.

When it comes to social gatherings, sharing this Pumpkin Pecan Cobbler with loved ones creates memorable moments around the table. Warm desserts are fantastic for fostering conversation, laughter, and togetherness—key elements of any enjoyable gathering. Whether you’re serving it at a formal dinner or a casual family meal, it will surely be a standout at the table.

Lastly, this recipe is highly accessible, using common ingredients that anyone can find at their local grocery store. Its cost-effectiveness makes it an excellent choice for those looking to treat themselves during the cooler months without breaking the bank. Plus, the impressive presentation will make you appear like a professional baker even if it’s your first time making a cobbler!

Historical Background and Cultural Significance

The Pumpkin Pecan Cobbler’s origins trace back to early American settlers who embraced the harvest produce of their environment. Pumpkin, a native plant to North America, became a staple ingredient in many traditional dishes, especially among Indigenous communities. Throughout history, cobblers emerged as an easy way to utilize various fruits and vegetables, baking them under a simple pastry crust—evolving into the beloved desserts we enjoy today.

Culturally, cobblers have played a significant role in American culinary traditions, often associated with holidays and family gatherings. The combination of pumpkin and pecans reflects the agricultural bounty of the fall season and showcases the regional flavors that characterize Southern cuisine. Over the years, variations of cobblers have spawned across the United States, adapting influenced by local ingredients and tastes.

This specific recipe showcases the blend of flavors and textures that have grown to symbolize comfort food in American culture. As families gather to celebrate harvest time or Thanksgiving, dishes like the Pumpkin Pecan Cobbler hold a special place at the table, evoking feelings of nostalgia and warmth that bring people together.

Interestingly, regional variations of this dessert exist, with some incorporating spices indigenous to certain cultures or adding different types of nuts. The cobbler’s evolution reflects the fusion of culinary traditions, allowing it to adapt and thrive during different seasons and in diverse households across the country.

Ingredient Deep Dive

Pumpkin: Pumpkin is not only a flavorful ingredient but also packed with nutrients such as beta-carotene, which is converted to vitamin A in the body. It is vital for eye health and has antioxidant properties. When selecting a pumpkin for your cobbler, opt for pure pumpkin puree rather than pumpkin pie filling, ensuring a more natural taste. Store unused pumpkin puree in the fridge for up to a week or freeze it for later use.

Pecans: Pecans are native to the Southern United States and are known for their rich, buttery flavor. They are a great source of healthy fats, protein, and essential vitamins, making them a nutritious addition to your diet. When choosing pecans, look for fresh, unsalted varieties. Store in an airtight container in a cool, dark place to prolong their freshness, and consider substituting walnuts if you need an alternative nut option.

Common Mistakes to Avoid

  • Using pumpkin pie filling instead of plain pumpkin puree: Pumpkin pie filling includes sugar and spices, which can alter the recipe’s taste considerably.
  • Not preheating the oven: Failing to preheat your oven can result in uneven cooking and improper baking times, affecting the cobbler’s texture.
  • Overmixing the batter: Mix just until combined; overmixing can lead to a dense cobbler instead of the light and fluffy texture desired.
  • Ignoring storage recommendations: Proper storage is crucial for maintaining freshness. Leaving the cobbler out too long can make it spoil faster.
  • Using stale nuts: Ensure your pecans are fresh; using old or rancid nuts can ruin the flavor of the entire dessert.
  • Not adjusting the sweetness: Taste your pumpkin mixture before baking and adjust the sweetness to your preference to ensure a balanced flavor.
  • Baking in the wrong size dish: Using a baking dish that’s too large can cause the filling to dry out, while a dish that’s too small can overflow.
  • Skipping the cooling time: Let the cobbler cool before serving; this helps the filling set and improves the overall flavor.

Essential Techniques

Mixing Ingredients: Properly incorporating your ingredients is vital for a consistent texture in your cobbler. Use a spatula to gently fold in the pumpkin and sugars without overmixing. This technique helps maintain air pockets for a lighter cobbler.

Baking: Monitor your cobbler closely towards the end of baking. When the top is golden brown and the edges are bubbling, you know it’s time to take it out. A toothpick inserted in the center should come out clean, signaling it’s perfectly baked.

Pro Tips for Perfect Pumpkin Pecan Cobbler

1. For a deeper flavor, toast your pecans lightly before adding them to the topping. This enhances their nuttiness and complements the warm spices.

2. Experiment with different spices. A pinch of ginger or cloves can add an exciting twist to the classic flavor.

3. Serve with homemade whipped cream to elevate the dessert further—whipping your cream with a touch of maple syrup can add a unique sweetness.

4. Make sure to let the cobbler sit for at least 10 minutes after baking; this resting period allows the flavors to settle and the filling to firm up.

5. Customize the sweetness by using brown sugar instead of granulated sugar for a richer, molasses-like flavor.

6. Consider adding a splash of vanilla extract to enhance the overall taste experience of your cobbler.

7. Serve it warm for the best experience, complemented by ice cream or cream for a decadent dessert feeling.

8. If you enjoy a bit of spice, consider a dash of cayenne pepper in the topping for a surprising kick!

Variations and Adaptations

For a regional twist, try adding local spices or even experimenting with seasonal ingredients like butternut squash in place of pumpkin to switch things up. Incorporate different nuts such as walnuts or almonds to yield varied flavors and textures. For a healthier take, consider using oats in the topping for added fiber and a delightful chewiness.

Adaptations can also cater to dietary needs—gluten-free oat flour could be a suitable alternative to regular flour, ensuring everyone can enjoy this delicious dish. For those looking for a low-sugar option, use natural sweeteners like honey or maple syrup instead of refined sugars.

Seasonal modifications like swapping in cranberries for added tartness in the fall can also bring a fresh dimension to the cobbler. Changing the topping to include chocolate chips or even caramel can create a decadent variation that excites the palate.

Presentation is key, so consider layering the cobbler in individual jars for a fun and trendy dessert presentation. Garnish with fresh mint or a sprinkle of cinnamon to impress your guests!

Serving and Presentation Guide

For an elegant yet simple presentation, serve the Pumpkin Pecan Cobbler in individual dessert bowls. Top with a generous scoop of vanilla ice cream or a dollop of whipped cream for a classic pairing. To elevate the visual appeal, sprinkle some extra toasted pecans and cinnamon on top for a rustic charming touch.

For a more modern spin, consider plating it in a mason jar, which allows layers of cobbler to be visible. This not only makes for a delightful visual display but also makes serving easier for guests. Always serve the cobbler warm for optimal flavor and satisfaction.

Consider pairing this dessert with a warm spiced beverage such as mulled cider or coffee to create a comforting and cozy dining experience. Temperature plays a significant role, as serving the cobbler too cold detracts from the flavor, and too hot may burn the palate.

Portion control is essential if you’re serving this at a gathering. Aim for modest servings, as this dessert can be quite rich and filling. Offering smaller plates encourages guests to enjoy more bites without overwhelming their appetite.

Wine and Beverage Pairing

Pair your Pumpkin Pecan Cobbler with a light dessert wine, such as a late harvest Riesling or a fresh Moscato, both of which will complement the sweetness of the cobbler beautifully. Alternatively, a spiced red wine could enhance the fall flavors and add a touch of warmth to your dessert experience.

For a non-alcoholic option, consider pairing with spiced apple cider or a chai tea. Both beverages bring a warm, comforting element that harmonizes with the cobbler’s spices.

If you enjoy coffee, a rich espresso or a creamy cappuccino serves as a delightful contrast to the sweet dessert, creating a well-rounded dessert experience. Always serve beverages at the appropriate temperature to enhance overall enjoyment.

Storage and Shelf Life

To store your Pumpkin Pecan Cobbler, allow it to cool completely before covering it with plastic wrap or aluminum foil to retain moisture. It can stay fresh in the fridge for up to 3 days. For longer storage, consider freezing it; ensure it’s well-wrapped to avoid freezer burn and can be stored for up to 3 months.

Signs of spoilage include an off smell or visible mold. If reheating, ensure even heating throughout to prevent any cold spots—reheating in the oven at 350°F for about 15-20 minutes is effective. Always err on the side of caution when in doubt about spoilage.

Freezing individual portions can allow you to enjoy this delightful dessert any time without needing a full bake. And remember to let it thaw in the fridge overnight before reheating to ensure the best recovery of flavors and textures.

Make Ahead Strategies

Consider preparing the pumpkin filling ahead of time and storing it in the refrigerator for up to 2 days before baking. This strategy saves time on busy days and prompts fresher flavors as the spices can blend and deepen.

You can also prepare the topping separately, storing it in an airtight container until you’re ready to assemble and bake. This step reduces prep time considerably on the day of serving and ensures a delightful, freshly baked dessert.

Assess how various elements of the recipe hold up over time to avoid soggy textures. For example, baking the cobbler directly before serving yields the best results in terms of taste and presentation.

When you reheat, be careful not to overdo it—monitoring closely will help preserve the cobbler’s delicate balance and quality. You may also choose to add fresh elements like whipped cream just before serving to enhance freshness.

Scaling Instructions

To halve the recipe, simply divide all ingredients by two, ensuring the baking time remains similar as smaller sizes often bake quicker. For doubling or tripling, check that your baking dish is adequately sized, as you want to avoid overcrowding, which can lead to uneven baking.

Consider ingredient adjustments that may need slight modifications; for instance, spices may need to be proportionally increased less than doubled to maintain balance. It might be necessary to adjust baking times when scaling up, as larger quantities can require additional time in the oven.

Always keep in mind the quantity of servings you plan to accommodate when preparing the dish. Storing extra portions can help maintain freshness and keep your dessert options versatile.

Nutritional Deep Dive

Your Pumpkin Pecan Cobbler packs nutritional value alongside satisfying flavor. With a generous serving of pumpkin, each piece delivers a dose of vitamins A and C, crucial for immune function and skin health. In addition, the fiber content from both pumpkin and pecans supports digestion and contributes to overall health.

Macro-wise, the dessert balances carbohydrates from the filling with healthy fats found in pecans. This balance not only keeps the meal enjoyable but offers healthy energy sources that can sustain you longer than typical sugary desserts.

Micronutrient analysis reveals that this cobbler also has calcium and potassium benefits from the nuts, playing a minor yet crucial role in supporting bone health and muscle function. Portion control will help manage caloric intake while still allowing you to indulge in this comforting fall treat.

Consider discussing dietary restrictions or alternatives for guests, ensuring everyone can enjoy a slice of this warm, spiced delight while staying mindful of their health needs and preferences.

Dietary Adaptations

To make this Pumpkin Pecan Cobbler gluten-free, you can substitute regular flour with almond flour or a gluten-free baking blend, ensuring that the texture remains intact. For a dairy-free option, choose plant-based butter or coconut oil as a replacement.

If you’re seeking a lower-carb twist, consider using a keto-friendly sweetener and almond flour. This adaptation will still give you that rich flavor profile while accommodating low-carb dietary needs.

Vegan adaptations can easily be made by substituting eggs with flaxseed meal or applesauce, adding moisture without dairy or meat. Moreover, using coconut cream in place of whipped cream can offer a delicious vegan dessert experience.

Low-FODMAP dietary users can adjust by selecting pecans in moderation and ensuring no excess high-FODMAP ingredients are included, making this delicious dish suitable for restricted diets.

Troubleshooting Guide

If you encounter texture issues, consider adjusting the liquid ratios; too much liquid can lead to a soggy cobbler while too little can result in dry textures. If flavor balance feels off, taste and adjust sweetness or spices before baking to achieve the desired flavor profile.

Temperature problems often arise with oven settings, ensuring your oven is calibrated correctly can prevent undercooking or burning. Use an oven thermometer to check your settings, confirming consistent temperatures throughout the process.

Equipment challenges might arise with baking dishes; ensure your dish is appropriate in size and material for even cooking. Glass or ceramic dishes work best to achieve that desired golden-brown finish and even heat distribution.

Recipe Success Stories

Community feedback about the Pumpkin Pecan Cobbler has been overwhelmingly positive, with many home bakers praising its ease of preparation and delicious flavor. Readers have shared their adaptations, showcasing creative toppings such as caramel drizzles or adding a layer of chocolate for unique twists.

Success stories highlight the enjoyment families have had making this cobbler together, turning a simple recipe into cherished memories around the kitchen. It’s a joyful tradition that brings loved ones closer, echoing the essence of fall and gratitude.

Photography tips include using natural light to capture the vibrant colors of the cobbler, showcasing the layering of pumpkin and pecans in beautiful detail. Social media posts have celebrated various adaptations that spark inspiration among home bakers, leading to a vibrant sharing community.

Frequently Asked Questions

Can I use fresh pumpkin instead of canned? Yes! You can roast and puree fresh pumpkin, but it may require more time than using canned pumpkin puree, which is more convenient for this recipe.

How should I store leftovers? Cool the cobbler completely, cover tightly or store in an airtight container in the refrigerator for up to 3 days.

Can I freeze the cobbler? Absolutely! Wrap it tightly and freeze for up to 3 months. Thaw in the fridge overnight before reheating.

How do I make it sweeter or less sweet? Adjust sweetness by increasing or decreasing the sugar added to the pumpkin mixture. Always taste before baking to find the right balance.

What can I substitute if I’m out of pecans? You can use walnuts, almonds, or even sunflower seeds as substitutes to maintain texture and flavor.

Can I make this cobbler ahead of time? Yes! You can prepare the pumpkin filling up to 2 days in advance and assemble it right before baking.

Is this recipe suitable for vegans? Yes, you can substitute eggs with flaxseed meal or applesauce and use plant-based butter.

What can I serve with this cobbler? Best served warm with whipped cream or vanilla ice cream, and consider a dash of caramel sauce for extra richness.

Do I need to cover it while baking? No, covering is unnecessary; letting it bake uncovered allows the top to get nicely browned and crisp.

What’s the best way to tell when it’s done? When the top is golden brown and the edges are bubbling, plus a toothpick inserted into the center should come out clean.

Additional Resources

For those who enjoyed this recipe, consider exploring related recipes that highlight the flavors of fall, such as Apple Crisp or Sweet Potato Pie. Technique guides on making the perfect pie crust or creating homemade whipped cream can enhance your baking skills and dessert offerings.

Ingredient information on the nutritional benefits of pumpkin and nuts can further inspire and inform your cooking journey. Additionally, researching seasonal variations can help you discover new and exciting ways to present familiar flavors throughout the year.

Join the Conversation

We invite you to share your experiences with this Pumpkin Pecan Cobbler! Join us on social media, capturing and sharing your baking journey with photos and stories. Sharing variations you’ve adopted or how you’ve hosted gatherings around this dessert can inspire others and build a community passionate about cooking.

Engagement through recipe reviews is encouraged, as it allows everyone to connect over their culinary successes and challenges. We’re excited to hear how you make this recipe uniquely yours and the memories you create along the way!

The Recipe

Pumpkin Pecan Cobbler

Serves: 8

Prep Time: 15 mins

Cook Time: 45 mins

Total Time: 60 mins

Kitchen Equipment Needed

  • Medium baking dish
  • Mixing bowls
  • Whisk
  • Spatula

Ingredients

  • 1 cup of pumpkin puree
  • 1 cup of granulated sugar
  • 1 teaspoon of cinnamon
  • ½ teaspoon of nutmeg
  • 2 eggs
  • 1 cup of chopped pecans
  • ¾ cup of all-purpose flour
  • ½ teaspoon of vanilla extract
  • ¼ teaspoon of salt

Directions

  1. Preheat the oven to 350°F (175°C).
  2. In a large mixing bowl, whisk together the pumpkin puree, sugar, cinnamon, nutmeg, eggs, and vanilla until well combined.
  3. Fold in the chopped pecans, flour, and salt until the mixture is smooth.
  4. Pour the pumpkin mixture into a greased medium baking dish.
  5. Bake for 45 minutes, or until the top is golden brown and a toothpick inserted into the center comes out clean.
  6. Allow to cool slightly before serving warm.

Recipe Notes

  • Feel free to substitute with different nuts or add dried cranberries for a fruity twist.
  • Store leftovers covered in the fridge for up to 3 days.
  • This recipe can easily be doubled for larger gatherings.

Best Chewy Pumpkin Snickerdoodle Cookies for Fall

Chewy Pumpkin Snickerdoodle Cookies: A Fall Favorite

⚖️
Difficulty
Easy

⏲️
Prep Time
15 mins

🕒
Cook Time
12 mins

⏱️
Total Time
27 mins

🍽️
Servings
24 cookies

Welcome to your new favorite fall treat: Chewy Pumpkin Snickerdoodle Cookies! This delightful fusion of traditional snickerdoodle flavor and the festive warm notes of pumpkin elevates your baking experience to new heights. Packed with the essence of cinnamon, nutmeg, and other aromatic spices, each cookie offers a perfect balance of sweetness and a soft, chewy texture that is simply irresistible. Whether you’re hosting a cozy gathering or craving something sweet for yourself, these cookies are a must-try!

What makes these cookies stand out is not just their flavor, but also their heartwarming aroma that fills your kitchen with the spirit of autumn. With the added richness of pumpkin puree, each bite envelops your taste buds and creates a nostalgic experience reminiscent of holiday celebrations. So grab your ingredients, preheat the oven, and let’s dive into the world of Chewy Pumpkin Snickerdoodle Cookies!

Quick Recipe Highlights

  • Flavor Profile: A wonderful blend of cinnamon, nutmeg, and pumpkin that creates a sweet and warm experience.
  • Texture: Soft, chewy cookies with a slightly crisp exterior, perfect for dunking in your favorite beverage.
  • Aroma: The intoxicating scent of pumpkin and spices wafts through your home while baking.
  • Visual Appeal: Beautifully golden brown cookies rolled in cinnamon sugar, making them a feast for the eyes.
  • Skill Level Needed: Perfect for beginners; simple techniques make this an enjoyable baking experience.
  • Special Equipment: Just basic kitchen tools like a mixing bowl, baking sheet, and an oven.

Recipe Overview

  • Difficulty Level: This recipe is classified as easy, making it accessible for bakers of all levels. You don’t need specialized skills to achieve cookie perfection.
  • Category: These cookies fall into dessert or snack categories, perfect for any time of day.
  • Cuisine: Rooted in American traditions, this recipe blends classic baking techniques with seasonal flavors.
  • Cost: The ingredients are generally inexpensive, making these cookies a budget-friendly indulgence.
  • Season: Ideal for fall, when pumpkin is in season and everyone craves comforting flavors.
  • Occasion: Perfect for holidays, gatherings, or just a delightful treat to brighten your day.

Why You’ll Love This Recipe

First and foremost, the taste and texture combined create an explosion of flavor in every bite. The warm spices of cinnamon and nutmeg enhance the pumpkin’s natural sweetness, resulting in a cookie that’s not only delicious but also uniquely satisfying. The chewy texture is complemented by a slight crispness on the edges, making them fun to eat and perfect for any occasion.

Moreover, the convenience of this recipe can’t be beaten. With quick prep and minimal cooking time, these cookies can be baked fresh whenever the mood strikes. Whether you have unexpected guests or just a craving for something sweet, you can whip up a batch in no time.

The nutritional advantages are another highlight. While indulging in a treat, you also get the benefits of pumpkin, which is rich in vitamins A and C, fiber, and antioxidants. This enhances the healthful nature of your dessert without sacrificing taste.

Socially, Chewy Pumpkin Snickerdoodle Cookies are fantastic for gatherings. They’re easy to share, perfect for cookie exchanges, and always a hit at parties. Watching friends relish each bite creates a bond over shared enjoyment, making these cookies perfect for creating memories.

Finally, these cookies are cost-effective and accessible. Most ingredients are staples in many households, and you won’t have to splurge on expensive items. This means you can bake without breaking the bank while still impressing everyone with your delicious treat.

Historical Background and Cultural Significance

The origin of snickerdoodle cookies is somewhat debated, with various theories tracing their roots back to Dutch settlers in America who called them “sneckerdoodles.” These cookies took on a life of their own as they blended new ingredients and techniques, resulting in the soft, chewy variety we enjoy today. The addition of pumpkin to this classic cookie represents a modern twist adapting to seasonal flavors.

Culturally, both pumpkin and snickerdoodle emerge from rich traditions in American baking. Pumpkin is a symbol of fall and harvest, deeply embedded in the culinary practices of many communities, especially during holidays like Thanksgiving. Combining these aspects highlights the importance of seasonal foods in creating comforting, relatable recipes.

Over the years, the snickerdoodle has evolved with numerous adaptations, but the base recipe and the warmth it delivers remain unchanged. The introduction of pumpkin into the mix not only revitalizes the classic cookie but also infuses it with festive flair suitable for cool weather. This evolution helps keep traditional recipes relevant and exciting.

Regionally, you’ll find variations across different parts of the United States, particularly during fall. Each region brings its own unique spices or alterations to the basic recipe, allowing for personal and cultural expressions through the universal medium of cookies. This adaptability is part of what makes baking so inviting and accessible to everyone.

Ingredient Deep Dive

Pumpkin puree is the star ingredient in Chewy Pumpkin Snickerdoodle Cookies. Historically, pumpkins have been a staple in American diets, celebrated for their versatility in sweet and savory dishes alike. Nutritionally, pumpkin is low in calories while high in vitamins, particularly vitamin A, which supports good vision and skin health. When choosing pumpkin, opt for pure pumpkin puree rather than pumpkin pie filling to avoid added sugars and spices.

For the sugars, both granulated sugar and brown sugar are essential. Granulated sugar helps achieve a crisp edge, while brown sugar adds moisture and depth of flavor thanks to its molasses content. Selecting high-quality sugars ensures a better result, and proper storage in airtight containers extends their shelf life.

Cinnamon is another crucial element, offering warmth and a delightful aroma. This spice has a significant history, dating back thousands of years, and is known for its anti-inflammatory and antioxidant properties. To ensure maximum freshness and flavor potency, buy whole cinnamon sticks and grind them as needed.

The flour used is typically all-purpose, providing the right balance of structure and chewiness. Stored properly in a cool, dry place, flour can last for several months. For alternatives, consider using a gluten-free blend if necessary, but be aware that this might alter the texture of your cookies.

Common Mistakes to Avoid

  • Not measuring ingredients accurately. Use kitchen scales or measuring cups to avoid disaster!
  • Overmixing the dough can lead to tough cookies instead of chewy ones.
  • Baking at the wrong temperature. Use an oven thermometer to ensure accuracy.
  • Skipping the chilling step which can lead to spreading while baking.
  • Not rolling cookies in cinnamon sugar before baking for that signature snickerdoodle taste.
  • Using expired or stale ingredients can compromise flavor and texture.
  • Not allowing cookies to cool on the baking sheet can cause them to break.
  • Ignoring the importance of using quality ingredients; fresher is always better.
  • Overbaking can lead to dry cookies; always keep an eye on time.
  • Not using parchment paper or silicone mats can lead to sticking.

Essential Techniques

One important technique for perfect cookies is to ensure proper creaming of the butter and sugars. This step incorporates air into the batter, helping the cookies rise and achieve that delightful chewiness we all love. Aim for a light and fluffy consistency; watch for changes in texture as a cue for success.

Chilling the cookie dough before baking is essential. This helps prevent excessive spreading during baking and results in a thicker cookie. Allowing the dough to rest in the fridge for 30 minutes enhances flavors, while also firming up the fats throughout the dough.

Pro Tips for Perfect Chewy Pumpkin Snickerdoodle Cookies

Always soften your butter to room temperature before mixing; this ensures proper incorporation with sugars.

Consider using a cookie scoop for uniform sizes to ensure even baking for all cookies.

For enhanced spice flavor, feel free to add a pinch of cloves or ginger for an extra kick!

Experiment with different coatings, such as a combination of granulated and brown sugars, for varied sweetness.

Try baking a small test cookie first; this will give you a sense of the final texture and flavor before committing to the whole batch.

Using fresh, high-quality spices significantly enhances the overall flavor of your cookies.

Variations and Adaptations

Regional variations of these cookies might incorporate local spices or flavors, such as pecans or maple syrup, giving them unique regional flair. In particular, adding a dash of cardamom can provide an exciting twist.

Seasonal adaptations can include substituting pumpkin with sweet potato or butternut squash during different times of the year, each providing distinct flavors while maintaining the chewy texture.

If you’re looking to adjust for dietary needs, consider substitutions for gluten-free and vegan adaptations. A gluten-free flour blend can replace all-purpose flour, while flaxseed meal can be used instead of eggs for a vegan option.

To create a more decadent version, consider stirring in chocolate chips or chopped nuts into the dough for added flavor and texture. This opens up a world of customization and personal preference.

Another way to change the texture is to thicken the dough by adding some oats, resulting in a more wholesome cookie with a delightful chew.

Presentation can also vary; instead of rolling the dough in cinnamon sugar, drizzle melted chocolate over baked cookies or decorate with festive sprinkles to make them festive for any occasion.

Serving and Presentation Guide

For an inviting presentation, stack the cookies neatly on a decorative platter. You can use colorful baking paper to line the plate, adding an appealing pop of color. Garnish with a sprinkle of cinnamon on top for that finishing touch!

Consider serving your cookies with delectable accompaniments such as hot apple cider, pumpkin spice lattes, or a scoop of vanilla ice cream for a delightful dessert experience.

Temperature is key; serve warm cookies fresh from the oven or allow them to cool fully for a softer, chewier texture. If you’re preparing these cookies for a gathering, present them on tiered serving trays for visual impact.

Portion control can also be an essential aspect of serving. Offering smaller cookies or half-sized portions allows guests to sample other treats while enjoying their favorite cookies.

Wine and Beverage Pairing

For a delightful pairing, consider serving Chewy Pumpkin Snickerdoodle Cookies with a glass of sweet dessert wine, such as a late-harvest Riesling. Its floral notes beautifully complement the spices in the cookies.

If you prefer non-alcoholic options, serving these cookies with spiced apple cider or a pumpkin spice latte creates a comforting fusion of flavors that highlights the essence of fall.

For coffee lovers, a cup of freshly brewed dark roast coffee balances the sweetness of the cookies with its rich, robust flavor. This combination encourages a delightful exchange of flavors with each bite.

When serving warm beverages, remember to maintain appropriate serving temperatures to enhance both the cookie’s enjoyment and the beverage pairing experience.

Storage and Shelf Life

When it comes to storage, place your cookies in an airtight container at room temperature. This will keep them soft and chewy for up to one week. To extend their shelf life, consider freezing leftover cookies.

For freezing, a simple method is to layer the cookies between parchment paper in an airtight container. They can last up to three months in the freezer without losing flavor or texture. Always label your container with the date for clarity.

Signs of spoilage include a hard or brittle texture, as well as any change in smell or appearance. It’s always best to enjoy your cookies fresh, but proper storage techniques will help keep them celebratory and delicious.

When you’re ready to enjoy cookies that have been frozen, allow them to thaw on a countertop for a few minutes or warm them slightly in the oven for the perfect soft bite once again.

Make Ahead Strategies

To streamline your baking process, you can prepare the dough ahead of time. Roll it into a log, wrap it tightly in plastic wrap, and refrigerate for up to a week or freeze for longer storage until you are ready to bake.

When you’re ready to bake, simply slice the dough into rounds and add a few extra minutes to the cooking time if baking from frozen. This method saves time, allowing for fresh cookies any day!

Consider prepping and measuring out ingredients in advance for recipes involving multiple steps. Organizing your workspace allows you to smoothly transition from mixing to baking without stress.

For maximum freshness, add any delicate toppings or glazes just before serving. This preserves their taste and appearance while allowing for a warm, inviting presentation.

Scaling Instructions

If you wish to halve this recipe, simply divide all ingredient quantities in half, and adjust the baking time as needed to ensure the cookies bake evenly.

Doubling or tripling the recipe is equally simple; just ensure you have enough baking sheets and space in your oven to accommodate all the cookies. Multiple batches may require slightly longer baking times or extra cooling space.

Keep an eye on the texture and color of the cookies during baking, as larger batches may result in slight variations. Ensuring that every batch bakes for the right amount of time helps maintain quality.

If you’re unsure about timing adjustments, consider baking a test batch to gauge the necessary alterations before committing to the larger quantity. This ensures you serve your guests perfectly baked cookies every time.

Nutritional Deep Dive

In a single Chewy Pumpkin Snickerdoodle Cookie, you can expect roughly 100 calories, with the majority coming from sugars and carbohydrates. Understanding these macros can help guide portion control and overall intake.

Micronutrient analysis shows that the pumpkin contributes significantly to vitamin A intake, making these cookies not just a treat but also a source of essential nutrients. Incorporating this ingredient elevates the nutritional profile compared to typical cookies.

When enjoying any dessert, moderation is key for weight management. Consider pairing these cookies with a protein-rich snack or a serving of fruit to create a more balanced dessert experience.

Dietary considerations are crucial, especially for those watching their sugar intake. Reducing sugar levels or opting for sugar substitutes can cater to health-conscious individuals while still enjoying the iconic flavor profile of these cookies.

Dietary Adaptations

For those following a gluten-free diet, substitute all-purpose flour with a gluten-free blend to create a similar texture and flavor without sacrificing enjoyment.

Dairy-free options can easily be achieved by using dairy-free butter or coconut oil, which still yields soft and chewy cookies that every guest will enjoy.

If vegan, simply replace the egg with a flax egg made from ground flaxseed and water. This not only binds the ingredients but also adds a boost of omega-3 fatty acids.

For individuals on low-carb or keto diets, alternatives such as almond flour and sugar substitutes can maintain the texture while helping to cut down on carbohydrates typically found in conventional cookies.

Following a paleo diet? Choose natural sweeteners like honey or maple syrup, while sticking to whole-food ingredients like almond flour for a wholesome cookie experience.

Low-FODMAP dieters can be accommodated by omitting any added sugars and ensuring no high-FODMAP ingredients are used in the recipe to enhance digestibility.

Troubleshooting Guide

If your cookies end up too dry, it may be due to overbaking or incorrect measuring of flour. Always keep an eye on baking time, and consider using a kitchen scale for accurate portions.

Should you encounter flavor balance issues, it might indicate insufficient spices or salt. Adding a pinch of salt enhances sweet flavors, so ensure your spices are fresh and potent.

Temperature problems can arise from inaccurate oven calibration. Use an oven thermometer to verify overheating or underbaking, which can lead to different textures and flavors.

If equipment challenges occur, such as cookie sheets sticking, ensure they are properly lined with parchment paper or silicone mats to prevent sticking and promote even baking.

Ingredient substitutions might alter the final result; understanding the role of each component in the dough will help you make better choices in the future.

Troubles with timing can often be traced back to preheating the oven. Always allow your oven to reach its baking temperature before inserting the cookies to achieve optimal results.

Recipe Success Stories

Many bakers rave about the delightful outcome of Chewy Pumpkin Snickerdoodle Cookies when they follow the recipe closely. Community feedback highlights the winning combination of flavors and textures, making it a go-to treat for fall celebrations.

Numerous variations shared by readers have led to exciting adaptations like adding white chocolate chips or nuts for varied textures, proving that the versatility of this recipe knows no bounds.

Photography tips provided by readers also showcase the beautiful end result, encouraging others to share their creations online, sparking a wave of conversation and excitement around this seasonal favorite.

Adaptation stories shine through, with many bakers customizing the recipe for dietary restrictions or unique flavor profiles, allowing everyone to enjoy this delicious cookie experience.

Frequently Asked Questions

Can I use fresh pumpkin instead of canned? Yes, you can. However, make sure to properly cook and puree the pumpkin to achieve the right consistency for your cookies.

How do I store leftover cookies? Keep your cookies in an airtight container at room temperature for up to a week or freeze them for longer storage.

Can I freeze unbaked cookie dough? Definitely! You can refrigerate or freeze the dough rolled into individual balls, making it convenient for baking fresh cookies anytime.

What can I use instead of eggs? For a vegan adaptation, a flaxseed egg can replace a regular egg in this recipe. Combine one tablespoon of flaxseed meal with two tablespoons of water, let it sit until it thickens, and then use it in place of the egg.

How do I know when cookies are done baking? Look for a light golden color on the edges, and the center should look slightly underbaked as they continue to cook on the baking sheet.

What spices can I add to enhance the flavor? You can add a pinch of ginger, cardamom, or allspice for a unique twist on the traditional snickerdoodle flavors.

Can I use a different type of flour? Sure! You can try using whole wheat flour or gluten-free flour for a different taste and nutritional profile, but be aware of potential adjustments to the recipe.

Why did my cookies spread too much while baking? This can happen if the dough was too warm. Ensure you chill your dough for at least 30 minutes before baking for best results.

Are these cookies suitable for a cookie exchange? Absolutely! Their unique flavor and chewy texture make them a delightful addition to any cookie spread.

Can I add chocolate chips to the dough? Yes! Chocolate chips would add a delightful touch; just make sure to adjust the quantities of sugar accordingly.

Additional Resources

For more seasonal inspiration, check out our related recipes featuring baked goods utilizing pumpkin, apples, and other fall flavors. You can also explore technique guides on cookie-making to perfect your skills for future baking adventures.

Enhance your understanding ahead of time with ingredient information that will boost your confidence when shopping for fresh produce, spices, and other essentials to optimize the baking process. Additionally, consider equipment recommendations for kitchen tools that can simplify your routine!

With the ever-changing seasons, try experimenting with our seasonal variations to keep your baking fresh and exciting throughout the year.

Join the Conversation

We encourage you to share your delicious success stories from baking Chewy Pumpkin Snickerdoodle Cookies. Post your mouthwatering photos on social media using dedicated hashtags and engage with fellow bakers about your personal twists on this classic recipe.

Recipe reviews are highly valued in our community, as they inspire newcomers and seasoned bakers alike to try new things. Share your feedback and help others discover the joy of this autumnal favorite.

We want to hear how you customized this recipe! Share variations that worked well for you, or delightful combinations that your family and friends adored. Your culinary ideas contribute to creating a rich shared experience!

The Recipe

Chewy Pumpkin Snickerdoodle Cookies

Serves: 24 cookies

Prep Time: 15 mins

Cook Time: 12 mins

Total Time: 27 mins

Kitchen Equipment Needed

  • Mixing bowls
  • Baking sheets
  • Parchment paper
  • Measuring cups and spoons
  • Rubber spatula
  • Cookie scoop (optional)

Ingredients

  • 1 cup unsalted butter, softened
  • 1 cup granulated sugar
  • 1 cup packed brown sugar
  • 1 cup pumpkin puree
  • 2 large eggs
  • 2 tsp vanilla extract
  • 4 cups all-purpose flour
  • 2 tsp cream of tartar
  • 1 tsp baking soda
  • 1/4 tsp salt
  • 1 tbsp ground cinnamon for dough
  • 1/4 cup granulated sugar for rolling
  • 1 tbsp ground cinnamon for rolling

Directions

  1. Preheat your oven to 350°F (175°C) and line baking sheets with parchment paper.
  2. In a large bowl, cream the softened butter, granulated sugar, and brown sugar until light and fluffy.
  3. Add in the pumpkin puree, eggs, and vanilla extract, mixing until combined.
  4. In another bowl, combine the flour, cream of tartar, baking soda, salt, and cinnamon. Gradually mix the dry ingredients into the wet ingredients until fully incorporated.
  5. In a small bowl, mix the rolling sugar and cinnamon for coating.
  6. Using a cookie scoop, drop rounded balls of dough into the cinnamon-sugar mixture and roll to coat.
  7. Place the coated dough balls onto the prepared baking sheets about 2 inches apart.
  8. Bake for 10-12 minutes, or until the edges are lightly golden. The centers may appear soft, but they will firm up upon cooling.
  9. Remove from the oven and let cool on the baking sheets for 5 minutes, then transfer to wire racks to cool completely.

Recipe Notes

  • You can substitute pumpkin puree with sweet potato or butternut squash puree for a unique flavor.
  • For a nutty flavor, try adding chopped pecans or walnuts to the dough.
  • Store cookies in an airtight container at room temperature for up to one week.
  • You can freeze baked cookies for up to three months for future enjoyment!

Best Cinnamon Apple Bread – Soft, Moist, and Full of Flavor

Cinnamon Apple Bread: A Warm and Cozy Delight

⚖️
Difficulty
Easy

⏲️
Prep Time
15 mins

🕒
Cook Time
60 mins

⏱️
Total Time
75 mins

🍽️
Servings
10 slices

Cinnamon Apple Bread is the perfect cozy treat to enjoy with your morning coffee or as an afternoon snack. This delightful bread bursts with flavors of sweet apples and warm cinnamon, creating a comforting experience that captivates your taste buds with every bite. The combination of fresh, crisp apples and fragrant spices not only reminds us of autumn but also brings a sense of home and nostalgia that many of us cherish.

As you slice into the golden-brown crust, the soft, moist interior reveals tender apple pieces, inviting you to taste what’s inside. Each bite is a harmonious blend of sweetness, warmth, and spice—ideal for sharing with loved ones or relishing by yourself, perhaps with a drizzle of honey or a pat of butter. Whether you’re baking to impress or simply indulging your own cravings, this Cinnamon Apple Bread promises both comfort and satisfaction.

Quick Recipe Highlights

  • Flavor Profile: This bread features sweetness from ripe apples complemented by the warm spice of cinnamon and hints of vanilla.
  • Texture: Experience a delightful contrast between the soft, cake-like bread and tender apple chunks that add bursts of moisture.
  • Aroma: The aroma of baking Cinnamon Apple Bread fills your kitchen with enticing notes of cinnamon, sugar, and baked apples.
  • Visual Appeal: The golden-brown crust, sprinkled with cinnamon sugar, makes for an enticing presentation on any table.
  • Skill Level Needed: This easy recipe is perfect for novice bakers, requiring basic mixing and measuring skills.
  • Special Equipment: You will need a mixing bowl, measuring cups, and a loaf pan to create this beautiful bread at home.

Recipe Overview

  • Difficulty Level: This Cinnamon Apple Bread is rated easy, making it approachable for beginners and experienced bakers alike. The straightforward directions and limited ingredients make it a fantastic project for anyone looking to hone their baking skills.
  • Category: This bread falls under the breakfast and snack categories, making it suitable for a variety of occasions. It’s versatile enough for both morning meals and afternoon tea.
  • Cuisine: Reflecting a blend of American baking traditions, this recipe has embraced the use of seasonal ingredients, particularly apples, which are a staple in many fall recipes.
  • Cost: The ingredients for this bread are affordable and widely available, making it a budget-friendly choice for home bakers.
  • Season: While this recipe shines in the fall during apple harvest time, it can be enjoyed year-round with store-bought apples.
  • Occasion: Cinnamon Apple Bread is perfect for cozy family breakfasts, holiday gatherings, or as a gift for friends and neighbors.

Why You’ll Love This Recipe

Cinnamon Apple Bread tantalizes your taste buds with its distinct flavor profile, featuring sweet, juicy apples paired with spicy cinnamon notes. The bread’s moist texture makes it incredibly satisfying, providing a perfect balance between sweetness and spice. Pair it with a cup of tea or coffee, and you have a delightful treat that can easily elevate any occasion.

The preparation of Cinnamon Apple Bread is a breeze, requiring just a few simple steps. It’s an excellent way to use up any extra apples lying around, effectively minimizing food waste. Plus, the baking process is a wonderful opportunity to fill your kitchen with heavenly aromas, drawing family and friends to gather around in anticipation.

Nutritionally, incorporating apples into your baking offers numerous benefits, including fiber and essential vitamins. This makes the bread not only a treat but a way to enjoy the goodness of fruit in a delicious format, appealing to health-conscious bakers.

Socially, this bread serves as a lovely centerpiece for gatherings. Whether you’re hosting a brunch or a cozy coffee date with friends, serving slices of this delectable bread encourages sharing and conversation, creating memorable moments together.

Lastly, with its accessible ingredients and straightforward process, baking Cinnamon Apple Bread is cost-effective. Preparing homemade treats not only allows you to control the ingredients but also enhances your baking skills, leaving you with a sense of accomplishment and delicious leftovers to enjoy.

Historical Background and Cultural Significance

Cinnamon Apple Bread has roots in American baking culture, where it serves as a comforting representation of home-cooked meals. Originating from early American settlers who embraced local produce and the warming spice of cinnamon, this bread reflects the resourcefulness of creating delicious meals from the land’s offerings.

In many cultures, bread holds significant value as a staple food and symbol of hospitality. Cinnamon Apple Bread, with its warm flavors and inviting aroma, embodies the spirit of welcoming guests into one’s home. It is often enjoyed during special occasions, from Thanksgiving to Christmas, bridging tradition and modern baking practices.

Over the years, variations of this bread have emerged, often reflecting regional preferences and seasonal availability of fruits. Across the United States, you’ll find different recipes that incorporate nuts, icing, or dried fruits, showcasing the diversity of this beloved baked good.

Regional adaptations have also brought unique twists to the recipe. For instance, in the Northeast, you might find a version enriched with maple syrup, while Southern variations may include a cream cheese swirl. These adaptations highlight the cultural significance of bread-making as families put their personal touches on classic recipes.

Ingredient Deep Dive

  • Apples: Apples have a rich history and were first cultivated in Central Asia. This fruit is not only delicious but also a good source of dietary fiber, vitamin C, and various antioxidants. When selecting apples for this recipe, choose firm varieties like Granny Smith or Honeycrisp, as they hold up well during baking. Store them in a cool, dry place to keep them fresh longer.
  • Cinnamon: Known for its warm and comforting flavor, cinnamon has been used for thousands of years. It possesses anti-inflammatory and antioxidant properties. To select high-quality cinnamon, look for sticks or ground powder with a strong aroma. For storage, keep cinnamon in a cool, dark place to maintain its potency. Ground cinnamon can also be substituted with fresh stick cinnamon, but the flavor may be slightly different.
  • Flour: All-purpose flour is a staple in most baking recipes, and its versatility makes it indispensable. It is made from a blend of hard and soft wheat, providing the right protein level for structure and texture in baked goods. Opt for unbleached flour for a slightly richer flavor. Store flour in an airtight container in a cool, dry area to prevent spoilage.
  • Sugar: Granulated sugar is commonly used to sweeten baked goods, but variations like brown sugar can add moisture and depth of flavor to recipes. To ensure freshness, store sugar in a cool area, and avoid exposure to humidity, which can cause clumping.

Common Mistakes to Avoid

  • Using Overripe Apples: Ensure that your apples are fresh and firm, as overripe apples can turn mushy during baking.
  • Not Measuring Ingredients Accurately: Precision is key when baking. Use measuring cups and spoons to ensure accurate measurements for a perfect loaf.
  • Overmixing the Batter: Mixing too vigorously can lead to a dense bread. Mix just until the ingredients are combined for a lighter texture.
  • Skipping the Parchment: Lining your baking pan with parchment paper can help prevent sticking and make removal easier.
  • Underbaking: Make sure to check for doneness with a toothpick inserted in the center; it should come out clean.
  • Cooling Improperly: Allowing the bread to cool in the pan can lead to soggy spots. Turn it out onto a wire rack to cool completely.
  • Ignoring the Rest Period: Allowing the bread to sit for a few moments before slicing enhances flavor and texture.
  • Using Cold Ingredients: Ensure that eggs and butter are at room temperature for a better emulsion in the batter.
  • Forgetting to Preheat the Oven: This step is essential for even cooking; a preheated oven allows the bread to rise properly.
  • Not Adjusting for Altitude: If you live in a high-altitude area, you may need to make adjustments like adding more flour or baking briefly.

Essential Techniques

  • Measuring Ingredients: Accurate measurement of dry and wet ingredients is essential for perfect baking. Using dry measuring cups for solids and liquid measuring cups for liquids can prevent mishaps. Always level off dry ingredients with a knife for precision.
  • Mixing: The method of combining wet and dry ingredients is crucial for texture. Use a gentle folding technique when adding dry ingredients into the wet mixture to avoid overmixing, which can create a tough bread.
  • Testing for Doneness: The most effective way to ensure your bread is cooked without being dry is to conduct a toothpick test. Insert a toothpick into the center of the loaf; it should come out clean if baked properly.
  • Cooling: Cooling the bread correctly is essential to avoid a soggy bottom. Transfer the pan to a cooling rack immediately after removing it from the oven, allowing air to circulate around it.

Pro Tips for Perfect Cinnamon Apple Bread

  • Choose a mix of sweet and tart apples for depth of flavor.
  • Let your batter rest for a few minutes before baking, allowing the flavors to meld.
  • Sprinkle some cinnamon sugar on top of the batter before baking to add a crispy, sweet crust.
  • Use a toothpick to poke holes in the batter before baking; it can allow moisture to distribute evenly.
  • Experiment with different nuts such as walnuts or pecans for added crunch.
  • Serve warm with butter or cream cheese spread for an indulgent treat.
  • Wrap and freeze any leftovers to enjoy in the future; it retains its flavor well when frozen.
  • Glaze with icing after baking for a sweet finish that enhances presentation.

Variations and Adaptations

Cinnamon Apple Bread can be tailored to suit various tastes and dietary needs. For a fruity twist, consider adding cranberries or raisins to the batter. You can also substitute some of the all-purpose flour for whole wheat flour for a heartier version packed with fiber.

Make the recipe gluten-free by using a gluten-free flour blend instead of all-purpose flour. This adaptation allows everyone to enjoy this sumptuous bread without dietary restrictions.

For seasonal adaptations, consider incorporating pumpkin purée or spices like nutmeg during fall holidays. You can also experiment with different spices, like cardamom or ginger, to give the bread a fresh, unique flavor.

Texture modifications can be achieved by adjusting the apple quantities; for a denser bread, use fewer apples, or for a lighter crumb, mix in some buttermilk to the batter.

Presentation plays a crucial role; consider serving the bread warm, topped with a scoop of vanilla ice cream or a dollop of whipped cream, to add a modern touch to traditional baking.

Serving and Presentation Guide

To serve your Cinnamon Apple Bread beautifully, consider using a serrated knife to slice the loaf for a clean presentation. Arrange the slices on a decorative platter, perhaps garnished with fresh apple wedges or a sprinkle of powdered sugar for an elegant touch.

For garnishing ideas, a light drizzle of caramel sauce or a cream cheese glaze can enhance visual appeal and flavor. If serving during holidays, consider placing the bread alongside nuts and dried fruits for a festive table display.

Temperature considerations are key—Cinnamon Apple Bread is best enjoyed warm or at room temperature. If stored in the refrigerator, reheat slices gently in the microwave or oven to revive its delightful softness.

Lastly, consider portion control by slicing the bread into thicker pieces for brunch or smaller bites for dessert. Offering a variety of serving suggestions will cater to guests’ preferences and make your gathering special.

Wine and Beverage Pairing

When it comes to pairing beverages with your warm Cinnamon Apple Bread, a light, fruity white wine, such as Riesling or Moscato, enhances the sweetness while balancing the flavors. For a more muted pairing, a dry cider with hints of apple and spice can complement the bread beautifully.

If alcoholic drinks aren’t on the menu, consider offering spiced apple cider or a warm chai latte, both of which evoke the cozy flavors found in the bread. These warm beverages perfectly match the comforting essence of the baked good.

For those who prefer coffee, a well-brewed cup of medium roast coffee can enhance the bread’s cinnamon notes, while a flavored latte, like vanilla or caramel, adds a deliciously sweet touch.

Temperature recommendations highlight that beverages should be served warm alongside bread for an inviting experience, encouraging guests to enjoy every bite together with their drink.

Storage and Shelf Life

To maintain the freshness of your Cinnamon Apple Bread, store it in an airtight container at room temperature for up to three days. If you want to extend its shelf life, consider refrigerating it, which can keep it fresh for about a week.

For longer storage, placing the bread in the freezer is a great option. Wrap it tightly with plastic wrap and then foil, which prevents freezer burn. It can be stored this way for up to three months. When ready to enjoy, thaw overnight in the refrigerator and reheat briefly in the oven.

Signs of spoilage to watch for include visible mold or off odors. If any signs appear, it’s best to discard the bread to ensure safety.

Reheating instructions are simple—slice the bread and place it in a warm oven for about 10 minutes, or use the microwave for a quick 15-30 seconds to revive its original softness.

Freezing guidelines ensure that you can always have a quick treat on hand, perfect for unexpected guests or personal cravings without the need to bake from scratch.

Make Ahead Strategies

When planning to make Cinnamon Apple Bread in advance, consider preparing the batter up to a day ahead. Store it in the refrigerator, which allows the apples to infuse their flavors into the mix and can enhance the overall taste.

For storage between steps, slice the bread once cooled and place individual slices between layers of parchment paper in an airtight container, keeping them from sticking together.

Quality impact assessment shows that while the texture may slightly change when refrigerated, the flavors often improve, creating a richer dough with delightful apple and cinnamon notes.

Assembly tips for a last-minute bake can ease your preparations. Simply pour the chilled batter into a pre-prepared loaf pan and bake, adjusting the cooking time if necessary due to the colder initial temperature.

When reheating guidelines are followed, you can ensure the bread tastes freshly baked. Serve it warm with toppings like butter or your favorite spreads for maximum enjoyment.

Lastly, for fresh element additions, consider adding a sprinkle of fresh nuts or seeds on top before baking for a delightful crunch and visual appeal.

Scaling Instructions

When scaling your Cinnamon Apple Bread recipe, halving the ingredients is straightforward but requires careful attention to mixing times and baking. Ensure your pan size is adjusted accordingly, opting for smaller loaf pans for a better result.

If doubling or tripling the recipe, consider baking in batches to ensure even cooking and optimal texture. Keep in mind that larger quantities may require a longer baking time, so always check for doneness with a toothpick.

Equipment adjustments can be necessary when scaling. Larger mixing bowls or multiple pans might be needed to accommodate increased volume, ensuring all ingredients are mixed properly.

Timing modifications should reflect your adjustments. Monitor the baking process as larger batches may take longer to cook thoroughly.

Remember that storage considerations become especially important when doubling or tripling recipes, so plan accordingly to ensure that your delicious bread stays fresh and flavorful.

Nutritional Deep Dive

Understanding the nutritional value of your Cinnamon Apple Bread requires a breakdown of its macro and micronutrients. This bread typically contains carbohydrates from flour and sugar, offering a quick source of energy, while apples provide fiber and essential vitamins.

The sugar content can vary based on how much is used; reducing sugar can lead to a healthier version of this bread if you’re watching your intake. Adding walnuts or flaxseed can enhance the bread’s healthy fat profile, contributing to heart health.

Dietary considerations are crucial, especially for individuals with specific health goals. For example, whole wheat flour can increase fiber content, beneficial for digestive health and stable energy levels.

When analyzing portion size, it’s essential to consider the number of slices you yield from the loaf. For a more moderate serving size, consider cutting thicker slices so that everyone can enjoy the bread without overindulging.

Lastly, weight management tips remind us that moderation is vital. Pairing with a protein-rich topping, like Greek yogurt, can help balance the meal while offering satisfying energy.

Dietary Adaptations

There are many ways to adapt Cinnamon Apple Bread for various dietary needs. For those following a gluten-free diet, using a gluten-free flour mix or almond flour can make this recipe accessible without sacrificing taste.

Dairy-free adaptations are also feasible; substituting ingredients like coconut oil for butter and almond milk for regular milk retains the beloved flavors while accommodating lactose-intolerant individuals.

Vegan options are possible by replacing eggs with flax eggs or applesauce, maintaining moisture without compromising texture. This allows for a completely plant-based bread that everyone can enjoy.

Low-carb and keto adaptations would involve using almond flour or coconut flour to significantly decrease carbohydrate content while maintaining the same warm spices and flavors.

For paleo diets, ensure all ingredients are compliant, focusing on natural sweeteners like honey or maple syrup instead of refined sugar, embracing whole foods for flavor.

Lastly, low-FODMAP variations can be achieved by ensuring the types of apples used are low in fructose, supporting digestion for those sensitive to fermentable carbohydrates.

Troubleshooting Guide

Troubleshooting common issues with Cinnamon Apple Bread can prevent mishaps. If your bread comes out too dense, it’s often due to overmixing the batter; ensure you mix just until combined for a light texture.

Flavor balance is another potential concern; if the bread tastes flat, consider adding a pinch of salt or enhancing cinnamon and sugar quantities to align with your preferences.

Temperature problems can arise if an oven runs hot or cold; using an oven thermometer can help ensure consistent baking conditions, leading to more predictable results.

Equipment challenges can sometimes occur when working with smaller pans, requiring adjustments in baking time; always keep an eye on doneness as larger or smaller loaves can cook unevenly.

If substituting ingredients, pay attention to moisture levels; some substitutes may yield different results in terms of texture or rise, so it’s advisable to make adjustments carefully.

Timing concerns are essential as well; ensure that you adjust cooking times based on the actual volume of batter or if you’re using a different type of pan. Underbaking can yield raw centers, while overbaking may dry out the edges.

Recipe Success Stories

Readers have shared numerous ways they’ve enjoyed Cinnamon Apple Bread, often highlighting how the smell alone brings their families together, creating an enticing atmosphere. Many have expressed that their first attempt was met with rave reviews, inspiring confidence in their baking skills.

Variations abound; one reader shared her success in substituting pears for apples, proving that this recipe invites creativity while remaining delicious. Others have modified the spice levels based on personal preferences, leading to unique and delightful results that still pay homage to the classic.

Adaptation stories often feature families gathering to bake together, transforming this simple recipe into a bonding experience where the act of cooking becomes just as significant as the final product.

Readers appreciate photography tips, aiding them in capturing the beauty of their baked bread. Beautifully styled slices alongside warm drinks became popular posts, showcasing the charm of homemade delights.

Through shared stories, communities have engaged, exchanging tips and celebrating successes, reminding us how a humble loaf of Cinnamon Apple Bread can shine in the spotlight of culinary traditions.

Frequently Asked Questions

Can I freeze Cinnamon Apple Bread?

Yes, you can freeze Cinnamon Apple Bread! Wrap the cooled bread tightly in plastic wrap, followed by foil, to prevent freezer burn. It can be stored for up to three months. To enjoy, simply thaw overnight in the refrigerator and reheat gently.

What type of apples work best in this recipe?

Firm varieties like Granny Smith, Honeycrisp, or Fuji are ideal for Cinnamon Apple Bread. They hold their texture during baking, offering a delightful contrast to the tender bread.

Can I add nuts to the bread?

Absolutely! Chopped walnuts or pecans make excellent additions, providing a satisfying crunch and enhanced flavor. Be sure to fold them into the batter gently to maintain the bread’s texture.

How do I know when my bread is done baking?

The best way to test for doneness is to insert a toothpick into the center of the loaf. If it comes out clean or with a few moist crumbs, the bread is ready. If it comes out wet, bake it for a few more minutes.

Can I make this recipe dairy-free?

Yes! Substitute butter with coconut oil or vegan butter and milk with almond or soy milk to create a delicious dairy-free version of Cinnamon Apple Bread.

How can I make the bread more flavorful?

To enhance the flavor, consider adding spices like nutmeg, vanilla extract, or even a splash of maple syrup for additional sweetness and depth.

Is it possible to make this bread gluten-free?

Yes! By using a gluten-free flour blend, you can successfully make Cinnamon Apple Bread that caters to gluten-sensitive individuals without sacrificing taste.

How can I store leftover bread?

Store leftover Cinnamon Apple Bread in an airtight container at room temperature for up to three days. You can refrigerate it for a week or freeze it for later enjoyment.

Can I add different fruits?

Certainly! You can experiment with fruits like pears, peaches, or even cranberries for a unique twist to the traditional recipe.

How do I prevent the bread from sticking to the pan?

To prevent sticking, greasing your loaf pan with butter or oil is essential. You may also line it with parchment paper for extra protection.

Additional Resources

For those eager to expand their baking repertoire, consider exploring related recipes that match the warm, comforting flavor profile of Cinnamon Apple Bread. Look into pumpkin bread, banana bread, or even a spiced zucchini bread, which all share similar techniques.

Techniques guides, such as mastering the art of quick breads or perfecting muffin-making, can provide invaluable knowledge for any baker. Understanding ingredient roles and how they interact will further enhance your baking abilities.

Ingredient information, particularly about apples and spices, can deepen your appreciation for their uses in different cultures and cuisines. This understanding can inspire further experimentation in your kitchen.

Equipment recommendations, such as quality mixing bowls, loaf pans, and cooling racks, can enhance your baking experience. Investing in the right tools ensures your baked goods turn out perfectly every time.

Lastly, exploring seasonal variations not only makes baking exciting but also allows you to incorporate fresh ingredients as they become available, connecting you to the natural cycle of food.

Join the Conversation

Join the community of home bakers sharing their success stories by engaging on social media platforms. Sharing your Cinnamon Apple Bread creations not only motivates you but also encourages others on their baking journey.

Consider photography tips to showcase your baked goods beautifully, capturing the lovely textures and colors to inspire engagement and comments from friends and fellow bakers.

Recipe reviews from family and friends can provide valuable feedback and inspire modifications to suit your group’s unique preferences. Discussions around variations often yield exciting new ideas that can evolve the traditional recipe.

Participating in community engagement can lead to discovering local baking groups or online forums that focus on shared interests. This connection helps build camaraderie over the love of baking and can foster lasting friendships.

By joining in, you’re not only sharing your path to culinary excellence but also contributing to a tapestry of stories, memories, and flavors that make baking truly special.

The Recipe

Cinnamon Apple Bread

Serves: 10 slices

Prep Time: 15 mins

Cook Time: 60 mins

Total Time: 75 mins

Kitchen Equipment Needed

  • Mixing bowls
  • Loaf pan
  • Measuring cups and spoons
  • Mixing spoon or spatula
  • Toothpick for testing doneness

Ingredients

  • 2 cups all-purpose flour
  • 1 teaspoon baking soda
  • 1 teaspoon baking powder
  • 1 teaspoon salt
  • 1 teaspoon ground cinnamon
  • 1/2 cup unsalted butter, softened
  • 3/4 cup granulated sugar
  • 2 large eggs
  • 1 teaspoon vanilla extract
  • 2 cups peeled, chopped apples (about 2 medium apples)

Directions

  1. Preheat your oven to 350°F (175°C) and grease a 9×5 inch loaf pan.
  2. In a mixing bowl, combine flour, baking soda, baking powder, salt, and cinnamon. Whisk together until blended.
  3. In a separate bowl, cream together the softened butter and sugar until light and fluffy.
  4. Add the eggs one at a time, beating well after each addition. Mix in vanilla extract.
  5. Gradually add the dry ingredients to the wet mixture, mixing just until combined.
  6. Gently fold in the chopped apples.
  7. Pour the batter into the prepared loaf pan, smoothing the top with a spatula.
  8. Bake in preheated oven for 60-65 minutes, or until a toothpick inserted in the center comes out clean.
  9. Remove from oven and let it cool in the pan for 10 minutes, then transfer it to a wire rack to cool completely.

Recipe Notes

  • Feel free to add nuts or raisins for extra flavor and texture.
  • This bread can be stored in an airtight container for up to three days at room temperature.
  • For a sweeter topping, sprinkle cinnamon sugar on the batter before baking.

Easy Caramel Apple Pie Bombs with Gooey Filling

Caramel Apple Pie Bombs: A Deliciously Sweet Treat

⚖️
Difficulty
Easy

⏲️
Prep Time
20 mins

🕒
Cook Time
25 mins

⏱️
Total Time
45 mins

🍽️
Servings
12 bombs

Indulge in the sweet and comforting flavors of Caramel Apple Pie Bombs, a delightful treat that combines the essence of a classic apple pie with gooey caramel. These bombs are perfect for any occasion, from cozy family gatherings to festive celebrations. Imagine biting into a warm, crispy outer shell to reveal cinnamon-spiced apple filling and a luscious caramel sauce. Each bite is a delicious explosion of flavor that will have everyone reaching for seconds!

The combination of sweet apples and rich caramel creates a comforting flavor profile that evokes nostalgia, making these pastry bombs a must-try. Whether served fresh out of the oven or at room temperature, the Caramel Apple Pie Bombs retain their appeal with a delightful crunch that gives way to soft, spiced apple goodness. You’ll love how versatile they are – serve them as a dessert, snack, or even a sweet breakfast treat!

Quick Recipe Highlights

  • Flavor Profile: A sweet and tart mixture of apples, cinnamon, and rich caramel sauce.
  • Texture: Crispy outer layer with a soft, gooey center packed with apples and caramel.
  • Aroma: The comforting scent of baked apples and cinnamon fills the air.
  • Visual Appeal: Golden-brown pastry with a glossy layer of caramel on top.
  • Skill Level Needed: An easy recipe suitable for all cooking skill levels.
  • Special Equipment: Requires parchment paper and a baking sheet.

Recipe Overview

  • Difficulty Level: Easy, perfect for beginners and experienced bakers alike.
  • Category: Dessert or snack, ideal for sharing with friends and family.
  • Cuisine: Inspired by American traditions, embracing the long-standing love for apple pie.
  • Cost: Reasonably priced ingredients make this a budget-friendly dessert.
  • Season: Best enjoyed in autumn when apples are at their peak.
  • Occasion: Celebrate holidays, birthday parties, or just a cozy afternoon treat.

Why You’ll Love This Recipe

Caramel Apple Pie Bombs not only taste amazing but also provide a satisfying texture contrast between the crispy pastry and the soft, spiced apple filling. The addition of caramel elevates the flavor to new heights, making it a perfect dessert for apple lovers. These bombs are a nostalgic nod to classic pies, ensuring each bite is filled with warmth and comfort.

The convenience of these bombs cannot be overemphasized. They can be prepared quickly and easily, making them an excellent option for unexpected guests or potluck contributions. The straightforward preparation and cooking processes make this recipe accessible to anyone, regardless of culinary experience.

Nutritionally, while these bombs are a treat, they offer the goodness of apples, which are rich in fiber and vitamins. Fresh apples contribute to a healthier dessert option, allowing you to indulge guilt-free. Plus, incorporating fruits into your diet can add essential nutrients and improve digestion.

Socially, Caramel Apple Pie Bombs are sure to impress your friends and family. These sweet treats are perfect for gatherings, providing a delightful and shareable dessert. Serve them warm or at room temperature, and watch as everyone enjoys this deliciously sweet creation while reminiscing about their favorite childhood desserts.

Finally, this recipe is cost-effective. The ingredients are accessible and budget-friendly, allowing you to create a crowd-pleaser without breaking the bank. The combination of affordability, ease, and deliciousness makes it a must-try for anyone looking to satisfy their sweet tooth.

Historical Background and Cultural Significance

Caramel Apple Pie stems from the rich tradition of American baking, where fruit pies have long been a favorite dessert. The use of apples in baked goods dates back to colonial times when apples were abundant in early American orchards. They symbolize comfort and home, often featured in family gatherings and festive occasions.

The caramel element adds a modern twist, showcasing the evolution of traditional recipes to incorporate newer flavors. Caramel has become a beloved addition to various desserts, enhancing the sweet profile while offering a touch of decadence.

Over time, variations of apple pie recipes emerged, with different regions of the U.S. showcasing their unique takes on this classic dish. The Caramel Apple Pie Bombs blend these influences, creating a fun and portable dessert that celebrates the love Americans have for pie.

Regional variations of apple pie often include spices and other fruit combinations, showcasing local tastes and preferences. Caramel Apple Pie Bombs allow for further experimentation, encouraging bakers to personalize their desserts based on what’s available or their unique flavor profiles.

Ingredient Deep Dive

Apples are the star of the show in this recipe. Rich in history, apples have been cultivated for thousands of years and were brought to America by European settlers. These nutritious fruits are packed with vitamins, antioxidants, and dietary fiber, making them a delightful and healthful component of any dish.

When selecting apples for your bombs, look for crisp, tart varieties such as Granny Smith or Honeycrisp, which hold up well when baked. For storage, keep apples in a cool, dry place or in the refrigerator to extend their freshness. If needed, substitutions can include pears for a different taste profile.

Caramel adds a rich, sweet dimension to the dish. It has roots in many culinary traditions and is celebrated for its transformative power in desserts. Not only does caramel enhance flavor, but it also adds a dramatic aesthetic appeal to desserts.

To make the most of your caramel, consider using homemade versions or high-quality store-bought options. Store caramel in an airtight container at room temperature for short periods or in the refrigerator for a longer shelf life. Substitute with chocolate for a different but equally indulgent flavor.

Common Mistakes to Avoid

  • Using the wrong type of apple: Choose firm varieties to maintain texture during baking.
  • Overstuffing the bombs: Too much filling can cause them to burst; stick to recommended amounts.
  • Not sealing properly: Ensure edges are well-sealed to prevent leaking during baking.
  • Skipping the chill time: Allow dough to chill for better handling and crispness.
  • Inconsistent pastry thickness: Keep the dough even for uniform cooking and texture.
  • Using too much flour: This can make your pastry tough; measure carefully.
  • Not preheating the oven: A properly preheated oven ensures even baking.
  • Underestimating cooking time: Monitor the bombs as they cook for the best results.
  • Forget to brush with egg wash: This step adds a lovely golden color to your bombs.
  • Ignoring baking sheet preparation: Use parchment to prevent sticking easily.

Essential Techniques

The technique of making the perfect pastry dough is vital for achieving flaky, crisp Caramel Apple Pie Bombs. Use cold ingredients and minimal handling to keep the dough light and airy. As you roll it out, aim for consistent thickness to prevent uneven cooking, resulting in a perfectly golden crust. Watch for visual cues such as golden edges to gauge doneness.

Another key technique is the art of sealing the bombs. Properly crimp the edges after filling to prevent any leaks during baking. Using a fork or a pinch method can ensure a tight seal. Look for visual indicators like a well-formed edge, ensuring the filling remains nestled within during baking.

Pro Tips for Perfect Caramel Apple Pie Bombs

Always chill your dough before rolling; this helps maintain the structure and avoids melting in hot hands. If you’re short on time, consider using store-bought dough to expedite the process while still achieving delicious results.

Experiment with spices; adding a pinch of nutmeg or ginger to your apple filling can elevate the traditional taste profile of these bombs. Consider adjusting the sweetness by mixing sweet and tart apple varieties for a complex flavor experience.

Use homemade caramel for a more personalized touch, allowing you to control sweetness and flavor intensity. This approach also makes the dish more impressive when serving guests.

To enhance presentation, dust the finished bombs with powdered sugar or drizzle with extra caramel sauce just before serving, creating an appealing dessert centerpiece.

Ensure that you let the bombs cool slightly before serving, allowing the filling to set a bit, preventing scalding bites. The waiting will make them easier to handle and eat.

Lastly, serve with a scoop of vanilla ice cream or whipped cream on the side for an indulgent dessert experience that pairs wonderfully with the flavors of the Caramel Apple Pie Bombs.

Variations and Adaptations

Explore various flavor profiles by substituting the apples with different fruits—pears, peaches, or even berries can provide unique twists. Each fruit brings a new dimension, making this dessert adaptable to seasonal offerings.

If you want to make the recipe seasonal, consider spices like pumpkin pie spice for fall or a citrus zest for a summer version. Such adaptations enhance the classic caramel apple flavor while infusing your seasonal preferences.

For dietary modifications, gluten-free pastry options are available using almond flour or coconut flour as substitutions. Vegan versions can use egg replacers and dairy-free caramel to ensure the recipe meets plant-based standards.

Texture modifications may include experimenting with crumb toppings, adding crushed nuts on top for crunch, or layering the filling with cake batter for added richness.

For presentations, consider using muffin tins to create individual-sized treats or bake them in decorative ramekins for a unique serving style that enhances the visual allure of the dish.

Serving and Presentation Guide

When plating the Caramel Apple Pie Bombs, consider arranging them on a large platter with vibrant fruits or simple greenery for a pop of color. This arrangement not only looks beautiful but also invites guests to help themselves.

Garnish options include a sprinkle of cinnamon or powdered sugar for added visual appeal. Drizzling some warm caramel sauce over the bombs just before serving can also enhance their presentation and flavor.

Traditional accompaniments like vanilla ice cream or whipped cream add richness and help balance the sweetness of the caramel. Maintaining room temperature when serving will ensure that they are at their best for guests.

Pay attention to portion control, as these treats are rich. Offer small servings to allow guests to sample without overwhelming sweetness and encourage enjoyment of multiple servings.

Temperature considerations are essential. Serve the bombs warm for a delightful contrast with cold accompaniments like ice cream. This combination makes each bite a creamy, melty experience.

Wine and Beverage Pairing

For an indulgent dessert experience, consider pairing these Caramel Apple Pie Bombs with a sweet dessert wine such as a Moscato or a fruity Riesling. Both wines will complement the sweetness of the caramel and balance the dessert’s flavors perfectly.

If you prefer non-alcoholic options, serve chilled apple cider with a sprinkle of cinnamon for a cozy touch that echoes the dessert’s apple flavors. Sparkling water with a splash of lemon can also serve as a refreshing palate cleanser.

For coffee enthusiasts, a smooth vanilla latte or a spiced chai tea can create a beautiful balance with the sweet and rich profile of the bombs. These warm beverages enhance the overall comforting feel of enjoying apples and caramel.

Temperature-wise, serve wines chilled and coffee warm to contrast with the pastry bombs, offering a range of sensory experiences for your guests.

Storage and Shelf Life

Store any leftover Caramel Apple Pie Bombs in an airtight container at room temperature for up to two days. To retain their crispness, it’s best to consume them fresh, but if necessary, refrigeration can extend freshness even further.

If you need to keep them longer, consider wrapping individually in plastic wrap and placing them in the freezer. This method allows for storage up to three months while preserving flavor and texture.

Reheating instructions vary based on storage; from a frozen state, allow them to thaw before placing them in a 350°F oven for about 10 minutes to restore crispness. Avoid microwaving directly as this can lead to a soggy texture.

Always check for signs of spoilage, such as off smells or a change in color, especially if stored for longer periods. Keeping a close eye on texture and aroma will ensure that you enjoy them at their best.

Make Ahead Strategies

To plan ahead, prepare the filling a day before. Store it in the refrigerator, ensuring the apples maintain their crispness and the flavors meld beautifully. Assemble the bombs just before baking for the freshest experience.

After assembling, consider chilling the bombs for 30 minutes before baking; this helps maintain shape and crisp texture during cooking. Keeping them in the freezer allows you to bake them straight from frozen in case you need a last-minute dessert.

When reheating, ensure to add fresh elements like whipped cream or a drizzle of caramel to boost flavor and presentation. Avoid reheating too often to maintain quality and avoid drying out the pastry shell.

The overall quality of the final product remains paramount; always monitor texture and flavor after making ahead to keep them enjoyable. Provide instructions for guests on how to best enjoy them hot out of the oven!

Scaling Instructions

Halving this recipe is simple—just reduce the ingredients by half and maintain similar cooking times. This flexibility allows you to cater to smaller gatherings without compromising flavor.

Doubling or tripling the recipe is also easy; however, remember to space out your baking sheet if making larger quantities to ensure even cooking. Adjust your timing accordingly, checking for doneness visually as the batch size increases.

When scaling up, also consider using multiple baking sheets in the oven to save time and maintain quality. Rotate the sheets halfway through the baking process for even results.

For equipment adjustments, larger quantities may require adapting your kitchen tools, such as using a bigger mixing bowl or additional rolling pins to accommodate dough handling. Planning ahead will make scaling a breeze!

Nutritional Deep Dive

Each Caramel Apple Pie Bomb offers a delightful balance of macronutrients, primarily from the apple and pastry dough. The carbs present come from both the apples and the crust, yielding a satisfying dessert option kids and adults alike enjoy.

Micronutrient analysis reveals that apples are rich in vitamin C, which contributes to overall health. The addition of spices like cinnamon adds antioxidant properties, promoting health benefits while indulging.

The health benefits of using fresh apples outweigh the indulgence, contributing dietary fiber and essential nutrients. Enjoy them as part of a balanced diet, knowing that each bite supports a healthy lifestyle.

Portion analysis is important; enjoy these bombs as an occasional treat, especially considering their sweetness. Managing portion sizes will allow for a balanced indulgence without going overboard.

Dietary Adaptations

For a gluten-free version of Caramel Apple Pie Bombs, substitute regular flour with alternatives like almond flour or a store-bought gluten-free blend, ensuring a deliciously light and flaky pastry.

Dairy-free adaptations involve replacing butter with vegan alternatives such as coconut oil or vegan margarine. Additionally, using dairy-free caramel can make this dessert suitable for those who are lactose intolerant.

Creating a vegan version can be achieved by utilizing a plant-based pie crust and egg replacer for the wash. Ensure that any caramel used aligns with vegan guidelines for the best results.

Low-carb adaptations can involve using almond flour for the crust and sugar-free caramel to reduce carbohydrate content while maintaining flavor. This lends itself well to those following a keto lifestyle.

For those following paleo or low-FODMAP diets, omit ingredients not permitted in these styles of eating and consider alternative sweeteners made with natural sources that bind well to create low-carb dessert options.

Troubleshooting Guide

If the bombs end up too soggy, ensure that the pastry is sealed tightly and properly maintain pastry thickness to prevent excess moisture from escaping during baking. Adjust baking times as necessary based on your oven’s performance.

Flavor imbalances can occur if the apples are too sweet or tart. Strike a balance by mixing apple varieties or adjusting spices to find the perfect equilibrium that matches your taste preferences.

Temperature problems may arise if the bombs are not baked thoroughly, resulting in raw centers. Always check for golden-brown color and use a thermometer if necessary to ensure the use of accurate temperatures while baking.

Equipment challenges can present themselves if the dough sticks; use adequately floured surfaces and tools. Consider parchment paper or silicone mats for easier handling, ensuring pieces come apart without damage.

Ingredient substitutions may require adjustments in cooking time; monitor your bombs closely to gauge doneness when swapping ingredients. Remain flexible with timing and visually assess texture for best results.

Recipe Success Stories

Community feedback has celebrated the versatility of Caramel Apple Pie Bombs, with many noting successful variations using different fruits and spices. These adjustments allow bakers to create a personal touch while still celebrating the original recipe.

Readers have shared adaptation stories, highlighting their experiences with unique ingredient swaps and flavor experiments. These exchanges foster a sense of community, inspiring others to get creative in the kitchen.

Photography tips shared within the community encourage capturing these delicious treats by highlighting the contrast of the gooey filling against a crispy shell, enticing viewers to experience the recipe firsthand.

Frequently Asked Questions

Can I freeze Caramel Apple Pie Bombs?
Yes, you can! Just wrap them tightly in plastic wrap and then place them in an airtight container before freezing. They will maintain quality for up to three months.

What type of apples work best for this recipe?
Firm varieties like Granny Smith and Honeycrisp are recommended, as they hold their shape during baking while providing a nice tartness that balances the sweetness of caramel.

Is it possible to make these bombs vegan?
Absolutely! Use a vegan pie crust and egg replacer for the wash, along with dairy-free caramel for a delicious vegan-friendly dessert.

How do I prevent the pastry from getting soggy?
Ensure the filling is not overly wet and seal the bombs properly before baking for best results. Using cold dough also helps maintain texture.

Can I add nuts to the filling?
Yes, adding chopped nuts can provide a delightful crunch. Consider walnuts or pecans for extra flavor and texture.

How long do these last outside of the fridge?
When stored in an airtight container, they can last up to two days at room temperature.

Can I use premade caramel?
Yes, using store-bought caramel can save time and still yield delicious results. Just ensure it’s poured and mixed in well with the apple filling.

Is this recipe easily scalable?
Yes, you can easily halve or double the recipe based on your needs, just be sure to adjust cooking times for larger batches.

What’s a good serving suggestion?
These bombs pair wonderfully with vanilla ice cream, whipped cream, or a drizzle of caramel for an indulgent dessert experience.

Are these suitable for kids?
Yes! Caramel Apple Pie Bombs are a hit with kids due to their sweet flavors and fun shape, making them a perfect treat for parties.

Additional Resources

Explore related recipes like classic apple pie or caramel sauce for deeper flavor profiles. Technique guides can enhance your baking skills, while ingredient information helps you select the best quality apples or caramel.

Look into equipment recommendations to make baking easy and enjoyable, and consider seasonal variations to keep the recipes fresh and exciting throughout the year.

Join the Conversation

We’d love to see your creations! Share your photography of Caramel Apple Pie Bombs with us on social media. Engage with our community by leaving feedback, sharing your variations, and discussing culinary tips to help others achieve their own baking victories.

The Recipe

Caramel Apple Pie Bombs

Serves: 12 bombs

Prep Time: 20 mins

Cook Time: 25 mins

Total Time: 45 mins

Kitchen Equipment Needed

  • Mixing bowls
  • Rolling pin
  • Baking sheet
  • Parchment paper
  • Knife or pastry cutter

Ingredients

  • 2 cups all-purpose flour
  • 1/2 cup unsalted butter, cold
  • 1/2 cup sugar
  • 1/4 tsp salt
  • 5-6 apples, peeled and diced
  • 2 tsp cinnamon
  • 1 cup caramel sauce
  • 1 egg (for wash)
  • Powdered sugar for dusting

Directions

  1. Preheat the oven to 375°F (190°C) and line a baking sheet with parchment paper.
  2. In a mixing bowl, combine flour, sugar, and salt.
  3. Cut in the cold butter until the mixture resembles coarse crumbs.
  4. Add 4-5 tablespoons of cold water, kneading until dough forms; chill for 30 mins.
  5. Roll out the dough and cut into circles, about 4 inches in diameter.
  6. In another bowl, mix diced apples with cinnamon and caramel sauce.
  7. Place a spoonful of the apple filling in the center of each dough circle.
  8. Fold the dough over the filling and seal edges tightly.
  9. Place on the baking sheet, brush with egg wash, and bake for 25 minutes.
  10. Remove from the oven, allow to cool slightly, and dust with powdered sugar before serving.

Recipe Notes

  • Feel free to experiment with different apples for varied taste.
  • To keep an eye on sweetness, you may reduce the sugar based on the apple variety.

Best Hawaiian Pineapple Coconut Poke Cake – Moist & Tropical

Hawaiian Pineapple Coconut Poke Cake: A Tropical Delight for Any Occasion

⚖️
Difficulty
Easy

⏲️
Prep Time
20 mins

🕒
Cook Time
30 mins

⏱️
Total Time
50 mins

🍽️
Servings
12

The Hawaiian Pineapple Coconut Poke Cake brings the vibrant flavors of the tropics right to your table. This delightful dessert features a soft, moist vanilla cake infused with coconut and topped with luscious pineapple pudding. Each bite transports you to a sunny beach, with the tropical flavors dancing on your palate. The sweetness of fresh pineapple combined with creamy coconut creates a blissful harmony—perfect for summer gatherings or any celebration.

As you bake this poke cake, the enticing aroma of coconut fills your kitchen, enveloping you in warmth and nostalgia. This dessert is not only a feast for the taste buds but also a visual treat, adorned with a cloud of whipped cream and garnished with toasted coconut flakes. Whether you’re hosting a luau or simply enjoying a cozy family dinner, this Hawaiian Pineapple Coconut Poke Cake is sure to become a cherished favorite.

Quick Recipe Highlights

  • Flavor Profile: Sweet vanilla cake complemented by rich coconut and tangy pineapple.
  • Texture: A moist cake that absorbs the creamy pudding, delivering a delightful softness.
  • Aroma: Tropical notes of coconut and fresh pineapple create an inviting scent.
  • Visual Appeal: A beautiful presentation with layers of whipped cream and toasted coconut.
  • Skill Level Needed: Perfect for beginners, requiring minimal cooking technique.
  • Special Equipment: A 9×13 inch baking pan, mixing bowls, and a whisk.

Recipe Overview

  • Difficulty Level: This Hawaiian Pineapple Coconut Poke Cake is easy to make, making it suitable for bakers of all levels.
  • Category: A delicious dessert that is perfect for potlucks, parties, or family gatherings.
  • Cuisine: This cake reflects the tropical flavors of Hawaiian cuisine, influenced by various cultures.
  • Cost: An economical recipe, with ingredients that are affordable and easy to source.
  • Season: Ideal for summer but can bring a taste of the islands to any season.
  • Occasion: Suitable for birthdays, barbecues, or just a fun day at home.

Why You’ll Love This Recipe

The taste and texture of the Hawaiian Pineapple Coconut Poke Cake create a balance that heightens the dessert experience. The soft, moist cake acts as a canvas for the rich, creamy pineapple and coconut flavors, ensuring each forkful is a joy. Adding whipped cream on top not only enhances the flavor but also provides an airy texture that perfectly contrasts the dense cake.

Preparation is a breeze, making this recipe a go-to for those busy days when you want to impress without spending hours in the kitchen. With just a few simple steps to follow, you’ll find yourself whipping this cake up in no time, drawing admiration from family and friends.

Nutritiously, this cake edges a bit on the sweeter side, thanks to the natural sugars in pineapple and coconut. However, when shared among friends or served at gatherings, it remains a delightful treat without the guilt.

Socially, this cake is a hit. Whether cutting slices during summer parties or sharing at a holiday gathering, it brings joy and creates a sense of community, as people bond over its tropical flavors and creamy texture.

Cost-effectiveness is another reason to adore this recipe. The ingredients are accessible and won’t break the bank, allowing you to make multiple batches for large occasions without worry.

Historical Background and Cultural Significance

The history of the poke cake dates back to the mid-1900s in America, where it became popular as a way to use cake mix and simple ingredients. Its roots can be linked to the post-war culinary movement where convenience was key. The addition of tropical elements like pineapple and coconut showcases the influence of Hawaiian cuisine and its vibrant flavors.

Culturally, Hawaii’s diverse heritage has created an enduring appreciation for tropical flavors, making this cake a homage to its rich culinary tradition. The integration of pineapple, a fruit native to the region, and coconut reflects the natural resources available in the islands.

Over the years, the poke cake has evolved, inspiring countless variations beyond just the Hawaiian twist. Each region has embraced local ingredients, allowing families to personalize the recipe with seasonal or favorite flavors.

Regional variations owing to cultural influences include adaptations that introduce ingredients such as macadamia nuts or even dragon fruit, embellishing the dish while maintaining its fundamentally tropical essence.

Ingredient Deep Dive

  • Pineapple: This tropical fruit is not only sweet and juicy but also rich in vitamins, minerals, and digestive enzymes. When selecting fresh pineapple, look for one that gives slightly to pressure and has a sweet aroma. Store whole pineapples at room temperature and cut pieces in the fridge for up to five days. Canned pineapple serves as a great substitute when fresh is not available.
  • Coconut Milk: A creamy and rich dairy alternative, coconut milk is a high-calorie ingredient that offers unique flavors and is packed with healthy fats. Choose full-fat coconut milk for the best results, ensuring maximum creaminess. To store, keep it sealed in the refrigerator, but it’s best used fresh to retain its flavor. Almond or soy milk can be used in moderation but won’t yield the same flavor profile.
  • Cake Mix: Easily accessible, cake mix is a staple in many kitchens. It provides a convenient base for creating various cakes. Always check the date for freshness, and store it in a cool, dry place. For those avoiding processed foods, homemade cake from scratch is an excellent alternative.
  • Whipped Topping: A light and fluffy finish to the cake, whipped topping adds a delightful sweetness. Homemade whipped cream can be substituted for those wanting a natural option. Store it in the refrigerator and use it within a week for the best quality.

Common Mistakes to Avoid

  • Not letting the cake cool completely: If you apply the pudding to a warm cake, it will not soak in properly.
  • Using a cake mix without ensuring it’s fresh: Old cake mixes can yield disappointing textures and flavors.
  • Skipping the cooling step: Allowing the cake to cool allows for better absorption of flavors.
  • Overmixing the batter: This can lead to a dense cake; mix until just combined.
  • Using low-quality ingredients: Premium ingredients lead to a better-tasting cake.
  • Failing to prepare the pan properly: Always grease and flour your pan to prevent sticking.
  • Ignoring storage recommendations: Proper storage ensures leftover cake remains fresh and delicious.
  • Not allowing flavor development: After making the cake, letting it sit in the refrigerator allows the flavors to marry.
  • Not adjusting the sweetness level: Test the sweetness before serving, especially with very ripe fruits that may alter the taste.

Essential Techniques

The cake mixture is crucial for a moist cake. Ensure to cream your butter and sugar together until fluffy before adding eggs to achieve a light texture. Avoid overmixing once you add in the dry ingredients to maintain the cake’s airiness.

When poking the cake, use a large fork or skewer to create evenly spaced holes without breaking it. This allows sufficient pudding to seep into the cake, which is a hallmark of poke cakes.

For the topping, beat heavy cream until stiff peaks form to create a fluffy whipped topping. Be cautious not to over-beat, as it can turn grainy and separate.

Finally, let the cake chill in the refrigerator after assembling it. Chilling allows flavors to meld, enhancing the overall taste and making it even more enjoyable.

Pro Tips for Perfect Hawaiian Pineapple Coconut Poke Cake

– For added flavor, use real coconut cream instead of just coconut milk for a richer taste.
– Customize the cake mix flavor for a twist; try using a lemon or almond-flavored cake mix for a unique taste.
– Let the pudding mixture sit for a few minutes to thicken before pouring it onto the cooled cake.
– Toast shredded coconut in the oven for a few minutes to enhance flavor and texture.
– Allow the cake to chill overnight for maximum flavor absorption.
– Serve the cake cold with a sprinkle of extra toasted coconut for added texture.
– Once assembled, it’s best eaten within 2-3 days for optimal freshness.
– If making ahead, consider assembling only the cake and pudding, adding whipped cream right before serving for a fresh look.

Variations and Adaptations

For regional variations, consider adding macadamia nuts for a delightful crunch or using a tropical fruit medley as a topping. Seasonal adaptations could include plums or peaches in the summer months.

Dietary modifications can easily be made; use a gluten-free cake mix for gluten-intolerant friends or consider dairy-free coconut milk and whipped topping. For a flavor variation, experiment with different fruit gelatin puddings, such as strawberry or mango, for a fruity flair.

Modify textures by incorporating coconut flakes directly into the batter for additional chewiness. Presentation alternatives may include serving individual portions in mason jars or cups for a trendy look at parties.

Serving and Presentation Guide

When plating, consider using a square or rectangular serving platter for a modern presentation. For garnishing, sprinkle toasted coconut or a few pineapple wedges on top for an eye-catching finish.

Traditional accompaniments include a scoop of vanilla ice cream or fresh fruit salad. Modern serving suggestions might involve pairing the cake with a tropical-inspired drink such as piña colada.

Temperature considerations are key; serve the cake chilled for a refreshing treat, and keep portion control in mind, as this cake can be rich and sweet.

Wine and Beverage Pairing

Pair this Hawaiian Pineapple Coconut Poke Cake with a sweet Riesling or a Sauvignon Blanc to complement the cake’s flavors. The fruity notes in the wine will echo the tropical aspects of the cake beautifully.

For non-alcoholic alternatives, consider serving with coconut water or a tropical fruit punch that echoes the cake’s flavor profile.

When considering coffee or tea, a light, fruity herbal tea can balance the sweetness of the dessert. Serving wines and beverages chilled heightens the overall dining experience.

Storage and Shelf Life

To store your Hawaiian Pineapple Coconut Poke Cake, cover it tightly with plastic wrap or foil and refrigerate it, where it will maintain its quality for up to four days. Avoid leaving it uncovered to prevent it from drying out.

Ensure the temperature in the refrigerator remains constant, as fluctuations can affect the cake’s moisture. Use an airtight container if storing leftovers to prolong freshness.

Signs of spoilage include an off smell, discoloration, or mold development. When reheating, use a microwave for individual slices and enjoy warm or at room temperature.

For freezing, it is advisable to freeze unassembled components: the cake and the pudding mixture separately. When ready to serve, prepare the whipped cream and assemble just before serving.

Make Ahead Strategies

To streamline preparation, bake the cake a day in advance, allowing it to cool completely before covering and storing it. The pudding can also be made earlier and stored in the refrigerator to save time.

If preparing for an event, consider layering the cake and pudding a few hours ahead, adding whipped topping just before serving for the best texture and appearance.

Consider keeping fresh fruit toppings separate until serving time to maintain their freshness. This ensures that the poke cake remains inviting and attractive for guests.

Scaling Instructions

If you wish to halve the recipe, simply divide all ingredient amounts by two, keeping in mind to use smaller baking equipment accordingly. This allows you to create a smaller version while maintaining flavors.

When doubling or tripling the recipe, ensure to use larger pans to accommodate the batter volume and extend the baking time as necessary. Checking for doneness may vary based on the size of the baking dish.

With increased quantity, ensure you have sufficient refrigeration space for storage and chilling to retain freshness. Double-check measuring quantities to prevent oversights.

Nutritional Deep Dive

A detailed macro breakdown indicates a balance of carbohydrates, fats from coconut, and proteins from eggs and cream. Monitor portion sizes to maintain a standard caloric intake, especially since this dessert can be dense.

Micronutrient analysis reveals essential vitamins and minerals from pineapple and coconut, such as Vitamin C and potassium. Their inclusion contributes not just to flavor but also to nutritional value.

Health benefits are associated with both pineapple and coconut, which can aid digestion and boost immunity. When enjoying this cake, moderation is key for those monitoring sugar consumption or overall caloric intake.

Consider dietary adjustments depending on the ingredient switches, as low-fat alternatives can reduce the overall caloric density. For weight management, ration portions when serving to ensure indulgence without excess.

Dietary Adaptations

For those who require gluten-free options, simply use a gluten-free cake mix, readily available at most grocery stores, while maintaining the rest of the recipe.

Dairy-free enthusiasts can swap out whipped cream for coconut cream or dairy-free whipped toppings to create a delicious vegan adaptation. Cater to low-carb or keto diets by utilizing sugar substitutes and almond flour for the cake base.

For a paleo-friendly version, consider using natural sweeteners and a nut flour base while avoiding processed sugars and grains. Ensuring your ingredients align with dietary needs enhances accessibility for diverse audiences.

Troubleshooting Guide

Texture issues often arise from the cake soaking too long in the pudding; limit the soaking time when refrigerating. If the cake turns out overly dry, check that moisture content is balanced and that it’s well covered while cooling.

Flavor balance can be adjusted by increasing or decreasing sugar in the pudding or whipped topping, allowing you to tailor it to personal tastes.

For temperature problems, ensure your ovens are calibrated correctly, as discrepancies can lead to overbaking or underbaking.

Ingredient substitutions should be made with care, ensuring that altered proportions account for characteristics like sweetness or density. Pudding failing to set could indicate an insufficient cooling duration.

Finally, if you find your cake breaks apart upon serving, allow it to settle briefly after assembly. This aids in binding the components and making servings easier.

Recipe Success Stories

Community feedback on the Hawaiian Pineapple Coconut Poke Cake has been overwhelmingly positive, with many praising its tropical flavor and moist texture.

Variation successes include creative takes on this poke cake, like introducing chocolate or berry elements, leading to exciting adaptations that entice readers to experiment in their own kitchens.

Reader suggestions often enhance recipe success, as tips floating through the community inspire confidence in new bakers and encourage personal touches to the original recipe.

Photography tips emphasize capturing the vibrant colors of the cake and its layered elements, with natural light creating an inviting visual representation that encourages others to try making it.

Frequently Asked Questions

Can I use fresh pineapple instead of canned?
Yes, fresh pineapple is great, but ensure it’s sweet and ripe for optimal flavor. You may need to adjust the sweetness in the pudding accordingly.

How long will the cake last in the fridge?
The cake should stay fresh for up to four days when properly stored in the refrigerator. Cover it well to avoid drying out.

Can I freeze leftovers?
Yes, you can freeze individual slices. Make sure they are well-wrapped in plastic wrap and stored in an airtight container. Reheat in the microwave or enjoy frozen.

Is it possible to make this cake dairy-free?
Absolutely! Use coconut cream instead of whipped cream and ensure that all other ingredients are dairy-free.

Can I make the cake ahead of time?
Yes, you can bake the cake a day in advance and assemble it the day you want to serve. This will allow the flavors to develop.

What is a poke cake?
A poke cake is a type of cake where holes are poked in the cooled cake, allowing sauces or puddings to seep into the cake, enhancing its moisture and flavor profile.

Can I use a different flavor of pudding?
Yes! Feel free to experiment with different pudding flavors like coconut or banana to switch up the profile of the cake.

Do I need to chill the cake after making it?
Yes, chilling the cake allows the pudding to set and the flavors to meld together, providing that ultimate tropical taste.

What’s the best way to serve the cake?
The cake is best served cold, garnished with whipped cream and toasted coconut flakes for added texture.

Can this cake be made gluten-free?
Yes, simply substitute the cake mix with a gluten-free version to enjoy this lovely dessert without gluten.

Additional Resources

For those looking to explore more tropical desserts, consider trying recipes like Mango Chiffon Cake or Coconut Macaroons for a sweet escape. In addition, dive into baking techniques to improve your skills, focusing on fundamentals such as cake mixing and frosting decorating.

Ingredient information about tropical fruits can also elevate your culinary pursuits, revealing their nutritional benefits and flavor profiles. As you delve into seasonal recipes, you’ll discover a variety of options that highlight fresh produce year-round.

Equipment recommendations can ensure you have the correct tools, like quality baking pans and precision scales, for optimal results in your baking adventures.

Join the Conversation

We’d love to hear your thoughts on the Hawaiian Pineapple Coconut Poke Cake! Share your experience, experiment feedback, and favorite adaptations.

Social media sharing is encouraged; snap a picture of your creation and tag us to showcase your version of this tropical delight.

Engage with our community through comments and recipe reviews, as we foster an environment of culinary creativity and support.

Don’t hesitate to share your twist on the recipe, as we believe that the best recipes evolve through collaboration and joy!

The Recipe

Hawaiian Pineapple Coconut Poke Cake

Serves: 12

Prep Time: 20 mins

Cook Time: 30 mins

Total Time: 50 mins

Kitchen Equipment Needed

  • 9×13 inch baking pan
  • Mixing bowls
  • Whisk
  • Fork or skewer

Ingredients

  • 1 box of vanilla cake mix
  • 1 cup of coconut milk (or regular milk)
  • 3 large eggs
  • 1 cup of pineapple pudding mix
  • 1 ½ cups crushed pineapple, drained
  • 1 cup of whipped topping
  • 1 cup of shredded coconut, toasted

Directions

  1. Preheat your oven to 350°F (175°C). Grease your 9×13 inch baking pan.
  2. In a mixing bowl, combine the cake mix, coconut milk, and eggs. Whisk until well blended.
  3. Pour the mixture into the prepared pan and bake for 25-30 minutes or until a toothpick comes out clean.
  4. Remove from the oven and let cool for about 15 minutes. Then, poke holes throughout the cake using a fork or skewer.
  5. In another bowl, mix the pineapple pudding with the crushed pineapple. Pour this mixture over the cake, allowing it to seep into the holes.
  6. Refrigerate for at least 2 hours to let it set.
  7. Top with whipped topping and sprinkle with toasted coconut before serving.

Recipe Notes

  • For a richer flavor, use full-fat coconut milk.
  • Try adding macadamia nuts for an extra tropical twist.
  • This cake is best served chilled for maximum flavor.
  • Feel free to substitute the vanilla cake mix with lemon or almond for a unique profile.

Best King’s Hawaiian Cinnamon Rolls with Buttery Glaze

Delicious King’s Hawaiian Cinnamon Rolls: The Sweetest Morning Treat

⚖️
Difficulty
Easy

⏲️
Prep Time
30 mins

🕒
Cook Time
25 mins

⏱️
Total Time
55 mins

🍽️
Servings
12 rolls

Cinnamon rolls made with King’s Hawaiian rolls provide an exquisite balance of sweetness and spice that elevates breakfast to a decadent occasion. These rolls are soft, fluffy, and rich, making them the perfect comfort food to enjoy on leisurely mornings or during festive gatherings. The lush sweetness of the Hawaiian rolls combined with the warm, aromatic blend of cinnamon and sugar creates an irresistible treat that you won’t be able to resist.

Imagine waking up to the warm aroma of freshly baked cinnamon rolls wafting through your home. These King’s Hawaiian Cinnamon Rolls not only entice with their enticing scent but also feature a delightful melt-in-your-mouth texture. Each roll is generously swirled with a sweet cinnamon filling and topped with a rich glaze, making them an indulgent option that can be enjoyed by family and friends alike.

Quick Recipe Highlights

  • Flavor Profile: The sweet and buttery Hawaiian rolls provide a unique twist, complemented by the warm and fragrant cinnamon filling.
  • Texture: These cinnamon rolls are impossibly fluffy and soft thanks to the rich ingredients used in the recipe.
  • Aroma: Baking these rolls fills your kitchen with the delightful scent of cinnamon, sugar, and vanilla, creating a cozy atmosphere.
  • Visual Appeal: Glazed to perfection, these rolls have a golden-brown exterior with an inviting swirled pattern, making them visually stunning.
  • Skill Level Needed: This recipe is perfect for beginner bakers looking to create something extraordinary without a complicated process.
  • Special Equipment: A baking dish and mixer are all that you need to whip up these delicious rolls.

Recipe Overview

  • Difficulty Level: This King’s Hawaiian Cinnamon Rolls recipe is considered easy, making it suitable for bakers of all skill levels. With straightforward steps, it’s accessible for anyone to try.
  • Category: This dish falls under breakfast and brunch recipes, ideal for starting your day on a sweet note or serving during a weekend gathering.
  • Cuisine: The recipe combines elements of traditional Hawaiian cuisine with classic American baking techniques, resulting in a delightful hybrid dish.
  • Cost: The approximate cost for making these rolls is budget-friendly, with common ingredients that are easy to find.
  • Season: These cinnamon rolls can be enjoyed year-round but are particularly popular during the fall and winter holidays.
  • Occasion: Perfect for family breakfasts, brunch gatherings, holidays, or even as a sweet surprise for a friend.

Why You’ll Love This Recipe

The taste and texture of King’s Hawaiian Cinnamon Rolls create an unforgettable experience. The soft, pillowy dough melds effortlessly with the sweet, spiced filling to form a heavenly bite that’s both satisfying and luxurious. Topped with a simple vanilla glaze, these rolls add an extra layer of sweetness that will delight all who sample them.

Convenience is yet another reason to love this recipe. The use of pre-made King’s Hawaiian rolls significantly cuts down on preparation time while delivering exceptional flavor. This means you can whip up a batch quickly and spend less time in the kitchen and more with your loved ones.

Nutritionally, these rolls offer a treat without the need for elaborate ingredients. While they are certainly indulgent, including them in moderation can fit into any lifestyle. The use of quality ingredients ensures a satisfying treat without sacrificing flavor.

Socially, these rolls are perfect for any occasion. Whether you’re hosting a brunch or having friends over for coffee, serving up a warm plate of King’s Hawaiian Cinnamon Rolls encourages connection and sharing among guests, instilling a feeling of warmth and hospitality.

Finally, this recipe is cost-effective. With affordable ingredients that yield a delightful outcome, you’re able to treat yourself and those you love without breaking the bank, making it a perfect solution for gatherings or special occasions.

Historical Background and Cultural Significance

The origin story of cinnamon rolls can be traced back centuries, with variations found in numerous cultures, but the Hawaiian twist brings a unique flavor profile to the classic. Initially rooted in European traditions of spiced breads and pastries, cinnamon rolls have transformed over time into a beloved American staple, especially during breakfast.

Culturally, the cinnamon roll carries significant weight across various communities, often associated with comfort and familial gatherings. The warmth of fresh cinnamon rolls unites families and friends, becoming a part of holiday traditions, cozy mornings, and celebratory events, embodying a sense of warmth.

As recipes evolved, different regions began to factor in local ingredients, creating unique spins on the traditional treat. Hawaiian rolls are known for their slightly sweeter taste and soft texture, making them a perfect candidate for adding a tropical twist to the longstanding cinnamon roll tradition.

Regional variations have also emerged, with some cultures favoring fruit added to their cinnamon rolls or even various nut toppings. This adaptability shows how the simple cinnamon roll has evolved into numerous fabulous forms throughout the world.

Ingredient Deep Dive

The King’s Hawaiian rolls serve as the base for this delectable recipe, originally created in Hilo, Hawaii in 1950. They are renowned for their sweetness and soft, airy texture. Nutritionally, these rolls provide carbohydrates for energy while being a delightful treat in moderation. When selecting King’s Hawaiian rolls, look for freshness and avoid any that have visible blemishes. Store them in a cool, dry place, and freeze any excess to retain their freshness.

Butter, a common ingredient in the filling and glaze, enriches the dough and adds flavor. High-quality butter acts as a emulsifier, ensuring that your rolls remain moist and fluffy. When selecting butter, look for unsalted options for more control over the seasoning. Proper storage requires keeping it in the fridge and using it within the recommended timeframe to ensure freshness.

Cinnamon is the star flavor in this recipe, boasting a rich history as one of the oldest known spices. Cinnamon offers anti-inflammatory properties and contributes to blood sugar regulation. When selecting cinnamon, opt for Ceylon cinnamon for the best flavor. It’s best stored in an airtight container in a cool, dark place. If you run low, you can substitute with pumpkin pie spice or apple pie spice for a delightful twist.

Sugar enhances the sweetness of the rolls and provides necessary structure to the dough. It’s important for achieving that perfect glaze. Granulated sugar is a common choice, but brown sugar may be utilized for a more caramelized flavor profile. Store sugar in an airtight container and keep it dry to avoid clumping. You can substitute it in the recipe with honey or agave syrup if necessary.

Common Mistakes to Avoid

  • Skimping on rising time. Allowing your dough to fully rise is essential for fluffy rolls.
  • Using old or expired ingredients. Freshness greatly impacts flavor and texture, especially with yeast and baking powder.
  • Overstuffing the rolls with filling can lead to messy baking and uneven rolls.
  • Not aligning the rolls properly in the pan can cause uneven cooking.
  • Failing to preheat the oven can lead to improperly baked rolls.
  • Skipping the glaze. It complements the flavors and adds visual appeal.
  • Not using a thermometer to check for doneness. Rolls should be golden brown and cooked through.
  • Using cold ingredients. Room temperature ingredients integrate better and contribute to a more uniform dough.
  • Not allowing the rolls to cool before glazing can create a smear instead of a beautiful drizzle.
  • Cutting into the rolls too soon can lead to a gummy texture.

Essential Techniques

Creating the perfect cinnamon roll begins with mastering dough preparation. Properly mixing your ingredients ensures a homogeneous dough that is light and airy. Kneading develops gluten, which is crucial for that fluffy texture; knead until the dough is smooth and elastic. Allowing the dough to rise in a warm environment will also ensure that your rolls expand nicely, creating fluffy layers.

Another vital technique is rolling the dough to an even thickness. An even roll leads to uniform swirls of filling, allowing for even cooking throughout each roll. Visual cues for success include small bubble formations on the surface—this shows that yeast is active and creating air pockets in the dough.

Another important skill is the baking process itself. Understanding the importance of using hot, preheated ovens ensures your rolls start baking immediately, setting the structure quickly. You can tell when they’re ready by their golden brown color and by tapping on the bottom to hear a hollow sound.

Finally, ensure you prepare the glaze to the right consistency. It should be smooth enough to drizzle while maintaining thickness. Adjust with more milk or sugar to achieve the desired result, allowing you to spend more time enjoying your delicious cinnamon rolls!

Pro Tips for Perfect King’s Hawaiian Cinnamon Rolls

Begin by measuring ingredients accurately to ensure consistent results. The use of weights instead of volume can be more precise. For best results, allow the yeast to bloom beforehand, mixing it with warm water and sugar to activate.

Integrate flavors by allowing the butter to sit out at room temperature, which makes spreading easier without tearing the dough. Also, don’t hesitate to experiment with fillings—chocolate chips, nuts, or dried fruits can elevate your rolls even further.

Don’t rush the rising process; a longer rise (even overnight in the fridge) can enhance flavor and texture. Always monitor oven temperature with a thermometer to ensure perfect baking. Remember to let the rolls rest after baking; this helps develop the flavor and improves the overall texture.

If you want a little crunch, consider adding nuts or sprinkle a bit of sea salt on top of the glaze. Lastly, practice patience: the more you make these King’s Hawaiian Cinnamon Rolls, the more adept you’ll become at perfecting your technique.

Variations and Adaptations

There are many regional variations to consider when it comes to King’s Hawaiian Cinnamon Rolls. For a more tropical approach, add coconut flakes to the filling for an island-inspired flavor. Seasonal adaptations may include pumpkin spice during fall, while summer may call for a fresh berry filling.

You can also explore dietary modifications; for a healthier version, substitute whole wheat flour for all-purpose flour or use alternative sweeteners like coconut sugar. For flavor twists, reinvent the filling using nut butters or chocolate spread for a modern take on the classic treat.

Texture modifications could include adding oats or nuts into the dough for a heartier roll. Presentation alternatives, such as individual servings baked in muffin tins, can make for a fun and festive appearance to your cinnamon roll experience.

Serving and Presentation Guide

When it comes to serving, consider the plate presentation. Arrange your King’s Hawaiian Cinnamon Rolls on a large platter and dust with powdered sugar for a beautiful finish. To elevate your dish, consider serving them with a side of fresh fruit or a warm cup of coffee to balance the sweetness.

Garnishing with chocolate drizzle or sprinkle real maple syrup over the top can create an eye-catching display that looks as delightful as it tastes. Traditional accompaniments like whipped cream cheese frosting can add texture and flavor nuances.

Modern suggestions might include serving with a scoop of vanilla ice cream for an indulgent dessert experience. Pay attention to temperature; serving them warm yields the best tasting experience. Finally, portion control by cutting into equal spirals ensures everyone enjoys a fair share.

Wine and Beverage Pairing

When it comes to pairing wine with King’s Hawaiian Cinnamon Rolls, opt for a sweet dessert wine like Riesling or Moscato that complements the rich flavors of the rolls. For a non-alcoholic alternative, consider pairing with warm spiced apple cider or a classic vanilla chai latte.

Coffee is also a fantastic pairing; a rich roast complements the sweetness beautifully, enhancing the roll experience. If serving with dessert, keep the temperature of the roll warm but not hot to keep the glaze intact and visually appealing.

Additionally, when choosing beverages, consider serving options alongside brunch options to encourage casual conversation and dynamic pairing possibilities.

Storage and Shelf Life

To maximize the shelf life of your King’s Hawaiian Cinnamon Rolls, store them in an airtight container at room temperature for up to two days, or refrigerate to keep for up to one week. When freezing, wrap them individually in plastic wrap and place in a freezer-safe bag, which is good for up to three months.

Always check for signs of spoilage, such as a stale smell or drying out. Reheating is best done in the oven or microwave, ensuring they are warmed through but not dried out. For frozen rolls, allow them to thaw in the refrigerator before reheating.

Consider using a light sprinkle of icing after reheating, as this can rejuvenate the flavor and appearance of the rolls, inviting back that fresh-made vibe.

Make Ahead Strategies

If you’re planning to serve King’s Hawaiian Cinnamon Rolls for a special occasion, consider starting the process the night before. Prepare the rolls up to the point just before baking, then cover and refrigerate overnight. This allows the flavors to meld beautifully and simplifies your schedule on the big day.

Storage between steps can include chilling the dough and keeping the filling components in individual containers. Be mindful of timing; rolls prepared in advance may require extra time for the rising process before baking.

For a fresh element after reheating, garnish with fresh fruits or nuts to enhance presentation and flavor. Reheating can be done in the oven to maintain their texture—keep them wrapped in foil to prevent drying out.

Scaling Instructions

If you wish to halve the King’s Hawaiian Cinnamon Rolls recipe, simply divide all ingredients by two, while keeping an eye on cooking time, which can be slightly less. Doubling or tripling the recipe is easy, but ensure you have the correct bakeware size to avoid overcrowding.

Equipment adjustments may be necessary, such as using multiple baking sheets or larger pans. Timing modifications might involve checking the rolls earlier as larger batches can cook unevenly; rotate them in the oven for even baking.

For storage considerations, ensure that rolls are kept in separate airtight containers based on batches to maintain optimal freshness.

Nutritional Deep Dive

The King’s Hawaiian Cinnamon Rolls boast a macro breakdown that includes carbohydrates for energy, fats for satisfaction, and a touch of protein. While the treats are indulgent, they can fit into a balanced diet when enjoyed in moderation.

Micronutrient analysis reveals that the presence of cinnamon provides benefits such as antioxidant properties and potential blood sugar regulation. For those monitoring dietary intake, it’s important to analyze portion sizes for balanced enjoyment.

Health benefits include the warmth of cinnamon, which has been praised for its anti-inflammatory properties. However, indulgence calls for mindful consumption, ensuring they complement a well-rounded diet.

Consider dietary triggers; the sweetness of the glaze may surpass recommended daily sugar intakes if consumed excessively. Practicing portion analysis prevents overindulgence while maximizing enjoyment of these delightful rolls.

Dietary Adaptations

To create gluten-free King’s Hawaiian Cinnamon Rolls, explore using gluten-free flour blends that replicate the texture while ensuring it rises properly. For a dairy-free option, swap out butter for coconut oil or a dairy-free margarines suitable for baking.

Vegans can substitute all animal-based ingredients—use flax eggs instead of regular eggs and coconut milk to maintain moisture. Low-carb adaptations could include using almond flour or coconut flour in the dough to reduce net carbs.

Keto adaptations might involve relying on sugar alternatives such as erythritol to mimic sweetness without the added sugars. Consider a paleo version that focuses on raw, unprocessed ingredients, emphasizing natural sweeteners like honey or maple syrup.

Finally, for low-FODMAP options, choose lactose-free ingredients and moderate the portion sizes of the rolls to ensure enjoyment without digestive discomfort.

Troubleshooting Guide

If you encounter texture issues with your cinnamon rolls, it could indicate too much or too little flour. To prevent this, measure flour accurately using the spoon-and-level method to avoid overly dense rolls.

Flavor balance is essential; if too sweet, consider reducing sugar in the filling or glaze. Adding a pinch of salt can also enhance the overall taste, ensuring a well-rounded flavor profile.

Temperature problems may arise if your oven is not calibrated correctly; using an oven thermometer can help achieve accurate baking temperatures. Equipment challenges? If your mixer isn’t powerful enough, consider kneading dough by hand to ensure proper elasticity.

When ingredient substitutions occur, take care to understand how they react differently in baking; always conduct a test run to verify changes before for a larger batch.

Timing concerns can arise with the rising process; if your dough doesn’t seem to rise adequately, try placing it in a warmer location to encourage fermentation.

Recipe Success Stories

Feedback from the community indicates that King’s Hawaiian Cinnamon Rolls have become a beloved breakfast item, often requested for family gatherings and special occasions. Many readers marvel at how easy it is to turn an everyday item into something extraordinary; it’s not uncommon for bakers to customize their rolls with unique fillings or toppings.

Success with variations, such as adding chocolate or other fruits, further demonstrates the adaptability of this recipe. Readers have enthusiastically shared their take on personal adaptations, often leading to delicious surprises and fun new twists on the classic.

Photography tips from the community highlight the appeal of natural lighting and simple plating techniques that make the rolls look as delicious as they taste. Recipe reviews often mention that these rolls not only taste better than store-bought options but are far more rewarding to create at home.

Overall, the positive experiences from a sample of dedicated bakers highlight how these King’s Hawaiian Cinnamon Rolls can create delicious memories around the kitchen table, making this recipe a cherished one.

Frequently Asked Questions

Can I use different types of bread for this recipe?

Absolutely! While King’s Hawaiian rolls add a unique sweetness, you can experiment with other types, such as brioche or sweet dinner rolls, to achieve a similar delicious flavor.

How can I make these rolls the night before?

Simply prepare the rolls entirely up to the point of baking, cover, and refrigerate overnight. In the morning, let them rise at room temperature before baking.

What if my cinnamon rolls don’t rise?

Check that your yeast is fresh and active. Ensure you’ve provided a warm environment for the dough to rise, as cold temperatures can hinder the process.

Can I freeze the dough?

Yes! You can freeze the dough before baking. Just ensure it’s well-wrapped and thaw it in the refrigerator before allowing it to rise again before baking.

How do I know when the rolls are done baking?

The rolls should be golden brown on top, and tapping the bottom should sound hollow. An internal temperature of around 190°F (88°C) also indicates doneness.

What’s the best way to store leftover cinnamon rolls?

Store them in an airtight container at room temperature for 2 days, or in the fridge for up to a week. You can freeze them for longer storage, up to 3 months.

Can I add nuts or other fillings?

Yes! Feel free to experiment by adding chopped nuts, chocolate chips, or even fruits like raisins or cranberries to the filling for added flavor.

Should I glaze them while warm or cool?

Glaze them while they’re still warm for a beautiful finish, but allow them to cool slightly to avoid a complete melt of frosting for the desired visual impact.

What can I use instead of milk in the glaze?

If you don’t have milk on hand, you can use almond milk, oat milk, or even a splash of heavy cream to achieve the same creamy glaze consistency.

How can I spice it up even more?

Add some nutmeg or allspice to the cinnamon filling for a more complex flavor profile, or consider a pinch of sea salt to balance the sweetness.

Additional Resources

For those looking to expand their baking repertoire, consider exploring related recipes such as sticky buns or savory cinnamon rolls variations. Technique guides can be immensely helpful, covering areas like dough kneading and yeast management, teaching you essential skills that will benefit all aspects of baking.

Understanding ingredient information, such as choosing high-quality cinnamon or the importance of fresh yeast, can transform how you approach baking. Recommendations for equipment can include using a kitchen scale for exact measurements or a stand mixer for consistent dough preparation.

As we move through the seasonal calendar, keep an eye on variations to incorporate fresh berries in spring or fond holiday flavors during the winter months—creating diverse culinary experiences centered around King’s Hawaiian Cinnamon Rolls.

Join the Conversation

Your experience is invaluable! Sharing your creations on social media platforms not only encourages others but builds a community of passionate bakers. Don’t forget to photograph your cinnamon rolls, capturing the moment of joy as they come out of the oven.

Community engagement in the comments section helps everyone refine their skills and share variations. Providing honest reviews can lead to discovering new tips or recommendations that improve the overall experience of making and sharing these delightful rolls.

Be sure to tag this recipe to compile a collection of unique twists and successes—your culinary journey matters, and together we can celebrate the joy of baking!

The Recipe

King’s Hawaiian Cinnamon Rolls

Serves: 12 rolls

Prep Time: 30 mins

Cook Time: 25 mins

Total Time: 55 mins

Kitchen Equipment Needed

  • Baking dish or pan
  • Mixing bowls
  • Electric mixer (optional)
  • Measuring cups and spoons

Ingredients

  • 1 package King’s Hawaiian rolls
  • 1/2 cup unsalted butter, softened
  • 1 cup brown sugar, packed
  • 2 tablespoons ground cinnamon
  • 1 cup powdered sugar
  • 2 tablespoons vanilla extract
  • 2-4 tablespoons milk

Directions

  1. Preheat the oven to 350°F (175°C).
  2. In a mixing bowl, combine the softened butter, brown sugar, and cinnamon to create the filling.
  3. Slice the King’s Hawaiian rolls in half and spread the filling mixture evenly across each side.
  4. Reassemble the rolls and place them in a greased baking dish.
  5. Bake for 25 minutes, or until golden brown and heated through.
  6. While baking, mix powdered sugar, vanilla, and enough milk to reach your desired glaze consistency.
  7. Once baked, drizzle the glaze over the warm cinnamon rolls and serve immediately.

Recipe Notes

  • You can substitute brown sugar with granulated sugar if preferred.
  • Feel free to add nuts or dried fruits to the filling for extra flavor.
  • For a spicier taste, add a pinch of nutmeg to the filling.

Best Southern Banana Cobbler – Warm, Gooey, and Delicious

Delicious Southern Banana Cobbler: A Comforting Classic Dessert

⚖️
Difficulty
Easy

⏲️
Prep Time
15 mins

🕒
Cook Time
30 mins

⏱️
Total Time
45 mins

🍽️
Servings
8

Southern Banana Cobbler is a delightful, warm dessert that brings the flavors of the South right into your kitchen. Imagine the sweet aroma of ripe bananas mingling with the rich notes of vanilla and cinnamon as they cook together, creating a creamy filling that envelops your senses. This cobbler is not just a treat; it’s a nostalgic journey through southern kitchens, where comfort food reigns supreme. Serve it warm topped with a scoop of vanilla ice cream, and you’ll find yourself in dessert paradise.

The combination of buttery biscuit topping and gooey banana filling creates a perfect fusion of flavors. This Southern Banana Cobbler is particularly versatile, allowing you to use fresh, ripe bananas or even overripe ones, which add extra sweetness. The beautiful golden crust, slightly crisp on top and soft beneath, adds a textural delight that perfectly complements the tender banana filling. This cobbler is a celebration of simple ingredients, transformed into an irresistible dish.

Quick Recipe Highlights

  • Flavor Profile: A harmonious blend of sweet bananas and hints of vanilla with a touch of cinnamon for warmth.
  • Texture: Soft, gooey banana filling with a warm, buttery biscuit topping that contrasts beautifully.
  • Aroma: Inviting scents of baked bananas, warm spices, and buttery biscuit waft through the air.
  • Visual Appeal: Gorgeous golden-brown crust on top, with a luscious yellow filling peeking through.
  • Skill Level Needed: This recipe is easy enough for beginners, requiring basic mixing and baking skills.
  • Special Equipment: No specialized tools are required, just standard kitchen ware such as baking dishes and mixing bowls.

Recipe Overview

  • Difficulty Level: This Southern Banana Cobbler is easy to prepare, making it perfect for novice bakers. The straightforward steps lead to a delicious result that will impress your family and friends.
  • Category: This dish fits well within the dessert category, particularly ideal for potlucks, family gatherings, or a cozy night in.
  • Cuisine: Southern cuisine is known for its comfort food, where desserts often reflect the rich agricultural heritage of the South, using locally-sourced fruits and simple ingredients.
  • Cost: The components of this cobbler are inexpensive, primarily requiring bananas, flour, sugar, and butter, resulting in a wonderful dessert without breaking the bank.
  • Season: While delicious year-round, this dessert shines in late summer and early fall when bananas are at their ripest.
  • Occasion: Southern Banana Cobbler is perfect for gatherings, holiday dinners, or as a family dessert after a hearty meal.

Why You’ll Love This Recipe

Southern Banana Cobbler offers an irresistible taste experience that combines sweet, ripe bananas with a buttery biscuit topping. When baked, the bananas become soft and caramelized, creating a filling that is decadently sweet yet balanced by the slight saltiness of the crust. Each bite is a delightful experience, leaving you craving more. The textures meld beautifully, as the smooth filling contrasts with the crisp topping, pleasing every palate.

Preparing this cobbler is a breeze, making it an excellent choice for last-minute dessert planning. You can whip it up in under an hour, making it perfect for unexpected guests or late-night cravings. The ease of preparation does not compromise flavor; in fact, it enhances the experience, allowing everyone to enjoy a homemade treat without spending hours in the kitchen.

Nutritionally, bananas are packed with potassium and fiber, making this dessert a slightly more wholesome choice than traditional sugary desserts. The use of fresh ingredients not only elevates the dish but also gives you peace of mind knowing you’re serving something nutritious and satisfying. Moreover, you can enjoy a sweet treat that is still mindful of your health.

Southern Banana Cobbler is also a wonderful dish for social occasions. Whether you’re hosting a family gathering or a casual get-together with friends, this dessert brings people together over its comforting, satisfying goodness. It’s a staple on southern tables, and sharing this warm cobbler evokes fond memories and laughter among loved ones.

Lastly, the cost-effectiveness makes it a go-to dessert. Using simple ingredients that are often found in your pantry, you can create an impressive dish that won’t strain your wallet. This accessibility means you can treat yourself to a homemade dessert more often, indulging in a slice of southern hospitality with every forkful.

Historical Background and Cultural Significance

The origins of Southern Banana Cobbler trace back to the heart of southern kitchens, where resourcefulness was essential. As cooks sought to minimize food waste, overripe bananas were transformed into a delightful dessert, reflecting the culinary ingenuity that defines southern cuisine. This recipe is not just about flavor; it carries stories and traditions that have been passed down through generations.

Culturally, desserts like cobbler have significant importance in southern gatherings. They are often the centerpiece of meals, representing warmth, hospitality, and family ties. The act of sharing this cobbler underscores the values of community and togetherness that are integral to Southern hospitality. Like many traditional recipes, it has evolved, incorporating different fruits and flavors, while still maintaining its core essence.

Over the years, the recipe has seen various adaptations. Some may use different fruits or even add spices to enhance the flavor profile. Each variation tells a story of the region and the family, highlighting how personal touches can transform a classic dish into something uniquely theirs. Regardless of its adaptations, banana cobbler has become a cherished dessert that evokes a sense of nostalgia.

Lastly, regional variations contribute to the popularity of Southern Banana Cobbler. While the traditional recipe holds its own, variations often include ingredients such as chocolate, nuts, or even caramel, reflecting the diverse culinary landscape of the South. These adaptations ensure the shiny legacy of Southern Banana Cobbler continues to flourish with each new generation.

Ingredient Deep Dive

Bananas: Bananas are one of the most popular fruits worldwide, known for their natural sweetness and versatility. Historically cultivated in tropical regions, they played a significant role in many cultures. Nutritionally, bananas are rich in potassium, which is essential for heart health and maintaining normal blood pressure. When selecting bananas for this recipe, choose ones that are ripe with brown spots, as they are sweeter and perfect for baking. Store bananas at room temperature and avoid refrigerating them, as this can alter their flavor and texture.

Flour: Flour, a staple in many household kitchens, is the foundation for baked goods. The choice of flour impacts the texture and flavor of the cobbler significantly. All-purpose flour is commonly used due to its versatility, but whole wheat flour can be a healthier alternative, adding more fiber. When purchasing flour, look for brands that offer unbleached options for a better taste. Store flour in a cool, dry place in an airtight container to preserve its freshness and prevent pests.

Common Mistakes to Avoid

  • Using underripe bananas: Always opt for ripe bananas for the best flavor and texture; underripe bananas can result in a bitter taste.
  • Overmixing the batter: Overmixing can lead to a dense cobbler. Mix just until combined for a light and fluffy texture.
  • Incorrect oven temperature: Ensure your oven is preheated correctly; an inconsistent temperature can affect the baking time and result.
  • Not greasing the baking dish: Always grease your baking dish to prevent the cobbler from sticking, which can ruin the presentation.
  • Ignoring the baking time: Pay attention to baking times; overbaking can dry out the cobbler while underbaking can leave it raw.
  • Skipping the resting time: Allow the cobbler to cool briefly before serving to let it set up and enhance flavor.
  • Using one type of flour: Mixing different types of flour can alter the texture; stick with what’s suggested for best results.
  • Underestimating the topping: Don’t skimp on the buttery topping; it creates a wonderful contrast to the soft filling.
  • Using cold ingredients: Ensure ingredients like butter and eggs are at room temperature for optimal mixing.
  • Not checking for doneness: Use a toothpick to test for doneness; if it comes out clean, the cobbler is ready to serve.

Essential Techniques

Mixing: Proper mixing technique is crucial for achieving the right consistency in your dough. The key is to combine ingredients without overworking the batter, which can lead to a tough texture. Use a gentle folding method to incorporate dry and wet ingredients until just mixed. This technique prevents the formation of gluten that can result in a heavy cobbler.

Baking: Mastering the baking process is essential to ensure your cobbler is cooked perfectly. Start with a preheated oven to allow even cooking. Keep an eye on the cobbler as it bakes; visual cues like a golden crust and bubbling filling indicate it’s ready. Use a toothpick inserted in the center to check for doneness—the toothpick should come out clean.

Pro Tips for Perfect Southern Banana Cobbler

1. Choose ripe bananas with brown spots for maximum sweetness and flavor; avoid green or overly mushy ones.
2. Opt for high-quality vanilla extract to enhance the flavor profile of your cobbler; homemade extract is an excellent choice if available.
3. Consider adding a pinch of nutmeg along with cinnamon for an extra layer of warm spice that complements the bananas perfectly.
4. Serve the cobbler warm with a generous scoop of vanilla ice cream to elevate the experience; the contrast of hot cobbler and cold ice cream is sensational.
5. If you prefer a firmer filling, reduce baking time slightly; this allows the filling to set better without becoming too gooey.
6. Experiment with the biscuit topping by adding oats or nuts for texture variation—these additions bring delightful crunch and flavor.
7. For a tropical twist, add shredded coconut to the filling or topping—the coconut adds an exotic flavor twist that pairs beautifully with bananas.
8. If making ahead, store the cobbler unbaked and assemble just before cooking to maintain optimal freshness and texture.

Variations and Adaptations

Many creative variations exist for Southern Banana Cobbler, allowing you to cater to personal preferences and seasonal ingredients. For instance, incorporating seasonal berries, like strawberries or blueberries, can add a refreshing twist to the traditional recipe. Additionally, feel free to blend in walnuts or pecans for added crunch and depth of flavor, complementing the sweetness of the banana.

For a healthier adaptation, consider a whole grain version by using whole wheat flour. This slight change promotes a heartier texture and increases the fiber content, promoting better digestion. Additionally, for a vegan version, substitute butter with coconut oil, and use flax eggs instead of traditional eggs to maintain the moisture and richness without compromising taste.

If you have dietary restrictions, this recipe is adaptable to gluten-free needs. Simply opt for a gluten-free flour blend that is suitable for baking. The versatility of Southern Banana Cobbler makes it a fantastic dessert that can fit various dietary needs and preferences without losing its beloved essence.

Serving and Presentation Guide

Serve your Southern Banana Cobbler warm directly from the oven to keep its delightful gooeyness. For an appealing presentation, scoop generous portions into individual bowls or dessert plates. Top each serving with a sprig of mint or a dusting of powdered sugar for visual flair. You can also add a drizzle of caramel sauce on top for additional richness and sweetness.

Consider pairing the cobbler with optional garnishes like whipped cream or vanilla ice cream, serving them on the side to give guests a choice. These accompaniments enhance not only the taste but also the presentation, giving a gourmet touch. You can serve the cobbler directly from the baking dish for a more rustic look, encouraging guests to help themselves and create a friendly, communal atmosphere.

For best enjoyment, serve the cobbler warm. If preparing in advance, reheat gently in the oven for optimal texture. It’s best enjoyed piping hot, as the aroma and warmth add to the overall comfort food experience. Portion control is also important; aim for medium-sized servings to ensure that everyone can indulge without overeating, serving up to 8 portions.

Wine and Beverage Pairing

Pairing beverages with Southern Banana Cobbler can enhance your dining experience. A sweet Riesling or Moscato wine works beautifully, complementing the sweetness of the bananas without overpowering them. The fruity notes of these wines harmonize perfectly with the cobbler’s rich flavors, making for an elegant pairing.

For a non-alcoholic option, consider iced tea sweetened with a hint of lemon or mint, which can refresh the palate while matching the southern charm of the dish. Another option is a rich, creamy coffee; its warmth and bitterness contrast nicely with the sweetness of the cobbler, enhancing the overall flavor experience. Whichever beverage you choose, aim for a balance that allows both the drink and dessert to shine.

Storage and Shelf Life

Store leftover Southern Banana Cobbler in an airtight container in the refrigerator for up to three days. For longer storage, consider freezing portions. To freeze, allow the cobbler to cool completely, then wrap it tightly in plastic wrap and foil to prevent freezer burn. It can be frozen for up to three months.

To reheat, thaw overnight in the refrigerator if frozen, then warm it in the oven at 350°F for about 15-20 minutes. If reheating from the refrigerator, simply pop individual portions in the microwave or the oven, keeping the cobbler covered to maintain moisture. Always check for texture and warmth to ensure it’s delicious when served.

Signs of spoilage include an off smell or visible mold. If unsure, it’s best to err on the side of caution and discard any questionable leftovers.

Make Ahead Strategies

Preparing Southern Banana Cobbler ahead of time can save you stress during busy occasions. You can make the filling and topping mixture ahead, storing them separately in the fridge. Layering the filling and topping just before baking ensures the freshest taste and texture.

Additionally, consider preparing your bananas in advance, slicing them and tossing them with lemon juice to prevent browning. This preparation enables you to assemble the cobbler quickly. Once assembled, you can refrigerate it before baking; adjust the cooking time accordingly, increasing it slightly if baking directly from the fridge.

Plan to add any fresh elements, such as ice cream or whipped cream, just before serving to maintain their quality. These straightforward strategies simplify the cooking experience without sacrificing flavor.

Scaling Instructions

If you need to adjust the recipe for larger gatherings, scaling Southern Banana Cobbler is easy. For doubled servings, simply increase the amounts of all ingredients and use a larger baking dish. Keep in mind that baking times may need to be adjusted; larger portions may require additional time to cook evenly.

Halving the recipe can also be done easily by measuring half of each ingredient. However, ensure you still use an appropriately-sized baking dish to maintain even cooking. When doubling or tripling the recipe, mix the dough in batches if necessary, depending on your mixing bowl’s size, to prevent overworking the batter.

When scaling the recipe, always check the cobbler for doneness as baking times may vary, and keep a close eye on visual cues such as golden brown topping and bubbling filling.

Nutritional Deep Dive

Southern Banana Cobbler can be both indulgent and nourishing. Each serving typically provides a good source of potassium from the bananas, which is vital for heart health and regulating blood pressure. Not to mention, the addition of whole wheat flour instead of white flour can boost fiber content, promoting digestive health.

The recipe does contain sugar and butter, so moderation is key. If you follow portion control, you can enjoy this dessert without straying from dietary goals. Maintaining an awareness of your overall dietary patterns while enjoying such a dessert allows for balance in nutrition, supporting long-term health.

Flavorful desserts like this can fit into most diets, especially when you focus on portion control and make nutritionally conscious choices throughout the day. This approach helps satisfy your sweet tooth while still adhering to a healthy eating pattern.

Dietary Adaptations

For those with specific dietary needs, Southern Banana Cobbler can be tailored accordingly. A gluten-free version can easily be made using a gluten-free flour blend while ensuring you’re mindful of other ingredients to avoid cross-contamination. Adding oats or almond flour can also give a unique texture suitable for gluten-free diets.

To create a vegan Southern Banana Cobbler, replace butter with coconut oil and use flax eggs (1 tablespoon of flaxseed meal mixed with 2.5 tablespoons of water for each egg) for moisture. This adaptation ensures that the cobbler remains delightful without sacrificing flavor for those avoiding animal products.

For those on a low-carb diet, consider experimenting with almond flour and a sugar substitute to reduce carbohydrate content while maintaining delicious flavor and texture. Checking for options that fit into paleo or keto guidelines allows dessert lovers to indulge without compromising their dietary choices.

Troubleshooting Guide

If your Southern Banana Cobbler doesn’t turn out as expected, don’t fret! One common issue is if the cobbler is too soggy; this may be due to using overly ripe bananas that released too much moisture. For future bakes, consider using bananas that are just ripe, or decrease the amount of added liquid in the filling.

If your cobbler is too dry, it may be a result of overbaking or not enough moisture in the filling. Adjust the baking time during future bakes, and ensure to add enough bananas for that juicy filling. Testing with a toothpick can help avoid overbaking.

Another issue could be the topping being too crumbly. Inadequate fat, often due to low-quality butter or not enough butter, can lead to a dry topping. Ensure to use high-quality ingredients and distinguish between measurements for a perfect texture next time.

If your cobbler has an off-smell or unappetizing appearance, it may be a sign of spoilage from improper storage. Always check for freshness and adjust refrigeration or freezing practices as needed for optimal storage.

Recipe Success Stories

The feedback from the community has been overwhelmingly positive, with many sharing their success tips for making the perfect Southern Banana Cobbler. Home bakers rave about the delightful aroma that fills their kitchens as it bakes, often sharing photos of their creations on social media and inspiring others to give it a try.

Adaptation stories abound, with readers experimenting with different fruit toppings such as peaches or mixed berries, proving the versatility of the recipe while maintaining its original charm. Those who have made it for gatherings share experiences of guests going back for seconds, highlighting the cobbler’s undeniable appeal.

Photography tips have also emerged from the community, with many suggesting natural lighting and simple plating techniques that showcase the cobbler’s warm, inviting colors. This attention to presentation emphasizes just how beloved this dish has become among friends and family gatherings.

Overall, the recipes have sparked creativity within home kitchens, blending traditional roots with modern takes while encouraging communal engagement around delicious homemade desserts.

Frequently Asked Questions

Q: Can I use frozen bananas for this recipe?

A: While fresh bananas yield the best results, frozen bananas can work in a pinch. Just ensure to thaw and drain any excess liquid before using them to prevent a soggy filling.

Q: How do I know when my cobbler is done?

A: The cobbler is ready when the topping is golden brown and a toothpick inserted into the center comes out clean, indicating the filling has set properly.

Q: Can I make this cobbler ahead of time?

A: Yes, you can prepare the filling and topping separately in advance and assemble just before baking. Alternatively, you can assemble it and keep it in the fridge before baking for fresh serving later.

Q: What is the best way to serve the cobbler?

A: For the best experience, serve Southern Banana Cobbler warm, topped with a scoop of vanilla ice cream or a dollop of whipped cream for added richness.

Q: Can I substitute other fruits in this recipe?

A: Absolutely! This cobbler is versatile—feel free to include other fruits like blueberries or peaches along with the bananas for a delightful twist.

Q: Is there a gluten-free version of this cobbler?

A: Yes! You can substitute all-purpose flour for a gluten-free flour blend to make the cobbler suitable for gluten-free diets.

Q: How long does leftover cobbler last?

A: Store any leftover cobbler in an airtight container in the refrigerator for up to three days. For longer storage, freeze it for up to three months.

Q: Can I reheat cobbler?

A: Yes, you can reheat leftover cobbler in the oven or microwave. Just reheat until warm, being cautious not to overheat to keep the texture intact.

Q: Is Southern Banana Cobbler suitable for vegan diets?

A: Yes, with simple substitutions like coconut oil instead of butter and flax eggs, you can easily make this dessert vegan-friendly.

Q: What sides pair well with this dessert?

A: Southern Banana Cobbler pairs well with vanilla ice cream, sweetened whipped cream, or even a light drizzle of caramel sauce for extra flavor.

Additional Resources

If you loved this Southern Banana Cobbler, consider exploring related recipes like Peach Cobbler or Apple Crisp for variations on southern desserts. Additionally, check technique guides on fruit preparation and tips for perfecting dough textures. Understanding how to select ripe bananas will elevate your cobbler game, ensuring maximum flavor and enjoyment.

For equipment recommendations, having a good quality mixing bowl and a sturdy baking dish is essential for baking success. Seasonal variations, such as incorporating different fruits or spices, keep your dessert options fresh and exciting. With each recipe explored, you’ll discover the beauty of simple, wholesome southern cooking.

Join the Conversation

We would love to hear your thoughts on this delicious Southern Banana Cobbler! Share your own experiences and photo submissions on social media, tagging our account to showcase your beautiful creations. Consider leaving a review here—your feedback is crucial in helping others find and enjoy this recipe.

Engage with fellow home bakers and explore recipe variations. Share tips, ask questions, and be part of our growing community! Whether it’s a successful adaptation or an experimentation with flavors, we want to hear all about your Southern Banana Cobbler journey. The inclusive environment encourages learning and sharing, making every baking experience memorable.

The Recipe

Southern Banana Cobbler

Serves: 8

Prep Time: 15 mins

Cook Time: 30 mins

Total Time: 45 mins

Kitchen Equipment Needed

  • Baking dish (9×13 inches)
  • Mixing bowls
  • Measuring cups and spoons
  • Whisk or spoon for mixing
  • Oven mitts

Ingredients

  • 4 ripe bananas, mashed
  • 1 cup granulated sugar
  • 1 teaspoon vanilla extract
  • 1 teaspoon ground cinnamon
  • 1 cup all-purpose flour
  • 1/2 cup unsalted butter, melted
  • 1 tablespoon baking powder
  • 1/2 teaspoon salt
  • 1/2 cup milk

Directions

  1. Preheat your oven to 350°F (175°C) and grease your baking dish.
  2. In a mixing bowl, combine mashed bananas, sugar, vanilla, and cinnamon until well mixed.
  3. In another bowl, whisk together flour, baking powder, and salt.
  4. Add the melted butter and milk to the banana mixture, then gradually combine it with the dry ingredients.
  5. Pour the mixture into the greased baking dish.
  6. Bake for 30 minutes, or until the top is golden brown and a toothpick comes out clean.
  7. Let cool slightly and serve warm, preferably with vanilla ice cream.

Recipe Notes

  • Feel free to experiment with adding nuts or chocolate chips for extra flavor.
  • This recipe can be halved easily; just use a smaller baking dish.
  • For added richness, consider using browned butter instead of the melted butter.

Best Chocolate Espresso Ricotta Torte – Rich and Creamy

Decadent Chocolate Espresso Ricotta Torte: A Sublime Dessert Delight

⚖️
Difficulty
Moderate

⏲️
Prep Time
20 mins

🕒
Cook Time
25 mins

⏱️
Total Time
45 mins

🍽️
Servings
8

Chocolate Espresso Ricotta Torte is more than just a dessert; it’s a delightful experience that combines rich flavors and a luxurious texture. This torte showcases the irresistible combination of chocolate and espresso, delivering a profound depth of taste that awakens the senses. The smoothness of the ricotta cheese enhances the creaminess, creating a cake that feels indulgent yet surprisingly light. Each bite offers a harmonious blend of sweet and bitter notes, reminiscent of your favorite café, making it the perfect finale to any meal or a delightful pick-me-up during an afternoon break.

One of the standout features of this recipe is its versatility—perfect for almost any occasion, from family gatherings to elegant dinner parties. The rich, deep brown color of the torte is visually captivating, often garnished with a dusting of cocoa powder or a sprinkle of chocolate shavings that add an artistic touch. When served, it is paired effortlessly with whipped cream or a refreshing scoop of vanilla ice cream, amplifying the dessert’s luxurious feel. Let this Chocolate Espresso Ricotta Torte transport you into a world of decadence where every bite is a moment to savor.

Quick Recipe Highlights

  • Flavor Profile: A perfect fusion of rich chocolate and aromatic espresso with a hint of vanilla that tantalizes the taste buds.
  • Texture: Each slice offers a creamy, melt-in-your-mouth experience complemented by a dense yet fluffy crumb.
  • Aroma: The intoxicating scent of brewed coffee mingled with the sweet notes of chocolate invites anticipation and indulgence.
  • Visual Appeal: Dark and glossy with an elegant presentation; simply dusted with cocoa or adorned with chocolate shavings.
  • Skill Level Needed: Moderate. Requires attention to detail but can be mastered with basic baking skills.
  • Special Equipment: A 9-inch springform pan is essential for achieving the perfect torte shape and easy removal.

Recipe Overview

  • Difficulty Level: The Chocolate Espresso Ricotta Torte presents a moderate challenge, combining baking and mixing techniques without demanding expert-level skills. Precision in ingredient handling enhances the final result.
  • Category: This dessert falls under the category of cakes, perfect for celebrations or as a luxurious treat to complement coffee.
  • Cuisine: With roots in Italian culinary traditions, this torte exemplifies the classic ingredients of rich chocolate and creamy cheese, recalling the artistry of Italian desserts.
  • Cost: Affordable yet sophisticated, the ingredients—ricotta, quality chocolate, and coffee—are budget-friendly, making this recipe accessible for many.
  • Season: Enjoyable year-round, it’s particularly popular in the cooler months, where chocolate desserts provide warmth and comfort.
  • Occasion: Ideal for intimate dinners, birthdays, or gatherings where you want to impress guests with a homemade treat.

Why You’ll Love This Recipe

The taste and texture appeal of the Chocolate Espresso Ricotta Torte is undeniable. You’ll be enchanted by its rich, chocolaty flavor combined with a hint of espresso, which creates a delicate balance that can elevate the simplest of meals into an extraordinary gourmet experience. The creamy filling melts in your mouth, while the slight resistance of the torte prevents it from feeling overly indulgent, allowing you to enjoy every deliciously crafted bite.

Convenience and preparation benefits abound with this recipe. While the torte may seem complex, it’s surprisingly straightforward. Prepared in one bowl, the ingredients blend seamlessly, significantly reducing cleanup time. Additionally, the torte can be baked in advance, allowing flavors to meld overnight, so it’s ready when you are, making it suitable for both spontaneous gatherings and planned celebrations.

Nutritional advantages make this torte a delightful indulgence without the guilt. Ricotta cheese provides a dose of protein and calcium, while the use of quality dark chocolate allows you to satisfy your sweet cravings with antioxidants. The moderate sweetness balances perfectly with the espresso notes, ensuring a healthier dessert choice compared to heavily frosted options.

Social and entertaining value is paramount with this impressive dessert. Bringing a Chocolate Espresso Ricotta Torte to a gathering is sure to spark conversations and compliments. Its visually stunning appearance and memorable taste make it the perfect centerpiece for sharing stories and laughter with loved ones. The act of slicing and serving enhances the experience, creating a moment of anticipation for each guest.

Cost-effectiveness and accessibility are essential aspects of this recipe. The ingredients are widely available and don’t require specialty shopping, making it a reliable option for anyone looking to impress without overspending. With minimal effort and maximum payoff, this torte proves that you can craft a restaurant-quality dessert in the comfort of your own kitchen.

Historical Background and Cultural Significance

The origin of the Chocolate Espresso Ricotta Torte hearkens back to Italian traditions, where desserts often feature regional ingredients like ricotta and chocolate. This cake represents how Italian cuisine celebrates simple yet impactful flavors, often using what is locally sourced.

Cultural importance looms large in this recipe, reflecting the Italian affinity for rich desserts that bring friends and family together. Desserts in Italy are not merely afterthoughts; they are essential aspects of mealtime, often serving as a literal and figurative centerpiece at gatherings.

The evolution of this recipe has seen variations across regions in Italy, with different cities showcasing their interpretations. Some areas might include nuts or fruit, while others emphasize the use of different cheeses or flavorings, illustrating the adaptability of this classic dessert.

Regional variations highlight how the basic framework of the Chocolate Espresso Ricotta Torte can differ, creating unique spins that represent local traditions. In some areas, it might be accompanied by a sweet wine, while others might serve it alongside a strong espresso, enhancing its rich flavors and demonstrating its versatility.

Ingredient Deep Dive

Chocolate
Cultural significance and history: Chocolate is a staple in numerous cultures worldwide, treasured for its decadent flavor. Throughout history, it has been used in both sweet and savory dishes, finding special prominence in European desserts.

Nutritional benefits: Dark chocolate is loaded with powerful antioxidants and can improve heart health when consumed in moderation. It is also known to contain essential minerals such as iron and magnesium, contributing to overall well-being.

Selection tips: Opt for high-quality dark chocolate with a cocoa content of at least 70% to ensure depth of flavor. Check for minimal added sugars and ingredients for the most health benefits.

Storage recommendations: Dark chocolate should be stored in a cool, dry place away from strong aromas. Wrapping it tightly in foil or using an airtight container can extend its shelf life.

Substitution options: If you prefer a sweeter taste, semisweet or milk chocolate can be used, though the richness may vary from the original recipe.

Ricotta Cheese
Cultural significance and history: Ricotta is an essential ingredient in Italian cuisine, often utilized in both savory and sweet dishes. Its light and creamy texture makes it ideal for a variety of desserts, bringing an authentic taste to Italian pastries.

Nutritional benefits: Ricotta is a soft cheese that is lower in fat than many other cheeses, making it a nutrient-rich choice packed with protein and calcium. It also contains a good amount of vitamins and minerals, promoting strong bones and overall health.

Selection tips: Fresh ricotta cheese is key for optimal flavor; opt for whole milk varieties for a creamier taste. Ensure that it is stored properly in a sealed container in the refrigerator.

Storage recommendations: Ricotta should be consumed within a few days of opening but can last longer if kept sealed. Freezing may change its texture, so it’s best enjoyed fresh.

Substitution options: If you need a non-dairy alternative, consider using tofu blended until smooth or cashew cream as a substitute for ricotta in this recipe.

Common Mistakes to Avoid

  • Using low-quality chocolate: Poor quality chocolate can lead to a disappointing flavor. Always choose high-quality chocolate to enhance the richness of the torte.
  • Overmixing the batter: Mixing too vigorously can incorporate too much air, leading to a dense texture rather than a light, fluffy torte.
  • Not letting the ingredients come to room temperature: Cold ingredients can lead to uneven mixing. Allowing eggs and ricotta to sit out for about 30 minutes before use ensures a more homogenous batter.
  • Underbaking or overbaking: It’s critical to keep an eye on baking time, as overbaking can result in a dry torte while underbaking leads to a gooey texture. Use a toothpick to check for doneness.
  • Not letting the torte cool completely: Removing the torte from the pan before it has cooled may lead to it breaking apart. Patience is key!
  • Using a damaged springform pan: Ensure your pan is in good condition to prevent leaks or messes, which could ruin the presentation.
  • Skipping the espresso: The espresso adds depth to the flavor. Omitting it can result in a flat-tasting torte.
  • Neglecting to grease the pan: Even with a springform pan, greasing is essential to ensure the torte releases easily. A light layer of butter or cooking spray is effective.
  • Not letting the torte set after baking: Allowing the torte to cool and set in the fridge for a few hours or overnight intensifies flavors and improves texture.
  • Using expired ingredients: Always check your ingredients, especially baking powder and cocoa powder, to avoid a failed recipe.

Essential Techniques

Mixing the Batter
It’s critical to mix gently to create the right texture; aggressive mixing can lead to a tough torte. Take your time, and mix until just combined for the best results. Watch for visual cues like a smooth batter without lumps.

Layering Ingredients
Layering is significant for achieving the perfect balance in this torte. Adding ingredients in a specific order ensures even distribution. Starting with the dry ingredients and gradually incorporating the wet ones will help achieve a better overall texture.

Pro Tips for Perfect Chocolate Espresso Ricotta Torte

1. Use room temperature ingredients for the best blending; this helps achieve a smooth batter without lumps.
2. Experiment with different types of espresso shots to find the flavor intensity you prefer.
3. For added richness, consider blending in a teaspoon of espresso powder into your dry ingredients.
4. Top with fresh berries to add a bright acidity that balances the dessert’s richness.
5. Remember to let your torte rest in the refrigerator after baking; this helps solidify the structure and enhances flavor.
6. Consider serving with a dusting of powdered sugar for an elegant finish.
7. Utilize a sharp knife for cutting; this will help maintain clean edges for a beautiful presentation.
8. Plate the torte with a drizzle of chocolate sauce for an impressive serving suggestion.

Variations and Adaptations

Seasonal adaptations can enhance your torte; consider adding a layer of citrus zest, such as orange or lime, to the ricotta mixture for a refreshing twist. During the fall, spices like nutmeg or cinnamon can introduce warmth and complexity.

Dietary modifications are possible with alternative ingredients. For dairy-free options, substitute ricotta with cashew cream or a dairy-free cheese option. To create a gluten-free version, ensure that your chocolate and other additives are labeled gluten-free.

Flavor variations can include infusing the torte with different extracts, such as almond or hazelnut, complementing the chocolate and coffee notes beautifully. Alternatively, adding a layer of fruit preserves could heighten the overall experience with natural sweetness.

Texture modifications can be achieved by adjusting the baking time slightly. A shorter baking time will result in a softer, fudgier torte, while a longer baking time will create a denser consistency.

Serving and Presentation Guide

Plating techniques can elevate your dessert. Serve the torte on a rustic wooden board or a sleek white plate to emphasize its rich color. Garnishing with fresh mint leaves or cocoa powder adds dimension to your presentation.

Garnishing ideas include a dollop of whipped cream, fresh berries, or a drizzle of chocolate sauce, all of which enhance both the flavor and visual appeal of your torte.

Traditional accompaniments might consist of a scoop of vanilla ice cream, which contrasts beautifully with the torte’s density and richness. Modern suggestions include pairing it with a dollop of Greek yogurt for a tangy balance.

Temperature considerations are essential; the torte is best served chilled to maintain its structure and enhance the flavors. However, a slight warming in the microwave for just a few seconds can create a wonderfully gooey center for an indulgent treat.

Portion control tips recommend slicing into smaller pieces when serving. The rich flavor means you can enjoy smaller portions, allowing guests to savor the torte without feeling overwhelmed.

Wine and Beverage Pairing

When it comes to wine pairings, opt for a robust red like Cabernet Sauvignon or a rich Port that complements the chocolate while cutting through its sweetness. The tannins balance out the dessert’s richness beautifully.

For non-alcoholic alternatives, consider pairing the torte with a rich, dark roast coffee or espresso to amplify the chocolate and coffee flavors without overwhelming sweetness.

The pairing of a late-harvest wine can offer a delightful contrast; the natural sweetness and acidity cut through the richness of the torte while harmonizing with its complex flavor profile.

Temperature considerations for serving beverages should align with the dessert. Chilled wines are appropriate for balance, while warm espresso enhances the indulgence of each bite.

Serving suggestions also include a side of sparkling water with lemon to cleanse the palate between bites, ensuring your guests fully enjoy the rich flavors.

Storage and Shelf Life

For optimal freshness, store the Chocolate Espresso Ricotta Torte in an airtight container in the refrigerator. It can last for about 3 to 5 days. Make sure to place a sheet of wax paper to prevent sticking.

Temperature requirements are crucial; this torte should be kept cool, but not frozen, as freezing can compromise its creamy texture. If left at room temperature, consume within a few hours to maintain quality.

Container recommendations include using glass or plastic containers with tight seals to prolong freshness. Avoid using open plates or foil, as these can cause the torte to dry out quickly.

Signs of spoilage include a sour smell or changes in texture, signaling a need for disposal. Always check for visible signs of mold before consuming.

Reheating instructions suggest microwave heating in short bursts of 10-15 seconds to maintain a rich, gooey texture without overheating.

Freezing guidelines recommend wrapping the torte tightly in plastic wrap and then aluminum foil if necessary. Thaw it slowly in the refrigerator before serving for best results.

Make Ahead Strategies

Developing a prep timeline is key for making this torte ahead of time. Bake the torte a day or two before serving, allowing ample time for flavors to meld and for easy cutting when it’s set.

Storage between steps involves allowing the torte to cool completely before refrigerating. Cover it with plastic wrap and refrigerate if making in advance, to keep it fresh.

Quality impact assessment reveals that flavors improve exponentially overnight. The cooling process allows the torte to firm up, leading to better slicing for presentation.

Assembly tips include preparing any garnishes, like whipped cream or berries, in advance. Assemble just before serving to maintain freshness and visual appeal.

Reheating guidelines should be minimal; let the torte come to room temperature before serving for the best texture and flavor experience.

Fresh element additions can include a sprinkle of freshly grated chocolate or seasonal fruit just before serving, giving a pop of color and added flavor.

Scaling Instructions

Halving the recipe is simple; use a smaller springform pan (about 6 inches). Adjust the baking time accordingly to achieve the same delicious results.

Doubling or tripling the recipe is feasible; ensure you have enough mixing bowls and a larger oven-safe pan to accommodate the increased batter volume, which might require longer baking time.

Equipment adjustments may include using multiple pans for larger batches, as well as possibly needing more workspace and additional mixing tools to handle bigger quantities.

Timing modifications will depend on the amount you choose to make. More batter may require checking for doneness frequently as bake times will differ.

Storage considerations entail using multiple airtight containers if you split up the torte for storage or gifting, ensuring each piece maintains freshness.

Nutritional Deep Dive

A macro breakdown shows that this torte offers a balance of carbohydrates, fats, and proteins, thanks to the key ingredients like ricotta and chocolate, providing energy and satisfaction.

Micronutrient analysis reveals the presence of essential nutrients found in ricotta, such as calcium and vitamin A, supporting bone health and enhancing immunity.

Health benefits include a combination of flavonoids from dark chocolate and the protein content from ricotta, making this dessert a more balanced choice compared to other sugary options.

Dietary considerations must be noted; mindful consumption ensures that any dietary restrictions are respected while enjoying this indulgent dessert.

Portion analysis suggests that a single slice is fulfilling, allowing for enjoyment without excessive calorie intake, aiding those managing their weight.

Weight management tips for incorporating this dessert into a balanced diet suggest enjoying it as an occasional treat, pairing it with a healthy meal to balance indulgence.

Dietary Adaptations

For a gluten-free version, ensure that all ingredients are certified gluten-free, particularly any chocolates or baking powders used in this recipe.

Dairy-free adaptations can be achieved by substituting ricotta with silken tofu blended until smooth or vegan cream cheese for a similar texture and equal creaminess.

A vegan option can incorporate egg substitutes like flaxseed or applesauce along with the dairy-free ricotta replacement for a wholesome version without animal products.

Low-carb adaptations can be made by substituting sugars with stevia or monk fruit sweetener, though be mindful of your preferred taste balance.

For a keto diet, use almond flour instead of traditional flour, allowing the torte to be a satisfying dessert without exceeding carbohydrate limits.

Paleo dieters can use coconut flour and honey as sugar substitutes, keeping it within the natural foods spectrum while enhancing flavor with these ingredients.

Low-FODMAP adaptations recommend avoiding any fruit toppings that are high in FODMAPs, focusing instead on simple chocolate and nut finishes that comply with dietary needs.

Troubleshooting Guide

Texture issues often arise due to incorrect mixing; undermixed batter can create lumps, while overmixing can lead to density. Always mix just until combined for optimal texture.

Flavor balance mistakes can often occur from inaccurate ingredient measurements; always use a kitchen scale for precision to achieve a harmonious blend of chocolate and espresso.

Temperature problems might arise from not preheating the oven properly; consistent temperatures are crucial for achieving the desired structure—check oven accuracy regularly.

Equipment challenges such as the springform pan leaking can often be avoided with adequate greasing. Always wrap the base with aluminum foil for added assurance when baking.

Ingredient substitutions may lead to unexpected flavor profiles; thorough research on replacements can prevent unpleasant surprises. Always taste and adjust seasoning as necessary.

Timing concerns can be minimized by keeping a close watch during the baking process; use visual cues and toothpicks to check for doneness to prevent overbaking.

Recipe Success Stories

Community feedback on the Chocolate Espresso Ricotta Torte has been overwhelmingly positive, with many home bakers sharing how easy and rewarding they found the process.

Variation successes include readers experimenting with infused flavors like peppermint or orange zest, which have been praised for adding a delightful twist to the traditional recipe.

Adaptation stories have emerged from those with dietary restrictions, showcasing how they successfully tailored the recipe to meet vegan and gluten-free needs while still enjoying a rich dessert.

Reader suggestions often highlight the various garnishing techniques used, sparking creativity across social media platforms with vibrant presentations of their version of the torte.

Photography tips shared by the community emphasize natural light and well-contrasted plating to highlight the beauty of the torte, inspiring novice bakers to document and share their creations.

Frequently Asked Questions

Q1: Can I freeze the Chocolate Espresso Ricotta Torte?
A: Yes, you can freeze the torte, although it’s best enjoyed fresh. Wrap it tightly in plastic wrap and foil to preserve its texture and flavor.

Q2: How long does the torte last in the fridge?
A: In the refrigerator, the torte lasts about 3 to 5 days. Always store it in an airtight container for freshness.

Q3: Can I use milk chocolate instead of dark chocolate?
A: You may use milk chocolate, but keep in mind it will add a sweeter flavor, which may alter the balance with espresso.

Q4: What type of espresso should I use?
A: A strong brewed espresso works best, but you can also use instant espresso powder for a more concentrated flavor.

Q5: Is there a gluten-free version of this torte?
A: Absolutely! Ensure all your ingredients, especially chocolate and baking powder, are gluten-free.

Q6: How can I tell when the torte is done baking?
A: Insert a toothpick in the center; if it comes out clean or with a few moist crumbs, it’s finished baking.

Q7: Can I adjust the sweetness level of the torte?
A: Yes, you can reduce the sugar in the recipe based on your preferences, but note this may affect the texture slightly.

Q8: What’s the best way to serve the torte?
A: Serve it chilled with a dollop of whipped cream or alongside fresh berries for a delightful contrast.

Q9: Do I need to let it cool in the pan?
A: Yes, allow it to cool completely in the pan before removing to prevent breaking or crumbling.

Q10: Can I make this torte without eggs?
A: Yes! Use flaxseed meal or applesauce as an egg substitute for a vegan version of the recipe.

Additional Resources

For those looking to enjoy other desserts, consider exploring related recipes that showcase similar flavor profiles such as espresso-infused panna cotta or rich chocolate soufflé.

Technique guides on baking basics can also help refine skills, ensuring better outcomes with future recipes, including tips on tempering chocolate or achieving a perfect meringue.

Ingredient information about sourcing quality chocolate and apps for finding local artisanal producers can enhance your dessert-making experience while ensuring you select the best for your torte.

Equipment recommendations for must-have kitchen tools include high-quality mixing bowls and flexible spatulas, which facilitate thorough mixing and easy handling of delicate batters.

Seasonal variations in culinary trends can inspire innovation; explore using seasonal fruits to accentuate desserts and deepen flavor.

Join the Conversation

Social media sharing is a fantastic way to connect with fellow food enthusiasts; consider tagging your Chocolate Espresso Ricotta Torte posts to share experiences and variations.

Photography tips focus on capturing the torte’s rich textures and colors. Using natural light will enhance the visual appeal, making your dessert irresistible.

Recipe reviews play a crucial role in community engagement; sharing successes and adaptations can encourage others to try the recipe and experiment freely.

Engaging with the community can also allow for exchanges of tips, meeting home bakers who share similar culinary interests and adventures.

Recipe variations offered by fellow bakers can foster an atmosphere of creativity and inspiration; don’t hesitate to try different flavor combinations or techniques that others have suggested.

The Recipe

Chocolate Espresso Ricotta Torte

Serves: 8

Prep Time: 20 mins

Cook Time: 25 mins

Total Time: 45 mins

Kitchen Equipment Needed

  • 9-inch springform pan
  • Mixing bowls
  • Electric mixer or whisk
  • Measuring cups and spoons
  • Spatula
  • Oven

Ingredients

  • 1 cup ricotta cheese
  • 1 cup dark chocolate, melted
  • 1/2 cup granulated sugar
  • 3 large eggs
  • 1/2 cup brewed espresso
  • 1/4 cup all-purpose flour
  • 1 teaspoon vanilla extract
  • Pinch of salt

Directions

  1. Preheat your oven to 350°F (175°C) and grease the springform pan.
  2. In a mixing bowl, combine ricotta cheese, melted chocolate, and sugar; mix until smooth.
  3. Add eggs one at a time, blending well after each addition.
  4. Stir in the brewed espresso, flour, vanilla extract, and salt until combined.
  5. Pour the mixture into the prepared springform pan and bake for 25 minutes or until the center is set.
  6. Let the torte cool in the pan for 10 minutes before transferring to a cooling rack.
  7. Once cooled, refrigerate for at least 2 hours before serving.

Recipe Notes

  • Top with whipped cream or fresh berries for an extra touch of flavor.
  • This torte can be made ahead and stored in the refrigerator for up to 5 days.
  • Feel free to add a tablespoon of espresso powder for enhanced coffee flavor.
  • For a richer taste, use dark chocolate with at least 70% cocoa content.