Best Chai Tea Latte Recipe – Easy, Homemade, 5 Ingredients

The EASIEST Chai Tea Latte: A Simple Delight with Only 5 Ingredients!

⚖️
Difficulty
Easy

⏲️
Prep Time
5 mins

🕒
Cook Time
5 mins

⏱️
Total Time
10 mins

🍽️
Servings
2 cups

The EASIEST Chai Tea Latte is your go-to recipe for a comforting and delicious drink that combines the warmth of traditional spices with the creaminess of milk. With just five simple ingredients, this chai latte comes together in minutes and offers a satisfying experience that will soothe your senses. The perfect balance of spicy and sweet, this easy chai recipe is perfect for chilly mornings or cozy evenings. You’ll savor the inviting aroma of cardamom and cinnamon as you brew this delightful beverage in your own kitchen.

Whether you’re taking a moment for yourself or sharing with friends, this chai tea latte provides a fulfilling taste of warmth and comfort. The simplicity of the recipe makes it accessible to everyone, from novice cooks to experienced bakers. Just imagine wrapping your hands around a warm mug filled with this creamy chai tea latte — it’s instant bliss!

Quick Recipe Highlights

  • Flavor Profile: This chai latte thrives on the harmonious blend of bold black tea and aromatic spices, delivering a delightful mix of warmth and sweetness that gently awakens your palate.
  • Texture: Experience the creamy smoothness of steamed milk that perfectly balances the spices, resulting in a velvety mouthfeel that feels indulgent and satisfying.
  • Aroma: The scent of freshly brewed chai, infused with cardamom, cinnamon, and ginger, fills the air, creating a welcoming atmosphere perfect for relaxation.
  • Visual Appeal: The chai tea latte boasts a lovely tan color, enriched by a frothy top that invites you to take a sip, often complemented by a sprinkle of cinnamon or nutmeg.
  • Skill Level Needed: This easy recipe is perfect for beginners and requires minimal cooking skills, making it an exciting project for anyone looking to explore homemade beverages.
  • Special Equipment: A simple saucepan and a whisk or milk frother are all you need to create this enchanting chai latte at home.

Recipe Overview

  • Difficulty Level: This recipe is classified as easy, incorporating straightforward steps that anyone can follow without prior experience in the kitchen.
  • Category: This chai latte falls into the beverage category, making it ideal for breakfast, an afternoon pick-me-up, or a cozy evening treat.
  • Cuisine: Drawing from Indian culinary traditions, this beverage is inspired by the ancestral chai recipes that have delighted tea drinkers for generations.
  • Cost: Making a homemade chai tea latte is budget-friendly, with ingredients that won’t break the bank and can be found in most kitchens.
  • Season: This chai latte is perfect for fall and winter seasons but can brighten your day all year round, regardless of the weather.
  • Occasion: Whether it’s a quiet morning at home, a gathering with friends, or a comforting evening snack, this recipe fits seamlessly into any occasion.

Why You’ll Love This Recipe

Firstly, the taste and texture of this chai tea latte are divine. The rich, creamy milk melds beautifully with the spicy chai, creating a balanced flavor that is both refreshing and comforting. With every sip, you’ll appreciate the depth of the spices and the smooth finish, leaving you wanting more. Pair this with a biscuit or a piece of cake to elevate your coffee break.

Convenience and ease of preparation are another reason you’ll adore this recipe. In less than 10 minutes, you can have a luxurious beverage that feels like a special treat. Perfect for those mornings when you need a little extra motivation to start your day, this latte can be prepared in no time. Plus, you can easily adjust the level of sweetness and spiciness to cater to your preferences.

From a nutritional standpoint, the chai tea latte is an excellent choice. The presence of spices such as ginger and cardamom not only adds flavor but also brings health benefits such as aiding digestion and boosting immunity. When made with unsweetened almond or oat milk, this drink can also fit various dietary needs, making it a versatile choice for many diets.

In addition, this chai tea latte is perfect for social settings. Imagine inviting friends over and serving them this warm, spiced beverage — it instantly sets a cozy atmosphere. You can even create a mini tea party by preparing different flavors or toppings, making it a more interactive experience that friends will love.

Lastly, considering cost-effectiveness, brewing your chai tea latte at home is much cheaper than purchasing one from a café. Ingredients are likely already at hand, and with just a few pantry staples, you can create café-quality lattes. Plus, there’s something incredibly rewarding about crafting your beverages at home.

Historical Background and Cultural Significance

The origin of chai tea dates back centuries in India, where it was traditionally served in homes as a soothing beverage. Initially, the spiced tea was considered medicinal, made from various herbs and spices thought to aid digestion and combat illnesses. As tea gained popularity in British colonial times, chai evolved into a more accessible drink, leading to the flavors and jarring popularity we know today.

Culturally, chai represents hospitality in India. Offering a cup of chai to guests is a common and cherished custom, symbolic of welcoming someone into your home. This beverage has woven itself into the social fabric of Indian life, fostering connection and conversation over generations.

Over time, the chai tea recipe has evolved with circulating influences and parent recipes, adapting to various tastes and preferences. Variations with different spices, milk types, and sweeteners emerged, contributing to the rich tapestry of flavors associated with chai tea globally. Each region has its twist, reflecting the local culture and preferences.

Today, regional variations abound, with chai becoming a beloved drink worldwide. Whether it’s a sweetened version with cinnamon or a spiced latte with black pepper, world travelers and tea enthusiasts continue to reinvent this iconic beverage while honoring its roots.

Ingredient Deep Dive

Tea: Black tea is the foundation of the chai tea latte, providing robust flavor and a caffeine boost. Traditionally, Assam tea or Darjeeling tea is used due to their strong profiles. The health benefits of black tea include antioxidants that promote heart health and improve metabolism. When selecting tea, choose high-quality loose leaf or teabags for the best flavor. Store tea in a cool, dark place away from moisture to maintain freshness.

Spices: The warm spices in chai, typically cardamom, cinnamon, and ginger, form the aromatic profile. Ginger aids digestion, while cardamom has anti-inflammatory properties. When selecting spices, opt for whole spices for the freshest flavor and grind them before use if possible. The storage of spices should also be in airtight containers, away from direct sunlight to retain their potency.

Milk: Milk adds creaminess to the chai tea latte. Dairy, or plant-based alternatives like almond or oat milk, are excellent options. Plant-based milks often have added health benefits such as lower calories and a lactose-free option. When choosing milk, look for unsweetened varieties to control sweetness levels and stay fresh in the fridge, using within a week of opening.

Sweetener: The sugar or honey you choose to sweeten your chai latte can greatly influence the flavor. While typical choices include sugar or honey, alternatives like maple syrup or agave can also work well. Choosing natural sweeteners can provide additional health benefits. Store in a cool, dry place and keep an eye on expiry dates for optimal quality.

Water: The most overlooked ingredient, high-quality water can significantly alter the taste of tea. Using filtered water can enhance the flavors and ensure a clean, crisp drink. Store water in a clean jug or pitcher, keeping it refrigerated for the best taste.

Common Mistakes to Avoid

  • Overcooking the spices: Allowing the spices to simmer for too long may result in a bitter taste. Just simmer them together for a few minutes to keep the flavor balanced.
  • Forgetting to strain the tea: Leaving the tea leaves in the mixture can lead to an overly strong and tannic flavor. Strain the tea before adding milk for a smoother taste.
  • Using low-quality tea: Cheap tea can result in a lackluster flavor. Opt for high-quality loose leaf or bags for the best results.
  • Not adjusting sweetness: Everyone has different sweetness preferences. Taste as you go and adjust the sweetener to your liking.
  • Using cold milk: Adding cold milk to hot tea can lead to a temperature drop. Use warmed milk or froth it before combining.
  • Ignoring measurements: Skip the guesswork and be precise with your measurements to ensure consistent results every time.
  • Skipping the frothing: Frothing the milk adds a delightful texture to your chai latte. Don’t miss this step for the best experience.
  • Removing the spices too soon: For the fullest flavor, give the spices adequate time to steep in the boiling water before adding the tea.
  • Not experimenting: Feel free to play with different spices or dairy alternatives. Each adjustment can lead to surprising, delightful results.
  • Forgetting to garnish: A sprinkle of cinnamon or nutmeg on top can take your chai latte to another level of elegance — it’s all in the details!

Essential Techniques

Cooking the spices carefully is essential to releasing their full flavor potential. Start by lightly toasting whole spices in the pan to awaken their natural oils before adding water. Mastering this technique ensures you get the aromatic depth typical of a well-made chai latte. Avoid high heat, as it can lead to burning rather than toasting.

Straining the tea is another key technique. Use a fine mesh sieve to separate the brewed leaves and spices from the liquid for a clean finish. This step prevents undesirable bits from floating in your drink, enhancing the visual appeal and texture of your latte.

Pro Tips for Perfect The EASIEST Chai Tea Latte

Start with fresh spices: Fresh spices have more potent flavors, so always opt for whole spices when you can.

Experiment with milk: Try different milk varieties, such as oat, almond, or coconut, to discover your favorite flavor combinations.

Sweeten to taste: Add sweeteners gradually to achieve the perfect balance for your palate without overpowering the chai’s natural flavors.

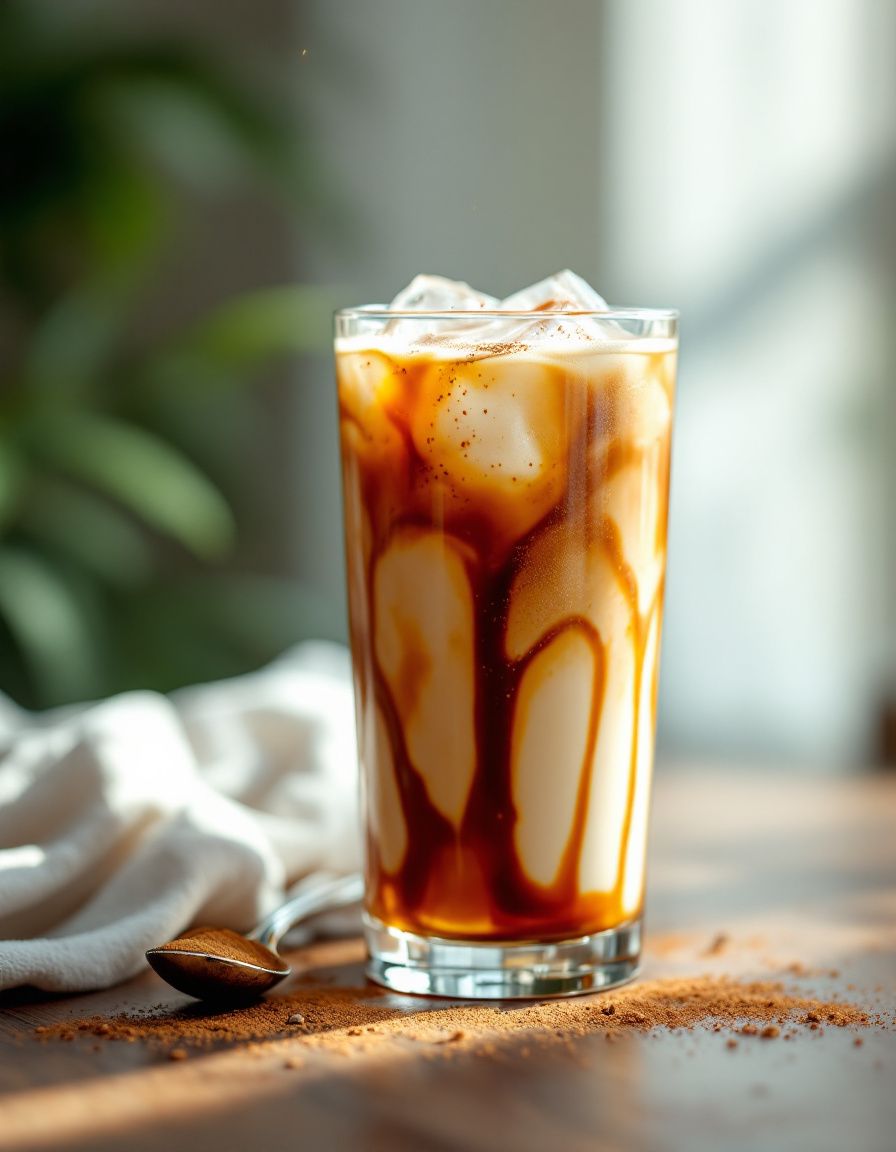
Chill the tea: For a delicious iced version, let your chai tea cool, then pour it over ice and top with cold milk.

Pre-brew the tea: Brew a larger batch of chai concentrate ahead of time to enjoy quick chai lattes whenever you want.

Garnish creatively: Get artistic with garnishes — consider a sprinkle of cocoa powder, a slice of fresh ginger, or a sprig of mint.

Try alternative spices: Don’t hesitate to experiment with spices like cloves or turmeric for a unique twist on the classic recipe.

Make it a chai tea frappé: Blend your prepared chai latte with ice for a refreshing summertime treat.

Variations and Adaptations

Regional variations can dramatically change your chai tea latte. For instance, in certain regions, cloves and black pepper are popular additions, lending a different spice profile. Adapt the core recipe to include local spices you enjoy for an exciting twist on the traditional flavors.

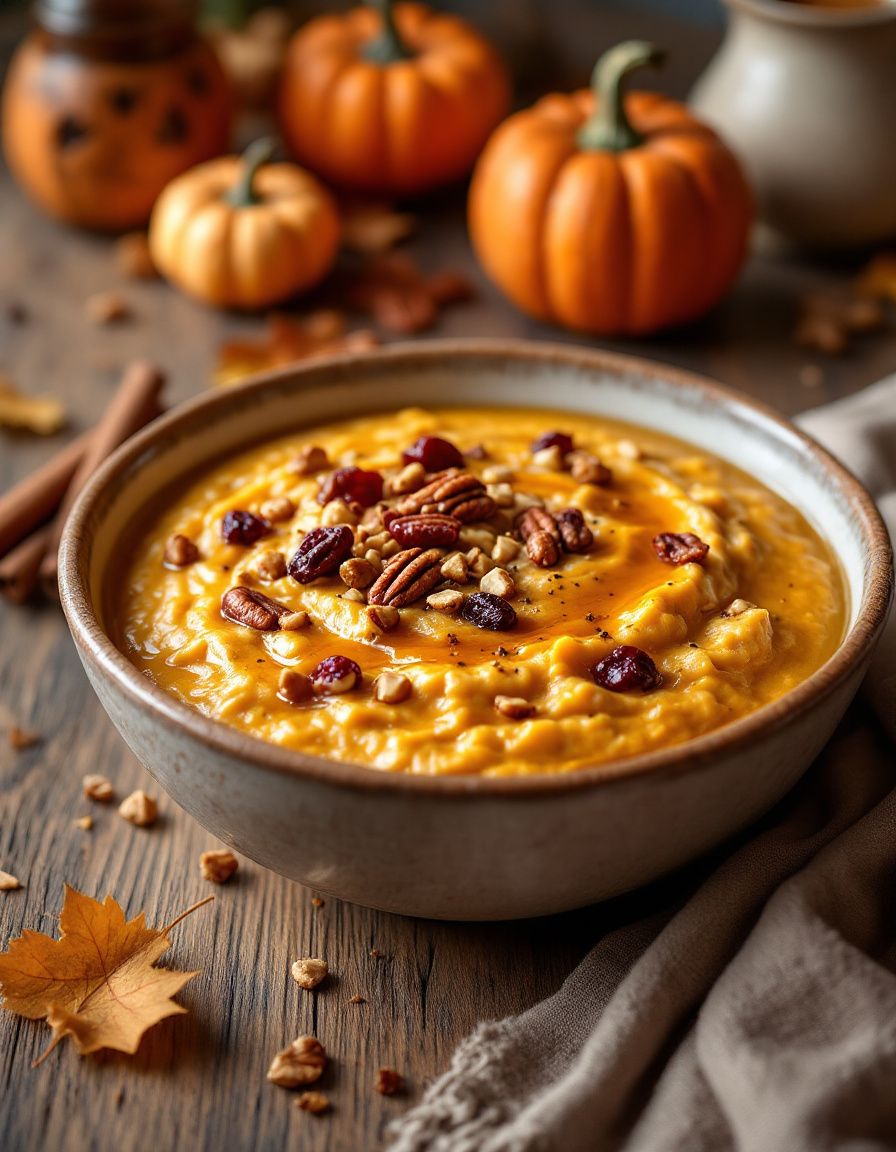
Seasonal adaptations offer an opportunity to get creative. In the fall, consider adding pumpkin spice to your chai latte to celebrate the season, or in the summer, switch to an iced version for a cooling treat.

Dietary modifications can easily be made to this recipe. For a vegan option, substitute dairy milk with almond or soy milk, and raise the natural sweetness with maple syrup instead of honey for a flexible beverage option suitable for all diets.

Flavor variations can alter the experience immensely. Adding flavored syrups, such as vanilla or caramel, can give it a unique aromatic touch and a hint of sweetness.

Texture modifications can simply be achieved by adjusting the milk-to-water ratio. More milk results in a creamier latte, while less can lead to a more traditional, tea-focused drink.

Presentation alternatives can elevate your chai experience at gatherings. Serve in unique mugs or glasses, and consider layering frothy milk art on top for an Instagram-worthy finish.

Serving and Presentation Guide

Plating techniques matter for an aromatic beverage like chai. Serve your chai latte in clear glass mugs to showcase the beautiful color and frothy top. Consider a stylish saucer to complement the drink and add a hint of elegance.

Garnishing ideas can take your drink up a notch. A light dusting of cinnamon or nutmeg on top adds a visually appealing finish while enhancing the warm aroma.

Traditional accompaniments like biscuits or chai-spiced cookies are perfect pairings that can elevate the overall experience of enjoying your chai treat.

Modern serving suggestions may include iced versions or even chai lattes adorned with whipped cream for a café-style indulgence.

Temperature considerations are crucial; serve immediately while hot to enjoy the full experience. If preparing ahead, reheat gently, avoiding boiling to preserve the flavors.

Portion control tips are essential for large gatherings. Make a pitcher of chai latte, allowing guests to serve themselves at their leisure while keeping the flavor and heat intact.

Wine and Beverage Pairing

Wine pairings for chai tea latte can be unusual but delightful. A smooth dessert wine with notes of spice can complement the latte’s flavors beautifully without overpowering it.

Non-alcoholic alternatives like fresh fruit juices or flavored sparkling water pair harmoniously, providing a refreshing counterpoint to the chai’s warmth while cleansing the palate.

For coffee/tea pairings, serving chai alongside a milder coffee can create a pleasing combo of rich flavors, inviting coffee lovers to embrace a new tea experience.

Temperature considerations for pairing drinks are important. Consider serving chilled beverages alongside warmer chai lattes to enhance their distinct characters.

Serving suggestions for a well-rounded experience could include a small platter of assorted treats meant to complement the chai’s spices, ensuring a delightful gathering.

Storage and Shelf Life

Storage methods for leftover chai are simple. Keep any uneaten chai latte in an airtight container in the refrigerator for up to three days. Reheat gently for best flavor retention.

Temperature requirements are vital; only refrigerate the latte after it has cooled to preserve its integrity. Avoid leaving it out for extended periods after preparation.

Container recommendations lean toward glass, as it doesn’t hold odors from previous contents and keeps beverages fresh longer.

Signs of spoilage can manifest as an unusual odor or separation. If unsure, trust your senses — discard if something seems off.

Reheating instructions are straightforward: heat in a saucepan over low heat, stirring to avoid burning while restoring its original texture.

Freezing guidelines can also be applicable; if you make a large batch, freeze portions in ice cube trays, then transfer to freezer bags for future use in smoothies or iced drinks!

Make Ahead Strategies

Prep timeline for this recipe allows for flexibility. Brew a batch of chai and store it in the fridge. Simply heat and froth milk when you’re ready to indulge in your favorite latte.

Storage between steps means keeping all components separate until ready to serve. This maintains freshness and flavor integrity without compromising the final result.

Quality impact assessment is crucial — remember that while you can make it ahead, the freshness on serving day remains unparalleled. Prep as close to serving time as possible for the best experience.

Assembly tips encourage pre-brewing. Have chai concentrate cooled and ready so you can quickly blend it with milk and sweetener when guests arrive.

Reheating guidelines stress patience. Heat slowly to prevent boiling, which can change the taste and texture. Stir while reheating for an even warmth.

Fresh element additions could include a dash of cinnamon or whipped cream just before serving, enhancing your chai latte with a touch of novelty.

Scaling Instructions

Halving the recipe is simple — use half the amount of each ingredient while keeping the same method. Test for taste after preparation to ensure balance.

Doubling or tripling the recipe works well for gatherings. Just ensure all ingredients scale properly without losing the intended flavors, which are key to this classic beverage.

Equipment adjustments may be necessary for larger batches. Ensure you have a larger pot and a suitable whisk or frother to handle increased volumes effectively.

Timing modifications will depend on your batch size; expect slightly longer cooking times for larger quantities to allow for even flavor extraction from spices.

Storage considerations should include separate containers for different batches if preparing ahead, ensuring a fresh taste and minimizing spoilage risk.

Nutritional Deep Dive

The macro breakdown for a chai latte typically provides protein from the milk, carbohydrates from sweeteners, and fats, depending on the milk choice used. Maintaining a balanced ratio can benefit overall nutrition while satisfying cravings for a warm drink.

Micronutrient analysis reveals the presence of beneficial vitamins and minerals derived from spices. For instance, cinnamon is known for supporting heart health, while ginger is recognized for its anti-inflammatory properties.

Health benefits of chai include its robust antioxidant content, which can aid overall wellness. Consuming chai can be a delightful way to integrate ingredients that boost energy and enhance mood.

Dietary considerations should take personal diets into account. For those monitoring caloric intake or seeking to manage weight, using unsweetened milk and limiting additional sweeteners can create a lighter drink.

Portion analysis reveals that moderation is key! Enjoying a single serving alongside a healthy snack can satisfy cravings without overindulging.

Weight management tips may include swapping whole milk for low-fat alternatives or reducing sugar to maintain a delightful flavor without excess calories.

Dietary Adaptations

For gluten-free adjustments, this chai tea latte is naturally gluten-free — just ensure that any ingredients used are certified gluten-free to avoid cross-contamination.

Dairy-free modifications can be achieved using plant-based milk alternatives, such as almond or coconut milk, allowing for a delicious vegan option that is still creamy and satisfying.

Vegan versions vary based on sweeteners; replacing honey with maple syrup or agave ensures that the recipe remains plant-based without losing flavor.

Low-carb adaptations can involve using stevia or erythritol in place of sugar to lower carb content while maintaining sweetness for balance.

Keto modifications focus on using unsweetened coconut milk and avoiding added sugars, making it a great beverage for those following a ketogenic diet.

Paleo options incorporate natural sweeteners while avoiding refined sugar, focusing on a clean ingredient list to align with paleo dining principles.

For a low-FODMAP chai latte, use lactose-free milk and limit certain spices to ensure compatibility with this dietary approach.

Other specific diets can explore the use of alternative milks like hemp or flaxseed milk to suit various nutritional needs without sacrificing flavor.

Troubleshooting Guide

Texture issues often arise when milk curdles. Avoid this by warming milk gradually instead of boiling, which can cause separation. Always reheat gently and stir.

Flavor balance can be tricky. If your chai latte tastes too bitter, consider reducing steep time or adjusting spice quantities in future batches to control strength.

Temperature problems may come from serving too cold. Ensure the milk is warmed adequately during preparation, and consider warming cups before serving to maintain heat.

Equipment challenges might appear when you don’t have a frother. Use a mason jar to shake and create froth or whisk vigorously in a bowl for a similar effect.

Ingredient substitutions might seem daunting. Keep in mind that dried spices may have different intensities than fresh; adjust accordingly when substituting or blending flavors.

Timing concerns are common, especially if guests are waiting. Prepare chai concentrate in advance but hold off on adding milk until serving to ensure freshness.

Recipe Success Stories

Community feedback highlights the ease with which individuals tackle this chai latte, often sharing their personal variations that reflect unique tastes. Many have delighted in customizing the spice level or trying new milk alternatives.

Variation successes show that playfulness with ingredients can lead to outstanding results. Readers have reported back with their spins, suggesting alternative spices such as nutmeg or even flavored syrups that elevate their experiences.

Adaptation stories illustrate the versatility of this recipe; it’s been transformed into iced lattes, chai smoothies, or even muffins, showcasing its flexibility across different contexts.

Reader suggestions emphasize the value of personal feedback in recipe creation, fostering a community dialog around what makes this drink truly special — gathering around good food!

Photography tips from users demonstrate the beauty of this drink, encouraging others to capture their creations and share them through social media, further enhancing engagement.

Frequently Asked Questions

How can I customize my chai tea latte?

You can customize your chai tea latte by adjusting the amount and type of spices, experimenting with different milk options, or adding flavored syrups or sweeteners to suit your taste.

What type of tea is best for chai lattes?

Typically, strong black teas such as Assam or Darjeeling are preferred for making chai lattes, providing depth of flavor that complements the spices well.

Can I make a chai tea latte without spices?

While spices are essential for a classic chai latte, you can create a simplified version using just black tea and milk, adjusting sweetness as desired.

Is it possible to make a caffeine-free chai tea latte?

Yes, you can make a caffeine-free version by using herbal teas like rooibos and incorporating the same spices to retain the chai’s flavor profile.

What milk alternatives can I use?

Almond, oat, soy, or coconut milk all work wonderfully in chai lattes. Choose unsweetened versions for better control over sweetness.

How long does a chai tea latte stay fresh?

A homemade chai tea latte should be consumed within three days if refrigerated; however, the freshest experience occurs when enjoyed immediately.

Can I freeze chai tea lattes?

Yes! You can freeze brewed chai tea in ice cube trays and blend them into smoothies or iced lattes later for a refreshing treat.

How do I froth milk without a frother?

To froth milk without a frother, pour warmed milk into a mason jar, secure the lid, and shake vigorously. Alternatively, whisk the milk vigorously in a bowl.

What spices are essential for a traditional chai latte?

Essential spices for traditional chai include cardamom, cinnamon, ginger, and sometimes cloves or black pepper, all contributing to its warm flavor profile.

How can I make my chai tea latte more indulgent?

Add a dollop of whipped cream on top, a drizzle of caramel or chocolate sauce, or serve it with a side of your favorite cookies for added indulgence!

Additional Resources

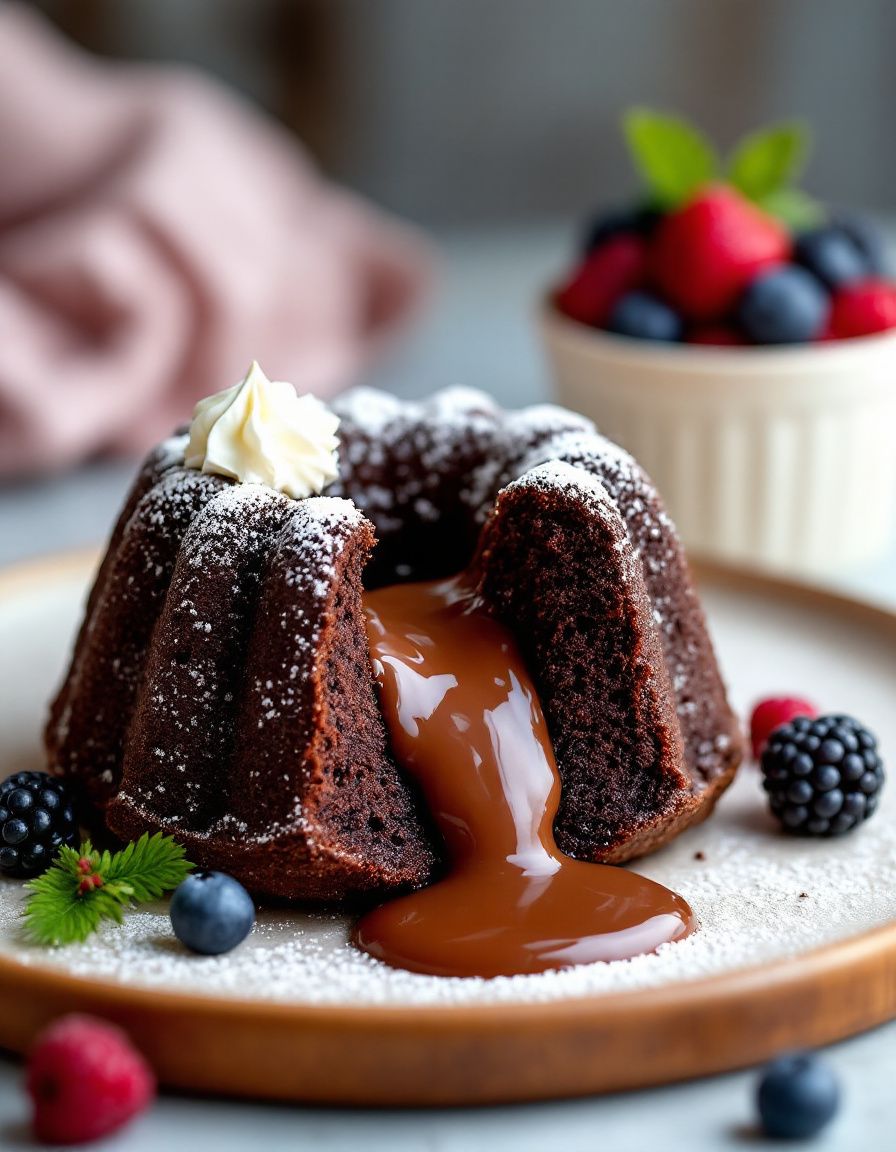
Related recipes, such as a spiced pumpkin latte or turmeric latte, can introduce additional flavors that enhance your chai experience. Discover these recipes to expand your beverage repertoire.

Technique guides detailing the various methods used for brewing tea and frothing milk can further enhance your results, ensuring you craft the perfect drink every time.

Ingredient information about different spices and their benefits provides insight into making intentional choices that elevate your chai tea latte to new heights.

Equipment recommendations highlight essential tools like high-quality whisks, tea infusers, and strainers that make preparing drinks easier and more enjoyable.

Seasonal variations encourage embracing ingredients from various times of the year; apple spice chai for fall or refreshing iced chai for summer will diversify your options, keeping your beverage enjoyable year-round.

Join the Conversation

Don’t forget to share your chai tea latte creations across social media platforms; use vibrant photography that showcases your drink and engage with others over their variations.

Encourage friends and family to partake in the chai experience, inspiring each other to explore different spices or milk options that enhance their personal recipes.

Recipe reviews play an important role in community building, so don’t hold back! Share your experiences and adjustments with others, showcasing your unique take on this delightful beverage.

Community engagement opportunities abound where you can connect with fellow chai lovers and share tips for perfecting this timeless recipe!

Recipe variations should be celebrated! Encourage readers to experiment boldly while emphasizing the joy of personalizing recipes, fostering a sense of creativity in the kitchen.

The Recipe

The EASIEST Chai Tea Latte

Serves: 2 cups

Prep Time: 5 mins

Cook Time: 5 mins

Total Time: 10 mins

Kitchen Equipment Needed

  • Medium saucepan
  • Whisk or milk frother
  • Fine mesh strainer
  • Mug or glass for serving

Ingredients

  • 2 cups of water
  • 2 black tea bags (or 2 teaspoons of loose leaf black tea)
  • 1 teaspoon ground cinnamon
  • 1 teaspoon ground ginger
  • 1 cup of milk (dairy or plant-based)
  • Sweetener to taste (sugar, honey, or alternatives)

Directions

  1. In a medium saucepan, bring water to a boil. Once boiling, add the black tea bags and spices. Simmer for 3-5 minutes, depending on your preferred strength.
  2. Remove from heat and strain the tea into a separate container, discarding the tea bags and spices.
  3. Return the strained tea to the saucepan. Add the milk and sweetener, stirring well to combine.
  4. Heat over low heat until warmed through, ensuring it does not boil. Whisk or froth the milk to create a creamy texture.
  5. Pour the chai tea latte into your favorite mug and garnish with an extra sprinkle of cinnamon if desired. Serve immediately and enjoy!

Recipe Notes

  • Feel free to adjust the spice amounts to suit your taste.
  • For a strong chai flavor, let the tea steep longer.
  • Try experimenting with a variety of plant-based milk for a unique flavor profile.

Homemade Starbucks Cake Pops Recipe – Easy and Delicious

Delicious Starbucks Cake Pops Recipe: A Sweet Treat for Any Occasion

⚖️
Difficulty
Moderate

⏲️
Prep Time
30 mins

🕒
Cook Time
15 mins

⏱️
Total Time
45 mins

🍽️
Servings
12 pops

Starbucks Cake Pops are not only a delightful treat but also a sweet sensation that brings joy to any gathering. Imagine biting into a moist and fluffy cake ball, coated in a layer of creamy chocolate or vibrant candy melts, all on a stick. The combination of flavors and textures makes these cake pops irresistible, whether they are enjoyed at a party, as a birthday treat, or simply as an afternoon pick-me-up with your coffee. The fun part about making these delightful treats at home is that you can customize them with your favorite flavors or toppings.

This Starbucks Cake Pops recipe is designed to capture the perfect balance of sweetness and creaminess, elevating your dessert experience. The unique appeal of cake pops lies in their portability, allowing you to take a little bit of indulgence with you wherever you go. They also make great gifts, offering a personal touch that is sure to delight friends and family. With a touch of creativity and a dash of patience, you too can master the art of making these popular café-style cake pops in your kitchen.

Quick Recipe Highlights

  • Flavor Profile: Enjoy a blend of rich chocolate or vanilla, complemented by your choice of toppings.
  • Texture: Moist on the inside with a smooth, decadent coating that melts in your mouth.
  • Aroma: The irresistible scent of baked cake mingling with the sweet aroma of chocolate.
  • Visual Appeal: Brightly colored coatings and sprinkles create a fun and inviting presentation.
  • Skill Level Needed: Moderate; requires mixing, rolling, and coating techniques.
  • Special Equipment: Lollipop sticks, a microwave-safe bowl, and a baking sheet for cooling.

Recipe Overview

  • Difficulty Level: This recipe is categorized as moderate due to the need for proper mixing and coating techniques, making it suitable for home bakers with some experience.
  • Category: A delicious dessert treat that falls under the snack and sweet category, perfect for any occasion.
  • Cuisine: Popularized in American cafés but can be found across various cultures with different fillings and coatings.
  • Cost: The ingredients for this recipe are affordable, usually costing around $10-$15, depending on your choice of chocolate and decorations.
  • Season: Ideal for celebrations year-round, particularly birthdays, holidays, or as a sweet surprise for guests.
  • Occasion: Perfect for parties, as gifts, or simply as a delightful afternoon snack with a cup of coffee.

Why You’ll Love This Recipe

Making Starbucks Cake Pops at home not only satisfies your sweet tooth but also allows you to experiment with flavors. The balance of moisture and sweetness makes each bite a delightful experience, bringing a familiar café treat right into your home. Personalizing your cake pops can truly elevate them—consider adding spices like cinnamon, zesting citrus, or using flavored extracts. The texture of a cake pop is something special; the outside is firm and shiny, while the inside is soft and moist.

Beyond taste, this recipe offers a convenient and straightforward process. A little bit of mixing and rolling transforms simple ingredients into beautifully crafted treats, making them a rewarding baking project. These cake pops are also a hit during gatherings, providing an elegant and easy-to-handle dessert option. Picture your guests marveling at them while enjoying good conversations, which adds to the overall enjoyment of any social event.

Nutritionally, while these cake pops are a treat meant for indulgence, you can create lighter versions using alternatives like almond flour or sugar-free chocolate. Providing guests with a delightful yet guilt-free option can be an appealing choice! They aren’t just delicious but also a fun activity to engage in with family, strengthening bonds through the joy of baking and decorating together.

Cost-effectiveness is another advantage of this recipe. Making cake pops at home is significantly cheaper than purchasing them from cafés or bakeries. With minimal ingredients and a bit of creativity, you can create a batch that caters to numerous individuals. This accessibility turns your baking sessions into a fulfilling experience where creating sweetness doesn’t have to come at a premium.

Lastly, these cake pops are an exciting canvas for creativity. Offering countless decorating options means you can tailor them for any occasion—think seasonal themes, birthday colors, or fun designs. The process of making these pops can be as rewarding as the final product itself, especially when you share them with those you love.

Historical Background and Cultural Significance

The concept of cake pops emerged in the United States in the early 2000s, gaining immense popularity thanks to innovative bakers. The inclusion of cake and frosting, crafted into small, bite-sized balls and dipped in chocolate, quickly took off, becoming a must-have treat at celebrations and events. The Starbucks version popularized this treat even further, introducing exquisite flavors alongside eye-catching presentations.

Culturally, cake pops represent the modern baking trend of miniaturization. As portion sizes decrease in many culinary applications, cake pops provide a perfect solution for satisfying a sweet craving without overwhelming guests or yourself. Their individual servings make them ideal for social gatherings and special occasions, blending seamlessly into celebratory protocols.

Over the years, cake pops have seen a significant evolution, transitioning from simple treats to elaborate designs reflecting various themes. You can find cake pops decorated for holidays, weddings, and seasonal events, displaying artistic flair from countless bakers. They’ve become iconic not only in the café settings but also in home baking communities.

Moreover, regional variations of cake pops have surfaced, adapting local ingredients or traditional flavors. For instance, ingredient substitutions may include unique spices or local chocolates, reflecting cultural preferences and showcasing culinary creativity. These provinces further encourage bakers to share their iterations, fostering a community built on pastry creativity and collective joy.

Ingredient Deep Dive

Cake Mix: The base of your cake pops typically involves a store-bought cake mix, which offers convenience and consistency. Cake mixes originated in the 19th century, intended to simplify baking. They provide a reliable flavor and texture, perfect for beginners and seasoned bakers alike. Try to choose a mix that appeals to you, whether chocolate, vanilla, or red velvet.

Nutritionally, cake mixes can vary substantially, so consider brands that focus on whole ingredients. When selecting a cake mix, check the expiration date and choose one that is as fresh as possible to avoid any stale taste. If you aim for a healthier option, consider substituting with gluten-free mixes for an inclusive treat.

Chocolate Coating: A rich chocolate coating enriches the cake pop’s flavor. Chocolate, a beloved treat worldwide, is derived from cacao beans. Each region’s production affects flavor, contributing to the global chocolate market. You may choose melting chocolate or candy melts to achieve a smooth, delicious coating.

Nutritionally, chocolate can offer antioxidants when consumed in moderation, but mindful selections are crucial due to the added sugars or fats found in many coatings. Proper storage in a cool, dry place ensures your chocolate remains usable, while substitutes like yogurt coatings can offer lighter alternatives.

Common Mistakes to Avoid

  • Not allowing the cake to cool completely before rolling can lead to melting chocolate during coating.
  • Overmixing the cake crumbs with frosting may yield a dense texture instead of a light, fluffy cake pop.
  • Using too much frosting can make the cake pop overly sweet and difficult to handle, resulting in breakage.
  • Skipping the refrigeration step can lead to soft cake pops that won’t hold their shape when dipping.
  • Poor quality chocolate for coating may get clumpy instead of achieving a smooth finish.
  • Not using the right-sized lollipop sticks can make pops too heavy and difficult to manage.
  • Settling for one flavor may limit creative possibilities—experiment with different cake and coating combinations!
  • Not allowing enough time to set after dipping will lead to messy, smudged coatings.
  • Skipping the sprinkles or additional toppings can make your cake pops look less appealing.
  • Using an overcrowded cooling rack can cause pops to stick together and distort their shape.

Essential Techniques

Rolling Cake Balls: This step is crucial for creating a uniform texture. When rolling, ensure your hands are clean and dry to prevent sticky residue from affecting the final product. The heat from your hands will help bind the cake and frosting mixture. Aim for roughly equal sizes for even baking times and presentation.

Dipping Techniques: Proper dipping is essential for a smooth finish. Ensure your chocolate is melted adequately before dipping, as the right consistency makes all the difference. Use a fork or an immersion blender to dip, allowing any excess chocolate to drip off for a sleek pop. Watch for visual cues, such as a glossy finish when the chocolate sets.

Pro Tips for Perfect Starbucks Cake Pops

1. Always let the cake mix cool to room temperature before crumbling it with frosting for the best texture.
2. Experiment with flavor extracts like almond or mint in the frosting for an unexpected twist on cake pop flavors.
3. For a photo-worthy presentation, add colored sprinkles that match the occasion’s theme or event.
4. Use high-quality chocolate or candy melts for the coating to achieve that glossy, professional finish.
5. Chill the cake pops before dipping to ensure they hold their form and reduce the risk of cracking.
6. Consider experimenting with various toppings like crushed nuts or coconut for added texture and flavor.
7. Make a note of any modifications that work for future reference; your perfected recipe can become a family favorite!
8. Don’t forget to label your cake pops when sharing variants, especially if you’ve added special dietary options.

Variations and Adaptations

Seasonal adaptations can be a fun approach to making your cake pops unique and festive. For instance, use pumpkin or spice cake in the fall for a cozy flavor or incorporate mint for a refreshing touch in the winter. During the spring, bright fruit flavors like lemon or strawberry can lend a vibrant, cheerful twist to your pops.

Dietary modifications are increasingly popular. For a gluten-free cake pop, substitute regular cake mix with a certified gluten-free alternative. If you’re aiming for a vegan option, replace eggs in cake mixes with applesauce or flax eggs while using dairy-free chocolate for coating.

Flavor variations let creativity flourish! Consider adding unique flavors like coffee, chai, or even matcha to the cake base; these can introduce a gourmet feel to a casual treat. Incorporating fillings like jam or ganache into the dough creates exciting bursts of flavor, enhancing the overall experience.

Texture modifications can also change the palate. For a crunchier exterior, trying nuts or toasted coconut in your decorations adds both flavor and complexity. Conversely, silky fillings like cream cheese frosting can elevate the cake pop as an indulgent treat.

Presentation alternatives include displaying your cake pops on a decorative platter or in a candy-filled vase for a fun touch. Creating cake pop bouquets can showcase your handiwork beautifully and become a centerpiece for any gathering.

Serving and Presentation Guide

For an attractive presentation, consider using colorful lollipop sticks that match the theme of your occasion. Laying cake pops out on decorative platters can enhance the allure, while plunging them into styrofoam boards piled with candy decorations offers a fun, festive appeal. You can also consider wrapping them individually in cellophane for gifts.

Garnishing with a drizzle of contrasting chocolate can also add visual interest and make them more appealing. Consider pairing cake pops with fresh fruit or a complementary dessert, like mini-brownies or cookies, to create a dessert platter. Always keep temperature in mind when serving; cake pops are best enjoyed at room temperature for optimal texture and flavor.

Portion control is significant, especially for parties. Providing guidance on how many pops to take can ensure your guests feel comfortable enjoying these sweet treats without overindulging. Remember, smaller bites encourage sharing and interaction among guests.

Wine and Beverage Pairing

A favorite pairing with cake pops is a dessert wine. Consider a sweet dessert wine such as Moscato or a fruity Riesling, which enhances the sweet flavors without overwhelming them. If you’re in the mood for coffee, pairing them with a rich espresso complements the sweetness of cake pops beautifully.

For non-alcoholic options, think of sparkling water infused with fresh fruits or herbal teas. Iced teas can also provide a refreshing counterpoint to the rich cake pops, creating a delightful experience as they balance the flavors.

Temperature matters; ensure your beverages are chilled or hot as needed, enhancing the overall enjoyment. Depending on the chocolate flavor, you might even consider pairing with flavored coffees or lattes—like vanilla or hazelnut—for an enticing tactile experience.

Storage and Shelf Life

Storing your Starbucks Cake Pops correctly extends their shelf life and maintains freshness. Ideally, store them in an airtight container at room temperature for up to three days. If the weather is particularly warm or humid, refrigerate them to prevent melting.

For longer-term storage, cake pops can last up to a month in the freezer. Use parchment paper to prevent sticking, wrapping individual pops in foil or plastic wrap and placing them in a freezer-safe container. Before consuming, allow them to thaw in the refrigerator to protect the coating from condensation.

Be aware of signs of spoilage, such as an off odor or change in texture. If the chocolate coating develops a white film, this indicates fat separation, though it may still be safe to consume. Reheating is generally not recommended; allowing them to achieve room temperature naturally revives their intended flavor.

Make Ahead Strategies

Planning makes it possible to create cake pops in advance, perfect for busy schedules. You can bake the cake and cool it, crumbling it and mixing with frosting, then refrigerate prepared balls for up to six hours before dipping. Preparing toppings and decorations ahead of time saves valuable moments during your assembly phase.

Quality is crucial; consider making chocolate or coatings the day before. Ensure they’re stored appropriately to maintain freshness. After completing the cake pops, allow them to set before packaging them up or refrigerating.

Finally, quality assessment is essential. Once created, well-made cake pops can last several days in optimal storage, but let freshness guide your presentation choices. When assembly time comes, revisit quality checks as pops partially thawing from the freezer may alter the appeal.

Scaling Instructions

To scale your Starbucks Cake Pops recipe, consider halving or doubling the ingredients accordingly. For precise results, using a scale can help achieve exact measurements, especially in flavoring agents like extracts or toppings.

Keep equipment changes in mind, as larger batches may require a bigger mixing bowl or additional trays for setting. Timing adjustments should also be made; larger quantities might require extra cooling or dipping time for the coating to set properly.

When scaling up or down, keep in mind the charm of personal touches; customize ingredients while adhering to ratios to maintain texture. For larger batches, you might consider dividing them into different flavors for a fun assortment.

Nutritional Deep Dive

In terms of nutritional analysis, Starbucks Cake Pops offer a unique balance of macronutrients, primarily carbohydrates from the cake and sugar content from the frosting. Exploring the nutritional breakdown can empower choices on portion sizes and frequency of indulgance.

Macro breakdowns vary depending on ingredient choices, particularly between homemade and store-bought mixes. Pay attention to sugar levels, which contribute significantly to energy intake. For those monitoring their diet, adjusting frosting or chocolate coating can assist with caloric control.

Health benefits exist in moderation; while sweet treats enhance mood, incorporating fruits or whole grains in cake mix can improve nutritional quality. Evaluate serving sizes to foster mindful eating while satisfying sweet cravings without excessive indulgence.

Dietary Adaptations

Navigating dietary restrictions makes these cake pops incredibly adaptable. For gluten-free modifications, select certified gluten-free cake mixes and chocolate coatings to ensure inclusivity. Labeling each variant ensures appropriate choices for guests.

If you’re leaning toward vegan, swap eggs with mashed bananas or applesauce, and use vegan butter or coconut oil. Dairy-free chocolate offers further inclusivity while enriching the flavor with alternative sweetness.

Low-carb or keto versions can utilize almond flour or coconut flour in place of conventional cake mixes, providing a satisfying treat without the carbohydrate load. Similarly, adjusting sweeteners to monk fruit or erythritol enables a diabetic-friendly option.

Paleo dieters can exclude processed sugars entirely by using honey and pureed fruits, offering a more natural ingredient profile. Customizing dietary adaptations reflects the flexibility that cake pops represent, broadening accessibility.

Troubleshooting Guide

If you encounter texture issues, like dry cake pops, consider reducing the baking time or adjusting the frosting quantity. Gather feedback or assess visual cues for moisture—if they appear crumbly, a light icing or chocolate drizzle could remedy the situation.

Flavors may also demand attention—if they taste bland, revisiting your spice or extract levels during mixing can elevate profile dramatically. Also consider increasing the sweetness gradually, ensuring balance.

When working with chocolate, temperature control is key; if chocolate seizes during coating, gently reheat with added oil to smoothen out. Melt only small batches to avoid waste; thickening chocolate can lead to uneven coating.

Timing is essential in this process; excessive handling or rushing through dipping can also affect quality. Allow time for your cake pops to set; otherwise, the appearance will suffer from mishandling.

Recipe Success Stories

Encouraging community feedback plays a pivotal role in perfecting this recipe. Many have shared joys of incorporating personal adaptations, such as infusing lavender into frosting or creating luscious raspberry cake pops that brought unexpected delight.

Celebrations often feature variations that became crowd favorites. One baker shared how their Halloween-themed pop blending pumpkin spice with chocolate coatings transformed their annual festivities.

Engagement with photography tips is frequent, with readers showcasing rainbow-colored dips made for children’s birthdays or holiday parties, providing visual inspiration for others. Haute designs in cake pops can captivate eyes while motivating bakers to push boundaries in their own creations.

Family stories often emerge, where bakers share anecdotes of laughing children decorating their pops, bonding over glistening chocolate and sprinkles that became a cherished family tradition. The art of making cake pops transcends mere dessert; it nurtures connection within communities.

Frequently Asked Questions

How do I store leftover cake pops?

Leftover cake pops should be stored in an airtight container at room temperature for up to three days or refrigerated for up to a week. For longer storage, wrap them individually and freeze.

Can I make cake pops in advance?

Yes! You can bake and form the cake pops in advance; just chill them until you’re ready to dip. They can stay in the fridge for a few days before coating.

What is the best chocolate for coating cake pops?

The best chocolate for coating cake pops is high-quality chocolate or candy melts, as they provide a nice finish and flavor. Make sure it’s melted adequately for smooth dipping.

Can I use a different filling for the cake pops?

Definitely! You can get creative with fillings by adding jams, flavored frosting, or even cream cheese mixtures into your cake pop center for a delightful surprise.

What should I do if my chocolate is too thick?

If your chocolate is too thick for dipping, you can thin it out by adding a small amount of vegetable oil or coconut oil and reheating it until it reaches the desired consistency.

Are there gluten-free options for cake pops?

Yes, you can make gluten-free cake pops by using gluten-free cake mix and ensuring all other ingredients, such as chocolate and frosting, are also gluten-free.

How can I make cake pops more visually appealing?

You can enhance the appeal by adding colorful sprinkles, drizzling with contrasting chocolate, or using themed decorations that align with your occasion.

What if my cake pops fall off the sticks?

If your cake pops fall off, it may be due to the chocolate being too hot or the balls being too heavy. Try chilling the pops before dipping and using thicker sticks.

Can I add flavors to the cake mix?

Absolutely! You can enhance boxed cake mixes by incorporating flavors like vanilla, almond, or even espresso to elevate the overall taste of your cake pops.

What is the ideal temperature to serve cake pops?

Cake pops are best served at room temperature. If they’ve been stored in the refrigerator, allow them to sit out for a bit to reach optimal flavor and texture.

Additional Resources

Explore more delightful recipes that pair perfectly with cake pops, including cookie designs and cupcake creations. Familiarize yourself with technique guides on cake decorating, or delve into ingredient information for alternative suggestions.

Equipment recommendations can greatly enhance your cake pop-making experience, offering essential tools for achieving the best results. Seasonal variations in flavors and designs can also inspire new ideas to keep your baking fresh.

Join online communities to share your cake pop experiences, from decorating tips to sharing completed works of art; many bakers love seeing what others create and can guide you through challenges.

Join the Conversation

Connect with other baking enthusiasts by sharing your cake pop creations on social media platforms. Embrace the beauty of photography by capturing vibrant, colorful cake pops to showcase your hard work.

Encourage community engagement through recipe reviews, engaging your audience with trial experiences. Inspire others by discussing variations of this recipe; each baker’s creative twist adds to the remarkable stories behind cake pops.

Engaging with fellow bakers can enhance your skills and inspire new flavors—all thanks to the innovative spirit of those within a shared passion. Don’t forget to invite friends and family to join in on the cake pop fun!

The Recipe

Starbucks Cake Pops

Serves: 12 pops

Prep Time: 30 mins

Cook Time: 15 mins

Total Time: 45 mins

Kitchen Equipment Needed

  • Lollipop sticks
  • Mixing bowls
  • Microwave-safe container
  • Baking sheet
  • Parchment paper
  • Cooling rack

Ingredients

  • 1 box of cake mix (any flavor)
  • 1 standard can of frosting (matching flavor)
  • 1-2 cups of chocolate melts or high-quality chocolate
  • Decorations (sprinkles, edible glitter, etc.)
  • Optional flavor extracts (vanilla, almond, etc.)

Directions

  1. Prepare the cake mix as per box instructions and allow it to cool completely.
  2. Crumble the cooled cake in a large bowl.
  3. Add in frosting and mix until combined; the mixture should hold together.
  4. Pinch out small amounts of the mixture and roll into balls, placing them on a lined baking sheet.
  5. Refrigerate for at least 30 minutes to firm up the cake balls.
  6. Melt chocolate according to package instructions until smooth.
  7. Dip the end of lollipop sticks into chocolate and insert them halfway into each cake ball.
  8. Coat each cake pop in chocolate, letting excess drip off, then place on a cooling rack.
  9. Decorate with sprinkles while the chocolate is still wet; let set completely.

Recipe Notes

  • For smoother coatings, ensure your chocolate is melted at the right temperature.
  • Feel free to blend various cake and frosting flavors for unique combinations.
  • Keep leftover cake pops stored in an airtight container for optimal freshness.

Best Mini Chocolate Lava Bundt Cake – Perfect for Dessert

Mini Chocolate Lava Bundt Cake: An Irresistible Indulgence

⚖️
Difficulty
Moderate

⏲️
Prep Time
20 mins

🕒
Cook Time
25 mins

⏱️
Total Time
45 mins

🍽️
Servings
6

Indulging in a rich, gooey Mini Chocolate Lava Bundt Cake is the perfect way to brighten your day. This delightful dessert features a warm chocolate center that oozes bliss with each bite. The essence of dark chocolate intertwined with a hint of sweet vanilla creates an irresistible flavor profile that captivates chocolate lovers. Serve it warm with a scoop of vanilla ice cream, and you will find yourself in dessert heaven. Easy to make and visually stunning, these mini cakes are perfect for entertaining guests or treating yourself after a long day.

Imagine the aroma wafting through your kitchen as these bundt cakes bake to perfection. The delicate, crusty exterior gives way to a molten chocolate center that flows like liquid gold. Each forkful is a heavenly experience, bringing warmth and comfort with its rich chocolatey goodness. Whether celebrating a special occasion or simply enjoying a cozy night in, these mini chocolate lava cakes will surely impress and satisfy your sweet cravings.

Quick Recipe Highlights

  • Flavor Profile: Decadent chocolate with a touch of sweet vanilla creates a richly satisfying dessert.
  • Texture: A crispy outer layer encompasses a molten, gooey center that delights the palate.
  • Aroma: The combination of melting chocolate and fresh vanilla gives off an enticingly sweet scent.
  • Visual Appeal: Beautifully presented in individual bundt shapes, these cakes have a glossy, stunning appearance.
  • Skill Level Needed: Moderate skill level; requires attention to timing for the perfect lava effect.
  • Special Equipment: A mini bundt cake pan is ideal to achieve the charming shape.

Recipe Overview

  • Difficulty Level: This recipe falls into the moderate category due to precise timing needed for the molten center.
  • Category: Perfect for dessert and special occasions, it can also be served at dinner parties.
  • Cuisine: Drawing from classic French pastry influences, it encapsulates the elegance of gourmet desserts.
  • Cost: Reasonably priced, the ingredients can be easily sourced without breaking the bank.
  • Season: Great for year-round enjoyment, especially during colder months when warm desserts shine.
  • Occasion: Ideal for birthday celebrations, dinners, or even romantic date nights at home.

Why You’ll Love This Recipe

The Mini Chocolate Lava Bundt Cake stands out not only for its exquisite taste but also for its luxurious texture. The combination of a crisp outer layer and a melt-in-your-mouth chocolate center creates an irresistible experience. These cakes cater to those who appreciate the finer details in dessert, making each bite a moment to savor. They provide a delightful balance, where sweetness meets richness, ensuring that chocolate lovers indulge without feeling overwhelmed.

Convenience is another major perk of this recipe. The mini bundt cakes are easy to prepare ahead of time, allowing for stress-free entertaining. Once baked, they can be stored without losing quality, providing a fresh dessert option at a moment’s notice. The simplicity of the preparation combined with the ultimate wow factor makes these cakes a go-to choice for gatherings.

Nutritionally, while dessert is typically indulgent, using high-quality dark chocolate can offer surprising benefits. Dark chocolate is known for its rich antioxidants, which can contribute positively to your health. This means you can enjoy a slice of cake while also indulging in some health-conscious choices!

Socially, the Mini Chocolate Lava Bundt Cakes shine as a shared delight that sparks conversation and enjoyment among friends and family. Their stunning presentation and individual servings foster a festive atmosphere during meals or gatherings. Offering these divine treats will undoubtedly bring smiles and compliments from your guests.

Affordability is key in today’s world, and this recipe ensures you can serve an impressive dessert without excessive costs. Using readily available ingredients keeps this delectable dessert accessible for everyone, making it a fantastic choice for anyone wishing to impress without overextending their budget.

Historical Background and Cultural Significance

The origins of the lava cake can be traced back to the late 1980s in France, attributed to renowned chef Jean-Georges Vongerichten. His innovative idea of serving a cake with a molten center quickly gained popularity in gourmet dining. This dessert represents a blend of classic French cooking techniques and modern culinary creativity, becoming a staple in upscale restaurants.

Culturally, chocolate has long been associated with indulgence and luxury. Its use in desserts, particularly in the form of molten lava cakes, reflects a celebration of pleasure and fine dining. Throughout various cultures, chocolate symbolizes love and affection, making it a perfect choice for romantic occasions and cherished gatherings.

Over time, the lava cake recipe has evolved, inspiring countless variations while maintaining its core elements. From the traditional chocolate base to innovative inclusions like fruit purees or unique flavorings, each new rendition offers a fresh twist on a beloved classic. This adaptability showcases the broader culinary trends towards personalization and creativity in dessert making.

Regional variations of the lava cake can be found worldwide, allowing different cultural influences to enhance this beloved dessert. In some countries, ingredients like spices or citrus flavors are paired with chocolate to create a unique fusion. These adaptations reflect the versatility of the lava cake while retaining its essence as a quintessential indulgence.

Ingredient Deep Dive

Chocolate: A symbol of luxury and indulgence, chocolate has historical roots going back thousands of years. It has been used in various desserts and recipes globally. Nutritionally, chocolate is rich in antioxidants and can positively impact mood. When selecting chocolate, look for high cocoa content (at least 70%) for better depth of flavor. Store chocolate in a cool, dry place, and consider alternatives like cacao nibs or carob for substitutions.

Butter: With a rich flavor and creamy texture, butter adds moisture and depth to the cake. Historically, butter has been a staple in cooking across many cultures. It provides essential fatty acids that contribute to overall health and must be used at room temperature for best results in baking. When substituting, consider margarine or plant-based butters for dietary needs, keeping in mind the potential impact on flavor.

Common Mistakes to Avoid

  • Overmixing the batter can lead to dense cakes. Only mix until ingredients are just combined.
  • Underbaking may cause the cakes to be too runny. Follow baking times closely for that perfect lava consistency.
  • Not greasing the pan adequately can cause cakes to stick. Ensure all surfaces are coated thoroughly before pouring in batter.
  • Skipping the resting time after baking can affect the gooey center. Allow the cakes to sit briefly for best results.
  • Using low-quality chocolate can compromise flavor. Choose high-quality chocolate to truly elevate the dessert.
  • Neglecting to use an oven thermometer may cause uneven baking. Always check your oven’s temperature for accuracy.
  • Failing to preheat the oven can alter baking times. Ensure your oven is preheated before placing the cakes inside.
  • Overheating the chocolate mixture can lead to a burnt flavor. Melt chocolate gently to maintain its rich taste.
  • Ignoring the cooling time before removing may lead to broken cakes. Let them cool slightly in the pan before inverting.
  • Forgetting garnishes can make the dessert less appealing. A simple dusting of powdered sugar can enhance presentation.

Essential Techniques

Mixing Techniques: Proper mixing is vital for achieving the right cake texture. Gently combine ingredients until just blended to avoid a dense cake. A light hand will maintain the airy structure necessary for a fluffy cake.

Baking Time Control: Knowing when to take the cake out of the oven is crucial. Keep a close eye on the timer and perform a toothpick test; remove the cakes when the toothpick is moist but not wet for that perfect lava effect.

Pro Tips for Perfect Mini Chocolate Lava Bundt Cake

1. Use high-quality chocolate to enhance flavor and ensure a luxurious mouthfeel.
2. Allow the cakes to cool slightly before inverting for easy removal without breaking.
3. Test your oven temperature with a thermometer to avoid over or under-baking.
4. Customize your lava cakes by adding espresso powder or spices for an extra flavor kick.
5. Experiment with flavored sauces, like raspberry or caramel, to enhance the dessert presentation.
6. Make sure all ingredients are at room temperature for better mixing and overall consistency.
7. Decorate with fresh berries or whipped cream for added visual appeal and freshness.
8. Store leftover cakes in an airtight container to enjoy later without compromising quality.

Variations and Adaptations

For regional variations, consider infusing your lava cakes with local flavors or ingredients. Adding spices like cinnamon or cardamom can create an aromatic twist. Seasonal adaptations might include incorporating pumpkin puree during fall or using peppermint extract for a holiday treat.

For those with dietary restrictions, modifications can be made to create gluten-free or dairy-free options. Use almond flour or coconut flour in place of traditional wheat flour, and almond or coconut milk for dairy-free variations. Additionally, a flaxseed egg can replace regular eggs for vegan adaptations.

Flavor variations can include adding citrus zest for a refreshing contrast or incorporating herbal notes like lavender or rosemary for an adventurous profile. For texture modifications, try swirling in a fruit compote or using nuts for an added crunch.

Lastly, presentation alternatives can elevate your lava cake experience. Serve in elegant ramekins topped with chocolate shavings or create a themed dessert platter that showcases a variety of flavors and textures.

Serving and Presentation Guide

When plating mini chocolate lava bundt cakes, opt for a simple yet elegant presentation. Place each cake on a small dessert plate and dust lightly with powdered sugar for a beautiful contrast. Garnish with fresh berries or mint leaves to add color and freshness.

Consider complementary sauces—like chocolate or caramel drizzle—around the plate for a gourmet touch. Modern serving suggestions could include pairing the cakes with artisanal ice cream or whipped cream on the side. Remember to serve the cakes warm for that delightful lava effect.

Temperature is key; keep the cakes warm just before serving to maintain their gooey centers. For portion control, simple cake cutters can help create perfect serving sizes, ensuring each guest receives a satisfying indulgence.

Wine and Beverage Pairing

For optimal pairing with your Mini Chocolate Lava Bundt Cake, consider serving a rich red wine, like a Cabernet Sauvignon or a Syrah. The deep berry flavors complement the chocolate’s richness beautifully.

If non-alcoholic options are preferred, a dark cherry soda or hibiscus tea can add a refreshing contrast to the sweet chocolate flavor. Additionally, a strong coffee or mocha can serve as a delightful accompaniment, intensifying the overall chocolate experience.

When serving, ensure that beverages are at the appropriate temperature—wines chilled to perfection and coffees hot for that inviting touch.

Storage and Shelf Life

To extend the shelf life of your Mini Chocolate Lava Bundt Cakes, store them in an airtight container at room temperature for up to three days. Ensure they are kept away from direct sunlight to preserve their quality.

For longer storage, freeze the cakes in a sealed bag or container. They can be kept frozen for up to three months. When ready to enjoy, thaw them overnight in the refrigerator, then reheat in the oven for that freshly baked taste.

Signs of spoilage include an off smell or changes in texture; if you notice any, it’s best to discard the cakes. For reheating, place the cakes in a preheated oven for about 10 minutes to restore the lava center.

Make Ahead Strategies

For pre-planning, prepare your batter a few hours in advance and store it in the refrigerator. When ready to bake, allow the batter to come to room temperature for best results. You can also bake the cakes a day ahead of time; simply reheat briefly before serving.

Storing between steps is convenient; you can keep unbaked batter in the fridge for up to 24 hours. Just be aware that the texture may slightly change, so it’s always best to bake them fresh.

To preserve quality, avoid mixing the toppings or sauces in advance; instead, prepare them just before serving. For added freshness, consider garnishing with fruits or herbs right before presenting at the table.

Scaling Instructions

If looking to halve the recipe, simply divide the ingredients by two, and use smaller baking molds if needed. Always watch the baking time as it may adjust slightly with smaller quantities.

When doubling or tripling, ensure your mixing bowl is large enough to accommodate the increased volume. Bake in batches if necessary, allowing the oven to preheat properly for even results across all cakes.

For timing modifications, keep a close eye on the baking process, especially with larger batches. More cakes may require adjusted cooking times. Be sure to store extra cakes following proper storage guidelines.

Nutritional Deep Dive

The Mini Chocolate Lava Bundt Cake, while primarily an indulgence, can fit into a balanced diet. A macro breakdown reveals primarily carbohydrates and fats, with chocolate contributing a healthy dose of antioxidants.

Micronutrient analysis shows that dark chocolate contains iron, magnesium, and fiber, which brings some nutritional bonuses to this dessert. Be conscious of portion sizes, as a small slice can provide satisfaction without compromising dietary goals.

Health benefits of moderate chocolate consumption include potential improvements in heart health and mood enhancement. Consider incorporating this dessert into your diet without guilt, focusing on mindful eating practices to enjoy every bite.

Observing dietary considerations, individuals looking to manage weight may limit portion sizes or share servings. Chocolate lovers can appreciate the rich flavors while still finding ways to keep desserts enjoyable within a healthy lifestyle.

Dietary Adaptations

For gluten-free adaptations, use a gluten-free blend instead of all-purpose flour. Many brands offer excellent substitutes that yield great results.

Dairy-free options can be achieved with vegan butter and almond milk, both of which work well in the recipe without compromising taste.

For a vegan version, replace eggs with flaxseed meal mixed with water, while maintaining the delicious chocolate experience.

Individuals following low-carb or keto diets can use almond flour and sugar alternatives to create a low-carb version, keeping the richness intact.

Other specific diets, like low-FODMAP, can be achieved with careful ingredient selection. Ensure any substitutions still keep the essence of the original cake as rich and satisfying.

Troubleshooting Guide

If texture issues arise, such as cakes being too dense, ensure that you do not overmix your batter and that all ingredients are at room temperature. This allows for a better rise and texture.

For flavor balance, if cakes taste too sweet or rich, consider reducing sugar in the recipe or adding a pinch of salt to enhance the chocolate flavor.

Temperature problems during baking can be solved by using a reliable oven thermometer. Uneven baking often happens due to incorrect temperatures.

Equipment challenges can arise with bundt pans sticking. Always remember to grease and flour your pan thoroughly before pouring in the batter.

Ingredient substitutions can affect outcomes; always research before replacing key elements to maintain quality and flavor.

Timing concerns during baking require vigilance. Utilize a timer and perform tests during the suggested cooking time to achieve the perfect lava center.

Recipe Success Stories

Community feedback on this dessert has been overwhelmingly positive. Many have shared how easy it is to make and how ecstatic their guests are with the molten center.

Inspirational stories from readers detail how they added personal twists, such as fruit compotes or whipped cream, enhancing the original recipe.

Adaptation stories highlight baking in larger batches for parties, successfully maintaining the quality while serving a crowd.

Readers often express excitement over sharing photos of their successful mini bundt cakes, capturing the moment and celebrating accomplishment.

For those who attempted the recipe for the first time, the joy of mastering the lava cake has led to newfound confidence in their baking abilities.

Frequently Asked Questions

1. Can I prepare the batter in advance?

Yes, you can prepare the batter and store it in the refrigerator for up to 24 hours. Just ensure to bring it to room temperature before baking for best results.

2. How do I know when the cakes are done?

The cakes should be firm on the outside but still slightly soft in the center. A toothpick should come out with a moist crumb but not wet batter.

3. What if I don’t have a mini bundt pan?

If you don’t have a mini bundt pan, you can use silicone molds or muffin tins, but adjust baking times accordingly.

4. Can I use milk chocolate instead of dark chocolate?

While you can use milk chocolate, it may result in a sweeter cake. Dark chocolate is recommended for a balanced flavor.

5. How can I make these vegan?

To make these vegan, substitute eggs with flaxseed meal and use plant-based butter and milk alternatives. The results will be just as delicious!

6. What should I serve with the lava cakes?

These lava cakes pair beautifully with vanilla ice cream, whipped cream, or fresh berry compotes to add a touch of brightness.

7. Can I freeze the cakes?

Yes, you can freeze the baked cakes in an airtight container for up to three months. Thaw and reheat before serving to restore the molten center.

8. What can I do if the cakes are too runny?

If the cakes turn out too runny after baking, they may not have cooked long enough. Adjust baking time and consider letting them cool slightly before serving.

9. How do I store leftover cakes?

Leftover cakes should be stored in an airtight container at room temperature for up to three days or refrigerated for a longer shelf life.

10. Can I add flavors to the batter?

Absolutely! Consider adding espresso powder, vanilla extract, or spices to create a unique flavor profile that complements the chocolate.

Additional Resources

If you’re intrigued by more chocolaty desserts, be sure to check out our other recipes for classic brownies, rich chocolate mousse, or mouthwatering chocolate chip cookies. Each recipe features detailed tips and techniques to elevate your baking skills.

For those wanting to perfect their technique, we offer guides on mixing, baking, and ingredient selection to enhance your culinary experience. Discover the best chocolate options and tips on how to melt and temper chocolate for a professional-grade finish.

Explore seasonal variations with our collection of festive desserts that celebrate the flavors of each season. From pumpkin spice brownies in fall to refreshing berry tarts in summer, our resources aim to inspire creativity in your kitchen.

Lastly, if you’re looking to invest in quality equipment, visit our recommendations for essential baking tools that every home baker should have, ensuring that your baking endeavors are always a success.

Join the Conversation

We invite you to share your experiences with our Mini Chocolate Lava Bundt Cake! Share your photos and stories on social media using #ChocolateLavaBundt and engage with our community of dessert lovers.

Consider leaving reviews and suggestions in the comments section, as we love hearing how our readers adapt the recipes and make them their own. Engage with others and exchange tips for perfecting the lava cake experience. Feel free to ask questions or help fellow bakers achieve delectable results.

Together, we can create a supportive baking community that celebrates the joy of cooking and the love of desserts, ensuring everyone can share in the unforgettable delight of Mini Chocolate Lava Bundt Cakes!

The Recipe

Mini Chocolate Lava Bundt Cake

Serves: 6

Prep Time: 20 mins

Cook Time: 25 mins

Total Time: 45 mins

Kitchen Equipment Needed

  • Mini bundt cake pan
  • Mixing bowls
  • Whisk or electric mixer
  • Spatula
  • Measuring cups and spoons
  • Toothpicks or cake tester

Ingredients

  • 1 cup dark chocolate (chopped)
  • ½ cup unsalted butter
  • 1 cup powdered sugar
  • 2 large eggs
  • 2 egg yolks
  • ½ teaspoon vanilla extract
  • ½ cup all-purpose flour
  • Pinch of salt

Directions

  1. Preheat your oven to 425°F (220°C) and grease the mini bundt pan thoroughly.
  2. In a microwave-safe bowl, melt the chopped chocolate and butter together, stirring until smooth.
  3. Whisk in the powdered sugar until well combined, then add the eggs, egg yolks, and vanilla extract, mixing until combined.
  4. Finally, add in the flour and salt, stirring gently until just blended. Be careful not to overmix.
  5. Pour the batter evenly into the prepared mini bundt pan, filling each cavity about ¾ full.
  6. Bake for 12–14 minutes, or until the edges are firm and tops set, but the centers remain soft.
  7. Remove from the oven, let cool for a few minutes, then carefully invert onto a serving plate.
  8. Serve immediately, optionally garnished with powdered sugar or fresh berries.

Recipe Notes

  • Store leftover cakes at room temperature for up to three days or refrigerate for longer storage.
  • These cakes can be frozen and reheated; just be cautious with timing to ensure the lava center is melted again.
  • You can substitute dark chocolate with milk chocolate for a sweeter dessert if desired.

Homemade Tie Dye Frappuccino with Vibrant Colors

Tie Dye Frappuccino: A Colorful Coffee Delight

⚖️
Difficulty
Easy

⏲️
Prep Time
10 mins

🕒
Cook Time
0 mins

⏱️
Total Time
10 mins

🍽️
Servings
2

If you’re looking for a beverage that’s as visually stunning as it is delicious, the Tie Dye Frappuccino is the perfect match. With vibrant colors swirling together, this frappuccino not only delights the eyes but also tantalizes the taste buds with its creamy coffee flavor complemented by delightful sweetness. It’s the ideal summer drink for coffee lovers and a fun treat for kids, making it a fantastic choice for hot days.

Imagine sipping on a refreshing layer of colorful, frosty concoctions that blend smoothly to create a unique taste experience. The Tie Dye Frappuccino features bold flavors accented by creaminess, making each sip a little celebration. It’s an instant pick-me-up that boosts your mood, perfect for a brunch gathering or as an afternoon delight. Let’s dive into this fun and easy recipe to make your own colorful frappuccino at home!

Quick Recipe Highlights

  • Flavor Profile: A delightful mix of rich coffee, creamy vanilla, and fruity undertones make this frappuccino an explosion of tastes.
  • Texture: The smooth, icy blend creates a luscious mouthfeel that is both refreshing and indulgent.
  • Aroma: Enjoy the enticing scent of fresh coffee intertwined with subtle notes of vanilla and sweetness.
  • Visual Appeal: Vibrant layers of swirling colors make it an Instagram-worthy beverage that is as fun to look at as it is to drink!
  • Skill Level Needed: This recipe is easy to master and requires no special skills – perfect for beginners!
  • Special Equipment: A blender is essential to create the smooth, frosty consistency of the frappuccino.

Recipe Overview

  • Difficulty Level: The Tie Dye Frappuccino is an easy recipe that even kids can help with. It requires basic blending skills and minimal hands-on time.
  • Category: This recipe falls into the beverage category, specifically as a dessert drink that can be enjoyed year-round.
  • Cuisine: While not a traditional dish from any specific cuisine, frappuccinos take inspiration from Italian coffee culture and American sweet treat trends.
  • Cost: Ingredients for the Tie Dye Frappuccino are budget-friendly, typically totaling around $10 for multiple servings.
  • Season: Ideal for warm weather, this frappuccino is especially satisfying during summer gatherings or afternoon picnics.
  • Occasion: Perfect for birthday parties, sunny brunches, or simply as a delightful personal treat after a long day.

Why You’ll Love This Recipe

The Tie Dye Frappuccino is a delightful treat that offers a perfect balance of taste and texture. Its creamy consistency and layered flavor profile will leave your taste buds dancing with joy. Plus, the fun colors make it an instant mood booster, ideal for hot summer days or festive occasions.

Convenience is key, and this frappuccino offers both quick preparation and effortless enjoyment. Blend it up in less than 10 minutes, and you have a stunning beverage that can rival any café creation. Not only does it taste fantastic, but it’s also customizable according to your dietary preferences.

Nutritionally, this recipe allows you to include elements such as low-fat milk or dairy-free options, making it a versatile addition to any diet. You can even control the sugar content while enjoying a deliciously sweet drink that doesn’t sacrifice flavor.

When it comes to social gatherings, this frappuccino becomes an attraction. Bright and attractive, it’s the perfect drink to share with friends, making for great conversations and enjoyable moments over an eye-catching treat. You can invite everyone to get creative with their colors – turning it into an interactive experience.

Lastly, the cost-effectiveness of the Tie Dye Frappuccino makes it accessible for anyone to recreate at home. Skip the overpriced coffee shop drinks and enjoy making this colorful beverage in your kitchen, perfect for indulging anytime you crave something special.

Historical Background and Cultural Significance

The frappuccino, as a concept, emerged in the United States during the 1990s as a blend of coffee and various flavorings, quickly gaining popularity in coffee houses across the country. It encapsulates a playful take on traditional coffee drinks, providing a sweeter, more decadent option perfect for warm weather.

Culturally, the Tie Dye Frappuccino symbolizes a shift in coffee drinking habits, leaning towards customization and extravagance. The vibrant colors and flavors reflect a broader trend in food and beverage choices, where visual appeal accompanies taste, making the drinking experience more engaging.

This particular recipe adds to the evolution of drinks by offering a creative twist, perfect for parties and social gatherings while celebrating the art of blending and layering flavors. The colorful display is reminiscent of tie-dye patterns, a fashion statement that thrived during the 1960s and 70s, known for representing individuality and self-expression.

Regional variations often arise with recipes like this, sometimes incorporating local flavors or seasonal fruits to make the drink unique to a specific location. These adaptations keep the traditional frappuccino exciting and fresh, inviting everyone to find their preferred combination of flavors and colors.

Ingredient Deep Dive

The main ingredients of the Tie Dye Frappuccino include coffee, milk, flavored syrups, and ice. Coffee is essential, not just for flavor but for its energizing qualities, making it a popular choice worldwide. The caffeine provides a much-needed boost, blending beautifully with the sweetness of syrups, enhancing the overall taste experience.

Milk offers creaminess and consistency, which contributes to the smooth texture of the frappuccino. You can opt for whole milk for a richer flavor or almond milk for a dairy-free alternative that still maintains the drink’s essential character. The choice of syrups allows for creativity in flavor, whether opting for vanilla, caramel, or fruit-based options, personalizing the drink to your liking.

When selecting coffee for your frappuccino, choose freshly brewed coffee or a favorite espresso blend for the best taste. Store your frappuccino ingredients correctly to maintain freshness, ensuring that your coffee beans are airtight to preserve flavor and aroma.

For those looking to switch up flavors, syrups can be substituted with homemade fruit purees or different flavored extracts, lending a personal twist to your Tie Dye Frappuccino.

Common Mistakes to Avoid

  • Using stale coffee: Always use fresh coffee or espresso to ensure optimal flavor. Stale coffee will not provide the same richness that’s essential for a delicious frappuccino.
  • Too much ice: Adding excessive ice can dilute the flavor. Aim for the right balance to maintain creaminess without watering down your drink.
  • Not blending long enough: Ensure your frappuccino is blended until smooth and creamy. Under-blending may result in ice chunks, which can affect texture and enjoyment.
  • Skipping the layers: For the iconic tie dye look, pour your syrups and coffee in layers instead of mixing everything at once.
  • Choosing the wrong milk: While any type of milk can be used, overly rich or flavored options may overpower the desired coffee flavor.
  • Ignoring texture: Monitor the blending process to achieve the right creamy consistency. Over-blending can lead to a thin drink.
  • Not chilling the glass: For an extra frosty experience, chill your serving glass before pouring in the frappuccino.
  • Forgetting about aesthetics: Presentation matters! Take time to create an appealing drink; it enhances the overall experience.
  • Neglecting garnishes: Dress up your frappuccino with whipped cream, chocolate drizzle, or colorful sprinkles for an eye-catching touch.
  • Inappropriate serving size: Consider the serving size for two people, ensuring each person enjoys enough of the vibrant drink without feeling overwhelmed.

Essential Techniques

To achieve the perfect Tie Dye Frappuccino, blending is the most crucial technique. Proper blending ensures that your ingredients come together seamlessly, creating the ideal creamy texture. When blending, pulse the mixture instead of blending continuously to control the consistency and avoid over-blending.

Layering your ingredients is another essential technique that produces the stunning visual effect of the frappuccino. Pour different colored syrups in a layered fashion to create the tie dye effect, carefully adding each layer so that colors don’t muddy together.

Proper pouring is also important. Use a spoon to gently guide the pouring process, creating layers without the ingredients mixing prematurely. This technique allows for an eye-catching presentation that enhances the overall experience.

Finally, presentation techniques, such as choosing the right glassware and garnish, can elevate your frappuccino. Use wide glasses to showcase the beautiful colors, and don’t hesitate to experiment with different garnishes like whipped cream or fruit slices for added flair.

Pro Tips for Perfect Tie Dye Frappuccino

Take the time to choose high-quality coffee or espresso for a rich base flavor that will elevate your frappuccino. Freshly brewed, cooled coffee will provide the best results.

Experiment with different flavored syrups to create a unique flavor profile. Mix and match to discover your perfect combination, whether it’s fruity, nutty, or creamy.

When blending, start with less ice and add more if necessary. This allows for greater control over the thickness of your frappuccino and ensures a creamy texture.

To get the best tie dye effect, pour each layer slowly and carefully. Use a spoon to help you control the flow and prevent the colors from mixing too much.

Garnish your frappuccino generously! Whipped cream, colorful sprinkles, and drizzles add visual appeal and could enhance the flavor experience.

Don’t hesitate to make this drink ahead of time. You can blend ingredients and store them in the refrigerator for a couple of hours before serving to maintain freshness.

Use frozen fruits instead of ice for a more flavorful addition. This can intensify the fruity flavors and offer a refreshing twist.

Lastly, always chill your serving glasses before use. A cold glass keeps the frappuccino at the right temperature, enhancing the overall experience.

Variations and Adaptations

There are countless variations to the Tie Dye Frappuccino that can enhance your experience. For instance, you could incorporate seasonal fruits like strawberries or mango for a fruity twist, adjusting the flavors based on what’s available during the year.

For a more indulgent treat, consider using chocolate sauce or mocha syrup in place of some of the flavored syrups. This addition can create a mocha tie-dye effect, giving you a delicious alternative while maintaining the colorful look.

Dietary modifications can also be made, including vegan options using nut milk and dairy-free whipped cream. For those seeking lower sugar content, opt for sugar-free syrups while still maintaining layering techniques.

Flavor variations such as adding spices like cinnamon or nutmeg can create an exciting new dimension to the frappuccino, ideal for fall or winter delights. Consider switching out the coffee base for matcha or chai for a unique twist that still keeps the colorful presentation.

Present your frappuccino in different glassware styles or combine with complementary sides like pastries or fruit platters to create a well-rounded serving idea.

Serving and Presentation Guide

When serving your Tie Dye Frappuccino, consider the glassware used to enhance visual attractiveness. For instance, tall, clear glasses allow guests to admire the vibrant layers. Use cocktail straws or wide straws for an added fun factor, inviting guests to mix the drink as they sip.

Garnishing plays a significant role, with options like whipped cream adorned with chocolate or caramel drizzle lifting the aesthetic. Adding sprinkles or slices of fresh fruit can complement the colors and flavor profile.

Traditional accompaniments like cookies or cakes can be paired alongside the frappuccino, creating a dessert beverage experience. Alternatively, for modern touches, consider serving with colorful fruit skewers, encouraging guests to indulge in refreshing bites between sips.

Temperature considerations are vital; serve the frappuccino immediately after preparation to ensure optimum chill. If you need to store any leftovers, place them in an airtight container in the fridge for up to a day, but prepare fresh whenever possible.

Lastly, consider portion control to balance indulgence with enjoyment. Serving in smaller glasses can enhance the experience while decreasing the likelihood of overwhelming guests with sweetness.

Wine and Beverage Pairing

For a fun pairing with the Tie Dye Frappuccino, consider sparkling wines like Prosecco or Asti Spumante. Their sweetness and bubbly nature create a delightful contrast with the creamy frappuccino, making for a celebratory treat.

Non-alcoholic options like flavored sparkling water can provide a refreshing counterbalance. Citrus-infused waters can contrast beautifully with the layered flavors of the frappuccino while keeping it light.

For coffee lovers, a side of chilled cold brew or a mild herbal tea can enhance the coffee experience. Try pairing it with a mild chamomile or refreshing mint tea to provide variety alongside the frappuccino.

Temperature considerations are important for any beverage pairing; serve all drinks chilled to accentuate the coolness of your Tie Dye Frappuccino.

For a cohesive experience, consider serving these options in colorful glassware that aligns with the fun and festive theme of the frappuccino.

Storage and Shelf Life

If you have leftover Tie Dye Frappuccino, storing it requires attention to detail. Use an airtight container to ensure freshness when placing it in the refrigerator. Ideally, consume any leftovers within 24 hours for the best taste and texture.

Due to the nature of the ingredients, texture may change slightly after refrigeration. Freezing is an option, but it may alter the consistency; if you choose to freeze, ensure it’s in a well-sealed container to avoid freezer burn.

Signs of spoilage typically include an off smell or separation of ingredients. If your frappuccino appears separated or has changed color, it’s best to discard it rather than take any chances with food safety.

Reheating isn’t recommended for frappuccinos as they are designed to be enjoyed cold. If frozen, defrost in the refrigerator and blend again with a splash of milk or additional coffee for a refreshed taste.

Finally, when preparing ahead, consider pre-measuring ingredients. Store them separately in the fridge until you’ve gathered them for a quick blend when you’re ready to serve.

Make Ahead Strategies

To streamline the creation of your Tie Dye Frappuccino, prep ahead by measuring ingredients like coffee and syrups in advance. Store them separately in small containers or bags in the refrigerator for easy access at blending time.

Consider freezing coffee ice cubes to create a quickly chilled frappuccino without diluting the flavor. Fill an ice tray with coffee and freeze; use these cubes to replace regular ice during blending.

Blend your frappuccino right before you’re ready to serve, but you can prepare the fruity syrups ahead of time. Freeze pureed fruits in ice cube trays and use them to layer your frappuccino when it’s time to showcase the drink.

Take assembly into account; create a fun layering station with all your ingredients ready to go. Presenting an array of colors can excite creativity, allowing guests to personalize their drinks.

After blending, store the frappuccino in the fridge for a short time if needed. However, prepare and serve fresh for the best flavor and visual experience, ensuring maximum enjoyment for everyone.

Scaling Instructions

When scaling the Tie Dye Frappuccino, ensure you maintain the same ratios for consistent blending. To halve the recipe, simply divide all ingredient amounts by two, making sure to blend to achieve the same creamy texture you desire.

Doubling or tripling the recipe can be easily done; just ensure your blender can handle the increased volume. Utilize larger containers or pitchers to blend in batches if necessary.

Timing adjustments are crucial; larger batches may require additional blending time to fully mix the ingredients. Monitor the consistency closely, ensuring each sip maintains the delightful creaminess you expect.

For storage considerations, keep in mind that larger servings may take longer to chill. Create coffee ice cubes ahead and use them when blending in larger batches to maintain ideal temperatures.

Each adjustment should respect the original concept of the Tie Dye Frappuccino. Balancing flavors, colors, and textures will ensure each serving is as delightful as intended, regardless of portions.

Nutritional Deep Dive

The Tie Dye Frappuccino’s nutritional profile can vary based on the ingredients used. A standard recipe will generally provide a balance of macronutrients, including carbohydrates from syrups, fats from milk or cream, and proteins if dairy is used.

Micronutrient analysis reveals that coffee contributes small amounts of key vitamins and antioxidants, offering some health benefits when consumed in moderation. The addition of fruits or flavored syrups can introduce vitamins, though added sugars might counterbalance this.

Health benefits can accompany coffee consumption, potentially improving mental alertness due to its caffeine content. Milk provides calcium and other essential nutrients, contributing to well-rounded nutrition.

Dietary considerations are flexible; for healthier options, select low-fat or plant-based alternatives for milk and choose low-sugar syrups. This customization allows various dietary needs to be accommodated.

Understanding portion sizes is important for mindful consumption; enjoying this frappuccino as an occasional treat rather than a daily indulgence will enhance its enjoyment while managing health considerations effectively.

Dietary Adaptations

For gluten-free individuals, the Tie Dye Frappuccino is inherently safe as it contains no gluten-containing ingredients. Always check labels of flavored syrups for hidden gluten before serving.

Dairy-free options abound by substituting traditional milk with alternatives like almond, soy, or oat milk, making it versatile for anyone looking to avoid dairy while maintaining creamy texture.

Vegan adaptations can be achieved similarly; choose plant-based whipped cream and syrups without artificial additives. This will create a delicious and refreshing beverage suitable for vegan dieters.

Low-carb or keto adaptations can be made by omitting syrups or using sugar-free alternatives. Utilize heavy cream to obtain that satisfying richness while maintaining low carbohydrate content.

For paleo dieters, sweeten with natural options like honey or maple syrup and adjust the creamy base using coconut milk or almond milk.

Low-FODMAP variations highlight lactose-free milk and focus on syrups that align with these dietary restrictions, ensuring everyone can enjoy this colorful treat without digestive concerns.

Troubleshooting Guide

Texture issues can arise if the frappuccino is too watery or thick. For a watery consistency, reduce the amount of ice added during blending or incorporate more solid ingredients like frozen fruit.

Flavor balance might seem off if the drink tastes too sweet. Counteract this by introducing additional brewed coffee or a pinch of salt to enhance the overall flavor profile.

Temperature problems can be common when the frappuccino isn’t cold enough. Ensure you’re using chilled glasses and consider refrigerating ingredients ahead of time for a more refreshing treat.

Equipment challenges can occur if your blender isn’t powerful enough. In such cases, consider blending in smaller quantities to achieve the desired consistency before combining in a larger pitcher.

Ingredient substitutions may lead to unexpected outcomes. Always opt for similar textures and flavors when making swaps to maintain the essence of the original recipe.

Timing concerns arise mostly during preparation; allow adequate blending time to ensure a smooth and creamy texture without interruptions or rushing through steps.

Recipe Success Stories

Community feedback on the Tie Dye Frappuccino has been overwhelmingly positive, with many sharing their favorite flavor combinations and personal twists. Variations using fresh fruit or alternative syrups have inspired a creative wave, enhancing the core elements of the recipe.

Readers have delighted in adapting the creation for birthday parties and kids’ gatherings, turning the frappuccino into a fun activity where everyone can make their unique drinks. These personalized creations often lead to exciting success stories shared on social platforms.

Photography tips play a significant role in successfully showcasing this vibrant drink. Many users have highlighted the importance of natural lighting for so colorfully presenting their frappuccinos, allowing the wonderful hues to shine.

Adaptation stories often include families creating themed drinks for special occasions, perhaps matching colors to parties or events. Such creativity keeps the concept of the Tie Dye Frappuccino fresh and engaging.

The joy of making this drink together as a family has brought people together, highlighting how simple recipes can create wonderful moments filled with laughter and camaraderie, proving that cooking can be a rewarding experience beyond just the flavors.

Frequently Asked Questions

1. Can I freeze my Tie Dye Frappuccino?
Yes, it’s advisable to freeze only the coffee components first. Blended beverages such as frappuccinos don’t hold up well when frozen due to the separation of ingredients after thawing. Instead, freeze individual components (like coffee or syrups) for the best outcomes.

2. How do I make this vegan-friendly?
For a vegan-friendly Tie Dye Frappuccino, swap cow’s milk for any plant-based milk like almond or coconut, and check syrup ingredients for dairy-free options.

3. What syrups work best for this recipe?
Flavored syrups such as vanilla, caramel, or hazelnut work beautifully. Feel free to experiment with fruity versions that can add refreshing elements to the flavor profile.

4. Can I make this a breakfast option?
Absolutely! By adding nutritious elements like oats or protein powder, you can transform the frappuccino into a filling breakfast that’s delicious and satisfying.

5. Is it okay to use instant coffee?
While brewed coffee is preferred for better flavor, instant coffee can be used in a pinch. Just mix it with hot water and cool before blending into your frappuccino.

6. Can the color and layer be adjusted?
Yes, you can adjust the layering technique by pouring the syrups in different amounts or using various colors to create your personalized visual effect.

7. How do I thicken my frappuccino?
To thicken, start with less ice and include frozen fruits like bananas or berries instead, enhancing both flavor and thickness without diluting.

8. Can I serve it without layers?
You can certainly mix all ingredients together for a solid color, but the overall visual appeal will differ from the layered style.

9. Is sugar necessary in the frappuccino?
Sugar is not necessary if you prefer a less sweet drink. Substitute with natural fruit purees for flavor without added sugars.

10. How do I store leftovers?
Store any leftovers in an airtight container in the refrigerator and consume within 24 hours for the best experience, although fresh is always best.

Additional Resources

For those looking to further expand their beverage repertoire, try checking out related recipes such as fruit smoothies or coffee milkshakes that are also vibrant and delicious. Engage with technique guides that elaborate on blending and layering to master the art of visually stunning drinks.

Ingredient information is crucial when it comes to sourcing quality items. Consider exploring local fruit markets for the freshest options possible. Additionally, check equipment recommendations to ensure you have the right appliances needed to create the perfect frappuccino.

Lastly, don’t miss out on seasonal variations that can enhance your frappuccino experience—think pumpkin spice in the fall or berry-infused flavors in the summer, making every season a reason for a new twist!

Join the Conversation

Connecting with others through social media can provide both inspiration and community. Share your own photo success with the Tie Dye Frappuccino and interact with others who are attempting this colorful beverage.

Invite family and friends to share their thoughts and variations on the recipe, fostering an engaging and creative cooking atmosphere. Recipe reviews and feedback can lead to improvements, making it a fun collaborative project.

Photography tips can aid in showcasing the beauty of the frappuccino, improving your food photography skills and enhancing how you capture and share your drinks on platforms like Instagram or Pinterest.

Additionally, don’t hesitate to ask for suggestions or share adaptation stories! Building a sense of community around this delicious recipe can turn simple refreshments into memorable occasions worth celebrating.

The Recipe

Tie Dye Frappuccino

Serves: 2

Prep Time: 10 mins

Cook Time: 0 mins

Total Time: 10 mins

Kitchen Equipment Needed

  • Blender
  • Measuring cups and spoons
  • Serving glasses

Ingredients

  • 1 cup brewed coffee, cooled
  • 1 cup milk (or milk alternative)
  • 1/2 cup ice
  • 1/4 cup vanilla syrup
  • 1/4 cup fruit syrup (your choice)
  • Whipped cream for topping (optional)
  • Sprinkles for garnish (optional)

Directions

  1. Start by adding the cooled coffee and milk to your blender.
  2. Add ice and blend until smooth and creamy.
  3. In separate glasses, layer the flavored syrups at the bottom of each glass.
  4. Pour the blended coffee mixture on top of the syrups carefully to create a layered effect.
  5. Top with whipped cream and serve with colorful sprinkles if desired.
  6. Enjoy your vibrant Tie Dye Frappuccino!

Recipe Notes

  • Feel free to adjust the sweetness by adding more or less syrup according to your preference.
  • Experiment with different flavored syrups to create your perfect blend.
  • For an extra creamy texture, use whole milk or a thicker milk alternative.

Best Cookie Butter Iced Coffee Recipe (Dairy-Free)

Cookie Butter Iced Coffee: A Dreamy Dairy-Free Delight

⚖️
Difficulty
Easy

⏲️
Prep Time
10 mins

🕒
Cook Time
5 mins

⏱️
Total Time
15 mins

🍽️
Servings
2

Indulge in the perfect blend of flavor and refreshment with our Cookie Butter Iced Coffee, a delightful dairy-free treat that combines the creamy richness of cookie butter with invigorating coffee. This easy and quick-to-make iced coffee recipe is perfect for warm days when you crave a sweet and energizing beverage. Picture yourself sipping this frothy delight, the flavors of caramelized sugar and spiced cookies dancing on your palate, leaving you craving another sip.

Cookie Butter Iced Coffee is not just about taste; it also offers a unique aroma that fills the air with the comforting notes of toasted spices and sweet vanilla, making it a perfect companion for your afternoon break or social gathering. The inviting visuals of a golden-brown iced coffee topped with luscious cookie butter drizzle create a mouthwatering experience that satisfies not only your taste buds but also your desire for a luxurious drink experience.

Quick Recipe Highlights

  • Flavor Profile: Rich coffee balanced by sweet cookie butter, offering hints of cinnamon and vanilla.
  • Texture: Creamy and smooth with a satisfying crunch from cookie butter swirls.
  • Aroma: Inviting notes of roasted coffee beans intertwined with warm, sweet spices.
  • Visual Appeal: Beautiful layers of dark coffee and golden cookie butter create an enticing drink.
  • Skill Level Needed: Simple techniques make this recipe accessible to anyone.
  • Special Equipment: Just a blender and your favorite glass are needed!

Recipe Overview

  • Difficulty Level: This Cookie Butter Iced Coffee is easy to make, making it perfect for all skill levels. Whether you’re a coffee aficionado or a casual home cook, you’ll find this recipe straightforward and quick.
  • Category: A delicious beverage that serves as an afternoon pick-me-up or dessert alternative.
  • Cuisine: Although it draws influence from both coffee and dessert traditions, the cookie butter adds a unique twist that bridges culinary cultures.
  • Cost: The ingredients are relatively affordable and widely available, making this an economical choice for coffee lovers.
  • Season: Ideal for warm summer months or anytime you desire a chilled, sweet drink.
  • Occasion: A wonderful addition to brunches, afternoon gatherings, or a simple nightcap treat.

Why You’ll Love This Recipe

You’ll adore the balance of taste and texture in this Cookie Butter Iced Coffee. The creamy richness of cookie butter blended with iced coffee creates a dessert-like drink that’s both satisfying and uplifting. Each sip is filled with the comforting flavors reminiscent of your favorite cookies, making it feel indulgent without being overly heavy.

This recipe is incredibly convenient, allowing you to whip up a café-style drink at home in just minutes. Perfect for those busy mornings or lazy afternoons, you can quickly blend your ingredients and enjoy a delicious drink without the need to venture out. Plus, the versatility of this recipe means you can customize it to suit your taste preferences perfectly.

Nutritionally, this dairy-free iced coffee can be a healthier alternative to many traditional coffee shop offerings. By controlling what goes into your drink, you can adjust sweetness, use natural ingredients, and avoid unnecessary additives. Cookie butter often brings added fiber and protein, giving you a simple boost without sacrificing taste.

This iced coffee also serves as a fun social beverage. Whip it up for gatherings or enjoy it during casual meet-ups. Its unique flavor will impress even the pickiest coffee drinkers, making it a conversation starter that can elevate any casual hangout.

Finally, making Cookie Butter Iced Coffee is cost-effective. Instead of spending at trendy cafés, you can recreate this treat in the comfort of your home. The basic ingredients are inexpensive and easy to find, ensuring you don’t break the bank to satisfy your sweet cravings.

Historical Background and Cultural Significance

Cookie butter has roots in Belgian cuisine, where it originated as a way to use leftoverSpeculoos cookies. This blend of crushed cookies and fat became a beloved spread across Europe and has recently gained tremendous popularity in North America. Cookie butter iced coffee combines this beloved treat with the traditional coffee experience, reflecting a growing trend of fusion beverages.

The cultural significance of cookie butter extends beyond mere enjoyment; it embodies creativity in the kitchen. With its rise in global popularity, cookie butter has entered homes and cafés around the world, becoming a versatile ingredient in numerous sweet and savory recipes. Merging it with iced coffee adds a new twist to both traditional flavors and modern drinks.

As the recipe for iced coffee has evolved, particularly in American culture, we’ve seen a shift toward more indulgent versions. Originally a simple combination of coffee and ice, today’s iced coffee creations highlight unique flavors and creative ingredients, such as cookie butter, resulting in beverages that are both comforting and indulgent.

Today, many regional variations feature local ingredients, showing how cultural influences continue to shape our palates. By adding cookie butter, the drink taps into nostalgia while being creative, keeping the legacy of innovative beverage-making vibrant in communities.

Ingredient Deep Dive

Coffee: Coffee has a rich history, originating from Ethiopia before spreading worldwide. It provides numerous health benefits, including mental clarity and mood enhancement, thanks to its caffeine content. When selecting coffee beans, choose fresh, high-quality beans and store them in a cool, dark place to preserve flavor.

Cookie Butter: A relatively modern ingredient, cookie butter is made from ground-up cookies blended with oils or butters. It’s a delicious source of quick energy due to its carbohydrate content and can satisfy sweet cravings. Always check the label for quality ingredients and consider making your own for an authentic flavor experience.

Common Mistakes to Avoid

  • Not using cold coffee: Warm coffee can dilute the ice, leading to a watery texture.
  • Overdoing the cookie butter: While it’s tempting to add more for sweetness, balancing the coffee flavor is essential.
  • Insufficient blending: Ensure your blender fully mixes the cookie butter with coffee; it should be smooth for the best texture.
  • Forgetting to chill: Always chill your coffee before blending to achieve the perfect iced experience.
  • Using low-quality coffee: The base of your drink matters; invest in good coffee for the best results.
  • Neglecting ice: Too little ice results in a less refreshing drink and a diluted flavor.
  • Skipping on garnishes: A little sprinkle of cinnamon or extra cookie butter on top enhances aesthetics and flavor.
  • Ignoring portion sizes: Be mindful of the energy boost; overindulgence can leave you jittery.

Essential Techniques

Blending: Proper blending ensures smooth incorporation of the ingredients, creating a uniform texture. Start at a low speed and gradually increase to achieve the desired consistency without chunks of cookie butter. Look for a smooth, creamy texture as an indicator of success.

Layering: If you’re going for visual appeal, layering your drink with ice and coffee creates a stunning contrast. Pour slowly to create distinct layers; this method showcases a professional touch and enhances the drinking experience.

Pro Tips for Perfect Cookie Butter Iced Coffee

1. Experiment with different coffee roasts to see which one complements the cookie butter best.

2. For an extra creamy texture, consider adding a splash of your favorite dairy-free milk.

3. Always use fresh ice to maintain the chill factor without diluting the drink.

4. Top with whipped coconut cream for an indulgent finish.

5. Make a double batch to save some for later or share with a friend.

6. Add a dash of vanilla extract for enhanced flavor depth.

7. Use a flavored coffee to change up the profile and keep things interesting.

8. Experiment with spices, such as nutmeg or cardamom, for unique variations.

Variations and Adaptations

Consider making this recipe with different flavored coffee, such as hazelnut or mocha, to shift the flavor profile entirely. Seasonal adaptations, like adding pumpkin spice in the fall, can reinvigorate this drink through the cooler months. For those with dietary restrictions, using plant-based alternatives like almond or oat milk creates a delightful combination without compromising taste.

Flavor variations also extend to cookie butter; explore different brands or even homemade versions using gluten-free cookies to cater to specific dietary needs. If you’re feeling adventurous, swap in chocolate syrup for a dessert-inspired chocolaty variant that tantalizes your taste buds.

Texture modifications such as blending in some frozen banana can create a richer, thicker drink, while presentation alternatives might include serving in a mason jar for a rustic touch.

Serving and Presentation Guide

For a stunning presentation, serve your Cookie Butter Iced Coffee in a tall glass that showcases the beautiful layers. Consider garnishing with a sprinkle of cinnamon or chocolate shavings on top for added flair. Pairing it with a couple of cookie halves on the side elevates the experience with complementary flavors.

Temperature is key; serve your iced coffee immediately after blending to maintain its refreshing chill. For portion control, use smaller glasses, especially if topping with creamy additions, allowing people to enjoy multiple servings without feeling overly full.

Wine and Beverage Pairing

To pair with your Cookie Butter Iced Coffee, consider a light-bodied white wine, such as a Sauvignon Blanc, which can complement the sweetness without overpowering it. Non-alcoholic alternatives like sparkling water enhance the freshness while balancing the richness of the drink.

If you prefer pairing coffee with coffee, a light roast cold brew works harmoniously with cookie flavors, while iced herbal teas can also provide a fantastic refreshing contrast. Serve these beverages chilled to maintain the refreshing nature of your Cookie Butter Iced Coffee experience.

Storage and Shelf Life

Store leftover Cookie Butter Iced Coffee in an airtight container in the refrigerator for up to 24 hours. Separation can occur, so give it a good shake or stir before serving again.

For longer storage, freeze the coffee before blending; ice cubes made from coffee can be a great way to prevent dilution on serving. Watch for signs of spoilage such as an off smell or unusual texture, indicating it’s past its prime.

Make Ahead Strategies

To save time, consider brewing coffee in advance and chilling it overnight. You can prepare cookie butter smooth beforehand and store it separately to blend later. By doing this, you can easily create your drink at the moment without the hassle.

Quality is key, so use fresh ingredients even when making ahead for the best flavor. Consider adding fresh components, like whipped topping, right before serving for a delightful texture contrast.

Scaling Instructions

When halving this recipe, simply adjust coffee and cookie butter measurements evenly, and maintain the same blending techniques. To double or triple, you might need a larger blender or to blend in batches, ensuring an even consistency throughout.

Pay attention to timing when adjusting batch sizes; larger quantities might require a bit more blending to achieve the same creamy texture. For storage, always choose suitable containers that can accommodate larger or smaller portions without compromising quality.

Nutritional Deep Dive

This delectable Cookie Butter Iced Coffee packs a flavorful punch while still being within reasonable caloric limits. The nutrient factors depend on your chosen coffee and cookie butter, but generally, you can expect a decent source of carbs and a bit of healthy fat from the butter. Caloric contributions primarily come from sweeteners and extras.

When analyzing micronutrients, coffee provides antioxidants beneficial for health while cookie butter offers a bit of fiber. Always take note of serving sizes and adjust ingredients accordingly to suit dietary considerations, especially if managing calorie intake.

Dietary Adaptations

For gluten-free options, substitute traditional cookie butter with a gluten-free cookie version. Dairy-free milk options like almond, coconut, or oat milk make the drink suitable for vegan diets. If you follow a low-carb or keto diet, consider a sugar-free cookie butter alternative while adjusting sweeteners accordingly.

Paleo enthusiasts can create a version using pure nut butters and vanilla extract, reflecting the flavors without processed ingredients. Low-FODMAP adherents should watch out for certain cookie ingredients and may need to create their own suitable variants.

Troubleshooting Guide

If you find your Cookie Butter Iced Coffee too sweet, consider adjusting the amount of cookie butter or balancing with a touch of unsweetened almond milk. Texture issues can arise from insufficient blending, so ensure your blender can handle creating a smooth finish.

If the flavor is lacking, review your ingredient quality; strong-flavored cookie butter and fresh coffee can enhance overall taste significantly. If you’re having equipment challenges, ensure your blender is powerful enough to handle ice and thick mixtures effectively.

Recipe Success Stories

Many at-home baristas have shared their excitement about recreating this beloved café drink, adapting it with personal touches and various flavors. Feedback suggests that even newcomers to iced coffee find this recipe both accessible and delicious, with many documenting their variations on social media.

Success stories often highlight the joy of hosting with this drink: offering it at brunch or afternoon gatherings allows hosts to showcase their creative skills while providing friends with a delightful treat. Popular adaptations include caramel or mocha infusions, further enhancing the flavor experience.

Frequently Asked Questions

Can I use regular milk instead of dairy-free options? Absolutely! While this recipe aims for a plant-based approach, regular milk or cream can be substituted according to personal preferences.

How can I make this recipe vegan? To ensure vegan compliance, simply use a plant-based cookie butter and dairy-free milk; everything else remains the same.

Can I use decaf coffee? Yes, decaf coffee works well, particularly if you’re looking to reduce caffeine intake while still enjoying the delicious flavors.

Is there a way to make this sugar-free? Certainly! Opt for sugar-free sweeteners and ensure your cookie butter is free from added sugars or consider making your own.

Can I make this recipe in larger batches? Yes, you can scale up the ingredients and blend multiple servings at once. Just keep an eye on blending time for consistency.

What can I do with leftovers? Leftover iced coffee can be stored in the refrigerator for up to a day; it’s great for quick morning beverages!

Can I freeze the ingredients? Yes, coffee can be frozen in ice cube trays for easy iced coffee preparation in the future.

What’s the best type of coffee for this recipe? A medium roast coffee generally provides the best balance of flavor without overwhelming the cookie butter.

Can I add extra flavorings? Feel free to customize with spices like cinnamon or nutmeg for added flavor and warmth.

How long should I blend the mixture? Blend until you achieve a smooth consistency, usually 30 to 60 seconds, depending on your blender’s strength.

Additional Resources

Explore more recipes that highlight coffee and cookie flavor combinations for inspiration. Technique guides focusing on blending and brewing can enhance your skill set and confidence in the kitchen. Check for ingredient information to understand the benefits each one brings to your cooking experience.

Look into recommendations for high-quality coffee makers that can elevate your home beverage crafting. Seasonal variations, especially with flavors and ingredients, can keep your coffee-loving heart content throughout the year with delightful new recipes to try.

Join the Conversation

We love hearing from you! Share your Cookie Butter Iced Coffee creations on social media, showcasing your unique versions. Engaging through photography and reviews not only builds community but also provides inspiration for others to try their hands at making this delicious drink.

Don’t forget to explore various recipe adaptations from fellow enthusiasts and bring your friends along on this delicious journey. Your creativity with this recipe could spark interest and excitement within the community!

The Recipe

Cookie Butter Iced Coffee

Serves: 2

Prep Time: 10 mins

Cook Time: 5 mins

Total Time: 15 mins

Kitchen Equipment Needed

  • Blender
  • Measuring cups
  • Tall glasses

Ingredients

  • 2 cups chilled brewed coffee
  • 2 tablespoons cookie butter
  • 1-2 tablespoons sweetener (maple syrup, agave, or sugar)
  • Ice cubes
  • Optional toppings: whipped coconut cream, cinnamon

Directions

  1. In a blender, combine chilled coffee, cookie butter, and sweetener.
  2. Add a handful of ice cubes and blend until smooth.
  3. Taste and adjust sweetness if necessary.
  4. Pour into tall glasses, and garnish with whipped coconut cream and a sprinkle of cinnamon if desired.
  5. Serve immediately and enjoy!

Recipe Notes

  • For a frothier drink, blend the ingredients longer.
  • Experiment with different flavored coffee or alternative sweeteners to personalize your drink.
  • This recipe can easily be doubled for larger gatherings.

Easy No Bake Eclair Cake with Rich Chocolate Topping

No Bake Eclair Cake: A Delicious Dessert Delight

⚖️
Difficulty
Easy

⏲️
Prep Time
20 mins

🕒
Cook Time
0 mins

⏱️
Total Time
20 mins

🍽️
Servings
12 servings

The No Bake Eclair Cake is an easy yet impressive dessert that will surely delight your family and friends. Made from layers of graham crackers, creamy vanilla pudding, and rich chocolate frosting, this dessert offers a perfect balance of flavors and textures that invokes a sense of nostalgia with every bite. The simplicity of this no bake recipe makes it accessible to bakers of all skill levels, allowing you to whip up a dessert without turning on the oven.

Imagine pulling out a chilled slice of this dessert on a hot summer day, the layers glistening with a smooth chocolate glaze that contrasts beautifully with the light and airy pudding. Each bite delivers a delightful crunch from the graham crackers, followed by the luscious creaminess of the pudding, creating a texture that is simply irresistible. This No Bake Eclair Cake is not just a dessert; it’s a sweet experience that is perfect for celebrating special moments or indulging on a quiet evening at home.

Quick Recipe Highlights

  • Flavor Profile: This cake features a delightful combination of creamy vanilla and chocolate flavors, reminiscent of traditional eclairs.
  • Texture: Expect a wonderful contrast between the crunchy graham crackers and the creamy filling, topped with a smooth chocolate layer.
  • Aroma: The rich chocolate aroma blends beautifully with the sweet vanilla notes, making it an enticing treat.
  • Visual Appeal: With its layered structure and glossy chocolate top, this cake is as pleasing to the eye as it is to the palate.
  • Skill Level Needed: This recipe is perfect for beginners and requires no baking, making it easy to master.
  • Special Equipment: A 9×13-inch baking dish and mixing bowls are all you need to create this beautiful cake.

Recipe Overview

  • Difficulty Level: This No Bake Eclair Cake is easy to prepare, making it a great choice for novice cooks or a fun activity with kids.
  • Category: This cake falls under the dessert category, perfect for potlucks, family gatherings, or just a sweet treat at home.
  • Cuisine: This recipe draws inspiration from French pastry, combining classic eclair flavors with an easy-to-make format.
  • Cost: Budget-friendly ingredients like graham crackers and whipped topping make this dessert economical to prepare.
  • Season: This recipe is ideal for any season, providing a refreshing treat in warmer months and a comforting dessert in the colder months.
  • Occasion: Perfect as a dessert for birthdays, holiday gatherings, or casual backyard barbecues.

Why You’ll Love This Recipe

One of the main reasons you’ll love this No Bake Eclair Cake is its incredible taste and texture. The combination of the creamy filling with the chocolate topping creates a decadence that is hard to resist. The sweetness is perfectly balanced, ensuring that every bite is satisfying without being overwhelmingly sweet.

Convenience is another huge selling point. With no baking involved, this dessert can be prepared quickly. Simply layer the ingredients, chill, and serve. It is a great choice for those last-minute gatherings when you want to impress without spending a whole day in the kitchen.

Nutritionally, this dessert can be made with lighter ingredients if needed. For instance, using low-fat pudding or sugar-free whipped topping can help lower the calorie content while still delivering a delicious treat.

Socially, sharing this No Bake Eclair Cake creates memorable moments with friends and family. It sparks conversation and excitement around the dessert table, making it a staple for gatherings and celebrations.

Finally, the cost-effectiveness of this recipe is a huge advantage. Affordable ingredients ensure that you can whip this up without breaking the bank, making it accessible for everyone, from families to college students.

Historical Background and Cultural Significance

The origin of the eclair dates back to the 19th century in France, where it was introduced as a choux pastry filled with cream and topped with chocolate. The name “éclair,” meaning “lightning” in French, is said to refer to the quickness with which the pastry is eaten and its glossy appearance, much like a flash of lightning.

The cultural significance of this dessert has expanded beyond its French origins, with adaptations appearing in various cultures. The No Bake Eclair Cake version brings a unique twist, allowing for its enjoyment without the need for pastry-making skills, thus democratizing this classic treat.

Over the years, the recipe has evolved, incorporating various flavors and fillings. Some versions use fruit or flavored creams, showcasing the versatility of this dessert. The No Bake Eclair Cake embraces this evolution while maintaining the essence of the original eclair.

Regionally, different bakers have created their takes on the eclair, resulting in variations that reflect local tastes and customs. The No Bake style is particularly popular in American homes, where the focus is often on convenience without sacrificing flavor.

Ingredient Deep Dive

Graham Crackers:
Graham crackers are a staple in American baking, used primarily for crusts and layered desserts. Their slightly sweet and honey-infused flavor provides a perfect base for no bake recipes. Nutritionally, they offer some fiber and can be a better alternative to other cookies that are high in sugar.

When selecting graham crackers, look for whole grain options to enhance the fiber content. Store them in a cool, dry place, and they can last for several months when kept sealed. If you need substitutions, consider using Digestive biscuits or crushed vanilla wafers.

Instant Vanilla Pudding:
Instant vanilla pudding is the heart of this cake, providing creaminess and a rich flavor. It’s quick to prepare and offers versatility, as it can be used in numerous desserts. Nutritionally, it provides a dose of calcium but is generally high in sugar, so moderation is advised.

To make the best choice, opt for brands that use real vanilla for a superior flavor. Store dry pudding mix in a cool, dry pantry, and it will keep for a long time. As a substitute, homemade pudding can be prepared, though it will require additional cooking.

Whipped Topping:
Whipped topping adds lightness and fluffiness to the cake, creating an irresistible texture. It’s typically made from hydrogenated oils and sugar, contributing no significant nutritional value but providing creaminess. For a healthier option, consider using whipped cream made from real heavy cream.

When purchasing whipped topping, look for varieties with fewer artificial ingredients. Store in the freezer for long-term use. If fresh whipped cream is not available, Greek yogurt can be a good alternative, allowing you to maintain some creaminess without the added sugars.

Common Mistakes to Avoid

  • Skipping the chilling step: Proper chilling is essential for setting the layers of the No Bake Eclair Cake; avoid the temptation to skip this step. Layering the ingredients without allowing them to set can result in a runny dessert.
  • Using stale graham crackers: Always check the expiration date on your graham crackers. Stale cookies will not provide the crunch needed for the texture contrast.
  • Overmixing the pudding: When preparing instant pudding, ensure you mix just until combined. Overmixing can lead to a grainy texture that diminishes the creaminess.
  • Pouring hot chocolate over cold layers: If making your own chocolate glaze, allow it to cool slightly before pouring it onto your cake. This prevents the heat from melting the layers below.
  • Not measuring ingredients accurately: For optimal results, always measure your ingredients carefully. Inaccurate measurements can alter the dessert’s consistency.
  • Rushing through preparation: Take your time when layering the graham crackers, pudding, and whipped topping. Hasty assembly can lead to uneven layers and a less appealing presentation.
  • Using the wrong size baking dish: Ensure you’re using a 9×13-inch dish for the correct portion size, which allows for the right layering of ingredients.
  • Forgetting to garnish: Elevate the presentation of your No Bake Eclair Cake by adding chocolate shavings or fresh berries on top, making for an even more inviting dessert.
  • Serving at the wrong temperature: Allow the cake to chill adequately before serving. Serving it too warm may lead to a runny filling.
  • Not planning for leftovers: This cake is best enjoyed within 2-3 days, so be sure to share it with friends to prevent any waste.

Essential Techniques

Layering:
Layering is crucial for achieving the signature look and texture of your No Bake Eclair Cake. To master this technique, start with a clean and even base layer of graham crackers, ensuring they cover the bottom of the dish completely. Then, alternate between the pudding mix and whipped topping for visually appealing layers. Look for visual cues like even distribution and height for each layer, allowing the dessert to look enticing when sliced.

Chilling:
Chilling is an important step that helps the flavors meld together while allowing the layers to set. It’s vital to cover the cake with plastic wrap or foil to prevent it from absorbing any odors from the fridge. The ideal chilling time is at least 4 hours, or overnight if possible, allowing for a firmer texture. You’ll know it’s successful when the layers hold their shape upon slicing.

Pro Tips for Perfect No Bake Eclair Cake

– Use fresh ingredients for the best flavor. Always check the dates on your pudding mix and whipped toppings to avoid any off-tastes.
– For added flavor, consider infusing the pudding with almond extract for a delightful twist.
– When layering your cake, use an offset spatula to create smooth layers that are evenly distributed, ensuring a professional look.
– Experiment with different flavors of pudding, such as chocolate or butterscotch, for unique variations of this classic dessert.
– Consider adding layers of fresh fruit like strawberries or bananas between layers for a refreshing twist.
– If you prefer a richer chocolate layer, melt semi-sweet chocolate together with icing instead of using pre-made frosting.
– Allow the cake to sit out for about 10 minutes before slicing to make cutting easier; this lets it slightly soften without losing its shape.
– Enhance presentation by sprinkling cocoa powder or powdered sugar on top before serving for an elegant finish.

Variations and Adaptations

One popular variation of the No Bake Eclair Cake is the chocolate version, where chocolate graham crackers replace traditional ones, adding an extra layer of chocolate flavor. This variation is sure to delight chocolate lovers and provide a deeper taste experience.

Seasonal adaptations allow for creativity. In the fall, you could incorporate pumpkin spice pudding for a seasonal twist on the original recipe, appealing to those who relish autumn flavors. In the summer, using fresh peach slices as a layer can add a refreshing touch.

For dietary modifications, simply swap out regular pudding for a gluten-free or dairy-free option. This allows everyone to enjoy this delicious dessert without compromising dietary restrictions.

To change the flavor profile, try adding a layer of peanut butter between the pudding and whipped topping. This classic combination is sure to be a hit at any gathering, offering both creaminess and an exciting taste.

For texture modifications, consider adding crushed nuts or toasted coconut on top for an added crunch that beautifully contrasts with the smooth layers beneath.

When it comes to presentation, serve individual portions in clear cups or mason jars for a fun and modern twist, allowing guests to appreciate the layers.

Serving and Presentation Guide

When serving the No Bake Eclair Cake, simple plating techniques can elevate the dish. Use a sharp knife to cut clean slices, and a spatula to transfer them to dessert plates. Garnish each slice with a dollop of whipped cream and a sprinkle of cocoa powder for added flair.

Traditional accompaniments might include fresh berries or a drizzle of chocolate sauce. However, modern serving suggestions could also incorporate a scoop of vanilla ice cream on the side for an indulgent experience. Temperature considerations are key; serve the cake chilled to maintain its integrity and freshness.

Portion control can be challenging with such a delectable dessert, so consider preparing smaller servings or mini versions to satisfy the craving without overindulgence.

Wine and Beverage Pairing

Pairing wine with dessert can enhance the overall dining experience. A light dessert wine, such as Moscato, complements the sweetness of the No Bake Eclair Cake beautifully, creating a harmonious balance. Alternatively, a sparkling wine can add an element of celebration to any occasion.

For non-alcoholic alternatives, consider serving a refreshing iced tea or lemonade, which can cleanse the palate and balance the richness of the dessert. If coffee is your preference, a creamy latte or cappuccino pairs perfectly with the cake, providing nice contrast.

When serving, ensure that drinks are presented in clean glassware, and consider garnishing your beverages with fruit for an aesthetically pleasing touch.

Storage and Shelf Life

Storing No Bake Eclair Cake is simple. Keep it covered in the refrigerator to prevent it from drying out. Use an airtight container or cover it with plastic wrap to maintain freshness, keeping it for up to 3 days.

Temperature requirements are straightforward: this cake should always be stored in the fridge to retain its creamy texture. Signs of spoilage include a sour smell or visible changes in the layers, indicating it’s time to discard.

If you need to reheat for a slightly warmer dessert option, allow it to sit at room temperature for a bit. Freezing this cake is not recommended, as it may change the texture of the whipped topping and pudding.

Make Ahead Strategies

To prepare this No Bake Eclair Cake ahead of time, consider its chilling timeline. You can assemble the cake a day in advance, allowing it to chill overnight for the best results. This also allows the flavors to meld, enhancing the taste.

For longer storage between steps, prepare the pudding mixture and graham crackers separately, assembling them just before serving if needed. It’s essential to ensure that the whipped topping is added just before enjoying for optimal freshness.

When assessing quality impact, remember that the texture may become less crisp if stored too long, so aim to enjoy it within a few days of preparation. For assembly tips, layer evenly and gently, ensuring a smooth presentation.

Adding fresh elements like berries should be considered just prior to serving to maintain their appearance and flavor.

Scaling Instructions

Scaling your No Bake Eclair Cake is straightforward. If you want to halve the recipe, ensure that you use a smaller dish, such as an 8×8 inch pan, for proper layering. This will guarantee that each slice remains appealing.

For doubling or tripling the recipe, opt for a larger baking dish or two separate pans. Timing modifications generally won’t be required, as the preparation remains the same, but be mindful of additional chilling time if layered at once in a larger dish.

Storage considerations should also be adjusted. Larger quantities can take longer to chill, so ensure that your refrigerator can accommodate the larger dish comfortably for optimal results.

Nutritional Deep Dive

The No Bake Eclair Cake can be broken down into its macronutrients. Each serving typically contains a moderate amount of carbohydrates primarily from the graham crackers and sugars found in the pudding and whipped topping. This is something to be mindful of for those monitoring carbohydrate intake.

Micronutrient analysis reveals minimal vitamins but does include some calcium due to the dairy products involved. While it’s not a health food, enjoying it in moderation allows for satisfying a sweet tooth without guilt.

Health benefits include the joy of creating a dessert that allows you to bond with family while engaging in the cooking process. It adds happiness to occasions and enhances mood, proving that food can be a source of joy.

Consider dietary needs when serving this dessert; aware portions can allow those watching their caloric intake to enjoy a taste without overindulging. This dessert can fit into a balanced diet when enjoyed occasionally.

For weight management tips, it’s advisable to serve smaller portions instead of larger slices, allowing for a sweet treat without excess calories.

Dietary Adaptations

If you need a gluten-free option for this No Bake Eclair Cake, simply substitute gluten-free graham crackers. Ensure that all other ingredients, such as pudding mix and whipped topping, are also gluten-free to guarantee safety.

For a dairy-free modification, consider using coconut cream instead of whipped topping and dairy-free pudding made from almond or soy milk.

If you’re looking to create a vegan version, opt for dairy-free chocolate for the frosting and swap traditional pudding for a plant-based alternative with non-dairy options.

For individuals following a low-carb or keto diet, you can use almond flour cookies for the base layer and opt for no-sugar-added pudding to keep the carbs down.

If paleo is your preference, consider making a coconut milk pudding and using almond flour in place of graham crackers, respecting the dietary guidelines without sacrificing flavor.

Those needing a low-FODMAP dietary option can use lactose-free pudding and toppings while ensuring ingredient suitability throughout the recipe.

Troubleshooting Guide

If you encounter texture issues, overlapping layers can lead to an unwanted mixture of flavors. Separate the graham cracker layer from the pudding layer more distinctly for clarity of flavor and texture.

For flavor balance, if the dessert tastes too sweet, consider balancing it out with a touch of sea salt or using a dark chocolate instead of milk chocolate for a richer experience.

Temperature problems may arise when serving; remember to chill the dessert thoroughly to achieve the right texture. If it’s too warm, allow it to firm up more in the refrigerator before serving.

If equipment challenges arise, ensure that your kitchen tools, especially mixing bowls and spatula, are sufficiently large for easier handling of layers and mixtures.

Ingredient substitutions require attention; switching instant pudding with homemade custard will change the texture and set times significantly. Use only compatible substitutes to avoid unexpected outcomes.

Timing concerns often revolve around chilling. Ensure to allow enough refrigerator time—at least 4 hours—before serving to allow layers to set properly for a clean slice.

Recipe Success Stories

Community feedback on this No Bake Eclair Cake has been overwhelmingly positive, with many praising its simplicity and delightful flavor. Home bakers have shared their adaptation stories, experimenting with flavored puddings and varying toppings that enhanced their unique take on this classic.

Variation successes often highlight how the recipe can please numerous palates, especially for gatherings where dietary preferences differ. Readers have reported using chocolate mint pudding in summer for a refreshing take.

Photography tips have been shared, showcasing the beauty of each layer. Capturing the shiny glaze paired with bright decorations can elevate the appeal of the dessert in social media posts, making it irresistible.

Readers have also suggested personalized variations, incorporating ingredients such as crushed peppermint candy or espresso powder for additional flavor dimensions while maintaining the core of the original recipe.

The success stories add to the richness of this recipe’s legacy, inspiring others to try their hands at this iconic dessert.

Frequently Asked Questions

Q1: Can I make this No Bake Eclair Cake the day before serving?

Absolutely! In fact, making it the day before allows the flavors to meld beautifully, enhancing the overall taste. Just be sure to cover it well in the refrigerator.

Q2: How can I ensure my layers are even?

To achieve even layers, use an offset spatula or the back of a spoon to spread the pudding and whipped topping evenly over the graham cracker layers. Take care to cover all corners of the dish.

Q3: What’s the best way to store leftovers?

Store leftover No Bake Eclair Cake in an airtight container in the refrigerator for up to 3 days. Make sure it’s covered to prevent it from drying out or absorbing unwanted flavors.

Q4: Is there any way to make this dessert healthier?

Definitely! You can use sugar-free pudding mix, low-fat whipped topping, or even Greek yogurt as a substitute for the topping to reduce calories and carbs while still enjoying a delicious dessert.

Q5: Can I freeze this cake?

While it’s not recommended to freeze the entire cake due to texture changes, you can freeze individual portions. Wrap them tightly and store for up to a month. Thaw in the refrigerator before serving.

Q6: Can I use other flavors of pudding?

Yes! Feel free to experiment with different flavored puddings such as chocolate, butterscotch, or even a banana cream flavor for a fun twist on the original recipe.

Q7: How long does the pudding mix need to set?

Usually, instant pudding sets quickly, within 5 minutes after mixing with milk. However, chilling the entire layered cake allows it to firm up properly.

Q8: What if I can’t find graham crackers?

If graham crackers are unavailable, you can substitute with Digestive biscuits or any other rectangular sweet biscuit for a similar flavor and crunch.

Q9: Can I add fruit to the layers?

Adding fruit is a great idea! Fresh strawberries, bananas, or even peaches can enhance the flavor and add a refreshing element to this dessert.

Q10: Is this recipe suitable for special diets?

Indeed, it can accommodate various diets by adjusting the ingredients such as opting for gluten-free graham crackers or dairy-free pudding, making it a versatile treat.

Additional Resources

For those seeking to enhance their skills further, explore related recipes such as no bake cheesecake or layered dessert cups that employ similar techniques. Technique guides focusing on no bake desserts can offer additional tips, tools, and tricks to ensure your creations shine.

Ingredient information can help you choose the freshest and highest quality components, while equipment recommendations provide insight into what essential tools will elevate your baking game.

Lastly, consider seasonal variations when preparing desserts, as different fruits and flavors can inspire creativity and keep your dessert table exciting throughout the year.

Join the Conversation

We’d love to hear from you! Share your No Bake Eclair Cake creations on social media using our hashtag. Your photography showcasing this dessert can inspire others to try their hand at this easy recipe.

Engage with our community by sharing your thoughts or suggestions based on your experiences with this recipe. Whether you made substitutions or additions, your insights can create a collaborative atmosphere where everyone learns together.

Don’t forget to leave reviews on our site, as feedback fuels our passion for sharing delicious recipes with the world. We encourage you to share your story about the first time you tried this No Bake Eclair Cake and how it became a cherished part of your dessert repertoire.

The Recipe

No Bake Eclair Cake

Serves: 12 servings

Prep Time: 20 mins

Cook Time: 0 mins

Total Time: 20 mins

Kitchen Equipment Needed

  • 9×13 inch baking dish
  • Mixing bowls
  • Spatula
  • Measuring cups and spoons

Ingredients

  • 1 box (14.4 oz) graham crackers
  • 2 (3.4 oz) packages instant vanilla pudding mix
  • 4 cups milk
  • 1 tub (8 oz) whipped topping
  • 1 cup chocolate frosting

Directions

  1. In a mixing bowl, whisk together vanilla pudding mix and milk for 2 minutes until smooth. Allow to sit for 5 minutes to thicken.
  2. In a separate bowl, fold whipped topping into the pudding mixture until well combined.
  3. Layer half of the graham crackers in the bottom of the baking dish.
  4. Spoon half of the pudding mixture over the graham crackers, spreading evenly.
  5. Repeat with another layer of graham crackers followed by the remaining pudding mixture.
  6. Finish with a layer of graham crackers on top and spread the chocolate frosting evenly.
  7. Cover the dish with plastic wrap and refrigerate for at least 4 hours or overnight.
  8. Slice and serve chilled, garnishing with additional whipped topping or chocolate shavings if desired.

Recipe Notes

  • You can substitute flavored pudding mix for a variation.
  • For a richer chocolate layer, use melted chocolate instead of frosting.
  • Add fresh fruit layers for added flavor and presentation.

Best Starbucks Iced Drink Recipe for a Refreshing Treat

A Refreshing Starbucks Iced Drink You Must Try: Beat the Heat with This Delicious Brew

⚖️
Difficulty
Easy

⏲️
Prep Time
10 mins

🕒
Cook Time
0 mins

⏱️
Total Time
10 mins

🍽️
Servings
2

When the sun shines high and the temperatures soar, nothing beats a cool, refreshing iced drink from Starbucks. This homemade version replicates the well-loved beverages from Starbucks with an added twist, allowing you to enjoy your favorite flavors anytime. The balance of rich coffee and silky milk creates a symphony of taste that delights the senses, while the invigorating chill rejuvenates your spirit, making it perfect for any summer day. Indulge in a cup of this delightful Starbucks iced drink, and discover the simple pleasure of crafting your own cafe-quality beverage at home.

In this recipe, we highlight the beauty of high-quality ingredients, ensuring that each sip transports you right back to the coffee shop. With its striking visuals and aromatic allure, this iced drink isn’t just refreshing; it’s an experience. Whether you sip it leisurely as you relax on a warm afternoon or whip it up on the go, this recipe is your ticket to instant refreshment in a cozy cup.

Quick Recipe Highlights

  • Flavor Profile: A delightful blend of bold coffee flavors, smooth creaminess, and a hint of sweetness create a balanced taste experience.
  • Texture: The drink features a creamy, frothy texture that’s silky smooth, enticing each sip to linger a little longer.
  • Aroma: Rich espresso and hints of vanilla lend aromatic notes that tantalize the senses before the first sip.
  • Visual Appeal: The contrast of creamy milk and dark coffee creates a beautiful layered effect, making it as pleasing to the eyes as it is to the palate.
  • Skill Level Needed: This recipe is user-friendly, making it suitable even for beginners looking to craft a delicious iced coffee.
  • Special Equipment: All you need is a blender or frother to create that perfect texture.

Recipe Overview

  • Difficulty Level: Easy, this recipe requires minimal steps and can be completed quickly, perfect for all skill levels.
  • Category: Beverage, ideal for any time of day, providing a refreshing break or a pick-me-up.
  • Cuisine: This recipe draws inspiration from modern American cafe culture, merging traditional espresso methods with contemporary flavors.
  • Cost: A quick estimate reveals that making this iced drink at home is significantly cheaper than purchasing from a cafe.
  • Season: Although perfect for summer, this drink can also be enjoyed year-round by adjusting flavor profiles with seasonal syrups or spices.
  • Occasion: Great for casual gatherings, brunches, or simply as a delightful treat during your day.

Why You’ll Love This Recipe

The taste and texture of this Starbucks iced drink will leave you craving more. The rich, bold flavor of freshly brewed coffee is balanced beautifully by creaminess, providing an indulgent texture that makes each sip feel luxurious. Chilled to ice-cold perfection, this drink is incredibly refreshing, revitalizing you during warm days.

Convenience is a key advantage, as this recipe is very straightforward, requiring just a few ingredients and minimal equipment. You can whip it up in under 10 minutes, making it an excellent option for busy mornings or spontaneous afternoon cravings. Plus, you can customize the sweetness and creaminess to your liking, tailoring it to your taste preferences.

Nutritionally, making this iced drink at home allows you to control the ingredients and portions, thus offering a healthier alternative compared to store-bought versions which might be laden with preservatives and excess sugars. You can opt for low-fat milk or a plant-based alternative to align with your health goals.

This drink is not just for solo enjoyment; it’s also a fantastic social beverage. Imagine serving it to friends during a casual get-together or enjoying it during a summer picnic. It adds a touch of café elegance to any occasion and sparks delightful conversations.

Cost-effectiveness is significant when comparing homemade versus store-bought. By making your drink at home, you save money while enjoying a high-quality, refreshing experience. Stock up on ingredients once, and you can make multiple servings that rival any Starbucks beverage.

Historical Background and Cultural Significance

The origin of iced coffee can be traced back to various cultures around the world, but it gained immense popularity in the United States in the 20th century. Starbucks played a pivotal role in popularizing handcrafted iced coffee drinks, transforming a simple beverage into an upscale delicacy. The iced coffee trend showcases the American love for coffee and innovation in blending flavors.

Culturally, iced coffee drinks represent a blend of convenience and indulgence, allowing coffee lovers to enjoy their caffeine in a refreshing form. Venturing into cafes, especially Starbucks, has become part of modern consumer culture where socializing often occurs over coffee or iced drinks.

Over the years, the iced coffee recipe has evolved, giving rise to various adaptations that cater to diverse tastes. From flavored syrups to unique milk alternatives, this drink has experienced an infusion of creativity and personalization, making it accessible to anyone wishing to enjoy a refreshing cup.

Regional variations abound; in some places, iced coffee is traditionally served with sweetened condensed milk, while others enjoy it with flavored syrups or spices like cinnamon. Each region adds its own twist, showcasing local preferences and creativity in coffee preparation.

Ingredient Deep Dive

Coffee: Coffee is not just a beverage; it has profound cultural significance. Originating from Ethiopia, its journey around the globe has transformed drinking culture and created a variety of brewing techniques. Nutritionally, coffee is low in calories and is loaded with antioxidants. When selecting coffee, opt for freshly roasted beans for optimal flavor. Store coffee in a cool, dark place to maintain freshness. If you wish to introduce flavor, consider adding flavored syrups or even spices like nutmeg into your grind.

Milk: Milk offers not only creaminess but also nutritional benefits like calcium and protein. Milk has been a staple in various cuisines, often used to enhance drinks, desserts, and meals. When selecting milk for your iced drink, consider full-fat, skim, or dairy alternatives such as almond or oat milk, which introduce different flavor notes. Keep milk refrigerated and consume it within the sell-by date for the best taste and quality.

Common Mistakes to Avoid

  • Using warm coffee: Always let your brewed coffee cool before mixing to maintain the refreshing chill of the drink.
  • Poor quality ingredients: Invest in high-quality coffee beans and fresh dairy or alternatives for the best flavor.
  • Neglecting ice: Without enough ice, your drink may lose its refreshing quality, so fill your glass adequately.
  • Over-sweetening: Start with a small amount of syrup and adjust to taste, as it’s easier to add than to correct an overly sweet drink.
  • Not blending enough: Ensure your ingredients are well-blended to avoid a gritty texture or separation.
  • Ignoring flavor balance: Adjust the ratio of coffee to milk for your desired taste; too much milk can dilute flavor.
  • Using stale coffee: Always use freshly brewed coffee for maximum taste impact.
  • Incorrect storage: Store any leftover iced coffee in the refrigerator, but note it’s best enjoyed fresh.
  • Poorly mixed ingredients: Make sure to mix thoroughly to achieve a cohesive flavor throughout.
  • Skipping aromatics: Adding vanilla or cinnamon not only enhances flavor but also elevates presentation and aroma.

Essential Techniques

Brewing the Coffee: The foundation of a great iced drink lies in the quality of the coffee. Brew your coffee using your preferred method, be it a drip coffee maker, French press, or espresso machine. Pay attention to the grind size; a medium grind works best for most brewing methods. Consistency is key, and aim for a balanced flavor by avoiding over-extraction. Brew at the right temperature (around 200°F) and let it cool before serving.

Frothing Milk: Frothing milk adds an essential creaminess to your drink. Use a frother or whisk to introduce air into milk until it expands and becomes creamy. Heat the milk slightly beforehand for even better results. Monitor the frothing process closely and stop once it reaches a velvety texture; over-frothing can lead to a dry, airy milk.

Pro Tips for Perfect A Refreshing Starbucks Iced Drink

Use high-quality coffee beans to ensure your drink stands out with rich flavors.

Let your brewed coffee cool to room temperature before combining with ice for the best taste.

Experiment with flavored syrups to personalize your drink and elevate flavors.

Consider using a coffee ice cube tray; freezing coffee instead of water prevents dilution.

For an added visual appeal, drizzle chocolate syrup down the sides of the glass before pouring.

Adjust the milk ratio based on your flavor preference—less milk for a stronger coffee taste.

Add a pinch of sea salt for depth in flavor; it enhances sweetness without added sugar.

Serve with fun straws or garnishes to elevate your drink’s presentation.

Variations and Adaptations

Regional variations include adding spices that reflect local tastes, such as cardamom in Middle Eastern coffee cultures or cinnamon in Latin American beverages. Seasonal adaptations can also include pumpkin spice flavors in the fall or fruity additions during summer.

For dietary modifications, substitute regular milk with almond, oat, or coconut milk for a dairy-free alternative. Low-carb variations can be made by using unsweetened syrups or natural sweeteners like stevia.

Texture modifications such as whipped cream topping or adding a layer of foam can enhance your iced drink experience. Present it in unique glassware or add fun garnishes, like chocolate shavings, fresh mint leaves, or a sprinkle of cocoa powder.

Serving and Presentation Guide

To plate this iced drink beautifully, use a tall glass to showcase the layers of coffee and milk. Consider garnishing the drink with a sprinkle of cocoa powder or chocolate drizzle to entice the eye. For traditional accompaniments, serve alongside delicious pastries or light sandwiches for a delightful afternoon treat.

Modern serving suggestions include offering several flavor options for guests to customize their drinks. Remember to add a straw for convenience and style; fun, colored straws can also enhance the overall aesthetic.

Wine and Beverage Pairing

While wine isn’t a traditional pairing with iced coffee, consider serving it alongside light desserts or pastries that can complement the drink’s flavor profile. Non-alcoholic alternatives include pairing with flavored sparkling waters or refreshing lemonades for a refreshing summer vibe.

For coffee enthusiasts, the drink can also be paired with a mild tea, such as a chamomile or peppermint infusion, for a soothing option. Always consider temperature; serve iced drinks with chilled accompaniments for a cohesive tasting experience.

Storage and Shelf Life

Store any brewed leftover coffee in an airtight container in the refrigerator for up to a week. When storing the iced drink, ensure it’s in a tightly sealed cup to avoid flavor absorption from other foods.

Watch for signs of spoilage such as off smells, a change in color, or a slimy texture, which indicate when to discard. If reheating is necessary, heat gently until warm but not boiling; this allows you to enjoy it in a different form.

Make Ahead Strategies

To save time, consider brewing coffee and allowing it to cool the night before. Store it in a pitcher in the refrigerator for immediate use the next day.

Prepare ice cubes in advance, especially if using coffee instead of water, to maintain flavor integrity. You can also have flavored syrups ready to add when you’re ready to mix your drink.

Scaling Instructions

If you wish to halve the recipe, simply divide the ingredient measurements by two, keeping the same processes for brewing and preparing. For doubling or tripling, ensure you have a large enough blender or container to accommodate the increased volume to prevent spills.

When making larger batches, carefully monitor brewing times as more coffee grounds may lead to stronger flavors. Be mindful of serving sizes and adjust storage practices accordingly to maintain freshness.

Nutritional Deep Dive

The macro breakdown of this beverage is primarily composed of carbohydrates from the milk and sugars in syrups, with significant protein content if dairy milk is used. Adding flavoring or sweeteners can modify the overall calorie count and dietary fit.

Regarding micronutrient analysis, this drink can provide calcium and vitamins found in milk, as well as antioxidants from coffee. However, portion size and ingredient selection should be considered to align with personal dietary goals.

Dietary Adaptations

For a gluten-free variation, ensure all syrups and flavorings are certified gluten-free. Dairy-free options can be made simply by switching to plant-based milks like almond or coconut. A vegan alternative can be achieved by using these plant-based products along with maple syrup or agave for sweetness.

Low-carb and keto adaptations can include using heavy cream in place of milk and choosing sugar-free syrups or sweeteners. Each dietary variation allows for enjoyment of the iced drink without compromising one’s health preferences or restrictions.

Troubleshooting Guide

If your drink is too watery, ensure you’re using enough ice and quality coffee to maintain flavor. Lessen the amount of ice if you notice excessive dilution during your preparation.

To address flavor balance, consider adjusting syrup quantities based on personal preference; too much sweetness can mask the coffee’s natural flavors. Additionally, if the coffee is too strong, dilute it with more milk or water.

Recipe Success Stories

Our community has shared glowing feedback on this iced drink, with many noting how easy it is to customize. One reader mentioned adapting the recipe to incorporate seasonal fruits, which added a delightful twist.

Photography tips from our audience suggest highlighting the drink’s layers through bright backgrounds or using fun straws in shots to capture an inviting essence. Each story adds layers to the community’s shared experience with this beloved beverage.

Frequently Asked Questions

Q: Can I make this drink dairy-free?
A: Absolutely! Just substitute regular milk with almond, oat, or coconut milk for a delicious non-dairy option.

Q: How can I make this drink less sweet?
A: Reduce the amount of syrup you use or opt for unsweetened flavored options to control the sweetness level.

Q: What is the best way to brew coffee for this recipe?
A: Any preferred method works, but cold brewing or a French press often yields smooth, rich flavor ideal for iced drinks.

Q: How can I enhance the flavor of my iced drink?
A: Consider adding spices like cinnamon or nutmeg, or try flavored syrups for a unique twist that complements the coffee.

Q: Can I store this drink for later?
A: It’s best consumed fresh. If needed, store in the refrigerator and consume within a day or two for optimal taste.

Q: What kind of coffee works best?
A: Any fresh-brewed coffee works, but medium to dark roasts generally provide the best flavor for iced drinks.

Q: How can I add a frothy layer to my drink?
A: Use a milk frother or whisk to froth the milk before adding it to the drink for a luscious, creamy texture.

Q: How do I adjust the coffee-to-milk ratio?
A: You can experiment with the ratio, using less milk for a stronger coffee flavor or more milk for a creamier texture.

Q: Can I make a larger batch for a party?
A: Yes! Just multiply the ingredients while ensuring your blender or mixing container can handle the extra volume.

Q: Is there a way to make this drink a dessert?
A: Absolutely! Try making a blended version with ice and whipped cream for a delectable coffee dessert.

Additional Resources

Explore related recipes such as refreshing iced teas or flavored lemonades to compliment your summer days. Enhance your skills with technique guides on brewing coffee and milk frothing.

Additionally, check out ingredient information to better understand flavor profiles and seasonal variations that can brighten your iced drink experience.

Join the Conversation

We invite you to share your experiences with this iced drink on social media. Use the hashtag #RefreshingStarbucksDrink to showcase your creations!

Photography tips can also help you capture the essence of your drink, making it visually appealing for your social media feeds. Don’t hesitate to leave your reviews or suggest variations; your feedback strengthens our community!

The Recipe

A Refreshing Starbucks Iced Drink

Serves: 2

Prep Time: 10 mins

Cook Time: 0 mins

Total Time: 10 mins

Kitchen Equipment Needed

  • Blender or frother
  • Measuring cups
  • Ice cube tray
  • Tall glass or mason jar

Ingredients

  • 2 cups brewed coffee, cooled
  • 1 cup milk (or dairy alternative)
  • 1-2 tablespoons flavored syrup (vanilla, caramel, or mocha)
  • Ice cubes
  • Optional: whipped cream for topping

Directions

  1. Begin by brewing your coffee and allowing it to cool.
  2. In a tall glass, fill halfway with ice cubes.
  3. Pour the cooled coffee over the ice.
  4. Add flavored syrup and stir to combine.
  5. Slowly pour milk into the glass and gently mix.
  6. Top with whipped cream if desired.
  7. Serve immediately and enjoy your refreshing drink!

Recipe Notes

  • Feel free to adjust the sweetness and milk ratio based on your preference.
  • For a more indulgent treat, blend the ingredients with ice for a frozen version.
  • Add interesting garnishes like chocolate shavings or sprigs of mint for a decorative touch.

Best My Signature Drink Recipe – Perfect for Parties

My Signature Drink: A Refreshing Delight

⚖️
Difficulty
Easy

⏲️
Prep Time
10 mins

🕒
Cook Time
0 mins

⏱️
Total Time
10 mins

🍽️
Servings
2

Introducing my signature drink, a vibrant and invigorating combination that bursts with flavor and refreshes your senses with each sip. This drink is perfect for warm weather gatherings or simply to enjoy during a leisurely afternoon on the patio. You’ll love how the fresh ingredients come together to create an experience that tantalizes the taste buds and rejuvenates the spirit. The balance of sweetness and acidity provides a delightful contrast that will make this drink a staple in your recipe collection.

Each cup of this signature drink is a burst of sunshine, filled with bright colors and refreshing aromas. The infusion of fruit not only adds visual allure but also enhances the flavor, making it a feast for the eyes and palate. As you enjoy this drink while relaxing with friends, you’ll find that it brings a sense of togetherness and joy, elevating any occasion into a memorable celebration.

Quick Recipe Highlights

  • Flavor Profile: Sweet with a hint of tartness, complemented by fresh fruit juices.
  • Texture: Smooth and refreshing, with a touch of fizz.
  • Aroma: Inviting and fruity, with citrus notes that awaken the senses.
  • Visual Appeal: Bright, colorful presentation that invites indulgence.
  • Skill Level Needed: Basic mixing techniques, perfect for beginners.
  • Special Equipment: Blender or shaker, and a strainer (optional).

Recipe Overview

  • Difficulty Level: This drink is easy to prepare, requiring minimal ingredients and no cooking. It’s ideal for anyone, regardless of kitchen experience.
  • Category: Beverages; perfect for summer refreshments or festive gatherings.
  • Cuisine: A fusion of tropical and citrus influences, representing a blend of flavors from various cultures.
  • Cost: Inexpensive to make, with fresh fruits being the main expense.
  • Season: Best enjoyed in the warm months when fresh fruits are at their peak.
  • Occasion: Perfect for parties, barbecues, and casual get-togethers.

Why You’ll Love This Recipe

This drink is not just about refreshment, it’s about experiencing an explosion of taste that perfectly balances sweetness with a hint of tartness, making it incredibly satisfying. The smooth texture glides down the throat and leaves you longing for another sip. Beyond its delicious flavor, this signature drink is quick to prepare, allowing you more time to enjoy and less time fussing in the kitchen. Packed with vitamin-rich fruits, it also offers nutritional benefits that support a healthy lifestyle, making indulgence guilt-free.

Not only is this drink super convenient for home preparation, but it’s also a hit when entertaining guests. Its vibrant colors and fresh ingredients create an inviting atmosphere, encouraging everyone to gather and enjoy together. Plus, with its affordable ingredients, serving this delightful beverage feels luxurious without breaking the bank.

From a nutritional standpoint, this signature drink stands out by offering vitamins, antioxidants, and hydration, contributing to overall well-being while satisfying cravings. This means you can enjoy your delicious beverage without compromising on health!

Imagine the fun of getting friends together to make this drink, where each person can customize their creation, adding their favorite fruits or flavors. It serves as a fantastic social activity that fosters creativity and connection. Plus, the elevated taste and presentation warrant compliments, making you the star of any celebration!

This drink is not just a recipe; it’s an experience that enhances your hospitality. It invites loved ones to share in the joy of good company and delicious flavors, making lasting memories that keep everyone coming back for more.

Historical Background and Cultural Significance

The roots of refreshing drinks can found in various cultures, where fruit-infused beverages have long been celebrated for their flavor and health benefits. Historically, these drinks were created for social gatherings, providing both nourishment and refreshment in communal settings. Different regions have added their own twist to these fruity concoctions, showcasing local ingredients and traditions.

This signature drink draws inspiration from both tropical and citrus-rich cultures, bringing together elements that reflect a blend of culinary heritages. Over time, recipes for similar drinks have evolved, incorporating modern techniques and different kinds of fruit, yet the essence of celebration remains intact.

Despite its variations, this drink serves as a common thread across cultures that emphasizes hospitality and enjoyment. Whether at a summer barbecue or a cozy winter gathering, the act of making and sharing drinks like this one brings people closer, washing away the boundaries between them.

Regional adaptations throughout history have led to unique flavors and serving styles. As you sip on this signature drink, you partake in a storied tradition that celebrates both nature and community.

Ingredient Deep Dive

Fresh Fruits: Fruits are the heart of this recipe, with various types contributing to flavor and nutrition. They are loaded with vitamins, minerals, and antioxidants, boosting health. When selecting fruits, prioritize those that are in season for optimal flavor and sweetness. Store them in a cool, dry place and consume them within a few days for the best taste. Consider experimenting with substitutions like using frozen fruits when fresh might not be available.

Citrus Juices: Citrus adds a zesty kick that balances the sweetness of the fruit. Rich in vitamin C, citrus juices have been celebrated for their health benefits throughout history. Select ripe, juicy fruits for the best flavor. When storing, keep them in the refrigerator and use them to enhance other dishes as well. There are various substitutes, such as vinegar or other citrus juices that can fit into the mix.

Common Mistakes to Avoid

  • Using overripe fruit can lead to overly sweet or fermented flavors. Always opt for fresh, ripe fruit for the best taste.
  • Not considering the balance of flavors. Experiment with different proportions so that no single flavor dominates the drink.
  • Failing to chill ingredients beforehand may result in a lukewarm drink. Chill your fruit and glasses for a refreshing experience.
  • Using too little liquid may cause the drink to be overly thick, so ensure a perfect balance of solid and liquid ingredients.
  • Overmixing can cause your drink to foam excessively. Mix just until combined for the best texture.
  • Forgetting to strain the drink can lead to unwanted pulp or seeds. Keep a fine mesh strainer handy.
  • Skimping on garnishes detracts from the visual appeal; a sprig of mint or a slice of fruit on the rim enhances presentation.
  • Neglecting dietary adjustments for guests may alienate some; be aware of allergies and preferences.
  • Failing to taste before serving can lead to an imbalanced drink. Always sample to adjust flavors as needed.
  • Not preparing enough drink for larger gatherings can lead to disappointment; always overestimate the quantity needed.

Essential Techniques

Blending: This technique is crucial for achieving a smooth texture and harmonious flavor in your drink. To master blending, ensure your blender is powerful enough to handle fruit. Start at a low speed to combine ingredients and gradually increase speed. Common pitfalls include overloading the blender, which can lead to uneven mixing, and not using enough liquid, causing the blender to struggle.

Mixing: Proper mixing enhances flavor integration and smoothness. Use a shaker for cocktails or a simple stirring method for non-alcoholic versions. Ensure to mix thoroughly, being cautious not to break fruit or create a mess. Visual cues for success include a uniform color and texture without large chunks.

Pro Tips for Perfect My Signature Drink

Choose fruits based on seasonal availability for the best flavor and quality. Add a splash of sparkling water to give the drink a refreshing fizz. Make the fruit puree ahead of time and store it in the refrigerator for quick preparation. For a gourmet touch, garnish with fresh herbs or edible flowers. Serve in chilled glasses to maximize refreshment. Always taste and adjust sweetness levels before serving to cater to all preferences.

Variations and Adaptations

Consider adapting this drink for regional flair by utilizing local fruit varieties, such as berries in summer or tropical fruits in warmer climates. Seasonal adaptations can enhance flavor profiles; for example, adding spices like cinnamon in the fall creates a cozy twist. If dietary modifications are desired, you can explore using natural sweeteners instead of sugar. Enhance the flavor by infusing unique herbs or spices, and experiment with different textures by adding crushed ice or purees. Presentation alternatives may include vibrant colored straws or stylish glassware.

Serving and Presentation Guide

When plating this drink, consider using tall, clear glasses to highlight its vibrant colors. Garnish with fruit slices on the rim or a sprig of mint for a pop of freshness. Traditional accompaniments include light finger foods or refreshing snacks that enhance the drink’s appeal. For modern serving tips, consider offering a flight of different flavors for guests to sample. Ensure the drink is served chilled, adding ice just before serving to maintain its refreshing nature. Pay attention to portion control, allowing guests to have a small drink so they can try multiple flavors without feeling overindulgent.

Wine and Beverage Pairing

Light white wines such as Sauvignon Blanc or Prosecco pair perfectly with fruity drinks, enhancing the experience with complementary flavors. For non-alcoholic options, consider herbal iced teas that offer similar refreshing qualities. If your drink combines coffee elements, an espresso or a light roast coffee pairs well for complementary flavor profiles. Always serve beverages at recommended temperatures, with chilled options for daytime sipping, ensuring the drinks maintain their refreshing appeal.

Storage and Shelf Life

When storing ingredients, keep fresh fruits refrigerated to prolong their shelf life. Assembled drinks should ideally be consumed immediately, but if you must store, keep them in airtight containers in the fridge for up to a day. Signs of spoilage include off odors and unusual textures. For reheating, avoid microwaving as this may alter texture; instead, consider adding fresh ingredients to elevate the flavors. If you plan to freeze any components, ensure they are blended or in liquid form, properly sealed in freezer-safe containers.

Make Ahead Strategies

To save time, prepare the fruit purees and place them in the refrigerator before your gathering. Consider assembling drink components separately to preserve freshness and avoid dilution. Quality can be impacted by storing for too long; fresh ingredients always yield the best results. Mix before the event, allowing guests to customize their drinks as desired. For fresh elements like herbs or spices, add them right before serving to maximize flavor and visual impact!

Scaling Instructions

If you’re halving the recipe, simply adjust the fruit quantities and mixer proportions. When doubling or tripling, ensure you have adequate blending capacity to mix everything evenly. For timing modifications, prep all components in advance to keep the original flavors intact. Equipment adjustments may include using a larger blender or multiple containers for large parties, and always account for storage considerations when making larger batches.

Nutritional Deep Dive

Each ingredient offers unique health benefits; fruits provide vitamins, minerals, and natural sugars. Analyzing macros reveals a balance of carbohydrates mainly from fruits, with negligible fats and proteins. This drink can fit into a healthy diet when consumed in moderation, offering hydration and essential nutrients. Keep portion size in mind, as larger servings can lead to increased sugar intake; use visual cues to provide appropriate portions for guests.

Dietary Adaptations

To make the drink gluten-free, simply ensure that all components used are naturally gluten-free. For dairy-free alternatives, replace any dairy components with plant-based milks or creams. Vegan options are easily achieved by sticking to fruits and plant-based sweeteners. Low-carb options can involve limiting sugar and focusing on berries, while keto-friendly adaptations can be made by using sugar substitutes. Additionally, paleo and low-FODMAP variations can accommodate specific dietary needs through ingredient swaps.

Troubleshooting Guide

If your drink comes out too thick, simply add more liquid to achieve desired consistency. For flavor balance issues, consider adjusting sweetness with natural sweeteners or adding citrus juice for a zesty kick. Temperature problems can be addressed by chilling or adding ice, while equipment challenges may involve re-evaluating your blending method to avoid texture issues. If substitutions lead to unexpected flavors, adjust by compensating with complementary ingredients.

Recipe Success Stories

Many readers have shared their successes with this signature drink; from background gatherings to celebratory brunches, it has become a favorite. Variations like adding different fruit were highlighted, showcasing personal twists that cater to tastes. Stories of adaptation for different dietary needs have also emerged, emphasizing the recipe’s versatility. Photography tips for visually capturing this drink have provided extra inspiration for readers looking to share their creations online.

Frequently Asked Questions

Can I make this drink in advance? Yes, you can prepare fruit purees ahead of time, but it’s best to mix everything just before serving for optimal flavor.

What if I can’t find fresh fruits? Frozen fruits can be a great alternative; just make sure to thaw and drain excess liquid.

Can I add alcohol to this drink? Absolutely! Adding a splash of vodka or rum enhances the drink’s enjoyment for adult gatherings.

How do I customize the sweetness? Adjust the sweetness by adding more or less sugar, honey, or another sweetener to taste.

Is this drink suitable for kids? Yes, it is a great non-alcoholic option for children; just ensure it’s not too sugary.

How can I make this drink low-calorie? Use less sugar or natural sugar substitutes to reduce calorie content without sacrificing flavor.

What kind of glasses should I serve this drink in? Tall, clear glasses work best to showcase the vibrant colors of the drink!

Can I use any kind of citrus juice? Yes, feel free to experiment with lemons, lime, or even orange juice based on your preference.

How long does the drink last in the fridge? It’s best enjoyed immediately, but can be stored in the fridge for up to a day.

Does this recipe require any special equipment? A blender or shaker is sufficient for this drink, with optional strainers for desired texture.

Additional Resources

If you’re interested in exploring related recipes, consider tropical smoothies or fruity cocktails that share similar flavor profiles. Technique guides on blending and mixing drinks can improve your preparation skills, while ingredient information will help you select the best produce. Equipment recommendations might include high-quality blenders or shakers that make drink preparation a breeze. Lastly, consider seasonal variations that capture the freshest flavors available!

Join the Conversation

Engage with our community by sharing your versions of this signature drink on social media. Tag your photos and let us know about your favorite adaptations! Recipe reviews greatly help fellow readers choose and create exciting flavors. Share your tips and variations to inspire others to make this delightful beverage their own. Whether you’re a casual sipper or a devoted fan, we want to hear your stories about this signature drink and its impact on your gatherings.

The Recipe

My Signature Drink

Serves: 2

Prep Time: 10 mins

Cook Time: 0 mins

Total Time: 10 mins

Kitchen Equipment Needed

  • Blender or shaker
  • Strainer (optional)
  • Chilled glasses

Ingredients

  • 1 cup fresh mixed fruits (e.g., strawberries, mango, and blueberries)
  • 1/2 cup fresh orange juice
  • 1/2 cup sparkling water or soda
  • 1-2 tablespoons sweetener of choice (honey or sugar)
  • Ice cubes (optional)
  • Fresh mint leaves for garnish

Directions

  1. In a blender, combine the fresh mixed fruits and blend until smooth.
  2. Strain the puree into a pitcher (optional) to remove any pulp or seeds.
  3. Add the fresh orange juice and sweetener, mixing well to combine.
  4. For each serving, pour the mixture into a glass and top it off with sparkling water.
  5. Garnish with fresh mint leaves and serve immediately over ice, if desired.

Recipe Notes

  • Feel free to substitute the fruits based on what is in season or available.
  • If you prefer a non-sweet recipe, reduce or omit the sweetener.
  • For adult versions, consider adding vodka or rum for a cocktail twist.

Best 11 Healthier Starbucks Drinks to Order Today

11 Healthier Starbucks Drinks To Try On Your Next Order: Delicious Alternatives for Your Coffee Fix

⚖️
Difficulty
Easy

⏲️
Prep Time
5 mins

🕒
Cook Time
0 mins

⏱️
Total Time
5 mins

🍽️
Servings
1

Coffee lovers rejoice! If you’re tired of the sugar-laden drinks at Starbucks, we’ve got you covered with healthier alternatives that still deliver amazing flavors. These 11 healthier Starbucks drinks don’t sacrifice taste for wellness; instead, they invite you to indulge in flavors that celebrate both health and satisfaction. Whether you prefer a rich coffee or a creamy tea, these options redefine your Starbucks experience, making it delightful and guilt-free.

Imagine sipping on a refreshing matcha latte that energizes your day while nourishing your body. Or perhaps a silky almond milk cappuccino that tempts your taste buds without the heaviness. Each of these drinks allows you to enjoy unique flavors while keeping your health in check, ensuring that your next Starbucks order is as good for you as it is for your palate.

Quick Recipe Highlights

  • Flavor Profile: Enjoy a blend of rich coffee, creamy textures, and herbal undertones that invigorate the senses.
  • Texture: Each drink provides a delightful mouthfeel, whether it’s the frothy top of a cappuccino or the silky smoothness of almond milk.
  • Aroma: Expect tantalizing aromas ranging from earthy matcha to sweet vanilla, creating an inviting experience.
  • Visual Appeal: Bright greens, creamy whites, and deep browns make these drinks visually stunning.
  • Skill Level Needed: Simple to prepare, these drinks require minimal barista skills.
  • Special Equipment: Basic kitchen tools like frothers or blenders are recommended.

Recipe Overview

  • Difficulty Level: These recipes are easy to make, perfect for novices and seasoned coffee drinkers alike.
  • Category: This collection falls under beverages, suited for breakfast or any time of day.
  • Cuisine: Influenced by global coffee culture, from Italian espresso to Japanese matcha.
  • Cost: Ingredients are budget-friendly and accessible, making these drinks economical.
  • Season: Great year-round, though ice variations are perfect for summer refreshment.
  • Occasion: Ideal for casual gatherings, weekend brunches, or as a personal treat.

Why You’ll Love This Recipe

These healthier Starbucks drinks tantalize your taste buds while offering a lighter alternative to traditional favorites. With flavors bursting in every sip, each recipe captures the essence of popular coffee shop drinks while ensuring they remain nourishing. The combination of textures—whether you’re enjoying a smooth frappuccino or a foamy latte—adds an element of indulgence, transforming your coffee break into a mini celebration.

Convenience is another reason these drinks shine. With minimal prep time, they can be whipped up quickly at home or in the office, keeping you energized without leaving your comfort zone. The ingredients used not only please the palate but also boost your wellbeing. From matcha’s antioxidant properties to the nourishing effects of almond milk, incorporating these drinks into your routine can positively influence your overall health.

Sharing these drink recipes with friends is an easy way to elevate any social gathering. Imagine serving a vibrant iced matcha latte at a coffee date, sparking conversation and admiration. With appealing presentation and delightful flavors, these drinks can act as your secret to being the star of any hosting role.

When it comes to cost-effectiveness, you’ll be pleasantly surprised. Instead of shelling out cash for pricey café visits, making these drinks at home can save you significant money while allowing you the creative freedom to adjust flavors to your liking. Plus, many of the ingredients are versatile and can be used in various dishes, adding to their accessibility.

Finally, the diversity of flavors offered ensures there’s something for everyone. From the boldness of dark roast to the sweetness of vanilla chai, these drinks reimagine Starbucks favorites so you can keep up your coffee romance without the guilt.

Historical Background and Cultural Significance

The love for coffee dates back centuries, tracing its roots to Ethiopia, where legend has it that a goat herder discovered the coffee bean’s energizing effects. Over time, coffee spread across the globe, with different cultures adapting its use and flavor profiles that would lead to the essence of modern-day coffee shops, like Starbucks.

Starbucks itself has transformed coffee consumption culture since its inception by emphasizing quality and experience. Through dedicated sourcing and roasting methods, it has paved the way for coffee lovers to indulge in specialty drinks. However, with growing health consciousness, the need for healthier drink options arose, acknowledging that even beloved indulgences could be made more nutritious without sacrificing flavor.

The evolution of coffee drinks has seen a fascinating array of variations, adapting to the tastes and preferences of each region. From the frothy cappuccinos of Italy to the smooth cold brews of America, coffee has a remarkable adaptability that has cemented its place in global culture. As we see more people incorporating alternative milks and naturally sweetened beverages, it reflects a society growing increasingly health-aware in its choices.

This shift has led to the emergence of drinks that honor traditional methods while offering modern solutions. The incorporation of ingredients, such as almond and oat milk, harkens back to simple practices, breathing new life into classic recipes. Each drink offers a connection to its cultural roots while allowing personal expression in creating the ideal beverage.

Ingredient Deep Dive

Coffee

Coffee is not just a widely consumed beverage but a cultural phenomenon deeply woven into society. Its origins can be traced back to the ancient coffee forests of Ethiopia, and its journey throughout the centuries has made it a staple in households around the world. Coffee beans are not only valued for their stimulating effects but also for their complex flavors that vary amongst different varieties and roasts.

Nutritionally, coffee is loaded with antioxidants and has been linked to numerous health benefits, including improved energy levels and cognitive function. When selecting coffee, look for organic, high-quality beans to ensure the best taste. To store coffee, keep it in an airtight container away from moisture, light, and heat to maintain freshness. Feel free to experiment with different types, integrating decaf or flavored variations for a unique twist.

Almond Milk

Almond milk is a fantastic alternative to dairy that holds significant cultural and nutritional appeal. Originating from the Mediterranean region, this creamy beverage gained popularity as a suitable option for those following vegan or lactose-free diets. With a lightly nutty flavor and smooth texture, almond milk complements coffee beautifully, enhancing its overall taste.

As far as nutrition goes, almond milk is lower in calories than regular milk, yet it provides essential vitamins and minerals such as vitamin E and calcium. When choosing almond milk, check the labels for added sugars and fortified options for greater nutritional value. Store it in the refrigerator, and consume it within a week after opening for optimal freshness. If you’re looking for a richer option, try blending in a little coconut milk for added creaminess.

Common Mistakes to Avoid

  • Choosing low-quality coffee: Poorly sourced beans can lead to bitter, unpleasant flavors. Always opt for reputable brands.
  • Using boiling water: Pouring boiling water directly over coffee grounds can extract undesirable bitter flavors; aim for water at roughly 200°F.
  • Not measuring ingredients: Use precise measurements for balanced flavors and consistency in your drinks.
  • Ignoring steeping times: Let lattes steep for the recommended time to maximize taste; rushing can lead to weak flavors.
  • Over-frothing milk: Creating too much foam can overwhelm the drink’s flavor; aim for a creamy texture instead.
  • Skipping taste tests: Taste and adjust drinks as needed, ensuring they meet your preferences before serving.
  • Using cold ingredients in hot drinks: Ensure all ingredients are properly warmed to blend flavors effectively.
  • Forgetting garnishes: Simple toppings, such as cinnamon or whipped cream, can elevate both flavor and presentation.

Essential Techniques

Creating a perfectly frothed milk is a crucial technique that can elevate any beverage. The goal is to achieve a fine microfoam, which creates a velvety texture. To master this, use a steam wand or frother, ensuring the milk reaches around 150°F while incorporating air gently. Watch for a glossy finish; under-heating results in a watery texture, while over-frothing leads to bubbles.

Brewing coffee requires precision. Whether using a French press, pour-over, or espresso machine, pay attention to the grind size, water temperature, and brewing time. Experimenting with these variables allows you to perfect your cup, and visual checks of color and aroma should guide your adjustments. For the best flavor profile, taste small batches to find your ideal brewing method.

Pro Tips for Perfect Healthier Starbucks Drinks

– Always start with high-quality coffee beans for optimal flavor. Opt for freshly ground beans for the best results.
– Experiment with different milk alternatives to discover your favorite combination, balancing taste and health features.
– Utilize flavored syrups sparingly; even a touch can significantly enhance drinks without overwhelming sweetness.
– Adjust the water temperature according to your brewing method to extract the best flavors from the coffee.
– Test various sweeteners, such as stevia or honey, to achieve desired sweetness levels while keeping calories in check.
– Incorporate spices like cinnamon or nutmeg to offer additional depth and health benefits without excess calories.
– Cold brew coffee can be made in batches for a refreshing drink, making it a convenient option throughout the week.
– Always taste as you go, adjusting flavors based on personal preference to create your perfect cup.

Variations and Adaptations

– Regional variations include different coffee preparation methods unique to areas like Italy and Brazil, showcasing the global love for coffee.
– Seasonal adaptations can introduce flavors like pumpkin spice in autumn or peppermint mocha during the winter holidays.
– Dietary modifications cater to specific needs; for example, try making a keto-friendly frappuccino using heavy cream instead of regular milk.
– Flavor variations can be introduced by using flavored coffee beans or adding natural fruit like strawberries or mangoes for fresh alternatives.
– Texture modifications can come from varying milk types, such as using oat milk for a creamier latte feel.
– Presentation alternatives include serving drinks in mason jars or colorful cups to elevate the visual experience.

Serving and Presentation Guide

Creating an inviting presentation can immensely enhance the enjoyment of your drinks. Plating techniques include using clear glasses to showcase colorful layers in iced beverages. Garnishing with spices, like a sprinkle of cinnamon or cocoa powder, adds a finishing touch that intrigues both the eyes and palate.

When serving, consider traditional accompaniments like biscotti or dark chocolate squares for balance. On the modern side, trendy edible flowers or flavored whipped cream can make your drink photogenic. Temperature considerations are essential; serve hot drinks in warmed mugs to maintain their comforting warmth. Lastly, learn portion control tips to balance indulgence and satisfaction; generally, a 12oz serving is perfect for most coffee drinks.

Wine and Beverage Pairing

While coffee drinks are a classic choice, pairing them with wine can create an intriguing tasting experience. For instance, dark roast coffee pairs well with full-bodied red wines like Cabernet Sauvignon or Malbec, complementing the deep, roasted flavors. Consider non-alcoholic alternatives, such as herbal tea, which can provide a refreshing contrasting flavor profile.

Enjoying a rich vanilla latte might well pair with a bright and light Prosecco, making for an excellent choice for celebrations. When selecting coffee or tea pairings, focus on beverages that balance the drink’s flavors and maintain harmony throughout the dining experience.

Storage and Shelf Life

When it comes to coffee, storage methods are crucial for maintaining freshness. Keep your coffee beans in an airtight container, away from direct sunlight or moisture, for optimal flavor retention. Brewed coffee, however, should generally be consumed within a day. If you have leftovers, store them in the fridge; reheating is not recommended, as it can alter the taste.

Almond milk or other non-dairy alternatives typically remain fresh for about a week after opening when stored in the refrigerator. Always check expiration dates and signs of spoilage, like separation or off smells, before consumption. If desired, iced coffee can be made in batches and frozen into ice cubes for gradual use, keeping it fresh longer.

Make Ahead Strategies

Preparing healthier Starbucks drinks can be streamlined with a few make-ahead strategies. Begin by prepping coffee grounds in small batches; this way, you can have fresh coffee ready for quick brewing. Also, prepare flavored syrups in advance, storing them in the fridge for easy access.

If you’re planning to serve iced beverages, consider freezing brewed coffee into ice cubes, which can be added directly to drinks without dilution. Have all your ingredients organized, with the measurements set ahead of time to simplify the assembly process. Knowing when to add fresh elements, such as whipped cream or garnishes, can help maintain the visual appeal and flavors.

Scaling Instructions

Scaling recipes is necessary when hosting larger gatherings or just wanting more for later. Halving the recipes is straightforward; simply divide all measurements by two, ensuring the flavor balance remains. For doubling or tripling, keep ratios consistent, and adjust brewing times accordingly.

Equipment adjustments may be necessary; larger pots or makers may be needed if preparing in bulk. For timing modifications, anticipate longer waiting periods for brewing, depending on your method. Proper storage considerations also help to preserve quality for larger batches; plan to consume or freeze within a week.

Nutritional Deep Dive

Understanding the nutritional value of your drinks can enhance your decision-making. Each drink provides distinct macros; for example, lattes formulated with almond milk may offer lower calorie counts while providing protein and healthy fats. Compare micronutrient profiles to unearth hidden health benefits, such as the antioxidants found in matcha drinks.

Dietary considerations play an essential role in customizing drinks for specific needs, such as ensuring lower calories for weight management. Keeping track of portion sizes can assist with balancing indulgence, and finding alternatives based on preferences can facilitate commitment to healthier choices.

Dietary Adaptations

– For those on a gluten-free diet, the recipes listed contain no gluten ingredients, ensuring safety and enjoyment.
– Dairy-free variations feature non-dairy milks, suitable for lactose-intolerant individuals, to maintain rich flavor profiles without discomfort.
– Vegan adaptations can easily replace any animal products with plant-based alternatives, allowing all to savor these delicious drinks.
– Low-carb and keto options are possible by adjusting sweeteners and base ingredients, each providing great taste without excess sugar.
– Paleo diets align well with whole food ingredients, foregoing processed sugars while embracing natural flavors.
– Low-FODMAP adaptations are available by using lactose-free milk and choosing light sweeteners to keep digestive wellbeing in check.

Troubleshooting Guide

– If your coffee tastes bitter, check the grind size; too fine can lead to over-extraction during brewing. Adjust grind size for a smoother finish.
– For overly sweet drinks, lessen the sweetener incrementally; tasting as you go helps balance flavors without overwhelming sweetness.
– If temperature problems arise, monitor the water used for brewing; too hot can scald grounds, and too cold yields weak coffee.
– Equipment challenges, like malfunctioning frothers, also require troubleshooting; check for functionality and cleanliness to avoid clogs.
– Ingredient abbreviations matter; ensure you’re correctly substituting for the desired result, as substitutions can alter outcomes significantly.
– Timing concerns can impact the brew’s flavor; monitor steeping times closely to adhere to recipe guidelines for optimal taste.

Recipe Success Stories

Community feedback surrounding healthier Starbucks drinks illustrates a delightful array of success stories. Readers have reported successful adaptations, swapping in favorite flavors and ingredients to suit their palettes. Many shared that not only did these recipes save them money, but they also feel empowered to create café-worthy drinks at home.

Photographic evidence highlights how engaging and beautiful these drinks can be when presented well. Instagram-worthy shots inspire more individuals to step into creating their own healthier variations, contributing to a wider appreciation for home-brewed beverages.

Frequently Asked Questions

Q1: Can I customize the sweetness of these drinks?

Absolutely! Sweetness can be adjusted to your taste by reducing or increasing sweeteners as needed. Natural options like honey, maple syrup, or stevia can also be used.

Q2: Are these drinks suitable for kids?

Yes, these healthier Starbucks drinks are kid-friendly, especially when modified. Opt for less caffeine and natural sweeteners for a delicious and safe treat.

Q3: How can I make these drinks lower in calories?

You can reduce calories by using unsweetened almond milk, limiting syrups, and opting for smaller servings. These simple swaps yield lighter variants without compromising flavor.

Q4: What are good non-dairy alternatives for coffee drinks?

Some fantastic non-dairy milk alternatives include oat milk, coconut milk, and soy milk, each contributing their own unique flavors and textures.

Q5: Are there any caffeine-free options available?

Yes, many drinks can be made with decaf coffee or herbal teas, perfect for anyone looking to reduce caffeine intake while savoring flavorful beverages.

Q6: How long will these drinks last once prepared?

Beverages like iced lattes can be consumed within a day or two if stored properly, while hot drinks are best served freshly brewed.

Q7: Can I use flavored coffees or teas in these recipes?

Using flavored variations of coffee or tea can enhance your drinks’ complexity! Always taste test first, as these can alter sweetness and outcomes.

Q8: What’s the best way to store leftover drinks?

Store any brewed coffee or latte in a sealed container in the fridge; it can stay fresh for about a day. Reheat gently before consuming.

Q9: Can I freeze these drinks?

For iced drinks, freeze brewed coffee in ice cubes. However, it’s not advisable to freeze lattes or frothy drinks, as their texture could change.

Q10: How can I make these drinks more nutritious?

Adding ingredients like protein powder, chia seeds, or greens can elevate the nutritional value while still tasting delicious!

Additional Resources

To further enhance your journey through healthier coffee alternatives, explore related recipes that focus on nourishing ingredients. Check out technique guides on milk frothing and coffee brewing that will refine your skills. Consider ingredient information that can expand your choices and recommendations for kitchen equipment that supports your journey towards delicious homemade drinks. Seasonal variations utilizing ingredients like pumpkin and fresh berries can inspire your next creation, making it easy to adapt.

Join the Conversation

Engage with fellow coffee lovers on social media by sharing your experiences with these recipes. Post mouthwatering photos of your creations, and invite feedback on personal modifications. Join discussions on recipes, providing insights or swapping tips to enhance everyone’s drink-making endeavors. Through your contributions, foster a sense of community, allowing everyone to enjoy the wonders of healthier Starbucks drinks together.

The Recipe

11 Healthier Starbucks Drinks

Serves: 1

Prep Time: 5 mins

Cook Time: 0 mins

Total Time: 5 mins

Kitchen Equipment Needed

  • Milk frother or steam wand
  • French press or coffee maker
  • Blender (for frappes or smoothies)
  • Measuring cups and spoons
  • Sealable container for storage

Ingredients

  • 1 cup brewed coffee or espresso
  • 1 cup almond milk (or alternative)
  • 1-2 tablespoons sweetener (optional)
  • Flavoring of choice (vanilla extract, cocoa powder, etc.)
  • Ice (for iced variations)

Directions

  1. Brew your preferred coffee or espresso and let it cool slightly.
  2. Froth the almond milk until creamy and smooth.
  3. If making an iced drink, fill a glass with ice before proceeding.
  4. Pour the brewed coffee into the glass and add the frothed milk on top.
  5. Sweeten to taste, add your chosen flavors, and stir gently.
  6. Garnish as desired, serve and enjoy!

Recipe Notes

  • Customize sweetness and flavors according to personal preference.
  • For a creamier texture, replace almond milk with whole or oat milk.
  • Experiment with adding spices, like cinnamon or nutmeg, for additional flavor.

Best Starbucks Copycat Iced Brown Sugar Oatmilk Espresso Recipe

Starbucks Copycat Iced Brown Sugar Oatmilk Shaken Espresso: A Refreshing Twist on a Classic

⚖️
Difficulty
Easy

⏲️
Prep Time
5 mins

🕒
Cook Time
2 mins

⏱️
Total Time
7 mins

🍽️
Servings
1

If you’re a fan of the refreshing and invigorating taste of Starbucks’ Iced Brown Sugar Oatmilk Shaken Espresso, you’ll love making this delightful beverage at home. This copycat recipe combines the rich flavors of espresso, the sweetness of brown sugar, and the creaminess of oat milk, creating a drink that is naturally satisfying and easy to prepare. In just a few minutes, you can whip up this delicious iced coffee that tantalizes your taste buds while providing the perfect pick-me-up for busy mornings or relaxing afternoons.

The combination of bold espresso and sweet brown sugar creates a flavor experience that’s both energizing and comforting. The oat milk lends a creamy texture to the drink while adding a subtle nutty flavor that pairs beautifully with the espresso and sweetness. Imagine sipping on this cold, frothy drink as you unwind on a sunny day—it’s a little piece of coffee heaven right at your fingertips!

Quick Recipe Highlights

  • Flavor Profile: This iced espresso boasts a harmonious blend of robust coffee and sweet brown sugar notes, balanced by the creamy oat milk.
  • Texture: The shaken method gives this drink a frothy texture, making it indulgent without feeling heavy.
  • Aroma: The aromatic richness of freshly brewed espresso combined with the warmth of brown sugar fills the air, enticing your senses.
  • Visual Appeal: This drink is visually stunning, showcasing a beautiful gradient of creamy oat milk blending into dark espresso.
  • Skill Level Needed: Perfect for beginners, this recipe involves simple techniques that anyone can master.
  • Special Equipment: All you need is a shaker, a coffee maker, and a glass to enjoy your drink.

Recipe Overview

  • Difficulty Level: This recipe is categorized as easy, as it requires minimal preparation and no advanced techniques.
  • Category: This refreshing beverage falls under the coffee drinks category, perfect for breakfast or an afternoon pick-me-up.
  • Cuisine: With its roots in coffee culture, this drink draws inspiration from popular café beverages.
  • Cost: Making this drink at home can save you money compared to frequent visits to your local café.
  • Season: It’s perfect for warm weather, making it an ideal refreshment for spring and summer.
  • Occasion: This drink is excellent for casual gatherings or a cozy day at home, bringing a café vibe to any occasion.

Why You’ll Love This Recipe

The taste and texture of this Starbucks Copycat Iced Brown Sugar Oatmilk Shaken Espresso are simply unmatched. The boldness of the espresso perfectly complements the sweetness of the brown sugar, creating a drink that is both rich and refreshing. The creamy oat milk enhances the texture, making each sip smooth and satisfying. You’ll find that this beverage not only quenches your thirst but also delivers a delightful punch of caffeine—a perfect balance for your daily coffee rituals.

Convenience is another key aspect of this recipe. With just a few ingredients and preparation steps, you can easily replicate your favorite café drink at home. No need to stand in long lines or pay high prices when you can create this delicious and trendy iced coffee in your own kitchen. Plus, it can be customized to your taste, whether you prefer it sweeter or with a touch of spice.

Nutritionally, this drink can be a better alternative to traditional coffee beverages loaded with sugar and artificial ingredients. Using oat milk not only provides a dairy-free option but also adds health benefits, such as high fiber content. You’ll enjoy the rich flavors without the guilt, making it a smart choice for those mindful of their diet.

Socially, the Iced Brown Sugar Oatmilk Shaken Espresso is a fantastic conversation starter. Share this delightful drink with friends and family during gatherings, showcasing your barista skills while providing a café-like experience at home. It’s perfect for brunch or relaxed afternoons, bringing a sense of community and warmth to any occasion.

Furthermore, making this beverage at home is a cost-effective strategy for coffee lovers. The ingredients are widely available, and by avoiding the café markup, you can enjoy your daily iced espresso without breaking the bank. You’ll find that with this recipe, you can indulge in high-quality coffee experiences without leaving your house or your budget.

Historical Background and Cultural Significance

The Iced Brown Sugar Oatmilk Shaken Espresso is rooted in the growing popularity of specialty coffee drinks that have surged in cafes worldwide. Over the years, coffee culture has evolved to include a myriad of flavor combinations and preparations, focusing on both quality and presentation. This drink is a prime example of how modern café offerings have tailored traditional brewing methods to create exciting new options for coffee enthusiasts.

Culturally, coffee has long been more than just a drink; it has been a social catalyst connecting people around the world. The emergence of oat milk as a popular alternative reflects the collective movement towards healthier, plant-based diets. The incorporation of oat milk into this espresso drink signifies a shift towards inclusivity in drink options, allowing everyone, regardless of dietary restrictions, to enjoy a rich coffee experience.

The evolution of this particular drink reflects broader culinary trends. With each seasonal menu update in cafés, baristas experiment with flavors, catering to customer cravings for unique and refreshing beverages. As the iced espresso trend has grown, so has the focus on craft and detail in preparation, transforming each drink into an art form.

Regionally, variations of iced coffee drinks can be found worldwide, showcasing the versatility of coffee as a beverage. From Italy’s classic iced espresso to Japan’s unique coffee jelly creations, the global influence of coffee culture has enriched the drink landscape. The Iced Brown Sugar Oatmilk Shaken Espresso stands out as a contemporary nod to these traditional roots, merging elements from various cultures into one delicious offering.

Ingredient Deep Dive

Espresso: Espresso serves as the backbone of this drink, providing caffeine and flavor depth. It has cultural significance, particularly in Italian coffee traditions where it is consumed as a quick shot. Nutritionally, espresso is low in calories and offers antioxidants. When selecting coffee beans for your espresso, opt for freshly roasted ones and store them in an airtight container to maintain freshness.

Brown Sugar: Brown sugar not only adds sweetness but also contributes a slight caramel flavor, enhancing the overall taste profile. It has a rich history, often used in baking and cooking due to its moisture content. Nutritionally, brown sugar contains trace minerals absent in refined sugar. When choosing brown sugar, look for varieties that are moist and fragrant, and store them in a cool, dry place to prevent hardening. You can substitute it with coconut sugar for a different flavor dimension.

Oat Milk: Oat milk has risen to fame for its creamy texture and is a fantastic dairy-free alternative. Its popularity underscores the shift towards vegan and plant-based diets. Nutritionally, oat milk is lower in fat and calories than whole milk and often fortified with vitamins. When selecting oat milk, opt for unsweetened varieties for a less sugary taste. Store it refrigerated, and once opened, consume it within a week. For substitutions, almond or soy milk can work, but may alter the flavor slightly.

Common Mistakes to Avoid

  • Not using freshly brewed espresso: Always brew your espresso fresh for the best flavor; pre-brewed espresso can taste bitter.
  • Skipping the shaking step: This step creates the frothy texture; without it, your drink may become one-dimensional.
  • Using too much sugar: Balance is key; start with less sugar and adjust to taste to avoid overwhelming flavors.
  • Overheating the oat milk: When warming, do not let it boil; otherwise, it may curdle or develop an unpleasant taste.
  • Ignoring ingredient quality: Use high-quality coffee and oat milk for the most authentic taste; cheap alternatives may lead to disappointment.
  • Using a dull shaker: A well-functioning shaker ensures thorough mixing; a poor one may not blend the drink effectively.
  • Serving without ice: Ensure your drink is adequately chilled; this enhances flavor and refreshing qualities.
  • Neglecting presentation: Garnish and serve attractively; the visual appeal adds to the overall drinking experience.

Essential Techniques

Preparing Espresso: Mastering espresso preparation is essential for achieving a robust flavor. Use finely ground coffee and maintain proper pressure and temperature for extraction. Common pitfalls include using stale coffee or incorrect grind size, which can lead to over- or under-extraction. Look for a rich crema on top to indicate success.

Shaking the Drink: Shaking the drink mixes the ingredients thoroughly while creating a frothy texture. Use ice along with the espresso and oat milk in your shaker, and shake vigorously for about 30 seconds. The common mistake here is not shaking long enough; visual cues for optimal blending include a significant froth build-up and coldness of the shaker.

Pro Tips for Perfect Starbucks Copycat Iced Brown Sugar Oatmilk Shaken Espresso

– Use freshly ground coffee for the best espresso flavor. The closer to brewing time, the better the taste.
– Don’t be afraid to experiment with the brown sugar amount; personal sweetness preferences vary greatly.
– Consider chilling your glass ahead of time for an extra refreshing feel.
– For added flavor, try infusing your oat milk with a cinnamon stick while warming.
– Use ice cubes made from oat milk for an extra creaminess as they melt.
– Enjoy this drink on ice to enhance its refreshing qualities and perfect for hot days.
– Use a cocktail shaker for an extra fun twist and impressive presentation.
– Pair it with your favorite pastry for a delightful coffee break.

Variations and Adaptations

You can easily create regional variations of the Iced Brown Sugar Oatmilk Shaken Espresso. For a tropical twist, add a splash of coconut cream or use coconut sugar instead of brown sugar. Seasonal adaptations include adding pumpkin spice during fall, transforming your drink into a festive treat. For dietary modifications, try using low-calorie sweeteners or sugar-free oat milk for a guilt-free option. If you enjoy flavor variations, consider adding a hint of vanilla extract or a dash of almond extract. Think about texture modifications by blending the ingredients for a smoothie-like consistency, perfect for a breakfast treat. Presentation alternatives might include serving in mason jars for a rustic touch or garnishing with fresh herbs like mint for a bright finish.

Serving and Presentation Guide

When it comes to plating techniques for your iced espresso, consider using tall, clear glasses to showcase the beautiful layers of your drink. Garnishing with a sprinkle of cinnamon or a few coffee beans on top adds an elegant touch. Traditional accompaniments like small pastries or cookies enhance the experience, making it ideal for serving at brunch or coffee gatherings. For a modern twist, consider adding colorful straws or serving it with a side of whipped cream. Temperature is important; serve this drink cold with plenty of ice to maintain its refreshing qualities. Portion control is key—one serving of this delightful drink is perfect per person, ensuring everyone gets a taste of its oddly refreshing goodness.

Wine and Beverage Pairing

While coffee is the main attraction here, considering beverage pairings can enhance your experience. A light white wine or rosé can be refreshing if you choose to make this drink for a summer gathering. The fruity notes often complement the sweetness of the brown sugar. Non-alcoholic alternatives might include flavored sparkling waters, which can add a refreshing zest. For those who prefer traditional pairings, consider serving a classic chai tea, which harmonizes beautifully with coffee flavors. Presentation should always consider temperature; ensure all beverages served alongside are chilled for a cohesive dining experience.

Storage and Shelf Life

For optimal freshness, consume your iced espresso immediately after preparation. However, if you need to store it, keep it in an airtight container in the refrigerator for up to 24 hours. Ensure that you separate the espresso and oat milk prior to storage to prevent the oat milk from curdling. When reheating, use gentle heat to warm the espresso, and avoid boiling the oat milk. You can freeze leftover espresso in ice cube trays, allowing you to create new iced coffee drinks later. Just remember that once thawed, the quality may not be as vibrant due to oxidation.

Make Ahead Strategies

To simplify your morning routine, consider prepping your ingredients the night before. Brew a batch of espresso and store it in the refrigerator; combine it with pre-measured brown sugar and oat milk in the morning. In terms of quality, chilling your espresso overnight can intensify flavor and ease preparation. For assembly tips, simply shake and pour your drink into a glass filled with ice before serving. Fresh elements like whipped cream or garnishes can be added just before serving to preserve their texture. These small, strategic preparations can make your coffee routine quick and stress-free!

Scaling Instructions

If you want to make multiple servings of this Iced Brown Sugar Oatmilk Shaken Espresso, consider halving or doubling the ingredients based on your needs. When doubling, you may need to brew espresso in batches to maintain consistency. Ensure that your equipment, such as a larger shaker or container, accommodates the volume changes. For timing, be mindful that more servings may require more time for brewing but shouldn’t significantly alter the shaking or mixing steps. Always keep in mind that the quality of each ingredient should remain constant to preserve the integrity of the drink.

Nutritional Deep Dive

This Iced Brown Sugar Oatmilk Shaken Espresso delivers a nice balance of macro and micronutrients. The espresso provides energy-boosting caffeine and minimal calories, while oat milk adds fiber and essential vitamins. The brown sugar contributes carbohydrates and a touch of minerals. Each serving is designed to satisfy both energy needs and taste preferences. For those monitoring their dietary intake, knowing the proper portion size is essential; enjoying this drink in moderation aligns with healthy eating habits. Understanding your nutritional needs can help you adjust ingredients for a balanced coffee treat.

Dietary Adaptations

For those following a gluten-free diet, the ingredients in this iced drink are naturally gluten-free, making it a fantastic choice. If you’re looking for dairy-free options, oat milk provides a creamy alternative that aligns with vegan diets. For low-carb or keto followers, simply swap out the brown sugar for stevia or erythritol to maintain sweetness without the carbs. Paleo enthusiasts can enjoy this iced treat by ensuring all ingredients are minimally processed. For a Low-FODMAP version, be cautious with portion sizes of oat milk and enjoy within limits. These adaptations make this drink widely accessible while retaining delicious flavor.

Troubleshooting Guide

If you encounter texture issues, like a grainy drink, ensure you’re using finely ground coffee for espresso. For flavor balance, if your drink tastes too sweet, adjust the brown sugar to accommodate personal preferences, adding more espresso to enhance bitterness. In case of temperature problems, serve with ample ice to keep the drink refreshing. Equipment challenges can arise with shakers; ensure yours is sealed correctly to prevent spills while mixing. For ingredient substitutions, always test small amounts first to confirm taste integrity. And for timing concerns, always brew espresso first before preparing the rest of the drink to maintain freshness.

Recipe Success Stories

Community feedback on this recipe has been overwhelmingly positive, with many readers reporting their successful attempts at home. Some have shared variations they have tried, like adding a hint of vanilla extract or introducing flavored syrups, leading to delightful surprises. Many readers have expressed their joy in being able to recreate café favorites without stepping foot in a coffee shop. Tips on photography have also emerged, with users sharing their beautiful presentations on social media, further encouraging more coffee lovers to try this refreshing drink.

Frequently Asked Questions

Can I use decaf espresso?
Yes! You can absolutely use decaffeinated espresso to enjoy the same flavors without the caffeine boost.

What if I don’t have a shaker?
If you lack a shaker, try using a sealed mason jar instead. Just ensure it’s tightly closed before shaking.

Can I make this drink hot?
Yes! Simply warm the oat milk and espresso together instead of serving it over ice for a cozy variation.

Will other plant-based milks work?
While oat milk provides a unique creaminess, almond or soy milk can also be used; however, this might alter the flavor slightly.

How can I make it sweeter?
You can add additional brown sugar or experiment with flavored syrups like vanilla or caramel for a sweeter taste.

Can I prep the espresso in advance?
Absolutely! Brew it ahead of time and store it in the refrigerator to have it ready for quick assembly.

How long will this drink stay fresh?
It’s best consumed immediately, but if stored in an airtight container, it will stay fresh for up to 24 hours in the fridge.

What can I do with leftover oat milk?
If you have leftover oat milk, use it in smoothies, baking, or pour it into cereals for a delicious alternative to regular milk.

Can I use instant coffee?
Using instant coffee might work in a pinch, but for optimal flavor, freshly brewed espresso is recommended.

What are some good snacks to pair with this drink?
Pastries like croissants, muffins, or cookies complement this beverage beautifully for a delightful snack break.

Additional Resources

To further your coffee journey, explore related recipes such as Vanilla Iced Lattes and Matcha Green Tea Lattes. Enhance your techniques with guides on mastering espresso brewing and tips for milk frothing. Learn about ingredients by diving deeper into the world of coffee beans or explore various oat milk brands and their flavor profiles. For equipment recommendations, consider a quality espresso machine or a reliable coffee maker to elevate your brewing experience. Seasonal variations like holiday spiced lattes can also keep your coffee routine exciting throughout the year.

Join the Conversation

We invite you to share your experiences and results with this recipe on social media! Don’t forget to snap a photo of your creation and tag us to engage with fellow coffee lovers. Feel free to leave feedback and suggestions for variations you’ve made or unique twists you’ve tried. Building a community around our love for coffee not only enhances our culinary adventures but also connects us with like-minded enthusiasts. Let’s create delicious memories together with this delightful Iced Brown Sugar Oatmilk Shaken Espresso!

The Recipe

Starbucks Copycat Iced Brown Sugar Oatmilk Shaken Espresso

Serves: 1

Prep Time: 5 mins

Cook Time: 2 mins

Total Time: 7 mins

Kitchen Equipment Needed

  • Espresso machine or coffee maker
  • Cocktail shaker or mason jar
  • Measuring spoons
  • Glass for serving
  • Ice tray

Ingredients

  • 1 shot of espresso (about 1 ounce)
  • 1-2 tablespoons brown sugar (to taste)
  • ½ cup oat milk (or to taste)
  • Ice cubes
  • Cinnamon for garnish (optional)

Directions

  1. Brew a shot of espresso and let it cool slightly.
  2. In a shaker, combine the warm espresso with brown sugar, stirring to dissolve.
  3. Add ice to the shaker and pour in the oat milk.
  4. Shake vigorously until the mixture is well-combined and frothy.
  5. Pour into a glass filled with ice, and top with a sprinkle of cinnamon if desired.

Recipe Notes

  • For a sweeter drink, increase the amount of brown sugar.
  • Feel free to substitute oat milk with your preferred plant-based milk.
  • This drink can also be easily doubled or halved for serving numbers.
  • Adjust the amount of oat milk based on your desired creaminess.