Best Caramel Coffee Recipe – Perfect for Cozy Mornings

Delicious Caramel Coffee – A Sweet Twist on Your Morning Brew

⚖️
Difficulty
Easy

⏲️
Prep Time
5 mins

🕒
Cook Time
10 mins

⏱️
Total Time
15 mins

🍽️
Servings
2

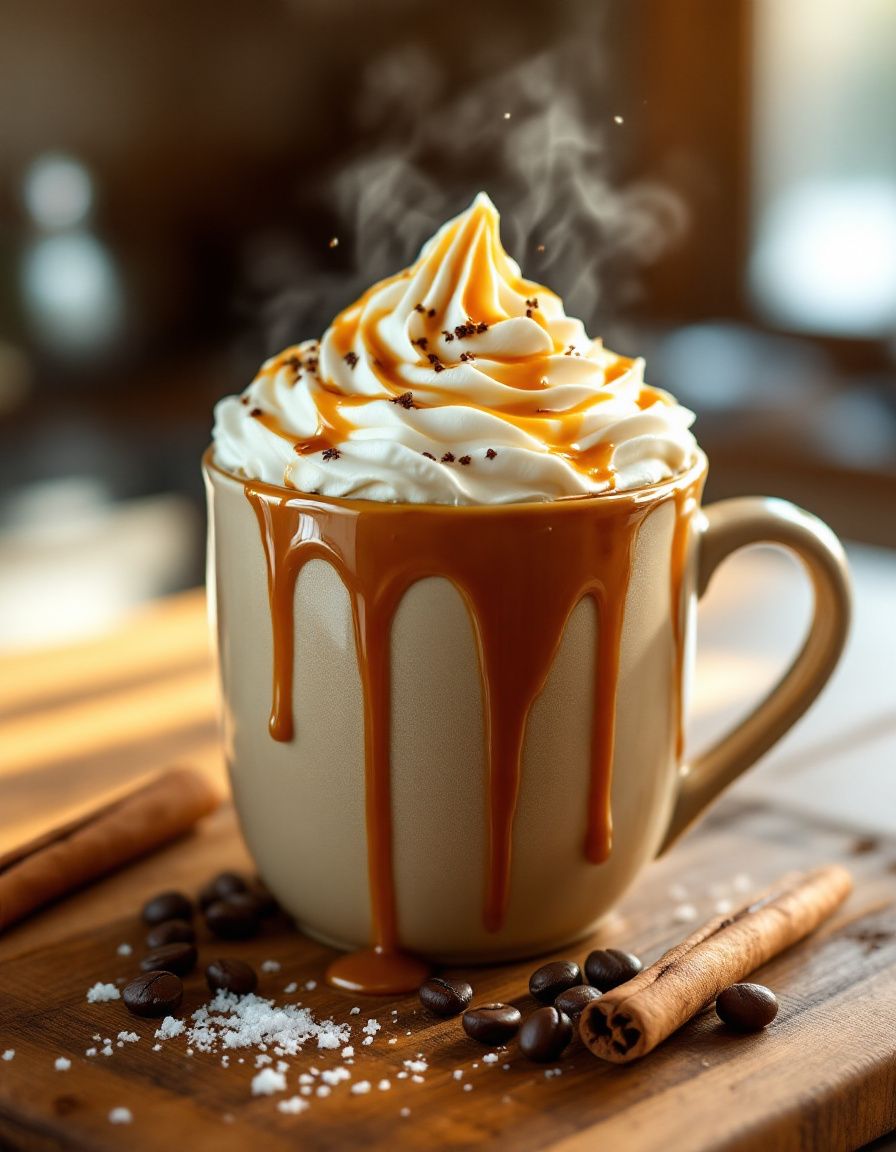
One of the most delightful ways to start your day is with a cup of Caramel Coffee. This indulgent drink blends the rich flavors of freshly brewed coffee with the sweet, decadent notes of caramel, creating an exquisite morning experience. Imagine sipping on this velvety concoction, where the aroma of roasted coffee beans mingles with the sweetness of caramel, offering a delightful respite from your daily routine. Whether you’re looking for a comforting weekend treat or a pick-me-up during a busy workday, this Caramel Coffee recipe promises to awaken your senses and elevate your coffee game.

The preparation of this Caramel Coffee is straightforward, making it accessible for any coffee lover looking to enhance their usual brew. As the smooth caramel slowly melts into the hot coffee, it creates a glossy, inviting surface that beckons you to take that first sip. With each taste, the harmony of flavors expands in your mouth—a perfect balance of bitter and sweet, blended with creamy undertones. Dive into the comforting embrace of this beverage as you savor the moment, delighting in its richness and warmth.

Quick Recipe Highlights

  • Flavor Profile: The blend of bold coffee with caramel sweetness creates a luxurious taste experience.
  • Texture: Creamy and smooth, with a delightful thickness from the melted caramel that coats your palate.
  • Aroma: The aromatic notes of freshly brewed coffee infused with sweet caramel is incredibly inviting and uplifting.
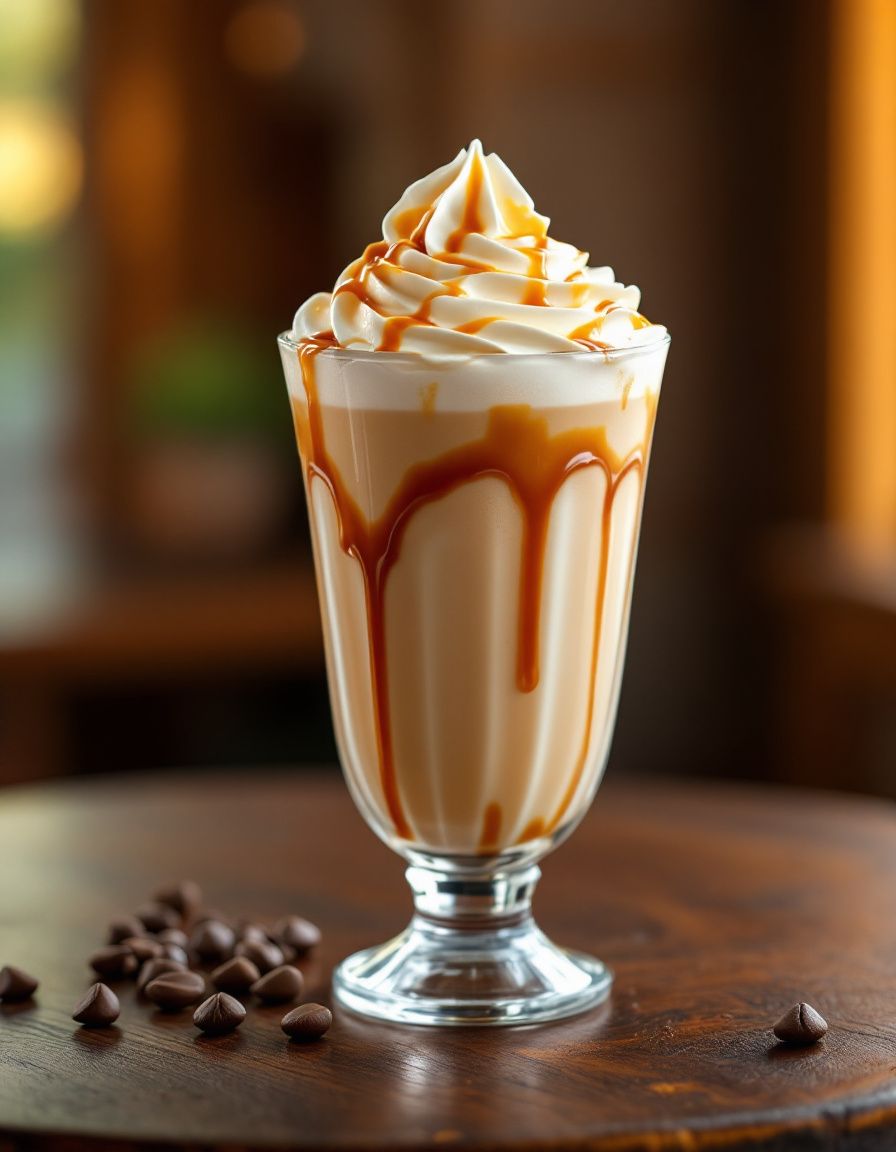
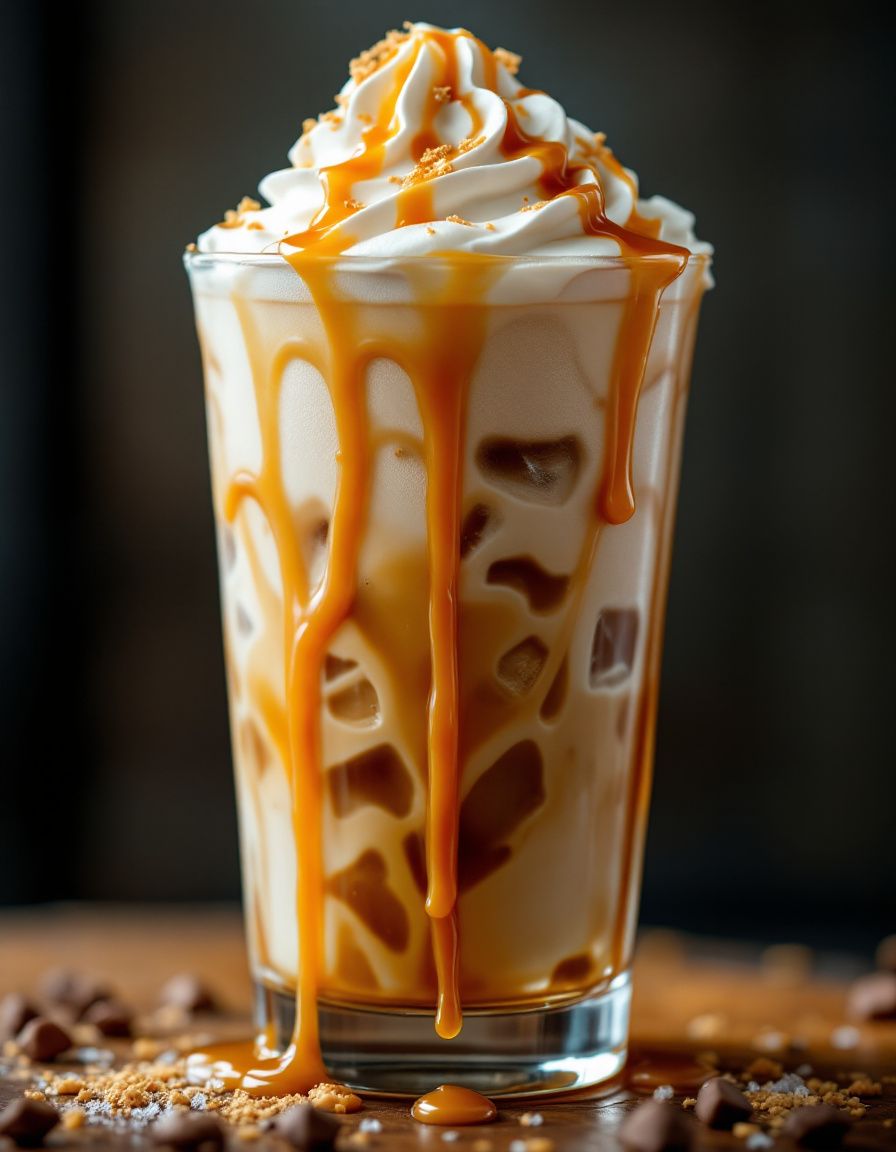
  • Visual Appeal: A beautiful golden-brown hue, topped with a frothy or whipped cream finish, makes this drink visually stunning.
  • Skill Level Needed: This recipe is simple and ideal for beginners, requiring minimal culinary skill.
  • Special Equipment: Just a coffee maker and a saucepan are required for this easy preparation.

Recipe Overview

  • Difficulty Level: This Caramel Coffee is easy to make, allowing novices to effortlessly create a café-quality drink at home.
  • Category: A delightful beverage perfect for breakfast, brunch, or a mid-afternoon pick-me-up.
  • Cuisine: This recipe draws inspiration from classic coffee culture, blending in sweet dessert elements.
  • Cost: Very economical, using inexpensive staples like coffee, sugar, and cream.
  • Season: Perfect for all seasons; however, it may be especially comforting during the colder months.
  • Occasion: Great for casual gatherings, coffee dates, or just a cozy solo morning treat.

Why You’ll Love This Recipe

Caramel Coffee is not just a drink; it’s an experience bursting with taste and texture. The combination of robust coffee and rich caramel creates an indulgent flavor that will leave you craving more. The sweetness of caramel perfectly balances the bitterness of coffee, offering a refined taste that can easily replace your regular morning cup. Each sip feels like a warm embrace, making it a soothing choice for any time of day.

The convenience of this Caramel Coffee recipe is another reason to love it. With simple ingredients and straightforward steps, you can whip up this delightful beverage in just 15 minutes. There’s no need for complex brewing techniques or specialized equipment; all you need is your favorite coffee and some caramel sauce. This makes it perfect for busy mornings when you still want something special.

From a nutritional standpoint, you can customize this Caramel Coffee to fit various dietary needs and preferences. Using milk alternatives or sugar-free caramel can make it a lighter option, while still delivering on flavor. It’s a beautiful way to enjoy your caffeine fix while indulging your sweet tooth without guilt.

This drink also has social value. Serving Caramel Coffee to friends or family can elevate any gathering, making it feel special and inviting. It’s an ideal offering for brunches or cozy get-togethers, proving that even simple moments can be accentuated with a little extra effort.

Lastly, the cost-effectiveness of this recipe cannot be overstated. With just a few ingredients that you likely already have at home, you can create a high-end beverage that rivals those from your favorite coffee shops—all without breaking the bank. This makes it an accessible treat for everyone to enjoy.

Historical Background and Cultural Significance

The origins of Caramel Coffee can be traced back to the rise of coffee culture around the world. Coffee became a staple in many households, and as the beverage gained popularity, so did the incorporation of sweeteners and flavors. Caramel, with its rich sweetness, was a natural complement to the bitter notes of coffee.

Culturally, coffee has always been more than just a drink; it’s a social connector. From the coffee houses of Europe in the 17th century to modern-day cafes, coffee brings people together. Adding caramel reflects a growing trend toward gourmet coffee experiences, allowing individuals to customize their drinks to their liking.

Over time, the recipe for Caramel Coffee has evolved. Initially, it may have focused on simply adding sugar or cream, but today’s versions often incorporate artisanal caramel sauces crafted from high-quality ingredients. This evolution showcases our continual desire for enhancing everyday experiences, including our coffee rituals.

Regional variations exist, with some cultures preferring additional toppings like whipped cream or spices, lending their unique touch to the beverage. These differences highlight the diverse ways people enjoy coffee around the globe, proving that there is no single right way to indulge in this delightful drink.

Ingredient Deep Dive

Coffee beans are the heart of any good Caramel Coffee. Originating from various regions around the world, the flavor profile of coffee varies significantly. Beans from South America tend to be milder, while African beans offer fruity and floral notes. These characteristics provide a rich foundation for your drink. Look for freshly roasted beans for the best flavor, as they will give your coffee a vibrant taste.

Caramel is another essential component. The process of making caramel involves heating sugar until it melts and transforms into a rich, golden syrup. This technique highlights the magic of cooking, creating a dessert flavor that complements coffee perfectly. For those short on time, store-bought caramel sauce offers great convenience while still allowing you to indulge.

Milk or cream can be added to enhance the beverage’s creaminess. Full-fat dairy adds a luxurious feel, while non-dairy alternatives like almond or oat milk create a lighter option. Regardless of the choice, a splash of cream or milk will enrich the drink’s mouthfeel, turning it from an ordinary cup of coffee into an extraordinary one.

Common Mistakes to Avoid

  • Using old coffee beans: Freshness is key to a great cup. Stale beans can lead to a flat and less flavorful coffee.
  • Overcooking the caramel: If the caramel is cooked too long, it can become bitter. Aim for a golden color for the best flavor.
  • Poor water temperature: Brewing coffee with water that is too hot or too cold can affect extraction, making the coffee taste weak or bitter.
  • Skipping the taste test: When combining ingredients, always taste your Caramel Coffee. Adjust sweetness or richness to your preference.
  • Not using the right proportion of ingredients: Balance is crucial. Too much caramel can overwhelm the coffee flavor.
  • Using cold milk in hot coffee: This can cause your drink to cool down quickly. Warm your milk or cream before adding it.
  • Neglecting to brew coffee properly: Follow the recommended brew time and methods to ensure the best flavor is extracted.
  • Using low-quality caramel: High-quality caramel will transform your drink. Avoid generic brands that lack flavor.
  • Being heavy-handed with toppings: While whipped cream looks tempting, remember to maintain balance in flavors with toppings.
  • Not experimenting: Don’t be afraid to try different coffee blends or additional flavors like vanilla or hazelnut in your Caramel Coffee.

Essential Techniques

One of the most critical techniques in crafting Caramel Coffee is brewing your coffee correctly. Start with coarsely ground coffee beans and use a coffee maker or French press. The key is to maintain the right water temperature, ideally between 195°F and 205°F. Proper extraction is vital; if the brewing process takes too long, your coffee can become bitter. Watch for the aromatic release that signals an optimal brewing time.

Making perfect caramel is another essential step. Begin by melting granulated sugar over medium heat, swirling the pan occasionally until it develops a golden hue. Mastery of caramel relies on attentiveness; it can quickly shift from ideal to burnt. Pay attention to the aroma—good caramel smells sweet and slightly toasted, whereas burnt caramel will have a darker, acrid scent. Familiarity with visual cues, such as color, will significantly help in mastering this sweet concoction.

Pro Tips for Perfect Caramel Coffee

1. Always grind your coffee beans fresh for the best flavor; invest in a good quality grinder for optimal results.
2. Use filtered water to brew your coffee for a cleaner taste. Chlorinated tap water can negatively impact flavor.
3. Experiment with different caramel sauces to find your preferred sweetness level. Artisanal or homemade caramel can add depth.
4. Add a pinch of salt to the caramel for an enhanced flavor profile. It balances sweetness and brings complexity.
5. Try different milks or creamers, such as flavored varieties, to give your Caramel Coffee a unique twist.
6. Opt for a unique serving glass to elevate the presentation; a clear glass shows off the layers beautifully.
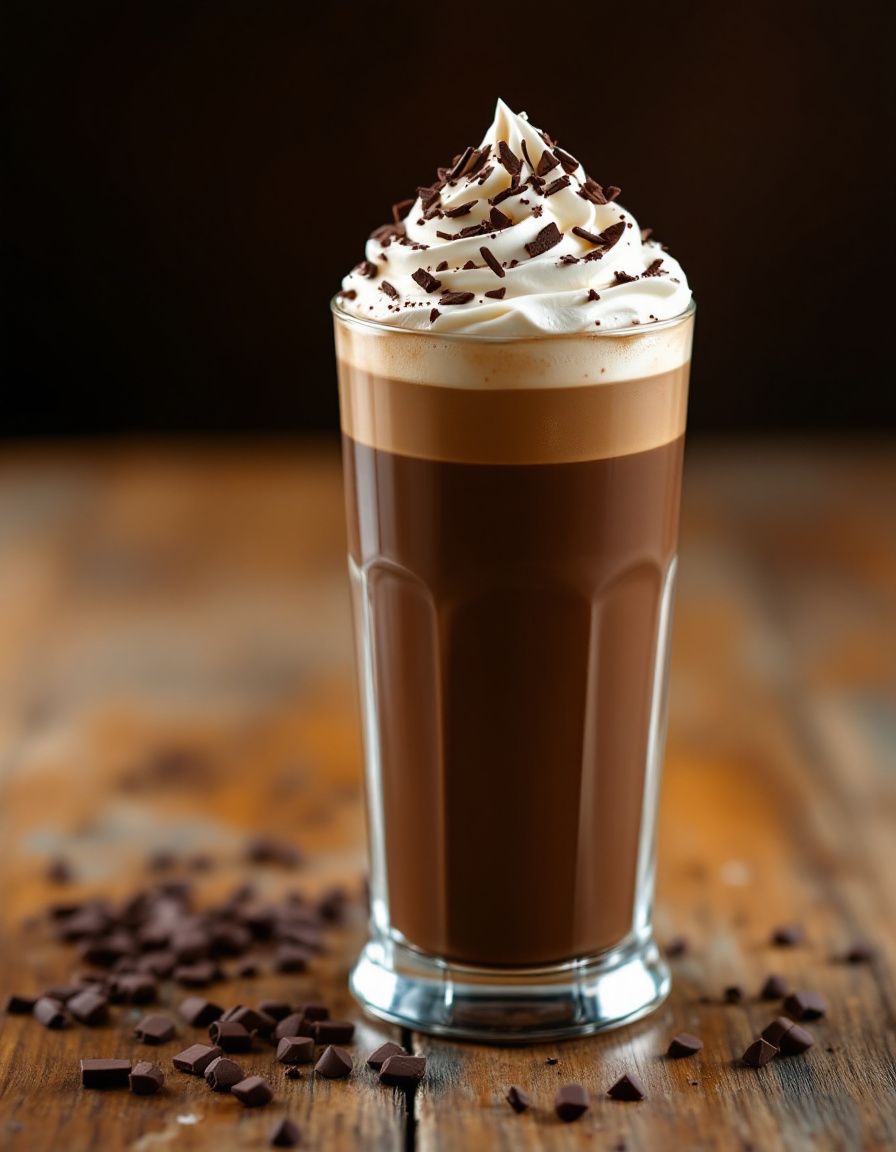
7. Serve with a sprinkle of cocoa or cinnamon on top to add extra flavor and aesthetic appeal.
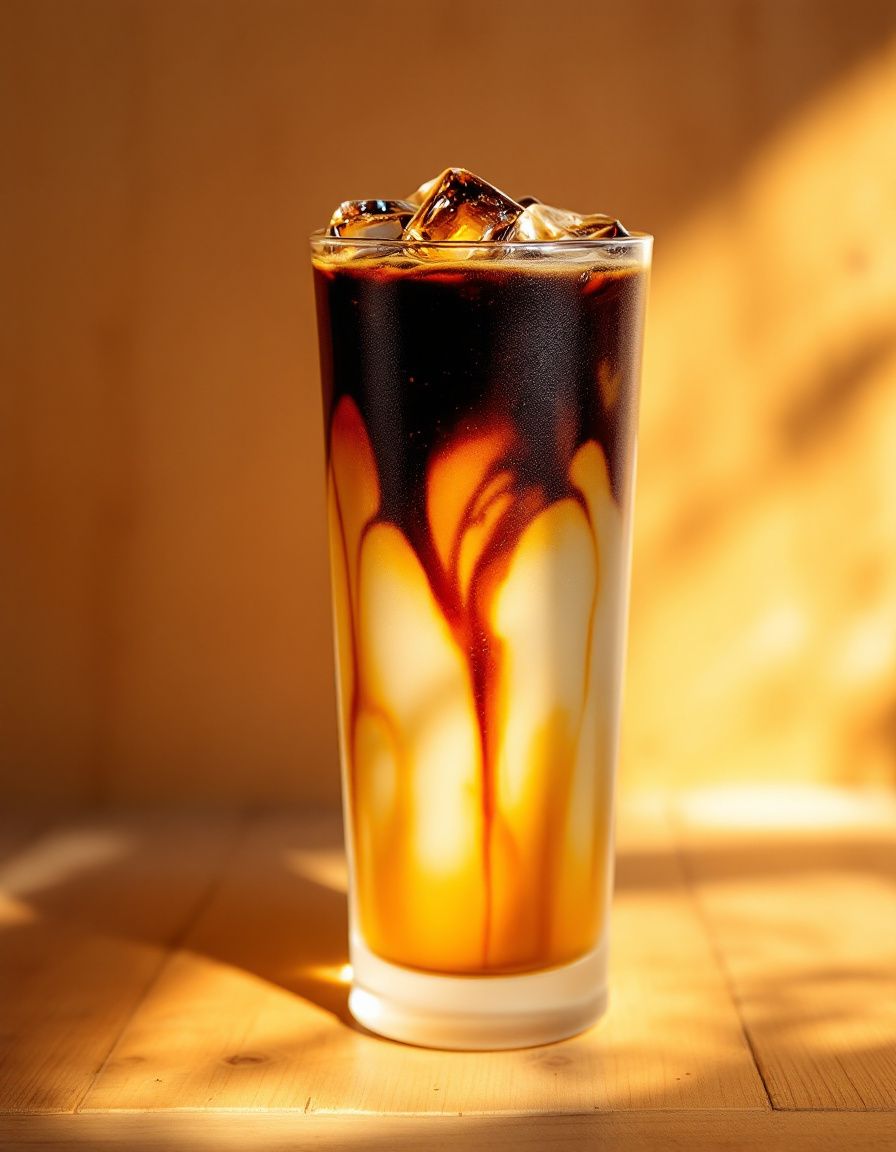
8. For an iced version, let your Caramel Coffee cool and serve it over ice for a refreshing summer treat.

Variations and Adaptations

Regional variations of Caramel Coffee can take your drink to new heights. For example, adding a dash of cardamom typically found in Middle Eastern coffee styles lends warmth and spice. During the fall, incorporating pumpkin spice can create a seasonal beverage that delights the taste buds.

Seasonal adaptations can involve using different ingredients; for summer, try using cold brew coffee mixed with caramel syrup and ice cubes for a refreshing twist. In contrast, winter can see caramel hot chocolate being combined for added richness.

Dietary modifications are also easy. Opt for almond or coconut milk for a vegan-friendly beverage that everyone can enjoy. You can also experiment with sugar-free caramel for a lighter option while still enjoying this delicious drink.

Flavor variations can be endless! Consider adding different extracts, such as hazelnut or vanilla, along with the caramel for a more complex beverage.

When it comes to texture modifications, consider heating and frothing your milk to create a luscious foam for a café-style experience. Alternatively, blending everything for a frappé twist results in a cold, thick drink that’s perfect for warm days.

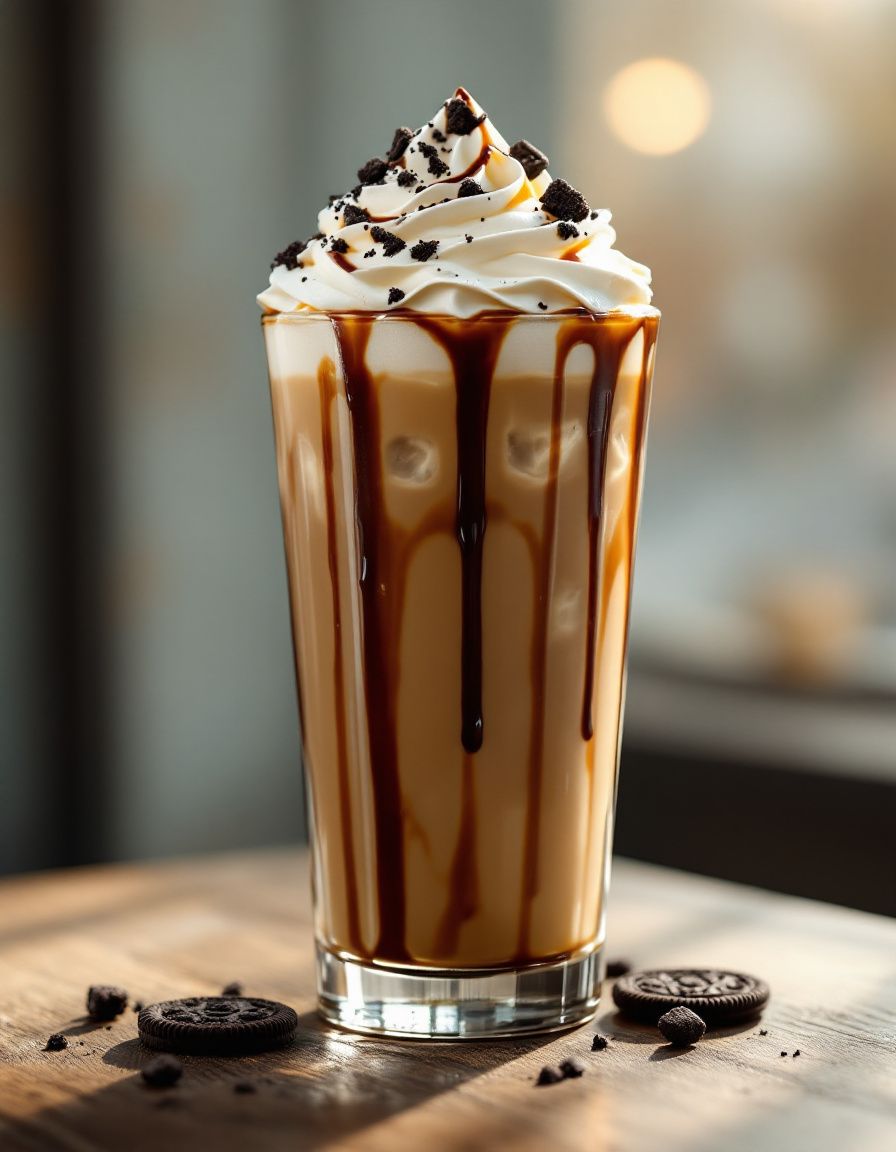
Lastly, presentation can also vary. Serve your Caramel Coffee in a clear glass to showcase the drink’s beautiful layers and colors. Add whipped cream topping along with caramel drizzle for a visually stunning drink.

Serving and Presentation Guide

The way you serve your Caramel Coffee can elevate the entire experience. For the best visual appeal, present your drink in an elegant glass that showcases the layers of coffee and caramel. A clear cup gives your drink a beautiful aesthetic that highlights its inviting appearance.

Garnishing ideas include a dollop of whipped cream on top, with a drizzle of caramel sauce cascading down for added visual flair. A sprinkle of sea salt can enhance flavor while providing a nice contrast to the sweetness.

When considering traditional accompaniments, Caramel Coffee pairs beautifully with pastries or desserts, such as croissants or brownies. Create a cozy café atmosphere by presenting your drink alongside a small plate of treats.

Modern serving suggestions might include pairing your Caramel Coffee with a small scoop of vanilla ice cream for a unique twist. This creates an indulgent dessert experience that’s to die for.

Temperature is another important consideration; serve your Caramel Coffee hot, ideally between 150°F and 180°F to maintain its comforting qualities. If preparing an iced version, ensure the glass is chilled beforehand to keep the coffee refreshing.

Portion control is essential to avoid overwhelming your guests. A standard serving size of 8-12 ounces is typically adequate, ensuring everyone enjoys a sip without feeling stuffed.

Wine and Beverage Pairing

When it comes to pairing beverages with Caramel Coffee, consider dessert wines like Moscato or late-harvest Riesling, which can complement the sweetness of the caramel beautifully. These wines support the flavor of the coffee without overpowering it, creating a harmonious experience.

For non-alcoholic alternatives, herbal teas such as chamomile or mint are excellent choices. They provide a soothing contrast and soften the strong coffee flavor without clashing.

Pairing with coffee-infused beverages also works well; a mix of your favorite coffee liqueur, such as Kahlua, can elevate the experience to a dessert-level indulgence.

Temperature considerations play a role as well: pair your hot Caramel Coffee with slightly chilled beverages to create an enjoyable contrast. If enjoying iced Caramel Coffee, consider serving it alongside a frosty sparkling water or a light lemonade for a refreshing combination.

Finally, regarding serving suggestions, offer small shot glasses of complementary flavors on the side, such as cream liquors, to allow guests to customize their drinks according to their taste.

Storage and Shelf Life

Proper storage is crucial for ensuring the longevity and quality of your Caramel Coffee ingredients. Brewed coffee can generally be stored in an airtight container in the fridge for up to a week. It’s best to consume it within that time to maintain freshness and flavor.

For homemade caramel, store it in a sealed jar in the refrigerator. Properly stored, it can last for several weeks. Just make sure to give it a good stir and reheat it slightly before using it in your coffee.

If you have leftover Caramel Coffee, it’s advisable to consume it within 24 hours for the best taste. Storing it longer may lead to flavor degradation, as the coffee can absorb the flavors of the caramel too strongly.

Reheating instructions include placing the Caramel Coffee in a saucepan over low heat or using a microwave at intervals, stirring occasionally to ensure even heating without scorching.

Freezing guidelines are not typically recommended for brewed coffee as it can alter the flavor; however, if you do want to freeze caramel, pour it into ice cube trays for easy portioning.

Make Ahead Strategies

If you’re planning to serve Caramel Coffee for a gathering, consider preparing components ahead of time. Brew a large batch of coffee in advance, and store it in the refrigerator. This allows for a quick assembly when guests arrive.

The caramel sauce can be made a day or two in advance. Simply reheat it gently before use to return it to a pourable consistency.

To best assess quality impact, be cautious about adding milk or cream until just before serving, since dairy can separate or spoil when prepared ahead of time.

Assembling is easy; simply combine the cold coffee, warmed caramel, and preferred milk together in a pitcher to streamline the final steps.

Reheating any leftover Caramel Coffee can be done on the stovetop or microwave, but remember to taste it before serving to adjust sweetness or creaminess as needed.

Incorporating fresh elements, such as whipped cream or chocolate shavings, at the last moment can elevate the experience even further.

Scaling Instructions

When it comes to scaling the Caramel Coffee recipe, halving or doubling can be straightforward. If you wish to halve the recipe, simply divide all ingredients according to the number of servings needed.

Doubling or tripling the recipe for a gathering? Ensure to keep track of brewing times and adjust the size of your coffee maker if needed. A larger pot will likely require longer brewing times to account for the increased volume.

Equipment adjustments may entail using larger measuring devices and pots to make handling easier and to avoid spills.

Timing modifications are vital; brew in batches if necessary, as overloading coffee makers may lead to weaker coffee.

When storing additional servings, remember to cool the coffee quickly after brewing and store it in airtight containers to preserve freshness.

Nutritional Deep Dive

Analyzing the macro breakdown of Caramel Coffee reveals a mixture of carbohydrates, fats, and proteins based on your ingredient choices. Coffee itself is low-calorie, but the addition of sugar and cream can significantly increase the total caloric intake.

Examining micronutrient content shows that coffee is rich in antioxidants, which may provide health benefits. The sugar in caramel, while delicious, adds minimal nutritional value, so moderation is key.

Health benefits of moderate coffee consumption include improved cognitive function and enhanced metabolism. However, it’s essential to remain mindful of total caffeine intake throughout the day.

Dietary considerations should note any lactose-intolerance when using cream or dairy. Gluten is not a concern, but people with sugar sensitivities should keep an eye on the caramel sauce’s sweetness.

From a portion analysis, a standard serving of Caramel Coffee typically falls between 8 to 12 ounces for optimal enjoyment without overindulging. Weight management tips include considering lower-calorie alternatives for caramel or sweeteners to reduce total sugar content.

Dietary Adaptations

You can easily modify Caramel Coffee for various dietary needs. For those following a gluten-free diet, all ingredients in this beverage are naturally gluten-free, although it’s wise to ensure that any store-bought caramel sauces are labeled as such.

Dairy-free versions can be created using nut or oat milk as substitutes for regular milk or cream, making it inclusive for vegan diets as well. Gluten-free and dairy-free caramel sauces are also widely available.

Those on a low-carb or keto diet can replace sugar with stevia or erythritol while using unsweetened almond milk as a base, keeping the indulgent flavors without the carbs.

Paleo dieters might enjoy using coconut cream and a homemade caramel sauce that relies on coconut sugar as an alternative sweetener.

Low-FODMAP individuals can use lactose-free milk and ensure that caramel sauces do not contain high FODMAP ingredients, keeping the final beverage safe for their needs.

Troubleshooting Guide

If you encounter texture issues in your Caramel Coffee, blending may resolve the problem. Use an immersion blender for a smooth consistency, especially if any ingredients separate.

Flavor balance can be addressed by adjusting caramel levels; if too sweet, adding a touch of salt or more coffee can help rectify it, leading to a more enjoyable taste profile.

Temperature problems may arise if coffee cools too quickly. Consider pre-warming your serving vessels to maintain the heat or using thermal mugs.

Equipment challenges can often be solved by checking your coffee maker’s instructions to ensure you’re setting it up correctly for optimal brewing.

If you’re facing ingredient substitution challenges, feel free to replace traditional caramel with sauces that align with dietary needs while maintaining the same proportions for sweetness.

For timing concerns, remember to prioritize brewing and caramel preparation; if fiery moments arise, let caramel cool slightly before incorporating into the hot coffee to avoid possible burns.

Recipe Success Stories

Community feedback on Caramel Coffee often highlights its delightful taste and simplicity. Many readers have shared adaptations, from swapping out different flavorings to incorporating seasonal spices that reflect their preferences.

Variation successes abound, with numerous users taking inspiration to create seasonal specialties like a spiced caramel version for fall or a mint-infused treat during the holidays, further spreading its popularity.

Readers’ suggestions often include tips on different types of coffee blends and how each one makes an impact on the overall flavor. This interaction enriches the community’s experience as they share successes in creating their Caramel Coffee masterpieces.

Photography enthusiasts enjoy snapping photos of their finished drinks, highlighting the colorful layers and frothy toppings. This not only showcases personal creativity but also inspires others to experiment with their presentations.

Engagement within the community makes it a joy to learn how others interpret this delicious recipe, turning a simple Caramel Coffee into a canvas of flavors and creativity.

Frequently Asked Questions

1. Can I make Caramel Coffee ahead of time?
Yes! You can brew the coffee and prepare the caramel in advance. Just let the coffee cool and store it in the refrigerator, reheating it before serving.

2. How do I adapt this recipe for a crowd?
To serve multiple people, brew a larger quantity of coffee and scale the caramel and milk proportions accordingly. A coffee maker with a higher capacity works best here.

3. What’s the best type of coffee to use?
A medium roast coffee generally complements the sweetness of caramel well. Feel free to experiment with your favorite blends to find the right flavor balance for you.

4. Can I use store-bought caramel?
Absolutely! Store-bought caramel sauce can save time and is often delicious. Just ensure you pick one with quality ingredients for the best flavor.

5. Is it possible to make a sugar-free version?
Yes! Substitute regular sugar and caramel with sugar-free sweeteners and syrups. Many brands offer versions that taste great without adding the calories.

6. Can I add other flavors besides caramel?
Definitely! You can add vanilla extract, hazelnut syrup, or even chocolate for a unique twist. The idea is to experiment with flavors that you enjoy.

7. How can I thicken the coffee?
If you want a thicker consistency, consider adding cream instead of milk or using a frother to incorporate air and create a rich texture.

8. Is it easy to veganize Caramel Coffee?
Yes! Simply replace dairy milk with any plant-based alternative and use vegan caramel sauce. It’s super easy to make it inclusive for everyone.

9. Can I make this as an iced drink?
Absolutely! Let your coffee cool, mix in the caramel, and serve it over ice for a refreshing treat that’s perfect for warm weather.

10. What type of milk is best?
The best milk depends on personal preference. Whole milk offers a rich flavor, while almond or oat milk provides a lighter touch; experiment and enjoy!

Additional Resources

If you’re eager for more caffeine inspiration, check out related recipes, including flavored lattes and coffee cake, both perfect for pairing with your Caramel Coffee. Explore technique guides on frothing milk or brewing methods to hone your coffee skills further.

Ingredient information is also available for coffee varieties, caramel-making tutorials, and how to choose the best creamers to enhance your morning brew.

For equipment recommendations, consider investing in good-quality coffee makers or frothers to elevate your coffee experience. Seasonal variations can also extend beyond Caramel Coffee, with recipes for refreshing spring and summer drinks.

Join the Conversation

We’d love to hear from you! Share your own Caramel Coffee creations on social media and don’t forget to tag us. Posting pictures of your beverages can inspire others and foster a stronger community around coffee culture.

Join discussions around personal variations and tips for improving the recipe. Community engagement creates the perfect chance to learn from one another, ensuring that every cup gets better.

Feel free to leave a recipe review sharing your thoughts and adaptations. Your feedback helps others discover the joys of Caramel Coffee.

Experimentation and creativity with this recipe are encouraged; try new flavors or serving methods, and share your favorites with us. Let’s continue celebrating coffee together!

The Recipe

Caramel Coffee

Serves: 2

Prep Time: 5 mins

Cook Time: 10 mins

Total Time: 15 mins

Kitchen Equipment Needed

  • Coffee maker or French press
  • Small saucepan
  • Measuring cups
  • Stirring spoon
  • Serving glasses

Ingredients

  • 2 cups brewed coffee
  • 2-4 tablespoons caramel sauce
  • 1/2 cup milk (or non-dairy alternative)
  • Optional: whipped cream and additional caramel for topping

Directions

  1. Brew your favorite coffee using a coffee maker or French press.
  2. In a small saucepan, heat the caramel sauce over low heat until it’s warm and pourable.
  3. Pour the brewed coffee into mugs, then add the warm caramel sauce. Stir well to combine.
  4. Add milk to the mixture, adjusting to your desired creaminess.
  5. Top with whipped cream and drizzle additional caramel sauce, if desired. Serve hot and enjoy!

Recipe Notes

  • Feel free to adjust the amount of caramel to your taste preference.
  • This recipe can easily be scaled up for larger gatherings.
  • Experiment with different types of coffee to find your favorite flavor combination.

Easy Credits Recipe with Tips from Real Home Cooks

Delicious Spaghetti Carbonara: A Classic Italian Delight

⚖️
Difficulty
Easy

⏲️
Prep Time
10 mins

🕒
Cook Time
15 mins

⏱️
Total Time
25 mins

🍽️
Servings
4 servings

Spaghetti Carbonara is one of the most cherished dishes from Italy, beloved not just for its uncomplicated preparation but also for its rich, creamy sauce that perfectly coats the pasta. This delightful dish is a celebration of simple ingredients—spaghetti, eggs, cheese, pancetta, and pepper—coming together to create an indulgence that is both comforting and satisfying. The moment you take a bite, the creamy, cheesy sauce envelops your taste buds, while the crispy pancetta adds a savory crunch.

What’s particularly appealing about this classic recipe is its quick cooking time; within just 25 minutes, you can have a restaurant-quality meal on your table. The fusion of flavors creates a warm, inviting aroma that fills your kitchen as you prepare the dish. You’ll appreciate the ease with which it comes together, making Spaghetti Carbonara the ultimate choice for both weeknight dinners and special occasions.

Quick Recipe Highlights

  • Flavor Profile: Rich and savory, with a delightful balance of creamy egg and sharp cheese.
  • Texture: Creamy sauce combined with al dente spaghetti and crispy pancetta for a satisfying mouthfeel.
  • Aroma: The smoky scent of pancetta mingles with the rich scent of cooked cheese and eggs, creating an inviting atmosphere.
  • Visual Appeal: A beautiful plate of spaghetti, glistening with a creamy sauce and garnished with a sprinkle of black pepper.
  • Skill Level Needed: Easy, suitable for beginner cooks with simple techniques.
  • Special Equipment: A large pot for cooking pasta and a skillet for sautéing pancetta.

Recipe Overview

  • Difficulty Level: This recipe is classified as easy. It only requires a few steps and minimal cooking techniques, making it accessible for anyone.
  • Category: A fantastic option for weeknight dinners or special gatherings that require a quick yet impressive meal.
  • Cuisine: This dish hails from the Lazio region of Italy, showcasing traditional Italian cooking methods that highlight the beauty of simplicity.
  • Cost: Minimal ingredients ensure a low-cost meal, with primary expenses being pasta, eggs, and pancetta.
  • Season: Ideal for all seasons, particularly comforting during colder months.
  • Occasion: Perfect for family dinners, dates, or impressing guests at dinner parties.

Why You’ll Love This Recipe

Spaghetti Carbonara is beloved for its deep-rooted Italian flavors that resonate with comfort and satisfaction. The richness of the egg yolk combines flawlessly with the cheese, creating a luscious sauce that clings to the spaghetti. This dish embodies the essence of Italian cooking—simplicity meets bold flavors. Additionally, the crisp pancetta offers a delightful contrast to the creamy sauce, ensuring every bite is a perfect harmony of texture and taste.

The convenience of this recipe is another reason it shines. With minimal preparation and short cooking time, it allows you to whip up an excellent meal after a long day. You can quickly sauté the pancetta while the pasta cooks, making efficiency a standout feature. It’s an answer to those busy weekdays when time is of the essence, yet you don’t want to compromise on flavor or quality.

Nutritionally, while it’s indulgent, Spaghetti Carbonara can be part of a balanced diet. The eggs provide high-quality protein, while the pancetta offers fat that keeps you satisfied. The key is portion control, making it easy to serve this dish within a nutritional framework.

Furthermore, this dish has enviable social and entertainment value. Serving Spaghetti Carbonara can transform any gathering into a culinary experience, sparking conversations and delighting taste buds. It’s a classic recipe that encourages shared meals and joyful moments around the table.

Cost-effectiveness is another highlight. With its simple ingredients, you can create a fascinating dish without breaking the bank, making it suitable for families or those on a budget. Everyone can enjoy the authentic taste and experience of Italian cuisine right at home.

Historical Background and Cultural Significance

Spaghetti Carbonara’s origins are somewhat mysterious, with several theories about how it came to be. Some food historians suggest it was created by Italian charcoal workers (“carbonai”) who would prepare it using basic ingredients that were readily available. This folklore adds a charming touch to its story, indicating how humble beginnings can lead to timeless classics.

Culturally, Carbonara symbolizes Italy’s culinary philosophy: using high-quality ingredients in their simplest forms. Italians value the art of minimalism in cooking, which is perfectly embodied in this dish. It thrives on the idea that good food doesn’t need to be complicated to be enjoyable.

Throughout the years, Carbonara has evolved into a staple of Italian cuisine, inspiring variations and adaptations across the globe. While the traditional recipe focuses on the core ingredients, many depending on the region or available ingredients have added their twist to it.

Regional variations are also abundant, as numerous cooks try incorporating local flavors into this classic dish. While the original recipe calls for guanciale, othere substitutes like pancetta or even bacon have become popular, showing how adaptable and beloved this dish has become worldwide.

Ingredient Deep Dive

Pasta:
The star of Carbonara is undoubtedly the pasta, traditionally spaghetti. It serves as the perfect vehicle for the creamy sauce. Choosing high-quality, dried pasta is essential for achieving the right al dente texture. Pasta is a source of complex carbohydrates that provide lasting energy. Store uncooked pasta in a cool, dry place, and it will last indefinitely. If you’re looking for alternatives, linguine or fettuccine work wonderfully.

Eggs:
Fresh eggs are the backbone of the Carbonara sauce. They create a luscious, creamy coating when mixed with cheese. Incorporating eggs into your diet provides essential proteins and nutrients vital for health. Always opt for large, fresh eggs, and consider free-range options for better quality. Use eggs within a few weeks of purchase, and store them in the refrigerator. For substitutes, try silken tofu blended for a vegan alternative.

Cheese:
Pecorino Romano cheese adds the characteristic sharp and salty flavor to Spaghetti Carbonara. This sheep’s milk cheese is rich in flavor, and freshly grated will provide the best results. Cheese is packed with calcium and essential fats. Ensure proper storage by keeping it sealed in the fridge, where it can last for several weeks. If unavailable, Parmigiano-Reggiano or a mix of the two can be excellent substitutions.

Pancetta:
Pancetta brings in that savory, smoky essence to Carbonara. It’s typically used uncooked in Italy, allowing its nuanced flavor to surface during the cooking process. Besides being delicious, cured pork products like pancetta are rich in proteins and can contribute to a balanced meal. Store it in the refrigerator, tightly wrapped to maintain its freshness. Feel free to swap it with guanciale for a more authentic taste or bacon for a different spin.

Black Pepper:
High-quality black pepper elevates the dish with its zingy flavor profile. As a healthy spice, it aids digestion and adds warmth. Always use freshly cracked pepper to enhance the flavor tremendously. Store peppercorns in an airtight container away from moisture, and they can last for years. Alternatives include white pepper for milder flavor or chili flakes for extra heat.

Common Mistakes to Avoid

  • Overcooking the pasta: Make sure to cook the spaghetti al dente. It continues to cook slightly when combined with the sauce, so avoid mushiness.
  • Using cold eggs: For the best texture, use room temperature eggs. Cold eggs don’t blend well and create a lumpy sauce.
  • Not reserving pasta water: Always save a cup of pasta cooking water before draining. It’s essential for adjusting the sauce consistency.
  • Cooking too slowly: Timing is crucial when combining the ingredients. The pasta must be hot enough to properly cook the eggs without scrambling them.
  • Using pre-grated cheese: Pre-grated cheese often contains fillers that prevent melting. Always choose freshly grated for authentic flavor.
  • Not seasoning properly: Salt the pasta water adequately, as it’s your main chance to enhance flavor. Taste the sauce before serving.
  • Skipping the pepper: The dish’s characteristic flavor relies on black pepper. Don’t skimp on this seasoning; fresh ground is best.
  • Adding cream: Traditional Carbonara does not include cream. The richness comes from eggs and cheese alone.

Essential Techniques

Cooking Pasta: Cooking pasta properly is crucial for a perfect Carbonara. Start with salted boiling water, adding the pasta only when the salt has dissolved. Look for al dente texture—cooked but still firm. This ensures the pasta absorbs more flavor from the sauce later.

Combining Ingredients: The technique of mixing hot pasta with eggs is key to emulsifying the sauce without scrambling it. Remove the pasta from the heat and quickly add the egg mixture while stirring vigorously to create a creamy sauce. This technique takes practice but creates that iconic texture.

Pro Tips for Perfect Spaghetti Carbonara

1. Use high-quality ingredients—fresh eggs, imported cheese, and artisanal pasta will make a noticeable difference in flavor and texture.
2. Do not add the egg mixture while the heat is on. Allow the pasta and skillet to cool slightly, preventing the eggs from cooking too fast.
3. If the sauce is too thick, gradually add reserved pasta water until desired consistency is reached.
4. For an extra layer of flavor, consider adding minced garlic to the pancetta as it cooks.
5. Do not skip the garnish! A sprinkle of extra grated cheese and cracked pepper elevates presentation and taste.
6. Experiment with herbs such as parsley or basil for a fresh touch alongside the deep flavors of Carbonara.
7. Try adding seasonal vegetables like peas or asparagus for a colorful and nutritious twist.
8. Plan your serving timing; serve immediately to enjoy the sauce at its best smooth, and creamy texture.

Variations and Adaptations

Spaghetti Carbonara is versatile, allowing for many delicious variations. Consider substituting the traditional guanciale with smoked salmon for a modern seafood twist. The smoky flavor pairs surprisingly well with the creamy sauce, providing a fresh take on the classic.

Seasonal adaptations can also play a pivotal role. Adding fresh peas in spring or roasted butternut squash in the fall can introduce new flavors while maintaining the dish’s integrity. Both ingredients easily complement the creamy sauce and elevate the dish.

For dietary modifications, making a vegan version is possible by using cashew cream or silken tofu as a base, along with nutritional yeast for a cheesy flavor. This caters to those looking for plant-based options while keeping the heart of Italian cuisine alive.

Flavor variations include using different cheese types, such as smoked Gouda or pecorino, to introduce new depth. Each brings a distinct taste profile that can transform the experience of traditional Carbonara.

Texture modifications can also come into play; adding a crunchy breadcrumb topping can enhance the mouthfeel while providing a contrast to the creamy sauce. Frying breadcrumbs in olive oil until golden can create an irresistible topping.

Lastly, presentation alternatives can astound when you experiment with serving Carbonara in unique ways—using hollowed-out zucchini or spaghetti squash as a base for those looking for a low-carb option.

Serving and Presentation Guide

Plating techniques play a role in the appreciation of this dish. Twirl the spaghetti using a pasta fork in the center of the plate to create a nest-like appearance. This not only looks appealing but helps retain the sauce.

Garnishing ideas include a light sprinkling of fresh chopped parsley for color contrast and a pinch of freshly cracked black pepper for added flavor. A dusting of extra Pecorino Romano cheese provides authenticity and adds to visual indulgence.

For traditional accompaniments, offer a side of garlic bread or a fresh green salad to complete the meal. This balance of flavors allows guests to enjoy the rich Carbonara alongside refreshing sides.

Modern serving suggestions include presenting the dish family-style in a large bowl, enabling guests to help themselves while creating a communal dining experience. This method fosters interaction and warmth around the table.

Always consider temperature when serving. Carbonara tastes best when hot, so serve immediately after finishing preparation. If it sits too long, the sauce can thicken, reducing its appeal.

Lastly, portion control is essential to ensure guests enjoy without overindulging. Serve moderate portions, allowing for seconds if desired while managing the meal’s richness.

Wine and Beverage Pairing

Pairing Spaghetti Carbonara with suitable wines can enhance your meal’s overall experience. A crisp white wine, like Pinot Grigio, complements the dish’s richness while refreshing the palette.

For those who prefer red, consider a light-bodied Chianti. Its acidity cuts through the creamy sauce without overwhelming the flavor profile, maintaining balance.

Non-alcoholic alternatives might include sparkling water with lemon or herbal iced tea, providing refreshing options that don’t detract from the main flavors.

Coffee or tea can complement the meal if desired. A robust espresso or herbal tea served post-dinner can provide a satisfying close.

Always serve wines chilled or at room temperature, ensuring optimal enjoyment of your beverage alongside this classic Italian favorite.

Storage and Shelf Life

Proper storage of Spaghetti Carbonara is crucial for maintaining quality. Leftover Carbonara should be cooled completely before refrigerating, packed in an airtight container. It can last safely in the fridge for up to 3 days.

For longer storage, consider freezing portions of the sauce without the pasta. Store in freezer-safe containers, ensuring to leave space for expansion. Thawed sauces should be consumed within a couple of days.

When reheating, add a splash of reserved pasta water to refresh the consistency before warming in the microwave or a skillet over low heat. Stir continuously to integrate the water into the sauce.

Signs of spoilage to watch for include off smells or changes in texture. If unsure, trust your instincts; always prioritize food safety.

For future reference, carbonara is best enjoyed fresh. However, using these storage guidelines helps maximize your enjoyment of leftovers.

Make Ahead Strategies

Preparing components of Spaghetti Carbonara in advance can streamline your cooking experience. Boil and cool the pasta ahead, tossing it lightly in olive oil to prevent sticking. Refrigerate until ready to use, saving time during meal prep.

You can also prepare pancetta in advance, storing it in the fridge or freezer. When it’s time to cook, simply reheat before combining it with the pasta and sauce.

Mix the egg and cheese mixture ahead of time, covering it with plastic wrap until ready to use. This action spares you moments of fussing in the kitchen when all you want is to serve.

Evaluate quality impacts: While fresh is best, prepping components can help preserve flavors and textures. Timing is everything in assembling the final dish—aim to put it all together just before serving.

Consider reheating leftovers gently for the best results. Avoid heating on high and stir frequently to prevent the sauce from separating or becoming too thick.

Scaling Instructions

Scaling Spaghetti Carbonara can be easily done without affecting the quality of the dish. To halve the recipe, simply divide each ingredient by two. Adjust cooking times slightly as less volume may cook faster.

When doubling or tripling, ensure your pasta and sauce are adjusted accordingly, remembering to keep ratios consistent. Larger portions may require increased energy on the stovetop; consider using larger cookware if necessary.

Additional equipment may be necessary for larger gatherings. A bigger pot for pasta or multiple frying pans can help avoid overcrowding and ensure even cooking.

Timing modifications are based on the number of servings. Monitor closely to adapt cooking times for ingredients while ensuring they blend well for taste and quality.

Consider storage options; larger batches should also factor in cooling parameters to ensure food safety. Always prioritize proper storage methods regardless of portion size.

Nutritional Deep Dive

Spaghetti Carbonara is nutritional in several ways. The macro breakdown showcases a combination of carbohydrates from the pasta, protein from the eggs and pancetta, along with fats primarily derived from cheese and pancetta.

Micronutrient analysis reveals calcium from cheese, critical for strong bones, and several vitamins from the egg yolks, including vitamin D and B12, essential for energy metabolism.

Health benefits associated with moderation can lead to a balanced diet when maximized with whole grains and lean proteins. Adjusting components can add more vegetables, increasing fiber and nutritional integrity.

A portion analysis shows that while rich, consuming appropriate servings allows for great enjoyment without guilt. Balancing it with lighter sides can also contribute to overall wellness.

For weight management, this dish encourages mindfulness regarding portions and promotes the use of lighter variants, helping fit the dish into healthy eating patterns without deprivation.

Dietary Adaptations

Gluten-free variations can use chickpea or lentil-based pasta, allowing those with dietary restrictions to enjoy Carbonara without compromising taste or texture. These alternatives offer extra protein and fiber.

Dairy-free adaptations might consider coconut cream or nutritional yeast for a cheesy flavor profile. Specialized cheese alternatives can also help maintain traditional flavors without dairy.

For vegan options, replace eggs with silken tofu blended with nutritional yeast, creating a creamy sauce without the traditional ingredients. This caters to plant-based diets while keeping integrity.

Low-carb enthusiasts can swap traditional pasta with zucchini noodles or cauliflower rice, allowing those on ketogenic diets to relish the flavors of Carbonara smartly.

Paleo diets can embrace Carbonara by utilizing sweet potato or squash-based pasta alternatives and ensuring no grains are included in the ingredients.

Other specific diets, like low-FODMAP, may modify ingredients such as cheese and pancetta. Always consider alternatives suitable for individual needs while keeping the core essence of Spaghetti Carbonara intact.

Troubleshooting Guide

Texture issues are often due to serving spaghetti too cold or allowing the sauce to sit too long. If this happens, simply reheat gently while adding a little reserved pasta water to smoothen the sauce.

Flavor balance might require adjustments, particularly if the dish ends up too salty. Adding a splash of lemon juice or fresh herbs can brighten the flavors without overpowering them.

Temperature problems can occur when pasta cools too quickly. Consider serving on warmed plates or preheating your serving dishes to maintain a cozy warmth throughout the meal.

Equipment challenges might hinder your ability to prepare. Always double-check your tools to ensure you have what you need before starting. Missing tools can cause delays.

Ingredient substitutions can lead to unwanted results. Stick to recommended alternatives for the best outcomes, especially concerning core items like cheese and meat.

If timing concerns arise, ensure that you coordinate cooking different elements simultaneously to streamline the overall process and ensure everything is served hot.

Recipe Success Stories

Community feedback has often celebrated the simplicity of this Spaghetti Carbonara recipe. Many have shared how it became a family favorite, easy to whip up even on the busiest days.

Variation successes are widespread; readers have delighted in exploring alternatives like adding seasonal vegetables, showcasing how versatile this dish can be when you let creativity shine.

Adaptation stories reveal how the recipe allows for easy experimentation, accommodating a variety of dietary preferences without losing taste or emotion connected to the classic dish.

Photography tips shared on social platforms have inspired many to beautifully present their Carbonara creations. The glistening, creamy textures and vibrant garnishes make for an impressive display in any setting.

Reader suggestions have enriched the recipe space, with numerous people recommending personal touches, like adding truffle oil or fresh herbs, allowing the recipe to evolve continuously.

Frequently Asked Questions

What kind of pasta is best for Carbonara?

Traditionally, spaghetti is used for Carbonara due to its long, thin shape, which perfectly holds the creamy sauce. However, other types such as fettuccine or bucatini are also acceptable alternatives.

Can I make Carbonara vegetarian?

Yes, you can substitute pancetta or guanciale with sautéed mushrooms or smoked tofu to maintain a hearty flavor without meat. This way, you create a vegetarian-friendly version of this classic dish.

Is it necessary to use pecorino cheese?

While Pecorino Romano is traditional, you can substitute it with Parmigiano-Reggiano or a blend of different cheeses to suit your taste. Just ensure they are grated fresh for the best results.

Can Carbonara be frozen?

It’s best not to freeze Carbonara because the sauce can separate when thawed. However, you can freeze the sauce (without pasta) and reheat it fresh pasta later for best results.

What is the secret to creamy Carbonara?

The key to achieving that creamy texture lies in quickly mixing the pasta with the egg and cheese mixture while the pasta is still hot. This ensures the eggs cook gently and emulsify, avoiding scrambling.

How can I adjust the recipe for a larger group?

Scaling the recipe is easy; simply maintain the proportions of ingredients, use larger pots, and adjust cooking times as necessary. Monitor doneness closely to ensure quality remains consistent.

Can I use egg whites instead of whole eggs?

Using just egg whites will significantly alter the flavor and texture of the sauce, as yolks provide richness and creaminess. For a lighter version, consider using one whole egg and additional egg whites.

What should I serve with Carbonara?

Pairing Spaghetti Carbonara with a crisp green salad, garlic bread, or seasonal vegetables creates a delightful balance. These sides complement the richness of the dish and add nutritional variety.

Is Carbonara safe for pregnant women?

Pregnant women should ensure the eggs used are pasteurized to minimize the risk of foodborne illness, especially since the dish contains raw or lightly cooked eggs. Consult with a doctor for personalized advice.

Are there gluten-free pasta options available?

Yes, numerous gluten-free pasta options like chickpea or quinoa pasta exist, allowing those with dietary restrictions to enjoy Carbonara without compromising enjoyment.

Additional Resources

For those eager to explore more culinary delights, consider checking out our related recipes, such as Fettuccine Alfredo, Pasta Primavera, or Pesto Linguine. Each brings unique flavors and techniques that can broaden your cooking skills.

Technique guides on essential cooking methods like sautéing, boiling pasta properly, or mastering the perfect egg sauce can also be helpful. Familiarizing yourself with these processes boosts confidence in the kitchen.

Diving into ingredient information can enrich your culinary knowledge base and inspire creativity. Understanding seasonality and flavor profiles helps develop your cooking style.

Equipment recommendations can simplify meal prep. Knowing essential kitchen tools that work best for specific tasks ensures a smooth cooking journey, especially when preparing intricate dishes.

Seasonal variations to consider can bring freshness to your meals. Depending on what’s available, you can adapt your recipes to incorporate seasonal eats that add vibrance and taste to your dishes.

Join the Conversation

Engaging with our recipe community is a fantastic way to enhance your cooking journey. Sharing your creations on social media encourages creativity and connection with fellow food lovers.

Photography tips shared can inspire others to showcase their dishes beautifully. Don’t hesitate to share your photos, as they can motivate and inspire others to try their hand at cooking.

Recipe reviews assist in providing feedback and personal experiences with our dishes. Leaving comments on your dish will help others decide and make you part of our cooking family.

Discussion around recipe variations sparks innovative ideas to enhance classic dishes. Your insights can foster a creative atmosphere within our food-loving community where everyone learns and grows together.

Explore our forums or comment sections to connect with others who appreciate culinary arts. Be part of a community that celebrates food, cooking techniques, and shared experiences around Spaghetti Carbonara and beyond.

The Recipe

Spaghetti Carbonara

Serves: 4 servings

Prep Time: 10 mins

Cook Time: 15 mins

Total Time: 25 mins

Kitchen Equipment Needed

  • Large pot for boiling pasta
  • Skillet for cooking pancetta
  • Mixing bowl for egg and cheese
  • Pasta fork or tongs for serving

Ingredients

  • 320g spaghetti
  • 150g pancetta, diced
  • 2 large eggs
  • 100g Pecorino Romano cheese, grated
  • Freshly cracked black pepper, to taste
  • Salt, for pasta water

Directions

  1. Bring a large pot of salted water to a boil and add the spaghetti. Cook according to package instructions until al dente.
  2. Meanwhile, in a skillet over medium heat, cook the diced pancetta until crispy. Remove from heat and set aside.
  3. In a mixing bowl, whisk together the eggs and grated Pecorino Romano until well combined.
  4. Once the pasta is cooked, reserve a cup of pasta water and drain the rest. Return the pasta to the pot while it is still hot.
  5. Quickly pour the egg and cheese mixture over the pasta, tossing vigorously to combine without scrambling the eggs. Add reserved pasta water as needed to achieve the desired sauce consistency.
  6. Finally, fold in the cooked pancetta and season generously with freshly cracked black pepper. Serve immediately, garnished with additional cheese if desired.

Recipe Notes

  • For a creamier pasta, add more egg yolks.
  • Fresh herbs can be added for additional flavor.
  • Store leftovers in the refrigerator and consume within 3 days.

Homemade Starbies Latte – Easy Recipe for Coffee Lovers

Starbies: A Decadent Recipe for Coffee-Infused Delights

⚖️
Difficulty
Medium

⏲️
Prep Time
15 mins

🕒
Cook Time
30 mins

⏱️
Total Time
45 mins

🍽️
Servings
4 servings

Welcome to the world of Starbies, where rich coffee meets indulgent sweetness! This delightful recipe elevates your coffee experience into a luscious dessert that you won’t soon forget. The luscious creaminess paired with the aromatic notes of freshly brewed coffee makes every bite a heavenly adventure, tantalizing your taste buds. Whether you are a coffee fanatic or just looking for a sweet treat, Starbies is the perfect solution for any occasion.

As the perfect balance of flavors dances on your palate, the comforting warmth of coffee resonates deep within your soul. This dessert is incredibly versatile, allowing you to serve it at brunch, transform it into a show-stopping finale at dinner parties, or even enjoy it as a delightful afternoon pick-me-up. The seductive aroma of brewed coffee fills the air as you prepare this enchanting dish, taking your senses on a journey that begins long before the first bite.

Quick Recipe Highlights

  • Flavor Profile: Rich and creamy with a satisfying coffee kick, this dessert envelops your mouth with notes of chocolate, vanilla, and a hint of sweetness. Perfect for both coffee lovers and dessert enthusiasts alike.
  • Texture: The velvety creaminess contrasts beautifully with a light, fluffy texture, offering an irresistible mouthfeel that leaves you wanting more.
  • Aroma: The fragrant invitation of freshly brewed coffee creates an enticing aroma that’s both comforting and invigorating.
  • Visual Appeal: Beautifully layered with a glossy finish, Starbies presents an inviting appearance, showcasing an elegant combination of brown and creamy white that is as tempting as it is delightful.
  • Skill Level Needed: With a medium difficulty level, this recipe is approachable for novice bakers while still providing enough challenge to excite seasoned cooks.
  • Special Equipment: A whisk, mixing bowls, an electric mixer, and glasses or ramekins for serving will ensure success in making this decadent masterpiece.

Recipe Overview

  • Difficulty Level: The medium difficulty level strikes a balance between approachability and skill, making it a fantastic choice for both beginner and experienced bakers alike. With a few essential techniques, anyone can create this delightful treat.
  • Category: This recipe falls under the dessert category, serving as a perfect ending to any meal or a delicious afternoon snack.
  • Cuisine: Influenced by coffee culture, this dessert finds its roots in culinary traditions that celebrate rich flavors and indulgent treats. Its adaptability allows for regional variations to shine through.
  • Cost: Budget-friendly, the ingredients are accessible, making it easy to whip up this luxurious dessert without breaking the bank.
  • Season: Ideal for any season, the comforting qualities of coffee are perfect in cooler months, while its refreshing nature makes it a delightful treat in warmer weather.
  • Occasion: From holiday gatherings to intimate dinners, Starbies shines in various occasions, inviting family and friends to indulge in a decadent culinary experience.

Why You’ll Love This Recipe

Starbies offers an enticing combination of taste and texture that will keep you coming back for more. The richness of the coffee-infused dessert intertwined with the creamy layers creates a dynamic flavor experience. Each spoonful adds depth, leaving you satisfied yet eager for another bite.

This recipe is incredibly convenient, minimizing stress while maximizing flavor. Most of the preparation can be done ahead of time, allowing you to relax and enjoy the company of your guests without worrying about last-minute cooking. The simplicity of the ingredient list and method makes it easy to replicate whenever the craving strikes.

Nutritionally, this dessert can also pack a punch! Coffee can boost metabolism, while high-quality ingredients guarantee satisfaction without overwhelming your palate with unnecessary additives. Replacing traditional sugar with alternatives makes it easier on the waistline without sacrificing flavor.

Whether hosting friends or enjoying family gatherings, Starbies transforms a casual get-together into an elegant affair. Its ability to impress while staying approachable makes it a beloved treat among guests. Share this indulgence as a unique way to create lasting memories!

Lastly, it’s budget-friendly! With simple yet adaptable ingredients, Starbies is accessible regardless of your culinary skill level or kitchen prowess. You can whip this up without breaking the bank, enjoying exquisite treats in the comfort of your home.

Historical Background and Cultural Significance

Starbies, in its essence, draws inspiration from the global coffee culture, which has evolved significantly throughout history. The origins of using coffee in desserts date back centuries, with cultures worldwide experimenting with the rich flavor profile of this beloved bean in various culinary applications.

Throughout different regions, coffee has been culturally significant as a social lubricant and a source of comfort. The act of brewing and enjoying coffee has always been a communal gathering experience, leading to the creation of culinary delights such as Starbies that can be enjoyed together.

As coffee spread around the world, many variations emerged, reflecting the unique culinary traditions of each region. Starbies reflects this diversity, showcasing the adaptability and creativity of bakers inspired by their local ingredients and flavors.

Over time, the recipe has evolved, incorporating modern techniques and flavor combinations that celebrate coffee while offering something fresh and exciting. New interpretations of Starbies can be found in contemporary desserts, each version encouraging creativity in the kitchen.

Ingredient Deep Dive

Coffee: Coffee is not just a beloved beverage; it carries a rich cultural heritage. Historically, coffee originated in Ethiopia and spread globally, celebrated for its stimulating effects and robust flavor. Nutritionally, coffee contains antioxidants, and moderate consumption may provide potential health benefits like improved cognitive function.

When choosing coffee for Starbies, opt for freshly ground beans to maximize flavor and aroma. Store coffee beans in an airtight container in a cool place to preserve freshness, and consider alternative options like decaf for a caffeine-free experience.

Cream: Cream adds an indulgent richness to the dessert, enhancing texture and flavor. The history of dairy use dates back thousands of years, with various cultures incorporating cream into their cuisine. Nutritionally, cream provides fats that contribute flavor and satiety, but moderation is key.

For substitutes, options like coconut cream or cashew cream can maintain the richness without dairy concerns. Be sure to store unused cream in the refrigerator and check for freshness before using it in recipes.

Common Mistakes to Avoid

  • Underestimating the strength of coffee – Always taste the brewed coffee before using it in recipes to ensure it meets your flavor expectations.
  • Overwhipping cream – Be cautious not to overwhip the cream, which can lead to a grainy texture instead of the desired smoothness.
  • Not allowing components to cool – Ensuring that hot mixtures cool before combining them with cream can prevent curdling and improve overall texture.
  • Skimping on quality ingredients – Using low-quality coffee or cream can dramatically impact the flavor and overall enjoyment of the dessert.
  • Ignoring measurements – Precision is crucial in baking; be sure to measure ingredients accurately to achieve the perfect balance of flavors.
  • Skipping the resting period – Allowing the dish to rest in the refrigerator helps flavors meld together and achieve the best culinary experience.
  • Rushing the preparation steps – Each step is essential; taking your time ensures high-quality results and a suitable texture.
  • Overcomplicating garnish – Keep garnishing simple; sometimes a dusting of cocoa powder or a sprig of mint is enough to elevate presentation without overshadowing the dessert.

Essential Techniques

Whipping cream is a key technique in creating the desired texture for this dessert. It’s essential to achieve soft peaks without overwhipping. Start with chilled cream in a cold bowl, and progress gradually to avoid graininess. Visual cues include a smooth and glossy appearance when whipped correctly.

Layering is another vital technique. Proper layering enhances the dessert’s visual appeal and the tasting sequence. Begin with the heaviest ingredient and end with the lightest to create a balance of flavors as you eat through each layer.

Pro Tips for Perfect Starbies

1. Use high-quality, freshly ground coffee beans to enhance the overall flavor of your Starbies.

2. Chill your cream, bowls, and utensils before whipping to help it achieve maximum volume.

3. Experiment with flavored extracts, such as vanilla or almond, to add an extra dimension of flavor.

4. Be cautious with the sugar; add gradually, tasting often until you reach the desired sweetness.

5. Give the dish adequate time to chill in the refrigerator before serving to allow flavors to meld.

6. Consider adding a touch of cinnamon or nutmeg for additional warmth and complexity.

7. Use dark chocolate shavings or a drizzle of chocolate sauce for elegant garnishing that complements the flavors.

8. Personalize with seasonal fruits as toppings for a fresh twist on the original recipe.

Variations and Adaptations

Regional variations of Starbies could include incorporating local flavors, such as spices from chai or matcha. Each addition reflects the culinary trends of different areas.

In the summer months, consider adapting this recipe into a cold-brew version, layering chilled coffee with whipped cream for a refreshing alternative.

For dietary modifications, this dessert can easily be made gluten-free by substituting ingredients accordingly and vegan by using plant-based cream and milk alternatives.

Flavor variations can also include using flavored syrups or reducing sugar for a less sweet option, providing a kick of flavor while making health-conscious choices.

Textural modifications, like adding crushed cookies or caramel swirls, can add exciting crunch and delightful surprises in every bite.

For presentation alternatives, consider serving in short glasses with artistic layering to showcase the beauty of the ingredients and create an impressive display.

Serving and Presentation Guide

Plating techniques play a crucial role in enhancing the dessert’s visual appeal. Consider using clear glass bowls or elegant ramekins to showcase the beautiful layers of cream and coffee.

Add garnishing ideas, such as cocoa powder, chocolate shavings, or mint leaves, for a touch of color and freshness. Traditional accompaniments include shortbread cookies or biscotti, which can add texture and complement the flavors.

For modern serving suggestions, consider creating a deconstructed version, allowing guests to mix their elements. Adjust temperature considerations by serving chilled for maximum refreshment, especially in warmer months.

Lastly, portion control tips can help maintain a balance between indulgence and moderation. Serve small portions in tasting sizes to encourage sharing and enjoyment, allowing everyone to try this delightful dessert.

Wine and Beverage Pairing

For wine pairings, consider a dessert wine like a sweet Moscato, which brings a bubbly contrast to the richness of Starbies.

Non-alcoholic alternatives can include iced coffee or sparkling water with a twist of lemon, offering a refreshing palate cleanser alongside the dessert.

If applicable, pairing with coffee or tea can enhance the coffee flavors in Starbies, selecting rich blends that complement the sweetness of the dessert.

Temperature considerations are essential; ensure any beverages served are appropriately chilled or warmed in line with guests’ preferences.

Serving suggestions may vary; consider pairing Starbies with a creamy cappuccino to enhance the coffee experience while providing a delightful contrast in textures.

Storage and Shelf Life

For storage methods, keep Starbies in an airtight container in the refrigerator, where it can last up to three days while maintaining its quality.

Maintain temperature requirements by avoiding prolonged exposure to heat, which could spoil the ingredients. Invest in quality glass containers for optimal air-tight storage.

Signs of spoilage include off smells or separation in ingredients, indicating it’s time to discard the dessert. Reheat gently using a microwave or double boiler if necessary, ensuring not to overdo it to maintain texture.

Freezing guidelines are not advisable due to the cream’s texture changes, but if necessary, it’s advisable to freeze components separately to preserve quality.

Make Ahead Strategies

Creating a prep timeline allows you to streamline the cooking process. Consider prepping individual components and storing them ahead of the event for a more relaxed cooking experience.

Quality impact assessment is crucial; ingredients like whipped cream should be prepared fresh for the best results, while coffee can be brewed ahead.

Assembly tips include layering components carefully right before serving to keep the textures intact, avoiding settling or mixing.

Add fresh elements, like garnishes, at the last moment for vibrancy and a fresh appeal that enhances presentation, ensuring guests enjoy the freshness!

Scaling Instructions

Halving the recipe can work smoothly with careful adjustments to ingredient measurements, ensuring flavor profiles remain consistent.

Doubling or tripling requires adequate equipment space, so consider using larger bowls and mixing containers for efficiency during preparation.

Timing modifications may also be necessary; plan accordingly to avoid crowding the cooking space, giving each component time to shine.

Storage considerations apply in larger batches, ensuring the dessert is stored properly to maintain quality and ease of service.

Nutritional Deep Dive

The macro breakdown of Starbies emphasizes the balance of fats, carbohydrates, and proteins, presenting a fulfilling dessert option for a balanced diet when enjoyed in moderation!

Micronutrient analysis showcases valuable nutrients found in coffee, dairy, and any ingredients used while maintaining an enjoyable dessert experience.

Health benefits, such as improved cognitive function and satisfaction from fulfilling flavors, can promote overall well-being when integrated into a healthy lifestyle.

Dietary considerations and portion analysis are necessary; provide mindful serving sizes that delight the palate without overwhelming it. Consider creating smaller sampler versions for a guilt-free indulgence.

Weight management tips include incorporating coffee’s metabolism-boosting properties while keeping the creamy elements within reasonable limits. Enjoy in moderation!

Dietary Adaptations

To make it gluten-free, opt for certified gluten-free ingredients and substitutes that align with dietary needs. Careful ingredient labels can ensure inclusivity.

Dairy-free adaptations can be achieved with coconut or almond cream, providing the same lush experience without dairy products.

For vegan options, use plant-based milk and cream alternatives that maintain the dessert’s rich and creamy textures focused on using wholesome ingredients.

Low-carb and keto modifications could involve substituting sugar for low-carb alternatives, making a decadent treat that suits dietary restrictions while still delivering on flavor.

Paleo diets can also find a fit with substitutions like honey or maple syrup while staying true to natural ingredients, perfect for those lifestyle choices.

For low-FODMAP adjustments, consider lactose-free milk options and storing recommendations to avoid digestive discomfort while enjoying this delightful dessert.

Troubleshooting Guide

Texture issues often stem from overwhipping or underchilling the cream. If it appears grainy, slowly re-whip to achieve fluffiness.

Flavor balance can elude beginners; if it’s too sweet or bitter, use a pinch of salt to harmonize flavors and balance the sweetness of the cream.

Temperature problems arise with overcooking or undercooking coffee; using brewed coffee at room temperature will help maintain an ideal consistency in the layers.

Equipment challenges, like inadequate mixing bowls or mixers, can hinder progress; ensure your equipment is up to the task of handling whipped components effectively.

Ingredient substitutions can lead to unexpected outcomes. Stick to the recommended ingredients or research alternative substitutes that maintain flavor integrity.

Timing concerns are common; reading the full recipe ahead of time and prepping components in advance can alleviate stress, ensuring a smooth cooking process.

Recipe Success Stories

Community feedback has celebrated the simplicity and rich flavors of Starbies. Many readers have voiced their joy at discovering how approachable the recipe is, making it a go-to dessert choice.

Variation successes include users sharing their takes on the recipe by incorporating spices, different coffee types, and flavorings that resulted in unique dessert versions.

Adaptation stories reflect the versatility of Starbies; readers have shared tales of using leftover coffee in creative ways, inspiring others to use what they have on hand.

Photography tips shared by community members show how beautiful Starbies can be when plated correctly, encouraging budding food photographers to capture their culinary creations.

Frequently Asked Questions

Can I make Starbies in advance?

Yes! You can prepare the components ahead of time and assemble it just before serving. This ensures freshness and saves you time on busy days.

What’s the best coffee to use for this recipe?

For the best flavor, use freshly ground medium to dark roast coffee for a robust flavor that balances perfectly with the creaminess of the dessert.

Can I use dairy alternatives for this recipe?

Absolutely! Coconut cream, almond milk, or any plant-based alternative can be used for a delicious dairy-free version of Starbies.

How should I store leftovers?

Store any leftover Starbies in airtight containers in the refrigerator. Consume within three days for optimal taste and texture.

Can I freeze this dessert?

Freezing may affect the texture of the whipped cream, so it’s best to avoid freezing the assembled dessert. Instead, freeze components separately if necessary.

How do I vary the flavors?

You can experiment by adding flavored syrups, using different types of coffee, or incorporating spices like cinnamon or nutmeg for a unique touch.

Is this recipe suitable for kids?

Starbies is generally suitable for kids, but you might want to use milder coffee or even chocolate milk as a substitute for a caffeine-free option.

What can I do if my cream doesn’t whip?

If your cream doesn’t whip, it may be too warm or not fresh. Ensure all equipment is chilled, and try again with cold cream.

Can I halve or double the recipe?

Yes, you can easily halve or double the recipe! Just ensure you adjust the ingredient proportions accurately for the best results.

What is the best way to translate this into a gluten-free recipe?

Use certified gluten-free ingredients and be mindful of pre-made components like cookies if included in garnish. Always check labels!

Additional Resources

If you enjoyed Starbies, check out other related recipes that feature delightful coffee-infused treats or desserts that promise an indulgent experience. Delve into technique guides that help you master whipping cream and layers.

Explore ingredient information to learn more about the health benefits and culinary potential of coffee, cream, and more. Lastly, equipment recommendations can get you the right tools for your desired results, ensuring every dessert you make is divine!

Join the Conversation

We’d love to see your Starbies creations! Share your photos on social media and tag us for a chance to be featured. Join our community by posting your variations and adaptations of this recipe, as we celebrate creativity in the kitchen together.

Engage with fellow food lovers through recipe reviews, sharing your experiences, tips, and tricks that make making Starbies even more enjoyable.

The Recipe

Starbies

Serves: 4 servings

Prep Time: 15 mins

Cook Time: 30 mins

Total Time: 45 mins

Kitchen Equipment Needed

  • Mixing bowls
  • Whisk or electric mixer
  • Measuring cups and spoons
  • Ramekins or glasses for serving

Ingredients

  • 1 cup freshly brewed coffee
  • 1 ½ cups heavy cream
  • ½ cup sugar (or to taste)
  • 1 teaspoon vanilla extract
  • Chocolate shavings for garnish
  • Cocoa powder for dusting

Directions

  1. Brew 1 cup of your favorite coffee and set aside to cool.
  2. In a separate bowl, whip the heavy cream until soft peaks form.
  3. Gradually add sugar and vanilla extract while continuing to whip until creamy and smooth.
  4. Gently fold the cooled coffee into the whipped cream until well combined.
  5. Layer the mixture into individual ramekins, starting with a layer of the coffee cream, and repeat until full.
  6. Chill in the refrigerator for at least 30 minutes before serving to enhance flavors.
  7. Garnish with chocolate shavings and a dusting of cocoa powder before serving.

Recipe Notes

  • Adjust sugar according to your taste preference.
  • Feel free to substitute coffee with cold brew for a refreshing option.
  • Enjoy with crushed cookies on top for added texture.

Best Oreo Iced Coffee Recipe for a Creamy Sweet Treat

Oreo Iced Coffee: A Perfect Blend of Creamy Delight

⚖️
Difficulty
Easy

⏲️
Prep Time
10 mins

🕒
Cook Time
5 mins

⏱️
Total Time
15 mins

🍽️
Servings
2

Indulge in the delightful world of **Oreo Iced Coffee**, a creamy and sweet beverage that offers a stunning refreshment on a hot day. This scrumptious iced coffee recipe combines rich coffee with the unique flavors of Oreo cookies, creating a taste that will make your taste buds dance. Perfect for coffee lovers and dessert aficionados alike, this drink captures the essence of your favorite cookies and pairs it with an energizing caffeine kick that’s hard to resist.

Imagining the coolness of refreshing iced coffee blended with the crumbled texture of Oreo cookies is enough to elevate your mood any day. Each sip is a sweet, chocolaty dream that not only satisfies your coffee cravings but also brings the joy of snacking to life. Easy to prepare and utterly satisfying, this Oreo Iced Coffee is your new go-to drink for summer gatherings or a lazy afternoon treat.

Quick Recipe Highlights

  • Flavor Profile: The classic chocolate and cream of Oreos perfectly complement the boldness of the coffee, infusing every sip with a delightful sweetness.
  • Texture: The drink features a smooth and creamy texture, combined with crunchy Oreo pieces for added dimension and fun.
  • Aroma: The aroma is a heavenly blend of freshly brewed coffee intertwined with sweet chocolate notes from the Oreos.
  • Visual Appeal: With its rich, dark color accented by creamy layers and crunchy cookie bits, this drink looks as good as it tastes.
  • Skill Level Needed: This recipe is easy for anyone, even beginners, making it perfect for quick morning pick-me-ups or enjoyable afternoon drinks.
  • Special Equipment: All you need is a blender and a glass to create this luxurious beverage.

Recipe Overview

  • Difficulty Level: With minimal steps and no culinary expertise required, this Oreo Iced Coffee is ideal for anyone looking to whip up a special drink at home.
  • Category: This recipe falls under beverages but can easily double as a dessert option, making it versatile.
  • Cuisine: This cookie-infused iced coffee is a modern American twist on traditional coffee drinks, reflecting a fun take on classic favorites.
  • Cost: This recipe remains budget-friendly, typically costing under $5 for two servings, especially if you buy ingredients in bulk.
  • Season: Enjoy this iced coffee in warm weather, but it can also be a cozy treat during chillier seasons when you’re craving comfort.
  • Occasion: Serve it at casual brunches, summer parties, or even as a fun weekday treat to brighten your day.

Why You’ll Love This Recipe

Treat yourself to a delicious blend of flavors that will captivate your taste buds with this Oreo Iced Coffee. Each sip brings a delightful mix of sweetness from the Oreos and the strong robust flavor of the coffee, creating a well-rounded beverage that pleases any palate. The unique texture and cool temperature make it particularly refreshing, especially during hot weather or after a long day.

This recipe is incredibly convenient, as it requires only a handful of common ingredients and can be made in just 15 minutes. There’s something wonderfully satisfying about preparing a café-quality drink right in your own kitchen, elevating your at-home experience without the need for fancy coffee shop prices or lengthy waits.

From a health perspective, this drink can be viewed as an indulgence without excessive guilt. Using your favorite coffee can provide a boost of antioxidants, while Oreos can add a nostalgic touch to the flavor profile. It’s an opportunity to savor something sweet while still enjoying caffeine’s benefits.

Sharing this drink with friends or family can turn an ordinary day into a festive occasion. Whether it’s a casual get-together or a family barbecue, serving Oreo Iced Coffee can become a conversation starter that brings smiles to everyone’s faces. Plus, the fun of blending and garnishing allows for creativity that makes entertaining enjoyable.

Cost-effectiveness cannot be overlooked. By making this creamy delight at home, you save money over frequenting coffee shops while still indulging in a delicious treat. With ingredients that are often staples in most households, preparing Oreo Iced Coffee is just a simple mix away, making it an accessible option for everyone.

Historical Background and Cultural Significance

The richly flavored combination of coffee and cookies has roots in both American culture and the international love of coffee. Coffee itself has a long history, deeply embedded in various global traditions, and Americans have consistently sought creative ways to adapt it to suit their tastes. The introduction of chocolate and cream cookies, like Oreos, in the late 19th century has since become ingrained in dessert and snack culture across generations.

Oreo cookies were first introduced in 1912, eventually becoming an iconic American snack. Their rise was not just about taste but also about the cultural significance of cookies in family gatherings and celebrations. The idea of incorporating Oreos into beverages reflects the modern palate’s tendency to experiment and have fun with established flavors and textures, blending nostalgia with innovation.

The evolution of iced coffee itself dates back to the early 19th century in European cafés before gaining incredible popularity in America. The trend continues to grow as coffee consumers seek new and exciting ways to enjoy their brews. Oreo Iced Coffee epitomizes this trend, combining rich cultural backgrounds and modern tastes in one irresistibly creamy beverage.

Regional variations, such as the addition of flavors like peppermint or vanilla, play a role in how this drink can be adapted across different locations, illustrating the versatility of both coffee and cookies in catering to regional preferences. As this drink gains traction, it promises to adapt further, creating elements that can make it a staple in cafés and homes alike.

Ingredient Deep Dive

Coffee: Coffee is steeped in cultural significance as a global beverage enjoyed in various forms. It is loaded with health benefits, including improved mood and cognitive function. When selecting coffee, opting for fresh, locally roasted beans can enhance the flavor profile significantly. Store your coffee beans in a cool, dry place to maintain flavor, and consider grinding them just before use for the best results.

Oreos: Introduced as a delightful treat, Oreos are more than just a cookie; they symbolize joy in childhood memories for many. Nutritionally, while they aren’t health food, they can enhance enjoyment in moderation. When buying Oreos, keep an eye out for limited-edition flavors that can add a fun twist. Store them in an airtight container to keep them fresh, and if you’re feeling adventurous, consider swapping out for gluten-free versions or alternative chocolate sandwich cookies.

Common Mistakes to Avoid

  • Using lukewarm coffee: Always ensure your coffee is chilled or cold-brewed for the best flavor.
  • Not blending long enough: Blend until the Oreos are mostly crushed to avoid large chunks that disrupt texture.
  • Overcomplicating the recipe: Keep it simple; the beauty is in the uncomplicated delight this drink provides.
  • Skipping the ice: Don’t forget to add ice afterward for that refreshing feel; it’s key to enjoyment.
  • Wrong cookie proportions: Balance is key; adding too many cookies can overpower the coffee and detract from the beverage dynamics.
  • Not adjusting sweetness: Depending on coffee strength, you may need to adjust added sugars or flavored syrups.
  • Ignoring presentation: Garnishing with whipped cream and cookie crumbles ups the appeal and showcases this drink’s indulgent essence.
  • Making too early: For the best texture and taste, serve immediately after preparing; don’t let it sit.
  • Mixing flavors indiscriminately: Some cookie flavors might not complement coffee well; stay classic with chocolate or vanilla.
  • Failing to chill: Ensure everything, especially the coffee, is properly chilled before preparation for an enjoyable iced drink.

Essential Techniques

Blending: Blending is crucial for achieving that smooth, creamy texture that makes this drink so satisfying. The goal is to break down the Oreos while incorporating them fully with the cold coffee. To master this technique, blend in short bursts and scrape the sides of the blender as needed. Watch for color change and consistency; a darker, thicker drink indicates success.

Layering flavors: Layering involves introducing flavors step by step to maximize taste. Begin by blending coffee and adding Oreos gradually, tasting as you go. This way, you control the flavor balance, ensuring neither ingredient overpowers the other. Be mindful of your taste buds and adjust accordingly to develop the perfect combination.

Pro Tips for Perfect Oreo Iced Coffee

– Use freshly brewed coffee for optimal flavor; consider cold-brew for less acidity.
– Incorporate a bit of chocolate syrup for added sweetness and flavor.
– Opt for milk or cream alternatives for a unique taste twist; try oat or almond milk.
– Experiment with different cookie flavors for variety, such as mint or peanut butter.
– Garnish generously with whipped cream for added indulgence and visual appeal.
– Use crushed Oreos on top for texture and a fun presentation element.
– Consider adding a drizzle of caramel for extra sweetness and flavor complexity.
– Know your preferred coffee strength to balance flavors perfectly.

Variations and Adaptations

If you’re feeling adventurous, try incorporating **regional variations** by swapping out the Oreos for local favorites or experimenting with different cookie types. To adapt this recipe seasonally, consider adding seasonal spices such as cinnamon or pumpkin spice during fall for a festive touch.

Dietary modifications can also enhance inclusivity; try using gluten-free cookies for a celiac-friendly option or dairy-free milk for vegan diets. You can introduce **flavor variations** such as salted caramel or hazelnut syrup to alter the taste profile significantly.

When looking for **texture modifications**, try blending with a banana for a creamier consistency. Additionally, consider **presentation alternatives** by serving in clear glasses to showcase layers, or adding colorful straws for a fun visual element.

Serving and Presentation Guide

Serve your Oreo Iced Coffee in tall, clear glasses to showcase the beautiful layers of color and texture. For an elegant touch, top with whipped cream and add a sprinkle of crushed Oreos for visual appeal. You may also consider drizzling chocolate syrup along the inside of the glass before pouring for an eye-catching accent.

Garnishing with a mint sprig or chocolate shavings can provide a refreshing contrast and enhance the luxurious feel of the drink. Traditional accompaniments can vary, but pairing with light pastries or cookies allows for an enjoyable coffee experience. Modern serving suggestions could include serving on a platter with colorful straws for added flair.

Temperature plays a crucial role; serve immediately over ice for the best experience, ensuring it remains chilled. Portion control is essential as well—consider offering smaller servings to encourage tasting without overwhelming your guests.

Wine and Beverage Pairing

Matching wines with coffee can be tricky, but consider pairing sweet dessert wines like Moscato for a delightful contrast. Keep in mind the balance between sweet and strong flavors; avoid overly tannic wines that may clash.

For non-alcoholic alternatives, consider pairing with milkshakes or smoothies that mirror the chocolate and creaminess of Oreos, enhancing the indulgent experience. If coffee or tea pairings are in question, enjoy this iced coffee alongside lighter, less robust teas, such as green or herbal blends, to complement flavors without competition.

Always serve chilled, and offer alongside savory snacks or desserts for a complete flavor experience to delight your palate.

Storage and Shelf Life

For optimal enjoyment, store any leftover Oreo Iced Coffee in an airtight container in the refrigerator. It is best consumed within 1-2 days for optimal flavor and freshness. Ensure not to leave it unrefrigerated for extended periods, as it can spoil quickly.

Reheat carefully if you enjoy it warm; however, the texture and flavor may not match the fresh experience. If you choose to freeze, blend thoroughly before using and store it in individual portions. Remember to consume within a month for the best results.

Signs of spoilage include sour smell and separation of ingredients; if you notice anything off, discard it to avoid health risks.

Make Ahead Strategies

Prepare your Oreo Iced Coffee efficiently by pre-brewing your coffee and chilling it in advance, allowing for quicker assembly. Store blended coffee in the fridge, but it’s best to mix in Oreos just before serving to maintain optimal texture.

If bringing this drink to a gathering, assemble all components separately and combine right before serving to retain the crunchy charm of the Oreos. Quality is vital, so avoid having it stored too long in a mixed state, as it may lose its creamy allure.

For the freshest possible experience, consider assembling individual servings ahead of time, maintaining the cookies’ texture integrity while maximizing flavor.

Scaling Instructions

If you want to half or double the recipe, do so by adjusting the ingredients accordingly. Double-check measurements to ensure everyone enjoys the right balance of coffee to Oreos.

Equipment adjustments may be necessary; if you’re making a larger batch, opt for a bigger blender or blend in batches for consistency.

Timing modifications also apply; if increasing serving size, be mindful of blending time, ensuring a smooth finish without overworking the mixture. Be ready to store any extra properly to maintain freshness and taste.

Nutritional Deep Dive

Given the various components, this drink offers a unique macro breakdown, providing carbohydrates primarily from the Oreos and coffee, along with some protein depending on added creams or milks.

Micronutrient analysis shows a mix of calcium and iron primarily from milk and Oreos, boosting nutritional value without heavily compromising flavor. Health benefits include increased alertness from caffeine, which also aids in metabolism.

Would-be enjoyers should consider dietary needs; for instance, those seeking to manage sugar intake may limit Oreos or balance them with healthier milks. **Portion analysis** is key; one serving typically offers moderate calories, making it a fulfilling, but treat-like indulgence.

Dietary Adaptations

For a gluten-free option, look for gluten-free Oreo alternatives that replicate the classic taste. Likewise, for dairy-free enjoyment, utilize cashew or almond milk, ensuring a smooth blend without compromising taste.

Helpful adaptations for vegan diets can include plant-based whipped cream as a topping. Low-carb individuals can substitute traditional cookies with keto-friendly options to maintain the setup while enjoying the flavors.

Consider varying to low-FODMAP biscuits for digestive comfort; other specific dietary needs can be addressed by carefully selecting your base ingredients, ensuring a treat for all.

Troubleshooting Guide

Texture issues might arise if over-blending occurs; ensure just enough blending to mix components while avoiding a soupy consistency. Should flavor balance be off, consider adjusting the sweetness or adding more coffee to enhance the overall taste.

Temperature problems come into play when using unchilled coffee; this drink should only be prepared using cold ingredients. If equipment challenges occur, ensure your blender is robust enough to handle ice and cookie pieces without stalling.

Ingredient substitutions are straightforward; however, remember that flavors can change significantly, so opt for similar taste profiles for best results.

Timing concerns pertain to preparation; allow adequate chilling time for your coffee to achieve the desired refreshing experience.

Recipe Success Stories

Community feedback on Oreo Iced Coffee has been overwhelmingly positive, with many lauding the perfect blend of flavors that capture both caffeine lovers and cookie enthusiasts’ hearts. Readers often share their variations, one person swapped regular milk for oat milk and loved the creamy consistency it provided.

Adaptation success stories also abound, where others have experimented with adding different flavors of Oreos, such as mint or lemon, creating exciting new tastes. Enthusiastic home chefs reveal tips on photography, accentuating the layers and inviting visuals, encouraging their friends to recreate it at home.

Social media engagement continues to grow, with followers tagging friends and sharing their creations, wishing for more recipes that adapt to future gatherings. This feedback loop fosters a sense of community, where every attempt brings more exciting knowledge to the table.

Frequently Asked Questions

How can I make Oreo Iced Coffee stronger?

You can enhance the strength by using a darker roast coffee or blending in more beans to increase the flavor profile. Cold brewing your coffee overnight also contributes to a richer taste without bitterness.

Can I use decaf coffee?

Absolutely! If you prefer less caffeine, swap regular coffee for decaf to enjoy all the flavor without the jitters.

How do I store leftovers?

Store any leftover Oreo Iced Coffee in an airtight container in the refrigerator. Ensure consumption within 1-2 days for the best flavor.

Can I use dairy alternatives?

Yes! Almond milk, oat milk, and other non-dairy options add unique flavors and can make your drink lighter.

Is there a vegan version available?

Certainly! Use vegan cookies for the Oreos and plant-based creams for the whipped topping to keep everything animal product-free.

What are other cookie options for this recipe?

Feel free to experiment with different sandwich cookies, such as chocolate chip or peanut butter cookies, to create your unique version of this iced coffee.

Can I put Oreos in a blender whole?

While you can, it’s best to break them into pieces beforehand. This will ensure even blending and prevent your blender from straining.

Can I add alcohol for a boozy twist?

Yes! Adding a splash of Baileys or Kahlua can create a decadent dessert cocktail that’s perfect for adult gatherings.

How can I make this a more indulgent dessert?

Transform it into a dessert by topping with more whipped cream, chocolate syrup, and extra crushed Oreos for a playful touch!

What is the calorie count of Oreo Iced Coffee?

The calorie count may vary based on ingredients, but on average, one serving can range from 250 to 400 calories depending on the milk and sugar used.

Additional Resources

If you enjoyed making Oreo Iced Coffee, explore related recipes such as Affogato and Mocha Frappuccino for more coffee-based delights. Consider technique guides for mastering blending or coffee preparation to enhance your skills further.

Investigate ingredient information, particularly on the many types of coffee beans and their flavor profiles. Equipment recommendations can help you determine which blenders work best for these recipes.

For seasonal variations, think about creating festive drinks during the holidays by adding suitable spices or swapping out cookies to match flavors for each time of year.

Join the Conversation

Engage with us on social media by sharing your photos of Oreo Iced Coffee creations! Tag us in your captures and find fellow enthusiasts who love experimenting with recipes.

Consider writing reviews to share your experiences and unique adaptations, contributing to our community where feedback fuels creativity and connection. Share your photography tips to inspire others in creating stunning presentations that appeal to both the eye and the palate.

Explore different recipe variations, and don’t hesitate to share your favorites. Join the discussion to brainstorm new ideas or discuss tips for improving this delicious treat.

The Recipe

Oreo Iced Coffee

Serves: 2

Prep Time: 10 mins

Cook Time: 5 mins

Total Time: 15 mins

Kitchen Equipment Needed

  • Blender
  • Measuring cup
  • Glass

Ingredients

  • 1 cup cold brewed coffee
  • 4 Oreo cookies
  • 1/2 cup milk (or dairy alternative)
  • 1 tablespoon chocolate syrup (optional)
  • Whipped cream for topping
  • Ice cubes

Directions

  1. In a blender, combine cold brewed coffee, milk, and half of the Oreo cookies. Blend until smooth.
  2. Add in ice cubes and blend again until you achieve your desired consistency.
  3. Pour the mixture into glasses, filling each about three-quarters full.
  4. Top each glass with whipped cream and garnish with remaining crumbled Oreos.
  5. Drizzle chocolate syrup if desired, and serve immediately.

Recipe Notes

  • For a sweeter drink, adjust the chocolate syrup to taste.
  • Use crumbled cookies for a decorative topping and an extra crunch.
  • Feel free to customize the recipe with flavored syrups or other types of cookies.

Easy Iced Passion Tango Tea Recipe for Refreshing Sips

Iced Passion Tango Tea: Refreshing Summer Delight

⚖️
Difficulty
Easy

⏲️
Prep Time
5 mins

🕒
Cook Time
5 mins

⏱️
Total Time
10 mins

🍽️
Servings
4

Iced Passion Tango Tea is the ultimate drink for hot summer days. Its vibrant, fruity flavors awaken your senses and transport you to a tropical paradise with every sip. The infusion of hibiscus and passion fruit creates a refreshing and slightly tart experience that cools down your body and lifts your spirits. Whether you’re hosting a summer gathering or enjoying a relaxing day by the pool, this iced tea will be your go-to beverage.

The beauty of this iced tea lies not only in its enticing flavor but also in its gorgeous presentation. Bright reds and rich yellows swirl together in your glass, creating a feast for the eyes. Garnished with fresh fruit or a sprig of mint, Iced Passion Tango Tea adds a touch of elegance to any occasion. With its quick preparation time and simple ingredients, offering a homemade beverage that impresses is easy.

Quick Recipe Highlights

  • Flavor Profile: A tangy explosion of sweet passion fruit enhanced by the floral notes of hibiscus.
  • Texture: Smooth with a refreshing chilled sensation, perfect for quenching thirst.
  • Aroma: Inviting fruity scents combined with a hint of floral undertones that refresh the air around you.
  • Visual Appeal: Brightly colored, eye-catching presentation that pairs well with vibrant fruit garnishes.
  • Skill Level Needed: Perfect for beginners, requiring only basic preparations and no complex cooking techniques.
  • Special Equipment: A simple teapot or kettle and a pitcher are all you need to create this delightful drink.

Recipe Overview

  • Difficulty Level: This Iced Passion Tango Tea is classified as easy due to its straightforward preparation process, making it accessible for anyone.
  • Category: Ideal as a summer beverage or a refreshing afternoon drink, perfect for entertaining guests.
  • Cuisine: While inspired by tropical flavors, this beverage is easy to adapt using local or seasonal ingredients.
  • Cost: Inexpensive to make, with the main ingredients being readily available at most grocery stores.
  • Season: Best enjoyed in summer when fresh fruits are at their peak, allowing for maximum flavor.
  • Occasion: Perfect for outdoor parties, picnics, or simply as a refreshing treat during a warm day.

Why You’ll Love This Recipe

Iced Passion Tango Tea appeals to both the taste buds and the senses. The bright and tangy flavor makes it an extremely refreshing choice that satisfies thirst on scorching summer days. The sweet notes of passion fruit blend perfectly with the tartness of hibiscus, creating a balanced drink that feels vibrant and invigorating. Each sip transports you to a sunny beach, making it a perfect summer refreshment.

Convenience is another reason you’ll fall in love with this recipe. With minimal prep and cook time, you can whip up a pitcher in just 10 minutes. This makes it ideal for last-minute gatherings or for enjoying on a warm afternoon when you want a quick, refreshing drink. Plus, it’s easily adjustable to suit your personal taste preferences, whether you like it sweeter or more tart.

Nutritionally, this iced tea is a great alternative to sugary sodas and artificially flavored beverages, offering a delightful taste without the guilt. Hibiscus is known for its health benefits, including supporting heart health and lowering blood pressure, while the antioxidants in passion fruit contribute to overall wellness. This means you can enjoy a tasty drink while also feeling good about what you’re consuming.

Socially, Iced Passion Tango Tea is great for entertaining. Its vibrant color and enticing aroma make it a showstopper at any gathering. Prepare a large batch and serve in a beautiful pitcher for an eye-catching centerpiece. Guests will be drawn to it, making it a conversational starter and enhancing the overall party atmosphere.

Lastly, it’s cost-effective and accessible. Most ingredients can be found at your local grocery store or farmers’ market, making this recipe an easy option for everyone. The minimal cost involved in producing a high-quality beverage makes it easier to entertain without breaking the bank.

Historical Background and Cultural Significance

The origins of iced tea can be traced back to the United States during the 19th century. While hot tea was popular, the introduction of iced tea coincided with the rise of summer activities and outdoor events, making it a staple in American culture. The incorporation of tropical flavors into iced tea, like those found in Iced Passion Tango Tea, reflects the influence of various culinary traditions, including those from Latin America and the Caribbean.

Passion fruit, a key ingredient in this iced tea, has a rich cultural significance, especially in tropical regions. It symbolizes hospitality and is often used in celebrations and gatherings. Its vibrant flavor and fragrant aroma have made it a favored addition to beverages worldwide, bringing a taste of the tropics to home kitchens everywhere.

As iced tea evolved, regional variations began to emerge, integrating local fruits and herbs. This adaptability has allowed for creative interpretations of traditional iced tea recipes, like the Iced Passion Tango Tea, showcasing seasonal fruits and promoting personal expression in flavor combinations.

In recent years, with the rise of wellness trends, beverages such as Iced Passion Tango Tea have gained popularity for their refreshing qualities and potential health benefits. This shift highlights a growing interest in natural ingredients and a move away from sugary, artificially flavored drinks, indicating a deeper appreciation for authenticity in our culinary choices.

Ingredient Deep Dive

Hibiscus

Hibiscus is cherished in many cultures for its vibrant color and tart flavor. Historically, it has been used in herbal teas for its health benefits, including its potential ability to lower blood pressure. Rich in antioxidants, hibiscus is a natural choice for refreshing beverages. When selecting hibiscus, look for dried flowers, ensuring they are vibrant in color without any added preservatives. Store it in an airtight container away from light to maintain its flavor and color. For a unique twist, consider substituting hibiscus with dried rose hips for a similar tartness.

Passion Fruit

Passion fruit, often called the “fruit of passion,” has a rich history tied to the tropics. Known for its aromatic and flavorful pulp, this fruit is packed with vitamins A and C, making it an excellent addition to a healthy diet. When selecting passion fruit, choose ones that feel heavy for their size with wrinkled skin, indicating ripeness. Store them in a cool, dry place, and for substitutes, consider using mango or orange juice to maintain the tropical flavor theme while altering sweetness levels.

Common Mistakes to Avoid

  • Over-steeping the tea: Leaving hibiscus to steep for too long can result in a bitter taste. Aim for 5-7 minutes maximum for optimal flavor.
  • Using boiling water on hibiscus: Hibiscus is best steeped in near-boiling water for a few minutes rather than fully boiling water, which can diminish its flavor.
  • Not sweetening properly: Many skip sweetening altogether. Experiment with natural sweeteners like honey or agave to enhance flavors without overwhelming the tea.
  • Ignoring cooling time: It is essential to let the tea chill properly before serving. Skip this step, and you might end up with a lukewarm drink that’s less enjoyable.
  • Neglecting fruit garnishes: Don’t skip out on garnishes; fresh fruit not only adds a pop of color but also enhances the flavor of the drink.
  • Using expired ingredients: Always check the date on your dried hibiscus and passion fruit to ensure freshness and maximize flavors.
  • Making too much: While it’s tempting to make a massive batch, consider your consumption to avoid wasting this delightful iced tea.
  • Not adjusting the sweetness: Everyone has different preferences. Taste your tea before serving and adjust the sweetness accordingly.
  • Using the wrong pitcher: A clear pitcher allows you to showcase the stunning color of the tea, making presentation as delightful as the taste.
  • Failing to chill the pitcher: Always chill your pitcher before pouring in the iced tea to keep it extra cold when serving.

Essential Techniques

Steeping the Tea

Steeping hibiscus properly is crucial for developing the right flavor. Begin by boiling water and then letting it cool slightly before pouring it over the dried hibiscus. Tik top tip to avoid bitterness is steeping just long enough to extract the flavors without overdoing it. Look for vibrant red hues to gauge that your tea is ready.

Chilling the Beverage

Chilling the tea properly is essential for a refreshing drink. After brewing, transfer it to a sealable pitcher and refrigerate until cold. Avoid adding ice while chilling, as this can dilute the flavor. Instead, serve the tea over ice for a perfect cold beverage without loss of intensity.

Pro Tips for Perfect Iced Passion Tango Tea

– Experiment with sweeteners such as honey, agave, or stevia for added flavor variation.
– Add fresh fruit like slices of lemon, lime, or berries to brighten the flavor profile.
– For a more complex flavor, consider blending in spices like ginger or mint during steeping.
– Serve the tea in clear glasses to showcase its beautiful crimson color, making it more appetizing.
– Create a simple syrup with equal parts water and sugar to allow for precise sweetness control.
– Infuse additional flavors by mixing in other teas like green or black to create a unique twist while maintaining a floral aspect.
– Ensure to taste-test the tea before serving to adjust the sweetness to your preference.
– Offer alternative serving options by creating tea mocktails by adding soda water and garnishing with herbs.

Variations and Adaptations

Iced Passion Tango Tea can be beautifully adapted to suit various tastes and occasions. For a tropical twist, add fresh tropical fruits, such as mango or pineapple, to the tea. This will give an even richer flavor while enhancing its color. You can also choose to switch hibiscus with rooibos tea for a caffeine-free alternative that still delivers on flavor.

Seasonal adaptations include using winter spices like cinnamon or cloves when serving in colder months, transforming the drink into a festive sensation. For those mindful of their diet, a low-calorie sweetener can be substituted, allowing everyone to indulge without worry.

Flavor variations can include adding a splash of citrus juices like orange or lime, giving it a zesty flair. Consider altering the texture by incorporating fruit purees for an added twist that creates a more robust mouthfeel. Presentation can be enhanced with colored ice cubes or decorative glasses to elevate the overall experience.

Serving and Presentation Guide

To plate your Iced Passion Tango Tea beautifully, consider using tall, clear glasses that exhibit its vibrant color. Garnish with fresh fruit such as citrus slices, berries, or mint sprigs for an aromatic touch. For traditional accompaniments, serve alongside light snacks like cookies or fruit platters to enhance the experience.

Temperature should always be considered, serving the tea chilled over ice but ensuring that your ice is made from the same tea for a flavorful drink. Master portion control to keep servings consistent, offering 8-12 oz per person depending on the occasion, and ensure ample volume for refills to keep guests refreshed.

Wine and Beverage Pairing

Pairing Iced Passion Tango Tea with a light white wine like Sauvignon Blanc can enhance your summer gatherings. The citrus notes in the wine complement the fruity tea exceptionally well. For non-alcoholic alternatives, consider pairing it with freshly squeezed lemonade or coconut water for hydration.

For those who enjoy coffee, a chilled espresso or cold brew can create interesting contrasts and deepen the flavors of the meal. When serving, ensure all beverages are chilled, maintaining a refreshing theme throughout the dining experience.

Storage and Shelf Life

Iced Passion Tango Tea can be stored in an airtight container in the refrigerator for up to 3 days. Be sure to keep it away from strong odors, which can affect the tea’s taste. Ideally, you should not store it with ice, as this will dilute the flavors.

When reheating, do so gently; however, it’s best enjoyed cold. If you find any signs of spoilage, such as an off smell or visual changes, do not hesitate to discard it for safety. For those looking to extend shelf life, consider freezing in ice cube trays for longer retention and adding to future beverages.

Make Ahead Strategies

Preparing Iced Passion Tango Tea ahead of time can simplify your entertaining. Brew a large batch a day in advance, keeping it chilled in the fridge. Store any fruit garnishes separately until just before serving to maintain their freshness.

When assessing the quality impact, freshly brewed tea will always outperform pre-made versions, but with proper storage, maintaining flavor is achievable. For assembly, mix the tea with garnishes right before serving, ensuring they shine bright and taste their best.

Scaling Instructions

Halving this iced tea recipe is as simple as reducing the measurements by half. For larger gatherings, feel free to double or triple the amounts, adjusting the brewing time slightly if necessary. Ensure that the steeping container is large enough to hold the increased volume without compromising flavor concentration.

When scaling, be mindful of time adjustments, especially if using a larger pot, which may require extra heating or cooling time. Finally, consider storing smaller portions separately in the fridge after brewing to keep flavors balanced when scaling up.

Nutritional Deep Dive

Iced Passion Tango Tea is not only refreshing but also nutrient-rich. Hibiscus is known for its antioxidant properties, providing essential vitamins like vitamin C, which promotes immune health.

The tea contains no added sugars unless desired, offering a low-calorie beverage option perfect for weight management. Portion sizes matter; a single serving of Iced Passion Tango Tea typically contains fewer than 50 calories if consumed without sweeteners, making it an excellent option for health-conscious consumers.

Dietary Adaptations

Iced Passion Tango Tea can be easily adapted for various dietary needs. For gluten-free diets, this recipe already meets requirements as no gluten-containing ingredients are present.

For dairy-free options, there’s no need for dairy at all, making it a solid choice for vegans. You can satisfy low-carb or keto dietary preferences by substituting sweeteners for options like stevia, maintaining the flavor without spiking sugar levels.

Troubleshooting Guide

If you find that the tea ends up too bitter, the over-steeping may be to blame. Reducing steeping time is key to addressing this issue. To manage flavor balance, be sure to adjust sweetener levels before serving, ensuring personal preferences are met.

If temperatures don’t seem right upon serving, check your cooling times as well as ice quality to ensure they match the desired chilled experience. Equipment challenges, such as not having a suitable steeping apparatus, can lead to weaker flavors or inconsistent brewing; investing in good quality tea-making equipment usually resolves these concerns.

Recipe Success Stories

Community feedback around Iced Passion Tango Tea is overwhelmingly positive, as many note its delightful taste and brightness. Variations posted on social media often feature unique adaptations, showcasing personal preferences across different cultures.

Many readers have shared their own adaptations, incorporating local fruits or herbs, demonstrating the drink’s versatility. Photography tips suggest using natural light to accentuate the rich colors, ensuring that the tea looks as delicious as it tastes.

Frequently Asked Questions

How long can I store Iced Passion Tango Tea?

You can store Iced Passion Tango Tea in the refrigerator for up to three days as long as it is kept in an airtight container.

Can I use fresh hibiscus flowers instead of dried?

Fresh hibiscus flowers can be used, but the drying process concentrates flavor and is typically recommended for brewing teas.

Does Iced Passion Tango Tea contain caffeine?

No, hibiscus tea is naturally caffeine-free, making it a perfect beverage for all ages or for those avoiding stimulants.

Can I sweeten this tea?

Absolutely! You can use various sweeteners such as honey, agave, or stevia to personalize the sweetness to your taste preference.

Is it possible to make a larger batch ahead of time?

Yes! Iced Passion Tango Tea can be prepared in larger batches and stored in the fridge for days. Just remember to keep garnishes separate until serving.

Can I use a different type of fruit?

Definitely! Feel free to introduce different fruits like mango, orange, or berries to achieve a unique taste.

Is Hibiscus Tea healthy?

Yes, hibiscus tea is known for its rich antioxidant content and may help with various health benefits, including supporting heart health.

Can I freeze Iced Passion Tango Tea?

Yes! You can freeze the tea in ice cube trays for future use, allowing you to maintain its flavor while extending its shelf life.

Should I strain the tea before serving?

If you’ve used loose hibiscus flowers, it’s recommended to strain the tea before serving to avoid gritty textures.

What are some creative ways to serve this tea?

You can serve Iced Passion Tango Tea in clear glasses garnished with fresh fruits or herbs to enhance presentation. Consider creating tea mocktails for an extra festive touch!

Additional Resources

For those looking to expand their beverage repertoire, you may want to explore related recipes such as fruit-infused water, mint lemonade, or traditional iced tea variations. Technique guides on steeping and flavor balancing are also helpful as they provide insight into creating flawless drinks.

Consider researching more about hibiscus and its uses in various cuisines. Understanding equipment recommendations for brewing aesthetically pleasing drinks can further enhance your culinary journey.

Join the Conversation

We encourage our readers to share their experiences with Iced Passion Tango Tea on social media. Show us your creative garnishing suggestions, photography tips, or simply tell us about your favorite variations. Engaging in community feedback can lead to discovering new adaptations and enhancing the enjoyment of this refreshing drink.

The Recipe

Iced Passion Tango Tea

Serves: 4

Prep Time: 5 mins

Cook Time: 5 mins

Total Time: 10 mins

Kitchen Equipment Needed

  • Kettle or teapot
  • Pitcher
  • Measuring cups
  • Stirring spoon
  • Strainer (if using loose hibiscus)

Ingredients

  • 4 cups water
  • 1 cup dried hibiscus flowers
  • 1/2 cup passion fruit puree or 4 fresh passion fruits
  • Sweetener of choice to taste
  • Ice for serving
  • Fresh fruit (like lemon slices or berries) for garnish

Directions

  1. Boil 4 cups of water in a kettle.
  2. Once boiling, remove from heat and add hibiscus flowers. Let steep for 5-7 minutes.
  3. Strain the hibiscus tea into a pitcher, discarding flowers.
  4. If using fresh passion fruit, scoop out the pulp and mix it into the warm tea.
  5. Add sweetener to taste while the tea is still warm, stirring until dissolved.
  6. Cool the tea in the refrigerator until chilled.
  7. Serve the chilled tea over ice in individual glasses and garnish with fresh fruit.

Recipe Notes

  • Adjust the sweetness according to preference.
  • For a stronger flavor, allow longer steeping of hibiscus.
  • You can make a larger batch for gatherings and store it in the refrigerator for up to three days.

Best Iced Brown Sugar Oatmilk Shaken Espresso Recipe

Iced Brown Sugar Oatmilk Shaken Espresso: A Refreshing Coffee Delight

⚖️
Difficulty
Easy

⏲️
Prep Time
10 mins

🕒
Cook Time
5 mins

⏱️
Total Time
15 mins

🍽️
Servings
1

Indulge in the refreshing flavors of our Iced Brown Sugar Oatmilk Shaken Espresso, a perfect blend for coffee lovers seeking a sweet, creamy, and energizing beverage. This delightful drink captures the essence of rich espresso, combined with the warm notes of brown sugar, topped with creamy oat milk. Ideal for those warm days when you crave a delicious boost, this shaken espresso not only offers a satisfying taste but also an invigorating caffeine kick.

As you prepare this delectable drink, the luscious texture of oat milk mingles beautifully with the robust espresso, offering a delightful mouthfeel that both comforts and energizes. The brown sugar adds a subtle sweetness that enhances the overall flavor, making each sip an experience worth savoring. Whether you’re enjoying it on a sunny patio or serving it at a gathering, this recipe is sure to impress guests and friends alike.

Quick Recipe Highlights

  • Flavor Profile: A harmonious blend of strong espresso and sweet brown sugar, balanced with the creamy texture of oat milk.
  • Texture: Smooth and rich due to the oat milk, with a frothy top resulting from the shaking process.
  • Aroma: Inviting aromas of roasted coffee and caramelized sugar that awaken your senses.
  • Visual Appeal: Beautifully layered colors, with a creamy top that enhances the overall presentation.
  • Skill Level Needed: This recipe is easy and suitable for all skill levels, requiring no special techniques.
  • Special Equipment: A cocktail shaker or jar with a tight lid is recommended to achieve the perfect frothiness.

Recipe Overview

  • Difficulty Level: This Iced Brown Sugar Oatmilk Shaken Espresso is considered easy to make, making it accessible to everyone, even beginners. The steps are straightforward and require minimal equipment.
  • Category: This drink falls under the beverage category, specifically as a coffee-based refreshment ideal for breakfast or a mid-afternoon pick-me-up.
  • Cuisine: Originating from contemporary coffee culture, this recipe draws inspiration from traditional espresso preparations while incorporating modern flavors like brown sugar and oat milk.
  • Cost: The ingredients are generally affordable, with dollar ranges varying based on locality, making it a cost-effective treat.
  • Season: This iced espresso is perfect for warm months, offering a cool and refreshing option for hot days, but can be enjoyed year-round.
  • Occasion: It’s suitable for casual gatherings, brunches, or even as an everyday coffee treat for personal enjoyment.

Why You’ll Love This Recipe

Prepare to be captivated by the taste and texture of this delightful beverage. The bold espresso combines perfectly with the sweet notes of brown sugar, creating an exquisite flavor profile that tantalizes your taste buds. The creamy oat milk enhances the drink’s richness, offering a smooth, satisfying mouthfeel that makes every sip more enjoyable.

Convenience is another benefit of this Iced Brown Sugar Oatmilk Shaken Espresso. With a prep time of just 10 minutes and minimal steps involved, you can whip up this refreshing drink in no time, perfect for busy mornings or impromptu get-togethers. Impress your friends with a café-style drink in the comfort of your home with very little effort.

Nutritionally, oat milk brings a host of health benefits, including being lower in calories compared to regular dairy milk and being naturally free from cholesterol. This makes the beverage a guilt-free indulgence, especially when paired with the energizing effects of espresso, keeping you alert and focused throughout the day.

Socially, this drink serves as a wonderful centerpiece for gatherings. The aesthetic appeal and unique flavors make it a conversation starter, inviting guests to ask about its delightful ingredients. Sharing this drink with friends creates a fun atmosphere, fostering an enjoyable experience around coffee culture.

Financially, this recipe is a great deal. Creating your own Iced Brown Sugar Oatmilk Shaken Espresso saves money compared to purchasing similar drinks from cafes, allowing you to enjoy delicious flavors without breaking the bank.

Historical Background and Cultural Significance

The history of espresso dates back to the early 20th century in Italy where it became a staple in coffee culture. Over time, espresso evolved, seeing various methods and flavors introduced to enhance the original drink. The addition of ingredients such as sugar and different types of milk can be traced through the rich tapestry of global coffee traditions.

The cultural significance of coffee is profound, often regarded as a social beverage that brings people together. Coffee houses have historically been community hubs where people gather to share ideas and experiences, making the Iced Brown Sugar Oatmilk Shaken Espresso a modern take on this age-old tradition. It reflects contemporary tastes while honoring the roots of coffee preparation.

As tastes changed, so has the espresso itself. With the growing popularity of dairy alternatives like oat milk, innovations in brewing and serving espresso have emerged. The shift towards plant-based ingredients has seen the emergence of recipes like this one, showcasing the versatility of coffee while adapting to modern dietary needs.

In various regions, coffee has taken on unique cultural presentations—from the frothy cappuccinos of Italy to the robust iced coffees of Thai street vendors. The Iced Brown Sugar Oatmilk Shaken Espresso represents a fusion of these diverse influences, making it a delicious drink that can be enjoyed globally.

Ingredient Deep Dive

Espresso: The central ingredient in this recipe, espresso, comes from finely ground coffee beans brewed using pressure. It is revered for its bold flavor and high caffeine content. Rich in antioxidants, espresso provides several health benefits but should be consumed in moderation. Look for freshly roasted coffee for the best results, and store in an airtight container to maintain flavor. For a lower-caffeine option, consider using decaffeinated coffee beans without sacrificing taste.

Brown Sugar: Brown sugar is made by retaining some of the natural molasses from sugarcane, giving it a distinct caramel flavor. It not only adds sweetness but also depth of flavor to the espresso. Nutritionally, it contains small amounts of minerals like calcium and iron, making it a slightly better alternative compared to refined white sugar. When selecting brown sugar, opt for dark brown for a more intense flavor, and store it in a cool, dry place to prevent hardening.

Oat Milk: Oat milk, created from soaked oats blended with water, is a popular dairy alternative known for its creamy texture and subtle sweetness. It is naturally lactose-free and contains vitamins and minerals beneficial for overall health. When choosing oat milk, look for brands without added sugars for a healthier option. Store it refrigerated and consume within the recommended time frame. You can also make oat milk at home for a fresher taste.

Common Mistakes to Avoid

  • Not using freshly brewed espresso: Always use freshly brewed espresso for the richest flavor. Stale coffee loses its potency.
  • Over-shaking or under-shaking: Finding the right balance in shaking ensures the perfect frothy finish. Too much shaking can dilute your drink.
  • Using too much or too little brown sugar: Adjusting the amount of brown sugar to your taste is crucial for achieving the desired sweetness.
  • Skipping the ice: Ice is essential for creating a refreshing iced drink; omitting it can lead to a lukewarm espresso.
  • Using stale ingredients: Always check the freshness of your oats and sugar to avoid off-flavors.
  • Ignoring ingredient ratios: Following the ratio of espresso, oat milk, and sugar is important to maintain the drink’s balance.
  • Not preparing in advance: Pre-measuring ingredients can help streamline the process, especially during busy mornings.
  • Forgetting to garnish: A simple garnish can make a big difference in presentation, so don’t skip this step to impress your guests.

Essential Techniques

Brewing Espresso: Mastering this technique is crucial as it forms the base of your drink. Use a quality espresso machine and grind beans just before brewing for optimal freshness. Watch the extraction time—ideally, it should be around 25-30 seconds. The right balance of espresso strength will elevate the flavor of your iced drink remarkably.

Shaking Technique: Proper shaking not only cools down your drink but also froths the oat milk to create a creamy texture. Use a cocktail shaker or jar; fill it halfway with ice and pour in your espresso and oat milk. Shake vigorously for about 15 seconds. The goal is to combine all components well and achieve a nice froth on top without causing dilution.

Pro Tips for Perfect Iced Brown Sugar Oatmilk Shaken Espresso

1. Use high-quality coffee beans for the best flavor; medium roast varieties often provide a balanced taste for this drink.

2. Always chill your glasses beforehand to keep your drink colder longer without excessive dilution.

3. If you enjoy a thicker consistency, consider blending the oat milk with ice before adding it to the espresso.

4. Experiment with flavored or spiced variations of oat milk for a unique twist on the original recipe.

5. Make sure to adjust the sweetness to your preference; start with a tablespoon of brown sugar and modify as needed.

6. For a fun presentation, use a clear glass to showcase the beautiful layers of espresso and oat milk.

Variations and Adaptations

1. For a chocolatey twist, add a tablespoon of chocolate syrup to the mixture before shaking for a mocha-inspired treat.

2. Consider switching out the oat milk for almond or coconut milk for different flavors and textures.

3. Seasonal adaptations could include pumpkin spice during fall or peppermint syrup in winter for festive vibes.

4. For those who are looking to reduce calories, using a sugar substitute can keep the sweetness without the added calories.

5. Garnish with whipped cream or nutmeg for flavor variations; these additions can enhance the visual appeal as well.

6. Present it over ice in a mason jar for a trendy look, perfect for picnics or outdoor gatherings.

Serving and Presentation Guide

When serving your Iced Brown Sugar Oatmilk Shaken Espresso, opt for tall, clear glasses to showcase the drink’s beautiful layers. Consider adding a slice of orange or a cinnamon stick for garnish; this not only adds to the drink’s presentation but also a hint of flavor. It’s best served with a straw for easy sipping, enhancing the experience as you enjoy the creaminess of the oat milk and the sweet notes of brown sugar.

Temperature considerations are crucial; serve immediately after shaking for the best experience, as the combination of ice and fresh ingredients ensures optimal flavor and chill. Portion control can be measured using standard drink sizes, but feel free to adjust based on guest preferences if serving at a gathering.

Wine and Beverage Pairing

This delightful espresso drink pairs best with light, fruity wines such as Moscato or Prosecco, which can complement the sweetness of the brown sugar without overpowering the coffee flavors. For non-alcoholic alternatives, consider serving alongside herbal teas like chamomile or mint, which provide refreshing contrasts to the richness of the drink.

If you wish to pair with coffee beverages, a rich iced mocha or chai latte would enhance the coffee experience, rounding out your beverage offering for guests or family. Temperature-wise, ensure that each beverage is served cold to offer a refreshing experience while enjoying this delicious espresso shake.

Storage and Shelf Life

The Iced Brown Sugar Oatmilk Shaken Espresso is best enjoyed fresh and is not recommended for long-term storage due to the separation of oat milk and potential for stale espresso. However, you can store any leftover oat milk in the refrigerator for up to 5-7 days. To ensure quality, always seal the container tightly. Check for any off smells or changes in texture before using.

If you have brewed espresso left over, it can be stored in an airtight container in the fridge for up to three days. When ready to enjoy again, refresh it with ice and a splash of oat milk, but note it may not have the same fresh taste as homemade. Reheating is not recommended as that will diminish the flavors.

Make Ahead Strategies

To streamline your morning beverage, prepare your espresso the night before and store it in the fridge, allowing for a quick assembly in the morning. You can also pre-measure the brown sugar and keep it handy for easy access. Prepare oat milk in larger batches to use throughout the week, ensuring you have it on hand whenever you need a refreshing drink.

In terms of quality, espresso will reflect its peak flavor when freshly brewed. Consider adding fresh ice immediately before serving to maintain a pleasing temperature without diluting the flavor. Garnishing your drink can be a last-minute step to keep it looking fresh, adding a vibrant touch to your presentation.

Scaling Instructions

If you intend to serve a larger group, doubling or tripling the recipe is simple; adjust the espresso shots and oat milk accordingly. Be mindful to scale your shaking container size accordingly—too much volume may lead to ineffective mixing.

For halving the recipe, use smaller amounts of each ingredient but maintain the same ratios for consistent taste. Keep track of your timing, as larger batches may need a little more time for each shake or prep step. Storage remains the same, as leftover espresso should still be consumed within three days for a fresh taste.

Nutritional Deep Dive

This Iced Brown Sugar Oatmilk Shaken Espresso offers a unique blend of macronutrients, providing energy from carbohydrates (in the form of sugar and oats) and protein from the oat milk. The espresso contributes a caffeine boost, important for enhancing mental alertness.

While enjoying this drink, be mindful of the added sugars, especially if modifying the recipe further with sweet syrups. Oat milk is beneficial for those who are lactose intolerant, providing a dairy-free alternative without sacrificing taste. If you’re tracking calorie intake, remaining cognizant of portion sizes is recommended to maintain moderation.

Dietary Adaptations

This Iced Brown Sugar Oatmilk Shaken Espresso is naturally vegan and dairy-free, making it a great choice for those following those diets. For gluten-free needs, ensure that your oat milk is certified gluten-free.

For those following lower-carb or keto diets, alternatives to brown sugar such as erythritol or stevia can provide the sweetness desired without the carbs. You can also opt for unsweetened oat milk to further reduce calories.

Troubleshooting Guide

Texture issues may arise if you don’t shake enough, leading to a watery consistency. Always shake vigorously to achieve a nice froth.

If your drink tastes unbalanced, adjust by adding more brown sugar or espresso until satisfied. For overly sweet results, consider increasing the strength of espresso or diluting with more oat milk.

Recipe Success Stories

Readers have shared their variations of this recipe, incorporating different flavored syrups or sweeteners to tailor it to personal taste. Many rave about the creamy texture of the oat milk enhancing the overall experience.

Photography enthusiasts have also enjoyed sharing their beautifully layered drinks on social media platforms, showcasing not just their culinary skills but also the aesthetic pleasure this drink offers. These community engagement opportunities provide avenues for learning and sharing experiences.

Frequently Asked Questions

Can I use regular milk instead of oat milk?

Yes, you can use regular dairy milk, but the creamy texture and flavor of oat milk really complements the drink, offering a unique taste that regular milk may not replicate.

Is there a way to make this drink lower in calories?

Absolutely! Use unsweetened oat milk and sugar substitutes like stevia or monk fruit sweetener to cut down on calories.

How do I make a larger batch for a party?

Simply multiply each ingredient by the number of servings needed, ensuring you have adequate equipment for shaking such a large volume.

Can I use pre-made espresso shots?

Yes, you can use pre-made espresso shots, but brewing fresh espresso contributes richer flavor and aroma, enhancing the overall experience.

What if I don’t have a cocktail shaker?

You can substitute any jar with a tight-fitting lid; just ensure not to overfill it to prevent spillage.

How long will the drink stay fresh?

This drink is best enjoyed immediately after preparation. If stored, components may separate, and the flavor will diminish over time.

Can I add flavors to this recipe?

Absolutely! You can incorporate vanilla, cinnamon, or cocoa powder to personalize your espresso shake further.

What is the best way to sweeten it?

Brown sugar is recommended for this recipe, as it complements the espresso, but feel free to use honey or other sweeteners according to your preference.

Is this drink suitable for kids?

Occasional consumption is generally fine; however, due to the caffeine content, moderation is advised for children.

Can I make this drink without sugar?

Yes, you can omit the sugar completely or use sugar alternatives according to your dietary needs.

Additional Resources

Explore more related recipes showcasing creative coffee beverages to expand your home barista skills. Consider diving into technique guides for espresso brewing or oat milk production to enhance your overall experience. Additionally, understanding the best equipment can up your coffee game, ensuring you have everything needed to prepare pieces of genuine café craftmanship.

Join the Conversation

Engage with our community by sharing your Iced Brown Sugar Oatmilk Shaken Espresso creations on social media. Utilize hashtags for friends to explore new adaptations, provide feedback, and exchange tips. Your photography can inspire others to get creative in their kitchens, fostering a conversation about flavor exploration and beverage personalization.

The Recipe

Iced Brown Sugar Oatmilk Shaken Espresso

Serves: 1

Prep Time: 10 mins

Cook Time: 5 mins

Total Time: 15 mins

Kitchen Equipment Needed

  • Cocktail shaker or jar with a tight lid
  • Espresso machine or stovetop espresso maker
  • Glass for serving

Ingredients

  • 2 shots of espresso
  • 1 tablespoon brown sugar
  • ½ cup oat milk
  • Ice cubes

Directions

  1. Prepare 2 shots of espresso and let them cool slightly.
  2. In a shaker, add the brown sugar and espresso, then shake until combined.
  3. Add the oat milk and a generous handful of ice. Shake vigorously to froth.
  4. Pour the mixture into a glass over ice.
  5. Enjoy as is, or garnish with cinnamon or extra oat milk, if desired.

Recipe Notes

  • Feel free to adjust the sweetness by modifying the amount of brown sugar.
  • This recipe is easily doubled or tripled for serving multiple guests.
  • Don’t skip the ice—it’s essential for keeping the drink cold!

Easy Homemade Caramel Frappuccino Recipe (Starbucks Copycat)

Easy Homemade Caramel Frappuccino: A Deliciously Refreshing Treat

⚖️
Difficulty
Easy

⏲️
Prep Time
10 mins

🕒
Cook Time
0 mins

⏱️
Total Time
10 mins

🍽️
Servings
2 servings

Indulge in a delightful refreshing treat with this Easy Homemade Caramel Frappuccino. This creamy, dreamy concoction blends coffee, milk, and rich caramel for an irresistible drink experience. Perfect for a warm day, this frappuccino offers a perfect balance of flavors, with a hint of coffee strength contrasted by the smooth sweetness of caramel. You can enjoy this at home, saving money while still enjoying a café-style beverage. An Easy Homemade Caramel Frappuccino is not just a drink; it’s a delightful escape that can whisk you away to your favorite coffee shop with every sip.

Imagine the first sip as the ice-cold frappuccino brings a burst of sweet caramel and velvety coffee to your taste buds, while whipped cream on top adds a luscious finish. With its inviting golden hue and coffee aroma wafting up, this drink is as pleasing to the eyes as it is to the palate. Whether you enjoy it as a mid-afternoon pick-me-up or a sweet dessert alternative, this homemade version guarantees satisfaction.

Quick Recipe Highlights

  • Flavor Profile: A perfect blend of robust coffee, rich caramel, and creamy milk, this drink delivers an exquisite sweetness with every sip.
  • Texture: The frappuccino combines smooth, creamy elements with a refreshing icy finish, creating a multi-layered mouthfeel.
  • Aroma: The aromatic notes of brewed coffee mingle harmoniously with the intoxicating scent of caramel, inviting you to take a sip.
  • Visual Appeal: Golden caramel drizzled on top of whipped cream creates a visually stunning drink that looks as good as it tastes.
  • Skill Level Needed: With no complicated techniques, this recipe is ideal for beginners and experienced cooks alike.
  • Special Equipment: A blender is all you need to whip up this satisfying drink.

Recipe Overview

  • Difficulty Level: This Easy Homemade Caramel Frappuccino is notably simple, requiring just a few minutes of preparation. Perfect for novice cooks and busy individuals, you can whip this up effortlessly.
  • Category: This recipe falls under the beverage category and is a fantastic choice for brunch, dessert, or an afternoon treat.
  • Cuisine: Emulating popular coffee shop beverages, this frappuccino draws on American café culture, bringing café-style drinks right to your kitchen.
  • Cost: With common ingredients found at grocery stores, this drink is affordable to make. Homemade versions often prove to be cheaper than ordering out.
  • Season: While great for any season, this iced drink shines in warm months, providing a refreshing escape from the heat.
  • Occasion: Perfect for casual gatherings or a quiet afternoon, this frappuccino can elevate any occasion with its comforting presence.

Why You’ll Love This Recipe

The Easy Homemade Caramel Frappuccino captivates your senses with its delectable taste and velvety texture. The pleasant sweetness from the caramel harmonizes flawlessly with the rich coffee, creating an indulgent drink that satisfies cravings for something special. Its smooth consistency makes it irresistible, as each sip feels like a treat.

Conveniently, this recipe is quick to prepare, taking just ten minutes from start to finish. With simple steps and readily available ingredients, you can enjoy a café-quality beverage right in your home. Plus, customizing the sweetness and coffee strength puts you in control, making it easy to adjust to your preferences.

From a nutritional standpoint, this frappuccino can be made with low-fat milk or dairy alternatives, allowing you to enjoy a sweet coffee drink that can fit your dietary needs. Plus, adding wholesome ingredients like milk can provide calcium and other essential nutrients, making it a more balanced indulgence.

This recipe is perfect for social gatherings, offering a fun and creative way to impress friends with your barista skills. Serve it alongside freshly baked cookies or pastries for a delightful coffee time experience. Sharing the process of making these drinks encourages social interaction and fun.

Lastly, creating your coffee drinks at home proves to be cost-effective compared to regularly visiting coffee shops. You can make multiple servings for less than one café order, allowing for everyday enjoyment without breaking the bank.

Historical Background and Cultural Significance

The caramel frappuccino traces its roots back to the rise of specialty coffee in the late 20th century. The combination of blended coffee drinks became popular, particularly among young consumers seeking a sweet and refreshing beverage option. Caramel, being a widely loved flavor, seamlessly intertwined with coffee culture, establishing itself as a go-to choice for frappuccino enthusiasts.

Cultural importance lies in the way drinks like the frappuccino have influenced coffee consumption trends. It reflects a desire for customization and indulgence in beverages, evolving coffee into a treat rather than just a regular morning ritual. The drink has created communal experiences in coffee shops, where friends gather over creative and flavorful drinks.

As the recipe evolved, versions began to surface globally, adopting regional ingredients and methods. From classic vanilla frappuccinos to exotic variations with spices or fruits, each region adds its unique touch while still holding onto the core essence of the delicious frappuccino.

Varieties of caramel frappuccinos also highlight various local tastes and preferences, with some incorporating different milk types, sweeteners, or flavorings that reflect regional palettes, enriching the beverage’s historical narrative.

Ingredient Deep Dive

Coffee: Coffee has a storied history, originating from Ethiopia and spreading across the globe as a desirable beverage. It offers significant health benefits, including antioxidants and energy-boosting qualities. Select high-quality beans for the best flavor, and store them in a cool, dry place. If you’re looking for alternatives, chicory or dandelion root can serve as caffeine-free substitutes.

Caramel: Caramel, a beloved confection, has deep cultural roots across many societies, often used in desserts and pastries. It’s rich in sugars, contributing energy and sweetness to your frappuccino. When selecting caramel, consider homemade or quality commercial brands for authentic flavor. Store in a cool environment to retain its texture, and explore options like butterscotch for varied sweetness.

Common Mistakes to Avoid

  • Over-blending: Blending too long can lead to a watery texture. Blend at a lower speed until desired consistency is achieved.
  • Using hot coffee: Hot coffee will melt the ice quickly, ruining the frappuccino’s intended frosty charm. Brew and cool coffee beforehand.
  • Omitting the ice: Skipping ice will result in a drink that’s more of a milkshake. Ensure to use plenty of ice to achieve that frappuccino texture.
  • Incorrect sweetener proportions: Adding too much or too little caramel can disrupt balance. Gradually add and taste to find the sweet spot.
  • Inconsistent ingredients: Make sure to use the same coffee and milk type throughout for a consistent flavor profile.
  • Choosing low-quality coffee: Using subpar coffee detracts from the overall flavor. Invest in quality coffee beans for a richer experience.
  • Not chilling the glass: Serving in a warm glass can affect temperature. Chill the glasses in advance for that café-like experience.
  • Ignoring presentation: A well-presented drink enhances enjoyment. Remember to garnish and decorate with caramel or whipped cream.

Essential Techniques

Blending: Achieving the perfect blend is crucial for a smooth frappuccino. Over-blending can result in excess water, while under-blending leaves chunks of ice. Pulse the blender to achieve even consistency, taking care to gauge the texture.

Layering: For an aesthetically pleasing frappuccino, layering is key. Start with the base and then carefully add toppings while the drink is in the blender. This careful approach will enhance both visual and taste appeal.

Pro Tips for Perfect Easy Homemade Caramel Frappuccino

Use coffee ice cubes to maintain flavor as the frappuccino melts, preventing dilution. Experiment with flavored syrups to add variety, such as vanilla or hazelnut. For added creaminess, opt for half-and-half instead of milk. A sprinkle of sea salt on top of the caramel enhances the overall flavor profile. Make it a coffee treat by adjusting espresso levels to intensify coffee richness. Remember to chill your glasses ahead of time to keep your drink cold longer. Finally, indulge in topping variations such as crushed nuts or chocolate shavings for extra decadence.

Variations and Adaptations

Craft distinct variations of the caramel frappuccino by incorporating seasonal flavors like pumpkin spice in fall or peppermint during winter holidays. For a health-conscious option, substitute traditional whipped cream with coconut cream or avocado for creaminess without added sugars. Adapt the drink for various dietary needs by opting for non-dairy milk or sugar substitutes, ensuring everyone can enjoy this delightful indulgence. For those seeking more texture, add a spoonful of crushed cookies to the blend or use dark chocolate drizzle to enhance visual appeal. Present it in mason jars for a rustic charm that complements the homemade nature.

Serving and Presentation Guide

Creating an inviting presentation elevates the drinking experience. Serve in clear glasses, allowing the beautiful layers and colors to shine through. Drizzle caramel around the inside of the glass before pouring in the frappuccino for an impressive visual effect. A dollop of whipped cream on top, adorned with a drizzle of caramel, completes the aesthetic. Consider serving with a straw for easy sipping, and don’t hesitate to offer a sprinkle of cocoa or cinnamon for added flair. Temperature plays a crucial role; for the ultimate indulgence, ensure your ingredients are cold and freshly blended.

Wine and Beverage Pairing

For a delightful pairing, consider wines with rich flavors, such as an espresso-infused red blend or a dessert wine like Moscato, which can complement the sweetness of the frappuccino. Non-alcoholic alternatives could include a light lemonade or herbal iced tea for a refreshing contrast. Pairing with complementary flavors like spiced chai or cold brew adds depth without overpowering the frappuccino’s caramel notes. Remember, while coffee drinks might seem singular, exploring a range of flavors adds exciting complexity to your beverage experience.

Storage and Shelf Life

This frappuccino is best enjoyed fresh, but if you have leftovers, store them in an airtight container in the fridge for up to 24 hours. Blend briefly before serving to revive the texture. Avoid freezing, as ice can alter the flavor and consistency dramatically. If you’d like to make components ahead of time, brew coffee and caramel sauce separately, refrigerating both until needed. Always check for freshness, as natural ingredients can vary in longevity.

Make Ahead Strategies

To streamline your preparation, brew coffee and chill it up to 24 hours ahead of time. Prepare caramel sauce in larger batches, storing it in the fridge for quick access. Measure out your ingredients the night before, allowing for easy assembly in the morning. Once blended, the frappuccino is best consumed immediately; therefore, consider organizing a smoothie bar style for gatherings where guests can customize their drinks as they like.

Scaling Instructions

For larger gatherings, doubling or tripling the recipe works seamlessly; simply increase the amounts of each ingredient while also ensuring your blender can accommodate larger batches. For fewer servings, halving the ingredients will retain the balance of flavors. Adjust timings minimally; preparation should remain consistent regardless of serving size.

Nutritional Deep Dive

The Easy Homemade Caramel Frappuccino packs an exciting flavor punch, resulting in significant nutritional benefits. Beyond coffee’s energizing properties, the combination of milk provides protein and essential nutrients like calcium. Be mindful of portion size, as caloric content increases with added sweeter toppings. Several sugars can be substituted for healthier options for those aiming to control sugar intake, while low-fat milk broadens its appeal for fitness-conscious consumers.

Dietary Adaptations

This recipe can be easily modified for various dietary needs. For gluten-sensitive individuals, ensure all ingredients are gluten-free and avoid any additives. Those pursuing a dairy-free lifestyle can replace regular milk with almond, soy, or oat milk while using vegan caramel options. Keto enthusiasts can substitute sugar with low-carb sweeteners for a sugary indulgence without the carbs, maintaining the taste without straying from dietary paths. For a Paleo-friendly version, consider using natural sweeteners like raw honey or fruits.

Troubleshooting Guide

If you encounter texture issues, the solution often lies in adjusting blending time or ice quantities; ensure to pulse in small increments. For an unbalanced flavor, test incorporating more milk or caramel until achieving the desired sweetness. Equipment challenges can arise from a less powerful blender; consider borrowing a high-speed model to avoid issues with ice blending. If timing concerns arise, measure out ingredients in advance for smoother preparation.

Recipe Success Stories

Our community has shared their love for the Easy Homemade Caramel Frappuccino, from college students enjoying study sessions to families bonding over a fun weekend treat. Some users have successfully adapted the recipe to be keto-friendly, sharing feedback on how their modifications enhanced the flavor and texture. Through vibrant photography shared online, readers are encouraged to experiment and showcase their creations, contributing to a culture of creativity and thoughtful engagement in the kitchen.

Frequently Asked Questions

Can I use decaf coffee? Absolutely! To reduce caffeine intake, opt for decaffeinated coffee while retaining the delicious flavor in your frappuccino.

Is it possible to make this dairy-free? Yes! Substitute regular milk with plant-based alternatives such as almond, soy, or coconut milk for a delightful dairy-free version.

How long does this frappuccino stay fresh? Ideally, consume your frappuccino within 2 hours for the best flavors. If stored, it can last up to a day in the fridge.

Can I freeze caramel frappuccino? Freezing is not recommended, as it can change the texture and flavor. Enjoy fresh for the best experience.

How can I make it less sweet? Reduce the amount of caramel or opt for unsweetened milk to adjust your drink according to your taste.

Is it possible to personalize the flavor? Definitely! Add flavor syrups, spices, or even blended fruits to customize your frappuccino as you wish.

Can I make this recipe in bulk? Yes! Simply double or triple the recipe; adjust blending time accordingly, and serve fresh.

What should I top my frappuccino with? Common toppings include whipped cream, chocolate shavings, or a sprinkle of sea salt for extra flair.

Are there any vegan caramel options? Yes, there are several vegan caramel sauces available on the market, or you can make your version using dates and coconut sugar.

Can I adapt this for kids? Absolutely! If you want to omit caffeine, use decaf coffee or even just milk and caramel for a fun kid-friendly treat.

Additional Resources

Explore related recipes on our blog to complement your Easy Homemade Caramel Frappuccino, such as homemade cookies or decadent cakes that pair perfectly with coffee. Our technique guides help you master coffee brewing for future endeavors. Additionally, discover ingredient information to enhance your understanding of coffee and caramel, ensuring well-rounded preparation in your culinary adventures.

Join the Conversation

We’d love to see how you enjoy your Easy Homemade Caramel Frappuccino! Share your creations with us on social media using our favorite hashtags or tag us in your photos. Your feedback and reviews enhance our community, fostering an environment of shared experiences and delicious discoveries. Feel free to suggest modifications or ask questions, as we continually strive to innovate recipes together.

The Recipe

Easy Homemade Caramel Frappuccino

Serves: 2 servings

Prep Time: 10 mins

Cook Time: 0 mins

Total Time: 10 mins

Kitchen Equipment Needed

  • Blender
  • Measuring cups
  • Spoon for stirring
  • Serving glasses

Ingredients

  • 1 cup brewed coffee (chilled)
  • 1 cup milk (whole, almond, or your choice)
  • 1/4 cup caramel sauce, plus more for drizzling
  • 2 cups ice
  • Whipped cream for topping

Directions

  1. In a blender, combine chilled coffee, milk, 1/4 cup caramel sauce, and ice.
  2. Blend on high until ice is crushed and the mixture is smooth.
  3. Taste and add more caramel if desired, then blend again briefly.
  4. Drizzle caramel inside of the serving glasses, then pour in the frappuccino mixture.
  5. Top with whipped cream and additional caramel drizzle before serving.

Recipe Notes

  • You can substitute coffee with decaf or use flavored syrups for varied tastes.
  • To make a stronger version, add an extra shot of espresso.
  • Consider using flavored whipped cream or adding spices for a custom flair.

Best Iced Caramel Latte Recipe – Refreshing and Easy to Make

Iced Caramel Latte: The Perfect Summer Treat

⚖️
Difficulty
Easy

⏲️
Prep Time
5 mins

🕒
Cook Time
0 mins

⏱️
Total Time
5 mins

🍽️
Servings
1

The Iced Caramel Latte is not just a refreshing drink; it’s a blissful escape during warm summer days. Imagine smooth, freshly brewed espresso cascading over icy cubes, mingling with velvety milk and drizzled with rich caramel sauce. Each sip is a delightful combination of sweet and creamy that instantly transports you to a café corner, no matter where you are. Perfect for those who need a caffeine fix with a sweet edge, this beverage is a crowd-pleaser among coffee lovers.

This recipe allows you to whip up an Iced Caramel Latte in just a few minutes, making it an ideal choice for busy mornings or leisurely afternoons. You get to customize the intensity of the flavor by adjusting the espresso and the sweetness from the caramel sauce. Whether you prefer it light or rich, this iced latte delivers an indulgent experience that keeps you refreshed and satisfied. Follow this easy guide to become your own barista at home!

Quick Recipe Highlights

  • Flavor Profile: This Iced Caramel Latte boasts a rich coffee flavor balanced with the sweetness of caramel, creating a comforting and enticing drink.
  • Texture: The creamy milk blends seamlessly with ice and caramel, resulting in a luxuriously smooth mouthfeel.
  • Aroma: Enjoy the aromatic essence of freshly brewed espresso combined with caramel notes that make every sip even more enjoyable.
  • Visual Appeal: The latte features beautiful layers of coffee, milk, and caramel drizzled on top, making it as visually enticing as it is delicious.
  • Skill Level Needed: This recipe is beginner-friendly and requires no special coffee-making techniques.
  • Special Equipment: All you need is an espresso maker or a strong coffee pot, a blender or shaker, and a glass.

Recipe Overview

  • Difficulty Level: The Iced Caramel Latte is easy to prepare, making it perfect for novice cooks and coffee enthusiasts. You’ll be able to replicate café-quality drinks from the comfort of your home.
  • Category: This drink falls under the coffee beverage category, perfect for breakfast or an afternoon treat.
  • Cuisine: While typically enjoyed in coffee shops across the United States, its roots can be traced back to Italian espresso culture.
  • Cost: This homemade Iced Caramel Latte can be made for a fraction of the cost of buying one at a café, averaging around $2 per serving.
  • Season: Best enjoyed in the summer, it provides a refreshing pick-me-up against the heat.
  • Occasion: Whether it’s a casual weekend brunch or a delightful pick-me-up during work, this drink fits various occasions perfectly.

Why You’ll Love This Recipe

The combination of caramel and coffee in this Iced Caramel Latte creates a truly delightful taste experience. Sweet, rich caramel complements the bold espresso, providing a balance of flavors that coffee lovers crave. The creamy texture from the milk adds a comforting layer, making every sip indulgent. This drink captures the essence of café life, but with the convenience of making it at home.

Preparation is a breeze; the entire process takes only five minutes, making it a quick and delicious option for busy mornings. You can easily adjust the sweetness by adding more or less caramel, tailoring the flavor to your preferences. Additionally, the flexibility in the recipe allows you to experiment with different milk types, from whole milk to almond or oat milk, catering to dietary needs.

Nutritionally, the Iced Caramel Latte offers a caffeine boost without excessive calories, especially when made lighter. You can enjoy a delicious treat without compromising your dietary goals. This drink also serves as a conversation starter for gatherings, adding an element of fun and creativity to your hosting arsenal.

In terms of cost-effectiveness, making an Iced Caramel Latte at home significantly reduces your expenditure on café visits. With simple ingredients readily available, this recipe is both accessible and budget-friendly. You can indulge in your love for coffee without breaking the bank.

Overall, this Iced Caramel Latte is not just a drink; it’s an experience that you can enjoy anytime. Its balanced flavors and ease of preparation make it a favorite among many.

Historical Background and Cultural Significance

The origins of the Iced Caramel Latte can be traced back to the tradition of espresso making in Italy. Espresso itself has a rich cultural background, often associated with family gatherings and social interactions in Italian culture. In America, the rise of coffee culture in the 1990s brought espresso drinks into the mainstream, leading to the development of various flavored lattes, including the caramel variant.

As this drink became more popular, the introduction of cold coffee beverages took the café scene by storm. Iced lattes offered a refreshing alternative to traditional hot varieties, making them a staple during warm weather. The addition of caramel not only added sweetness but also an appealing look, making it a favored choice among customers around the world.

Over the years, the Iced Caramel Latte has evolved into a customizable beverage that reflects personal tastes. Different coffee shops have introduced their versions with varying ingredients and proportion adjustments, attracting a diverse audience. This evolution signifies how culinary practices adapt and grow over time, often influenced by consumer preferences.

Today, the Iced Caramel Latte stands as an example of cross-cultural adoption in cuisine. It encapsulates elements of Italian coffee tradition while embracing modern-day convenience and personalization, allowing it to resonate with a broad audience globally.

Ingredient Deep Dive

Espresso
Espresso is a concentrated form of coffee created by forcing hot water through finely-ground coffee beans. It has roots in Italy and plays a significant role in various coffee drinks. Nutritional benefits of espresso include a low calorie count alongside antioxidants that provide health advantages. When selecting espresso, opt for freshly ground beans to ensure maximum flavor. Store espresso coffee beans in an airtight container away from light and heat for optimal freshness. If you don’t have espresso, a strong brewed coffee can serve as a substitute.

Milk
Milk adds creaminess and body to the Iced Caramel Latte. It can range from whole milk to plant-based alternatives such as almond or oat milk, catering to dietary restrictions. Each type of milk offers unique nutritional benefits, like protein from cow’s milk or heart-healthy fats from nut milks. When purchasing milk, choose organic varieties when possible to avoid additives. Store milk in the fridge and check for expiration dates. If you want to lower calories, consider using skim or almond milk as a substitute.

Caramel Sauce
Caramel sauce brings sweetness and a unique flavor to the Iced Caramel Latte. Originating from the French technique of caramelizing sugar, it adds depth to many desserts and coffee drinks. Nutritionally, caramel is high in sugar, so moderation is key. When selecting caramel sauce, look for quality products with minimal ingredients, or consider making your own at home! Store in a cool, dry place and check for any crystallization. If you’re looking for alternatives, try using butterscotch or toffee sauce for a different flavor profile.

Common Mistakes to Avoid

  • Using stale coffee beans: Always use freshly roasted beans for the best flavor.
  • Overheating the milk: If heating milk for hot drinks, take care not to scorch it; warm it gently and monitor the temperature.
  • Too much ice: Adding excessive ice can dilute the drink too quickly; measure appropriately for desired taste.
  • Not separating the layers: To achieve a beautiful layered effect, pour slowly over the back of a spoon.
  • Using low-quality caramel: Invest in a good caramel sauce as it significantly affects the overall flavor.
  • Forgetting to chill the glass: Pre-chilling your glass can help maintain the temperature of the drink for longer.
  • Skipping the espresso shot: For a truly authentic iced latte, make sure to use real espresso for that rich flavor.
  • Ignoring the milk ratios: Experiment with milk proportions to find your perfect creaminess level.
  • Not stirring well: To fully integrate flavors, stir the drink well before consumption.
  • Serving without garnish: A drizzle of caramel on top can elevate the presentation and enhance the flavor.

Essential Techniques

Brewing Espresso
Brewing espresso is a vital skill for making an authentic Iced Caramel Latte. Use finely ground coffee and a good quality machine to ensure the right pressure extraction. Watch for the right temperature and timing—typically, 25-30 seconds is ideal. Common pitfalls include using too coarsely ground coffee or extracting for too long, resulting in bitterness. Visual cues include a rich crema forming on top, indicating a well-brewed espresso.

Frothing Milk
Frothing milk can elevate the texture of your Iced Caramel Latte. For a consistent froth, use whole or dairy alternatives that froth well. Avoid overheating the milk, as this can prevent proper frothing. Master this by practicing the angle of the steam wand and the technique used. Common pitfalls include not letting the milk sit for a few seconds after steaming to create small bubbles. Look for a velvety consistency with no large bubbles for the best result.

Pro Tips for Perfect Iced Caramel Latte

1. Use high-quality coffee beans for maximum flavor and aroma.
2. Opt for fresh milk, preferably whole or oat, for a richer taste.
3. Experiment with different caramel sauces to find your perfect sweetness level.
4. Chill your glass beforehand to keep the drink cold longer.
5. Layer your drink—start with espresso, then milk, and finish with ice to maintain the coffee’s integrity.
6. Customize sweetness by starting with a little caramel; you can always add more.
7. Don’t forget a pinch of sea salt on top to enhance the caramel flavor.
8. Use flavored syrups for a unique twist, such as vanilla or hazelnut.

Variations and Adaptations

For regional variations, consider trying a Mexican twist by adding a pinch of cinnamon or espresso infused with chocolate. Seasonal adaptations are fun too! In the fall, you can add pumpkin spice to your caramel latte for a festive touch. If you need dietary modifications, switch to almond milk for a dairy-free option or use sugar-free caramel sauce for a low-carb version. To enhance the flavor, infuse your latte with flavored syrups like vanilla or hazelnut.

If you’re looking for texture modifications, try blending the drink with ice for a frozen version, perfect for sweltering days. For presentation alternatives, consider serving in mason jars or with whipped cream on top for a more indulgent feel—perfect for any social gathering!

Serving and Presentation Guide

When plating the Iced Caramel Latte, use a clear glass to showcase the beautiful layers. A drizzle of caramel around the inside of the glass adds visual appeal. For garnishing ideas, consider whipped cream topped with a sprinkle of sea salt or crushed nuts. Pair it with a slice of cake or cookies for an indulgent treat. Temperature consideration is key; make sure to serve your latte cold for that refreshing experience, and pouring it over fresh ice just before serving keeps every sip cool. For portion control, aim for a standard 12 oz glass to keep your servings moderate while still satisfying.

Wine and Beverage Pairing

For a beverage pairing, consider a rich dessert wine if serving as an after-dinner treat. A glass of Port can complement the caramel beautifully. Non-alcoholic alternatives include flavored sparkling waters or iced herbal teas, which will not overpower the latte’s flavor profile. If pairing with a breakfast dish, an iced tea or a light fruit juice can provide balance. Ensure that any accompanying beverage has a refreshing quality that enhances the overall enjoyment of the Iced Caramel Latte.

Storage and Shelf Life

The Iced Caramel Latte is best enjoyed fresh, but you can store leftover brewed espresso in the fridge for up to three days. Milk, depending on the type, should be stored according to the label instructions; typically, this is 5-7 days after opening. If you have leftover caramel sauce, store it in an airtight container at room temperature for a month or in the refrigerator for longer-lasting freshness. Signs of spoilage include sour smells or separation in milk, so always check before use. If you need to reheat espresso, do so gently to avoid bitterness.

Make Ahead Strategies

For those looking to plan ahead, brew a batch of espresso and store it in the fridge overnight for morning use. Prepare caramel sauce in advance and store it for up to a month. Consider pre-measuring ingredients the night before to streamline your morning routine, and blend for a quick iced latte whenever needed. Fresh elements like whipped cream or garnishes can be prepared just before serving to maintain their integrity without losing freshness.

Scaling Instructions

Scaling the Iced Caramel Latte recipe is simple; to halve it, use a single shot of espresso and reduce the milk accordingly. For doubling or tripling, ensure your espresso maker can handle the quantity, and adjust the proportions of milk and caramel proportionately. If you’re scaling up, consider prepping all components separately and combining them right before serving to maintain flavor and freshness. Keep an eye on timing adjustments when brewing larger amounts; you may need to brew in batches for optimal results.

Nutritional Deep Dive

When analyzing the nutrition of an Iced Caramel Latte, consider the macro breakdown: one serving typically has about 200-300 calories, mostly from the milk and caramel. Espresso contributes minimal calories but adds caffeine for an energy boost. Micronutritionally, this drink can provide calcium from milk, and antioxidants from coffee can offer health benefits as well. Be aware of portion sizes, especially with caramel, which can significantly increase sugar content—moderation is key. For those watching their weight, calorie-conscious versions can be made with lighter milk and controlled caramel use.

Dietary Adaptations

For gluten-free adaptations, the base recipe is naturally gluten-free. You can make it dairy-free by substituting with almond or coconut milk. For vegan options, choose a plant-based milk and a vegan caramel sauce. You can also create a low-carb or keto version by using sugar-free caramel syrup instead of regular caramel sauce. Consider a low-FODMAP option for sensitive digestion by ensuring the milk and other ingredients are suitable for such diets, providing delightful coffee enjoyment for everyone.

Troubleshooting Guide

If you encounter a watery drink, reduce the amount of ice or use less milk. For flavor balance issues, try adjusting the amount of caramel or coffee used. If your milk doesn’t froth properly, ensure you’re using the right kind for frothing and not overheating. Equipment challenges can arise when espresso machines malfunction—ensure proper cleaning and maintenance to prevent issues. If substitutions affect the texture, such as using almond milk, remember that different milks react differently when combined with coffee, adjusting might be necessary.

Recipe Success Stories

Readers have shared their successes in making the Iced Caramel Latte at home, emphasizing how easy it is to customize according to personal taste. Many enjoy experimenting with different milks and flavor infusions, sparking their creativity in the kitchen. Others appreciate the cost savings compared to café purchases, often sharing pictures of their tasty creations on social media. Photography tips often involve using natural light to capture the beautiful layers and colors of the latte, showcasing their triumph in replicating this beloved drink.

Frequently Asked Questions

Can I use instant coffee instead of espresso?

Yes, you can use instant coffee in place of espresso. However, the flavor may differ, and it may be less potent. Make sure to dissolve it in minimal water to create a concentrated flavor.

What type of milk is best for Iced Caramel Latte?

Whole milk is commonly used for its rich flavor and creaminess, but you can also use oat, almond, or skim milk according to your preference.

Can I use flavored coffee for this latte?

Absolutely! Flavored coffees can add an exciting twist to your Iced Caramel Latte, enhancing the overall taste experience.

How can I make my caramel sauce at home?

To make homemade caramel sauce, melt sugar in a saucepan until it turns golden brown, then slowly stir in cream and a pinch of sea salt. Cool before using.

How long can I store my Iced Caramel Latte?

For best quality, enjoy your Iced Caramel Latte fresh. You can store the brewed espresso in the fridge for up to three days, but the milk should be consumed within a few days of opening.

Is this drink suitable for kids?

Yes, kids can enjoy the Iced Caramel Latte, especially if you use less coffee or switch to decaf options.

Can I make a larger batch?

Yes, you can easily scale this recipe to make larger batches by adjusting the espresso and milk amounts proportionately.

What if I don’t have an espresso machine?

No worries! You can brew a strong cup of coffee using a French press or drip coffee maker instead. Aim for a concentration similar to espresso.

Can I use sugar-free caramel sauce?

Yes! Sugar-free caramel sauce works as a great alternative for those monitoring their sugar intake, offering the same sweet flavor without the additional calories.

What’s the best way to sweeten my drink?

Adjust the sweetness to your liking by adding more or less caramel sauce. You can also use other sweeteners like honey or flavored syrups for variety.

How do I achieve a layered look?

To create beautiful layers, pour the milk in slowly over the back of a spoon, then add your espresso and finally the ice, letting it settle naturally for a visually appealing effect.

Additional Resources

For those looking for more coffee recipes, consider exploring variations on classic lattes, such as the Mocha or Vanilla Latte. Technique guides on brewing espresso or frothing milk will deepen your coffee-making skills. Understanding different types of milk and their flavor profiles add another dimension to your drinks. Check out recommended coffee equipment to enhance your brewing at home. Seasonal variations can inspire you to infuse your beverages with flavors that correspond to different times of the year.

Join the Conversation

We love hearing from our community! Share your Iced Caramel Latte photos and variations on social media. Engage with us by leaving feedback and suggestions on this recipe; it helps others in the community discover new ways to enjoy this drink. Your experiences, tips, and tricks can help elevate this recipe while inspiring others to craft their own barista-style beverages at home.

The Recipe

Iced Caramel Latte

Serves: 1

Prep Time: 5 mins

Cook Time: 0 mins

Total Time: 5 mins

Kitchen Equipment Needed

  • Espresso machine or coffee maker
  • Measuring cups
  • Spatula
  • Glass
  • Spoon for stirring

Ingredients

  • 1 shot of espresso (or 1/2 cup strong brewed coffee)
  • 1 cup of milk (dairy or non-dairy)
  • 2 tablespoons of caramel sauce
  • Ice cubes

Directions

  1. Brew a shot of espresso and allow it to cool for a moment.
  2. In a tall glass, add ice cubes until filled to your liking.
  3. Pour the cooled espresso over the ice.
  4. Gently pour the milk over the espresso to create layers.
  5. Drizzle caramel sauce on top and stir before drinking.
  6. Enjoy your refreshing Iced Caramel Latte!

Recipe Notes

  • This recipe can easily be doubled or multiplied to serve more.
  • Feel free to adjust the amount of caramel sauce according to your taste.
  • Experiment with different flavored syrups for unique variations.

Best Healthy Starbucks Secret Menu Drinks for 2020

15 Healthy Starbucks Secret Menu Drinks For 2020

⚖️
Difficulty
Easy

⏲️
Prep Time
5 mins

🕒
Cook Time
0 mins

⏱️
Total Time
5 mins

🍽️
Servings
1

Are you ready to elevate your beverage game with some delightful, healthy options? Welcome to the world of Starbucks Secret Menu drinks! These drinks not only satisfy your taste buds but also allow you to indulge without compromising your healthy lifestyle. Whether you’re craving something fruity, creamy, or a little bit spicy, the Starbucks Secret Menu has something to offer everyone, and we’ve curated a list of 15 irresistible drinks for 2020. Get ready to explore the wonders that lie beyond the typical orders!

From light and refreshing iced beverages perfect for a sunny afternoon to warming and cozy options ideal for chilly mornings, each drink champions distinctive flavors and health-conscious ingredients. Unlocking these drinks isn’t just about taste; it’s a fun way to customize your beverage experience. The magical combinations crafted from Starbucks’ base drinks give you the freedom to play with flavors and make something that truly caters to your cravings.

Quick Recipe Highlights

  • Flavor Profile: Experience the delightful marriage of refreshing fruits with creamy textures that dance on your palate.
  • Texture: From velvety drink options to refreshing icy blends, these beverages will leave you craving more.
  • Aroma: Each secret drink bursts with aromatic hints of berries, coconut, and espresso, creating an inviting atmosphere.
  • Visual Appeal: Bright colors, frothy toppings, and artisanal garnishes make each drink Instagram-worthy.
  • Skill Level Needed: Perfect for beginners; no advanced barista skills are necessary!
  • Special Equipment: Just your trusty blender and a selection of outer Starbucks ingredients.

Recipe Overview

  • Difficulty Level: Most of these drinks are easy to make and require only a few ingredients, perfect for any home barista.
  • Category: This recipe falls under beverages but could easily accompany breakfast or a snack.
  • Cuisine: While inspired by Starbucks’ classic drinks, these recipes lean towards modern, health-conscious options.
  • Cost: Enjoying a drink at home saves you money compared to buying it at Starbucks regularly.
  • Season: Enjoy these drinks year-round, with fruity options for summer and cozy flavors in the winter.
  • Occasion: Perfect for gatherings, study breaks, or leisurely brunches!

Why You’ll Love This Recipe

These 15 Healthy Starbucks Secret Menu Drinks are not only delicious but they also push the boundaries of what we expect from typical coffee shop offerings. Each drink is crafted with an emphasis on flavor and nutrition, allowing you to indulge guilt-free. The convenience of whipping up these beverages at home means you can enjoy a refreshing treat any time of the day.

Incorporating nutrient-rich ingredients, these drinks support a healthy lifestyle without sacrificing taste. Whether you’re looking for something rich in antioxidants or simply pure fruit flavors, these recipes leverage the best ingredients Starbucks has to offer. Entertaining friends or simply craving a tasty drink? These beverages will impress beyond just the visual appeal.

Moreover, these drinks are exceptionally cost-effective. With just a few ingredients and some creativity, you can recreate your favorite Starbucks orders for a fraction of the price. The accessibility of ingredients means that anyone can enjoy these drinks, making them a great option for a cozy gathering or a refreshing solo treat.

Lastly, the social aspect of these drinks cannot be overlooked. Sharing unique beverage creations can spark conversations and make gatherings more enjoyable. From summer picnics to winter gatherings, these drinks add a touch of fun and creativity that will have everyone asking for the recipe!

Historical Background and Cultural Significance

The Starbucks Secret Menu is a phenomenon that began organically among coffee lovers who wanted to customize their drinks beyond the standard offerings. As people began experimenting, a wealth of flavors and combinations surfaced, giving birth to a vibrant community of coffee enthusiasts. The yearly updates, like the one for 2020, reflect evolving tastes and health trends in the beverage industry.

This cultural significance extends beyond coffee; it showcases creativity and individual expression through food and drink. As more people became health-conscious, the trend shifted towards better-for-you ingredients, prompting the rise of the secret menu items that cater to these evolving preferences.

Additionally, regional variations became significant as fans of Starbucks began to explore culturally-inspired drinks, integrating local flavor preferences into the secret menu. From fruity flavors to exotic spices, every new recipe is a nod to diverse culinary traditions.

Over the years, the popularity of these creative drinks has led not just to new concoctions, but also a broader understanding of what coffee and tea can be. This allows drinkers to explore outside traditional boundaries and embrace flavors from around the world in their caffeine fix.

Ingredient Deep Dive

Almond Milk: This nut-based milk offers a creamy texture while remaining low in calories compared to traditional dairy. It’s rich in vitamin E and is a good source of healthy fats. When selecting almond milk, opt for unsweetened options to avoid added sugars.

Almond milk is versatile for drinks and can be stored in the fridge for up to a week once opened. If you’re unable to find it, try substituting with coconut milk for a different flavor profile.

Matcha Powder: Matcha is a finely ground powder made from specially grown green tea leaves, rich in antioxidants. Its unique flavor offers a natural sweetness and depth that pairs beautifully in drinks. When selecting matcha, choose high-quality brands for the best flavor and health benefits.

Store matcha in a cool, dry place to maintain its freshness. If you need a quick substitute, consider green tea powder, though the flavor profile will differ slightly.

Common Mistakes to Avoid

  • Not asking for specific customization: Many Starbucks employees are familiar with the secret menu, but it’s crucial to clearly communicate your desires to avoid any misunderstandings.
  • Overloading ingredients: Adding too many ingredients can lead to overwhelming flavors. Stick to a few key components to maintain balance.
  • Ignoring temperature: Always be mindful of how hot or cold you want your drink to be; specify temperature preferences to the barista.
  • Choosing low-quality ingredients: For the best flavor, always opt for premium ingredients when available.
  • Forgetting to request modifications: Many drinks can be further customized; don’t hesitate to ask for more or less sweetness, or for specific substitutions.
  • Ordering off the secret menu in a hurry: Take the time to decide on your drink to avoid disappointment.
  • Assuming all baristas know the secret menu: If a barista seems unfamiliar, be prepared to explain your drink.
  • Neglecting to specify cup size: Starbucks offers different sizes, and forgetting to specify could lead to receiving a drink that’s either too big or too small.
  • Limited to one variation: Don’t shy away from trying different variations; explore flavors you haven’t experienced yet!
  • Ignoring seasonal specials: The secret menu evolves; make sure to ask for any seasonal variations that could enhance your drink experience.

Essential Techniques

Mastering the art of requesting drinks off the Starbucks Secret Menu is essential for getting your desired beverage just right. To perfect the technique, familiarize yourself with how drinks are typically made at Starbucks and think creatively in terms of blending flavors.

Pay attention to visual cues; each drink has a unique appearance. Ensure your requested drink matches the aesthetic you’re after, cultivating the experience of authentic barista craftsmanship right at home.

Pro Tips for Perfect Healthy Starbucks Secret Menu Drinks

1. **Experiment with Flavors**: Don’t be afraid to mix and match ingredients. The beauty of these drinks lies in customization.

2. **Use Quality Ingredients**: Whenever possible, opt for organic or local products to enhance the flavor of your drinks.

3. **Stay Seasonal**: Incorporate seasonal fruits and spices to elevate your drinks throughout the year.

4. **Adjust Sweetness**: Many recipes can be adjusted in terms of sweetness. Start with less and gradually add more to find the perfect balance.

5. **Think Visuals First**: Presentation can make a difference. Use layers of colors for visual appeal.

6. **Serve Chilled**: If it’s an iced drink, make sure the glasses are pre-chilled for maximum refreshment.

7. **Invest in Good Tools**: Having the right blender and measuring tools can make a world of difference in your beverage creations.

8. **Share Your Creations**: Encourage others to join in on the fun by sharing your secret menu drink experiences and recipes!

Variations and Adaptations

Regional variations in the Starbucks Secret Menu reflect local flavor preferences, such as incorporating local fruits or spices. Additionally, seasonal adaptations allow for the use of ingredients that are fresh at certain times of the year, like pumpkin spice in fall.

For those with dietary restrictions, there are easy modifications to explore, like using oat milk for a creamier texture that remains dairy-free. Flavor variations could include adding flavor syrups or substituting traditional flavors with fruit purees for a healthier twist.

Serving and Presentation Guide

Serving your drinks in clear, aesthetically pleasing glasses not only enhances the visual appeal but also showcases the beautiful colors of your ingredients. Creating layers with your drinks can add an extra flair to presentation.

Garnishing with fresh herbs or fruits welcomes creativity; consider mint leaves or cinnamon sticks for different flavor accents. Temperature is also vital; serve iced drinks over crushed ice for a refreshing experience and hot drinks in pre-warmed mugs for the perfect slow sip.

Wine and Beverage Pairing

When it comes to enjoying your healthy drinks with meals, pairing can enhance the experience. For fruity options, consider a light white wine or sparkling water with a splash of citrus. Alternatively, for richer or coffee-based drinks, a deep red wine could complement the flavors well.

If you prefer non-alcoholic alternatives, craft mocktails using complementary fruit flavors. Also, coffee or tea pairings can elevate your experience; explore herbal teas that mirror the flavor notes in your drinks.

Storage and Shelf Life

To maintain the freshness of your ingredients, store them in airtight containers in the fridge. Generally, homemade drinks can last for up to 48 hours before losing their flavor profile.

If you wish to keep your drinks longer, consider freezing fruit purees or optional creamy ingredients in ice cube trays for easy access. To reheat any warmed beverages, gently warm them on the stove or in a microwave, being cautious not to overheat.

Make Ahead Strategies

One of the best strategies for enjoying these secret menu drinks regularly is to prepare ingredients ahead of time. Pre-slicing fruits or blending fruit purees in bulk allows for quick assembly when you’re ready to enjoy your beverage.

Think about storing blends separately and assembling on the day you plan to indulge; this can preserve the fresh flavor and texture that is oh-so-important in drinks.

Scaling Instructions

Scaling these drinks is easy. To halve the recipe, simply divide each ingredient by two. Alternatively, if you want to double or triple the quantity, ensure your equipment can handle larger volumes and adjust blending time accordingly for a smoother consistency.

When adjusting the timing for larger batches, remember to allow more time for blending if necessary. Store any leftovers in airtight containers for easy access later!

Nutritional Deep Dive

Understanding the nutritional content of your secret menu drinks can help you make informed choices. Daily macro breakdowns reveal beneficial components like healthy fats from nut milks and antioxidants from fruits.

Micronutrient analyses show how incorporating ingredients like matcha boosts overall health. Each ingredient has its health benefits, so it’s essential to mix and match based on dietary needs.

Dietary Adaptations

The versatility of the Starbucks Secret Menu allows for numerous dietary adaptations. If you’re gluten-free, simply ensure that no gluten-containing ingredients are included in your drinks. Dairy-free options can seamlessly incorporate nut or plant-based milks.

For vegan enthusiasts, using plant-based proteins or fibers in your drinks can add crucial nutrients while keeping the recipe aligned with lifestyle choices. Exploring keto or paleo adaptations is also simple by substituting sugars with natural sweeteners.

Troubleshooting Guide

If you run into texture issues, ensure you’re blending for long enough to smooth out lumps. Failing to balance flavors can be remedied by adjusting sweetness or acidity to reach the desired taste.

For temperature-related problems, always taste your drinks before serving to check if they’re too hot or cold. If an ingredient just doesn’t match, feel free to swap it out for something that better fits your theme.

Recipe Success Stories

Many fans of the Starbucks Secret Menu have shared their experiences recreating drinks at home, highlighting how simple modifications can lead to delightful results. Individual variations, like adding unique flavor syrups or crafting beautiful layered presentations, showcase how versatile and fun these recipes can be.

Photography tips abound in the community, emphasizing the appeal of Instagram-worthy drinks. Sharing successful attempts and variations keeps the spirit of the secret menu alive and inspires others to venture into their drink-making adventures.

Frequently Asked Questions

1. What are Starbucks Secret Menu drinks? These drinks are customizable options created by customers and fans, going beyond the standard Starbucks menu.

2. Are these drinks available year-round? Some ingredients may vary by season, and not all drinks are available at all times.

3. Can I order these drinks at any Starbucks? While many baristas are familiar with secret menu items, it’s best to explain your drink customization in detail.

4. What are some popular secret menu drinks? Favorites often include customized lattes and fruity refreshers, but creativity is key!

5. How can I find new secret menu drinks? Explore social media and recipe blogs for inspiration and community-created drinks.

6. Can I make these drinks vegan? Yes, by using non-dairy milks and ensuring no animal-derived ingredients are included.

7. What’s a good way to sweeten these drinks? Natural sweeteners like honey, agave syrup or even stevia can be used depending on your preference.

8. How do I make these drinks healthy? Opt for low-calorie or sugar-free syrups and substitute milk with lighter versions like almond or oat.

9. Can I freeze leftovers? Yes! Freezing can preserve flavors; just be mindful of texture changes.

10. What should I do if my drink doesn’t taste right? Adjust ingredients to find the right balance and remember to taste as you go!

Additional Resources

For those looking to dive deeper into the world of copycat recipes, exploring similar beverage recipes can reveal more unique creations. Technique guides can offer insight into mastering skills needed for blending and customizing flavors.

Ingredient information is also vital for understanding the best options to enhance your drinks. Be sure to check out equipment recommendations that could further elevate your beverage-making skills.

Join the Conversation

Engaging with fellow coffee enthusiasts on social media is a fantastic way to share your take on these Starbucks Secret Menu drinks. Encourage others by showcasing your photos, sharing your successes, and providing feedback on different variations.

Offering recipe reviews and making suggestions can also encourage more exploration within the community, fostering a supportive environment for all drink lovers!

The Recipe

15 Healthy Starbucks Secret Menu Drinks

Serves: 1

Prep Time: 5 mins

Cook Time: 0 mins

Total Time: 5 mins

Kitchen Equipment Needed

  • Blender
  • Measuring cups and spoons
  • Glass for serving

Ingredients

  • 1 cup of almond milk
  • 1-2 tablespoons of matcha powder (optional)
  • Fruits of choice (like strawberries, mango, or blueberries)
  • Sweetener to taste (honey or agave syrup)
  • Ice cubes (for iced drinks)

Directions

  1. Add all ingredients into the blender.
  2. Blend until smooth and well combined.
  3. Taste and adjust sweetness if necessary.
  4. If making an iced drink, serve over ice in a glass.
  5. Garnish as desired and enjoy your delightful drink!

Recipe Notes

  • You can adjust the sweetness based on personal preference.
  • Different milk alternatives can be used for added flavor.
  • Feel free to experiment with various fruits for different flavor profiles!

Best Mocha Iced Coffee Recipe with Creamy Chocolate Flavor

The Best Mocha Iced Coffee Recipe: A Refreshing Pick-Me-Up

⚖️
Difficulty
Easy

⏲️
Prep Time
5 mins

🕒
Cook Time
0 mins

⏱️
Total Time
5 mins

🍽️
Servings
2 servings

Welcome to the ultimate refreshment for coffee lovers! This mocha iced coffee recipe is not only a delectable treat but also a delightful way to kickstart your day or reinvigorate your afternoon. Infused with rich, aromatic coffee blended with creamy chocolate, it offers a flavor experience that’s both indulgent and satisfying. Every sip encapsulates the perfect balance of bold espresso and sweet mocha – a little touch of heaven that keeps you cool during those warm sunny days.

This recipe is incredibly simple and quick, making it a perfect choice for those busy mornings or a last-minute pick-me-up. With just a few ingredients, you can enjoy a café-quality drink right at home. Imagine the smoothness of chilled coffee meeting the lovely sweetness of chocolate, topped with an optional dollop of whipped cream. You’ll find yourself craving this refreshing drink over and over again!

Quick Recipe Highlights

  • Flavor Profile: Rich coffee with sweet chocolate notes, balanced by a hint of creaminess.
  • Texture: Smooth and satisfying with a slight froth from the whipped cream or milk, creating a luxurious mouthfeel.
  • Aroma: Inviting blend of roasted coffee and decadent chocolate that fills the air, awakening the senses.
  • Visual Appeal: Gorgeous layers of dark coffee and luscious cream with an optional sprinkle of cocoa or chocolate shavings on top.
  • Skill Level Needed: Very easy, suitable for all skill levels, even beginner home cooks.
  • Special Equipment: All you need is a blender and a glass – simple yet effective!

Recipe Overview

  • Difficulty Level: This recipe is rated easy because it requires no complex techniques and is perfect for quick preparation.
  • Category: Great as a breakfast drink or afternoon refreshment, making it versatile for any time of the day.
  • Cuisine: An American twist on classic Italian café culture where coffee and dessert flavors are popular.
  • Cost: This recipe is budget-friendly, with a total cost of around $5 for two servings, making it affordable for everyone.
  • Season: Ideal for summer days when iced drinks are a craving – however, it can also be enjoyed year-round.
  • Occasion: Perfect for backyard barbecues, brunch gatherings, or simply a quiet moment to yourself.

Why You’ll Love This Recipe

When it comes to taste and texture, this mocha iced coffee is a standout. The intense flavor of freshly brewed coffee combined with smooth chocolate creates a delightful sip that’s both energizing and comforting. Each sip offers a luxuriously creamy texture, especially when garnished with whipped cream, elevating your coffee drinking experience to new heights. It’s a coffee drink that feels indulgent without the need for high-end café prices.

This mocha iced coffee recipe is incredibly convenient. With just five minutes of prep time, you can whip up this delicious beverage even on the busiest of mornings. It allows you to enjoy a café-style drink without ever leaving the house, saving you both time and money. You can easily adjust the sweetness to your preference, making it a customizable drink that caters to your taste buds.

In terms of nutritional advantages, this recipe incorporates coffee, which can boost your metabolism and enhance focus. The chocolate adds a touch of sweetness, and if you opt for dairy alternatives, it can cater to different dietary needs. Best of all, it provides a refreshing and caffeinated treat without the unnecessary additives found in many store-bought options.

Serving this delightful drink can become a social affair as well. Picture a summer gathering where you prepare this mocha iced coffee for friends and family – it’s guaranteed to be a hit! With its visually appealing layers and rich flavors, it’s a conversation starter that brings people together over their shared love for coffee.

Finally, cost-effectiveness is a huge plus. By preparing this mocha iced coffee at home, you avoid the premium prices of coffee shops. All of the ingredients can be found easily in your local grocery store, making it accessible for everyone. Enjoying your favorite drink without breaking the bank is always an appealing option!

Historical Background and Cultural Significance

The origin of mocha iced coffee can be traced back to the coffee culture of the Middle East, where coffee was first discovered. The term “mocha” itself comes from the port of Mocha in Yemen, an early coffee trading center. Over the years, the preparation methods evolved, leading to the incorporation of chocolate into coffee drinks, giving rise to the beloved mocha flavor we enjoy today.

Culturally, coffee has always held a significant role in social interactions globally. It acts as a catalyst for conversation, relaxation, and connections among friends and family. The addition of chocolate in tradition reflects the indulgence often sought in coffee experiences, merging two favorites into one comforting beverage.

Through the decades, recipes for iced coffee have evolved, especially with the café culture boom in the United States. As more coffee shops began offering cold beverages, the mocha iced coffee quickly gained popularity, marking its place as a favorite among coffee enthusiasts and casual drinkers alike.

Regional variations of mocha iced coffee can be found worldwide. In Italy, for example, espresso is often the base, while Latin American influences may incorporate spices such as cinnamon or vanilla to enhance the flavor. Each area adds its unique twist, showcasing the versatility of this classic beverage.

Ingredient Deep Dive

Coffee: As the star of our recipe, coffee has a rich cultural significance in many traditions. It not only serves as a staple beverage but also acts as a social lubricant across the globe. Nutritionally, coffee offers antioxidants and has been linked to various health benefits, such as improved cognitive function and enhanced calorie burning. Selection tips include opting for quality, freshly roasted beans. Store coffee in a cool, dark place to maintain freshness and consider alternatives like cold brew for a smoother flavor.

Chocolate: The addition of chocolate plays a crucial role in this recipe, adding both sweetness and depth. Historically, chocolate originated from the cacao bean, which has been celebrated for centuries for its flavor and potential health benefits. Look for high-quality chocolate to enhance your drink. Store it in a cool location, and if you’re looking to reduce sugar content, consider using dark chocolate or cocoa powder as a substitute.

Common Mistakes to Avoid

  • Not brewing enough coffee: Ensure you brew enough coffee to keep the flavor strong. Weak coffee can dilute the experience.
  • Using water instead of milk: For a creamy consistency, always use milk or cream instead of water.
  • Overloading on sweeteners: Balance is key! Start with a small amount of sugar and adjust to your taste.
  • Skipping the chilling process: Allowing the coffee to cool is essential to prevent diluting the drink with melting ice.
  • Ignoring ingredient quality: Premium ingredients make a noticeable difference in flavor and overall enjoyment.
  • Not blending thoroughly: Blend until smooth for the best texture and consistency.
  • Serving too warm: Iced coffee should be served cold; if it’s warm, it defeats the purpose!
  • Not garnishing: A simple garnish can elevate your drink visually and flavor-wise, so don’t skip this step.
  • Using old coffee: Always use freshly brewed coffee for the best taste and aroma.
  • Not experimenting: Don’t be afraid to try different types of chocolate to create unique flavor profiles!

Essential Techniques

Brewing Coffee: Brewing coffee is the foundation of creating a delicious iced coffee. Master the brewing method that suits your taste: whether it’s using a French press, drip coffee maker, or espresso machine. Aim for a rich extraction to ensure a flavored base. Over-extraction can lead to bitterness, while under-extraction might yield a sour coffee; always taste and adjust your brewing time.

Blending: Blending ingredients is pivotal for achieving the right texture in your mocha iced coffee. A powerful blender can break down ice chunks and combine flavors smoothly. Watch for consistency; blend until you achieve a creamy finish without any gritty texture. Avoid over-blending, which can alter the temperature and dilute your drink.

Pro Tips for Perfect Mocha Iced Coffee

1. Use cold brew coffee for a smoother, less acidic flavor profile.

2. Experiment with flavored syrups to add unique twists like vanilla or hazelnut.

3. Try whipping heavy cream to add a decadent topping; it adds an indulgent mouthfeel.

4. Use a chocolate shaver for garnish for an aesthetically pleasing finish.

5. Mix in a pinch of salt to enhance the chocolate flavor and cut bitterness.

6. To reduce sweetness, replace sugar with natural sweeteners like honey or agave.

7. Incorporate an espresso shot for an extra caffeine kick!

8. Chill your glasses ahead of time for an added touch of luxury.

Variations and Adaptations

For those looking to mix things up, consider regional variations such as adding cinnamon for a subtly spiced mocha. Seasonal adaptations can be made by incorporating pumpkin spice during fall or peppermint extract during winter holidays for festive flair. If you’re following a special diet, this recipe can easily be adapted to fit low-carb or gluten-free lifestyles by using sugar-free syrups or alternative milk options.

For flavor variations, try swapping the chocolate for caramel for a unique twist, or incorporate nut-flavored syrups like almond or hazelnut for added richness. Texture modifications can include using crushed ice for a slush-like consistency or adding a scoop of vanilla ice cream for a dessert-inspired mocha iced coffee. Presentation can be enhanced with colorful straws or fun glassware for an eye-catching display.

Serving and Presentation Guide

To create a gorgeous presentation, be sure to layer components in your glass for visual appeal. Use a clear glass to showcase the beautiful layers of chocolate and coffee. For garnishing, sprinkle cocoa powder or drizzle chocolate syrup on top of the whipped cream. Seasonal decorations, such as festive straws or mint leaves, can enhance the aesthetic for parties. Remember to serve it with a straw for convenience and enjoyment!

Wine and Beverage Pairing

Add a fun twist by pairing this mocha iced coffee with dessert wines like a rich Port or a sweet Moscato that enhances the flavor of chocolate. Alternatively, for a refreshing non-alcoholic option, consider pairing it with sparkling water or coconut water to cleanse the palate. If you prefer tea, an unsweetened iced chai can beautifully complement the flavors of your mocha iced coffee. Always serve your coffee chilled to maintain its refreshing quality!

Storage and Shelf Life

To store mocha iced coffee, keep it in an airtight container in the refrigerator. It’s best consumed fresh, but you can store it for up to two days. To maintain quality, avoid adding ice until serving to prevent dilution. If you plan to save it, separate the coffee and any cream components as they may separate over time. Realistically, aim to consume it as soon as possible for the best flavor experience.

Make Ahead Strategies

To streamline your mornings, make coffee ahead of time and store it in the refrigerator. Allow it to cool completely, then blend it with the chocolate before serving. If desired, you can prepare whipped cream in advance and refrigerate it in a sealed container. For optimum freshness, mix everything together right before serving, and consider incorporating a fresh element like mint or chocolate shavings as a finishing touch!

Scaling Instructions

If you want to double this recipe for a crowd, simply increase the ingredients proportionately. For a smaller batch, halving the recipe is just as easy. Ensure you have a blender capable of accommodating larger volumes or blend in batches. Keep in mind to adjust ice levels to maintain that perfect consistency and chilling effect.

Nutritional Deep Dive

This mocha iced coffee primarily derives its benefits from coffee and milk. It offers a low-calorie option without compromising flavor. The macro breakdown includes carbohydrates from the chocolate and milk, with proteins if using dairy. Nutritionally, coffee provides antioxidants, while milk offers calcium, depending on the type you choose. Always consider portion sizes to manage overall calorie intake, especially if adding whipped cream or chocolate syrup.

Dietary Adaptations

For a gluten-free version, ensure all ingredients, especially any syrups used, are certified gluten-free. To make it dairy-free, simply swap cow’s milk with almond, oat, or coconut milk. Vegans can replace dairy-based whipped cream with coconut whipped cream for that luscious finish. Anyone on a low-carb diet can use sugar-free chocolate for sweetness without the carbs, and keto adaptations can utilize MCT oil for added fat without sugar.

Troubleshooting Guide

For issues with texture, ensure all ingredients are blended until smooth without any graininess. If flavors aren’t balanced, adjust sweetness gradually, tasting after each addition. Should you find your coffee too warm, ensure your iced coffee is chilled adequately, and use plenty of ice to keep your beverage cool. If you face problems with equipment, check your blender’s settings to ensure it’s on the right speed. For ingredient substitutions, always adjust accordingly with total volume in mind, especially when altering dairy products.

Recipe Success Stories

Many readers have shared their enthusiasm for home-making this mocha iced coffee, emphasizing its easy preparation and delicious outcome. Stories of gatherings where the drink became a highlight have been frequent. Users have enjoyed experimenting with different flavor variations and have shared beautiful photographs of their creations on social media. Suggestions for additional garnishes have inspired many others to take their mocha iced coffee experience to the next level!

Frequently Asked Questions

Q: Can I use instant coffee for this recipe?
A: Yes! While freshly brewed coffee offers the best flavor, instant coffee can be a quick alternative. Simply dissolve it in hot water and let cool before blending with other ingredients.

Q: What type of chocolate is best to use?
A: Dark chocolate or high-quality cocoa powder works best as they provide a richer flavor that balances nicely with coffee’s bitterness.

Q: Can I make this mocha iced coffee dairy-free?
A: Absolutely! Substitute cow’s milk with almond, soy, oat, or coconut milk for a delicious dairy-free version.

Q: How do I adjust the sweetness?
A: Start with small amounts of sugar or sweetener, blending and tasting until you achieve your desired sweetness.

Q: Can I add alcohol to this drink?
A: Yes! Consider adding a splash of coffee liqueur for an adult version of this drink.

Q: What should I do with leftovers?
A: Store any leftover iced coffee in the refrigerator, and consume it within two days for the best freshness.

Q: Is it possible to prepare this recipe ahead of time?
A: Yes! Brew your coffee and blend all ingredients in advance, then store them separately until ready to serve.

Q: Can I use flavored syrups?
A: Certainly! Flavored syrups can enhance the drink’s sweetness and add exciting new flavors.

Q: What’s a good garnish for mocha iced coffee?
A: Whipped cream, chocolate shavings, or a drizzle of chocolate syrup are perfect garnishes!

Q: Is this drink kid-friendly?
A: Yes! This mocha iced coffee can be made without any alcohol, and is suitable for kids when made with less caffeine.

Additional Resources

For those seeking more coffee-related recipes, consider checking out our guides on making homemade cold brew or experimenting with flavored iced teas. Additionally, explore our technique guides for perfecting your coffee brewing skills. Our equipment recommendations can help you choose the right blender or coffee maker to suit your needs!

Join the Conversation

We’d love to see your mocha iced coffee creations! Share your photos on social media and tag us. Feedback on recipe variations and personal adaptations are encouraged, helping to build a community of coffee lovers. Join the discussion with fellow food enthusiasts by leaving a comment and sharing your experience with this recipe.

The Recipe

The Best Mocha Iced Coffee

Serves: 2 servings

Prep Time: 5 mins

Cook Time: 0 mins

Total Time: 5 mins

Kitchen Equipment Needed

  • Blender
  • Measuring cups
  • Glass for serving

Ingredients

  • 2 cups brewed coffee, cooled
  • ½ cup milk (any kind)
  • ¼ cup chocolate syrup
  • Ice cubes
  • Whipped cream (optional)

Directions

  1. Brew your coffee according to your preference and allow it to cool.
  2. In a blender, combine the cooled coffee, milk, chocolate syrup, and a handful of ice cubes.
  3. Blend on high until smooth and frothy.
  4. Pour into glasses and top with whipped cream, if desired.
  5. Serve immediately, garnished with chocolate syrup or shavings, if you like!

Recipe Notes

  • For a richer flavor, use dark chocolate syrup.
  • Consider adding a touch of vanilla extract for an extra flavor dimension.
  • If you prefer a stronger coffee flavor, add an espresso shot before blending.