Easy Starbucks Iced White Chocolate Mocha Copycat Recipe

Starbucks Iced White Chocolate Mocha Copycat Recipe: Your Favorite Café Drink at Home

⚖️
Difficulty
Easy

⏲️
Prep Time
5 mins

🕒
Cook Time
5 mins

⏱️
Total Time
10 mins

🍽️
Servings
1

When it comes to delightful iced coffee beverages, nothing quite compares to a Starbucks Iced White Chocolate Mocha. This rich and creamy drink combines sumptuous white chocolate, smooth espresso, and velvety milk, all over ice to create an indulgent treat that’s perfect for hot days. Many of us crave this café classic but may not want to brave the long lines or the pricetag typical at our favorite coffee shops. That’s where this Starbucks Iced White Chocolate Mocha Copycat Recipe comes into play, allowing you to whip up this coffeehouse favorite in the comfort of your own home.

Imagine enjoying the silky sweet notes of white chocolate blending beautifully with the robust depth of espresso, all while being perfectly chilled. This copycat recipe not only captures the essence of the original but also allows you to customize the sweetness and creaminess to suit your preferences. Whether you’re commuting, working at home, or simply lounging on a sunny afternoon, this iced treat will bring a bit of café luxury right into your kitchen.

Quick Recipe Highlights

  • Flavor Profile: Expect a beautiful harmony of sweet white chocolate and bold espresso flavors complemented by creamy milk, creating a taste sensation.
  • Texture: The drink is smoothly blended, ensuring a satisfying icy experience that is both creamy and refreshing.
  • Aroma: This beverage emanates delightful notes of chocolate paired with invigorating coffee aromas, enticing your senses.
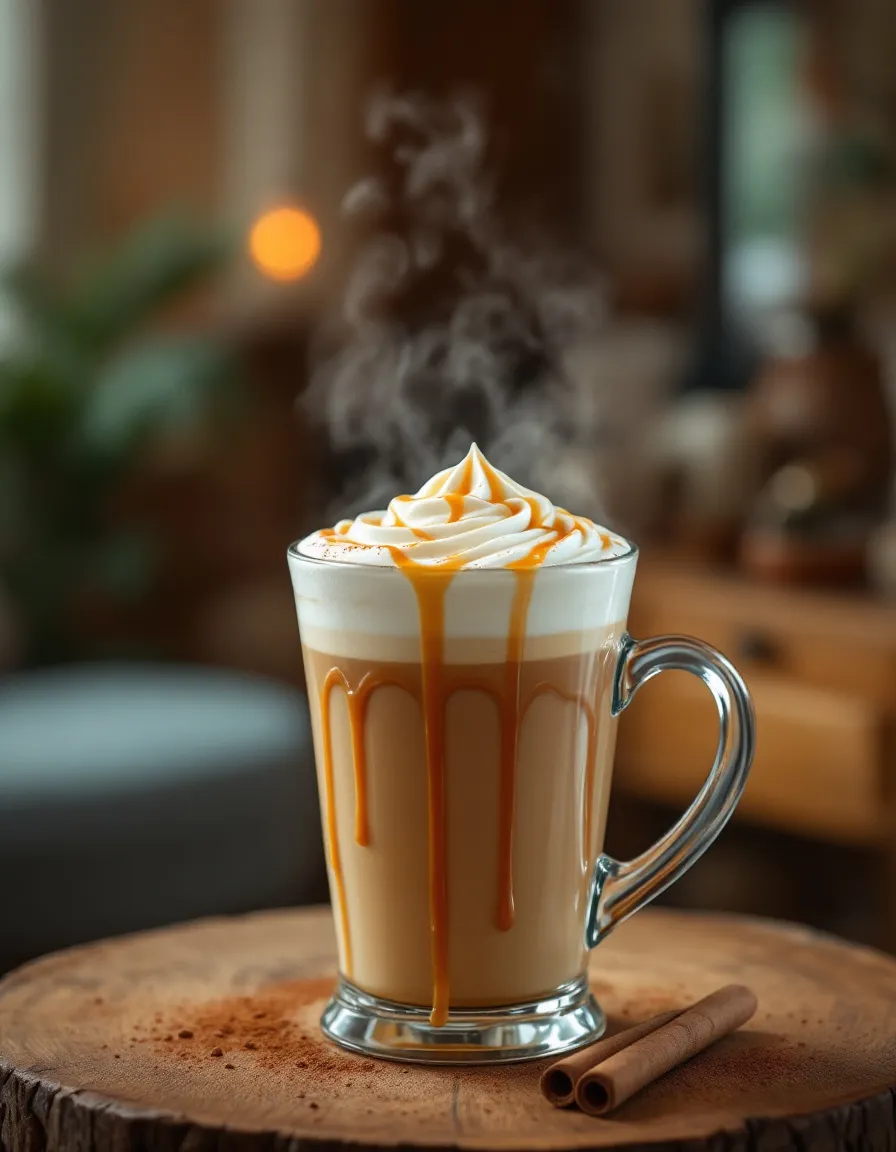
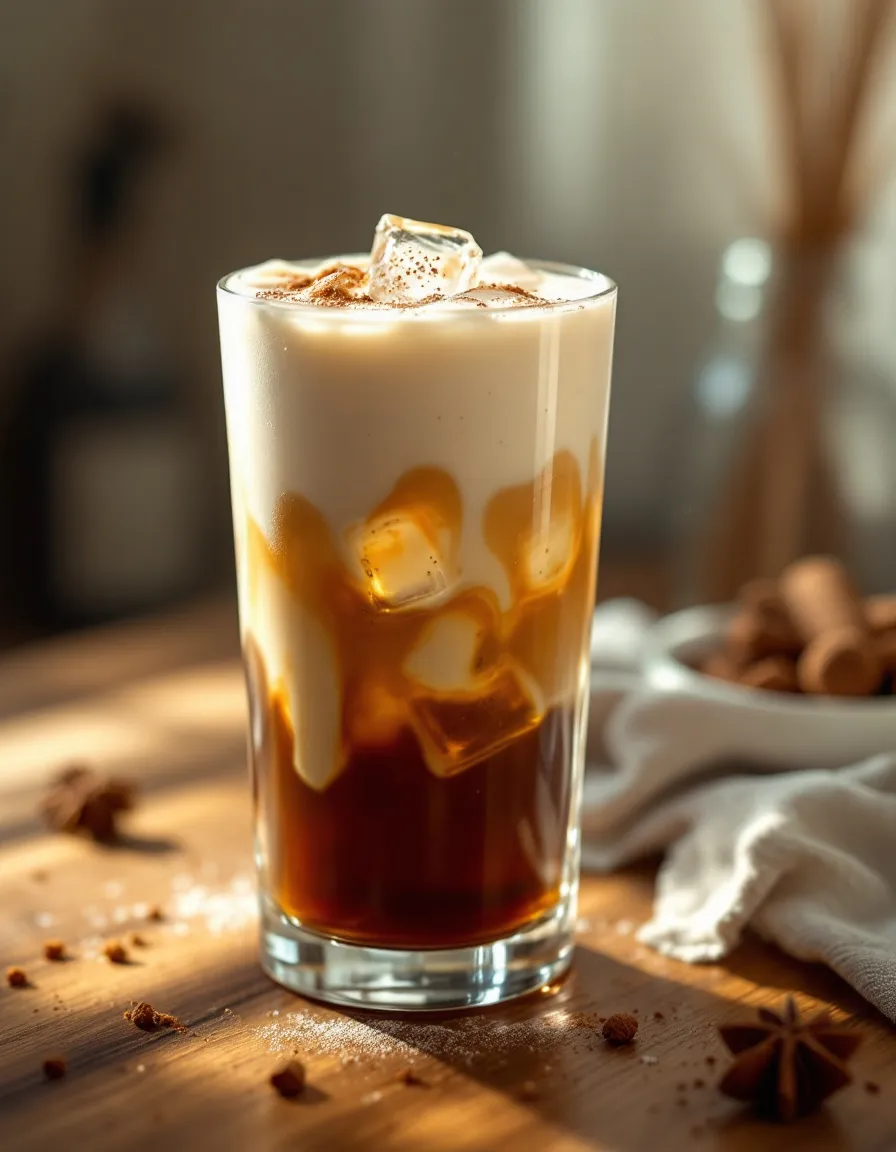
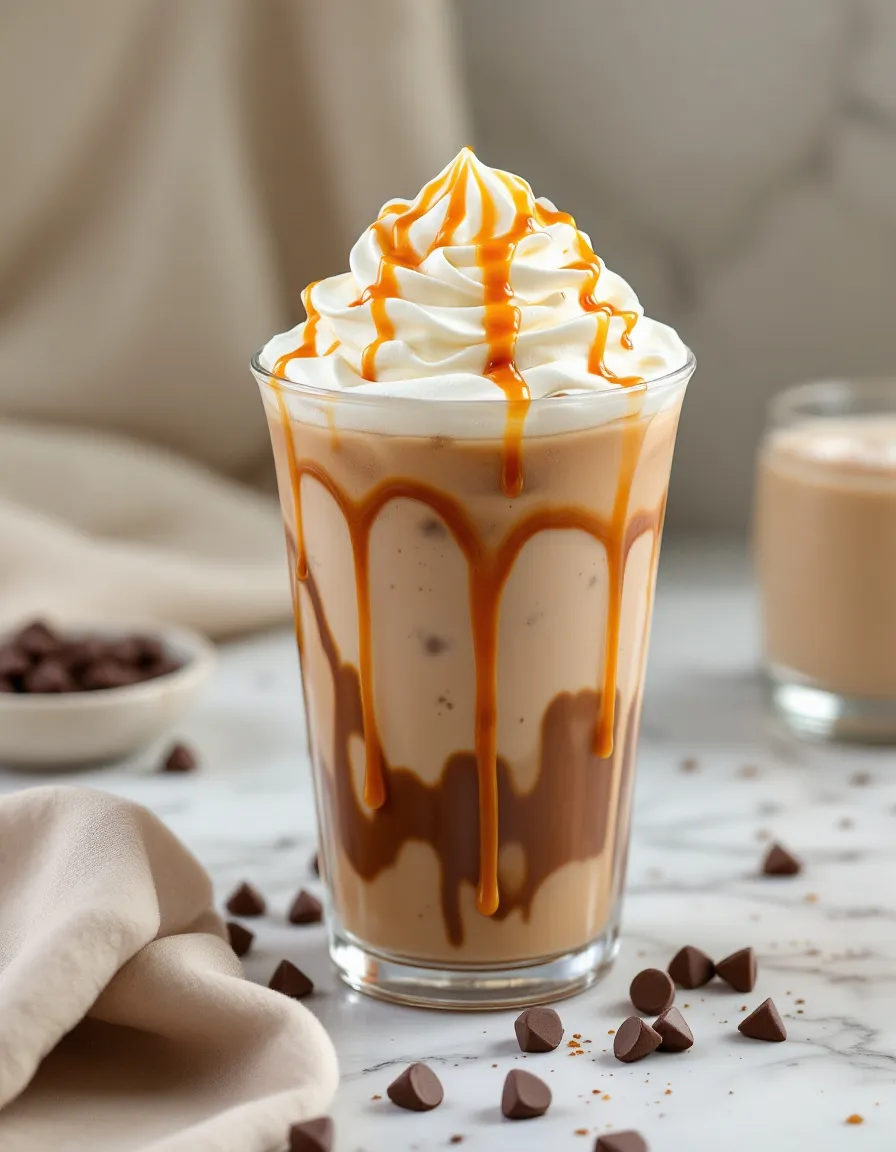
  • Visual Appeal: Served over ice, the drink boasts a rich light brown color topped with a light frothy layer, perfect for Instagram-worthy photos.
  • Skill Level Needed: This is an ideal recipe for beginners; it requires no complex techniques, just simple mixing and assembly.
  • Special Equipment: You’ll need an espresso machine or a strong coffee maker along with a blender for the ultimate results.

Recipe Overview

  • Difficulty Level: This Starbucks Iced White Chocolate Mocha Copycat Recipe is classified as easy. With only a few steps, anyone can master this drink in no time.
  • Category: It’s a delightful drink perfect for breakfast, brunch, or as a refreshing afternoon pick-me-up.
  • Cuisine: This recipe draws inspiration from American café culture but incorporates elements from various coffee traditions worldwide.
  • Cost: Making this drink at home can save you significantly; you’ll spend a fraction of the price compared to store-bought versions.
  • Season: Perfect for summer but can be enjoyed year-round, especially when you need a refreshing treat during colder months as well.
  • Occasion: Ideal for casual get-togethers, brunches with friends, or simply as a cozy, self-indulgent break.

Why You’ll Love This Recipe

Savoring a Starbucks Iced White Chocolate Mocha Copycat Recipe offers not just an explosion of flavors but a delightful texture that leaves a lasting impression. The blend of chocolate and coffee creates a dessert-like treat that’s both indulgent and energizing, perfect for when you want to treat yourself without compromising on quality. It’s rich and flavorful, allowing you to experience café luxury at a fraction of the price.

One of the greatest perks of this recipe is convenience. No need to travel to a coffee shop or wait in long lines. You can easily brew your espresso, mix in the white chocolate syrup, and add milk— all in just a matter of minutes. This makes it a great option for busy mornings or afternoon breaks, allowing you to enjoy a delicious drink anytime.

Nutritionally, while it’s a treat, you control what goes into your cup. This allows for healthier adjustments, such as using low-fat milk or at-home sweeteners, so you can enjoy this delightful drink while being mindful of your dietary preferences. Together with an espresso’s caffeine kick, it can also serve as a fantastic pre-workout pick-me-up.

This drink also has social value. It’s perfect for entertaining friends or simply enjoyed quietly while reading a book or catching up on a favorite show. Serve this at gatherings, and watch your friends enjoy a café-style experience at home, sparking enjoyment and conversation.

Lastly, by making your own Iced White Chocolate Mocha, you embrace cost-effectiveness. The ingredients are relatively inexpensive, especially since the amounts used for a single recipe are small. This not only allows you to enjoy this drink without guilt but also encourages exploration of various flavors and adjustments suited to your palate.

Historical Background and Cultural Significance

The origins of the mocha can be traced back to Yemen and its mocha coffee beans, which were celebrated for their distinct flavors. Over the centuries, this coffee evolved into various interpretations worldwide, including the sweetened and flavored variations we know today. The introduction of white chocolate to coffee drinks bridged a gap between dessert and beverage, appealing to a broader audience seeking sweet coffee experiences.

Culturally, coffeehouses have long been a gathering place for communities, fostering conversation, creativity, and connection. The incorporation of sweet elements like white chocolate mirrors contemporary trends where flavors are often elevated to enhance enjoyment, showcasing a shift toward sweeter, indulgent beverages in American coffee culture.

This Starbucks Iced White Chocolate Mocha Copycat Recipe reflects the evolution of coffee drinks as they adapt to modern tastes and trends. With its rich, creamy profile, this beverage speaks to the demand for convenience without sacrificing quality—a hallmark of today’s culinary landscape.

Regional variations also contribute to the drink’s significance, as global coffee traditions meet local preferences. For instance, you might find different ingredients being incorporated based on regional availability or cultural tastes, leading to unique takes on this beloved beverage that cater to various palates.

Overall, the Starbucks Iced White Chocolate Mocha has become an iconic drink in the coffee world, its popularity emblematic of our ongoing love affair with coffee and chocolate that continually invites joy into everyday moments.

Ingredient Deep Dive

Espresso
Espresso is the heart and soul of this drink, contributing both depth and richness. Espresso originated in Italy, where it quickly became a preferred method of brewing coffee. This concentrated coffee delivers intense flavors in small volumes, thus becoming a staple in various coffee drinks worldwide. Nutritionally, espresso is low in calories and packed with antioxidants, making it a healthier option compared to cream-laden beverages. When selecting espresso, look for freshly roasted beans for the best flavor, and store them in an airtight container to maintain freshness.

White Chocolate Sauce
White chocolate sauce adds sweetness and creamy texture, delighting those with a sweet tooth. Its history dates back to the early 1900s, once considered a luxurious ingredient primarily enjoyed by the elite. Today, it is widely celebrated and integrated into numerous desserts and beverages. Nutritionally, while rich in calories, white chocolate contains cocoa butter, which can provide some health benefits. It’s best to use high-quality varieties for maximum flavor, and remember to store any extra sauce in the fridge, ready for your next homemade delight.

Milk
Milk provides the luxurious creaminess that balances the bold flavors of espresso and white chocolate. It also aids in achieving the right texture and mouthfeel. Dairy has been consumed for centuries and is a staple in many cultures around the globe. Nutritiously, milk is a great source of calcium and vitamin D. When choosing milk, consider whole for richness or skim for a lighter option. Non-dairy alternatives like almond or oat milk can also be delicious substitutes, especially for those with dietary restrictions.

Common Mistakes to Avoid

  • Using low-quality espresso: Always opt for freshly roasted beans. Poorly made espresso can lead to a bitter drink.
  • Overheating the milk: Milk should be heated gently to preserve its sweetness and creaminess without scalding.
  • Not blending properly: Ensure that the white chocolate syrup is fully mixed for an even distribution of flavor.
  • Not using ice: Serving this drink without ice can result in a less enjoyable experience, as it’s meant to be refreshing.
  • Ignoring ingredient proportions: Use the recommended ratios for a balanced drink; too much syrup can overpower the coffee.
  • Choosing the wrong milk: Different milks can drastically alter the flavor and texture, so pick one that suits your taste.
  • Skipping the espresso: While you can use strong brewed coffee, espresso provides a depth that makes the drink special.
  • Not chilling: Make sure your glass and other ingredients are cool if you want to maintain the iced effect longer.
  • Neglecting aesthetics: An iced drink should be visually appealing, so consider how you present it.
  • Forgetting to adjust sweetness: Each person’s palate is different, so remember to taste and adjust sweetness according to preference.

Essential Techniques

Brewing Espresso: Brewing a perfect espresso is essential for this recipe. Use freshly roasted beans and an espresso machine for optimal results. Aim for a rich, dark crema on top, which indicates a well-extracted shot. Common pitfalls include using old beans and incorrect grind size; the beans should be finely ground to achieve proper extraction. For a visual cue, the espresso should have a thick, foamy layer on top.

Mixing Ingredients: Properly mixing white chocolate syrup and espresso is crucial to balance flavors. Use a whisk or a milk frother to incorporate the syrup smoothly into the espresso. Avoid clumping by warming the syrup slightly if it’s too thick. Visually, you’ll know it’s ready when it achieves a uniform color without any streaks.

Pro Tips for Perfect Starbucks Iced White Chocolate Mocha

– Always use freshly brewed espresso for the best flavor and intensity in your drink; consider investing in high-quality beans.
– For a creamier texture, opt for whole milk or half-and-half; these fats enhance the mouthfeel and richness.
– Feel free to adjust the amount of white chocolate syrup to match your sweetness preference—start small and increase as needed.
– Chill your glass in the freezer before pouring the drink; a cold glass will keep your beverage icy for longer.
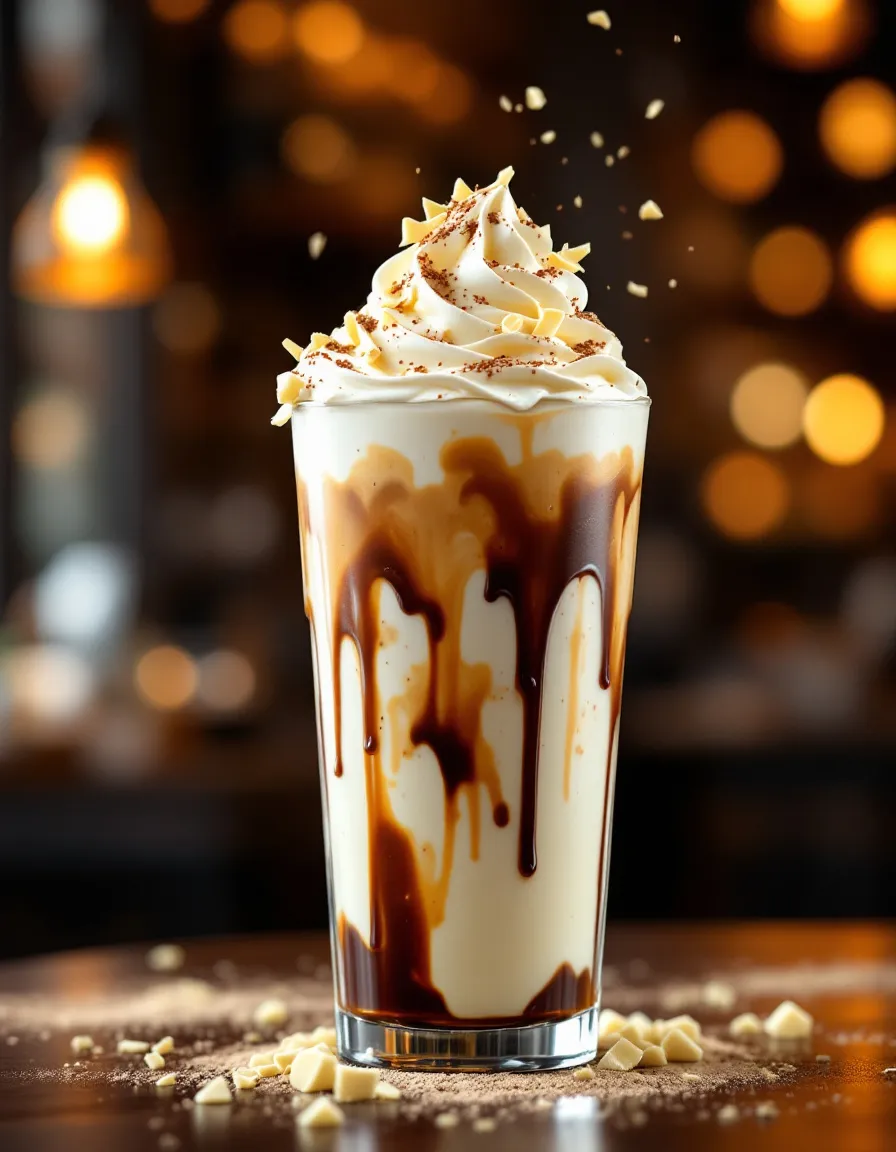
– For an even more indulgent touch, add whipped cream and a drizzle of white chocolate on top before serving.
– Don’t skip the ice—using too little can dilute the drink too quickly, while too much may water it down.
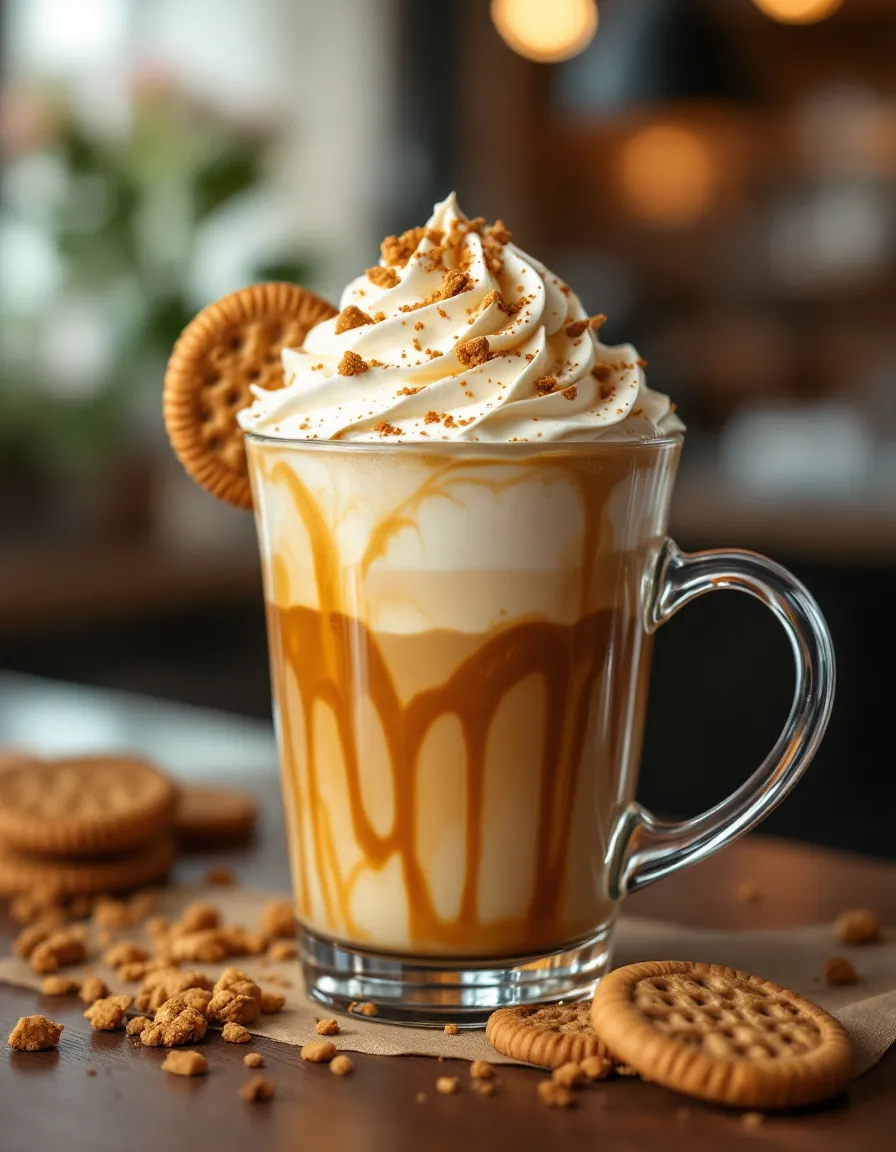
– Experiment with flavored syrups like vanilla or caramel to customize your drink further.
– If you’re feeling adventurous, try incorporating a dash of cinnamon or nutmeg for a subtle spice twist.

Variations and Adaptations

You can easily explore regional variations with your Iced White Chocolate Mocha. For instance, adding a hint of hazelnut or caramel syrup can provide a new flavor dimension. Seasonal adaptations also come into play; consider infusing your drink with peppermint syrup during the holidays for a festive twist.

Dietary modifications can be implemented as well. For a dairy-free option, almond or coconut milk works beautifully, providing a nutty sweetness that pairs well with the white chocolate. If you prefer a lower-carb version, opt for sugar-free syrups which are now widely available.

Flavor variations also extend into creative toppings. Instead of whipped cream, use a foamy coconut cream for a tropical twist. Additionally, consider integrating cold brew coffee instead of espresso for a smoother, more mellow flavor. Presentation can also be modified; serve your Iced White Chocolate Mocha in a mason jar for a rustic look.

Serving and Presentation Guide

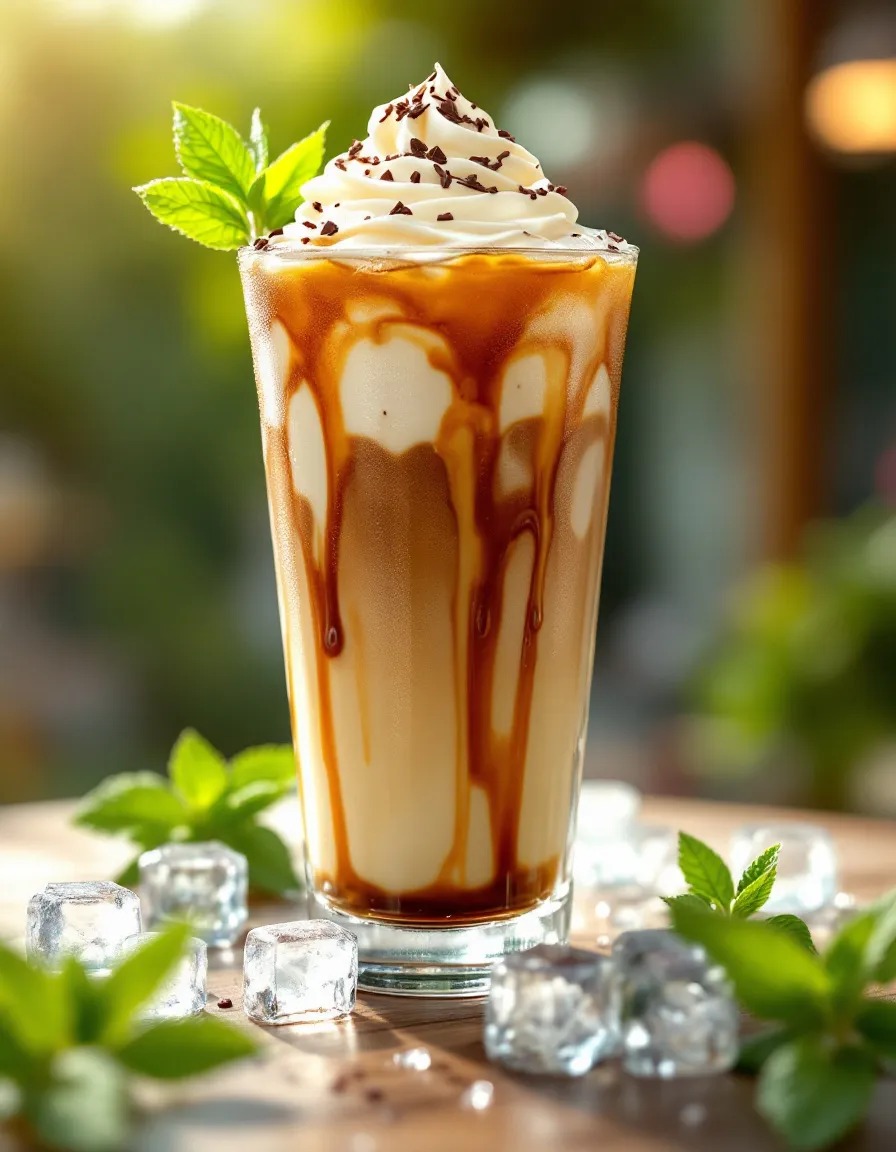
Plating techniques for your Iced White Chocolate Mocha can enhance its visual appeal. Use a tall, clear glass to showcase the layers of espresso and white chocolate. Garnish with a sprinkle of cocoa powder or chocolate shavings for an elegant touch.

Garnishing plays a huge role in the enjoyment factor; a swirl of whipped cream topped with a white chocolate drizzle instantly elevates the drink. For traditional accompaniments, serve it alongside some biscotti or a chocolate croissant to heighten the experience.

Modern serving suggestions can include pairing it with a light summer fruit salad; the freshness of the fruit complements the richness of the mocha. Keep temperature considerations in mind; serving it very chilled enhances the drinking experience, especially in warm weather.

Finally, portion control tips can help manage serving sizes. Consider using smaller glasses for a quick pick-me-up, allowing the cocktail to satisfy without overindulging.

Wine and Beverage Pairing

While this is primarily a coffee drink, there are still delightful pairings worth considering. A light-bodied dessert wine, such as a Moscato, can complement the sweetness of the white chocolate and balance the coffee’s bitterness.

For non-alcoholic alternatives, opt for sparkling water or a fresh lemonade. These drinks offer a bright palate cleanser that’s refreshing alongside the richness of your mocha.

If you’re including a meal, a robust herbal tea can enhance the flavors if served alongside brunch or similar light dishes. Keep temperature considerations in mind, serving your beverages cool to match the precision of your iced mocha.

Storage and Shelf Life

When it comes to storage methods, it’s best to prepare your Iced White Chocolate Mocha fresh to enjoy its rich taste. However, if you have leftovers, store them in a sealed container in the fridge for up to a day.

Temperature requirements are crucial, as the drink should be kept cold. When storing, ensure you minimize exposure to warm air and keep it out of sunlight to maintain optimal flavors.

Use airtight containers to store any remaining espresso or white chocolate syrup, as this keeps them fresh for longer. Signs of spoilage include off odors or significant separation of the ingredients; always inspect your ingredients before use.

For reheating instructions, avoid microwaving iced drinks directly. Instead, it’s best to make a fresh batch when possible as reheating can alter the textures and flavors. Freezing can be tricky with this drink—while you can freeze espresso for future use, adding ice to a frozen drink won’t achieve the desired consistency.

Make Ahead Strategies

For an effortless morning routine, consider preparing elements of your Iced White Chocolate Mocha ahead of time. Brew your espresso the night before and store it in the fridge. This allows you to quickly blend it in the morning without any time constraints.

Storage between steps is easy; keep the white chocolate sauce in a squeeze bottle or jar for easy access. Assessing the quality of your ingredients before assembly is crucial; ensure your milk is fresh and any syrups used are not expired.

When it comes time to assemble, simply combine your chilled espresso, white chocolate syrup, and milk over ice. To enhance freshness, consider adding a handful of fresh whipped cream at the last moment for that luxurious feel.

Reheating guidelines should prioritize freshness. If you prepared espresso, ensure it retains its creamy consistency—if not serving immediately, keep it in the refrigerator.

Scaling Instructions

Scaling your Starbucks Iced White Chocolate Mocha is simple for larger gatherings. Halve or double the recipe easily by adjusting each ingredient proportionately while keeping the brewing method the same.

Equipment adjustments might be needed for larger batches; using a larger espresso machine or coffee maker will ensure that you maintain quality. Timing modifications are essential as well; brew more espresso shots simultaneously to prevent delays.

Considerations for storage changes include making enough white chocolate sauce to ensure flavor richness across all servings. This makes it easy to serve a crowd while keeping the essence of the drink intact.

Nutritional Deep Dive

The macro breakdown of your homemade Iced White Chocolate Mocha will depend heavily on the ingredients selected. A standard serving might contain around 300 calories, primarily from carbohydrates and fats present in white chocolate and milk.

Micronutrient analysis reveals that using whole milk can contribute to a higher intake of calcium and vitamins A and D. Each ingredient plays a key role nutritionally, and having control over them allows for a more wholesome beverage compared to a store-bought version.

Health benefits, including antioxidants from the espresso, complement the indulgence of white chocolate, providing a satisfying experience that may help curb sweet cravings.

Be mindful of dietary considerations; using low-fat or non-dairy options can reduce overall calorie content while still delivering texture and creaminess. Careful portion analysis not only enhances enjoyment but can also assist those practicing weight management or mindful eating.

Dietary Adaptations

Creating a Starbucks Iced White Chocolate Mocha can easily accommodate specific dietary needs. For a gluten-free option, ensure any syrups or sauces are labeled accordingly, as cross-contamination may occur with certain flavored sauces.

A dairy-free version can be simply achieved by using almond, soy, or coconut milk. These alternatives provide varied richness and flavors that complement the beverage while avoiding lactose.

For vegans, substituting white chocolate with dairy-free options or homemade versions can maintain the sweetness without animal products. Further modifications for low-carb or keto diets can include sugar-free syrups and unsweetened almond milk for compliance without sacrificing the essence of the drink.

The paleo diet can incorporate raw honey or maple syrup in place of sweetened sauces, while still providing that beloved sweetness. Each adjustment considers flavor while adhering to dietary preferences, ensuring everyone can enjoy a delightful iced mocha experience.

Troubleshooting Guide

If your iced mocha turns out too bitter, it’s often due to over-extraction from the espresso. Ensure your espresso is brewed correctly, using properly ground beans to mitigate this issue. If flavor balance is off, consider adjusting the amount of white chocolate complimentary to your espresso’s intensity.

In case of temperature problems, using ice that’s been sitting out might lead to diluted flavors; always opt for fresh ice. Equipment challenges may arise, so consult your espresso machine’s manual for best brews; maintaining the machine is key to achieving quality results.

Some common ingredient substitutions can alter flavor, so be mindful of the decisions you make—using a different milk can result in unexpected textural differences. Timing also plays a role; allowing ample cooling time for your drink will create a more refreshing sip.

Recipe Success Stories

Community feedback has shown that many readers successfully adapted the Starbucks Iced White Chocolate Mocha Copycat Recipe to fit their tastes. Variability in flavors, such as a dash of hazelnut, has been particularly popular among those looking to customize their drinks.

Additionally, countless adaptation stories have emerged around incorporating seasonal ingredients—pumpkin spice in the fall or peppermint during the holidays. Such variations bring joy and excitement to those who recreate this delightful drink.

Readers often share photography tips to showcase their iced mochas visually. Capturing the layers of chocolate and coffee, along with playful uses of garnishes, helps ignite inspiration within the community, showcasing the versatility of this beloved recipe.

Engaging with one another further enriches this recipe experience. Many have found camaraderie in sharing their rendition, discovering together the smooth ride from a complex drink to a simple process at home.

Frequently Asked Questions

Can I use brewed coffee instead of espresso?
Yes, if you do not have an espresso machine, strong brewed coffee can be used. However, keep in mind that the flavor may differ slightly.

How can I make this drink lower in calories?
You can use fat-free or nut milk options, and reduce the amount of white chocolate syrup to customize sweetness.

Can I prepare this drink ahead of time?
It’s best enjoyed fresh; however, you can prepare elements like the espresso and syrup beforehand for quicker assembly.

What type of milk should I use?
Whole milk provides the creamiest texture, while almond, oat, or skim milk are excellent alternatives depending on dietary preferences.

Is there a dairy-free version available?
Absolutely! You can substitute regular milk with almond, soy, or coconut milk to cater to dietary needs.

How can I adjust the sweetness of my drink?
Start with the recommended syrup amount and taste; add more syrup or use flavored creamers until you achieve your desired taste.

Is this recipe kid-friendly?
Yes! You can easily adapt the sweetness to fit children’s tastes, making a delightful treat that can be enjoyed by the whole family.

What is the ideal serving temperature?
The drink should be served cold over ice to ensure a refreshing experience, especially during warm seasons.

Can I add alcoholic beverages to this mocha?
Yes! A splash of coffee liqueur can create an adult version of this drink, perfect for special occasions.

How can I store leftover white chocolate sauce?
Store in an airtight container in the fridge, and it should last for up to two weeks; just warm it slightly before using again.

Additional Resources

Explore related recipes for various iced coffee drinks or delve into other variations of mocha-inspired beverages. Technique guides can enhance your brewing skills, helping you elevate coffee elements at home. Consider valuable ingredient information to understand where to source high-quality coffee beans or chocolate.

If you enjoyed this recipe, check out our guides on related flavorful desserts or techniques to perfect your espresso. Seasonal variations contribute to enhancing your experience by flavoring them based on local produce or market offerings.

Join the Conversation

We’d love to hear how your journey with the Starbucks Iced White Chocolate Mocha Copycat Recipe goes! Share your creations adorned with beautiful photography on social media, and connect with others who love this creamy delight.

Leave your reviews and personal adaptations, suggesting flavorful twists or alterations you’ve explored, as community engagement is vital in celebrating our culinary experiences together.

Share your tips and tricks with fellow enthusiasts online, and inspire others to recreate the café experience at home with this delicious drink.

The Recipe

Starbucks Iced White Chocolate Mocha Copycat

Serves: 1

Prep Time: 5 mins

Cook Time: 5 mins

Total Time: 10 mins

Kitchen Equipment Needed

  • Espresso machine or strong coffee maker
  • Whisk or milk frother
  • Measuring cups and spoons
  • Tall glass or mason jar

Ingredients

  • 1 shot of espresso
  • 2 tablespoons of white chocolate syrup
  • 1 cup of milk (or dairy-free alternative)
  • Ice cubes
  • Whipped cream (optional, for garnish)
  • Chocolate shavings (optional, for garnish)

Directions

  1. Brew a shot of espresso and allow it to cool slightly.
  2. In a tall glass, add the white chocolate syrup.
  3. Pour the espresso over the syrup and stir well to combine.
  4. Add ice cubes to the glass, filling it about three-quarters full.
  5. Pour milk over the ice until the glass is nearly full and stir gently.
  6. Top with whipped cream if desired and garnish with chocolate shavings.
  7. Serve immediately and enjoy your café-style drink at home!

Recipe Notes

  • For a sweeter drink, add more white chocolate syrup.
  • Experiment with flavored syrups such as vanilla or caramel.
  • Cold brew coffee can be used as a substitute for espresso for a smoother flavor.

Easy Caramel Latte Recipe – Creamy & Homemade

Easy Caramel Latte: A Creamy Delight at Home

⚖️
Difficulty
Easy

⏲️
Prep Time
5 mins

🕒
Cook Time
5 mins

⏱️
Total Time
10 mins

🍽️
Servings
2

Enjoying an exquisite coffeehouse experience in the comfort of your own kitchen is possible with our Easy Caramel Latte recipe. Imagine rich, freshly brewed coffee smoothened with velvety milk and painted with luscious caramel. This durable blend of flavors will awaken your senses and wrap you in a warm embrace with each sip. Whether it’s a relaxing morning treat or a delightful afternoon pick-me-up, this caramel latte is the perfect way to escape the day.

The beauty of this easy caramel latte recipe lies in its simplicity, allowing anyone to indulge in a barista-level creation without the complexity. You won’t need a fancy espresso machine or barista training; just your trusty coffee maker, some milk, and a few staple ingredients. As the sweetness of the caramel unfolds, paired with the intensity of the coffee, you are left savoring a harmonious balance that feels indulgent yet comforting.

Quick Recipe Highlights

  • Flavor Profile: This Easy Caramel Latte features a delightful combination of bold coffee and sweet caramel that complements each other perfectly.
  • Texture: The drink boasts a creamy texture with a smooth finish, enhanced by foamy milk mingling with the silky caramel.
  • Aroma: Expect inviting aromatic notes of roasted coffee beans mixed with a buttery caramel scent that entices you from the kitchen.
  • Visual Appeal: Served in a clear glass, the caramel swirls create a beautiful visual, with a golden layer accentuating the rich brown of the coffee.
  • Skill Level Needed: This recipe requires a beginner’s skill level, as it involves simple brewing and mixing techniques that anyone can master.
  • Special Equipment: The only equipment needed is a coffee maker and frother, making this latte accessible for all coffee lovers.

Recipe Overview

  • Difficulty Level: The recipe is straightforward, making it perfect for beginners who want to try their hand at crafting coffee drinks at home.
  • Category: This caramel latte falls under the breakfast and brunch category, ideal for energizing your morning or brightening a brunch spread.
  • Cuisine: Rooted in the coffee culture prevalent in many countries, this recipe draws inspiration from the beloved café offerings around the globe.
  • Cost: This recipe is budget-friendly, with minimal ingredients, typically costing around $2-3 per serving.
  • Season: While delicious year-round, the warm and comforting flavors of caramel make it a favorite during colder months.
  • Occasion: Perfect for cozy mornings at home, gatherings with friends, or even as a thoughtful homemade gift for any coffee lover.

Why You’ll Love This Recipe

Indulging in an Easy Caramel Latte not only satisfies your taste buds but also elevates your coffee experience at home. The combination of the robust flavor of coffee and the silky sweetness of caramel creates a delightful drink that you can’t resist. Each sip provides the warmth you need on a chilly day while treating your palate to a unique blend of flavors that feels indulgent yet accessible.

Preparation of this latte is a breeze, making it ideal for busy mornings or when you’re hosting guests. With just a few quick steps, you can create a coffeehouse-quality beverage that impresses everyone around you. The ritual of brewing coffee and frothing milk transforms a regular coffee moment into an uplifting experience.

Nutritionally, this homemade latte is a smarter choice than store-bought versions since you control the ingredients and sweetness level. You can opt for low-fat or dairy-free milk, and the amount of caramel can be adjusted according to your taste preference. This allows you to enjoy a treat without overindulging in sugars and calories.

An Easy Caramel Latte is also a great way to bring people together. Invite friends over for a coffee morning, share the recipe, and enjoy delightful conversations over your homemade creations. With its inviting aroma and delicious flavor, this latte will set the perfect mood for any gathering.

Additionally, this recipe is budget-friendly, ensuring you don’t have to break the bank for a delicious coffee. With just a handful of ingredients you likely already have on hand, you can enjoy the luxuries of a café experience at home—making it not only enjoyable but economical.

Historical Background and Cultural Significance

The caramel latte, like many coffee beverages, stems from the global love affair with coffee that dates back centuries. Originating from Arabica beans, coffee made its way to Europe in the 17th century and quickly became a cultural phenomenon, with cafés popping up in cities such as Paris and Vienna. Over time, coffee evolved from an energizing beverage to an artisanal craft.

The rise of specialty coffee shops in the late 20th century introduced various espresso drinks, including lattes that incorporate flavored syrups like caramel. This addition catered to sweet-toothed coffee lovers and quickly gained popularity. As people embraced sweet flavored coffees, their repertoire expanded, further cementing coffee’s integral role in social interaction and relaxation.

Culturally, the caramel latte represents a blend of traditional coffee-making techniques with modern flavor profiles, reflecting the evolving tastes of consumers. Coffee shops aimed to create a welcoming atmosphere where friends gather and connect, and the caramel latte became a staple on many menus, adding a touch of sweetness to the coffee experience.

Regional variations of this drink have emerged worldwide. While the basic combination of espresso, milk, and caramel remained, each region added its twist—be it a different sweetener, milk alternative, or preparation method—demonstrating the versatility of coffee across cultures and allowing people to personalize their caffeinated delight.

Ingredient Deep Dive

Coffee
Coffee is the heart of this beverage, providing the bold flavor that pairs beautifully with sweet caramel. Its history is rich, with origins in Ethiopia, where coffee was first discovered. Nutritionally, coffee is loaded with antioxidants and essential nutrients like B vitamins and potassium, contributing both to health benefits and taste. When selecting coffee, look for freshly roasted beans to maximize flavor; store them in a cool, dark place to maintain freshness. For those looking to switch things up, instant coffee or cold brew can also work in a pinch.

Milk
Milk adds creaminess and texture to the caramel latte, enhancing the overall experience. With a history that dates back thousands of years, milk has been a staple in diets worldwide. In addition to its delicious taste, milk provides essential nutrients such as calcium, vitamin D, and protein. Choosing between whole, skim, or non-dairy alternatives can alter the texture and richness, so experiment to find your favorite. Always store milk in the fridge and consume it before its expiration date to maintain quality.

Caramel
The sweet, sticky goodness of caramel is what defines this latte. Historically, caramel originated as a candy-making technique and has been part of culinary practices for centuries. Just like milk and coffee, caramel brings flavor and texture to the latte, with its sweetness balancing the strong coffee taste. When selecting caramel, consider using homemade or store-bought options. Look for organic or natural alternatives if you want a quality product. When storing, keep caramel in an airtight container at room temperature for optimal consistency.

Common Mistakes to Avoid

  • Using Old Coffee: Ensure your coffee beans are fresh. Old coffee results in a stale flavor that diminishes the quality of your latte.
  • Incorrect Milk Frothing: Froth can be tricky—too hot and it burns; too cold and it won’t foam. Aim for a temperature between 150-155°F.
  • Over-Sweetening: It’s easy to add too much caramel syrup. Start small and add more to taste; balance is key to maintaining coffee flavor.
  • Ignoring Brew Strength: Make sure to brew your coffee strong enough to stand up to the sweetness of the caramel and creaminess of the milk.
  • Skipping the Stir: Remember to stir your latte before enjoying. This ensures that the caramel is well incorporated and not settled at the bottom.
  • Using Low-Quality Ingredients: For a truly delicious caramel latte, don’t skimp on the quality of your coffee, milk, and caramel.
  • Not Adjusting to Taste: Everyone’s palate differs. Don’t hesitate to modify the recipe by adjusting milk ratios or sweetness level based on preference.
  • Poorly Stored Ingredients: Store coffee beans and milk properly. Incorrect storage can lead to loss of flavor in your latte.

Essential Techniques

Frothing Milk
Frothing milk is essential for creating the creamy texture in your caramel latte. To master this technique, use a milk frother or steam wand, and practice getting the perfect microfoam. Common pitfalls include over-frothing or under-frothing, leading to an unappealing texture. Visually, the froth should be silky and glossy, sitting lightly on top of your latte.

Brewing Coffee
Perfecting your coffee brewing method is crucial for achieving the desired flavor. Whether using a drip coffee maker or an espresso machine, pay attention to water temperature and brewing time. Avoid issues like bitterness by sticking to a 1:15 coffee-to-water ratio, adjusting based on personal taste. The result should be bright, bold coffee that stands out against the sweetness of the caramel.

Pro Tips for Perfect Easy Caramel Latte

– Opt for a freshly brewed espresso for a robust flavor; this forms the backbone of your latte.
– Experiment with different types of milk—almond milk and oat milk can add unique flavors.
– Layer your ingredients by pouring the espresso first, followed by milk, then caramel for a stunning visual effect.
– Top with whipped cream for an indulgent touch and an extra drizzle of caramel for presentation.
– Sweeten to taste—start with a little caramel syrup, then gradually add more until it’s just right.
– For an iced version, brew double-strength coffee, chill, and pour over ice with milk and caramel.
– Try flavored syrups, like vanilla or hazelnut, to elevate your latte experience even further.
– Serve in a clear glass to showcase the beautiful layers of caramel and milk.

Variations and Adaptations

Explore numerous variations of this Easy Caramel Latte to suit different preferences. For a regional twist, consider adding a splash of Irish cream for a festive drink. Seasonal adaptations can include pumpkin spice during the fall or peppermint in the winter.

For dietary modifications, almond or coconut milk can serve as excellent dairy alternatives for those who are lactose intolerant. Adjust the amount of syrup based on whether you want a lighter or richer flavor profile. Texture modifications might include using whipped coconut cream as a dairy-free alternative, adding a fun garnish to your drink.

Presentation alternatives can also enhance the experience—try serving in a mason jar or a stylish cup with a decorative saucer to impress your guests.

Serving and Presentation Guide

Presentation matters when serving your Easy Caramel Latte. Use layered presentation techniques, pouring the espresso first, then gently adding the milk to create distinct layers. Drizzle caramel over the top and consider adding a sprig of mint or a light dusting of cocoa powder for decoration.

For a comforting café-style experience, serve with a side of shortbread or biscotti; the pairing will elevate the overall experience. Use large coffee mugs or clear glasses to showcase the beautiful colors of your drink.

Cold servings can benefit from a fun twist—fill a glass with ice and pour the latte over it. Finally, consider portion control; a standard serving of this latte is 8-12 ounces, ensuring an indulgent yet reasonable treat.

Wine and Beverage Pairing

Considering a delightful pairing for your Easy Caramel Latte? A sweet dessert wine like Moscato or a light-bodied red like Pinot Noir can complement the flavors well. While coffee can stand on its own, pairing it with sweet treats enhances the overall experience.

Non-alcoholic alternatives also work beautifully; consider herbal teas or smooth chai lattes that can provide a fragrant and richness comparable to coffee. For a unique experience, a rich hot chocolate drizzled with caramel can also make an enjoyable companion for your caramel latte.

Storage and Shelf Life

For optimal quality, it’s best to consume your Easy Caramel Latte immediately after preparation. If you have leftovers, store the milk and coffee separately in the fridge. Milk should be consumed within a week after opening, and brewed coffee is best kept for up to two days.

If you have leftover caramel syrup, store it in an airtight container at room temperature. To reheat a previously made latte, use low heat to avoid scalding the milk, and swirl to reintegrate the caramel for best results.

Make Ahead Strategies

To create this caramel latte in advance, prepare the coffee and caramel syrup the night before. Brew a strong batch of coffee and refrigerate it for a refreshing iced version. Pre-make your caramel syrup and store it in the fridge for easy access when you’re ready to whip up your drink.

When making the latte, froth your milk just before serving to keep it fresh and fluffy. As an alternative, consider assembling each component without mixing and place them in jars for a fun DIY coffee bar for guests. Don’t forget to garnish right before serving to maintain visual appeal.

Scaling Instructions

When scaling your Easy Caramel Latte recipe, consider precise measurements for accurate flavor across servings. Halving the recipe is straightforward—use half the amount of each ingredient and follow the same preparation steps.

Doubling the recipe for a group can be accomplished by brewing a larger batch of coffee and adjusting the milk quantity accordingly. Be mindful of the size of your container when scaling up; ensure you have a large enough pot to froth milk without spilling.

Finally, timing modifications may be necessary when brewing larger quantities. The brewing method should remain consistent, but ensure to measure milk quantity accurately to avoid dilution.

Nutritional Deep Dive

Understanding the nutritional aspects of your Easy Caramel Latte can empower better choices. Each serving roughly contains 200-300 calories, depending on milk choice and amount of caramel used.

The macros generally involve about 15-20g of carbohydrates, primarily from the caramel, while proteins and fats vary with the type of milk utilized. Consider nutrient-dense varieties like whole or plant-based milks for added health benefits.

Micronutrients like calcium and vitamin D improve with certain milk choices, serving not just as a treat, but a nutritional source. If watching caloric intake, customize your serving size to maintain healthy portion control while still enjoying a delicious beverage.

Dietary Adaptations

Offering a variety of dietary adaptations for this Easy Caramel Latte allows for widespread enjoyment. For those who are gluten-sensitive, this recipe is naturally gluten-free.

Dairy-free options are achievable with almond or oat milk substitutes, allowing lactose-intolerant individuals to enjoy this caramel latte. Vegan adaptations can be made by substituting syrup with agave or maple syrup to maintain that sweetness found in caramel.

Incorporating low-carb or keto-friendly ingredients might include using sugar-free caramel or choosing unsweetened almond milk. Finally, modifications can be made for other specific diets, such as paleo options utilizing ingredients that adhere to that lifestyle.

Troubleshooting Guide

Smooth out any potential issues you encounter while making your Easy Caramel Latte. If your latte tastes too bitter, check your coffee brewing time, decreasing it will enhance the sweetness of caramel.

If the milk doesn’t froth properly, ensure the milk is cold enough and not scalded. Using whole milk is often the best for optimal frothing results.

A common concern is the latte separating; this might happen if the milk temperature is too hot. Always froth milk just below boiling point to prevent separation. If the caramel isn’t blending well, ensure that you’re stirring sufficiently to incorporate it throughout the drink.

If you find your latte too sweet or not sweet enough, remember to adjust the caramel syrup to taste with a gradual addition and measurement.

Recipe Success Stories

Many fans of this Easy Caramel Latte have shared their joyful experiences in crafting this delightful drink at home. Community feedback showcases varying modifications, with readers experimenting with different flavored syrups that bring a personal touch to the recipe.

The versatility of the recipe has allowed families to adapt it uniquely, making it a staple for home coffee bars, particularly during holiday gatherings with extended family. Adaptations like using extra whipped cream or flavored milk have garnered praise from readers eager to customize their lattes.

Others have noted that this Easy Caramel Latte has become a bonding experience, connecting families through shared coffee moments and serving as the perfect caffeine companion during early morning hustle or late-night study sessions.

Finally, photography tips and showcasing final products on social media platforms have contributed to camaraderie among coffee enthusiasts, inspiring them to celebrate their coffee successes and share them with others.

Frequently Asked Questions

Can I use decaf coffee?

Yes! Decaf coffee is an excellent option for those sensitive to caffeine but still want to enjoy the rich flavors of a caramel latte. Simply follow the recipe as usual, substituting regular coffee with decaf.

What if I don’t have caramel syrup?

You can easily make a quick caramel sauce at home using sugar, butter, and heavy cream. Mix these ingredients on low heat until smooth, or try substituting with another flavored syrup like vanilla or hazelnut.

Is this recipe easy to adjust for single servings?

Absolutely! This Easy Caramel Latte recipe is highly adaptable. Simply reduce the ingredients by half to create a single serving without losing any of the delicious flavors.

How can I make this caramel latte less sweet?

If you prefer a less sweet drink, start with a smaller amount of caramel syrup and gradually add more to find the right balance for your palate. Additionally, you can use unsweetened milk alternatives to reduce sweetness.

Can I use a milk alternative?

Yes! Almond milk, coconut milk, oat milk, and other non-dairy alternatives froth well and can be substituted for regular milk while still providing a delicious taste.

How long do leftovers last?

Brewed coffee should be consumed within two days, while milk typically has a one-week shelf life after being opened. Caramel syrup can last several weeks if stored in an airtight container.

What spices can I add for flavor?

Adding spices like cinnamon or nutmeg can provide an exciting twist to your Easy Caramel Latte. Simply sprinkle a bit on top or mix it into the milk for a warm, inviting flavor.

What is the best way to make iced caramel lattes?

For an iced version, brew a double-strength coffee, let it cool, and pour it over ice along with cold milk and caramel syrup. Stir well to combine and enjoy!

Can I prepare this latte in advance?

Yes! You can prep brewed coffee and caramel syrup the night before. Just reheat the components before serving for a fresh-tasting latte.

Additional Resources

Explore more delicious recipes and tips related to coffee and lattes on our blog. Check out our guides on mastering coffee brewing techniques, delightful dessert pairings to go along with your latte, and helpful tips on selecting the perfect ingredients.

For seasonal variations, our collection features festive drinks for the holidays that can warm your spirits. Embrace the meal with complementary dishes that pair beautifully, creating a satisfying breakfast or brunch spread.

Dive into our ingredient information section to deepen your understanding of the types of coffee beans and milk options available. Finally, our kitchen equipment recommendations will help set up your home coffee bar and prepare you for endless caffeine inspiration.

Join the Conversation

We invite you to connect with us on social media! Share your Easy Caramel Latte creations, variations, and pairings. Engage with our community by leaving your feedback, trying out reader suggestions, or exploring new photography techniques to showcase your latte masterpieces.

Don’t forget to follow our blog for updates on new recipes, tips, and featured stories from fellow coffee enthusiasts. Join the conversation by sharing your experiences with homemade lattes, and inspire others to create their delightful coffee moments.

The Recipe

Easy Caramel Latte

Serves: 2

Prep Time: 5 mins

Cook Time: 5 mins

Total Time: 10 mins

Kitchen Equipment Needed

  • Coffee maker or espresso machine
  • Milk frother or steam wand
  • Measuring spoons
  • Glass or coffee mug

Ingredients

  • 2 cups strong brewed coffee (or espresso)
  • 1 cup milk (dairy or non-dairy)
  • 2 tablespoons caramel syrup (plus extra for drizzling)

Directions

  1. Brew coffee or espresso according to your machine instructions.
  2. In a small saucepan, heat the milk over medium heat but do not boil.
  3. Use a milk frother to froth the heated milk until light and creamy.
  4. Combine caramel syrup with brewed coffee, stirring well to mix.
  5. Gently pour frothed milk over the coffee mixture.
  6. Drizzle additional caramel syrup on top for garnish.
  7. Serve immediately and enjoy your Easy Caramel Latte!

Recipe Notes

  • Adjust the amount of caramel syrup to suit your taste preference.
  • For a stronger coffee flavor, consider using a double shot of espresso.
  • Experiment with different milk types for varied flavors.

Best Butterbeer Latte from Starbucks – Easy Secret Menu Drink

You Can Get A Butterbeer Latte From Starbucks: Accio It To Me!

⚖️
Difficulty
Easy

⏲️
Prep Time
5 mins

🕒
Cook Time
10 mins

⏱️
Total Time
15 mins

🍽️
Servings
2

This Butterbeer Latte is a magical blend of flavors that transports you straight to the wizarding world. Imagine warm, creamy buttery goodness combined with hints of rich caramel and vanilla, topped off with frothy whipped cream. This delightful drink is reminiscent of the classic butterbeer served in the Harry Potter series, making it a nostalgic treat for fans and coffee lovers alike. Whether you’re enjoying a cozy afternoon or hosting a themed gathering, this easy recipe will enchant your taste buds and your guests.

The sheer aroma of this Butterbeer Latte is enough to entice anyone—inviting notes of caramel blended with light spices elevate the sensory experience. As you sip the warm latte, the smooth texture caresses your palate, while its rich golden hue warms your heart. This drink is perfect for cooling autumn days or via a summertime cooling treat served iced, making it a versatile addition to your coffee repertoire.

Quick Recipe Highlights

  • Flavor Profile: This latte combines buttery sweet flavors with a hint of vanilla and caramel.
  • Texture: The latte is creamy and smooth, with a delightful thickness from the whipped cream on top.
  • Aroma: The enticing scent of caramel and butter fills the air, creating an inviting atmosphere.
  • Visual Appeal: Creamy, golden latte topped with fluffy whipped cream, it’s a feast for the eyes!
  • Skill Level Needed: This recipe is simple and perfect for beginners, requiring minimal cooking techniques.
  • Special Equipment: All you need is a blender and a coffee maker to whip up this delightful drink.

Recipe Overview

  • Difficulty Level: This Butterbeer Latte is categorized as easy, making it accessible for anyone to create.
  • Category: This drink fits perfectly into the beverage category, ideal for cafes and home coffee stations.
  • Cuisine: With roots in American café culture, this drink brings together flavors inspired by English butterscotch.
  • Cost: The ingredients are affordable, with a total cost of around $5-7 for multiple servings.
  • Season: Perfect for fall and winter months, this latte brings warmth and comfort on chilly days.
  • Occasion: A fantastic choice for themed parties, cozy gatherings, or simply enjoying on a quiet evening.

Why You’ll Love This Recipe

This Butterbeer Latte is not just about great taste; it also offers a creamy texture that elevates the experience. Each sip is like a warm hug, perfect for chilly evenings or when you need a mood boost. The blend of flavors is crafted to please both caramel lovers and those who enjoy the comforting notes of butter and vanilla, creating a delightful experience in every cup.

Convenience is a cornerstone of this recipe, as it can be made in under 15 minutes, allowing you to satisfy your cravings quickly. With just a few ingredients that you probably already have in your pantry, it’s a straightforward and stress-free recipe. No complicated techniques here, making it achievable for anyone—perfect for both everyday enjoyment and special occasions.

Nutritionally, while this latte is a treat, it offers some benefits. The addition of milk provides calcium, and you can easily adjust the sweetness to your preference, making it more suitable for a balanced diet. Swapping out sugary syrups for natural sweeteners can decrease calorie count without sacrificing flavor.

The Butterbeer Latte also brings social value; it’s a delightful drink to share with friends and family. Hosting a Harry Potter-themed gathering? This beverage could steal the show, igniting conversation and making memories. Each cup encourages connection, reminding us of the shared experiences that come with good food and drink.

Moreover, this recipe is cost-effective. With only a few ingredients and minimal effort, you can delight your taste buds without breaking the bank. Enjoying café-style drinks at home saves money while providing the same comforting experience of your favorite coffee shop.

Historical Background and Cultural Significance

The Butterbeer Latte’s origin can be traced back to the beloved Harry Potter series, where butterbeer is served at the iconic Three Broomsticks Inn. While originally a fictional drink described as warm and frothy, it has gained popularity in real-life cafés, forever cementing its place in the hearts of fans around the world. The transformation of this drink into a café staple represents the fusion of literature and culinary creativity.

Culturally, butterbeer symbolizes a connection to friendship and adventure in the Harry Potter universe. It’s often associated with cozy gatherings among friends, evoking feelings of warmth and nostalgia. Its rise to prominence in popular culture has inspired myriad variations, including our own delightful latte version that brings this whimsical flavor to life.

Over time, recipes for butterbeer have evolved from their original ideas to include variations such as frozen or iced. Each adaptation brings unique elements that cater to different tastes while maintaining the spirit of the original. The popularity has paved the way for innovative interpretations, from rich fudge flavors to lighter, dairy-free options.

Regional variations further add to the allure of the Butterbeer Latte. In some areas, local cafés may offer their unique twists, but the comforting profile of buttery sweetness and caramel remains the common thread. This diversity encourages experimentation and creativity, allowing everyone to put their unique stamp on this classic drink.

Ingredient Deep Dive

Milk: Milk is the base of our butterbeer latte, providing a creamy texture and rich flavor. It has been a staple in many cultures for centuries, known for its nutritional benefits, including calcium and protein. When selecting milk, whole milk offers a richer taste, while dairy-free alternatives like almond or oat milk provide different textures and flavors. It’s best stored in the refrigerator and consumed before its expiration date.

Butter Extract: Butter extract is the key ingredient that gives our latte its signature buttery flavor. While it may seem simple, butter extract carries with it a history linked to baking and dessert innovations. This ingredient enhances flavors and can replace traditional butter, making it a convenient option. When purchasing, look for high-quality extracts to ensure optimal taste and aroma. Store in a cool, dark place for longevity.

Vanilla Syrup: Vanilla syrup adds sweetness and aromatic notes that elevate this drink beyond the ordinary. Its origin dates back to early French patisserie, where it was used to flavor confections. Along with enhancing flavor, this syrup also has the versatility to be used in various desserts and drinks. When selecting syrup, opt for natural variations without artificial additives for the best flavor. Once opened, store in the refrigerator to maintain freshness.

Caramel Sauce: Caramel sauce integrates sweetness with a touch of decadence, binding the flavors together beautifully in the latte. Caramel’s legacy has roots in candy-making, stretching back to ancient times. This ingredient not only adds flavor but also visual appeal to the drink. Choose sauce with quality ingredients for an authentic taste. Keep in a sealed jar in the pantry until opened.

Common Mistakes to Avoid

  • Using Low-Quality Ingredients: Always opt for high-quality extracts and sauces to enhance your drink’s flavor.
  • Not Frothing the Milk Properly: Frothed milk creates the creamy texture essential to this beverage, so take time with this step.
  • Over or Under-Sweetening: Adjust sweetness according to your taste but avoid overpowering the drink with sugar.
  • Forgetting to Stir: Properly mix the syrup and sauce into the milk to ensure an even distribution of flavors.
  • Ignoring Temperature: Ensure that your milk is heated to the right temperature; too hot can scald it, while too cool won’t provide the comforting warmth desired.
  • Skipping the Whipped Cream: A dollop of whipped cream enhances the presentation and adds an extra creamy layer that complements the drink.
  • Using Cold Milk: Cold milk will not achieve the desired creaminess and warmth required for this latte.
  • Not Measuring Ingredients: Use precise measurements for balanced flavors; free pouring might disrupt the flavor profile.
  • Rushing the Process: Take your time to properly prepare each component for the best result.
  • Not Exploring Variations: Feel free to experiment with flavors like butterscotch or spice to find your perfect blend.

Essential Techniques

Frothing Milk: Frothing milk is crucial for creating that creamy texture for your latte. Use a milk frother or whisk to aerate the milk until it’s light and bubbly. Achieving the right foam can transform a standard drink into a café-quality latte. Watch for visual cues; the milk should appear velvety and smooth, not bubbly or separated.

Mixing Flavors Evenly: Properly mixing ingredients ensures that each sip delivers a delightful burst of flavor. Begin by mixing syrup and butter extract into your warm milk before adding caramel sauce. This will result in a well-balanced taste. Avoid clumping or layering by stirring gently but thoroughly until everything is seamless.

Piping Whipped Cream: When it comes to garnishing, make sure your whipped cream is piped beautifully on top of your latte for stunning presentation. Use a piping bag with a star tip for a professional look. Practice makes perfect; ensure your whipped cream is cold and firm for the best hold and presentation.

Pro Tips for Perfect Butterbeer Latte

– Use whole milk for a richer flavor and creamier texture, but explore dairy-free options for variety.
– Opt for real vanilla extract or syrup, as artificial ones can have an overwhelming flavor.
– Experiment with different types of caramel sauce to find your favorite variety, be it sea salt or traditional.
– A sprinkle of cinnamon on top adds a warm, inviting aroma and enhances flavor.
– Consider making your own vanilla or caramel syrup at home for a personalized touch.
– Chill your glass before serving for an even more refreshing latte when served iced.
– Add a touch of butterscotch syrup for an extra layer of sweetness and depth.
– If you want to try an iced version, simply cool down the components and serve over ice.

Variations and Adaptations

– **Seasonal Variations**: In the fall, add pumpkin spice for a seasonal twist, reminiscent of autumn flavors.
– **Iced Butterbeer Latte**: Simply blend cooled milk with syrup and ice for a refreshing summertime treat.
– **Dairy-Free Option**: Replace milk with oat or almond milk for a vegan-friendly adaptation without losing flavor.
– **Sugar-Free Version**: Use sugar-free syrups for those avoiding sugar while still enjoying the drink.
– **Flavor Variations**: Incorporate a few drops of hazelnut or toffee syrup to customize the flavor profile.
– **Presentation Alternatives**: Instead of whipped cream, top with whipped coconut cream for a non-dairy alternative that packs a flavorful punch.

Serving and Presentation Guide

For an aesthetic presentation, use a tall glass to showcase the creamy layers of your Butterbeer Latte. Consider drizzling some caramel sauce along the inside of the glass before pouring, enhancing both looks and taste. Garnish generously with whipped cream, and finish with a sprinkle of cinnamon or a drizzle of extra caramel on top.

Serve the latte warm, and if desired, pair it with shortbread cookies or buttery scones for a lovely afternoon treat. Guests will appreciate the elegant touch, making it perfect for presentations at social gatherings. Temperature is vital, ensure the latte is hot, especially in cooler months, to provide comfort and warmth in each sip.

Wine and Beverage Pairing

Pair this delightful Butterbeer Latte with a glass of chilled Prosecco for a bubbly counterbalance that enhances the creamy sweetness of the latte. If you prefer non-alcoholic options, a simple sparkling water or ginger ale can refresh the palate between sips.

For those who enjoy coffee with a twist, complement the latte with a rich espresso shot for an extra caffeine kick, known as a Butterbeer macchiato. Avoid pairing it with overly bitter drinks to maintain the mellow experience this blend aims to deliver.

Storage and Shelf Life

Butterbeer Latte is ideal for enjoying fresh, but if prepared in advance, store it in an airtight container in the refrigerator. Keep it away from strong odors to maintain its flavor integrity. When reheating, avoid boiling to prevent the milk from curdling. For optimal flavor, consume within 2-3 days.

Freezing is not recommended, as this can separate the milk and extract flavors. Instead, prepare individual servings as desired to ensure freshness every time. If you wish to keep syrup or caramel on hand, these can typically last for a few weeks if stored correctly.

Make Ahead Strategies

To save time during busy days, prepare your elements in advance. Mix the butter extract and vanilla into milk and store it in the refrigerator without frothing until ready to serve. When you’re ready, heat and froth your prepared milk, adding the warm caramel last for a comforting beverage.

You can also pre-make some caramel sauce at home and keep it in a sealed container for quick assembly. Ensure all your elements are fresh to enhance the charming appeal of this latte. For an even simpler experience, consider portioning and combining dry ingredients together for a ready-to-use latte mix.

Scaling Instructions

When halving or doubling your Butterbeer Latte recipe, keep the ratios consistent to maintain the flavor balance. If serving a larger party, consider adjusting your cooking equipment accordingly; a larger pot or a separate frother may be necessary.

For a quicker service when scaling, prepare the latte in batches, blending the liquids before serving. Keeping an eye on timing is essential; you may need to adjust milk heating times as more servings will require longer to reach the desired temperature.

Nutritional Deep Dive

A standard serving of Butterbeer Latte provides a mix of carbohydrates, fat, and a dose of protein, making it a satisfying drink. The milk provides calcium and important vitamins, while the sweeteners supply a quick energy boost. It’s important to enjoy this drink in moderation, considering its sugar content.

To make healthier choices, you could opt for low-fat milk or plant-based alternatives, which can affect the calorie count significantly. This drink can fit into various diets, provided that adjustments are made to suit individual needs, like using sugar substitutes or lower-calorie toppings.

Dietary Adaptations

– **Gluten-Free**: This recipe is naturally gluten-free; no modifications are necessary.
– **Dairy-Free**: Replace milk with almond, soy, or coconut milk to make it dairy-free without sacrificing flavor.
– **Vegan**: Use plant-based whipped cream and ensure all syrups are free from animal products.
– **Low-Carb/Keto**: Swap traditional syrup for sugar-free syrup options, and consider reducing added sugars.
– **Paleo**: Use natural sweeteners like honey or maple syrup instead of processed sugars for a proper paleo approach.
– **Low-FODMAP**: Stick with lactose-free milk and monitor syrup quantities to maintain low-FODMAP status.

Troubleshooting Guide

If the texture of your latte is too watery, ensure that you’re heating the milk properly and not diluting it with too much syrup. For flavor balance, taste before serving; sometimes a small pinch of salt can enhance sweetness.

If your latte is too sweet, add a small splash of unsweetened milk to tone it down. If you experience separation of ingredients, ensure that you mix thoroughly after adding each element. Always heat milk gently to avoid curdling and maintain creaminess.

Recipe Success Stories

Readers have embraced this Butterbeer Latte recipe, recounting their delightful experiences when hosting Harry Potter-themed events. Many have shared their unique twists, from adding extra spices to infuse creativity into the classic drink.

Photographers and bloggers love to showcase their creations, celebrating the ease at which this latte adapts to their style. Community engagement highlights emerging favorite adaptations, enriching the conversation around this beloved recipe.

Frequently Asked Questions

Can I make this drink dairy-free?

Yes! Simply substitute the milk with any plant-based milk option such as almond, soy, or oat milk, and enjoy a creamy and delicious Butterbeer Latte!

What flavor variations can I explore?

You can experiment with flavors like hazelnut or butterscotch syrup for exciting twists on the original beverage. These enhancements add individual character to your latte.

Can I make this latte iced?

Certainly! Prepare the latte as usual and allow it to cool before serving over ice for a refreshing iced Butterbeer Latte treat.

What’s the best way to store leftovers?

Store any leftover latte in an airtight container in the refrigerator for up to 2-3 days. Reheat gently on the stove or in the microwave before serving again.

Is there a way to reduce the sugar content?

Yes! You can use sugar-free syrups or adjust the amount of syrup you’re using. You can also explore natural sweeteners like stevia or monk fruit.

Does this drink suit gluten-free diets?

This Butterbeer Latte is gluten-free, as it does not contain any gluten ingredients. Just be sure your syrups and extracts are also gluten-free.

Can I use different types of milk?

Of course! Feel free to experiment with various milks such as almond, soy, or coconut for a different flavor and texture.”

Does this recipe require a frother?

A frother is recommended for the best texture, but you can also whip the milk by hand or in a blender for similar results.

Can I serve this drink at parties?

Absolutely! The Butterbeer Latte makes a great conversation starter at parties and will undoubtedly enchant the guests with its incredible flavors.

What are the nutritional values of the Butterbeer Latte?

Nutritional values depend on the specific ingredients used. Generally, it provides essential nutrients from the milk and can be made lower in calories by adjusting sweeteners.

How can I make this recipe more indulgent?

Add extra whipped cream on top along with drizzling caramel sauce for a richer, more decadent experience that perfectly compliments the latte.

Additional Resources

Explore our collection of related recipes to discover more delightful beverages, including seasonal lattes and inspired dessert drinks. Enhance your culinary skills with our technique guides, covering everything from perfect milk frothing to flavor balancing.

Additionally, learn about the best equipment recommendations for home-brewed café drinks and seasonal variations that will keep your lattes fresh all year round. Take the next step in your culinary journey and try out these exciting resources!

Join the Conversation

We love hearing from our readers! Share your culinary experiences on social media, and tag us in your Butterbeer Latte creations. Photography enthusiasts will find joy in capturing these magical drinks, so don’t hesitate to show off your skills.

Engage in our thriving community by leaving recipe reviews and sharing your personal adaptations. Let’s conjure up delicious memories together and keep the creativity flowing in the world of flavored lattes!

The Recipe

Butterbeer Latte

Serves: 2

Prep Time: 5 mins

Cook Time: 10 mins

Total Time: 15 mins

Kitchen Equipment Needed

  • Milk frother (or whisk/blender)
  • Measuring cups and spoons
  • Small saucepan
  • Tall serving glasses

Ingredients

  • 2 cups of milk (or dairy alternative)
  • 1 tsp butter extract
  • 2 tbsp vanilla syrup
  • 2 tbsp caramel sauce
  • Whipped cream for topping
  • Pinch of salt (optional)

Directions

  1. In a small saucepan, heat the milk over medium heat without boiling.
  2. Once warmed, remove from heat and stir in the butter extract, vanilla syrup, and caramel sauce until well combined.
  3. Froth the milk using the frother or whisk, until it becomes light and creamy.
  4. Pour the frothy mixture into glasses, ensuring even distribution.
  5. Top off with whipped cream and a drizzle of caramel sauce.
  6. Serve immediately and enjoy your magical Butterbeer Latte!

Recipe Notes

  • Feel free to add spices like cinnamon or nutmeg for an extra touch of warmth.
  • Adjust sweetness to your liking by adding more or less syrup.
  • This recipe can easily be doubled or halved as needed.

Homemade Caramel Brulee Latte with Creamy Vanilla Foam

Caramel Brulee Latte: A Sweet and Creamy Delight

⚖️
Difficulty
Easy

⏲️
Prep Time
10 mins

🕒
Cook Time
5 mins

⏱️
Total Time
15 mins

🍽️
Servings
2

The Caramel Brulee Latte is the ultimate holiday drink that transforms your cozy moments into a delightful experience. Combining the rich flavors of espresso, caramel, and cream, this drink not only tantalizes your taste buds but also envelops you in warmth and comfort. Perfect for chilly mornings or festive gatherings, this latte brings the sweet notes of caramel with a velvety finish, reminiscent of the classic dessert.

As you indulge, the golden caramel flavor dances on your palate, while the creamy foam adds a luxurious touch. This drink is not just a beverage; it’s an invitation to sit down, relax, and savor each sip. With its luscious taste and aromatic appeal, the Caramel Brulee Latte can easily become your favorite go-to when you’re craving something sweet and satisfying.

Quick Recipe Highlights

  • Flavor Profile: Sweet caramel intertwined with bold espresso and creamy milk.
  • Texture: Silky smooth with a frothy top, offering a delightful mouthfeel.
  • Aroma: Rich, buttery caramel combined with freshly brewed coffee notes.
  • Visual Appeal: A beautiful layered drink crowned with caramel drizzle and a sprinkle of sugar.
  • Skill Level Needed: Suitable for beginners who want to explore café-style drinks at home.
  • Special Equipment: Espresso machine or French press, milk frother, and a small saucepan.

Recipe Overview

  • Difficulty Level: This recipe is easy to follow, making it perfect for those new to espresso drinks, while still impressing seasoned coffee lovers.
  • Category: Best categorized as a beverage, this latte is ideal for breakfast or as an afternoon pick-me-up.
  • Cuisine: The Caramel Brulee Latte takes inspiration from traditional French desserts, blending coffee culture with rich flavor profiles.
  • Cost: This recipe is budget-friendly, with ingredients that are commonly found in most kitchens.
  • Season: Best enjoyed during the fall and winter months, adding warmth to your holidays.
  • Occasion: Perfect for festive gatherings, cozy nights in, or as a special morning treat for yourself.

Why You’ll Love This Recipe

The Caramel Brulee Latte offers an unbeatable taste that combines the richness of caramel with the boldness of coffee. With each sip, you’ll experience layers of flavor that create a comforting sensation, making it a delightful treat for any coffee lover. The smoothness of the latte contrasts beautifully with the sweet, crunchy brulee topping, giving every sip a satisfying texture.

Preparation is twofold: you can whip it up in under 15 minutes, allowing you to enjoy café-style drinks without the wait. The added bonus of making coffee at home means you have complete control over the taste and sweetness, allowing for adjustments that cater to your personal preferences.

Nutritionally, this latte provides a rush of energy from the espresso, paired with a touch of sweetness that can uplift your mood. It’s a delightful way to kickstart your day or rejuvenate in the afternoon, making it a functional indulgence.

When hosting gatherings, serving delicious lattes can elevate the entire experience. Your guests will appreciate the effort, and the impressive presentation ensures a memorable moment over warm hearts and steaming mugs.

Cost-effectiveness is another key advantage. With simple ingredients, you can create a luxurious beverage that rivals any high-end coffee shop, all from the comfort of your home. This makes the Caramel Brulee Latte not only a treat but also a great way to save money while enjoying gourmet experiences.

Historical Background and Cultural Significance

The origin of the Caramel Brulee Latte can be traced back to the rich coffee traditions of Europe, particularly reflecting France’s penchant for desserts that incorporate caramelized sugars. Traditionally, desserts such as Crème Brûlée showcase the mastery of caramel, and this latte cleverly blends that technique into a beloved beverage format.

Culturally, this drink has become a staple in cafés, particularly during the holiday season, where warm, comforting flavors are highly sought after. It’s not just a drink but a ritual, a way to connect with others and enjoy leisurely moments amidst busy days.

As the recipe evolved, adaptations began to surface across different regions, inspiring variations that cater to local tastes, which led to the creation of seasonal menu items in coffee shops. The Caramel Brulee Latte reflects a broader trend of integrating dessert-like flavors into popular drinks, highlighting our collective love for blended, decadent experiences.

With each sip of this latte, you’re participating in a global coffee culture that celebrates both flavor and community. Sharing this drink with friends or family can help foster deeper connections and shared memories, mimicking the atmosphere of a cozy French café right in your home.

Ingredient Deep Dive

Espresso: This concentrated coffee is the heart of the Caramel Brulee Latte. Known for its bold flavor and higher caffeine content, espresso forms the base of many coffee beverages worldwide. When selecting espresso beans, look for freshly roasted, high-quality options to ensure a rich flavor. Proper storage in a cool, dark place helps maintain freshness, and for those without an espresso machine, a French press can serve as an excellent substitute.

Caramel Sauce: The caramel sauce in this latte adds a delightful sweetness and complexity. This ingredient has roots in French cuisine, where caramel is often used in desserts. It’s made by melting sugar and adding butter and cream to create a smooth, rich sauce. Selecting a high-quality caramel can elevate the drink, and for homemade enthusiasts, simple recipes are available to create your own. Store it in the refrigerator for up to two weeks for optimal freshness.

Common Mistakes to Avoid

  • Using Regular Coffee Instead of Espresso: Espresso offers a rich, concentrated flavor necessary for this drink’s character. Regular coffee won’t provide the same intensity.
  • Poor Milk Frothing Technique: To achieve the perfect creaminess, ensure your milk is heated properly before frothing. Avoid overheating, as it can scorch the milk.
  • Overcomplicating the Caramel: Store-bought caramel sauces are convenient and consistent. Making caramel from scratch can be risky if not closely monitored to prevent burning.
  • Ignoring the Type of Milk: Different milk types can alter the latte’s flavor and texture. Experiment with whole, skim, or alternatives to find your favorite.
  • Not Adding Enough Caramel: To maximize flavor, ensure you add enough caramel sauce to match your taste preference. A well-balanced latte should showcase this sweetness.
  • Sipping Too Quickly: The Caramel Brulee Latte is best enjoyed slowly to appreciate the rich flavors and textures. Rushing can lead to a missed experience.
  • Skipping the Topping: A sprinkle of sugar before serving can add an exciting crunch, mirroring the classic crème brûlée experience.
  • Not Paying Attention to Espresso Shots: Ensure your espresso shots are brewed correctly, focusing on timing and technique for optimal flavor extraction.

Essential Techniques

Frothing Milk: Frothing milk is crucial for achieving that creamy texture that enhances the Caramel Brulee Latte experience. Use a steam wand or a milk frother, ensuring the milk reaches around 150-155°F for ideal froth. Watch for bubbles; the goal is a velvety microfoam that integrates smoothly with the espresso. Avoid overheating, as scalded milk can ruin the flavor.

Preparing Espresso: Mastering the preparation of espresso shots is vital for this recipe. Ensure your coffee beans are finely ground and tamped evenly. Use the right amount of water and pressure to extract flavors effectively. Keep an eye on timing; a shot should take about 25-30 seconds to brew to avoid bitterness or weak flavors.

Pro Tips for Perfect Caramel Brulee Latte

Choose high-quality espresso beans for the best flavor, as the base of this drink significantly impacts the overall taste experience. Personalize the caramel sweetness based on your preference; don’t hesitate to add more caramel than suggested for a richer flavor. When frothing milk, tilt the jug slightly to create a whirlpool effect, leading to a better froth consistency. Experiment with different types of milk; oat or almond milk can add unique flavors that complement the caramel. If you enjoy a crisp topping, sprinkle a layer of sugar and lightly caramelize it with a kitchen torch for a festive touch. Always taste your drink before serving to adjust sweetness or flavor; a good barista wouldn’t serve something they hadn’t tested themselves!

Variations and Adaptations

For a seasonal twist, consider adding seasonal spices like cinnamon or nutmeg to the caramel sauce to create a warm, spiced latte perfect for the holidays. If you’re looking for a chilled variant, try blending the ingredients with ice for a refreshing iced Caramel Brulee Latte, which is perfect for warm summer afternoons. For those on dietary restrictions, use dairy alternatives such as coconut milk or almond milk, ensuring the texture remains creamy. Additionally, flavored syrups can be introduced, such as vanilla or hazelnut, to create a unique take on the traditional recipe. To adapt the drink for special occasions, layer it with whipped cream and drizzle more caramel for an impressive dessert-style beverage.

Serving and Presentation Guide

When plating your Caramel Brulee Latte, consider using clear glass mugs to showcase the beautiful layers of coffee and caramel. Garnish the top with a swirl of whipped cream and a drizzle of caramel sauce for visual appeal. Sprinkle a pinch of coarse sugar for added texture and sweetness. Serving alongside a small dessert, like biscotti or a cookie, can enhance the overall experience. For the perfect sip, make sure the latte is served hot; if it cools too quickly, it can lose its comforting charm. Paying attention to portion control is also essential; a well-sized serving will ensure everyone enjoys the experience without feeling overwhelmed.

Wine and Beverage Pairing

To complement the Caramel Brulee Latte, consider pairing it with a well-balanced dessert wine like a sweet Riesling or a light Moscato, both of which will accentuate the caramel flavors. If you prefer non-alcoholic beverages, a spiced apple cider can provide a wonderful contrast, enhancing the drink’s warmth. For coffee enthusiasts, pairing with a strong black coffee or a dark roast can create a delightful contrast with the sweetness of the latte. Serve your drink alongside a classic French pastry, such as a macaroon or éclairs, to add a touch of elegance to your coffee experience.

Storage and Shelf Life

For best results, the Caramel Brulee Latte is best enjoyed fresh. However, any leftover components can be stored separately. Store the caramel sauce in an airtight container in the refrigerator for up to two weeks; it can be gently reheated when needed. Any prepared espresso can be kept in the refrigerator for up to one day, but it’s best enjoyed fresh for optimal flavor. Frothing milk should always be done fresh, as once frothed, it doesn’t retain its texture well for later use. When reheating any components, do so gently to avoid altering the flavors negatively; aim for a temperature of around 150°F when serving.

Make Ahead Strategies

To ease morning preparations, you can make the caramel sauce ahead of time and store it in the refrigerator. Brew espresso shots early in the day and store them in the fridge; when you’re ready to enjoy, simply reheat them briefly. Frothing milk should be done fresh for the best results, but you can prepare and chill milk overnight, allowing it to froth better in the morning. If entertaining, consider preparing a batch of espresso and caramel ahead of time so that you can serve your guests quickly. Lastly, if you choose to create a layered presentation, prepare each component individually and assemble just before serving for a fresh, visually appealing result.

Scaling Instructions

If you wish to halve the recipe, simply divide all ingredient amounts by two, ensuring that your espresso shots remain balanced to avoid weak flavors. Doubling the recipe is also straightforward; just ensure your equipment can accommodate the increased volume and adjust brew time slightly if necessary. When scaling up for larger gatherings, consider brewing espresso in batches and blending all components together efficiently. If your equipment cannot handle larger volumes, prepare in sections and then combine for consistency. Be mindful of the timing; making everything fresh is key, and aim to serve it immediately for the best drinking experience.

Nutritional Deep Dive

The Caramel Brulee Latte is a delicious combination of macronutrients that can contribute to a balanced diet when enjoyed in moderation. It provides carbohydrates primarily from the latte and the sugar content in the caramel, while the milk contributes essential proteins and fats. Caloric content varies depending on milk choice and added syrup; a standard serving may contain around 300-400 calories. Micronutrient benefits include calcium and vitamin D from the milk, antioxidants from coffee, and potential mood-enhancing properties from the sweetness of caramel. For those managing weight, moderation is key; enjoy smaller servings or adjust sweetness to balance caloric intake without sacrificing flavor.

Dietary Adaptations

For gluten-free versions of the Caramel Brulee Latte, opt for gluten-free ingredients when selecting syrups and toppings. If you need a dairy-free option, abundant alternatives like almond, oat, or coconut milk can replace regular milk without compromising the drink’s creaminess. Vegan adaptations require simple substitutions, using plant-based creamers and ensuring the caramel is dairy-free. For low-carb versions, use sugar-free syrups and alternative sweeteners, ensuring taste remains enjoyable. Keto modifications would focus on using high-fat dairy options, while eliminating sugar entirely. Paleo enthusiasts can enjoy this drink with natural sweeteners like honey or maple syrup, while avoiding processed ingredients.

Troubleshooting Guide

For texture issues in your Caramel Brulee Latte, ensure milk is frothed properly. Too much heat or not enough air can lead to a soup-like consistency. If the flavor is off-balance with too much sweetness, consider increasing the espresso content or adding a pinch of salt to counteract the caramel. Temperature problems can be solved by ensuring all components are heated separately before assembling to achieve an optimum drinking temperature. Equipment challenges often arise from improper cleaning or calibration; regularly check your espresso machine to avoid bitterness in your shots. If necessary ingredients aren’t available, trust your intuition with substitutions, but stay true to the core flavors.

Recipe Success Stories

Our community has shared fantastic feedback about the Caramel Brulee Latte! Many have successfully adapted this recipe to fit dietary needs, showcasing various milk alternatives and sugar-free caramel sauces with great results. Readers have also uploaded stunning photography of their variations, inspiring others to try their hands at creating a unique presentation. Suggestions for different flavor profiles have surfaced, with users integrating seasonal spices, prompting discussions on creativity in the kitchen. Each story reaffirms the versatility of this latte, encouraging a collective exploration of flavors and textures that expand beyond traditional boundaries.

Frequently Asked Questions

Can I make this latte without an espresso machine?

Absolutely! You can use a French press or a stovetop espresso maker to brew espresso-style coffee. The key is to ensure you achieve a similar concentrated flavor.

What can I substitute for caramel sauce?

For a caramel alternative, consider using chocolate syrup, butterscotch, or a homemade version made with sugar and cream. Each option will give a different flavor twist.

How can I make this drink vegan?

To make a vegan Caramel Brulee Latte, use plant-based milk such as almond or oat milk and ensure the caramel sauce is dairy-free. There are many great brands available.

Is it possible to prepare this in advance?

You can prepare the caramel sauce and espresso ahead of time. However, it’s best to froth the milk just before serving to maintain its texture.

Can I make a larger batch for a crowd?

Yes! Simply adjust your ingredient amounts and brew the espresso in batches. Keep the other components ready for quick assembly when serving.

What’s the best milk to use?

The best milk often depends on your taste preference. Whole milk provides a creamy texture, but alternatives like oat or almond milk can also work wonderfully.

How long does leftover caramel last?

Homemade or store-bought caramel sauce can typically last up to two weeks when stored in an airtight container in the refrigerator.

Can I use decaffeinated coffee?

Yes! Decaffeinated coffee beans can be used in place of regular coffee beans to enjoy the same rich flavors without the caffeine kick.

What should I do if my milk isn’t frothing properly?

If your milk isn’t frothing well, check that it hasn’t been overheated, and ensure you’re using the right milk type. Whole milk froths better than skim milk.

Can I customize the sweetness level?

Definitely! Feel free to adjust the amount of caramel sauce you add to fit your personal sweetness preference, experimenting until it meets your taste.

What equipment do I need to make this latte?

You will need an espresso machine or alternative coffee maker, a milk frother, and basic kitchen tools like a saucepan for caramel.

Additional Resources

For those eager to expand their coffee repertoire, consider exploring related recipes like the Vanilla Latte or a Pumpkin Spice Latte, which both feature simple techniques and flavorful results. Technique guides on milk frothing or espresso preparation can provide valuable insights for perfecting your coffee skills. Additionally, look into ingredient information resources that can help you choose the best coffee beans and syrups available. For those who love seasonal flavors, try experimenting with guiding principles that can adapt recipes to match the current harvest and ingredient availability.

Join the Conversation

We’d love to hear your thoughts on the Caramel Brulee Latte! Share your experiences on social media or in the comments below. Photos of your creations can inspire others and allow our community to grow. Don’t hesitate to let us know any personal adaptations or variations you’ve tried, capturing the essence of this delightful drink. Engage with fellow coffee lovers and swap tips to elevate our collective knowledge and enjoy what makes coffee culture so rich and vibrant.

The Recipe

Caramel Brulee Latte

Serves: 2

Prep Time: 10 mins

Cook Time: 5 mins

Total Time: 15 mins

Kitchen Equipment Needed

  • Espresso machine or French press
  • Milk frother
  • Small saucepan
  • Measuring cups and spoons
  • Clear glass mugs or cups

Ingredients

  • 2 shots of espresso
  • 1 cup milk (any type)
  • 2 tablespoons caramel sauce
  • 1 tablespoon sugar (for topping, optional)
  • Whipped cream (for garnish, optional)

Directions

  1. Brew 2 shots of espresso using your machine or alternative method.
  2. In a small saucepan, heat the milk until hot but not boiling. Froth the milk until creamy.
  3. In a glass mug, swirl 2 tablespoons of caramel sauce and pour in the espresso on top.
  4. Pour the frothed milk over the espresso, layering the milk gently.
  5. If desired, top with whipped cream, a sprinkle of sugar, and additional caramel drizzle.
  6. Serve immediately and enjoy your delightful Caramel Brulee Latte!

Recipe Notes

  • Feel free to adjust the sweetness by adding more or less caramel sauce according to your preference.
  • For an extra treat, caramelize some sugar on top if you’d like a crunchy topping like crème brûlée.
  • This recipe can easily be halved or doubled based on your needs.

Best Nespresso Iced Coffee Recipes to Try This Summer

16 Nespresso Iced Coffee Recipes To Try: Cool Down with These Delicious Brews

⚖️
Difficulty
Easy

⏲️
Prep Time
5 mins

🕒
Cook Time
0 mins

⏱️
Total Time
5 mins

🍽️
Servings
1 serving

Indulging in summer delights calls for a refreshing drink, and what better way to chill out than with Nespresso iced coffee recipes? These cool concoctions capture the rich flavors of your favorite espresso while adding a twist of ice-cold refreshment. From creamy blends topped with whipped cream to vibrant options enhanced with flavored syrups, these 16 Nespresso iced coffee recipes are perfect for warm afternoons or gatherings with friends.

Whether you’re an espresso enthusiast or someone simply looking for a delightful caffeine boost, these recipes cater to all tastes. Each icy beverage showcases the gourmet qualities of Nespresso coffee, artfully combined with various ingredients that enhance flavor and texture. Let’s dive into the cool world of Nespresso iced coffees and discover how to elevate your brew game.

Quick Recipe Highlights

  • Flavor Profile: Revel in balanced tastes of rich coffee, creamy textures, and sweet notes that tantalize your palate.
  • Texture: Enjoy the perfect blend of creamy smoothness and refreshing icy crunch with each sip.
  • Aroma: Experience enticing scents of coffee intertwined with hints of caramel, vanilla, or seasonal spices.
  • Visual Appeal: Feast your eyes on layered drinks with contrasting colors and vibrant garnishes that invite you to indulge.
  • Skill Level Needed: These recipes are straightforward, ideal for novice coffee drinkers and seasoned aficionados alike.
  • Special Equipment: All you need is a Nespresso machine and a few common kitchen tools to whip up these delightful drinks.

Recipe Overview

  • Difficulty Level: The simplicity of these recipes encourages everyone to try their hand at crafting homemade iced coffee with minimal effort.
  • Category: Perfect for breakfast, afternoon snacks, or post-dinner indulgence, these recipes bridge all parts of the day.
  • Cuisine: These iced coffee variations reflect global influences, integrating gourmet coffee culture with local tastes.
  • Cost: With affordable ingredients, making iced coffee at home becomes a budget-friendly alternative to café purchases.
  • Season: Summer is the perfect season for these chilled beverages; the refreshing qualities offer respite from the heat.
  • Occasion: These recipes are suitable for everything from casual brunches to elegant outdoor parties.

Why You’ll Love This Recipe

The taste and texture of these Nespresso iced coffee recipes will captivate your senses and make each sip an exhilarating experience. Combining the bold flavors of espresso with creamy milk or plant-based alternatives results in a delightful contrast that tantalizes your taste buds. You’ll enjoy the added layer of flavor from sweet syrups and spices, all balanced perfectly over ice.

In addition to their delightful flavor, these iced coffee recipes offer ultimate convenience. They come together quickly, requiring just a few minutes and minimal equipment. Whether you’re rushing out the door or hosting friends, these recipes allow you to present an impressive beverage without the fuss of elaborate preparation.

Nutritionally, these Nespresso iced coffee recipes can be tailored to meet specific dietary needs, allowing you to indulge without compromising health goals. You can opt for low-fat milk, sugar substitutes, or dairy-free creams based on your preference, making each drink enjoyable and guilt-free.

Socially, sharing delicious iced coffee recipes can bring friends and family together for a shared experience. They provide an opportunity for tasting parties, inviting guests to explore unique flavor combinations and share their favorites, enhancing the joy of connection.

Cost-effectiveness is another appealing factor; creating your iced coffee creations at home not only saves money but also gives you the freedom to experiment with different ingredients and customize each beverage to suit your tastes.

Historical Background and Cultural Significance

The origins of iced coffee can be traced back centuries, with variations emerging globally as coffee culture flourished. Initially a means of preserving coffee during heat, iced coffee evolved into a beloved drink enjoyed by many. Countries like Japan and Vietnam have uniquely crafted their own iced coffee styles, showcasing diverse flavor profiles and techniques, with each culture putting its own spin on this refreshing beverage.

Culturally, iced coffee has significant importance in various regions. In places like Italy, coffee is a ritual, and incorporating cold methods brings a novel touch to traditional practices. Enjoying iced coffee signifies relaxation and leisure; it’s the perfect drink for enjoying sunny days and long afternoons.

The evolution of iced coffee from a simple refreshment to an artisanal specialty reflects the growing appreciation for coffee globally. As people increasingly seek innovative ways to enjoy coffee, the creation of gourmet iced coffee blends has become a popular trend.

Regional variations abound, offering inspired combinations of flavors and making the iced coffee experience truly diverse. These include adding local ingredients such as spices, fruits, or flavored creams, demonstrating how various cultures adapt this drink to complement their unique tastes.

Ingredient Deep Dive

Espresso is the heart of these Nespresso iced coffee recipes, characterized by its concentrated flavor and rich body. This small but mighty ingredient carries a robust caffeine punch and is the foundation for countless beverages. The art of espresso-making dates back to the early 20th century in Italy and has since gained global prominence, gaining respect in both culinary and cultural contexts.

The nutritional benefits of espresso are noteworthy; it is low in calories and high in antioxidants, making it a healthy choice for coffee drinkers. When selecting espresso pods, look for quality brands and blends that match your flavor preferences.

Milk and dairy alternatives play a crucial role in crafting creamy iced coffee drinks. Whether you opt for whole milk, almond milk, or oat milk, each brings unique flavors and textures to enhance your coffee experience. The history of milk in coffee beverages traces back to early Italian cappuccinos, continuing to grow in popularity as millions enjoy creamy additions to their daily brews.

For storage, keep milk in a cold refrigerator, ideally at 35°F to 40°F. Consider shelf-stable options for longer-lasting alternatives. When selecting milk, ensure to check for fat content to suit your taste and recipe needs. These providers often have alternatives that cater to various dietary restrictions.

Common Mistakes to Avoid

  • Using warm coffee: Ensure your coffee is chilled before mixing to avoid a diluted flavor.
  • Over-diluting: Avoid adding excessive ice that can quickly water down the drink.
  • Poor quality ingredients: Always use fresh, high-quality coffee and milk for optimal taste.
  • Neglecting flavor balance: Be mindful of sweetness and creaminess; adjust syrups and milk as necessary.
  • Skipping garnishes: Enhance the visual appeal and flavor with simple garnishes like whipped cream or chocolate shavings.
  • Wrong ratios: Carefully measure ingredients to achieve the desired taste and consistency.
  • Inadequate blending: Mix thoroughly to integrate flavors and ensure an enjoyable drinking experience.
  • Ignoring preparation time: Allow your iced coffee to chill adequately for the best results.
  • Using expired ingredients: Always check the freshness of your ingredients, particularly cream and milk.
  • Inconsistent brewing: Follow your Nespresso machine’s instructions for a consistent espresso extraction.

Essential Techniques

Brewing an excellent espresso is key to any iced coffee recipe. Mastering the espresso-making technique ensures your coffee retains its bold flavor even when chilled. Be attentive to the grind size, tamping pressure, and extraction time to achieve the perfect shot consistently. Watch for a rich crema; this golden frothy layer indicates a well-extracted espresso.

Another essential technique is the layering method. When preparing iced coffee, pour the ingredients slowly to maintain distinct layers. This improves presentation and enhances the sensory experience, allowing drinkers to appreciate the flavors as they meld. Practice gently pouring over the ice or milk to create beautiful, visible sections.

Pro Tips for Perfect Nespresso Iced Coffee

Choose strong espresso shots to ensure the flavor stands up against the ice and milk, achieving a robust flavor profile. Use frozen coffee cubes instead of regular ice to prevent dilution as they melt. Experiment with flavored syrups and add ins to create unique and satisfying combinations. Don’t hesitate to personalize each drink, adjusting sweetness and dairy to your taste preference.

Enhance your iced coffee by using different spices like cinnamon or nutmeg sprinkled on top for added warmth. Opt for chilled glassware to maintain cold temperatures for longer throughout your drink’s consumption. Lastly, consider the texture by blending with frosty ingredients for a whipped-feel if you desire creamy iced coffees.

Variations and Adaptations

Each Nespresso iced coffee recipe can embrace regional twists, such as a Vietnamese iced coffee enriched with sweetened condensed milk or a Greek freddo served with foamed milk. Seasonal adaptations can include pumpkin spice flavors in the fall or refreshing mint additions for summer sips.

For dietary modifications, consider using low-carb sweeteners or dairy alternatives for those seeking healthier options. These substitutions ensure everyone can indulge. Experiment with flavors like caramel, hazelnut, or chocolate to find your signature iced coffee that aligns with your taste preferences.

Texture modifications can also enhance your iced coffee experience; add whipped cream for a luxurious feel or blend for a smoothie-like consistency. Presentation alternatives like serving in mason jars or creatively layered glasses can make your iced coffee even more appealing.

Serving and Presentation Guide

When serving your Nespresso iced coffee, attention to plating can elevate the experience. Use tall glassware to showcase the beautiful layers of color and texture. Garnishes like a sprig of mint or a sprinkle of cocoa can add freshness and vibrancy. Consider pairing your iced coffee with pastries or cookies to create an inviting snack experience.

Keep temperature considerations in mind; serving straws can enhance comfort and convenience as guests savor their beverages. Portion control is crucial to avoid overwhelming guests; typically, an 8 oz serving is ideal for most drinks.

Wine and Beverage Pairing

Pairing wine with your Nespresso iced coffee can enhance the flavor experience. Opt for sweet wines, such as Moscato or dessert wines, that complement the coffee’s richness. Non-alcoholic alternatives like sparkling water can cleanse the palate, creating a refreshing balance alongside your drinks.

Consider coffee-based cocktails for a unique twist; beverages like espresso martinis blend rich coffee flavors with a hint of indulgence. Serve chilled options alongside coffee to offer variety for guests and enhance their experience.

Storage and Shelf Life

To store any leftover iced coffee, keep it in an airtight container in the refrigerator for up to 24 hours. Avoid adding milk or cream until serving to maintain freshness and prevent spoilage. Coffee can lose its vibrant flavors over time, which is why it is best to consume as soon as possible.

If freezing iced coffee, use ice cube trays to create individual frozen portions that are easy to blend into smoothies. Reheating leftover espresso should always be done gently to avoid altering its taste.

Make Ahead Strategies

When planning a gathering, consider prepping elements in advance. Brew espresso and store in the refrigerator for up to 24 hours, allowing you to assemble iced coffee drinks quickly on the day of the event. Gather all ingredients beforehand, ensuring they’re chilled for immediate use.

For iced coffees served with sweeteners or syrups, prepare these in bulk and store them in the refrigerator for easy access. Assemble drinks shortly before serving for the freshest results.

Scaling Instructions

To scale your recipe down for a smaller gathering, simply halve the ingredients while maintaining the same preparation techniques. Conversely, for larger crowds, double or triple the recipe, ensuring adequate storage and blending accommodations.

Adjust equipment sizes as necessary; for example, larger batches may require bigger containers or blenders. Monitor your brewing times to ensure consistent quality, especially with espresso, as larger quantities may necessitate slightly adjusted brewing times.

Nutritional Deep Dive

Exploring the nutritional composition of iced coffee can further enhance your understanding and enjoyment of the drink. An average iced coffee made with espresso typically contains minimal calories unless sweeteners or creams are added. Monitoring your additions allows for customization based on your dietary goals.

Breaking down macronutrients helps identify suitable options for various diets. For instance, staying aware of sugar content in flavored syrups can ensure accommodations for those monitoring their intake for health reasons.

Incorporating nutrients from alternative milk can also provide added health benefits, such as vitamins and minerals that enhance the coffee experience.

Dietary Adaptations

Iced coffee is versatile and can easily accommodate various dietary needs. To make your drink gluten-free, ensure all added ingredients, especially flavored syrups, are certified gluten-free. For those following a dairy-free lifestyle, opt for almond, coconut, or oat milk to achieve a similar creamy texture without lactose.

Vegan adaptations can be achieved simply by replacing milk with plant-based options. For low-carb or keto followers, sugar-free syrups and unsweetened milk alternatives can help maintain carbohydrate limits without sacrificing flavor.

Whether following a paleo or low-FODMAP diet, selecting specific ingredients can align your iced coffee with dietary guidelines while still allowing enjoyment of this chilled beverage.

Troubleshooting Guide

Texture issues may arise if too much ice is added, leading to a watery drink. Limit ice or use coffee ice cubes to maintain integrity. If flavors appear unbalanced, experiment with varying levels of sweeteners and cream ratios to find the perfect blend.

For temperature problems, ensure your coffee is adequately chilled, and consider using cold brew methods for an even smoother finish. Equipment challenges, like an espresso machine not heating correctly, may require cleaning or checking water levels for optimal function.

Ingredient substitutions may alter the taste and texture; therefore, be mindful of ratios. Keep an eye on timing, especially with brewing, to ensure quality espresso shots, resulting in delicious iced coffee.

Recipe Success Stories

Community feedback on Nespresso iced coffee recipes often celebrates easy preparation and delicious results. Many readers express excitement about discovering new flavor combinations and enhancing their summer gatherings.

Variations shared within the community show creative twists, such as incorporating seasonal ingredients like peppermint during the holidays or fruit purees during summer months. Each recipe serves as a foundation for experimentation, inspiring personal adaptations.

Suggestions from readers often highlight additional garnishes or the use of local ingredients, leading to beautiful presentations. Success stories feature captivating photography that captures the visual glory of various iced coffee drinks, inviting even more engagement and inspiration.

Frequently Asked Questions

Can I use decaffeinated coffee in these recipes? Absolutely! Feel free to swap out regular espresso with decaffeinated versions for a caffeine-free treat, maintaining the iced coffee experience without jitters.

What’s the best way to sweeten my iced coffee? Popular options include flavored syrups, honey, or natural sweeteners like agave. Experiment to find the right level of sweetness for your palate.

Can I make these recipes dairy-free? Yes, you can easily substitute traditional dairy with almond, coconut, or oat milk for a delicious dairy-free iced coffee.

How do I store leftover iced coffee? Store any leftover iced coffee in an airtight container in the refrigerator for up to 24 hours; however, it’s best consumed fresh for the best flavor.

Can I use flavored Nespresso pods? Absolutely! Flavored pods can add a delightful twist to your iced coffee, making it even more exciting.

What’s the ideal ratio of coffee to milk? A common ratio is 1:1, but you can adjust it according to your preference for a stronger or creamier coffee drink.

Can I add alcohol to my iced coffee? Yes! Consider adding a splash of coffee liqueur for a delightful cocktail twist, perfect for an evening treat.

Is it safe to freeze iced coffee? While you can freeze coffee, it’s best to use it in cold brew or blended drinks, as traditional iced coffee may lose some flavor during freezing.

How long does it take to brew espresso? Brewing a shot of espresso typically takes about 25-30 seconds; ensure you’re using a finely ground coffee for the best extraction.

Are there seasonal variations for iced coffee? Absolutely! Seasonal ingredients like pumpkin spice can be added in the fall, while summer fruits can elevate your iced coffee experience during warmer months.

Additional Resources

If you’re eager to expand your culinary repertoire, explore related recipes like dynamic cold brews, exotic frappes, and various coffee drinks perfect for entertaining. Technique guides can assist you in perfecting espresso brewing methods or enhancing your foam techniques for toppings and garnishes.

For ingredient information, consider exploring the benefits of various milks and their flavor profiles, allowing for more informed choices in your iced coffee. Equipment recommendations, including must-have tools for coffee enthusiasts, will elevate your home brewing experience and simplify preparation.

Seasonal variations in ingredients and flavors can also inspire creativity and excitement with your iced coffee preparation. Keep things fresh and engaging by experimenting periodically.

Join the Conversation

We invite you to engage with us and share your Nespresso iced coffee creations via social media! Post your favorite photos, offer tips, and connect with others who appreciate the art of iced coffee making. Participate in recipe reviews, sharing your personal adaptations and successes to inspire the community.

Explore variations on the classic recipes together, fostering creativity and providing feedback on flavor pairings and presentation ideas. Together, we can create and celebrate iced coffee as not just a drink but an experience to be savored.

The Recipes

Nespresso Iced Coffee Variations

Serves: 1

Prep Time: 5 mins

Cook Time: 0 mins

Total Time: 5 mins

Kitchen Equipment Needed

  • Nespresso machine
  • Ice cube tray (optional for coffee cubes)
  • Blender (for frappes)
  • Long spoon
  • Glasses or cups for serving

Ingredients

  • 1 Nespresso espresso pod
  • Ice cubes
  • Milk or cream (to taste)
  • Syrup or sweetener (to taste)
  • Optional spices or flavorings (e.g., vanilla, caramel, or spices)
  • Garnishes (e.g., whipped cream, chocolate shavings)

Directions

  1. Brew 1 shot of Nespresso espresso using your machine.
  2. Fill a glass with ice cubes.
  3. Pour the brewed espresso over the ice.
  4. Add milk or cream according to your preference.
  5. Sweeten with syrup or sweetener, adjusting to taste.
  6. Optional: Add spices or flavorings as desired.
  7. Garnish with whipped cream or toppings if desired.
  8. Stir gently and enjoy your refreshing iced coffee!

Recipe Notes

  • Try different syrups for a unique twist.
  • Use frozen coffee cubes to enhance chill without watering down.
  • A variety of spices can change the flavor profile dramatically.
  • Experiment with different types of milk or non-dairy alternatives.

Easy Iced Vanilla Chai Latte Recipe for a Refreshing Treat

Cool Down with This Easy Iced Vanilla Chai Latte Recipe!

⚖️
Difficulty
Easy

⏲️
Prep Time
10 mins

🕒
Cook Time
5 mins

⏱️
Total Time
15 mins

🍽️
Servings
2 servings

Indulge in the refreshing bliss of a homemade Iced Vanilla Chai Latte, a perfect drink to cool down on a warm day! This delightful beverage combines the warm spices of chai with smooth vanilla and cold milk, resulting in a flavor explosion that delights the senses. The creamy texture, infused with notes of cinnamon and cardamom, combines beautifully with the soothing vanilla, making each sip a luxurious escape.

Imagine sitting on your porch, sipping this chilled, spiced drink while the sun sets. The aroma of freshly brewed chai wafts through the air, creating a cozy ambiance that is both invigorating and comforting. Plus, making this easy iced vanilla chai latte at home means you can customize the sweetness and spice levels to your liking, making it not just a treat, but also a personal favorite.

Quick Recipe Highlights

  • Flavor Profile: This iced vanilla chai latte boasts a balance of sweet and spicy flavors, with deep notes of cinnamon, ginger, and rich vanilla.
  • Texture: It has a creamy consistency that feels smooth on the palate, complemented by the refreshing chill of ice.
  • Aroma: The aromatic blend of warm spices and fragrant vanilla makes every sip a sensory delight.
  • Visual Appeal: The beautiful layering of chai and milk creates an eye-catching beverage, perfect for summer gatherings.
  • Skill Level Needed: This recipe requires minimal cooking techniques, making it accessible for anyone to create.
  • Special Equipment: All you need is a good quality blender or shaker and a glass to serve this delicious drink!

Recipe Overview

  • Difficulty Level: Easy! This iced vanilla chai latte is simple to make and perfect for kitchen novices. The recipe includes straightforward steps that anyone can follow.
  • Category: This drink falls into the category of beverages and can be enjoyed anytime—whether it’s breakfast, an afternoon pick-me-up, or a refreshing dessert.
  • Cuisine: Chai is traditionally an Indian drink, rich in history and culture. It has gained global popularity, often enjoyed in various forms across different regions.
  • Cost: This recipe is budget-friendly, with ingredients that are easily sourced and can be found in most grocery stores.
  • Season: While it’s ideal for warm summer days, this drink can be enjoyed year-round, providing comfort during colder months as well.
  • Occasion: Perfect for casual gatherings, brunch parties, or even quiet afternoons alone with a good book!

Why You’ll Love This Recipe

First and foremost, the taste of this iced vanilla chai latte is simply irresistible! The balance between the cool creaminess and warm spices makes this drink a unique favorite. With the ability to customize sugar and spice levels, experimentation is part and parcel of the fun. You can easily adjust it to suit your taste buds, meaning you can enjoy a perfectly personalized beverage each time.

Convenience is key in today’s fast-paced world. This recipe not only takes minimal time to prepare, but it also allows you to use pantry staples. The quick prep and easy cleanup make this drink an accessible treat for coffee lovers and non-coffee drinkers alike. Imagine a hot summer day where you can whip up a refreshing drink in just 15 minutes!

Nutritionally, chai tea boasts health benefits, including antioxidant properties and digestive support from varied spices. Utilizing real spices keeps the drink wholesome, thus letting you savor it without guilt. The addition of milk or alternative dairy options also contributes to a balanced drink, giving you a little protein hit alongside the serving of flavor.

Socially, sharing this iced vanilla chai latte with friends can transform a simple afternoon into a delightful occasion. Whether you’re hosting a tea party or enjoying it alone, the inviting aroma and beautiful presentation make it a drink to be shared and enjoyed together.

In terms of cost-effectiveness, making your drinks at home can save you a significant amount compared to cafe prices. Not only do you get to indulge in a delectable beverage, but you also gain the satisfaction of crafting a quality drink from the comfort of your kitchen.

Historical Background and Cultural Significance

The origin of chai tea dates back centuries, rooted in Ayurvedic traditions from India. Originally consumed for medicinal benefits, chai has evolved into a beloved everyday drink, swept into cafes and homes worldwide. Each sip pays homage to this rich cultural history.

Culturally, chai is more than just a drink; it embodies warmth and hospitality. In India, serving chai to guests is a cherished tradition, symbolizing welcome and community. It stands as a testament to the art of conversation and connection over shared experiences.

As chai gained international fame, various iterations emerged, leading to adaptations like the iced chai latte. This evolution shows how culinary traditions can reshape and adapt to new tastes while preserving beloved flavors.

Regional variations of chai differ significantly, yet they all reflect local flavors. From the spiciness of masala chai to the creaminess of Kashmiri chai, the concept of chai brings diverse tastes and houses unique stories that contribute to its cultural significance.

Ingredient Deep Dive

Chai Tea: Traditionally brewed with black tea and infused with spices like cinnamon, cardamom, and ginger, chai tea carries a rich heritage from Indian culture. For an iced version, you can steep it stronger for a bolder flavor or opt for tea bags for convenience. The key is to select quality tea that can withstand dilution from ice without losing flavor.

The spices used not only enhance flavor but also offer health benefits such as anti-inflammatory properties. When selecting chai tea, look for blends that incorporate whole spices for an authentic experience. After brewing, store leftover tea in the refrigerator, and make sure to consume it within a few days.

Milk: The choice of milk can significantly impact the overall experience of your iced vanilla chai latte. Whether using dairy, oat, almond, or coconut milk, each variation introduces a different flavor and texture. When going non-dairy, be mindful of the thickness of the alternative; this can alter the drink’s creamy quality.

Choosing the right milk depends on personal taste and dietary preferences. Store milk in a cool environment, and always check the expiry date for optimal freshness. Remember, when substituting, the sweetness of some plant-based milks may change the drink’s flavor profile.

Vanilla Syrup: Vanilla syrup infuses sweetness and an aromatic flavor, enhancing the iced latte’s overall taste. You can either buy premade syrups or make your own from sugar and vanilla extract. A homemade version provides control over sweetness and freshness.

When selecting syrup brands, look for those made with real vanilla for an authentic taste. Store purchased syrups in a cool place after opening. Homemade syrups should be refrigerated and can typically last for a few weeks.

Common Mistakes to Avoid

  • Not brewing tea long enough: Brewing for the right duration ensures a full-bodied flavor, essential for iced drinks where tea flavor may get diluted.
  • Using boiling water for steeping: Pouring boiling water over tea can result in bitterness. Allow it to cool slightly before pouring.
  • Skipping sweeteners: While chai can be enjoyed unsweetened, using some form of sweetener brings out the flavors more effectively—don’t be shy!
  • Not refrigerating the brewed tea: If you’re not using the tea immediately, refrigerating it will preserve the flavor and freshness longer.
  • Choosing low-quality ingredients: A good iced vanilla chai latte starts with high-quality tea and vanilla. Investing in premium ingredients can elevate your drink significantly.
  • Filling the glass with ice before adding the latte: Ice may dilute quickly; to keep your drink cold without watering it down, add your latte first and then ice.
  • Forgetting to balance spice levels: Depending on the brand of chai, the spice profiles can vary significantly; tasting and adjusting is crucial.
  • Not using a large enough glass: This drink looks best in a tall glass, allowing for beautiful layers of chai and milk.

Essential Techniques

Brewing Chai: Brewing chai tea properly is crucial. To enhance the full-bodied flavor, steep the tea longer. Use a fine mesh strainer for easy removal of leaves and spices, and let the aromas deepen by allowing the tea to sit for a moment before serving.

Ice Avoidance: Prevent too much dilution by allowing freshly brewed tea to reach room temperature before mixing with ice. This helps maintain a potent flavor.

Layering: For visual appeal, layer your chai and milk. Pour slowly to create distinct layers, enhancing both appearance and flavor as you sip, inviting drinkers to savor the experience.

Sweetening: Incorporate sweeteners gradually, tasting as you go. Syrups blend differently than granulated sugar, so adjust accordingly to achieve your desired sweetness without overwhelming the drink.

Pro Tips for Perfect Iced Vanilla Chai Latte

1. Always brew the chai stronger than usual since it will be diluted with ice. Aim for a robust flavor.

2. Chill brewed tea in the fridge prior to mixing with ice to keep the drink colder longer.

3. Try experimentation with spices—cardamom and black pepper can add unique twists that elevate your latte.

4. For extra creaminess, consider blending the latte to froth it up before pouring over ice.

5. Use flavored milk or milk alternatives to add an additional flavor dimension to your iced latte.

6. Garnish with a sprinkle of cinnamon or a vanilla bean for a chic presentation.

7. Don’t skimp on the is; fill the glass adequately to keep your drink cold and refreshing.

8. Serve with a straw for an immersive experience—each sip should envelop you in the delightful flavors!

Variations and Adaptations

Experimenting with variations of the iced vanilla chai latte can enhance your experience. Adding seasonal spices such as nutmeg in the fall or pumpkin spice can introduce exciting new flavors.

Consider dietary adaptations; using almond milk makes it suitable for vegan diets, while dairy can bring richness for hearty individuals. Adjusting sweetness levels can cater to those aiming for lower sugar intake.

Regional variations might include the addition of flavored syrups, like hazelnut or caramel, to provide a unique twist on this classic beverage. You can also play around with textures by blending for a frozen chai latte effect, offering a fun summer cooler.

When it comes to presentation, serving in vibrant glassware or incorporating colorful straws might add a delightful visual note. No matter the adaptation, each change brings the iced vanilla chai latte into the realm of your personal tastes!

Serving and Presentation Guide

Plating this iced vanilla chai latte leaves ample room for creativity. Use tall, clear glasses to showcase the beautiful layers of chai and milk. For garnishing, add a garnish of cinnamon or a sprig of mint to introduce a pop of color and aroma.

Traditional accompaniments could include sweet biscuits or a light pastry, enhancing your latte experience. When serving, be aware of temperature; ice should be added just before guests arrive to prevent dilution.

Consider modern serving suggestions like a curated coffee or tea bar, where guests can customize their iced vanilla chai latters, experimenting with various milk options, sweeteners, and spices.

For portion control, consider using smaller glasses for a tasting menu, allowing guests to sample different versions of the latte without overindulging.

Wine and Beverage Pairing

While wine may not be the typical choice to accompany a chai latte, a light Sparkling Rosé can complement the spiced flavors without overshadowing the drink. Its refreshing bubbles enhance the experience of sipping spicy, creamy beverages.

For non-alcoholic alternatives, a light herbal iced tea can balance the rich flavors of the chai without taking away from its intricate taste.

Pairing the iced vanilla chai latte with lighter snacks, such as fruit tarts or mini quiches can enhance the overall experience, as they won’t compete with the strong chai flavors.

When enjoying your iced vanilla chai latte with friends, serving it alongside a variety of beverages can create a wonderful communal experience, making every sip more delightful.

Storage and Shelf Life

Storing brewed iced vanilla chai latte is relatively easy. If you have leftovers, keep the drink in the fridge for no longer than two days to maintain quality. If you prepare in bulk, separate the different components—storing brewed tea, milk, and syrup individually is optimal.

Make sure to use airtight containers for tea and milk, avoiding potential spoilage due to exposure. The ice should always be added at serving time to prevent moisture build-up. For reheating, allow your latte to come back to a mild temperature on low heat or cold-blend to reinstate its chilled aspect.

If you need to store your ingredients, the brewed chai tea can last up to a week in the refrigerator, while dairy items should be consumed within the recommended shelf life of fresh products.

Make Ahead Strategies

Planning smartly for your iced vanilla chai latte can elevate your hosting possibilities. Brew a larger batch of chai tea at the beginning of the week, and store it, allowing you to whip up drinks in an instant.

When making ahead, measure out syrup and refrigerate. For an immediate flavorful boost, consider freezing ice cubes made from brewed chai tea, preventing dilution while keeping the drink flavorful.

Quality impacts when prepared in advance can be minimized by ensuring ingredients are kept fresh and only mixing the drink before serving. You may wish to combine components just before your event to ensure that flavors are vibrant and enjoyable.

Scaling Instructions

Scaling your iced vanilla chai latte is straightforward. If you want to halve the recipe, simply divide all ingredients by two and adjust brewing methods accordingly.

For those looking to double or triple the amounts, consider brewing in larger pots, ensuring that everything is infused according to your desired strength. You may need to adjust brewing times slightly based on quantity.

When working with larger quantities, ensure your serving container is large enough to accommodate sufficient ice and sweeteners. Timing modifications may require a more immediate mixing strategy to ensure every part is enjoyed at its best.

Nutritional Deep Dive

Breaking down macros, a standard iced vanilla chai latte contains protein from milk, healthy fats, and carbohydrates from the sugar and syrup. If made with plant-based alternatives, it can shift nutritionally to cater to specific dietary needs.

The micronutrient analysis shows benefits like calcium from milk, along with vitamins and minerals from spices like cinnamon, known for its anti-inflammatory properties. For health benefits, chai is rich in antioxidants, contributing to overall wellness.

When assessing dietary considerations, balance sweeteners to keep sugars to a minimum. A simple syrup can be swapped for alternative sweeteners, helping manage caloric intake without sacrificing flavor.

In terms of portion analysis, keep in mind that larger serving sizes will elevate calorie counts. If managing weight is a goal, measuring portions can help you enjoy the drink while staying on track with dietary goals.

Dietary Adaptations

This Iced Vanilla Chai Latte can easily adapt to various diets. For gluten-free options, ensure all ingredients, particularly those from mixed spices, are certified gluten-free.

Achieving a dairy-free option is simple by substituting your choice of almond, soy, or oat milk. These alternatives can alter flavor profiles, so choose according to your palate preference!

For a vegan version, replace any dairy components with plant-based options, including using agave or maple syrup for sweetening to avoid honey. The heartiness remains intact.

If you’re following a low-carb or keto diet, consider using sugar substitutes like erythritol or monk fruit sweeteners, allowing you to enjoy the beverage without added sugars!

Paleo and low-FODMAP adaptations can focus on using natural sweeteners and ensuring that the spices used align with dietary restrictions while keeping the drink fresh and flavorful.

Troubleshooting Guide

In the case of texture issues, ensure that chai is brewed strongly enough to stand up to the ice—this prevents the drink from feeling watered down. If you find it too watery after adding ice, try using less ice or brewing a stronger tea base next time.

If the flavor balance seems off, consider adjusting spice quantities. The natural sweetness from the vanilla can overwhelm, so tasting and adjusting sweetener levels throughout the making process is vital.

Temperature problems can sometimes arise when not brewing and chilling tea properly. Allowing brewed chai to cool on the counter before refrigerating ensures there’s no condensation dilution.

For equipment challenges, ensure your blender or shaker is large enough to accommodate the quantities you’re preparing. If not blended well, ingredients can separate—giving an unsightly appearance and uneven texture.

Ingredient substitutions may lead to unexpected results, so always test a small batch before serving larger quantities. This can prevent unwanted surprises and ensure quality experiences.

Timing concerns may crop up when hosting, especially if a group is gathered. Prepare components ahead, but ensure to mix just before serving for freshly blended flavor!

Recipe Success Stories

Community feedback about this recipe has been overwhelmingly positive—readers have shared their variations, such as adding coconut milk or incorporating seasonal fruits, creating individualized experiences.

Many have had success in creating iced vanilla chai latte kits, gifting them to friends as a fun DIY project. The flexibility of this drink has made it a favorite amongst readers.

Adaptation stories have risen, with readers sharing their successful experiences in local cafes using this recipe as a guide to create a business, highlighting the versatility of making a cherished drink!

Photography tips abound, with fans sharing stunning images of their creations on social media. The vibrant colors and elegant garnishes have inspired many to create their versions and share!

Frequently Asked Questions

Can I make this drink vegan? Absolutely! Simply swap the milk for a plant-based option like almond or oat milk and use a vegan sweetener.

How can I make my chai stronger? Brew the chai tea for a longer duration or use more tea leaves to intensify the flavor and spice elements.

Can I store leftover chai mix? Yes, brewed chai can be stored in the refrigerator for up to a week in an airtight container.

What sweeteners work best? Popular choices include regular sugar, honey, or flavored syrups. For lower-calorie options, consider erythritol or stevia.

Is this recipe suitable for kids? Yes! This iced vanilla chai latte is an enjoyable treat for children but monitor the sweetness level according to preference.

Can I freeze leftover chai? Yes, freeze leftover brewed chai in an ice cube tray for later use in iced drinks!

What spices can I add for extra flavor? Experiment with nutmeg, pepper, or cardamom to elevate the traditional chai flavors even further.

Is it possible to adjust the amount of vanilla? Yes, you can increase or decrease the vanilla syrup to your taste. Start small and adjust as desired!

Can I use instant chai mix? While it’s not the traditional method, instant chai mix can work if you’re short on time; adjust milk and sweetness accordingly.

What kind of tea is best for chai? Black tea is traditionally used; however, you can experiment with green tea for a different flavor profile.

Additional Resources

Explore related recipes like Mint Iced Tea or Mocha Iced Coffee to complement your summer beverage repertoire. Dive deeper into technique guides for brewing exceptional chai, or investigate ingredient information for innovative uses of spices in your cooking.

For equipment recommendations, consider investing in a quality tea infuser or milk frother to elevate your drink. Seasonal variations are abundant with chai, allowing for endless possibilities; try adding pumpkin spice in the fall or fresh fruit during spring and summer!

Join the Conversation

We invite you to share your experiences with the iced vanilla chai latte! Share your photos and variations on social media, using the hashtag #IcedVanillaChaiLatte. Join our growing community of chai enthusiasts, where we exchange tips, tricks, and unique presentations to create delightful experiences.

Participation doesn’t just stop with sharing photos; we encourage you to leave feedback and reviews on this recipe! Your insights inspire others and help evolve our recipe collection further.

As you create your perfect iced vanilla chai latte, remember to adapt and share, as every story enriches the tradition behind this cherished drink!

The Recipe

Iced Vanilla Chai Latte

Serves: 2 servings

Prep Time: 10 mins

Cook Time: 5 mins

Total Time: 15 mins

Kitchen Equipment Needed

  • Blender or shaker
  • Measuring cups and spoons
  • Stove or kettle for brewing
  • Fine mesh strainer
  • Tall glasses for serving

Ingredients

  • 2 cups chai tea (brewed strongly)
  • 1 cup milk (dairy or plant-based)
  • 2 tablespoons vanilla syrup
  • Ice cubes
  • Cinnamon for garnish (optional)

Directions

  1. Brew the chai tea according to package instructions, allowing it to steep for 8-10 minutes for a stronger flavor.
  2. In a glass, mix the brewed chai with vanilla syrup.
  3. In another glass, fill with ice cubes, and pour the chai mixture over the ice.
  4. Top with milk, and stir gently to combine. Optionally, you can blend or shake for a frothy texture.
  5. Garnish with a sprinkle of cinnamon and enjoy your iced vanilla chai latte!

Recipe Notes

  • You can adjust the sweetness and spice levels to suit your taste preferences.
  • Store leftover chai in the refrigerator for up to a week for later use.
  • Experiment with different milk alternatives for unique flavor profiles.

Best Pink Panther Frappuccino Recipe to Brighten Your Day

You Can Get A Pink Panther Frappuccino From Starbucks To Brighten Your Day

⚖️
Difficulty
Easy

⏲️
Prep Time
10 mins

🕒
Cook Time
0 mins

⏱️
Total Time
10 mins

🍽️
Servings
2

Looking for a delicious and refreshing drink to brighten your day? The Pink Panther Frappuccino from Starbucks is the perfect treat! This delightful beverage offers a unique twist on traditional frappuccinos, combining fruity flavors with a creamy base. Its vibrant pink hue is not only visually appealing but also represents a summertime joy that can instantly lift your spirits.

When you take a sip, the sweet and tangy notes dance on your palate, leaving you refreshed and invigorated. The smooth texture, coupled with the delightful hints of strawberry, will make this drink a favorite for those hot afternoons. Whether you are enjoying it solo or sharing it with friends, the Pink Panther Frappuccino is guaranteed to bring a smile to your face.

Quick Recipe Highlights

  • Flavor Profile: This frappuccino features a delightful mix of strawberry and cream, balanced with hints of vanilla.
  • Texture: Expect a creamy and whipped texture that melts in your mouth, perfectly icy for hot days.
  • Aroma: The fragrant aroma of strawberries combined with sweet vanilla will tantalize your senses.
  • Visual Appeal: Its striking pink color garnished with whipped cream makes for a stunning presentation.
  • Skill Level Needed: Easy to prepare, making it perfect for beginners and seasoned cooks alike.
  • Special Equipment: A blender and a jar for serving are all you need to create this masterpiece.

Recipe Overview

  • Difficulty Level: The Pink Panther Frappuccino is an easy recipe that doesn’t require any special skills beyond basic blending.
  • Category: This drink fits perfectly into the beverage category, ideal for snacks or dessert.
  • Cuisine: Influenced by classic American café culture, this recipe is a modern twist on frappuccino variations.
  • Cost: The ingredients are relatively inexpensive, making it a budget-friendly option for everyone.
  • Season: Best enjoyed in summer, but it’s a lovely treat any time you need a little pick-me-up.
  • Occasion: Perfect for casual gatherings, parties, or a refreshing drink during a sunny day out.

Why You’ll Love This Recipe

The Pink Panther Frappuccino is not just a drink; it’s an experience. From the first taste, you’ll fall in love with its blend of sweetness and creaminess. Each sip delivers a burst of fruit flavor that is incredibly satisfying and refreshing, perfect for a summer day or as a treat any time of year. Its beautiful presentation elevates your drink-drinking experience, making it feel even more special.

Convenience is another big reason to love this recipe. It requires minimal preparation time—truly, just a quick blend followed by serving. This makes it an ideal choice for last-minute gatherings or when you just want to spoil yourself without spending hours in the kitchen. The ingredients are easy to come by, which means you can whip it up whenever your cravings strike.

Nutritionally, this frappuccino strikes a wonderful balance as a treat. While it’s indulgent, it also brings in the benefits of strawberries, which are rich in antioxidants and vitamins. Enjoying this drink allows you to treat yourself without straying too far from nutritious choices. So, you can sip with a smile, knowing you’re indulging responsibly.

Socially, the Pink Panther Frappuccino shines—it’s great for social media, making it a hit for photography lovers. Its eye-catching color and presentation make it perfect for sharing with friends or posting on Instagram. It’s a crowd-pleaser that’s sure to spark conversations and encourage others to try their own versions.

Finally, its cost-effectiveness is unbeatable. By making this drink at home, you can indulge in your favorite Starbucks flavor without breaking the bank. It’s a delicious way to enjoy a café experience in the comfort of your own home.

Historical Background and Cultural Significance

The Pink Panther character, originally introduced in the slapstick animated sequences of the 1963 film “The Pink Panther,” quickly captured the hearts of audiences worldwide, becoming a cultural icon. This beverage draws its inspiration from this beloved character, embracing the playful spirit that embodies joy and fun, making it a fitting tribute for fans of the franchise.

In recent years, specialty coffee shops and franchises like Starbucks have started to offer a variety of unique flavored drinks, elevating the humble frappuccino into an art form. The Pink Panther Frappuccino stands out among these offerings with its vibrant color and enticing flavor profile. Its creation highlights the evolution of coffee culture, where creativity meets traditional beverages.

As drink recipes modernize and take on new flavors, certain variations gain popularity in specific regions, showcasing culinary creativity. This frappuccino exemplifies an innovative take on an all-time favorite, engaging with food trends that focus on customization and personalization, allowing coffee lovers to enjoy their favorite drinks in new, exciting ways.

The regional adaptations of drinks like the Pink Panther Frappuccino can often reflect local ingredients or tastes, showcasing how certain flavors resonate across different cultures. As this drink gains popularity, it may inspire variations localized in other countries, leading to even more delightful explorations in flavor.

Ingredient Deep Dive

Strawberries are the star ingredient in the Pink Panther Frappuccino. These berries carry cultural significance in many parts of the world, representing summer and joy in various dishes. Strawberries are packed with vitamins and antioxidants, making them a nutritious choice. When selecting strawberries, look for bright red colors and firmness, indicating ripeness. Store them in the refrigerator for optimal freshness, and wash them only just before use to prevent spoilage. Alternatives like frozen strawberries can also be used for a thicker texture.

Another crucial ingredient is milk, which lends creaminess to the frappuccino. Milk has a long history in diverse culinary traditions, known for its health benefits, including calcium and protein. Whole milk provides a rich flavor, but alternatives like almond or oat milk work well for those with dietary restrictions. When storing milk, keep it refrigerated and tightly sealed to maintain freshness. Additionally, consider substituting flavored milk or adding vanilla extract for enhanced taste.

Sugar is used to sweeten the frappuccino; its historical significance dates back centuries as a primary sweetening agent in various cultures. While white granulated sugar is commonly used, alternatives like honey or agave syrup can provide a distinct flavor and sweetness level. Always store sugar in a cool, dry place, and consider variations such as brown sugar for a richer taste.

Common Mistakes to Avoid

  • Not using chilled ingredients: Warm ingredients can lead to a less refreshing drink. Always chill your berries and milk before blending.
  • Over-blending: Blending the frappuccino too much can create a watery texture. Aim for a cream-like consistency without overdoing it.
  • Skipping the garnish: Whipped cream not only enhances the flavor but also elevates presentation—never skip it!
  • Not tasting before serving: Ensure the flavor is to your liking before serving. Adjust sweetness if necessary for your palate.
  • Using low-quality strawberries: Fresh, ripe strawberries make all the difference in flavor. Opt for the best quality you can find.
  • Inconsistent measurements: Accurate ingredient measurement ensures a balanced flavor—use measuring cups for best results.
  • Neglecting to layer: For a more visually appealing drink, layer your frappuccino’s components rather than blending everything together immediately.
  • Rushing through prep: Taking your time with preparation will lead to better flavor and texture outcomes. Enjoy the process!

Essential Techniques

Mastering the blending technique is crucial for achieving the perfect frappuccino. To get a smooth texture, start by blending the solid ingredients, and then gradually add the liquids. This method ensures everything incorporates well, resulting in an evenly textured drink. Visual cues for success include a smooth spin without large ice chunks.

Garnishing is another essential technique that elevates your drink’s appeal. Use a piping bag to create swirls or peaks of whipped cream for an attractive presentation. This not only adds aesthetic value but also enhances flavor with each sip. Remember to add garnishes just before serving for the best visual impact.

Pro Tips for Perfect Pink Panther Frappuccino

1. Freeze strawberries ahead of time for a thicker frappuccino and extra cold refreshment.
2. Play with different types of sweeteners to find the best match—experiment with maple syrup or coconut sugar.
3. Add a scoop of vanilla ice cream for an ultra-rich and creamy beverage.
4. Use whole milk or heavy cream for a luxurious texture—your frappuccino will taste even more indulgent.
5. Blend in some protein powder for an added nutritional boost without compromising flavor.
6. For a sharper taste, add a squeeze of lemon juice to enhance the fruity notes of the strawberries.
7. If serving at a gathering, prepare single portions in advance to save time and impress your guests.
8. Utilize a straw to ensure every sip captures the beautiful layered effect of the ingredients.

Variations and Adaptations

Wide variations of the Pink Panther Frappuccino exist, inspired by different flavor profiles. You can experiment by incorporating mango or raspberry puree to introduce new fruity dimensions. Seasonal adaptations such as adding pumpkin spice in the fall deliver a festive twist that keeps the drink relevant year-round.

For dietary modifications, consider making it vegan by substituting milk with almond or oat milk and opting for dairy-free whipped cream. Flavor variations can include adding chocolate syrup for a chocolate-covered strawberry essence or incorporating matcha for a refreshing green twist that retains the frappuccino’s vibrant appearance.

When it comes to texture modifications, blending in some crushed Oreos or cookie crumbles could enhance the overall mouthfeel, adding a delightful crunch. For elegant presentations, consider serving in tall glasses or adding colorful straws to make the drink even more inviting.

Serving and Presentation Guide

Plating techniques for showcasing your Pink Panther Frappuccino greatly enhance its visual appeal. Use tall, clear glasses to highlight the vibrant pink color, layering it for added dramatic effect. Top with generous dollops of whipped cream spiraled on top, adding a pop of color with sprinkles or edible glitter.

Garnishing ideas include fresh strawberry slices perched on the rim of the glass or a mint sprig for a splash of freshness. Traditional accompaniments, like a side of cookies or a slice of cake, can complement the drink beautifully. For modern designs, consider adding straws with fun patterns or colors to draw attention to the drink.

Ensure the frappuccino is served promptly after preparation to enjoy it at the ideal temperature. For portion control tips, serving smaller cups allows guests to taste with less commitment—ideal for sampling multiple variations.

Wine and Beverage Pairing

Pairing the Pink Panther Frappuccino with beverages can elevate a casual drink to a complete experience. Wine pairings typically lean towards sparkling wines, which complement the fruity layers hydratingly. A light Prosecco could harmonize this drink’s refreshing nature, adding fizz on the palate.

For non-alcoholic alternatives, consider pairing it with lemonade for a wash of citrus that can balance the sweet notes. As for coffee pairings, a lightly brewed iced coffee serves as a gentle contrast, inviting drinkers to alternate between contrasting flavors.

Serving temperature is essential when combining drinks. Always ensure both beverages are well-chilled to maintain a delightful drinking experience. Sharing these pairings at brunches or casual gatherings can add a touch of elegance to your event.

Storage and Shelf Life

When it comes to storing the Pink Panther Frappuccino, it’s essential to consume it fresh for the best flavor and texture. If leftovers occur, cover the beverage tightly and store it in the refrigerator for up to 24 hours. However, it’s recommended to blend it fresh whenever possible to avoid separation.

Due to the presence of fresh strawberries and milk, keep the frappuccino at a cool temperature. Signs of spoilage include an off smell or curdled consistency, indicating it should not be consumed. For reheating, gently blend it again to restore its creamy consistency rather than using a microwave, which can alter the texture.

If you wish to make a larger batch, consider freezing individual servings in airtight containers. When ready to enjoy, allow them to thaw in the fridge overnight, then blend again for fresh flavor.

Make Ahead Strategies

Preparing the Pink Panther Frappuccino can be simplified with strategic planning. Create your fruit puree in advance, storing it in the refrigerator for up to three days while keeping flavors vibrant. Building a prep timeline allows you to quickly assemble ingredients when you’re ready to enjoy your drink.

Storage between steps can be accomplished by keeping ingredients in the freezer until needed. For optimal quality, assess how the flavors develop over time—freshly blended will always yield the best results. Assembly tips include keeping blended ingredients chilled until serving, ensuring maximum refreshment on those hot summer days.

For fresh element additions, consider topping off with whipped cream or adding a pop of fresh fruit just before serving to elevate the final product without compromising advance preparation.

Scaling Instructions

Scaling the Pink Panther Frappuccino recipe is easy. To halve it, adjust strawberries and milk proportions accordingly for smaller servings, ensuring flavor balance remains intact. Doubling or tripling the recipe is straightforward, but a larger blender may be required to accommodate the increased volume.

Timing modifications, while blending in larger batches, may require an extra few moments to ensure consistent texture throughout. Storage considerations are important; allow ample room for expansion if freezing any leftovers.

Always keep in mind that enhancing flavors and sweetness may be necessary when scaling, as different ingredient quantities can alter the final taste. Testing small batches will help ensure an accurate scaling process.

Nutritional Deep Dive

Analyzing the nutritional aspects of the Pink Panther Frappuccino reveals a balance of macronutrients. Each serving delivers carbohydrates primarily from strawberries and sugar, which provides energy. Additionally, the inclusion of milk contributes protein and fats, essential for satiety, making it a satisfying treat.

Micronutrient content includes vitamin C from strawberries, known for antioxidant properties that support immune health. Calcium and vitamin D found in milk are beneficial for bone health. Understanding these nutritional elements sharpens awareness of their roles in a balanced diet.

Health benefits abound in this frappuccino, particularly when made with fresh fruits and quality ingredients. Choosing alternatives for sugar and incorporating plant-based milks can enhance its healthy profile further.

Dietary considerations speak to this drink’s versatility; adjusting portion sizes allows it to align with different health goals, whether for weight management or fun enjoyment. Planning allows it to fit seamlessly into various dietary frameworks.

Dietary Adaptations

For those on gluten-free diets, the Pink Panther Frappuccino naturally fits, as all key ingredients contain no gluten. Keeping it gluten-friendly is as simple as ensuring additives like flavor syrups are also gluten-free.

Dairy-free modifications can be made by substituting milk with almond, coconut, or oat milk, as well as using dairy-free whipped toppings. This opens up the drink to vegans and those with lactose intolerant intolerances delighting in creamy indulgence.

For those following low-carb or Keto diets, swap sugars with low-carb sweeteners like stevia or erythritol while using unsweetened almond milk. This modification maintains sweetness without impacting carbohydrate count.

Paleo adaptations involve using natural sweeteners and whole fruits, ensuring you stay true to the Paleo guidelines. Maintaining a focus on fresh ingredients helps retain overall nutritional integrity.

Troubleshooting Guide

Sometimes, you may run into issues while preparing your Pink Panther Frappuccino. For texture issues, if it comes out too thin, consider blending in extra ice cubes or frozen strawberries to thicken their consistency. Similarly, if it’s too thick, adjust by adding a small splash of milk.

When facing flavor balance problems, ensure you taste along the way. If too sweet, add additional strawberries to introduce tanginess or a dash of lemon juice to cut through the sweetness.

Temperature problems can occur if the drink isn’t chilled enough; quickly blend in ice cubes to cool it down, or ensure your milk and fruits are pre-chilled next time for immediate refreshment.

Equipment challenges may arise from blender issues; ensure your blender is capable of crushing ice effectively for a smooth finish—an underperforming blender can lead to less-than-desired outcomes.

Ingredient substitutions can lead to unexpected flavors; always choose fresh ingredients whenever possible and test small modifications before making large batches to avoid disappointments.

Timing concerns are easily solved by preparing in advance, yet ensure leftovers don’t sit too long, which may compromise flavor. Check to ensure freshness by tasting before serving guests.

Recipe Success Stories

Community feedback on the Pink Panther Frappuccino has universally praised its delightful flavor and creative presentation. Many readers share their successes on social media, highlighting modifications they’ve made, further sparking inspiration within the community.

Successes with variations, such as adding different fruits or themed garnishes, have encouraged others to explore. Many readers love to share their recipes inspired by the Pink Panther Frappuccino, creating a variety of delightful interpretations based on personal taste.

Photography tips follow with the recipe as well, noting that capturing its vibrant color against colorful backdrops amplifies its visual appeal. The result? Instagram-worthy creations that encourage more people to try making the frappuccino at home.

Throughout this process, readers express how easy it is to tailor the drink to their preferences. Options become endless, with the recipe serving as a starting point for delicious personal adaptations.

Frequently Asked Questions

What is the Pink Panther Frappuccino?

The Pink Panther Frappuccino is a refreshing, berry-flavored drink inspired by the iconic character, featuring strawberries and cream for a delightful treat.

Can I make this frappuccino vegan?

Yes, you can easily make it vegan by substituting regular milk with a plant-based alternative, like almond or oat milk, and using dairy-free whipped cream.

How long does the frappuccino last in the fridge?

For best flavor and texture, consume your Pink Panther Frappuccino within 24 hours. If you have leftovers, keep them tightly covered in the refrigerator.

Can I use frozen strawberries?

Absolutely! Using frozen strawberries will give your frappuccino a thicker texture and keep it colder, enhancing the refreshing experience.

What sweeteners work best?

You can use sugar, honey, or any zero-calorie sweetener based on your preference. Adjust sweetness to your liking for the perfect balance.

Is it easy to double the recipe?

Yes! Doubling the recipe is simple; just ensure your blender can accommodate the increased volume for smooth blending.

How can I make this drink more indulgent?

Add a scoop of vanilla ice cream or whipped cream on top for a richer, creamier experience—perfect for a dessert treat.

Can I use different fruit flavors?

Certainly! Feel free to experiment with different fruits like raspberries or mangoes to create your own variations of the Pink Panther Frappuccino.

What’s the best way to serve this frappuccino?

Serve in tall, clear glasses to showcase its beautiful pink color, topped with whipped cream and garnished with fruit for added visual appeal.

Can I prepare this drink in advance?

While best served fresh, you can prepare components ahead of time, such as blending strawberries. Keep them chilled until ready to mix.

Additional Resources

If you loved the Pink Panther Frappuccino, you may want to try other refreshing beverage recipes available on our blog. Explore vibrant smoothies or creatively crafted lemonade variations. For those looking for technique guides, we offer a plethora of tips on mastering your blender for smooth results.

Expand your ingredient knowledge with our detailed posts about strawberries and other fruit varieties, maximizing your culinary adventures. Explore equipment recommendations focusing on blenders and kitchen essentials for all your recipe needs.

Finally, consider seasonal variations incorporating fruits specific to the time of year, keeping your drinks fresh and exciting throughout the seasons.

Join the Conversation

We want to hear from you! Share your experience about making the Pink Panther Frappuccino, including any modifications or personal twists you incorporated. Posting your successes and favorite adaptations helps inspire others within our community to explore this delightful beverage.

Engage with us on social media by posting pictures of your creation and tagging us. We love to see your culinary artistry and creativity come to life! Provide your feedback, rate the recipe, and encourage your friends to try making their own delicious beverages.

Be part of our thriving community, where sharing ideas and experiences around food brings us together. Your stories not only enhance our collective culinary journey but also serve as inspiration and motivation for others on their cooking adventures.

The Recipe

Pink Panther Frappuccino

Serves: 2

Prep Time: 10 mins

Cook Time: 0 mins

Total Time: 10 mins

Kitchen Equipment Needed

  • Blender
  • Measuring cups
  • Serving glasses
  • Piping bag for whipped cream (optional)

Ingredients

  • 1 cup fresh strawberries (hulled)
  • 1 cup milk (any kind)
  • 2 tablespoons sugar (adjust to taste)
  • 1 cup ice cubes
  • Whipped cream for topping
  • Optional: edible glitter or sprinkles for garnish

Directions

  1. In a blender, combine the hulled strawberries, milk, sugar, and ice cubes.
  2. Blend until smooth and creamy, ensuring no ice chunks remain.
  3. Taste and adjust sweetness if necessary—blend again if adding more sugar.
  4. Pour the frappuccino into serving glasses, filling each halfway.
  5. Top generously with whipped cream and sprinkle with edible glitter or sprinkles if desired.
  6. Serve immediately and enjoy your refreshing Pink Panther Frappuccino!

Recipe Notes

  • Feel free to substitute the strawberries for your favorite berries or mixes.
  • If using frozen strawberries, reduce ice amounts for a thicker consistency.
  • This recipe can be easily doubled or adjusted for larger gatherings.
  • Experiment with flavors by adding a hint of vanilla or other extracts for variation.

Homemade Starbucks Drinks – Easy Recipes to Try at Home

Ultimate Starbucks Copycat Drinks Recipe: Savor the Flavors at Home

⚖️
Difficulty
Medium

⏲️
Prep Time
10 mins

🕒
Cook Time
15 mins

⏱️
Total Time
25 mins

🍽️
Servings
2

Starbucks drinks have become a beloved part of many people’s daily routines. The rich and creamy textures, along with the bold flavors of coffee and various syrups, make them irresistible. Imagine being able to enjoy these delightful beverages right in the comfort of your own home. This ultimate Starbucks copycat drinks recipe will walk you through the process of creating your favorite beverages, allowing you to customize your drinks to your own palate. Whether it’s the iconic Caramel Macchiato or a refreshing Iced Matcha Latte, you can now recreate these enchanting flavors and experience that café ambiance without paying for it!

The beauty of making Starbucks drinks at home is that you can adjust each ingredient to meet your personal taste preferences. Want it sweeter? Go ahead and add more syrup! Prefer a creamier texture? Substitute milk for your favorite plant-based alternative. With this recipe, you can mix and match flavors, control your ingredients, and create a drink that’s tailored just for you. Get ready to impress your friends and family with these delicious homemade Starbucks drinks that are sure to satisfy your cravings and elevate your beverage game.

Quick Recipe Highlights

  • Flavor Profile: This recipe features balanced sweetness combined with rich coffee and milk, offering a delightful medley that tantalizes your taste buds.
  • Texture: Each drink boasts a creamy mouthfeel with just the right amount of froth for an authentic barista-style experience.
  • Aroma: You’ll be greeted by the delightful aroma of freshly brewed coffee and flavored syrups that fill your kitchen.
  • Visual Appeal: The drinks are visually stunning, layered beautifully with vibrant colors that make them a feast for the eyes as well.
  • Skill Level Needed: This recipe is manageable for both beginners and those with some kitchen experience, as it involves simple blending and assembling techniques.
  • Special Equipment: You will need a blender, milk frother, and measuring cups for precise preparation.

Recipe Overview

  • Difficulty Level: This recipe is categorized as medium difficulty due to the precision in measurements and techniques like frothing milk.
  • Category: These drinks fall under beverages and are perfect for breakfast, brunch, or as a pick-me-up throughout the day.
  • Cuisine: Rooted in modern American café culture, this recipe draws inspiration from popular coffeehouse menus worldwide.
  • Cost: The total cost of ingredients is minimal compared to store-bought drinks, providing a cost-effective solution to your caffeine cravings.
  • Season: Enjoy these drinks year-round, whether it’s a hot summer day or a cozy winter evening.
  • Occasion: Perfect for any occasion, from casual gatherings to special celebrations, impressing guests with your homemade Starbucks drinks.

Why You’ll Love This Recipe

Get ready to indulge in the captivating taste and texture of these homemade Starbucks drinks. Each sip will transport you to your favorite coffee shop, yet you can enjoy it in the tranquility of your home. The rich flavors combined with the velvety smoothness will leave you craving more, making it the perfect treat anytime during the day.

Not only do these drinks have an enticing taste, but they are also incredibly convenient to make. You can prepare them within minutes, utilizing simple techniques that allow for quick assembly. This means you’ll never have to settle for mediocre coffee again as you can whip up a delicious beverage whenever the craving strikes.

From a nutritional standpoint, these drinks can be tailored to accommodate various dietary needs, making them suitable for nearly everyone. You have control over the ingredients, allowing you to utilize low-fat milk, sugar alternatives, or even entirely plant-based options for a healthier version that still satisfies your cravings.

Socially, these Starbucks copycat drinks look fantastic and can be a conversation starter when serving guests. Imagine hosting a brunch and delighting your friends with your amazing skills in recreating their favorite café drinks! They’ll be amazed and certainly impressed.

Moreover, the cost-effectiveness of this recipe is a cherry on top. You’ll save a significant amount over time compared to purchasing similar drinks at Starbucks. Making your favorites at home not only fulfills those cravings but also aligns with a savvy and budget-friendly lifestyle.

Historical Background and Cultural Significance

The origin of coffee drinks has deep historical roots, with coffee consumption dating back to as early as the 15th century. The phenomenon of coffeehouses began in the Middle East, spreading first through Europe and then into America. As these establishments formed, special blends and methods emerged, leading to the variety of drinks we now savor worldwide, including the famous concoctions from Starbucks.

Culturally, coffee drinks serve as more than just a beverage; they are a ritual in many societies. From the Italian espresso to the frothy cappuccinos, each culture has added a unique twist. Starbucks capitalizes on this by bringing global flavors to its menu, creating an inclusive experience through coffee, tea, and seasonal specialties that cater to diverse palates.

Over time, the Starbucks menu has evolved, adapting to the growing demand for creative and customizable beverages. This evolution underscores how coffee shops aim to meet the desires of consumers, bridging tradition with innovation. Regional flavors and specialties also have their place, as Starbucks incorporates local tastes to resonate with customers around the world.

Finally, the recipe for these drinks has taken on a new life in recent years as home brewing has surged. With the rise of DIY culture, making Starbucks-like beverages in home kitchens has become a trendy activity, allowing coffee lovers to discover their inner barista. Everyone can now explore their creativity while enjoying a delicious cup that mirrors, or surpasses, café standards.

Ingredient Deep Dive

Coffee is the heart of this recipe, and its cultural significance cannot be overstated. Originating from Ethiopia, coffee has transcended its humble beginnings to become a global phenomenon. It’s beloved for its stimulating properties, energizing those around the world. When brewing coffee at home, opt for whole beans and grind them just before use to preserve maximum flavor and aroma.

Milk is another essential component that undeniably affects the drink’s texture and taste. The tradition of adding milk to coffee beverages began centuries ago, and it has since evolved with varying types of milk gaining popularity. From whole to skim and plant-based alternatives like almond and oat, the options available today cater to numerous dietary preferences. When using milk, frothing it to the right consistency enhances the overall experience, making it creamy and luxurious.

Syrups add the final burst of flavor to your drinks. Starbucks is famous for its variety of flavored syrups, which can easily be replicated at home with basic ingredients. Many syrup options allow for individual taste preferences, such as vanilla, caramel, or seasonal options like pumpkin spice. Homemade syrup can be made with natural sweeteners or adjusted for sugar-free alternatives, ensuring that you customize your beverage just the way you like it.

For toppings like whipped cream or seasonal spices, the selection is endless. These finishing touches are not just about aesthetics; they enhance flavor and aroma while adding a delightful contrast in texture. Incorporating fresh spices, such as nutmeg or cinnamon, adds an aromatic layer that transforms the drinking experience.

When selecting your ingredients, prioritize freshness and quality to create the best possible homemade Starbucks drinks. By carefully choosing your coffee beans, milk, and flavorings, you’ll elevate your beverages. Additionally, consider storage recommendations for each ingredient to maintain their peak flavor and nutrition.

Common Mistakes to Avoid

  • Not using fresh coffee: Always choose freshly ground coffee for optimal flavor and freshness. Purchasing pre-ground coffee diminishes quality.
  • Incorrect milk frothing: Frothing milk too long or too short can result in undesirable textures. Aim for a velvety, smooth consistency.
  • Ignoring ingredient measurements: Precision in measurements is key for balance. Too much or too little syrup can overpower or dilute your drink.
  • Using inadequate temperature: Ensure your coffee is brewed at the correct temperature, ideally between 195°F to 205°F, to extract rich flavors.
  • Overcomplicating flavors: Avoid using too many syrups or flavors at once, as they can clash. Keep it simple for a harmonious taste experience.
  • Neglecting presentation: Take the time to garnish and present your drink well. A visually appealing drink enhances the overall experience.
  • Skipping the taste test: Always taste your drink before serving. Adjust sweetness or flavors as needed for your desired profile.
  • Using low-quality ingredients: Invest in good quality coffee and syrup for the best results. Cheap ingredients will lead to inferior flavor.
  • Not cleaning equipment: Ensure your blender and frother are clean after use to avoid flavor contamination next time.
  • Focusing solely on recipes: Feel free to experiment beyond the recipe, discovering unique flavor combinations that suit your taste.

Essential Techniques

Frothing milk is an essential technique that separates a good coffee drink from a great one. Understanding the science of aerating milk helps achieve the desired consistency. Use a frother or steam wand, and focus on creating microfoam that is silky and stable. Common pitfalls include overheating the milk, which can create a burnt flavor, and failing to create sufficient foam for a cappuccino-like finish. Look for visual cues such as a glossy sheen that indicates proper frothing.

Another important technique is brewing the perfect cup of coffee. Choose high-quality beans and ensure your brewing equipment is set correctly. Grind size and brewing time play significant roles in flavor extraction. A coarser grind works best for cold brews, while fine grinds are ideal for espresso. Pay attention to brewing time and temperature; the right combination will yield a rich, flavorful cup.

Pro Tips for Perfect Starbucks Copycat Drinks

Choose high-quality, freshly roasted coffee beans for maximum flavor.
Experiment with different milk types—almond, soy, or oat—to find your favorite.
Invest in a milk frother to achieve a professional texture for your beverages.
Add a pinch of salt to your syrup for enhanced sweetness and reduced bitterness.
Customize your drink by adding spices like cinnamon or nutmeg for a seasonal twist.
Make your own flavored syrups to avoid artificial additives and enhance freshness.
Change the sweetness level based on preference; taste and adjust as you go.
Use a high-quality blender for mixed beverages to create a smoother consistency without chunks.

Variations and Adaptations

Regional variations are abundant; consider making a traditional Italian Macchiato by skipping milk for a pure espresso treat. Seasonal adaptations can easily transform your recipe for fall-themed drinks by incorporating pumpkin spice syrups and whipped cream. For dietary modifications, use dairy-free milk alternatives to cater to lactose-free guests. Flavor variations like hazelnut or chocolate mocha open up an array of possibilities, while texture modifications can be achieved by adjusting frothing techniques. Lastly, presentation alternatives can enhance the visual appeal, using colored sprinkles or fruit garnishes.

Serving and Presentation Guide

Plating techniques for coffee drinks can elevate the overall experience significantly. Consider using clear glass mugs to showcase the beautiful layers of your drinks. Garnishing ideas like drizzling caramel or chocolate syrup add visual flair. Traditional accompaniments, such as biscotti or pastries, can provide a delightful side pairing. Modern serving suggestions include adding a fresh mint sprig or citrus twist for a refreshing edge. Always serve beverages at the right temperature to enhance the drinking experience. Lastly, monitor portion control to avoid overwhelming guests with oversize servings.

Wine and Beverage Pairing

Pairing your drinks with complementary wines can elevate gatherings. Consider serving a lightly fruity Pinot Grigio alongside sweetened coffee drinks. For a cozy night, a robust dessert wine can balance chocolate flavors in variations like mocha lattes. When opting for non-alcoholic alternatives, try pairing your drinks with herbal teas that harmonize with sweet coffee notes. Coffee pairings can include a rich roast or flavored teas, depend on personal preference. Keep temperature in mind; warm beverages contrast beautifully against chilled wine.

Storage and Shelf Life

Proper storage methods ensure your ingredients remain fresh. Store coffee in an airtight container in a cool, dark place to maintain flavor. Milk should be kept refrigerated and consumed within a week of opening. Syrups often retain shelf life longer but should be stored properly in cool conditions and checked for separations. For finished drinks, consume within a few hours for optimal freshness. Signs of spoilage include off-smells, curdled milk, or mold. If freezing, consider that texture may change upon reheating; use a microwave or stovetop to gradually warm your drinks.

Make Ahead Strategies

To simplify preparation, you can pre-make certain elements such as coffee or flavored syrups. Brew your coffee in batches and store in the fridge for easy access during busy mornings. Prepare syrups and keep them in airtight containers—this ensures flavor is locked in for weeks. Also, assemble your drink components by batching together necessary ingredients to streamline the assembly process later on. Quality won’t diminish if stored correctly, but freshness is always best. Reheat your coffee gently or utilize chilled coffee for iced versions to retain texture.

Scaling Instructions

Scaling your recipe is a breeze, allowing you to adjust ingredients based on the number of servings desired. If halving the recipe, maintain the same ingredient proportions for balanced flavors. Doubling or tripling requires careful consideration of equipment; ensure you have larger containers or multiple brewing cycles to handle the volume. Timing modifications may also be necessary; larger batches may take longer to cool or cool down. Ensure proper storage of any excess to enjoy later, emphasizing the freshness of all ingredients used.

Nutritional Deep Dive

Breaking down the nutrients in coffee drinks reveals surprising benefits. Coffee is rich in antioxidants and can provide cardiovascular health advantages. When choosing milk, factor in the calorie and fat content in relation to your dietary goals. Flavor syrups, however, can add sugar and calories, so it’s beneficial to monitor usage. When adjusted for health-conscious plans, homemade versions allow more control over sugar and sweeteners. Each drink can provide a satisfying balance of fuel and indulgence, making it an appropriate part of any diet when enjoyed in moderation.

Dietary Adaptations

Dietary adaptations cater to many lifestyles. For gluten-free options, ensure syrups and flavorings are certified gluten-free. Dairy-free alternatives can be easily utilized; almond, coconut, or oat milk can replace traditional dairy without losing quality. Vegan variations use plant-based alternatives across all components, including whipped toppings. Low-carb or keto drinkers should limit syrup use, focusing on naturally flavored beverages. Paleo and low-FODMAP options encourage natural ingredients without processed additives, making your drinks as healthy as they are indulgent.

Troubleshooting Guide

In case of texture issues, adjust frothing time to achieve the desired creaminess without over-aeration. For flavor balance, taste your drink at various stages; under-sweetened beverages can be remedied with small syrup increments. Temperature problems can arise if coffee is overly hot or cold; brewing method should ensure the right temperature range. Equipment challenges may include malfunctioning frothers; if so, seek troubleshooting guides or replace when necessary. Lastly, ingredient substitutions should be monitored, as different brands and types may yield varied outcomes in flavor and texture.

Recipe Success Stories

Community feedback shines a light on the joy of recreating these drinks. Many have shared how their customized versions exceeded their expectations, encouraging the experimentation with flavor profiles. Success stories often involve perfecting whipped cream techniques or discovering unique spice combinations that enhance familiar drinks. Adaptation stories reflect creativity within communities as readers showcase personal takes on beloved recipes. Photography tips often arise in discussions, inspiring others to present their creations beautifully and share the experience on social media.

Frequently Asked Questions

Can I use decaf coffee for these recipes?

Yes! Decaf coffee can be used without compromising flavor, making it ideal for late-night enjoyment without caffeine.

What if I don’t have a milk frother?

If a frother isn’t available, shake warm milk in a jar or whisk vigorously to achieve a creamy consistency suitable for your drinks.

How long can I store homemade syrups?

Homemade syrups can typically last in the fridge for about 2-3 weeks. Be sure to check for mold or changes in smell.

Can I make these drinks hot or iced?

Absolutely! Each recipe can be tailored; simply serve hot for a comforting experience or pour over ice for a refreshingly cool option.

What are some good substitutes for sugar in the syrups?

Consider using honey, agave syrup, or stevia as alternative sweeteners. They add sweetness without the added calories from processed sugars.

Can I use flavored coffee beans?

Yes! Flavored beans can enhance your drink further. Look for quality sources to ensure the best flavor infusion.

What’s the best way to froth non-dairy milk?

Non-dairy milks typically froth well when heated. Use almond or oat milk for better results; always check for barista versions for optimal frothing.

How do I know if my milk is too hot?

For milk, a good temperature is around 150-160°F. Any hotter can risk compromising the taste of your drink.

What is the best way to reheat coffee drinks?

Reheat gently on the stovetop or in a microwave until warm. Avoid boiling to maintain flavor quality.

Can I prepare these drinks in advance for guests?

Yes! Prepare syrups and batch-brew coffee ahead of time. Just assemble the drinks right before serving for freshness.

Are there any sugar-free options available?

Many sugar-free syrups exist that can be substituted. Look for options available at grocery stores or even create your own by controlling sweetness.

What’s the best type of blender for these drinks?

A high-speed blender works best, especially for frappes or blended drinks. Look for one capable of handling ice and frothing milk efficiently.

Additional Resources

To enhance your culinary repertoire, explore our collection of related recipes perfect for your next gathering. Discover technique guides for brewing the perfect cup and delve into comprehensive ingredient information to make informed choices. Our recommendations for equipment will ensure you have the right tools needed in your kitchen, while seasonal variations can inspire exciting new twists on classic drinks, allowing for continued experimentation and enjoyment in recreating your favorites.

Join the Conversation

We would love for you to share your experiences with making these drinks! Join the conversation on social media and showcase your beautiful creations by photographing your drinks. Don’t be shy to leave reviews or share feedback about variations you have tried, as well as any tips you may have for fellow coffee lovers. Engage with our community to exchange creative ideas and culinary triumphs surrounding these delicious homemade Starbucks drinks.

The Recipe

Starbucks Copycat Drinks

Serves: 2

Prep Time: 10 mins

Cook Time: 15 mins

Total Time: 25 mins

Kitchen Equipment Needed

  • Blender
  • Milk frother or whisk
  • Measuring cups
  • Airtight containers

Ingredients

  • 2 cups of strong brewed coffee
  • 1 cup of milk (or dairy-free alternative)
  • 2 tablespoons of flavored syrup (caramel, vanilla, etc.)
  • Ice or whipped cream (optional for serving)

Directions

  1. Brew your coffee as desired and let it cool.
  2. Froth your milk using a frother or whisk.
  3. Combine brewed coffee and flavored syrup in a glass.
  4. Add ice if desired, then pour frothed milk over the coffee.
  5. Top with whipped cream and additional syrup if desired.
  6. Enjoy your personalized coffee drink at home!

Recipe Notes

  • Adjust the sweetness by varying the syrup amount used.
  • Feel free to experiment with different flavors to create your perfect drink.
  • For an iced beverage, blend ice into the drink for a creamy frappe.

Best Cookie Butter Latte Recipe – Creamy and Homemade Delight

Cookie Butter Latte: A Cozy Cup of Comfort

⚖️
Difficulty
Easy

⏲️
Prep Time
5 mins

🕒
Cook Time
5 mins

⏱️
Total Time
10 mins

🍽️
Servings
2

Indulging in a Cookie Butter Latte is like wrapping yourself in a warm blanket on a chilly day. This delightful drink, blending the rich flavors of cookie butter, espresso, and steamed milk, creates a cozy experience that is both comforting and satisfying. Imagine each sip bursting with caramelized sweetness paired with the warmth of coffee, making it a perfect treat for mornings or afternoons alike. Whether enjoyed alone or shared, this drink is bound to uplift your spirits.

The Cookie Butter Latte not only tempts the palate with its satisfying sweetness but also provides a nostalgic essence that evokes fond memories of childhood treats. The combination of creamy milk and spicy cookie butter creates a luscious texture that envelops your taste buds, leaving you craving more. It’s not just a drink; it’s a moment of bliss, an escape from the everyday hustle, and a chance to savor life’s simple pleasures.

Quick Recipe Highlights

  • Flavor Profile: A delectable blend of sweet, buttery flavors with a hint of spice, making each sip a memorable experience.
  • Texture: Smooth and creamy with a lovely froth on top, this latte satisfies both sweet and creamy cravings.
  • Aroma: Inviting scents of freshly brewed coffee fused with the warm, comforting smell of cookie butter fill the air.
  • Visual Appeal: Beautiful layers of espresso and frothed milk topped with a sprinkle of cookie crumbs create a tempting look.
  • Skill Level Needed: Even beginners can whip up this drink surprisingly easily, making it accessible to everyone.
  • Special Equipment: A simple espresso machine or a strong coffee maker paired with a milk frother ensures perfect results.

Recipe Overview

  • Difficulty Level: Easiest to prepare, the Cookie Butter Latte requires minimal steps and equipment, making it perfect for anyone.
  • Category: This delicious drink is categorized as a beverage and fits wonderfully into breakfast or brunch menus.
  • Cuisine: While it features elements of traditional coffee culture, this recipe brings a unique twist influenced by cookie butter’s popularity.
  • Cost: This recipe remains budget-friendly, using common pantry ingredients that won’t break the bank.
  • Season: Best enjoyed during fall or winter, when cozy drinks are most appealing, though it’s delightful year-round.
  • Occasion: Ideal for holiday gatherings, cozy mornings, or an afternoon pick-me-up with friends or family.

Why You’ll Love This Recipe

First, the Cookie Butter Latte is a truly indulgent treat that will please any sweet tooth. The unique combination of cookie butter and coffee creates a beautiful balance that is both rich and satisfying while avoiding being overly sweet. Each sip offers a comforting warmth that embraces you, making it perfect for sipping on a chilly day or during a cozy evening at home.

Second, ease of preparation makes this latte a breeze to make. Taking only 10 minutes from start to finish, it’s perfect for busy mornings or unexpected guests. You can quickly whip this delightful drink at home, avoiding costly coffee shop visits and long lines, making it a smart choice for your wallet and schedule.

Furthermore, this recipe packs a punch with its uniqueness. While traditional lattes are great, this cookie butter-infused version elevates your coffee experience, allowing you to impress friends and family with your barista skills. It’s a delightful way to introduce something new and exciting to the usual beverage offerings.

Additionally, Cookie Butter Lattes can be a part of nutritional balance when consumed in moderation. While indulgent, you can adjust the sweetness by controlling the amount of cookie butter and enhance the flavors with lower-caloric options, making it a treat you can feel good about enjoying.

Lastly, sharing this latte with friends creates memorable moments, whether it’s a warm gathering during the holidays or simply a catch-up session with a friend over coffee. The comforting nature of this drink lends itself beautifully to social experiences, encouraging connection and warmth in every cup.

Historical Background and Cultural Significance

The origins of cookie butter can be traced back to Belgium, where it became a beloved spread made primarily from crushed speculoos cookies. Its unique flavor profile quickly gained popularity, inspiring a range of desserts and drinks worldwide, ultimately leading to the delightful Cookie Butter Latte that we enjoy today. The invention and rise of cookie butter in mainstream markets reflect a growing trend toward combining nostalgic flavors with modern culinary techniques.

Cookie butter holds a special place in many hearts, reminiscent of cozy childhood memories spent enjoying cookies. Over the years, this simple spread has transformed into a multi-functional ingredient that is embraced by bakers and coffee enthusiasts. The evolution of cookie butter into the coffee scene showcases its versatility and ability to enhance the traditional coffee experience.

As more people become aware of cookie butter, variations have emerged to incorporate it into drinks, creating delicious creations that appeal to a wide audience. The Cookie Butter Latte is not just a drink; it represents a fusion of cultures and flavors that highlights how traditional treats can find new life in modern recipes.

Regional variations of this drink can also be found based on local tastes, preferences, and available ingredients. Coffee culture around the world frequently innovates popular drinks, leading to endless possibilities for delicious adaptations and creative recipes inspired by original concepts.

Ingredient Deep Dive

Cookie Butter: A sweet, spiced spread made predominantly from crushed cookies, cookie butter is beloved for its sweet and caramel-like flavor. It’s versatile in use—not only for toasting but as an ingredient in various recipes like desserts, cakes, and beverages. When selecting cookie butter, aim for brands with fewer additives for the most authentic flavor.

In terms of nutrition, cookie butter does contain sugar and fat, so it’s best enjoyed in moderation. Look for options with natural ingredients to maintain a healthier profile. Storing your cookie butter in a cool, dry place can prolong its freshness, and always check for signs of spoilage.

Espresso: Espresso forms the base of this latte, delivering a strong coffee flavor. The coffee beans used for espresso are finely ground, often ranging from Arabica to Robusta depending on taste preference. Always choose high-quality beans for the best flavor. Freshly brewed espresso provides a bold backdrop that blends wonderfully with cookie butter.

Espresso is packed with antioxidants and can showcase numerous health benefits, including improved mental alertness. To ensure the freshest taste, store your coffee beans in an airtight container away from light and heat. You can substitute with strong brewed coffee if necessary, although the flavors may vary slightly.

Common Mistakes to Avoid

  • Using cold milk: It’s crucial to use milk that is properly steamed for optimal foam and taste. Cold milk won’t froth well, leading to a less satisfying latte.
  • Adding too much or too little cookie butter: Balancing is key; too much can make the drink overly sweet, while too little may lack flavor depth.
  • Not using fresh ingredients: Using stale cookie butter or old coffee can significantly diminish the quality of your latte.
  • Skipping the espresso shot: The foundation of the latte is the espresso; omitting it results in a different beverage altogether.
  • Overheating the milk: Heating the milk too quickly or at too high a temperature can burn it, resulting in an unpleasant taste.
  • Frothing the milk incorrectly: Proper frothing techniques are essential. Too much air can create a dry foam, while not frothing enough may leave the milk too flat.
  • Not adjusting sweetness: Taste your latte before serving, as different cookie butter brands have varying sweetness levels.
  • Ignoring presentation: A well-presented drink enhances the experience. Take a moment to garnish appropriately.

Essential Techniques

Frothing Milk: Properly frothing milk is vital for achieving that luxurious texture. Use cold milk and a steam wand or frother to incorporate air into the milk gradually. Common pitfalls include overheating and creating bubbles instead of foam, which can ruin the texture. Look for visual cues like silky smoothness and glossy appearance.

Brewing Espresso: Understanding how to brew the perfect espresso is foundational. Use freshly ground beans and the right pressure and temperature settings – typically around 190°F. A common issue is using too coarse a grind, which results in weak coffee. Aim for a rich and creamy consistency to complement the cookie butter.

Pro Tips for Perfect Cookie Butter Latte

1. Use fresh espresso for the best flavor—quality matters, so select premium coffee beans.

2. Experiment with different types of milk; almond or oat milk can create interesting flavor profiles.

3. Consider adding a sprinkle of cinnamon or nutmeg on top for additional warmth and flavor.

4. Use a blender for a smooth, integrated blend if you prefer a less frothy texture.

5. Adjust the amount of cookie butter if you desire a more subtle flavor.

6. For an iced version, chill the espresso beforehand and serve over ice with cold milk.

7. If you have leftover cookie butter, it’s fantastic on toast for a quick snack.

8. Pair with a small pastry on the side for a delightful breakfast or snack experience.

Variations and Adaptations

Many regional variations exist for the Cookie Butter Latte. For example, adding pumpkin spice creates a fall-inspired version that’s ideal for seasonal festivities. In warmer months, consider an iced latte with cookie butter mixed in after blending cold milk and espresso over ice.

Seasonal adaptations can enhance your latte experience. During the winter, add peppermint syrup for a festive feel, whereas in spring, a splash of vanilla extract can lighten the drink’s overall profile.

Dietary modifications are simple as well. Opt for dairy-free alternatives such as coconut or almond milk for a vegan-friendly version, adjusting cookie butter brands to ensure they meet dietary needs.

Flavor variations can play a significant role as well. Explore different cookie butters, like speculoos or chocolate cookie butter, to switch things up. You can also blend in other flavorings such as caramel or hazelnut.

Texture modifications are also worth considering. For a creamier experience, whip a small amount of heavy cream and fold it into your drink before serving. Alternatively, using a thicker yogurt in your latte could give it a unique twist.

Presentation alternatives can elevate your drink. Consider clear glass cups to showcase the lovely layers of your latte. Adding a dusting of crushed cookies or whipped cream on top can make it even more enticing.

Serving and Presentation Guide

When serving your Cookie Butter Latte, consider using clear glass mugs to display the beautiful layers of coffee and foam. A dusting of crushed cookie crumbs or a light sprinkle of cinnamon can enhance the visual appeal and add an aromatic element. For added flair, a dollop of whipped cream on top elevates the presentation and satisfies sweeter palettes.

Garnishing ideas include drizzling a bit of cookie butter over the whipped cream or using a cinnamon stick as a stirring tool for both aesthetics and flavor. Serve your latte at warm temperatures, ideally around 150°F to preserve the comfort of the drink without risking burns.

Portion control is important if you’re serving at gatherings. Consider preparing a larger batch in a carafe for self-service, allowing guests to enjoy as much or as little as they prefer. Pairing with a light breakfast pastry or some cookies can also complement the flavors beautifully and make for a delightful experience.

Wine and Beverage Pairing

The Cookie Butter Latte is best enjoyed on its own due to its rich flavors, but it can also pair beautifully with a light dessert wine such as Moscato or a spiced wine like Gluhwein during the holidays. If you’re opting for a non-alcoholic alternative, consider offering a selection of herbal teas that complement its sweetness.

Coffee enthusiasts might pair it with a straight espresso shot to contrast the sweetness with bold coffee notes that cleanse the palate. Iced versions are lovely with fruit-infused water or smoothies that offer light, refreshing flavors during warm months.

For those who enjoy tea, consider chai lattes, which share similar warm spice notes and create a cozy drink experience, making for an enjoyable contrasting pair when entertaining.

Storage and Shelf Life

Cookie Butter Lattes are best enjoyed fresh, however, if you have leftovers, store any prepared latte in an airtight container in the refrigerator for up to 24 hours. Reheating is simple; gently warm in the microwave or on the stovetop, but avoid boiling to maintain quality.

Cookie butter itself has a long shelf life when stored properly. Keep it in a cool, dry area away from direct sunlight. After opening, use it within a few months, ensuring to keep it tightly sealed to prevent moisture from affecting its texture and flavor.

Signs of spoilage in cookie butter include any off odors, separation, or unusual discoloration. If you notice these changes, it’s best to discard it. You can freeze cookie butter for longer storage, allowing you to scoop out what you need as you go.

Make Ahead Strategies

If you’re planning to serve Cookie Butter Lattes at breakfast gatherings, consider making a strong batch of espresso ahead of time. Brew the espresso and refrigerate it so that you can quickly assemble lattes in the morning.

You can also pre-froth your milk and store it in a thermos to maintain heat, ensuring you only need to combine the ingredients when ready to serve, enhancing efficiency while maintaining quality.

Keep cookie butter stored near your coffee setup, as this will prompt you to mix and create lattes effortlessly. If you’re timing prep, we recommend assembling your cups right before serving to ensure that everything remains warm and delightful.

Scaling Instructions

Scaling your Cookie Butter Latte recipe is simple! If you want to double or triple the batch, the equipment you use should accommodate the increased volume—this may involve brewing espresso in larger portions or using a bigger milk frother.

For smaller servings, halving the recipe works just as well; portions can be made in individual cups. Just remember to maintain the proportions for espresso and milk to keep the flavors balanced.

Pacing is important, especially when preparing for larger gatherings. You may need to adjust your timing for brewing extra coffee, but with efficient organization, you can serve multiple guests very quickly.

Nutritional Deep Dive

This delightful Cookie Butter Latte can be a guilty pleasure, but it can also fit into a balanced lifestyle. Depending on your ingredient choices, the macro breakdown generally includes carbohydrates from the cookie butter, protein from milk, and fat from both. This mixture can create energy-boosting benefits while also satisfying your cravings.

Especially with the use of different milk types and substitutes, you can modify the nutritional profile to suit your goals—like choosing low-fat milk or sugar alternatives. Nutritionally, cookie butter typically contains sugars and fats, so moderation is key, but there are variations that use less sugar or natural sweeteners.

For those watching their portions, be mindful of how many servings are consumed and read the nutrition labels carefully! Adjusting your recipe with lower calorie options can significantly influence your health goals while allowing you to still enjoy sweet lattes.

Dietary Adaptations

For gluten-free adaptations, confirm that your cookie butter is certified gluten-free, and utilize gluten-free alternatives in lattes. The beauty of this recipe is its versatility, making it easy to suit various dietary restrictions.

Dairy-free options are available with a range of non-dairy alternatives like almond, coconut, or oat milk. All of these will create a unique flavor profile—just ensure your cookie butter aligns with your dietary needs.

If you’re following a vegan regimen, select vegan cookie butter and consider plant-based whipped cream for an indulgent twist. There are also many low-carb or keto-friendly options available nowadays for those seeking to watch their carbohydrate intake without sacrificing the enjoyment of this tasty latte.

Other specific diets like Paleo or Low-FODMAP can be accommodated as well by choosing compliant cookie butter alternatives and structuring the recipe according to their guidelines, allowing everyone to relish this enjoyable drink.

Troubleshooting Guide

If your latte turns out too frothy, ensure you’re controlling the air intake while frothing the milk to reach the desired consistency. On the other hand, if it’s too flat, consider using a different milk that froths better, like whole milk or oat milk.

Flavor balance is critical, and if your latte tastes too sweet, you can always add more espresso to counter the sweetness of cookie butter, creating that perfect balance of rich and sweet flavors.

During the brewing phase, if your espresso runs cold, make sure to brew it just before assembling the drink. Alternatively, you can warm up your milk before pouring it over the espresso to retain the temperature.

For ingredient challenges, always check for the quality of your cookie butter, as stale ingredients can affect the overall taste and texture significantly. Ensuring freshness will keep all flavors intact.

Recipe Success Stories

Many readers have shared delightful experiences with this Cookie Butter Latte recipe, often modifying it to fit their tastes and needs. From adding a dash of nutmeg for warmth or the use of almond milk for a creamy texture, the personable touch inspires creative experimentation.

Feedback indicates that family and friends particularly enjoy the rich flavor differences when someone brews this latte at social gatherings. Presentation is equally applauded, with the visual layers impressing guests every time.

Numerous readers report that this recipe became their go-to for every cozy occasion, tying in sentiments of warmth and nostalgia with each sip. Visual documentation in social media posts shows beautiful servings enjoyed on chilly mornings and festive celebrations alike.

Frequently Asked Questions

Can I make this latte without an espresso machine?
Yes, strong brewed coffee works as a substitute for espresso; just adjust the amount used to maintain the flavor balance.

How do I store leftover latte?
Attempts to store lattes are best avoided; it’s best to make fresh. If necessary, store it in an airtight container in the refrigerator and reheat it gently.

Is there a non-dairy alternative for the cookie butter?
Many brands offer non-dairy cookie butters made with coconut and almonds; check labels for quality and nutritional values.

How can I adjust the sweetness of my latte?
You can use less cookie butter or incorporate a sugar substitute to find the perfect sweetness level according to your personal taste.

Can I serve a large batch of these lattes?
Absolutely! Brew the espresso and steam a larger quantity of milk to serve at gatherings to keep things running smoothly.

What are other flavors I can incorporate?
Consider flavors like vanilla, caramel, or even a chocolate cookie butter variant for an exciting twist.

How do I make it more seasonal?
Incorporate seasonal spices like pumpkin spice during fall or peppermint during the winter season for a holiday touch.

Can I make an iced version?
Definitely! Brew espresso, allow it to chill, and mix with cold milk and cookie butter over ice.

What is cookie butter made of?
Cookie butter is typically made from crushed cookies, sugar, and oils, giving it a creamy texture with rich flavors.

Where can I find cookie butter?
You can find cookie butter in most grocery stores, particularly in the international or specialty food aisle.

Additional Resources

Related recipes like a Pumpkin Spice Latte or a decadent Mocha can offer exciting variations to your beverage lineup. For technique guides, learning about proper espresso brewing or milk frothing methods will perfect your coffee-making skills.

Ingredient information is crucial; understanding the qualities of different milk types and cookie butters can enhance your adventures in coffee. Equipment recommendations like purchasing a quality espresso machine or milk frother can elevate your drink-making to café standards.

Seasonal variations may include festive recipes throughout holidays that align with flavor profiles, allowing your drink repertoire to continuously expand. Check back often for new and exciting ideas!

Join the Conversation

We love hearing from our readers! Share your cookie butter latte experiences and tips on social media, or join our community for more culinary inspiration. Showcasing your homemade latte creations can spark discussions and ideas and connect you with fellow coffee lovers.

Don’t forget to leave a review or suggestion! Your feedback helps us refine our recipes and offer the best possible experience for all. Share photos of your lattes and feel free to tag our community—let’s inspire each other with culinary creativity!

The Recipe

Cookie Butter Latte

Serves: 2

Prep Time: 5 mins

Cook Time: 5 mins

Total Time: 10 mins

Kitchen Equipment Needed

  • Espresso machine or strong coffee maker
  • Milk frother or steam wand
  • Measuring spoons
  • Heatproof glass or mugs

Ingredients

  • 2 shots of espresso (or strong coffee)
  • 1/4 cup cookie butter
  • 1 cup milk (any kind)
  • Whipped cream (optional)
  • Cookie crumbs (for garnish)

Directions

  1. Brew 2 shots of espresso or strong coffee into heatproof mugs.
  2. In a small saucepan, warm the milk until steaming but not boiling.
  3. Remove from heat and use a frother to froth the milk until light and airy.
  4. Stir in the cookie butter until well combined.
  5. Pour the frothed milk mixture over the espresso shots.
  6. Add whipped cream on top if desired and sprinkle with cookie crumbs.

Recipe Notes

  • Sugar can be adjusted based on the sweetness of the cookie butter used.
  • Add seasonal spices to customize flavors—pumpkin spice is a festive touch in the fall.

Homemade Starbucks Birthday Cake Pop Recipe for Any Occasion

Starbucks Birthday Cake Pop Recipe: A Sweet Celebration In Every Bite

⚖️
Difficulty
Medium

⏲️
Prep Time
30 mins

🕒
Cook Time
15 mins

⏱️
Total Time
45 mins

🍽️
Servings
12 pops

The Starbucks Birthday Cake Pop Recipe is a delightful treat that brings the joy of a birthday celebration to any occasion. With its festive flavors and charming appearance, each bite of these cake pops evokes memories of sweet celebrations and happiness shared with friends. You’ll love how this recipe captures the moistness of cake mixed with creamy frosting, all coated in a layer of colorful chocolate. Whether you’re planning a special party or just want to brighten your day, these cake pops are sure to deliver smiles.

Imagine biting into a perfectly round cake pop, the outer shell crackling gently as your teeth sink into the soft, moist cake inside. The creamy frosting complements the gentle sweetness of the cake, creating a delightful juxtaposition of textures. The vibrant colors of the candy melts add a festive flair, making these treats visually appealing and perfect for any gathering. Each pop is not only a dessert but also a piece of art that can spark joy and excitement.

Quick Recipe Highlights

  • Flavor Profile: These cake pops offer a delightful sweet vanilla flavor, enhanced by a buttery richness from the frosting.
  • Texture: With a soft and moist cake center surrounded by a smooth chocolate coating, the contrast in textures is truly satisfying.
  • Aroma: The warm aroma of vanilla cake mingles with the sweet scent of melted chocolate, creating an inviting kitchen atmosphere.
  • Visual Appeal: The colorful candy coating and sprinkles make these cake pops not just tasty but stunningly beautiful as well.
  • Skill Level Needed: The recipe requires basic baking skills, making it accessible for beginners yet enjoyable for experienced bakers.
  • Special Equipment: You will need a microwave-safe bowl, cake pop sticks, and a baking sheet for optimal results.

Recipe Overview

  • Difficulty Level: The medium difficulty level stems from the combination of baking and decorating techniques, perfect for keen home bakers.
  • Category: This recipe falls under desserts and sweet treats, making it ideal for parties, celebrations, or special occasions.
  • Cuisine: Influenced by American baking traditions, these cake pops have become popular in cafes and bakeries across the country.
  • Cost: The approximate cost is reasonable for a bright and indulgent treat, making it accessible for all budgets.
  • Season: Cake pops are perfect for any season, with their vibrant colors adding cheer to spring and summer events.
  • Occasion: Ideal for birthdays, graduations, or holiday parties, these cake pops bring festive joy to any gathering.

Why You’ll Love This Recipe

The taste and texture appeal of Starbucks Birthday Cake Pops are undeniable. Their combination of rich vanilla cake and creamy frosting makes every bite satisfying. The glossy chocolate coating adds a satisfying crunch, infusing each pop with indulgent flavor. Your taste buds will thank you for the joyful explosion of sweetness that comes from this delicate dessert.

Moreover, the convenience and preparation benefits of this recipe make it ideal for home bakers. With relatively short preparation and cooking times, you can create a batch of these delights to share with family and friends quickly. The use of simple, accessible ingredients means that even novice bakers can whip up these magical treats without feeling overwhelmed.

The nutritional advantages may be surprising for a dessert. Incorporating baked goods like cake pops can actually offer joy and a sense of moderation in your diet. Using portion-controlled servings allows you to indulge without overdoing it. Furthermore, the presence of valuable ingredients such as eggs and milk gives unique nutritional benefits that can be enjoyed in moderation.

Social and entertaining value cannot be overlooked either. These cake pops are always a hit at gatherings, making them an excellent conversation starter. The vibrant colors and adorable sizes make them a favorite among children and adults alike. Bringing people together over delicious desserts fosters connection and creates memorable experiences.

Moreover, the recipe is cost-effective and accessible, ensuring you won’t break the bank while hosting. With basic pantry staples as the primary ingredients, you can create something both delicious and decorative. Guests will be amazed that these delightful treats don’t come from a bakery but from your own kitchen.

Historical Background and Cultural Significance

The origin story of cake pops is quite fascinating. Emerging in the late 2000s, cake pops quickly made waves in the dessert world, celebrated at events and parties for their charming appearance and delightful taste. They represent the modern marriage of convenience and indulgence, where baking becomes an art form that can be consumed on-the-go.

Culturally, these treats hold a special place as they symbolize celebration and happiness. Cake pops have become synonymous with joyous occasions, and their small size allows for easy sharing, contributing to a communal atmosphere. They embody the spirit of festivity, providing a sweet bite of nostalgia wrapped in nostalgia.

As recipes evolve, so too has the cake pop itself. Initially simple, they now come in various flavors, colors, and designs. Different cultural influences have inspired countless adaptations, allowing them to become a canvas for creativity. Bakeries and home cooks alike experiment with new ingredients, showcasing personal styles and interpretations.

Regional variations also exist, reflecting local tastes and traditions. In certain areas, cake pops are dressed in seasonal flavors, while others emphasize decorative techniques that highlight cultural icons or landmarks. This adaptability enhances their appeal, allowing them to fit seamlessly into any culinary tradition.

Ingredient Deep Dive

The main ingredient, cake mix, has a cultural significance that spans many generations. It simplifies the baking process, allowing novices to enjoy homemade treats without extensive baking skills. Rich in carbohydrates, cake mix offers quick energy and can be paired with various flavors and ingredients for customization.

Frosting plays a crucial role in adding moisture and sweetness to the cake pops. Commonly made with sugar and butter, it enhances flavor and provides a creamy texture. Nutritionally, frosting is high in sugar; however, when used sparingly, it can elevate the overall treat. Consider using homemade alternatives for added health benefits.

Candy melts are essential for coating the cake pops and provide a smooth, sweet finish. Available in many colors and flavors, they allow bakers to express creativity. Nutritionally, candy melts are predominantly sugar but can be used creatively with healthier coatings like dark chocolate. When selecting, always ensure they are high-quality for the best results.

Sprinkles add fun and visual appeal, contributing to the festive atmosphere. These tiny toppings can provide texture and flavor while inviting playful engagement. Though primarily decorative, some sprinkles come in varied flavors or colors, enhancing the baking experience and appealing to different taste preferences.

Common Mistakes to Avoid

  • Overmixing the cake batter can lead to a dense texture. Mix just until combined for light and fluffy cake.
  • Not letting the cake cool completely before crumbling can lead to a mushy mixture. Allow adequate cooling time for better texture.
  • Using too much frosting can make the pops overly sweet and unstable. Aim for a balanced ratio to maintain structural integrity.
  • Not enough candy melts can hinder proper coating. Ensure you have sufficient melts to cover all pops evenly.
  • Skipping refrigeration after assembly can lead to the pops falling apart. Chill them to help firm up the coating and filling.
  • Using different sizes of sticks can affect presentation. Stick to standard-sized sticks for uniformity.
  • Not melting the candy melts properly can result in a clumpy coating. Heat in short intervals and stir frequently.
  • Skipping the sprinkles or decorative touches can make them look plain. Personalize with colors and designs to enhance visual appeal.

Essential Techniques

Mastering the cake pop crumbling technique is essential for achieving the perfect consistency. It’s crucial to crumble the cooled cake thoroughly before mixing to achieve a uniform texture. Avoid large chunks, as they can disrupt the shape of the pops during coating.

Coating the pops in candy melts requires precision. Ensuring the candy melts are perfectly melted and at the right temperature is key. Avoid overheating, as this can cause them to seize. Instead, melt in intervals, stirring frequently until smooth and pourable for more even coating.

Chilling the assembled pops before serving is another vital technique. This helps to set the coating and keep the pops intact. Chilling not only enhances structure but also improves flavor, as the ingredients meld together. Refrigerate for at least an hour for best results.

Pro Tips for Perfect Starbucks Birthday Cake Pops

1. Experiment with various cake flavors to create unique combinations, such as lemon or chocolate, to surprise your guests.
2. Opt for dark chocolate or yogurt melts for a healthier alternative to regular candy melts, while maintaining rich flavor.
3. Use a Styrofoam base to hold the pops upright while they set, ensuring they maintain their shape and presentation.
4. Mix in different flavors of frosting or use flavored extracts for more delicious combinations, enhancing the cake pop experience.
5. Create themed cake pops with color-coordinated candy melts and sprinkles for specific celebrations, increasing their appeal.
6. Use a larger cookie scoop to form the cake mixture; this ensures uniformity, leading to evenly-sized pops.
7. Before dipping, dry the cake pops thoroughly to prevent water from causing the candy coating to harden improperly.
8. Practice proper storage techniques to maintain the freshness and texture of the pops, ensuring lasting enjoyment.

Variations and Adaptations

Dive into regional variations by experimenting with local flavors or ingredients. For instance, incorporating local fruits or nuts can give your cake pops a unique twist, highlighting regional preferences. Seasonal adaptations, such as pumpkin spice in the fall or peppermint during winter holidays, also provide delightful variations for enjoyment all year round.

Dietary modifications are equally rewarding. For gluten-free options, use gluten-free cake mix and check all ingredients for hidden gluten. Vegan cake pops can be created using plant-based ingredients, making them suitable for a wider audience. These modifications ensure that everyone can enjoy your delicious creations.

Flavor variations open up a whole world of possibilities. Adding flavorings, such as almond extract or citrus zests, can elevate the taste profile significantly. Alternatively, blending different types of candy melts for coating provides an exciting element that enhances both flavor and aesthetics.

Texture modifications also play a vital role in cake pop diversity. Some recipes incorporate nuts or crunchy toppings for added texture, while others might use soft fillings to create a contrasting mouthfeel. Experiment with these differences to discover new favorites.

Presentation alternatives, such as decorative stands or themed wrappers, can give your cake pops a distinctive touch. Consider how these small changes can enhance the overall experience, making your cake pops not just delicious, but also visually appealing.

Serving and Presentation Guide

Plating techniques for your cake pops can enhance their visual appeal. Use decorative plates or stands that complement the colors of the pops, showcasing them beautifully. Layering on a contrasting colored cloth can provide an eye-catching background, drawing attention to their vibrant hues.

Garnishing ideas include drizzling melted chocolate over the pops for added pizzazz. Alternatively, use edible glitter or gold sprinkles to elevate their appearance for special occasions, making them look extra special. When served, consider a creative arrangement that encourages guests to grab and enjoy freely.

For modern serving suggestions, utilize clear dessert cups or jars filled with colorful candies and insert the cake pops upright. This not only looks pleasing but keeps the pops stable and accessible for guests. Temperature considerations are equally important; serve them chilled to maintain their shape and texture.

Weight and portion control are essential for a balanced dessert experience. A standard serving size typically consists of one or two pops per guest, allowing for enjoyment without excess. This moderation keeps your dessert experience enjoyable while avoiding waste.

Wine and Beverage Pairing

A delightful pairing for Starbucks Birthday Cake Pops includes a sweet Moscato, which complements the sugary goodness of the cake pops beautifully. The light and fruity notes enhance the vanilla flavor, creating an explosion of sweetness on the palate.

For non-alcoholic alternatives, consider pairing them with a sparkling lemonade or iced tea, which provides a refreshing counterpoint to the richness of the cake. These beverages not only cleanse the palate but also enhance the celebratory experience.

If you prefer coffee or tea, match the cake pops with a smooth latte or a creamy chai tea. The warmth and spice of these beverages pair well with the sweet cake pops, allowing each bite to shine through. Temperature considerations are key; serving these drinks warm enhances the overall experience.

Serving suggestions can enhance the occasion further by arranging the pops on display while guests enjoy their drinks. Ensure that there’s an effortless flow of dessert and beverages, ensuring everything is accessible while fostering a warm social atmosphere.

Storage and Shelf Life

Proper storage methods are essential for keeping your cake pops delicious and fresh. Store them in an airtight container at room temperature for up to 5 days. If you want to prolong their freshness, refrigeration is an excellent option, keeping them for an additional week.

Temperature requirements are vital; avoid exposing them to heat sources as this can cause the coating to melt. Room temperature is ideal for maintaining the integrity and taste of the pops. Handle them delicately when transferring to avoid any breaks or cracks.

Container recommendations suggest using glass or plastic options with tight lids to avoid moisture and air exposure. Ensure that you layer parchment paper between pops if stacking them, preventing them from sticking together and maintaining their shape.

Signs of spoilage include changes in texture or flavor, such as a sour smell or visible mold. It’s essential to assess their quality before serving, ensuring that all ingredients are fresh.

Reheating instructions are key if you’ve stored cake pops in the fridge. Allow them to reach room temperature before serving, as this enhances the flavor and texture, making them more enjoyable.

For those interested in freezing cake pops, wrap each pop individually in plastic wrap and store them in a freezer-safe bag. They can last for up to 3 months in the freezer, ensuring that you always have a sweet treat ready for unexpected occasions.

Make Ahead Strategies

Creating a prep timeline is essential when making Starbucks Birthday Cake Pops. Bake the cake a day or two before, allowing ample cooling time before crumbling. Prepare the frosting in advance as well, ensuring an efficient assembly process during the final steps.

Storage between steps is vital; keep the crumbled cake in the refrigerator if not assembling immediately. This helps maintain freshness, while also making the assembly process more manageable down the line.

Assess the impact on quality by preparing cake pops a day ahead. They taste even better after chilling, as the flavors meld beautifully. Assembly can be done in batches, offering flexibility for busy schedules.

When reheating guidelines are necessary, ensure to defrost pops slowly to avoid condensation. Leave them at room temperature for a few hours before serving to unlock the best taste experience.

Finally, consider fresh elements to add just before serving. Topping the pops with fresh sprinkles or drizzles of chocolate can create an appealing contrast that catches the eye, making the dessert stand out.

Scaling Instructions

Halving the recipe is straightforward; simply divide all ingredients in half, ensuring you adjust the baking time if necessary. Monitor the pops closely as they cook, watching for signs that they are fully set.

Doubling or tripling the recipe requires larger mixing bowls and additional baking sheets or pans. Prepare for a longer prep time and ensure you have adequate space for cooling and assembly.

Timing modifications should account for larger batches; baking times may vary, requiring adjustments based on your oven’s efficiency and type. Plan for extra time when coating if the sheer volume requires more attention.

Equipment adjustments involve using larger quantities if available. For instance, utilize several mixing bowls, ensuring efficiency during preparation. Different cake mixers may be beneficial to simplify mixing large amounts of batter.

Storage considerations are essential when scaling up; larger containers may be necessary to store all finished pops. Ensure they are airtight to maintain freshness and utilize the same techniques for freezing if making ahead.

Nutritional Deep Dive

The macro breakdown for these cake pops primarily features carbohydrates and sugar, alongside small amounts of protein from the egg and dairy in the cake mix. Understanding the impact of these macros can help you better manage intake, especially during celebrations.

Micronutrient analysis is relevant as well; while these treats are not nutrient-dense, the presence of eggs and milk adds nutritional value which can benefit overall dietary balance. Moderation remains key, particularly during larger gatherings.

Health benefits, when enjoyed in moderation, include psychological benefits from treating oneself and enjoying celebrations with loved ones. Emphasizing balance and understanding how these treats can fit into a varied diet is essential for mindful eating.

Dietary considerations play an important role in ensuring the diversity of guests can be accommodated. Be sure to consider allergies and preferences, as different guests will appreciate when their dietary needs are considered.

Portion analysis is key for maintaining balance in your dessert offerings. Keeping to one or two cake pops per serving reduces the likelihood of overindulgence, while still providing sweetness and satisfaction for your guests.

Weight management tips include encouraging others to join you in enjoying the treats. Incorporating balance by offering healthier options alongside the cake pops ensures that indulging feels less guilty while still remaining enjoyable.

Dietary Adaptations

Creating gluten-free cake pops is achievable by selecting gluten-free cake mixes and ensuring all other ingredients are certified gluten-free. This allows those with sensitivities to enjoy the same desserts as everyone else.

For dairy-free options, substitute almond or coconut milk for traditional dairy ingredients, and use dairy-free frosting. This recipe can be made accessible for various diets without compromising flavor or texture.

Vegan adaptations can be accomplished with egg replacements such as flaxseed meal or applesauce, and using plant-based butter in the frosting. These changes allow those following vegan lifestyles to indulge in delicious cake pops.

Low-carb and keto options involve using almond flour or coconut flour in place of traditional cake mix. These variations result in cake pops that are lower in carbohydrates, ensuring they’re suitable for those on ketogenic diets.

Paleo followers need a bit more adjustment, focusing on whole food ingredients. Using almond flour, raw honey, and coconut oil, these cake pops maintain their sweetness while meeting dietary requirements.

For low-FODMAP need adjustments, choose lactose-free dairy options and avoid certain sweeteners that may cause discomfort. You can easily meet varying dietary needs while celebrating together.

Troubleshooting Guide

Texture issues can usually be resolved by adjusting the ratio of cake to frosting. A drier mixture can be moistened with additional frosting, while an overly moist mixture may require more crumbled cake for balance.

Flavor balance can be improved by tasting the crumbs before coating; adjusting the sweetness by adding a pinch of salt or additional vanilla extract can enhance the overall dish. Always taste before final assembly.

Temperature problems can arise during preparation; ensuring all ingredients are at room temperature before you begin mixing can mitigate these issues. If the batter is too cold, it may not bake evenly, while overly warm batter can lose its texture.

Equipment challenges often arise with older appliances. Test your oven’s temperature accuracy and use quality mixing tools to prevent larger issues, ensuring even blending and baking of your ingredients.

Ingredient substitutions require careful consideration; if replacing cake mix, ensure that ratios for dry and wet ingredients are appropriate to maintain consistency. Use reliable conversion resources when needed to avoid mishaps.

Timing concerns can lead to overbaking or underbaking. Always check your cake pops a few minutes before the indicated time, as oven temperatures can vary. Adjust for additional time as necessary to ensure perfect results.

Recipe Success Stories

Community feedback on these cake pops is overwhelmingly positive, with many bakers sharing delightful photos of their creations. Countless variations inspired by personal tastes or themed events have also garnered attention on social media, highlighting the allure of this sweet treat.

Readers report success after following this recipe closely, often stressing the importance of proper cooling and techniques essential to perfecting texture. Sharing tips and tricks has fostered an engaging community of home bakers passionate about creating delicious memories.

Adaptation stories shine through in creative changes. An inspiring tale from a reader showcases how they turned the eatery classic into a gluten-free delight for their birthday celebration, bringing joy to everyone involved. Personal touches have become the hallmark of this popular recipe.

Photography tips have also been exchanged, with many bakers advising on lighting and angles to really showcase the beauty of their cake pops. From close-ups revealing the texture to playful group shots, the proliferation of stunning visuals has further solidified the cake pop’s status among home bakers.

Encouraging experiences from the creation of Starbucks Birthday Cake Pops demonstrate how these recipes can bridge connections among diverse groups. The shared joy of baking and creations have given rise to support networks among baking enthusiasts looking to showcase their culinary journey.

Frequently Asked Questions

Can I use store-bought frosting for the cake pops?

Yes, store-bought frosting can be used in this recipe to save time. Just ensure it complements the flavor of your cake mix.

How long can I store cake pops?

Stored in an airtight container, cake pops can last up to 5 days at room temperature and up to a week in the refrigerator.

Can I freeze cake pops?

Absolutely! Wrap each cake pop individually in plastic wrap and store in a freezer-safe bag for up to 3 months.

What is the best way to melt candy melts?

Melt candy melts in the microwave in 15 to 30-second intervals, stirring frequently until smooth. Avoid overheating to prevent clumping.

How can I make my cake pops more stable?

Ensure your cake mixture is well combined with frosting and use quality sticks. Refrigerate the pops before coating to help keep their shape.

Can I make these cake pops without sticks?

Yes, you can shape them into bite-sized balls without sticks. These can be served in cupcake liners for a fun presentation.

How do I get a smooth coating on my cake pops?

After dipping in candy melts, gently tap the stick to remove excess coating and let pops sit upright until the coating is hardened.

What flavors can I use for the cake mix?

You can use any flavor cake mix you prefer, such as chocolate, vanilla, or red velvet, for diverse taste experiences in cake pops.

How do I add color to the candy melts?

Use oil-based food coloring, as regular food coloring can affect the consistency of the melts. Mix in a few drops before dipping.

Can I use this recipe for different occasions?

Absolutely! You can adapt the designs and flavors for birthdays, holidays, or any festive gathering, making them versatile.

Additional Resources

Check out related recipes such as cookie pops, brownie bites, and other delightful treats to expand your dessert repertoire. Explore technique guides covering baking fundamentals or advanced decorating skills to enhance your cake pop creations.

Ingredient information on cake mixes and candy melts can also help you make informed choices when selecting products for your projects. Furthermore, consider equipment recommendations for achieving the best results, from quality mixing bowls to fun decorating tools.

Lastly, explore seasonal variations by adapting your cake pops for holidays with festive flavors and colors. This versatility adds fun to any celebration, ensuring sweet treats are always within reach.

Join the Conversation

Engage with the community through social media sharing. Capture your delicious creations and share them online; connecting with fellow bakers fosters support and encouragement.

Photography tips can help showcase your hard work! High-quality photos attract attention and inspire others while highlighting your unique variations on the recipe.

Recipe reviews invite feedback and encourage discussions among your friends and family about modifications, successes, and areas for improvement. This conversation cultivates understanding and can inspire new ideas.

Encouraging community engagement through sharing experiences and variations opens up opportunities for everyone to learn and enjoy baking together. This shared passion for delicious treats can create lasting connections.

The Recipe

Starbucks Birthday Cake Pop Recipe

Serves: 12 pops

Prep Time: 30 mins

Cook Time: 15 mins

Total Time: 45 mins

Kitchen Equipment Needed

  • Mixing bowls
  • Microwave-safe bowl
  • Baking sheet
  • Cake pop sticks
  • Styrofoam block (for cooling)

Ingredients

  • 1 box of vanilla cake mix
  • 4 ounces of frosting (vanilla or funfetti)
  • 12 ounces of candy melts (your choice of color)
  • Sprinkles for decoration

Directions

  1. Prepare the cake mix according to the package instructions; bake and let cool completely.
  2. Once cooled, crumble the cake into a large bowl; add frosting and mix until well combined.
  3. Roll mixture into small balls (about 1 inch in diameter) and place on a baking sheet.
  4. Insert cake pop sticks into each ball; chill in the refrigerator for at least 30 minutes.
  5. Melt the candy melts in the microwave until smooth, stirring frequently.
  6. Dip each cake pop into the melted candy melts, ensuring full coverage, then allow excess to drip off.
  7. Place pops upright in a Styrofoam block and decorate with sprinkles before the coating hardens.
  8. Let set completely in the refrigerator before serving.

Recipe Notes

  • For a chocolate version, substitute chocolate cake mix for vanilla.
  • Adjust the melting time based on your microwave to avoid burning the candy melts.
  • Use different flavored frosting to broaden your cake pop variety.
  • Store cake pops in an airtight container up to 5 days at room temperature.