Best Healthy Starbucks Vanilla Bean Coconut Milk Latte

Delicious Vanilla Bean Coconut Milk Latte: A Healthier Starbucks Drink at Home

⚖️
Difficulty
Easy

⏲️
Prep Time
5 mins

🕒
Cook Time
10 mins

⏱️
Total Time
15 mins

🍽️
Servings
2

The health-conscious among us often seek out delicious options that don’t compromise on flavor, and the Vanilla Bean Coconut Milk Latte is the perfect solution. If you’re a fan of Starbucks drinks but want to enjoy a healthier alternative at home, this recipe is for you. Combining the rich taste of vanilla with creamy coconut milk, this latte not only satisfies your coffee cravings but also brings an extra layer of nutrition. The subtle sweetness of vanilla paired with the smoothness of coconut milk gives this drink a velvety texture that delights the senses.

Imagine the aroma of fresh coffee wafting through your kitchen as you prepare this Vanilla Bean Coconut Milk Latte. It’s a glorious blend that’s equally comforting and invigorating. The simplicity of the ingredients makes it accessible for anyone, whether you’re an experienced barista or just starting your culinary journey. Enjoying a homemade latte means you can customize it to your taste and dietary needs, making it a versatile addition to your morning or afternoon routine.

Quick Recipe Highlights

  • Flavor Profile: This latte features a delightful mix of rich vanilla and nutty coconut, creating a balanced sweetness without being overpowering.
  • Texture: The coconut milk lends a creamy, smooth mouthfeel that beautifully complements the espresso.
  • Aroma: The enticing fragrance of vanilla enhances the warm, inviting scent of brewed coffee, making each sip a sensory pleasure.
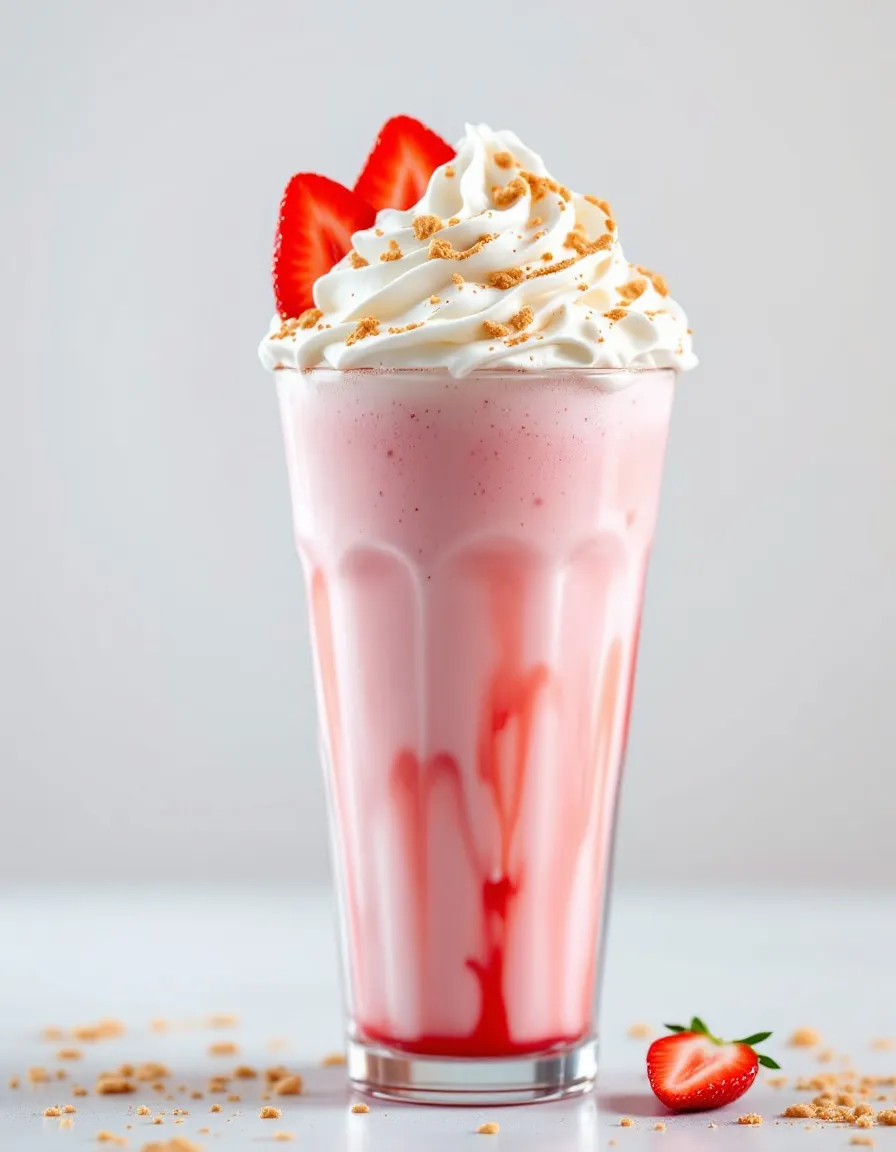
  • Visual Appeal: The latte boasts a light beige color with a frothy top that is visually appealing, making it perfect for sharing on social media.
  • Skill Level Needed: This recipe is easy enough for beginners yet rewarding for seasoned coffee lovers looking for a healthy twist.
  • Special Equipment: All you need is a coffee maker, a frother for the milk, and a couple of cups to savor your creation.

Recipe Overview

  • Difficulty Level: This Vanilla Bean Coconut Milk Latte is an uncomplicated recipe that requires only basic coffee-making skills, perfect for anyone looking to elevate their morning routine.
  • Category: It fits well under beverages, specifically focusing on coffee-based drinks that can be enjoyed at any time of the day.
  • Cuisine: Influenced by cafe culture around the globe, this latte channels the essence of modern coffee houses while emphasizing healthier alternatives.
  • Cost: With about $5-7 for all the ingredients, you can create multiple servings that are well worth the investment.
  • Season: This latte is ideal year-round but particularly enjoyable in cooler seasons when a warm drink is comforting.
  • Occasion: Perfect for a weekend brunch, a warm treat during a chilly evening, or as a delightful boost to start your day.

Why You’ll Love This Recipe

The taste and texture appeal of this Vanilla Bean Coconut Milk Latte make it a go-to option for any latte lover. The creamy consistency and the sweet notes of vanilla perfectly balance the bitterness of the espresso. Each sip is a creamy delight, combining rich coffee with a smooth coconut finish that can brighten up your day.

Convenience and preparation benefits are significant, as this recipe requires minimal effort but offers maximum flavor. In less than 15 minutes, you can whip up an impressive drink that rivals your favorite coffee shop creations. It allows you to skip the long lines and save money while still enjoying a café-quality latte from home.

The nutritional advantages are another compelling reason to try this recipe. Coconut milk is a great dairy-free alternative that contains healthy fats and is lower in calories than traditional creams. This latte is not only more nutritious but also naturally free of lactose, making it suitable for those with dietary restrictions.

Social and entertaining value comes into play when you share this delightful drink with friends and family. Hosting a small gathering? Serve this latte to impress your guests with a barista-style experience right in your kitchen. You can even create a DIY coffee bar with different flavors and toppings for a fun and interactive brunch.

Finally, this Vanilla Bean Coconut Milk Latte is cost-effective and accessible. With just a few simple ingredients, you can create multiple servings that are far less expensive than specialty drinks from coffee shops. It’s an easy and satisfying way to indulge without breaking the bank.

Historical Background and Cultural Significance

The origin story of this drink can be traced back to the rise of coffee culture in the early 20th century, highlighting how different countries influence the way coffee is enjoyed. The integration of coconut into beverages often reflects tropical regions where it’s abundantly available, adding a flavor profile that symbolizes paradise in a cup.

Culturally, lattes have become synonymous with comfort and socialization, especially in café settings. This drink brings people together, offering a warm hug in a mug that fuels dialogue and fosters connection. Coffee gatherings resonate in every society, from bustling metropolises to quiet towns, reinforcing the beverage’s universal and comforting nature.

The evolution of the recipe has allowed for numerous adaptations, drawing inspiration from various global traditions. Today, health-conscious versions like the Vanilla Bean Coconut Milk Latte are popular, reflecting a shift towards more mindful eating and drinking habits.

Regional variations of lattes abound, with unique twists and flavor combinations reflecting local tastes. This Vanilla Bean Coconut Milk Latte is just one of many interpretations, yet its blend of vanilla and coconut resonates with many palates across the globe.

Ingredient Deep Dive

– **Vanilla Bean**: Vanilla has a rich history, highly sought after since the time of the Aztecs, who revered its flavor. Nutritionally, it’s known for its antioxidant properties. When selecting vanilla, look for plump and fragrant beans, and store them in a cool, dark place. Alternatives include vanilla extract or syrup.

– **Coconut Milk**: Produced by pressing fresh coconut meat, coconut milk has been a staple in many tropical cultures. Its rich, creamy consistency provides healthy fats beneficial for maintaining energy levels. Always choose high-quality coconut milk, and store it in an airtight container. If you can’t find coconut milk, almond or oat milk can also serve as suitable substitutes.

– **Espresso**: The heart of any good latte, espresso is a concentrated form of coffee brewed by forcing hot water through finely-ground coffee beans. It originated in Italy, evolving into the basis for countless coffee drinks. Opt for freshly roasted beans for the finest flavor, and store them in a cool, dark place. Instant coffee can be a quick substitute in a pinch but won’t achieve the same richness.

– **Sweetener (optional)**: Depending on your preference, you may wish to add sweetness. Honey, agave syrup, or any preferred sweetener will elevate the flavor. Always choose organic options when possible for the best quality.

Common Mistakes to Avoid

  • Not warming the coconut milk properly, which can lead to a less creamy texture. Warm gently, but don’t let it boil.
  • Using stale coffee can spoil the flavor. Always use freshly roasted and ground beans for best results.
  • Choosing overly sweet vanilla syrup can mask the delicate flavors of the espresso. Use less and taste as you go.
  • Not frothing the milk sufficiently can result in a flat drink without that delightful foam on top. Invest time in frothing for the best texture.
  • Using low-quality coconut milk can significantly affect the taste and texture. Opt for full-fat versions for creaminess.
  • Over-extracting your espresso can lead to a bitter taste. Aim for a 25-30 seconds extraction to achieve a balanced flavor.
  • Neglecting to taste and adjust has a big impact. Be sure to try the latte as you go and modify sweetness and vanilla levels based on your palate.
  • Not measuring your ingredients accurately can throw off the harmony of flavors. Precision is key in perfecting your latte.
  • Skipping the vanilla bean in favor of artificial flavorings can detract from the natural sweetness found in the real thing.
  • Failing to chill the coconut milk before blending can create a lukewarm drink. For iced versions, always start with chilled ingredients.

Essential Techniques

– **Frothing Milk**: Frothing milk is essential for adding a creamy texture to your latte. Use a hand frother or steam wand, and aim for velvety foam. Avoid overheating; the ideal temperature is between 160-170°F. Practice makes perfect—look for fine bubbles and a shiny surface for success.

– **Brewing Espresso**: Mastering espresso brewing is crucial for a balanced flavor. Use freshly ground beans, and tamp them evenly for optimal extraction. Pay attention to brew time and adjust your grind settings if the shot runs too fast or slow.

– **Flavor Balancing**: Achieving the perfect balance of coffee, coconut, and sweetness requires practice. Add sweeteners gradually and taste testers to find your ideal mix. Remember that flavors can intensify, so adjust gradually.

Pro Tips for Perfect Vanilla Bean Coconut Milk Latte

– Use high-quality, fresh ingredients for the best flavor. Your espresso choice, type of coconut milk, and sweetness all significantly contribute to the outcome.

– Blend your coconut milk for extra frothiness by mixing it before adding to your espresso. A whirl in the blender works wonders.

– Experiment with different espresso beans for unique flavors. Light roasts will yield a fruity taste, while dark roasts provide deeper, chocolatey notes.

– Create a special vanilla extract by steeping vanilla beans in bourbon or vodka for a personalized touch.

– For an extra flavorful twist, consider adding a pinch of cinnamon or nutmeg on top before serving.

– Don’t rush the frothing process. Take your time to achieve that velvety foam that truly elevates your latte.

– Customize your sweetness. Start with a small amount and build up slowly until you reach your desired flavor profile.

– Garnish with a sprinkle of cocoa powder or toasted coconut for added texture and visual appeal.

Variations and Adaptations

– Consider seasonal adaptations by incorporating pumpkin spice in the fall or cinnamon and nutmeg during winter holidays for festive flavors.

– Dietary modifications can make this latte suitable for various preferences. You can use almond or oat milk for a nutty taste or preference against coconut.

– Flavor variations can include adding caramel, hazelnut syrup, or even a shot of flavored coffee to personalize your drink to your liking.

– Explore different texture modifications by blending the coconut milk longer for an ultra-smooth drink or increasing foam for a creamier finish.

– For presentation alternatives, consider serving in a clear glass to showcase the layers of your latte, highlighting its beautiful colors.

Serving and Presentation Guide

Serve your Vanilla Bean Coconut Milk Latte in an attractive mug to enhance the drinking experience. Consider garnishing with a sprinkle of cocoa powder or cinnamon for added flavor and an appealing look. A dollop of whipped coconut cream can also elevate its indulgence factor.

For modern serving suggestions, use clear glass cups to showcase the latte’s rich colors, offering guests a visual treat. Pair your latte with light snacks such as biscotti or pastries for an elegant touch. Serve at a comfortable drinking temperature, ideally between 130-150°F, ensuring that it’s warm but not scalding.

Portion control tips are essential if serving at gatherings—consider offering small servings that guests can enjoy without feeling overwhelmed. Encourage sampling different toppings or flavors to create a fun tasting experience.

Wine and Beverage Pairing

For wine pairings, consider a light, fruity Pinot Grigio to complement the sweetness of the Vanilla Bean Coconut Milk Latte. The refreshing notes can balance the rich flavors nicely.

If you’re looking for non-alcoholic alternatives, consider pairing with sparkling water infused with lime, providing a refreshing contrast to the latte’s creaminess. Additionally, a light herbal tea can enhance the overall experience, providing relaxation alongside your coffee.

For coffee pairings, a light roast brewed with hints of fruit or floral notes can heighten your latte’s flavor profile. Serve at room temperature for those who enjoy a refreshing change from the warmth.

Storage and Shelf Life

Store any leftover Vanilla Bean Coconut Milk Latte in an airtight container in the refrigerator for up to two days. Reheat gently in the microwave or on the stovetop, stirring frequently to maintain the texture. Avoid prolonged exposure to air, and always check for fresh ingredients, especially coconut milk, before use.

If you wish to enjoy it later, consider freezing individual portions. Pour the prepared latte into ice cube trays, and once frozen, transfer to a zip-lock bag. You can add these cubes to smoothies or iced teas for a flavor boost.

Signs of spoilage include a sour smell or any changes in texture and color. Always ensure that your coconut milk is fresh and not past its expiration date before using.

Make Ahead Strategies

Create a prep timeline to streamline your morning routine. Brew your coffee the night before, and store it in the fridge. You can also prepare your coconut milk several days in advance. Always make sure to shake well before using, as natural separation can occur.

Storage between steps is essential. If you’ve made a larger batch, separate the whipped milk from the espresso before storing to maintain optimal taste and texture. Quality doesn’t deteriorate when it’s layered right.

Assess quality impact by preparing smaller batches at a time. This method ensures freshness without overwhelming flavors or textures. In your make-ahead strategies, always consider what components can be made and stored beforehand to simplify.

Scaling Instructions

Scaling this Vanilla Bean Coconut Milk Latte recipe is a breeze. To halve the recipe, simply divide all ingredients by two and use a smaller coffee maker if necessary.

For larger gatherings, double or triple the ingredients while ensuring your espresso machine can handle the volume. Make sure to brew in batches to maintain consistency in flavor and temperature.

Equipment adjustments may be necessary when scaling—consider using larger storage containers or additional brewing equipment to accommodate increased servings.

Timing modifications are also crucial, as more servings require a longer process, particularly if handling the espresso separately. Always prioritize brewing quality for the best results.

Storage considerations should factor in the increased servings. Ensure all ingredients are stored fresh, and store any leftovers safely as mentioned above.

Nutritional Deep Dive

A macro breakdown of the Vanilla Bean Coconut Milk Latte reveals a blend of carbohydrates, healthy fats, and protein primarily from the coconut milk, which helps maintain energy levels. It’s essential to remember that nutritional content varies based on the specific brands and types of products used.

In terms of micronutrient analysis, coconut milk is rich in several vitamins and minerals including potassium and magnesium, contributing to a balanced diet. The antioxidants in vanilla provide additional health benefits, promoting well-being.

When considering health benefits, this recipe provides a low-calorie alternative to heavy cream-based lattes while still offering satisfying flavors. It’s an excellent choice for those looking for a guilt-free indulgence.

Dietary considerations are essential as you adapt the recipe to various needs. This latte can be easily modified for gluten-free, dairy-free, and vegan diets, making it a versatile option for all.

Portion analysis should also consider personal dietary goals, with notes on calorie control depending on how much sweetness is added, as well as any additional flavors or complementary snacks paired with it.

Dietary Adaptations

For a gluten-free version, this latte is already suitable as all its components are gluten-free. However, it’s essential to check any added sweeteners or flavorings for gluten content.

Making it dairy-free is easy by simply using coconut milk as specified, ensuring no other dairy ingredients are introduced. Check flavored syrups used to ensure they’re also dairy-free.

For a vegan adaptation, ensure that sweeteners are plant-based, and feel free to explore different non-dairy individual cups if desired.

Low-carb adaptations can be achieved by reducing or eliminating sweeteners entirely or replacing them with keto-approved options like erythritol or stevia.

A keto-friendly approach can include counting the carbs in the coconut milk used and replacing any added sugars with keto-friendly additives that still bring sweetness without the carbs.

Additionally, baking or blending the ingredients into smoothies can offer a Paleo version of this drink while still incorporating the essence of coconut and vanilla.

Troubleshooting Guide

For texture issues, if your latte is too watery, consider adding more creaminess by increasing the amount of coconut milk used or by double frothing to add body.

When facing flavor balance concerns, always taste as you go. Adjust the sweetness and vanilla levels until you find the perfect harmony that suits your palate.

Temperature problems often arise from overheating or not heating enough. Aim for ideal temperature ranges, testing as you go to encourage perfect warmth with each sip.

Equipment challenges can lead to issues with frothing or brewing. Familiarize yourself with your tools and experiment with different techniques for success.

Ingredient substitutions can alter the intended taste; always take note of how different types of coconut milk or sweeteners may impact the final drink.

Timing concerns arise typically when brewing espresso. Pay close attention to your shots, as longer extraction times can lead to bitterness, while faster shots may be under-extracted.

Recipe Success Stories

Community feedback for the Vanilla Bean Coconut Milk Latte has been positive, with many users praising the rich flavor and creamy texture achieved at home. Individuals have reported successfully creating this drink without disappointment.

Variation successes often come from substituting different coconut milks or experimenting with flavored syrups, leading to unique adaptations that many find pleasing. Enthusiasts have often suggested adding seasonal spices for even richer flavors.

Adaptation stories highlight readers utilizing different lactose-free or non-dairy ingredients that cater to their dietary needs while still enjoying the luscious flavors of the original recipe.

Photography tips ensure your homemade lattes look as good as they taste. Natural lighting can accentuate the drink’s colors, creating inviting photos to share with friends and family.

Frequently Asked Questions

Can I use regular milk instead of coconut milk?

Yes, regular milk can be used if you prefer a more traditional latte. However, this recipe highlights coconut milk for its unique flavor and dairy-free benefits.

Is this recipe suitable for vegans?

Absolutely! The drink is created using only plant-based ingredients, making it a great option for vegans.

Can I sweeten my latte differently?

Certainly! Feel free to use your preferred sweetener, whether it’s honey, stevia, or a flavored syrup. Adjust the sweetness according to your taste.

How long can I store leftovers?

Leftovers can be stored in an airtight container for up to two days in the refrigerator. Reheat gently before consuming.

Should I strain the coconut milk before using?

It’s not necessary to strain coconut milk; use it directly as it contains the creamy goodness you want for your latte.

What type of coffee should I use?

A good quality espresso is recommended for a rich and authentic coffee flavor. You can use pre-ground espresso or grind your own beans fresh.

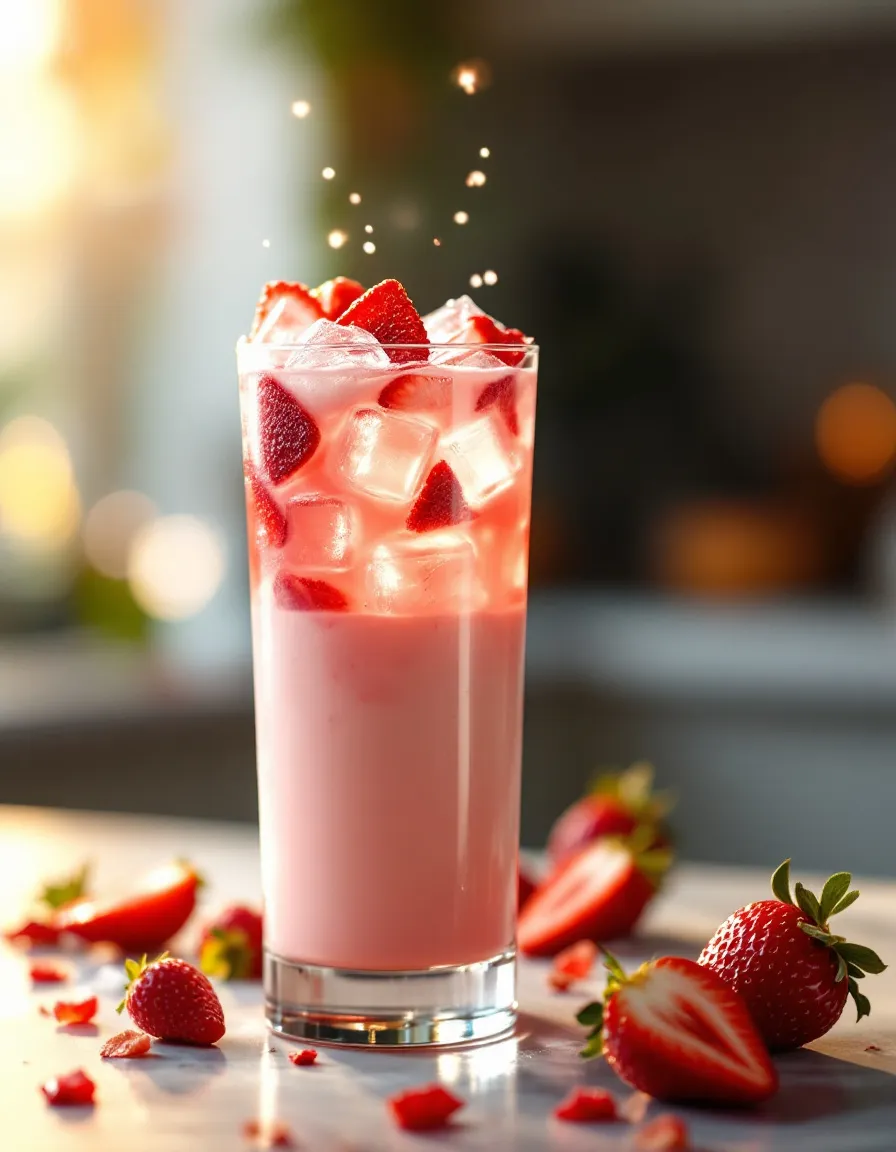
Is it possible to make this iced?

Yes! Simply allow the latte to cool after brewing and serve it over ice, or blend with ice for a frozen treat.

Can I add flavorings?

Absolutely! Add flavored syrups or spices to personalize your latte, like hazelnut, caramel, or seasonal spices.

Is there a way to make this latte lower in calories?

For a lower-calorie version, reduce or eliminate added sweeteners and choose a light coconut milk option.

How can I achieve a perfect froth?

Ensure your coconut milk is well-shaken or agitated before frothing, and use the right amount of steam or frothing time for achieving a velvety texture.

Additional Resources

If you enjoyed this Vanilla Bean Coconut Milk Latte, you might also like our related recipes for chai lattes and matcha lattes. Additionally, explore technique guides on how to brew the perfect espresso and froth milk like a pro.

For ingredient information, consider looking into the differences between coconut milk brands and their unique properties. Equipment recommendations can also help you choose the best tools for making your coffee creations, ensuring that you have the right setup for success.

Lastly, don’t forget to check out seasonal variations that celebrate flavors like pumpkin spice in the fall or peppermint in the winter for tailored experiences to your palates.

Join the Conversation

Share your thoughts and experiences with the Vanilla Bean Coconut Milk Latte on social media! Use our designated hashtag to connect with other coffee enthusiasts and showcase your beautiful creations.

For the best photography tips, focus on well-lit areas or natural backdrops that amplify your drink’s aesthetic. Join our community and post reviews of your adaptations to build connections with fellow recipe explorers.

Feel free to start discussions about variations you’ve created, and share what worked and what didn’t to enhance others’ experiences. Your feedback can inspire someone else to create their perfect cup!

The Recipe

Vanilla Bean Coconut Milk Latte

Serves: 2

Prep Time: 5 mins

Cook Time: 10 mins

Total Time: 15 mins

Kitchen Equipment Needed

  • Coffee maker or espresso machine
  • Milk frother (optional)
  • Measuring spoons
  • Cup for serving

Ingredients

  • 2 shots of espresso
  • 1 cup coconut milk
  • 1 tablespoon vanilla bean paste or syrup
  • Sweetener to taste (optional)

Directions

  1. Brew two shots of espresso and set aside.
  2. In a small saucepan, heat the coconut milk over medium heat until warm, but not boiling.
  3. Using a frother, froth the coconut milk until creamy and foamy.
  4. Add the vanilla bean paste or syrup to the espresso and stir to combine.
  5. Pour the frothed coconut milk over the espresso and slowly combine.
  6. Sweeten to taste if desired and serve immediately.

Recipe Notes

  • Feel free to adjust the sweetness to your liking.
  • This latte can be served iced by pouring it over ice.
  • Experiment with additional flavors like caramel or hazelnut for variety.

Easy No-Bake Mini Banana Cream Pies – Perfect for Dessert

No-Bake Mini Banana Cream Pies: A Delightful Treat

⚖️
Difficulty
Easy

⏲️
Prep Time
20 mins

🕒
Cook Time
0 mins

⏱️
Total Time
20 mins

🍽️
Servings
12 mini pies

Indulge in the delightful sweetness of No-Bake Mini Banana Cream Pies, the perfect treat for any occasion. These charming little desserts offer a burst of banana flavor combined with a creamy filling that melts in your mouth. With an easy preparation that requires no baking, you can whip up a batch quickly, making them ideal for last-minute gatherings, potlucks, or simply a sweet craving at home. Each bite is a perfect balance of sweetness with a hint of vanilla, making them a crowd favorite.

The light and fluffy texture of the pie filling pairs beautifully with the buttery crunch of the graham cracker crust. Topped with freshly whipped cream and banana slices, these mini pies are as appealing to the eye as they are to the palate. In addition to being a delicious dessert, they evoke nostalgic feelings that bring warm memories of family gatherings and sunny afternoons.

Quick Recipe Highlights

  • Flavor Profile: These mini banana cream pies deliver a rich blend of sweet banana, creamy vanilla filling, and a buttery graham cracker crust.
  • Texture: The combination of creamy filling and crunchy crust creates a delightful contrast, ensuring each bite is enjoyable.
  • Aroma: Expect a wonderful aroma of ripe bananas accented with vanilla and hints of fresh cream.
  • Visual Appeal: Presented in small cups and topped with banana slices and whipped cream, these pies are both vibrant and inviting.
  • Skill Level Needed: This recipe is simple and perfect for beginner bakers, with no complex techniques involved.
  • Special Equipment: You will need small pie cups or ramekins and a mixing bowl to prepare this easy dessert.

Recipe Overview

  • Difficulty Level: This no-bake recipe is easy to follow, making it accessible even for novice cooks. It requires minimal ingredients and straightforward steps, ensuring a stress-free baking experience.
  • Category: Ideal for desserts, these Mini Banana Cream Pies can be served at various occasions including birthdays, picnics, or family meals.
  • Cuisine: The classic banana cream pie is a beloved American dessert that has stood the test of time, bringing joy to dessert tables for generations.
  • Cost: The ingredients for this recipe are fairly inexpensive; banana, cream, and graham crackers can be easily found in most grocery stores.
  • Season: These pies are delightful year-round, especially in warm months when fresh bananas are plentiful.
  • Occasion: Perfect for celebrations, casual gatherings, or simply as a treat after a family dinner, their adorable size adds to their charm.

Why You’ll Love This Recipe

The combination of luscious banana flavor and creamy filling creates an unforgettable taste experience. As you bite into these mini pies, the sweetness from the ripe bananas is perfectly complemented by the rich, vanilla-infused cream. This combination makes each mini banana cream pie not only satisfying but also indulgent.

Preparing these pies is incredibly convenient, as there’s no baking required, allowing you to freely prepare them even on a busy day. Simply mix the ingredients, layer them, and refrigerate. They can be made in advance, ensuring a delightful dessert for last-minute occasions without the hassle.

In terms of nutrition, bananas are rich in potassium and provide essential vitamins, making these pies a more health-conscious choice compared to many other desserts. This allows you to enjoy a sweet treat without the pang of guilt often associated with indulging.

These mini pies are a fantastic option for social gatherings or entertaining guests. Their individual servings promote sharing and create an eye-catching dessert table. You can feel confident serving them, as they are sure to please both friends and family alike.

Lastly, this recipe is budget-friendly. Made with simple ingredients, it’s a cost-effective way to impress guests without breaking the bank. This accessibility makes it possible for anyone to recreate this delightful dessert.

Historical Background and Cultural Significance

The banana cream pie has roots that trace back to the late 19th century, originating in the United States. It became a popular dessert in diners and homes alike, particularly during the early to mid-20th century. The rise of mass-produced bananas also contributed to its popularity, making this formerly exotic fruit more accessible.

In American culture, banana cream pie has cemented its place as a classic dessert, often seen as a nostalgic dish that brings back memories of home-cooked meals and family gatherings. It signifies comfort and joy, often enjoyed during festive occasions or family reunions.

The evolution of the banana cream pie has seen various adaptations, including the modern mini versions we enjoy today. These smaller pies offer the same delightful taste while being more convenient for serving at parties or social events.

Regional variations of banana cream pie exist, with different interpretations such as the use of different crusts and flavor accents. These adaptations showcase the versatility of the dessert, allowing for creativity and personalization.

Ingredient Deep Dive

  • Bananas: Bananas are a staple fruit with a rich history linked to tropical regions. They are packed with essential nutrients like potassium and vitamin C, supporting heart health and digestion. When selecting bananas, choose those that are slightly ripe and free from bruises. Store them at room temperature and avoid refrigeration to maintain their natural sweetness. Substitute with other fruits like mango or berries for a different flavor twist.
  • Heavy Cream: Heavy cream is a luxurious ingredient known for its high-fat content, producing rich and creamy textures. Historically, it has played a vital role in many culinary traditions. Nutritionally, it provides a good source of calcium and fat. When selecting heavy cream, look for fresh, high-quality products. Store it in the refrigerator, and use it within a week of opening. For lighter options, half-and-half or coconut cream can be used as substitutes.
  • Graham Crackers: Graham crackers originated in the early 19th century as a health food by a diet reformer, Sylvester Graham. These crunchy treats are often used in pie crusts for their convenient and sweet flavor. Rich in whole grains, they also provide fiber. For optimal freshness, store them in a cool, dry place. If you prefer, you can substitute with digestive biscuits or crushed cookies.

Common Mistakes to Avoid

  • Using overripe bananas can lead to an overly sweet filling that lacks texture. Always select bananas that are ripe but still firm for the best flavor.
  • Not chilling the dessert long enough can result in a filling that doesn’t set properly. Allow the mini pies to refrigerate for at least two hours before serving.
  • Mixing the whipped cream too aggressively can lead to a grainy texture. Whip until soft peaks form for the best consistency.
  • Skipping the crust blind baking can cause a soggy bottom if you opt for a baked crust. This recipe, however, uses no-bake crusts, so this is not a concern.
  • Failing to layer the ingredients carefully can create a pie with inconsistent flavors. Take the time to layer the bananas and cream evenly for balanced taste.
  • Overfilling cups can lead to messy serving. Leave a little space at the top of the cups to accommodate toppings and prevent overflow.
  • Ignoring ingredient quality, especially when it comes to cream, may result in a less flavorful pie. Always use the freshest ingredients you can find.
  • Neglecting to cover the pies while they set can lead to a crust that absorbs moisture. Cover them lightly with plastic wrap to keep them fresh.

Essential Techniques

  • Whipping Cream: Whipping cream is important to create a light and airy filling for the pies. Start with cold cream and a chilled bowl or beaters to achieve optimal volume. Avoid over-whipping, which can cause the cream to turn grainy. Look for soft peaks before stopping the mixer to ensure the perfect texture.
  • Layering Ingredients: Proper layering prevents the flavors from blending together unnecessarily. Add a layer of sliced bananas, followed by the cream mixture, and then repeat. Visually cue for even distributions of each layer for a balanced dessert experience.
  • Chilling: Chilling allows the filling to set, ensuring each mini pie holds its shape when served. Be patient and refrigerate for at least two hours. A firm filling avoids spills and allows for easy presentation.

Pro Tips for Perfect No-Bake Mini Banana Cream Pies

  • For added flavor, consider mixing a dash of cinnamon or vanilla extract into the whipped cream before folding it into the filling.
  • Using a piping bag to distribute the cream filling can yield a cleaner and more polished look for your mini pies.
  • Top each pie with a sprinkle of crushed graham crackers or shaved chocolate for added texture and visual appeal.
  • For a fun twist, try adding a layer of caramel or chocolate sauce between the bananas and the cream.
  • Use ripe but not overly brown bananas to achieve the best flavor without being excessively sweet.
  • Allow the pies to sit at room temperature for a few minutes before serving for improved texture and flavor.
  • Experiment with different toppings like toasted coconut, nuts, or seasonal fruits for a unique spin on this classic dessert.
  • Pair these pies with a scoop of vanilla ice cream for an indulgent treat that elevates the dessert experience.

Variations and Adaptations

  • Consider making chocolate banana cream pies by incorporating melted chocolate into the cream filling, providing a decadent twist.
  • For a seasonal spin, use fresh strawberries or raspberries layered with bananas for a refreshing summery dessert.
  • If you want a gluten-free variation, substitute the graham crackers with gluten-free cookies to create a delicious crust.
  • During the holidays, try adding pumpkin spice to the cream for a festive flavor throughout the fall season.
  • Adding a layer of peanut butter or Nutella can turn these mini pies into a rich, indulgent dessert for chocolate lovers.
  • You can modify the texture by using a cookie crust baked until golden for a firmer pie base.
  • To enhance presentation, consider serving the pies in clear cups to showcase the beautiful layers inside.

Serving and Presentation Guide

  • Plating can be achieved by using elegant dessert cups or ramekins that showcase the layers. Individual servings add a personal touch.
  • Garnishing with whipped cream rosettes and a banana slice on top enhances both elegance and flavor.
  • Classic accompaniments include a drizzle of chocolate or caramel sauce that complements the banana flavor beautifully.
  • Serve with a side of fresh fruit or small cookies for added texture and variety on the dessert table.
  • Ensure the pies are served chilled for the best taste experience and a refreshing bite.
  • Controlling portions is key; aim for small dessert cups to maintain moderation while still satisfying sweet tooth cravings.

Wine and Beverage Pairing

  • Pair your mini banana cream pies with a sweet dessert wine such as a Moscato, which complements the banana flavor beautifully.
  • A delicious non-alcoholic alternative is iced tea, especially fruit-infused varieties that bring out fresh notes in the pie.
  • For a cozy touch, a warm cup of chai tea can be a perfect contrast to the cool creaminess of the pies.
  • When serving with coffee, opt for a light roast that won’t overpower the delicate flavors of the dessert.
  • Ensure drinks are served at a comfortable temperature to balance with the deliciously cold mini pies.

Storage and Shelf Life

  • To store mini banana cream pies, keep them in an airtight container in the refrigerator, where they will stay fresh for up to 3 days.
  • They should be kept at a consistent refrigerator temperature to avoid spoilage; avoid leaving them out for extended periods.
  • For freezing, consider storing the components separately; freeze the crust and filling separately to maintain texture.
  • Signs of spoilage include a sour smell or discoloration in the bananas; always check before consuming.
  • To reheat, it is typically unnecessary since they are served chilled; however, if components are frozen, allow them to thaw in the refrigerator.

Make Ahead Strategies

  • Prep the filling and crust one to two days in advance for a quick assembly before serving; this will help flavors meld beautifully.
  • Store leftover pies in the refrigerator wrapped well to preserve freshness until you are ready to serve.
  • To ensure optimal quality, avoid assembling until just before serving to prevent the crust from becoming soggy.
  • Keep toppings prepared and ready to add right before serving for a fresh touch and to maintain texture.
  • If you plan to serve the pies at a later date, consider preparing the filling and only assemble when needed for best results.

Scaling Instructions

  • To halve the recipe, simply reduce all ingredients proportionally while maintaining the same preparation steps for consistency.
  • Doubling the recipe is straightforward; just ensure you have enough mixing space and containers to hold the additional servings.
  • If tripling, consider using larger mixing bowls and storage containers to accommodate the increased volume of ingredients.
  • Timing modifications may include adjusting chilling times; larger batches may require a bit more time to set in the refrigerator.
  • For storage, remember that larger batches may require extra refrigerator space; stack mini pies carefully to avoid crushing.

Nutritional Deep Dive

  • These Mini Banana Cream Pies are a delightful treat, offering a satisfying balance of macronutrients with carbohydrates from bananas and fats from cream.
  • Balances of micronutrients include potassium, which bananas provide, essential for heart health and muscle function.
  • The health benefits of using bananas in desserts are significant; they contribute fiber that supports digestion.
  • For dietary considerations, be mindful that although delicious, these pies can be calorie-dense; portion control can help maintain a balanced diet.
  • When considering weight management, remember that savoring small bites can provide satisfaction without the need for large servings.

Dietary Adaptations

  • For a gluten-free option, use gluten-free graham crackers or almond flour to create a sturdy crust that retains the classic flavor.
  • A dairy-free adaptation can include coconut cream as a substitute for heavy cream, ensuring a rich texture while adhering to vegan diets.
  • For those following a vegan lifestyle, consider using a plant-based whipped topping and entirely plant-derived ingredients for a guilt-free dessert.
  • Low-carb versions can substitute bananas with lower-carb fruits such as strawberries, adjusting the sweetness with a sugar alternative.
  • For keto diets, adjust the recipe further by using keto-friendly substitutes for cream and sweeteners.
  • Paleo-friendly adaptations can be made by utilizing raw honey or maple syrup in place of refined sugar, with a nut-based crust.
  • Low-FODMAP versions may substitute bananas with firm varieties and monitor serving sizes to ensure digestive comfort.

Troubleshooting Guide

  • If your filling is too runny, it likely hasn’t been chilled long enough. Ensure a minimum of two hours in the refrigerator to set.
  • For a pie that doesn’t hold its shape, consider reducing the amount of whipped cream used, adding more cream cheese for texture.
  • If the flavor balance is off, assess if you’ve added sufficient bananas; they’re key to the sweet profile of the dessert.
  • When using different storage containers, incorrect sizes can lead to uneven chilling; ensure you’re using the right volume for even results.
  • Timing issues when preparing can lead to texture disparities; be sure to follow the suggested chilling times closely for best results.

Recipe Success Stories

  • Readers often share how this recipe has transformed their dessert tables, with family members constantly requesting these mini pies.
  • Variations like chocolate or peanut butter have also become popular among those who love exploring exciting flavor combinations.
  • Community feedback highlights that it’s a fantastic beginner recipe, giving many their first success in making desserts from scratch.
  • Photography tips from readers share how the aesthetic appeal of these mini pies captures attention and elevates any gathering.
  • Many report these pies as a hit at parties, sparking joy and conversation around a shared love for banana flavors.

Frequently Asked Questions

Can I use frozen bananas for this recipe?

It’s best to use fresh bananas for optimal texture and flavor. Frozen bananas can become too mushy when thawed, resulting in an undesirable pie filling.

How long can I leave the mini pies in the fridge before serving?

You can leave them in the fridge for up to 3 days, but they are best enjoyed within 24 hours to ensure the crust stays crisp and the bananas remain fresh.

Is it possible to make these mini pies ahead of time?

Absolutely! You can prepare the filling and crust a day ahead and assemble them just before serving to maintain freshness.

Can I make these mini pies dairy-free?

Yes! You can use coconut cream or a dairy-free whipped topping to create a delicious dairy-free option.

What is the best way to store leftovers?

Store leftovers in an airtight container in the refrigerator for up to 3 days. Cover them lightly to keep the crust from becoming soggy.

Can I use a pre-made crust instead?

Yes, you can use a store-bought crust for convenience, but the flavor and texture of a homemade crust often surpass pre-packaged options.

What if I don’t have mini cups?

If you don’t have mini cups, you can use larger ramekins or even a pie dish and serve with a spoon!

How can I make these pies more visually appealing?

Garnish with fresh banana slices, whipped cream rosettes, and a sprinkle of graham cracker crumbs dressed in colorful dessert cups for an attractive presentation.

Can I replace bananas with other fruits?

Yes! You can experiment with other fruits like strawberries or raspberries, but adjust the sweetness accordingly to maintain the flavor balance.

Is this recipe suitable for kids?

Absolutely! These mini banana cream pies are fun for kids to help make, and their charming size is perfect for little hands.

Additional Resources

  • Check out our collection of easy dessert recipes for more delicious ideas that require minimal effort.
  • Explore our guides on whipping techniques to master the art of achieving the perfect texture for creams and toppings.
  • If you’re interested in learning more about the nutritional benefits of bananas, our in-depth articles provide valuable insights.
  • We recommend investing in versatile dessert equipment that can help create various sweet treats beyond this pie.
  • Don’t miss our seasonal recipe variations, which adapt traditional recipes to fit the flavors of each season.

Join the Conversation

  • We invite you to share your variations of this recipe on social media to inspire others and spark creativity!
  • Photography tips can also enhance your posts, as visually appealing dishes often draw more attention and engagement.
  • Recipe reviews and personal experiences can provide valuable insights for fellow bakers, fostering a sense of community.
  • Feel free to discuss your adaptations with others, as sharing ideas always enriches cookbooks and recipes.
  • Join dedicated food forums and groups to connect with fellow cooks and fuel your passion for cooking.

The Recipe

No-Bake Mini Banana Cream Pies

Serves: 12 mini pies

Prep Time: 20 mins

Cook Time: 0 mins

Total Time: 20 mins

Kitchen Equipment Needed

  • Mixing bowls
  • Electric mixer or whisk
  • Mini pie cups or ramekins
  • Spatula
  • Piping bag (optional)

Ingredients

  • 3 ripe bananas, sliced
  • 2 cups heavy cream
  • 1/2 cup granulated sugar
  • 1 teaspoon vanilla extract
  • 1 cup crushed graham crackers
  • 4 tablespoons unsalted butter, melted

Directions

  1. In a mixing bowl, combine crushed graham crackers and melted butter; mix well.
  2. Press the mixture into the bottoms of your mini cups to form the crust.
  3. In a separate bowl, whip heavy cream until soft peaks form, then incorporate the sugar and vanilla.
  4. Fold in half of the banana slices into the whipped cream gently.
  5. Layer banana slices onto the crust, followed by the whipped cream mixture, then repeat the layers as preferred.
  6. Cover and refrigerate for at least 2 hours, allowing the pies to set.
  7. Serve chilled, topped with additional whipped cream and banana slices as desired.

Recipe Notes

  • For added flavor, consider mixing a dash of cinnamon or chocolate into your cream.
  • These mini pies can be made a day in advance, but are best enjoyed within 24 hours of assembly.
  • Feel free to experiment with different fruits or toppings to create your unique versions!

Authentic Kashmiri Pink Chai Recipe – Creamy & Flavorful

How to Make Kashmiri Pink Chai at Home – Easy Recipe!

⚖️
Difficulty
Easy

⏲️
Prep Time
10 mins

🕒
Cook Time
20 mins

⏱️
Total Time
30 mins

🍽️
Servings
4 servings

Kashmiri Pink Chai, also known as Noon Chai, is a delightful beverage that has gained popularity beyond its origin in the stunning landscapes of Kashmir. The mesmerizing light pink hue, achieved through a unique preparation process, captivates the eyes just as much as it enchants the palate. This fragrant tea, infused with spices and the creamy richness of milk, creates a comforting drink perfect for sharing during cold evenings or at festive gatherings.

Making Kashmiri Pink Chai at home is simpler than many believe. With a few ingredients and some technique, you can replicate the restaurant-quality pink chai right in your kitchen. This recipe not only guides you through the step-by-step process but also fills your home with the warmth of spices like cardamom and cinnamon. Enjoy the art of rolling the tea leaves to unleash the full spectrum of flavors and discover why this drink has become beloved universally.

Quick Recipe Highlights

  • Flavor Profile: The Kashmiri Pink Chai features a harmonious blend of sweet and savory flavors, highlighted by the subtle tang of salt and creamy richness from the milk.
  • Texture: This chai has a silky-smooth texture that makes every sip feel luxurious, complemented by the frothy foams created during whisking.
  • Aroma: The warming aromas of cardamom and cinnamon infuse the air, creating an inviting environment that enhances the chai-drinking experience.
  • Visual Appeal: The striking pink hue of the chai is mesmerizing, offering a feast for the eyes that complements its delicious taste.
  • Skill Level Needed: This recipe is beginner-friendly, featuring easy-to-follow steps that anyone can master.
  • Special Equipment: Having a traditional samovar is helpful, but a simple saucepan and whisk will suffice.

Recipe Overview

  • Difficulty Level: This easy recipe requires basic cooking skills and patience to develop the unique flavors, making it accessible for anyone to try.
  • Category: Kashmiri Pink Chai is a beverage, serving as a comforting drink that can be enjoyed at breakfast or as an afternoon treat.
  • Cuisine: This chai belongs to Kashmiri cuisine, which is known for its rich flavors and aromatic spices, showcasing a blend of Persian influences.
  • Cost: The approximate cost for making this chai is low, primarily involving pantry staples like tea leaves, milk, and spices.
  • Season: Perfect for chilly weather, Kashmiri Pink Chai can be enjoyed any time of year but is especially comforting in winter.
  • Occasion: This beverage is ideal for special gatherings, festive occasions, or as a unique treat during regular tea time.

Why You’ll Love This Recipe

Kashmiri Pink Chai stands out not only for its striking appearance but also for its incredible taste and texture. The combination of rich, creamy milk and the nutty, robust flavor of green tea creates a delightful contrast that keeps you coming back for more. With the addition of spices like cardamom and cinnamon, every sip is a warm embrace that soothes the soul. This beverage goes beyond just a drink; it provides a comforting experience that delights your senses and provides a moment of respite from the day.

Preparing Kashmiri Pink Chai at home is a rewarding experience. The method draws you into the calming ritual of making tea, allowing you to engage your senses fully. Boiling the tea leaves, whisking the mixture to bring out the frothy texture, and savoring the aroma as it brews turns the process into a culinary meditation. This ritual can transform ordinary moments into cherished ones, encouraging the tradition of family and friends sitting together over cups of warm chai.

Nutritionally, Kashmiri Pink Chai offers a unique blend of benefits. The tea provides antioxidants that contribute to overall health, while the milk adds calcium and protein, making it a wholesome choice. Pair your chai with some light snacks, and you have a balanced treat that not only satisfies your cravings but also nourishes your body in moderation.

When hosting gatherings, Kashmiri Pink Chai serves as a conversation starter. Its unique color and flavor profile intrigue guests, inviting them to try something new and celebrate the culture it represents. Sharing this chai becomes a gesture of hospitality, bridging gaps between diverse backgrounds while introducing flavors rooted in Kashmiri traditions.

Lastly, this chai is accessible to a broad audience. The ingredients are typically easy to find, making it a great option for anyone looking to try a new recipe without the hassle of sourcing exotic components. You can easily keep the kitchen stocked with what you need to whip up a comforting cup of Kashmiri Pink Chai whenever the craving strikes.

Historical Background and Cultural Significance

Kashmiri Pink Chai, or Noon Chai, traces its origins to the enchanting region of Kashmir, where it has been a staple for centuries. Traditionally served at celebrations, weddings, and during cold winters, this chai not only provides comfort but also symbolizes the heritage and hospitality of the Kashmiri people. Rooted in Persian influences, it reflects the region’s rich cultural tapestry.

The cultural significance of this tea cannot be overstated. Imbued with warmth and character, it has played a central role in Kashmiri hospitality, often being served to guests as a show of respect and generosity. Additionally, Noon Chai is deeply intertwined with societal rituals, often accompanying traditional meals during gatherings and special occasions.

As the years progressed, Kashmiri Pink Chai has evolved from a customary drink to a trendy beverage found in cafes worldwide. While many modern variations have emerged, the core ingredients and preparation methods remain closely aligned with the original tradition. This evolution has allowed the beverage to reach an ever-growing audience while preserving its deep-rooted cultural significance.

Interestingly, regional variations of Noon Chai exist, showcasing how different families and communities interpret this cultural treasure. Whether adapted with unique spices or served with different types of milk, these variations tell stories of the families that steep them and the robust history that Kashmiri Pink Chai embodies.

Ingredient Deep Dive

  • Green Tea Leaves: Essential for creating the signature flavor of Kashmiri Pink Chai, the green tea is traditionally used for its robust character and health benefits. When selecting tea, look for high-quality, whole leaves for the best flavor extraction. Proper storage in a cool, dark place will keep the leaves fresh, while alternatives such as black tea can be used for a different flavor profile.
  • Milk: Typically whole milk is used, contributing to the creamy texture. The choice of milk can vary with preferences for dairy or non-dairy alternatives. High-fat milk enhances the richness of the chai, while lower fat options may alter the overall taste. Consider full-fat dairy for optimal results, and store any leftovers in the refrigerator to maintain freshness.
  • Cardamom: This spice adds warmth and depth to the chai. It is essential for flavoring and can also offer numerous health benefits. Freshly cracked cardamom pods will provide the best flavor. Store any unused pods in an airtight container, and consider substitutions such as cinnamon or nutmeg for different flavor profiles.
  • Salt: A unique addition in Kashmiri Pink Chai, salt balances the sweetness and enriches the overall taste. It’s best to use a fine-quality sea salt for optimal flavor. When adding salt, do so gradually, adjusting to personal taste preferences.

Common Mistakes to Avoid

  • Not using freshly cracked cardamom: To achieve an authentic flavor, always use freshly cracked cardamom pods rather than pre-ground spices.
  • Skipping the whisking step: Whisking the chai is crucial to releasing its signature foamy texture and ensuring the flavors blend properly.
  • Using low-fat milk: Whole fat milk yields the creamy consistency characteristic of Kashmir Pink Chai, so avoid low-fat variants unless needed.
  • Boiling the tea for too long: Over boiling can create a bitter taste in the tea, so be attentive to the brewing time.
  • Neglecting the salt: The salt is an essential ingredient in Kashmiri Pink Chai, enhancing the overall flavor; don’t omit it.
  • Not letting the tea steep enough: Allow the tea to brew properly to develop the full flavor profile; 10-15 minutes is ideal.
  • Rushing the process: The preparation of this chai is an art that requires time and patience for best results.
  • Forgetting to strain: Ensure to strain the chai well before serving to eliminate any undissolved particles.

Essential Techniques

To successfully create Kashmiri Pink Chai, the whisking technique is vital. This step incorporates air, resulting in the frothy texture characteristic of the beverage. To master this technique, use a traditional whisk or a hand-held mixer until your chai has a light and airy consistency. Common pitfalls include not whisking enough or doing it too roughly, which can create bubbles but not the velvety texture desired. Visual cues of success include a luminous pink hue and an airy froth topping.

Another essential technique is the proper brewing of the tea leaves. This is where you allow the flavors to steep and develop complexity. Master this technique by paying attention to time and temperature; have the water boiling before you introduce the tea. A common mistake is to rush this step, which results in a lackluster flavor. Look for a rich, bold scent and a rosy color as indicators that your tea has brewed adequately.

Pro Tips for Perfect Kashmiri Pink Chai

1. Start with high-quality loose leaf green tea to enhance the flavors and aroma of the chai.
2. Create a lush color and texture by whisking vigorously to ensure proper incorporation of air.
3. Don’t skip the resting period after boiling; letting the chai rest will enhance its flavors.
4. Experiment with spices; feel free to add star anise or cloves for a personal touch.
5. Adjust the salt content according to taste, balancing the sweetness and creaminess.
6. For an extra decadent version, try splashing a bit of evaporated milk for richness.
7. Serve with traditional accompaniments like sweet pastries or cookies for an authentic experience.
8. For a festive touch, consider garnishing with crushed pistachios for visual appeal and added texture.

Variations and Adaptations

Explore regional variations of Kashmiri Pink Chai by adjusting the spices based on local preferences. For instance, adding rose water can enhance floral notes, creating a lighter beverage perfect for summer occasions. Seasonal adaptations might include infusing autumnal flavors like nutmeg and ginger to warm the body during colder months.

When it comes to dietary modifications, those avoiding dairy can substitute regular milk with almond or soy milk, creating a delightful vegan version of this classic drink. For a unique twist, introduce flavor variations by incorporating sweeteners like honey or flavored syrups to customize your chai experience further.

Texture modifications can also be applied by blending the chai for a creamier finish or leaving it chunky for a more rustic feel. Presentation alternatives include serving it in colorful glasses or traditional Kashmiri cups, enhancing the overall experience with visual interest.

Serving and Presentation Guide

Plating techniques for Kashmiri Pink Chai can enhance guest experience. Consider using traditional Kashmiri cups for authenticity, or elegant glasses for a modern touch. Garnish the chai with crushed almonds or pistachios, adding visual and crunch elements.

Accompanying snacks can further elevate the experience; serve with sweet breads or light pastries that complement the chai’s rich flavor. Temperature is crucial—serve hot to maximize the chai’s soothing properties; it should be steaming but not scalding.

Portion control is another aspect to consider: traditionally, chai is served in small cups to encourage sipping and sociability. This method fosters conversation and allows guests to have multiple servings without excessive indulgence.

Wine and Beverage Pairing

While wine isn’t the typical accompaniment for Kashmiri Pink Chai, certain non-alcoholic beverages pair seamlessly. A light soda or sparkling water infused with lemon can cleanse the palate between sips. If you’re looking for a tea pairing, consider serving curry-flavored teas that complement the spices within the chai.

For unique pairings, a smooth, creamy latte could enhance the chai’s profile without overwhelming it. Avoid overly sweet or heavy beverages, which can overshadow the elegant flavors of the chai. Aim for refreshing options that don’t compete but rather harmonize with the warm, inviting chai.

Temperature considerations are also essential when serving—you want to ensure that guests enjoy their chai at the desired warmth. Presenting it in heat-retaining mugs can help maintain its temperature throughout your gathering.

Storage and Shelf Life

When it comes to storing Kashmiri Pink Chai, it’s best enjoyed fresh, but if you have leftovers, store them in an airtight container in the refrigerator for up to three days. Reheating can bring back the chai’s cozy charm; gently warm it on the stove while whisking to restore some of its delicious texture.

For optimal flavor, avoid freezing as it can alter the texture and taste. If reheating, aim for a low and slow method; high heat can scorch the chai. Pay attention to visual signs of spoilage, such as changes in color or the presence of sediment, indicating that it’s best to discard.

As with any tea, it’s crucial to keep the storage container clean and free from other strong odors, preserving the chai’s delicate flavors. Consuming within a few days is advisable for maintaining freshness and taste.

Make Ahead Strategies

To prepare ahead for a gathering, you can follow a few simple strategies. Brew the tea and store it separately from the milk; this will keep the flavors intact until serving time. If desired, whisk the chai and store it in an insulated container to maintain warmth.

Consider preparing the spice mix in advance, allowing them to infuse overnight, enhancing the flavor when added during the final brew. Chilling the milk beforehand can also save time on the day of your event, enabling a quick reheat.

Be sure to plan your serving timeline accordingly; ideally, reheat the chai just before serving to ensure guests enjoy it at its best. Fresh ingredients like nuts can be added just before serving for added crunch and flavor.

Scaling Instructions

If you need to scale the Kashmiri Pink Chai recipe, adjust the quantities of your ingredients while keeping the proportions consistent. Halving the recipe is straightforward, and you can use half of the specified amounts.

When doubling or tripling, consider the equipment size: ensure you have a large enough pot to accommodate the increased volume without overflowing. Timing may need adjusting when increasing the batch size; larger quantities take longer to brew effectively.

For storage considerations, be mindful that larger amounts may require multiple containers. When scaling, keep the cooking method and timings in mind to ensure the same quality is maintained across all servings.

Nutritional Deep Dive

Kashmiri Pink Chai provides a well-rounded macro breakdown, primarily consisting of carbohydrates from the milk and sugars added, minor protein from the dairy, and healthy fats if whole milk is used. The antioxidants present in green tea contribute to overall well-being, promoting improved metabolism.

Micronutrient analysis indicates that this chai offers calcium and vitamins from milk, while spices like cardamom provide essential oils known for their anti-inflammatory properties. Drinking this chai in moderation can aid digestion and improve heart health.

For dietary considerations, be aware that portion sizes matter; the creamy depth of chai can lead to calorie accumulation. Consider offering smaller servings alongside mindful snacks to enhance both enjoyment and nutritional balance while keeping a keen eye on sweetness levels if managing sugar intake.

Dietary Adaptations

Kashmiri Pink Chai can be easily adapted to fit various dietary needs. For gluten-free options, the recipe is naturally gluten-free; simply ensure any accompanying treats are also gluten-free.

To create a dairy-free version, substitute regular milk with almond, soy, or oat milk. This not only accommodates lactose intolerance but also introduces unique flavor profiles to the chai itself.

Vegan adaptations are straightforward, allowing all components to come from plant sources. Low-carb variations can focus on reducing the sugar content or using low-calorie sweeteners that maintain the chai’s essence while fitting within dietary restrictions.

For those on the keto or paleo diets, consider preparing a nut-based milk and ensuring the sweeteners align with dietary goals. Making these adaptations doesn’t compromise the beloved traits of this traditional drink but rather expands its reach.

Troubleshooting Guide

If you encounter a grainy texture, ensure you’ve strained the chai well to eliminate undissolved particles. This is critical for achieving that silky smooth mouthfeel.

For flavor balance issues, consider adjusting the spice levels; adding more cardamom or salt can enhance the chai’s profile if it comes off too sweet or bland. It’s often beneficial to taste as you go along.

Temperature problems can affect enjoyment—if your chai cools too quickly, serving it in insulated mugs can help maintain warmth. To resolve issues with the tea being too bitter, ensure you’re not over-brewing the leaves and avoid boiling the mixture too rapidly.

If using plant-based milks, be aware that some may curdle when heated too harshly. Opt for gentle reheating methods and add the milk slowly to prevent curdling.

Recipe Success Stories

Community feedback on making Kashmiri Pink Chai is overwhelmingly positive, with many praising its ability to bring families together. Readers often share their personal variations, highlighting regional spices or ingredients that showcase their unique heritage while honoring tradition.

Many readers have observed success by tweaking the brewing times or altering the milk types to suit their tastes. Adaptation stories reflect the inclusive nature of this recipe, making it versatile in various cultural contexts.

Suggestions from readers often include pairing chai with specific sweets or biscuits, enhancing the experience with complementary flavors that resonate well with the rich chai.

Photography tips arise often as this stunning chai tends to be a favorite subject for social media shares, encouraging others to appreciate its visual appeal as much as its delicious taste.

Frequently Asked Questions

What makes Kashmiri Pink Chai different from regular chai? Kashmiri Pink Chai utilizes green tea and incorporates milk to create a creamy texture enhanced with salt and spices, resulting in its unique flavor profile and iconic pink hue.

Can I make this chai without a whisk? While a whisk helps achieve the desired frothy texture, you can use a blender to create a similar effect. Just ensure not to make the mixture too airy.

Is Kashmiri Pink Chai caffeine-free? Since it uses green tea leaves, it does contain caffeine, but it’s lower than black tea. Decaffeinated versions of green tea can be used for a caffeine-free option.

How long can I store leftover chai? Store leftover Kashmiri Pink Chai in the refrigerator for up to three days. For best results, consume it fresh.

What are traditional snacks to serve with Kashmiri Pink Chai? Traditional snacks include sweet breads, pastries, or dry fruits. These complement the chai’s rich flavors beautifully.

Can I use condensed milk in my chai? Yes, using condensed milk adds sweetness and richness. Adjust the sugar levels accordingly if you opt for condensed milk.

How do I achieve the perfect pink color? The key to achieving the signature pink is whisking the tea properly during preparation and allowing it to oxidize. Ensure good air incorporation.

Is it possible to make a large batch? Absolutely! Just scale up the ingredients while keeping the proportions consistent and use a larger pot to brew.

Can I use flavored teas? Yes, variations can include using flavored green teas, but traditional recipes extra emphasize the unique flavors of plain green tea.

How do I avoid bitterness in my Kashmir Pink Chai? Avoid boiling the tea for too long and monitor the steeping time closely to keep the flavors balanced and pleasant.

Additional Resources

If you’re keen to explore more recipes, check out our collection of traditional beverage recipes inspired by the vibrant cultures around the world. Dive into ingredient guides that elaborate on unique spices commonly used in Eastern cuisine.

Explore further into chai techniques, including different brewing methods or alternative flavor combinations for a unique twist on your favorite drinks. You can also find equipment recommendations for making the perfect brewed beverages at home.

Keep an eye out for seasonal variations, ensuring your chai recipe evolves with the changing seasons, offering health benefits and culinary excitement throughout the year.

Join the Conversation

We invite you to share your experiences and adaptations when making Kashmiri Pink Chai. Consider posting your success stories or variations on social media platforms, sparking joy and creativity among fellow chai enthusiasts.

Engage with our community by sharing photographs of your chai creations and tips for perfecting the traditional recipe. Your contributions can inspire others and create a collective appreciation for this stunning beverage.

Feedback on your experiences is invaluable. We encourage you to leave your thoughts or suggestions in the comments, fostering a strong community around the rich traditions and modern adaptations of Kashmiri Pink Chai.

The Recipe

Kashmiri Pink Chai

Serves: 4 servings

Prep Time: 10 mins

Cook Time: 20 mins

Total Time: 30 mins

Kitchen Equipment Needed

  • Medium-sized saucepan
  • Whisk (or traditional wooden whisk)
  • Strainer
  • Measuring cups and spoons

Ingredients

  • 2 cups water
  • 2 tablespoons green tea leaves
  • 1/4 teaspoon salt
  • 2 cups whole milk
  • 2-3 green cardamom pods, crushed
  • Sugar to taste (optional)

Directions

  1. In a medium-sized saucepan, bring water to a boil.
  2. Add green tea leaves and crushed cardamom, then simmer for about 10 minutes.
  3. Whisk vigorously to aerate the mixture, enabling the color to change to a pink hue.
  4. Add the milk and salt, and whisk again. Simmer for another 5-10 minutes.
  5. Remove from heat and strain into serving cups.
  6. Add sugar to taste, if desired, and serve hot garnished with nuts.

Recipe Notes

  • For an extra twist, try adding a splash of rose water.
  • Adjust the sweetness level according to your preference; less sugar enhances the chai’s authenticity.
  • Feel free to experiment with different spices to find your perfect blend.

Best Strawberry Shortcake Frappe Starbucks Copycat Recipe

Delicious Strawberry Shortcake Frappe: A Refreshing Treat!

⚖️
Difficulty
Easy

⏲️
Prep Time
10 mins

🕒
Cook Time
0 mins

⏱️
Total Time
10 mins

🍽️
Servings
2

Indulge in the delightful flavors of a Strawberry Shortcake Frappe, a refreshing drink inspired by the beloved dessert. This creamy treat brings together the sweetness of strawberries with the richness of whipped cream, making it the perfect summertime beverage. Whether you’re lounging by the pool or need a quick pick-me-up, this drink promises to transport your taste buds to dessert heaven.

The Strawberry Shortcake Frappe combines fresh strawberries, creamy ice cream, and a hint of vanilla, all blended to perfection. This velvety drink isn’t just delicious; it offers a satisfying contrast of textures—from the smooth consistency of the frappe to the bursts of strawberry flavor. You can even customize this recipe by adding extra toppings for an Instagram-worthy presentation that will impress any guest.

Quick Recipe Highlights

  • Flavor Profile: The Strawberry Shortcake Frappe boasts a balanced sweetness with a refreshing essence of fresh strawberries, perfectly complemented by creamy undertones.
  • Texture: This beverage showcases a smooth and creamy texture, with occasional bits of strawberry for added delight on the palate.
  • Aroma: Expect a lovely combination of fresh strawberries and rich cream that invites you to enjoy every sip.
  • Visual Appeal: The vibrant red of the strawberries combined with the creamy white of the whipped topping makes for an enticing presentation.
  • Skill Level Needed: This recipe requires no advanced cooking skills, making it accessible for anyone who wants a refreshing treat.
  • Special Equipment: A blender is essential for achieving the perfect frappe consistency.

Recipe Overview

  • Difficulty Level: This Strawberry Shortcake Frappe is classified as easy, making it a perfect choice for novice cooks. With minimal ingredients and straightforward blending steps, anyone can prepare this delightful drink.
  • Category: This recipe falls under beverages and desserts, making it a versatile addition to a summer menu, parties, or afternoon snacks.
  • Cuisine: While inspired by American dessert traditions, this frappe incorporates classic elements found in many global dessert drinks.
  • Cost: The approximate cost for this recipe is budget-friendly, making it accessible for most households and suitable for gatherings.
  • Season: Best enjoyed in warm weather, this frappe is a refreshing option perfect for spring and summer months when strawberries are in season.
  • Occasion: Ideal for casual get-togethers, pool parties, or as a sweet afternoon treat, this frappe fits countless occasions.

Why You’ll Love This Recipe

The Strawberry Shortcake Frappe is a celebration of sweet, juicy strawberries blended into a creamy delight that satisfies your dessert cravings while keeping you refreshed. It’s not just about taste; the combination of flavors and textures meld into a perfect summer drink. Each sip transports you to a sunny picnic, evoking happy memories and flavors of freshly baked strawberry shortcake.

Not only does this frappe offer an indulgent treat without much effort, but it also allows for quick preparation—ideal for busy days when you still crave a sweet escape. With just a few ingredients readily available, you won’t spend hours in the kitchen to enjoy a restaurant-level experience in your own home.

Nutritionally, this drink can provide energy through its natural sugars from strawberries while being customizable to suit dietary preferences. Adding extra fruits or low-fat ice cream can enhance the nutrient content, making it a more wholesome indulgence.

Socially, this Strawberry Shortcake Frappe adds an element of fun to any gathering. Guests will appreciate the effort behind this drink, and it’s likely to be a conversation starter, especially with its vibrant appearance.

Moreover, its cost-effectiveness makes it a win-win for summer parties or evenings on the patio. You can serve a crowd without breaking the bank while enjoying a delightful homemade frappé.

Historical Background and Cultural Significance

The origins of strawberry shortcake trace back to the 19th century in North America, evolving from a simple biscuit-like cake topped with strawberries and cream. This dessert gained popularity as strawberries became more accessible and integrated into American culinary traditions. The transition of the dessert into drinks aligns with contemporary trends that blend traditional flavors into refreshing concoctions.

Culturally, strawberry shortcake holds a beloved place in American dessert history, often associated with summer celebrations and barbecues. The drink version takes this seasonal favorite to another level, making it a thirst-quenching counterpart to the classic dessert.

Over the years, the strawberry shortcake has evolved into various interpretations, inspiring numerous recipes across different cuisines. By melding this dessert into a frappe, we retain its essence while modernizing it for diverse palates.

Regional variations often showcase local fruits, such as peaches or blueberries, making this beverage adaptable and inviting experimentation based on available ingredients or personal preferences.

Ingredient Deep Dive

Fresh strawberries are the star ingredient of our Strawberry Shortcake Frappe. Known for their vibrant color and sweetness, strawberries are celebrated for their high vitamin C and antioxidant content. When selecting strawberries, look for firm, plump berries with a bright red hue. Proper storage involves keeping them refrigerated and consuming them within a few days to maintain their freshness.

Ice cream adds a creamy texture to the frappe and can also be switched out for frozen yogurt or non-dairy alternatives, accommodating various dietary needs. Full-fat ice cream offers richness, while lighter options create a similar texture with fewer calories. It’s important to consider ingredient freshness, as older ice cream can develop off-flavors.

Vanilla extract enhances the overall flavor of the frappé, lending depth to the drink. This aromatic ingredient is often overlooked but can easily elevate a recipe. When using vanilla extract, opt for pure extract for the best flavor, and be mindful of its potency—just a splash goes a long way.

Common Mistakes to Avoid

  • Not using fresh strawberries: Always opt for ripe, fresh strawberries to maximize flavor. Using stale or overly ripe fruit can result in a mushy drink.
  • Over-blending the mixture: Blend just until smooth; over-blending can lead to a watery consistency. Aim for a balance of creaminess and thickness.
  • Neglecting to taste: Always taste your frappe before serving; you may need to adjust sweetness or flavor intensity with more strawberries or ice cream.
  • Using low-quality vanilla: The choice of vanilla extract significantly affects the final taste. Use high-quality pure vanilla extract rather than imitation for best results.
  • Ignoring serving temperatures: Serve immediately for optimal flavor. Allowing the frappe to sit can change its texture and temperature.
  • Adding too much ice: Too much ice can dilute the flavor of the frappe, leading to a less enjoyable drink experience. Stick to the required amount for the best results.
  • Forgetting garnish: A simple garnish of whipped cream and fresh strawberries adds visual appeal and enhances the drinking experience.
  • Not chilling your glass: For a frosty experience, chill your glasses beforehand. This simple step enhances the presentation and enjoyment of the drink.
  • Using soft-serve ice cream: Using soft-serve can lead to a less creamy consistency. Choose quality hard-packed ice cream for best results.
  • Skipping customization: Don’t hesitate to add your favorite ingredients or substitutes to personalize the drink to your preference.

Essential Techniques

Blending is crucial to achieving the perfect f frappe texture. Proper blending involves starting with lower speeds and gradually increasing them. This method allows the ingredients to combine seamlessly without turning your drink watery. A visual cue for success is a smooth, creamy mixture without lumps; this ensures all flavors meld perfectly.

When it comes to flavor balancing, how you adjust sweetness can define your final result. A good rule of thumb is to taste before serving and adjust as necessary. Providing the right sweetness enhances the overall flavor without overpowering the natural strawberry essence. A visual cue is observing the color; if it appears too pale, it might need an extra boost of berries or ice cream.

Pro Tips for Perfect Strawberry Shortcake Frappe

Using frozen strawberries can enhance the drink’s texture, making it chilled and thick without diluting flavor. Keep frozen berries handy to whip up a frappe anytime. Also, consider blending ingredients quickly after measuring them to maintain their freshness.

Experiment with different ice cream types, such as gelato, for a denser texture. For a dairy-free option, consider coconut cream or almond-based ice creams that still provide a creamy finish.

Create a layered appearance by alternating layers of strawberry puree and whipped cream while pouring the frappe for a beautiful presentation. This tactic not only looks appealing but enhances the overall flavor experience.

Pre-chill the glasses to keep the frappe cool longer and serve with a decorative straw or spoon, which adds a playful touch to your drink.

For a healthier twist, consider replacing part of the ice cream with Greek yogurt for added protein without sacrificing creaminess. The versatility of ingredients means you can personalize the frappe to suit many tastes.

Enhance flavor with optional extracts like almond or coconut for a unique touch that distinguishes your frappe from others. Always taste as you explore different flavors.

Variations and Adaptations

Explore regional variations by incorporating seasonal fruits—the Strawberry Shortcake Frappe can be deliciously adapted with peaches or blueberries during their peak seasons. This switch entices new flavors while keeping the essence of the beverage.

Consider dietary modifications for guests with specific needs. For a vegan option, use plant-based ice cream and non-dairy milk, ensuring everyone can enjoy this delightful drink.

To tailor the flavor, experiment with adding a splash of citrus juice, like lemon or lime, which can brighten and enhance the berry notes. Alternatively, factor in seasonal herbs like mint to create a refreshing layer of complexity.

If you’re looking to modify the texture, opt for responsive ingredients; for instance, blending in a banana can add creaminess while also acting as a natural sweetener. This keeps the drink refreshing without compromising flavor.

Finally, think about presentation alternatives; use mason jars for a rustic vibe or sophisticated glassware for a formal occasion. The right glass can add a touch of elegance to your serve.

Serving and Presentation Guide

Plating techniques for your Strawberry Shortcake Frappe can significantly enhance its appeal. Serve in clear glasses to showcase the rich colors and textures, adding a dollop of whipped cream on top provides a creamy contrast.

Garnishing ideas include slivers of fresh strawberry or a sprig of mint to elevate the visual appeal. Consider drizzling caramel or chocolate sauce inside the glass before pouring in the frappe for a stunning effect.

Traditional accompaniments might include thin slices of shortcake or fun cookies served on the side for added fun. Modern serving suggestions could involve pairing with a light salad for a delightful brunch option.

Temperature considerations affect how the flavors bloom; serve the frappé cold, ideally immediately after blending, to preserve its refreshing attributes. This drink can be enticingly frosty served immediately after blending.

Portion control tips suggest serving in smaller glasses to allow guests to sample a variety of drinks or desserts without overwhelming their taste buds, bringing a balanced tasting experience to your table.

Wine and Beverage Pairing

For a delightful pairing with your Strawberry Shortcake Frappe, consider sweet dessert wines such as Moscato or a sparkling rosé that harmonizes with the fruity vibrancy of the drink. These wines enhance the overall experience without competing with the drink’s flavors.

Non-alcoholic alternatives can include sparkling herbal teas that echo the freshness of strawberries while offering a bubbly effect. This pairing is particularly refreshing and can be enjoyed by all inviting guests to partake.

If you wish to enhance or contrast the drink, consider serving herbal teas like chamomile or mint, which can cleanse the palate while complementing the refreshing strawberry notes.

Temperature matters—ensure beverages are served chilled, paralleling the frappé’s icy essence which keeps your drink experience refreshing and smooth.

Finally, offering an iced coffee can create a fun contrast, especially for those who enjoy layering flavors! The coffee’s boldness serves as a delicious counterpoint.

Storage and Shelf Life

Store any leftover Strawberry Shortcake Frappe in an airtight container, preferably in the freezer if you like thicker textures; this will help maintain the drink’s flavor and frosty consistency. Keep it chilled for up to 1-2 days, but note that freshness is paramount—consuming it sooner rather than later yields the best results.

When it comes to temperature requirements, ensure your drink remains frozen until ready to serve; thawing will alter flavor and consistency. Serve immediately after blending for best results.

A clear, durable container suited for freezing ensures your drink maintains its delightful texture and flavor. Avoid glass containers which may break under freezing conditions; opt for plastic instead.

Signs of spoilage include an off smell or color changes; if the frappé appears icy but has been in the fridge too long, it’s best to err on the side of caution and discard it.

When reheating isn’t an option for this drink, always consider blending it fresh. Freezing previous blends may cause textural changes—maintain optimal quality with fresh ingredients each time.

Make Ahead Strategies

Preparing ingredients in advance can streamline your frappé-making process. Consider pre-slicing strawberries and freezing them for later use; this will cut down on prep time when you’re ready to blend.

For best storage between steps, keep your dry ingredients pre-mixed and store them in an airtight container. This keeps your base ready to go—just blend when you’re ready to serve.

The quality of the frappe does depend on when it’s assembled—components should be used shortly after preparation to maintain the ideal balance of flavor and texture.

Assembly tips include blending and serving immediately for the best taste experience. Having your garnishes ready ahead of time will make serving quick and easy, allowing you to enjoy your company without long waits.

Finally, consider adding fresh elements like crushed mint or more strawberries right before serving. This retains freshness and enhances flavors, giving your drink an attractive finish.

Scaling Instructions

To halve the Strawberry Shortcake Frappe recipe, simply cut the ingredients in half. This is perfect for smaller gatherings or when you want to test variations without preparing a full batch.

If you find the need to double or triple this recipe for parties, ensure your blending equipment can accommodate larger quantities. Blending in smaller batches may give better results.

Equipment adjustments may involve using a larger blender or processing the mixtures in parts, allowing for easier blending without compromising the drink’s integrity.

Timing modifications are essential when scaling up; longer blending times may be necessary to ensure consistency across larger batches. Keep an eye on texture to avoid over-blending.

When storing scaled recipes, consider spacing them out into individual servings or group them within a larger container but keeping the fridge and freezer space in mind for optimal storage.

Nutritional Deep Dive

The macro breakdown of the Strawberry Shortcake Frappe often includes substantial carbohydrates from the sugars in strawberries and ice cream, providing a quick energy source. Fat content varies based on your choice of ice cream, with options available to fit various dietary needs.

Micronutrient analysis shows strawberries packed with vitamin C, manganese, and antioxidants, promoting health benefits like improved skin and heart health. The inclusion of cream or alternative ingredients can enhance or reduce calorie intake.

Health benefits of enjoying this drink include a refreshing source of hydration combined with immune-boosting vitamins from strawberries. Furthermore, the dairy from the ice cream aids in calcium intake, giving you multiple positives in each sip.

Dietary considerations are essential; while the base recipe is rich and sweet, it can be adjusted to be lighter or more nutrient-dense. Consider options for high-protein ice cream or non-dairy variants that fit specific dietary practices.

Portion analysis should be kept in mind—noting that while delicious, this drink can be rich in calories. Moderation is key for enjoying while maintaining balanced nutrition, especially in social settings where multiple desserts may be presented.

Weight management tips recommend that while this is a tasty beverage, it’s best enjoyed occasionally rather than as a daily staple, allowing for indulgence without discomfort.

Dietary Adaptations

For a gluten-free version of the Strawberry Shortcake Frappe, ensure that the ingredients, especially any sprinkles, are certified gluten-free. The base recipe is naturally gluten-free, providing an inclusive option for those with dietary restrictions.

A dairy-free adaptation can be achieved using almond or coconut ice cream, alongside non-dairy milk alternatives. This not only enhances accessibility but can lend exciting new flavors to your frappe.

If you’re looking to make this recipe vegan, swap the standard ice cream out for plant-based varieties and use maple syrup to maintain sweetness without using dairy.

Low-carb or keto enthusiasts can utilize more almond milk or sugar-free ice cream alternatives to create a similarly delicious drink while sticking to dietary goals. Explore recipes that still indulge while being mindful of carb counts.

Paleo followers may appreciate using coconut cream for added richness while avoiding processed sugars—this creates a clean yet delicious version of the frappé.

Consider experimenting with other specific diets, including low-FODMAP options that involve utilizing lactose-free ice cream and ensuring all additives are compliant with dietary needs.

Troubleshooting Guide

Texture issues often arise from incorrect blending; strive for that perfect creamy consistency without becoming too watery. If your frappe turns too thick, consider adding more milk or ice cream to adjust.

Flavor balance can be disrupted if the sweetness overwhelms the natural strawberry taste. If this occurs, introducing a dash of lemon juice can elevate flavors and restore balance.

Temperature problems appear when drinks aren’t enjoyed immediately—if your frappe starts to melt too quickly, consider serving it in chilled glasses or pre-chilling your ingredients.

Equipment challenges may occur if your blender is too small; blending in batches will improve textures and ensure thorough mixing without burning out your machine.

Ingredient substitutions may lead to unexpected results; always consider the role of each component and how modifications can impact overall flavor and consistency.

Timing concerns arise if the frappe is prepared too early. Ideally, blend right before serving to maintain optimal freshness—this gives the best drinking experience.

Recipe Success Stories

Community feedback reflects positive experiences with the Strawberry Shortcake Frappe. Many families share how it’s become a favorite summer tradition for backyard barbecues, with kids particularly enjoying the flavor.

Variation successes often come from fresh fruit substitutions, leading to flavorful anecdotes of creating peach or berry blend frappes that surprise and delight family gatherings.

Readers often convey similar suggestions—adding crushed ice or coconut flakes elevates their drinks while integrating personal tastes, proving how easily adaptable this recipe can be.

Photography tips consistently highlight the vibrant colors in the drink as enticing visual stories for social media, emphasizing the celebratory feel that this frappé brings to any occasion.

Additionally, many attest to the versatility of this beverage, often scaling down the recipe for intimate gatherings or brunches, ensuring everyone experiences this delightful treat without excess waste.

Frequently Asked Questions

1. Can I use frozen strawberries instead of fresh?
Yes! Frozen strawberries are great for maintaining the frappé’s chill factor and can give a thicker consistency. Just make sure they are unsweetened for best results.

2. How long can I store leftover frappé?
For optimal flavor and texture, it’s best consumed fresh. However, it can last in the freezer for up to 2 days; if it starts to separate, blend again before serving.

3. Can I make this recipe dairy-free?
Absolutely! Substitute with non-dairy milk and a dairy-free ice cream option to enjoy a delicious vegan version.

4. What if I don’t have vanilla extract?
You can substitute with vanilla bean paste or even almond extract for a different twist in flavor.

5. Is it possible to scale the recipe up for a party?
Yes, this recipe is easy to double or triple. Just ensure your blender can handle larger batches without compromising texture.

6. Can I add spinach or kale for added nutrition?
Definitely! Those greens can blend well and provide nutritional benefits without altering the sweet flavor significantly.

7. What’s the best way to serve this frappé?
This frappé is best served immediately in a chilled glass, garnished with whipped cream and fresh strawberries for a delightful presentation.

8. Can I use other fruits in this recipe?
Yes, you can experiment with various fruits such as mangoes or blueberries to switch up the flavors while keeping the same base recipe.

9. Will the taste change if I freeze it?
While freezing will maintain texture, the flavor might dull slightly, so it’s always best enjoyed shortly after making it.

10. What’s the best way to make it thicker?
To create a thicker frappé, consider using less milk or adding a frozen banana as a natural thickness enhancer.

11. Can I make this ahead of time?
It’s recommended to prepare the ingredients in advance but blend just before serving to maintain the best texture and flavor.

12. Is there a low-calorie option for this frappé?
Yes, you can use low-calorie ice cream or yogurt and reduce the amount of added sugars to lower the calorie count significantly.

Additional Resources

Explore related recipes like smoothies and milkshakes, which share similar components while providing varied flavor profiles. For technique guides, consider resources on blending tips to master perfectly smooth beverages.

Delve into ingredient information for strawberries to understand their health benefits and nutritional value. Equipment recommendations like high-speed blenders can enhance your frappé-making adventures.

Keep an eye out for seasonal variations that highlight the freshest fruits available; utilizing what’s in season can inspire new recipes and make the experience more enjoyable and sustainable.

Join the Conversation

Engage with your community by sharing your own Strawberry Shortcake Frappe experiences on social media! Share photographs, and invite friends to try variations or adaptations that best suit their personal tastes. Recipe reviews can bring joyous feedback, while variations might inspire others to get creative in their kitchens.

Community engagement often leads to new ideas; the addition of a personal touch or an ingredient swap can uncover an incredible new twist. Let’s spark conversations around creativity in the kitchen to bring everyone together around this delightful treat!

The Recipe

Strawberry Shortcake Frappe

Serves: 2

Prep Time: 10 mins

Cook Time: 0 mins

Total Time: 10 mins

Kitchen Equipment Needed

  • Blender
  • Measuring cups and spoons
  • Chilled glasses for serving

Ingredients

  • 1 cup fresh strawberries, hulled
  • 2 cups vanilla ice cream
  • 1/2 cup milk (or non-dairy alternative)
  • 1 tsp vanilla extract
  • Whipped cream, for garnish
  • Extra strawberries, for garnish

Directions

  1. In a blender, combine the fresh strawberries, vanilla ice cream, milk, and vanilla extract.
  2. Blend until smooth and creamy, adjusting thickness if necessary with more milk or ice cream.
  3. Pour the mixture into chilled glasses and top with whipped cream.
  4. Garnish with extra strawberries for an attractive presentation.
  5. Serve immediately and enjoy!

Recipe Notes

  • For a healthier option, substitute part of the ice cream with Greek yogurt.
  • Frozen strawberries can be used in place of fresh for a thicker, colder frappe.
  • Adjust sweetness by adding honey or maple syrup to taste, if desired.

Best Starbucks Drinks You Can Make at Home Easily

8 Starbucks Drinks You Can Make At Home: Craft Your Favorite Coffees

⚖️
Difficulty
Easy

⏲️
Prep Time
10 mins

🕒
Cook Time
5 mins

⏱️
Total Time
15 mins

🍽️
Servings
2 servings

Discover the world of Starbucks drinks right from the comfort of your home! Imagine enveloping your senses with the rich aroma of freshly brewed coffee and the delightful flavors of your favorite beverages. Whether you crave the bold taste of a classic espresso or the sweet warmth of a caramel macchiato, these recipes will bring that Starbucks experience straight to your kitchen.

Each of these eight drinks is designed to recreate the magic of Starbucks while enabling you to customize them to your taste. Our step-by-step guide will show you how to make every drink, from frothy lattes to twisted frappuccinos. Perfect for those cozy mornings or as a pick-me-up in the afternoon, making these Starbucks-inspired beverages not only satisfies your cravings but also makes for an excellent opportunity to impress your family and friends.

Quick Recipe Highlights

  • Flavor Profile: Indulge in the balance of rich espresso and sweet syrups; each drink highlights unique nuance from creamy velvety textures to cool refreshing variations.
  • Texture: Experience a myriad of textures — from smooth foamy lattes to crunchy frappuccino toppings, every sip offers a delightful mouthfeel.
  • Aroma: Be greeted by the warm, inviting scents of roasted coffee beans mingling with sweet vanilla, caramel, or chocolate notes.
  • Visual Appeal: Each beverage is beautifully presented with colors ranging from caramel golden to vibrant green, making them a feast for the eyes.
  • Skill Level Needed: These drinks are all beginner-friendly, requiring minimal but rewarding techniques to create café-quality beverages.
  • Special Equipment: A blender, frother, or simple brewing methods are essential to unlock the potential of these Starbucks recipes at home.

Recipe Overview

  • Difficulty Level: The recipes range from simple to moderate difficulty, perfect for anyone looking to level up their home beverage game without stress.
  • Category: Enjoy these drinks during breakfast, brunch, or as an afternoon treat, making them versatile additions to your culinary repertoire.
  • Cuisine: While inspired by the well-known American coffeehouse chain, these drinks pull from international coffee traditions, enhancing their global appeal.
  • Cost: Preparing these drinks at home can save you money, often costing a fraction of what you’d pay at Starbucks, making them budget-friendly.
  • Season: Perfect for any time of year, each drink can be easily tailored to seasonal ingredients and flavors, such as pumpkin spice in the fall.
  • Occasion: Whether it’s a casual get-together or a cozy quiet afternoon, these drinks elevate any occasion with their café-style charm.

Why You’ll Love This Recipe

These Starbucks drinks are irresistible not only for their taste but also for their texture and convenience. Imagine sipping on a homemade caramel latte, rich with buttery notes that envelop your palate. The creamy milk combined with espresso creates a comforting feeling, much like a warm hug in a cup. Furthermore, creating your own drinks allows you to control the sweetness and ingredients, making them healthier and catered to your personal preference.

The convenience of these recipes means you can enjoy barista-quality beverages without stepping out of your house. With just a few basic ingredients and some simple kitchen tools, you can whip these drinks up in a matter of minutes. Preparing them in batches also allows you to enjoy your favorites all week long. Plus, involving family or friends in the process makes it a social and fun activity!

These drinks also come with nutritional benefits if prepared using healthier ingredients. You can substitute full-fat milk with almond or oat milk, or sweeteners with natural alternatives, thus reducing the overall calorie count. Enjoy the pleasure of a coffeehouse beverage while making choices that align with your dietary goals.

Additionally, these recipes are perfect for entertaining guests or social gatherings. Whether it’s a brunch with friends or a cozy movie night at home, serving homemade Starbucks beverages adds a touch of sophistication. Delight your guests with a selection of drinks that they can customize according to their own taste preferences.

Cost-effectiveness is another compelling reason to recreate these Starbucks drinks at home. As coffee prices continue to rise, making your favorite beverages at home not only provides an excellent experience but also helps save money in the long run. You can purchase ingredients in bulk and reduce food waste while enjoying quality flavors.

Historical Background and Cultural Significance

Starbucks, founded in 1971 in Seattle, revolutionized the way coffee is consumed in the United States and beyond. Initially starting as a retailer of high-quality coffee beans and equipment, the brand quickly evolved into an iconic café. This evolution created a culture centered around coffeehouse socialization, where drinks became vessels of comfort and community.

The significance of Starbucks drinks reflects various coffee traditions drawn from around the world. For instance, the macchiato originated in Italy, traditionally featuring a shot of espresso with a dollop of foamed milk. These rich traditions are upheld in Starbucks’ recipes, reinforcing the global nature of coffee culture while appealing to modern tastes with twists and innovations.

Over the years, Starbucks has continually adapted its menu to include seasonal beverages, aligning with consumer preferences and trends. Coffee drinking has grown beyond a mere caffeine fix into an experience, where taste, aromatics, and presentation merge to create memorable moments.

Regional variations also play a role in the Starbucks experience. Different cultural influences bring unique flavors, as seen in Asian markets where matcha-based drinks gained popularity, further expanding the Starbucks repertoire and attracting diverse clientele.

Ingredient Deep Dive

Coffee Beans

The foundation of all Starbucks drinks lies in high-quality coffee beans, essential for good flavor. Various types of beans have unique characteristics; for instance, Arabica beans are known for their smooth, sweet flavor, while Robusta beans provide a stronger, more bitter taste. Selecting beans based on your preferred flavor profile is essential for achieving the desired beverage outcome.

Nutritionally, coffee offers antioxidants and may enhance cognitive function. Store your coffee beans in a cool, dark place to maintain their freshness. If you don’t have a particular type, substitutions may include any local quality coffee that aligns with your taste preferences.

Milk and Milk Alternatives

Milk contributes to the creamy texture of many Starbucks drinks. Whole milk is commonly used for lattes due to its richness, but alternatives like almond or oat milk are excellent for lactose-intolerant or health-conscious individuals.

Almond milk, for example, contains fewer calories than whole milk and provides vitamin E, while oat milk offers a creamy texture with additional fiber. When choosing any milk, consider how it will froth and blend with coffee to ensure you maintain the beverage’s texture. Store non-dairy alternatives in the fridge and consume them according to their label.

Common Mistakes to Avoid

  • Using stale coffee beans – Always use fresh coffee beans as stale beans diminish the quality of your drinks.
  • Not measuring ingredients – Precision in measuring coffee and milk can vastly impact the flavor balance; always use a scale or measuring cup.
  • Overheating milk – Heat milk slowly and avoid boiling; burnt milk alters the texture and taste.
  • Skipping the frothing step – Skipping frothing for drinks that call for it results in a lack of creaminess; ensure to froth for a delightful finish.
  • Forgetting to chill blender for frappes – Always use a chilled blender for icy drinks to avoid a slushy texture.
  • Using low-quality syrups – Quality syrups enhance flavors; avoid using low-grade syrups that lack depth and taste.
  • Neglecting to taste test – Always sample your drink during preparation; adjustments can make significant differences in flavor.
  • Inconsistent ingredient ratio – Keeping the ratios consistent ensures your drink tastes just like your favorite Starbucks beverage each time.

Essential Techniques

Frothing Milk

Frothing milk is essential for creating lattes and cappuccinos. It’s important to aerate strategically for a creamy texture. To master this technique, use a frothing wand or steam wand and incorporate air slowly while heating. Watch for the milk to double in volume and create velvety microfoam.

Blending for Frappes

When making frappuccinos, achieving the right texture is key. Blend coffee with ice and cream until smooth while watching out for chunks. If your drink is too thick, add more liquid gradually until desired consistency is reached.

Pro Tips for Perfect Starbucks Drinks

Start with high-quality coffee beans to ensure excellent flavor in your drinks. Experiment with different milk types to find what works best for your chosen recipe. Don’t rush the frothing process; patience leads to superior results. Always chill your serving cups before pouring cold drinks to enhance the overall drinking experience. Adjust sweetness post-preparation; adding sugar afterward allows for better control over the flavor profile. For stronger coffee flavor, increase the coffee-to-milk ratio as needed to intensify taste.

Variations and Adaptations

Each drink can be modified for regional tastes, seasonal ingredients, and dietary needs. For example, pumpkin spice syrup can transform a latte into a cozy fall favorite. Additionally, using coconut milk can introduce a tropical dimension, while flavored syrups allow you to create unique variations.

Dietary adaptations are also easy; consider making vegan versions of lattes using plant-based milk and avoiding dairy additives entirely. Experiment with spices like cinnamon or nutmeg for flavor variations that can elevate your drinks further.

Serving and Presentation Guide

Presentation makes a significant impact on the enjoyment of your drinks. Use clear glass mugs to showcase the layers of your lattes. Garnish with whipped cream for frappuccinos or sprinkle with cocoa powder for an added aesthetic touch. Consider traditional accompaniments like biscotti or sweet pastries for a complete café experience. Keep beverages served at optimal temperatures — hot drinks should be piping hot and cold drinks refreshingly chilled.

Wine and Beverage Pairing

For coffee drinks, consider pairing them with dessert wines or port. A rich coffee cocktail can also complement dark chocolate desserts beautifully. For non-alcoholic options, match the flavors of your coffee beverages with desserts or cheese platters. For robust coffee flavors, opt for dark chocolate beverages or sweet pastries.

Storage and Shelf Life

To maximize the freshness of your Starbucks drink creations, store homemade syrup in the refrigerator for up to two weeks. Cold coffee can be kept chilled for up to three days, while milk should be used within its expiration date. Always check for signs of spoilage — sour smells or changes in consistency are indicators it’s time to discard.

Make Ahead Strategies

Prep ingredients ahead of time; batch-make syrups or pre-brew coffee to save time. Store syrups in airtight containers for easy access. Chilling milk overnight can speed up the process of making cold drinks. For blended drinks, consider prepping and freezing coffee cubes that can be easily thrown into the blender later. This maintains the coffee flavor without diluting your drink when adding ice.

Scaling Instructions

Feel free to halve or double the recipes depending on the number of servings desired. Adjust brewing times and equipment sizes accordingly, especially for larger quantities. Keep in mind storage considerations; larger servings may require larger containers to maintain freshness.

Nutritional Deep Dive

Understanding the nutritional value of your drinks can enhance your culinary journey. Monitor macronutrients such as carbohydrates, fats, and proteins based on the ingredients you utilize. For example, whole milk will have a higher calorie count compared to almond milk, which could be beneficial for weight management.

Micronutrient analysis varies based on syrups and flavorings; choosing natural sweeteners will improve overall health benefits while decreasing sugar consumption. Portion control can play a crucial role in enjoying your homemade Starbucks drinks without excessive calorie intake.

Dietary Adaptations

For gluten-free adaptations, ensure ingredient packets are marked gluten-free. Dairy-free options can be made by using nut or soy milk, while vegan recipes can exclude all animal by-products. Low-carb or keto-friendly beverages can utilize alternative sweeteners and heavy cream, creating tasty options without the extra carbohydrates.

Troubleshooting Guide

If you encounter texture issues in your frothed milk, try avoiding boiling milk. For flavor balance problems, consider tweaking your syrup ratio until achieving your desired sweetness. Temperature problems can be resolved by reheating but always test before serving. If equipment challenges arise, ensure your blender is up to par; sometimes, replacing old gadgets improves your drink quality. Adjust cooking time accordingly if your blend feels too watery or slushy, and take care when substituting ingredients to prevent unwanted flavors.

Recipe Success Stories

Community feedback showcases various successes, from perfecting the iced caramel macchiato to stunning latte art. Many readers enjoy sharing their variations and adaptations, inspiring others to find their perfect drink. Photography tips are also plentiful, with creative ideas on capturing your finished drinks to spice up your social media feed.

Frequently Asked Questions

1. Can I use decaf coffee in these recipes?

Absolutely! Decaf coffee can be used in any of the recipes without sacrificing flavor, allowing you to enjoy your favorite drinks any time of the day.

2. How can I make these drinks sugar-free?

Choose sugar-free syrups or naturally sweet alternatives like stevia or monk fruit. Adjust sweetness to your taste preferences while maintaining flavor integrity.

3. What tools do I need for these recipes?

A basic coffee maker, blender, and milk frother are essential. You can also use a whisk to froth milk manually if you don’t have a frother on hand.

4. Are Starbucks drink recipes suitable for kids?

Certain recipes can be made kid-friendly by reducing caffeine levels and utilizing milder flavors, making them delightful for younger palates.

5. How long can I store homemade iced coffee?

Homemade iced coffee can be refrigerated and consumed within three days. Store in an airtight container to maintain its quality.

6. Can I use non-coffee bases for these drinks?

Yes! You can substitute coffee with herbal teas or flavored extracts, allowing for a fresh twist on the original Starbucks drinks.

7. What’s the best way to froth milk?

Heat the milk to about 150°F (65°C) and use a frother or steam wand. Incorporate air slowly for smooth results, avoiding boiling temperatures.

8. Can I make these drinks ahead of time?

Yes, many ingredients can be prepped ahead, and drinks can be stored in the fridge for later enjoyment, especially syrups and brewed coffee.

9. How do I create latte art at home?

Start with microfoam and pour into a cup set at an angle. Move your hand while pouring to create designs, allowing practice for improvement.

10. What should I do if I want to make a larger batch?

Simply multiply the ingredient amounts while ensuring your storage containers are large enough for the higher volumes.

Additional Resources

For those eager to dive deeper, explore related recipes that highlight unique coffee and non-coffee beverages alike. Technique guides provide helpful insights into refining your brewing skills. Ingredient information is essential for understanding what goes into your drinks, while equipment recommendations assist in selecting the right tools for your kitchen. Seasonal variations on the recipes can also lead to exciting flavor profiles, adapting to the time of year.

Join the Conversation

Your experience with these Starbucks drinks is important! Share photos of your creations on social media and tag us to inspire others. Connect with fellow coffee enthusiasts to swap tips and tricks for the perfect brew. Engage in recipe reviews, allowing better versions to flourish through community feedback.

The Recipe

Starbucks Inspired Drinks

Serves: 2 servings

Prep Time: 10 mins

Cook Time: 5 mins

Total Time: 15 mins

Kitchen Equipment Needed

  • Coffee maker or espresso machine
  • Blender
  • Milk frother (or manual whisk)
  • Measuring cups and spoons

Ingredients

  • 2 cups brewed strong coffee
  • 1 cup milk (or milk alternative)
  • 1/4 cup flavored syrup (vanilla, caramel, etc.)
  • Ice cubes (for frappes)
  • Whipped cream (optional)
  • Chocolate or caramel drizzle (optional)

Directions

  1. Brew your coffee using your preferred method and set it aside to cool slightly.
  2. In a separate container, heat the milk or milk alternative until warm, then froth it until it reaches a creamy texture.
  3. If making a frappe, add coffee, flavored syrup, and ice to the blender and blend until smooth.
  4. Pour the coffee mixture over ice into your desired cup.
  5. Top with frothed milk (or whipped cream, if using) and drizzle chocolate or caramel on top as desired.
  6. Enjoy your homemade Starbucks drink!

Recipe Notes

  • Feel free to experiment with different syrups and flavors!
  • Adjust sweetness based on personal preference; you can always add more syrup.
  • Make sure to chill your mugs before serving cold drinks for the best experience.

Easy Starbucks Chocolate Covered Strawberry Refresher

Starbucks Chocolate Covered Strawberry Refresher: A Deliciously Fruity Treat

⚖️
Difficulty
Easy

⏲️
Prep Time
10 mins

🕒
Cook Time
0 mins

⏱️
Total Time
10 mins

🍽️
Servings
2

Indulge in the delightful flavors of the Starbucks Chocolate Covered Strawberry Refresher that’s not just a drink; it’s an experience. This refreshing beverage blends the sweetness of ripe strawberries with rich chocolate overtones, making every sip a little adventure of taste. Whether you’re preparing for a summer picnic or just treating yourself on a hot day, this recipe captures the essence of lush, fruity flavors melded with decadent chocolate, reminiscent of a beloved café classic.

Create a drink that feels luxurious while providing that caffeine kick. The vibrant colors evoke freshness, making it visually appealing for both you and your guests. Perfect for hot days or simply satisfying your sweet tooth, this Chocolate Covered Strawberry Refresher brings the café experience into your home. The outcome is a visually stunning drink that serves not just as a refreshment but also as a conversation starter.

Quick Recipe Highlights

  • Flavor Profile: This refresher boasts a combination of sweet strawberry notes balanced with a hint of rich chocolate, creating a refreshing and indulgent drink.
  • Texture: The silky texture is complemented by the sweetness of the strawberries and a light froth on top, offering a refreshing mouthfeel.
  • Aroma: The delightful aroma of fresh strawberries mingles with the rich scent of chocolate, making this an uplifting beverage.
  • Visual Appeal: The striking red from strawberries and the dark chocolate create a beautiful contrast, enhancing the drink’s visual allure.
  • Skill Level Needed: This recipe requires basic mixing skills, making it accessible for any home cook.
  • Special Equipment: A blender or shaker is required for mixing, with optional garnishing tools to enhance presentation.

Recipe Overview

  • Difficulty Level: This easy recipe is perfect for beginners and can be whipped up in just a few minutes, making it stress-free.
  • Category: This drink can be classified as a specialty beverage, ideal for brunch or a refreshing summer drink.
  • Cuisine: This refresher draws inspiration from popular café beverages, blending elements of fruity flavors and chocolate indulgence.
  • Cost: The approximately cost for this recipe is low, with basic ingredients widely available at grocery stores.
  • Season: The best season for this drink is summer when strawberries are at their peak freshness, but it can be enjoyed year-round.
  • Occasion: Ideal for garden parties, casual get-togethers, or simply as a refreshing treat during the week.

Why You’ll Love This Recipe

The Starbucks Chocolate Covered Strawberry Refresher is not just a drink; it’s a sensory delight. The rich flavor profile offers a sweet indulgence that doesn’t compromise on refreshing qualities. Perfectly balanced, this drink encapsulates the joy of biting into a ripe strawberry complemented by a touch of chocolate. Its smooth texture and vibrant aroma create a multisensory experience that will leave you wanting more.

Convenience is another perk of this refresher. With minimal prep time, you can clear your afternoon in no time, allowing you to enjoy this delightful drink without spending endless hours in the kitchen. This makes it an excellent choice for both planned events and spontaneous gatherings. Just blend, pour, and refresh. Plus, you’ll impress your guests with a café-inspired treat they can make at home.

From a nutritional perspective, strawberries are loaded with vitamins and antioxidants while offering a deliciously sweet flavor. With the addition of chocolate, you gain an indulgent element without overwhelming sweetness. This makes the refresher a guilt-free treat that satisfies your cravings while delivering nutritional value. Enjoying this drink can feel like a little act of self-care in the midst of a busy day.

Socially, this refresher encourages interaction. Serve it at your next brunch and watch your friends marvel at the vibrant colors and enticing aroma. This drink is perfect for sharing moments and creating lasting memories. It invites conversation, enabling you to engage with guests and share creative ideas about further variations.

Financially, this refresher allows you to enjoy café-quality drinks at home without the premium price. Easy access to ingredients and straightforward preparation make this an accessible treat for everyone. Save money and still enjoy the pleasures of a high-quality beverage, all while treating your taste buds to something special.

Historical Background and Cultural Significance

The origins of chocolate-covered strawberries can be traced back to culinary innovations in the 1960s. Often considered a romantic treat, the pairing of strawberries and chocolate has become synonymous with celebrations like Valentine’s Day, showcasing indulgence and sweetness. This cultural backdrop enhances the experience of enjoying a drink inspired by this beloved duo.

Chocolate beverages, on the other hand, have a rich history that dates back to ancient Mesoamerican cultures. The balance and contrast of sweet and bitter flavors paved the way for modern adaptations of chocolate drinks enjoyed globally today. This refreshment blends traditional chocolate flavors with the freshness of strawberries, creating a delightful beverage that pays homage to these significant culinary histories.

As beverage culture evolved, cafés began experimenting with fruit-infused refreshers, leading to the creation of drinks that offer not only flavor but also visual appeal. The Starbucks Chocolate Covered Strawberry Refresher is an embodiment of this playful creativity and showcases how flavors can be combined to elevate our drinking experiences.

Regional variations of strawberry drinks can be found across different cultures, incorporating local fruits and flavors. By adapting this refresher to local preferences, it has become a versatile beverage that resonates in various culinary landscapes while remaining deeply tied to its origins.

Ingredient Deep Dive

Fresh strawberries are the star of this refresher. Known for their vibrant red color and sweet flavor, strawberries have been enjoyed for centuries. They are packed with vitamins, especially vitamin C, and antioxidants, making them a nutritious choice. When selecting strawberries, look for bright, shiny fruit without any blemishes. Store them unwashed in the refrigerator for up to a week, but for best taste, consume them shortly after purchase.

Chocolate, particularly dark chocolate, offers not only a rich flavor but also health benefits like improved heart health due to its high antioxidant content. When using chocolate for this refresher, select high-quality varieties for the best flavor. Store chocolate in a cool, dry place, but avoid refrigeration as it can affect its texture. Substitution options include using cocoa powder or dairy-free chocolate for a vegan variation.

The addition of soda or flavored sparkling water enhances the drink’s refreshing nature. These bubbly elements impart a light fizz while adding another layer of flavor. Choose natural sodas to avoid unnecessary sugars or artificial flavors. For storage, maintain the carbonation by keeping the beverage sealed until ready to serve, ensuring a refreshing experience for everyone.

Common Mistakes to Avoid

  • Using overripe strawberries: Always choose firm, bright strawberries to avoid a mushy consistency in your drink.
  • Not balancing the sweetness: Adjust the chocolate according to your taste; too much can make the drink overly sweet.
  • Forgetting to chill ingredients: Warm ingredients can dilute the refreshing nature of the drink; chill everything beforehand.
  • Using low-quality chocolate: Opt for high-quality chocolate for a deeper flavor that enhances the overall drink.
  • Not blending long enough: Ensure you blend until smooth to prevent any gritty texture; this enhances the refreshing experience.
  • Overmixing with soda: Adding soda too aggressively can create excessive fizz; pour gently to maintain carbonation.
  • Neglecting garnishes: Present your refresher with a strawberry garnish or chocolate drizzle for enhanced visual appeal.
  • Skipping the taste test: Always taste your refresher before serving to adjust flavors to your liking.

Essential Techniques

To master blending, ensure all ingredients are cut into small pieces for an even consistency. The goal is to create a smooth texture that feels refreshing and light, which will make each sip enjoyable. Avoiding large chunks means a more harmonious blend of flavors.

For those who want to garnish their refreshers, learning to pipe chocolate sauce elegantly can significantly enhance the visual presentation. This simple technique adds a touch of sophistication to your drink and makes it look picture-perfect for serving or sharing on social media.

Selecting and preparing strawberries correctly is essential for flavor and texture. Wash them gently, remove stems, and slice as needed to make blending easier. This preparation ensures that the fresh fruit flavors are showcased prominently in your refresher.

Pro Tips for Perfect Starbucks Chocolate Covered Strawberry Refresher

Start with chilled ingredients for a vibrant and refreshing drink. This will enhance the overall experience, making each sip cool and satisfying, especially on a hot day.

Experiment with additional flavors by adding a splash of vanilla extract or a hint of mint to elevate your refresher’s flavor profile further.

Consider using frozen strawberries for a thicker texture, which can make the drink even more refreshing. Just remember to adjust the amount of soda to maintain the proper consistency.

For an adult twist, adding a splash of rum or vodka can transform this refresher into a delightful cocktail perfect for summer parties.

Highlight your drink with edible decorations like strawberry slices or a sprinkle of cocoa powder for a stunning presentation.

Serve immediately after preparation for the best taste experience; waiting too long can compromise the drink’s vibrant flavors and texture.

Use a high-speed blender to achieve the smoothest consistency, ensuring that the chocolate is fully incorporated.

Lastly, adjust sweetness according to personal preference; you may prefer a sweeter or more balanced flavor, so taste along the way to achieve your perfect drink.

Variations and Adaptations

For a refreshing twist, consider seasonal adaptations. In winter, incorporate warmed spices like cinnamon for a unique take on the traditional refresher, blending perfectly with chocolate and strawberries.

Dietary modifications are easily achievable; opt for dairy-free chocolate and use agave syrup or honey instead of refined sugar to make it vegan and also friendly for those with lactose intolerance.

Flavor variations can include adding a splash of orange juice for a fruity citrus twist that brightens the flavor profile, or substituting strawberries with raspberries for a different berry experience.

Texture modifications can be achieved by blending in a banana for creaminess or incorporating chia seeds for a nutritious boost while adding a slight crunch.

Presentation alternatives could involve layering ingredients in a clear glass to showcase the vibrant colors, making it an eye-catching drink at any gathering.

Serving and Presentation Guide

For plating techniques, serve your refresher in a tall, clear glass to showcase its vibrant colors. A fun straw or a fancy glass can elevate the overall experience.

Garnishing with fresh fruit on the rim of the glass or drizzling melted chocolate on top adds an elegant touch, enhancing both aesthetics and flavor.

Consider traditional accompaniments like mini desserts for a well-rounded serving option that pleases your guests and balances out flavors.

For modern serving suggestions, pair the refresher with light snacks such as cucumber sandwiches or savory bites, making it suitable for gatherings or casual get-togethers.

Consider temperature considerations; serve the drink nicely chilled and ensure that accompanying snacks are served at the proper temperature for an enjoyable experience.

Finally, portion control is key; serving smaller portions can make this a more manageable snack-sized refresher without overwhelming your guests.

Wine and Beverage Pairing

When pairing wine with this refresher, consider a sweet Moscato or a fruity rosé that complements the strawberry flavors without overpowering them.

For non-alcoholic alternatives, consider pairing your refresher with herbal teas or sparkling waters infused with fruit, creating a refreshing combination that aligns with the drink’s flavors.

Coffee pairings can include cold brews or lattes made with vanilla or mocha to maintain the chocolate theme while still enjoying a refreshing drink.

Temperature considerations should favor serving drinks at a chilled temperature to enhance the refreshing qualities brought by the strawberries.

Serving suggestions can also incorporate light cocktails, balancing fruitiness with subtle spirits, making this refresher a versatile accompaniment to various beverages.

Storage and Shelf Life

Store any leftover refresher in an airtight container in the refrigerator, but be sure to consume it within 24 hours to retain maximum freshness and flavor.

Keeping it at the right temperature is crucial; ensure your refresher stays chilled until serving to maintain its refreshing characteristics.

Consider using glass containers for storage to avoid any flavor absorption that might occur in plastic containers. Avoid letting it sit exposed to air for extended periods.

Signs of spoilage include an off-smell or color changes; if either occurs, discard the drink immediately to ensure food safety.

Reheat instructions aren’t applicable in this case, as this refreshing drink is best enjoyed cold and should not be heated.

For freezing, pour the refresher into ice cube trays, freeze, and blend with fresh ingredients for a future smoothie-like treat.

Make Ahead Strategies

Create a prep timeline by preparing strawberries in advance, slicing and refrigerating them to save time on the day of serving.

Store blended ingredients separately to maintain freshness and maximize flavor, combining just before serving for the best result.

Quality impact can be assessed by using fresh ingredients; always opt for the best available strawberries and chocolates to enhance your refresher.

For easy assembly, prepare chocolate decorations ahead of time by melting and drizzling on parchment paper to set; they can be used the day of serving.

Reheating guidelines don’t apply to this drink, but ensure to mix just before serving for maximum froth and texture.

Lastly, consider adding any fresh elements, like mint or additional strawberries, right before serving to keep the flavors bright and vibrant.

Scaling Instructions

For halving the recipe, simply divide all ingredients by two; this is straightforward and allows for easy adjustments without wasting ingredients.

When doubling or tripling the recipe, ensure to adjust your blending time and equipment size accordingly; a larger blender may be necessary to achieve consistency.

Equipment adjustments should consider larger pitchers or containers for larger batches, ensuring all drinks are served chilled and fresh.

Timing modifications are crucial; prepare drinks closer to serving time when making larger batches to maintain the refreshing qualities.

Finally, keep storage considerations in mind; larger volumes can take up more space, so plan and adjust your refrigerator or cooler accordingly.

Nutritional Deep Dive

In macro breakdown, this refresher offers a light mix of carbohydrates mostly from strawberries, moderate sugar content from sweeteners, and minimal fats if made with dark chocolate.

Micronutrient analysis reveals that strawberries add vitamin C, potassium, and folate, contributing to daily nutritional needs while offering health benefits.

The health benefits include antioxidants from strawberries and chocolate, potentially supporting heart health and reducing inflammation in the body.

Dietary considerations include keeping it low in calories, depending on added sweeteners, making it suitable for various lifestyles, including wellness-focused diets.

Portion analysis indicates that this refresher serves as a delightful treat without excessive calorie intake; moderate enjoyment allows for a balanced diet.

Finally, keep weight management tips in mind; indulging in this refresher occasionally can fit within a healthy diet without compromising goals.

Dietary Adaptations

For gluten-free adaptations, all ingredients used in this refresher are naturally gluten-free, ensuring anyone with gluten sensitivities can enjoy it.

Dairy-free options can be achieved with coconut or almond milk instead of traditional dairy, catering to those with lactose intolerance or dietary choices.

For vegan modifications, simply use vegan chocolate and ensure no dairy-based mixers are included; this makes the drink accessible for all diets.

Low-carb variations can be made with sugar substitutes or avoiding sweeteners altogether for a lighter option that fits into ketogenic lifestyles.

For paleo diets, replace commercial sweeteners with natural options like honey and ensure all ingredients used are paleo-friendly.

Low-FODMAP adjustments suggest using small quantities of strawberries, as they can sometimes trigger sensitivities, but this refresher can suit many diets.

Troubleshooting Guide

Texture issues can arise from under-blending; ensure a thorough blend to achieve a smooth consistency, avoiding chunks of fruit.

Flavor balance can be tricky; adjusting the ratio of chocolate to strawberries can enhance or mute flavors, so taste and tweak as needed.

Temperature problems might lead to a less refreshing drink; ensure all ingredients are served chilled to maintain its refreshing qualities.

Equipment challenges may arise with blenders; ensure yours is powerful enough to blend frozen ingredients or thicker mixtures without straining.

Ingredient substitutions can affect flavor; always consider the impact of each replacement and adjust sweeteners accordingly to maintain desired outcomes.

Timing concerns when serving large batches can lead to losing the refreshment; prepare drinks close to serving time to retain fizziness.

Recipe Success Stories

Community feedback has been overwhelmingly positive, with many readers sharing how easy and quick this refresher is to prepare for gatherings and as a personal treat.

Variation successes have inspired others to try using different types of berries or flavoring agents, adding their own twists to the original recipe with great results.

Adaptation stories often highlight how easily the refresher fits into various dining occasions, from brunch events to cocktail hours with friends.

Reader suggestions frequently include adding alternative sweeteners or mixing in spices for seasonal variations, expanding the possibilities beyond the original recipe.

Photography tips often emphasize capturing the vibrant colors and textures of the refresher, making it enticing for those browsing for new recipes.

Frequently Asked Questions

Can I make this refresher without chocolate?

Absolutely! You can enjoy the refreshing strawberry flavor on its own. Consider adding flavors like vanilla or mint instead for a different twist.

How do I adjust the sweetness to my taste?

Taste your refresher before serving; you can always add a bit more sweetener, whether it’s sugar, honey, or agave syrup, to match your preference.

Can this recipe be made in advance?

While it’s best served fresh, you can prepare the strawberry mixture in advance. Just add the soda right before serving to maintain carbonation.

What if I don’t have a blender?

If you don’t have a blender, you can mash the strawberries and mix them with chocolate syrup and soda. However, the texture will differ from the blended version.

Is it possible to make this non-alcoholic?

Yes! This refresher is naturally non-alcoholic. Just enjoy it as is for a sweet and satisfying treat without any spirits added.

Can I use frozen strawberries instead?

Definitely! Frozen strawberries can be used, but be sure to reduce or adjust the soda to achieve the desired consistency for your refresher.

What’s the best way to garnish this drink?

Fresh strawberry slices and a drizzle of melted chocolate on top make for a beautiful presentation. You can also add a sprig of mint for color.

How long can I store leftovers?

The refresher is best enjoyed fresh, but if you have leftovers, store them in an airtight container in the refrigerator and consume within 24 hours.

Can I make this refresher dairy-free?

Yes, using dairy-free chocolate and non-dairy milk will ensure this refresher fits into a dairy-free or vegan lifestyle.

How can I make this drink a bit more special?

Consider adding a splash of sparkling wine or flavored syrups like lavender or hibiscus for an elevated celebration-ready refresher.

Additional Resources

If you enjoyed this refresher, you might also like similar fruity beverages like watermelon slushies or berry smoothies. Explore other techniques for mastering refreshing drinks, focusing on blending methods and ingredient combinations.

For a deeper understanding of strawberries and their multifunctional uses in cooking, browse ingredient information that explores their rich culinary history.

Equipment recommendations can enhance your kitchen to create refreshing beverages, ensuring you have quality blenders or mixers for effortless preparation.

Don’t miss seasonal variations, as fresh strawberries and other summer fruits can inspire new drink ideas and techniques to refresh your repertoire.

Join the Conversation

We invite you to share your experiences and photography tips while preparing this refresher. Your reviews and feedback are invaluable to our community, helping others discover the joy of this delightful drink!

Engage with our community by sharing your own variations or adaptations, allowing everyone to try your creative takes on this refreshing treat. Let’s continue the conversation around this delicious Starbucks-inspired refresher.

The Recipe

Starbucks Chocolate Covered Strawberry Refresher

Serves: 2

Prep Time: 10 mins

Cook Time: 0 mins

Total Time: 10 mins

Kitchen Equipment Needed

  • Blender or blender bottle
  • Spoon for mixing
  • Measuring cups and spoons

Ingredients

  • 1 cup fresh strawberries, hulled and sliced
  • 2 tablespoons dark chocolate syrup (or melted chocolate)
  • 1 cup soda or flavored sparkling water
  • Ice cubes (as needed)
  • Optional: fresh strawberries for garnish

Directions

  1. In a blender, combine the strawberries and chocolate syrup. Blend until smooth and creamy.
  2. Add ice cubes and blend again until well mixed and chilled.
  3. Pour the blended mixture into glasses, filling each halfway.
  4. Top each glass with soda or sparkling water to fill, stirring gently to combine.
  5. Garnish with fresh strawberry slices and serve immediately.

Recipe Notes

  • For a richer chocolate flavor, adjust the chocolate syrup to taste.
  • Frozen strawberries can be used; just adjust the amount of soda added.
  • Feel free to add a splash of vanilla for an additional flavor boost.

Easy Starbucks Pink Drink Recipe (Ready in 5 Minutes)

EASY WAY TO REMAKE THE STARBUCKS PINK DRINK IN LESS THAN 5 MINUTES: A Refreshing Delight!

⚖️
Difficulty
Easy

⏲️
Prep Time
2 mins

🕒
Cook Time
0 mins

⏱️
Total Time
2 mins

🍽️
Servings
1

The Starbucks Pink Drink has become a favorite among many for its sweet and fruity flavor, but making it at home has now been simplified with this easy way to remake the Starbucks Pink Drink in less than 5 minutes. Imagine a refreshing burst of strawberry and coconut flavors mixed together, offering you a delightful treat that is not only quick to prepare but also incredibly satisfying. Whether you’re looking for a cool drink to kick-start your day or a sweet indulgence in the afternoon, this recipe has got you covered!

This vibrant drink is a perfect blend of creamy coconut milk, fruity strawberry acai, and fresh strawberries, topped off with a splash of sparkling water. The combination creates a beautiful color that instantly uplifts your mood and is perfect for any occasion, from lazy afternoons to social gatherings. So, let’s dive into how you can whip this up easily!

Quick Recipe Highlights

  • Flavor Profile: A perfect blend of sweet strawberries and creamy coconut milk that delightfully quenches your thirst.
  • Texture: A creamy, smooth drink with tiny bits of fruit providing a nice bite.
  • Aroma: A sweetened scent of strawberries combined with a hint of coconut, making it a refreshing aroma.
  • Visual Appeal: A gorgeous pink hue topped with strawberry slices, making it Instagram-worthy!
  • Skill Level Needed: No cooking or complicated skills required—just mix and enjoy!
  • Special Equipment: Just a blender and a serving glass are needed!

Recipe Overview

  • Difficulty Level: This recipe is exceptionally easy, perfect for anyone who wants to enjoy a gourmet drink in a pinch.
  • Category: Refreshing Beverage—perfect for summer, brunch, or even as a special treat for guests.
  • Cuisine: Inspired by American cafe culture, blending tropical flavors for a fun twist on a classic.
  • Cost: Very economical, usually under $5 for ingredients serving multiple drinks!
  • Season: Ideal for warm weather; however, it can be enjoyed year-round.
  • Occasion: Great for casual gatherings, parties, or just a sweet personal treat.

Why You’ll Love This Recipe

Not only does the Starbucks Pink Drink remake tantalize your taste buds, but it also captivates with its luscious texture that is creamy yet refreshing at the same time. The sweetness from the strawberries blends beautifully with the coconut milk, creating a well-balanced drink that will keep you coming back for more. It’s like a vacation in a cup!

Additionally, the convenience of preparation allows anyone to indulge in this delicious drink without buying expensive ingredients or going out. Within minutes, you can prepare a drink that tastes like it came straight from your favorite café. All it takes is a few fresh ingredients and some simple mixing to have yourself a delicious evening refreshment!

From a nutritional standpoint, the combination of coconut milk and strawberries adds a burst of vitamins and nutrients that can enhance your daily intake. Strawberries are rich in vitamin C, while coconut milk provides healthy fats that help support your body’s functions, making this drink not only appealing but also a bit healthier.

This drink is also perfect for entertaining! Serve it at brunches, picnics, or casual get-togethers—everyone will be impressed by your homemade version of the iconic Starbucks drink. Not to mention, it’s a great conversation starter, encouraging your friends to ask for your recipe.

Lastly, this Easy Pink Drink remake is budget-friendly and accessible. You won’t need to drive to the store or stand in line at Starbucks, saving both time and money while still enjoying a drink that feels indulgent!

Historical Background and Cultural Significance

The Starbucks Pink Drink entered the scene as a viral refreshment on social media, captivating drink lovers everywhere. Its origins trace back to the Starbucks menu, where it caught the attention of customers with its unique color and blend of flavors. Originally, the drink was a secret menu item, but its sweetness and aesthetic led to its eventual inclusion in official offerings.

Culturally, the drink represents a fusion of flavors from tropical influences, emphasizing the growing trend of bright and colorful beverages that appeal to younger consumers. It embodies the spirit of modern America, where quick, trendy, and flavorful drinks are perfect for social media and sharing.

Over the years, the recipe has evolved as many have begun experimenting with their own versions at home, leading to a variety of adaptations and modifications while keeping the core flavors intact. Starbucks helped popularize the concept of signature drinks, and the Pink Drink became a symbol of that evolution.

Regional variations have emerged, with substitutes for coconut milk or additions like matcha or different types of fruit based on local availability, showcasing the versatility of the drink and how it can be tailored to personal preferences or dietary needs.

Ingredient Deep Dive

Strawberries

Strawberries hold significant cultural importance as they are often associated with summer and freshness. Nutritionally, they are an excellent source of vitamin C, antioxidants, and dietary fiber. When selecting strawberries, look for bright red, plump fruits with a fresh green crown. Store them in the refrigerator, ideally in a breathable container to prevent spoilage. If you’re out of fresh strawberries, you can substitute with frozen strawberries for a similar taste.

Coconut Milk

Coconut milk has its origins in tropical cuisines and is prized for its creaminess and health benefits, including healthy fats that aid in heart health. Always opt for canned coconut milk for the richest flavor and texture for this drink. To store, keep it sealed in a cool, dry place. If you’re in need of an alternative, almond milk or oat milk can provide a different, yet delicious experience.

Common Mistakes to Avoid

  • Using low-quality or flavored coconut milk can alter the taste significantly; always choose fresh, high-quality coconut milk.
  • Forgetting to blend the strawberries well can leave chunks; ensure even consistency for the best experience.
  • Over-sweetening the drink can make it too sugary; start with less and taste as you go.
  • Neglecting to chill the glass can reduce the refreshing element; serve it cold for maximum enjoyment.
  • Using overly ripe strawberries may spoil the flavor; choose firm and fresh fruits for the best taste.
  • Skipping out on garnishing with fresh fruit makes for a less appealing presentation; take the time for that extra touch!
  • Try not to add too much ice which can dilute the drink; aim for a balance between dilution and chill.
  • Not taking consideration for dietary needs; always check for allergies related to coconut or strawberries.
  • Using only one type of strawberry can limit flavor; try incorporating different varieties like wild strawberries for added depth!
  • Failing to shake or stir before serving can lead to separation of ingredients; ensure everything is well mixed.

Essential Techniques

Blending

This step is essential to achieving a smooth and creamy drink. Proper blending breaks down the strawberries while infusing them evenly with coconut milk. To master this, start on a low setting and gradually increase the speed to avoid splashing. A common pitfall is not blending enough, which can result in a chunky consistency—aim for a silky texture!

Layering

For a beautiful presentation, layer your drink by adding the coconut milk first, followed by blended strawberries. The visual cue for success is a lovely gradient from pink to white. Ensure you pour gently to maintain the layers, as layering can enhance the drinking experience and visual appeal, making it more inviting when served.

Pro Tips for Perfect Easy Pink Drink

1. Always use ripe, fresh strawberries for the best flavor; you can try freezing them slightly for a colder drink.

2. Experiment with adding a splash of lime juice for a citrusy twist that enhances the overall flavor.

3. For an adventurous flavor, try adding a few mint leaves to infuse a refreshing minty aroma.

4. Blend on high for a few extra seconds to eliminate any strawberry chunks; a smooth drink is essential!

5. Serve immediately after preparation for the best texture and presentation—no one enjoys a drink that’s sat too long.

6. For a playful look, add colorful straws and garnishes like mint leaves to wow your guests!

7. If entertaining, prepare individual cups for guests with portion-controlled servings.

8. Lastly, don’t be afraid to adjust sweetness based on your preference; taste as you create!

Variations and Adaptations

For a lower sugar version, swap out regular coconut milk for unsweetened coconut or almond milk while adding a natural sweetener like agave or honey to your preference. In winter, frozen fruits can be utilized for a blended frozen treat that’s similar but with a chill factor! Additionally, you can create flavor variations by incorporating other fruits like raspberries, mangoes, or kiwi to your mixture for a new twist on the classic.

For a caffeine kick, consider adding a scoop of matcha or cold brew coffee instead of some coconut milk. This would still keep the essence of fruity while enhancing your drink’s energy content. If you’re on a specific diet, like keto, consider replacing strawberries with fresh blueberries, which will add a delicious yet low-sugar profile to your drink!

Serving and Presentation Guide

For a stunning presentation, use clear glasses to showcase the vibrant colors of your Starbucks Pink Drink remake. Layer the drink to create a beautiful gradient effect, and garnish with a fresh strawberry or mint leaves on the rim. Serve with a colorful straw that enhances the drink’s aesthetic and encourages enjoyment.

Consider serving it with ice in the warmer months, providing an extra refreshing factor. Temperature is important; ensure each component is chilled prior to preparation for a cold drink upon serving.

Wine and Beverage Pairing

If you plan to serve your Easy Pink Drink at brunch, it pairs beautifully with a light sparkling wine like Prosecco or a fruity rosé for those who desire an alcoholic accompaniment.

For a non-alcoholic alternative, fruity herbal teas mixed with sparkling water can complement the flavors without the alcohol. Consider serving your drink alongside ginger ale for a fizzy contrast or iced green tea for a more traditional pairing.

Storage and Shelf Life

For optimal freshness, consume your Pink Drink immediately after preparation. However, if you have leftovers, you can store them in an airtight container in the refrigerator for up to 24 hours. Be wary that as time passes, the separation may occur, so give it a good stir before enjoying again.

If you find yourself with plenty of strawberries or coconut milk, consider freezing them to use later in smoothies or future recreations of this fun drink. Just portion out any leftovers into ice trays for easy serving sizes!

Make Ahead Strategies

If you’re planning to serve multiple drinks, consider preparing the strawberry mixture the night before by blending but withholding the coconut milk until close to serving for the best texture. Alternatively, you can have all your ingredients pre-measured to expedite the assembly process, allowing for quick serving while maximizing freshness!

Keep in mind, adding fresh fruit at the last moment is ideal for maintaining that lovely vibrant color and flavor. This way, your drink remains visually appealing and doesn’t lose charm even when assembled in advance!

Scaling Instructions

To scale this drink recipe up or down, easily halve or double all ingredients while keeping the ratios consistent. If you are making a larger batch for a party, consider using a pitcher instead of individual glasses, but maintain the layering technique for looks. Should you find yourself needing to adjust the serving size, it’s best to do so by altering the quantities in even numbers to maintain simplicity in measurement!

Nutritional Deep Dive

Each serving of your Pink Drink is packed with a variety of nutrients. Strawberries are high in vitamin C, dietary fiber, and antioxidants, promoting heart health and immunity. Coconut milk provides healthy fats that support energy levels and overall cellular function. If you’re counting macros, you can keep track of your ingredients effectively to ensure you balance your sugar, carbs, and fats while enjoying this refreshing drink.

Portion control can also help manage caloric intake. By understanding the components, you can tailor each serving for your specific dietary needs or energy goals, ensuring you feel good while enjoying this delicious treat!

Dietary Adaptations

This Easy Pink Drink can be easily modified to accommodate various dietary restrictions! For those who need gluten-free options, rest assured this recipe is naturally gluten-free, allowing everyone to enjoy. If you’re pursuing a low-carb or keto diet, simply swap out the strawberries for lower-carb fruits like blackberries or raspberries, adjusting the sweetness accordingly.

For vegans or dairy-free individuals, coconut milk serves as a perfect alternative to dairy products, giving that creamy texture without any animal products. Likewise, if you’re looking to make a low-sugar or diabetic-friendly adaptation, using unsweetened coconut or an alternative sweetener such as stevia can reduce sugar while keeping the flavors intact.

Troubleshooting Guide

If you find your drink is too watery, it could be due to excessive ice or improper blending. Adjust the amount of ice and ensure you’re adequately blending to avoid chunkiness. If your flavor balance seems off, consider adding a sweetness booster carefully to enhance the strawberry’s taste without overpowering it. Addressing any separation of layers can be fixed by giving your drink a good stir prior to serving.

If your drink is too sweet, try balancing it with a splash of lemon or lime juice to cut through the sugar; this creates a refreshing twist! Should you face ingredient issues, feel free to explore alternative fruit flavors and liquids that align with your dietary preferences or what you have available in the pantry!

Recipe Success Stories

easy way to remake the Starbucks Pink Drink have shared their experiences on social media, showcasing colorful photographs of their creations. Readers often express how the simplicity of the recipe made it a go-to in their summer refreshment lineup, receiving rave reviews from friends and family.

Variations have emerged as readers incorporate different fruits and flavors, creating a delightful community of innovative adaptations. With each success, there are tips and tricks shared that lead to even better outcomes, allowing others to learn from their experiences.

Frequently Asked Questions

Can I use frozen strawberries?

Absolutely! Frozen strawberries work perfectly and can help make your drink extra chilled. Just ensure you blend them well to achieve a smooth texture!

Is this drink vegan?

Yes! The ingredients used in the Easy Pink Drink are plant-based, making it suitable for a vegan diet. Enjoy without worry!

How do I store leftovers?

If you have leftovers, store them in an airtight container in the refrigerator for up to 24 hours. Stir well before serving again!

Can I make this drink without coconut milk?

Yes! Substitute coconut milk with almond milk or oat milk for a different flavor profile that still maintains a creamy texture. Adjust flavors to your liking!

What is the best way to serve this drink?

Serve your Easy Pink Drink immediately after preparation in a clear glass, garnished with sliced strawberries or mint leaves for an attractive appearance.

Can I customize the sweetness?

Definitely! Taste your drink as you prepare it and add sweeteners as desired until reaching your preferred sweetness level.

Is it okay to use store-bought coconut milk?

Yes! Store-bought coconut milk works well, but choose the kind without added sugars or preservatives for the best taste.

How long does it take to make?

This drink takes less than 5 minutes to make, making it an ideal choice for a quick refreshment.

Can I make this drink for a crowd?

Yes! Simply multiply the recipe as needed, mixing individual servings or prepare in a large pitcher for easy serving.

What if I can’t find fresh strawberries?

If fresh strawberries are not available, frozen strawberries are a great substitute—just ensure you blend them well!

Additional Resources

For more refreshing drink recipes, check out our smoothies and slushies section, where you can find delicious fruit-based beverages. Additionally, our guide on blending techniques can help you master how to achieve the perfect consistency for all your drinks. Don’t forget to explore our top equipment recommendations for blending and food storage, ensuring you have the right tools for every recipe.

Join the Conversation

We’d love to see your versions of the Easy Pink Drink! Share your creations on social media and don’t forget to tag us. Engage in the community by sharing tips on your delicious adaptations and variations of the drink. Let’s inspire one another with our creativity and delicious experiences while enjoying this delightful refreshment!

The Recipe

Easy Way to Remake the Starbucks Pink Drink

Serves: 1

Prep Time: 2 mins

Cook Time: 0 mins

Total Time: 2 mins

Kitchen Equipment Needed

  • Blender
  • Measuring Cup
  • Serving Glass

Ingredients

  • 1 cup fresh strawberries, hulled and sliced
  • 1/2 cup coconut milk
  • 1 cup coconut-flavored sparkling water
  • Ice cubes (optional)
  • Additional sliced strawberries for garnish (optional)

Directions

  1. Blend the strawberries in a blender until smooth.
  2. In a glass, add the blended strawberries and pour in coconut milk.
  3. Top it off with coconut-flavored sparkling water.
  4. Garnish with sliced strawberries if desired, and serve immediately!

Recipe Notes

  • For a sweeter drink, add a teaspoon of honey or agave syrup.
  • Substitute strawberries with other fruits like raspberries for a new flavor twist!
  • Keep everything well chilled for the best, refreshing experience.

Best TikTok Viral Iced Cracking Latte Copycat Recipe

TikTok Viral Iced Cracking Latte Copycat Recipe: Your New Favorite Summer Drink

⚖️
Difficulty
Easy

⏲️
Prep Time
5 mins

🕒
Cook Time
0 mins

⏱️
Total Time
5 mins

🍽️
Servings
1

Get ready to elevate your coffee experience with this TikTok Viral Iced Cracking Latte Copycat Recipe! Perfect for warm summer mornings or afternoons, this delightful iced latte recreates the trendy drink that has taken social media by storm. Imagine enjoying a refreshing blend of rich coffee, creamy milk, and a unique flavor twist that will keep your taste buds dancing. With just a handful of ingredients, you can create a café-quality beverage right in the comfort of your home!

This Iced Cracking Latte is not only aesthetically pleasing but also bursting with flavor. The combination of sweet syrup and rich espresso creates a sensational experience, while the ice and milk give it a creamy texture that is simply irresistible. Best of all, you can customize this drink according to your preferences—whether you like it classic or with a fun twist, the possibilities are endless. Prepare to impress your friends and family with this delightful drink that is sure to become a summer favorite!

Quick Recipe Highlights

  • Flavor Profile: The drink showcases a delightful blend of coffee sweetness and creamy milk, making each sip a luxurious experience.
  • Texture: This iced latte has a smooth and creamy mouthfeel, complemented by the cool crunch of ice.
  • Aroma: You’ll be greeted by the inviting aroma of freshly brewed espresso and the sweet notes from flavored syrup.
  • Visual Appeal: The beautiful layers of coffee and cream create an eye-catching presentation that is perfect for Instagram.
  • Skill Level Needed: This is an easy recipe, perfect for beginners looking to expand their coffee-making skills.
  • Special Equipment: A milk frother or blender will enhance the texture but is not absolutely necessary.

Recipe Overview

  • Difficulty Level: This recipe is categorized as easy, making it accessible for anyone from novice cooks to seasoned baristas. With minimal steps and ingredients, you’ll be crafting perfect lattes in no time.
  • Category: It falls under beverages, with a focus on coffee specialty drinks, ideal for breakfast or afternoon refreshment.
  • Cuisine: While the iced latte has roots in Italian coffee culture, this recipe embraces a modern twist influenced by global coffee trends.
  • Cost: The ingredients for this recipe are budget-friendly, averaging around $3-$5 per serving.
  • Season: This drink shines in the summertime, offering a refreshing option for warm weather enjoyment.
  • Occasion: It’s perfect for brunch gatherings, coffee dates, or simply a treat to start your day right!

Why You’ll Love This Recipe

The TikTok Viral Iced Cracking Latte Copycat Recipe is a delightful blend of flavors that brings joy to your coffee routine. The rich espresso serves as the perfect base, harmonizing with creamy milk and sweet syrup. This combination creates a luxurious taste experience that is both satisfying and refreshing.

Preparing this delicious drink at home grants you convenience that saves both time and money. You can whip it up in less than five minutes and customize it to suit your unique preferences. Forget the long lines at cafés—enjoy a barista-quality latte without leaving your kitchen!

Nutritionally, you can make this drink with alternative ingredients, such as non-dairy milk options or sugar-free syrups. This allows the iced latte to fit various dietary needs, making it accessible to all coffee enthusiasts.

This iced latte also makes for a wonderful social beverage. Serve it at brunch or offer it as a refreshing option for guests at your next gathering. The visual appeal alone will spark conversations, while the taste will leave everyone craving more.

Finally, crafting your own TikTok-inspired iced latte is cost-effective. With simple, affordable ingredients, you can enjoy a gourmet drink without frequenting overpriced coffee shops. This recipe is not only accessible but also a great way to indulge in your favorite café flavors at home!

Historical Background and Cultural Significance

The iced latte, a beloved summer beverage, has roots in the centuries-old espresso traditions of Italy. As espresso gained international popularity, variations began to emerge, elevating coffee from mere morning fuel to a cultural experience. This adaptation reflects the growing trend of iced coffee drinks enjoyed worldwide, particularly during the warmer months.

Culturally, coffee has always been a focal point of social gatherings. The evolution of iced lattes mirrors our fast-paced lifestyle, providing a refreshing and energizing drink that fits perfectly into our modern routines. Furthermore, the rise of social media platforms like TikTok has allowed unique coffee recipes to flourish, inspiring home brewers to experiment and share their delicious creations.

Each region has its own take on coffee drinks; for instance, cold brews in America, cà phê sữa đá in Vietnam, and affogatos in Italy. The TikTok Viral Iced Cracking Latte reflects this blend of influences, resulting in a versatile drink that appeals to a global audience, while also paving the way for innovations within coffee culture.

As global connections strengthen, coffee drinks like the iced latte continue to evolve. Emerging flavors, alternative ingredients, and exciting presentations signify our collective embrace of creativity in the world of coffee.

Ingredient Deep Dive

Espresso

Espresso is the heart of this iced latte, delivering a rich and concentrated flavor that forms the drink’s base. Originating from Italy, espresso became an essential part of coffee culture in the early 20th century. Its deep flavor can enhance a range of beverages, and it is packed with antioxidants, providing energy without excessive calories. When choosing espresso, opt for freshly ground coffee beans for the best flavor. To store, keep coffee beans in an airtight container in a cool, dark place.

Milk

Milk adds a creamy texture and balances the intense flavor of espresso, resulting in a luscious mouthfeel. Whether you choose whole, skim, or plant-based options, milk has a variety of nutritional benefits, providing protein, calcium, and vitamin D. When selecting milk, look for fresh options, and for storage, keep it in the refrigerator and consume it before the expiration date.

Syrup

Flavored syrup transforms this iced latte into a unique indulgence. Popular choices include vanilla, caramel, or hazelnut, each adding their signature touch to the beverage. Originating in cafés, flavored syrups enhance drinks’ sweetness and aroma. Look for high-quality syrups made from natural ingredients, and store them in a cool, dry place after opening.

Ice

Ice is essential for this iced latte, providing a refreshing chill that complements the rich flavors. While it usually doesn’t have much of a bearing on the drink’s taste, the type of ice used can impact texture. Larger ice cubes melt more slowly, diluting the drink less. For proper storage, keep ice in a freezer-safe container, ensuring it doesn’t absorb any unwanted flavors.

Common Mistakes to Avoid

  • Using stale coffee beans can lead to a dull flavor. Always use fresh espresso for the best taste.
  • Overloading the ice can cause excessive dilution. Use just enough to chill the drink without overwhelming it.
  • Failing to mix the ingredients properly may result in uneven flavors. Stir well to ensure balanced sweetness and richness.
  • Using warm milk instead of chilled can alter the drink’s refreshing quality. Milk should be cold before adding to the espresso.
  • Overcomplicating the recipe can detract from its simplicity. Stick to the basics for a delicious iced latte.
  • Not experimenting with flavor choices may limit your enjoyment. Feel free to try different syrups and milk options!
  • Making the drink too far in advance can affect its quality. Prepare it fresh for the best experience.
  • Ignoring the right espresso-to-milk ratio can lead to an unbalanced latte. Aim for a classic balance for the best flavor.

Essential Techniques

Making a great iced latte begins with brewing the perfect espresso. The essence of espresso lies in using finely ground coffee, optimal pressure, and accurate timings. Use about 7-9 grams of coffee for a single shot and ensure your machine is calibrated correctly. Watch for the rich crema on top as a sign of success.

Another crucial technique is properly frothing or incorporating milk. If using cold milk, take care not to over-froth it. You want a creamy texture without an excessive volume of foam. Start with chilled milk and employ a steady motion to integrate air while maintaining a smooth consistency.

Finally, layering your iced latte correctly adds to the visual appeal. Pour espresso over ice first, followed by gently adding the milk. This technique showcases the stunning contrast of colors, making your drink Instagram-ready.

Pro Tips for Perfect TikTok Viral Iced Cracking Latte

– Use an espresso machine or a stovetop Moka pot for the richest flavor.
– Experiment with different milk types, like oat or almond, for fun variations.
– Add a pinch of cinnamon or cocoa powder for an extra flavor boost.
– Make your own flavored syrup by simmering sugar and water with fresh herbs or fruits.
– For an indulgent twist, consider topping your latte with whipped cream.
– Chill your glasses before serving to elevate the refreshing experience.
– Use large ice cubes to keep the drink cool without diluting it too quickly.
– Try infusing the espresso with spices like vanilla or nutmeg during brewing for a unique twist.

Variations and Adaptations

Regional variations of iced lattes can lead to exciting adaptations. In Italy, try an affogato style, adding a scoop of gelato instead of milk for a delicious dessert-like coffee. For a seasonal adaptation, infuse your latte with pumpkin spice in the fall or peppermint syrup during the winter holidays.

Dietary modifications can also be made by choosing low-carb sweeteners or dairy-free milk alternatives, making this drink versatile for various diets. If you’re looking for flavor variations, consider adding flavored cold brew or experimenting with chocolate syrup for a mocha twist.

For texture modifications, try blending the ingredients instead of mixing them for a smoother, milkshake-like consistency. Presentation alternatives may include garnishing with chocolate shavings or drizzling homemade caramel syrup over the top of the latte.

Serving and Presentation Guide

To plate your TikTok Viral Iced Cracking Latte, consider using a tall glass to highlight the enticing layers of espresso and milk. Garnish your drink with a light sprinkle of cocoa powder or a few coffee beans on top for an elegant touch. For a modern serving suggestion, try using a sealed mason jar for a rustic appeal.

Temperature considerations are crucial for an iced drink; serve immediately after preparation to ensure it’s as cold as possible. To help control portions, provide smaller glasses for tasting, allowing guests to enjoy this delightful beverage in several servings.

Wine and Beverage Pairing

For those who enjoy a glass of wine with their coffee, consider pairing your iced latte with a light-bodied white wine, such as a Sauvignon Blanc, which can complement the drink’s creamy notes. If you prefer non-alcoholic alternatives, a refreshing glass of infused lemonade works beautifully, balancing the sweetness and richness of the latte.

For a coffee-centric pairing, match your iced latte with a light herbal tea such as chamomile, which can provide soothing undertones. Temperature-wise, make sure any pairing beverages remain cold to keep the experience refreshing.

Storage and Shelf Life

To maximize the iced latte’s freshness, consume it immediately after preparation. However, if you have leftover syrup or brewed espresso, store them in airtight containers in the refrigerator for up to a week. Always check for signs of spoilage, such as any unusual smells or flavors before use.

Ice, once melted, should not be frozen again—making precise amounts critical during preparation. If you choose to prepare your espresso ahead of time, ensure it’s cooled completely and stored correctly in refrigeration until you’re ready to serve.

Make Ahead Strategies

Preparing your TikTok Viral Iced Cracking Latte in advance can enhance efficiency. Brew extra espresso and store it cold in the refrigerator, ensuring all you need to do is mix when it’s time to enjoy. If you make your flavored syrup, consider making larger batches and storing them for several weeks.

Quality can be impacted if prepared too far in advance, so aim to assemble your drink shortly before serving. Fresh elements, such as mint or whipped cream, should be added last to maintain their vibrant flavors and presentations.

Scaling Instructions

Scaling the TikTok Viral Iced Cracking Latte recipe is straightforward. To halve the serving, simply use half of each ingredient for a single serving. Doubling or tripling the recipe is just as easy—just keep your espresso-to-milk ratio consistent to maintain flavor balance.

Keep in mind that while larger batches can accommodate friends or family effortlessly, equipment adjustments—such as using a larger pitcher for mixing—may be required. Adjust timing for brewing espresso as multitasking is key in larger quantities.

Nutritional Deep Dive

Breaking down the nutritional content of this iced latte reveals macro-rich ingredients. A typical latte contains around 100 calories, depending on the milk and syrup choices. The protein from milk adds satiety, making this drink an excellent snack alternative.

Micronutrient analysis shows vitamins like A and D from milk, along with caffeine’s energy-boosting properties. For health benefits, coffee is known to be rich in antioxidants, while low-calorie syrups provide sweet flavor without adding too much sugar.

Managing portions is essential; sticking to one serving can help keep calorie intake regulated. For those seeking weight management benefits, consider substituting with lower-calorie sweeteners or using unsweetened alternatives.

Dietary Adaptations

For gluten-free versions, simply ensure that any flavored syrups are labeled gluten-free. Dairy-free alterations can be made using almond, soy, or oat milk, which also adds exciting flavor elements. Those looking for vegan options can select plant-based syrups and milk.

If you’re following a low-carb or keto diet, choosing unsweetened almond milk and sugar-free syrups can create a refreshing drink without excess carbohydrates. For paleo enthusiasts, using coconut milk and natural sweeteners aligns well with dietary guidelines.

Low-FODMAP adaptations can include lactose-free milk or selecting coconut cream for creaminess while avoiding common digestive triggers.

Troubleshooting Guide

If you experience texture issues in your iced latte, check the espresso. Over-brewing can lead to bitterness while under-brewing may leave it weak. For flavor balance, adjust the syrup amount—too much can overpower the coffee.

If temperature problems arise, using frozen coffee cubes instead of regular ice can maintain flavor without excessive dilution. Should ingredient substitutions cause challenges, seek similar profiles, like using cold brew instead of espresso for a different base flavor.

Timing can significantly impact the success of your latte; make sure to prepare it in a timely manner to enhance freshness, especially regarding milk, which can have a short shelf life.

Recipe Success Stories

Our community of coffee enthusiasts has shared incredible feedback about creating their own TikTok Viral Iced Cracking Latte. Many have praised the simplicity and speed, leading to exciting moments in preparing iced lattes for family gatherings, brunches, or a simple treat during hot days.

Readers have also shared their variations and adaptations. From adding unique flavor notes to exploring dairy-free options, each story highlights personal touches that make the drink their own. Feedback about presentation tips has led to inspiring photos on social media, encouraging others to create their coffees at home.

Sharing their success stories within the community encourages more exploration. Photographs of stunning finished drinks and involvement in the conversation enrich the experience of crafting these drinks, creating bonds over shared interests in coffee.

Frequently Asked Questions

1. Can I make this drink without an espresso machine?

Absolutely! You can make strong coffee using a French press or a stovetop Moka pot as an alternative. The key is to ensure the coffee is strong enough to stand out against the milk and syrup.

2. How can I store leftover espresso?

Leftover espresso can be stored in an airtight container in the refrigerator for about 3-4 days. Just remember to stir it before using, as the flavors may settle.

3. What milk alternatives work best for this recipe?

Almond milk, oat milk, and coconut milk are excellent choices for this iced latte. Each will impart a unique flavor while still providing that creamy texture.

4. Can I freeze my iced latte?

While it’s best enjoyed fresh, you can freeze your latte into coffee cubes to use in future drinks. This way, they won’t dilute the flavor as they melt.

5. What can I substitute for flavored syrup?

Homemade syrup can be made by dissolving sugar in water along with your favorite extracts, like vanilla or caramel. You can also use honey or agave nectar for a natural sweetener.

6. Is there a way to make this drink sugar-free?

Yes! For a sugar-free version, use a sugar-free flavored syrup or opt for sweeteners like erythritol or stevia to achieve a sweet taste without calories.

7. How do I make my iced latte thicker?

To achieve a thicker texture, consider using cream instead of milk. Alternatively, blending the drink can create a richer, frothier consistency.

8. Can I add protein powder to my iced latte?

Definitely! Just blend the protein powder with the milk before mixing it with the espresso. This can enhance your drink’s nutritional profile.

9. How can I make this drink less bitter?

To decrease bitterness, ensure not to overbrew your espresso. You can also adjust the sweetness by adding more flavored syrup or using a sweeter milk alternative.

10. What’s the best way to serve this drink at a gathering?

To serve at a gathering, consider pre-brewing the espresso and keeping it chilled. Set up a DIY station where guests can customize their lattes with different syrups and toppings.

Additional Resources

If you’re fascinated by coffee creations, check out related recipes for iced drinks and coffee-based desserts on our blog. Dive deeper into our technique guides detailing espresso brewing, milk frothing, or creating homemade syrups. Explore ingredient information specifically focusing on sourcing quality beans and milk alternatives.

For new equipment recommendations, read our reviews of coffee machines, grinders, and frothers that can elevate your home-brewing game. Seasonal variations of iced drinks are also available for exploring fresh, new flavors throughout the year.

Join the Conversation

We’d love to hear about your experiences with the TikTok Viral Iced Cracking Latte Copycat Recipe! Share your photos and variations on social media, and engage with our vibrant coffee community. Your feedback helps us improve and inspires others to try new flavors and techniques.

Don’t forget to leave us a review and let us know how your iced latte turned out. We’re excited to see your creativity as you put your twist on this trendy beverage!

The Recipe

TikTok Viral Iced Cracking Latte

Serves: 1

Prep Time: 5 mins

Cook Time: 0 mins

Total Time: 5 mins

Kitchen Equipment Needed

  • Espresso machine or Moka pot
  • Milk frother or blender (optional)
  • Tall glass or mason jar

Ingredients

  • 1 shot of espresso
  • 1 cup of milk (dairy or non-dairy)
  • 1-2 tablespoons of flavored syrup (your choice)
  • Ice cubes

Directions

  1. Brew one shot of espresso and let it cool slightly.
  2. Fill a tall glass or mason jar with ice cubes.
  3. Pour the espresso over the ice.
  4. Add the flavored syrup to the glass.
  5. Pour the milk on top of the espresso and syrup, layering the drinks for visual appeal.
  6. Stir gently before enjoying!

Recipe Notes

  • Feel free to adjust syrup quantity based on your sweetness preference.
  • For a fun twist, try using different flavored syrups.
  • Use frozen coffee cubes to enhance flavor while preventing dilution.

Easy 5 Iced Coffee Recipes to Make at Home

5 Easy Iced Coffee Recipes: Refreshing Brews for Every Palate

⚖️
Difficulty
Easy

⏲️
Prep Time
5 mins

🕒
Cook Time
0 mins

⏱️
Total Time
5 mins

🍽️
Servings
2 servings each recipe

If you’re looking to elevate your coffee experience, these 5 easy iced coffee recipes are perfect for you. Whether you’re a coffee fanatic or just starting to explore the world of cold brews, these refreshing and flavorful drinks will cater to every palate. From creamy and rich to light and fruity, each recipe offers a unique twist that makes them perfect for a hot summer day or a cozy afternoon indulgence.

Imagine sitting outside on a sunny day, sipping on a delicious iced coffee that not only cools you down but also satisfies your taste buds. These recipes are designed to be quick, requiring only a few ingredients, ensuring that you spend less time in the kitchen and more time enjoying your beverage. Plus, the joy of making your own iced coffee at home means you can customize it just the way you like, adding your favorite flavors or adjusting the sweetness level.

Quick Recipe Highlights

  • Flavor Profile: Each recipe combines various flavors, from rich chocolate to fruity notes, ensuring every sip is delightful.
  • Texture: The drinks vary from smooth and creamy to light and refreshing, creating a pleasurable mouthfeel.
  • Aroma: Expect enticing coffee aromas blended with hints of vanilla, caramel, or even spices depending on the recipe.
  • Visual Appeal: Each iced coffee presents beautifully with vibrant colors, enticing garnishes, and ice cubes that sparkle.
  • Skill Level Needed: No advanced skills required, making these recipes accessible for everyone, from beginners to seasoned coffee lovers.
  • Special Equipment: Just basic kitchen tools such as a coffee maker, blender, and ice trays are needed to prepare these drinks.

Recipe Overview

  • Difficulty Level: These iced coffee recipes are classified as easy, making them perfect for anyone from novice cooks to experienced baristas.
  • Category: Perfect for breakfast, brunch, or an afternoon pick-me-up, these drinks fall under the beverage category.
  • Cuisine: While coffee is a universal beverage, these recipes draw inspiration from various café styles, from classic espresso-based drinks to trendy modern concoctions.
  • Cost: Cost-effective, these iced coffee recipes can be made at home using simple ingredients available at local stores.
  • Season: Ideal for summer months when a refreshing drink is essential, but enjoyable year-round for coffee lovers.
  • Occasion: Perfect for casual gatherings, weekend brunches, or simply a personal treat to enjoy on your patio.

Why You’ll Love This Recipe

Imagine indulging in a rich mocha iced coffee that provides a luscious chocolate flavor with a smooth finish. Each recipe has been crafted to offer a unique taste experience, ensuring that you’ll never tire of your cold coffee options. The texture is equally important; these coffee delights blend seamlessly, producing a satisfying drink that feels both light and indulgent.

Preparation is a breeze! With minimum time required and easy-to-find ingredients, these recipes can be whipped up within minutes. They encourage a fun, hands-on coffee-making experience that’ll impress your friends and family. Plus, the nutritional benefits of coffee combined with milk or non-dairy alternatives means you’re enjoying a treat without the guilt.

Furthermore, these iced coffee recipes are perfect for social gatherings, serving as an ideal refreshment while catching up with friends. You can easily make these drinks in batches, making hosting effortless. They’re also budget-friendly, providing a café-quality experience in the comfort of your home without breaking the bank.

Cost-effectiveness is yet another reason to love these recipes. With just a few basic ingredients, you can craft delightful drinks, saving you trips to the coffee shop. This means you can experiment with flavors and personalizations all while keeping your wallet happy!

Finally, these recipes are highly customizable—whether it’s adjusting sweetness levels, choosing your favorite milk, or adding extra flavors, the options are endless! Enjoying iced coffee at home allows for creativity while satisfying your cravings any time of the day.

Historical Background and Cultural Significance

The origins of iced coffee can be traced back to ancient traditions where coffee was served cold in various cultures. The drink has evolved significantly over time, particularly gaining popularity in Western countries during the 20th century.

Culturally, iced coffee has become a staple, especially in warm climates, where it serves as a refreshing alternative to hot coffee. From classic Italian iced coffee to trendy Asian style brews, different cultures have contributed unique flavors and methods of preparation to the iced coffee phenomenon.

The recipe has continually evolved; traditional cold brew methods have been replaced by modern techniques that cater to our fast-paced lifestyles. Today, additionally, the craft coffee movement has inspired an array of creative iced coffee variations, making the drink even more accessible.

Regional variations exist, with each area putting its twist on the beverage. For instance, in South America, you’ll find variations blended with milk or spices, showcasing the local flavor preferences while enhancing the coffee experience.

Ingredient Deep Dive

Coffee: Coffee beans are one of the most beloved ingredients worldwide, cherished for their stimulating effects and rich flavors. When selecting coffee, look for high-quality, freshly roasted beans, preferably ground just before brewing to capture their full aroma and taste. Coffee is also rich in antioxidants and can offer a variety of health benefits, including improved mental focus.

Ice: Ice is an essential component of iced coffee, preventing the drink from becoming too hot and enhancing refreshment. Use purified water to make ice cubes for the best flavor retention. Store ice in an airtight container to avoid absorbing odors from your freezer. For a twist, consider using coffee ice cubes, made by freezing brewed coffee, to prevent dilution.

Common Mistakes to Avoid

  • Using Hot Coffee: Ensure you cool your coffee before adding ice, or you’ll dilute the flavor significantly.
  • Not Prepping Coffee Concentrate: Using a standard brew will result in a weak iced coffee; brew a concentrate instead.
  • Over-sweetening: It’s easy to go overboard with sweeteners; start small and adjust to taste.
  • Using Poor Quality Coffee: The quality of coffee greatly impacts the final drink; always choose fresh, high-quality beans.
  • Add Ice Too Late: Adding ice too late can lead to a disappointing warm beverage instead of a refreshing iced drink.
  • Ignoring Presentation: A well-presented iced coffee enhances the experience; consider garnishing with whipped cream or spices.
  • Not Experimenting: Sticking to one recipe is common; don’t hesitate to mix flavors and try new ingredients.
  • Using Flat Milk: If adding milk or cream, opt for fresh or flavored varieties to elevate your iced coffee.
  • Not Chilling the Glass: For an extra refreshing experience, chill your glasses before pouring in your iced coffee.
  • Skipping the Stirring Step: Always stir your coffee well to ensure the flavors are evenly distributed.

Essential Techniques

Brewing the Coffee: Mastering the brewing process is crucial. Use a coffee-to-water ratio that works for your taste to achieve the perfect concentration. A common mistake is over-extracting the coffee; aim for around 4-5 minutes with hot water for best results. A good rule of thumb is to use coarser grounds for cold brewing to avoid bitterness.

Chilling: Once your coffee is brewed, it should be cooled quickly. Pour hot coffee into a heat-resistant glass or bowl to reduce temperature and then refrigerate. Don’t forget to chill your serving glasses if you want your drink to stay cold longer!

Pro Tips for Perfect Iced Coffee

Start with good-quality coffee beans to ensure a flavorful base for your iced coffee. Grind your beans just before brewing for a fresh taste.

Opt for coffee brewed as a concentrate. This ensures the coffee flavor isn’t diluted when poured over ice.

Add frozen coffee cubes instead of regular ice to prevent your drink from becoming watery as it sits.

Experiment with different types of milks like oat or almond for new and exciting flavor profiles.

Garnish with chocolate shavings or a sprinkle of cinnamon for an aesthetic touch and an extra flavor boost!

Consider sweetening with natural alternatives like honey, agave, or flavored syrups to enhance taste without overpowering the coffee.

Variations and Adaptations

Experiment with your iced coffee by adding different syrups or flavored extracts, such as hazelnut or caramel, to create new taste experiences.

Seasonal adaptations can also play a role. During the fall, try adding pumpkin spice, while summer might call for a refreshing mint infusion.

If you’re looking for dietary modifications, swap regular milk with dairy-free options like coconut or almond milk for a vegan delight.

For a stronger kick, consider using espresso instead of regular brewed coffee, particularly in recipes that call for a rich coffee base.

Texture modifications include blending ingredients together for a creamier, smoothie-like consistency or leaving it more traditional for straightforward sipping.

Presentation can be enhanced by serving iced coffee in unique glassware or garnishing with whipped cream and a sprinkle of your favorite spices.

Serving and Presentation Guide

Present your iced coffee in tall glasses filled with ice. A layered effect looks stunning, with cream slowly poured over coffee for aesthetic appeal.

Garnish with fresh herbs like mint or even small fruit slices for a pop of color and added freshness. A colorful straw can also add a fun touch!

Consider pairing iced coffee with a complementary snack, such as pastries or light bites, adding to its appeal during a casual meet-up.

Temperature matters; serve your iced coffee as cold as possible to maximize refreshment, considering a chilled server if preparing for guests.

Control portions with smaller servings for taste testing various flavors, perfect for gathering with friends where everyone can try different versions!

Wine and Beverage Pairing

For a delightful pairing, consider serving an iced coffee alongside light-bodied wines such as sparkling whites to contrast the richness of the coffee.

Non-alcoholic alternatives include pairing with refreshing fruit-infused sparkling water, complementing iced coffee without overwhelming the palate.

If tea is your preference, chai tea works wonderfully blended with coffee, offering a robust flavor palette that’s rich in spices.

Ensuring drinks are served at optimal temperatures enhances enjoyment; chilled beverages can refresh alongside your iced coffee.

Use visually appealing glassware to accompany both coffee and its pairing drink, enhancing the presentation during gatherings.

Storage and Shelf Life

Store brewed iced coffee in an airtight container in the refrigerator to keep it fresh for up to 3 days. Avoid leaving it at room temperature for extended periods.

For best results, frozen coffee can last 1-2 months, but it’s advisable to consume it while fresh for optimal flavor.

When reheating, be cautious; microwaving is generally okay, but it can spoil the flavor. Instead, try adding hot water to warm up brewed coffee without changing its taste significantly.

Check for signs of spoilage such as off-smells or changes in texture and discard if necessary to avoid unpleasant experiences.

Freezing brewed coffee in ice cube trays is a great method to preserve leftovers and incorporate them into future drinks easily.

Make Ahead Strategies

Prepare coffee in advance by brewing a strong batch and chilling it overnight; this will save you time in the morning.

Store individual ingredients like flavored syrups or whipped cream ahead of time, making it easy to whip up drinks quickly.

Consider preparing coffee ice cubes a day in advance to have on hand for your iced coffee preparations.

Quality is important; assess the taste when making ahead and remember to adjust sweetness or flavor notes right before serving.

Fresh elements like mint or chocolate shavings can be prepped but add them at the last moment for the best taste and presentation.

Scaling Instructions

If you’re looking to double the recipe, ensure you maintain the coffee-to-water ratio for a consistent flavor profile. Brew a larger batch and proportion your ingredients accordingly.

For smaller gatherings, simply halve the ingredients, but remember to adjust cooking times or chilling periods accordingly.

Large gatherings may require additional equipment like larger pitchers; remember to include more ice for adequate chilling without sacrificing flavor!

Pay attention to the size of your serving vessels, as this will impact the overall volume if you’re scaling up or down.

Always taste test if you’re altering amounts; sometimes brewing processes can yield different results based on quantities.

Nutritional Deep Dive

When analyzing iced coffee, the macro breakdown generally includes carbohydrates from sweeteners, proteins from milk or milk alternatives, and fats depending on your dairy choice.

Coffee offers a wealth of micronutrients such as B vitamins and magnesium, contributing to overall health benefits when consumed in moderation.

Health benefits of iced coffee extend beyond caffeine; research suggests coffee consumption can support metabolism and improve mental clarity.

Consider dietary aspects when whipping up your iced coffee; it’s essential to be aware of sugar intake and opt for healthier sweeteners or alternative milks.

For portion management, consider limiting high-calory toppings or additives, keeping your enjoyment within a healthy range.

Dietary Adaptations

Adapting iced coffee for gluten-free diets is easy; simply select gluten-free flavor syrups or enjoy it black.

For dairy-free options, use almond milk, coconut milk, or oat milk in place of traditional dairy creamers.

Vegan adaptations can be made by omitting any dairy additives and substituting with plant-based alternatives across the board.

Low-carb dieters can enjoy this drink by skipping the traditional sugar and opting for sugar-free sweeteners like stevia or erythritol.

The keto diet is compatible; swap regular milk for heavy cream or unsweetened coconut milk for a rich texture without carbs.

Paleo adherents can embrace iced coffee as-is, ensuring the flavor additives used are natural and free from processed ingredients.

Troubleshooting Guide

If your iced coffee turns out too bitter, consider adjusting your brew time or opting for milder coffee profiles next time.

Flavor balance can sometimes falter; adjust sweetener and milk levels until you find the perfect blend for your palate.

Temperature problems might arise if ice melts too quickly; ensure your coffee is cool before adding ice to balance temperature properly.

Equipment challenges can be resolved by using proper brewing techniques; invest in a good-quality coffee maker for consistent results.

When substituting ingredients, be cautious of flavor impacts; test small batches first before committing to larger quantities.

Timing concerns may limit enjoyment; prepare your coffee ahead of time and chill for optimal results!

Recipe Success Stories

Community feedback has shown that many love to share their adaptations, such as adding unexpected flavors like lavender or chai spices, transforming a simple iced coffee into a gourmet experience.

Many readers highlight their successes with variations that cater to different dietary needs, showing that iced coffee is adaptable for a wide range of preferences.

It’s inspiring to see how readers share their favorite photos of the drinks they’ve created, encouraging others to try these delicious iced coffee recipes.

Suggestions on ingredients often come from successful adaptations where personal preferences enhance the base recipe, opening up new flavor avenues.

Photography tips abound, with readers offering advice on lighting and angles to showcase their iced coffee creations beautifully.

Frequently Asked Questions

How can I make my iced coffee less bitter?

If you’re finding your iced coffee too bitter, consider using a coarser grind for your coffee or brewing it for a shorter time. Also, balancing it with milk and sweeteners can help mellow the sharp notes.

What’s the best coffee for iced drinks?

The best coffee for iced drinks is often a medium to dark roast, which tends to have a richer, bolder flavor that holds up well when served cold. Cold brew coffee is also a fantastic choice due to its naturally sweeter taste and lower acidity.

Can I use instant coffee for iced coffee?

Absolutely! Instant coffee can be quickly dissolved and is a great option for iced coffee. To avoid bitterness, adjust the water-to-coffee ratio until you achieve your preferred flavor.

How do I prevent my iced coffee from becoming watery?

To prevent dilution, use coffee ice cubes instead of regular ice. An excellent way to make these is by freezing leftover coffee in ice trays, adding them to your next batch.

Is iced coffee healthier than hot coffee?

Iced coffee offers similar health benefits to hot coffee, given that it’s prepared without excess sugars or additives. The key is to monitor what you add to your iced coffee, keeping it healthy by opting for natural sweeteners and low-calorie milk alternatives.

How long can I store iced coffee?

Brewed iced coffee can typically be stored in the refrigerator for up to 3 days. However, it’s best enjoyed fresh, so plan to consume it within a day or two for peak flavor.

Can I mix different coffee types?

Yes! Mixing different types of coffee can yield unique flavors. Experiment with blends or different brewing styles like cold brew and traditional espresso to discover new favorites!

What’s the ideal temperature to serve iced coffee?

Iced coffee should be served cold, ideally around 34°F to 40°F, to ensure it is refreshing and enjoyable. Using pre-chilled glasses and freezing coffee cubes can help maintain this temperature.

Do I need to use a blender for these recipes?

Blending is only necessary for certain recipes requiring a creamier texture; otherwise, most iced coffee recipes can be made by simply mixing brewed coffee with ice and other ingredients.

Can I add flavoring syrups to iced coffee?

Absolutely! Flavor syrups can elevate your iced coffee, enhancing sweetness and adding varieties like hazelnut, vanilla, or caramel. Just remember to adjust the amount of syrup based on your taste preference!

Additional Resources

For those interested in more similar recipes, check out our collection of other coffee-based drinks that offer delightful alternatives to your standard brews.

We also provide technique guides on brewing methods to enhance your iced coffee experience, including step-by-step videos and articles detailing best practices.

Explore ingredient information for various alternatives and unique add-ins to make your iced coffee truly stand out!

Looking for equipment recommendations? Our blog features essential coffee-making tools that ensure quality and flavor in every cup.

Don’t miss out on seasonal variations that bring festive touches to your iced beverages, perfect for holiday gatherings or summer parties.

Join the Conversation

We invite you to share your iced coffee creations on social media, using our hashtag to connect with fellow coffee enthusiasts and share your journey.

Photography sessions can be a delightful way to showcase your iced coffee—don’t forget to tag us, and we may feature your photos on our page!

We encourage readers to leave reviews and comments on their experiences with the recipes and any modifications they’ve tried.

Engage with our community by suggesting variations or flavor combinations you’ve discovered; your idea could inspire someone else!

Lastly, feel free to reach out with questions or suggestions; we love expanding our coffee community with your input!

The Recipe

5 Easy Iced Coffee Recipes

Serves: 2 servings each recipe

Prep Time: 5 mins

Cook Time: 0 mins

Total Time: 5 mins

Kitchen Equipment Needed

  • Coffee maker or French press
  • Blender (optional for some recipes)
  • Measuring cups and spoons
  • Ice trays or freezer-safe containers
  • Serving glasses

Ingredients

  • 2 cups brewed coffee (chilled)
  • Iced coffee flavoring syrups (to taste)
  • Milk or milk alternative (to taste)
  • Ice cubes (or coffee ice cubes)
  • Optional: whipped cream, chocolate shavings, spices for garnish

Directions

  1. Start by brewing your coffee and allowing it to chill in the refrigerator for at least one hour.
  2. Once chilled, pour the coffee into a tall glass over ice (coffee cubes optional).
  3. Add in your choice of flavoring syrup and milk, adjusting to your personal preference.
  4. Stir gently to combine all ingredients, ensuring the syrup is evenly distributed.
  5. Garnish with whipped cream or chocolate shavings if desired and serve immediately.

Recipe Notes

  • Experiment with different flavoring syrups to find your favorite combo.
  • For a creamier texture, blend your iced coffee with ice instead of just pouring it over ice.
  • Use a variety of milk alternatives to change taste and texture based on your dietary preferences.

Best Starbucks Secret Menu Items and How to Order Them

Starbucks Secret Menu Items: How to Order Them Like a Pro

⚖️
Difficulty
Easy

⏲️
Prep Time
5 mins

🕒
Cook Time
0 mins

⏱️
Total Time
5 mins

🍽️
Servings
1 serving

Starbucks Secret Menu items have become a delightful way for coffee lovers to customize their drinks beyond the standard offerings. Each secret menu item is crafted by creative coffee enthusiasts looking to enhance their Starbucks experience. Whether you crave something sweet, refreshing, or simply want to try a unique flavor combination, the Starbucks Secret Menu has something for everyone. Here’s everything you need to know about these exciting beverages and how to order them effectively.

From the beloved “Pink Drink” to the “Butterbeer Frappuccino,” these secret menu items add a new dimension to your typical coffee shop visit. As you delve into our guide on how to order these items, you’ll discover tips and tricks, ensuring you walk away with the drink of your dreams. With a little knowledge and confidence, you’ll be navigating the Starbucks registers like a pro in no time!

Quick Recipe Highlights

  • Flavor Profile: Experience a delightful blend of sweet, fruity, or creamy flavors that elevate your coffee experience.
  • Texture: Enjoy the creamy consistency of blended drinks and the refreshing fizz of iced beverages.
  • Aroma: Indulge in the enticing scents that fill the air, from luxurious caramel notes to fruity undertones.
  • Visual Appeal: Eye-catching colors, luscious layers, and tasty toppings make these drinks Instagram-worthy.
  • Skill Level Needed: Simple and straightforward; no special coffee-making skills are required!
  • Special Equipment: Generally, no additional equipment is necessary, just your willingness to ask for something special!

Recipe Overview

  • Difficulty Level: Ordering from the secret menu is easy for anyone, regardless of coffee expertise.
  • Category: Perfect for coffee lovers looking for a unique twist on classic beverages.
  • Cuisine: Inspired by global coffee culture and trends, these drinks celebrate creativity and flavor.
  • Cost: The price varies depending on the drink complexity, with most averaging standard beverage costs.
  • Season: Enjoy these delightful drinks year-round, with seasonal items adding holiday cheer.
  • Occasion: Ideal for casual hangouts, coffee dates, or simply treating yourself on a busy day.

Why You’ll Love This Recipe

Indulging in Starbucks Secret Menu items offers a unique tasting adventure that goes beyond traditional coffee flavors. The creative combinations provide an exciting opportunity to explore your personal coffee preferences, whether you’re in the mood for something sweet, a little spicy, or refreshingly fruity. With endless possibilities, you can try a different drink each time you visit Starbucks, keeping your taste buds tantalized.

Convenience is key when ordering these secret menu items. Believe it or not, you don’t need to pull out your blender or special ingredients; just walk up to the counter and make your request. With a quick presentation of the secret menu item name, your barista can whip up your customized drink with ease. This ease of enjoyment means you’ll barely spend more time than usual ordering your favorite cup of coffee.

Beyond taste, these drinks often present surprising nutritional benefits that can fit within a balanced diet. You can opt for lighter options, like those that use almond milk or fresh fruits, affording those health-conscious individuals a chance to indulge without guilt. You also have control over sugar content, so you can tailor your order to meet your personal dietary needs.

Starbucks Secret Menu items also carry a social aspect, turning a simple coffee run into an entertainment experience. Sharing these drinks with friends or colleagues not only enhances the enjoyment but also ignites conversation about favorite beverages and flavors. The vibrant colors and creative names lend themselves perfectly to social media sharing, making your coffee moments even more special.

Finally, the cost-effectiveness of these secret menu items cannot be ignored. You can enjoy a premium coffee experience in a casual setting without overspending. Most items remain within the usual Starbucks price range, allowing you to explore extravagant flavors without breaking the bank. This accessibility makes indulging in a fun drink something you can consider whenever the craving strikes.

Historical Background and Cultural Significance

The concept of a secret menu at Starbucks originated as customers began sharing unique drink combinations and alternatives on social media platforms. These homemade blends gained popularity, transforming the customer’s voice into a collaborative effort with baristas. The creativity around these drinks has fostered a vibrant community of coffee aficionados.

Culturally, secret menu items reflect the broader trend of customization in consumer experiences. The rise of social media has allowed individuals to share their unique combinations, highlighting the personal touch that is increasingly valued in dining experiences. This move towards personalization aligns perfectly with Starbucks’ ethos of crafting a unique coffee journey tailored to individuals.

Over time, secret menu items have evolved, mirroring seasonal trends and ingredient availability. For example, during summer, more fruity and refreshing drinks appear, while winter might favor warm and spiced concoctions. This adaptability keeps the menu dynamic and engaging, ensuring customers return for new tastes.

Regional variations of Starbucks Secret Menu items also reflect local preferences. In warmer climates, lighter drinks gain favor, whereas colder areas might prefer decadent options. This geographic diversity enriches the overall experience and showcases how coffee culture can become intertwined with local customs and tastes.

Ingredient Deep Dive

One of the main ingredients in Starbucks secret menu items is the infamous base syrup, such as vanilla, caramel, or hazelnut. Each syrup carries distinct flavors and can easily adapt to your favorite drink for uniqueness. Syrups provide sweetness and depth, making them essential to enhance various beverages, from lattes to frappuccinos. When selecting syrup flavors, opt for seasonal offerings, which often provide the freshest and most exciting combinations.

Another crucial ingredient in these drinks is the milk or milk alternative used to create creamy textures. Choices like almond, oat, and coconut milk cater to various dietary preferences and can deepen flavor profiles through rich, nutty undertones. When storing milk alternatives, always check expiration dates, ensuring they stay fresh for your coffee creations.

Common Mistakes to Avoid

  • Not specifying the size: Always mention the size you desire; otherwise, the barista may default to a standard size.
  • Forgetting to clarify sweetness: Specify if you like the drink less sweet, especially for rich selections.
  • Overloading on ingredients: Too many flavors can complicate the drink’s profile; keep it simple!
  • Neglecting seasonal variations: Always ask if there are limited-time options to further enhance your order.
  • Skipping the custom request: Don’t hesitate to tweak a recipe; it’s the essence of the secret menu.
  • Not experimenting: Stick to your comfort zone and miss out on great flavors; be adventurous!
  • Ignoring the barista’s suggestions: They’re knowledgeable! Ask for their recommendations or modifications.
  • Choosing the wrong drink title: It’s crucial to remember proper names for better communication.
  • Not checking for availability: Ensure the ingredients required for your drink are in stock.
  • Ordering during peak hours: Some items may take longer to prepare; try visiting during quieter times.

Essential Techniques

When venturing into the world of secret Starbucks drinks, mastering the art of customization is paramount. The key to success lies in familiarizing yourself with the menu details; understanding what to request and how to communicate effectively makes a significant difference. Practice clear communication with baristas to ensure they understand precisely what you want.

Additionally, learning about substitutions can enhance your drink considerably. For example, if you prefer certain flavors or have dietary restrictions, being equipped with alternative options like non-dairy milk or sugar substitutes will help tailor your experience. This will also educate you on how flavors interact, turning your coffee journey into a fun experimentation.

Pro Tips for Perfect Starbucks Secret Menu Items

1. **Ask for a modification:** Whenever possible, ask for an extra ingredient, flavor shot, or change in milk to elevate your drink.
2. **Utilize the Starbucks app:** Check app specials for new secret menu items before you visit for ideas.
3. **Order during off-peak hours:** Quieter times mean baristas can focus on crafting your custom drink properly.
4. **Understand drink names:** Familiarize yourself with the right terms to speed up the ordering process.
5. **Communicate with the barista:** Seeking their input can lead to delightful drink suggestions that you may have never considered.
6. **Try seasonal flavors:** Change your order with the seasons, as ingredients may vary for unique taste experiences.
7. **Don’t combine too many flavors:** Stick to two to three complementary flavors to avoid a confusing taste profile.
8. **Share your creations:** Encourage friends to explore the secret menu with you; sharing the discovery adds to the fun!

Variations and Adaptations

While the Starbucks secret menu offers endless possibilities, regional variations can provide a unique twist. For example, in tropical areas, drinks may lean more towards fruity flavors, while colder regions may favor spiced or creamy beverages. Adapting your drink to local flavors allows you to enjoy a cultural experience with every sip.

Tempering your order with seasonal ingredients can also add freshness. During fall, pumpkin flavors take center stage, while summer welcomes refreshing iced teas or berry blends. Embracing seasonal changes keeps your Starbucks experience exciting throughout the year.

Dietary modifications are simple with these secret menu items. You can opt for almond or oat milk instead of regular dairy, making your drink vegan-friendly or suitable for lactose-intolerant individuals. Informing your barista of any dietary needs will empower them to craft your drink accordingly.

Flavor variations can easily enhance the experience. If you love fruity drinks but would like a little kick, ask for a hint of spice or an extra fruit layer. The ability to improvise helps create a drink personalized to your palette while keeping it fun.

Presentation can also vary; consider ordering your drink with whipped cream, various toppings, or even colorful sprinkles to add a fun flair. Experimenting with your drink’s appearance can spark conversations and make your outing more memorable.

Serving and Presentation Guide

When diving into the world of Starbucks Secret Menu items, focusing on presentation creates a visually appealing drink experience. Use tall, clear cups to showcase multi-layered drinks, emphasizing color and texture.

Garnishing plays an essential role in enhancing the visual appeal while providing additional flavors. Toppings like whipped cream, chocolate drizzle, or colorful fruit not only elevate the drink but also add a delightful texture element.

Consider traditional accompaniments like biscotti or pastries to elevate your coffee experience further. These snacks complement the beverage and create a well-rounded treat.

For hot beverages, ensure to consider temperature serving. Hot drinks should be paired with warm sleeves to avoid burns, while iced beverages benefit from chilled glasses or cups.

Additionally, practicing portion control helps maintain balance in your order, encouraging moderation while still indulging in the fun of secret menu exploration.

Wine and Beverage Pairing

Surprisingly, while Starbucks is primarily known for its coffee, pairing drinks from their secret menu with wines can be an enjoyable experience. For dessert drinks that are richer in flavor, consider sweet wines, like late-harvest Riesling, to complement the lush flavors and bring balance to your palate.

For non-alcoholic alternatives, sparkling water with refreshing fruits, like lemon or lime, can create an uplifting pairing, making your experience feel both fancy yet casual.

If coffee is your beverage of choice, consider pairing drinks with complementary teas; herbal or chai blends are delightful with creamier secret menu items.

Temperature is crucial when considering pairings; ensure that hot drinks are served with warm pastries, while iced beverages beautifully accentuate cold desserts.

Serving suggestions can include vibrant fresh fruit on the side or small tasting portions of pastries to encourage creative pairing experimentation.

Storage and Shelf Life

When it comes to enjoying your secret menu creations, be mindful of storage methods. Keeping drinks fresh and flavorful is essential for maximizing enjoyment. If you plan on saving leftover portions, consider storing them in an airtight container in the refrigerator.

Temperature is crucial; ideally, iced drinks should be consumed within a couple of hours to prevent dilution, while hot drinks are best enjoyed fresh for that delightful warmth.

Use clear containers to observe color changes, indicating freshness and prevent any unwanted spoilage. Additionally, always ensure that any garnishes are removed if you plan on storing the drink. This will help maintain flavor integrity.

Signs of spoilage include unusual odor or separation of ingredients, indicating that it’s best to discard. To reheat drinks, use gentle warming methods to avoid scorching and ruining flavor.

Following proper freezing guidelines by separating the beverage components before freezing is crucial. Consider storing syrups and creams separately, then blending them when ready to enjoy a fresh coffee experience again.

Make Ahead Strategies

For those busy mornings, preparing secret menu drinks ahead of time can save you precious moments. Creating a prep timeline is essential; consider batching syrups or ingredients the night before.

Cooling methods can allow quick assembly in the morning. Ensure you store prepared components like syrups in the refrigerator, so they remain fresh while waiting for use. This solitary prep step enhances future drink assembly efficiency.

Quality impact is crucial; always utilize fresh ingredients to maintain the intended taste and aroma associated with your favorite beverages.

When it comes to assembly tips, blending ingredients right before serving helps maintain temperature and taste. Adding ice just before serving ensures textures remain crisp for chilled drinks.

Reheating guidelines are simple; gently warm up coffee components without boiling to maintain flavor profiles. Lastly, adding fresh elements, such as fruits or whipped cream, can instantly elevate your drink’s appeal.

Scaling Instructions

Scaling your secret menu concoctions allows you to cater to a crowd easily. Halving or doubling recipes takes confidence; familiarizing yourself with the base recipes for various favorites will yield numerous options.

When doubling or tripling, ensure to account for ingredient ratios, ensuring consistent flavors across larger batches remains possible without overwhelming the palate with too much sweetness or creaminess.

Equipment adjustments are also necessary; consider your blender or mixing tools’ capacity to accommodate larger quantities without sacrificing quality.

Timing modifications should reflect increased batch size properly, allowing for additional time requirements based on the number of drinks you are preparing.

Store any extras appropriately to enjoy at a later time, adapting storage methods for various ingredients, such as syrups, that may need dedicated containers.

Nutritional Deep Dive

Understanding the nutritional profile of these delightful drinks ensures you maintain balance while indulging. A macro breakdown will reveal sugar, fat, and carbohydrate contributions across secret menu drinks, affecting overall dietary consumption.

Analyzing micronutrients highlights potential vitamins and minerals present in fresh or seasonal ingredients, like antioxidants from berries, which can contribute positively to health.

Evaluating health benefits allows you to see how various developments may align with personal dietary considerations, such as fiber or protein from specific additives.

Dietary considerations are essential, as observing the caloric differences between lighter drink choices and indulgent selections will guide your options for unique beverages based on personal needs.

Lastly, portion analysis will help you understand how proper serving sizes impact enjoyment without overwhelming sugar intake, promoting healthier choices in your coffee experience.

Dietary Adaptations

For those with gluten sensitivities, Starbucks Secret Menu items can easily be tailored to fit your dietary needs. Opt for gluten-free syrups and confirm no cross-contamination with baked goods if chosen as an accompaniment.

Dairy-free options are widely available; ask for almond, oat, or coconut milk to transform your favorite drinks. Mix and match these alternatives to discover delightful flavor combinations while keeping your drink lactose-free.

Vegans can enjoy secret menu items by requesting plant-based ingredients, ensuring no dairy or animal products are included. Based on taste preferences, you might still find satisfaction in flavor-rich alternatives.

Low-carb or keto followers can opt for sugar-free syrups while adjusting milk choices to non-dairy variations. This allows the enjoyment of Starbucks beverages without sacrificing dietary goals.

Paleo enthusiasts may seek ingredients that adhere to organic or fresh principles, while low-FODMAP diets require careful selection of fruits and sweeteners, ensuring comfort while indulging.

Troubleshooting Guide

When experimenting with Starbucks Secret Menu items, you may encounter common challenges. If your drink’s texture is too runny, consider adding more creaminess through whipped toppings or re-blending.

Flavor balance is crucial; if a drink is overly sweet, requesting less syrup in the next order can provide a more harmonious experience.

Temperature problems can be rectified by specifically asking for temperature adjustments during ordering, ensuring you relish the beverage at the perfect degree.

If equipment challenges arise, such as spills or messy presentation, consider ordering modifications that accommodate simpler drink requests to lessen potential issues.

Ingredient substitutions can create hurdles; ensure you communicate with the barista about desired changes to avoid unwanted surprises in flavor or texture.

Timing concerns are vital, especially during busy hours. Prioritize ordering popular drink combinations during these times for a smoother process.

Recipe Success Stories

The community has spoken! Each Starbucks Secret Menu item boasts a passion-driven origin story, featuring customers sharing unique drink combinations often highlighted in online forums.

Feedback about luscious, delightful creations has added to the buzz, enriching the coffee scene; variations have spread across cities as more customers jump on the trend.

Readers often share personal success stories about crafting the perfect drink at home using recommendations explored in our guides, enhancing community engagement around beloved drinks.

Photography tips provide inspiration as well; capturing the vibrancy of these drinks encourages happy social media sharing while inspiring others to try creations.

Reader suggestions have transformed basic drink orders into mouthwatering creations; incorporating their recommendations leads to ongoing evolution and excitement around secret menu items.

Frequently Asked Questions

Q1: What are Starbucks Secret Menu Items?
A1: Starbucks Secret Menu items refer to unofficial drink combinations created by customers and shared mainly through social media channels. These combinations leverage the existing menu ingredients to create exciting new beverages.

Q2: Can I order a secret menu item at any Starbucks location?
A2: Yes! While baristas may not be familiar with every single secret menu item, simply mentioning the drink combination or its key ingredients usually works. Just be clear in your request!

Q3: Are secret menu items more expensive than regular drinks?
A3: Typically, the price should not change significantly when ordering a secret menu drink compared to similar regular menu items. However, add-ons might increase the final cost based on customization.

Q4: How can I find new secret menu items?
A4: New secret menu items often emerge on social media platforms like Instagram or TikTok, where creative coffee lovers post their drink creations and share vibrant visuals to inspire others.

Q5: Can I customize my secret menu drink further?
A5: Absolutely! One of the benefits of the secret menu is the ability to mix and match flavors and ingredients until you achieve your perfect drink tailored to your preferences.

Q6: How do I know if I can modify a drink?
A6: Understanding the base ingredients available at Starbucks allows you to brainstorm ideas but discussing options with the barista enables further experimentation for your ideal drink.

Q7: Are there seasonal secret menu items?
A7: Yes! Seasonal ingredients often inspire limited-time secret menu items, showcasing flavors reflecting festivals or holidays like pumpkin spice in fall or peppermint during winter.

Q8: Is there a way to enjoy secret menu drinks at home?
A8: Definitely! Replicating Starbucks Secret Menu items at home can be achieved with simple recipes and adjustments using ingredients available in your kitchen. This opens the door to plenty of fun possibilities.

Q9: Can I request specific milk options for my secret drink?
A9: Yes, Starbucks offers various milk options to fit dietary needs; thus, feel free to request almond, oat, soy, or coconut milk, ensuring you have your desired beverage experience without dairy.

Q10: Will my drink taste different than expected?
A10: Each Starbucks drink is unique, as blend quality can vary based on the barista’s expertise. If your drink veers from expectation, don’t hesitate to ask for adjustments.

Additional Resources

Explore related recipes that can refine your coffee creativity further. Technique guides on proper espresso preparation or understanding milk foam will add to your skillset.

Ingredient information can provide the background and nutritional data linked to popular syrup options or seasonal ingredients to enhance your recipes.

Moreover, equipment recommendations like blenders for those at-home creations will inspire new adventures. Your coffee journey could also benefit from exploring seasonal variations to keep your taste experiences fresh and exciting!

Join the Conversation

Become part of the growing community around Starbucks Secret Menu items by engaging on social media! Share your favorite drink combinations, send photos, and connect with other coffee enthusiasts who enjoy similar tastes.

Photography tips such as how to style and capture your unique drink can enhance your engagement. Add your voice through reviews, providing positive feedback to baristas and each other, enriching the community experience.

Last but not least, feel free to explore and suggest variations of your own; the Starbucks Secret Menu thrives on shared creativity and experiences. Your ideas could inspire countless others to discover new favorites!

The Recipe

Starbucks Secret Menu Items

Serves: 1

Prep Time: 5 mins

Cook Time: 0 mins

Total Time: 5 mins

Kitchen Equipment Needed

  • Blender (if desired for blended drinks)
  • Clear cups for visual appeal
  • Straws for easy sipping
  • Measuring spoons for ingredient precision

Ingredients

  • Starbucks base syrups (vanilla, caramel, hazelnut)
  • Your choice of milk (almond, oat, or dairy)
  • Ice cubes for chilled drinks
  • Any additional flavorings or toppings (whipped cream, fruit)

Directions

  1. Select one of your favorite secret menu items or create your unique blend.
  2. Ask for specific syrups and milk choices when ordering at Starbucks.
  3. Add ice cubes for blended drinks or if you prefer iced options.
  4. Request additional toppings or components to enhance flavor.
  5. Enjoy your delicious creation and share your review with friends!

Recipe Notes

  • Feel free to mix flavors and experiment to discover your perfect blend.
  • Don’t shy away from getting back to the barista for flavor adjustments.
  • Remember that seasonal ingredients can elevate your drink’s complexity.
  • Community suggestions can range from variations; make it your own!