Easy 3-Ingredient Dalgona Coffee Recipe at Home

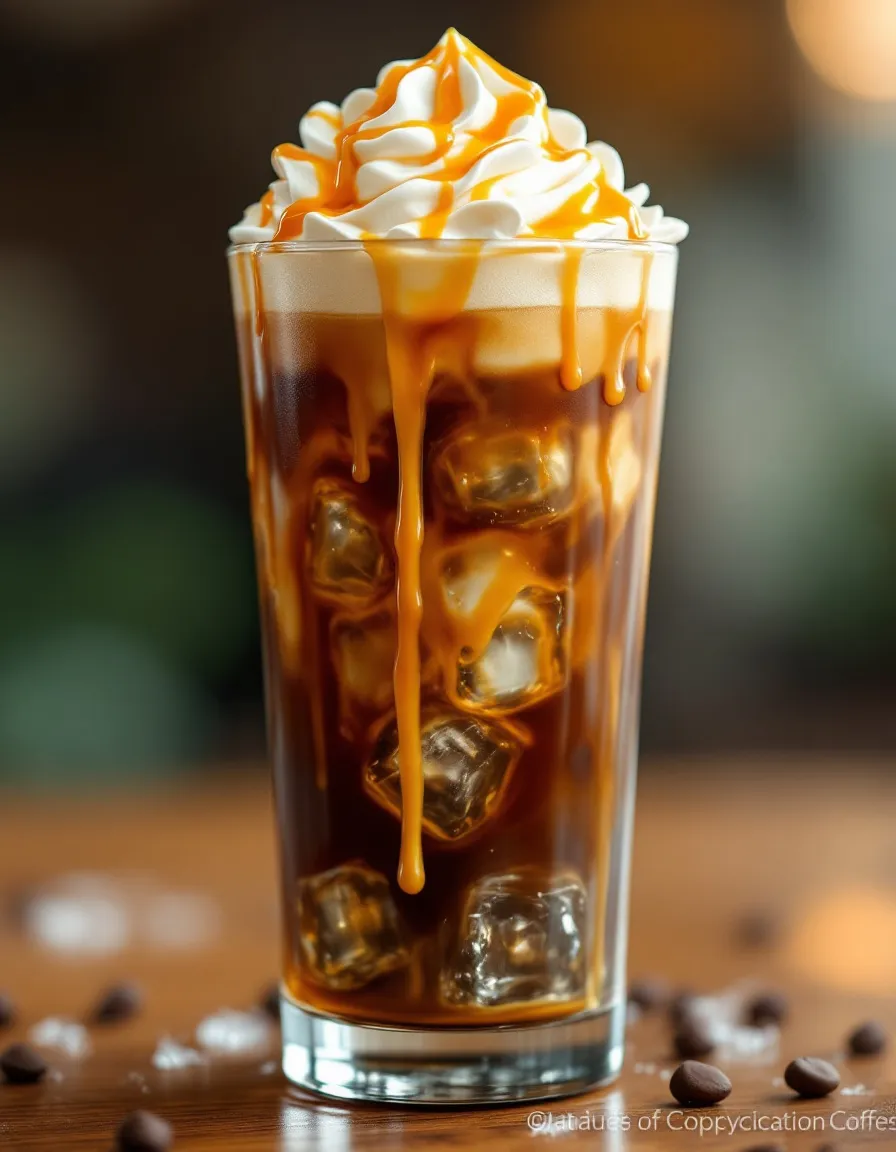
How To Make The 3-Ingredient Dalgona Coffee Everyone’s Talking About

⚖️
Difficulty
Easy

⏲️
Prep Time
5 mins

🕒
Cook Time
0 mins

⏱️
Total Time
5 mins

🍽️
Servings
1

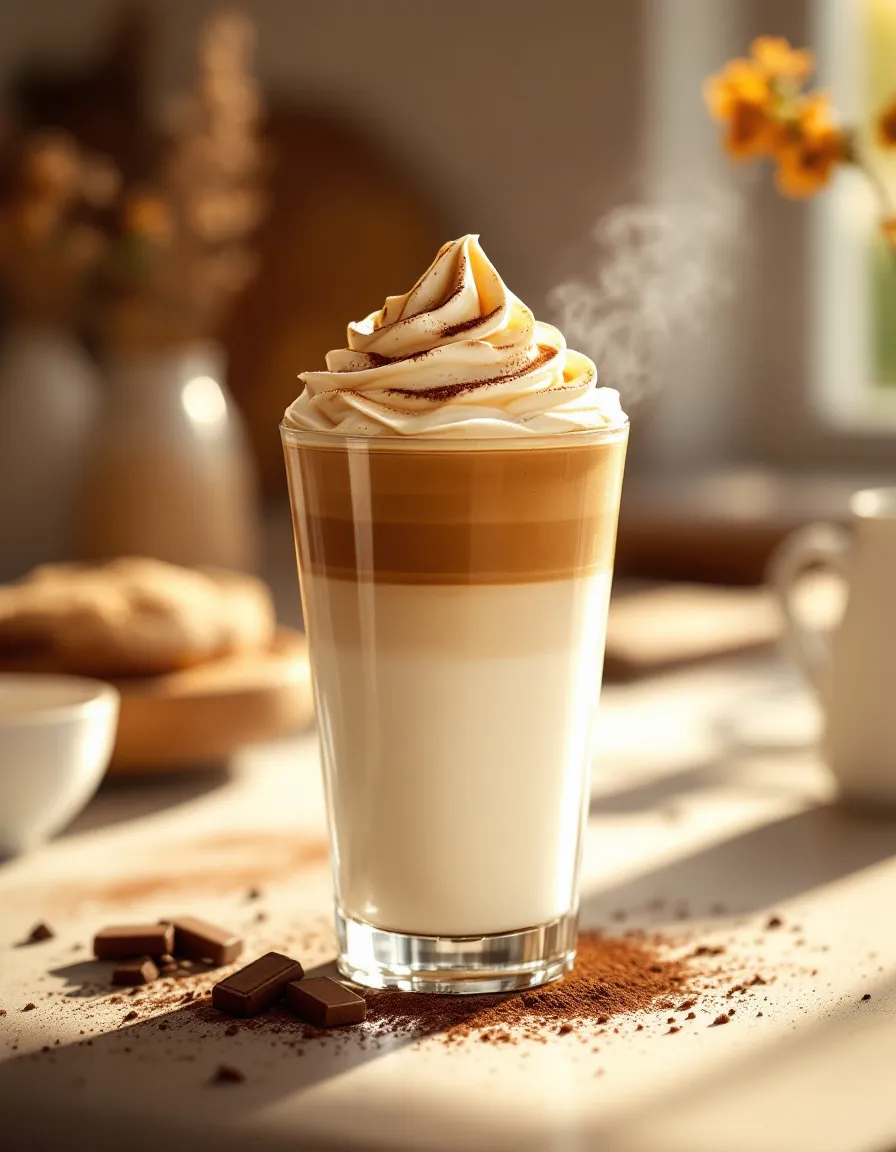
Dalgona coffee is the viral beverage that has captured the hearts and taste buds of coffee lovers around the world. This fluffy, whipped coffee drink is not only delicious but also incredibly simple to make with just three ingredients: instant coffee, sugar, and hot water. The creamy, frothy mixture, when poured over milk, creates a stunning contrast and offers a delightful taste that’s both strong and sweet. Dalgona coffee is not just a feast for the taste buds but also a visual treat, perfect for your morning routine or as an impressive dessert drink.

The process of making Dalgona coffee is as satisfying as drinking it. Whipping the coffee and sugar together creates airy peaks that remind you of whipped cream. As you dip your spoon into the fluffy mixture, you can’t help but feel excited about the coffee experience that awaits you. The combination of rich coffee flavor with the smoothness of milk makes for a truly indulgent treat, whether you enjoy it hot or cold. So, let’s dive in and learn how to make this trendy beverage that has everyone talking!

Quick Recipe Highlights

  • Flavor Profile: Dalgona coffee offers a rich coffee flavor balanced with a sweet, sugary taste that excites the palate.
  • Texture: The whipped coffee creates a light, airy texture that contrasts beautifully with the creaminess of the milk.
  • Aroma: The aroma of freshly whipped coffee is strong and inviting, making it hard to resist taking a sip.
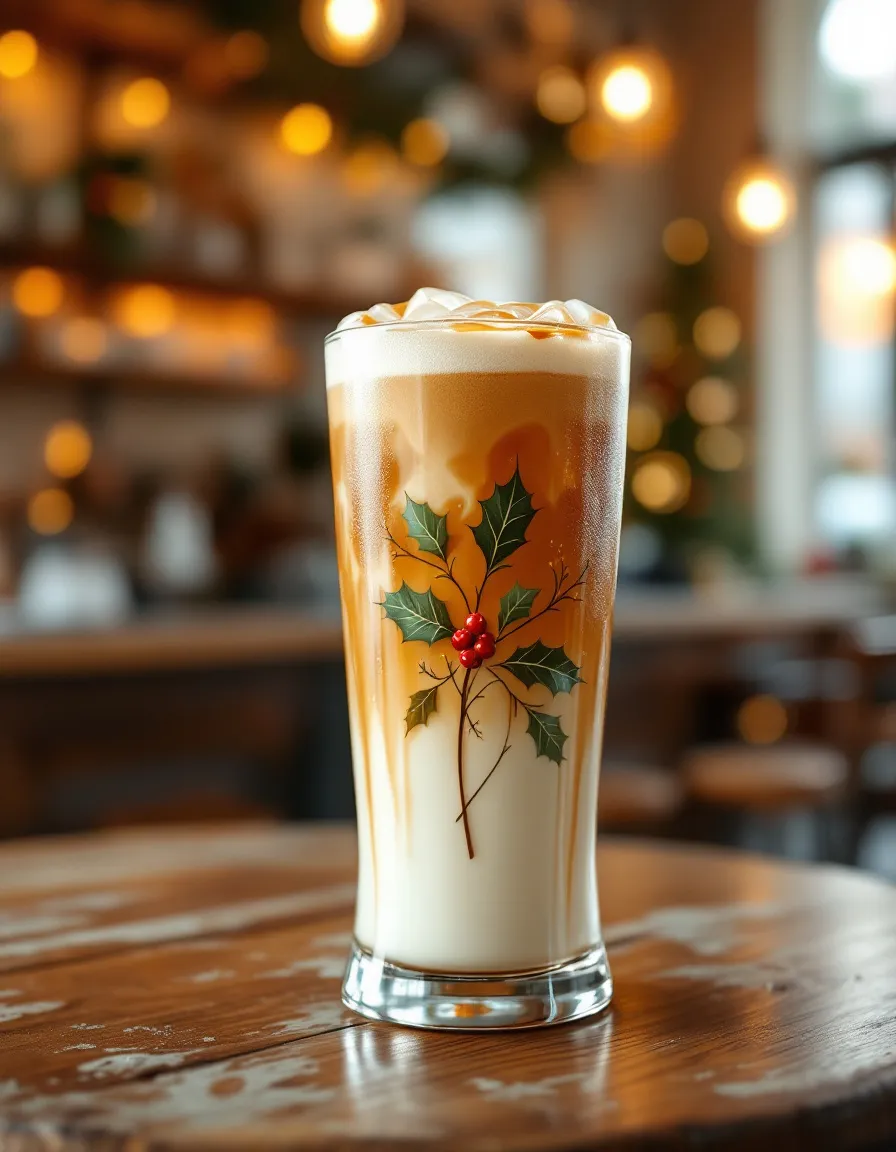
  • Visual Appeal: The striking contrast between the whipped coffee layer and the milk underneath makes this drink visually stunning.
  • Skill Level Needed: This recipe is perfect for beginners; just whisk the ingredients together for a few minutes.
  • Special Equipment: All you need is a bowl and a whisk or electric mixer for easy preparation.

Recipe Overview

  • Difficulty Level: Making Dalgona coffee is quite easy, requiring minimal effort and just a few minutes of your time.
  • Category: This recipe falls under beverages, specifically coffee-based drinks that can be enjoyed at any time of the day.
  • Cuisine: Originating from South Korea, Dalgona coffee draws inspiration from the traditional whipped coffee famous in many cultures.
  • Cost: This recipe is budget-friendly, with all ingredients easily available at your local grocery store.
  • Season: Dalgona coffee is perfect year-round, but its light and fluffy nature make it especially refreshing during warm months.
  • Occasion: Enjoy this delightful drink during breakfast or serve it at brunch gatherings to impress your guests.

Why You’ll Love This Recipe

Dalgona coffee encapsulates a unique taste and texture that you won’t find in standard coffee drinks. The delightful layering of whipped coffee over milk allows for a complex flavor experience; each sip combines the robustness of coffee with the sweetness of sugar. This contrast creates a deeply satisfying drink, perfect for lifting your spirits any time of day.

The convenience and quick preparation of Dalgona coffee are unbeatable. With only three ingredients and five minutes of your time, you can create an impressive beverage. Whether you enjoy it as a refreshing afternoon pick-me-up or a sweet dessert, Dalgona coffee is a versatile choice that fits beautifully into any routine.

Nutritionally, this drink can be easily adjusted to your preferences—use dairy or plant-based milk to tailor it to your dietary needs. Plus, you can control the sweetness by adjusting the sugar, allowing for a slightly healthier alternative without sacrificing taste.

Socially, Dalgona coffee has sparked a worldwide trend, encouraging coffee enthusiasts to share their variations and experiences on social media. This recipe fosters creativity and experimentation, making it a fun activity to showcase with friends and family.

Additionally, the cost-effectiveness of Dalgona coffee makes it accessible to everyone. With common ingredients already likely in your kitchen, it’s inexpensive to whip up this trendy drink and delight your guests without straining your wallet.

Historical Background and Cultural Significance

Dalgona coffee has roots tracing back to South Korea, where it gained popularity during the 2020 pandemic. During lockdown, many looked for new activities to pass the time and found joy in creating this whipped coffee at home, spawning the #dalgonacoffee trend on social media.

Its cultural importance lies in its ability to unite people through a simple act of making coffee. As individuals experimented with different variations and shared recipes online, the sense of community around Dalgona coffee grew significantly. It became a symbol of comfort during uncertain times, reflecting the power of food to bring joy.

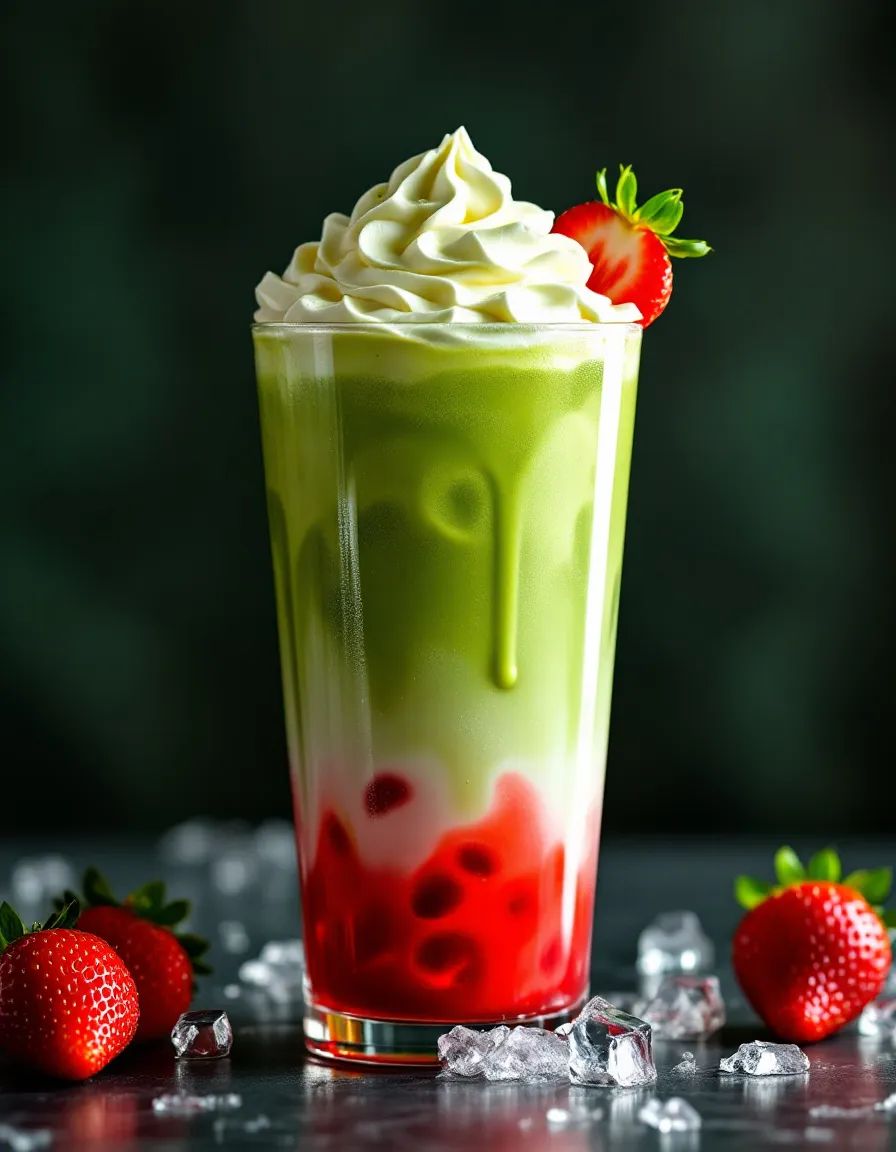
The evolution of the Dalgona coffee recipe has led to numerous adaptations across various cultures. People have customized it with flavors like matcha, cocoa, or cinnamon, showcasing the drink’s versatility and allowing it to evolve while maintaining its core ingredients.

Regional variations of whipped coffee drinks exist globally, from Indian “ph.D” coffee to Italian “caffè frappé.” Each version resonates with its culture, highlighting how Dalgona coffee fits within a wider context of global coffee traditions.

Ingredient Deep Dive

  • Instant Coffee: Instant coffee was created to provide a quick and convenient way to enjoy coffee without the need for brewing. It packs a punch of caffeine with each serving. When selecting instant coffee, opt for a brand you enjoy drinking, as this will affect the overall flavor of your Dalgona coffee. Store it in a cool, dry place.
  • Sugar: Sugar adds sweetness to the coffee, balancing the bitterness of the coffee flavor. You can use white sugar or brown sugar for a slight variation in taste. Always choose refined sugar for a smoother texture in your whipped coffee. Store sugar in airtight containers to maintain its quality and prevent clumping.
  • Hot Water: Hot water activates the instant coffee and sugar, aiding in the whipping process. It’s crucial to use boiling water for best results, as it helps dissolve the sugar completely. To keep the drink warm, consider heating your milk while preparing the whipped coffee.

Common Mistakes to Avoid

  • Using regular brewed coffee instead of instant coffee: Traditional coffee won’t whip the same way and will not achieve the desired texture.
  • Not whisking long enough: Ensure you whisk until the mixture becomes thick, fluffy, and holds peaks; otherwise, it won’t set properly.
  • Overusing sugar: Too much sugar can make the whipped coffee overly sweet, covering the delightful coffee flavor.
  • Not using hot enough water: The water needs to be boiling to properly dissolve the coffee and sugar to achieve the right texture.
  • Skipping the chilling steps for milk: If you use warm milk, the contrasting layers won’t hold well, and visual appeal can be lost.
  • Using the wrong bowl: Make sure to use a deep enough bowl; this prevents splattering while whisking.
  • Not adjusting the ratio: Personalize it; if you prefer a stronger or sweeter taste, adjust the coffee and sugar accordingly.
  • Using low-quality instant coffee: The taste of instant coffee greatly affects the final product; good quality ensures better flavor.

Essential Techniques

To achieve that perfect whipped texture for your Dalgona coffee, it’s essential to master the whipping technique. This involves vigorously whisking the coffee, sugar, and hot water together until it becomes light and fluffy. It’s important to take your time during this step; using an electric whisk can significantly speed up the process and ensure the coffee reaches the right consistency more easily.

Pay attention to the color change while whipping. As you whisk, the mixture will transition from a dark brown to a lighter shade, indicating the incorporation of air and sugar. Once you see stiff peaks forming, you know you’ve achieved the ideal texture to serve over milk.

Pro Tips for Perfect Dalgona Coffee

1. Use a whisk if you prefer a workout—just know it will take longer! A hand mixer or stand mixer will cut down the time significantly.
2. Experiment with flavored sugars or syrups to elevate your Dalgona coffee and create a signature twist.
3. Always use hot milk, but don’t heat it to boiling; steaming is ideal for an optimal drinking experience.
4. Adjust the coffee-to-sugar ratio based on your personal taste preferences; find your perfect balance.
5. If you’re feeling adventurous, try adding spices, like cinnamon or vanilla, to the whipped mix for an exciting twist.
6. For a creamier texture, consider using whipped cream on top along with the Dalgona coffee mixture for a dessert-like experience.
7. If you prefer using cold milk, consider using ice to enhance the refreshing experience of the drink.
8. For a visual flair, try garnishing your drink with cocoa powder, cinnamon, or a drizzle of honey for enhanced presentation.

Variations and Adaptations

Dalgona coffee can be easily adapted to suit different flavor profiles. For a mocha twist, incorporate cocoa powder into the whipped mixture, providing a chocolatey richness. You can also experiment with different types of milk, such as oat, almond, or soy, for a dairy-free option that still offers a delicious taste.

Seasonal adaptations are also fun. During the holidays, add peppermint extract for a festive Dalgona coffee or warm spices like nutmeg in the fall to evoke cozy vibes.

If you are looking for dietary modifications, consider using sugar substitutes like stevia or monk fruit to create a lower-calorie version of Dalgona coffee. On the flip side, adding a splash of heavy cream can enhance luxury, turning your drink into a decadent treat.

Presentation alternatives can be equally creative. Layer your Dalgona coffee in a clear glass to showcase its compelling visual appearance, or serve it in a mason jar for a rustic feel at an outdoor gathering.

Serving and Presentation Guide

Proper plating techniques can elevate your Dalgona coffee experience. Using a clear glass allows the layers of milk and whipped coffee to shine. You can also use a spoon to drizzle your whipped coffee over the milk to achieve a beautiful layered effect.

For garnishing ideas, sprinkle cocoa powder, cinnamon, or even crushed nuts on top of the whipped coffee for added flavor and texture. Traditional accompaniments like cookies or a slice of cake can enhance your coffee-drinking experience.

Considering temperature is key to enjoying this treat. Serve Dalgona coffee chilled for a refreshing summer drink or warm for a comforting winter beverage.

Portion control tips suggest serving your Dalgona coffee in a smaller glass and pairing it with a snack to create a balanced treat without overindulging.

Wine and Beverage Pairing

Pairing wine and coffee can be tricky, but a light-bodied white wine like Sauvignon Blanc works surprisingly well with Dalgona coffee due to its crisp acidity. Alternatively, a dessert wine or sweet Moscato complements the coffee’s sweetness.

For non-alcoholic alternatives, consider serving iced teas, such as Earl Grey or hibiscus, offering a tangy complement. Additionally, if you want a coffee-centric pairing, opt for an espresso or cold brew to create a rich coffee experience.

Temperature considerations are essential when pairing beverages—a cool Dalgona coffee pairs best with chilled wines or iced teas, enhancing refreshment on a hot day.

Serving suggestions include creating a coffee flight alongside Dalgona coffee, allowing guests to explore different coffee beverages while enjoying the unique experience of your whipped treat.

Storage and Shelf Life

Dalgona coffee is best enjoyed fresh, as its whipped texture does not hold well over time. However, if you have leftovers, it can be stored in the refrigerator for up to a day. Store the whipped coffee in an airtight container to prevent it from absorbing other odors.

When reheating the milk, ensure you heat it gently to preserve its creaminess and avoid curdling. Whipped coffee can’t be reheated or frozen, but fresh batches can easily be made to revitalize the experience.

Signs of spoilage to look out for include changes in the texture, off-smells, or separation of the ingredients, which indicate that it should be discarded.

Make Ahead Strategies

For those who are busy, you can prepare your coffee mixture ahead of time, but it’s recommended to whip it fresh for optimal texture. If preparing in advance, store the whipped coffee in an airtight container in the refrigerator.

Quality may diminish slightly if left for more than a day, so plan to make just enough to enjoy immediately after whipping.

Assembly tips suggest preparing your milk in advance and chilling it, ready to enjoy whenever you crave Dalgona coffee. This ensures you have all elements set for a quick assembly.

Adding fresh elements, such as whipped cream or spices, should be done just before serving to maintain freshness and visual appeal.

Scaling Instructions

If you want to half the recipe, simply use half the designated amount of instant coffee and sugar while adjusting your milk accordingly. This method preserves the proportions and ensures consistent flavor.

When doubling or tripling the recipe, be cautious about whisking; you may need to use a larger bowl and consider whisking in batches for effective mixing.

Equipment adjustments include using a larger bowl or mixing container for bigger batches, ensuring ample space for whisking.

Timing modifications are minimal; the whipping time remains fairly constant regardless of scaling.

Lastly, consider your storage options if making a large batch; use multiple containers to maintain freshness and avoid spoilage.

Nutritional Deep Dive

Dalgona coffee can be a delightful treat in moderation, offering a nice balance of carbohydrates from sugar and caffeine from coffee. The calorie content varies depending on the milk used, with whole milk contributing more calories than alternatives like almond or skim milk.

For macros, the whipped coffee itself is low in calories, with most calories originating from the type of milk added.

Micronutrient analysis reveals that using non-dairy milk can offer different vitamins and minerals while still maintaining the beverage’s delicious qualities.

Health benefits from this drink arise from coffee’s antioxidants, known to support overall wellness. However, dietary considerations should take into account caffeine sensitivity and sugar intake.

Portion analysis suggests enjoying Dalgona coffee as a treat rather than a staple; keeping it as an occasional indulgence can help maintain a balanced diet.

Dietary Adaptations

For those needing gluten-free options, Dalgona coffee naturally fits this requirement since it contains no gluten-containing ingredients, making it safe for those with allergies.

Dairy-free substitutions can include oat, almond, coconut, or soy milk, allowing a wide variety of flavors without compromising the creamy texture.

Vegans can swap traditional sugar for alternatives like maple syrup, coconut sugar, or agave. Look for corresponding plant-based milk to ensure a vegan-friendly adaptation.

Low-carb and keto enthusiasts can use sugar substitutes like erythritol or stevia to replicate the sweetness without the carbohydrates, aligning with dietary needs.

Paleo diets can adhere to this recipe by choosing natural sweeteners such as raw honey or coconut sugar while still using instant coffee. Other specific diets can easily be accommodated by adjusting the milk options.

Troubleshooting Guide

Texture issues often arise if the coffee isn’t whipped long enough; ensure you whisk until stiff peaks are formed for the best consistency.

Flavor balance can be a common challenge as well; adding more sugar or adjusting the coffee ratio can help tailor the taste to your liking.

Temperature problems generally stem from boiling water being too hot or too cold milk; always stick to the recommended temperature for best results.

Equipment challenges can be mitigated by using electric mixers for the whipping process, should hand whisking prove difficult.

Ingredient substitutions don’t always yield the same results; ensure that any substitutions maintain the properties of the original ingredients, especially in terms of texture and flavor.

Timing concerns regarding preparation and assembly can lead to messy results; dedicate a well-timed approach to ensure each step flows seamlessly.

Recipe Success Stories

Community feedback has been overwhelmingly positive, with many sharing their personal variations, from chocolate-infused Dalgona coffee to matcha twists that have delighted friends and family alike.

Readers have encouraged each other to try their hand at creating gorgeous whipped coffee presentations, enjoying social media engagement highlighting their unique spins on the classic recipe.

Adaptation stories highlight creativity with different milk bases and flavors, leading to expansive exploration beyond the original recipe.

Those who sustained dietary changes have reported success in recreating Dalgona coffee that suits their lifestyle, inspiring others to adapt and enjoy their own delicious concoctions.

Photography tips from the community suggest vibrant backgrounds and strategic lighting, showcasing the beverage’s visual appeal alongside creative garnishes, elevating the social media presence surrounding their experiences with Dalgona coffee.

Frequently Asked Questions

1. Can I use regular coffee instead of instant coffee for Dalgona Coffee?
No, instant coffee is essential for achieving the whipped texture, as regular brewed coffee won’t whip properly.

2. How do I store leftover Dalgona coffee?
While Dalgona coffee is best enjoyed fresh, you can store leftovers in the refrigerator for up to 24 hours in an airtight container.

3. What type of milk works best for this recipe?
Any type of milk can work, from dairy to non-dairy options like almond or oat milk, depending on your taste preference.

4. Is Dalgona coffee vegan?
It can be vegan if you use plant-based milk and opt for sugar substitutes or natural sweeteners.

5. How long do I need to whip the coffee?
It usually takes about 2-5 minutes of vigorous whisking to achieve the desired fluffy texture.

6. Can I make Dalgona coffee without a mixer?
Yes, you can whisk by hand using a whisk or fork, but it will take more time and effort.

7. What can I do if my Dalgona coffee won’t whip?
Ensure you’re using instant coffee and that your water is hot enough. Keep whisking until stiff peaks form.

8. Can I add flavors to Dalgona coffee?
Absolutely! You can mix in cocoa powder, vanilla extract, or spices to enhance the flavor profile.

9. What’s a good sugar substitute for making Dalgona coffee?
Options like stevia, erythritol, or monk fruit can provide sweetness without the calories.

10. How do I adjust the sweetness of Dalgona coffee?
You can increase or decrease the sugar based on your preference before whipping the coffee.

Additional Resources

If you loved making Dalgona coffee, you might enjoy exploring other whipped coffee recipes, like whipped matcha or whipped cocoa. These variations offer an exciting way to change your beverage routine.

For more technique guides, consider checking out resources on properly frothing milk or creating flavored syrups to elevate your drinks even further.

Understanding the history and origin of coffee will deepen your appreciation of this popular beverage, enriching your coffee-making journey.

As for equipment recommendations, investing in quality instant coffee and a reliable handheld mixer can streamline your Dalgona coffee experience while maximizing flavor and texture.

Seasonal variations can inspire new creations; during the holidays, think of introducing pumpkin spice or peppermint flavors to transform your Dalgona coffee into a festive treat.

Join the Conversation

As a member of the coffee enthusiast community, sharing your Dalgona coffee experiences on social media can spark conversations and inspire others to join in on the fun!

Don’t forget to include vibrant photos of your creations when posting; photography tips from fellow coffee lovers can also enhance your skills in capturing the perfect shot.

Recipe reviews go a long way in motivating others; encourage readers to share their feedback and variations, creating an engaging exchange of ideas and inspirations.

Engaging with fellow coffee enthusiasts fosters a sense of community, and sharing your own journey can inspire others to create and explore their own Dalgona coffee adventures.

Be sure to share any variations you try—finding new adaptations keeps the conversation active and exciting in our ever-growing coffee culture!

The Recipe

Dalgona Coffee

Serves: 1

Prep Time: 5 mins

Cook Time: 0 mins

Total Time: 5 mins

Kitchen Equipment Needed

  • Bowl
  • Whisk or Electric Mixer
  • Measuring Cups
  • Spoon for mixing
  • Glass for serving

Ingredients

  • 2 tablespoons instant coffee
  • 2 tablespoons sugar
  • 2 tablespoons hot water
  • Milk of choice for serving (to taste)

Directions

  1. In a bowl, combine instant coffee, sugar, and hot water.
  2. Using a whisk or electric mixer, whip the mixture until it becomes light and fluffy, resembling whipped cream.
  3. Fill a glass with milk of your choice, leaving some room for the whipped coffee.
  4. Top the milk with the whipped coffee mixture, allowing it to float on top.
  5. Serve immediately, encouraging guests to mix before enjoying.

Recipe Notes

  • You can adjust the coffee-to-sugar ratio to suit your taste preference.
  • For a vegan option, use plant-based milk and dairy-free sugar substitutes.
  • Experiment with flavored syrups or spices for a unique twist on the recipe.

Best Lemon Zucchini Cake with Cream Cheese Filling

Lemon Zucchini Cake with Cream Cheese Filling: A Delightful Citrus Treat

⚖️
Difficulty
Medium

⏲️
Prep Time
30 mins

🕒
Cook Time
45 mins

⏱️
Total Time
75 mins

🍽️
Servings
12

Welcome to the world of delightful desserts! Today, we’re diving into one of the most refreshing and moist cakes you’ll ever make — the Lemon Zucchini Cake with Cream Cheese Filling. Combining the subtle sweetness of zucchini with the zesty brightness of lemon creates an extraordinarily moist and flavorful cake. Perfect for spring and summer gatherings, this cake not only satisfies your sweet tooth but also adds a splash of color to your dessert table.

Every bite promises a crumb that is tender and fluffy, with a refreshing burst of lemon that dances on your palate. The cream cheese filling adds a decadent creaminess, balancing the cake’s natural sweetness and refreshing citrus twist. Whether you’re savoring a slice with morning coffee or serving it at a festive gathering, this Lemon Zucchini Cake is sure to impress with its warming flavors and satisfying texture.

Quick Recipe Highlights

  • Flavor Profile: The cake features a balanced sweet and tangy flavor profile, enhanced by fresh lemon juice and zest.
  • Texture: Expect a delightful combination of moist cake with a rich and creamy filling that melts in your mouth.
  • Aroma: As it bakes, your kitchen will fill with the irresistible scent of citrus and vanilla.
  • Visual Appeal: The cake is visually stunning, layered with a smooth frosting and garnished with lemon zest or slices.
  • Skill Level Needed: Intermediate skill is advised due to the layering and cream filling process.
  • Special Equipment: A hand mixer, stand mixer, and a round cake pan will be essential for this recipe.

Recipe Overview

  • Difficulty Level: While this cake involves multiple steps, beginner bakers can confidently tackle it by following the instructions carefully. It’s a great opportunity to enhance your baking skills.
  • Category: This recipe falls under desserts and is perfect for both casual and formal occasions alike.
  • Cuisine: Infused with flavors typically found in American desserts, this cake adds a refreshing twist inspired by contemporary baking trends.
  • Cost: You can make this delicious treat on a budget, with most ingredients being cost-effective and easy to find in any grocery store.
  • Season: This cake shines in the warmer months when zucchinis are in season and lemons are plentiful, making it a great summer dessert.
  • Occasion: It’s ideal for birthday celebrations, picnics, and potlucks, bringing a unique flavor to any gathering.

Why You’ll Love This Recipe

The Lemon Zucchini Cake with Cream Cheese Filling is unrivaled in taste and texture. The combination of lemon and zucchini not only makes it a delicious dessert option but also brings a freshness that is perfect for warm weather. The zing of the lemon complements the subtle sweetness of the cake beautifully, creating a moreish blend that makes it hard to stop at just one slice.

Convenience is a key feature of this recipe. With the zucchini ensuring moisture without overpowering flavor, it simplifies the baking process. Additionally, the cream cheese filling can be prepared in advance, making assembly quick and easy when you’re ready to serve. Perfect for those moments when you want to impress guests without spending the entire day in the kitchen!

Nutrition is also on your side with this cake. Zucchini adds essential vitamins and minerals while keeping the cake moist and light. Furthermore, the lemon provides a boost of vitamin C, making the dessert a little less indulgent and more healthful than others. Treat yourself without too much guilt!

This cake isn’t just for solo indulgence; it makes for great social gatherings and celebrations. Impressive yet relatable, it’s a conversation starter everywhere you set it down. The unique flavor combination encourages sharing and trying something new. You’ll find your friends asking for seconds and for the recipe!

Finally, with accessible ingredients, this Lemon Zucchini Cake won’t break the bank. Most items are pantry staples, and the zucchini and lemons can often be found at your local farmers’ market, which is also a great way to support local producers.

Historical Background and Cultural Significance

The origins of zucchini cakes can be traced back to the Mediterranean, where zucchinis thrive and are a staple in many culinary traditions. Over time, the concept of incorporating vegetables into dessert became intriguing to bakers, leading to the delightful zucchini cake we know today. The addition of lemon enhances the flavor profile and pays homage to the fruits commonly used in many sweet dishes around the world.

Culturally, the incorporation of lemon and zucchini in sweetness showcases resourcefulness in baking, particularly during harvest periods when home cooks sought to use their gardens’ bounty. This cake not only serves as a means to reduce waste but also embodies the spirit of seasonal cooking and baking.

As the recipe evolved, so did its popularity, especially in the United States, where the sweet-tooth culture embraced zucchini as a cake ingredient. Today, it stands as a testament to how versatile vegetables can be, inspiring creativity in both home and professional kitchens.

Various regions have crafted their own variations, infusing local spices and flavors, reflecting the culinary identities of different areas. This adaptability makes the Lemon Zucchini Cake a global favorite, celebrated for its versatility and deliciousness.

Ingredient Deep Dive

Zucchini: This versatile vegetable is packed with nutrients like vitamin C and potassium. It has a mild flavor that can seamlessly blend into sweet and savory dishes. When selecting zucchini, look for firm, unblemished ones, and store them in the refrigerator for about a week. If necessary, you can substitute it with yellow squash, though the flavor and moisture content may vary.

Lemon: An essential ingredient in this recipe, lemons not only amplify flavor but also provide a bright, fresh aroma. Rich in vitamin C, they can enhance your immunity. When choosing lemons, opt for those that are heavy for their size and free of blemishes. They can be stored at room temperature for a week or refrigerated for longer freshness. If fresh lemons aren’t available, lemon juice can be substituted, but fresh zest would be missed.

Flour: All-purpose flour acts as the backbone of this cake, providing structure. It’s best to use unbleached all-purpose flour for better flavor. Whole wheat flour can also be substituted for a healthier option, resulting in a denser cake. Store flour in a cool, dry place for longevity, and always check for clumping as a sign of moisture.

Cream Cheese: Cream cheese adds a luscious and tangy flavor to the filling, making it irresistible. When purchasing, seek out full-fat versions for a richer taste. Cream cheese can be kept in the refrigerator for weeks but should be used within a few days after opening for optimal freshness. It’s possible to substitute it with mascarpone or yogurt, but the flavor and texture will differ.

Common Mistakes to Avoid

  • Not draining the zucchini: Failing to remove excess moisture from the grated zucchini can lead to a soggy cake. Be sure to squeeze out water using a clean kitchen towel before mixing.
  • Overmixing the batter: Mixing too vigorously can create a tough texture. Stir until just combined to maintain a tender crumb.
  • Using cold ingredients: If your eggs and cream cheese are cold, it may result in clumps in the batter. Let them sit at room temperature for about 30 minutes before you start.
  • Oven temperature inconsistencies: Ensure that your oven is preheated; an uncalibrated oven can lead to uneven baking. Use an oven thermometer for accuracy.
  • Skipping the cream cheese filling: Many may be tempted to skip the filling, but it is essential for adding richness and flavor to the cake.
  • Not checking for doneness: Use a toothpick to test the center of the cake. If it comes out clean, the cake is done. Underbaking can make the cake dense.
  • Ignoring frosting consistency: If your cream cheese frosting is too thick, add a tablespoon of milk at a time until you reach the desired spreadability.
  • Using outdated ingredients: Always check the expiration dates on baking soda and flour for the best results.
  • Cutting the cake while warm: Allow the cake to cool completely before cutting, as cutting it when warm can lead to a crumbly mess.
  • Not garnishing: A simple garnish of lemon zest or powdered sugar can elevate presentation; skipping this can result in a more basic appearance.

Essential Techniques

Preparing Zucchini: Properly preparing zucchini is crucial for achieving the right cake consistency. Grate the zucchini finely and squeeze out as much moisture as possible. This technique keeps your cake light without excess liquid.

Making Cream Cheese Frosting: Start with softened cream cheese and beat it until smooth before adding sugar. Gradually incorporate other ingredients to achieve creamy consistency. Mastering this technique ensures a well-blended, smooth frosting without lumps.

Layering the Cake: To create a beautiful layered cake, cool the layers completely. Trim any domed tops to ensure flat surfaces for stacking. Using an offset spatula helps in achieving an even layer of frosting, presenting a professional look.

Baking Perfectly: Keep a close eye on bake times and perform the toothpick test to check for doneness. Visual cues like a golden top and spring back when pressed help you know when your cake is baked perfectly.

Pro Tips for Perfect Lemon Zucchini Cake

Use freshly grated zucchini to maximize flavor. Store it in the refrigerator until right before baking for optimal freshness.

Substitute some of the all-purpose flour with almond flour for added nutty flavor and richness.

To enhance the lemon flavor, add lemon extract in addition to the zest and juice—just a teaspoon goes a long way.

Chill your cream cheese filling for at least 30 minutes before using; this helps stabilize it and makes it easier to spread.

Add a pinch of salt to the frosting; it enhances sweetness and balances the flavors beautifully.

Experiment with different citrus fruits like orange or lime for a unique twist on flavor profiles.

Use a serrated knife for slicing the cake; it creates cleaner, more professional-looking cuts.

If frosting the cake ahead of time, keep it refrigerated, and allow it to come to room temperature before serving for the best taste.

Variations and Adaptations

Regional variations may include adding spices such as nutmeg or cinnamon for warmth. Consider utilizing local seasonal fruits like blueberries for a flavor twist with texture.

Transform the cake into a sheet cake for easy serving at parties, and simply adjust the baking time accordingly.

For a dietary modification, consider reducing the sugar by using a natural sweetener such as honey or maple syrup, altering the flavor profile slightly but retaining moisture.

Flavors can be heightened by swirling in a fruit puree or jam between the layers, creating delightful pockets of fruit flavor.

Adjust the texture by folding in nuts or chocolate chips for added richness and crunch in every bite.

Play with presentation by serving individual slices topped with fresh berries and whipped cream for a delightful finish.

Serving and Presentation Guide

For an elegant presentation, use a cake stand to display your Lemon Zucchini Cake. A dusting of powdered sugar or a drizzle of lemon glaze can elevate looks easily.

Garnish with fresh mint leaves or edible flowers to add color and appeal that complements the lemon flavors.

Consider serving slices on decorative plates to enhance the dessert’s visual aspect, and provide forks for practical yet elegant dining.

For temperature considerations, serve the cake slightly chilled, ensuring the cream cheese filling is at a pleasant temperature for enjoyment.

Portion control is vital; aim for slices that allow guests to enjoy more without feeling overwhelmed—about 2-inch squares work well.

Wine and Beverage Pairing

Pair your Lemon Zucchini Cake with a glass of dry Prosecco, as the bubbles and acidity complement the cake’s citrus notes beautifully.

For non-alcoholic options, a refreshing lemon-infused sparkling water can enhance the citrus flavors while cleansing the palate.

If you prefer tea, consider serving it with a light Earl Grey or chamomile tea, both of which accentuate the sweet and zesty flavors of the cake.

Temperature matters; ensure drinks are chilled to elevate the refreshing experience while enjoying this delightful dessert.

Serving suggestions such as a scoop of vanilla ice cream can also add creaminess that pairs well with the zesty cake.

Storage and Shelf Life

Store your Lemon Zucchini Cake in an airtight container in the refrigerator to maintain freshness; it can last for up to a week.

For longer shelf life, consider freezing individual slices wrapped tightly in plastic wrap and placed in a freezer-friendly bag, good for 2-3 months.

Detecting spoilage comes down to observing any mold growth or an off smell; if either occurs, discard immediately.

To reheat cake slices, simply microwave for a short burst of 10-15 seconds to gently warm without sacrificing texture.

For proper thawing, move frozen slices to the refrigerator overnight for a gradual defrost before serving.

Make Ahead Strategies

Prepare the zucchini and cream cheese filling a day in advance, saving time on your baking day. Store them in the fridge separately to maintain freshness.

For optimal cake texture, consider baking the cake layers the day before serving and allowing them to cool completely before wrapping securely.

Day of serving, assemble and frost the cake to ensure it’s freshly prepared right before being shared with guests. This will keep the textures intact while enhancing flavors.

When making ahead, keep ingredients organized; prepare a checklist to track what you’ve prepared and what needs to be assembled.

Consider adding fresh elements, such as berries, to the top just before serving, ensuring they are vibrant and eye-catching.

Scaling Instructions

Halving the recipe is simple; just divide all ingredient quantities by two and use smaller baking pans to maintain baking times.

Doubling or tripling the recipe is straightforward; ensure you use appropriately sized pans and increase baking time as necessary.

Adjusting equipment may include using multiple mixing bowls or batching the cake layers to ensure quick preparation without overwhelming the kitchen.

Timing modifications are essential, so monitor the cake closely and use a toothpick for doneness during the baking process.

For storage considerations, freezing extras can be ideal for future events while maintaining the integrity of flavors and textures.

Nutritional Deep Dive

The Lemon Zucchini Cake boasts macro nutrients, with a balanced mix of carbohydrates and fats contributing to its lovely texture. Each slice also provides a generous serving of fiber from the zucchini.

Micronutrient analysis shows that this cake contains beneficial vitamins from both the lemon (vitamin C) and the zucchini (vitamins A and K) that can boost your immunity and overall health.

Nutritional advantages include the presence of antioxidants found in zucchini and lemon that can support skin health and reduce inflammation.

For those mindful of their health, consider portion control and enjoying smaller servings to maintain a balanced approach to indulgence.

Weight management tips include pairing the cake with a healthy topping, such as fresh fruit or yogurt, to enhance its nutritional profile while keeping the indulgence in check.

Dietary Adaptations

For a gluten-free option, substitute all-purpose flour with an equal amount of gluten-free flour blend, ensuring it’s suitable for baking.

Dairy-free modifications can involve using vegan cream cheese and plant-based milk to replace dairy without compromising on taste.

To cater to vegan lifestyles, replace eggs with flaxseed or chia seed eggs, and use almond or oat milk in the batter for moist texture.

Low-carb adaptations can include using almond flour and a sugar alternative such as erythritol or stevia for a delicious treat minus the carbs.

Keto dieters can follow similar guidelines to low-carb by sticking to high-fiber, low-sugar options for sweetness while maintaining cake’s structure.

Paleo adaptations could focus on using almond flour and raw honey or maple syrup to maintain compliance with paleo standards while ensuring flavor.

Low-FODMAP options can be created by ensuring to use specific brands of cream cheese and opting for small portions of zucchini.

Other specific diets may require additional substitutions; always check compatibility with each ingredient to make it inclusive for all dietary needs.

Troubleshooting Guide

Texture issues can often stem from too much moisture in the batter; ensure you’ve drained the zucchini thoroughly before grating.

Flavor balance problems may arise from insufficient sweetness. Always taste batter before baking and adjust accordingly for the right balance.

Temperature problems in the oven can be critical; if cakes are burning on top but raw in the middle, consider rotating the pan halfway through baking.

Equipment challenges may include incorrect usage of tools; ensure you’re familiar with your mixer and how to properly operate it for best outcomes.

Ingredient substitutions must be done wisely to maintain the integrity of the recipe; ensure you understand how each alternative interacts with the base components.

Timing concerns in baking require precision; be diligent with your watches or timers to prevent over or under baking cakes.

Recipe Success Stories

Community feedback has spotlighted this cake as a hit in family gatherings, with many sharing their adaptations and personal twists on the classic recipe.

Variation successes include the addition of spices, leading to unique flavor combinations that have delighted adventurous palates.

Reader suggestions often highlight creative garnishing ideas and presentation tips that elevate the overall dessert experience.

Photography tips shared by the community showcase how to capture the rich colors and textures of the cake perfectly, making it Instagram-worthy!

Frequently Asked Questions

Can I use frozen zucchini for this recipe? Yes, you can use frozen zucchini. Just ensure it is thawed and drained of excess moisture to avoid a soggy cake.

How do I store leftover cake? Store leftover cake in an airtight container in the fridge for up to a week or freeze slices for longer storage.

Can I add nuts to the cake batter? Absolutely! Adding chopped nuts such as walnuts or pecans provides a delightful crunch and flavor contrast.

Is it possible to bake this in a different pan? Yes, you may opt for a different size or shape pan, but be sure to adjust baking times accordingly.

How can I make this recipe healthier? You can opt for whole wheat flour and reduce the sugar content or substitute with natural sweeteners like honey or maple syrup.

Can I make the cream cheese filling ahead of time? Yes, you can prepare the cream cheese filling a day in advance and store it in the fridge before using it.

What other flavors work well with lemon and zucchini? Blueberries, lavender, and ginger pair exceptionally well and can be incorporated into the cake or topping.

Can I substitute the cream cheese with something else? Yes, you can use mascarpone or a dairy-free cream cheese alternative if you’d like a different flavor profile.

Is it necessary to frost the cake? While frosting adds richness and moisture, it’s not mandatory. The cake can be enjoyed plain or dusted with powdered sugar.

What size lemons do I need for this recipe? Medium to large lemons are best. You will need both zest and juice, so choose the ones that are plump and juicy.

Additional Resources

For more delightful baking recipes, consider trying our Chocolate Zucchini Bread or Classic Lemon Meringue Pie, which feature the same refreshing zest and moisture!

Technique guides on proper frosting application and cake layering can elevate your baking skills to achieve impeccable results.

Ingredient information focusing on the benefits of zucchini and lemon can enhance your understanding of why this cake is both delightful and nutritious.

Ensuring you have the right equipment can drastically improve your baking experience—consider investing in quality mixing bowls and baking pans.

Seasonal variations can inspire fun adaptations; look for other fruits that are in season and may complement this cake well!

Join the Conversation

We’d love to see how your Lemon Zucchini Cake turns out! Share your baking journey on social media using our handle and tag us.

Photography tips suggest taking shots in natural light to capture the vibrance of the ingredients and finished cake beautifully.

Recipe reviews from readers enhance our community, so feel free to leave your thoughts, suggestions, and modifications after trying it out!

Engagement with fellow bakers can spark new ideas and inspiration—don’t hesitate to share your unique variations for this recipe!

The Recipe

Lemon Zucchini Cake with Cream Cheese Filling

Serves: 12

Prep Time: 30 mins

Cook Time: 45 mins

Total Time: 75 mins

Kitchen Equipment Needed

  • Mixing bowls
  • Cake pans
  • Hand or stand mixer
  • Grater for zucchini
  • Rubber spatula
  • Measuring cups and spoons

Ingredients

  • 2 cups grated zucchini
  • 1½ cups all-purpose flour
  • 1 cup granulated sugar
  • ½ cup vegetable oil
  • 2 large eggs
  • 2 tablespoons lemon zest
  • ½ cup lemon juice (freshly squeezed)
  • 1 teaspoon baking soda
  • ½ teaspoon baking powder
  • ½ teaspoon salt
  • 8 ounces cream cheese, softened
  • 1 cup powdered sugar
  • 1 teaspoon vanilla extract

Directions

  1. Preheat the oven to 350°F (175°C). Grease and flour two 9-inch round cake pans.
  2. In a large mixing bowl, combine the flour, baking soda, baking powder, and salt.
  3. In another bowl, whisk together the sugar, eggs, vegetable oil, zucchini, lemon zest, and lemon juice until well blended.
  4. Gradually add the dry ingredients to the wet ingredients, stirring gently until just combined.
  5. Divide the batter evenly between the prepared cake pans and smooth the tops.
  6. Bake for 35-40 minutes or until a toothpick inserted in the center comes out clean. Allow cooling in the pans for 10 minutes before transferring to a wire rack to cool completely.
  7. For the cream cheese filling, combine the cream cheese, powdered sugar, and vanilla in a bowl and beat until smooth and fluffy.
  8. Once the cakes are completely cool, place one layer on a serving plate, spread the cream cheese filling evenly on top, and then place the second cake layer on top.
  9. Frost the top and sides of the cake with your preferred frosting or serve it plain. Garnish with lemon zest if desired.

Recipe Notes

  • This cake is best served fresh but can be stored in the fridge for up to a week.
  • Feel free to customize with nuts or additional flavors according to your preference.
  • Make sure to properly drain the zucchini to prevent a soggy cake.

Best Starbucks Copycat Recipes – 20 Homemade Favorites

20 Of The Best Starbucks Copycat Recipes: Enjoy Café Perfection at Home

⚖️
Difficulty
Moderate

⏲️
Prep Time
15 mins

🕒
Cook Time
30 mins

⏱️
Total Time
45 mins

🍽️
Servings
4 servings

Starbucks has cultivated a massive following thanks to its wide array of delightful drinks and delicious pastries. But did you know that you can recreate those beloved flavors right in your kitchen? This collection features 20 of the best Starbucks copycat recipes that bring the café experience home. From tantalizing lattes to decadent pastries, every recipe serves as an invitation for you and your loved ones to indulge in luxurious flavors without leaving your house.

Imagine waking up to the aroma of freshly brewed coffee mingling with the scent of warm cinnamon rolls. Picture the joy of enjoying your favorite Starbucks drink while lounging on your couch. These recipes are crafted to not only tantalize your taste buds but also to spark a sense of nostalgia associated with your preferred café treats. With just a handful of ingredients and a bit of creativity, you can achieve café perfection in the comfort of your own kitchen.

Quick Recipe Highlights

  • Flavor Profile: Each recipe features familiar flavors ranging from sweet vanilla to rich chocolate and smooth caramel, hitting all the right notes.
  • Texture: Enjoy creamy and frothy beverages paired with soft and flaky pastries that melt in your mouth.
  • Aroma: The enticing scents of espresso, baked goods, and seasonal spices fill your kitchen as you craft these beloved treats.
  • Visual Appeal: Gorgeous lattes topped with artful foam designs and pastries that look as good as they taste create a feast for the eyes.
  • Skill Level Needed: While these recipes are easy enough for beginners, they offer opportunities for more adventurous cooks to refine their skills.
  • Special Equipment: Most recipes require common tools, such as coffee makers, baking sheets, and mixing bowls, making them accessible to all.

Recipe Overview

  • Difficulty Level: These recipes have been categorized as moderate, offering challenges that are suitable for home cooks with some experience.
  • Category: The recipes fall under beverages and baked goods, perfect for breakfast or a delightful afternoon snack.
  • Cuisine: Inspired by North American café culture, these recipes combine traditional baking with specialty coffee techniques.
  • Cost: Most ingredients are affordable and easily sourced at your local grocery store, ensuring a cost-effective meal option.
  • Season: These recipes can be enjoyed year-round, with some seasonal adaptations perfect for festive celebrations.
  • Occasion: Ideal for casual gatherings, brunches, or even quiet nights at home, these dishes add a special touch to any occasion.

Why You’ll Love This Recipe

Recreating Starbucks favorites at home is an easy way to enjoy rich, satisfying flavors without breaking the bank. The taste and texture of each recipe are designed to mirror that of your preferred café indulgences, ensuring that every sip and bite delights. With these delicious copies, you can customize sweetness and ingredients to cater to your personal preferences.

Preparation is a breeze, whether you’re making an afternoon pick-me-up or a tasty treat for guests. Many of the recipes feature simple steps and common ingredients, allowing even novice cooks to achieve impressive results. This accessibility means you can focus on savoring the moment rather than stressing over complex cooking techniques.

Nutritionally, many of these recipes can be tweaked to offer healthier alternatives without sacrificing flavor. Whether you’re looking to reduce sugar, opt for dairy-free options, or add more whole grains, there’s plenty of room for creativity.

Moreover, preparing these recipes can transform casual gatherings into memorable occasions. Enjoying homemade Starbucks beverages becomes an act of sharing joy and warmth with friends and family. It’s the perfect opportunity to create lasting memories over a cup of coffee.

Last but not least, crafting these recipes yourself is a wallet-friendly way to indulge in gourmet-style treats. From frappuccinos to scones, crafting your favorite Starbucks copycat recipes saves you money while delivering luscious taste at home.

Historical Background and Cultural Significance

The origin of Starbucks can be traced back to a small coffee bean store in Seattle in 1971 when it catered to those seeking quality coffee. The unique blend of beans and expert brewing methods quickly drew a local following. Starbucks gained a foothold in coffee culture by emphasizing high-quality beverages over mass-market options.

Starbucks has evolved into a prominent symbol of café culture, shaping how people enjoy coffee in the modern age. The brand introduced innovative menu items, transforming traditional coffee drinks into trendy favorites. Seasonal themed drinks and unique flavor profiles widened the appeal and contributed to the brand’s cultural significance.

The evolution of recipes in Starbucks reflects changing consumer tastes as the chain adapts to modern dietary preferences, from vegan options to low-calorie beverages. This responsiveness cements Starbucks as a leader in the café industry.

Regional variations of Starbucks drinks often incorporate local ingredients, accommodating diverse tastes and preferences worldwide. This international approach has greatly increased the company’s influence, establishing a widespread community of coffee lovers who enjoy both traditional and contemporary recipes inspired by the chain.

Ingredient Deep Dive

Coffee Beans

Coffee beans are at the heart of every Starbucks drink. The choice of beans influences flavor, with Arabica beans often creating a sweeter, fruitier profile. Rich in antioxidants and essential nutrients, coffee can provide energy and enhance cognitive function. When selecting coffee beans, look for a roast date to ensure freshness. Store your beans in an airtight container in a cool, dark place to maintain their robust flavor.

Milk Alternatives

Dairy and non-dairy milk substitutes enhance many Starbucks offerings. Almond, oat, and soy milk provide varying flavor profiles and can cater to dietary restrictions. Each type has unique health benefits, such as lower calories in almond milk or the creaminess of oat milk. Be sure to check labels for added sugars or preservatives.

Cocoa Powder

Cocoa powder adds a rich chocolate flavor to drinks and desserts. The history of cacao dates back thousands of years, with ancient cultures using it in rituals and as currency. Nutritionally, cocoa is rich in flavonoids, which can support heart health. When selecting cocoa powder, choose unsweetened varieties for better control over sugar content. Store in a cool, dry place to prevent clumping and preserve freshness.

Spices

Spices like cinnamon and nutmeg lend warmth and depth to beverages. Their origins date back to ancient civilizations, where they were treasured for culinary and medicinal purposes. Both spices are packed with antioxidants and may aid digestion. When using spices, consistency and freshness matter, so store them in airtight containers and replace them every six months to maintain flavor.

Common Mistakes to Avoid

  • Using stale coffee beans can lead to bland flavors; always opt for freshly roasted beans.
  • Overheating milk can create a burnt taste; use a thermometer to monitor temperature.
  • Skimping on the steeping time for teas or cold brews can result in weak flavors.
  • Neglecting to preheat your baking sheets can lead to uneven cooking for pastries.
  • Ignoring ingredient measurements can throw off taste and texture balance.
  • Skipping the fine straining step can leave gritty sediment in drinks.
  • Serving iced drinks immediately after blending can lead to dilution; let them sit for a moment before serving.
  • Not using fresh spices can result in muted flavors, so replace them regularly.
  • Failing to cool baked goods properly before storage can cause moisture and sogginess.
  • Overcomplicating recipes can lead to confusion; keep it simple to enhance enjoyment.

Essential Techniques

Perfecting the art of brewing coffee is crucial to achieving café-quality drinks. Use coarsely ground beans for cold brews and finely ground for espresso, ensuring optimal flavor extraction. Avoid boiling water when brewing; 195-205°F is ideal for coffee preparation.

Foaming milk can elevate any drink’s presentation. Use a steam wand or handheld frother to create a rich, creamy texture. Keep the milk cold prior to steaming for best results and avoid overfilling your frothing pitcher.

Baking pastries calls for accuracy in temperature and detail. Always preheat the oven and double-check that ovens are calibrated correctly to avoid undercooked or burnt goods. Small imperfections are normal, but focus on visual cues like golden-brown tops to determine doneness.

Pro Tips for Perfect Starbucks Copycat Recipes

1. Invest in quality ingredients to ensure each recipe shines—especially coffee and spices can elevate a dish dramatically.
2. Experiment with flavor combinations to create your own unique version of popular Starbucks offerings.
3. Keep tools like a thermometer and scale handy for precise measurements that yield consistent results.
4. Immerse pancakes or waffles in flavored syrups to mimic seasonal Starbucks specials.
5. Don’t rush the brewing process; allow drinks to steep dependably for the best flavor.
6. Opt for freshly whipped cream to top drinks, giving them an indulgent café touch.
7. For iced beverages, make coffee ice cubes to prevent dilution as they melt.
8. Personalize your drinks’ sweetness by experimenting with sugar alternatives like agave or honey.

Variations and Adaptations

Transforming Starbucks copycat recipes to suit different tastes can create an exciting twist. Consider incorporating seasonal flavors, such as pumpkin spice in the fall or peppermint during the winter holidays, to each recipe, making them relevant and timely.

Dietary modifications can also enhance these recipes. For vegan versions, substitute almond or oat milk for dairy and use flaxseed or chia seeds in baked goods instead of eggs.

Texture variations can be brought about by adjusting baking times. Softening pastries slightly under-permits a chewy inside, while longer baking yields a crisper finish.

To alter flavors, consider adding unexpected ingredients. A splash of vanilla extract or dash of nutmeg can contribute to drinks’ layered complexity.

Presentation methods, such as serving drinks in unique glassware or incorporating colorful fruits, can elevate the overall experience, making each sip feel special and celebratory.

Serving and Presentation Guide

Serving Starbucks-inspired drinks can be an affair of its own. Use clear glass cups to showcase colorful drinks artfully layered with frothy milk or creamy whips. Garnish lattes with cinnamon sticks or a sprinkle of cocoa for a gourmet feel.

When plating pastries, consider a rustic look featuring either a wooden or slate cutting board. Pair with fresh fruits or a side of specialty honey for added interest.

Temperature is crucial; ensure that cold drinks are served with plenty of ice to maintain refreshment, while hot drinks should be consumed directly after preparation to retain their warmth.

For portion control, create smaller, appetizer-sized servings of pastries, allowing guests to sample different flavors without feeling overwhelmed.

Wine and Beverage Pairing

While pairing wine with coffee-based drinks can be unconventional, certain wines do complement these flavors well. A sweet dessert wine like Moscato can pair nicely with frothy, sweet lattes or flavored whipped beverages.

For non-alcoholic options, consider serving herbal teas alongside baked goods, providing a refreshing contrast to rich flavors. Herbal infusions work perfectly with coffee for a “pick-me-up” experience.

Coffee pairings are integral, too; lighter coffees can accompany fruity pastries, while darker roasts complement richer desserts. Keep flavor profiles balanced to enhance the tasting experience.

For iced beverages, consider crafting a light lemonade or mocktail for a refreshing take. Serve all drinks chilled to balance the flavors of both hot and cold offerings.

Storage and Shelf Life

Proper storage is key to maintaining the freshness of homemade Starbucks treats. After preparing baked goods, cool completely before transferring to airtight containers to preserve moisture.

Coffee can deteriorate quickly; store it in an airtight container at room temperature. Avoid exposure to light and heat to extend freshness, and consider freezing unused grounds.

Milk and milk alternatives should be consumed within a week of opening for optimum freshness. Pay attention to expiration dates and refrigeration conditions to maintain quality.

When reheating items, avoid microwave misuse that can dry out pastries; instead, try an oven to rejuvenate crispness.

For beverages, cool any leftovers and store them in the refrigerator, ideally consuming within 2-3 days for the best flavor experience.

Make Ahead Strategies

Planning is essential for a successful Starbucks-inspired brunch. Prepare dry ingredients such as flour, sugars, and spices ahead of time for baked goods, combining them into a mix that can be stored for easy access.

Coffee drinks can be made in large batches and stored in the fridge. Cold brew coffee lasts about two weeks, offering a quick potential pick-me-up on busy mornings.

Assemble pastries the night before baking to minimize preparation time, ensuring they’re ready to pop in the oven when you wake up.

Consider keeping fresh fruits on hand to enhance presentation without cutting into prep time.

Lastly, if creating layered beverages, prep specific components in advance. For example, create flavored syrups or whipped toppings beforehand to speed up assembly.

Scaling Instructions

Scaling recipes up or down can help you cater to different gatherings and tastes. For smaller servings, cut recipes in half while ensuring ingredient ratios remain consistent. Use smaller measuring cups to keep amounts precise.

When preparing for events, doubling the recipe allows for bulk preparation. Keep in mind changes in baking times; larger batches may require extra processing time.

Consider adapting equipment sizes; a larger mixer or multiple baking sheets may be necessary for scalability, ensuring even cooking across batches.

Be cautious of timing adjustments; larger quantities might require longer cooking times, while halved portions will need monitoring to avoid overcooking.

For storage, plan ahead. Increased quantities may lead to needing additional container space, so prepare by having the appropriate size.

Nutritional Deep Dive

Examining the nutritional breakdown of Starbucks copycat recipes unveils a variety of benefits. Most recipes can be easily modified to lower calorie counts while maintaining flavor. Utilizing healthier ingredients, such as whole grain flour or plant-based sweeteners, enhances overall health.

A macro breakdown reveals a balance of carbohydrates from baked goods, healthy fats from milk alternatives, and antioxidants from coffee. Balancing these macros ensures satisfying meals that contribute to well-being.

Micronutrient levels, including vitamins and minerals from fresh fruits used in toppings, enhance the recipe’s health profile. These additions make each bite both enjoyable and nourishing.

Portions matter, especially when managing weight; serving sizes should align with dietary goals. Utilize small cups for drinks and portioned servings for pastries to help maintain control.

Dietary considerations, such as specific needs for low-sugar or gluten-free diets, are increasingly easy to accommodate, demonstrating the versatility of Starbucks-inspired recipes.

Dietary Adaptations

Adapting Starbucks copycat recipes for various dietary needs ensures everyone can enjoy these café favorites. Gluten-free options can include almond or coconut flour substitutes to create delicious pastries that cater to gluten sensitivities.

For vegan adaptations, replace eggs with flaxseed or applesauce and choose soy or oat milk instead of dairy. Many drinks can also be topped with a plant-based whipped cream alternative to maintain richness.

Low-carb and keto diets can integrate almond flour for baked goods while swapping out sugars for stevia or erythritol, successfully mimicking sweetness without added carbs.

Paleo fans can stay on track by utilizing unprocessed ingredients. Replace traditional wheat flour with nut flours while sweetening with natural pods or honey for balanced flavor.

Each adaptation preserves the spirit of Starbucks’s iconic flavors while ensuring all dietary preferences are acknowledged and celebrated.

Troubleshooting Guide

Common challenges may arise while recreating Starbucks treats, but solutions are readily available. If your coffee lacks richness, try a finer grind and ensure water temperature is optimal for extraction.

For beverages that are too sweet, balance with added acidity from citrus or plan with frothy milk layering to enhance taste and avoid excess sugar.

If baked goods turn out dry, consider incorporating moisture through ingredients like yogurt or adding fruit purées.

Temperature mistakes while brewing can lead to bitter flavors; adjusting steeping times or temperatures can remedy the situation simply.

Ingredient substitutions may lead to unexpected outcomes; experiment beforehand to find the best ratios for equal performance in original recipes.

Lastly, timing concerns during baking or brewing can be meticulous. Use visual guides, such as color and texture, to ensure desired readiness and avoid over/undercooking.

Recipe Success Stories

Many home cooks have shared their successes with replicating Starbucks treats, fostering a community of passionate bakers and coffee lovers. These stories not only inspire others but often include tips for adaptation that elevate techniques.

Variations on classic recipes have led to delightful results. Some bakers report creating their own signature coffee beverages by adjusting flavor ratios, consistently receiving rave reviews from family and friends.

Photography has become part of the experience, with home cooks sharing beautiful images of their creations on social media platforms. Step-by-step guides are often accompanied by stunning visuals that engage the community and promote recipe sharing.

Reader suggestions frequently enrich the recipe experience, leading to further experimentation. Ingredients may shift with availability, prompting creative thinking, and leading to delightful surprises.

From struggles to success, each journey offers valuable insights into how homemade treats can transform regular days into special occasions.

Frequently Asked Questions

Can I use regular coffee instead of espresso for these recipes?

Yes, while espresso provides a strong flavor, regular coffee can be a suitable alternative in many recipes. Opt for a bold coffee to achieve similar intensity.

How long do the Starbucks copycat drinks last in the fridge?

Most homemade drinks can last in the fridge for up to 3 days if stored in airtight containers. Always check for freshness before consuming.

Can I freeze the pastries?

Yes! Many pastries freeze well. Wrap them tightly to prevent freezer burn and reheat in the oven for optimal texture.

What’s the best way to froth milk at home?

Using a steam wand provides the best results, but handheld frothers or even shaking milk in a jar can achieve satisfactory results for beginners.

Can I make these recipes sugar-free?

Definitely! Many recipes can accommodate sugar substitutes like stevia, erythritol, or maple syrup to adjust sweetness without added sugars.

Do I need special equipment to make these recipes?

No special equipment is necessary. Basic kitchen tools like baking sheets, mixing bowls, and a coffee maker or French press will suffice.

How do I adjust these recipes for altitude cooking?

If you are at a higher elevation, reduce baking temperatures slightly and increase cooking time, as adjustments can lead to puffier results at high altitudes.

Is it better to serve these drinks hot or cold?

This often depends on personal preference! Many recipes offer delicious variations to enjoy both cold and hot, making them versatile throughout the year.

Are these recipes kid-friendly?

Most recipes are suitable for kids! Simply adjust the caffeine content or substitute with decaffeinated options to cater to younger palates.

Can I find gluten-free ingredients for these recipes?

Yes, gluten-free flour options are widely available, allowing for delicious pastries and treats without gluten, making inclusivity easy.

Additional Resources

For those eager to dive deeper into the world of homemade Starbucks copycat recipes, consider exploring other related recipes. Think about blending brews with various milk alternatives or searching for baking guides specifically tailored to café-style muffins and scones.

Ingredient information can further improve your choices, ensuring quality and authenticity in recreating your favorite coffeehouse treats.

Equipment recommendations help streamline your cooking experience. Investing in a good coffee maker, a quality frother, and versatile bakeware will enhance your endeavors.

Seasonal variations—such as festive pumpkin lattes or cozy holiday cookies—heighten relevance and enrich your recipe repertoire, making every season special.

Join the Conversation

Engaging with your community enhances the cooking experience. Share photos of your creations on your favorite social media platforms, enticing others to join in the fun. Capture your creations in vibrant settings, and don’t hesitate to invite friends and family over to taste your Starbucks-inspired meals.

Leave recipe reviews to help fellow cooks navigate their culinary paths. By sharing suggestions, you foster a sense of connection and support within the cooking community.

Participate in discussions about unique adaptations and swap personalized recipe variations. This collaboration enriches culinary expertise and brings fresh ideas to the forefront.

Ultimately, celebrating the simple joys of cooking and the enjoyment of flavor is what connects us all. Explore, create, and relish each delicious moment with your homemade Starbucks copycat recipes.

The Recipe

Starbucks Copycat Recipes

Serves: 4 servings

Prep Time: 15 mins

Cook Time: 30 mins

Total Time: 45 mins

Kitchen Equipment Needed

  • Mixing bowls
  • Baking sheets
  • Coffee maker or French press
  • Handheld frother
  • Measuring cups and spoons

Ingredients

  • 2 cups coffee or espresso
  • 1 cup milk or milk alternative
  • 1/2 cup cocoa powder
  • 1/4 cup sugar or sweetener of choice
  • 2 tsp cinnamon or seasonal spices
  • 2 cups flour (or gluten-free substitute)
  • 1/2 cup butter

Directions

  1. Brew your coffee or espresso to your liking.
  2. In a mixing bowl, combine dry ingredients (flour, sugar, cocoa powder, and spices).
  3. In a separate bowl, whisk together wet ingredients (milk and melted butter).
  4. Combine both mixtures until just blended, avoiding over-mixing.
  5. Pour batter onto greased baking sheet, spreading evenly.
  6. Bake in preheated oven at 350°F (175°C) for about 20-30 minutes.
  7. Once cooled, froth milk and drizzle with flavored syrups before serving.
  8. Enjoy as part of your homemade Starbucks experience!

Recipe Notes

  • Adapt sweeteners to suit personal preferences or dietary needs.
  • Experiment with different textures and toppings according to taste.
  • Store leftovers in an airtight container for up to three days.

Easy Rainbow Refresher with Fresh Fruit and Citrus

Rainbow Refresher: A Vibrant Drink to Brighten Your Day

⚖️
Difficulty
Easy

⏲️
Prep Time
10 mins

🕒
Cook Time
0 mins

⏱️
Total Time
10 mins

🍽️
Servings
4

Rainbow Refresher is a delightful, colorful drink that brings a radiant burst of flavor and refreshment to any gathering. With layers of fruit juices and a splash of sparkling water, this beverage not only cheers up your palate but also provides an eye-catching presentation that is sure to impress your guests. Imagine sipping on this vibrant drink on a sunny afternoon, as the flavors dance upon your taste buds, creating a unique fusion of fruity goodness.

The beauty of the Rainbow Refresher lies in its versatility and refreshing taste. Each layer represents a different fruit, making it not only visually stunning but also a treat for the senses. The sweetness of the fruit mingles with the fizz of the sparkling water, providing a refreshing beverage that feels as light as it tastes. Whether served at a summer party or simply enjoyed on a lazy afternoon, this drink becomes a sensational centerpiece that draws people together.

Quick Recipe Highlights

  • Flavor Profile: The Rainbow Refresher boasts a mix of sweet and tangy flavors, with hints of tropical fruit that brighten up each sip.
  • Texture: This drink has a delightful effervescence from the sparkling water, providing a light and refreshing mouthfeel.
  • Aroma: The aromatic notes of fresh fruit create an inviting bouquet, enhancing the overall sensory experience.
  • Visual Appeal: Bright, vibrant colors make this drink a stunning showcase at any event, appealing to both children and adults alike.
  • Skill Level Needed: The preparation is simple enough for beginners, requiring no special culinary skills, just a little creativity.
  • Special Equipment: No special equipment is needed; just basic kitchen tools like a juicer and measuring cups will do.

Recipe Overview

  • Difficulty Level: This drink is categorized as easy due to its no-cook preparation method, making it accessible to anyone.
  • Category: Ideal for drinks and beverages, it serves as a refreshing option for any social setting.
  • Cuisine: Drawing inspiration from tropical flavors, this drink captures the essence of vibrant summer festivities.
  • Cost: The cost of ingredients is relatively low, typically ranging between $10-$15 depending on seasonal fruit availability.
  • Season: Summer is the best season for making a Rainbow Refresher, as fresh fruits are abundant and can be enjoyed chilled.
  • Occasion: This drink is perfect for parties, picnics, BBQs, or simply for those relaxing moments at home.

Why You’ll Love This Recipe

The Rainbow Refresher not only dazzles with its colorful layers but also offers a burst of flavors that cater to various taste preferences. Each sip encapsulates the essence of summer, ensuring that everyone has a favorite layer to enjoy. Children are especially drawn to the vibrant hues, making it an excellent option for birthday parties or family gatherings.

Convenience is another major plus of this recipe. With minimal prep time and no cooking involved, you can whip up this delightful drink in just 10 minutes. It’s the perfect solution for unexpected guests or last-minute entertaining, allowing you to provide a special treat without diving into complex recipes.

From a nutritional standpoint, fresh fruits are packed with vitamins and minerals, making the Rainbow Refresher not only delicious but also a healthful choice. By blending various fruits, you contribute valuable nutrients to your diet, while also hydrating with refreshing fluids. This drink can also be adjusted to suit dietary preferences, such as using organic ingredients or sweeteners.

Socially, the Rainbow Refresher is not just a drink; it’s a conversation starter. Its captivating appearance sparks interest and encourages guests to explore the differing flavors. This drink can be further customized with fun garnishes, making it a fantastic addition to your gathering that invites everyone to partake in the experience.

Finally, the cost-effectiveness of this recipe makes it appealing. Utilizing seasonal fruits and basic ingredients means you can create a dazzling drink without breaking the bank. This accessibility means you can offer a delightful refreshment every week, celebrating summer flavors all season long.

Historical Background and Cultural Significance

The Rainbow Refresher draws its inspiration from the rich tradition of fruit-infused drinks enjoyed across various cultures. Originating in tropical regions, these beverages often celebrate local fruits and are a staple in festive gatherings. Many cultures incorporate vibrant colors into their food and drink, as it’s believed to symbolize joy and prosperity.

The evolution of layered drinks dates back centuries, with each culture adding its unique twist. From the colorful fruit punches of the Caribbean to the tangy beverage concoctions of Southeast Asia, the Rainbow Refresher captures these influences while making it approachable for contemporary audiences.

As the modern world becomes more health-conscious, drinks like the Rainbow Refresher gain popularity for their ingredient transparency and nutritional benefits. The use of fresh fruits rather than processed ingredients aligns well with the current culinary trends focusing on whole foods.

Regional variations of drinks similar to the Rainbow Refresher can be found worldwide, showcasing local flavors and ingredients. This drink’s adaptability encourages creativity, allowing it to be both a familiar comfort and an exciting new experience, reflecting the diversity of culinary traditions around the globe.

Ingredient Deep Dive

For this Rainbow Refresher, the primary ingredients include fresh fruits such as strawberries, oranges, pineapple, and blue berries. Each fruit brings its own cultural significance and individual nutritional benefits.

Strawberries, widely loved for their sweetness, are rich in antioxidants, particularly vitamin C, which supports immune health. When selecting strawberries, choose firm, bright red ones that possess a sweet aroma. Store them in the refrigerator to prolong freshness, and they can be enjoyed for a few days after purchase.

Oranges provide a zesty flavor that balances sweetness with acidity, enhancing the drink’s complexity. Furthermore, they are an excellent source of vitamin C and other important nutrients. Fresh, juicy oranges that are heavy for their size tend to be the sweetest. If storing oranges, keep them in a cool, dry place, where they can last up to two weeks.

Pineapples contribute both tropical flavor and a unique texture that adds to the drink’s overall experience. They’re loaded with vitamins C and B6, and bromelain, an enzyme promoting digestion. Selecting a ripe pineapple involves looking for a sweet scent and a slight give when pressed at the base. Store cut pineapple in the fridge; it can last about three to five days.

Blueberries offer a deep color and burst of sweetness to the drink while also being a powerhouse of antioxidants. When choosing blueberries, opt for plump, firm ones with a dusty blue color. Store them in the refrigerator and consume within a week for best freshness, although freezing them extends their shelf life.

Common Mistakes to Avoid

  • Using overly ripe fruits can lead to a mushy texture in the drink. Always opt for fresh, firm fruits for a brighter presentation.
  • Not layering the juices properly might result in a blended drink rather than a layered aesthetic. Pour each juice slowly over a spoon to achieve distinct layers.
  • Forgetting to chill the ingredients can lead to a warm drink that lacks refreshment. Always chill fruits and liquid beforehand.
  • Using too much sugar can overpower the natural fruit flavors, resulting in a sickly sweet drink. Taste as you go to balance the sweetness.
  • Neglecting to wash fruits properly can introduce unwanted residues. Thorough rinsing is essential for safe consumption.
  • Skipping garnishes can keep your drink from looking visually appealing. Add fresh mint or fruit slices for that extra pop.
  • Using flat water instead of sparkling can reduce the refreshing fizz. Always opt for sparkling or soda water to elevate the drink.
  • Not serving immediately could lead to the layers mixing over time. Serve promptly to maintain the beautiful visual appeal.

Essential Techniques

Layering drinks is fundamental for achieving the captivating appearance of the Rainbow Refresher. To master this technique, pour each juice slowly over the back of a spoon, allowing it to gently settle on top of the previous layer. The key to perfect layering is in the density of the liquids; heavier juices should be poured first, followed by lighter ones.

Chilling fruits and liquids before assembly is crucial for ensuring a refreshing beverage. This keeps the drink cool and enhances the overall flavor while preventing the fruit layers from mixing prematurely. To chill fruits quickly, slice them and place them in the freezer for about 10 minutes before making your drink.

Using the right tools for juicing can significantly affect the outcome of this recipe. A citrus juicer works best for oranges, while a blender can handle soft fruits like strawberries and pineapples. Always keep an eye on the consistency of your juices; they should be smooth yet pourable.

Pro Tips for Perfect Rainbow Refresher

Using only fresh ingredients enhances both the flavor and visual appeal of your Rainbow Refresher. Whenever possible, choose seasonal fruits for the best taste and quality.

Experiment with flavors by adding herbs like basil or mint to your fruit juices for an unexpected twist. The fresh herbal notes can take your drink to the next level.

To enhance the presentation, use clear glasses that allow guests to see each layer of color. The aesthetics of rainbow drinks are just as important as their taste.

Always consider portion sizes when serving. Smaller glasses allow guests to sample various flavors without overwhelming their palate or wasting leftover drink.

If making the drink ahead of time, prepare the juices separately and assemble just before serving to maintain the distinct layers.

Encourage creativity by inviting guests to customize their drinks with various fruits or garnishes—this can lead to unique flavor combinations and a fun atmosphere.

Finally, always offer a refreshing garnish like a slice of fruit or a sprig of mint on top. Not only does this enhance aesthetics, but it also uplifts the aromatic elements.

Variations and Adaptations

For regional variations, consider incorporating local fruits depending on what’s available in your area. Adding mango or kiwi can give you a tropical twist, while peaches can add a sweet and juicy dimension when in season.

Seasonal adaptations can also enhance the flavors. In the fall, consider using spiced apple or cranberry juice for a festive take on the Rainbow Refresher. This twist creates an autumn-themed beverage that’s perfect for holiday gatherings.

Dietary modifications are easy to implement. For a low-sugar option, use unsweetened fruit juices and add a splash of sparkling water to lighten the drink. Alternatively, using agave nectar or honey can provide natural sweetness.

Flavor variations can enrich the drink. Incorporating coconut water instead of sparkling water lends a tropical flair, while adding ginger juice can create a refreshing kick.

Explore presentation alternatives by using mason jars or tiered serving dishes. These options not only enhance visual appeal but also cater to larger groups.

Finally, regarding texture modifications, experiment with adding crushed ice for a slushy feel, perfect for those hotter days, or consider blending everything for a smoothie-type drink if preferred.

Serving and Presentation Guide

When serving the Rainbow Refresher, opt for clear, tall glasses that highlight its colorful layers. This method showcases the vibrancy of the drink, naturally enticing guests.

For garnishing, consider fresh fruit slices or sprigs of mint atop each glass. This not only adds to the aesthetic but also enhances the aroma, creating a naturally inviting experience.

Traditional accompaniments can include snacks like fruit kabobs or light pastries, maintaining the thematic essence of lightness and refreshment across your menu.

Temperature considerations are key; ensure that the drinks are served cold for optimal enjoyment. If preparing a large batch, keep it in the refrigerator until ready to serve, or place ice cubes in a separate serving pitcher to maintain chill without diluting the flavors.

Portion control is essential to maintain the drink’s allure and prevent waste. Consider offering smaller servings alongside a variety of flavors for guests to sample multiple combinations.

Wine and Beverage Pairing

For wine pairings, consider a light, crisp white wine like a Sauvignon Blanc, which complements the fruity notes while providing a refreshing balance.

Non-alcoholic alternatives could include flavored sparkling water infused with fruits, allowing guests to enjoy a similar essence without alcohol.

If coffee or tea pairings apply, offer a lightly brewed iced tea with mint, as its refreshing quality matches that of the Rainbow Refresher.

Temperature considerations are important; provide these drinks chilled to match the refreshing nature of the Rainbow Refresher, enhancing the overall experience.

Serving suggestions could include pairing the Rainbow Refresher with a light dessert, such as fruit sorbet, to create a cohesive and festive ambiance.

Storage and Shelf Life

For storage methods, it’s best to keep unused juice layers separated in airtight containers, up to a week in the refrigerator. This helps maintain freshness while also allowing for easy assembly when needed.

Temperature requirements are crucial for maintaining the drink’s quality, as warmer temperatures can lead to spoilage. Ensure your fruits are kept cool, ideally in the crisper drawer of your refrigerator.

Container recommendations include using glass jars or plastic containers that seal well. This helps in retaining freshness and preventing odors from mingling with other foods.

Signs of spoilage include off-smells or discoloration; consuming fruits while fresh is key to enjoying the vibrant flavors in your drink.

Reheating is unnecessary for this cold drink; however, you can refresh it with additional sparkling water or ice for a chilled experience.

Freezing guidelines are simple; individual juices can be frozen in ice cube trays. When ready to use, blend the frozen cubes into a smoothie-like texture for a unique take.

Make Ahead Strategies

Creating a prep timeline involves juicing fruits a day in advance, storing them refrigerated until assembly. This strategy saves you time on the day of serving and maintains freshness.

Storage between steps can be simplified by preparing the fruit juices ahead of time, keeping them separate until just before serving. This method preserves the drink’s aesthetic appeal while enhancing flavor.

Quality impact assessment shows that preparing juices beforehand retains freshness, which is beneficial when hosting events where time is limited.

Assembly tips include keeping excess juice in the fridge until right before serving to prevent dilution over time. Use a pour spout for easier service.

For reheating, serve chilled juices directly over ice. This not only enhances the drinking experience but keeps the beverage refreshing throughout.

Adding fresh elements like mint or citrus garnishes just before serving enhances the drink’s appeal and taste, making each glass feel freshly crafted.

Scaling Instructions

Halving the Rainbow Refresher recipe is straightforward; simply reduce all fruit amounts by fifty percent while following the same layering technique for presentation.

Doubling or tripling the recipe requires more fruit sources, so consider purchasing in bulk at farmers’ markets for better pricing.

Equipment adjustments for scaling up may involve using larger pitchers or containers for mixing, streamlining the preparation process while saving time.

Timing modifications can factor in if preparing larger batches, as multitasking could be necessary to manage the process efficiently.

Storage considerations are crucial when scaling up, as larger quantities should be chilled adequately to maintain freshness prior to serving.

Nutritional Deep Dive

Macro breakdown shows that each serving of Rainbow Refresher is primarily composed of carbohydrates from the natural sugars found in fruits. Fiber content is also beneficial for digestion.

Micronutrient analysis reveals that this drink is packed with vitamins and antioxidants, including vitamin C, beneficial for immune support. Each fruit contributes a unique blend of nutrients.

Health benefits of consuming fresh fruit beverages provide hydration and essential nutrients. The natural sweetness eliminates the need for added sugars while promoting healthy lifestyle habits.

Dietary considerations involve watching sugar intake; however, this drink’s natural sugars come from whole foods, making it a more wholesome option.

Portion analysis indicates that a serving size of about 8 ounces keeps calorie counts reasonable while providing adequate hydration.

Weight management tips suggest opting for smaller servings, which allow for the enjoyment of flavorful beverages without overeating.

Dietary Adaptations

Gluten-free adaptations are inherently available, as all ingredients are naturally gluten-free, allowing those with sensitivities to enjoy this refreshing drink.

Dairy-free options are automatically achievable; this drink is entirely plant-based, making it suitable for those avoiding dairy.

Vegan adaptations apply as well, with no animal products present. It’s a fully plant-based beverage celebrating delicious fruits.

Low-carb variations can be made by using lower carb fruits, such as berries or substituting juice with flavored sparkling water.

Keto modifications could include additional fiber, like chia seeds, to make the drink more satisfying while keeping carbs in check.

Paleo choices align with the fresh, whole ingredient approach, providing a beverage that fits this lifestyle seamlessly.

Low-FODMAP adaptations can be explored by choosing strawberries and oranges while avoiding high-FODMAP fruits like apples and pears.

Troubleshooting Guide

Texture issues can occur if fruits are too mushy; ensure freshness before use. If blending the drink, consider incorporating some ice for added texture.

Flavor balance might be off if excessive sugars or under-ripe fruits are used. Adjust sweetness by adding more citrus or less sugar as needed.

Temperature problems arise when drinks aren’t chilled adequately. Always keep fruits and juices refrigerated until serving to maintain refreshing coolness.

Equipment challenges might surface while juicing; a manual juicer could necessitate added effort, so ensure handy tools are clean and accessible.

Ingredient substitutions might leave significant flavor changes; stick with fruits closely associated with the original for the best results.

Timing concerns can complicate preparation; have all ingredients prepped and ready to speed assembly and maintain visually appealing layers.

Recipe Success Stories

Community feedback highlights how families love making Rainbow Refreshers together, with children enjoying the vibrant colors and tastes. Often regarded as a fun way to introduce healthy fruits to kids, parents report successful experimentation with unconventional ingredients, leading to delightful spins on the original recipe.

Variation successes are also common; attendees at summer gatherings rave about the diversity of flavors when different fruits are used. From berry mixes to tropical combinations, these adaptations generate excitement and keep the drink fresh from year to year.

Adaptation stories from readers feature how they modified the recipe to fit dietary needs, such as using stevia for those watching sugar intake without sacrificing flavor.

Photography tips from users emphasize the importance of lighting when capturing the drink’s vibrant hues; natural sunlight can make layers pop beautifully, enticing viewers with thirst-quenching visuals.

Frequently Asked Questions

Can I make the Rainbow Refresher ahead of time?
Yes, you can prepare the fruit juices a day in advance and keep them refrigerated, assembling the drink just before serving for the best visual appeal and flavor.

What fruits work best for this recipe?
Strawberries, oranges, pineapple, and blueberries are excellent choices due to their vibrant colors and refreshing flavors, but feel free to experiment with others based on your preferences.

How can I adjust the sweetness?
To modify the sweetness, taste each juice before mixing. You can add natural sweeteners like honey or agave syrup as needed, or use less sugar overall.

Is there a non-alcoholic version?
Absolutely! The Rainbow Refresher is inherently non-alcoholic, making it perfect for family gatherings, events, or simply a refreshing treat at home.

Can I use frozen fruits instead?
Yes, frozen fruits can be used, though they may not achieve the same vibrant layering. They will still provide delicious flavors and nutrients!

How can I make this drink more festive?
Add seasonal fruits based on the time of year, and consider garnishing with brightly colored herbs or serving it in themed glassware.

What should I serve with the drink?
This drink pairs wonderfully with light appetizers such as fruit skewers, crackers with cheese, or refreshing salads.

Can I add alcohol for adults?
Certainly! A splash of vodka or rum can be added to create a fun cocktail version of the Rainbow Refresher.

How long will the drink last once made?
The Rainbow Refresher is best enjoyed immediately, but if stored properly, it can last for a few hours before the layers begin to mix.

Are there any substitutions I can make?
You can substitute fruits based on availability or preference, ensuring the integrity of both color and flavor remains intact while exploring new tastes!

Additional Resources

For further culinary inspiration, consider exploring related recipes that spotlight fresh juices or fruity drinks. Ensure you explore technique guides for juicing, blending, and layering drinks to perfect your approach.

Ingredient information can deepen your understanding of what fruits are best at different times of the year, helping you select the freshest produce available.

Equipment recommendations emphasize the use of quality juicers and blenders, which can enhance your ability to create a variety of refreshing beverages.

Seasonal variations can broaden your beverage repertoire, allowing you to explore integrating hearty flavors for other seasons.

Join the Conversation

Engage with our vibrant community by sharing your experiences with the Rainbow Refresher. Follow us on social media platforms and tag us in your creations to showcase your beautiful renditions of this refreshing beverage!

Share your photography tips, variations, and personal anecdotes. We love hearing how you and your family enjoy this delightful drink, and who knows—you might inspire someone else to try their hand at crafting the perfect Rainbow Refresher!

The Recipe

Rainbow Refresher

Serves: 4

Prep Time: 10 mins

Cook Time: 0 mins

Total Time: 10 mins

Kitchen Equipment Needed

  • Citrus juicer
  • Blender
  • Measuring cups
  • Spoon for layering
  • Clear glasses for serving

Ingredients

  • 2 cups strawberries, hulled and pureed
  • 2 cups orange juice
  • 2 cups pineapple juice
  • 1 cup blueberries, whole
  • 2 cups sparkling water
  • Ice cubes as needed

Directions

  1. Begin by preparing each fruit component. Puree the strawberries using a blender, then strain if necessary for a smoother texture.
  2. Juice the oranges and measure out the pineapple juice.
  3. In a clear glass, slowly pour the strawberry puree to create the first layer.
  4. Using the back of a spoon, gently pour the orange juice over the strawberries to form the second layer.
  5. Repeat the same technique with the pineapple juice for the third layer.
  6. Top with fresh blueberries and a splash of sparkling water for a fizzy finish.
  7. Serve immediately over ice, enjoying the colorful layers as they blend with each sip!

Recipe Notes

  • For sweeter drinks, feel free to add honey or agave syrup during the blending process.
  • If making ahead, prepare juices separately and assemble just before serving for lasting visual appeal.
  • Experiment with other fruits, such as kiwi or mango, to create unique variations!

Best Banana Chocolate Dream Roll – Soft & Chocolatey

Banana Chocolate Dream Roll: A Delectable Dessert Delight

⚖️
Difficulty
Intermediate

⏲️
Prep Time
30 mins

🕒
Cook Time
15 mins

⏱️
Total Time
45 mins

🍽️
Servings
8 servings

Welcome to the world of sweet indulgence with our Banana Chocolate Dream Roll! This mouth-watering dessert combines the rich flavors of chocolate with the delightful sweetness of ripe bananas, all wrapped in a soft and fluffy rolled cake. Imagine cutting into this delicate roll, revealing a beautiful swirl of chocolate and banana, and being greeted by an inviting aroma that fills the air. Perfect for parties, family gatherings, or simply as a treat for yourself, this recipe promises a delightful experience that tantalizes the taste buds and satisfies cravings.

The appeal of the Banana Chocolate Dream Roll doesn’t stop at its taste. Each bite offers a harmonious blend of flavors, where the sweetness of bananas meets the silky richness of chocolate. The addition of whipped cream enhances the overall experience, creating a dessert that is not just a feast for the palate but also a visual delight. As you savor this dessert, you will appreciate its versatility; whether served cold from the refrigerator or slightly warmed, it offers a uniquely satisfying texture that will leave you wanting more.

Quick Recipe Highlights

  • Flavor Profile: This dessert features a decadent chocolatey richness complemented by the natural sweetness of bananas, creating a balanced flavor that’s sure to please.
  • Texture: The roll boasts a light and airy sponge cake with a creamy filling, delivering a delightful melt-in-your-mouth experience.
  • Aroma: The inviting scent of baked chocolate with hints of banana creates an irresistible ambiance that will entice your guests.
  • Visual Appeal: The stunning presentation of the rolled cake, with its contrasting colors of chocolate and yellow banana, makes it a stunning centerpiece for any dessert table.
  • Skill Level Needed: While this dessert requires some baking skills, the process is manageable for those with a little experience in the kitchen.
  • Special Equipment: You’ll need a baking sheet, parchment paper, and an electric mixer to achieve the best results for this roll.

Recipe Overview

  • Difficulty Level: The Banana Chocolate Dream Roll is rated as intermediate, making it perfect for home bakers looking to hone their skills without being overwhelming.
  • Category: This delightful dessert fits perfectly into the category of sweet treats and party desserts, making it a great option for any occasion.
  • Cuisine: Influenced by classic baking techniques, this roll combines elements of both Western desserts and tropical notes reflecting the beloved banana.
  • Cost: Ingredients for this dessert are budget-friendly, typically ranging between $10-15, making it an affordable indulgence.
  • Season: The best times to enjoy this dessert are during spring and summer when bananas are at their sweetest and most plentiful.
  • Occasion: Ideal for celebrations, picnics, or cozy family dinners, this roll adds a touch of elegance to any gathering.

Why You’ll Love This Recipe

First and foremost, the combination of bananas and chocolate is an undeniable crowd-pleaser that appeals to both children and adults alike. The sweetness of the bananas pairs perfectly with rich chocolate, creating a balance that excites the taste buds. The creamy filling enhances this experience, ensuring that each mouthful is a delightful journey through layers of flavor and texture.

This recipe also shines in terms of convenience and preparation. Despite its impressive appearance, the Banana Chocolate Dream Roll is straightforward to make, allowing you to impress guests without spending the entire day in the kitchen. The roll can be prepared ahead of time, making it a perfect make-ahead dessert for gatherings, so you can spend more time enjoying the company of friends and family.

In addition to its amazing flavor, this dessert has nutritional advantages. Bananas are a great source of potassium and fiber, making them a healthier choice than some other desserts. By including these wholesome ingredients, you’re able to offer a sweeter option without sacrificing too much on the health front.

When it comes to social and entertaining value, this dessert presents beautifully, making it a perfect centerpiece for gatherings. The moment you place the Banana Chocolate Dream Roll on the table, it becomes a conversation starter, enticing guests with its delightful aesthetics. Sharing this dessert creates a sense of community, as everyone can appreciate the effort put into making it.

Finally, cost-effectiveness and accessibility make this recipe appealing to a wide audience. Most ingredients are easily obtainable and do not require special trips to gourmet food stores. The simplicity in preparation ensures that anyone can replicate this delicious treat, making it a beloved addition to any home cook’s recipe box.

Historical Background and Cultural Significance

The origins of the Banana Chocolate Dream Roll are thought to emerge from traditional rolled cakes, which have been enjoyed for centuries in various cultures. The technique of making rolled sponge cakes is linked to European baking practices, particularly in French and Swiss desserts. However, the incorporation of bananas brings a tropical twist, highlighting their global appeal.

Culturally, bananas have held significance in different regions, often symbolizing abundance and nourishment. The pairing with chocolate takes this dessert to another level, appealing to sweet-toothed enthusiasts around the world and cementing its place in the dessert canon.

Over time, the recipe has evolved, incorporating variations that reflect personal preferences and cultural influences. From incorporating different flavors to using alternative fillings like peanut butter or cream cheese, the Banana Chocolate Dream Roll continues to inspire creativity in kitchens everywhere.

Regional variations also exist, as different cultures may experiment with local ingredients, custards, or toppings, leading to unique adaptations of the banana chocolate roll. Each variation tells a story, reflecting the diverse culinary landscape that surrounds us.

Ingredient Deep Dive

Bananas are the star of this recipe; they have been cherished in tropics for hundreds of years. Rich in vitamins and nutrients, bananas provide a healthy sweetener in desserts. When selecting bananas for this roll, look for those that are perfectly ripe – not too green, yet not overly spotty. The best storage for ripe bananas is at room temperature; however, once they begin to brown, they can be refrigerated to extend their shelf life. You can substitute with applesauce or pumpkin puree for a different flavor profile.

Chocolate adds another layer of decadence to the Banana Chocolate Dream Roll. Dark chocolate is particularly favored for its depth and rich flavor while also being a source of antioxidants. Choose high-quality chocolate for the best results. Chocolate can be stored in a cool, dry place and substituted with cocoa powder if needed. Just remember to adjust the sugar levels to maintain balance.

Common Mistakes to Avoid

  • Not using ripe bananas can result in a less sweet dessert; always opt for those that are fully matured for the best flavor.
  • Overmixing the batter can lead to a dense roll, so ensure you fold gently to keep it light and airy.
  • Skipping the parchment paper can result in a roll that sticks to the pan; always line your baking sheet for easy removal.
  • Not allowing the cake to cool properly before rolling can cause it to crack, leaving you with an unappealing presentation.
  • Using too much filling may overpower the delicate balance of flavors; stick to the recommended amount for a perfect rollout.
  • Failure to preheat the oven can affect the cooking time and result in unevenly baked products.
  • Not leveling the cake batter before baking can lead to a lopsided roll, so smooth it out for even cooking.
  • Not tasting the filling before rolling can lead to a filling that lacks flavor; adjust sweetness and chocolate levels to your preference.
  • Waiting too long after baking to roll the cake can lead to it becoming too firm, making it hard to achieve the desirable swirl.
  • Rushing through cooling and assembly can yield a messy final result; take your time to achieve the best presentation.

Essential Techniques

Mastering the rolling technique is crucial for a successful Banana Chocolate Dream Roll. Start by carefully rolling the warm cake with the parchment paper to create a gentle curve. This helps in achieving a beautiful spiral once the cake is filled. Remember, practice makes perfect; so don’t hesitate to try a couple of practice rolls.

Whipping the cream properly ensures a light and fluffy filling. Use chilled beaters and a cold bowl to whip the cream to stiff peaks, which will hold the filling together perfectly. Be cautious not to over-whip, as this can lead to a grainy texture; stop just when it looks smooth and satiny.

Pro Tips for Perfect Banana Chocolate Dream Roll

1. Make sure to use room temperature ingredients to ensure even mixing and better incorporation of air into the batter.

2. Experiment with various chocolate types such as milk, dark, or white chocolate to find the sweetness balance you prefer.

3. Chill the roll in the fridge for at least an hour after assembly, allowing the flavors to meld and making slicing easier.

4. Garnish with toasted coconut or chopped nuts for an extra layer of flavor and texture against the creamy filling.

5. Always measure ingredients accurately for the most consistent results throughout the baking process.

6. If you want to include a fruit layer, thinly slice fresh strawberries or kiwis to add color and freshness.

7. For a chocolate drizzle, simply melt some chocolate chips and drizzle over your rolled cake prior to serving.

8. If not serving immediately, cover the roll tightly with plastic wrap to prevent it from drying out.

Variations and Adaptations

Regionally, you can adapt the Banana Chocolate Dream Roll by incorporating local fruits or spices. For instance, adding a hint of cinnamon or nutmeg can provide a warm, homey touch that resonates well in autumn gatherings.

Seasonally, consider infusing the filling with pumpkin puree during fall or pomegranate seeds during winter holidays for a festive aesthetic and flavor contrast.

Dietary modifications can cater to preferences; swap traditional sugar for coconut or maple syrup for a healthier version. You may also use gluten-free flour to create a gluten-free delight.

Flavor variations can be easily made by incorporating different fillings, such as peanut butter or nutella, providing a twist on the classic chocolate banana fusion.

Texture modifications such as adding crushed cookies or caramel sauce can enhance the dessert’s complexity and surprise your palate with delightful textural contrasts.

Presentation alternatives include decorating the roll with edible flowers or serving slices on a platter alongside fresh berries for a stunning visual effect.

Serving and Presentation Guide

For plating the Banana Chocolate Dream Roll, outline a large, decorative serving platter. You can slice the roll into even portions and arrange them in a slight overlap for a cascading visual effect. Sprinkle with powdered sugar and cocoa for a restaurant-style finish.

Garnishing with fresh mint leaves or edible flowers not only adds color but enhances the dessert’s appeal. Traditional accompaniments may include a scoop of vanilla ice cream or a dollop of whipped cream on the side.

Modern serving suggestions might involve pairing the roll with a side of fresh fruit compote or berry sauce drizzled to elevate the flavor experience.

Temperature considerations are important; the roll is best served chilled, allowing flavors to bloom, but can also be enjoyed at room temperature for a softer texture.

For portion control, slice into smaller pieces if serving at gatherings; this allows guests to sample alongside other treats without overwhelming their sweet tooth.

Wine and Beverage Pairing

A rich dessert like the Banana Chocolate Dream Roll pairs beautifully with dessert wines such as a port or a sweet Riesling. These wines complement the sweetness of the cake while balancing its richness.

If you prefer non-alcoholic alternatives, consider serving a creamy chai latte or iced coffee to enhance the flavors of the chocolate and banana.

For those who enjoy tea, a light green or white tea can provide a refreshing counterbalance to the dessert’s sweetness, making for an excellent after-meal palate cleanser.

Temperature considerations when serving beverages should align closely with the dessert in order to enhance the overall dining experience.

Lastly, experiment with serving suggestions such as mocha lattes or spiced apple cider, providing complementary flavors and options for every guest.

Storage and Shelf Life

For proper storage, wrap the Banana Chocolate Dream Roll tightly in plastic wrap or aluminum foil to keep it fresh and moist. It can be stored in the fridge for up to 3-4 days, ideal for snacking throughout the week.

Temperature requirements suggest that the roll should be served cold but can be left out for short periods prior to serving—remember to refrigerate any leftovers promptly to maintain quality.

When selecting containers, consider using a cake dome or an airtight container to keep the roll protected from odors.

Signs of spoilage can include an off smell and a change in texture, indicating that the roll may have dried out or gone bad.

Reheating instructions may not be necessary; however, if you prefer a warm dessert, gently warm slices in the microwave for just a few seconds—be careful not to overheat!

For longer preservation, you may freeze slices individually in an airtight freezer bag, allowing you to enjoy this sweet treat even later.

Make Ahead Strategies

To make this dessert ahead of time, prepare the cake and filling the day before the event. Assemble the roll and refrigerate, allowing flavors to deepen overnight.

Storing between steps, you can keep each component separately if needed; store the cake and filling in airtight containers to ensure freshness.

Assess the quality impact as certain desserts can taste even better after resting, allowing flavors to harmonize. Enjoying the waiting period can enhance the overall experience when serving later.

Assembly tips include preparing a clean work surface and having utensils handy to streamline the process. The quicker assembly helps maintain the cake’s freshness.

For fresh element additions, consider slicing fruits or nuts to add just before serving to maintain their original texture and enhance the dessert’s appeal.

Scaling Instructions

When halving the recipe, carefully adjust your ingredient quantities to maintain the flavor integrity while ensuring layers don’t compromise the overall texture.

For doubling or tripling the recipe, ensure you have sufficient baking sheet space, as well as scaled-up equipment to handle larger batches.

Equipment adjustments may be necessary when scaling; consider using larger mixing bowls and taller baking sheets for better volume management.

Timing modifications also play a role; larger batches might require an extra few minutes in the oven—always check for doneness with a toothpick.

When storing scaled quantities, remember that longer refrigeration times may lead to dried edges, so wrap tightly to lock in moisture.

Nutritional Deep Dive

The macro breakdown of this dessert includes significant carbohydrates from the flour and sugar, alongside healthy fats if you opt for full-fat cream. Each slice provides a satisfying balance of essential nutrients derived from bananas and other wholesome ingredients.

Micronutrient analysis shows bananas providing potassium, vitamin C, and vitamin B6, which support heart and digestive health, making this a sweet treat that offers nutritional support.

Health benefits include the use of moderation when enjoying desserts, helping maintain a balanced diet while satisfying sugar cravings.

Dietary considerations are essential, especially for those on calorie-restricted diets; serving smaller portions or pairing them with fresh fruit can enhance nutritional value.

Performing portion analysis allows you to enjoy this dessert without derailing your health goals; a single slice can be enjoyed as a rewarding treat.

Weight management tips suggest savoring each bite—taking time to enjoy the flavors can lead to greater satisfaction with smaller amounts.

Dietary Adaptations

For gluten-free adaptations, replace all-purpose flour with a certified gluten-free blend, allowing those with dietary restrictions to enjoy this dessert without worry.

For dairy-free variations, you may substitute the whipped cream with coconut cream or another non-dairy alternative, still achieving a delightful taste and texture.

Vegan adaptations include using flaxseed meal as an egg substitute and dairy-free chocolate options to create a plant-based version of the roll.

If following a low-carb or keto diet, consider using almond flour and a sugar substitute to significantly reduce carbohydrate levels while maintaining flavor.

For paleo-friendly adaptations, use almond flour and raw sweeteners such as honey or maple syrup to align with paleo guidelines without losing out on taste.

Low-FODMAP options may involve selecting specific types of bananas that are ripe but still firm, thus reducing irritants while enjoying this indulgence.

Troubleshooting Guide

Texture issues can arise if the batter is overmixed; always fold gently to ensure a light and fluffy cake. If the roll is too dry, consider drizzling a simple syrup made of equal parts sugar and water to retain moisture.

Flavor balance can be off if sugar levels are inadequate; always taste the filling and adjust with additional sweetener if necessary to ensure satisfaction.

If you face temperature problems, adjust your oven temperature and cooking times accordingly, checking for doneness at multiple checkpoints during baking.

Equipment challenges may arise if your mixer isn’t functioning; consider whisking by hand as an alternative, though it will require some extra effort.

Ingredient substitutions could alter the intended texture and flavor; seek out similar ingredient profiles to ensure the taste remains authentic.

Timing concerns may cause uneven baking; always set your timer and check back frequently, ensuring consistent baking throughout the process.

Recipe Success Stories

Community feedback showcases how this recipe has brought families together, where many have shared their personal tweaks and twists—like adding aloe vera or cream cheese fillings to create a diversified experience.

Variation successes include a version that incorporates coffee and hazelnuts—transforming the traditional recipe into a luxurious dessert, enjoyed on special occasions.

Reader suggestions often highlight personal stories of satisfaction, with many sharing how the simple act of baking this roll became a cherished activity during holidays with loved ones.

Photography tips suggest capturing the roll’s elegance by using natural light and presenting it alongside fresh fruit or a vibrant drink to enhance its charm.

Frequently Asked Questions

Can I make this roll ahead of time?

Yes! The Banana Chocolate Dream Roll can be made a day in advance. Just assemble it and refrigerate, allowing flavors to develop overnight for a more delightful treat.

What can I substitute for bananas?

If you’re out of bananas or looking for another flavor, you can use unsweetened applesauce or even mashed avocado for a healthier twist.

How do I know when the cake is cooked?

To check for doneness, insert a toothpick into the center of the cake; if it comes out clean, your cake is finished baking. Avoid overbaking, as this can lead to a dry texture.

Can I freeze the Banana Chocolate Dream Roll?

Absolutely! Wrap the roll tightly in plastic wrap and aluminum foil, then store it in the freezer for up to three months. Thaw in the refrigerator before serving.

Is there a way to make this roll gluten-free?

Yes, simply substitute all-purpose flour with a gluten-free flour blend. Be sure to also check that all other ingredients are gluten-free as needed.

How should I store leftovers?

Wrap any leftovers tightly in plastic wrap and refrigerate. The roll is best enjoyed within a few days for optimal freshness.

Can I use store-bought whipped cream?

While homemade whipped cream offers the best flavor and texture, store-bought whipped cream can be used in a pinch for convenience.

How long will the roll last in the fridge?

The Banana Chocolate Dream Roll can last in the fridge for about four days, as long as it’s wrapped properly to keep it fresh.

What’s the best way to serve this dessert?

This dessert is best served chilled, but you can let it sit at room temperature for a few minutes before serving for a softer texture.

Can I add nuts or other toppings?

Yes! Chopped nuts, chocolate shavings, or a drizzle of caramel can elevate the presentation and add delightful texture to your dessert.

What if the roll cracks while rolling?

If the roll cracks, don’t worry! You can still work with it by covering the crack with filling or using a little whipped cream to mask it.

Additional Resources

For those interested in exploring more delightful recipes, consider checking out our banana bread and chocolate mousse recipes as excellent complements to the Banana Chocolate Dream Roll.

Technique guides focusing on rolling techniques or baking tips can sharply enhance your dessert-making skills, providing a foundation for various rolled cakes in the future.

Understanding ingredients can make a big difference—be sure to familiarize yourself with various types of sugars or chocolates, ensuring better outcomes in your baking endeavors.

Equipment recommendations such as silicone baking mats or high-quality mixing bowls can elevate your baking experience, providing convenience and consistency.

Seasonal variations often inspire creativity; lookup recipes for festive-themed desserts that utilize seasonal fruits for refreshing twists throughout the year.

Join the Conversation

Engage with us on social media by sharing your experiences with the Banana Chocolate Dream Roll! We love seeing how you’ve adapted the recipe and the variations that have become family favorites.

Photography tips are always welcome—sharing your best shots helps inspire others and showcase the beauty of this delicious dessert.

Recipe reviews and feedback from the community enrich our collective cooking adventures, creating a space where we can all learn and grow together.

Feel free to explore your own variations, whether it’s swapping ingredients or creating fun toppings; let’s share our culinary explorations and create a vibrant collection of delicious ideas!

The Recipe

Banana Chocolate Dream Roll

Serves: 8 servings

Prep Time: 30 mins

Cook Time: 15 mins

Total Time: 45 mins

Kitchen Equipment Needed

  • Baking sheet (15×10 inches)
  • Parchment paper
  • Spatula
  • Cooling rack
  • Plastic wrap

Ingredients

  • 3 ripe bananas
  • 3/4 cup sugar
  • 1 cup all-purpose flour
  • 1/4 cup cocoa powder
  • 1/2 cup butter, softened
  • 3 eggs
  • 1 teaspoon vanilla extract
  • 1 cup heavy whipping cream
  • 1/2 cup chocolate chips
  • 1/4 cup powdered sugar

Directions

  1. Preheat your oven to 350°F (175°C) and line the baking sheet with parchment paper.
  2. In a mixing bowl, combine the flour, cocoa powder, and sugar. In a separate bowl, mash bananas and mix in eggs and vanilla.
  3. Combine the wet and dry ingredients until just blended.
  4. Spread the mixture onto the prepared baking sheet evenly and bake for 15 minutes or until a toothpick comes out clean.
  5. Once baked, cool for a few minutes, then invert onto a cooling rack and remove the parchment paper.
  6. Whip the heavy cream with powdered sugar until stiff peaks form and fold in the chocolate chips.
  7. Spread the whipped cream mixture over the cooled cake and roll it tightly from the short side using the parchment paper to help.
  8. Wrap in plastic wrap and refrigerate for at least an hour before serving to allow the flavors to meld.
  9. Slice and serve with additional fruit or chocolate drizzle if desired!

Recipe Notes

  • Feel free to adjust the sweetness based on your taste preferences.
  • Store leftovers wrapped in plastic in the refrigerator for up to three days.
  • You can freeze portions for a quick dessert option later.
  • Alternate fillings with peanut butter or cream cheese for a delightful twist!

Best Starbucks Iced Gingerbread Chai Tea Latte Recipe

Starbucks Iced Gingerbread Chai Tea Latte Copycat Recipe: Your Favorite Holiday Beverage at Home

⚖️
Difficulty
Easy

⏲️
Prep Time
15 mins

🕒
Cook Time
0 mins

⏱️
Total Time
15 mins

🍽️
Servings
2 servings

If you’re craving the cozy and festive flavors of the holiday season, this Starbucks Iced Gingerbread Chai Tea Latte Copycat Recipe is just what you need. Imagine a creamy blend of spiced chai, gingerbread sweetness, and cool ice, all coming together to create a drink that will warm your heart even on the hottest days. Whether you’re sipping on this delightful beverage while lounging at home or enjoying it on the go, it promises to delight your senses and capture the essence of winter.

This copycat recipe is not just a replica; it’s a way to enjoy this seasonal treat any time of the year. By making it at home, you have control over the sweetness and can customize it to suit your taste buds. The combination of aromatic spices and rich flavors will have you coming back for more. Plus, it’s straightforward enough for any kitchen novice!

Quick Recipe Highlights

  • Flavor Profile: The warm spices of chai paired with the soothing sweetness of gingerbread create a comforting flavor experience that’s both delicious and aromatic.
  • Texture: This drink is smooth and creamy due to the milk and frother-mixed spices, with a refreshing icy element that makes it perfect for any season.
  • Aroma: The inviting scent of cinnamon, ginger, and nutmeg wafts through the air, reminding you of cozy holiday moments and warm gatherings.
  • Visual Appeal: With its creamy, frothy top and warm golden-brown color, this latte is as pleasing to the eye as it is to the palate, ideal for Instagram posts!
  • Skill Level Needed: This recipe is easy to follow, making it approachable for beginners and enjoyable for more experienced home brewers alike.
  • Special Equipment: A quality frother or blender will help achieve the desired creamy texture, though simple hand whisking can work too!

Recipe Overview

  • Difficulty Level: The simplicity of this recipe makes it an excellent choice for anyone looking to whip up a festive drink without much hassle. The steps are straightforward and quick.
  • Category: Beverages – This delightful iced drink falls under the category of espresso drinks and is a quintessential alternative for coffee lovers.
  • Cuisine: Influenced by both Indian chai traditions and Western coffee culture, this recipe perfectly blends global culinary elements into one enticing drink.
  • Cost: With common ingredients found in most kitchens, this drink is affordable, costing around $5 for two servings.
  • Season: While perfect for winter festivities, the refreshing nature of iced drinks makes it suitable for any season.
  • Occasion: Great for casual gatherings, brunches, or enjoying a moment of solitude; it suits both everyday treats and festive celebrations.

Why You’ll Love This Recipe

First and foremost, the taste and texture of the Starbucks Iced Gingerbread Chai Tea Latte will captivate your senses. The rich, creamy chai blended with gingerbread flavors creates a harmonious burst of spices that dance on your palate. The icy refreshment makes it a delightful indulgence during warm weather, ensuring you’ll savor every sip.

Convenience is key when it comes to this recipe. Taking only 15 minutes from start to finish, it’s a quick way to enjoy a similar treat to what you’d find at your favorite coffee shop, right from your own kitchen. No more waiting in long lines or spending too much; you can make this drink at your leisure!

Nutritionally, this recipe can be tailored to suit your dietary needs, allowing you to choose healthier milk alternatives or lower-calorie sweeteners. This flexibility helps you enjoy the taste you love while being more mindful of your choices.

This iced latte is perfect for entertaining friends or simply enjoying a quiet afternoon at home. With its inviting aroma and rich flavor, it’s sure to impress your guests and create memorable moments around your kitchen table.

Lastly, the cost-effectiveness of this drink cannot be overstated. Making it at home saves you money in the long run, allowing you to indulge without breaking the bank. Enjoy the festivity of gingerbread chai whenever the mood strikes!

Historical Background and Cultural Significance

The origins of chai can be traced back to the 5,000-year-old tradition in India, where masala chai was created to blend various spices for medicinal purposes. Over time, it became a staple in households and tea stalls across the country. The advent of modern espresso drinks has led to the fusion of traditional chai with café culture, resulting in drinks like the gingerbread chai latte.

In recent years, the global appreciation for chai has led to variations such as the gingerbread latte, capturing the festive spirit of gingerbread houses and desserts typically enjoyed during the holiday season. The warming spices of ginger and cinnamon represent comfort and warmth, making this beverage particularly popular in cooler months.

The evolution of the iced version highlights the versatility of chai, adapting it to suit warm weather while maintaining its traditional roots. This adaptation has breathed new life into a classic beverage, making it accessible year-round, especially in different climates.

Regional variations abound, with different cultures adding their unique twists to the basic recipe. From adding whipped cream and seasonal syrups or garnishing with nutmeg, these adaptations enhance the enjoyment of the drink while retaining its cherished flavor.

Ingredient Deep Dive

Chai Tea: Chai, a traditional Indian tea, is rooted deeply in cultural significance as a beverage of hospitality. Its blend of black tea and spices offers numerous health benefits, including improved digestion and immunity. Selecting a high-quality loose-leaf or tea bag ensures a flavorful brew.

Gingerbread Syrup: Gingerbread syrup adds a sweet and spicy essence to our drink. Historically tied to the holiday season, it is a festive staple. Its rich spices contribute antioxidants and can be made easily at home or purchased from specialty stores.

Common Mistakes to Avoid

  • Using stale chai tea: Make sure your chai tea is fresh for the best flavor.
  • Too much syrup: Start with a small amount of gingerbread syrup, as it can quickly overwhelm the flavors.
  • Improper milk frothing: A light froth is essential for achieving the right texture. Don’t overdo it.
  • Neglecting the ice: Ensure you use enough ice to properly chill the drink without diluting it too quickly.
  • Overheating the chai: If making your chai, bring it to a gentle boil, and do not overcook.
  • Not balancing spices: Adjusting spice levels can dramatically affect taste; feel free to experiment to find your perfect blend.
  • Skimping on presentation: A well-garnished drink is more inviting. Add a sprinkle of cinnamon or a dollop of whipped cream for extra flair.
  • Ignoring nutritional adjustments: If you’re mindful of sugar or calories, make sure to account for those in your ingredients.

Essential Techniques

Frothing Milk: Frothing is crucial for achieving a creamy texture. To master this, heat your milk to around 150°F before frothing to avoid scalding. Use a frother or whisk vigorously for a few minutes. Avoid letting your froth sit too long.

Brewing Chai: Properly brewing chai ensures a strong flavor. Use boiling water and steep the tea for 5-7 minutes, depending on the strength you desire. Always taste your tea for the perfect strength before mixing.

Pro Tips for Perfect Starbucks Iced Gingerbread Chai Tea Latte

1. Use fresh spices for the best flavor; consider grinding your own for maximum freshness.

2. Experiment with milk alternatives, such as almond milk or oat milk, to find your favorite pairing.

3. If you’re dairy-free, coconut cream makes an excellent substitute for whipped toppings.

4. Add a pinch of nutmeg for an extra layer of warmth.

5. Chill your glass beforehand to keep your drink icy for longer.

6. Consider blending your ingredients for a full-bodied flavor and smoother texture.

7. Top with crushed ginger cookies for an extra festive touch.

8. Always taste as you go, adjusting sweetness and spice levels to suit your preferences.

Variations and Adaptations

Regional adaptations can include using local spices or flavors to enhance the traditional recipe. For example, adding cardamom or changing the sweetener to maple syrup can offer a unique twist.

Seasonal adaptations include adding pumpkin spice for fall or peppermint for winter holidays, allowing you to create a distinct flavor that reflects the time of year.

For dietary modifications, consider making it vegan by using plant-based milk and skipping the whipped cream. You can use stevia or agave syrup for a lower-calorie option without losing flavor.

Texture modifications are easy to achieve by adjusting the consistency of the milk; for a thicker drink, add more froth or creaminess through whipped cream.

Presentation alternatives can include serving in festive mugs during the holidays or layering the drink with whipped cream, cinnamon, and a green mint leaf in summer.

Serving and Presentation Guide

To serve your iced gingerbread chai latte, choose tall glasses that highlight the layers of creamy beverage topped with froth. Garnish with a sprinkle of cinnamon or nutmeg for visual appeal, evoking that festive spirit.

Consider adding whipped cream or a dollop of crème fraiche with a drizzle of caramel sauce to elevate the drink’s look and flavor, appealing to both the eye and the palate.

For modern serving suggestions, pair with gingerbread cookies or spiced cake for a delightful combo that celebrates the essence of the drink.

Temperature considerations are key; ensure the drink is cold when served and plan based on the ice quantity to maintain the chill throughout consumption.

Portion control tips include suggesting a smaller size for tasting at gatherings, encouraging guests to try multiple drinks throughout an evening.

Wine and Beverage Pairing

For non-alcoholic alternatives, pumpkin spice lattes or chai-infused lattes complement the gingerbread flavors beautifully, offering rich options that mingle well with dessert courses.

If you prefer alcoholic pairings, consider a spiced rum that can merge with the flavors of the drink while maintaining a festive touch. This way, you can enjoy a warm, comforting drink while entertaining.

For coffee or tea pairings, try serving alongside a robust black coffee or a smooth green tea to cleanse the palate between sips of your creamy gingerbread chai.

Always keep temperature considerations in mind; serving chilled drinks together makes the presentation cohesive, enhancing your guests’ experience.

Serving suggestions might include offering your drink alongside holiday-themed pastries for an extra festive kick to gatherings.

Storage and Shelf Life

Your iced gingerbread chai latte is best enjoyed fresh but can be stored for up to 24 hours in the refrigerator. Always store in an airtight container to preserve flavor.

If you have extra gingerbread syrup, store it in a glass jar in a cool, dark place; it can last several weeks. Be sure to label any containers with the date for freshness monitoring.

Signs of spoilage can include separation in liquids or a change in smell; discard any suspicious-looking ingredients immediately.

Reheat by using a microwave on low for milk-based beverages, stirring frequently to maintain texture without overheating.

For freezing guidelines, consider freezing extras into ice trays or zip-lock bags for use in smoothies or cold drinks later.

Make Ahead Strategies

To make ahead, brew your chai and store it in the fridge overnight. This allows flavors to deepen and saves time for busy mornings.

Store your gingerbread syrup separately to retain its potency. The mixture can be made a week in advance and simply stirred into your latte when ready to serve.

Assess the quality impact if prepping too far in advance; over time, spices can lose their allure, so make aromatics fresh closer to serving.

Assembly tips include having glassware ready for pouring; pre-chill your glasses for added effect.

Reheating guidelines are key for chai; always avoid boiling the pre-made mix as it can adversely affect flavor quality.

For fresh element additions, consider waiting on toppings like whipped cream until just before serving for optimal fluffiness.

Scaling Instructions

To halve the recipe, simply adjust the ingredient measurements accordingly, ensuring you maintain the same proportions for balance.

Doubling or tripling the recipe for gatherings is a breeze; just remember to use a large pitcher for combining and chilling.

Be aware of equipment adjustments needed for larger batches, such as using a more powerful blender for frothing or larger containers for brewing.

Timing modifications may be necessary as preparation may take longer with additional servings.

Always consider storage for leftovers, using sealable containers for easy access to refrigerated mix if needing to store your iced gingerbread chai longer.

Nutritional Deep Dive

The macro breakdown reveals a balance of carbohydrates from the syrup and tea, with healthy fats if using whole milk or cream.

Micronutrient analysis shows high levels of antioxidants from the spices, particularly cinnamon, which offers various health benefits including anti-inflammatory properties.

Health benefits can range from improved digestion from chai to relaxation provided by the warm spices when enjoyed in moderation.

Dietary considerations such as lactose intolerance or vegan preferences can easily be catered to by swapping ingredients as needed.

Portion analysis ensures servings remain mindful of sugar and calorie content, allowing for a delightful treat that won’t lead to overconsumption.

For weight management tips, be sure to understand serving sizes, enjoying this delicious latte as an occasional indulgence rather than a daily fixture.

Dietary Adaptations

For gluten-free adaptions, ensure the syrups and any biscuits or extras are certified gluten-free, as cross-contamination can occur in production.

Dairy-free versions can be made using almond or oat milk to create a creamy base while also lowering caloric content.

For vegan adaptations, coconut milk or cashew milk provides creaminess without dairy, making this drink plant-based friendly.

Low-carb adjustments can feature sugar substitutes like erythritol or monk fruit to cut calories without losing that signature sweetness.

Keto diets can utilize heavy cream and sugar-free syrups for an iced gingerbread tea latte that fits within carb limits.

Paleo variations could focus on using raw honey as sweetener or a variety of spices allowed in paleo diets to enhance flavor.

Low-FODMAP fans can reduce the syrup or choose alternative sweeteners to maintain friendliness with their dietary requirements.

Troubleshooting Guide

For texture issues, ensure your milk is properly frothed, as under-whipping can result in a flat drink. Use a blender for a better incorporation of air.

If the flavor seems off, revisit the balance of spices and sweetness to create a more balanced drink; sometimes, less is more!

Temperature problems can arise too; chill glasses prior to serving to keep your drink cold, and avoid letting it sit too long with ice.

Equipment challenges can be mitigated by ensuring you use proper tools; a quality frother can make all the difference in achieving the perfect creaminess.

For ingredient substitutions, have a few versatile options available, like flavored syrups or alternative sweeteners, to adapt your drink as needed.

Timing concerns can impact the final product; ensure you’re not rushing through any steps to guarantee everything blends beautifully.

Recipe Success Stories

Community feedback often highlights how this iced latte brings joy during gatherings, making it an instant hit among friends and family.

Variation successes include readers sharing how they’ve adjusted the spices for unique flavor profiles, leading to exciting new iterations of the recipe!

Adaptation stories abound, with individuals tailoring the recipe for their specific dietary needs while maintaining all the rich flavors of the original.

Photography tips suggest capturing this beverage’s layers and toppings in natural light for stunning imagery, inviting others to want to try it for themselves.

Frequently Asked Questions

Can I make this drink hot? Yes! Simply skip the ice and enjoy it hot, just as you would a traditional chai latte!

What kind of milk works best? Whole milk provides creaminess, but feel free to use almond, oat, or any other favorite milk for variations.

How do I store leftovers? Store any leftovers in an airtight container in the fridge for up to 24 hours- just know the flavor may shift slightly.

What if I want a stronger chai flavor? You can steep the chai longer or add extra chai spice mix to boost intensity without altering other ingredients.

Is this drink suitable for kids? Yes! Just mellow out on the syrup and adjust sweetness to cater to their preferences.

Can I use a different sweetener? Absolutely! Consider honey, agave syrup, or sugar substitutes for personalized sweetness.

How do I add more nutrition? Consider adding a protein powder or a scoop of nut butter for a nutritional boost!

Does this taste similar to the Starbucks version? Yes! The goal of this recipe is to replicate that delicious flavor in your kitchen.

Can I make this drink dairy-free? Yes! Use any non-dairy milk alternative for a completely dairy-free version.

How long does it take to make? This recipe only takes about 15 minutes from start to finish!

Additional Resources

For related recipes, check out our selections of iced lattes and festive beverages, each full of flavor and seasonal charm.

Technique guides on frothing milk or creating homemade flavored syrups may enhance your experience and versatility in the kitchen.

Ingredient information, specifically about the spices used in chai, can deepen your appreciation and knowledge for cooking with them.

Equipment recommendations for frothers or blenders will help ensure you have the right tools needed to achieve café-quality results.

Seasonal variations give exciting new colors and flavors that can be adapted to any holiday or celebration throughout the year.

Join the Conversation

Engage with us on social media to share your experiences trying this recipe, including any personal twists or adaptations you’ve made!

Photography tips can inspire others to capture their scrumptious creations, helping to spread the joy of this iced gingerbread chai latte.

Recipe reviews allow the community to share their feedback, giving newcomers insight into how this drink delights others.

Join our network for culinary enthusiasts to discuss recipe variations and swap ideas for holiday beverages and meals.

The Recipe

Starbucks Iced Gingerbread Chai Tea Latte Copycat Recipe

Serves: 2 servings

Prep Time: 15 mins

Cook Time: 0 mins

Total Time: 15 mins

Kitchen Equipment Needed

  • Frother or blender
  • Tall glasses
  • Tea kettle or pot
  • Measuring spoons

Ingredients

  • 2 cups brewed chai tea, cooled
  • 1/2 cup gingerbread syrup
  • 1 1/2 cups milk (dairy or non-dairy)
  • Ice cubes
  • Optional: whipped cream and ground cinnamon for topping

Directions

  1. Brew your chai tea and allow it to cool to room temperature.
  2. In a large glass, combine the cooled chai tea and gingerbread syrup.
  3. Add the milk and stir well to combine.
  4. Fill a glass with ice cubes and pour the mixture over the ice.
  5. Top with whipped cream and a sprinkle of ground cinnamon if desired.
  6. Serve immediately and enjoy your homemade iced gingerbread chai latte!

Recipe Notes

  • For a stronger flavor, steep the chai tea for a little longer.
  • Feel free to adjust the amount of gingerbread syrup to suit your taste.
  • Try using different types of milk to find your favorite combination.
  • This recipe is easily doubled for a larger batch!

Ultimate Banana Caramel Peanut Butter Cheesecake Recipe

Banana Caramel Peanut Butter Cheesecake: A Heavenly Dessert Delight

⚖️
Difficulty
Medium

⏲️
Prep Time
30 mins

🕒
Cook Time
60 mins

⏱️
Total Time
90 mins

🍽️
Servings
8

Indulging in a slice of Banana Caramel Peanut Butter Cheesecake is not just a dessert experience; it’s a pathway to bliss. This deliciously decadent cheesecake combines layers of creamy peanut butter and luscious caramel, all placed atop a buttery graham cracker crust. As you take your first bite, the smooth, velvety texture melts in your mouth, leaving you craving more. The delightful sweetness of ripe bananas complements the bold flavors of peanut butter, creating a harmonious blend that will please any palate.

Perfect for special occasions or simply to indulge yourself, this cheesecake brings warmth to your gatherings. The visual appeal of its golden caramel dripped over a creamy surface is simply irresistible. You’ll find yourself taken back to memories of childhood treats and happy gatherings with every mouthful. Whether served at a birthday party, anniversary celebration, or a cozy weekend get-together, this banana caramel peanut butter cheesecake is sure to steal the spotlight.

Quick Recipe Highlights

  • Flavor Profile: The banana caramel peanut butter cheesecake offers a delightful combination of sweet and salty flavors that dance on your palate.
  • Texture: Creamy and rich with a crumbly crust, each bite invites you to savor the different layers of indulgence.
  • Aroma: The warm aroma of caramel combined with the nutty scent of peanut butter creates a comforting ambiance.
  • Visual Appeal: Its layers of yellow banana, golden caramel, and dark crust make each slice a feast for the eyes.
  • Skill Level Needed: Ideal for bakers with intermediate skills, this recipe does require some attention to detail in layering and baking.
  • Special Equipment: A springform pan is essential for creating the perfect cheesecake shape and ease of removal.

Recipe Overview

  • Difficulty Level: The medium difficulty level stems from the precise layering and baking required to achieve that perfect creamy texture while ensuring the crust holds up.
  • Category: This cheesecake falls under the dessert category, perfect for satiating sweet cravings after a hearty meal.
  • Cuisine: Combining American comfort food with dessert tradition, this cheesecake showcases the creative possibilities within American desserts.
  • Cost: The approximate cost of making this cheesecake is reasonable, with most ingredients being affordable staples.
  • Season: Ideal for all seasons, especially during late summer and fall when bananas are at their peak sweetness.
  • Occasion: Perfect for celebrations such as birthdays, holidays, or even a cozy family dinner.

Why You’ll Love This Recipe

The banana caramel peanut butter cheesecake is a delightful dessert that tantalizes the taste buds with its mix of flavors and textures. You can expect a perfect balance between the sweetness of the ripe bananas, the richness of the cream cheese, and the savory notes of peanut butter, creating a multi-dimensional flavor profile that everyone will adore. The crumbly base adds a different texture, making each bite an exciting adventure.

Making this cheesecake can be a breeze. The steps are straightforward, and the ingredients are easily accessible, allowing bakers of varying levels to enjoy the process. This cake sets beautifully, and chilling it in the refrigerator allows it to develop deeper flavors over time, making it not just delicious, but also a convenient make-ahead dessert for gatherings.

Beyond its delightful indulgence, this dessert can pack a nutritional punch as well. Bananas are a good source of potassium and vitamins, while the peanut butter adds protein, making each bite worthwhile even in a sweet treat context. This cheesecake provides a more balanced dessert option for those who might feel guilty about indulging.

The beauty of this cheesecake also shines in its versatility for gatherings. The visually appealing dessert is sure to impress guests, and its rich flavors create the perfect talking point at any gathering. It’s a crowd-pleaser that can also serve as a nostalgic reminder of simpler desserts from childhood.

Lastly, you will find that this banana caramel peanut butter cheesecake is remarkably cost-effective. Most ingredients are basic, and yet the finished product tastes gourmet and worthy of any fine dining setting. It also offers substantial servings, which means you can share with family and friends without breaking the bank.

Historical Background and Cultural Significance

Cheesecake has roots that trace back to ancient Greece, where it was originally consumed by athletes during the first Olympic Games. However, the modern interpretations, especially those incorporating unique flavors like banana and peanut butter, emerged in America much later in the 19th century. The combination of banana and peanut butter reflects a cultural preference for sweet yet creamy textures.

In American culture, desserts often take center stage during family gatherings, celebrations, and holidays. The banana caramel peanut butter cheesecake has become a favorite because it blends comfort with a sophisticated touch. Beyond just nourishing the body, desserts like this one serve as a means to bring people together, fostering a sense of community.

Over time, variations of the cheesecake have evolved to include seasonal fruits, flavored creams, or even chocolate, showcasing the versatility of the recipe. The adaptation of different flavors serves as a testament to cultural exchange, mirroring the diversity of culinary practices across the globe.

Regionally, variations of banana caramel peanut butter cheesecake may be enhanced with locally sourced ingredients, reflecting the unique flavors and preferences of different communities. This dessert has found its way into homes as a delightful special treat, adapted to mirror local influences and tastes.

Ingredient Deep Dive

  • Peanut Butter: This versatile ingredient adds a nutritious element, high in protein and healthy fats. Look for natural peanut butter without added sugars or hydrogenated oils for the best flavor and health benefits. Store it tightly sealed in a cool place; it can become hard if exposed to heat.
  • Bananas: Ripe bananas not only add natural sweetness but also contribute to texture and flavor. When selecting bananas, choose ones that are slightly spotty, indicating they are at their sweetest. They should ideally be consumed within a week or can be frozen for later use in smoothies or baked goods.
  • Cream Cheese: Key to a creamy cheesecake texture, cream cheese also imparts a mild tanginess. Opt for full-fat options for better flavor and creaminess. Always check the expiration date and store it in the refrigerator.
  • Caramel Sauce: The sweet, rich caramel complements the other flavors beautifully. Homemade caramel can create a richer flavor, but store-bought versions are often quicker for day-to-day use. Store caramel in an airtight container for future use, warming slightly before drizzling.
  • Graham Crackers: This classic crust ingredient creates a delicious crumbly texture. When purchasing, avoid varieties with added sugars for better balance. Store graham crackers in a cool, dry place and keep them sealed to maintain crunch.

Common Mistakes to Avoid

  • Skimping on the chilling time: Allow the cheesecake to chill for several hours, or even overnight, to enhance the flavors and set properly.
  • Mixing too quickly: Be gentle when folding in ingredients to avoid incorporating air, which can lead to cracks in your final cheesecake.
  • Not using room temperature ingredients: Using cold ingredients can prevent proper mixing and result in a lumpy texture.
  • Overbaking: Keep an eye on the cheesecake, as it continues to cook after being removed from the oven. Overbaking can lead to a dry texture.
  • Skipping the water bath: A water bath helps to regulate temperature, preventing the cheesecake from baking unevenly and reducing the risk of cracks.
  • Forgetting to line the springform pan: This can result in sticking, making it difficult to remove the cheesecake without breaking it.
  • Using stale ingredients: Always use fresh, high-quality ingredients for the best flavor and texture.
  • Not tasting before serving: Make sure to taste your cheesecake before it sets to adjust flavors, especially sweetness.

Essential Techniques

Creating the perfect cheesecake involves mastering key techniques. First, it’s vital to achieve the perfect consistency in your cheesecake filling. This means mixing until combined without overbeating, which can introduce air bubbles and lead to cracks. Use a stand mixer on low speed or mix by hand to prevent overmixing.

Next, the water bath technique is essential for a creamy result. This helps to maintain moisture and even cooking within the cheesecake. Wrap your springform pan in foil to prevent water from seeping in, then place it in a larger baking dish filled with hot water. This method ensures that the heat is distributed evenly, reducing the chance of cracks on your beautiful creation.

Finally, cooling your cheesecake gradually is crucial. After baking, turn off the oven, crack the door open, and let it cool slowly to room temperature. This prevents sudden changes in temperature, which can cause the cheesecake to shrink or crack. Following these techniques will set you on the path to cheesecakes that will wow your friends and family every time.

Pro Tips for Perfect Banana Caramel Peanut Butter Cheesecake

1. Always preheat your oven before baking to ensure uniform cooking and texture in your cheesecake.
2. Use a high-quality springform pan to avoid leaks and ensure easy removal of your cheesecake.
3. Chill your ingredients beforehand for the best mixing and blending results, which helps incorporate flavors nicely.
4. For rich caramel flavor, consider making your own caramel sauce with sugar, water, and cream to achieve that velvety texture.
5. Keep an eye on the cheesecake towards the end of the baking time; it should look slightly jiggly in the middle to ensure a creamy texture.
6. After baking, let your cheesecake cool completely before adding any topping, to prevent it from melting and mixing into the cake.
7. Serve your cheesecake at room temperature for enhanced flavor experience, as chilling can dull flavors.
8. Garnish with crushed nuts, banana slices, or drizzles of chocolate to elevate the presentation and add texture.

Variations and Adaptations

This banana caramel peanut butter cheesecake recipe can be adapted to suit various tastes and dietary needs. Consider swapping the peanut butter for almond butter for a different flavor twist, or switch up the graham cracker crust with a gluten-free alternative for those with gluten sensitivities.

Seasonal adaptations can also enhance this dessert; in fall, add spices like cinnamon or nutmeg to the filling to create a warm, seasonal flavor profile. You could even incorporate pumpkin puree for a unique fall cheesecake.

For a lighter version, consider using Greek yogurt in place of some cream cheese to reduce fat while still keeping that creamy texture. Vegan adaptations might include using coconut cream and a nut-based crust to maintain a rich flavor without animal products.

Finally, explore flavor variations by adding chocolate chips or a layer of chocolate ganache on top for a chocolate banana twist. Each modification allows for creative expression while staying within the framework of this delightful dessert.

Serving and Presentation Guide

When it comes to presenting your banana caramel peanut butter cheesecake, there are numerous ways to make it visually appealing. Start by using a sharp knife to slice the cheesecake, ensuring clean edges for a professional look. A warm knife will help make cleaner cuts, so periodically rinse it in hot water.

For garnishing, consider adding thin slices of fresh bananas and a drizzle of caramel sauce over the top. Chopped peanuts sprinkled on top not only enhance the visual appeal but also add extra texture. Alternatively, you can present the cheesecake on a decorative cake stand to elevate its visual impact.

Serve each slice on a beautiful dessert plate, and consider pairing it with a scoop of vanilla ice cream or a dollop of whipped cream to create a comforting experience. Mix different textures on the plate for added visual interest, and remember to serve at room temperature to make the flavors pop.

Wine and Beverage Pairing

For the perfect pairing with your banana caramel peanut butter cheesecake, consider sweet dessert wines, such as a late-harvest Riesling or a Sauternes, which will complement the richness of the cheesecake beautifully. These wines bring a fruity character to the pairing that enhances the tropical essence of bananas.

If you prefer a sparkling wine, opt for a demi-sec Champagne. The bubbles can cleanse the palate, making each subsequent bite of the creamy cheesecake refreshing. Alternatively, serve with a chilled glass of milk or even a rich coffee to balance the sweetness while pairing nicely with the cheesecake’s flavors.

When serving coffee or tea, consider a medium-roast coffee with notes of caramel and chocolate, as the flavors will harmonize with the dessert while elevating the overall dessert experience. Make sure the beverages are served at optimal temperatures to enhance the flavors alongside each slice of cheesecake.

Storage and Shelf Life

To store your banana caramel peanut butter cheesecake, wrap it tightly in plastic wrap or aluminum foil, then place it in an airtight container. This method keeps it fresh and prevents it from absorbing any odors from the fridge. Properly stored cheesecake can last for about 5-7 days in the refrigerator.

If you plan to store it for a longer period, consider freezing individual slices. Wrap each slice in plastic wrap, then store them in a freezer-safe bag. This allows you to enjoy a slice whenever a craving strikes. Frozen cheesecake can last up to 3 months. To thaw, simply move it to the refrigerator a few hours before enjoying.

When checking for signs of spoilage, be cautious of any off odors or changes in texture. Reheating can refresh the flavors; however, avoid heating it in the microwave, which can alter the texture. Instead, let it come to room temperature before serving again.

Make Ahead Strategies

One of the beautiful aspects of banana caramel peanut butter cheesecake is its ability to be prepared ahead of time, which makes it an excellent choice for gatherings. You can make the cheesecake one to two days in advance, allowing it ample time to set and develop its flavors.

After baking, allow it to cool completely and refrigerate it until you’re ready to serve. For optimal flavor, add toppings, such as caramel or fresh banana slices, just before serving to maintain freshness. You can also prepare the crust ahead of time; simply press it into the pan and store it in the refrigerator until you’re ready to make the filling.

For ease of serving, consider portioning the cheesecake into slices before events; this not only showcases the dessert but makes for quicker serving when guests arrive. Additionally, maintain communication with your guests regarding dietary needs in advance, so you can adapt your cheesecake accordingly if needed.

Scaling Instructions

Should you wish to scale your banana caramel peanut butter cheesecake recipe, it’s relatively straightforward. Halving the recipe is easy by simply dividing all ingredients by two; just ensure you use a smaller pan to accommodate the reduced volume.

For doubling or tripling, keep in mind that you may need to adjust your baking time slightly. Larger cheesecakes will typically require more time in the oven, while smaller ones may bake more quickly. Watch for signs of doneness, such as puffing edges and a slightly jiggly center.

Equipment adjustments might be necessary for larger quantities; ensure you have sufficient mixing bowls and a mixer to handle the volume. Consider baking in batches if you don’t have a large enough oven space. Ultimately, paying attention to texture and baking times are key factors in scaling a cheesecake recipe successfully.

Nutritional Deep Dive

In a serving of banana caramel peanut butter cheesecake, you can expect a rich balance of macronutrients. The majority will come from healthy fats and carbohydrates, with protein from the peanut butter and cream cheese. Each slice provides a satisfying treat that can fit nicely within an active lifestyle moderation.

Micronutrient analysis reveals vitamins and minerals primarily contributed from bananas, including vitamin B6 and potassium. Peanut butter also adds important nutrients such as magnesium and vitamin E, enhancing the overall nutritional profile of this delectable dessert.

Especially for those on weight management programs, portion control is crucial. Enjoying a small slice can satisfy sweet cravings while keeping calories in check. This cheesecake can also be a part of a balanced diet, providing a sweet yet nutrient-dense option for dessert lovers.

Dietary considerations should be noted, especially for individuals with peanut allergies or specific dietary preferences. Understanding the nutritional components and how they fit into your diet allows for better choices without sacrificing enjoyment.

Dietary Adaptations

Adapting the banana caramel peanut butter cheesecake for specific dietary needs is absolutely achievable. For gluten-free options, substituting traditional graham crackers with gluten-free alternatives ensures that those with sensitivities can still enjoy this dessert without worry.

If you’re catering to vegan diets, swapping out cream cheese for vegan cream cheese and peanuts for nut or seed butters creates a decadent plant-based dessert. Use coconut cream to add that rich, creamy texture while maintaining all the wonderful flavors.

For those monitoring carbs, reducing sugar by using natural sweeteners such as stevia or erythritol can make this dessert more suitable for low-carb or keto diets. Adjusting ingredients allows for enjoying sweet treats without the traditional guilt.

Lastly, low-FODMAP modifications can be made by ensuring that the ingredients utilized, such as the types of sweeteners or nut butters, fit within those dietary guidelines. Exploring these alternatives opens up a world of opportunity for everyone to enjoy the deliciousness of banana caramel peanut butter cheesecake.

Troubleshooting Guide

If your cheesecake has texture issues, such as being too dense or crumbly, it may be due to overmixing or adding too many solids. Always ensure to mix at low speeds and gently fold ingredients to maintain that desired creamy texture.

Flavor balance is essential; if the banana flavor seems off, consider adjusting the sugar level or adding an extra banana to bolster the fruity profile. Taste testing throughout the process allows for early adjustments and prevents unpleasant surprises.

In cases where the cheesecake doesn’t set properly, too little bake time or an inadequate water bath can be to blame. Keep a watchful eye on baking time and ensure adequate use of the water bath technique for best outcomes.

If you encounter difficulties with equipment, such as leaks from a springform pan, ensure you wrap it properly in foil. This minimizes mess and preserves the integrity of your masterpiece during the baking process.

The timing of layers can be tricky; if the caramel doesn’t adhere or the toppings slide off, allow the layers to set a bit longer in the refrigerating process before adding them. This provides stability and secures the flavors successfully.

Recipe Success Stories

The banana caramel peanut butter cheesecake has garnered many positive feedback stories within our community. Many bakers have shared their versions of the recipe and how they incorporated their unique touch, bringing variations that were equally as delightful.

Family celebrations and casual get-togethers have been brightened by this cheesecake; readers have shared heartwarming stories about passing down this recipe through generations, turning it into a beloved family tradition.

Photographic success stories also abound, as many find this dessert the perfect subject for gorgeous Instagram posts. It’s visually stunning, leading to positive engagement and requests for the recipe.

Various readers have reported successes in scaling the recipe for larger gatherings, boasting how it became the highlight of the affair. The impressive taste and appeal have received unanimous applause in gatherings.

Overall, the sense of community created around this recipe showcases the power of food in uniting people. As bakers experiment and adapt, they intertwine their narratives with the dish, creating connections through shared culinary experiences.

Frequently Asked Questions

Q1: Can I make this cheesecake without bananas?

Absolutely! If you’re not a banana fan, you can substitute with other fruits, such as strawberries or blueberries, or stick to a classic vanilla or chocolate cheesecake flavor.

Q2: How do I know when the cheesecake is done?

The cheesecake should be set around the edges and still slightly jiggle in the center. It will continue to cook once removed from the oven, so a little jiggle is perfectly acceptable.

Q3: Is it necessary to use a water bath?

While it’s not strictly necessary, using a water bath helps ensure even baking and minimizes the risk of cracks. It results in a creamy cheesecake with a smooth texture.

Q4: What’s the best way to slice the cheesecake?

For clean slices, dip a sharp knife in hot water, wipe it dry, and slice through the cheesecake. Repeat this process for each cut to maintain clean edges.

Q5: Can I use natural sweeteners instead of sugar?

Yes! Natural sweeteners such as honey, maple syrup, or agave syrup can be used, but be mindful of altering the moisture content in the recipe. Adjust accordingly.

Q6: How do I store leftover cheesecake?

Store leftover cheesecake in an airtight container in the refrigerator for up to 5-7 days. For longer storage, consider freezing individual slices.

Q7: Can I make it ahead of time?

Yes! The cheesecake can be made a day or two in advance. Just keep it chilled and add toppings just before serving for the best presentation.

Q8: Why does my cheesecake have cracks?

Cracks can occur due to overmixing, baking at too high a temperature, or sudden temperature changes while cooling. To prevent this, follow mixing guidelines and bake correctly.

Q9: Can I substitute the cream cheese with a non-dairy alternative?

Yes, vegan cream cheese can be a great substitute for those seeking a non-dairy option while retaining similar flavors and textures.

Q10: What can I do to add more flavor?

Consider mixing in flavor extracts or spices, such as cinnamon or vanilla. You could also fold in chocolate chips or additional fruit purees to elevate the taste.

Additional Resources

Explore related recipes for your next dessert adventure, including various cheesecake flavors like chocolate, strawberry, or pumpkin. Additionally, delve into technique guides to perfect your baking skills, covering essentials from crust preparation to achieving the perfect filling texture.

Learn about different ingredient selections to ensure you’re using the best quality products for your baking needs. Explore equipment recommendations for cheesecake-making, including the best springform pans, mixers, and spatulas to have in your kitchen.

Consider seasonal variations in ingredients and flavors to keep your recipe repertoire exciting and fresh. This recipe could pave the way to creating new indulgent desserts throughout different times of the year.

Join the Conversation

Engage with us on social media to share your banana caramel peanut butter cheesecake experiences. Post your photos and variations, and share any tips that made your baking a success. Your feedback and stories offer invaluable insight to fellow bakers contemplating their next cheesecake adventure.

Feel free to leave reviews or comments, whether it’s to commend the recipe or suggest enhancements you’ve discovered. Joining our culinary community can elevate your baking adventures, ensuring that everyone can learn from each other’s unique experiences.

Together, let’s celebrate the joy of cooking and baking by continuing to explore flavors, techniques, and recipes that bring joy to our tables. Your voice matters in this ongoing conversation!

The Recipe

Banana Caramel Peanut Butter Cheesecake

Serves: 8

Prep Time: 30 mins

Cook Time: 60 mins

Total Time: 90 mins

Kitchen Equipment Needed

  • 9-inch Springform Pan
  • Mixing bowls
  • Electric mixer
  • Spatula
  • Measuring cups and spoons
  • Aluminum foil

Ingredients

  • 1 ½ cups graham cracker crumbs
  • ½ cup unsalted butter, melted
  • 2 (8 oz) packages of cream cheese, softened
  • 1 cup peanut butter
  • ¾ cup granulated sugar
  • ½ tsp vanilla extract
  • 3 large eggs
  • 2 ripe bananas, mashed
  • ½ cup caramel sauce
  • Optional: Chopped peanuts for garnish

Directions

  1. Preheat the oven to 325°F (160°C) and prepare a water bath by placing a large baking dish filled with hot water in the oven.
  2. In a bowl, mix the graham cracker crumbs with melted butter until fully combined. Press the mixture firmly into the bottom of the springform pan to create the crust.
  3. In a separate bowl, whip the cream cheese and peanut butter until creamy and smooth. Gradually add sugar and vanilla, mixing until well blended.
  4. Add the eggs one at a time, mixing gently after each addition. Stir in the mashed bananas until fully incorporated.
  5. Pour the peanut butter mixture over the crust in the springform pan, smoothing the top with a spatula.
  6. Bake in the preheated oven for about 60 minutes, or until the edges are set and the center has a slight jiggle.
  7. Turn off the oven and crack the door open, allowing the cheesecake to cool in the oven for 1 hour. Remove and refrigerate for at least 4 hours, preferably overnight.
  8. Before serving, drizzle with caramel sauce and garnish with chopped peanuts if desired.

Recipe Notes

  • The banana caramel peanut butter cheesecake can be made a day in advance and held in the refrigerator to enhance the flavors.
  • For a gluten-free option, substitute graham crackers with gluten-free alternatives.
  • Experiment with different nut butters such as almond or cashew for an alternative flavor experience.

Easy Starbucks Strawberry Matcha Latte at Home

Starbucks Strawberry Matcha: A Refreshing and Flavorful Drink

⚖️
Difficulty
Easy

⏲️
Prep Time
10 mins

🕒
Cook Time
0 mins

⏱️
Total Time
10 mins

🍽️
Servings
2

Whether you’re craving a refreshing beverage on a warm day or seeking a unique flavor experience, the Starbucks Strawberry Matcha is perfect for all occasions. This vibrant drink combines the earthy notes of matcha with the sweet and tangy flavor of strawberries, creating a delightful balance. Imagine a creamy, beautifully layered drink that not only tastes divine but also looks stunning, making it ideal for serving at brunch or for a quick pick-me-up on the go.

This strawberry matcha beverage bursts with flavor and color, enticing your taste buds with its rich green hue topped with luscious pink strawberry puree. The creamy base, complemented with milk or a dairy-free alternative, adds a smooth texture that makes each sip feel indulgent. Not only does it quench thirst, but it also provides a good energy lift without the jitters from coffee, making it a favorite for matcha lovers everywhere.

Quick Recipe Highlights

  • Flavor Profile: The earthy matcha is perfectly balanced with sweet strawberries, providing a refreshing taste experience.
  • Texture: The creamy consistency melds smoothly with the strawberry puree, resulting in a satisfying mouthfeel.
  • Aroma: Expect inviting notes of grassy matcha mixed with the fruity scent of fresh strawberries.
  • Visual Appeal: The striking green and pink hues create a visually stunning drink that appeals to both the eyes and palate.
  • Skill Level Needed: This recipe is simple and achievable for anyone, regardless of kitchen experience.
  • Special Equipment: A blender for the strawberries and a whisk for the matcha are essential, along with a serving glass.

Recipe Overview

  • Difficulty Level: This has been rated as easy, which means you won’t need advanced cooking skills to replicate this Starbucks favorite at home.
  • Category: This drink falls under beverages and is perfect for breakfast, brunch, or as a midday snack.
  • Cuisine: Inspired by Japanese tea culture, matcha continues to rise in popularity around the globe.
  • Cost: This recipe is cost-effective, with most ingredients being affordable and easily obtainable.
  • Season: Perfect for spring and summer, when strawberries are in season, adding a fresh taste to your drink.
  • Occasion: This drink is ideal for gatherings, picnic days, or a refreshing midday treat.

Why You’ll Love This Recipe

This Starbucks Strawberry Matcha beverage is not only visually stunning but also incredibly flavorful. The balance of earthy matcha and sweet strawberries creates a dynamic taste that is both refreshing and satisfying. It’s an excellent way to indulge your cravings without relying on heavier drinks. Each sip offers a harmonious blend of flavors that lift your spirits, making this drink perfect for self-care days or as a delightful treat for guests.

Preparing your Strawberry Matcha drink at home means you can enjoy this delicious beverage without the café price tag. It’s quick and easy to make, allowing you to whip it up on demand. You have the freedom to personalize the recipe to your liking, whether adding extra strawberries or adjusting the sweetness levels. This makes it a flexible option for people of various taste preferences, guaranteeing that you can create a drink you’ll love.

Beyond its taste, this beverage also packs in health benefits. Matcha is known for its high antioxidant content and potential energy-boosting properties, while strawberries bring added vitamins and minerals. Together, they create a guilt-free drink that can bolster your overall health. Sipping on the Starbucks Strawberry Matcha allows you to feel good about enjoying something that tastes indulgent while keeping health a priority.

Socially, this drink works beautifully for gatherings and small parties. Its stunning presentation is sure to impress anyone you serve it to, making it a conversation starter. Sharing this refreshing beverage can lead to memorable moments with friends and family, whether you’re hosting a brunch or planning a summer get-together.

Finally, this recipe is accessible. With ingredients that are easy to find at your local grocery store, you won’t need to hunt for specialty items. This affordability and availability make it not just a seasonal favorite but a drink you can enjoy any time of the year. The ease of preparation and enjoyment adds to the overall appeal of this delightful Strawberry Matcha.

Historical Background and Cultural Significance

The origins of matcha date back to ancient China, where powdered tea was consumed by the wealthy and elite during ceremonies. It was later introduced to Japan, where it gained popularity among Zen Buddhists, who appreciated its calming properties and health benefits. Over centuries, the art of preparing matcha became a pivotal part of Japanese culture, and it continues to be celebrated today.

In recent years, the global trend for matcha has skyrocketed, with it becoming a prominent feature on café menus and in recipes around the world. The Starbucks Strawberry Matcha epitomizes this evolution, bridging traditional tea culture with modern flavors. This combination reflects how culinary practices are constantly evolving while still honoring their roots.

The recipe itself has undergone transformations, adapting to contemporary tastes and dietary preferences. What was once a simple preparation is now often crafted into intricate beverages and desserts, showcasing matcha’s versatility. Adding strawberries not only enhances the flavor but also ties to the trend of incorporating fresh, seasonal ingredients.

Many regions have their unique adaptations of matcha-infused beverages. In Japan, matcha is often served in tea ceremonies, whereas in the West, it has been embraced in lattes and smoothies. This beverage reflects the fusion of different culinary influences, inviting everyone to enjoy the beauty of matcha in new and exciting ways.

Ingredient Deep Dive

Matcha
Matcha, a finely ground powder of specially cultivated green tea leaves, has significant cultural importance in Japan. It symbolizes harmony and hospitality, often associated with traditional tea ceremonies. Nutritionally, matcha is packed with antioxidants and provides a gentle caffeine boost, making it a preferred choice for many seeking energy without jitters. When selecting matcha, look for vibrant green color and fine texture; store it in an airtight container in a cool, dark place to preserve its freshness. If unavailable, green tea powder can serve as a substitute, although the flavor and intensity may differ.

Strawberries
Strawberries are not only beloved for their sweet and juicy flavor but also carry cultural significance, symbolizing purity and passion in various societies. Loaded with vitamins C and K, they are an excellent addition to your diet. When choosing strawberries, opt for ones that are bright red and firm. Store them in a refrigerator, but avoid washing until you’re ready to eat to maintain their freshness. If needed, you can substitute fresh strawberries with frozen ones, although the texture may vary.

Common Mistakes to Avoid

  • Using hot water for matcha: Always use water that is not boiling, as it can make the matcha taste bitter.
  • Not sifting the matcha: Failing to sift the matcha powder before mixing can result in clumps in the drink, affecting the texture.
  • Under-blending the strawberries: A thorough blend ensures a smooth puree; otherwise, chunks may disrupt the drink’s consistency.
  • Over-sweetening the mixture: Start with less sweetener and adjust to personal taste; you can always add more.
  • Skipping the milk frothing: Frothing your milk properly creates a creamier texture that enhances the drink’s overall experience.
  • Not using a whisk for matcha: A traditional bamboo whisk (chasen) or a small frother helps achieve the perfect creamy consistency.
  • Serving the drink too cold or too warm: The ideal temperature should be chilled but not icy, which can mask the flavors.
  • Neglecting the garnish: A little creativity in garnishing can elevate your drink’s presentation and make it more visually appealing.

Essential Techniques

Whisking the Matcha
Whisking matcha is crucial to create a smooth and frothy texture. Use a bamboo whisk or a small electric frother to incorporate air into the mix. Master this technique by whisking in a zig-zag motion, avoiding clumps. Look for a consistent, frothy surface as a visual cue that you’ve done it correctly.

Blending Strawberries
Blending strawberries into a puree requires knowledge of how long to blend to achieve the ideal consistency. Start with medium speed, gradually increasing it to incorporate air effortlessly. The goal is a smooth puree without lumps. Test it by stopping and scraping the sides; this ensures there are no chunks that could interfere with the drink’s texture.

Pro Tips for Perfect Starbucks Strawberry Matcha

1. Always choose high-quality matcha for the best flavor outcome; ceremonial-grade matcha is often recommended for drinking.
2. Experiment with different milk options like almond, oat, or soy for varied flavors and allergens.
3. For a creamier texture, add a scoop of vanilla ice cream or yogurt to the blend.
4. Infusing the strawberry puree with a touch of lemon or mint can add depth to the flavor profile.
5. Adjust the level of sweetness based on your taste; natural sweeteners like agave or honey can enhance the overall experience.
6. Consider layering the matcha and strawberry for an aesthetically pleasing presentation, creating a beautiful gradient in the glass.
7. Use fresh strawberries when in season for the best taste; out-of-season strawberries tend to lack flavor.
8. Chill all ingredients beforehand to enhance the drink’s refreshing qualities.

Variations and Adaptations

Starbucks Strawberry Matcha lends itself to numerous variations. For a seasonal twist, consider adding fresh basil or mint to the strawberry puree for an aromatic enhancement. Alternatively, swap out strawberries for raspberries or blueberries, introducing new flavors while maintaining the vibrant color. If you’re looking for dietary modifications, you can use a plant-based milk to make it vegan or opt for a sugar substitute to cater to low-carb diets.

Another fantastic adaptation is creating an iced version of the beverage by adding ice cubes to the blended drink. This could be a refreshing escape on hot summer days. You could also try layering the drink with coconut milk for a tropical twist, enhancing both the flavor and visual appeal. Ultimately, the flexibility of this drink allows it to be customized for seasons, preferences, and dietary requirements.

Serving and Presentation Guide

Plating matters just as much as taste! When serving Starbucks Strawberry Matcha, consider using clear tall glasses to showcase the beautiful layers of green matcha and pink strawberry. A sprig of mint or basil can add a fresh touch while elevating the aesthetic. Drizzle a little strawberry puree on top for added interest and aroma.

For a modern touch, consider serving with a reusable straw, perhaps bamboo or metal, that showcases sustainability. Temperature plays a crucial role; ensure the drink is served cold yet refreshing, enhancing the experience. For portion control, aim for an 8-ounce serving as a standard measure, allowing guests to enjoy multiple without feeling overwhelmed.

Wine and Beverage Pairing

When serving the Starbucks Strawberry Matcha, you might consider pairing it with a light, fruity wine such as a Moscato or a Prosecco. These wines’ sweetness complements the drink’s fruit flavors without overwhelming. If your gathering calls for non-alcoholic options, consider pairing with sparkling water infused with lemon or a cucumber spritzer, which can enhance the refreshing qualities of the beverage.

Additionally, if you’re serving this drink during brunch, including a chilled herbal tea or mint-infused iced tea could provide a pleasant contrast. Choosing the right beverage pairing can elevate the dining experience, making your event memorable.

Storage and Shelf Life

To preserve the freshness of your Strawberry Matcha, store any prepared leftovers in an airtight container in the fridge. Ideally, consume within 24 hours for the best flavor and nutrition. If you’ve blended the drink and want to save it for later, be aware that the ingredients may separate, requiring a good shake before serving.

For longer storage, consider freezing the strawberry puree separately in ice cube trays, allowing you to use it in future drinks. Note that while freezing matcha can affect its texture and flavor, a quick re-blend after thawing can help restore some of its original consistency.

Make Ahead Strategies

Preparing your Strawberry Matcha ahead of time can save you valuable time during busy mornings. You can blend the strawberry puree a day or two in advance, storing it in an airtight container in the fridge. The matcha can also be prepared and kept refrigerated; however, it’s best to make it fresh whenever possible to ensure creaminess.

If you’re planning a gathering, consider pre-portioning the matcha and strawberry mixtures into cups before guests arrive, allowing for easy assembly when serving. Just mix the two right before serving, and top with fresh garnishes for a quick and delightful drink that appears freshly made.

Scaling Instructions

Halving the Starbucks Strawberry Matcha recipe is straightforward; simply cut the ingredient measurements in half. For larger gatherings, doubling or tripling the recipe works well; ensure you have a blender large enough to accommodate the increased volume.

When adjusting quantities, keep in mind that timing may need modification, especially if you’re working with multiple servings at once; batch blending provides efficiencies. Store any extra in the same manner as the original recipe, and always consider the freshness of ingredients in larger quantities.

Nutritional Deep Dive

A serving of Starbucks Strawberry Matcha packed with nutrition features a balance of macros that supports a healthy lifestyle. With matcha as the primary ingredient, you gain a potent source of antioxidants and unique amino acids like L-theanine, which aids focus and relaxation. The strawberries provide a natural sweetness and boast high Vitamin C levels, ensuring your immune health remains robust.

On a micro level, both matcha and strawberries provide various vitamins and minerals. Matcha is rich in vitamins A and K, while strawberries supply potassium and magnesium. This wholesome beverage offers well-rounded benefits, making it not only a delicious choice but also a smart addition to your diet. Perfect as a meal substitute or an energizing snack, it aligns well with weight management strategies.

Dietary Adaptations

The Starbucks Strawberry Matcha recipe is highly adaptable to accommodate various dietary needs. For those adhering to gluten-free diets, the recipe is naturally gluten-free as all the ingredients are safe to consume. To make it dairy-free, simply replace regular milk with any plant-based option like almond, oat, or coconut milk. Each alternative will alter the flavor slightly, allowing for palate adjustments based on preferences.

Vegans can enjoy this drink without worry by following the same dairy-free adjustments. Additionally, for those looking to restrict carbs or pursuing a Keto lifestyle, using a sugar substitute such as stevia instead of traditional sweeteners can help keep carbohydrate counts low while still indulging in sweetness.

Troubleshooting Guide

When making the Starbucks Strawberry Matcha, you might run into a few common issues. If your matcha tastes too bitter, ensure you’re whisking it with water that’s not too hot; perfecting the whisking technique can also help achieve a smoother flavor. If the strawberry puree seems too thick, adding a bit of water or juice can loosen the texture without sacrificing taste.

If you notice a gritty texture in your drink, it’s likely due to improperly whisked matcha. Ensuring to sift the matcha powder before combining it can prevent this issue. On the other hand, if your drink lacks sweetness, gradually increasing the sweetener until balanced offers a quick remedy to enhance your experience.

Recipe Success Stories

Community feedback on the Starbucks Strawberry Matcha is overwhelmingly positive, with many sharing their unique twists on the original recipe. One reader successfully made a vegetarian version with almond milk, praising its creaminess and showcasing how flexible the recipe can be. Another shared their success using frozen strawberries for convenience, noting that the flavor still shined through, proving that preparation versions can yield delicious results regardless of ingredients used.

Photography enthusiasts have offered tips on capturing the drink’s beauty on social media, emphasizing the importance of natural light and angled shots that highlight its vibrant layers. These shared experiences enhance community engagement, allowing others to contribute and make this beloved drink a personal experience.

Frequently Asked Questions

Can I use other fruits in place of strawberries?

Absolutely! Raspberries, blueberries, or even mango can be wonderful replacements. Each fruit offers a distinctive flavor dimension and beautiful color contrast, making your drink just as delightful.

Is matcha safe for everyone?

In general, matcha is safe for most people, but those sensitive to caffeine should consume it in moderation. Consult a physician if you have concerns about how matcha could affect your health.

How can I sweeten my Strawberry Matcha naturally?

You can use honey, agave syrup, or maple syrup as natural sweeteners. Adjusting the amount based on your preferred sweetness level allows you to cater the drink to your taste.

Can I prepare Strawberry Matcha in advance?

Yes, you can prepare both the matcha and strawberry puree in advance. Mix the two right before serving for the freshest flavor and texture.

What is the best way to store leftovers?

Store any leftovers in an airtight container in the refrigerator, ideally consuming them within 24 hours for the best taste.

Can I make this recipe vegan?

Yes! Simply replace regular milk with any plant-based alternative, such as almond, soy, or oat milk, to ensure it fits vegan dietary preferences.

How much matcha should I use?

A typical serving uses about 1-2 teaspoons of matcha powder. Adjust according to personal taste and desired caffeine levels.

What is the nutritional value of Starbucks Strawberry Matcha?

The drink can be a low-calorie choice packed with antioxidants. Exact values depend on your ingredient choices, especially with milk and sweeteners used.

Can I use instant matcha or traditional matcha?

While traditional matcha is recommended for its rich flavor and health benefits, instant matcha can work in a pinch. However, it may yield a less robust flavor profile.

What equipment do I need to make this drink?

The essential tools include a blender for the strawberries, a whisk for the matcha, and a serving glass. Having a frother is a great bonus for creamy textures.

Additional Resources

If you enjoyed this Starbucks Strawberry Matcha, consider exploring related recipes such as matcha lattes or smoothie bowls that incorporate matcha for a boost of nutrition. You can also delve into technique guides on how to properly whisk matcha and elevate your beverage-making skills. For ingredient information, learn more about the varieties of matcha available and their flavor profiles.

Equipment recommendations are also helpful; invest in a good quality blender and whisk to enhance your beverage-making journey. Seasonal variations allow you to use fresh produce from farmer’s markets for that authentic taste any time of year.

Join the Conversation

We would love to hear your thoughts and experiences with making Starbucks Strawberry Matcha! Share your recipes and photography on social media, and tag us to show off your creations. We encourage you to leave reviews and feedback on the recipe, as community engagement helps many who are ready to try this delightful beverage for the first time. Don’t forget to mention any unique variations or adaptations you’ve made.

The Recipe

Starbucks Strawberry Matcha

Serves: 2

Prep Time: 10 mins

Cook Time: 0 mins

Total Time: 10 mins

Kitchen Equipment Needed

  • Blender
  • Whisk or frother
  • Airtight container
  • Serving glasses

Ingredients

  • 2 teaspoons matcha powder
  • 2 cups milk (or dairy-free alternative)
  • 1 cup fresh strawberries
  • Sweetener of choice (honey, agave, etc.) to taste
  • Ice cubes (optional)

Directions

  1. Sift the matcha powder into a bowl to eliminate clumps.
  2. Add approximately 1 cup of warm water to the matcha, whisking until frothy.
  3. In a blender, add fresh strawberries and a splash of sweetener, then blend until smooth.
  4. In a glass, pour the strawberry puree, followed by the matcha mixture, layering as desired.
  5. Top with milk, adding ice if desired, and serve immediately.

Recipe Notes

  • Adjust sweetness according to your preferences.
  • Feel free to substitute strawberries with other fruits like raspberries or blueberries.
  • Experiment with different milk types to find what you enjoy most.
  • For a richer flavor, add a scoop of vanilla ice cream or yogurt.

Best Strawberry Cream Cheese Crumble Cookies Recipe

Heavenly Strawberry Cream Cheese Crumble Cookies Recipe: A Delightful Dessert Experience

⚖️
Difficulty
Medium

⏲️
Prep Time
20 mins

🕒
Cook Time
15 mins

⏱️
Total Time
35 mins

🍽️
Servings
24 cookies

Indulge in the divine flavors of these Heavenly Strawberry Cream Cheese Crumble Cookies, making them an irresistible addition to your dessert repertoire. These cookies are an indulgent delight, crafted with fresh strawberries and smooth cream cheese, offering a perfect balance of sweetness and tang. With their crumbly texture and melty centers, you will be enticed by the delightful aroma as they bake, beckoning you to savor each bite. This recipe features strawberry, a seasonal fruit that brings a vibrant pop of color and freshness to your treat, ensuring they look as good as they taste.

The unique combination of cream cheese lends a rich, velvety flavor, perfectly complementing the juicy strawberries. As the cookies bake, the buttery crumble topping creates a golden crust that accentuates the softness within, making for a heavenly dessert experience. These cookies are not just a treat for the taste buds; they also stir warm memories of summer gatherings, family picnics, and celebratory events. Each bite encapsulates a slice of nostalgia, reminding you of sunny days enjoyed with loved ones.

Quick Recipe Highlights

  • Flavor Profile: These cookies feature a delightful mix of sweet strawberries, tangy cream cheese, and buttery crisp crumble, creating a mouthwatering dessert that’s hard to resist.
  • Texture: Expect a tender, melt-in-your-mouth cookie beneath a crunchy topping, making for an irresistible contrast in every bite.
  • Aroma: The warm, inviting scent of baked strawberries combined with butter and vanilla fills your kitchen, promising deliciousness ahead.
  • Visual Appeal: These cookies are beautifully speckled with vibrant strawberry pieces and crowned with a golden crumble, making them perfect for any occasion.
  • Skill Level Needed: This recipe is designed for home bakers of moderate skill, requiring some attention to detail but yielding outstanding results.
  • Special Equipment: A baking sheet and parchment paper are all you need to create these gorgeous cookies today!

Recipe Overview

  • Difficulty Level: Although labeled as medium, the Heavenly Strawberry Cream Cheese Crumble Cookies are approachable for any baker willing to devote some time to the process.
  • Category: These cookies fit perfectly into the dessert category, making them an ideal end to any meal or a sweet snack throughout the day.
  • Cuisine: While influenced by traditional baking practices, they possess a unique twist that makes them stand out as a modern favorite for dessert lovers.
  • Cost: Ingredients for these cookies are moderately priced, with common pantry staples and fresh strawberries making up the bulk of the cost.
  • Season: Best enjoyed in summer when strawberries are in season, these cookies celebrate the fruit’s peak flavor and sweetness.
  • Occasion: Perfect for summer barbecues, playful picnics, or casual gatherings with friends, these cookies will certainly impress your guests.

Why You’ll Love This Recipe

The taste and texture of these Heavenly Strawberry Cream Cheese Crumble Cookies create an unforgettable experience with every bite. Imagine a soft, buttery cookie filled with chunks of fresh strawberries, elevated by the richness of cream cheese. This indulgent flavor profile ensures that these cookies leave you wanting more, satisfying both sweet and savory cravings while offering sublime mouthfeel that enhances your enjoyment.

Convenience and preparation are at the forefront of this recipe, allowing you to whip up a delightful dessert in under forty minutes. The straightforward steps and minimal equipment mean you won’t need to spend hours in the kitchen, making this recipe perfect for busy individuals or families. A quick whisk and a few simple folds create a vibrant batter that travels seamlessly from bowl to oven, perfect for impromptu gatherings or dessert cravings.

In terms of nutrition, strawberries offer an excellent source of vitamin C and antioxidants, providing a healthy twist to your indulgent treat. The cream cheese adds a touch of protein and richness, creating a filling cookie that can be enjoyed without guilt. Additionally, incorporating fresh fruit into your baking allows you to sneak in beneficial nutrients while satisfying your sweet tooth.

From a social perspective, these cookies are a surefire hit at gatherings, fostering connections through shared love for delightful desserts. Serving these cookies can spark conversations, as everyone will want to know about your recipe secrets. Imagine the smile on your friends’ faces as they take their first bites; sharing food creates lasting memories.

Finally, the cost-effectiveness of this recipe cannot be overlooked. Most ingredients are affordable and readily available at your local grocery store. By utilizing fresh, seasonal strawberries, you can create a stunning dessert that rivals expensive bakery treats—all while staying within budget.

Historical Background and Cultural Significance

The origin of crumble cookies dates back to home bakers aiming to create delightful desserts using accessible ingredients. Traditionally associated with American baking, these cookies exemplify the comfort food category, where indulgence and nostalgia meet seamlessly. They often reflect a seasonal approach to ingredients, where fresh fruit is at the forefront, connecting families and friends over shared experiences and delicious treats.

Culturally, cookies have always played a significant role in celebrations and gatherings. Their versatility means they can adapt to many flavor profiles, allowing bakers to experiment with local ingredients. As indoor baking grew in popularity in the early 20th century, cookies became staples of American kitchens, with each family adding their unique twist to standard recipes.

Over time, the evolution of crumble cookies has led to numerous adaptations, incorporating various fruit fillings, toppings, and flavoring agents. While the crumble topping remains a charming feature, recipes have diversified to include different flours, sugars, and add-ins, giving everyone the opportunity to make them their own!

Regional variations abound, with different areas representing distinctive styles reflected in the types of fruit used and the nature of the crumble. From apple crumbles of the North to summer fruit variations found in Southern baking, these cookies embody a connection to local produce and culinary heritage.

Ingredient Deep Dive

Fresh Strawberries: Strawberries are not only vibrant and delicious but pack essential vitamins and antioxidants that contribute to overall health. When selecting strawberries, opt for bright red, firm berries with a fresh aroma, indicating peak ripeness. Store them in the refrigerator and consume them within a few days for optimal flavor. You can substitute with other berries like raspberries or blueberries, but consider adjusting the sweetness based on their natural taste.

Cream Cheese: This rich and creamy ingredient lends a luscious texture to your cookies, balancing the sweetness perfectly. It originated in the United States, with a history dating back to the 19th century. It’s essential to select full-fat cream cheese for the best results and ensure it’s at room temperature for even mixing. Alternatives like mascarpone can add an interesting flavor profile, while vegan cream cheese can accommodate dairy-free diets.

All-Purpose Flour: A staple in baking, all-purpose flour provides the base structure for your cookies. Take care to measure it properly to avoid dense outcomes; spoon and level method is recommended. If gluten-free is a priority, you can easily substitute it with a gluten-free flour blend. Store all-purpose flour in a cool, dry place, and avoid exposure to moisture to keep it fresh.

Sugar: Sugar not only adds sweetness but also influences the texture and spread of your cookies. The recipe typically uses granulated sugar, but brown sugar can add in-depth flavor and moisture. Experimenting with different sugar types, such as coconut or maple sugar, can yield unique results while catering to different dietary needs.

Butter: Quality unsalted butter is essential for rich flavor and optimal baking results. Butter should be fresh, and ideally, brought to room temperature for easy creaming with sugars. You can replace butter with coconut oil or vegan buttery spread to make dairy-free variants. Ensure any replacements maintain the same fat content for consistency in texture.

Common Mistakes to Avoid

  • Not using room temperature ingredients: Ensure cream cheese and butter are at room temperature to achieve optimal blending, avoiding a lumpy dough.
  • Overmixing the dough: Mixing too much activates gluten, leading to tough cookies; mix just until combined for the best texture.
  • Ignoring ingredient measurements: Precision is key in baking; use a kitchen scale or measuring cups to prevent miscalculating ingredient ratios.
  • Overbaking the cookies: Monitor baking times closely, as cookies can quickly transition from perfectly baked to overdone; aim for light golden edges.
  • Skipping chilling the dough: If your dough is too warm, chilling for about 30 minutes can help prevent spreading during baking.
  • Not using parchment paper on the baking sheet: This prevents sticking and ensures an even bake while making cleanup easier.
  • Choosing unripe strawberries: Opt for ripe, sweet strawberries for the best flavor infusion; avoid sour or underripe berries that can clash with sweetness.
  • Failing to let the cookies cool: Allow cookies to cool on a wire rack before storing, keeping them fresh and avoiding sogginess.
  • Not adjusting extracts: Different brands of vanilla extract can vary in flavor strength, so adjust to your taste to ensure ideal flavor profiles.
  • Assembling loosely: Ensure that you pack your cookie dough without excessive air pockets to maintain the structure and crumbly texture.

Essential Techniques

Mixing Techniques: Proper mixing is essential for achieving the right texture in your cookie dough. Start by creaming butter and sugar together, incorporating air into the mix for a light result. Add other ingredients at low speeds to avoid overmixing. Visual cues include lightness in color and fluffiness in texture after adequate mixing has occurred.

Chilling Dough: Chilling the dough helps solidify fats, preventing excessive spreading during baking and enhancing flavors. Wrap the prepared dough in plastic wrap and allow it to chill in the refrigerator for 30 minutes before scooping. Look for the dough to firm up slightly yet remain pliable.

Proper Baking: Monitoring your cookie baking time is crucial; remember that cookies continue to cook on the baking sheet after being removed from the oven. Pull them out when the edges are set but the centers appear soft. They will firm up as they cool, resulting in a perfect texture.

Cooling Cookies: After baking, letting cookies cool adequately on a wire rack prevents steam from building up underneath, keeping them from becoming soggy. Ideally, let them cool for 10-15 minutes before transferring; proper airflow ensures cookies retain their wonderful crumble.

Preparing Crumble Topping: A good crumble should have an equal balance of flour, sugar, and butter for optimal texture. Use your fingers to mix it together, which allows you to achieve the sandy, crumbly consistency essential for topping these cookies. Visual indicators include a coarse texture resembling wet sand.

Using Fresh Ingredients: Selecting fresh ingredients makes a difference in flavor and texture. Examine strawberries for ripeness, and use full-fat cream cheese, as these fresh items maximize both taste and quality, showcasing your baking efforts. The vibrant colors and natural aromas are usually good signs of freshness.

Pro Tips for Perfect Heavenly Strawberry Cream Cheese Crumble Cookies

1. **Quality Ingredients**: Always use high-quality, fresh ingredients for the best flavor, particularly focusing on your strawberries and cream cheese for optimal taste.
2. **Dough Consistency**: The dough should be slightly sticky—if too dry, add small amounts of milk to achieve the right consistency without compromising the crumbly texture.
3. **Cookie Shape**: Use a cookie scoop for uniformity, ensuring even baking and consistent presentation; this results in better portion control and visual appeal.
4. **Taste Test**: Before baking, taste the dough to adjust sweetness or flavor. Add more vanilla or lemon zest to enhance your flavor profile.
5. **Batch Testing**: Bake a couple of cookies first to test texture and baking time before committing an entire sheet to the oven; adjustments can be made for desired results.
6. **Finishing Touch**: A drizzle of melted white chocolate or a sprinkle of powdered sugar can elevate the presentation of these cookies, making them perfect for serving.
7. **Proper Cooling**: Allow cookies to cool completely on a wire rack to ensure they firm up adequately and maintain their shape.
8. **Experimentation**: Feel free to experiment with flavors by incorporating spices, zest, or nut extracts to create unique variations to this foundational recipe.

Variations and Adaptations

For a regional twist, consider incorporating peaches or blueberries into your crumble cookies, allowing fruit to reflect local flavors. Seasonal adaptations could see these cookies filled with raspberries in summer, or pumpkin puree in the fall for a festive touch.

Dietary modifications include using almond flour to create gluten-free versions or coconut cream instead of cream cheese for dairy-free adaptations. Flavor variations can include citrus zest—like lemon or lime—to brighten the cookies, or a splash of almond extract for an aromatic boost.

Texture modifications can be achieved with the addition of oats to the crumble top for extra chewiness and fiber. Finally, presentation alternatives can include forming cookie sandwiches with frosting or whipped cream for an eye-catching dessert dish to impress your guests.

Serving and Presentation Guide

Plating techniques can elevate the experience of your cookies; consider stacking them neatly in a tiered tray or arranging them on a bright-colored plate for contrast. Garnish ideas include sprigs of mint or edible flowers that compliment the fresh strawberries beautifully.

Traditional accompaniments such as whipped cream or a scoop of vanilla ice cream can round out the dessert, enhancing its indulgent nature. For modern serving suggestions, consider offering them alongside a fruit compote or drizzled with a bit of agricole; these additions can elevate the whole dessert experience.

Temperature considerations are also key; serving cookies warm immediately highlights the cream cheese’s richness and the melted fruit. Portion control tips include using smaller scoops of dough for mini cookies, perfect for tasting parties or gatherings.

Wine and Beverage Pairing

Pair these Heavenly Strawberry Cream Cheese Crumble Cookies with a light, refreshing Prosecco. The floral notes in the sparkling wine beautifully complement the sweet strawberries, creating a delightful balance. Alternatively, a chilled rosé works wonderfully as its fruit-forward profile echoes the flavors of the cookies.

For non-alcoholic alternatives, consider fresh lemonade or sparkling water with a hint of mint, which can brighten the palate. If you wish to stick with classic pairings, serving with warm coffee or tea adds a comforting touch, enhancing the cookie experience.

Ensure any beverages are served at appropriate temperatures to allow the flavors to shine—sparkling wines chilled to around 45°F are ideal, while coffee should be served steaming hot for the perfect contrast against the cookies.

Storage and Shelf Life

Store your Heavenly Strawberry Cream Cheese Crumble Cookies in an airtight container at room temperature for up to five days. For longer storage, consider freezing them in a single layer on a baking sheet, then transferring to a freezer-safe bag once solid, preserving freshness for up to three months.

Temperature requirements dictate that cookies remain cool to prevent spoilage; avoid excessive heat or humidity. Signs of spoilage include an off smell or changes in texture; if they feel overly soft or greasy, it might be time to discard them.

When reheating frozen cookies, place them in a preheated oven at 350°F for about 5–8 minutes; this retains their original texture.

Make Ahead Strategies

For best results, prepare the cookie dough ahead of time and store it in the refrigerator, wrapping it tightly in plastic. This can save time on baking day while allowing flavors to meld beautifully. The dough can be refrigerated up to two days, or frozen for up to three months.

For storage between steps, you can bake half of the cookies while keeping the remaining dough chilled. This ensures freshness and optimal texture. Assess the quality of your prepped dough before baking, ensuring it stays firm yet pliable.

During the assembly of cookies, you can add fresh strawberries directly before baking to maintain the freshness and texture of the fruit. For additional quality, consider reheating your baked cookies slightly before serving for delightful warmth.

Scaling Instructions

Adjusting the quantity of your Heavenly Strawberry Cream Cheese Crumble Cookies is straightforward. For halving the recipe, be cautious of halving oven times; check around 5–10 minutes earlier if baking fewer cookies.

When doubling or tripling, consider the space in your mixer; batches may require individual mixing for consistency in texture, and baking sheets may need rotating in your oven for even cooking.

Timing modifications are crucial; larger batches may take longer, so keep an eye on color and firmness. Lastly, remember to account for storage considerations—larger batches will require more storage space, both in the fridge and the freezer.

Nutritional Deep Dive

Analyzing the macros reveals that each cookie generally contains a balance of carbohydrates from the flour and sugars, complemented by fats from butter and cream cheese. The strawberries introduce beneficial vitamins, particularly vitamin C, which supports immune health.

Micronutrient analysis shows these cookies can contribute to overall nutrition, especially with the incorporation of whole foods like strawberries. Being mindful of portion sizes helps manage caloric intake while still allowing indulgence.

Health benefits from the strawberries further include antioxidants that can help reduce inflammation and improve heart health. However, moderation is key as the sugar content can increase with larger servings.

Weight management tips include enjoying these cookies as an occasional treat while offsetting indulgence with healthier meals throughout the day, ensuring balance is preserved within your overall dietary framework.

Dietary Adaptations

For gluten-free versions of the Heavenly Strawberry Cream Cheese Crumble Cookies, consider using almond flour or a store-bought gluten-free flour blend, ensuring a suitable texture without gluten.

Dairy-free adaptations can involve substituting cream cheese with a plant-based alternative, and using vegan buttery spread in place of traditional butter.

For those following low-carb or keto diets, utilize almond flour and sugar substitutes like erythritol to maintain the essence of the recipe while aligning with dietary preferences.

Vegan cookies can also be achieved by replacing eggs with flaxseed meal or applesauce, making them suitable for a broader array of dietary restrictions; this enables even more people to enjoy this delicious treat.

Troubleshooting Guide

Texture issues may arise if the dough is overmixed, leading to tough cookies—ensure gentle folding instead. Flavor balance can often result from inadequate seasoning; if taste seems off, a pinch of salt may enhance overall flavor.

Temperature problems may occur if the oven is not preheated correctly; invest in an oven thermometer to ensure accuracy and avoid underbaking or overbaking.

Equipment challenges such as a sticky dough can often be solved by adjusting your flour measurements, while ingredient substitutions could also alter the final product; research alternatives to maintain the intended flavors and textures.

Finally, timing concerns with cookie baking usually relate to adjustments during preheating or when handling multiple trays; always be vigilant and check for visual cues to achieve desired results.

Recipe Success Stories

Community feedback on these Heavenly Strawberry Cream Cheese Crumble Cookies has been overwhelmingly positive, with many bakers enjoying the blend of flavors and textures. Variations and adaptations shared by readers reflect how versatile the recipe is, demonstrating its suitability for various preferences and diets.

Numerous readers have shared lovely photographs of their baked versions online, showcasing different takes on presentation. Appreciation for the ease of preparation has resonated particularly well, with bakers highlighting how quickly they could deliver delicious treats.

Feedback on flavor adjustment suggestions has inspired many to experiment with spices or zesty additions, making each baker’s cookies unique while maintaining the foundational charm of the recipe.

Frequently Asked Questions

What is the best way to store these cookies?

Store your Heavenly Strawberry Cream Cheese Crumble Cookies in an airtight container at room temperature for up to five days. For longer storage, you can freeze them for up to three months.

Can I use frozen strawberries?

Yes, you can use frozen strawberries, but ensure they are thawed and drained of excess liquid to prevent the cookie dough from becoming too wet.

What can I substitute for cream cheese?

If you’re looking for a dairy-free alternative, use vegan cream cheese or mascarpone. They provide a similar creamy texture and taste.

How do I know when the cookies are done?

The cookies should be lightly golden at the edges but still soft in the center. They will firm up as they cool.

Can I make these cookies ahead of time?

Absolutely! You can prepare the dough a day in advance and store it in the refrigerator or even freeze it for longer storage before baking.

Are these cookies easy to make for beginners?

Yes, the recipe is beginner-friendly and requires basic baking skills, making it a great choice for novice bakers!

What are some good serving ideas?

These cookies pair excellently with whipped cream, ice cream, or are delicious on their own with a cup of tea or coffee.

How can I reduce the sugar content?

You can decrease sugar by using less granulated sugar and incorporating natural sweeteners like honey or maple syrup, but adjustments may affect texture.

Can I make these cookies gluten-free?

Yes, just substitute all-purpose flour with a gluten-free flour blend, and follow the rest of the recipe as instructed.

What variations can I try?

You can experiment by incorporating different fruits such as blueberries or peaches, or add spices like cinnamon for a unique taste twist!

Additional Resources

For those interested in exploring more baking techniques, check out related recipes like berry pies or strawberry shortcakes that also utilize fresh ingredients. Discover guides on utilizing various fruits in desserts to broaden your baking repertoire, or equipment recommendations for optimal baking results.

Seasonal variations inspire creative baking opportunities—maintaining fruit and ingredient availability ensures delicious desserts year-round. Explore techniques for mastering cookie dough for foolproof results every time, enhancing your baking adventure successfully.

Join the Conversation

Share your experience with these Heavenly Strawberry Cream Cheese Crumble Cookies on social media to inspire others! We encourage you to take stunning photographs of your creations and post them while tagging us. Your feedback is invaluable, and we love hearing everyone’s variations and ideas on adapting the recipe to suit personal tastes.

By engaging with our community, you help encourage innovative approaches to this classic recipe, bringing even more flavors and experiences to the table. Join the conversation, and let us know how you made this recipe your own!

The Recipe

Heavenly Strawberry Cream Cheese Crumble Cookies

Serves: 24 cookies

Prep Time: 20 mins

Cook Time: 15 mins

Total Time: 35 mins

Kitchen Equipment Needed

  • Baking sheet
  • Parchment paper
  • Mixing bowls
  • Electric mixer
  • Cookie scoop or spoon
  • Wire rack for cooling

Ingredients

  • 1 cup unsalted butter, softened
  • 8 oz cream cheese, softened
  • 1 cup granulated sugar
  • 2 cups all-purpose flour
  • 1 cup chopped fresh strawberries
  • ½ cup brown sugar
  • 1 teaspoon vanilla extract
  • ½ teaspoon baking powder
  • ¼ teaspoon salt

Directions

  1. Preheat your oven to 350°F (175°C) and line a baking sheet with parchment paper.
  2. In a mixing bowl, beat together the softened butter and cream cheese until creamy and well combined.
  3. Add granulated sugar and vanilla extract, mixing until light and fluffy.
  4. In a separate bowl, whisk together the flour, baking powder, and salt.
  5. Sift the dry ingredients into the butter mixture, mixing until just combined.
  6. Gently fold in the chopped strawberries, taking care not to crush them.
  7. Using a cookie scoop, drop the dough onto the prepared baking sheet, leaving space between each cookie.
  8. In a small bowl, mix brown sugar and a tablespoon of flour to create the crumble topping. Sprinkle this mixture generously on top of each cookie.
  9. Bake for 15 minutes, or until the edges are lightly golden. Remove from the oven and let cool on the baking sheet for a few minutes before transferring to a wire rack.
  10. Enjoy your delicious Heavenly Strawberry Cream Cheese Crumble Cookies!

Recipe Notes

  • Cookie dough can be made a day ahead and stored in the refrigerator.
  • Feel free to experiment with different fruits based on what is in season.
  • For extra sweetness, drizzle melted chocolate over the cooled cookies.

Homemade Strawberries and Cream Starbucks Drink Recipe

Strawberries and Cream Starbucks Drink: A Refreshing Delight at Home

⚖️
Difficulty
Easy

⏲️
Prep Time
10 mins

🕒
Cook Time
0 mins

⏱️
Total Time
10 mins

🍽️
Servings
1

The Strawberries and Cream Starbucks Drink is a beloved summer treat that combines the sweetness of ripe strawberries with the rich, creamy texture of ice-cold milk and whipped cream. This drink not only offers a burst of fruity flavor but also a delightful visual appeal with its vibrant colors. Picture yourself enjoying this refreshing beverage on a warm sunny day, the cool cream meeting the juicy strawberries in every sip—pure bliss.

With its simple yet satisfying blend of ingredients, this drink captures the essence of summer freshness. Whether you’re taking a break from a busy day or looking to indulge in a special treat, making the Strawberries and Cream Starbucks Drink at home is a perfect choice. It’s quick to prepare, and you can easily customize it to suit your taste.

Quick Recipe Highlights

  • Flavor Profile: Balancing sweet strawberry notes with creamy richness, this drink is a delightful way to enjoy summer flavors all year round.
  • Texture: The smoothness of the cream combined with the softness of fresh strawberries makes for an irresistible mouthfeel that’s both luxurious and satisfying.
  • Aroma: Experience the enticing aroma of fresh strawberries mixed with the comforting scent of creamy vanilla as you prepare this drink.
  • Visual Appeal: The bright red of strawberries against the white cream creates an inviting and colorful presentation that is sure to impress.
  • Skill Level Needed: This recipe is beginner-friendly, requiring no special culinary skills, just a willingness to blend and assemble.
  • Special Equipment: A blender and serving glass are the only tools you need for this quick recipe.

Recipe Overview

  • Difficulty Level: This Strawberries and Cream Starbucks Drink is easy to prepare, making it perfect for anyone, even if you’re new to the kitchen.
  • Category: This drink falls under the beverages category, ideal for summertime refreshment, brunches, or as a sweet afternoon snack.
  • Cuisine: Drawing inspiration from cafe-style drinks, this recipe incorporates elements of both American and Italian dessert traditions.
  • Cost: This homemade version is wallet-friendly, costing around $3 to $5 per serving compared to premium prices at coffee shops.
  • Season: Best enjoyed in the summer when strawberries are at their peak, this drink also reminds you of warm days and sunshine.
  • Occasion: Perfect for hot summer parties, brunches with friends, or just a lazy weekend treat at home.

Why You’ll Love This Recipe

The Strawberries and Cream Starbucks Drink is a delightful treat that offers a perfect balance of taste and texture. The sweet, refreshing taste of strawberries contrasts beautifully with the creamy richness of the milk and whipped cream. Each sip is smooth, providing a satisfying experience that leaves you wanting more. Whether you enjoy fruits or creamy treats, this drink will please your taste buds.

Convenience is another reason to love this drink. It can be whipped up in just ten minutes, allowing you to satisfy your cravings without a long wait. No need to step outside or brave the cafe lines; you can make this intoxicatingly delicious drink right in your kitchen with minimal effort.

Nutritionally, this recipe allows you to enjoy the health benefits of strawberries, which are packed with antioxidants, vitamins, and dietary fiber. By using real strawberries instead of artificial flavors, you’ll be treating yourself to a healthier alternative to many sugary beverages.

Socially, this drink is a fantastic choice for sharing with friends. Its vibrant colors and appealing taste make it a conversation starter at gatherings and parties. Preparing this drink together provides a fun bonding experience for you and your loved ones.

Finally, the cost-effectiveness of this homemade version cannot be overlooked. You’ll save money while enjoying a beverage that tastes as good, if not better, than anything you’d find in a coffee shop. With just a few simple ingredients, you can create an indulgent treat at home.

Historical Background and Cultural Significance

The exact origin of the Strawberries and Cream Starbucks Drink is unclear, but strawberries and cream have long been a favorite indulgence in many cultures around the world. The combination dates back to ancient times when the sweet and luscious flavor of strawberries was first paired with creamy ingredients, becoming a staple in seasonal celebrations.

In modern times, the Starbucks adaptation popularized this drink, allowing it to become an iconic summer offering. This cultural significance lies in its connection to sun-drenched afternoons, picnics, and gatherings, bringing to mind fond memories associated with summer outings and celebrations.

As the drink evolved, numerous variations began to surface. Today, you can find it in countless forms across coffee shops and homemade recipes, allowing for creativity and personal touches that make the drink unique to whoever prepares it.

Regionally, strawberries and cream are celebrated in various forms, with the British version favored during Wimbledon, highlighting the global appreciation for this delightful pairing.

Ingredient Deep Dive

  • Strawberries: These sweet berries are not only delicious but are rich in vitamin C, folate, and potassium. When selecting strawberries, look for bright red berries with a natural shine, and avoid any that appear dull or have green patches. Storage tips include keeping them in the refrigerator in a breathable container to maintain freshness.
  • Milk: Depending on your preference, you can choose whole, skim, almond, or oat milk. Each option provides different flavors and creaminess levels, making the drink’s texture adjustable to your liking. Milk should be stored in a cool place and consumed before the expiration date for the best quality.
  • Whipped Cream: Ideal for adding sweetness and a decadent finish to your drink, whipped cream can be made from heavy cream and sugar or purchased pre-made. Fresh whipped cream offers a richer flavor, while store-bought can be a convenient alternative. Use it sparingly for fresh applications and check for expiration if buying pre-made options.
  • Vanilla Extract: A great flavor enhancer, vanilla promotes the strawberry’s sweetness and adds depth to the drink. Choose pure vanilla extract for the best flavor and store it tightly sealed in a cool place away from direct light.

Common Mistakes to Avoid

  • Using unripe strawberries: Always choose fully ripe strawberries for optimal sweetness and flavor; unripe berries can ruin the drink.
  • Not blending well: Ensure the ingredients are thoroughly blended to achieve a smooth texture; lumps can detract from the drinking experience.
  • Adding too much sugar: This drink is naturally sweet; start with less sugar and adjust as needed to avoid overwhelming the strawberry flavor.
  • Neglecting the whipped cream: Whip the cream till soft peaks form; over-whipping can lead to a grainy texture.
  • Using low-quality milk: Since milk is a significant ingredient, using fresh, high-quality milk will elevate the overall flavor of your drink.
  • Skipping the vanilla: A splash of vanilla extract enhances the flavor of both strawberries and cream; don’t skip it!
  • Serving too warm: This drink is best enjoyed cold; avoid letting it sit too long after preparation.
  • Ignoring garnishes: Enhance visual appeal and flavor with fresh strawberries or a drizzle of chocolate syrup as a finishing touch.

Essential Techniques

Blending: Blending is important as it ensures that all components are smoothly integrated. To master this technique, combine ingredients gradually to avoid overflow and adjust consistency as needed. Watch for a creamy texture without any lumps left behind.

Whipping Cream: Perfecting whipped cream is crucial for achieving the right texture. Use chilled equipment and heavy cream for best results. Be cautious not to over-whip, as this can turn your cream grainy; stop mixing as soon as you achieve soft peaks.

Pro Tips for Perfect Strawberries and Cream Starbucks Drink

– Always use fresh strawberries for maximum flavor. Frozen strawberries can serve as a substitute, but they may alter the drink’s texture.
– Make the whipped cream from scratch using heavy cream and a touch of sugar for a fresh, rich finish.
– Adjust the milk type according to your taste preference; coconut milk can add a delightful tropical twist.
– Serve immediately for the best experience, as textures can change if left to sit.
– Experiment with the sweetness of your drink by tasting as you go.
– Try garnishing with fresh mint leaves or a slice of strawberry for added freshness.
– For a fun twist, add a scoop of vanilla ice cream for a richer, dessert-like experience.
– Consider using a milk frother for an extra creamy texture.

Variations and Adaptations

– Regional variations could include adding local fruits along with strawberries, such as raspberries or blueberries, for a berry medley drink.
– Seasonal adaptations might involve incorporating spices like cinnamon or nutmeg during fall for a cozy flavor.
– Dietary modifications can be made using dairy-free milk alternatives and ensuring the whipped cream is coconut-based for vegan diets.
– For flavor variations, consider adding a splash of fruit syrups or flavored extracts for a unique twist.
– Texture modifications can be achieved by blending in crushed ice for a smoothie-style version of the drink.
– Presentation alternatives include serving the drink in a mason jar for a rustic, summer vibe.

Serving and Presentation Guide

To serve the Strawberries and Cream Drink, choose a tall glass to showcase the beautiful colors. Consider layering the ingredients for visual appeal, placing blended strawberries at the bottom, followed by milk, and topping it off with whipped cream. Adding a garnish of fresh strawberries or a sprinkle of chocolate can enhance the presentation and add a touch of elegance. Serve chilled to ensure that the drink is refreshing, and consider using a colorful straw to brighten the experience.

Wine and Beverage Pairing

While this drink stands beautifully on its own, pairing it with a sparkling wine can enhance the fruity flavors. A light Moscato or Prosecco complements the sweetness of strawberries perfectly. If you prefer non-alcoholic options, try serving with sparkling lemonade for a refreshing alternative. Iced tea with hints of peach or hibiscus could also balance the creamy texture of the drink while keeping things light and refreshing.

Storage and Shelf Life

Due to the fresh nature of the ingredients, it is best to consume the Strawberries and Cream Starbucks Drink right after preparing it. If you must store leftovers, keep them in an airtight container in the refrigerator and consume within 24 hours. Note that the whipped cream may separate, so whisk it back together before serving. Avoid freezing, as this will change the texture and quality of the drink significantly.

Make Ahead Strategies

For this drink, the strawberries can be pre-prepared by washing, hulling, and slicing them a few hours ahead of time. Store them in the refrigerator until you’re ready to blend. You can also prepare the whipped cream in advance. Keep it in an airtight container in the fridge; just give it a quick stir before using. Assembling the drink itself should still be done just before serving to maintain the fresh elements.

Scaling Instructions

To halve the recipe, simply measure out half the necessary ingredients. For doubling or tripling, use a larger blender to combine the ingredients efficiently. Remember to taste and adjust the sweetness level accordingly when increasing batch sizes. Timing adjustments are minimal since this drink requires no cooking, but ensure that you have enough cups or glasses available for the servings and adjust ingredient proportions to maintain correct ratios.

Nutritional Deep Dive

A typical serving of the Strawberries and Cream Drink provides essential vitamins and minerals primarily from strawberries, which are low in calories and rich in antioxidants. Each serving could contain around 200 calories, depending on the milk and sugar used. The drink provides a good balance of carbohydrates and fats, especially if heavy cream is included. For a nutritious twist, consider using alternatives like almond milk or low-calorie sweeteners to accommodate various dietary preferences without sacrificing taste.

Dietary Adaptations

For gluten-free options, this recipe is naturally free of gluten; however, always check labels for any added ingredients. To make it dairy-free, substitute regular milk and whipped cream with almond or oat milk and coconut cream. The drink can also be adapted for vegan lifestyles by ensuring all ingredients are plant-based. For low-carb or keto diets, consider utilizing sugar-free sweeteners and coconut cream to maintain flavor without unnecessary carbohydrates.

Troubleshooting Guide

If the drink appears too runny, consider adjusting the consistency by adding more strawberries or reducing the amount of milk. For flavor balance, if too sweet, add a touch more milk or a splash of lemon juice to enhance tartness. If texture issues arise, ensure your blender is capable of adequately blending the ingredients to avoid lumps. For ingredient substitutions, doing a little research on ratios can help preserve the overall flavor while accommodating what you have on hand.

Recipe Success Stories

Community feedback reflects the ease and joy of making the Strawberries and Cream Drink at home. Many readers have shared their adaptations, such as adding different fruits or flavors to create unique variations. Readers also highlight successful photo-sharing of their creations on social media, sparking engaging conversations among friends and followers about the delightful experience of enjoying this refreshing drink.

Frequently Asked Questions

Q1: Can I make this drink vegan?

Yes! Simply use plant-based milk and coconut cream or non-dairy whipped cream to keep it vegan-friendly while enjoying the same rich flavors.

Q2: How can I make this with frozen strawberries?

Frozen strawberries can be used; just add them directly to the blender. You may want to thaw them slightly to help blend smoothly.

Q3: What can I substitute for whipped cream?

If you want a lighter option, consider using whipped coconut cream or a vegan whipped topping instead of traditional whipped cream.

Q4: Can I prepare this drink in advance?

While best fresh, you can prepare the ingredients ahead of time. Blend shortly before serving to maintain optimal freshness and texture.

Q5: How long does this drink last in the fridge?

It’s recommended to consume the drink within 24 hours for the best flavor and texture, as separation may occur.

Q6: Is this drink gluten-free?

Absolutely! All the ingredients in the Strawberries and Cream Drink are gluten-free, making it safe for those with gluten sensitivities.

Q7: Can I add other fruits to it?

Definitely! Adding different fruits like raspberries or blueberries can create an exciting fusion of flavors.

Q8: How much sugar should I add?

The amount depends on your taste preference and the sweetness of your strawberries. Start with a tablespoon and adjust as needed.

Q9: What kind of milk do you recommend?

Whole milk gives the creamiest taste, but almond, oat, or coconut milk can also be delicious alternatives based on dietary needs.

Q10: Is there a way to make it more filling?

For a heartier version, consider blending in a scoop of protein powder or adding oats for added nutrition.

Additional Resources

If you’re eager to explore more refreshing drinks, check out our recipes for homemade fruit smoothies and iced beverages. Additionally, our guides provide invaluable tips on perfecting blending techniques, selecting high-quality kitchen equipment, and seasonal fruit availability for your drinks.

Join the Conversation

We’d love to hear about your experiences with the Strawberries and Cream Starbucks Drink! Share your beautiful photos, suggest your variations, and engage in conversations about your favorite flavors with our community. Your feedback is invaluable in creating delightful recipes everyone can enjoy.

The Recipe

Strawberries and Cream Starbucks Drink

Serves: 1

Prep Time: 10 mins

Cook Time: 0 mins

Total Time: 10 mins

Kitchen Equipment Needed

  • Blender
  • Measuring cups
  • Serving glass

Ingredients

  • 1 cup fresh strawberries, hulled and sliced
  • 1 cup milk of choice
  • 2 tablespoons sugar (adjust to taste)
  • 1 teaspoon vanilla extract
  • 1/2 cup whipped cream

Directions

  1. In a blender, combine fresh strawberries, milk, sugar, and vanilla extract. Blend until smooth.
  2. Pour the strawberry mixture into a tall glass.
  3. Top with a generous dollop of whipped cream.
  4. Garnish with sliced strawberries if desired and serve immediately.

Recipe Notes

  • Adjust sweetness by adding more or less sugar according to your preference.
  • For a thicker texture, add more strawberries or reduce the amount of milk.
  • This recipe can easily be doubled or tripled for larger servings.